
A good Sunday dinner should earn its keep twice. It has to hit the table with enough steam, browned edges, and real flavor to make everyone happy tonight, then sit in the fridge and still behave itself when Monday morning turns loud, rushed, and slightly chaotic.
These Sunday family dinner ideas for busy school mornings lean hard on that second job. Some are saucy casseroles that reheat without drying out. Some are roasts that slice cleanly for sandwiches or grain bowls. A few are soups and stews that taste even better after a night of hanging out in the fridge, which is one of those small kitchen miracles people underestimate until they’re staring into an empty lunch box at 6:45 a.m.
Dry leftovers are the enemy.
The meals below are built to avoid that trap. They use sturdy starches, enough sauce to keep things loose, and flavors that don’t fall apart after a day or two. If a dish can survive a microwave, a thermos, or a hurried forkful before someone dashes out the door with one shoe still untied, it deserves a spot on the Sunday table.
Why This Collection Feels Different
- Leftover-First Cooking: Every recipe is chosen because it still tastes like dinner the next day, not like a sad afterthought scraped from a container.
- Kid-Friendly Flavors: Cheese, chicken, beef, potatoes, pasta, and mild spice show up often because they tend to disappear fast at the table.
- School-Morning Payoff: Several dishes can become thermos lunches, lunchbox fillings, or a fast breakfast for the parent who forgot to eat.
- Low-Fuss Cleanup: Sheet pans, casseroles, slow cookers, and one-pot meals do the heavy lifting so Sunday doesn’t feel like a production.
- Real Meals, Not Snack Piles: These are proper dinners with protein, starch, and something saucy or juicy enough to hold together after chilling.
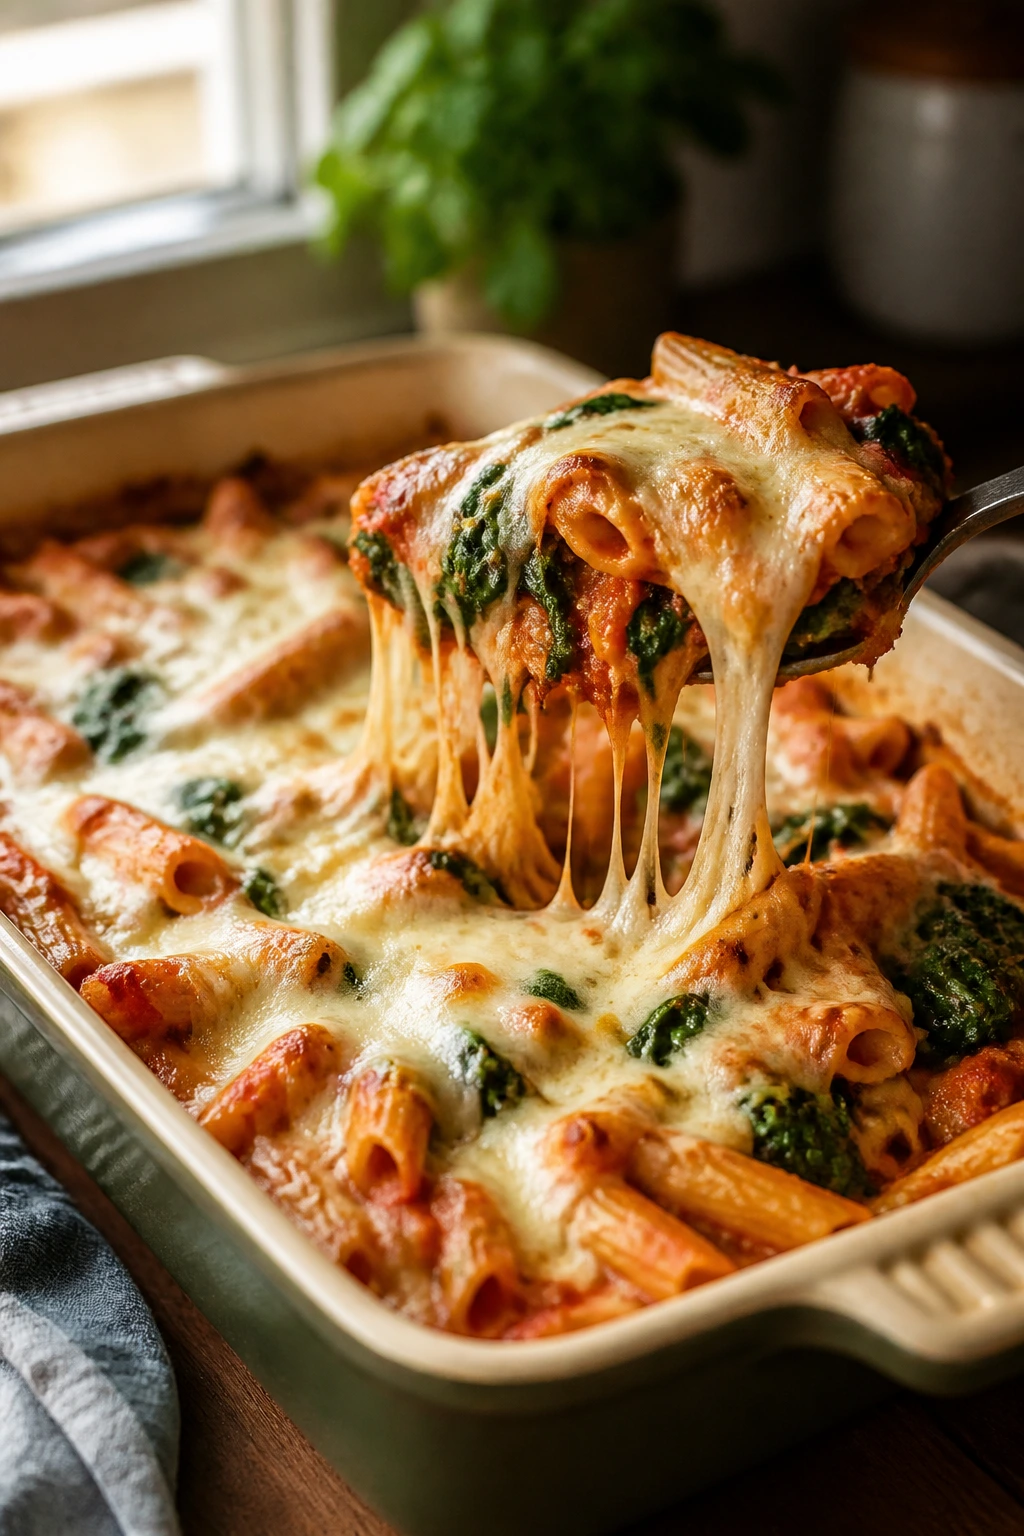
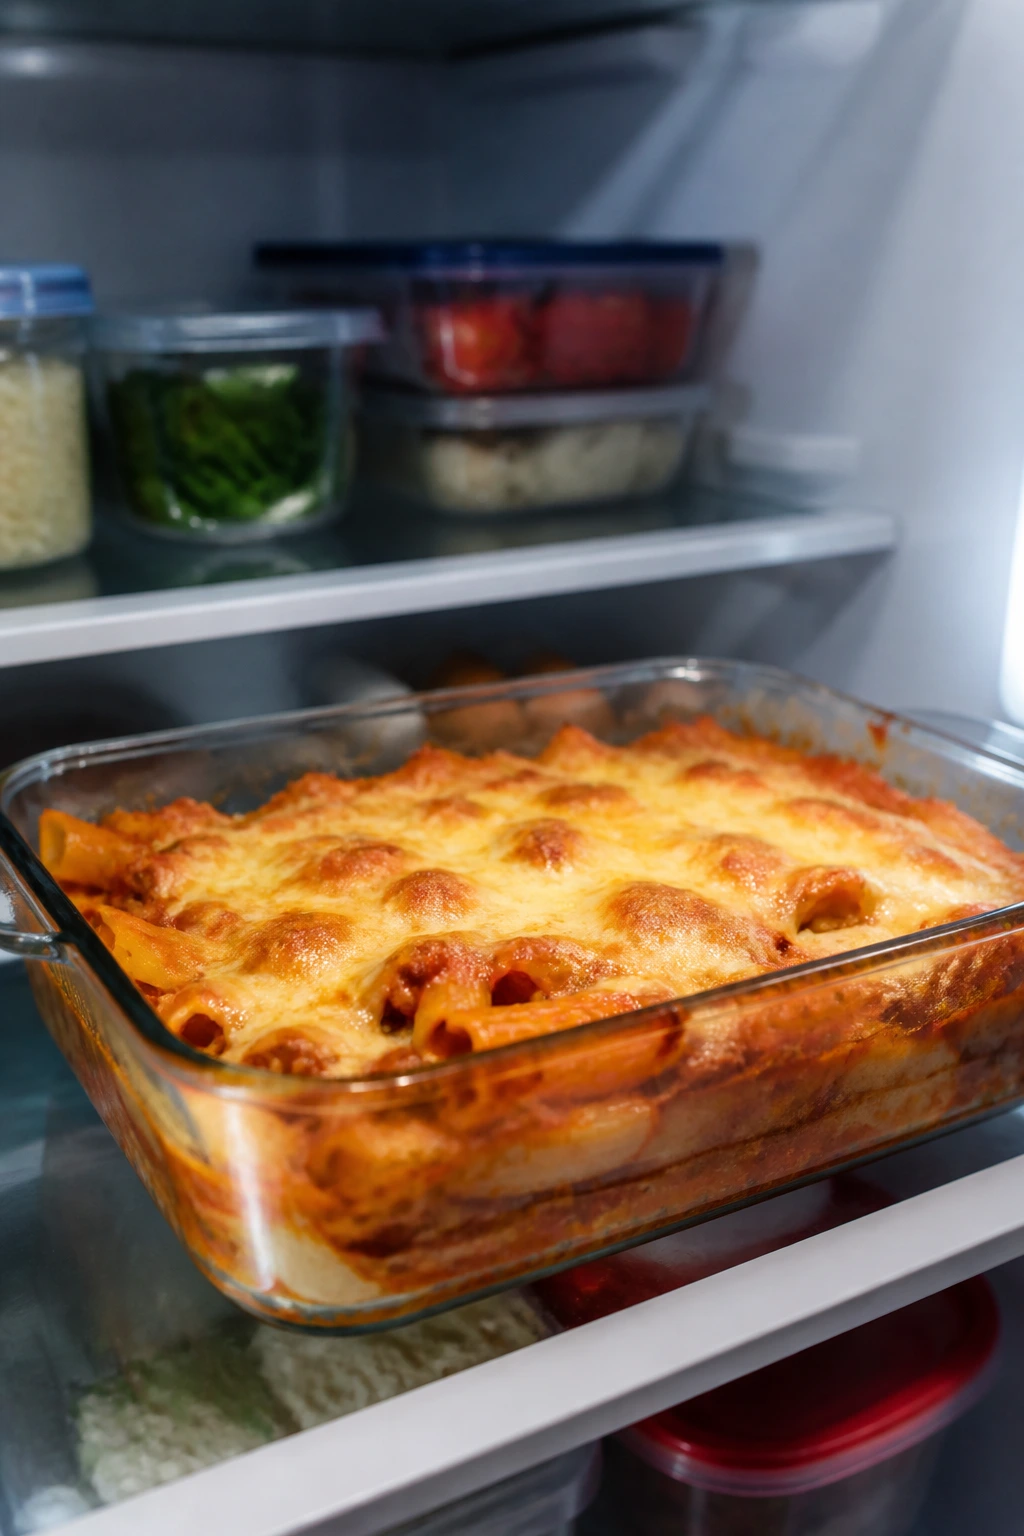
1. Baked Ziti with Spinach and Mozzarella
There’s a reason baked ziti keeps showing up in family kitchens. It lands in the oven as a messy pile of pasta and cheese, then comes out as a bubbling slab you can cut into tidy squares. The spinach disappears into the sauce, the mozzarella stretches in long strings, and the leftovers keep their shape instead of collapsing into mush.
This is the kind of Sunday dinner that makes Monday lunch nearly effortless. Reheat a square with a splash of water, and the tomato sauce wakes right back up.
Why It Works: Ziti holds sauce in its ridges, which matters more than people think. Ricotta makes the bake creamy without turning it soupy, and baking the pasta a little underdone keeps the texture from going soft overnight. A 10-minute rest after baking lets the cheese settle so you can slice it cleanly.
Key Ingredients:
- 1 lb ziti pasta
- 2 tbsp olive oil
- 1 small yellow onion, diced
- 4 cloves garlic, minced
- 1 lb Italian sausage, casings removed
- 1 jar (24 oz) marinara sauce
- 1 cup ricotta cheese
- 2 cups shredded mozzarella
- 1/2 cup grated Parmesan
- 3 cups baby spinach
- 1 large egg
- 1 tsp Italian seasoning
- 1 tsp kosher salt
- 1/2 tsp black pepper
Quick Steps:
- Preheat the oven to 375°F (190°C) and grease a 9×13-inch baking dish.
- Boil the ziti in salted water for 2 minutes less than the package says, then drain.
- Brown the sausage in olive oil with the onion and garlic until the meat is no longer pink.
- Stir in marinara, spinach, salt, pepper, and Italian seasoning until the spinach wilts.
- Mix ricotta with the egg and half the mozzarella in a large bowl, then fold in the pasta and sauce.
- Transfer to the baking dish, top with remaining mozzarella and Parmesan, and bake for 25 minutes until bubbling.
- Rest for 10 minutes before cutting.
Equipment for This Recipe:
- 9×13-inch baking dish
- Large pot for pasta
- Large skillet
- Wooden spoon or spatula
- Colander
How to Serve This Dish: Serve it with a sharp green salad and garlic bread if you want the plate to feel complete. The square pieces hold well, so they’re easy to pack into lunch containers the next day. I like the first slice a little messy and the second one neat.
Pro Tips for This Recipe:
- Add a splash of pasta water to the sauce if it looks too tight.
- Use whole-milk ricotta if you want a creamier middle.
- Let the ziti sit before cutting or you’ll lose the clean edges.
- If your family likes extra browned cheese, broil for 1 to 2 minutes at the end.
Variations on This Dish:
- Chicken Alfredo Ziti: Swap the sausage for 3 cups shredded chicken and use Alfredo sauce with a few spoonfuls of marinara stirred in.
- Veggie-Packed Ziti: Skip the meat and add sautéed mushrooms and zucchini; drain them well so the bake doesn’t get watery.
- Spicy Sunday Ziti: Add red pepper flakes and use hot Italian sausage for a little heat that survives reheating.
Common Mistakes to Avoid with This Dish:
- Overcooking the pasta: It turns soft after baking. Stop early in the boiling stage.
- Using dry sauce: Thick marinara with no extra moisture can make the leftovers firm up. Loosen it with a few tablespoons of pasta water.
- Skipping the rest time: Cut too soon and the filling slides out. Ten minutes makes a real difference.
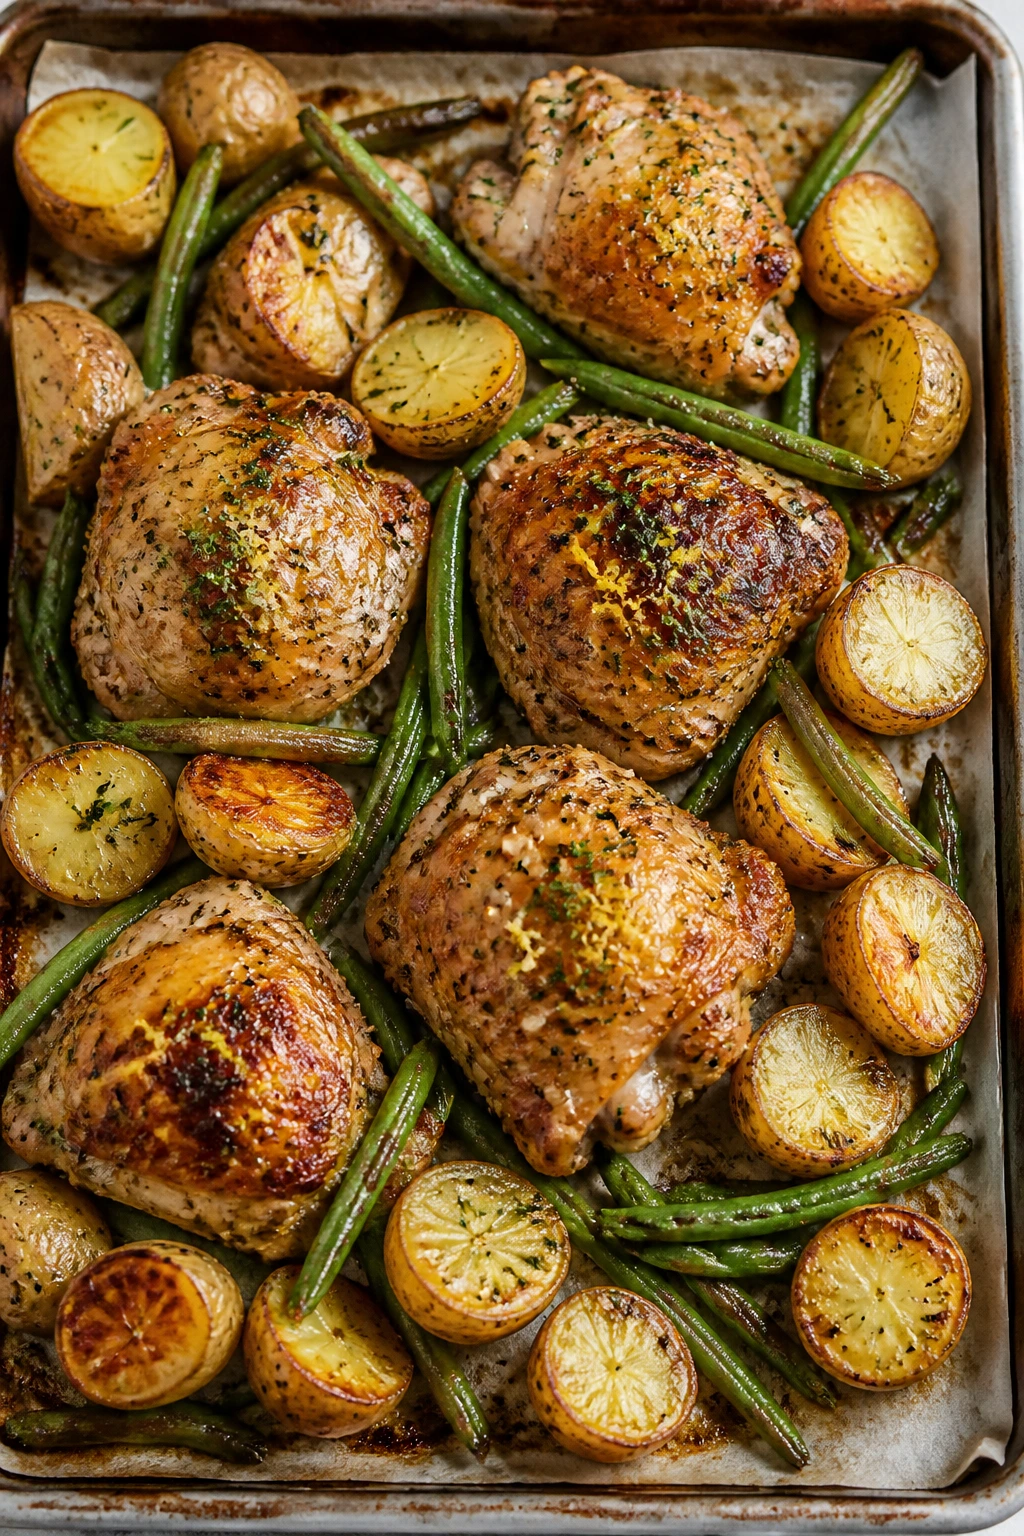
2. Sheet Pan Lemon Garlic Chicken Thighs with Potatoes and Green Beans
A sheet pan dinner has a certain honesty to it. Everything roasts together, the chicken drips into the potatoes, and the green beans pick up the garlicky edges from the pan without turning limp. This version leans bright and savory, with lemon cutting through the richness so the leftovers still taste awake on day two.
If you want one pan that gives you dinner and then quietly handles tomorrow’s lunch, this one behaves.
Why It Works: Bone-in chicken thighs stay juicy through roasting, which is why I reach for them here instead of breasts. The potatoes start first so they can brown before the beans join the party. A splash of lemon juice at the end keeps the whole tray from tasting heavy.
Key Ingredients:
- 2 lb bone-in, skin-on chicken thighs
- 1 1/2 lb baby potatoes, halved
- 12 oz green beans, trimmed
- 3 tbsp olive oil
- 4 cloves garlic, minced
- 1 lemon, zested and juiced
- 1 tbsp Dijon mustard
- 1 tsp dried oregano
- 1 tsp kosher salt
- 1/2 tsp black pepper
Quick Steps:
- Preheat the oven to 425°F (220°C) and line a sheet pan with parchment.
- Toss the potatoes with 2 tbsp oil, half the garlic, oregano, salt, and pepper.
- Roast the potatoes for 20 minutes until the cut sides start to brown.
- Mix the chicken with the remaining oil, garlic, lemon zest, lemon juice, and Dijon.
- Add the chicken to the pan and roast for 20 minutes.
- Scatter the green beans over the pan and roast 10 to 12 minutes more until the chicken reaches 175°F (80°C) and the beans are tender-crisp.
- Spoon pan juices over everything before serving.
Equipment for This Recipe:
- Rimmed sheet pan
- Parchment paper
- Mixing bowl
- Instant-read thermometer
- Tongs
How to Serve This Dish: Pile the chicken over the potatoes and let the green beans stay right on the tray if that’s easier. A dollop of plain yogurt or a spoonful of pan juices wakes up the leftovers. This also packs well for school lunches if the chicken is pulled off the bone.
Pro Tips for This Recipe:
- Dry the chicken skin with paper towels before seasoning; it browns better.
- Cut the potatoes in similar sizes so they finish at the same time.
- Add the lemon juice after the chicken comes out if you want a brighter, fresher finish.
- If the pan looks crowded, use two pans. Crowding traps steam.
Variations on This Dish:
- Herb-Roasted Version: Swap oregano for rosemary and thyme for a more woodsy flavor.
- Pesto Lemon Chicken: Stir 2 tbsp pesto into the oil mixture for a greener, richer finish.
- Sweet Potato Swap: Use cubed sweet potatoes instead of baby potatoes and roast them 5 minutes longer.
Common Mistakes to Avoid with This Dish:
- Adding the beans too early: They turn soft and dull. Wait until the last 10 minutes.
- Using boneless breasts without adjusting time: They dry out fast. Thighs stay much juicier here.
- Skipping the thermometer: Chicken thighs should hit 175°F for the best texture.
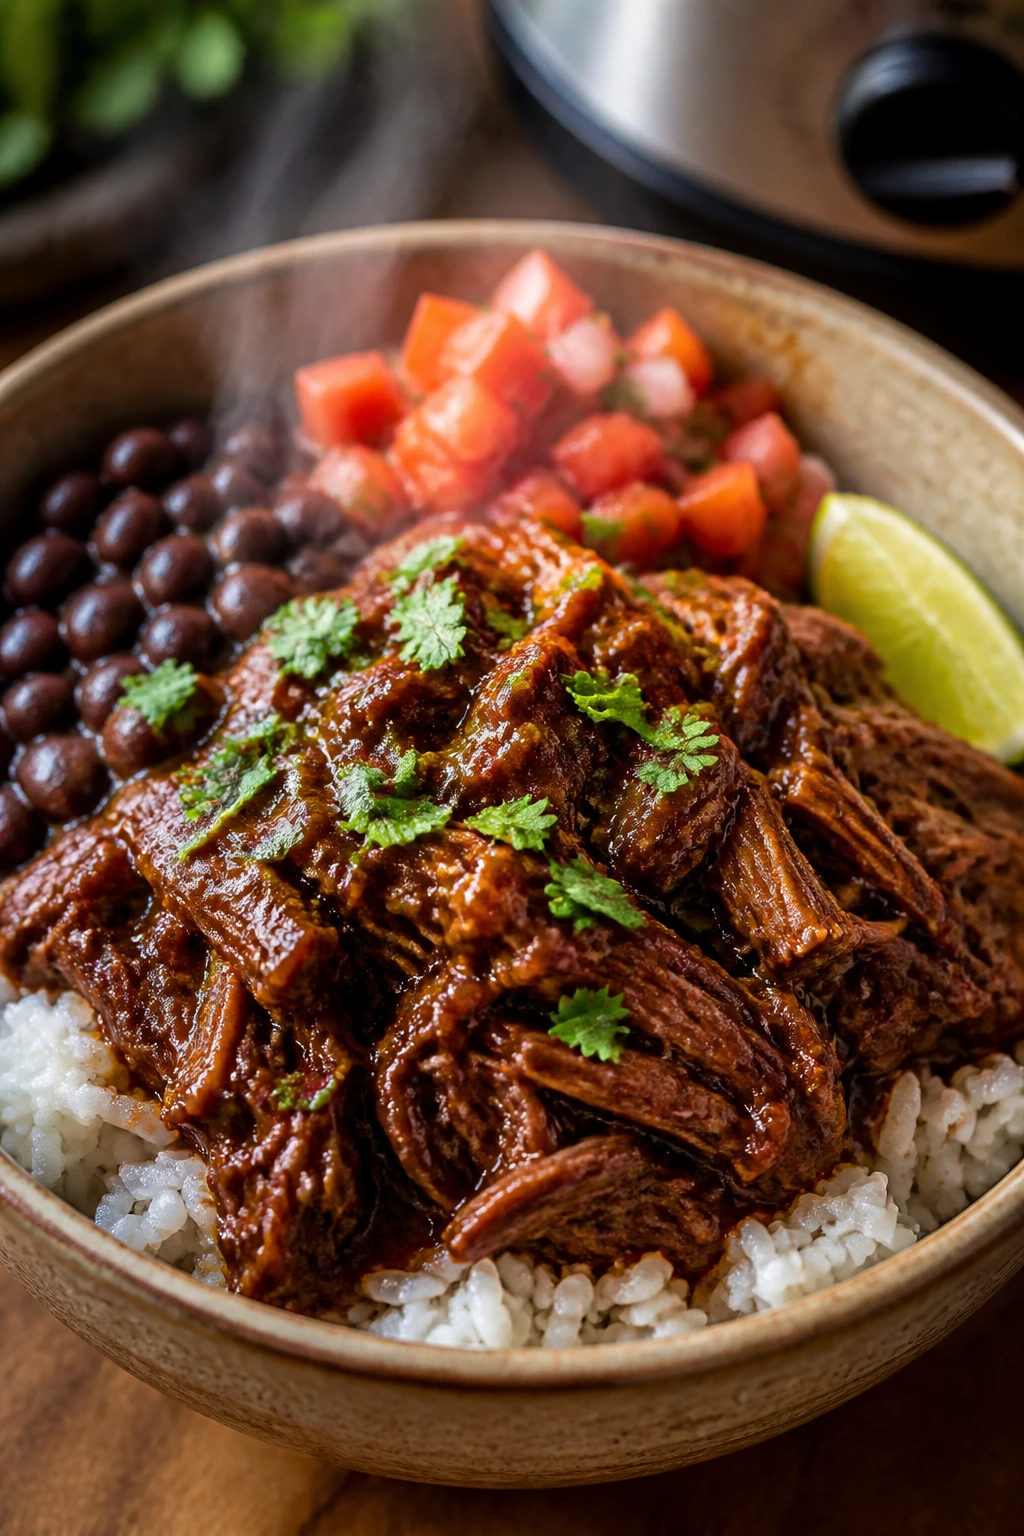
3. Slow Cooker Beef Barbacoa Bowls
This is the dinner that makes the house smell like something worth coming home to. The beef turns soft enough to shred with a fork, the chipotle gives it a smoky edge, and the juices soak into rice or tortillas like they were meant to be there. Leftovers are almost better after a night in the fridge, which is exactly the kind of dinner a school week asks for.
I like barbacoa for Sunday because it keeps working long after you walk away from the slow cooker.
Why It Works: Chuck roast has enough fat and connective tissue to break down into tender strands after hours of low heat. Chipotle in adobo brings smoke without needing a grill. A little vinegar and lime at the end keeps the meat from tasting flat the next morning.
Key Ingredients:
- 3 lb chuck roast
- 1 large onion, sliced
- 4 cloves garlic, minced
- 2 chipotle peppers in adobo, chopped
- 1 tbsp adobo sauce
- 1 cup beef broth
- 2 tbsp apple cider vinegar
- 2 tbsp lime juice
- 1 tsp ground cumin
- 1 tsp dried oregano
- 1 1/2 tsp kosher salt
Quick Steps:
- Season the chuck roast with salt and cumin.
- Sear it in a hot skillet for 3 to 4 minutes per side, or skip this if you need the faster route.
- Put the onion, garlic, chipotles, adobo sauce, broth, vinegar, and oregano in the slow cooker.
- Nestle the roast into the liquid, cover, and cook on low for 8 to 9 hours until the beef shreds easily.
- Shred the beef with two forks, then stir in the lime juice.
- Let the meat sit in its juices for 10 minutes before serving.
Equipment for This Recipe:
- 6-quart slow cooker
- Skillet for searing
- Two forks
- Measuring cups and spoons
- Slotted spoon
How to Serve This Dish: Spoon the beef over rice with black beans and a handful of chopped cilantro, or pile it into warm tortillas. It also works in a thermos if you keep the rice and beef together. The leftover meat stays juicy if you store it with the cooking liquid.
Pro Tips for This Recipe:
- Sear the roast if you have the time; it adds a deeper flavor.
- Don’t drain the cooking liquid entirely. The meat needs some of it.
- Lime juice added at the end tastes sharper than lime cooked all day.
- Shred the beef while it’s still warm. Cold beef fights back.
Variations on This Dish:
- Mild Family Version: Use one chipotle and add extra broth for less heat.
- Barbacoa Tacos: Serve with white onion, cilantro, and crumbled queso fresco.
- Barbacoa Nacho Bake: Layer the shredded beef over tortilla chips, beans, and cheese, then broil until melted.
Common Mistakes to Avoid with This Dish:
- Cooking on high and calling it done: The texture gets tougher. Low and slow wins here.
- Forgetting the acid: Without lime or vinegar, the beef tastes heavy the next day.
- Letting the meat dry after shredding: Stir it back into the juices right away.
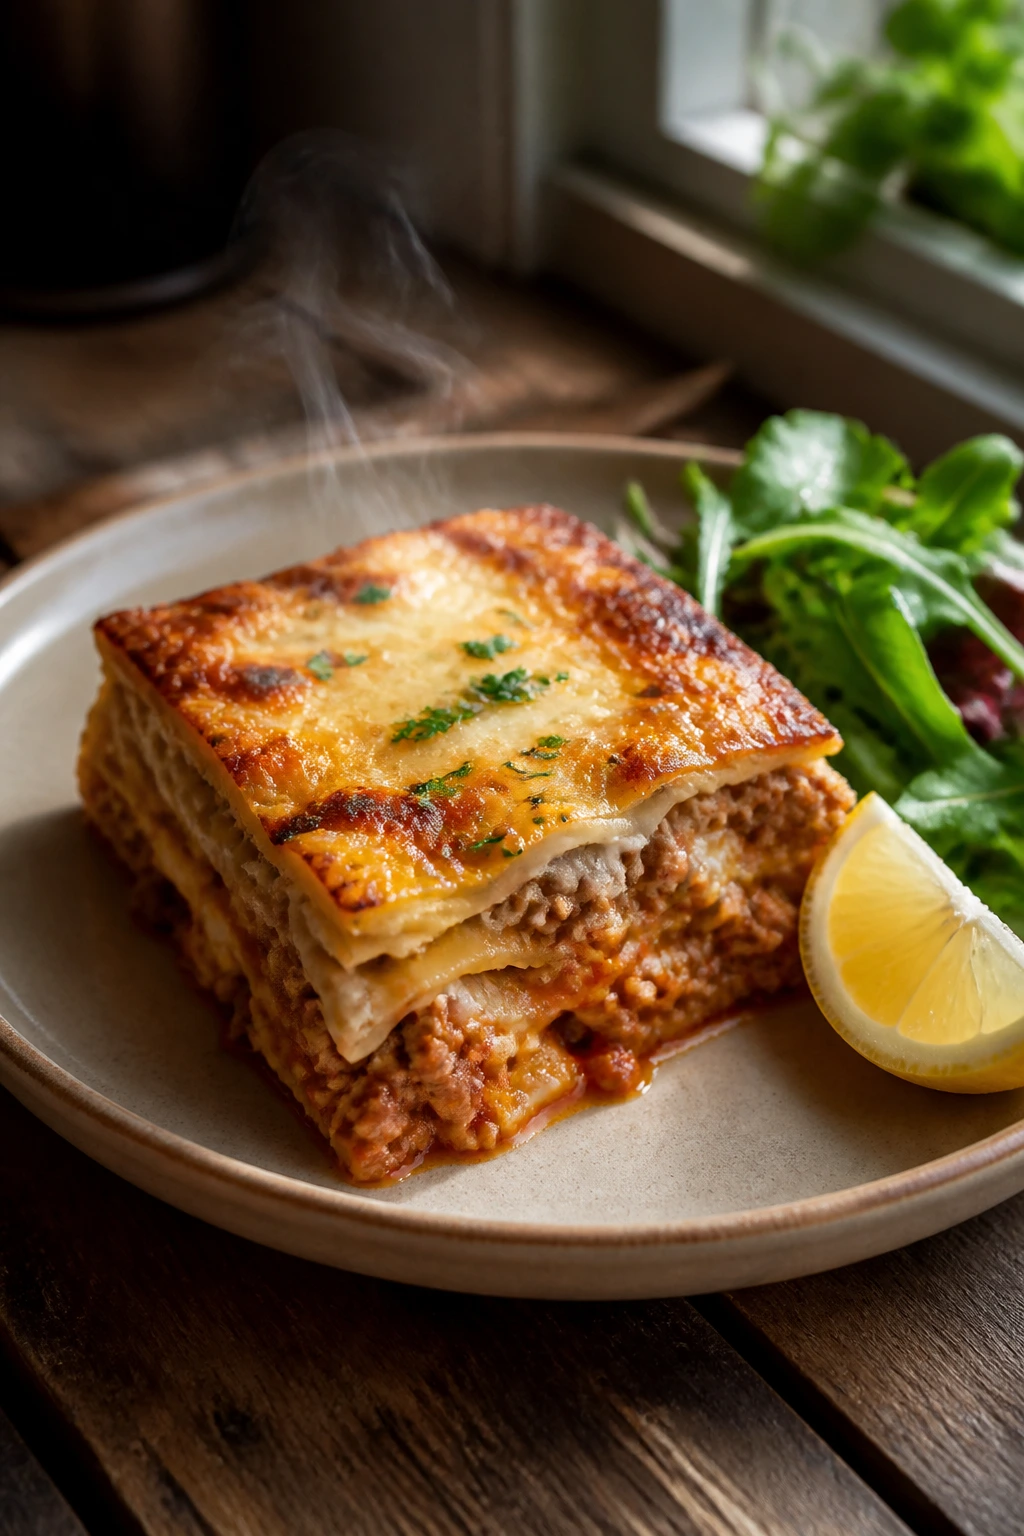
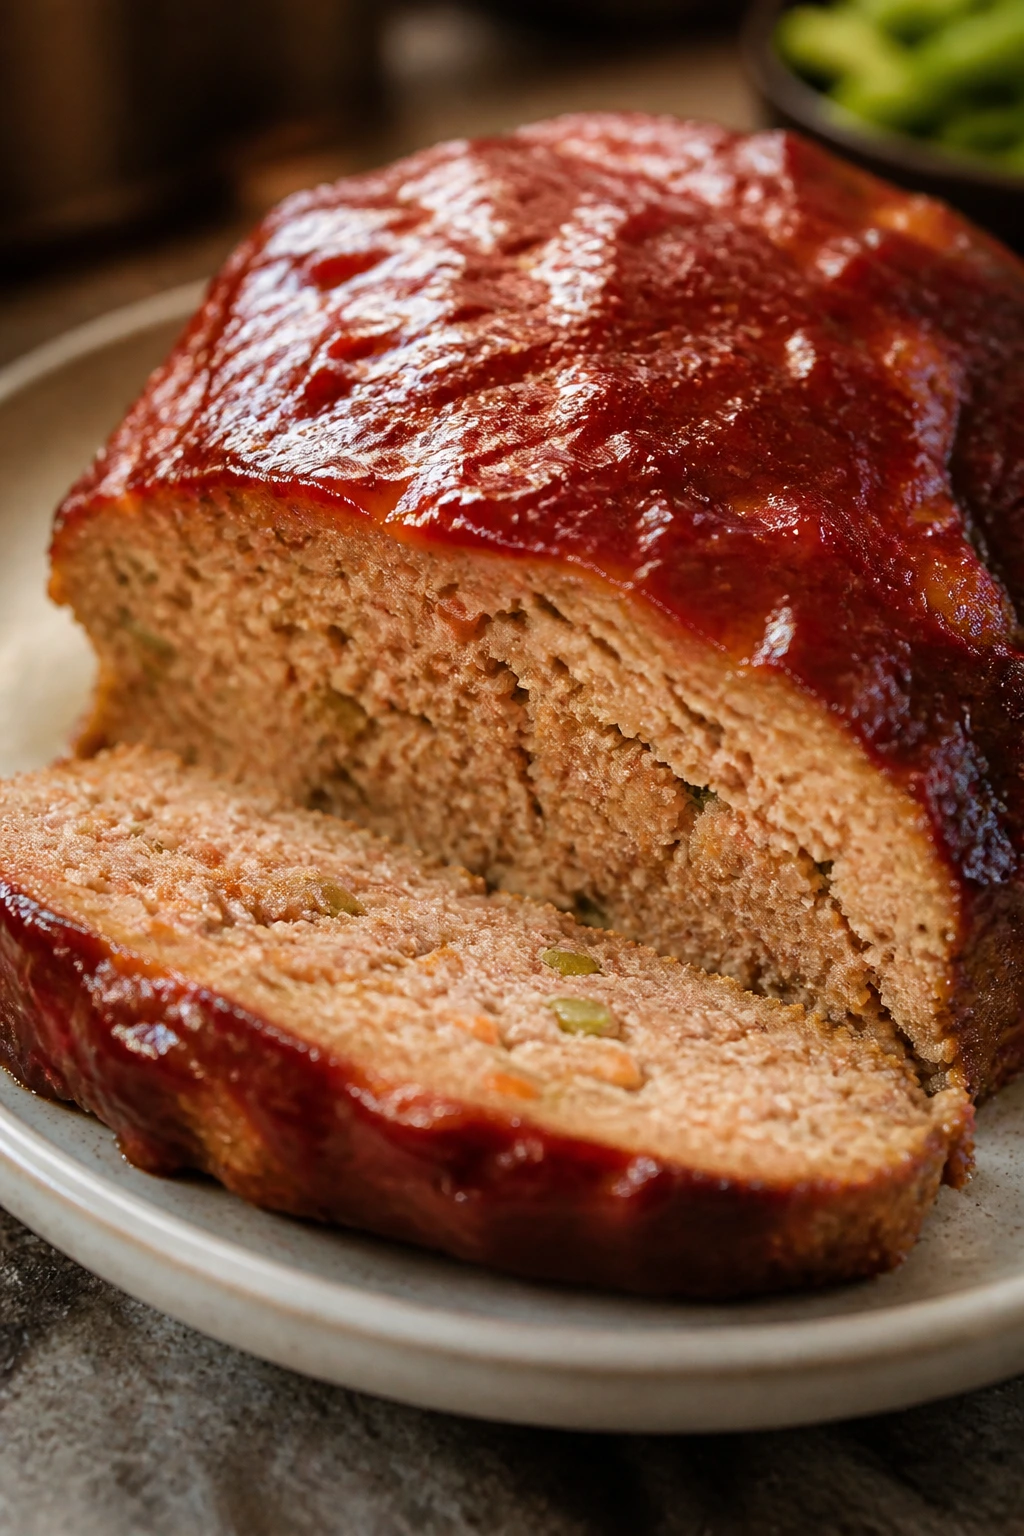
4. Turkey Meatloaf with Glazed Ketchup Top
Meatloaf gets a bad reputation from people who have had one dry, gray slice too many. This version fixes that. Ground turkey stays tender with breadcrumbs and milk, the glaze turns sticky on top, and the slices hold together so well you can tuck them into sandwiches the next morning without them falling apart.
It’s plain in the best way. Not boring. Just dependable.
Why It Works: Turkey needs a little help staying moist, so the milk-soaked breadcrumbs do real work here. Grated onion melts into the loaf and keeps the texture soft. The ketchup-Dijon glaze caramelizes on top, giving you a sweet-savory crust that reheats well.
Key Ingredients:
- 2 lb ground turkey
- 1 cup plain breadcrumbs
- 1/2 cup milk
- 2 large eggs
- 1 small onion, grated
- 2 tbsp Worcestershire sauce
- 1 tsp kosher salt
- 1/2 tsp black pepper
- 1/2 cup ketchup
- 1 tbsp brown sugar
- 1 tsp Dijon mustard
Quick Steps:
- Preheat the oven to 375°F (190°C) and line a loaf pan with parchment.
- Mix the breadcrumbs and milk in a bowl and let them sit for 2 minutes.
- Add the turkey, eggs, onion, Worcestershire, salt, and pepper; mix gently until combined.
- Press the mixture into the pan without packing it too tightly.
- Stir the ketchup, brown sugar, and Dijon together, then spread it over the top.
- Bake for 50 to 55 minutes until the center reaches 165°F (74°C).
- Rest for 10 minutes before slicing.
Equipment for This Recipe:
- 9×5-inch loaf pan
- Mixing bowl
- Box grater
- Measuring spoons
- Instant-read thermometer
How to Serve This Dish: Meatloaf loves mashed potatoes, but roasted carrots and green beans keep the plate from feeling too heavy. Leftover slices make a strong sandwich with mustard and lettuce. Cold meatloaf is not glamorous, but it is useful.
Pro Tips for This Recipe:
- Don’t overmix the meat or it turns dense.
- Grate the onion instead of dicing it so the loaf stays tender.
- Use the thermometer. A dry meatloaf usually just means it stayed in too long.
- If the glaze starts to darken too quickly, tent the pan loosely with foil.
Variations on This Dish:
- BBQ Meatloaf: Swap ketchup glaze for barbecue sauce and a spoonful of honey.
- Cheddar-Stuffed Meatloaf: Add a strip of cheddar down the middle for a molten center.
- Mini Meatloaves: Divide the mixture into muffin tins and bake for about 22 minutes.
Common Mistakes to Avoid with This Dish:
- Packing the loaf too firmly: It turns rubbery. Shape it gently.
- Skipping the rest: Slice too soon and the juices run out.
- Using extra-lean turkey with no moisture: Choose ground turkey with enough fat to stay soft.
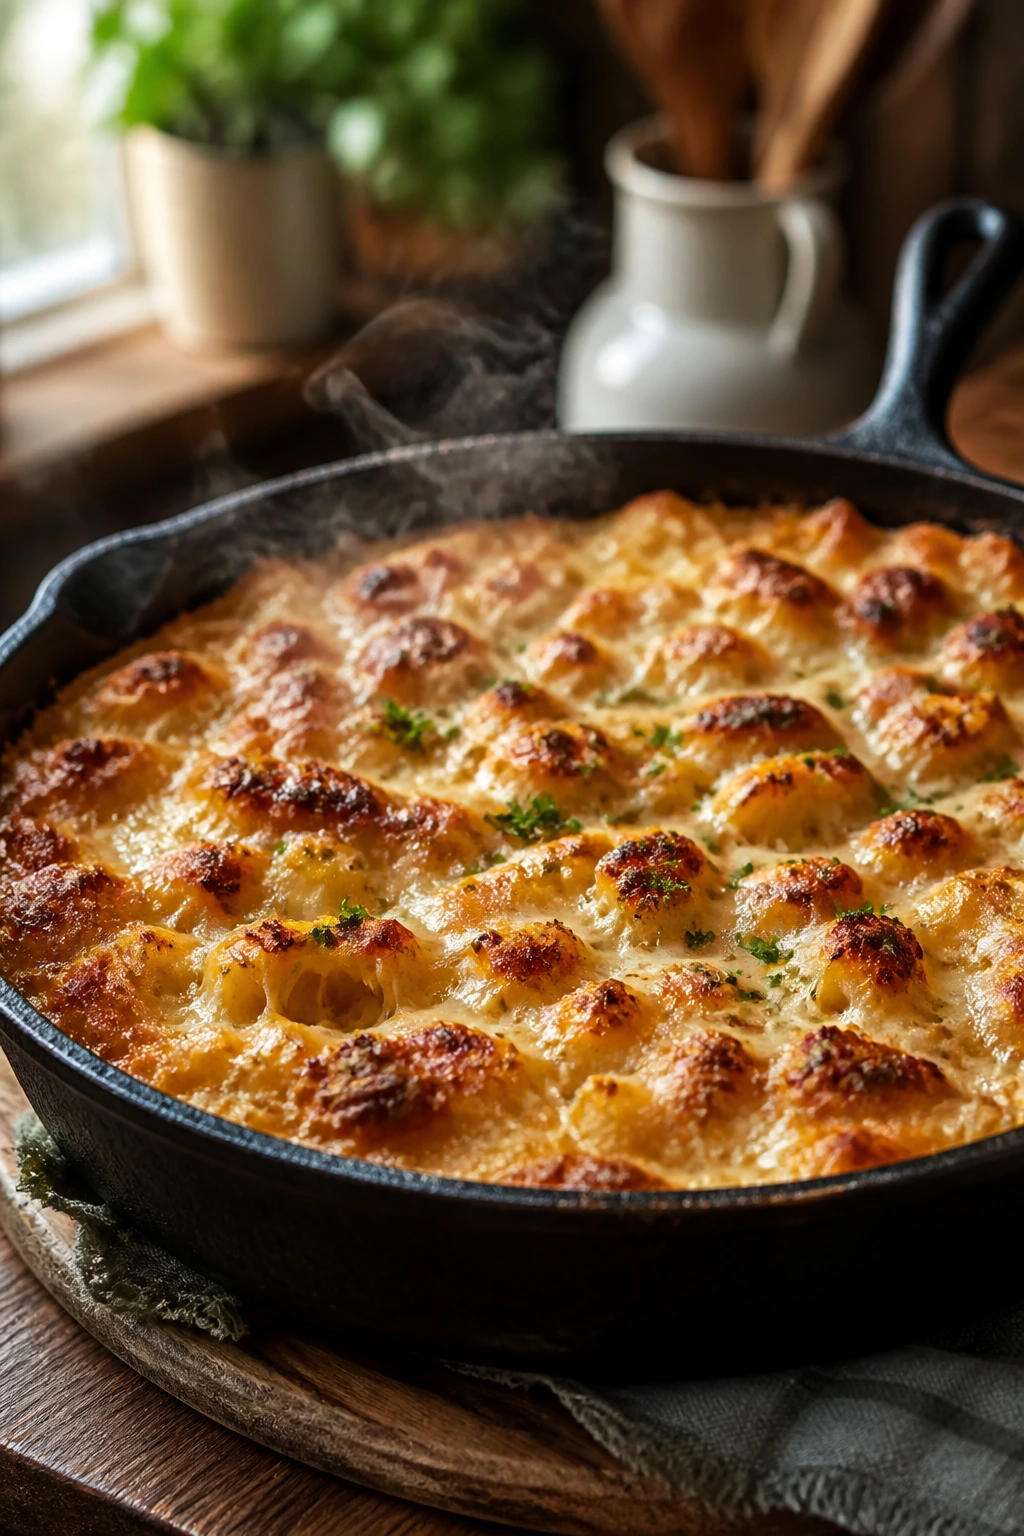
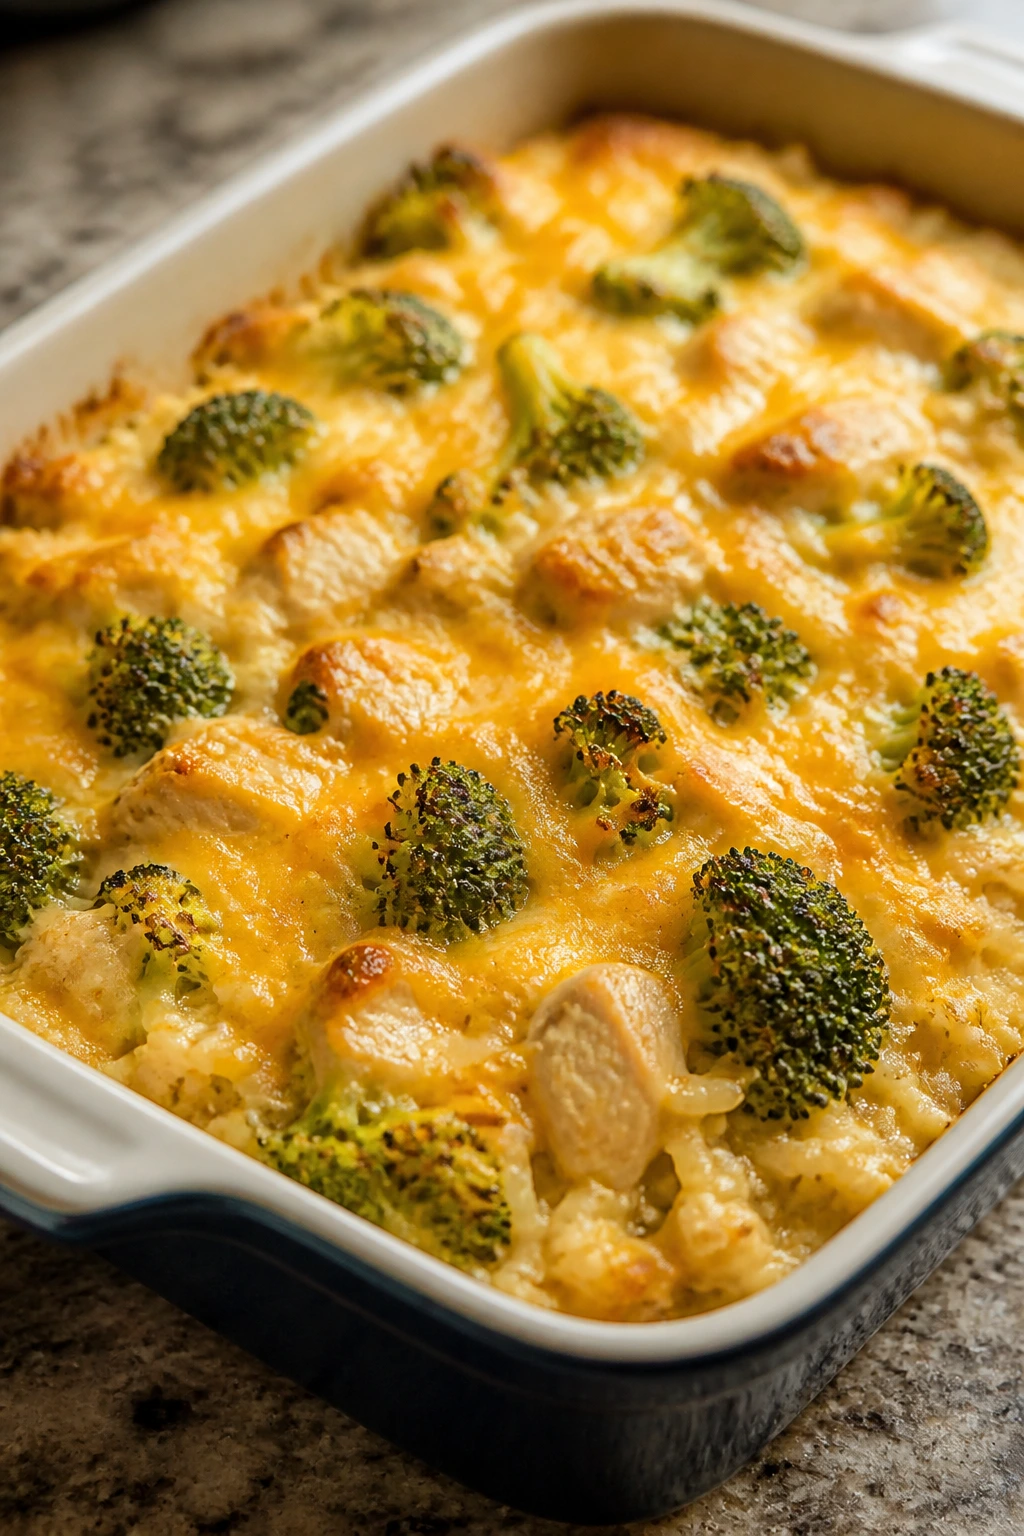
5. Chicken and Rice Casserole with Broccoli
If you want a dinner that feels like it has your back, this is the one. The rice cooks in the same dish as the chicken, the broccoli softens just enough to stay green, and the cheese on top forms a lid that makes everyone at the table suspiciously happy. It’s the sort of casserole that disappears fast and reheats even faster.
The leftovers are useful in a very ordinary, satisfying way. Microwave a square, add a spoonful of broth if needed, and breakfast chaos feels a little less personal.
Why It Works: Long-grain rice cooks evenly in a covered casserole when it has enough liquid, and chicken thighs stay juicy through the bake. Broccoli added near the end keeps some bite instead of turning into green paste. A little cheddar on top gives the dish the browned edge that makes casseroles feel finished.
Key Ingredients:
- 1 1/2 cups long-grain white rice
- 1 3/4 lb boneless, skinless chicken thighs, cut into bite-size pieces
- 4 cups broccoli florets
- 1 can (10.5 oz) cream of chicken soup
- 2 1/2 cups chicken broth
- 1 small onion, diced
- 2 cups shredded cheddar
- 1 tsp paprika
- 1 tsp kosher salt
- 1/2 tsp black pepper
Quick Steps:
- Preheat the oven to 375°F (190°C) and grease a 9×13-inch dish.
- Stir the rice, soup, broth, onion, paprika, salt, and pepper together in the dish.
- Nestle the chicken pieces into the rice mixture.
- Cover tightly with foil and bake for 35 minutes.
- Scatter the broccoli and 1 cup of cheddar over the top, then re-cover and bake for 15 minutes more.
- Remove the foil, add the remaining cheddar, and bake 5 to 7 minutes until melted and bubbly.
- Let the casserole rest for 10 minutes before serving.
Equipment for This Recipe:
- 9×13-inch baking dish
- Foil
- Mixing spoon
- Sharp knife
- Measuring cups
How to Serve This Dish: Serve it in deep bowls so the rice and cheese stay together. A crisp apple salad or sliced cucumbers beside it keeps the plate from feeling heavy. This is one of the best leftovers in the bunch for a school lunch thermos.
Pro Tips for This Recipe:
- Cut the chicken small so it cooks through on schedule.
- Cover the dish tightly or the rice can dry out at the edges.
- If your broccoli florets are huge, chop them smaller so they fit into each spoonful.
- Use low-sodium broth if your soup is already salty.
Variations on This Dish:
- Cheesy Mushroom Version: Swap broccoli for sliced mushrooms and add a handful of thyme.
- Rotisserie Chicken Shortcut: Use 3 cups shredded rotisserie chicken and reduce the first bake by 10 minutes.
- Extra-Creamy Bake: Stir in 1/2 cup sour cream before baking for a softer, richer casserole.
Common Mistakes to Avoid with This Dish:
- Using instant rice: It can go mushy fast. Long-grain rice holds up better.
- Leaving the dish uncovered from the start: The rice dries out before it finishes.
- Adding all the broccoli at once: It can turn too soft. Save some for the end.
6. Cheesy Taco Bake
Taco night gets messy in a hurry, and sometimes that’s the point. But a taco bake gives you the same beefy, spiced, cheese-heavy flavor in a form that slices cleanly and survives the fridge without sulking. The tortilla layers soften just enough to hold together, and the top comes out bronzed and a little crunchy around the edges.
This one is especially good when Monday needs leftovers that can turn into lunch or a quick after-school dinner.
Why It Works: Refried beans act like glue in the best possible way, keeping the layers from sliding apart. Salsa adds moisture and seasoning without extra chopping. Corn tortillas soften in the bake but still give enough structure to make neat portions.
Key Ingredients:
- 1 lb ground beef or ground turkey
- 1 small onion, diced
- 1 packet taco seasoning
- 1 cup salsa
- 1 can (16 oz) refried beans
- 8 small corn tortillas, cut into strips
- 1 cup corn kernels
- 2 cups shredded cheddar
- 1/2 cup sour cream, for serving
- 1/4 cup chopped cilantro, for serving
Quick Steps:
- Preheat the oven to 375°F (190°C) and grease an 8×8-inch or 9×9-inch baking dish.
- Brown the meat with the onion, then stir in taco seasoning and salsa.
- Warm the refried beans just enough to spread easily.
- Layer half the tortilla strips, half the beans, half the meat, half the corn, and 1 cup of cheese in the dish.
- Repeat the layers, finishing with the remaining cheese.
- Bake for 20 to 25 minutes until the cheese bubbles and the edges brown.
- Rest for 5 minutes, then top with sour cream and cilantro.
Equipment for This Recipe:
- Skillet
- Baking dish
- Spatula
- Knife
- Measuring cups
How to Serve This Dish: Spoon it into bowls with shredded lettuce or serve it like a square of casserole with salsa on top. It also works well wrapped in warm tortillas the next day. I like it with pickled jalapeños on the side for the adults and plain chips for everyone else.
Pro Tips for This Recipe:
- Don’t overfill the layers or the bake gets sloppy.
- Choose a salsa that tastes good on its own; it’s doing a lot here.
- Let the meat cool for a minute before layering so the tortillas don’t steam into mush.
- If you want crisp edges, use a slightly smaller dish.
Variations on This Dish:
- Chicken Taco Bake: Use shredded chicken and a little extra salsa for a lighter version.
- Black Bean Vegetarian Bake: Skip the meat and add black beans and sautéed peppers.
- Fire-Roasted Upgrade: Use fire-roasted corn and chipotle salsa for deeper flavor.
Common Mistakes to Avoid with This Dish:
- Too much liquid: The bake turns soupy. Drain excess grease from the meat.
- Skipping the rest time: The slices need a few minutes to settle.
- Using only flour tortillas: They can get gummy. Corn tortillas hold their shape better here.
7. Vegetable Lasagna Roll-Ups
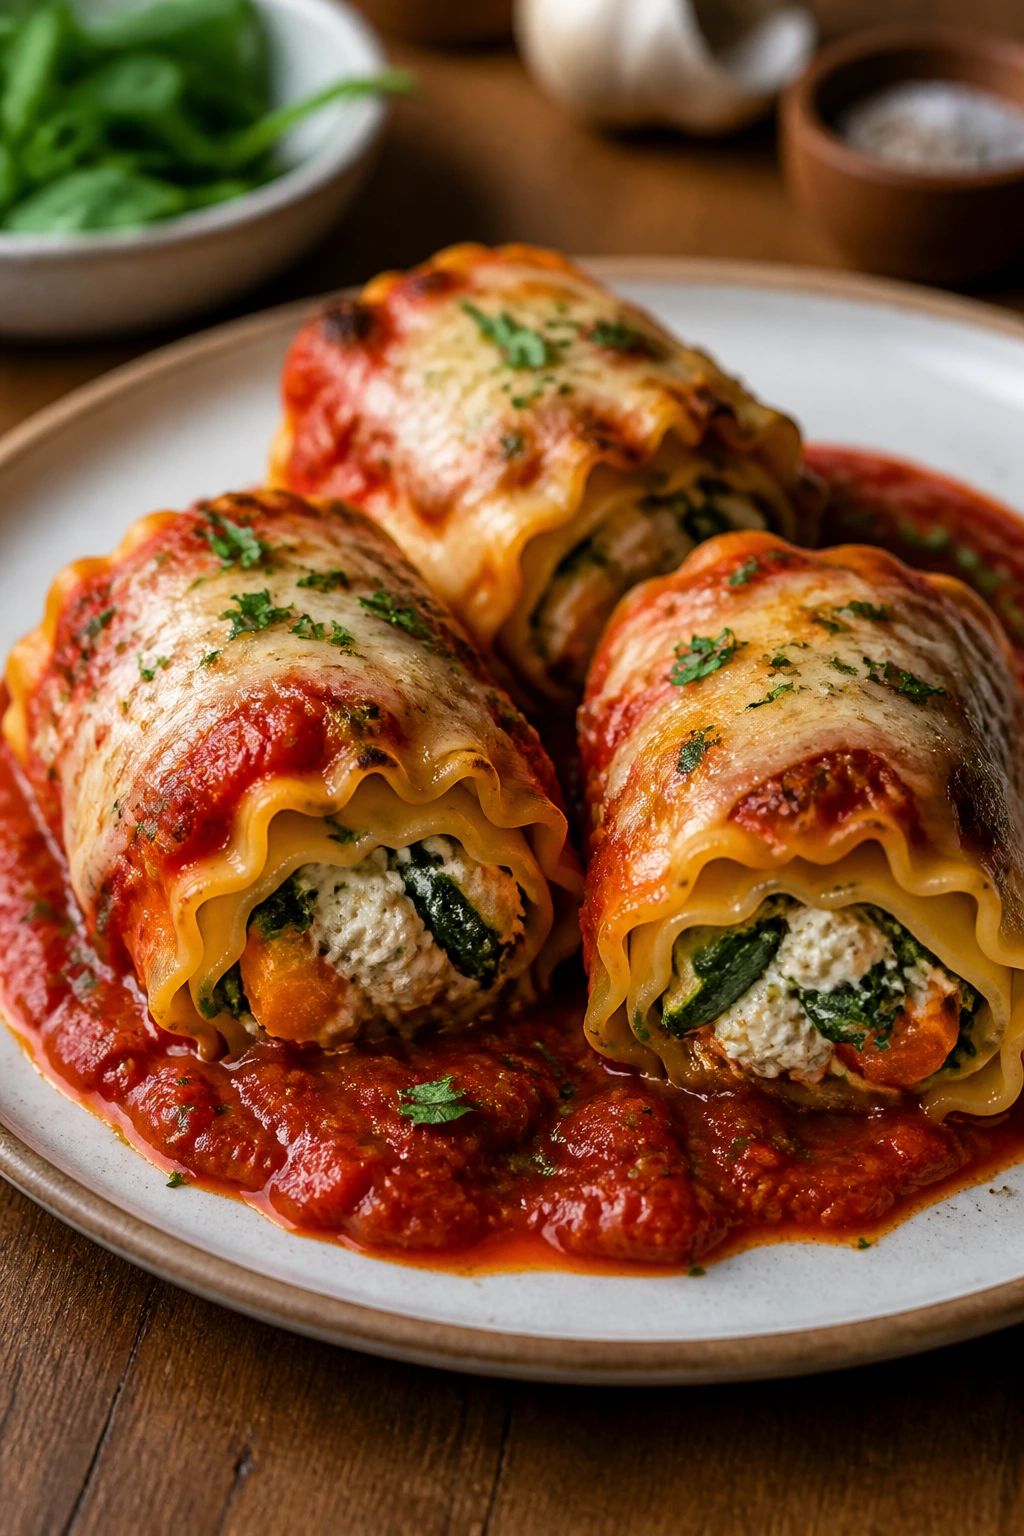
Roll-ups are lasagna without the drama of slicing a giant pan into perfect squares. Each noodle gets its own little bundle of ricotta, vegetables, and marinara, which means serving is tidy and leftovers reheat evenly. The edges crisp, the centers stay creamy, and nobody has to argue over the corner piece.
This is the meatless Sunday dinner I make when I want the fridge to have something green and useful in it by Monday.
Why It Works: Rolling the noodles keeps the filling distributed so every bite gets cheese and vegetables. Sautéing the zucchini and mushrooms first drives off extra moisture, which is the difference between a sturdy roll-up and a watery pan. Marinara underneath and over top keeps the noodles from drying out.
Key Ingredients:
- 10 lasagna noodles
- 2 tbsp olive oil
- 8 oz mushrooms, sliced
- 1 medium zucchini, grated and squeezed dry
- 3 cups baby spinach
- 15 oz ricotta cheese
- 1 large egg
- 2 cups marinara sauce
- 2 cups shredded mozzarella
- 1/2 cup grated Parmesan
- 1 tsp Italian seasoning
- 1/2 tsp kosher salt
Quick Steps:
- Preheat the oven to 375°F (190°C) and spoon 1 cup marinara into a 9×13-inch dish.
- Cook the noodles until just flexible, then lay them flat on a towel.
- Sauté the mushrooms and zucchini in olive oil until their moisture cooks off, then stir in spinach until wilted.
- Mix ricotta, egg, Parmesan, Italian seasoning, salt, and the cooked vegetables.
- Spread filling over each noodle, roll it up, and place seam-side down in the dish.
- Pour the remaining marinara over the top and scatter mozzarella over everything.
- Bake for 25 to 30 minutes until the sauce is bubbling and the cheese is golden in spots.
Equipment for This Recipe:
- 9×13-inch baking dish
- Large pot
- Skillet
- Clean kitchen towel
- Mixing bowl
How to Serve This Dish: Serve two roll-ups per person with a crisp salad and maybe some crusty bread if you need to stretch the meal. Leftovers are easiest to reheat covered in the oven. They also pack neatly for lunch, which is more than I can say for regular lasagna.
Pro Tips for This Recipe:
- Squeeze the zucchini dry or the filling gets loose.
- Don’t overcook the noodles; they need enough structure to roll.
- Spread the filling thinly so the roll-ups seal properly.
- Let the pan sit 10 minutes before serving so the sauce thickens.
Variations on This Dish:
- Spinach-Only Roll-Ups: Skip the zucchini and use extra spinach for a tighter filling.
- Meaty Roll-Ups: Add cooked ground turkey to the ricotta mixture.
- Pesto Roll-Ups: Stir 2 tbsp pesto into the filling for a sharper, greener flavor.
Common Mistakes to Avoid with This Dish:
- Wet vegetables: They leak into the sauce. Cook them down first.
- Overstuffing the noodles: They burst open in the oven.
- Forgetting sauce under the roll-ups: The bottom can dry out and stick.
8. One-Pot Chili Mac
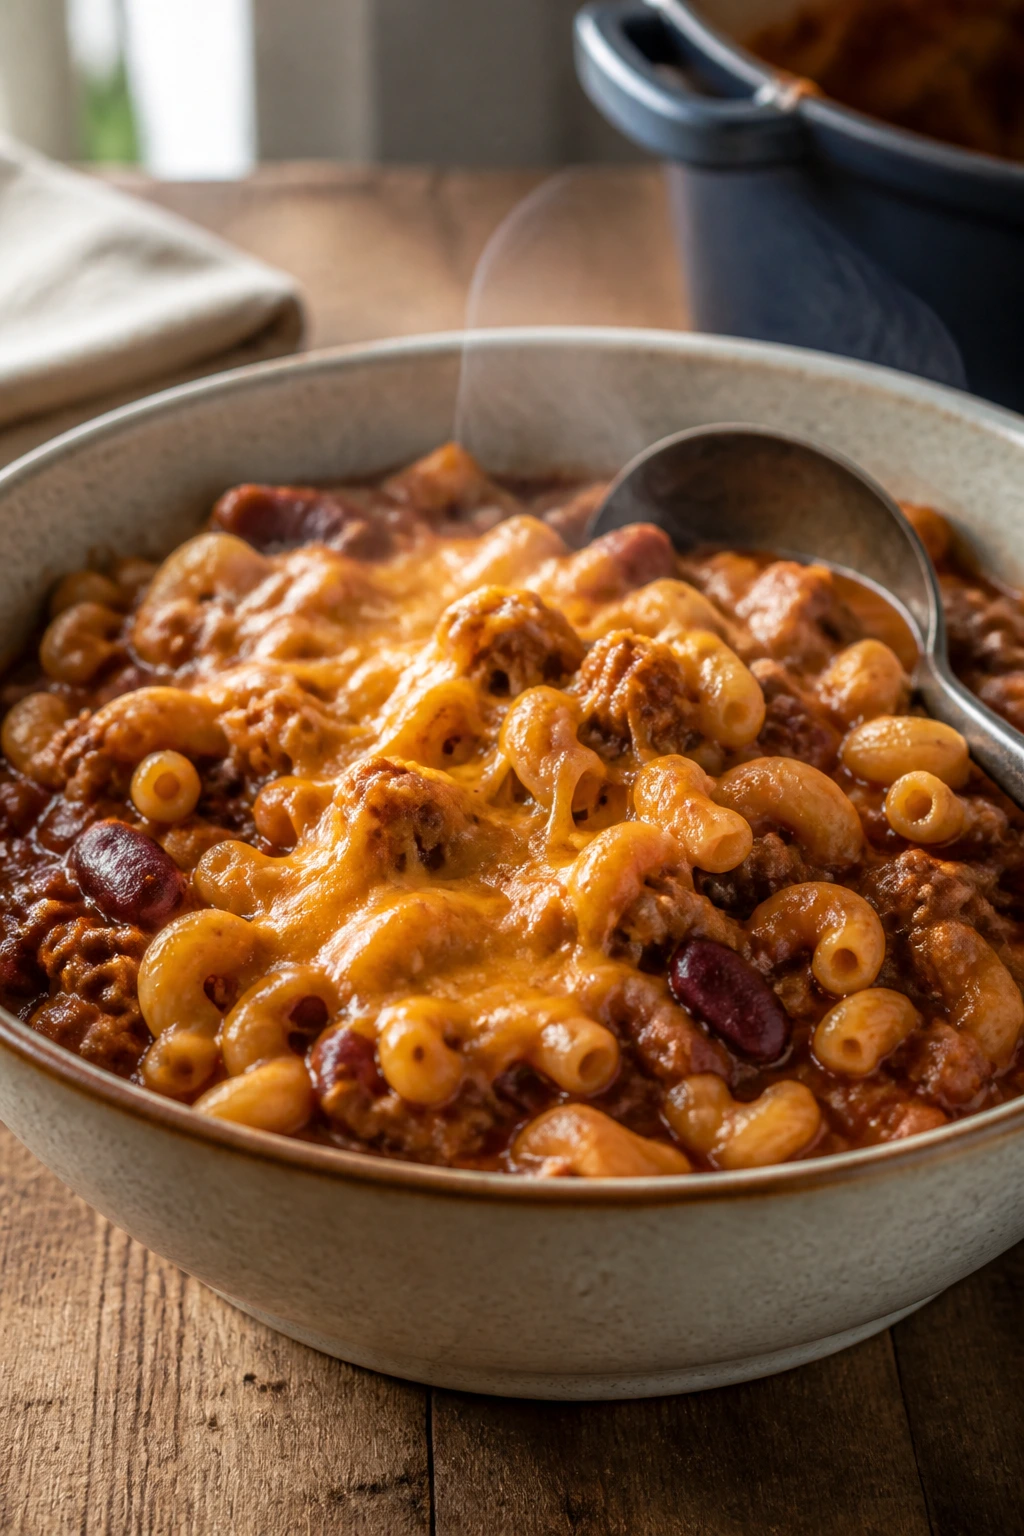
This is one of those dinners that feels slightly reckless in the best way. Ground beef, pasta, beans, tomatoes, and cheese all end up in the same pot, and somehow the result tastes like more effort than it actually took. The sauce clings to the elbows, the beans make it hearty, and the leftovers reheat like they were built for school-night survival.
If you need a dinner that can turn into lunch without complaint, this one does the job.
Why It Works: The pasta cooks in the seasoned tomato liquid, so it absorbs flavor instead of getting rinsed in plain water. Beans bulk up the pot and keep the dish from feeling thin. Cheese stirred in at the end makes the sauce clingy and rich.
Key Ingredients:
- 1 lb ground beef
- 1 medium onion, diced
- 3 cloves garlic, minced
- 2 tbsp chili powder
- 1 tsp ground cumin
- 1 can (14.5 oz) diced tomatoes
- 1 can (8 oz) tomato sauce
- 2 cups beef broth
- 2 cups elbow macaroni
- 1 can kidney beans, drained and rinsed
- 2 cups shredded cheddar
- 1 tsp kosher salt
- 1/2 tsp black pepper
Quick Steps:
- Brown the beef with the onion in a large pot over medium-high heat.
- Stir in the garlic, chili powder, cumin, salt, and pepper for 30 seconds.
- Add the diced tomatoes, tomato sauce, broth, macaroni, and kidney beans.
- Bring to a boil, then lower to a simmer and cook uncovered for 10 to 12 minutes, stirring often, until the pasta is tender and the sauce has thickened.
- Turn off the heat and stir in the cheddar until melted.
- Let it sit for 5 minutes before serving.
Equipment for This Recipe:
- Large Dutch oven or heavy pot
- Wooden spoon
- Measuring cups
- Colander
- Cheese grater
How to Serve This Dish: Spoon it into deep bowls and add a little chopped scallion if you want color on top. A simple cucumber salad on the side keeps the meal from feeling too heavy. It reheats well with a splash of broth or water.
Pro Tips for This Recipe:
- Stir often so the pasta does not stick.
- Add more broth if the pot tightens before the macaroni is tender.
- Shred the cheese yourself for the smoothest melt.
- If you like a little heat, add a pinch of cayenne with the chili powder.
Variations on This Dish:
- Turkey Chili Mac: Use ground turkey and a spoonful of olive oil for a lighter pot.
- Southwest Chili Mac: Add corn and black beans, then finish with tortilla chips.
- Smoky Chipotle Mac: Stir in chopped chipotle peppers and use smoked cheddar.
Common Mistakes to Avoid with This Dish:
- Cooking it too dry: The pasta keeps drinking liquid. Leave a little sauce.
- Using low-flavor broth: The dish relies on that liquid. Taste before you season.
- Adding cheese too early: It can clump or string badly. Stir it in off the heat.
9. Herb-Roasted Pork Tenderloin with Apples and Onions
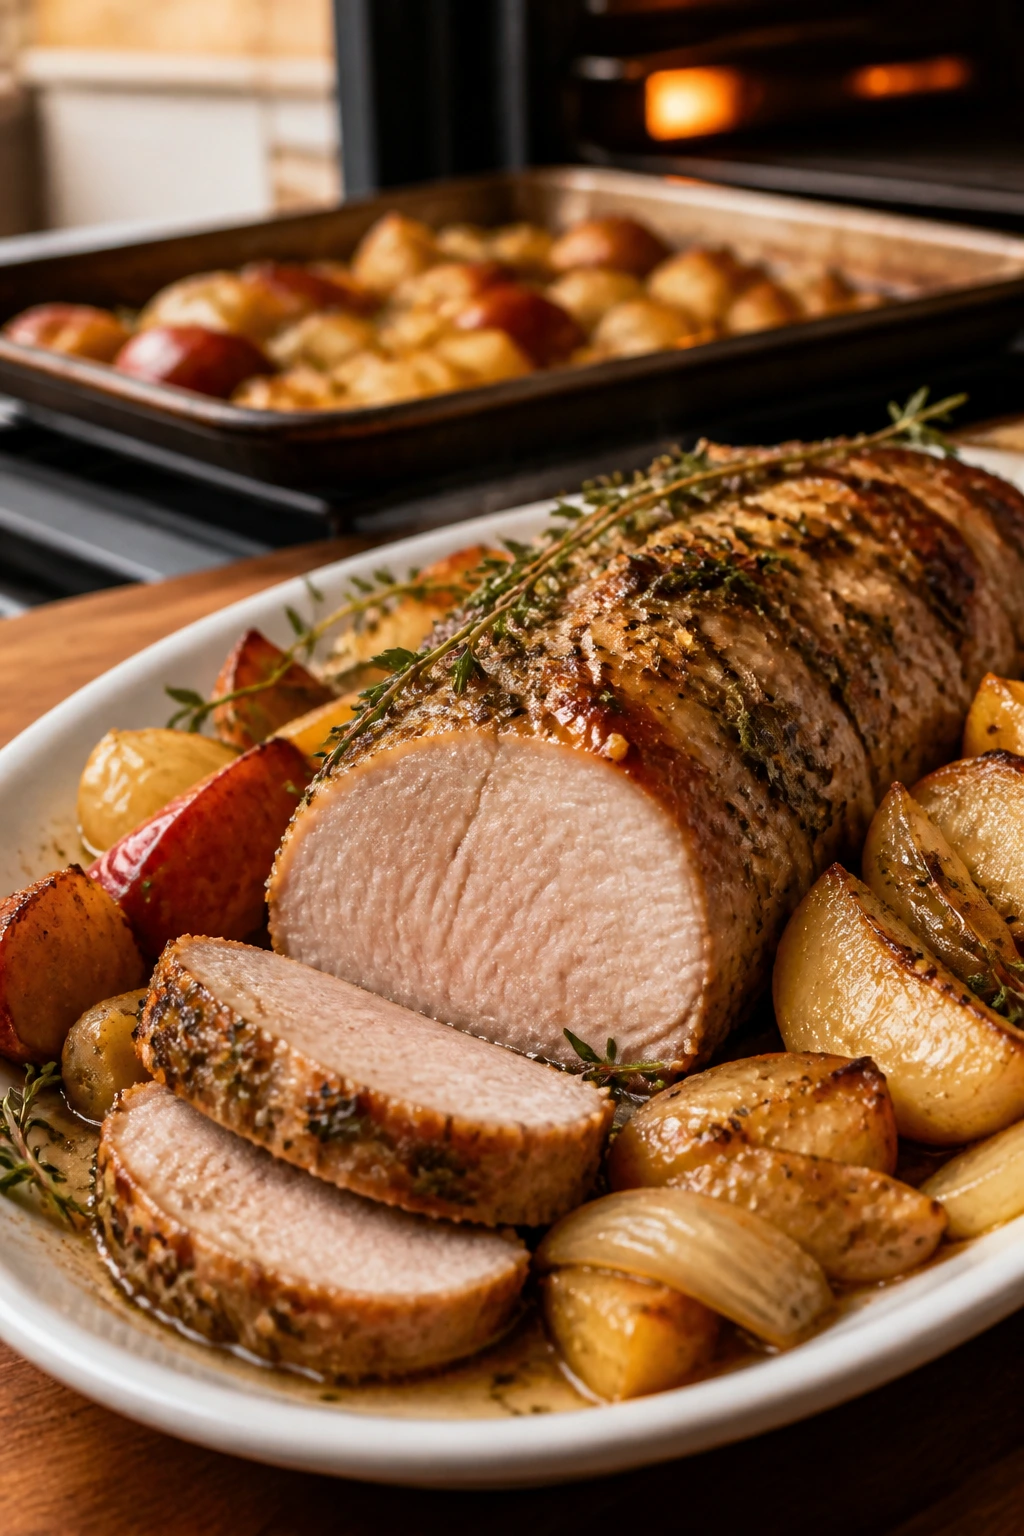
Pork tenderloin gets a lot of attention for being fast, but fast doesn’t have to mean dull. Here, the pork stays juicy while apples and onions soften around it, soaking up the pan drippings and turning gently sweet. The whole tray smells like thyme, garlic, and roasted fruit in a way that makes the kitchen feel warmer than it should.
The leftovers are excellent in sandwiches the next day, especially if you keep the apples and onions with the meat.
Why It Works: Pork tenderloin cooks quickly, so you don’t need a long Sunday afternoon to get dinner on the table. Apples and onions roast into a soft, savory-sweet bed under the meat. Dijon and herbs keep the flavor from drifting into plain roast territory.
Key Ingredients:
- 2 pork tenderloins, about 2 lb total
- 2 apples, cored and sliced
- 1 large onion, sliced
- 2 tbsp olive oil
- 1 tbsp Dijon mustard
- 1 tsp dried thyme
- 1 tsp dried rosemary
- 1 tsp kosher salt
- 1/2 tsp black pepper
- 1/2 cup apple cider
Quick Steps:
- Preheat the oven to 425°F (220°C).
- Toss the apples and onions with half the oil, salt, and pepper, then spread them in a roasting pan.
- Rub the pork with the remaining oil, Dijon, thyme, rosemary, salt, and pepper.
- Set the pork on top of the apples and onions.
- Roast for 20 to 25 minutes, until the pork reaches 145°F (63°C) in the thickest part.
- Rest for 5 to 10 minutes, then slice and spoon the pan juices over the top.
Equipment for This Recipe:
- Roasting pan or baking dish
- Instant-read thermometer
- Sharp knife
- Cutting board
- Tongs
How to Serve This Dish: Serve it with mashed potatoes or buttered egg noodles if you want something that drinks up the juices. The apple-onion mixture makes a built-in side dish, so you do not need much more. Thin slices work well cold in wraps the next day.
Pro Tips for This Recipe:
- Pull the pork at 145°F, not later, or it dries out fast.
- Slice apples thick enough that they don’t disappear in the oven.
- Rest the meat before slicing or the juices will run out onto the board.
- If the pan seems dry, add a few tablespoons more cider before roasting.
Variations on This Dish:
- Garlic-Parsley Pork: Use chopped fresh parsley and extra garlic for a brighter finish.
- Maple Apple Pork: Add 1 tbsp maple syrup to the cider for a sweeter glaze.
- Root Vegetable Version: Swap some apples for parsnips or carrots for a deeper roast flavor.
Common Mistakes to Avoid with This Dish:
- Overcooking tenderloin: It goes from juicy to dry quickly.
- Slicing too soon: Give it time to settle.
- Using tiny apple pieces: They melt away before the pork finishes.
10. Baked Ham and Potato Gratin
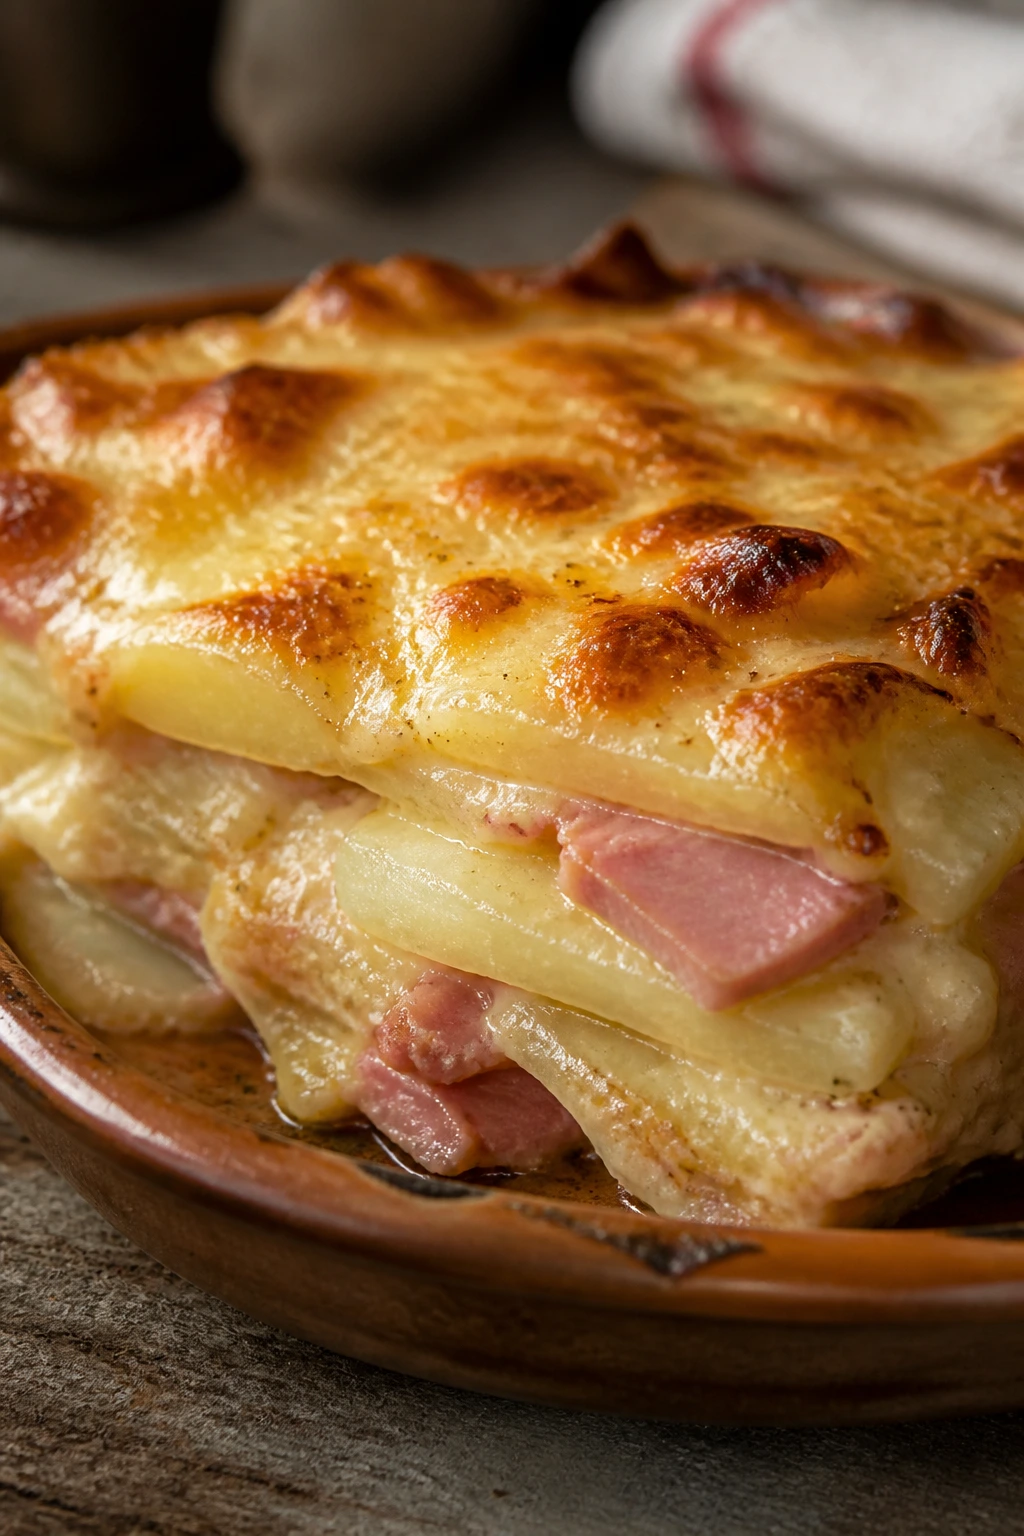
This is the kind of Sunday dinner that feels a little old-fashioned, in a good way. Ham gives the potatoes a salty backbone, the cream sauce slips between the layers, and the top turns brown and a little blistered in the oven. If your family likes a meal that tastes like a warm pause, this one lands in that exact place.
The leftovers also make a brutally efficient breakfast, especially if you reheat a square in a skillet until the edges crisp a little.
Why It Works: Thin potato slices cook at the same pace when they’re cut evenly. Ham adds salt and smoke, so the sauce does not need to work overtime. A quick flour-thickened cream mixture keeps the gratin from becoming watery.
Key Ingredients:
- 1 1/2 lb Yukon gold potatoes, thinly sliced
- 2 cups diced ham
- 1 small onion, thinly sliced
- 2 tbsp butter
- 2 tbsp all-purpose flour
- 2 cups whole milk
- 1 cup heavy cream
- 2 cups shredded Swiss or cheddar
- 1 tsp dried thyme
- 1 tsp kosher salt
- 1/2 tsp black pepper
Quick Steps:
- Preheat the oven to 375°F (190°C) and grease a 9×13-inch dish.
- Melt the butter in a saucepan, whisk in the flour, and cook for 1 minute.
- Slowly whisk in the milk and cream, then cook until the sauce lightly coats a spoon.
- Stir in half the cheese, thyme, salt, and pepper.
- Layer potatoes, ham, onion, and sauce in the dish, repeating until everything is used.
- Top with the remaining cheese and bake for 55 to 65 minutes until the potatoes are tender and the top is browned.
- Rest for 15 minutes before cutting.
Equipment for This Recipe:
- 9×13-inch baking dish
- Saucepan
- Whisk
- Mandoline or sharp knife
- Foil
How to Serve This Dish: Pair it with a sharp green salad or steamed green beans, because the gratin is rich enough to ask for something crisp beside it. It slices best after a rest. Leftovers hold together beautifully for lunch.
Pro Tips for This Recipe:
- Slice the potatoes thin and even so they cook at the same pace.
- Keep the sauce warm before layering so it spreads easily.
- Cover with foil for the first half of baking if the top browns too fast.
- Let it stand before serving or the layers slide apart.
Variations on This Dish:
- Cheddar-Dill Gratin: Swap Swiss for cheddar and add chopped dill.
- Leek and Ham Version: Replace onion with sliced leeks for a softer flavor.
- Sweet Potato Gratin: Use half sweet potatoes for a sweeter, more colorful dish.
Common Mistakes to Avoid with This Dish:
- Too-thick potato slices: They stay hard in the middle.
- Watery sauce: Cook the flour long enough to thicken before layering.
- Skipping the rest: The gratin needs time to set up.
11. Mediterranean Chickpea and Sausage Stew

This stew has a deep, tomato-rich smell that feels like it’s been simmering longer than it has. Chickpeas make it filling, sausage brings enough fat to carry the flavor, and a handful of greens at the end keeps it from feeling heavy. It’s one of those meals that tastes calm and practical, which is a fine thing to be on a Sunday.
The broth is the part I keep coming back to. It turns into lunch soup the next day if you add a splash of water and reheat gently.
Why It Works: Chickpeas hold their shape in broth, so the stew stays hearty after chilling. Sausage seasons the pot from the inside, which means you need fewer extra ingredients. Lemon at the end brightens the beans and tomatoes so the leftovers still taste sharp.
Key Ingredients:
- 1 lb Italian sausage, casings removed
- 1 onion, diced
- 3 cloves garlic, minced
- 2 cans chickpeas, drained and rinsed
- 1 can diced tomatoes
- 3 cups chicken broth
- 2 cups chopped kale
- 1 tsp smoked paprika
- 1 tsp dried oregano
- 1 lemon, juiced
- 1 tsp kosher salt
- 1/2 tsp black pepper
Quick Steps:
- Brown the sausage in a large pot over medium heat.
- Add the onion and cook until soft, then stir in the garlic, paprika, oregano, salt, and pepper.
- Add the chickpeas, tomatoes, and broth.
- Simmer uncovered for 20 minutes so the flavors thicken and settle together.
- Stir in the kale and cook for 5 more minutes until just wilted.
- Finish with lemon juice and taste for salt before serving.
Equipment for This Recipe:
- Dutch oven or soup pot
- Wooden spoon
- Measuring cups
- Citrus juicer
- Ladle
How to Serve This Dish: Serve it with toasted bread rubbed with garlic, or spoon it over rice if you want a firmer meal. A little olive oil on top makes it look finished. The leftovers hold up well in a lunch thermos.
Pro Tips for This Recipe:
- Use sausage with enough seasoning to carry the broth.
- Don’t overcook the kale; it should stay dark green.
- Lemon juice at the end matters more than people expect.
- If you want a thicker stew, mash a few chickpeas against the side of the pot.
Variations on This Dish:
- Chicken Sausage Version: Swap in chicken sausage for a lighter stew.
- White Bean Twist: Use cannellini beans instead of chickpeas for a softer texture.
- Spicy Tomato Stew: Add red pepper flakes and a spoonful of harissa.
Common Mistakes to Avoid with This Dish:
- Salting too early and too hard: Sausage can be salty. Taste late.
- Boiling kale into submission: It turns muddy. Add it at the end.
- Skipping acid: The stew can taste flat without lemon.
12. Chicken Enchilada Casserole
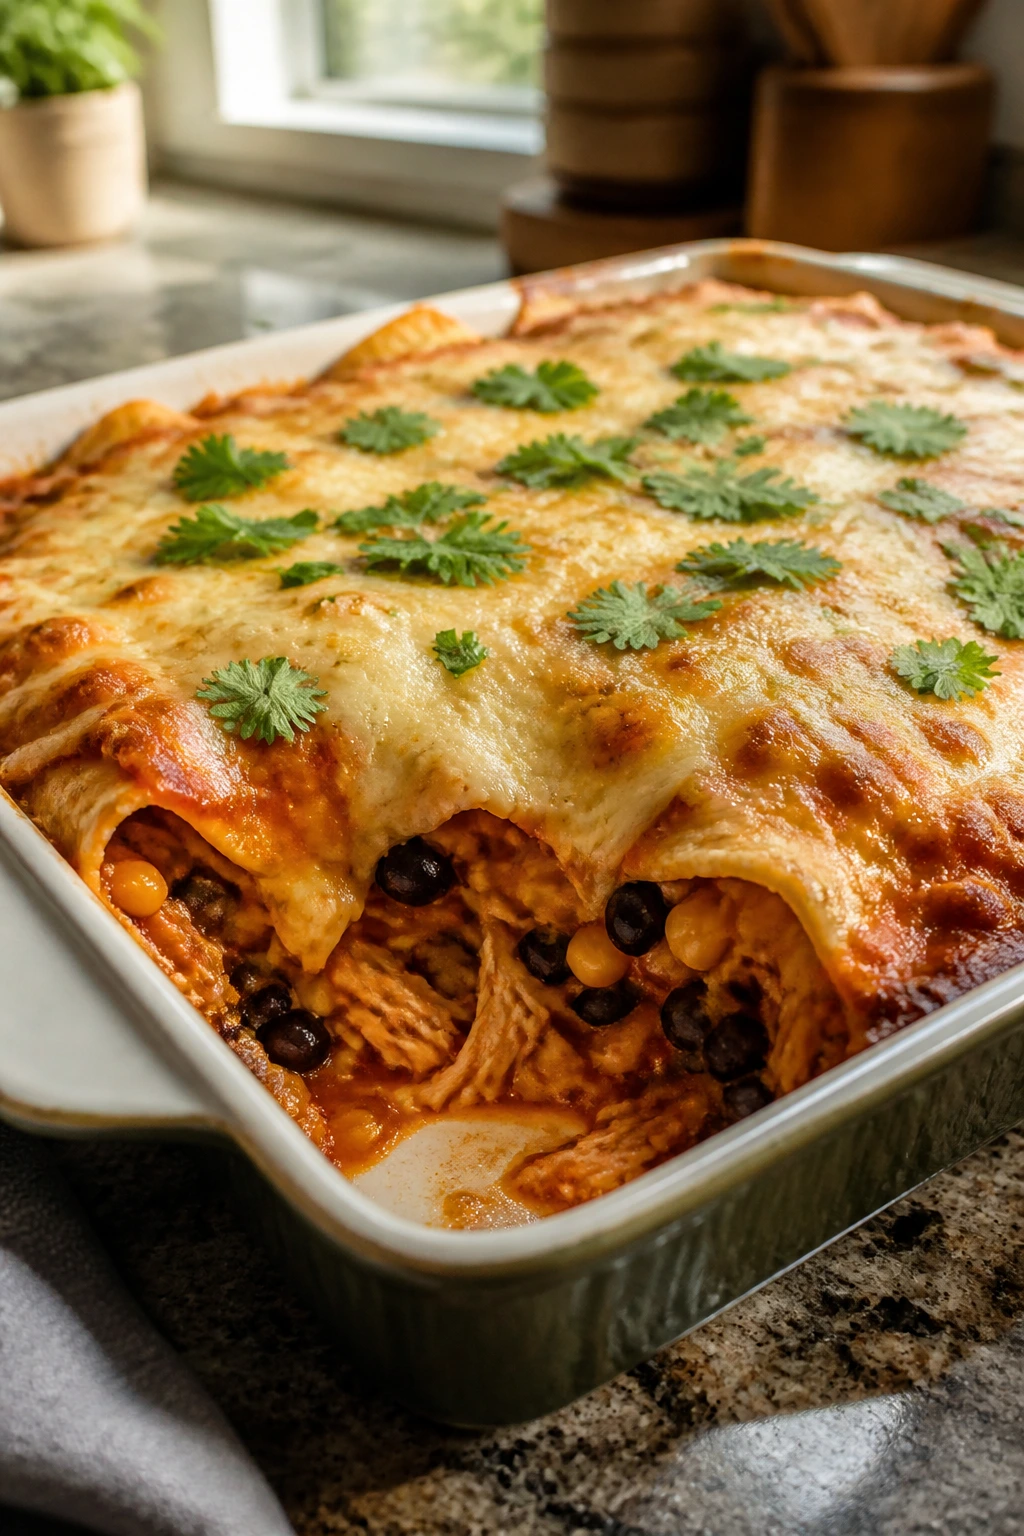
Enchiladas are great until you start rolling. This casserole gives you the same saucy, cheesy result without the fiddly part. The tortillas soften into layers, the chicken stays tucked into the sauce, and the whole pan cuts into neat squares that reheat without falling apart in the microwave.
This is one of my favorite Sunday dinners for a week that starts early. It stays sturdy, which is half the battle.
Why It Works: Corn tortillas soften in enchilada sauce but keep enough structure to hold the casserole together. Shredded chicken soaks up flavor without drying out. Beans and corn add texture so each bite feels complete.
Key Ingredients:
- 3 cups shredded cooked chicken
- 12 corn tortillas
- 2 cups enchilada sauce
- 1 can black beans, drained and rinsed
- 1 cup corn kernels
- 2 cups shredded Monterey Jack
- 1/2 cup diced onion
- 1/4 cup chopped cilantro
- 1 tsp ground cumin
- 1/2 tsp kosher salt
Quick Steps:
- Preheat the oven to 375°F (190°C) and grease a 9×13-inch dish.
- Mix the chicken with cumin, salt, onion, beans, and corn.
- Spread a thin layer of enchilada sauce in the dish.
- Layer tortillas, chicken mixture, sauce, and cheese, repeating until everything is used.
- Finish with sauce and the remaining cheese.
- Bake for 25 minutes until bubbling, then broil briefly if you want brown spots.
- Rest for 10 minutes and scatter cilantro over the top.
Equipment for This Recipe:
- 9×13-inch baking dish
- Mixing bowl
- Sharp knife
- Foil
- Spatula
How to Serve This Dish: Serve it with shredded lettuce and sliced avocado if you want it to feel more complete. A spoonful of sour cream cools the edges nicely. The leftovers can be cut cold and reheated in a skillet or microwave.
Pro Tips for This Recipe:
- Use a sauce you actually like. It matters.
- Keep the first sauce layer thin so the bottom doesn’t go soggy.
- If your tortillas are brittle, warm them first for easier layering.
- Resting the casserole helps it slice instead of slump.
Variations on This Dish:
- Green Enchilada Version: Use salsa verde and Monterey Jack for a brighter flavor.
- Beef Enchilada Bake: Swap chicken for seasoned ground beef.
- Vegetarian Bean Casserole: Add pinto beans and sautéed peppers in place of chicken.
Common Mistakes to Avoid with This Dish:
- Too much sauce: The casserole turns loose. Thin layers work better.
- Dry tortillas at the top: Press them slightly into the sauce.
- Cutting too soon: Give the layers a chance to set.
13. Classic Shepherd’s Pie
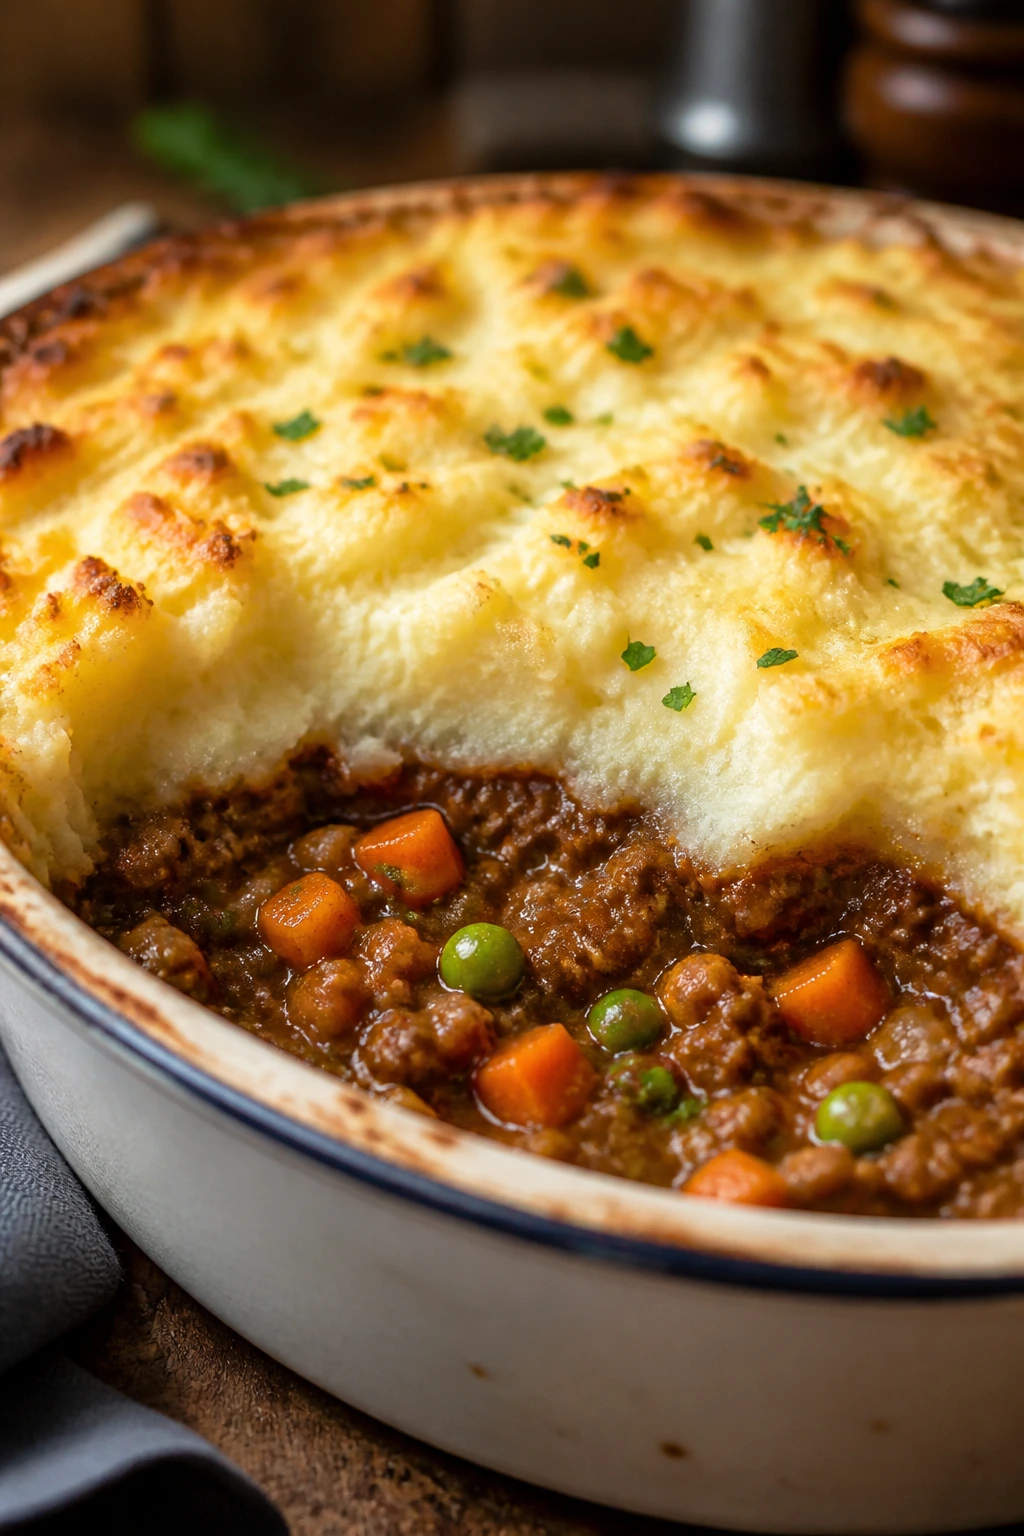
Shepherd’s pie is comfort food with a very practical spine. The savory filling sits under a lid of mashed potatoes that browns in patches, and the whole thing comes out of the oven looking like dinner solved itself. It’s also one of those dishes that tastes even better the next day, when the flavors settle into each other and the potato top firms up just enough.
Leftovers reheat neatly, especially if you do not drown them in extra gravy.
Why It Works: The meat filling needs enough liquid to stay juicy beneath the potatoes. Carrots and peas give the pie texture so it doesn’t feel like a bowl under a blanket. A thicker mashed topping browns better and holds its shape when sliced.
Key Ingredients:
- 2 lb Yukon gold potatoes, peeled and cubed
- 4 tbsp butter
- 1/2 cup milk
- 1 1/2 lb ground lamb or ground beef
- 1 onion, diced
- 2 carrots, diced
- 1 cup peas
- 2 tbsp tomato paste
- 1 cup beef broth
- 1 tsp kosher salt
- 1/2 tsp black pepper
Quick Steps:
- Boil the potatoes in salted water until tender, then mash with butter and milk.
- Brown the meat with the onion and carrots in a skillet.
- Stir in the tomato paste, broth, salt, and pepper and simmer until the sauce thickens.
- Add the peas and cook for 2 minutes.
- Spread the meat mixture in a baking dish and cover with mashed potatoes.
- Rough up the top with a fork so it browns in ridges.
- Bake at 400°F (205°C) for 20 to 25 minutes until the top is golden.
Equipment for This Recipe:
- Large pot
- Potato masher
- Skillet
- Baking dish
- Fork
How to Serve This Dish: Let it sit a little before scooping so the layers stay defined. A simple green salad is enough beside it. Leftovers reheat well in the oven, covered, at 325°F.
Pro Tips for This Recipe:
- Don’t make the potatoes too loose or the topping slides.
- Brown the meat well; pale filling tastes flat.
- Fork the potato top before baking so the ridges crisp.
- If the filling seems dry, add a splash more broth.
Variations on This Dish:
- Turkey Cottage Pie: Use ground turkey and call it cottage pie if you want to be exact.
- Cheddar Potato Top: Stir shredded cheddar into the mash for a sharper top.
- Mushroom Version: Add chopped mushrooms to the filling for more body.
Common Mistakes to Avoid with This Dish:
- Watery filling: Simmer until thick before topping.
- Thin mashed potatoes: They can slide off.
- Skipping salt in the potatoes: The topping needs seasoning too.
14. BBQ Pulled Pork Sandwiches
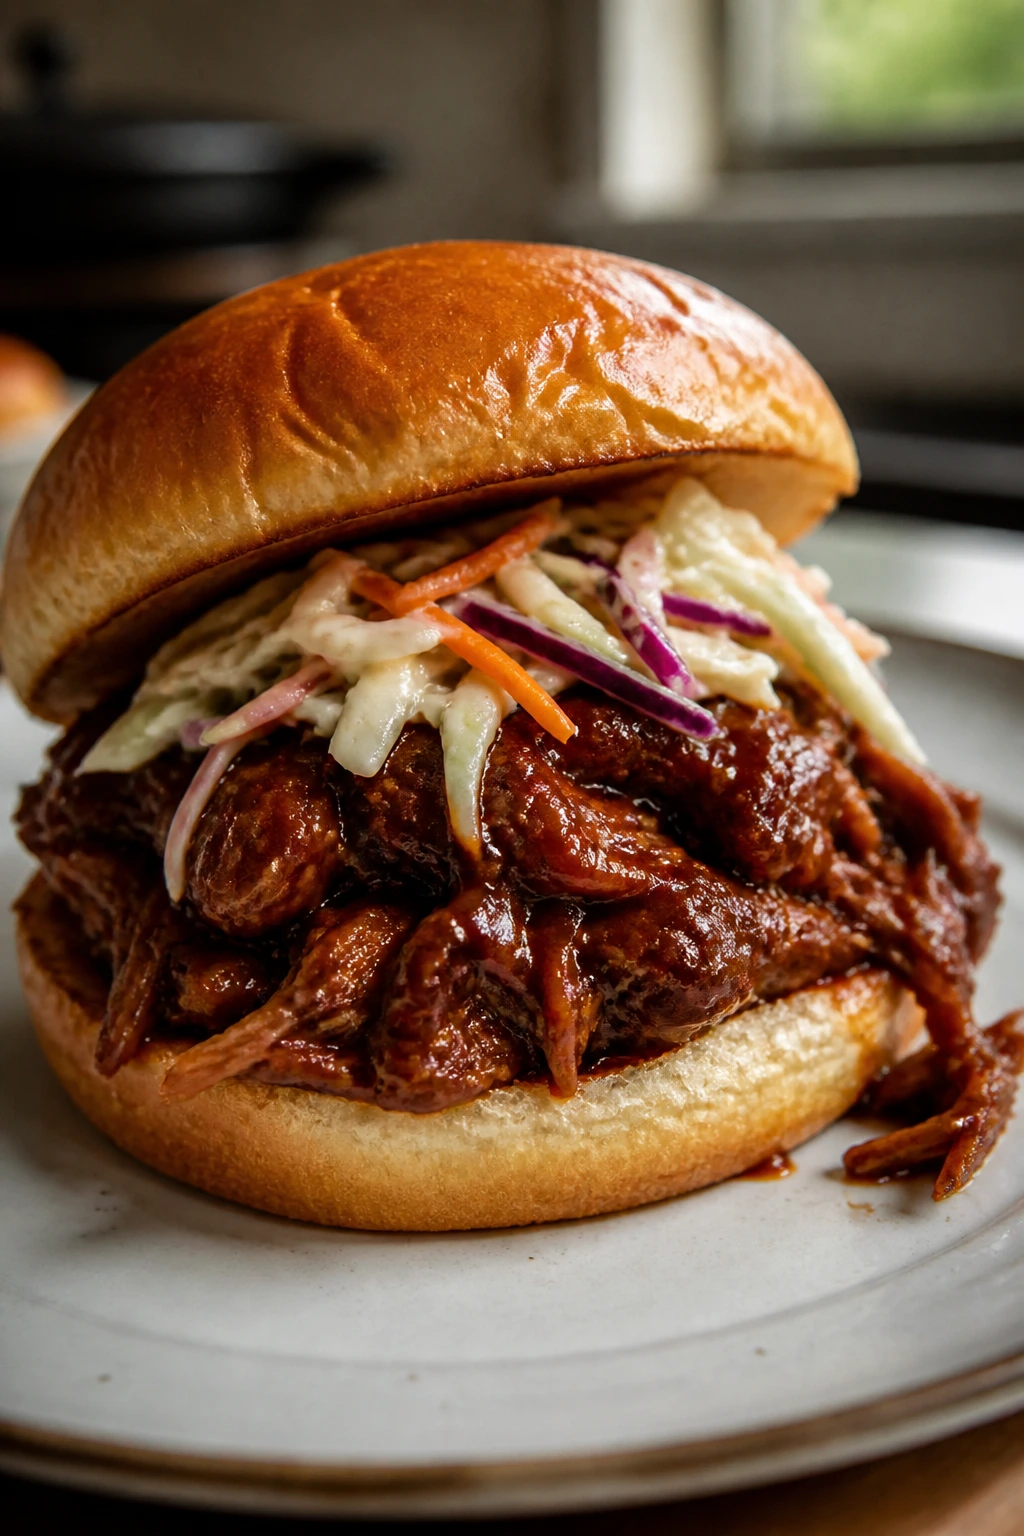
Pulled pork is one of the rare dinners that lets you start early, walk away, and still end up with something people get excited about. The meat turns soft enough to shred in strands, the barbecue sauce clings to every piece, and the buns soak up the good stuff without dissolving. Add slaw on top and the sandwich gets the crunch it needs.
This is the sort of Sunday dinner that leaves behind enough meat for tacos, baked potatoes, or breakfast hash.
Why It Works: Pork shoulder has enough fat and connective tissue to stay moist through a long cook. A little vinegar keeps the barbecue sauce from tasting sticky-sweet. The meat rest matters because it lets the fibers relax before shredding.
Key Ingredients:
- 3 lb pork shoulder
- 1 large onion, sliced
- 1 cup barbecue sauce
- 1/2 cup apple cider vinegar
- 1/2 cup chicken broth
- 1 tbsp brown sugar
- 1 tsp smoked paprika
- 1 1/2 tsp kosher salt
- 1/2 tsp black pepper
- Hamburger buns, for serving
- Coleslaw, for serving
Quick Steps:
- Rub the pork with salt, pepper, paprika, and brown sugar.
- Put the onion in the slow cooker and set the pork on top.
- Add the vinegar, broth, and half the barbecue sauce.
- Cook on low for 8 to 9 hours until the pork falls apart easily.
- Shred the pork, stir in the remaining barbecue sauce, and let it sit in the juices for 10 minutes.
- Pile onto buns and top with slaw.
Equipment for This Recipe:
- Slow cooker or Dutch oven
- Two forks
- Cutting board
- Measuring cups
- Slotted spoon
How to Serve This Dish: Serve the pork on toasted buns with crunchy slaw and pickles. If you want a bigger meal, add baked beans or potato salad. Cold leftovers also work in quesadillas, which is a small but real weeknight win.
Pro Tips for This Recipe:
- Don’t skip the vinegar; it keeps the pork from tasting one-note.
- Shred the pork while it’s still warm.
- Add sauce gradually so you don’t drown the meat.
- Toast the buns or they soften too fast.
Variations on This Dish:
- Carolina-Style Pork: Use more vinegar and a thinner sauce for a tangier finish.
- Spicy BBQ Pork: Add cayenne or hot sauce to the rub.
- Oven-Braised Pork: Cook covered at 300°F if you don’t want to use the slow cooker.
Common Mistakes to Avoid with This Dish:
- Using pork loin: It dries out too easily.
- Dumping all the sauce in at once: The pork can get soggy.
- Shredding before resting: The meat loses juices.
15. Salmon and Dill Potato Bake
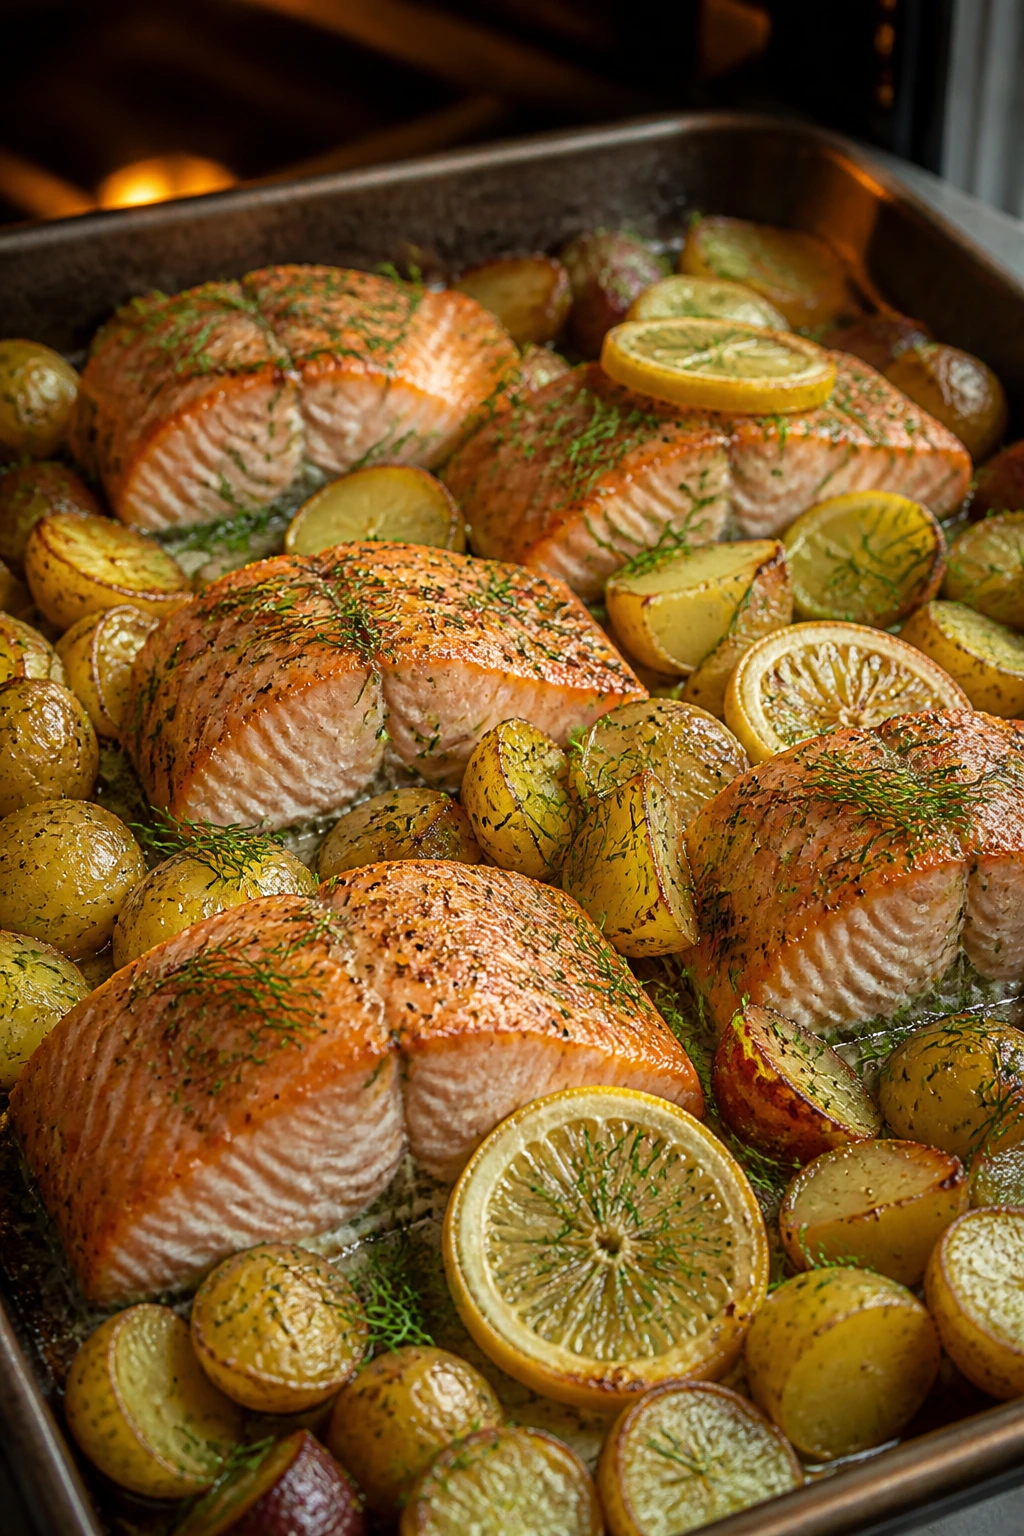
Salmon is not the first thing people think of for leftovers, and I get that. But baked with potatoes, lemon, and dill, it turns into a tidy sheet-pan meal that tastes fresh enough for Sunday and still useful on Monday if you eat it within a day. The potatoes give the dish staying power, and the lemon keeps the salmon from feeling heavy.
I would not push this one past a day or so in the fridge. Fish asks for respect.
Why It Works: Potatoes need more time than salmon, so they roast first and make the whole tray feel substantial. Dill and lemon are clean, sharp flavors that keep reheated fish from tasting tired. A light yogurt sauce on the side helps the bake stay moist.
Key Ingredients:
- 1 1/2 lb baby potatoes, halved
- 1 1/2 lb salmon fillet, cut into 4 portions
- 2 tbsp olive oil
- 1 lemon, sliced and juiced
- 2 tbsp chopped fresh dill
- 1/2 cup plain Greek yogurt or sour cream
- 1 cup broccoli florets or asparagus tips
- 1 tsp kosher salt
- 1/2 tsp black pepper
Quick Steps:
- Preheat the oven to 425°F (220°C).
- Toss the potatoes with oil, salt, and pepper, then roast for 20 minutes.
- Stir the broccoli or asparagus into the pan and nestle the salmon among the potatoes.
- Drizzle the salmon with lemon juice and add lemon slices on top.
- Bake 10 to 12 minutes until the salmon flakes and the vegetables are tender.
- Stir the dill into the yogurt and serve it alongside.
Equipment for This Recipe:
- Sheet pan
- Parchment paper
- Small bowl
- Fish spatula or wide spatula
- Instant-read thermometer
How to Serve This Dish: Serve it with the dill yogurt on the side and a pile of extra lemon wedges. The potatoes help make it feel like a complete dinner instead of a fish course pretending to be one. If you’re saving leftovers, cool them quickly and eat them within a day.
Pro Tips for This Recipe:
- Cut the potatoes small enough that they finish on time.
- Pull the salmon when it still looks slightly glossy in the middle.
- Do not overstore fish; it’s best fresh or very soon after.
- Add the dill after baking for a sharper flavor.
Variations on This Dish:
- Mustard-Dill Salmon: Brush the fish with Dijon before baking.
- Mediterranean Version: Add cherry tomatoes and olives.
- Crumb-Topped Salmon: Sprinkle buttered breadcrumbs on the salmon for crunch.
Common Mistakes to Avoid with This Dish:
- Overcooking the fish: It turns dry and chalky fast.
- Starting the salmon too early: It finishes before the potatoes do.
- Leaving leftovers too long: Fish is not forgiving in the fridge.
16. Stuffed Bell Peppers with Ground Beef and Rice
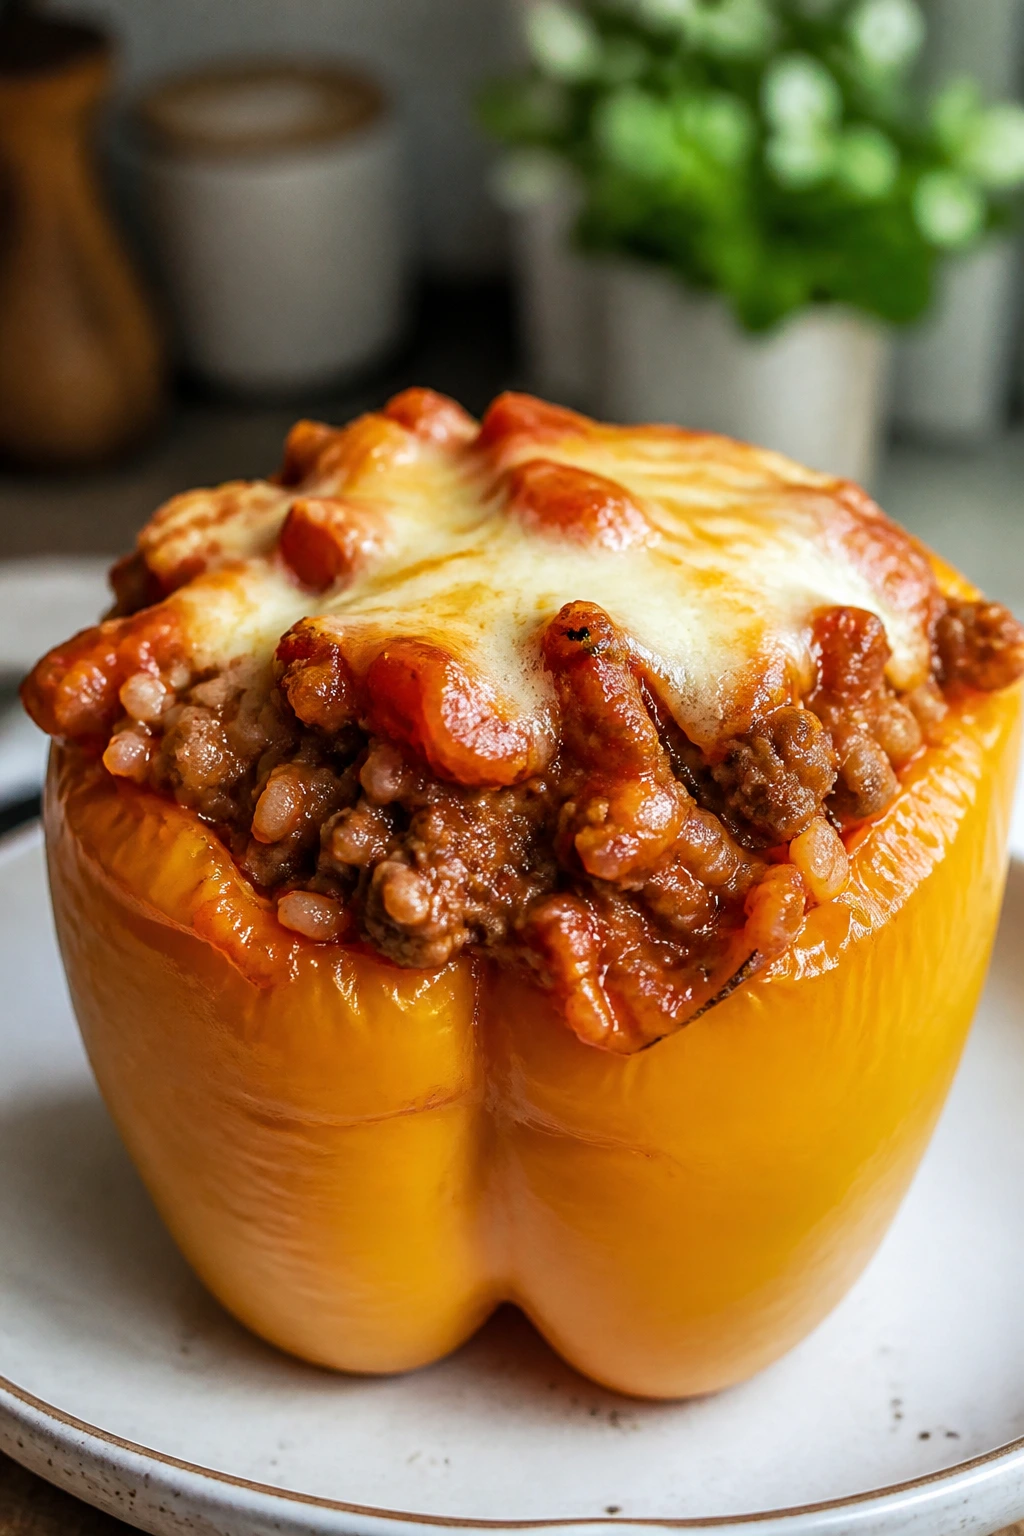
Stuffed peppers look a little old-school, and I mean that as a compliment. The peppers soften into sweet, edible bowls while the filling stays savory and a little saucy. Each one is its own portion, which makes them easy to serve, easy to pack, and easy to keep from turning into a pile of anonymous casserole.
They also make a strong lunch the next day, especially if you reheat them with a spoonful of tomato sauce.
Why It Works: Bell peppers hold shape in the oven but soften enough to cut with a fork. Ground beef and rice give the filling enough bulk to make one pepper feel like dinner. Tomato sauce inside the filling keeps everything moist after reheating.
Key Ingredients:
- 6 bell peppers
- 1 lb ground beef
- 1 cup cooked rice
- 1 onion, diced
- 1 can tomato sauce
- 1 cup shredded cheddar
- 1 tsp Italian seasoning
- 1 tsp kosher salt
- 1/2 tsp black pepper
Quick Steps:
- Preheat the oven to 375°F (190°C).
- Slice the tops off the peppers and remove the seeds.
- Brown the beef with the onion, then stir in rice, half the tomato sauce, seasoning, salt, and pepper.
- Fill the peppers and set them upright in a baking dish.
- Spoon the remaining tomato sauce over the tops and cover with foil.
- Bake for 35 minutes, then uncover, add cheese, and bake 10 minutes more.
- Rest for 5 minutes before serving.
Equipment for This Recipe:
- Baking dish
- Skillet
- Knife
- Spoon
- Foil
How to Serve This Dish: Two pepper halves usually feel right for most adults, one for a smaller eater. A side salad or crusty bread keeps the meal from feeling too neat, which is fine by me. Leftovers reheat well in the oven or microwave.
Pro Tips for This Recipe:
- Choose peppers with flat bottoms so they stand up.
- Cook the filling before stuffing or the rice can stay underdone.
- If the peppers are large, blanch them for 2 minutes first.
- Don’t overload the filling; leave room for the cheese.
Variations on This Dish:
- Turkey Pepper Boats: Use ground turkey and a splash of Worcestershire.
- Mexican-Style Peppers: Add taco seasoning, corn, and black beans.
- Cheesy Rice Version: Use extra rice and less meat for a lighter budget option.
Common Mistakes to Avoid with This Dish:
- Raw rice in the filling: It may not cook through evenly.
- Peppers without stability: They tip over and spill.
- Skipping the sauce on top: The filling dries out.
17. Creamy Tuscan Tortellini Soup
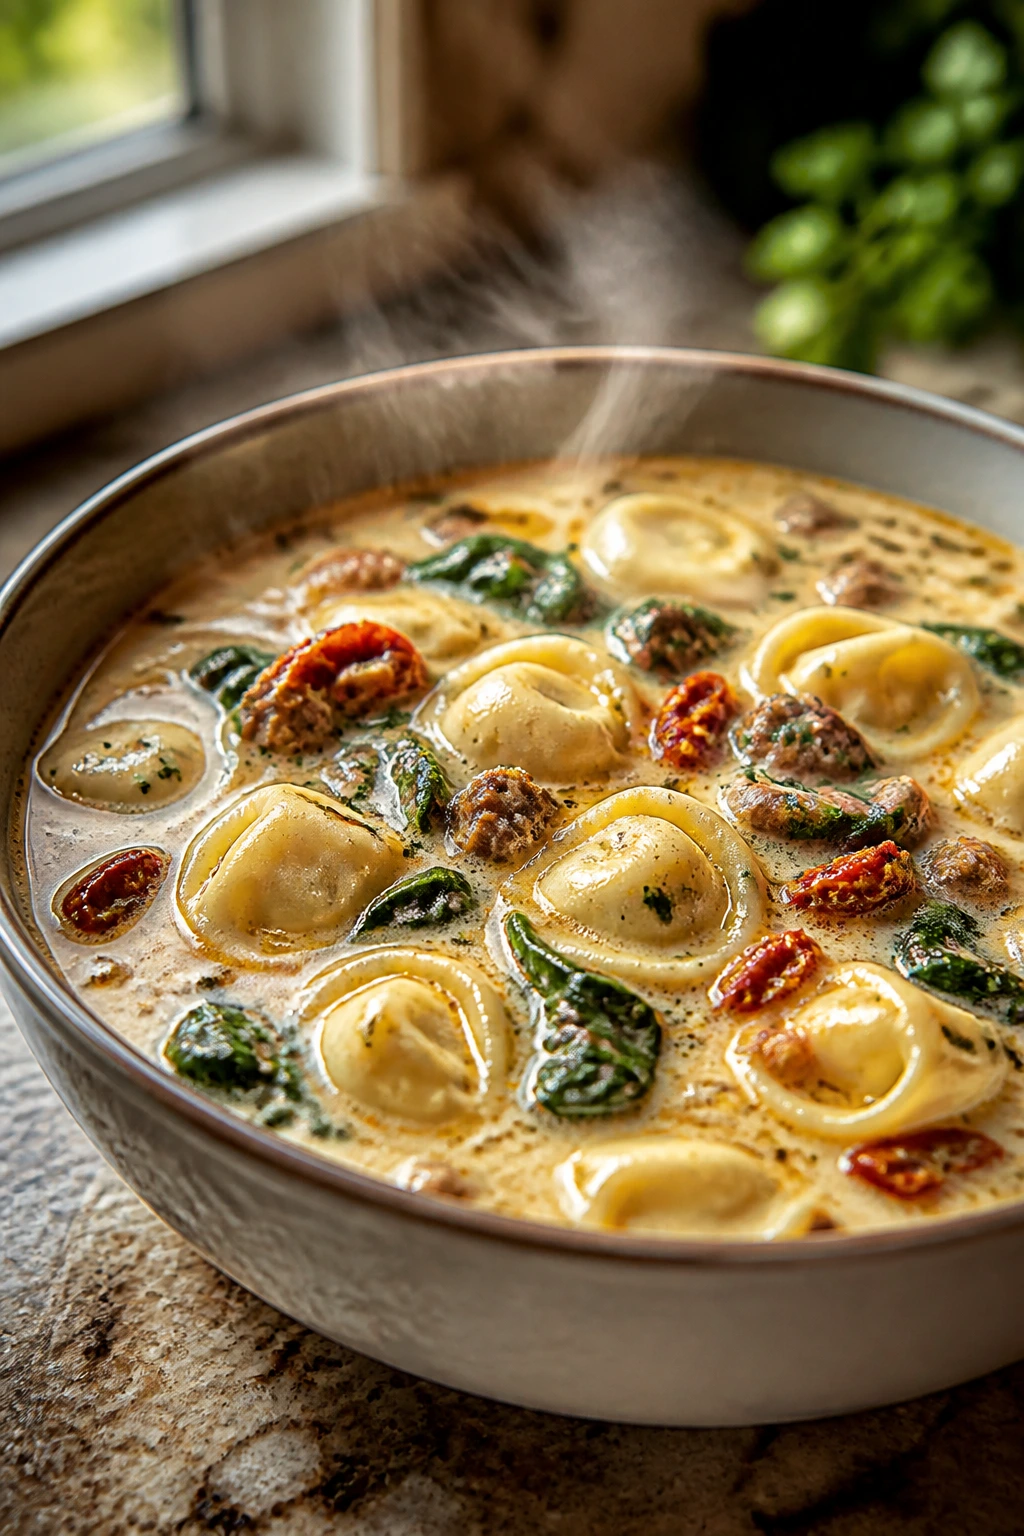
This soup is lush in the way a school-night dinner almost never gets to be. The tortellini make it filling, the sausage gives the broth a meaty backbone, and the spinach and sun-dried tomatoes keep it from tasting flat. It’s rich, but not heavy enough to knock everyone into a nap.
The key thing with this one is timing. Tortellini should be cooked just until tender or they’ll swell too much overnight.
Why It Works: Cheese tortellini adds built-in richness and enough starch to thicken the broth slightly. Sun-dried tomatoes bring sharpness, while spinach wilts without taking over. Half-and-half at the end gives the soup a creamy finish without needing a flour slurry.
Key Ingredients:
- 1 lb Italian sausage or chicken sausage
- 1 onion, diced
- 4 cloves garlic, minced
- 6 cups chicken broth
- 1 package (20 oz) cheese tortellini
- 2 cups baby spinach
- 1 cup half-and-half
- 1/2 cup chopped sun-dried tomatoes
- 1/2 tsp red pepper flakes
- 1 tsp kosher salt
- 1/2 tsp black pepper
Quick Steps:
- Brown the sausage in a large pot, breaking it into pieces.
- Add the onion and cook until soft, then stir in the garlic and red pepper flakes.
- Pour in the broth and sun-dried tomatoes and bring to a simmer.
- Add the tortellini and cook until just tender, usually 4 to 5 minutes.
- Stir in the spinach and half-and-half, then season with salt and pepper.
- Heat gently for 2 minutes and serve hot.
Equipment for This Recipe:
- Soup pot
- Ladle
- Wooden spoon
- Measuring cups
- Sharp knife
How to Serve This Dish: Serve it with bread for dunking, because that’s half the pleasure. If you’re storing leftovers, keep a little broth nearby to loosen the soup on reheating. Tortellini likes to soak up liquid in the fridge.
Pro Tips for This Recipe:
- Add the tortellini near the end so it stays intact.
- Warm the soup gently after adding the dairy; boiling can split it.
- Thin with broth if leftovers get too thick.
- Chop the sun-dried tomatoes small so they spread through each bowl.
Variations on This Recipe:
- Chicken and Spinach Version: Skip the sausage and use shredded chicken.
- Tomato-Heavy Soup: Add an extra 1/2 cup crushed tomatoes for more body.
- Dairy-Light Bowl: Use evaporated milk instead of half-and-half.
Common Mistakes to Avoid with This Recipe:
- Overcooking tortellini: It turns bloated and soft.
- Boiling after the cream goes in: The soup can split.
- Underseasoning the broth: Tortellini soaks up flavor fast.
18. Teriyaki Meatball Rice Bowls
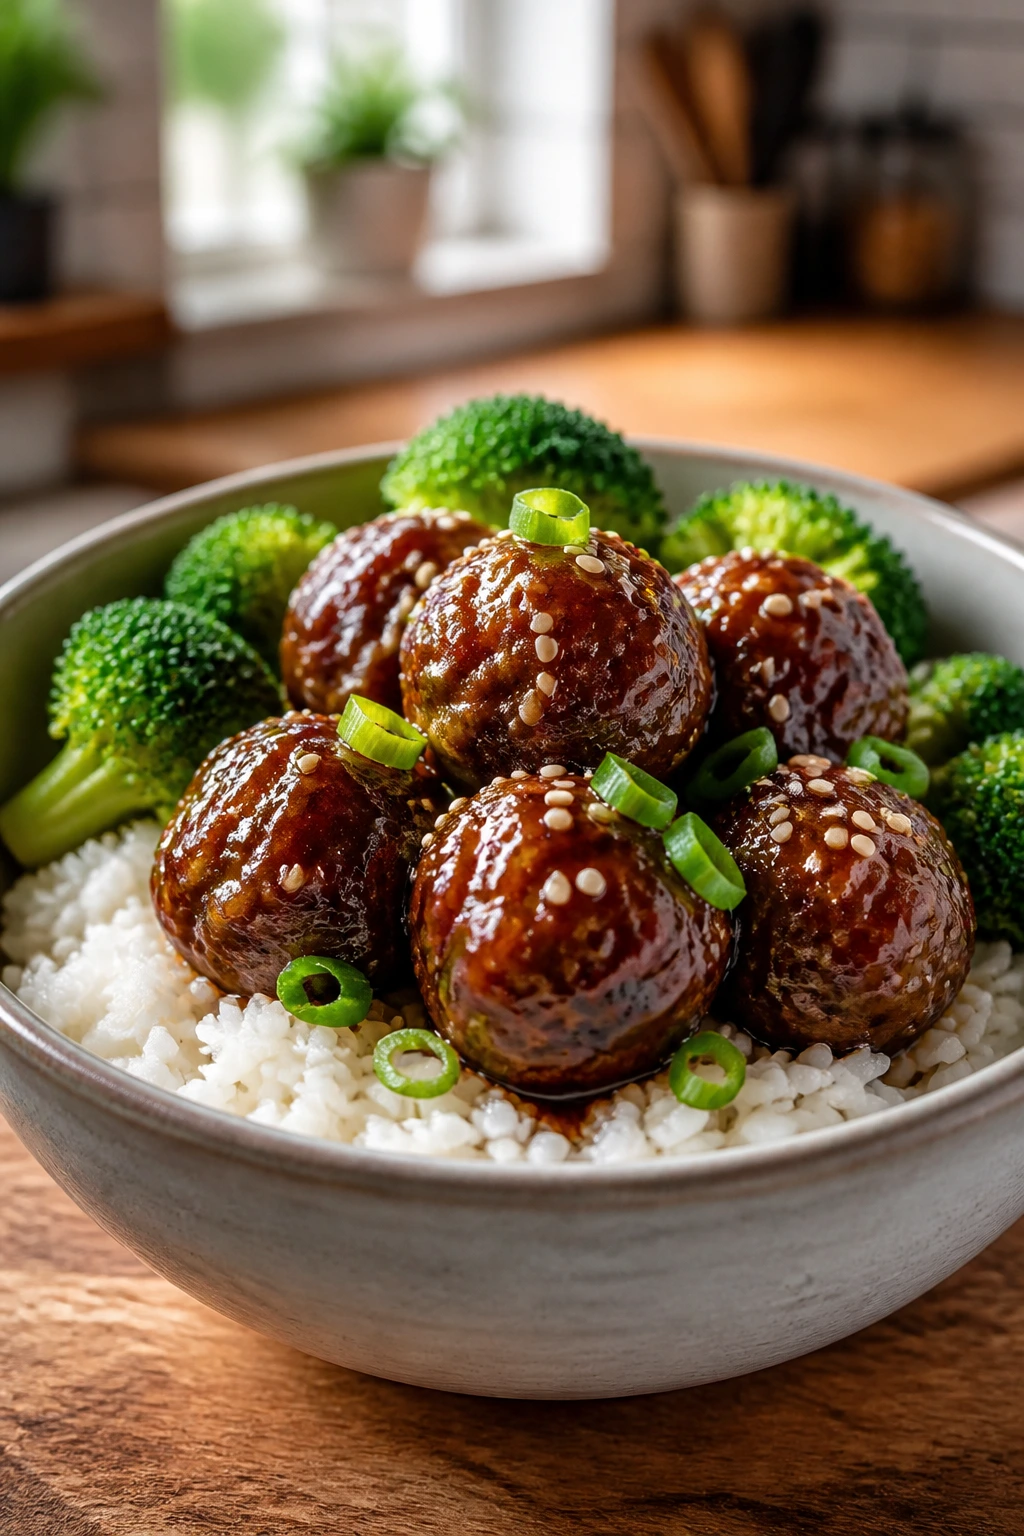
These bowls taste like takeout you can control. The meatballs are tender, the teriyaki glaze turns shiny and sticky, and the rice underneath catches every bit of sauce. Add broccoli or snap peas and you have a dinner that can be built for Sunday and packed for Monday without any awkward rearranging.
Bowls are useful that way. They let you separate things if someone is picky, or pile everything together if your family likes one-pan energy.
Why It Works: Ground chicken or turkey stays light but still holds together with egg and breadcrumbs. Teriyaki sauce clings to meatballs better than a thin glaze, which means the flavor survives storage. Rice and broccoli give the bowl enough structure to eat like a real meal, not a sauce accident.
Key Ingredients:
- 1 lb ground turkey or chicken
- 1 egg
- 1/3 cup breadcrumbs
- 2 tbsp soy sauce
- 1 tsp grated fresh ginger
- 3 cups cooked rice
- 2 cups broccoli florets
- 1/2 cup teriyaki sauce
- 1 tbsp sesame seeds
- 2 green onions, sliced
Quick Steps:
- Preheat the oven to 400°F (205°C) and line a sheet pan.
- Mix the meat, egg, breadcrumbs, soy sauce, and ginger, then form 1 1/2-inch meatballs.
- Bake for 12 to 15 minutes until cooked through.
- Steam or roast the broccoli until crisp-tender.
- Toss the meatballs with teriyaki sauce.
- Build bowls with rice, broccoli, meatballs, sesame seeds, and green onions.
Equipment for This Recipe:
- Sheet pan
- Mixing bowl
- Small saucepan or microwave-safe bowl
- Rice cooker or pot
- Spoon
How to Serve This Dish: Serve the bowls hot with extra teriyaki on the side. If you want to stretch the meal, add shredded carrots or cucumbers. These are excellent packed cold or reheated in a container with a damp paper towel over the rice.
Pro Tips for This Recipe:
- Wet your hands before rolling the meatballs; it keeps the mixture from sticking.
- Don’t overbake or the meatballs tighten up.
- Keep some sauce aside for reheating.
- Fresh ginger gives the bowls more lift than dry ginger.
Variations on This Recipe:
- Sweet-Sesame Bowls: Add a drizzle of honey to the teriyaki sauce.
- Spicy Bowl Version: Stir chili garlic sauce into the glaze.
- Cauliflower Rice Bowl: Swap in cauliflower rice if you want a lighter base.
Common Mistakes to Avoid with This Recipe:
- Meatballs too large: They cook unevenly. Keep them uniform.
- Sauce added too early in the oven: It can burn. Toss after baking.
- Dry rice: Add a splash of water when reheating.
19. Chicken Pot Pie with Puff Pastry
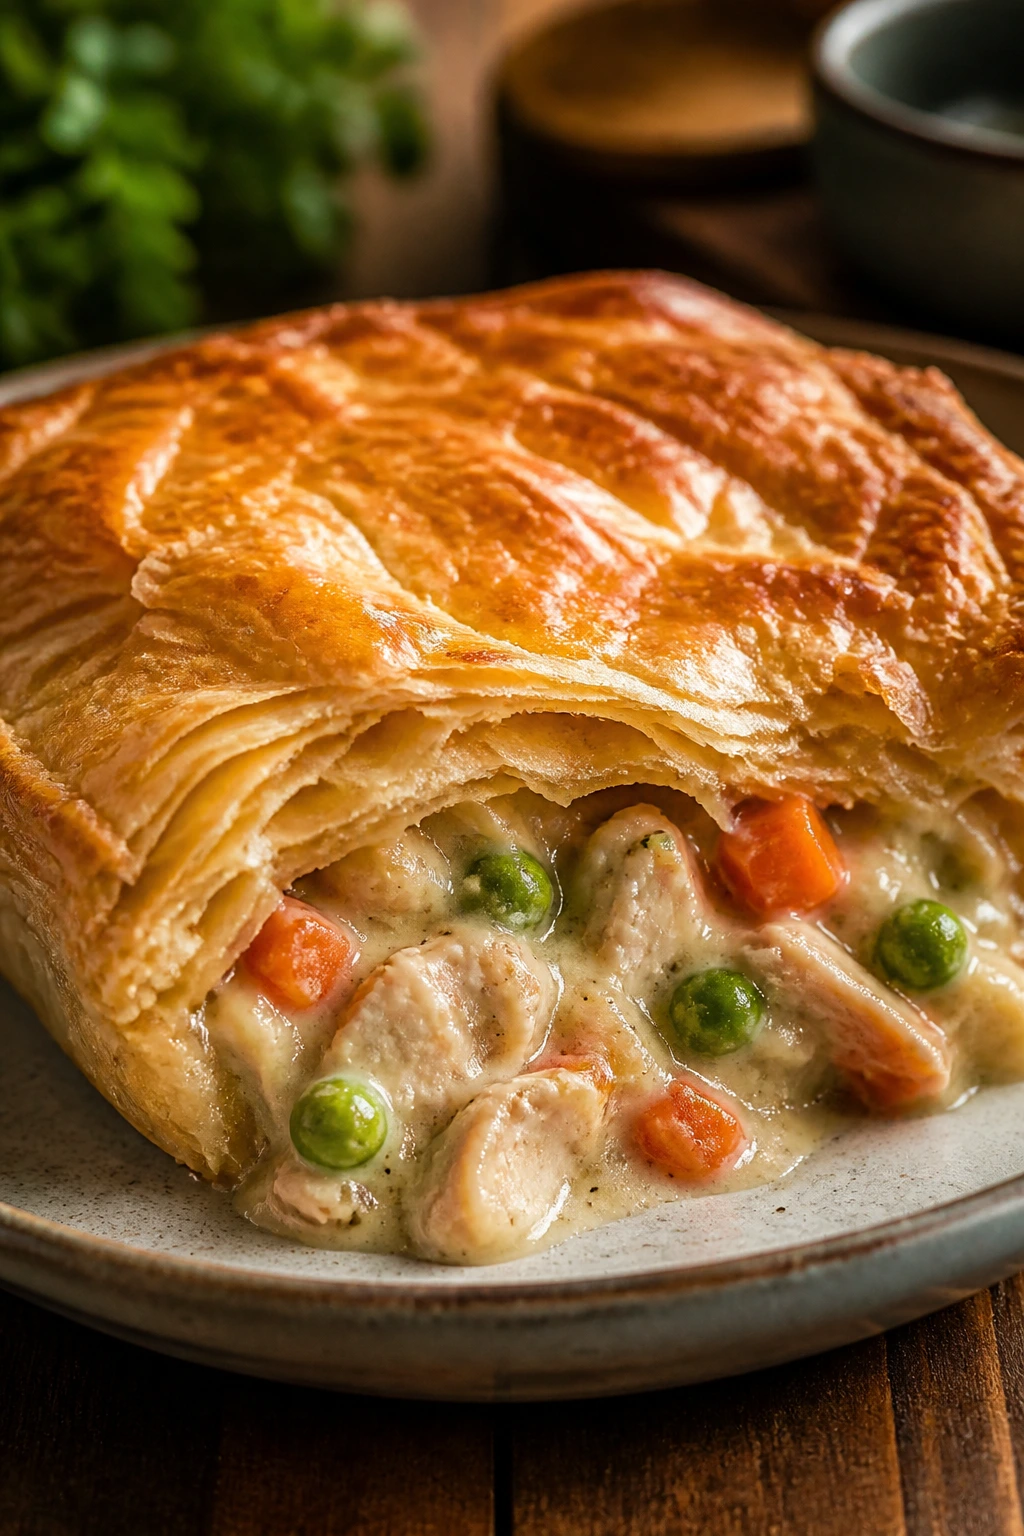
Chicken pot pie has the rare ability to feel both familiar and a little dramatic. The filling is creamy and loaded with vegetables, the puff pastry rises into crisp, flaky layers, and the whole thing sends steam up when you cut into it. It’s rich enough for Sunday and tidy enough for Monday lunch.
A pot pie gets a lot from texture. The pastry must stay crisp, so the filling needs to be thick before it goes in.
Why It Works: Pre-cooked chicken keeps the filling simple and fast. A flour-thickened sauce stops the pie from running all over the plate. Puff pastry on top gives you a crisp lid without the fuss of making pie dough.
Key Ingredients:
- 2 cups cooked chicken, shredded
- 2 carrots, diced
- 2 celery stalks, diced
- 1 onion, diced
- 2 cups frozen peas
- 2 cups chicken broth
- 1/2 cup milk or cream
- 3 tbsp all-purpose flour
- 1 sheet puff pastry, thawed
- 1 egg, beaten
- 1 tsp kosher salt
- 1/2 tsp black pepper
Quick Steps:
- Preheat the oven to 400°F (205°C).
- Sauté the carrots, celery, and onion in a saucepan until softened.
- Sprinkle in the flour and cook for 1 minute.
- Slowly whisk in broth and milk, then simmer until thick.
- Stir in chicken, peas, salt, and pepper, then pour into a baking dish.
- Lay the puff pastry over the filling, trim the edges, and brush with egg.
- Bake for 25 to 30 minutes until the pastry is puffed and deep golden.
Equipment for This Recipe:
- Baking dish
- Saucepan
- Whisk
- Pastry brush
- Knife
How to Serve This Dish: Let the pie sit for 10 minutes before serving or the filling will run. A simple salad cuts the richness nicely. The leftovers reheat best in the oven so the pastry stays crisp.
Pro Tips for This Recipe:
- Make the filling thick before adding pastry.
- Chill the pastry if it softens while you work.
- Cut a few small steam vents in the top.
- Use a rimmed dish so the filling does not bubble over.
Variations on This Recipe:
- Turkey Pot Pie: Swap in turkey after a big roast or holiday meal.
- Herb Pot Pie: Add thyme and parsley for more flavor.
- Mini Pot Pies: Bake in ramekins for easy portions.
Common Mistakes to Avoid with This Recipe:
- Runny filling: It makes the pastry soggy.
- Warm pastry from the start: It won’t puff as well.
- Overbaking: The top turns dark before the inside settles.
20. Sausage, Peppers, and Onions Skillet

There’s a reason this combination keeps coming back. Sausage browns, peppers soften into sweet ribbons, onions turn jammy, and the whole skillet smells like a proper dinner before you even set the table. It is fast, but not thin or rushed, which matters on a Sunday when you still want the kitchen to feel like it produced something real.
I like this one on a busy family night because you can serve it a dozen ways and still feel like you cooked.
Why It Works: Sausage seasons the pan as it browns, so the vegetables don’t need much more than salt and pepper. Bell peppers and onions soften at roughly the same pace, which makes the skillet feel cohesive. A short simmer in tomato sauce brings the whole thing together without drying it out.
Key Ingredients:
- 1 1/2 lb Italian sausage links or bulk sausage
- 3 bell peppers, sliced
- 2 onions, sliced
- 3 cloves garlic, minced
- 1 can crushed tomatoes
- 1 tsp Italian seasoning
- 2 tbsp olive oil
- 1 tsp kosher salt
- 1/2 tsp black pepper
- Hoagie rolls or cooked polenta, for serving
Quick Steps:
- Brown the sausage in a large skillet over medium heat, then remove it.
- Add olive oil, peppers, onions, and salt, and cook until softened and browned in spots.
- Stir in the garlic and Italian seasoning for 30 seconds.
- Add crushed tomatoes and return the sausage to the skillet.
- Simmer for 10 minutes until the sauce thickens and the sausage finishes cooking.
- Serve on rolls or over polenta.
Equipment for This Recipe:
- Large skillet
- Tongs
- Knife
- Cutting board
- Spoon
How to Serve This Dish: Serve it on toasted rolls if you want handheld dinner or over creamy polenta if you want something more spoonable. Leftovers are excellent chopped up and folded into pasta or scrambled eggs. That second part is not fancy, but it is practical.
Pro Tips for This Recipe:
- Brown the sausage well before removing it.
- Slice the peppers and onions evenly so they soften together.
- Use a skillet large enough that the vegetables can actually sauté.
- If you want more sauce, add a splash of broth.
Variations on This Dish:
- Spicy Sausage Skillet: Use hot Italian sausage and red pepper flakes.
- Mushroom Addition: Add sliced mushrooms for more bulk.
- Low-Carb Bowl: Serve over cauliflower mash instead of bread.
Common Mistakes to Avoid with This Dish:
- Crowding the skillet: The vegetables steam instead of brown.
- Skipping the simmer: The flavors need a few minutes to settle.
- Using thick raw sausage that never finishes: Cut links or use bulk sausage for faster cooking.
21. Broccoli Cheddar Rice Casserole
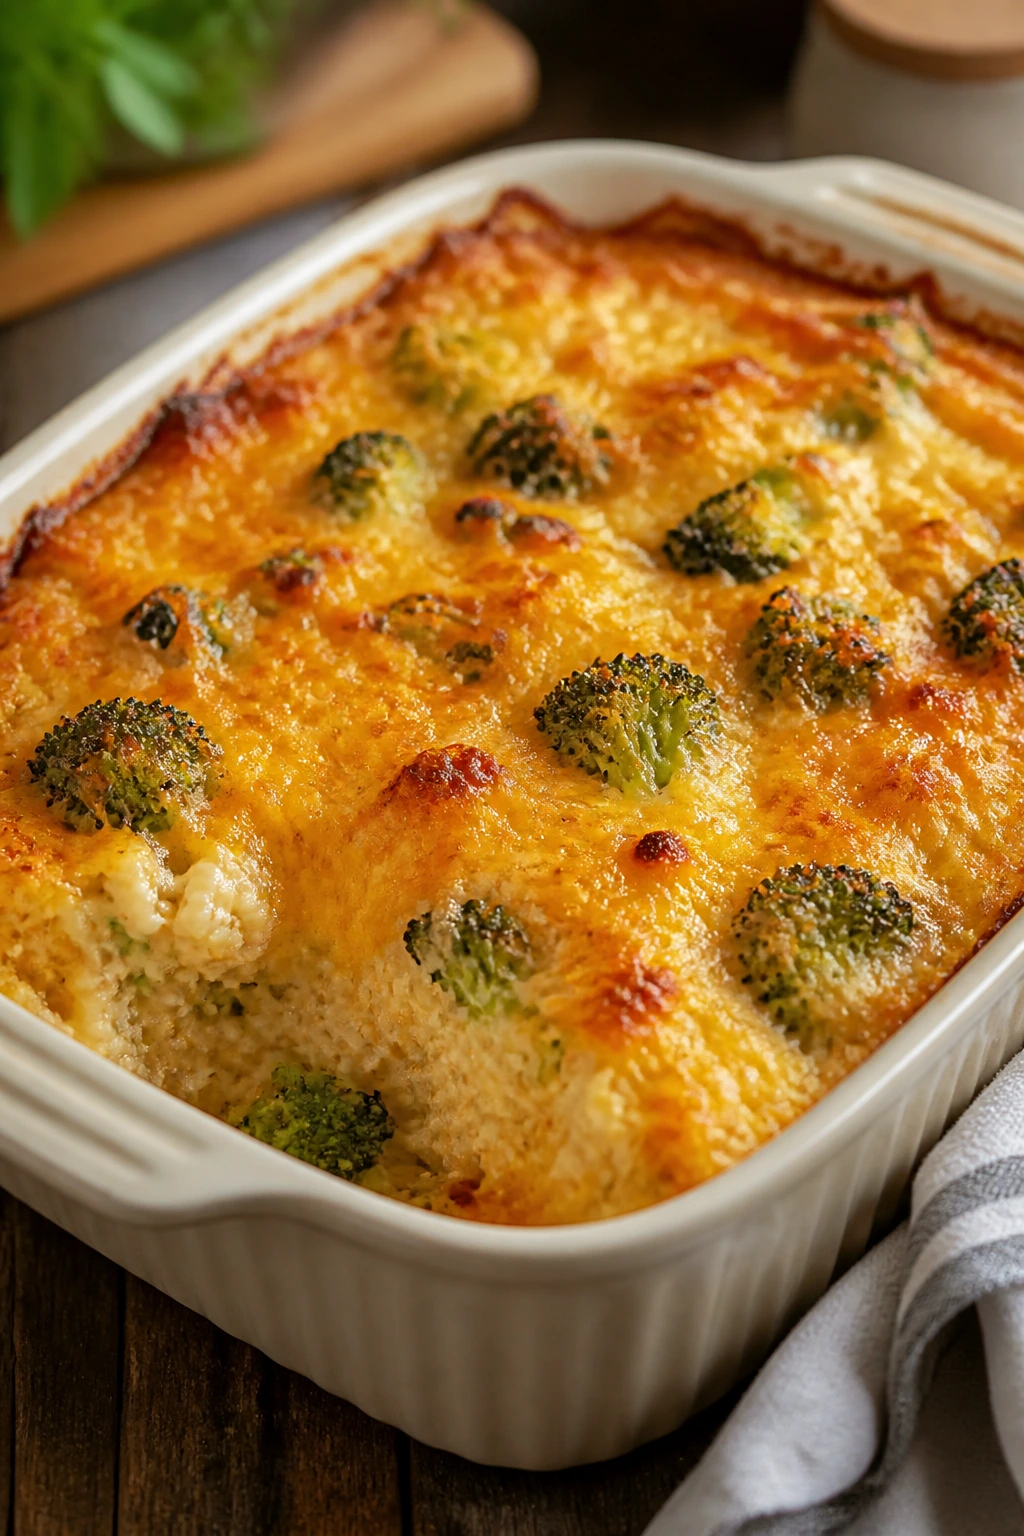
This casserole is all about texture in the right places. The rice settles into a creamy cheese sauce, the broccoli keeps a little bite, and the top gets a browned, almost crackly edge that makes the whole dish feel more finished than it has any right to. It is one of those plates that disappears fastest when the family is tired and hungry.
It also reheats without falling apart, which is the whole point of this collection.
Why It Works: Cooked rice gives the casserole structure, while a simple cheese sauce keeps it moist. Broccoli brings color and a little freshness so the dish doesn’t taste like beige on beige. A splash of mustard powder sharpens the cheese in a subtle way.
Key Ingredients:
- 2 cups cooked rice
- 4 cups broccoli florets
- 2 tbsp butter
- 1 small onion, diced
- 2 tbsp all-purpose flour
- 2 cups milk
- 2 cups shredded cheddar
- 1/2 cup grated Parmesan
- 1/2 tsp mustard powder
- 1 tsp kosher salt
- 1/2 tsp black pepper
Quick Steps:
- Preheat the oven to 375°F (190°C) and grease a baking dish.
- Steam or blanch the broccoli until just tender.
- Melt the butter and cook the onion until soft, then whisk in flour.
- Slowly whisk in the milk and cook until the sauce thickens.
- Stir in cheddar, Parmesan, mustard powder, salt, and pepper.
- Mix the sauce with rice and broccoli, then spread in the dish.
- Bake for 20 to 25 minutes until hot and lightly browned.
Equipment for This Recipe:
- Saucepan
- Whisk
- Baking dish
- Steamer basket or pot
- Spoon
How to Serve This Dish: Serve it with roast chicken, ham, or a simple salad if you want a fuller meal. It also works as a main dish in a smaller portion. Leftovers can be packed into lunch containers and reheated with a spoonful of milk.
Pro Tips for This Recipe:
- Use sharp cheddar for a stronger cheese flavor.
- Don’t overcook the broccoli before baking or it turns too soft.
- Thin the sauce with a little extra milk if it gets too thick.
- A small splash of lemon juice at the end brightens the cheese.
Variations on This Recipe:
- Cauliflower Broccoli Mix: Swap in half cauliflower for a milder casserole.
- Jalapeño Cheddar Version: Add diced jalapeño for heat.
- Chicken Broccoli Casserole: Fold in shredded chicken to make it a full one-dish meal.
Common Mistakes to Avoid with This Recipe:
- Overcooked broccoli: It goes dull and watery.
- Cheese sauce too thin: The casserole can slump.
- Skipping seasoning: Rice can absorb flavor and leave the dish flat.
22. Roast Chicken with Carrots and Shallots
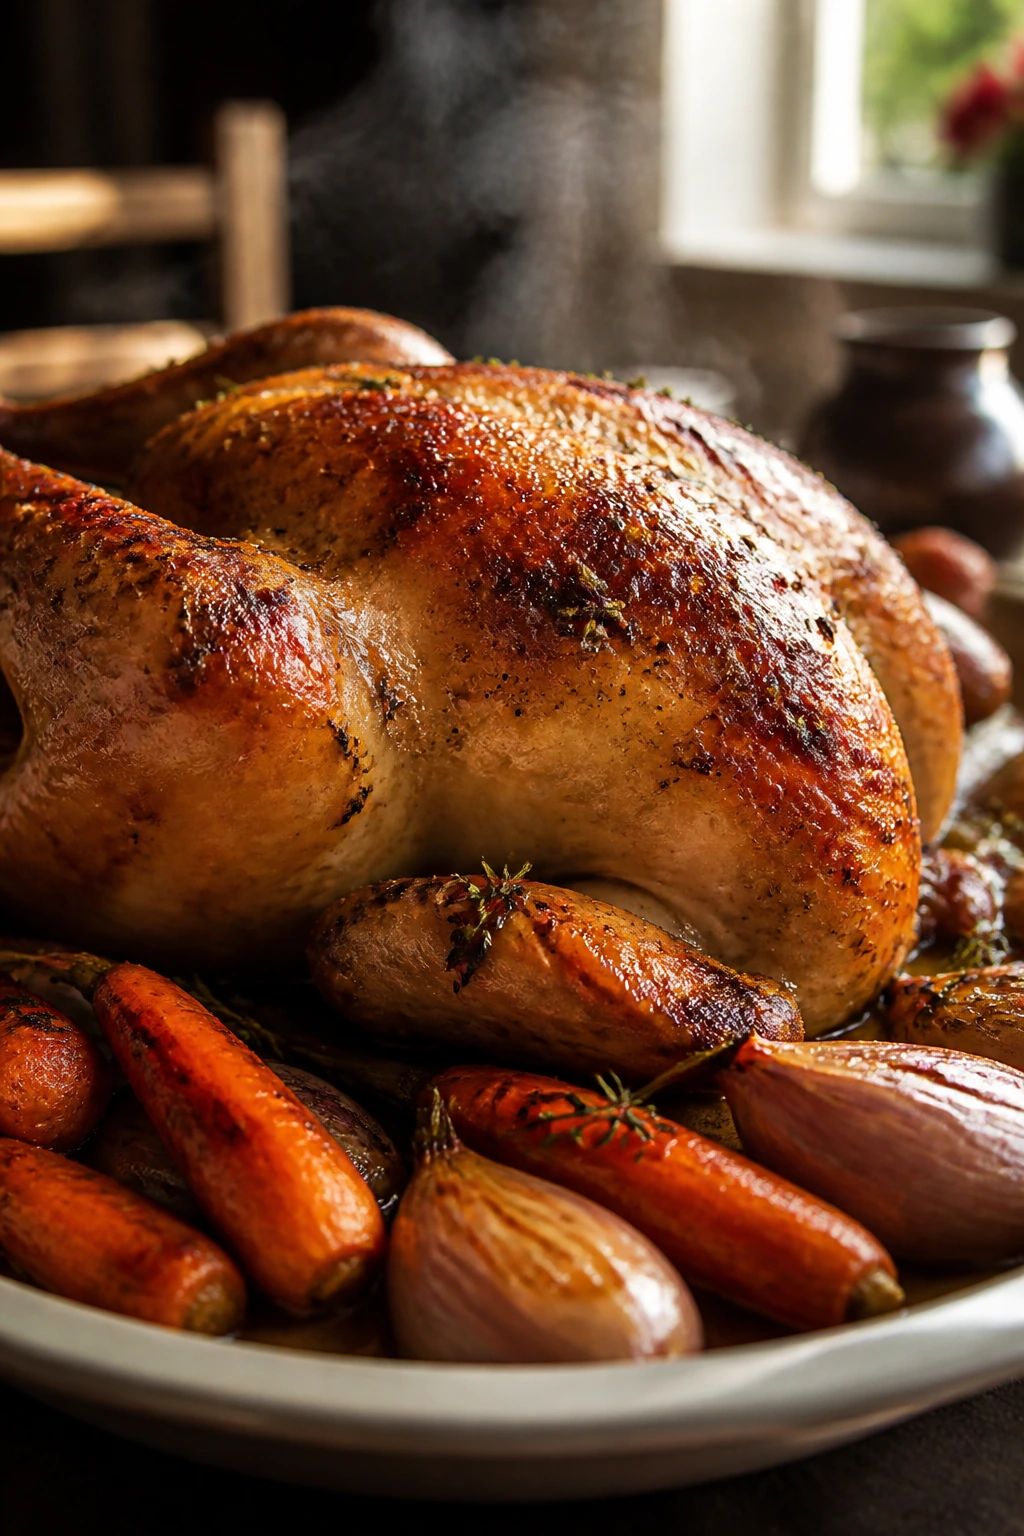
A whole roast chicken still feels like a proper Sunday meal. The skin turns bronze and crisp, the carrots sweeten under the drippings, and the shallots soften into little pockets of sauce. It is simple, yes, but not plain. The carcass also gives you stock later, which is the kind of practical kitchen bonus I can never quite ignore.
If you want a dinner that can become soup, sandwiches, and lunch boxes over the next two days, this is the one to roast.
Why It Works: A whole chicken roasts evenly when it’s trussed loosely and surrounded by vegetables. The carrots and shallots catch the pan juices, so nothing underneath goes to waste. Butter under the skin helps the breast stay juicy while the legs cook through.
Key Ingredients:
- 1 whole chicken, 4 to 5 lb
- 1 1/2 lb carrots, cut into chunks
- 8 shallots, peeled and halved
- 1 lemon, halved
- 4 tbsp butter, softened
- 4 cloves garlic, minced
- 2 tsp fresh or dried thyme
- 1 1/2 tsp kosher salt
- 1/2 tsp black pepper
Quick Steps:
- Preheat the oven to 425°F (220°C).
- Pat the chicken dry and season it inside and out with salt and pepper.
- Mix butter, garlic, and thyme, then rub some under the skin and the rest over the bird.
- Arrange carrots and shallots in a roasting pan and place the chicken on top with lemon halves inside the cavity.
- Roast for about 1 hour 15 minutes, until the thigh reaches 165°F (74°C) and the skin is deeply golden.
- Rest the chicken for 15 minutes before carving.
Equipment for This Recipe:
- Roasting pan or large baking dish
- Instant-read thermometer
- Sharp carving knife
- Cutting board
- Kitchen twine, optional
How to Serve This Dish: Carve the chicken and spoon the carrots and shallots around it. A green salad or simple rice keeps the meal grounded. Save the bones; they make broth, and broth makes the next round of school-night soup easier.
Pro Tips for This Recipe:
- Dry the chicken well so the skin crisps.
- Let butter soften so it spreads under the skin without tearing it.
- Use the thermometer in the thickest part of the thigh, not the breast.
- Rest before carving or the juices run out.
Variations on This Recipe:
- Lemon-Herb Roast Chicken: Add rosemary and extra lemon zest for a brighter finish.
- Garlic-Heavy Version: Double the garlic and tuck whole cloves under the bird.
- Root Vegetable Roast: Swap some carrots for parsnips or potatoes.
Common Mistakes to Avoid with This Recipe:
- Starting with wet skin: It roasts pale and soft.
- Carving too soon: The juices haven’t settled.
- Overcooking the breast: Pull the bird when the thigh is done and let carryover heat finish the rest.
Why Sunday Dinners Pull Double Duty
The best Sunday family dinners do not just fill plates. They create a buffer between the weekend and the school-week scramble. A roast chicken becomes sandwiches, a casserole becomes lunch, and a pot of stew becomes one less thing to think about when the alarm clock starts bullying everybody before sunrise.
Texture matters more than most people realize. Saucy dishes, braises, baked pasta, and casseroles reheat better because they start with enough moisture to survive a few hours in the fridge and a few minutes in the microwave. Lean, dry food can still be good, but it does not give you the same next-day payoff. That’s why I lean toward thighs, chuck roast, sausage, and pasta bakes here instead of fussier cuts that fade quickly.
There’s also the quiet usefulness of dishes that cut into portions cleanly. A tray of enchilada casserole, shepherd’s pie, or baked ziti means lunch is one scoop away. No assembly. No panic. No searching for containers while someone asks where the other shoe went.
Essential Equipment for These Recipes
- 9×13-inch baking dish: The workhorse for casseroles, baked pasta, and pot pie filling.
- Sheet pans with rims: Handy for chicken, salmon, roast vegetables, and anything that needs browning.
- Large Dutch oven or soup pot: Best for chili mac, soups, stews, and braises that need room to simmer.
- Slow cooker: Useful for barbacoa and pulled pork when you want dinner to build itself.
- Large skillet: Needed for taco filling, sausage skillets, and quick browning before a bake.
- Instant-read thermometer: The simplest way to keep chicken, pork, and roast meat juicy instead of guessing.
- Sharp chef’s knife: Worth it for clean slices, even chopping, and faster prep on Sunday.
- Cutting board with a damp towel underneath: Keeps the board from skating around while you slice.
- Mixing bowls: You’ll need at least two sizes for fillings, sauces, and quick tosses.
- Foil or parchment: Useful for covering bakes and making cleanup easier.
Smart Shopping and Ingredient Tips
Buy the cut that suits the job, not the one that sounds lean and virtuous. Chicken thighs stay juicier than breasts in casseroles and sheet-pan meals. Chuck roast gives barbacoa and pulled pork-style dishes the kind of shreddable texture that a leaner cut cannot fake. For pork tenderloin and roast chicken, an instant-read thermometer matters more than a promise from the package.
Cheese is another place where a little care pays off. Block cheese grated at home melts smoother in casseroles and soups because it does not have the anti-caking powder that bagged shreds carry. That powder is fine in a pinch. I use it when I’m tired. But if you want the best melt on baked ziti, pot pie filling, or broccoli cheddar casserole, block cheese wins.
Rice, pasta, and tortillas need a sturdier hand on Sunday if you want leftovers on Monday. Choose long-grain rice for casseroles, elbow macaroni or ziti for saucy bakes, and corn tortillas when you want a casserole that keeps its shape. Thin flour tortillas go gummy in the fridge. That’s just how they behave.
For broths and sauces, low-sodium versions give you breathing room. A salty sausage, a jarred sauce, and a salted cheese can pile up fast. Low-sodium broth lets you season at the end instead of fighting the pot.
How to Serve These Recipes
Presentation: Keep the food honest and warm-looking. Casseroles slice neatly into squares, soups belong in deep bowls, and sheet-pan meals look best when the chicken or meat sits on top of the vegetables instead of being buried under them. A handful of herbs, a lemon wedge, or a few sliced scallions goes a long way.
Accompaniments: Think in contrasts. Crisp salads help with creamy bakes, toasted bread helps with soups, and a simple vegetable side keeps roast dinners from feeling too heavy. Garlic bread works with baked ziti and lasagna roll-ups. Green beans, cucumbers, or a fast slaw give richer dinners some balance.
Portions: Most of these recipes serve 4 to 6 with reasonable family portions. If you have bigger eaters, plan on a casserole plus a salad or bread. If you want Monday leftovers, make the full batch and hold back a little extra sauce or broth so reheating stays easy.
Beverage Pairing: Sparkling water with lemon fits almost all of these, especially the richer ones. For a more specific match, iced tea works well with barbecue and taco bakes, while a tart apple cider suits pork and roast chicken. Keep it simple. The dinner already did enough.
Additional Tips and Flavor Boosters
Flavor Enhancement: A little acid at the end changes everything. Lemon juice on chicken, vinegar in pulled pork, or a spoonful of salsa verde over enchilada casserole can wake up flavors that were starting to look sleepy. Use the finishing acid after the main cook, not before, or it loses its edge.
Customization: Keep a few add-ins on hand that fit multiple recipes: shredded cheese, chopped herbs, sliced scallions, and hot sauce. Those let you move a dish toward kid-friendly, sharper, or spicier without rebuilding the whole thing. I also like keeping frozen peas, spinach, and corn around because they disappear into casseroles without arguing.
Serving Suggestions: Crunch matters. Toasted breadcrumbs on baked pasta, crushed tortilla chips on taco bake, or a little crispy onion on chicken casserole can break up all the soft textures. A small crunchy finish makes leftovers feel refreshed instead of reheated.
Make-It-Yours: For dairy-free meals, swap in olive oil and broth-thickened sauces instead of cream-heavy ones. For gluten-free versions, use corn tortillas, rice, potatoes, or gluten-free pasta where the structure matters. For lower-sodium cooking, choose low-sodium broth, go light on cheese, and use herbs plus acid to keep the flavor from flattening out.
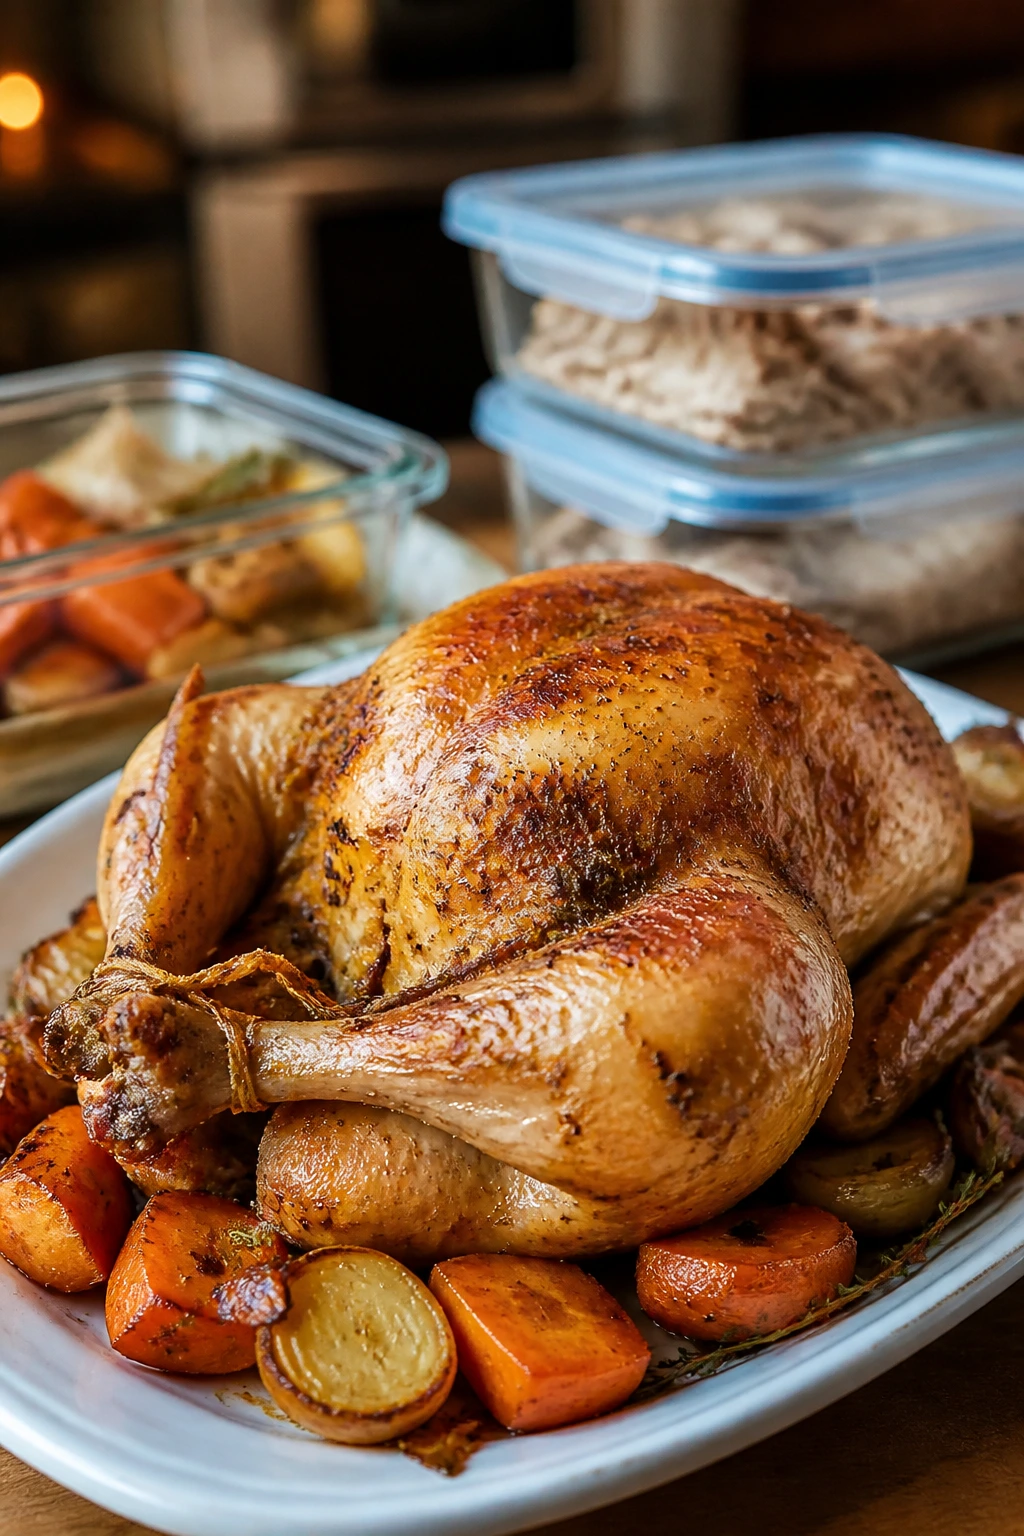
Make-Ahead, Storage, and Reheating Guidance
Most of these dishes keep 3 to 4 days in the refrigerator if they’re cooled promptly and stored in shallow containers. Soups and stews often taste even better the next day, while baked pasta, casseroles, and rice dishes hold up nicely if they’re covered before the surface dries out. Fish is the exception: salmon is best eaten within 1 day, and I would not push it much further.
Freezing works best with the sturdy dishes. Baked ziti, chili mac, shepherd’s pie, barbacoa, pulled pork, meatloaf, and enchilada casserole all freeze well for up to 2 to 3 months. Cool them fully, wrap tightly, and label the container with the dish name. For casseroles, freeze in portions if you want faster school-night reheating.
Reheating depends on the texture. Casseroles and baked pasta do well in a 325°F oven, covered with foil, until hot through. Add a spoonful of water, broth, or sauce if they look dry. Soups and stews should go back on the stove over medium-low heat; stir often so the bottom does not scorch. Rice bowls and meatballs need a small splash of water and a covered microwave session, then a quick stir. Roast chicken and pork are better gently reheated in the oven than blasted in the microwave, unless you plan to chop them for sandwiches or wraps.
Make-ahead fans should also think in components. You can roast vegetables early, mix casseroles a few hours ahead, or shred chicken and store it with a little broth. That one trick keeps the protein from tightening up overnight.
Variations and Adaptations to Try
Gluten-Free Route: Swap regular pasta for gluten-free pasta, use corn tortillas in casseroles, and lean on rice, potatoes, or polenta for the base. The main thing is to avoid overcooking the gluten-free pasta by a minute or two, since it softens faster in the oven.
Dairy-Light Version: Use olive oil, broth, and a smaller amount of sharp cheese instead of heavy cream where possible. In soups and casseroles, a spoonful of yogurt or evaporated milk can stand in for richer dairy without making the dish feel thin. You’ll lose some richness, but not all of it.
Vegetarian Sunday Night: Baked ziti, lasagna roll-ups, broccoli cheddar rice casserole, stuffed peppers, and chickpea stew all adapt cleanly without much fuss. Swap the meat for mushrooms, beans, lentils, or extra vegetables that have been cooked down enough to avoid extra water.
Lower-Sodium Plan: Choose low-sodium broth, rinse canned beans, and taste before adding salt at the end. Sausage, cheese, and jarred sauces already bring salt to the table, so there’s usually less need to add much more than a pinch.
Kid-Friendly Mild Mode: Keep spicy sauces on the side instead of baked in. Use mild cheddar, skip chili flakes, and let the adults add heat with hot sauce at the table. That approach keeps the dinner one recipe instead of two.
Lunchbox Remix: Turn leftovers into wraps, thermos meals, or grain bowls with a few fresh toppings. A square of casserole with sliced cucumber on the side or a scoop of pulled pork over rice can rescue the school day without extra cooking.
Common Mistakes to Avoid
Making the food too dry from the start: A lot of leftovers go bad because the original dinner was already dry. If you want the next day to work, build in sauce, broth, or a little fat while cooking. Lean proteins need the most help.
Overcooking “for safety”: People do this to chicken, pork, pasta, and even casseroles. The result is a meal that tastes tired before it even hits the fridge. Use the thermometer for meat, stop pasta early, and pull baked dishes when they’re hot and set.
Skipping the rest period: Casseroles, roasts, and meat pies need a minute to settle. If you cut into them right away, the filling runs out or the slices collapse. Resting is not a luxury step. It is part of the recipe.
Packing too much into one pan: Crowding leads to steaming, not browning. That matters on sheet pans and skillets in particular. If your vegetables look pale or your chicken skin stays soft, the pan probably needed more room.
Forgetting how leftovers behave: Pasta keeps drinking sauce, rice keeps soaking up liquid, and fish gets fragile fast. Store each dish with that in mind. A splash of broth, a little extra sauce, or a faster eating schedule can save the whole thing.
Frequently Asked Questions
Which of these recipes is best for leftovers the next morning?
Baked ziti, chili mac, shepherd’s pie, pulled pork, and chicken enchilada casserole are the strongest leftover players. They keep their shape and stay moist after reheating, which is the main thing school-morning food needs to do.
Can I make these on Saturday and bake them Sunday?
Yes, several of them work well that way. Assemble casseroles, stuffed peppers, and lasagna roll-ups, then chill them covered overnight and bake the next day. If you do this, add a few extra minutes in the oven since the dish is starting cold.
What dinners freeze best from this list?
Barbacoa, pulled pork, chili mac, shepherd’s pie, meatloaf, and baked ziti freeze very well. Soups can freeze too, though tortellini soup is better without the pasta in the freezer, since it softens on thawing.
How do I keep casseroles from drying out when I reheat them?
Cover them loosely with foil in the oven or add a spoonful of broth, water, or sauce before microwaving. The goal is to bring moisture back into the surface layer without making the dish soupy. A little goes a long way.
Can I use rotisserie chicken in several of these recipes?
Absolutely. It works well in chicken casserole, enchilada casserole, pot pie, and tortellini soup. Because it’s already cooked, add it near the end so it stays tender instead of turning stringy.
Which recipes are best for picky eaters?
Turkey meatloaf, baked ziti, chicken and rice casserole, taco bake, and cheddar rice casserole tend to go over well because the flavors are familiar and the textures are soft. If your crowd resists visible vegetables, chop them small or cook them down into the sauce.
How long can I leave dinner out before storing it?
Two hours is the safe window for most cooked food, and less if the kitchen is hot. Move leftovers into shallow containers so they cool faster. A giant deep pot of stew tucked into the fridge warm is one of those ideas that sounds easier than it is.
What if my family does not like leftovers?
Then build the meal so the second serving looks different. Pulled pork becomes sandwiches, roast chicken becomes soup, taco bake becomes wraps, and roast pork becomes a chopped rice bowl. People are often rejecting repetition, not the actual food.
The Sunday Night Payoff
A fridge full of useful leftovers is not glamorous, but it is a relief. That matters on school mornings when everyone is moving too fast, the coffee is thin, and someone is asking for a missing library book while standing in the hallway with one sock on.
These Sunday family dinner ideas for busy school mornings do what good home cooking should do: they feed tonight, then quietly make tomorrow easier. Keep a few of them in rotation, and Monday starts looking less like a problem and more like a meal waiting its turn.