
The best potluck Italian dishes do one thing the modern buffet line keeps forgetting: they travel well and still taste like somebody in Tuscany knew exactly what they were doing. Bread soaks up broth without turning to paste, beans carry olive oil like they were made for it, and a braise can sit in a casserole dish for twenty minutes without sulking. That’s the Tuscan trick—sturdy ingredients, sharp seasoning, and a refusal to fuss over food that should be eaten with friends, not admired from a distance.
Potluck Italian dishes also need to survive a real-life table: a long drive, a warm room, a spoon that gets lost in the bowl, and a cousin who serves himself before everyone else arrives. The recipes below lean into that reality. They’re built on olive oil, rosemary, tomatoes, cannellini beans, farro, pecorino, and bread in the Tuscan style, which means they tend to get better as they sit, not worse.
And that matters. A lot. The Tuscan dishes that show up strongest at a potluck are rarely the flashiest ones. They’re the ribollita with the crusty bread in the bottom, the panzanella that drinks tomato juice like it’s thirsty, the baked pasta that holds its shape in a serving spoon instead of sliding into a puddle. Those are the plates people finish first.
Why This Collection Earns a Spot on the Table
-
They hold up after travel: These recipes lean on braises, beans, grains, and sturdy bread, so they don’t collapse the moment the lid comes off the container.
-
Tuscan pantry staples do the heavy lifting: Cannellini beans, olive oil, tomatoes, rosemary, pecorino, and stale bread bring real flavor without a mile-long shopping list.
-
You get more than one kind of dish: There’s soup, pasta, bread, salad, dessert, and a few things that behave like side dish and main course at the same time.
-
Several improve as they rest: Ribollita, meatballs in sauce, farro salad, biscotti, and panforte all settle into better texture after a short sit.
-
They work at room temperature: That’s the sweet spot for a potluck table, because not every dish should be fighting the clock.
-
They feel rustic, not heavy-handed: These recipes taste rich because of olive oil, herbs, and slow cooking, not because they’re buried under cream.
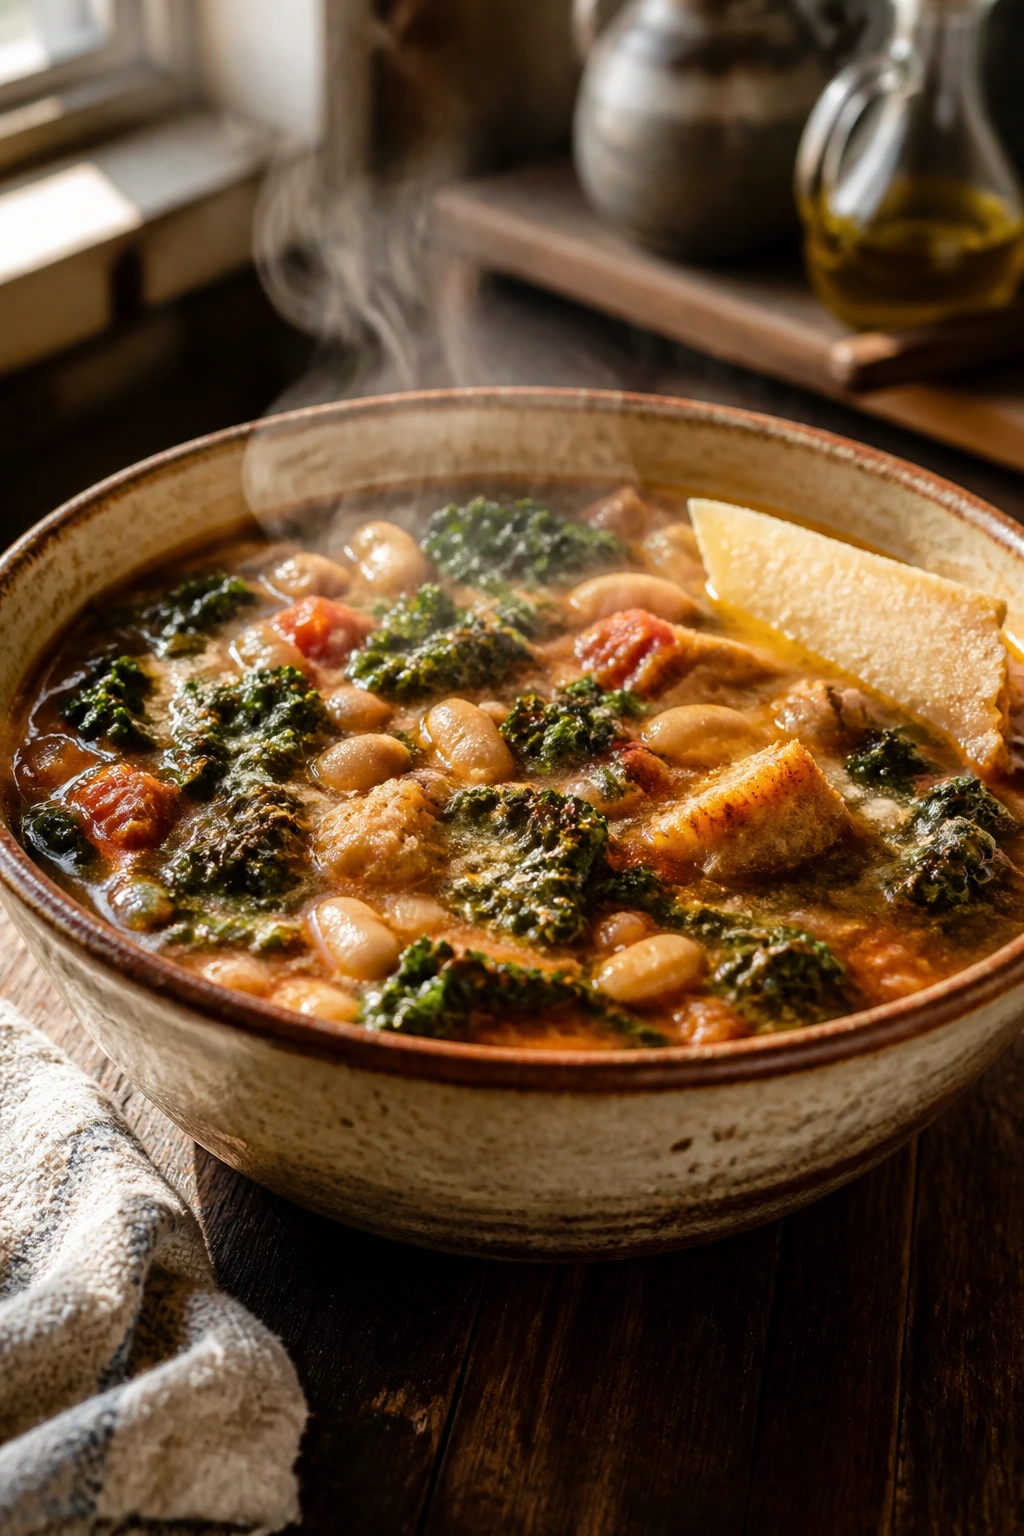
1. Rustic Ribollita with Kale and Cannellini Beans
Ribollita is the soup that makes a potluck table feel older, calmer, and more sensible. It starts as a vegetable stew, then stale bread goes into the pot and turns the whole thing into something thick enough to stand a spoon in. The kale stays leafy and dark, the beans soften into the broth, and the parmesan rind leaves behind that salty, savory edge that people always notice even if they can’t name it.
What I like most is that ribollita does not apologize for being humble. It eats like a meal and carries like a casserole, which is exactly the sort of behavior a potluck dish should have. If you let it sit for an hour before serving, it gets even better.
Why It Works:
The bread thickens the soup from the inside instead of asking for a separate crouton garnish that will go limp anyway. Cannellini beans give the broth body without making it heavy, and kale keeps enough structure to look good after reheating. Ribollita is also one of those rare soups that can be made ahead, cooled, and reheated without losing its shape or personality.
Key Ingredients:
- 3 tablespoons extra-virgin olive oil — use a peppery Tuscan-style oil if you have it; it matters here.
- 1 large yellow onion, diced — this is your sweet base note.
- 2 carrots, diced, and 2 celery stalks, diced — they build the soup’s backbone.
- 4 garlic cloves, minced — don’t let them brown hard.
- 2 tablespoons tomato paste — this gives the broth a darker, rounder taste.
- 1 (28-ounce) can crushed tomatoes — choose one with a clean tomato flavor, not a sugary one.
- 6 cups low-sodium vegetable broth — keeps the salt under control until the end.
- 2 (15-ounce) cans cannellini beans, drained and rinsed — the classic Tuscan bean.
- 1 Parmesan rind — optional, but the soup is noticeably flatter without it.
- 4 cups chopped Tuscan kale — ribs removed so the leaves stay tender.
- 6 cups torn stale country bread — day-old is the point; soft bread turns gluey.
Quick Steps:
-
Warm the olive oil in a Dutch oven over medium heat. Add the onion, carrots, and celery with a pinch of salt, then cook for 8 to 10 minutes, until the vegetables look glossy and the onion turns translucent.
-
Stir in the garlic and tomato paste and cook for 1 minute, just until the paste darkens a shade and smells sweet instead of raw.
-
Add the crushed tomatoes, broth, beans, rosemary, thyme, and Parmesan rind. Bring to a simmer, then cook uncovered for 20 minutes so the flavors tighten up.
-
Add the kale and simmer for 5 minutes more, until the leaves soften but still look dark and distinct.
-
Stir in the bread a handful at a time. Simmer for 5 to 8 minutes, until the bread breaks down and the soup turns thick enough to coat a spoon.
-
Taste and adjust with salt and black pepper. Let the pot sit off heat for 10 minutes, then finish with a drizzle of olive oil and grated Pecorino.
Equipment for This Recipe:
- 5- to 6-quart Dutch oven
- Wooden spoon
- Sharp chef’s knife
- Cutting board
- Ladle
How to Serve This Dish:
Ladle ribollita into wide bowls so the bread-heavy base stays visible instead of sinking. A little olive oil on top and a shower of Pecorino make it look finished without fuss. Serve it with a green salad and another loaf of bread if your crowd leans hungry.
Pro Tips for This Recipe:
- Tear the bread, don’t cube it too neatly. Rough edges grab broth better.
- If the soup gets too thick after resting, loosen it with 1/2 to 1 cup hot broth.
- Use kale, not baby spinach. Spinach disappears and muddies the texture.
- Ribollita tastes best after a 20-minute rest, when the bread and broth stop arguing and settle down together.
Variations on This Dish:
- Sausage Ribollita: Brown 8 ounces of Italian sausage with the onion for a meatier, more potluck-heavy version.
- Bean-and-Greens Vegan Pot: Skip the Parmesan rind and finish with extra olive oil plus a spoonful of nutritional yeast if you want more savory depth.
- Winter Pantry Version: Use Swiss chard instead of kale and add 1 diced potato for a softer, starchier bowl.
Common Mistakes to Avoid with This Dish:
- Using fresh sandwich bread: It turns mushy fast. Dry, rustic bread holds the soup without disappearing.
- Adding the kale too soon: Overcooked kale goes swampy and dull. Stir it in near the end.
- Over-salting early: The rind and Pecorino add salt later, so season in layers and taste before the final finish.
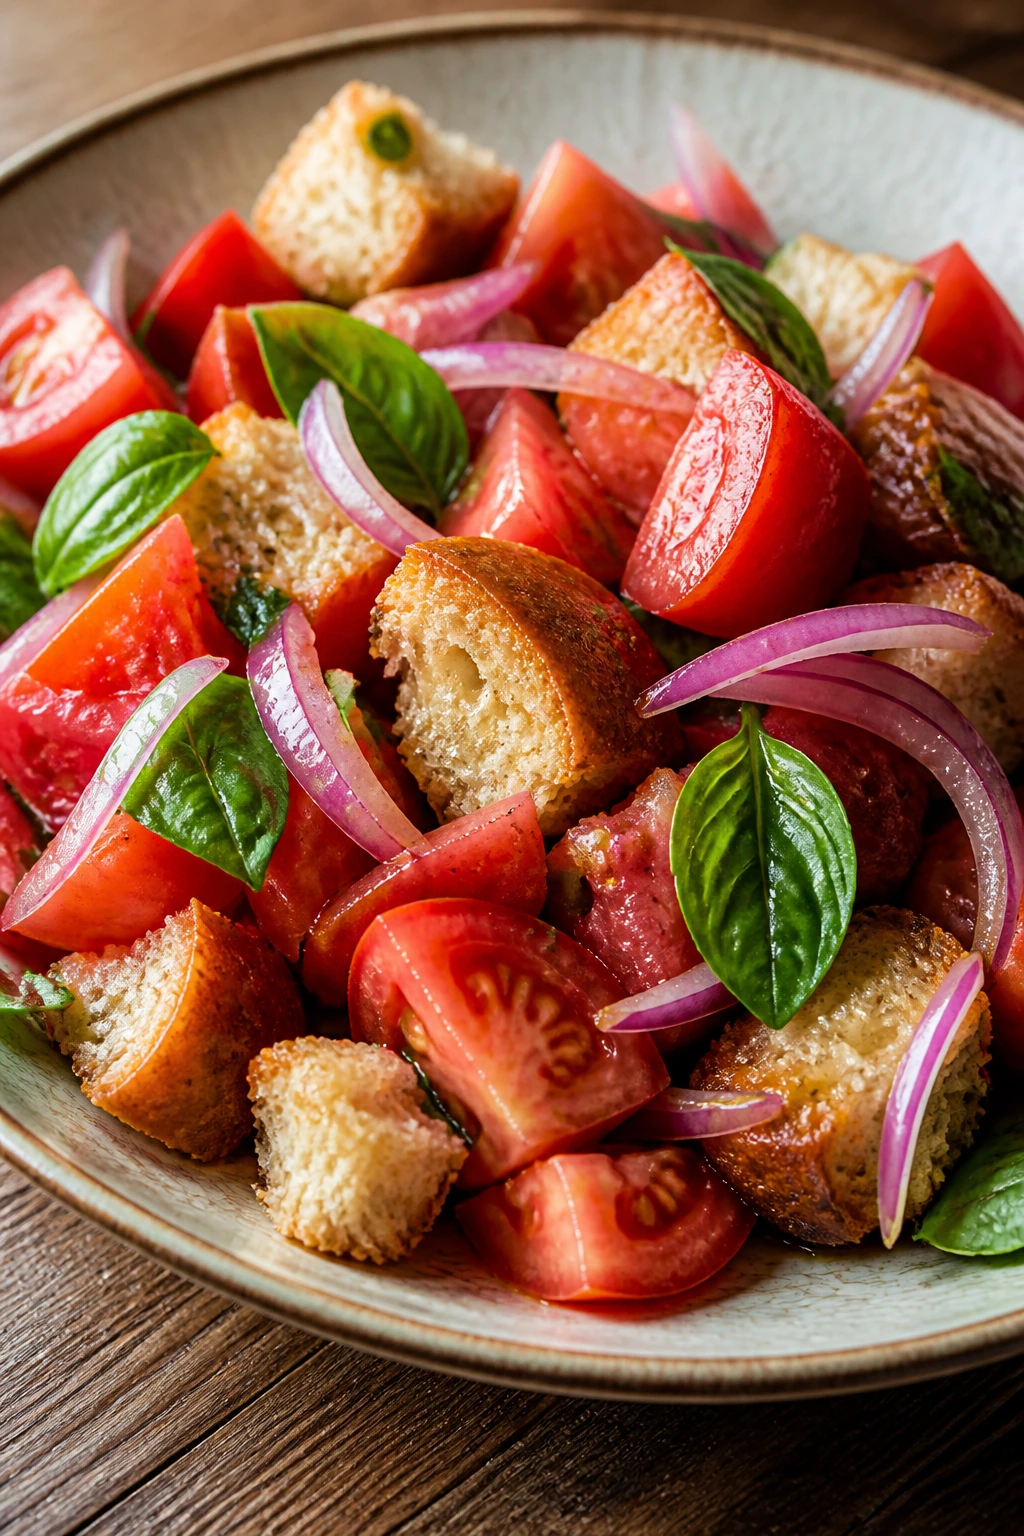
2. Tomato Panzanella with Basil and Red Onion
Panzanella is what happens when tomatoes and stale bread decide to stop wasting time. The bread doesn’t sit on top like a garnish; it drinks the tomato juice and vinegar, then turns chewy at the edges and soft in the middle. The whole salad tastes like a July tomato counter, even if you make it under a fluorescent kitchen light.
This is one of the easiest Tuscan dishes to carry to a potluck because it wants to be eaten at room temperature. Cold fridge salad muddies the bread. Room temp panzanella, though, has the right snap, the right soak, and that sharp basil smell that hits before the bowl reaches the table.
Why It Works:
Panzanella is all about contrast: juicy tomatoes, crisp cucumber, sharp onion, and bread that has just enough structure to absorb without collapsing. A short rest lets the vinaigrette sink in and softens the onion’s edge. The salad gets better in the first 20 minutes, which is a nice gift when you’re juggling other dishes.
Key Ingredients:
- 2 pounds ripe tomatoes, chopped into bite-size pieces — use the best tomatoes you can find; bland ones flatten the whole bowl.
- 1 teaspoon kosher salt — pulls the tomato juices out.
- 8 cups day-old rustic bread cubes — Italian loaf or country bread works best.
- 1 English cucumber, sliced into half-moons — adds a cool crunch.
- 1 small red onion, thinly sliced — keep the slices fine so they don’t dominate.
- 1/4 cup extra-virgin olive oil — enough to gloss, not drown.
- 3 tablespoons red wine vinegar — the sharp note that wakes the tomatoes up.
- 1/2 cup packed basil leaves, torn — add at the end so they stay bright.
- 1 tablespoon capers — optional, but they bring a briny bite I like.
- Black pepper to taste — don’t skip it.
Quick Steps:
-
Put the chopped tomatoes in a bowl with the salt and let them sit for 10 minutes. You want juice collecting in the bottom; that liquid is part of the dressing.
-
If the bread is only slightly stale, toast the cubes on a sheet pan at 375°F for 8 to 10 minutes, until the outsides feel dry but not rock-hard.
-
Whisk the olive oil and red wine vinegar in a large bowl, then add the onion and cucumber.
-
Add the tomatoes and bread. Toss gently so the bread catches the tomato liquid without being crushed.
-
Rest the salad for 15 to 20 minutes, tossing once halfway through. Right before serving, fold in the basil and capers and grind over black pepper.
Equipment for This Recipe:
- Large mixing bowl
- Sheet pan, if the bread needs to be toasted
- Chef’s knife
- Cutting board
- Salad serving spoon
How to Serve This Dish:
Pile panzanella into a shallow bowl or onto a wide platter so the tomatoes stay in view. It sits well next to grilled chicken, salami, or a wedge of pecorino, and it’s strong enough to live beside richer dishes without getting lost. A cold bowl from the fridge is the one thing that hurts it.
Pro Tips for This Recipe:
- Salt the tomatoes first. That liquid is the whole point.
- Use bread with a tight crumb. Fluffy bread turns into damp lint.
- If your tomatoes are watery, drain off a little juice before tossing and save it for another salad or soup.
- Add basil at the last minute so the leaves don’t blacken.
Variations on This Dish:
- Heirloom Panzanella: Mix red, yellow, and green tomatoes for a louder, sweeter bowl.
- Tuscan Pantry Version: Add a handful of pitted olives and a few slivers of celery for extra bite.
- Bruschetta-Style Panzanella: Toss in 1 cup of diced mozzarella if you want it a little richer and more filling.
Common Mistakes to Avoid with This Dish:
- Using fresh, soft bread: It turns soggy before the bowl reaches the table. Stale bread is not a suggestion.
- Dressing too early and refrigerating it for hours: The salad loses its chew and starts tasting muddy.
- Skipping the resting time entirely: The bread needs a few minutes to soak up the tomato juices or the texture stays awkward.
3. Tuscan Sausage, Kale, and White Bean Pasta Bake
This is the sort of baked pasta that disappears before the serving spoon gets a second trip. Italian sausage browns into the tomato sauce, cannellini beans hide in the gaps, and kale adds enough structure that every forkful feels loaded instead of soupy. The top gets browned at the edges, which is one of those little details people always remember even if they can’t explain why.
I like a pasta bake for a potluck more than a straight sauced pasta because it can sit in a dish and still look intentional. No one has to guess where the serving platter is. It’s already in the pan.
Why It Works:
Rigatoni and similar tubes trap sauce in the middle and keep their shape after baking. Beans add creaminess without extra dairy, and ricotta gives the finished bake a few pale pockets that soften the tomato intensity. Kale is sturdy enough to survive the oven and still show up in the final bite.
Key Ingredients:
- 1 pound rigatoni — a ridged pasta holds the sauce best.
- 1 1/2 pounds sweet or hot Italian sausage, casings removed — the seasoning does half your work.
- 1 tablespoon olive oil — only if the sausage is lean.
- 1 yellow onion, diced — lets the sauce taste built, not dumped together.
- 4 garlic cloves, minced — add after the onion softens.
- 1 (28-ounce) can crushed tomatoes — the body of the sauce.
- 1/2 cup dry white wine or broth — lifts the bottom of the pan.
- 2 (15-ounce) cans cannellini beans, drained and rinsed — they make the bake heartier and creamier.
- 4 cups chopped kale — remove tough stems.
- 1 cup ricotta — spoons into soft pockets.
- 2 cups shredded low-moisture mozzarella — melts cleanly on top.
- 1/2 cup grated Pecorino Romano — sharpens the whole dish.
- 1 teaspoon dried oregano and black pepper — keep the seasoning simple.
Quick Steps:
-
Bring a large pot of salted water to a boil and cook the rigatoni for 2 minutes less than the package says. Drain it while it still has a little bite.
-
Brown the sausage in a large skillet over medium-high heat, breaking it into pieces. Once it loses its raw pink color, add the onion and cook for 5 minutes, then add the garlic for 30 seconds.
-
Pour in the wine and scrape up the browned bits. Add the crushed tomatoes, beans, kale, oregano, and black pepper. Simmer for 8 to 10 minutes, until the kale softens.
-
Toss the pasta with the sauce and ricotta. If it looks dry, add 1/2 cup pasta water.
-
Spread the mixture in a 9-by-13-inch baking dish, top with mozzarella and Pecorino, and bake at 400°F for 20 to 25 minutes, until the edges bubble and the top bronzes.
-
Rest the bake for 10 minutes before serving. That pause keeps the pieces from sliding apart.
Equipment for This Recipe:
- Large pot
- Colander
- Large skillet
- 9-by-13-inch baking dish
- Wooden spoon
How to Serve This Dish:
Cut the bake into squares and lift them with a wide spatula so the layers stay intact. Serve with a peppery arugula salad and a basket of bread for scooping up the sauce left in the pan. It’s filling enough to stand on its own, but a sharp salad keeps the meal from feeling too heavy.
Pro Tips for This Recipe:
- Undercook the pasta. It keeps cooking in the oven.
- Use low-moisture mozzarella, not fresh mozzarella, or the bake turns watery.
- Let the sauce simmer before mixing it with pasta so the sausage flavor spreads through the pan.
- If you’re transporting it, cover tightly and carry it in the baking dish instead of scooping it into something else.
Variations on This Dish:
- Turkey Sausage Version: Swap in turkey sausage and add 1 extra tablespoon olive oil so the sauce doesn’t taste dry.
- Meatless Mushroom Bake: Use 1 1/2 pounds chopped mushrooms browned hard in olive oil instead of sausage.
- Calabrian Heat Version: Stir 1 tablespoon Calabrian chile paste into the tomato sauce for a sharper finish.
Common Mistakes to Avoid with This Dish:
- Cooking the pasta all the way before baking: It goes soft. Stop early.
- Using a watery cheese blend: Fresh mozzarella can flood the pan. Low-moisture shreds behave better here.
- Skipping the rest after baking: The first slice will collapse if you cut too fast.
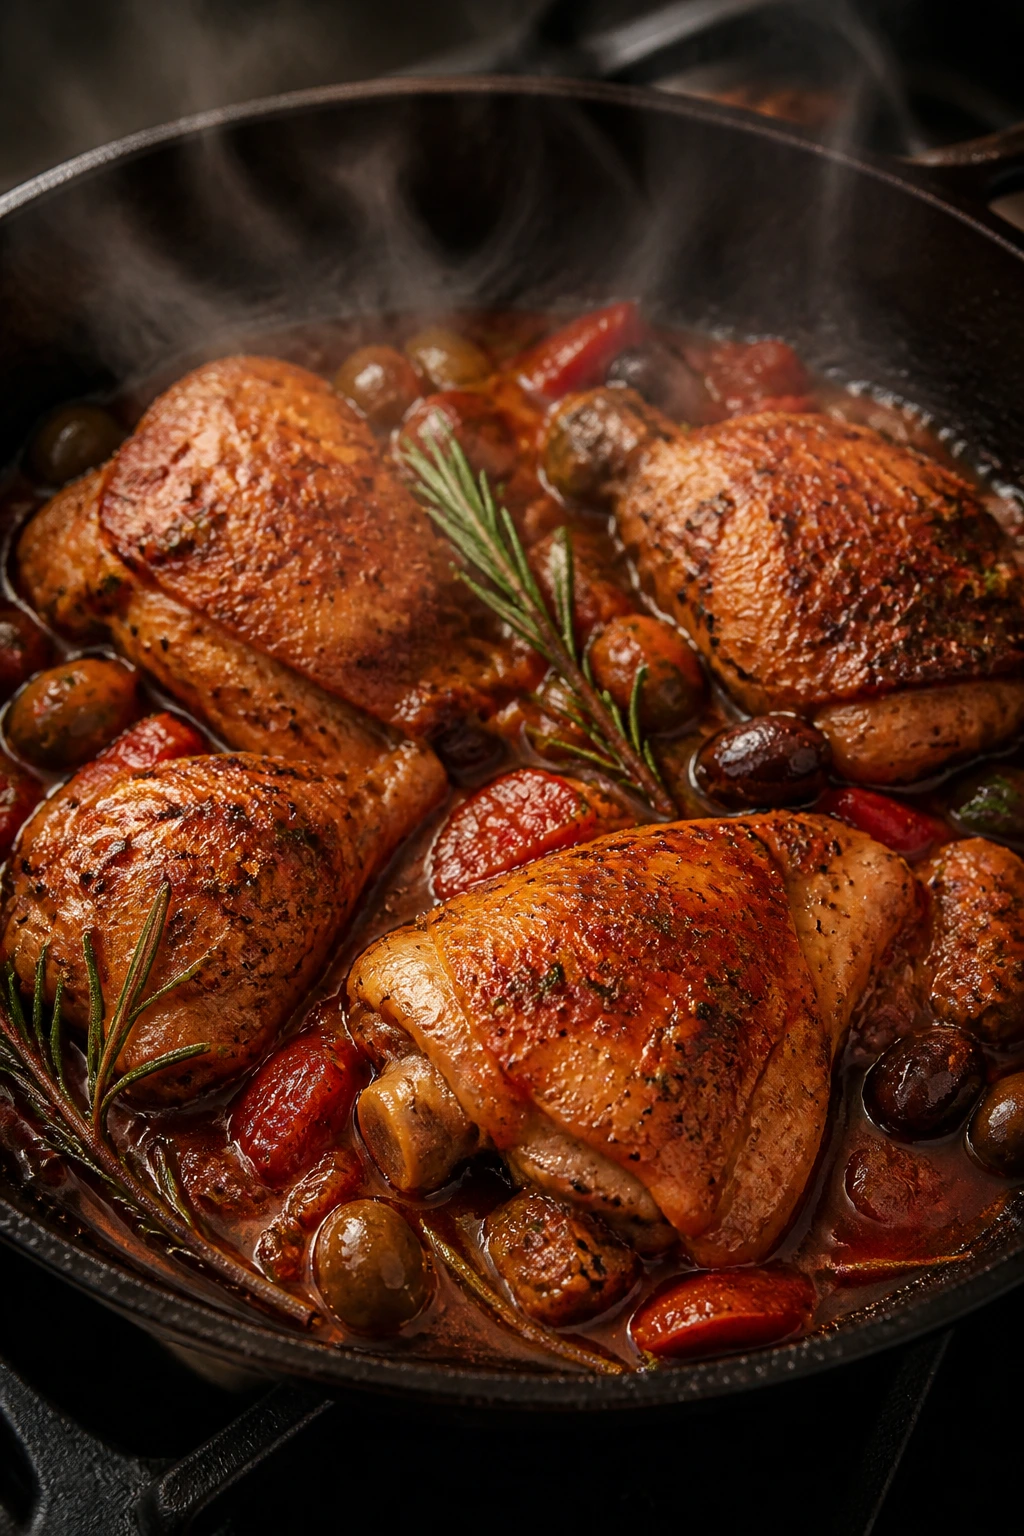
4. Braised Chicken Cacciatore with Rosemary and Olives
Chicken cacciatore has that deep, red-sauce comfort people expect from a good potluck dish, but the Tuscan version leans cleaner and more herb-driven than the heavy Americanized one. Rosemary, olives, white wine, and tomatoes give the sauce its backbone. The chicken stays juicy because it braises instead of frying itself to death in the oven.
This is a good dish for a crowd because it doesn’t dry out the way chicken breasts do. It also fills a room with that roasted, savory smell that makes people drift toward the buffet before they even know what they’re looking for.
Why It Works:
Bone-in thighs and drumsticks stay tender through a long simmer. The sauce picks up browned chicken flavor from the pan, then the olives go in late so they stay briny and distinct instead of muddy. The dish tastes good hot, warm, or even room temperature, which is exactly the range a potluck demands.
Key Ingredients:
- 3 pounds bone-in, skin-on chicken thighs and drumsticks — dark meat braises better than breasts.
- 1 1/2 teaspoons kosher salt — season the chicken before it hits the pan.
- 1/2 teaspoon black pepper — simple and enough.
- 2 tablespoons olive oil — for searing.
- 1 large onion, sliced — softens into the sauce.
- 2 carrots, sliced — add sweetness.
- 2 celery stalks, sliced — rounds out the base.
- 3 garlic cloves, minced — add after the vegetables soften.
- 1 cup dry white wine — deglazes the pan cleanly.
- 1 (28-ounce) can crushed tomatoes — forms the sauce.
- 1 cup chicken broth — keeps the braise loose enough to spoon.
- 1 tablespoon chopped rosemary and 2 bay leaves — the Tuscan perfume.
- 1 cup pitted olives — add them near the end.
- 8 ounces sliced mushrooms — optional, but they fit the style well.
- Chopped parsley for finishing — a bright final note.
Quick Steps:
-
Pat the chicken dry and season it with salt and pepper. Brown it in olive oil over medium-high heat for about 4 minutes per side, until the skin picks up deep color. Remove it to a plate.
-
In the same pan, add the onion, carrots, celery, and mushrooms. Cook for 8 minutes, stirring now and then, until the vegetables soften and start to catch at the edges.
-
Stir in the garlic, then pour in the white wine and scrape the bottom of the pan until it looks clean.
-
Add the crushed tomatoes, broth, rosemary, and bay leaves. Return the chicken to the pan, skin side up, and bring everything to a simmer.
-
Cover and cook on low for 35 to 40 minutes, until the chicken is cooked through and the meat feels loose at the bone.
-
Stir in the olives for the last 10 minutes. Finish with parsley before serving.
Equipment for This Recipe:
- Large Dutch oven or heavy braising pan
- Tongs
- Wooden spoon
- Sharp knife
- Cutting board
How to Serve This Dish:
Spoon the chicken and sauce over creamy polenta, mashed potatoes, or thick slices of grilled bread. If you’re serving buffet-style, keep it in the braising pan so the sauce stays where it belongs. A scatter of parsley and a few olive halves on top make it look lively instead of muddy.
Pro Tips for This Recipe:
- Don’t skip drying the chicken. Wet skin steams instead of browns.
- Add the olives late so they stay sharp and salty.
- If the sauce looks thin, simmer uncovered for 10 minutes after the chicken comes out.
- A squeeze of lemon at the end can wake up the whole pan.
Variations on This Dish:
- Pepper-and-Olive Version: Add 1 sliced bell pepper with the onion for a sweeter sauce.
- Mushroom-Forward Braise: Double the mushrooms and cut the tomato by half for a deeper, earthier pot.
- Boneless Shortcut: Use boneless thighs and cut the braise time to about 20 minutes, but keep an eye on texture.
Common Mistakes to Avoid with This Dish:
- Using chicken breasts: They dry out before the sauce finishes. Thighs and drumsticks are the better move.
- Boiling the braise hard: The sauce splits and the chicken toughens. Keep it at a quiet simmer.
- Adding olives at the start: They lose their bite and start tasting flat.
5. Tuscan Schiacciata with Rosemary and Olive Oil
Schiacciata is the bread I want at a potluck when I know there will be sauce on the table. It’s flat, dimpled, oily in the best possible way, and perfumed with rosemary so the whole pan smells like a bakery that has been standing in a hillside wind. It tears apart in long strips instead of neat slices, which is one reason people keep reaching back for more.
This is the kind of bread that can sit beside soups, cheeses, olives, and sliced meats without trying too hard. It doesn’t need a special spread. It is the spread’s best friend.
Why It Works:
A generous olive-oil coating keeps the crumb tender and helps the crust blister into something crisp and almost crackly. The dough is simple enough to make ahead, and the final proof gives it enough lift that it feels airy rather than dense. Rosemary and flaky salt on top create enough flavor that you can serve it plain.
Key Ingredients:
- 4 cups bread flour — the higher protein gives the bread chew.
- 2 1/4 teaspoons instant yeast — reliable and fast.
- 1 1/2 teaspoons kosher salt — the bread needs it.
- 1 teaspoon sugar or honey — feeds the yeast.
- 1 1/2 cups warm water — around 105°F to 110°F.
- 1/4 cup extra-virgin olive oil, plus more for the pan — don’t skimp.
- 2 tablespoons chopped fresh rosemary — use fresh, not dried, if you can.
- Flaky salt for the top — gives you little sharp pops in each bite.
Quick Steps:
-
Mix the flour, yeast, salt, and sugar in a large bowl. Stir in the warm water and 1/4 cup olive oil until a sticky dough forms.
-
Cover the bowl and let the dough rise for 60 to 90 minutes, until it looks puffy and nearly doubled.
-
Oil a rimmed sheet pan heavily. Stretch the dough into the pan with oiled fingers, then let it rest for 15 minutes if it keeps shrinking back.
-
Press deep dimples all over the surface with your fingertips. Drizzle with more olive oil, sprinkle rosemary and flaky salt, and let it proof for 30 to 40 minutes.
-
Bake at 450°F for 20 to 25 minutes, until the top is deeply golden and the edges pull away from the pan.
-
Cool for 10 minutes, then cut or tear while it’s still warm.
Equipment for This Recipe:
- Large mixing bowl
- Rimmed sheet pan
- Measuring cups and spoons
- Kitchen towel or plastic wrap
- Bench scraper, optional but helpful
How to Serve This Dish:
Serve schiacciata in rough squares or torn strips beside meats, soups, or a bowl of olives. It also belongs on the same platter as panzanella and bruschetta, which is a little bread-on-bread redundancy that nobody complains about. For a potluck, wrap it in a clean towel so the crust doesn’t go soft on the drive.
Pro Tips for This Recipe:
- Oil your fingers before dimpling. Sticky dough is normal.
- Let the dough rest if it shrinks back in the pan; forcing it only tears the surface.
- Bake until the edges are truly golden, not pale. Pale bread tastes unfinished.
- Fresh rosemary beats dried here by a mile.
Variations on This Dish:
- Onion Schiacciata: Scatter thinly sliced onions over the dough before baking for a sweeter, more savory bread.
- Grape Version: Add halved seedless grapes for a sweet Tuscan bakery feel.
- Tomato-and-Olive Topper: Press in sliced cherry tomatoes and chopped olives for a more meal-like bread.
Common Mistakes to Avoid with This Dish:
- Using too little oil: The bread sticks, dries out, and loses the Tuscan feel.
- Shaping it too aggressively: The dough wants a gentle hand.
- Underbaking the bottom: Lift the bread and check for color; pale bottoms go gummy as they cool.
6. Creamy Polenta with Mushroom Ragù
Polenta is one of those dishes that looks plain in the pot and then suddenly turns into the reason people ask for seconds. The base is soft and buttery, and the mushroom ragù on top gives you that deep, savory, almost meaty thing without needing actual meat. If you want a dish that can sit on a potluck table and still feel polished, this is it.
I prefer serving the ragù separately if I’m traveling, then spooning it over the polenta at the table. That keeps the texture creamy instead of setting up into a brick. It’s a small move. It changes everything.
Why It Works:
Coarse polenta cooks into a velvety base when it’s stirred slowly and finished with butter and Parmesan. Mushrooms need high heat to brown properly, and once they do, they pick up a dark, almost roasted flavor that reads as rich rather than earthy. The dish is naturally adaptable to vegetarian guests and still feels substantial.
Key Ingredients:
- 1 1/2 cups coarse polenta — not instant; the texture is the point.
- 6 cups water or low-sodium broth — broth adds more flavor, water keeps it lighter.
- 1 cup whole milk — makes the polenta creamier.
- 2 tablespoons butter — for gloss and richness.
- 1 cup grated Parmigiano-Reggiano — stir some into the polenta, save some for topping.
- 1 tablespoon olive oil — starts the ragù.
- 1 1/2 pounds mixed mushrooms, chopped — cremini, shiitake, or a mix.
- 1 small onion, diced — sweetens the ragù base.
- 3 garlic cloves, minced — add after the onion softens.
- 2 tablespoons tomato paste — deepens the mushroom flavor.
- 1/2 cup dry white wine — deglazes and brightens.
- 1 teaspoon thyme and black pepper — the herbs should stay subtle.
- Chopped parsley — for the finish.
Quick Steps:
-
Bring the water or broth and milk to a boil in a heavy saucepan. Slowly whisk in the polenta, reduce the heat to low, and cook for 25 to 30 minutes, stirring often, until thick and smooth.
-
Stir in the butter and 1/2 cup Parmesan. Taste and adjust salt.
-
While the polenta cooks, heat olive oil in a skillet over medium-high heat. Add the mushrooms and let them brown undisturbed for a few minutes before stirring.
-
Add the onion and cook for 5 minutes, then add the garlic and tomato paste. Cook for 1 minute, pour in the wine, and let it reduce by half.
-
Add thyme, black pepper, and a pinch of salt. Cook until the mushrooms look glossy and the pan smells deep and savory.
-
Spoon the polenta into a serving dish or individual bowls and ladle the mushroom ragù on top. Finish with parsley and more Parmesan.
Equipment for This Recipe:
- Heavy saucepan
- Whisk
- Large skillet
- Wooden spoon
- Serving bowl or shallow platter
How to Serve This Dish:
Polenta wants a shallow bowl rather than a deep one so the ragù stays on top. Serve it with roasted chicken, a green salad, or a plate of grilled vegetables if you want the meal to stay vegetarian. For a potluck, keep the polenta warm in a covered dish and bring the mushrooms separately so the texture stays soft.
Pro Tips for This Recipe:
- Whisk the polenta in gradually or it will clump the second it hits the liquid.
- Brown the mushrooms in batches if your skillet is crowded.
- Season the polenta more than you think you need; bland polenta is a sad thing.
- If the polenta stiffens while sitting, stir in a splash of hot milk or broth.
Variations on This Dish:
- Sausage Ragù Polenta: Add browned Italian sausage to the mushroom mixture for a heavier main course.
- Porcini Version: Soak a handful of dried porcini in hot water, chop them, and add both mushrooms and soaking liquid for a deeper flavor.
- Dairy-Free Bowl: Use olive oil instead of butter and finish with a spoonful of sautéed herbs in place of cheese.
Common Mistakes to Avoid with This Recipe:
- Rushing the polenta: If it hasn’t cooked long enough, it tastes gritty.
- Crowding the mushrooms: They steam instead of browning.
- Serving it too thick after a long hold: Thin with warm liquid before it reaches the table.
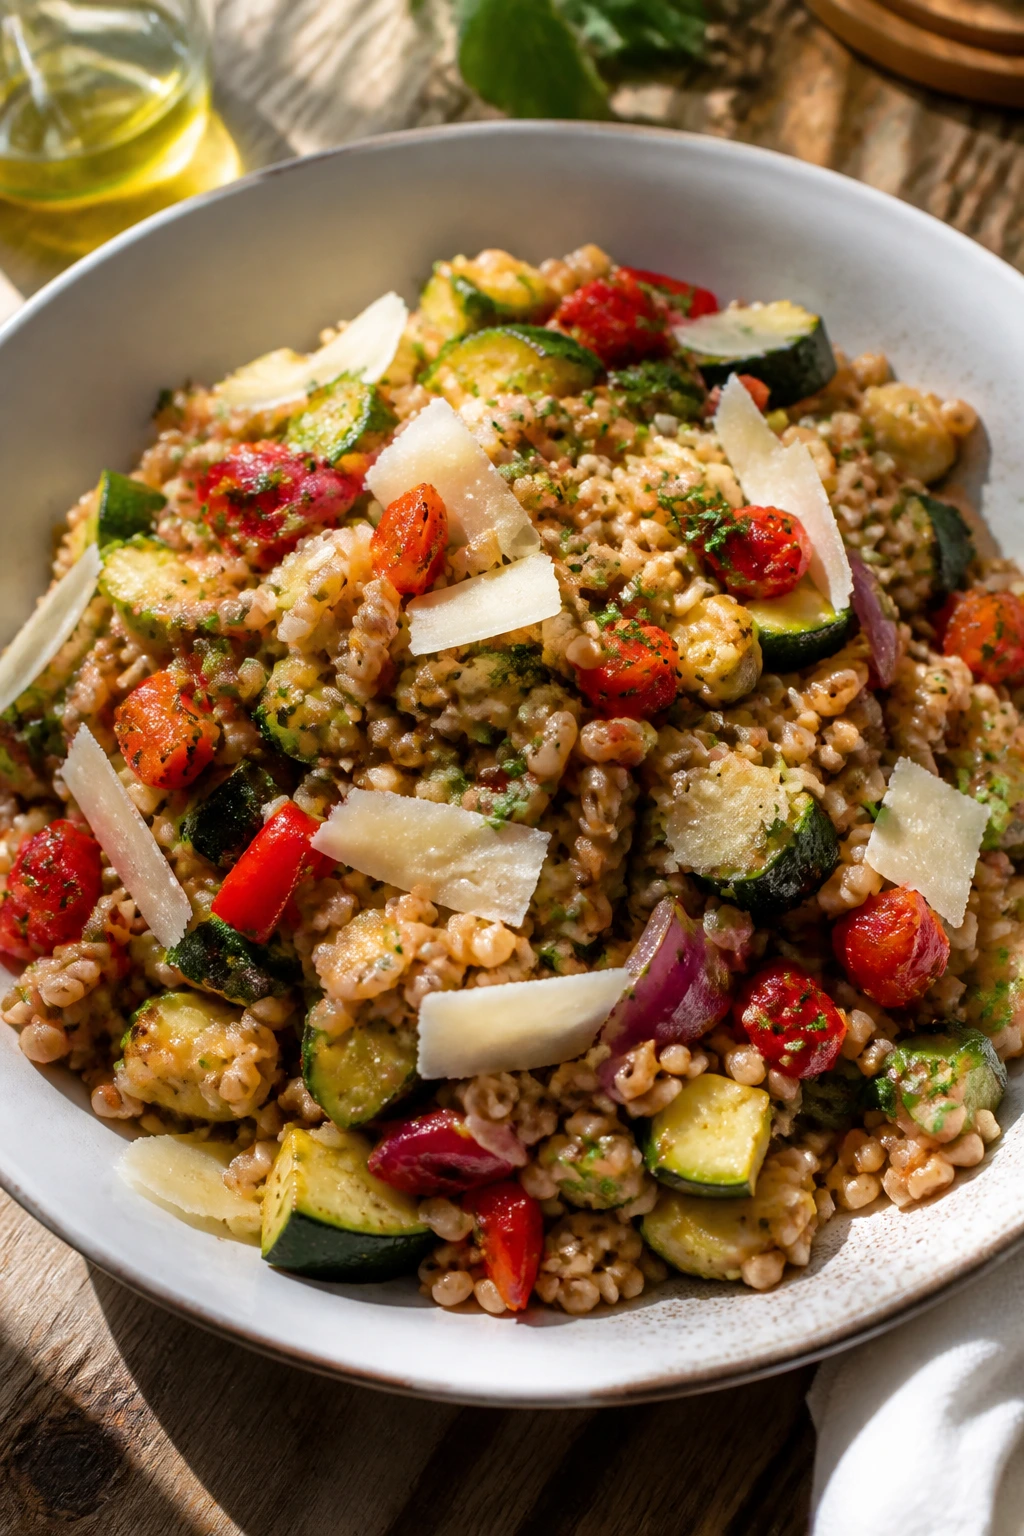
7. Farro Salad with Roasted Vegetables and Pecorino
Farro salad is the quiet overachiever of a Tuscan potluck. It looks modest in the bowl, then people start eating it and realize it has more going on than the shiny pasta dish next to it. The grains stay pleasantly chewy, the roasted vegetables bring sweetness, and the Pecorino adds that salty edge that keeps the whole thing from tasting like health food in a beige sweater.
It is also one of the easiest dishes to make ahead without damage. In fact, it gets better after a short rest because the vinaigrette sinks into the farro instead of sitting on top like an oil slick.
Why It Works:
Farro has a firmer bite than rice or couscous, so it doesn’t collapse under dressing. Roasted vegetables add caramelized edges that play well with the lemon and vinegar, while chickpeas or cheese make the salad feel like a complete dish instead of a side. It’s sturdy enough for a buffet and still bright enough to stand next to richer foods.
Key Ingredients:
- 2 cups pearled farro — cooks faster than whole farro and still has chew.
- 5 cups water or broth — enough for simmering until tender.
- 1 zucchini, diced — roasts quickly and stays sweet.
- 1 red bell pepper, chopped — adds color and a little char.
- 1 yellow bell pepper, chopped — same job, different sweetness.
- 1 small red onion, cut into wedges — goes jammy in the oven.
- 1 pint cherry tomatoes — roast until they wrinkle.
- 1 can chickpeas, drained and rinsed — optional, but useful for body.
- 1/4 cup olive oil — for roasting and dressing.
- 3 tablespoons red wine vinegar — the acid that sharpens the bowl.
- Juice and zest of 1 lemon — makes the grains taste awake.
- 1/2 cup chopped basil and parsley — fresh herbs matter here.
- 4 ounces shaved Pecorino — salty finish.
- Salt and black pepper — season every layer.
Quick Steps:
-
Cook the farro in salted water or broth until tender but still chewy, about 20 to 25 minutes. Drain well and spread it on a tray to cool slightly.
-
Toss the zucchini, peppers, onion, and tomatoes with olive oil, salt, and pepper. Roast at 425°F for 20 to 25 minutes, until the vegetables show browned edges.
-
Whisk the olive oil, red wine vinegar, lemon juice, lemon zest, salt, and pepper in a large bowl.
-
Add the farro, roasted vegetables, chickpeas, and herbs to the bowl. Toss while the grains are still warm so they catch the dressing.
-
Fold in the Pecorino right before serving.
Equipment for This Recipe:
- Medium saucepan
- Colander
- Rimmed sheet pan
- Large mixing bowl
- Wooden spoon
How to Serve This Dish:
Spread the salad on a broad platter if you want the vegetables to show. It works beside grilled meats, roasted chicken, or a simple platter of olives and cheese, and it is one of the few potluck dishes that still feels right at room temperature after a drive. I also like a few extra herb leaves scattered on top so the bowl looks fresh.
Pro Tips for This Recipe:
- Don’t overcook the farro. Chew is the whole point.
- Toss the grains while they’re still warm so they absorb the vinaigrette.
- Roast the vegetables hard enough to get some color; pale vegetables taste flat.
- If the salad sits for hours, save a little extra dressing to refresh it before serving.
Variations on This Dish:
- Tuna-and-Caper Version: Add a can of good olive-oil tuna and a spoonful of capers for a more lunch-like salad.
- Grilled Vegetable Farro: Swap in grilled zucchini and eggplant for a smokier, summer-leaning bowl.
- Vegan Pantry Bowl: Leave off the Pecorino and add toasted pine nuts for a little richness.
Common Mistakes to Avoid with This Dish:
- Overcooking the farro: Mushy grains make the salad heavy.
- Dressing hot vegetables too aggressively: They soak up too much and can go soggy.
- Using too little salt: Farro needs seasoning at the cooking stage and again after dressing.
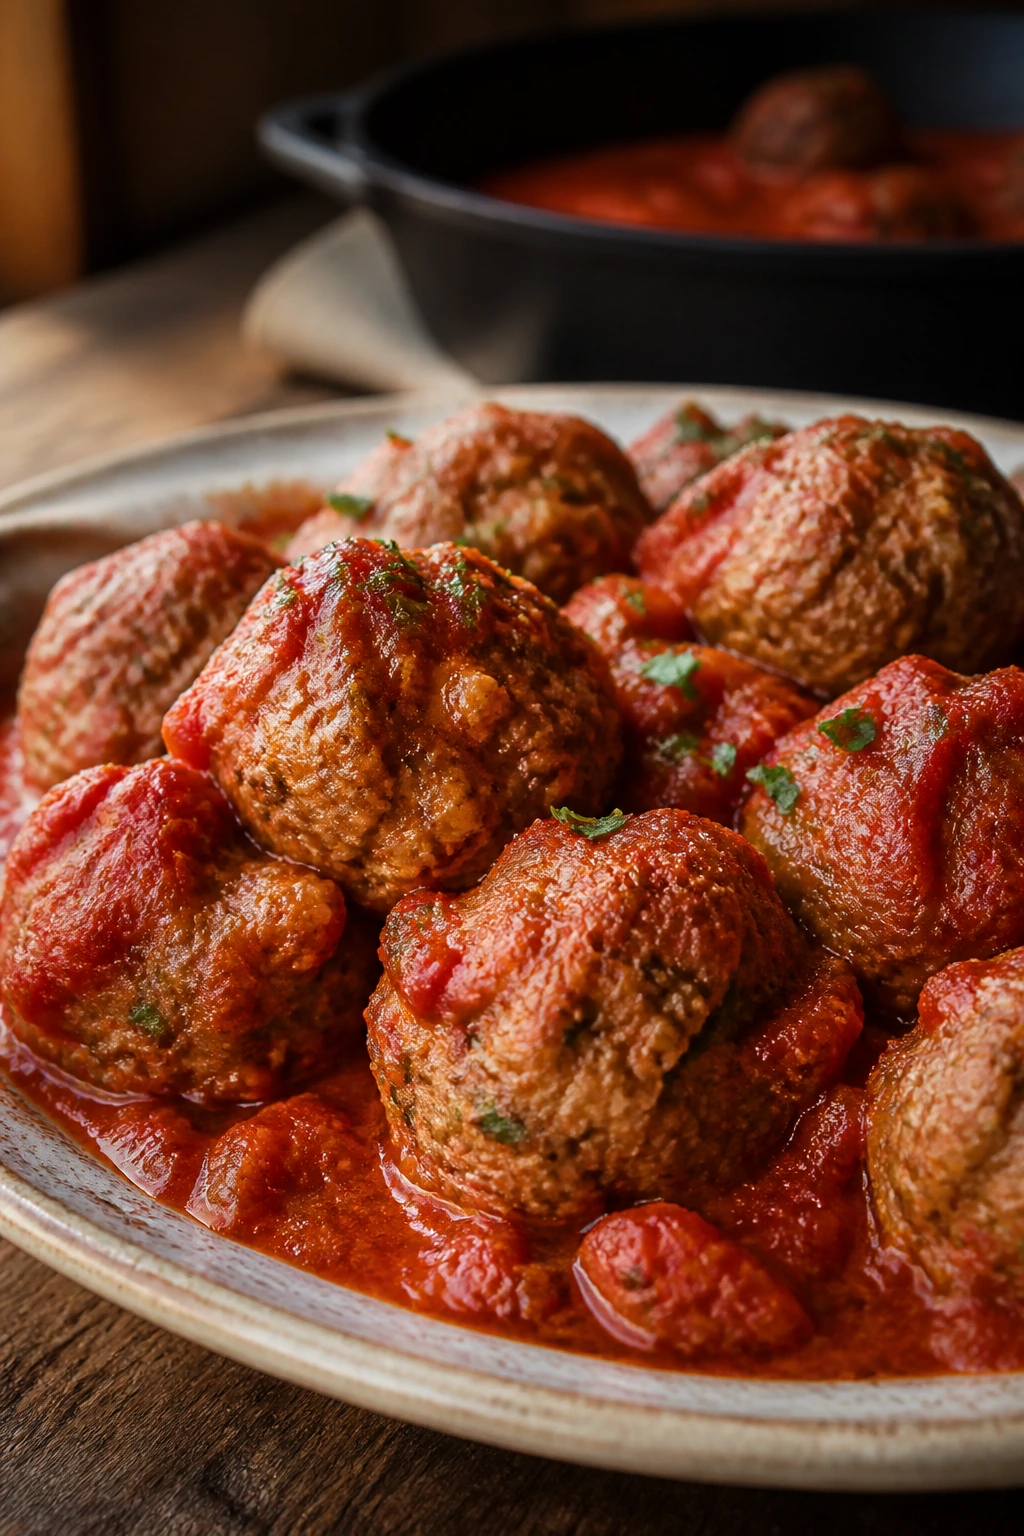
8. Tuscan Meatballs in Tomato Sauce
These meatballs are built for a potluck because they behave like they belong in a buffet tray. They’re tender, saucy, and easy to serve with toothpicks if you want them to work as an appetizer, or over polenta if you want them to act like dinner. The Tuscan lean is in the seasoning: garlic, parsley, pecorino, a little nutmeg, and a tomato sauce that tastes cooked, not dumped.
What makes them worth bringing is the texture. A good meatball should be soft inside but not fragile, and these hold together without feeling dense. That’s a useful skill in a potluck dish.
Why It Works:
Using two meats gives the meatballs a richer texture than one lean grind alone. Soaking the breadcrumbs in milk keeps the mixture tender, while a gentle bake or sear sets the outside before the sauce finishes the job. The tomato sauce coats them without turning them bouncy or dry.
Key Ingredients:
For the Meatballs:
- 1 pound ground beef — gives structure.
- 1 pound ground pork — keeps the meatballs juicy.
- 1 cup fresh breadcrumbs — use soft crumbs, not dry dust.
- 1/2 cup whole milk — soaks into the crumbs.
- 2 large eggs — bind everything together.
- 1/2 cup grated Pecorino Romano — salty and sharp.
- 2 garlic cloves, minced — don’t use more or the mix gets harsh.
- 1/4 cup chopped parsley — brightens the mixture.
- 1 teaspoon kosher salt and 1/2 teaspoon black pepper — season properly.
- 1/4 teaspoon grated nutmeg — small amount, big payoff.
For the Sauce:
- 2 tablespoons olive oil — for the base.
- 1 small onion, diced — softens into the tomato.
- 2 garlic cloves, minced — add after the onion.
- 1 (28-ounce) can crushed tomatoes — the main sauce.
- 1 teaspoon dried oregano — classic without shouting.
- 1 teaspoon sugar — only if the tomatoes taste sharp.
- Basil leaves for finishing — keep them at the end.
Quick Steps:
-
Mix the breadcrumbs and milk in a bowl and let them sit for 2 minutes. Stir in the beef, pork, eggs, Pecorino, garlic, parsley, salt, pepper, and nutmeg just until combined.
-
Shape the mixture into meatballs about 1 1/2 inches wide. Don’t pack them hard.
-
Bake the meatballs at 425°F for 12 to 15 minutes, or brown them in a skillet if you want a deeper crust.
-
In a separate pan, cook the onion in olive oil over medium heat for 5 minutes. Add the garlic for 30 seconds, then pour in the crushed tomatoes, oregano, and sugar if needed. Simmer for 10 minutes.
-
Nestle the meatballs into the sauce and simmer gently for 15 to 20 minutes, until they’re cooked through and the sauce clings to them.
-
Finish with torn basil.
Equipment for This Recipe:
- Large mixing bowl
- Rimmed sheet pan or skillet
- Saucepan or braising pan
- Wooden spoon
- Small cookie scoop, optional
How to Serve This Dish:
Serve the meatballs in the sauce with a spoon and plenty of napkins. For the buffet, keep them in a shallow dish so people can see the sauce and not have to dig. They’re good with schiacciata, over polenta, or tucked into rolls if you want them to act like sliders.
Pro Tips for This Recipe:
- Stop mixing as soon as the ingredients come together. Overworked meatballs turn tight.
- Bake or brown them before simmering so they keep their shape.
- Taste the sauce before serving; a pinch of salt or a tiny splash of olive oil can wake it up.
- If you want appetizer-sized meatballs, make them smaller and cut the simmer to about 10 minutes.
Variations on This Dish:
- Turkey Meatballs: Swap in ground turkey and add 1 tablespoon olive oil to the mix for moisture.
- Mini Party Meatballs: Make them smaller and serve with toothpicks as a starter.
- Herb-Heavy Version: Add a little chopped sage and rosemary to the meatball mix for a more Tuscan angle.
Common Mistakes to Avoid with This Dish:
- Overmixing the meat: It makes the texture springy instead of tender.
- Skipping the milk soak for the breadcrumbs: Dry crumbs pull moisture from the meat.
- Letting the sauce boil hard: A furious simmer can break the meatballs apart.
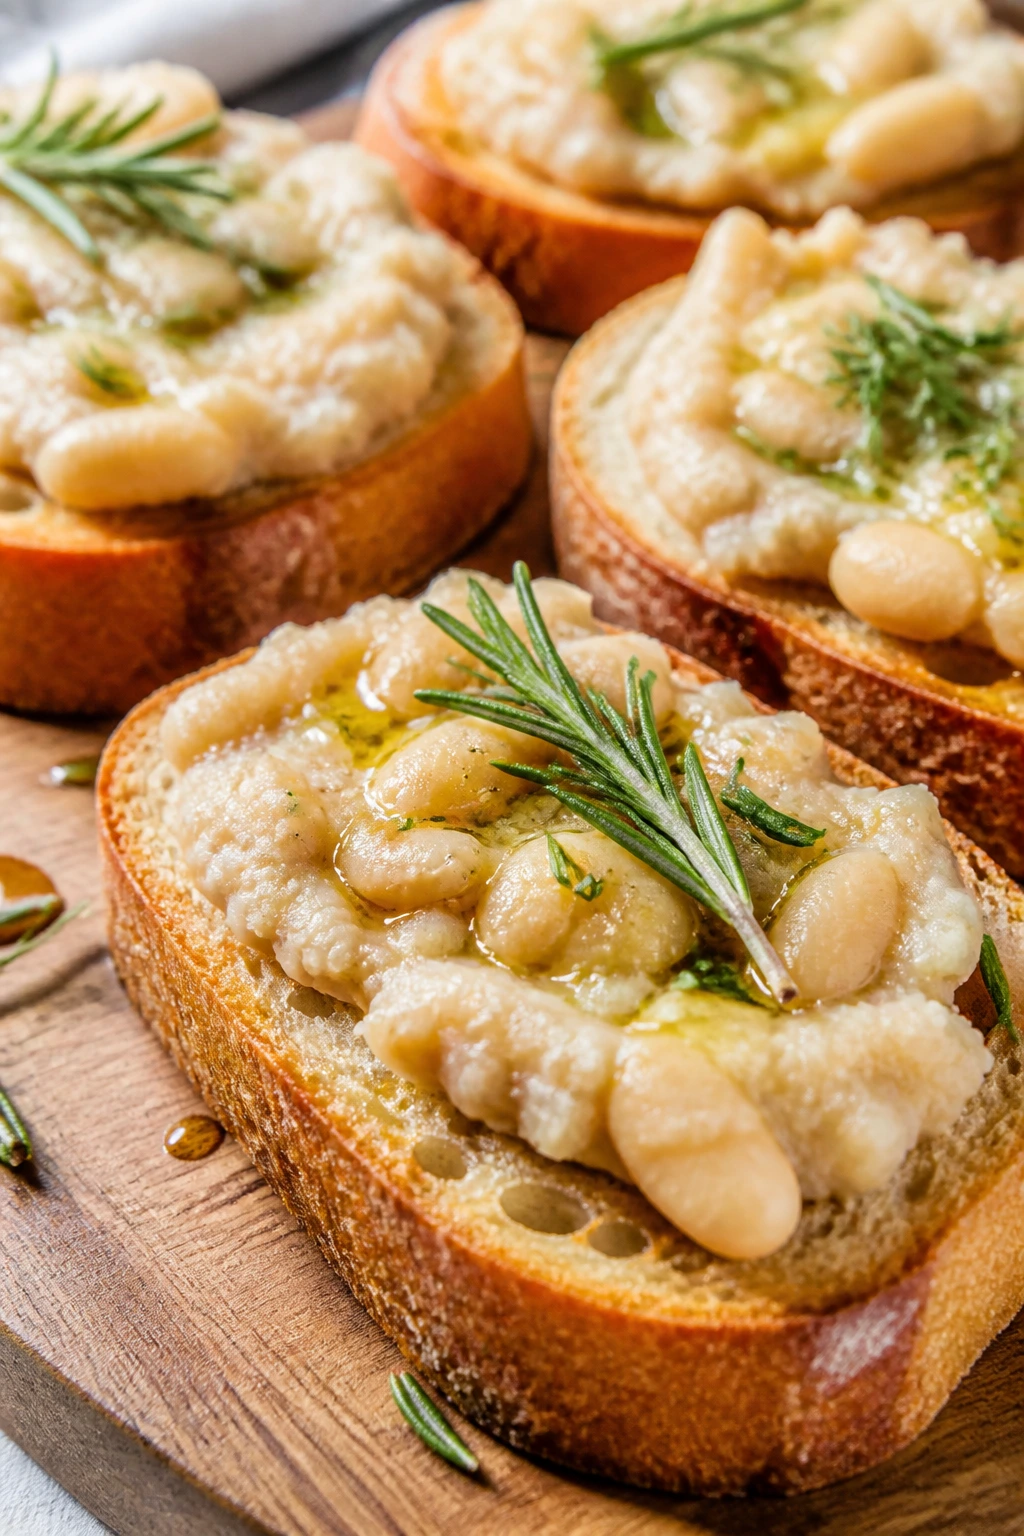
9. White Bean and Rosemary Bruschetta
Bruschetta is the first thing to vanish when people spot a platter with toasted bread and something creamy on top. The white bean spread gives you that soft, savory base, while rosemary and lemon keep it from tasting like pure pantry food. Add a few tomatoes or a little olive oil on top, and it suddenly looks like you spent far more time on it than you did.
I like this one because it solves the “one more appetizer” problem without being fussy. It uses the same Tuscan ingredients that keep showing up everywhere else, but in a form that people can pick up and eat in one bite or two.
Why It Works:
Cannellini beans blend into a spread that feels creamy without needing cream. Rosemary and lemon give the bean mash shape, and toasted bread stays crisp long enough for a potluck serving line. If you’re worried about sogginess, this is one of the safest bets in the whole collection.
Key Ingredients:
- 2 (15-ounce) cans cannellini beans, drained and rinsed — the base of the spread.
- 2 tablespoons extra-virgin olive oil — for body.
- 1 garlic clove, finely grated or minced — enough to notice, not enough to burn.
- 2 tablespoons lemon juice — sharpens the beans.
- 1 teaspoon chopped rosemary — use a light hand.
- Salt and black pepper — bean spreads need both.
- 1 baguette or rustic Tuscan loaf, sliced — toast it well.
- 2 tablespoons olive oil for brushing the bread — helps it crisp.
- 1 cup cherry tomatoes, diced — optional topping.
- 1 tablespoon red wine vinegar — for the tomato topping if you use it.
- 1 tablespoon chopped parsley — brightens the finish.
Quick Steps:
-
Toast the bread slices on a sheet pan at 400°F for 8 to 10 minutes, until they feel dry and the edges turn golden.
-
Mash or blend the beans with olive oil, garlic, lemon juice, rosemary, salt, and pepper until mostly smooth. Leave a little texture if you like the spread rustic.
-
If using tomatoes, toss them with the red wine vinegar, parsley, salt, and black pepper.
-
Spread the bean mixture onto the toasted bread.
-
Top with the tomato mixture or a thread of olive oil and a few rosemary leaves.
Equipment for This Recipe:
- Baking sheet
- Food processor or sturdy bowl and fork
- Knife
- Cutting board
- Spoon or offset spatula
How to Serve This Dish:
Arrange the bruschetta on a platter, not stacked in a pile where the bottoms steam. It works well with olives, salami, and a wine-friendly cheese board. For a potluck, keep the bean spread in a separate bowl and assemble the toasts just before guests arrive.
Pro Tips for This Recipe:
- Toast the bread a little more than you think you need to.
- If the bean spread feels dry, add olive oil 1 teaspoon at a time.
- Make the topping right before serving so the tomatoes don’t flood the bread.
- A tiny pinch of chili flakes is nice if you want a little heat.
Variations on This Dish:
- Roasted Garlic Bruschetta: Replace the raw garlic with 2 cloves of roasted garlic for a softer flavor.
- Anchovy-Flecked Version: Mash in 1 minced anchovy fillet if your crowd likes salty depth.
- Tomato-Free Bean Toast: Finish the beans with chopped herbs and lemon zest instead of tomato.
Common Mistakes to Avoid with This Dish:
- Assembling too early: The bread softens and the edges lose their snap.
- Under-seasoning the beans: Plain bean mash tastes flat no matter how pretty it looks.
- Using flimsy sandwich bread: It buckles under the spread.
10. Spinach and Ricotta Crespelle Bake
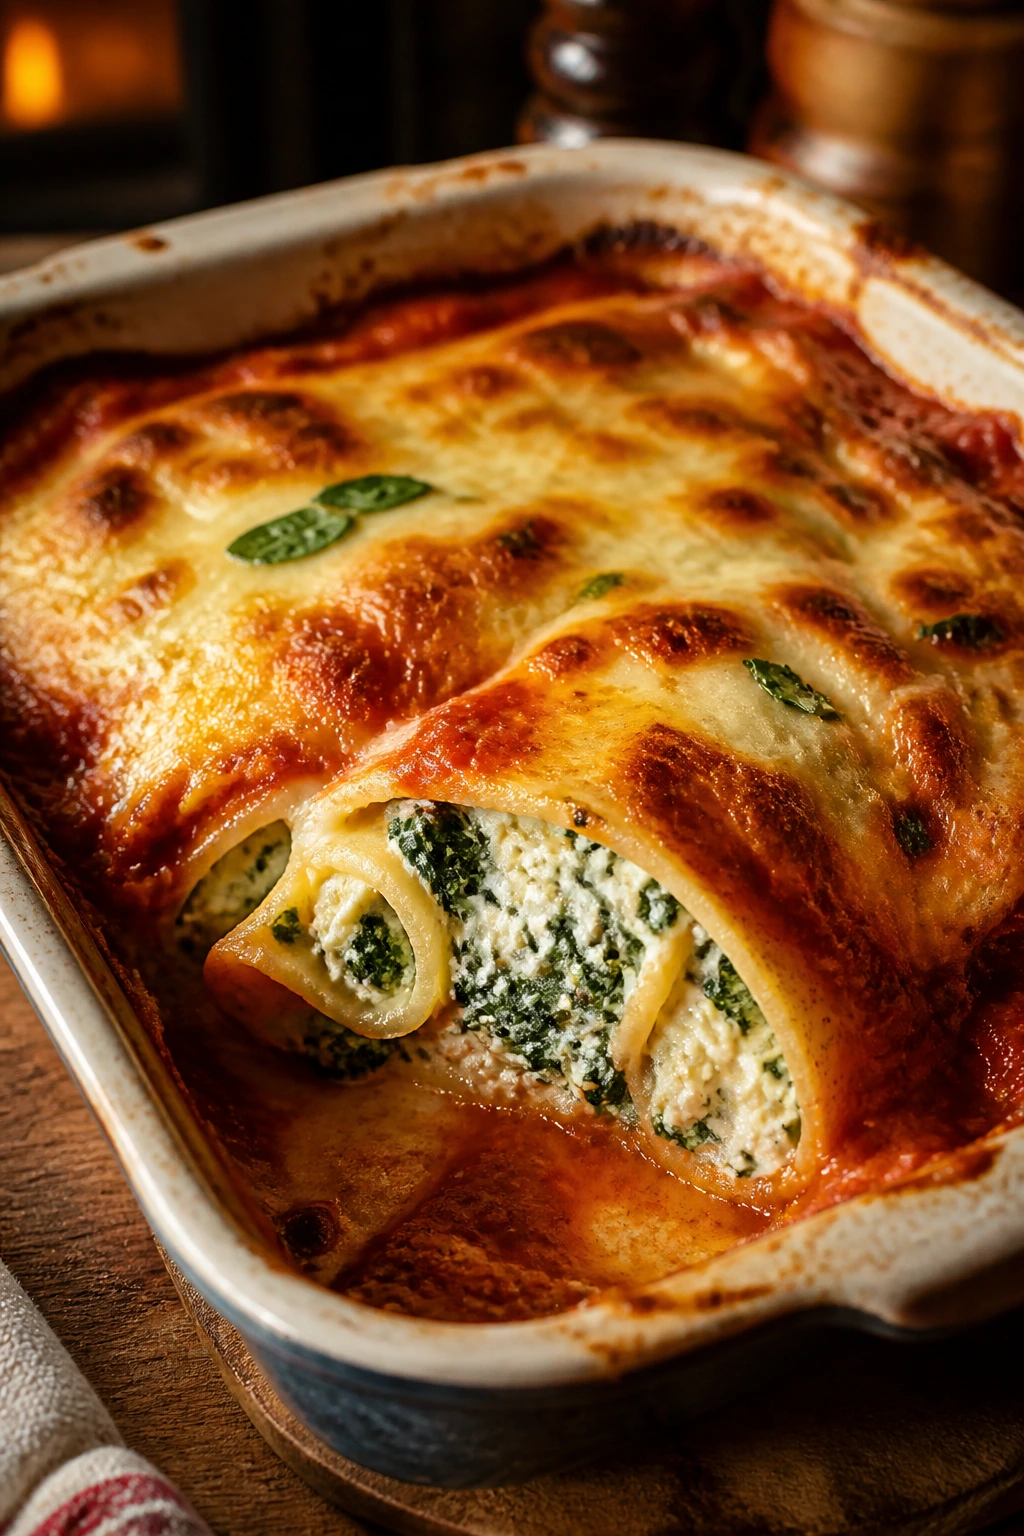
Crespelle are the savory crepe version of a baked pasta that feels a little more polished than the usual casserole. Thin pancakes get rolled around spinach and ricotta filling, then tucked into sauce and baked until the top bubbles. They’re soft, creamy, and a little delicate, which sounds fancy until you realize they’re also very easy to assemble in a 9-by-13 dish.
For a potluck, this is one of my favorite “looks harder than it is” dishes. People always assume crepes mean trouble. They don’t. They mean a skillet and a little patience.
Why It Works:
The crepes bake into tender layers instead of collapsing into one heavy mass. Ricotta and well-drained spinach keep the filling rich without making it wet, and tomato sauce adds enough acidity to keep the whole tray from feeling one-note. It’s a good make-ahead dish because the components can be built separately, then baked right before serving.
Key Ingredients:
For the Crepes:
- 1 cup all-purpose flour — gives the batter structure.
- 3 large eggs — helps the crepes set.
- 1 1/2 cups milk — thins the batter to pouring consistency.
- 2 tablespoons melted butter — keeps them flexible.
- 1/2 teaspoon salt — don’t forget it.
For the Filling:
- 15 ounces ricotta — full-fat tastes better here.
- 10 ounces spinach, cooked and squeezed dry — moisture is the enemy.
- 1 large egg — binds the filling.
- 1/2 cup grated Parmigiano-Reggiano — adds salt and depth.
- 1/4 teaspoon nutmeg — the classic whisper.
- Salt and black pepper — taste the filling before rolling.
For the Bake:
- 3 cups marinara sauce — a smooth, tomato-forward sauce.
- 1 cup shredded mozzarella — melts on top.
- 1/4 cup grated Parmesan — for finishing.
- Basil leaves — optional, but pretty.
Quick Steps:
-
Whisk the flour, eggs, milk, melted butter, and salt into a smooth batter. Rest it for 20 minutes so the flour hydrates.
-
Cook thin crepes in a lightly buttered nonstick skillet over medium heat, about 1 minute per side, until pale golden spots appear.
-
Mix the ricotta, spinach, egg, Parmesan, nutmeg, salt, and pepper until smooth.
-
Spoon the filling onto each crepe, roll them up, and place them seam-side down in a baking dish spread with a thin layer of sauce.
-
Cover the crepes with the remaining sauce, mozzarella, and Parmesan. Bake at 375°F for 20 to 25 minutes, until bubbling and lightly browned.
-
Rest for 10 minutes before cutting.
Equipment for This Recipe:
- Nonstick skillet
- Whisk
- Medium mixing bowl
- 9-by-13-inch baking dish
- Spatula
How to Serve This Dish:
Cut the crepe bake into neat squares and spoon a little sauce from the pan over each portion. A simple green salad or a tray of roasted vegetables is enough on the side. The dish is soft, so don’t crowd it with another creamy casserole on the same table.
Pro Tips for This Recipe:
- Squeeze the spinach until it feels almost dry. Wet spinach ruins the filling.
- Rest the crepe batter so the pancakes cook without tearing.
- Use a small spoon or cookie scoop for filling the crepes evenly.
- If a crepe tears, no problem. Patch it in the baking dish and keep moving.
Variations on This Dish:
- Mushroom Crespelle: Replace half the spinach with finely chopped cooked mushrooms.
- Prosciutto Version: Add a thin slice of prosciutto to each crepe before rolling.
- Gluten-Free Crepes: Use a good gluten-free flour blend and make one test crepe first to check the texture.
Common Mistakes to Avoid with This Dish:
- Watery spinach: It leaks into the filling and makes the bake slide apart.
- Too-thick crepes: They turn chewy instead of tender.
- Stuffing the crepes too full: They burst during baking.
11. Eggplant and Tomato Stacks with Parmigiano and Basil
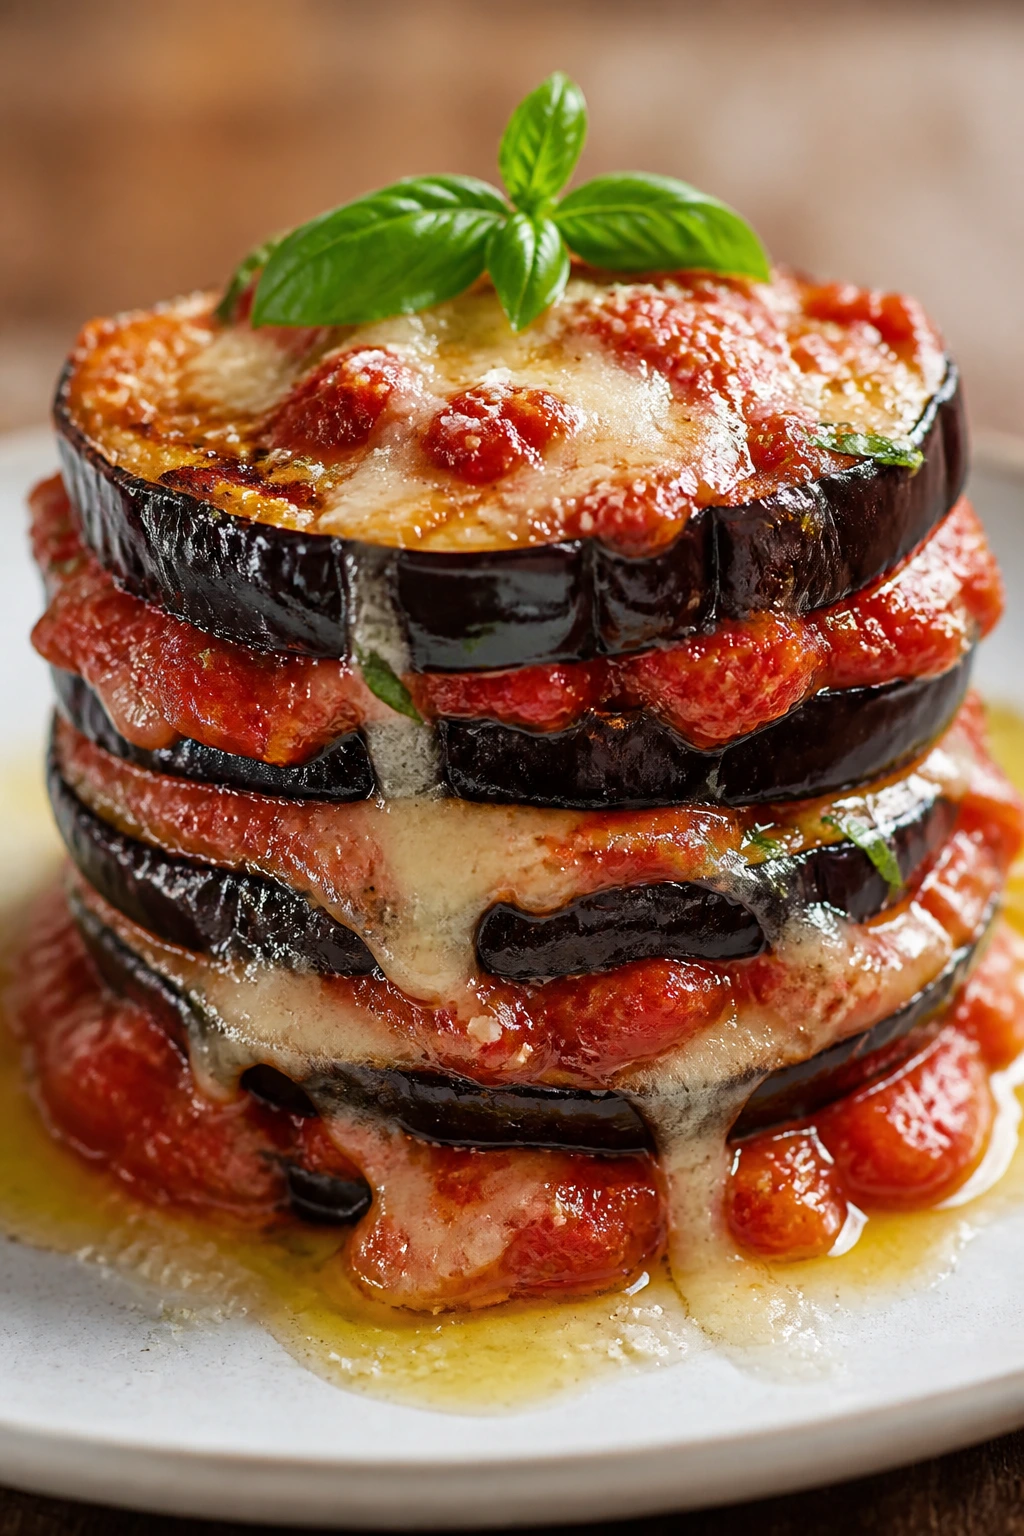
Eggplant stacks are the answer when you want something vegetable-forward that still feels like real food at a potluck. The slices roast until soft, the tomato sauce slips into the layers, and the cheese browns in little patches on top. The finished dish looks composed on a platter but doesn’t demand delicate handling, which is a rare and useful combination.
These stacks taste best when the eggplant is fully cooked and the sauce is concentrated. If either part is weak, the dish goes mushy. Get those two things right and it lands beautifully.
Why It Works:
Salting the eggplant pulls out moisture so it roasts instead of steaming. Roasting, rather than frying, keeps the dish lighter and easier to manage for a crowd. The tomato sauce and cheese hold the layers together enough that each stack can be lifted with a spatula or fork.
Key Ingredients:
- 2 large eggplants, sliced into 1/2-inch rounds — uniform slices cook evenly.
- 1 tablespoon kosher salt — for drawing out moisture.
- 1/4 cup olive oil — enough to coat the slices lightly.
- 3 cups marinara or thick tomato sauce — thin sauce will run all over the pan.
- 8 ounces fresh mozzarella, sliced — use it in modest layers.
- 1/2 cup grated Parmigiano-Reggiano — gives the top color.
- 1/4 cup fresh basil leaves — torn at the end.
- Black pepper — season the layers.
Quick Steps:
-
Salt the eggplant slices and let them sit for 30 minutes. Pat them dry with paper towels to remove the beads of moisture.
-
Brush the slices with olive oil and roast them at 425°F for about 20 minutes, flipping once, until they’re soft and browned at the edges.
-
Spread a thin layer of sauce in a baking dish or on a platter if you’re assembling for service only.
-
Stack a slice of eggplant, a spoonful of sauce, and a piece of mozzarella, then repeat with another slice. Finish with Parmesan on top.
-
Bake the stacks for 10 to 15 minutes, until the cheese melts and the edges bubble.
-
Scatter basil and black pepper over the top before serving.
Equipment for This Recipe:
- Rimmed sheet pan
- Paper towels
- Sharp knife
- Baking dish or serving platter
- Spatula
How to Serve This Dish:
Serve the stacks warm or room temperature with crusty bread and a simple salad. They’re a nice vegetable side next to chicken or sausage, but they can also stand alone as part of a meatless spread. Keep a spoon nearby for any sauce that escapes.
Pro Tips for This Recipe:
- Salt the eggplant. Skipping this step leads to watery slices.
- Roast the slices enough that they feel soft all the way through.
- Use a thick sauce so the stacks don’t slide around.
- Fresh basil should go on at the end; heat blunts it quickly.
Variations on This Dish:
- Grilled Eggplant Stacks: Grill the slices instead of roasting for a smokier flavor.
- Pesto Finish: Add a spoonful of pesto under the top layer of cheese.
- Dairy-Free Version: Skip the cheese and top with toasted breadcrumbs and extra olive oil.
Common Mistakes to Avoid with This Dish:
- Thick eggplant slices: They stay spongy.
- Sauce that’s too thin: The stacks melt into a puddle.
- Not drying the eggplant after salting: Extra moisture ruins the texture.
12. Tuscan Potato and Green Bean Salad
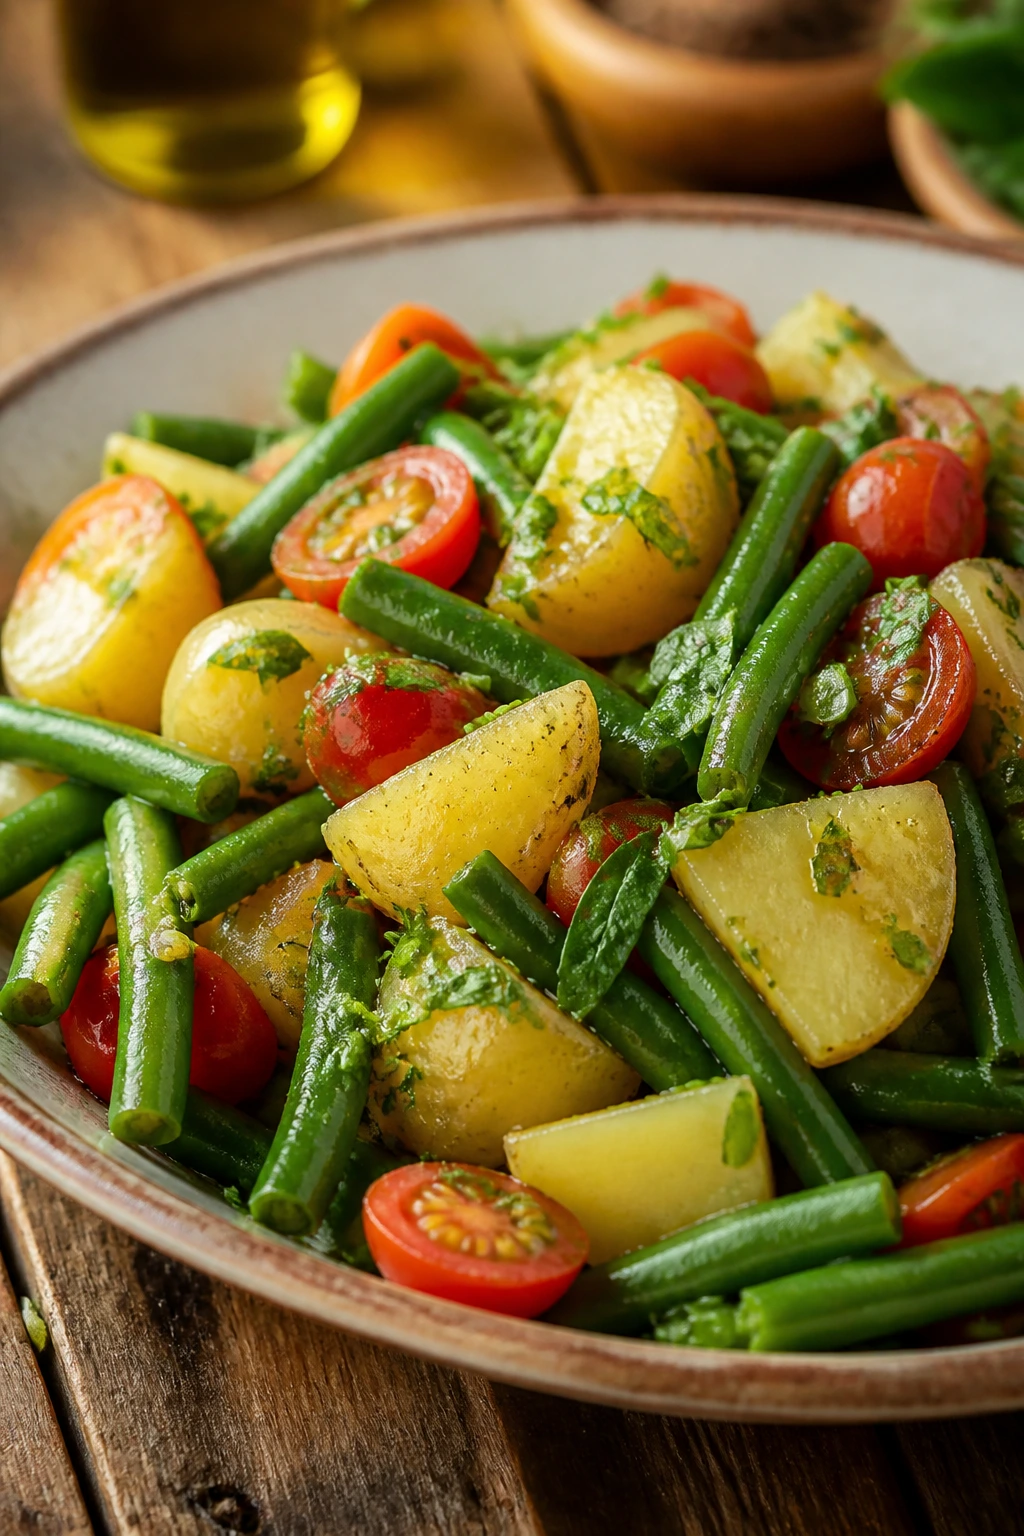
This is the potato salad for people who don’t want mayo sitting in the sun. Boiled potatoes, crisp-tender green beans, tomatoes, herbs, and olive oil vinegar dressing make a bright bowl that still feels grounded. It’s the kind of side dish that quietly disappears because everybody assumes someone else already had some.
The Tuscan angle matters here. Olive oil and vinegar let the vegetables taste like themselves, and the salad is good warm or room temperature, which means it won’t punish you for being the last dish out of the car.
Why It Works:
Potatoes catch dressing when they’re still warm, which is why this salad tastes better if you toss it soon after cooking. Green beans add a bite that keeps the texture from going soft, and tomatoes bring acidity and color. A little caper or olive brine in the dressing can make the whole bowl taste more intentional.
Key Ingredients:
- 2 pounds Yukon Gold potatoes, cut into chunks — creamy but sturdy.
- 1 pound green beans, trimmed — snap them cleanly.
- 1 pint cherry tomatoes, halved — add them after the potatoes cool a little.
- 1/2 small red onion, thinly sliced — sharpens the salad.
- 1/3 cup extra-virgin olive oil — the main dressing body.
- 3 tablespoons red wine vinegar — gives the proper bite.
- 1 garlic clove, finely grated — use sparingly.
- 1 tablespoon capers, chopped — optional but useful.
- 1/4 cup chopped parsley and basil — fresh herbs matter.
- Salt and black pepper — season the water and the dressing.
Quick Steps:
-
Boil the potatoes in salted water until a knife slides in easily, about 12 to 15 minutes depending on size. Drain them well.
-
In the same or a separate pot, blanch the green beans for 2 to 3 minutes until bright green and crisp-tender. Drain and cool slightly.
-
Whisk the olive oil, red wine vinegar, garlic, capers, salt, and black pepper in a large bowl.
-
Add the warm potatoes, green beans, tomatoes, and onion. Toss gently so the potatoes keep their shape.
-
Fold in the herbs and taste again for salt before serving.
Equipment for This Recipe:
- Large pot
- Colander
- Large bowl
- Whisk
- Sharp knife
How to Serve This Dish:
Pile it into a wide bowl so the tomatoes and herbs stay visible. It sits well next to grilled chicken, sausage, or a braised main, and it’s one of the easiest sides to bring when you don’t want a dish that needs reheating. A few whole basil leaves on top make it look finished.
Pro Tips for This Recipe:
- Salt the potato water well. Bland potatoes stay bland even with dressing.
- Toss while the potatoes are warm so they drink in the vinaigrette.
- Add tomatoes after the potatoes cool slightly so they don’t collapse.
- If you want a little more punch, let the dressed salad sit 20 minutes before serving.
Variations on This Dish:
- Tuna Potato Salad: Add a can of good tuna for a fuller main-course version.
- Olive Version: Fold in sliced green olives for a sharper briny note.
- Egg Upgrade: Add quartered hard-boiled eggs for a more substantial buffet side.
Common Mistakes to Avoid with This Dish:
- Overcooking the potatoes: They fall apart when tossed.
- Skipping the warm toss with dressing: The salad tastes flatter if the dressing never gets into the potatoes.
- Using a heavy hand with the onion: Too much raw onion takes over the bowl.
13. Olive Oil and Lemon Cake
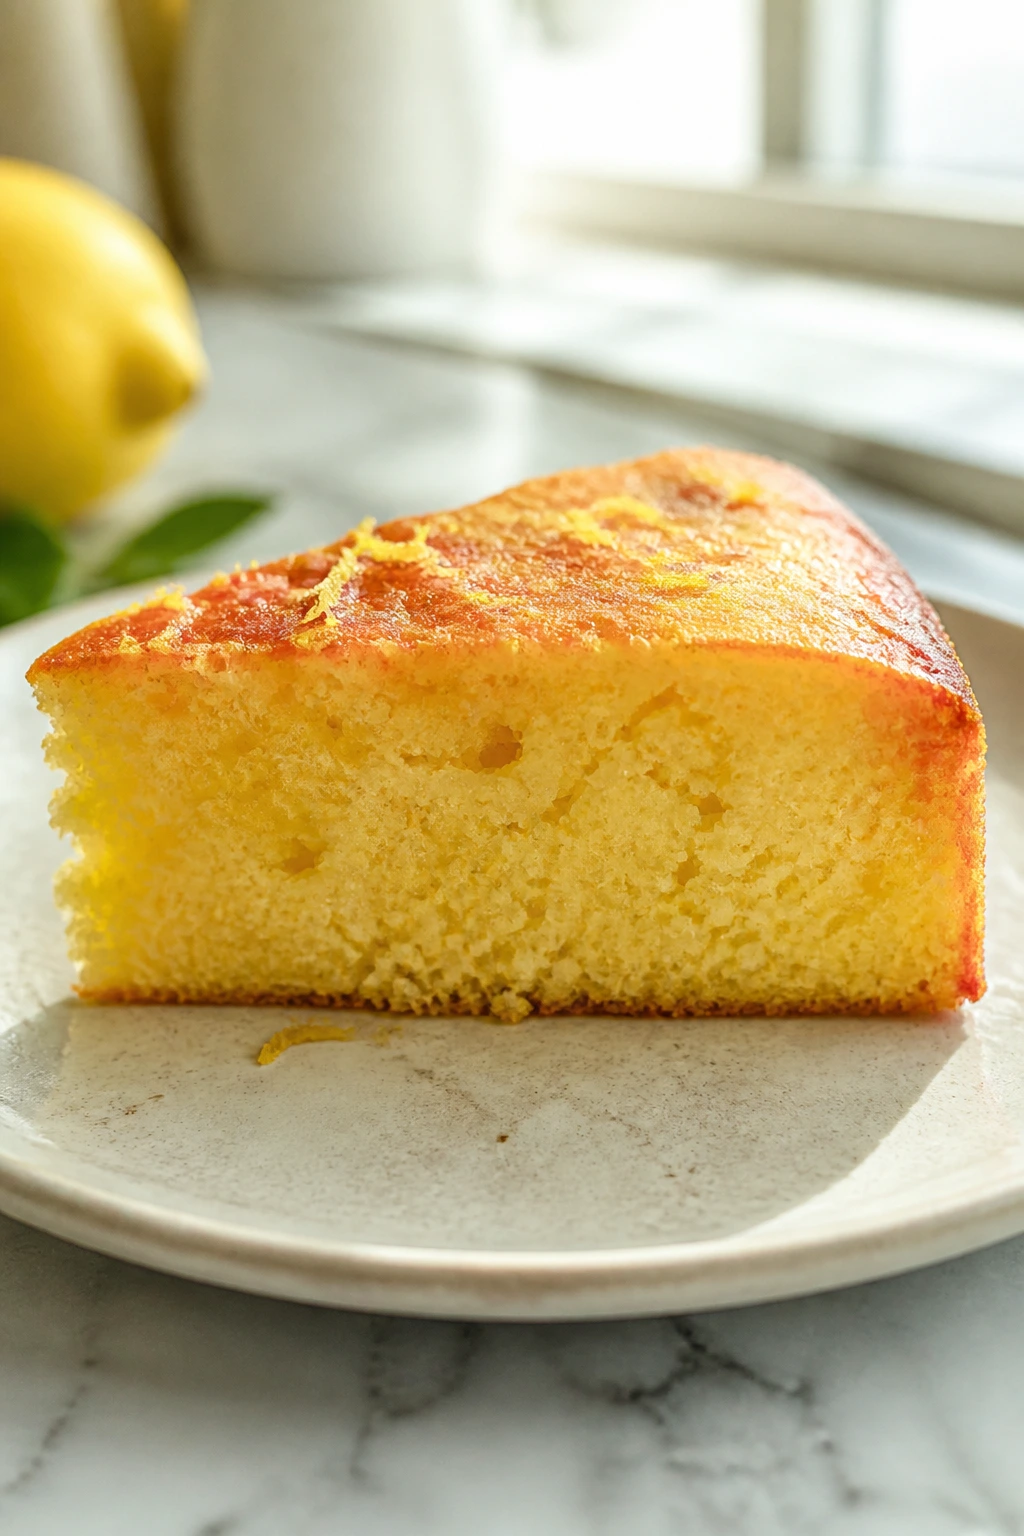
This is the cake I bring when I want dessert to feel sunny instead of loud. Olive oil gives it a soft, moist crumb, and lemon zest keeps the flavor clean enough to cut through a big dinner. It travels beautifully because it doesn’t rely on frosting, and it slices neatly even after a little time in the car.
Tuscany does dessert in a way I always appreciate: restrained, fragrant, and not buried under sugar. This cake fits that mood. It tastes like citrus peel, good olive oil, and a little vanilla, which is plenty.
Why It Works:
Olive oil keeps the crumb tender for days, and lemon zest perfumes the batter more deeply than juice alone. Yogurt or whole milk adds moisture without making the cake heavy. Because the cake is unfrosted or lightly glazed, it holds up on a buffet table and still looks neat after slicing.
Key Ingredients:
- 2 cups all-purpose flour — standard cake flour is fine too if that’s what you have.
- 2 teaspoons baking powder — for lift.
- 1/2 teaspoon salt — sharpens the flavor.
- 1 1/4 cups granulated sugar — enough sweetness without losing the lemon.
- 3 large eggs — room temperature helps the batter blend.
- 3/4 cup mild extra-virgin olive oil — choose one that tastes fruity, not bitter.
- 1 cup plain Greek yogurt or whole milk — keeps the crumb soft.
- Zest of 2 lemons — this is the main flavor.
- 1/4 cup fresh lemon juice — for brightness.
- 1 teaspoon vanilla extract — rounds out the citrus.
- 1/2 cup powdered sugar for a glaze or dusting — optional.
Quick Steps:
-
Preheat the oven to 350°F and grease a 9-inch round cake pan or loaf pan. Line the bottom with parchment if you want the cake to release cleanly.
-
Whisk the flour, baking powder, and salt in one bowl.
-
In another bowl, whisk the sugar and eggs until pale, then whisk in the olive oil, yogurt, lemon zest, lemon juice, and vanilla.
-
Add the dry ingredients and stir just until the batter comes together. Don’t beat it hard; you want a tender crumb, not a tough one.
-
Bake for 35 to 40 minutes, until the top is golden and a toothpick comes out with a few dry crumbs.
-
Cool for 15 minutes in the pan, then turn out and dust with powdered sugar or drizzle with a thin lemon glaze.
Equipment for This Recipe:
- 9-inch round cake pan or loaf pan
- Mixing bowls
- Whisk
- Rubber spatula
- Parchment paper
How to Serve This Dish:
Cut the cake into slim wedges and serve it plain, with berries, or with a spoon of lightly sweetened whipped cream if the meal was especially rich. It’s good at room temperature and even better the next day when the lemon settles into the crumb. For a potluck, bring it in the pan and glaze it only after it has cooled.
Pro Tips for This Recipe:
- Use a mild olive oil. A harsh, peppery one can make the cake taste savory in the wrong way.
- Don’t overmix once the flour goes in.
- Lemon zest carries more flavor than extra juice, so don’t skimp there.
- A light glaze should go on a fully cooled cake or it will disappear into the top.
Variations on This Dish:
- Orange Olive Oil Cake: Swap the lemon for orange zest and juice.
- Almond Version: Add 1/2 teaspoon almond extract and top with sliced almonds before baking.
- Rosemary Citrus Cake: Steep a small rosemary sprig in the olive oil for 10 minutes, then strain and use it for a faint herbal note.
Common Mistakes to Avoid with This Recipe:
- Using a bitter oil: The flavor shows through more than people expect.
- Overbaking: The cake dries out quickly if you wait for a bone-dry toothpick.
- Glazing while warm: The glaze slides off and disappears.
14. Cantucci Almond Biscotti
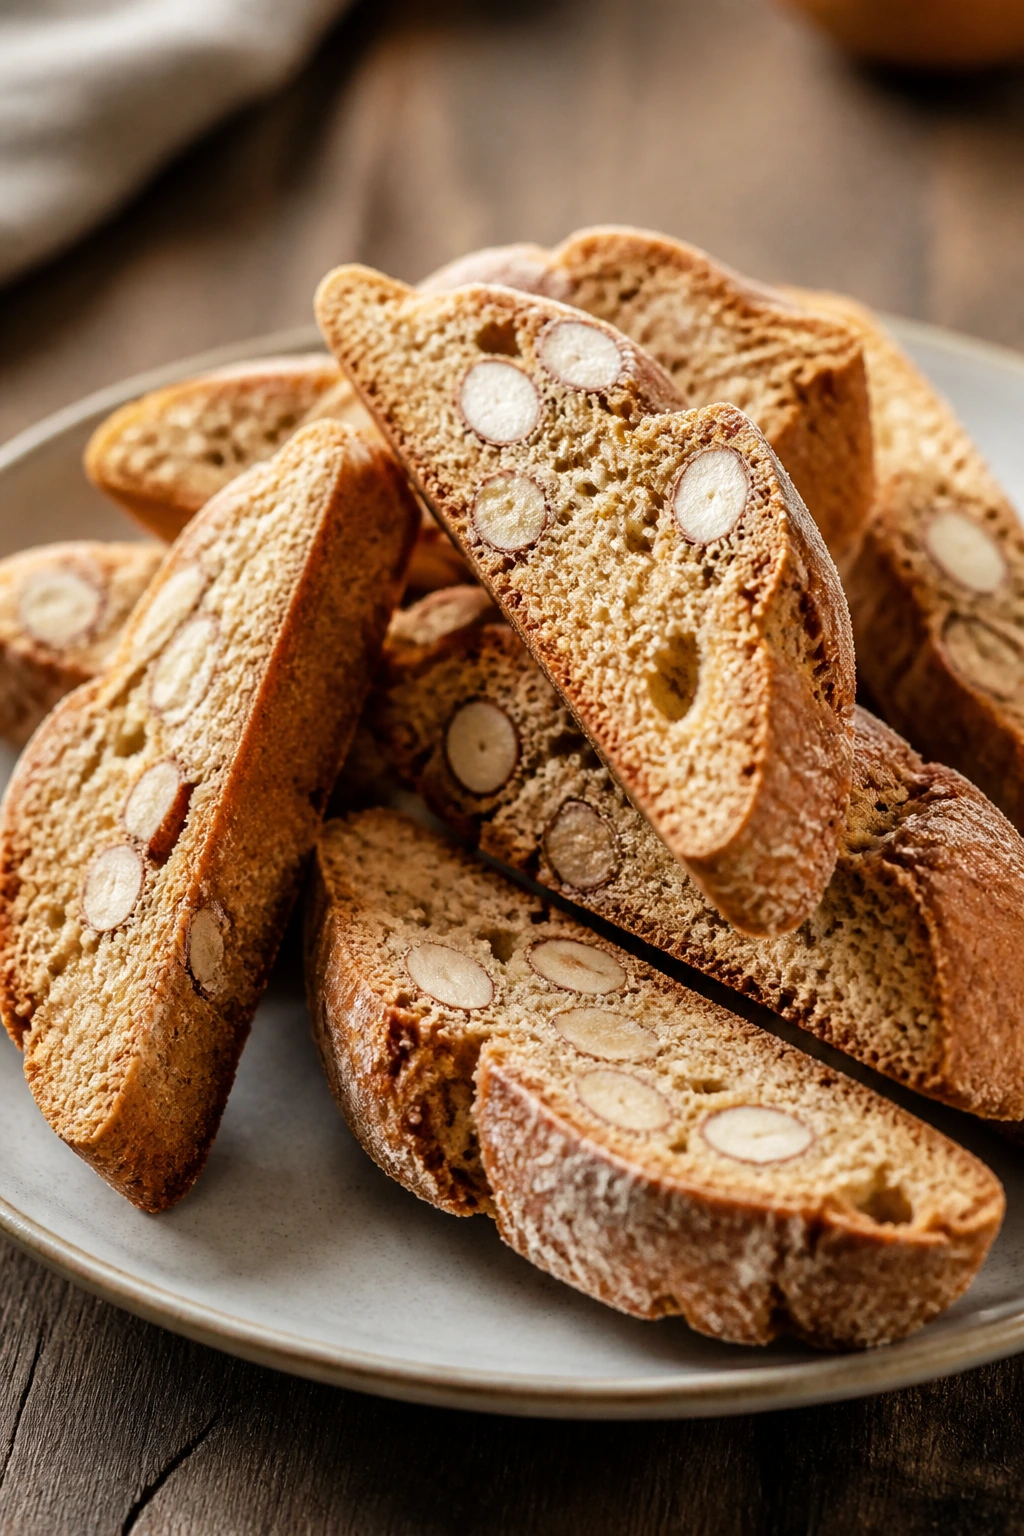
Cantucci are the biscotti I want at the end of a long meal when nobody feels like a frosting bomb. They’re dry, crisp, and packed with almonds, which means they handle a potluck tin like champs. You can make them ahead, stack them in a tin, and forget about them until dessert time, which is about as friendly a cookie behavior as I can ask for.
These are very Tuscan in spirit: practical, crisp, and built for coffee or sweet wine. They don’t try to be soft. That’s the whole point.
Why It Works:
The twice-baked method dries the cookies enough that they snap cleanly without crumbling into dust. Almonds bring texture, orange zest gives the dough a little lift, and the dough itself is sturdy enough to shape into logs without much drama. Biscotti also keep for a long time, which makes them one of the smartest potluck desserts in the bunch.
Key Ingredients:
- 2 cups all-purpose flour — enough for a firm dough.
- 1 cup granulated sugar — the sweetness should stay modest.
- 1 teaspoon baking powder — for a little lift in the first bake.
- 1/2 teaspoon salt — essential.
- 3 large eggs — bind the dough.
- 1 teaspoon vanilla extract — rounds it out.
- 1 teaspoon almond extract — optional, but a little goes far.
- 1 1/2 cups whole almonds, toasted — use whole or roughly chopped.
- Zest of 1 orange — classic and bright.
- 1 tablespoon sugar for finishing, optional — a little sparkle on top.
Quick Steps:
-
Whisk the flour, sugar, baking powder, and salt in a bowl. Stir in the eggs, vanilla, almond extract, and orange zest until a shaggy dough forms, then fold in the almonds.
-
Shape the dough into two long logs on a parchment-lined sheet pan, about 12 inches long and 2 inches wide.
-
Bake at 350°F for 25 to 28 minutes, until the logs are golden and set on the outside.
-
Cool the logs for 10 minutes, just enough so they’re firm but not rock-hard.
-
Slice the logs on a diagonal into 1/2-inch cookies with a serrated knife.
-
Lay the slices cut-side down and bake for 10 to 12 minutes, flip them, then bake 8 to 10 minutes more until dry and crisp.
-
Cool completely before storing.
Equipment for This Recipe:
- Rimmed sheet pan
- Parchment paper
- Serrated knife
- Mixing bowl
- Cooling rack
How to Serve This Dish:
Pile the biscotti in a tin or a bowl beside coffee, espresso, or a small pour of vin santo. They also make a neat ending to a heavier potluck meal because they’re dry enough to feel clean on the palate. If you’re transporting them, wrap them once they’re fully cool or they’ll steam and soften.
Pro Tips for This Recipe:
- Toast the almonds first for a deeper flavor.
- Slice the logs while they’re still warm, not cold, or they can crack badly.
- Keep the second bake low enough that the cookies dry out without turning dark.
- If you want a more rustic look, leave a few almond pieces sticking out of the dough.
Variations on This Dish:
- Chocolate-Dipped Biscotti: Dip one end in melted dark chocolate after cooling.
- Pistachio Version: Swap the almonds for pistachios and keep the orange zest.
- Anise Biscotti: Add 1/2 teaspoon ground anise seed for a more traditional old-school flavor.
Common Mistakes to Avoid with This Recipe:
- Slicing the logs when they’re fully cold: They crack too easily.
- Overbaking the second time: Biscotti can go from crisp to tooth-breaking fast.
- Not letting them cool fully before storing: Residual heat creates softness in the tin.
15. Panforte with Citrus and Nuts
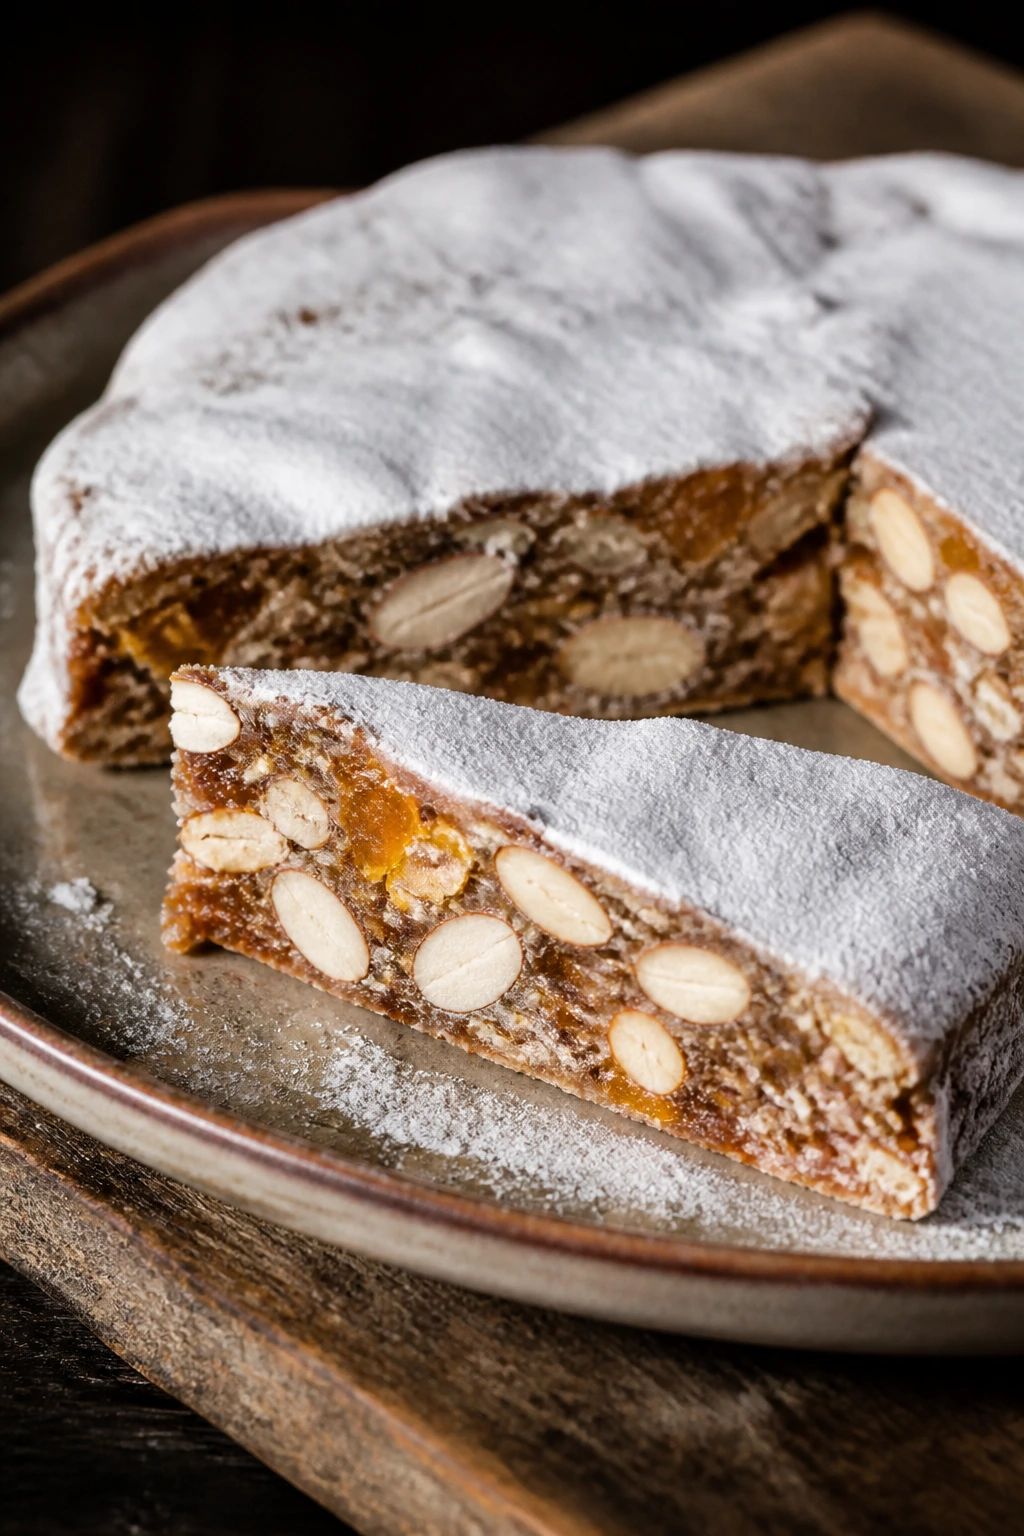
Panforte is dense, spiced, and a little dramatic in the way only a proper Tuscan dessert can be. It’s part cake, part candy, part fruit-and-nut brick in the best possible sense. You slice it thin, dust it with powdered sugar, and let the almonds, candied citrus, honey, and spices do all the talking.
At a potluck, panforte has one big advantage: it travels like a champion. It doesn’t slump, frost, or thaw. It just waits in the tin and gets more settled by the hour.
Why It Works:
The honey-sugar syrup binds the nuts and fruit into a firm slab that cuts cleanly once cooled. Flour keeps the texture from becoming pure candy, while cinnamon, nutmeg, and a whisper of black pepper give it depth without making it taste like holiday potpourri. A thin slice goes a long way, which is useful when dessert trays get crowded.
Key Ingredients:
- 1 cup whole almonds — toasted for better flavor.
- 1 cup hazelnuts — or more almonds if that’s easier.
- 1/2 cup candied orange peel, chopped — the citrus brightness matters.
- 1/2 cup dried figs, chopped — adds chew.
- 1 cup all-purpose flour — the binder.
- 1 teaspoon cinnamon — warm and familiar.
- 1/4 teaspoon ground nutmeg — subtle.
- 1/4 teaspoon ground cloves — use lightly.
- 1/4 teaspoon black pepper — tiny amount, big payoff.
- 1/4 teaspoon salt — sharpens the sweetness.
- 1/2 cup honey — for the syrup.
- 1/2 cup granulated sugar — helps the set.
- 1 tablespoon cocoa powder — optional, for a deeper panforte nero feel.
- Powdered sugar for dusting — finish only after cooling.
Quick Steps:
-
Toast the nuts at 350°F for 8 to 10 minutes, until fragrant. Let them cool slightly.
-
Line an 8-inch springform pan or cake pan with parchment, making sure the sides are covered too.
-
Mix the nuts, candied peel, figs, flour, cinnamon, nutmeg, cloves, pepper, salt, and cocoa in a large bowl.
-
Heat the honey and sugar in a small saucepan over medium heat until the sugar dissolves and the syrup starts to bubble. Stir it constantly so it doesn’t scorch.
-
Pour the hot syrup over the nut mixture and stir fast. It will thicken quickly.
-
Press the mixture firmly into the lined pan. Bake at 325°F for 25 to 30 minutes, until the top looks set and slightly darker.
-
Cool completely before removing from the pan and dusting with powdered sugar.
Equipment for This Recipe:
- 8-inch springform pan or cake pan
- Parchment paper
- Small saucepan
- Mixing bowl
- Spatula
How to Serve This Dish:
Cut panforte into very thin wedges. It’s rich, so people usually want a smaller piece than they think. Serve it with espresso, black coffee, or a glass of sweet wine if that’s your style. A dusting of powdered sugar right before serving makes it look finished and hides the sticky edge of the syrup.
Pro Tips for This Recipe:
- Line the pan carefully; panforte likes to stick.
- Press the mixture firmly so it sets into a tight sliceable slab.
- Cool it all the way before cutting or the center will smear.
- The slices are supposed to be small. Don’t apologize for that.
Variations on This Dish:
- Panforte Nero: Add more cocoa and a darker spice profile for a deeper, less sweet version.
- Chocolate-Hazelnut Panforte: Increase the cocoa and use extra hazelnuts for a richer finish.
- Honey-Citrus Panforte: Add orange and lemon zest to the mixture for a brighter, lighter aroma.
Common Mistakes to Avoid with This Recipe:
- Not lining the pan well: Removing panforte in one piece becomes a wrestling match.
- Cutting it warm: The center needs to set or it will smear.
- Using too much syrup heat: If the syrup scorches, the flavor turns bitter fast.
Why Tuscan Flavors Work So Well at a Potluck Table
Tuscan cooking has a kind of practical intelligence that makes it ideal for shared meals. It uses olive oil instead of heavy sauce when it can, beans instead of unnecessary fuss, bread when there’s soup to thicken, and herbs that smell alive even after a drive across town. That is a useful formula when you need dishes to hold shape, stay flavorful, and not demand a burner under the buffet table.
The other reason these dishes work is texture. Tuscany knows what to do with soft, chewy, crisp, and silky food in the same meal. Ribollita has bread and greens. Panzanella has juicy tomatoes and stale bread that turns plush instead of soggy. Farro brings chew, schiacciata brings crisp edges, and panforte ends the whole spread with something dense enough to slice thinly. That mix matters more than most people realize.
And yes, the ingredients are familiar. That’s part of the charm. Cannellini beans, Pecorino, rosemary, tomatoes, kale, olives, and citrus are easy to find, but they still taste distinct when handled with care. You’re not asking the table to decode anything. You’re just giving it food that knows how to behave.
Essential Equipment for These Recipes
-
Dutch oven or heavy braising pot — ideal for ribollita and chicken cacciatore because it holds steady heat and keeps sauces from scorching.
-
9-by-13-inch baking dish — the workhorse for pasta bakes, crepe bakes, and anything you want to carry and serve in one piece.
-
Rimmed sheet pans — useful for roasting vegetables, toasting bread, baking schiacciata, and drying biscotti logs evenly.
-
Large mixing bowls — you’ll need at least two; Tuscan potluck cooking seems to involve more tossing than people expect.
-
Sharp chef’s knife and cutting board — onions, tomatoes, herbs, eggplant, and bread all need clean cuts.
-
Colander — for pasta, farro, potatoes, and green beans.
-
Whisk — especially important for the olive oil cake, crepe batter, and panforte syrup.
-
Wooden spoon or heatproof spatula — these are easier on bread-based soups and thick sauces than a whisk or fork.
-
Serrated knife — helpful for schiacciata, biscotti, and panforte.
-
Airtight containers or lidded tins — not glamorous, but they make transport and storage much less annoying.
Smart Shopping and Ingredient Tips

Start with the olive oil. If you can taste bitterness in the oil straight from a spoon and it feels harsh, save it for cooking and choose a softer one for finishing and baking. Tuscan-style dishes love olive oil, but they do not all want the same oil. A bold peppery bottle can be right for ribollita or schiacciata and wrong for cake.
Bread matters more than people think. For ribollita, panzanella, and bruschetta, you want country bread with a tight crumb and some chew. Sandwich bread goes mushy. Super airy artisan bread can collapse. Day-old is not a compromise here; it’s the ingredient that makes the recipe work.
Beans should taste clean and fresh out of the can. If they smell metallic or look broken apart in the liquid, rinse them well and give them a quick simmer with aromatics so they behave better in the pot. Cannellini beans are the classic Tuscan choice, but great northern beans are a workable stand-in if that’s what the store has.
For tomatoes, choose the ones that smell like tomatoes. That sounds obvious, but it’s still the best test. In colder months or when the produce counter is weak, a good canned crushed tomato often beats a sad fresh one in soups, sauces, and cacciatore. That is not a consolation prize. It’s the smarter move.
Cheese should be treated like seasoning, not wallpaper. Pecorino is saltier and sharper than Parmesan, and it shows up fast in polenta, pasta bakes, and soups. If you’re serving a crowd with mixed tastes, hold a little back and let people add more at the table.
Herbs are where the Tuscan feeling shows up. Rosemary, basil, parsley, thyme, and sage each do a different job. Rosemary is strongest and easiest to overdo; basil is the one that should go on at the end. If you’re buying ahead, keep the herbs wrapped in a slightly damp towel in the fridge so they don’t wilt into the crisper drawer and give up.
How to Serve These Recipes
Presentation:
Use wide platters, shallow bowls, and low baking dishes when you can. Tuscan food looks better when it spreads out a bit instead of being piled into a deep mountain. A drizzle of olive oil, a handful of torn basil, or a few shaved Pecorino curls can finish a dish without making it feel precious.
Accompaniments:
Think bread, greens, and briny things. Ribollita and cacciatore want schiacciata or crusty loaf slices. Panzanella, farro salad, and potato salad do well beside olives and a shaved fennel salad. Polenta, pasta bake, and meatballs are happier with something sharp and leafy, like arugula tossed with lemon. For dessert, coffee is the cleanest partner for biscotti and panforte.
Portions:
For potluck purposes, assume people serve themselves a little more than they meant to. A hearty soup or pasta bake should feed about 8 to 10 from a standard 9-by-13 dish or medium Dutch oven. Salads and bread dishes can disappear faster, so if those are your main contribution, make the larger batch. Dessert slices should be smaller than you think, especially for panforte.
Beverage Pairing:
A dry Chianti is the obvious answer for the savory dishes because its acidity keeps tomato, beans, and olive oil from feeling heavy. Sparkling water with lemon is the easy all-ages option. Coffee or espresso belongs with the biscotti and cake, and a small sweet wine can sit beautifully beside panforte if that’s the end of the meal you want to linger over.
Additional Tips and Flavor Boosters

Flavor Enhancement: A spoonful of good olive oil at the very end can do more than another pinch of salt. Use it on ribollita, polenta, bean bruschetta, or even the green bean salad, and the dish suddenly tastes more finished.
Customization: If your crowd likes more heat, keep crushed red pepper or Calabrian chile paste on the side rather than building it into everything. That way the meatballs can stay family-friendly while the pasta bake gets the kick some people want.
Serving Suggestions: For the savory dishes, finish with one bright thing and one salty thing. That might be lemon zest and Pecorino on the farro salad, basil and Parmesan on the baked pasta, or parsley and a little extra vinegar on the potato salad. The combination keeps the flavors from flattening after they sit.
Make-It-Yours: Dairy-free guests can still eat most of this spread if you lean on beans, vegetables, bread, and olive oil. Gluten-free guests do best with polenta, meatballs, chicken cacciatore, potato salad, and the olive oil cake, plus a clear note on which items contain wheat. For a vegetarian table, ribollita, panzanella, bruschetta, farro salad, eggplant stacks, and polenta can carry the load without feeling like side dishes pretending to be mains.
Make-Ahead, Storage, and Reheating Guidance

A few of these dishes are best made the day before. Ribollita, chicken cacciatore, meatballs in sauce, and the mushroom ragù for polenta all settle in overnight and taste even better after a rest in the fridge. Store them in airtight containers for up to 4 days. Reheat gently on the stovetop over medium-low heat, adding a splash of broth or water if the sauce has thickened too much.
Baked pasta and crepe bakes keep well for 3 to 4 days refrigerated. Cover the dish tightly once it’s cool, then reheat in a 325°F oven until the center is hot and the edges start to bubble again. If you microwave a square, do it with a spoonful of sauce or a damp paper towel over the top so the pasta doesn’t dry into rubber.
Bread-based dishes are more delicate. Panzanella is best the day it’s made, though leftovers can survive one more day if you know the bread will be softer. Schiacciata keeps at room temperature for 1 day wrapped in a towel, or up to 2 days in a bread bag. To refresh it, warm it in a 350°F oven for 5 to 7 minutes.
Farro salad, potato salad, and eggplant stacks keep for about 3 days in the fridge. They’re good cold or brought back to room temperature, but don’t over-chill them if you want the herbs and olive oil to show up clearly. Olive oil cake stays moist for 4 to 5 days wrapped well, and biscotti keep for 2 weeks in a tin or airtight jar. Panforte lasts even longer, often 2 to 3 weeks, tightly wrapped and stored in a cool cupboard.
If you’re making multiple dishes for the same event, freeze the braised and sauced items rather than the bread or salad items. Ribollita, cacciatore, meatballs, and sauce-heavy pasta bakes freeze for about 2 months, though pasta bakes are best frozen before the final cheese topping if you can manage it. Thaw overnight in the fridge, then reheat slowly so the texture doesn’t split or dry out.
Variations and Adaptations to Try
Meat-Free Tuscan Table:
Lean on ribollita, panzanella, farro salad, bruschetta, eggplant stacks, polenta with mushroom ragù, and the desserts. You’ll still get a complete spread with enough salt, acid, and chew that no one feels like they’re missing the point. For extra heft, add chickpeas to the farro salad and serve the polenta with a mushroom mix that has been browned hard.
Gluten-Free Pantry Swap:
Polenta, potato salad, chicken cacciatore, meatballs without bread crumbs, and the olive oil cake do most of the work here. Use gluten-free breadcrumbs in the meatballs or skip them and add a little extra egg and Parm. For bread-heavy dishes, a true gluten-free loaf that toasts well is necessary; soft gluten-free sandwich bread won’t survive panzanella or bruschetta.
Lighter Olive-Oil Route:
If you want the table to feel less rich, push the vegetables, grains, and beans to the front. Farro salad, potato salad, panzanella, and eggplant stacks can be built around olive oil, herbs, and acid instead of heavy cheese. That doesn’t make the food bland. It just means you let the tomatoes, lemon, and rosemary do more of the talking.
Spice-Forward Version:
A little Calabrian chile paste, red pepper flakes, or hot Italian sausage brings welcome heat to the pasta bake, meatballs, and cacciatore. Keep the heat moderate on the soup and salad side so the whole spread doesn’t start shouting. The desserts should stay out of this conversation entirely.
Kid-Friendly Mild Spread:
Use sweet Italian sausage instead of hot, keep the panzanella dressing gentle, and let the rosemary on the bread stay light rather than loud. Ribollita, pasta bake, polenta, meatballs, and olive oil cake all work fine with less aggressive seasoning if you keep the salt and acid balanced. Children usually prefer the dishes with obvious shapes and soft textures first.
Holiday Potluck Upgrade:
Add one richer finish to a few dishes and leave the rest rustic. Shaved Pecorino on the soup, a little extra olive oil on the bread, a glossy tomato glaze on the meatballs, and a powdered sugar dusting on the biscotti or panforte make the table feel more dressed up without changing the recipes.
Common Mistakes to Avoid
The biggest mistake is bringing a dish that hates travel. A delicate green salad with lettuce, a creamy pasta salad with mayo, or anything that depends on perfect temperature control will fight you the whole way. Tuscan food is better when it’s built from ingredients that can sit still for a while.
Bread is another place people get careless. Fresh, fluffy bread in ribollita or panzanella can turn mushy before the first serving. Stale country bread, toasted if needed, holds texture and still drinks the liquid. That one choice changes the result more than most people expect.
Over-chilling is a sneaky problem. Several of these dishes taste dull straight from the fridge because olive oil firms up, herbs go flat, and tomatoes lose their scent. If the dish is meant to be room temperature, let it sit out long enough to lose the cold edge before you serve it.
Seasoning in one giant dump also causes trouble. Beans, grains, soups, and braises all need salt in layers, not only at the finish. Taste the broth before the bread goes in, taste the salad before the herbs go in, taste the sauce before the meatballs come out. That habit keeps the food from arriving flat.
Transport can ruin a good dish faster than cooking can save it. Use a lidded pan or a snug container, and keep bread or toppings separate whenever texture matters. Panzanella, bruschetta, and biscotti are all happier if you assemble or finish them close to serving time.
Finally, don’t make every dish rich. A potluck table needs a few bright, acidic things or the whole spread turns muddy. That’s why the salad, the bruschetta, the lemon cake, and even a squeeze of lemon on the cacciatore matter so much.
Questions People Usually Ask

Which of these dishes travels the best?
Ribollita, cacciatore, pasta bake, meatballs in sauce, farro salad, biscotti, and panforte all handle transport well. Schiacciata and bruschetta are good too, but they’re better if you keep them wrapped or assembled close to serving. Panzanella is the most fragile of the bunch and should be dressed near the end.
Can I make any of these the day before?
Yes, and some improve overnight. Ribollita, chicken cacciatore, meatballs, polenta ragù, and panforte all benefit from a rest. Salads with bread are the exception; panzanella and bruschetta should be held back until the last possible moment.
What bread should I use for ribollita and panzanella?
Use a rustic loaf with a sturdy crust and a fairly tight crumb. Italian country bread, ciabatta from a good bakery, or a plain sourdough loaf work well if they’re day-old. Skip soft sandwich bread unless you want the dish to turn gluey.
Can I swap cannellini beans for something else?
Great northern beans are the closest substitute, and navy beans can work in a pinch. The point is a mild, creamy bean that blends into soup or spread without stealing the show. Chickpeas are fine in salads, but they’re firmer and more obvious in texture.
How do I keep baked pasta from drying out?
Undercook the pasta before baking, keep enough sauce in the pan, and cover the dish loosely with foil for the first part of the bake if it looks dry. Let it rest after baking so the sauce settles into the noodles instead of running everywhere when you cut it.
Can I freeze the soups and braises?
Yes. Ribollita, chicken cacciatore, meatballs in sauce, and mushroom ragù freeze well for about 2 months. Cool them completely, portion them into containers, and thaw them overnight in the fridge before reheating gently.
What should I do if my panzanella gets soggy?
Add more toasted bread and a handful of fresh tomatoes, then let it sit only 10 to 15 minutes before serving. If the salad is already over-dressed, drain off some of the liquid first. Panzanella can be rescued, but only if you act fast.
Can I serve these dishes at room temperature?
Most of them are happy there. Farro salad, potato salad, olive oil cake, biscotti, panforte, ribollita, and meatballs all tolerate a room-temperature buffet very well. Just don’t let braises sit out for too long in a warm room; keep food safety in mind and rewarm as needed.
A Tuscan Table That Travels
The nicest thing about these Tuscan potluck dishes is that they don’t feel like compromises. They feel like food that knows where it’s going. Beans, bread, herbs, olive oil, tomatoes, polenta, and nuts all have a way of carrying flavor without becoming fussy, and that’s exactly why they work when the pan has to survive a car ride and a crowded table.
Bring one of the braises if you want the room to smell like dinner the second you walk in. Bring the bread salad if you want something bright and immediate. Bring panforte or biscotti if you want to be the person who remembered dessert needed backbone. That’s the real Tuscan lesson here: simple ingredients, handled with care, travel farther than flashy ones ever do.