
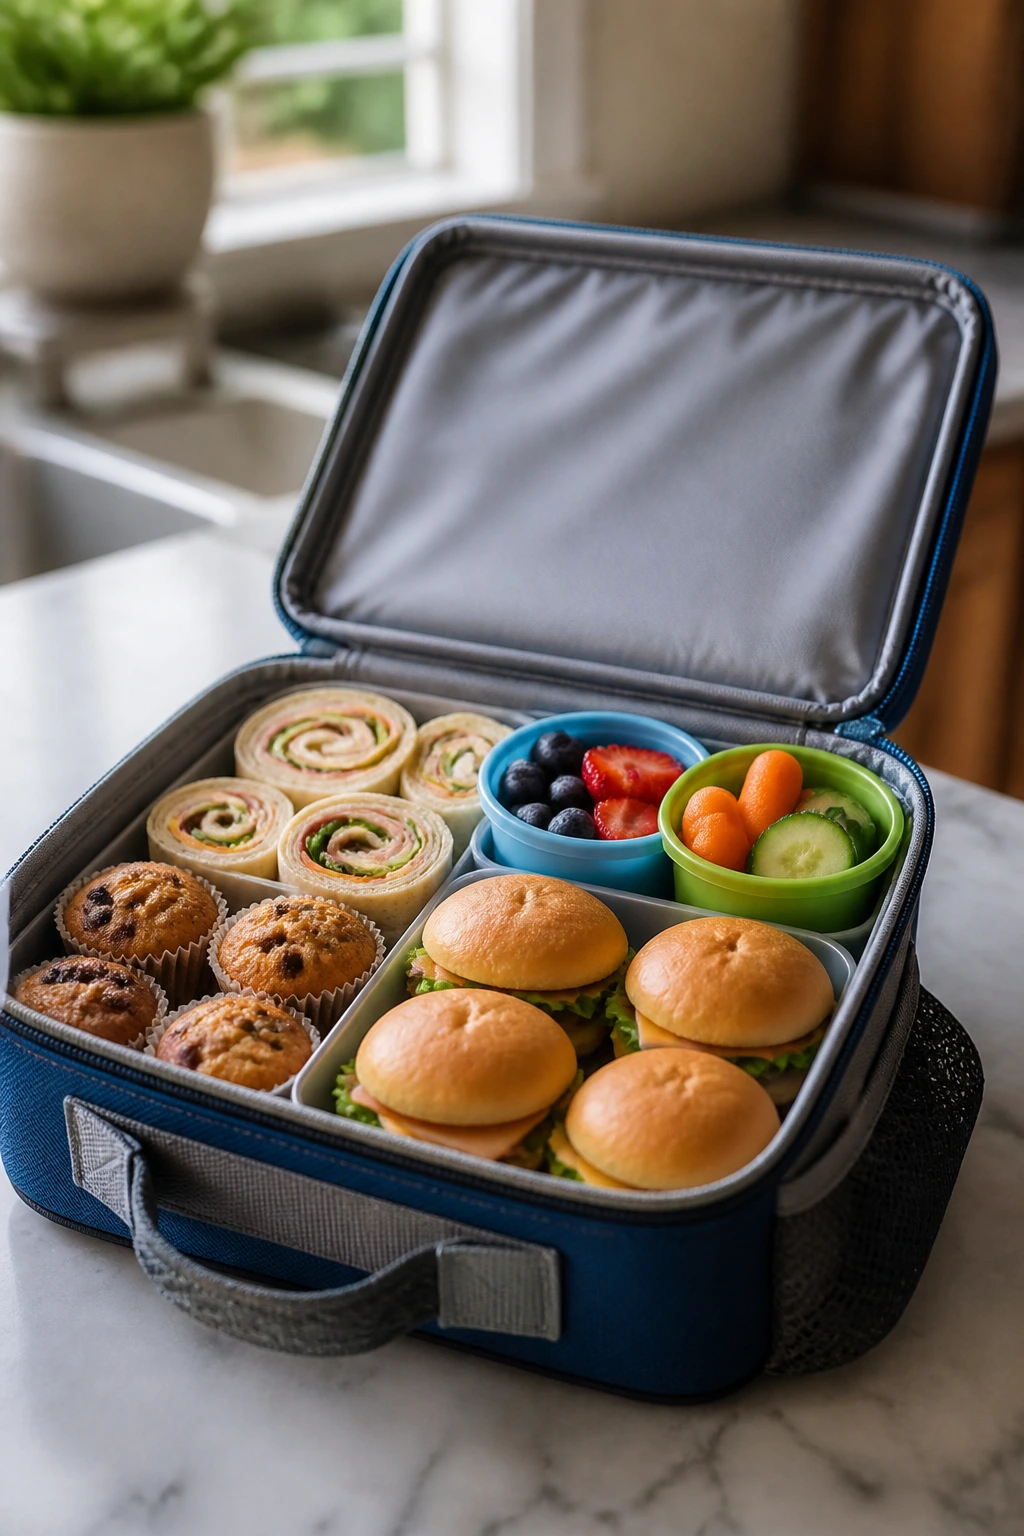
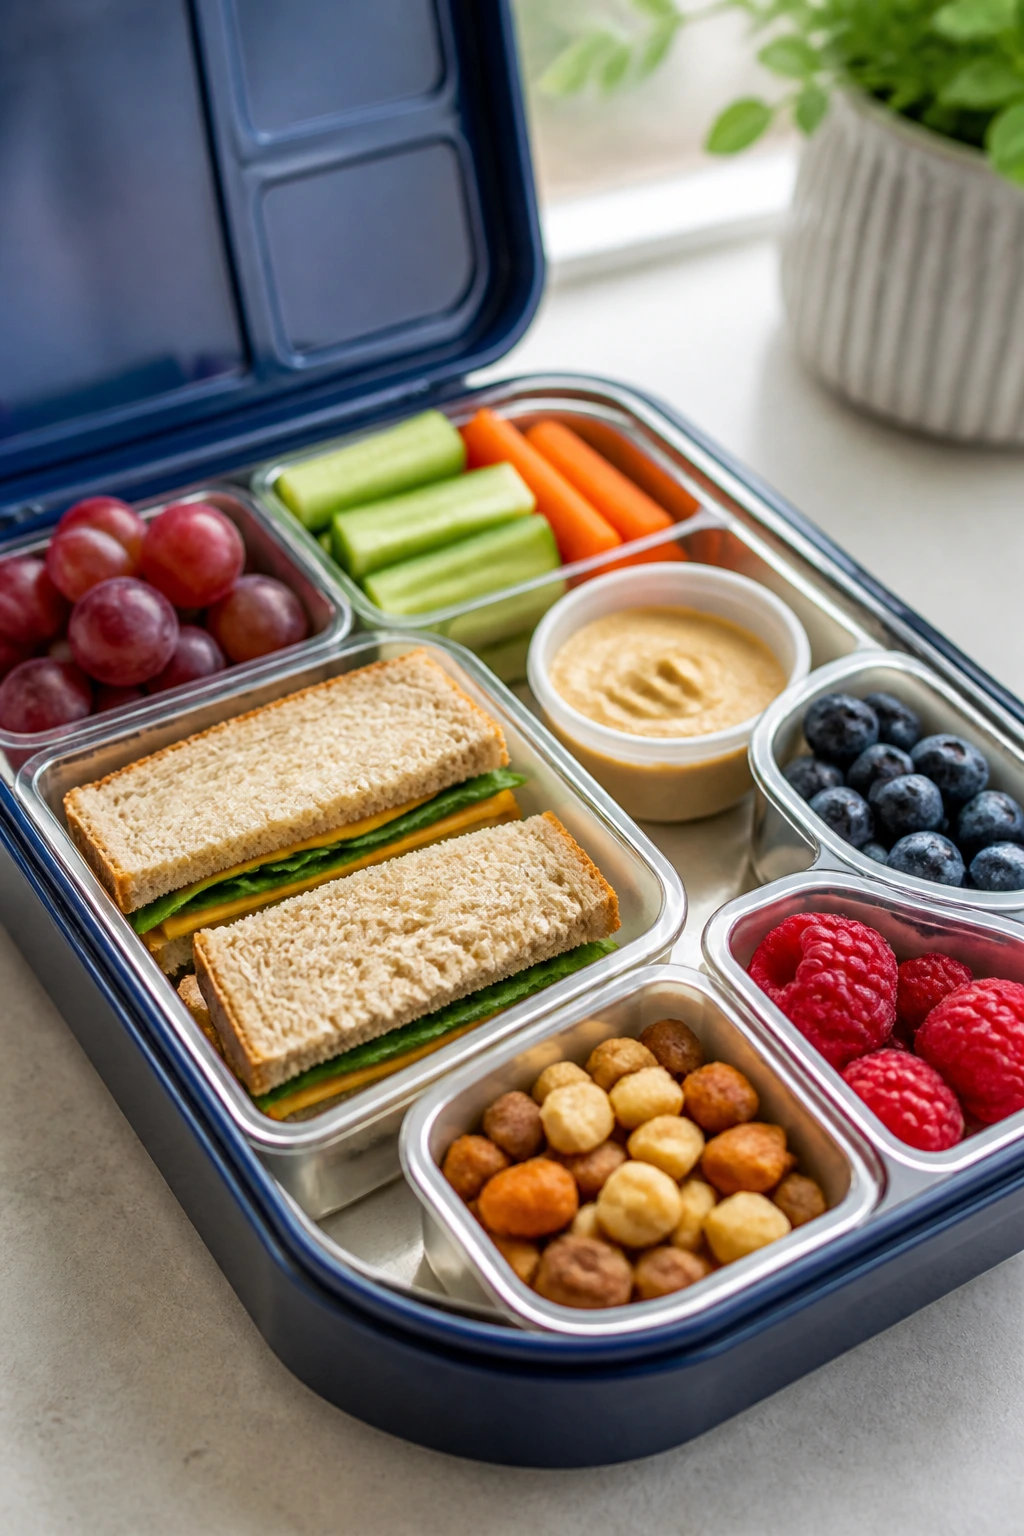
A good lunchbox meal has to survive a closed lid, a backpack toss, and a kid who opens it thirty feet from the table. That’s a harder job than most people give it credit for. The best kid-friendly family meals for lunchboxes are not the fussy, sauce-soaked dishes that look cute for five minutes and collapse by noon. They’re the sturdy ones: pinwheels that hold their shape, pasta salads that stay bright instead of gluey, rice bowls that still taste like food after a morning in the fridge.
I keep coming back to one simple rule: if it leaks, sweats, or turns to mush, it does not belong in a lunchbox. That’s why the meals here lean on cooled fillings, firm pasta, baked edges, and little tricks like packing croutons separately or using cream cheese as a barrier. There’s nothing mysterious about it. Just a lot of attention to moisture, texture, and how food behaves after it leaves the kitchen.
Some of these are cold and good straight from the fridge. Some are better tucked into a thermos with a little heat left in them. A few can be frozen in portions, which is the kind of practical detail that saves a weeknight when the next day’s lunch is already staring at you from the calendar.
Why This Lunchbox Rotation Works
-
Sturdy Shapes: Pinwheels, muffins, cups, and sliders keep their form better than loose casseroles or saucy sandwiches, so kids can actually eat them without chasing filling around the container.
-
Make-Ahead Friendly: Most of these recipes can be cooked the day before, and a few taste better after a chill in the fridge because the flavors settle in and the texture firms up.
-
Cold or Warm Options: You get both camps here — chilled pasta salads and wraps for easy packing, plus meatballs, fried rice, and stuffed potatoes for thermos lunches that feel more like a proper meal.
-
Kid-Readable Flavors: Familiar ingredients do most of the work: cheese, chicken, turkey, pasta, rice, eggs, and mild seasoning. Nothing here depends on a hard sell.
-
Budget-Smart Building Blocks: A single rotisserie chicken, a bag of pasta, a few potatoes, and a block of cheese can stretch across multiple lunches instead of becoming one dinner and a forgotten leftover box.
-
Less Morning Panic: These recipes reward batch cooking. That matters when the day starts with shoes missing, someone asking for a science project sign-off, and a lunchbox that still needs to happen.
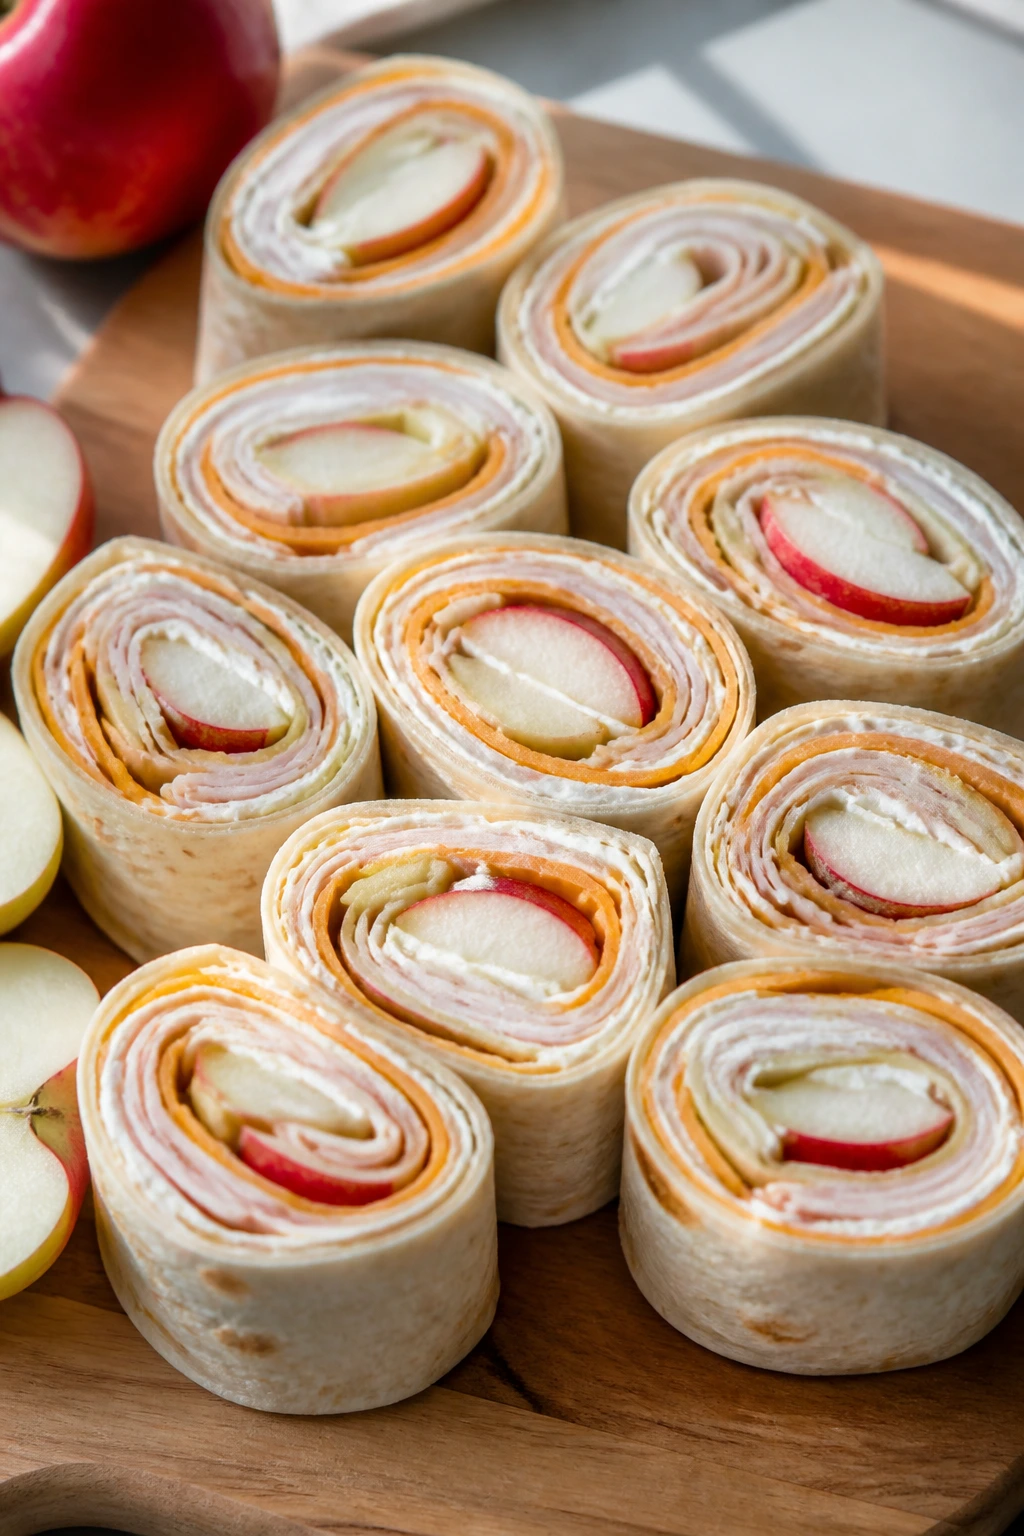
1. Turkey, Cheddar, and Apple Pinwheels
These taste like a deli sandwich that learned how to behave in a lunchbox. The apple brings a crisp snap, the cheddar adds a salty edge, and the cream cheese keeps everything from sliding around. Roll them tightly and they slice into neat little spirals that look tidy even after a morning in the fridge.
Why It Works:
Pinwheels are lunchbox gold because they hold together without a knife and don’t go soggy the way many sandwich fillings do. The soft tortilla acts like a wrapper and a seal at the same time, while the cream cheese gives you a stable base for the turkey and fruit. A quick chill before slicing makes the whole thing easier to pack and less likely to unravel.
Key Ingredients:
- 6 large flour tortillas, 8-inch
- 8 oz cream cheese, softened
- 2 tsp Dijon mustard
- 12 oz sliced turkey breast
- 1 1/2 cups shredded sharp cheddar
- 1 medium apple, peeled if you want a softer bite, then very thinly sliced
- 1 tbsp lemon juice
- 1/4 tsp black pepper
Quick Steps:
- In a small bowl, stir the cream cheese and Dijon until smooth.
- Toss the apple slices with lemon juice and pat them dry with a paper towel.
- Spread each tortilla with a thin layer of the cream cheese mixture, leaving a 1-inch border on one edge.
- Layer turkey, cheddar, and apple slices across the tortilla, then sprinkle with black pepper.
- Roll each tortilla tightly, wrap it in plastic wrap, and chill for 20 to 30 minutes until firm.
- Unwrap and slice into 1-inch pinwheels with a sharp knife, wiping the blade between cuts if needed.
Equipment for This Recipe:
- Cutting board for clean rolling and slicing
- Small mixing bowl for the spread
- Sharp knife for neat pinwheel cuts
- Plastic wrap or parchment for chilling the rolls
How to Serve This Dish:
Pack the pinwheels with grapes, carrot coins, or snap peas for a lunchbox that feels full without being messy. They also sit well beside a cheese stick or a handful of pretzels. If you want them to feel more complete, tuck in a small container of mustard for dipping.
Pro Tips for This Recipe:
- Use room-temperature cream cheese. Cold cream cheese tears tortillas.
- Slice the apple paper-thin; thick chunks make the roll awkward and push the filling out.
- Chill before cutting. That 20-minute wait is not decorative.
- Wrap the finished pinwheels seam-side down in the lunchbox so they stay closed.
Variations on This Dish:
- Cranberry Turkey Roll-Up: Add 2 tablespoons of dried cranberries for a sweeter edge that works well in colder months.
- Ham and Swiss Spiral: Swap the turkey for ham and the cheddar for thin Swiss slices.
- Hummus Veggie Pinwheel: Replace the cream cheese with 1/2 cup hummus and use shredded carrots and cucumber matchsticks.
Common Mistakes to Avoid with This Dish:
- Don’t overload the tortilla. Too much filling makes the roll split open.
- Don’t skip the lemon on the apple. Brown apple slices look tired by lunchtime.
- Don’t slice warm rolls. They smear and flatten instead of cutting cleanly.
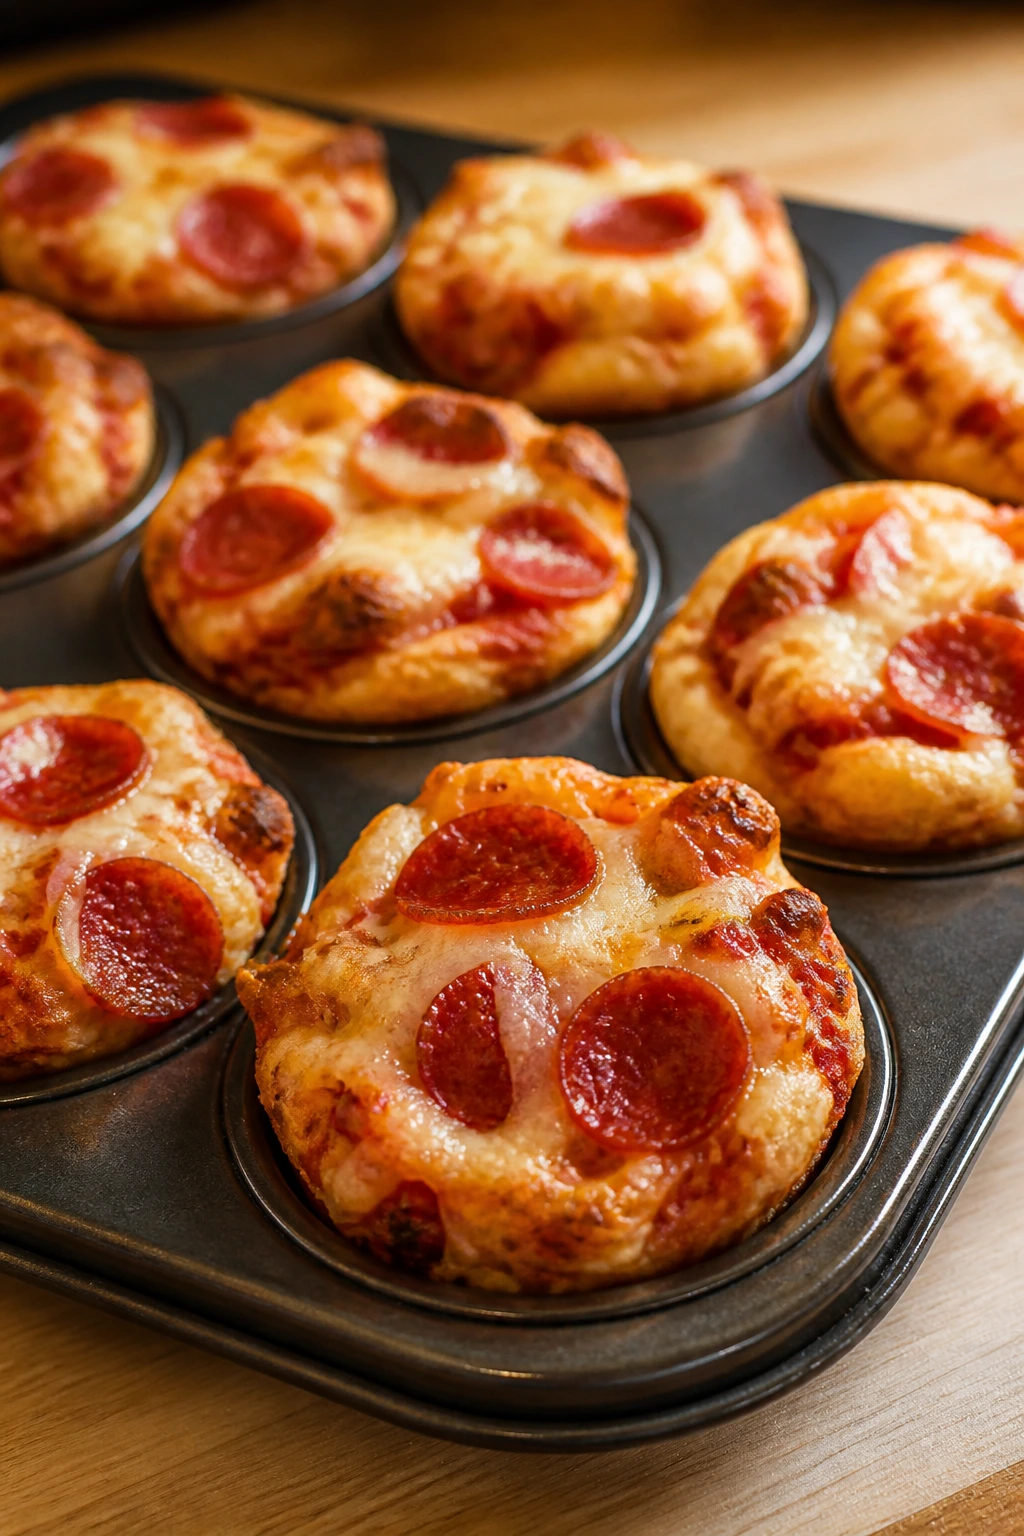
2. Mini Pizza Muffins
These smell like pizza the second the tin hits the oven. Kids usually notice before the timer does. The trick is keeping the batter thick enough to hold pepperoni or vegetables in place, so the finished muffins stay airy inside and browned around the edges instead of turning into gummy little bricks.
Why It Works:
Pizza muffins solve the soggy-crust problem that ruins many lunchbox “pizza” recipes. They bake in a muffin tin, which gives them crisp sides and a portable shape, and they taste good warm, room temperature, or straight from the fridge. A spoonful of sauce on top keeps the pizza flavor obvious without flooding the batter.
Key Ingredients:
- 2 cups all-purpose flour
- 1 tbsp baking powder
- 1/2 tsp fine salt
- 1 tsp garlic powder
- 1 cup milk
- 2 large eggs
- 1/4 cup olive oil
- 1 cup shredded mozzarella
- 1/2 cup grated parmesan
- 3/4 cup thick pizza sauce
- 1 cup mini pepperoni or diced bell peppers
- 1 tsp Italian seasoning
Quick Steps:
- Preheat the oven to 375°F and grease a 12-cup muffin tin well.
- Whisk the flour, baking powder, salt, garlic powder, and Italian seasoning in a large bowl.
- In another bowl, whisk the milk, eggs, and olive oil until smooth.
- Add the wet mixture to the dry ingredients and stir just until combined; a few small lumps are fine.
- Fold in the mozzarella, parmesan, and pepperoni or peppers.
- Divide the batter among the muffin cups, fill each about 3/4 full, and spoon about 1 teaspoon of pizza sauce over each one.
- Bake for 18 to 22 minutes, until the tops are puffed and a toothpick comes out clean.
- Cool in the pan for 5 minutes, then move to a rack so the bottoms do not get damp.
Equipment for This Recipe:
- 12-cup muffin tin
- Large mixing bowl and whisk
- Measuring cups and spoons
- Cooling rack to keep the bottoms from steaming
How to Serve This Dish:
Pair two or three muffins with fruit, cucumber sticks, or roasted broccoli florets. A small dip cup of extra pizza sauce makes the lunch feel more complete, though the muffins are sturdy enough to stand alone. They also work well tucked into a bento box with a few olives on the side.
Pro Tips for This Recipe:
- Use thick sauce. Thin sauce sinks and leaves wet pockets.
- Don’t overmix the batter. Stirring too long makes the muffins tough.
- Let them cool before packing or the steam will soften the bottoms.
- Freeze extras in a single layer, then bag them for fast lunches later.
Variations on This Dish:
- Veggie Supreme Muffins: Add diced mushrooms and peppers, but keep the pieces small.
- Sausage and Olive Version: Swap mini pepperoni for cooked crumbled sausage and sliced black olives.
- Plain Cheese Batch: Skip the toppings and make them extra mild for picky eaters.
Common Mistakes to Avoid with This Dish:
- Don’t use watery toppings. Mushrooms and tomatoes need to be cooked down first.
- Don’t fill the muffin cups to the top. They puff and spill over.
- Don’t pack them while warm. Condensation softens the crust fast.
3. Chicken Caesar Pasta Salad
Cold pasta with Caesar dressing sounds simple, and it is — but the details matter. Short pasta clings to the dressing better than long noodles, the chicken adds enough substance to make it a real lunch, and the croutons stay separate until the last minute so they keep their crunch. That last part matters. Nobody wants damp croutons.
Why It Works:
This is the kind of lunch that gets better when it has a little time to sit. The pasta absorbs some of the dressing, the chicken keeps it from feeling like a side dish, and parmesan gives it that salty finish people expect from Caesar. If you pack the romaine and croutons apart, the texture stays crisp instead of soggy and tired.
Key Ingredients:
- 12 oz rotini pasta
- 2 cups cooked chicken breast, chopped or shredded
- 2 cups chopped romaine
- 1 cup cherry tomatoes, halved
- 1/2 cup grated parmesan
- 3/4 cup Caesar dressing
- 1 cup croutons
- 1/2 tsp black pepper
- 1 lemon wedge, optional
Quick Steps:
- Cook the rotini in well-salted water until just tender, then drain and rinse briefly with cool water.
- Let the pasta cool for 10 minutes so it does not melt the dressing.
- In a large bowl, combine the pasta, chicken, tomatoes, parmesan, Caesar dressing, and black pepper.
- Toss until everything is coated, then fold in the romaine right before packing.
- Pack the croutons in a separate bag or small container and add the lemon wedge if using.
Equipment for This Recipe:
- Large pot for boiling pasta
- Colander for draining
- Big mixing bowl
- Small containers for croutons and lemon wedges
How to Serve This Dish:
Serve it with apple slices, a few crackers, or a hard-boiled egg if you need to stretch the meal. It’s also good in a two-compartment container, with the salad on one side and crunchy add-ins on the other. For a warmer lunch, skip the romaine and pack it more like a chicken pasta bowl.
Pro Tips for This Recipe:
- Salt the pasta water well. Bland pasta makes the whole salad flat.
- Use thick Caesar dressing, not a thin pourable one.
- Keep the croutons out until serving or they’ll turn leathery.
- If the chicken came from the fridge, chop it small so it distributes evenly.
Variations on This Dish:
- Ranch Caesar Twist: Use half Caesar and half ranch dressing.
- Tuna Caesar Pasta: Replace the chicken with drained canned tuna.
- Gluten-Free Version: Use a sturdy gluten-free rotini and check the croutons separately.
Common Mistakes to Avoid with This Dish:
- Don’t dump the dressing on hot pasta. It loosens and turns greasy.
- Don’t use romaine too early if the lunch sits for hours. Add it close to packing.
- Don’t forget the croutons need their own container.
4. Ham and Pea Fried Rice
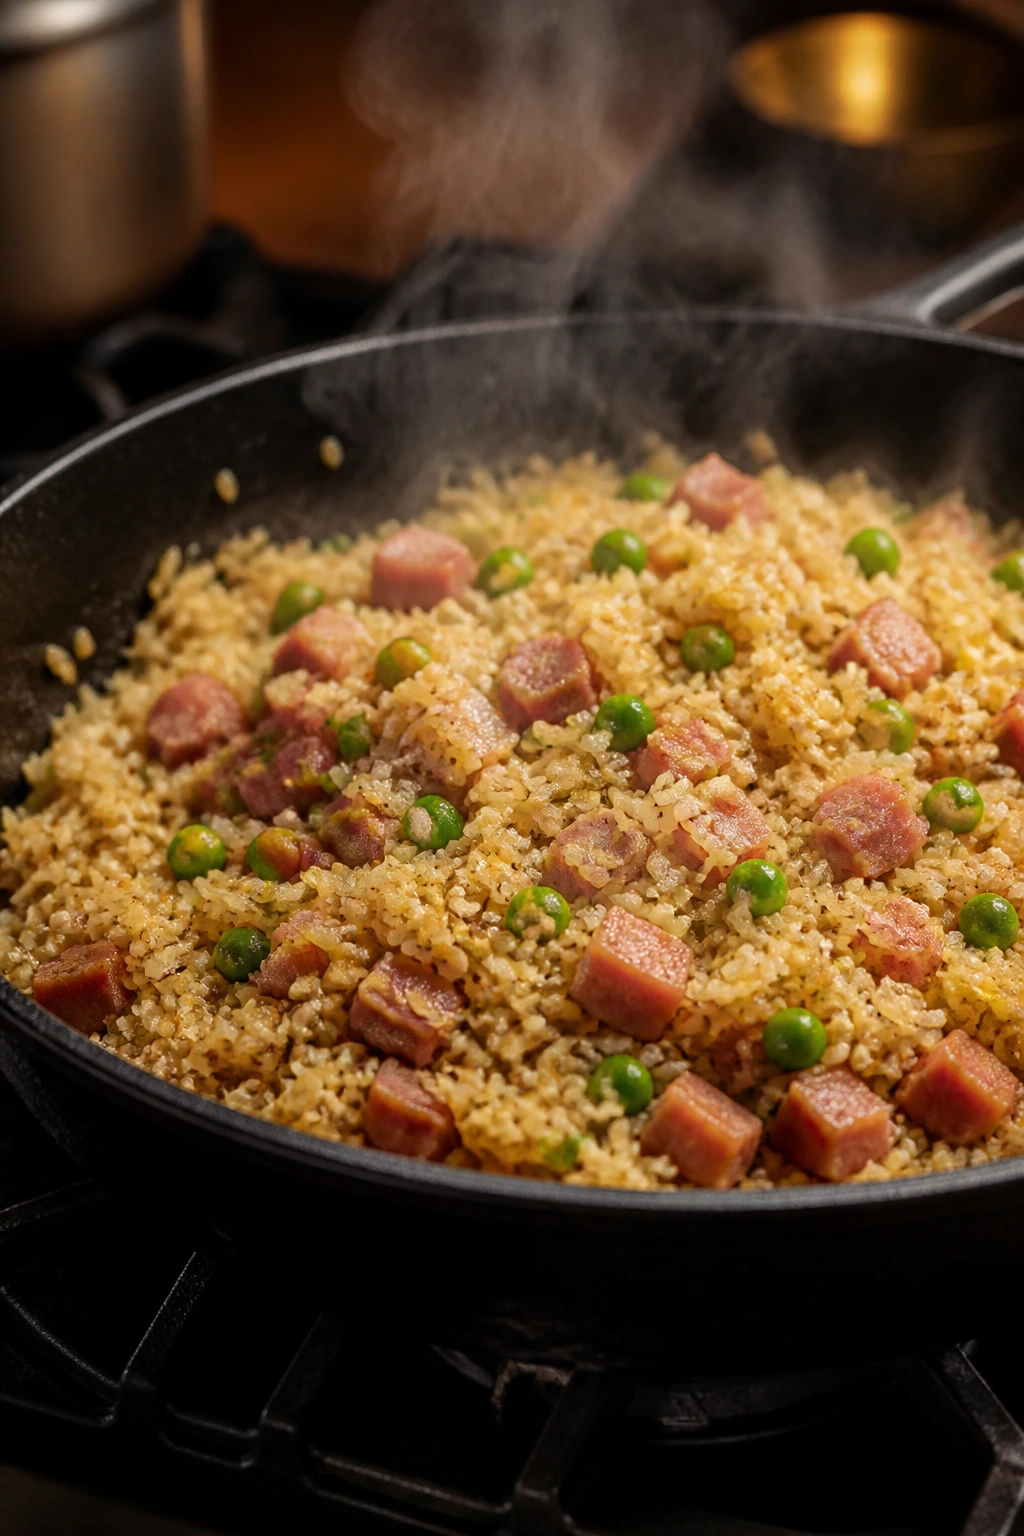
A skillet of fried rice has a smell that makes the whole kitchen feel warmer. The soy sauce, butter, and scallions hit the rice fast, and day-old grains soak it up without turning heavy. Fresh rice can work in a pinch, but cold rice gives you the separate grains that fried rice needs.
Why It Works:
Fried rice is one of the best thermos lunches because it reheats cleanly and doesn’t need a sauce cup on the side. The rice has enough starch to hold together, the ham brings salt and protein, and the peas keep the texture from going flat. If the rice is cold before it hits the pan, it fries instead of steaming.
Key Ingredients:
- 3 cups cooked, chilled white rice
- 2 tbsp neutral oil
- 2 large eggs, beaten
- 1 cup diced ham
- 1 cup frozen peas and carrots
- 2 scallions, sliced
- 2 tbsp soy sauce
- 1 tbsp butter
- 1 tsp sesame oil
- 1 clove garlic, minced
Quick Steps:
- Heat the oil in a large skillet or wok over medium-high heat.
- Add the eggs and scramble until just set, then move them to a plate.
- Add the ham, peas and carrots, garlic, and scallions to the pan and cook for 2 minutes.
- Stir in the cold rice and break up any clumps with a spatula.
- Add the soy sauce, butter, sesame oil, and scrambled eggs, then toss for 2 to 3 minutes until the rice is hot and lightly glossy.
- Taste and add a touch more soy sauce only if needed.
Equipment for This Recipe:
- Large skillet or wok
- Spatula for breaking up rice
- Small bowl for the eggs
- Lunch thermos if you want it warm at noon
How to Serve This Dish:
Pack it hot into a thermos, or cool it and send it in a lunchbox with a fork and a fruit cup. It also works with a side of sliced cucumbers or leftover edamame. If you want it to feel more complete, add a little mandarin orange cup on the side.
Pro Tips for This Recipe:
- Use rice that has been chilled. Warm rice clumps and turns soft.
- Keep the pan hot enough that you hear a little sizzle when the rice goes in.
- Taste before adding more soy sauce; ham already brings salt.
- If you want extra color, finish with a few drops of sesame oil, not a flood.
Variations on This Dish:
- Bacon Fried Rice: Swap the ham for crisp chopped bacon.
- Vegetable Fried Rice: Leave out the meat and add extra peas, carrots, and a scrambled egg.
- Pineapple Fried Rice: Add 1/2 cup pineapple chunks near the end for a sweet edge.
Common Mistakes to Avoid with This Dish:
- Don’t use freshly cooked rice unless you’ve chilled it first.
- Don’t crowd the skillet. The rice needs room to fry.
- Don’t overdo the soy sauce; the rice should look seasoned, not wet.
5. Mini Meatloaf Muffins
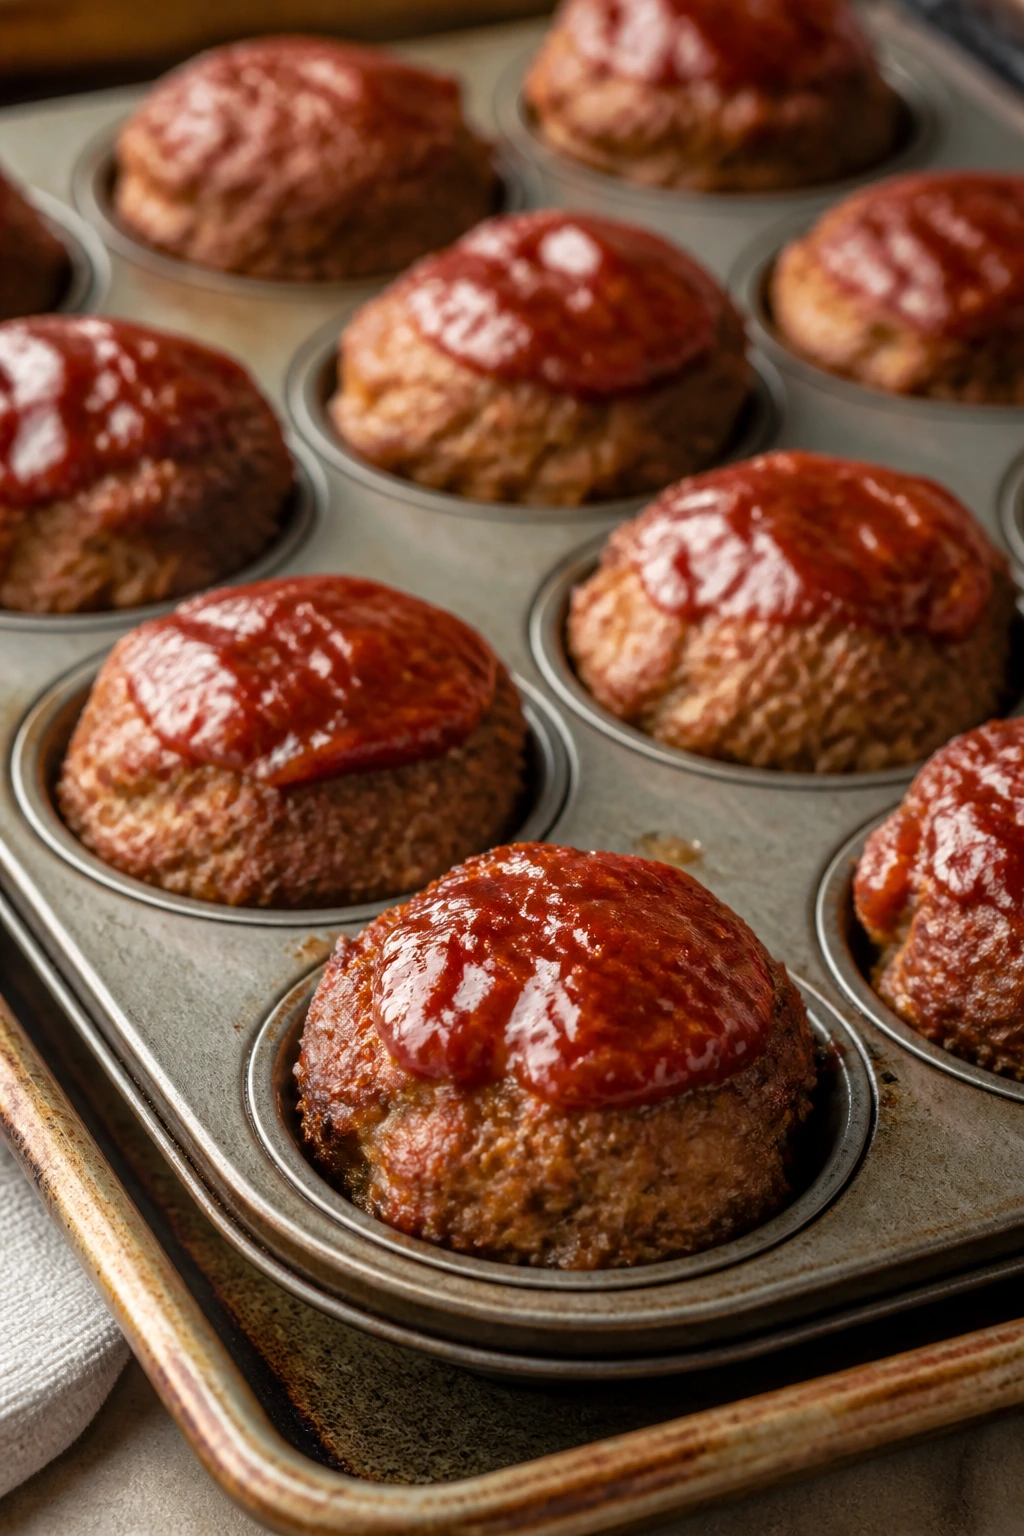
A full meatloaf can take its time cooling, which is annoying when lunchboxes need to be packed. Meatloaf muffins fix that. They bake faster, cool faster, and portion themselves without you having to carve neat slices before coffee has even kicked in.
Why It Works:
The muffin shape gives you more browned edges, which is where meatloaf tastes best anyway. A little glaze on top caramelizes during baking, and the small size means the centers cook through without drying out. These are easy to send warm in a thermos or cold with a fork and some ketchup on the side.
Key Ingredients:
- 1 1/2 lbs ground beef or ground turkey
- 1 large egg
- 1/2 cup breadcrumbs
- 1/4 cup milk
- 1 small onion, finely grated
- 2 tbsp ketchup
- 1 tbsp Worcestershire sauce
- 1 tsp salt
- 1/2 tsp black pepper
For the Glaze:
- 1/3 cup ketchup
- 1 tbsp brown sugar
- 1 tsp yellow mustard
Quick Steps:
- Preheat the oven to 375°F and grease a 12-cup muffin tin.
- In a large bowl, mix the meat, egg, breadcrumbs, milk, onion, ketchup, Worcestershire, salt, and pepper until just combined.
- Divide the mixture evenly among the muffin cups and press lightly so there are no air pockets.
- Stir the glaze ingredients together and spoon about 1 teaspoon over each muffin.
- Bake for 20 to 25 minutes, until the centers reach 165°F and the tops are browned.
- Rest for 5 minutes before lifting them out of the tin.
Equipment for This Recipe:
- 12-cup muffin tin
- Large mixing bowl
- Small bowl for the glaze
- Instant-read thermometer, useful but not required
How to Serve This Dish:
Pack the muffins with mashed potatoes in a thermos, or send them cold with a roll, pickles, and a handful of cherry tomatoes. They also fit well into a lunchbox with a spoonful of mac and cheese on the side if you’re sending a bigger meal.
Pro Tips for This Recipe:
- Grate the onion instead of chopping it. It melts into the meat and keeps the texture soft.
- Do not overmix. Packed meat gets dense fast.
- Check one muffin early if your oven runs hot; smaller portions cook quicker than a loaf.
- Let them rest before removing from the tin or they can break apart.
Variations on This Dish:
- BBQ Meatloaf Muffins: Replace the ketchup glaze with barbecue sauce.
- Cheesy Center Muffins: Press a cube of cheddar into the center before baking.
- Turkey and Herb Version: Use ground turkey, parsley, and a little garlic powder for a lighter flavor.
Common Mistakes to Avoid with This Dish:
- Don’t bake them in a flat pan if you want the muffin shape.
- Don’t skip the glaze. The tops taste dry without it.
- Don’t pack them before they cool a little; steam softens the tops.
6. Beef Taco Rice Bowls
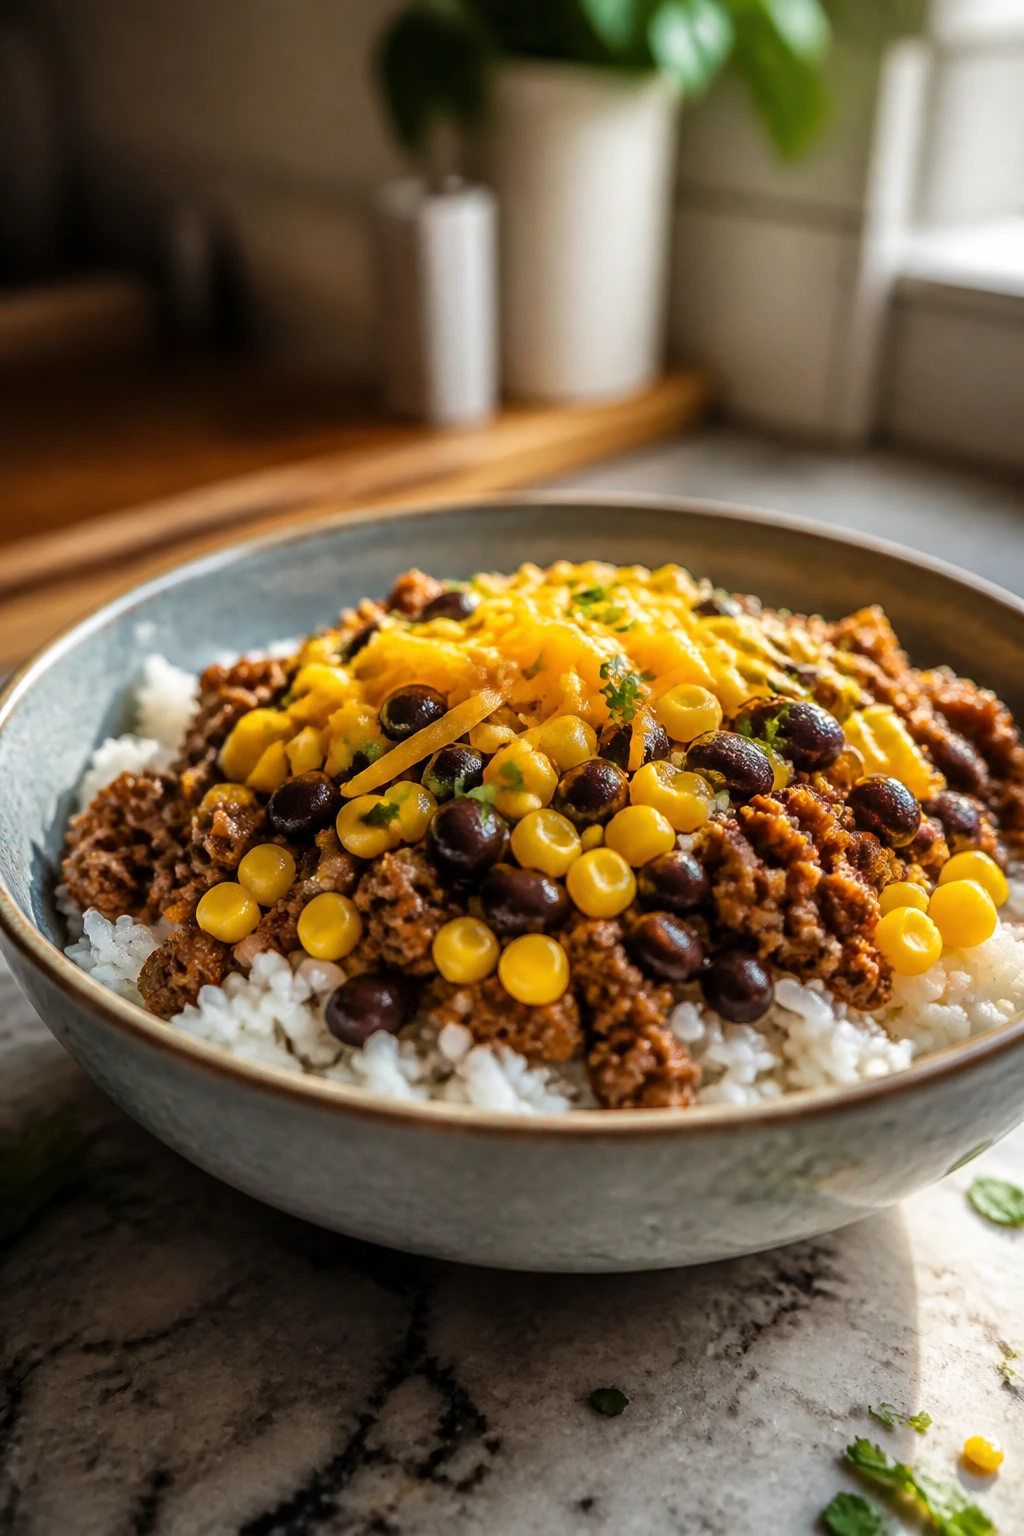
Some lunches need to feel a little more like dinner. Taco rice bowls do that job well. They bring the familiar combination of beef, rice, cheese, and salsa in a form that can be packed in sections, which keeps the rice from soaking up every drop of moisture before lunch.
Why It Works:
The beef carries the seasoning, the rice gives you something filling under it, and the beans or corn add enough texture that the bowl doesn’t taste one-note. Keeping the salsa and lettuce separate lets you control the moisture. That’s the difference between a lunch that stays bright and one that turns into a wet heap by noon.
Key Ingredients:
- 2 cups cooked rice
- 1 lb ground beef
- 1 tbsp olive oil
- 2 tbsp taco seasoning
- 1/2 cup water
- 1 cup frozen corn, thawed
- 1 cup black beans, drained and rinsed
- 1 cup shredded cheddar
- 1 cup salsa
- 1 cup shredded lettuce, optional
Quick Steps:
- Heat the olive oil in a skillet over medium heat and brown the ground beef, breaking it into small crumbles.
- Drain off excess grease, then stir in the taco seasoning and water.
- Simmer for 2 to 3 minutes until the beef is coated and the pan looks mostly dry.
- Divide the rice into lunch containers, then top with the beef, corn, black beans, and cheddar.
- Pack salsa and lettuce in separate compartments or small containers.
Equipment for This Recipe:
- Large skillet
- Wooden spoon or spatula
- Small meal-prep containers
- Spoon for portioning rice
How to Serve This Dish:
Add tortilla chips, a lime wedge, or a spoonful of sour cream on the side if the lunchbox can handle one more cup. For younger kids, keep the salsa mild and leave the lettuce out. The bowl can be eaten warm or cold, though warm rice gives it a better texture.
Pro Tips for This Recipe:
- Drain the beef well so the rice does not get greasy.
- Use medium salsa, not watery salsa.
- If you want a stronger taco flavor, add a pinch of cumin and garlic powder with the seasoning.
- Pack cheese on top of the hot beef so it softens a little before lunch.
Variations on This Dish:
- Turkey Taco Bowls: Swap the beef for ground turkey.
- Bean-Forward Version: Use extra black beans and less meat.
- Nacho Bowl Style: Add crushed tortilla chips just before eating.
Common Mistakes to Avoid with This Dish:
- Don’t pack salsa directly onto the rice unless you want a soft, wet lunch.
- Don’t skip draining the beef.
- Don’t use hot rice in sealed containers unless you want condensation.
7. Baked Mac and Cheese Cups
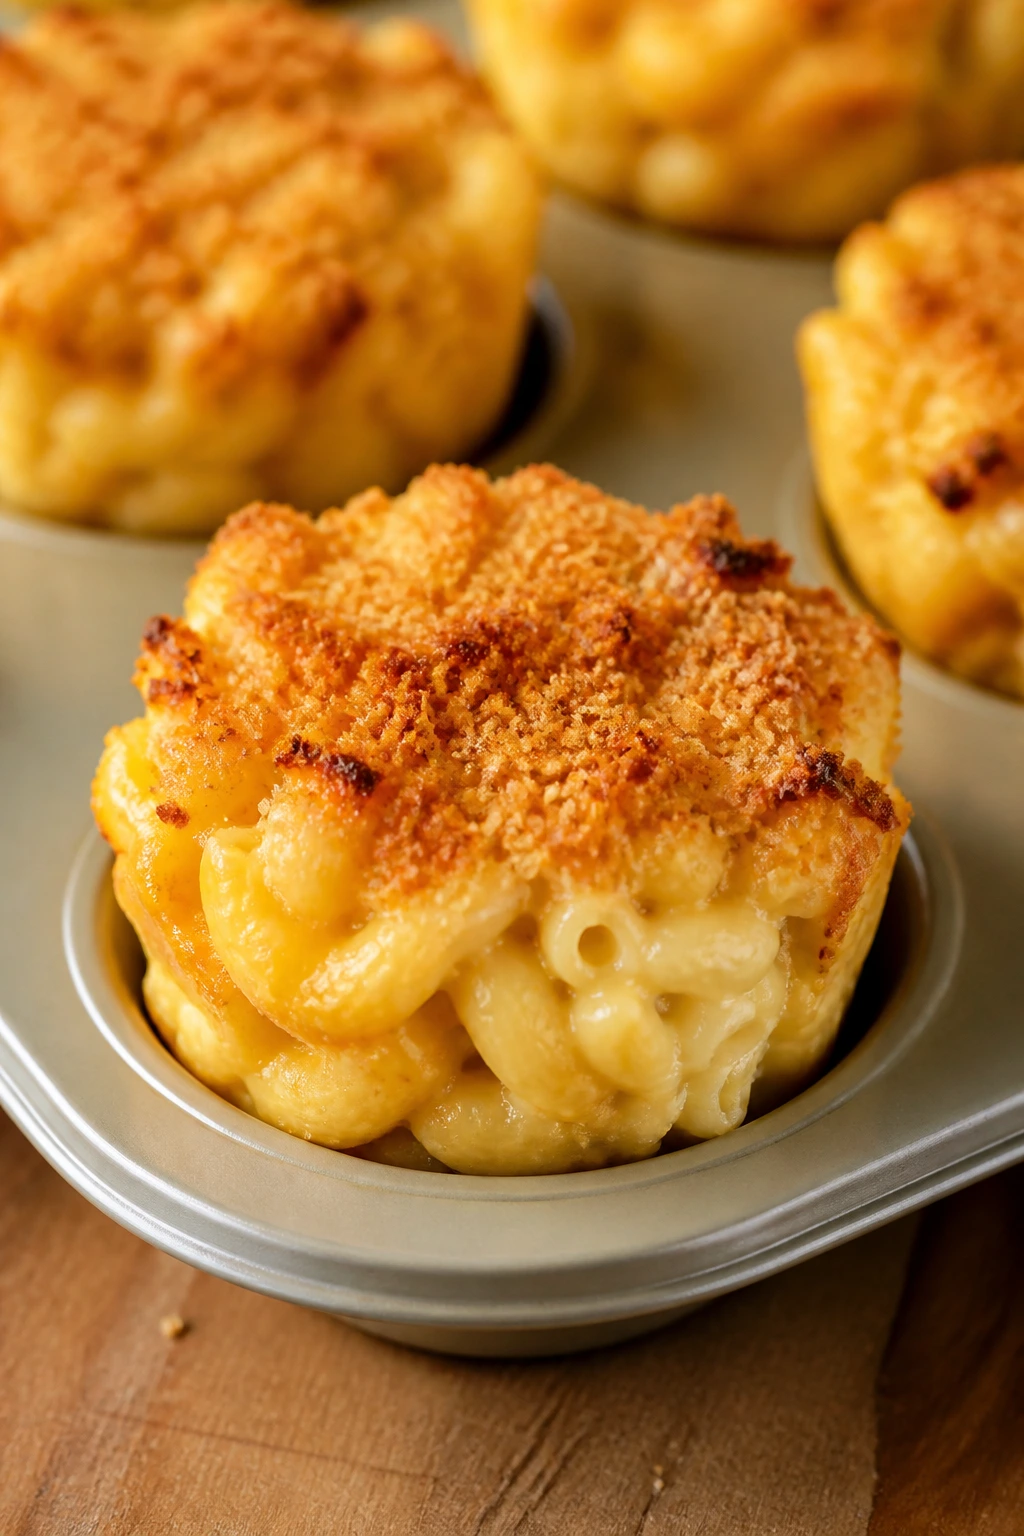
Mac and cheese in a lunchbox can go wrong fast if it’s too loose. These cups solve that by baking the pasta into compact little portions with crisp edges and a creamy center. Kids get the same comfort-food flavor, only in a shape that can actually be carried.
Why It Works:
A muffin tin gives the mac and cheese structure, which matters more than people think. The pasta is held together by a thick cheese sauce and a little breadcrumb topping, so each cup lifts out in one piece. They reheat well, but they’re also fine at room temperature if you’re packing lunch without a thermos.
Key Ingredients:
- 2 cups elbow macaroni
- 2 tbsp butter
- 2 tbsp all-purpose flour
- 2 cups milk
- 2 cups shredded cheddar
- 1/2 cup shredded mozzarella
- 1/2 tsp mustard powder
- 1/2 tsp salt
- 1/4 tsp black pepper
- 1 cup frozen peas, thawed
- 1/2 cup panko breadcrumbs
- 1 tbsp melted butter
Quick Steps:
- Cook the macaroni for 2 minutes less than the package says, then drain.
- Melt the butter in a saucepan over medium heat, whisk in the flour, and cook for 1 minute.
- Slowly whisk in the milk and cook until the sauce thickens enough to coat a spoon.
- Stir in the cheddar, mozzarella, mustard powder, salt, and pepper until smooth.
- Fold in the macaroni and peas.
- Grease a 12-cup muffin tin, spoon the mixture in, and press lightly so it holds together.
- Mix the panko with the melted butter and sprinkle it over the tops.
- Bake at 375°F for 15 to 18 minutes, until the tops are golden and the cups hold shape.
Equipment for This Recipe:
- Saucepan
- Whisk
- Muffin tin
- Spoon or small scoop
- Cooling rack
How to Serve This Dish:
Serve two cups with cucumber rounds, apple slices, or a few cherry tomatoes. They also work next to roasted broccoli if you want a lunch that feels more like a full plate. A small container of ketchup or hot sauce can sit on the side for older kids.
Pro Tips for This Recipe:
- Undercook the pasta slightly. It keeps its shape after baking.
- Use a thick sauce before mixing it with the pasta.
- Let the cups cool in the tin for 10 minutes before lifting them out.
- Freeze them on a tray first so they do not stick together in the bag.
Variations on This Dish:
- Broccoli Cheddar Cups: Swap peas for finely chopped steamed broccoli.
- Bacon Mac Cups: Add crisp chopped bacon to the pasta mixture.
- Mild White Cheddar Version: Use white cheddar and skip the mustard powder if you want a softer flavor.
Common Mistakes to Avoid with This Dish:
- Don’t make the sauce too thin. Loose sauce won’t hold the cups together.
- Don’t overbake them or the edges go dry and sandy.
- Don’t pack them hot. Steam softens the crisp top.
8. Chicken Quesadilla Wedges
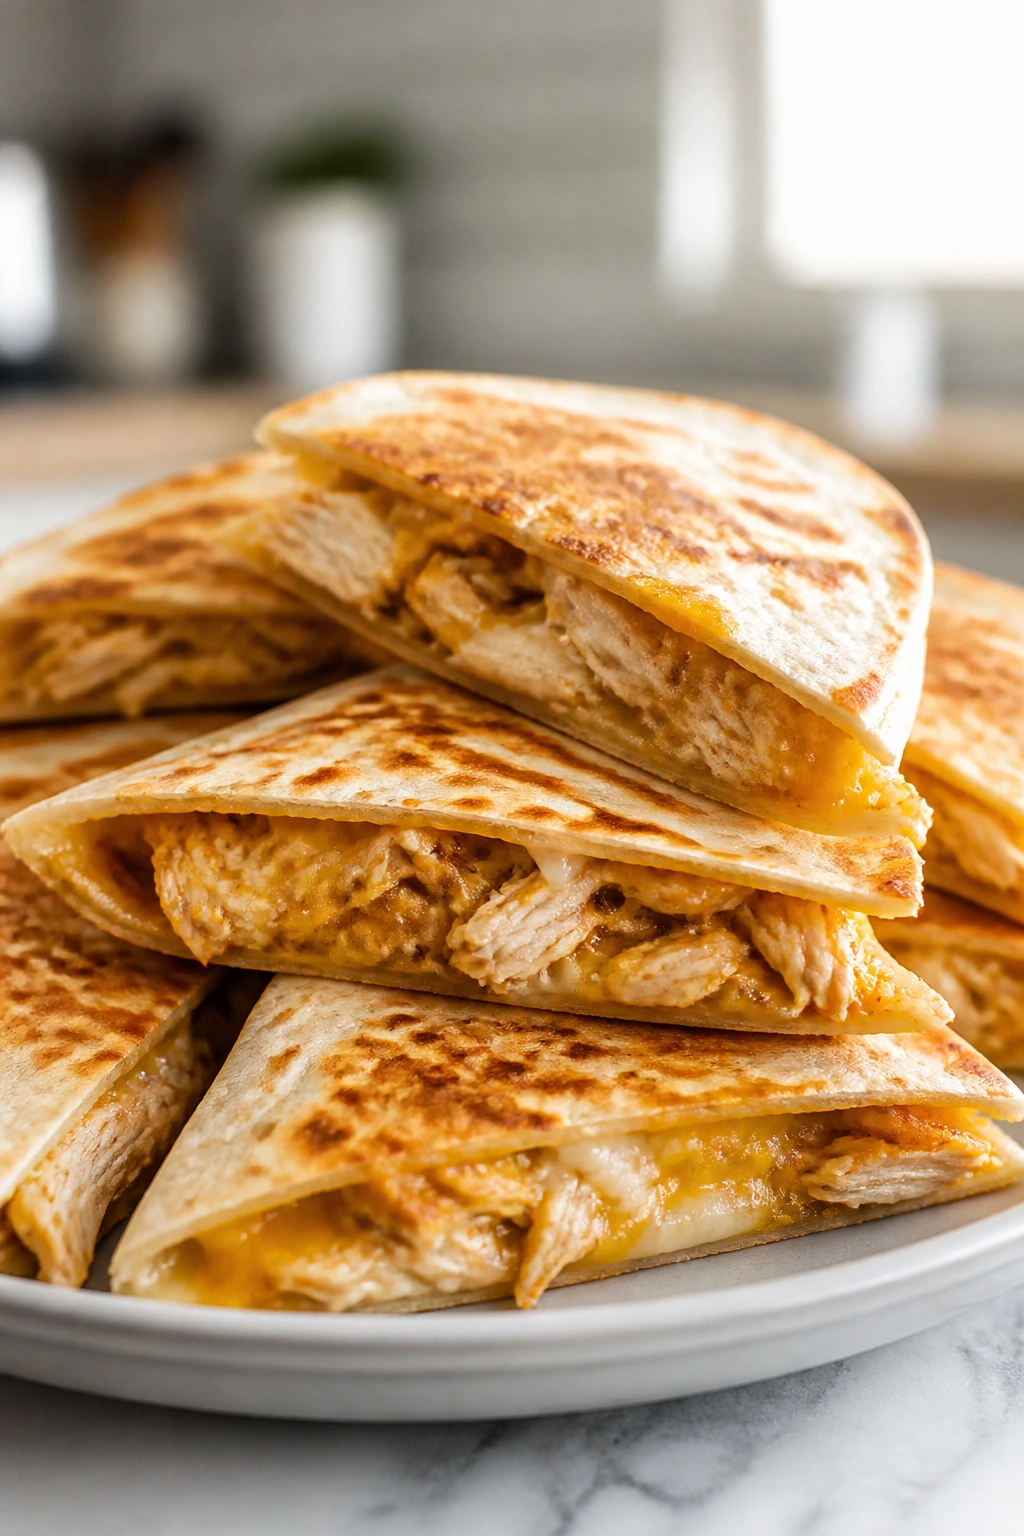
A good quesadilla should have a crisp tortilla, melted cheese, and filling that stays where it belongs. Cut into wedges, it becomes lunchbox-friendly instead of floppy and awkward. Leftover chicken works especially well here because the tortillas give you a second life for dinner scraps.
Why It Works:
Quesadillas are one of the easiest ways to send a meal that still feels hand-held. The cheese acts as the glue, the chicken brings protein, and the tortilla crisps at the edges while staying soft enough to bite through. If you keep the filling dry and the heat moderate, the finished wedge stays neat.
Key Ingredients:
- 4 large flour tortillas
- 2 cups shredded cooked chicken
- 2 cups shredded Monterey Jack or cheddar
- 1 cup black beans, rinsed and drained
- 1/2 cup corn
- 1 tsp ground cumin
- 1/2 tsp salt
- 1 tbsp butter or neutral oil
Quick Steps:
- In a bowl, mix the chicken, black beans, corn, cumin, and salt.
- Heat a skillet over medium-low and melt a little butter or oil.
- Lay one tortilla in the skillet and spread half of the cheese over one side, then add half the chicken mixture and more cheese on top.
- Fold the tortilla over and cook for 2 to 3 minutes per side until golden and crisp.
- Repeat with the second quesadilla, then let both cool for 5 minutes before cutting into wedges.
Equipment for This Recipe:
- Large skillet
- Spatula
- Cutting board
- Sharp knife or pizza cutter
How to Serve This Dish:
Pack the wedges with salsa, guacamole, or sour cream in a separate cup so the tortilla stays crisp until lunch. Sliced peppers, grapes, or a few corn chips round it out well. If you’re sending it warm, wrap it in foil first and slide it into an insulated lunch bag.
Pro Tips for This Recipe:
- Keep the heat at medium-low so the tortilla browns before the filling burns.
- Dry the beans and corn well.
- Cool before slicing; cutting too early lets the cheese run out.
- Use more cheese than you think you need. It keeps the wedges intact.
Variations on This Dish:
- BBQ Chicken Quesadilla: Swap the cumin for a spoonful of barbecue sauce.
- Veggie Bean Quesadilla: Leave out the chicken and add chopped peppers.
- Breakfast Version: Use scrambled eggs, cheese, and a little cooked potato.
Common Mistakes to Avoid with This Dish:
- Don’t overfill the tortilla or it will tear when folded.
- Don’t use high heat. The outside burns before the cheese melts.
- Don’t cut it straight from the skillet. It falls apart.
9. Greek Chickpea Pasta Salad
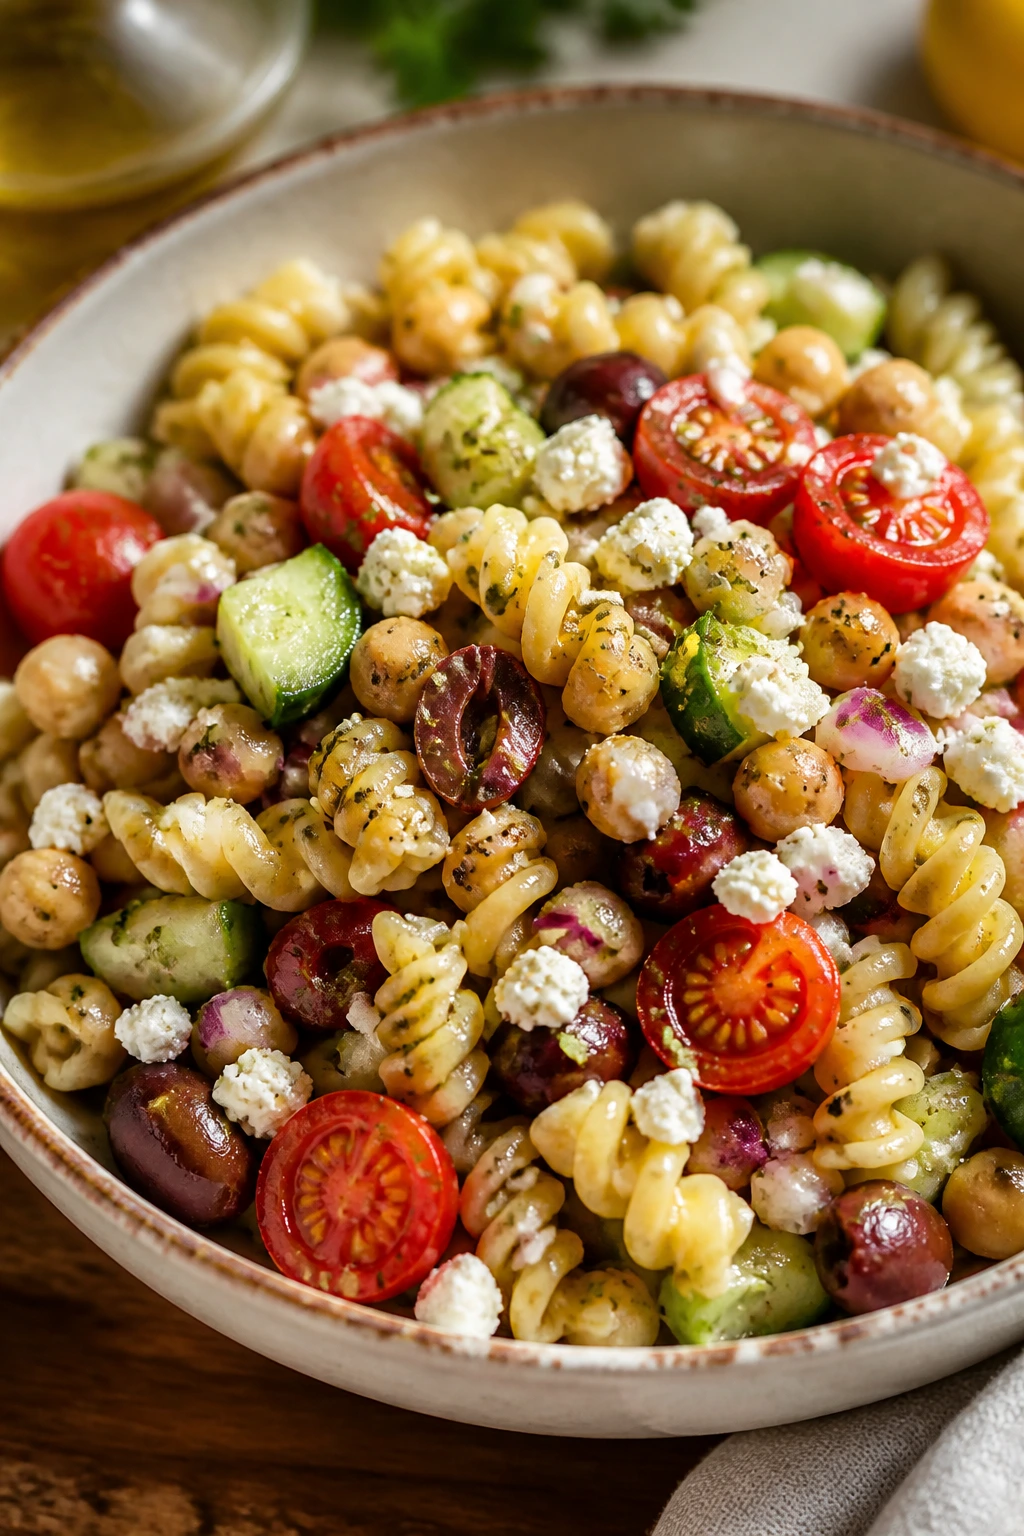
This one tastes bright instead of heavy, which is a relief when lunchboxes need a break from cheese and ketchup. Chickpeas give it enough body to count as a meal, and the lemon-oregano dressing keeps it from feeling like cold pasta pretending to be something else.
Why It Works:
No mayo means fewer worries about the salad breaking down in a warm lunch bag. Chickpeas hold their shape, the pasta absorbs the dressing, and cucumber, tomatoes, and feta keep the flavors sharp. If you let it sit for a bit, the lemon and oregano settle in and the whole bowl tastes more pulled together.
Key Ingredients:
- 12 oz short pasta, like rotini or penne
- 1 can chickpeas, drained and rinsed
- 1 cucumber, diced
- 1 cup cherry tomatoes, halved
- 1/2 red onion, thinly sliced
- 1/2 cup crumbled feta
- 1/3 cup sliced olives
- 1/4 cup olive oil
- 2 tbsp lemon juice
- 1 tsp dried oregano
- 1/2 tsp salt
- 1/4 tsp black pepper
Quick Steps:
- Cook the pasta until just tender, then drain and rinse briefly with cool water.
- Whisk the olive oil, lemon juice, oregano, salt, and black pepper in a large bowl.
- Add the pasta, chickpeas, cucumber, tomatoes, onion, and olives.
- Toss well, then fold in the feta at the end so it stays in chunks.
- Chill for at least 20 minutes before packing.
Equipment for This Recipe:
- Large pot
- Colander
- Large mixing bowl
- Whisk
- Airtight container
How to Serve This Dish:
Pack it with pita wedges, hummus, or a few sliced peppers if you want the lunch to feel fuller. It also sits well beside grilled chicken or a hard-boiled egg for extra protein. A little extra feta on top before serving makes the bowl look more finished.
Pro Tips for This Recipe:
- Salt the pasta water well or the salad tastes flat.
- Rinse the onion in cold water if you want a milder bite.
- Let it chill before serving so the dressing sinks into the pasta.
- If the cucumber is seedy, scrape out the center first so it does not get watery.
Variations on This Dish:
- Chicken Greek Salad: Add chopped grilled chicken.
- Dairy-Free Version: Skip the feta and add extra olives.
- Whole-Wheat Swap: Use whole-wheat pasta for a nuttier bite.
Common Mistakes to Avoid with This Dish:
- Don’t overcook the pasta. Soft noodles fall apart when mixed.
- Don’t add feta too early if you want distinct crumbles.
- Don’t use too much dressing at once; you can always add more.
10. Breakfast Burrito Wraps
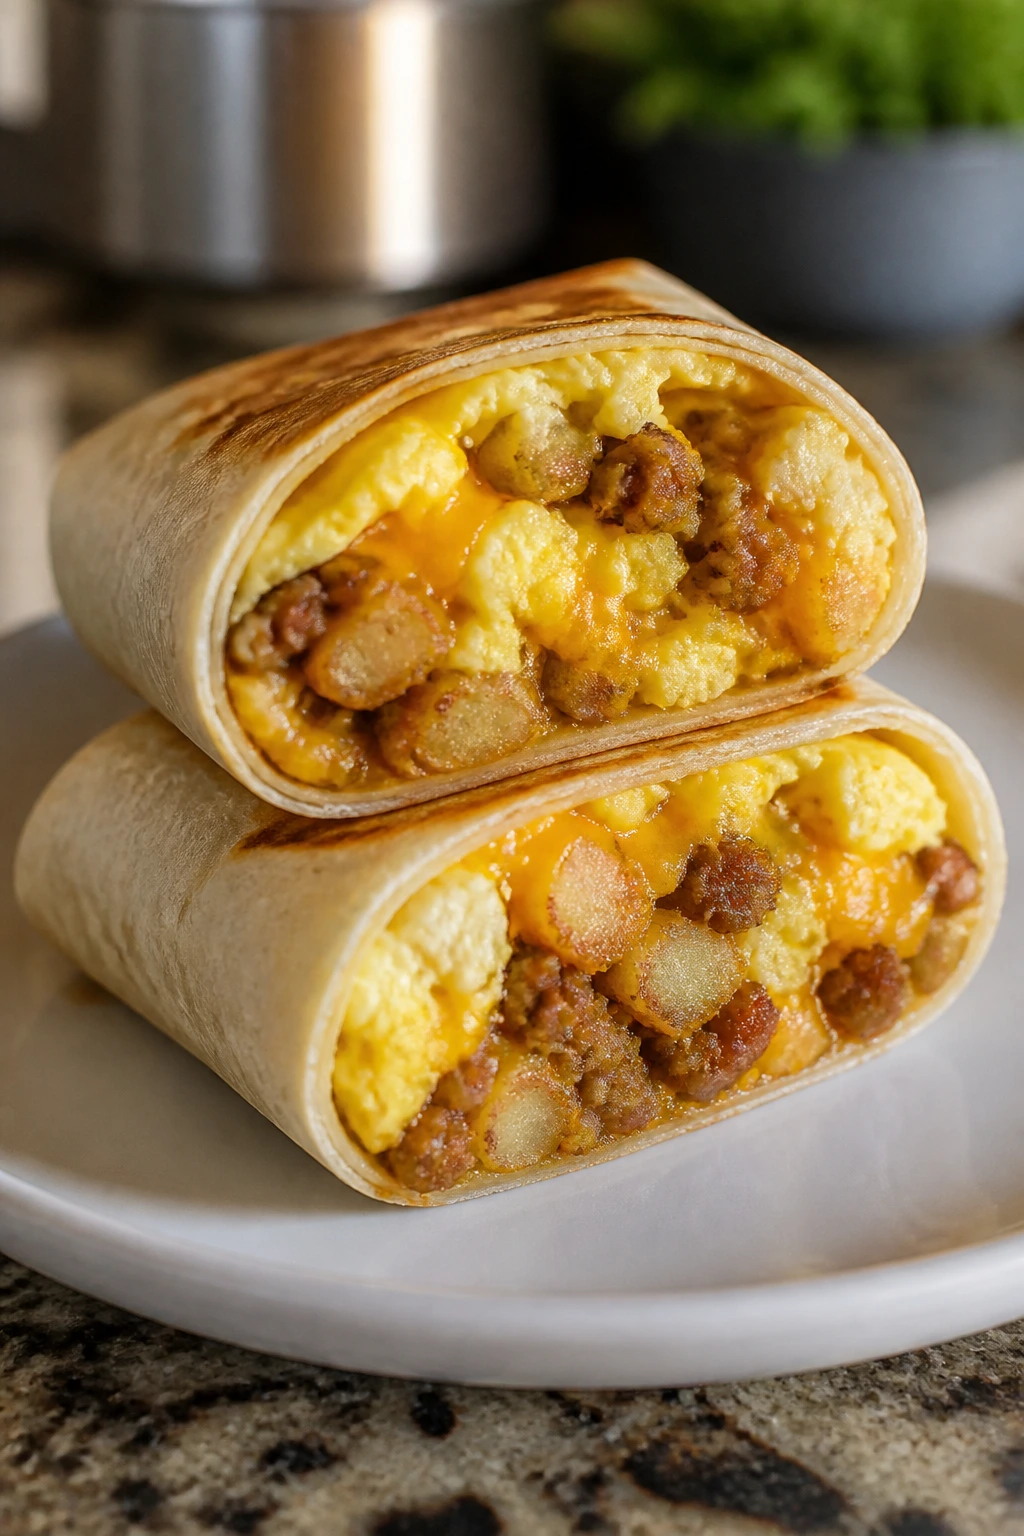
A lunchbox does not have to wait until noon to feel useful. Breakfast burritos work because they freeze in portions, reheat cleanly, and give you a full meal wrapped in something easy to hold. Eggs, potatoes, and cheese are enough on their own, but the tortilla turns them into a real grab-and-go lunch.
Why It Works:
The fillings here are sturdy and forgiving. Scrambled eggs stay soft, potatoes give the burrito heft, and cheese helps everything stay packed when the tortilla is rolled tight. Make a batch, freeze the extras, and you’ve got future lunches that only need reheating and wrapping.
Key Ingredients:
- 8 large eggs
- 1 tbsp butter
- 2 cups diced cooked potatoes or hash browns
- 1 cup cooked breakfast sausage or black beans
- 1 cup shredded cheddar
- 1/2 tsp salt
- 1/4 tsp black pepper
- 6 large flour tortillas
- Salsa, for serving
Quick Steps:
- Heat the butter in a skillet and warm the potatoes until browned in spots.
- Add the sausage or black beans and cook for 1 minute.
- Whisk the eggs with salt and pepper, then scramble them in a separate pan until just set.
- Combine the eggs, potato mixture, and cheddar in a bowl and let the filling cool for 10 minutes.
- Spoon the filling into the tortillas, roll them tightly, and tuck in the sides.
- Toast the burritos seam-side down in a dry skillet for 1 minute per side if you want a little extra seal.
Equipment for This Recipe:
- Skillet
- Mixing bowl
- Spoon for filling
- Foil for wrapping and freezing
How to Serve This Dish:
Pack a burrito with salsa in a separate cup, and add fruit or a yogurt tube on the side. If you’re sending it warm, wrap it in foil and tuck it into an insulated lunch bag. Frozen burritos can go straight from freezer to microwave for a fast morning fix.
Pro Tips for This Recipe:
- Cool the filling before rolling or the tortilla gets soggy.
- Use large tortillas; small ones split at the seam.
- Wrap each burrito tightly if you plan to freeze them.
- Add salsa after reheating, not before.
Variations on This Dish:
- Veggie Burritos: Use black beans and peppers instead of sausage.
- Bacon and Egg Wraps: Swap in crisp bacon for a saltier version.
- Southwest Style: Add corn and a little cumin to the filling.
Common Mistakes to Avoid with This Dish:
- Don’t overfill the tortilla.
- Don’t roll them while the filling is steaming hot.
- Don’t forget to seal the seam side down if you want a tighter wrap.
11. Teriyaki Chicken Meatballs
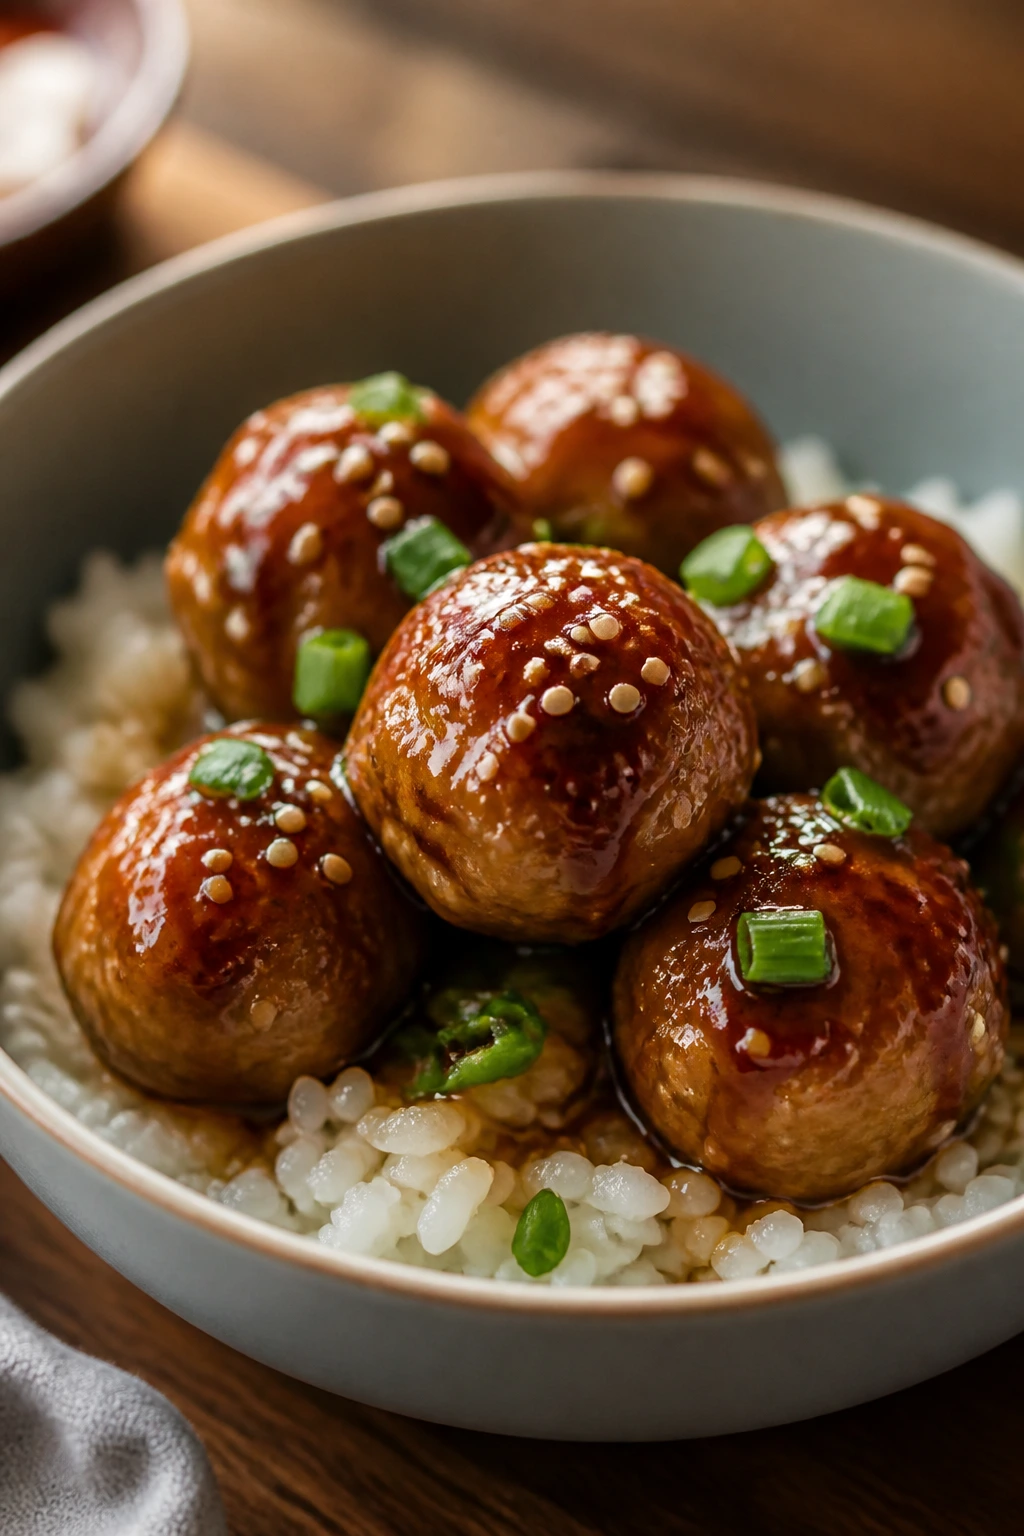
These smell like ginger and soy the moment they hit the oven. Teriyaki chicken meatballs are neat enough for a lunchbox, but they still feel like a proper meal when you spoon them over rice. The glaze clings best when the sauce is a little thick, not watery.
Why It Works:
Meatballs are easier to pack than strips of chicken because they hold their shape and reheat evenly. The sauce coats each one, the rice soaks up any extra glaze, and the whole thing stays tidy in a lunch container. A small meatball scoop keeps the sizes even, which matters more than it sounds.
Key Ingredients:
- 1 1/2 lbs ground chicken
- 1 large egg
- 1/2 cup panko breadcrumbs
- 2 scallions, finely sliced
- 2 cloves garlic, minced
- 1 tsp grated fresh ginger
- 1/2 tsp salt
- 1/4 tsp black pepper
For the Sauce:
- 1/2 cup soy sauce
- 1/3 cup brown sugar
- 2 tbsp rice vinegar
- 1 tsp sesame oil
- 1 tbsp cornstarch
- 2 tbsp water
Quick Steps:
- Preheat the oven to 400°F and line a sheet pan with parchment.
- Mix the ground chicken, egg, panko, scallions, garlic, ginger, salt, and pepper until just combined.
- Roll into 1 1/2-inch meatballs and place them on the sheet pan.
- Bake for 14 to 16 minutes, until the centers reach 165°F.
- While they bake, simmer the soy sauce, brown sugar, rice vinegar, and sesame oil in a small saucepan.
- Stir the cornstarch and water together, add it to the sauce, and cook until thickened.
- Toss the hot meatballs in the sauce and serve over rice.
Equipment for This Recipe:
- Sheet pan
- Parchment paper
- Small saucepan
- Mixing bowl
- Small scoop or spoon
How to Serve This Dish:
Pack the meatballs over rice with steamed broccoli or snap peas on the side. If you want the glaze to stay glossy, keep a little extra sauce in a separate cup. They also reheat well in a thermos with a few spoonfuls of rice under them.
Pro Tips for This Recipe:
- Use a light hand when mixing or the meatballs get dense.
- A small scoop keeps the size even and the baking time predictable.
- Simmer the sauce until it coats a spoon, not until it turns into syrup.
- If you’re packing them cold, let them cool before sealing the container.
Variations on This Dish:
- Turkey Teriyaki Meatballs: Swap the ground chicken for ground turkey.
- Pineapple Glaze: Stir 2 tablespoons of pineapple juice into the sauce.
- Spicy Ginger Version: Add a pinch of red pepper flakes to the glaze.
Common Mistakes to Avoid with This Dish:
- Don’t make the sauce too thin or it pools at the bottom of the container.
- Don’t bake the meatballs too long; chicken dries out fast.
- Don’t crowd the pan. They need room to brown.
12. Tuna Pita Pockets

Tuna salad gets a bad reputation when it’s wet and slippery. Keep the mix chunky, drain the tuna properly, and stuff it into pita pockets instead of bread slices. That little pocket shape keeps the filling contained and makes the lunch much easier to eat with one hand.
Why It Works:
Pita is better than soft sandwich bread here because it creates a built-in wall. Tuna salad made with a little yogurt or mayo stays creamy without running, and crisp celery or apple adds the bite kids usually notice first. You can pack the filling separately if you want the pita to stay extra firm.
Key Ingredients:
- 2 cans tuna in water, drained well
- 1/4 cup mayonnaise or plain Greek yogurt
- 1 tbsp Dijon mustard
- 1 celery stalk, finely diced
- 1/4 cup diced cucumber or pickles
- 1 tbsp lemon juice
- 1/4 tsp salt
- 1/4 tsp black pepper
- 4 pita rounds
- Lettuce leaves, optional
Quick Steps:
- Flake the drained tuna into a bowl with a fork.
- Stir in the mayonnaise or yogurt, mustard, celery, cucumber or pickles, lemon juice, salt, and pepper.
- Chill the tuna salad for 10 minutes if you want the flavors to settle.
- Cut the pita rounds in half and open each pocket gently.
- Line each pocket with lettuce if using, then spoon in the tuna salad.
Equipment for This Recipe:
- Mixing bowl
- Fork
- Knife
- Cutting board
- Small container for extra salad
How to Serve This Dish:
Pack the pita pockets with baby carrots, crackers, or a few olives if your child likes them. If the lunch sits for a while, keep the tuna salad separate and stuff the pockets later. That’s the cleanest way to avoid a soft pita.
Pro Tips for This Recipe:
- Drain the tuna well. Wet tuna salad is the fastest route to a soggy pocket.
- Use small pitas for kids with smaller hands.
- Add lettuce only if you want extra crunch.
- If you pack it ahead, keep the filling and bread apart until lunch.
Variations on This Dish:
- Egg Salad Pitas: Replace tuna with chopped hard-boiled eggs.
- Salmon Pocket Lunches: Use canned salmon and skip the mustard if needed.
- Chickpea Smash: Mash chickpeas with yogurt, celery, and lemon for a vegetarian version.
Common Mistakes to Avoid with This Dish:
- Don’t overfill the pita. It splits near the seam.
- Don’t use watery pickles or cucumbers without draining them.
- Don’t pack bread with wet filling hours ahead if you want it to stay firm.
13. Mini Shepherd’s Pies
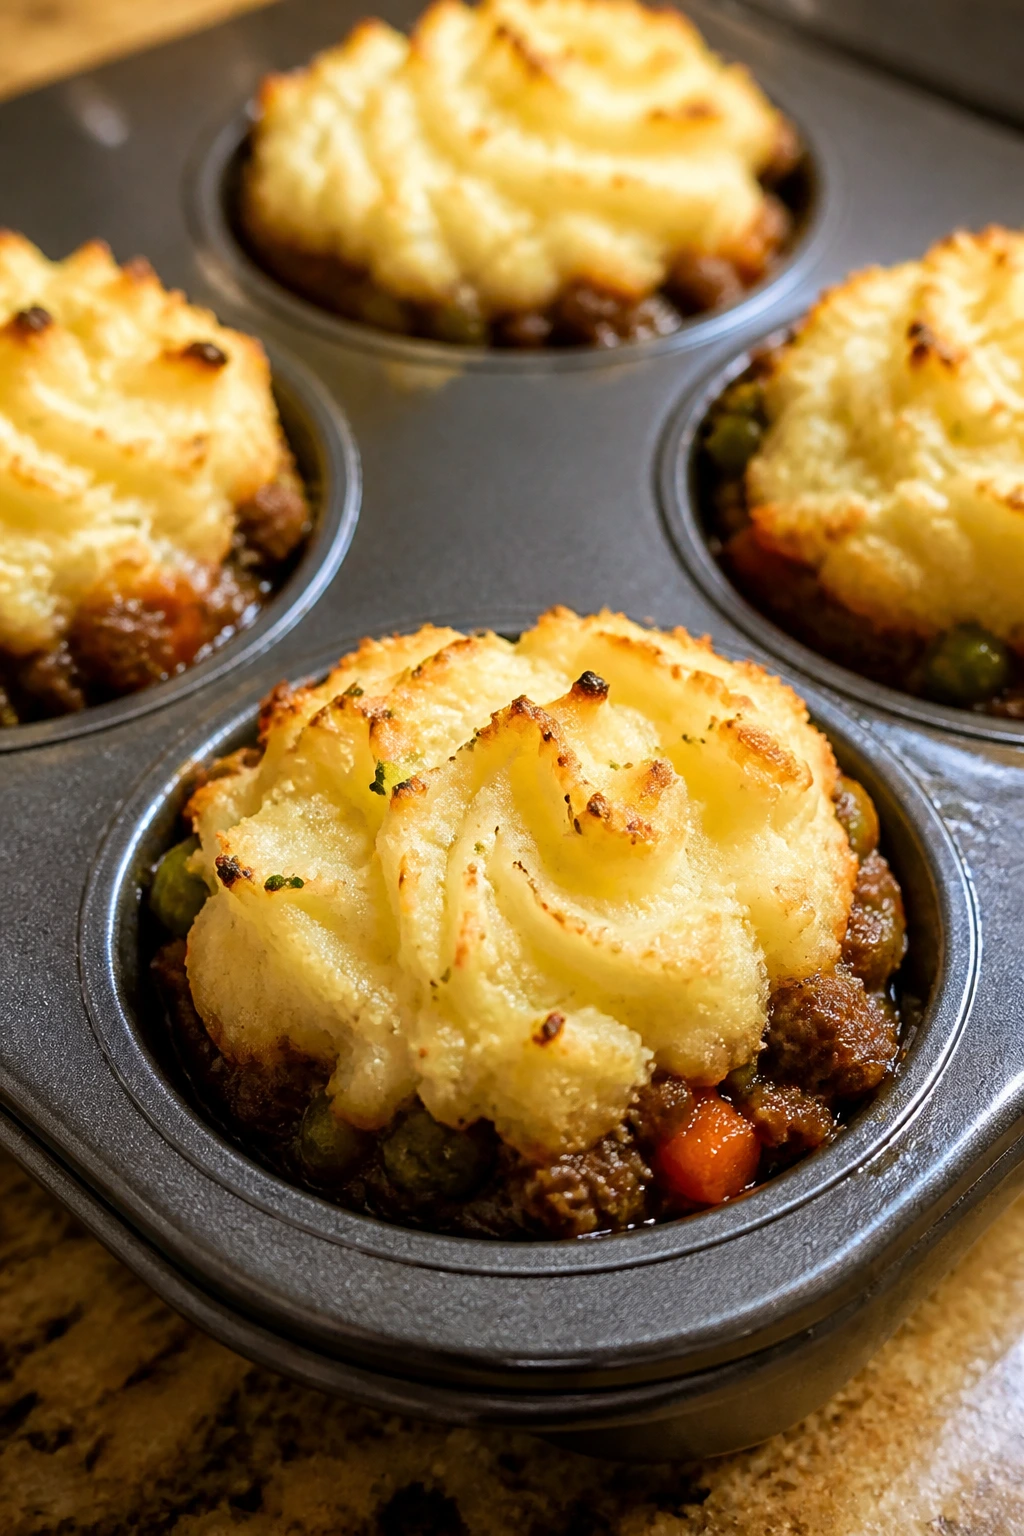
Shepherd’s pie feels like the sort of thing that should be spooned into a bowl and eaten slowly, but the mini version solves the lunchbox problem neatly. A thick meat filling under mashed potatoes makes a compact, spoonable meal that reheats well and stays together in little portions.
Why It Works:
The meat layer thickens as it cooks, so it does not ooze all over the container. Mashed potatoes on top act like a lid, which keeps the filling from drying out. If you bake them in muffin tins or small ramekins, they cool faster than a big casserole and are much easier to portion.
Key Ingredients:
- 1 1/2 lbs ground beef or ground turkey
- 1 small onion, diced
- 2 carrots, diced small
- 1 cup frozen peas
- 2 tbsp tomato paste
- 1 tbsp Worcestershire sauce
- 1 cup beef or chicken broth
- 4 cups prepared mashed potatoes
- 1/2 tsp salt
- 1/4 tsp black pepper
- 1/2 cup shredded cheddar, optional
Quick Steps:
- Cook the onion and carrots in a skillet over medium heat until they start to soften.
- Add the ground meat and cook until browned, then stir in the tomato paste and Worcestershire sauce.
- Pour in the broth and simmer until the filling is thick, not soupy.
- Stir in the peas and season with salt and pepper.
- Spoon the filling into greased muffin tins or ramekins, then top with mashed potatoes.
- Add cheddar if using and bake at 400°F for 15 to 20 minutes until the tops are lightly golden.
Equipment for This Recipe:
- Skillet
- Muffin tin or small ramekins
- Spoon or piping bag for the potatoes
- Baking sheet to catch drips
How to Serve This Dish:
These are good in a thermos if you want them warm, or packed cold with a fruit cup and cucumber sticks. A small spoon is easier than a fork for younger kids. If you’re sending a bigger lunch, add a roll or a biscuit on the side.
Pro Tips for This Recipe:
- Cook the filling until it’s thick enough to sit on a spoon.
- Pipe the potatoes on top if you want a tidier finish.
- Let the pies cool before removing them from the tin.
- Use leftover mashed potatoes if you have them; they work well here.
Variations on This Dish:
- Sweet Potato Pie: Swap the mashed potatoes for mashed sweet potatoes.
- Lentil Shepherd’s Pie: Replace the meat with cooked lentils and extra vegetables.
- Cheesy Top Version: Stir parmesan into the potatoes before topping.
Common Mistakes to Avoid with This Dish:
- Don’t leave the filling watery or it will leak out.
- Don’t skip the browning step; it builds the flavor base.
- Don’t pack them hot unless you want the lid to collect steam.
14. Pesto Turkey Sliders
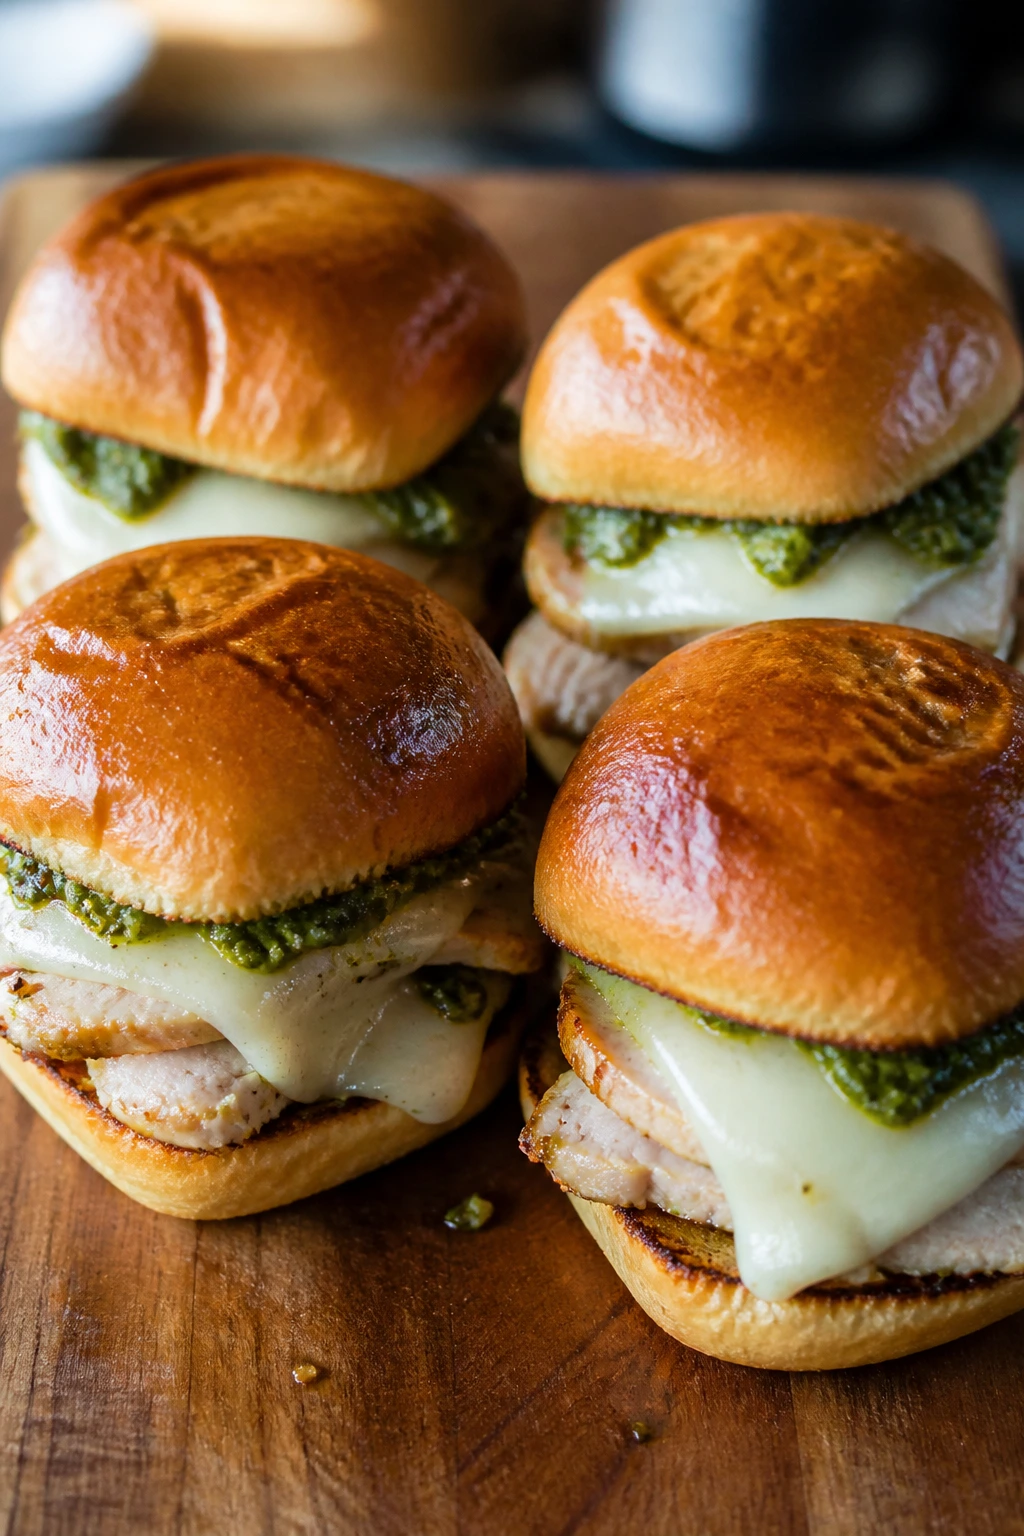
Sliders are not just party food. They’re actually useful in lunchboxes because the smaller size is easier for kids to manage, and the bun-to-filling ratio usually lands better than a giant sandwich. Pesto brings enough flavor that the turkey does not taste dry or bland.
Why It Works:
Ground turkey can be lean and a little dull on its own, so pesto solves that fast. Breadcrumbs and egg keep the patties from crumbling, while melted mozzarella helps everything stick together on the bun. If you toast the buns lightly, they hold up better and do not turn floppy by lunch.
Key Ingredients:
- 1 1/2 lbs ground turkey
- 1/4 cup basil pesto
- 1/2 cup breadcrumbs
- 1 large egg
- 1/2 tsp salt
- 1/4 tsp black pepper
- 1 tbsp olive oil
- 8 slider buns
- 4 slices mozzarella or 1 cup shredded mozzarella
- Tomato slices, optional
Quick Steps:
- Mix the turkey, pesto, breadcrumbs, egg, salt, and pepper until just combined.
- Shape into 8 small patties.
- Heat the olive oil in a skillet over medium heat and cook the patties for 4 to 5 minutes per side, until the centers reach 165°F.
- Toast the slider buns lightly.
- Add mozzarella to the hot patties so it melts a little, then build the sliders and add tomato only if you’re serving them right away.
Equipment for This Recipe:
- Mixing bowl
- Skillet
- Spatula
- Knife and cutting board
How to Serve This Dish:
Pack with cucumber spears, fruit, or roasted carrot sticks. If you want them to travel better, keep the tomatoes separate so the buns stay dry. A little container of pesto mayo works if your family likes extra richness.
Pro Tips for This Recipe:
- Use cold ground turkey; it’s easier to shape.
- Don’t overmix the meat or the patties turn firm.
- Toast the buns only lightly so they don’t go hard.
- Keep juicy toppings separate unless lunch happens right away.
Variations on This Dish:
- Chicken Pesto Sliders: Swap in ground chicken.
- Sun-Dried Tomato Version: Add 2 tablespoons chopped sun-dried tomatoes to the patties.
- Dairy-Free Build: Skip the mozzarella and use extra pesto with lettuce.
Common Mistakes to Avoid with This Dish:
- Don’t cook the patties past 165°F or they dry out.
- Don’t pile on wet toppings if the sliders need to sit.
- Don’t use big buns; the slider size is part of the appeal.
15. Baked Ziti Cups
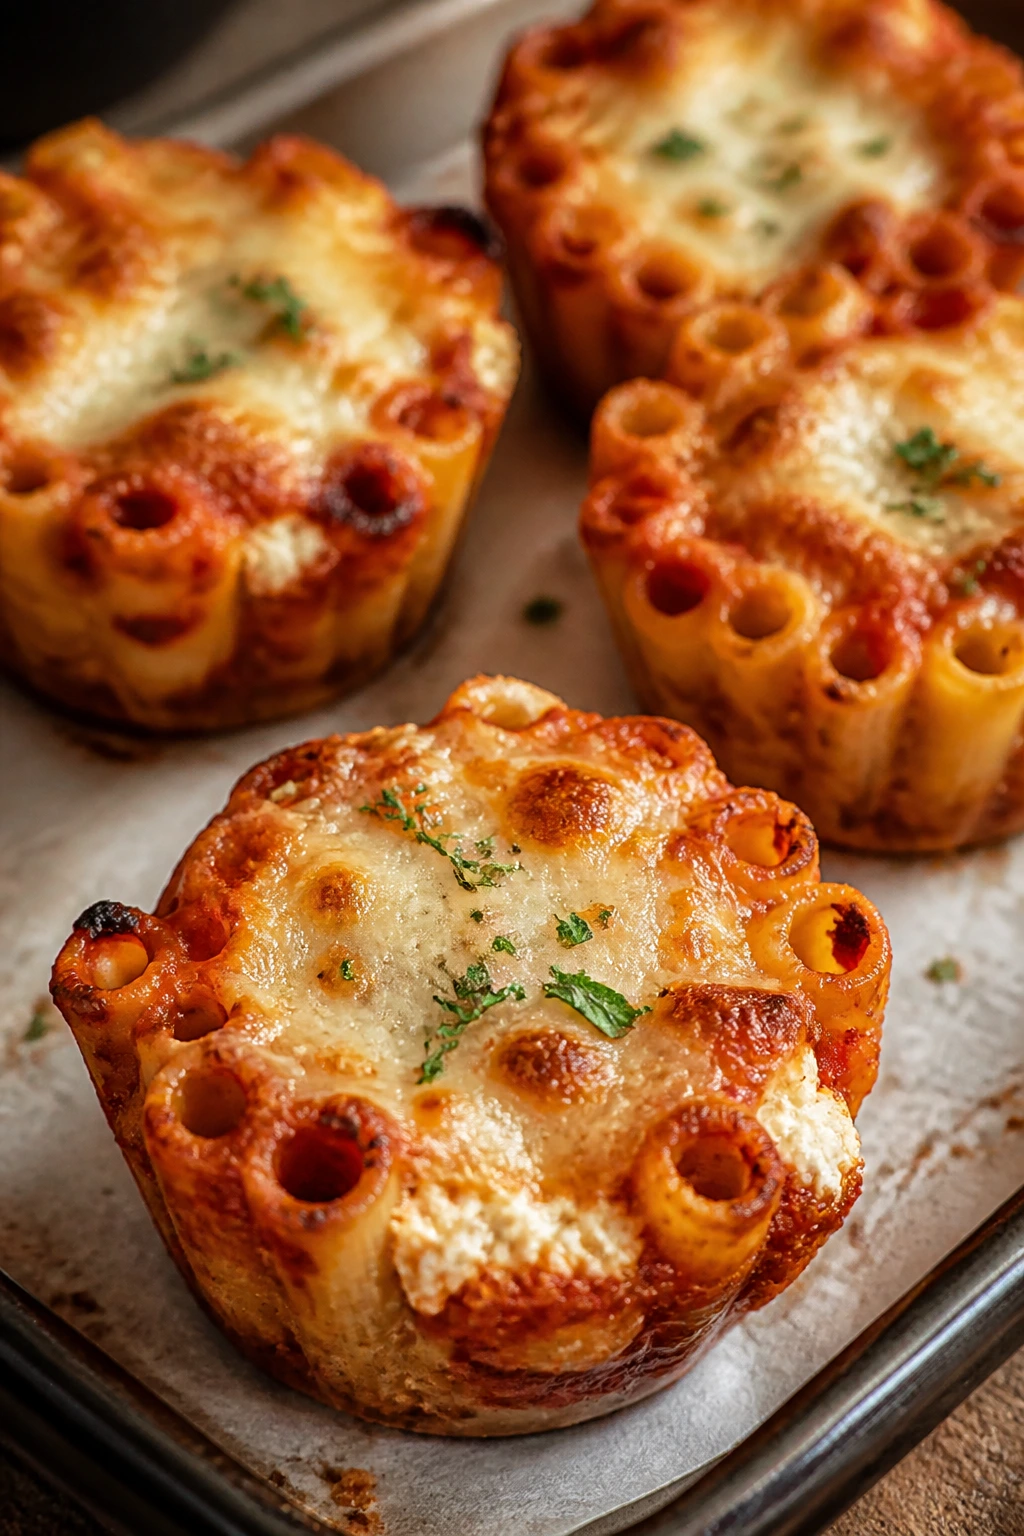
Baked ziti usually shows up in a casserole dish, which is lovely at home and awkward in a lunchbox. The cup version solves that with crisp edges, a cheesy middle, and portions that lift out cleanly. It’s basically the lunchbox version of a cozy pasta bake.
Why It Works:
The pasta holds sauce without turning soupy, and the muffin tin gives each portion structure. Ricotta keeps the center creamy, mozzarella melts into the pasta, and parmesan adds a salty edge on top. If you let the cups rest before lifting them out, they keep their shape better than a loose scoop from a pan.
Key Ingredients:
- 12 oz ziti or penne
- 3 cups marinara sauce
- 1 cup ricotta cheese
- 2 cups shredded mozzarella
- 1/2 cup grated parmesan
- 1 large egg
- 1 tsp Italian seasoning
- 1/2 tsp salt
- 1/4 tsp black pepper
Quick Steps:
- Cook the pasta until just shy of tender, then drain.
- In a large bowl, stir together the marinara, ricotta, mozzarella, parmesan, egg, Italian seasoning, salt, and pepper.
- Fold in the pasta until evenly coated.
- Grease a muffin tin well and spoon the mixture in, pressing lightly so it holds together.
- Bake at 375°F for 20 to 25 minutes until the tops are bubbling and set.
- Let the cups rest for 10 minutes before removing them from the tin.
Equipment for This Recipe:
- Pot for boiling pasta
- Large bowl
- Muffin tin
- Spoon or small scoop
- Cooling rack
How to Serve This Dish:
Send the cups with a simple salad, some sliced bell pepper, or a few breadsticks if you’re packing a bigger lunch. They’re also strong enough to sit beside meatballs or roasted vegetables. A spoonful of extra marinara on the side is useful, not essential.
Pro Tips for This Recipe:
- Under-cook the pasta by a minute or two.
- Grease the tin generously or the cheese can grab.
- Let the cups set before removing them.
- Add cooked sausage or spinach if you want a heavier meal.
Variations on This Dish:
- Meat Sauce Cups: Stir in cooked ground beef or sausage.
- Spinach Ricotta Version: Add chopped cooked spinach for a veggie boost.
- Lighter Dairy Swap: Use part-skim cheeses and a bit less ricotta.
Common Mistakes to Avoid with This Dish:
- Don’t use too much sauce or the cups lose structure.
- Don’t pull them out too early.
- Don’t overbake until the edges harden.
16. Spinach and Cheese Egg Bites
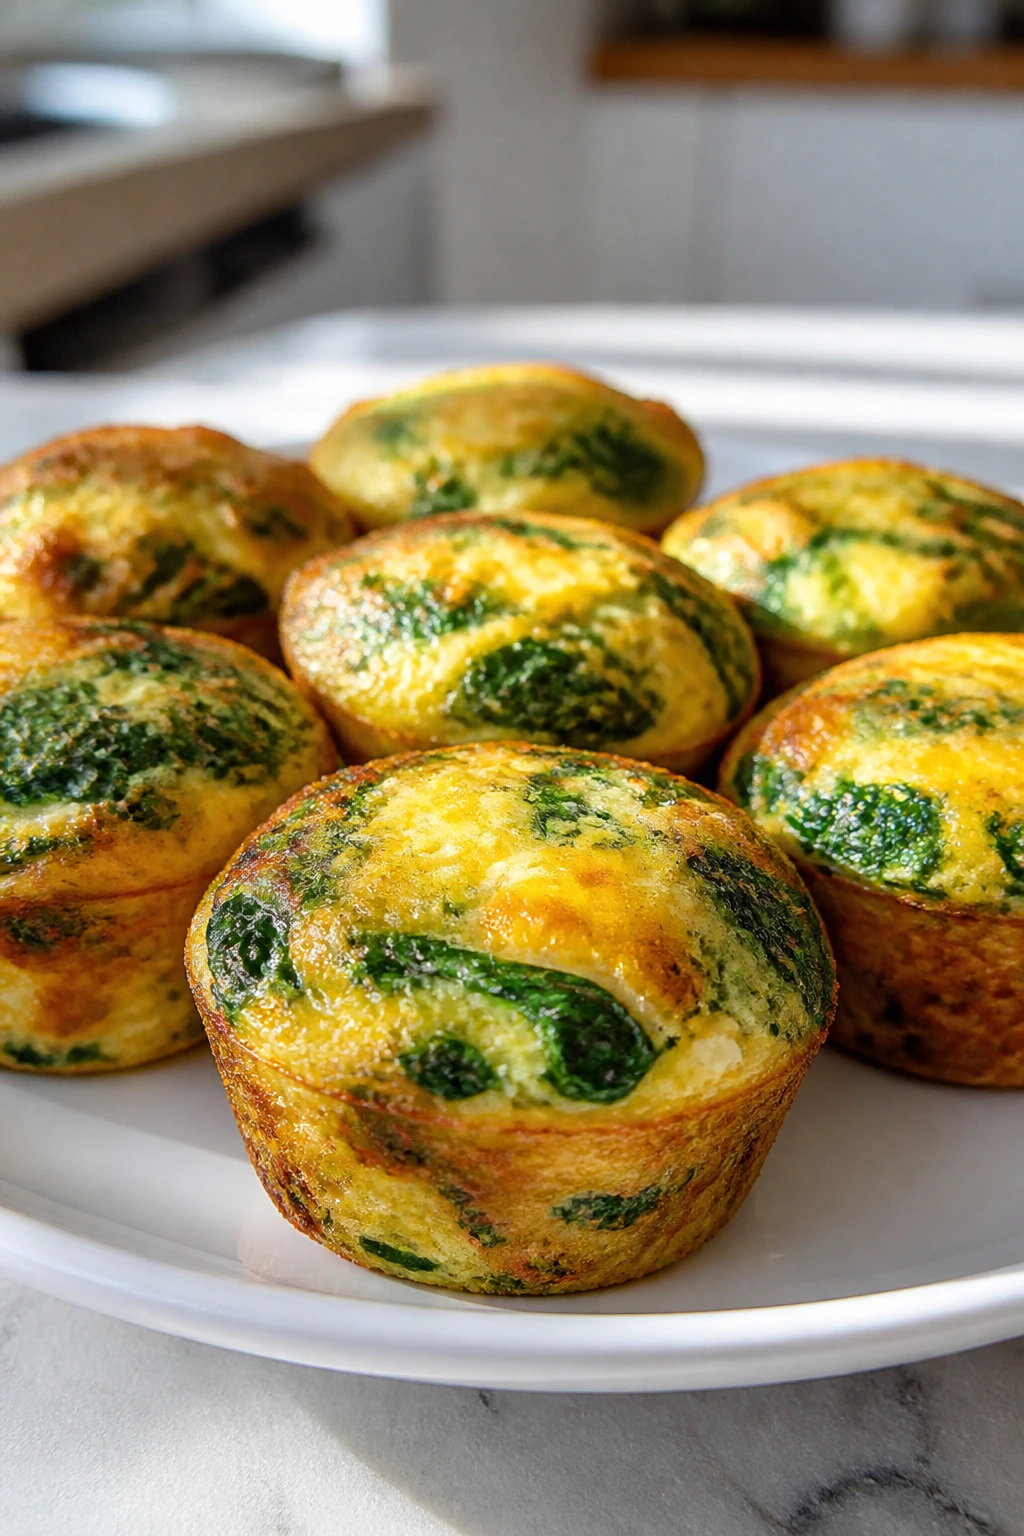
Egg bites are one of those lunchbox foods that look small but carry a lot of weight. They’re compact, protein-rich, and easy to eat without utensils if you don’t overstuff the tin. Spinach and cheese keep them mild enough for kids while still giving them enough flavor to matter.
Why It Works:
Baked eggs hold up better than scrambled eggs when they need to travel. The cheese keeps the bites tender, the spinach adds color and a little vegetable balance, and the muffin tin makes every portion the same size. If you squeeze the spinach dry, the egg bites stay fluffy instead of spongy.
Key Ingredients:
- 10 large eggs
- 1/2 cup milk
- 1 cup shredded cheddar
- 1 cup finely chopped spinach
- 1/2 cup diced ham or bell pepper
- 1/2 tsp salt
- 1/4 tsp black pepper
Quick Steps:
- Preheat the oven to 350°F and grease a muffin tin well or use a silicone tin.
- Whisk the eggs, milk, salt, and pepper until smooth.
- Stir in the cheddar, spinach, and ham or bell pepper.
- Divide the mixture among the muffin cups, filling each about 3/4 full.
- Bake for 18 to 20 minutes, until the centers are just set and no longer wet in the middle.
- Cool for 5 minutes before removing.
Equipment for This Recipe:
- Muffin tin or silicone egg-bite mold
- Mixing bowl
- Whisk
- Measuring cup
- Small spatula
How to Serve This Dish:
Pack them with toast fingers, fruit, or a few cherry tomatoes. They’re good warm or cold, which makes them easier than many egg dishes. A small cup of ketchup or salsa on the side works if your family likes a dip.
Pro Tips for This Recipe:
- Squeeze the spinach dry so the eggs do not water out.
- Use a silicone tin if you hate sticking.
- Do not overbake or the eggs get rubbery.
- Reheat gently; a short microwave burst is enough.
Variations on This Dish:
- Bacon and Cheddar Bites: Swap ham for cooked bacon.
- Mushroom Version: Use finely chopped cooked mushrooms instead of ham.
- Dairy-Free Egg Cups: Skip the cheese and add a spoonful of sautéed vegetables.
Common Mistakes to Avoid with This Recipe:
- Don’t add raw watery vegetables.
- Don’t fill the cups to the top.
- Don’t bake them too long just because the tops look pale.
17. BBQ Chicken Stuffed Potatoes
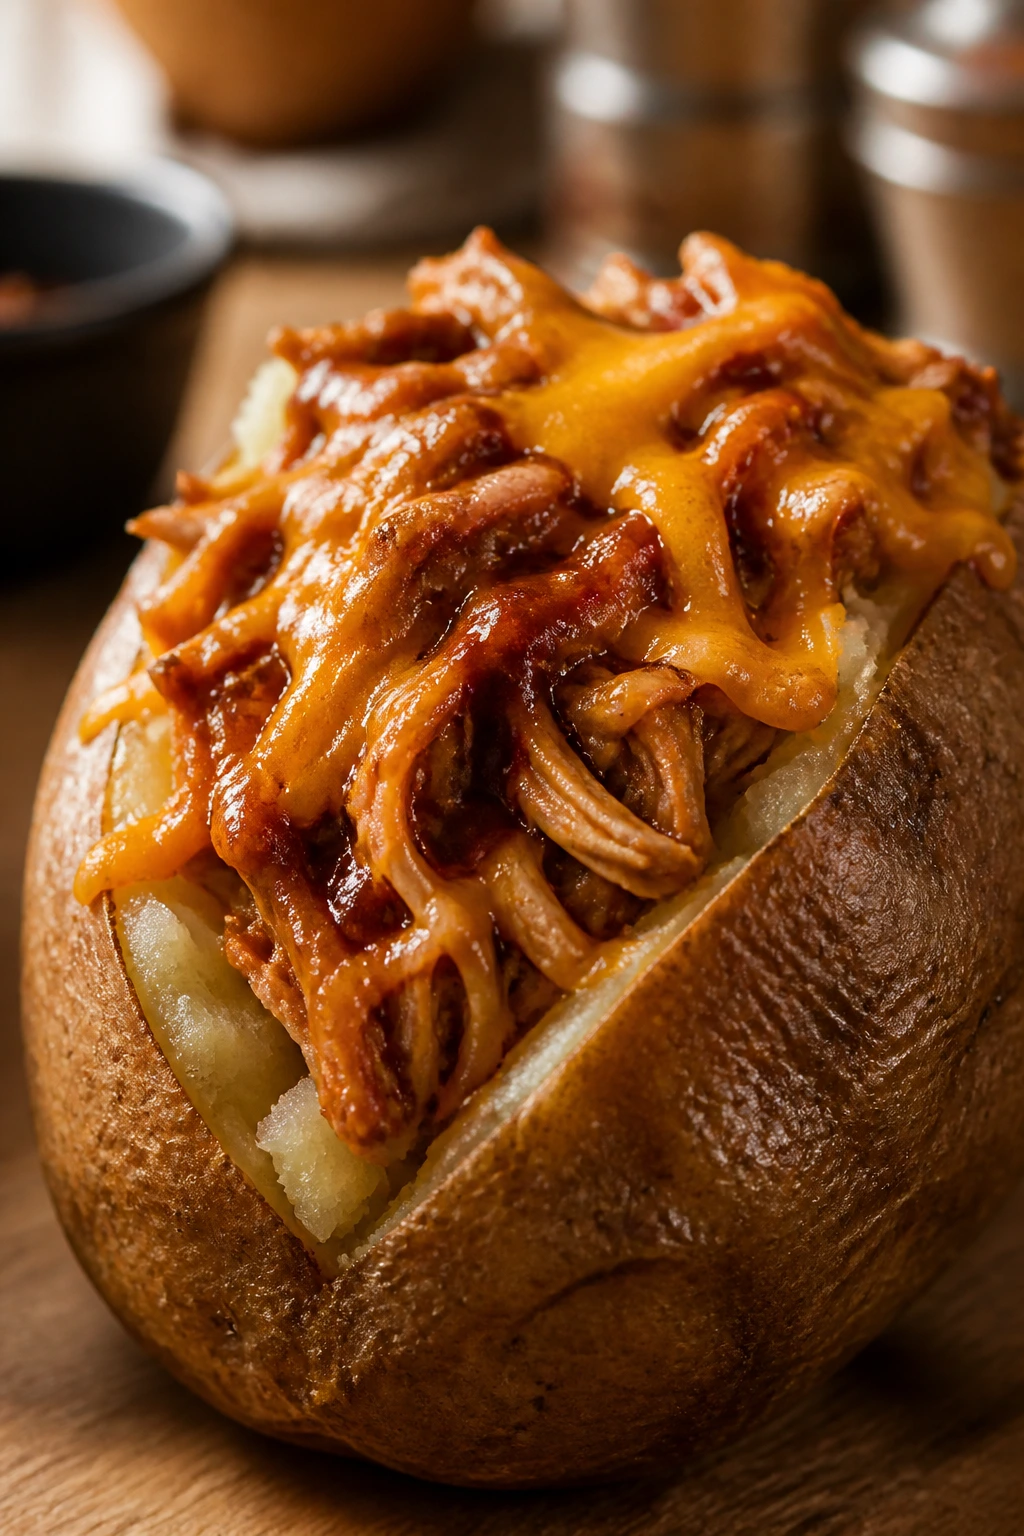
A baked potato can be a boring side dish or a very useful lunch. Stuff it with shredded chicken and barbecue sauce, and it turns into something sturdy enough for an insulated container. The potato skin acts like a built-in bowl, which is why this works so much better than piling the same filling onto bread.
Why It Works:
Potatoes hold heat, hold shape, and accept filling without turning soggy. Barbecue sauce gives the chicken moisture and flavor, while cheddar melts into the cut potato so the whole thing tastes unified. If you bake the potatoes until the skins are crisp and the centers are fluffy, the filling sits in them neatly instead of spilling out.
Key Ingredients:
- 4 large russet potatoes
- 2 cups shredded cooked chicken
- 3/4 cup barbecue sauce
- 1 cup shredded cheddar
- 1/2 cup sour cream or plain Greek yogurt
- 2 scallions, sliced
- 1 tbsp butter
- 1/2 tsp salt
- 1/4 tsp black pepper
Quick Steps:
- Preheat the oven to 400°F, prick the potatoes with a fork, and bake them for 45 to 55 minutes until the skins are crisp and the centers are soft.
- Mix the chicken with the barbecue sauce in a bowl.
- Split the potatoes open and fluff the insides with a fork, then add a little butter, salt, and pepper.
- Spoon in the barbecue chicken and top with cheddar.
- Return to the oven for 5 minutes, or until the cheese melts.
- Finish with sour cream and scallions if using.
Equipment for This Recipe:
- Baking sheet
- Fork
- Mixing bowl
- Spoon
- Foil for wrapping if packing warm
How to Serve This Dish:
Add slaw, apple slices, or a few baby carrots on the side. For lunchboxes, smaller potatoes are easier to manage than giant ones. If you need them warm, wrap each potato tightly in foil and place it in an insulated bag.
Pro Tips for This Recipe:
- Bake the potatoes until the skins feel crisp when pressed.
- Warm the chicken mixture before stuffing so the potato stays hot.
- Keep sour cream separate if the lunch will sit for a while.
- Smaller potatoes pack more neatly than oversized baking potatoes.
Variations on This Dish:
- Pulled Pork Version: Use shredded pork instead of chicken.
- BBQ Bean Potato: Add black beans and skip the meat.
- Spicy Cheddar Style: Stir a little hot sauce into the chicken filling.
Common Mistakes to Avoid with This Recipe:
- Don’t underbake the potatoes or the inside stays waxy.
- Don’t drown the filling in sauce.
- Don’t pack them bare if they need to stay warm; insulation matters.
18. Creamy Veggie Pasta Salad with Sunflower Seeds
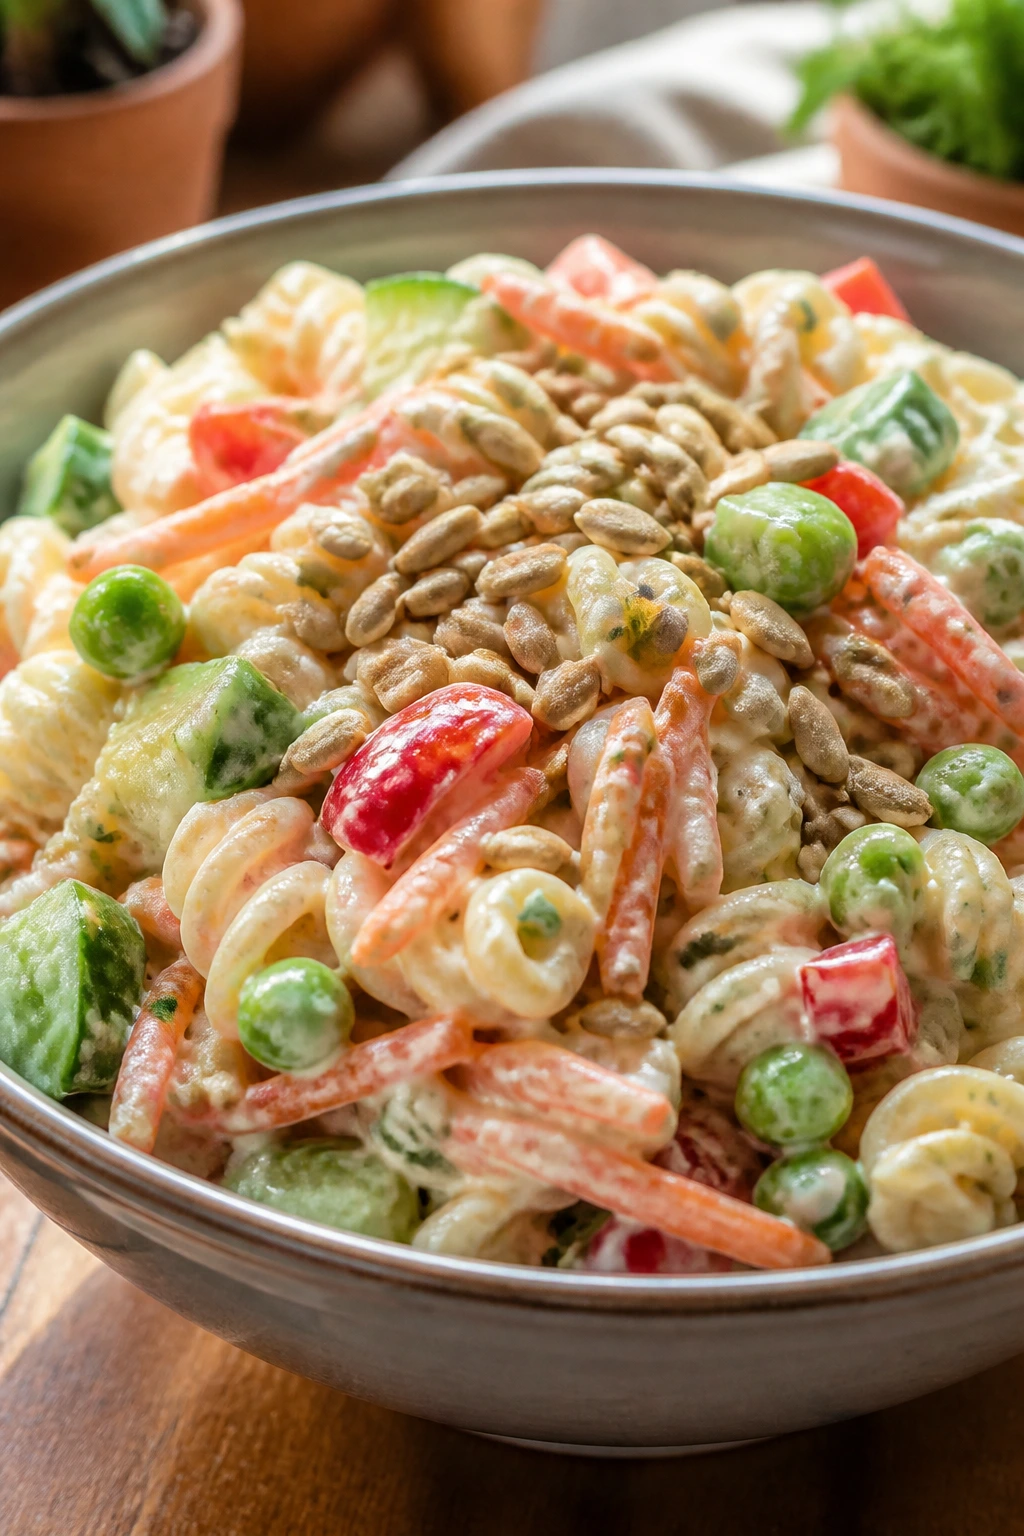
This one is all about texture. The pasta is soft but not mushy, the vegetables stay crunchy, and the sunflower seeds bring a little bite that makes the whole bowl feel finished. A creamy yogurt-mayo dressing keeps it family-friendly without becoming heavy.
Why It Works:
Vegetable pasta salads can fail when every ingredient is the same softness. Sunflower seeds fix that problem, and a thick dressing clings to the pasta instead of pooling at the bottom. The salad holds up well in a lunchbox because the flavors get better after a short chill, but the vegetables still taste fresh.
Key Ingredients:
- 12 oz short pasta
- 1 cup frozen peas, thawed
- 1 cup grated carrots
- 1 red bell pepper, diced
- 1/2 cucumber, diced
- 1/2 cup sunflower seeds
- 1/2 cup plain Greek yogurt
- 1/4 cup mayonnaise
- 1 tbsp lemon juice
- 1 tsp honey
- 1/2 tsp salt
- 1/4 tsp black pepper
Quick Steps:
- Cook the pasta until just tender, then drain and cool briefly under cold water.
- Whisk the yogurt, mayonnaise, lemon juice, honey, salt, and pepper in a large bowl.
- Add the pasta, peas, carrots, bell pepper, and cucumber.
- Toss until everything is lightly coated.
- Stir in the sunflower seeds just before packing or sprinkle them on top so they stay crunchy.
- Chill for 20 minutes if you have time.
Equipment for This Recipe:
- Large pot
- Colander
- Mixing bowl
- Whisk
- Airtight lunch container
How to Serve This Dish:
This salad pairs well with cheese cubes, a boiled egg, or a few crackers for a fuller lunchbox. It also makes a solid side dish next to grilled chicken or turkey meatballs. A fruit cup balances the creamy dressing nicely.
Pro Tips for This Recipe:
- Cool the pasta before adding the dressing.
- Add the seeds at the end so they stay crisp.
- Use a thick yogurt, not a runny one.
- If the salad sits overnight, give it one stir before packing.
Variations on This Dish:
- Ranch Veggie Salad: Swap the lemon dressing for ranch-style seasoning.
- Tuna Pasta Salad: Fold in drained tuna for extra protein.
- Dairy-Free Bowl: Use dairy-free yogurt or a simple vinaigrette instead.
Common Mistakes to Avoid with This Recipe:
- Don’t overcook the pasta or it loses its bite.
- Don’t add the sunflower seeds too early if crunch matters.
- Don’t make the dressing too thin.
Why These Lunchbox Meals Stay Fresh Instead of Turning Sad
Lunchbox food fails for boring reasons, mostly moisture and timing. A tortilla that sits against wet tomato slices turns gummy. Pasta that goes into a container while still hot sweats itself into softness. A crisp topping left on a casserole loses its edge if you seal it before the steam has a place to go. None of that is dramatic. It just quietly ruins lunch.
The meals in this collection dodge those problems by using shapes and textures that travel well. Pinwheels, cups, muffins, meatballs, and stuffed potatoes each solve a different packing headache. Some hold sauce in the middle. Some use cheese as glue. Some depend on chilling, which sounds dull until you realize it keeps the whole thing from sliding around in the lunchbox.
I also like that this approach makes leftovers feel intentional. A bowl of fried rice or a tray of meatballs stops being “what’s left” and starts being tomorrow’s lunch. That shift matters. It cuts waste, saves time, and makes the whole week feel less chaotic.
Essential Equipment for These Recipes
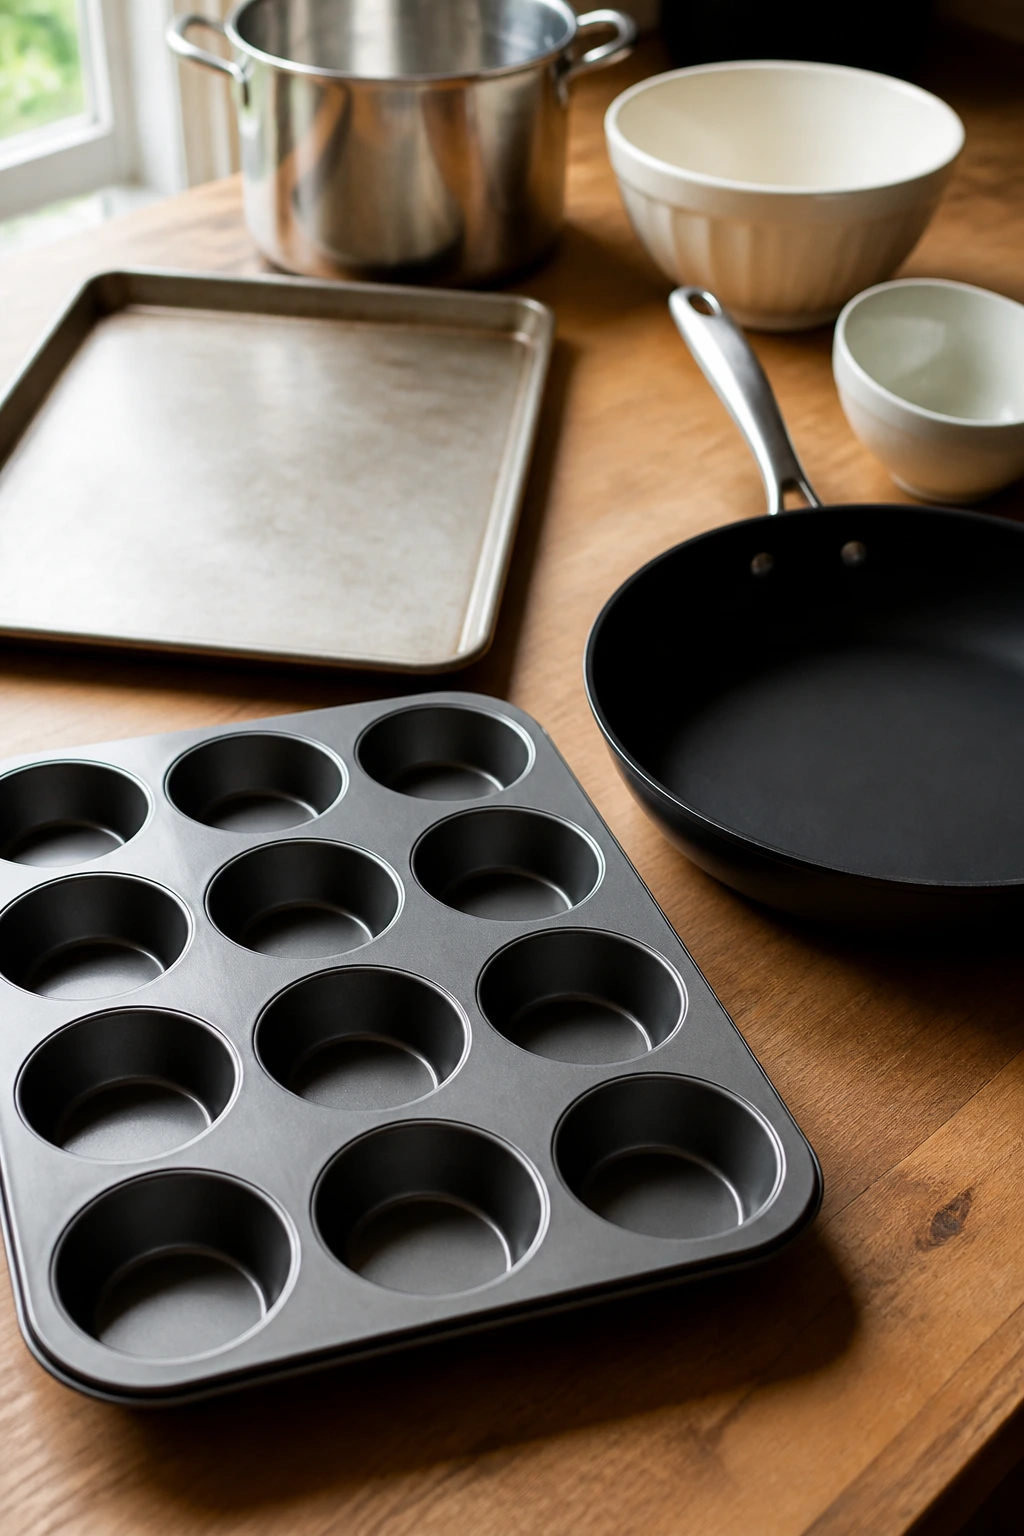
- 12-cup muffin tin: Useful for pizza muffins, mac cups, meatloaf muffins, egg bites, and ziti cups.
- Large skillet or wok: Best for fried rice, quesadillas, taco beef, and sliders.
- Sheet pan with parchment: Handy for meatballs and anything baked in portions.
- Large pot and colander: Needed for pasta salads and baked ziti cups.
- Mixing bowls in two or three sizes: You’ll use them constantly for fillings, dressings, and sauces.
- Sharp chef’s knife: Thin apple slices, neat vegetables, and clean sandwich cuts depend on it.
- Airtight lunch containers: Split compartments help keep wet and dry foods apart.
- Small sauce cups: Ideal for salsa, dressing, barbecue sauce, and dip.
- Foil and parchment: Foil helps with warm lunches; parchment makes cleanup easier.
- Instant-read thermometer: Especially useful for meatballs, turkey patties, and meatloaf muffins.
Smart Shopping and Ingredient Tips
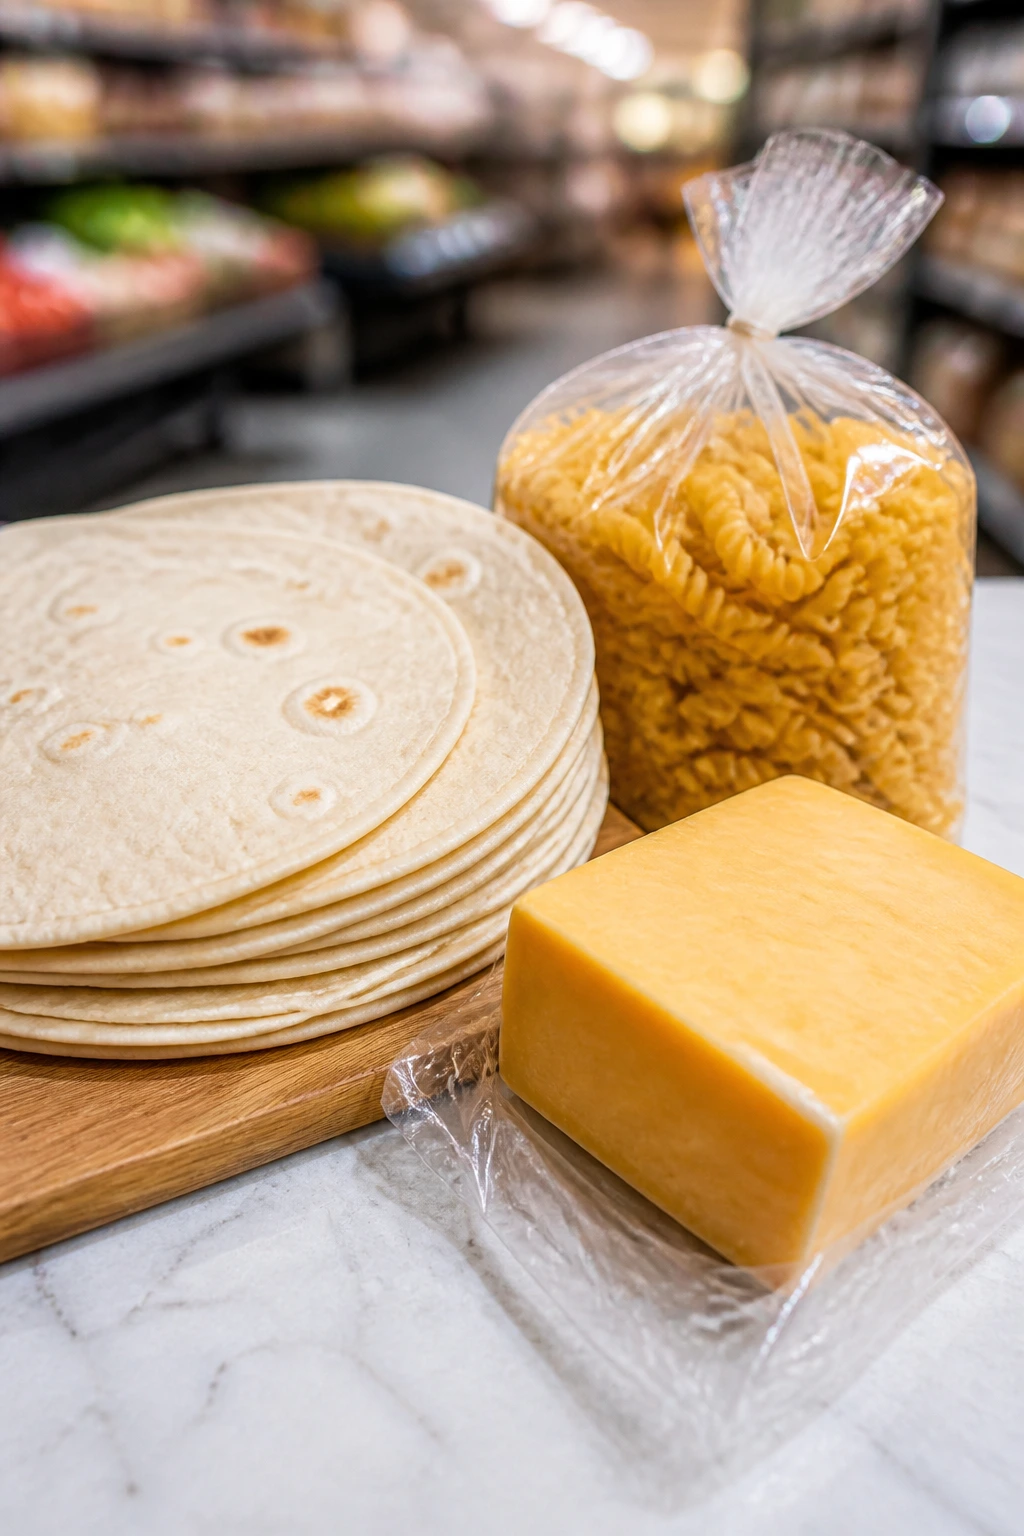
Buy tortillas that still feel soft when you bend them; stiff ones crack when rolled. For pinwheels, wraps, and sliders, that’s the difference between neat and annoying. The same goes for pita — fresh pita opens more cleanly than dry, brittle pockets that split the second you fill them.
Cheese matters more than a lot of people think. Block cheese grated at home melts and blends better than some pre-shredded bags, which often carry anti-caking powder. That said, pre-shredded cheese is still fine for lunchbox food if convenience keeps you cooking. I’d rather see you use the bagged stuff and actually make the meal than buy the “perfect” block and forget it in the fridge drawer.
For pasta salads, choose short shapes with ridges or curves: rotini, penne, ziti, shells. They catch dressing better than smooth noodles. And for baked pasta cups, undercook the pasta by a minute or two because it finishes in the oven and firms up as it cools. The same rule applies to fried rice: cold, cooked grains outperform fresh ones every time.
When you shop for proteins, think about what survives a second life. Rotisserie chicken, cooked turkey, leftover ham, and canned tuna all work because they’re already seasoned enough to stand on their own. For ground meat, choose something not too lean unless you’re adding a little fat elsewhere; extra-lean turkey can dry out fast in sliders or meatballs. And if you’re buying dressings, sauces, or salsa, pick the thicker versions. Thin ones make lunchbox food sad.
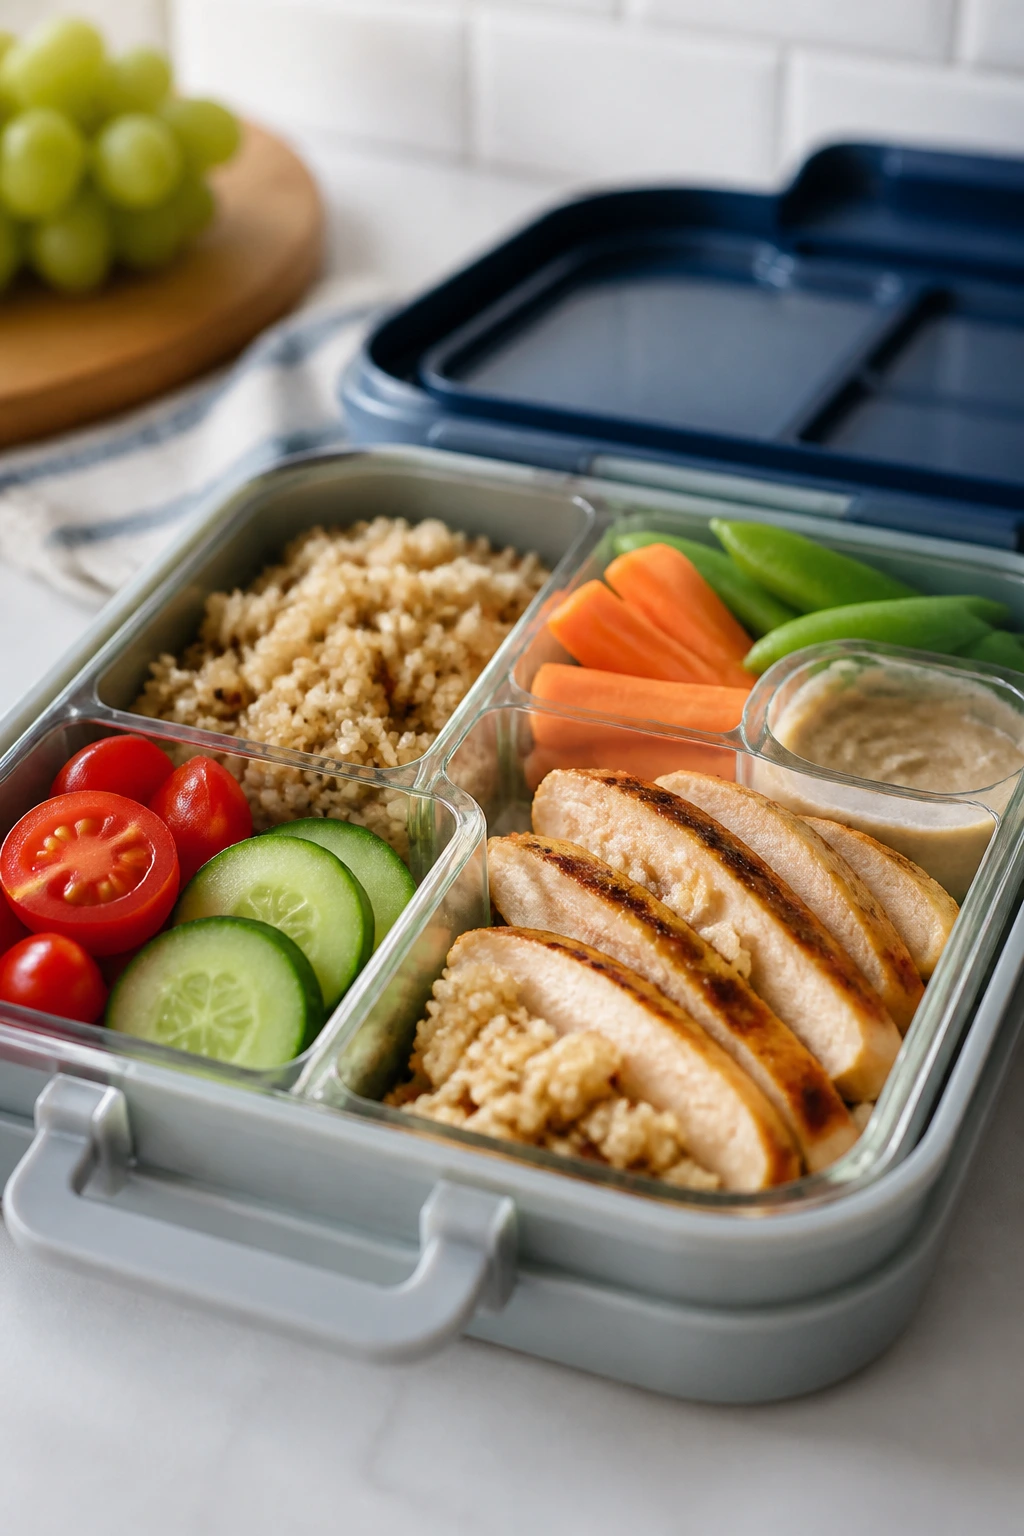
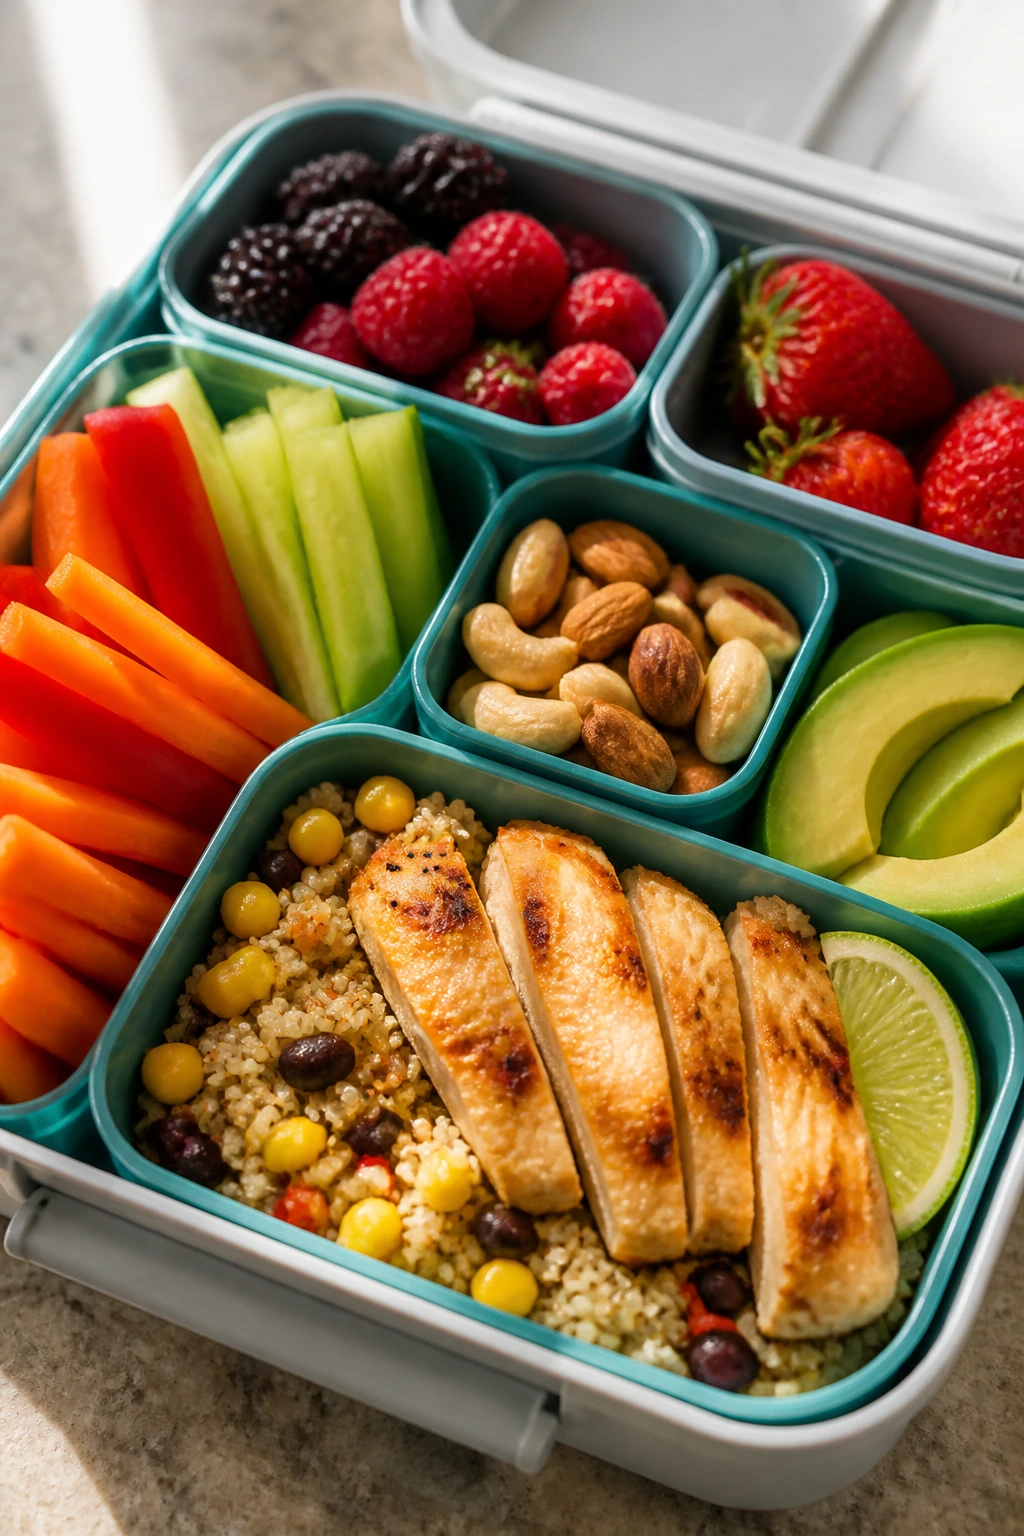
How to Serve These Recipes

Presentation:
Lunchboxes look better when you separate the wet stuff from the dry stuff. Use silicone cups or divided containers for salsa, dressing, and dips. Stack pinwheels in a fan, line up meatballs over rice, and keep crunchy pieces like croutons or sunflower seeds on top or in their own pocket.
Accompaniments:
Fruit does a lot of quiet work here. Grapes, apple slices, clementines, and berries balance cheesy or savory meals without stealing the show. Raw vegetables — cucumbers, carrot sticks, snap peas, bell pepper strips — pair cleanly with almost every recipe in this collection.
Portions:
For younger kids, plan on one main item plus one or two sides. Two pinwheels, one or two meatloaf muffins, or a single stuffed potato can be enough if the box also includes fruit and a crunchy side. Older kids and adults usually do better with a larger protein portion and one starch.
Beverage Pairing:
Cold water is the obvious answer, but milk works especially well with pizza muffins, mac cups, and breakfast burritos. For lunches that lean savory and bright — like Greek pasta salad or chickpea bowls — a plain sparkling water or diluted fruit juice feels cleaner than anything sweet.
Additional Tips and Flavor Boosters
Flavor Enhancement: A squeeze of lemon, a little hot sauce, or a spoonful of pesto can rescue a lunch that tastes flat after chilling. Tiny finishing moves matter more than people think when food has been sitting in a cold box for a few hours.
Customization: Add corn to taco bowls, peas to mac cups, spinach to egg bites, or chopped olives to pasta salad. These are easy swaps that change the texture without asking the cook to start over from scratch.
Serving Suggestions: Fresh herbs, a sprinkle of parmesan, or a few sesame seeds on fried rice make even a basic lunch look finished. A small dip cup of ranch, hummus, barbecue sauce, or Caesar dressing also makes kids more willing to eat the vegetables on the side.
Make-It-Yours: For dairy-free lunches, lean on hummus, avocado, mustard, or vinaigrette instead of cheese-heavy fillings. For gluten-free versions, use corn tortillas, rice, baked potatoes, and certified gluten-free pasta or breadcrumbs. If heat matters, keep chili flakes or spicy sauce on the parent side of the fridge, not mixed into the whole batch.
Make-Ahead, Storage, and Reheating Guidance

Most of these meals keep well for 3 to 4 days in the refrigerator if they’re cooled before sealing. Pinwheels, pasta salads, fried rice, meatloaf muffins, mac cups, and ziti cups all fit that window. For the best texture, let hot food cool until the steam has settled before you lid the container, or you’ll trap moisture and soften the tops.
A few recipes freeze especially well. Breakfast burritos, meatballs, meatloaf muffins, mac and cheese cups, and mini shepherd’s pies can all be frozen for up to 2 months in airtight containers or freezer bags. Freeze them in single portions if possible. It makes weekday mornings almost unfairly easy.
When reheating, aim for 165°F in the center for meat-based dishes. Fried rice and meatballs reheat nicely in the microwave with a damp paper towel over the top for a minute or two, then a short finish if needed. Burritos can go from frozen to microwave, but wrap them in a paper towel first so the tortilla doesn’t turn leathery. Pasta cups and ziti cups should be reheated loosely covered so the cheese melts without drying out.
Room temperature storage is not the place to be casual. Pack perishables with an ice pack if they won’t be eaten within about two hours. Thermos lunches need to start hot, not lukewarm; fill the thermos with boiling water for a few minutes first, dump it, then add the food. That small ritual makes a bigger difference than people expect.
Variations and Adaptations to Try
Gluten-Free Lunchbox Swap:
Use corn tortillas for quesadillas, certified gluten-free pasta in the salads and baked ziti, and gluten-free breadcrumbs in meatballs or meatloaf muffins. The textures stay close enough that most kids won’t notice the switch if the seasoning is right.
Dairy-Free Rework:
Skip the cheese-heavy versions and lean on hummus pinwheels, chicken rice bowls, tuna pockets, and BBQ chicken potatoes with olive oil instead of sour cream. A dairy-free yogurt can stand in for creamy dressings in pasta salad if you choose one that isn’t thin.
Thermos Lunch Route:
Fried rice, meatballs with sauce, stuffed potatoes, and mini shepherd’s pies all shine when packed warm. Preheat the thermos with hot water, fill it with hot food, and seal it fast. That little bit of insulation keeps lunch from going lukewarm halfway through the day.
Picky-Eater Build:
Keep sauces on the side and break meals into clean parts: plain pasta, plain chicken, cheese cubes, fruit, and crackers. Once kids get used to the foods separately, you can start combining them. A lunchbox does not need to look fancy to work.
Lower-Sodium Version:
Choose low-sodium tuna, reduced-sodium broth, and use less soy sauce by adding more garlic, ginger, lemon, or herbs. Homemade seasoning blends help here because they let you control the salt without making the food bland.
Extra-Protein Boost:
Add beans to taco bowls, peas to mac cups, chickpeas to pasta salads, or an extra egg to breakfast burritos. These are easy upgrades that do not change the meal’s personality much, which is why they work so well for family lunches.
Common Mistakes to Avoid
The biggest mistake is packing hot food too early. Steam has nowhere to go in a sealed container, so bread softens, cheese sweats, and crisp tops lose their edge. Let hot items cool until they stop sending up steam before closing the lid.
Another common problem is mixing wet and dry ingredients too soon. Croutons, sunflower seeds, lettuce, and tortilla chips all need their own moment. If you dump them in with the dressing or sauce hours before lunch, you end up with a soft, muted version of the meal you meant to make.
People also overfill containers. That seems generous until the lid pushes down on the top layer and smears the food into the corners. Leave a little space, especially for quesadillas, pinwheels, muffins, and sliders. Packed too tightly, they lose the very shape that makes them useful.
Skipping texture checks is a quiet disaster. A pasta salad can taste fine and still be wrong if the noodles are overcooked. Meatballs can look done and still be dry. Rice can seem seasoned and still be too salty once it cools. Taste, cool, and taste again if you can. Cold food does not always taste the way it did in the pan.
Food safety matters here too. If a lunchbox meal contains chicken, eggs, tuna, dairy, or meat sauce, get it into the fridge quickly after cooking and send it out with an ice pack unless it’s going into a thermos. Lunch should be pleasant, not risky.
Frequently Asked Questions About Lunchbox Family Meals

Which recipes in this collection are best served cold?
Pinwheels, pasta salads, tuna pockets, and egg bites are especially good cold or room temperature. They keep their texture without needing a microwave, which makes them easier for school lunches and busy workdays.
Which recipes freeze the best?
Breakfast burritos, meatballs, meatloaf muffins, mac and cheese cups, and mini shepherd’s pies freeze cleanly. Wrap or bag them in single portions so you can reheat only what you need.
How do I keep lunchbox meals from getting soggy?
Keep wet ingredients separate until the last possible moment. Sauce cups, crouton bags, and dry compartments do a lot of quiet work here. Cooling food before sealing also helps because trapped steam is a sogginess machine.
Can I make these meals on one day and pack them all week?
Yes, with a little planning. Cook one or two cold options and one hot option, then rotate them across three or four days so nothing sits too long. Most of these recipes keep well for 3 to 4 days in the fridge.
What’s the best way to pack hot food for lunch?
Preheat an insulated thermos with boiling water, dump it out, then fill it with very hot food. Fried rice, meatballs, stuffed potatoes, and mini shepherd’s pies all hold up well when packed this way.
What if my child hates mixed foods?
Separate the parts. Put chicken by itself, pasta by itself, fruit by itself, and a dip cup on the side. Once the foods are familiar, you can start combining them again without much resistance.
Can I swap the proteins in most of these recipes?
Usually, yes. Turkey can stand in for chicken, ham can replace bacon, and beans can replace meat in several of the bowl and wrap recipes. The main thing is keeping the moisture and seasoning balanced so the lunch still tastes finished.
How long can a lunchbox sit out safely?
Perishable food should not sit out for more than about two hours. If the room is warm, give it less time. Ice packs and insulated bags help, but they do not replace refrigeration.
A Lunchbox Routine Worth Keeping
The best lunchbox meals are not flashy. They open cleanly, taste like lunch instead of leftovers in disguise, and make the middle of the day feel a little more handled. That’s enough. Honestly, it’s a lot.
A small rotation of recipes like these can take a surprising amount of pressure off the week. Cook once, pack twice, repeat. After a while, you stop dreading the lunchbox and start treating it like one of the easier jobs on the list.