
The kitchen gets loud fast after school. Backpacks hit the floor, shoes vanish under the table, and somebody starts asking for food before the homework folder is even open. That’s the moment when kids dinners for after-school snacks earn their place: not a full sit-down meal, not a tray of random chips, but something warm, handheld, and substantial enough to quiet the whole scene for twenty minutes.
I like this category because it solves a very specific problem. Kids are hungry, but they’re rarely hungry for a slow, formal dinner at 4:15. They want pizza energy, sandwich energy, nugget energy, the kind of food that can be eaten standing up or perched sideways on a chair while a backpack spills out across the floor. The best after-school snack dinners feel familiar, and that familiarity matters more than fancy ingredients ever will.
A good snack-dinner also gives you room to be practical. Leftover chicken, a half bag of shredded cheese, a lonely zucchini, a few tortillas, a can of beans — this is where those odds and ends stop looking like clutter and start acting like a plan. The trick is not making a second dinner. It’s making little foods that eat like dinner.
Why These Snack-Dinners Work So Well After School

- They hit the hunger window fast: Most of these recipes go from fridge to table in 15 to 30 minutes, which matters when everyone is edging toward meltdowns.
- They feel like real food: Melted cheese, crispy edges, warm bread, or savory fillings tell kids this is more than a placeholder snack.
- They reuse everyday ingredients: Tortillas, eggs, shredded cheese, canned beans, bread, pasta, and rotisserie chicken show up again and again for a reason.
- They’re easy to portion: You can make two quesadillas for one child or a whole pan of slider-sized bites for a crowd without changing the method.
- They play well with dips and sides: A small bowl of fruit, cucumbers, or ranch turns a snack into a plate that looks finished, not thrown together.
- They survive repeat requests: The best after-school snack dinners are the ones kids will actually ask for again next week, not the ones you only make once because they were “interesting.”
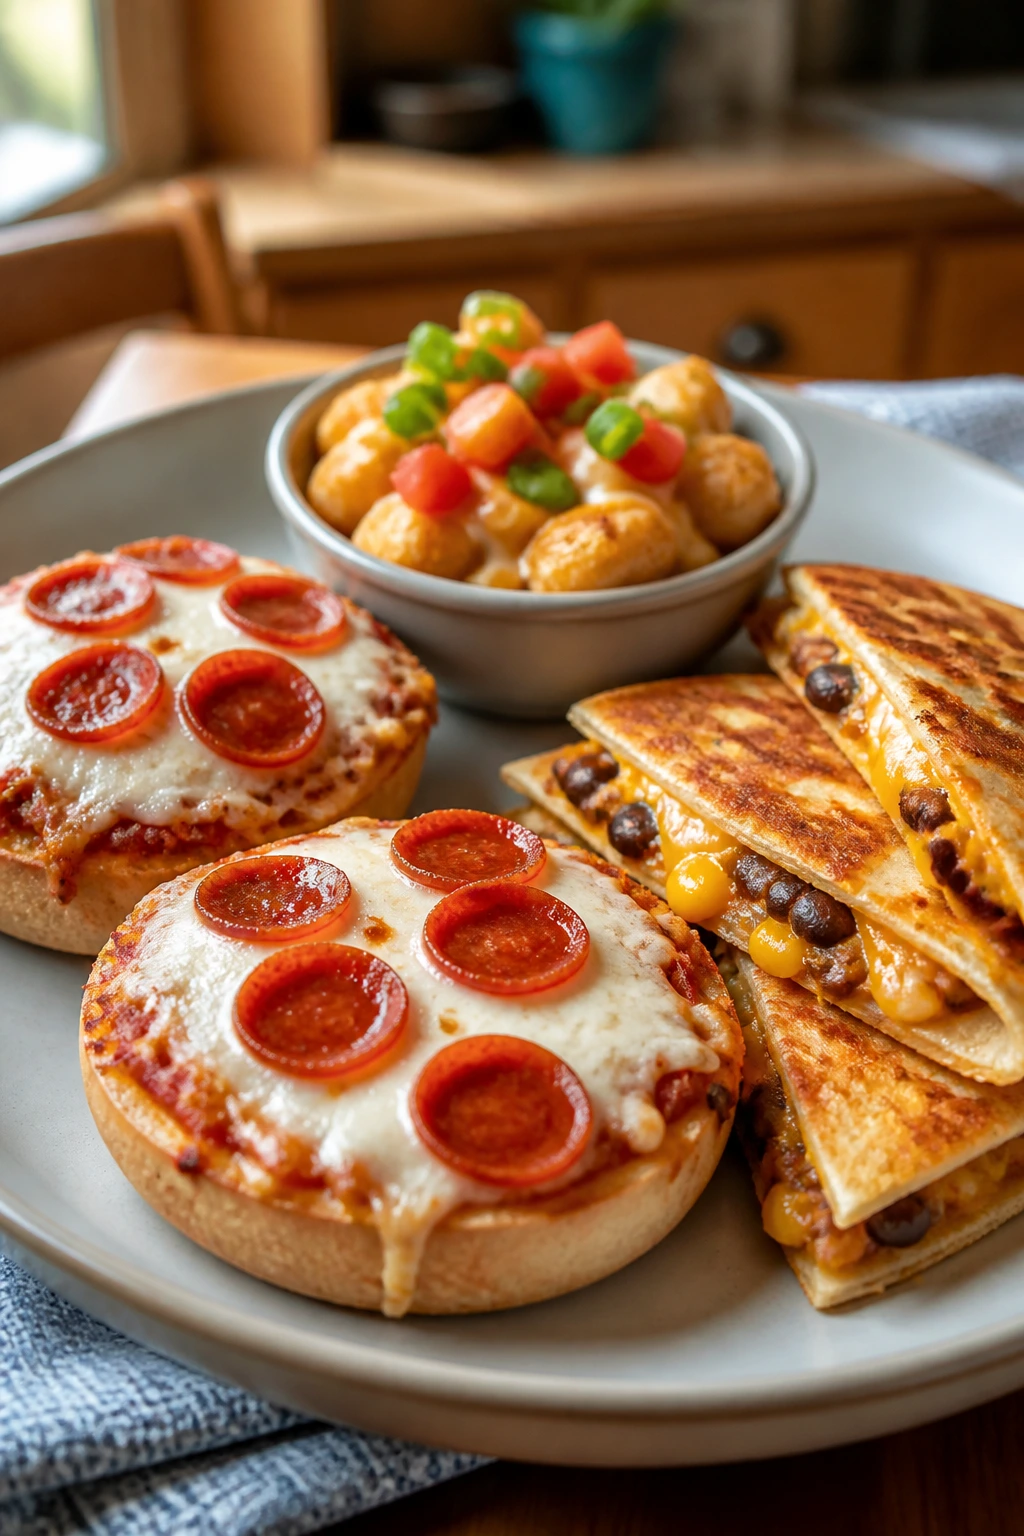
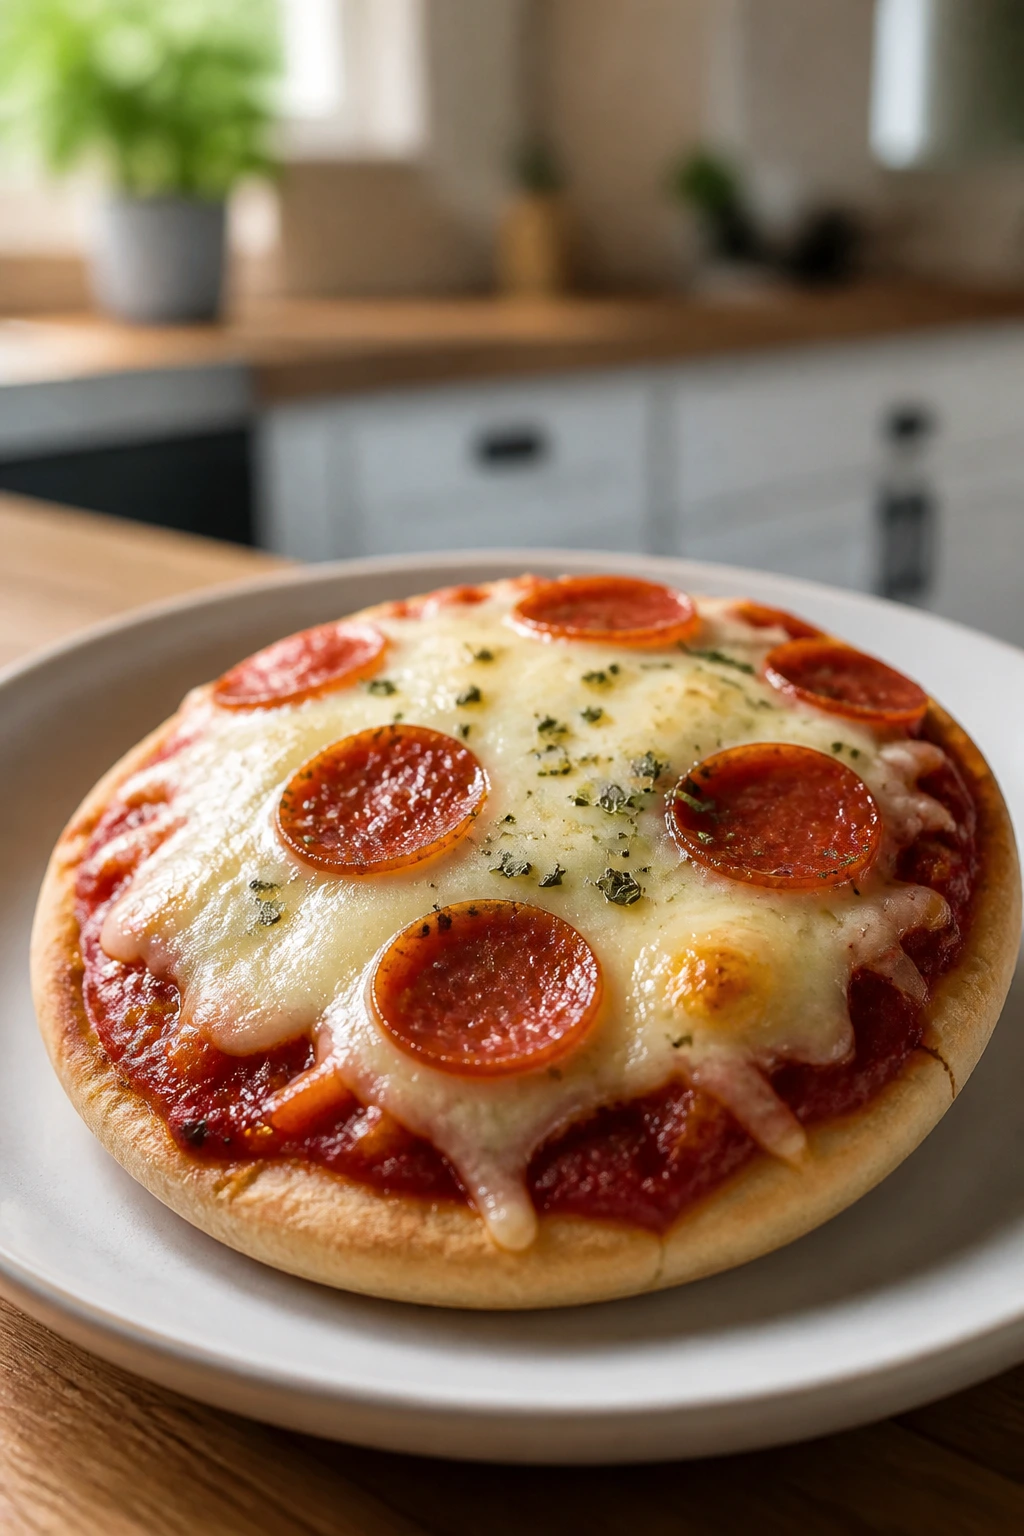
1. Mini Pita Pizzas
A mini pita pizza has exactly the right kind of chaos: crisp edges, gooey cheese, and sauce that tastes like the corner pizzeria without making you stand at the stove for half an hour. I reach for these when I want something that feels like a reward, not a compromise.
Why It Works:
Pita bread bakes faster than dough and stays sturdy under sauce, which means you get a crisp bottom instead of a floppy mess. The small size helps too — kids like the personal-scale look, and you can set out toppings without turning dinner into a build-your-own production.
Key Ingredients:
- 4 mini pitas or 2 large pitas, cut in half
- 1/2 cup marinara sauce
- 1 cup shredded mozzarella
- 1/2 cup mini pepperoni
- 1/4 cup diced bell pepper
- 1 tablespoon olive oil
- 1/2 teaspoon dried oregano
Quick Steps:
- Preheat the oven to 425°F and line a baking sheet with parchment.
- Brush the pita surfaces with olive oil so the edges turn crisp.
- Spread 2 tablespoons marinara over each pita, leaving a slim border.
- Top with mozzarella, pepperoni, bell pepper, and oregano.
- Bake for 8 to 10 minutes, until the cheese is bubbling and the pita edges are golden.
Equipment for This Recipe:
- Baking sheet
- Parchment paper
- Spoon for spreading sauce
- Chef’s knife for slicing toppings
How to Serve This Dish:
Serve them hot and cut into quarters so little hands can grab the slices cleanly. A bowl of grapes or carrot sticks makes the plate feel finished without adding work.
Pro Tips for This Recipe:
- Use a light hand with sauce. Too much marinara makes the pita soft in the center.
- If your oven runs cool, give the pizzas an extra minute or two and watch the cheese, not the clock.
- A sprinkle of parmesan at the end gives the whole thing a salty finish that tastes more bakery-case than school-cafeteria.
Variations on This Dish:
- Plain Cheese Version: Skip the pepperoni and use mozzarella plus a little parmesan for kids who want no surprises.
- Veggie Patch Pizza: Add finely chopped spinach, mushrooms, or olives. Keep pieces small so they don’t fall off.
- White Pizza Twist: Swap marinara for a thin layer of ricotta mixed with garlic powder and top with mozzarella.
Common Mistakes to Avoid with This Dish:
- Don’t overload the pita with toppings. If the middle gets soggy, the whole thing loses its snap.
- Don’t bake on foil if you want a crisp bottom. Parchment or a bare sheet pan works better.
2. Cheesy Chicken Quesadilla Wedges
This is the one I make when the afternoon has gone off the rails and everybody wants food now. The tortilla gets crispy, the cheese turns stretchy, and the chicken gives the whole thing enough heft to count as a meal.
Why It Works:
Quesadillas are fast because the filling is already cooked, so all the heat has to do is melt and brown. The tortilla acts like a sealed packet, which keeps the filling from falling apart in the way sloppy sandwiches sometimes do.
Key Ingredients:
- 2 cups shredded cooked chicken
- 1 1/2 cups shredded cheddar or Monterey Jack
- 4 large flour tortillas
- 2 tablespoons butter, softened
- 1/4 cup salsa, drained a little if very wet
- 2 tablespoons chopped spinach, optional
- 1/2 teaspoon garlic powder
Quick Steps:
- Warm a large skillet over medium heat.
- Mix the chicken with salsa, spinach, and garlic powder.
- Butter one side of each tortilla and place two tortillas, butter-side out, in the skillet.
- Divide the chicken mixture and cheese between them, then top with the remaining tortillas.
- Cook for 2 to 3 minutes per side, until deeply golden and the cheese has melted.
- Rest for 1 minute, then cut into wedges.
Equipment for This Recipe:
- Large skillet
- Spatula
- Cutting board
- Sharp knife or pizza cutter
How to Serve This Dish:
These wedge nicely with sour cream, salsa, or mashed avocado. I like to stack them on a plate with a few cucumber coins on the side so the meal doesn’t feel too heavy.
Pro Tips for This Recipe:
- Shred the chicken finely. Big chunks make the quesadilla lumpy and harder to flip.
- Drain watery salsa before mixing it in.
- Use medium heat. High heat burns the tortilla before the cheese melts.
Variations on This Dish:
- Bean-and-Chicken Quesadilla: Add 1/2 cup mashed black beans for extra filling power.
- Mild Cheese Only: Skip the salsa and use plain chicken plus cheddar for kids who want a cleaner flavor.
- Spicy Grown-Up Corner: Add sliced jalapeños to one half of the skillet batch.
Common Mistakes to Avoid with This Dish:
- Don’t stuff it too full. Overfilled quesadillas leak and tear when you cut them.
- Don’t slice immediately. That little one-minute rest keeps the cheese from spilling out.
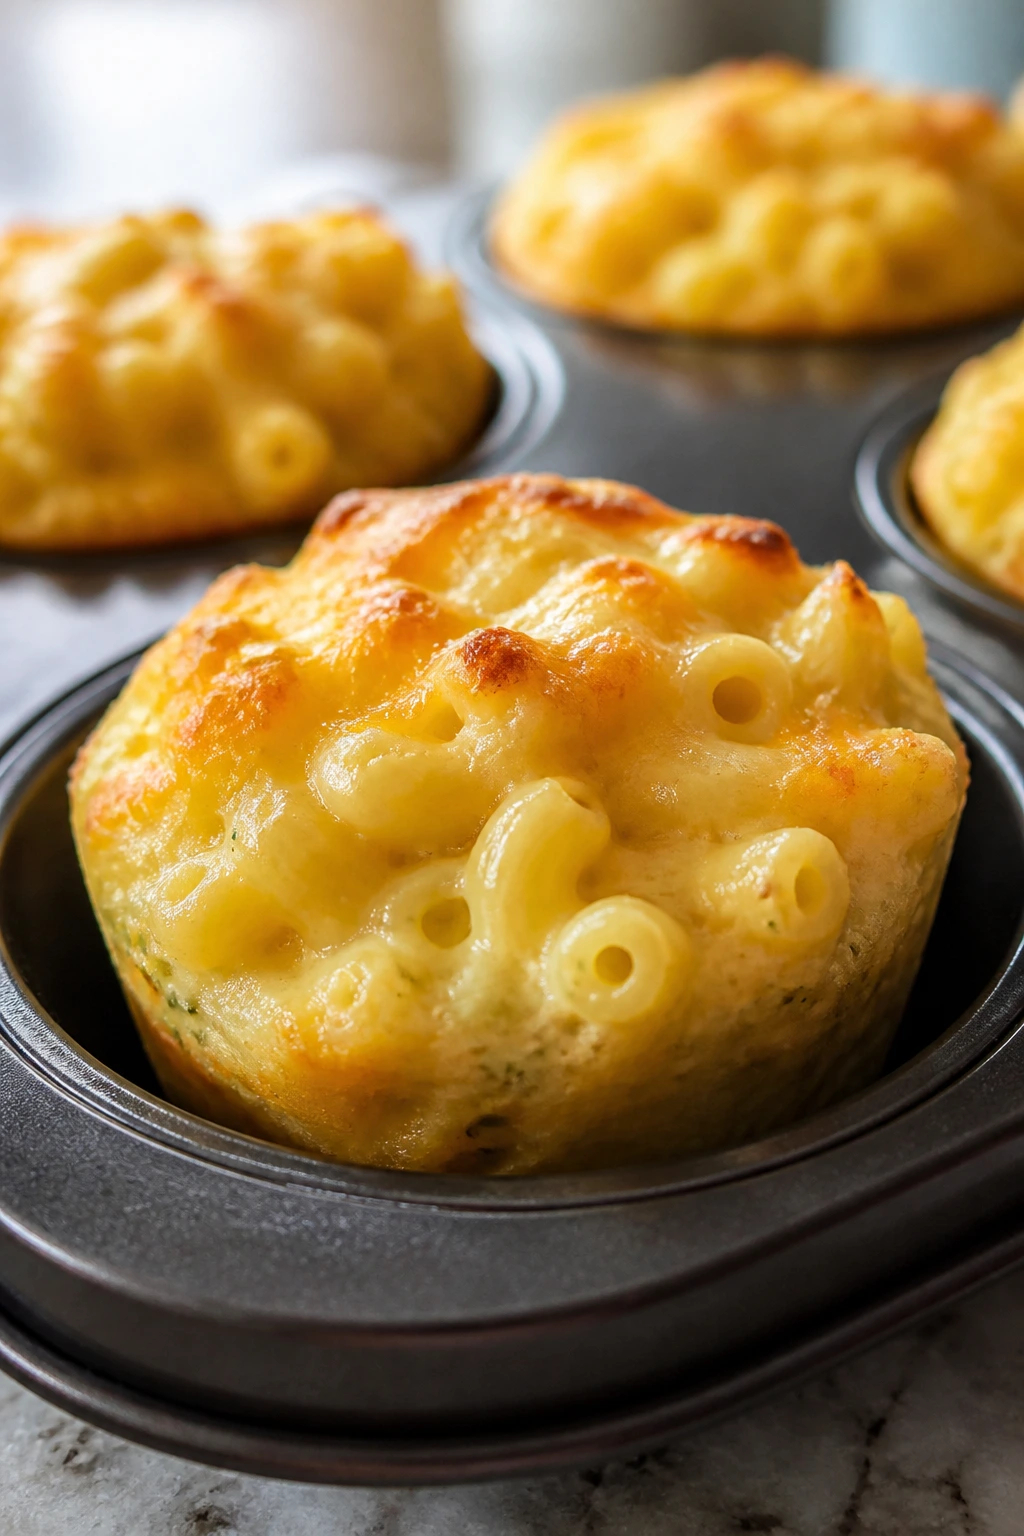
3. Hidden-Veggie Mac and Cheese Cups
Mac and cheese gets a bit more useful when you bake it in muffin tins. The edges crisp up, the centers stay creamy, and the little cups are neat enough for small hands without a fork battle.
Why It Works:
A muffin tin turns ordinary mac and cheese into portioned bites with crunchy edges, which kids tend to love even when they swear they “don’t like vegetables.” Grated cauliflower or carrot disappears into the cheese sauce once it’s cooked, especially if you keep the shreds fine.
Key Ingredients:
- 8 ounces elbow macaroni
- 2 tablespoons butter
- 2 tablespoons all-purpose flour
- 2 cups milk
- 2 cups shredded cheddar
- 1 cup finely grated cauliflower or carrot
- 1/2 teaspoon salt
- 1/2 cup panko breadcrumbs
Quick Steps:
- Preheat the oven to 375°F and grease a 12-cup muffin tin.
- Cook the macaroni until just shy of tender, then drain.
- Make a simple cheese sauce with butter, flour, milk, cheddar, salt, and the grated vegetable.
- Stir in the pasta and spoon the mixture into the muffin cups.
- Top with panko and bake for 18 to 20 minutes, until set and golden.
- Cool for 5 minutes before lifting them out.
Equipment for This Recipe:
- Muffin tin
- Saucepan
- Whisk
- Measuring cups
How to Serve This Dish:
Serve with ketchup for the kids who are loyal to it, or a little marinara if you want a more dinner-like plate. A few steamed peas on the side make the tray feel balanced without much effort.
Pro Tips for This Recipe:
- Undercook the pasta by a minute. It finishes in the oven and won’t go mushy.
- Grate the vegetable finely so it disappears into the sauce.
- Let the cups cool before removing them, or they’ll break apart.
Variations on This Dish:
- Broccoli Cheddar Cups: Swap cauliflower for very finely chopped broccoli florets.
- Smoky Version: Add a pinch of smoked paprika to the cheese sauce.
- Dairy-Heavy Comfort Version: Use half cheddar and half mozzarella for a softer melt.
Common Mistakes to Avoid with This Dish:
- Don’t use watery vegetables. They thin the sauce and keep the cups from setting.
- Don’t skip greasing the muffin tin. Even a well-browned cup can stick like glue.
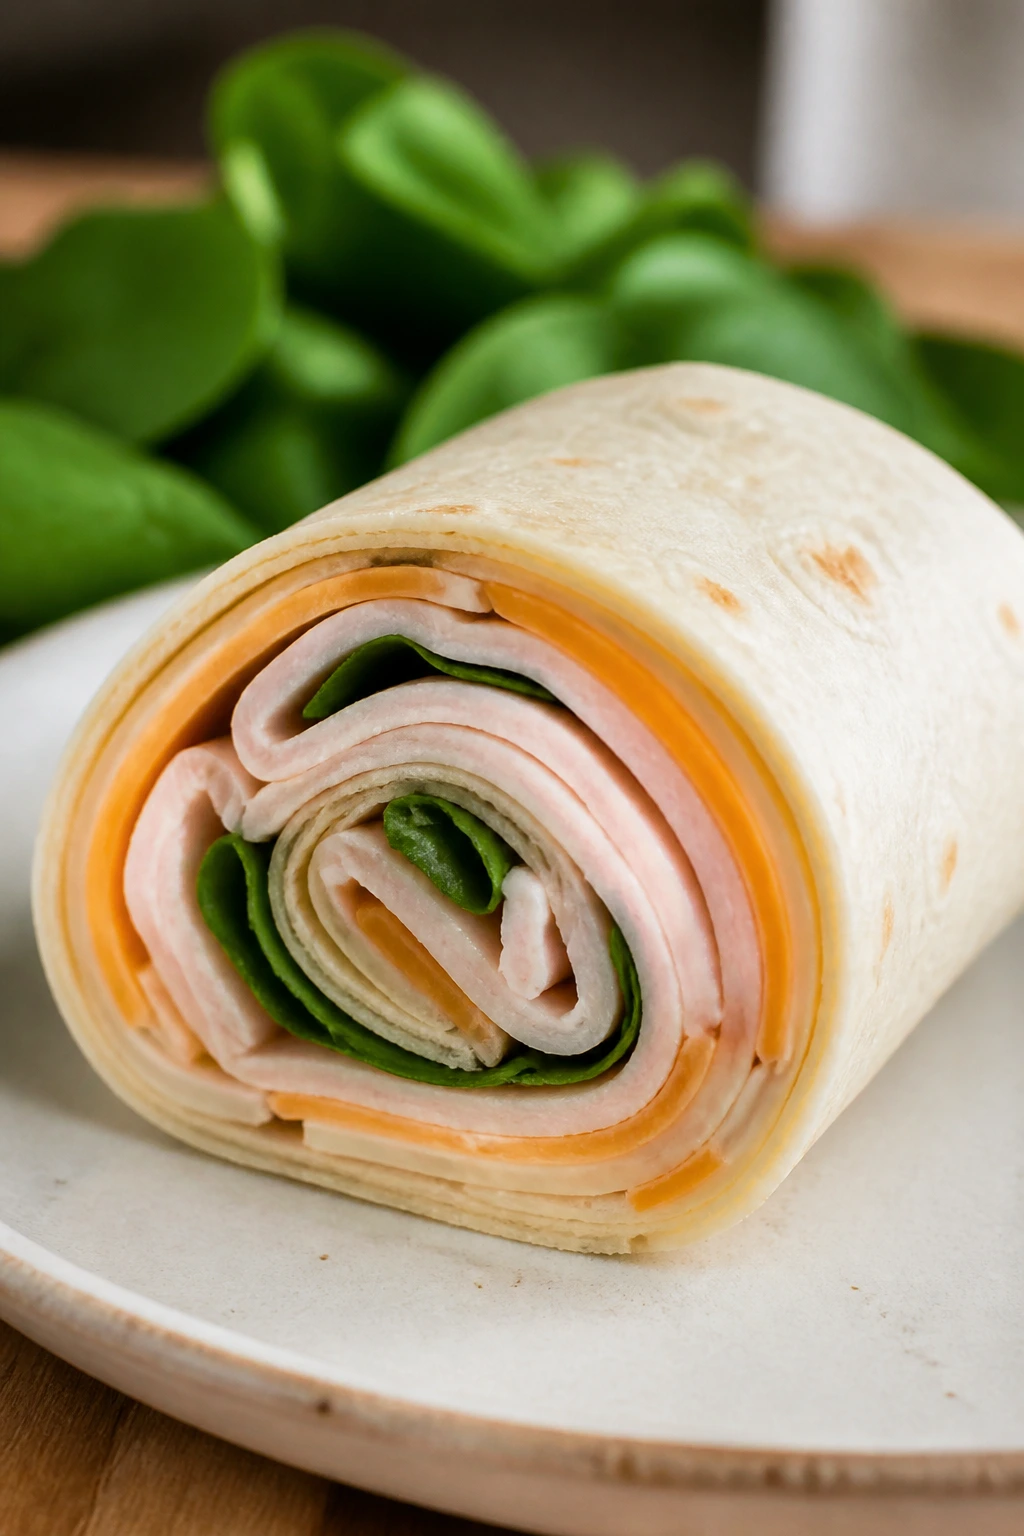
4. Turkey and Cheese Roll-Ups
These taste like a lunchbox classic, only cleaner and more satisfying because they’re rolled tight and sliced into little spirals. They’re cold, quick, and a good answer when the house is too hot to turn on the oven.
Why It Works:
Soft tortillas keep the filling contained, and cream cheese gives the roll-up enough structure that it doesn’t unravel the second a kid picks it up. The shape matters here. Slices look fun, and fun gets eaten.
Key Ingredients:
- 4 large flour tortillas
- 4 ounces cream cheese, softened
- 8 slices deli turkey
- 4 slices cheddar or Swiss cheese
- 1 cup baby spinach, optional
- 1/2 cup shredded carrots, optional
- 1 teaspoon Dijon mustard, optional
Quick Steps:
- Spread each tortilla with cream cheese, leaving a thin border.
- Add turkey, cheese, spinach, carrots, and a tiny swipe of mustard if using.
- Roll the tortillas tightly, pressing as you go.
- Chill for 10 minutes if you want cleaner slices, then cut into 1-inch rounds.
Equipment for This Recipe:
- Cutting board
- Butter knife or offset spatula
- Sharp knife
- Plastic wrap if chilling
How to Serve This Dish:
Pile the rounds on a plate with cherry tomatoes and apple slices. If you’re feeding a kid who likes dipping, set out ranch or honey mustard in a small bowl.
Pro Tips for This Recipe:
- Dry the spinach well. Wet leaves make the tortilla slippery.
- Slice with a sharp knife in one clean motion.
- If the tortilla cracks, warm it for 10 seconds in the microwave first.
Variations on This Dish:
- Ham and Cheese Swap: Use thin ham slices and mild cheddar instead of turkey.
- Veggie-First Roll-Ups: Skip the meat and add cucumber matchsticks plus shredded carrots.
- Everything Bagel Version: Sprinkle the cream cheese with a pinch of everything bagel seasoning.
Common Mistakes to Avoid with This Dish:
- Don’t overfill the tortilla. The roll should look snug, not stuffed.
- Don’t cut immediately after rolling if you want neat spirals. A short chill helps a lot.
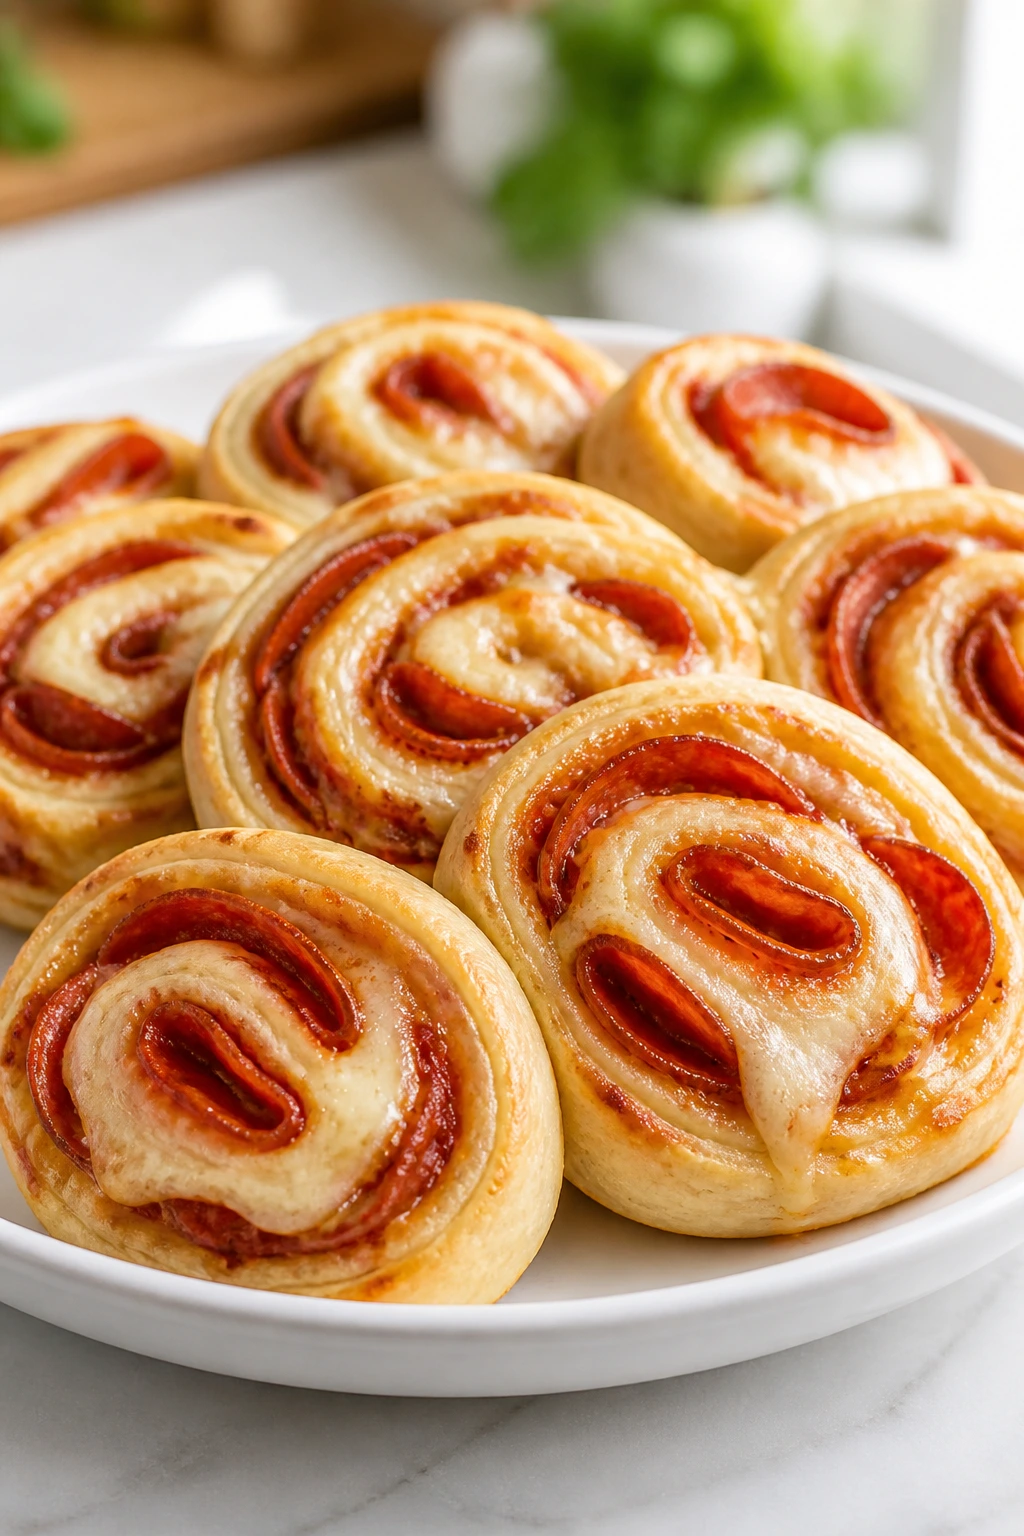
5. Pizza Pinwheels
Pizza pinwheels are the kind of snack that makes a house smell like a Saturday afternoon, even when it’s a Tuesday and everybody’s grumpy. The puffed edges, the melted cheese, the little spirals of pepperoni — kids notice all of it.
Why It Works:
Crescent dough or puff pastry bakes into flaky layers, which gives you a crisp bite around a soft, cheesy center. The spiral shape distributes the filling so every slice tastes balanced, not like one random mouthful of sauce and another of bread.
Key Ingredients:
- 1 can refrigerated crescent dough sheet or 1 sheet puff pastry
- 1/2 cup pizza sauce
- 1 cup shredded mozzarella
- 1/2 cup chopped pepperoni
- 1 tablespoon grated parmesan
- 1/2 teaspoon Italian seasoning
Quick Steps:
- Heat the oven to 400°F and line a baking sheet with parchment.
- Roll out the dough into a rectangle and spread on a thin layer of pizza sauce.
- Scatter mozzarella, pepperoni, parmesan, and Italian seasoning over the surface.
- Roll tightly into a log and slice into 1-inch pinwheels.
- Bake for 12 to 15 minutes, until golden and puffed.
Equipment for This Recipe:
- Baking sheet
- Parchment paper
- Serrated or sharp knife
- Pastry brush, optional
How to Serve This Dish:
Serve warm with extra pizza sauce for dipping. A bowl of sliced oranges makes a good side because the acidity cuts through the cheese.
Pro Tips for This Recipe:
- Chill the rolled log for 10 minutes before slicing if the dough feels soft.
- Use a light hand with sauce; too much leaks out and burns.
- Cut with a sharp knife rather than sawing back and forth.
Variations on This Dish:
- Veggie Pizza Swirl: Use finely chopped mushrooms and bell peppers instead of pepperoni.
- Cheese-Only Spiral: Leave out the meat and double the mozzarella.
- Garlic Bread Version: Brush the top with melted butter and garlic powder before baking.
Common Mistakes to Avoid with This Dish:
- Don’t roll the log loosely. Tight spirals hold together better in the oven.
- Don’t skip parchment. Sticky cheese on a bare pan is a nuisance to scrub off.
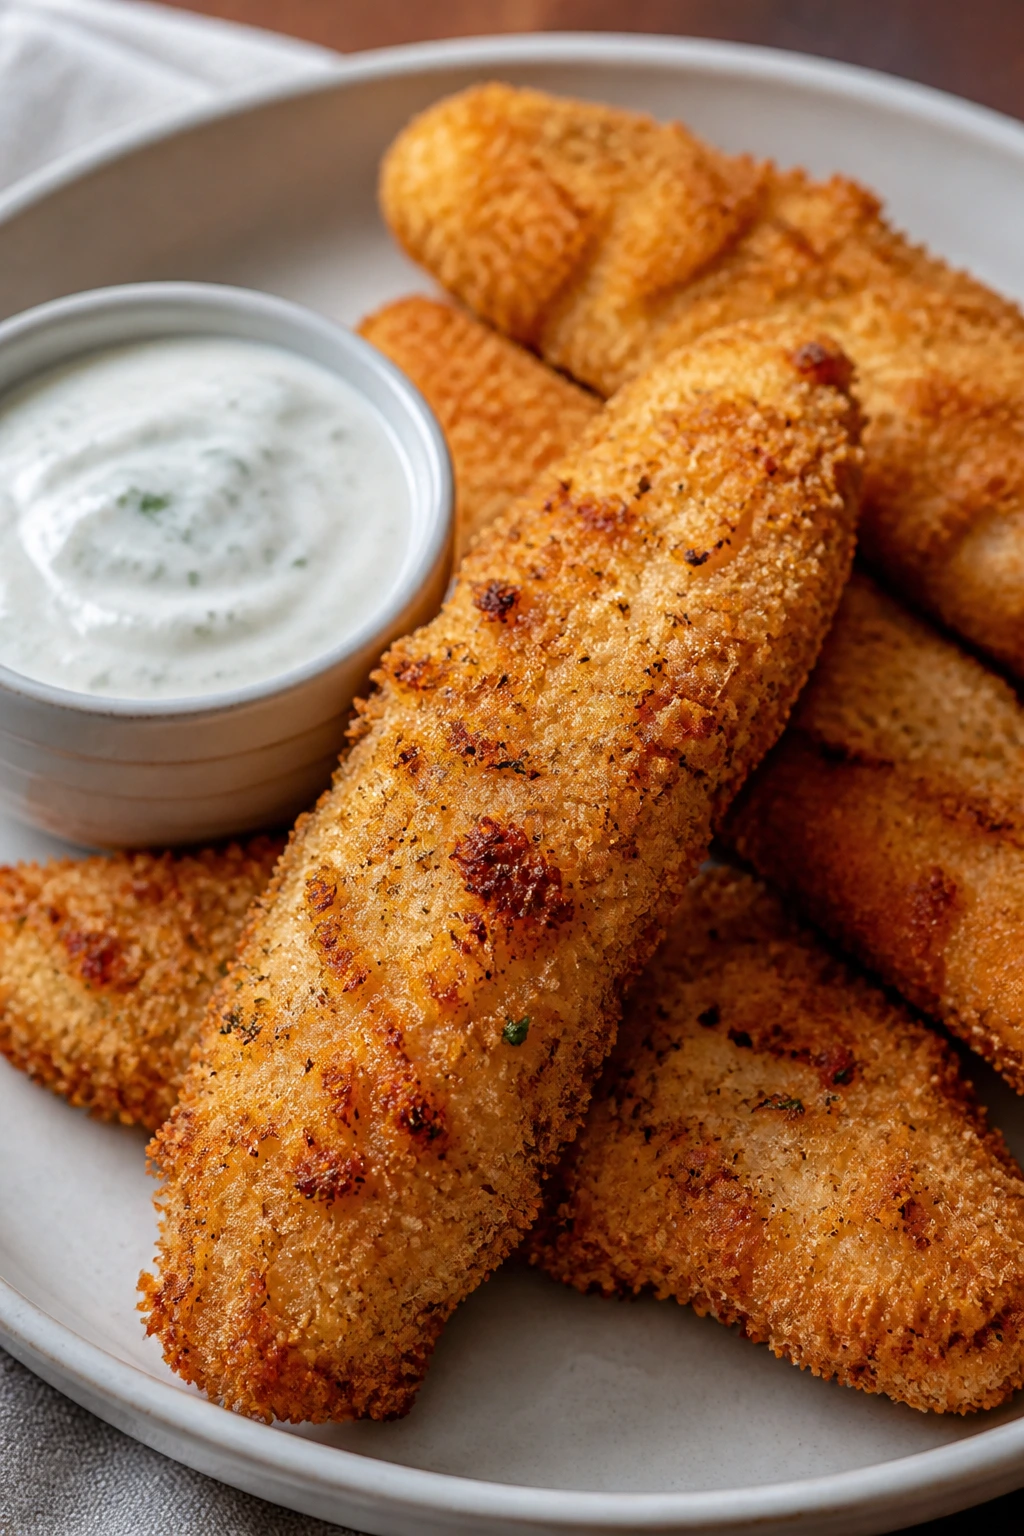
6. Baked Chicken Tenders with Yogurt Ranch
A plate of chicken tenders has a way of calming an after-school crowd. These bake in the oven, come out crisp, and still feel familiar enough that nobody argues with the menu.
Why It Works:
Panko gives the tenders a craggy crust without needing a deep fryer, and the yogurt ranch adds tang without making the meal heavy. Baking at a high heat keeps the coating crisp while the chicken stays juicy.
Key Ingredients:
- 1 1/2 pounds chicken tenders
- 1/2 cup flour
- 2 eggs, beaten
- 1 1/2 cups panko breadcrumbs
- 1/2 cup grated parmesan
- 1 teaspoon salt
- 1 cup plain Greek yogurt
- 1 tablespoon ranch seasoning
Quick Steps:
- Preheat the oven to 425°F and set a rack over a lined baking sheet if you have one.
- Set up flour, eggs, and a panko-parmesan mixture in separate bowls.
- Coat each tender in flour, dip in egg, then press into the crumbs.
- Place on the sheet, spray lightly with oil, and bake for 15 to 18 minutes, flipping once.
- Mix yogurt with ranch seasoning for the dip.
Equipment for This Recipe:
- Rimmed baking sheet
- Wire rack, optional but helpful
- Three shallow bowls
- Tongs
How to Serve This Dish:
Put out the tenders with ranch, ketchup, or honey mustard and a handful of baby carrots. They also sit nicely beside buttered corn or a baked potato if you want to stretch them toward dinner.
Pro Tips for This Recipe:
- Press the crumbs on firmly so the coating sticks through the bake.
- Don’t overcrowd the pan. Airflow keeps the crust crisp.
- Add a little paprika to the crumbs if you want deeper color.
Variations on This Dish:
- Air Fryer Tenders: Cook at 400°F for about 10 to 12 minutes, flipping once.
- Parmesan Herb Version: Mix dried parsley and garlic powder into the crumb mixture.
- Gluten-Free Swap: Use gluten-free flour and crushed gluten-free crackers instead of panko.
Common Mistakes to Avoid with This Dish:
- Don’t under-season the crumbs. Plain coating tastes flat, no matter how crisp it is.
- Don’t cut into the chicken too early. Let the tenders rest for 3 minutes so the juices settle.
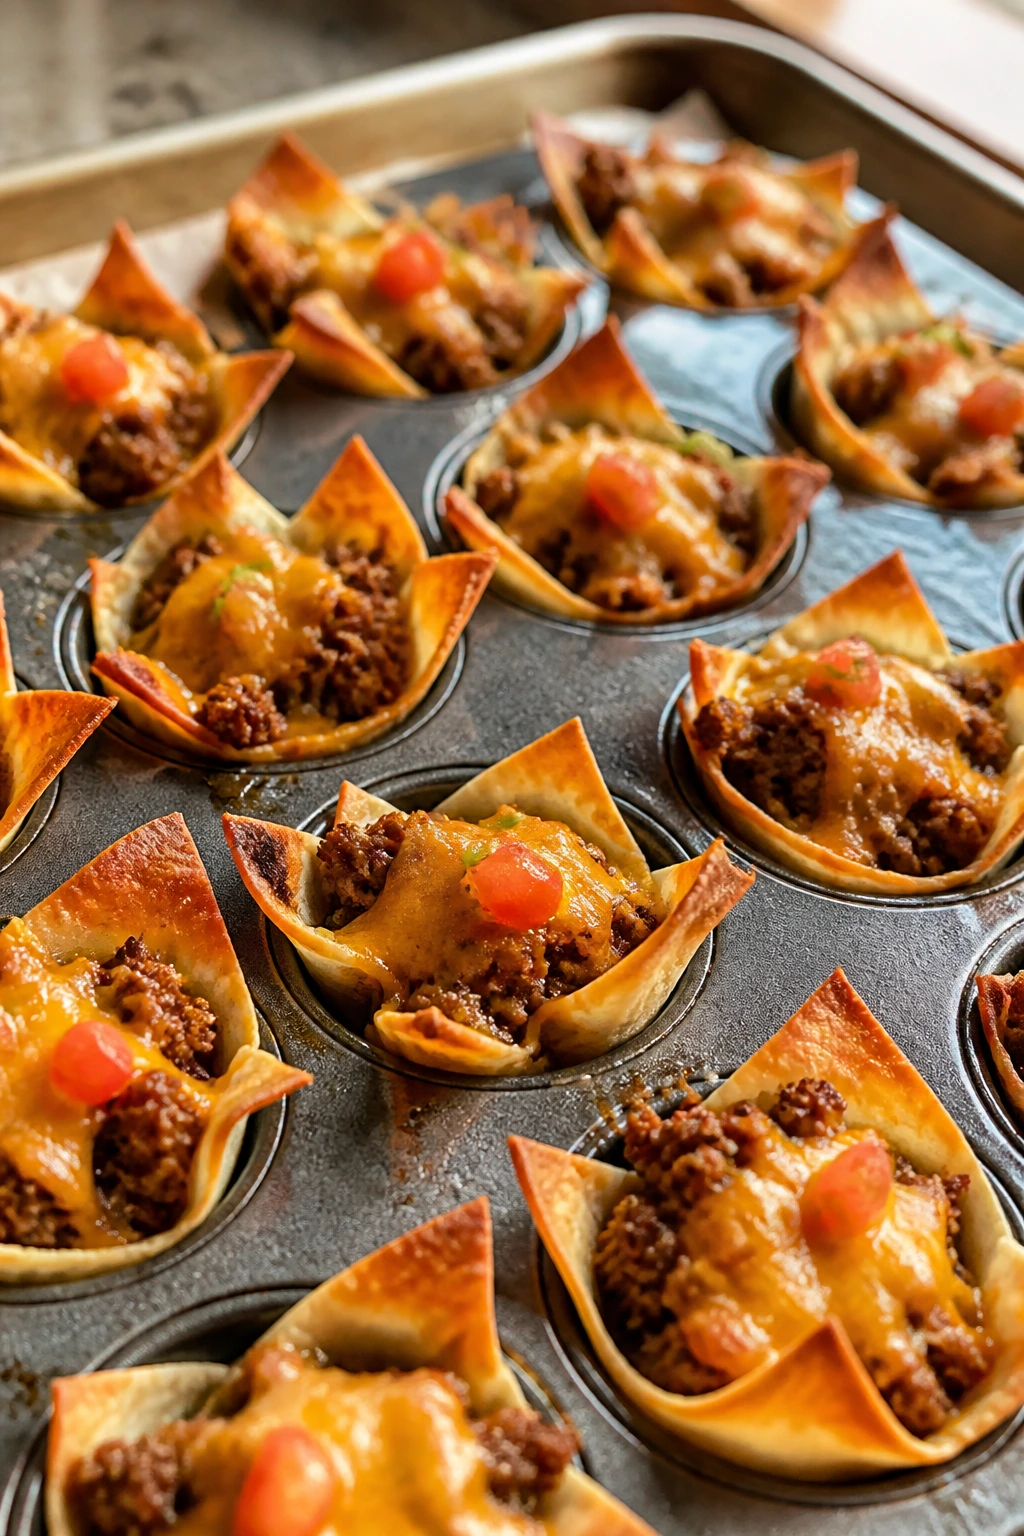
7. Mini Taco Cups
Mini taco cups feel playful in the best way. Wonton wrappers turn into little crispy shells, and the filling stays tucked inside instead of leaking all over the plate.
Why It Works:
The muffin tin gives each taco cup a built-in shape, which means kids can pick them up without a wrapper collapsing in their hands. Beans and beef make the filling sturdy, and the cheese seals everything together as it melts.
Key Ingredients:
- 24 wonton wrappers
- 1 pound ground beef or turkey
- 1 tablespoon taco seasoning
- 1/2 cup salsa
- 1/2 cup black beans, rinsed and drained
- 1 cup shredded cheddar
- 1/4 cup chopped scallions, optional
Quick Steps:
- Preheat the oven to 375°F and grease a 12-cup muffin tin.
- Press two wonton wrappers into each cup, slightly offsetting them.
- Cook the ground meat with taco seasoning, then stir in salsa and beans.
- Spoon filling into the cups, top with cheese, and bake for 10 to 12 minutes.
- Finish with scallions if using.
Equipment for This Recipe:
- Muffin tin
- Skillet
- Spoon
- Small bowl for toppings
How to Serve This Dish:
Serve with sour cream, guacamole, or plain salsa. A little shredded lettuce on the side gives the plate some crunch and keeps the meal from feeling too heavy.
Pro Tips for This Recipe:
- Pre-bake the wonton shells for 3 minutes if you want extra crisp edges.
- Cool the filling a bit before spooning it in so the wrappers don’t soften too fast.
- Use a teaspoon to pack the filling gently without tearing the cups.
Variations on This Dish:
- Chicken Taco Cups: Swap in shredded chicken and add a splash of broth to keep it moist.
- Bean-Only Version: Use mashed pinto beans and omit the meat.
- Mild Cheesy Cups: Skip the salsa and season the meat lightly with cumin and salt.
Common Mistakes to Avoid with This Dish:
- Don’t leave the cups in the oven too long. The wrappers can go from crisp to too dark fast.
- Don’t overfill them. A little mound is enough; a heap falls over.
8. Pepperoni Biscuit Bites
These are the food equivalent of a shortcut that still tastes like you did something. Biscuits, cheese, and pepperoni bake into little golden bites that vanish from the pan faster than you expect.
Why It Works:
Refrigerated biscuit dough puffs around the filling and seals in the cheese, which gives each bite a soft center and browned outside. They’re also easy to hold, which is worth a lot at snack time.
Key Ingredients:
- 1 can refrigerated biscuit dough, 8 count
- 1 cup shredded mozzarella
- 1/2 cup chopped pepperoni
- 2 tablespoons melted butter
- 1/2 teaspoon garlic powder
- 1 tablespoon grated parmesan
- 1/4 cup marinara for dipping
Quick Steps:
- Heat the oven to 375°F and line a baking sheet with parchment.
- Flatten each biscuit slightly and fill with mozzarella and pepperoni.
- Pinch the dough closed and place seam-side down on the sheet.
- Brush with melted butter mixed with garlic powder and parmesan.
- Bake for 12 to 15 minutes, until golden brown.
Equipment for This Recipe:
- Baking sheet
- Parchment paper
- Pastry brush
- Small bowl
How to Serve This Dish:
Serve in a basket with warm marinara alongside. They also work with a simple salad if you want to push them toward dinner instead of pure snack territory.
Pro Tips for This Recipe:
- Seal the edges well or the cheese will leak out.
- Chop the pepperoni small so it spreads through the dough.
- Let them cool for 2 minutes before serving; the filling is hot.
Variations on This Dish:
- Supreme Bites: Add tiny diced peppers and olives.
- Ham and Cheese Bites: Swap pepperoni for diced ham and use cheddar.
- Garlic Knot Style: Brush with extra garlic butter after baking.
Common Mistakes to Avoid with This Dish:
- Don’t overstuff the biscuits. They need space to close and rise.
- Don’t skip parchment. Melted cheese can glue itself to the pan.
9. Grilled Cheese Dippers with Tomato Soup
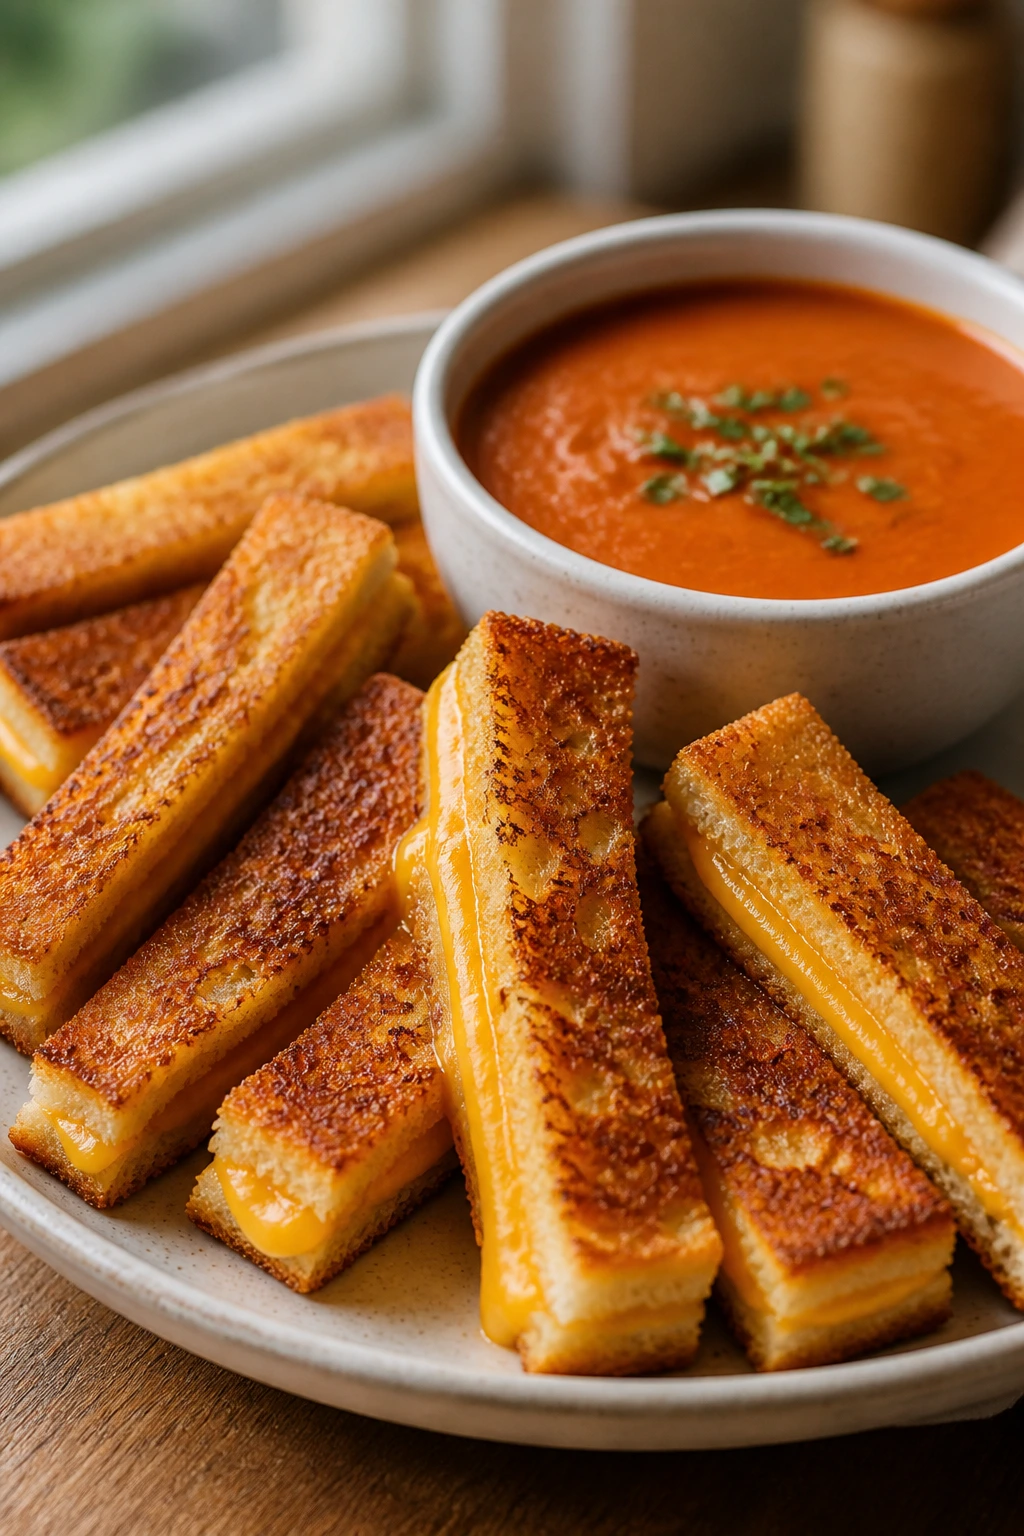
There’s a reason grilled cheese keeps showing up in family kitchens. It’s fast, salty, and comforting in a way that doesn’t need a speech. Cut into strips, it becomes much more snack-friendly.
Why It Works:
Bread buttered on the outside turns crisp in a skillet, and the cheese melts into the exact kind of stretch kids remember. Tomato soup rounds it out and gives the plate a warm, spoonable element that feels more complete than a sandwich alone.
Key Ingredients:
- 8 slices sandwich bread
- 4 tablespoons butter, softened
- 8 slices cheddar cheese
- 1 can crushed tomatoes, 28 ounces
- 1 cup chicken or vegetable broth
- 1/4 cup milk or cream
- 1/2 teaspoon salt
- 1/4 teaspoon sugar, optional
Quick Steps:
- Make the soup by simmering tomatoes, broth, salt, and sugar for 10 minutes.
- Stir in milk or cream and keep warm on low.
- Assemble the sandwiches with butter on the outside and cheese inside.
- Cook in a skillet over medium heat for 3 to 4 minutes per side until golden.
- Slice into strips for dipping.
Equipment for This Recipe:
- Skillet
- Saucepan
- Spatula
- Blender, optional if you want a smoother soup
How to Serve This Dish:
Pour the soup into mugs if kids are likely to wander off with their food. The grilled cheese strips should lean against the mug like little yellow rafts.
Pro Tips for This Recipe:
- Keep the heat medium so the bread browns at the same pace the cheese melts.
- Add a pinch of sugar to the soup if your canned tomatoes taste sharp.
- Use cheddar that melts cleanly; pre-sliced sandwich cheese works fine here.
Variations on This Dish:
- Mozzarella Stretch Version: Use mozzarella and a little parmesan for a milder flavor.
- Soup-Free Version: Serve the strips with ketchup or ranch if soup isn’t welcome.
- Herby Tomato Soup: Stir dried basil or oregano into the pot.
Common Mistakes to Avoid with This Dish:
- Don’t use high heat. Burnt bread with cold cheese is a bad trade.
- Don’t drown the sandwich in butter. A thin, even coat is enough.
10. Vegetable Egg Muffins
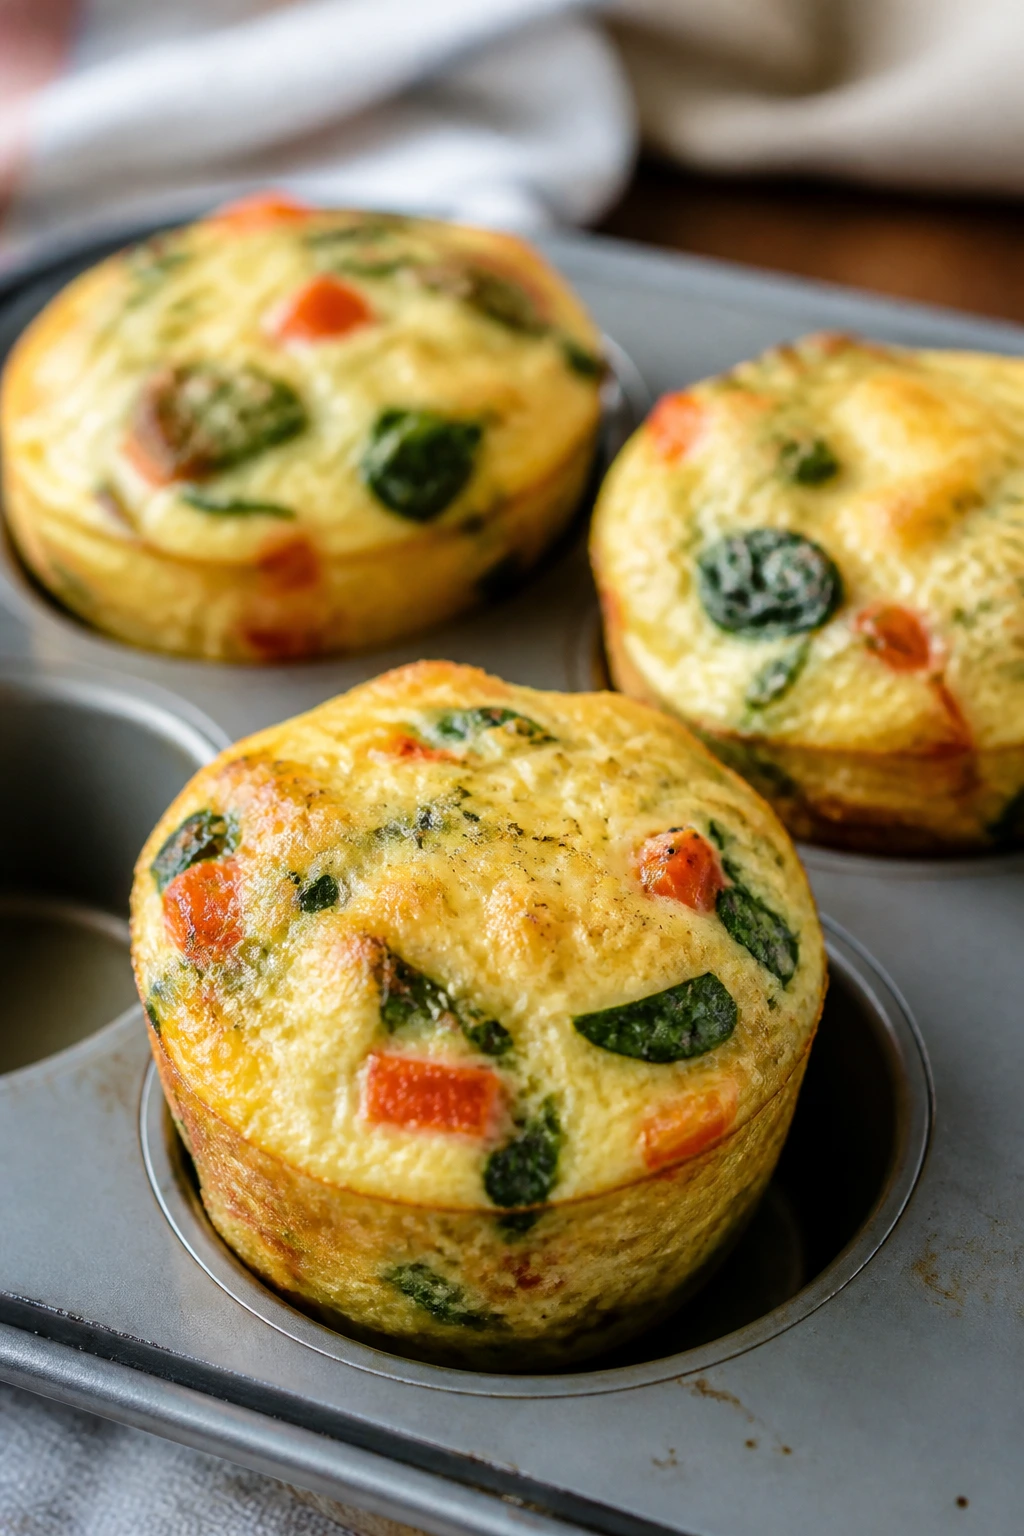
Egg muffins sound plain until you bite into one and get the soft egg, the melted cheese, and the tiny bits of vegetables tucked inside. They’re neat, portable, and excellent warm or cool.
Why It Works:
Eggs set neatly in a muffin tin, which means you can bake a whole batch at once and store extras. The vegetables stay small and evenly distributed, so each muffin tastes balanced instead of lopsided.
Key Ingredients:
- 8 large eggs
- 1/4 cup milk
- 1/2 cup chopped spinach
- 1/2 cup finely diced bell pepper
- 1/2 cup shredded cheddar
- 1/4 teaspoon salt
- 1/4 teaspoon black pepper
Quick Steps:
- Preheat the oven to 350°F and grease a muffin tin well.
- Whisk eggs, milk, salt, and pepper together.
- Stir in vegetables and cheese.
- Divide the mixture among 8 muffin cups.
- Bake for 18 to 22 minutes, until puffed and set in the center.
Equipment for This Recipe:
- Muffin tin
- Mixing bowl
- Whisk
- Measuring cup with pour spout, helpful but optional
How to Serve This Dish:
Serve with toast, sliced fruit, or a little salsa on top. One or two muffins per child is enough for a snack, and three makes a more filling mini dinner.
Pro Tips for This Recipe:
- Dice the vegetables small so they cook through.
- Grease the tin well or use silicone liners.
- Let the muffins cool slightly before removing them so they don’t tear.
Variations on This Dish:
- Broccoli Cheddar Muffins: Use chopped cooked broccoli instead of bell pepper.
- Ham-and-Egg Version: Add 1/2 cup diced ham for extra protein.
- Mild Garden Muffins: Skip the pepper and use grated zucchini, squeezed dry.
Common Mistakes to Avoid with This Dish:
- Don’t overfill the cups. Egg expands in the oven and can spill over.
- Don’t pack in wet vegetables. Extra moisture makes the muffins rubbery.
11. Crispy Potato Wedges with Yogurt Dip
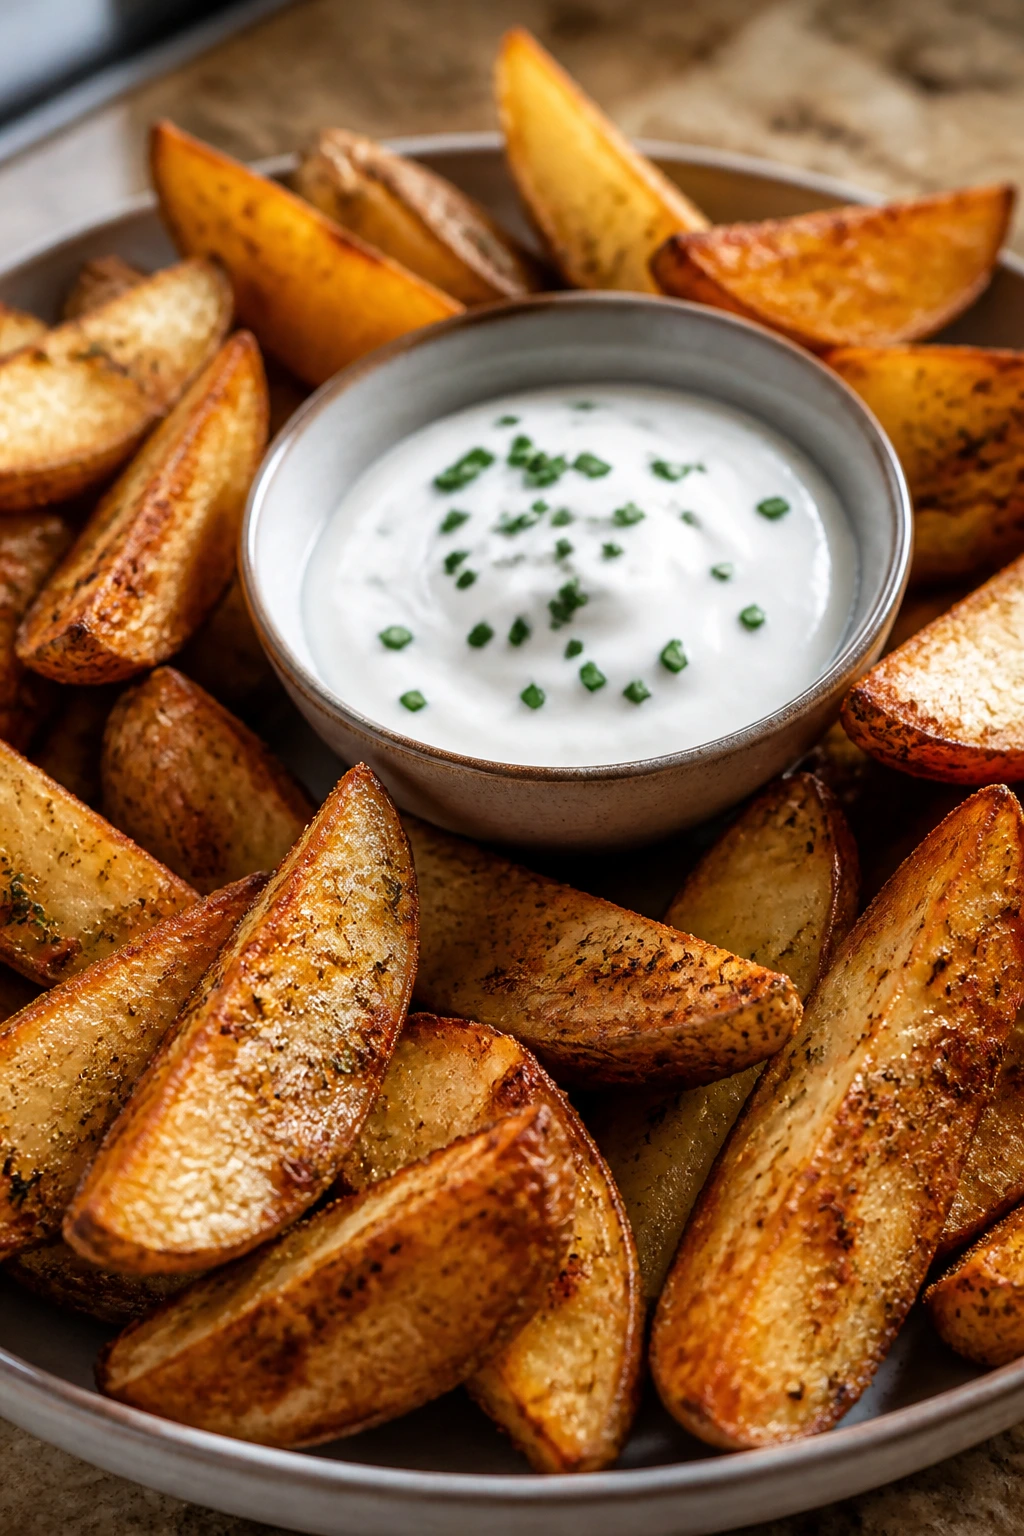
Potato wedges are the sort of food that disappear suspiciously fast. They’re golden on the edges, soft inside, and easy to season any direction you like.
Why It Works:
Cutting potatoes into wedges gives you a sturdy shape with enough surface area for browning. A hot oven pulls moisture off the outside, which is what gives you that crisp edge without frying.
Key Ingredients:
- 3 large russet potatoes
- 2 tablespoons olive oil
- 1 teaspoon salt
- 1/2 teaspoon paprika
- 1/2 teaspoon garlic powder
- 1 cup plain Greek yogurt
- 1 teaspoon dried dill or chives
- 1 tablespoon lemon juice
Quick Steps:
- Preheat the oven to 425°F and line a baking sheet with parchment.
- Cut the potatoes into wedges and toss with oil, salt, paprika, and garlic powder.
- Spread in a single layer, leaving space between the pieces.
- Bake for 30 to 35 minutes, flipping once, until browned and tender.
- Stir together yogurt, dill, and lemon juice for the dip.
Equipment for This Recipe:
- Baking sheet
- Sharp knife
- Large bowl
- Spatula
How to Serve This Dish:
Serve the wedges in a bowl with the dip in the center. They pair well with almost anything else on this list, especially chicken tenders or mini sliders.
Pro Tips for This Recipe:
- Don’t crowd the pan. Tight wedges steam instead of crisp.
- Soak the cut potatoes in cold water for 15 minutes if you have time, then dry them well.
- Flip with a thin spatula so the browned edges stay intact.
Variations on This Dish:
- Cheesy Wedges: Sprinkle parmesan over the potatoes during the last 5 minutes.
- Smoky Version: Add smoked paprika and a pinch of cumin.
- Air Fryer Method: Cook in batches at 400°F for about 18 minutes.
Common Mistakes to Avoid with This Dish:
- Don’t leave the wedges wet after soaking. Water blocks browning.
- Don’t cut them too thin or they’ll dry out before the centers soften.
12. Bean and Cheese Nachos
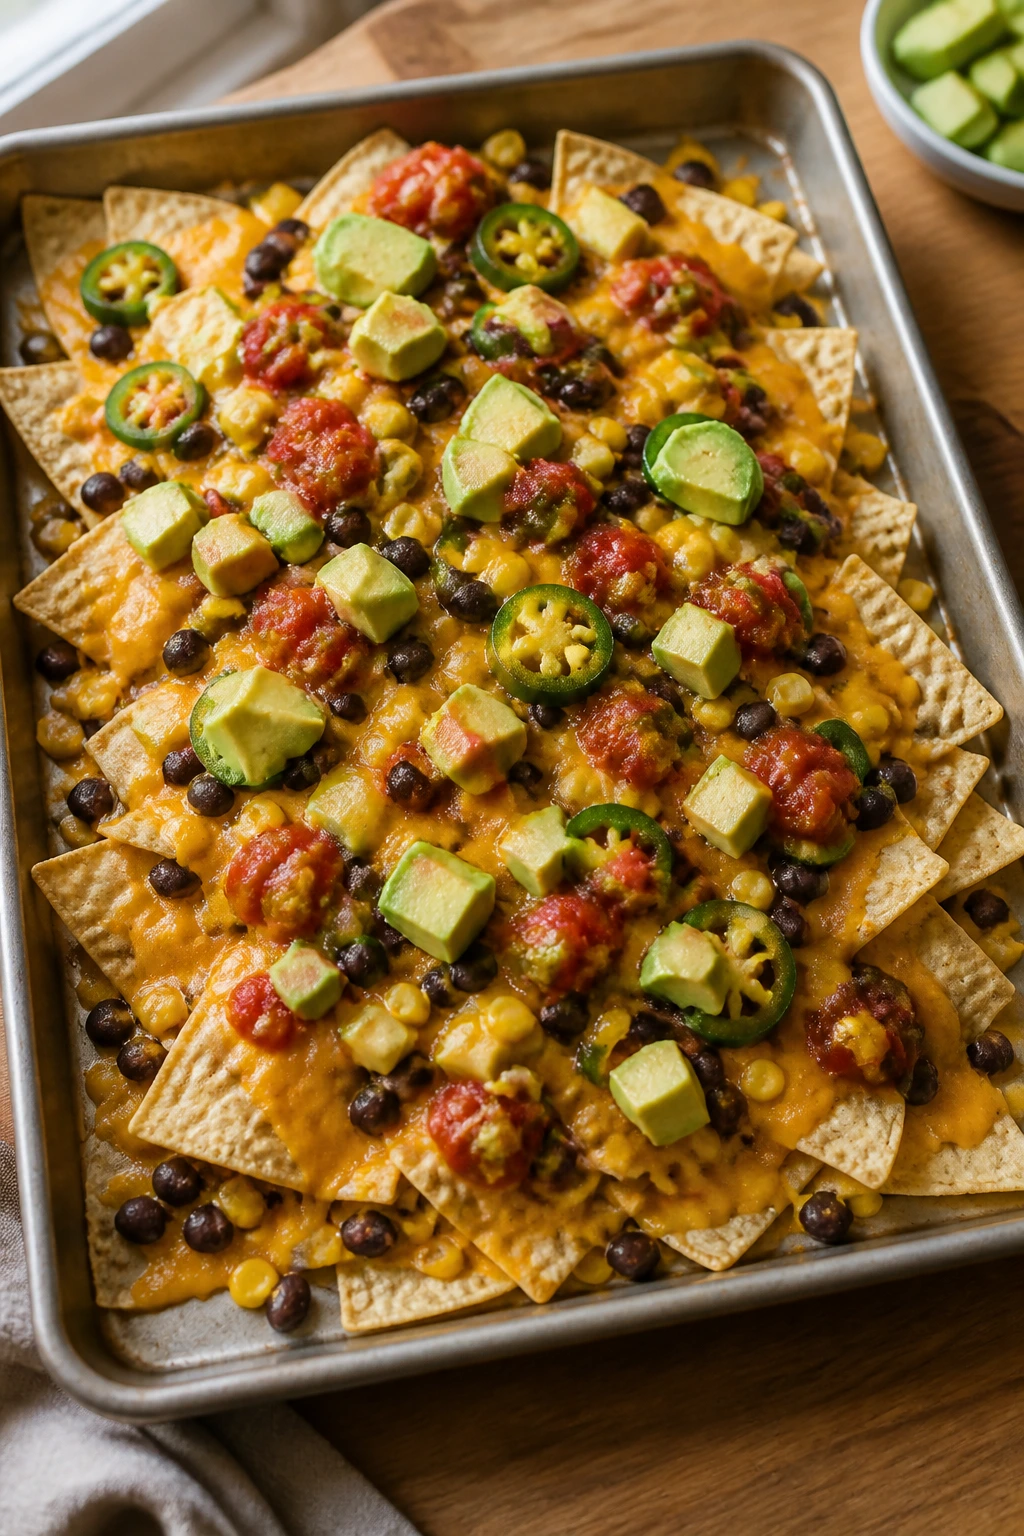
This is the pan you make when everyone wants to eat at different speeds but still end up at the same table. The beans make the nachos more substantial, and the melted cheese pulls the whole thing together.
Why It Works:
A sheet pan gives you a wide, shallow layer, so the chips get warm without turning into a soggy pile. Beans add protein and make the snack feel more like food-food, not just a side.
Key Ingredients:
- 8 ounces tortilla chips
- 1 can black beans, 15 ounces, rinsed and drained
- 2 cups shredded cheddar or Mexican blend
- 1/2 cup corn kernels, frozen or canned and drained
- 1/4 cup sliced jalapeños, optional
- 1/2 cup salsa
- 1 avocado, diced, optional
Quick Steps:
- Preheat the oven to 400°F.
- Spread half the chips on a sheet pan, then scatter half the beans, corn, and cheese.
- Add the remaining chips and toppings, finishing with another layer of cheese.
- Bake for 6 to 8 minutes, until the cheese melts.
- Top with salsa and avocado after baking.
Equipment for This Recipe:
- Rimmed baking sheet
- Can opener
- Cheese grater
- Spoon for topping
How to Serve This Dish:
Bring the pan to the table and let people scoop their own. A side of cucumber sticks or sliced peppers gives the plate a cold crunch that balances the warm chips.
Pro Tips for This Recipe:
- Keep the toppings light so the chips stay crisp.
- Add avocado after baking, not before.
- If the chips are thick, bake a minute longer to help the cheese melt through.
Variations on This Dish:
- Chicken Nachos: Add shredded rotisserie chicken for a fuller meal.
- Mild Cheese Nachos: Skip jalapeños and use only cheddar.
- Breakfast Nachos: Swap corn for scrambled egg bits if you’re leaning breakfast-for-dinner.
Common Mistakes to Avoid with This Dish:
- Don’t pile everything in the center. Spread it out so the chips on the edges still get some topping.
- Don’t use too much salsa before baking. Wet chips are not fun.
13. Mini Sloppy Joe Sliders
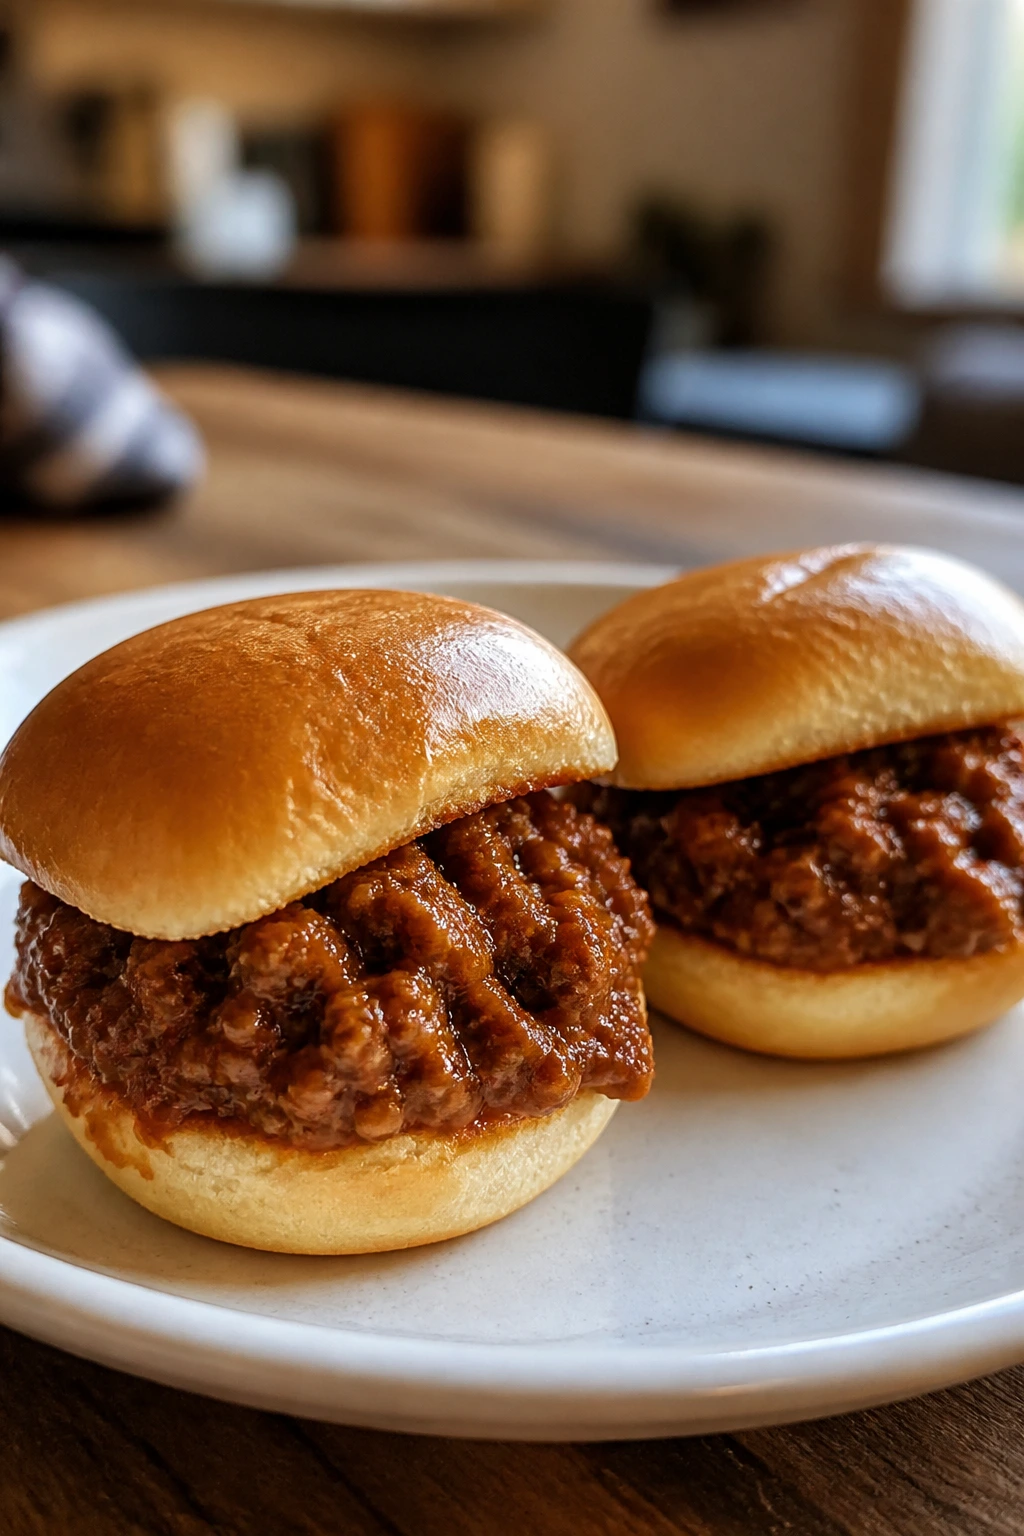
A sloppy joe slider has a charming amount of mess built into it, and that’s part of the appeal. Sweet-savory filling, soft buns, and a little drip at the edges — it feels like a proper old-school snack dinner.
Why It Works:
Ground meat cooks fast and takes on sauce well, which makes it ideal for after-school food. Slider buns keep the portion size manageable and stop the filling from collapsing into a giant sandwich situation.
Key Ingredients:
- 1 pound ground beef or turkey
- 1/2 cup onion, finely diced
- 3/4 cup ketchup
- 1 tablespoon tomato paste
- 1 tablespoon Worcestershire sauce
- 1 teaspoon brown sugar
- 8 slider buns
Quick Steps:
- Brown the meat with onion in a skillet over medium heat.
- Stir in ketchup, tomato paste, Worcestershire sauce, and brown sugar.
- Simmer for 5 to 7 minutes until thick and glossy.
- Spoon into slider buns and serve warm.
Equipment for This Recipe:
- Skillet
- Wooden spoon
- Measuring spoons
- Serving plate
How to Serve This Dish:
Set them out with pickle chips and carrot sticks. They also pair well with potato wedges if you want a more filling plate.
Pro Tips for This Recipe:
- Let the sauce reduce a bit so it doesn’t flood the buns.
- Toast the cut sides of the buns if you want extra sturdiness.
- Use turkey if you want a lighter flavor; the sauce does most of the work either way.
Variations on This Dish:
- BBQ Sliders: Replace the ketchup and Worcestershire with barbecue sauce.
- Cheesy Topper Version: Melt a slice of cheddar over each slider before serving.
- Bean Sloppy Joes: Add 1/2 cup mashed kidney beans to stretch the filling.
Common Mistakes to Avoid with This Dish:
- Don’t leave the filling watery. Thin sauce soaks through the buns quickly.
- Don’t skip seasoning the meat while it browns. Salt in the pan matters.
14. Ham and Cheese Crescent Rolls

These are the kind of snacks that make the whole kitchen smell like a bakery case. Crescent dough bakes up flaky and pale-golden, and the ham and cheese inside turn hot and soft.
Why It Works:
Crescent dough is forgiving and quick, which makes it a reliable weeknight move. The spiral shape of the roll keeps the cheese from escaping too fast, and the baked exterior gives you a little crunch.
Key Ingredients:
- 1 can refrigerated crescent roll dough
- 8 slices deli ham
- 4 slices cheddar or Swiss cheese
- 1 tablespoon Dijon mustard, optional
- 1 tablespoon melted butter
- 1/2 teaspoon poppy seeds or sesame seeds, optional
Quick Steps:
- Heat the oven to 375°F and line a baking sheet with parchment.
- Separate the crescent dough and place ham and cheese on each triangle.
- Add a small dab of mustard if using, then roll up from the wide end.
- Brush with melted butter and sprinkle with seeds.
- Bake for 12 to 14 minutes, until the rolls are puffed and golden.
Equipment for This Recipe:
- Baking sheet
- Parchment paper
- Pastry brush
- Small bowl
How to Serve This Dish:
Serve with apple slices or a few grapes so the plate has something cold and crisp next to the warm pastry. They’re good on a napkin, no fork needed.
Pro Tips for This Recipe:
- Use thin ham slices so the rolls close easily.
- Seal the ends a bit if cheese tends to leak in your oven.
- Pull them when the tops are deep golden, not pale blond.
Variations on This Dish:
- Turkey and Cheddar Roll: Swap ham for turkey and add a little mayo.
- Pizza Crescent Roll: Use mozzarella, pepperoni, and a swipe of marinara.
- Breakfast Version: Add a thin scrambled egg layer for morning-style snacking.
Common Mistakes to Avoid with This Dish:
- Don’t overfill the triangles. The dough needs room to roll.
- Don’t bake on a dark pan without checking early; bottoms can brown fast.
15. Cheesy Broccoli Rice Bites
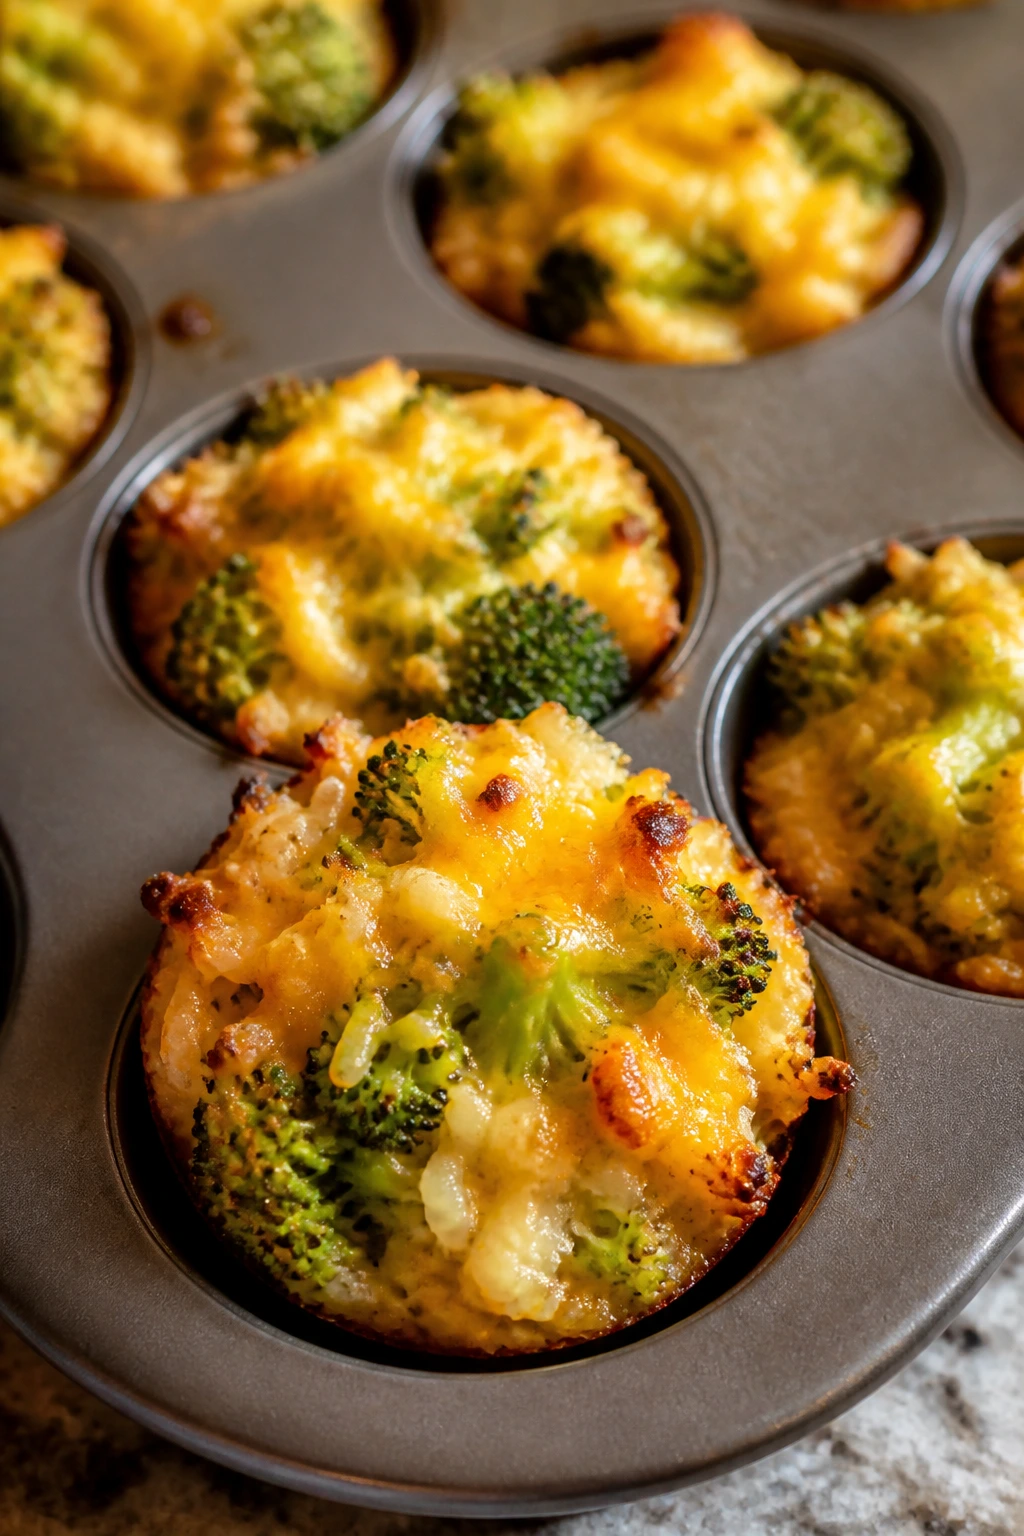
This is where leftovers stop being leftovers and start being useful. Rice, broccoli, egg, and cheese come together into little baked bites that taste far more intentional than the ingredient list suggests.
Why It Works:
Cooked rice binds well with egg and cheese, which gives the bites enough structure to hold their shape. Broccoli adds color and texture without needing a separate side dish, and the muffin tin makes cleanup simple.
Key Ingredients:
- 2 cups cooked rice
- 1 cup chopped cooked broccoli
- 1 cup shredded cheddar
- 2 eggs
- 1/4 cup grated parmesan
- 1/3 cup breadcrumbs
- 1/2 teaspoon salt
Quick Steps:
- Preheat the oven to 375°F and grease a mini muffin tin or standard muffin tin.
- Mix rice, broccoli, cheese, eggs, parmesan, breadcrumbs, and salt.
- Scoop into the tin and press gently so the mixture holds together.
- Bake for 18 to 20 minutes, until the tops are set and lightly browned.
- Cool for 5 minutes before removing.
Equipment for This Recipe:
- Muffin tin
- Mixing bowl
- Spoon or small scoop
- Cooling rack
How to Serve This Dish:
Serve with ketchup, ranch, or a spoonful of marinara. They’re good warm, but they also hold up well at room temperature for a more snacky feel.
Pro Tips for This Recipe:
- Chop the broccoli small so the bites pack evenly.
- If the mixture feels loose, add another tablespoon or two of breadcrumbs.
- Use cold leftover rice if you have it; it mixes better and clumps less.
Variations on This Dish:
- Cauliflower Rice Bites: Swap in cauliflower rice, but squeeze out extra moisture first.
- Ham and Broccoli Version: Add 1/2 cup diced ham for more protein.
- Mexican-Style Bites: Add a pinch of cumin and a little Monterey Jack.
Common Mistakes to Avoid with This Dish:
- Don’t use wet broccoli. Steam it, cool it, and chop it well.
- Don’t try to unmold them too soon. They need a few minutes to firm up.
16. Mini Meatball Subs
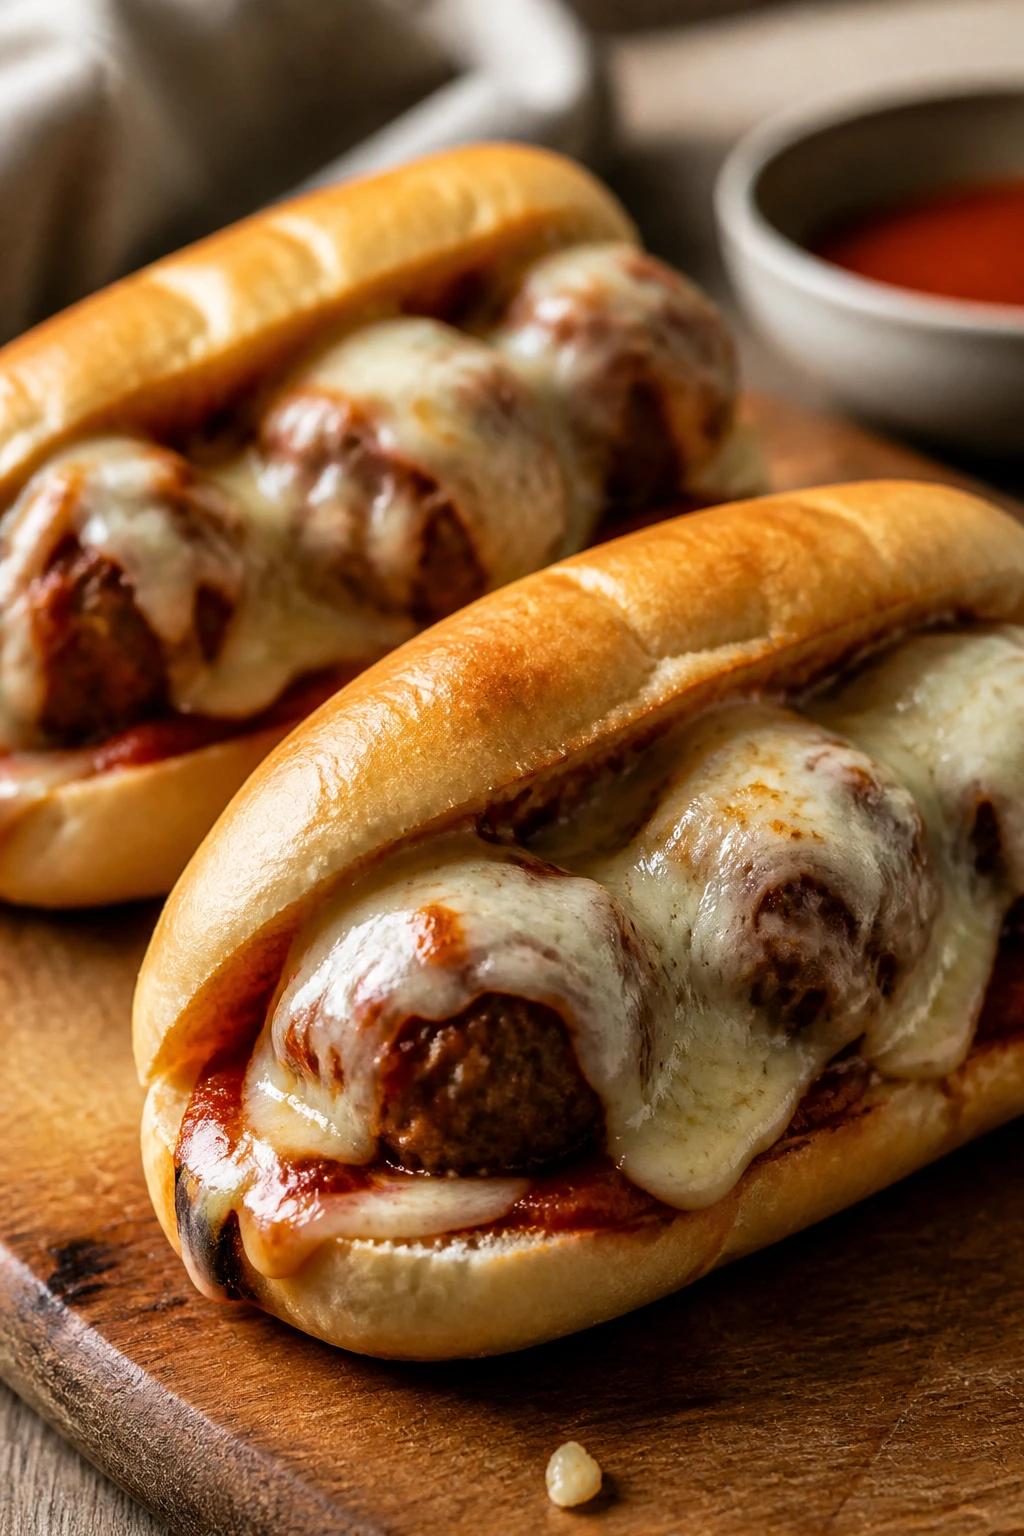
Mini meatball subs are messy in a way kids usually approve of. The sauce, the soft bun, the melted cheese — it all feels like a tiny, manageable version of a bigger dinner.
Why It Works:
Meatballs are easy to portion, and once they’re tucked into rolls with sauce and cheese, they become a complete hand-held bite. Using small rolls keeps the filling contained and makes serving easier.
Key Ingredients:
- 16 small meatballs, homemade or frozen and cooked
- 1 1/2 cups marinara sauce
- 8 mini rolls or slider buns
- 1 cup shredded mozzarella
- 1 tablespoon grated parmesan
- 1 teaspoon dried oregano
Quick Steps:
- Heat the oven to 375°F.
- Warm the meatballs in marinara until hot through.
- Split the rolls and fill each with 2 meatballs and a spoonful of sauce.
- Top with mozzarella, parmesan, and oregano.
- Bake for 8 to 10 minutes, until the cheese melts.
Equipment for This Recipe:
- Baking dish or sheet pan
- Saucepan
- Spoon
- Sharp knife for slicing buns
How to Serve This Dish:
Serve on a tray with extra napkins. A simple side salad or some sliced cucumbers keeps the plate from leaning too hard into pure bread-and-cheese territory.
Pro Tips for This Recipe:
- Drain excess sauce a little before stuffing the rolls so they don’t collapse.
- Use small meatballs, not giant ones. The size is the point here.
- Toast the buns first if you want more structure.
Variations on This Dish:
- Chicken Meatball Subs: Use chicken meatballs and a lighter marinara.
- Garlic Butter Subs: Brush the rolls with garlic butter before baking.
- Meatball Melt Tray: Leave the rolls open-faced and bake on a sheet pan.
Common Mistakes to Avoid with This Dish:
- Don’t over-sauce the rolls. They should be juicy, not soaked.
- Don’t use bread that is too soft or thin; it falls apart once the filling hits it.
17. Apple Cheddar Toasts
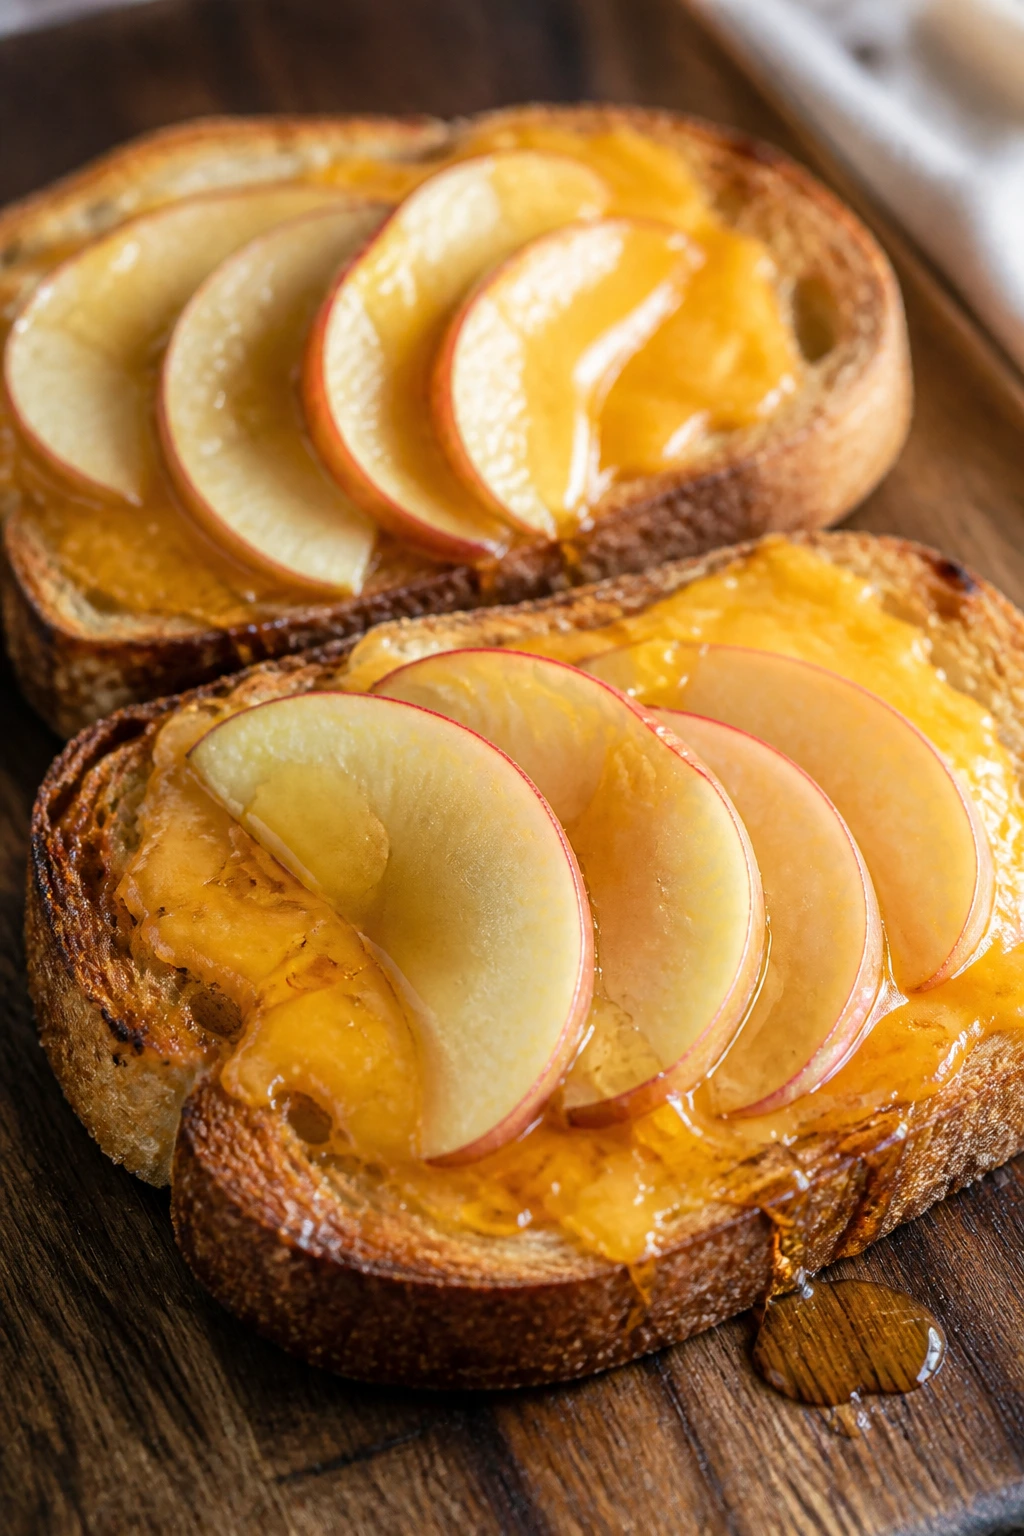
Sweet apple and sharp cheddar is one of those combinations adults appreciate immediately and kids often come around to after one bite. On toast, it becomes a small, tidy snack dinner with a little crunch and a little melt.
Why It Works:
Toasting the bread keeps it from going limp under the apple slices, and the warm cheddar softens just enough to bind the whole thing together. A small drizzle of honey rounds out the sharpness without making the toast feel sugary.
Key Ingredients:
- 4 slices sturdy whole grain bread
- 2 tablespoons butter, softened
- 4 ounces sharp cheddar, thinly sliced
- 1 apple, thinly sliced
- 1 tablespoon honey
- 1/4 teaspoon cinnamon, optional
Quick Steps:
- Toast the bread lightly or heat it in a skillet with butter until golden.
- Layer cheddar and apple slices over each piece.
- Return to the skillet or oven for 1 to 2 minutes, just until the cheese softens.
- Drizzle with honey and a pinch of cinnamon if using.
Equipment for This Recipe:
- Toaster or skillet
- Knife
- Cutting board
- Small spoon for honey
How to Serve This Dish:
Cut each toast into halves or quarters, then serve with celery sticks or a handful of berries. It looks especially good on a wooden board, but a plate works fine too.
Pro Tips for This Recipe:
- Slice the apple thin so the toast stays easy to bite.
- Use a firm apple like Honeycrisp or Gala.
- If the cheese is thick, give it a brief melt under the broiler.
Variations on This Dish:
- Nut Butter Version: Spread a thin layer of peanut butter under the cheese.
- Savory Thyme Toast: Add a tiny pinch of thyme before melting.
- Open-Faced Melt: Use one thick slice of bread instead of two thin ones.
Common Mistakes to Avoid with This Dish:
- Don’t use a flimsy sandwich bread. It softens too fast.
- Don’t slice the apples thick. Thick pieces make the toast hard to eat.
18. Baked Zucchini Tots
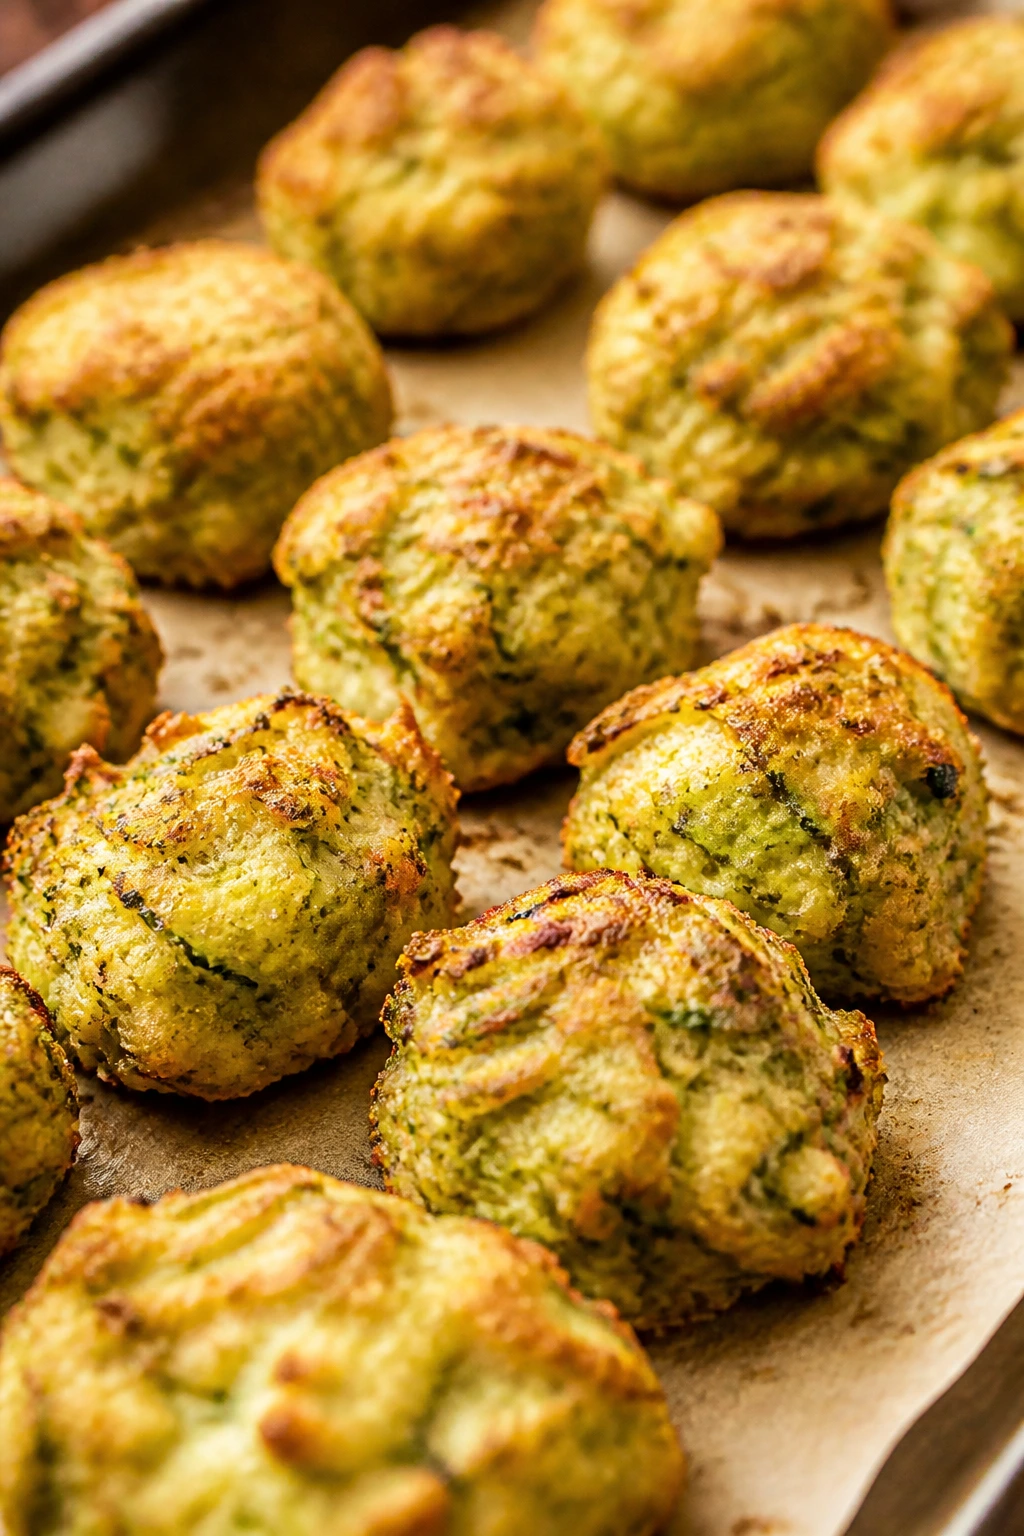
Zucchini tots are the closest thing to a magic trick on this list. They come out crisp on the outside, tender inside, and suspiciously green vegetables somehow disappear into snack form.
Why It Works:
Shredded zucchini has enough moisture to help bind the tots, but not so much that they collapse if you squeeze it dry first. Parmesan and breadcrumbs bring the texture into familiar tot territory.
Key Ingredients:
- 2 medium zucchini, grated
- 1 large egg
- 1/2 cup breadcrumbs
- 1/2 cup grated parmesan
- 1/4 teaspoon salt
- 1/4 teaspoon garlic powder
- 1 tablespoon olive oil, for brushing
Quick Steps:
- Preheat the oven to 400°F and line a baking sheet with parchment.
- Grate the zucchini and squeeze out as much water as possible with a towel.
- Mix zucchini with egg, breadcrumbs, parmesan, salt, and garlic powder.
- Shape into small tot-like ovals and place on the sheet.
- Brush lightly with oil and bake for 20 to 25 minutes, flipping once.
Equipment for This Recipe:
- Box grater
- Clean kitchen towel
- Baking sheet
- Spatula
How to Serve This Dish:
Serve with ketchup or ranch in a tiny bowl. They also work as a side next to chicken tenders or mini sliders if you want the plate to feel more complete.
Pro Tips for This Recipe:
- Squeeze the zucchini hard. Seriously hard.
- Keep the tots small so they crisp instead of steaming.
- Let them cool on the pan for 2 minutes before moving them.
Variations on This Dish:
- Cheddar Zucchini Tots: Swap half the parmesan for shredded cheddar.
- Herb Version: Add chopped parsley or dill.
- Air Fryer Tots: Cook at 390°F for about 12 minutes, turning once.
Common Mistakes to Avoid with This Dish:
- Don’t skip the squeeze step. Wet zucchini means soft tots.
- Don’t make them too large. Big tots stay damp in the middle.
19. Creamy Tomato Soup Mugs with Toast Soldiers
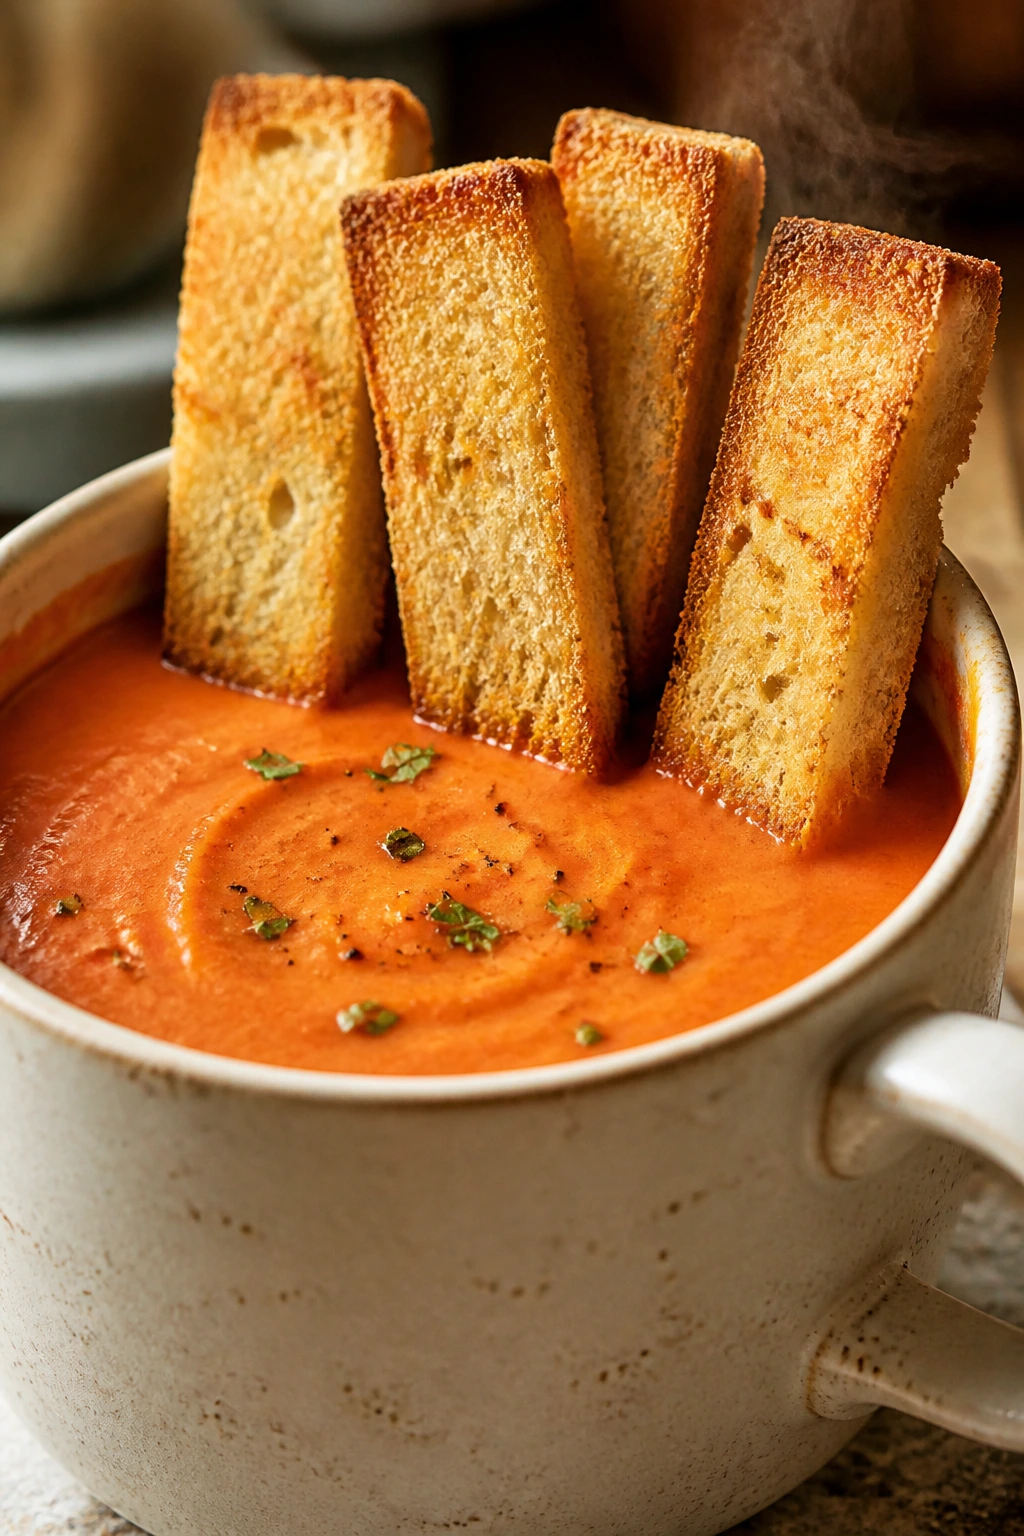
A mug of tomato soup feels calm in a way that a bowl sometimes doesn’t. The toast soldiers give kids something to dip, and the whole thing lands squarely in that comforting, after-school lane.
Why It Works:
Tomato soup gets smoother and richer with a little cream or milk, and serving it in mugs makes it easy to carry from counter to couch. The toast soldiers turn the soup into a dip-and-bite snack instead of a plain bowl of liquid.
Key Ingredients:
- 1 can crushed tomatoes, 28 ounces
- 1 cup broth
- 1/2 cup milk or cream
- 1 tablespoon butter
- 1/2 teaspoon salt
- 4 slices bread, cut into strips
- 1 tablespoon olive oil or melted butter
Quick Steps:
- Melt butter in a saucepan and add tomatoes, broth, and salt.
- Simmer for 10 to 12 minutes until the flavors meld.
- Stir in milk or cream and keep warm over low heat.
- Brush bread strips with oil or butter and toast in a skillet or oven until golden.
- Pour soup into mugs and serve with the toast on the side.
Equipment for This Recipe:
- Saucepan
- Wooden spoon
- Baking sheet or skillet for toast
- Mugs or heat-safe cups
How to Serve This Dish:
Use sturdy mugs that kids can hold without wrapping both hands around the whole thing. A sprinkle of parmesan on top makes the soup feel a little more finished.
Pro Tips for This Recipe:
- If the soup tastes sharp, add a pinch of sugar.
- Blend it if you want a smoother texture.
- Make the toast strips long enough to dip without breaking.
Variations on This Dish:
- Garlic Toast Version: Rub the bread with garlic before toasting.
- Cheesy Soup Topper: Stir in a handful of shredded cheddar at the end.
- Roasted Tomato Style: Use canned fire-roasted tomatoes for deeper flavor.
Common Mistakes to Avoid with This Dish:
- Don’t boil after adding milk. Gentle heat keeps it smooth.
- Don’t use flimsy bread for the soldiers. They need enough body to dip.
20. Pancake Dippers with Sausage

Some afternoons want breakfast food, even if nobody planned for it. Pancake dippers with sausage feel a little playful and a little practical, which is a nice combination when kids are tired.
Why It Works:
Pancakes cook quickly on a skillet and can be made small enough for dipping, while sausage adds the savory part that turns a sweet snack into a mini meal. You can cook the whole batch in one pan and feed a crowd without turning on the oven.
Key Ingredients:
- 1 cup all-purpose flour
- 1 tablespoon sugar
- 1 teaspoon baking powder
- 1 cup milk
- 1 egg
- 2 tablespoons melted butter
- 8 breakfast sausage links
- Maple syrup, for dipping
Quick Steps:
- Whisk flour, sugar, and baking powder in a bowl.
- Add milk, egg, and melted butter, then mix until just combined.
- Cook tablespoon-size pancakes in a buttered skillet over medium heat, 1 to 2 minutes per side.
- Warm the sausage links in the same skillet or according to package directions.
- Serve pancakes with sausage and maple syrup for dipping.
Equipment for This Recipe:
- Skillet or griddle
- Mixing bowl
- Whisk
- Spatula
How to Serve This Dish:
Stack the pancakes in a little pile and tuck the sausage alongside. A bowl of berries makes the plate look brighter and keeps the sweetness from taking over.
Pro Tips for This Recipe:
- Stop mixing when the batter is just combined; a few lumps are fine.
- Keep the pancakes small so they’re easier to dip.
- Wipe the skillet lightly between batches if the butter starts to brown too much.
Variations on This Dish:
- Blueberry Pancake Dippers: Fold blueberries into the batter.
- Cheese Pancake Version: Add a handful of shredded cheddar for a savory twist.
- Turkey Sausage Swap: Use turkey sausage for a lighter flavor.
Common Mistakes to Avoid with This Dish:
- Don’t cook on too-high heat. Pancakes brown before the centers set.
- Don’t make the batter too thin. Runny batter spreads into awkward discs.
21. Teriyaki Chicken Skewers
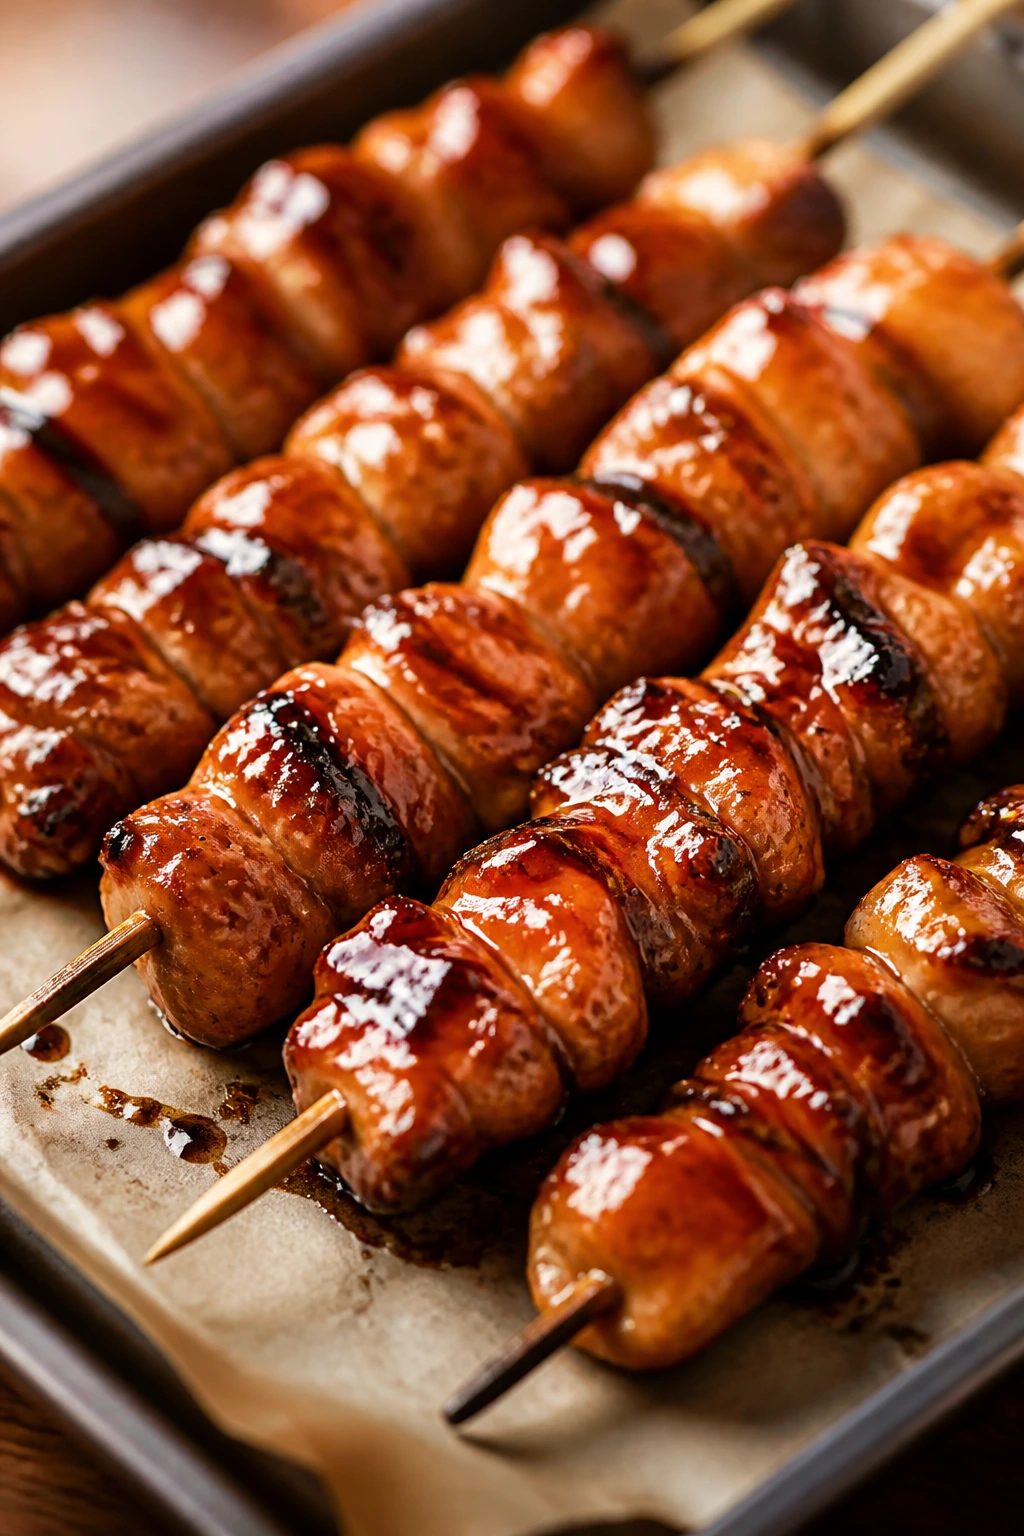
These skewers bring a little sticky-sweet energy to the after-school hour, and kids usually notice the glaze before they notice anything else. The chicken stays juicy if you cut it small and cook it fast.
Why It Works:
Small chicken pieces cook evenly and pick up teriyaki sauce on every side, which gives the skewers more flavor than plain strips. The skewer format also makes them feel special, even though the method is straightforward.
Key Ingredients:
- 1 1/2 pounds boneless chicken thighs or breasts, cut into 1-inch pieces
- 1/3 cup teriyaki sauce
- 1 tablespoon honey
- 1 tablespoon soy sauce
- 1 teaspoon grated fresh ginger
- 1 tablespoon oil
- Wooden or metal skewers
Quick Steps:
- If using wooden skewers, soak them in water for 20 minutes.
- Toss the chicken with teriyaki sauce, honey, soy sauce, ginger, and oil.
- Thread the chicken onto skewers.
- Broil on a lined sheet pan for 8 to 10 minutes, turning once, until cooked through and lightly caramelized.
- Rest for 2 minutes before serving.
Equipment for This Recipe:
- Sheet pan
- Broiler or grill
- Skewers
- Mixing bowl
How to Serve This Dish:
Serve with rice, cucumber slices, or steamed broccoli if you want to turn it into a fuller meal. A little sesame sprinkle on top makes the plate look finished fast.
Pro Tips for This Recipe:
- Cut the chicken evenly so it cooks at the same pace.
- Don’t leave the chicken under the broiler too long; the glaze can scorch.
- If the sauce is thick, brush a little extra on after cooking.
Variations on This Dish:
- Pineapple Chicken Skewers: Thread a small pineapple cube between chicken pieces.
- Sesame Garlic Version: Add minced garlic and sesame oil to the marinade.
- Air Fryer Skewers: Cook in batches at 400°F until done, turning once.
Common Mistakes to Avoid with This Dish:
- Don’t use oversized chicken chunks. They dry out before the outside caramelizes.
- Don’t skip the rest time after cooking; the juices need a minute to settle.
22. Mini Calzones

Mini calzones feel like pizza’s more self-contained cousin. They’re sealed, hand-held, and stuffed with exactly the kind of cheesy filling that keeps kids occupied for a while.
Why It Works:
Pizza dough stretches well around filling, and sealing the edges means the cheese stays inside instead of melting all over the baking sheet. Because they’re small, they bake quickly and cool fast enough for snack time.
Key Ingredients:
- 1 pound pizza dough
- 1 cup ricotta
- 1 cup shredded mozzarella
- 1/2 cup pepperoni or cooked sausage, chopped
- 1/4 cup marinara, plus more for dipping
- 1 teaspoon Italian seasoning
- 1 egg, beaten, for brushing
Quick Steps:
- Preheat the oven to 425°F and line a baking sheet with parchment.
- Divide the dough into 6 to 8 pieces and roll each into a small circle.
- Spoon ricotta, mozzarella, pepperoni, marinara, and Italian seasoning onto one side of each circle.
- Fold over, seal the edges firmly, and brush with beaten egg.
- Bake for 12 to 15 minutes, until golden and puffed.
Equipment for This Recipe:
- Baking sheet
- Parchment paper
- Rolling pin
- Fork for sealing, optional
How to Serve This Dish:
Serve with extra marinara for dunking and a few olives or carrot sticks on the side. They’re good hot, but the filling stays soft enough to eat warm rather than blazing out of the oven.
Pro Tips for This Recipe:
- Keep the filling modest so the dough can seal properly.
- Press the edges with a fork if they need extra help staying closed.
- Cut a small steam slit on top if the calzones puff too much.
Variations on This Dish:
- Spinach and Ricotta Calzones: Swap pepperoni for chopped cooked spinach.
- Sausage and Pepper Version: Use cooked sausage and tiny diced peppers.
- Cheesy Garlic Calzones: Skip the meat and add garlic powder plus parmesan.
Common Mistakes to Avoid with This Dish:
- Don’t overfill the dough. Calzones split when they’re stuffed too full.
- Don’t forget the egg wash. It gives the crust the browning you want.
Why These Snack-Dinners Hold Up on Busy Afternoons
There’s a reason these recipes work better than a random scatter of crackers and cheese cubes. Each one gives you some combination of warm, crisp, creamy, and handheld, which is the exact texture balance kids seem to go for after a long school day. The food feels finished. That matters more than people admit.
The other thing I like here is the way these recipes bend around whatever is already in the kitchen. Tortillas, eggs, bread, beans, chicken, biscuits, pasta, rice — these are not fussy foods, and that’s the whole point. They are built for the hours when energy is low and appetites are loud.
Essential Equipment for These Recipes
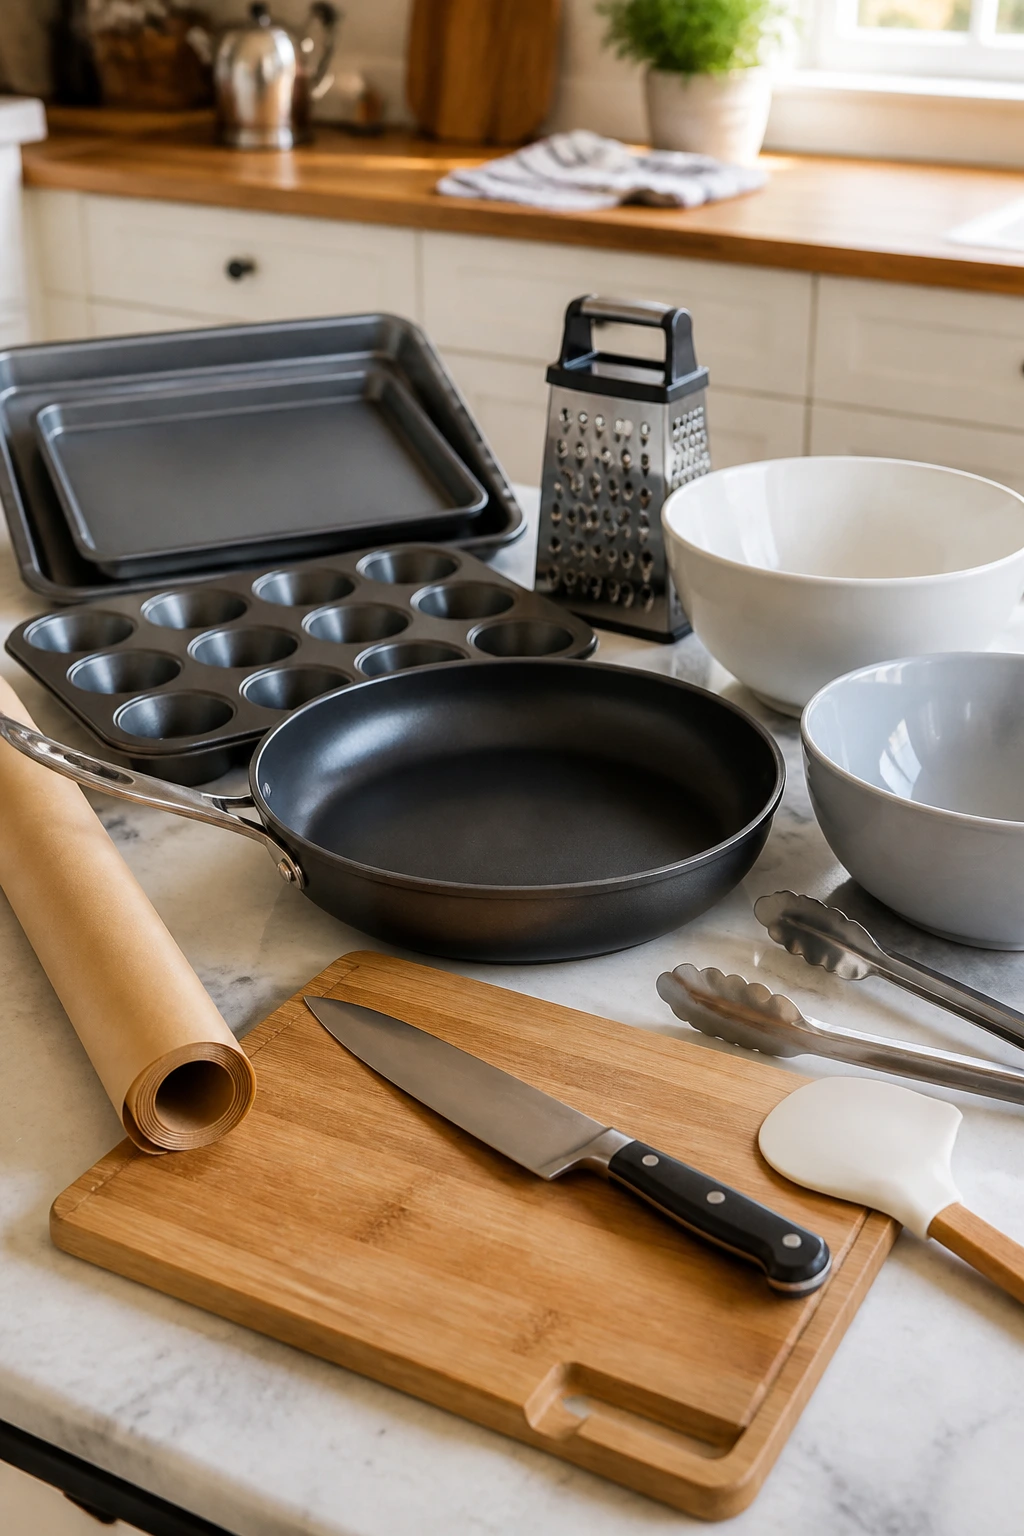
- Rimmed baking sheets: You’ll use them for pizzas, tenders, calzones, skewers, and anything that needs a hot oven.
- Muffin tins: Great for egg muffins, taco cups, mac and cheese cups, and rice bites.
- Large skillet: A good nonstick or well-seasoned skillet handles quesadillas, grilled cheese, and pancakes.
- Mixing bowls: You need at least two, and a larger one makes fast work of batters and fillings.
- Sharp knife and cutting board: For slicing apples, rolling sandwiches, chopping toppings, and trimming vegetables.
- Spatula and tongs: Helpful for flipping sandwiches, turning tenders, and lifting wedges.
- Parchment paper: Keeps sticky cheese and dough from welding to the pan.
- Box grater: Faster and better than pre-shredded cheese when you want smoother melting.
Smart Shopping and Ingredient Tips
The ingredient list for this kind of cooking is almost never glamorous, and that’s a strength. Buy the chicken tenders, tortillas, cheese, eggs, bread, potatoes, and canned tomatoes you’ll actually use, not the fancy version you’ll guard in the fridge and never touch. I’d rather see a well-used bag of shredded cheddar than a pristine wedge of something expensive that nobody wants to grate on a Tuesday.
For cheese, think about melt first. Mozzarella, cheddar, Monterey Jack, and a little parmesan cover most of the recipes here because they melt or brown in useful ways. Pre-shredded cheese is fine when speed matters, though fresh-grated melts a little smoother if you have the time.
Pick tortillas and bread with structure. Thin, flimsy wraps tear under filling, and bread that’s too soft turns to paste when it meets sauce. For snacks that need holding power, go with medium-thick tortillas, slider buns that feel springy, or toast bread that can take a little butter and heat.
Vegetables work best when they’re cut small. Tiny bell pepper dice, finely grated zucchini, chopped spinach, or minced broccoli all disappear better inside these recipes than big rough chunks. That’s the whole trick with kid food: make the vegetables small enough that they join the party instead of announcing themselves.
How to Serve These Recipes

Presentation:
Build each plate around one main item and one cold side. A few wedges of pizza, a handful of grapes, and a small cup of ranch looks more thoughtful than a heap of food dumped on a plate. Kids notice color even when they act like they don’t, so add berries, cucumber coins, carrot sticks, or apple slices wherever they fit.
Accompaniments:
Fruit, baby carrots, cucumber spears, corn, simple salads, and a small dip bowl all work across this whole collection. If the main food is rich — grilled cheese, calzones, nachos — pair it with something crisp and cool. If the main food is lighter — egg muffins, roll-ups, apple toasts — add a warm side like wedges or soup.
Portions:
For younger kids, 2 to 4 snack-size pieces often do the job. Older kids usually want a little more: a quesadilla cut into wedges, 2 sliders, 2 egg muffins, or a small plate of nachos with fruit on the side. If dinner is still a while away, lean toward the larger portion; if this is a bridge snack, keep it smaller and let the sides do the work.
Beverage Pairing:
Cold milk is the classic move for a reason. Water with sliced fruit works just as well. For the warm savory items, I like plain sparkling water or a very light lemonade because they cut the cheese and bread without fighting the food.
Additional Tips and Flavor Boosters
Flavor Enhancement:
A small finishing touch goes a long way here. A shake of parmesan on pizza items, a few drops of hot sauce for adults, or a dab of honey on apple toast can make the food feel more deliberate without changing the recipe much.
Customization:
Keep one “plain” version and one “extra” version whenever you can. Kids who hate visible vegetables can get the stripped-down roll-up or cheese-only quesadilla, while everyone else gets the version with spinach, peppers, or onions. That split saves arguments.
Serving Suggestions:
Use tiny bowls for dips. It sounds minor, but a proper dip bowl turns ranch, salsa, yogurt sauce, or marinara into part of the meal instead of a puddle on the side of the plate. Toothpick-style skewers, napkins, and cutting food into smaller pieces also make snack dinners feel easier to eat.
Make-It-Yours:
For dairy-free eaters, swap in plant-based cheese where it melts well and use olive oil instead of butter for grilling and baking. For gluten-free versions, reach for corn tortillas, gluten-free breadcrumbs, or potato-based recipes like wedges and egg muffins. For extra protein, add beans, chicken, turkey, or eggs before reaching for another package of cheese.
Make-Ahead, Storage, and Reheating Guidance
A lot of these recipes are friendlier to planning than people expect. The baked items — pizza pinwheels, tenders, taco cups, egg muffins, rice bites, calzones, sliders, biscuit bites, and mac and cheese cups — keep well in the fridge for 3 to 4 days in airtight containers. Most of them can be frozen for up to 2 months, though items with fresh apple, lettuce, or raw tomato should be made fresh instead of frozen.
For reheating, use the oven or air fryer when you want the outside to stay crisp. A 350°F oven for 8 to 12 minutes usually brings back the texture on tenders, wedges, pinwheels, and calzones. The air fryer is even faster for small batches; 375°F for 4 to 7 minutes is enough for many of these snacks, especially anything breaded or pastry-based.
Microwave reheating is fine for egg muffins, sliders, soup, and roll-ups, but it softens crisp edges. That’s not a failure. It’s just the trade-off. If you do microwave something like pizza pinwheels or biscuit bites, use 20 to 30 second bursts and stop before the cheese starts to boil.
A few items improve after a short rest in the fridge. Sloppy joe filling, meatball sauce, and tomato soup get a little deeper after sitting overnight. Other items — especially toasts, apple-cheddar builds, and anything with raw produce — are better assembled right before serving. If you want to make life easier, prep the components and hold them separately, then combine them when everyone comes through the kitchen like a small, hungry parade.
Variations and Adaptations to Try
Gluten-Free Crunch Route:
Use corn tortillas, gluten-free breadcrumbs, and naturally gluten-free recipes like egg muffins, potato wedges, soup, nachos, and rice bites. For the bread-based recipes, don’t force it; build around the dishes that already fit.
Dairy-Light Swap:
Choose recipes that rely on structure more than cheese — chicken skewers, potato wedges, tomato soup, turkey roll-ups, and tacos. Where cheese is part of the charm, use a smaller amount and add flavor through seasoning, not just more dairy.
Veggie-Heavy Plate:
Double the vegetables in egg muffins, taco cups, rice bites, and quesadillas by using finely chopped spinach, grated zucchini, broccoli, or bell pepper. Keep the pieces small and cooked enough to blend into the filling, or kids will push them aside on principle.
Mild Kid Version:
Leave out jalapeños, strong mustard, heavy pepper, and aggressive sauces. Keep the seasonings to salt, a little garlic powder, and familiar cheeses. Plain food is not boring when it’s made well; it’s often what gets eaten.
Air Fryer Shortcut:
Use the air fryer for tenders, wedges, pinwheels, biscuit bites, and some calzone-style snacks in small batches. It’s especially useful when you want crisp edges without heating the whole kitchen.
Protein Boost Without Drama:
Add shredded chicken to quesadillas and nachos, extra egg to muffins, meat to taco cups and sliders, or beans to mac cups and rice bites. The goal is not to make every snack a gym meal. It’s to keep hungry kids from hunting for a second snack twenty minutes later.
Common Mistakes to Avoid
The biggest mistake is treating after-school food like a formal dinner. That leads to overcomplicated recipes, too many ingredients, and a long prep window when the kids are already restless. These recipes work because they’re quick, not because they’re impressive on paper.
Another common problem is making everything too wet. Sauce-heavy pizzas, sloppy nachos, watery vegetables, and overfilled roll-ups all fall apart in the same annoying way: they taste fine but handle badly. Dry your vegetables, use sauce with restraint, and think about structure before you think about flavor additions.
People also under-season snack food. A plain baked tortilla or a batch of rice bites with no salt or parmesan tastes flat, even if the ingredients are good. Taste the filling before baking when you can, and season the breading or sauce layer rather than hoping melted cheese will fix everything.
Watch the heat. Too many of these recipes suffer because the oven or skillet is pushed too hard. High heat burns bread before the cheese melts, scorches sugar-heavy sauces, and dries out small chicken pieces. Medium heat, or a properly preheated oven, gives you more control.
Finally, don’t skip the small resting step after cooking. A minute or two matters for quesadillas, meatballs, tenders, mac cups, and baked bites. The filling settles, the cheese stops racing out the side, and the whole thing holds together better in a child’s hand. That pause is worth it.
Frequently Asked Questions
Can I make these kids dinners ahead of time?
Yes, and that’s one of the best things about them. Baked items like egg muffins, taco cups, sliders, rice bites, and calzones can be cooked ahead and reheated later in the oven or air fryer so they don’t turn limp.
Which recipes freeze best?
Taco cups, meatballs, sliders, egg muffins, rice bites, and calzones freeze well if wrapped tightly once cooled. Items with fresh apple, raw tomato, or cucumber are better made fresh, because freezing changes the texture in all the wrong ways.
What if my child only eats plain food?
Start with the simplest versions: cheese quesadillas, grilled cheese dippers, plain chicken tenders, pizza pinwheels with only cheese, or turkey roll-ups with no vegetables. Once those are accepted, you can slip in tiny changes like a little spinach, a lighter sauce, or a mild dip on the side.
Can I use the air fryer instead of the oven?
For many of these recipes, yes. It works especially well for tenders, wedges, biscuit bites, and pinwheels. Keep the batch small and watch closely, because air fryers brown edges fast.
How do I keep snack dinners from getting soggy?
Use dry fillings, pre-toast or pre-bake the base when needed, and don’t overdo sauce. Let hot fillings cool for a minute before assembling sandwiches and roll-ups, and keep dips on the side rather than inside the food.
How much should I serve per child?
For younger children, one main item plus fruit or vegetables is often enough. Older kids usually need a larger portion, like two sliders, a full quesadilla, or a generous plate of nachos with a side. If dinner is far away, err on the larger side.
Can I pack any of these in a lunchbox?
Yes, but choose the sturdier ones. Roll-ups, pizza pinwheels, egg muffins, rice bites, and cooled chicken tenders travel better than soup, grilled cheese, or anything drenched in sauce. Keep dips in separate containers so the food stays dry.
What’s the best way to reheat something crispy?
Use a 350°F oven or a 375°F air fryer. That brings back the crunch on tenders, pinwheels, wedges, and biscuit bites far better than the microwave, which tends to soften everything into the same texture.
The Snack-Dinner Sweet Spot

The nicest thing about these recipes is that they don’t try to be more than they are. They’re small, sturdy, and forgiving. A tired kid can eat them without ceremony, and a tired adult can make them without a second grocery run.
That’s a useful sweet spot. Warm enough to feel like dinner, simple enough to land as a snack, and flexible enough that you can repeat the same few favorites without hearing a complaint every single time. That combination is rare, and worth keeping in the back pocket.
If the afternoon starts slipping sideways, pick one of these and keep it moving. The right snack dinner can change the whole mood of the house.