
Some nights, the problem isn’t cooking. It’s negotiating with the people at the table.
Easy meals for picky eaters have to do a weird little job: they need to be familiar enough to lower the guard, simple enough to avoid a dinner standoff, and still solid enough that the adults don’t stare at their plate and sigh. That means soft noodles, crisp chicken, cheesy wraps, rice bowls with the toppings parked off to the side, and sauces that stay polite instead of shouting.
The trick is not to make food bland. It’s to make it predictable in the best way. A kid who refuses “mixed things” may still happily eat buttered noodles, a slider, a strip of chicken, or a tortilla pizza if the edges are crisp and the ingredients are visible. That’s the lane here.
The meals below are built for that exact reality. They’re quick, low-drama, and practical. Some are one-pan dinners. Some are lunch fixes. A few are breakfast-for-dinner rescues, which, frankly, deserve more respect than they get.
Why These 22 Meals Actually Work for Picky Eaters
-
Familiar flavors: These recipes lean on chicken, cheese, noodles, rice, potatoes, and mild tomato sauce, which means the first bite usually feels known instead of strange.
-
Low-mess textures: Crisp edges, soft centers, and simple toppings keep each bite separate enough that kids who hate “mixed-up food” can still get through dinner.
-
Fast cleanup: A lot of these use one skillet, one baking sheet, or one pot, and that matters when you’re cooking while answering three questions at once.
-
Easy swaps: Ground turkey can stand in for beef, mozzarella can replace cheddar, and tortillas can turn almost anything into a hand-held meal.
-
Sauce on the side: Ketchup, ranch, sour cream, yogurt dip, and extra marinara stay optional, which lowers resistance before the plate even hits the table.
-
Leftover-friendly: Most of these reheat well the next day, as long as you protect the crisp parts and don’t drown the noodles in sauce.
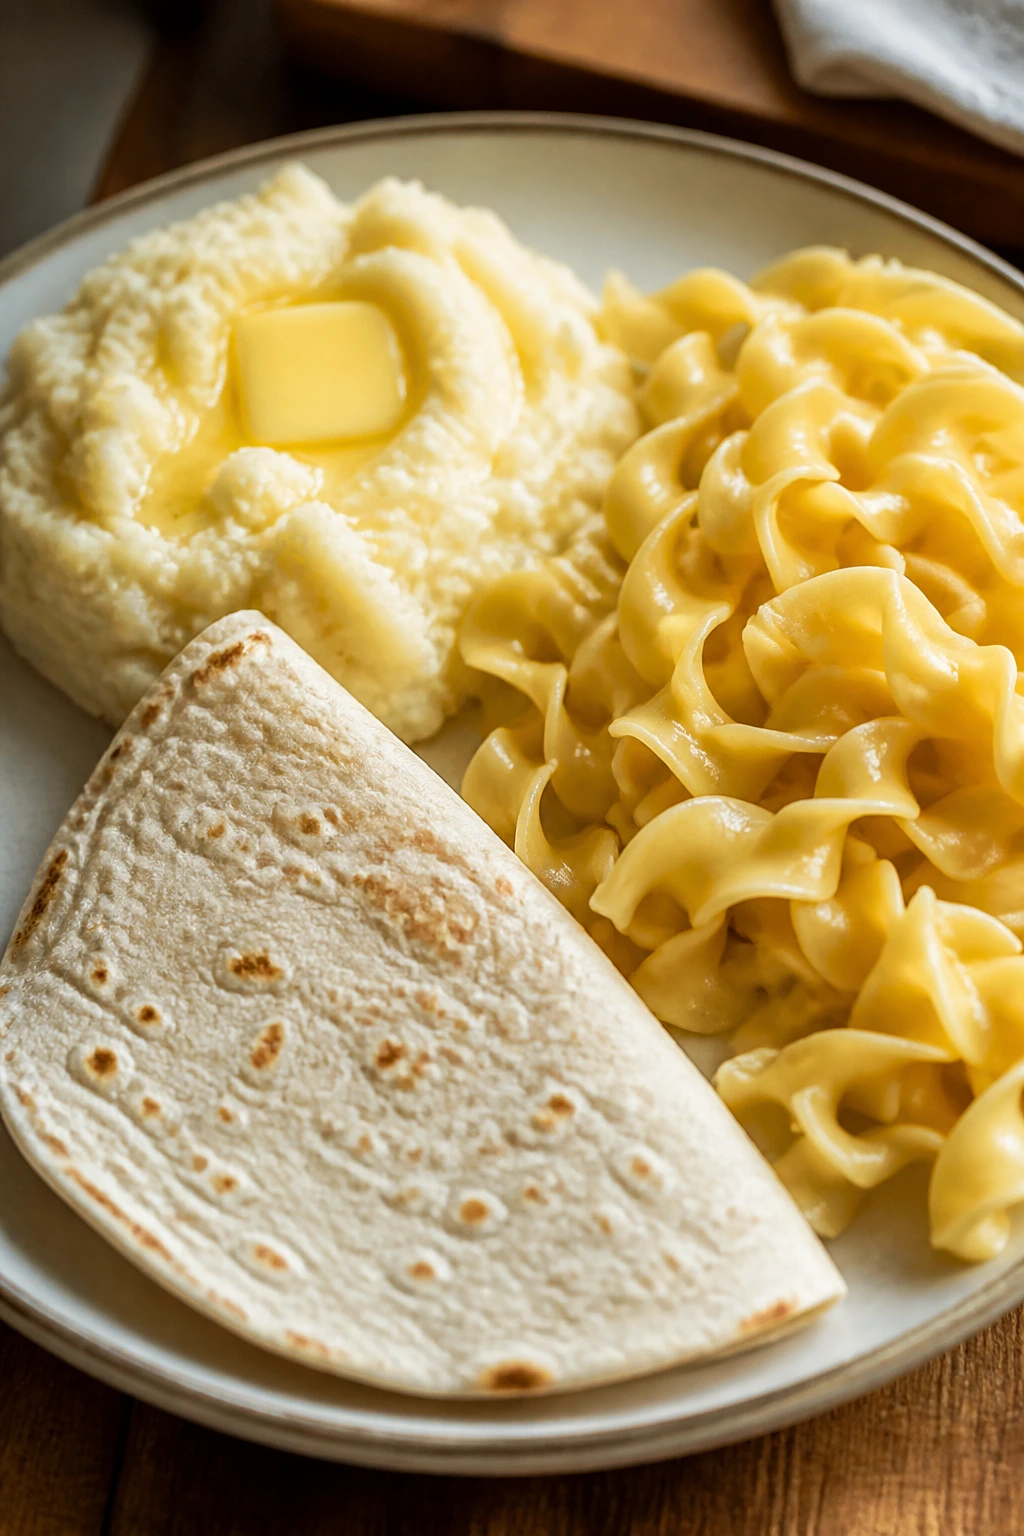
1. Buttered Parmesan Noodles
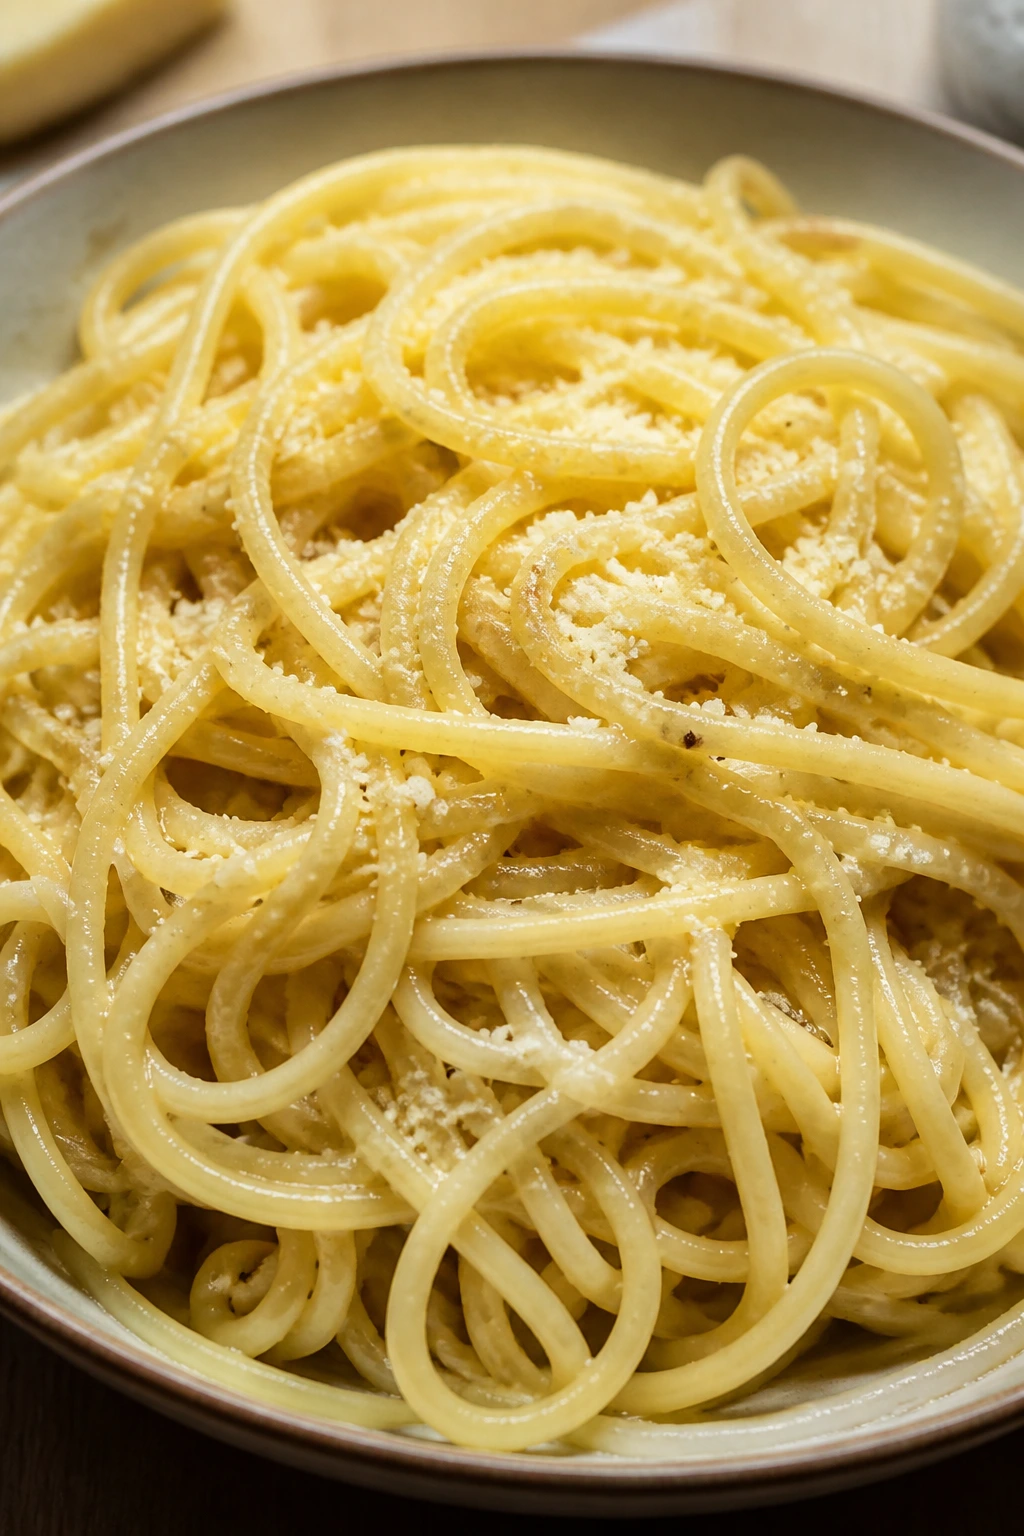
Intro: These are the noodles you make when everybody wants dinner to be quiet. Butter, parmesan, and a little pasta water make a glossy sauce that clings to every strand instead of sliding off, and that cling is exactly why this works so well for picky eaters. Nothing gets in the way.
Why It Works: The flavor stays mild, but it doesn’t taste flat. Butter gives the noodles a soft, rich base, and parmesan adds salt and a little bite without turning the whole bowl into a cheese bomb. If a kid likes plain pasta, this is the next step up, not a leap.
Key Ingredients:
- 12 ounces egg noodles or spaghetti
- 3 tablespoons unsalted butter
- 1/2 cup finely grated parmesan cheese
- 1/4 cup reserved pasta water
- 1/2 teaspoon kosher salt
- 1/4 teaspoon garlic powder, optional
- Black pepper, to taste
Quick Steps:
- Bring a large pot of salted water to a boil and cook the noodles until just al dente, about 8 to 10 minutes.
- Reserve 1/2 cup of pasta water, then drain the noodles.
- Melt the butter in the warm pot over low heat.
- Add the noodles, parmesan, and 1/4 cup pasta water, tossing until the cheese melts into a light sauce.
- Season with salt, garlic powder if using, and a little pepper.
Equipment for This Recipe: Large pot, colander, wooden spoon, measuring cup.
How to Serve This Dish: Pile it next to roasted chicken, steamed peas, or a simple salad with dressing on the side. It also works as a base under sliced meatballs or grilled nuggets.
Pro Tips for This Recipe:
- Use finely grated parmesan, not big shards. It melts faster and coats better.
- Add the pasta water a splash at a time if the noodles look dry.
- Keep the heat low after draining. High heat can make the cheese clump.
Variations on This Dish:
- Garlic Butter Version: Add 1 small minced garlic clove to the melted butter for a softer garlic note.
- Creamier Bowl: Stir in 2 tablespoons of cream cheese for a richer, more clingy sauce.
- Broccoli Sidecar: Fold in 1 cup of very small steamed broccoli florets if you’ve got a child who accepts green things in tiny doses.
Common Mistakes to Avoid with This Dish:
- Don’t rinse the noodles. You’ll wash away the starch that helps the sauce stick.
- Don’t dump the cheese into a dry pot. You need the butter and pasta water to make the sauce smooth.
- Don’t over-salt before tasting. Parmesan brings salt with it.
2. Crispy Oven Chicken Tenders
Intro: A good chicken tender has a loud crunch on the outside and a juicy center that stays calm, not dry and stringy. These bake in the oven, so you skip the oil splatter, but the panko still gives you that crackly coating kids tend to trust.
Why It Works: Chicken tenders are friendly food. They’re hand-held, easy to dip, and familiar enough that a picky eater usually knows what to expect before the first bite. Baking them on a rack helps the coating stay crisp on the bottom, which matters more than people think.
Key Ingredients:
- 1 1/2 pounds chicken tenders
- 1 cup panko breadcrumbs
- 1/2 cup all-purpose flour
- 2 large eggs
- 2 tablespoons milk
- 1 teaspoon kosher salt
- 1 teaspoon paprika
- 1/2 teaspoon garlic powder
- Cooking spray
Quick Steps:
- Heat the oven to 425°F and set a wire rack over a rimmed baking sheet.
- Mix the flour, salt, paprika, and garlic powder in one bowl. Whisk the eggs and milk in another. Put the panko in a third bowl.
- Dredge each tender in flour, dip in egg, then press into panko.
- Set the tenders on the rack, spray lightly with cooking spray, and bake for 18 to 20 minutes.
- Cook until the coating is golden and the chicken reaches 165°F inside.
Equipment for This Recipe: Rimmed baking sheet, wire rack, three shallow bowls, tongs.
How to Serve This Dish: Serve with ketchup, ranch, or honey mustard in tiny bowls. Add potato wedges, cucumber slices, or fruit if you need a plate that feels complete without being crowded.
Pro Tips for This Recipe:
- Don’t crowd the rack. Air needs to move around each tender.
- A light spray of oil on top helps the crust brown instead of drying out.
- If the panko looks pale at 18 minutes, give it 2 more minutes rather than guessing.
Variations on This Dish:
- Parmesan Crust: Mix 1/4 cup grated parmesan into the panko for a slightly saltier crust.
- Mild BBQ Twist: Stir 1 teaspoon BBQ seasoning into the flour for a smoky finish.
- Nugget Style: Cut larger chicken breasts into strips if that’s the shape your table prefers.
Common Mistakes to Avoid with This Dish:
- Don’t skip the flour. The egg needs something dry to grip.
- Don’t overbake. Even 3 extra minutes can dry out thin tenders.
- Don’t use too much spray. A light coat browns the crust; a heavy one can make it greasy.
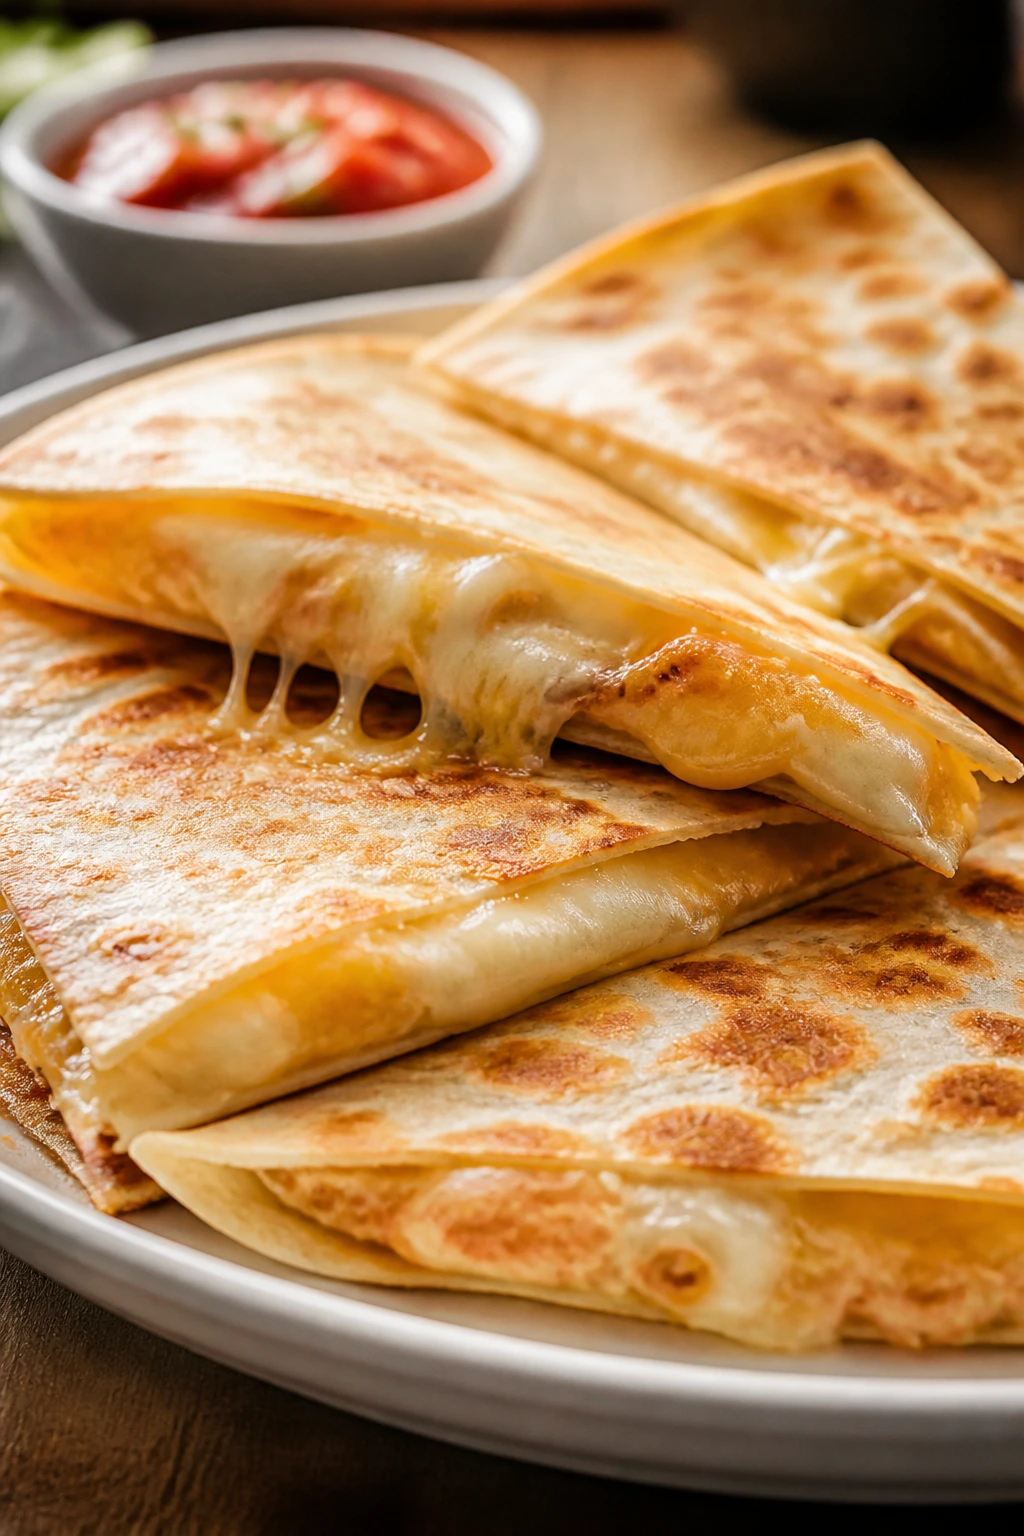
3. Cheesy Quesadillas
Intro: A quesadilla is one of the rare meals that can feel boring in the best possible way. The tortilla gets toasted, the cheese melts into a stretchy center, and if you keep the filling simple, most picky eaters will meet it halfway.
Why It Works: The filling can stay as plain as cheese alone, or you can tuck in a little chicken or beans without changing the whole personality of the dish. The crisp tortilla edge gives you contrast, which is half the point. If you cut it into wedges and serve salsa on the side, it suddenly feels like a choice instead of a demand.
Key Ingredients:
- 4 large flour tortillas
- 2 cups shredded Monterey Jack or mild cheddar
- 1 cup cooked shredded chicken or drained black beans, optional
- 1 tablespoon butter
- Salsa or sour cream, for serving
Quick Steps:
- Heat a skillet over medium heat and melt a little butter in it.
- Place one tortilla in the skillet and scatter cheese over half of it.
- Add chicken or beans if using, then fold the tortilla over.
- Cook 2 to 3 minutes per side until golden and the cheese is melted.
- Rest for 1 minute before cutting into wedges.
Equipment for This Recipe: 10-inch skillet, spatula, knife or pizza cutter, plate.
How to Serve This Dish: Cut the wedges small and set out dip cups for salsa, sour cream, or plain yogurt. Add a fruit cup or baby carrots, and you’ve got lunch that doesn’t need a speech.
Pro Tips for This Recipe:
- Shred your own cheese if you can. It melts faster than the bagged stuff.
- Keep the heat at medium. Too hot, and the tortilla browns before the cheese melts.
- Let the quesadilla rest for a minute so the filling doesn’t slide out.
Variations on This Dish:
- Chicken and Cheese Classic: Add a few tablespoons of chopped cooked chicken for a little more protein.
- Bean-and-Cheese Version: Use rinsed black beans, lightly mashed, for a softer texture.
- Breakfast Quesadilla: Swap in scrambled eggs and a little cheese for a morning meal.
Common Mistakes to Avoid with This Dish:
- Don’t overfill it. A stuffed quesadilla splits before the cheese melts.
- Don’t cook it on high heat. You’ll get a burnt tortilla and cold cheese.
- Don’t slice it immediately. The filling needs a minute to settle.
4. Mini Meatballs and Rice
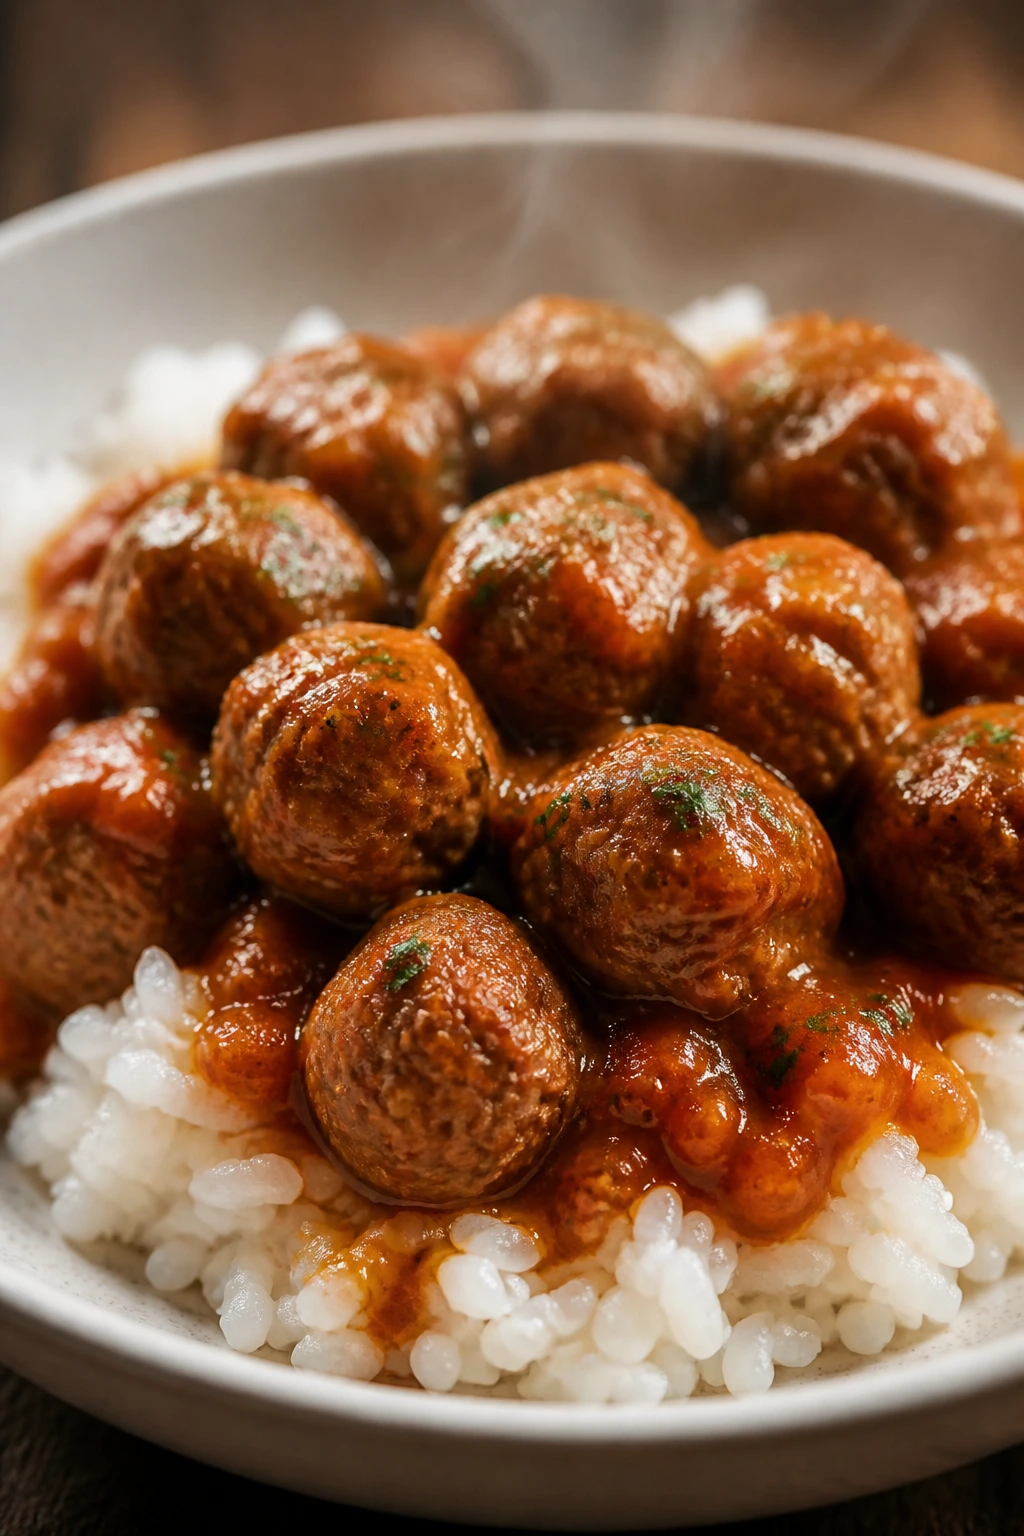
Intro: Mini meatballs solve a very specific dinner problem: they feel like something real, but they’re small enough to seem less intimidating. Put them over rice, and you get a bowl that’s plain enough for picky eaters and solid enough for everyone else.
Why It Works: Small meatballs cook quickly and stay tender if you don’t pack them too hard. Rice is a neutral base that doesn’t fight for attention, which is useful when you’re serving a child who notices every speck of green. Mild gravy or a soft tomato sauce turns the whole thing into a complete plate without making it busy.
Key Ingredients:
- 1 pound ground beef or ground turkey
- 1 large egg
- 1/2 cup breadcrumbs
- 1/4 cup milk
- 1 teaspoon kosher salt
- 1/2 teaspoon onion powder
- 1/2 teaspoon garlic powder
- 2 cups cooked white rice
- 1 cup mild gravy or tomato sauce
Quick Steps:
- Heat the oven to 400°F and line a baking sheet with parchment.
- Mix the meat, egg, breadcrumbs, milk, salt, onion powder, and garlic powder until just combined.
- Roll into 1-inch meatballs and place on the sheet.
- Bake for 12 to 15 minutes until browned and cooked through.
- Warm the sauce, spoon it over rice, and top with the meatballs.
Equipment for This Recipe: Rimmed baking sheet, parchment paper, mixing bowl, small scoop or spoon.
How to Serve This Dish: Serve in a shallow bowl so the sauce stays where it should. A few cucumber slices or plain peas on the side are enough if you need color.
Pro Tips for This Recipe:
- Stop mixing as soon as everything looks combined. Overworking makes meatballs dense.
- Use a small scoop so the meatballs are even.
- If you want extra tenderness, use turkey and a little more milk.
Variations on This Dish:
- Swedish-Style Bowl: Use gravy and a spoonful of sour cream for a softer, creamier version.
- Tomato Spoon-Over: Heat them in mild marinara if your table likes sauce with a little sweetness.
- Mini Subs: Tuck the meatballs into soft rolls with melted cheese for a different shape, same idea.
Common Mistakes to Avoid with This Dish:
- Don’t make the meatballs too big. Large ones dry out before the center cooks.
- Don’t skip lining the pan. The bottoms can stick and tear.
- Don’t drown the rice in sauce. Keep it light so the texture stays clear.
5. Sloppy Joe Sliders

Intro: Sloppy Joes are messy by design, which is half the charm and half the reason you want slider buns instead of giant sandwich bread. Smaller portions feel easier to manage, and the sweet-savory filling tends to be friendly even for kids who avoid anything with a sharp edge.
Why It Works: The filling is soft, saucy, and easy to chew. That matters for younger eaters and for adults who are tired and want dinner to stop arguing with them. Sliders also let you control the sauce-to-bread ratio, which is a real issue with picky eaters; too much sauce, and the bun collapses.
Key Ingredients:
- 1 pound ground beef
- 1/2 small onion, finely chopped
- 3/4 cup ketchup
- 2 tablespoons brown sugar
- 1 tablespoon Worcestershire sauce
- 1 teaspoon yellow mustard
- 12 slider buns
- 6 slices cheddar, optional
Quick Steps:
- Brown the beef and onion in a skillet over medium heat, breaking the meat into small crumbles.
- Drain excess fat if needed.
- Stir in ketchup, brown sugar, Worcestershire, and mustard.
- Simmer for 8 to 10 minutes until thick and glossy.
- Spoon onto buns and add cheese if you want it melted on top.
Equipment for This Recipe: Large skillet, wooden spoon, measuring cups, baking sheet for warming buns.
How to Serve This Dish: Put the filling in the middle of the table and let people build their own sliders. Add baked chips, apple slices, or corn on the cob if you want a simple spread.
Pro Tips for This Recipe:
- Chop the onion very fine so it disappears into the sauce.
- Simmer long enough for the sauce to thicken; runny Sloppy Joes make soggy buns.
- Warm the buns for a minute or two if they’re dry.
Variations on This Dish:
- Cheesy Melt Slider: Top the filling with cheddar and cover the pan for 30 seconds to melt it.
- Turkey Swap: Use ground turkey and add 1 tablespoon butter to the skillet for a little extra richness.
- Mild BBQ Joe: Replace half the ketchup with BBQ sauce for a sweeter profile.
Common Mistakes to Avoid with This Dish:
- Don’t leave the filling watery. It should mound on a spoon.
- Don’t use large onion chunks unless everyone at the table likes onion.
- Don’t overstuff the buns. Sliders are meant to be manageable, not structural experiments.
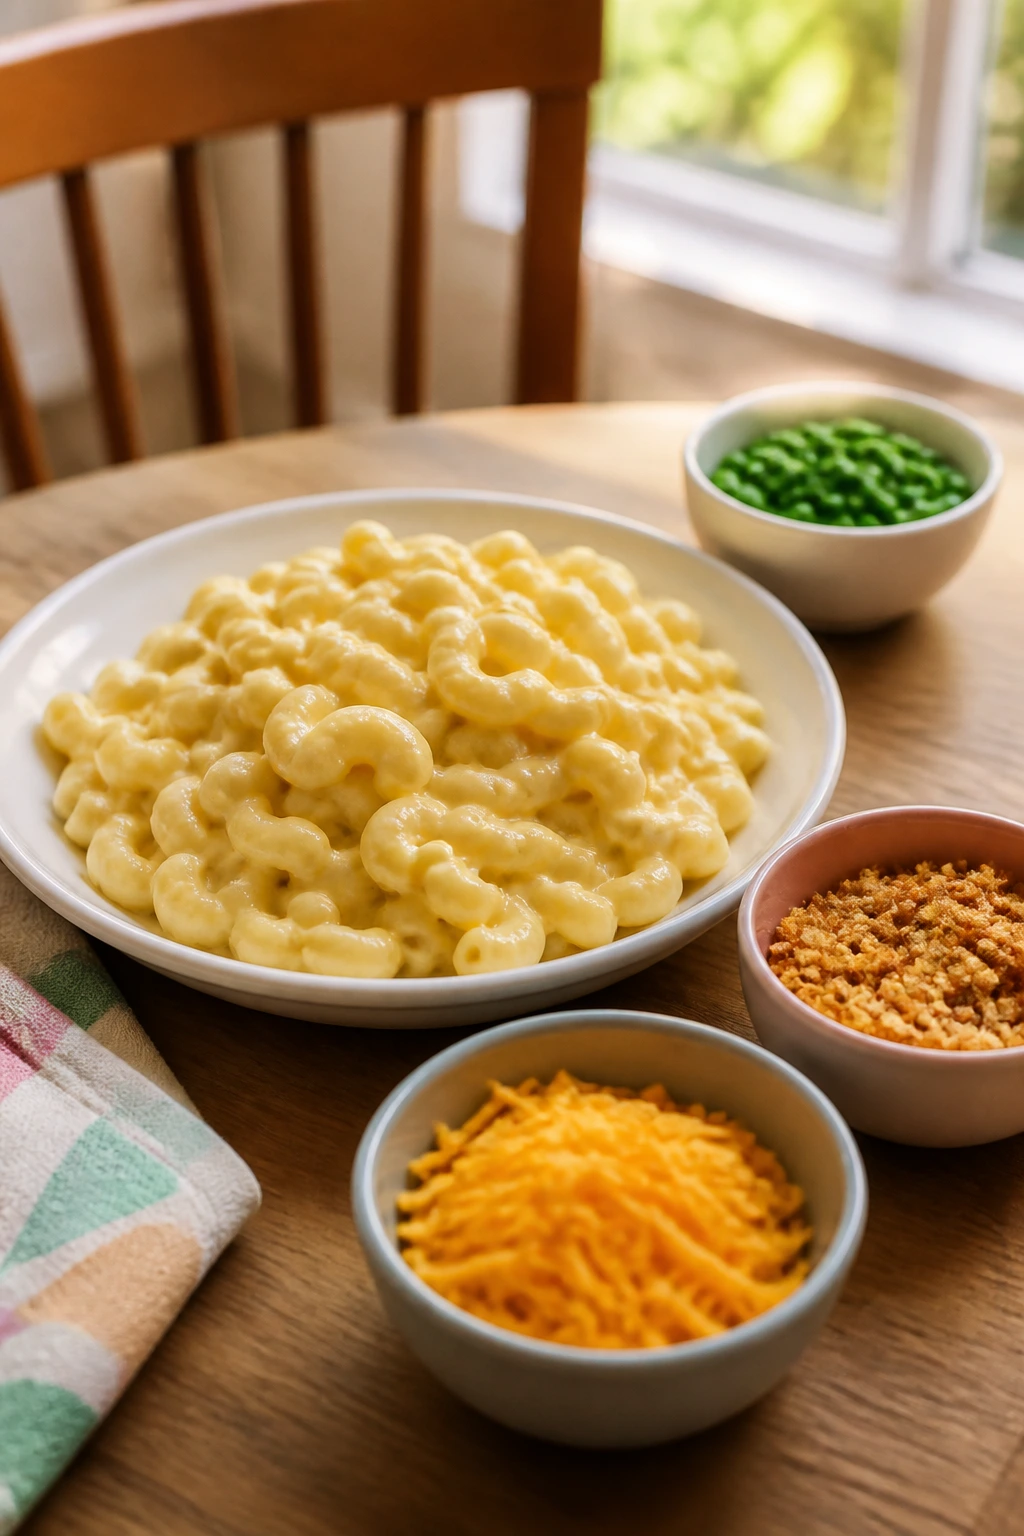
6. Baked Mac and Cheese
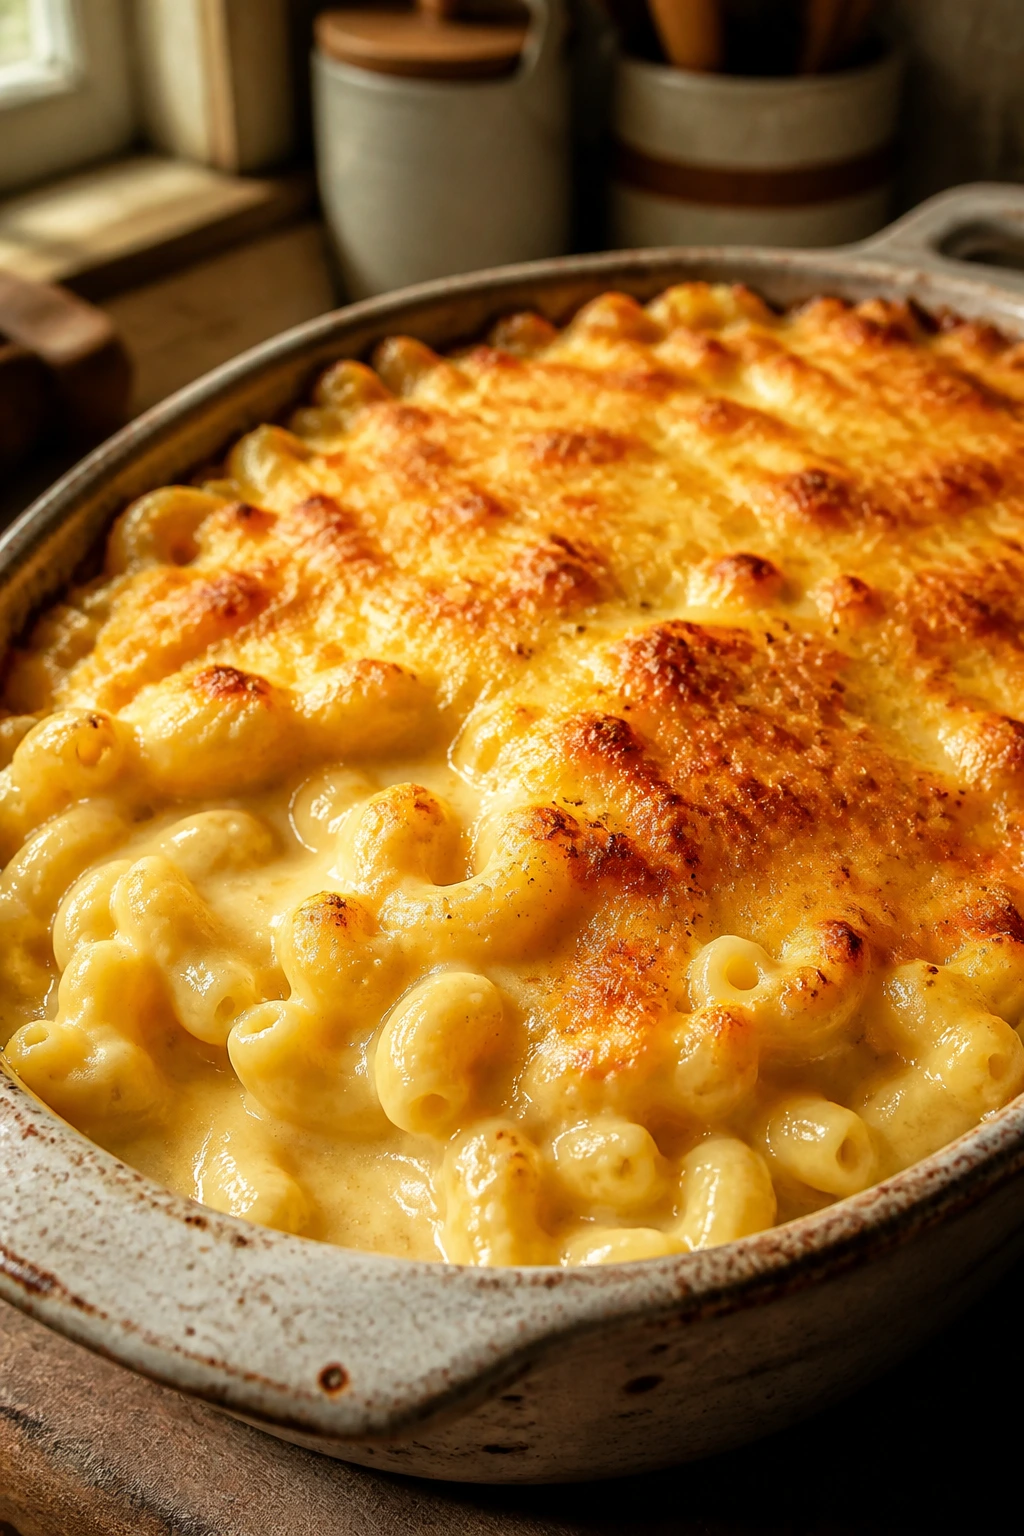
Intro: Mac and cheese has a reputation for being simple, but the difference between a bowl that disappears and a tray that sits there all night usually comes down to texture. You want a sauce that coats, not a sauce that turns grainy or greasy.
Why It Works: Elbow macaroni catches the cheese in its curves, and a basic roux keeps the sauce smooth. Baked mac and cheese gives you a little top crust, which kids often like more than a deeply browned casserole. Keep the seasoning gentle, and it lands right in the sweet spot.
Key Ingredients:
- 12 ounces elbow macaroni
- 3 tablespoons unsalted butter
- 3 tablespoons all-purpose flour
- 2 cups milk
- 2 cups shredded cheddar cheese
- 1/2 teaspoon kosher salt
- 1/4 teaspoon mustard powder, optional
- 1/2 cup breadcrumbs, optional
Quick Steps:
- Cook the macaroni until just shy of al dente, then drain.
- Melt the butter in a saucepan, whisk in the flour, and cook for 1 minute.
- Slowly whisk in the milk and simmer until the sauce thickens.
- Stir in the cheese and salt, then fold in the macaroni.
- Pour into a baking dish, top with breadcrumbs if using, and bake at 375°F for 15 to 20 minutes.
Equipment for This Recipe: Saucepan, whisk, baking dish, colander.
How to Serve This Dish: Put it next to plain chicken, green peas, or sliced apples if you want a plate that feels complete. It’s also the rare casserole that holds its own as a main dish when everyone’s too tired for sides.
Pro Tips for This Recipe:
- Pull the pasta early. It keeps cooking in the oven.
- Shred the cheese from a block if you want the smoothest sauce.
- If the top browns too fast, tent loosely with foil.
Variations on This Dish:
- Extra Creamy Version: Stir in 2 ounces of cream cheese with the cheddar.
- Pasta Shell Swap: Small shells catch even more sauce if your table likes a wetter bite.
- No-Bake Version: Skip the oven and serve it straight from the pot for a softer texture.
Common Mistakes to Avoid with This Dish:
- Don’t boil the milk hard. Gentle heat keeps the sauce from splitting.
- Don’t overbake. Mac and cheese dries out fast once the cheese starts bubbling hard.
- Don’t use too much breadcrumbs. You want a little crunch, not a dry lid.
7. Pita Pizzas
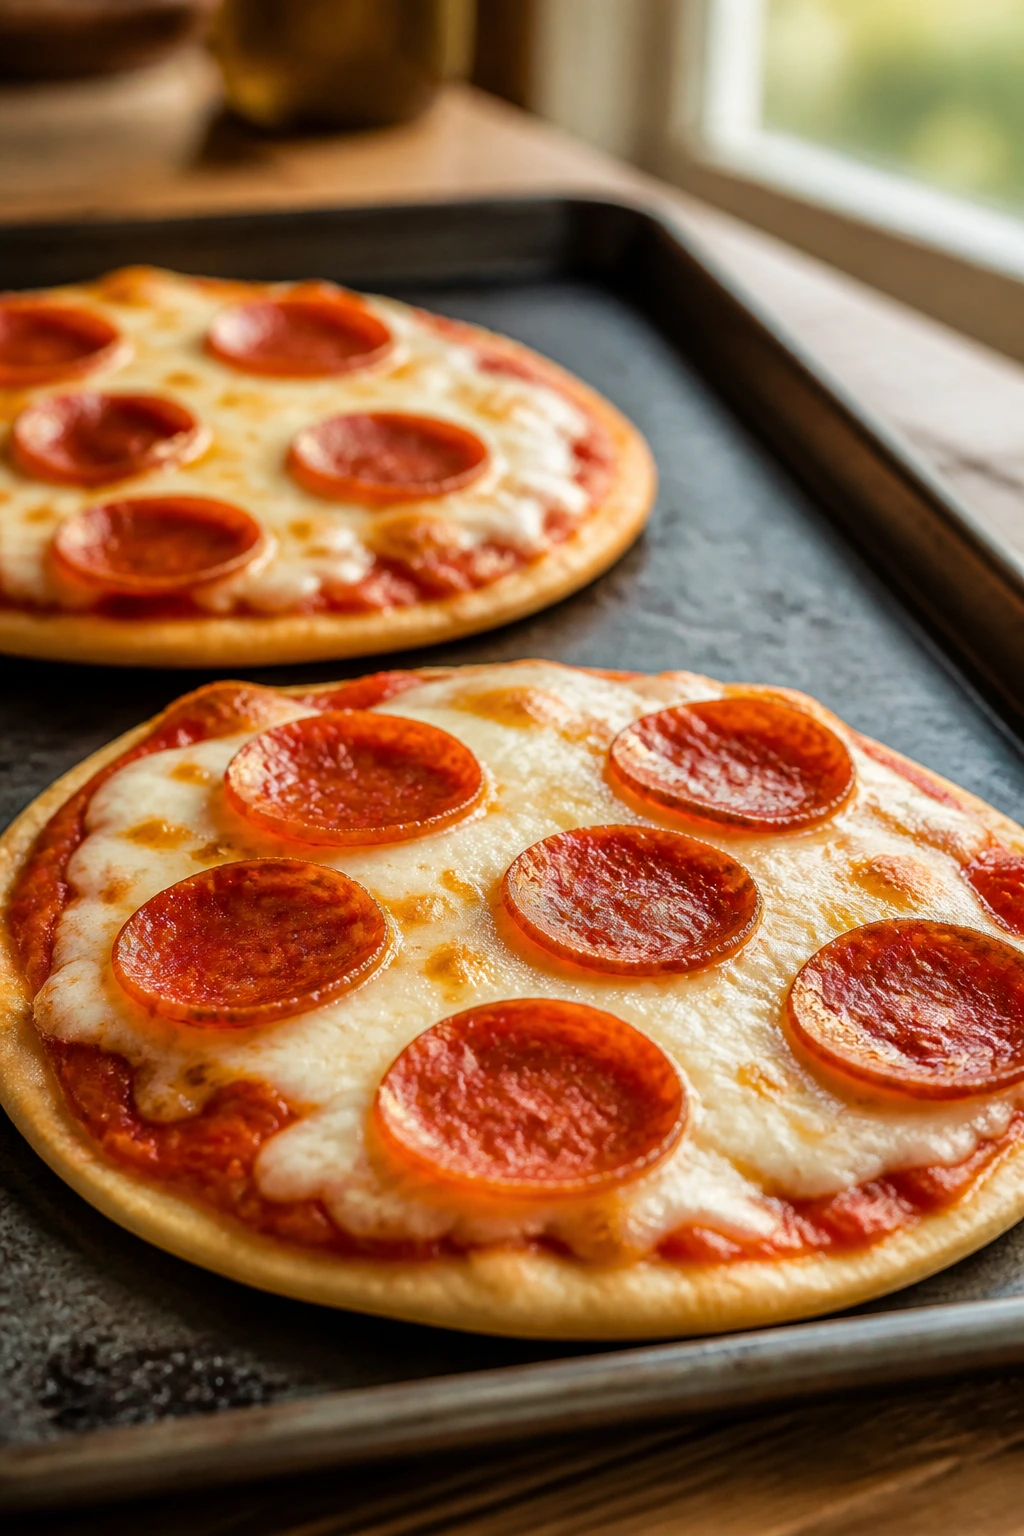
Intro: Pita pizzas feel like a shortcut, but they don’t taste like one if you crisp the bread properly. They’re built for picky eaters because every piece is visible: sauce, cheese, and maybe a few pieces of pepperoni. Nothing hidden. Nothing mysterious.
Why It Works: The pita acts like a sturdy crust that bakes fast and stays easy to hold. Kids like choosing their own toppings, and adults like that the whole thing is done in under 10 minutes. You can keep one plain and dress up the others, which is often the most peaceful move.
Key Ingredients:
- 4 pita rounds
- 1 cup pizza sauce
- 2 cups shredded mozzarella
- 1 cup pepperoni or diced ham
- 1 tablespoon olive oil
Quick Steps:
- Heat the oven to 425°F.
- Brush each pita lightly with olive oil and place on a baking sheet.
- Spread sauce over each pita, leaving a small border.
- Add mozzarella and toppings.
- Bake for 8 to 10 minutes until the cheese melts and the edges are crisp.
Equipment for This Recipe: Rimmed baking sheet, pastry brush or spoon, spatula.
How to Serve This Dish: Cut each pita into wedges and serve with a few cucumber sticks or grapes. It makes an easy lunch, and it works just as well for a dinner when you’ve got zero interest in a complicated menu.
Pro Tips for This Recipe:
- Pre-bake the pita for 2 minutes if you want a firmer base.
- Use less sauce than you think. Too much makes the middle soggy.
- Let the pizzas cool for 1 minute before slicing so the cheese settles.
Variations on This Dish:
- Cheese-Only Classic: Skip the toppings and keep it plain for the least adventurous eater.
- Breakfast Pita: Add scrambled eggs and a little cheese instead of tomato sauce.
- Veggie Tiny-Step: Add a few finely chopped mushrooms or peppers only on the adult pizza.
Common Mistakes to Avoid with This Dish:
- Don’t overload the topping layer. Pita can’t hold a heavy pile the way a thick crust can.
- Don’t bake too long or the edges turn hard.
- Don’t forget the olive oil. A little oil helps the bread crisp instead of drying out.
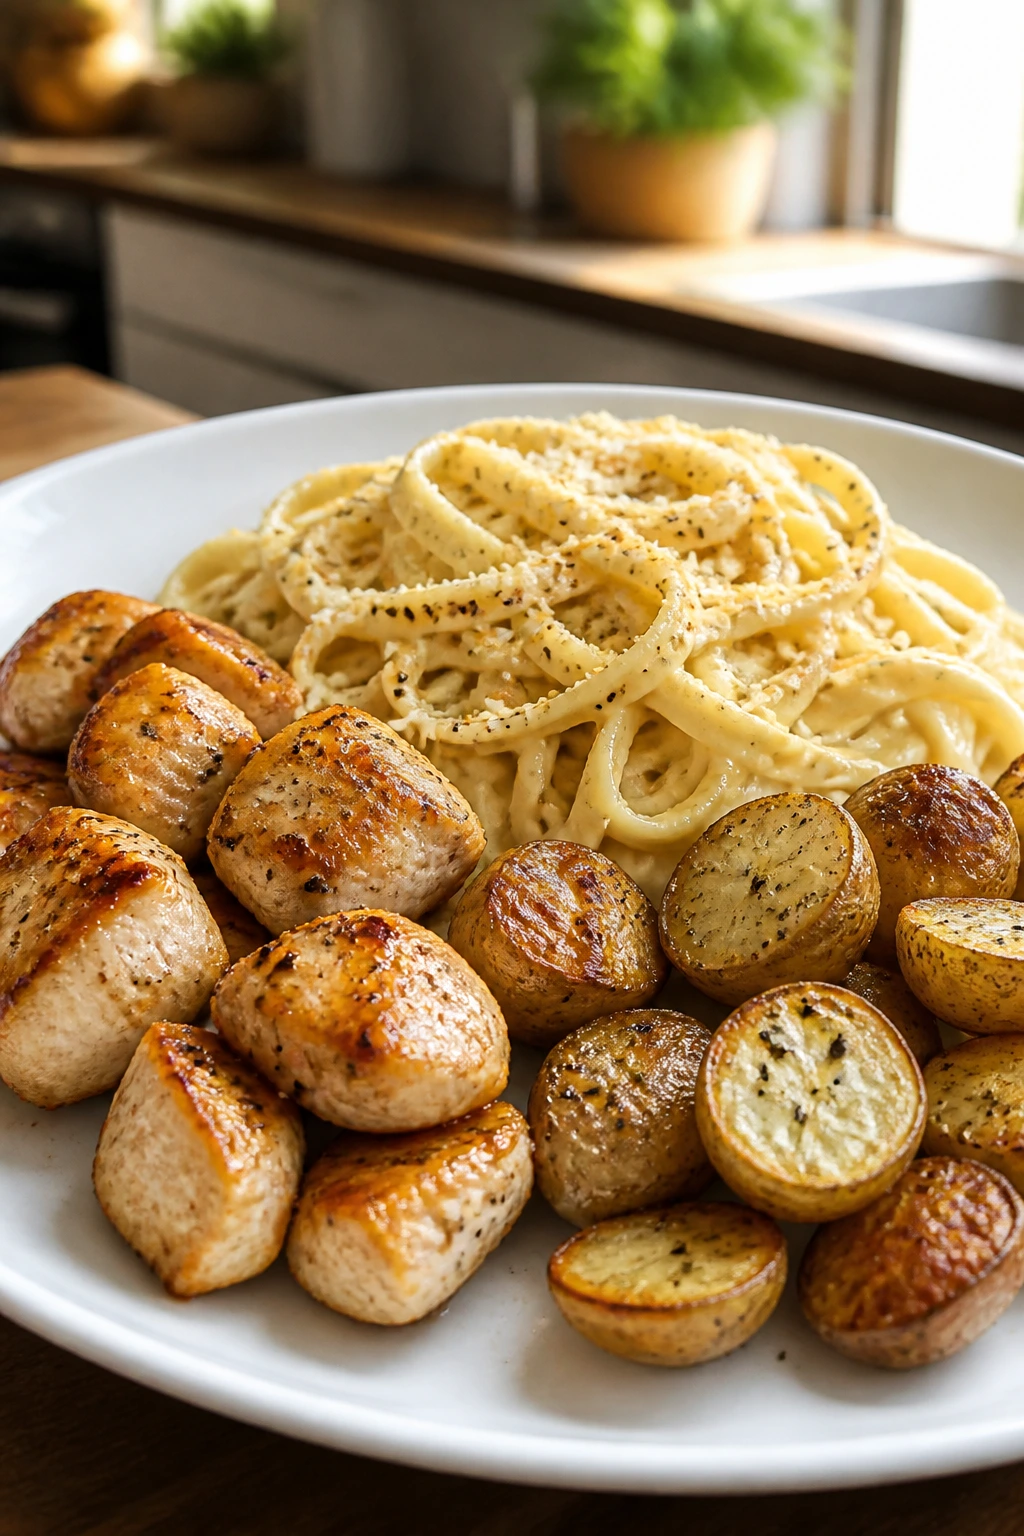
8. Honey Garlic Chicken Bites
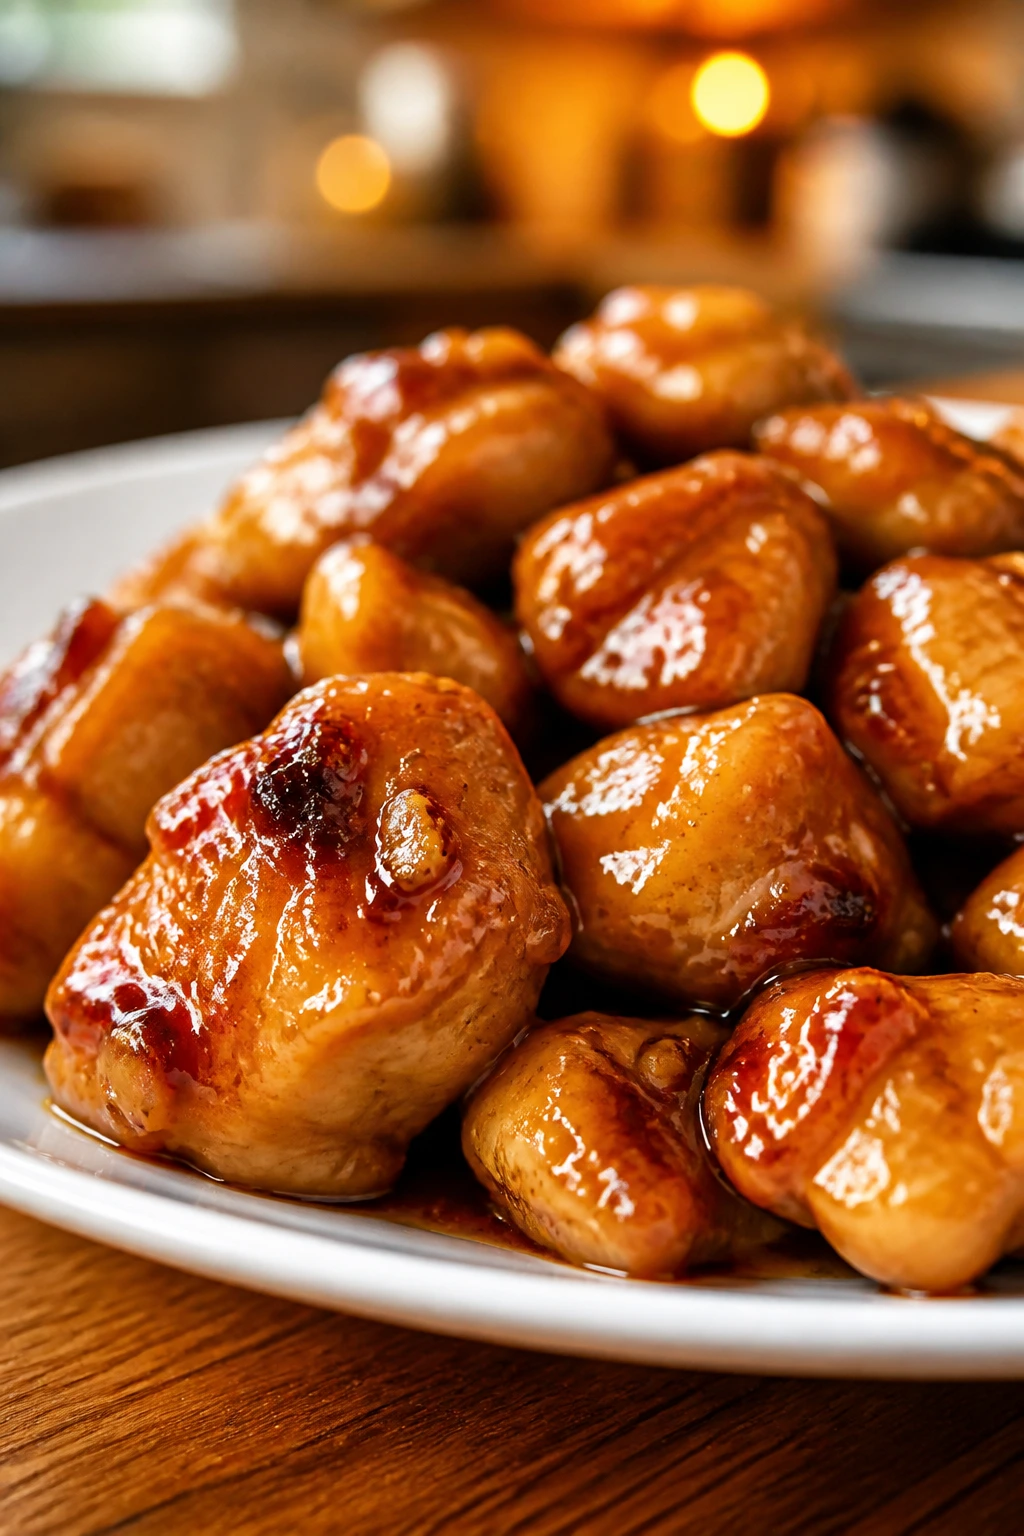
Intro: These chicken bites are glossy, sticky, and mild enough that they don’t scare off cautious eaters. The trick is cornstarch on the outside and a quick sauce in the pan, so you get tender pieces with a shiny finish instead of dry cubes.
Why It Works: Sweet-salty sauce usually lands better than spicy sauce when you’re feeding picky people. Cutting the chicken small means more surface area for the sauce, and that gives every bite the same flavor without needing a long ingredient list. It’s also fast, which never hurts.
Key Ingredients:
- 1 1/2 pounds boneless, skinless chicken breast, cut into 1-inch pieces
- 3 tablespoons cornstarch
- 1 teaspoon kosher salt
- 2 tablespoons neutral oil
- 3 tablespoons honey
- 2 tablespoons soy sauce
- 2 cloves garlic, minced
- 1 tablespoon unsalted butter
Quick Steps:
- Toss the chicken with cornstarch and salt.
- Heat oil in a skillet over medium-high heat and sear the chicken in a single layer until golden, about 4 to 5 minutes per side.
- Stir in the garlic and cook for 30 seconds.
- Add honey, soy sauce, and butter.
- Toss until the sauce turns glossy and coats the chicken, about 1 to 2 minutes.
Equipment for This Recipe: Large skillet, tongs, mixing bowl, cutting board.
How to Serve This Dish: Serve over rice with the sauce drizzled lightly, not flooded. A few steamed broccoli florets or snap peas on the side are enough if someone at the table tolerates green.
Pro Tips for This Recipe:
- Dry the chicken before tossing it with cornstarch so it browns instead of steaming.
- Keep the pan hot, but not smoking.
- Add a spoonful of water if the sauce thickens too fast.
Variations on This Dish:
- Orange Honey Version: Stir in 1 tablespoon orange juice for a brighter sauce.
- Sesame Finish: Add 1 teaspoon sesame oil at the end for a nutty note.
- Air Fryer Bites: Cook the coated chicken in an air fryer at 400°F until crisp, then toss with the sauce on the stovetop.
Common Mistakes to Avoid with This Dish:
- Don’t crowd the pan. The chicken needs space to brown.
- Don’t burn the garlic. Thirty seconds is enough.
- Don’t add all the honey before the chicken is cooked. It can scorch.
9. Breakfast Egg Wraps

Intro: Breakfast wraps work because they feel portable and predictable. Eggs, cheese, and a little ham inside a tortilla are about as safe as dinner gets, which is useful when the meal needs to be eaten with one hand and zero complaints.
Why It Works: Scrambled eggs stay soft, tortillas stay familiar, and the filling can be kept mild. If your table likes breakfast food more than dinner food, this is a neat bridge between the two. You can also leave the filling plain and put salsa or hot sauce on the side for the adults.
Key Ingredients:
- 6 large eggs
- 1/4 cup milk
- 1 cup shredded cheddar cheese
- 1/2 cup diced ham or cooked breakfast sausage
- 4 flour tortillas
- 1 tablespoon butter
- Salt and pepper, to taste
Quick Steps:
- Whisk the eggs, milk, salt, and pepper.
- Melt the butter in a skillet over medium-low heat and scramble the eggs until soft.
- Warm the tortillas for 10 to 15 seconds so they bend without cracking.
- Fill each tortilla with eggs, cheese, and ham or sausage.
- Roll the wraps and toast them seam-side down for 1 minute per side.
Equipment for This Recipe: Nonstick skillet, spatula, whisk, plate or griddle.
How to Serve This Dish: Cut the wraps in half and serve with fruit, hash browns, or yogurt. They’re also handy for school-morning leftovers if your household eats in shifts.
Pro Tips for This Recipe:
- Pull the eggs off the heat while they still look a little soft.
- Warm tortillas first or they’ll split at the fold.
- If you want extra hold, sprinkle cheese against the tortilla before adding the eggs.
Variations on This Dish:
- Sausage and Cheese Wrap: Use cooked sausage crumbles instead of ham.
- Plain Egg-and-Cheese: Keep it stripped down for a hesitant eater.
- Potato Breakfast Wrap: Add a spoonful of diced cooked potatoes for a fuller wrap.
Common Mistakes to Avoid with This Dish:
- Don’t cook the eggs until dry. They’ll keep firming up inside the wrap.
- Don’t overfill the tortilla. That turns the roll into a split seam.
- Don’t toast too hard. You want warmth and a little color, not a cracker.
10. Mild Taco Bowls
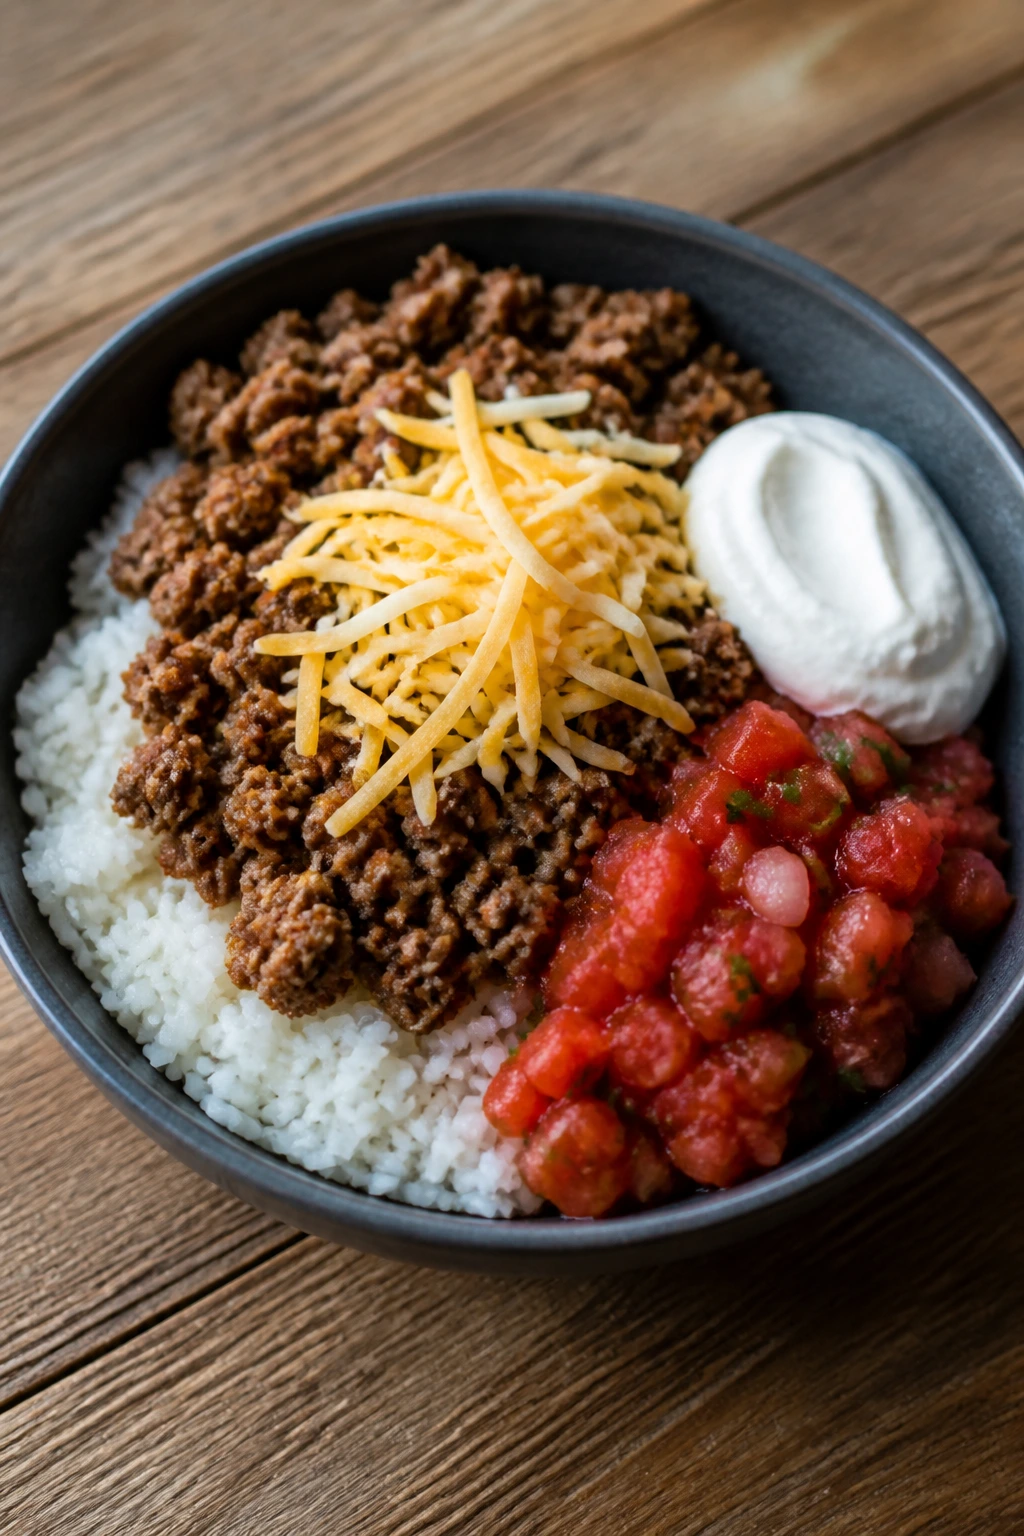
Intro: Taco bowls can be picky-eater friendly if you stop trying to make them theatrical. Keep the seasoning mild, let the toppings sit in separate piles, and build the bowl around rice, meat, and cheese.
Why It Works: A bowl lets people choose what they touch, which is half the battle with hesitant eaters. You can leave out lettuce for one person, add sour cream for another, and keep salsa in a tiny spoonful instead of flooding the whole thing. The core stays steady.
Key Ingredients:
- 1 pound ground turkey or ground beef
- 1 packet mild taco seasoning or 2 tablespoons homemade seasoning
- 1 cup cooked white rice
- 1 cup shredded lettuce
- 1 cup shredded cheddar cheese
- 1/2 cup salsa
- 1/2 cup sour cream
Quick Steps:
- Brown the meat in a skillet over medium heat, breaking it into small crumbles.
- Stir in the seasoning and 1/4 cup water, then simmer for 3 to 4 minutes.
- Warm the rice.
- Divide the rice into bowls and top with meat, lettuce, cheese, salsa, and sour cream.
- Keep toppings separate if anyone prefers to build their own.
Equipment for This Recipe: Skillet, spoon, microwave-safe bowl or saucepan for rice, serving bowls.
How to Serve This Dish: Set everything on the table buffet-style so nobody feels trapped by the assembly. Chips on the side help, but plain rice and meat already do the heavy lifting.
Pro Tips for This Recipe:
- Use mild seasoning if your audience is sensitive to heat.
- Chop lettuce finely so it doesn’t feel like a whole leaf in the mouth.
- Keep salsa in a small bowl so the bowl doesn’t get soggy.
Variations on This Dish:
- Cheesier Bowl: Add a second layer of cheese on warm meat so it softens.
- Bean Boost: Stir in 1/2 cup black beans if the table accepts them.
- Nacho Bowl: Swap rice for crushed tortilla chips when you want more crunch.
Common Mistakes to Avoid with This Dish:
- Don’t over-season the meat. Mild works better here than bold.
- Don’t pile on wet toppings before serving.
- Don’t skip the rice base unless your eater already likes fully deconstructed bowls.
11. Loaded Potato Wedges with Cheese
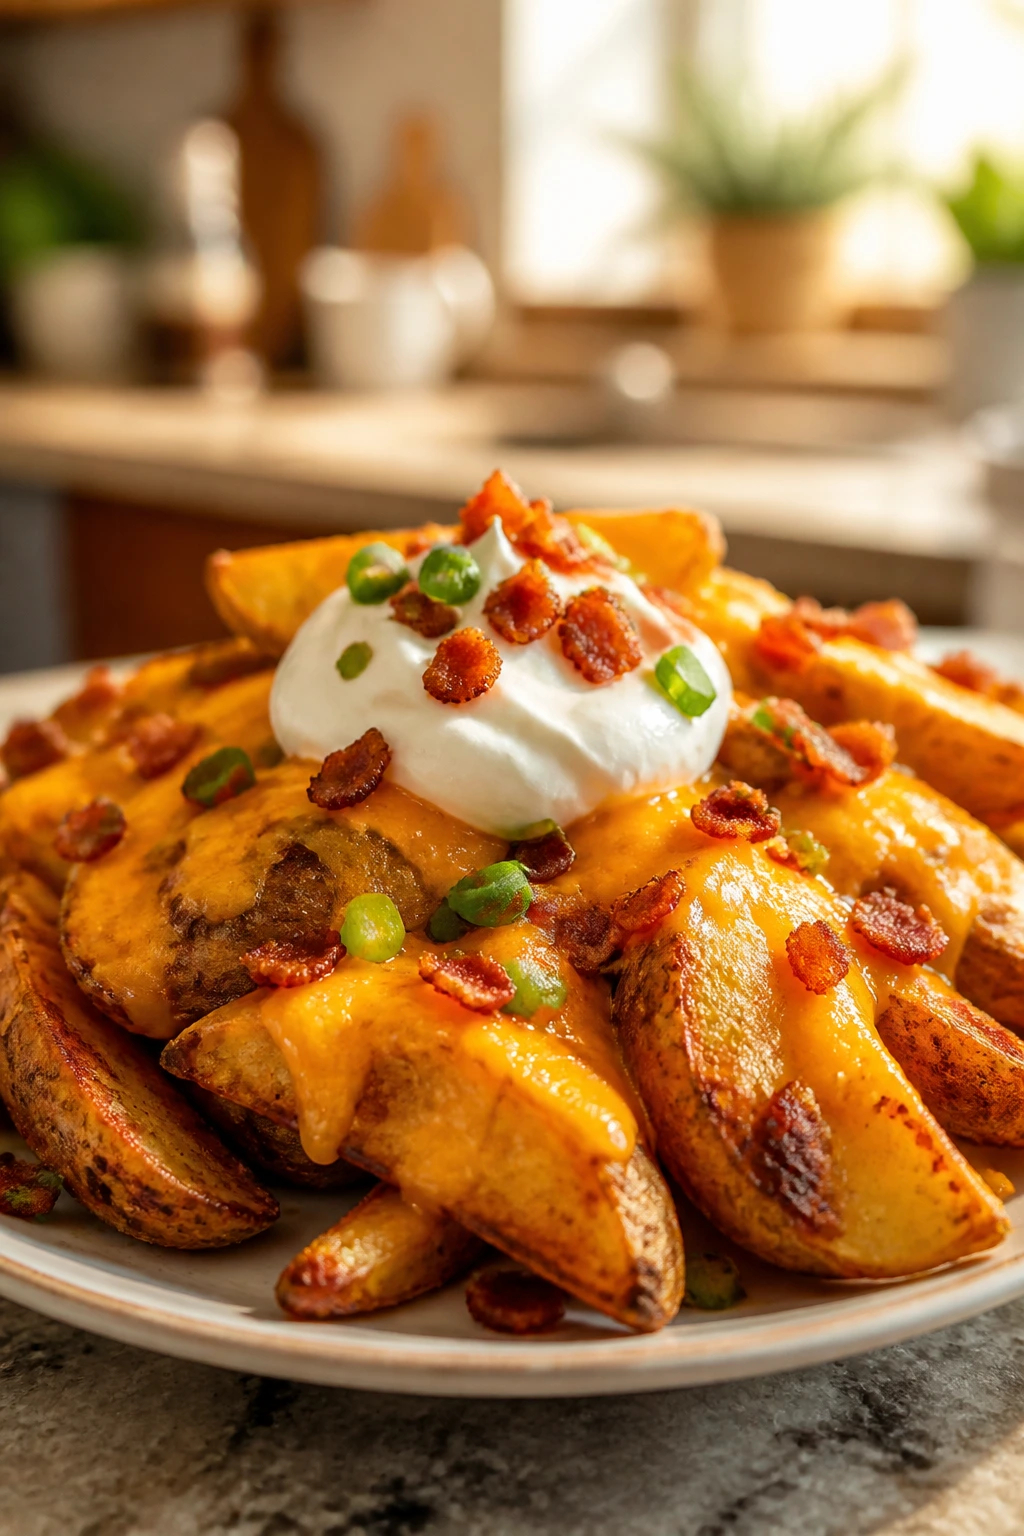
Intro: Potato wedges are one of the easiest ways to make dinner feel fun without making it complicated. They’re crisp on the edges, soft in the middle, and easy to dip, which gives them broad appeal.
Why It Works: Russet potatoes roast into wedges with a sturdy outside and fluffy inside. That texture matters. Add melted cheddar and a little sour cream, and you’ve got something that lands somewhere between a side dish and a full meal, which is a useful place to be.
Key Ingredients:
- 3 large russet potatoes
- 2 tablespoons olive oil
- 1 teaspoon kosher salt
- 1/2 teaspoon paprika
- 1 cup shredded cheddar cheese
- 2 tablespoons sour cream
- 2 tablespoons bacon bits, optional
Quick Steps:
- Heat the oven to 425°F and line a baking sheet.
- Cut the potatoes into wedges and toss with oil, salt, and paprika.
- Arrange in a single layer and bake for 30 to 35 minutes, flipping once.
- Sprinkle with cheddar and return to the oven for 2 minutes, just until melted.
- Finish with sour cream and bacon bits if using.
Equipment for This Recipe: Rimmed baking sheet, sharp knife, large bowl, spatula.
How to Serve This Dish: Serve with ketchup or ranch for dipping and add chicken strips or a fried egg if you want the meal to feel complete. It’s a good one for evenings when nobody wants a fork-heavy dinner.
Pro Tips for This Recipe:
- Soak the wedges in cold water for 20 minutes if you want extra crisp edges, then dry them well.
- Give the wedges space on the pan or they’ll steam.
- Add cheese at the very end so it melts without burning.
Variations on This Dish:
- Garlic Potato Wedges: Toss with garlic powder and parsley instead of paprika.
- Sweet Potato Swap: Use sweet potatoes for a softer, sweeter version.
- Loaded Fries Style: Cut the potatoes into fries if thinner crisp edges are easier for your table.
Common Mistakes to Avoid with This Dish:
- Don’t cut the wedges too thick. Thick wedges take forever to soften.
- Don’t crowd the tray. Steam is the enemy of crisp.
- Don’t add sour cream before baking. It belongs at the end.
12. Turkey Roll-Ups and Fruit
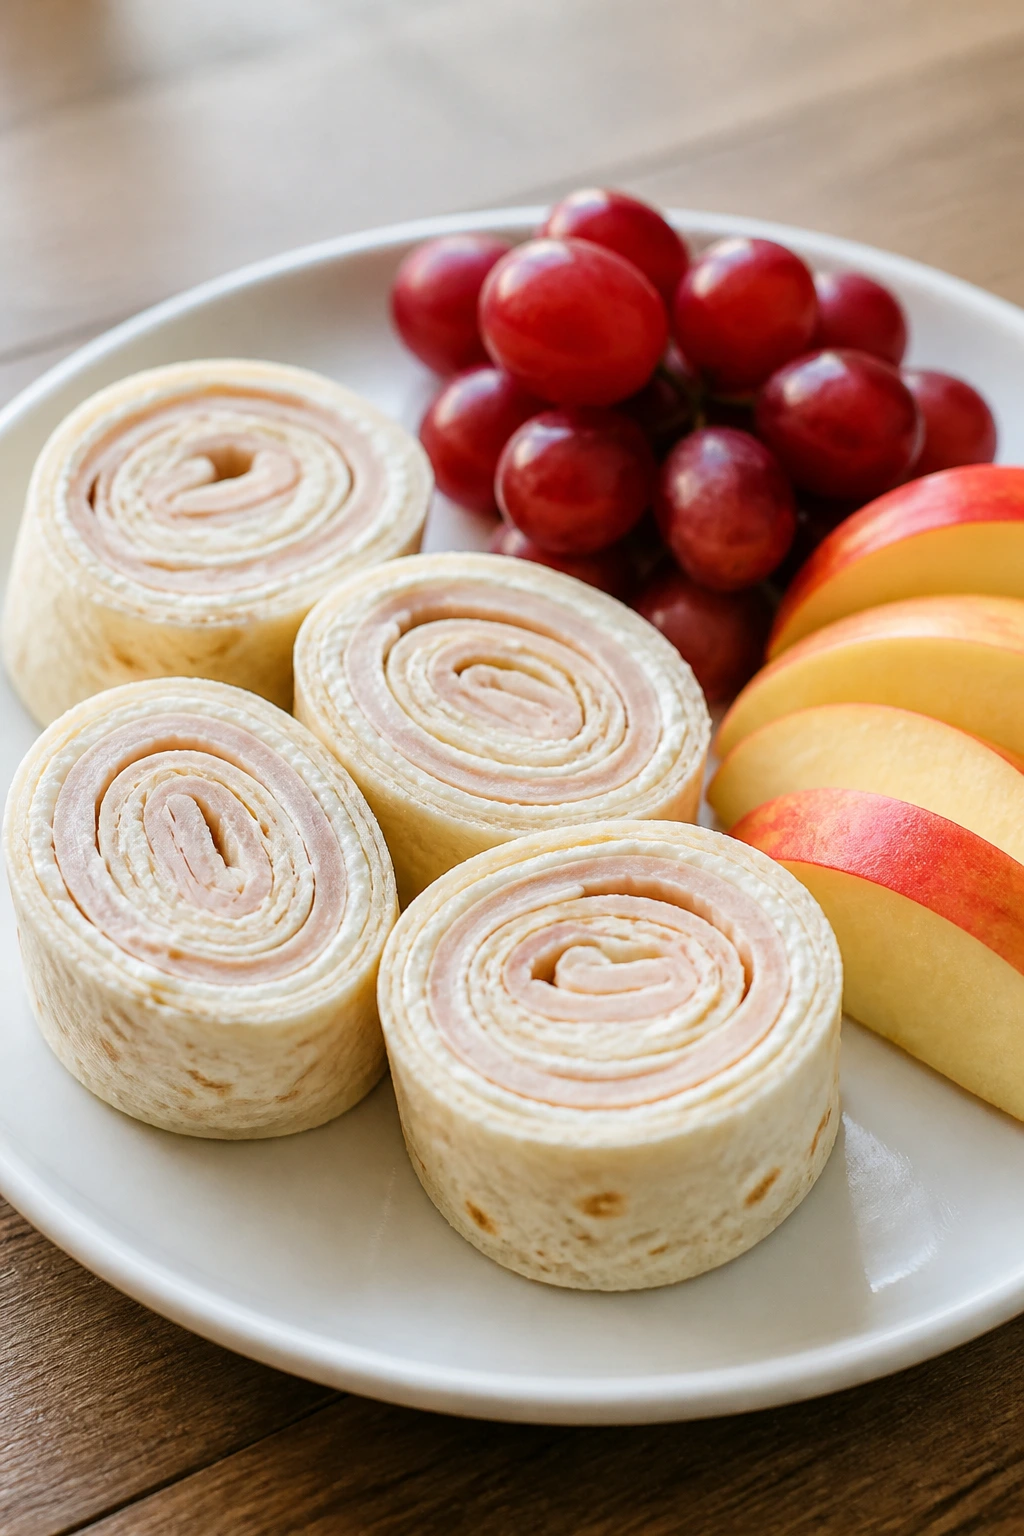
Intro: Sometimes dinner needs to be so straightforward it can be packed in a lunchbox without a second thought. Turkey roll-ups do that job well. They’re soft, mild, and easy to hold, with no hot pan required.
Why It Works: A roll-up gives picky eaters separate layers instead of a messy mixed filling. The turkey is familiar, cream cheese keeps the texture smooth, and the fruit side makes the plate feel finished. It’s a low-pressure meal, and there’s value in that.
Key Ingredients:
- 4 large flour tortillas
- 4 ounces cream cheese, softened
- 8 ounces sliced turkey
- 4 slices mild cheddar cheese
- 1 cup shredded lettuce, optional
- 2 cups grapes or apple slices
Quick Steps:
- Spread each tortilla with cream cheese.
- Layer turkey, cheddar, and lettuce if using.
- Roll each tortilla tightly and press the seam closed.
- Slice into pinwheels or halve for a wrap-style meal.
- Serve with grapes or apple slices.
Equipment for This Recipe: Cutting board, butter knife or spatula, sharp knife.
How to Serve This Dish: Put the fruit on the plate in its own section and keep the roll-ups neat and dry. A handful of crackers or pretzels can round it out if you need more food without more fuss.
Pro Tips for This Recipe:
- Soften the cream cheese first or the tortilla may tear.
- Pat the turkey dry if it’s very moist.
- Wrap tightly before slicing so the layers hold together.
Variations on This Dish:
- Ham and Swiss Roll-Up: Swap the turkey for ham and the cheddar for Swiss.
- Veggie Lite Version: Add shredded carrot only if your eater tolerates a bit of crunch.
- Lunchbox Pinwheels: Slice them small and pack with fruit for a cold lunch.
Common Mistakes to Avoid with This Dish:
- Don’t overload the tortilla. Thin, neat layers roll better.
- Don’t skip the cream cheese. It acts like glue.
- Don’t let sliced roll-ups sit too long before serving or they can dry at the cut edge.
13. Hidden-Veggie Pasta Sauce
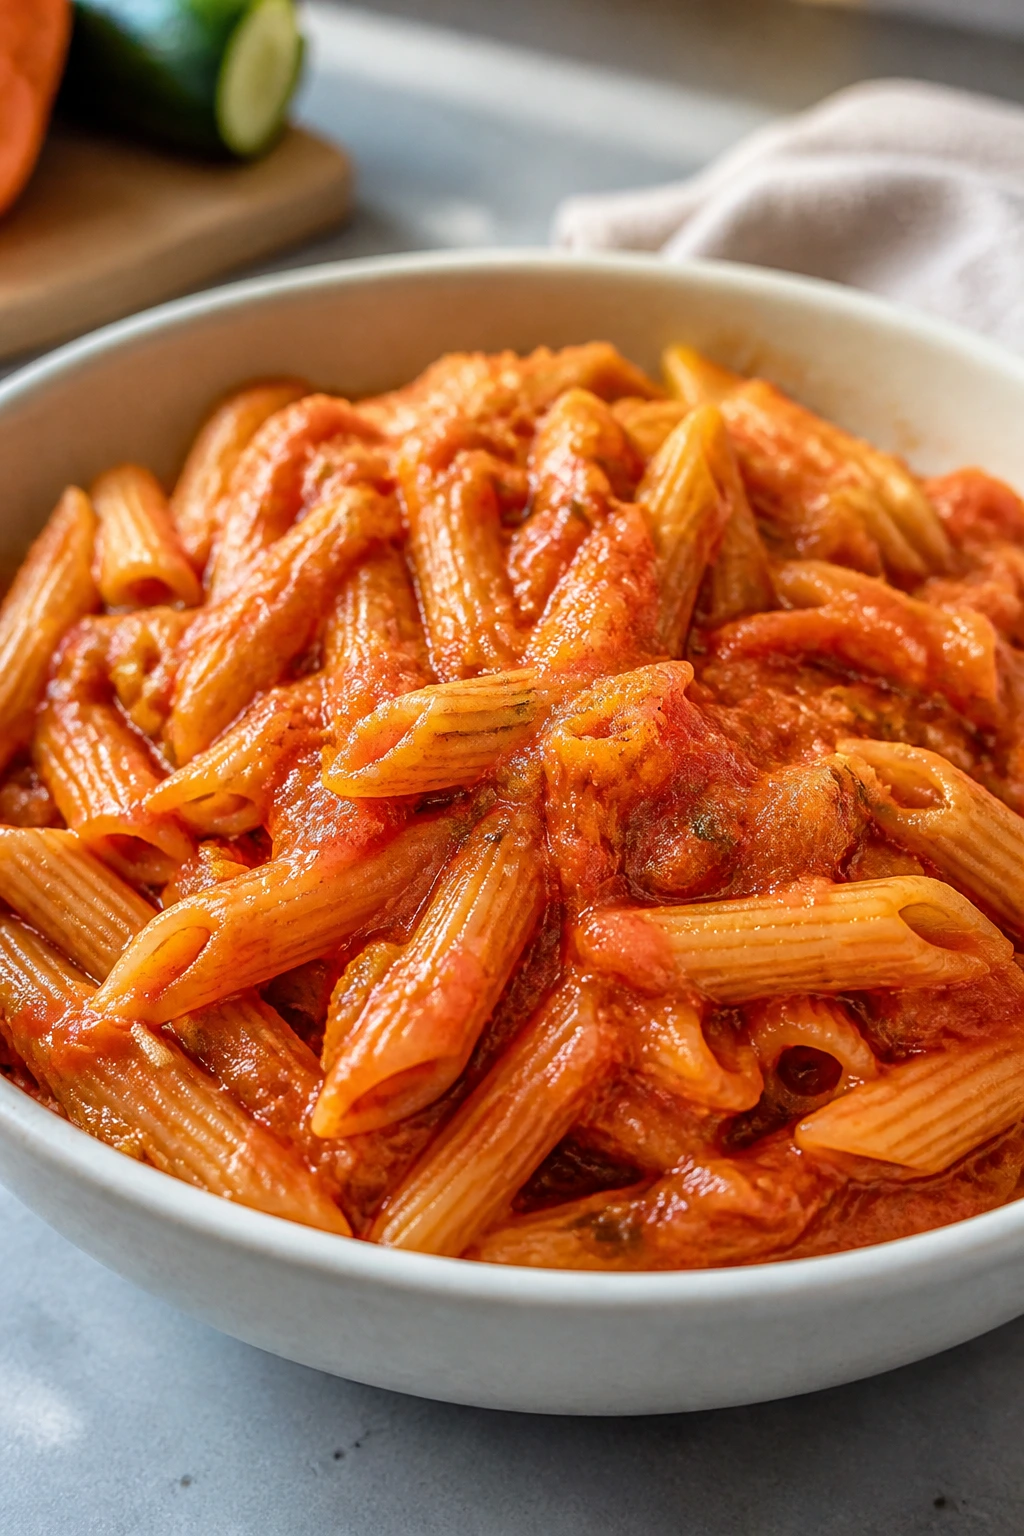
Intro: This is the kind of sauce that keeps the peace without making a speech about vegetables. Grated zucchini and carrot melt into marinara so the flavor stays familiar, but the sauce gets a little thicker and sweeter.
Why It Works: The vegetables disappear into the sauce once they’ve cooked down enough. That means you get the comfort of a plain red sauce with a little extra body. If the sauce is smooth, most picky eaters will never stop to investigate.
Key Ingredients:
- 12 ounces pasta
- 1 tablespoon olive oil
- 1 small onion, finely chopped
- 1 zucchini, finely grated
- 1 medium carrot, finely grated
- 1 jar (24 ounces) marinara sauce
- 1/2 cup water
- 1/4 cup grated parmesan
Quick Steps:
- Cook the pasta and reserve 1/2 cup of the water.
- Heat olive oil in a skillet over medium heat and cook the onion for 3 minutes.
- Add zucchini and carrot and cook until soft, about 5 minutes.
- Stir in marinara and water and simmer for 10 minutes.
- Toss with pasta and parmesan.
Equipment for This Recipe: Large skillet or saucepan, box grater, pot, colander.
How to Serve This Dish: Keep the sauce lightly coated over the pasta, not buried. Garlic bread or a side of plain cheese sticks can make it feel like a bigger dinner without changing the flavor profile.
Pro Tips for This Recipe:
- Grate the vegetables finely so they melt into the sauce.
- Simmer long enough for the sauce to lose any raw vegetable taste.
- Blend the sauce briefly if you want it smoother than a chunky jarred version.
Variations on This Dish:
- Meat Sauce Upgrade: Add browned ground beef or turkey if you want more protein.
- Creamy Red Sauce: Stir in 2 tablespoons of cream at the end for a softer finish.
- Cheese Melt Version: Top bowls with mozzarella and let it melt for 1 minute.
Common Mistakes to Avoid with This Dish:
- Don’t leave the vegetables in big pieces. Picky eaters will find them.
- Don’t rush the simmer. Raw zucchini flavor needs time to cook off.
- Don’t overload with herbs if the goal is a simple sauce.
14. Pancake Dippers with Sausage

Intro: Pancakes and sausage are already familiar, but turning pancakes into strips changes the whole feel of breakfast. Dipping is oddly powerful with picky eaters. It gives them control, and that control lowers complaints.
Why It Works: Pancake strips are easy to hold and less messy than a big stacked plate. Pair them with warm sausage links, and you have a breakfast-style meal that works at dinner too. Syrup on the side keeps the sweet part separate until the last second.
Key Ingredients:
- 2 cups pancake mix
- 1 1/2 cups milk
- 1 large egg
- 8 breakfast sausage links
- 1 tablespoon butter
- Maple syrup, for serving
Quick Steps:
- Cook the sausage links in a skillet or oven until browned and cooked through.
- Mix pancake batter according to the package directions, using the milk and egg.
- Pour the batter onto a buttered griddle and cook until bubbles form, then flip.
- Slice the pancakes into strips.
- Serve warm with sausage and syrup for dipping.
Equipment for This Recipe: Griddle or skillet, spatula, mixing bowl, knife.
How to Serve This Dish: Put the pancake strips and sausage on a plate with a small cup of syrup. If you want to add fruit, berries or banana slices are the least disruptive choices.
Pro Tips for This Recipe:
- Keep the pancakes a little thicker so they hold up to dipping.
- Don’t cook the sausage until it’s dried out. Juicier links feel better here.
- Slice the pancakes while warm so they don’t crack.
Variations on This Dish:
- Blueberry Strip Version: Add a small handful of blueberries to the batter.
- Mini Pancake Bites: Make silver-dollar pancakes if your table likes tiny food.
- Savory Breakfast Plate: Skip syrup and add scrambled eggs instead.
Common Mistakes to Avoid with This Recipe:
- Don’t make the batter too thin. Thin pancakes tear when dipped.
- Don’t let the sausage sit too long uncovered or it loses warmth fast.
- Don’t drown the plate in syrup. A little dipping cup goes further.
15. Chicken Alfredo Pasta
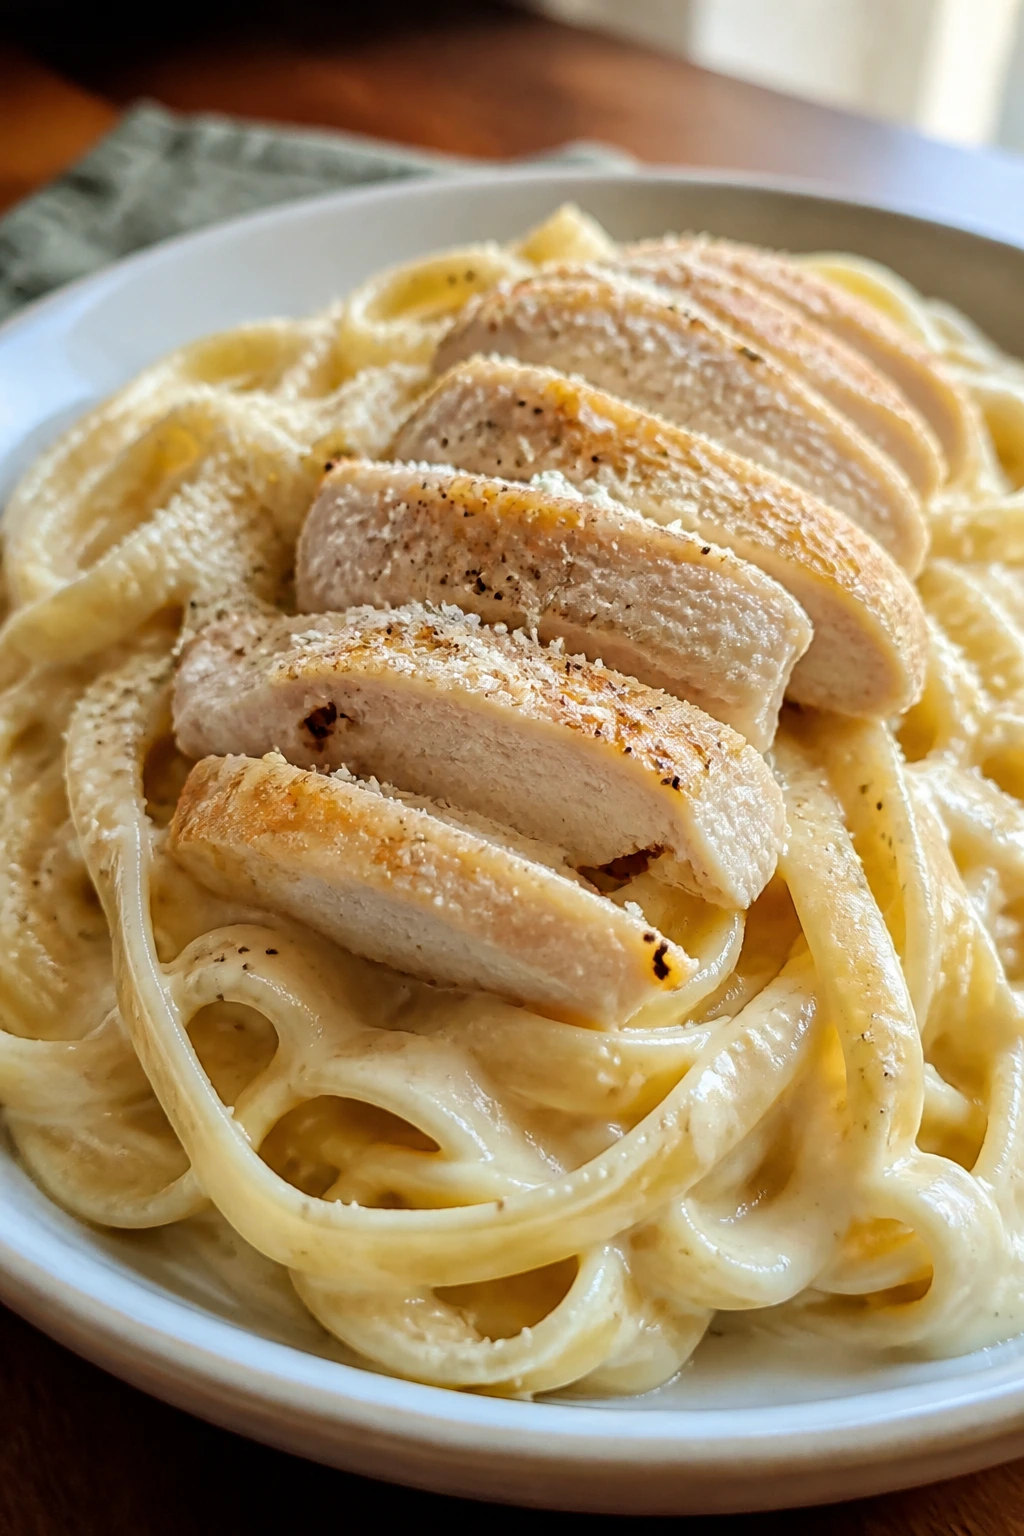
Intro: Alfredo works for picky eaters because it tastes like cream, butter, and cheese first, and that’s a comforting message on a plate. If you keep the garlic mild and the chicken plain, it stays familiar enough to pass inspection.
Why It Works: The sauce clings to long pasta and makes every bite feel soft and rich without being spicy or sharp. Chicken breast adds a clean protein that doesn’t bring much flavor of its own, which is useful when you’re trying to keep the whole dish calm. The key is not to over-reduce the sauce.
Key Ingredients:
- 12 ounces fettuccine
- 1 pound boneless, skinless chicken breast
- 2 tablespoons butter
- 2 cloves garlic, minced
- 1 cup heavy cream
- 1 1/2 cups grated parmesan
- 1 teaspoon kosher salt
- Black pepper, to taste
Quick Steps:
- Cook the fettuccine until al dente.
- Season and cook the chicken in a skillet until browned and cooked through, then slice.
- Melt the butter and cook the garlic for 30 seconds.
- Add the cream and simmer 3 to 4 minutes.
- Stir in parmesan, then toss with pasta and chicken.
Equipment for This Recipe: Large pot, skillet, whisk, tongs.
How to Serve This Dish: Serve in shallow bowls with extra parmesan on the side and a simple vegetable only if the table accepts it. A slice of plain bread is often enough.
Pro Tips for This Recipe:
- Use low heat once the cream goes in.
- Reserve a little pasta water in case the sauce needs loosening.
- Slice the chicken thin so it eats easily with the pasta.
Variations on This Dish:
- Broccoli Alfredo: Add very small broccoli florets if your eater will tolerate them.
- Shrimp Alfredo: Swap the chicken for shrimp if seafood is a yes at your table.
- Lighter Sauce: Use half-and-half instead of cream for a thinner finish.
Common Mistakes to Avoid with This Dish:
- Don’t boil the cream hard. It can split.
- Don’t overcook the chicken breast or it gets dry fast.
- Don’t use too much garlic if your audience is sensitive to stronger flavors.
16. Ham and Cheese Pinwheels

Intro: Pinwheels feel like snack food pretending to be dinner, which is part of their charm. They’re soft, salty, and easy to pick up, and the spiral shape makes them look a little more special than a plain sandwich.
Why It Works: The filling is simple: ham, cheese, and a touch of mustard if you want it. Puff pastry or crescent dough bakes into a crisp outside while the center stays soft. That mix of textures is enough to keep the meal interesting without making it complicated.
Key Ingredients:
- 1 sheet puff pastry or 1 can crescent dough
- 6 ounces sliced ham
- 6 slices mild cheese, such as cheddar or provolone
- 1 tablespoon yellow mustard, optional
- 1 egg, beaten for brushing
Quick Steps:
- Heat the oven to 400°F.
- Roll out the dough and spread mustard, if using.
- Layer ham and cheese, then roll the dough into a log.
- Slice into 1-inch pinwheels and place on a baking sheet.
- Brush with egg and bake for 15 to 18 minutes.
Equipment for This Recipe: Baking sheet, knife, rolling pin if needed, pastry brush.
How to Serve This Dish: Serve warm with apple slices, baby carrots, or a cup of tomato soup. Pinwheels are also good for lunchboxes because they taste fine at room temperature.
Pro Tips for This Recipe:
- Chill the rolled log for 10 minutes before slicing if the dough feels soft.
- Don’t overfill or the spirals will pop open.
- Use mild cheese so the flavor stays easy.
Variations on This Dish:
- Pizza Pinwheels: Swap ham and cheese for pepperoni and mozzarella.
- Turkey Club Roll: Use turkey, cheddar, and a little mayo.
- No-Mustard Version: Leave out the mustard entirely for the most cautious eaters.
Common Mistakes to Avoid with This Dish:
- Don’t slice with a dull knife. It squashes the spiral.
- Don’t bake on a cold tray if the dough is already soft and sticky.
- Don’t expect them to stay crisp for hours; they’re best warm.
17. Cheeseburger Bowls
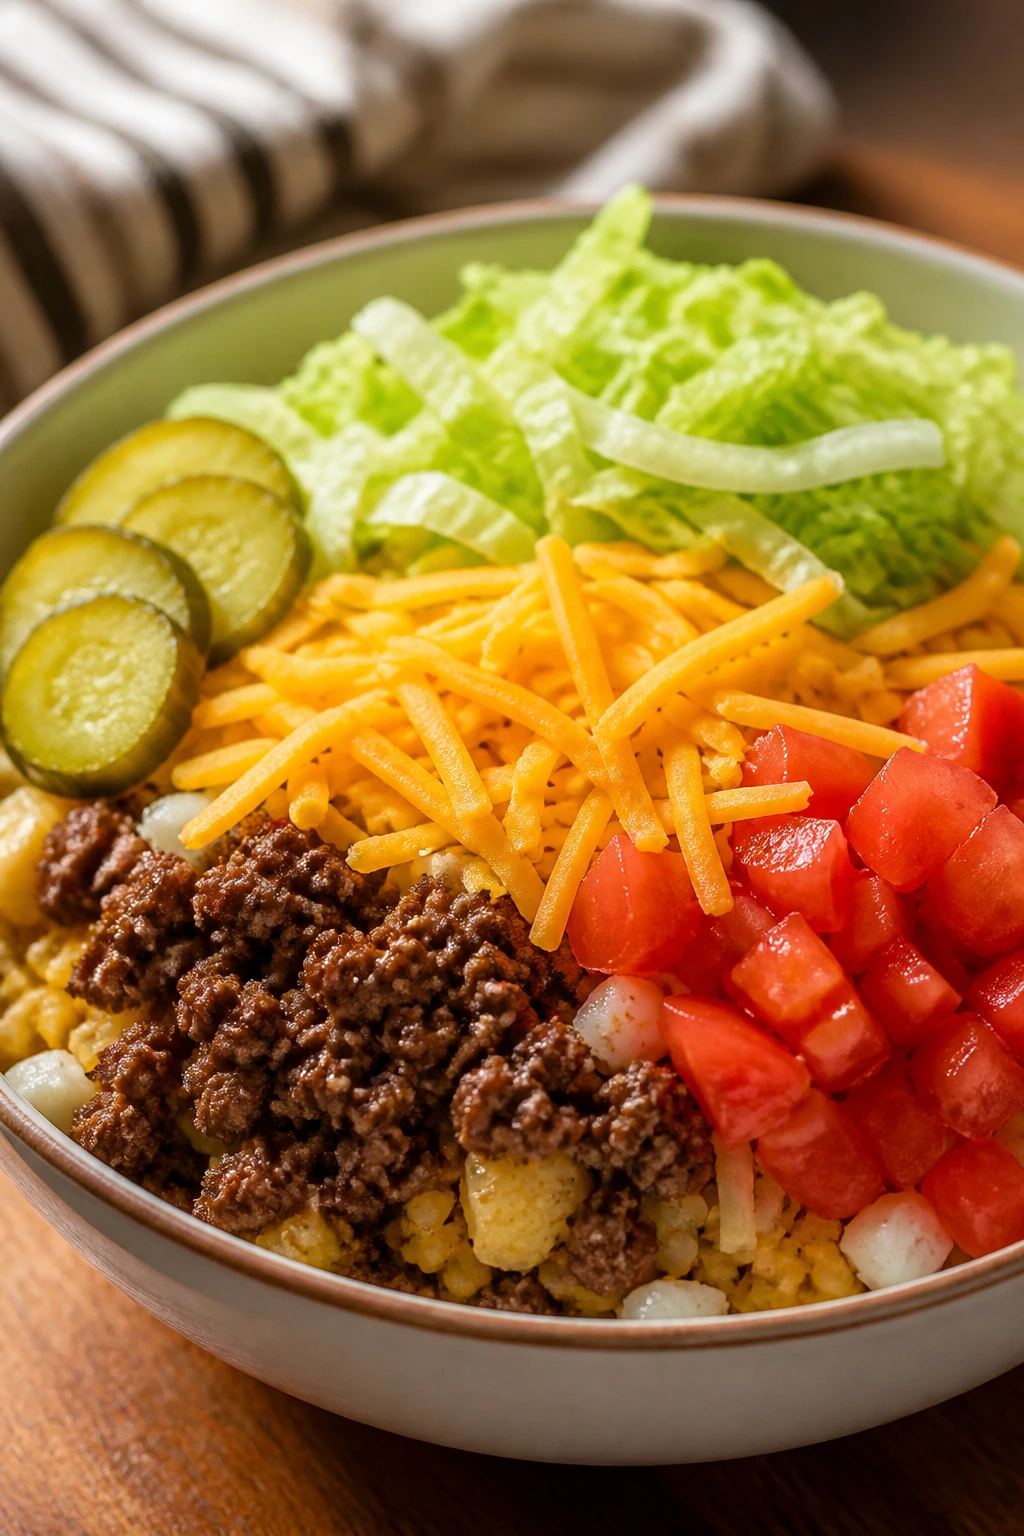
Intro: Cheeseburger bowls solve a sneaky problem: some eaters want the taste of a burger but not the bun, the mess, or the whole sandwich experience. Put the flavors in a bowl, and suddenly everybody has room to pick around the parts they don’t want.
Why It Works: Beef, cheese, potatoes or rice, and classic burger toppings stay recognizable. The pickles and tomatoes can sit off to one side, which helps kids who hate touching wet ingredients. It tastes like a cheeseburger without forcing the full construction of one.
Key Ingredients:
- 1 pound ground beef
- 1 teaspoon kosher salt
- 1/2 teaspoon garlic powder
- 2 cups chopped lettuce
- 1 cup diced tomatoes
- 1/2 cup sliced pickles
- 1 cup cooked potatoes or rice
- 1 cup shredded cheddar cheese
- Ketchup and mustard, for serving
Quick Steps:
- Brown the beef in a skillet with salt and garlic powder.
- Warm the potatoes or rice.
- Divide the base into bowls.
- Top with beef, lettuce, tomatoes, pickles, and cheese.
- Drizzle with ketchup and mustard or serve them on the side.
Equipment for This Recipe: Skillet, spoon, bowls, knife and cutting board.
How to Serve This Dish: Keep wet toppings in small piles instead of mixing them through. That one habit makes the meal much easier for selective eaters.
Pro Tips for This Recipe:
- Cook the beef until just browned so it stays juicy.
- Dice tomatoes small if the texture is a problem.
- Use rice when you want a softer bowl and potatoes when you want more bite.
Variations on This Dish:
- Big Mac-Style Bowl: Add shredded lettuce, pickles, and a little mayo-based sauce.
- Cheeseburger Fries Bowl: Use fries instead of potatoes or rice.
- Turkey Burger Bowl: Swap in ground turkey and add a little butter for richness.
Common Mistakes to Avoid with This Dish:
- Don’t overdo the toppings. Too many extras make the bowl feel messy.
- Don’t skip a warm base. Cold rice or potatoes make the whole thing feel flat.
- Don’t let ketchup soak everything. Serve sauce on the side if needed.
18. Creamy Tomato Tortellini
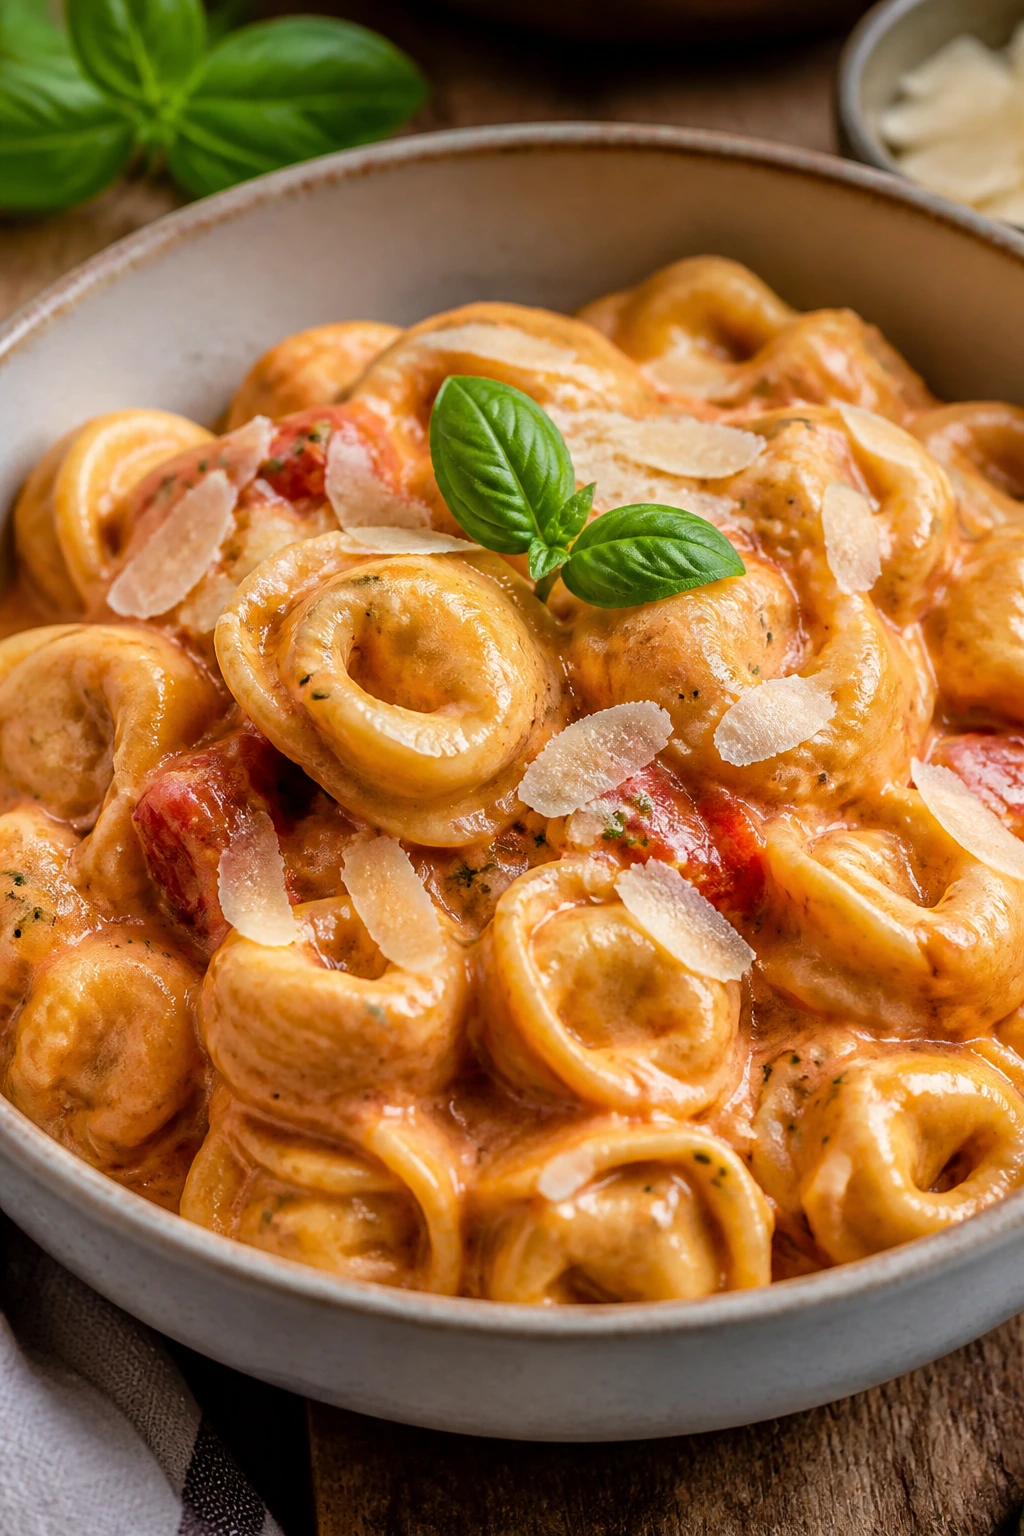
Intro: Tortellini is useful because it brings its own filling to the party. Add a creamy tomato sauce, and you get a meal that tastes soft, mild, and a little fancy without asking for much work.
Why It Works: Refrigerated tortellini cooks in minutes and gives you a built-in cheesy center. The tomato sauce stays gentle when you soften it with cream, which keeps the edge off for picky eaters who like red sauce but not bright, sharp tomato flavor. This is the kind of dish that looks like a lot more effort than it took.
Key Ingredients:
- 1 pound refrigerated cheese tortellini
- 1 tablespoon olive oil
- 2 cloves garlic, minced
- 1 jar (24 ounces) tomato sauce
- 1/2 cup heavy cream
- 1/4 cup grated parmesan
- Fresh basil, optional
Quick Steps:
- Cook the tortellini according to the package directions.
- Warm the olive oil in a skillet and cook the garlic for 30 seconds.
- Stir in the tomato sauce and cream.
- Simmer for 5 minutes until smooth and slightly thickened.
- Toss with tortellini and parmesan.
Equipment for This Recipe: Large pot, skillet, slotted spoon, colander.
How to Serve This Dish: Serve it in a wide bowl with a little parmesan on top and basil only for the people who want it. Garlic bread fits here, but plain bread sticks are enough.
Pro Tips for This Recipe:
- Keep the simmer gentle so the cream doesn’t separate.
- Salt the pasta water lightly; the sauce already brings flavor.
- Stir the tortellini carefully so the pasta shells don’t tear.
Variations on This Dish:
- Meatball Tortellini: Add small cooked meatballs for a bigger dinner.
- Pink Sauce Version: Use a little less cream if you want a brighter red sauce.
- Spinach Option: Stir in a handful of baby spinach only if your table accepts soft greens.
Common Mistakes to Avoid with This Dish:
- Don’t overcook the tortellini. It can split if left in boiling water too long.
- Don’t boil the sauce hard once the cream goes in.
- Don’t add too much basil if your eaters are wary of visible herbs.
19. BBQ Chicken Sliders
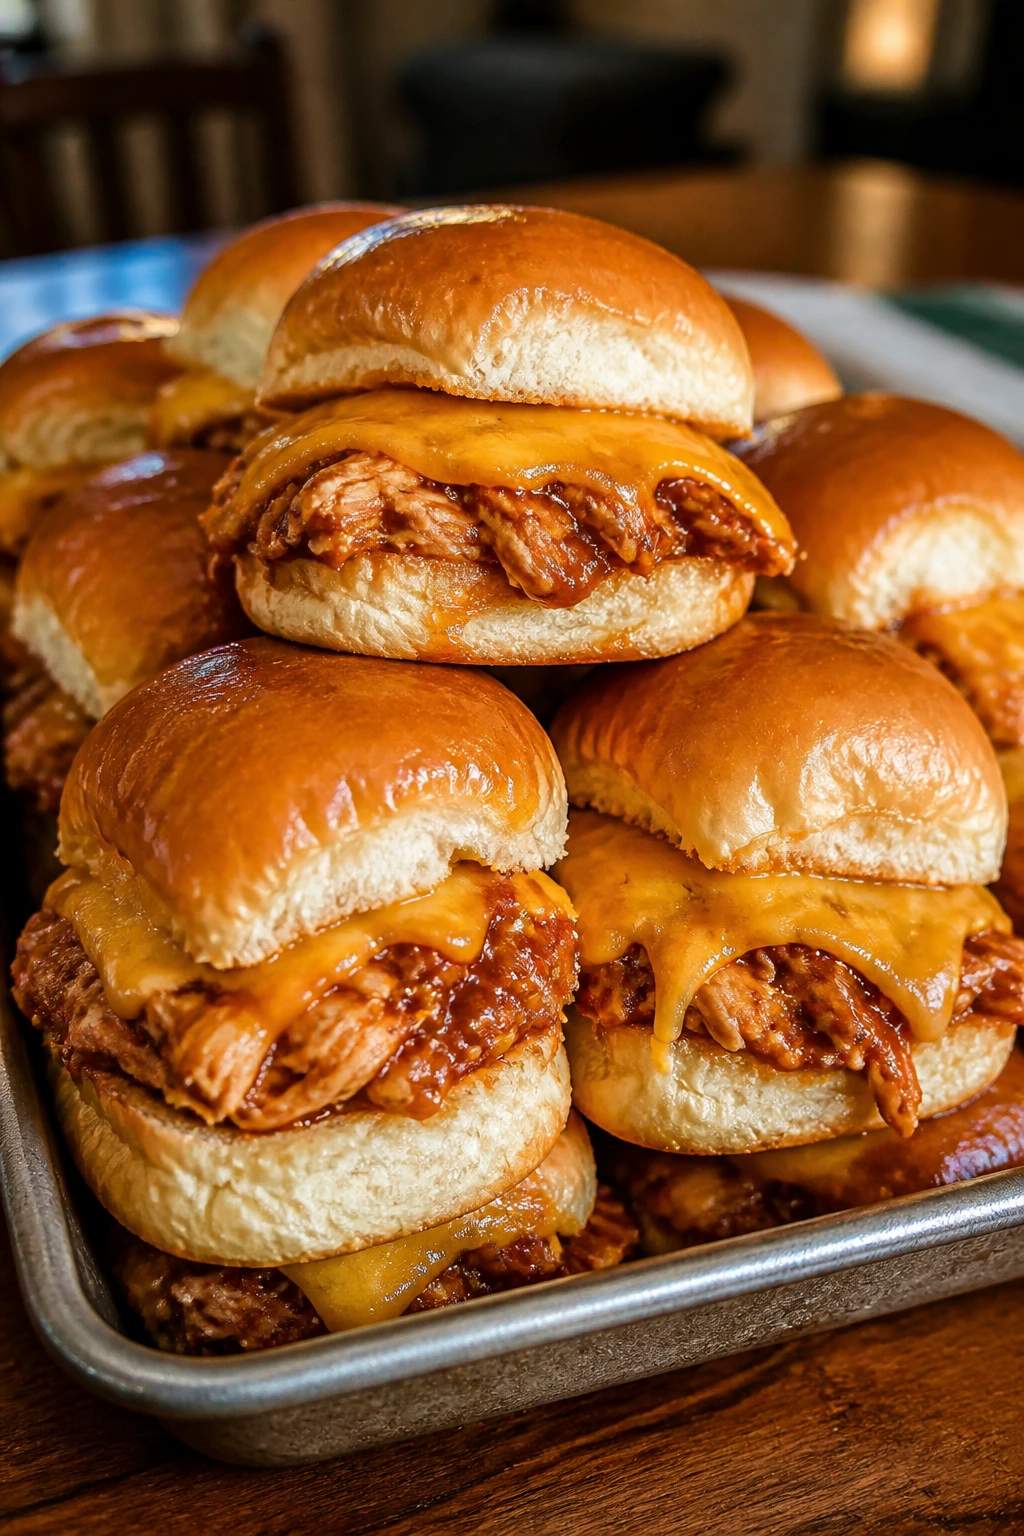
Intro: BBQ chicken sliders are what happens when you want something sweet, saucy, and easy to hand out without a knife. They’re low-fuss, which is a blessing on nights when attention spans are short and dinner is already late.
Why It Works: Shredded chicken drinks up the sauce without getting chewy. The slider bun keeps portions small, and a little cheese on top helps hold everything in place. If you add coleslaw, keep it optional; some people want crunch, and some want none of it.
Key Ingredients:
- 2 cups cooked shredded chicken
- 3/4 cup BBQ sauce
- 12 slider buns
- 1 cup shredded cheddar cheese
- 1 cup coleslaw, optional
- 1 tablespoon butter, melted
Quick Steps:
- Warm the chicken in a skillet with BBQ sauce until hot.
- Split the slider buns and place the bottoms in a baking dish.
- Spoon the chicken over the buns and top with cheddar.
- Bake at 375°F for 8 minutes, just until the cheese melts.
- Add coleslaw if using, then top with buns.
Equipment for This Recipe: Skillet, baking dish, spoon, pastry brush.
How to Serve This Dish: Put out extra sauce for dipping, but don’t pour it over everything. These sliders are best when the bun stays intact and the filling stays thick.
Pro Tips for This Recipe:
- Shred the chicken finely so it nests into the bun.
- Toast the buns lightly if they tend to get soft.
- Keep coleslaw on the side unless everyone likes the texture.
Variations on This Dish:
- Honey BBQ Version: Use a sweeter sauce if your table likes mild smoke and sugar.
- Cheddar Melt: Add cheese on both the top and bottom layers for more hold.
- Pulled Pork Swap: Use pulled pork the same way if that’s what you have.
Common Mistakes to Avoid with This Recipe:
- Don’t make the chicken mixture too wet.
- Don’t skip the butter brush on the buns if you want them to hold up.
- Don’t pile on coleslaw before baking. It gets warm and limp fast.
20. Simple Egg Fried Rice
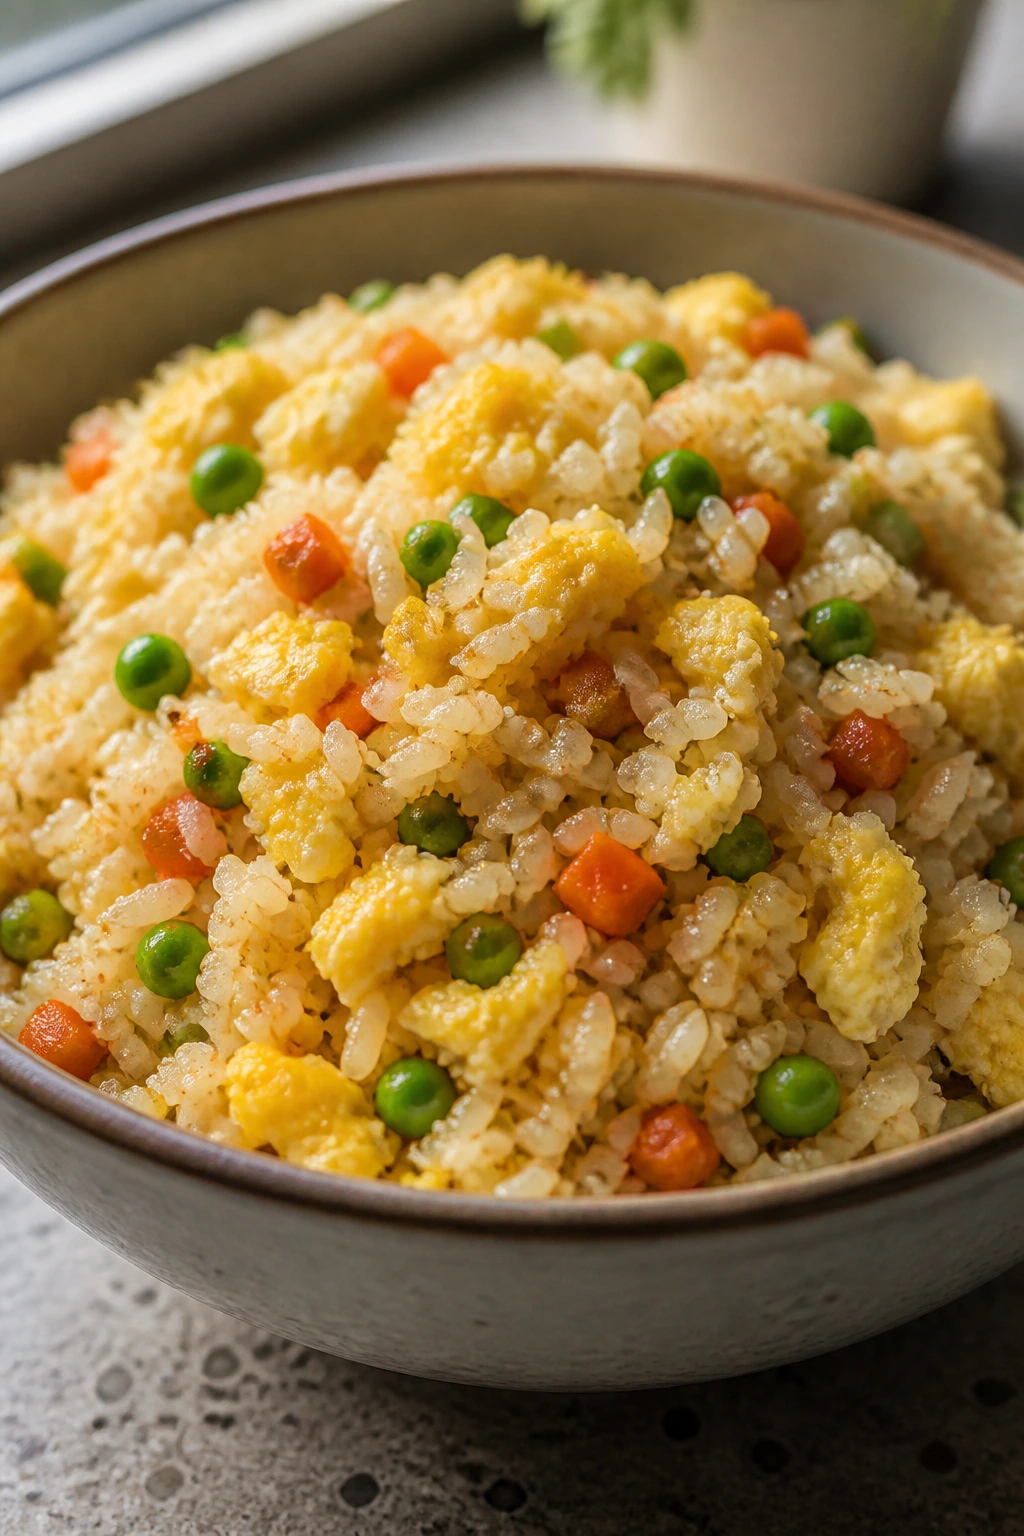
Intro: Fried rice is one of the best ways to turn leftovers into dinner that doesn’t feel recycled. The eggs, rice, and tiny vegetables stay separate enough to read clearly, which is useful when the people eating are suspicious of mixed food.
Why It Works: Cold rice fries better than fresh rice because it’s drier and less sticky. That means you get grains that stay distinct in the pan instead of turning into a soft lump. The peas and carrots are small, sweet, and easy to ignore if someone wants to.
Key Ingredients:
- 3 cups cold cooked rice
- 3 large eggs
- 1 cup frozen peas and carrots
- 2 tablespoons soy sauce
- 2 tablespoons butter or neutral oil
- 2 scallions, sliced, optional
Quick Steps:
- Scramble the eggs in a hot skillet, then set them aside.
- Add butter or oil and cook the peas and carrots until hot.
- Stir in the rice and break up any clumps.
- Add soy sauce and toss until the rice is evenly coated.
- Fold the eggs back in and top with scallions if using.
Equipment for This Recipe: Large skillet or wok, spatula, bowl, measuring spoons.
How to Serve This Dish: Serve it in bowls with a small side of chicken, dumplings, or fruit if you need to stretch it. The nice part is that it can stand alone when the fridge is bare.
Pro Tips for This Recipe:
- Use rice that’s been chilled for several hours.
- Keep the pan hot so the rice fries, not steams.
- Add soy sauce slowly; too much makes the rice muddy and salty.
Variations on This Dish:
- Chicken Fried Rice: Add diced cooked chicken for a fuller meal.
- Plain Egg Rice: Leave out the vegetables for the least adventurous version.
- Sesame Rice: Add 1 teaspoon sesame oil at the end if your table likes it.
Common Mistakes to Avoid with This Dish:
- Don’t use fresh, hot rice. It clumps and goes soft.
- Don’t overcrowd the pan or the rice loses its fried edges.
- Don’t pour in soy sauce too fast. You want a light coat, not a brown flood.
21. Sheet Pan Sausage and Potatoes
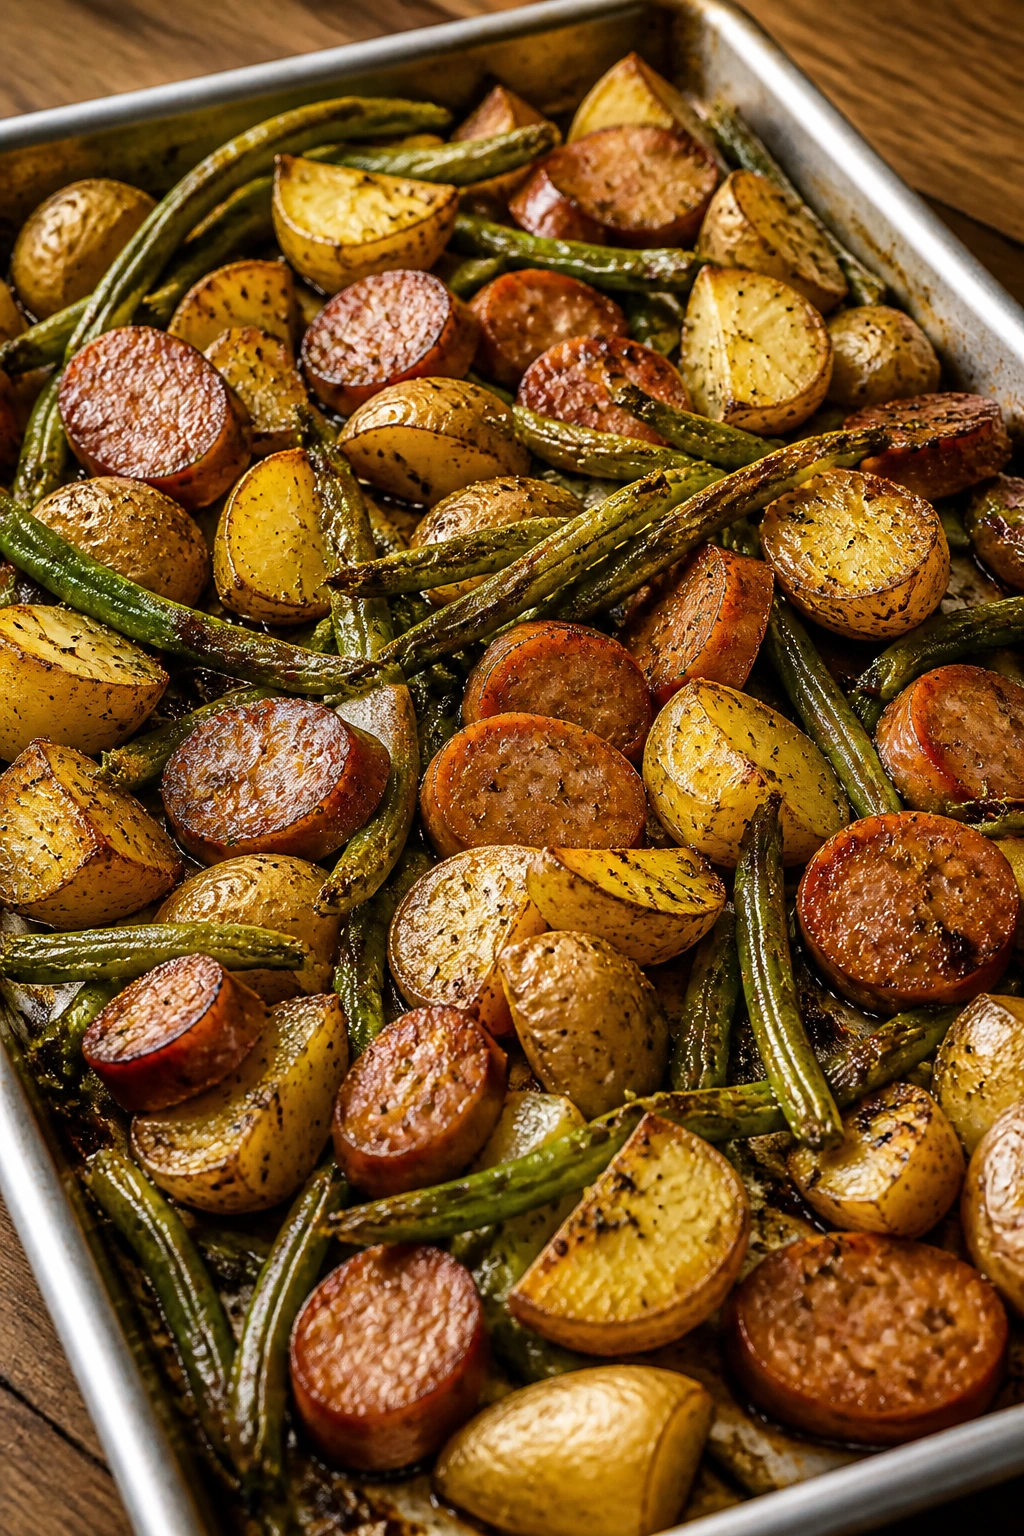
Intro: This is the kind of dinner that feels old-school in the best possible way. Sausage, potatoes, and green beans roast together, but each piece keeps enough of its own identity that picky eaters can still sort through the plate.
Why It Works: Sheet pan dinners are easy because the oven does the heavy lifting. Baby potatoes get crisp edges, sausage gets browned and savory, and green beans keep a little snap if you add them late enough. The whole meal lands with minimal hands-on work.
Key Ingredients:
- 1 pound chicken sausage or kielbasa, sliced
- 1 1/2 pounds baby potatoes, halved
- 2 cups green beans, trimmed
- 2 tablespoons olive oil
- 1 teaspoon kosher salt
- 1/2 teaspoon black pepper
- 1 teaspoon Italian seasoning
Quick Steps:
- Heat the oven to 425°F.
- Toss the potatoes with oil, salt, pepper, and Italian seasoning.
- Roast the potatoes for 20 minutes.
- Add sausage and green beans, toss lightly, and roast for 15 more minutes.
- Bake until the potatoes are tender and the sausage is browned.
Equipment for This Recipe: Large rimmed baking sheet, mixing bowl, spatula, knife.
How to Serve This Dish: Serve directly from the tray if you want less cleanup, or move it to a platter so the browned edges show. Mustard or ranch on the side gives picky eaters a dip without forcing a sauce.
Pro Tips for This Recipe:
- Cut potatoes evenly so they roast at the same speed.
- Add green beans later so they don’t turn limp.
- Use a second sheet pan if the first one is crowded.
Variations on This Dish:
- Sausage and Peppers Version: Add sliced bell peppers if they’re accepted at your table.
- Smoked Paprika Twist: Swap the Italian seasoning for paprika and garlic powder.
- All-Potato Version: Leave out the beans for a more traditional roast plate.
Common Mistakes to Avoid with This Dish:
- Don’t add everything at the beginning. The sausage will overcook before the potatoes are done.
- Don’t overcrowd the pan. You want browning, not steaming.
- Don’t cut the sausage too thin or it dries out.
22. French Toast Sticks with Yogurt Dip
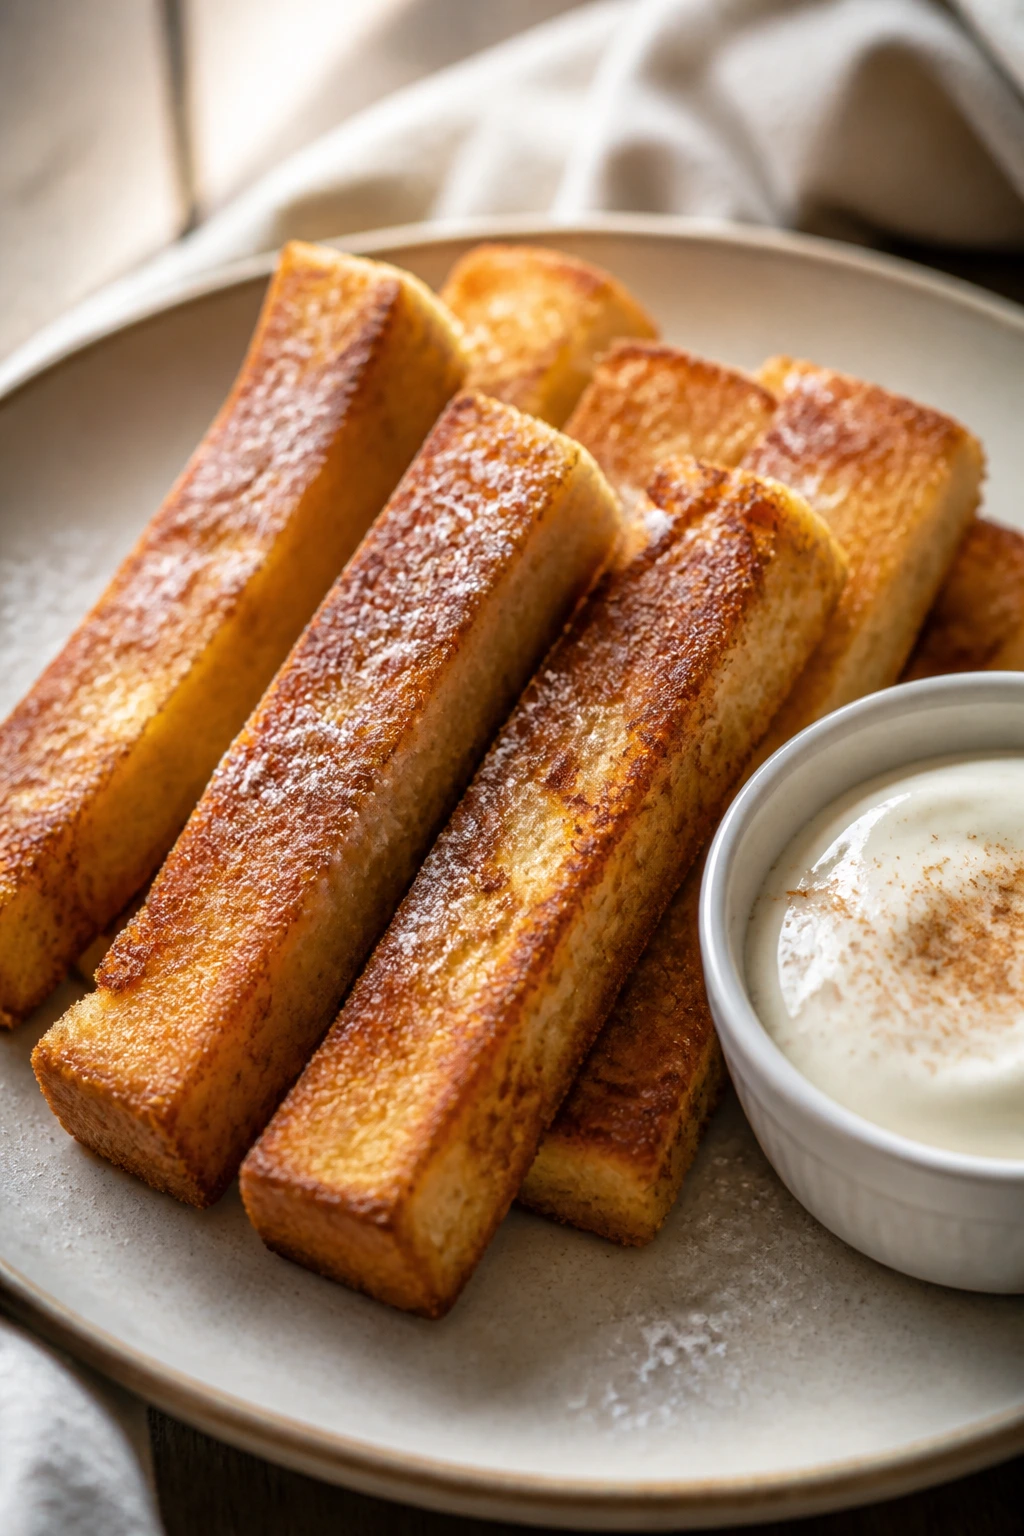
Intro: French toast sticks are breakfast food that behaves like snack food, and that is a useful thing. They’re crisp on the edges, soft inside, and easy to dip, which makes them a surprisingly strong dinner backup too.
Why It Works: Thick bread soaks up the custard without falling apart, and the stick shape makes the pieces feel manageable. A yogurt dip keeps the sweetness in check and gives you one more handheld element. For picky eaters, that “dip and eat” format is often more persuasive than a fork and a lecture.
Key Ingredients:
- 8 slices thick bread, such as brioche or Texas toast
- 3 large eggs
- 1/2 cup milk
- 1 teaspoon cinnamon
- 1 teaspoon vanilla extract
- 1 tablespoon butter
- 1 cup plain Greek yogurt
- 1 tablespoon honey
Quick Steps:
- Whisk the eggs, milk, cinnamon, and vanilla in a shallow bowl.
- Cut the bread into sticks.
- Dip the sticks quickly in the custard, letting the excess drip off.
- Cook in a buttered skillet over medium heat until golden on all sides.
- Stir the yogurt and honey together for dipping.
Equipment for This Recipe: Shallow bowl, skillet, spatula, knife, whisk.
How to Serve This Dish: Stack the sticks on a plate with the yogurt dip in a small bowl and berries on the side if you want them. They work for breakfast, lunch, or an easy dinner when the pantry feels thin.
Pro Tips for This Recipe:
- Use thick bread so the sticks stay sturdy.
- Don’t soak the bread too long or it goes soggy in the pan.
- Cook in batches so each stick gets a browned crust.
Variations on This Dish:
- Cinnamon-Sugar Finish: Toss the hot sticks with a little cinnamon sugar.
- Banana Dip: Mash banana into the yogurt if that’s a flavor your table likes.
- Savory Version: Leave out the cinnamon and vanilla, then serve with eggs and sausage.
Common Mistakes to Avoid with This Dish:
- Don’t use thin sandwich bread. It falls apart fast.
- Don’t cook the sticks on high heat or the outside burns before the center sets.
- Don’t make the custard too sweet if you’re serving the yogurt dip too.
Why Simple, Familiar Flavors Win at the Table
A picky eater usually isn’t asking for a “less ambitious” meal. The real request is more specific than that. They want a dinner that feels readable at a glance, with fewer surprises in the texture and fewer mystery ingredients hiding under the top layer.
That’s why these meals lean so hard on cheese, noodles, rice, potatoes, tortillas, and mild sauces. They give you a safe starting point, then let you build outward in tiny steps. A little chicken. A little salsa. A crisp edge. A dip on the side. No drama.
There’s also a practical reason to keep meals this clean. When the food is easy to identify, kids are more willing to try it. When the shapes are predictable, they’re less likely to start picking apart the plate before the first bite. And when the adult version can be upgraded with extra greens, hot sauce, or a bigger salad, nobody has to cook two different dinners.
The goal is not to trick anyone. It’s to make dinner feel calm enough that people actually eat it.
Essential Equipment for These Meals
-
Large skillet or sauté pan: Useful for chicken tenders, fried rice, mac and cheese sauce, tacos, sliders, and most of the quick stove-top meals.
-
Rimmed baking sheets: You’ll use these for chicken tenders, pita pizzas, potato wedges, sausage and potatoes, and pinwheels.
-
Wire rack: Optional, but worth it for chicken tenders because it keeps the coating crisp underneath.
-
Large pot: Needed for noodles, pasta, tortellini, and any batch cooking that starts with boiling water.
-
Colander: Simple, boring, necessary.
-
Mixing bowls in two or three sizes: One for dry ingredients, one for wet, and one for the messier stuff.
-
Whisk: Helps with eggs, sauces, and custards; a fork works in a pinch, but a whisk does the job better.
-
Tongs or a sturdy spatula: Especially handy for flipping tenders, quesadillas, and French toast sticks.
-
Sharp knife and cutting board: You’ll need both for sliders, wedges, fruit, and anything that needs even pieces.
-
Box grater: Best for cheese, carrot, and zucchini; pre-shredded cheese is fine for speed, but grated-from-block melts smoother.
-
Airtight storage containers: Leftovers keep better when they’re sealed fast and chilled properly.
Smart Shopping for Kid-Friendly Ingredients
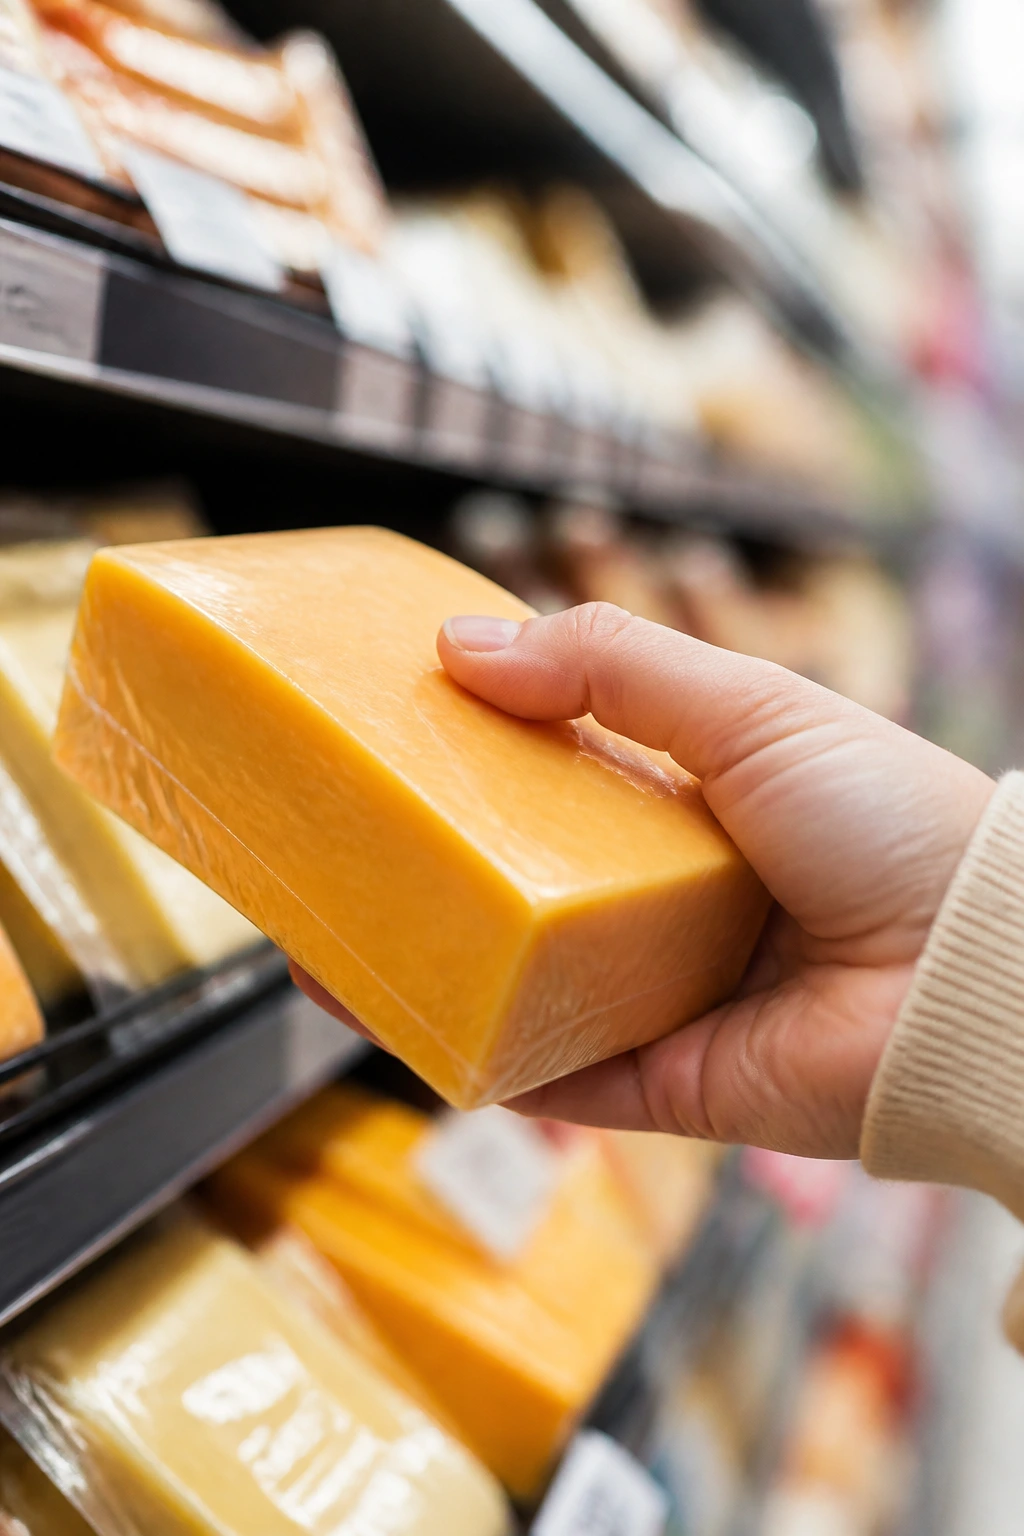
The easiest way to make these meals work is to shop for ingredients that already behave themselves. Mild cheddar, mozzarella, Monterey Jack, and parmesan are the cheeses I reach for most here because they melt cleanly and don’t bring a sharp bite. If you buy one stronger cheese for grown-up plates, keep it separate so the kids don’t feel ambushed by flavor.
For meat, think about shape first and seasoning second. Chicken tenders, shredded chicken, ground turkey, ground beef, sausage links, and sliced ham all fit the theme because they’re easy to recognize. If you’re starting with plain chicken breast or a tough cut, cut it small and cook it gently; picky eaters notice dryness fast.
Bread and starch matter more than people expect. Soft slider buns, flour tortillas, pita rounds, egg noodles, elbow macaroni, rice, and russet potatoes all give the meal a familiar base. If you want crisp edges, buy a starch that can handle heat. If you want calm and soft, choose pasta or rice.
Canned or jarred sauces are fine, and sometimes they’re the right choice. Pizza sauce, marinara, BBQ sauce, ketchup, and mild taco seasoning all save time, but read the label if you’re feeding a salt-sensitive crowd. A sauce can be perfectly useful and still too sweet or too salty for your table.
Frozen vegetables are useful here, too. Peas, carrots, and green beans tend to survive picky-eater meals better than big fresh vegetables because they’re small and soft. If your family resists visible vegetables, buy the ones you can chop, grate, or tuck into sauce until they disappear.
How to Serve These Meals Without Starting a Side-Dish War

Presentation: Keep the plate clean and obvious. Separate the components into neat sections instead of piling everything into one heap, especially for tacos, bowls, and roll-ups. Kids who dislike mixed food often eat more when they can see exactly what’s in each section.
Accompaniments: Use low-stress sides: apple slices, grapes, cucumber sticks, baby carrots, peas, corn, plain crackers, garlic bread, or a small salad for the people who want one. If the main dish is already rich, a fresh fruit side usually works better than another heavy starch.
Portions: Younger kids often do best with half a serving of the main dish plus one familiar side. Older kids and adults usually land around one full serving, though mac and cheese, sliders, and fried rice can climb fast if nobody has eaten much during the day. Keep extra toppings separate so people can build up without wasting food.
Beverage Pairing: Cold milk fits the noodle, casserole, and breakfast dishes. For taco bowls, sliders, and sausage dinners, sparkling water or a light apple juice does the job without overpowering the plate. No need to overthink the drink.
Additional Tips and Flavor Boosters
Flavor Enhancement: If a dish tastes a little flat, finish it with a pinch of salt and a small hit of something bright: parmesan on noodles, lemon on chicken, or a spoon of sour cream on taco bowls. Tiny finishing moves matter more than people admit.
Customization: Keep an “add-on” bowl nearby with shredded cheese, chopped herbs, pickle slices, or crushed crackers. That way, one meal can split into three versions without three separate recipes.
Serving Suggestions: Serve dips in tiny cups, not pooled over the food. Ketchup, ranch, marinara, yogurt dip, and BBQ sauce all feel less threatening when they stay out of the main pile. That small detail saves a surprising number of dinners.
Make-It-Yours: For gluten-free plates, use GF pasta, tortillas, and breadcrumbs where needed. For dairy-free versions, swap in olive oil, dairy-free butter, and a melty plant-based cheese where it behaves well. For extra protein, add eggs, shredded chicken, ground turkey, or Greek yogurt instead of piling on more cheese.
Make-Ahead, Storage, and Reheating Guidance
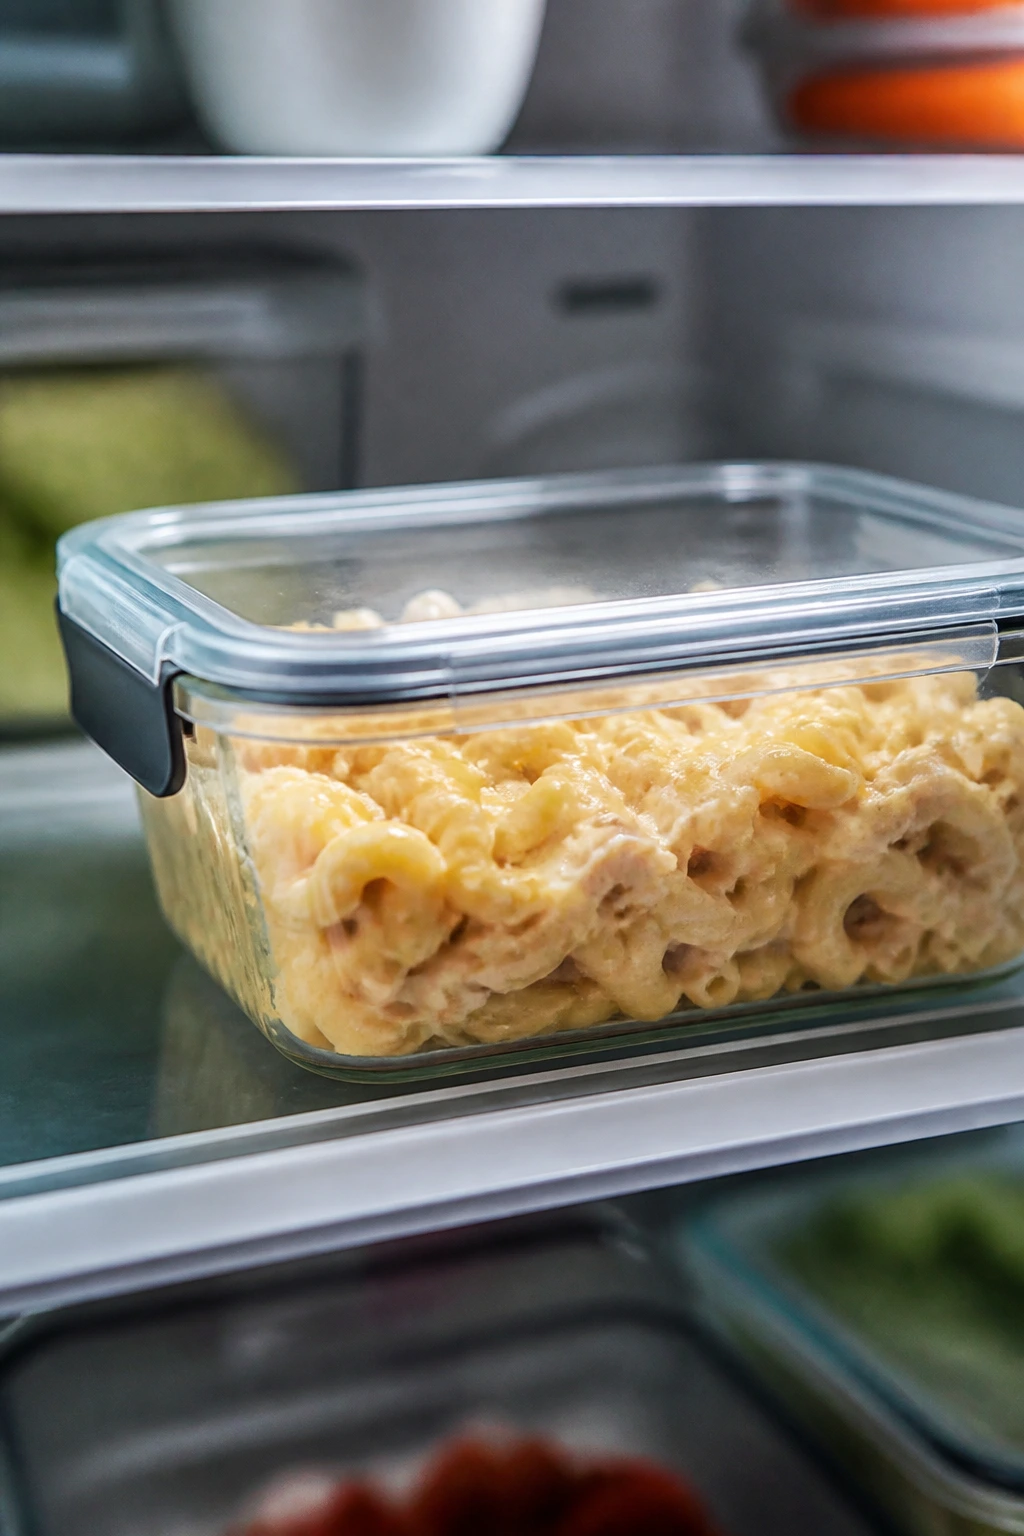
Most of these meals keep well for 3 to 4 days in the refrigerator if you cool them fast and store them in shallow, airtight containers. Meatballs, sloppy joe filling, shredded chicken, fried rice, cooked pasta with sauce, and roasted sausage all hold up nicely. The drier the food, the better it keeps; the wetter the sauce, the more you want to separate it from the starch.
For freezing, 2 months is a good target for cooked meatballs, sloppy joe filling, taco meat, BBQ chicken, chicken bites, and mac and cheese. Tortilla-based meals, fried rice, and quesadillas can freeze, but the texture changes enough that I’d use them only when convenience matters more than perfection. French toast sticks freeze well if you cool them first and reheat them in a toaster oven or skillet.
Reheat baked dishes like mac and cheese, potato wedges, and sausage trays in a 325°F oven covered loosely with foil until hot, usually 15 to 20 minutes depending on the portion size. Use a skillet with a splash of water for rice and pasta dishes; that keeps them from drying out. Chicken tenders, pinwheels, and pita pizzas come back best in an oven or air fryer, where the heat can revive the crisp edges.
Roll-ups, fruit plates, and fresh bowls are a different story. Those are best assembled the day you eat them, or at most the night before if you keep wet ingredients separate. Sauce on the side, fruit cut last, lettuce added at the end. That little bit of discipline buys you much better leftovers.
Variations and Adaptations to Try
Sauce-on-the-Side Nights: For any meal that tends to make picky eaters nervous, keep the sauce separate and let everyone add their own spoonful. This works especially well for taco bowls, sliders, noodles, and chicken bites, where a little control goes a long way.
Extra-Crunch Version: If your table likes texture, add panko to chicken tenders, toasted breadcrumbs to mac and cheese, or crispy potato edges to bowls. A crunchy finish can make a familiar dish feel fresh without changing the flavor.
Dairy-Free Path: Swap butter for olive oil or dairy-free margarine, and use a melty dairy-free cheese only where it performs well, like quesadillas or quesadilla-style wraps. For creamy dishes, a splash of unsweetened oat milk can keep the sauce loose without changing the whole flavor.
Gluten-Free Route: Use gluten-free pasta, tortillas, and breadcrumbs as needed. Rice bowls, fried rice, and burger bowls already fit this direction with almost no adjustment, which is one reason they stay so useful.
Higher-Protein Plates: Add shredded chicken to pasta, eggs to fried rice, extra turkey to taco bowls, or Greek yogurt dips to breakfast plates. The trick is to raise the protein without making the meal feel heavier or more complicated.
Vegetable-Nudging Method: Grate zucchini into pasta sauce, chop greens very small, or keep vegetables in the tiniest pieces possible. The goal isn’t to disguise dinner into nonsense. It’s to make the vegetables easier to accept, one bite at a time.
Common Mistakes to Avoid

The first mistake is trying to force too many flavors into one meal. A picky eater who likes plain pasta does not need a sauce with six herbs, chili flakes, and three vegetables chopped into confetti. Keep the base simple, then offer extra toppings separately.
Another problem is mixing textures that don’t belong together. Wet sauce on crisp bread, soggy toppings on a sandwich, or overcooked vegetables in a bowl can make the whole plate feel wrong. If the dish depends on crunch, protect the crunch right up until serving.
People also cook the protein too hard. Chicken tenders, chicken breast, and meatballs all dry out faster than you think if the heat is too aggressive or the cook time runs long. Use a thermometer when you can. 165°F for poultry is the number to remember.
A fourth mistake is forgetting that picky eaters often notice shape and color before flavor. Big onion chunks, visible herbs, and random green leaves can stop dinner before the first bite. If you want to add vegetables, go small, soft, or hidden in sauce.
And then there’s the sauce flood. Too much sauce turns noodles mushy, sliders soggy, and fried rice wet. Serve it lightly at first. People can always add more.
Frequently Asked Questions
What should I make first if my eater is extremely picky?
Start with buttered parmesan noodles, chicken tenders, or cheesy quesadillas. Those meals have one clear flavor path, few visible surprises, and a texture that most people already know how to trust.
How do I get vegetables onto the plate without a battle?
Keep them small and separate. Tiny peas, grated carrot in sauce, or a few cucumber slices on the side usually go over better than a big mixed casserole full of visible chunks.
Which recipes in this collection freeze best?
Sloppy joe filling, meatballs, taco meat, chicken bites, and mac and cheese hold up the best. Rice and tortilla-based dishes can freeze, but they lose more texture, so I’d treat them as backup meals rather than freezer stars.
Can I make most of these meals ahead of time?
Yes, but keep the crisp parts separate. Cooked meat, pasta sauce, rice, and filling can be made a day or two ahead, then reheated and assembled right before serving. Breading, toasting, and final baking should usually happen close to dinner.
What if my child hates mixed food?
Build the plate in sections. Put the protein, starch, and any toppings in separate piles, and keep sauces in tiny bowls. That setup makes the meal feel safer and gives the eater some control.
Can I swap chicken for turkey or beef in these recipes?
Usually, yes. Ground turkey works in taco bowls, meatballs, and sloppy joes, while chicken can replace ham in sliders or wraps if the flavor is kept mild. Just watch moisture and don’t overcook lean meats.
What’s the easiest no-cook meal on the list?
Turkey roll-ups and fruit are probably the simplest. Pita pizzas and quesadillas are nearly tied if you’re willing to turn on the stove for a few minutes.
How do I keep food warm without ruining the texture?
Use a low oven, around 200°F, for short holding times, and keep sauces separate whenever possible. Crispy foods like tenders and wedges should not sit under tight foil for long or they’ll go soft.
Do I have to use exact cheeses for each recipe?
No, but choose cheeses that melt in a friendly way. Cheddar, mozzarella, Monterey Jack, provolone, and parmesan are safe bets; very sharp or crumbly cheeses can be a harder sell at a picky table.
A Quieter Dinner Routine

The nicest thing about these meals is not that they’re fancy, or even that they’re fast. It’s that they lower the temperature in the kitchen. Less debate. Fewer surprise ingredients. More plates getting eaten instead of pushed around.
That’s a useful thing to have in your back pocket. Start with the simplest meal that fits the mood, keep a few dips on hand, and let the table stay a little calmer than it was before supper started. That’s enough.