
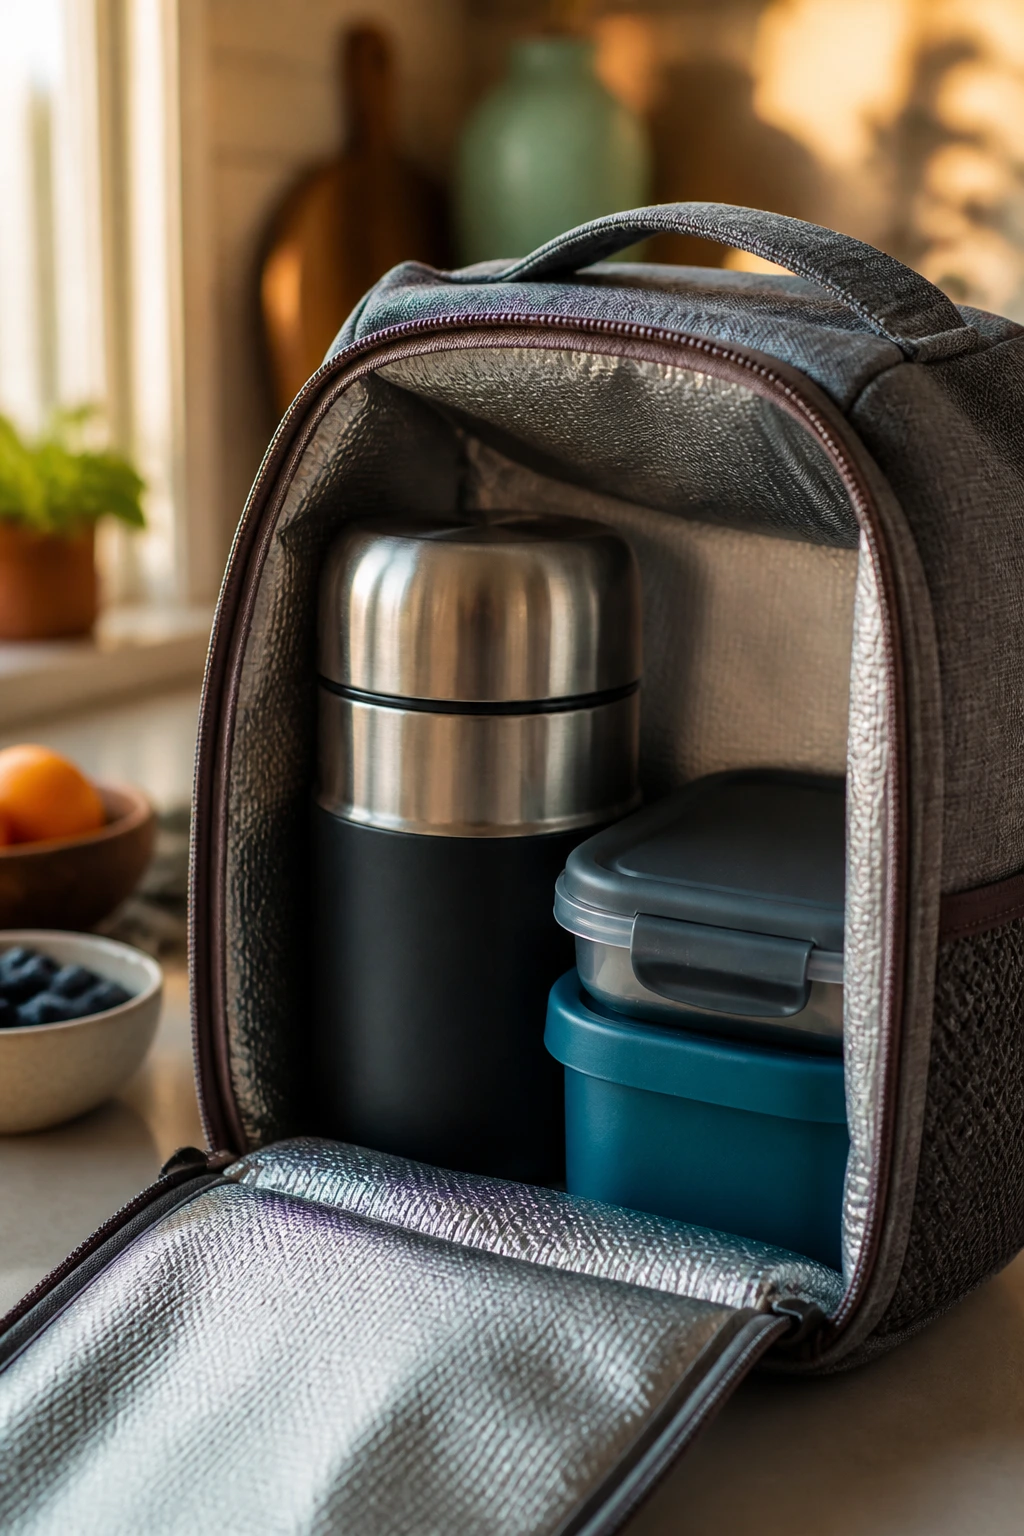
A winter lunchbox can go from cheerful to tragic in one soggy afternoon. Crackers soften, sandwiches steam themselves into paste, and anything meant to be warm comes out lukewarm unless you pack it with a little strategy.
Winter meals for lunchboxes need different rules. You want food that stays tidy in a backpack, tastes good after a few hours, and still feels like lunch instead of leftovers doing a bad impression of lunch.
Some of my favorites are soups that hold heat in a prewarmed thermos, pasta dishes with enough sauce to stay silky instead of clumped, and handhelds that can survive parchment, foil, and a jostle across the classroom or office. The trick is not fancy cooking. It is choosing the right texture, the right container, and the right amount of moisture.
Why You’ll Love This Collection
-
Thermos-Friendly: Several of these meals stay steamy for hours when you preheat the container with boiling water for 5 minutes.
-
Kid-Sized and Grown-Up Enough: The flavors lean familiar—tomato, cheddar, chicken, beans, turkey—so they work for picky eaters without tasting bland.
-
Make-Ahead Calm: Most of these can be cooked the night before, packed fast in the morning, and still taste like someone paid attention.
-
Hot and Cold Options: Some lunches are built for insulation, while others are meant to be eaten straight from the box, which keeps the menu from feeling repetitive.
-
Lunchbox-Proof Texture: These recipes are chosen because they stay moist, slice cleanly, or reheat without turning into a gluey mess.
1. Creamy Tomato Soup with Grilled Cheese Dippers
Tomato soup is one of those lunches that still feels kind when the weather turns cold. The soup is velvety, a little sweet, and bright enough to wake up the palate, while the grilled cheese strips bring the buttery crunch that turns a plain thermos lunch into something worth opening.
Why It Works:
The soup stays smooth because the tomato base is thickened with a short simmer and a little cream, not a fistful of flour. The sandwich strips are cut after toasting, so they fit neatly into a lunchbox and don’t collapse into floppy triangles. Warm soup in a preheated thermos and a separate grilled cheese portion gives you the best version of both.
Key Ingredients:
- 2 tablespoons unsalted butter
- 1 small yellow onion, diced fine
- 2 cloves garlic, minced
- 1 tablespoon tomato paste
- 1 (28-ounce) can crushed tomatoes
- 2 cups low-sodium chicken broth
- 1/2 cup heavy cream
- 1 teaspoon sugar
- 8 slices sandwich bread
- 8 slices cheddar cheese
- 2 tablespoons softened butter for grilling
Quick Steps:
- Melt the butter in a saucepan over medium heat. Cook the onion for 5 to 6 minutes, until soft and glossy, then stir in the garlic and tomato paste for 1 minute.
- Add the tomatoes, broth, sugar, salt, and pepper. Simmer for 15 minutes, stirring now and then, until the soup looks slightly thick and the onion bits are tender.
- Stir in the cream. Blend lightly with an immersion blender if you want a smoother texture, then let the soup cool for 5 to 10 minutes before pouring it into a preheated thermos.
- Build the sandwiches with cheddar between the bread slices, butter the outsides, and toast in a skillet over medium heat for 2 to 3 minutes per side, until golden and the cheese is fully melted. Cut into strips for packing.
Equipment for This Recipe:
- Medium saucepan
- Immersion blender or regular blender
- Skillet
- Wide-mouth insulated thermos
How to Serve This Dish:
Pack the soup in the thermos and the grilled cheese dippers in a separate compartment or wrap. A few cucumber sticks or apple slices on the side keep the lunchbox from feeling heavy.
Pro Tips for This Recipe:
- Preheat the thermos with boiling water for 5 minutes, then dump it out before filling.
- Cool the soup for a few minutes before sealing the lid; trapped steam can make the inside watery.
- Use a sharp cheddar if you want the sandwich to hold up after sitting in the box for a while.
Variations on This Dish:
- Basil-Tomato Version: Stir in a spoonful of pesto at the end and swap cheddar for mozzarella.
- Spicy Pantry Version: Add a pinch of red pepper flakes and use pepper jack in the sandwich.
Common Mistakes to Avoid with This Dish:
- Packing the sandwich while it is still steaming: The bread turns damp fast. Let it rest 2 minutes before cutting.
- Boiling the soup hard after adding cream: That can make it grainy. Keep it at a gentle simmer.
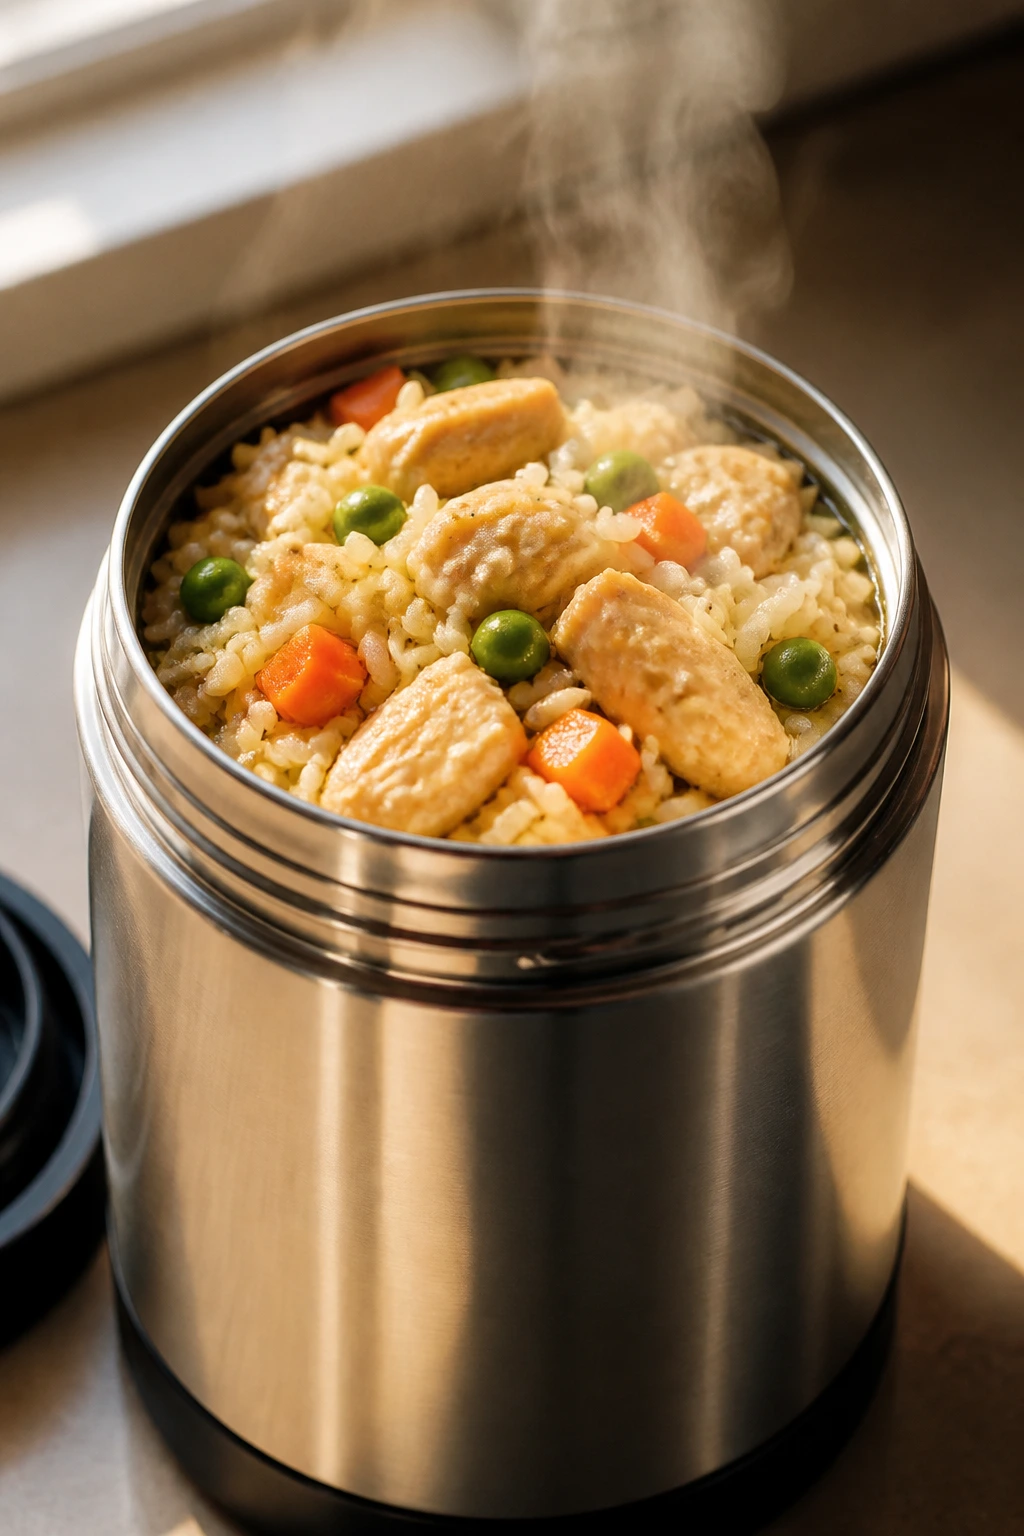
2. Chicken and Rice Thermos Bowl
Rice bowls do well in a lunchbox because rice holds heat, chicken stays tender, and the sauce sinks into every grain instead of running off the top. This one tastes like a weeknight dinner that learned how to travel.
Why It Works:
Long-grain rice keeps its shape better than short-grain rice when it sits in a thermos. The chicken is cooked in bite-size pieces so it reheats quickly and stays juicy, and the carrots and peas give enough color and crunch to keep the bowl from feeling flat. A little soy sauce and honey go a long way.
Key Ingredients:
- 1 cup long-grain white rice
- 2 cups low-sodium chicken broth
- 1 pound boneless, skinless chicken thighs, cut into 1-inch pieces
- 1 cup carrots, sliced thin
- 1 cup frozen peas
- 2 tablespoons soy sauce
- 1 tablespoon honey
- 1 teaspoon grated fresh ginger
- 1 tablespoon neutral oil
Quick Steps:
- Rinse the rice until the water runs mostly clear, then simmer it in the chicken broth with the lid on for about 15 minutes, until the liquid is absorbed and the rice is tender.
- Heat the oil in a skillet over medium-high heat. Cook the chicken for 5 to 7 minutes, until the outside turns golden and the centers are no longer pink.
- Stir in the carrots, peas, soy sauce, honey, and ginger. Cook for 3 to 4 minutes, until the carrots soften and the sauce clings lightly to the chicken.
- Fluff the rice, fold the chicken mixture through it, and pack it into a thermos while hot.
Equipment for This Recipe:
- Medium saucepan with lid
- Large skillet
- Wooden spoon
- Insulated food thermos
How to Serve This Dish:
Serve it straight from the thermos, or add a handful of sesame seeds on top before sealing the lid. A clementine or a handful of snap peas gives the lunch some brightness.
Pro Tips for This Recipe:
- Dice the chicken evenly so every piece finishes at the same time.
- If your rice sits too long before packing, splash in 1 to 2 tablespoons of broth and fluff it again.
- Leftover rotisserie chicken works here; just stir it in at the end so it does not dry out.
Variations on This Dish:
- Teriyaki Shortcut: Replace the soy sauce, honey, and ginger with 1/4 cup teriyaki sauce.
- Veggie Bowl: Swap the chicken for cubed tofu and use vegetable broth.
Common Mistakes to Avoid with This Dish:
- Overcooking the rice: Soft rice turns pasty in a thermos. Stop when the grains are tender but still separate.
- Packing it cold: Warm rice holds heat better and tastes better at lunch.
3. Turkey Meatball Marinara Subs
There’s a reason meatballs show up in lunchboxes so often. They hold together, they stay moist, and they taste good even after they’ve sat in a roll for a few hours.
Why It Works:
Ground turkey keeps these meatballs lighter than beef, but the breadcrumbs and Parmesan stop them from drying out. Marinara gives the filling enough moisture to coat the bread without turning it swampy. If you pack the sauce separately and assemble at lunch, the roll stays much better.
Key Ingredients:
- 1 pound ground turkey
- 1/2 cup plain breadcrumbs
- 1 large egg
- 1/4 cup grated Parmesan
- 1 teaspoon Italian seasoning
- 2 cups marinara sauce
- 4 small sub rolls
- 1 cup shredded mozzarella
Quick Steps:
- Heat the oven to 400°F (205°C). Mix the turkey, breadcrumbs, egg, Parmesan, and Italian seasoning in a bowl until just combined.
- Roll the mixture into 16 small meatballs and place them on a lined sheet pan. Bake for 12 to 14 minutes, until cooked through and lightly browned.
- Warm the marinara in a saucepan, then toss the meatballs in the sauce for 2 minutes so they soak up flavor.
- Split the rolls, fill them with meatballs and sauce, top with mozzarella if you want, and pack them wrapped in foil or parchment.
Equipment for This Recipe:
- Rimmed sheet pan
- Large mixing bowl
- Saucepan
- Parchment paper
How to Serve This Dish:
These are best with a few extra napkins and something crisp on the side, like carrot sticks or a small bag of baked chips. If you prefer less mess, pack the meatballs in one container and the roll in another.
Pro Tips for This Recipe:
- Wet your hands lightly before rolling the meatballs; they shape cleaner.
- Use rolls with a firm crust so the sauce does not leak through.
- If you like a melted finish, broil the assembled subs for 1 minute before packing, then cool fully.
Variations on This Dish:
- Pizza Meatball Subs: Add a pinch of oregano and swap mozzarella for provolone.
- Garlic-Herb Version: Stir minced garlic and chopped parsley into the meatball mix.
Common Mistakes to Avoid with This Dish:
- Making the meatballs too big: They take longer to cook and can dry out on the outside. Keep them small.
- Assembling too early: Sauce softens the bread fast. Build the sub closer to lunch if you can.
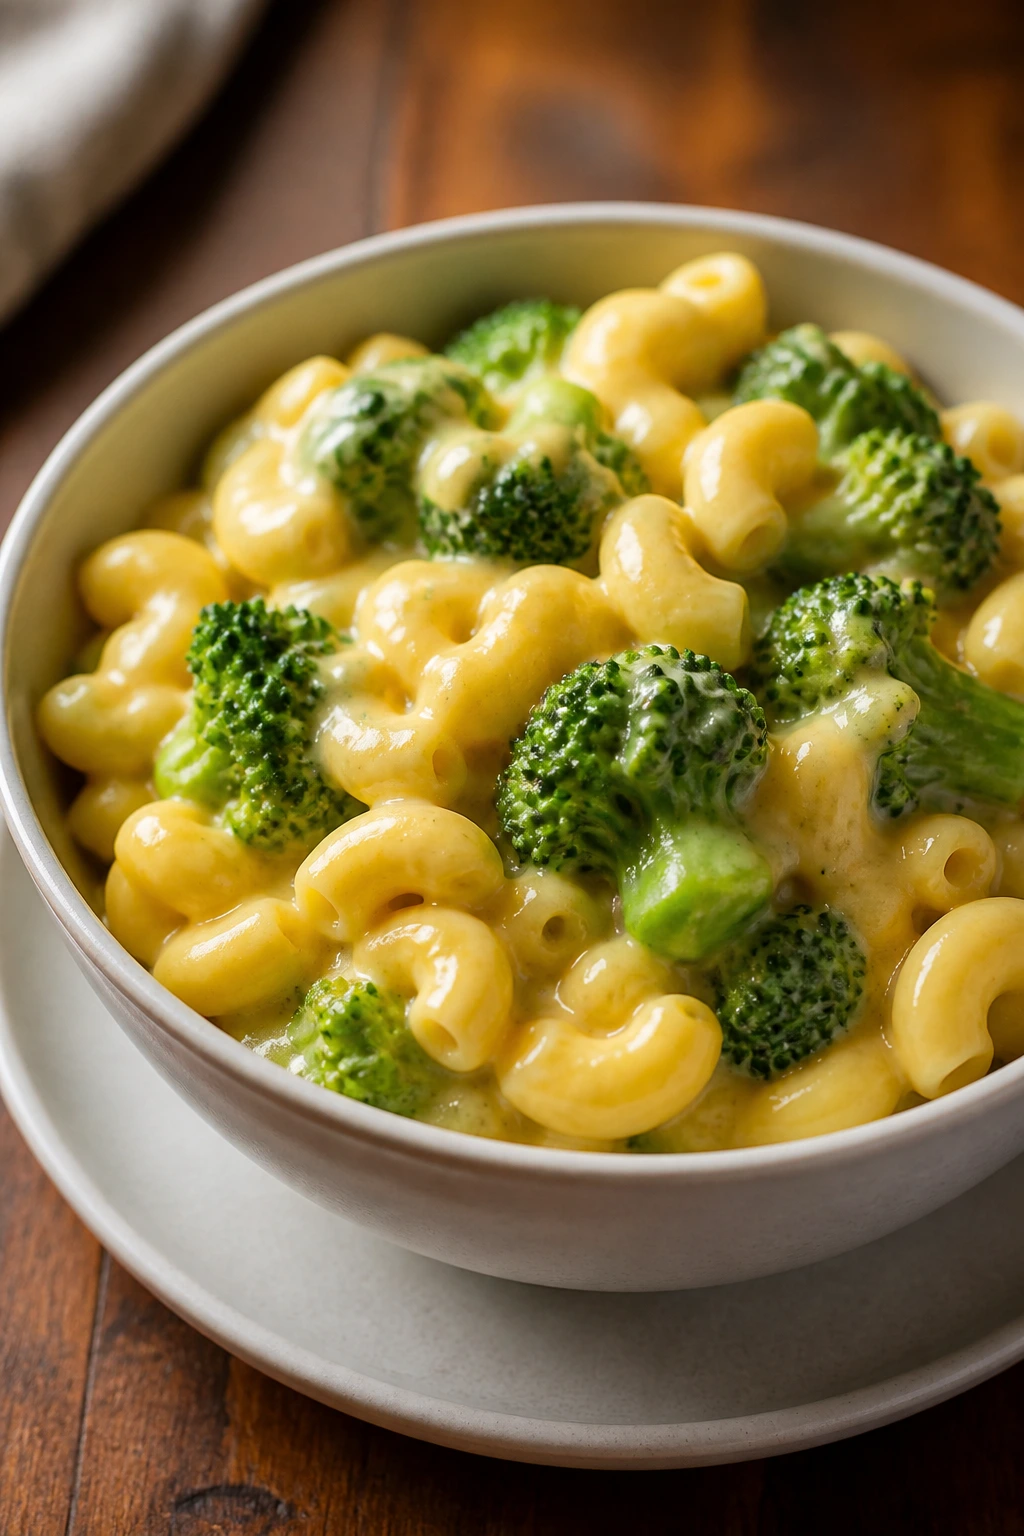
4. Broccoli Mac and Cheese
Mac and cheese that has some broccoli in it feels like the sort of lunch a parent packs with a straight face because it actually works. The cheese is creamy, the broccoli gives a little bite, and the pasta stays comforting without getting claggy.
Why It Works:
A smooth cheese sauce clings to elbow macaroni better than a thin one, which matters when the dish gets reheated later. The broccoli is cooked just until bright green, so it keeps a little texture. A spoonful of Dijon sounds odd until you taste it; it sharpens the cheese without tasting like mustard.
Key Ingredients:
- 12 ounces elbow macaroni
- 3 cups broccoli florets, cut small
- 2 tablespoons unsalted butter
- 2 tablespoons all-purpose flour
- 2 cups milk
- 2 cups shredded sharp cheddar
- 1 teaspoon Dijon mustard
- 1/2 teaspoon kosher salt
Quick Steps:
- Cook the macaroni in salted water until just shy of tender, then add the broccoli for the last 2 minutes. Drain and set aside.
- Melt the butter in a saucepan over medium heat. Whisk in the flour and cook for 1 minute, until the mixture smells a little nutty.
- Slowly whisk in the milk and cook for 3 to 4 minutes, until the sauce thickens enough to coat the back of a spoon. Stir in the cheddar, Dijon, salt, and pepper.
- Fold in the pasta and broccoli, then portion into lunch containers while warm.
Equipment for This Recipe:
- Large pot
- Medium saucepan
- Whisk
- Colander
How to Serve This Dish:
Pack it warm in a thermos or reheat it at lunch and top with a spoonful of extra cheddar. A few grape tomatoes or a small orange brighten the box.
Pro Tips for This Recipe:
- Shred your own cheese if you can; pre-shredded works, but it melts a touch less smoothly.
- Undercook the pasta a little. It finishes softening when reheated.
- Chop the broccoli small enough that it fits on a spoon with the pasta.
Variations on This Dish:
- Cauliflower Swap: Use half cauliflower florets instead of broccoli.
- Smoked Cheddar Version: Replace half the cheddar with smoked cheddar for a deeper flavor.
Common Mistakes to Avoid with This Dish:
- Letting the cheese sauce boil after the cheese goes in: It can turn grainy. Keep the heat low.
- Cooking the broccoli to mush: It should stay green and a little firm.
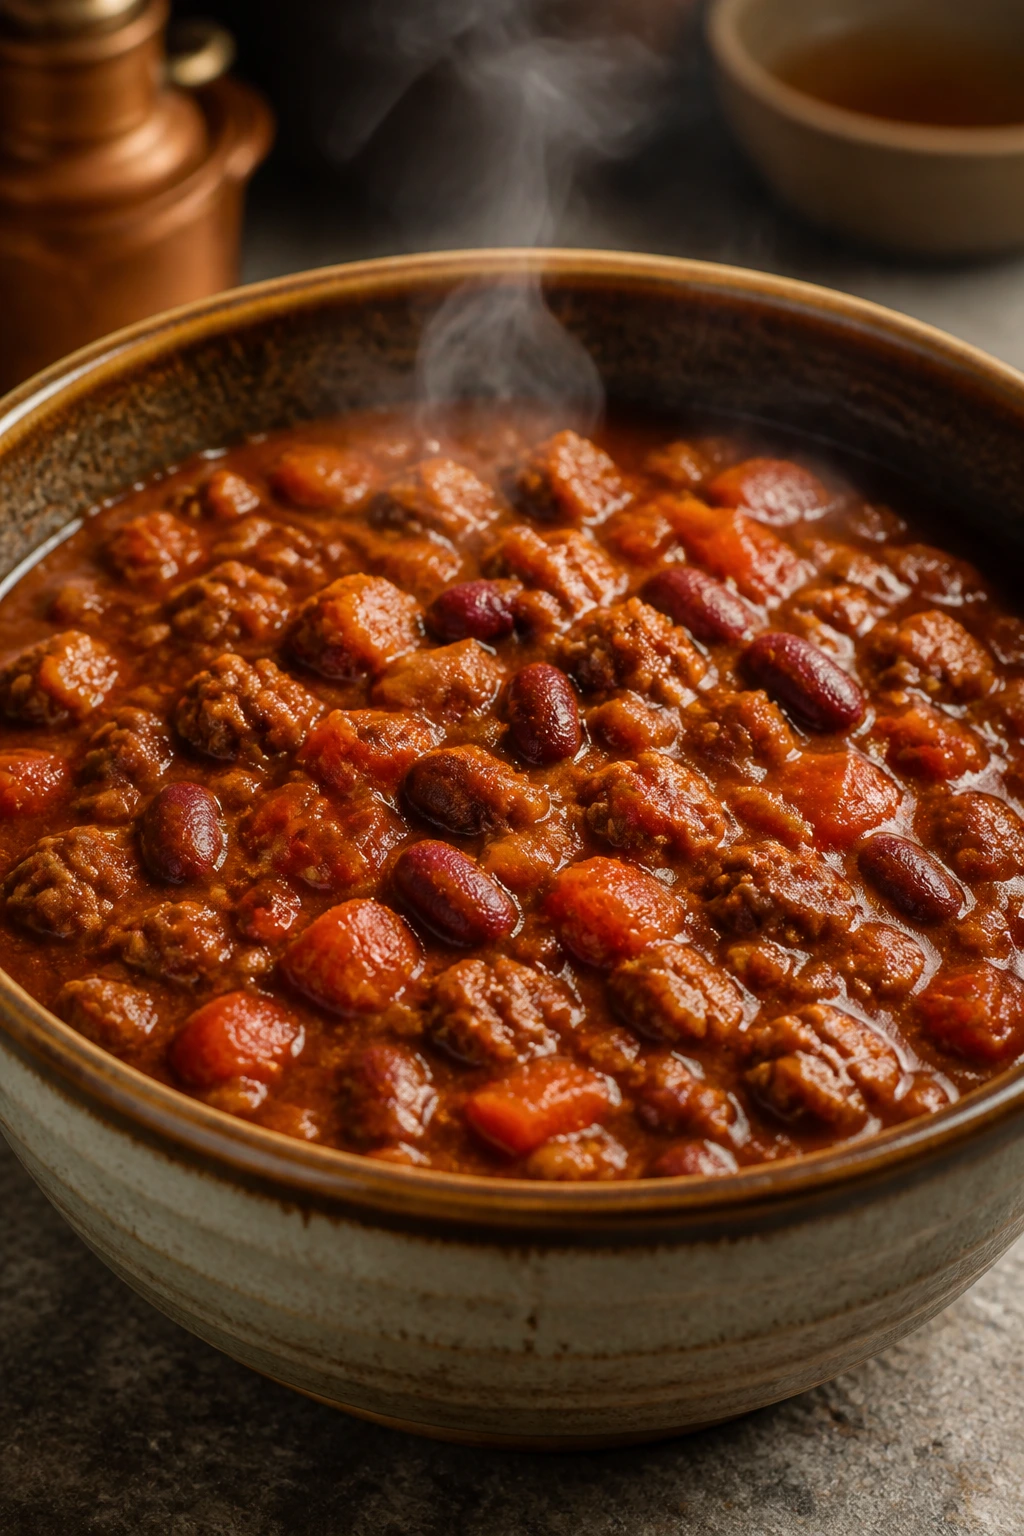
5. Beef and Bean Chili
Chili is lunchbox food with real backbone. It reheats cleanly, it fills a thermos without losing texture, and it tastes even better after the flavors sit together for a few hours.
Why It Works:
Ground beef gives the chili a savory base, while beans and tomatoes add body so it does not feel thin. Chili powder and cumin carry enough warmth for cold weather without making it scorching hot. It is one of the easiest meals here to portion out for different ages.
Key Ingredients:
- 1 pound ground beef
- 1 small yellow onion, diced
- 2 cloves garlic, minced
- 1 can kidney beans, drained and rinsed
- 1 can black beans, drained and rinsed
- 1 (14-ounce) can diced tomatoes
- 2 tablespoons chili powder
- 1 teaspoon ground cumin
- 2 cups low-sodium beef broth
Quick Steps:
- Brown the beef and onion in a pot over medium heat for 6 to 8 minutes, until the meat is no longer pink and the onion softens.
- Stir in the garlic, chili powder, and cumin for 30 seconds, just until fragrant.
- Add the beans, tomatoes, and broth. Simmer uncovered for 20 minutes, until the chili thickens and the beans taste seasoned through.
- Pack into a thermos or small container. Let it cool slightly before sealing.
Equipment for This Recipe:
- Large pot
- Wooden spoon
- Ladle
- Thermos or leakproof container
How to Serve This Dish:
Top with shredded cheddar, if you like, and pack a few tortilla chips separately for scooping. A spoonful of sour cream can go in a tiny cup if you do not mind an extra container.
Pro Tips for This Recipe:
- Drain the beef if it is very fatty; otherwise the chili can feel greasy after reheating.
- If the sauce is thinner than you want, simmer it 5 more minutes with the lid off.
- This freezes well in single portions, which makes future lunches easier.
Variations on This Dish:
- Turkey Chili: Swap the beef for ground turkey and add 1 extra teaspoon cumin.
- Smoky Chipotle Version: Stir in 1 minced chipotle pepper in adobo for a deeper heat.
Common Mistakes to Avoid with This Dish:
- Underseasoning before it sits: Chili tastes flatter when cold. Taste it after simmering and adjust.
- Packing it piping hot without venting: Steam builds pressure. Let it cool a few minutes first.
6. Spinach and Feta Puff Pastry Pockets
These are the kind of lunchbox pastries that feel a little fancy but are made from sensible things. The pastry shatters lightly at the edges, and the spinach-feta filling stays savory and creamy without leaking all over the lunchbox.
Why It Works:
Puff pastry gives you a crisp shell with almost no effort, which is hard to beat for a packed lunch. Cream cheese keeps the filling from crumbling, and feta brings salt so you do not need a long ingredient list. These are good warm, but they also hold up at room temperature.
Key Ingredients:
- 1 sheet puff pastry, thawed
- 1 tablespoon olive oil
- 1/4 cup finely diced onion
- 5 ounces fresh spinach, chopped
- 4 ounces cream cheese, softened
- 1/2 cup crumbled feta
- 1 egg, beaten for sealing and brushing
- 1/4 teaspoon black pepper
Quick Steps:
- Heat the oven to 400°F (205°C). Cook the onion in olive oil for 2 minutes, then add the spinach and cook until wilted and dry.
- Stir the spinach mixture with the cream cheese, feta, and pepper. Let it cool for a few minutes so it is not steaming.
- Cut the pastry into 4 squares, spoon filling onto one half of each square, fold over, seal with egg, and crimp the edges with a fork.
- Brush the tops with egg and bake for 18 to 20 minutes, until puffed and deeply golden.
Equipment for This Recipe:
- Sheet pan
- Parchment paper
- Skillet
- Pastry brush
How to Serve This Dish:
Pack the pockets with a few cherry tomatoes or a small salad if you want a fuller lunch. They are easy to eat with your hands, which helps on crowded school days.
Pro Tips for This Recipe:
- Cook the spinach until it has released most of its moisture. Wet filling is the enemy of crisp pastry.
- Chill the filled pockets for 10 minutes before baking if the dough feels soft.
- Use a sharp knife to cut the pastry cleanly; squished edges puff less.
Variations on This Dish:
- Ricotta Herb Pockets: Swap half the feta for ricotta and add chopped dill.
- Mushroom Spinach Version: Sauté chopped mushrooms with the onion for a deeper flavor.
Common Mistakes to Avoid with This Dish:
- Overfilling the squares: The filling leaks and the pastry splits. Keep it modest.
- Baking on a warm tray: Puff pastry likes a hot oven and a cool tray.
7. Loaded Potato Soup

Loaded potato soup is basically a baked potato with better manners. It is creamy, savory, and sturdy enough to travel, especially if you keep the bacon crisp and add the toppings at the end.
Why It Works:
Russet potatoes break down enough to thicken the soup naturally, which means you do not need a heavy roux. Bacon, cheddar, and chives give the familiar loaded-potato flavor, but the texture stays spoonable after reheating. A spoonful of sour cream at the end keeps the soup from tasting flat.
Key Ingredients:
- 2 pounds russet potatoes, peeled and diced
- 4 slices bacon, chopped
- 1 small onion, diced
- 3 cups low-sodium chicken broth
- 1 cup milk
- 1 cup shredded cheddar
- 1/2 cup sour cream
- 2 tablespoons chopped chives
- Salt and pepper
Quick Steps:
- Cook the bacon in a soup pot over medium heat until crisp, then remove it and leave about 1 tablespoon of fat in the pot.
- Add the onion and cook for 4 minutes, until soft. Stir in the potatoes and broth, then simmer for 15 to 18 minutes, until the potatoes are tender.
- Mash some of the potatoes with the back of a spoon to thicken the soup. Stir in the milk and half the cheddar.
- Finish with sour cream, chives, salt, pepper, and bacon. Pack into a thermos while hot.
Equipment for This Recipe:
- Large pot
- Potato masher or spoon
- Ladle
- Wide-mouth thermos
How to Serve This Dish:
A few extra chives on top make it look finished, even in a lunchbox. Add a small roll or a couple of crackers on the side if the eater wants something to dip.
Pro Tips for This Recipe:
- Dice the potatoes evenly so they cook at the same pace.
- Do not overblend; a little texture is better than gluey soup.
- Hold back some bacon for topping right before serving.
Variations on This Dish:
- Broccoli Potato Soup: Add 2 cups chopped broccoli in the last 5 minutes of simmering.
- Turkey Bacon Version: Swap the bacon for turkey bacon and add a little extra salt.
Common Mistakes to Avoid with This Dish:
- Using waxy potatoes: They do not break down the same way and can leave the soup too thin.
- Adding cheese over high heat: It can turn stringy. Stir it in off the boil.
8. Teriyaki Chicken Noodle Bowl
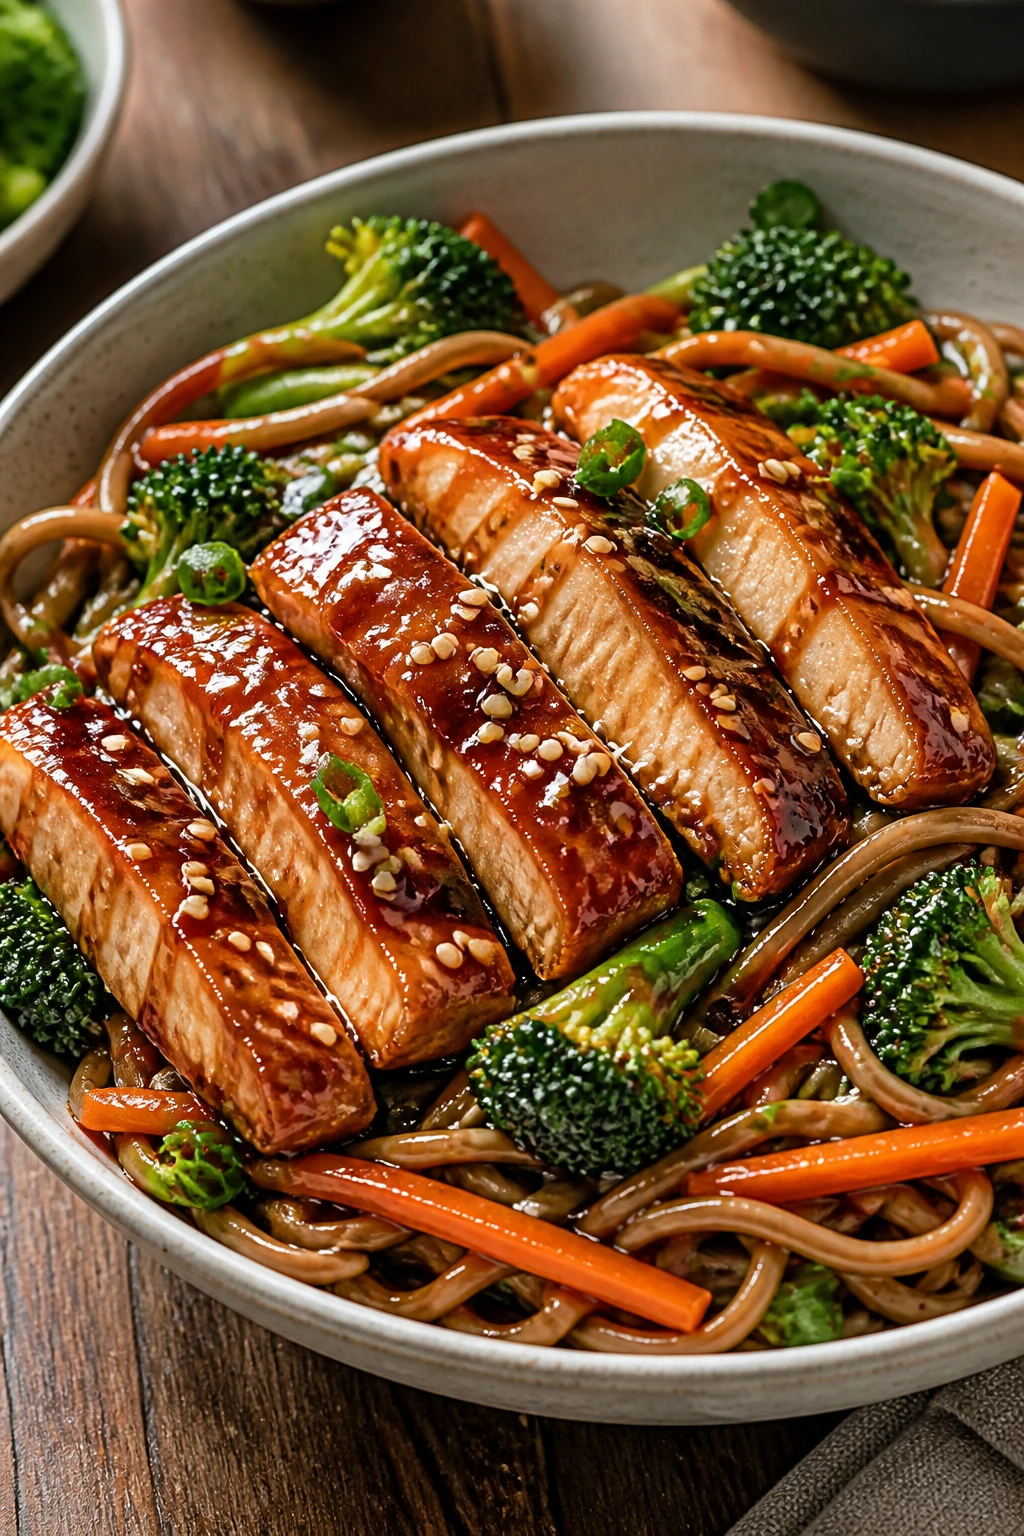
Teriyaki chicken noodles are one of those lunches that still feels lively after a few hours in a container. The noodles stay slick, the chicken gets a sweet-salty glaze, and the broccoli gives the bowl a bit of crunch instead of mush.
Why It Works:
The sauce is strong enough to season the noodles without drowning them. Soba or ramen noodles work because they stay tender after reheating, and broccoli holds up better than delicate vegetables like spinach. A little sesame oil at the end gives the whole bowl a roasted, nutty smell.
Key Ingredients:
- 8 ounces soba or ramen noodles
- 1 pound boneless chicken thighs, sliced
- 2 cups broccoli florets
- 1 carrot, cut into thin matchsticks
- 3/4 cup teriyaki sauce
- 1 tablespoon sesame oil
- 2 green onions, sliced
- 1 tablespoon neutral oil
Quick Steps:
- Cook the noodles until just tender, then drain and rinse briefly so they do not stick together.
- Heat the neutral oil in a skillet over medium-high heat and cook the chicken for 5 to 6 minutes, until browned and cooked through.
- Add the broccoli and carrot, then cook for 2 to 3 minutes until the broccoli turns bright green but still has bite.
- Stir in the teriyaki sauce and sesame oil, toss with the noodles, and finish with green onions.
Equipment for This Recipe:
- Large skillet
- Pot for noodles
- Colander
- Lunch container with a tight lid
How to Serve This Dish:
Pack it as a warm bowl or serve it cold if you like a noodle-salad feel. A few sesame seeds on top and some orange slices on the side keep the lunchbox from looking too brown.
Pro Tips for This Recipe:
- Cut the chicken thin so it cooks fast and soaks up the sauce.
- Save a spoonful of sauce to stir in after reheating if the noodles dry out.
- Broccoli stems work too; peel and slice them thin.
Variations on This Dish:
- Peanut Noodle Version: Stir 1 tablespoon peanut butter into the sauce.
- Vegetable Bowl: Use cubed tofu and extra broccoli instead of chicken.
Common Mistakes to Avoid with This Dish:
- Overcooking the noodles: They will go soft after packing. Stop at just tender.
- Using too much sauce: The bowl turns slippery and hard to eat. Coat, don’t flood.
9. Ham and Cheddar Pinwheels
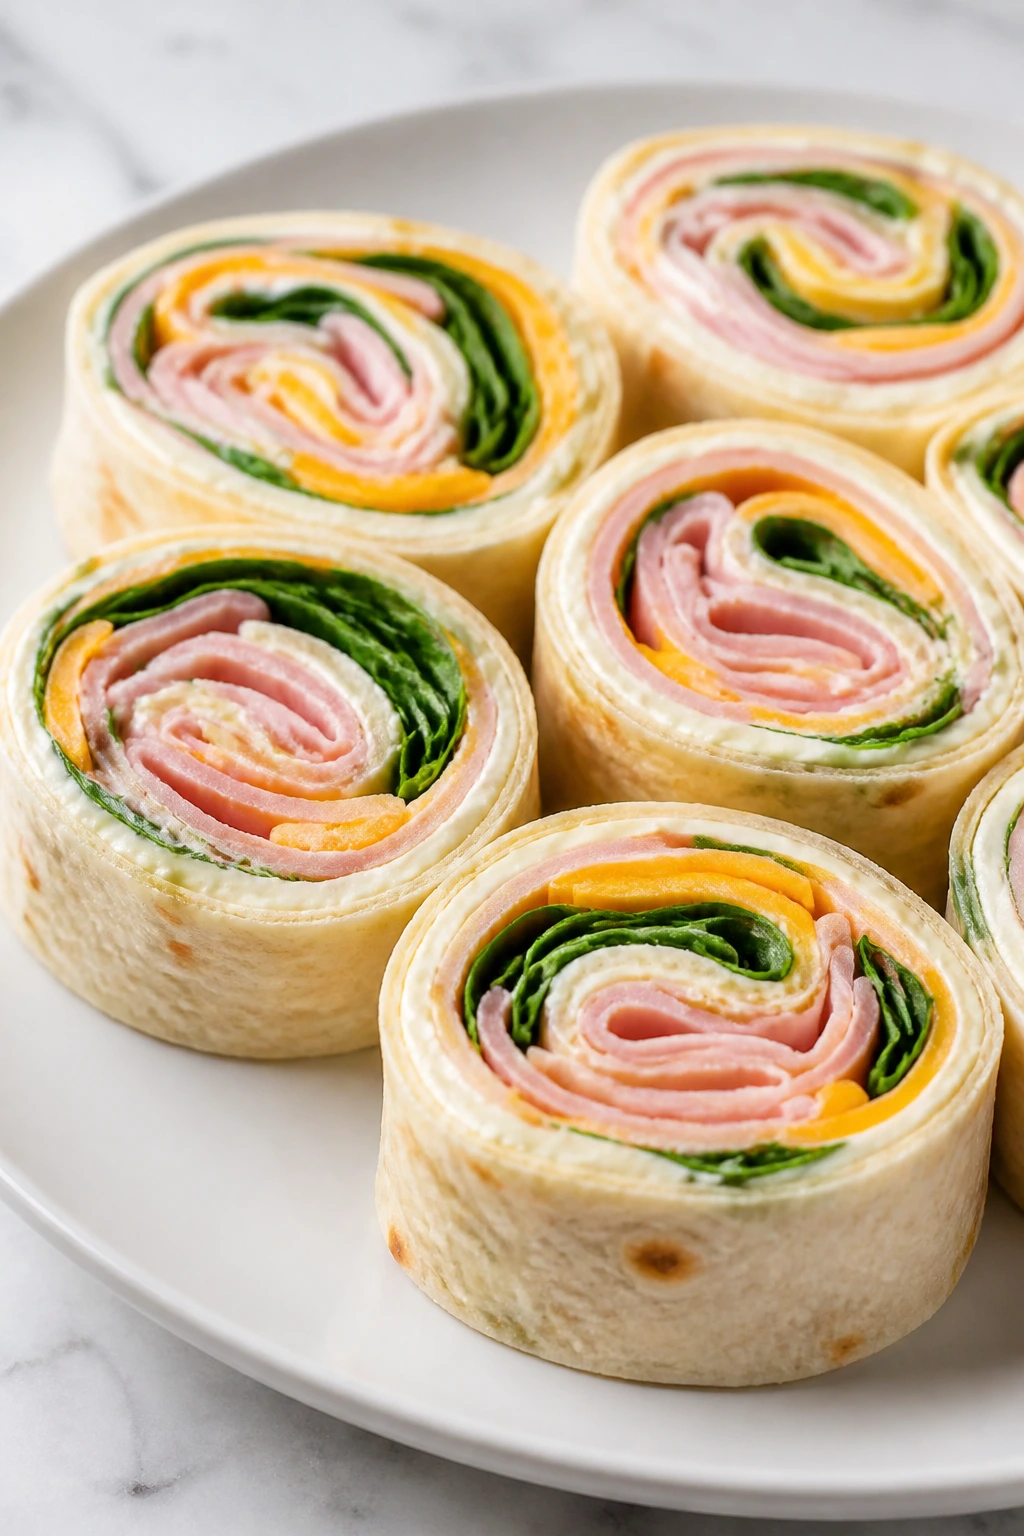
Pinwheels are lunchbox food with almost no drama. They slice neatly, they hold together, and they taste like a sandwich that learned a better shape.
Why It Works:
Cream cheese acts like edible glue, so the roll stays tight when you slice it. Ham and cheddar give you salt, fat, and enough flavor that you do not need much else. A tortilla makes the whole thing easier than bread, which is why pinwheels survive a school bag better than a stacked sandwich.
Key Ingredients:
- 4 large flour tortillas
- 8 ounces cream cheese, softened
- 2 tablespoons Dijon mustard
- 6 ounces sliced ham
- 1 cup shredded cheddar
- 1 cup baby spinach
Quick Steps:
- Mix the cream cheese and Dijon in a bowl until smooth.
- Spread the mixture over the tortillas, then layer on ham, cheddar, and spinach.
- Roll the tortillas up tightly, wrap each one in plastic or parchment, and chill for 20 minutes so they firm up.
- Slice into 1-inch pinwheels and pack them cut-side up.
Equipment for This Recipe:
- Cutting board
- Sharp knife
- Mixing bowl
- Parchment or plastic wrap
How to Serve This Dish:
These are easy to eat with fruit and a handful of pretzels. If you want them extra tidy, pack the pinwheels in a single layer so they do not flatten.
Pro Tips for This Recipe:
- Chill before slicing. Warm rolls squish and smear.
- Keep the filling layer thin so the tortilla seals cleanly.
- Use a very sharp knife and wipe it between cuts for neat spirals.
Variations on This Dish:
- Turkey Club Pinwheels: Swap the ham for turkey and add a little bacon.
- Veggie Pinwheels: Use roasted red pepper strips and shredded carrots instead of ham.
Common Mistakes to Avoid with This Dish:
- Overstuffing the roll: It bursts when sliced. Keep the layers modest.
- Slicing too soon: The roll needs that short chill to stay intact.
10. Lentil Vegetable Stew
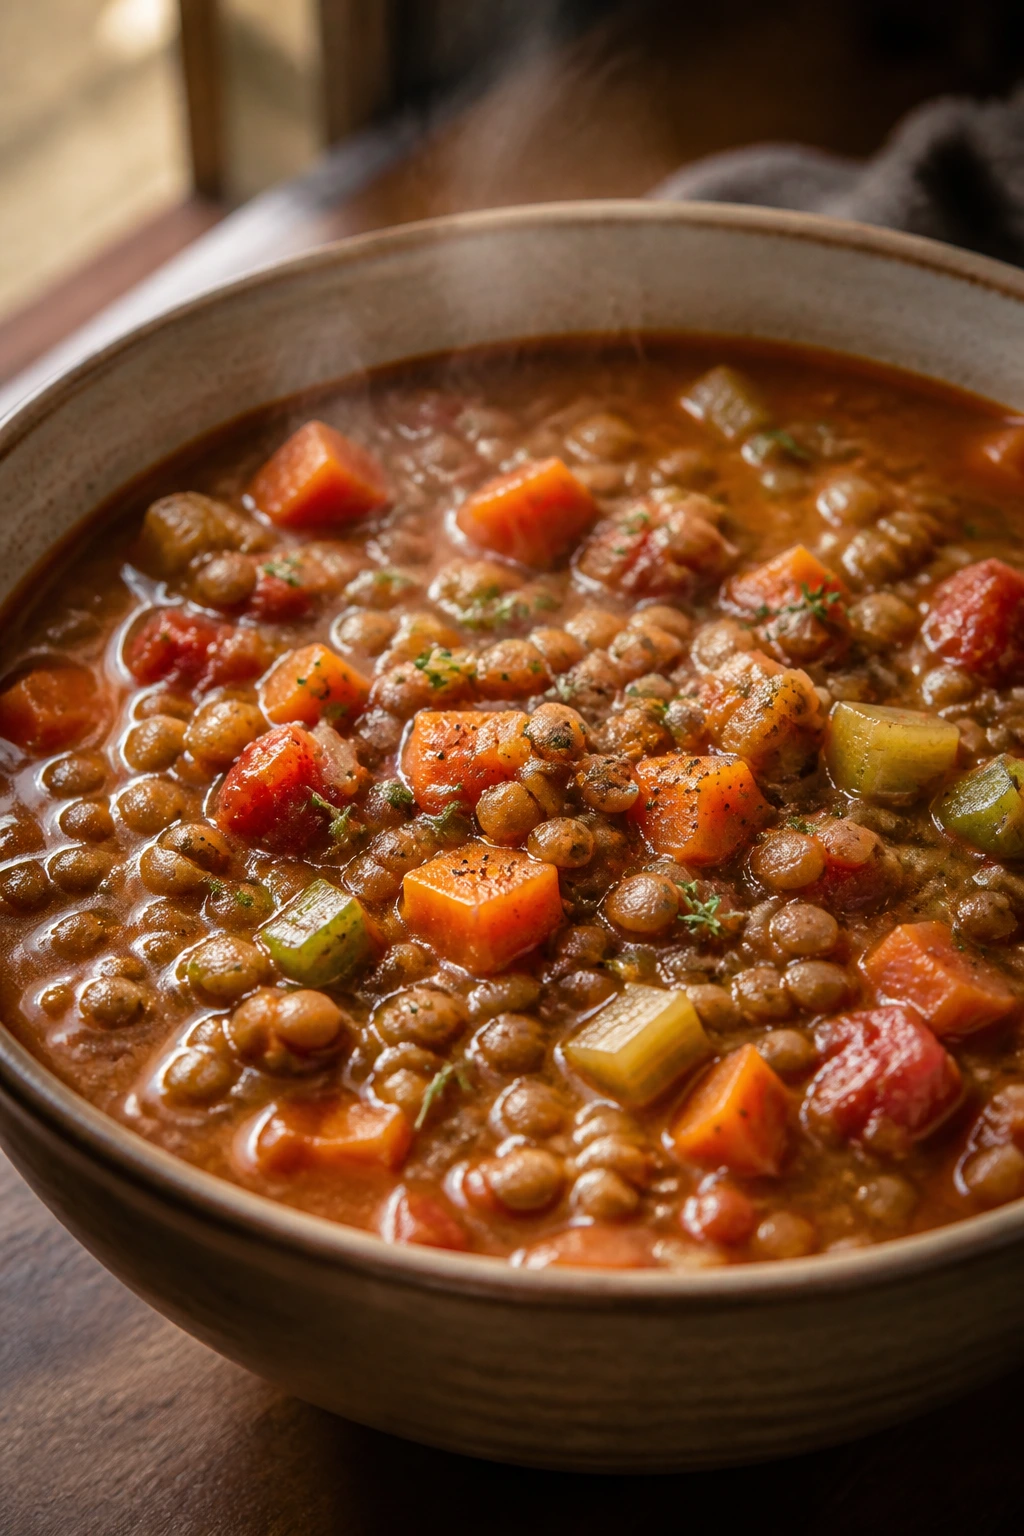
Lentil stew is one of the easiest ways to put something warm, filling, and cheap into a lunchbox without making it feel bare. It has enough body to eat like a meal and enough broth to stay spoonable in a thermos.
Why It Works:
Brown lentils hold their shape better than red lentils, so the stew stays textured instead of collapsing. Carrots and celery bring sweetness and a little crunch, while tomatoes and thyme make it taste like it simmered all afternoon even when it didn’t. It also freezes well, which is always useful.
Key Ingredients:
- 1 cup brown lentils, rinsed
- 1 small onion, diced
- 2 carrots, diced
- 2 celery stalks, diced
- 2 cloves garlic, minced
- 1 (14-ounce) can diced tomatoes
- 4 cups low-sodium vegetable broth
- 1 teaspoon dried thyme
- 1 bay leaf
Quick Steps:
- Cook the onion, carrots, and celery in a pot with a little oil for 5 minutes, until the edges soften.
- Stir in the garlic and thyme for 30 seconds.
- Add the lentils, tomatoes, broth, and bay leaf. Simmer for 25 to 30 minutes, until the lentils are tender but not falling apart.
- Remove the bay leaf, season well, and pack the stew hot into a thermos.
Equipment for This Recipe:
- Soup pot
- Wooden spoon
- Ladle
- Thermos
How to Serve This Dish:
A piece of crusty bread or a buttered roll makes the stew feel fuller. If you want a little brightness, add a squeeze of lemon after reheating.
Pro Tips for This Recipe:
- Salt at the end after the lentils are tender; early salt can slow softening a little.
- If the stew thickens too much overnight, loosen it with a splash of broth.
- Chop the vegetables small so they fit easily on a spoon.
Variations on This Dish:
- Curried Lentil Stew: Add 1 teaspoon curry powder with the thyme.
- Lemony Herb Version: Finish with parsley and lemon zest.
Common Mistakes to Avoid with This Dish:
- Using red lentils for this version: They break down too much for a lunchbox stew.
- Skipping the bay leaf or thyme: The stew can taste plain without that herbal edge.
11. Mini Shepherd’s Pies
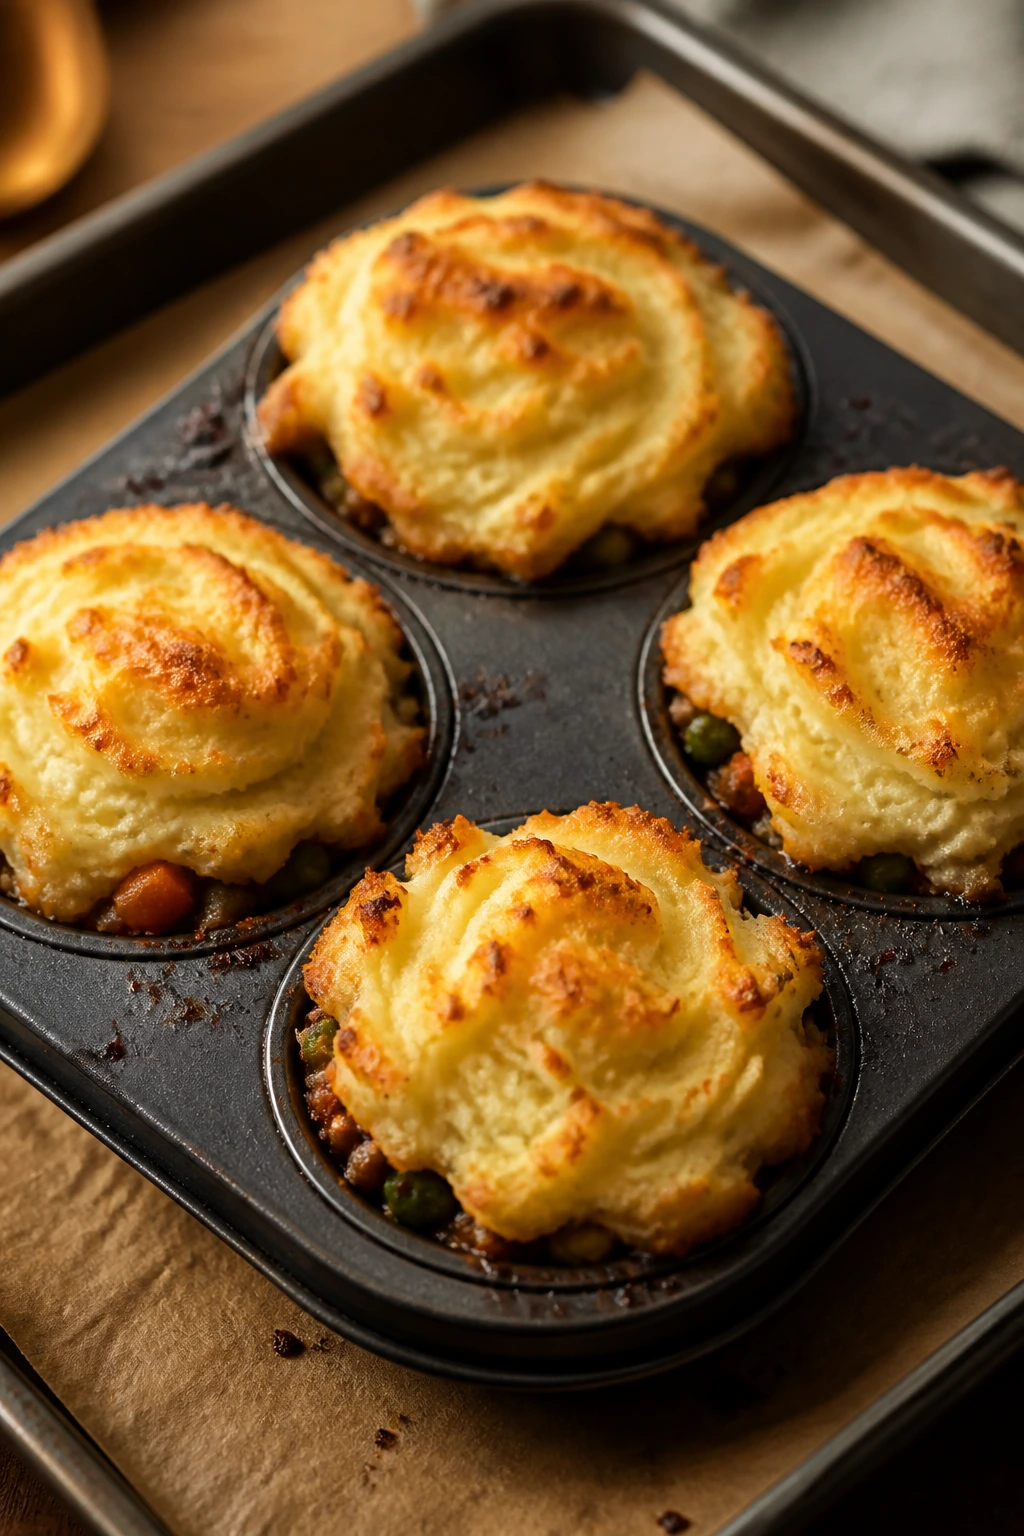
Mini shepherd’s pies are excellent lunchbox food because they pack neatly, reheat well, and deliver the kind of comfort that feels earned on a cold day. The potato topping seals in the filling and keeps everything moist.
Why It Works:
The meat filling is thickened before baking, so it does not leak into the potatoes. A muffin tin creates perfect individual portions, which means no cutting at lunch and no messy scooping. It is a tidy dish, and I mean that in the best possible way.
Key Ingredients:
- 1 pound ground beef or lamb
- 1 small onion, diced
- 1 cup frozen peas and carrots
- 2 tablespoons all-purpose flour
- 1 cup beef broth
- 2 pounds potatoes, peeled and chopped
- 4 tablespoons butter
- 1/2 cup milk
Quick Steps:
- Boil the potatoes in salted water until tender, then mash with butter, milk, salt, and pepper.
- Brown the meat and onion in a skillet over medium heat, then stir in the flour for 1 minute. Add the broth and vegetables and cook until thickened.
- Spoon the filling into a greased muffin tin, top with mashed potatoes, and bake at 400°F (205°C) for 15 minutes, until the tops are lightly browned.
- Cool for 10 minutes before removing and packing.
Equipment for This Recipe:
- Muffin tin
- Skillet
- Potato masher
- Piping bag or spoon for topping
How to Serve This Dish:
They are good hot or warm, with a small side of peas or a pickle spear. If you want them to look finished, drag a fork lightly across the potato topping before baking.
Pro Tips for This Recipe:
- Make the filling thick enough that it sits like a spoonable stew, not soup.
- Let the pies cool before lifting them out, or the bottoms can tear.
- Pipe the potatoes if you want a prettier top, but a spoon works fine.
Variations on This Dish:
- Sweet Potato Top: Replace half the potatoes with sweet potatoes.
- Cheddar Potato Version: Mix 1/2 cup cheddar into the mash.
Common Mistakes to Avoid with This Dish:
- Making the filling too wet: It slips under the potato layer and soaks the base.
- Trying to unmold them while hot: They need a short rest to set.
12. Sausage and Pepper Pasta
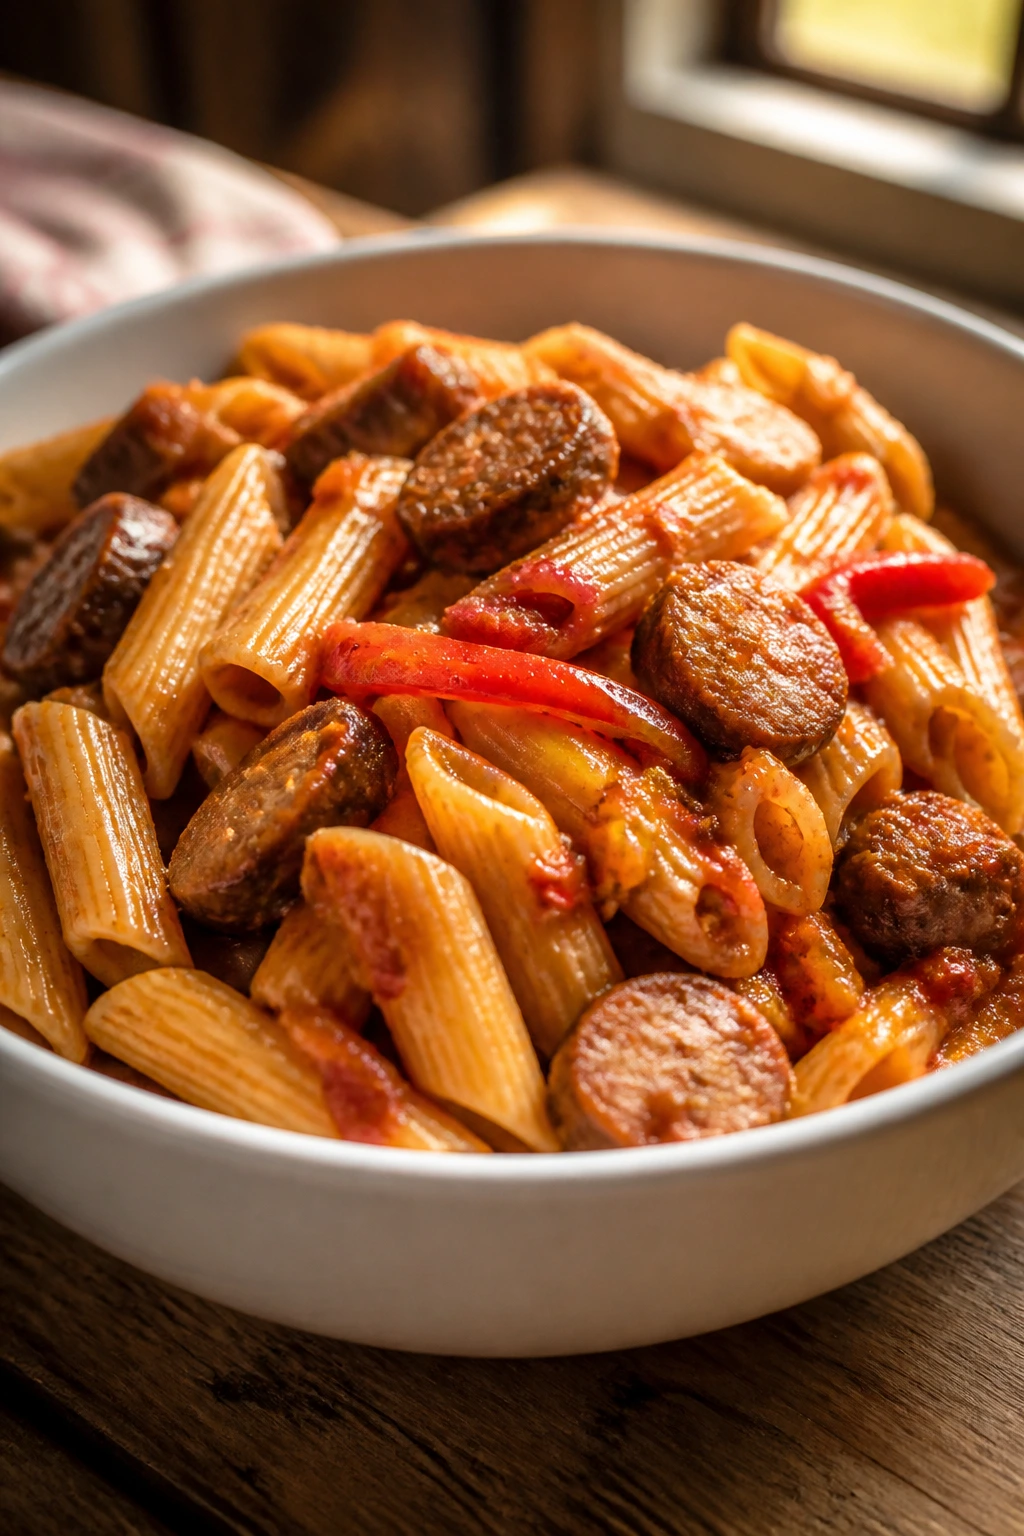
Sausage and peppers is one of those old-school combinations that still earns its keep in a lunchbox. The pasta soaks up the tomato sauce, the sausage keeps it hearty, and the peppers bring enough sweetness to stop the whole thing from feeling heavy.
Why It Works:
A short, sturdy pasta shape catches sauce better than long noodles in a packed container. The sausage drips flavor into the peppers and onion, which means the sauce tastes richer than the ingredient list suggests. It reheats cleanly, and that matters more than perfect photo-food ever does.
Key Ingredients:
- 12 ounces penne or rotini
- 1 pound Italian sausage, casings removed
- 2 bell peppers, sliced
- 1 small onion, sliced
- 2 cups marinara sauce
- 2 tablespoons olive oil
- 1/4 cup grated Parmesan
Quick Steps:
- Cook the pasta until just tender, then drain.
- Brown the sausage in a skillet over medium heat, breaking it into chunks as it cooks.
- Add the peppers and onion, and cook for 6 to 8 minutes, until softened at the edges.
- Stir in the marinara and pasta, cook for 2 minutes, and finish with Parmesan before packing.
Equipment for This Recipe:
- Large pot
- Deep skillet
- Colander
- Lunch containers
How to Serve This Dish:
A little extra Parmesan on top works well, and a simple green salad can round out the lunch if you have room. Garlic bread is nice, but a plain roll keeps the box lighter.
Pro Tips for This Recipe:
- Use rotini if you want the sauce tucked into every curl.
- Drain the pasta well so the sauce does not thin out.
- A splash of pasta water can help the sauce cling if it looks dry.
Variations on This Dish:
- Chicken Sausage Version: Swap in chicken sausage for a lighter bowl.
- Creamy Pepper Pasta: Stir in 2 tablespoons cream cheese at the end.
Common Mistakes to Avoid with This Dish:
- Overcooking the pasta: It gets too soft when reheated. Pull it early.
- Skipping the onion time: Raw onion makes the lunch taste rough and sharp.
13. Black Bean Quesadilla Wedges
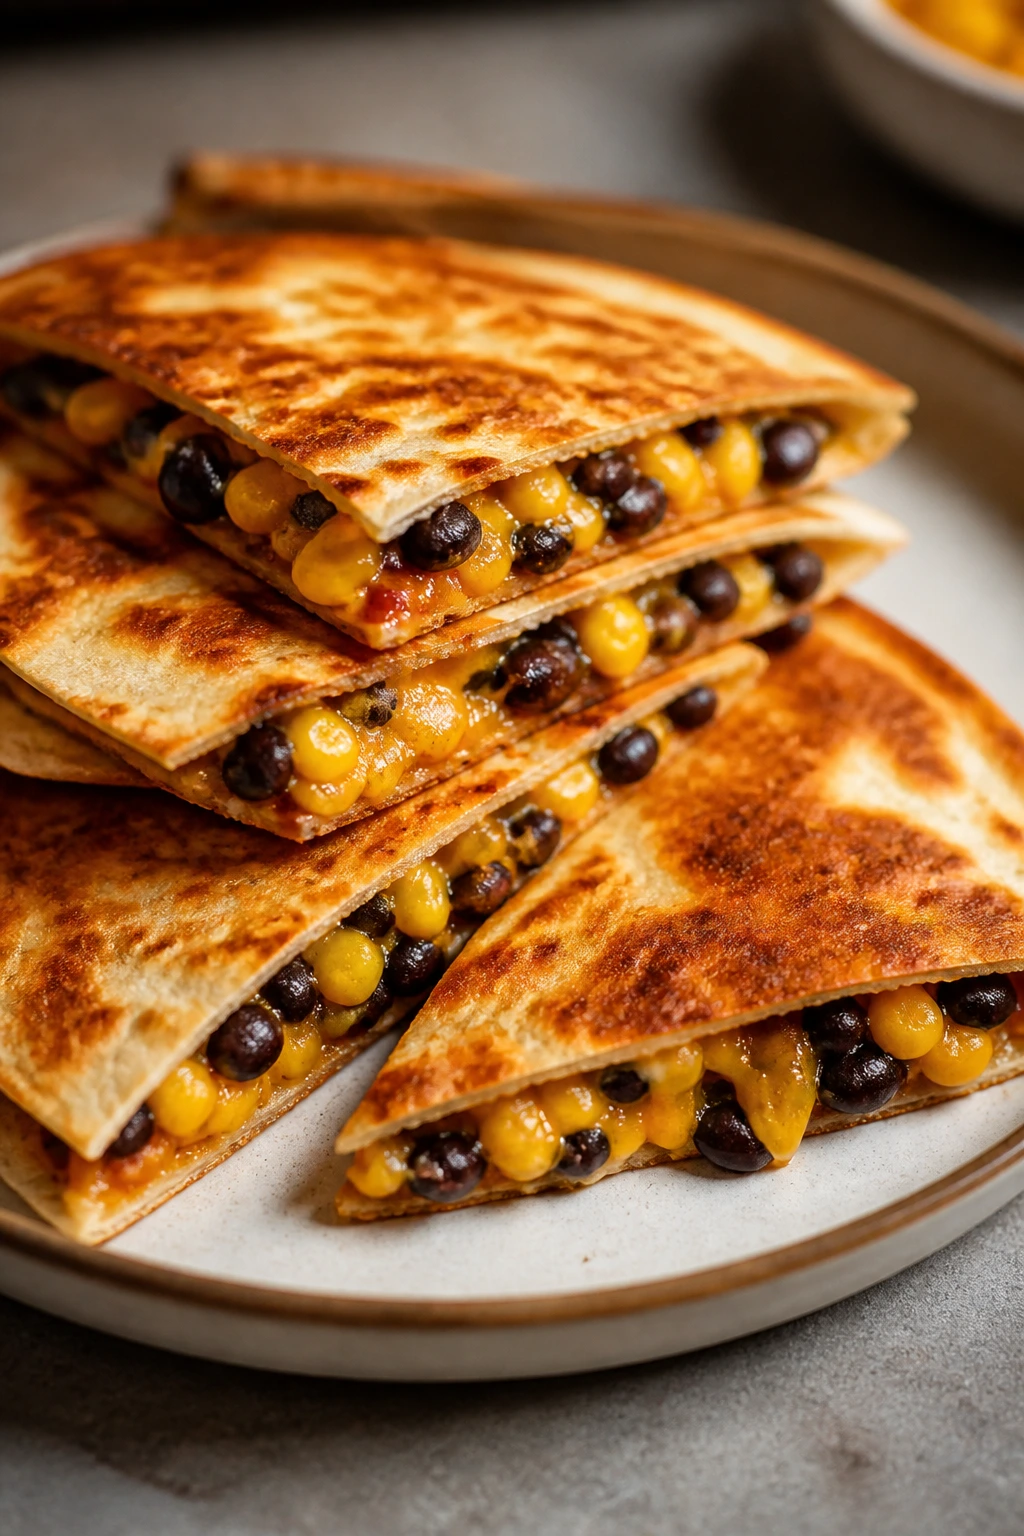
Quesadillas are the lunchbox answer to a lot of problems. They slice cleanly, they taste good warm or room temperature, and they do not require a fork if you cut them right.
Why It Works:
Black beans give the filling enough heft that the quesadilla feels like a meal, not a snack. Cheese acts as the binder, and a little salsa keeps the interior from drying out. If you crisp the tortilla in a skillet first, the wedges stay sturdy for hours.
Key Ingredients:
- 4 large flour tortillas
- 1 can black beans, drained and rinsed
- 2 cups shredded Monterey Jack or cheddar
- 1 cup corn kernels
- 1/2 cup salsa
- 1 teaspoon ground cumin
- 1 tablespoon neutral oil
Quick Steps:
- Mash about half the beans with the salsa and cumin, then stir in the remaining beans and corn.
- Heat a skillet over medium heat. Lay down one tortilla, add cheese and filling, then more cheese, and top with another tortilla.
- Cook for 2 to 3 minutes per side, until crisp and golden and the cheese melts.
- Cut into wedges and cool for a few minutes before packing.
Equipment for This Recipe:
- Skillet
- Spatula
- Knife or pizza cutter
- Cutting board
How to Serve This Dish:
Pack a little sour cream or guacamole in a small cup if you want dipping on the side. A few orange slices balance the savory filling nicely.
Pro Tips for This Recipe:
- Keep the filling thin and spread it evenly so the tortilla seals.
- Let the quesadilla rest before slicing or the cheese will run out.
- If you need extra crispness, cook it a minute longer on the second side.
Variations on This Dish:
- Chicken Quesadilla: Add 1 cup shredded cooked chicken.
- Breakfast Quesadilla: Swap the beans for scrambled eggs and potatoes.
Common Mistakes to Avoid with This Dish:
- Using too much salsa: It makes the tortilla soggy fast. Keep the filling thick.
- Cutting while scorching hot: The cheese spills everywhere. Wait a few minutes.
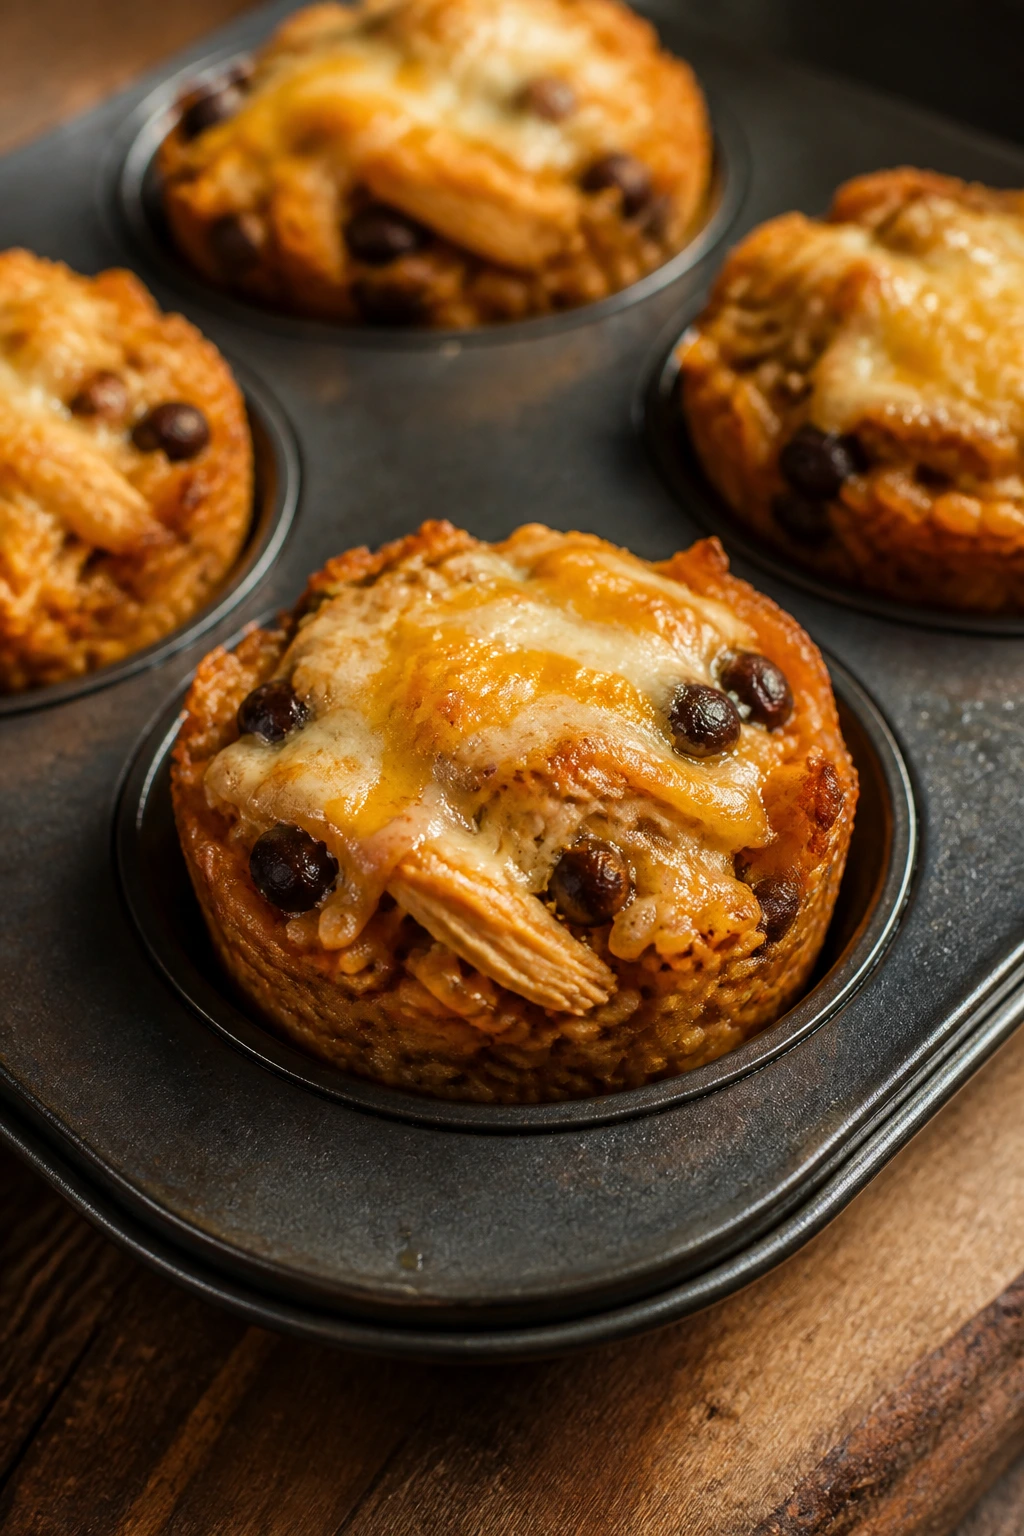
14. Chicken Pot Pie Muffins
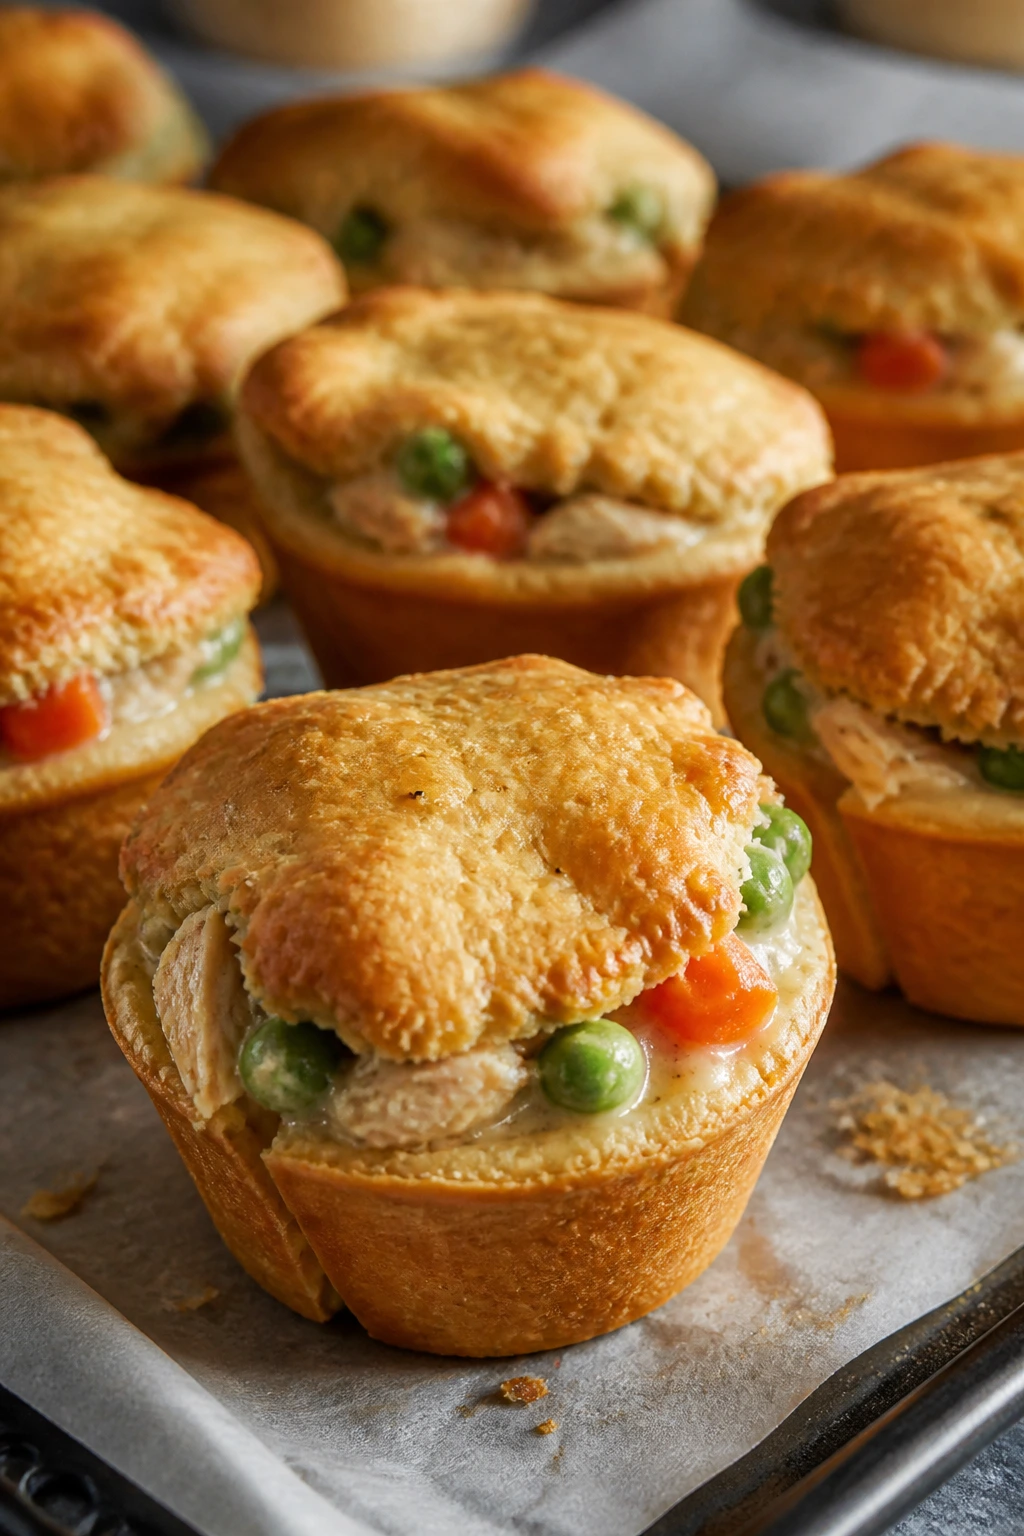
These taste like pot pie but pack like a muffin, which is about as practical as lunch gets. The biscuit edge turns golden, the filling stays creamy, and each portion is easy to pick up, even if the day is moving fast.
Why It Works:
Using biscuit dough as the shell saves time and gives you an edible cup that traps the filling nicely. Chicken, peas, carrots, and a simple creamy sauce make the flavor familiar enough for kids while still feeling substantial. They are a strong make-ahead option because they reheat without falling apart.
Key Ingredients:
- 1 can refrigerated biscuit dough, 8 biscuits
- 2 cups cooked shredded chicken
- 1 cup frozen peas and carrots
- 1 cup condensed cream of chicken soup
- 1/2 cup milk
- 1/2 teaspoon dried thyme
- Salt and pepper
Quick Steps:
- Heat the oven to 375°F (190°C). Press each biscuit into a greased muffin cup to form a shell.
- Mix the chicken, peas and carrots, soup, milk, thyme, salt, and pepper in a bowl.
- Spoon the filling into the biscuit cups and bake for 18 to 20 minutes, until the biscuit edges are deep golden and the filling bubbles.
- Cool for 10 minutes before removing from the tin.
Equipment for This Recipe:
- Muffin tin
- Mixing bowl
- Spoon
- Oven mitts
How to Serve This Dish:
They are good with a small side salad or a few apple slices. If you want them extra tidy, pack them in paper liners so the crust stays crisp.
Pro Tips for This Recipe:
- Do not overfill the cups. The filling rises and can spill over.
- If the biscuit dough puffs too much, press it gently back into the tin halfway through baking.
- Use pre-cooked chicken from the fridge to keep the filling fast.
Variations on This Dish:
- Turkey Pot Pie Muffins: Swap in diced cooked turkey.
- Cheddar Herb Version: Stir 1/2 cup cheddar into the filling.
Common Mistakes to Avoid with This Dish:
- Packing them before they cool: The steam softens the biscuit shell.
- Using watery filling: It sogs the bottom. Keep it thick.
15. French Toast Casserole Bites
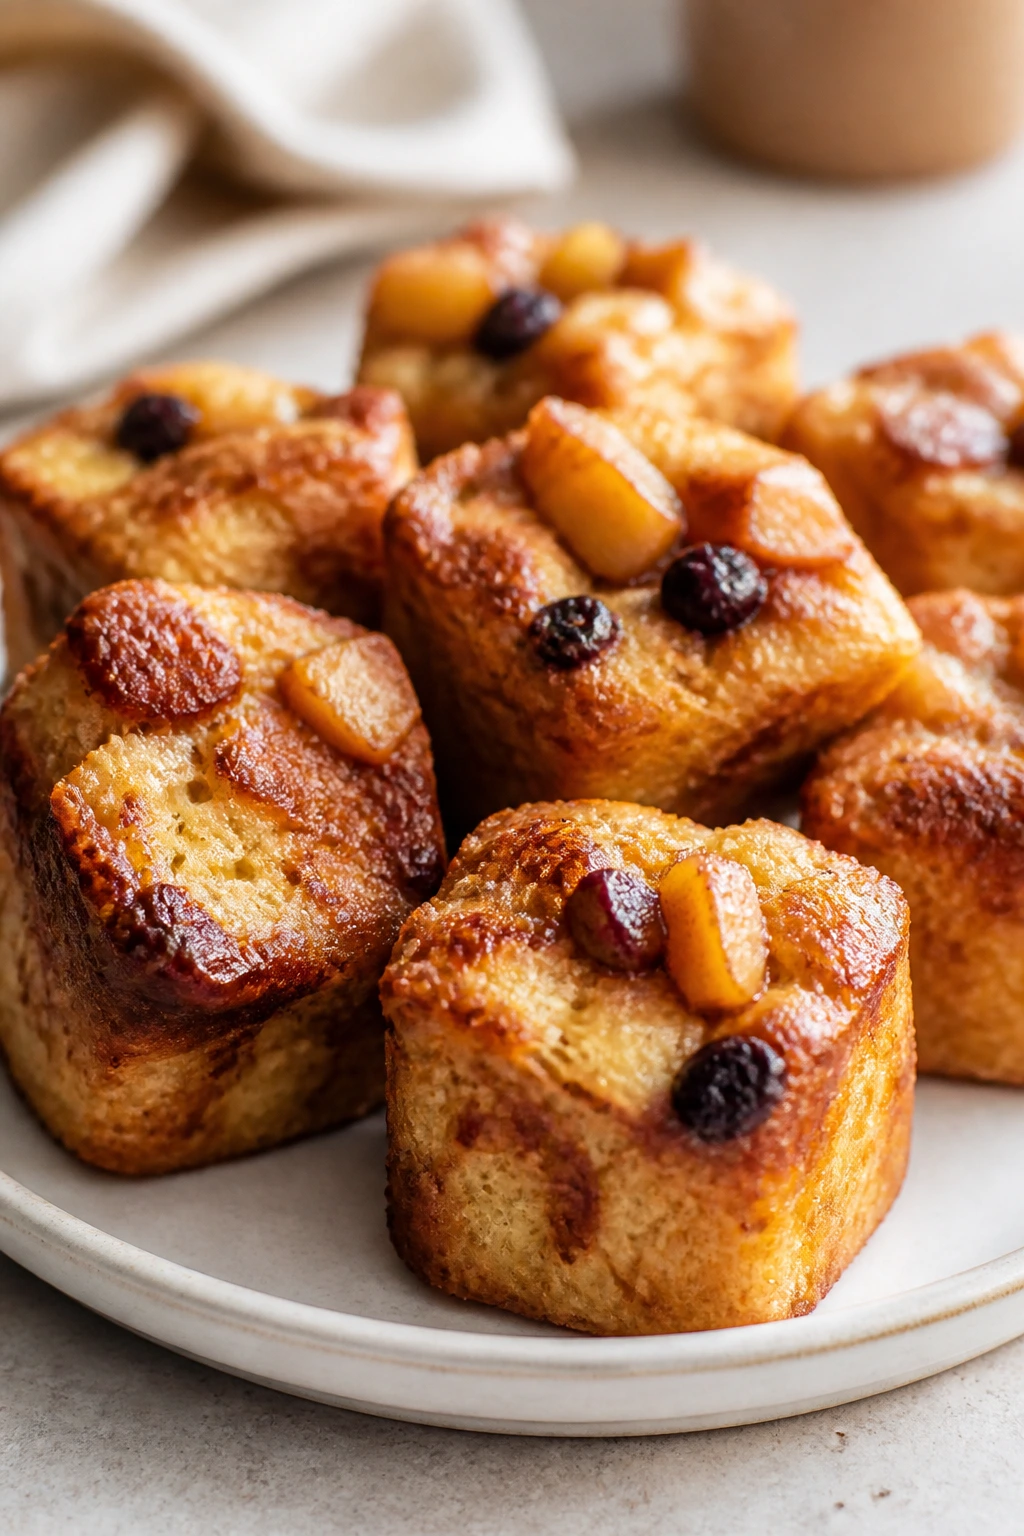
Breakfast for lunch is rarely a bad decision, and these little bites make it easy. They taste like French toast with the edges left in the oven long enough to caramelize, which is usually the best part anyway.
Why It Works:
Cubed bread soaks up the egg custard evenly, and baking in a muffin tin gives you neat portions that do not need a knife. Maple syrup and cinnamon bring the classic flavor, while the bits of fruit keep the bites from tasting too one-note. They are especially good in a lunchbox because they can be eaten warm or at room temperature.
Key Ingredients:
- 8 cups cubed day-old bread
- 4 large eggs
- 1 cup milk
- 2 tablespoons maple syrup
- 1 teaspoon cinnamon
- 1 teaspoon vanilla extract
- 2 tablespoons melted butter
- 1/2 cup berries or raisins
Quick Steps:
- Heat the oven to 350°F (175°C) and grease a muffin tin.
- Whisk the eggs, milk, maple syrup, cinnamon, vanilla, and melted butter together.
- Toss the bread cubes and fruit in the custard, then spoon the mixture into the muffin cups and press lightly.
- Bake for 20 to 25 minutes, until puffed and golden around the edges.
Equipment for This Recipe:
- Muffin tin
- Mixing bowl
- Whisk
- Measuring cups
How to Serve This Dish:
Pack with a small cup of yogurt for dipping if the lunchbox has room. They also go well with apple slices or a few strawberries when you want something fresh on the side.
Pro Tips for This Recipe:
- Day-old bread holds up better than fresh bread, which can turn mushy.
- Press the bread down lightly after soaking so the custard reaches all the pieces.
- Cool them fully if you want the bites to hold their shape in the box.
Variations on This Dish:
- Apple-Cinnamon Version: Swap the berries for small diced apples.
- Chocolate Chip Version: Add 1/3 cup mini chips for a sweeter lunch treat.
Common Mistakes to Avoid with This Dish:
- Using bread that is too soft: It falls apart in the custard.
- Underbaking the centers: They should feel set, not wet, when pressed.
16. Tuna Pasta Salad with Peas
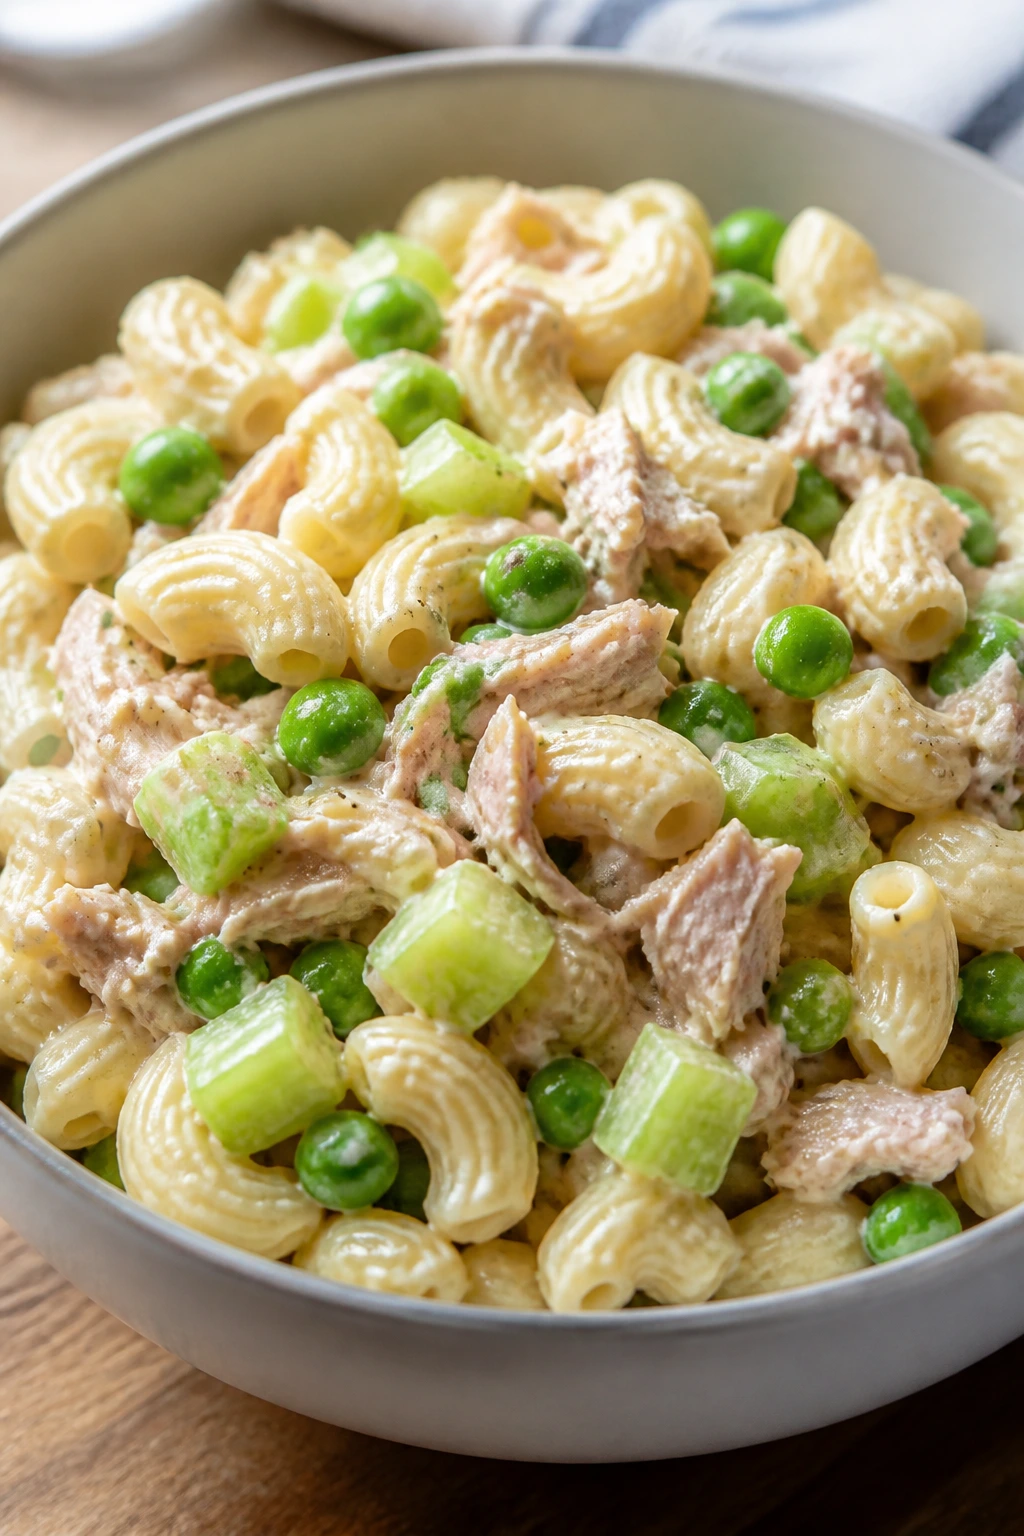
Cold pasta salad can absolutely belong in winter lunchboxes. This one is creamy enough to feel substantial, and the peas and celery give it enough crunch that it does not taste like a cafeteria relic.
Why It Works:
Tuna brings protein without needing reheating, and short pasta holds the dressing better than spaghetti ever could. A little lemon keeps the mayo from tasting heavy, which matters when the lunch sits for a while. This is the sort of lunch that tastes better after the flavors mingle for a few hours.
Key Ingredients:
- 12 ounces short pasta, such as shells or rotini
- 2 cans tuna, drained
- 1 cup frozen peas, thawed
- 1/2 cup diced celery
- 1/2 cup mayonnaise
- 2 tablespoons plain yogurt
- 1 tablespoon lemon juice
- 1 teaspoon Dijon mustard
- Salt and pepper
Quick Steps:
- Cook the pasta until tender, then drain and cool under cold water.
- Stir together the mayonnaise, yogurt, lemon juice, mustard, salt, and pepper.
- Fold in the tuna, peas, celery, and pasta. Chill for at least 20 minutes so the dressing settles in.
- Pack in a cold lunch container with an ice pack.
Equipment for This Recipe:
- Large pot
- Mixing bowl
- Colander
- Airtight container
How to Serve This Dish:
Serve with crackers or a slice of rye bread if you want it to feel more like a meal. A few carrot sticks keep the lunch crisp and bright.
Pro Tips for This Recipe:
- Rinse the pasta after cooking if you want a cold salad; it stops the noodles from sticking.
- Add a spoonful of dressing right before packing if the salad looks dry.
- Use solid tuna, not flaky tuna, if you want firmer bites.
Variations on This Dish:
- Sweet Pickle Version: Add chopped pickles or relish for tang.
- Herby Tuna Salad: Stir in chopped dill and parsley.
Common Mistakes to Avoid with This Dish:
- Packing it warm: Mayo-based salads should cool fully first.
- Using too much dressing at the start: The pasta keeps absorbing it. Save a little for later.
17. Breakfast Burritos with Potato and Egg

A good breakfast burrito is already portable; turning it into lunchbox food is almost too easy. Eggs, potatoes, and cheese make a filling center that stays soft instead of dry, which is more than can be said for a lot of packed breakfasts.
Why It Works:
Potatoes give the burrito some heft, and eggs hold together better than loose scramble when they are wrapped tightly. A little sausage or beans adds staying power, while a warm tortilla keeps everything intact. These are built for reheating, but they also work at room temperature if needed.
Key Ingredients:
- 8 large eggs
- 2 cups diced cooked potatoes
- 1 cup shredded cheddar
- 1/2 cup cooked sausage crumbles or black beans
- 4 large flour tortillas
- 2 tablespoons butter
- Salt and pepper
Quick Steps:
- Whisk the eggs with salt and pepper. Cook them in butter over medium-low heat, stirring gently, until just set and still soft.
- Warm the potatoes and sausage or beans in a skillet or microwave.
- Fill each tortilla with eggs, potatoes, cheese, and filling, then roll tightly into burritos.
- Wrap each burrito in foil and pack. Reheat briefly at lunch or keep warm in a thermos sleeve.
Equipment for This Recipe:
- Skillet
- Mixing bowl
- Foil
- Spatula
How to Serve This Dish:
Salsa in a small cup makes these feel finished. A piece of fruit on the side helps balance the richness.
Pro Tips for This Recipe:
- Let the eggs stay a little soft; they finish setting when reheated.
- Warm the tortillas before rolling so they do not crack.
- Wrap tightly so the filling stays centered and easy to bite.
Variations on This Dish:
- Southwest Version: Add black beans, corn, and a little salsa.
- Veggie Burrito: Use spinach and sautéed peppers instead of sausage.
Common Mistakes to Avoid with This Dish:
- Overcooking the eggs: Dry eggs taste chalky after reheating.
- Overstuffing the tortilla: It tears and spills. Keep the filling moderate.
18. Meatloaf Muffins with Mashed Potato Cups
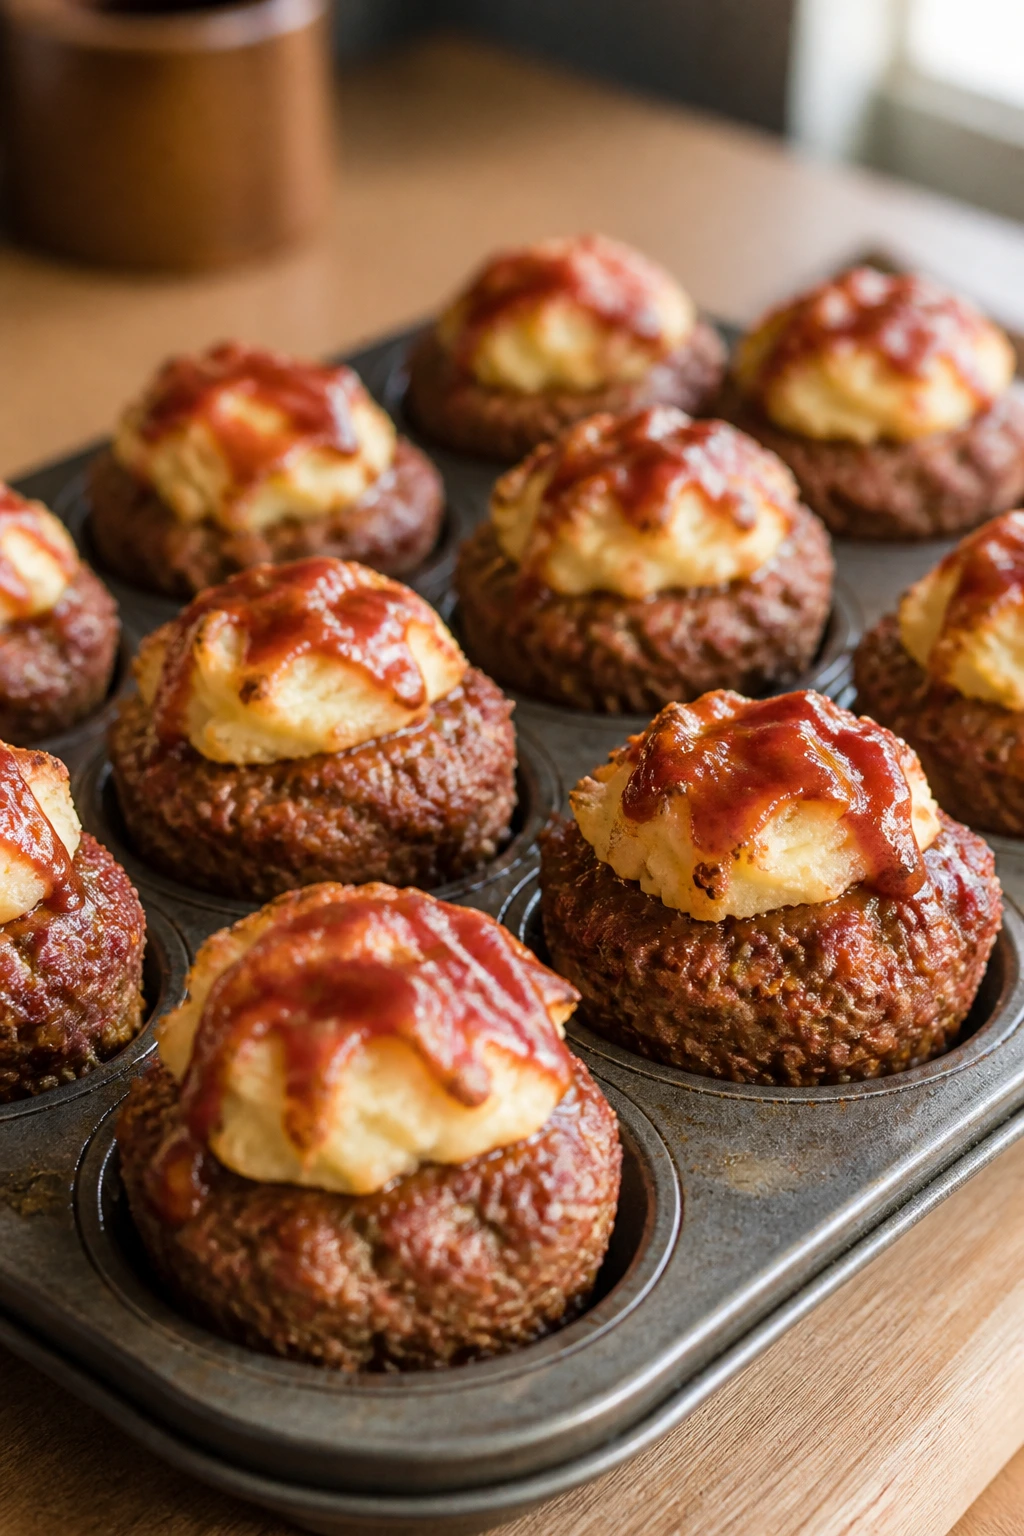
Meatloaf gets a better reputation when it is packed into little muffin shapes instead of appearing as a heavy slab. The tops glaze nicely, the centers stay juicy, and the mashed potatoes make the lunch feel complete.
Why It Works:
Muffin tins create a portion that cools fast and reheats evenly. The ketchup glaze caramelizes at the edges, while the mashed potatoes give you a soft, creamy side that fits in the same container. It is a neat way to turn a classic dinner into a lunchbox meal.
Key Ingredients:
- 1 pound ground beef
- 1/2 cup breadcrumbs
- 1 large egg
- 2 tablespoons ketchup
- 1 tablespoon Worcestershire sauce
- 1/2 small onion, grated
- 2 pounds potatoes, peeled and chopped
- 4 tablespoons butter
- 1/2 cup milk
Quick Steps:
- Boil the potatoes until tender, then mash with butter, milk, salt, and pepper.
- Mix the beef, breadcrumbs, egg, ketchup, Worcestershire sauce, onion, salt, and pepper.
- Press the mixture into a greased muffin tin and bake at 400°F (205°C) for 18 to 20 minutes. Brush with a little more ketchup in the last 5 minutes if you like a glaze.
- Pack with a scoop of mashed potatoes once cooled.
Equipment for This Recipe:
- Muffin tin
- Mixing bowl
- Potato masher
- Spoon or small scoop
How to Serve This Dish:
Add peas, green beans, or a few pickle slices if you want a sharper side. This is a lunch that benefits from a little contrast.
Pro Tips for This Recipe:
- Grate the onion so the meatloaf stays moist without chunky bits.
- Let the muffins rest before lifting them out.
- Use a small cookie scoop for tidy mashed potato portions.
Variations on This Dish:
- BBQ Meatloaf Muffins: Swap ketchup for barbecue sauce.
- Turkey Version: Use ground turkey and add an extra spoonful of milk.
Common Mistakes to Avoid with This Dish:
- Packing them hot and closing the lid tight: Steam makes the potatoes watery. Cool first.
- Making the mixture too dense: Breadcrumbs and egg should keep it tender.
19. Butternut Squash Mac and Cheese
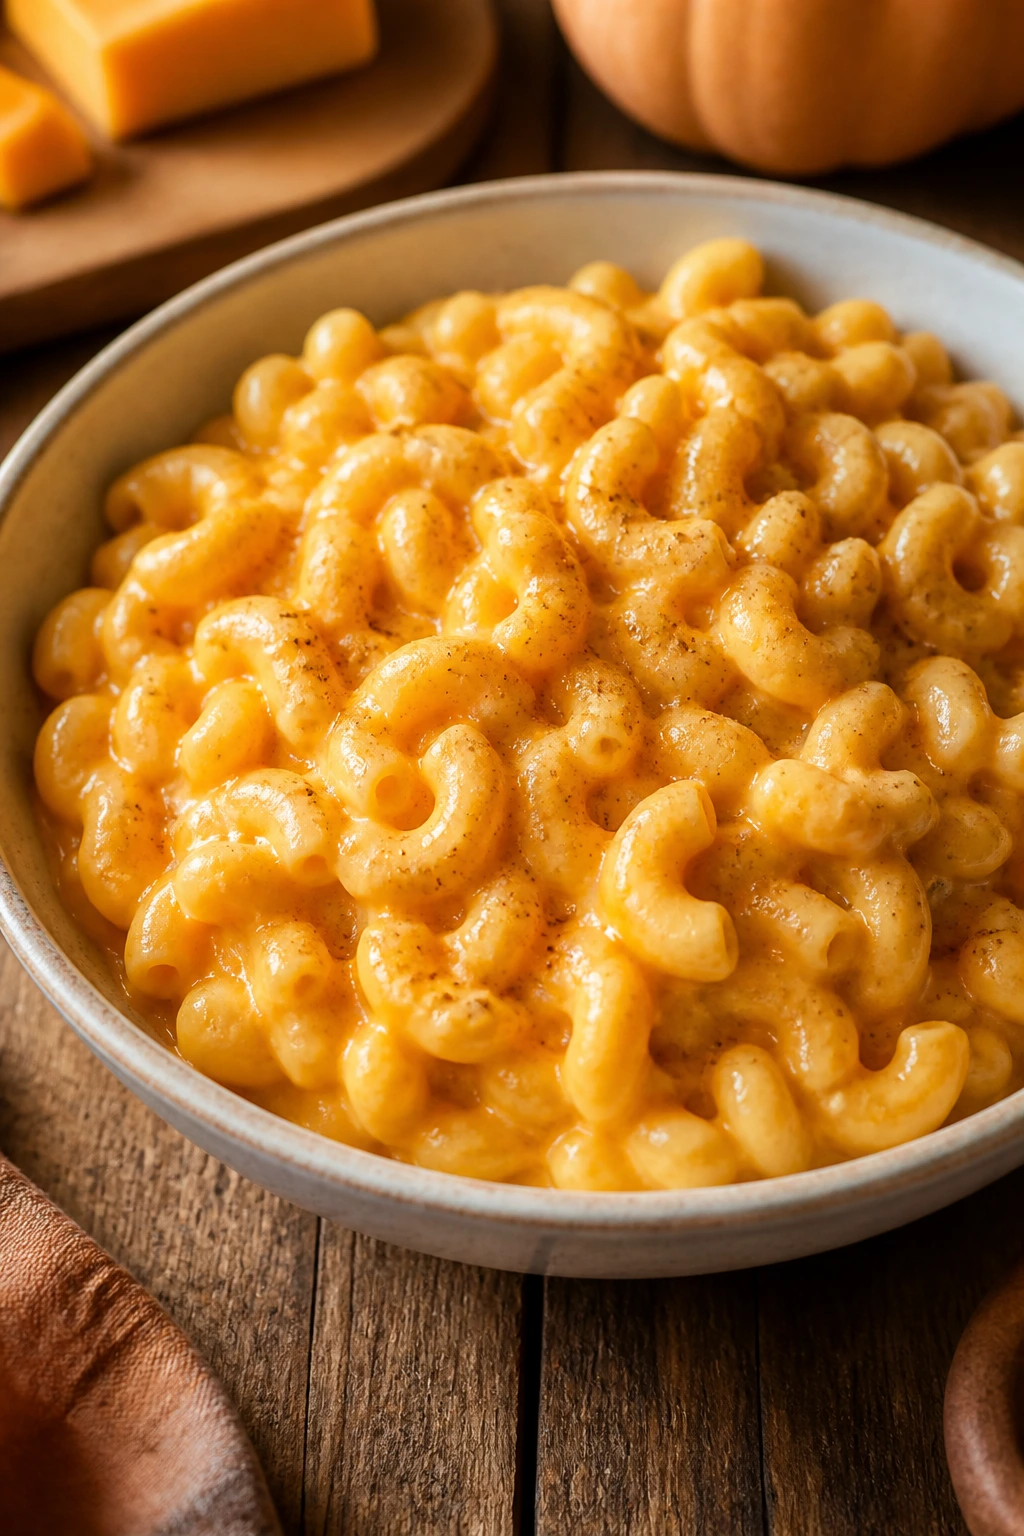
Butternut squash gives mac and cheese a deeper color and a little sweetness that works especially well in cold-weather lunches. The cheese stays front and center, but the squash makes the sauce feel rounder and less heavy.
Why It Works:
Squash puree gives the sauce body without needing much flour, and that means the noodles stay coated instead of buried. Cheddar keeps the flavor familiar, while a pinch of nutmeg makes the squash taste more natural and less like baby food, which is a real risk if you lean too hard on the puree.
Key Ingredients:
- 12 ounces elbow macaroni
- 2 cups butternut squash, peeled and cubed
- 2 tablespoons butter
- 2 tablespoons flour
- 1 1/2 cups milk
- 2 cups shredded cheddar
- Pinch of nutmeg
- Salt and pepper
Quick Steps:
- Roast the squash at 400°F (205°C) for 20 minutes or boil it until tender, then mash or puree it smooth.
- Cook the macaroni until just shy of tender and drain.
- Make a quick sauce with butter, flour, milk, squash puree, cheddar, nutmeg, salt, and pepper, stirring until smooth and creamy.
- Fold in the pasta and portion into lunch containers or a thermos.
Equipment for This Recipe:
- Saucepan
- Pot for pasta
- Whisk
- Blender or fork for squash
How to Serve This Dish:
A small side of roasted broccoli or a few apple slices helps the lunch feel balanced. If you want extra texture, sprinkle on toasted breadcrumbs right before serving.
Pro Tips for This Recipe:
- Roast the squash if you want a deeper, sweeter flavor.
- Blend the sauce smooth before adding the pasta if you prefer a silkier finish.
- Taste after the cheese melts; squash can mellow the salt more than you expect.
Variations on This Dish:
- Smoked Gouda Version: Replace part of the cheddar with smoked gouda.
- Pumpkin Swap: Use plain pumpkin puree in a pinch.
Common Mistakes to Avoid with This Dish:
- Using too much squash: The sauce can turn thick and sweet. Keep the balance.
- Adding cheese over high heat: It can get stringy. Lower the flame.
20. Turkey Cranberry Sliders
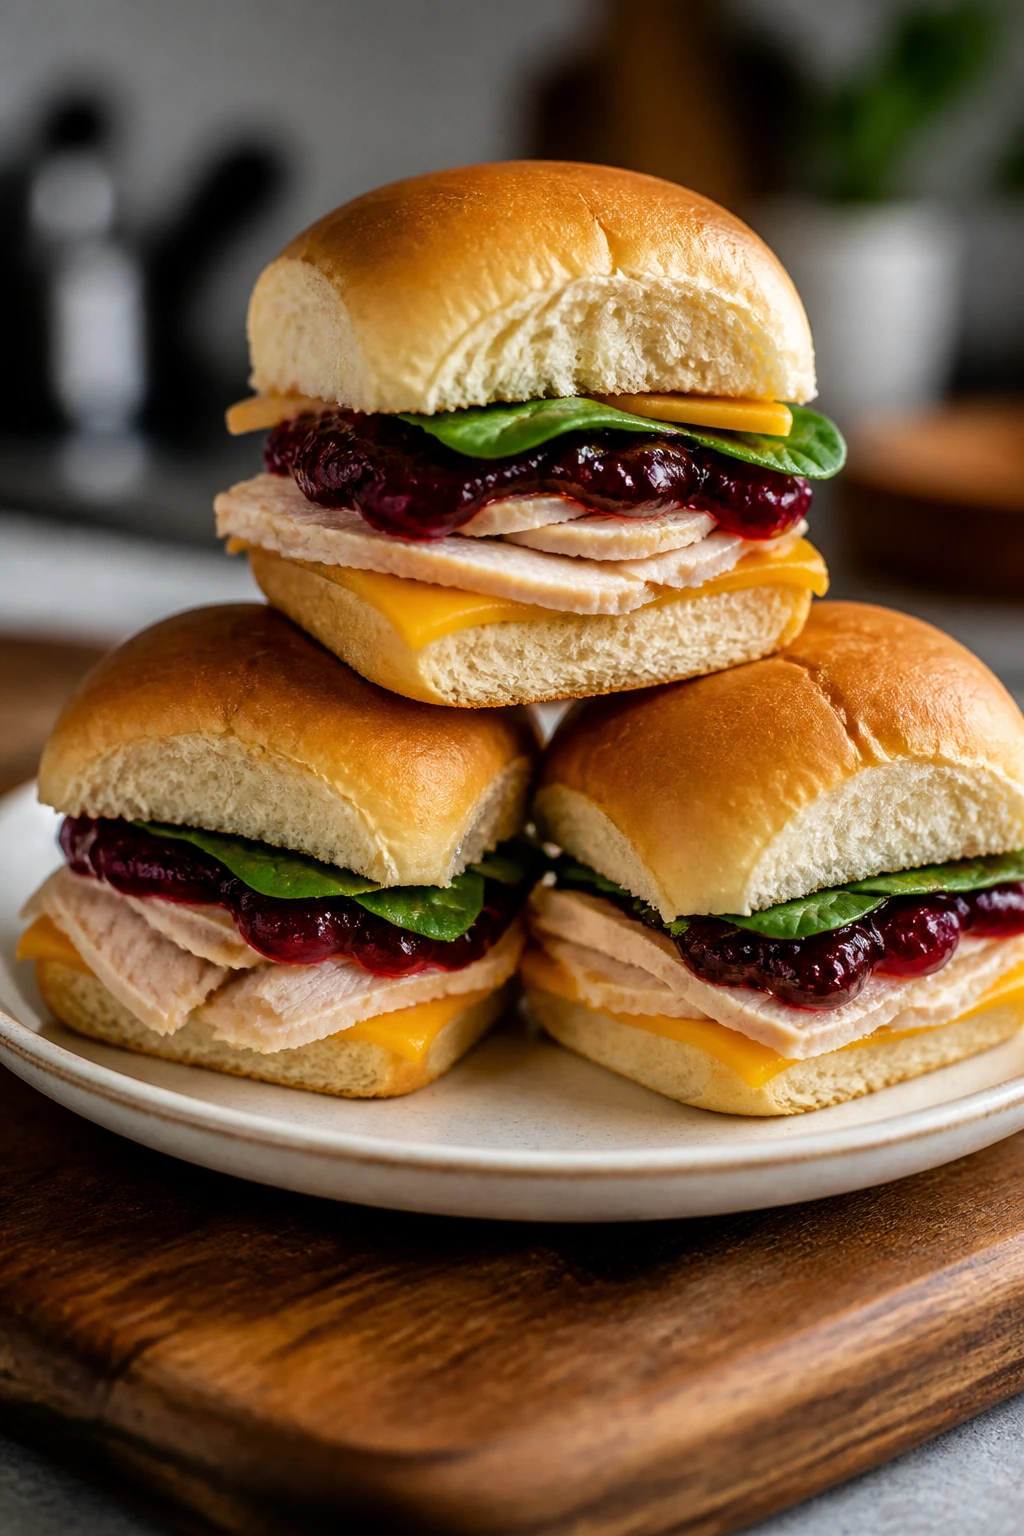
These are the lunchbox version of a holiday sandwich, minus the fuss and the giant roast. Sweet cranberry sauce, savory turkey, and sharp cheddar do all the work, and the slider size keeps them easy to handle.
Why It Works:
Soft rolls hold the filling without needing a knife, and the cranberry sauce gives enough moisture that the turkey does not feel dry. Spinach adds a fresh note and keeps the sandwich from tasting like pure leftovers. If you warm them briefly, the cheese melts into the bread in a way that makes the whole thing feel more deliberate.
Key Ingredients:
- 12 slider rolls
- 1 pound sliced turkey
- 1/2 cup cranberry sauce
- 6 slices cheddar
- 2 tablespoons mayonnaise
- 1 cup baby spinach
- 2 tablespoons melted butter
Quick Steps:
- Split the rolls and spread the bottoms with mayonnaise.
- Layer on turkey, cranberry sauce, cheddar, and spinach.
- Cap with the tops, brush with melted butter if you want, and bake at 350°F (175°C) for 8 to 10 minutes, until warm.
- Cut into individual sliders and pack once cooled slightly.
Equipment for This Recipe:
- Baking dish or sheet pan
- Pastry brush
- Knife
- Foil
How to Serve This Dish:
These pair well with baby carrots or a small cup of yogurt. If you skip the warm bake, tuck them into the lunchbox with parchment between layers so they do not stick.
Pro Tips for This Recipe:
- Use thicker cranberry sauce so it does not run.
- If the rolls are soft, toast the cut sides lightly first.
- Pack them snugly so they hold their shape.
Variations on This Dish:
- Brie Slider Version: Replace cheddar with brie if you want a softer sandwich.
- Deli-Style Version: Add a thin layer of mustard for more bite.
Common Mistakes to Avoid with This Dish:
- Using too much sauce: It makes the rolls slide apart.
- Skipping the cool-down: Hot sliders steam themselves soft in the container.
21. Ramen Stir-Fry with Veg and Egg
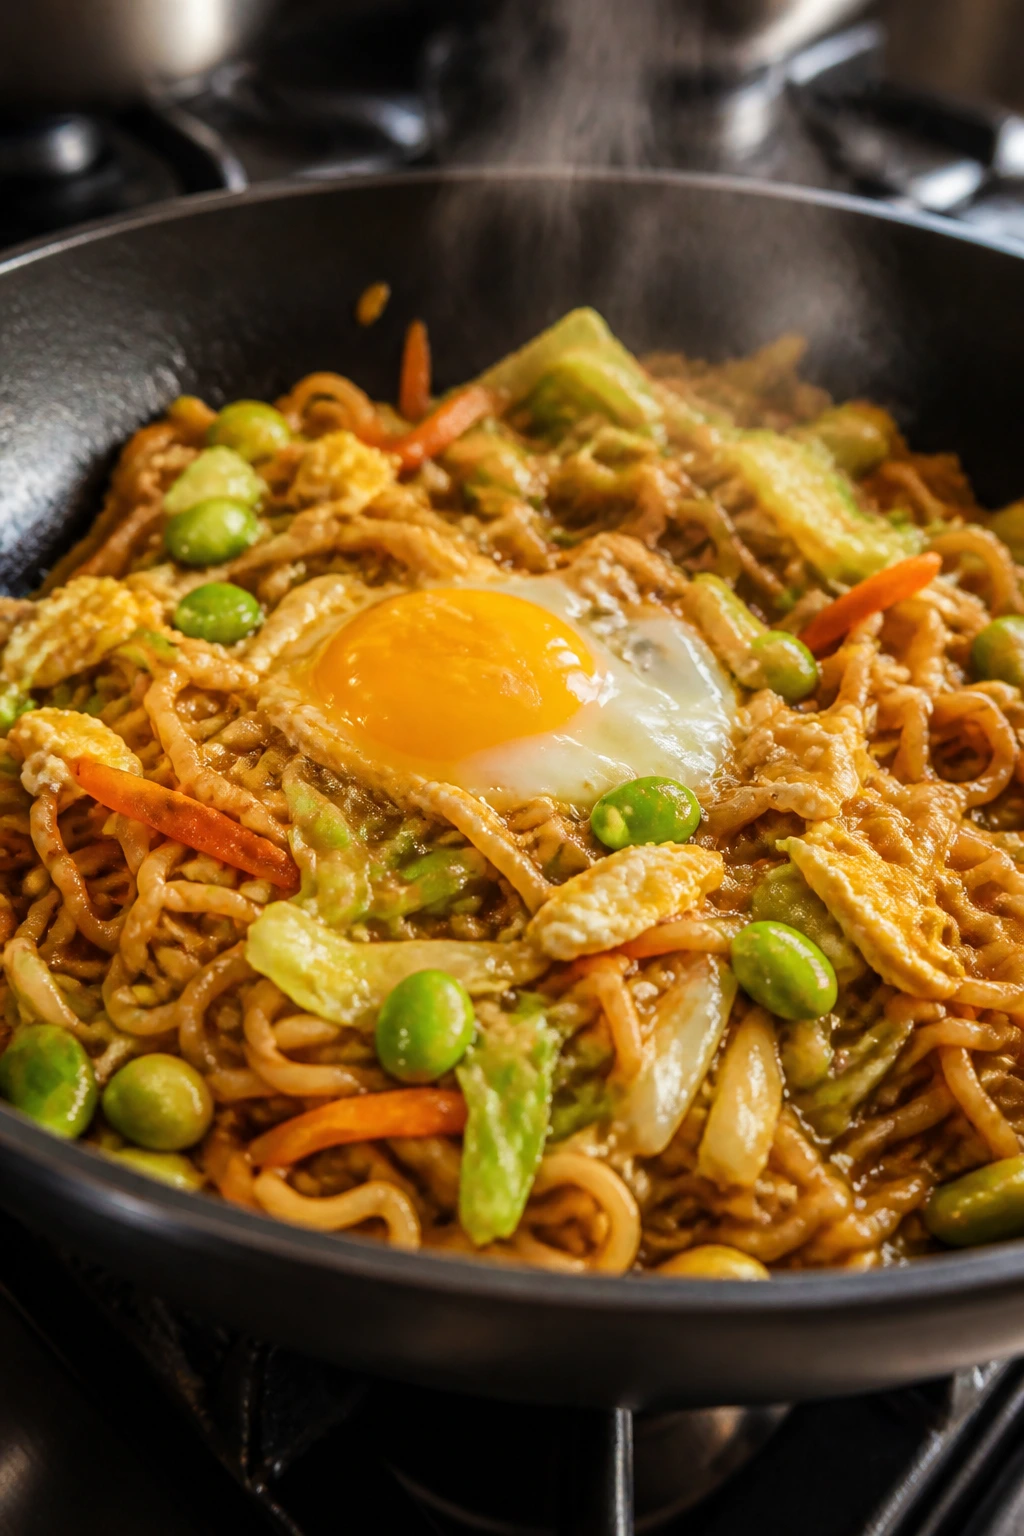
Ramen gets a much better job title when you turn it into a stir-fry. The noodles pick up sauce, the egg makes it filling, and the vegetables keep it from feeling like a cheap shortcut.
Why It Works:
Instant ramen noodles cook fast and take on sauce well, which makes them useful for packed lunches. Eggs and edamame add protein, and cabbage stays pleasantly crisp if you keep the cook time short. Sesame oil gives the bowl a toasty smell that survives reheating.
Key Ingredients:
- 3 packs ramen noodles, seasoning packets discarded or used lightly
- 2 large eggs
- 1 cup shredded cabbage
- 1 carrot, cut into matchsticks
- 1 cup frozen edamame, thawed
- 3 tablespoons soy sauce
- 1 tablespoon sesame oil
- 1 tablespoon honey
- 2 green onions, sliced
Quick Steps:
- Cook the ramen noodles for just 2 minutes, then drain well.
- Scramble the eggs in a skillet over medium heat and set them aside.
- Stir-fry the cabbage, carrot, and edamame for 2 to 3 minutes, then add the noodles, soy sauce, sesame oil, and honey. Toss until coated.
- Fold the eggs back in and finish with green onions. Pack warm or cold.
Equipment for This Recipe:
- Skillet or wok
- Pot for noodles
- Colander
- Spatula
How to Serve This Dish:
This works with a few mandarins or a little container of cucumber slices. If you want a bigger lunch, add a hard-boiled egg on the side.
Pro Tips for This Recipe:
- Undercook the noodles a little so they stay springy.
- Keep the vegetables moving in the pan so they do not go limp.
- Save a splash of water from the noodle pot to loosen the sauce if needed.
Variations on This Dish:
- Peanut Ramen: Stir peanut butter into the sauce.
- Miso Version: Add a teaspoon of miso paste for a deeper savory note.
Common Mistakes to Avoid with This Dish:
- Leaving the seasoning packet in by accident: It can overpower the dish. Use only a little if you want it.
- Cooking the cabbage too long: It loses the bite that makes the bowl interesting.
22. Chicken Enchilada Rice Cups
These rice cups are what happens when enchiladas stop rolling around and decide to become lunchbox-friendly. They are compact, cheesy, and sturdy enough to be eaten without a fork if you do the packing right.
Why It Works:
Rice gives the cups structure, chicken adds protein, and enchilada sauce keeps the interior saucy without making it wet. Baking them in a muffin tin firms everything up so the cups can be lifted out cleanly. They reheat well, which is half the battle with packed rice.
Key Ingredients:
- 2 cups cooked rice
- 2 cups shredded cooked chicken
- 1 cup enchilada sauce
- 1 cup black beans, drained and rinsed
- 1 cup shredded cheddar or Monterey Jack
- 2 green onions, sliced
- 1 teaspoon ground cumin
Quick Steps:
- Heat the oven to 375°F (190°C) and grease a muffin tin.
- Mix the rice, chicken, enchilada sauce, beans, half the cheese, green onions, and cumin.
- Spoon the mixture into the muffin cups and top with the remaining cheese.
- Bake for 18 to 20 minutes, until set and the cheese is melted. Cool before removing.
Equipment for This Recipe:
- Muffin tin
- Mixing bowl
- Spoon
- Measuring cups
How to Serve This Dish:
A spoonful of salsa or sour cream on the side makes them feel complete. Add corn, salsa, or a few tortilla chips if you want a bigger lunch.
Pro Tips for This Recipe:
- Press the mixture into the cups firmly so they hold together.
- Let them cool in the tin for 5 minutes before lifting.
- Use day-old rice if you have it; it binds better.
Variations on This Dish:
- Turkey Enchilada Cups: Swap chicken for shredded turkey.
- Veggie Version: Use extra beans and diced peppers instead of meat.
Common Mistakes to Avoid with This Dish:
- Packing them too loosely: They fall apart when lifted. Press them down well.
- Using too much sauce: The cups turn soft and mushy.
23. Minestrone Orzo Soup
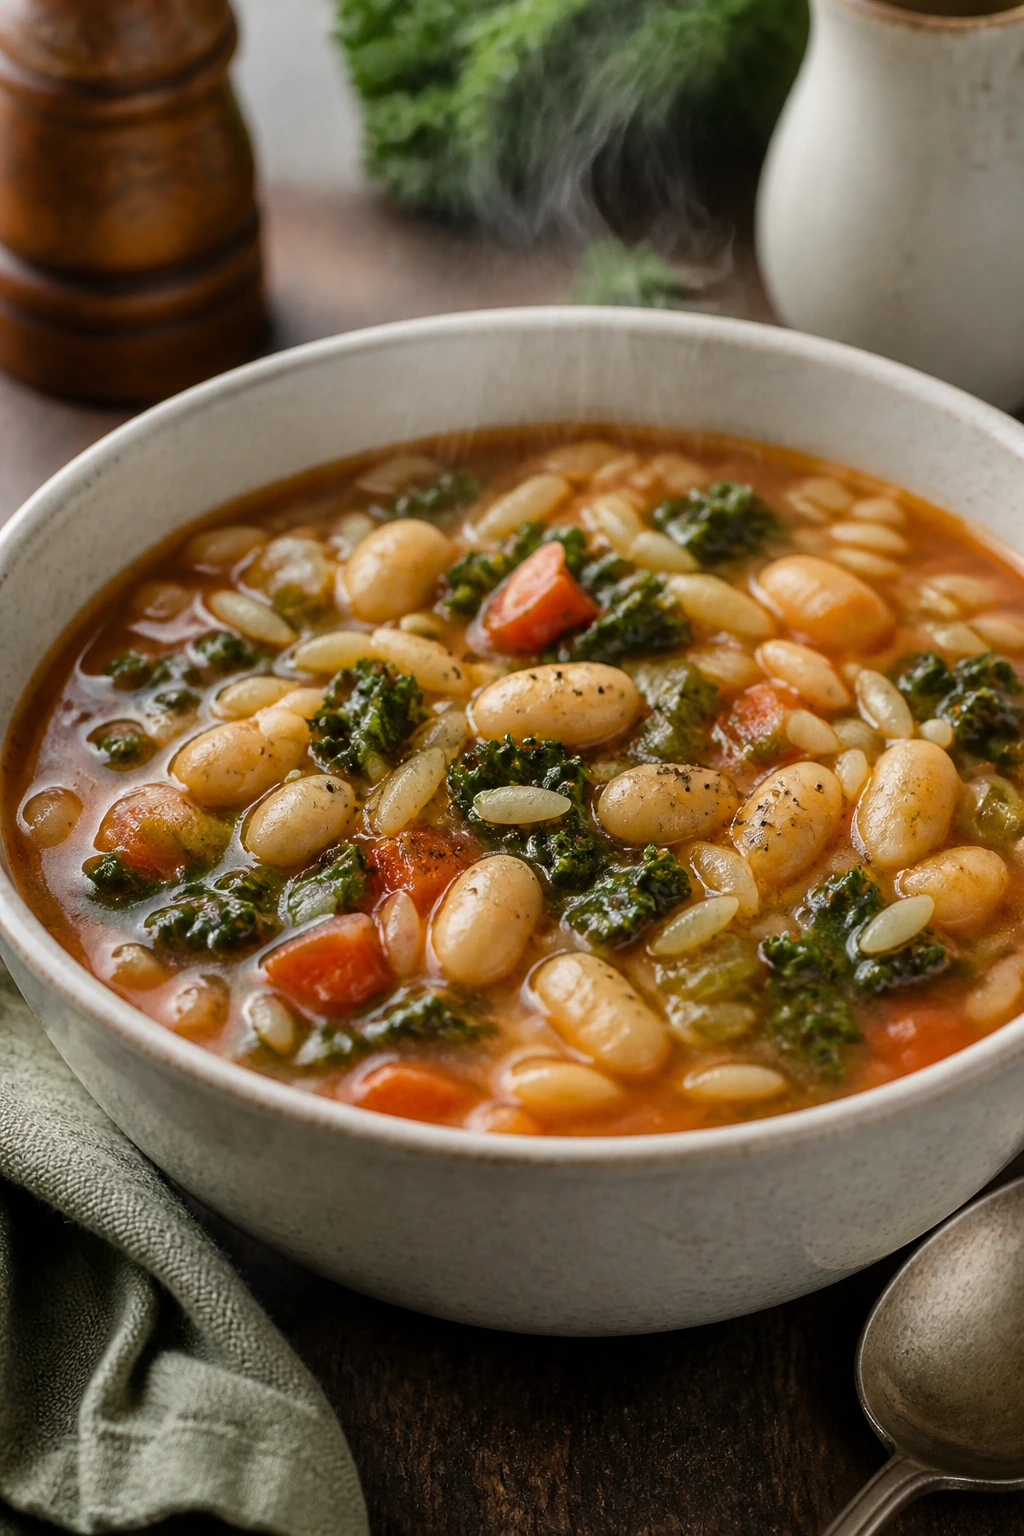
Minestrone is one of the rare soups that still feels lively after a ride in a thermos. The orzo makes it filling, the beans bring body, and the vegetables keep the broth from tasting thin.
Why It Works:
Orzo cooks quickly and makes the soup feel like a meal rather than a starter. Cannellini beans give a creamy texture without cream, and kale holds up better than tender greens after reheating. It is a sensible lunch, which is not a bad thing at all.
Key Ingredients:
- 1 small onion, diced
- 2 carrots, diced
- 2 celery stalks, diced
- 2 cloves garlic, minced
- 1 (14-ounce) can diced tomatoes
- 1/2 cup orzo
- 1 can cannellini beans, drained and rinsed
- 4 cups low-sodium vegetable broth
- 1 cup chopped kale
- 1 teaspoon Italian seasoning
Quick Steps:
- Cook the onion, carrots, and celery in a pot for 5 minutes, until the onion softens.
- Stir in the garlic and Italian seasoning for 30 seconds.
- Add the tomatoes, broth, orzo, and beans. Simmer for 10 minutes, then stir in the kale and cook for 2 more minutes.
- Pack hot into a thermos once the orzo is tender.
Equipment for This Recipe:
- Soup pot
- Wooden spoon
- Ladle
- Thermos
How to Serve This Dish:
A sprinkle of Parmesan at lunch gives it more depth. A small roll or a few crackers works if the eater wants something to scoop with.
Pro Tips for This Recipe:
- Add the kale near the end so it stays green and toothsome.
- Orzo keeps absorbing liquid, so add a splash of broth if you need to reheat leftovers.
- Chop the vegetables small enough to fit a spoon easily.
Variations on This Dish:
- Bean-Heavy Version: Add a second can of beans and skip the orzo.
- Pesto Finish: Stir in a spoonful of pesto just before packing.
Common Mistakes to Avoid with This Dish:
- Overcooking the orzo: It turns soft in the thermos. Stop when it is just tender.
- Using too little broth: The soup thickens as it sits, so leave it loose.
24. Roasted Veg Hummus Pita Pockets
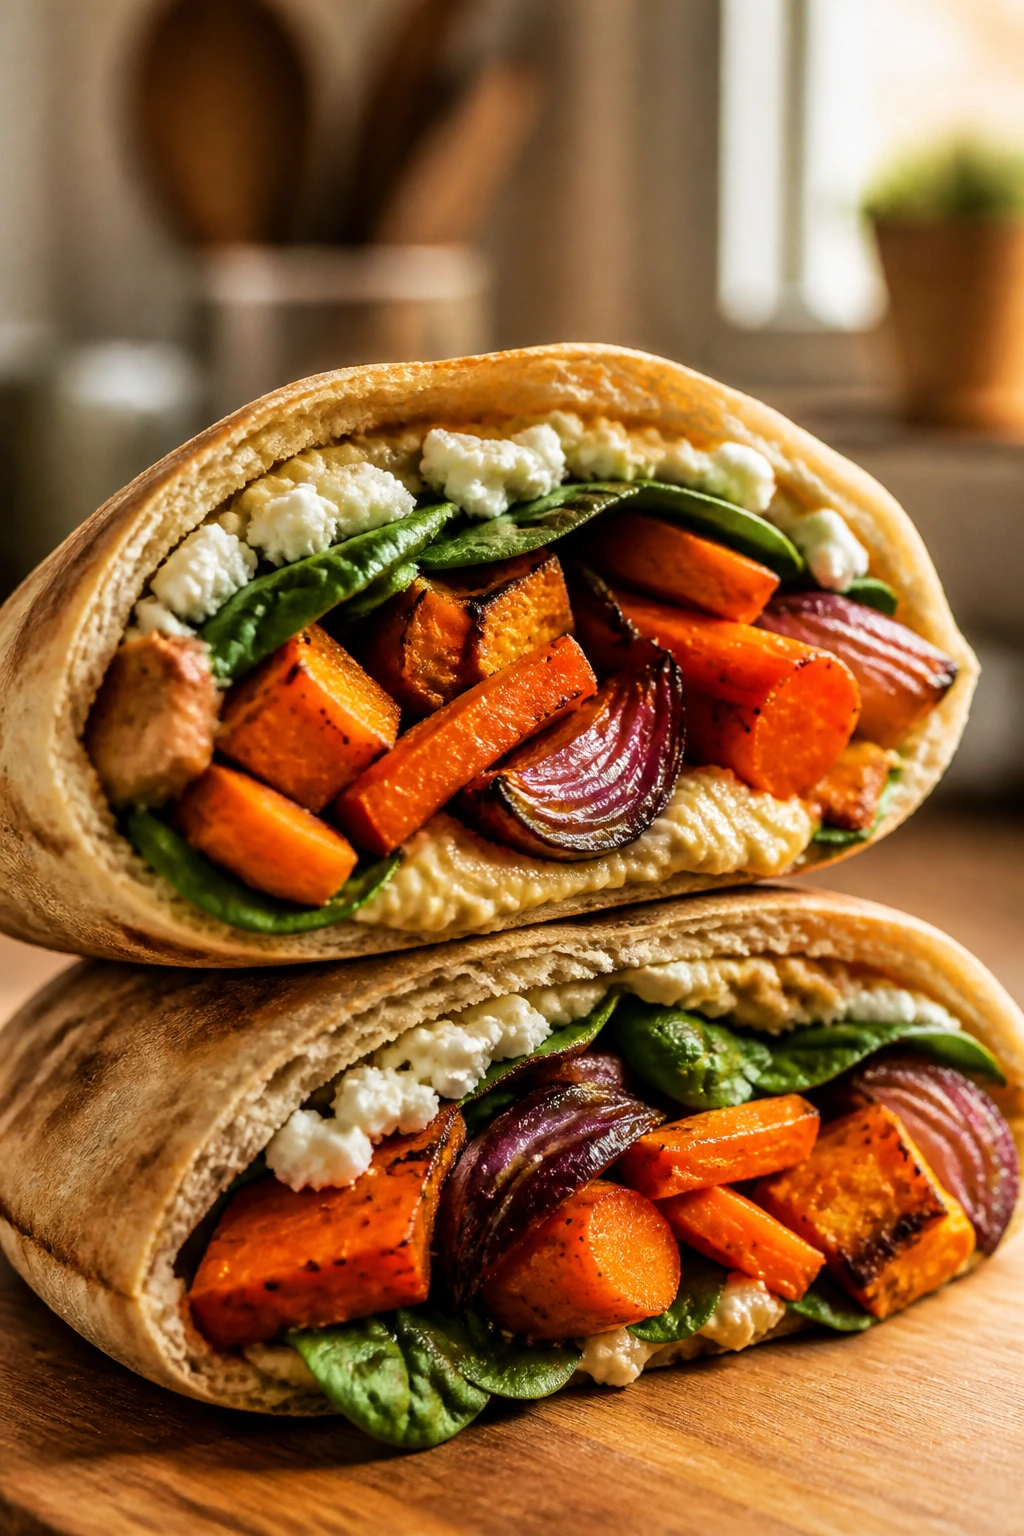
Not every winter lunch needs to arrive steaming. These pita pockets are cool, sturdy, and built around roasted vegetables that taste sweeter and more interesting once they have browned a little around the edges.
Why It Works:
Roasted carrots and sweet potato bring enough caramelized flavor to stand up to hummus. Pita pockets are cleaner than a stacked sandwich because the filling stays tucked inside. A little feta adds salt if you want it, but the lunch works fine without it.
Key Ingredients:
- 4 whole wheat pitas
- 2 carrots, sliced into thin sticks
- 1 medium sweet potato, cubed small
- 1/2 red onion, sliced
- 2 tablespoons olive oil
- 1 cup hummus
- 1 cup baby spinach
- 1/2 cup crumbled feta, optional
Quick Steps:
- Heat the oven to 425°F (220°C). Toss the carrots, sweet potato, and onion with olive oil, salt, and pepper, then roast for 20 to 25 minutes, until browned and tender.
- Let the vegetables cool for a few minutes so they do not wilt the spinach.
- Spread hummus inside each pita, then stuff with roasted vegetables, spinach, and feta if using.
- Pack in parchment or a lunch container so the pita does not split.
Equipment for This Recipe:
- Sheet pan
- Mixing bowl
- Knife and cutting board
- Spatula
How to Serve This Dish:
These pair well with grapes, an apple, or a few crackers. If you want extra crunch, tuck in cucumber slices right before eating instead of packing them early.
Pro Tips for This Recipe:
- Cut the vegetables small so they roast fast and fit the pita cleanly.
- Warm the pita briefly if you want it more flexible for stuffing.
- Keep wet ingredients away from the pita wall to prevent tearing.
Variations on This Dish:
- Mediterranean Version: Add olives and cucumber, then skip the sweet potato.
- Tahini Swap: Use tahini instead of hummus for a nuttier pocket.
Common Mistakes to Avoid with This Dish:
- Overstuffing the pita: It splits at the seam. Fill lightly.
- Packing the vegetables while hot: They steam the pita and make it limp.
25. Apple Cheddar Turkey Wraps
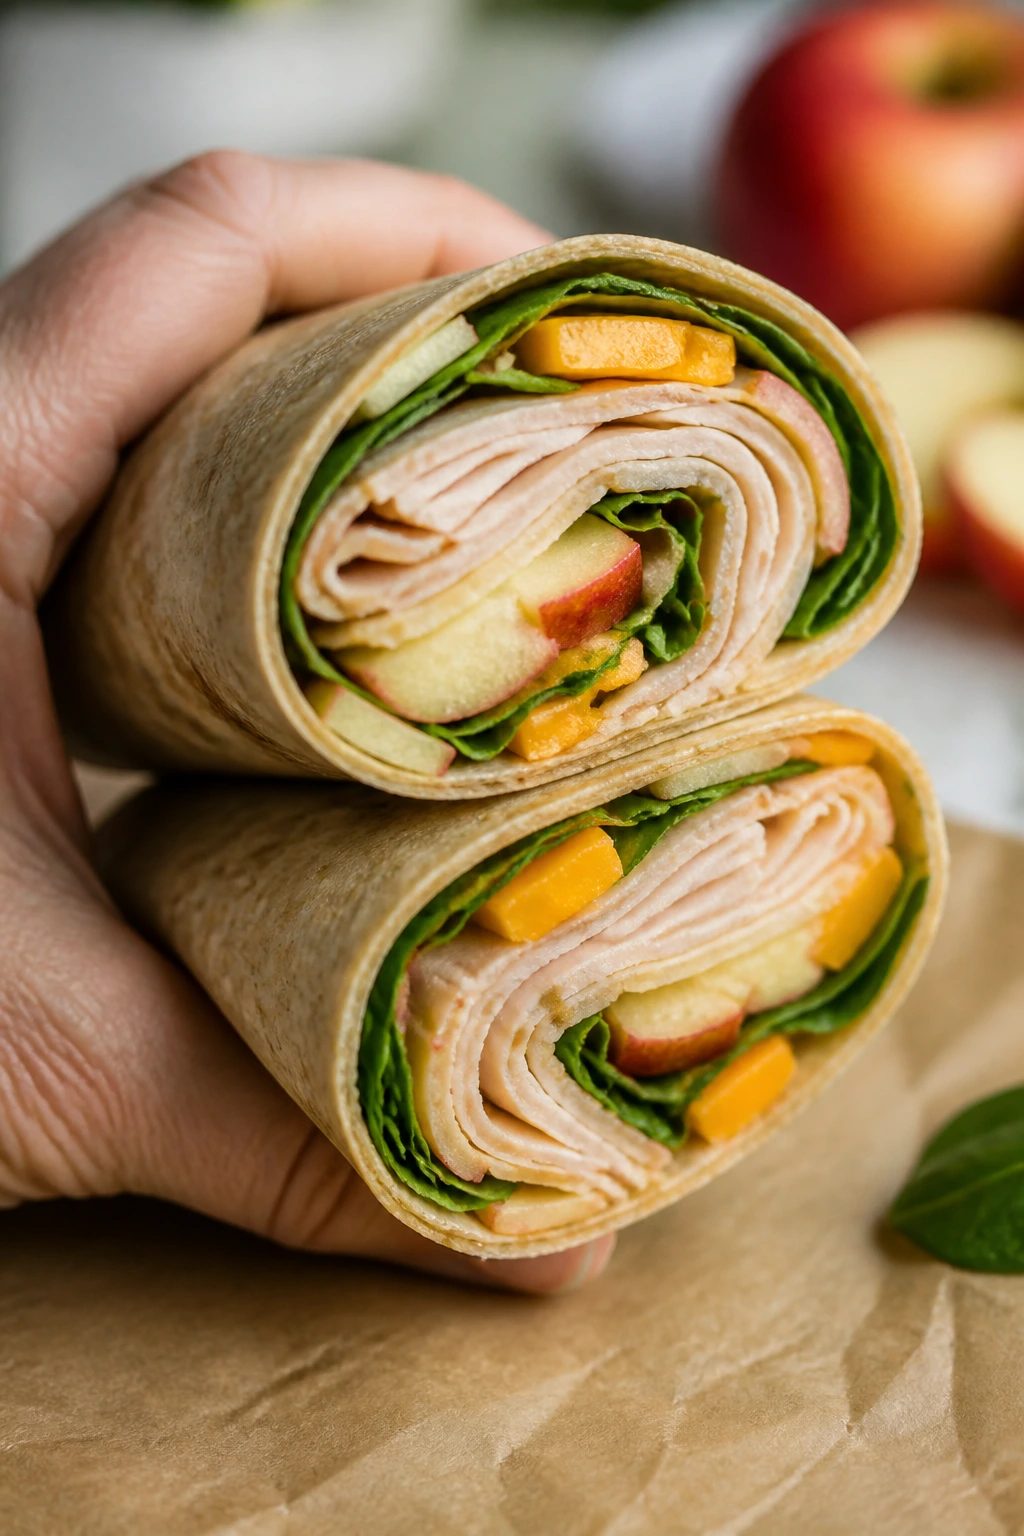
This is the lunchbox wrap that earns its keep through contrast. The turkey is savory, the apple slices are crisp and sweet, and the cheddar gives the wrap enough weight to feel like lunch instead of a snack.
Why It Works:
Thin apple slices stay bright and fresh if you pack them with a little mustard or cream cheese on the tortilla. Turkey and cheddar are familiar enough for kids, but the apple keeps each bite from tasting dry or dull. It is a cold lunch, which means no reheating, no leaky thermos, no fuss.
Key Ingredients:
- 4 large flour tortillas
- 8 ounces sliced turkey
- 4 ounces cheddar, sliced thin
- 1 apple, cored and sliced thin
- 1/4 cup mayonnaise or cream cheese
- 2 tablespoons Dijon mustard
- 1 cup baby spinach
Quick Steps:
- Spread each tortilla with mayonnaise or cream cheese, then smear on a little Dijon.
- Layer turkey, cheddar, apple slices, and spinach in the center.
- Roll the tortillas tightly, tucking in the sides as you go.
- Slice in half and wrap in parchment or foil for the lunchbox.
Equipment for This Recipe:
- Cutting board
- Sharp knife
- Knife or spreader
- Parchment or foil
How to Serve This Dish:
These are good with a handful of pretzels or a small yogurt cup. If you want a firmer bite, chill the wrapped tortillas for 15 minutes before slicing.
Pro Tips for This Recipe:
- Slice the apple very thin so the wrap rolls without tearing.
- Use a soft tortilla with some flex; stiff tortillas crack.
- A little mustard keeps the wrap from tasting flat after chilling.
Variations on This Dish:
- Ham and Apple Wrap: Swap turkey for ham and keep the cheddar.
- Cranberry Holiday Version: Add a thin layer of cranberry sauce.
Common Mistakes to Avoid with This Dish:
- Using thick apple wedges: They poke through the tortilla. Slice thin.
- Packing it without wrapping tightly: The fillings slide out by the time lunch starts.
Why Winter Lunchboxes Need Different Rules
Cold-weather lunch packing has a different rhythm from a summer lunchbox. In warm months, you are mostly trying to keep things cold and crisp. In winter, you are trying to keep food either hot enough to feel like a meal or structured enough to survive the trip without turning mushy.
Moisture is the real villain here. Steam softens bread, sauces keep spreading in containers, and noodles that looked fine at breakfast can turn into a tangle by noon. That is why so many of these recipes lean on sturdier shapes: muffin tins, puff pastry pockets, pasta with enough sauce to coat instead of drown, and fillings that thicken as they cool.
A good winter lunchbox also needs contrast. A thermos of soup feels better when it comes with a crunchy side. A wrap tastes sharper when there is apple or mustard in the mix. Chili needs a few tortilla chips. Mac and cheese gets friendlier with fruit or vegetables beside it. The food does not need to be fancy; it needs to hold together and still taste like itself after a few hours in a bag.
Essential Equipment for These Recipes
-
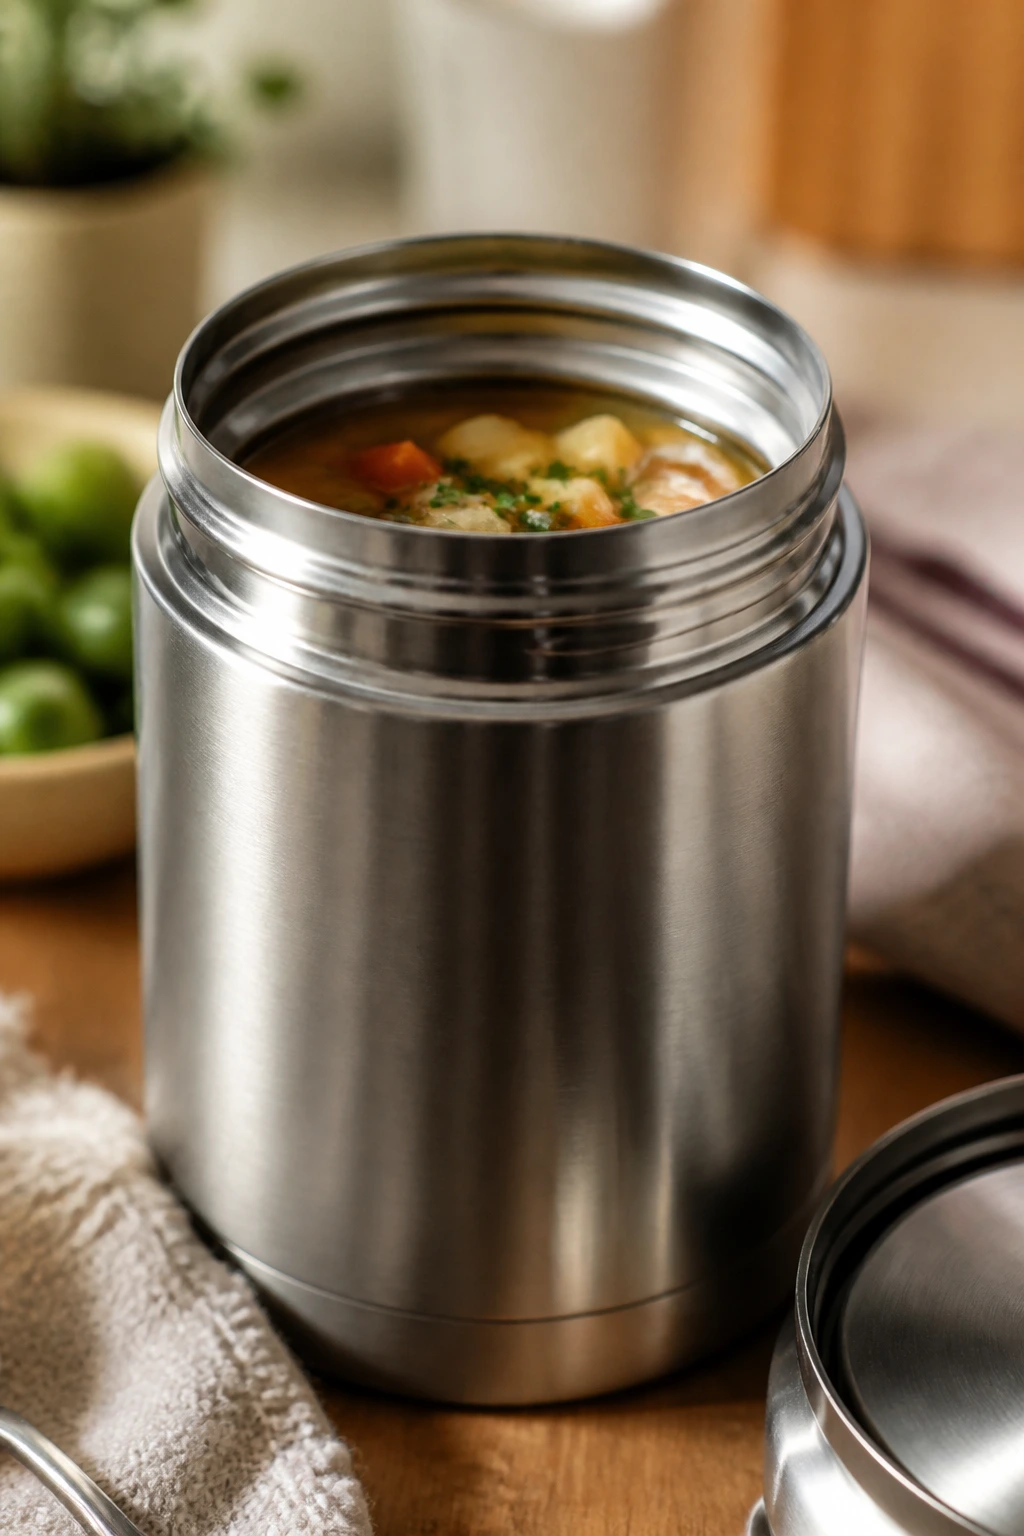
Wide-mouth insulated thermos: Best for soup, chili, stew, and hot noodle dishes; a wider opening makes packing and eating easier.
-
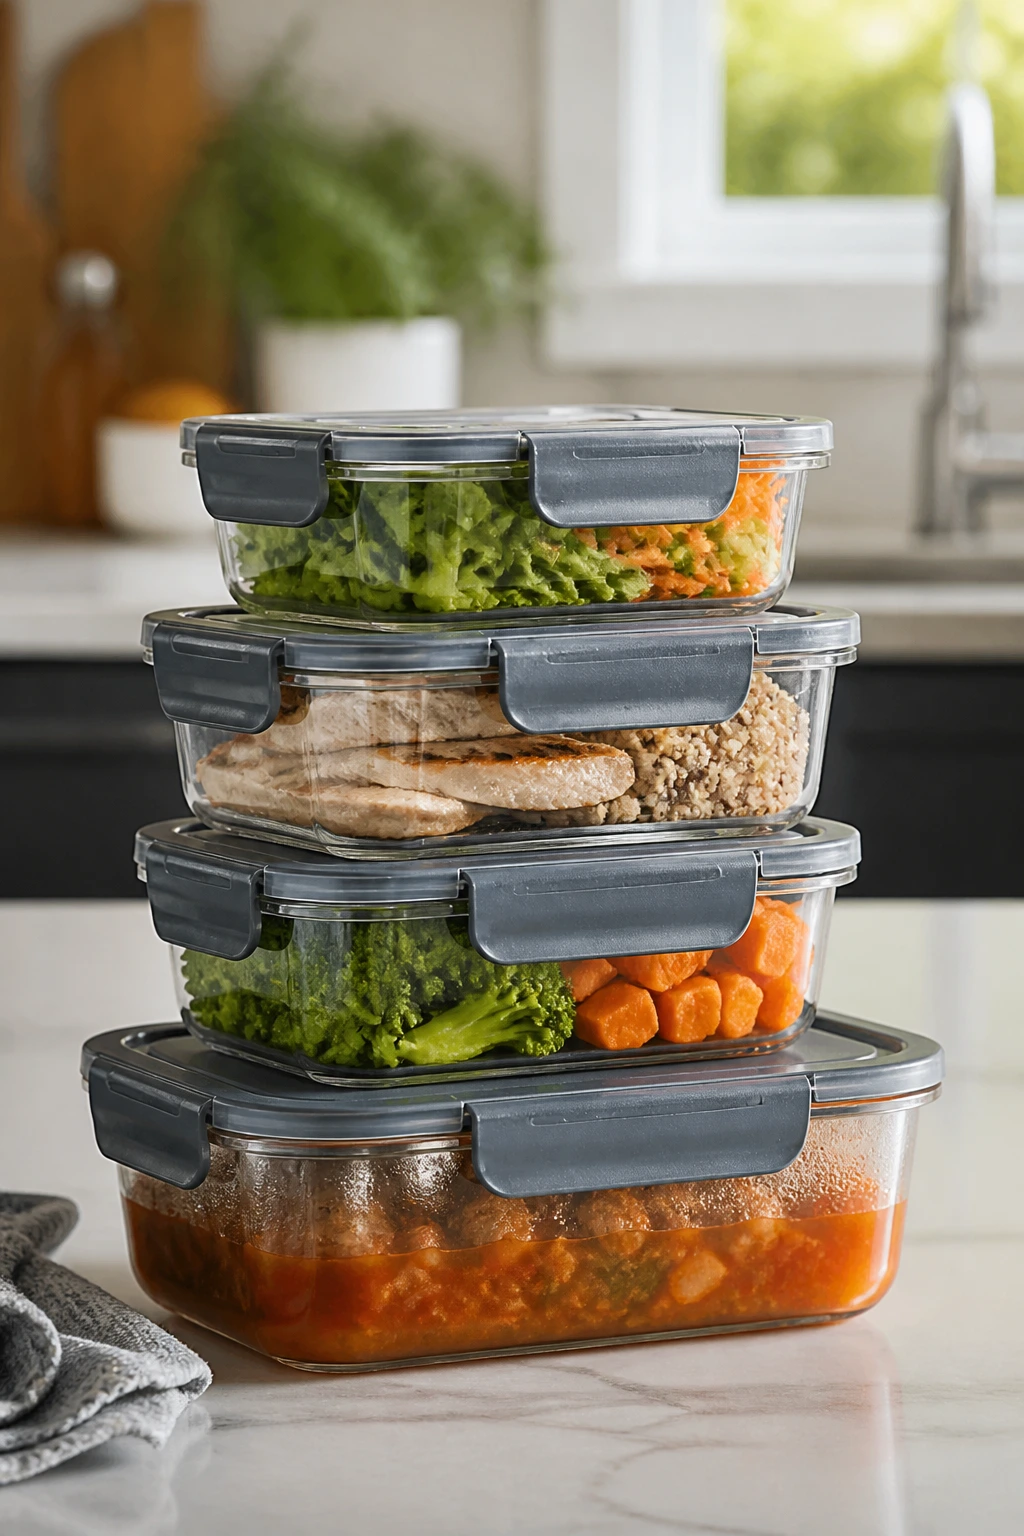
Leakproof lunch containers: Use these for pasta, rice bowls, wraps, and chilled salads so sauces do not wander.
-
Muffin tin: The workhorse for pot pie muffins, shepherd’s pies, enchilada cups, and French toast bites.
-
Rimmed sheet pan: Useful for roasting vegetables, baking pastry pockets, toasting sandwiches, and cooling food evenly.
-
Large skillet: Good for meatballs, stir-fries, quesadillas, and quick fillings that need browning.
-
Soup pot or Dutch oven: Handy for anything that simmers, especially chili, potato soup, minestrone, and tomato soup.
-
Sharp knife and cutting board: Thin, even slices matter more here than in a lot of home cooking, especially for wraps and pinwheels.
-
Parchment paper: Keeps pastry pockets, sliders, and meatballs from sticking and makes cleanup easier.
-
Small sauce cups: Perfect for salsa, sour cream, dressing, or dip so the main lunch stays crisp.
-
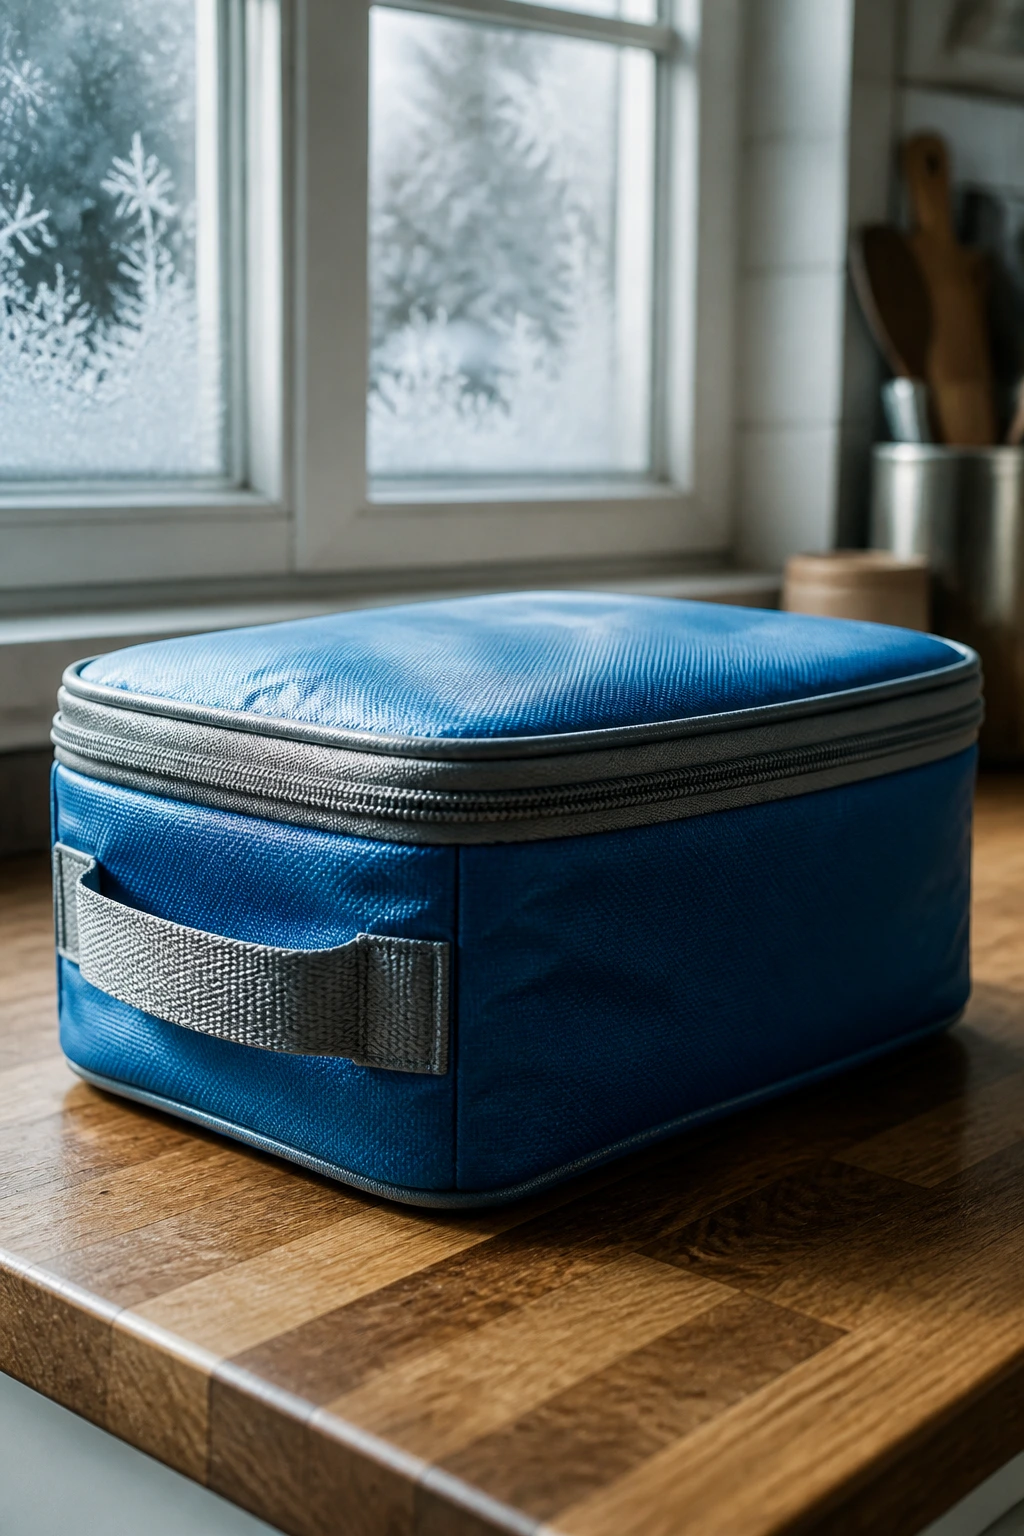
Ice packs: Needed for tuna salad, wraps, pinwheels, and any lunch that is meant to be eaten cold.
Smart Shopping and Ingredient Tips

A winter lunchbox lives or dies on a few practical grocery choices. Start with bread and tortillas that have some structure. A soft sandwich loaf is fine for home, but for packed lunches I prefer tighter-crumb bread, sturdy rolls, and flour tortillas that bend instead of crack. Thin deli bread collapses the minute sauce gets involved.
Cheese matters more than people think. Sharp cheddar, Monterey Jack, mozzarella, feta, and Parmesan all do different jobs here. Sharp cheddar cuts through tomato soup and mac and cheese. Monterey Jack melts smoothly in quesadillas and rice cups. Feta gives puff pastry pockets a salty edge. If you buy pre-shredded cheese for speed, that is fine, though freshly shredded melts more smoothly in sauces.
For proteins, rotisserie chicken is an easy shortcut that deserves respect. It saves time and works in soups, rice bowls, enchiladas, pot pie muffins, and sliders. Ground turkey is lean, but it needs breadcrumbs, egg, or sauce to stay juicy. Ground beef brings more flavor in chili and shepherd’s pies. Tuna is best when packed with enough dressing and a little lemon to keep it from tasting flat.
Frozen vegetables are not a compromise here. Peas, carrots, broccoli, and edamame often taste better than tired produce by the time they hit the pan. Canned tomatoes, beans, and broth should be low-sodium if possible; they are easier to season than to fix when they are already too salty. And if you are buying apples for wraps, pick a crisp one that resists browning a little better, like Honeycrisp, Pink Lady, or Fuji.
How to Serve These Recipes
Presentation:
Pack hot foods in prewarmed thermoses and cold foods in containers that close tightly, then separate anything crunchy from anything wet. A small parchment sleeve around sandwiches, pinwheels, and sliders keeps the edges neater. If you are sending a lunch with dip, keep the dip in a tiny lidded cup instead of spreading it on too early.
Accompaniments:
Fruit is the easiest companion because it resets the palate. Apple slices, clementines, grapes, and berries all work, depending on what the main dish is doing. For savory lunches, carrots, cucumber sticks, pretzels, crackers, or a small roll fill out the box without stealing the show. A yogurt cup works especially well with breakfast bites, wraps, and mac and cheese.
Portions:
For younger kids, 1 to 1 1/2 cups of a warm dish is usually enough once you add a fruit or vegetable side. Older kids and adults often need closer to 2 cups for chili, soup, stew, or pasta. Handheld lunches usually work best at 1 wrap, 1 sandwich, or 2 small pieces plus a side, not a giant overstuffed portion that falls apart halfway through.
Beverage Pairing:
Water is the easiest pairing, and it makes the most sense with everything here. Milk works well with mac and cheese, French toast bites, and meatloaf muffins. Unsweetened apple cider, if you are packing it cold, fits wraps, sliders, and roasted vegetable lunches without getting in the way.
Additional Tips and Flavor Boosters

Flavor Enhancement: A small finish can change the whole lunch. A dusting of Parmesan on tomato soup, a squeeze of lemon over lentil stew, or a few sesame seeds on teriyaki noodles gives the meal a fresher taste after it sits. Even 1 teaspoon of something sharp or salty can wake up a lunch that has been packed and chilled.
Customization: Build around what your eaters already like. If a child loves cheese, lean into mac and cheese, quesadillas, and sliders. If they like dipping, send the sauce on the side. If they eat better with a sweet note, use apple, cranberry, honey, or roasted squash in small amounts instead of forcing a brand-new flavor profile.
Serving Suggestions: Use crunchy toppings at the last minute. Bacon bits, toasted breadcrumbs, green onions, and chopped herbs are all better packed separately if you can manage it. They keep soups, pasta, and potato dishes from flattening out.
Make-It-Yours: For dairy-free lunches, use olive oil, broth, and non-dairy cheese where it makes sense, then skip the cream-heavy finish. For gluten-free versions, switch to corn tortillas, gluten-free pasta, rice bowls, or potato-based dishes. For vegetarian lunches, beans, lentils, eggs, and hummus do the heavy lifting without making the box feel empty.
Make-Ahead, Storage, and Reheating Guidance
Most of these lunches keep well for 3 to 4 days in the refrigerator, though a few are best eaten sooner. Soups, chili, stew, meatballs in sauce, mac and cheese, and pasta dishes all sit comfortably in that range if they are cooled and sealed properly. Puff pastry pockets and baked muffins are happiest within 2 to 3 days, because the crust softens a bit each day.
Freezing is useful for the heavier fillings. Chili, tomato soup, lentil stew, meatballs, shepherd’s pie filling, enchilada rice cups, and pot pie muffins can usually be frozen for up to 2 months. Wrap each portion tightly, label it, and reheat until piping hot in the center. For best texture, freeze sauces and fillings separately from bread or tortillas when possible.
For hot lunches, reheat until the food reaches 165°F in the center if you are checking with a thermometer. Microwave in short bursts, stirring once or twice for soups, chili, rice bowls, and pasta. Oven reheating works better for puff pastry pockets, sliders, quesadillas, and muffins because it restores some crispness. A 350°F oven for 8 to 12 minutes is usually enough for most of the handheld items here.
Cold lunches need a different rhythm. Tuna pasta salad, wraps, pinwheels, and hummus pockets should be packed cold and kept chilled with an ice pack until lunch. If a wrap contains apple or spinach, a little mustard or cream cheese helps it stay fresh-tasting longer. And yes, preheating a thermos still matters. Fill it with boiling water for 5 minutes, empty it, then add the hot food. That small step does more than people expect.
Variations and Adaptations to Try
Thermos-First Week:
If you want fewer moving parts, build lunches around soup, stew, and chili. These keep their texture well, they are easy to portion, and they do not need much garnish to feel complete. A thermos plus a piece of bread is a very workable winter lunch.
Cold-Lunch Rescue:
When reheating is awkward, lean into the recipes that taste good chilled: tuna pasta salad, pinwheels, wraps, hummus pockets, and slider-style sandwiches. Add an ice pack and keep sauces on the side so the lunch stays crisp instead of soggy.
Vegetarian Lane:
Swap beans for meat in the chili, rice cups, and quesadillas; use lentils in place of beef in shepherd’s pie; and lean on hummus, eggs, and cheese for the handheld lunches. The structure stays the same, which makes the swap easier than starting from scratch.
Gluten-Free Shuffle:
Use corn tortillas for quesadillas and wraps, gluten-free pasta for the noodle dishes, and rice or potatoes as the base for soups and bowls. Muffin-tin recipes built on potatoes, eggs, or rice are the easiest place to start. Puff pastry and biscuit dough are trickier, so I would skip those if the box needs to be fully gluten-free.
Dairy-Free Path:
Tomato soup, chili, lentil stew, teriyaki chicken bowls, and roasted vegetable pockets are the easiest recipes to adapt. Use olive oil instead of butter, skip the cream, and choose a non-dairy cheese only where melting matters. The food stays satisfying if you keep enough salt and acid in the mix.
Lower-Sodium Reset:
Use low-sodium broth, rinse beans well, and go easier on deli meat and packaged sauces. Add flavor with garlic, lemon, thyme, cumin, pepper, and a small amount of Parmesan rather than relying on salt alone. The result tastes cleaner and less heavy by lunch.
Common Mistakes to Avoid
The first mistake is packing hot food into a cold thermos and expecting it to stay warm. It will not. Preheat the thermos with boiling water, then fill it fast and seal it tight. That five-minute habit makes a huge difference.
Second, people let wet fillings touch bread too early. Soup, chili, cranberry sauce, salsa, and creamy dressings all migrate into bread, rolls, tortillas, and pitas if they sit together for hours. Keep the wet part separate when you can, or build the sandwich as close to lunchtime as possible.
Third, overcooked pasta and rice turn soft in storage. If a noodle already feels too tender on the stove, it will be mush by noon. Pull pasta a little early, keep rice fluffy, and use just enough sauce to coat.
Fourth, some lunches get closed up before they have cooled. That trapped steam softens pastry, makes wraps sweat, and waters down soups. Give baked and sautéed foods a few minutes to settle before sealing the lid. Patience here saves texture.
Fifth, lunchboxes sometimes get underseasoned on purpose, which sounds polite but backfires. Cold food tastes flatter than hot food, so a dish that seems seasoned in the pan can taste dull later. Taste the finished filling and make it a little bolder than you think you need.
Frequently Asked Questions

Which of these winter lunches stay warm the longest?
Soups, chili, lentil stew, and rice bowls hold heat best in a prewarmed thermos. Dense foods with moisture do better than dry ones, and they usually taste closer to fresh at noon.
Can I pack soup in a regular lunchbox instead of a thermos?
You can, but it will cool quickly and may leak if the lid is not tight. A thermos is the better tool for anything you expect to eat hot.
How do I keep wraps and sandwiches from getting soggy?
Use a barrier like cream cheese, mayo, or mustard on the bread, then keep wetter items away from the surface that touches it. Wrapping them in parchment also helps absorb a little moisture.
What is the best way to reheat pasta without drying it out?
Add a spoonful of water, broth, or sauce before microwaving, then stir halfway through. Pasta dishes with a creamy or tomato sauce usually reheat better than plain noodles.
Can these lunches be made ahead on a Sunday and used through the week?
Yes, but not all of them should be held the same way. Soups, chili, and fillings for rice cups or muffins hold up best; wraps, pinwheels, and apple sandwiches are better assembled closer to the day you pack them.
What if my child refuses anything that looks like leftovers?
Use the handheld options first: pinwheels, sliders, quesadilla wedges, muffins, and wraps. Smaller portions and familiar flavors do a lot of the heavy lifting, and a crunchy side helps the meal feel new.
Are these lunches good for adults at work too?
Absolutely. Chili, soup, noodle bowls, shepherd’s pie muffins, and rice cups travel well to an office lunch just as easily as to a school lunchbox. The only real difference is portion size.
Can I freeze the baked items?
Yes. Muffins, pot pie cups, shepherd’s pies, quesadilla wedges, and enchilada rice cups freeze well once cooled. Wrap them tightly, label the date, and reheat until the center is hot.
Noon, Still Warm
The best winter lunchbox food is not complicated. It is sturdy, seasoned well, and packed in a way that respects the clock between breakfast and lunch. A soup in a hot thermos, a wrap that does not collapse, a pasta dish that stays silky instead of sticky—those small things matter more than elaborate cooking.
If you keep one rule in mind, make it this: choose foods that still know who they are after a few hours in a bag. Once you do that, lunch stops being an afterthought and starts feeling like part of the day you can count on.