
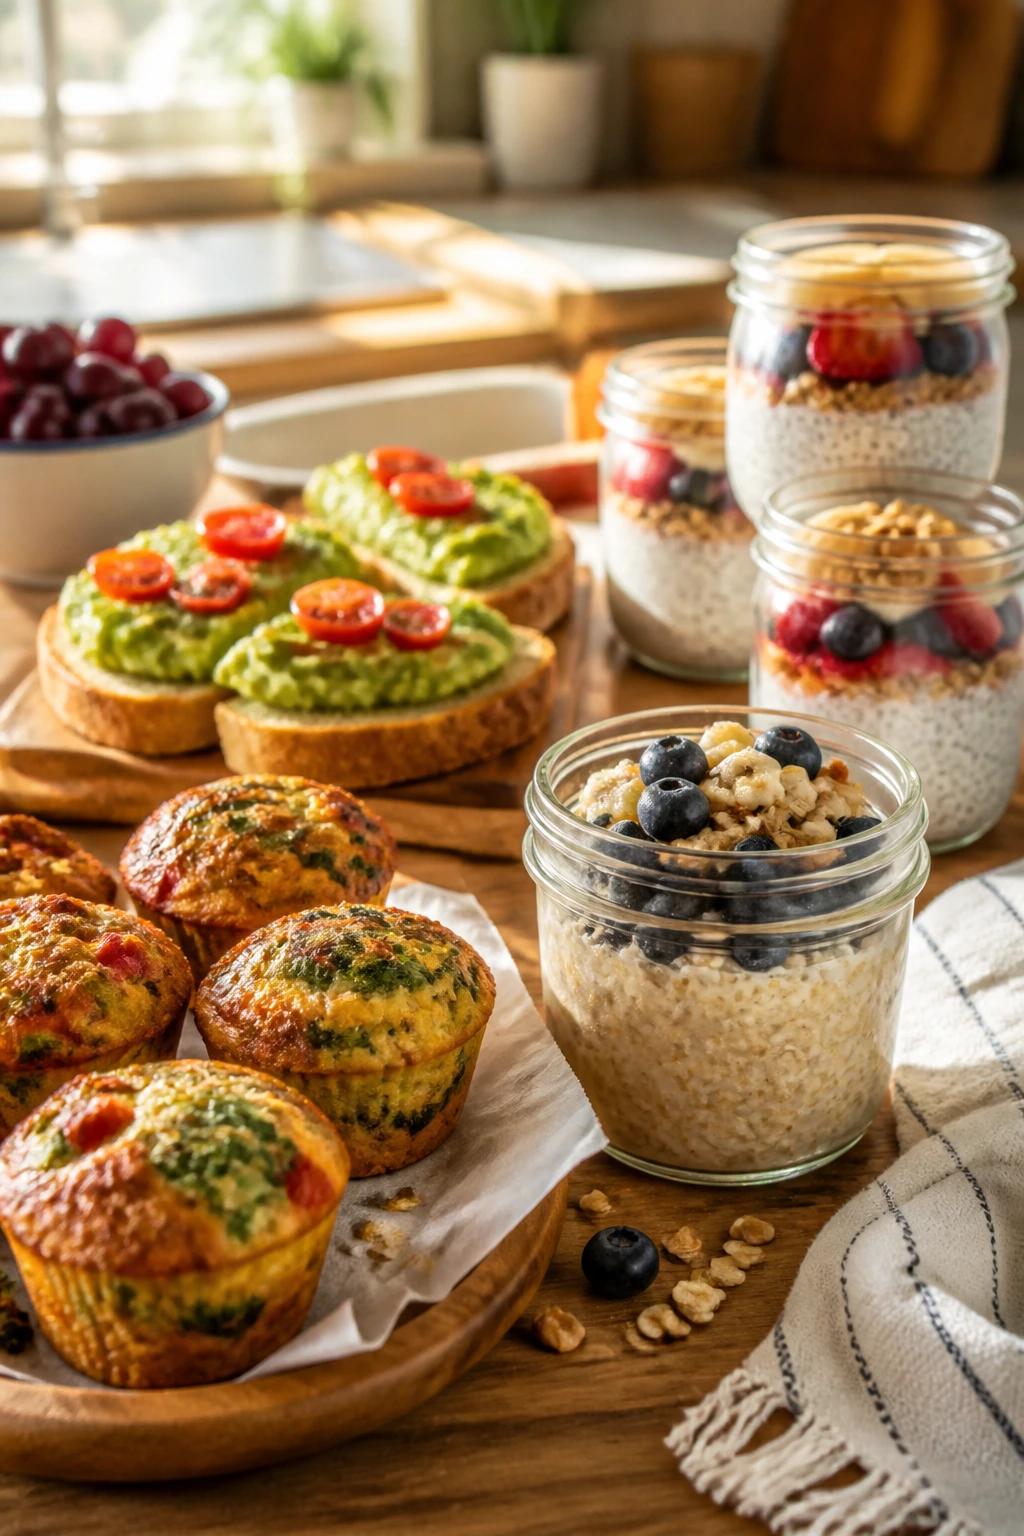
Five minutes before the bus is not a time for improvisation. Shoes are missing, the lunch box is open on the counter, and somebody has decided that a shirt from the clean hamper is a personal insult. That is when no meat meals for busy school mornings earn their place.
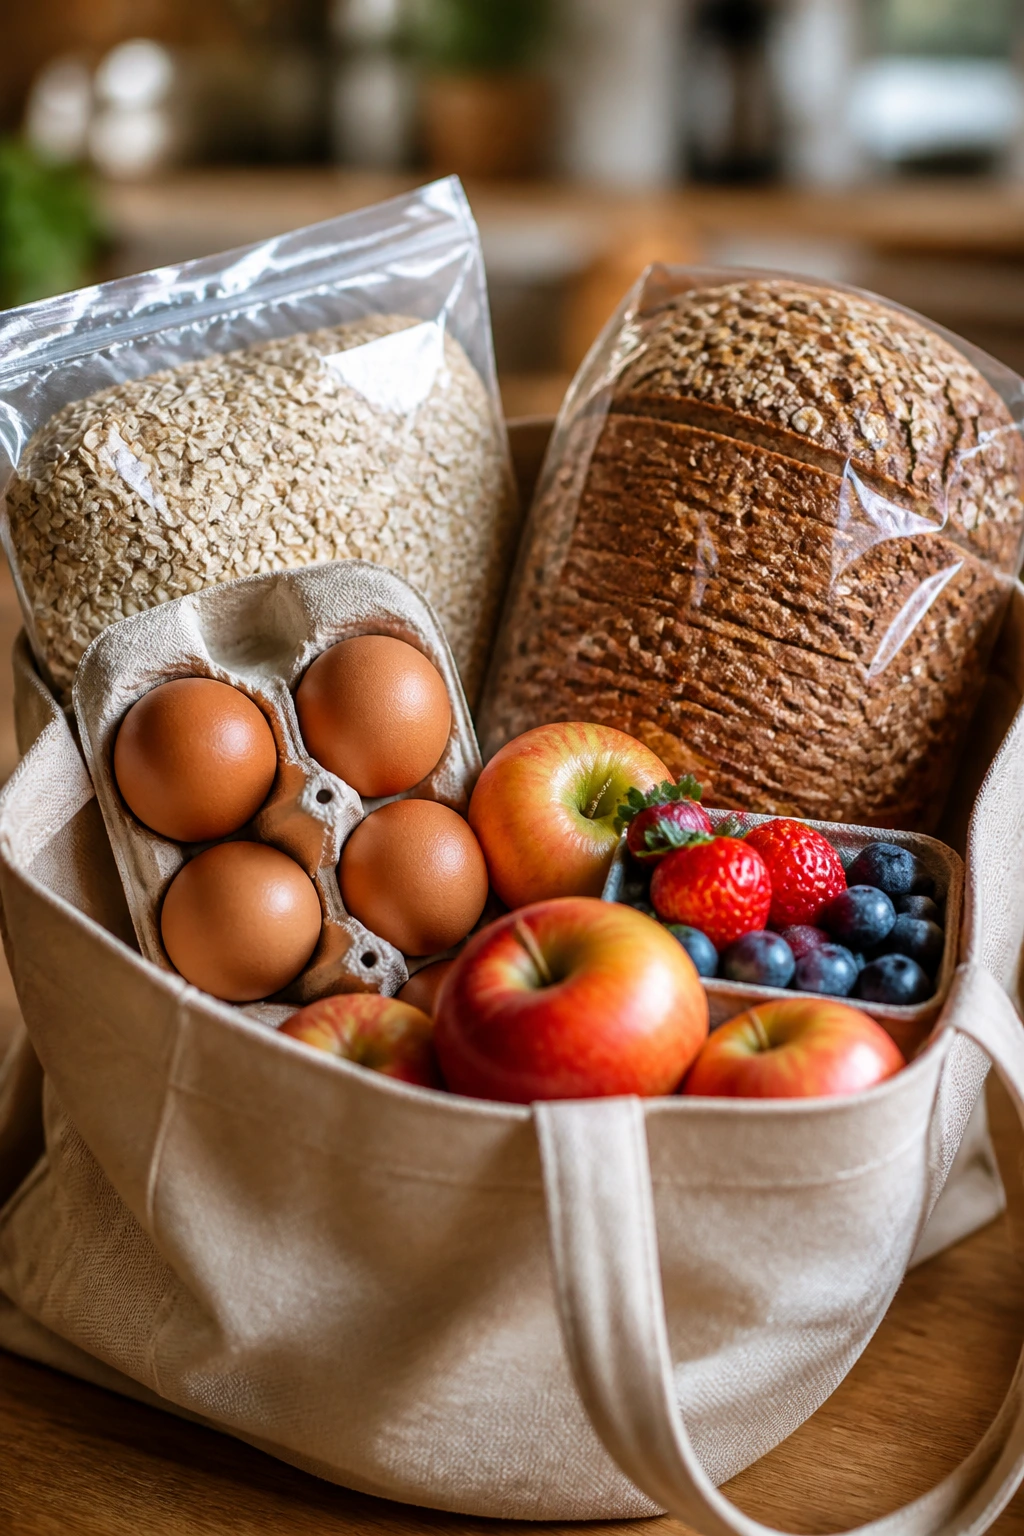
No meat does not mean flimsy. Eggs, oats, yogurt, beans, cheese, fruit, and nut butter can build breakfasts that hold shape, travel well, and keep a kid from raiding the snack drawer at 9:15. The best versions are the ones that already know how mornings behave: a little loud, a little rushed, and never as tidy as a recipe card suggests.
I like breakfasts that can be made ahead without losing their manners. A jar of overnight oats should still look thick after a ride in a backpack. An egg muffin should come out of a lunchbox intact, not in three sad crumbs. A good school-morning recipe understands the difference between food that sounds nice and food that survives the hallway.
The collection below leans on sweet and savory options, because nobody in a real house wants the same texture every day. Some are cold from the fridge. Some reheat in under two minutes. A few can be eaten with one hand while the other hand is still signing a form, finding a sock, or hunting down the missing water bottle.
Why These Meatless Mornings Deserve a Spot in the Rotation
- Make-ahead friendly: Several of these recipes are built the night before, so you can pull breakfast from the fridge instead of starting from zero.
- Kid-hand friendly: Muffins, burritos, toast, sticks, and pockets are easier to eat in a moving car than a bowl with a slippery spoon.
- Pantry-staple heavy: Oats, eggs, bread, tortillas, yogurt, beans, bananas, and cheese do most of the work, which keeps the shopping list sane.
- Sweet and savory balance: Some kids want cinnamon and berries; others want eggs and cheese before the sun is fully up.
- Filling without meat: Protein comes from eggs, dairy, beans, chia, and nut butter, so the breakfast feels like a meal and not a snack pretending to be more.
- Flexible for picky eaters: Most of these can be tweaked with one swap — a different fruit, a milder cheese, or a hidden vegetable chopped fine enough to disappear.
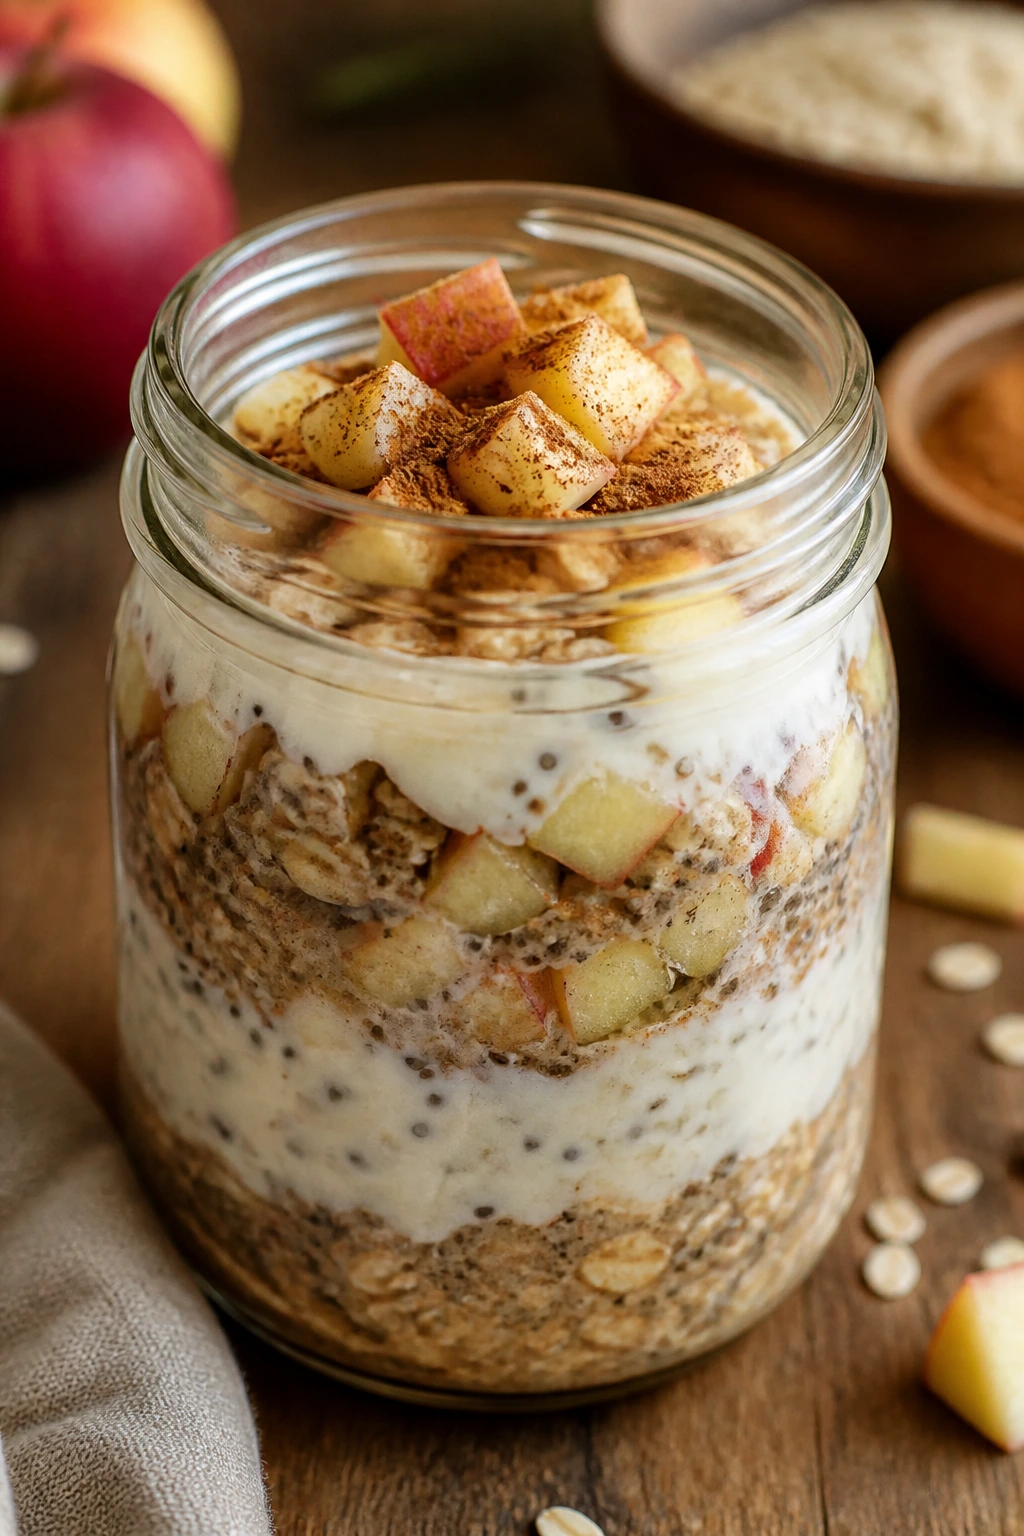
1. Cinnamon-Apple Overnight Oats in a Jar
The first spoonful tastes like apple pie that decided to behave itself. The oats soften overnight, but they keep enough chew to feel like breakfast, not pudding, and the diced apple gives you little crisp-sweet bites instead of one big mushy note. I reach for this one when the morning needs to be calm before it can be productive.
Why It Works:
Overnight oats are built for school mornings because the fridge does the hard part while you sleep. The chia seeds thicken the mixture, the yogurt gives it body, and the apple brings freshness that keeps the jar from tasting flat. If you use old-fashioned oats and chill the mixture for at least 6 hours, the texture lands in that sweet spot between creamy and spoonable. A little lemon juice on the apple keeps the pieces bright.
Key Ingredients:
- 2 cups old-fashioned rolled oats — they soften without turning gluey.
- 2 cups milk, any kind — whole milk makes it richer; oat milk keeps it dairy-free.
- 1 cup plain Greek yogurt — this gives the jar a thicker, more filling texture.
- 2 tablespoons chia seeds — they help the oats set up overnight.
- 2 tablespoons maple syrup — enough sweetness without making it candy-like.
- 1 teaspoon ground cinnamon — the whole jar leans on this.
- 1/4 teaspoon fine salt — tiny amount, big difference.
- 1 medium apple, cored and finely diced — use a crisp one that still snaps when you bite it.
- 1 teaspoon lemon juice — keeps the apple from browning.
- 2 tablespoons chopped walnuts, optional — good if your kids like crunch.
Quick Steps:
- Stir the oats, milk, yogurt, chia seeds, maple syrup, cinnamon, and salt in a medium bowl until everything looks evenly mixed.
- Toss the diced apple with the lemon juice in a small bowl so the pieces stay pale and fresh-looking.
- Divide the oat mixture between 4 jars or containers, then spoon the apple over the top and press it in lightly.
- Cover and refrigerate for at least 6 hours, or overnight, until the oats are thick and the spoon stands up a little when you stir.
- In the morning, stir once more. Add a splash of milk if you want it looser, or a spoon of yogurt if you want it denser.
- Top with walnuts right before serving so they stay crisp.
Equipment for This Recipe:
- 4 small jars or lidded containers — mason jars work well.
- Medium mixing bowl — big enough to stir without sloshing.
- Spoon or silicone spatula — for scraping the bowl clean.
- Apple corer or paring knife — makes prep faster.
How to Serve This Dish:
Serve it cold, straight from the jar, or tip it into a small bowl if your kid prefers a spoon with more room. A few extra apple slices on top make it look deliberate instead of rushed. One jar is enough for a light eater; two jars or a jar plus a hard-boiled egg make a fuller breakfast for a bigger appetite.
Pro Tips for This Recipe:
- Use crisp apples like Honeycrisp, Pink Lady, or Gala. Soft apples go mealy overnight.
- If you want a warmer flavor, add a pinch of nutmeg or a few drops of vanilla.
- Keep the walnuts separate until morning. They lose their crunch fast in the fridge.
- Make four jars at once; the texture gets better after the oats fully hydrate, not worse.
Variations on This Dish:
- Pear-and-Ginger Jar: Swap the apple for diced pear and add 1/4 teaspoon ground ginger.
- PB Apple Breakfast Jar: Stir 2 tablespoons peanut butter into the oat base for a richer, more filling version.
- Dairy-Free School Jar: Use oat milk and coconut yogurt, then skip the dairy entirely.
Common Mistakes to Avoid with This Dish:
- Using instant oats: They turn too soft and lose the pleasant chew that makes this recipe work.
- Skipping the salt: The jar tastes flatter without it, even with cinnamon and maple syrup.
- Adding crunchy toppings too early: Walnuts and granola should go on just before serving.
2. Spinach, Cheddar, and Egg Muffins
These are the kind of little breakfast cups I trust when the morning is already leaning sideways. They smell like warm cheddar and gently set eggs, and if you chop the spinach fine, nobody has to stare at big green leaves before 8 a.m. They also reheat without fuss, which matters more than people admit.
Why It Works:
Egg muffins are the rare breakfast that can be baked once and eaten all week. The eggs hold the filling together, the cheese melts into the custardy part, and the spinach disappears into the mix without making the texture watery. Bake them until the tops are just set and the centers no longer jiggle; overbaking is what gives egg muffins that dry, bouncy feel nobody loves. They’re also easy to eat with one hand, which is the whole point on a school morning.
Key Ingredients:
- 8 large eggs — the structure of the whole recipe.
- 1/4 cup milk — loosens the eggs just enough.
- 1 cup shredded sharp cheddar — sharper cheese gives more flavor per bite.
- 1 cup packed baby spinach, finely chopped — chop it small so it blends in.
- 1/2 cup diced red bell pepper — adds sweetness and color.
- 2 green onions, thinly sliced — they give the muffins a mild onion note.
- 1/2 teaspoon fine salt — enough to season the eggs properly.
- 1/4 teaspoon black pepper — keep it light for kids.
- 1 tablespoon butter or oil for the pan — don’t skip the greasing.
Quick Steps:
- Preheat the oven to 375°F and grease a 12-cup muffin tin generously with butter or oil.
- Whisk the eggs, milk, salt, and pepper in a large bowl until the yolks and whites are fully blended.
- Stir in the cheddar, spinach, bell pepper, and green onions.
- Divide the mixture evenly among the muffin cups, filling each about 3/4 full.
- Bake for 18 to 22 minutes, until the centers are set and the tops look lightly puffed with no wet shine.
- Cool in the pan for 5 minutes, then run a thin knife around the edges and lift them out.
Equipment for This Recipe:
- 12-cup muffin tin — a standard tin works best.
- Large mixing bowl — you want room to whisk.
- Whisk — helps the eggs bake up evenly.
- Small knife or offset spatula — useful for releasing the muffins.
How to Serve This Dish:
Serve two muffins per child with fruit and a slice of buttered toast, or pair one muffin with a yogurt cup if the morning needs more staying power. They look nicest on a small plate with the top side facing up, where the cheese and green flecks show. For older kids or adults, three muffins make a proper breakfast.
Pro Tips for This Recipe:
- Chop the spinach finely so it doesn’t pull apart the egg muffins when you bite into them.
- If your muffin tin is old and sticky, use paper liners plus grease; the paper makes cleanup easier.
- Let them cool before storing. Steam trapped in a container turns the bottoms soggy.
- A spoonful of cottage cheese whisked into the eggs makes them extra tender.
Variations on This Dish:
- Mild Cheddar and Corn: Swap the bell pepper for 1/2 cup thawed corn and use a younger cheddar.
- Feta Garden Muffins: Replace cheddar with feta and add chopped zucchini, squeezed dry.
- Dairy-Light Version: Use 2 tablespoons milk only and a smaller handful of cheese; they’ll still set.
Common Mistakes to Avoid with This Dish:
- Overfilling the cups: The eggs puff, then spill, and the edges get sticky.
- Baking too long: Once the tops are fully dry and springy, they’ve gone past their best texture.
- Forgetting to grease the tin: Egg muffins love to stick in the corners.
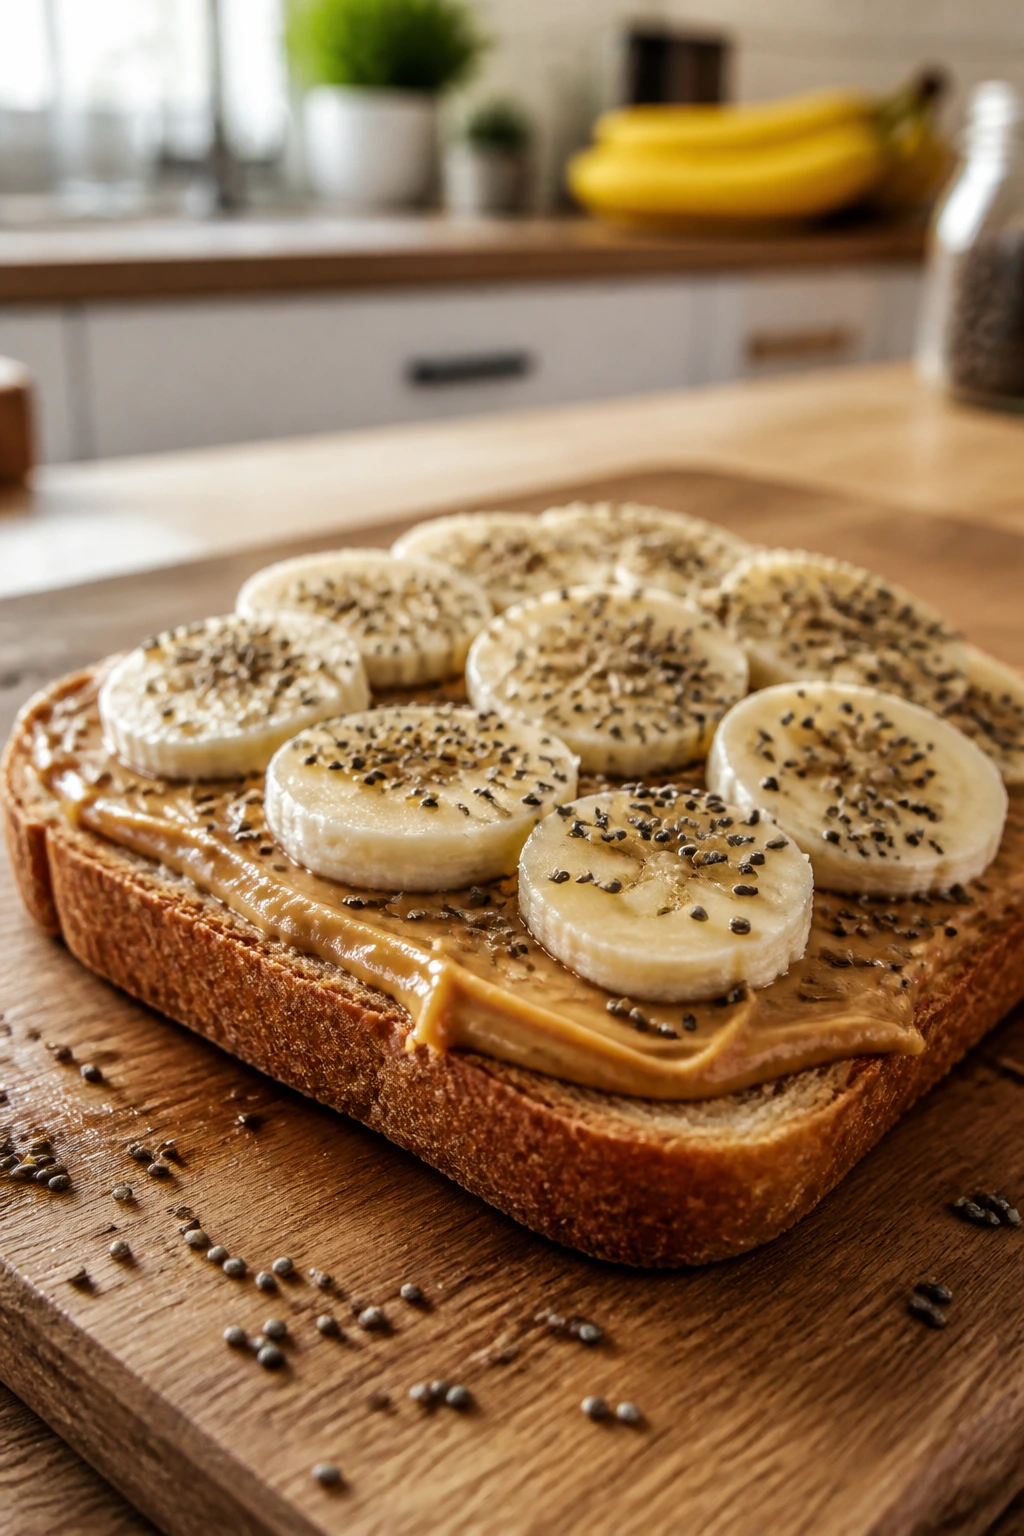
3. Peanut Butter Banana Toast with Chia
This is breakfast at its fastest, but it should never feel like an afterthought. The peanut butter goes creamy against warm toast, the banana softens the middle, and the chia seeds give the whole thing a faint crunch that makes each bite feel finished. I like it because it tastes like a kid made it with help from someone who knows what the clock is doing.
Why It Works:
The combination of fat, fiber, and quick carbs keeps this toast from disappearing in ten minutes. Peanut butter spreads the energy out, banana brings sweetness without extra fuss, and chia seeds add a little texture plus staying power. A sturdy slice of bread matters here; flimsy sandwich bread goes limp under the toppings and starts falling apart before you get to the table. Toast it well and it holds together better in a lunchbox too.
Key Ingredients:
- 8 slices sturdy whole-grain bread — choose bread with enough structure to hold toppings.
- 1/2 cup creamy peanut butter — natural or standard both work.
- 4 medium bananas, sliced — use bananas with a few freckles, not black spots.
- 2 tablespoons chia seeds — tiny crunch, extra fiber.
- 1 tablespoon honey — optional, but nice if the bananas are less sweet.
- 1/2 teaspoon cinnamon — keeps the toast from tasting one-note.
- Pinch of fine salt — makes the peanut butter taste fuller.
Quick Steps:
- Toast the bread until the edges are golden and the slices feel firm when pressed.
- Spread about 1 tablespoon of peanut butter over each slice while the toast is still warm.
- Arrange banana slices on top in a single layer, slightly overlapping if needed.
- Sprinkle each slice with chia seeds, cinnamon, and a tiny pinch of salt.
- Drizzle with honey if you want extra sweetness.
- Eat right away, or pack once cooled so the toast doesn’t trap steam.
Equipment for This Recipe:
- Toaster or toaster oven — the bread needs a good crisp edge.
- Butter knife or small offset spatula — for the peanut butter.
- Cutting board and knife — for the bananas.
How to Serve This Dish:
Serve two slices per child, or one thick slice cut in half if your eater is small. A cold glass of milk beside it makes the breakfast feel complete, and a few extra banana coins on the side make it look more like a plate and less like a rush job. If you’re packing it, let the toast cool before stacking it in a container.
Pro Tips for This Recipe:
- Spread the peanut butter all the way to the edges. It helps seal the toast and slows sogginess.
- Keep the banana slices thin. Thick rounds slide off.
- If you want more staying power, add a thin smear of Greek yogurt under the peanut butter.
- Use crunchy peanut butter only if your kid likes texture; otherwise creamy is easier to eat on the move.
Variations on This Dish:
- Sunflower Butter Version: Swap peanut butter for sunflower seed butter for a nut-free lunchbox option.
- Apple Slice Toast: Replace banana with thin apple slices and add a touch more cinnamon.
- Chocolate Banana Toast: Add a few mini chocolate chips on top for a sweeter treat.
Common Mistakes to Avoid with This Dish:
- Using soft bread: It bends under the toppings and gets messy fast.
- Making it too far ahead: Banana darkens and the toast loses its crisp edge.
- Skipping the salt: The peanut butter tastes flatter without it.
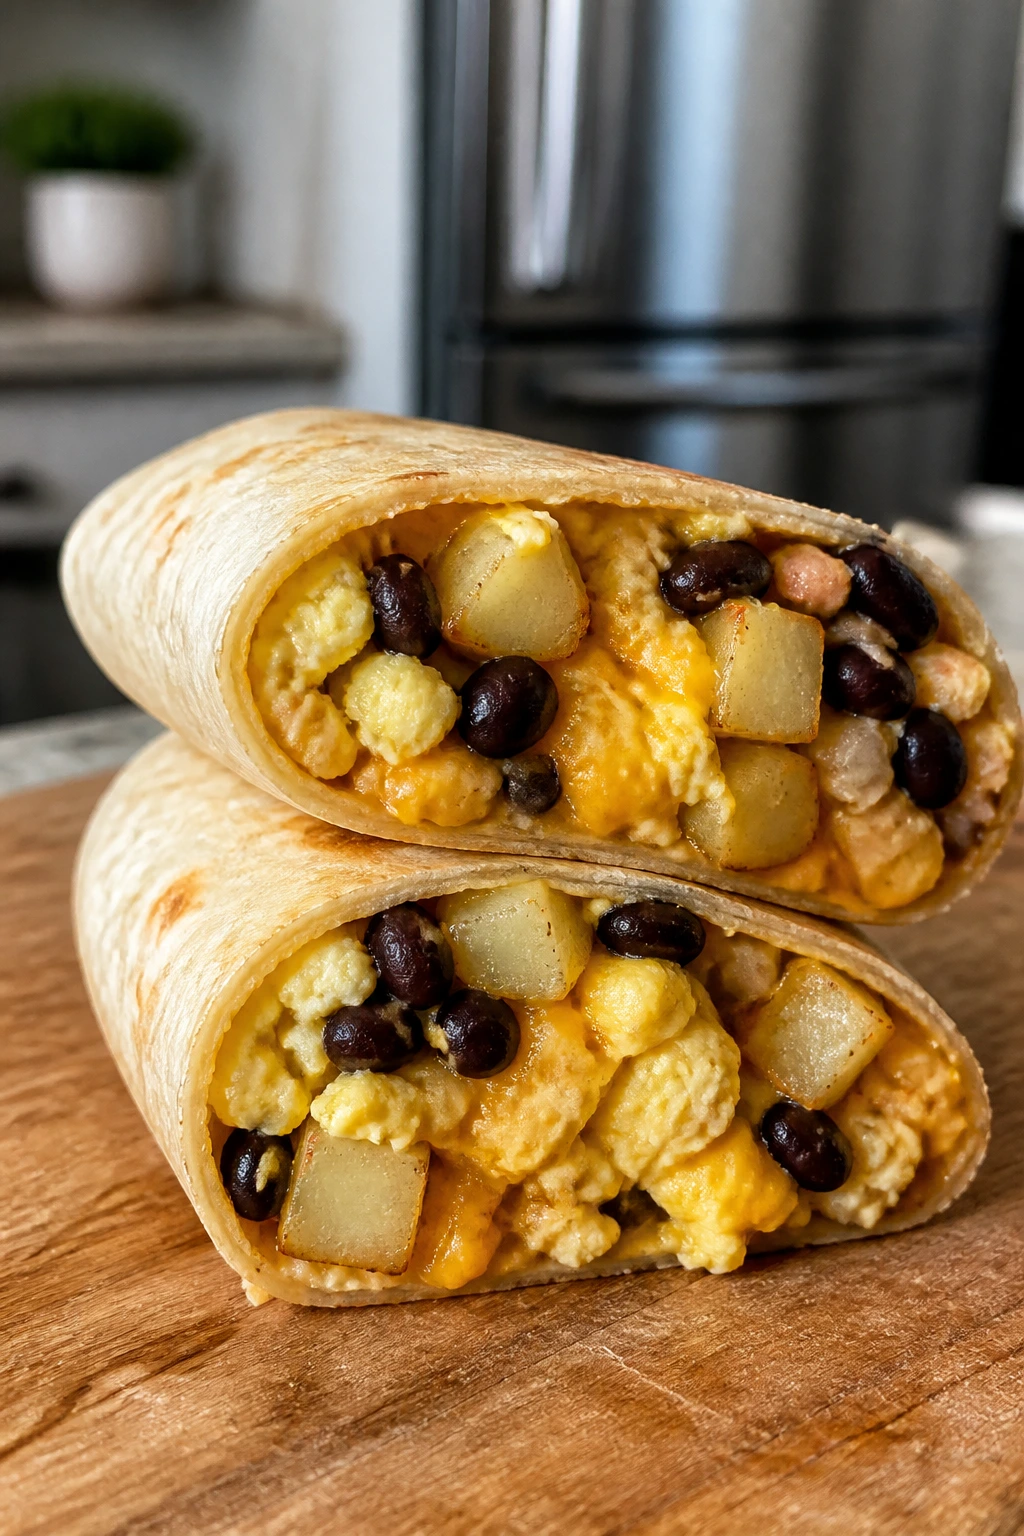
4. Freezer Breakfast Burritos with Beans and Potatoes
A good breakfast burrito has a little heft to it. The tortilla should be warm and flexible, the filling should feel cozy rather than wet, and every bite should deliver beans, eggs, potato, and cheese without leaking down your wrist. These freeze well, which is why I make them when the week ahead looks noisy.
Why It Works:
Beans and potatoes give the burritos enough body to hold up in the freezer and in the microwave. Scrambled eggs add protein, cheese glues everything together, and salsa brings the wake-up call. The trick is keeping the filling dry enough to wrap cleanly; if it’s sloppy in the bowl, it’ll be worse once it thaws. Warm tortillas fold better, and a tight roll prevents the dreaded split seam.
Key Ingredients:
- 8 large flour tortillas — the soft kind that fold without cracking.
- 8 large eggs — for the base filling.
- 1 tablespoon butter — for scrambling.
- 2 cups cooked diced potatoes — roasted or pan-fried potatoes both work.
- 1 can black beans, 15 ounces, drained and rinsed — adds bulk and protein.
- 1 cup shredded cheddar — melts into the filling.
- 1/2 cup salsa, thick rather than watery — keep it spoonable.
- 1/2 teaspoon ground cumin — gives the filling a warm edge.
- 1/2 teaspoon fine salt — seasons the eggs and beans.
- 1/4 teaspoon black pepper — enough without overpowering the kids.
Quick Steps:
- Scramble the eggs in a skillet with the butter over medium heat until just set but still soft.
- Warm the potatoes, beans, cumin, salt, and pepper together in a separate pan for 2 to 3 minutes, until the mixture is hot and the beans look glossy.
- Warm the tortillas briefly in a dry skillet or the microwave so they bend without tearing.
- Spoon eggs, potato-bean mixture, cheese, and a tablespoon of salsa onto each tortilla.
- Fold in the sides, roll tightly from the bottom, and place seam-side down.
- Wrap each burrito in foil or parchment, then chill or freeze.
- Reheat from refrigerated for 1 to 2 minutes in the microwave; frozen burritos usually need 2 1/2 to 3 1/2 minutes, turning once.
Equipment for This Recipe:
- Large skillet — for the eggs and filling.
- Small skillet or microwave — for warming tortillas.
- Foil or parchment paper — for wrapping.
- Freezer bags or airtight containers — for storage.
How to Serve This Dish:
Serve one burrito per child with orange slices or grapes on the side, and cut it in half if the eater likes to see the filling first. A little extra salsa in a small cup gives older kids something to dip into. For a bigger breakfast, pair the burrito with yogurt or a piece of fruit.
Pro Tips for This Recipe:
- Let the filling cool before rolling if you plan to freeze the burritos. Steam is the enemy of a tidy wrap.
- Use thick salsa or drain the watery kind. Thin salsa leaks.
- Roll the burrito tight enough that the seam holds, but not so tight that the tortilla tears.
- If you want extra flavor, stir a spoonful of sour cream into the egg mixture after cooking.
Variations on This Dish:
- Sweet Potato Burritos: Swap the diced potatoes for roasted sweet potato cubes.
- Salsa Verde Wraps: Use salsa verde and pepper jack for a brighter flavor.
- Bean-Only Version: Skip the potatoes and add extra beans plus corn for a softer filling.
Common Mistakes to Avoid with This Dish:
- Overfilling the tortillas: The wrap opens up and the seam splits during reheating.
- Wrapping while the filling is hot: Condensation makes the tortilla soggy.
- Using thin tortillas: They crack in the freezer and tear before breakfast.
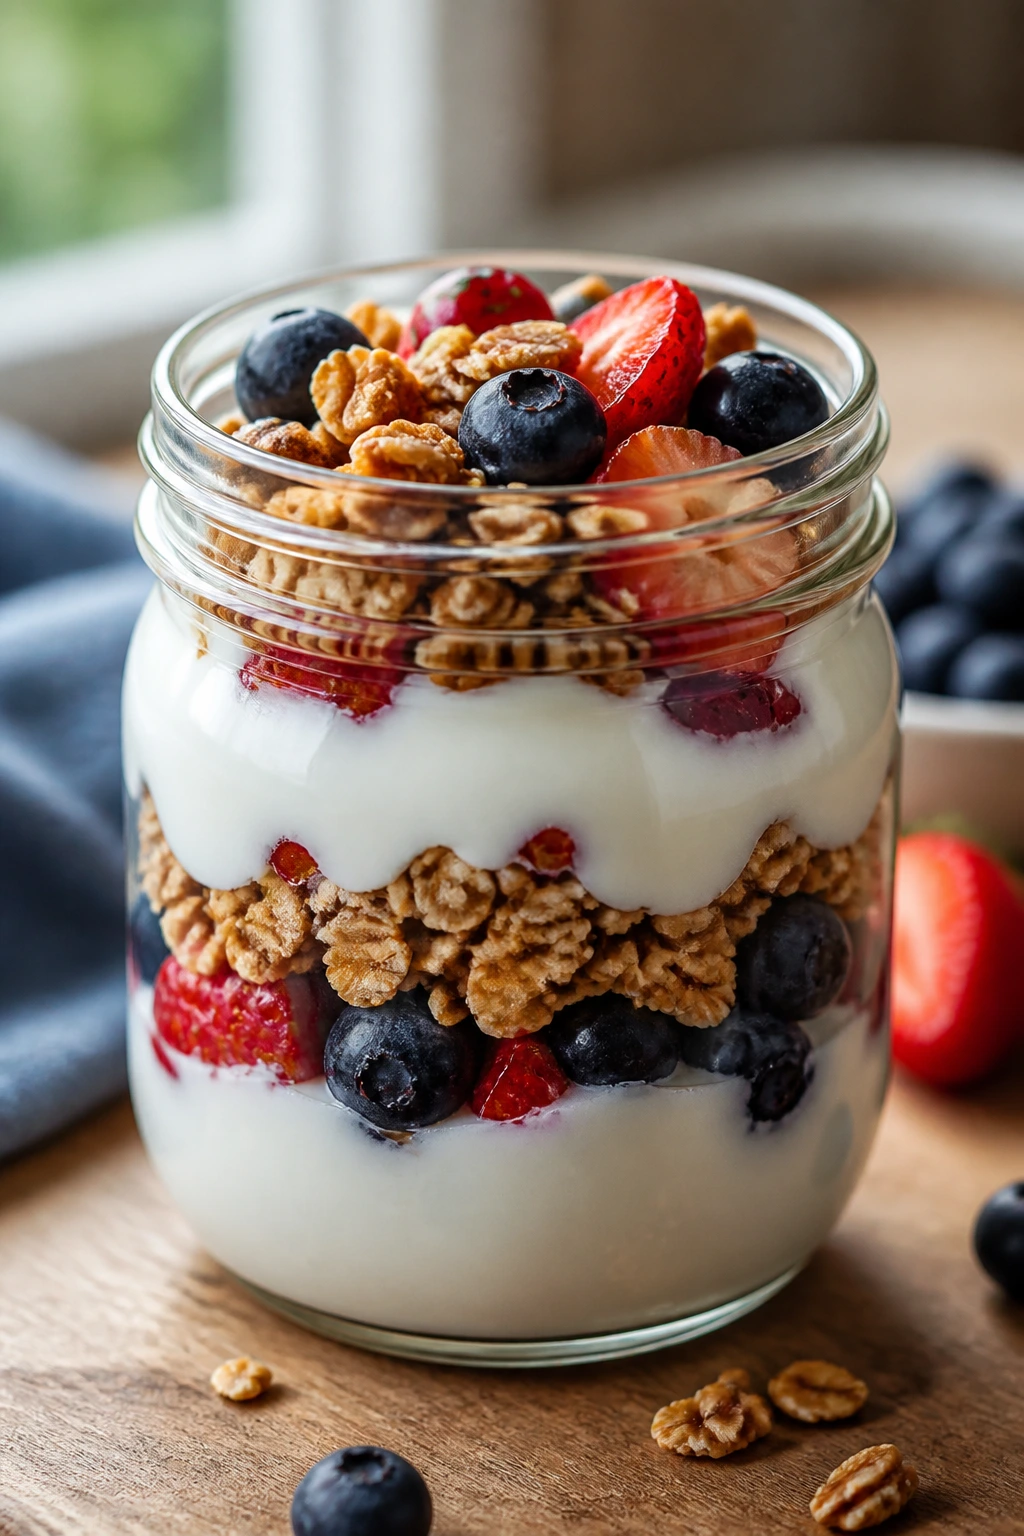
5. Greek Yogurt Parfait Jars
Cold, creamy, and very hard to mess up. These parfait jars are the breakfast I reach for when the refrigerator is full of odds and ends and I need something that looks intentional in a clear container. The layers matter here: thick yogurt, juicy berries, and crunchy granola should each show up in their own stripe.
Why It Works:
Greek yogurt brings protein without cooking, and the berries keep the whole jar bright instead of heavy. Granola gives the crunch you lose in soft breakfasts, but it should stay separate until the last minute or it turns soggy. A little honey and vanilla make plain yogurt taste finished without turning it into dessert. Because the ingredients stay cold and separated, you can build the jars the night before and still get a clean texture in the morning.
Key Ingredients:
- 4 cups plain Greek yogurt — thick yogurt holds the layers best.
- 2 cups mixed berries — fresh or thawed frozen berries both work.
- 2 cups granola — choose a crunchy one with clusters.
- 2 tablespoons honey — optional, to sweeten the yogurt.
- 1 teaspoon vanilla extract — gives the yogurt a softer flavor.
- 2 tablespoons chia seeds or ground flaxseed, optional — good if you want more staying power.
Quick Steps:
- Stir the yogurt with honey and vanilla until smooth.
- Spoon a layer of yogurt into 4 jars or cups.
- Add berries, then another layer of yogurt, and repeat if your containers are tall enough.
- Top with granola right before serving, or keep it in a separate bag and pour it on in the morning.
- Add chia or flax between the yogurt layers if you want a denser breakfast.
- Chill up to 2 days for the cleanest texture.
Equipment for This Recipe:
- 4 jars or lidded cups — clear containers show the layers.
- Spoon — for neat layering.
- Small bowl — optional, for mixing sweetener into the yogurt.
How to Serve This Dish:
Serve one jar as a light breakfast or pair it with toast if the morning demands more food. The jars look nicest when the berry layer is pressed to the glass so the color shows through. If you’re packing them, keep the granola on top in a separate container so it stays loud and crunchy.
Pro Tips for This Recipe:
- Use thick yogurt. Thin yogurt slides around and makes muddy layers.
- Pat fresh berries dry before layering, especially strawberries.
- If you want a more filling jar, add a spoonful of nut butter between the yogurt layers.
- Granola with clusters holds up better than fine crumbs.
Variations on This Dish:
- Tropical Parfait: Use mango, pineapple, and toasted coconut.
- Chocolate Berry Jar: Stir cocoa powder into the yogurt and add raspberries.
- Nut-Free Crunch Jar: Use pumpkin seeds or crisp rice cereal instead of granola.
Common Mistakes to Avoid with This Dish:
- Adding granola too early: It softens fast and loses all texture.
- Using watery fruit: The jar turns loose and the yogurt thins out.
- Over-sweetening the yogurt: The berries lose their brightness.
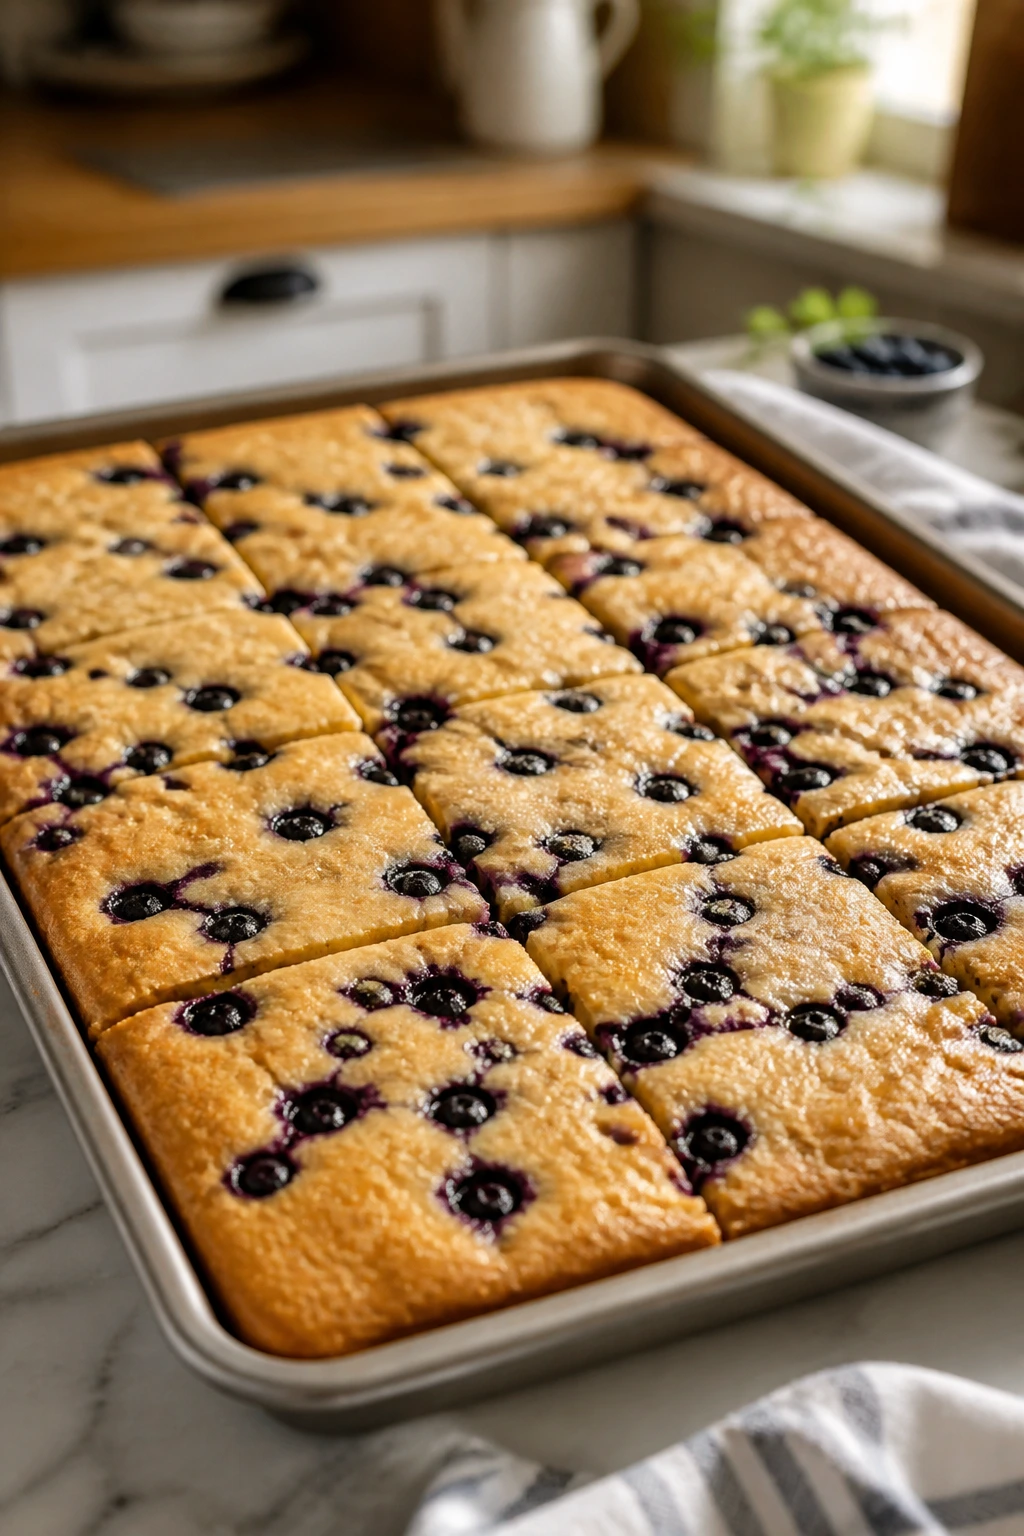
6. Sheet-Pan Blueberry Pancakes
This is what I make when I want pancakes for a crowd without standing at the stove like a short-order cook. The pancake bakes into one big soft slab, the blueberries burst in little purple spots, and the edges turn just golden enough to slice cleanly. It’s the pancake version of taking the easy road and still ending up somewhere good.
Why It Works:
The sheet pan gives you even heat and a surface that’s easy to portion. A thicker batter bakes up tender in the middle and slightly crisp at the edges, which is exactly what a school-morning pancake should do. Blueberries sink less when the batter is spread evenly, and you can cut the pan into neat squares that reheat well later. The big win is time: one pan feeds the table without flipping.
Key Ingredients:
- 2 cups all-purpose flour — the main structure.
- 2 tablespoons sugar — enough for breakfast, not dessert.
- 1 tablespoon baking powder — gives the cake-like lift.
- 1/2 teaspoon fine salt — sharpens the flavor.
- 2 large eggs — help the batter set.
- 2 cups milk — whole milk makes the crumb softer.
- 1/4 cup melted butter — for flavor and tenderness.
- 1 teaspoon vanilla extract — rounds out the batter.
- 1 1/2 cups blueberries — fresh or frozen, with frozen used straight from the freezer.
Quick Steps:
- Preheat the oven to 425°F and grease an 18-by-13-inch rimmed sheet pan well.
- Whisk the flour, sugar, baking powder, and salt in a large bowl.
- In another bowl, whisk the eggs, milk, melted butter, and vanilla until smooth.
- Pour the wet mixture into the dry and stir just until combined; a few small lumps are fine.
- Spread the batter into the prepared pan and scatter the blueberries evenly over the top.
- Bake for 15 to 18 minutes, until the top springs back lightly and a toothpick in the center comes out clean.
- Cool for 5 minutes, slice into squares, and serve with maple syrup.
Equipment for This Recipe:
- Rimmed sheet pan — the standard half-sheet size works.
- Large mixing bowl — for the batter.
- Whisk and spatula — to mix without overworking.
- Parchment paper, optional — makes cleanup easier.
How to Serve This Dish:
Serve two squares per child with a small spoonful of yogurt or a swipe of butter on top. The squares stack neatly on a plate, and they also fit into lunch containers if breakfast has to move with you. A drizzle of warm maple syrup is enough; too much syrup just floods the pan.
Pro Tips for This Recipe:
- Don’t overmix. Lumpy batter makes tender pancakes.
- Frozen blueberries can go straight on top; thawing them first stains the batter more.
- If your oven runs hot, check a minute or two early.
- Cool the pan briefly before slicing so the squares hold together.
Variations on This Dish:
- Lemon Blueberry Pan Pancakes: Add 1 tablespoon lemon zest to the batter.
- Mixed Berry Tray Bake: Replace half the blueberries with raspberries.
- Gluten-Free Version: Use a good 1:1 gluten-free flour blend.
Common Mistakes to Avoid with This Dish:
- Greasing the pan lightly: Pancakes stick in the corners and tear when sliced.
- Making the batter too thin: It spreads too much and bakes like a flat cake.
- Overbaking: Dry sheet-pan pancakes lose the soft middle that makes them worth making.
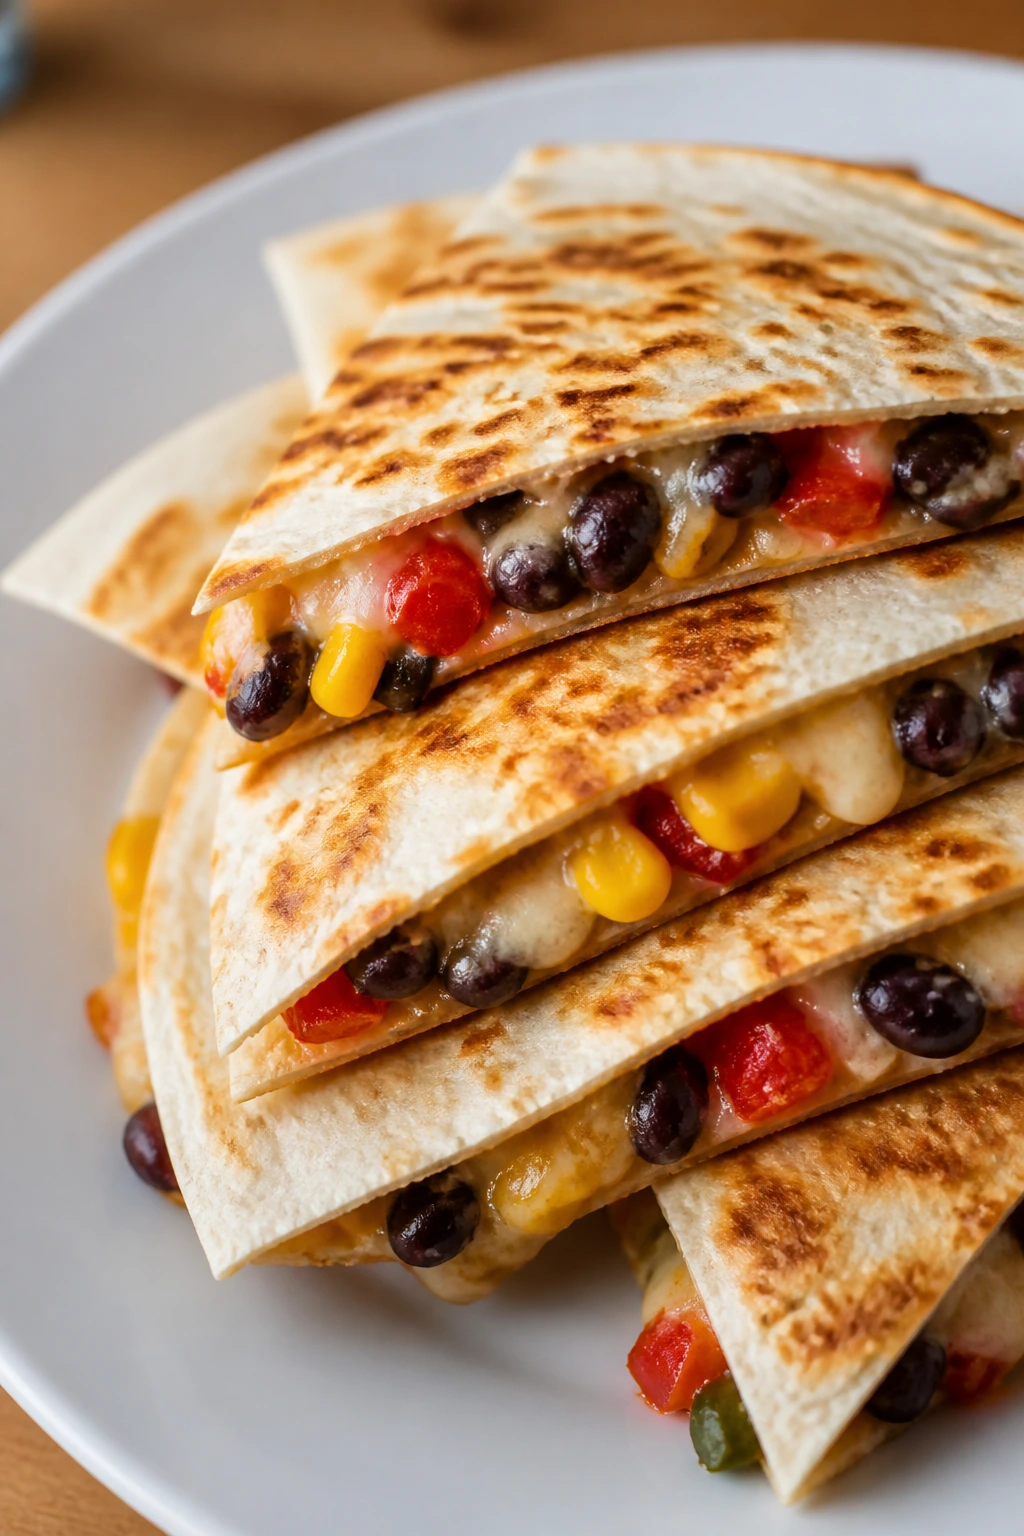
7. Veggie Quesadilla Triangles
A quesadilla is still one of the smartest breakfasts in the kitchen. The tortilla crisps in the pan, the cheese melts into the vegetables, and the whole thing cuts into sturdy triangles that kids can hold without a napkin crisis. This version uses beans and corn, which make it feel more like a meal than a snack.
Why It Works:
The magic here is in the cheese: it holds the filling together and gives the tortilla something to cling to. Black beans bring protein, corn brings a little sweetness, and peppers keep the flavor from going flat. Cook it on medium heat so the tortilla turns golden before the cheese burns; too hot and you get a dark shell with cold filling. Cut it while the cheese is still warm but not molten, or the triangles slide apart.
Key Ingredients:
- 8 medium flour tortillas — softer tortillas fold and crisp better.
- 2 cups shredded Monterey Jack or cheddar — choose a cheese that melts cleanly.
- 1 cup black beans, drained and rinsed — dry them well so the quesadilla isn’t wet.
- 1 cup corn, thawed if frozen — adds a sweet pop.
- 1 cup diced bell peppers — keep the pieces small.
- 1/2 cup finely chopped spinach — hidden greens work well here.
- 1 teaspoon mild taco seasoning or 1/2 teaspoon cumin — gives the filling a little lift.
- 1 tablespoon butter or neutral oil — for the skillet.
Quick Steps:
- Mix the beans, corn, peppers, spinach, and seasoning in a bowl.
- Warm a skillet over medium heat and melt a little butter or oil.
- Lay one tortilla in the pan and sprinkle cheese over half of it, then spoon on the vegetable filling and more cheese.
- Fold the tortilla over and cook for 2 to 3 minutes per side, until golden spots appear and the cheese is fully melted.
- Repeat with the remaining tortillas.
- Let each quesadilla rest for 1 minute, then cut into triangles.
Equipment for This Recipe:
- 12-inch skillet or griddle — large enough for easy flipping.
- Spatula — a wide one helps.
- Mixing bowl — for the filling.
- Sharp knife or pizza cutter — for clean triangles.
How to Serve This Dish:
Serve two or three triangles with salsa and sliced fruit. A small bowl of plain yogurt makes a fine dip if you want something cooler and milder. These also pack well in foil once they’ve cooled, which makes them useful for breakfast in the car.
Pro Tips for This Recipe:
- Pat the beans dry. Extra moisture makes the tortilla steam instead of crisp.
- Keep the heat at medium, not high. A quesadilla that browns too fast usually isn’t melted inside.
- Add the spinach finely chopped so it disappears into the cheese.
- If you’re packing them, cool completely before wrapping or the tortilla softens.
Variations on This Dish:
- Breakfast Quesadilla: Add scrambled eggs to the filling.
- Bean-and-Cheese Only: Leave out the vegetables for a simpler texture.
- Pepper Jack Version: Use pepper jack for older kids who like a little heat.
Common Mistakes to Avoid with This Dish:
- Overstuffing the tortilla: The filling spills out when you flip it.
- Cooking on high heat: The outside burns before the center melts.
- Cutting immediately: The cheese runs out and the triangles lose their shape.
8. Baked Oatmeal Squares with Raisins and Walnuts
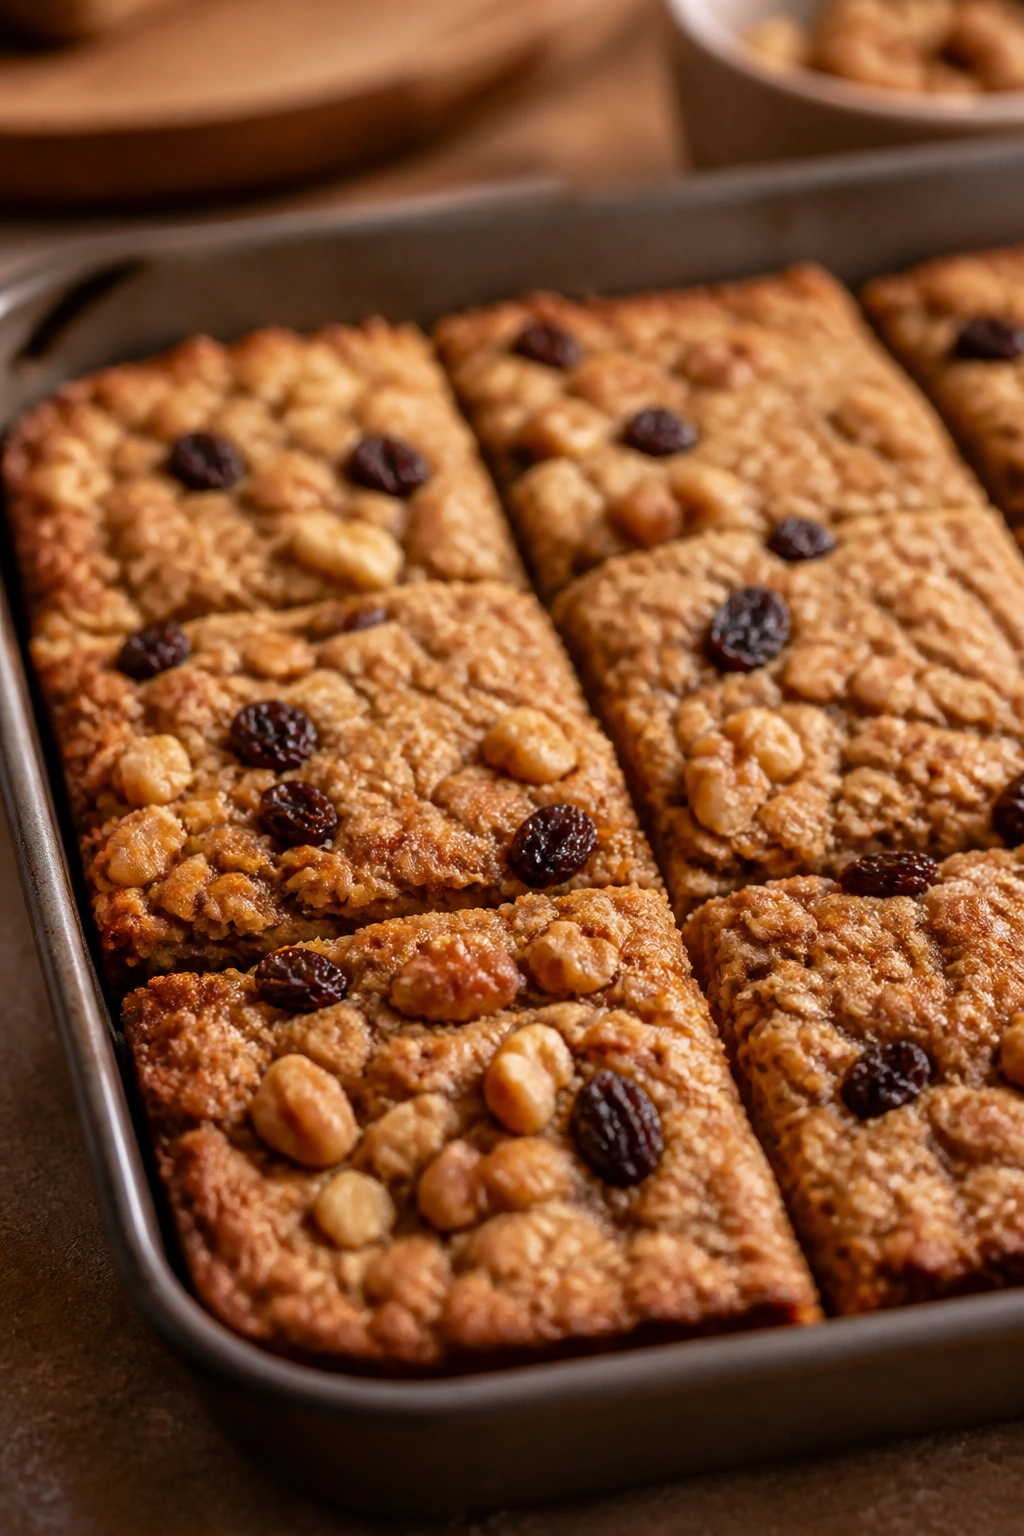
Baked oatmeal sits in the middle between a breakfast bar and a warm bowl of oats, which is exactly why it works so well for school mornings. The top turns golden, the middle stays tender, and each square cuts cleanly enough to pick up and eat without a spoon if needed. It smells like cinnamon and toasted oats, which is a respectable way to wake up.
Why It Works:
Old-fashioned oats absorb the milk and eggs in a way that makes the bake sliceable instead of loose. Brown sugar and cinnamon give it warmth, while raisins and walnuts add little hits of sweetness and crunch. Bake it until the center is just set; if it jiggles too much, the squares fall apart when you cut them. It reheats well, freezes well, and tastes good warm or cold.
Key Ingredients:
- 3 cups old-fashioned rolled oats — use rolled oats, not instant.
- 1/2 cup brown sugar — enough to sweeten without overwhelming.
- 1 teaspoon cinnamon — the background flavor.
- 1/2 teaspoon baking powder — gives a little lift.
- 1/2 teaspoon fine salt — keeps it from tasting bland.
- 2 large eggs — hold the bake together.
- 2 cups milk — any kind works.
- 1/4 cup melted butter or neutral oil — for richness.
- 1 teaspoon vanilla extract — softens the flavor.
- 1 cup raisins — optional, but classic.
- 1/2 cup chopped walnuts — optional crunch.
- 1 medium apple, peeled and diced, optional — for extra fruit.
Quick Steps:
- Preheat the oven to 350°F and grease an 8-by-8-inch or 9-by-9-inch baking dish.
- Stir the oats, brown sugar, cinnamon, baking powder, and salt in a large bowl.
- Whisk the eggs, milk, melted butter, and vanilla in another bowl.
- Add the wet ingredients to the dry, then fold in the raisins, walnuts, and apple if using.
- Pour the mixture into the dish and spread it evenly.
- Bake for 35 to 40 minutes, until the top is golden and the center feels set when pressed gently.
- Cool for at least 15 minutes before slicing into squares.
Equipment for This Recipe:
- Baking dish — 8-by-8 or 9-by-9 inches.
- Mixing bowls — one for wet, one for dry.
- Whisk and spatula — for mixing.
- Measuring cups and spoons — for accuracy.
How to Serve This Dish:
Serve a square in a bowl with a splash of milk, or plate it alongside yogurt and berries. Two small squares make a breakfast for a hungry child; one square plus fruit works for a lighter appetite. It also tastes good cut into fingers and eaten like a soft bar.
Pro Tips for This Recipe:
- Let it cool before slicing or the squares crumble.
- If you want a firmer texture, chill the bake before cutting.
- Toast the walnuts first if you want deeper flavor.
- If raisins are not your thing, use chopped dried cranberries or diced dates.
Variations on This Dish:
- Cranberry-Orange Squares: Add orange zest and dried cranberries.
- Chocolate Chip Oat Bake: Swap raisins for mini chocolate chips.
- Vegan Version: Use flax eggs and plant milk.
Common Mistakes to Avoid with This Dish:
- Using instant oats: The texture gets too soft and loses its shape.
- Underbaking: The center stays loose and falls apart.
- Cutting while hot: The squares crumble into rough pieces.
9. Avocado Cottage Cheese Toast with Tomato
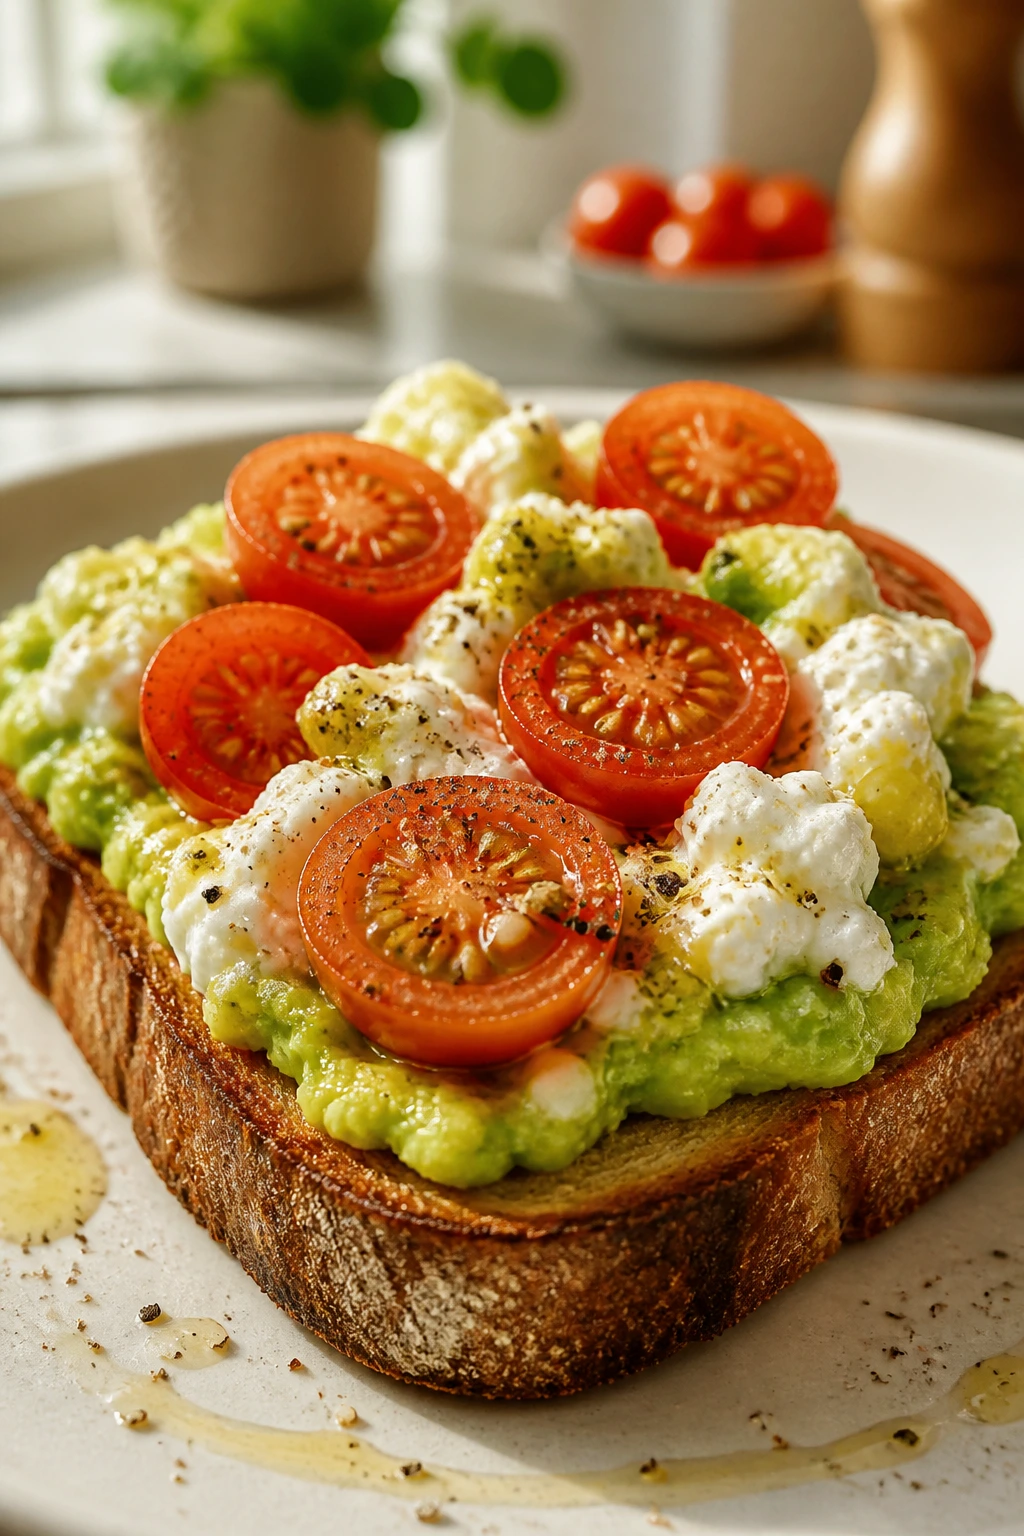
This is the savory toast I make when nobody wants anything sweet and there’s no time for a skillet full of drama. The avocado is creamy, the cottage cheese is cool and salty, and the tomato brings enough brightness to keep the whole slice from tasting heavy. It’s simple, but not lazy. There’s a difference.
Why It Works:
Avocado supplies fat that makes the toast feel satisfying, while cottage cheese adds protein without needing heat. Tomato and lemon give it acid, which keeps the creamy parts from turning dull. The bread has to be sturdy and toasted enough to hold the toppings; soft bread caves in under the weight and turns the whole thing into a mess. Everything is assembled in minutes, which is the real selling point.
Key Ingredients:
- 8 slices sturdy bread — sourdough, multigrain, or another thick slice.
- 2 ripe avocados — soft but not stringy.
- 1 cup cottage cheese — small-curd works nicely.
- 1 cup cherry tomatoes, halved — or one large tomato, sliced thin.
- 2 tablespoons lemon juice — keeps the avocado bright.
- 1 tablespoon olive oil — optional, but nice.
- 1 teaspoon everything seasoning — gives the toast a salty crunch.
- Fine salt and black pepper — to taste.
Quick Steps:
- Toast the bread until the slices are deeply golden and firm.
- Mash the avocados with lemon juice, salt, and pepper in a bowl.
- Spread the avocado over each toast slice.
- Spoon cottage cheese on top, then add tomatoes.
- Finish with olive oil and everything seasoning.
- Serve immediately while the toast is still crisp.
Equipment for This Recipe:
- Toaster or oven broiler — for sturdy toast.
- Small bowl and fork — for mashing avocado.
- Knife and cutting board — for the tomatoes.
How to Serve This Dish:
Serve one or two slices per person, depending on how hungry the kid is. A few cucumber sticks on the side make the plate feel balanced, and the bright green-and-red topping looks neat on a simple white plate. If you want to turn it into a bigger breakfast, add a boiled egg or a piece of fruit.
Pro Tips for This Recipe:
- Toast the bread more than you think you need. The toppings soften it fast.
- Mash the avocado just before serving if you want the freshest color.
- Use small-curd cottage cheese if your family dislikes big curds.
- A pinch of red pepper flakes works for adults, but I would keep it off the kid slices.
Variations on This Dish:
- Feta Swap: Replace cottage cheese with crumbled feta for a saltier bite.
- Cherry Tomato Basil Toast: Add torn basil leaves and a tiny drizzle of balsamic.
- Seeded Crunch Version: Top with sunflower seeds or pumpkin seeds instead of everything seasoning.
Common Mistakes to Avoid with This Dish:
- Using soft sandwich bread: It collapses under the toppings.
- Assembling too early: Avocado browns and the toast softens.
- Skipping acid: Without lemon, the avocado tastes heavier and darker.
10. Blender Banana Oat Waffles
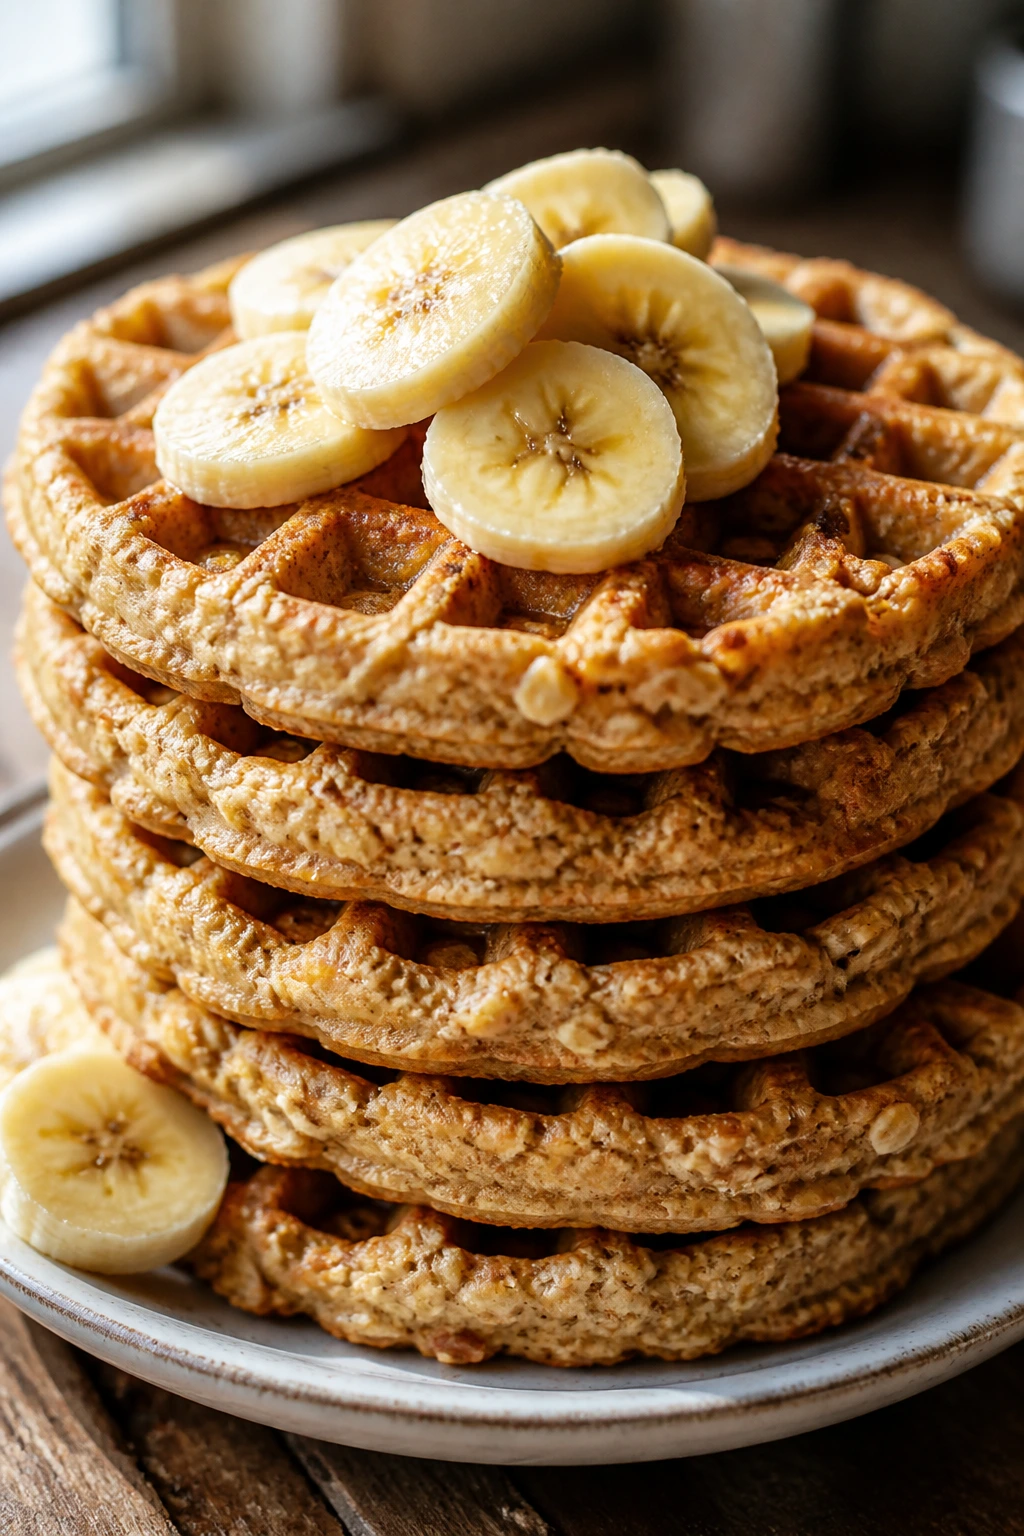
Waffles made from a blender always feel a little like cheating, which is probably why I like them. The batter comes together fast, the oats give the waffles a toasty flavor, and the bananas keep them soft enough for kids without making them floppy. If your waffle iron has been sitting in the cupboard for months, this is the recipe that earns it a spot on the counter again.
Why It Works:
Blending the oats into a rough flour gives the waffles a sturdy crumb without needing a separate bowl of dry ingredients. Banana adds sweetness and moisture, so you can keep the sugar low. The batter benefits from a short rest because oats need a minute to absorb liquid; if you skip that step, the waffles can cook up a little thin and fragile. Freeze the extras, and you’ve got breakfast in reserve.
Key Ingredients:
- 2 cups old-fashioned rolled oats — the base of the batter.
- 2 ripe bananas — the riper they are, the sweeter the waffles.
- 2 large eggs — help everything set.
- 1 1/2 cups milk — any milk works.
- 1 teaspoon baking powder — for lift.
- 1 teaspoon vanilla extract — softens the banana flavor.
- 1/2 teaspoon cinnamon — optional, but good.
- Pinch of fine salt — needed more than you’d think.
- 1 tablespoon neutral oil — for the batter or waffle iron.
Quick Steps:
- Blend the oats in a blender until they look like a coarse flour.
- Add the bananas, eggs, milk, baking powder, vanilla, cinnamon, salt, and oil, then blend until smooth.
- Let the batter rest for 5 minutes so the oats thicken it slightly.
- Heat the waffle iron and grease it lightly.
- Pour in the batter and cook until the waffles are deep golden and steam slows down, about 4 to 5 minutes depending on your iron.
- Serve right away or cool on a rack before freezing.
Equipment for This Recipe:
- Blender — a standard one works.
- Waffle iron — whatever style you own.
- Measuring cups — for consistent batter.
- Cooling rack — keeps frozen waffles from steaming soft.
How to Serve This Dish:
Serve two waffles per child with berries and a spoonful of yogurt, or stack one waffle with peanut butter between the halves for a more filling plate. A drizzle of maple syrup is enough; these already have banana sweetness. If you’re freezing them, toast them straight from frozen and they come back nicely crisp.
Pro Tips for This Recipe:
- Let the batter rest. Oats need that minute.
- Grease the iron lightly even if it claims to be nonstick.
- Cool leftovers on a rack before freezing or they trap moisture.
- Use bananas with plenty of brown speckles for the best flavor.
Variations on This Dish:
- Blueberry Banana Waffles: Fold in 1/2 cup blueberries after blending.
- Chocolate Chip Version: Stir in mini chips after blending for a sweeter version.
- Dairy-Free Batch: Use oat milk and a little extra oil.
Common Mistakes to Avoid with This Recipe:
- Skipping the rest time: The waffles can cook up uneven and fragile.
- Overfilling the iron: Batter spills, and the edges burn.
- Stacking them hot: Steam softens the crisp outside.
11. Mini Egg and Cheese Pita Pockets
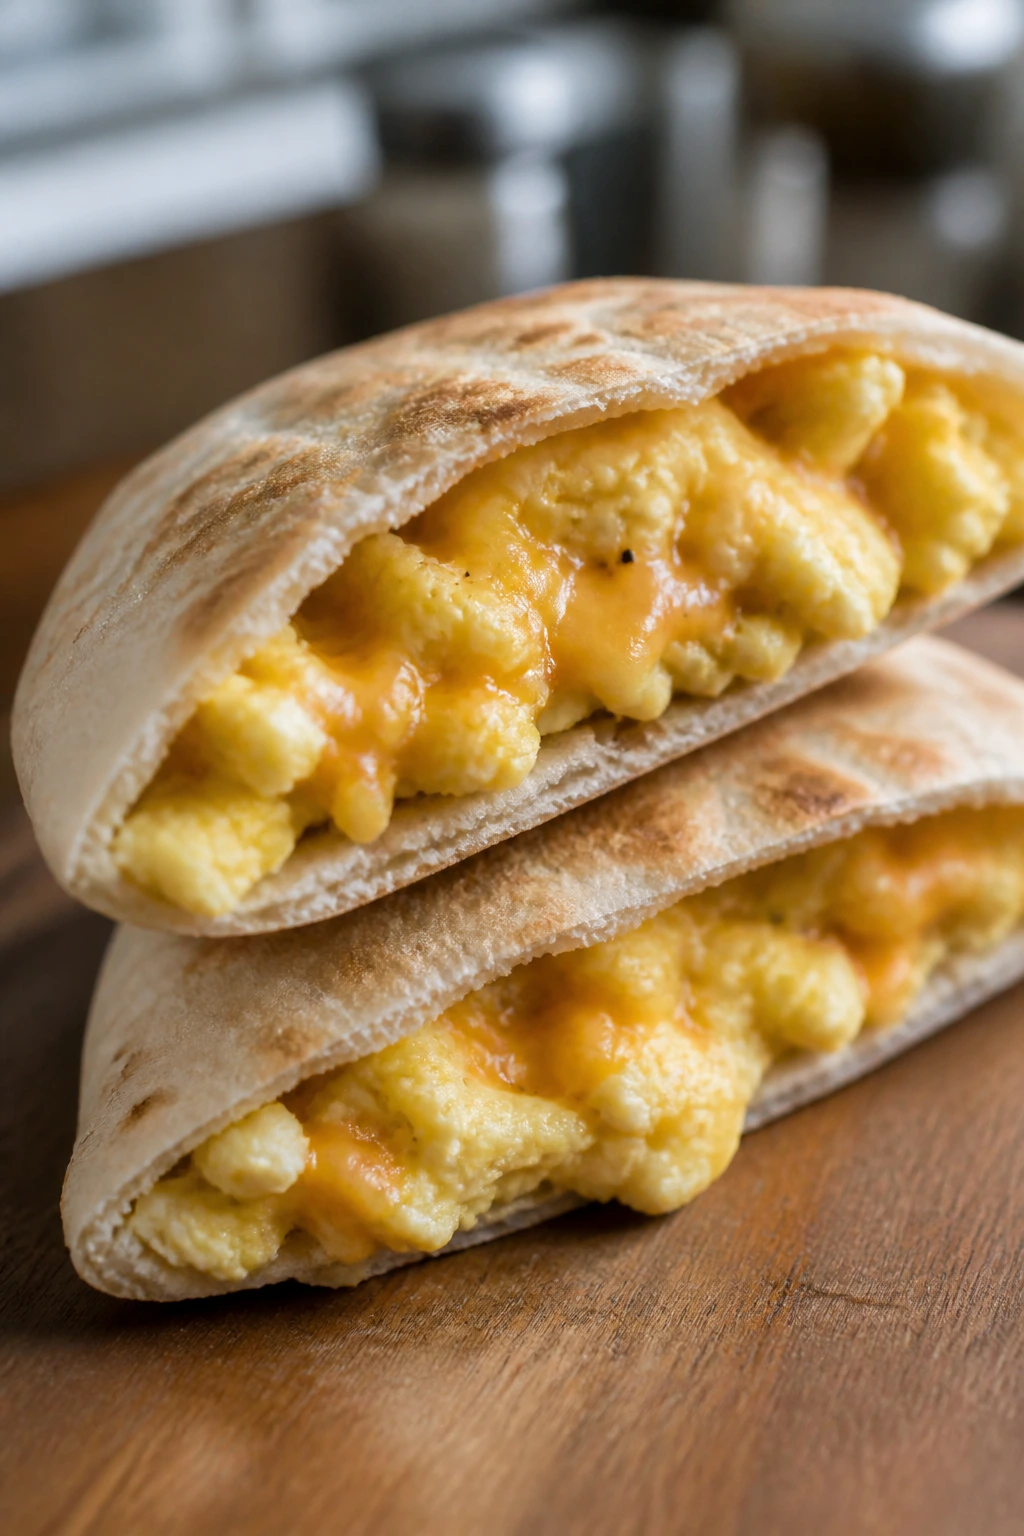
Pita pockets are underrated for school mornings. They hold the filling inside a neat little parcel, and once you cut them in half, they behave like breakfast you can hand to a child without a scavenger hunt. Scrambled eggs and cheese are the obvious filling, but that’s not a weakness. Sometimes obvious is exactly what you need.
Why It Works:
The pocket shape keeps the filling from sliding around, which makes these easier to eat in the car or on a bench outside school. Soft scrambled eggs stay tender inside the pita, and the cheese helps everything stick together as it cools. Spinach and tomato add freshness, but they should be kept dry so they don’t make the bread soggy. Warm the pita first or it tears when you open it.
Key Ingredients:
- 4 pocket pitas — sturdy ones with a clean opening.
- 6 large eggs — enough for a generous filling.
- 1 tablespoon butter — for the eggs.
- 1/2 cup shredded cheddar or mozzarella — pick a mild meltable cheese.
- 1 cup baby spinach, chopped — chop it fine.
- 1/2 cup diced tomato, seeded if possible — less water, better pocket.
- 1/4 teaspoon fine salt — seasons the eggs.
- 1/4 teaspoon black pepper — optional, light hand.
- 1 tablespoon plain yogurt or sour cream, optional — makes the eggs softer.
Quick Steps:
- Whisk the eggs with salt, pepper, and yogurt if using.
- Scramble the eggs in a buttered skillet over medium-low heat until soft and just set.
- Warm the pitas for 20 to 30 seconds so they open without tearing.
- Fill each pita with eggs, cheese, spinach, and tomato.
- Let the cheese melt from the heat of the eggs, then cut each pita in half.
- Serve warm or wrap for later.
Equipment for This Recipe:
- Nonstick skillet — for gentle eggs.
- Spatula — to keep the eggs soft.
- Knife — for halving the pitas.
- Cutting board — for filling and slicing.
How to Serve This Dish:
Serve one pita pocket half per small eater, two halves for a bigger breakfast. A few apple slices or grapes on the side keep the plate simple. If you want the pockets to feel more substantial, add a smear of hummus before the eggs go in.
Pro Tips for This Recipe:
- Cook the eggs on low heat so they stay soft.
- Seed the tomatoes if they’re juicy.
- Don’t overstuff the pocket; the opening tears.
- Wrap the pitas in foil if you want to keep them warm for a little while.
Variations on This Dish:
- Hummus Breakfast Pocket: Add hummus under the eggs.
- Feta Spinach Pocket: Swap cheddar for feta and skip the tomato.
- Milder Kid Version: Use mozzarella and finely chopped spinach only.
Common Mistakes to Avoid with This Dish:
- Using torn pita: The filling falls out before the first bite.
- Wet tomatoes: They make the bread soft in minutes.
- Cooking eggs too hard: Dry eggs feel heavy inside the pocket.
12. Berry Chia Pudding Cups
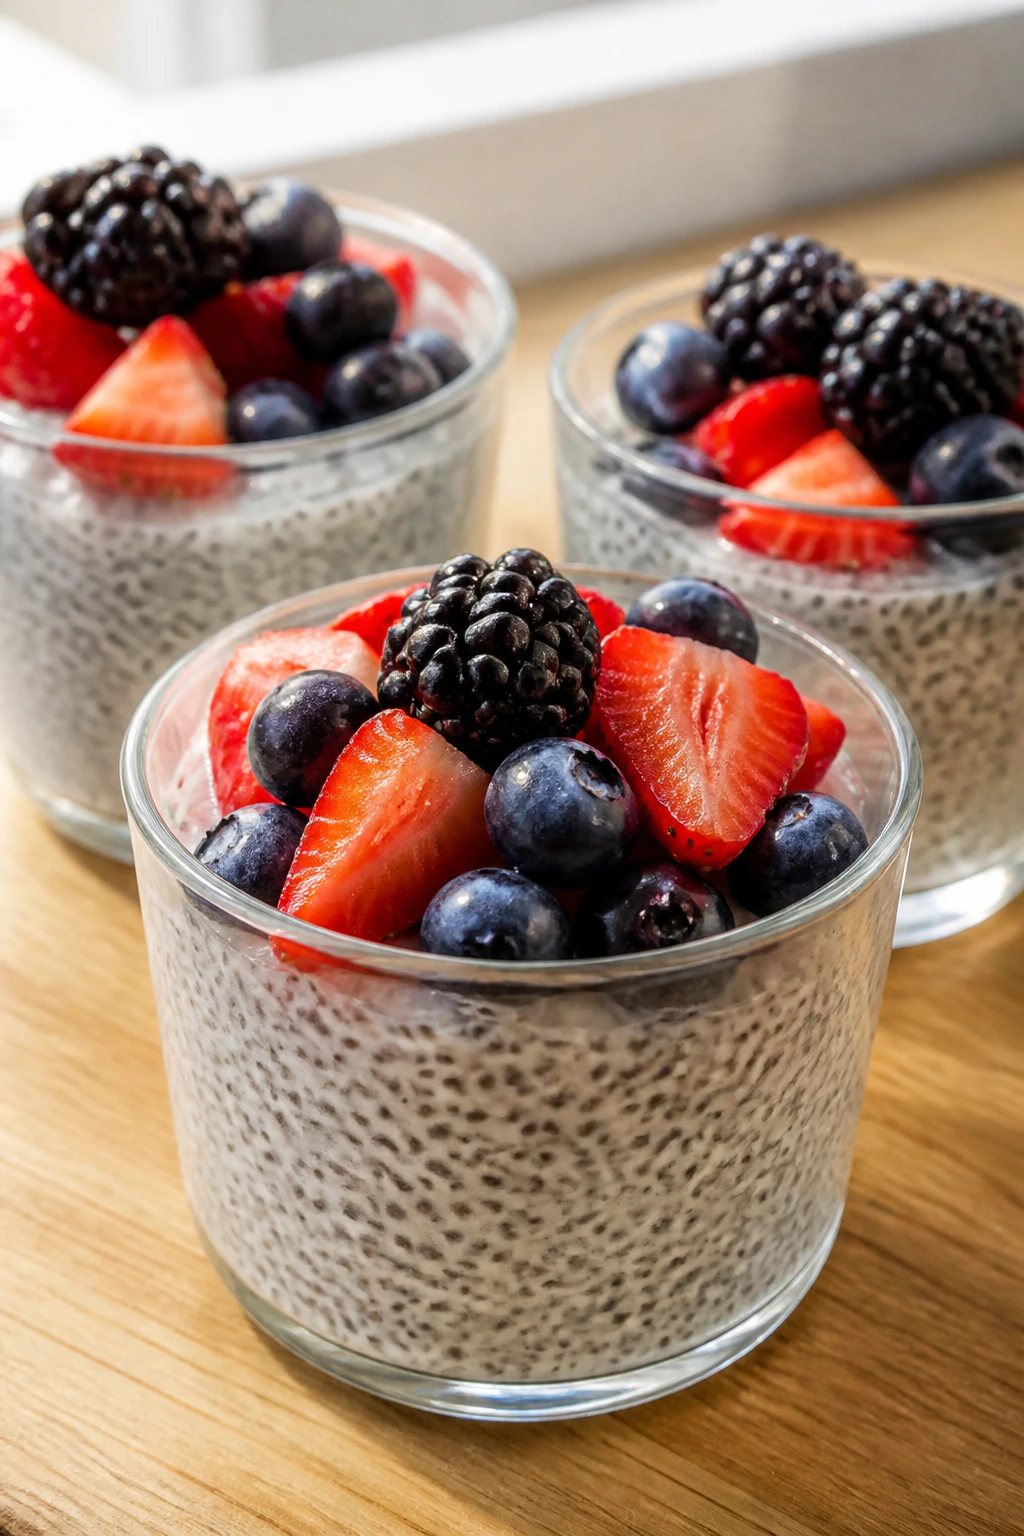
Chia pudding looks almost too quiet to count as breakfast until you eat it. The berries cut through the creamy base, the seeds set into a soft gel, and the whole thing feels cool and clean in a way that suits a rushed morning. It’s the kind of breakfast that works best when you make peace with the fact that the fridge will do the cooking.
Why It Works:
Chia seeds absorb liquid and thicken on their own, which makes this one of the easiest no-cook breakfast options in the group. Greek yogurt adds body, while berries bring moisture and brightness. The key is stirring well at the start and again after ten minutes so the seeds don’t clump into little fish-eye pockets. If you want crunch, add granola only when you serve it.
Key Ingredients:
- 1/2 cup chia seeds — the seeds need enough liquid to bloom.
- 2 cups milk — dairy or non-dairy both work.
- 2 tablespoons maple syrup — enough sweetness for a breakfast cup.
- 1 teaspoon vanilla extract — keeps the flavor soft.
- 2 cups berries — strawberries, blueberries, raspberries, or a mix.
- 1/2 cup plain Greek yogurt, optional — makes the pudding richer.
- 1/2 cup granola, optional — for topping.
Quick Steps:
- Whisk the chia seeds, milk, maple syrup, and vanilla in a bowl or large jar.
- Wait 10 minutes, then whisk again to break up any clumps.
- Stir in the yogurt if using, then cover and chill for at least 2 hours, or overnight.
- Spoon the pudding into cups or jars.
- Top with berries and granola just before serving.
- If the pudding feels too thick, stir in a splash of milk.
Equipment for This Recipe:
- Jar or mixing bowl with lid — makes storage easy.
- Whisk — important for clump-free pudding.
- Spoon — for serving.
- Measuring cups — chia is all about balance.
How to Serve This Dish:
Serve in a clear cup so the berry layer shows through. A small spoon works better than a big one, because chia pudding can be thick. One cup is enough for a lighter breakfast; pair it with toast or a boiled egg if you want more.
Pro Tips for This Recipe:
- Stir twice before chilling. That second whisk saves you from clumps.
- Use ripe berries for the best flavor; tart berries may need a touch more syrup.
- Add granola at the last minute.
- If your pudding feels too loose after chilling, add another teaspoon of chia and wait 20 minutes.
Variations on This Dish:
- Cocoa-Berry Cup: Stir in 1 tablespoon cocoa powder for a chocolate version.
- Mango Coconut Pudding: Use coconut milk and diced mango.
- Vanilla Protein Cup: Stir in a spoon of protein powder if your family uses it.
Common Mistakes to Avoid with This Dish:
- Not stirring twice: The seeds clump and the texture turns uneven.
- Too much chia: The pudding becomes stiff and rubbery.
- Adding crunchy toppings too early: They soften and lose the point.
13. Savory Fried Rice with Eggs and Peas

If you have leftover rice in the fridge, this breakfast can be on the table faster than cereal gets soggy. The rice takes on the sesame oil and soy sauce, the eggs fluff through the grains, and the peas and carrots give little bursts of sweetness. It’s savory, it’s filling, and it feels like a rescue plan that turned out better than the original schedule.
Why It Works:
Day-old rice is drier than fresh rice, which means it fries instead of steaming. That dry surface is what lets the grains pick up flavor from the pan. Eggs add protein, vegetables add color and texture, and a small splash of soy sauce gives the dish that salty backbone school mornings seem to ask for. Use medium-high heat and keep the rice moving so it doesn’t clump or scorch.
Key Ingredients:
- 3 cups cooked, chilled rice — day-old rice is ideal.
- 3 large eggs — scrambled into the rice.
- 1 cup frozen peas — no need to thaw fully.
- 1 cup diced carrots — small dice cooks faster.
- 2 tablespoons neutral oil — for the pan.
- 1 tablespoon sesame oil — for flavor, not for frying alone.
- 2 tablespoons soy sauce — or tamari for gluten-free.
- 2 green onions, sliced — for freshness.
- 1 clove garlic, minced — optional, but good.
- Black pepper, to taste — a little finish goes a long way.
Quick Steps:
- Heat the neutral oil in a large skillet over medium-high heat.
- Scramble the eggs in the pan until just set, then transfer them to a bowl.
- Add the carrots and cook for 2 to 3 minutes, then stir in the garlic if using.
- Add the rice, breaking up clumps with a spatula, and cook until the grains are hot and slightly glossy.
- Stir in the peas, soy sauce, sesame oil, eggs, and green onions.
- Cook for 1 to 2 minutes more, until everything is heated through and the rice looks evenly coated.
Equipment for This Recipe:
- Large skillet or wok — you need room to toss.
- Spatula — best for breaking up rice.
- Bowl — to hold the cooked eggs.
- Knife and cutting board — for the vegetables.
How to Serve This Dish:
Serve this in shallow bowls with a fork or spoon, depending on what your kids prefer. A few slices of cucumber or a clementine on the side keep the plate from feeling too heavy. If you want to pack it, use a thermos so it stays warm through the morning.
Pro Tips for This Recipe:
- Use cold rice, not fresh. Fresh rice turns mushy.
- Keep the pan hot enough that the rice sizzles when it hits the skillet.
- Cut the carrots small so they cook through quickly.
- A small drizzle of chili oil on adult portions is nice, but leave it off the kid bowls.
Variations on This Dish:
- Curry Fried Rice: Add 1/2 teaspoon curry powder with the soy sauce.
- Veggie-Heavy Version: Add chopped broccoli florets or bell pepper.
- Cauliflower Rice Swap: Use a half-and-half mix of rice and cauliflower rice.
Common Mistakes to Avoid with This Recipe:
- Using fresh rice: It clumps and steams instead of frying.
- Crowding the pan: The rice goes soft and pale.
- Adding too much soy sauce: The rice turns wet and salty.
14. Baked French Toast Sticks with Maple Yogurt Dip
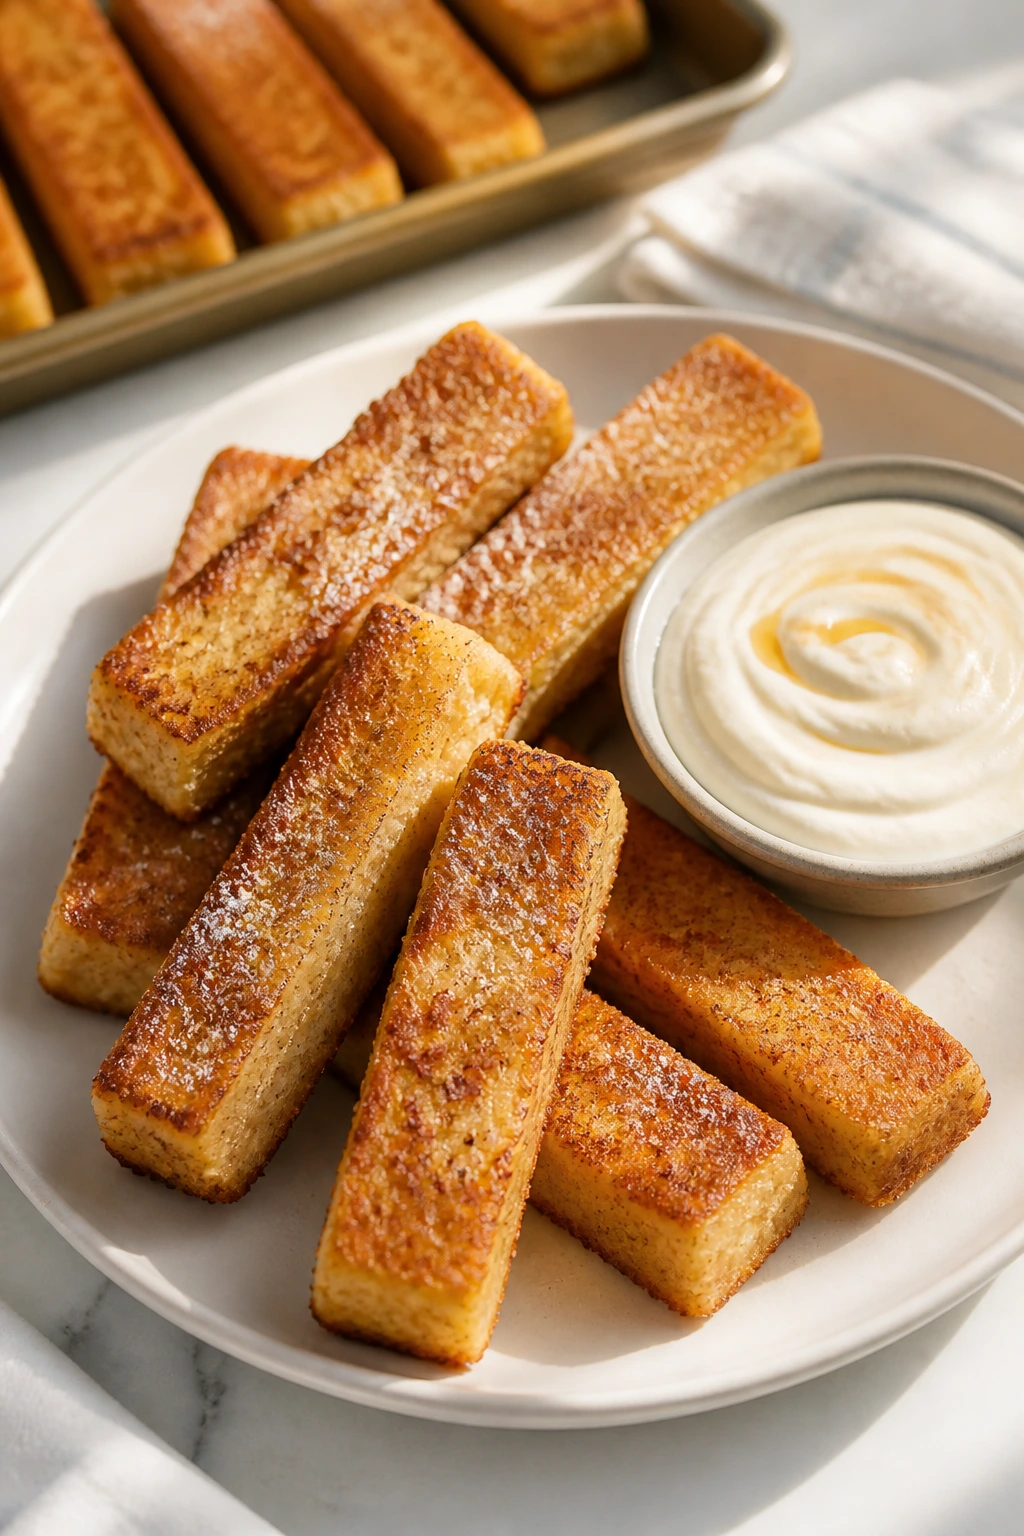
French toast sticks feel like breakfast and a small event at the same time. They’re golden on the outside, soft in the middle, and cut into shapes that are easy to dunk, which matters more than you might think when you’re feeding a kid before school. Bake them instead of frying and you can make enough for everyone without standing over the stove.
Why It Works:
Sturdy bread soaks up the custard without collapsing, and baking the sticks on a rack or sheet pan lets the outside dry and brown instead of turning greasy. The cinnamon-vanilla custard gives them enough flavor to stand on their own, while the yogurt dip adds tang and keeps the whole meal from reading as dessert. Cut the bread into sticks before soaking so the pieces absorb the custard evenly and bake faster.
Key Ingredients:
- 10 slices brioche or sturdy sandwich bread — slightly stale bread holds up best.
- 4 large eggs — the custard base.
- 1 cup milk — whole milk makes the sticks richer.
- 1 tablespoon sugar — just enough to round things out.
- 1 teaspoon cinnamon — the main flavor note.
- 1 teaspoon vanilla extract — adds warmth.
- Pinch of fine salt — sharpens the batter.
- 2 tablespoons butter, melted or softened — for the pan or brushing.
- 1 cup plain yogurt — for the dip.
- 2 tablespoons maple syrup — stirred into the dip.
Quick Steps:
- Preheat the oven to 425°F and line a baking sheet with parchment or lightly grease it.
- Whisk the eggs, milk, sugar, cinnamon, vanilla, and salt in a shallow bowl.
- Cut the bread into sticks, then dip each stick quickly into the custard so it’s coated but not saturated.
- Lay the sticks on the baking sheet and brush or dot them with butter.
- Bake for 10 to 14 minutes, flipping halfway through, until the edges are golden and the centers feel set.
- Stir the yogurt and maple syrup together for the dip.
- Serve warm.
Equipment for This Recipe:
- Baking sheet — a rimmed one is safest.
- Parchment paper — helps with cleanup.
- Shallow bowl — for the custard.
- Whisk — to blend the egg mixture.
How to Serve This Dish:
Serve four to six sticks per child with the maple yogurt dip in a small cup. A bowl of strawberries or sliced pears beside them makes the plate feel complete. They also pack well for later if you cool them first and keep the dip separate.
Pro Tips for This Recipe:
- Use bread that’s a day old if you have it. It soaks better.
- Don’t let the bread sit in the custard too long or it becomes fragile.
- Flip halfway through baking so both sides pick up color.
- Keep the dip plain enough that it doesn’t overpower the cinnamon.
Variations on This Dish:
- Pumpkin Spice Sticks: Add 1/2 teaspoon pumpkin pie spice to the custard.
- Whole-Wheat Version: Use thick whole-wheat bread and a little extra custard.
- Berry Dip Swap: Mix the yogurt with mashed strawberries instead of maple syrup.
Common Mistakes to Avoid with This Dish:
- Soaking too long: The sticks fall apart before baking.
- Using flimsy bread: It collapses under the custard.
- Skipping the flip: One side goes pale and soggy.
15. Berry Spinach Smoothie Packs with Oats
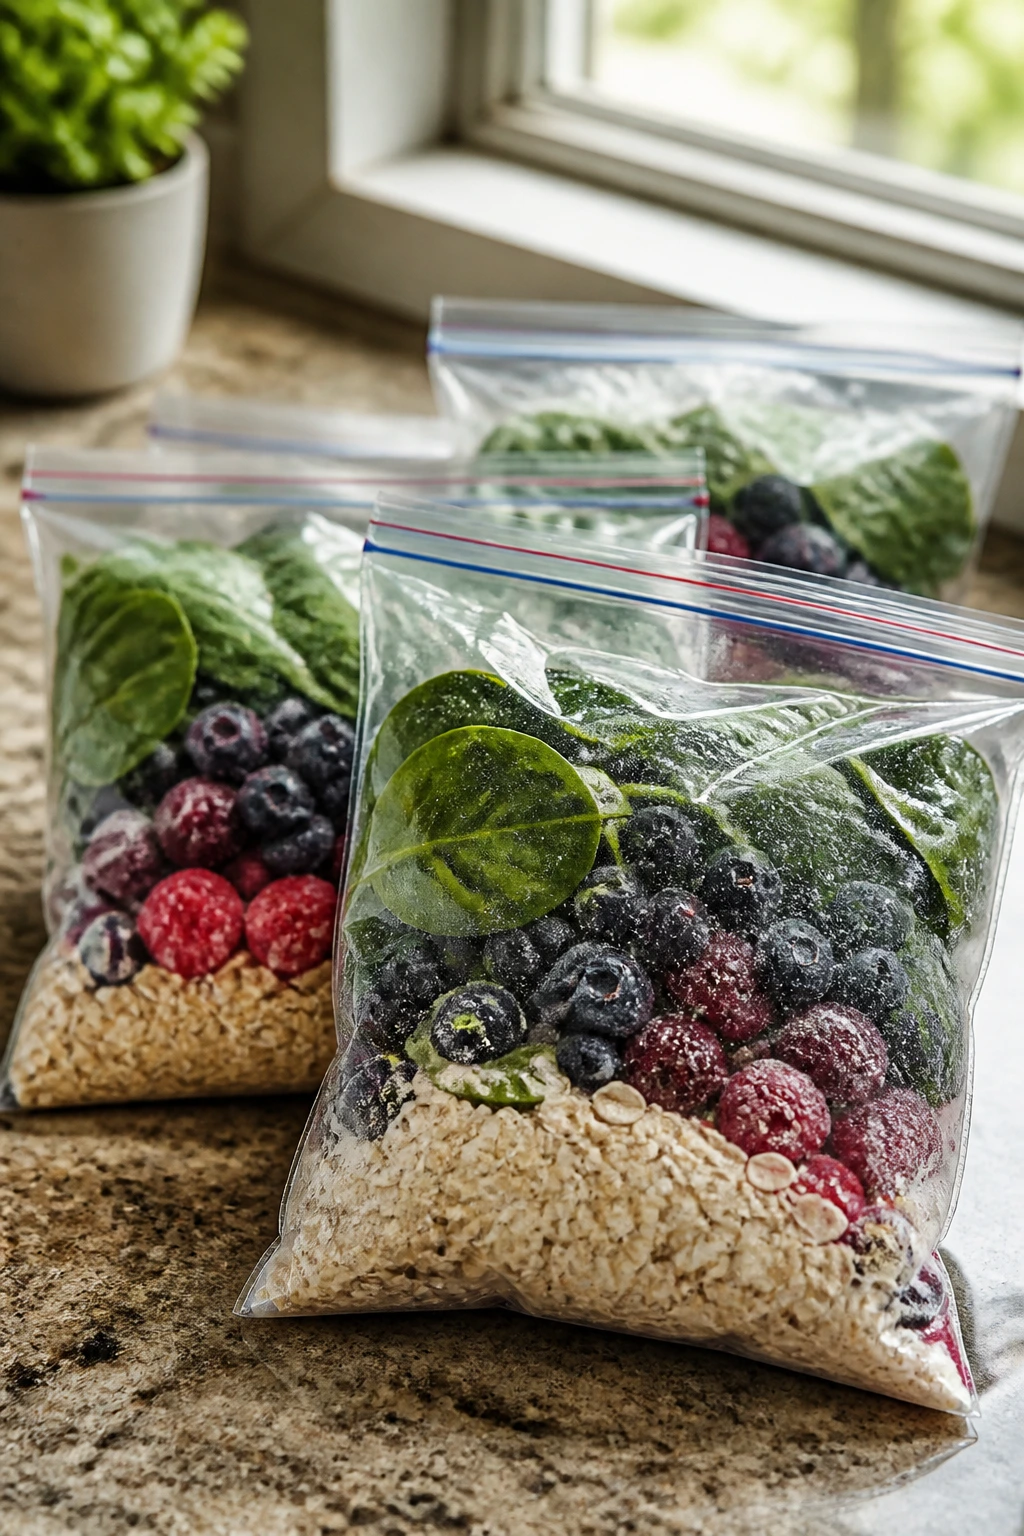
These are less a recipe than a morning shortcut with good manners. You assemble the freezer packs when you have time, and the blender takes over later. The berries keep the smoothie cold and sweet, the spinach disappears into the color, and the oats give enough thickness that it feels like breakfast instead of juice in a cup.
Why It Works:
Freezer packs remove almost all the morning decision-making. Because the fruit and greens are already portioned, you only need liquid and a blender. Oats and chia help the smoothie stay thick and more filling, which matters if the kids are not eating another thing until lunch. The spinach adds nutrients but should be tucked under the fruit so it doesn’t cling to the blender blades in a leafy clump.
Key Ingredients:
- 4 medium bananas, sliced — one banana per smoothie pack.
- 4 cups mixed berries — about 1 cup per pack.
- 4 packed cups baby spinach — one cup per pack.
- 8 tablespoons rolled oats — 2 tablespoons per pack.
- 4 tablespoons chia seeds — 1 tablespoon per pack.
- 4 freezer bags or containers — each one becomes a single smoothie pack.
- 4 cups milk or yogurt for blending — about 1 cup per smoothie.
Quick Steps:
- Divide the bananas, berries, spinach, oats, and chia seeds evenly among 4 freezer bags.
- Press the air out, seal the bags, and freeze flat.
- In the morning, tip one pack into a blender.
- Add 1 cup milk or 1 cup milk plus a few spoonfuls of yogurt.
- Blend until smooth and thick, stopping once to scrape down the sides if needed.
- Pour into glasses and serve right away.
Equipment for This Recipe:
- Blender — any full-size blender works.
- Freezer bags or containers — for the packs.
- Measuring cups — for even portions.
- Spatula — helpful for scraping the blender.
How to Serve This Dish:
Serve in a tall glass with a straw, or pour into spill-proof cups if the smoothie has to travel. A slice of toast or a few crackers on the side turns it into a more filling breakfast. For kids who drink slowly, serve it cold and thick so it holds together longer.
Pro Tips for This Recipe:
- Freeze the packs flat so they store neatly and thaw faster in the blender.
- Use ripe bananas; they sweeten the smoothie without added sugar.
- Add liquid slowly so you can control thickness.
- If the smoothie is too thick, blend in a splash more milk instead of dumping it all at once.
Variations on This Dish:
- Mango Spinach Pack: Swap the berries for mango chunks.
- Peanut Butter Smoothie: Add 1 tablespoon peanut butter to each pack.
- Dairy-Free Blend: Use oat milk or almond milk and skip the yogurt.
Common Mistakes to Avoid with This Recipe:
- Too much fruit in the bag: The blender struggles and the smoothie gets grainy.
- Forgetting the oats: The drink turns thin and stops feeling like breakfast.
- Adding all the liquid at once: It’s harder to thicken back up.
16. Potato, Pepper, and Egg Hash
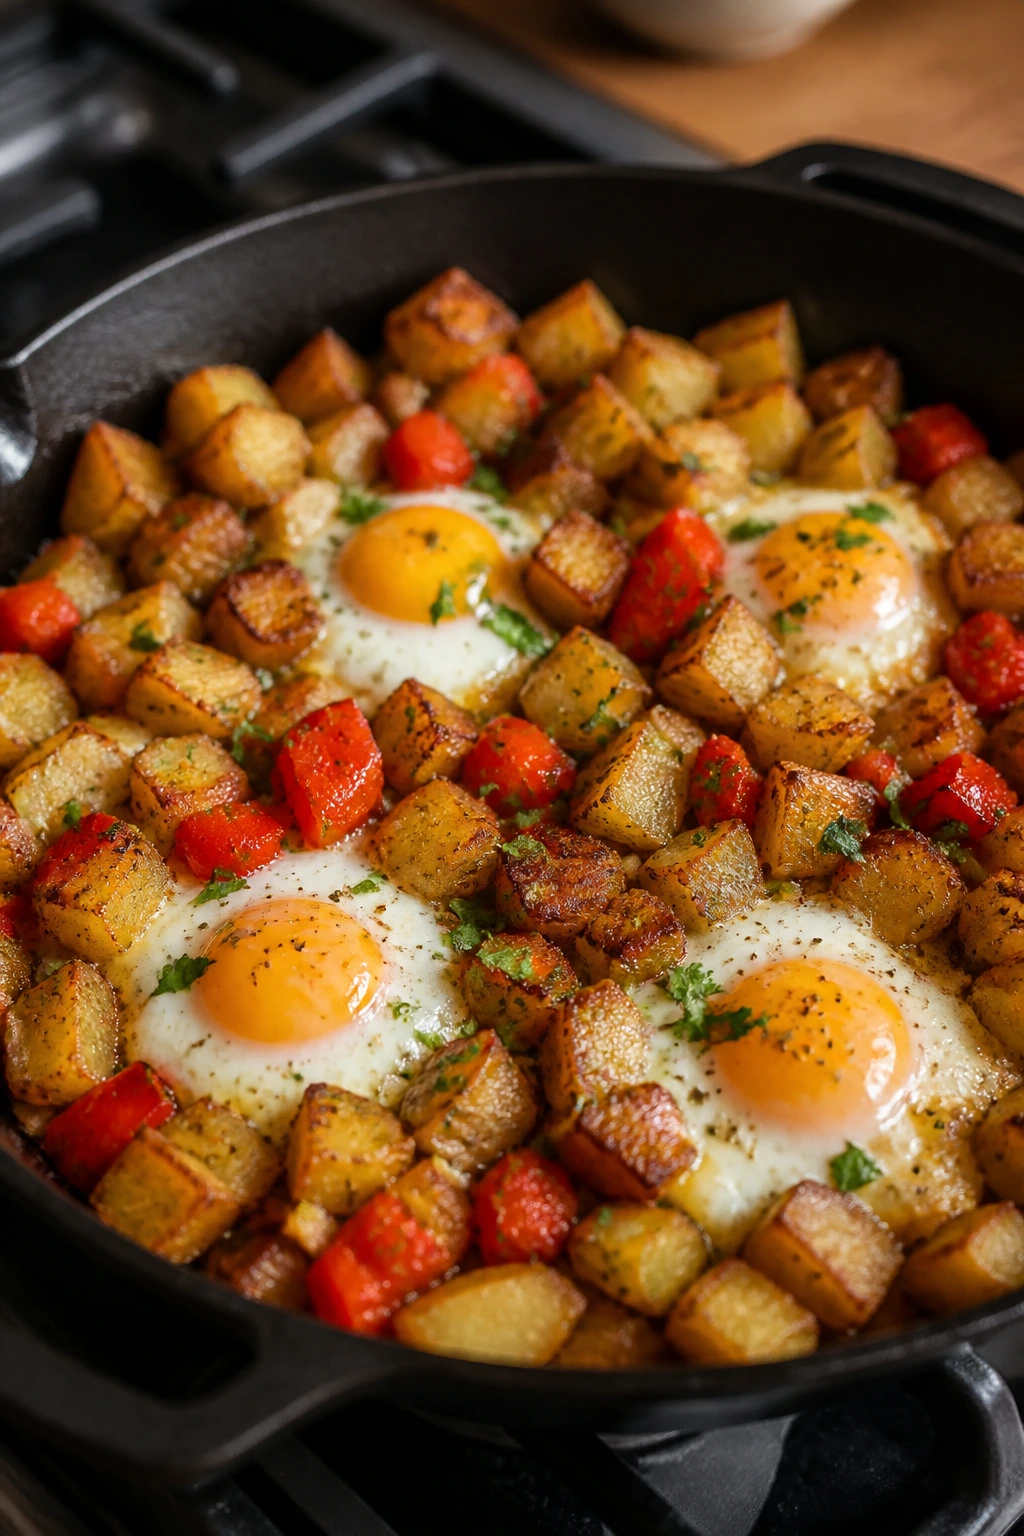
This is the skillet breakfast I make when a few extra minutes are available and the fridge is holding on to potatoes with purpose. The potatoes crisp at the edges, the peppers soften just enough, and the eggs settle into the whole thing like a built-in sauce. It’s hearty, savory, and better than it has any right to be for something so ordinary.
Why It Works:
Potatoes bring the bulk, peppers bring sweetness, and eggs round everything out so you’re not eating a pan of vegetables and calling it a day. If you dice the potatoes small and cook them until they’re truly tender, they hold together better when you add the eggs. A covered finish helps the eggs set without drying the potatoes. This is one of those breakfasts that can be turned into a bigger batch and reheated without getting sad.
Key Ingredients:
- 2 pounds Yukon Gold potatoes, diced small — the small dice cooks faster.
- 2 tablespoons neutral oil — for frying.
- 1 medium onion, diced — optional but helpful.
- 1 red bell pepper, diced — for sweetness.
- 1 teaspoon paprika — adds color and warmth.
- 1/2 teaspoon fine salt — more to taste.
- 1/4 teaspoon black pepper — light seasoning.
- 4 large eggs — cracked into the hash.
- 1 cup baby spinach, optional — wilts down quickly.
- 2 tablespoons chopped parsley or chives — for finishing.
Quick Steps:
- Heat the oil in a large skillet over medium heat.
- Add the potatoes and cook for 10 to 12 minutes, stirring now and then, until the edges start to brown and the centers are tender.
- Add the onion and pepper, then cook for another 4 to 5 minutes until softened.
- Stir in paprika, salt, and pepper.
- Make four small wells in the hash and crack an egg into each one.
- Cover the skillet and cook for 4 to 6 minutes, until the whites are set and the yolks are cooked to your liking.
- Add spinach at the end if using, then finish with herbs.
Equipment for This Recipe:
- Large skillet with lid — the lid helps the eggs set.
- Spatula — for turning and stirring.
- Knife and cutting board — for the vegetables.
- Bowl — optional, for cracking eggs first if that helps.
How to Serve This Dish:
Scoop the hash onto plates with toast on the side, or leave it in the skillet for a rustic family-style breakfast. One egg over a mound of potatoes is enough for a smaller child; two eggs makes it a heavier breakfast for older kids or adults. A spoonful of salsa on top is never a bad idea.
Pro Tips for This Recipe:
- Dice the potatoes small and evenly so they cook at the same pace.
- Don’t stir too much once the potatoes start browning; they need contact with the pan.
- If you want crispier edges, leave the pan uncovered for the first half.
- Use Yukon Golds if you can; they stay creamy inside.
Variations on This Dish:
- Sweet Potato Hash: Swap in sweet potatoes and add a little cumin.
- Cheesy Hash: Sprinkle cheese over the top right before covering the pan.
- Salsa Hash: Serve with salsa and avocado for a brighter finish.
Common Mistakes to Avoid with This Recipe:
- Potatoes cut too large: They brown before they soften.
- Low heat the whole time: The potatoes turn pale and soft instead of crisp.
- Covering too early: The potatoes steam and never get their edges right.
17. Apple Cheddar Breakfast Biscuits
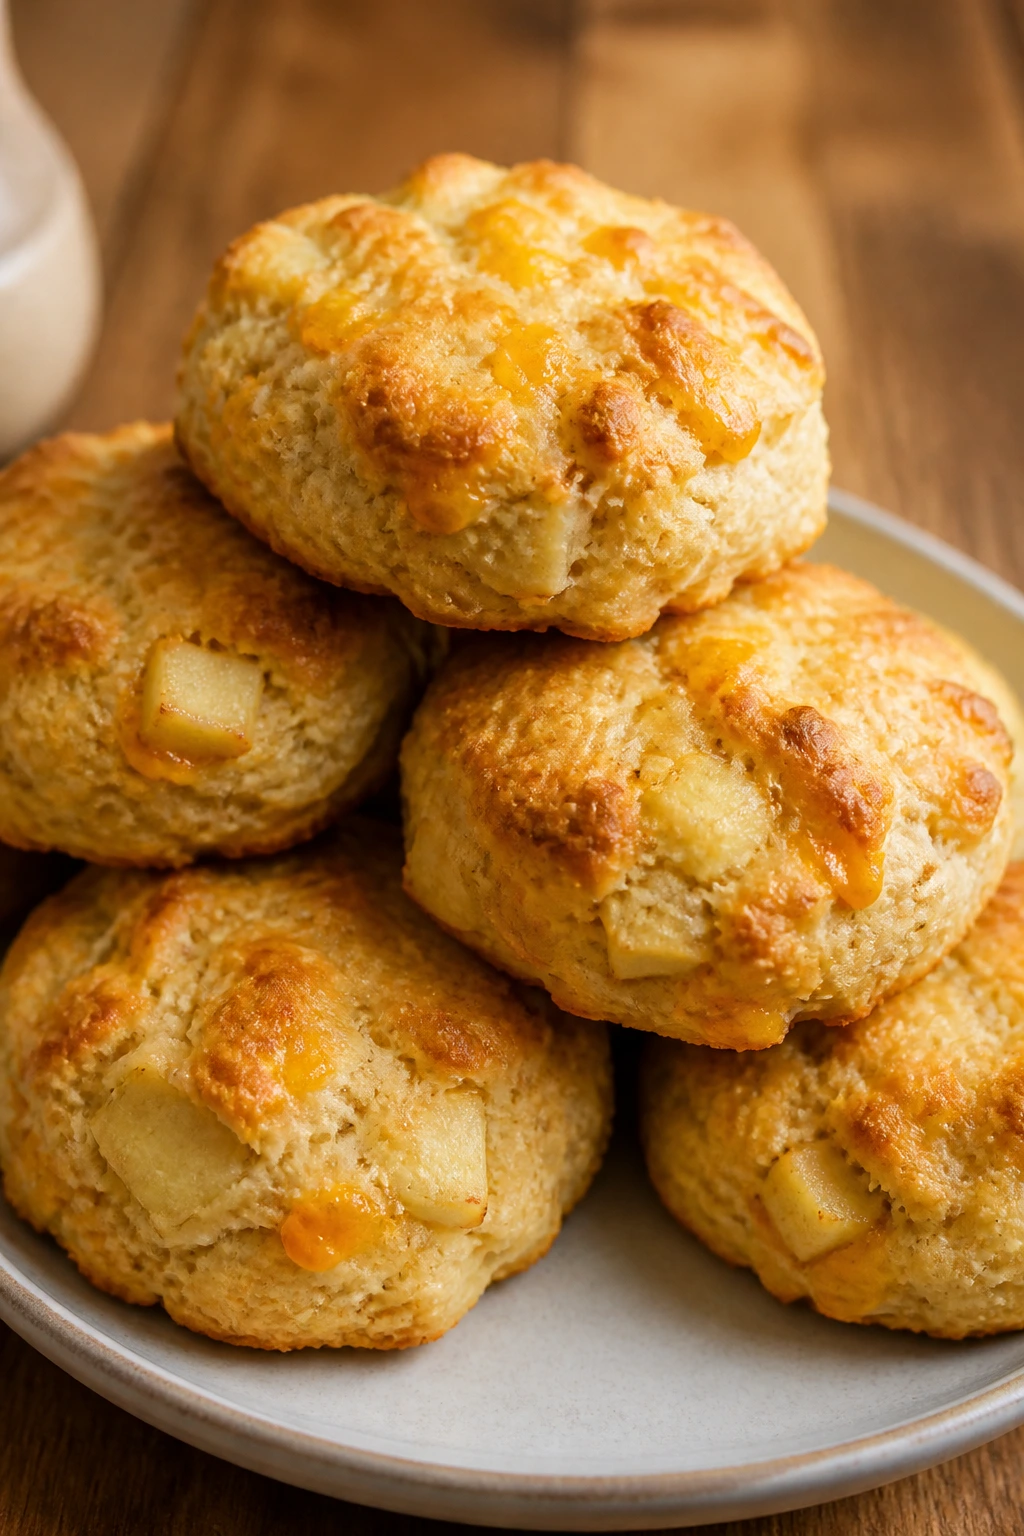
These biscuits walk the line between savory and sweet in a way kids usually trust. The apple adds little pockets of moisture, the cheddar gives a salty edge, and the biscuit itself stays sturdy enough to split, butter, and carry out the door. They taste like they were meant for a lunchbox, even when they’re still warm from the oven.
Why It Works:
Cold butter and a quick hand keep biscuits tender, while grated apple brings moisture without needing extra sugar. Cheddar keeps the flavor grounded, so the biscuit doesn’t drift into dessert territory. Squeezing the apple dry matters more than people think; if it’s too wet, the dough spreads and bakes up heavy. These freeze well, which makes them a smart batch bake.
Key Ingredients:
- 2 cups all-purpose flour — the base.
- 1 tablespoon baking powder — for lift.
- 1/2 teaspoon fine salt — keeps the biscuit from tasting flat.
- 1/2 teaspoon cinnamon — pairs with the apple.
- 6 tablespoons cold unsalted butter, cubed — cold butter makes flakes.
- 1 cup shredded cheddar — sharp cheddar gives the most flavor.
- 1 cup peeled, grated apple, squeezed dry — remove extra moisture.
- 3/4 cup cold milk — add a little more only if needed.
Quick Steps:
- Preheat the oven to 425°F and line a baking sheet with parchment.
- Whisk the flour, baking powder, salt, and cinnamon in a bowl.
- Cut in the cold butter with your fingers or a pastry cutter until the mixture looks like coarse crumbs.
- Fold in the cheddar and squeezed apple.
- Add the milk and stir just until the dough comes together.
- Pat the dough into a 1-inch-thick round and cut into 8 biscuits.
- Bake for 14 to 16 minutes, until the tops are golden and the bottoms are set.
Equipment for This Recipe:
- Baking sheet — lined with parchment.
- Mixing bowl — large enough for the dough.
- Pastry cutter or fork — for the butter.
- Box grater — for the apple and cheese.
How to Serve This Dish:
Serve warm with butter, jam, or a thin swipe of honey. One biscuit makes a side; two biscuits make breakfast. They also pair nicely with yogurt and fruit, especially when the morning needs something that feels homemade without taking much time.
Pro Tips for This Recipe:
- Squeeze the apple well. Too much moisture ruins the crumb.
- Keep the butter cold so the biscuits rise in layers.
- Handle the dough lightly; overmixing makes them tough.
- Freeze baked biscuits and reheat in a toaster oven for a few minutes.
Variations on This Dish:
- Cranberry Cheddar Biscuits: Swap the apple for dried cranberries.
- Whole-Wheat Version: Replace half the flour with whole wheat flour.
- Mild Cheese Swap: Use Monterey Jack if cheddar feels too sharp.
Common Mistakes to Avoid with This Recipe:
- Warm butter: The biscuits spread instead of rising.
- Wet apple: The dough turns heavy and sticky.
- Twisting the cutter: That seals the edges and cuts down the rise.
18. Ricotta Veggie Toast Pizzas

This is the toast that tries to be a pizza and mostly succeeds. Ricotta makes the base creamy, mozzarella melts over the top, and the vegetables bring enough color to make the whole thing feel like more than bread with toppings. It’s fast, it’s flexible, and it gives you a warm breakfast without dragging out the skillet.
Why It Works:
Ricotta spreads easily and gives the toast a soft, rich base that doesn’t need much seasoning. Because the veggies are chopped small and lightly cooked, they soften quickly under the broiler without dumping water onto the bread. Toasting the bread first is non-negotiable; raw bread under wet toppings goes limp fast. A short blast under the broiler melts the cheese and browns the top in minutes.
Key Ingredients:
- 8 slices sturdy bread or 4 split English muffins — something that can take heat.
- 1 1/2 cups ricotta cheese — the creamy base.
- 1 cup shredded mozzarella — for melt.
- 1 cup mushrooms, finely chopped and sautéed — cook out their moisture first.
- 1 cup baby spinach, chopped — add it to the mushrooms or wilt it briefly.
- 1/2 cup cherry tomatoes, halved — use them sparingly so the toast doesn’t get wet.
- 1 teaspoon Italian seasoning — the flavor bridge.
- 1 tablespoon olive oil — for sautéing or brushing.
- Salt and black pepper — to finish.
Quick Steps:
- Preheat the broiler and line a sheet pan with parchment or foil.
- Sauté the mushrooms in olive oil over medium heat until their moisture cooks off and the edges look browned, about 5 to 6 minutes.
- Stir in the spinach just until wilted, then season with salt, pepper, and Italian seasoning.
- Toast the bread lightly so it firms up.
- Spread ricotta over each slice, then top with the mushroom mixture, tomatoes, and mozzarella.
- Broil for 1 to 3 minutes, watching closely, until the cheese melts and spots of brown appear.
- Serve hot.
Equipment for This Recipe:
- Sheet pan — for broiling.
- Broiler or toaster oven — either works.
- Skillet — for the vegetables.
- Spoon or small spatula — for spreading ricotta.
How to Serve This Dish:
Serve two toast pizzas per child with a few grapes or cucumber rounds on the side. They look nicest when the ricotta peeks through the cheese and the tomatoes sit on top like little red dots. If you want a fuller plate, add a boiled egg or a small fruit salad.
Pro Tips for This Recipe:
- Cook the mushrooms first so they do not steam the toast.
- Watch the broiler closely; it goes from golden to scorched fast.
- Use thicker bread if you want a sturdier base.
- A little parmesan mixed into the ricotta gives more flavor.
Variations on This Dish:
- Pesto Ricotta Toast: Swirl a spoonful of pesto into the ricotta.
- Spinach-Only Version: Skip the mushrooms and keep the greens simple.
- Margherita Toast: Use tomato, mozzarella, and a few torn basil leaves.
Common Mistakes to Avoid with This Dish:
- Wet vegetables: They soak the bread and make the toast collapse.
- Skipping the pre-toast: The bread turns soft under the toppings.
- Walking away from the broiler: The cheese browns in a hurry.
Why These Breakfasts Hold Up When the Morning Gets Loud
A school morning does not care how beautiful a recipe looks in the quiet of the kitchen. It cares whether the food can be made fast, packed cleanly, and eaten before the second shoe is found. That is why the best no meat meals are usually built around one of three things: make-ahead jars, reheat-friendly bakes, or handheld foods that don’t need a fork and a prayer.
The texture part matters more than people think. Soft foods need structure from oats, eggs, or bread. Crunchy toppings need to stay separate until the last minute. Wet ingredients need to be tamed — drained beans, seeded tomatoes, thick yogurt, cooled fillings, that sort of thing. Once you start noticing how moisture moves through a breakfast, the whole category gets easier to manage.
I also like the way these meals spread the workload across the week. A batch of egg muffins on Sunday, a jar or two of oats, a freezer bag of smoothie packs, and a pan of pancakes or oatmeal squares can carry several mornings without repeating the same plate every day. That is what makes breakfast feel less like a daily problem and more like a drawer you already stocked.
Essential Equipment for These Recipes
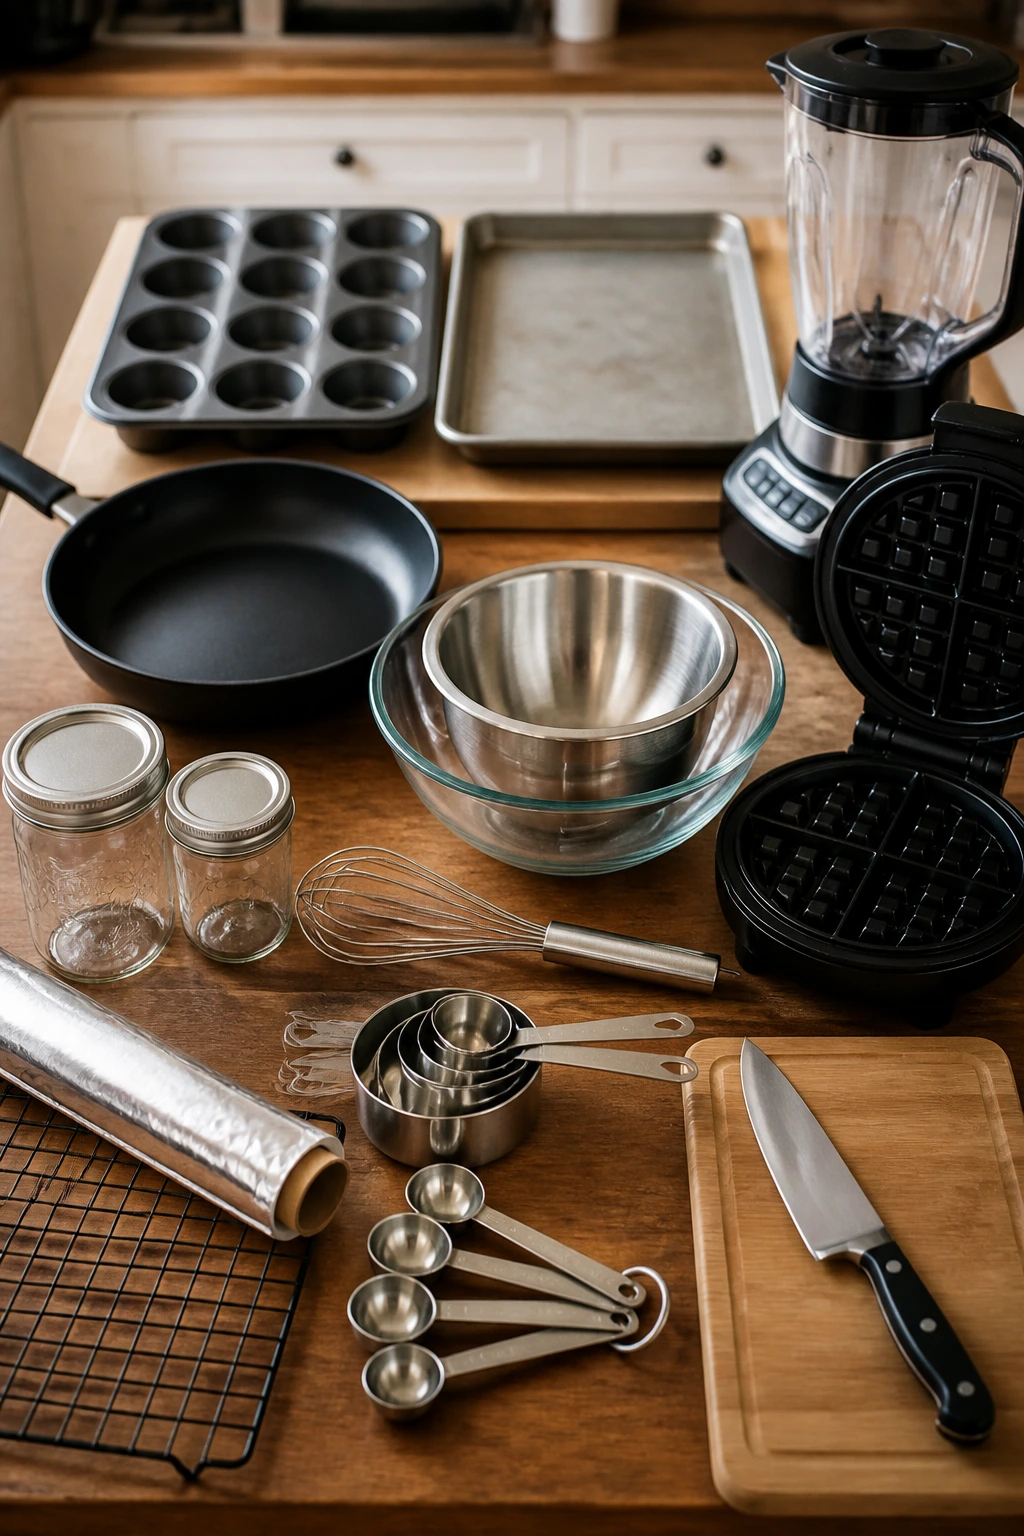
- 12-cup muffin tin: Useful for egg muffins and any small baked breakfast that needs shape.
- Rimmed sheet pan: Needed for sheet-pan pancakes and baked toast-style bakes.
- Large skillet or nonstick pan: The workhorse for quesadillas, hashes, and fried rice.
- Waffle iron: Handy for banana oat waffles, especially if you freeze extras.
- Blender: Smoothies and blender waffles both lean on it.
- Mixing bowls in two sizes: One big bowl and one medium bowl cover most of the recipes.
- Whisk: Better than a fork for eggs, batters, and chia pudding.
- Measuring cups and spoons: These recipes depend on enough liquid, not a hopeful splash.
- Jars or leakproof containers: Best for overnight oats, parfaits, and chia pudding.
- Foil, parchment, and freezer bags: Simple tools that save time and keep food from sticking together.
- Cooling rack: Helps baked items release steam before they get packed.
- Sharp knife and cutting board: Small, clean cuts make breakfast easier to serve and less messy to eat.
Smart Shopping for Oats, Eggs, Bread, and Fruit
Old-fashioned rolled oats are the best backbone for this kind of breakfast. They soften in the fridge without collapsing, and they bake into squares that hold their shape. Instant oats are fine if you want porridge, but they turn too soft in overnight oats and baked pans. Buy a bigger bag than you think you need; it disappears fast once you start making jars and baked oatmeal.
For dairy, thick matters. Plain Greek yogurt with some body makes parfaits and chia cups more filling, and cottage cheese with a small curd is easier for kids who don’t like the lumpy look. Milk can be whole, 2%, or a non-dairy option, but if a recipe needs structure — like baked oatmeal or waffles — richer milk gives a softer result. Pre-shredded cheese is fine for muffins and burritos, while block cheese melts cleaner in quesadillas and toast pizzas.
Bread and tortillas should be sturdy. Thin sandwich bread droops under banana or avocado, and fragile tortillas split when you roll them tight. Seek out whole-grain bread with a little heft, flour tortillas that bend instead of crack, and pitas with a real pocket. For fruit, bananas with brown speckles, apples that still snap, and frozen berries that pour straight from the bag are the workhorses. Frozen fruit is not a compromise here; it’s often the smarter buy because it keeps flavor without turning limp in the fridge.
Beans should be rinsed well, especially for burritos and quesadillas. They taste cleaner, and the filling is less wet. Eggs are worth buying fresh, but you do not need fancy ones. Large eggs, plain and uncomplicated, do the job.
How to Serve These Meals Without a Morning Mess
Presentation:
Keep the plated breakfast simple and clean. A jar with visible layers, a square of sheet-pan pancake with berries, or two egg muffins on a small plate looks more appealing than a crowded spread. If you’re serving several kids, group the food by type — fruit in one bowl, main breakfast in another — so nobody has to fish through a pile of options while the clock is ticking.
Accompaniments:
Fruit is the easiest side across this whole collection: apple slices with toast, orange wedges with burritos, grapes with quesadillas, berries with waffles. A cup of milk, a spoon of yogurt, or a handful of cucumber sticks can round out a plate without adding much work. For savory breakfasts, salsa, hot sauce, or a little ketchup on the side keeps older kids happier than trying to season everything heavily in the pan.
Portions:
Younger kids usually do fine with one muffin, one jar, half a burrito, or a square of sheet-pan pancake plus fruit. Bigger appetites need two muffins, a full burrito, two quesadilla triangles, or a larger bowl of baked oatmeal. The cleanest way to scale these recipes is to make a few base items — a pan, a batch, a tray — and then add fruit or yogurt rather than building a second whole meal from scratch.
Beverage Pairing:
Cold milk pairs well with oats, pancakes, biscuits, and toast. Water and fruit-infused water work well with burritos, hashes, and fried rice, which are saltier and more savory. For adults eating alongside the kids, black coffee or a milky coffee drink fits the sweeter breakfasts, while plain tea is a neat match for the avocado toast and ricotta toast pizzas.
Additional Tips and Flavor Boosters

Flavor Enhancement:
Keep a couple of tiny finishers near the breakfast shelf: cinnamon, everything seasoning, flaky salt, and a small jar of maple syrup. A pinch of one of those at the end changes a plain breakfast into something that tastes finished. On savory items, a spoon of salsa or a few drops of hot sauce does more than another handful of cheese.
Customization:
If your family likes one fruit better than another, swap it straight across. Apples can become pears, blueberries can become raspberries, and bananas can become mango in the smoothie packs. For savory recipes, swap cheddar for mozzarella, Monterey Jack, or feta depending on what your people actually eat without complaint.
Serving Suggestions:
Finish toast recipes with sliced scallions, seeds, or a few herbs if you’ve got them. Add granola to yogurt and chia cups at the table, not before. Burritos get better with a little side bowl of salsa, and oatmeal bakes feel more like breakfast when they’re served with an extra spoonful of yogurt on top.
Make-It-Yours:
For dairy-free breakfasts, use oat milk or almond milk, skip the yogurt in recipes that don’t need it, and rely on nut butter, chia, or eggs for body. For nut-free homes, use sunflower butter instead of peanut butter and keep the seed toppings simple. For extra protein, add an extra egg to the muffins, use Greek yogurt in the parfaits, or pair the sweeter recipes with a boiled egg on the side.
Make-Ahead, Storage, and Reheating Guidance
The cold breakfasts hold up differently from the hot ones, and that’s worth planning around. Overnight oats, chia pudding, and parfait jars keep well in the fridge for 3 to 4 days, though granola should stay separate until serving or it loses all crunch. If you’re making fruit-heavy jars, use berries or diced apples that stay firm; soft fruit gets watery by day three.
Egg muffins, baked oatmeal squares, sheet-pan pancakes, waffles, French toast sticks, biscuits, burritos, and toast pizzas all freeze well once cooled. Pack them airtight and freeze for up to 2 months for the best texture. Burritos and egg muffins are the most freezer-friendly of the bunch, because they reheat without turning weird. Waffles and French toast sticks should be cooled on a rack before freezing so the crisp outside doesn’t trap steam.
Reheat egg muffins, pancakes, waffles, biscuits, and French toast sticks in a toaster oven or regular oven at 350°F for 6 to 10 minutes, depending on thickness. The microwave is faster, but it softens the edges, so I use it only when speed matters more than texture. Burritos do well in the microwave for 2 to 3 minutes from refrigerated, or a little longer from frozen, and they benefit from being wrapped in a damp paper towel so the tortilla stays flexible.
Toast-based breakfasts are the exception. Avocado toast, cottage cheese toast, and ricotta toast pizzas are best made fresh, even if the toppings are prepped ahead. You can mash the avocado, chop the tomatoes, and sauté the mushrooms the night before, but the bread should still be toasted just before eating. That one detail keeps the whole breakfast from turning limp.
Smoothie packs freeze well for up to 2 months, though they taste best within a month while the fruit flavor is still bright. Blend them straight from frozen with enough liquid to keep the motor from fighting. If the smoothie is too thick, add liquid in small splashes rather than pouring in a full cup at once. It’s easier to loosen a smoothie than to rescue one that’s gone watery.
Variations and Adaptations to Try
Gluten-Free School Basket:
Use certified gluten-free oats, gluten-free bread, and corn tortillas where needed. The overnight oats, chia pudding, smoothie packs, egg muffins, and hash are naturally easy to adapt once you swap the bread and tortillas. Keep a separate toaster or toaster bag if you’re sensitive to cross-contact.
Dairy-Free Desk Drawer:
Swap in oat milk, almond milk, or soy milk, and choose dairy-free yogurt and cheese where the recipe needs them. Peanut butter toast, smoothie packs, overnight oats, and chia pudding barely change at all with this swap. For savory dishes, a little extra olive oil or avocado usually makes up for the missing dairy richness.
Nut-Free Lunchbox Lane:
Sunflower butter replaces peanut butter cleanly, and pumpkin seeds can stand in for walnuts in baked oatmeal or yogurt toppings. Check the granola too; many store-bought versions sneak in nuts. This version matters if the breakfast has to travel to school, not just sit at your own table.
Higher-Protein Morning Plan:
Add an extra egg to muffins and hashes, choose Greek yogurt over regular yogurt, and tuck cottage cheese into toast or pita pockets. Beans in burritos and fried rice help too. If you want a breakfast that carries a child through a long morning, protein plus fiber is the combination that tends to hold.
Lower-Sugar Rotation:
Trim the maple syrup in oats and chia pudding, lean on cinnamon and vanilla, and let ripe fruit do more of the sweetening. This works especially well in banana waffles, overnight oats, and smoothie packs. You don’t need every breakfast to taste sweet to make it kid-friendly; many kids do fine once the texture is pleasant and the flavors are familiar.
Savory-First Schedule:
If your household leans salty, prioritize egg muffins, burritos, hash, pita pockets, and toast pizzas. Make one sweet batch on the weekend and keep the rest savory so the fridge doesn’t become a dessert parade. A lot of mornings are easier when breakfast is treated like a real meal and not a treat trying to wake itself up.
Common Mistakes to Avoid
The biggest mistake is making breakfasts too wet. Wet beans, watery tomatoes, thin yogurt, and overripe fruit all slide the texture in the wrong direction. Drain, seed, pat dry, or chill the ingredients that need it, and the food stays together better.
Another trap is pretending every breakfast should be hot. Some recipes are best cold from the fridge, and some are best fresh from the toaster or skillet. Forcing a cold recipe to be hot, or vice versa, usually makes the texture worse. A good rotation includes both kinds, because school mornings are not consistent enough to demand only one style.
People also under-season savory breakfasts. Eggs, potatoes, beans, rice, and toast need salt, even if the final food is for kids. The trick is not making them salty; it’s seasoning them early so they taste like something instead of “warm.” A tiny amount of cumin, paprika, or everything seasoning can carry an entire recipe.
Skipping the cooling step causes more trouble than most people expect. Hot pancakes, muffins, burritos, and biscuits trap steam when they’re packed too soon, and that steam turns crisp edges soft and makes containers damp. A short cool-down on a rack feels boring at the moment, but it saves the texture later.
The last mistake is trying to make every breakfast a solo event instead of a system. A freezer item, a fridge item, and one fresh option cover more mornings than one ambitious recipe ever will. That’s the part people miss — not every school day needs a fresh-cooked masterpiece, just food that’s ready when the house is not.
Frequently Asked Questions
Which of these breakfasts is best for the busiest mornings?
The fastest options are the ones you can grab cold or reheat in under two minutes: overnight oats, chia pudding, smoothie packs, egg muffins, and freezer burritos. If you want the least morning effort, make two of those ahead and keep one fresh option for the weekend.
What can I make the night before without ruining the texture?
Overnight oats, chia pudding, parfait jars, burritos, smoothie packs, and egg muffins all handle advance prep well. Toast-based recipes need fresher assembly, but you can prep the toppings and bread separately. The main thing is keeping crunchy parts dry and separate until serving time.
How do I keep breakfast from getting soggy in a lunchbox or car cup holder?
Use sturdy bread, drain wet fillings, and cool hot food before packing it. Burritos should be wrapped tightly, toast should be made right before eating, and granola should stay in a separate bag until the last minute. Steam is the usual culprit when breakfast loses its shape.
Can I freeze the egg muffins, pancakes, waffles, and biscuits together?
Yes. Freeze them once fully cooled, then store them in airtight containers or freezer bags for up to 2 months. Reheat them in the toaster oven or oven if you want the edges to stay firmer than the microwave would leave them.
What if my kid won’t eat eggs?
Lean on the cold breakfasts, the toast options, the burritos with more beans and cheese, and the smoothie packs. Banana toast, yogurt parfaits, baked oatmeal, chia pudding, and peanut butter toast all work without eggs. If you still want a hot breakfast, the baked oatmeal squares usually get the least resistance.
How far ahead can I prep fruit for these recipes?
Apples and berries can usually be washed and cut a day ahead if they’re stored dry and sealed well. Bananas are better sliced just before serving unless they’re going into a smoothie pack. If the fruit is going on toast, keep it fresh; it matters more than people think.
Do any of these work for gluten-free school breakfasts?
Yes, quite a few. Overnight oats, chia pudding, smoothie packs, egg muffins, fried rice, hash, and the yogurt cups are already easy to adapt, and the rest usually just need gluten-free bread, tortillas, or flour. Check labels on granola and soy sauce, because those are the spots where gluten sneaks in.
What’s the best option for kids who want something sweet but not dessert-level sweet?
Overnight oats, baked oatmeal squares, French toast sticks with yogurt dip, and banana oat waffles sit in that middle zone. They taste familiar and mildly sweet, but they still behave like breakfast. A little cinnamon and vanilla go a long way without needing a heavy hand with sugar.
How do I feed a bigger family without cooking three separate breakfasts?
Choose one batch recipe and one assemble-only recipe. A pan of sheet-pan pancakes plus a bowl of fruit, or egg muffins plus overnight oats, covers a lot of ground with less stress than trying to make everyone their own thing. You’re aiming for variety, not a custom order counter.
A Calmer Breakfast Counter
A school morning will probably never become quiet. Someone will still lose a shoe, the backpack will still open at the wrong time, and the clock will still feel a little rude. But a breakfast that’s already waiting in the fridge, freezer, or toaster changes the shape of the whole morning.
I trust that more than I trust a heroic scramble at 7:42. Pick a couple of cold options, keep one freezer batch ready, and leave yourself at least one fresh recipe for the days when you have a little more room to breathe. That small bit of planning does more than save time — it takes the edge off the first hour of the day.