
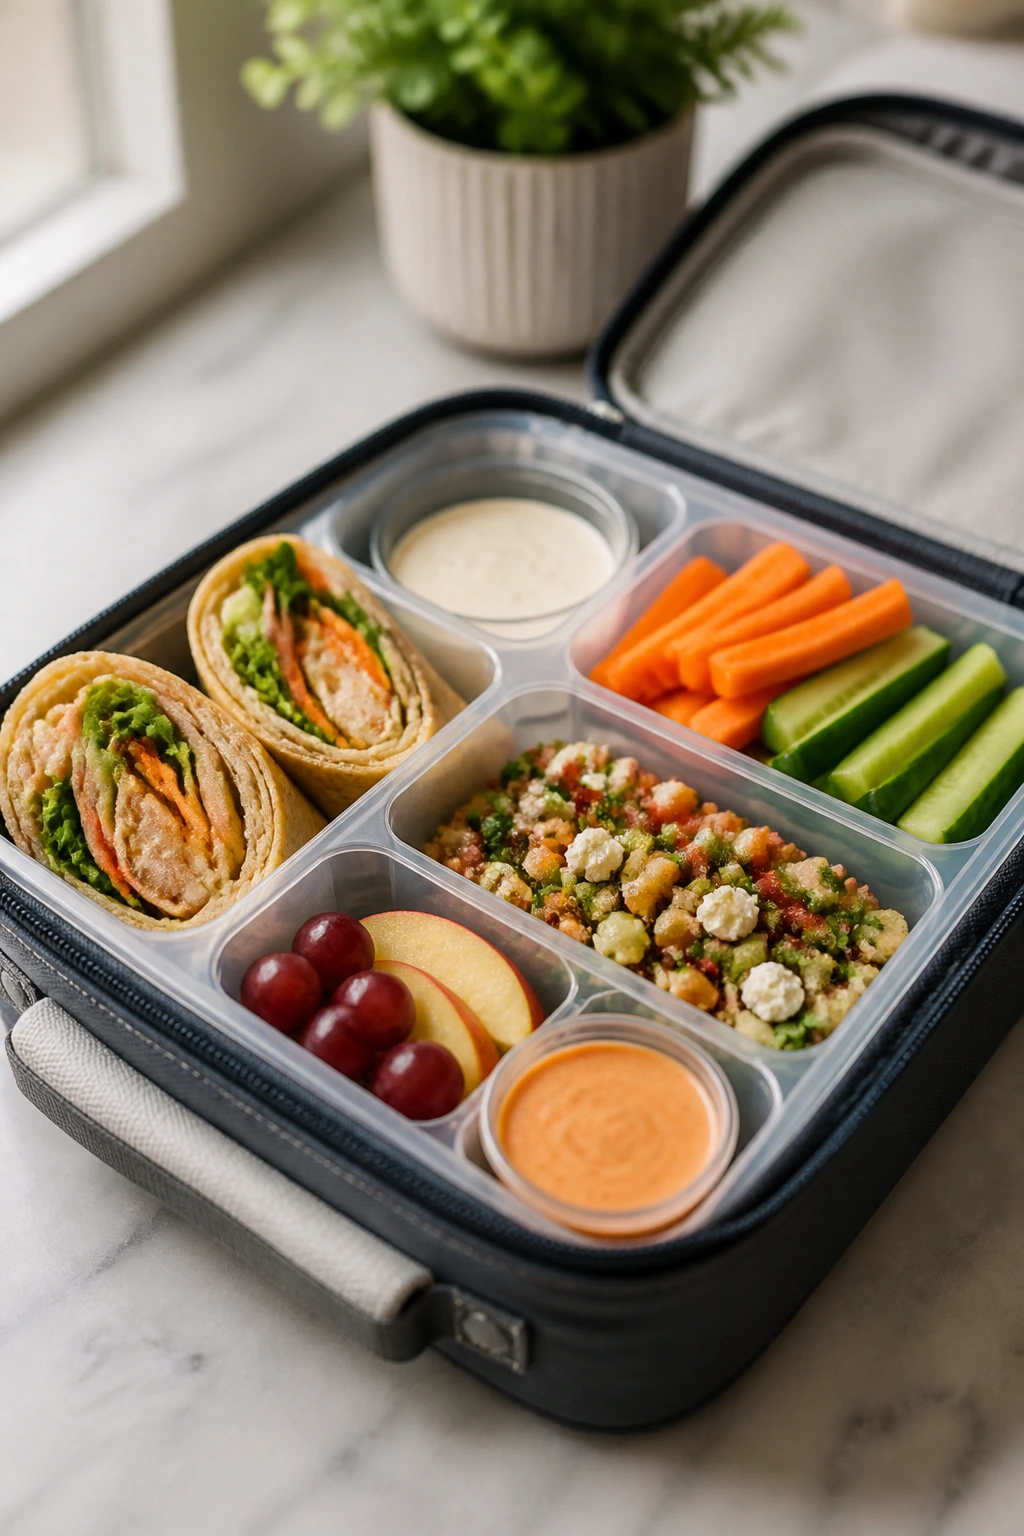
A lunchbox can be a little battlefield. Bread gets damp. Crackers soften. Warm fillings turn the whole thing into a sad, lukewarm mush by noon. The difference between a lunch that gets eaten and one that comes home untouched usually comes down to a few small choices: a tighter wrap, a drier filling, a sauce packed on the side, or a thermos that was warmed the right way before you filled it.
These 40 meals for lunchboxes lean hard into those details. They’re the kind of packable lunches I trust because they hold shape, taste good cold or warm, and don’t demand a kitchen full of leftovers to pull off. Some are built for picky kids who want familiar flavors. Some are better for adults who need something sturdier than a sandwich. A few travel best in a thermos, which is still one of the most useful lunch tools ever made, even if it looks boring sitting on the shelf.
The real trick with lunchbox food is balance. You want enough protein to carry the meal, enough starch to make it feel like lunch, and enough moisture control so nothing goes soggy before the bell rings. That’s the thread running through every recipe below, and it’s why these pack well when a random leftover bowl often doesn’t.
Why This Collection Works in Real Lunchboxes
-
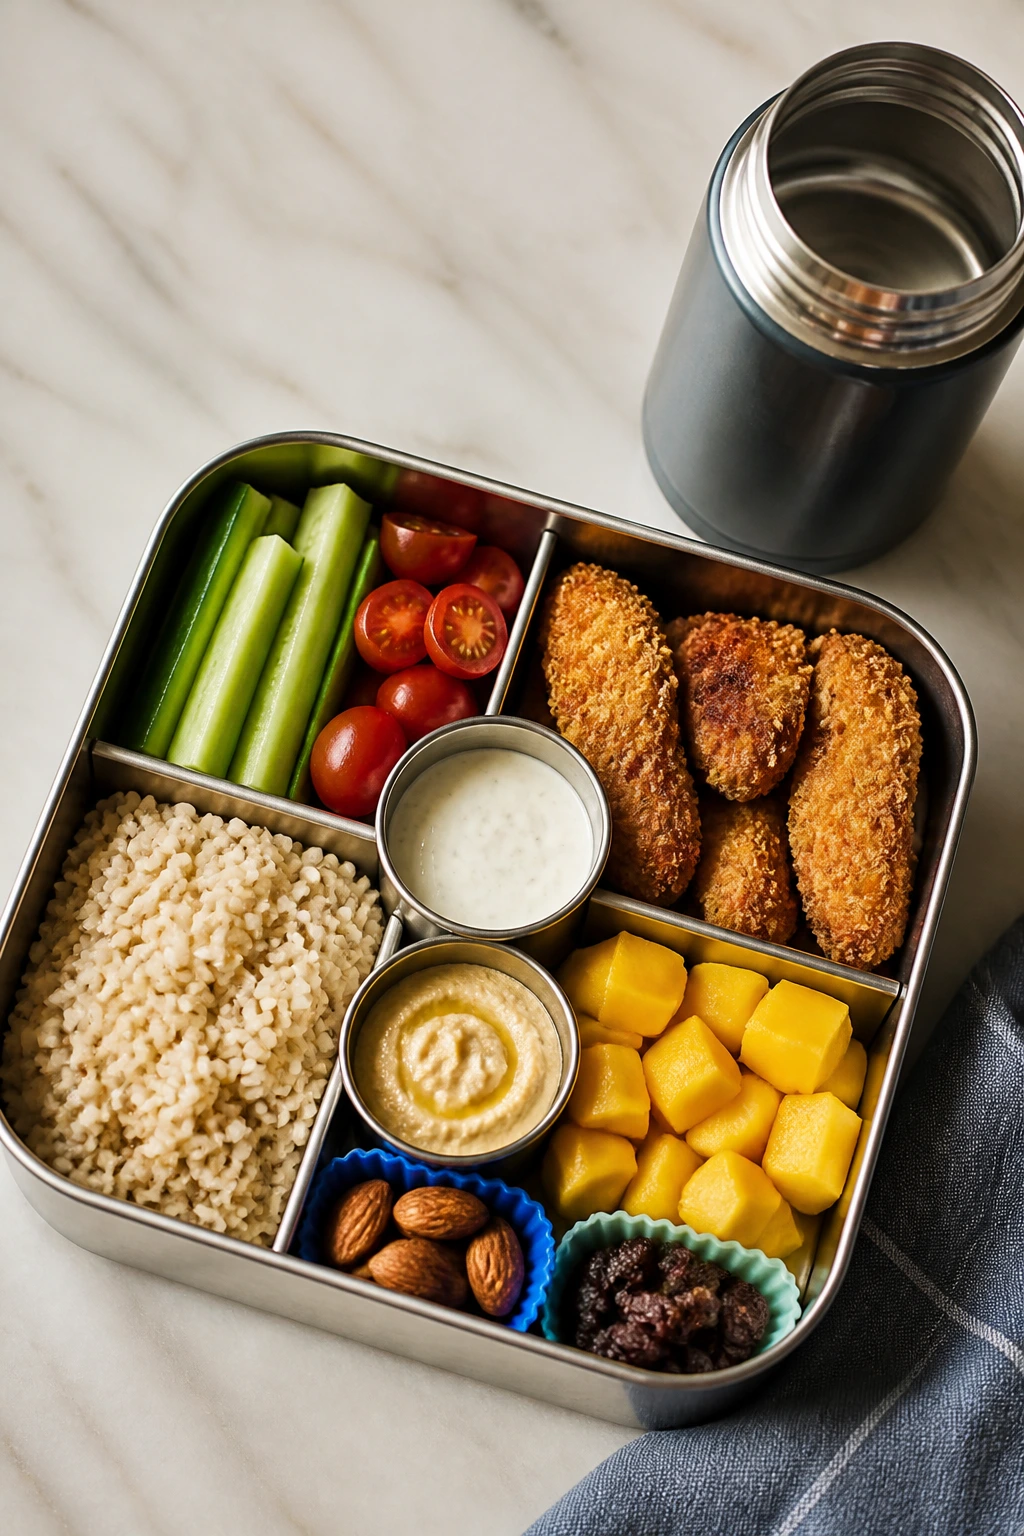
Built for the commute: Every meal here can sit in a container, a bento box, or a thermos without falling apart halfway to school or work.
-
No soggy surprises: The recipes rely on wraps, bakes, salads, and fillings that stay tidy, with sauces either absorbed on purpose or packed separately.
-
Kid-friendly without being bland: Mild cheese, chicken, pasta, rice, and familiar vegetables show up a lot because they tend to get eaten instead of negotiated over.
-
Flexible with leftovers: Roasted chicken, cooked rice, pasta, beans, and chopped vegetables can slide into several of these meals without much planning.
-
Easy to batch: Most of these are built to make 2 to 6 lunchboxes at a time, which is the sweet spot for a fridge that doesn’t need another mystery container.
-
Hot or cold options: Some lunches are better chilled, some shine from a thermos, and some work either way depending on how the morning goes.
1. Turkey and Cheddar Pinwheels
Intro: Cold, neat, and a little bit nostalgic. These pinwheels taste like a deli sandwich got cleaned up for a lunchbox, with soft tortilla spirals, sharp cheddar, and turkey tucked into a creamy spread that keeps every bite from feeling dry.
Why It Works: The cream cheese acts like glue and moisture insurance at the same time. Roll them tight and chill them for 15 minutes, and the slices stay tidy instead of springing open.
Key Ingredients:
- 2 large flour tortillas, 10-inch
- 4 oz cream cheese, softened
- 1 tablespoon Dijon mustard
- 6 slices deli turkey, about 6 oz, chopped
- 1 cup shredded sharp cheddar
- 1/2 cup baby spinach, chopped
- 1 tablespoon chopped chives
Quick Steps:
- Stir the cream cheese and Dijon until smooth.
- Spread the mixture over both tortillas.
- Layer turkey, cheddar, spinach, and chives.
- Roll each tortilla tightly from one edge.
- Chill 15 minutes, then slice into 1-inch rounds.
Equipment for This Recipe:
- Cutting board
- Butter knife or offset spatula
- Plastic wrap
- Sharp knife
How to Serve This Dish: Pack 6 to 8 pinwheels with grapes and carrot sticks. They sit well beside crackers, and the spiral cut makes them feel more deliberate than a plain sandwich.
Pro Tips for This Recipe:
- Dry the spinach well so the tortilla doesn’t get slick.
- Chill before slicing or the filling will squish out.
- Use thin deli slices; thick-cut turkey makes the roll awkward.
Variations on This Dish:
- Ranch Turkey Roll-Up: Swap Dijon for 1 tablespoon ranch seasoning mixed into the cream cheese.
- Pesto Pinwheels: Use basil pesto instead of mustard for a more savory, herby version.
- Gluten-Free Wrap: Use a soft gluten-free tortilla and warm it for 10 seconds so it flexes.
Common Mistakes to Avoid with This Dish:
- Rolling too loosely leaves gaps, and the pinwheels fall apart when sliced.
- Adding wet greens makes the tortilla gummy by lunchtime.
- Skipping the chill gives you ragged spirals instead of clean rounds.
2. Hummus Veggie Pita Pockets
Intro: These are the lunchbox lunch you make when you want crunch, color, and something that feels fresh at 11:30 without getting flimsy. Hummus coats the pita from the inside, which keeps the bread from drying out while the vegetables stay crisp.
Why It Works: Hummus does the job of spread and filler, and it’s thick enough to hold the diced vegetables in place. The pocket shape keeps the filling contained better than a standard sandwich.
Key Ingredients:
- 2 pita pockets
- 1 cup hummus
- 1 cup shredded carrots
- 1 cup cucumber, diced small
- 1 cup bell pepper strips
- 2 cups baby spinach
- 1/2 cup crumbled feta
- 1 teaspoon lemon juice
Quick Steps:
- Stir lemon juice into the hummus.
- Open each pita pocket gently.
- Spread hummus inside the pocket.
- Pack in spinach, carrots, cucumber, pepper, and feta.
- Wrap tightly and refrigerate until packing.
Equipment for This Recipe:
- Knife
- Cutting board
- Spoon
- Parchment or foil wrap
How to Serve This Dish: Pair each pita with olives and apple slices. If you want a fuller lunch, add a hard-boiled egg or a small yogurt.
Pro Tips for This Recipe:
- Dice the cucumber small so it doesn’t tear the pita.
- Use thick hummus rather than a loose one; thin hummus leaks.
- Pat the vegetables dry after washing.
Variations on This Dish:
- Mediterranean Pocket: Add chopped tomatoes and a spoonful of chopped parsley.
- Roasted Pepper Version: Use jarred roasted peppers instead of raw bell peppers.
- No-Dairy Option: Skip feta and add a pinch of salt and smoked paprika.
Common Mistakes to Avoid with This Dish:
- Overstuffing the pocket makes it split open.
- Using soggy cucumber turns the hummus watery.
- Packing it too early without wrap dries the pita edges.
3. Creamy Chicken Salad Crackers
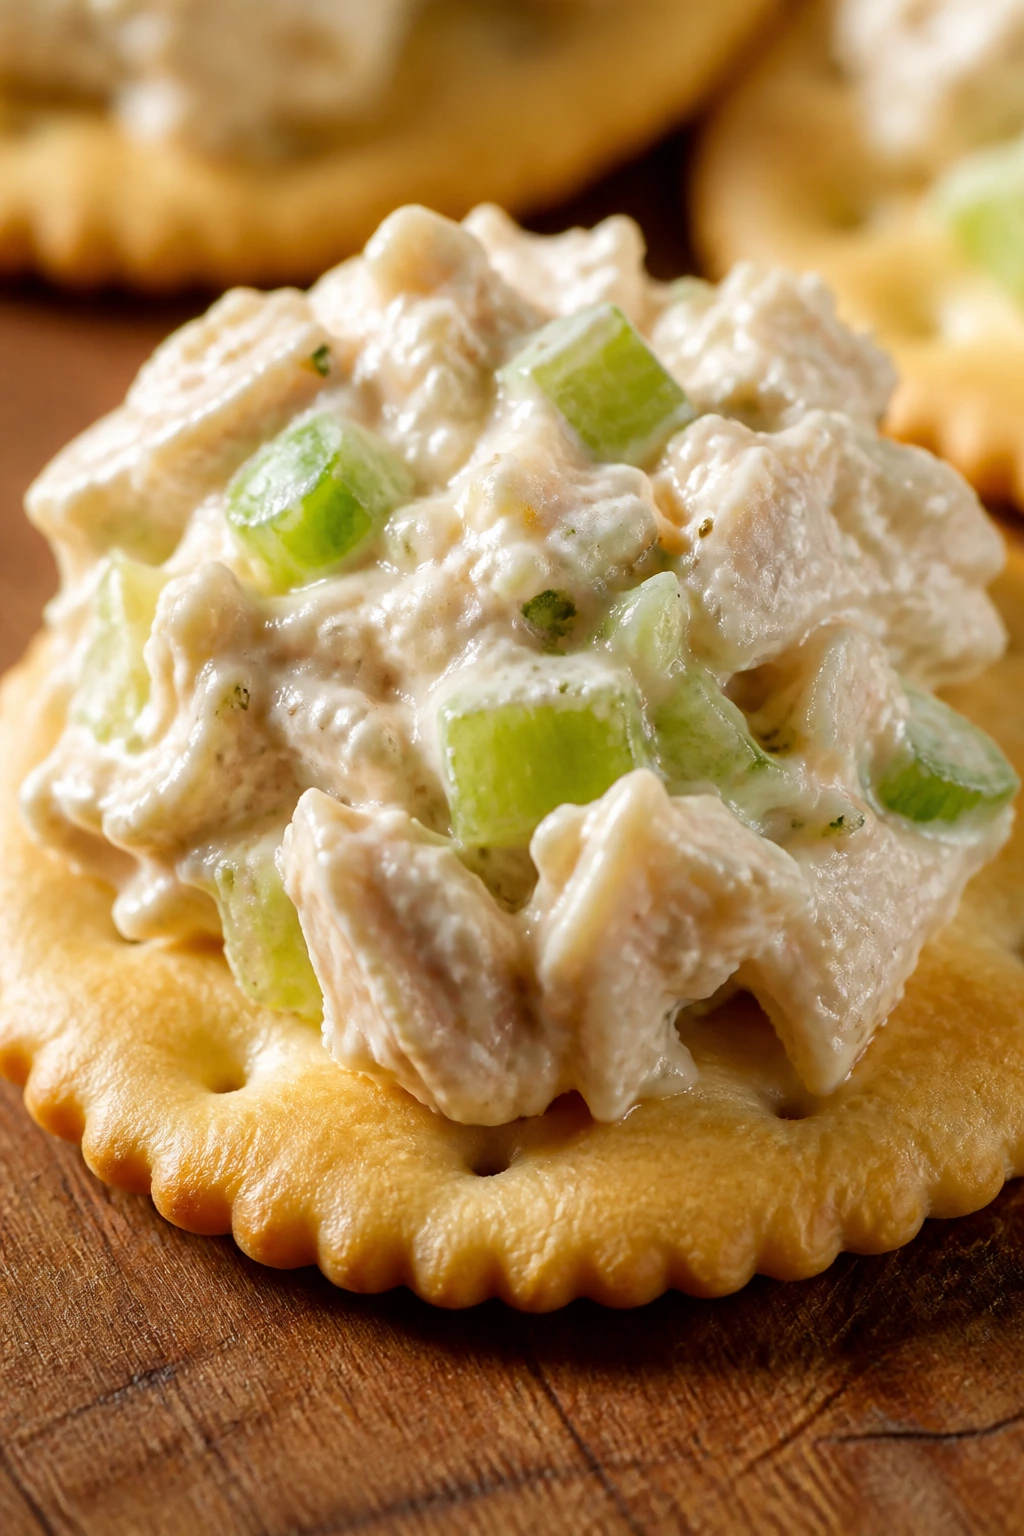
Intro: This is the lunchbox answer for anyone who likes chicken salad but hates a soggy sandwich. The filling is creamy, a little tangy, and sturdy enough to scoop with crackers instead of turning bread into paste.
Why It Works: Greek yogurt cuts the heaviness of mayonnaise and keeps the texture lighter. A chopped celery stalk gives enough crunch that the filling doesn’t slump into one soft note.
Key Ingredients:
- 2 cups cooked chicken, chopped or shredded
- 1/3 cup mayonnaise
- 1/3 cup plain Greek yogurt
- 1 celery stalk, finely diced
- 1 teaspoon Dijon mustard
- 1 tablespoon lemon juice
- 1/4 cup red grapes, halved
- Salt and black pepper
- 12 sturdy crackers
Quick Steps:
- Mix mayo, yogurt, Dijon, lemon, salt, and pepper.
- Stir in chicken, celery, and grapes.
- Chill 10 minutes if you have the time.
- Pack the salad in one container and crackers in another.
- Scoop at lunch so the crackers stay crisp.
Equipment for This Recipe:
- Mixing bowl
- Spoon
- Knife
- Airtight container
How to Serve This Dish: Pack with celery sticks and a few grapes. If you’re sending it to school, keep the crackers separate until eating.
Pro Tips for This Recipe:
- Cool the chicken fully before mixing or the dressing loosens.
- Dice the celery finely so it blends into the scoop.
- Add grapes at the end to keep them from crushing.
Variations on This Dish:
- Curry Chicken Salad: Add 1/2 teaspoon curry powder and skip the grapes.
- Apple Chicken Salad: Swap grapes for 1/2 cup diced apple.
- No-Mayo Version: Use all Greek yogurt and add a drizzle of olive oil.
Common Mistakes to Avoid with This Dish:
- Packing it on bread too early softens the whole sandwich.
- Using wet chicken waters down the dressing.
- Making the salad too loose makes it slide right off crackers.
4. Mozzarella Tomato Pasta Salad
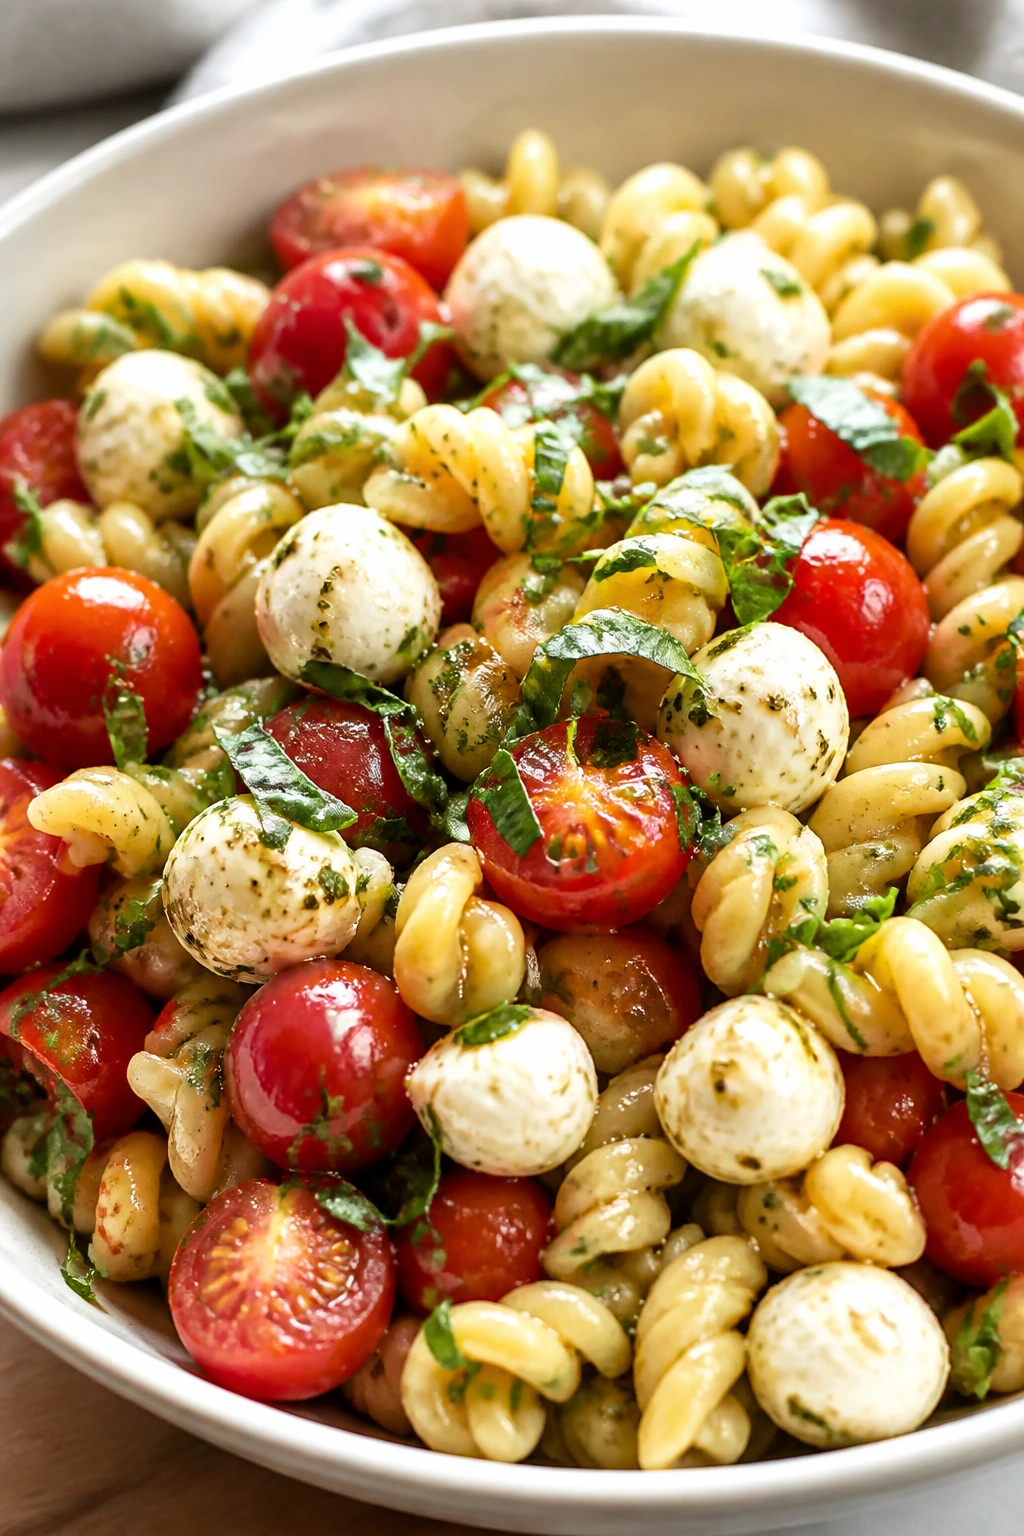
Intro: Pasta salad gets packed a lot, but this version earns its spot because the dressing clings to the noodles instead of pooling at the bottom. The tomatoes stay bright, the mozzarella stays creamy, and the basil makes the whole box smell like an actual lunch rather than leftovers.
Why It Works: Short pasta catches the vinaigrette in every curve. A little vinegar wakes up the tomatoes, and the mozzarella pearls add enough richness that you don’t need much else.
Key Ingredients:
- 8 oz short pasta, like rotini or shells
- 1 cup cherry tomatoes, halved
- 8 oz mozzarella pearls
- 1/4 cup fresh basil, torn
- 2 tablespoons olive oil
- 1 tablespoon red wine vinegar
- 1 teaspoon Italian seasoning
- Salt and pepper
Quick Steps:
- Cook pasta until just tender, then rinse cool.
- Whisk oil, vinegar, seasoning, salt, and pepper.
- Toss pasta with dressing while still slightly warm.
- Fold in tomatoes, mozzarella, and basil.
- Chill at least 20 minutes before packing.
Equipment for This Recipe:
- Pot
- Colander
- Mixing bowl
- Spoon
How to Serve This Dish: Serve cold or cool with a chicken skewer or cucumber slices. It works well as a main lunch because the cheese and pasta carry enough weight.
Pro Tips for This Recipe:
- Salt the pasta water well or the salad tastes flat.
- Toss while warm so the pasta drinks in the dressing.
- Add basil close to packing if you want the leaves bright.
Variations on This Dish:
- Pesto Pasta Salad: Swap the vinaigrette for 1/4 cup pesto thinned with olive oil.
- Tuna Pasta Salad: Add one drained can of tuna.
- Gluten-Free Version: Use chickpea or rice pasta and rinse well.
Common Mistakes to Avoid with This Dish:
- Overcooking the pasta gives you a sticky box of mush.
- Adding too much dressing makes it slick instead of glossy.
- Skipping the chill leaves the flavors sharp and disconnected.
5. Peanut Butter Banana Roll-Ups
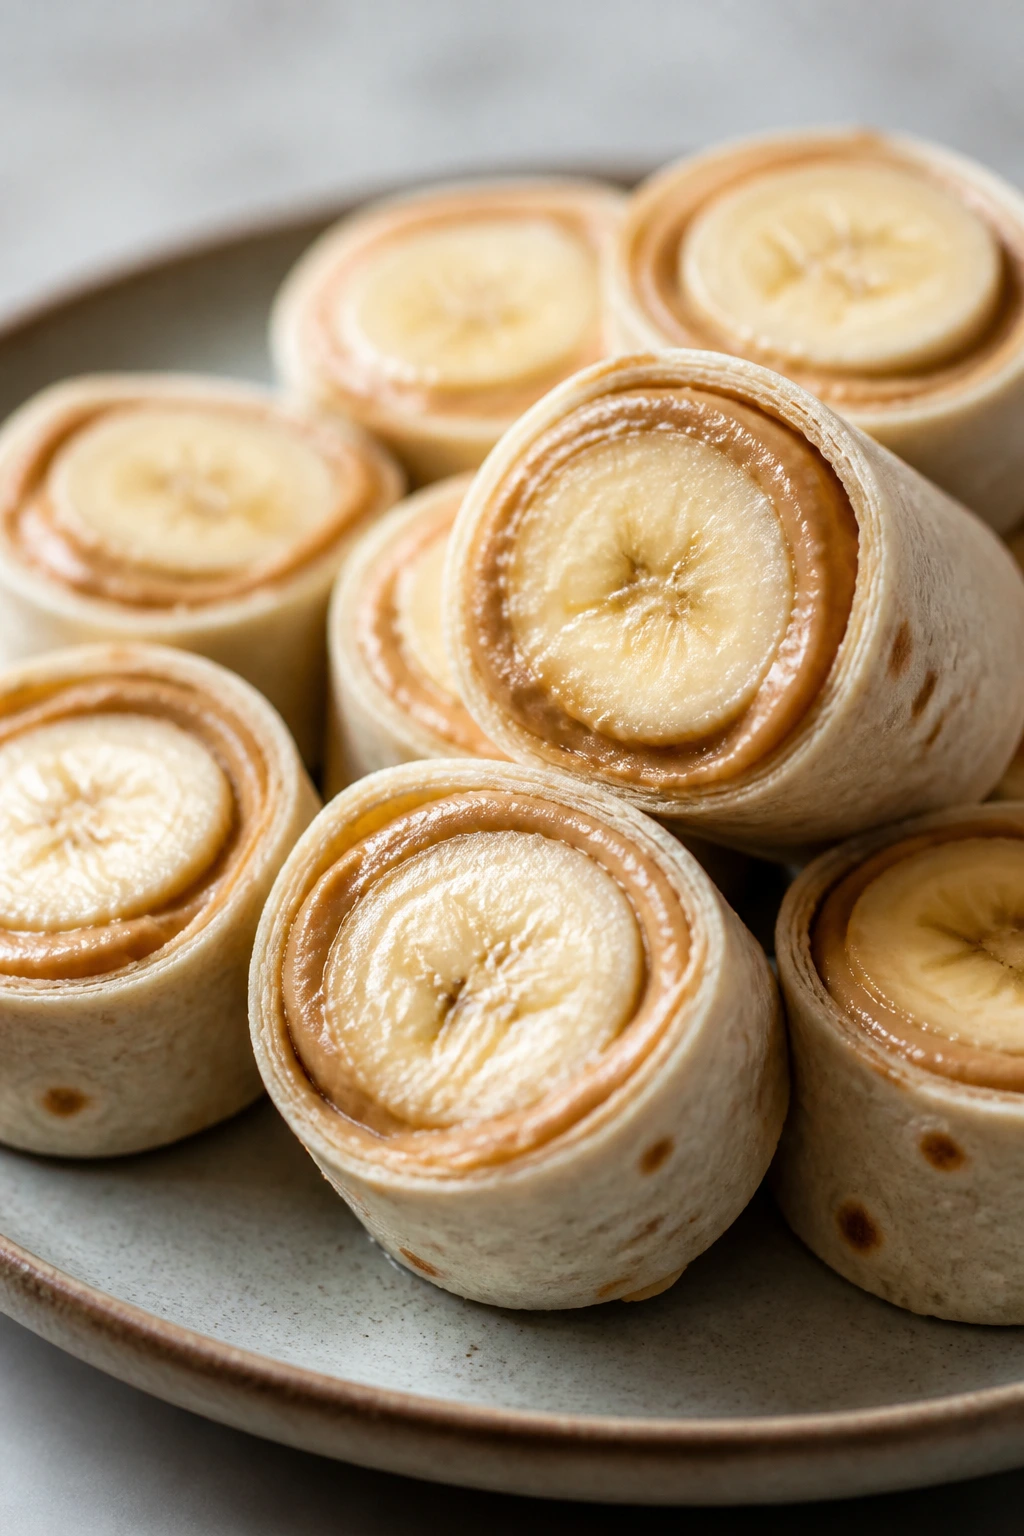
Intro: Sweet, soft, and fast enough to make on a frantic morning. These roll-ups are basically a tidy peanut butter banana sandwich without the bulk, which matters when the lunchbox already has fruit, a drink, and a note shoved into it.
Why It Works: The tortilla gives structure, the peanut butter keeps the banana from sliding, and a light dusting of cinnamon makes it taste finished instead of improvised.
Key Ingredients:
- 2 flour tortillas, 8-inch
- 1/2 cup peanut butter
- 2 bananas, peeled
- 1/2 teaspoon cinnamon
- 1 tablespoon honey, optional
- 1 tablespoon ground flaxseed, optional
Quick Steps:
- Spread peanut butter over each tortilla.
- Sprinkle cinnamon and flaxseed if using.
- Place a banana near one edge.
- Roll tightly, then slice into halves or coins.
- Wrap so they hold together.
Equipment for This Recipe:
- Cutting board
- Knife
- Small spreader
- Foil or wax wrap
How to Serve This Dish: Pack with apple slices and a cheese stick for a balanced lunchbox. It also works as a second-breakfast item when the main lunch needs a sweet edge.
Pro Tips for This Recipe:
- Use firm bananas so they don’t turn mushy.
- Warm the tortilla for 10 seconds if it feels stiff.
- Skip heavy honey unless you want the wrap to get slippery.
Variations on This Dish:
- Sunflower Butter Roll-Ups: Use sunflower seed butter for nut-free boxes.
- Strawberry Banana Roll-Ups: Add thin strawberry slices and reduce the banana slightly.
- Crunch Version: Sprinkle in crushed pretzels for texture.
Common Mistakes to Avoid with This Dish:
- Using overripe bananas makes the filling squishy.
- Overfilling the tortilla causes tearing.
- Packing them cut too early lets the spiral unravel.
6. Spinach Cheddar Egg Muffins
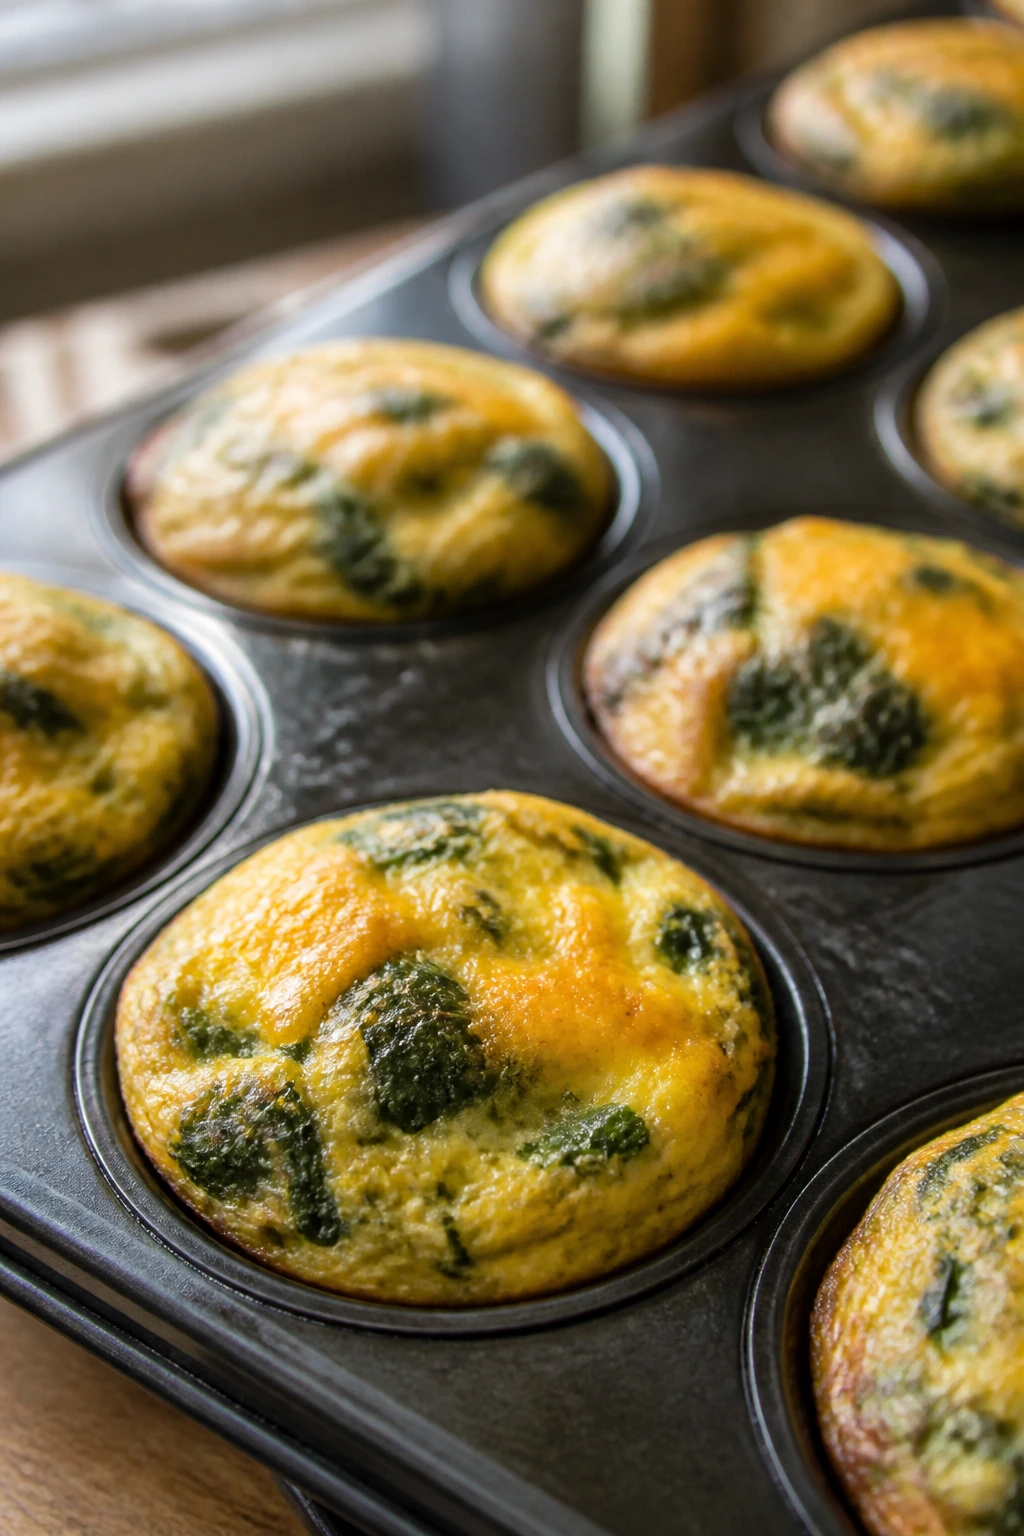
Intro: Egg muffins sound boring until you bite into one that’s tender in the middle with little flecks of spinach and melted cheddar. They’re tidy, warm or cold, and far less fussy than a skillet breakfast that needs babysitting.
Why It Works: Eggs set into perfect little portions, and a muffin tin bakes them evenly. Cheese keeps the texture soft, while spinach adds enough green to make the lunchbox feel less beige.
Key Ingredients:
- 6 large eggs
- 1/4 cup milk
- 1 cup chopped spinach
- 1/2 cup shredded cheddar
- 1/4 cup diced bell pepper
- 1/4 teaspoon salt
- 1/8 teaspoon black pepper
Quick Steps:
- Heat oven to 350°F.
- Whisk eggs, milk, salt, and pepper.
- Stir in spinach, cheddar, and pepper.
- Divide into greased muffin cups.
- Bake 16 to 18 minutes until set in the center.
Equipment for This Recipe:
- Muffin tin
- Mixing bowl
- Whisk
- Measuring cup
How to Serve This Dish: Pack two or three muffins with toast fingers and fruit. They’re good warm from a thermos-style lunch or cold with ketchup on the side.
Pro Tips for This Recipe:
- Grease the tin well or the eggs grip the cups.
- Chop the spinach fine so each bite stays even.
- Let them cool before packing so they don’t sweat in the container.
Variations on This Dish:
- Ham and Cheese Muffins: Add 1/2 cup diced ham.
- Broccoli Cheddar Muffins: Swap spinach for very small broccoli florets.
- Dairy-Free Version: Use unsweetened oat milk and skip the cheese.
Common Mistakes to Avoid with This Dish:
- Overfilling the cups makes the eggs spill over.
- Baking too long gives you rubbery centers.
- Packing while hot traps steam and makes the tops wet.
7. Teriyaki Chicken Rice Cups
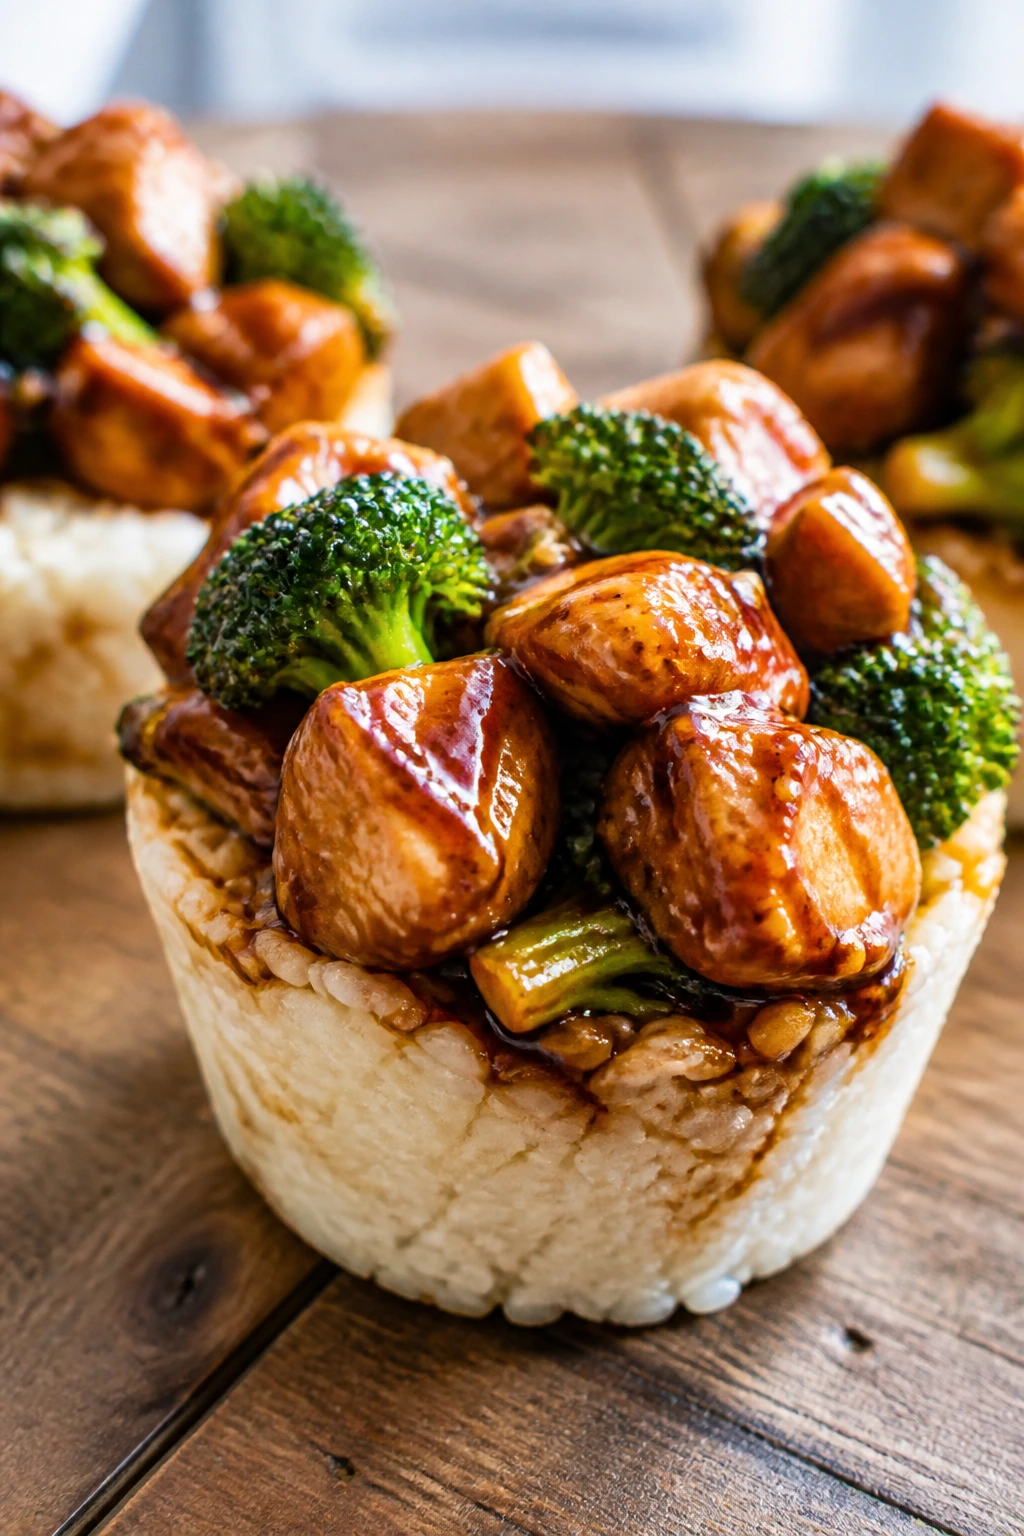
Intro: If you want a lunchbox meal that feels like a takeout container without the takeout bill, this is the one. Sweet-savory chicken and broccoli over rice hold up beautifully, especially when the sauce is cooked down until it clings.
Why It Works: Teriyaki thickens a little as it reduces, so it coats the rice instead of running everywhere. Broccoli adds bite and survives reheating better than delicate vegetables.
Key Ingredients:
- 1 lb boneless chicken thighs, cut into bite-size pieces
- 2 cups cooked rice
- 2 cups broccoli florets, small
- 1/3 cup teriyaki sauce
- 1 tablespoon soy sauce
- 1 tablespoon neutral oil
- 1 teaspoon sesame seeds
Quick Steps:
- Heat oil in a skillet over medium-high.
- Cook chicken 6 to 8 minutes until browned.
- Add broccoli and 2 tablespoons water; cover 2 minutes.
- Stir in teriyaki and soy, then cook 1 to 2 minutes.
- Spoon over rice and finish with sesame seeds.
Equipment for This Recipe:
- 12-inch skillet
- Lid
- Spoon
- Lunch containers
How to Serve This Dish: Pack warm in a thermos or cool in a container with sliced cucumber on the side. A little extra sauce in a tiny cup helps if the rice sits overnight.
Pro Tips for This Recipe:
- Cut the chicken evenly so it cooks at the same pace.
- Use thighs instead of breasts for juicier reheated meat.
- Don’t drown the rice; the sauce should coat, not flood.
Variations on This Dish:
- Pineapple Teriyaki: Add 1/2 cup pineapple chunks near the end.
- Vegetable Bowl: Swap chicken for extra broccoli, carrots, and edamame.
- Spicy Version: Stir 1 teaspoon sriracha into the sauce.
Common Mistakes to Avoid with This Dish:
- Crowding the pan steams the chicken instead of browning it.
- Using too much sauce turns the rice sloppy.
- Overcooking broccoli makes it dull and limp.
8. Ham and Cheese Sliders

Intro: These are the kind of sliders people reach for without thinking twice. Soft rolls, salty ham, and melted cheese under a buttery top make them feel more like a treat than a packed sandwich, which helps on long school or work days.
Why It Works: The rolls bake as one slab, so they stay soft in the middle and crisp slightly on top. A butter-mustard glaze keeps the sandwiches from tasting flat after the fridge.
Key Ingredients:
- 12 Hawaiian rolls
- 8 oz deli ham
- 6 slices Swiss cheese
- 4 tablespoons butter, melted
- 1 tablespoon Dijon mustard
- 1 teaspoon poppy seeds
- 1 teaspoon onion powder
Quick Steps:
- Heat oven to 350°F.
- Slice the rolls in half as a group.
- Layer ham and cheese on the bottom half.
- Replace the top, brush with butter mixture, and bake 12 to 15 minutes.
- Cool slightly before wrapping or packing.
Equipment for This Recipe:
- Baking dish
- Pastry brush
- Knife
- Foil
How to Serve This Dish: Pack with baby carrots and a small fruit cup. They’re best warm, but they still hold up well once cooled and wrapped.
Pro Tips for This Recipe:
- Keep the rolls attached while slicing for neater sliders.
- Brush the tops generously so they don’t dry out.
- Let them rest 5 minutes before cutting.
Variations on This Dish:
- Turkey and Provolone: Swap ham for turkey and Swiss for provolone.
- Pizza Slider: Add a thin layer of marinara and mozzarella.
- Garlic Herb Version: Add 1/2 teaspoon garlic powder and chopped parsley to the butter.
Common Mistakes to Avoid with This Dish:
- Overbaking dries the rolls fast.
- Using thick cheese slices can make the sliders slide apart.
- Packing while steaming hot makes the bottoms soggy.
9. Tuna Corn Pasta Salad
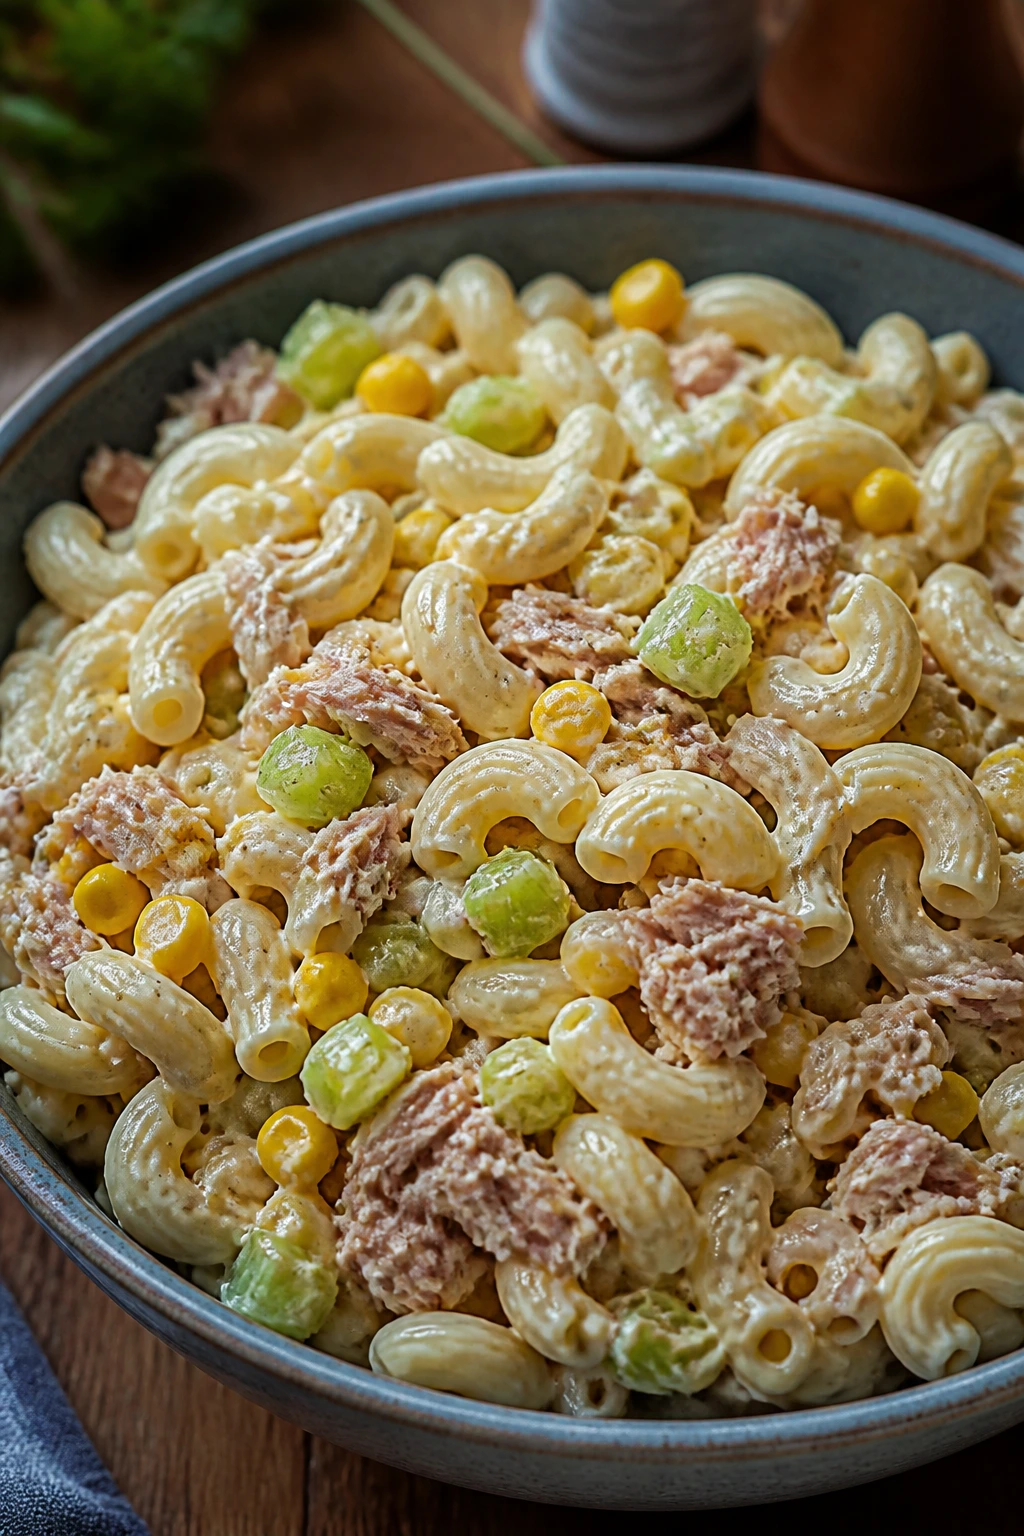
Intro: This one has the practical energy of a lunch made by someone who pays attention to texture. Tuna gives it protein, corn adds sweetness, and the pasta catches just enough dressing to keep everything together.
Why It Works: The corn pops against the tuna, and celery keeps the salad from feeling heavy. It travels well because the mayonnaise is balanced with lemon and a little mustard, not turned into a swamp.
Key Ingredients:
- 8 oz elbow pasta
- 1 can tuna, 5 oz, drained
- 1 cup corn kernels, cooked or thawed
- 2 celery stalks, diced
- 1/3 cup mayonnaise
- 1 tablespoon lemon juice
- 1 teaspoon Dijon mustard
- Salt and pepper
Quick Steps:
- Cook pasta and cool under cold water.
- Whisk mayo, lemon, mustard, salt, and pepper.
- Fold in pasta, tuna, corn, and celery.
- Chill 20 minutes so the flavors settle.
- Pack with a fork and a few crackers if desired.
Equipment for This Recipe:
- Pot
- Colander
- Mixing bowl
- Spoon
How to Serve This Dish: Serve cold with cucumber spears or a few cherry tomatoes. It’s one of those lunches that works best when it has a crisp side nearby.
Pro Tips for This Recipe:
- Drain the tuna well or the dressing loosens.
- Cool the pasta fully before adding mayo.
- Use small pasta shapes so every bite carries tuna and corn.
Variations on This Dish:
- Pickle Tuna Salad: Add 2 tablespoons chopped dill pickles.
- Greek Tuna Pasta: Add olives, feta, and oregano.
- Dairy-Free Version: Keep the mayo base and skip any cheese add-ins.
Common Mistakes to Avoid with This Dish:
- Hot pasta with mayo can make the salad greasy.
- Too much celery overwhelms the tuna.
- Skipping acid leaves it tasting dull and heavy.
10. Taco Rice Bowls
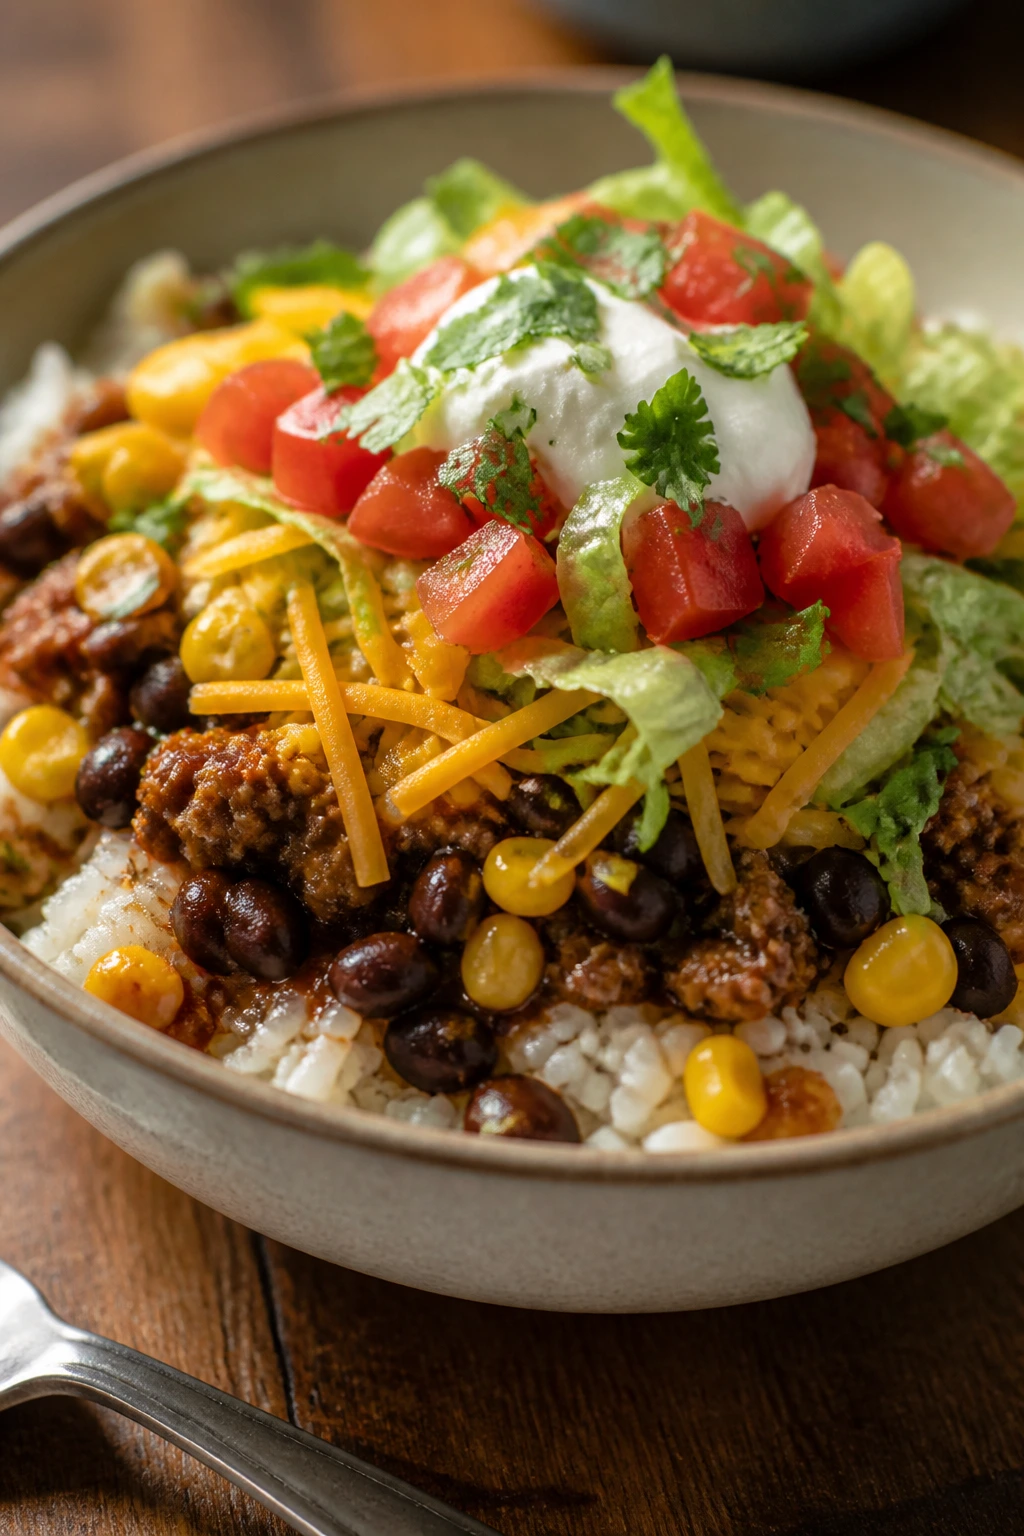
Intro: Taco night leftovers make excellent lunchbox food, but this version is built to travel from the start. Rice, seasoned meat, beans, and cheese stay solid in a container, and the salsa can ride in its own little cup if you want to keep the texture sharp.
Why It Works: Rice absorbs flavor, beans add body, and the taco seasoning gives the bowl enough punch that it doesn’t need a heavy sauce. It’s the lunchbox equivalent of a dependable hoodie.
Key Ingredients:
- 1 lb ground turkey or beef
- 2 cups cooked rice
- 1 cup black beans, rinsed
- 1 packet taco seasoning or 2 tablespoons homemade
- 1/2 cup shredded cheddar
- 1/2 cup corn
- 1/2 cup salsa
- 1 tablespoon oil
Quick Steps:
- Heat oil and brown the meat.
- Stir in taco seasoning and 1/4 cup water.
- Add beans and corn; cook 2 minutes.
- Spoon over rice.
- Top with cheese and pack salsa separately.
Equipment for This Recipe:
- Skillet
- Spoon
- Container with divider
- Small sauce cup
How to Serve This Dish: Add lettuce and avocado right before eating if you want them fresh. A lime wedge in the box makes the whole thing taste brighter.
Pro Tips for This Recipe:
- Make the meat fairly dry so the rice doesn’t get soggy.
- Use thick salsa if you’re packing it mixed in.
- Warm the rice first if you’re serving from a thermos.
Variations on This Dish:
- Chicken Taco Bowl: Swap ground meat for shredded chicken.
- Bean-Only Bowl: Use an extra can of beans and skip the meat.
- Crunch Bowl: Add tortilla strips just before eating.
Common Mistakes to Avoid with This Dish:
- Over-saucing the meat makes the bowl wet.
- Adding avocado too early turns it brown.
- Packing lettuce under hot rice wilts it instantly.
11. Pizza Quesadillas
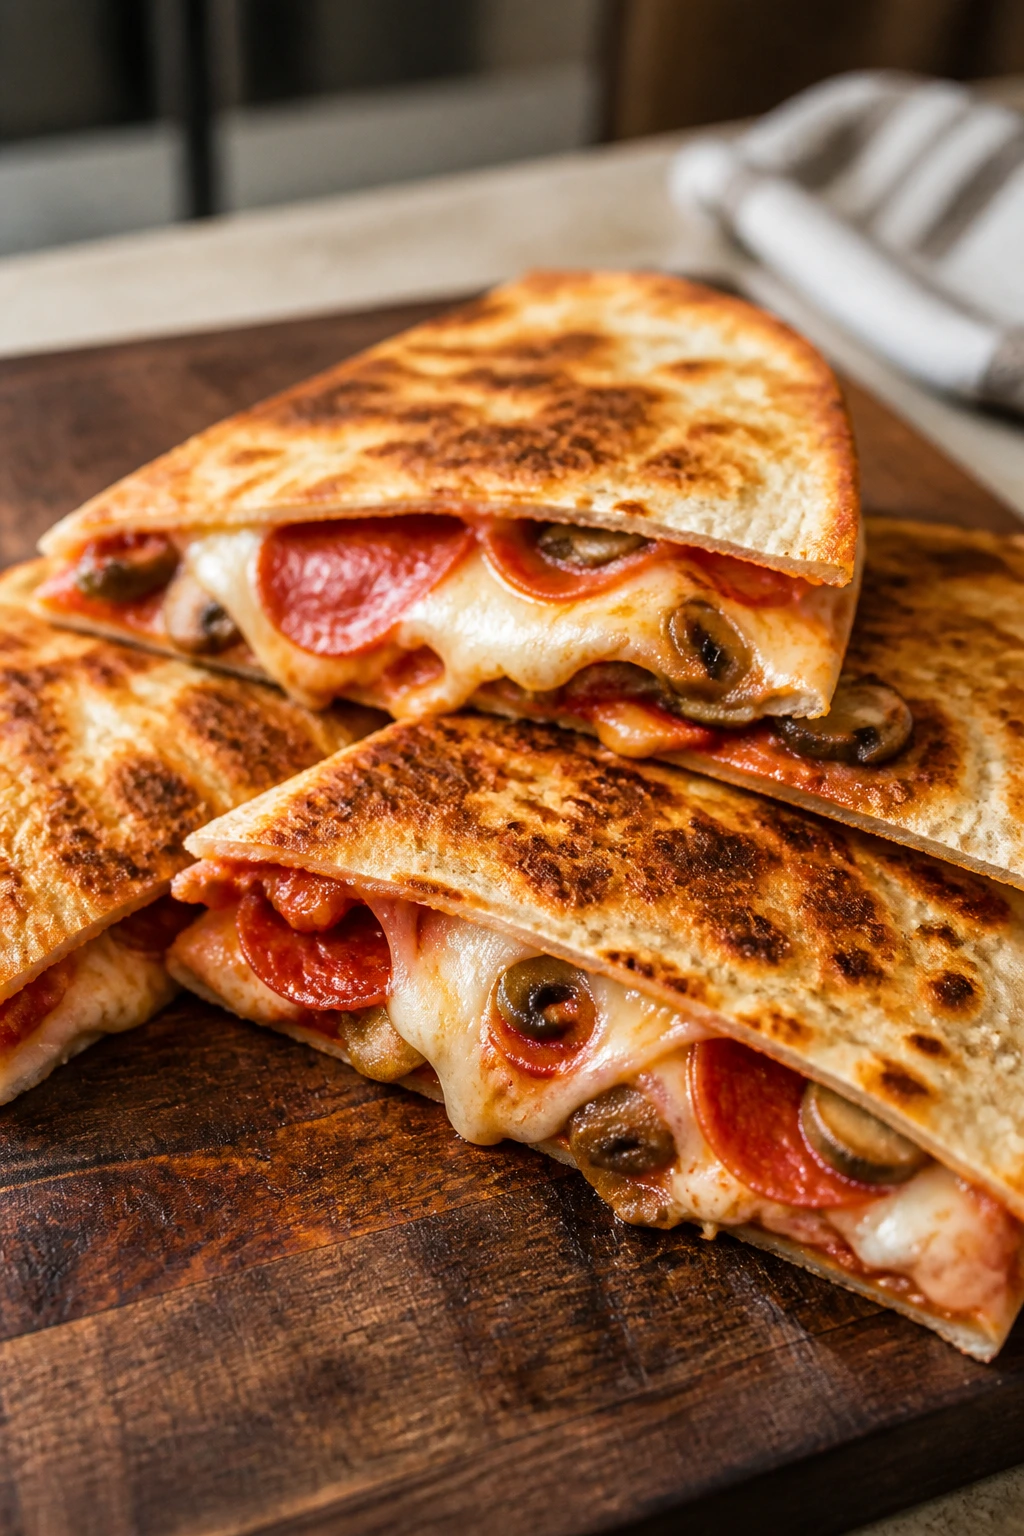
Intro: This is what happens when a quesadilla and a pizza stop pretending they’re different things. It’s cheesy, crisp-edged, and easy to dip, which is why it disappears faster than a normal sandwich in most lunchboxes.
Why It Works: The tortilla seals in the filling, and the skillet gives you that browned outside that survives a lunch bag better than toast. Marinara on the side keeps the middle from getting wet.
Key Ingredients:
- 2 large flour tortillas
- 1 cup shredded mozzarella
- 1/4 cup mini pepperoni
- 2 tablespoons finely diced bell pepper
- 2 tablespoons sliced mushrooms
- 1/3 cup marinara sauce
- 1 tablespoon butter
Quick Steps:
- Heat a skillet over medium.
- Sprinkle cheese over one tortilla and add toppings.
- Fold with the second tortilla or half-fold if preferred.
- Cook 2 to 3 minutes per side until golden.
- Cool, cut into wedges, and pack with marinara.
Equipment for This Recipe:
- Skillet
- Spatula
- Knife
- Small dip container
How to Serve This Dish: Pack with sliced cucumbers or grapes. It works warm or room temp, which makes it useful on mornings that are already too busy.
Pro Tips for This Recipe:
- Use less sauce inside than you think you need.
- Grate the cheese finely so it melts fast.
- Let it cool before slicing or the cheese will run.
Variations on This Dish:
- Veggie Pizza Quesadilla: Skip pepperoni and add olives.
- BBQ Chicken Version: Use shredded chicken and a thin layer of barbecue sauce.
- White Pizza Style: Use ricotta and mozzarella with spinach.
Common Mistakes to Avoid with This Dish:
- Too much filling makes the quesadilla burst.
- Cooking over high heat burns the tortilla before the cheese melts.
- Packing it steaming hot makes the bottom damp.
12. Greek Chicken Couscous Salad
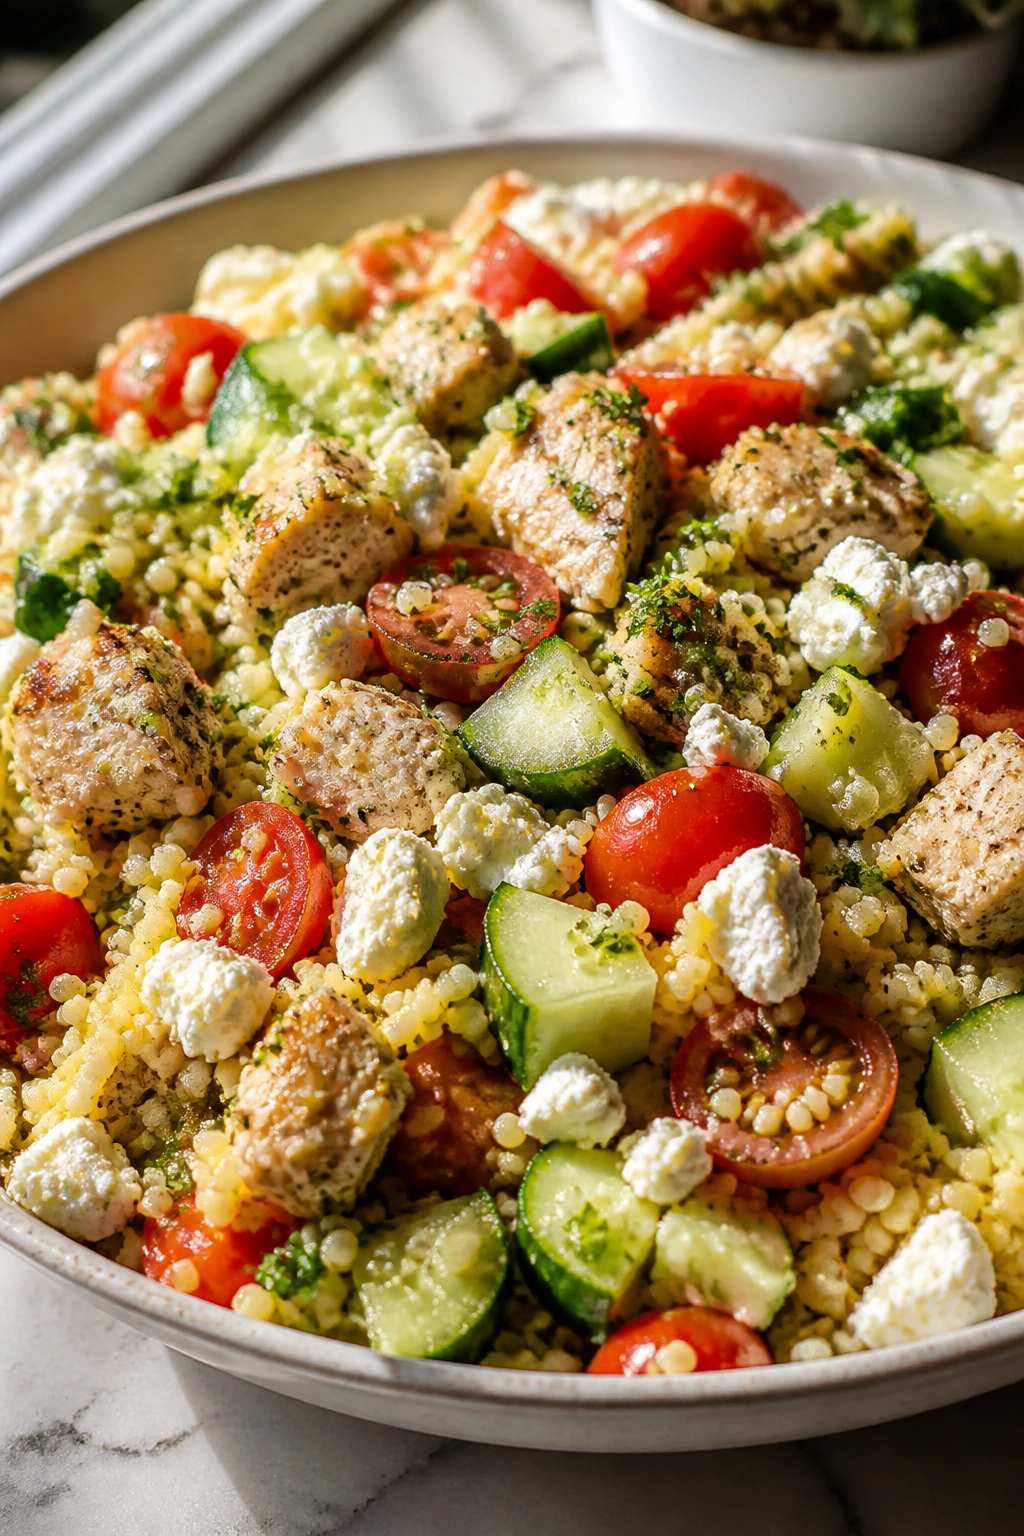
Intro: This salad has the sturdy, slightly chewy feel that lunchboxes need. Couscous soaks up lemony dressing fast, chicken gives it weight, and cucumber plus feta keep each bite from getting same-y.
Why It Works: Couscous is quick and forgiving, and it doesn’t clump up the way some grains do. The lemon dressing wakes up the whole container after a night in the fridge.
Key Ingredients:
- 1 cup couscous
- 1 cup boiling water
- 2 cups cooked chicken, diced
- 1 cucumber, diced
- 1 cup cherry tomatoes, halved
- 1/2 cup feta
- 2 tablespoons olive oil
- 1 tablespoon lemon juice
- 1 teaspoon oregano
Quick Steps:
- Pour boiling water over couscous, cover 5 minutes.
- Fluff with a fork.
- Whisk oil, lemon, oregano, salt, and pepper.
- Toss couscous with chicken and vegetables.
- Fold in feta and chill.
Equipment for This Recipe:
- Bowl with lid
- Fork
- Knife
- Measuring cup
How to Serve This Dish: Pack with pita chips or a small roll. It’s substantial enough to stand alone, but a few crisp sides make it feel more complete.
Pro Tips for This Recipe:
- Fluff couscous while warm so it doesn’t clump.
- Salt the dressing well; couscous needs it.
- Add cucumber after cooling for a fresher bite.
Variations on This Dish:
- Chickpea Couscous Salad: Replace chicken with chickpeas.
- Lemon Dill Version: Swap oregano for dill and add more lemon.
- No-Cheese Option: Leave out feta and add olives.
Common Mistakes to Avoid with This Dish:
- Skipping the seasoning leaves couscous bland.
- Using watery tomatoes makes the salad limp.
- Overmixing feta smears it into the dressing.
13. Turkey Meatball Orzo
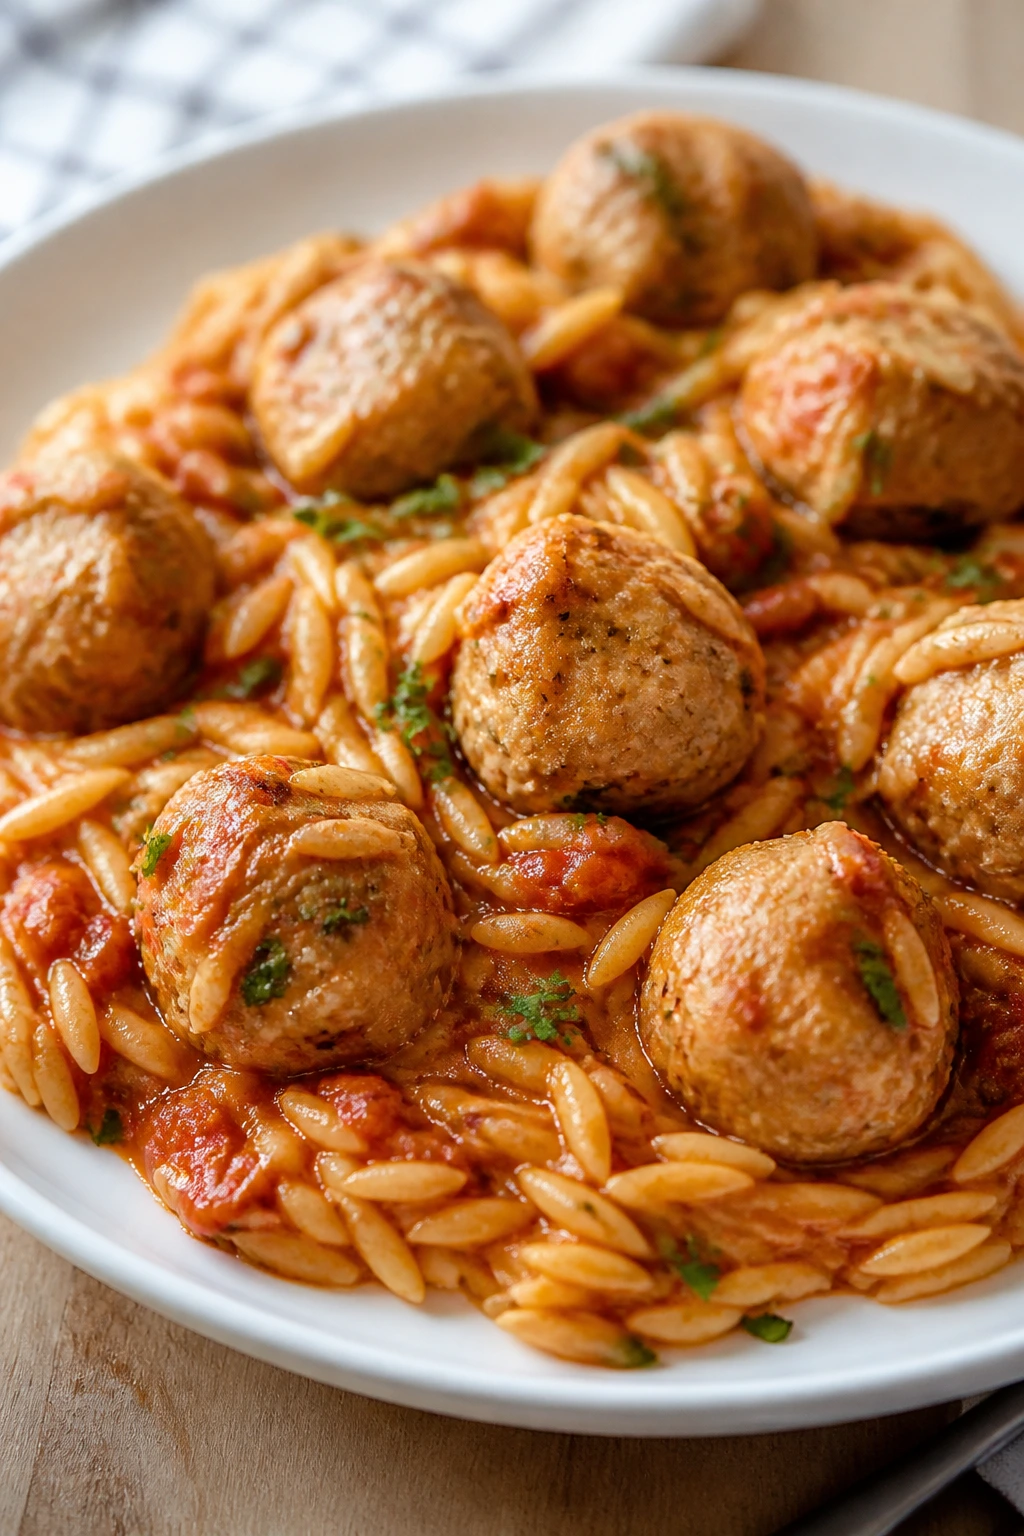
Intro: Meatballs make lunch feel more intentional, even when the recipe is plain on paper. Orzo gives the box a pasta shape that scoops well, and the tomato sauce settles into the grains instead of soaking everything.
Why It Works: Small meatballs heat evenly and fit neatly in a container. Orzo stays tender but not messy, which is the whole point when you’re packing lunch the night before.
Key Ingredients:
- 1 lb ground turkey
- 1/3 cup breadcrumbs
- 1 egg
- 1 teaspoon garlic powder
- 1 teaspoon Italian seasoning
- 1 cup orzo
- 1 1/2 cups marinara sauce
- 1 tablespoon olive oil
Quick Steps:
- Mix turkey, breadcrumbs, egg, and seasonings.
- Roll into 1-inch meatballs.
- Brown in oil, then cover and cook through.
- Cook orzo until tender and drain.
- Toss orzo with marinara and top with meatballs.
Equipment for This Recipe:
- Skillet
- Pot
- Bowl
- Sheet pan, optional for rolling meatballs
How to Serve This Dish: Pack with steamed peas or broccoli. It’s best warm, but it still tastes solid at room temperature if the sauce is thick.
Pro Tips for This Recipe:
- Don’t overmix the meat or the meatballs get tough.
- Make the sauce thick so the orzo doesn’t swim.
- Use a small scoop for even meatballs.
Variations on This Dish:
- Chicken Meatballs: Swap ground turkey for ground chicken.
- Cheesy Orzo: Stir in 1/4 cup parmesan before packing.
- Herb Version: Add chopped parsley and basil to the meat.
Common Mistakes to Avoid with This Dish:
- Making meatballs too large leaves the center undercooked.
- Overcooking orzo turns it gummy.
- Packing with thin sauce makes the lunch watery.
14. Thermos Mac and Cheese
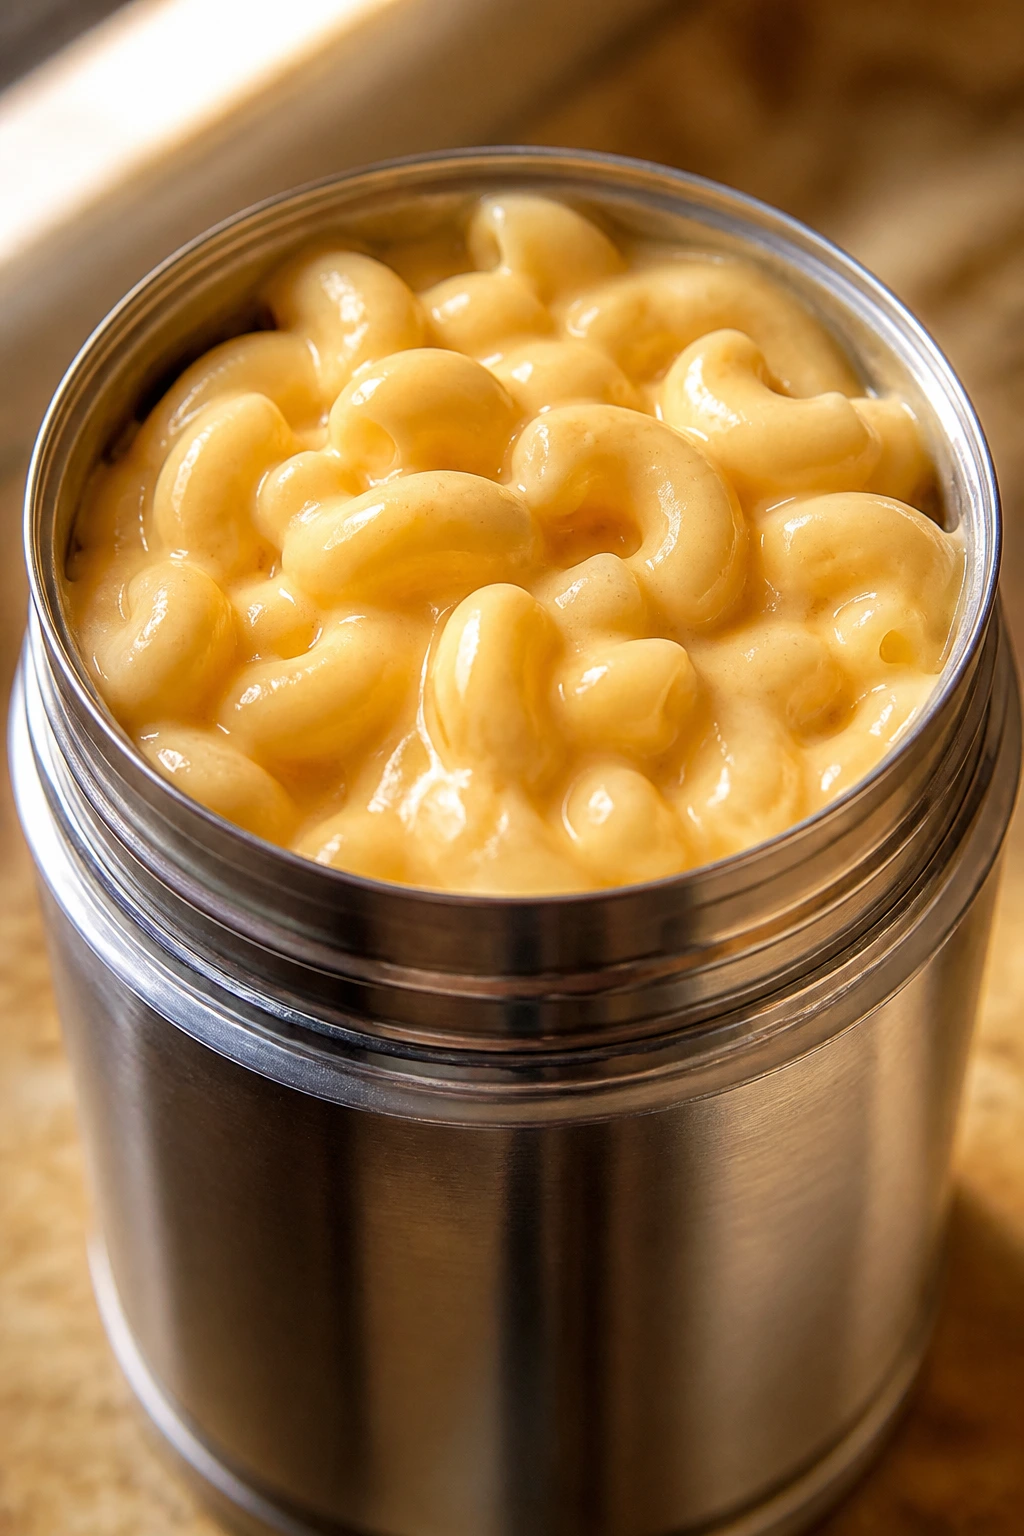
Intro: Hot mac and cheese in a lunchbox is a small act of kindness. The trick is making it creamy enough to stay soft in a thermos, not so loose that it becomes a cheesy puddle by noon.
Why It Works: A simple cheddar sauce clings to elbow pasta, and the thermos keeps the texture warm without baking it into glue. This is one of the few lunches that can actually improve an ordinary day.
Key Ingredients:
- 8 oz elbow macaroni
- 2 tablespoons butter
- 2 tablespoons flour
- 1 1/2 cups milk
- 2 cups shredded cheddar
- 1/4 teaspoon salt
- 1/8 teaspoon mustard powder
Quick Steps:
- Cook macaroni until just tender.
- Melt butter, whisk in flour, then cook 1 minute.
- Slowly add milk and stir until smooth.
- Melt in cheese, salt, and mustard powder.
- Stir with pasta and pack into a warmed thermos.
Equipment for This Recipe:
- Pot
- Whisk
- Thermos
- Spoon
How to Serve This Dish: Add apple slices or a few cucumber rounds on the side. A thermos lunch like this does best when it’s the center of the box, not one item among many wet foods.
Pro Tips for This Recipe:
- Warm the thermos with boiling water for 5 minutes first.
- Use freshly shredded cheese for a smoother sauce.
- Leave the pasta slightly firm so it finishes soft in the thermos.
Variations on This Dish:
- Broccoli Mac: Stir in tiny broccoli florets.
- Bacon Mac: Add crisp chopped bacon.
- White Cheddar Version: Swap half the cheddar for white cheddar.
Common Mistakes to Avoid with This Dish:
- Packing a dry mac and cheese gives you clumpy pasta.
- Skipping the thermos preheat cools the meal too fast.
- Using low heat too long can make the sauce grainy.
15. Bean and Cheese Burritos
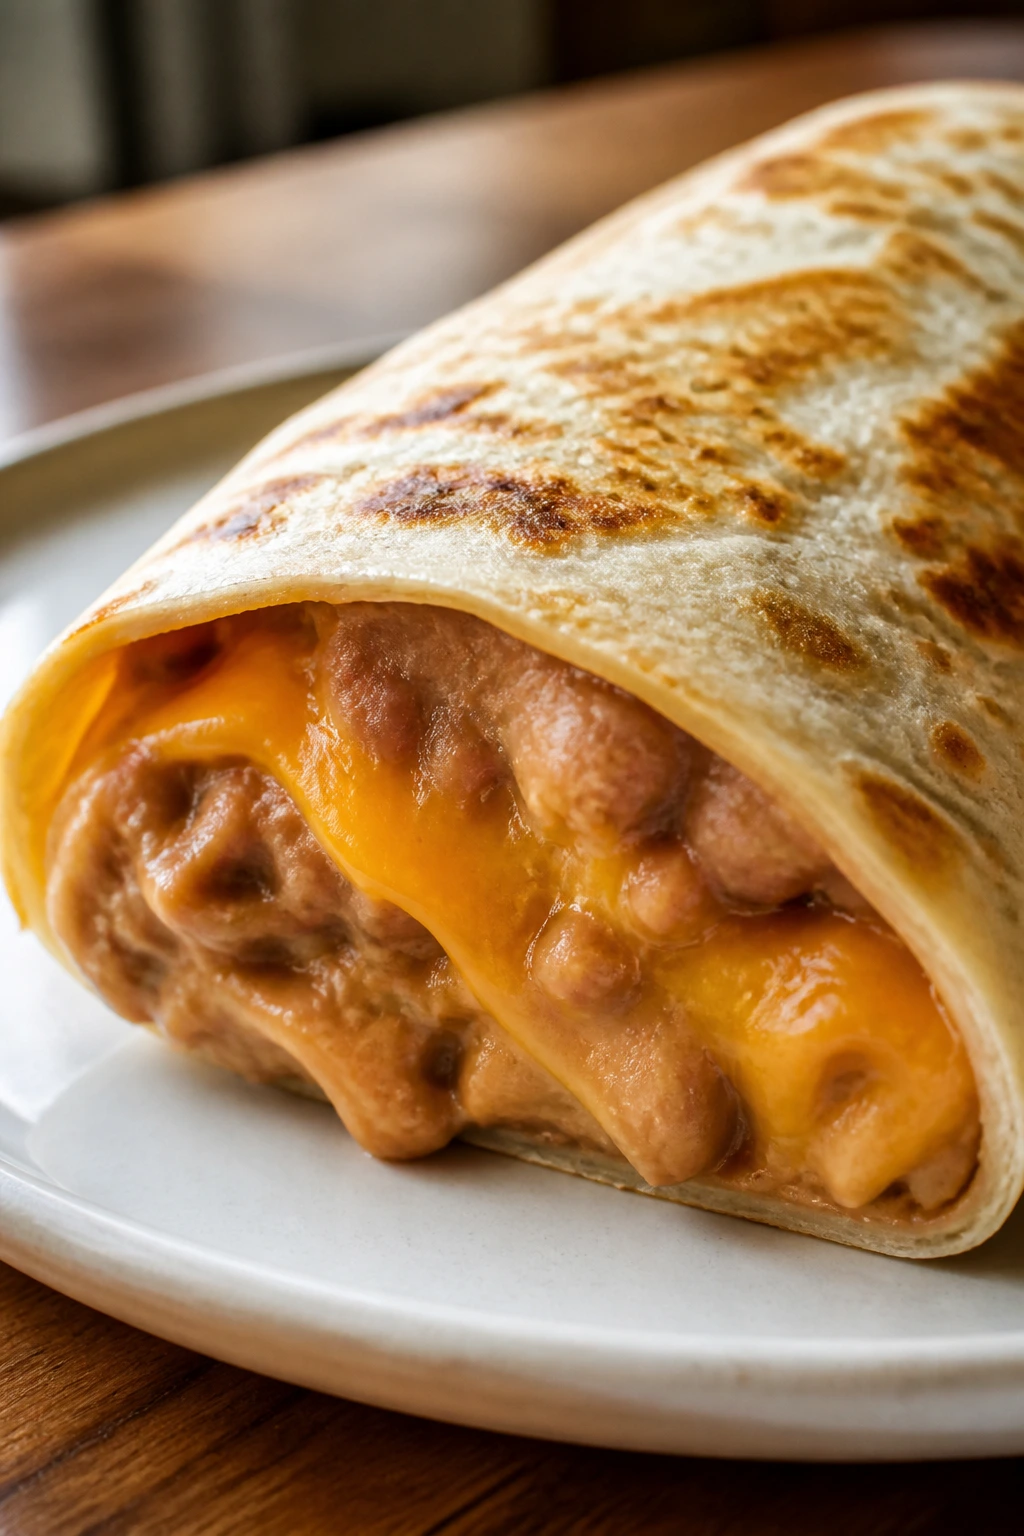
Intro: Bean and cheese burritos are lunchbox workhorses. They’re cheap, filling, and forgiving, and they reheat well without needing a separate sauce or side dish to make sense.
Why It Works: Refried beans hold the filling together, while cheese melts into the beans and gives the burrito a creamy center. A quick toast in the skillet keeps the tortilla from tasting bland.
Key Ingredients:
- 4 flour tortillas, 8-inch
- 1 can refried beans, 16 oz
- 1 1/2 cups shredded cheddar
- 1/4 cup salsa
- 1/2 teaspoon cumin
- 1 tablespoon butter or oil
Quick Steps:
- Warm beans with cumin until smooth.
- Spread beans down the center of each tortilla.
- Add cheese and a spoonful of salsa.
- Roll tightly and tuck the ends.
- Toast seam-side down in a skillet until golden.
Equipment for This Recipe:
- Skillet
- Spoon
- Spatula
- Foil wrap
How to Serve This Dish: Pack with fruit and a crunchy vegetable. If you want a stronger meal, add a small cup of guacamole or sour cream on the side.
Pro Tips for This Recipe:
- Warm the tortillas first so they roll cleanly.
- Don’t overfill or the seam bursts.
- Toast both sides lightly for better texture later.
Variations on This Dish:
- Chicken Bean Burritos: Add shredded chicken.
- Breakfast Burritos: Mix in scrambled eggs.
- No-Dairy Version: Skip cheese and add extra salsa.
Common Mistakes to Avoid with This Dish:
- Cold beans tear the tortilla.
- Too much salsa makes the burrito wet.
- Loose rolling leads to filling spill.
16. Caprese Sandwiches
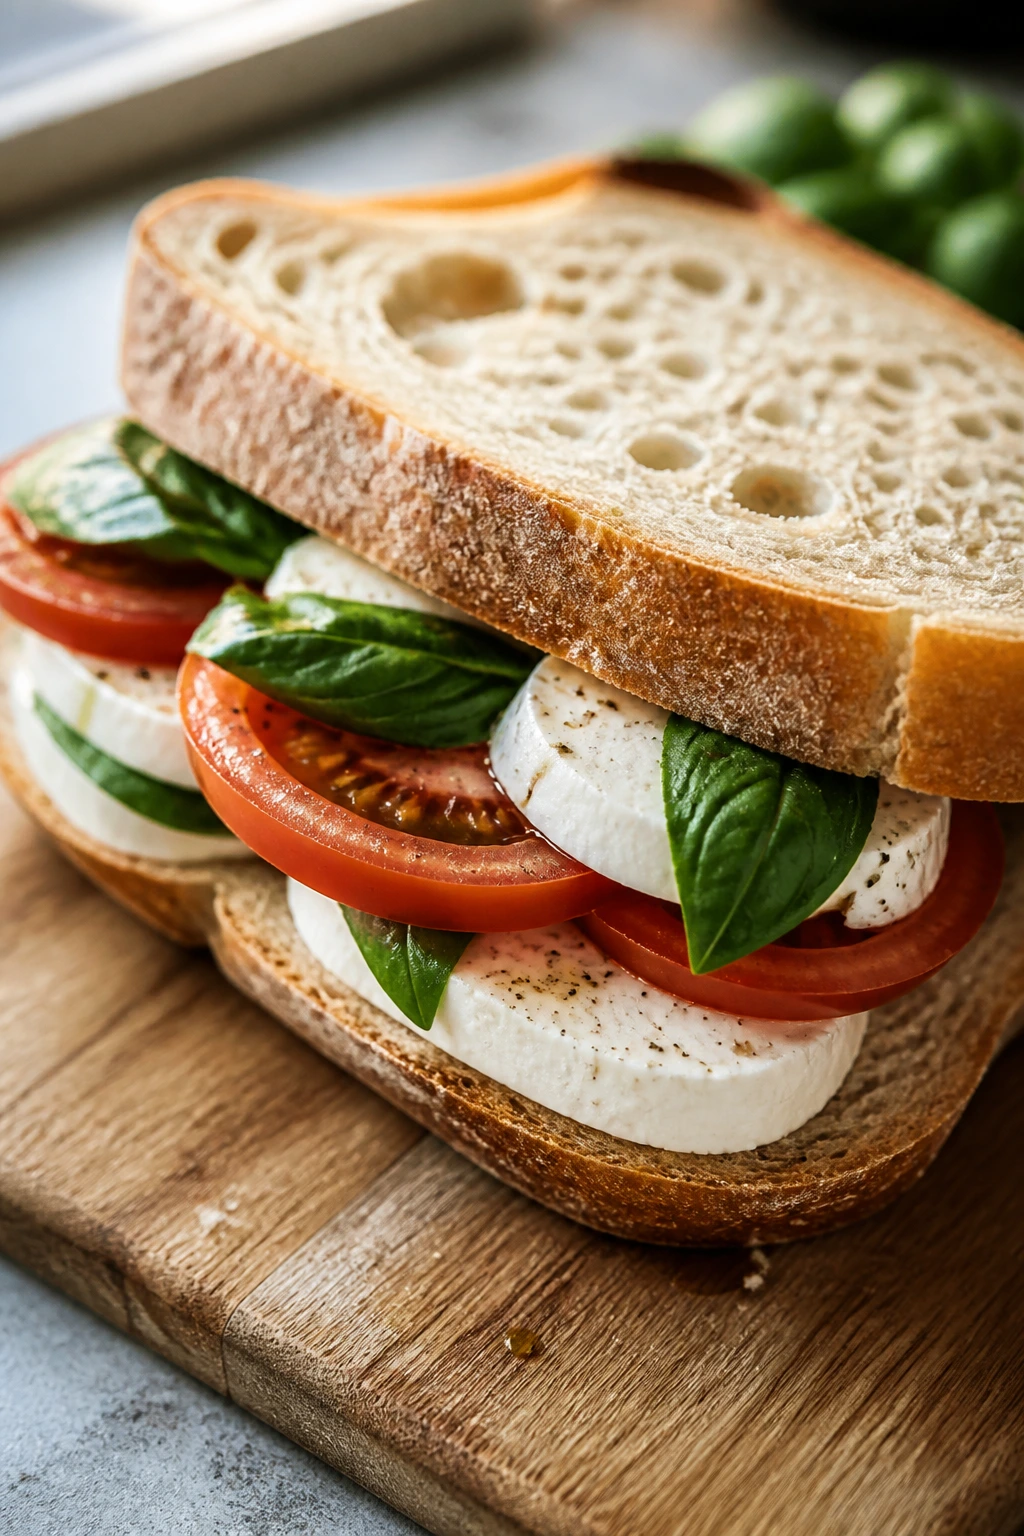
Intro: Caprese in a lunchbox is all about restraint. You want enough tomato and basil to taste fresh, but not so much that the bread turns into a damp sponge by the time the container opens.
Why It Works: A thin layer of pesto or butter acts as a moisture barrier. Mozzarella and tomato are simple, but the sandwich feels polished when the layering is tight and the bread is sturdy.
Key Ingredients:
- 4 slices sturdy bread or ciabatta
- 4 oz fresh mozzarella, sliced
- 1 medium tomato, sliced and seeded
- 1/4 cup basil leaves
- 2 tablespoons pesto
- Salt and pepper
Quick Steps:
- Spread pesto on the bread.
- Layer mozzarella, tomato, and basil.
- Sprinkle lightly with salt and pepper.
- Close the sandwich and press gently.
- Wrap and chill until packing.
Equipment for This Recipe:
- Knife
- Cutting board
- Spoon or spreader
- Parchment wrap
How to Serve This Dish: Serve with olives, grapes, or a few baked chips. Cutting the sandwich in half helps it pack tighter and looks cleaner in the lunchbox.
Pro Tips for This Recipe:
- Seed the tomato so excess juice doesn’t leak.
- Use sturdy bread like ciabatta or sourdough.
- Pack basil leaves dry so they don’t darken fast.
Variations on This Dish:
- Turkey Caprese: Add sliced turkey for more protein.
- Roasted Tomato Version: Use roasted tomato slices instead of fresh.
- No-Pesto Option: Use butter or mayonnaise as the barrier.
Common Mistakes to Avoid with This Dish:
- Overloading with tomato makes it soggy.
- Using soft sandwich bread can collapse under the filling.
- Packing it warm creates condensation inside the wrap.
17. Sesame Noodle Salad

Intro: Sesame noodles are one of those lunches that tastes better after the flavors sit together. The noodles soak up the dressing, the vegetables keep their crunch, and the whole thing feels cool and slurpable instead of heavy.
Why It Works: Sesame oil gives a big flavor hit with a small amount, and a soy-lime dressing clings better to noodles than a creamy one does. Edamame or chicken can turn it into a full meal fast.
Key Ingredients:
- 8 oz spaghetti or soba noodles
- 1 cup shredded carrots
- 1 cup cucumber, julienned
- 1 cup shelled edamame
- 2 tablespoons soy sauce
- 1 tablespoon sesame oil
- 1 tablespoon rice vinegar
- 1 teaspoon honey
- 1 teaspoon sesame seeds
Quick Steps:
- Cook noodles and rinse cool.
- Whisk soy, sesame oil, vinegar, and honey.
- Toss noodles with dressing.
- Fold in carrots, cucumber, and edamame.
- Chill before packing with sesame seeds on top.
Equipment for This Recipe:
- Pot
- Colander
- Bowl
- Tongs or forks
How to Serve This Dish: Add sliced chicken if you want more protein. It goes well with orange slices or snap peas for a lunchbox that feels complete.
Pro Tips for This Recipe:
- Rinse noodles well so they don’t clump.
- Cut vegetables thin for easy forkfuls.
- Dress while the noodles are still slightly warm for better absorption.
Variations on This Dish:
- Peanut Sesame Noodles: Add 1 tablespoon peanut butter to the dressing.
- Spicy Noodles: Stir in a little chili paste.
- Chicken Noodle Salad: Add shredded rotisserie chicken.
Common Mistakes to Avoid with This Dish:
- Skipping the rinse leads to sticky noodles.
- Too much cucumber can water down the dressing.
- Packing the seeds mixed in too early can soften them.
18. Mini Frittata Bites
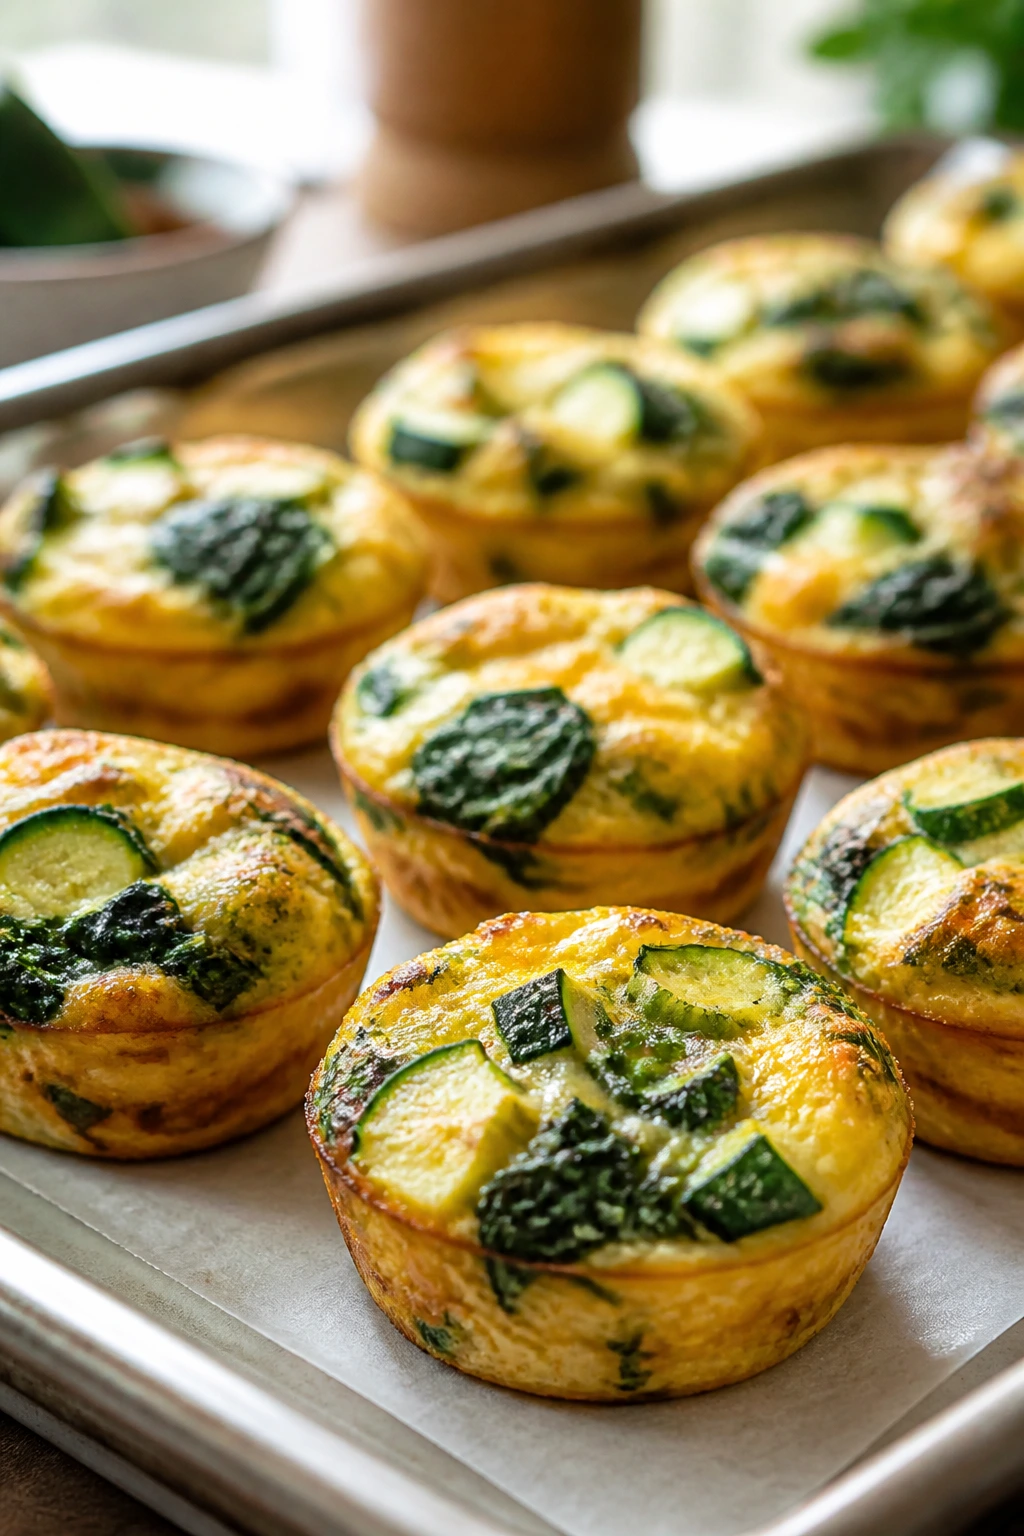
Intro: These are basically egg muffins with a little more structure and a little more flexibility. Bake them once, and they behave like tiny lunchbox omelets that don’t need a fork unless you want one.
Why It Works: The eggs set around vegetables and cheese in a muffin tin, which gives you built-in portions. They’re easy to eat cold, which makes them one of the least fussy protein options in the whole batch.
Key Ingredients:
- 8 large eggs
- 1/4 cup milk
- 1/2 cup diced zucchini
- 1/2 cup chopped spinach
- 1/2 cup shredded cheddar or feta
- 1/4 teaspoon salt
- 1/8 teaspoon black pepper
Quick Steps:
- Heat oven to 375°F.
- Whisk eggs, milk, salt, and pepper.
- Stir in vegetables and cheese.
- Divide into greased muffin cups.
- Bake 14 to 16 minutes until just set.
Equipment for This Recipe:
- Muffin tin
- Whisk
- Bowl
- Cooling rack
How to Serve This Dish: Pack with toast soldiers, berries, or a small salad. They’re good warm, but they don’t suffer much at room temperature.
Pro Tips for This Recipe:
- Chop vegetables small so they don’t sink.
- Bake until just set; overbaked frittatas turn spongy.
- Cool on a rack so the bottoms don’t steam.
Variations on This Dish:
- Ham Frittata Bites: Add 1/3 cup diced ham.
- Broccoli Cheddar Bites: Use tiny broccoli pieces and cheddar.
- Dairy-Free Version: Skip the cheese and use a splash more milk.
Common Mistakes to Avoid with This Dish:
- Adding too many wet vegetables makes the bites watery.
- Pulling them early leaves a runny center.
- Packing while hot creates condensation and ruins the top.
19. Apple Cinnamon Oat Bars
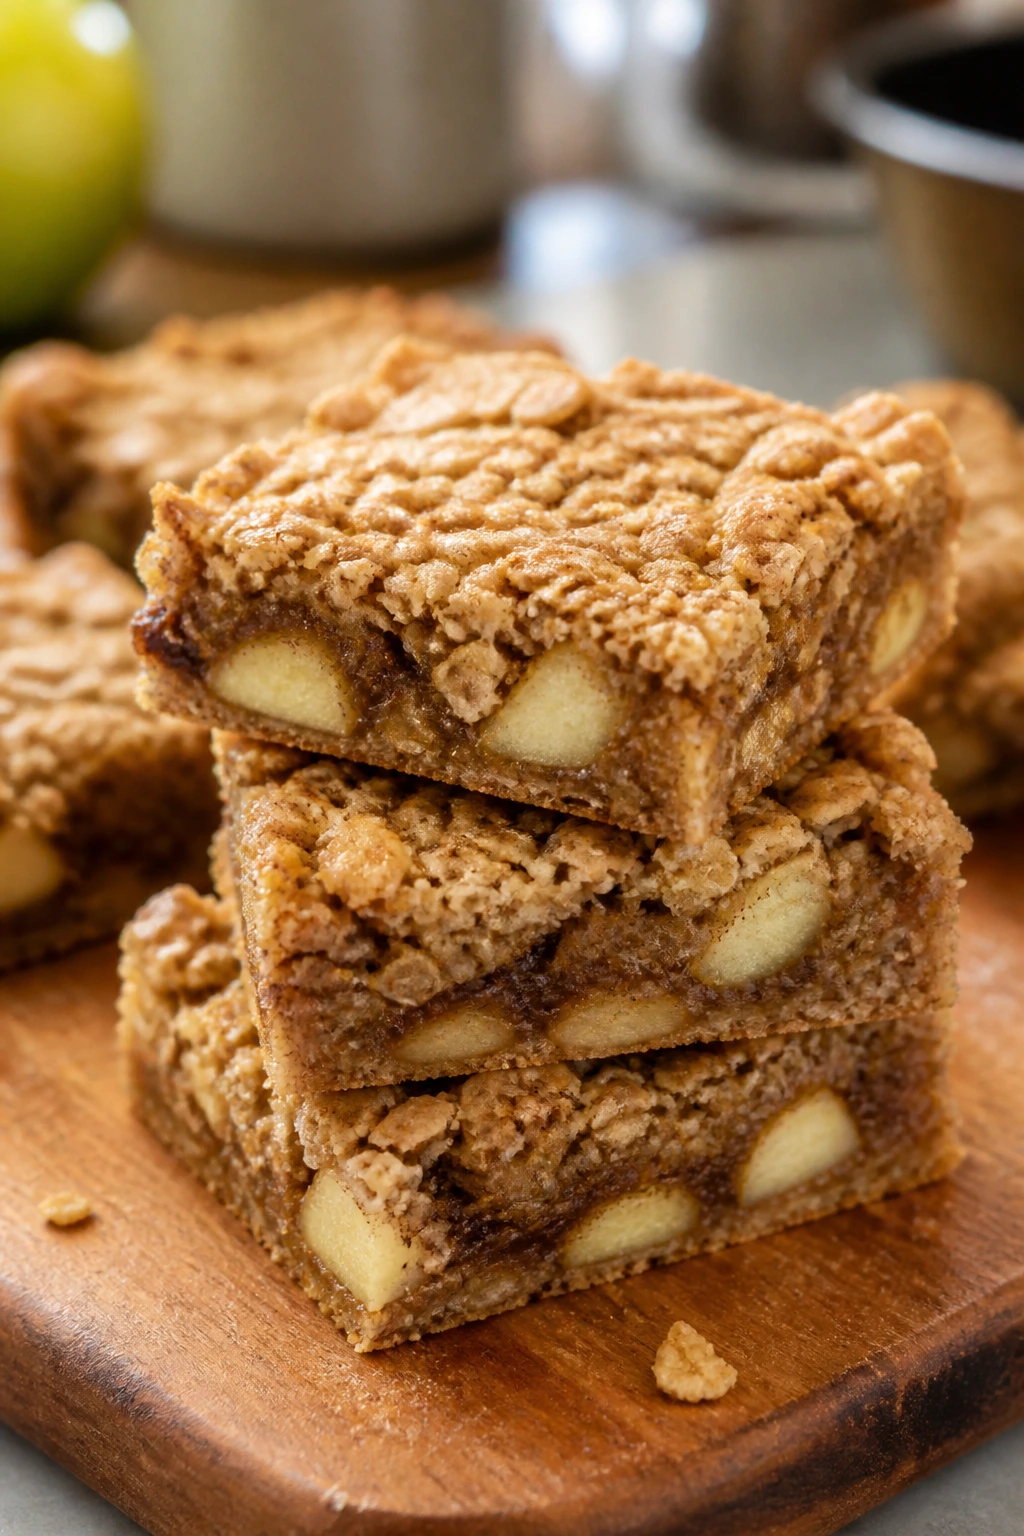
Intro: Some lunchboxes need a sweet anchor that doesn’t crumble into dust. These oat bars stay chewy, taste like an apple pie went to school, and hold together better than a loose muffin ever could.
Why It Works: Oats give the bars structure, apples add moisture, and cinnamon makes them taste like a finished snack rather than a random bake. They’re useful when you want a lunchbox that has a little dessert energy without going full cookie.
Key Ingredients:
- 2 cups rolled oats
- 1 cup all-purpose flour
- 1/2 cup brown sugar
- 1 teaspoon cinnamon
- 1/2 teaspoon baking powder
- 1/2 teaspoon salt
- 1/2 cup melted butter
- 1 egg
- 1 cup finely diced apple
Quick Steps:
- Heat oven to 350°F.
- Mix oats, flour, sugar, cinnamon, baking powder, and salt.
- Stir in butter and egg until crumbly.
- Fold in apple and press into a lined pan.
- Bake 22 to 25 minutes, then cool fully before cutting.
Equipment for This Recipe:
- 8-inch square pan
- Mixing bowl
- Spatula
- Parchment paper
How to Serve This Dish: Pack with yogurt or cheese cubes so the lunch feels more balanced. One bar can also work as the sweet end of a larger lunch.
Pro Tips for This Recipe:
- Dice the apple very small so the bars cut cleanly.
- Cool completely before slicing or they’ll break apart.
- Use a firm apple like Fuji or Granny Smith.
Variations on This Dish:
- Raisin Oat Bars: Swap the apple for raisins.
- Pear Cinnamon Bars: Use pear for a softer, sweeter version.
- Nutty Version: Add 1/3 cup chopped walnuts if the box allows it.
Common Mistakes to Avoid with This Dish:
- Cutting them warm makes the bars fall apart.
- Too much apple creates a wet center.
- Skipping the lining paper turns the pan into a scraping job.
20. Baked Ziti Cups
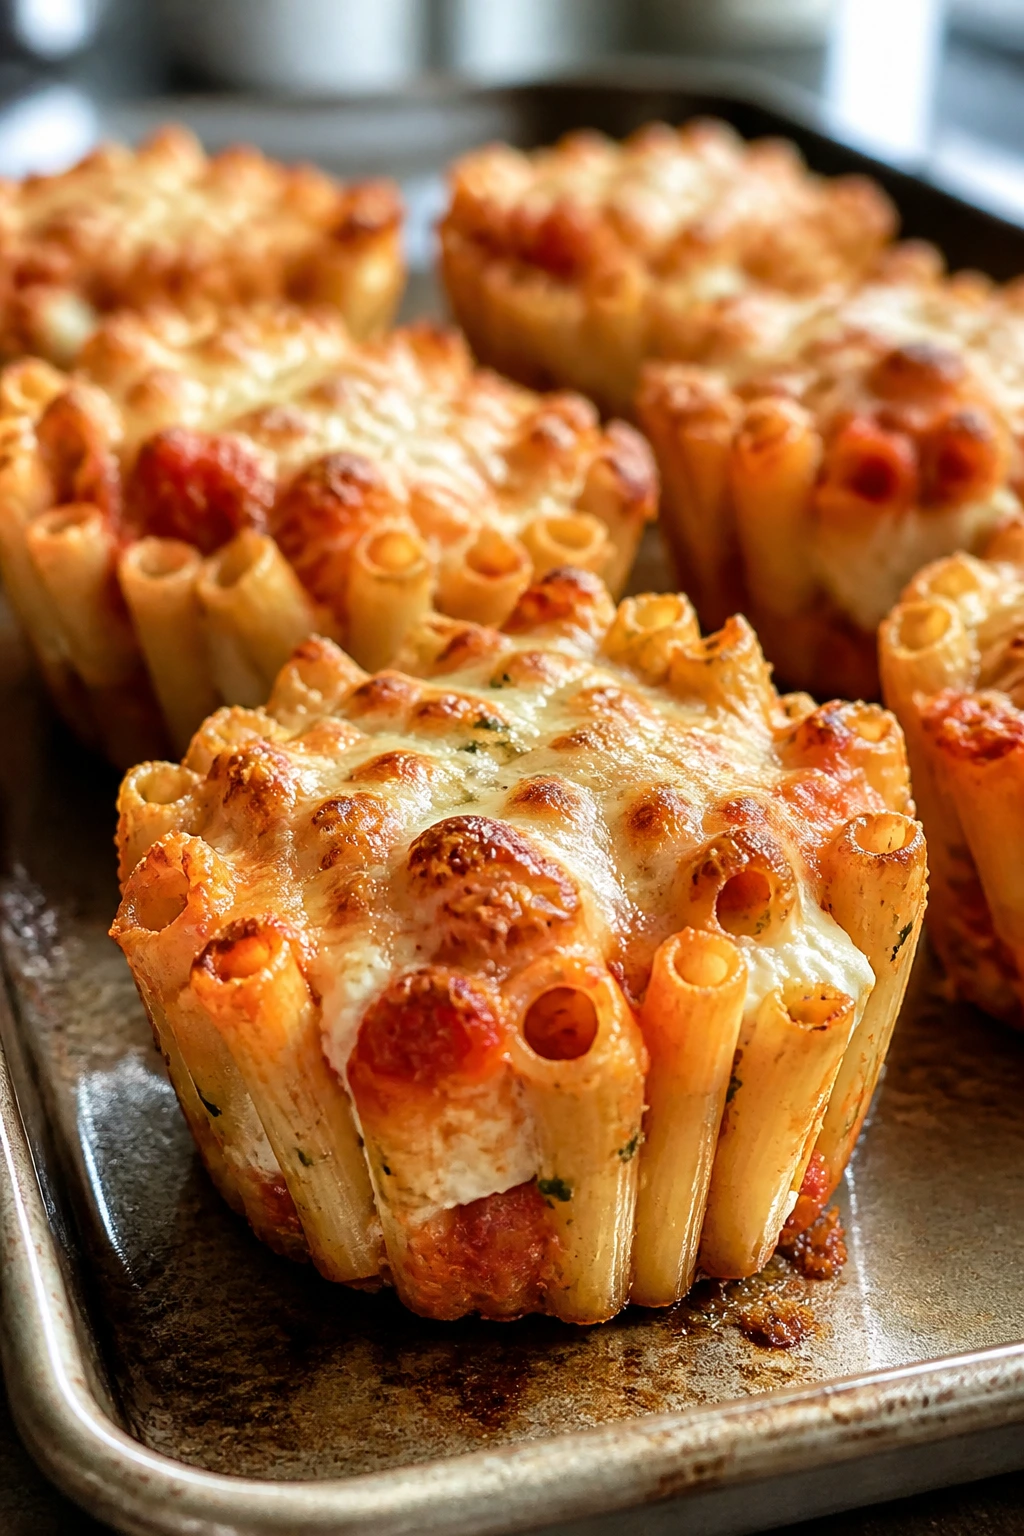
Intro: Ziti in muffin form is one of those ideas that sounds unnecessary until you pack it and realize how neat it is. Every portion is self-contained, which means no forkful escaping across the lunchbox lid.
Why It Works: The pasta, ricotta, and sauce bake into tidy little stacks. Mozzarella on top gives you a browned cap that reheats nicely and still tastes like lunch, not leftovers pretending to be dinner.
Key Ingredients:
- 8 oz ziti or penne
- 1 cup ricotta
- 1 1/2 cups marinara
- 1 cup shredded mozzarella
- 1 egg
- 1/4 cup parmesan
- 1 teaspoon Italian seasoning
Quick Steps:
- Cook pasta until just shy of done.
- Mix ricotta, egg, parmesan, and seasoning.
- Stir pasta with half the marinara.
- Press into greased muffin cups with ricotta in the middle.
- Top with more sauce and mozzarella, then bake at 375°F for 18 minutes.
Equipment for This Recipe:
- Muffin tin
- Pot
- Mixing bowl
- Spoon
How to Serve This Dish: Pack 2 or 3 cups with a green vegetable on the side. They’re good warm, and they reheat well in a microwave if the box has one nearby.
Pro Tips for This Recipe:
- Undercook the pasta slightly so it doesn’t turn soft in the oven.
- Press firmly into the cups so the shapes hold.
- Use thick sauce to avoid watery bottoms.
Variations on This Dish:
- Spinach Ziti Cups: Add chopped spinach to the ricotta.
- Meat Sauce Version: Mix in cooked ground beef or turkey.
- White Sauce Version: Use Alfredo instead of marinara.
Common Mistakes to Avoid with This Dish:
- Overcooking the pasta gives you mushy cups.
- Thin sauce leaks into the muffin tin.
- Skipping the cool-down makes them collapse when removed.
21. Salmon Salad Wraps
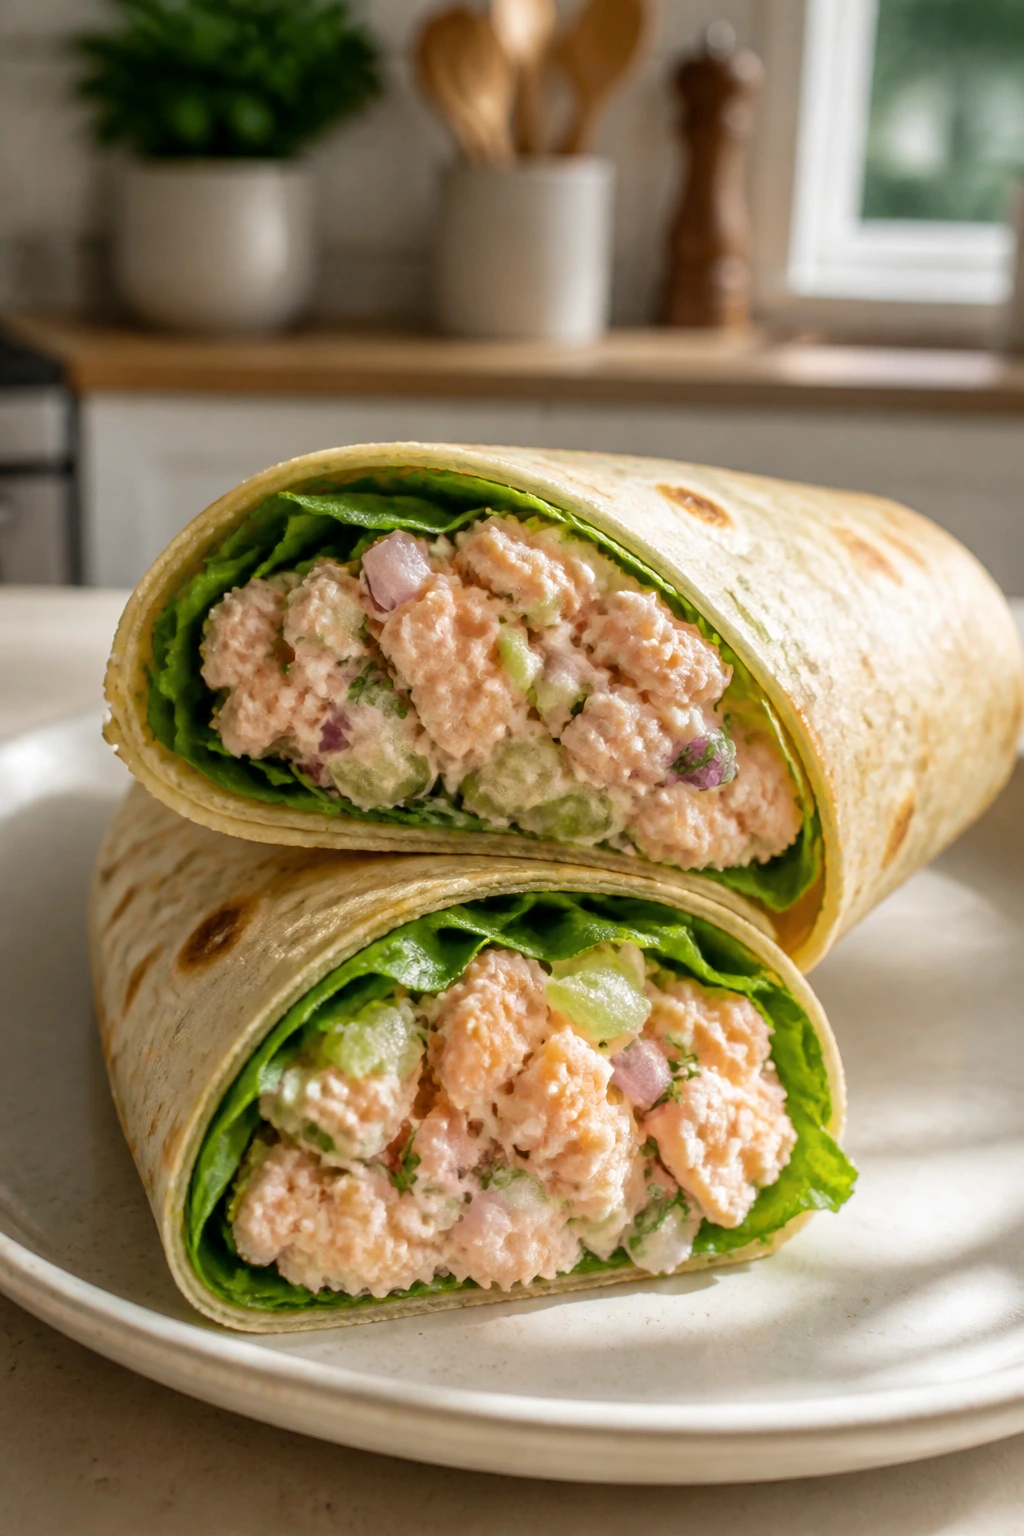
Intro: Canned salmon is one of those ingredients people forget until they need a fast lunch that actually has protein. Mixed with yogurt, celery, and lemon, it becomes a wrap filling that tastes fresh instead of fishy.
Why It Works: The yogurt lightens the texture, celery adds crunch, and lemon cuts through the richness. Wrapped tightly, it packs better than a sandwich layered with delicate greens.
Key Ingredients:
- 1 can salmon, 6 oz, drained and flaked
- 1/3 cup Greek yogurt
- 1 tablespoon mayonnaise
- 1 celery stalk, finely diced
- 1 tablespoon lemon juice
- 1 tablespoon chopped dill
- 2 large tortillas or wraps
- Salt and pepper
Quick Steps:
- Mix yogurt, mayo, lemon, dill, salt, and pepper.
- Fold in salmon and celery.
- Spread onto wraps.
- Roll tightly and slice.
- Chill before packing.
Equipment for This Recipe:
- Bowl
- Fork
- Knife
- Wrap paper or foil
How to Serve This Dish: Add cucumber slices and crackers. If salmon isn’t a regular lunch food in your house, this is the version that usually wins people over.
Pro Tips for This Recipe:
- Drain the salmon well so the filling stays thick.
- Use sturdy wraps to avoid splitting.
- Add lettuce only if it’s very dry.
Variations on This Dish:
- Herbed Salmon Wrap: Add parsley and chives.
- Avocado Salmon Wrap: Mash in a little avocado right before packing.
- No-Mayo Version: Use only Greek yogurt.
Common Mistakes to Avoid with This Dish:
- Leaving bones or skin in makes the texture awkward.
- Too much yogurt turns the filling runny.
- Packing with wet cucumber inside softens the wrap.
22. Chicken and Broccoli Fried Rice
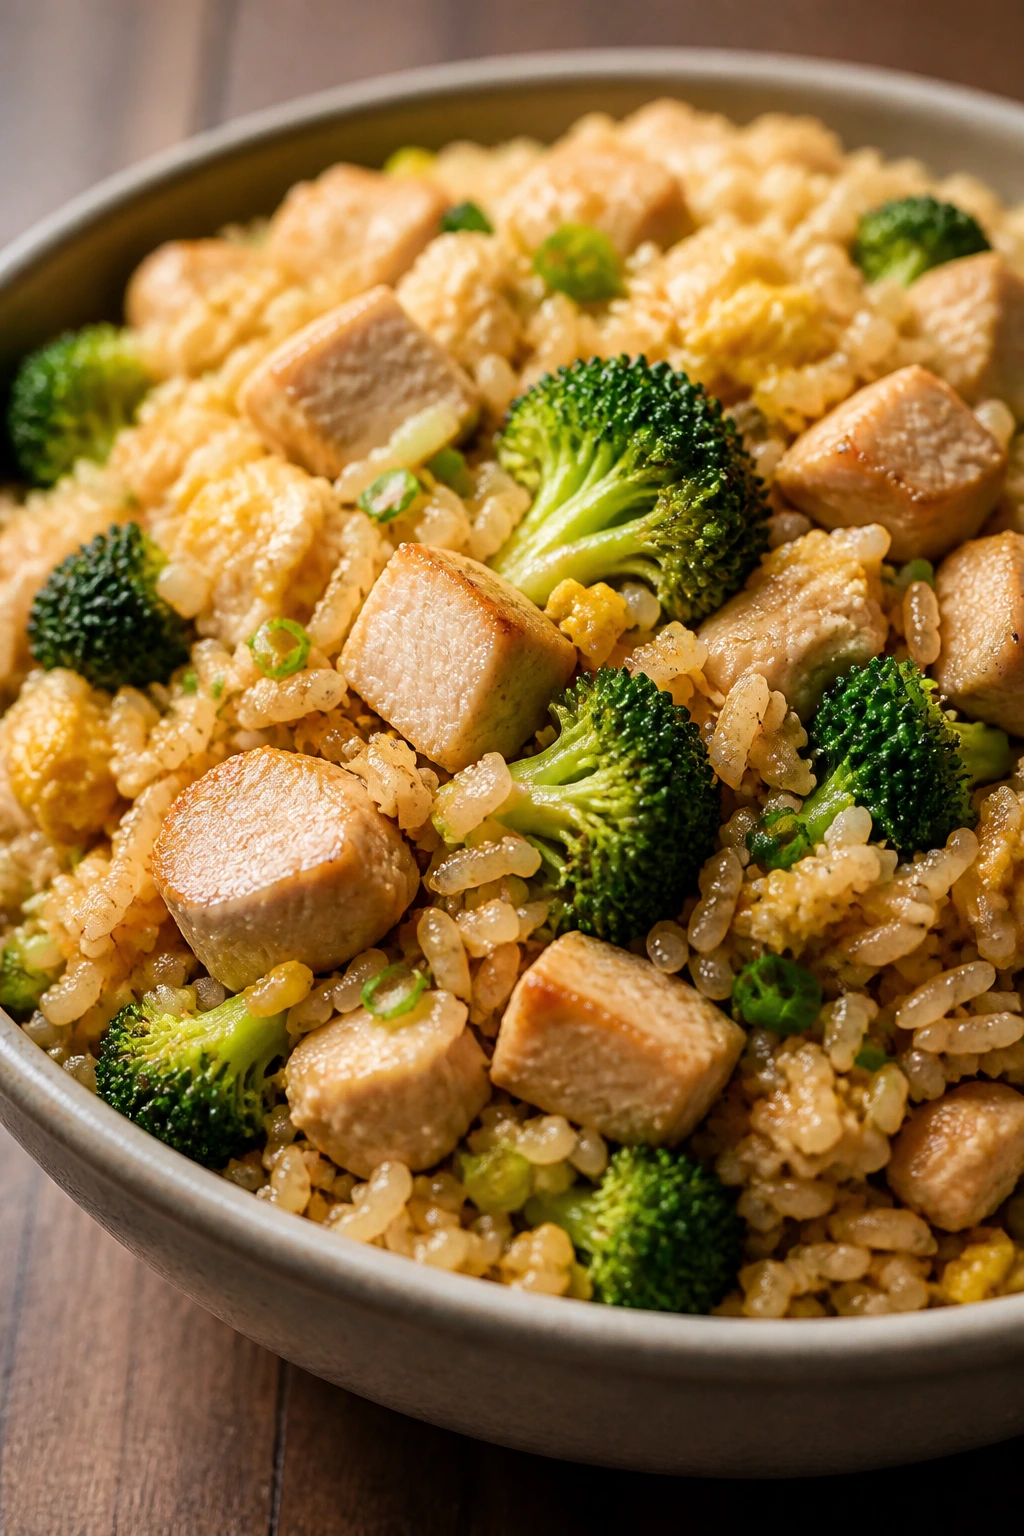
Intro: Fried rice is one of the best lunchbox meals because it tastes like it belongs in a container. The rice picks up the savory sauce, the egg gives richness, and broccoli keeps the whole thing from feeling one-note.
Why It Works: Cold rice fries better because it dries out just enough to separate. That means less clumping, better browning, and a lunch that reheats without turning sticky.
Key Ingredients:
- 2 cups cooked cold rice
- 1 cup cooked chicken, diced
- 1 1/2 cups broccoli florets, chopped small
- 2 eggs
- 2 tablespoons soy sauce
- 1 tablespoon oil
- 1 teaspoon sesame oil
- 2 green onions, sliced
Quick Steps:
- Heat oil in a skillet over medium-high.
- Scramble eggs, then remove.
- Cook broccoli 2 minutes.
- Add rice and chicken, then stir in soy and sesame oil.
- Return eggs and finish with green onions.
Equipment for This Recipe:
- Large skillet
- Spatula
- Bowl
- Container with lid
How to Serve This Dish: Pack with orange slices or edamame. It’s one of the easiest hot lunches to reheat without getting weird.
Pro Tips for This Recipe:
- Use cold rice from the fridge.
- Keep the heat high enough to get a little toast on the grains.
- Cut broccoli small so it cooks fast and stays bite-sized.
Variations on This Dish:
- Veggie Fried Rice: Skip chicken and add peas and carrots.
- Shrimp Version: Use cooked shrimp instead of chicken.
- Spicy Version: Add chili garlic sauce.
Common Mistakes to Avoid with This Dish:
- Fresh hot rice clumps and smears.
- Overloading the pan steams everything.
- Too much soy sauce makes the lunch salty and wet.
23. Chicken Caesar Wraps
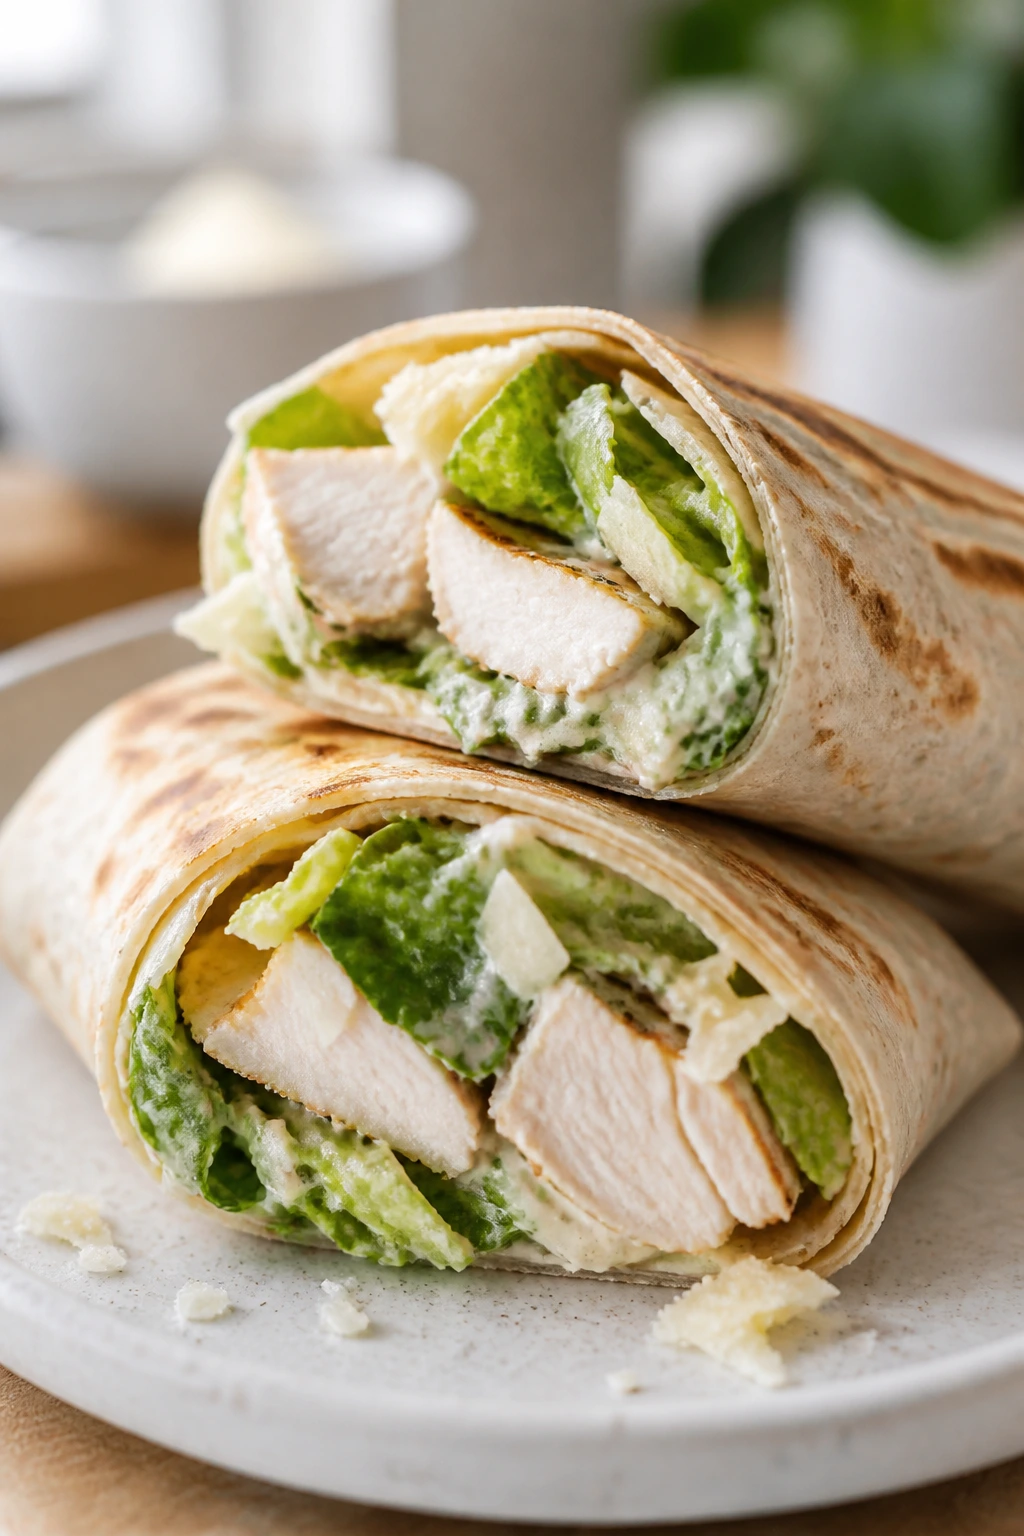
Intro: Caesar salad in a wrap is one of those lunches that works because the container does the thinking for you. The chicken brings heft, the romaine gives crunch, and the dressing does its job without needing a bowl and fork.
Why It Works: Wrapping the ingredients tightly keeps the dressing from spreading through the tortilla. Parmesan adds salt and punch, so you don’t need to overfill it with sauce.
Key Ingredients:
- 2 large tortillas
- 2 cups cooked chicken, sliced
- 2 cups romaine, chopped
- 1/3 cup Caesar dressing
- 1/4 cup grated parmesan
- 1/2 cup croutons, optional
Quick Steps:
- Toss chicken with a little Caesar dressing.
- Lay romaine on each tortilla.
- Add chicken and parmesan.
- Sprinkle croutons if using.
- Roll tightly and wrap for the lunchbox.
Equipment for This Recipe:
- Knife
- Cutting board
- Mixing bowl
- Foil or parchment
How to Serve This Dish: Serve with grapes or snap peas. If you want the croutons to stay crisp, pack them separately and add them at lunch.
Pro Tips for This Recipe:
- Use chopped romaine, not whole leaves.
- Keep dressing light so the wrap doesn’t leak.
- Pat chicken dry if it was sauced or roasted.
Variations on This Dish:
- BLT Caesar Wrap: Add a little bacon and tomato.
- Turkey Caesar Wrap: Swap the chicken for turkey.
- Vegetarian Caesar: Use chickpeas instead of chicken.
Common Mistakes to Avoid with This Recipe:
- Too much dressing makes the tortilla slick.
- Packing croutons inside softens them fast.
- Using wet lettuce turns the wrap soggy.
24. Lentil Curry and Rice
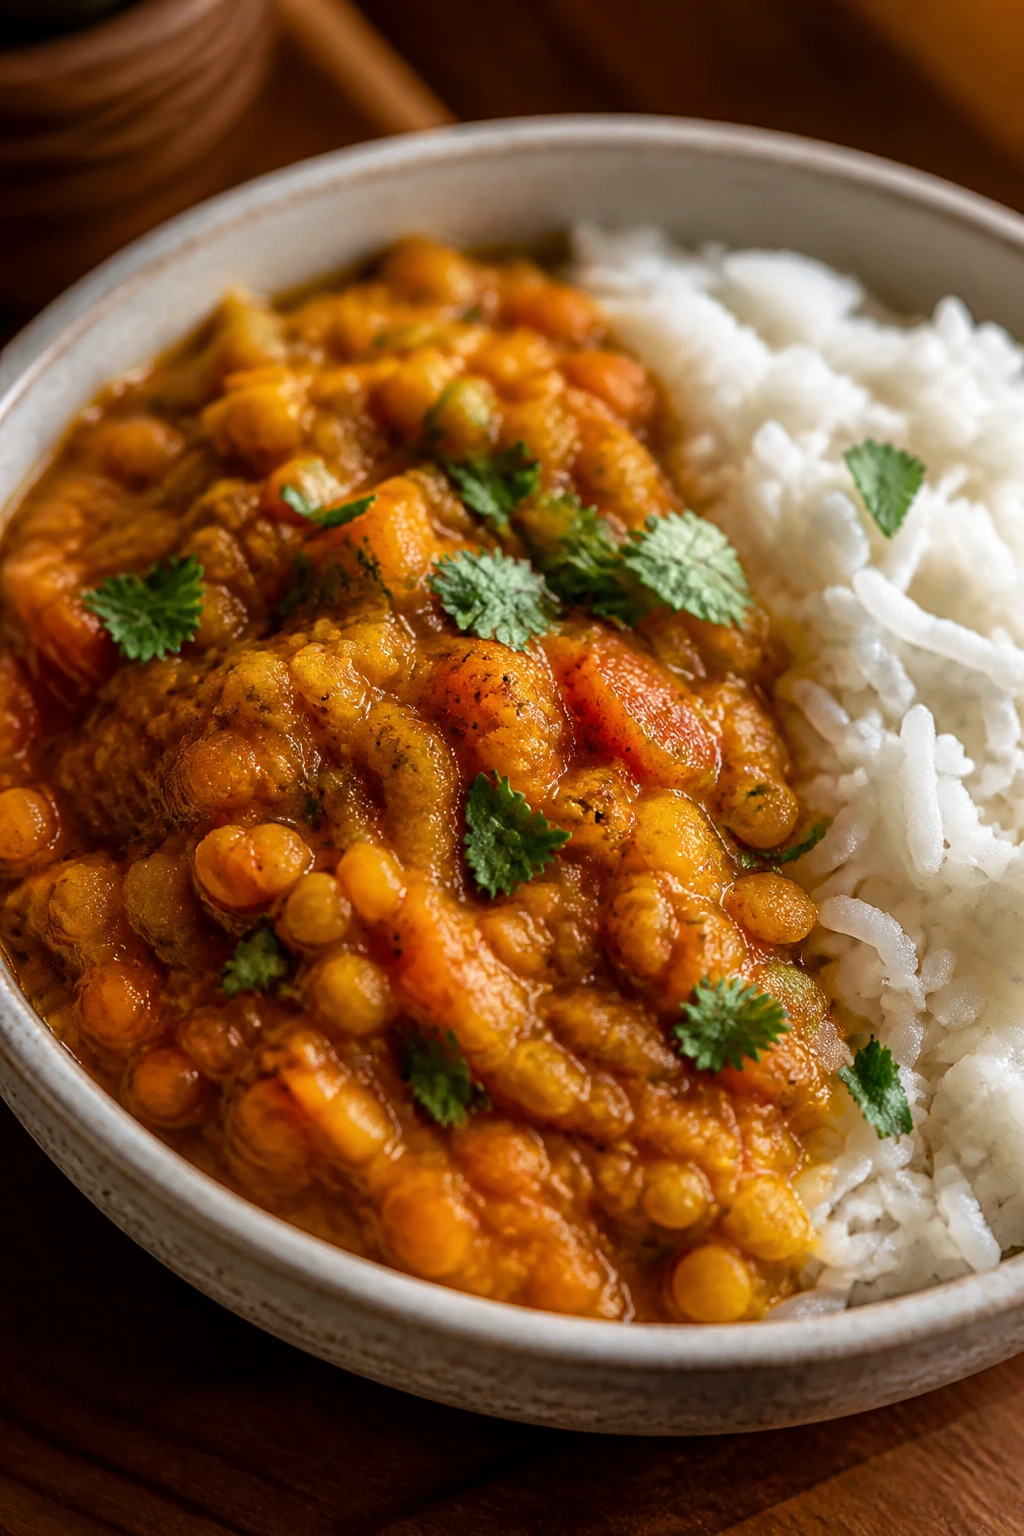
Intro: This is the lunchbox meal for people who want something warm, filling, and deeply practical. Lentils cook down into a thick curry that sits nicely over rice, and a thermos keeps the texture in the sweet spot for hours.
Why It Works: Red lentils break down naturally, so the curry thickens without flour or cream. Coconut milk rounds it out, and rice gives the meal enough body to feel finished.
Key Ingredients:
- 1 cup red lentils, rinsed
- 1 tablespoon oil
- 1 small onion, diced
- 2 cloves garlic, minced
- 2 teaspoons curry powder
- 1/2 teaspoon salt
- 1 can coconut milk, 13.5 oz
- 2 cups water
- 2 cups cooked rice
Quick Steps:
- Cook onion in oil until soft.
- Add garlic and curry powder for 30 seconds.
- Stir in lentils, coconut milk, water, and salt.
- Simmer 18 to 20 minutes until thick.
- Spoon over rice and pack hot in a thermos.
Equipment for This Recipe:
- Pot
- Wooden spoon
- Thermos
- Measuring cups
How to Serve This Dish: Add naan triangles if you want a bigger lunch. A squeeze of lemon at eating time sharpens the curry nicely.
Pro Tips for This Recipe:
- Rinse lentils well so they cook cleanly.
- Stir often to prevent sticking.
- Make it thicker than soup or the rice gets flooded.
Variations on This Dish:
- Tomato Lentil Curry: Add 1/2 cup crushed tomatoes.
- Spinach Version: Stir in spinach at the end.
- Mild Coconut Curry: Use less curry powder for younger eaters.
Common Mistakes to Avoid with This Dish:
- Too much water makes it soupy.
- Skipping the preheat on the thermos cools it too fast.
- Undercooked lentils stay gritty.
25. Meatloaf Muffins with Mashed Potatoes
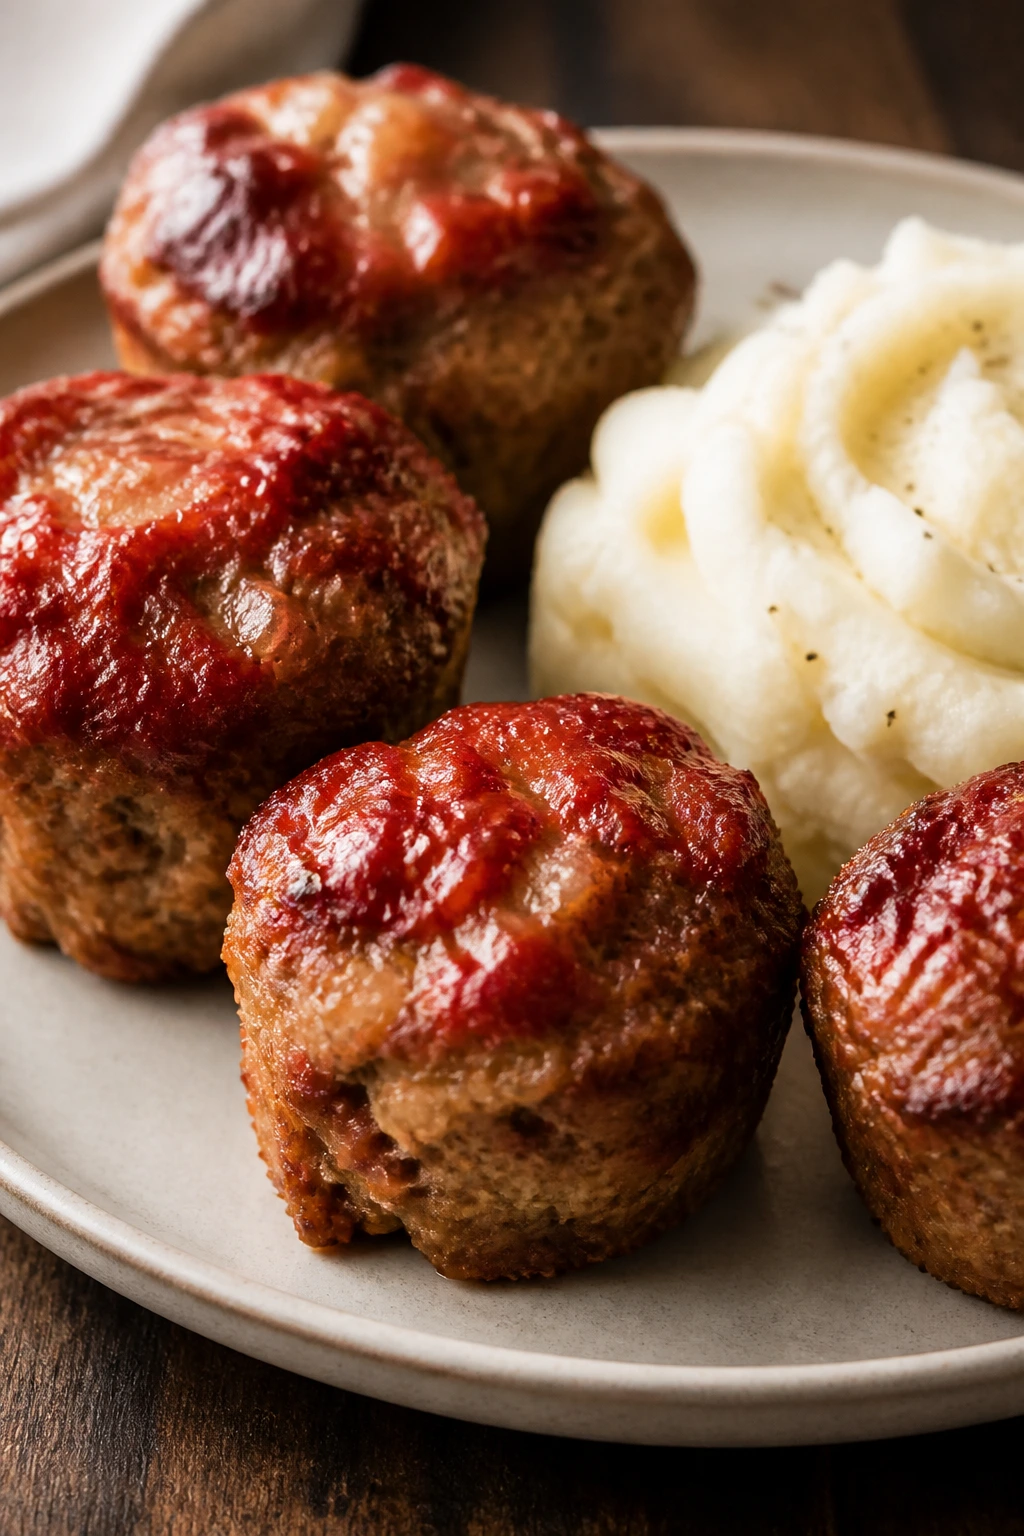
Intro: Meatloaf gets a better reputation when it’s portioned into muffin cups. The mini shape gives you crust on the outside, tender meat inside, and a lunchbox format that feels manageable instead of heavy.
Why It Works: Small portions cook faster and hold together well. Mashed potatoes on the side round out the meal and make the box feel complete without needing a lot of extra parts.
Key Ingredients:
- 1 lb ground beef
- 1/2 cup breadcrumbs
- 1 egg
- 1/4 cup milk
- 1 teaspoon salt
- 1 teaspoon onion powder
- 1/4 cup ketchup
- 2 cups mashed potatoes
Quick Steps:
- Heat oven to 375°F.
- Mix beef, breadcrumbs, egg, milk, salt, and onion powder.
- Press into greased muffin cups.
- Top with ketchup and bake 20 to 22 minutes.
- Pack with mashed potatoes once cool.
Equipment for This Recipe:
- Muffin tin
- Bowl
- Spoon
- Potato masher
How to Serve This Dish: Add peas or green beans on the side. If you want it warm, pack the mash in a separate container and heat both pieces before lunch.
Pro Tips for This Recipe:
- Don’t overwork the meat or it gets dense.
- Use a small scoop for even cups.
- Make the mash fairly thick so it doesn’t leak around the meat.
Variations on This Dish:
- Turkey Meatloaf Muffins: Use ground turkey instead of beef.
- BBQ Version: Swap ketchup for barbecue sauce.
- Cheesy Version: Fold in 1/2 cup shredded cheddar.
Common Mistakes to Avoid with This Dish:
- Packing wet mashed potatoes makes the lunch sloppy.
- Overbaking dries the meat out.
- Ignoring salt leaves the whole thing bland.
26. Turkey Pasta Bake
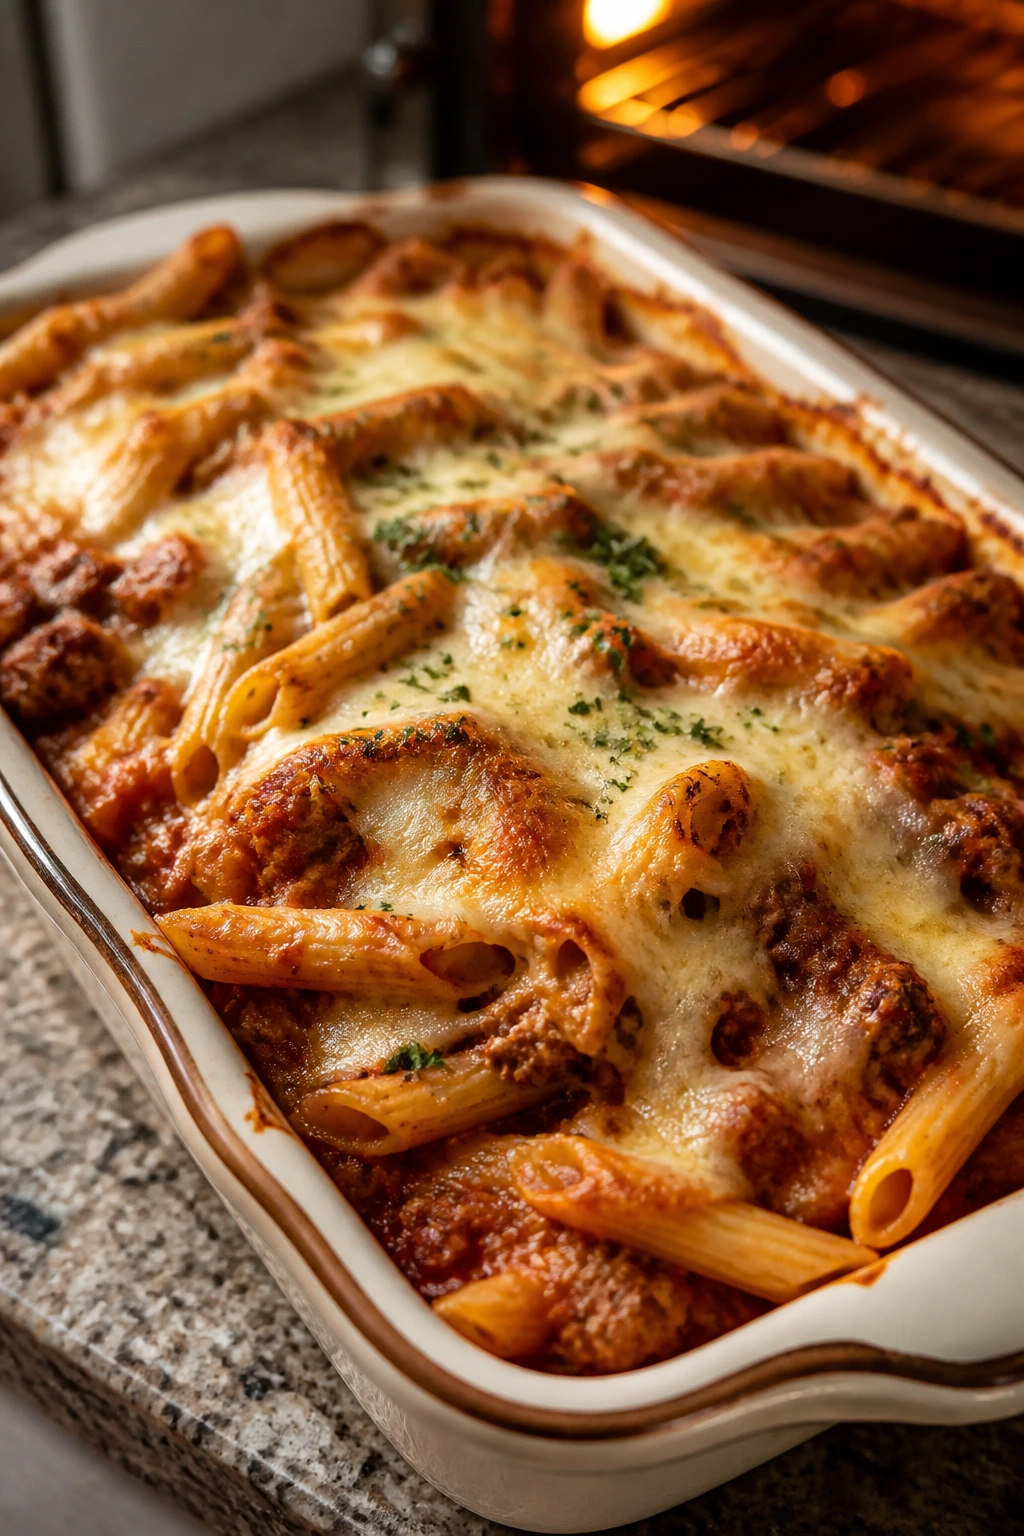
Intro: A pasta bake is one of the easiest ways to turn leftovers into a real lunch. Turkey, sauce, pasta, and melted cheese bake into something sturdy enough to reheat without losing its shape.
Why It Works: The sauce coats the pasta before baking, so every bite stays seasoned. Ground turkey keeps it lighter than beef while still giving enough heft for a lunchbox main.
Key Ingredients:
- 8 oz penne
- 1 lb ground turkey
- 1 1/2 cups marinara
- 1 cup shredded mozzarella
- 1/4 cup parmesan
- 1 teaspoon garlic powder
- 1 teaspoon Italian seasoning
Quick Steps:
- Cook pasta until just shy of done.
- Brown turkey with garlic powder and seasoning.
- Mix pasta, turkey, and marinara.
- Top with mozzarella and parmesan.
- Bake at 375°F for 20 minutes.
Equipment for This Recipe:
- Baking dish
- Pot
- Skillet
- Spoon
How to Serve This Dish: Pack with a simple salad or cucumber slices. It reheats well and usually tastes even better after a night in the fridge.
Pro Tips for This Recipe:
- Use a thick sauce so the bake holds together.
- Slightly undercook the pasta before baking.
- Let it rest before scooping or it will fall apart.
Variations on This Dish:
- Vegetable Pasta Bake: Add spinach or mushrooms.
- Spicy Bake: Add red pepper flakes.
- White Sauce Version: Use Alfredo and broccoli.
Common Mistakes to Avoid with This Dish:
- Too much liquid makes the pasta bake loose.
- Overcooked noodles go mushy after baking.
- Cutting immediately wrecks the layers.
27. Veggie Fried Rice with Edamame
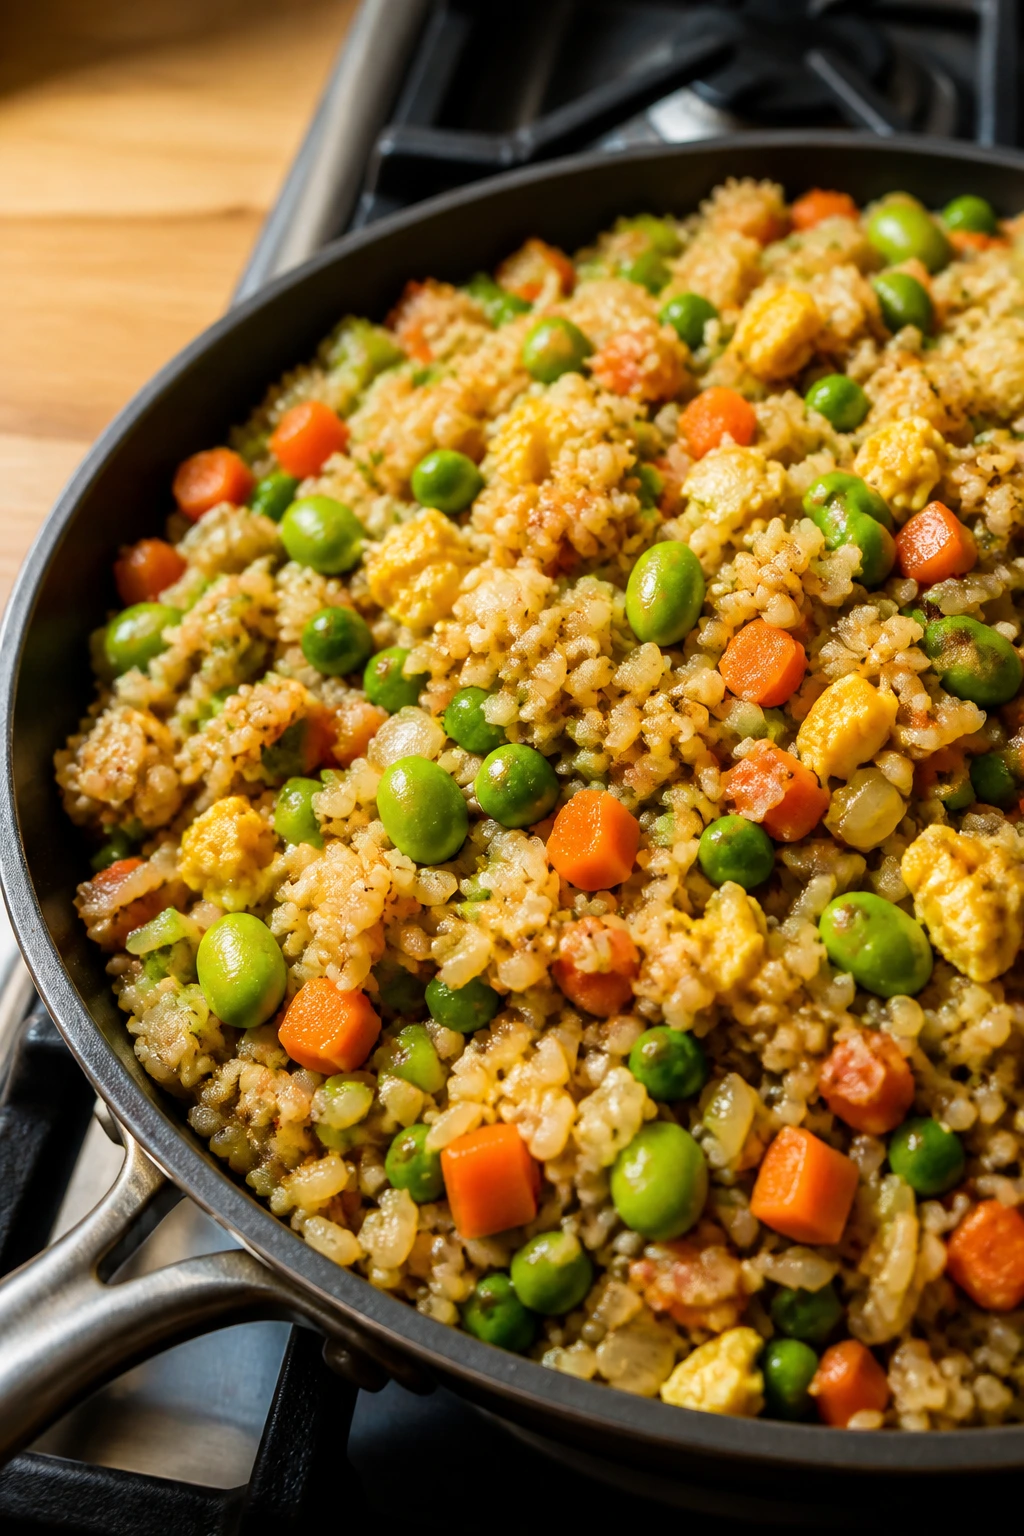
Intro: This is the vegetarian fried rice that doesn’t feel like an apology. Edamame gives it protein, carrots add sweetness, and the rice fries up with enough flavor that nobody asks where the meat went.
Why It Works: Cold rice is the secret again. It separates in the pan, absorbs soy sauce, and keeps the final texture from turning sticky and dense.
Key Ingredients:
- 3 cups cooked cold rice
- 1 cup shelled edamame
- 1/2 cup diced carrots
- 1/2 cup peas
- 2 eggs
- 2 tablespoons soy sauce
- 1 tablespoon oil
- 1 teaspoon sesame oil
Quick Steps:
- Scramble eggs in oil, then remove.
- Cook carrots and peas for 2 minutes.
- Add rice and edamame.
- Stir in soy sauce and sesame oil.
- Return eggs and cook until hot.
Equipment for This Recipe:
- Large skillet or wok
- Spatula
- Bowl
- Lunch container
How to Serve This Dish: Add a fruit cup or sliced pears. A little chili crisp can go in a side cup if older kids or adults want heat.
Pro Tips for This Recipe:
- Use day-old rice for best texture.
- Keep vegetables small so the rice stays easy to scoop.
- Finish with sesame oil rather than cooking it hard.
Variations on This Dish:
- Mushroom Fried Rice: Add chopped mushrooms.
- Pineapple Fried Rice: Add a few pineapple chunks.
- Egg-Free Version: Skip the eggs and add more edamame.
Common Mistakes to Avoid with This Dish:
- Wet rice clumps and steams.
- Too much sauce makes the lunch salty.
- Crowding the pan prevents browning.
28. BBQ Chicken Sliders
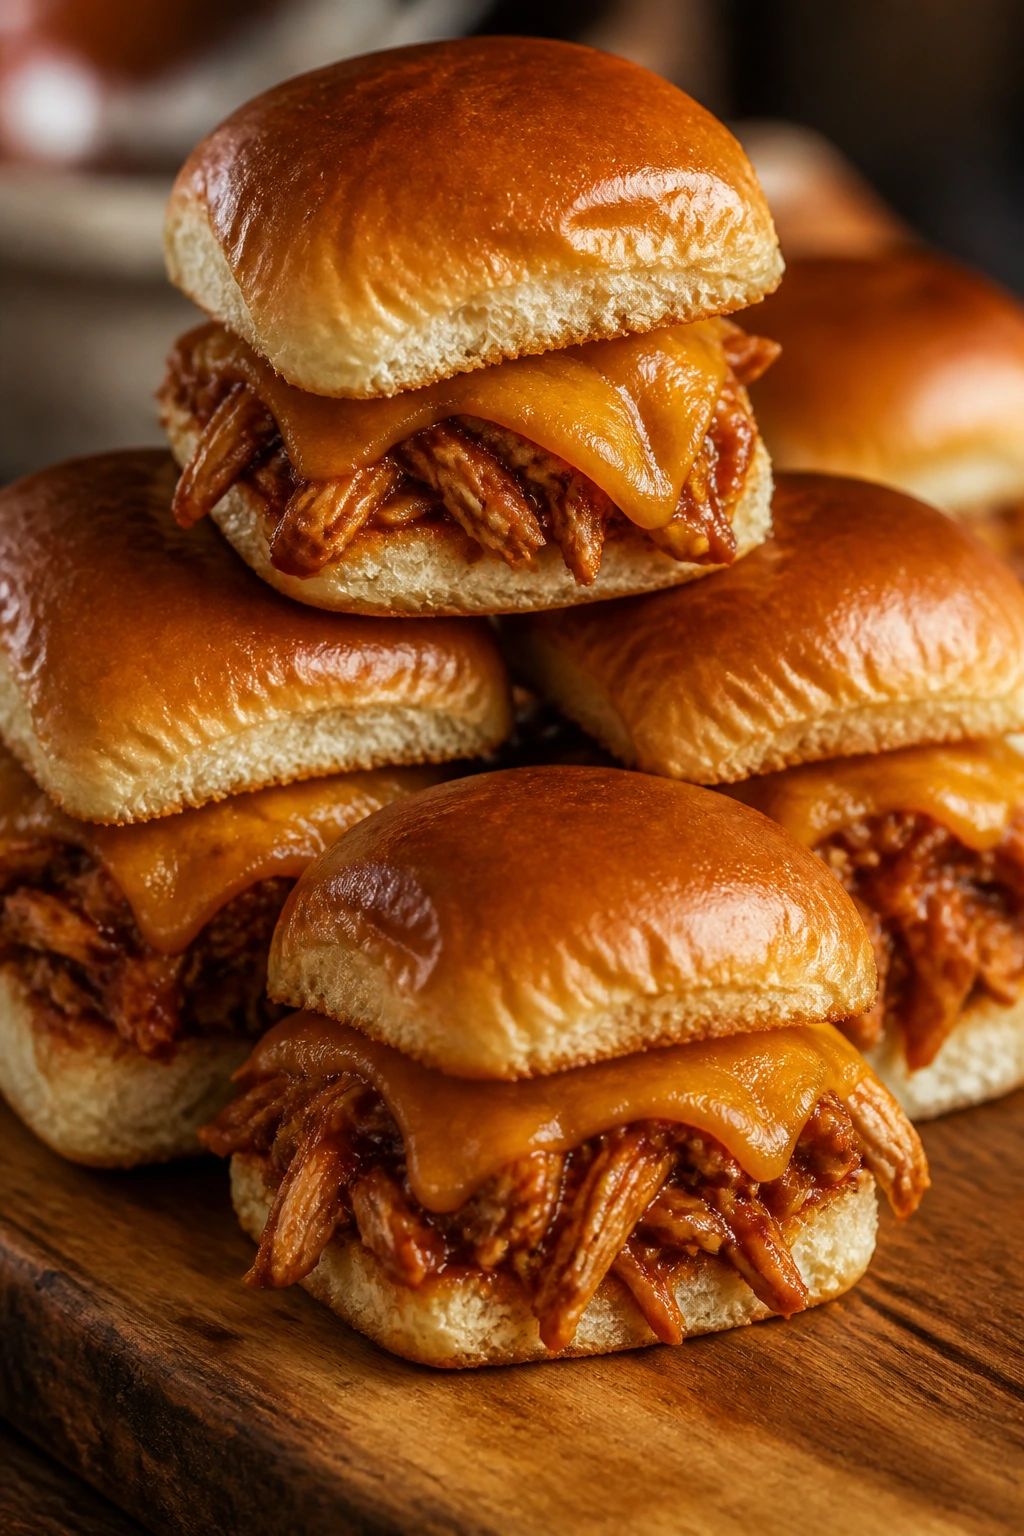
Intro: These sliders have that sticky, smoky flavor kids tend to notice first. The shredded chicken soaks up barbecue sauce, and the soft rolls keep everything easy to eat with minimal mess.
Why It Works: Barbecue sauce binds the chicken and keeps it moist. A little cheese under the top bun helps seal the layers and keeps the rolls from getting soaked.
Key Ingredients:
- 2 cups cooked shredded chicken
- 1/2 cup barbecue sauce
- 12 slider rolls
- 1 cup shredded cheddar
- 2 tablespoons melted butter
- 1 teaspoon garlic powder
Quick Steps:
- Toss chicken with barbecue sauce.
- Split the rolls and layer chicken and cheddar.
- Replace tops and brush with butter and garlic powder.
- Bake at 350°F for 12 minutes.
- Cool slightly before wrapping.
Equipment for This Recipe:
- Baking dish
- Brush
- Knife
- Foil
How to Serve This Dish: Pack with slaw in a separate container or a few pickle chips. They make a good hot lunch, but they’re just as workable cooled down.
Pro Tips for This Recipe:
- Use thicker barbecue sauce so it stays put.
- Shred chicken finely for easier bites.
- Bake just long enough to melt the cheese.
Variations on This Dish:
- Pulled Pork Sliders: Swap chicken for pork.
- Buffalo Chicken Sliders: Use buffalo sauce and blue cheese.
- Cheddar Jalapeño Version: Add sliced jalapeños.
Common Mistakes to Avoid with This Dish:
- Too much sauce soaks the buns.
- Packing while very hot creates steam.
- Skipping the butter top makes the rolls dry.
29. Southwestern Quinoa Bowl
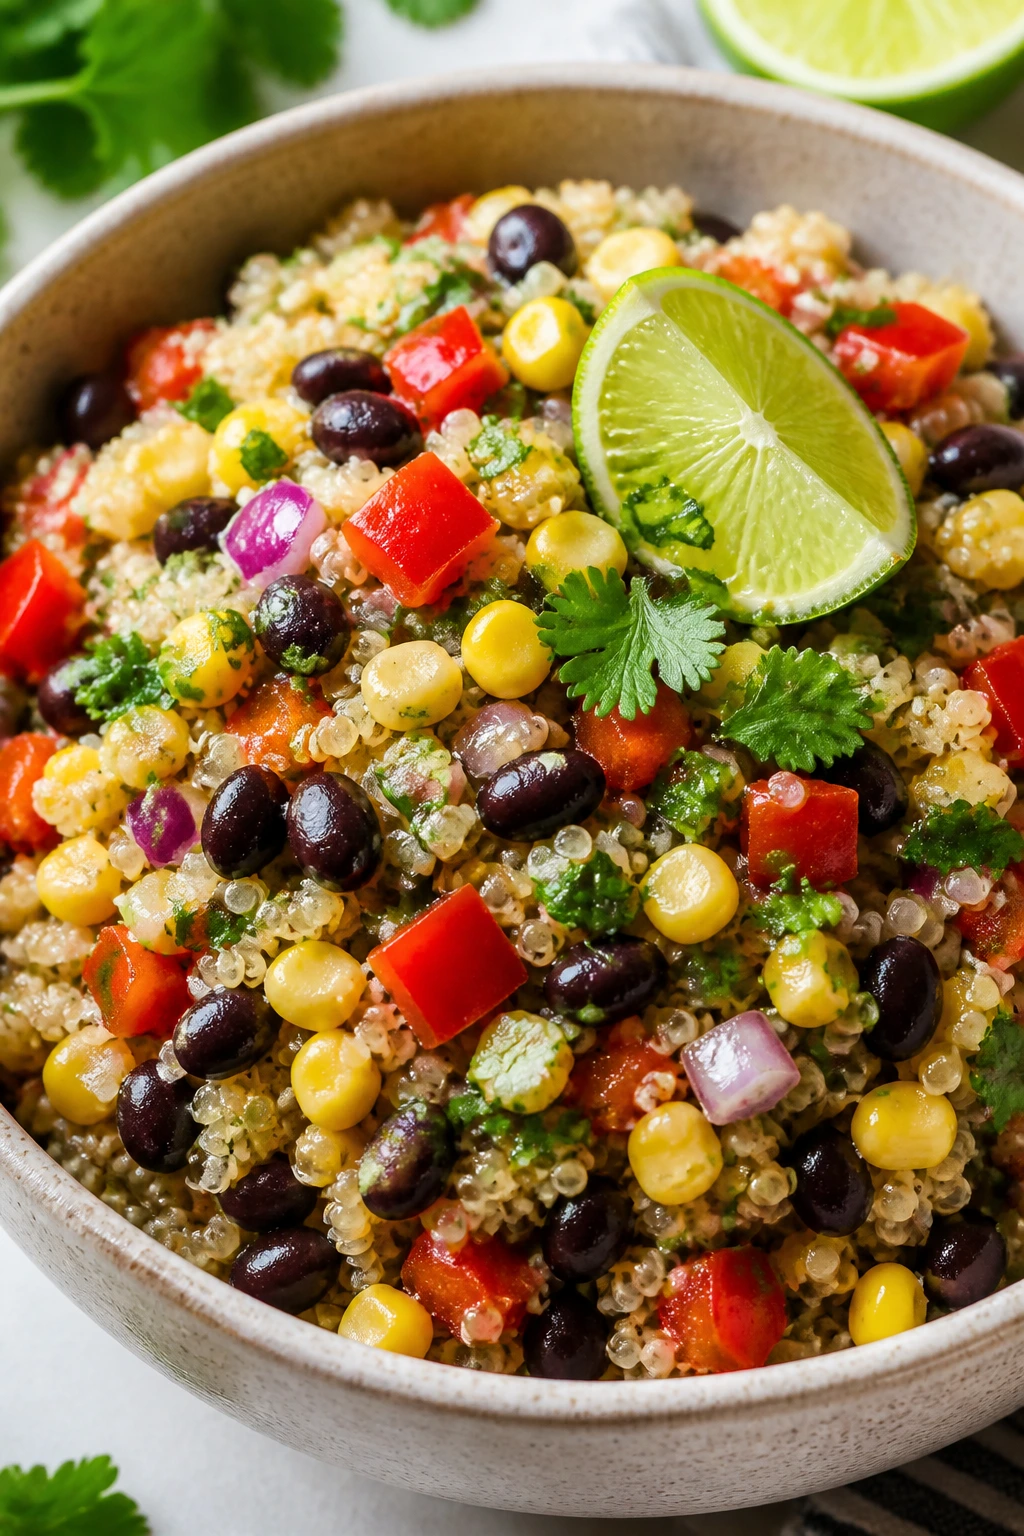
Intro: Quinoa bowls can get dull fast, but this one has enough color and bite to keep lunch interesting. Black beans, corn, and a lime dressing make it taste built rather than assembled.
Why It Works: Quinoa has a dry, fluffy texture that holds dressing well. Beans and corn add enough substance that the bowl works cold without needing heat.
Key Ingredients:
- 1 cup quinoa, rinsed
- 2 cups water
- 1 cup black beans, rinsed
- 1 cup corn
- 1 red bell pepper, diced
- 2 tablespoons lime juice
- 2 tablespoons olive oil
- 1/2 teaspoon cumin
- Salt
Quick Steps:
- Cook quinoa in water until fluffy.
- Whisk lime juice, oil, cumin, and salt.
- Toss quinoa with beans, corn, and pepper.
- Add dressing and chill.
- Pack with avocado only if eating soon.
Equipment for This Recipe:
- Pot
- Fork
- Bowl
- Container
How to Serve This Dish: Add tortilla chips on the side for crunch. If you want more protein, a handful of shredded chicken slides in without changing the flavor much.
Pro Tips for This Recipe:
- Rinse quinoa well to remove bitterness.
- Cool before packing so it doesn’t sweat.
- Add avocado at lunch time if possible.
Variations on This Dish:
- Chicken Quinoa Bowl: Add shredded chicken.
- Bean-Heavy Version: Increase the black beans and skip meat.
- Spicy Lime Bowl: Add chopped jalapeño.
Common Mistakes to Avoid with This Dish:
- Not rinsing quinoa leaves a bitter edge.
- Too much dressing makes the bowl wet.
- Packing avocado overnight turns it brown.
30. Cucumber Cream Cheese Tea Sandwiches
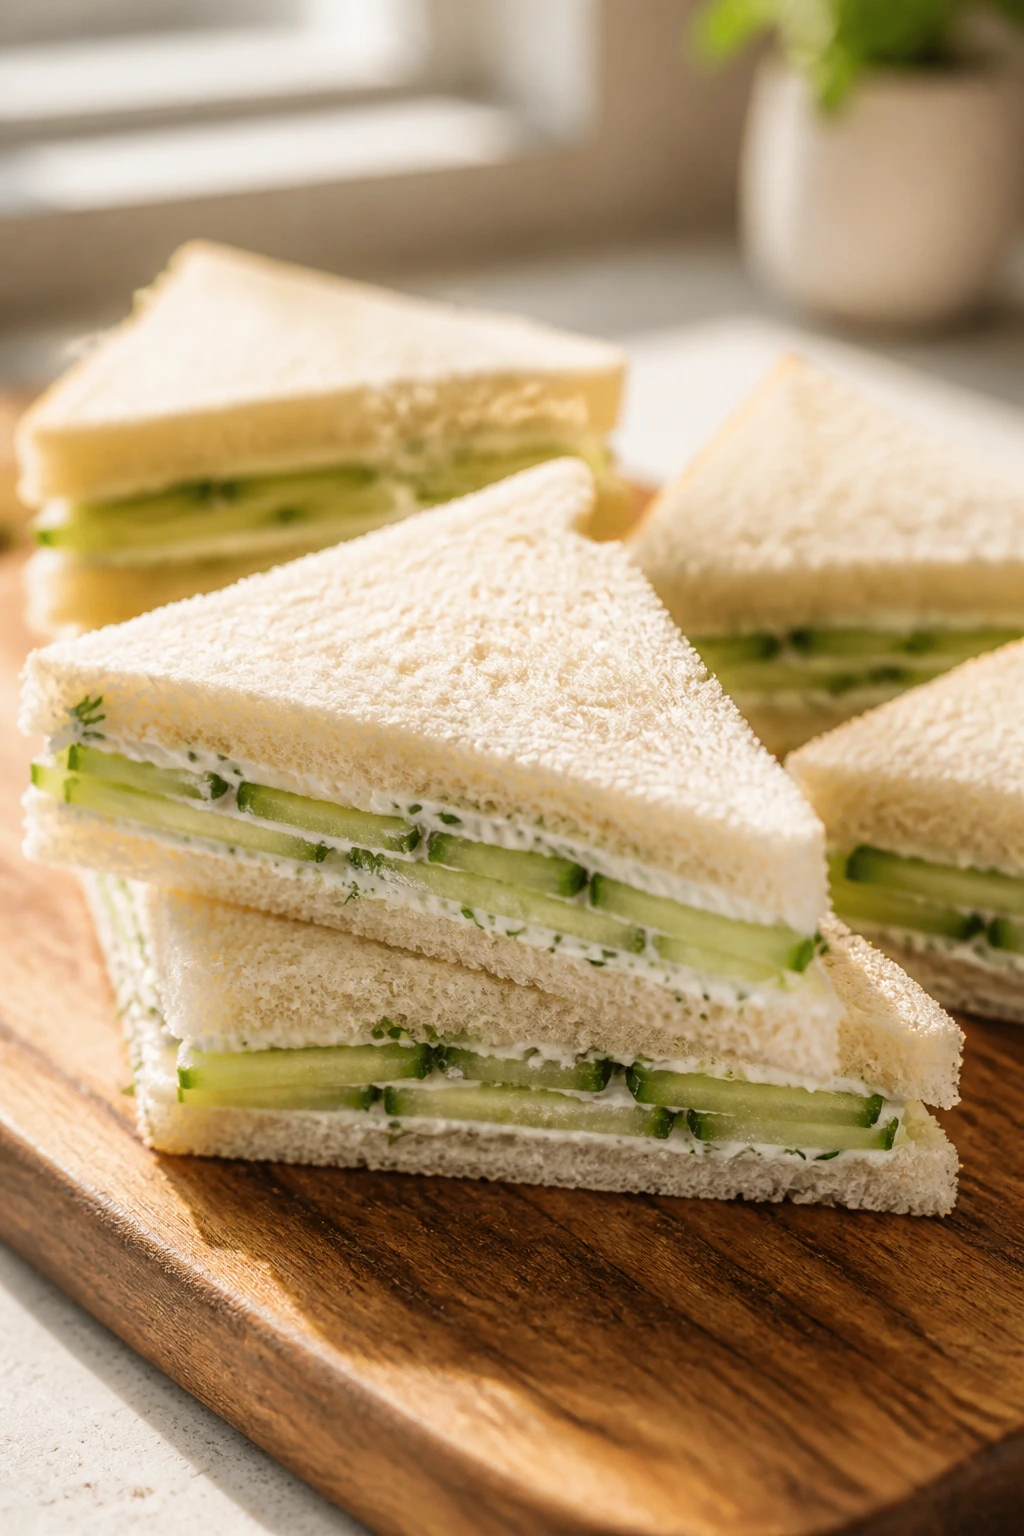
Intro: These are delicate, yes, but not fragile if you build them right. Thin cucumber slices, a thick cream cheese spread, and sturdy bread make a lunch that feels light without being empty.
Why It Works: Cream cheese forms a moisture barrier, and salting the cucumber lightly pulls off excess water. That’s the difference between elegant and limp.
Key Ingredients:
- 8 slices sandwich bread, crusts removed
- 4 oz cream cheese, softened
- 1 tablespoon mayonnaise
- 1 tablespoon chopped dill
- 1 cucumber, thinly sliced
- Pinch of salt
- Black pepper
Quick Steps:
- Mix cream cheese, mayo, dill, and pepper.
- Salt cucumber slices and blot after 5 minutes.
- Spread bread with the cream cheese mixture.
- Layer cucumber and close sandwiches.
- Cut into triangles or fingers.
Equipment for This Recipe:
- Knife
- Spoon
- Cutting board
- Paper wrap
How to Serve This Dish: Pack with grapes or a small handful of nuts if allowed. These are best for a lighter lunch, not the day someone is planning to run around after school.
Pro Tips for This Recipe:
- Blot cucumber dry or the bread softens.
- Use firm, thin bread rather than soft bakery slices.
- Cut just before packing for the neatest edges.
Variations on This Dish:
- Herbed Version: Add chives and parsley.
- Smoked Salmon Tea Sandwich: Add a thin layer of salmon.
- Dairy-Free Version: Use a dairy-free spread with dill.
Common Mistakes to Avoid with This Dish:
- Thick cucumber slices make the sandwich slip.
- Too much cream cheese squishes out.
- Packing without sealing dries the bread edges.
31. Sausage and Pepper Pasta
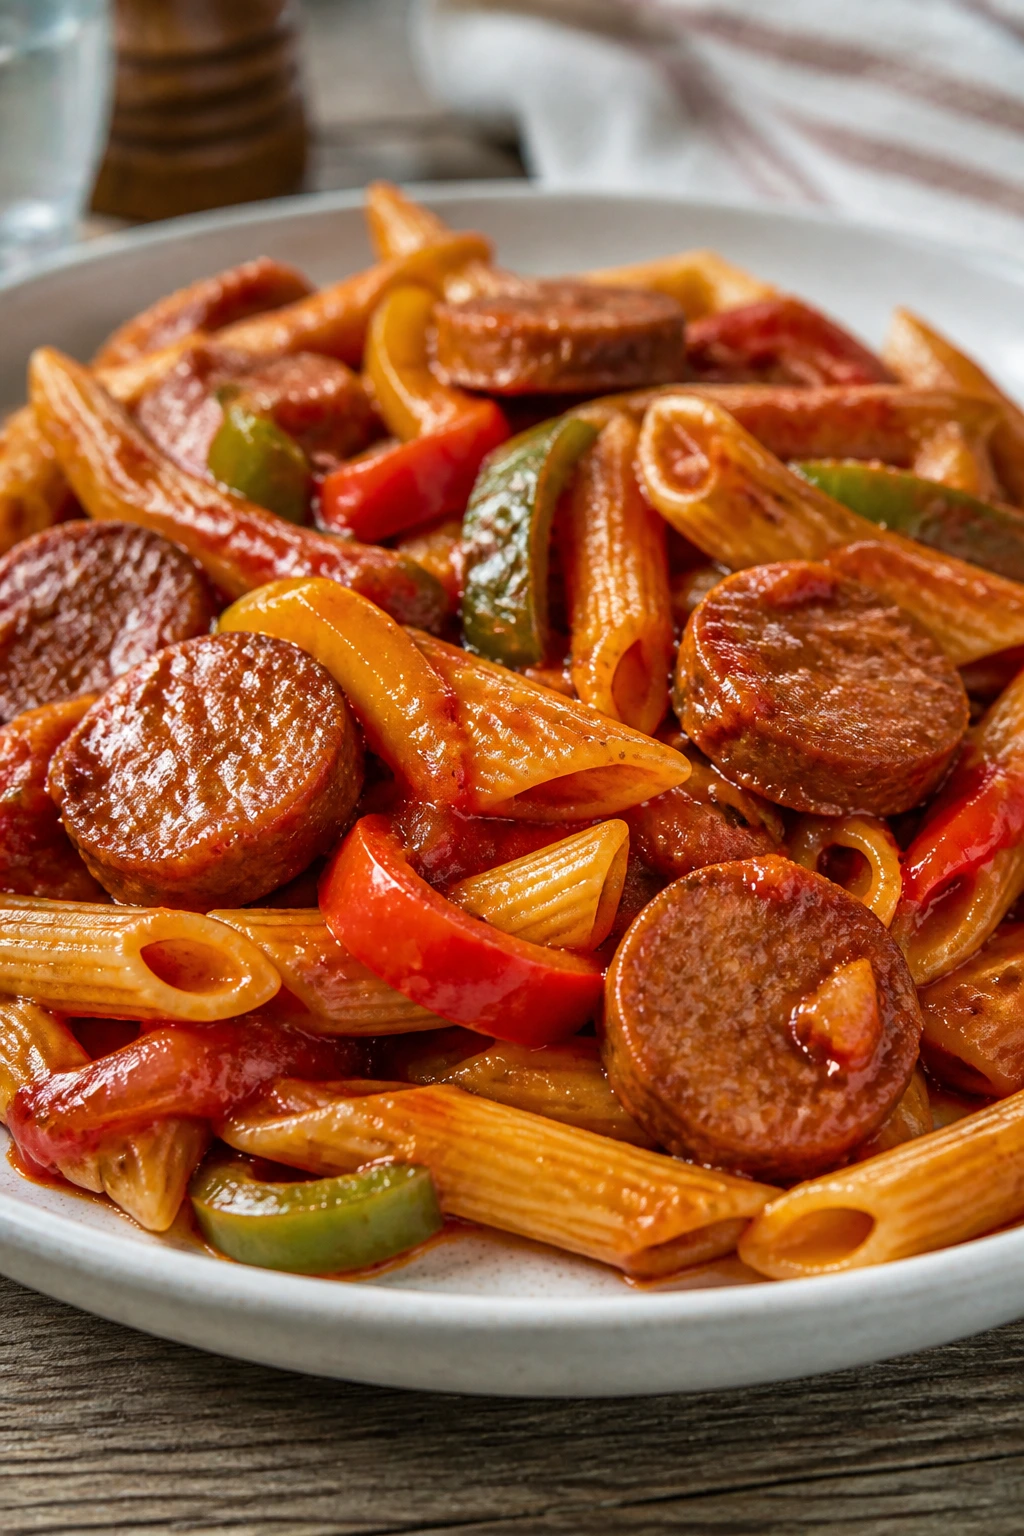
Intro: This is a lunchbox pasta with some backbone. Sausage brings seasoning to the whole pan, peppers keep it lively, and the sauce clings just enough to reheat without turning watery.
Why It Works: Sausage releases flavor into the pan as it browns, so the whole dish tastes seasoned without a long ingredient list. Pasta shape matters here; ridges help trap the sauce.
Key Ingredients:
- 8 oz penne or rigatoni
- 12 oz Italian sausage, sliced or removed from casing
- 1 bell pepper, sliced
- 1 small onion, sliced
- 1 1/2 cups marinara
- 1 tablespoon olive oil
- 1 teaspoon Italian seasoning
Quick Steps:
- Cook pasta until barely tender.
- Brown sausage in oil.
- Add onion and pepper, cook until soft.
- Stir in marinara and seasoning.
- Toss with pasta and pack once cooled.
Equipment for This Recipe:
- Skillet
- Pot
- Spoon
- Container
How to Serve This Dish: A little parmesan on top is enough. Serve with a crisp apple or a side of roasted broccoli.
Pro Tips for This Recipe:
- Brown the sausage well for the best flavor.
- Don’t overcook the peppers; they should still have shape.
- Use a thick sauce so the pasta stays coated.
Variations on This Dish:
- Chicken Sausage Version: Swap sausage types.
- Spicy Sausage Pasta: Use hot Italian sausage.
- Vegetarian Pepper Pasta: Use mushrooms instead of sausage.
Common Mistakes to Avoid with This Dish:
- Soft peppers make the pasta mushy.
- Thin sauce runs to the bottom.
- Pasta cooked too far won’t hold up on reheating.
32. Spinach and Cheese Empanadas
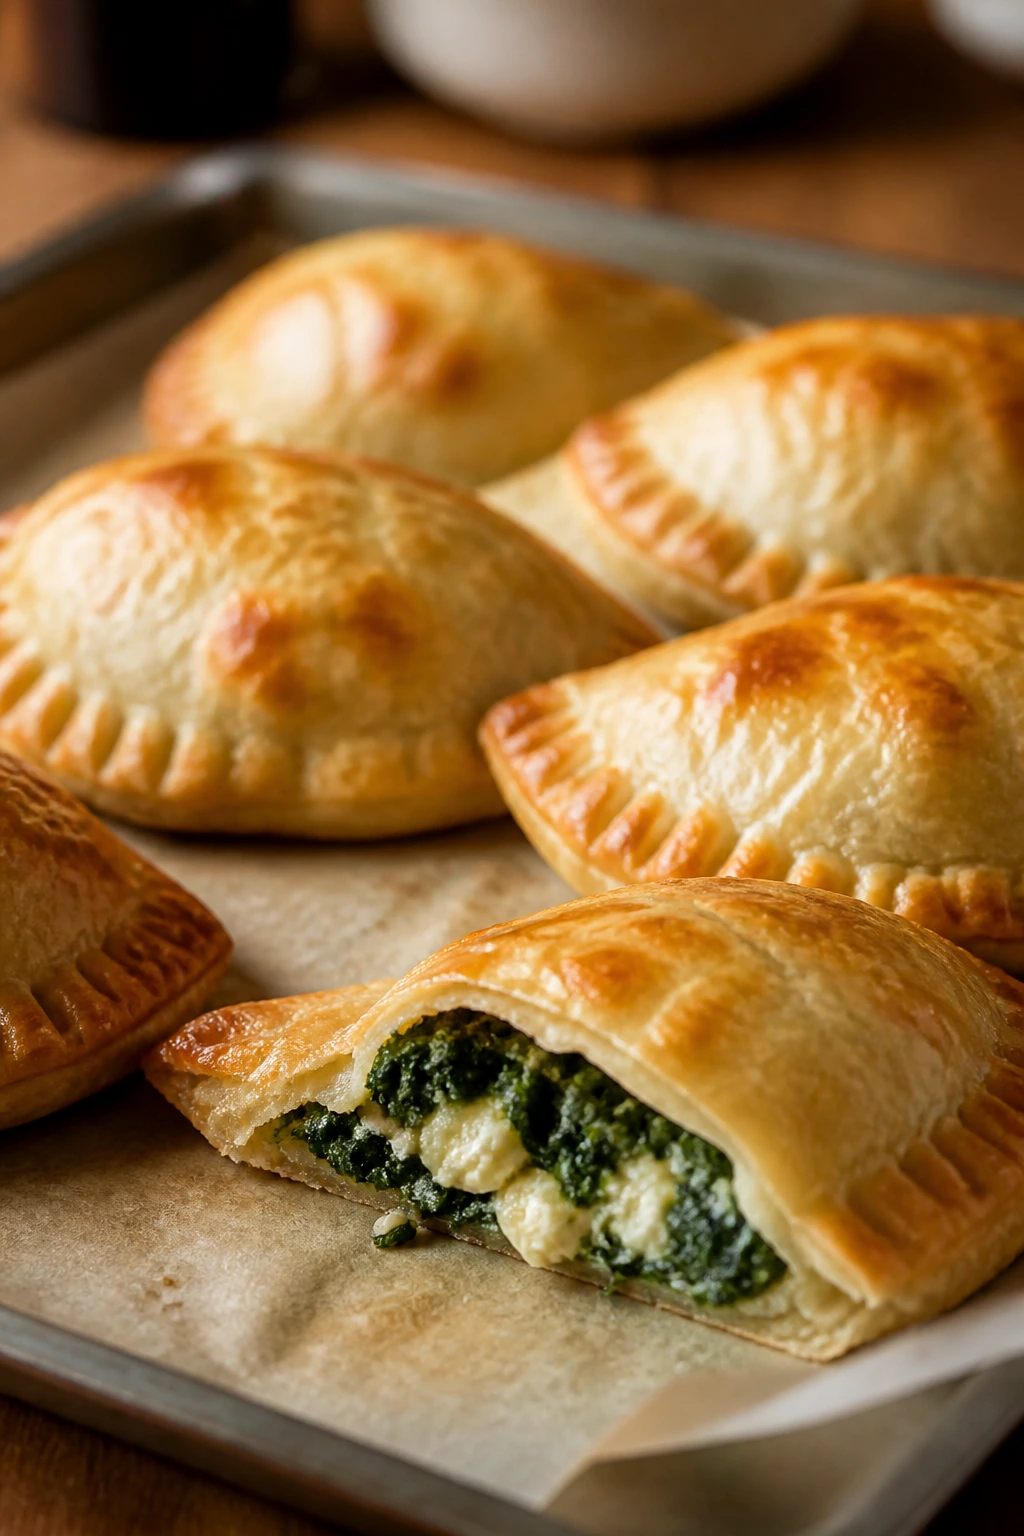
Intro: Empanadas are one of the smartest lunchbox foods because the filling stays sealed inside the crust. Spinach and cheese make them feel savory and portable, and they’re one of the few handheld lunches that still feel special after chilling.
Why It Works: The pastry keeps everything contained, and the filling is thick enough not to leak. Bake them until the crust is golden and the edges actually crisp; that’s what helps them travel.
Key Ingredients:
- 1 package pie crust or empanada dough
- 2 cups chopped spinach, cooked and squeezed dry
- 1 cup shredded mozzarella
- 1/2 cup ricotta
- 1 egg
- 1/4 teaspoon garlic powder
- Salt and pepper
Quick Steps:
- Heat oven to 400°F.
- Mix spinach, mozzarella, ricotta, egg, and seasonings.
- Fill dough rounds, fold, and seal edges.
- Brush with egg wash.
- Bake 18 to 20 minutes until golden.
Equipment for This Recipe:
- Baking sheet
- Fork
- Bowl
- Pastry brush
How to Serve This Dish: Pack with salsa or marinara for dipping. A fruit side makes the meal feel balanced without competing with the savory filling.
Pro Tips for This Recipe:
- Squeeze spinach dry or the crust gets soggy.
- Seal the edges firmly with a fork.
- Cool before packing so steam doesn’t soften the pastry.
Variations on This Dish:
- Chicken Empanadas: Add shredded chicken.
- Cheddar Spinach Version: Swap mozzarella for cheddar.
- Greek Version: Add feta and dill.
Common Mistakes to Avoid with This Dish:
- Wet filling leaks through the dough.
- Underbaked crust turns doughy after cooling.
- Skipping the egg wash leaves the tops pale and dry.
33. Chicken Satay Noodles
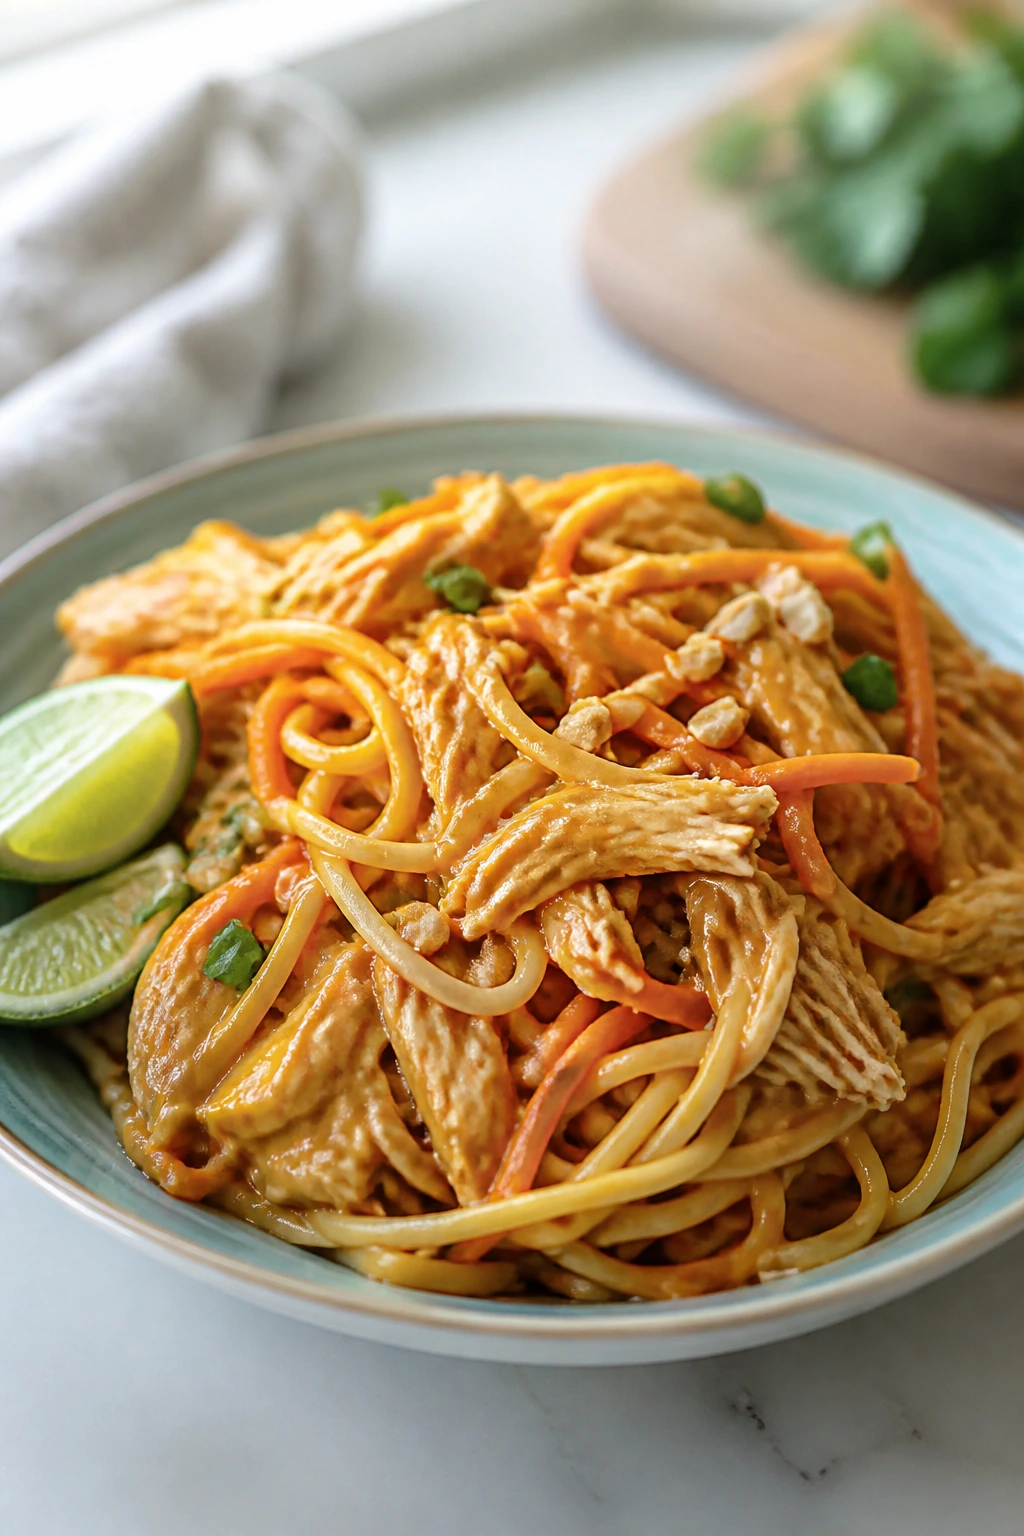
Intro: Peanut sauce on noodles is one of those lunchbox combinations that gets better as it sits, which is rare and useful. The chicken gives the dish weight, the noodles give it structure, and the sauce carries enough flavor to hold the whole thing together cold.
Why It Works: Peanut butter thickens the sauce and coats noodles instead of running off them. A little lime keeps it from tasting heavy, which is the line this dish needs to walk.
Key Ingredients:
- 8 oz spaghetti or rice noodles
- 1 1/2 cups cooked chicken, shredded
- 1/4 cup peanut butter
- 2 tablespoons soy sauce
- 1 tablespoon lime juice
- 1 tablespoon honey
- 1/4 cup warm water
- 1/2 cup shredded carrots
Quick Steps:
- Cook noodles and rinse cool.
- Whisk peanut butter, soy, lime, honey, and water.
- Toss noodles with sauce.
- Fold in chicken and carrots.
- Chill before packing.
Equipment for This Recipe:
- Pot
- Bowl
- Whisk or fork
- Lunch container
How to Serve This Dish: Add cucumber sticks or snap peas for crunch. If the sauce thickens too much in the fridge, a teaspoon of water stirs it back to life.
Pro Tips for This Recipe:
- Use warm water to smooth the peanut sauce.
- Keep the carrot shreds thin for easy eating.
- Add herbs at the end if you like cilantro or basil.
Variations on This Dish:
- Tofu Satay Noodles: Swap chicken for baked tofu.
- Spicy Satay Noodles: Add chili paste.
- Sesame Satay Version: Stir in a little sesame oil.
Common Mistakes to Avoid with This Dish:
- Sauce too thick makes the noodles gluey.
- Skipping the rinse leaves them sticky.
- Too much chicken can make the dish dry unless the sauce is generous.
34. Mini Shepherd’s Pies
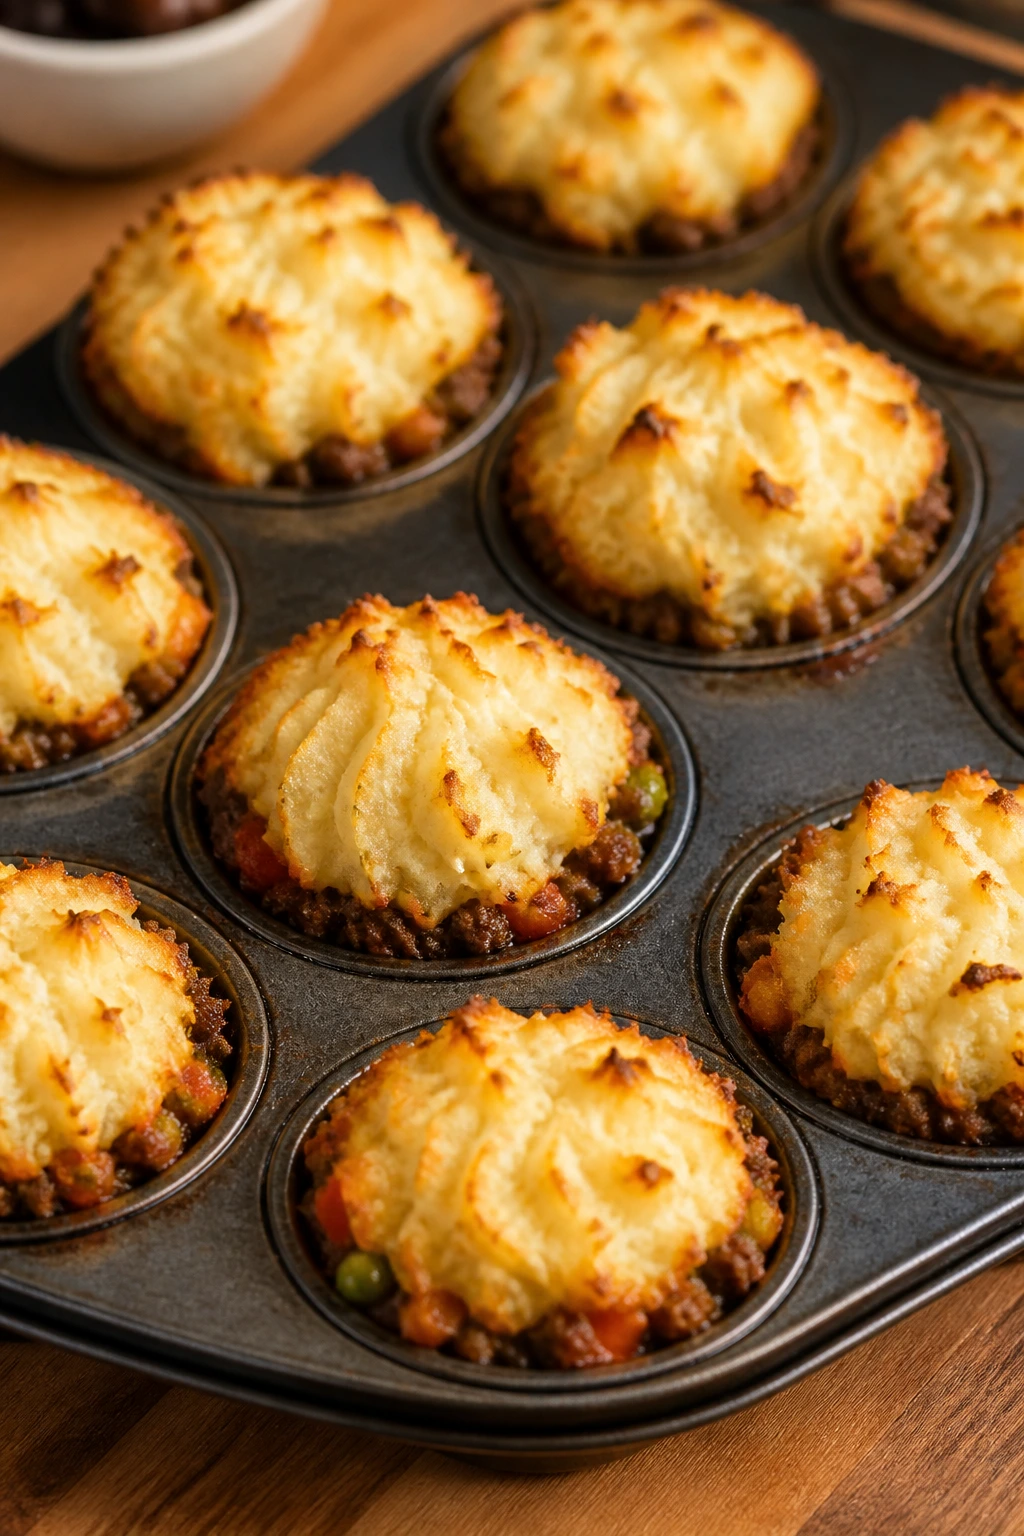
Intro: Mini shepherd’s pies are the lunchbox version of a comfort dish that usually demands a plate and a fork. The muffin tin makes them portable, and the mashed topping seals in the meat and peas underneath.
Why It Works: The potato top helps the filling stay put. Small portions also reheat more evenly than one big casserole, which matters when lunch is only getting a quick microwave pass.
Key Ingredients:
- 1 lb ground beef or lamb
- 1 small onion, diced
- 1 cup peas
- 1 tablespoon tomato paste
- 1 teaspoon Worcestershire sauce
- 2 cups mashed potatoes
- Salt and pepper
Quick Steps:
- Brown meat and onion.
- Stir in tomato paste, Worcestershire, peas, salt, and pepper.
- Spoon into muffin cups or ramekins.
- Top with mashed potatoes.
- Bake at 400°F until the tops brown.
Equipment for This Recipe:
- Skillet
- Muffin tin or ramekins
- Spoon
- Potato masher
How to Serve This Dish: Add a small side of green beans or carrots. These are best warm, but they also hold together well at room temperature if the mash is thick.
Pro Tips for This Recipe:
- Cook the filling until thick before topping.
- Pipe or spoon the potatoes neatly for better sealing.
- Use firm mashed potatoes rather than loose ones.
Variations on This Dish:
- Turkey Shepherd’s Pie: Use ground turkey.
- Corn Topping Version: Add a little corn to the filling.
- Cheesy Mash Version: Stir cheddar into the potatoes.
Common Mistakes to Avoid with This Dish:
- Watery filling slips under the mash.
- Too much butter in mash can make the top collapse.
- Skipping the browning step leaves the filling flat.
35. Greek Chickpea Pasta
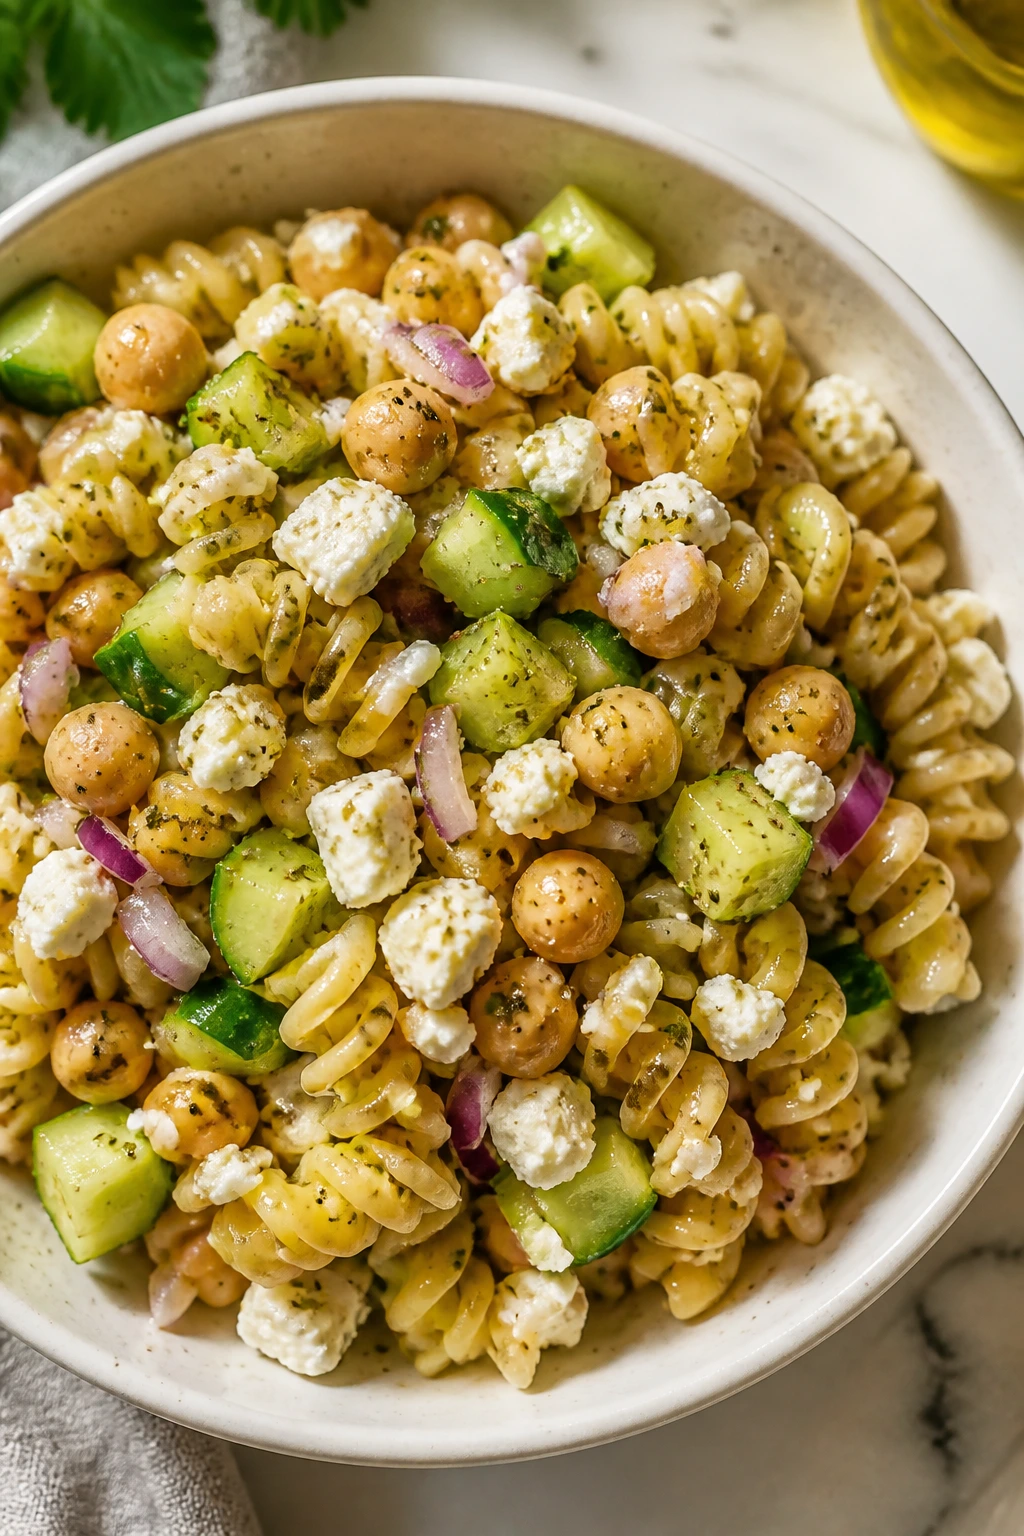
Intro: Chickpeas make pasta lunch feel sturdier without needing meat. Add cucumber, feta, and lemon, and the whole dish turns bright enough to wake up a tired afternoon.
Why It Works: Chickpeas bring protein and a little bite, while pasta gives you the base that makes the box feel full. The lemony dressing keeps it from tasting like cold pantry food.
Key Ingredients:
- 8 oz pasta
- 1 can chickpeas, 15 oz, rinsed
- 1 cucumber, diced
- 1 cup cherry tomatoes, halved
- 1/2 cup feta
- 2 tablespoons olive oil
- 1 tablespoon lemon juice
- 1 teaspoon oregano
Quick Steps:
- Cook pasta and cool.
- Whisk oil, lemon, oregano, salt, and pepper.
- Toss pasta with chickpeas and vegetables.
- Fold in feta.
- Chill and pack cold.
Equipment for This Recipe:
- Pot
- Colander
- Bowl
- Spoon
How to Serve This Dish: Pack with pita chips or a small piece of fruit. It’s one of those lunches that works well when the person eating it wants something cold but still filling.
Pro Tips for This Recipe:
- Drain chickpeas well so the salad stays crisp.
- Use a short pasta with ridges or curls.
- Add feta last so it doesn’t smear.
Variations on This Dish:
- Tuna Chickpea Pasta: Add tuna.
- Olive Lover’s Version: Add Kalamata olives.
- No-Cheese Version: Skip feta and use extra lemon.
Common Mistakes to Avoid with This Dish:
- Hot pasta with feta makes the cheese mushy.
- Too much cucumber waters down the bowl.
- Underseasoning leaves chickpeas tasting dry.
36. Baked Falafel Pitas
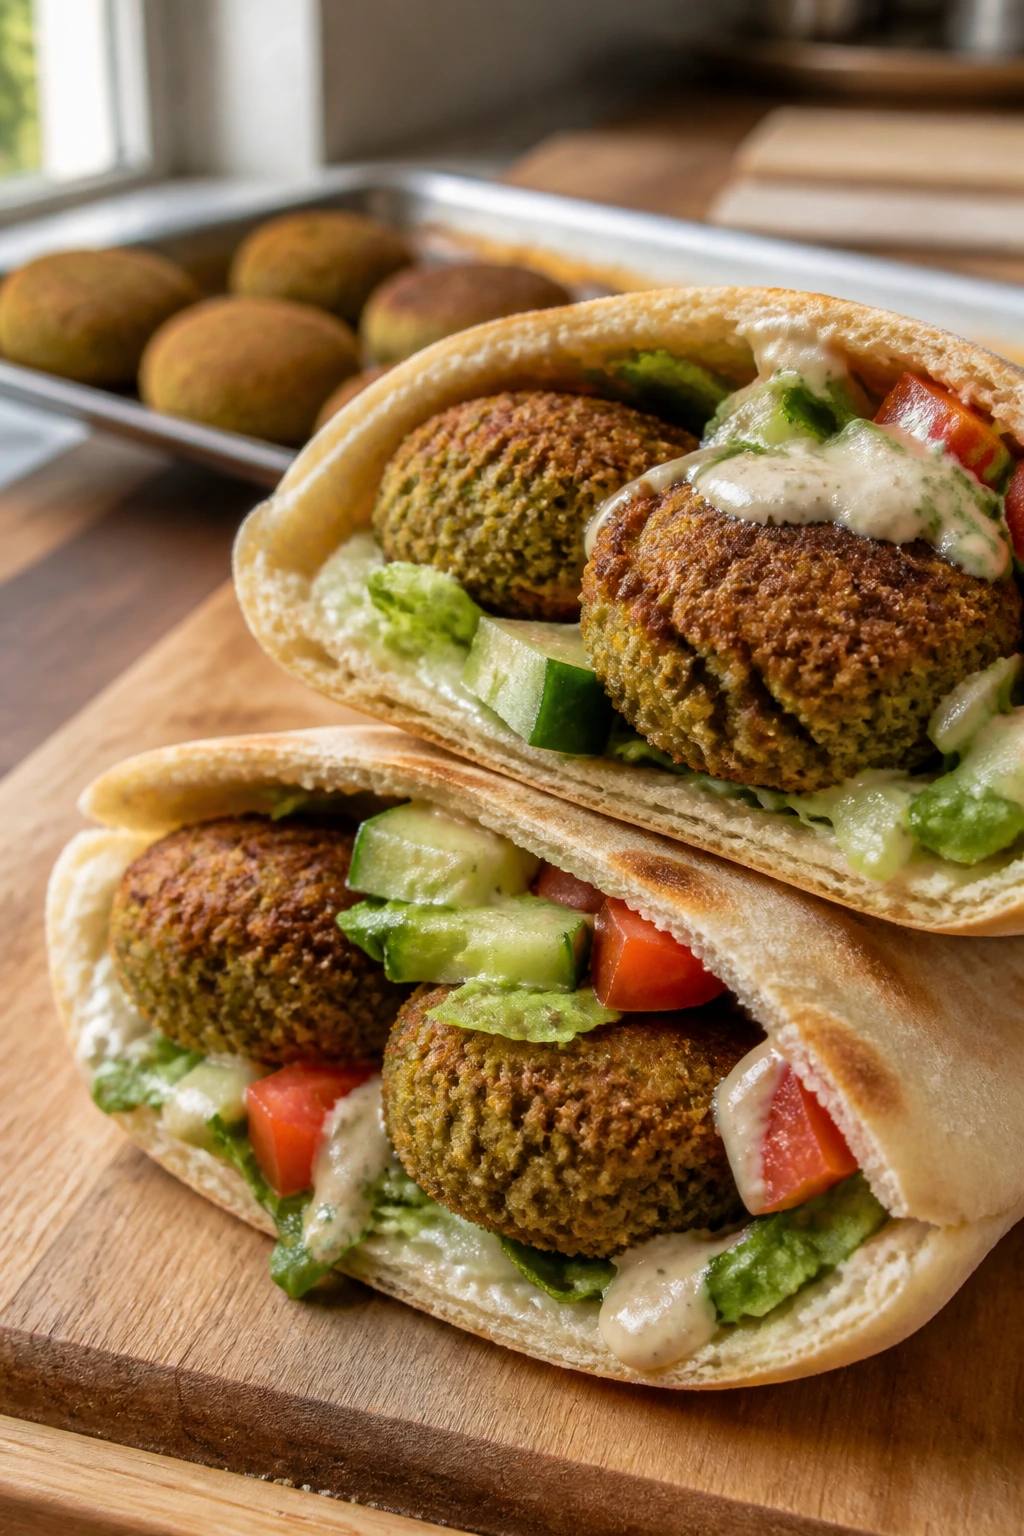
Intro: Falafel in a lunchbox has a narrow window to be good, and baking instead of frying helps a lot. The patties stay tidy, the pita holds them, and tahini gives you enough richness that the meal doesn’t dry out.
Why It Works: Baked falafel is firmer and less greasy, which makes it easier to pack. Tahini and cucumber add moisture back without turning the bread soggy.
Key Ingredients:
- 1 package falafel mix, or 2 cups prepared falafel mixture
- 2 pita pockets
- 1/2 cup tahini sauce
- 1 cup shredded lettuce
- 1 cup diced cucumber
- 1/2 cup diced tomato
- 1 tablespoon lemon juice
Quick Steps:
- Bake falafel according to package or recipe directions.
- Mix tahini with lemon juice and a little water.
- Open pita pockets.
- Fill with lettuce, cucumber, tomato, and falafel.
- Pack sauce separately.
Equipment for This Recipe:
- Baking sheet
- Bowl
- Spoon
- Foil or wrap
How to Serve This Dish: Keep the tahini in a side container so the pita stays crisp. It pairs nicely with grapes or carrot sticks.
Pro Tips for This Recipe:
- Cool falafel before packing or it steams the pita.
- Use thick tahini sauce that can be drizzled at lunch.
- Don’t overload the pocket; falafel needs room.
Variations on This Dish:
- Hummus Falafel Pita: Use hummus instead of tahini.
- Falafel Bowl: Skip the pita and pack over rice.
- Spicy Falafel: Add harissa to the sauce.
Common Mistakes to Avoid with This Dish:
- Packing hot falafel softens the bread.
- Too much tomato makes the pita wet.
- Overfilling tears the pocket.
37. Ham and Apple Sandwiches
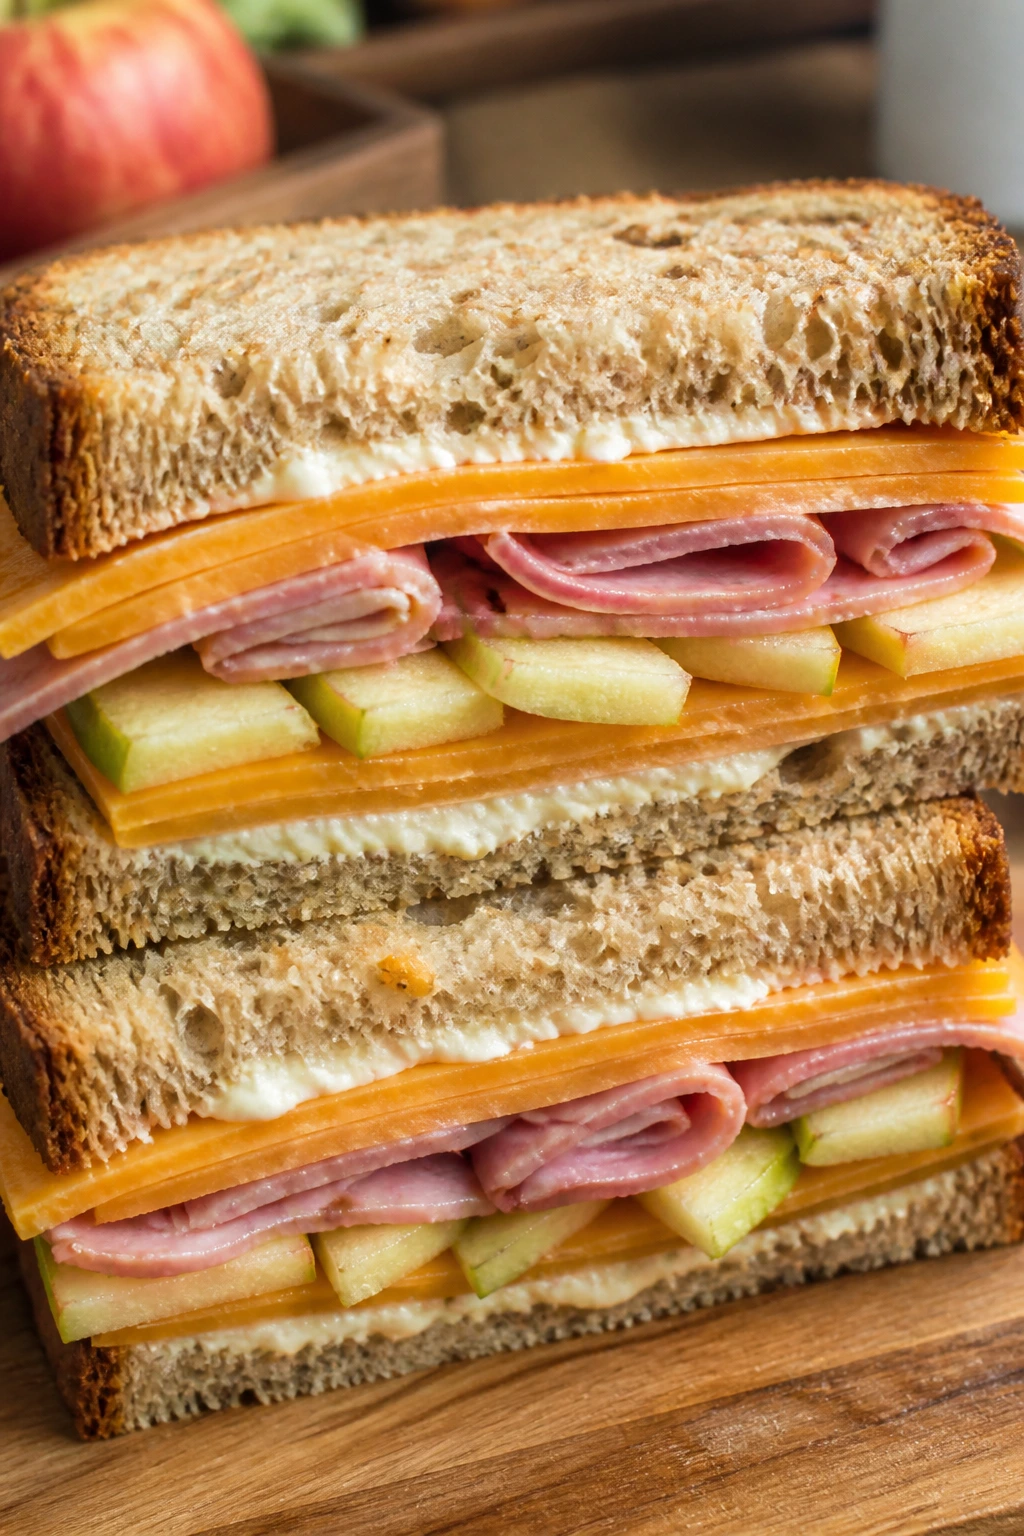
Intro: Ham and apple sounds simple, and that’s exactly why it works. The salt of the ham and the snap of the apple keep each bite lively, while cheddar ties the whole thing together.
Why It Works: The apple adds crunch and a little sweetness without making the sandwich sugary. A thin spread of mustard or mayo prevents the bread from tasting dry after a few hours.
Key Ingredients:
- 4 slices sturdy bread
- 6 slices deli ham
- 1 apple, thinly sliced
- 4 slices cheddar
- 1 tablespoon mayonnaise or mustard
- Lettuce, optional
Quick Steps:
- Spread bread with mayo or mustard.
- Layer ham, cheese, and apple slices.
- Add lettuce if using.
- Close and press gently.
- Wrap tight and chill.
Equipment for This Recipe:
- Knife
- Cutting board
- Peeler, optional
- Wrap paper
How to Serve This Dish: Pack with a few pretzels or a small yogurt. It’s a simple lunch that feels complete because the textures keep changing.
Pro Tips for This Recipe:
- Slice the apple thin so the sandwich stays flat.
- Use a crisp apple like Honeycrisp or Fuji.
- Add cheese against the bread to slow moisture migration.
Variations on This Dish:
- Turkey and Apple Sandwich: Swap ham for turkey.
- Brie Version: Use brie instead of cheddar.
- Cinnamon Apple Twist: Dust apple slices with a tiny pinch of cinnamon.
Common Mistakes to Avoid with This Dish:
- Thick apple slices make the sandwich bulky.
- Packing without a moisture barrier softens the bread.
- Using a soft apple turns mealy fast.
38. Tomato Soup and Grilled Cheese Dippers
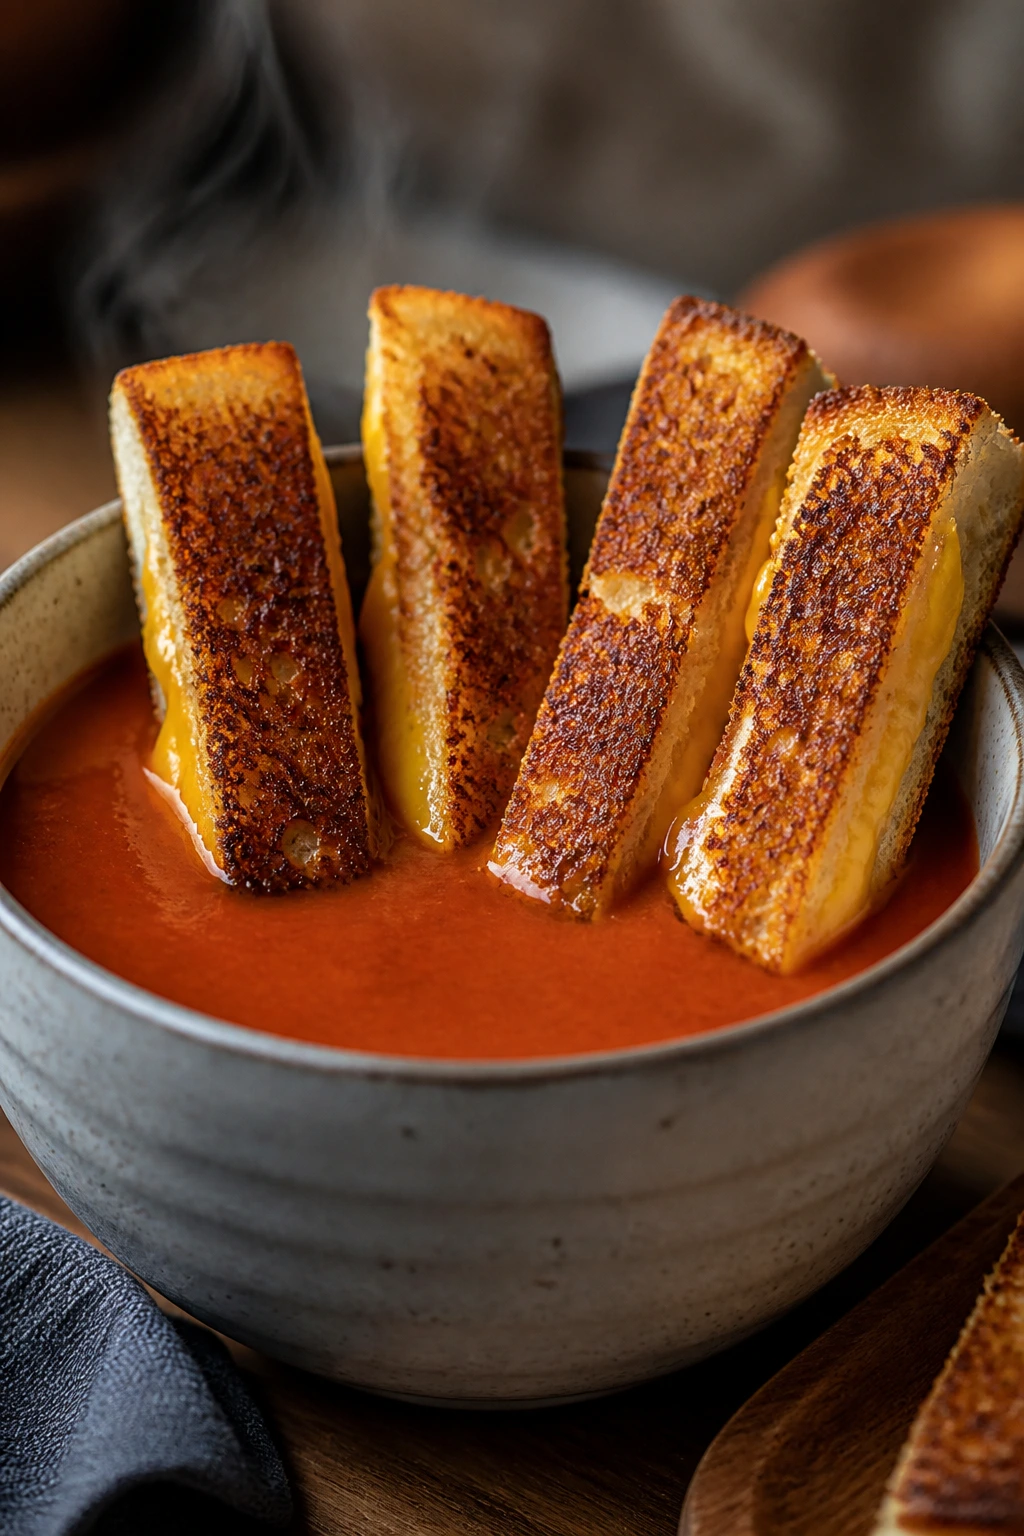
Intro: This is lunch with good manners. Soup in a thermos, grilled cheese cut into fingers, and suddenly a rainy-day classic becomes a lunchbox meal that feels comforting without getting messy.
Why It Works: The thermos keeps soup hot, and the grilled cheese is sturdy enough to dip without dissolving immediately. Cutting the sandwich into sticks makes the whole thing easier for smaller hands and easier to pack.
Key Ingredients:
- 2 cups tomato soup
- 4 slices bread
- 4 slices cheddar
- 1 tablespoon butter
- Pinch of salt
- Pinch of garlic powder, optional
Quick Steps:
- Heat soup until steaming.
- Warm a thermos with boiling water, then fill with soup.
- Butter bread, add cheese, and grill until golden.
- Cut into strips.
- Pack strips separately from the soup.
Equipment for This Recipe:
- Pot
- Thermos
- Skillet
- Spatula
How to Serve This Dish: Serve the soup with the sandwich fingers on the side for dipping. A few celery sticks or a fruit cup round it out nicely.
Pro Tips for This Recipe:
- Preheat the thermos or the soup loses heat too quickly.
- Use thick bread that won’t collapse.
- Butter the outside well for a real crust.
Variations on This Dish:
- Pesto Grilled Cheese: Spread pesto inside before grilling.
- Mozzarella Version: Use mozzarella and a little parmesan.
- Mild Soup Swap: Use roasted red pepper soup instead.
Common Mistakes to Avoid with This Dish:
- Packing the sandwich hot makes it soggy.
- Thin soup cools too fast and leaks.
- Weak bread falls apart in the thermos routine.
39. Sushi-Inspired Rice Rolls

Intro: These aren’t fussy sushi rolls; they’re the lunchbox version, which is a much more useful thing. Rice, nori, cucumber, and crab or salmon turn into neat little rolls that stay together if you don’t overfill them.
Why It Works: Sticky rice holds the shape, and the nori keeps everything compact. The flavor is mild enough for kids and still interesting enough for adults who are bored of sandwiches.
Key Ingredients:
- 2 cups cooked sushi rice
- 2 tablespoons rice vinegar
- 4 sheets nori
- 1 cucumber, cut into thin sticks
- 1 avocado, sliced, optional
- 4 oz imitation crab or cooked salmon
- Sesame seeds
- Soy sauce, for dipping
Quick Steps:
- Season warm rice with rice vinegar.
- Lay nori on a mat or clean towel.
- Spread rice thinly over the sheet.
- Add filling in a line and roll tightly.
- Slice and pack with soy sauce.
Equipment for This Recipe:
- Bamboo mat or clean kitchen towel
- Sharp knife
- Bowl
- Small sauce cup
How to Serve This Dish: Pack with edamame or orange slices. The rolls taste best chilled, and the soy sauce should ride separately so the nori stays firm.
Pro Tips for This Recipe:
- Keep rice slightly warm when rolling.
- Don’t overload the center or the roll splits.
- Wet the knife lightly for cleaner slices.
Variations on This Dish:
- Veggie Rolls: Use carrot, cucumber, and avocado.
- Tuna Rolls: Use canned tuna mixed with a little mayo.
- Sesame Crab Rolls: Add sesame seeds inside the roll.
Common Mistakes to Avoid with This Dish:
- Too much rice makes rolling hard.
- Wet fillings soften the nori.
- Skipping the sauce cup leaves the rolls bland.
40. Cold Soba Chicken Lunchbox
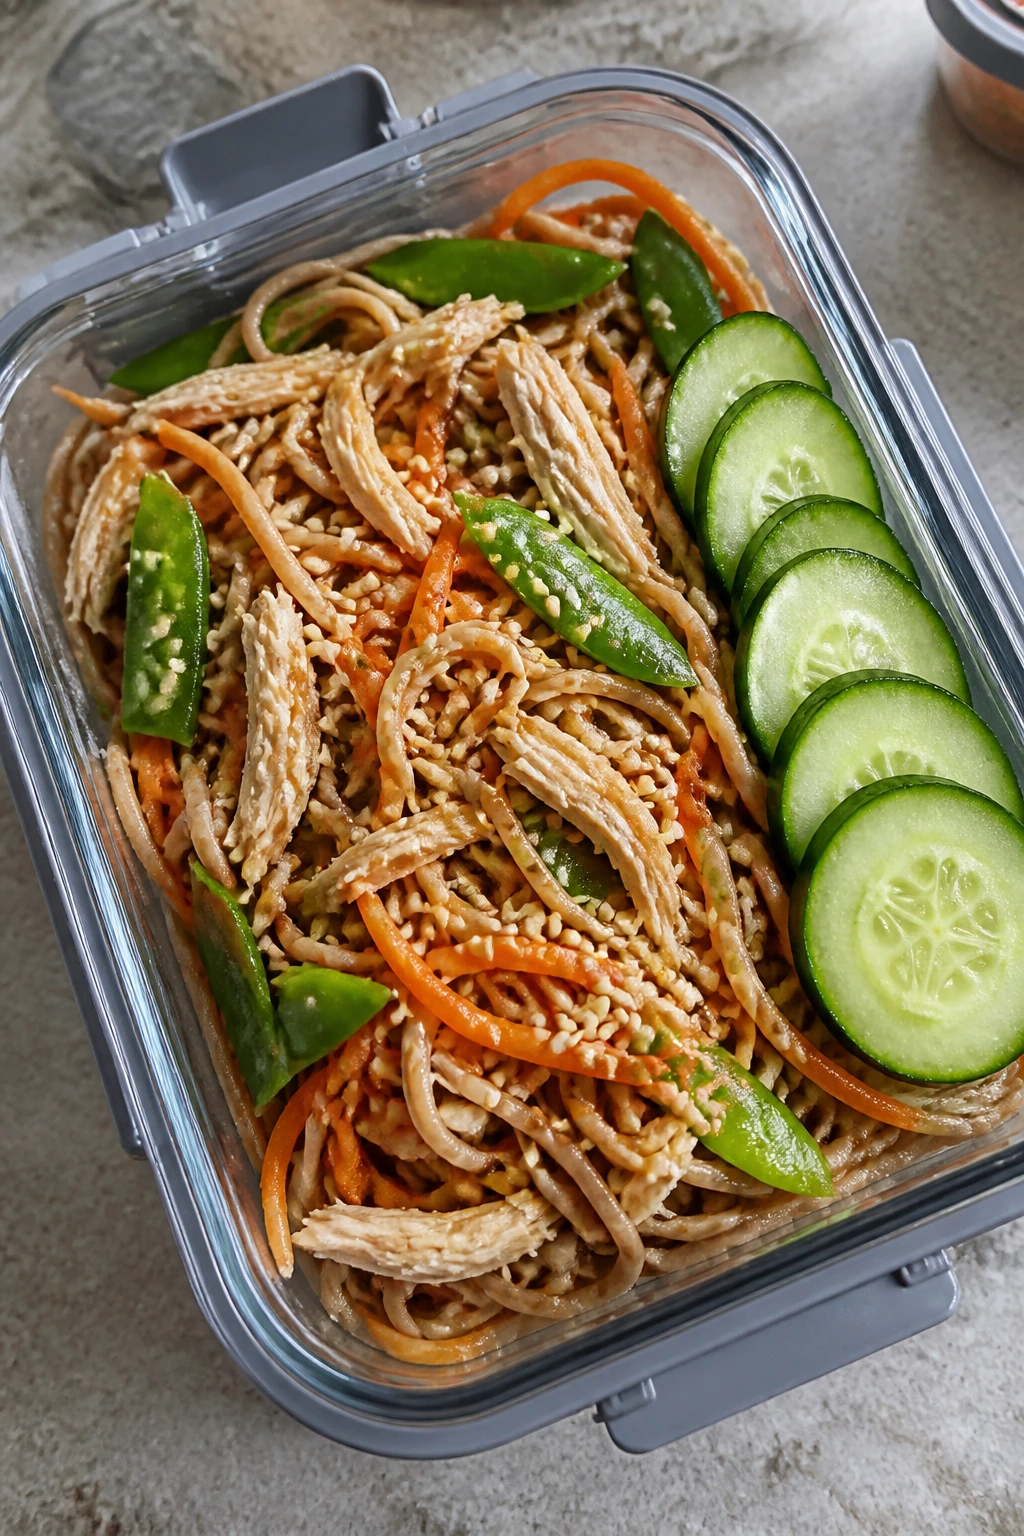
Intro: Cold soba noodles are one of the best answers to a lunchbox that needs to stay interesting after a morning in the fridge. They’re nutty, slippery in the best way, and good with shredded chicken and crunchy vegetables.
Why It Works: Soba holds up better than many noodles when chilled. A sesame-soy dressing coats the strands lightly, and the vegetables keep the texture from going flat.
Key Ingredients:
- 8 oz soba noodles
- 1 1/2 cups cooked chicken, shredded
- 1 cup snap peas, thinly sliced
- 1 cup carrots, shredded
- 2 tablespoons soy sauce
- 1 tablespoon sesame oil
- 1 tablespoon rice vinegar
- 1 teaspoon honey
- Sesame seeds
Quick Steps:
- Cook soba and rinse well with cold water.
- Whisk soy sauce, sesame oil, vinegar, and honey.
- Toss noodles with dressing.
- Fold in chicken, snap peas, and carrots.
- Chill and pack with sesame seeds on top.
Equipment for This Recipe:
- Pot
- Colander
- Bowl
- Tongs or chopsticks
How to Serve This Dish: Pack with cucumber slices or a small fruit container. If you want extra protein, add a hard-boiled egg or a few edamame pods.
Pro Tips for This Recipe:
- Rinse soba thoroughly to stop sticking.
- Cut vegetables thin so they mix easily with the noodles.
- Keep dressing light; too much makes the lunch slick.
Variations on This Dish:
- Peanut Soba: Swap part of the dressing for peanut butter.
- Vegetarian Soba: Use tofu instead of chicken.
- Spicy Soba: Add chili oil or sriracha.
Common Mistakes to Avoid with This Dish:
- Overcooked soba turns fragile.
- Too much dressing pools at the bottom.
- Packing warm noodles creates condensation.
Why Lunchbox Meals Need a Different Kind of Cooking
A lunchbox meal is not just dinner in a smaller container. It has to survive time, movement, and temperature changes, which means you want textures that hold up after a few hours. Crisp lettuce is risky. Thin bread is risky. Loose sauces are risky unless they’re sealed away from the rest of the food.
The best lunchbox recipes are a little overbuilt on purpose. A tortilla gets rolled tighter than you’d roll it for dinner. Pasta salad gets a thicker dressing. Rice bowls get less sauce than you think they need. Hot food goes into a preheated thermos so it stays worth eating, not lukewarm and weird by lunchtime.
That’s why I favor meals that can be split into components. Even when the lunch is simple, the parts should have jobs. A sauce should coat, not flood. A vegetable should crunch, not slump. A protein should stay tender after cooling or reheating, not dry out in a shallow container with a bad lid.
Essential Equipment for These Recipes
-
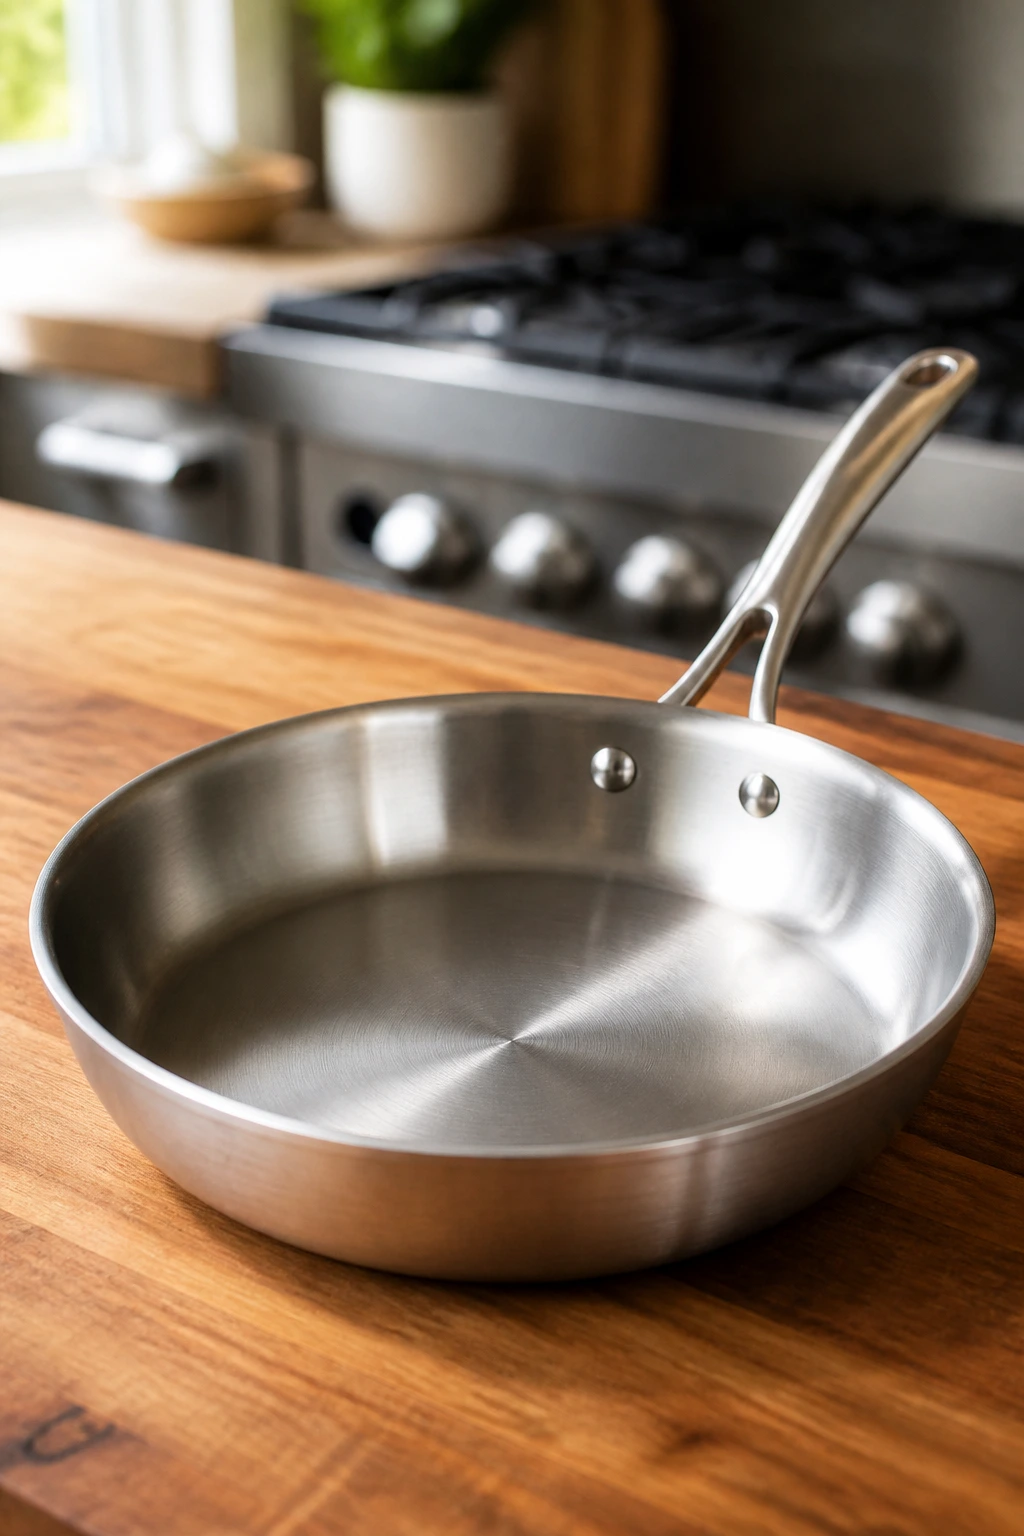
12-inch skillet: Useful for quesadillas, fried rice, sliders, and quick browning.
-
Muffin tin: The trick behind egg muffins, ziti cups, frittata bites, and mini shepherd’s pies.
-
Thermos: The difference between a hot soup or curry lunch and a disappointing warm mess.
-
Mixing bowls: You’ll need at least two sizes for dressings, fillings, and pasta salads.
-
Sharp knife: Clean slicing matters for wraps, sandwiches, rolls, and pinwheels.
-
Cutting board: Preferably one with enough room to work without chasing ingredients.
-
Colander: Needed for pasta, noodles, quinoa, and anything that needs a full drain.
-
Foil, parchment, or wrap paper: Keeps rolled and sliced lunches from shifting in the bag.
-
Small sauce cups: Handy for salsa, marinara, tahini, dressing, and peanut sauce.
-
Airtight containers with dividers: Best for keeping crunchy items separated from wet ones.
Smart Shopping and Ingredient Tips
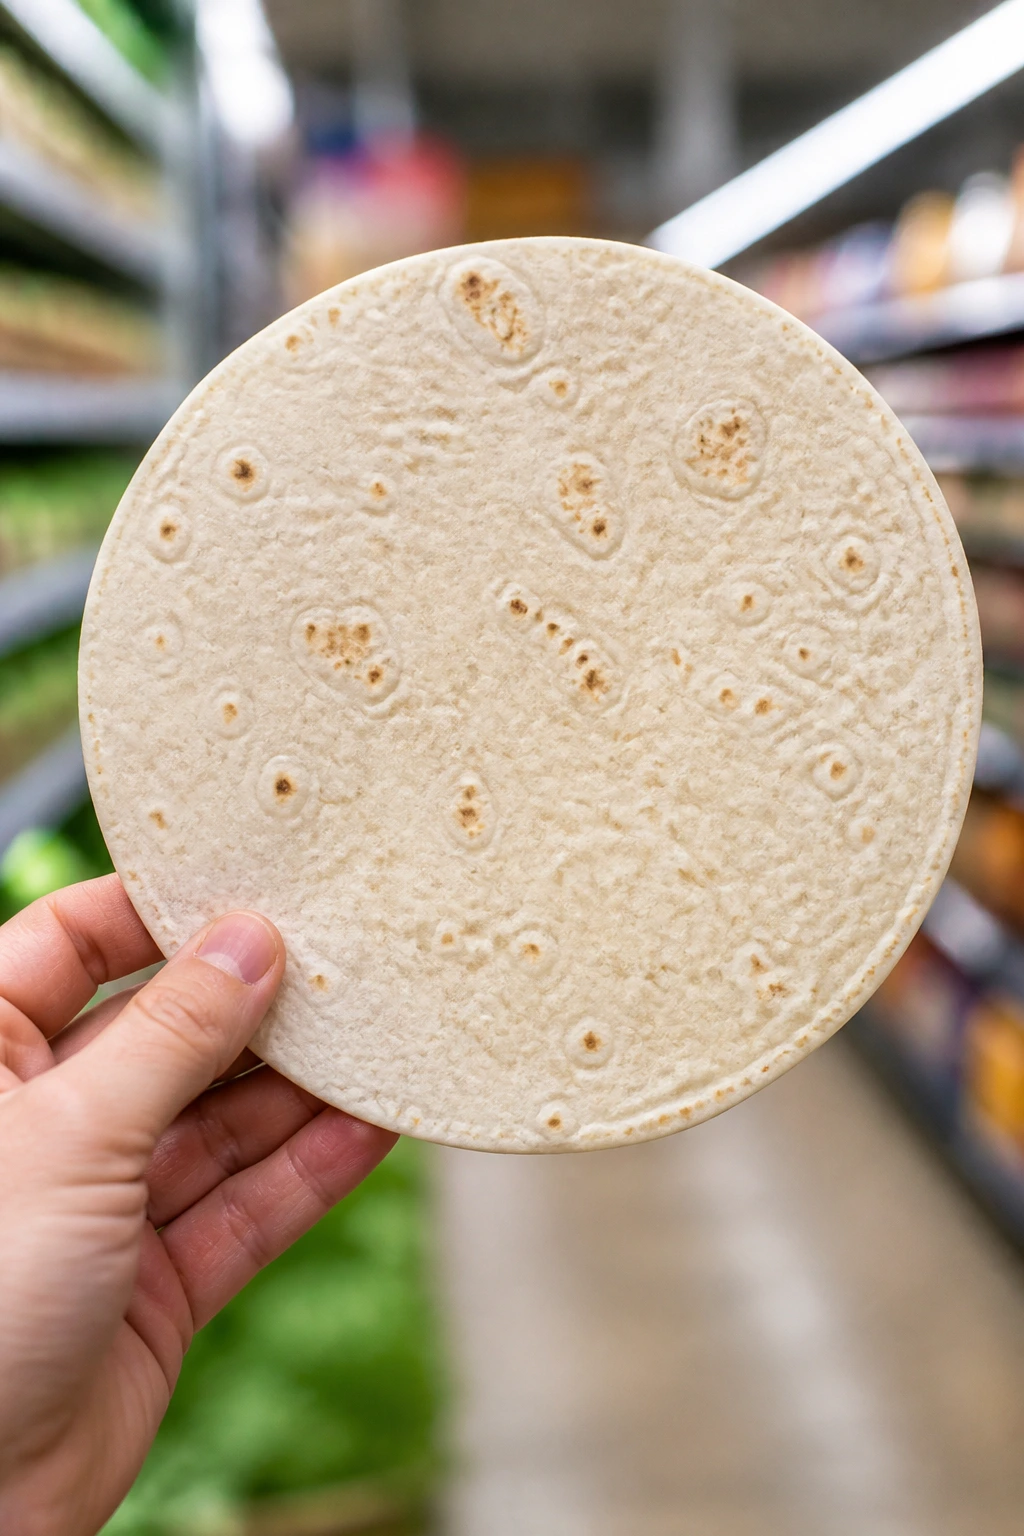
Lunchbox food is cheaper and better when you shop with texture in mind. Buy tortillas that feel flexible, not stiff or dry; a brittle wrap cracks the minute you roll it. For sandwiches, choose bread with some structure, like sourdough, ciabatta, or a dense whole grain loaf, instead of airy slices that collapse under tomato juice or cream cheese.
Protein matters more than people think in lunchbox meals. Rotisserie chicken, cooked rice, canned tuna, eggs, and beans are the pantry and fridge pieces I reach for first because they hold up after chilling. If you’re buying deli meat, ask for thinner slices; thick-cut turkey or ham tends to fight the roll, slide out of sandwiches, and turn pinwheels into a wrestling match.
Vegetables need a little judgment too. Cucumber, tomato, and zucchini all bring water, which is useful in dinner and annoying in lunch. Seed tomatoes when possible, blot cucumbers after slicing, and cook watery vegetables down if they’re going into a bake or pasta dish. On the other hand, broccoli, carrots, bell peppers, snap peas, and spinach behave well when packed right.
Cheese is one of the simplest tools in the box, but it matters which kind you buy. Shredded cheddar melts into baked dishes and holds nicely in wraps. Fresh mozzarella tastes lovely in a caprese sandwich, but it needs a moisture barrier. Parmesan, feta, and Swiss bring strong flavor, which means you can use less and still get a lunch that doesn’t taste flat.
How to Serve These Recipes
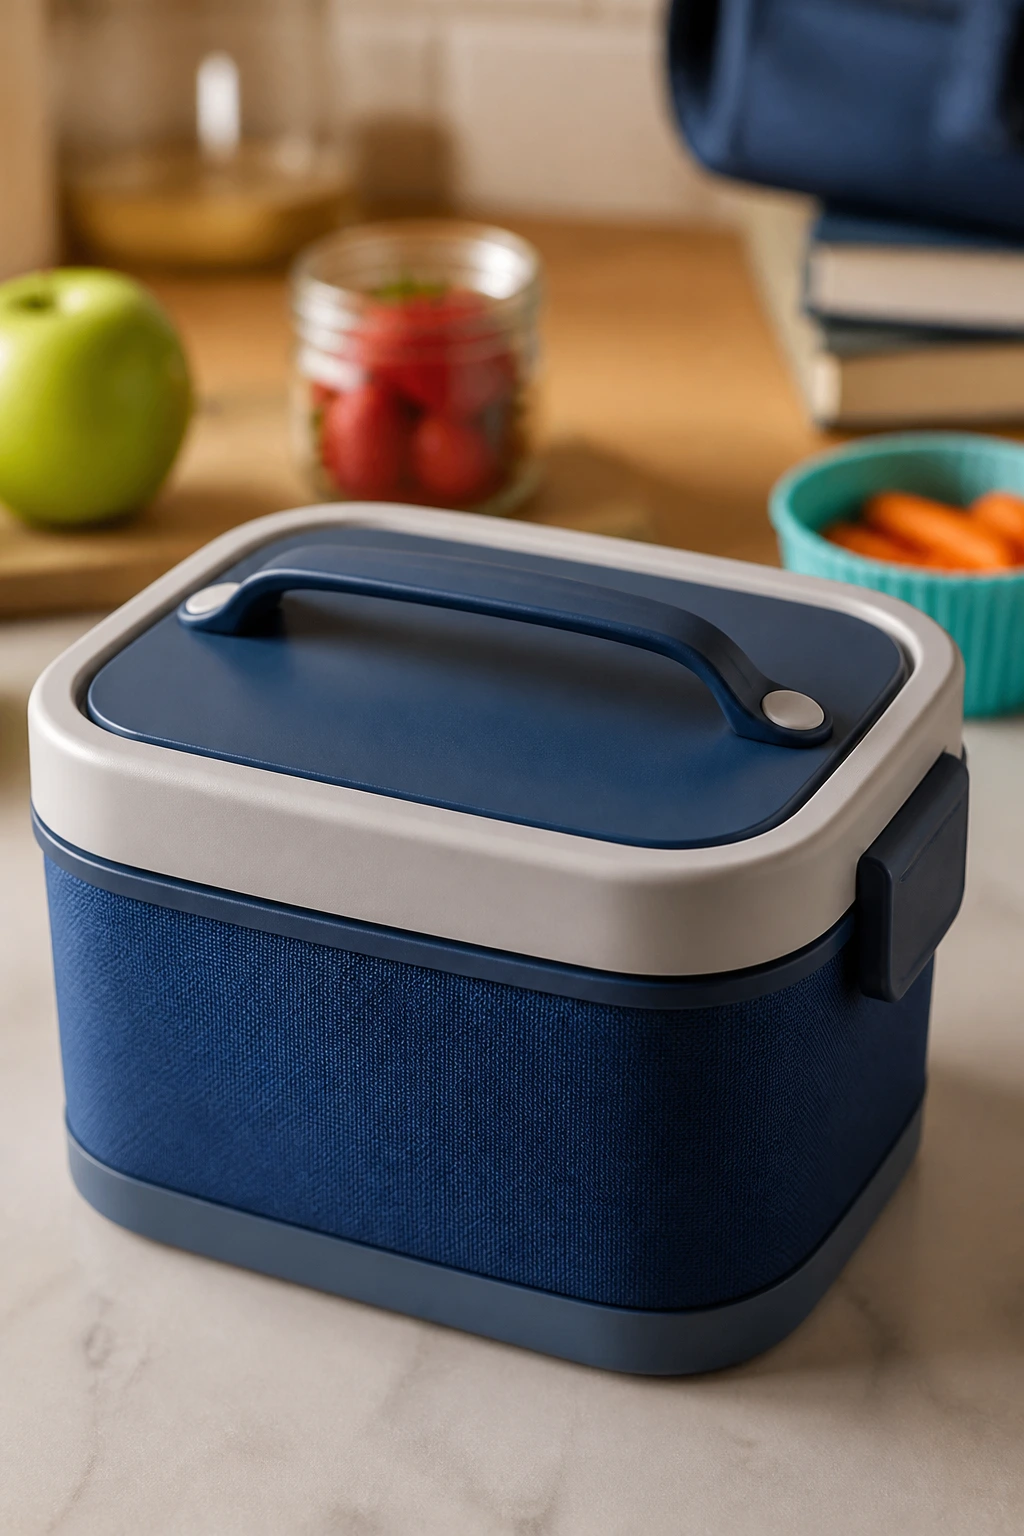
Presentation: Pack hot meals in insulated containers and cold meals in tight, flat containers so the food doesn’t slide around. If a lunch has a dip or sauce, use a tiny cup with a lid rather than pouring it over the main item too early.
Accompaniments: Fruit, baby carrots, snap peas, cucumber spears, pretzels, crackers, and simple yogurt cups fit beside almost everything here. If the main meal is bread-based, a crisp side balances it out; if the main meal is pasta or rice, a crunchy side keeps the lunch from feeling heavy.
Portions: Most of these recipes make 2 to 4 lunchbox servings, depending on age and appetite. For kids, think one main item plus one fruit and one crunchy side; for adults, increase the protein portion or add a second starch like crackers, pita chips, or a roll.
Beverage Pairing: Cold water is still the cleanest match, but milk, sparkling water, or unsweetened iced tea fit these lunches without fighting them. For hotter meals, a thermos of soup or curry works better than a separate drink, because it keeps the whole box from feeling mismatched.
Additional Tips and Flavor Boosters
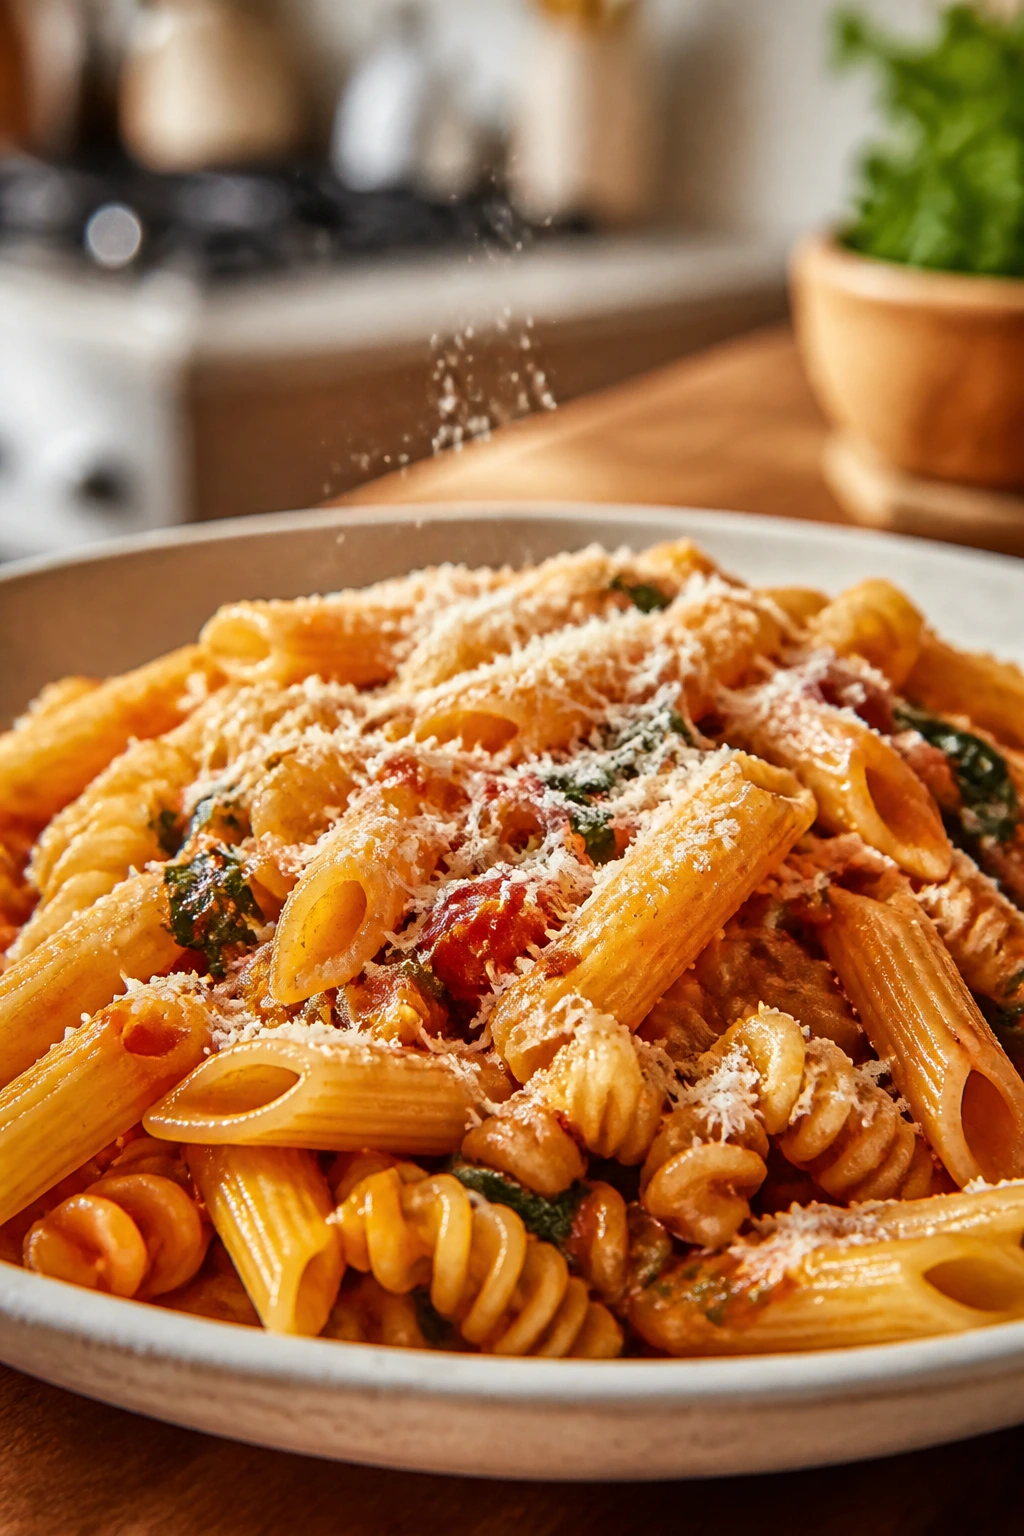
Flavor Enhancement: A small finishing hit matters more than most people realize. Lemon juice on pasta salad, sesame seeds on fried rice, chopped dill on salmon, or a dusting of parmesan over ziti can wake up a lunch that spent the night in the fridge.
Customization: Keep the base recipe mild if you’re packing for kids, then send a tiny side cup of salsa, hot sauce, chili crisp, mustard, or dressing for the people who want more punch. That one move makes the same lunch feel tailored instead of repetitive.
Serving Suggestions: If a lunchbox looks too brown, add one bright thing and one crisp thing. Cherry tomatoes, grapes, snap peas, orange slices, and carrot sticks do a lot of visual and textural work. Small jobs. Big effect.
Make-It-Yours: For gluten-free eaters, use GF tortillas, rice, quinoa, or corn-based options. For dairy-free boxes, use hummus, tahini, olive oil dressings, or dairy-free cheese where it actually fits. For higher-protein lunches, add chicken, eggs, tuna, chickpeas, or beans to almost any item above without changing the whole shape of the meal.
Make-Ahead, Storage, and Reheating Guidance
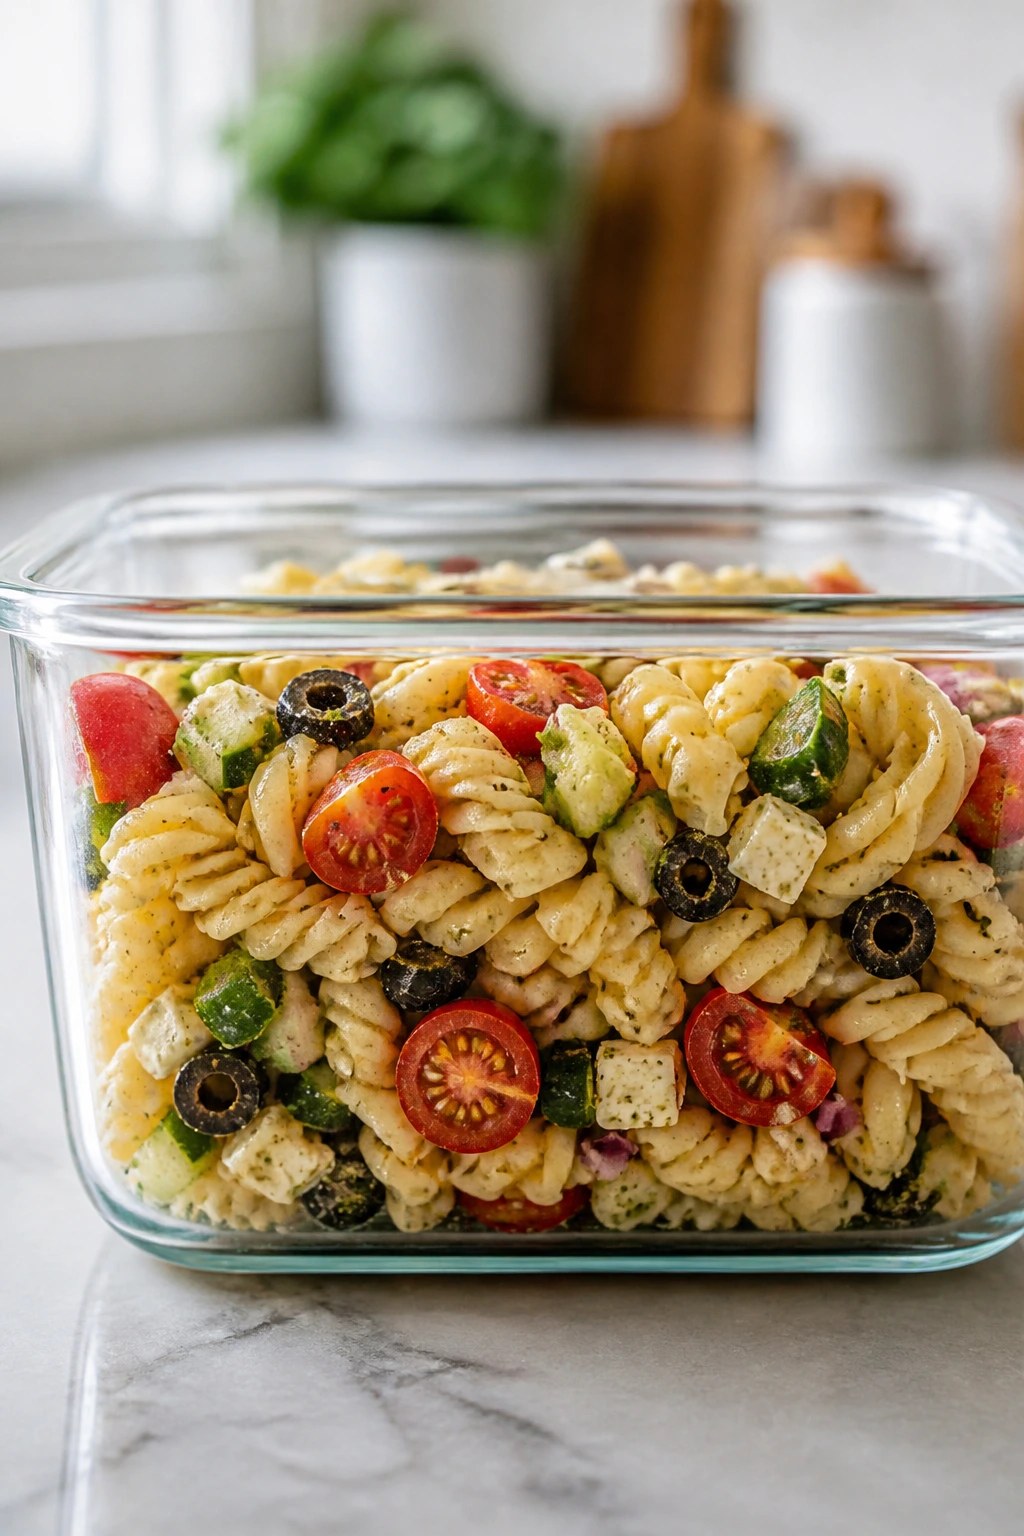
Most of these lunchbox meals keep well for 3 to 4 days in the refrigerator if they’re cooled before sealing. Pasta salads, rice bowls, egg muffins, baked cups, and cooked meat dishes usually sit in that range without trouble. Wraps and sandwiches are pickier, so I like to assemble them the night before only when the fillings are dry and the bread has a moisture barrier like cream cheese, pesto, or butter.
Hot meals need different handling. Soups, curries, mac and cheese, fried rice, and pasta bakes can be made ahead and reheated the next day, but the texture stays better if you reheat only once. Store them in shallow containers so they cool quickly, then heat until steaming before packing into a thermos or lunch container.
Freezing helps with several of these. Egg muffins, frittata bites, meatloaf muffins, burritos, sliders, pasta bakes, and baked cups can often be frozen for up to 2 months if wrapped well. Thaw overnight in the fridge when possible, then reheat gently so the edges don’t dry out while the center is still cold.
Cold lunches need a little attention to texture. Keep wet components separate when you can, and only mix them at packing time. A sauce on the side, a toasted wrap cooled fully before boxing, or a salad packed with greens on top can make the difference between a lunch that tastes assembled and one that tastes tired.
Variations and Adaptations to Try
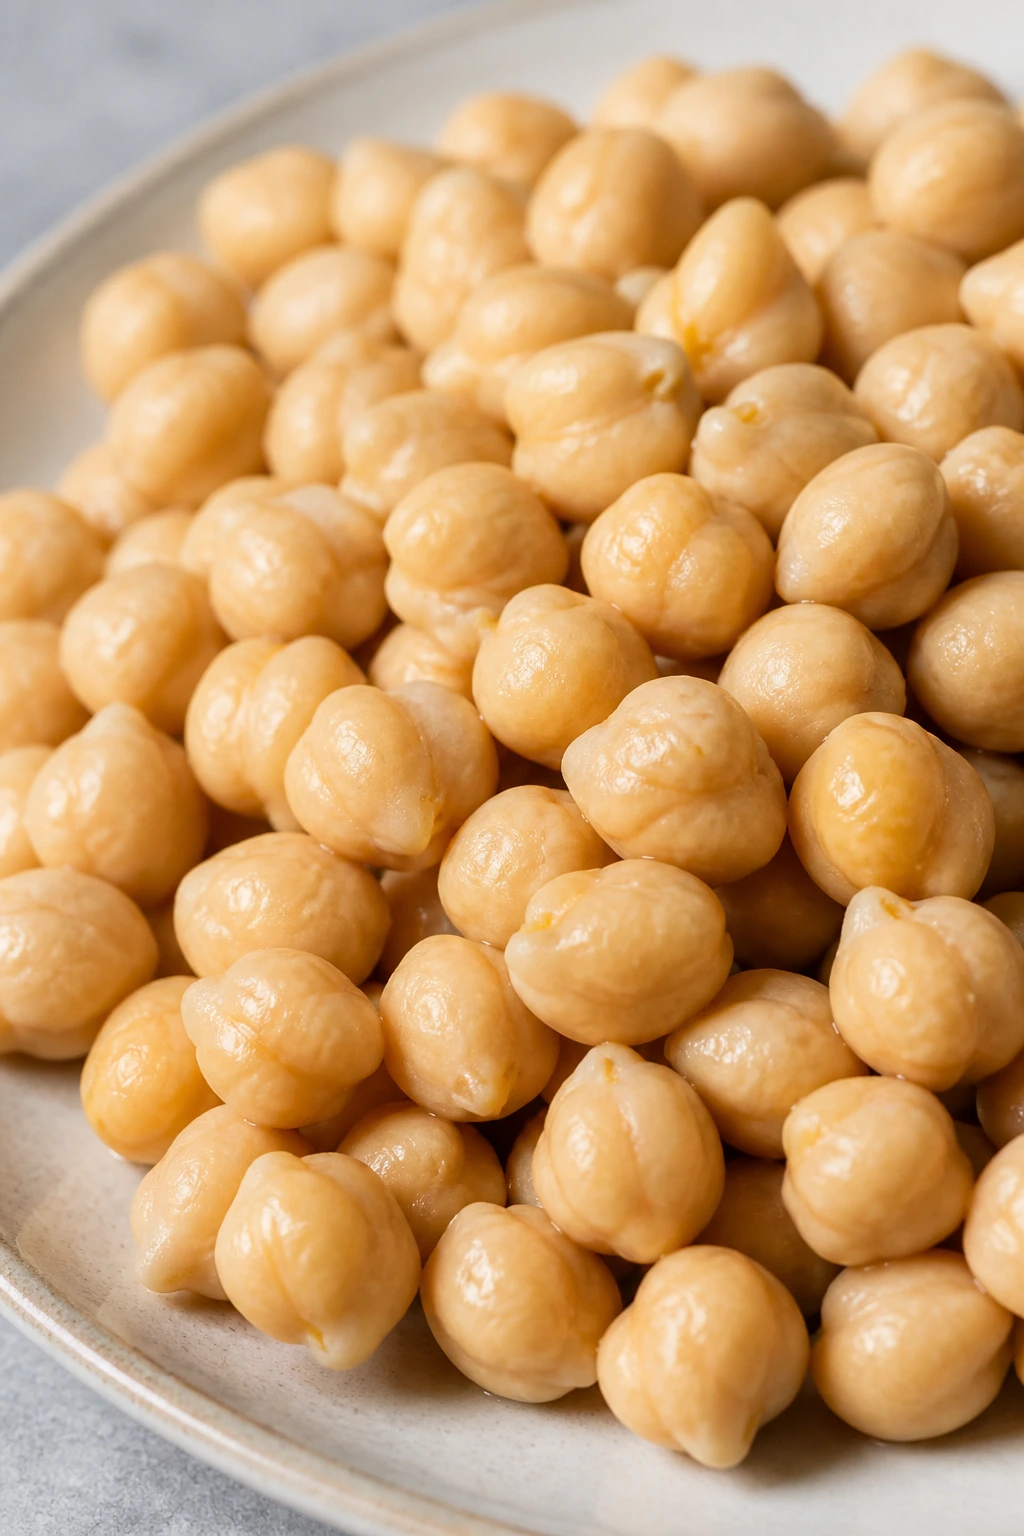
Nut-Free School Box: Swap peanut butter for sunflower seed butter in the roll-ups, use hummus instead of nut-based sauces, and keep labels tight on any store-bought pesto or dressings.
Dairy-Light Lunches: Leave out the cheese in burritos, rice bowls, and pasta salads, then use olive oil, lemon, salsa, or tahini to keep the flavors awake. A lunch doesn’t need dairy to be satisfying; it needs enough seasoning and a good texture.
Warm Thermos Rotation: Make a few meals in the soup, curry, or pasta lane and rotate them through the week. Tomato soup with grilled cheese dippers, lentil curry and rice, and mac and cheese each pack differently, which keeps hot lunches from feeling repetitive.
Vegetarian Protein Swap: Chickpeas, black beans, lentils, edamame, eggs, and tofu can replace meat in most of these recipes without much fuss. Keep the seasoning slightly stronger when you skip meat, because beans and grains usually need the help.
Picky-Eater Soft Landing: Use familiar forms — pinwheels, sliders, muffin cups, pasta, rice, and roll-ups — and keep one part plain. A plain fruit, a plain cheese cube, or a plain cracker beside the main meal lowers the chance of a lunch coming home untouched.
Common Mistakes to Avoid with Lunchbox Meals

The biggest mistake is packing food with too much moisture. Tomatoes, cucumbers, sauces, warm pasta, and steamed vegetables all behave better when you control the water before they go into the box. Seed the tomato. Blot the cucumber. Cool the pasta. Use thick sauce rather than thin sauce.
The second mistake is assembling too early without thinking about texture. Some lunches can be made the night before and some cannot. A chicken salad cracker box works because the crackers stay separate. A caprese sandwich only works if you’ve handled the tomato properly and used a good barrier. A hot rice bowl works if it’s packed hot into the right container, not left to cool half-open on the counter.
Another common miss is overstuffing. Big portions look generous at home and annoying by lunchtime. Wraps split, pinwheels unravel, burritos burst, and sandwiches flatten when they’re crammed too full. Tidy packing usually beats oversized packing, especially for younger eaters who need the lunch to be easy to open and even easier to finish.
Finally, people forget temperature. Hot food should be truly hot when it goes into a thermos. Cold food should be fully cooled before the lid goes on. Somewhere in between is where lunches get strange.
Frequently Asked Questions
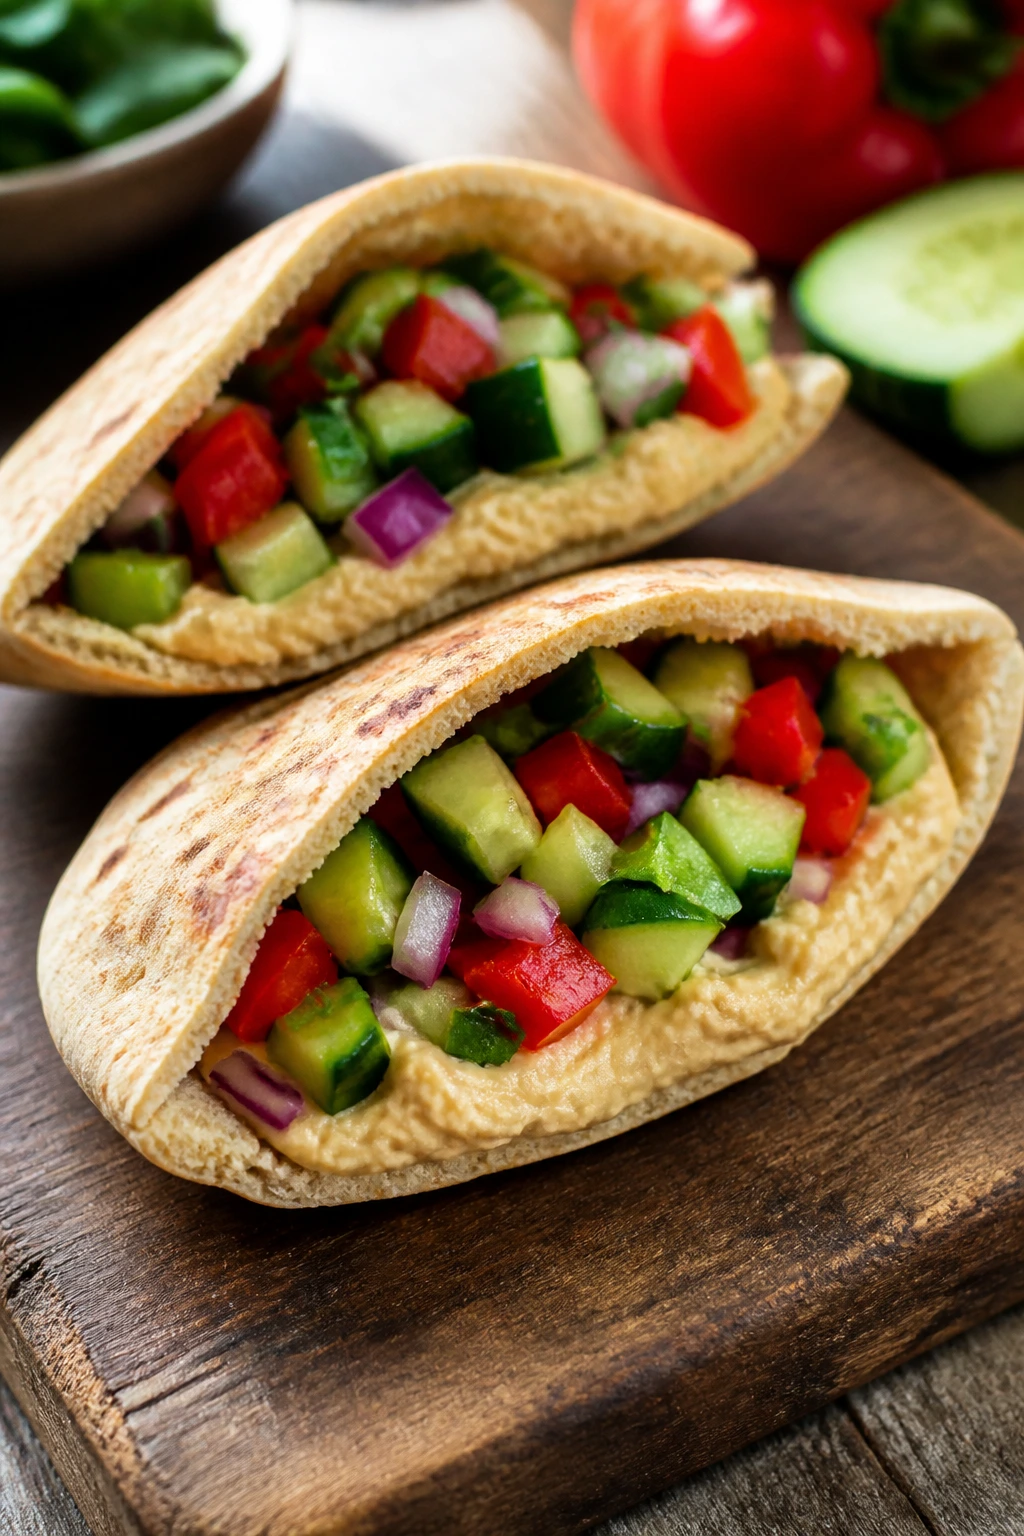
How do I keep sandwiches from getting soggy in a lunchbox?
Use a moisture barrier like cream cheese, pesto, butter, or mustard on the bread, then keep juicy ingredients like tomato or cucumber thin, seeded, and well blotted. If the filling is very wet, pack it separately and assemble at lunch.
Can these lunchbox meals be packed the night before?
Yes, most of them can. Wraps, pasta salads, rice bowls, muffins, and baked dishes do well overnight, while bread-heavy items need a little more care and sometimes a late assembly.
What’s the best way to keep hot lunches hot?
Preheat the thermos with boiling water for 5 minutes, empty it, then fill it with food that’s steaming hot. Soups, curries, mac and cheese, and fried rice all hold better when they start hot and go into a tight container fast.
Which meals are best for kids who hate mixed foods?
Pinwheels, sliders, egg muffins, burritos, cheese quesadillas, and pasta bake cups usually work better than big bowls with lots of separate textures. Kids who prefer separation often do better with bento-style packing too.
Can I freeze any of these recipes?
Yes. Egg muffins, frittata bites, burritos, sliders, meatloaf muffins, baked ziti cups, and pasta bakes freeze well for up to 2 months if wrapped tightly. Wraps with fresh lettuce, cucumber sandwiches, and pasta salads usually do not freeze well.
How do I stop wraps from cracking?
Warm the tortilla for about 10 seconds before rolling, don’t overfill it, and use a spread that softens the tortilla a little. A dry wrap folds badly; a flexible wrap holds together.
What if my child won’t eat cold food?
Use the thermos options first: mac and cheese, lentil curry, tomato soup, fried rice, or meatloaf with mash. That gives you a hot lunch without needing a microwave at school.
How can I make lunchbox meals more filling without making them heavier?
Add one extra protein or one extra sturdy carb, not both. Chickpeas, eggs, chicken, beans, quinoa, or cheese can stretch a lunch enough that it still feels light in the hand but lasts until the end of the day.
Do I need special containers for these meals?
Not special, but useful. Flat containers for wraps, divided boxes for mixed meals, small sauce cups for dressings, and a good thermos for hot food make lunch prep easier and reduce the chance of soggy edges and leaked sauce.
Lunchboxes That Come Back Empty
The best lunchbox meals are the ones that respect the container. They don’t collapse, drown, or turn to paste by lunchtime. They keep a little structure, a little bite, and enough flavor that the person eating them doesn’t need to negotiate with the last few bites.
That’s the real value of a good lunchbox rotation. You stop gambling on whatever is left in the fridge and start packing meals that already know how to travel. Once you get used to that way of cooking, the whole routine gets calmer — and the lunchbox comes back with less mystery and more crumbs.