
Some evenings smell like burnt toast, cold broccoli, and someone insisting they are “not hungry” while standing in front of the open fridge. That is the real setting for weeknight dinners for picky eaters: a little chaos, a little bargaining, and a very short window before the mood at the table turns sour.
The easiest way to win that night is not to fight it. It is to cook meals that look familiar, taste gentle, and still give adults something worth eating. Think crispy chicken tenders, cheesy pasta bakes, mild taco skillets, sliders, soup with grilled cheese — food that lands on the plate without drama and disappears fast enough that nobody has time to object.
I keep coming back to recipes like these because they solve the part most dinner lists ignore: the texture battle. Kids who reject “mixed up” food often do fine with a plate that lets the chicken stay separate from the rice, the sauce stay in a little pile, and the vegetables stay visible instead of hidden in a mystery blend. That tiny bit of control changes everything.
Why These Dinners Belong in the Rotation
-
Recognizable shapes calm the table down: Nuggets, sliders, noodles, tacos, and pizza work because they look like dinner before anyone tastes a bite.
-
Separate components matter: A lot of these meals let you keep sauce, protein, and vegetables in their own corners, which helps when a child will not eat anything touching.
-
Most of them finish fast: Plenty of these recipes land in 20 to 35 minutes, and the baked ones use that time to work while you set the table.
-
Pantry overlap keeps shopping sane: Chicken, ground beef, cheese, pasta, rice, tortillas, broth, salsa, and canned tomatoes show up again and again.
-
Leftovers still behave: Meatballs, pasta bakes, soup, and slider fillings reheat well if you add a splash of broth, water, or sauce.
-
Adults can finish their own plates: Hot sauce, pickles, herbs, mustard, and extra cheese live at the table, not buried in the pan.
Why Familiar Shapes Beat a Complicated Plate
A lot of picky eating has less to do with flavor than with uncertainty. A child can smell garlic and butter and still refuse dinner if the bowl looks busy, saucy, or mashed together in a way they do not trust. That is why the most reliable weeknight dinners often feel plain at first glance. Plain is not a flaw here. Plain is a strategy.
A chicken tender is easy to understand. So is a slider, a baked potato, a bowl of noodles, or a cheese-topped casserole. Those shapes give kids a quick read on the plate, and that read matters more than people admit. When the food looks predictable, the conversation at dinner gets shorter.
Adults benefit too, by the way. If you have ever tried to coax a tired child through a complicated stir-fry after a long day, you already know the problem. These recipes move with less friction because they keep the flavors gentle, the textures clear, and the finish flexible.
1. Crispy Baked Chicken Tenders
A tray of chicken tenders coming out of the oven has a very specific sound: that dry, crisp little crackle as the crust sets. These bake up golden and sturdy, with a coating that stays on the chicken instead of sliding off onto the pan.
Why It Works:
The breading is simple, the pieces cook fast, and the shape is familiar enough that even cautious eaters usually go for it. Panko and parmesan give you crunch without a deep fryer, and the butter or oil spray helps the crust brown instead of drying out.
Key Ingredients:
- 1 1/2 lb chicken tenders — the size is right for quick cooking.
- 1 cup all-purpose flour — helps the coating cling.
- 2 large eggs — the glue for the crust.
- 2 tablespoons milk — thins the egg just enough.
- 1 1/2 cups panko breadcrumbs — gives the sharp crunch.
- 1/2 cup finely grated parmesan — adds salt and browning.
- 1 teaspoon garlic powder — keeps the flavor from tasting flat.
- 1 teaspoon paprika — adds color and a mild warm note.
- 1 tablespoon kosher salt — seasons the chicken through.
- 2 tablespoons melted butter or oil spray — helps the crust crisp.
Quick Steps:
- Preheat the oven to 425°F and set a wire rack on a rimmed baking sheet.
- Set out three shallow bowls with flour, beaten eggs mixed with milk, and panko mixed with parmesan, garlic powder, paprika, and salt.
- Dredge each tender in flour, dip in egg, then press into the crumb mixture so every side is coated.
- Arrange on the rack and brush lightly with melted butter or spray with oil.
- Bake for 18 to 20 minutes, until the coating is deep golden and the chicken reaches 165°F at the thickest point.
- Rest for 3 minutes before serving so the crust firms up.
Equipment for This Recipe:
- Rimmed baking sheet — catches drips and keeps the oven cleaner.
- Wire rack — helps the bottoms stay crisp.
- Three shallow bowls — for an easy breading station.
How to Serve This Dish:
Pile the tenders on a warm platter with ketchup, ranch, or honey mustard in small bowls. Add celery sticks, apple slices, or oven fries if you want the plate to feel complete without making it feel busy.
Pro Tips for This Recipe:
- Press the crumbs on firmly, but do not pack them like cement.
- A rack matters here; a flat sheet pan makes the bottoms soft.
- If the tenders are thick, flatten the wider end a little so they cook evenly.
Variations on This Dish:
- Parmesan Herb Tenders: Add dried parsley and a pinch of oregano to the crumb mix.
- Gluten-Free Crunch: Use gluten-free flour and gluten-free breadcrumbs.
- Spicy Adult Finish: Stir cayenne into the panko and keep the kid batch plain.
Common Mistakes to Avoid with This Dish:
- Skipping the rack: The underside steams and turns pale instead of crisp. Use a rack or flip halfway through.
- Crowding the pan: The pieces touch, the steam builds, and the crust softens. Leave space between each tender.
2. Buttered Parmesan Noodles with Chicken
This one smells like comfort the second the butter hits the pan. The sauce is light, glossy, and salty in a way kids tend to accept quickly, especially when the chicken is shredded and tucked through the noodles instead of piled on top.
Why It Works:
It uses ingredients people already know how to eat: noodles, butter, cheese, and chicken. The cream and broth make a silky sauce that clings to the pasta without feeling heavy, and that matters when you are trying to keep dinner gentle.
Key Ingredients:
- 12 oz wide egg noodles — they catch the sauce well.
- 2 cups cooked shredded chicken — rotisserie chicken works fine.
- 3 tablespoons unsalted butter — the base of the sauce.
- 1 clove garlic, minced — keeps the flavor warm.
- 1 cup chicken broth — loosens the sauce.
- 1/2 cup heavy cream — gives the noodles a soft finish.
- 1/2 cup grated parmesan — melts into the sauce.
- 1/2 teaspoon salt — adjust after tasting.
- 1/4 teaspoon black pepper — optional for the adults.
- 1 tablespoon chopped parsley — for a fresh finish.
Quick Steps:
- Cook the noodles in salted water until just tender, then drain.
- Melt the butter in a large skillet over medium heat and cook the garlic for 30 seconds.
- Pour in the broth and cream, simmer for 2 to 3 minutes, then stir in the parmesan until smooth.
- Add the chicken and noodles, tossing until every strand is coated.
- Cook for 1 more minute, then finish with parsley and serve right away.
Equipment for This Recipe:
- Large skillet — big enough to toss the noodles.
- Colander — for draining the pasta.
- Wooden spoon — helps coat everything evenly.
How to Serve This Dish:
Serve it in shallow bowls with extra parmesan at the table. A side of peas, green beans, or soft dinner rolls keeps the meal simple and kid-friendly.
Pro Tips for This Recipe:
- Save a splash of pasta water in case the sauce tightens too much.
- Use rotisserie chicken when the evening is crowded.
- Add the parmesan off the hottest part of the burner so it melts smooth.
Variations on This Dish:
- Broccoli Noodle Bowl: Stir in steamed broccoli florets at the end.
- Plain Butter Version: Skip the cream and use more broth plus extra butter.
- Ham Swap: Replace chicken with diced ham for a different leftover dinner.
Common Mistakes to Avoid with This Dish:
- Boiling the sauce hard: The cream can split and get grainy. Keep it at a low simmer.
- Letting the noodles sit too long: They drink up the sauce fast. Serve immediately.
3. Cheesy Taco Rice Skillet
This is the kind of skillet dinner that smells like taco night before it even hits the table. The rice cooks right in the pan, so you get seasoned meat, soft beans, melted cheese, and a spoonable dinner that still feels familiar.
Why It Works:
It gives picky eaters a choice between scooping rice, meat, or cheese, instead of presenting everything as one mixed mystery. The salsa and seasoning live in the background, which is exactly where they should be for a family meal like this.
Key Ingredients:
- 1 lb ground beef or ground turkey — the main protein.
- 1 small onion, finely diced — melts into the skillet.
- 1 cup long-grain white rice — cooks evenly in the pan.
- 2 cups chicken broth — helps the rice soften.
- 1 cup mild salsa — adds flavor and moisture.
- 1 packet taco seasoning or 2 tablespoons homemade mix — seasons the whole pan.
- 1 can black beans, drained and rinsed — adds substance.
- 1 cup corn — frozen works fine.
- 1 1/2 cups shredded cheddar — the finish.
- 1 tablespoon oil — for browning the meat.
Quick Steps:
- Heat the oil in a deep skillet and cook the onion and meat over medium-high heat until the beef is no longer pink.
- Stir in the rice, broth, salsa, taco seasoning, beans, and corn.
- Bring to a gentle boil, cover, and reduce to low heat for 18 minutes.
- Turn off the heat, sprinkle cheddar over the top, and cover for 2 minutes until melted.
- Fluff the rice with a fork and serve with chips or sour cream.
Equipment for This Recipe:
- Deep skillet with a lid — the rice needs steam.
- Wooden spoon — for breaking up the meat.
- Measuring cup — useful for the broth-to-rice ratio.
How to Serve This Dish:
Spoon it into wide bowls and let kids add their own cheese or chips. A little lettuce, diced tomato, or avocado on the side works better than forcing them into the pan.
Pro Tips for This Recipe:
- Use mild salsa if your crowd is sensitive to heat.
- Keep the lid on during the rice simmer or the grains cook unevenly.
- Let the skillet rest for 5 minutes before serving so the rice sets.
Variations on This Dish:
- Chicken Taco Skillet: Use shredded chicken instead of ground meat.
- Bean-Forward Version: Skip the meat and add an extra can of beans.
- Nacho Night Finish: Top with crushed tortilla chips just before serving.
Common Mistakes to Avoid with This Dish:
- Using instant rice without adjusting liquid: It turns mushy fast. Stick with long-grain rice or change the method.
- Stirring too much while it simmers: The rice can break and get sticky. Leave it alone.
4. Mini Naan Pizzas
These are tiny, fast, and hard to argue with. The naan bakes into a chewy-crisp base, the cheese melts in smooth puddles, and the toppings can stay as plain as a child needs them to stay.
Why It Works:
Pizza is one of the most reliable kid meals for a reason: familiar dough, tomato sauce, and melted cheese do a lot of the heavy lifting. Naan cuts the prep time way down and gives you individual portions, which is handy when everyone wants a slightly different version.
Key Ingredients:
- 4 naan breads — the quick crust.
- 3/4 cup pizza sauce — keep it light.
- 2 cups shredded mozzarella — the main melt.
- 1/2 cup pepperoni slices — optional for one half.
- 1/2 cup diced cooked ham — another easy topping.
- 1/4 cup sliced black olives — for the people who want them.
- 1 teaspoon dried oregano — a little more pizza flavor.
- 1 tablespoon olive oil — brushes the edges.
Quick Steps:
- Preheat the oven to 450°F and place the naan on a baking sheet.
- Brush the edges with olive oil and spread a thin layer of sauce over each piece.
- Top with mozzarella and any toppings you want.
- Bake for 8 to 10 minutes, until the cheese bubbles and the naan edges brown.
- Rest for 1 minute, then slice into wedges.
Equipment for This Recipe:
- Baking sheet — holds the pizzas flat.
- Pizza cutter or sharp knife — makes clean slices.
- Pastry brush — for the oil, though a spoon works.
How to Serve This Dish:
Serve each naan pizza whole or sliced on a cutting board with fruit on the side. This dinner works well when kids want to “build” their own, because a plain cheese version can sit right next to the loaded one.
Pro Tips for This Recipe:
- Use a light hand with the sauce or the naan gets soft.
- Pre-bake the naan for 2 minutes if you want a firmer base.
- Put wet toppings, like tomatoes, under the cheese so they do not slide off.
Variations on This Dish:
- Margherita Naan: Use fresh mozzarella and basil.
- BBQ Chicken Naan: Swap the sauce for barbecue sauce and add chicken.
- Breakfast Pizza: Top with scrambled eggs and cheddar.
Common Mistakes to Avoid with This Dish:
- Overloading the toppings: The bread can go limp. Less is better.
- Baking too long: The cheese burns before the naan finishes. Watch the edges.
5. Hidden-Veggie Spaghetti
The sauce looks like regular spaghetti sauce, which is the whole point. Behind the scenes, grated carrot and zucchini melt into the tomato base and soften the bite without making the dish taste like a vegetable purge.
Why It Works:
The vegetables are cooked down until they disappear into the sauce, not chopped big enough to trigger a protest. Ground meat gives the sauce body, and spaghetti is such a familiar shape that the plate feels safe before anyone starts digging in.
Key Ingredients:
- 12 oz spaghetti — the classic base.
- 1 lb ground beef or ground turkey — for a meat sauce.
- 1 small onion, finely diced — cooks into the sauce.
- 1 carrot, finely grated — disappears into the mix.
- 1 zucchini, finely grated and squeezed dry — same idea.
- 24 oz marinara sauce — keeps things easy.
- 2 tablespoons tomato paste — deepens the tomato flavor.
- 1 tablespoon olive oil — for the skillet.
- 1 teaspoon Italian seasoning — the background flavor.
- 1/4 cup grated parmesan — for serving.
Quick Steps:
- Cook the spaghetti in salted water until al dente, then drain.
- Heat the oil in a skillet and cook the onion, carrot, and zucchini for 4 to 5 minutes.
- Add the meat and cook until browned, breaking it up as you go.
- Stir in the marinara, tomato paste, and seasoning, then simmer for 10 minutes.
- Toss with the pasta and serve with parmesan.
Equipment for This Recipe:
- Large skillet — for the sauce.
- Pot for pasta — nothing fancy needed.
- Box grater — makes the vegetables disappear.
How to Serve This Dish:
Serve it with garlic bread and a few cucumber sticks or pear slices. If your household is suspicious of visible green bits, keep the parsley off the top and let adults add it later.
Pro Tips for This Recipe:
- Grate the zucchini, then squeeze it dry in a clean towel.
- Let the sauce simmer long enough to lose the raw vegetable edge.
- Salt the pasta water well; bland noodles make the whole bowl dull.
Variations on This Dish:
- Meatless Red Sauce: Skip the meat and add a little extra zucchini.
- Creamy Red Spaghetti: Stir in 1/4 cup cream at the end.
- Tiny Veg Version: Use only carrots if zucchini gets rejected at your table.
Common Mistakes to Avoid with This Dish:
- Leaving the vegetables chunky: Kids spot them instantly. Grate them fine.
- Serving the sauce too thin: It slides off the noodles. Simmer until glossy.
6. Turkey Meatballs in Marinara
These meatballs stay tender and mild, which is the trick. They do not need a lot of fuss, only enough parmesan and garlic to keep the flavor round while the marinara does the rest of the work.
Why It Works:
Turkey keeps the meatballs lighter, and baking them first means you are not babysitting a skillet full of splatter. Once they hit the sauce, they soak up flavor without turning dense.
Key Ingredients:
- 1 lb ground turkey — lean and quick.
- 1/2 cup breadcrumbs — holds the meatballs together.
- 1 egg — binds the mix.
- 1/4 cup grated parmesan — adds salt and depth.
- 2 tablespoons milk — keeps the meat tender.
- 1 teaspoon garlic powder — mild but noticeable.
- 1/2 teaspoon salt — seasons the mix.
- 1/4 teaspoon black pepper — optional.
- 2 cups marinara sauce — for simmering.
- 1 tablespoon olive oil — for the pan or tray.
Quick Steps:
- Heat the oven to 400°F and line a baking sheet with parchment.
- Mix the turkey, breadcrumbs, egg, parmesan, milk, garlic powder, salt, and pepper until just combined.
- Roll into 1 1/2-inch meatballs and place them on the sheet.
- Bake for 12 to 15 minutes, then move them into warm marinara and simmer for 5 minutes.
- Serve over pasta or tucked into rolls.
Equipment for This Recipe:
- Rimmed baking sheet — for even browning.
- Mixing bowl — to combine the meat gently.
- Saucepan — for the marinara finish.
How to Serve This Dish:
Put the meatballs over spaghetti, buttered noodles, or soft sub rolls. A small bowl of extra sauce helps kids keep the pasta plain if they want to.
Pro Tips for This Recipe:
- Mix just until combined or the meatballs go tight.
- Wet your hands before rolling so the mixture does not stick.
- Bake first, then finish in sauce; that keeps them from falling apart.
Variations on This Dish:
- Chicken Meatballs: Use ground chicken for a softer flavor.
- Cheesy Center: Hide a little mozzarella in the middle of each ball.
- Sub Sandwich Night: Serve them on toasted rolls with extra sauce.
Common Mistakes to Avoid with This Dish:
- Making them too large: The centers cook slowly and dry out. Keep them small.
- Skipping the simmer in sauce: They taste like plain baked turkey instead of dinner.
7. Sloppy Joe Sliders
A good Sloppy Joe is messy by design, but sliders make the mess smaller and the whole thing easier to hand to a child. The filling is sweet, tangy, and soft enough to be familiar without turning into mush.
Why It Works:
The sauce leans on ketchup and brown sugar, which keeps the flavor in the sweet-savory lane many kids accept fast. Slider buns are a nice touch because they turn a saucy filling into neat little portions.
Key Ingredients:
- 1 lb ground beef — the classic base.
- 1/2 small onion, finely diced — cooks into the sauce.
- 1 cup ketchup — the main sauce body.
- 2 tablespoons tomato paste — deepens the flavor.
- 1 tablespoon brown sugar — adds the sweet note.
- 1 tablespoon Worcestershire sauce — gives the filling depth.
- 1 teaspoon yellow mustard — sharpens the sauce.
- 12 slider buns — soft enough to hold the filling.
- 2 tablespoons butter, melted — for the tops.
- 12 pickle chips — optional, but useful.
Quick Steps:
- Cook the beef and onion in a skillet over medium heat until browned.
- Stir in ketchup, tomato paste, brown sugar, Worcestershire, and mustard.
- Simmer for 5 to 7 minutes until thick and spoonable.
- Fill the slider buns, brush the tops with butter, and warm them in a 350°F oven for 5 minutes.
- Add pickles and serve hot.
Equipment for This Recipe:
- Large skillet — for the filling.
- Baking sheet — for warming the buns.
- Wooden spoon — useful for breaking up the beef.
How to Serve This Dish:
Stack the sliders on a platter with carrot sticks or potato chips nearby. They are best when the filling is thick enough to stay put but not so thick that it dries out between the buns.
Pro Tips for This Recipe:
- Let the filling simmer until it clings to the spoon.
- Toasting the bun tops helps with soggy bottoms.
- If the sauce tastes too sharp, add 1 more teaspoon of brown sugar.
Variations on This Dish:
- Turkey Joe Sliders: Swap in ground turkey and add a little extra oil.
- BBQ Joe Sliders: Replace half the ketchup with barbecue sauce.
- Cheese Topped: Melt cheddar over the filling before closing the buns.
Common Mistakes to Avoid with This Dish:
- Making the filling too wet: The buns collapse fast. Simmer it down.
- Assembling too early: The bread softens before dinner. Fill just before serving.
8. Broccoli Cheddar Baked Potatoes
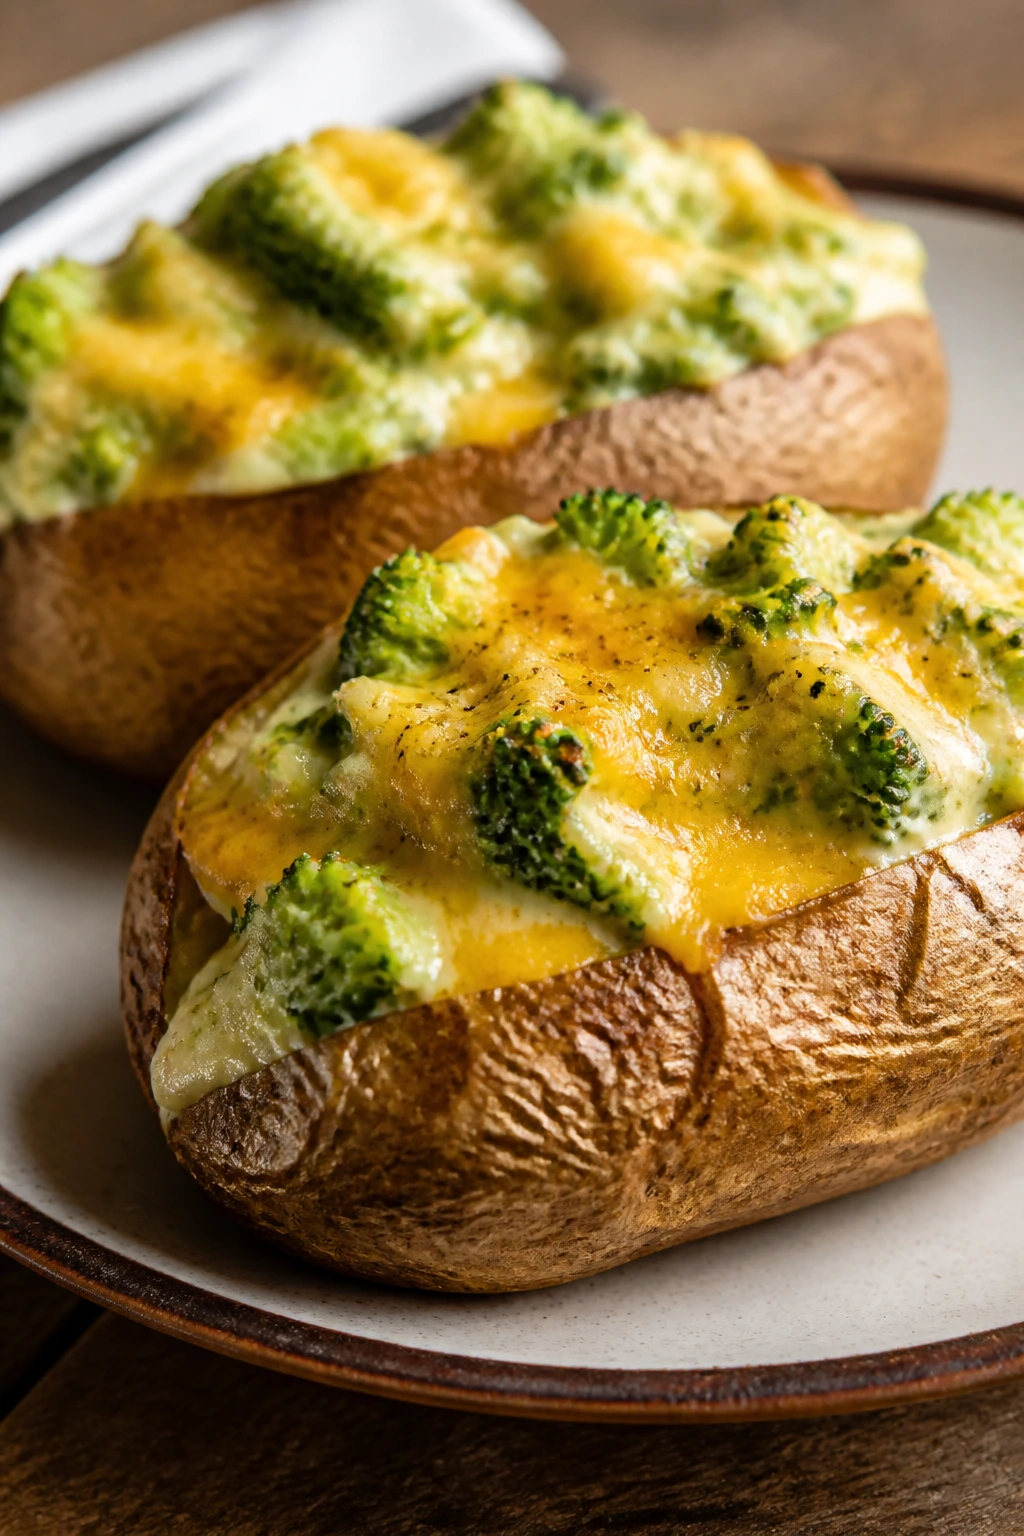
A baked potato becomes much more interesting once it gets a sharp cheddar sauce and soft broccoli. The potato stays familiar, the broccoli is optional enough to avoid a fight, and the cheese sauce makes the whole thing feel like dinner instead of a side.
Why It Works:
The potato gives you a sturdy base that can hold plenty of topping without falling apart. Broccoli cheddar is one of those combinations that works because the cheese covers the vegetable just enough to make the bite friendlier.
Key Ingredients:
- 4 medium russet potatoes — the best size for baking.
- 3 cups small broccoli florets — chop them small.
- 2 tablespoons butter — starts the sauce.
- 2 tablespoons flour — thickens the sauce.
- 1 1/2 cups milk — builds the sauce.
- 2 cups shredded sharp cheddar — the main flavor.
- 1/2 teaspoon salt — for the sauce.
- 1/4 teaspoon garlic powder — optional.
- 1/4 teaspoon black pepper — optional.
- 2 tablespoons sour cream — for serving, if you want it.
Quick Steps:
- Bake the potatoes at 425°F for 50 to 60 minutes until the skins are crisp and the centers are soft.
- Steam the broccoli for 3 to 4 minutes until bright green and just tender.
- Melt the butter in a saucepan, whisk in the flour, then slowly whisk in the milk.
- Stir in the cheddar until smooth, then season to taste.
- Split the potatoes, fluff the insides, top with broccoli and cheese sauce, and serve.
Equipment for This Recipe:
- Baking sheet — for the potatoes.
- Saucepan — for the cheese sauce.
- Whisk — keeps the sauce smooth.
How to Serve This Dish:
Serve each potato on its own plate with a spoonful of sour cream or bacon bits if your crowd wants them. A crisp salad or apple slices keeps the meal from feeling too heavy.
Pro Tips for This Recipe:
- Pierce the potatoes before baking so they do not split.
- Chop the broccoli small; huge florets are where picky eaters give up.
- Add the cheese off the hottest burner so the sauce stays smooth.
Variations on This Dish:
- Bacon Potato Version: Add crisp bacon to the top.
- Cauliflower Swap: Replace half the broccoli with cauliflower florets.
- Loaded Mash Bowl: Scoop the potato out and mash it with the toppings.
Common Mistakes to Avoid with This Dish:
- Undercooking the potatoes: The filling stays chalky. Bake until a knife slides in easily.
- Thin cheese sauce: It runs off the potato. Whisk in the flour patiently.
9. Honey Garlic Chicken Thighs
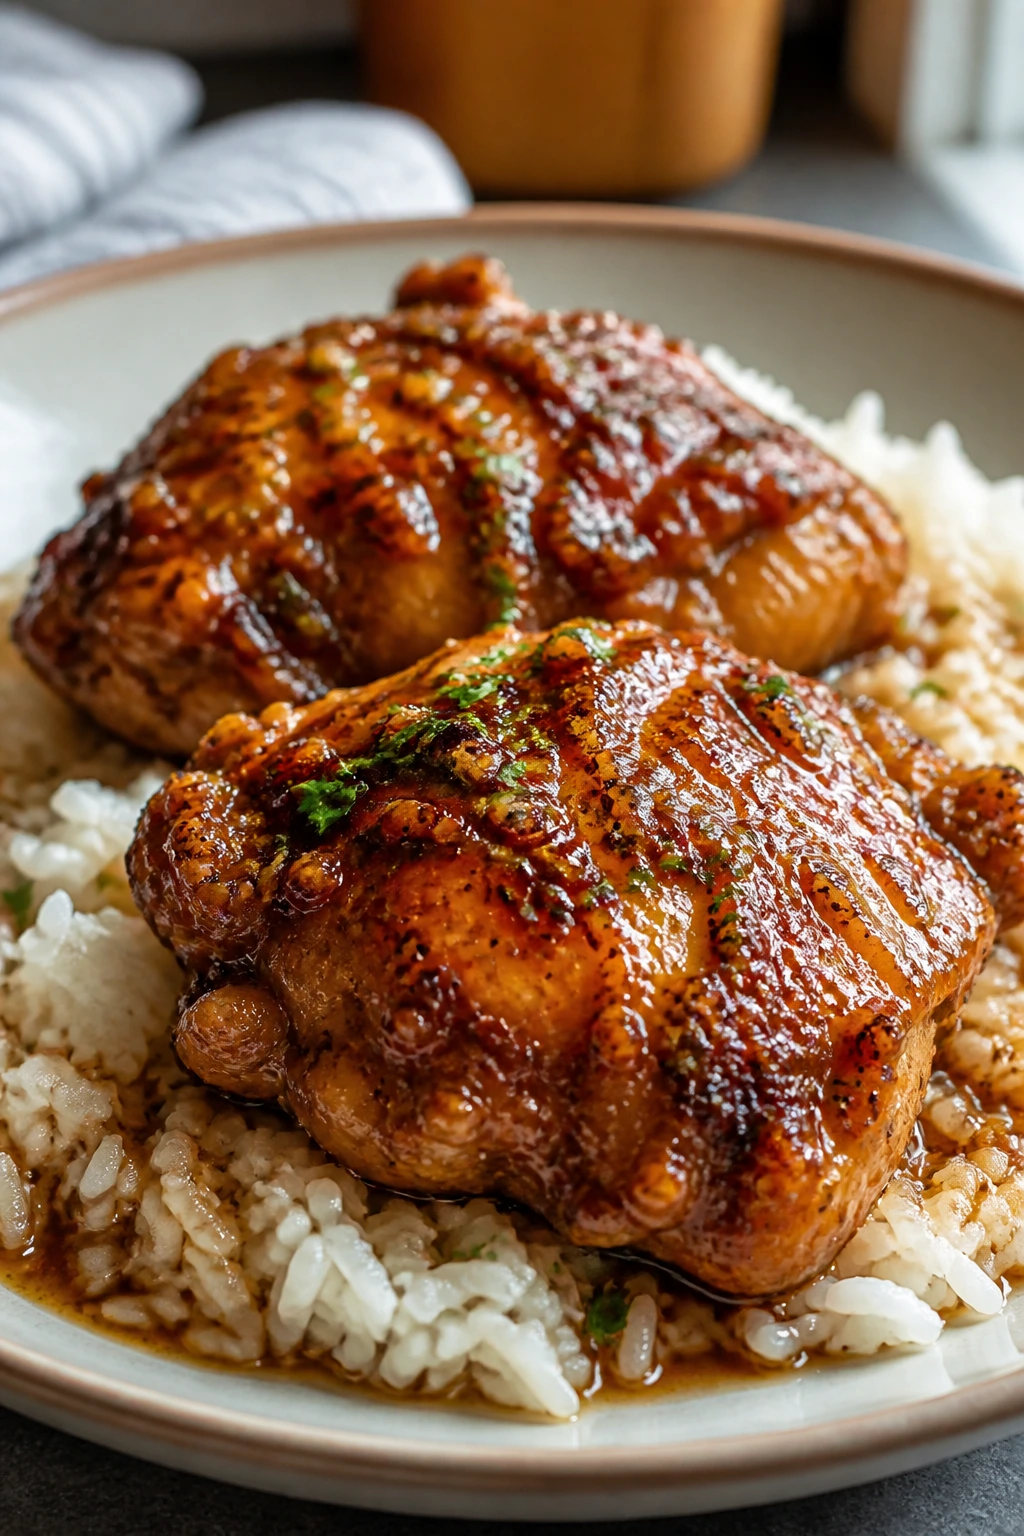
Sticky, glossy chicken thighs are a strong weeknight move because they bring their own sauce. The honey and garlic glaze turns the pan shiny, and the thighs stay juicier than breast meat after a quick sear.
Why It Works:
Thighs forgive a lot, which is helpful when dinner has to land on the table without a second attempt. The sauce is sweet enough to attract picky eaters but still tastes like dinner, not dessert.
Key Ingredients:
- 1 1/2 lb boneless skinless chicken thighs — stay juicy and cook fast.
- 2 tablespoons oil — for searing.
- 1/4 cup honey — gives the glaze body.
- 3 tablespoons soy sauce — keeps the sweetness in check.
- 3 garlic cloves, minced — the main savory note.
- 1 tablespoon ketchup — helps the sauce cling.
- 1 teaspoon cornstarch mixed with 1 tablespoon water — thickens the glaze.
- 1/2 teaspoon black pepper — optional.
- 2 cups cooked rice — for serving.
Quick Steps:
- Season the chicken lightly with salt and pepper.
- Heat the oil in a skillet over medium-high heat and sear the chicken for 4 to 5 minutes per side.
- Stir together the honey, soy sauce, garlic, and ketchup, then pour it into the skillet.
- Simmer for 3 to 4 minutes, then stir in the cornstarch slurry and cook until the sauce turns glossy.
- Spoon the glaze over rice and serve hot.
Equipment for This Recipe:
- Large skillet — wide enough to sear without crowding.
- Small bowl — for the sauce.
- Tongs — to flip the chicken cleanly.
How to Serve This Dish:
Serve the chicken over rice with steamed broccoli or cucumber slices on the side. Keep extra glaze in a small bowl for anyone who likes their rice a little saucier.
Pro Tips for This Recipe:
- Do not crowd the skillet or the chicken will steam.
- If the sauce gets too thick, add a tablespoon of water.
- Cut the thighs into smaller pieces after searing if you want kid-sized bites.
Variations on This Dish:
- Orange Garlic Chicken: Swap half the honey for orange juice.
- Drumstick Version: Use bone-in drumsticks and bake a little longer.
- Milder Glaze: Reduce the garlic and add a touch more honey.
Common Mistakes to Avoid with This Dish:
- Burning the glaze: Honey catches fast over high heat. Keep the simmer gentle.
- Slicing too soon: The juices run out. Let the chicken rest for 3 minutes.
10. Baked Mac and Cheese with Toasted Crumbs
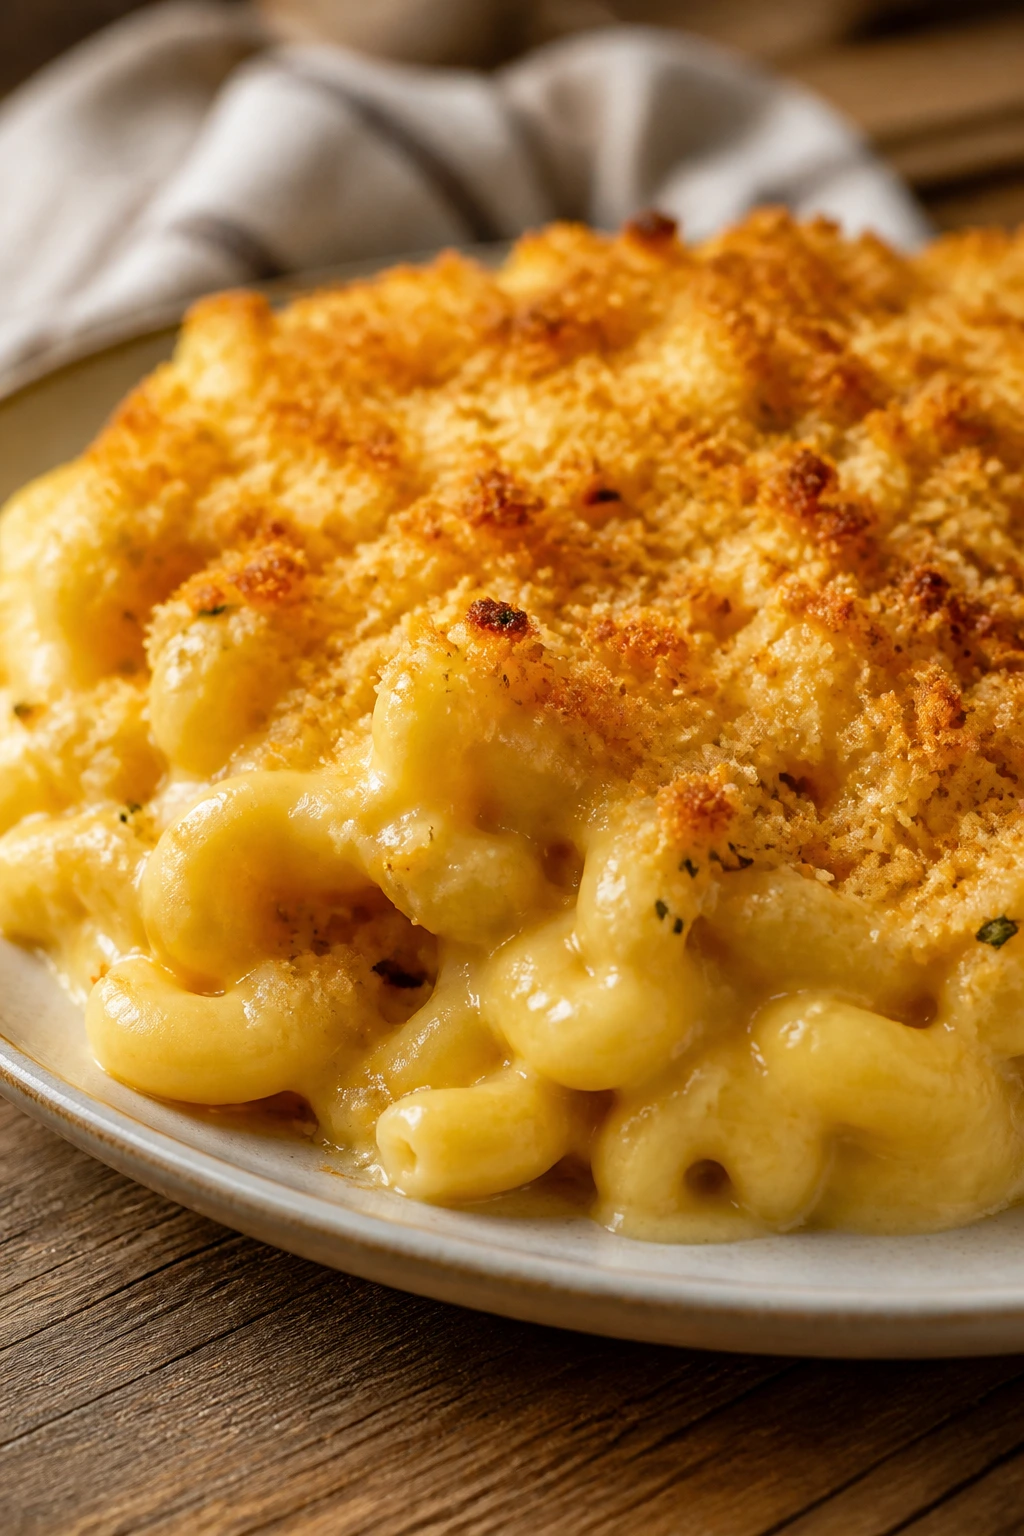
This is the mac and cheese that lands with a little crust on top and a soft, stretchy middle underneath. It has enough structure to slice cleanly, which is useful when dinner needs to feel like a meal and not a bowl of emergency cheese.
Why It Works:
The sauce starts with a roux, so it stays smooth and stable instead of gritty. A breadcrumb topping gives you a little crunch, which helps the dish feel finished.
Key Ingredients:
- 12 oz elbow macaroni — the classic shape.
- 3 tablespoons butter — for the roux and crumbs.
- 3 tablespoons flour — thickens the sauce.
- 2 1/2 cups milk — builds the cheese sauce.
- 2 cups shredded cheddar — the main cheese.
- 1 cup shredded mozzarella — adds stretch.
- 1/2 teaspoon salt — for the sauce.
- 1/2 cup breadcrumbs — for the top.
- 1 tablespoon melted butter — tosses with the crumbs.
- 1/4 teaspoon paprika — optional.
Quick Steps:
- Cook the macaroni until just shy of tender, then drain.
- Melt 3 tablespoons butter in a saucepan, whisk in the flour, then slowly whisk in the milk.
- Stir in the cheddar and mozzarella until the sauce is smooth.
- Mix the pasta into the sauce, pour into a greased baking dish, and top with breadcrumbs mixed with melted butter.
- Bake at 375°F for 20 minutes until bubbling and lightly browned.
Equipment for This Recipe:
- Saucepan — for the cheese sauce.
- 9×13-inch baking dish — for the finished mac.
- Whisk — keeps the sauce lump-free.
How to Serve This Dish:
Serve it with peas, roasted carrots, or slices of ham if you want more protein. The mac itself is rich, so a crisp green side helps the plate feel less heavy.
Pro Tips for This Recipe:
- Pull the pasta early; it finishes in the oven.
- Shred the cheese yourself if you can. It melts more smoothly.
- Let the mac rest 5 minutes before scooping so it sets.
Variations on This Dish:
- Ham Mac: Stir in diced ham before baking.
- Stovetop Only: Skip the oven and serve it straight from the pot.
- Mild Mustard Note: Add 1 teaspoon Dijon to the sauce for adults.
Common Mistakes to Avoid with This Dish:
- Using high heat for the sauce: It can turn grainy. Keep it medium-low.
- Baking too long: The pasta dries out. Stop when the top is golden, not dark.
11. Chicken Quesadillas
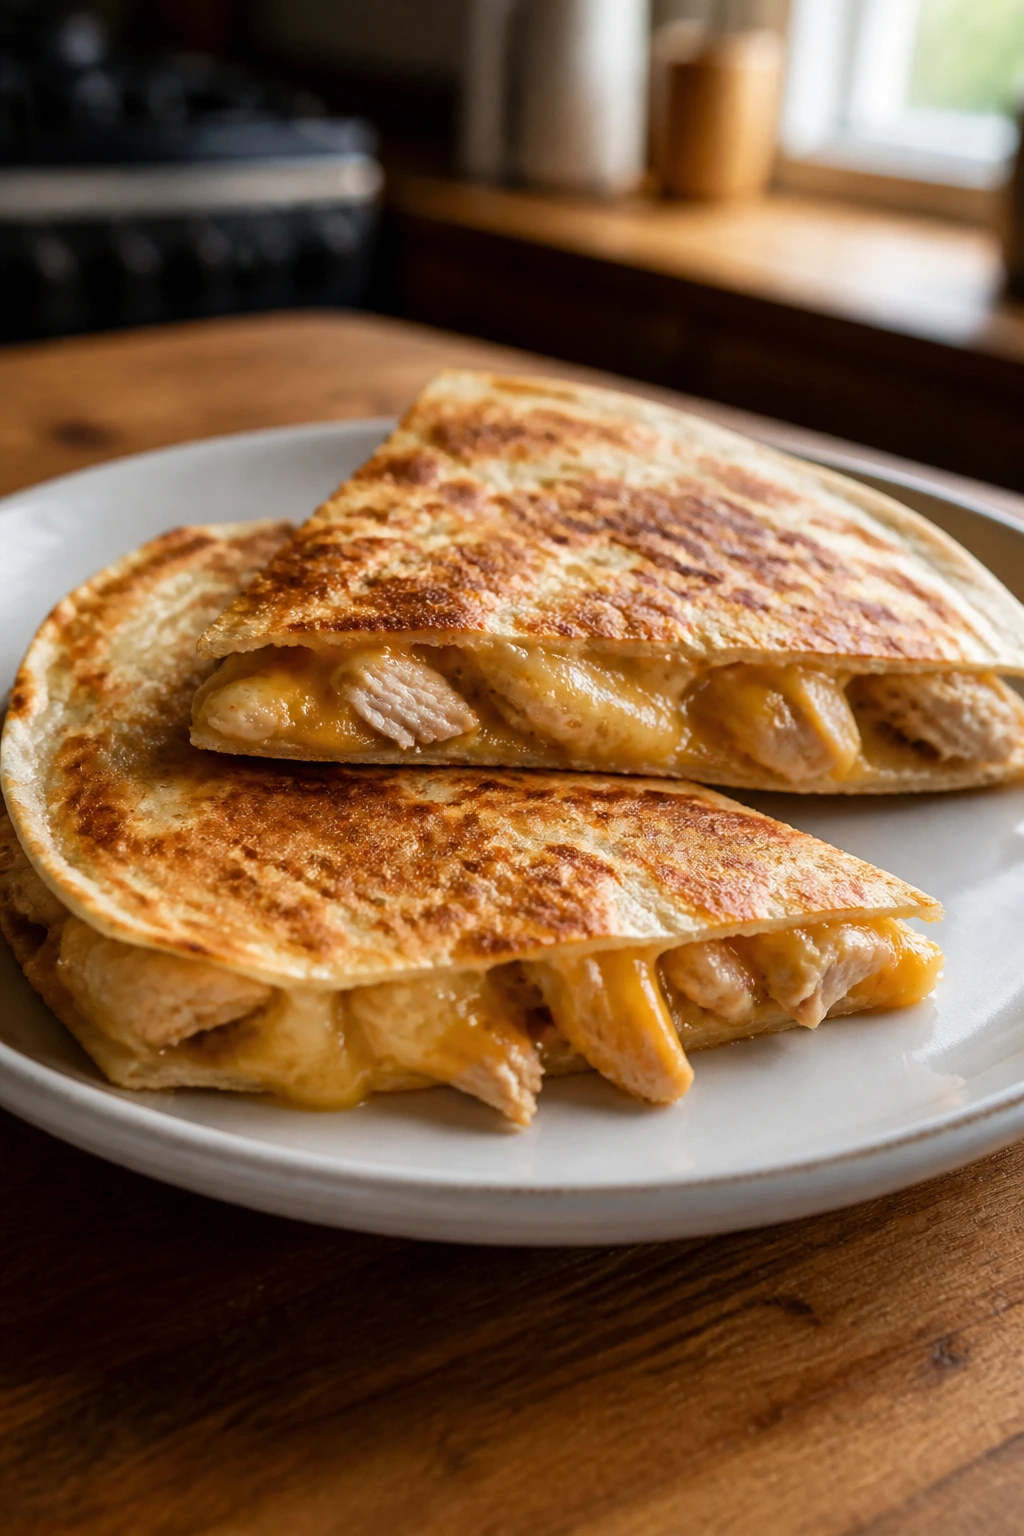
Quesadillas are one of the few dinners that can be both fast and negotiable. You can keep the filling plain, the salsa on the side, and the slices small enough that a nervous eater does not feel trapped by a giant plate of food.
Why It Works:
The tortilla holds everything together, the cheese acts like edible glue, and the chicken can be seasoned very lightly. It is also one of the easiest ways to use leftover chicken without announcing that it is leftovers.
Key Ingredients:
- 2 cups shredded cooked chicken — rotisserie chicken works.
- 2 cups shredded cheddar or Monterey Jack — the melt.
- 4 large flour tortillas — the shell.
- 1/2 cup mild salsa — optional, not mandatory.
- 1 tablespoon butter — for the skillet.
- 1/2 cup corn — optional.
- 1/4 teaspoon salt — only if the chicken needs it.
Quick Steps:
- Heat a skillet over medium heat and melt a little butter.
- Lay down one tortilla and scatter cheese over half of it.
- Add chicken and any optional corn, then top with more cheese and fold the tortilla over.
- Cook for 2 to 3 minutes per side until the tortilla is golden and the cheese melts.
- Slice into wedges and serve right away.
Equipment for This Recipe:
- Nonstick skillet — makes flipping easy.
- Spatula — for pressing and turning.
- Sharp knife or pizza cutter — for clean slices.
How to Serve This Dish:
Serve the wedges with sour cream, salsa, or guacamole in small bowls. Fruit salad or carrot sticks keep the meal simple and bright.
Pro Tips for This Recipe:
- Keep the heat at medium so the tortilla browns before the cheese burns.
- Do not overfill; a stuffed quesadilla falls apart.
- Let it rest for 30 seconds before cutting so the cheese settles.
Variations on This Dish:
- Bean and Cheese: Use mashed black beans instead of chicken.
- Chicken and Corn: Add extra corn for sweetness.
- Cheese Only: Leave the chicken out on especially picky nights.
Common Mistakes to Avoid with This Dish:
- Cooking on high heat: The outside burns too fast. Medium is the sweet spot.
- Using too much filling: The tortilla tears when you flip it. Keep it modest.
12. Sheet Pan Chicken and Potatoes
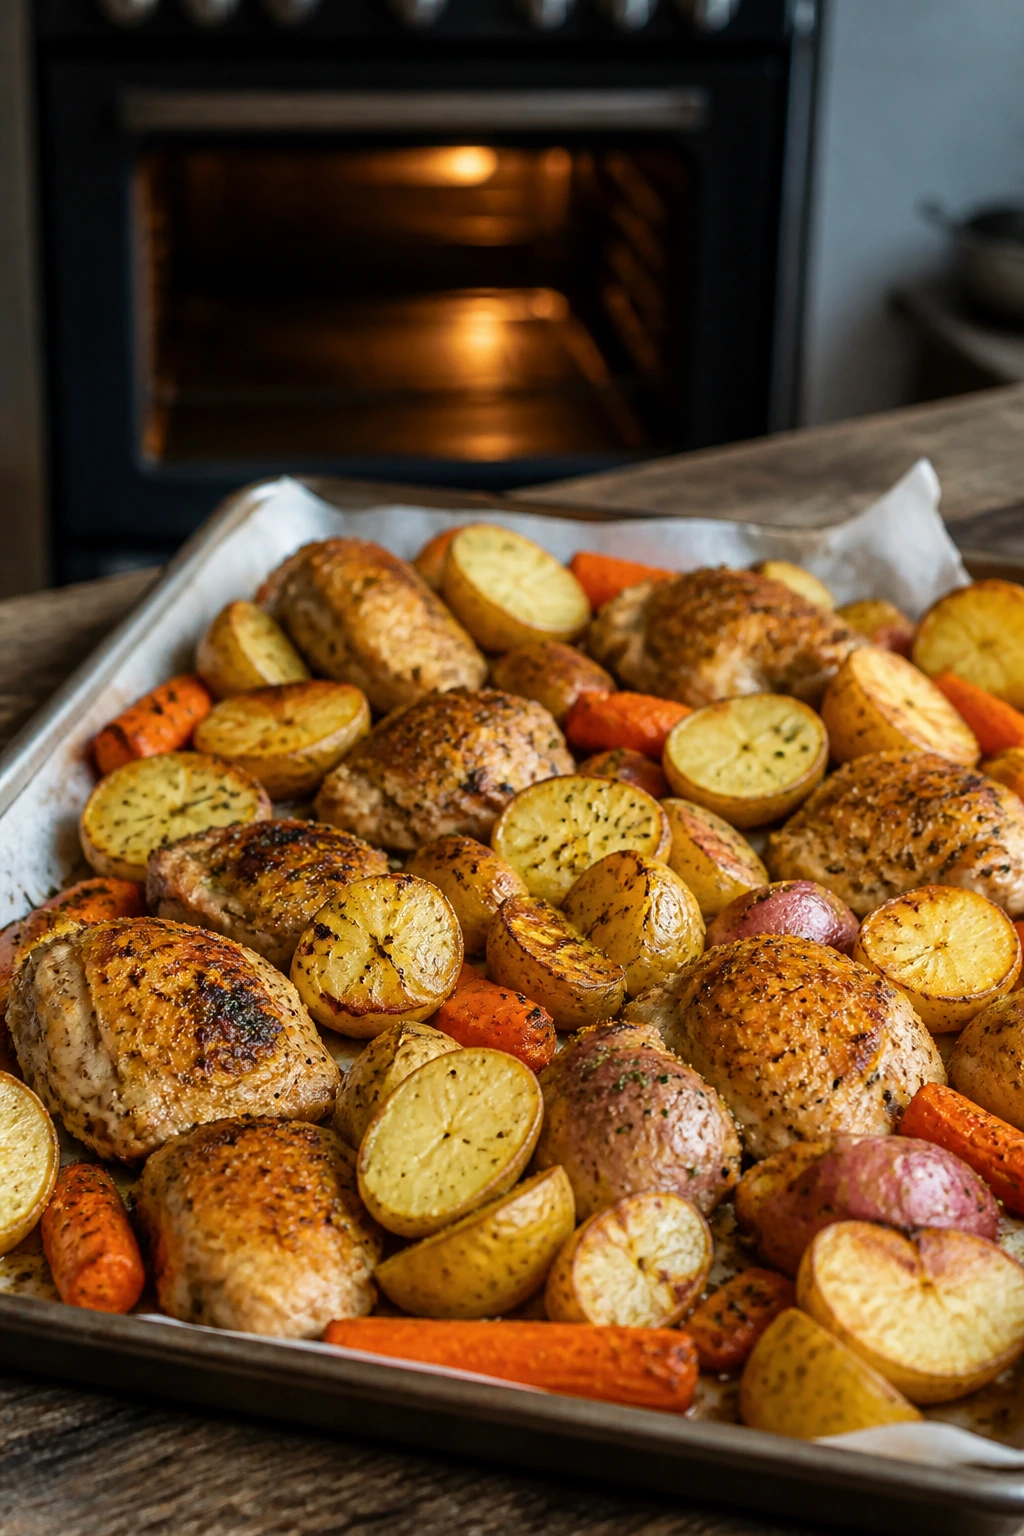
A sheet pan dinner works because the oven does the work while you do something else, like help with homework or find the missing shoe. The chicken gets browned edges, the potatoes go soft in the middle, and the carrots pick up the seasoning without turning mushy.
Why It Works:
Everything roasts at roughly the same pace, which keeps dinner from becoming a juggling act. The ingredients are plain enough for picky eaters, but the seasoning still gives the pan a real dinner smell.
Key Ingredients:
- 1 1/2 lb chicken thighs or breasts — cut evenly.
- 1 1/2 lb baby potatoes, halved — roast at the same speed.
- 2 cups baby carrots — easy and kid-friendly.
- 3 tablespoons olive oil — coats everything.
- 1 teaspoon garlic powder — background flavor.
- 1 teaspoon paprika — for color.
- 1 teaspoon dried thyme — optional but good.
- 1 teaspoon salt — season the pan.
- 1/2 teaspoon black pepper — optional.
Quick Steps:
- Heat the oven to 425°F and line a sheet pan with parchment.
- Toss the potatoes and carrots with half the oil and seasoning, then spread them out.
- Rub the chicken with the rest of the oil and seasoning and place it among the vegetables.
- Roast for 35 to 40 minutes, stirring the vegetables once halfway through.
- Check that the chicken reaches 165°F and serve hot.
Equipment for This Recipe:
- Large rimmed sheet pan — needs space.
- Parchment paper — cuts cleanup.
- Tongs — for moving the hot chicken.
How to Serve This Dish:
Serve it straight from the pan with a little ketchup, ranch, or plain yogurt dip. It is already a full dinner, but a biscuit or fruit cup makes it feel complete.
Pro Tips for This Recipe:
- Cut the potatoes small enough to finish with the chicken.
- Leave space between pieces or the vegetables steam.
- If the chicken breasts are thick, slice them in half horizontally first.
Variations on This Dish:
- Lemon Herb Version: Add lemon slices and rosemary.
- Sausage Swap: Use smoked sausage instead of chicken.
- Plain Salted Potatoes: Keep the seasoning minimal for extra-sensitive eaters.
Common Mistakes to Avoid with This Dish:
- Crowding the pan: Everything softens instead of roasts. Use two pans if needed.
- Uneven potato size: Some pieces stay hard while others burn. Keep them close in size.
13. Cheeseburger Pasta
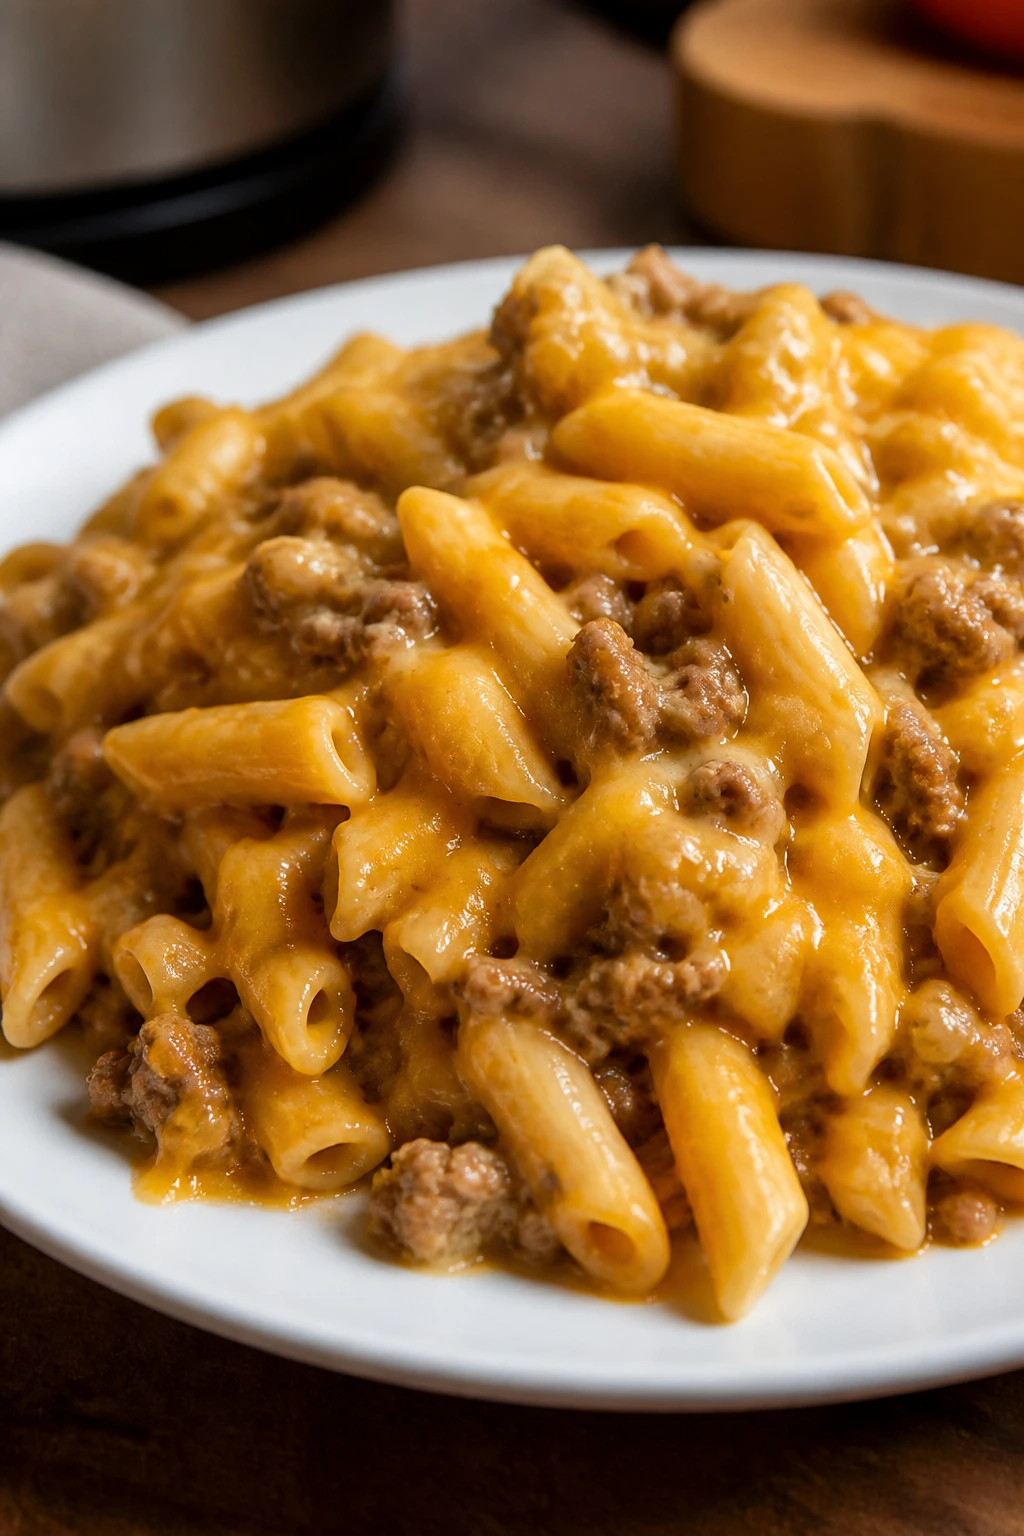
Cheeseburger pasta tastes like the diner version of weeknight dinner. It has the savory pull of a burger, the comfort of noodles, and enough sauce to keep it from drying out in the pan.
Why It Works:
Kids who like burgers usually recognize the flavor profile right away: beef, cheese, a little tang from mustard or ketchup. The pasta stretches the meat so the meal feeds more people without feeling thin.
Key Ingredients:
- 1 lb ground beef — the main flavor.
- 1 small onion, diced — softens into the sauce.
- 8 oz medium shell pasta — catches the sauce well.
- 2 cups beef broth — cooks the pasta.
- 2 cups milk — makes it creamy.
- 2 cups shredded cheddar — the cheese finish.
- 1 tablespoon mustard — gives it burger flavor.
- 1 teaspoon garlic powder — rounds it out.
- 1 teaspoon salt — adjust to taste.
- 1 tablespoon oil — for browning.
Quick Steps:
- Brown the beef and onion in a deep skillet over medium heat.
- Stir in the broth, milk, pasta, mustard, garlic powder, and salt.
- Bring to a simmer, cover, and cook for 10 to 12 minutes, stirring once or twice.
- Stir in the cheddar until melted and creamy.
- Serve hot, with pickles on the side if you want the full burger feeling.
Equipment for This Recipe:
- Deep skillet with a lid — the pasta cooks in the sauce.
- Wooden spoon — for stirring and scraping.
- Measuring cup — important for the liquid balance.
How to Serve This Dish:
Serve it in bowls with chopped pickles or tomato slices nearby. A handful of steamed peas is one of those quiet additions that works better than it sounds.
Pro Tips for This Recipe:
- Stir near the end so the pasta does not stick.
- If the sauce looks thin, let it sit uncovered for 2 minutes.
- Use cheddar that melts well; the block version is usually smoother.
Variations on This Dish:
- Bacon Burger Pasta: Stir in cooked bacon bits.
- Turkey Burger Pasta: Swap the beef for ground turkey.
- Mac Style: Use elbow macaroni instead of shells.
Common Mistakes to Avoid with This Dish:
- Cooking the pasta dry: Keep enough liquid in the skillet. The noodles need it.
- Adding cheese too early over high heat: It can clump. Stir it in off the hottest burner.
14. Mild Chicken Fried Rice
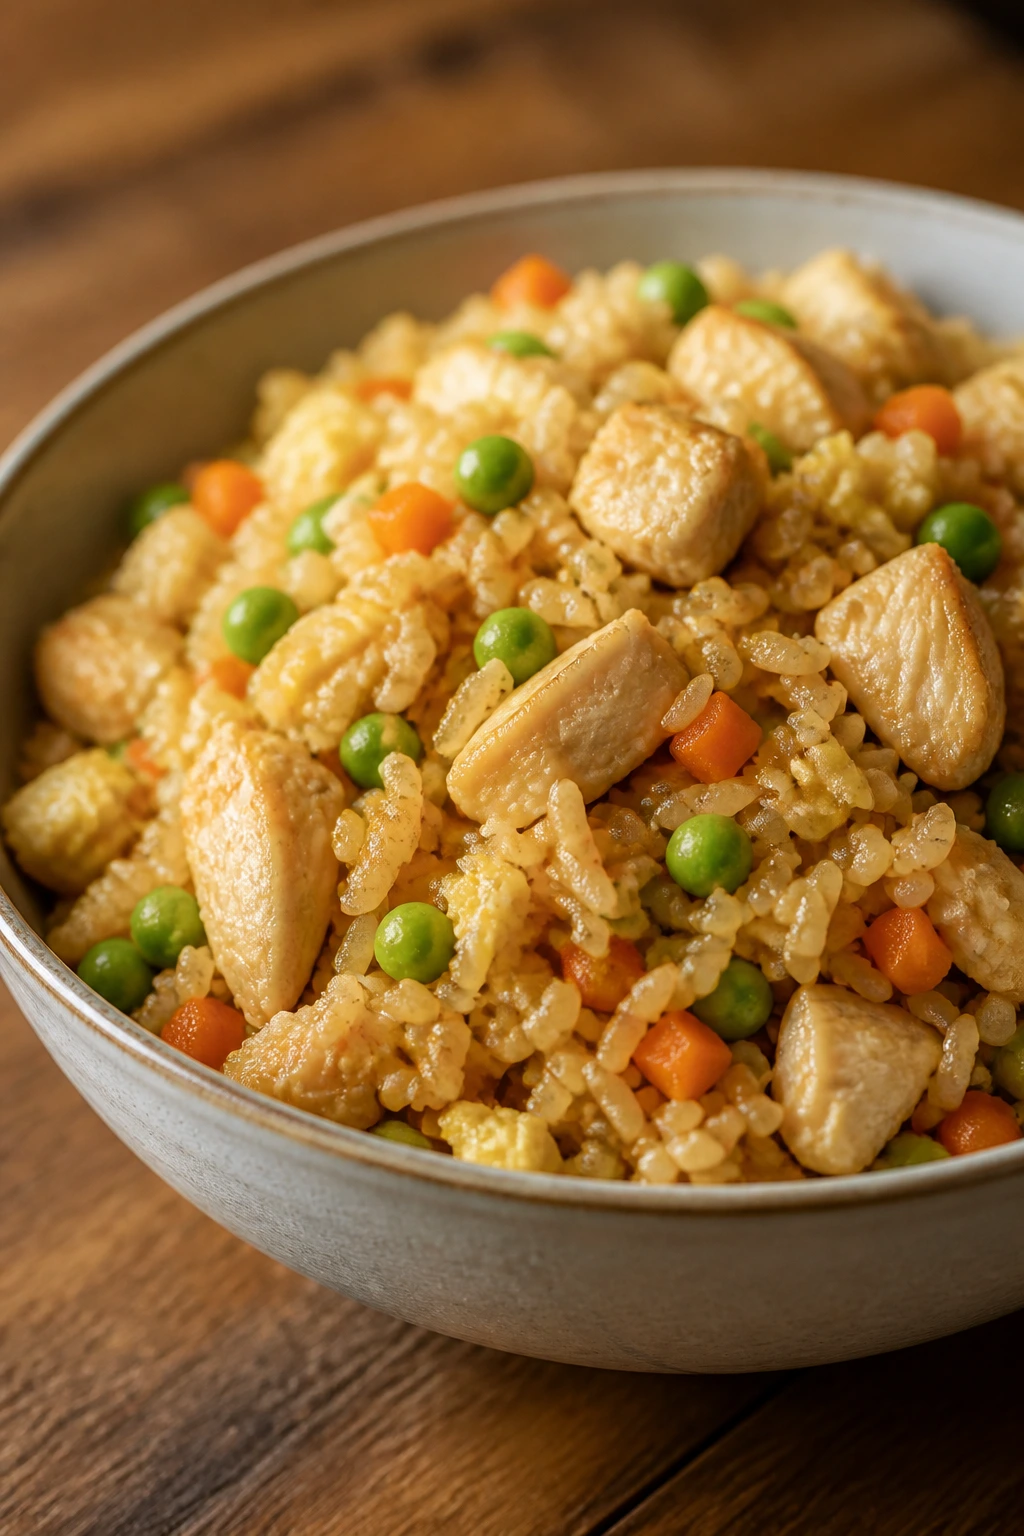
This is fried rice that stays calm. The rice gets a little toasty, the eggs disappear into soft ribbons, and the chicken gives enough protein to make the bowl feel like dinner without turning the flavor loud.
Why It Works:
Cold rice fries better than warm rice, which gives you a drier, less sticky result. Peas and carrots are small enough that many picky eaters will tolerate them, especially when the soy sauce stays light.
Key Ingredients:
- 3 cups cold cooked rice — day-old rice is best.
- 1 lb chicken breast, diced small — cooks quickly.
- 2 large eggs — the soft scramble.
- 1 cup frozen peas and carrots — classic and mild.
- 3 tablespoons soy sauce — season lightly.
- 1 tablespoon sesame oil — for flavor.
- 2 tablespoons neutral oil — for cooking.
- 2 scallions, sliced — optional.
- 1/2 teaspoon garlic powder — optional.
Quick Steps:
- Heat 1 tablespoon neutral oil in a large skillet or wok over medium-high heat.
- Cook the chicken until browned and cooked through, then move it to one side.
- Add the eggs and scramble them gently in the pan.
- Stir in the rice, peas and carrots, soy sauce, sesame oil, and garlic powder.
- Cook for 3 to 4 minutes, stirring until the rice is hot and lightly toasted.
Equipment for This Recipe:
- Large skillet or wok — needs room for stirring.
- Spatula — for breaking up the rice.
- Small bowl — for the eggs.
How to Serve This Dish:
Serve it in bowls with extra soy sauce on the side for adults. Cucumber slices or orange segments make a nice, cool side without asking much from the cook.
Pro Tips for This Recipe:
- Chill the rice first or it gets clumpy.
- Keep the heat high enough to toast, not steam.
- Cut the chicken small so every scoop has a little bit in it.
Variations on This Dish:
- Egg and Rice Only: Skip the chicken for a lighter dinner.
- Ham Fried Rice: Use diced ham instead of chicken.
- Extra Veg Bowl: Add finely diced zucchini or bell pepper.
Common Mistakes to Avoid with This Dish:
- Using fresh rice: It turns gummy in the pan. Cool it first.
- Pouring in too much soy sauce: The rice goes dark and salty. Add a little, then taste.
15. Baked Ziti with Ricotta
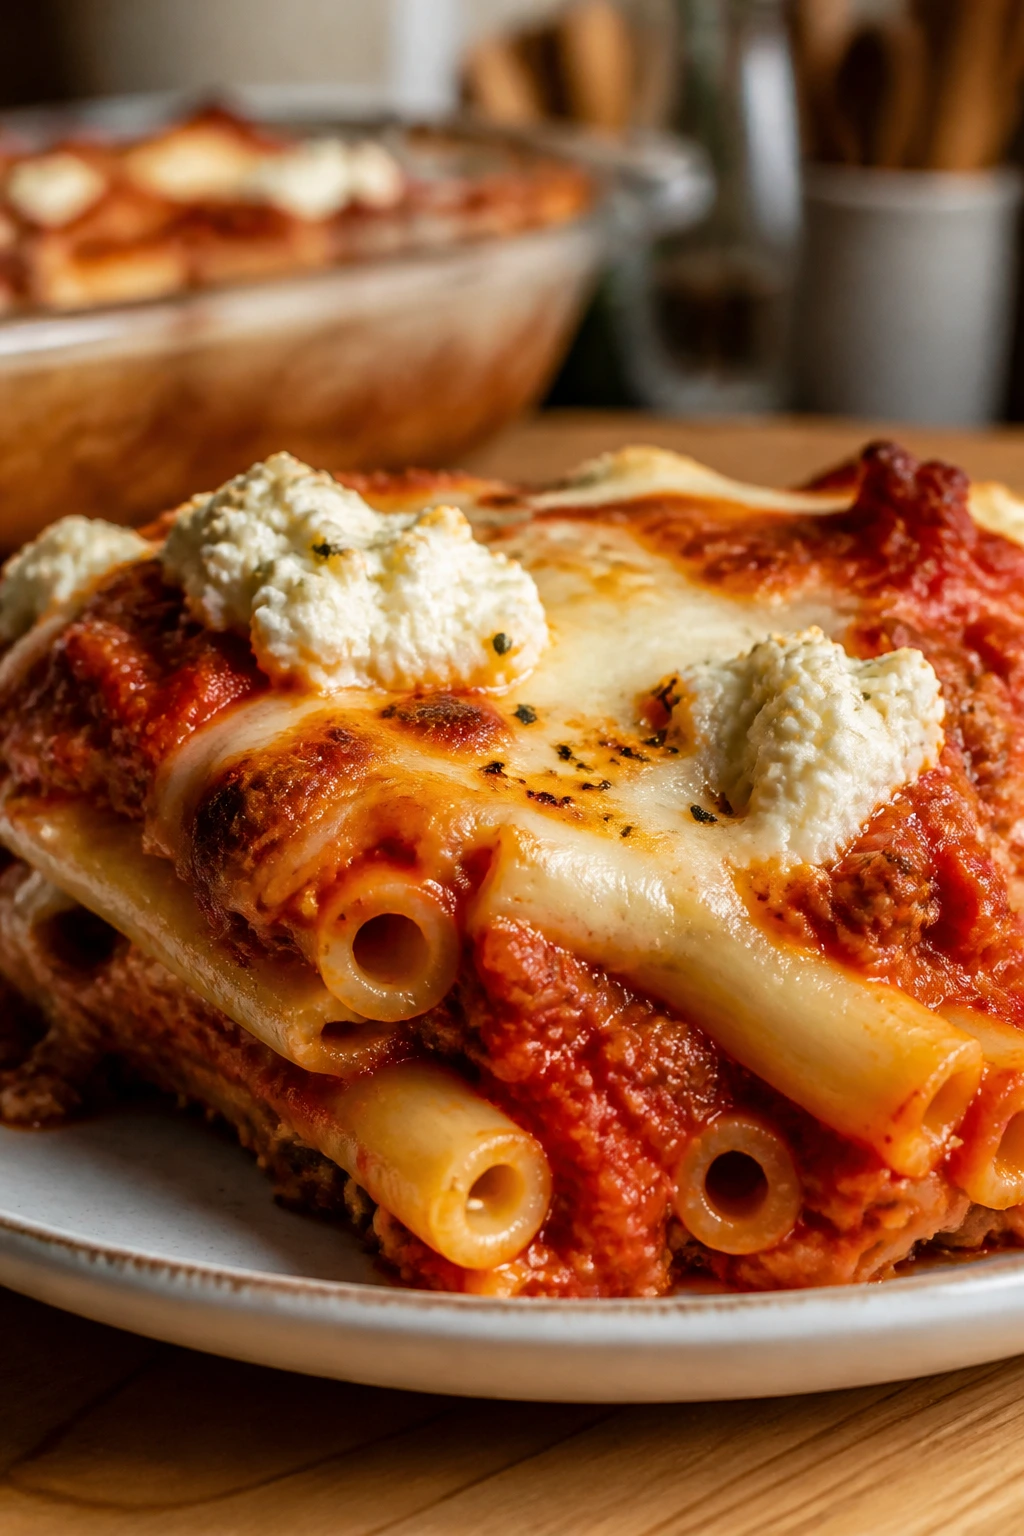
Baked ziti is one of those meals that looks a little more generous than it is complicated. The ricotta softens the pasta, the mozzarella gives you those stretchy pulls, and the baked top brings enough browning to make it feel finished.
Why It Works:
The pasta bakes in sauce, which means it stays moist and easy to serve. Ricotta gives the dish a softer texture than a plain meat sauce, and that tends to help with younger eaters who like creamy foods.
Key Ingredients:
- 12 oz ziti — the right shape for holding sauce.
- 1 lb ground beef or mild Italian sausage — for the filling.
- 24 oz marinara — keeps it easy.
- 1 cup ricotta — softens the center.
- 2 cups shredded mozzarella — the top layer.
- 1/4 cup grated parmesan — for salt and color.
- 1 egg — helps the ricotta hold together.
- 1 teaspoon Italian seasoning — background flavor.
- 1 teaspoon salt — for the pasta water and sauce.
- 1 tablespoon olive oil — for the pan.
Quick Steps:
- Cook the ziti until just al dente, then drain.
- Brown the meat in a skillet, stir in the marinara and seasoning, and simmer for 5 minutes.
- Mix the ricotta with the egg and parmesan in a bowl.
- Layer pasta, sauce, and ricotta in a greased baking dish, then top with mozzarella.
- Bake at 375°F for 25 minutes until bubbling, then rest 10 minutes before cutting.
Equipment for This Recipe:
- 9×13-inch baking dish — the right size for the layers.
- Skillet — for the sauce.
- Mixing bowl — for the ricotta layer.
How to Serve This Dish:
Serve with garlic bread and a plain salad or steamed green beans. Let the ziti sit for a few minutes after baking so the slices hold together instead of sliding apart.
Pro Tips for This Recipe:
- Undercook the pasta by 1 minute so it finishes in the oven.
- Let the dish rest before scooping or the layers run.
- If the ricotta tastes bland, add a pinch of salt before mixing.
Variations on This Dish:
- Spinach Ziti: Stir chopped spinach into the sauce.
- Meatless Baked Ziti: Skip the beef and use extra sauce.
- Extra Cheesy Version: Add provolone under the mozzarella.
Common Mistakes to Avoid with This Dish:
- Using too much pasta water in the sauce: The bake can turn watery. Drain well.
- Cutting immediately: The cheese and sauce need a rest to settle.
16. Fish Sticks with Wedges
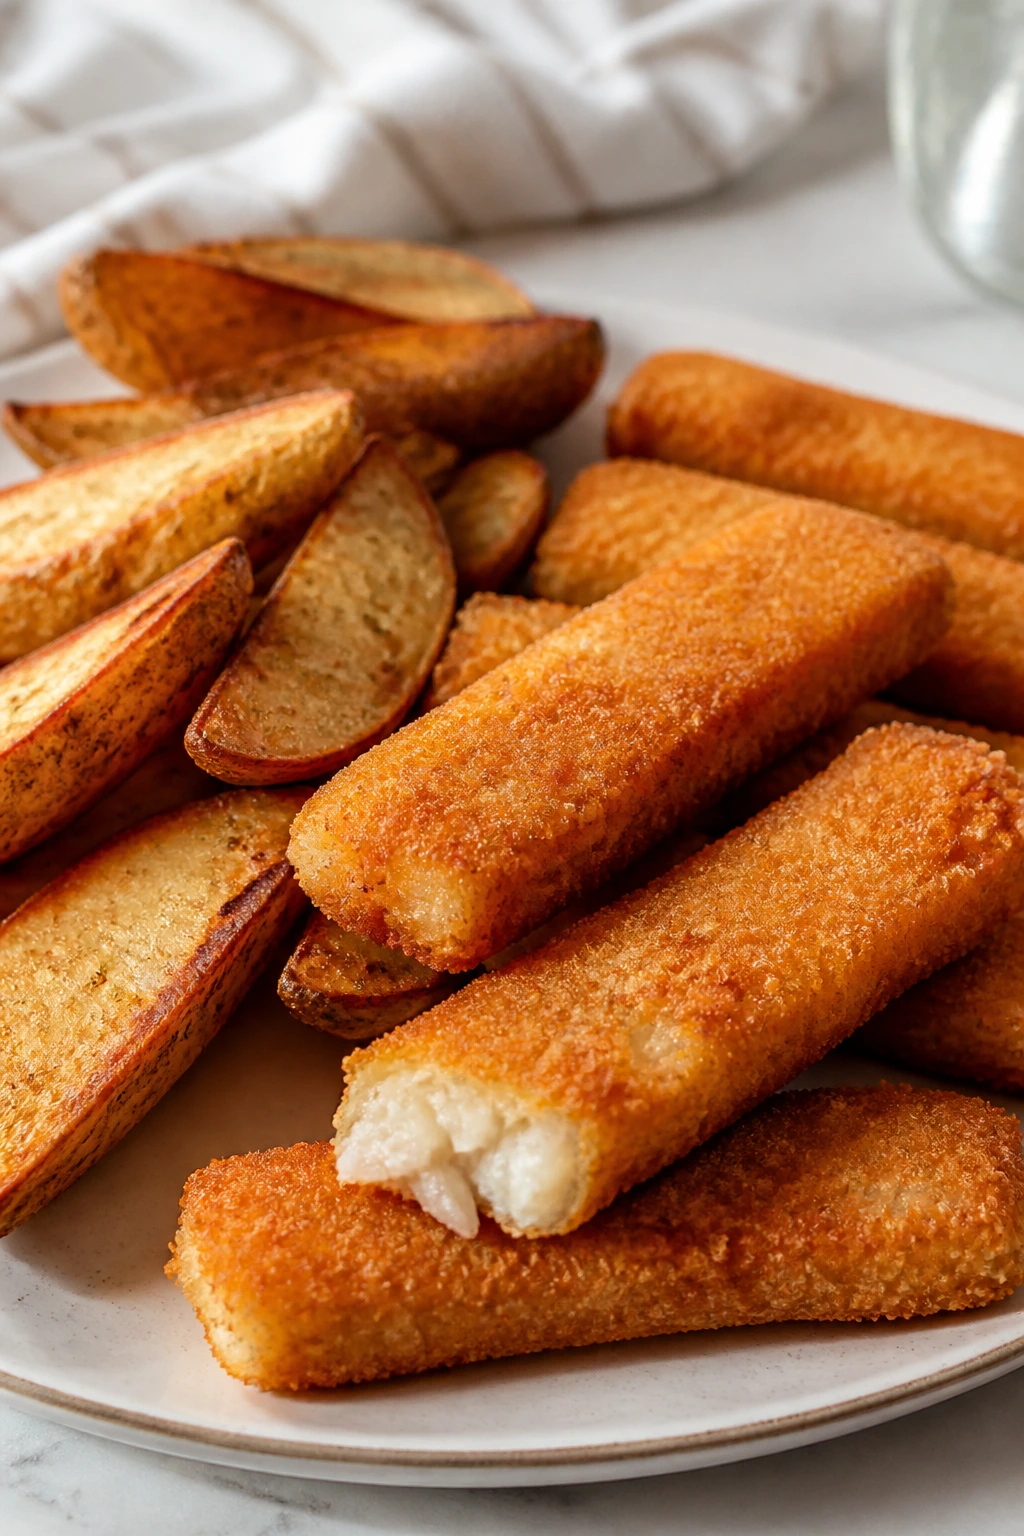
This is the rare fish dinner that does not ask a picky eater to embrace a brand-new texture. Fish sticks keep things familiar, and the potato wedges give you a crunchy, salty side that feels like part of the main event.
Why It Works:
Store-bought fish sticks are mild, crispy, and portioned in a way kids understand instantly. If you roast the wedges on the same tray, you get a dinner that feels cohesive without much effort.
Key Ingredients:
- 1 bag frozen fish sticks, about 20 oz — the shortcut.
- 3 russet potatoes, cut into wedges — the side.
- 2 tablespoons oil — for the potatoes.
- 1 teaspoon salt — season the wedges.
- 1/2 teaspoon paprika — optional.
- 1/2 teaspoon garlic powder — optional.
- Lemon wedges — for serving.
- Tartar sauce — optional, but useful.
Quick Steps:
- Heat the oven to 425°F and line a sheet pan with parchment.
- Toss the potato wedges with oil, salt, paprika, and garlic powder.
- Bake the wedges for 20 minutes, then add the fish sticks to the pan.
- Continue baking for 12 to 15 minutes until the fish sticks are crisp and the wedges are tender.
- Serve hot with lemon and tartar sauce.
Equipment for This Recipe:
- Sheet pan — for both parts of dinner.
- Mixing bowl — for the wedges.
- Spatula — for flipping if needed.
How to Serve This Dish:
Put the fish sticks and wedges on separate parts of the plate and add peas or coleslaw if you want a green side. A lemon wedge helps adults brighten the fish without changing the kids’ plate.
Pro Tips for This Recipe:
- Dry the potato wedges well before seasoning.
- Give the fish sticks enough space so they crisp.
- Serve the sauce on the side for anyone who likes dipping.
Variations on This Dish:
- Air Fryer Version: Cook the fish sticks and wedges separately.
- Homemade Crumb Fish: Use breaded fillets instead of sticks.
- Oven Chip Night: Swap wedges for thick-cut fries.
Common Mistakes to Avoid with This Dish:
- Adding fish sticks too early: They overcook before the potatoes finish. Put them on halfway through.
- Skipping the oil on the wedges: They roast dry instead of crisp.
17. Breakfast Tacos
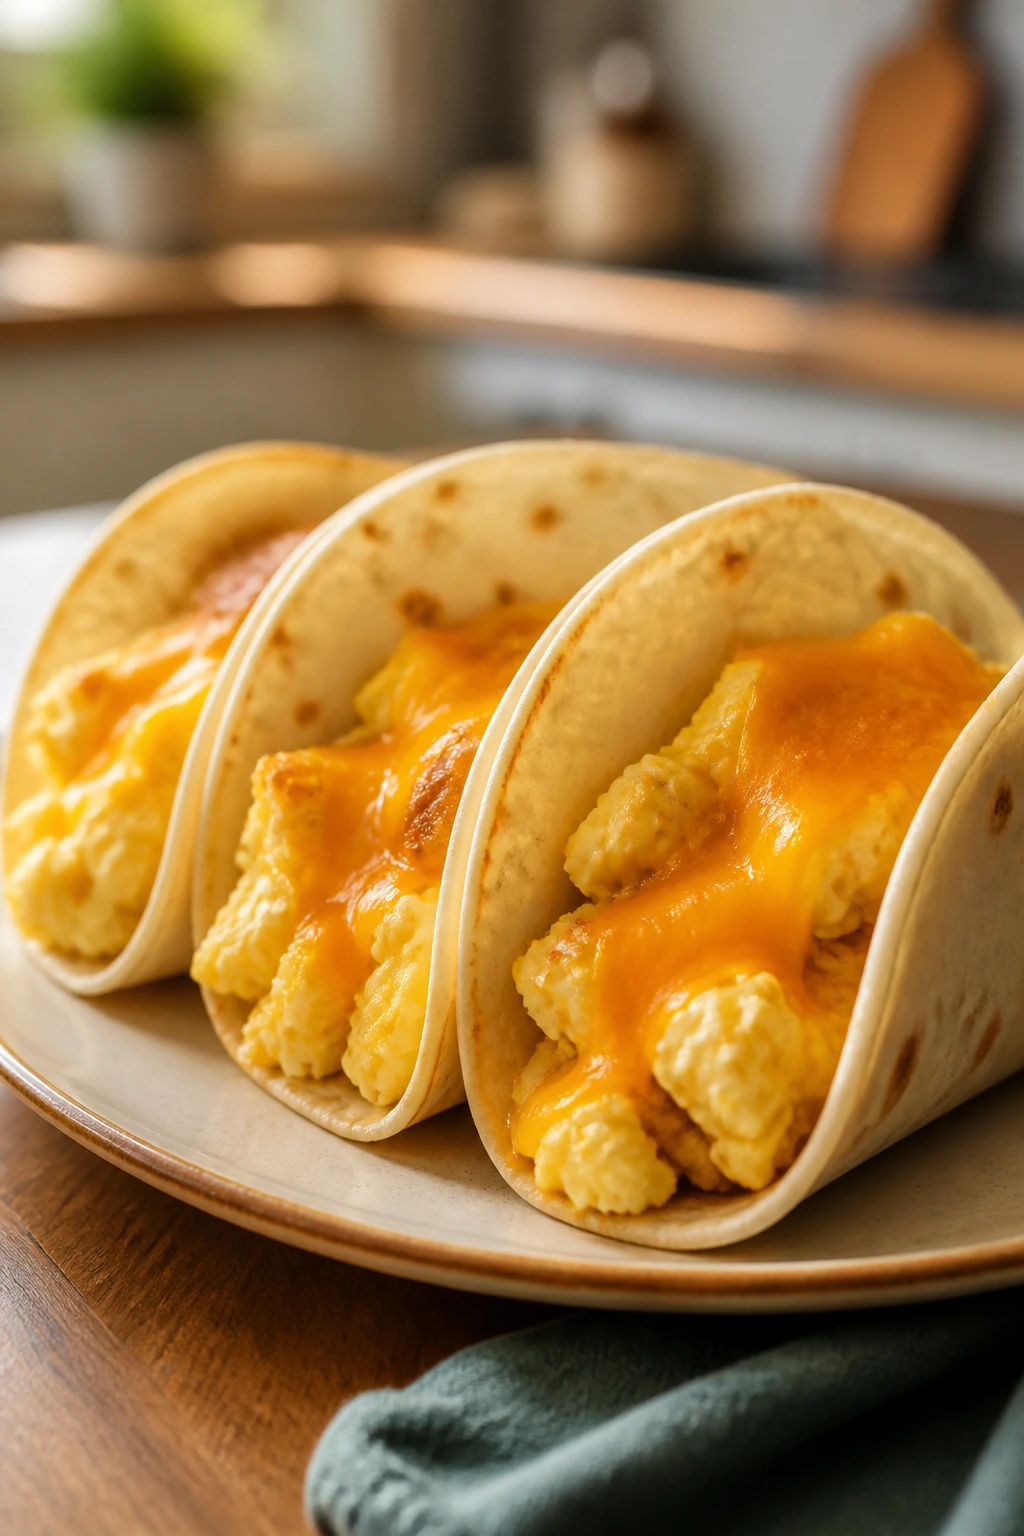
Breakfast tacos turn eggs into dinner without making anyone feel tricked. They are soft, warm, and easy to customize one tortilla at a time, which is a nice way to lower the pressure on the table.
Why It Works:
Eggs, cheese, and tortillas are all familiar, mild foods. If one person wants sausage and another wants plain egg and cheese, you can make both happen without cooking two separate dinners.
Key Ingredients:
- 8 large eggs — the filling.
- 1 tablespoon butter — for scrambling.
- 1 cup shredded cheddar — melts into the eggs.
- 8 small flour tortillas — the wrapper.
- 1 cup cooked breakfast sausage — optional.
- 1/2 cup mild salsa — optional.
- 1/2 cup diced roasted potatoes — optional.
- 1/4 teaspoon salt — for the eggs.
Quick Steps:
- Melt the butter in a skillet over medium-low heat.
- Whisk the eggs with salt, pour them in, and scramble gently until just set.
- Stir in the cheese and any sausage or potatoes.
- Warm the tortillas in a dry skillet for 20 seconds per side.
- Fill and fold, then serve with salsa on the side.
Equipment for This Recipe:
- Nonstick skillet — for the eggs.
- Small bowl — for whisking.
- Dry skillet or griddle — for warming tortillas.
How to Serve This Dish:
Serve the tacos with fruit, yogurt, or a little extra cheese on the side. I like giving each person two tacos instead of one overloaded one; it feels easier to eat.
Pro Tips for This Recipe:
- Cook the eggs slowly so they stay soft.
- Warm the tortillas or they crack when folded.
- Keep fillings separate until the last minute.
Variations on This Dish:
- Potato Tacos: Use more potatoes and skip the sausage.
- Bacon Version: Replace sausage with crisp bacon pieces.
- Plain Egg Tacos: Keep them minimal for very picky eaters.
Common Mistakes to Avoid with This Dish:
- Overcooking the eggs: They turn dry and crumbly. Pull them when they still look glossy.
- Overfilling the tacos: They tear and spill. Use a modest scoop.
18. Sausage and Peppers Pasta
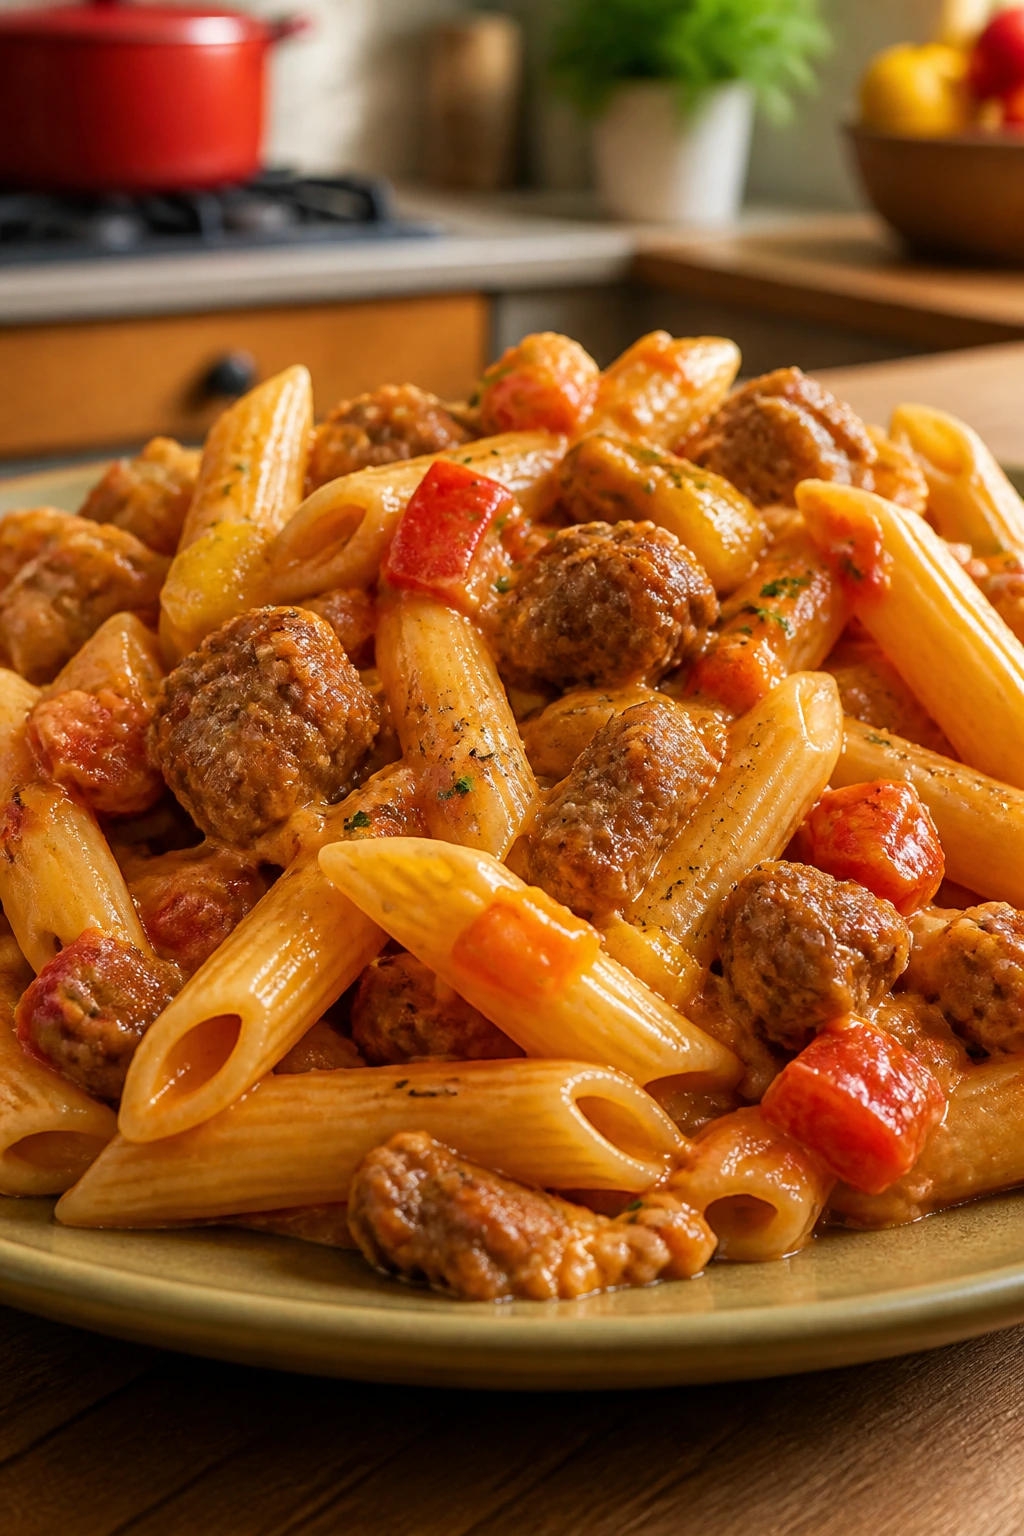
This dish has the smell of a busy kitchen in the best way: onions softening, sausage browning, pasta waiting in the pot. It looks more grown-up than some of the other dinners here, but the flavor can stay gentle if you use mild sausage and cut the peppers small.
Why It Works:
The sausage brings the flavor, and the pasta stretches it into a full meal. A little cream softens the tomato sauce and keeps the sauce from tasting sharp, which helps with cautious eaters.
Key Ingredients:
- 12 oz penne — sturdy enough for sauce.
- 1 lb mild Italian sausage — the main protein.
- 1 bell pepper, diced small — choose red or yellow for sweetness.
- 1 small onion, sliced thin — adds sweetness.
- 24 oz marinara — the base sauce.
- 1/2 cup heavy cream — softens the tomato edge.
- 1 tablespoon olive oil — for the skillet.
- 1/4 cup parmesan — for serving.
- 1 teaspoon Italian seasoning — optional.
- Salt and pepper — to taste.
Quick Steps:
- Cook the pasta until al dente, then drain.
- Brown the sausage in a skillet, breaking it into pieces.
- Add the onion and pepper and cook until soft, about 5 minutes.
- Stir in the marinara and cream, then simmer for 5 minutes.
- Toss with the pasta and finish with parmesan.
Equipment for This Recipe:
- Large skillet — for the sauce.
- Pot for pasta — straightforward.
- Colander — for draining.
How to Serve This Dish:
Serve it in bowls with garlic bread and maybe a few steamed green beans. If peppers are a concern, keep the pieces small and let them melt into the sauce instead of standing out.
Pro Tips for This Recipe:
- Use mild sausage, not spicy, if the table is sensitive.
- Slice the peppers thin so they soften fast.
- Add a splash of pasta water if the sauce feels too tight.
Variations on This Dish:
- Chicken Sausage Version: Swap in chicken sausage.
- Baked Pasta Version: Mix with mozzarella and bake 15 minutes.
- Red-and-White Sauce: Use a little more cream for a softer sauce.
Common Mistakes to Avoid with This Dish:
- Leaving the peppers crunchy: They stand out too much. Cook them until soft.
- Using hot sausage: It can take over the whole meal. Mild works better here.
19. Creamy Ranch Pork Chops
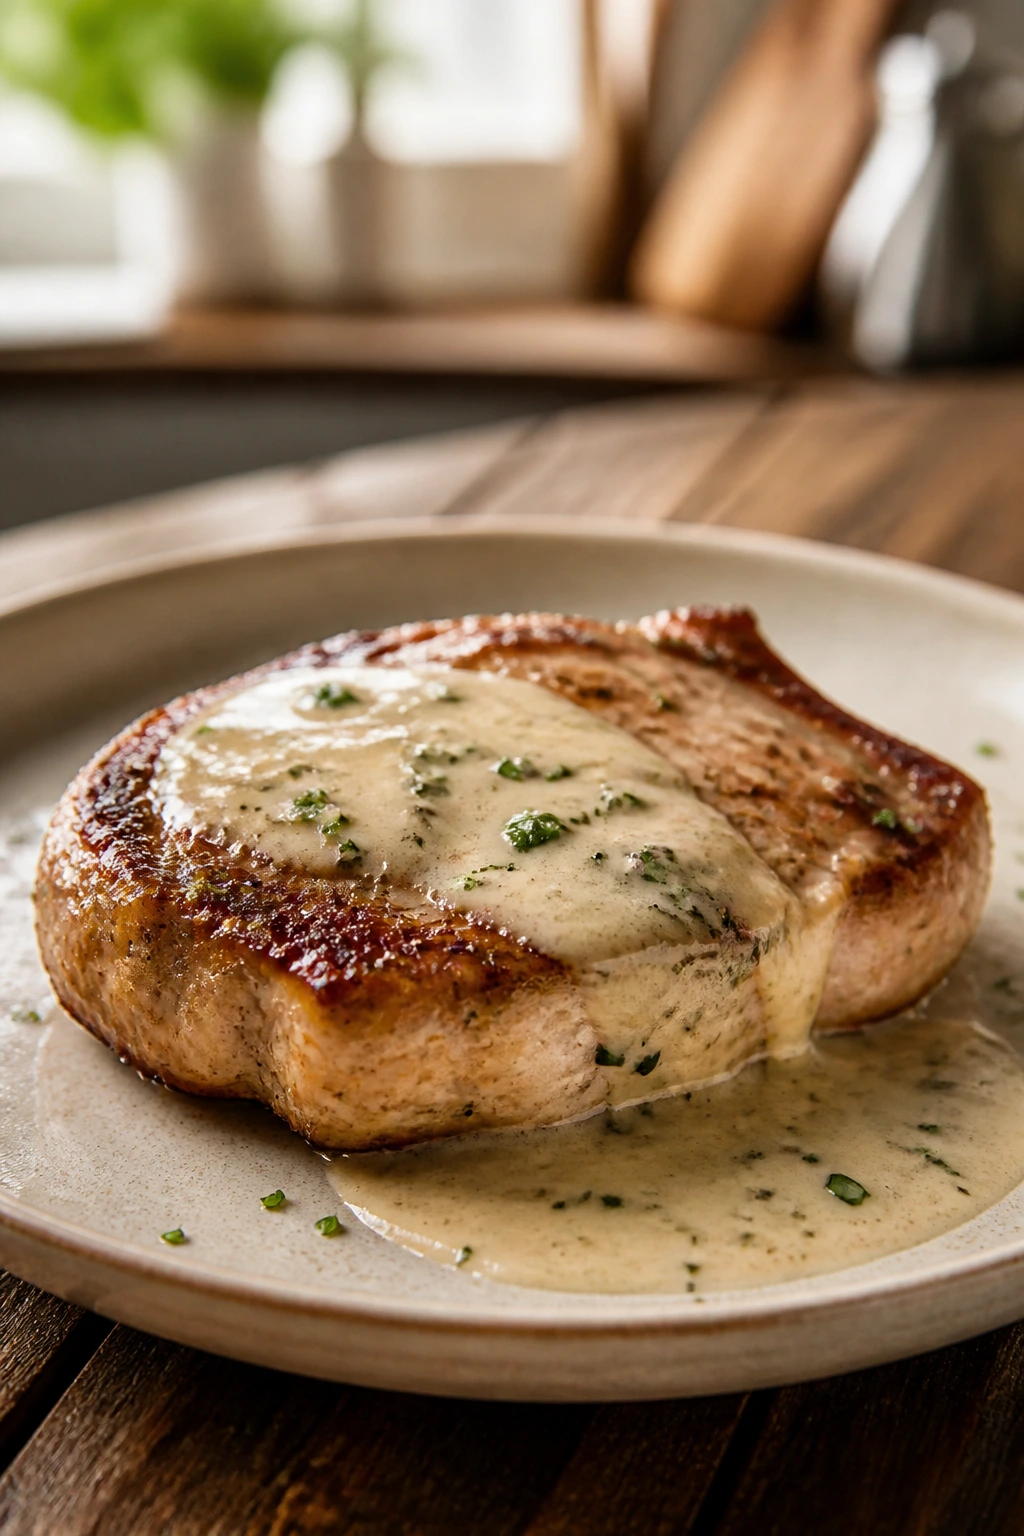
Ranch seasoning has a way of making pork chops feel less serious. The sauce is creamy, the chops stay tender if you do not overcook them, and mashed potatoes or noodles can catch every bit of the pan sauce.
Why It Works:
Boneless chops cook fast and take well to a creamy sauce, which keeps dinner from drying out. Ranch is familiar enough that kids often accept it without a battle, especially when the flavor stays mild.
Key Ingredients:
- 4 boneless pork chops — about 1 inch thick.
- 1 tablespoon oil — for searing.
- 1 packet ranch seasoning or 2 tablespoons homemade mix — the flavor base.
- 1 can cream of chicken soup — for the sauce.
- 1/2 cup milk — loosens the sauce.
- 1 teaspoon garlic powder — optional.
- 1 tablespoon butter — adds richness.
- Mashed potatoes or egg noodles — for serving.
Quick Steps:
- Season the pork chops lightly and sear them in oil over medium-high heat for 2 minutes per side.
- Whisk the soup, milk, ranch seasoning, and garlic powder together.
- Pour the sauce into the skillet, lower the heat, and simmer for 5 minutes.
- Transfer to a 375°F oven and bake for 15 to 20 minutes until the chops reach 145°F.
- Rest for 5 minutes before serving with sauce.
Equipment for This Recipe:
- Oven-safe skillet — makes the transfer easy.
- Whisk — for the sauce.
- Instant-read thermometer — helps avoid overcooking.
How to Serve This Dish:
Serve with mashed potatoes, egg noodles, or rice so the sauce has somewhere to go. A side of green beans keeps the plate from feeling too soft.
Pro Tips for This Recipe:
- Do not cook the chops past 145°F if you want them juicy.
- Searing first gives the sauce more flavor.
- Thin chops cook too fast; choose thicker ones.
Variations on This Dish:
- Chicken Ranch Skillet: Use chicken cutlets instead.
- Mushroom Ranch: Add sliced mushrooms to the sauce.
- Extra Mild Version: Use plain cream sauce and ranch at the table.
Common Mistakes to Avoid with This Dish:
- Overcooking the pork: It turns dry fast. Use a thermometer.
- Skipping the sear: The sauce tastes flatter. Brown the meat first.
20. Ham and Cheese Pasta Bake
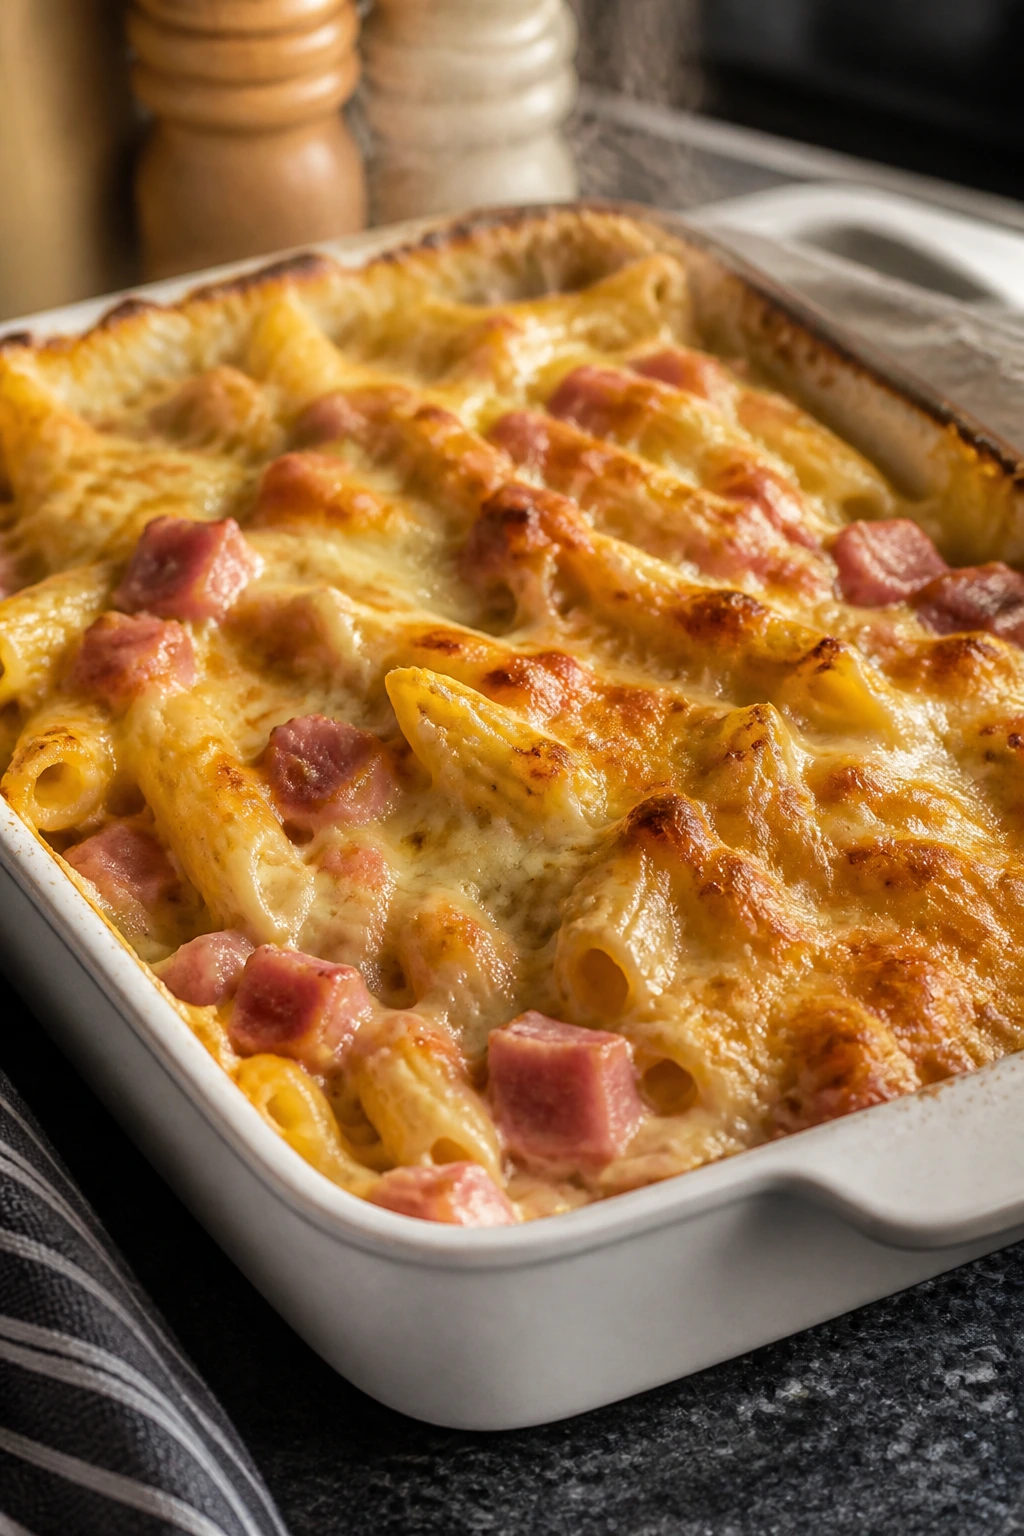
This one tastes like the leftovers got a promotion. The ham is salty, the sauce is creamy, and the pasta bake gives you a familiar combination that kids tend to accept without much hesitation.
Why It Works:
Ham and cheese is already a safe flavor pair for many picky eaters. Turning it into a pasta bake gives you a full dinner without adding a lot of moving parts.
Key Ingredients:
- 12 oz pasta shells or elbows — holds the sauce.
- 2 cups diced ham — the protein.
- 3 tablespoons butter — for the sauce.
- 3 tablespoons flour — thickener.
- 2 cups milk — makes the creamy base.
- 2 cups shredded cheddar — the main cheese.
- 1/2 cup breadcrumbs — for the top.
- 1/2 cup frozen peas — optional.
- 1/2 teaspoon salt — go light because ham is salty.
- 1 tablespoon melted butter — for the crumbs.
Quick Steps:
- Cook the pasta until just tender and drain.
- Make a simple white sauce with butter, flour, and milk in a saucepan.
- Stir in the cheddar until melted, then add the ham and peas.
- Combine with the pasta, pour into a baking dish, and top with breadcrumbs mixed with melted butter.
- Bake at 375°F for 20 to 25 minutes until bubbly and lightly browned.
Equipment for This Recipe:
- Saucepan — for the sauce.
- Baking dish — for the casserole.
- Whisk — helps the sauce stay smooth.
How to Serve This Dish:
Serve it with apple slices, a crisp salad, or steamed broccoli. The casserole is rich enough that a fresh side keeps the plate from feeling heavy.
Pro Tips for This Recipe:
- Salt carefully because ham varies a lot.
- Let the pasta finish in the oven, not the pot.
- Add peas only if they are welcome at your table.
Variations on This Dish:
- Broccoli Ham Bake: Swap peas for small broccoli florets.
- Turkey Ham Version: Use diced turkey instead.
- Plain Cheddar Bake: Leave the ham out and keep it simple.
Common Mistakes to Avoid with This Dish:
- Making the sauce too thick before baking: The pasta dries out. Leave it a little loose.
- Overbaking: The cheese tightens and gets chewy. Stop when it bubbles.
21. Chicken Parmesan Meatballs
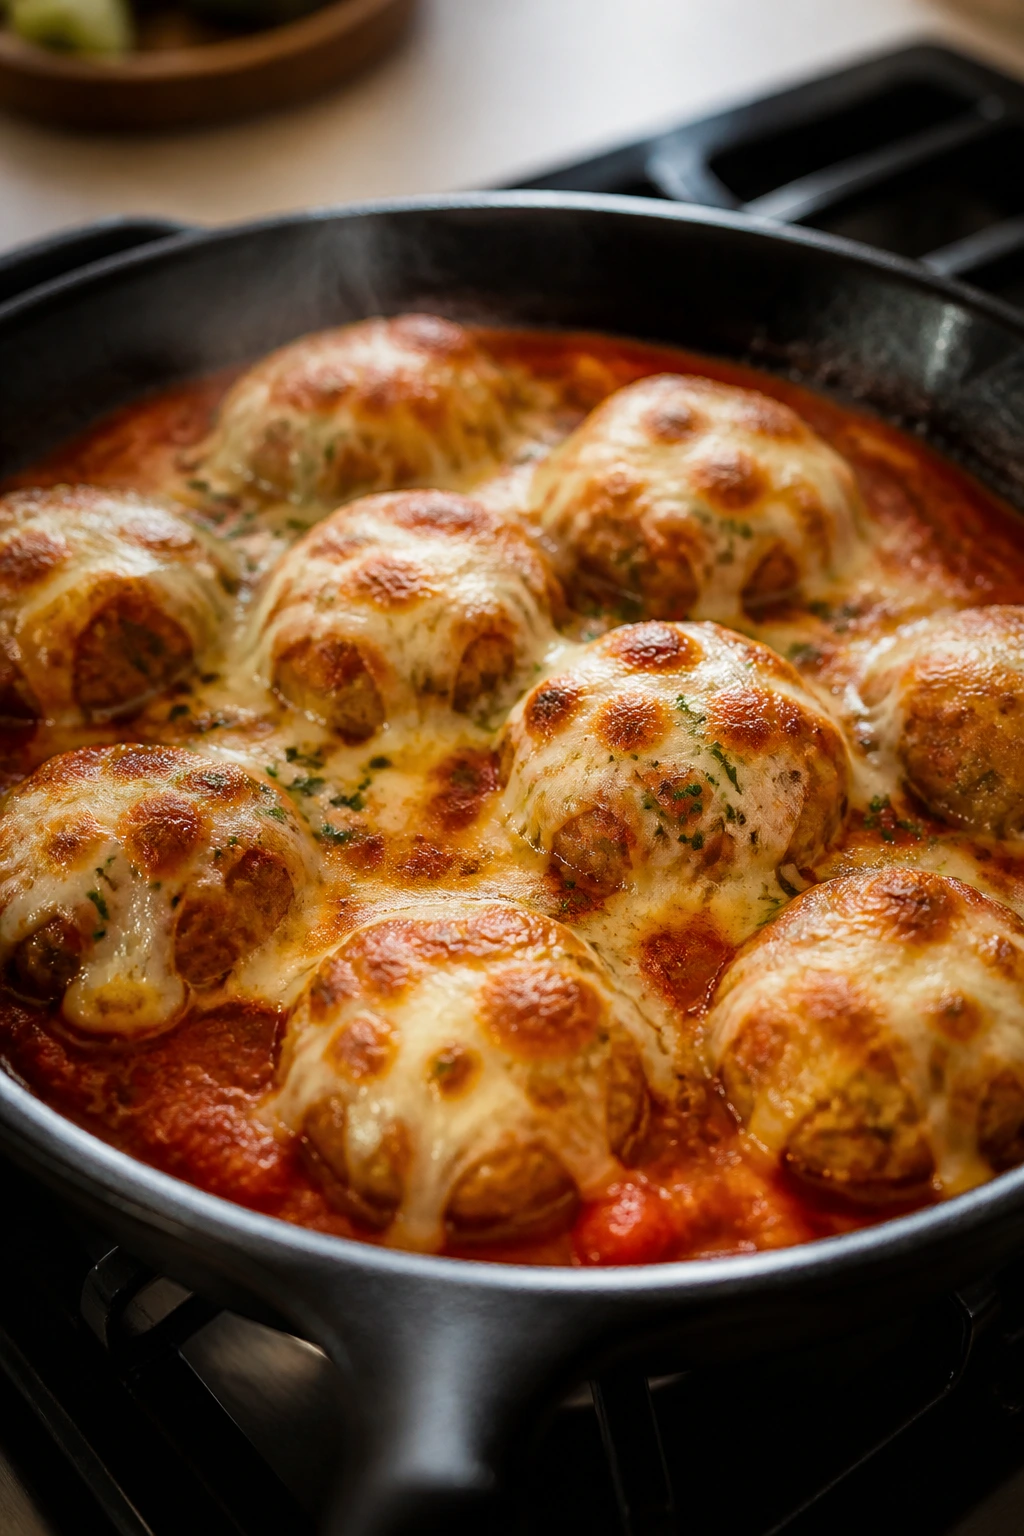
These meatballs take the flavor of chicken parmesan and turn it into something easier to eat with a spoon or fork. The sauce and cheese are still there, but the shape is friendlier and the whole dish feels less formal.
Why It Works:
Ground chicken takes seasoning well and cooks quickly. Baking the meatballs keeps the texture light, and the marinara plus mozzarella gives you that classic parmesan finish without the breaded cutlet hassle.
Key Ingredients:
- 1 lb ground chicken — mild and quick.
- 1/2 cup breadcrumbs — for structure.
- 1 egg — binds the mix.
- 1/4 cup parmesan — adds flavor.
- 1 teaspoon garlic powder — the savory note.
- 1/2 teaspoon salt — for the meatballs.
- 2 cups marinara sauce — for simmering.
- 1 cup shredded mozzarella — for the top.
- 1 tablespoon olive oil — if you want to brown the meatballs first.
Quick Steps:
- Heat the oven to 400°F and line a baking sheet.
- Mix the chicken, breadcrumbs, egg, parmesan, garlic powder, and salt gently.
- Roll into 1 1/2-inch meatballs and bake for 15 minutes.
- Transfer to a skillet with marinara, top with mozzarella, and cover until melted.
- Serve over pasta or tucked into rolls.
Equipment for This Recipe:
- Baking sheet — for the meatballs.
- Skillet with lid — for the sauce and cheese finish.
- Mixing bowl — for the meat.
How to Serve This Dish:
Serve over spaghetti, buttered noodles, or in sub rolls with extra sauce. A little green salad on the side balances the richness.
Pro Tips for This Recipe:
- Handle the mix lightly so the meatballs stay tender.
- Bake first, then sauce; they hold together better that way.
- Use a spoon to mound extra sauce over each serving.
Variations on This Dish:
- Turkey Parmesan Meatballs: Swap in ground turkey.
- Air Fryer Meatballs: Cook them in a basket at 380°F.
- Cheese-Stuffed: Tuck a cube of mozzarella into the center.
Common Mistakes to Avoid with This Dish:
- Packing the meatballs too tightly: They get dense. Roll them lightly.
- Skipping the cheese melt step: The dish loses its parmesan feel. Let it bubble under the lid.
22. Teriyaki Chicken Rice Bowls
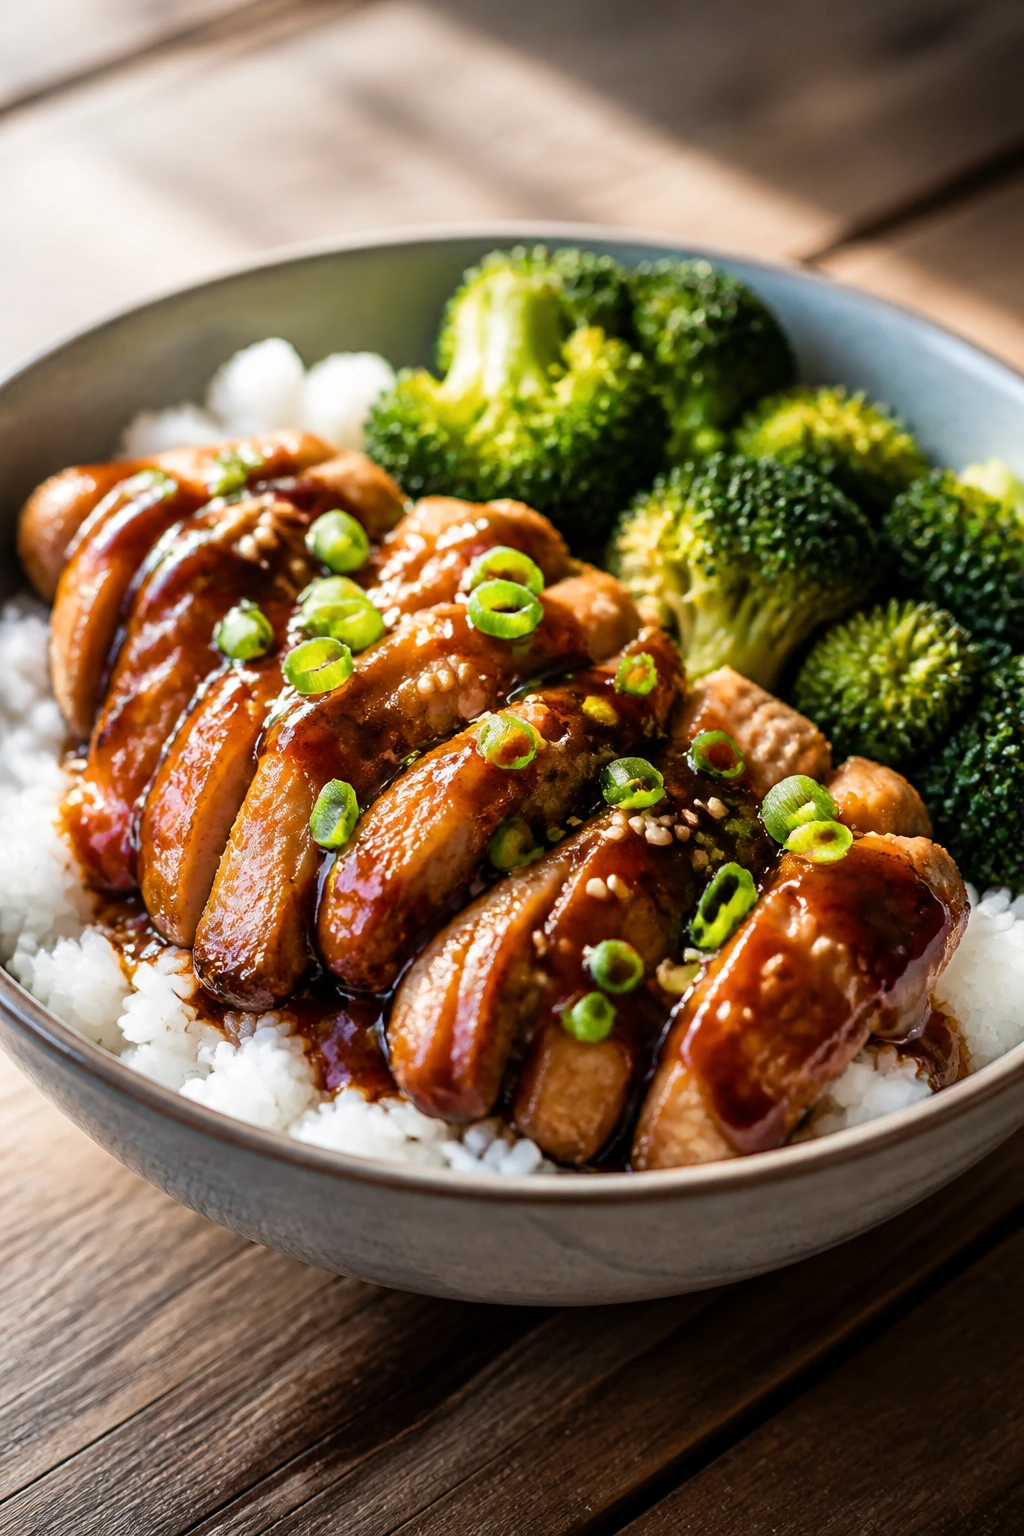
These bowls are sweet, glossy, and very easy to serve in parts. The rice sits underneath, the chicken gets coated in sauce, and the broccoli can stay politely to one side if that helps dinner go better.
Why It Works:
Teriyaki is one of the gentlest ways to add flavor without making the dish feel complicated. Rice bowls also let everyone control how much sauce lands on the plate.
Key Ingredients:
- 1 1/2 lb chicken breast, cut into bite-size pieces — cooks fast.
- 1/2 cup teriyaki sauce — the glaze.
- 2 cups cooked rice — the base.
- 2 cups broccoli florets — the vegetable.
- 1 tablespoon oil — for the skillet.
- 1 teaspoon sesame seeds — optional.
- 1 scallion, sliced — optional.
- 1 teaspoon cornstarch mixed with 1 tablespoon water — if the sauce needs thickening.
Quick Steps:
- Cook the rice and steam the broccoli until tender-crisp.
- Heat the oil in a skillet and cook the chicken until lightly browned and cooked through.
- Pour in the teriyaki sauce and simmer for 2 minutes.
- Stir in the cornstarch slurry if you want a thicker glaze.
- Build bowls with rice, chicken, broccoli, and sesame seeds.
Equipment for This Recipe:
- Skillet — for the chicken.
- Small saucepan or steamer — for the broccoli.
- Bowls — for serving.
How to Serve This Dish:
Keep the rice, chicken, and broccoli in separate sections of the bowl. A little extra teriyaki on the side helps adults who like a wetter bowl without flooding the kid portion.
Pro Tips for This Recipe:
- Cut the chicken evenly so it cooks at the same pace.
- Use low-sodium teriyaki if your sauce is salty.
- Do not overcook the broccoli; bright green looks and tastes better.
Variations on This Dish:
- Pineapple Bowl: Add pineapple chunks for sweetness.
- Cauliflower Rice Version: Swap the rice for cauliflower rice.
- Beef Teriyaki: Use thin-sliced beef instead of chicken.
Common Mistakes to Avoid with This Dish:
- Using too much sauce: The rice gets soggy. Start with less and add more at the table.
- Overcooking the broccoli: It turns dull and mushy. Pull it while it still has bite.
23. Loaded Baked Potato Soup
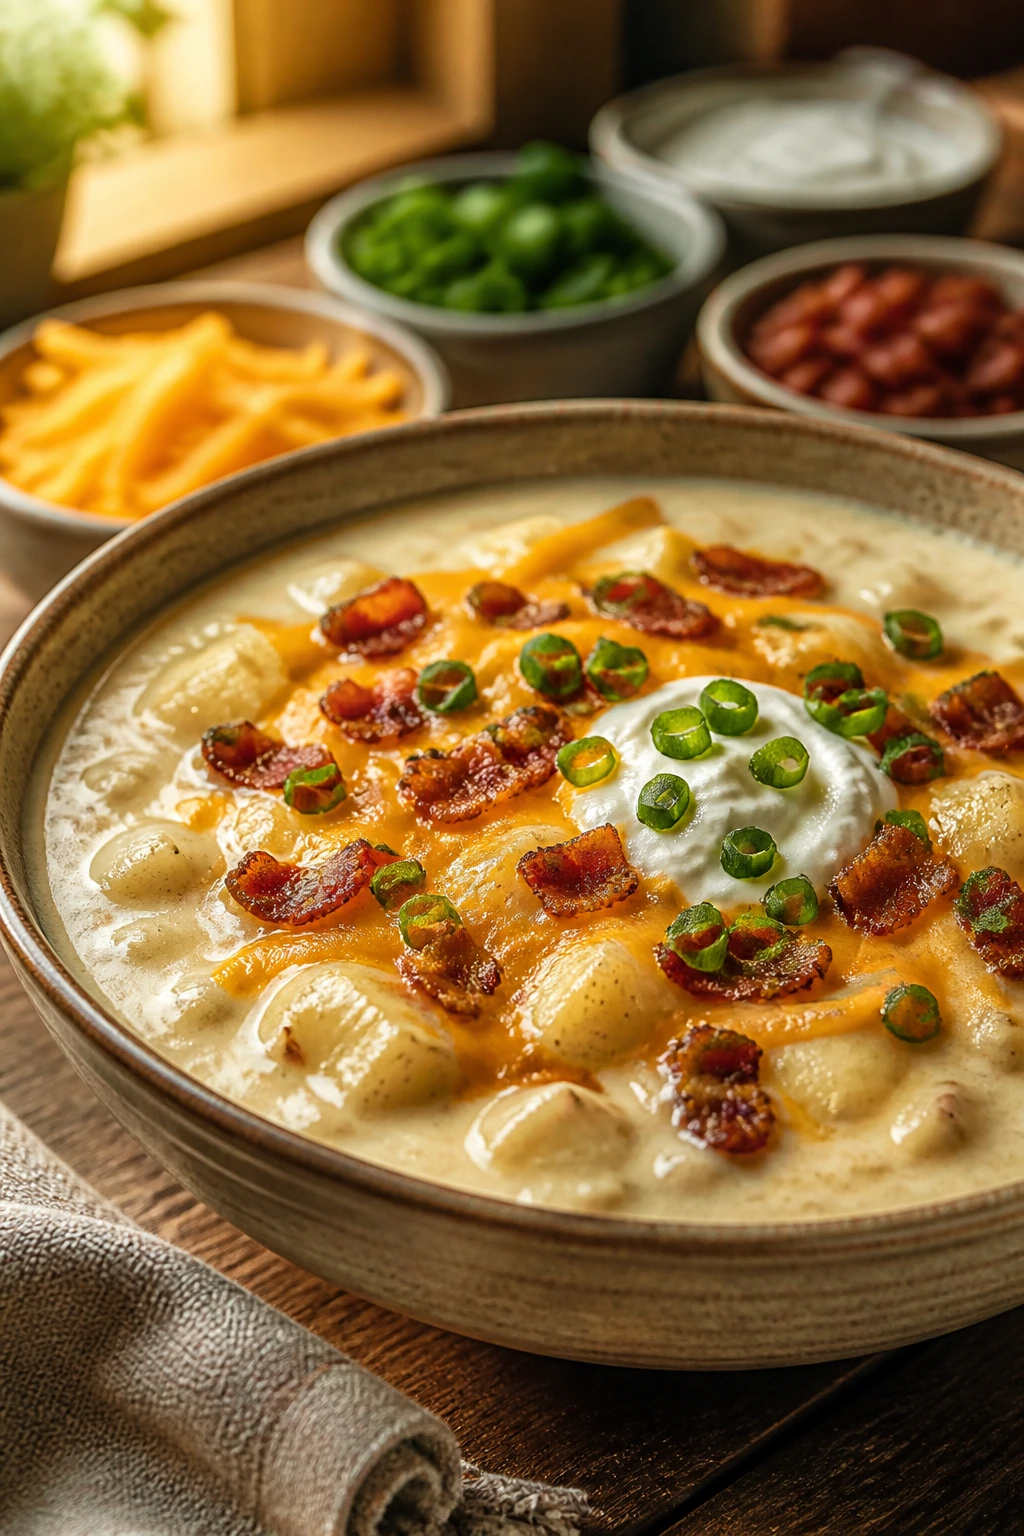
This soup tastes like a baked potato in a bowl, which is why it works so well with hesitant eaters. The potatoes are soft, the bacon and cheese are familiar, and the soup has enough body to count as dinner.
Why It Works:
The flavor is simple and recognizable: potato, dairy, bacon, and a little onion if you want it. You can leave toppings separate, which is useful when one person wants green onion and another wants only cheese.
Key Ingredients:
- 4 large russet potatoes, peeled and diced — the base.
- 4 cups chicken broth — for cooking.
- 1 cup milk — makes it creamy.
- 4 slices bacon, cooked and crumbled — for topping.
- 2 tablespoons butter — for the base.
- 2 tablespoons flour — thickens the soup.
- 1 cup shredded cheddar — the finish.
- 2 green onions, sliced — optional.
- 1/2 cup sour cream — for serving.
Quick Steps:
- Simmer the potatoes in broth until very tender, about 15 minutes.
- Mash some of the potatoes right in the pot for a thicker texture.
- Melt the butter in a small pan, whisk in the flour, then whisk in the milk.
- Stir the milk mixture into the soup and heat gently until thickened.
- Top with cheddar, bacon, green onion, and sour cream.
Equipment for This Recipe:
- Large pot — for the soup.
- Potato masher — useful but not required.
- Whisk — for the roux.
How to Serve This Dish:
Serve it with crackers, crusty bread, or a grilled cheese half on the side. Keep the toppings separate so each bowl can stay as plain or loaded as needed.
Pro Tips for This Recipe:
- Do not boil the soup after adding dairy.
- Mash only part of the potato so the texture stays interesting.
- Salt at the end because broth and bacon can vary a lot.
Variations on This Dish:
- Cheddar-Only Soup: Skip bacon and keep it vegetarian.
- Slow Cooker Version: Cook the potatoes low and slow, then finish with dairy.
- Ham Potato Soup: Swap bacon for diced ham.
Common Mistakes to Avoid with This Dish:
- Using low heat too late: The potatoes never fully soften. Start with a real simmer.
- Adding dairy too fast over high heat: It can split. Warm it gently.
24. Taco Stuffed Shells
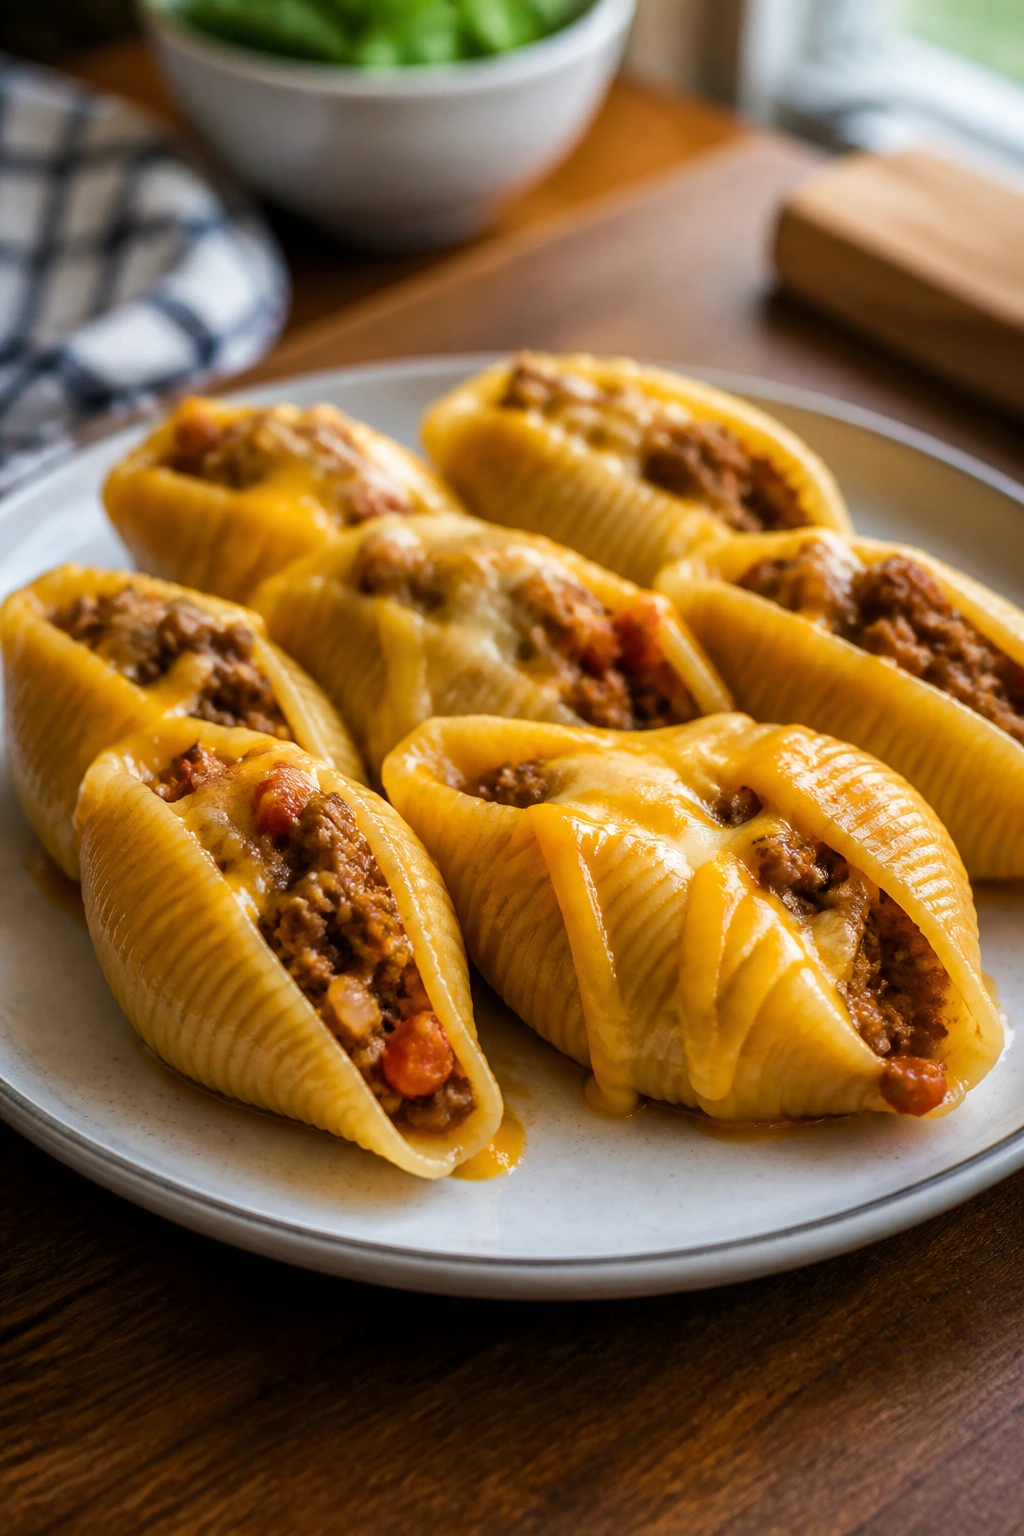
These stuffed shells taste like taco night took a calmer turn. The pasta shells hold the filling neatly, which is one of the reasons this dinner works so well with kids who do not love a messy plate.
Why It Works:
The shells keep the meat and cheese contained, and the taco seasoning stays mild enough to feel familiar rather than loud. A little salsa and sour cream on top gives you the taco flavor without forcing the whole pan into one texture.
Key Ingredients:
- 20 jumbo pasta shells — for stuffing.
- 1 lb ground beef or turkey — the filling.
- 1 packet taco seasoning or 2 tablespoons homemade mix — the flavor.
- 1 cup salsa — keeps the filling moist.
- 1 1/2 cups shredded cheddar — mixed in and topped.
- 1/2 cup sour cream — for the filling or topping.
- 1/2 cup corn — optional.
- 1 tablespoon oil — for browning.
- 1/4 cup water — helps the filling blend.
Quick Steps:
- Cook the shells until al dente and cool them enough to handle.
- Brown the meat, stir in taco seasoning and water, then mix in salsa, corn, and some cheese.
- Stuff each shell with the filling and place them in a baking dish.
- Spoon a little salsa over the top, add the remaining cheese, and bake at 375°F for 20 minutes.
- Finish with sour cream if you like.
Equipment for This Recipe:
- 9×13-inch baking dish — for the shells.
- Skillet — for the meat.
- Spoon — for stuffing.
How to Serve This Dish:
Serve the shells with lettuce, diced tomato, or chips if that helps round out the plate. A dollop of sour cream on each shell gives the dinner a softer finish.
Pro Tips for This Recipe:
- Cook extra shells in case a few tear.
- Keep the filling thick enough that it does not run out.
- Stuff with a small spoon, not a ladle.
Variations on This Dish:
- Chicken Taco Shells: Use shredded chicken.
- Bean Taco Shells: Replace half the meat with black beans.
- Milder Family Version: Skip the salsa on top and serve it on the side.
Common Mistakes to Avoid with This Dish:
- Overcooking the shells: They tear when you stuff them. Pull them early.
- Too much filling: The shells split open. Use a modest scoop.
25. Beef and Bean Burrito Skillet
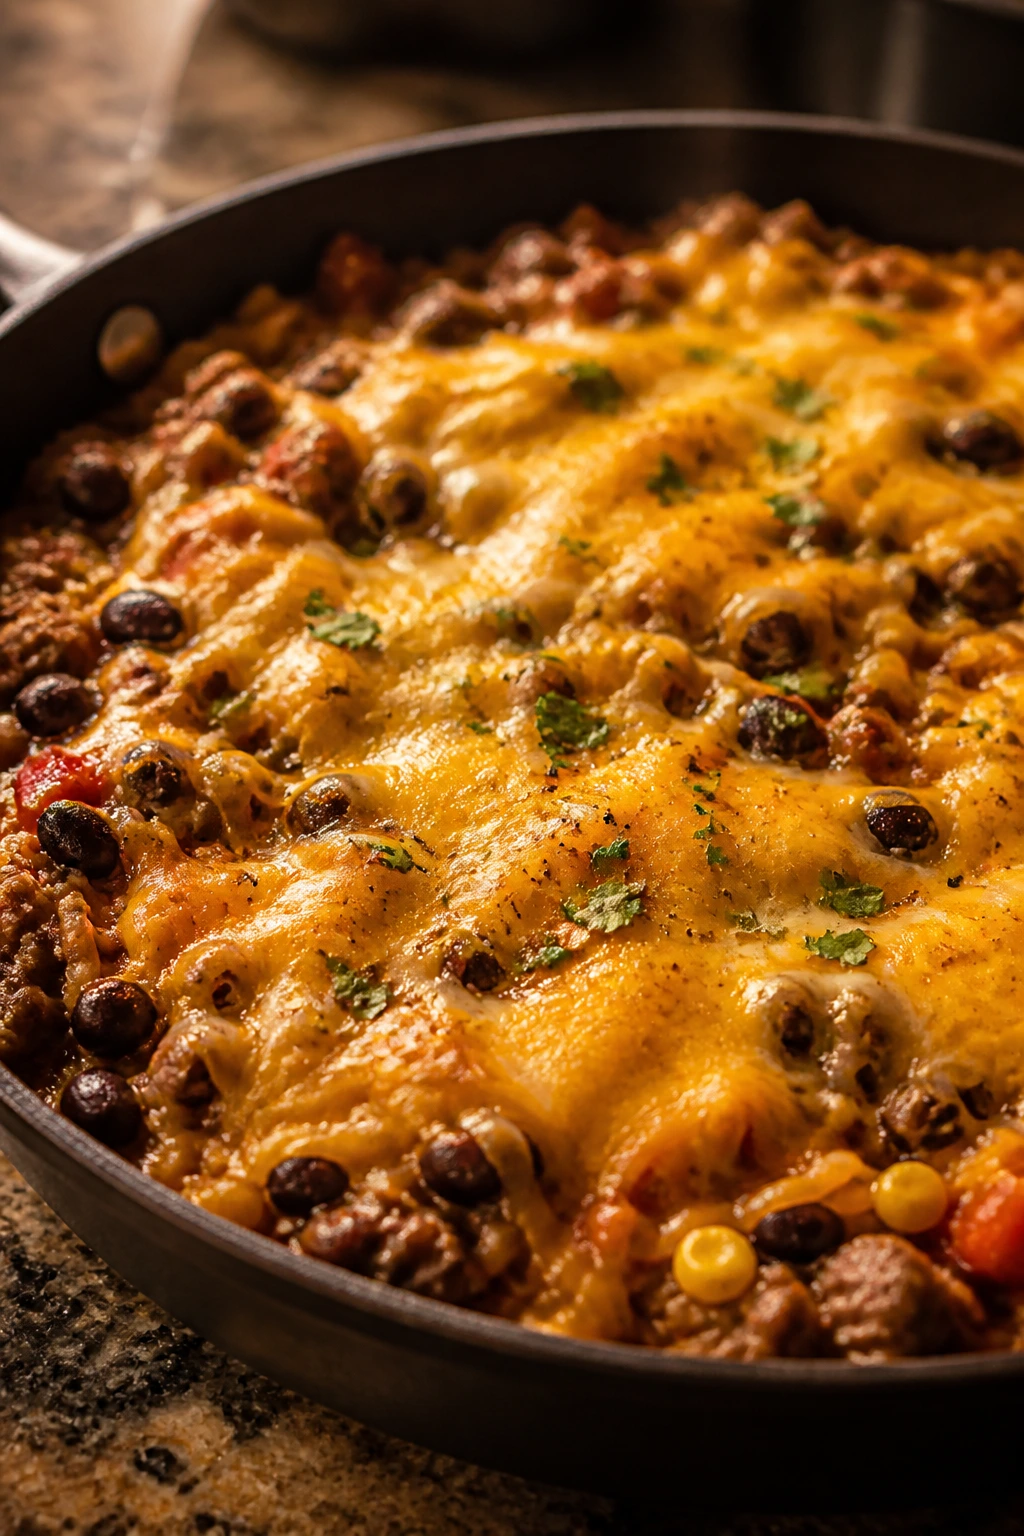
This skillet tastes like a burrito, but you do not have to roll a single tortilla. Everything simmers together just enough to get cozy, then the cheese melts on top and the whole thing turns into a spoonable dinner.
Why It Works:
Beans stretch the beef, rice makes the dish filling, and the salsa keeps the flavor recognizable. It is a good way to get a burrito-style dinner on the table without building each one by hand.
Key Ingredients:
- 1 lb ground beef — the main protein.
- 1 cup long-grain white rice — cooks in the skillet.
- 1 can black beans, drained — adds bulk.
- 1 cup salsa — for flavor and moisture.
- 2 cups chicken broth — cooks the rice.
- 1 cup corn — optional.
- 1 1/2 cups shredded cheddar — the finish.
- 1 tablespoon taco seasoning — seasons the pan.
- 1 tablespoon oil — for browning.
Quick Steps:
- Brown the beef in a deep skillet over medium-high heat.
- Stir in the rice, broth, salsa, taco seasoning, beans, and corn.
- Cover and simmer on low for 18 minutes.
- Remove the lid, sprinkle cheddar over the top, and cover for 2 minutes until melted.
- Serve with sour cream or tortilla chips.
Equipment for This Recipe:
- Deep skillet with a lid — essential here.
- Wooden spoon — for stirring the beef.
- Measuring cup — helps with the rice liquid.
How to Serve This Dish:
Scoop it into bowls and let everyone add chips or sour cream if they want. A few sliced cucumbers or orange wedges on the side keep the meal light enough to finish.
Pro Tips for This Recipe:
- Use mild salsa if the household is heat-sensitive.
- Do not lift the lid while the rice cooks.
- Rest the skillet 5 minutes before serving.
Variations on This Dish:
- Turkey Burrito Skillet: Swap in ground turkey.
- Chicken Burrito Skillet: Use shredded chicken and cut the simmer time.
- Queso Finish: Stir a spoonful of queso in at the end.
Common Mistakes to Avoid with This Dish:
- Using too much liquid: The skillet turns soupy. Measure carefully.
- Stirring while the rice cooks: The grains break and go sticky.
26. Pesto Chicken Pasta
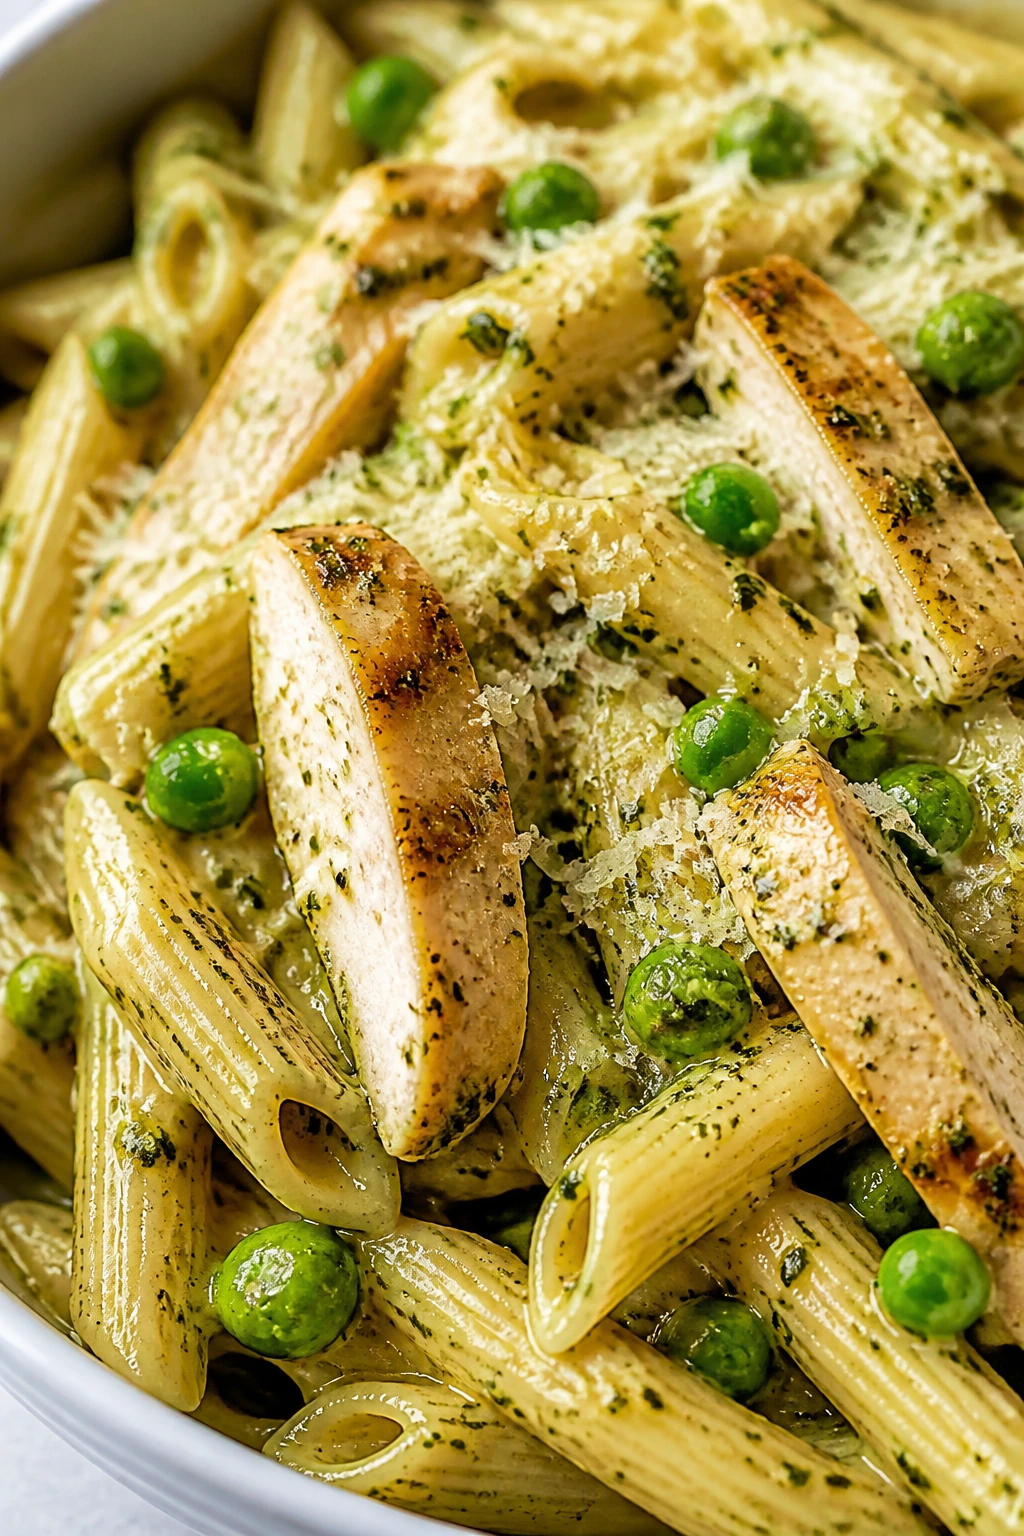
Pesto can be a tricky sell with picky eaters, but when you keep it light and creamy, it behaves more like a gentle herb sauce than a bold green statement. The chicken and pasta do most of the talking anyway.
Why It Works:
A little pesto goes a long way, especially when it is stretched with cream or pasta water. The chicken makes the dish feel complete, and the sauce clings to the pasta in a way that is easy to eat.
Key Ingredients:
- 12 oz pasta — penne or rotini works well.
- 1 lb chicken breast, sliced — quick-cooking.
- 1/2 cup basil pesto — use less if you want it milder.
- 1/2 cup heavy cream or pasta water — smooths the sauce.
- 1 cup frozen peas — optional, but tiny enough to disappear.
- 1/2 cup grated parmesan — for serving.
- 2 tablespoons oil — for the pan.
- Salt and pepper — to taste.
Quick Steps:
- Cook the pasta and drain, saving a little pasta water.
- Sauté the chicken in oil over medium heat until cooked through.
- Stir in the pesto and cream, adding pasta water if needed to loosen the sauce.
- Toss in the pasta and peas, cooking just until hot.
- Finish with parmesan and serve.
Equipment for This Recipe:
- Large skillet — for the sauce.
- Pot for pasta — standard.
- Colander — for draining.
How to Serve This Dish:
Serve with bread and a plain vegetable like peas or sliced cucumbers. Keep the pesto light and adults can add more parmesan or pepper at the table.
Pro Tips for This Recipe:
- Start with less pesto than you think.
- Save pasta water before draining.
- Cut the chicken small so it blends into the pasta.
Variations on This Dish:
- Chicken Pesto Bake: Add mozzarella and bake 10 minutes.
- Walnut-Free Pesto Pasta: Use a nut-free pesto if needed.
- Tomato-Pesto Swirl: Stir in a spoonful of marinara.
Common Mistakes to Avoid with This Dish:
- Using too much pesto: The flavor can go bitter or overpowering. Start small.
- Skipping the cream or pasta water: The sauce may cling too sharply and feel dry.
27. Tomato Soup and Grilled Cheese
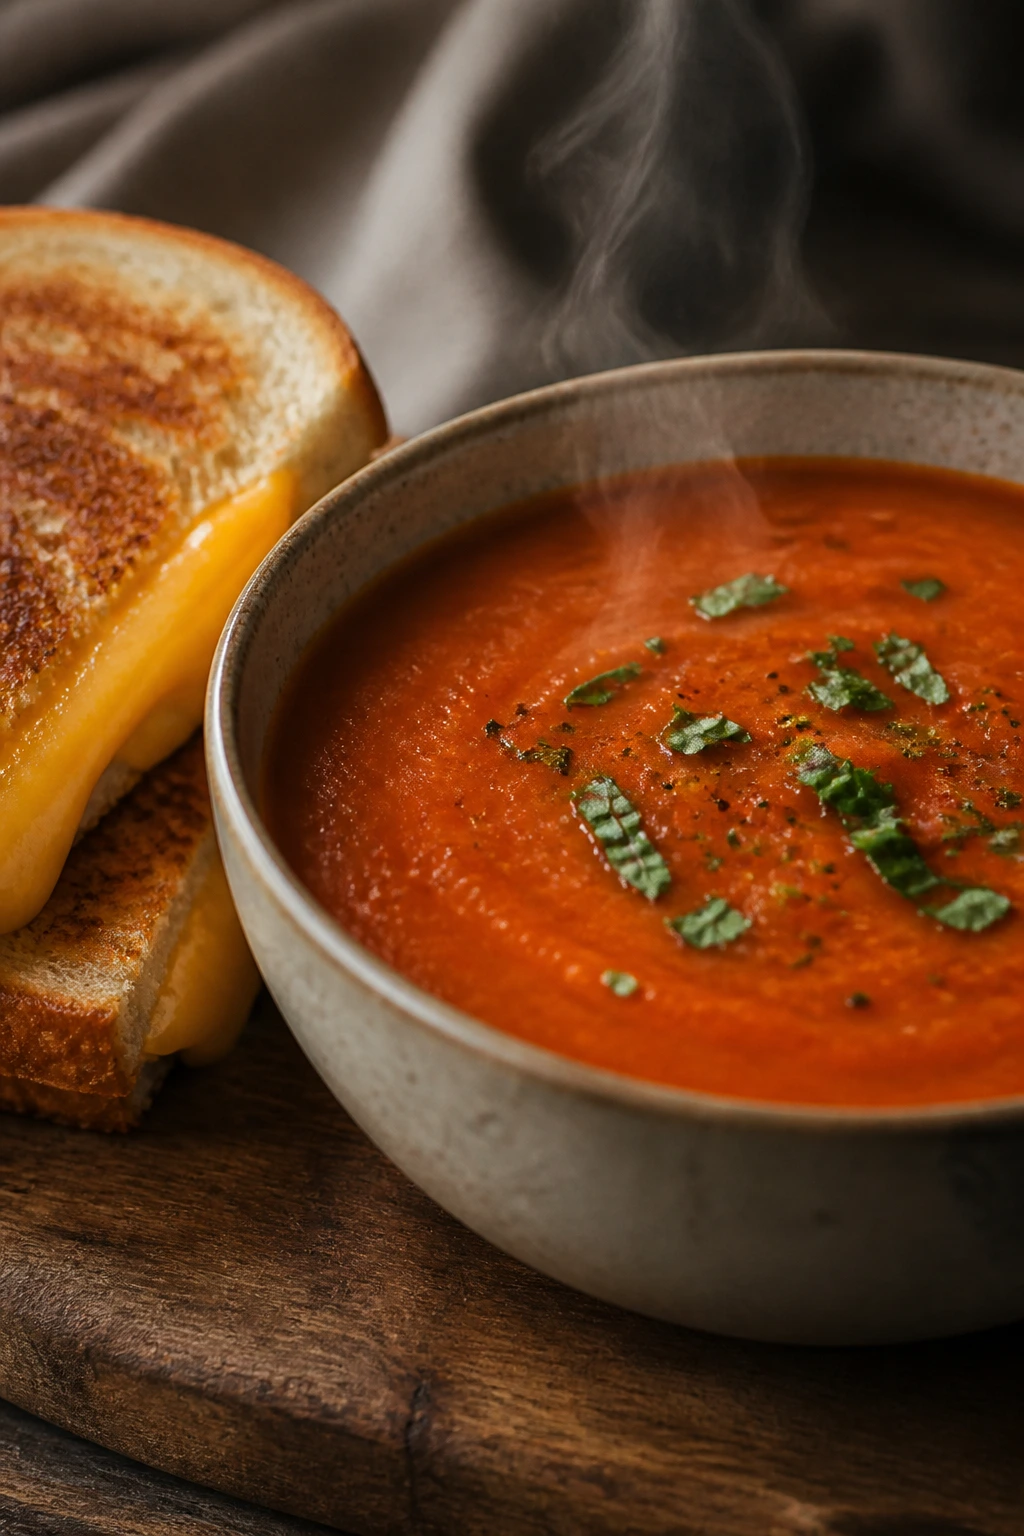
This is the dinner equivalent of a soft blanket. The soup is smooth and gently sweet from the tomatoes, and the grilled cheese brings the crunch that makes kids perk up before the first spoonful.
Why It Works:
The flavors are old friends: tomato, bread, butter, cheese. When picky eaters are tired, that kind of dinner often works better than anything dressed up with extra ingredients.
Key Ingredients:
- 2 tablespoons butter — for the soup and sandwiches.
- 1 small onion, diced — cooks into the soup.
- 2 cans crushed tomatoes, 28 oz each — the soup base.
- 2 cups chicken or vegetable broth — thins the soup.
- 1/2 cup heavy cream — smooths the finish.
- 1 teaspoon sugar — takes the sharp edge off.
- 8 slices bread — for the sandwiches.
- 8 slices cheddar or American cheese — the melt.
- Salt and pepper — to taste.
Quick Steps:
- Cook the onion in butter over medium heat until soft.
- Add tomatoes, broth, and sugar, then simmer for 15 minutes.
- Blend if you want a smoother soup, then stir in the cream.
- Build the grilled cheese and cook it in a skillet until golden on both sides.
- Serve hot together.
Equipment for This Recipe:
- Soup pot — for the tomato base.
- Blender or immersion blender — optional for smooth soup.
- Skillet — for the grilled cheese.
How to Serve This Dish:
Serve the soup in mugs or bowls with the sandwiches cut into triangles. A pickle spear or apple slices adds a bright bite next to all that butter and cheese.
Pro Tips for This Recipe:
- Add the cream after the soup simmers.
- Use thick bread so the sandwich holds up.
- Keep the heat medium on the sandwich so the cheese melts before the bread burns.
Variations on This Dish:
- Basil Tomato Soup: Add a few torn basil leaves.
- Roasted Red Pepper Soup: Blend in jarred roasted peppers.
- Extra Cheesy Sandwich: Use two cheeses in the grilled cheese.
Common Mistakes to Avoid with This Dish:
- Boiling the soup after cream goes in: It can curdle. Keep it gentle.
- Using too much heat on the sandwich: The bread burns before the cheese melts.
28. Chicken and Broccoli Alfredo
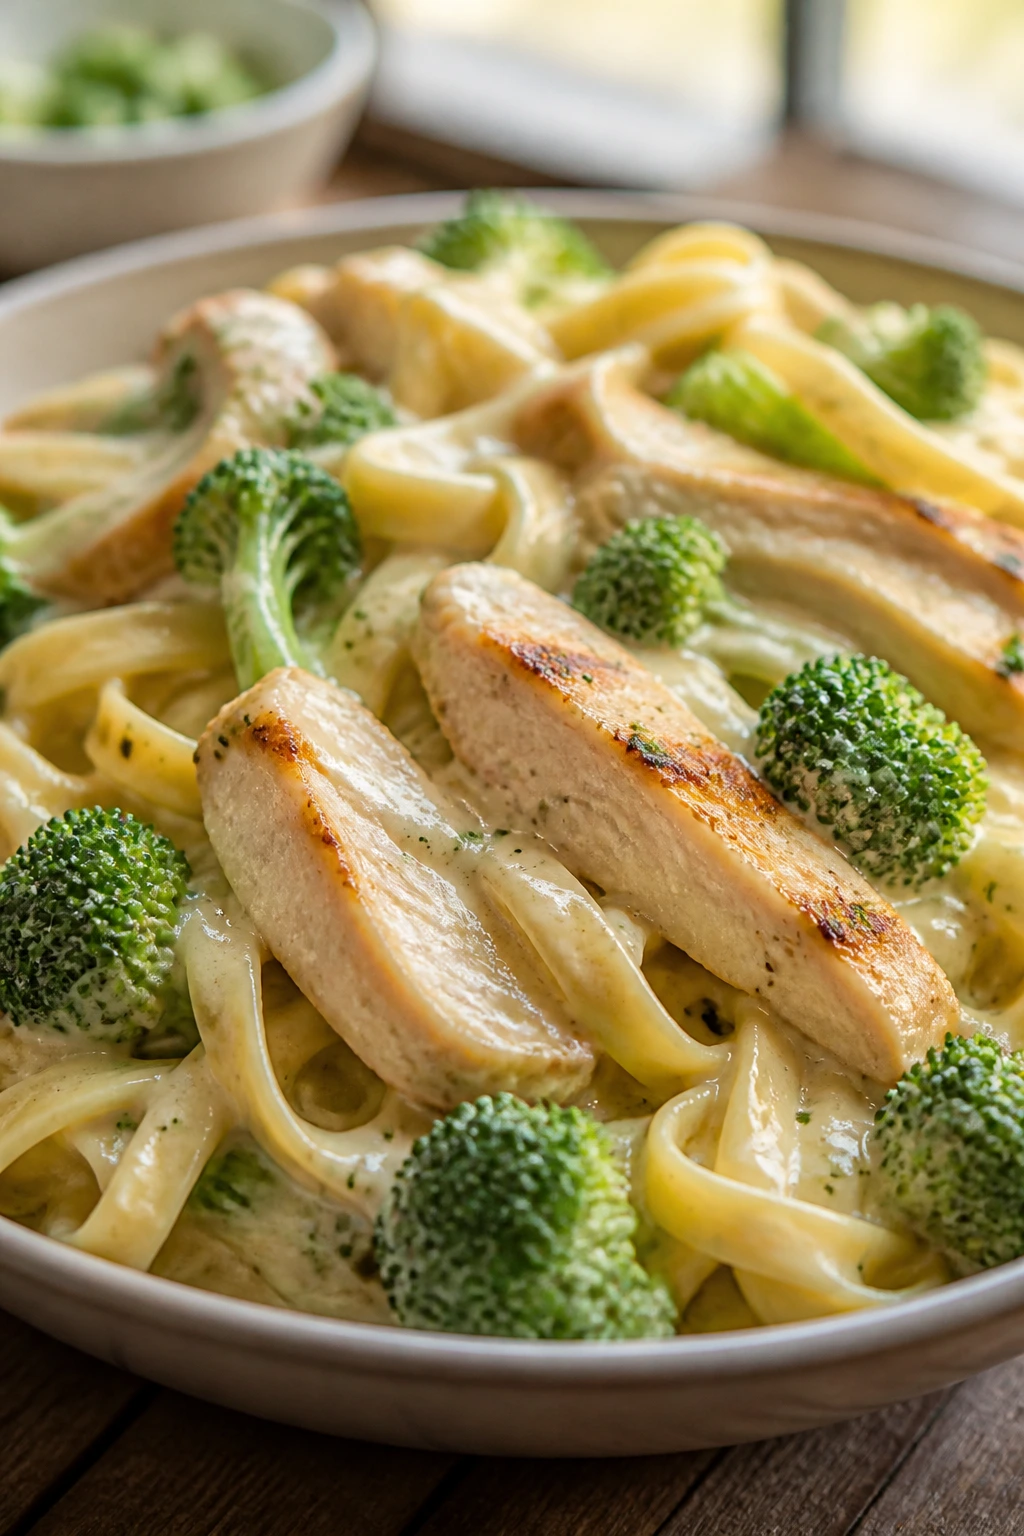
Alfredo is not shy, but it can still be a good picky-eater dinner when you keep the broccoli small and the sauce smooth. The chicken makes it feel like a full meal, and the pasta carries the sauce in a way that kids usually accept.
Why It Works:
Cream, butter, and parmesan make a sauce with enough richness to feel like restaurant food without a complicated method. Broccoli florets, chopped small, soften enough to blend into the bowl without dominating it.
Key Ingredients:
- 12 oz fettuccine — the classic pasta here.
- 1 lb chicken breast, sliced — cooks quickly.
- 3 cups broccoli florets — cut small.
- 2 tablespoons butter — for the sauce.
- 2 cloves garlic, minced — mild flavor.
- 1 1/2 cups heavy cream — the sauce base.
- 1 cup grated parmesan — for thickening and flavor.
- 1 tablespoon oil — for the chicken.
- Salt and pepper — to taste.
Quick Steps:
- Cook the pasta and broccoli in separate pots or blanch the broccoli with the pasta during the last 2 minutes.
- Sauté the chicken in oil until cooked through.
- Melt the butter in the skillet, cook the garlic for 30 seconds, then pour in the cream.
- Stir in parmesan until the sauce thickens and coats the spoon.
- Toss in the pasta, broccoli, and chicken, then serve.
Equipment for This Recipe:
- Large skillet — for the sauce.
- Pasta pot — for boiling.
- Whisk — keeps the Alfredo smooth.
How to Serve This Dish:
Serve in wide bowls with extra parmesan and black pepper for the adults. Garlic bread is the obvious partner, but a plain salad works too if you want something crisp.
Pro Tips for This Recipe:
- Grate the parmesan fine so it melts smoothly.
- Keep the sauce on low heat once the cheese goes in.
- Cut the broccoli small enough that it feels like part of the pasta.
Variations on This Dish:
- Shrimp Alfredo: Swap chicken for shrimp and cook it fast.
- Light Cream Sauce: Use half cream and half milk.
- Broccoli-Free Version: Leave the vegetable out on extra-sensitive nights.
Common Mistakes to Avoid with This Dish:
- High heat after adding cheese: The sauce can break. Keep it low.
- Overcooking broccoli: It turns dull and mushy. Pull it when bright green.
29. Meatloaf Muffins
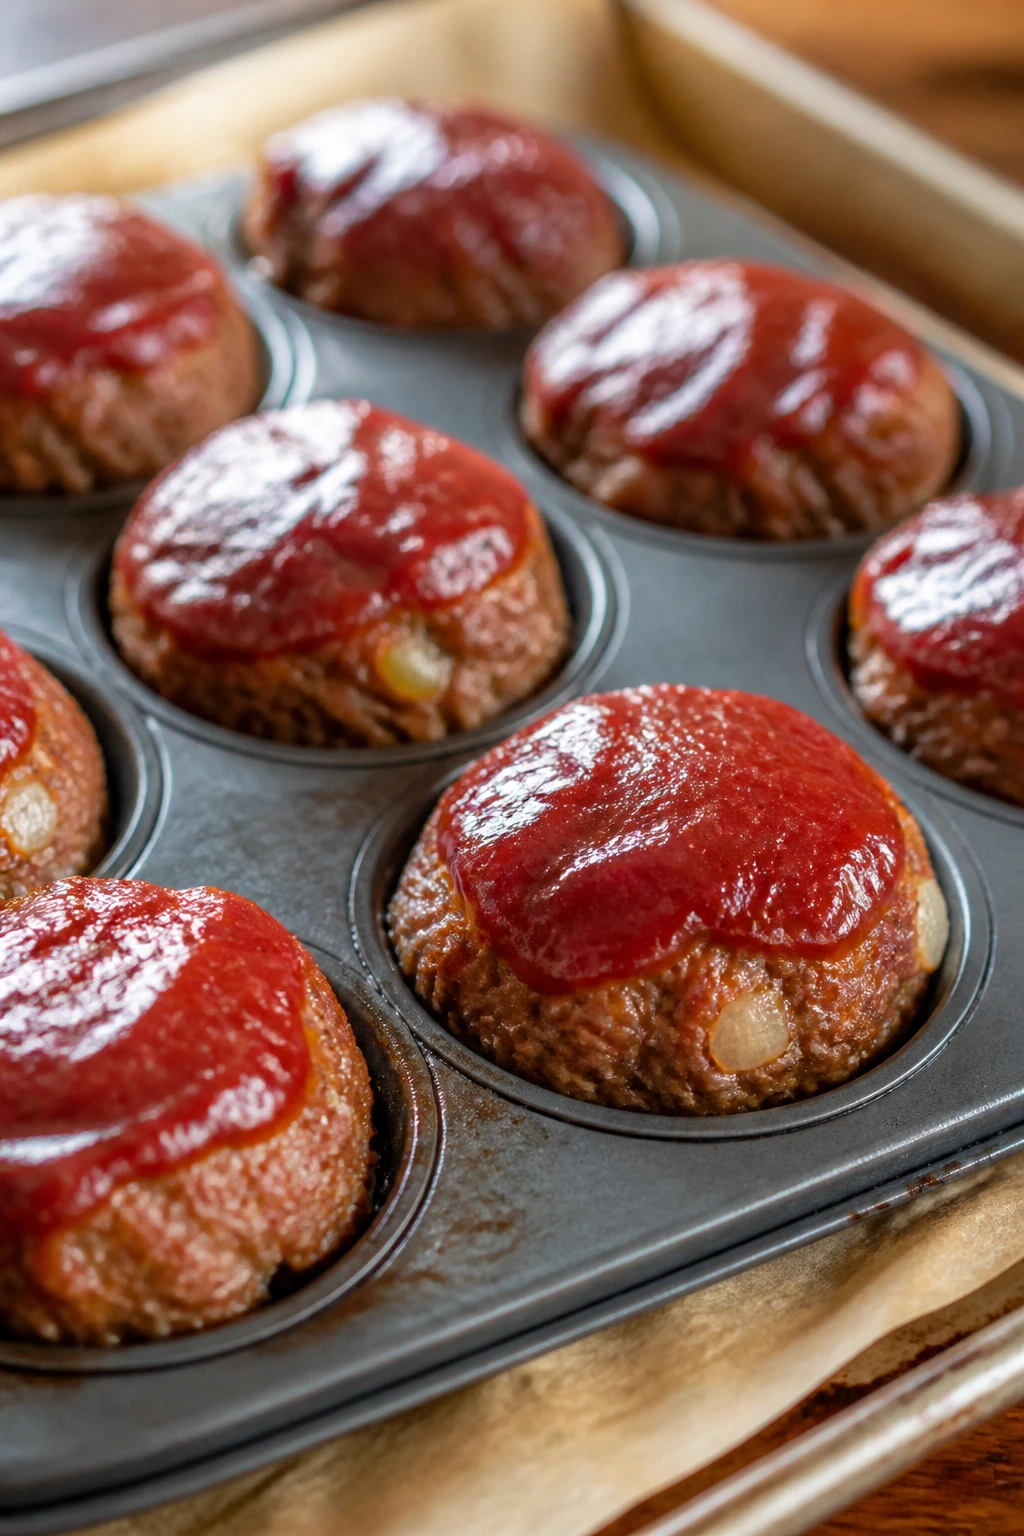
Meatloaf muffins are old-school dinner in a better shape. The smaller size cooks faster, the glaze gets more surface area, and kids who dodge a huge slice of meatloaf often have no problem with a muffin-sized one.
Why It Works:
The portion size feels manageable, and the ketchup glaze gives you that familiar sweet-savory top. Baking in a muffin tin also helps the meat cook evenly without drying the edges.
Key Ingredients:
- 1 lb ground beef — the base.
- 1/2 cup breadcrumbs — keeps it tender.
- 1 large egg — binds everything.
- 1/2 cup milk — softens the mixture.
- 1 small onion, grated or very finely diced — melts into the loaf.
- 1 tablespoon Worcestershire sauce — adds depth.
- 1/2 teaspoon salt — season the mix.
- 1/3 cup ketchup — for the glaze.
- 1 tablespoon brown sugar — sweetens the glaze.
Quick Steps:
- Heat the oven to 375°F and grease a muffin tin.
- Mix the beef, breadcrumbs, egg, milk, onion, Worcestershire, and salt until combined.
- Divide into muffin cups and shape them gently.
- Stir the ketchup and brown sugar together and spoon it over the tops.
- Bake for 20 to 22 minutes until cooked through, then rest 5 minutes.
Equipment for This Recipe:
- Muffin tin — gives the shape.
- Mixing bowl — for the meat.
- Small spoon — for the glaze.
How to Serve This Dish:
Serve with mashed potatoes, peas, or corn. A muffin-sized meatloaf also makes leftovers easy to pack for lunch the next day.
Pro Tips for This Recipe:
- Grate the onion if you want it to disappear better.
- Do not pack the meat too tightly into the cups.
- Pull them as soon as they reach 160°F so they stay moist.
Variations on This Dish:
- Turkey Muffins: Swap ground turkey for beef.
- BBQ Glaze: Use barbecue sauce instead of ketchup.
- Cheese Center: Tuck a little cheddar in the middle.
Common Mistakes to Avoid with This Dish:
- Overmixing the meat: The texture gets dense. Mix just until combined.
- Overfilling the cups: The muffins rise and spill. Stop near the top.
30. English Muffin Pizzas
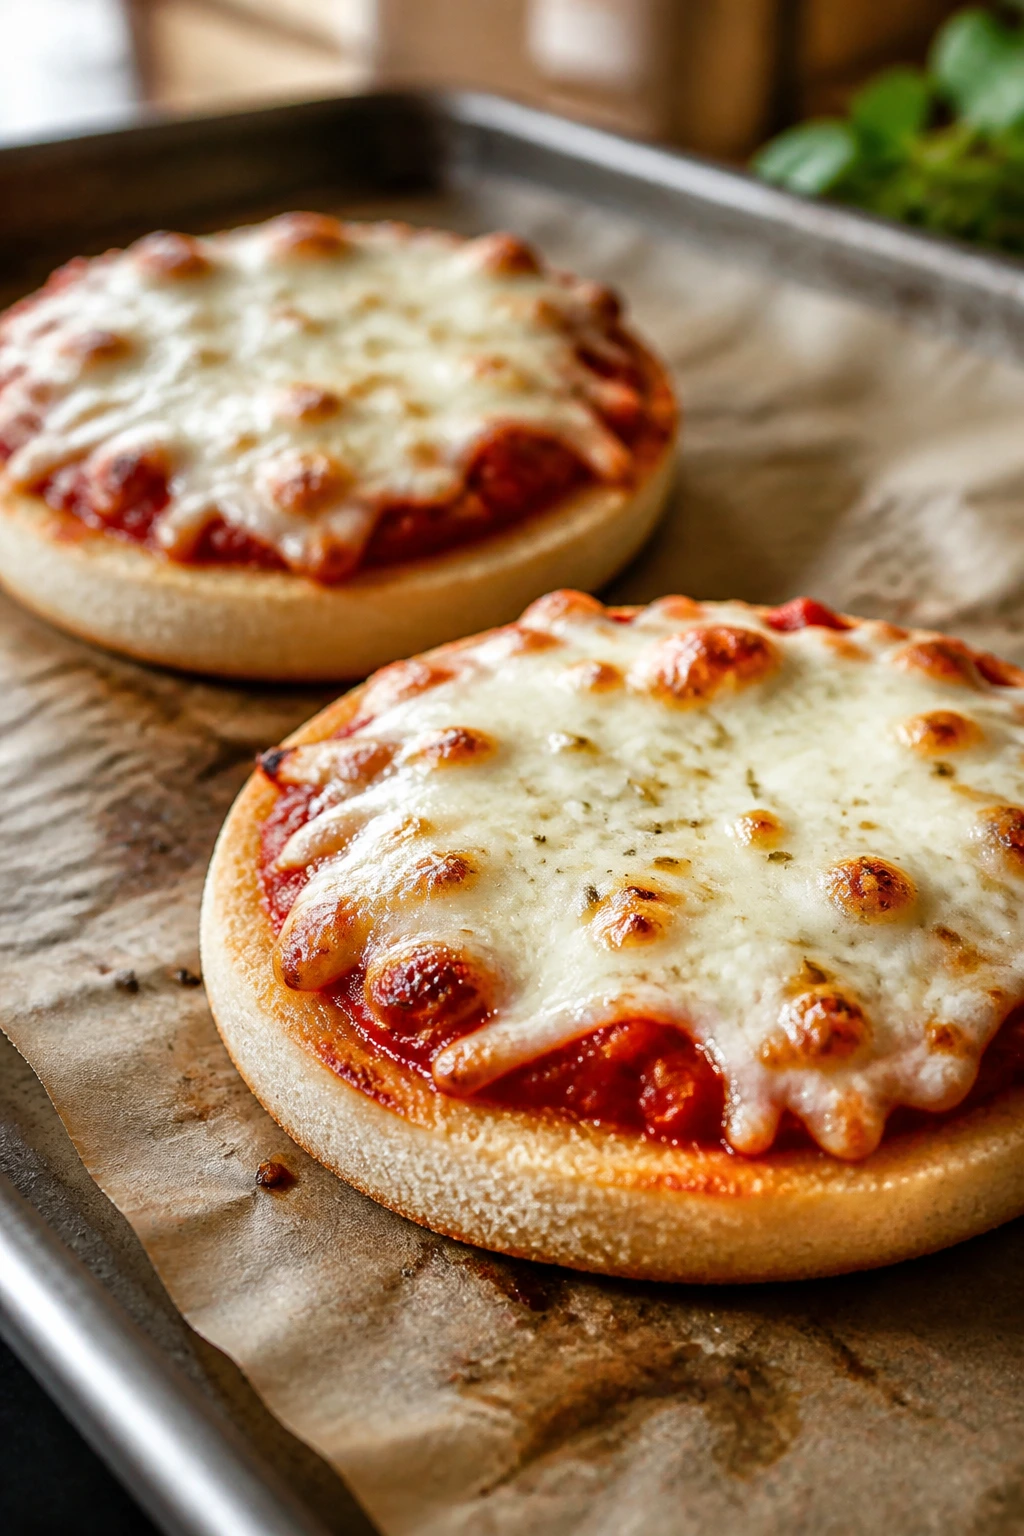
English muffin pizzas are tiny, fast, and weirdly satisfying. The bottoms toast up, the cheese melts quickly, and each person gets their own little pie without anyone having to share a topping decision.
Why It Works:
The muffin halves are the right size for small appetites and short attention spans. You can make one tray with plain cheese and another with toppings, which is a relief when dinner has strong opinions in it.
Key Ingredients:
- 6 English muffins, split — the crust.
- 1 cup pizza sauce — thin layer only.
- 2 cups shredded mozzarella — the melt.
- 1/2 cup pepperoni slices — optional.
- 1/2 cup diced ham — optional.
- 1 tablespoon olive oil — for brushing if needed.
- 1 teaspoon dried oregano — optional.
- Pinch of salt — optional.
Quick Steps:
- Toast the English muffin halves lightly so they do not go soggy.
- Spread a thin layer of sauce over each half.
- Add cheese and toppings.
- Bake at 425°F for 8 to 10 minutes until the cheese bubbles.
- Cool for 1 minute before serving.
Equipment for This Recipe:
- Baking sheet — for the muffins.
- Toaster or oven broiler — for the initial toast.
- Spoon — for spreading sauce.
How to Serve This Dish:
Serve them with fruit, carrot sticks, or a bowl of salad if you want to make the meal feel fuller. They are also useful as an after-school dinner when the table needs to move quickly.
Pro Tips for This Recipe:
- Toast first or the muffins get floppy.
- Keep sauce light.
- Let kids top their own plain halves.
Variations on This Dish:
- Breakfast Pizza: Add scrambled eggs and bacon.
- White Pizza: Use a little ricotta instead of sauce.
- Veggie Half-and-Half: Add mushrooms only to the adult side.
Common Mistakes to Avoid with This Dish:
- Using too much sauce: The muffin softens fast. Spread a thin layer.
- Skipping the pre-toast: The bottoms stay gummy. Toast first.
31. Chicken Noodle Soup with Tiny Pasta
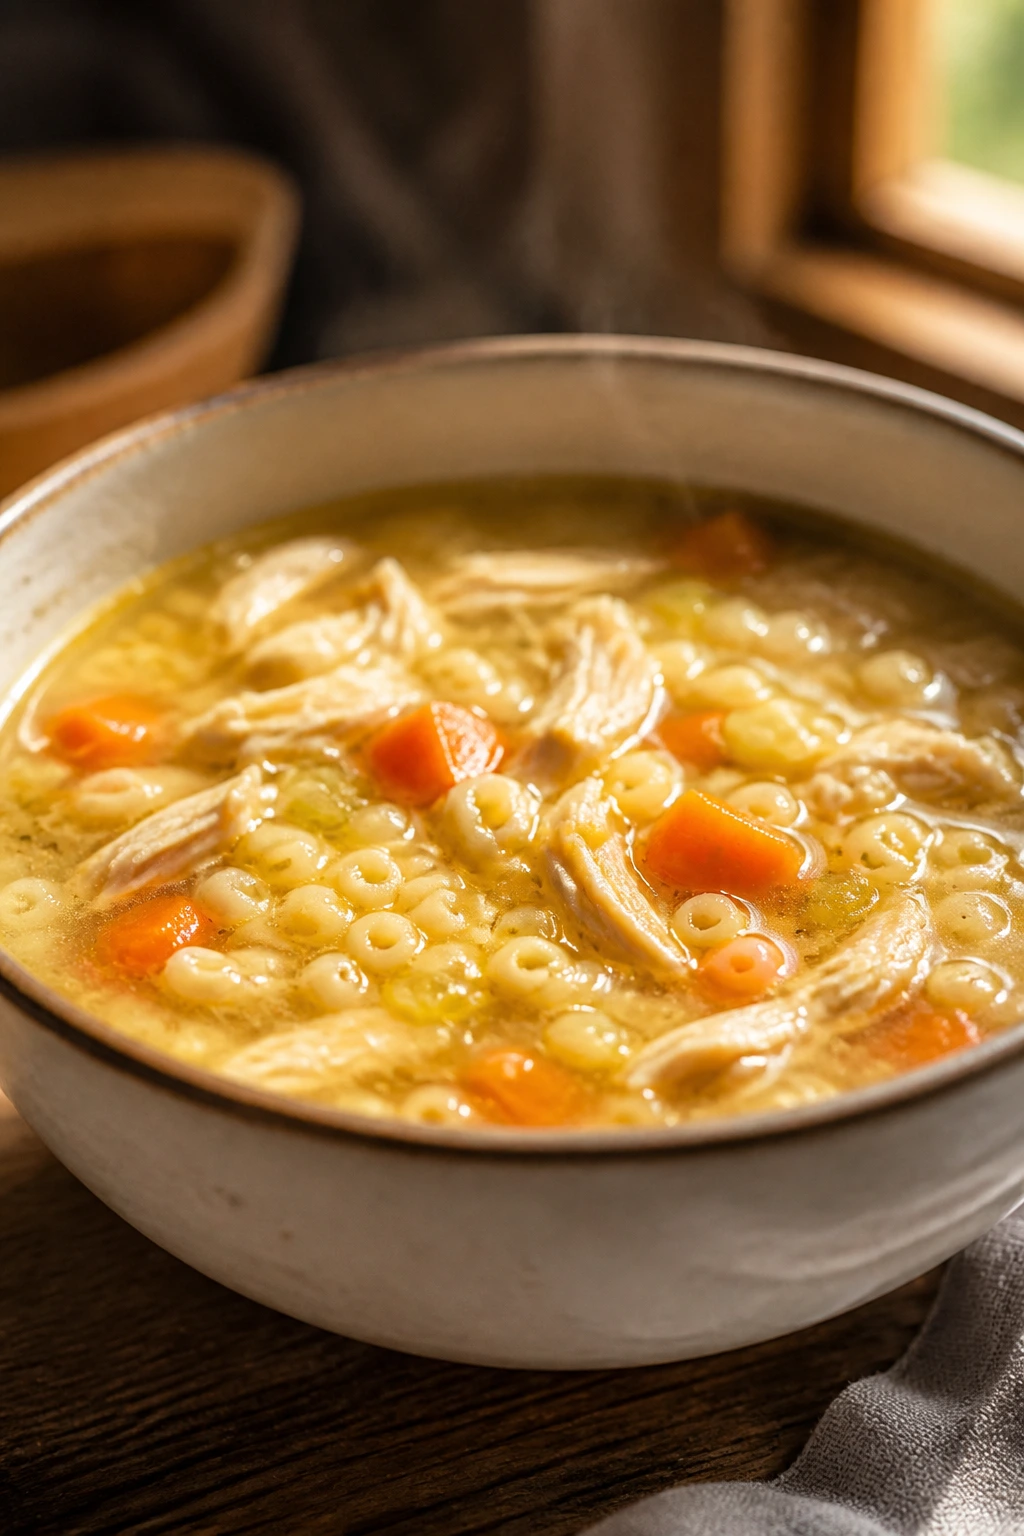
This soup is gentle enough for a tired day. The broth is warm and simple, the noodles are small, and the chicken stays in soft shreds instead of chunky pieces that make some kids pause.
Why It Works:
Small pasta cooks faster and feels less intimidating in a spoonful than big noodles. The broth is mild, which lets the chicken and carrots stay familiar instead of turning the soup into a challenge.
Key Ingredients:
- 1 lb chicken breast or thighs — for the soup.
- 8 cups chicken broth — the base.
- 2 carrots, sliced thin — softens in the broth.
- 2 celery stalks, sliced thin — optional but classic.
- 1 small onion, diced — for flavor.
- 1 1/2 cups small pasta, like ditalini or shells — cooks quickly.
- 1 tablespoon olive oil — for the pot.
- 1 teaspoon dried thyme — optional.
- Salt and pepper — to taste.
- Parsley — for serving.
Quick Steps:
- Heat the oil in a soup pot and cook the onion, carrots, and celery for 4 minutes.
- Add the broth and chicken, then simmer until the chicken is cooked through, about 15 minutes.
- Remove the chicken, shred it, and return it to the pot.
- Add the pasta and cook until tender, about 8 minutes.
- Season and serve with parsley.
Equipment for This Recipe:
- Soup pot — the main vessel.
- Ladle — helpful for serving.
- Forks — for shredding the chicken.
How to Serve This Dish:
Serve with crackers, toast, or a small grilled cheese if you want to make it more filling. The soup is mild enough that the bread can do the heavy lifting.
Pro Tips for This Recipe:
- Cook the pasta in the soup only right before serving.
- Shred the chicken while it is still warm.
- Taste the broth at the end; it often needs more salt than you expect.
Variations on This Dish:
- Orzo Soup: Use orzo instead of tiny pasta.
- Lemon Chicken Soup: Add a squeeze of lemon at the end.
- Vegetable-Heavy Version: Add extra carrots and skip celery if needed.
Common Mistakes to Avoid with This Dish:
- Overcooking the pasta in the pot: It gets bloated fast. Add it late.
- Undersalting the broth: The soup tastes flat. Season before serving.
32. Hash Brown Breakfast Casserole
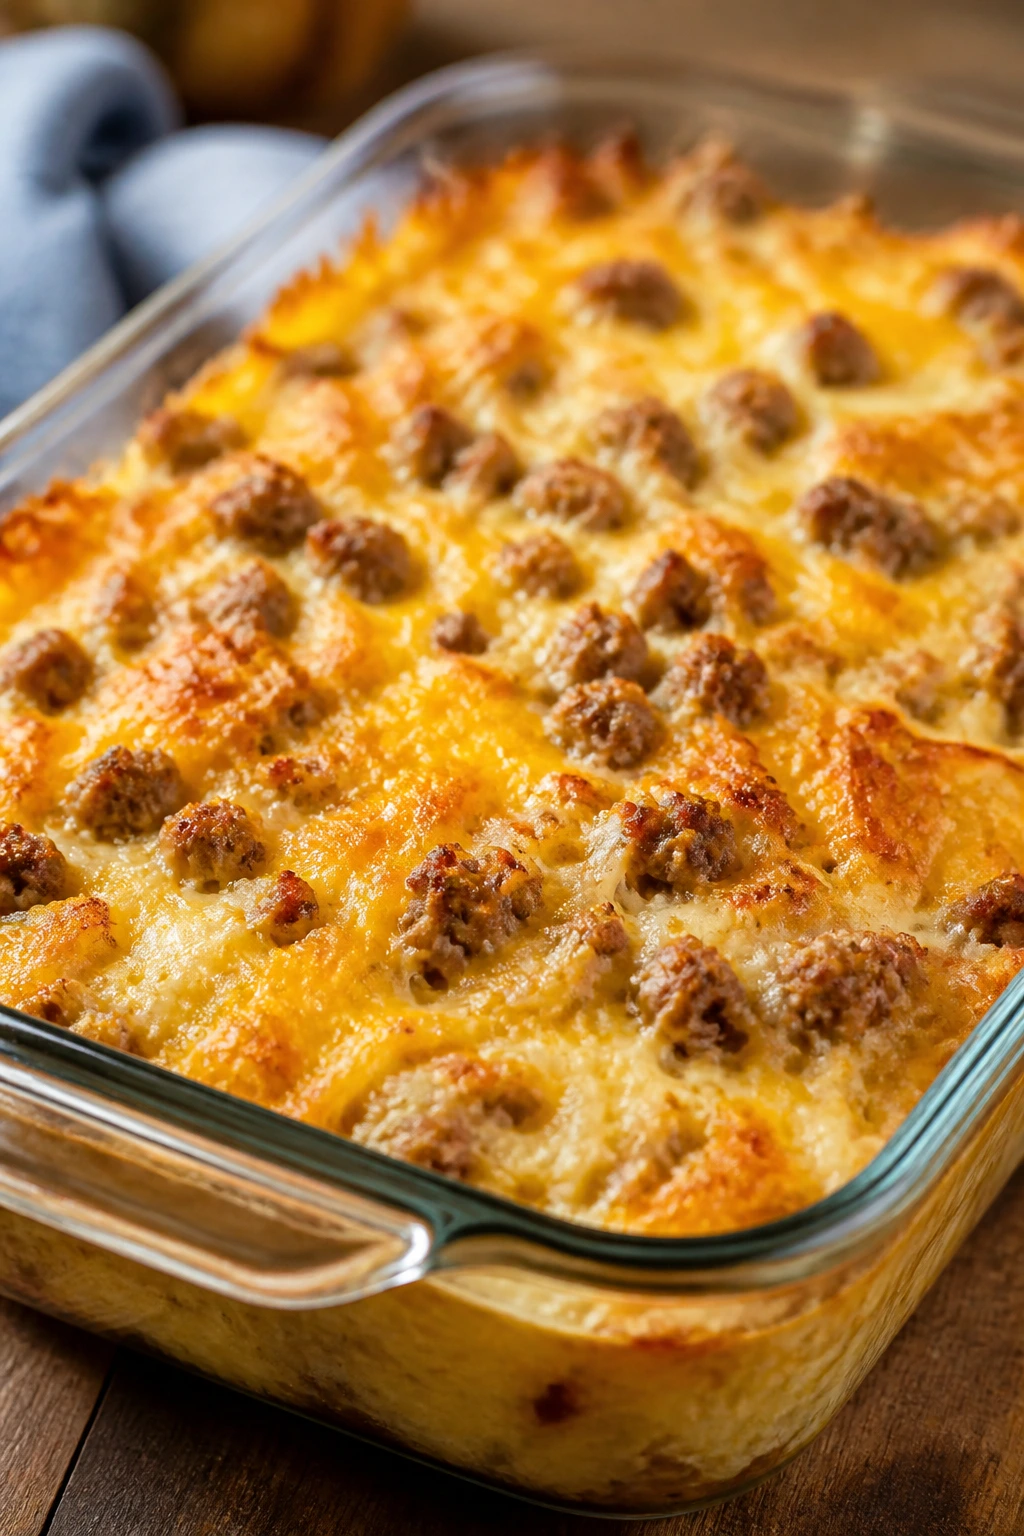
This casserole is the kind of breakfast-for-dinner meal that feels like a reward, even on a hard evening. Hash browns give it body, eggs set the whole thing, and sausage adds enough salt and flavor to keep it from tasting plain.
Why It Works:
Frozen hash browns are an easy shortcut here, and they bake up soft inside with browned edges. The casserole slices cleanly once it rests, which helps with serving a tired crowd.
Key Ingredients:
- 30 oz frozen hash browns, thawed — the base.
- 8 large eggs — hold it together.
- 1 cup milk — loosens the eggs.
- 1 lb breakfast sausage — the main flavor.
- 2 cups shredded cheddar — the top and mix-in.
- 1 teaspoon salt — go easy because sausage is salty.
- 1/2 teaspoon black pepper — optional.
- 1 tablespoon butter — for the dish.
Quick Steps:
- Brown the sausage in a skillet and drain it.
- Whisk the eggs, milk, salt, and pepper together.
- Mix the hash browns, sausage, and most of the cheese in a baking dish.
- Pour the egg mixture over the top and sprinkle with the remaining cheese.
- Bake at 375°F for 40 to 45 minutes until set and lightly browned.
Equipment for This Recipe:
- 9×13-inch baking dish — for the casserole.
- Skillet — for the sausage.
- Whisk — for the eggs.
How to Serve This Dish:
Serve with fruit, toast, or sliced tomatoes if you want some freshness alongside it. It reheats well, which makes it one of the better make-ahead dinners in this group.
Pro Tips for This Recipe:
- Thaw and pat the hash browns dry so the casserole is not watery.
- Let it rest before cutting.
- Use a fork to test the center; it should be set, not jiggly.
Variations on This Dish:
- Bacon Hash Brown Bake: Swap sausage for bacon.
- Veggie Version: Add finely chopped bell pepper.
- Breakfast-Only Cheese: Use Monterey Jack for a softer flavor.
Common Mistakes to Avoid with This Dish:
- Using frozen hash browns straight from the bag: Extra moisture can make the bake soggy. Thaw them first.
- Cutting too soon: The slices fall apart. Let it sit.
33. BBQ Chicken Sliders
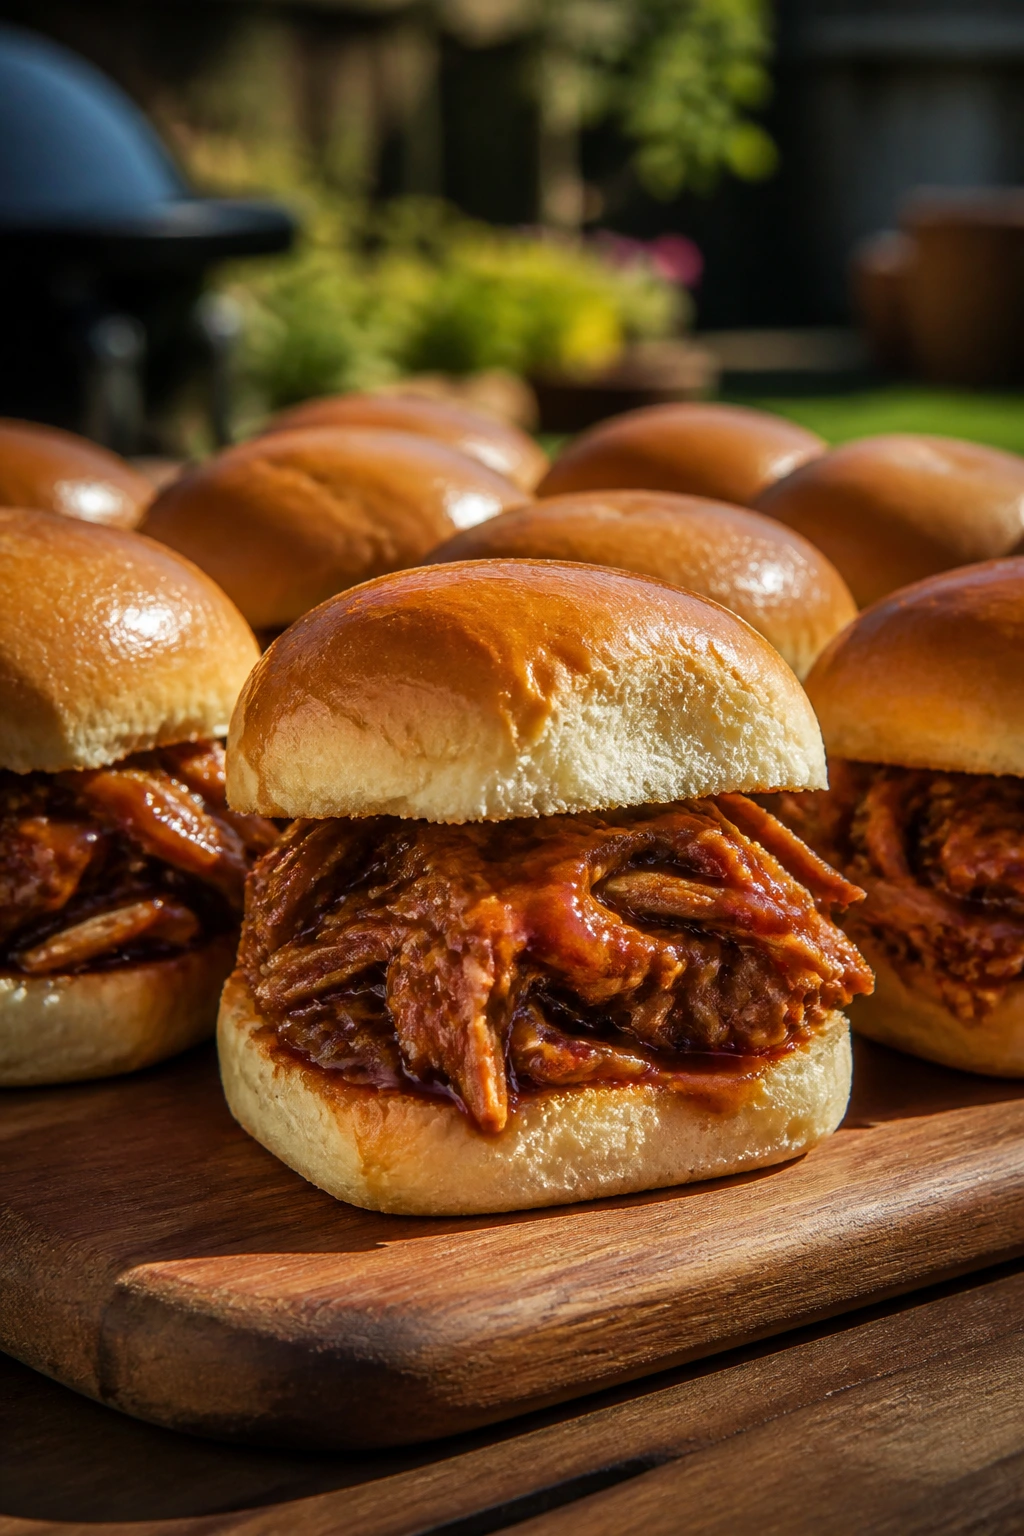
These sliders taste like a backyard meal that found a weekday slot. The chicken is saucy and sweet, the buns get soft but not soggy if you handle them right, and the whole pan disappears faster than you expect.
Why It Works:
Shredded chicken absorbs barbecue sauce without much effort, and the small buns make the portion size less intimidating. If your crowd likes tangy food, this is one of the easiest dinners to win with.
Key Ingredients:
- 2 cups shredded cooked chicken — rotisserie chicken works.
- 1 cup barbecue sauce — the flavor.
- 12 slider buns — the base.
- 2 cups coleslaw mix — optional for crunch.
- 2 tablespoons butter, melted — for the tops.
- 1 teaspoon vinegar — for the slaw if you want it.
- 1 tablespoon mayo — optional for the slaw.
Quick Steps:
- Warm the shredded chicken with barbecue sauce in a skillet over low heat.
- If using slaw, toss the mix with mayo and vinegar.
- Split the buns and fill them with chicken and optional slaw.
- Brush the tops with butter and warm the sliders in a 350°F oven for 5 to 7 minutes.
- Serve immediately.
Equipment for This Recipe:
- Skillet — to warm the chicken.
- Baking sheet — for the sliders.
- Small bowl — for the slaw.
How to Serve This Dish:
Serve with pickles, chips, or carrot sticks. I like keeping extra barbecue sauce on the side for anyone who wants more but do not pour it over all the buns at once.
Pro Tips for This Recipe:
- Keep the chicken filling thick.
- Buttering the tops helps the buns brown lightly.
- Add slaw only if your kids like crunch; otherwise keep it separate.
Variations on This Dish:
- Ranch BBQ Sliders: Add a little ranch to the chicken.
- Buffalo Chicken Sliders: Use mild buffalo sauce.
- Cheddar Sliders: Melt cheese over the chicken before closing the buns.
Common Mistakes to Avoid with This Dish:
- Soaking the buns with too much sauce: They fall apart. Use a thick filling.
- Assembling too soon: The bottoms get soft. Fill right before serving.
34. Tuna Noodle Casserole
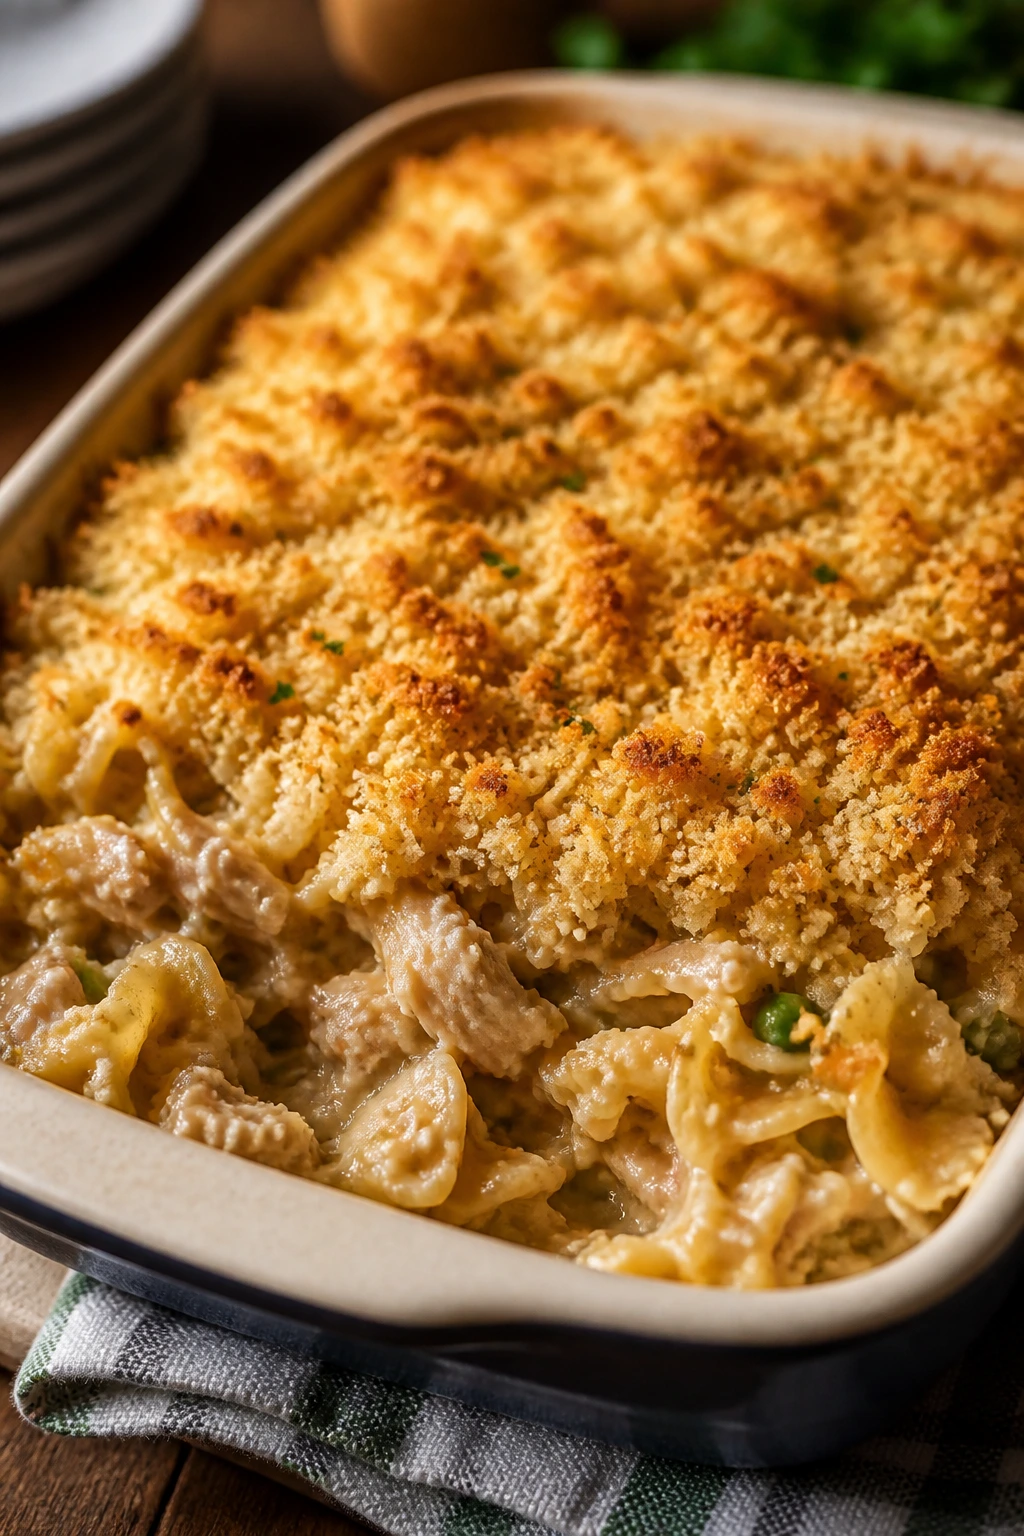
Tuna noodle casserole is old-fashioned in the best sense: warm, creamy, and built from pantry food. It has a soft texture that some picky eaters welcome, especially when the peas are small and the topping gets a little crunch.
Why It Works:
The casserole uses canned tuna, noodles, and a creamy base that all behave well together in the oven. It is also one of the easiest dinners to make when the fridge looks lean and you still need something real on the table.
Key Ingredients:
- 12 oz egg noodles — the base.
- 2 cans tuna, drained — the protein.
- 1 can cream of mushroom soup — the sauce base.
- 1 cup milk — loosens the sauce.
- 1 cup frozen peas — small and mild.
- 1 cup shredded cheddar — optional but welcome.
- 1/2 cup breadcrumbs — for the top.
- 2 tablespoons butter, melted — for the crumbs.
- Salt and pepper — to taste.
Quick Steps:
- Cook the noodles until just tender and drain.
- Stir together the soup, milk, tuna, peas, cheddar, and noodles.
- Pour into a greased baking dish.
- Mix the breadcrumbs with melted butter and sprinkle them on top.
- Bake at 375°F for 20 to 25 minutes until hot and lightly browned.
Equipment for This Recipe:
- Baking dish — for the casserole.
- Mixing bowl — for combining.
- Pot for noodles — straightforward.
How to Serve This Dish:
Serve with cucumber slices, tomatoes, or a little fruit on the side. The casserole tastes best when it is hot and creamy, not dried out at the edges.
Pro Tips for This Recipe:
- Drain the tuna well or the casserole gets watery.
- Leave the noodles slightly underdone.
- If the top browns too fast, cover loosely with foil.
Variations on This Dish:
- Chicken Noodle Bake: Swap tuna for shredded chicken.
- No-Cheese Version: Leave out the cheddar for a simpler flavor.
- Extra Crunch Top: Use crushed crackers instead of breadcrumbs.
Common Mistakes to Avoid with This Dish:
- Using too much milk: The casserole turns loose. Measure carefully.
- Overbaking: The noodles dry out fast. Stop when it is hot through.
35. Chicken and Stuffing Casserole
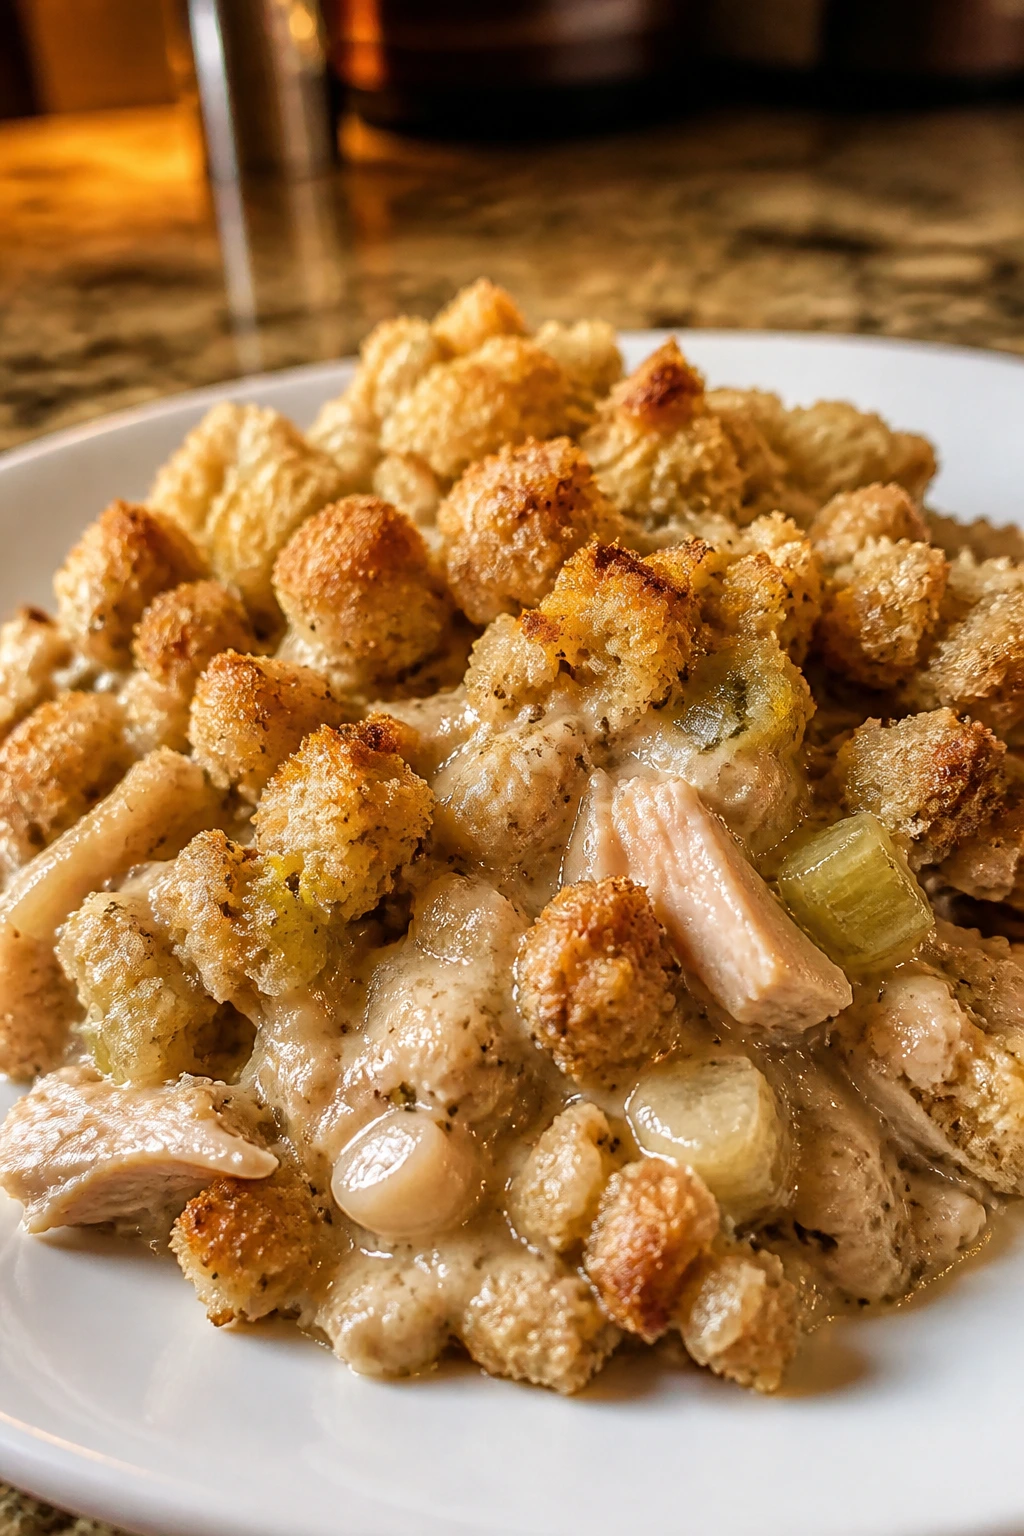
This casserole tastes like holiday leftovers without requiring a holiday. The stuffing gives you the familiar herb-and-bread comfort, the chicken keeps it grounded, and the cream sauce ties it together into a one-dish dinner.
Why It Works:
Stuffing is one of those foods many kids already know how to eat. Pairing it with chicken and a creamy base makes the casserole feel more like dinner and less like a side dish that wandered into the wrong pan.
Key Ingredients:
- 2 cups cooked chicken, chopped — the main protein.
- 1 box stuffing mix, about 6 oz — the topping.
- 1 can cream of chicken soup — the creamy base.
- 1 cup sour cream — adds body.
- 1 cup frozen corn or broccoli — optional.
- 1 cup chicken broth — moistens the stuffing.
- 1 cup shredded cheddar — optional, but useful.
- 2 tablespoons butter — for the stuffing mix.
Quick Steps:
- Preheat the oven to 375°F and grease a baking dish.
- Stir together the chicken, soup, sour cream, and vegetables.
- Spread the mixture in the dish.
- Prepare the stuffing mix with broth and butter, then spoon it over the top.
- Bake for 30 to 35 minutes until hot and browned.
Equipment for This Recipe:
- Baking dish — for the casserole.
- Mixing bowl — to combine the filling.
- Spoon — for layering.
How to Serve This Dish:
Serve it with cranberry sauce, green beans, or apple slices if you want a little brightness on the plate. It is one of those dinners that benefits from a spoonful, not a knife and fork battle.
Pro Tips for This Recipe:
- Keep the stuffing a little moist before it goes on top.
- Chop the chicken small so it spreads evenly.
- Rest for 5 minutes so the casserole firms up.
Variations on This Dish:
- Turkey Stuffing Bake: Use leftover turkey.
- Corn-Only Version: Skip broccoli if that is too much.
- Cheesy Top: Add cheddar under the stuffing for more richness.
Common Mistakes to Avoid with This Dish:
- Dry stuffing on top: It bakes into crumbs. Moisten it before layering.
- Too much filling liquid: The casserole stays soupy. Measure the sour cream and broth carefully.
Why a Mild, Flexible Dinner Wins on Busy Nights
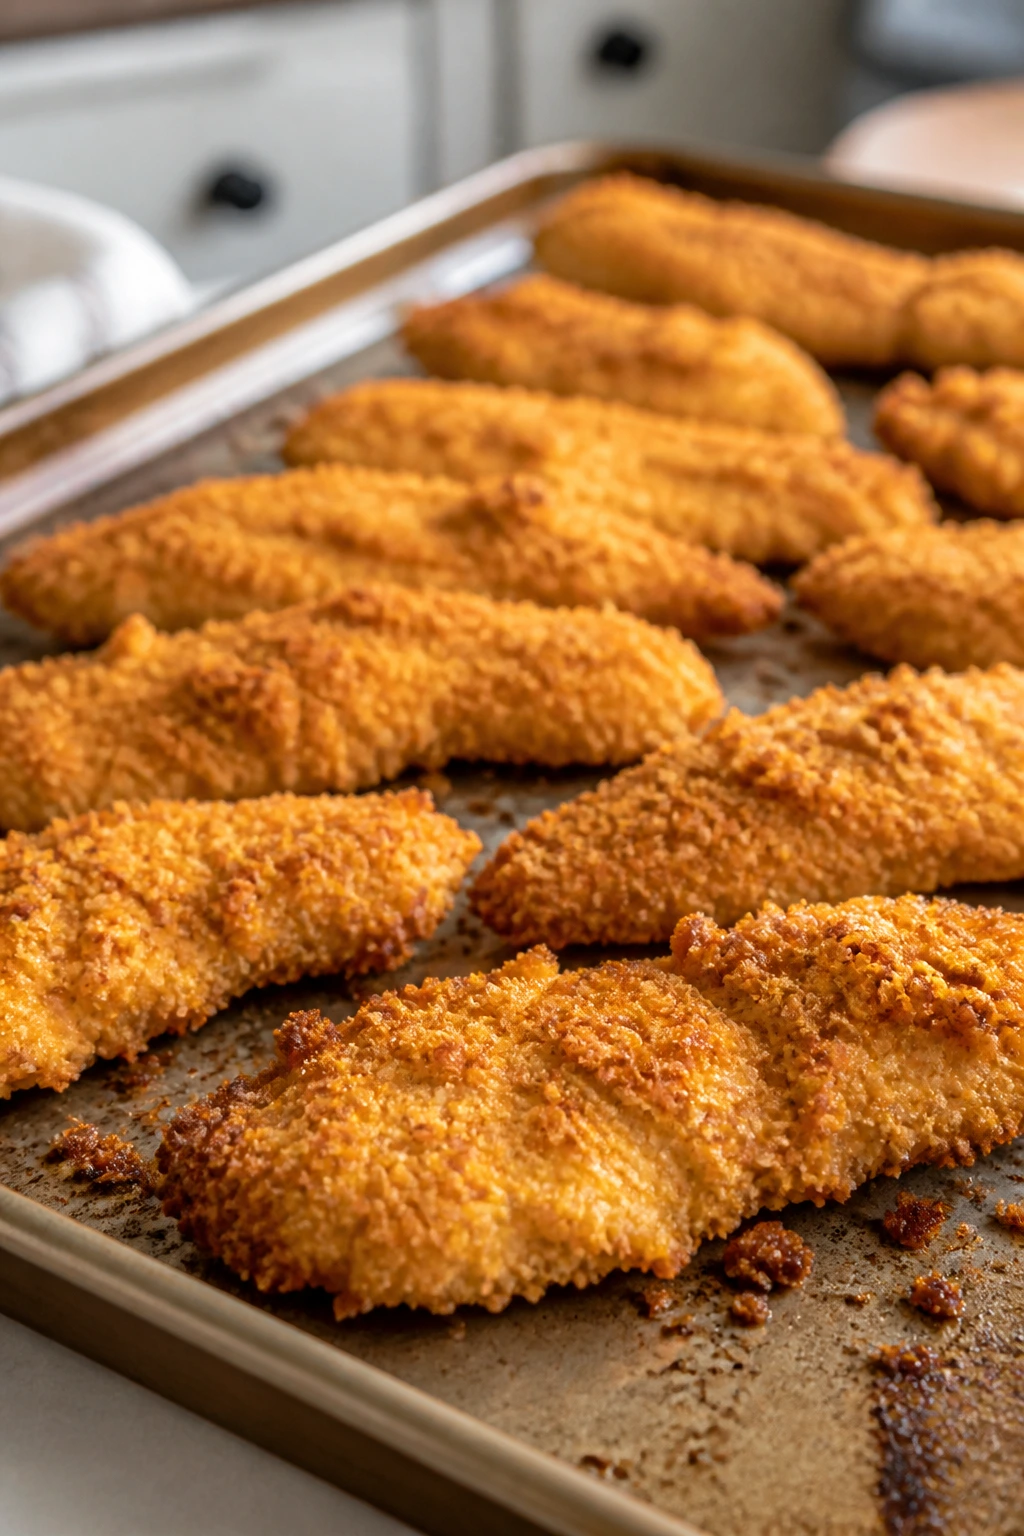
There is a reason these kinds of dinners keep showing up in real homes. They do not demand a perfect mood, a perfect pantry, or a perfect audience. They ask for a few reliable ingredients, a clear shape, and enough flexibility to let one person eat the sauce and another person avoid it.
That is not a small thing. A dinner that can stay calm on the plate often keeps the rest of the evening calmer too. You still have to cook it. You still have to clean up after it. But you are no longer staring down a table full of complaints before the first bite.
Essential Equipment for These Recipes
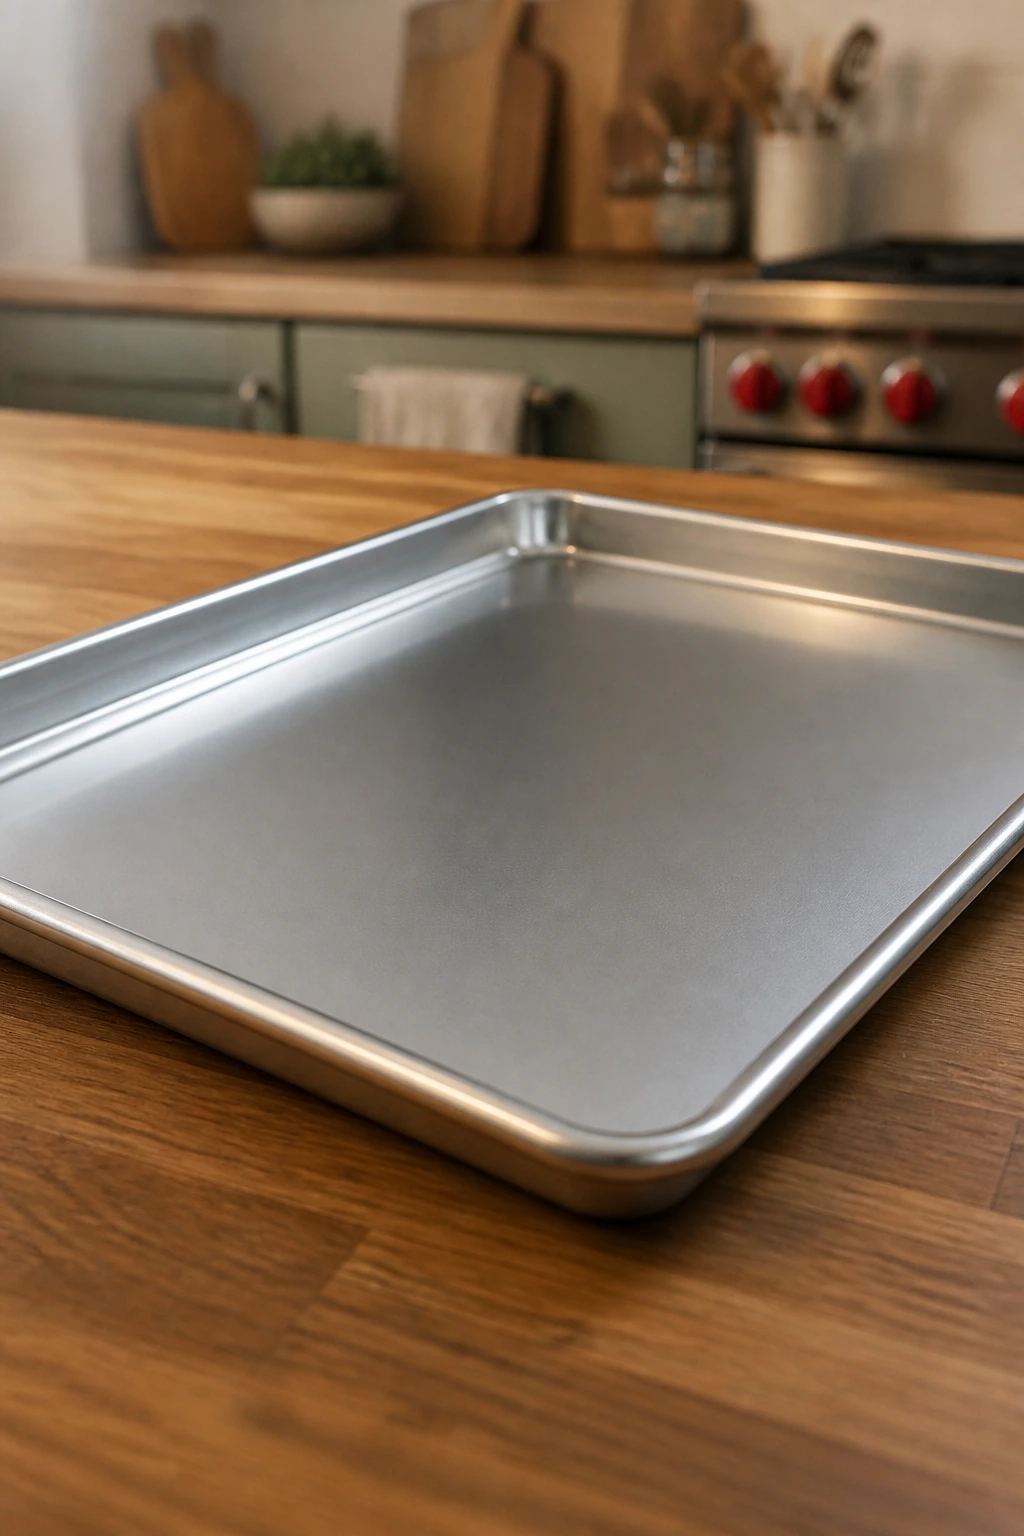
-
Rimmed baking sheets: Needed for chicken tenders, fish sticks, sliders, and pizzas; the rim keeps drips from spreading.
-
Large nonstick or stainless skillet: Useful for taco skillets, fried rice, sausage pasta, and chicken sauces.
-
9×13-inch baking dish: The workhorse for pasta bakes, casseroles, and stuffing dishes.
-
Medium saucepan or soup pot: Keep one around for cheese sauce, tomato soup, and potato soup.
-
Wire rack: Helps baked tenders and wedges stay crisp instead of steaming on the pan.
-
Colander: Pasta, potatoes, and soup vegetables all need a fast drain.
-
Whisk: Smooth sauces depend on it; a fork does not do the same job.
-
Instant-read thermometer: The easiest way to keep chicken and pork from drying out.
-
Mixing bowls: At least two, because breading stations and casserole mixes like to happen at once.
-
Wooden spoon or heatproof spatula: Good for scraping the bottom of skillets and breaking up ground meat.
Smart Shopping and Ingredient Tips
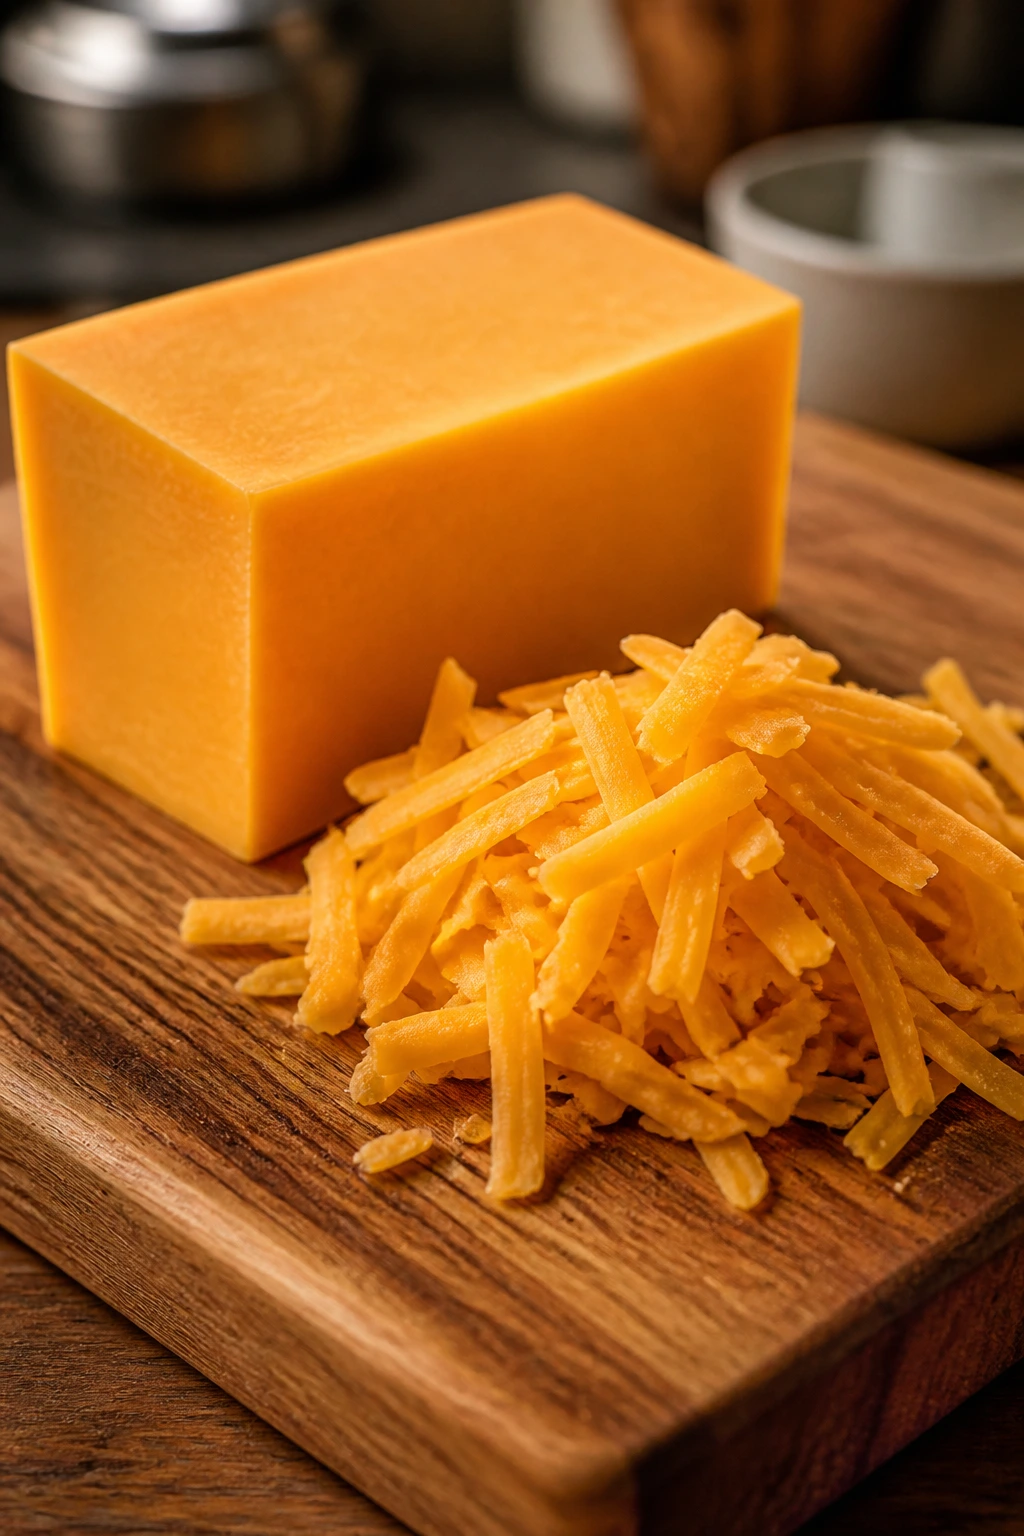
Buy the version of each ingredient that saves you trouble later. For chicken recipes, tenders and thighs are easier on weeknights than giant breasts, and if you do use breasts, slice them thinner so they cook evenly. For ground beef, 80/20 gives you more flavor in sloppy joes, taco skillets, and cheeseburger pasta; leaner beef can work, but it needs more help from sauce or cheese.
Cheese matters more than most people admit. Block cheddar you grate yourself melts smoother in mac and cheese, queso-style skillet dinners, and casseroles. Pre-shredded cheese still works for topping, especially when time is short, but the coating on the shreds can make sauce a little less silky. That does not ruin dinner. It just changes the finish.
Use frozen vegetables where they make sense. Peas, carrots, broccoli florets, and corn are often better frozen than limp from the produce drawer, and they save you the work of trimming and chopping. Canned tomatoes, broth, salsa, marinara, and barbecue sauce are the other quiet heroes here. Pick ones with flavors you already like, because these recipes do not hide a bad tomato sauce.
Rotisserie chicken is worth buying if it keeps dinner on track. It turns quesadillas, sliders, noodle bowls, pasta, and casseroles into a 10-minute assembly job. And for rice dishes, use long-grain white rice unless the recipe says otherwise; it stays loose and friendly instead of turning pasty.
How to Serve These Recipes
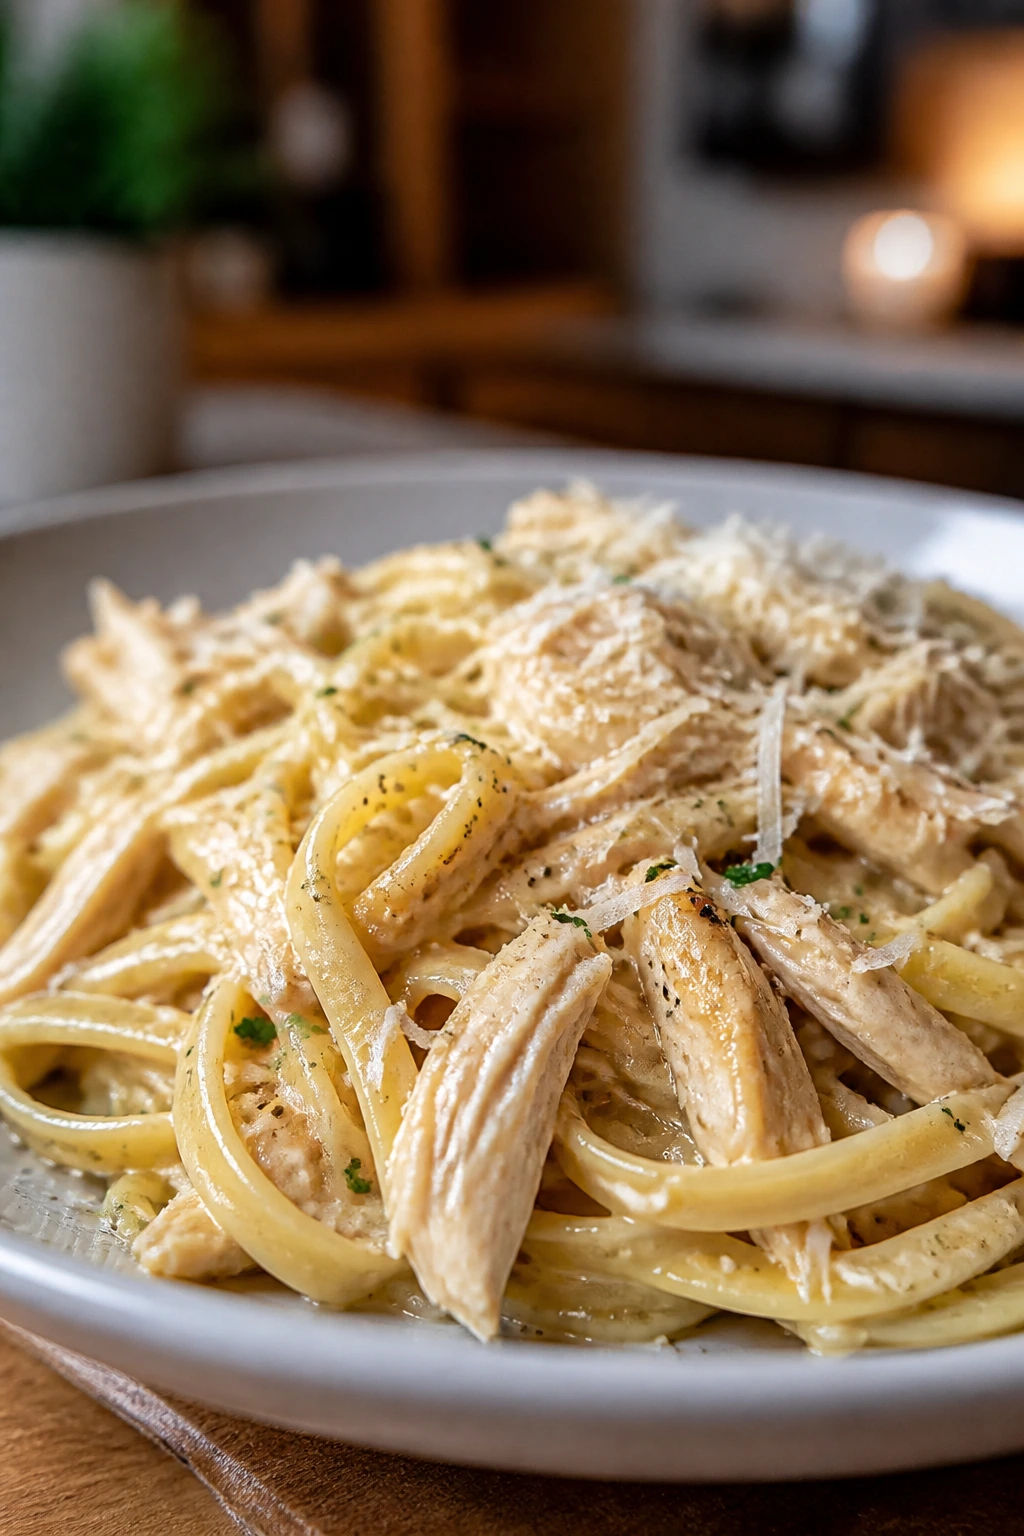
Presentation: Keep the plate readable. Put chicken tenders in a little stack, rice in one section, noodles in a shallow bowl, and sauce in a small cup when possible. A crowded plate looks busy; a simple one looks inviting.
Accompaniments: The safest sides are the ones that stay plain: apple slices, grapes, cucumber rounds, steamed peas, green beans, carrot sticks, garlic bread, and simple fruit salad. If you need one starchy side, choose fries, rolls, or a baked potato instead of another complicated dish.
Portions: Most of these meals feed 4 with normal appetites, though pasta bakes and soups often stretch farther. For smaller eaters, build the plate around one protein, one starch, and one fruit or vegetable; for bigger appetites, add a second bread or an extra scoop of rice rather than doubling the whole recipe.
Beverage Pairing: Milk, lemonade, apple juice, and sparkling water with lemon all fit this kind of dinner better than anything fussy. For adults, iced tea or a cold lager works with the burger, chicken, and pasta side of the lineup.
Additional Tips and Flavor Boosters
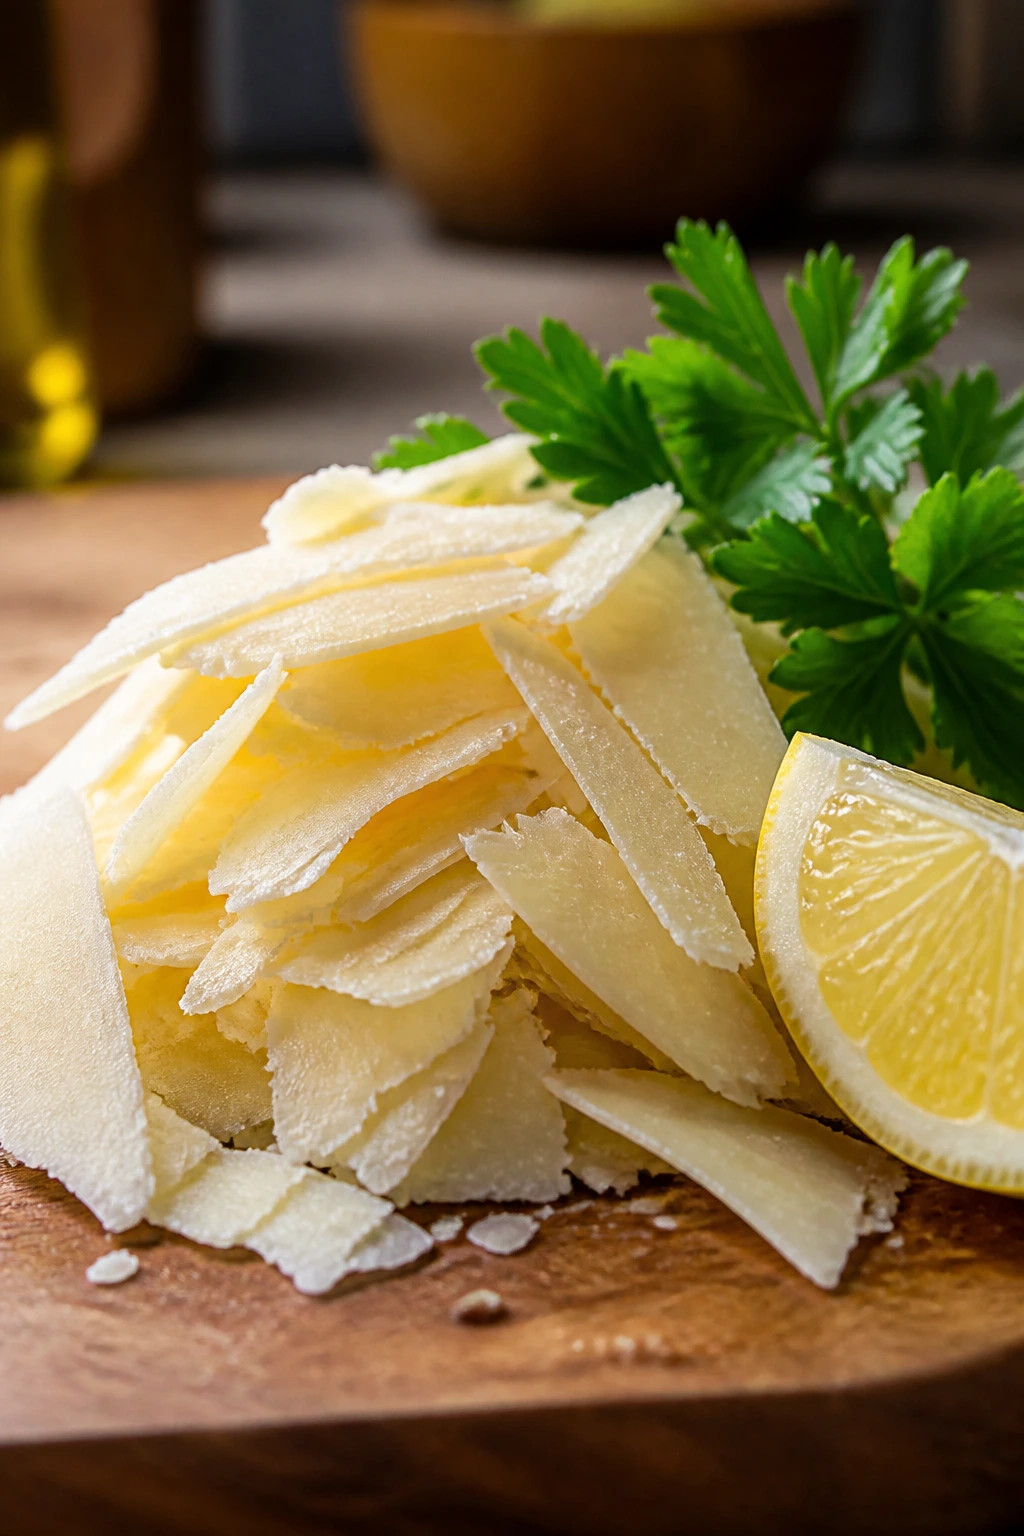
Flavor Enhancement: Keep a couple of finishing moves in the kitchen drawer: parmesan, hot sauce, pickles, chopped parsley, and lemon wedges. A tiny hit of something bright at the end does more than a heavy hand in the pot ever will.
Customization: Let the table decide the last 10 percent. Spoon sauces into small bowls, offer shredded cheese separately, and keep crunchy add-ons like tortilla chips or breadcrumbs on the side. That keeps one dinner from needing to satisfy every taste in one pan.
Serving Suggestions: When a meal is soft or creamy, give it one crisp thing next to it. When it is crispy, give it one soft thing next to it. Chicken tenders like fruit; mac and cheese likes peas; soup likes toast; sliders like pickles.
Make-It-Yours: For gluten-free plates, swap in gluten-free pasta, breadcrumbs, or tortillas where needed. For dairy-free plates, use a plant-based butter and a melting cheese that you already trust. For lower-sodium meals, start with low-sodium broth and keep salty toppings at the table instead of in the pan.
Make-Ahead, Storage, and Reheating Guidance
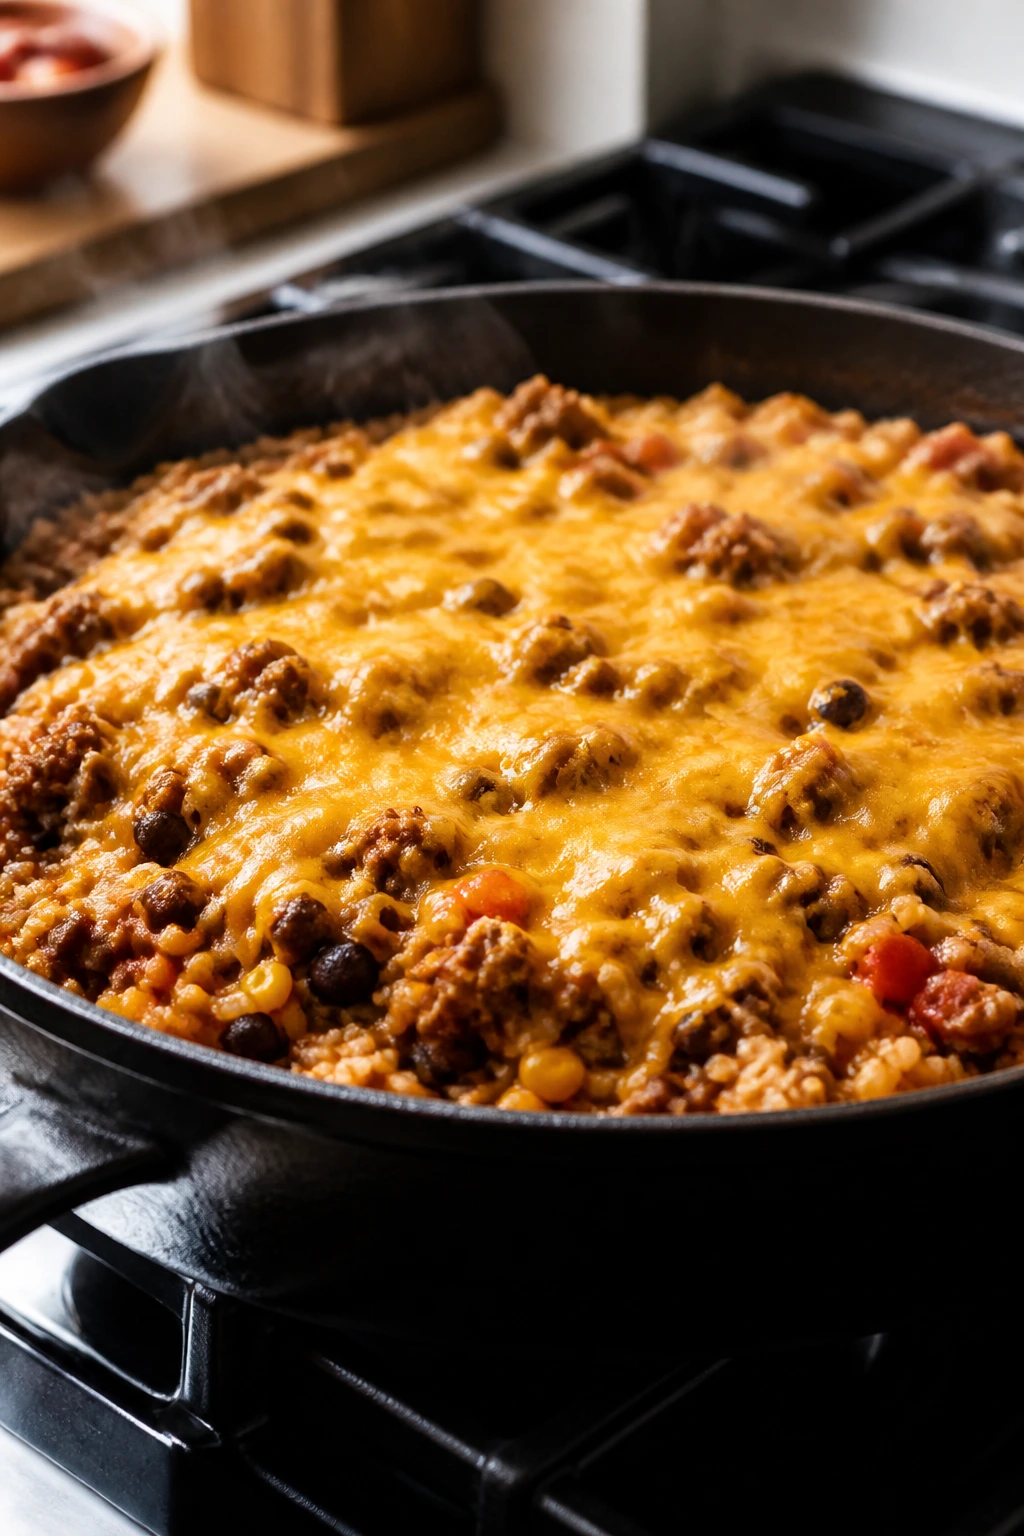
Most of these dinners keep best when they are cooled, covered, and moved into the fridge within 2 hours. Pasta bakes, meatballs, sloppy joe filling, taco skillets, and casseroles usually hold for 3 to 4 days refrigerated. Rice dishes and fried rice are best eaten within 3 days, and soups usually stay good for 4 days if they are chilled quickly.
Freezing works well for several of them, but not all. Meatballs in sauce, sloppy joe filling, chili-style skillet meals, soups, and baked casseroles freeze for up to 2 months in airtight containers. Chicken tenders, sliders, quesadillas, and grilled cheese are better frozen only if you freeze the filling or components, not the finished sandwich or crust. Wet toppings like lettuce, sour cream, and fresh herbs should stay out of the freezer completely.
Reheating depends on the texture you want back. Pasta bakes, ziti, mac and cheese, and casseroles do best in a 325°F oven covered with foil and a spoonful of milk or broth stirred in first. Skillet meals, rice bowls, and noodle dishes reheat well on the stove over medium-low heat with a small splash of water. Microwave reheating works too, but keep the power lower and cover the dish so the edges do not dry out while the center stays cold.
If you are making ahead, assemble casseroles the day before and hold the crumb or cheese topping back until baking time. Cooked chicken, shredded meat, and sauce bases are the easiest pieces to prep early. And if a dish has bread or a crisp coating, re-crisp it in the oven instead of the microwave or it will come back sad and limp.
Variations and Adaptations to Try
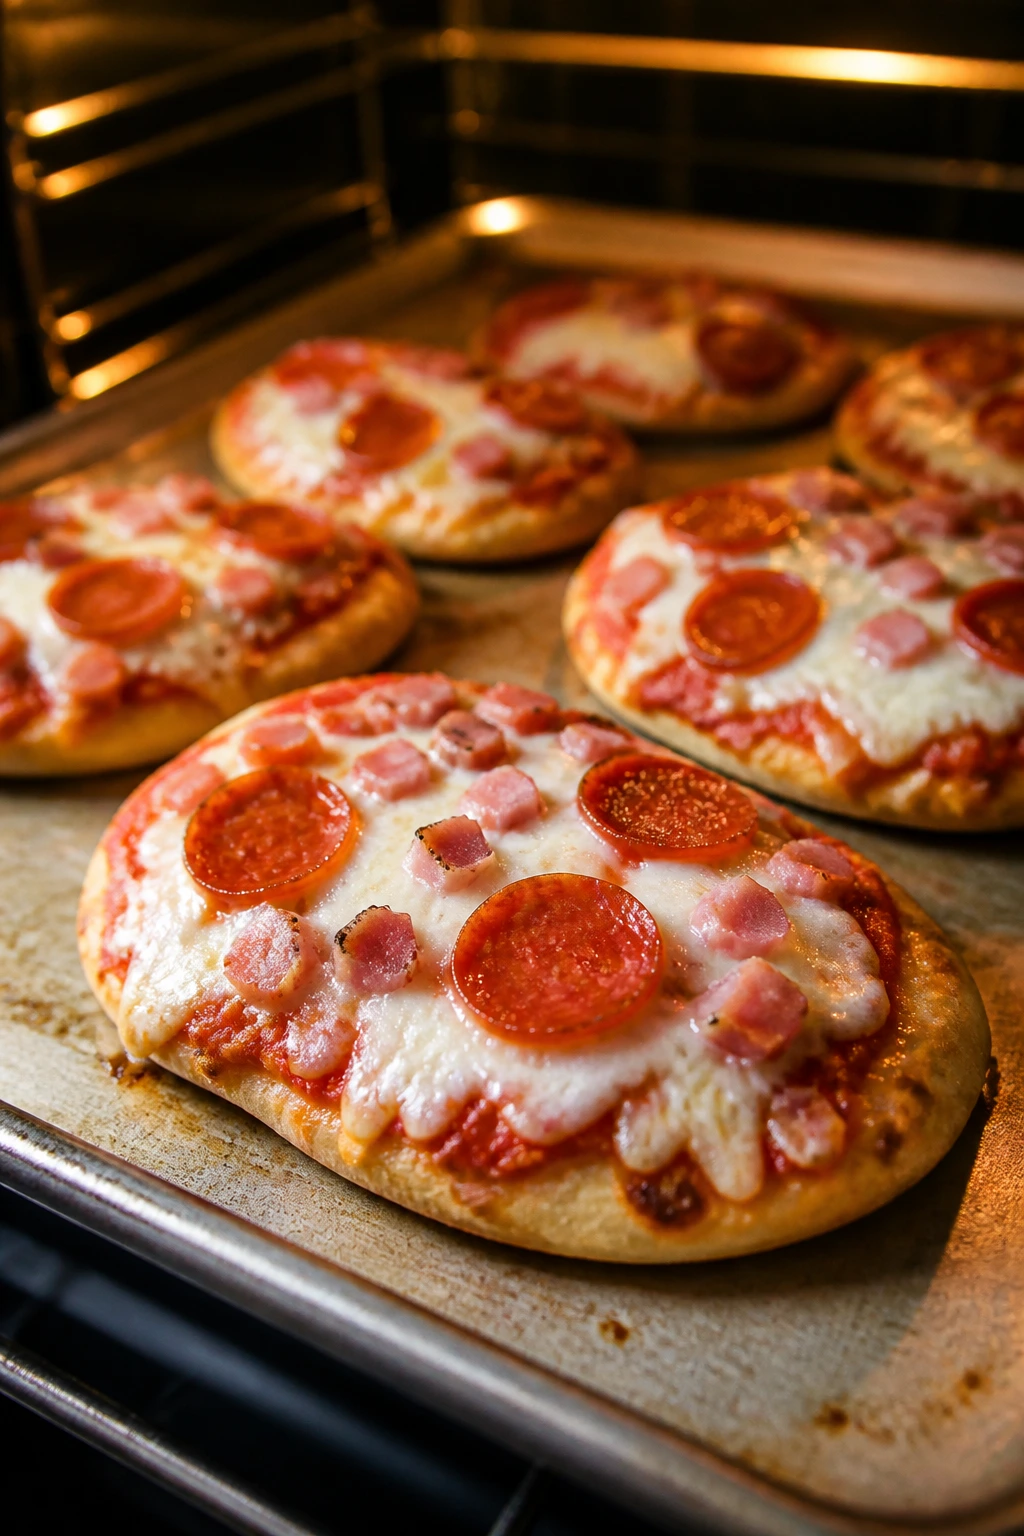
Sauce-on-the-Side Night: Keep sauces in little bowls and let everyone dip instead of mixing. This works especially well for chicken tenders, sliders, meatballs, and quesadillas, where control over texture often matters more than the sauce itself.
Gluten-Free Table: Swap in gluten-free pasta, breadcrumbs, and tortillas where needed, and use cornstarch for thickening sauces. The best candidates are the rice bowls, sheet pan chicken, soups, and any casserole that can hold together without a wheat-heavy base.
Dairy-Light Swap: Use olive oil instead of butter where possible, and choose a plant-based milk that stays neutral in soups or sauces. Recipes like taco skillets, fried rice, and chicken bowls adapt easily because the dairy is optional rather than structural.
Vegetable-Hiding Mode: Grate carrots, zucchini, or cauliflower into sauces and meat mixtures until they melt in. The hidden-veggie spaghetti and burrito skillet are the easiest places to start, but the same trick works in meatloaf muffins and meatballs too.
Big-Kid Heat Upgrade: Keep the family batch mild, then put hot sauce, crushed red pepper, jalapeños, or chili crisp at the table. That way one pan feeds both the cautious eater and the person who wants more bite without making the whole meal loud.
Common Mistakes to Avoid
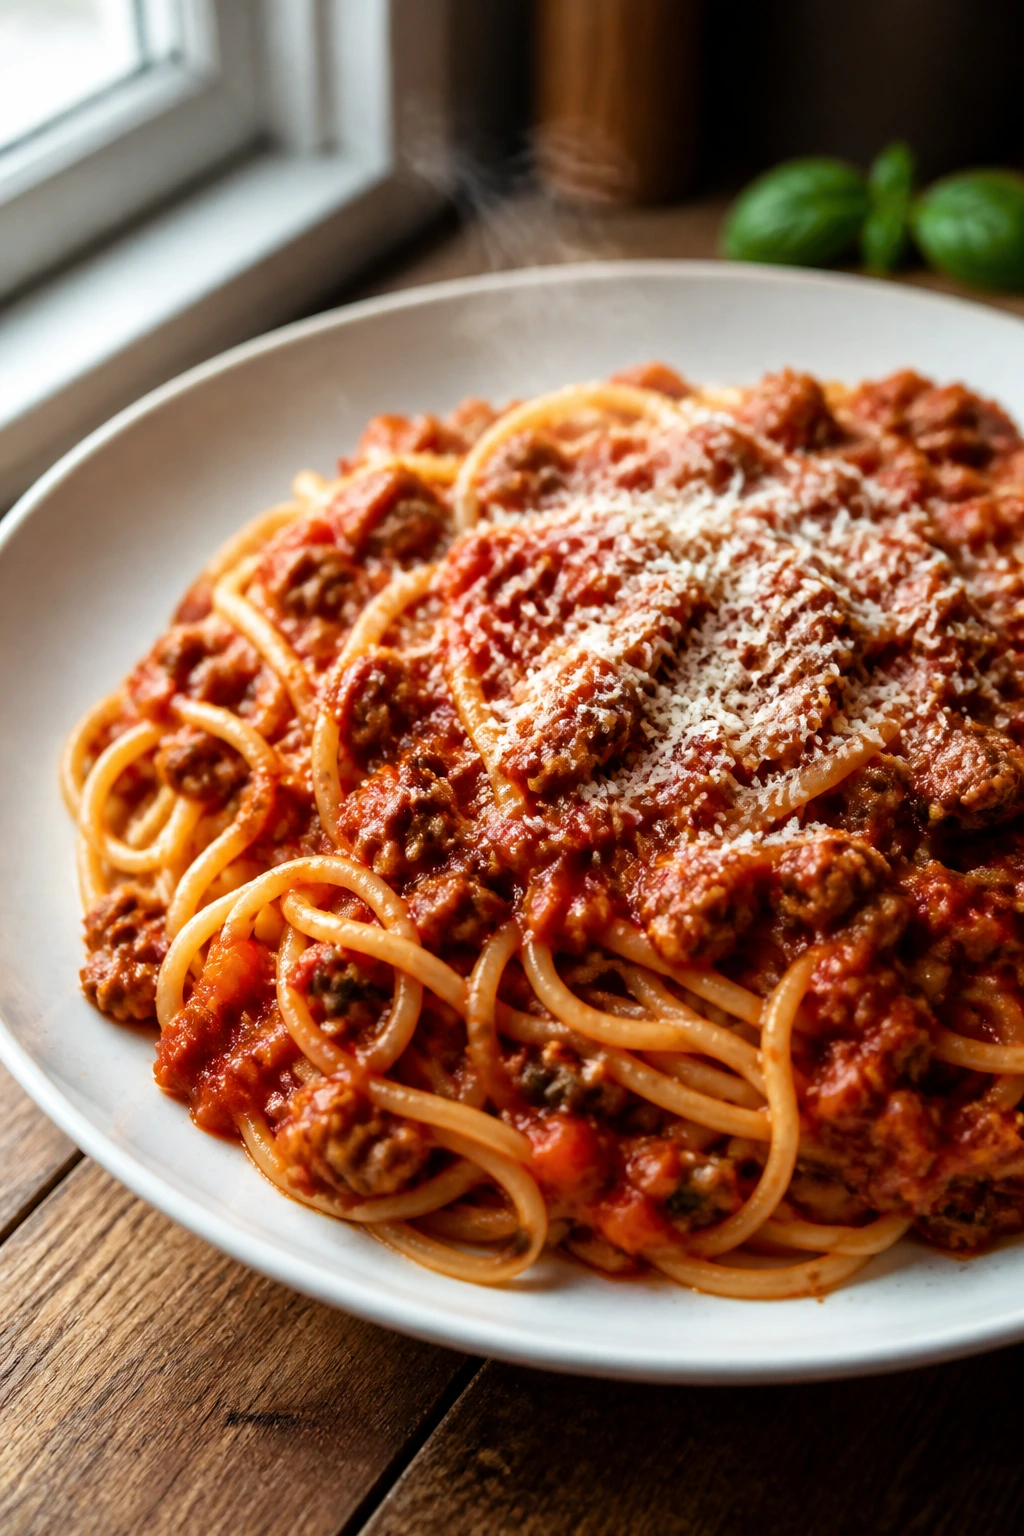
Making the whole dish too wet: This is the fastest way to lose picky eaters. Soft food can be fine, but soggy food is a different issue. Keep an eye on sauce amounts, drain meat well, and do not drown bread or pasta in liquid before baking.
Hiding vegetables too aggressively: Purees and surprise vegetables sound clever, but if the texture changes too much, kids notice anyway. Grating or mincing vegetables until they disappear into sauce usually works better than turning everything into one smooth mash.
Overcooking the protein: Chicken breasts, pork chops, and meatballs all dry out quickly if you chase extra browning after they are already done. Use a thermometer when you can, and take the meat off the heat as soon as it reaches the right temperature.
Forgetting the side logic: A dinner that is creamy needs crunch somewhere. A crispy dinner needs something soft nearby. If you skip that contrast, the plate can feel monotone and kids get tired halfway through.
Seasoning the pan for adults and then serving the same pan to everyone: That is how dinner gets rejected. Keep the base mild, then add the sharper stuff at the table. It is much easier to add pepper or hot sauce than to take it out.
Frequently Asked Questions
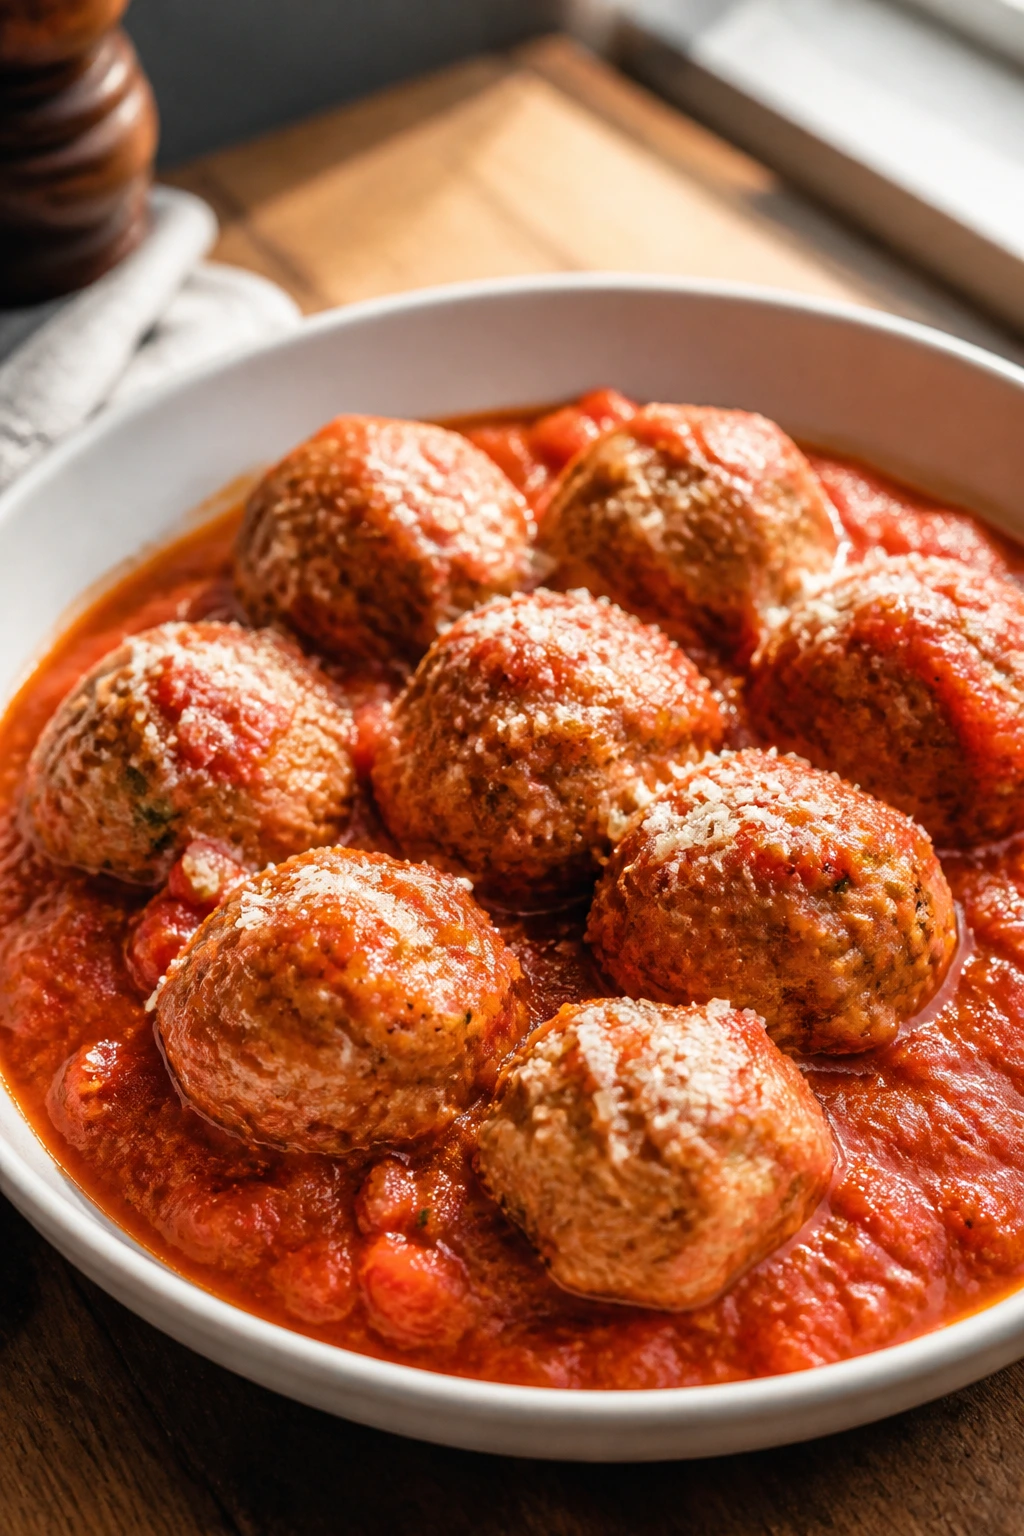
Which of these dinners work best when I only have 20 minutes?
Chicken quesadillas, mini naan pizzas, breakfast tacos, and buttered noodles with chicken are the fastest wins. Rotisserie chicken helps a lot here because you are skipping the long protein cook.
Can I use rotisserie chicken in most of these recipes?
Yes, and it is one of the easiest shortcuts in the whole collection. It works especially well in quesadillas, pasta, sliders, soup, chicken and stuffing casserole, and BBQ chicken sliders.
How do I keep my child from rejecting mixed dishes?
Serve the meal in parts when you can. Keep sauce, cheese, and toppings separate for the first few servings so the plate looks predictable, then let them mix if they want to.
Which recipes freeze best?
Meatballs in sauce, sloppy joe filling, soups, mac and cheese, baked ziti, and most casseroles freeze well for up to 2 months. Skip freezing anything that depends on crisp breading or fresh lettuce.
What if my family wants spice and the kids do not?
Cook the base mild and build heat at the table. Hot sauce, chili crisp, jalapeños, pepper flakes, and spicy salsa all work as add-ons instead of forcing the whole pan to match one palate.
Can I make these ahead for the next day?
Yes. Casseroles, soup, meatballs, and pasta bakes are especially good for this. If a dish has crumbs, tortilla chips, or bread on top, add those just before baking or reheating so they stay crisp.
What should I do if a sauce gets too thick?
Add warm broth, milk, or pasta water a little at a time and stir over low heat. Thick sauces are easy to loosen; broken or scorched ones are not.
Which dinners are best for leftovers in lunch boxes?
Meatballs, sliders, pasta bakes, fried rice, and mac and cheese reheat well. Pack dipping sauce separately and reheat the main portion with a small splash of water so it does not turn dry.
The Calmer Side of Weeknight Dinner
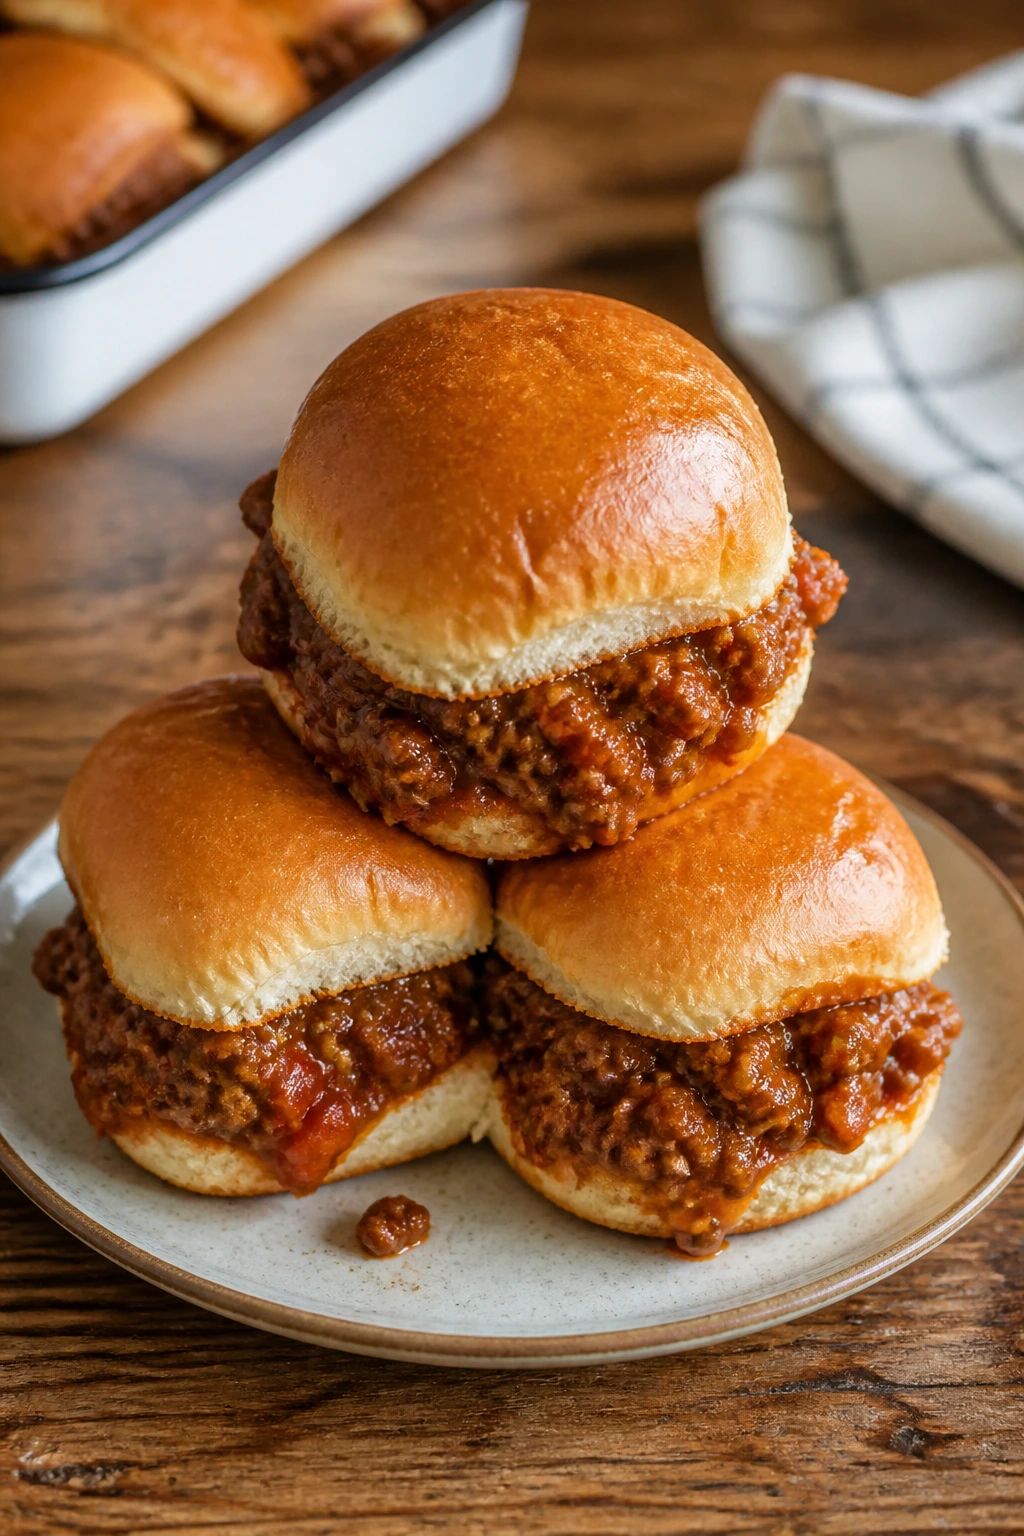
You do not need a separate meal for every person at the table. You need a few dinners that look familiar, taste gentle, and still give you enough flexibility to adjust on the fly. That is what makes these recipes useful: they lower the temperature in the kitchen without lowering the quality of the food.
Pick three or four favorites, stock the pantry around them, and keep the sauces and toppings flexible. The next time dinner starts to wobble, you will have a plan that looks simple on the page and feels even better in practice.