
Romantic desserts for beginner bakers do not need sugar sculpture, pastry rings, or a thermometer clipped to a saucepan like a science project. They need good flavor, a neat finish, and a method that behaves when you’re tired, a little nervous, and trying to make something that feels special without turning the kitchen upside down.
That’s the sweet spot here. Think glossy chocolate, berries that stain the cream pink at the edges, crisp sugar tops, custards that set in the fridge, and little bakes that come out of a muffin tin looking more polished than the effort should allow. The trick isn’t complexity. It’s choosing desserts that look intentional even when the method is mercifully plain.
If you’ve ever wanted a date-night finish that feels thoughtful without demanding bakery-level precision, this is the lane to stay in. A few of these are no-bake. A few lean on store-bought shortcuts in the smartest possible way. And a few will teach you useful basics—melt chocolate without burning it, whip cream to soft peaks, bake a small cake until it springs back—without making you wrestle with finicky doughs or fragile decorations.
Why These Desserts Work for New Bakers
-
Small batches keep the risk low: Most of these recipes make two to six servings, so one slightly imperfect tart or cake doesn’t waste an entire party-size dessert.
-
Chocolate, berries, and cream do a lot of the visual work: A spoonful of raspberry sauce or a dusting of cocoa can make a plate look deliberate without any piping skills.
-
The methods are forgiving: Whisking, folding, chilling, and simple baking show up again and again, while the fussy stuff stays out of the way.
-
You can lean on smart shortcuts: Puff pastry, graham crumbs, brownie mix, and pre-made tart shells belong here when they save time without cheapening the dessert.
-
Most of these finish well at room temperature or cold: That matters when you want to plate dessert after dinner instead of racing a melting clock.
-
They scale cleanly for two or four people: Double a batter, halve a custard, or make a tray of cookies without relearning the method.
1. Chocolate-Dipped Strawberries
Fresh strawberries and a hard shell of dark chocolate do a lot with almost no fuss. The berries stay bright and juicy, the chocolate snaps when you bite in, and the whole plate looks more elegant than the ingredient list deserves.
Why It Works: The contrast is the whole trick: cold fruit, room-temperature chocolate, and a glossy finish that sets in minutes. This is one of the few desserts where perfect imperfection works in your favor.
Key Ingredients:
- 1 lb fresh strawberries, hulled and dried completely
- 8 oz semi-sweet chocolate, chopped
- 1 tsp coconut oil or neutral oil
- 1 tbsp finely chopped pistachios or sprinkles, optional
- Flaky salt, optional pinch
Quick Steps:
- Line a baking sheet with parchment paper.
- Melt the chocolate with the oil in a heatproof bowl over barely simmering water, stirring until smooth.
- Hold each strawberry by the stem end and dip about two-thirds into the chocolate.
- Set on the parchment and top with pistachios or salt before the coating sets.
- Chill for 10 minutes, just until firm.
Equipment for This Recipe:
- Small saucepan
- Heatproof bowl
- Parchment-lined baking sheet
How to Serve This Dish: Arrange the berries on a chilled plate with a few extra strawberries around the edges. They’re best served the same day, especially if you want the chocolate crisp.
Pro Tips for This Recipe:
- Dry the strawberries with paper towels and let them sit for 10 minutes after washing; water makes the chocolate slide.
- If the chocolate feels thick, add the oil a drop at a time rather than dumping in more.
Variations on This Dish:
- White Chocolate Ribbon: Use melted white chocolate and a few dark chocolate drizzles on top.
- Espresso Edge: Stir 1/2 tsp instant espresso powder into the chocolate for a deeper finish.
Common Mistakes to Avoid with This Dish:
- Don’t dip wet berries. The coating will streak and set poorly.
- Don’t chill them too long uncovered. Condensation dulls the chocolate.
2. Single-Serve Molten Chocolate Cake
Crack the spoon through the top and the center spills out like warm truffle filling. That little moment is why people keep making this dessert, even though it sounds fancier than it is.
Why It Works: The batter is built to bake fast at high heat so the edges set before the center does. You get a soft shell, a tender crumb, and that molten middle with very little technique.
Key Ingredients:
- 2 tbsp unsalted butter, plus more for ramekins
- 2 oz bittersweet chocolate, chopped
- 1 large egg
- 1 large egg yolk
- 2 tbsp granulated sugar
- 1 tbsp all-purpose flour
- Pinch of fine salt
Quick Steps:
- Preheat the oven to 425°F and butter two 6-ounce ramekins well.
- Melt the butter and chocolate together until smooth.
- Whisk in the egg, yolk, sugar, flour, and salt until glossy.
- Divide into ramekins and bake 9 to 11 minutes, until the edges are set but the centers still jiggle.
- Rest 1 minute, then invert onto plates.
Equipment for This Recipe:
- 2 ramekins
- Small saucepan or microwave-safe bowl
- Whisk
How to Serve This Dish: Dust with powdered sugar and add a scoop of vanilla ice cream or a few raspberries. Serve immediately; the center loses its drama if it sits around.
Pro Tips for This Recipe:
- Use ramekins with straight sides so the cakes release cleanly.
- Pull them early if your oven runs hot; overbaking turns the center into regular cake.
Variations on This Dish:
- Raspberry Core: Drop 2 raspberries into the center before baking.
- Orange-Chocolate Version: Add 1/2 tsp orange zest to the batter.
Common Mistakes to Avoid with This Dish:
- Don’t bake until the top looks fully done. That’s how you lose the molten middle.
- Don’t skip greasing the ramekins. The cake needs to slide out in one piece.
3. Vanilla Bean Panna Cotta with Raspberry Sauce
Silky, cold, and faintly floral, panna cotta feels like restaurant dessert dressed for a smaller table. The vanilla reads clean instead of heavy, and the raspberry sauce gives the whole dish a tart little spark.
Why It Works: Gelatin sets the cream without baking, so the texture stays smooth and cool. It’s a quiet dessert, which is exactly why the bright sauce and vanilla seeds matter so much.
Key Ingredients:
- 2 cups heavy cream
- 1 cup whole milk
- 1/3 cup granulated sugar
- 2 1/4 tsp unflavored gelatin
- 1 vanilla bean, split, or 2 tsp vanilla bean paste
- 1 cup raspberries
- 1 tbsp lemon juice
Quick Steps:
- Sprinkle the gelatin over 3 tbsp cold milk and let it bloom for 5 minutes.
- Warm the cream, remaining milk, sugar, and vanilla until steaming, not boiling.
- Stir in the gelatin mixture until dissolved, then strain into cups.
- Chill 4 hours until set.
- Simmer the raspberries and lemon juice for 3 minutes, cool, then spoon over the panna cotta.
Equipment for This Recipe:
- Small saucepan
- Fine-mesh strainer
- 4 small glasses or ramekins
How to Serve This Dish: Serve in clear glasses so the pale cream and red sauce show through. A mint leaf or two is enough; don’t bury it under garnish.
Pro Tips for This Recipe:
- Strain the base if you want a flawless surface.
- Use whole vanilla beans only if you like the tiny flecks; paste is easier and still gives the right flavor.
Variations on This Dish:
- Rose-Raspberry Version: Add 1/4 tsp rosewater to the cream.
- Lemon Vanilla Version: Swap half the raspberry sauce for lemon curd.
Common Mistakes to Avoid with This Dish:
- Don’t boil the cream. Too much heat can weaken the gelatin.
- Don’t rush the chill time. Soft panna cotta tastes undercooked even when it’s fine.
4. Strawberry Shortcake Biscuits
A warm biscuit split open under strawberries and cream is one of those desserts that looks casual until you taste it. The edges are crisp, the center stays tender, and the berries leak juice into the crumb in the best way.
Why It Works: Butter pieces in the dough create flaky pockets, while the strawberries soften into their own syrup. It’s a low-stress bake that still lands squarely in “special.”
Key Ingredients:
- 2 cups all-purpose flour
- 1 tbsp baking powder
- 1/4 cup sugar, plus more for topping
- 1/2 tsp fine salt
- 6 tbsp cold unsalted butter, cubed
- 3/4 cup cold buttermilk
- 2 cups sliced strawberries
- 1 cup whipped cream
Quick Steps:
- Heat the oven to 425°F and line a baking sheet.
- Cut the butter into the flour, baking powder, sugar, and salt until pea-size bits remain.
- Stir in the buttermilk just until the dough comes together.
- Pat, cut, and bake the biscuits for 12 to 14 minutes until golden.
- Toss the strawberries with a spoonful of sugar and spoon them over split biscuits with whipped cream.
Equipment for This Recipe:
- Baking sheet
- Biscuit cutter or glass
- Mixing bowl
How to Serve This Dish: Serve while the biscuits are still warm. The contrast between warm crumb and cold cream is the whole point.
Pro Tips for This Recipe:
- Keep the butter cold. Soft butter makes dense biscuits.
- Let the berries sit for 15 minutes so they start making juice.
Variations on This Dish:
- Basil Berry Shortcake: Add thin basil ribbons to the strawberries.
- Lemon-Zest Version: Grate lemon zest into the biscuit dough.
Common Mistakes to Avoid with This Dish:
- Don’t twist the cutter. That seals the edges and limits lift.
- Don’t overwork the dough. A shaggy, slightly uneven dough bakes better than a smooth one.
5. Easy Brownie Heart Bars
These are brownies with a small amount of theater built in. A heart-shaped cutter, a little jam, and a shiny top make them feel like they came from a bakery case instead of a 9×13 pan.
Why It Works: Brownies are forgiving, and the heart cutouts give you clean edges without extra decorating skill. A spoon of jam in the center keeps the whole thing from tasting one-note.
Key Ingredients:
- 1 box fudgy brownie mix
- Eggs, oil, and water as listed on the box
- 1/3 cup raspberry jam
- 1/2 cup powdered sugar
- 1 to 2 tsp milk
- Pinch of salt
Quick Steps:
- Mix and bake the brownies in an 8×8-inch pan according to the box directions.
- Cool completely, then cut heart shapes with a cookie cutter.
- Stir powdered sugar, milk, and salt into a thin glaze.
- Spoon a little jam onto each brownie heart and drizzle with glaze.
Equipment for This Recipe:
- 8×8-inch pan
- Cookie cutter
- Small bowl
How to Serve This Dish: Stack the hearts on a small platter with berries scattered around them. They travel well, which makes them good for gifting.
Pro Tips for This Recipe:
- Chill the brownies for 20 minutes before cutting for cleaner edges.
- Use seedless jam if you want a smoother look.
Variations on This Dish:
- Cherry Heart Bars: Swap raspberry jam for cherry preserves.
- Salted Caramel Finish: Drizzle with warm caramel instead of glaze.
Common Mistakes to Avoid with This Dish:
- Don’t cut warm brownies. They crumble and look ragged.
- Don’t flood the tops with glaze. A thin drizzle keeps the heart shape visible.
6. No-Bake Cheesecake Cups
Cold, creamy, and neatly layered, these cups are the easiest way to get cheesecake flavor without a springform pan. The crumb base stays sandy and buttery, while the filling cuts cleanly with a spoon.
Why It Works: Cream cheese and whipped cream set up in the fridge, so there’s no oven time and no crack to worry about. Individual cups also feel a little more intentional than one big slice.
Key Ingredients:
- 1 cup graham cracker crumbs
- 3 tbsp melted butter
- 8 oz cream cheese, softened
- 1/3 cup powdered sugar
- 1 tsp vanilla extract
- 1 cup cold heavy cream
- 1 cup berries
Quick Steps:
- Mix the crumbs and butter, then press into the bottom of 4 small cups.
- Beat the cream cheese, sugar, and vanilla until smooth.
- Whip the cream to soft peaks and fold it into the cheese mixture.
- Spoon into the cups and chill for 2 hours.
- Top with berries before serving.
Equipment for This Recipe:
- Hand mixer
- Mixing bowls
- 4 dessert cups
How to Serve This Dish: Serve with a spoon and a few extra crumbs sprinkled on top. A fresh strawberry slice on each cup is enough decoration.
Pro Tips for This Recipe:
- Beat the cream cheese until no lumps remain before adding the whipped cream.
- If you want sharper layers, pipe or spoon the filling instead of dumping it in.
Variations on This Dish:
- Chocolate Crumb Cups: Use crushed chocolate cookies for the base.
- Lemon Berry Cups: Add 1 tsp lemon zest to the filling.
Common Mistakes to Avoid with This Dish:
- Don’t use warm cream. It won’t whip well.
- Don’t serve before chilling. The filling needs time to firm up.
7. Lemon Posset with Berries
This is one of those desserts that sounds fancier than its method. Cream, sugar, and lemon turn into a spoonable custard with a bright edge that keeps it from feeling heavy.
Why It Works: Lemon acid thickens the cream as it cools, which is why the texture goes from liquid to lush in the fridge. You get a clean citrus finish and almost no work at the stove.
Key Ingredients:
- 2 cups heavy cream
- 1/2 cup sugar
- 1/4 cup fresh lemon juice
- 1 tsp lemon zest
- 1 cup berries
- Mint leaves, optional
Quick Steps:
- Simmer the cream and sugar for 3 minutes, stirring often.
- Off the heat, whisk in the lemon juice and zest.
- Pour into 4 small glasses.
- Chill for at least 4 hours until set.
- Top with berries and mint.
Equipment for This Recipe:
- Small saucepan
- Whisk
- Serving glasses
How to Serve This Dish: Keep the glasses cold and add the berries at the last minute so they stay bright. A short spoon is better than a long one here.
Pro Tips for This Recipe:
- Measure the lemon juice carefully; too much can make the texture grainy.
- Use fresh juice, not bottled, for the cleanest flavor.
Variations on This Dish:
- Lime Posset: Swap lemon for lime and top with strawberries.
- Orange Cream Version: Use orange juice and zest for a softer profile.
Common Mistakes to Avoid with This Dish:
- Don’t boil hard. The cream can take on a cooked taste.
- Don’t skip the chill. Posset needs time to set properly.
8. Raspberry Almond Thumbprint Cookies
Buttery shortbread, a jam center, and a little almond scent give these cookies an old-fashioned charm. They look like something you spent far longer on than you did.
Why It Works: The dough is stiff enough to hold shape, and the thumbprint creates a ready-made pocket for jam. Almond extract makes the raspberry taste sharper and cleaner.
Key Ingredients:
- 1 cup unsalted butter, softened
- 1/2 cup sugar
- 1 egg yolk
- 1 tsp almond extract
- 2 cups all-purpose flour
- 1/2 cup raspberry jam
- Pinch of salt
Quick Steps:
- Beat the butter and sugar until creamy.
- Mix in the yolk, almond extract, flour, and salt.
- Roll into balls, press the centers, and fill with jam.
- Bake at 350°F for 12 to 14 minutes until the edges barely color.
- Cool on the pan for 10 minutes.
Equipment for This Recipe:
- Baking sheet
- Mixing bowl
- Spoon or thumb for indenting
How to Serve This Dish: Serve on a small plate with tea or coffee. They’re sturdy enough for gifting and pretty enough for a dessert tray.
Pro Tips for This Recipe:
- Make the indent before baking, then press lightly again halfway through if it puffs up.
- Warm the jam slightly so it spoons in cleanly.
Variations on This Dish:
- Apricot Almond Version: Use apricot preserves instead of raspberry.
- Chocolate Center Version: Fill with chocolate hazelnut spread.
Common Mistakes to Avoid with This Dish:
- Don’t overfill the centers. Jam bubbles over and sticks.
- Don’t use cold butter straight from the fridge. It won’t cream properly.
9. Dark Chocolate Ganache Tart
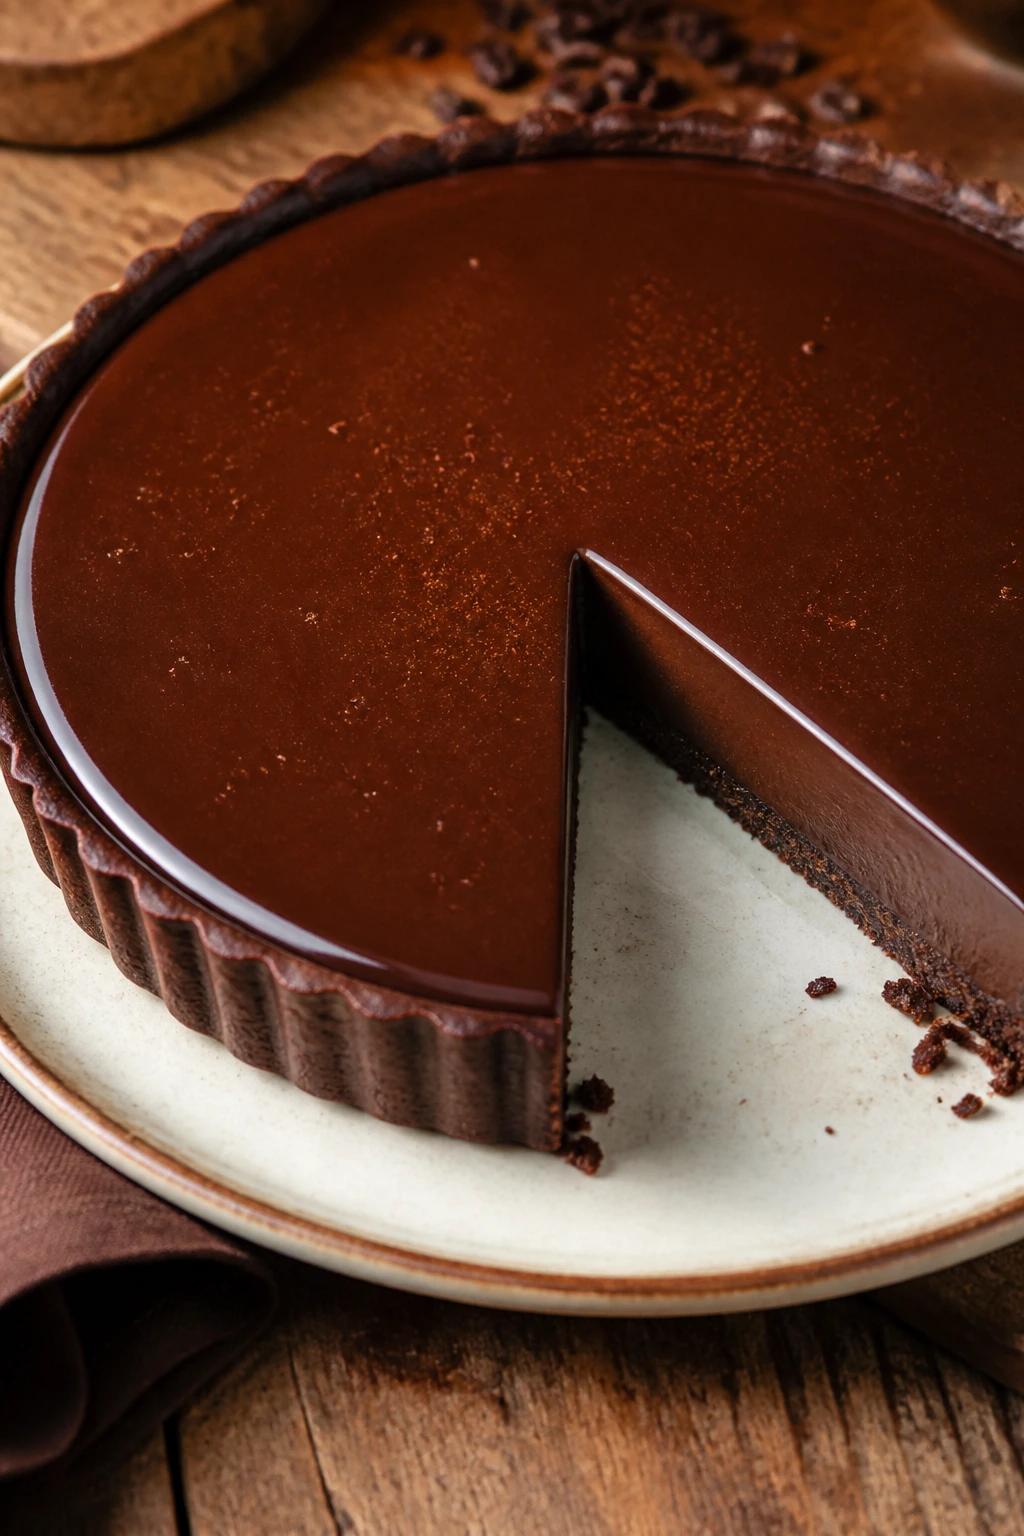
The filling is glossy enough to mirror a window, and the crust gives just enough crunch to keep each bite from feeling too rich. It’s a simple tart with a strong sense of occasion.
Why It Works: Ganache is one of the easiest chocolate fillings because hot cream melts the chocolate into a smooth, sliceable set. A crumb crust keeps the method beginner-friendly and skips pastry anxiety.
Key Ingredients:
- 1 1/2 cups chocolate cookie crumbs
- 5 tbsp melted butter
- 8 oz dark chocolate, chopped
- 1 cup heavy cream
- 1 tbsp butter
- Flaky salt, optional
Quick Steps:
- Press the crumbs and melted butter into a 9-inch tart pan.
- Bake the crust for 8 minutes and cool.
- Pour hot cream over the chopped chocolate and wait 2 minutes.
- Stir until smooth, then mix in the butter.
- Pour into the crust and chill 2 hours.
Equipment for This Recipe:
- 9-inch tart pan
- Saucepan
- Heatproof bowl
How to Serve This Dish: Slice with a warm knife and add raspberries or a little whipped cream on the side. A tiny pinch of salt on top gives the chocolate more depth.
Pro Tips for This Recipe:
- Use bar chocolate, not chips, if you want a smoother ganache.
- Let the tart sit 10 minutes before slicing so the filling doesn’t crack.
Variations on This Dish:
- Orange Ganache Tart: Add orange zest to the cream.
- Hazelnut Tart: Stir 2 tbsp finely chopped hazelnuts into the crust.
Common Mistakes to Avoid with This Dish:
- Don’t overbake the filling. Ganache should set in the fridge, not in the oven.
- Don’t slice it straight from the coldest part of the fridge; the crust can shatter.
10. Mini Red Velvet Cupcakes
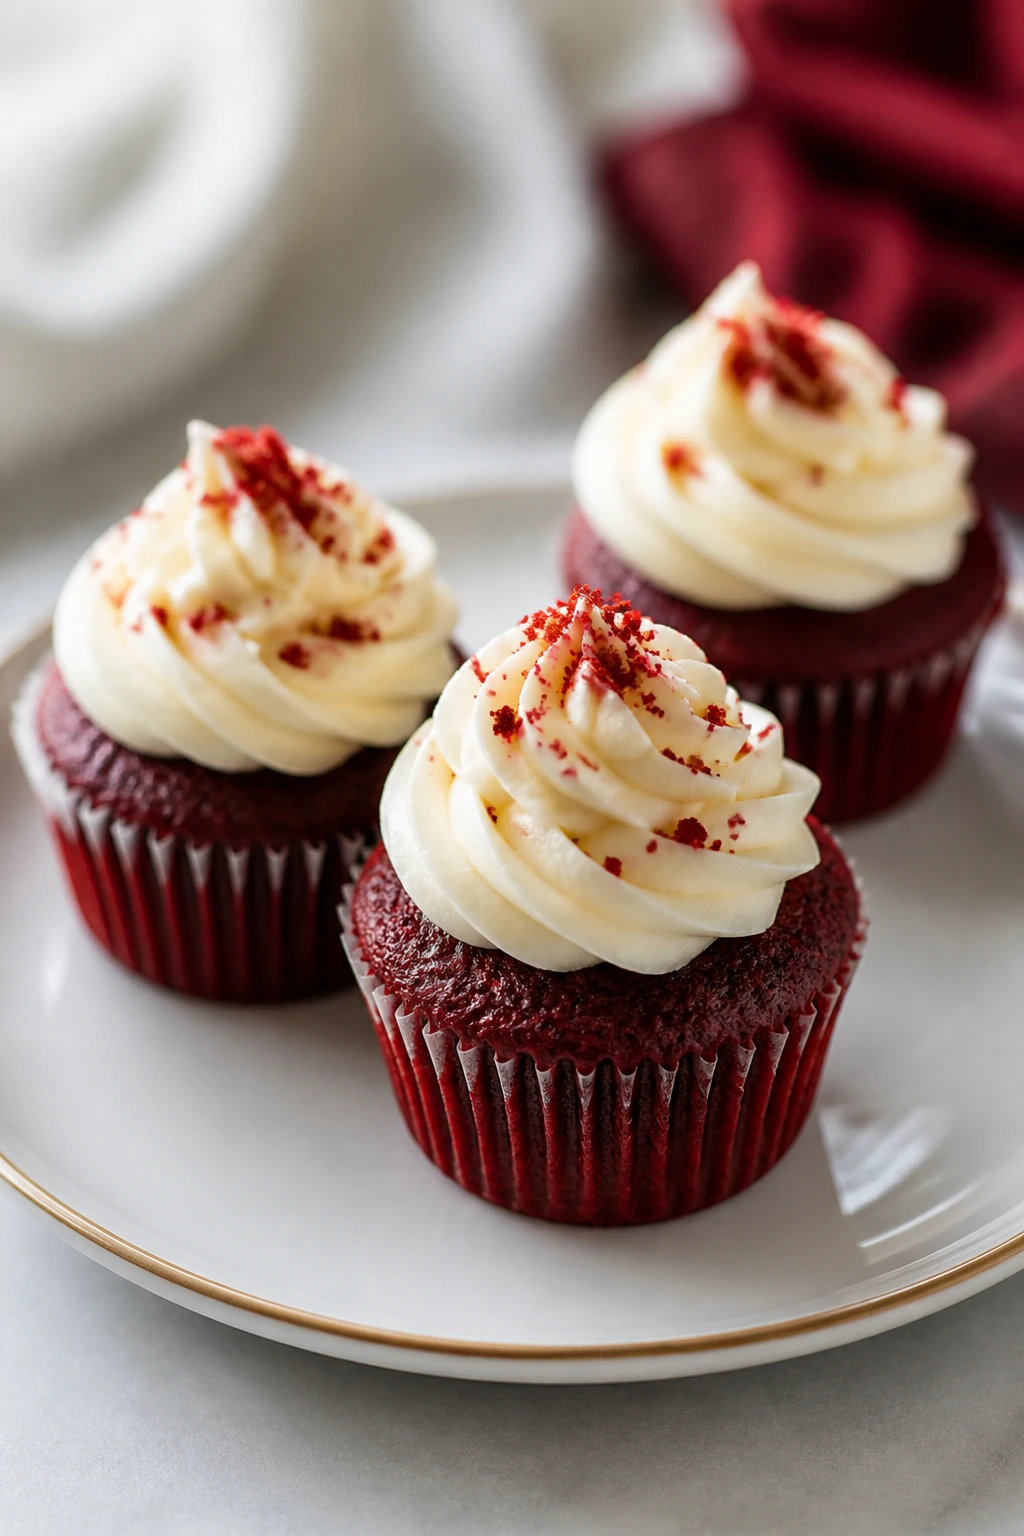
Tiny cupcakes carry the romance here: deep red crumbs, a cream cheese cap, and a shape that feels made for two or three at a table. The cocoa stays mild, so the tangy frosting gets to lead.
Why It Works: Oil keeps the cupcakes soft even after chilling, while buttermilk gives the crumb a little lift and bite. Mini size means they bake fast and forgive a slight timing error.
Key Ingredients:
- 1 cup flour
- 1 tbsp cocoa powder
- 3/4 cup sugar
- 1/2 cup vegetable oil
- 1/2 cup buttermilk
- 1 egg
- 1 tsp vinegar
- Red food coloring, as needed
- 4 oz cream cheese, softened
- 1 cup powdered sugar
Quick Steps:
- Mix the dry ingredients in one bowl and the wet ingredients in another.
- Combine until just smooth; the batter should be glossy.
- Fill mini muffin cups 2/3 full and bake at 350°F for 12 to 14 minutes.
- Cool completely, then frost with the cream cheese mixture.
Equipment for This Recipe:
- Mini muffin tin
- Two bowls
- Hand mixer
How to Serve This Dish: Plate three cupcakes on a small dessert plate and dust the edge with cocoa. They make a neat finish after dinner without feeling oversized.
Pro Tips for This Recipe:
- Stop mixing as soon as the flour disappears.
- Chill the frosting for 10 minutes if it feels too soft to pipe.
Variations on This Dish:
- Chocolate Red Velvet: Add 1 extra tbsp cocoa for a darker crumb.
- Berry-Frosted Version: Beat 1 tsp freeze-dried strawberry powder into the frosting.
Common Mistakes to Avoid with This Dish:
- Don’t use too much coloring. The batter can taste odd if you overdo it.
- Don’t frost warm cupcakes; the topping slides right off.
11. Berry Galette
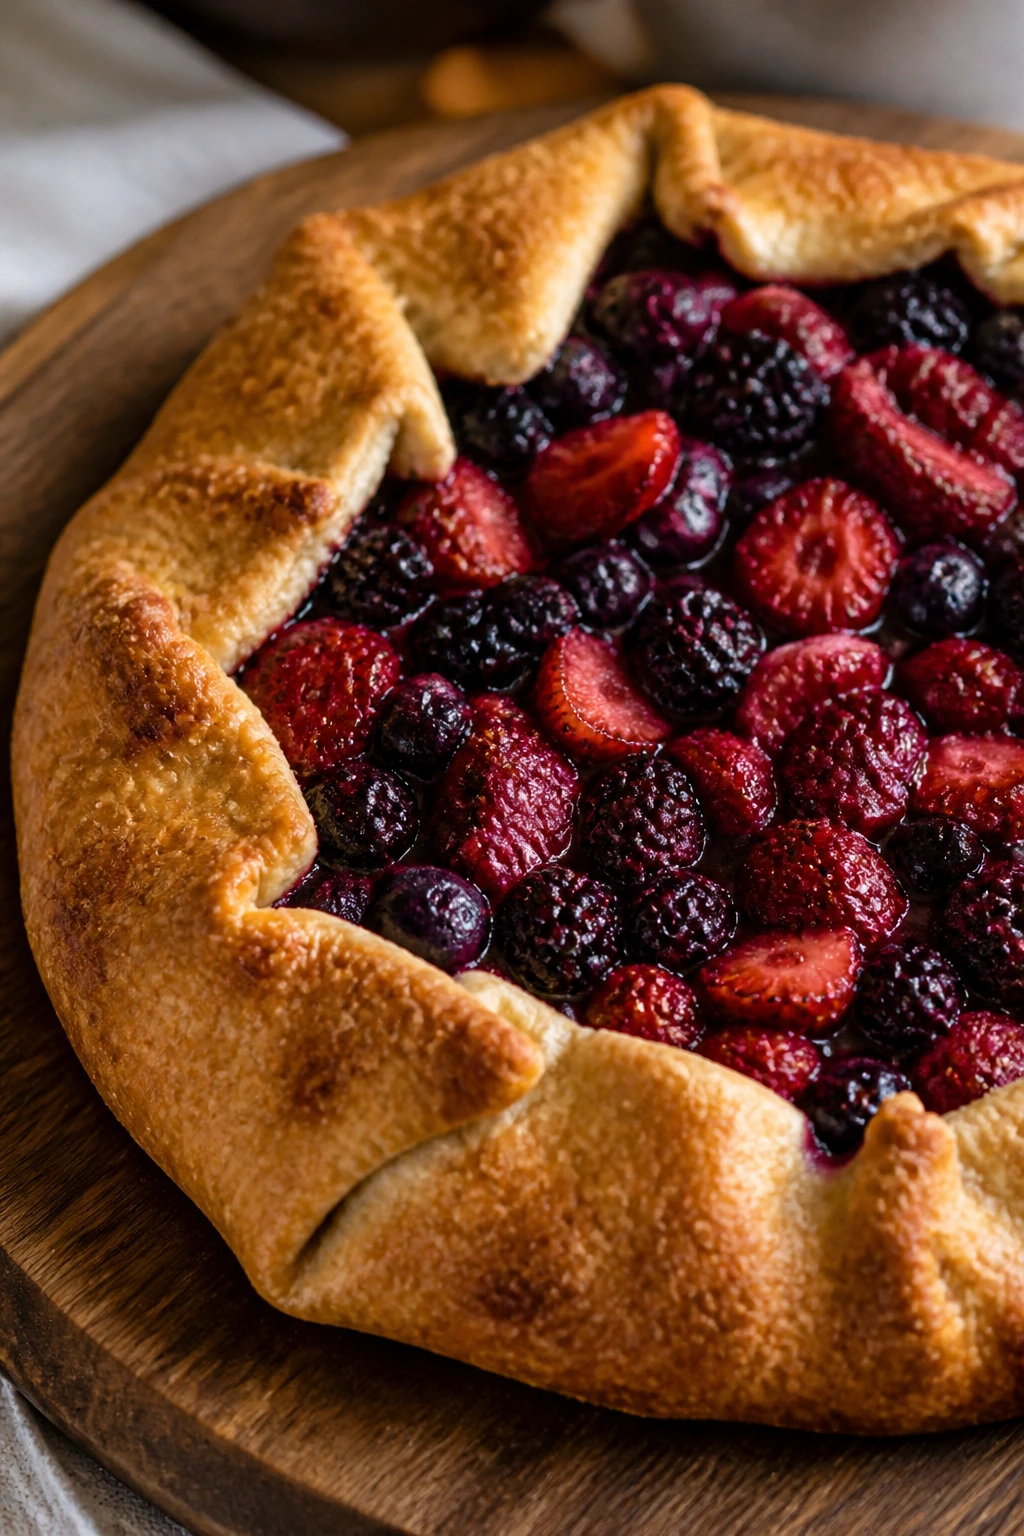
Rustic sounds casual, but what it really means here is low-stress and handsome. The folded crust traps bubbling berries, and the free-form shape means you do not need to care whether the edges are perfectly even.
Why It Works: Galettes are forgiving because the filling is contained by the crust, not a crimped pan edge. The fruit softens into jammy pockets while the pastry turns crisp underneath.
Key Ingredients:
- 1 pie crust, homemade or store-bought
- 2 cups mixed berries
- 3 tbsp sugar
- 1 tbsp cornstarch
- 1 tsp lemon juice
- 1 egg, beaten
- 1 tbsp coarse sugar
Quick Steps:
- Toss the berries with sugar, cornstarch, and lemon juice.
- Roll the crust into a circle and pile the filling in the center.
- Fold the edges over the fruit, brush with egg wash, and sprinkle sugar.
- Bake at 400°F for 30 to 35 minutes until the crust is golden and the filling bubbles.
Equipment for This Recipe:
- Baking sheet
- Rolling pin
- Parchment paper
How to Serve This Dish: Let it cool for 15 minutes, then serve with whipped cream or vanilla ice cream. The tart juices thicken as it rests, so don’t slice too early.
Pro Tips for This Recipe:
- Dust the center with a little almond flour if your berries are very juicy.
- Keep the crust cold before baking for better flake.
Variations on This Dish:
- Peach-Berry Galette: Mix sliced peaches with the berries.
- Blackberry-Lavender Version: Add a pinch of dried lavender to the sugar.
Common Mistakes to Avoid with This Dish:
- Don’t skip cornstarch for wet fruit. The filling can run across the pan.
- Don’t bake on a crowded tray. The bottom needs direct heat.
12. Cinnamon Sugar Palmiers
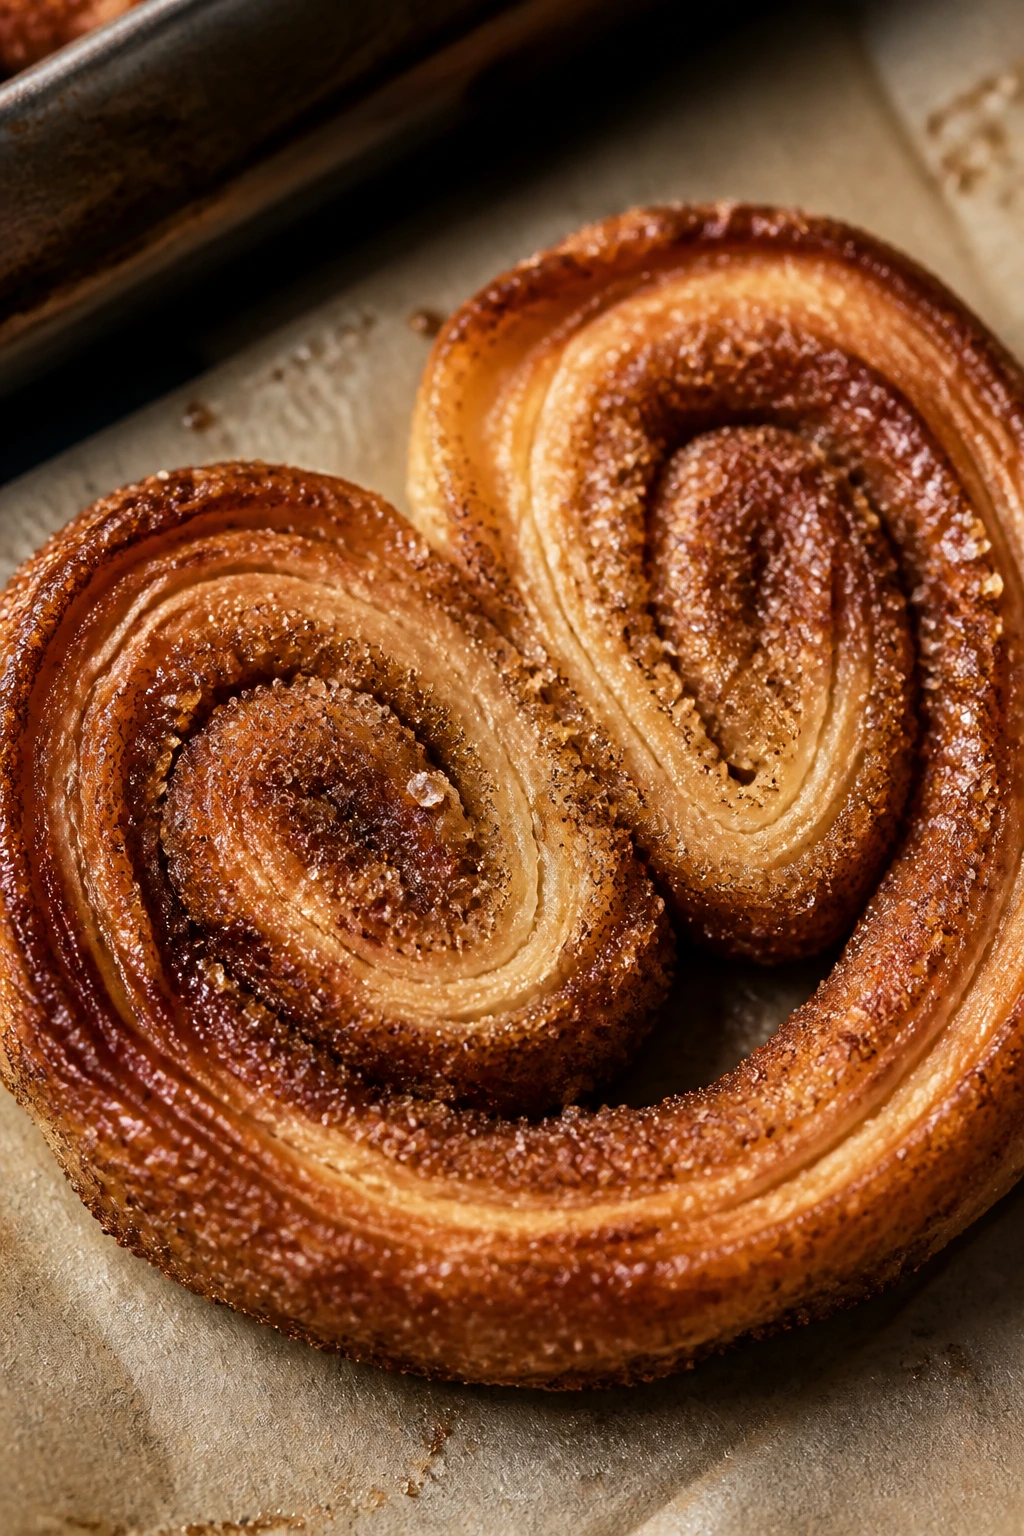
These crisp, caramelized spirals look like you spent time on laminating dough. You didn’t. That is part of the charm.
Why It Works: Store-bought puff pastry already has the flaky layers built in. Sugar melts between those layers and turns the edges into glassy little shards.
Key Ingredients:
- 1 sheet puff pastry, thawed but cold
- 1/2 cup sugar
- 1 tsp cinnamon
- Pinch of salt
Quick Steps:
- Mix the sugar, cinnamon, and salt.
- Sprinkle over the puff pastry and fold both long edges toward the center.
- Slice into 1/2-inch pieces and place on a parchment-lined sheet.
- Bake at 400°F for 12 to 15 minutes, flipping once, until caramelized.
Equipment for This Recipe:
- Baking sheet
- Sharp knife
- Rolling pin, optional
How to Serve This Dish: Serve alongside coffee or tea, or tuck two onto a dessert plate beside berries. They’re best the day they’re baked, while the sugar shell is crisp.
Pro Tips for This Recipe:
- Keep the pastry cold until the oven is ready.
- Use a sharp knife so the layers don’t squish together.
Variations on This Dish:
- Cardamom Palmiers: Add 1/2 tsp ground cardamom to the sugar mix.
- Orange Sugar Palmiers: Add orange zest for a brighter finish.
Common Mistakes to Avoid with This Dish:
- Don’t overfill with sugar; too much leaks and burns.
- Don’t underbake them. Pale palmiers go soft fast.
13. Honey Lavender Pound Cake
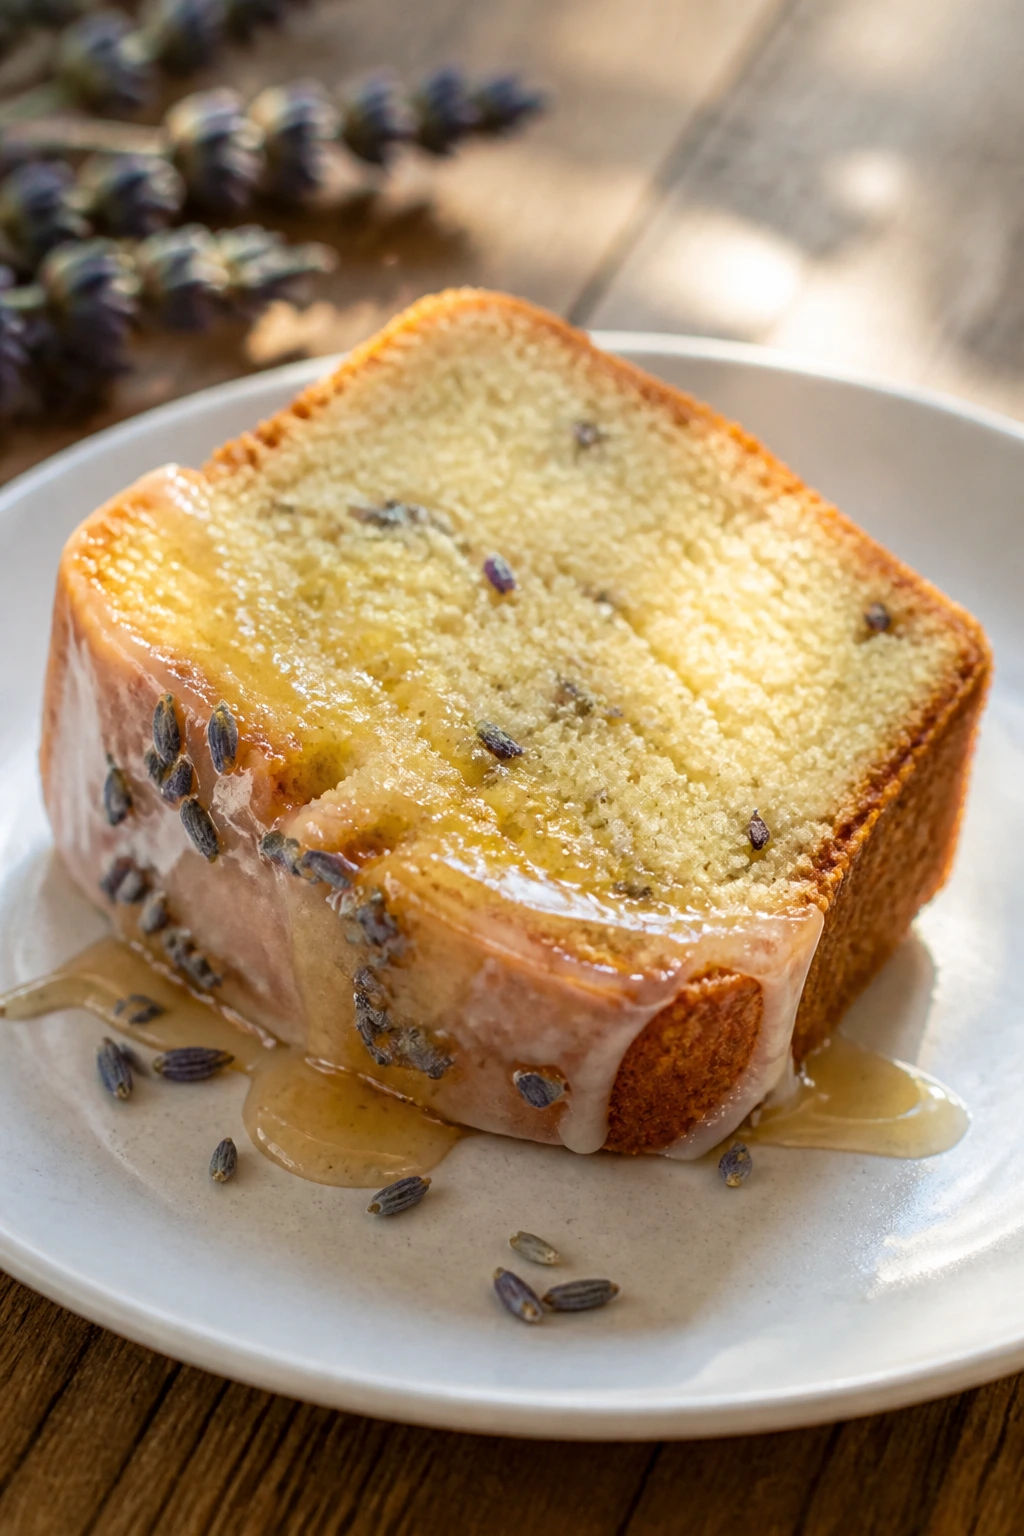
A good lavender dessert smells like a field after rain, not like soap. Here, honey softens the floral note and the cake itself stays moist enough to slice cleanly the next day.
Why It Works: Pound cake takes well to gentle flavors because its crumb is tight and sturdy. Honey adds depth, while a little lavender makes the cake feel special without taking over.
Key Ingredients:
- 1 cup unsalted butter, softened
- 1 cup sugar
- 3 eggs
- 2 cups all-purpose flour
- 1 1/2 tsp baking powder
- 1/2 cup milk
- 2 tbsp honey
- 1 tsp dried culinary lavender, lightly crushed
- 1 tsp vanilla extract
Quick Steps:
- Cream the butter and sugar until pale.
- Beat in the eggs one at a time.
- Mix in the dry ingredients, milk, honey, lavender, and vanilla just until combined.
- Bake in a loaf pan at 350°F for 50 to 60 minutes.
- Cool before slicing.
Equipment for This Recipe:
- Loaf pan
- Mixer
- Cooling rack
How to Serve This Dish: Slice thin and serve with strawberries or a spoon of whipped cream. A drizzle of honey on top keeps it from feeling dry.
Pro Tips for This Recipe:
- Crush the lavender lightly; whole buds can feel grassy.
- Line the pan with parchment for easy lifting.
Variations on This Dish:
- Lemon Lavender Cake: Add lemon zest to the batter.
- Honey-Almond Version: Replace 1/4 cup flour with almond flour.
Common Mistakes to Avoid with This Dish:
- Don’t use too much lavender. It can turn the loaf bitter.
- Don’t slice while warm; the crumb needs time to settle.
14. Chocolate Crinkle Cookies
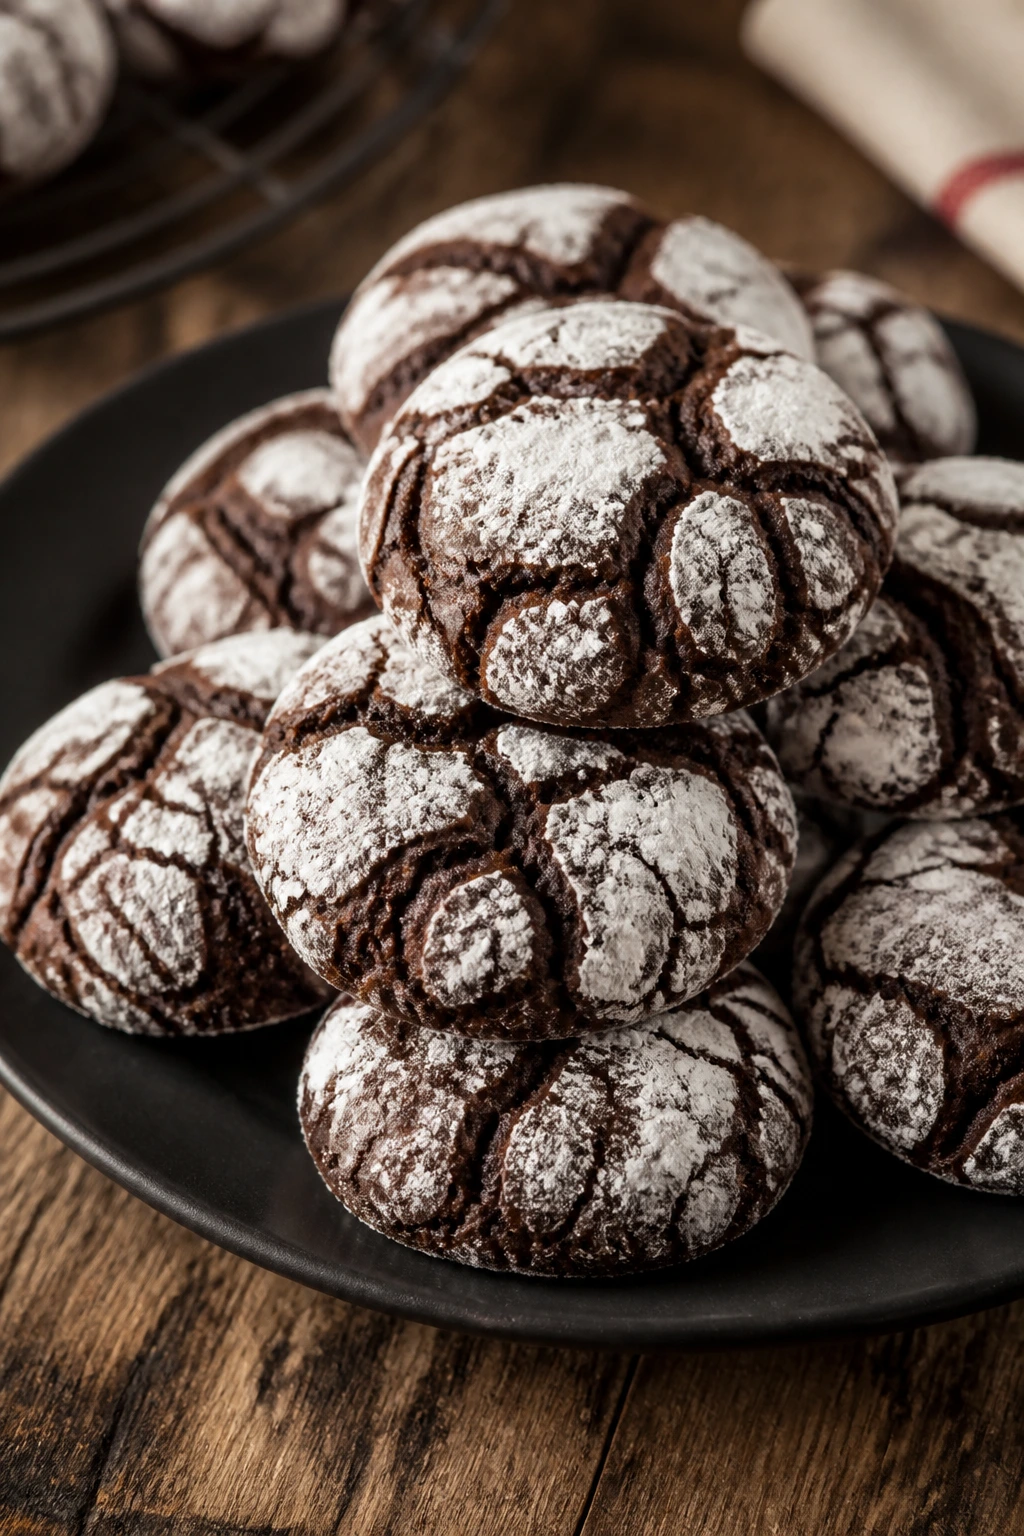
The cracked sugar tops make these cookies look like they came out of a bakery tin, not a beginner bowl. They’re chewy in the middle, a little crisp at the edges, and full of deep cocoa flavor.
Why It Works: Rolling the dough in powdered sugar before baking creates the dramatic crackled surface. The dough is soft and sticky, so chilling matters more here than usual.
Key Ingredients:
- 1/2 cup vegetable oil
- 1 cup sugar
- 2 eggs
- 1 tsp vanilla extract
- 1/2 cup cocoa powder
- 1 1/2 cups flour
- 1 tsp baking powder
- 1/2 tsp salt
- 1/2 cup powdered sugar
Quick Steps:
- Mix the oil, sugar, eggs, and vanilla.
- Stir in cocoa, flour, baking powder, and salt to form a soft dough.
- Chill 1 hour.
- Roll into balls, coat in powdered sugar, and bake at 350°F for 10 to 12 minutes.
Equipment for This Recipe:
- Mixing bowl
- Baking sheet
- Cookie scoop, optional
How to Serve This Dish: Pile them on a plate with strawberries or espresso. They look especially good stacked in a slightly messy little tower.
Pro Tips for This Recipe:
- Chill the dough long enough to handle cleanly.
- Coat generously in powdered sugar for a strong crackled look.
Variations on This Dish:
- Peppermint Crinkles: Add a little peppermint extract.
- Raspberry Crinkles: Fold in freeze-dried raspberry powder.
Common Mistakes to Avoid with This Dish:
- Don’t skip chilling. The dough will spread too much.
- Don’t overbake. They should still look a little soft in the center.
15. Rice Pudding with Cardamom and Rose

Warm or chilled, this pudding has a soft, old-world feel that suits a quiet dessert after dinner. Cardamom gives it lift, and rosewater adds a perfume-like note that should stay in the background.
Why It Works: Arborio or short-grain rice releases starch as it cooks, which thickens the milk into a creamy spoonful. Rosewater is potent, so a small amount gives the pudding a romantic finish without making it taste like soap.
Key Ingredients:
- 3/4 cup short-grain rice
- 4 cups whole milk
- 1/3 cup sugar
- 4 green cardamom pods, lightly crushed
- 1 tsp vanilla extract
- 1/4 tsp rosewater
- Chopped pistachios, optional
Quick Steps:
- Simmer the rice and milk over low heat, stirring often.
- Add sugar and cardamom, then cook 35 to 40 minutes until thick.
- Stir in vanilla and rosewater off the heat.
- Spoon into bowls and top with pistachios.
Equipment for This Recipe:
- Heavy saucepan
- Wooden spoon
- Small bowls
How to Serve This Dish: Serve warm in winter or chilled in small cups with pistachios on top. A spoonful of berry compote works well beside it.
Pro Tips for This Recipe:
- Stir often so the milk doesn’t catch on the bottom.
- Remove the cardamom pods before serving if you want a smoother texture.
Variations on This Dish:
- Coconut Rice Pudding: Replace 1 cup milk with coconut milk.
- Orange Cardamom Version: Add orange zest and skip the rosewater.
Common Mistakes to Avoid with This Dish:
- Don’t rush the simmer. Rice pudding needs slow cooking.
- Don’t overdo the rosewater; the flavor takes over quickly.
16. Cherry Clafoutis

This one lands between custard and cake, with cherries suspended inside like little jewels. It’s soft, gently sweet, and rustic in the way that makes people think you meant to do it that way.
Why It Works: A thin batter poured over fruit bakes into a tender set custard. Whole cherries keep their shape and release enough juice to perfume the pan.
Key Ingredients:
- 2 cups pitted cherries
- 3 eggs
- 1/2 cup sugar
- 1/2 cup flour
- 1 cup milk
- 1 tsp vanilla extract
- 1 tbsp melted butter
- Powdered sugar for dusting
Quick Steps:
- Butter an 8-inch baking dish and scatter the cherries inside.
- Whisk the eggs, sugar, flour, milk, vanilla, and butter until smooth.
- Pour over the cherries.
- Bake at 350°F for 35 to 40 minutes until puffed and lightly golden.
- Dust with powdered sugar after cooling slightly.
Equipment for This Recipe:
- 8-inch baking dish
- Whisk
- Mixing bowl
How to Serve This Dish: Serve warm or at room temperature, cut into wedges. A spoon of softly whipped cream or plain yogurt works surprisingly well beside it.
Pro Tips for This Recipe:
- Pit the cherries, even if some traditional versions leave them in; it’s kinder at the table.
- Don’t overfill the dish, or the custard can spill over.
Variations on This Dish:
- Berry Clafoutis: Use blueberries or raspberries instead of cherries.
- Almond Cherry Version: Add 1/2 tsp almond extract.
Common Mistakes to Avoid with This Dish:
- Don’t expect a firm cake crumb. Clafoutis should wobble a little.
- Don’t skip the dusting of sugar; it softens the custard’s mild flavor.
17. Salted Caramel Pots de Crème
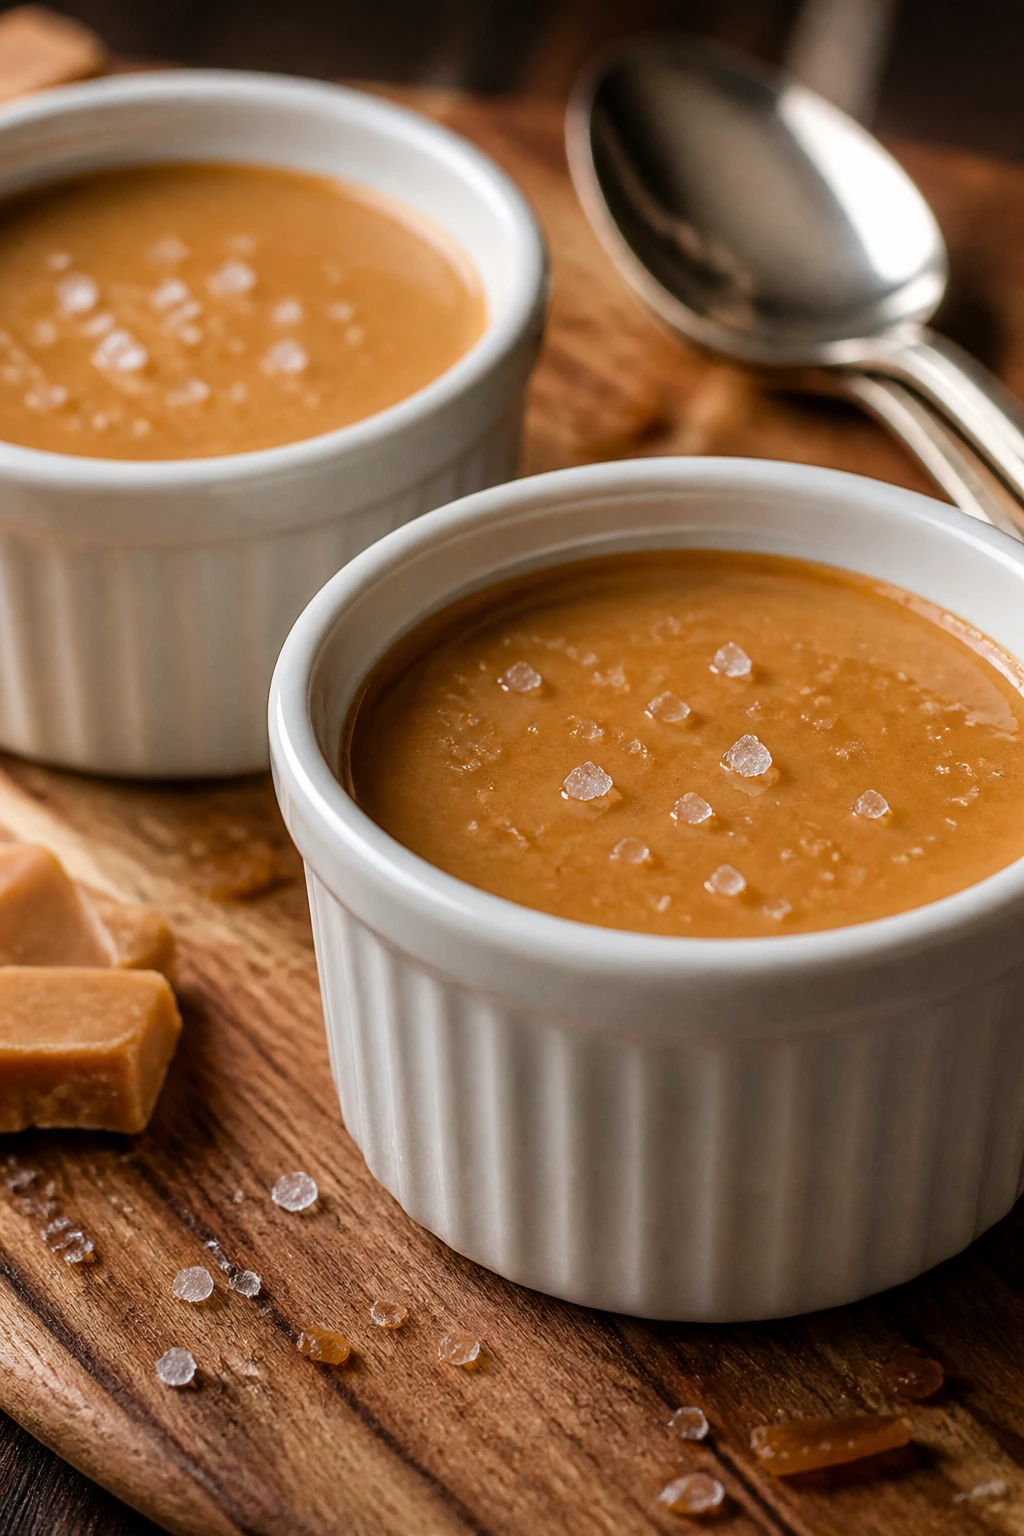
Deep caramel flavor, a spoonable custard, and a pinch of salt make this dessert feel much richer than the ingredient count suggests. It’s the kind of thing you bring out in little cups and watch people go quiet.
Why It Works: Baking the custard in a water bath keeps the texture smooth instead of eggy. The caramel gives a toasted sweetness that plain vanilla custards don’t have.
Key Ingredients:
- 3/4 cup sugar
- 2 cups heavy cream
- 1/2 cup whole milk
- 4 egg yolks
- 1 tsp vanilla extract
- 1/2 tsp flaky salt, plus more to finish
Quick Steps:
- Cook the sugar in a saucepan until amber.
- Slowly whisk in cream and milk; it will bubble hard.
- Whisk the hot caramel mixture into the yolks, vanilla, and salt.
- Pour into ramekins and bake in a water bath at 325°F for 30 to 35 minutes.
- Chill until cold and set.
Equipment for This Recipe:
- Saucepan
- Whisk
- Ramekins
- Roasting pan for the water bath
How to Serve This Dish: Finish with a few flakes of salt and a spoon of whipped cream. Small portions work best; this is rich enough to feel like a complete ending.
Pro Tips for This Recipe:
- Add the hot cream slowly so the caramel doesn’t seize.
- Pull the custards while the centers still wobble slightly.
Variations on This Dish:
- Espresso Caramel: Stir in 1 tsp espresso powder.
- Orange Salted Caramel: Add orange zest to the cream.
Common Mistakes to Avoid with This Dish:
- Don’t let the caramel turn too dark or it will taste bitter.
- Don’t skip the water bath; direct heat makes the custard grainy.
18. Peach or Plum Crisp for Two
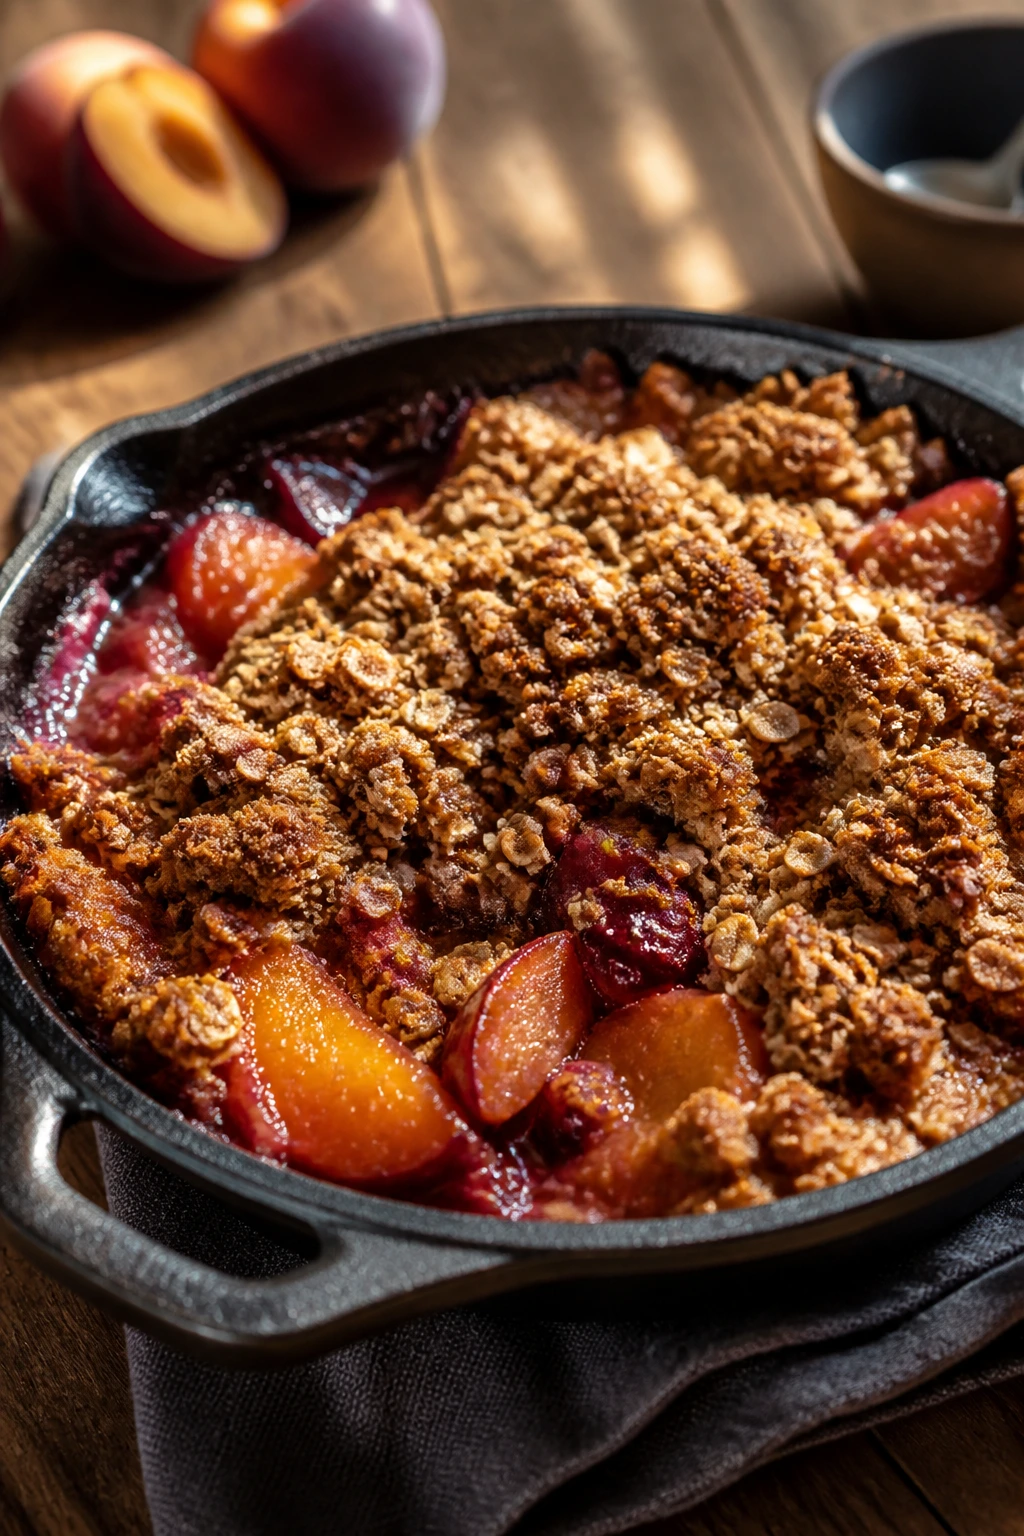
A little cast-iron skillet of bubbling fruit does something no towering cake can do: it smells like dessert before the first bite. The oat topping gets crisp, the fruit softens, and the whole thing feels relaxed in the right way.
Why It Works: Fruit releases juice as it bakes, and a simple oat-butter topping catches the syrup without turning soggy. Smaller pans make it easier to control portion size and bake evenly.
Key Ingredients:
- 2 cups sliced peaches or plums
- 2 tbsp sugar
- 1 tsp lemon juice
- 1/2 cup oats
- 1/4 cup flour
- 1/4 cup brown sugar
- 1/4 tsp cinnamon
- 3 tbsp cold butter, cubed
Quick Steps:
- Toss the fruit with sugar and lemon juice.
- Mix oats, flour, brown sugar, cinnamon, and butter until crumbly.
- Put the fruit in a small baking dish and scatter the topping on top.
- Bake at 375°F for 30 to 35 minutes until bubbling and golden.
Equipment for This Recipe:
- Small baking dish or skillet
- Mixing bowl
- Spoon
How to Serve This Dish: Serve warm with vanilla ice cream or lightly sweetened cream. It’s generous enough for two with leftovers, if you want them.
Pro Tips for This Recipe:
- Use firmer fruit if you want clear slices, softer fruit if you want more syrup.
- Let the crisp rest 10 minutes before spooning.
Variations on This Dish:
- Berry Crisp for Two: Swap half the fruit for berries.
- Ginger Crisp: Add a teaspoon of grated ginger to the filling.
Common Mistakes to Avoid with This Dish:
- Don’t overpack the topping or it stays doughy.
- Don’t slice the fruit too thin; it can disappear into mush.
19. Strawberry Pretzel Dessert Cups
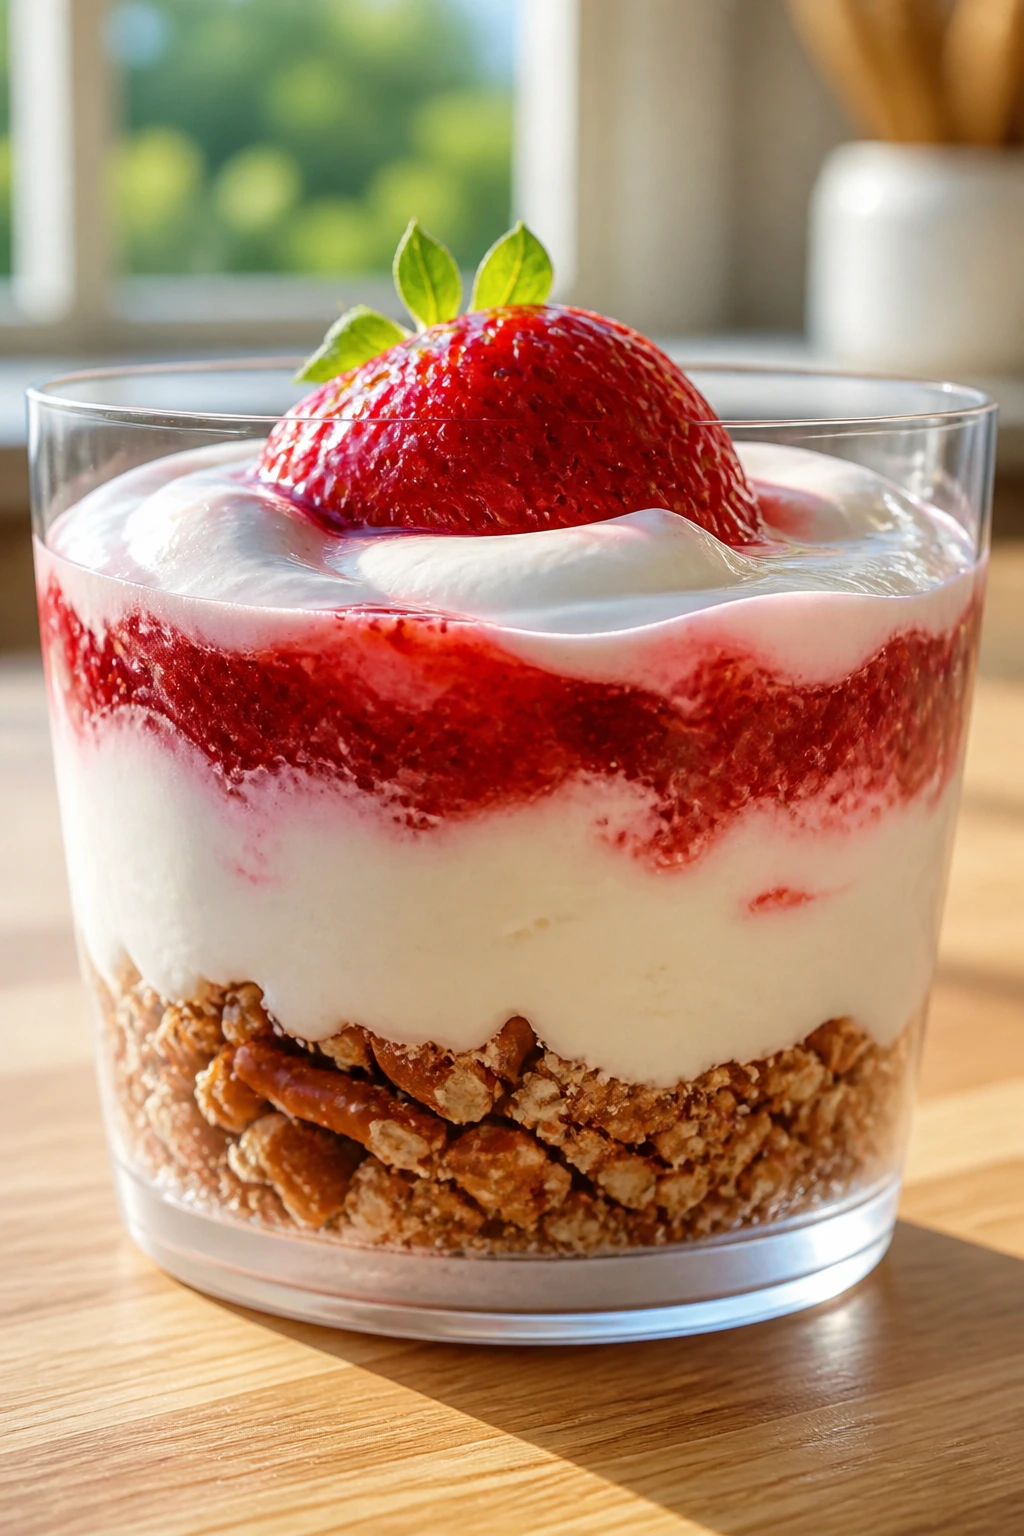
Salty pretzels, sweet cream cheese, and strawberries layered in little glasses make a dessert that tastes like a picnic with better lighting. The crunch gives the cups enough structure to stay interesting.
Why It Works: The salty crust balances the sweet filling, and individual cups keep the layers neat. It’s a no-bake dessert that still feels composed.
Key Ingredients:
- 1 cup crushed pretzels
- 3 tbsp melted butter
- 8 oz cream cheese, softened
- 1/3 cup powdered sugar
- 1 cup whipped cream
- 1 1/2 cups sliced strawberries
- 1 tbsp strawberry jam, optional
Quick Steps:
- Mix pretzels and butter, then press into the bottom of 4 cups.
- Beat cream cheese and powdered sugar until smooth, then fold in whipped cream.
- Spoon the filling over the crust.
- Top with strawberries, and drizzle with jam if using.
- Chill 1 hour.
Equipment for This Recipe:
- Mixing bowl
- Dessert cups
- Hand mixer
How to Serve This Dish: Serve cold with a spoon that can dig through the pretzel layer cleanly. A single berry on top of each cup makes them look finished fast.
Pro Tips for This Recipe:
- Crumble the pretzels finely so the base packs tightly.
- Chill before adding berries if you want very neat layers.
Variations on This Dish:
- Blueberry Pretzel Cups: Swap strawberries for blueberries.
- Chocolate Pretzel Cups: Add cocoa powder to the cream layer.
Common Mistakes to Avoid with This Dish:
- Don’t leave the pretzels too coarse or they fall apart.
- Don’t add juicy berries too early if you want them to stay tidy.
20. Mini Tiramisu Cups
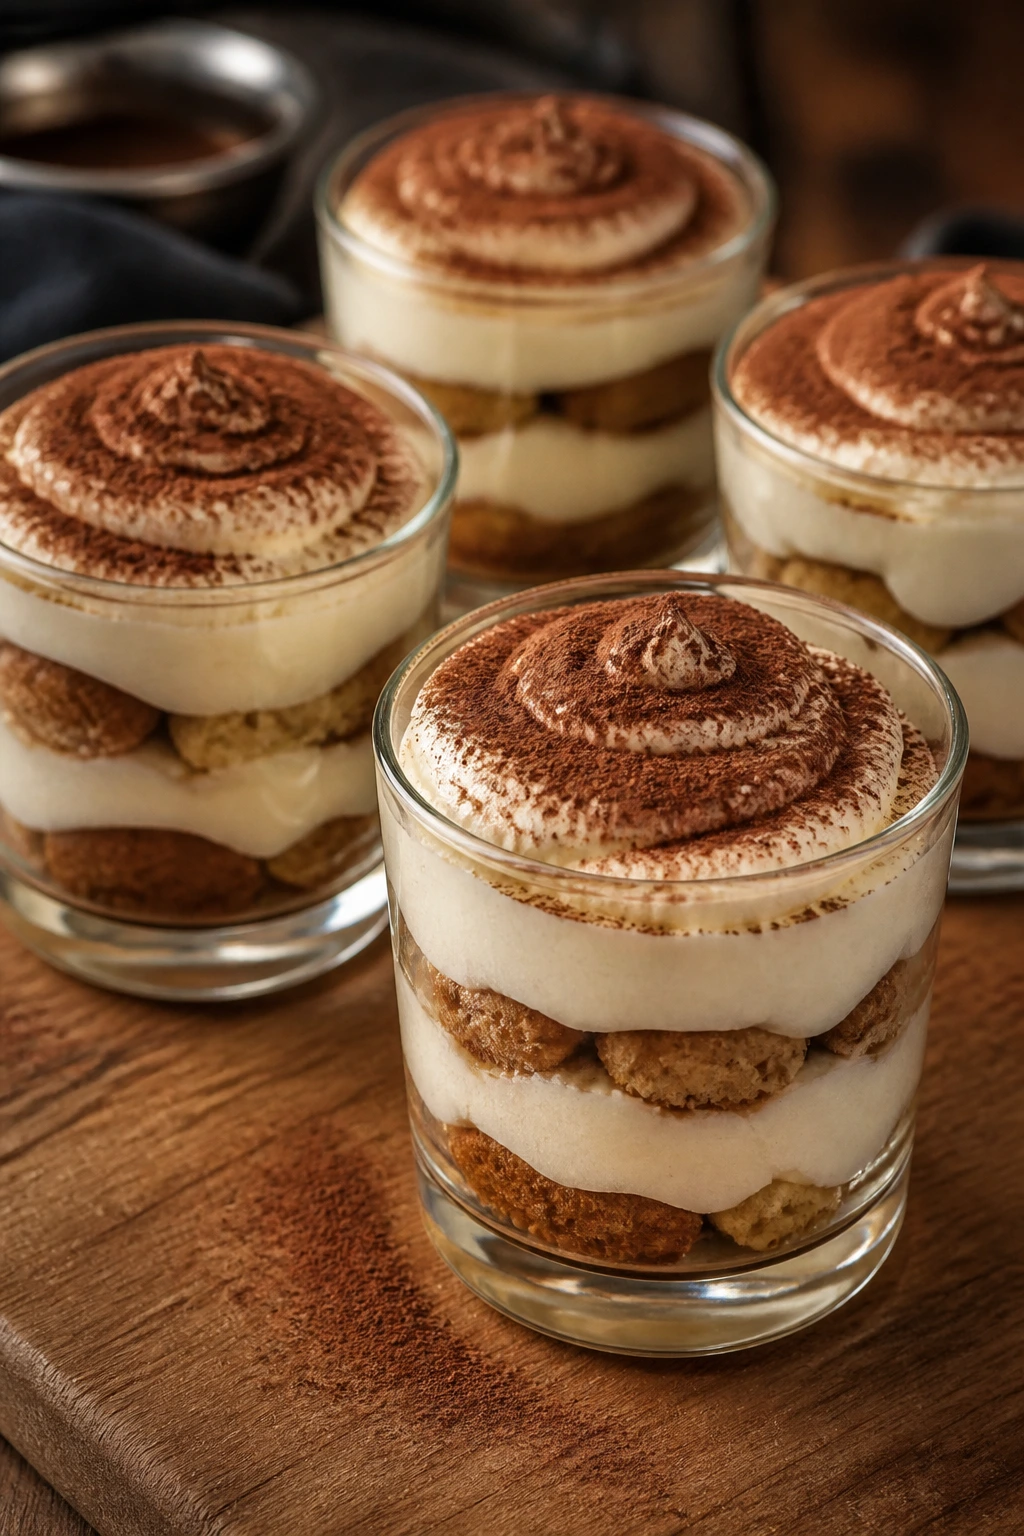
Coffee, mascarpone, and cocoa make a dessert that feels like a quiet after-dinner treat instead of a project. The cups keep the layers tidy and let the espresso soak into the cookies without turning everything soggy.
Why It Works: Ladyfingers absorb coffee quickly, so layering in small cups gives you control. Mascarpone adds body without making the filling heavy or cloying.
Key Ingredients:
- 1 cup strong brewed espresso, cooled
- 12 ladyfingers, broken to fit
- 8 oz mascarpone
- 1 cup cold heavy cream
- 1/4 cup powdered sugar
- 2 tbsp cocoa powder
Quick Steps:
- Whip mascarpone, cream, and powdered sugar until thick and smooth.
- Dip ladyfingers briefly in espresso.
- Layer cookies and cream in 4 cups.
- Chill 2 to 4 hours.
- Dust with cocoa before serving.
Equipment for This Recipe:
- Mixing bowl
- Hand mixer
- Dessert cups
How to Serve This Dish: Serve cold with a dusting of cocoa right before plating. A small spoon is enough; you don’t need big portions here.
Pro Tips for This Recipe:
- Dip the ladyfingers fast; a long soak turns them mushy.
- Use very cold cream so the filling whips up with good body.
Variations on This Dish:
- Chocolate Tiramisu Cups: Add shaved chocolate between layers.
- Berry Tiramisu: Swap half the coffee for berry syrup.
Common Mistakes to Avoid with This Dish:
- Don’t oversoak the cookies.
- Don’t dust cocoa too early, or it darkens and clumps.
21. Beginner’s Crème Brûlée
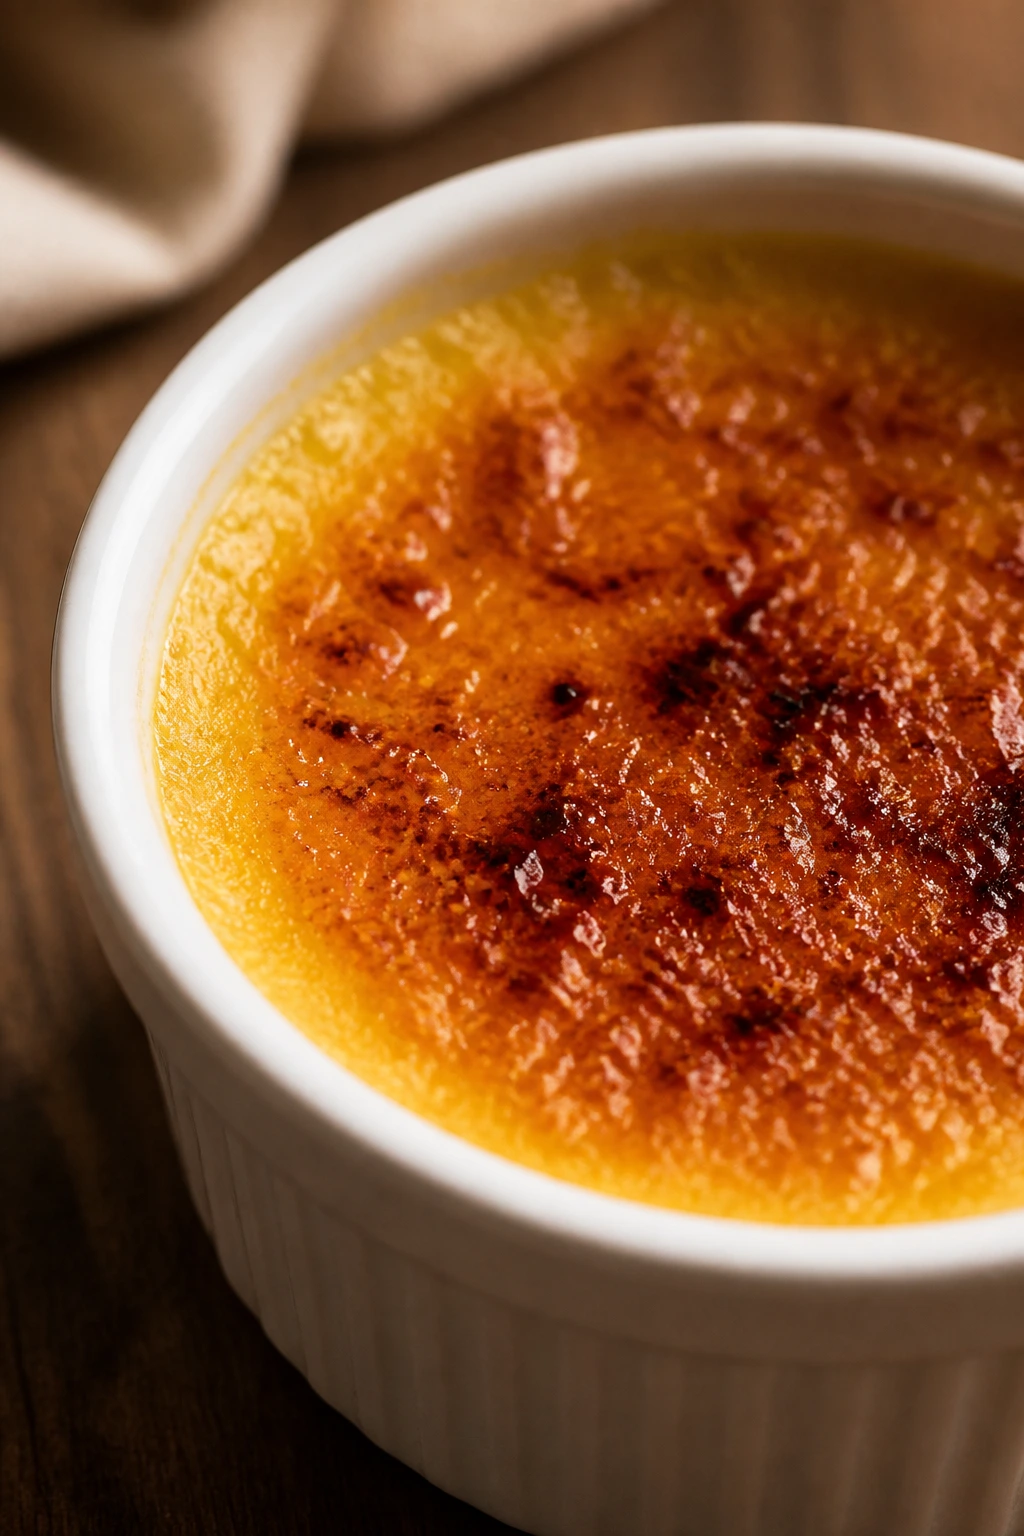
The appeal is simple: a cool vanilla custard beneath a sugar top that shatters like thin glass. You do not need a pastry degree to make it happen.
Why It Works: Egg yolks and cream set into a smooth custard when baked gently, and sugar torched on top gives the crackly finish. The contrast is the point.
Key Ingredients:
- 2 cups heavy cream
- 5 egg yolks
- 1/3 cup sugar, plus 2 tbsp for topping
- 1 tsp vanilla extract
- Pinch of salt
Quick Steps:
- Heat the cream with vanilla until steaming.
- Whisk yolks, sugar, and salt, then slowly whisk in the cream.
- Strain into ramekins.
- Bake in a water bath at 325°F for 30 to 35 minutes.
- Chill, then sprinkle with sugar and torch until amber.
Equipment for This Recipe:
- Ramekins
- Roasting pan
- Kitchen torch or broiler
How to Serve This Dish: Serve straight from the fridge after torching. The sugar top softens after a few minutes, so timing matters.
Pro Tips for This Recipe:
- Strain the custard for a silkier finish.
- Use a torch in small circles so the sugar melts evenly.
Variations on This Dish:
- Citrus Brûlée: Add orange or lemon zest to the cream.
- Coffee Brûlée: Steep espresso powder in the cream.
Common Mistakes to Avoid with This Dish:
- Don’t overbake; the center should still jiggle.
- Don’t torch too long in one spot or the sugar burns bitter.
22. Chocolate Mousse Cups
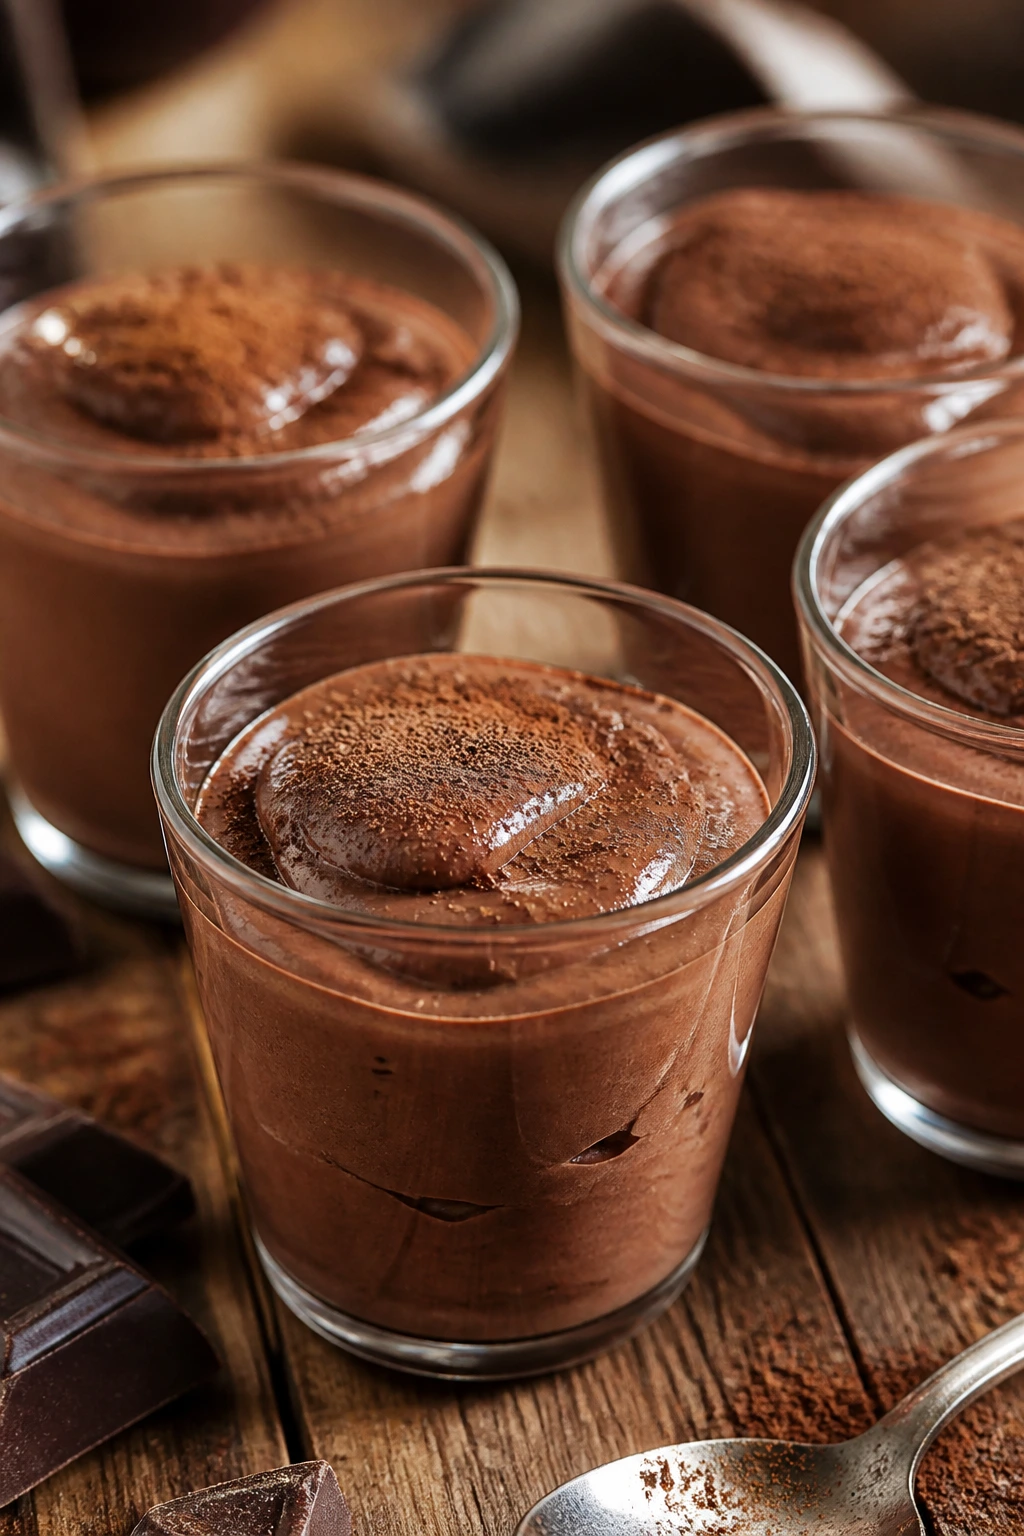
Light, airy, and intensely chocolatey, mousse feels fancy even when it’s made in a bowl with a whisk. In cups, it looks polished with almost no extra work.
Why It Works: Whipped cream folds into melted chocolate and gives the mousse its lift. Chilling firms the texture without baking or gelatin.
Key Ingredients:
- 6 oz dark chocolate, chopped
- 1 1/4 cups heavy cream, divided
- 2 tbsp sugar
- 1 tsp vanilla extract
- Pinch of salt
Quick Steps:
- Melt the chocolate with 1/4 cup cream.
- Whip the remaining cream with sugar and vanilla to soft peaks.
- Fold the whipped cream into the cooled chocolate.
- Spoon into cups and chill 2 hours.
- Top with cocoa or berries.
Equipment for This Recipe:
- Two mixing bowls
- Whisk or mixer
- Serving cups
How to Serve This Dish: Keep portions modest; mousse is rich. A few raspberries or a curl of chocolate on top is enough.
Pro Tips for This Recipe:
- Let the chocolate cool before folding, or the cream melts.
- Fold gently so you keep the airy texture.
Variations on This Dish:
- Mocha Mousse: Add espresso powder to the chocolate.
- Orange Mousse: Stir in orange zest before chilling.
Common Mistakes to Avoid with This Dish:
- Don’t use chocolate that’s too hot.
- Don’t overwhip the cream or the mousse turns grainy.
23. Raspberry Swirl Cheesecake Brownies
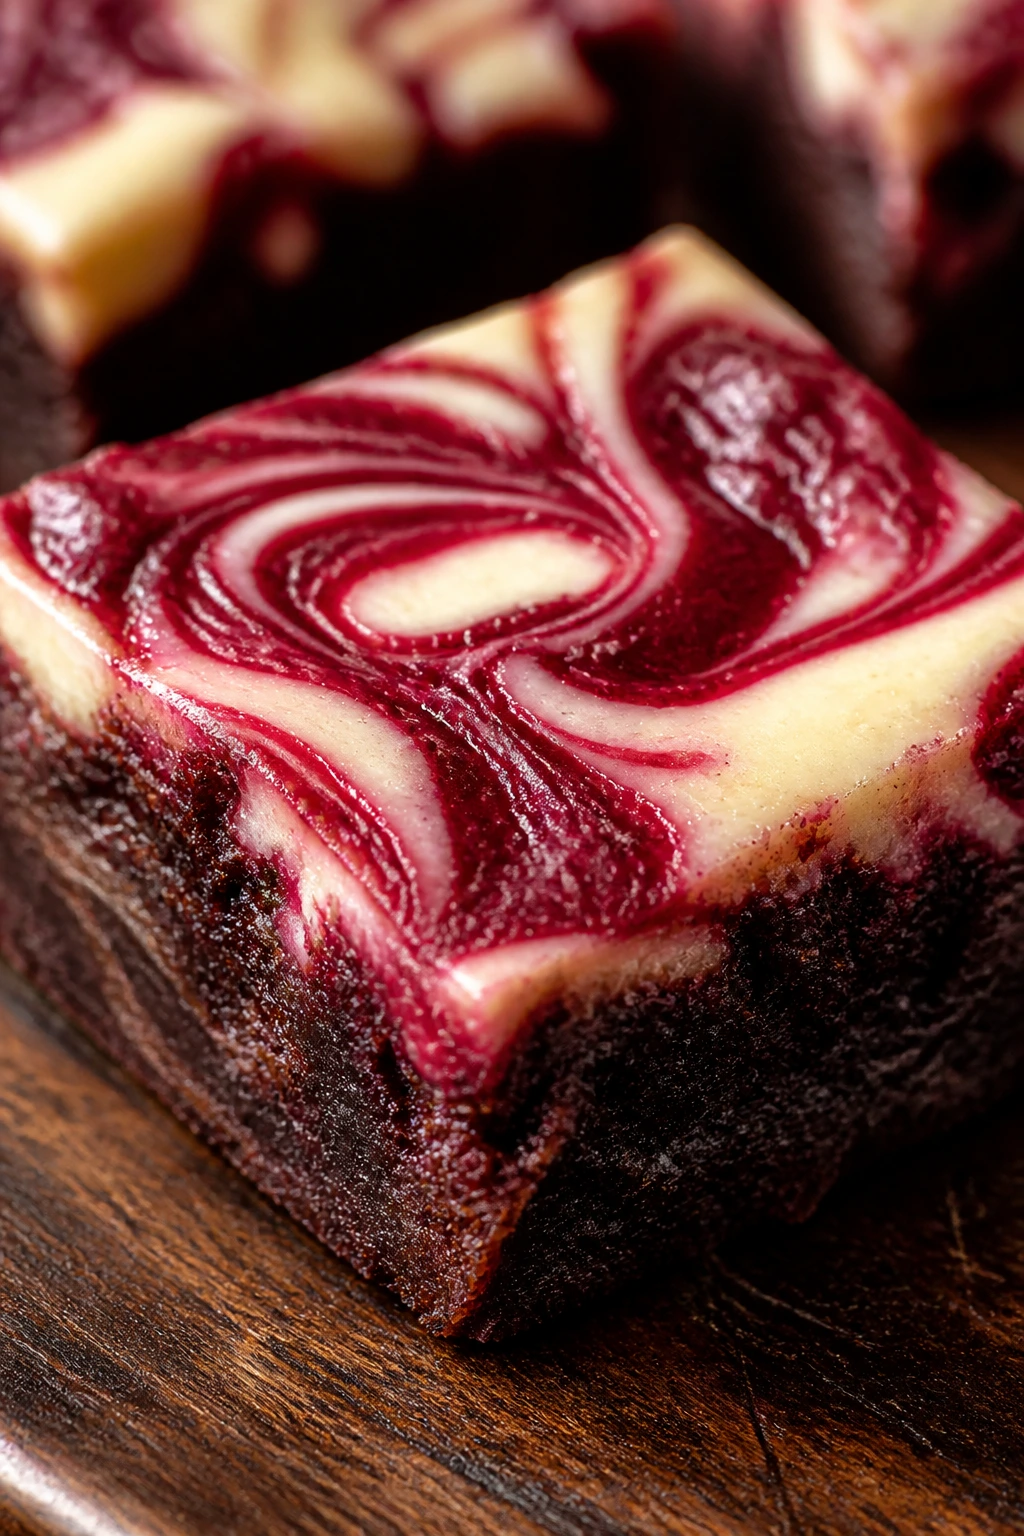
These are the brownies people remember because the raspberry stripe cuts through the chocolate and cream cheese. They look fancier than standard brownies, but the swirl does the decorating for you.
Why It Works: Brownie batter and cheesecake batter bake together at the same pace in one pan. Raspberry jam gives you color and tartness without needing fresh berries.
Key Ingredients:
- 1 box brownie mix, prepared
- 8 oz cream cheese, softened
- 1/4 cup sugar
- 1 egg
- 1/3 cup raspberry jam
Quick Steps:
- Spread brownie batter in an 8×8-inch pan.
- Beat cream cheese, sugar, and egg until smooth and spoon over the batter.
- Drop jam by spoonfuls on top and swirl with a knife.
- Bake at 350°F until the center is set, about 35 minutes.
- Cool completely before cutting.
Equipment for This Recipe:
- 8×8-inch pan
- Knife for swirling
- Mixing bowl
How to Serve This Dish: Cut into small squares and serve with a few fresh raspberries. These are easy to pack up if you need dessert that travels.
Pro Tips for This Recipe:
- Don’t over-swirl or the layers blur into one color.
- Cool fully so the cheesecake layer slices cleanly.
Variations on This Dish:
- Blackberry Swirl Brownies: Swap the jam.
- White Chocolate Brownies: Add white chocolate chips to the batter.
Common Mistakes to Avoid with This Dish:
- Don’t underbake the cheesecake layer.
- Don’t cut while warm; the swirl smears.
24. Almond Flour Financiers
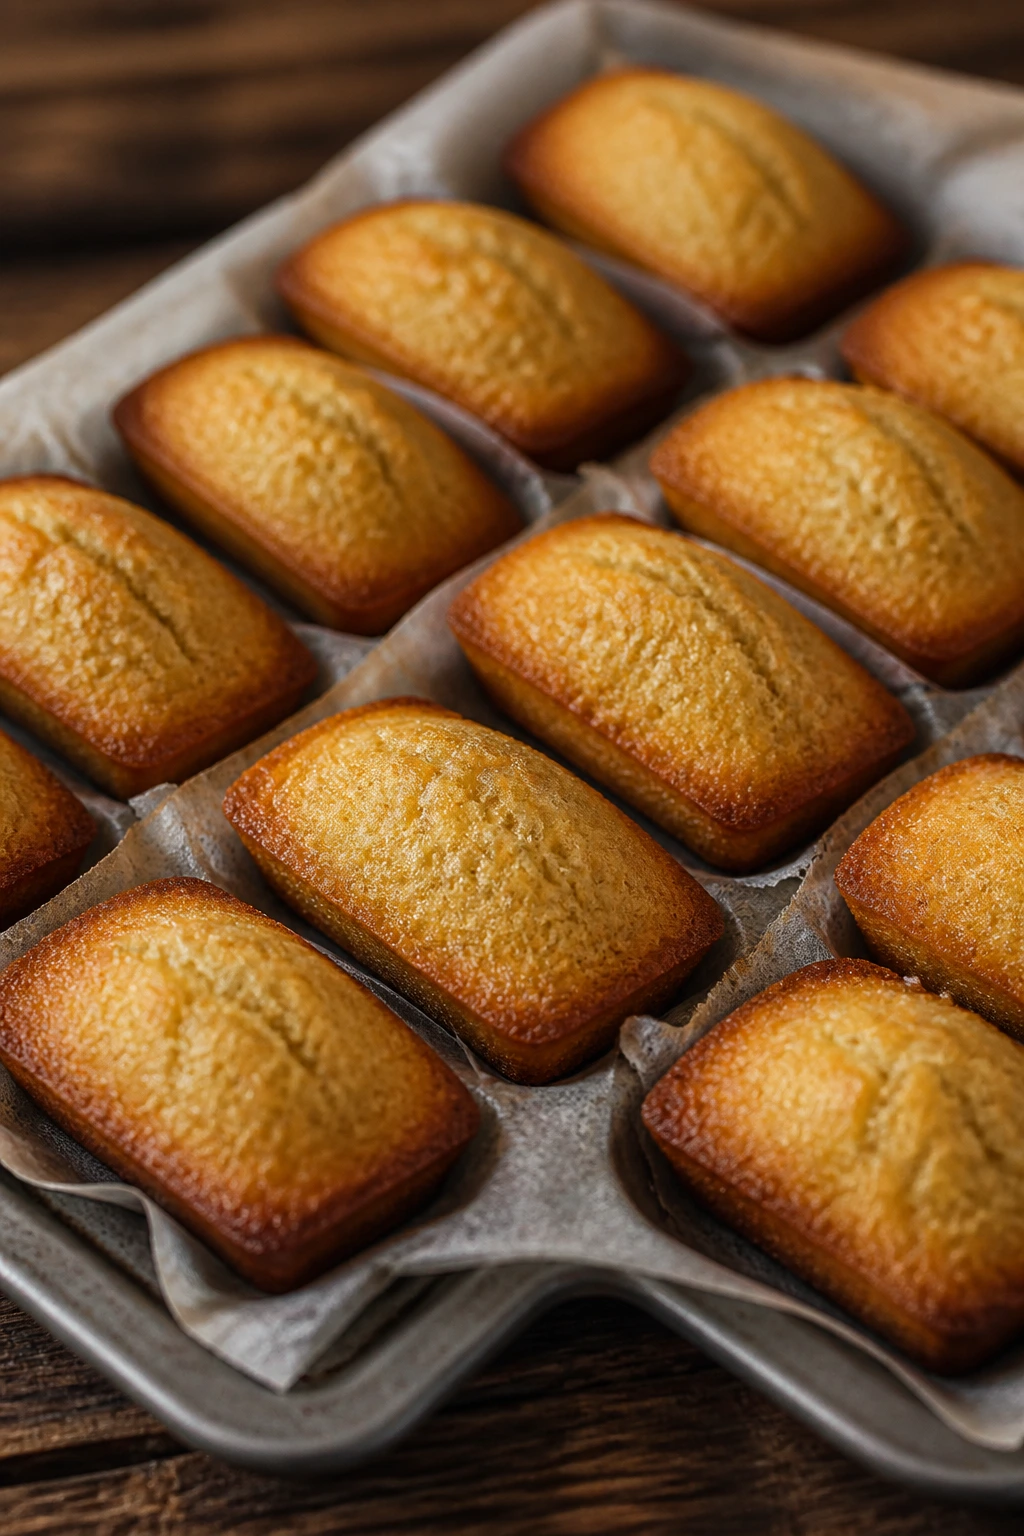
These little tea cakes are buttery, nutty, and just crisp at the edges. They bake fast in a mini pan, which makes them a good choice when you want something elegant without a long ingredient list.
Why It Works: Almond flour keeps the crumb tender and gives a rich flavor with less effort than a layered cake. Browned butter adds a toasted note that makes the cakes taste more finished.
Key Ingredients:
- 1/2 cup unsalted butter
- 3 egg whites
- 3/4 cup powdered sugar
- 1 cup almond flour
- 1/4 cup all-purpose flour
- 1 tsp vanilla extract
- Pinch of salt
Quick Steps:
- Brown the butter and cool slightly.
- Whisk egg whites, sugar, almond flour, flour, vanilla, and salt.
- Stir in the butter.
- Spoon into a mini muffin tin and bake at 375°F for 12 to 15 minutes.
Equipment for This Recipe:
- Mini muffin tin
- Small saucepan
- Whisk
How to Serve This Dish: Dust with powdered sugar or serve with berries. Their small size makes them easy to plate two or three at a time.
Pro Tips for This Recipe:
- Brown the butter until it smells nutty, not burnt.
- Grease the pan well; the cakes are delicate.
Variations on This Dish:
- Pistachio Financiers: Replace part of the almond flour with ground pistachios.
- Lemon Financiers: Add fine lemon zest to the batter.
Common Mistakes to Avoid with This Dish:
- Don’t overmix once the butter goes in.
- Don’t overfill the molds or the edges mushroom over.
25. Chocolate Lava Cookies
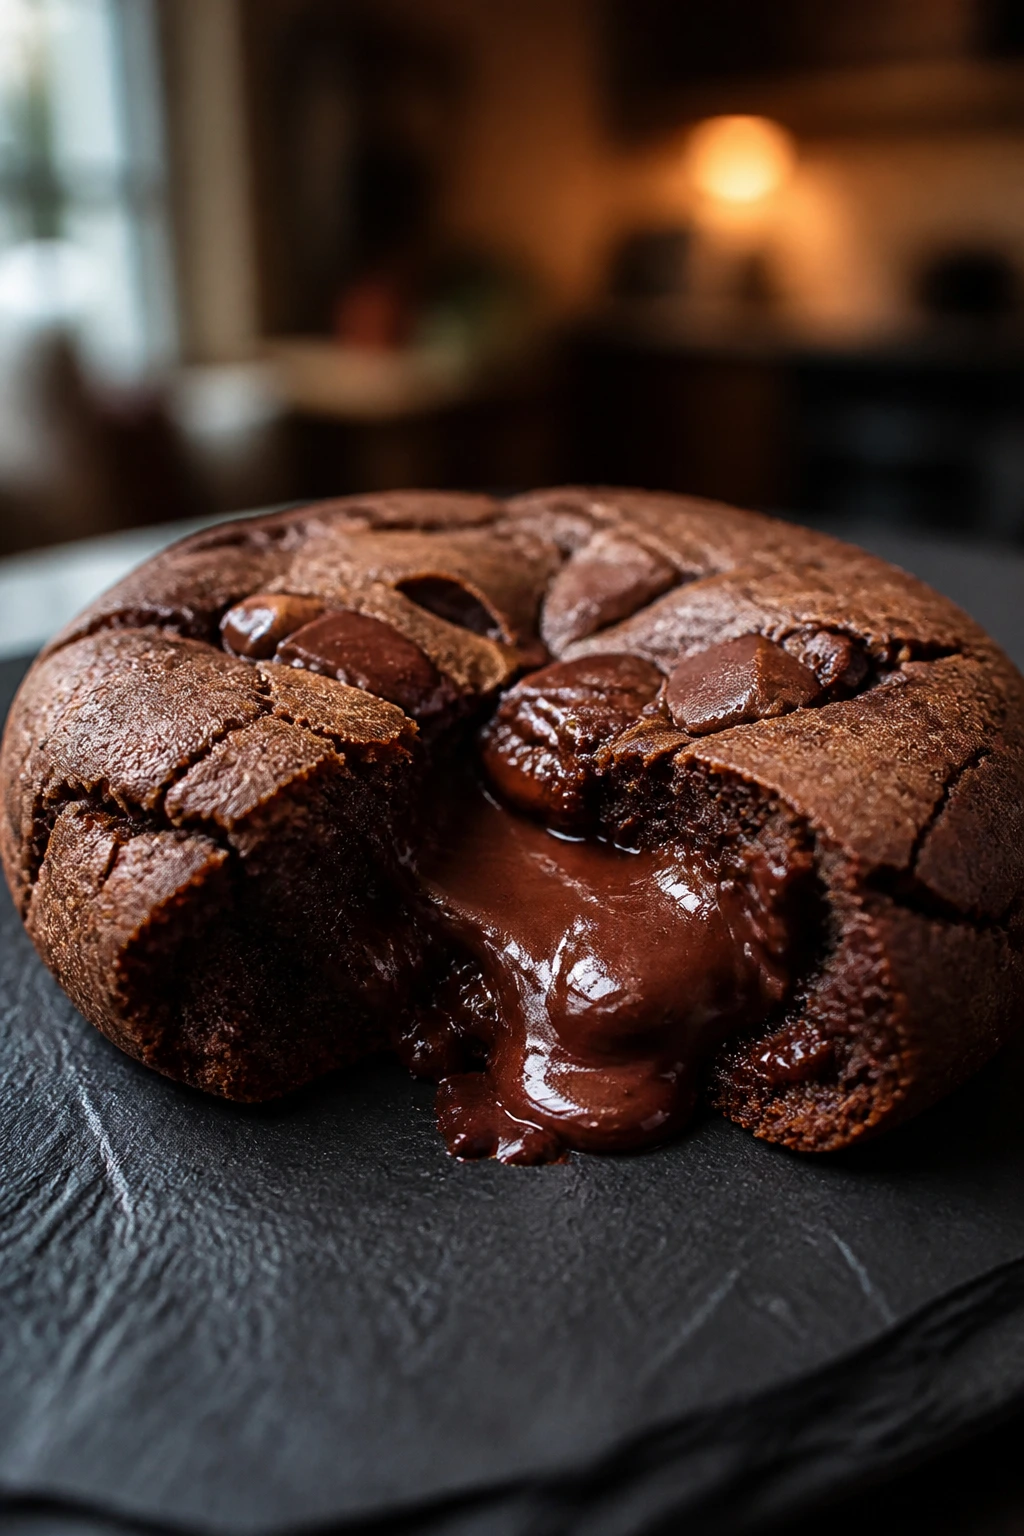
These are soft, thick cookies with a gooey chocolate center hidden inside. They give you that molten-cake feeling in a handheld form, which is a very good trade.
Why It Works: A chilled chocolate center stays solid long enough to survive the oven, then melts into a soft middle as the cookie bakes. The outer dough sets first, so you get contrast in one bite.
Key Ingredients:
- 1 cup flour
- 1/2 cup cocoa powder
- 1/2 tsp baking soda
- 1/2 tsp salt
- 1/2 cup butter, softened
- 3/4 cup brown sugar
- 1 egg
- 1 tsp vanilla extract
- 12 chocolate squares or chips, frozen
Quick Steps:
- Beat butter and sugar, then mix in the egg and vanilla.
- Stir in flour, cocoa, baking soda, and salt.
- Wrap the dough around frozen chocolate pieces.
- Bake at 350°F for 10 to 12 minutes until the edges set.
Equipment for This Recipe:
- Baking sheet
- Mixing bowl
- Spoon or scoop
How to Serve This Dish: Serve warm, when the center is still soft. A little flaky salt on top makes the chocolate taste deeper.
Pro Tips for This Recipe:
- Freeze the centers before assembling.
- Pull the cookies when they still look slightly underdone.
Variations on This Dish:
- Nutella Lava Cookies: Freeze teaspoon-size dollops of Nutella for the center.
- Peppermint Lava Cookies: Use peppermint chocolate squares.
Common Mistakes to Avoid with This Dish:
- Don’t make the dough too thin or the filling leaks out.
- Don’t overbake; the gooey center depends on it.
26. Coconut Macaroons Dipped in Chocolate
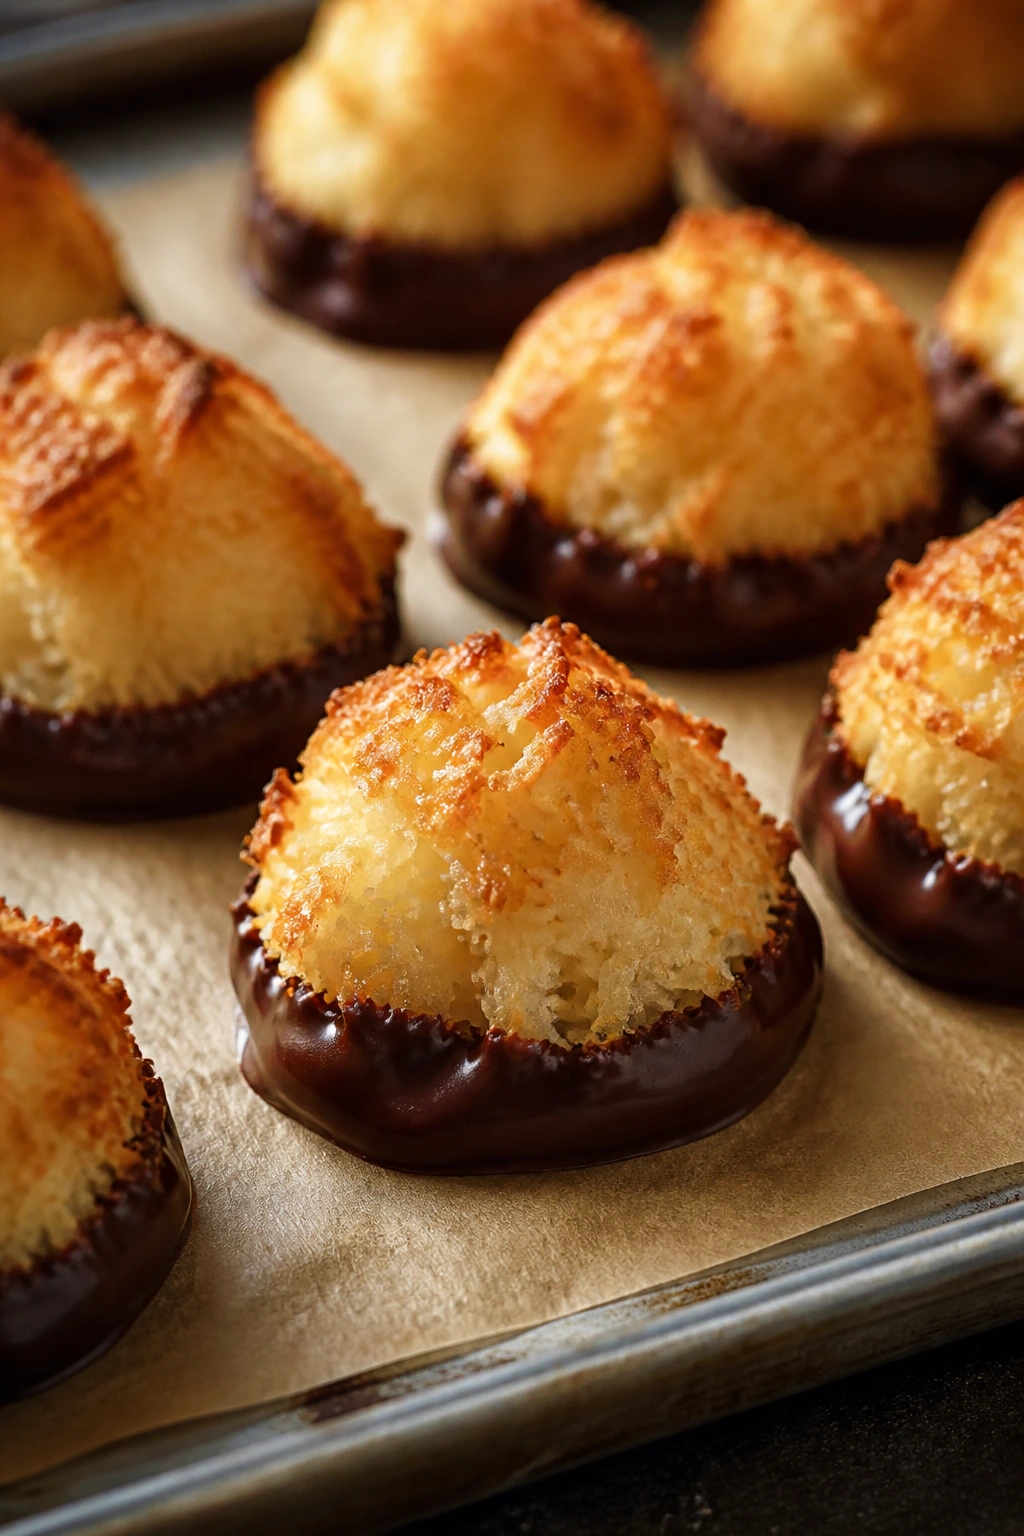
Chewy coconut mounds dipped in chocolate are one of the easiest desserts to make look dressy. The texture is all wrong in the best way: crisp on the outside, tender inside, and finished with a hard chocolate base.
Why It Works: Egg whites hold the coconut together without much mixing, and the shredded coconut toasts as it bakes. Dipping the bottoms in chocolate gives you a clean, glossy finish.
Key Ingredients:
- 3 cups sweetened shredded coconut
- 2 egg whites
- 1/2 cup sugar
- 1 tsp vanilla extract
- 1/4 tsp salt
- 4 oz semi-sweet chocolate, melted
Quick Steps:
- Mix coconut, egg whites, sugar, vanilla, and salt.
- Scoop into mounds on a lined baking sheet.
- Bake at 325°F for 18 to 20 minutes until golden.
- Cool, then dip the bottoms in melted chocolate.
Equipment for This Recipe:
- Baking sheet
- Mixing bowl
- Small scoop
How to Serve This Dish: Serve at room temperature so the chocolate stays crisp. They’re good with coffee or as part of a cookie tray.
Pro Tips for This Recipe:
- Press the mixture together lightly in the scoop so the mounds hold shape.
- Watch the last few minutes closely; coconut browns fast.
Variations on This Dish:
- Lime Coconut Macaroons: Add lime zest.
- Dark Chocolate Drizzle: Skip the dip and drizzle chocolate over the tops.
Common Mistakes to Avoid with This Dish:
- Don’t use unsweetened coconut unless you adjust the sugar.
- Don’t bake too dark or they dry out.
27. Banana Split Parfaits
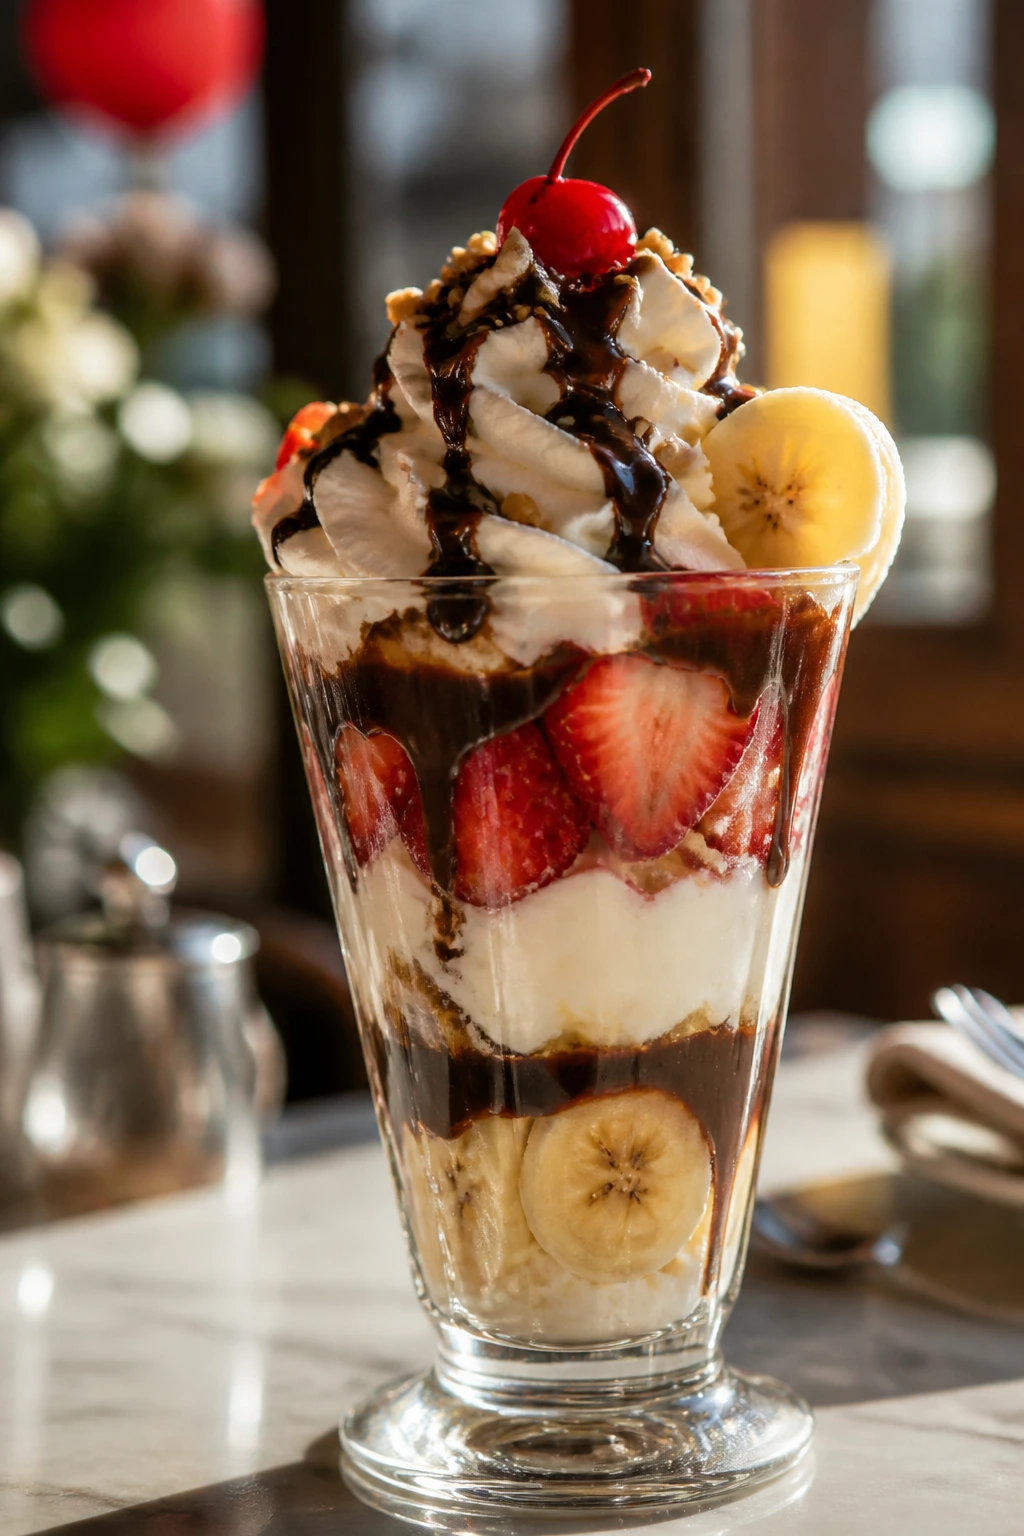
This is the dessert version of a diner classic, only neater and easier to serve. Layers of banana, strawberries, cream, and chocolate sauce give you a bright, playful finish.
Why It Works: Building the dessert in layers keeps the bananas from sinking and lets each spoonful hit several flavors at once. It’s also a good way to use ripe fruit without turning on the oven.
Key Ingredients:
- 2 bananas, sliced
- 1 cup strawberries, chopped
- 1 cup vanilla yogurt or pudding
- 1 cup whipped cream
- 2 tbsp chocolate sauce
- Chopped peanuts, optional
Quick Steps:
- Layer yogurt, bananas, strawberries, and whipped cream in glasses.
- Drizzle with chocolate sauce.
- Repeat layers once.
- Top with peanuts if using.
- Chill 15 minutes before serving.
Equipment for This Recipe:
- Tall glasses
- Spoon
- Small knife
How to Serve This Dish: Serve with a long spoon so you can reach the bottom layers. It’s fun and unfussy, which is sometimes the right note.
Pro Tips for This Recipe:
- Add the banana slices just before assembling so they stay fresh.
- Chill the glasses if you want a more polished look.
Variations on This Dish:
- Chocolate Banana Split: Use chocolate pudding instead of vanilla.
- Berry Split: Add blueberries or raspberries to the fruit layer.
Common Mistakes to Avoid with This Dish:
- Don’t assemble too far ahead or the bananas brown.
- Don’t use watery yogurt; it blurs the layers.
28. Fresh Fruit Tartlets with Vanilla Custard
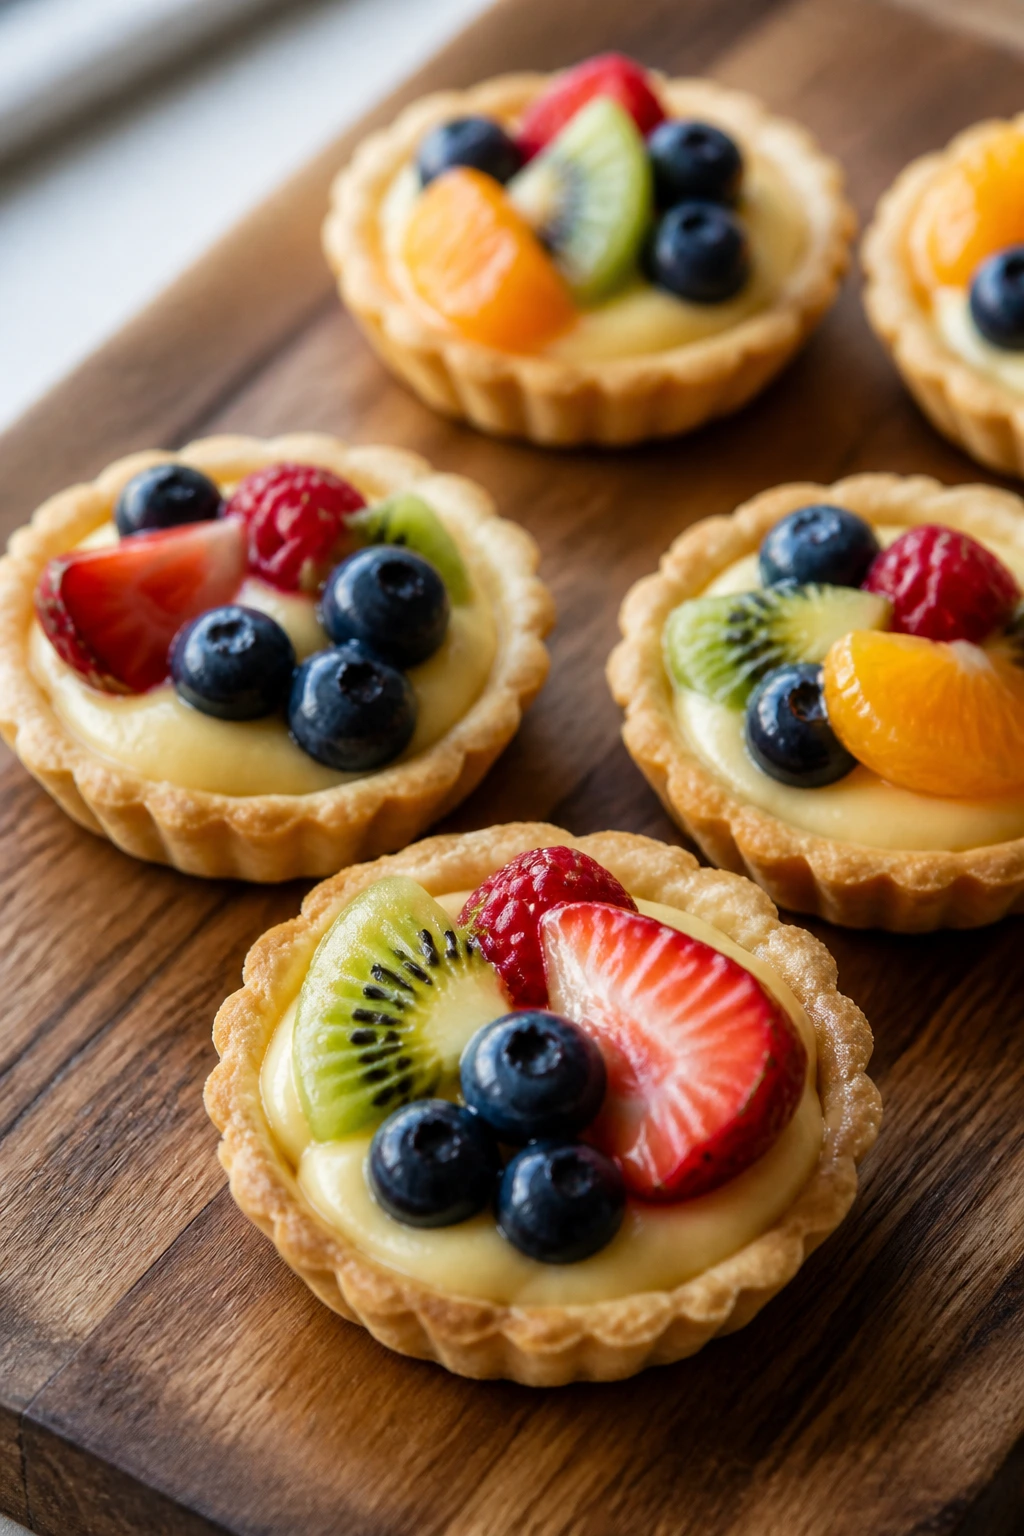
Tiny tartlets make fruit look ceremonial. A soft custard base, a crisp shell, and shiny fruit on top are enough to get the job done without decorating drama.
Why It Works: A sturdy tart shell supports the custard and fruit, while the vanilla filling gives the tartlets a creamy middle. The fruit stays fresh because it sits on top, not baked into the filling.
Key Ingredients:
- 6 mini tart shells, baked
- 1 cup milk
- 2 egg yolks
- 3 tbsp sugar
- 1 tbsp cornstarch
- 1 tsp vanilla extract
- Assorted fruit, sliced
Quick Steps:
- Whisk yolks, sugar, and cornstarch.
- Heat milk until steaming, then whisk it into the yolk mixture.
- Cook until thick, then stir in vanilla and cool.
- Fill tart shells and top with fruit.
Equipment for This Recipe:
- Small saucepan
- Whisk
- Mini tart pans or ready-made shells
How to Serve This Dish: Serve chilled on a small platter. If you want extra shine, brush the fruit with a little warm apricot jam.
Pro Tips for This Recipe:
- Cool the custard before filling or it softens the shells.
- Slice fruit thin so it sits neatly.
Variations on This Dish:
- Chocolate Tartlets: Add cocoa to the custard.
- Citrus Tartlets: Use orange segments and a little zest.
Common Mistakes to Avoid with This Dish:
- Don’t overload the shells with custard.
- Don’t add fruit too far ahead if it’s especially juicy.
29. Rosewater Fudge
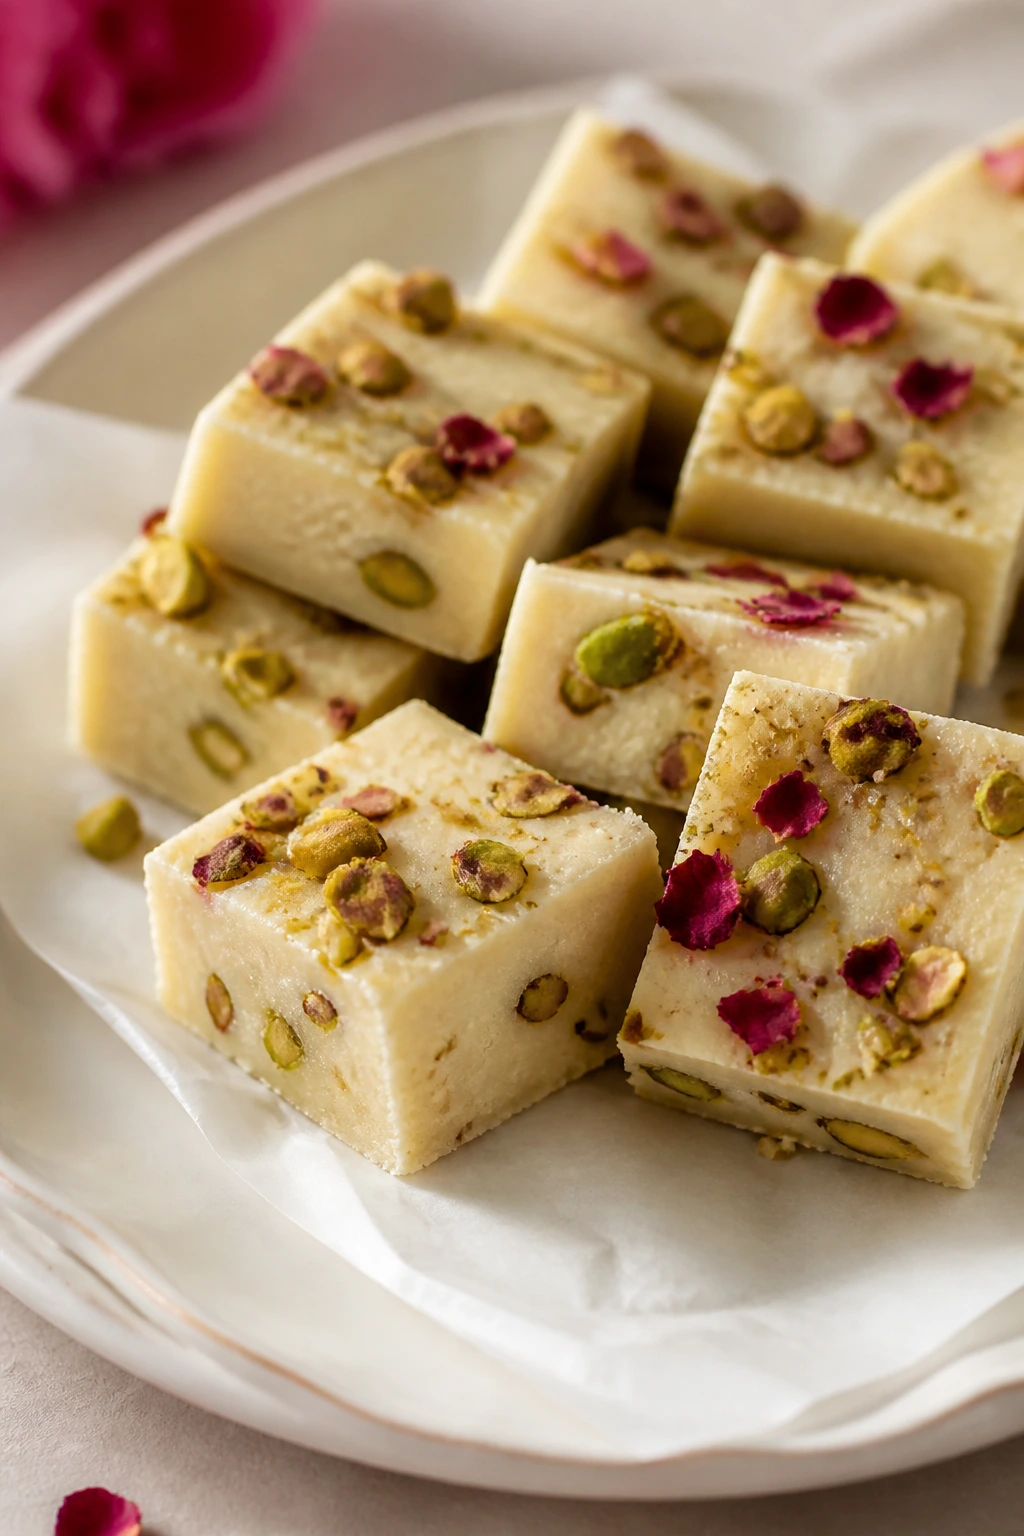
A square of white chocolate fudge with rosewater and pistachios feels like a little gift. It’s sweet, but the floral note keeps it from tipping into plain candy territory.
Why It Works: Condensed milk and white chocolate set into a soft, sliceable fudge without a candy thermometer. Rosewater works best in small doses, which is perfect for a beginner batch.
Key Ingredients:
- 3 cups white chocolate chips
- 1 can sweetened condensed milk
- 2 tbsp butter
- 1/2 tsp rosewater
- 1/4 cup chopped pistachios
- Pinch of salt
Quick Steps:
- Melt the chips, condensed milk, and butter together over low heat.
- Stir in rosewater and salt.
- Spread in a parchment-lined pan.
- Sprinkle pistachios on top and chill until firm.
Equipment for This Recipe:
- Small saucepan
- 8×8-inch pan
- Parchment paper
How to Serve This Dish: Cut into tiny squares; it’s rich. A few pieces on a small plate with tea feel about right.
Pro Tips for This Recipe:
- Add the rosewater off the heat so the aroma stays clean.
- Chill fully before cutting for neat edges.
Variations on This Dish:
- Cardamom Fudge: Swap rosewater for ground cardamom.
- Dark Chocolate Fudge: Use dark chips and top with almonds.
Common Mistakes to Avoid with This Dish:
- Don’t overheat the white chocolate or it seizes.
- Don’t use too much rosewater; the flavor turns sharp fast.
30. Baked Apples with Brown Sugar and Walnuts
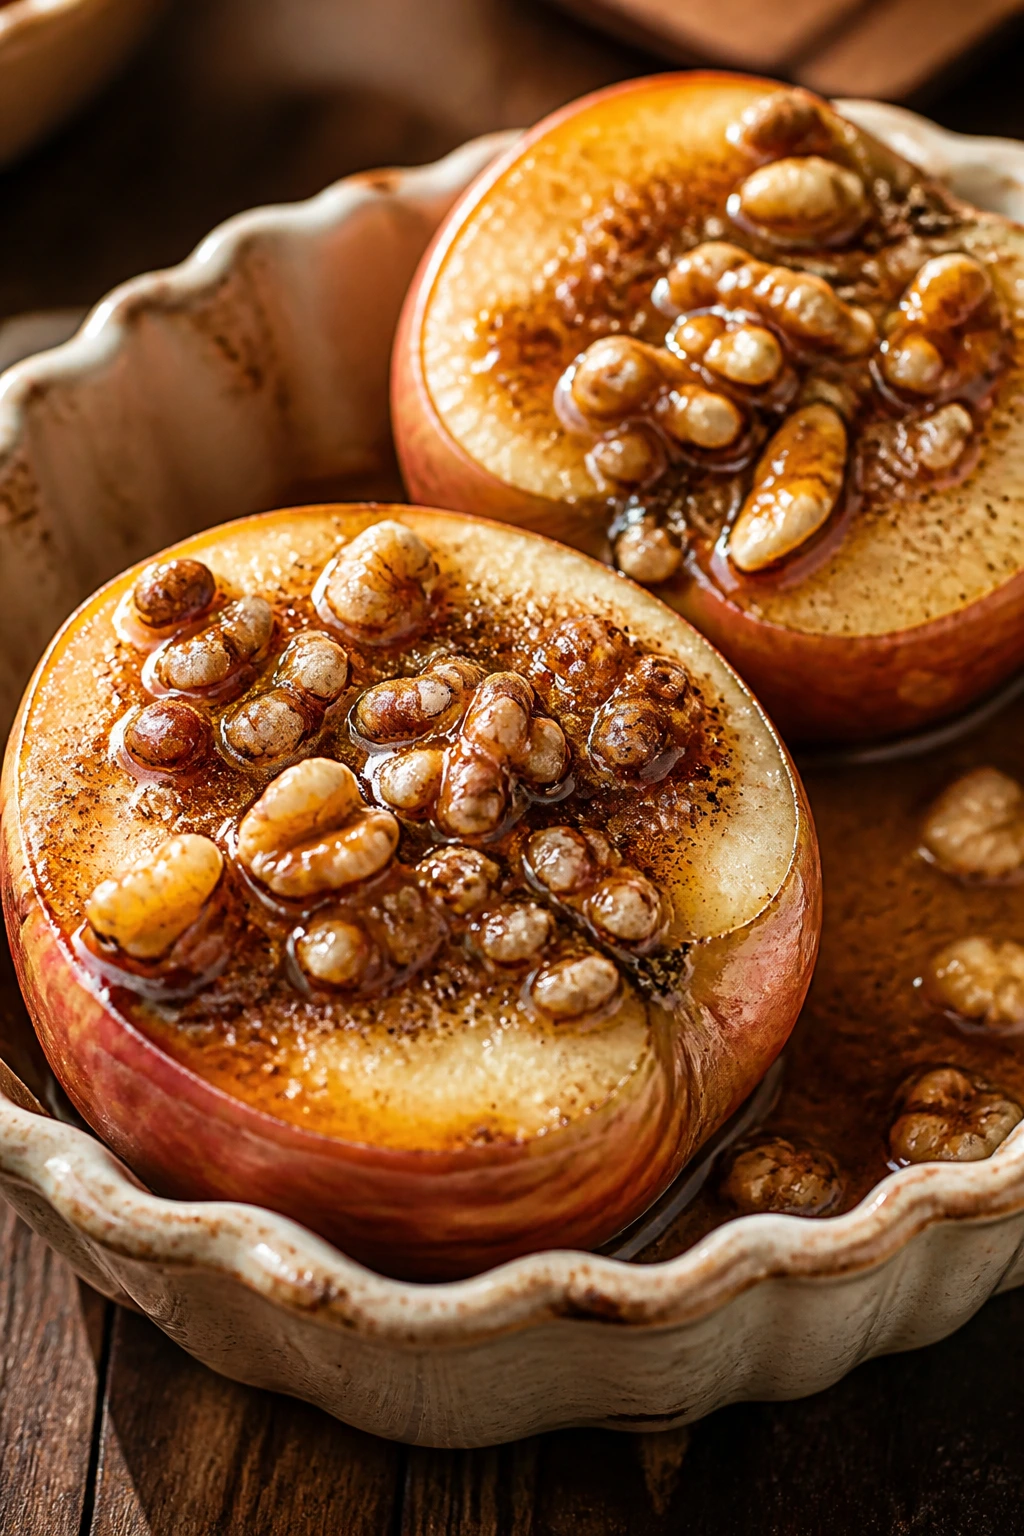
Warm apples split open and filled with brown sugar smell like a kitchen that’s being kind to you. They’re humble, yes, but the syrup at the bottom of the dish does a lot of heavy lifting.
Why It Works: Baking softens the apple while the filling melts into a spiced glaze. The walnut topping adds crunch so each bite has more than one texture.
Key Ingredients:
- 2 large apples, cored
- 2 tbsp brown sugar
- 1 tbsp butter
- 2 tbsp chopped walnuts
- 1/2 tsp cinnamon
- Pinch of salt
- 2 tbsp water
Quick Steps:
- Place the apples in a small baking dish with water.
- Fill each center with butter, sugar, walnuts, cinnamon, and salt.
- Bake at 375°F for 30 to 35 minutes until tender.
- Spoon pan juices over the apples before serving.
Equipment for This Recipe:
- Small baking dish
- Paring knife or corer
- Spoon
How to Serve This Dish: Serve warm with yogurt, cream, or ice cream. A small drizzle of the pan syrup over the top is worth doing.
Pro Tips for This Recipe:
- Choose apples that hold their shape, like Honeycrisp or Braeburn.
- Pierce the skins once or twice so they don’t split unpredictably.
Variations on This Dish:
- Cranberry Apples: Add dried cranberries to the filling.
- Maple Walnut Apples: Replace part of the sugar with maple syrup.
Common Mistakes to Avoid with This Dish:
- Don’t use apples that collapse into mush.
- Don’t underfill the dish with water; the bottoms can scorch.
31. Blackberry Lemon Bars
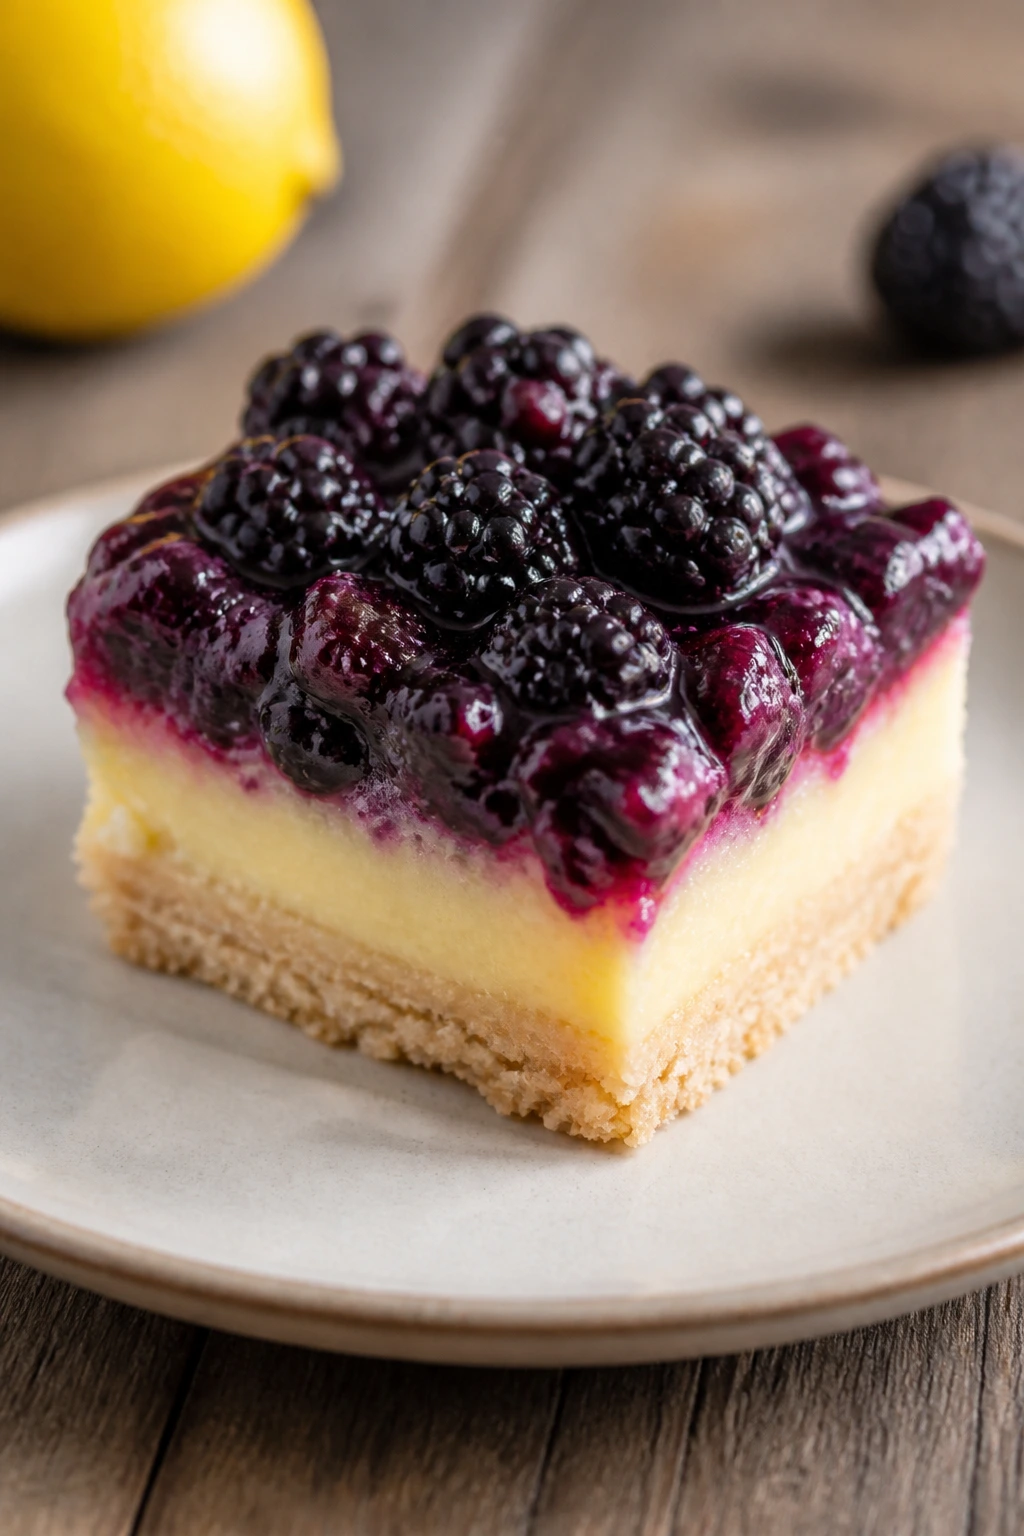
Bright, tart, and buttery, these bars feel like sunshine with a sharper edge. The blackberry layer stains the lemon filling a little purple, which is not a flaw at all.
Why It Works: A shortbread base supports a custard-like lemon layer, while blackberries add juice and color. The bars chill into clean slices, which makes them easy to serve.
Key Ingredients:
- 1 cup flour
- 1/2 cup butter, softened
- 1/4 cup powdered sugar
- 2 eggs
- 3/4 cup sugar
- 1/4 cup lemon juice
- 1 cup blackberries
- 1 tbsp flour
Quick Steps:
- Bake the shortbread crust at 350°F for 15 minutes.
- Whisk eggs, sugar, lemon juice, blackberries, and flour.
- Pour over the crust and bake 20 to 25 minutes more.
- Chill fully, then cut into bars.
Equipment for This Recipe:
- 8×8-inch pan
- Whisk
- Mixing bowls
How to Serve This Dish: Dust with powdered sugar and serve cold. These are neat bars, so cut them carefully with a hot knife.
Pro Tips for This Recipe:
- Toss the blackberries with flour so they sink less.
- Chill overnight for the cleanest slices.
Variations on This Dish:
- Raspberry Lemon Bars: Swap the fruit.
- Blueberry Lemon Bars: Use blueberries and a little extra zest.
Common Mistakes to Avoid with This Dish:
- Don’t cut before chilling.
- Don’t overload the filling with berries or it won’t set cleanly.
32. Meringue Nests with Cream and Berries
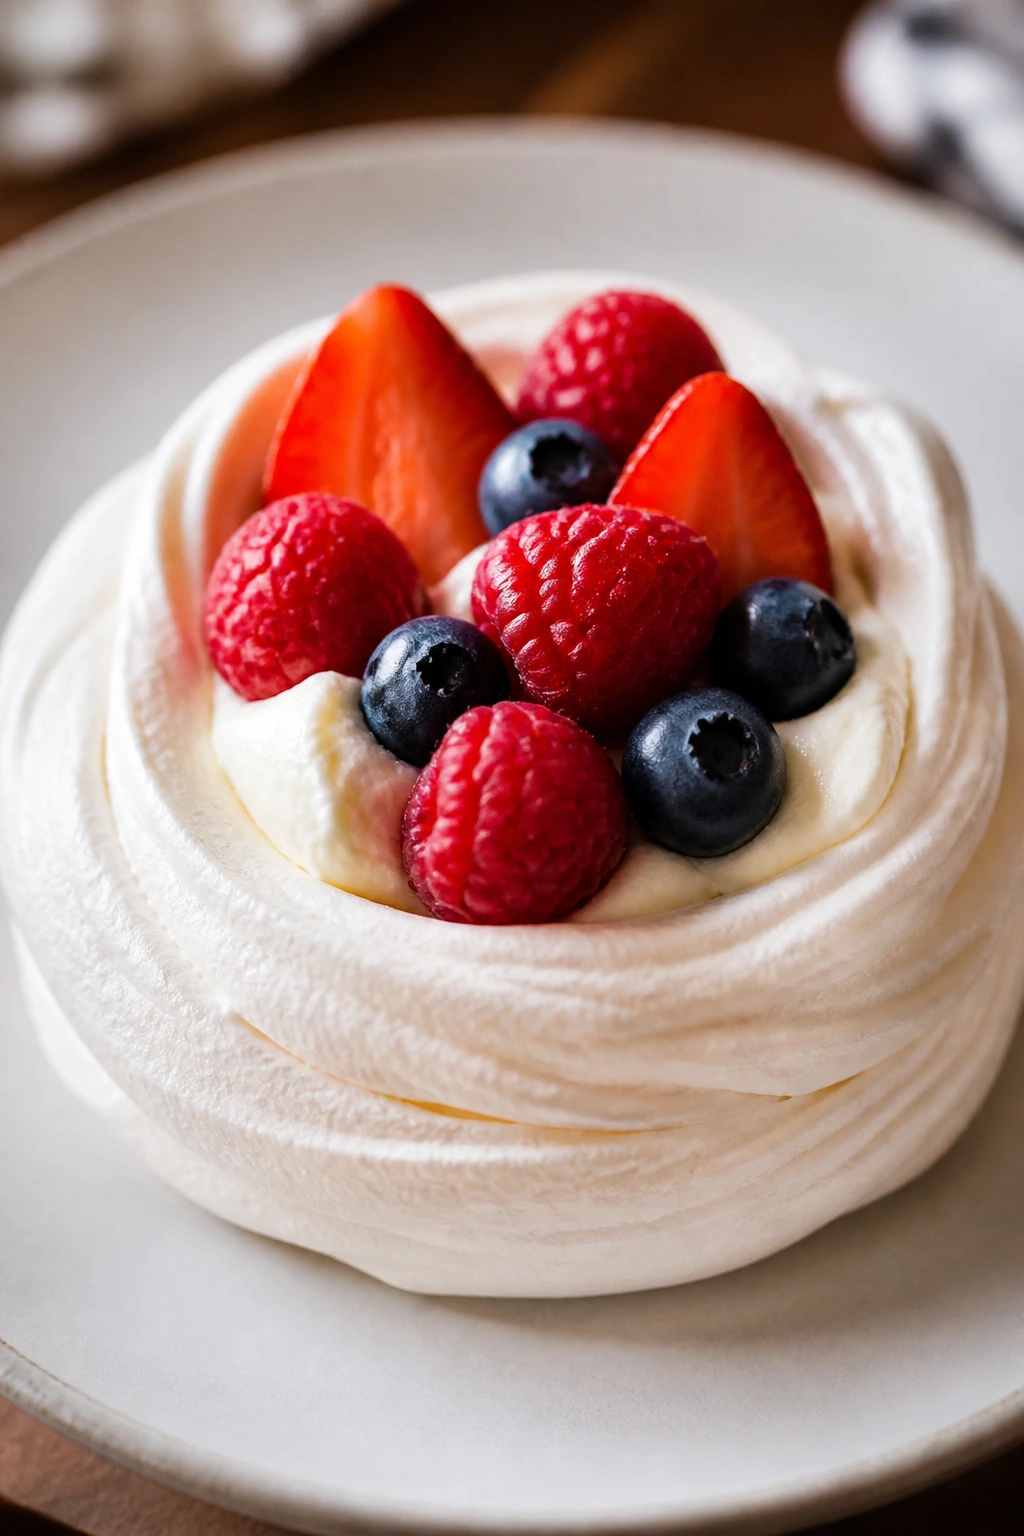
Crisp shells, soft cream, and fresh fruit make a dessert that looks like more work than it is. The nests are light, airy, and best filled right before serving.
Why It Works: Whipped egg whites dry into a crisp shell when baked low and slow. The center stays a little marshmallow-soft, which gives the dessert some give under the berries and cream.
Key Ingredients:
- 3 egg whites
- 3/4 cup sugar
- 1/4 tsp cream of tartar
- 1 cup whipped cream
- 1 1/2 cups mixed berries
- 1 tsp vanilla extract
Quick Steps:
- Whip egg whites and cream of tartar to soft peaks.
- Add sugar gradually until glossy and stiff.
- Spoon into nests on a lined baking sheet.
- Bake at 225°F for 1 hour, then cool in the oven.
- Fill with cream and berries.
Equipment for This Recipe:
- Mixer
- Baking sheet
- Parchment paper
How to Serve This Dish: Fill the nests at the table if you want the crisp shells to stay crisp. They’re pretty with a mix of berries, not just one fruit.
Pro Tips for This Recipe:
- Make sure the bowl is grease-free.
- Cool the meringues in the turned-off oven so they don’t crack as hard.
Variations on This Dish:
- Chocolate Meringue Nests: Fold in a little cocoa.
- Citrus Berry Nests: Add lemon zest to the whipped cream.
Common Mistakes to Avoid with This Dish:
- Don’t rush the sugar; it needs time to dissolve.
- Don’t assemble too early or the meringue softens.
33. Chocolate-Covered Pretzel Rods

Salty, crunchy, and glossy with chocolate, these are the easiest “I made this for you” dessert on the list. They’re also the kind of thing beginner bakers can finish without a single oven rack.
Why It Works: The pretzel gives you structure, the chocolate gives you shine, and toppings do the decorating. You can make a batch in under half an hour.
Key Ingredients:
- 12 pretzel rods
- 8 oz chocolate, melted
- 2 tbsp chopped nuts or sprinkles
- Flaky salt, optional
Quick Steps:
- Melt the chocolate in a narrow bowl.
- Dip each pretzel rod halfway.
- Roll in nuts or sprinkles.
- Set on parchment until firm.
Equipment for This Recipe:
- Narrow mug or bowl
- Parchment-lined tray
- Spoon
How to Serve This Dish: Stand them in a glass or lay them across a plate for a simple finish. They also pack well in cellophane for gifting.
Pro Tips for This Recipe:
- Use a narrow container so dipping is easier.
- If the chocolate thickens, warm it gently rather than forcing it.
Variations on This Dish:
- White Chocolate Pretzels: Use white coating and crushed freeze-dried berries.
- Double Chocolate Pretzels: Drizzle dark chocolate over set white chocolate.
Common Mistakes to Avoid with This Dish:
- Don’t let moisture touch the chocolate.
- Don’t stack them until fully set.
34. Strawberry Hand Pies
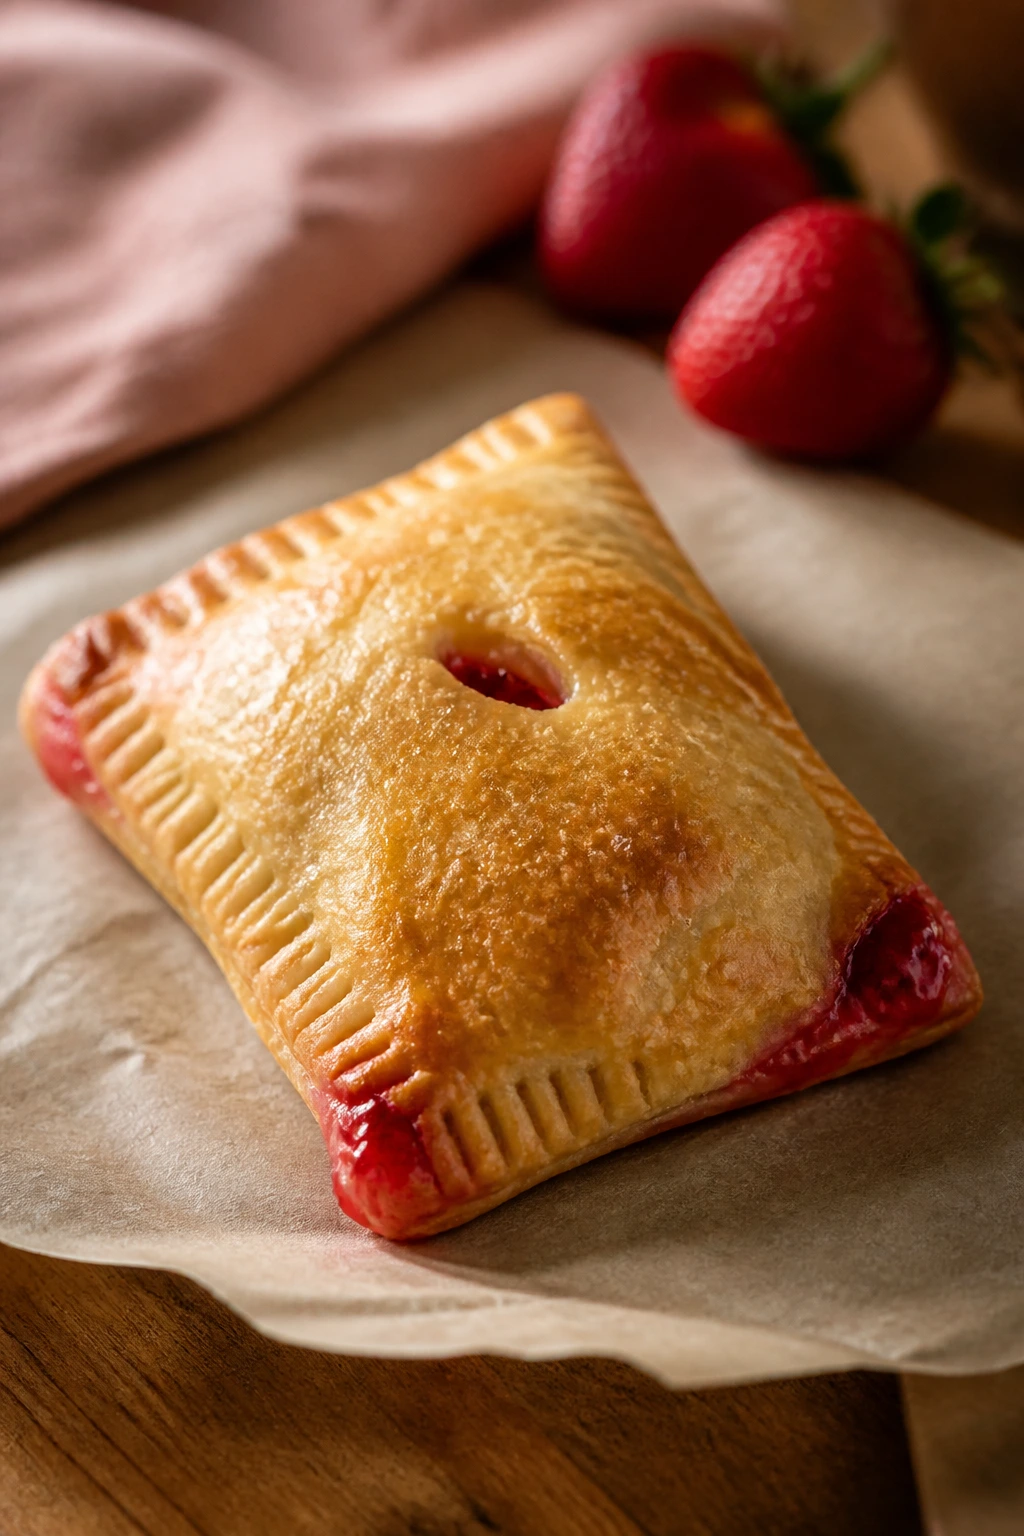
Flaky pastry wrapped around strawberries gives you all the charm of pie with fewer moving parts. The edges seal into little pockets that bake up golden and tidy.
Why It Works: A small amount of filling stays put better in hand pies than in a full pie shell. The handheld shape makes them beginner-friendly and easy to share.
Key Ingredients:
- 1 pie crust, chilled
- 1 1/2 cups diced strawberries
- 2 tbsp sugar
- 1 tsp cornstarch
- 1 tsp lemon juice
- 1 egg, beaten
- 1 tbsp coarse sugar
Quick Steps:
- Mix strawberries, sugar, cornstarch, and lemon juice.
- Cut the crust into circles or squares.
- Fill, fold, and crimp the edges.
- Brush with egg wash, sprinkle sugar, and bake at 400°F for 18 to 22 minutes.
Equipment for This Recipe:
- Baking sheet
- Fork
- Pastry brush
How to Serve This Dish: Serve warm or at room temperature with a little whipped cream. They’re sweet enough on their own, which is part of the appeal.
Pro Tips for This Recipe:
- Chill the assembled pies for 10 minutes before baking.
- Cut vents so steam can escape.
Variations on This Dish:
- Mixed Berry Hand Pies: Add blueberries or raspberries.
- Strawberry Cream Hand Pies: Add a tiny spoon of cream cheese to the filling.
Common Mistakes to Avoid with This Dish:
- Don’t overfill or the pies burst.
- Don’t skip sealing the edges; the juices will leak.
35. Chocolate Cream Pie Cups
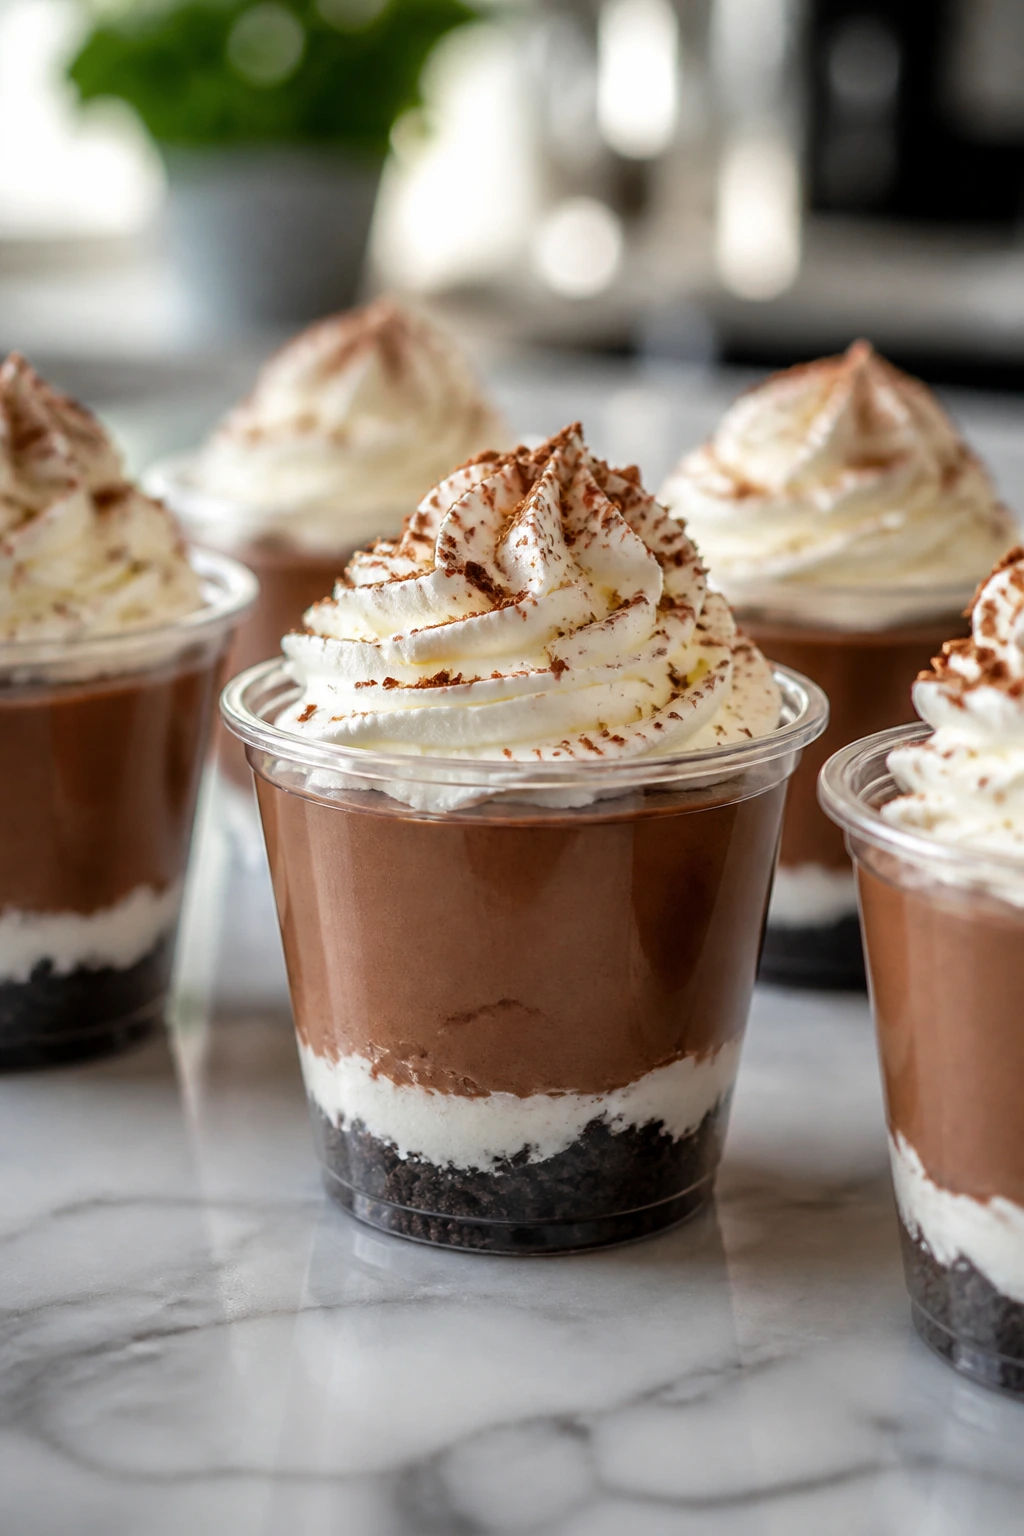
This is pie in a smaller, calmer form. A crumb base, silky chocolate filling, and whipped cream on top are enough to feel complete without needing a whole crust.
Why It Works: Cornstarch thickens the chocolate filling into a pudding-like texture, and the cups keep each layer neat. You get the pie experience without a blind-baking lesson.
Key Ingredients:
- 1 cup cookie crumbs
- 3 tbsp melted butter
- 2 cups milk
- 1/3 cup sugar
- 3 tbsp cocoa powder
- 3 tbsp cornstarch
- 1 tsp vanilla extract
- Whipped cream for topping
Quick Steps:
- Mix crumbs and butter, then press into cups.
- Whisk milk, sugar, cocoa, and cornstarch in a saucepan.
- Cook until thick and glossy, then stir in vanilla.
- Spoon into cups and chill.
- Top with whipped cream.
Equipment for This Recipe:
- Saucepan
- Whisk
- Small dessert cups
How to Serve This Dish: Serve cold with a spoonful of whipped cream and chocolate shavings. The cups keep the layers neat, which is half the charm.
Pro Tips for This Recipe:
- Keep whisking while the pudding heats so it doesn’t scorch.
- Chill fully before topping.
Variations on This Dish:
- Peanut Butter Cups: Swirl peanut butter into the filling.
- Mint Chocolate Cups: Add a drop of peppermint extract.
Common Mistakes to Avoid with This Dish:
- Don’t stop stirring while the filling thickens.
- Don’t use too much cocoa or the texture turns chalky.
36. Orange Olive Oil Cake
This cake smells bright the second it hits the oven. Olive oil keeps the crumb tender, and orange zest gives it a clean, sunny finish that feels right for a dessert meant to be sliced and shared.
Why It Works: Oil makes the cake stay moist longer than butter-heavy batters, and citrus cuts the sweetness so the slice doesn’t feel heavy. It’s a low-drama loaf with a polished flavor.
Key Ingredients:
- 2 cups flour
- 1 cup sugar
- 3 eggs
- 3/4 cup olive oil
- 1 cup plain yogurt
- Zest and juice of 2 oranges
- 2 tsp baking powder
- 1/2 tsp salt
Quick Steps:
- Whisk the dry ingredients in one bowl.
- Whisk the eggs, oil, yogurt, orange juice, and zest in another.
- Combine, then pour into a loaf pan.
- Bake at 350°F for 45 to 55 minutes.
Equipment for This Recipe:
- Loaf pan
- Mixing bowls
- Whisk
How to Serve This Dish: Serve plain or with a dusting of powdered sugar. A few orange segments on the side make the plate look finished fast.
Pro Tips for This Recipe:
- Use a mild olive oil, not one that tastes peppery.
- Let the cake cool before slicing so it doesn’t crumble.
Variations on This Dish:
- Lemon Olive Oil Cake: Swap the orange for lemon.
- Almond Orange Cake: Add a little almond extract.
Common Mistakes to Avoid with This Dish:
- Don’t overbake; oil cakes dry out quickly if left too long.
- Don’t skip the zest. The flavor lives there.
37. Poached Pears in Red Wine
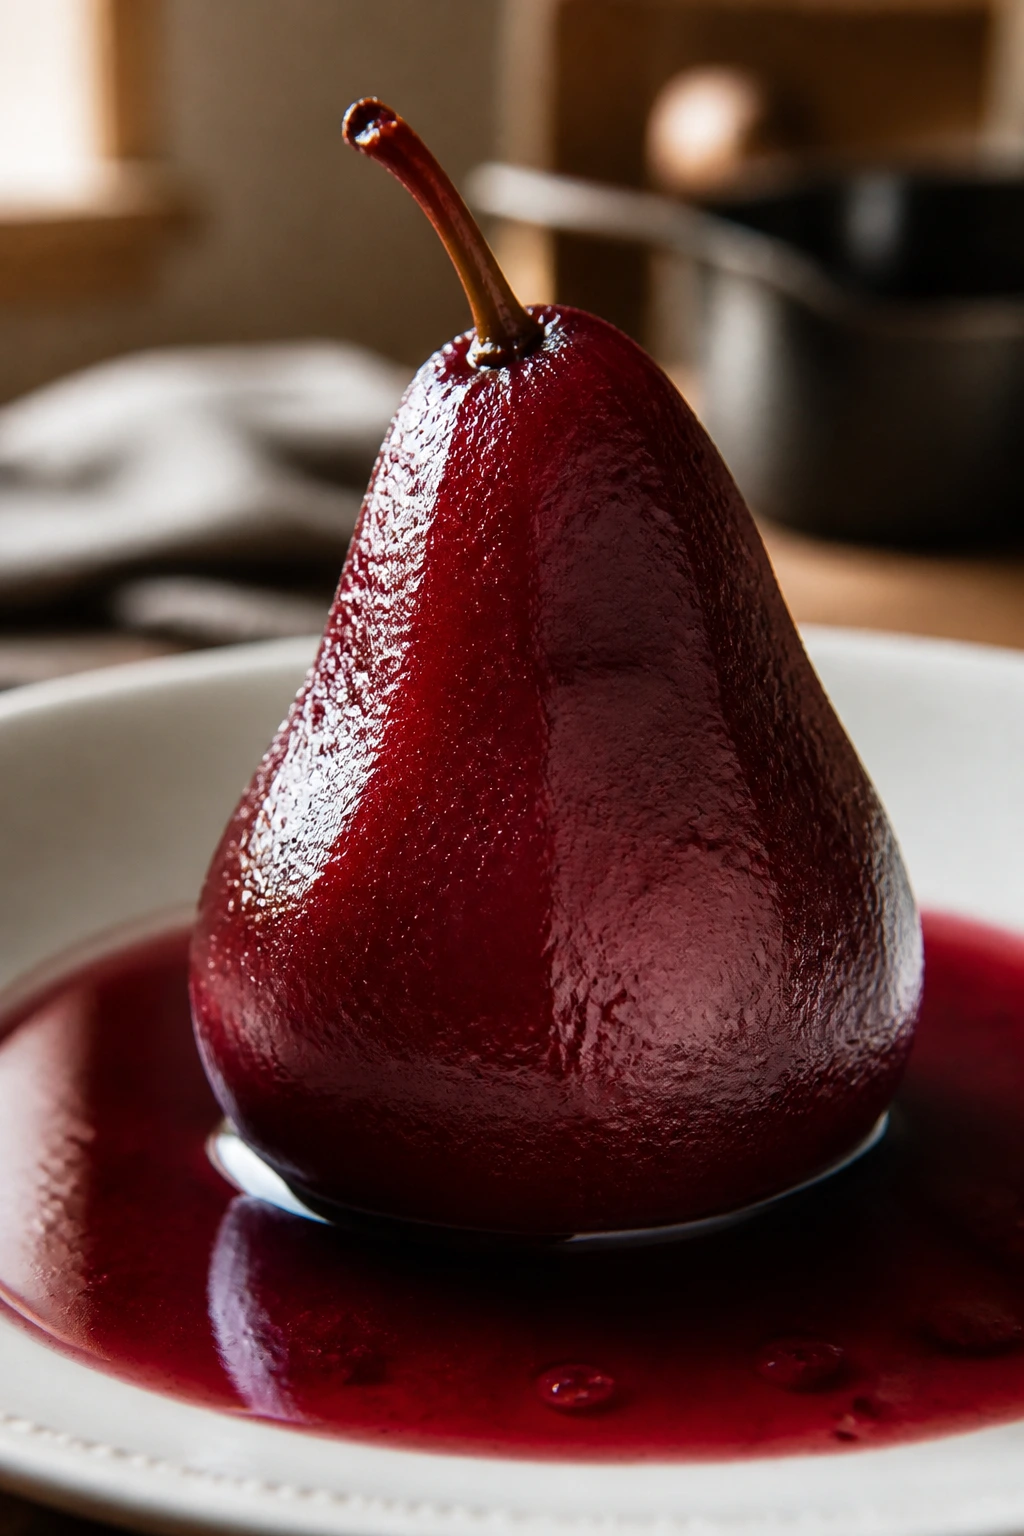
Whole pears in a ruby syrup look dramatic with very little hands-on work. They soften slowly, soak up spice, and end up tasting like a winter dessert without needing pastry skills.
Why It Works: Gentle poaching keeps the pears intact while the wine reduces into a glossy syrup. A little spice goes a long way here; the fruit should still taste like pear first.
Key Ingredients:
- 4 firm pears, peeled
- 2 cups red wine
- 1 cup water
- 1/2 cup sugar
- 1 cinnamon stick
- 2 strips orange peel
- 1 tsp vanilla extract
Quick Steps:
- Combine wine, water, sugar, cinnamon, and orange peel in a saucepan.
- Add pears and simmer gently 20 to 30 minutes.
- Turn the pears occasionally until tender.
- Remove pears and reduce the liquid into syrup.
- Spoon syrup over the pears.
Equipment for This Recipe:
- Deep saucepan
- Peeler
- Spoon
How to Serve This Dish: Serve with a spoonful of mascarpone or whipped cream. One pear per plate looks neat and elegant.
Pro Tips for This Recipe:
- Choose pears that are firm and not fully ripe.
- Keep the simmer low so the pears don’t break apart.
Variations on This Dish:
- White Wine Pears: Use white wine and lemon peel.
- Spiced Pears: Add star anise and clove.
Common Mistakes to Avoid with This Dish:
- Don’t use soft pears.
- Don’t boil hard or the fruit gets ragged.
38. Tiramisu Brownies
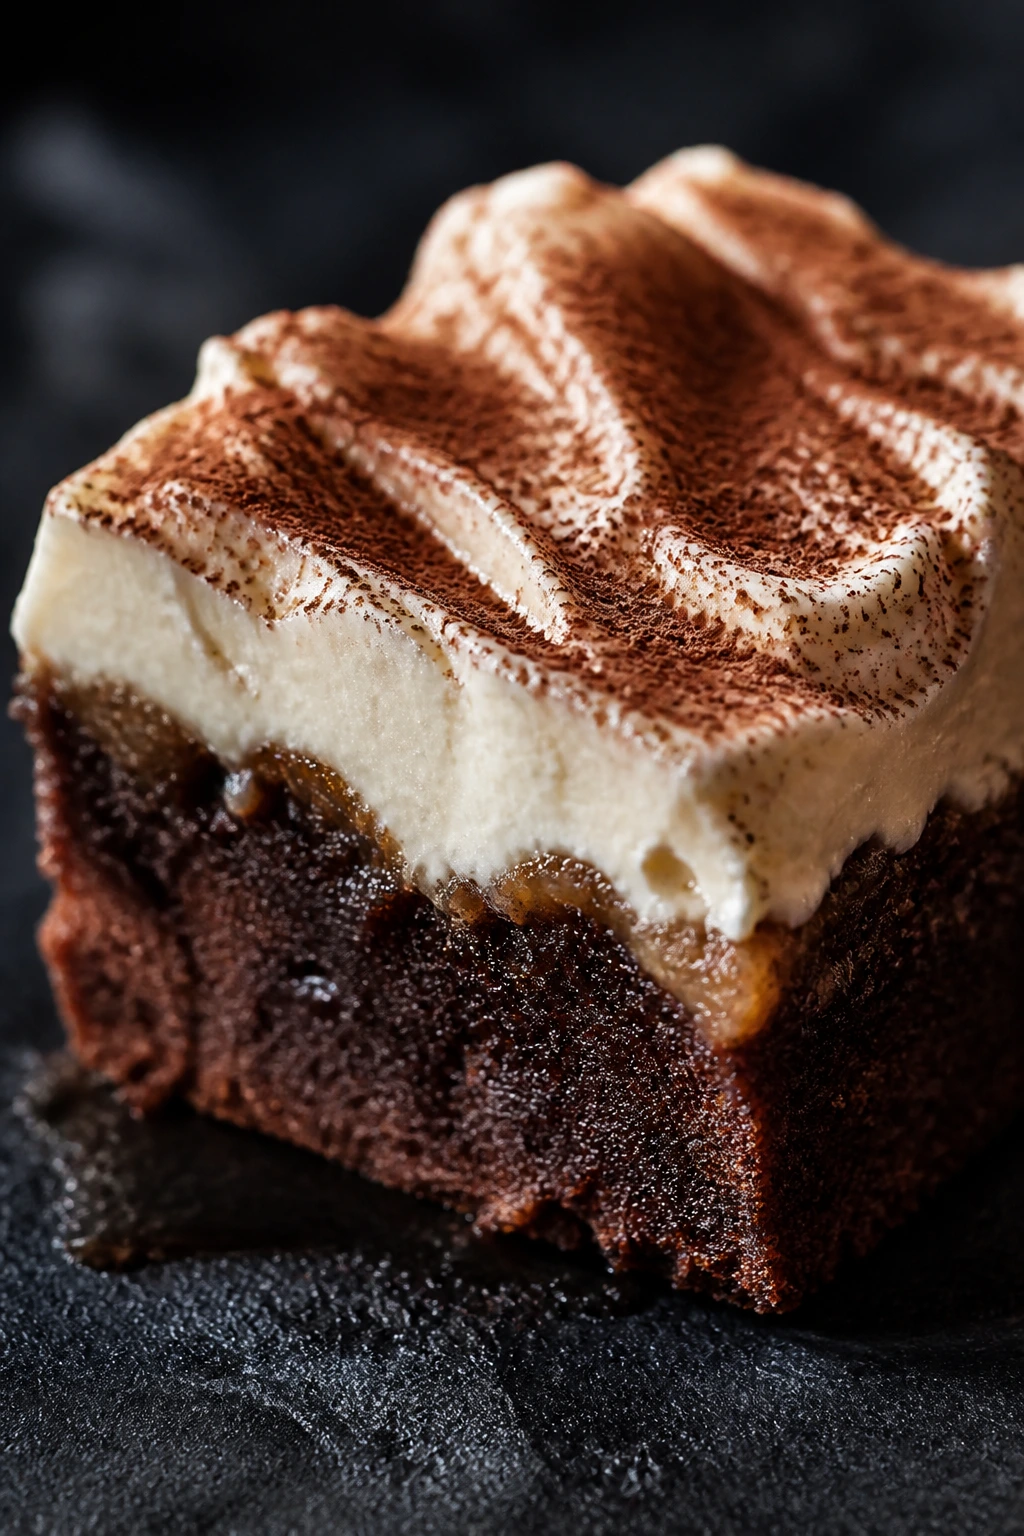
Chocolate brownies and coffee-soaked layers make a dessert that tastes like a late-night cafe order. The mascarpone topping keeps it creamy without turning the whole pan heavy.
Why It Works: Brownies bring the structure, coffee adds depth, and mascarpone softens the finish. It’s a hybrid dessert that forgives a little mess in the layering.
Key Ingredients:
- 1 pan brownies, baked and cooled
- 1/2 cup strong coffee, cooled
- 8 oz mascarpone
- 1 cup whipped cream
- 1/4 cup powdered sugar
- 2 tbsp cocoa powder
Quick Steps:
- Brush the brownies lightly with coffee.
- Whip mascarpone, cream, and powdered sugar until smooth.
- Spread over the brownies.
- Chill 1 hour.
- Dust with cocoa before cutting.
Equipment for This Recipe:
- 8×8-inch pan
- Mixer
- Fine sieve
How to Serve This Dish: Cut into small squares and serve cold. The cocoa dusting looks best right before the plate leaves the kitchen.
Pro Tips for This Recipe:
- Don’t pour coffee; brush it on so the brownies stay firm.
- Chill before slicing for clean layers.
Variations on This Dish:
- Mocha Brownies: Add espresso powder to the brownie batter.
- Cherry Tiramisu Brownies: Add cherry preserves in a thin layer.
Common Mistakes to Avoid with This Dish:
- Don’t soak the brownies too heavily.
- Don’t whip the topping until grainy.
39. Peanut Butter Heart Thumbprints
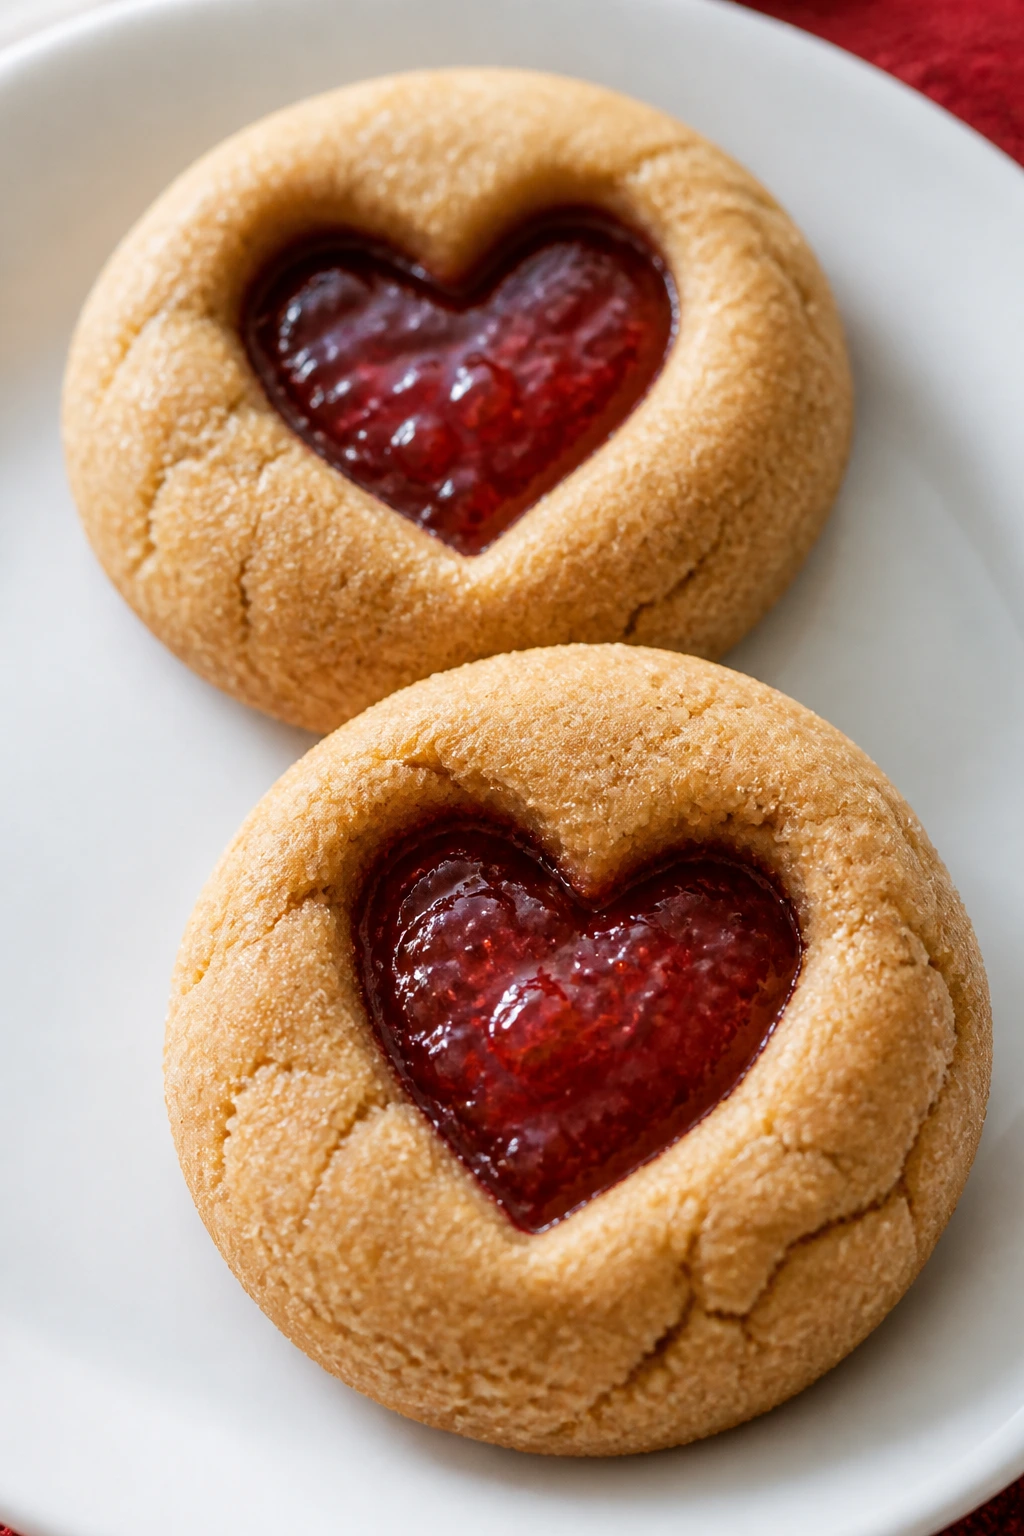
Sweet peanut butter cookies with a jam center feel playful and nostalgic, which is useful when you want the dessert to seem warm rather than formal. The center keeps the cookie from drying out.
Why It Works: Peanut butter gives the dough enough structure to hold a thumbprint well, and jam adds a tart edge. The shape is easy to press and fills nicely without extra tools.
Key Ingredients:
- 1/2 cup butter, softened
- 1/2 cup peanut butter
- 3/4 cup brown sugar
- 1 egg
- 1 1/4 cups flour
- 1/2 tsp baking soda
- 1/2 cup strawberry jam
Quick Steps:
- Cream butter, peanut butter, and sugar.
- Beat in the egg, then mix in flour and baking soda.
- Shape into balls and press a heart-shaped or round indent.
- Fill with jam and bake at 350°F for 10 to 12 minutes.
Equipment for This Recipe:
- Mixing bowl
- Baking sheet
- Measuring spoon or thumb
How to Serve This Dish: Serve slightly warm or fully cooled. They pair well with milk or a strong cup of tea.
Pro Tips for This Recipe:
- Use smooth peanut butter if you want a neater texture.
- Re-press the indent right after baking if it puffs up.
Variations on This Dish:
- Raspberry Peanut Butter Cookies: Swap the jam.
- Chocolate Peanut Butter Hearts: Fill with chocolate spread.
Common Mistakes to Avoid with This Dish:
- Don’t overbake; the centers should stay soft.
- Don’t use too much jam or it spills over.
40. Lemon Sugar Cookies
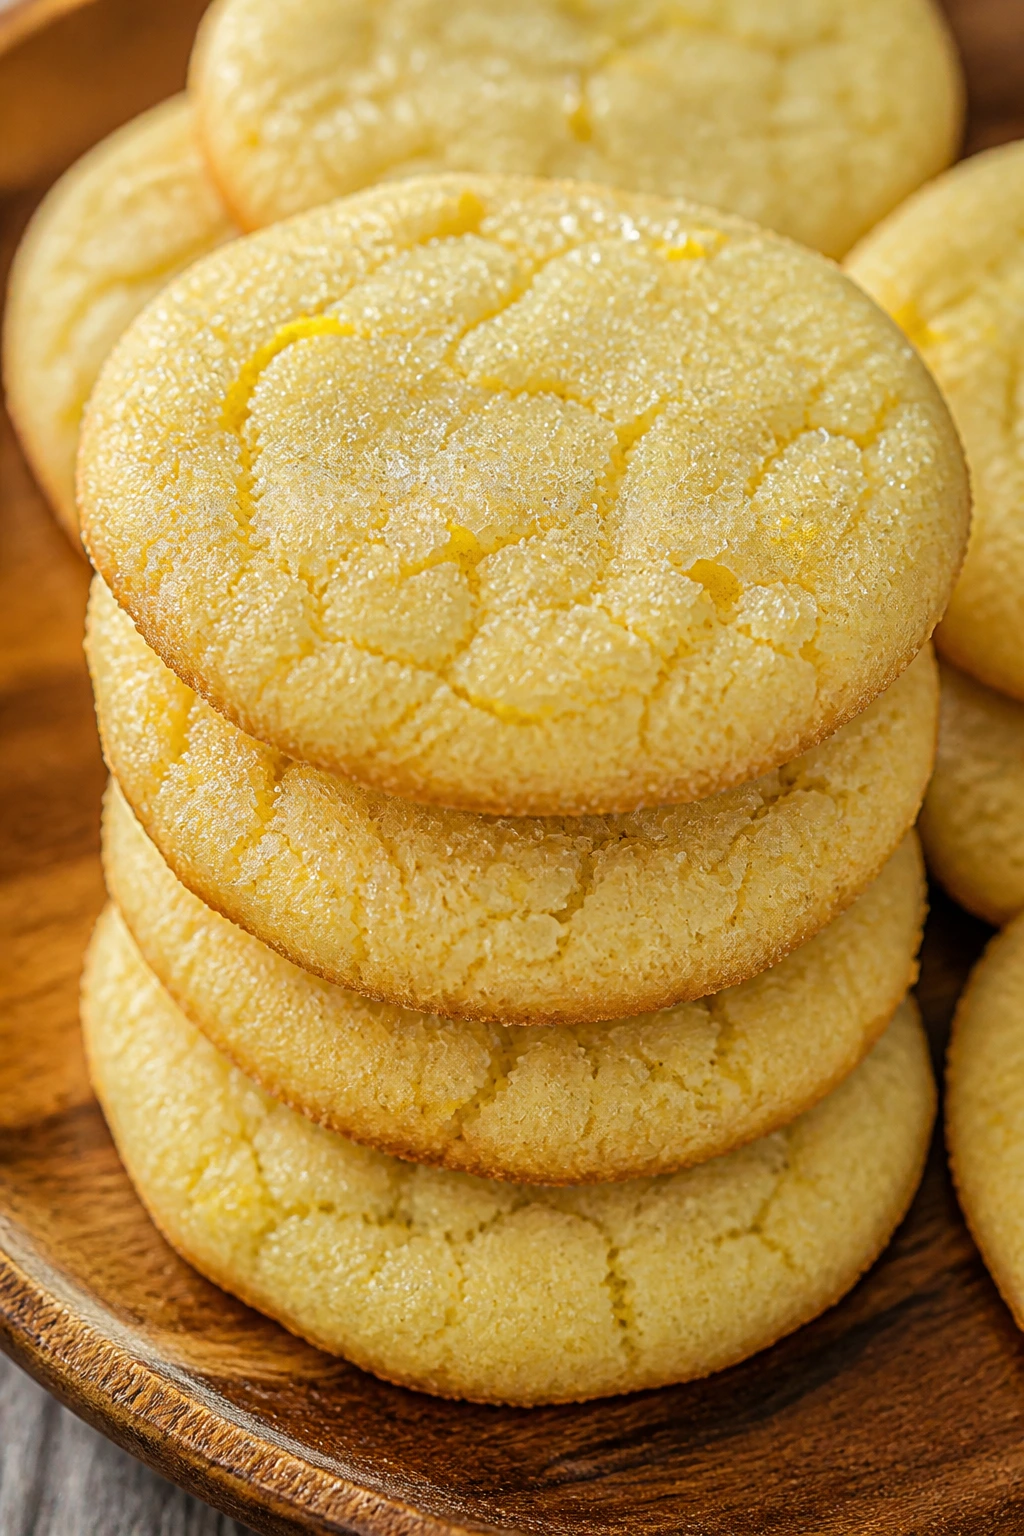
Bright lemon sugar cookies can carry a whole dessert plate on flavor alone. They’re crisp at the edges, soft in the middle, and easy to finish with a little sugar glaze if you want extra shine.
Why It Works: Lemon zest in the dough gives the cookies a fresher flavor than extract alone. Sugar on the outside makes the edges sparkle and adds a faint crunch.
Key Ingredients:
- 1 cup butter, softened
- 1 cup sugar
- 1 egg
- Zest of 2 lemons
- 2 1/2 cups flour
- 1/2 tsp baking soda
- 1/2 tsp salt
- 1 tbsp lemon juice
Quick Steps:
- Cream butter and sugar.
- Beat in the egg, lemon zest, and lemon juice.
- Mix in flour, baking soda, and salt.
- Roll, cut, and bake at 350°F for 10 to 12 minutes.
- Cool before glazing or serving plain.
Equipment for This Recipe:
- Cookie cutters
- Baking sheet
- Mixer or wooden spoon
How to Serve This Dish: Stack them on a plate and finish with a thin lemon glaze if you want a cleaner, shinier look. They also ship well in a tin.
Pro Tips for This Recipe:
- Zest the lemons before juicing them.
- Chill cut shapes for 15 minutes before baking if the dough softens.
Variations on This Dish:
- Lemon-Poppy Cookies: Add 1 tbsp poppy seeds.
- Lavender Lemon Cookies: Add a pinch of culinary lavender.
Common Mistakes to Avoid with This Dish:
- Don’t overbake; they should stay pale.
- Don’t skip zest. Juice alone tastes flat.
41. Chocolate Mug Cake for Two
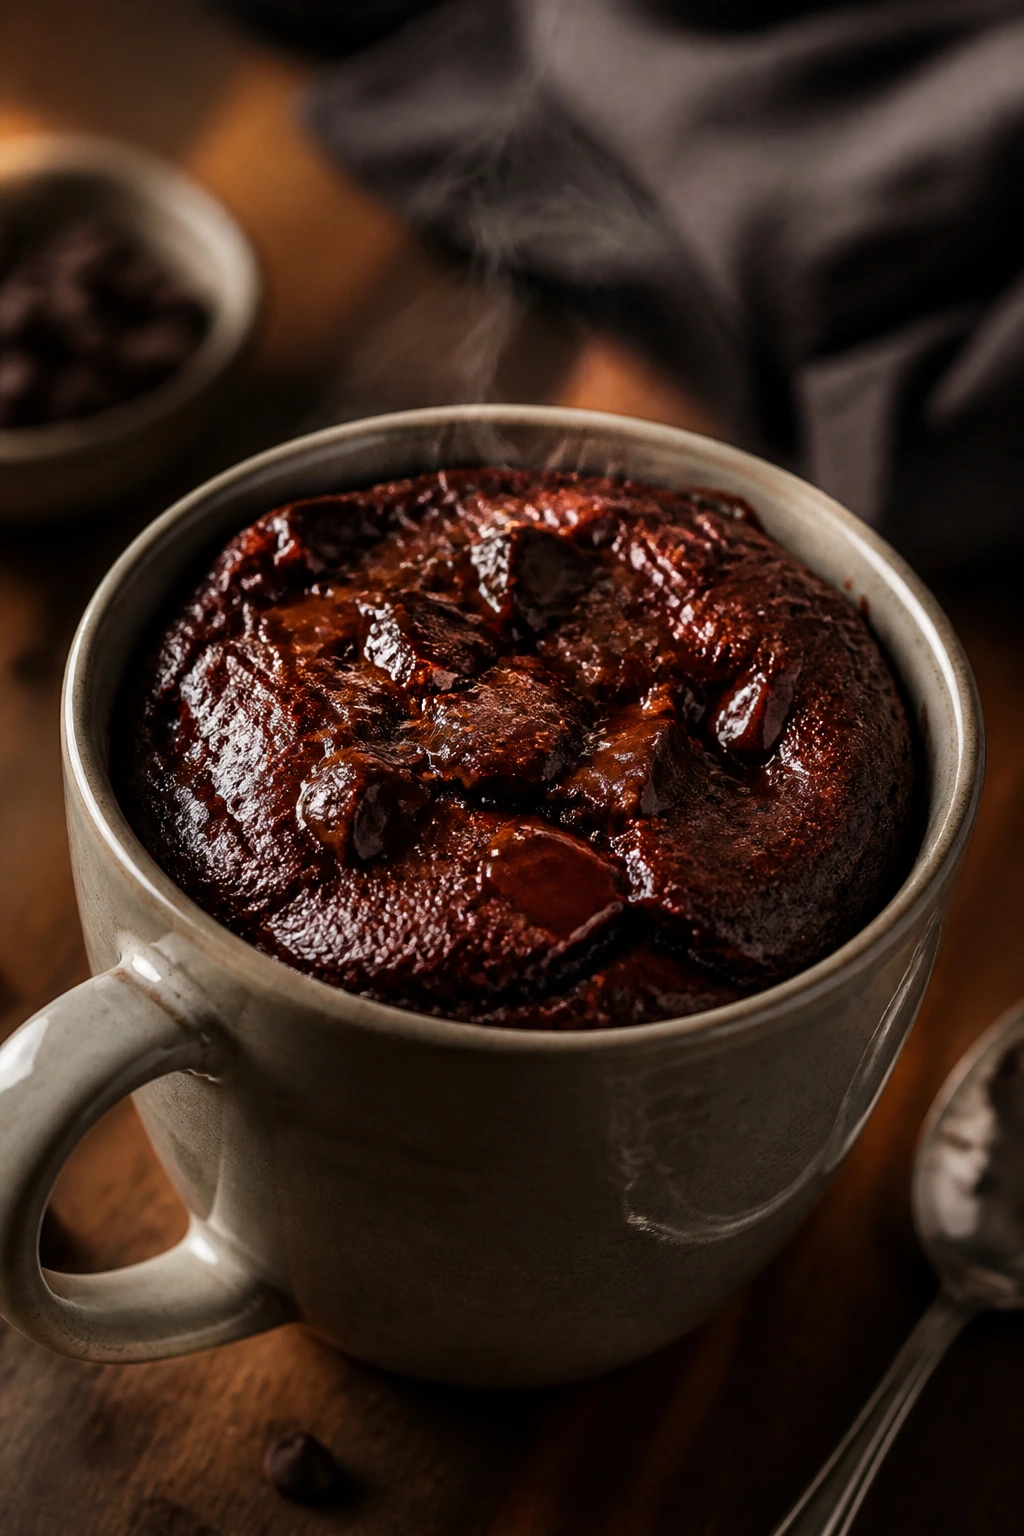
Warm cake in minutes, no oven preheat, no long cleanup. For a small evening dessert, that speed matters more than people admit.
Why It Works: A microwave cooks the batter quickly enough to keep it soft and steamy, and small portions prevent the edges from drying out. It’s the easiest path from craving to plate.
Key Ingredients:
- 1/2 cup flour
- 1/4 cup sugar
- 2 tbsp cocoa powder
- 1/2 tsp baking powder
- 1/2 cup milk
- 2 tbsp oil
- 2 tbsp chocolate chips
Quick Steps:
- Mix the dry ingredients in a microwave-safe bowl.
- Stir in the milk and oil until smooth.
- Fold in chocolate chips.
- Microwave 60 to 90 seconds until just set on top.
- Rest 1 minute before eating.
Equipment for This Recipe:
- Microwave-safe bowl
- Spoon
- Measuring cups
How to Serve This Dish: Serve straight from the bowl with a spoonful of whipped cream or ice cream. It’s meant to be immediate, not elegant in a fussy way.
Pro Tips for This Recipe:
- Start with less microwave time; you can always add 10 seconds.
- Use a wide mug or bowl so the cake cooks evenly.
Variations on This Dish:
- Peanut Butter Mug Cake: Swirl peanut butter into the batter.
- Mint Chocolate Mug Cake: Add a tiny drop of peppermint extract.
Common Mistakes to Avoid with This Dish:
- Don’t overcook; mug cakes go rubbery fast.
- Don’t fill the cup too high or it can spill over.
42. Berry Parfait Trifles
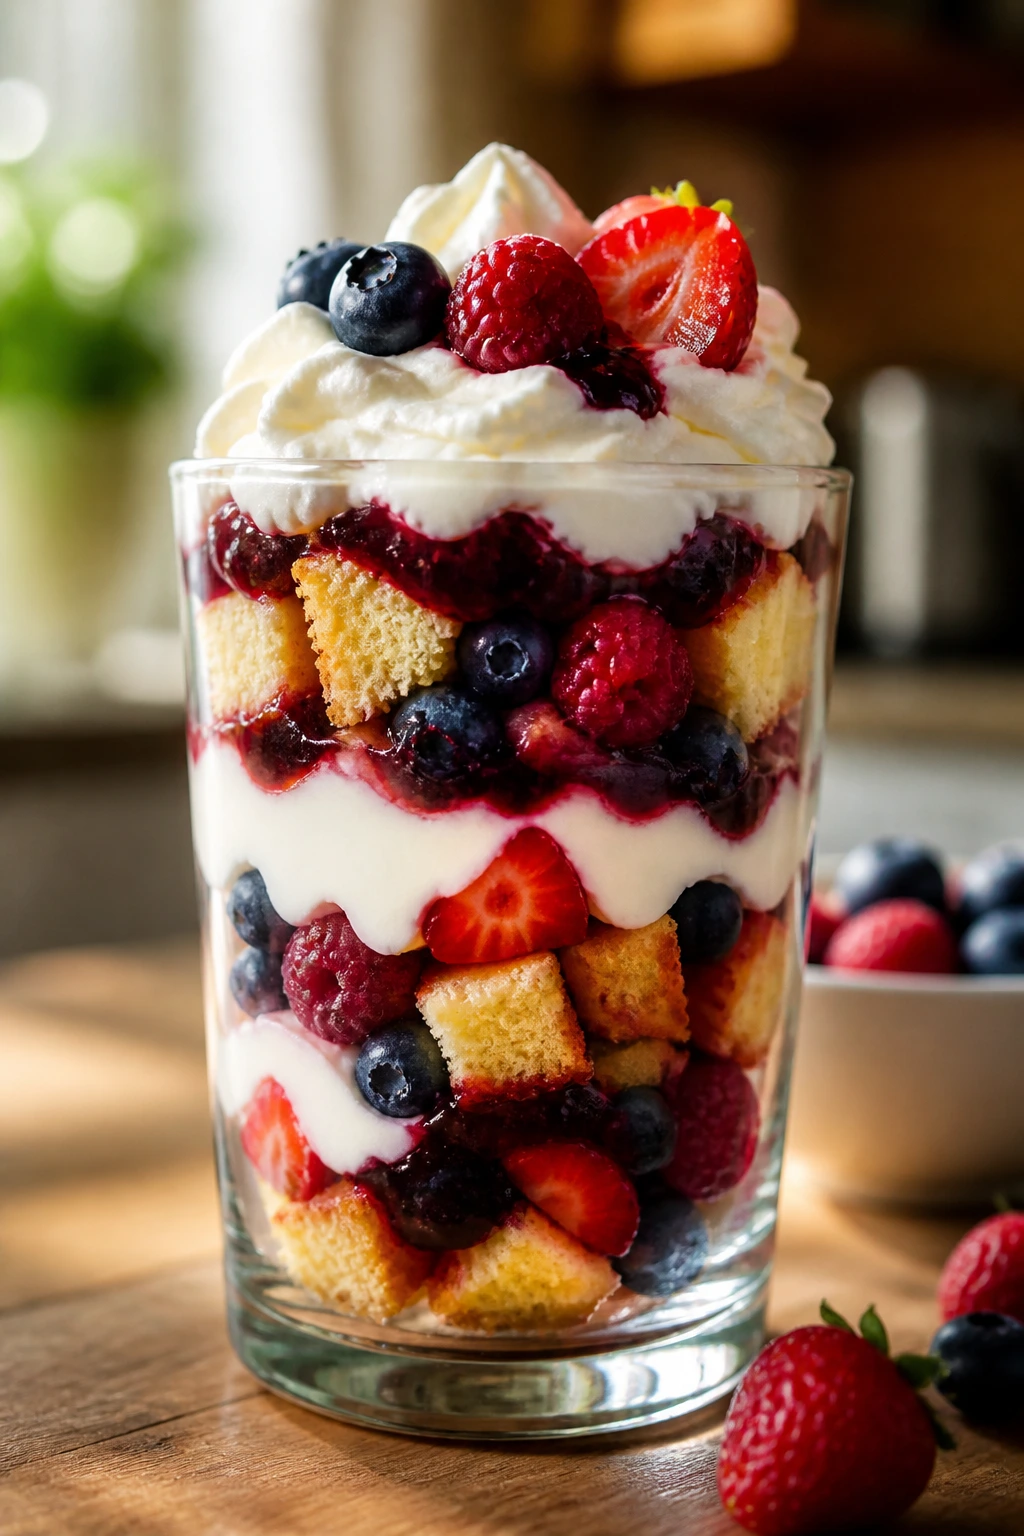
Layers of cake, berries, cream, and jam make this dessert look generous without needing a pastry bag. The glass does the presentation for you.
Why It Works: Soft cake soaks up berry juice and cream, which keeps every spoonful moist. The layers also let you use store-bought pound cake without apology.
Key Ingredients:
- 2 cups pound cake cubes
- 1 cup mixed berries
- 1/2 cup berry jam
- 1 cup whipped cream
- 1/2 cup vanilla yogurt
Quick Steps:
- Stir berries with jam.
- Layer cake, berry mixture, yogurt, and whipped cream in glasses.
- Repeat once.
- Chill 20 minutes before serving.
Equipment for This Recipe:
- Tall glasses
- Knife
- Spoon
How to Serve This Dish: Serve in clear glasses so the layers show. A berry on top and a little crumb on the rim is enough.
Pro Tips for This Recipe:
- Cut the cake into even cubes so the layers stay tidy.
- Use cold cream so the trifle holds its shape.
Variations on This Dish:
- Chocolate Trifles: Use chocolate cake and strawberries.
- Lemon Trifles: Add lemon curd between layers.
Common Mistakes to Avoid with This Dish:
- Don’t drown the cake in jam.
- Don’t assemble too far ahead or the cake gets soggy.
43. Cherry Pie Crumble Bars
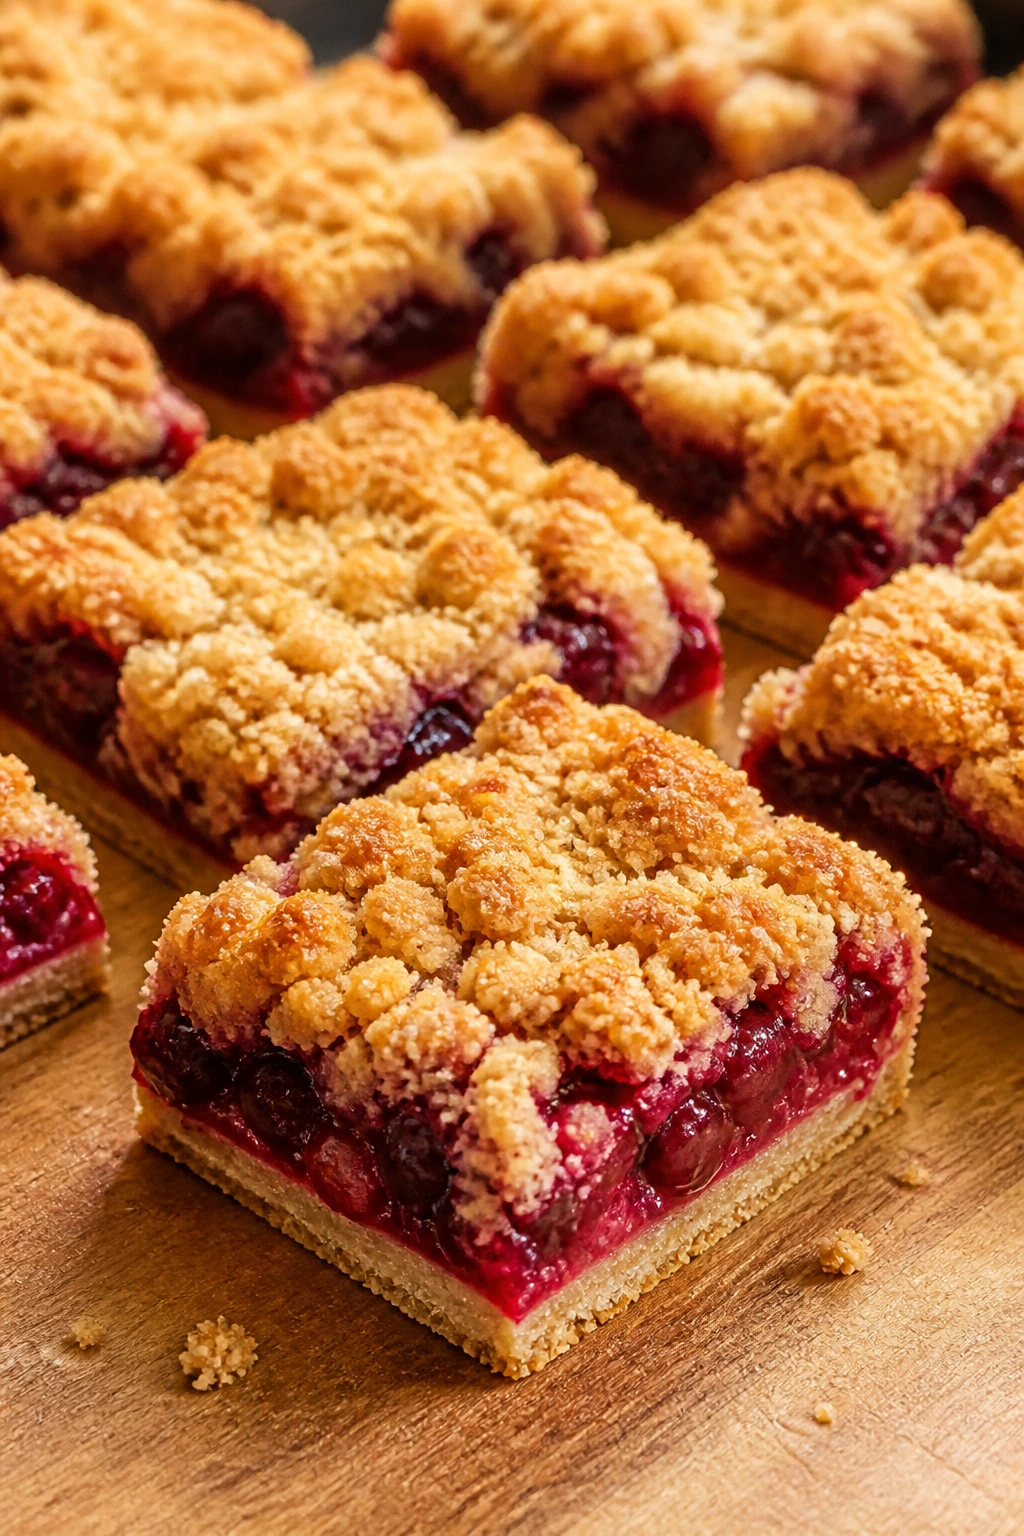
Pie flavor, bar format, no rolling pin battle. These bars give you a buttery crust, juicy cherry filling, and a crumb topping that looks right at home on a dessert plate.
Why It Works: The bottom and top are made from the same dough, which keeps the recipe simple. Cherries hold their flavor well once baked, especially when thickened with a little starch.
Key Ingredients:
- 1 1/2 cups flour
- 1 cup oats
- 3/4 cup sugar
- 1 cup butter, cold and cubed
- 2 cups cherry pie filling or pitted cherries with sugar
- 1 tsp lemon juice
Quick Steps:
- Mix flour, oats, sugar, and butter into crumbly dough.
- Press half into a pan and bake 10 minutes.
- Spread cherry filling over the crust.
- Crumble the rest on top and bake until golden.
Equipment for This Recipe:
- 8×8-inch pan
- Mixing bowl
- Spoon
How to Serve This Dish: Cool fully before cutting into neat squares. They’re good plain, but a little vanilla ice cream makes them feel finished.
Pro Tips for This Recipe:
- Press the base firmly so it slices cleanly.
- Chill before cutting if you want sharper edges.
Variations on This Dish:
- Blueberry Crumble Bars: Swap the filling.
- Almond Cherry Bars: Add almond extract to the filling.
Common Mistakes to Avoid with This Dish:
- Don’t use filling that’s too wet.
- Don’t underbake the top layer; it should be golden, not pale.
44. White Chocolate Raspberry Blondies
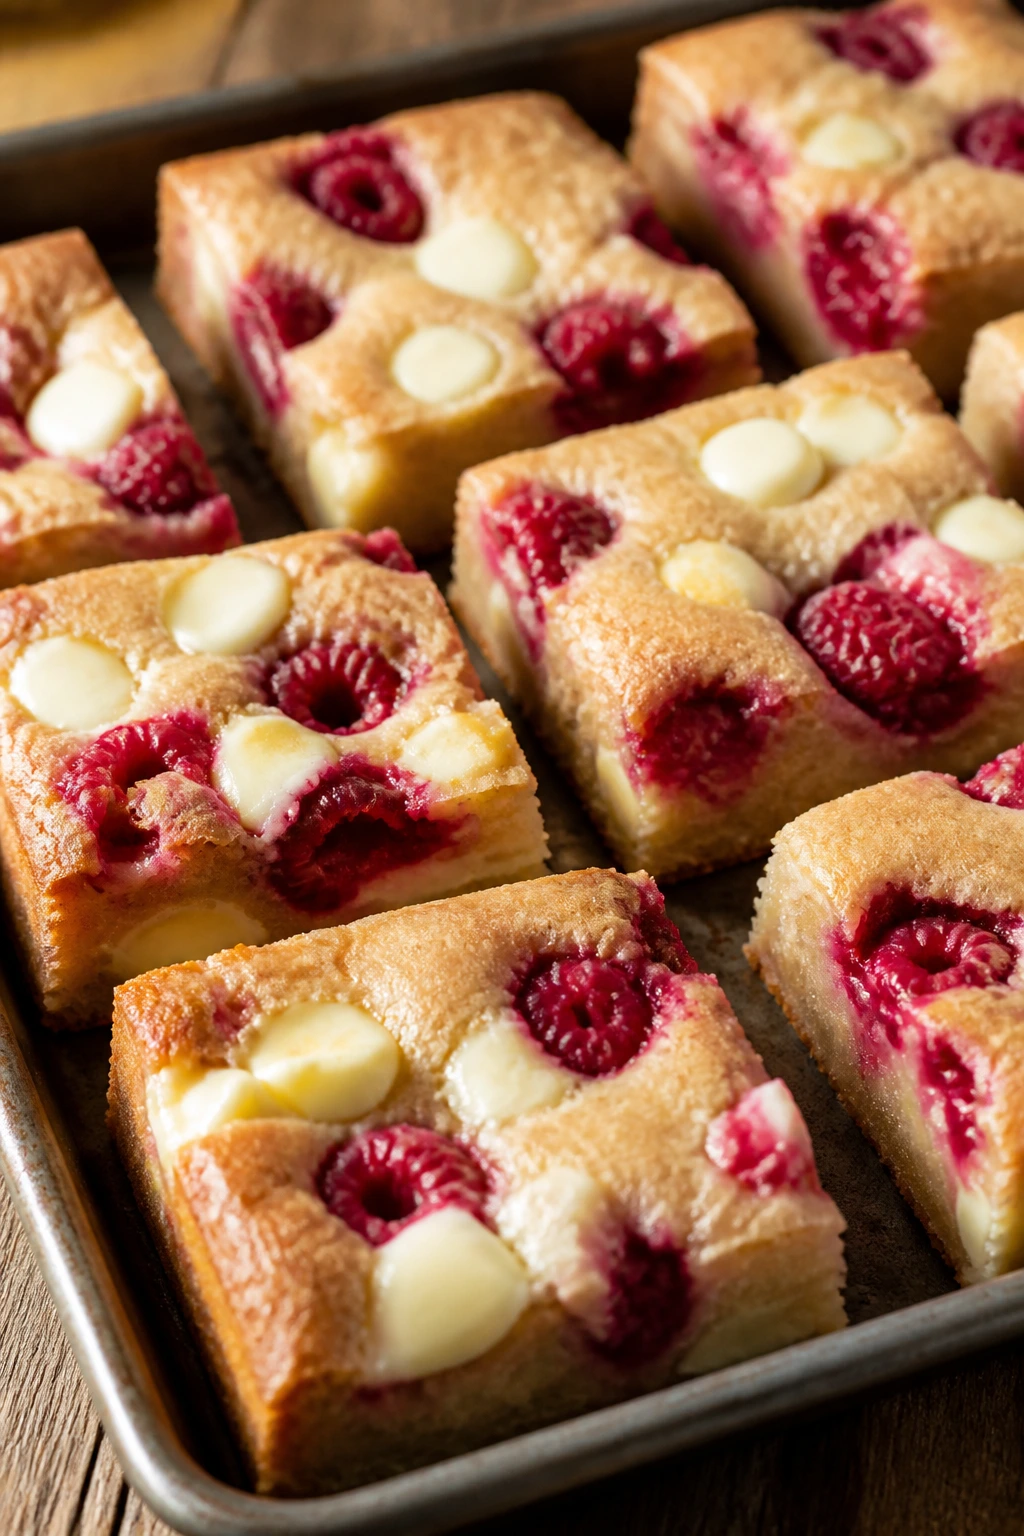
These are soft, buttery bars with pockets of melted white chocolate and sharp raspberry bites. The flavor leans sweet, but the berries keep it from feeling flat.
Why It Works: Blondies bake into a chewy bar base that holds fruit and chocolate well. The raspberries streak the batter and make the bars look more deliberate than they are.
Key Ingredients:
- 1/2 cup butter, melted
- 1 cup brown sugar
- 1 egg
- 1 tsp vanilla extract
- 1 1/4 cups flour
- 1/2 tsp salt
- 3/4 cup white chocolate chips
- 3/4 cup raspberries
Quick Steps:
- Mix butter and brown sugar.
- Stir in egg and vanilla, then add flour and salt.
- Fold in chocolate chips and raspberries gently.
- Bake in an 8×8-inch pan at 350°F for 25 to 30 minutes.
Equipment for This Recipe:
- 8×8-inch pan
- Spatula
- Mixing bowl
How to Serve This Dish: Cut into small bars; they’re rich. A few extra raspberries on the plate make them feel brighter.
Pro Tips for This Recipe:
- Fold the raspberries in gently so they don’t crush completely.
- Cool before slicing or the bars will smear.
Variations on This Dish:
- Blackberry Blondies: Swap the fruit.
- Lemon Raspberry Blondies: Add lemon zest to the batter.
Common Mistakes to Avoid with This Dish:
- Don’t stir too hard once the berries go in.
- Don’t overbake; blondies should stay soft in the center.
45. Coconut Cream Pudding Cups
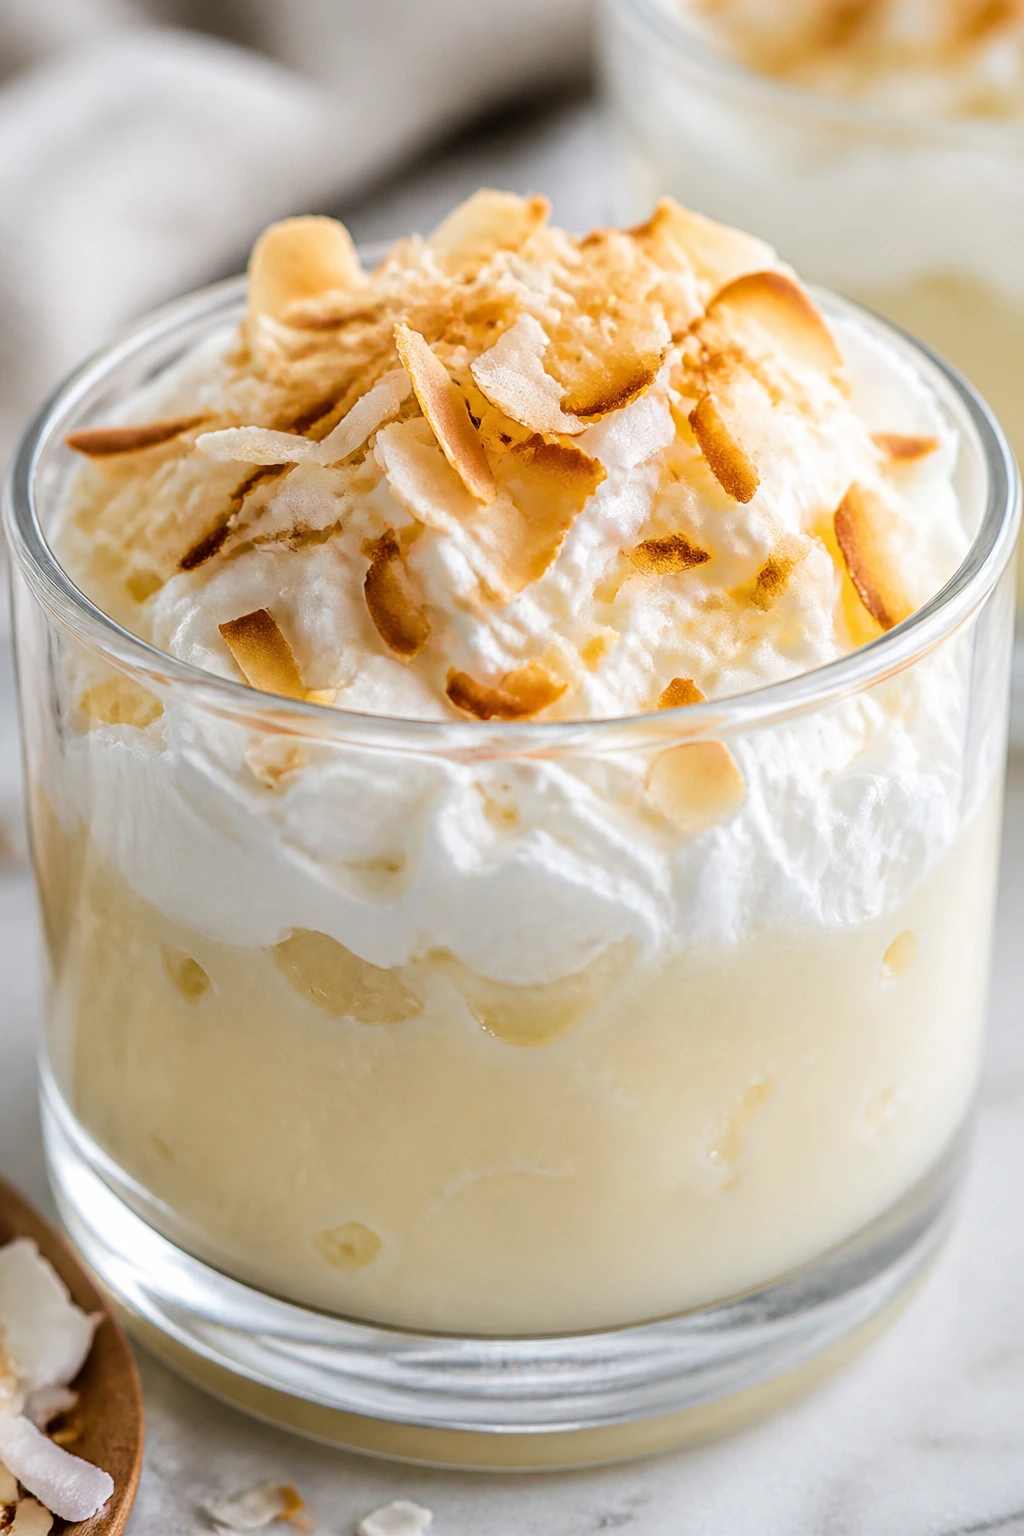
Cold coconut pudding with a soft whipped top feels like a dessert you’d order if you wanted something calm and creamy. Toasted coconut gives it a little crunch at the end.
Why It Works: Cornstarch thickens the pudding without eggs, and coconut milk adds a round, tropical flavor. Served in cups, it looks neat and stays easy to scoop.
Key Ingredients:
- 1 can coconut milk
- 1 1/2 cups milk
- 1/2 cup sugar
- 1/4 cup cornstarch
- 1 tsp vanilla extract
- Toasted coconut, for topping
- Whipped cream, optional
Quick Steps:
- Whisk coconut milk, milk, sugar, and cornstarch in a saucepan.
- Cook over medium heat until thick and glossy.
- Stir in vanilla.
- Pour into cups and chill 2 hours.
- Top with coconut and cream.
Equipment for This Recipe:
- Saucepan
- Whisk
- Dessert cups
How to Serve This Dish: Serve cold with a spoon and a little toasted coconut on top. A berry on the side gives the plate more color.
Pro Tips for This Recipe:
- Whisk constantly as it thickens to avoid lumps.
- Toast the coconut in a dry skillet until light gold.
Variations on This Dish:
- Chocolate Coconut Pudding: Add cocoa powder.
- Mango Coconut Cups: Top with diced mango.
Common Mistakes to Avoid with This Dish:
- Don’t let the pudding sit unstirred on the stove.
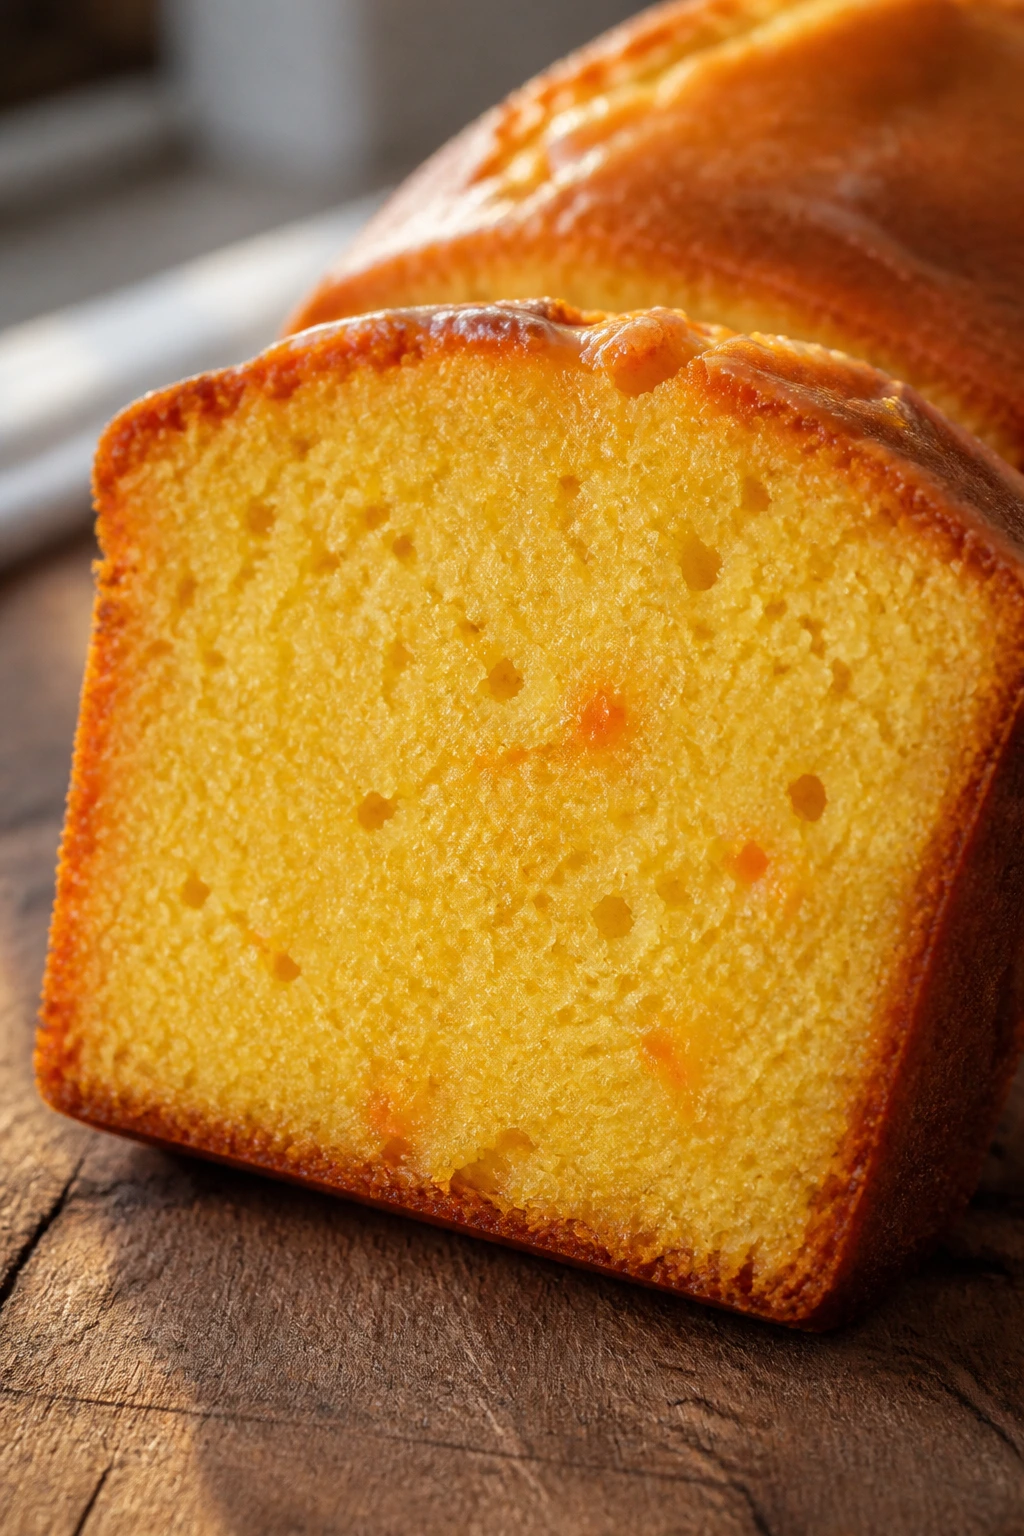
- Don’t skip chilling; it needs time to firm.
46. Hazelnut Shortbread Hearts
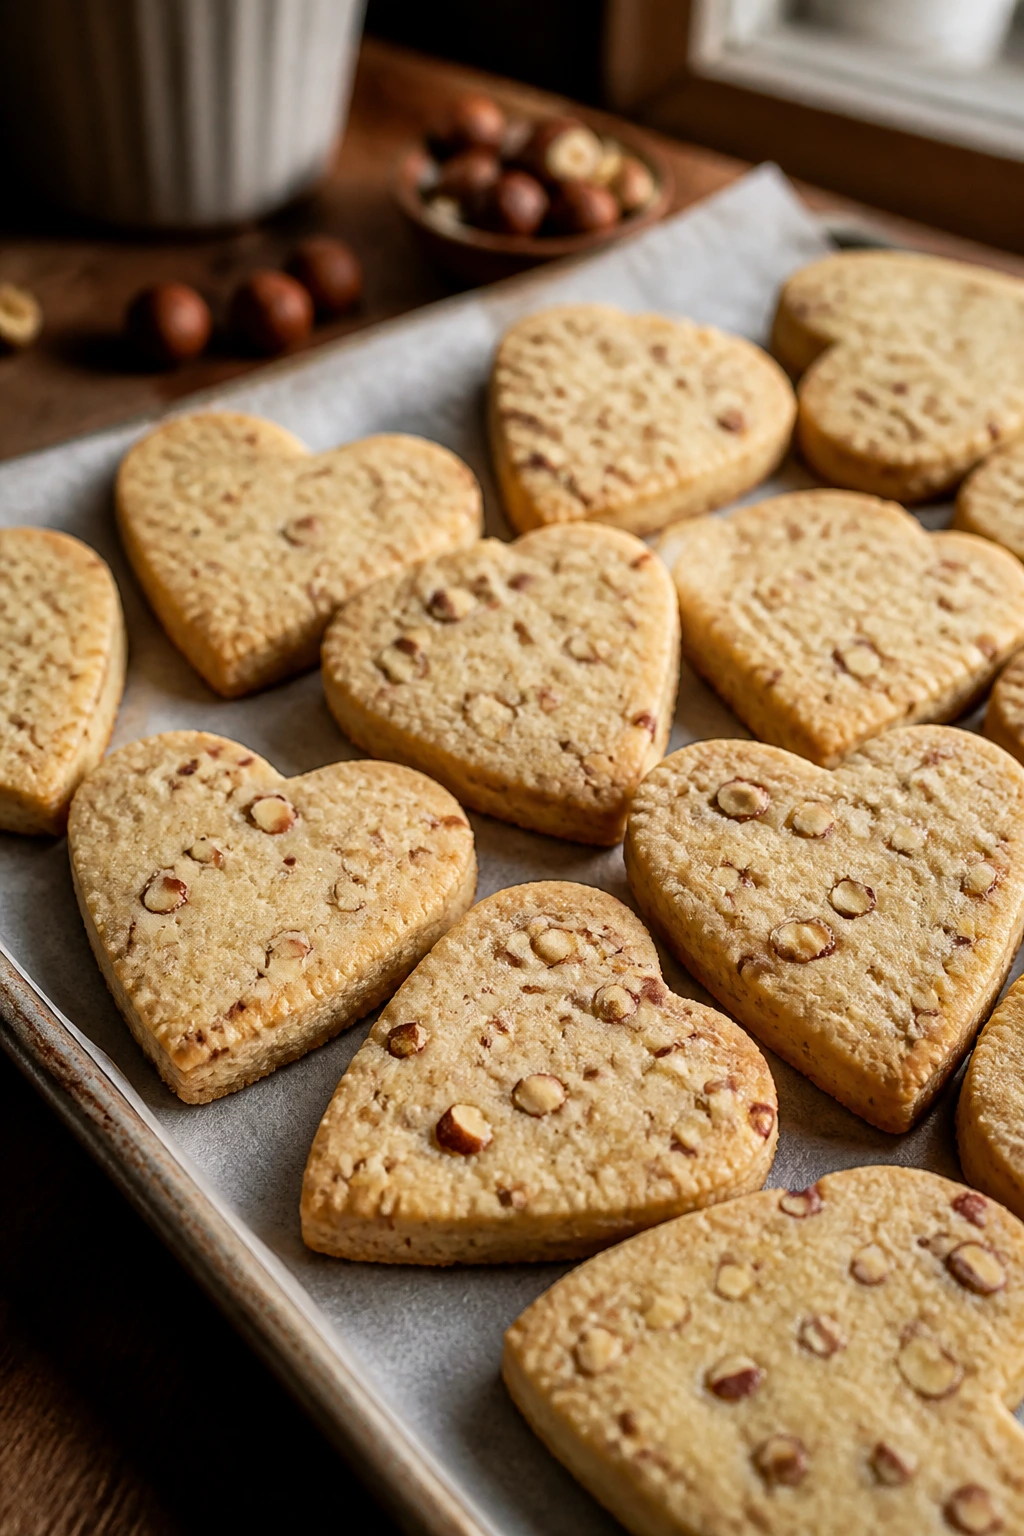
These cookies are crisp, buttery, and sturdy enough to cut into neat hearts. Hazelnut gives them a warm, toasty flavor that feels a little more grown-up than plain shortbread.
Why It Works: Shortbread likes a simple formula, which makes it beginner-friendly. Ground hazelnuts add flavor without changing the method much.
Key Ingredients:
- 1 cup butter, softened
- 1/2 cup powdered sugar
- 1 3/4 cups flour
- 1/2 cup finely ground hazelnuts
- 1/4 tsp salt
- 1 tsp vanilla extract
Quick Steps:
- Cream butter and powdered sugar.
- Mix in vanilla, flour, hazelnuts, and salt.
- Roll, cut into hearts, and chill 15 minutes.
- Bake at 325°F for 14 to 16 minutes.
Equipment for This Recipe:
- Cookie cutter
- Baking sheet
- Mixer or bowl and spoon
How to Serve This Dish: Dust with powdered sugar or dip one edge in chocolate. They’re good as a quiet, neat cookie beside coffee.
Pro Tips for This Recipe:
- Chill cut shapes before baking for cleaner edges.
- Use finely ground hazelnuts so the dough rolls smoothly.
Variations on This Dish:
- Chocolate-Dipped Hearts: Dip half the cookie in dark chocolate.
- Orange Hazelnut Shortbread: Add orange zest.
Common Mistakes to Avoid with This Dish:
- Don’t overbrown them; shortbread should stay pale-golden.
- Don’t overwork the dough or it toughens.
47. Apricot Frangipane Tartlets
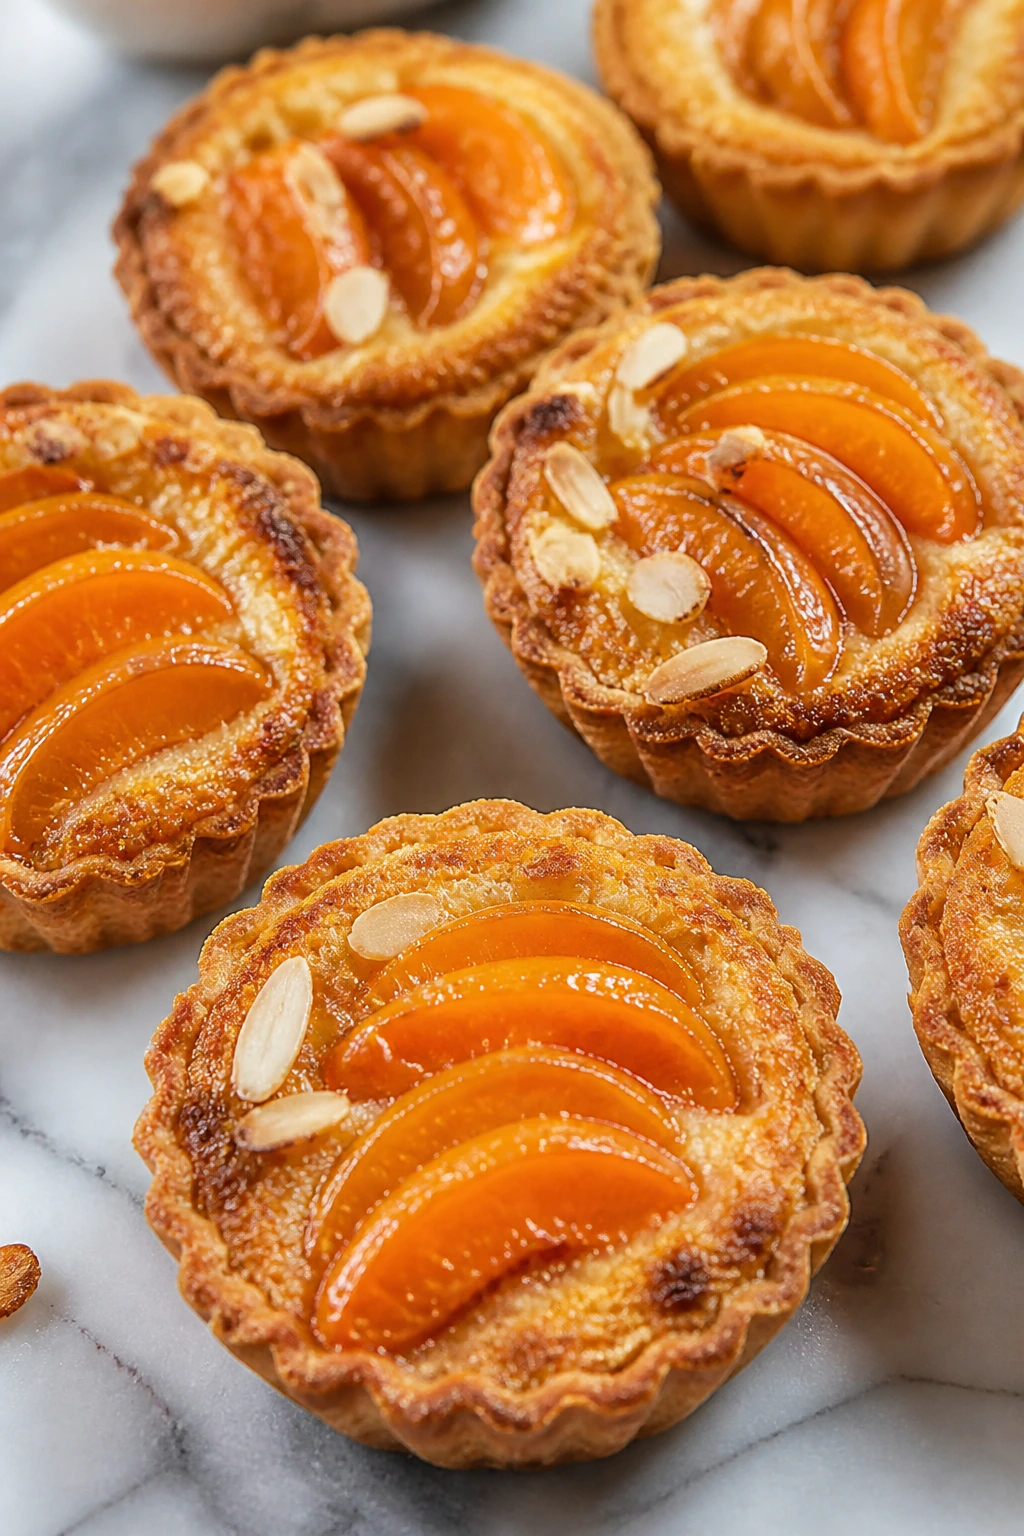
These little tartlets sound fancy, but the parts are friendly: pastry shell, almond filling, fruit on top. The almond cream bakes up soft and nutty, and the apricot keeps the sweetness under control.
Why It Works: Frangipane is just an almond-butter filling that sets into a tender layer. Small tartlets bake faster and are easier to handle than one large tart.
Key Ingredients:
- 6 mini tart shells
- 1/2 cup almond flour
- 1/4 cup sugar
- 1/4 cup butter, softened
- 1 egg
- 1 tsp vanilla extract
- 1/3 cup apricot preserves
- Sliced apricots, optional
Quick Steps:
- Beat almond flour, sugar, butter, egg, and vanilla into a paste.
- Spoon into tart shells.
- Top with a little apricot preserve and fruit if using.
- Bake at 350°F for 20 to 25 minutes until set.
Equipment for This Recipe:
- Mini tart pans or shells
- Mixing bowl
- Spoon
How to Serve This Dish: Serve warm or room temperature with tea. A small tartlet on a dessert plate looks far more polished than its method suggests.
Pro Tips for This Recipe:
- Don’t overfill the shells; the filling puffs a little.
- Use apricot preserves sparingly so the top doesn’t run.
Variations on This Dish:
- Pear Frangipane Tartlets: Swap apricot for thin pear slices.
- Cherry Frangipane: Use cherry preserves and sliced almonds.
Common Mistakes to Avoid with This Dish:
- Don’t use coarse almond meal if you want a smooth filling.
- Don’t overbake or the almond layer dries out.
48. Matcha White Chocolate Sables
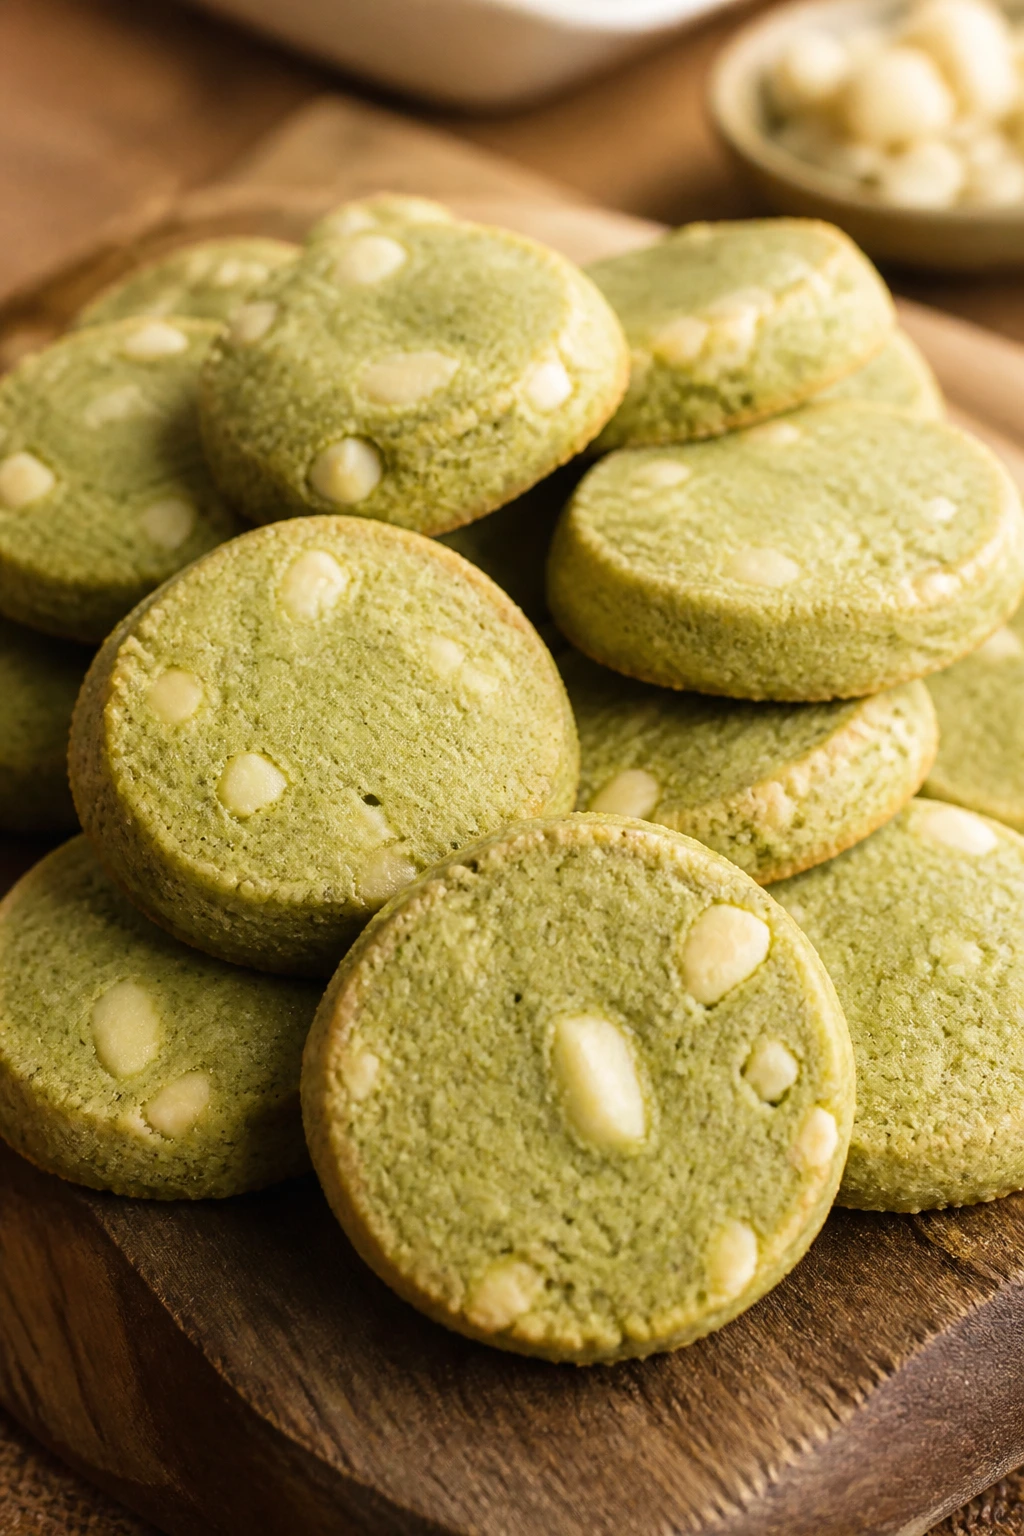
These cookies are crisp, buttery, and pale green in a way that looks calm rather than loud. White chocolate rounds out the earthiness of the matcha so the flavor stays balanced.
Why It Works: Sables are a tender short cookie, which makes them easy to shape and bake evenly. Matcha adds color and a tea-like finish that makes them stand out on a dessert plate.
Key Ingredients:
- 1 cup butter, softened
- 1/2 cup powdered sugar
- 2 cups flour
- 1 tbsp matcha powder
- 1/2 tsp salt
- 1/2 cup white chocolate chunks
Quick Steps:
- Cream butter and powdered sugar.
- Mix in flour, matcha, and salt.
- Fold in white chocolate.
- Shape into logs, chill, slice, and bake at 325°F for 14 to 16 minutes.
Equipment for This Recipe:
- Mixing bowl
- Knife
- Baking sheet
How to Serve This Dish: Serve in a shallow bowl with tea. Their crisp edges make them good for stacking.
Pro Tips for This Recipe:
- Sift the matcha if it’s clumpy.
- Chill the dough logs so the slices hold their shape.
Variations on This Dish:
- Lemon Matcha Sables: Add lemon zest.
- Dark Chocolate Matcha: Swap white chocolate for dark chunks.
Common Mistakes to Avoid with This Dish:
- Don’t use stale matcha; the color and flavor fade.
- Don’t bake too hot or the cookies brown too fast.
49. Strawberry Crème Fraîche Scones
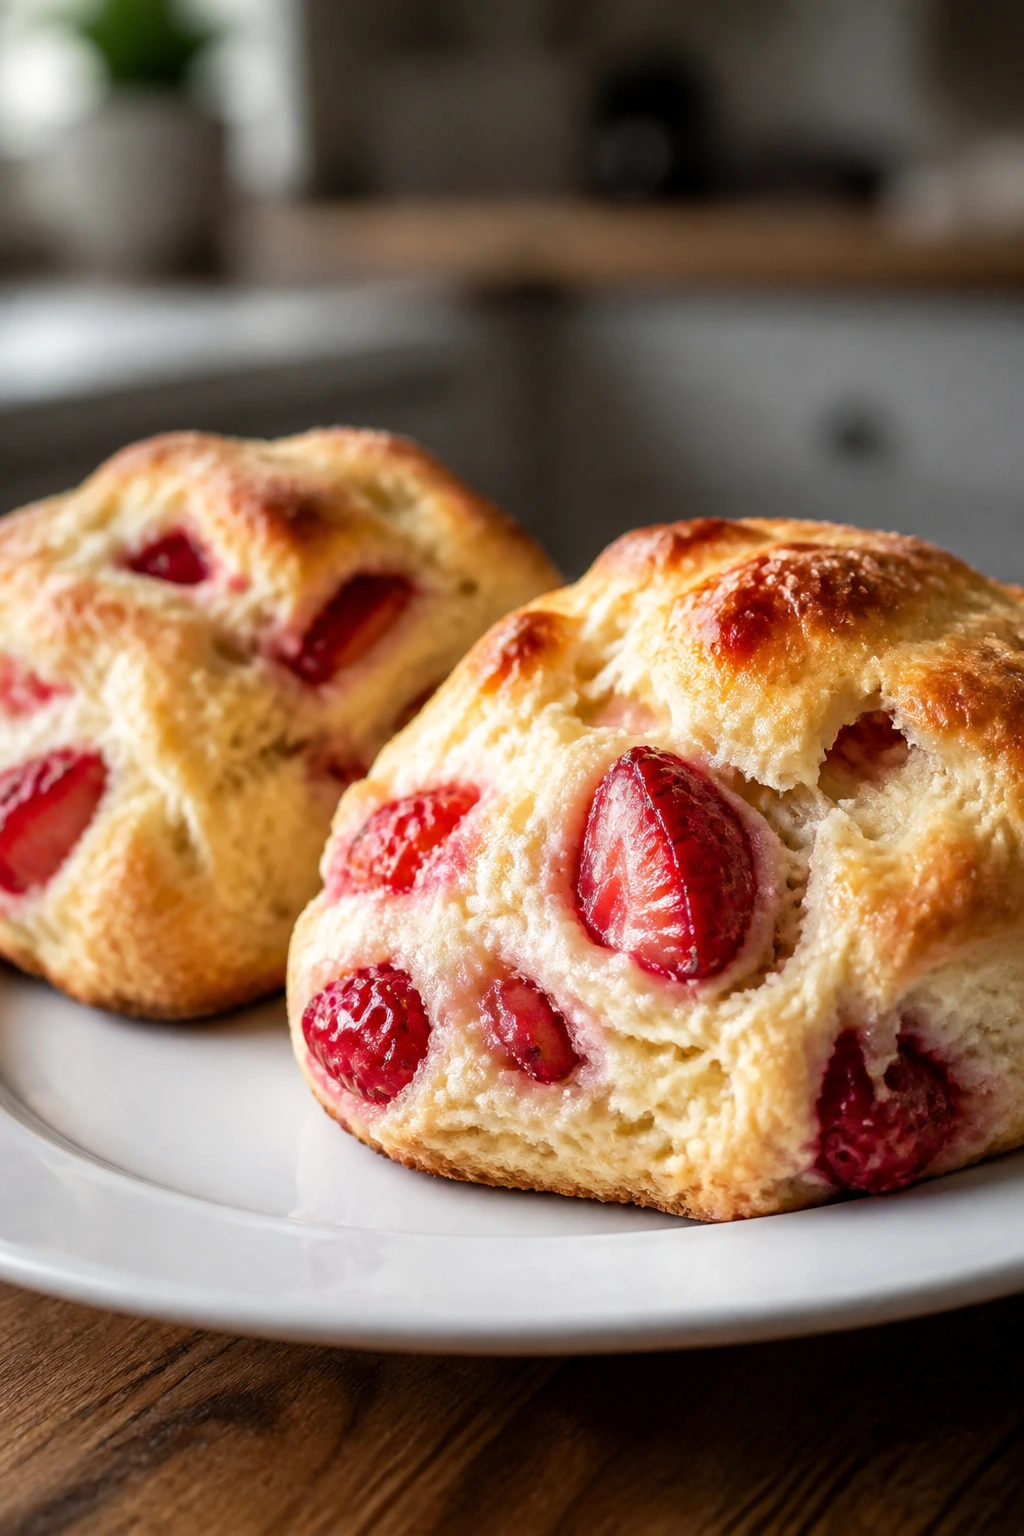
Scones can go dry fast, but crème fraîche keeps these ones tender and a little rich. Strawberry pieces and a hint of sugar give them a breakfast-dessert crossover that works well with tea.
Why It Works: The fat in crème fraîche softens the crumb, while cold butter creates flaky bits. Strawberries give bursts of flavor, and the dough stays simple enough for a first-timer.
Key Ingredients:
- 2 cups flour
- 1/3 cup sugar
- 1 tbsp baking powder
- 1/2 tsp salt
- 6 tbsp cold butter, cubed
- 3/4 cup crème fraîche
- 1 egg
- 1 cup diced strawberries
- 1 egg yolk for brushing
Quick Steps:
- Cut the butter into flour, sugar, baking powder, and salt.
- Stir in crème fraîche and egg just until combined.
- Fold in strawberries.
- Pat into a circle, cut into wedges, brush with yolk, and bake at 400°F for 16 to 18 minutes.
Equipment for This Recipe:
- Baking sheet
- Mixing bowl
- Bench scraper or knife
How to Serve This Dish: Serve warm with a little jam or clotted cream. They’re sturdy enough for a brunch plate and soft enough for dessert.
Pro Tips for This Recipe:
- Freeze the diced strawberries for 10 minutes so they don’t smear.
- Handle the dough lightly to keep the scones tender.
Variations on This Dish:
- Blueberry Crème Fraîche Scones: Swap berries.
- Lemon Strawberry Scones: Add lemon zest and a glaze.
Common Mistakes to Avoid with This Dish:
- Don’t knead the dough like bread.
- Don’t let the strawberries sit in the dough too long before baking.
50. Spiced Hot Chocolate Fudge
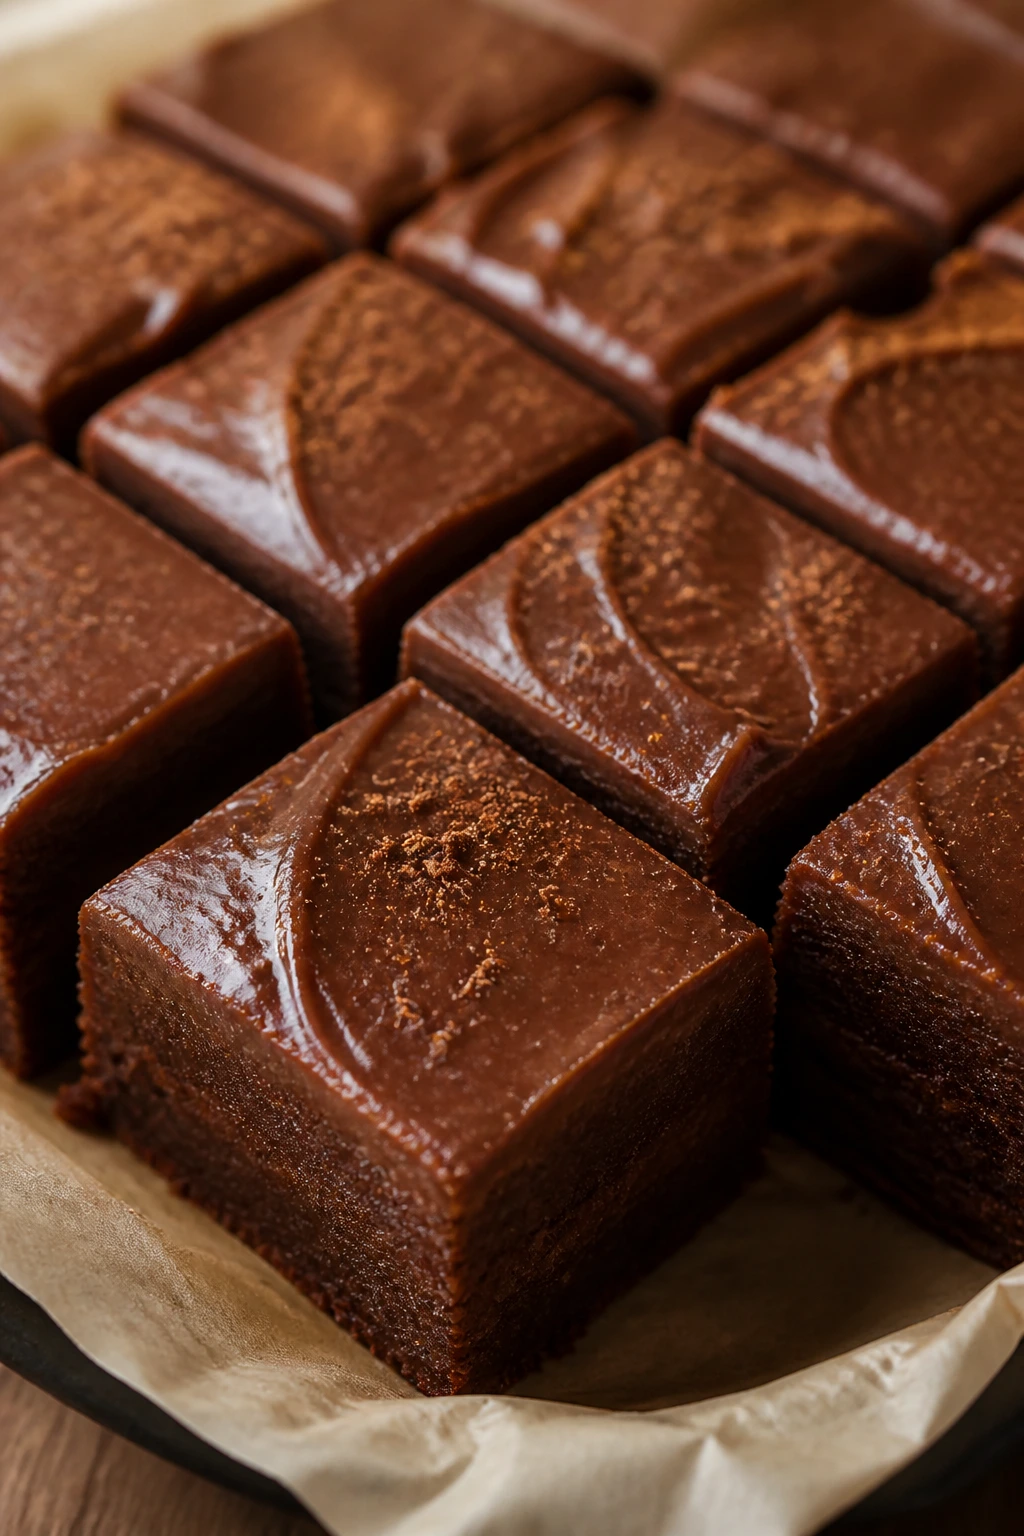
This is the kind of square that tastes like a winter evening with the lights low. Chocolate, cinnamon, and a tiny hit of spice make the flavor feel fuller than standard fudge.
Why It Works: Condensed milk gives the fudge its smooth set, while cinnamon and cayenne lift the chocolate so it tastes deeper, not just sweeter. It’s a fast stovetop candy with no thermometer.
Key Ingredients:
- 3 cups semi-sweet chocolate chips
- 1 can sweetened condensed milk
- 2 tbsp butter
- 1 tsp cinnamon
- Pinch of cayenne
- 1 tsp vanilla extract
- Pinch of salt
Quick Steps:
- Melt the chips, condensed milk, and butter over low heat.
- Stir in cinnamon, cayenne, vanilla, and salt.
- Spread into a parchment-lined pan.
- Chill until firm, then cut into squares.
Equipment for This Recipe:
- Small saucepan
- 8×8-inch pan
- Parchment paper
How to Serve This Dish: Cut small; this fudge is rich. A square with coffee after dinner is plenty.
Pro Tips for This Recipe:
- Keep the heat low so the chocolate stays smooth.
- Taste before adding more cayenne; a pinch is usually enough.
Variations on This Dish:
- Peppermint Hot Chocolate Fudge: Swap cinnamon for peppermint extract.
- Orange Spiced Fudge: Add orange zest.
Common Mistakes to Avoid with This Dish:
- Don’t overheat the mixture or it can turn grainy.
- Don’t cut before it’s fully chilled or the edges crumble.
The Quiet Tricks That Make These Desserts Feel Special
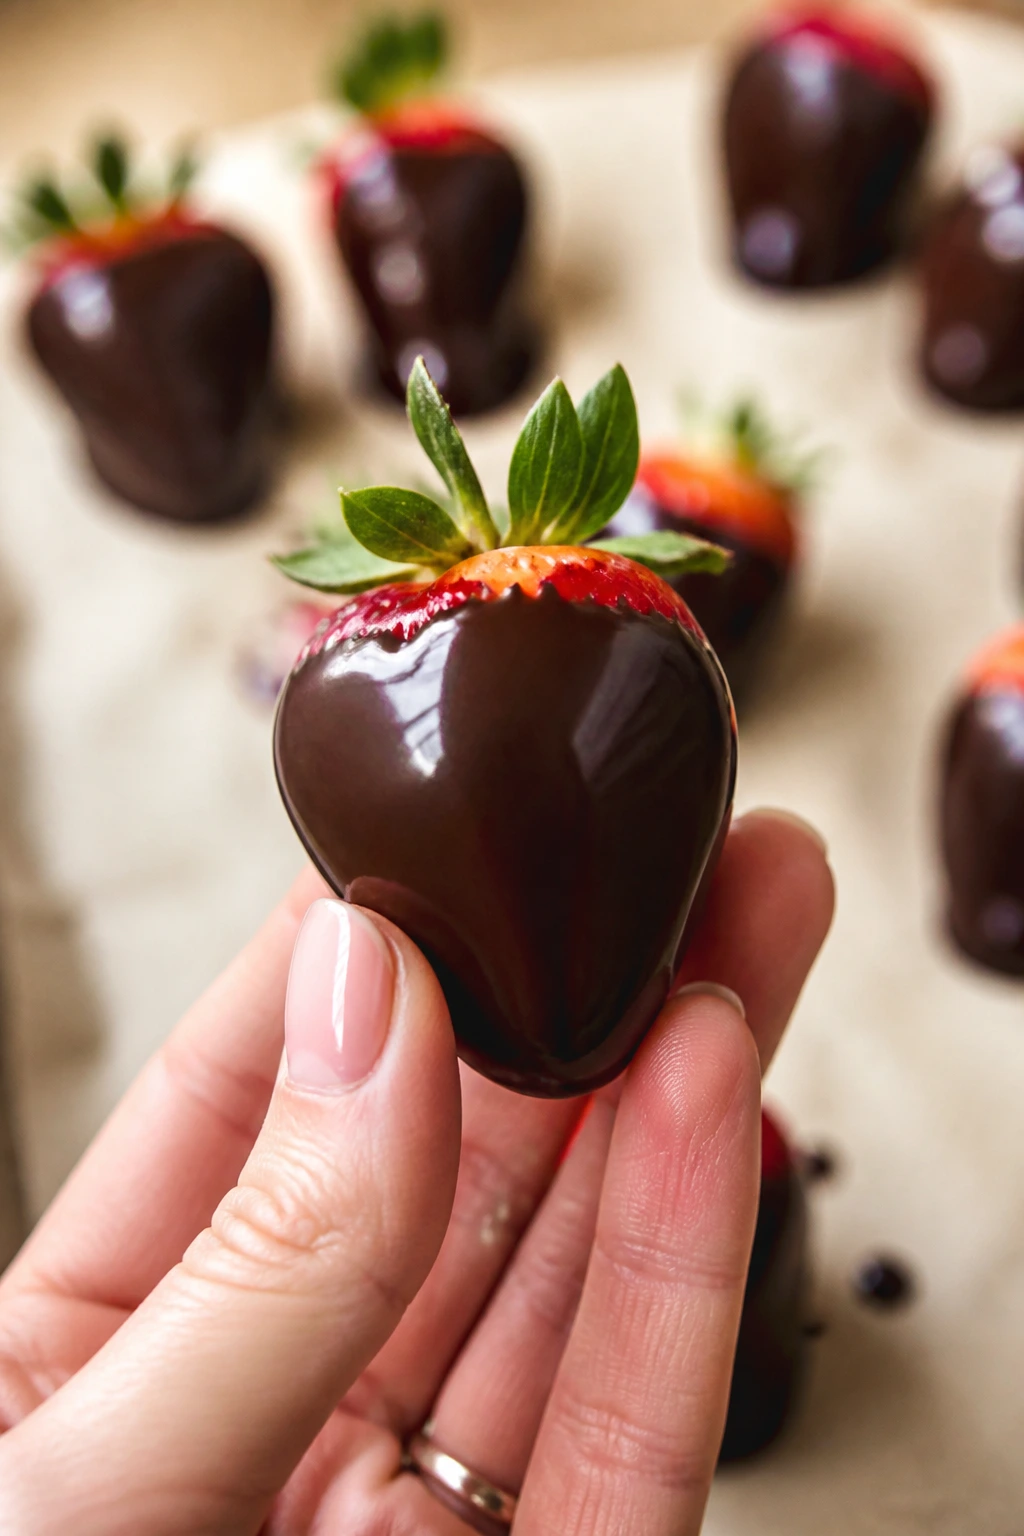
The little finish matters more than people think. A dessert doesn’t need lacework sugar or a torch if the berries are glossy, the chocolate is smooth, and the plate is clean. A teaspoon of jam turned into sauce, a pinch of flaky salt, or a strip of orange zest can do more than another layer ever could.
Flavor Enhancement: Keep one or two finishing moves in your pocket: flaky salt on chocolate, lemon zest on berry desserts, or a spoon of reduced jam thinned with a splash of water. Those tiny touches sharpen flavor without making the recipe harder.
Customization: If you’re baking for someone who loves fruit, lean hard into berries, citrus, or stone fruit. If chocolate is the main event, use darker chocolate than you think you need; 60 to 70 percent cocoa keeps things from tasting flat.
Serving Suggestions: Small plates help. So do chilled dessert glasses, a few mint leaves, and a dusting of cocoa through a fine sieve. Candles help the mood, yes, but a tidy plate does more than people give it credit for.
Time-Saver: Choose two or three recipes from this list and keep the rest in your back pocket. One no-bake cup dessert, one cookie or bar, and one small bake covers nearly any date-night situation.
What Usually Goes Wrong, and How to Avoid It
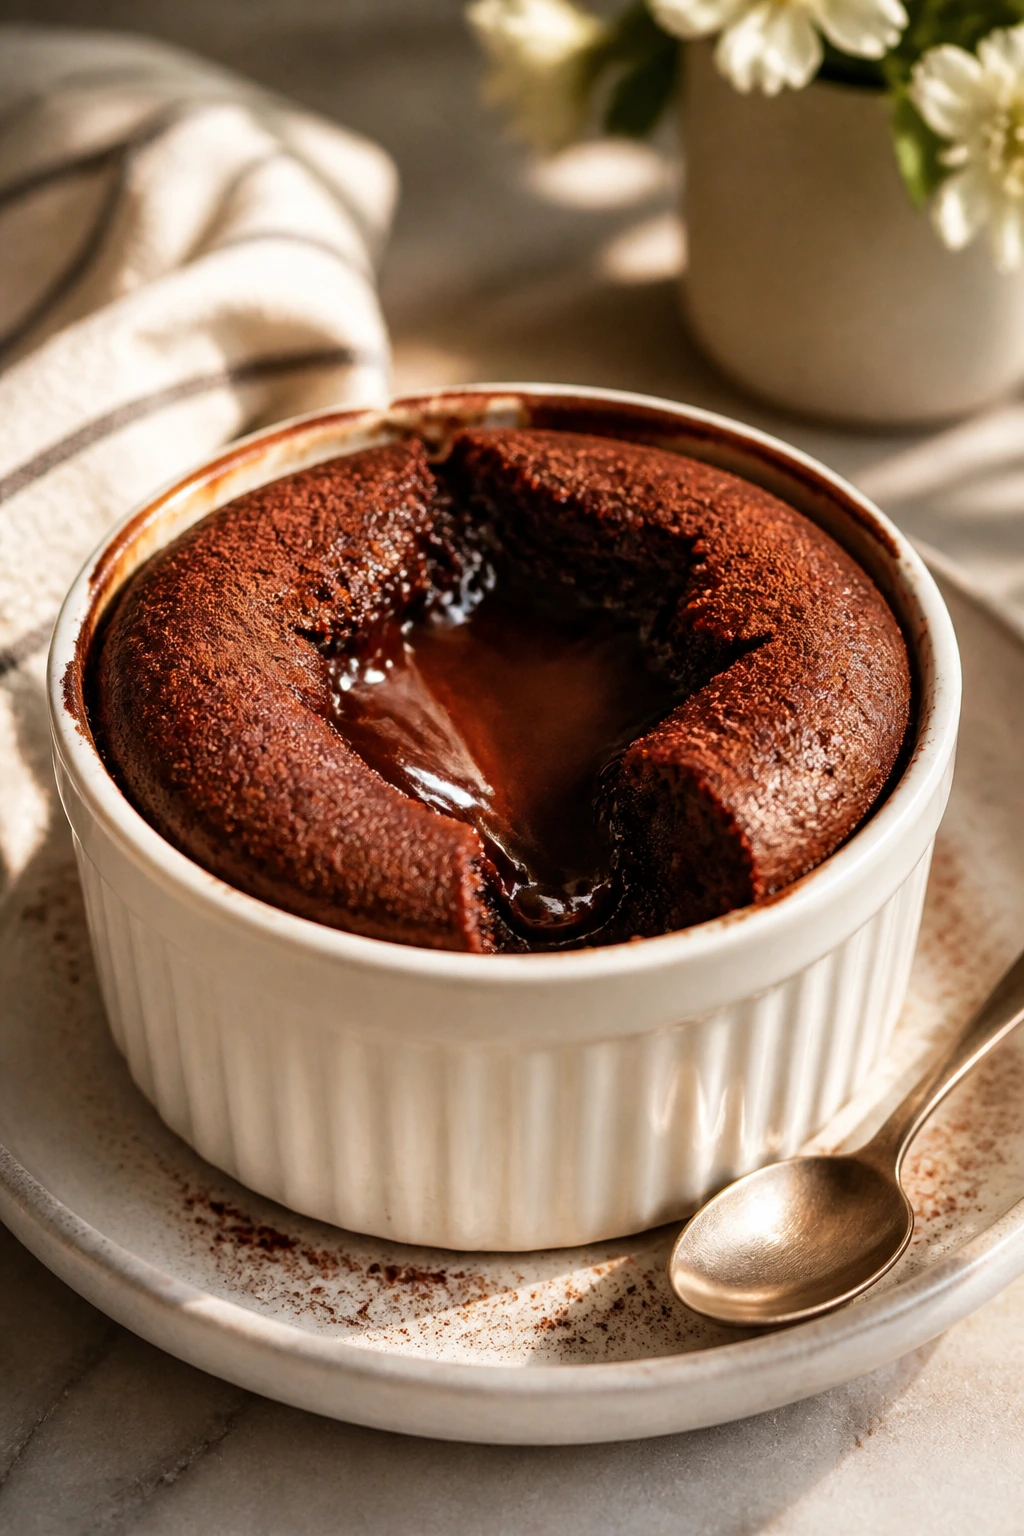
Wet fruit causes more trouble than it should. Strawberries, berries, and cherries all leak water, and that moisture can blur whipped fillings or make crusts soggy. Dry fruit well, and if a recipe needs it, toss the fruit with a little cornstarch or flour so the juices thicken instead of running.
Custards and cream fillings need patience. If you pour them into cups or tart shells while they’re still warm, the crust softens and the layers slide. Let them cool first, then chill fully; that extra waiting time is not wasted time.
Baked desserts also fail at the tail end. People pull small cakes, cookies, and bars the minute they look close, then wonder why the texture is gummy or underdone. Start checking a few minutes early, but trust the cue in the recipe: set edges, slight jiggle in custards, pale-golden tops on cookies.
Chocolate can be fussy if you bully it. Water, high heat, or steam in the bowl can make it seize into a dull paste. Keep everything dry, melt it gently, and stop the heat before it looks fully finished; residual warmth will do the rest.
Small Swaps That Keep the Whole Collection Flexible
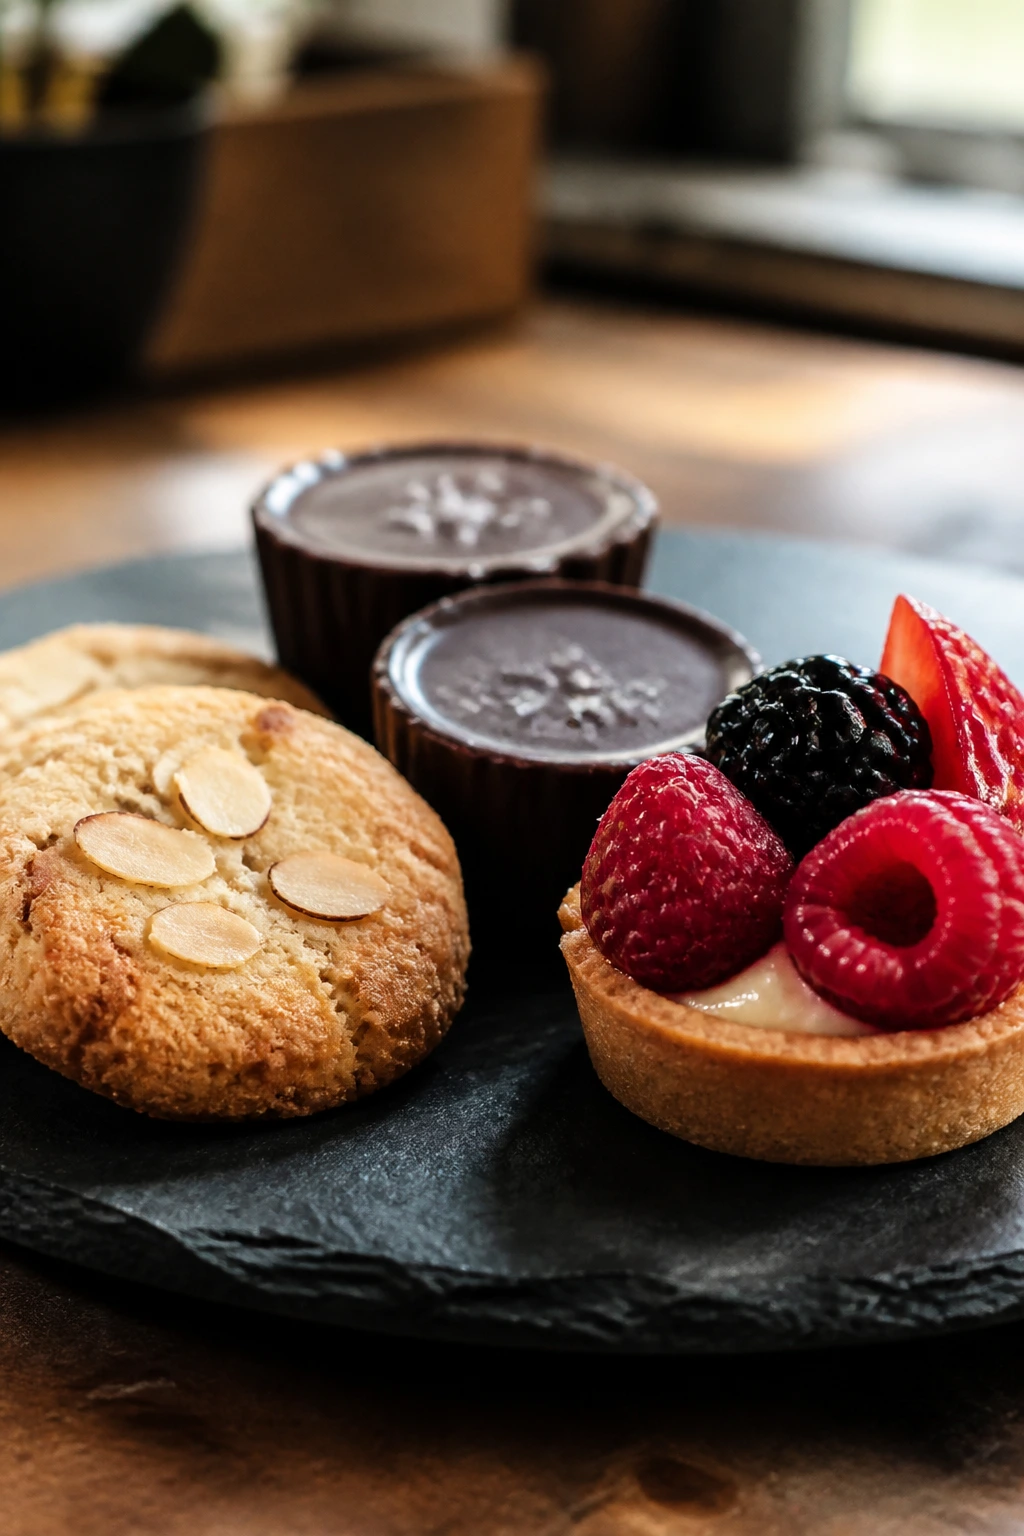
Gluten-Free Dessert Tray: Use almond flour cookies, flourless chocolate cups, panna cotta, and baked fruit. The best gluten-free choices here are the ones that never needed a wheat structure in the first place.
Dairy-Free Date-Night Swap: Chocolate-dipped strawberries, fruit galettes with vegan crust, baked apples, and coconut pudding all work well with simple dairy swaps. Coconut milk stands in nicely for cream in several of these recipes without changing the method.
Berry-First Plate: If you want one visual theme, lean on strawberries, raspberries, blackberries, and cherries. They give the whole table that red-and-pink note that reads romantic without trying too hard.
Chocolate-Heavy Version: Build around molten cake, brownies, ganache tart, mousse, and fudge. Use one very dark chocolate and one milkier chocolate if you want contrast across the spread.
Low-Sugar Finish: Pick desserts where fruit does some of the work—posset with berries, clafoutis, fruit tartlets, poached pears, or baked apples. A dessert does not need to be sugary to feel finished.
Gear That Saves You Trouble

- Rimmed baking sheets: Good for cookies, palmiers, berries, and anything that might leak a little.
- Parchment paper: Keeps caramel, chocolate, and jam from welding themselves to the pan.
- Mixing bowls in three sizes: Small for custards, medium for fillings, large for batters.
- Hand mixer: Not required for every recipe, but it makes cream, mousse, and frosting much easier.
- Whisk: The workhorse for custards, sauces, and simple batters.
- Rubber spatula: Useful for folding whipped cream and scraping every bit of batter from the bowl.
- Mini muffin tin: Handy for tartlets, financiers, and bite-size bakes.
- Ramekins: Best for molten cakes, posset, crème brûlée, and other small plated desserts.
- 9-inch tart pan: Ideal for ganache tart and fruit tarts.
- 8×8-inch pan: The bar-dessert size that shows up again and again.
- Fine-mesh sieve: Great for cocoa dusting, custards, and smooth finishes.
- Kitchen torch, optional: Only needed for brûlée; a broiler works in a pinch.
Smart Shopping and Ingredient Tips
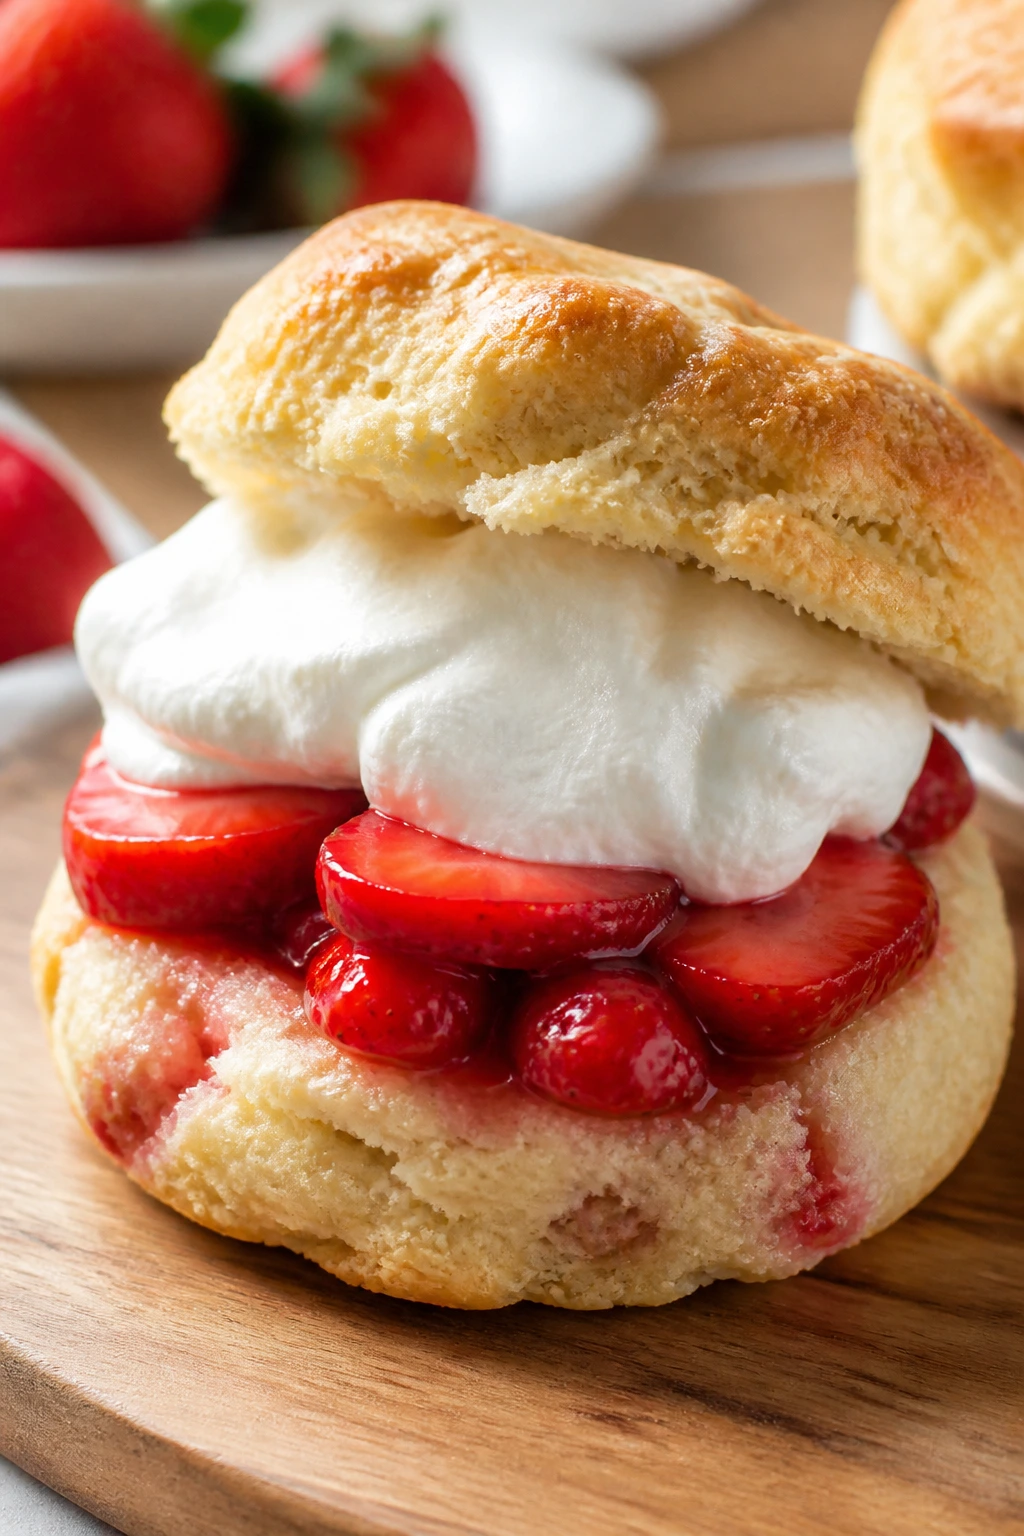
Chocolate is worth buying in bars for ganache, mousse, and glaze work. Chips are fine for cookies and fudge, but bar chocolate melts smoother because it has a different balance of cocoa butter and stabilizers. If the recipe depends on gloss, use the better melting chocolate.
Fruit should look dry, firm, and fragrant. Strawberries with soft shoulders or a pale white cap under the green tops usually lack flavor, while berries that are overripe can flood a filling. For desserts that need neat slices, choose fruit that can hold its shape after a short bake.
Cream and eggs matter more than people think in custards, mousse, and whipped fillings. Use cold heavy cream when a recipe asks you to whip it, and bring cream cheese or butter to room temperature when a recipe needs a smooth blend. That one detail keeps lumps from showing up later.
Store-bought shortcuts are welcome here, but pick the right ones. Puff pastry, pie crust, brownie mix, and tart shells are smart in a dessert roundup like this because they save time without flattening the flavor. What I’d skip is anything with a stale smell or a long, dusty ingredient list you wouldn’t want to eat straight.
Rosewater, lavender, and matcha are strong flavors, not decorative extras. Use tiny amounts. If you can smell them before the dessert is even finished, you may already have too much.
How to Plate These Desserts So They Feel Thoughtful
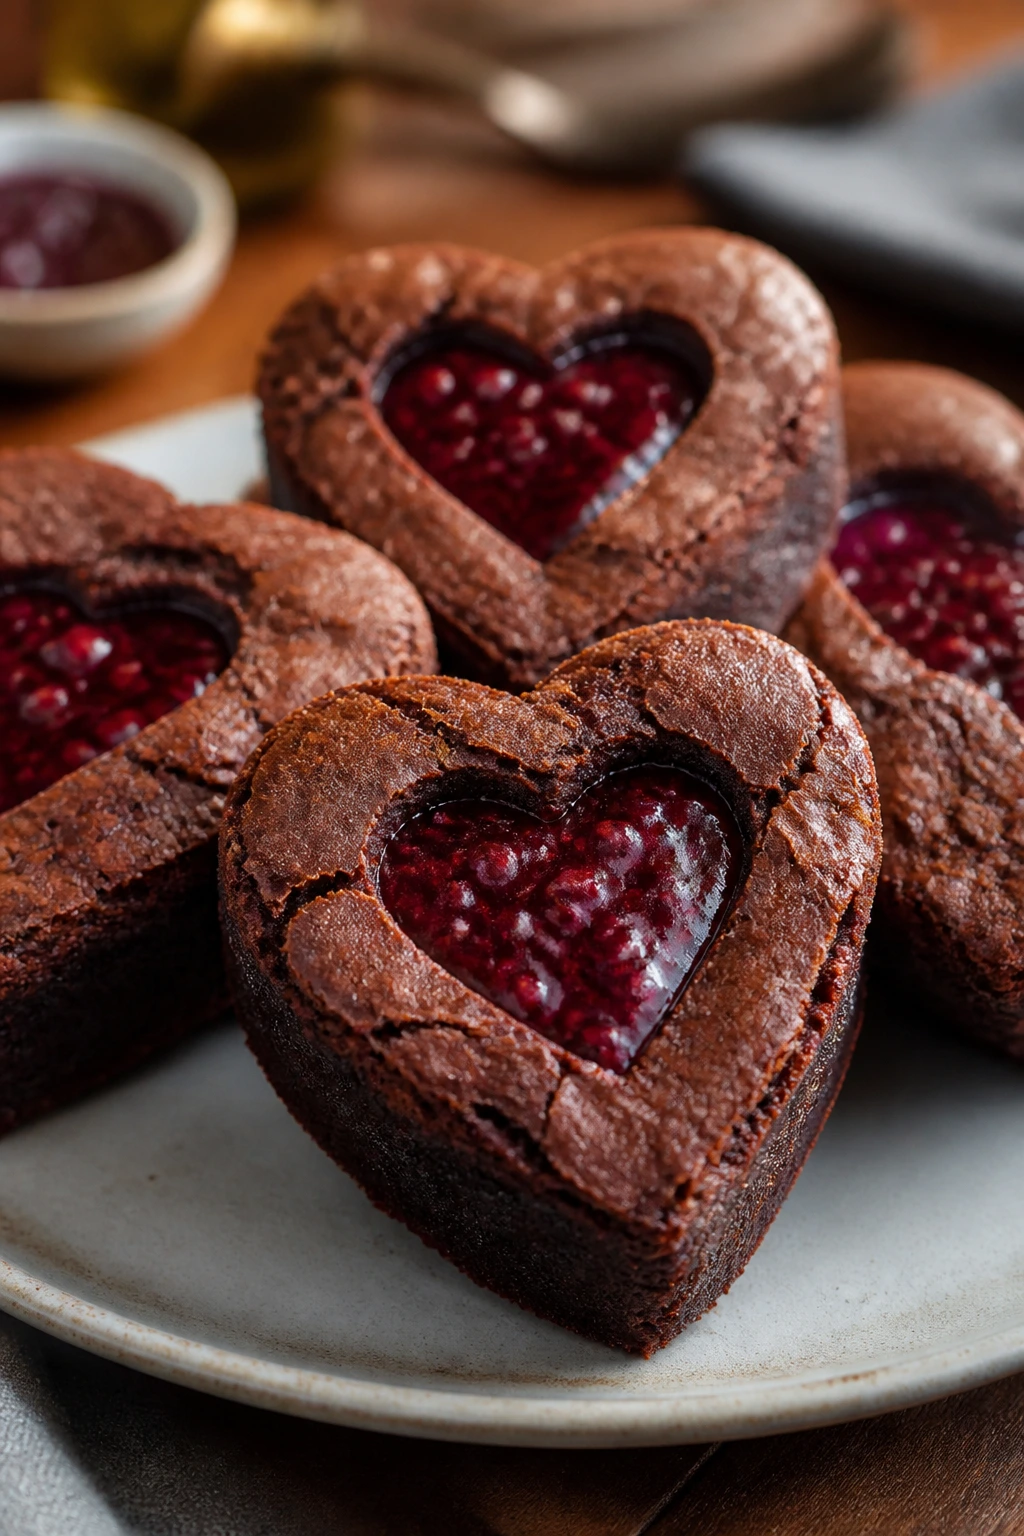
Presentation: Use small plates, shallow bowls, or clear glasses whenever the dessert has layers. A little empty space around the dessert makes even a simple brownie square look considered.
Accompaniments: Fruit desserts like berries, citrus, cherries, and pears pair well with whipped cream, mascarpone, or vanilla ice cream. Chocolate-heavy desserts do well with espresso, strong tea, or a handful of fresh raspberries to cut the richness.
Portions: Romantic desserts usually work best in smaller servings—one tartlet, two cookies, one ramekin, or two thin slices. If you’re serving more people, make a tray of bars or cookies rather than trying to scale every plated dessert into a centerpiece.
Beverage Pairing: For a low-key table, serve coffee, black tea, or sparkling water with citrus. For a more celebratory feel, a brut sparkling wine or a berry-forward nonalcoholic spritz goes well with chocolate, cream, and fruit.
Make-Ahead, Storage, and Reheating Guidance
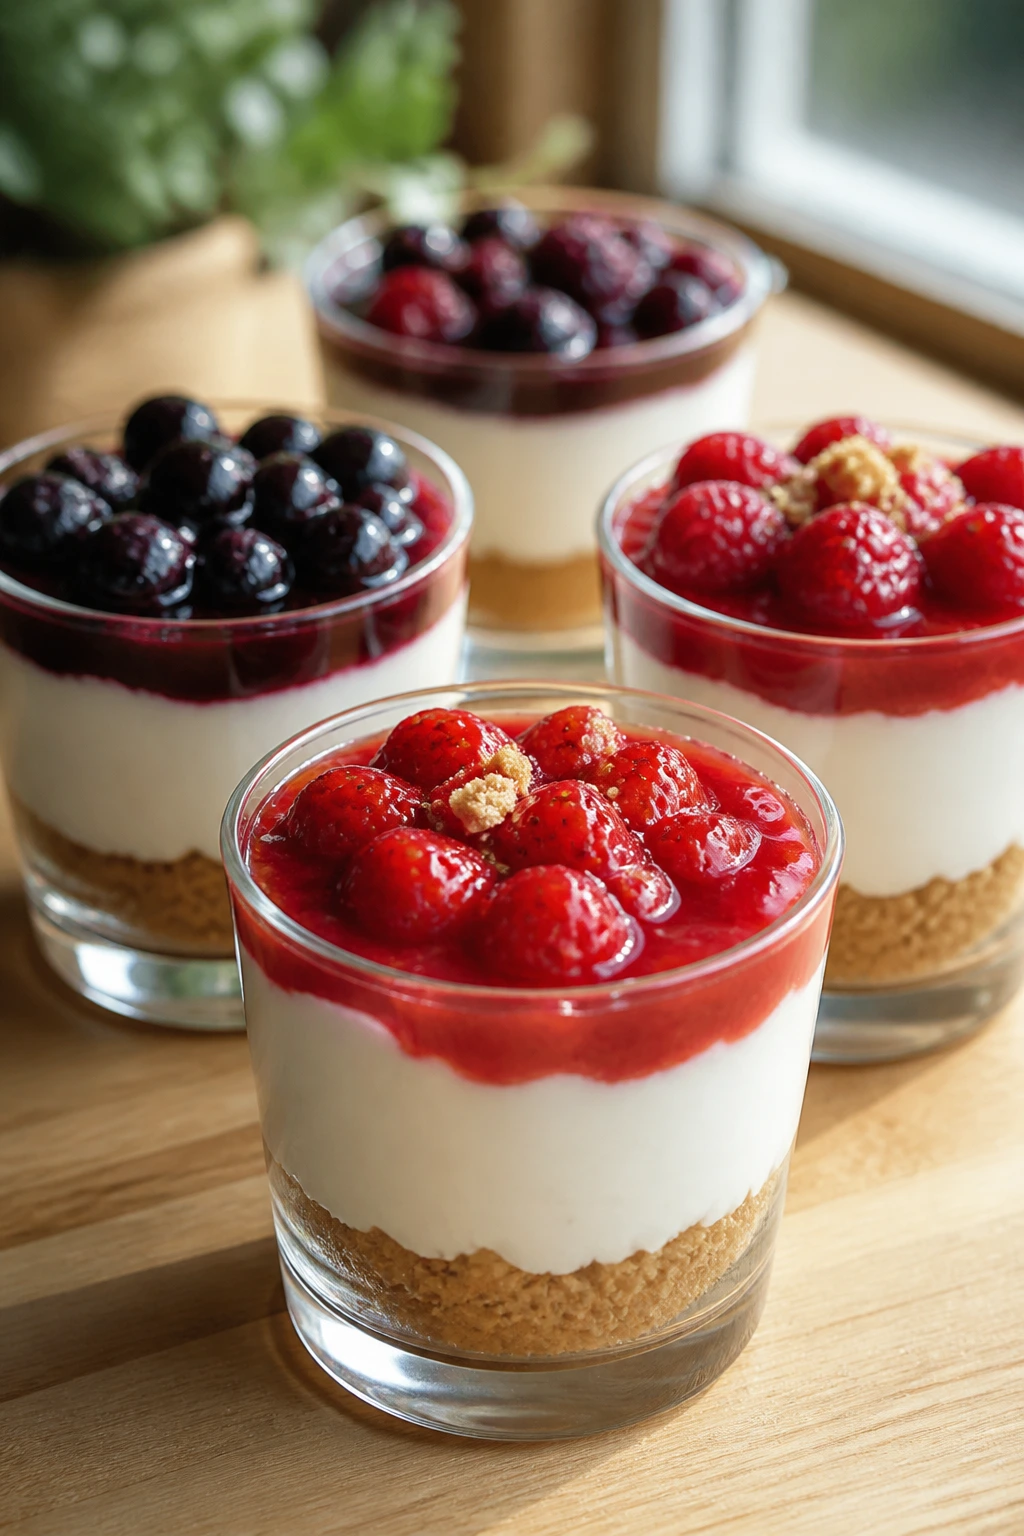
Cookies, bars, fudge, and shortbread are the easiest make-ahead wins. Most keep 3 to 5 days at room temperature in an airtight container, and sturdier ones like crinkles, thumbprints, and shortbread can be layered with parchment and frozen for up to 2 months.
Cream desserts need cooler storage. Cheesecake cups, panna cotta, mousse, posset, tiramisu cups, and pudding keep 2 to 3 days in the fridge if covered well. They’re usually best cold, so reheating is not the goal; freshness and texture are.
Fresh fruit desserts have shorter lives. Chocolate-dipped strawberries, fruit tartlets, and berry parfaits are happiest the day they’re assembled, though some components can be prepared ahead. Bake the shells, make the custard, or whip the cream early, then assemble close to serving so the fruit stays bright.
Warm desserts like baked apples, crisps, galettes, molten cakes, and mug cakes can be revived gently. A crisp or galette warms well in a 300°F oven for 8 to 12 minutes. Baked apples can be reheated for 10 minutes at 325°F. Mug cake is the exception—eat it right away, because the texture changes fast.
If you’re planning ahead for a dinner, choose one dessert that likes the fridge and one that likes the oven. That way you’re not betting everything on a single timeline.
Answers You’re Likely to Ask Before You Bake
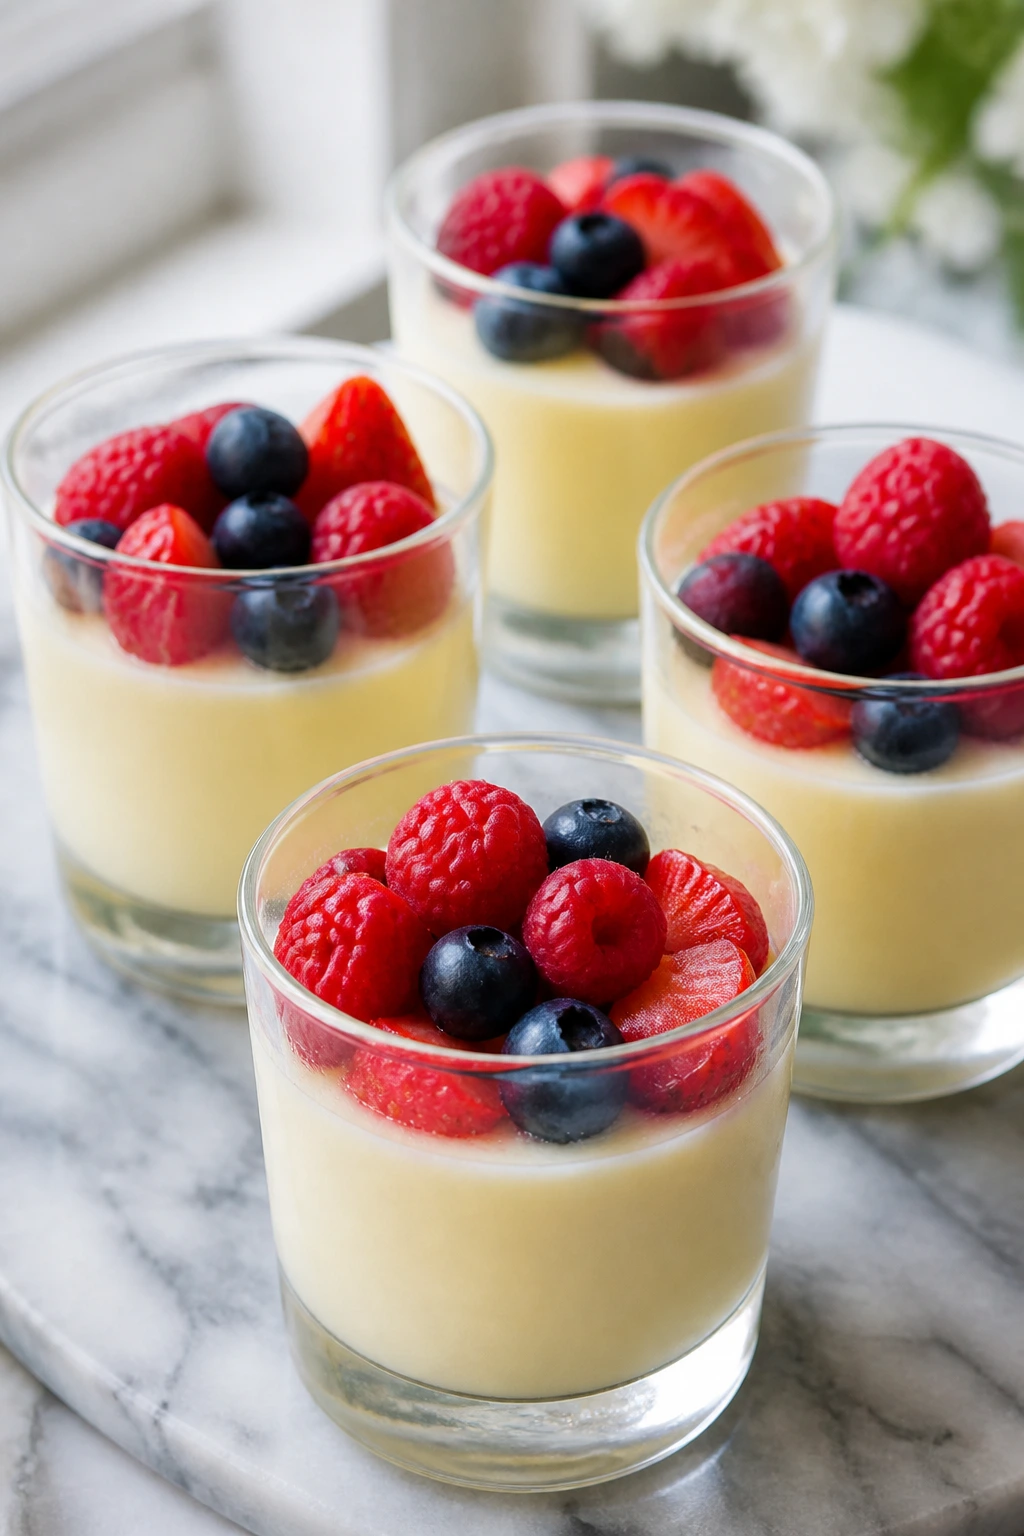
Which dessert on this list is the easiest first try?
Chocolate-dipped strawberries, lemon posset, chocolate-covered pretzel rods, and coconut pudding cups are the least demanding. If you want one bake, go with shortbread hearts or lemon sugar cookies because the doughs behave predictably.
Can I use boxed mix or store-bought pastry and still make these feel special?
Yes. Brownie mix, puff pastry, pie crust, tart shells, and even ladyfingers are fair game here if you finish them well. A homemade garnish—berries, glaze, cocoa, or a dusting of sugar—does more for the final plate than people expect.
What if my custard or pudding turns lumpy?
Strain it. That fix saves a surprising number of desserts, especially panna cotta, pudding cups, crème brûlée, and posset. If it’s already thickened, whisk hard off the heat or blitz briefly with an immersion blender, then strain.
How do I keep berries from making desserts watery?
Dry them thoroughly, and only wash them right before using. For baked desserts, toss berries with a little cornstarch or flour; for no-bake cups, add them at the last minute or serve them on top instead of folding them in.
Do I need a kitchen torch for crème brûlée?
No. A broiler works if you keep the ramekins cold and watch them closely. The sugar top can go from pale to burned in a blink, so stay right there and rotate if one side colors faster.
Which desserts travel well if I’m bringing them somewhere?
Bars, cookies, fudge, shortbread, hand pies, and tartlets all travel better than custards or whipped desserts. Pack them in a flat container with parchment between layers, and keep anything cream-filled chilled until the last possible moment.
Can I scale these recipes for a larger dinner without trouble?
Usually, yes, but baked custards, mousses, and small cakes need the most caution. Double the ingredients, but watch the pan size and bake time; a larger pan can change the thickness and the way the center sets.
What should I make if chocolate isn’t the main flavor?
Go for fruit-forward desserts like clafoutis, baked apples, berry galette, lemon bars, poached pears, or fruit tartlets. They still feel romantic, but the flavor leans brighter and less rich.
Sweet, Small, and Worth Repeating
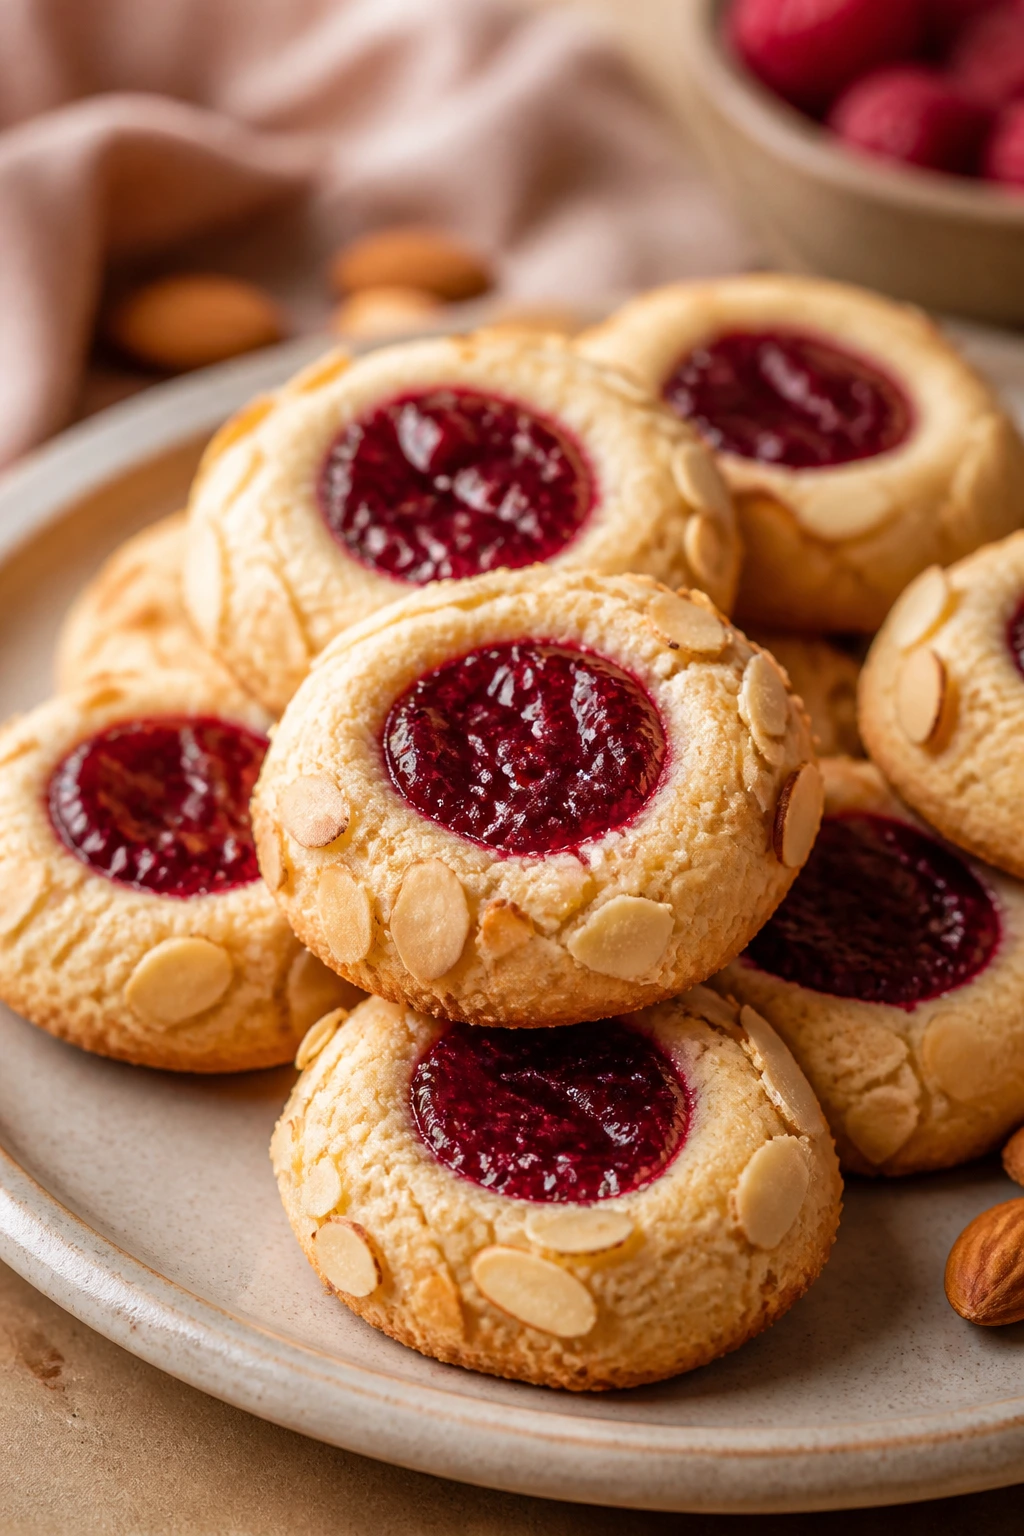
The best romantic desserts for beginner bakers are the ones that give you a clean finish without a stressful process. They’re small enough to stay under control, pretty enough to feel deliberate, and flexible enough that you can lean on shortcuts without apology.
Pick one that suits the night. Maybe it’s the kind that comes out of the oven warm and soft, maybe it’s the kind that waits in the fridge while you set the table, maybe it’s just a plate of glossy berries and chocolate done well. If the last five minutes are calm, the dessert will usually feel that way too.