
The softest keto dessert is usually the one that looks a little underbaked when it comes out of the oven. That’s not a flaw. It’s the trick. Almond flour, cream cheese, sour cream, butter, eggs, and the right sweetener can hold onto moisture in a way that keeps a bar tender on day three and a cookie bendy instead of sandy.
That matters because a lot of keto dessert recipes fail in the same boring way: they taste fine on the first bite, then dry out, crack, or turn gritty after a night in the fridge. Erythritol can do that. Coconut flour can do that if you get heavy-handed. Even a good batter can go wrong if you bake it until the center looks as firm as a sponge cake. The recipes below are built to avoid those traps.
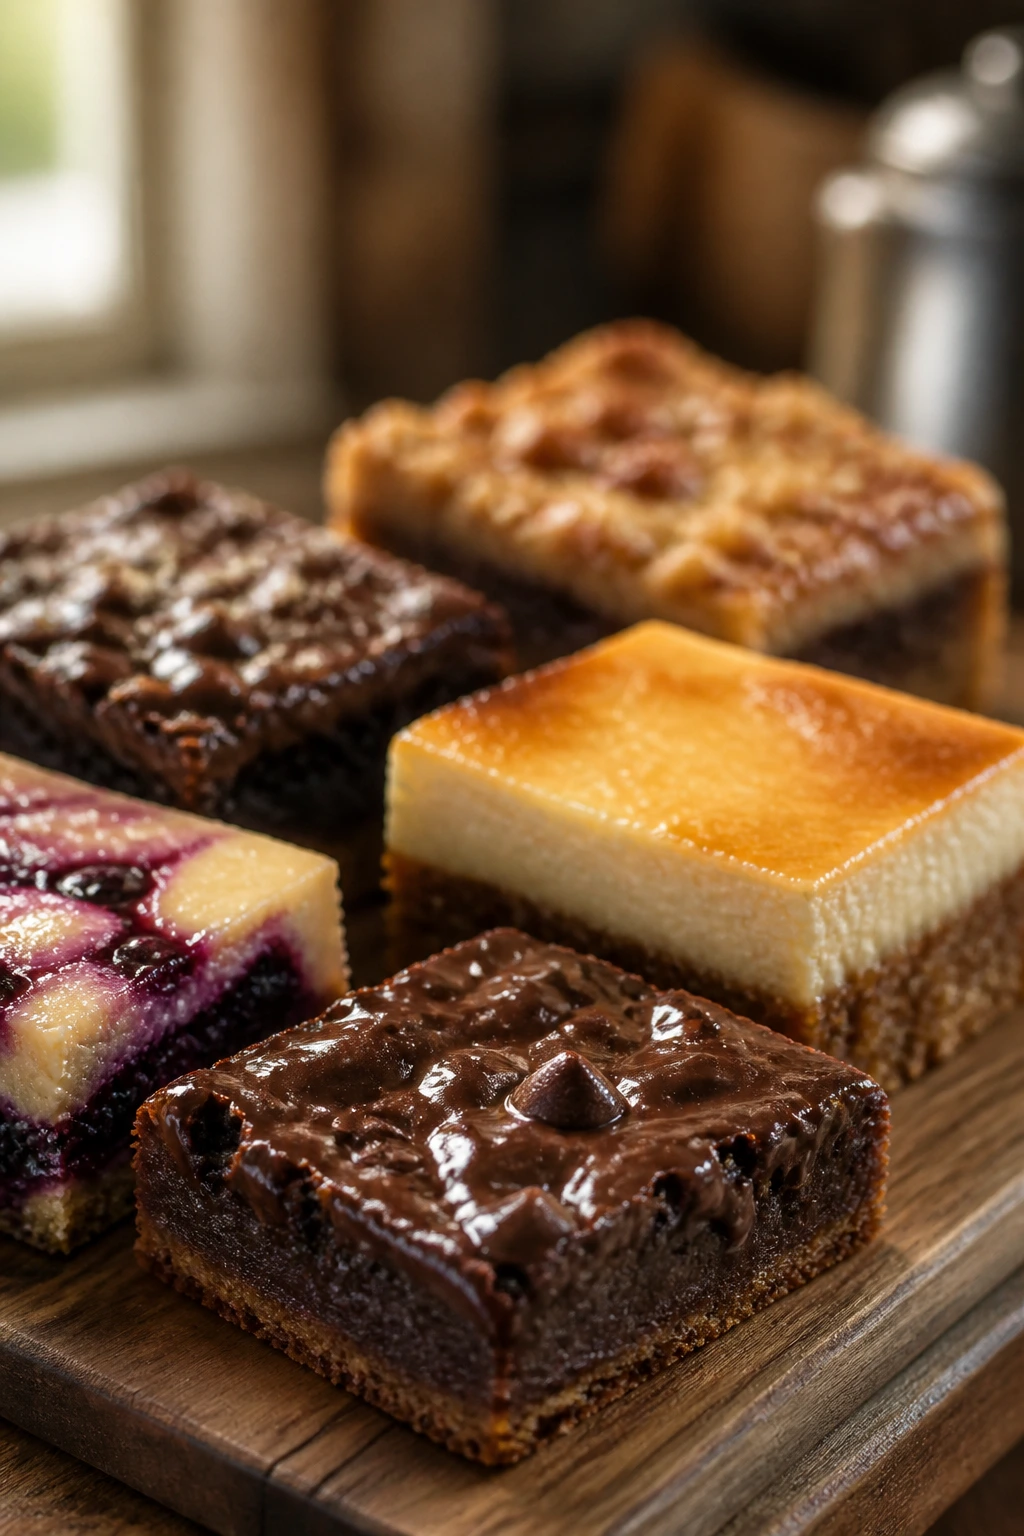
And yes, the texture really is the point here. If you’ve ever cut into a brownie that still slices cleanly but feels fudgy, or pulled a cheesecake bar from the fridge and found it stayed creamy instead of rubbery, you already know why this style of baking is worth the trouble. Soft is not accidental. It’s designed.
Why You’ll Love These Keto Dessert Recipes
-
They stay tender past day one. Each recipe uses moisture-holding ingredients like cream cheese, sour cream, yogurt, butter, or a custard-style batter so the crumb doesn’t go dusty in the fridge.
-
They skip the usual keto dryness. A lot of low-carb baking leans too hard on coconut flour or overbaked almond flour batters; these recipes keep the flour ratio and bake time in a safer range.
-
You get different textures, not just “cookie again.” Bars, loaf cakes, jars, muffins, cheesecake layers, and mousse cups all show up here, so you can match the dessert to the craving.
-
The sweeteners are chosen for softness. Powdered allulose and monk fruit blends tend to keep a smoother bite than gritty granulated erythritol alone.
-
Most of them hold well in the fridge. That means you can bake once, chill overnight, and still pull out a dessert that cuts or spoons cleanly without cracking.
-
They feel like real dessert. There’s no sad, chalky aftertaste if you use the right dark chocolate, citrus zest, vanilla, or a pinch of salt where it belongs.
Why These Desserts Stay Tender Instead of Turning to Chalk
Soft keto baking starts with a simple rule: fat and moisture beat dryness every time. That’s why cream cheese shows up so often in this collection, why sour cream gets folded into cakes and loafs, and why a few recipes use yogurt or heavy cream to keep the crumb supple. A dry cake can still be low-carb. It just won’t be worth eating on day three.
Sweetener choice matters too. Allulose keeps a softer finish than erythritol, which is part of why bars and cakes made with it tend to stay chewy instead of setting up like cold candy. Powdered sweeteners also dissolve better in batters and fillings, which means fewer gritty bites and fewer dry patches around the edge of the pan.
Then there’s the bake itself. Keto desserts usually do better at 325°F to 350°F, not blazing heat. Lower heat gives almond flour and coconut flour time to set without squeezing out every bit of moisture. Pull the pan when the center still has a slight wobble. Let carryover heat finish the job. That little wobble is often the difference between fudgy and dry.
The other trick is boring, but it works: cool completely before cutting. Warm keto bars can look done and still be fragile inside. Give them time. The structure firms as they rest, and the texture usually improves after a night in the fridge.
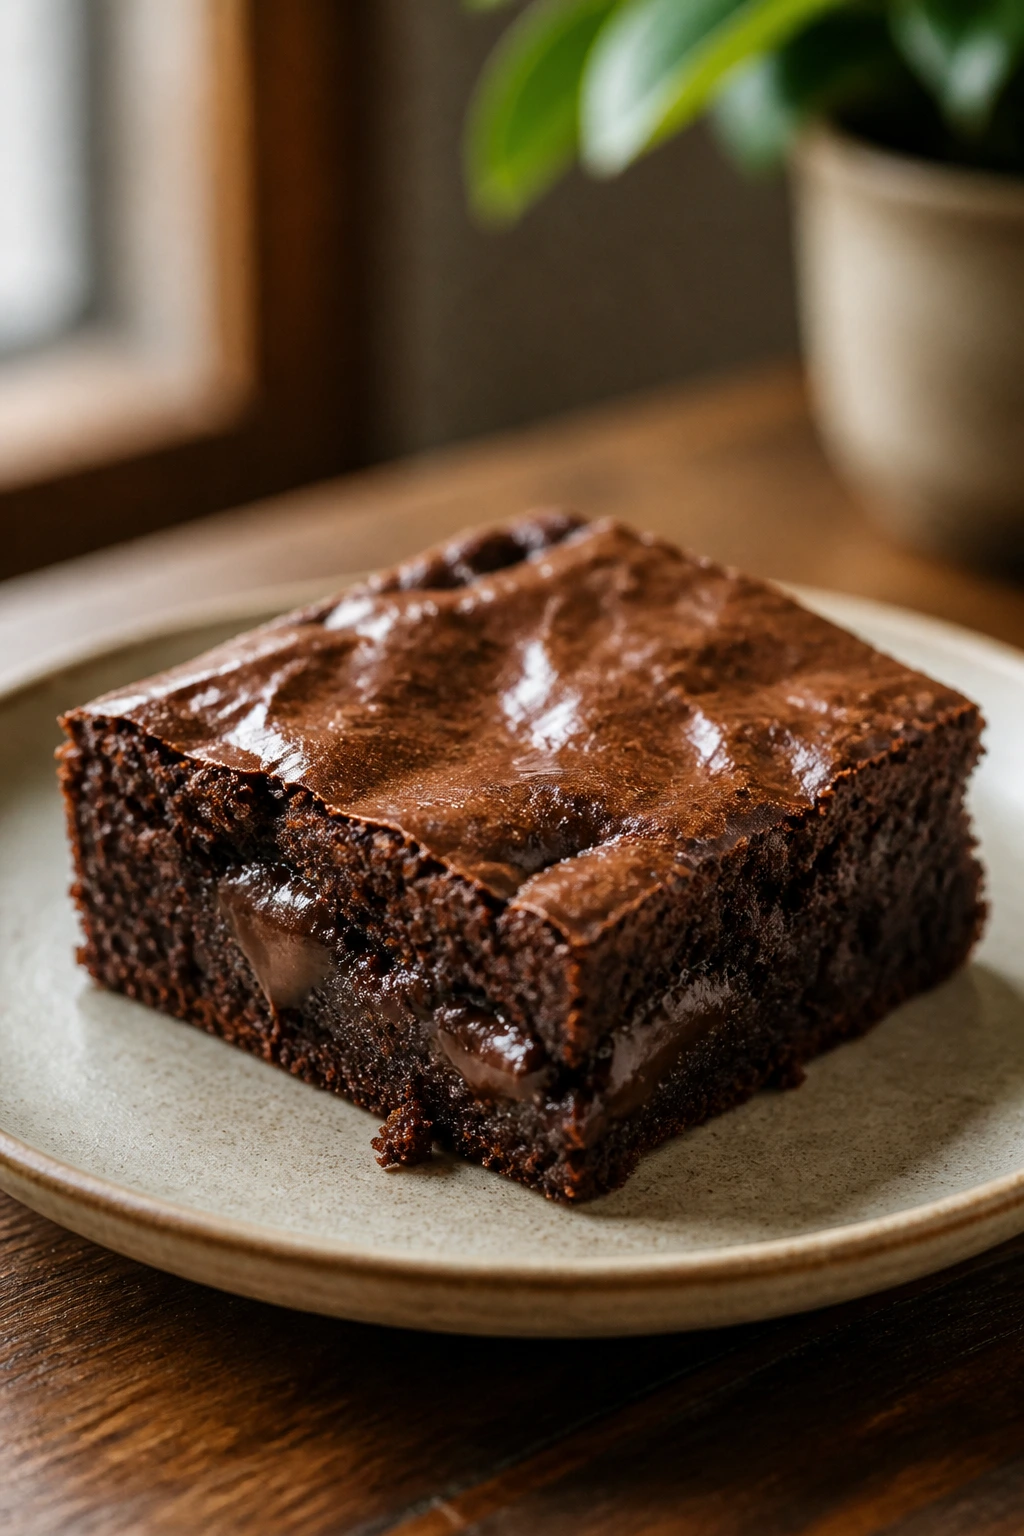
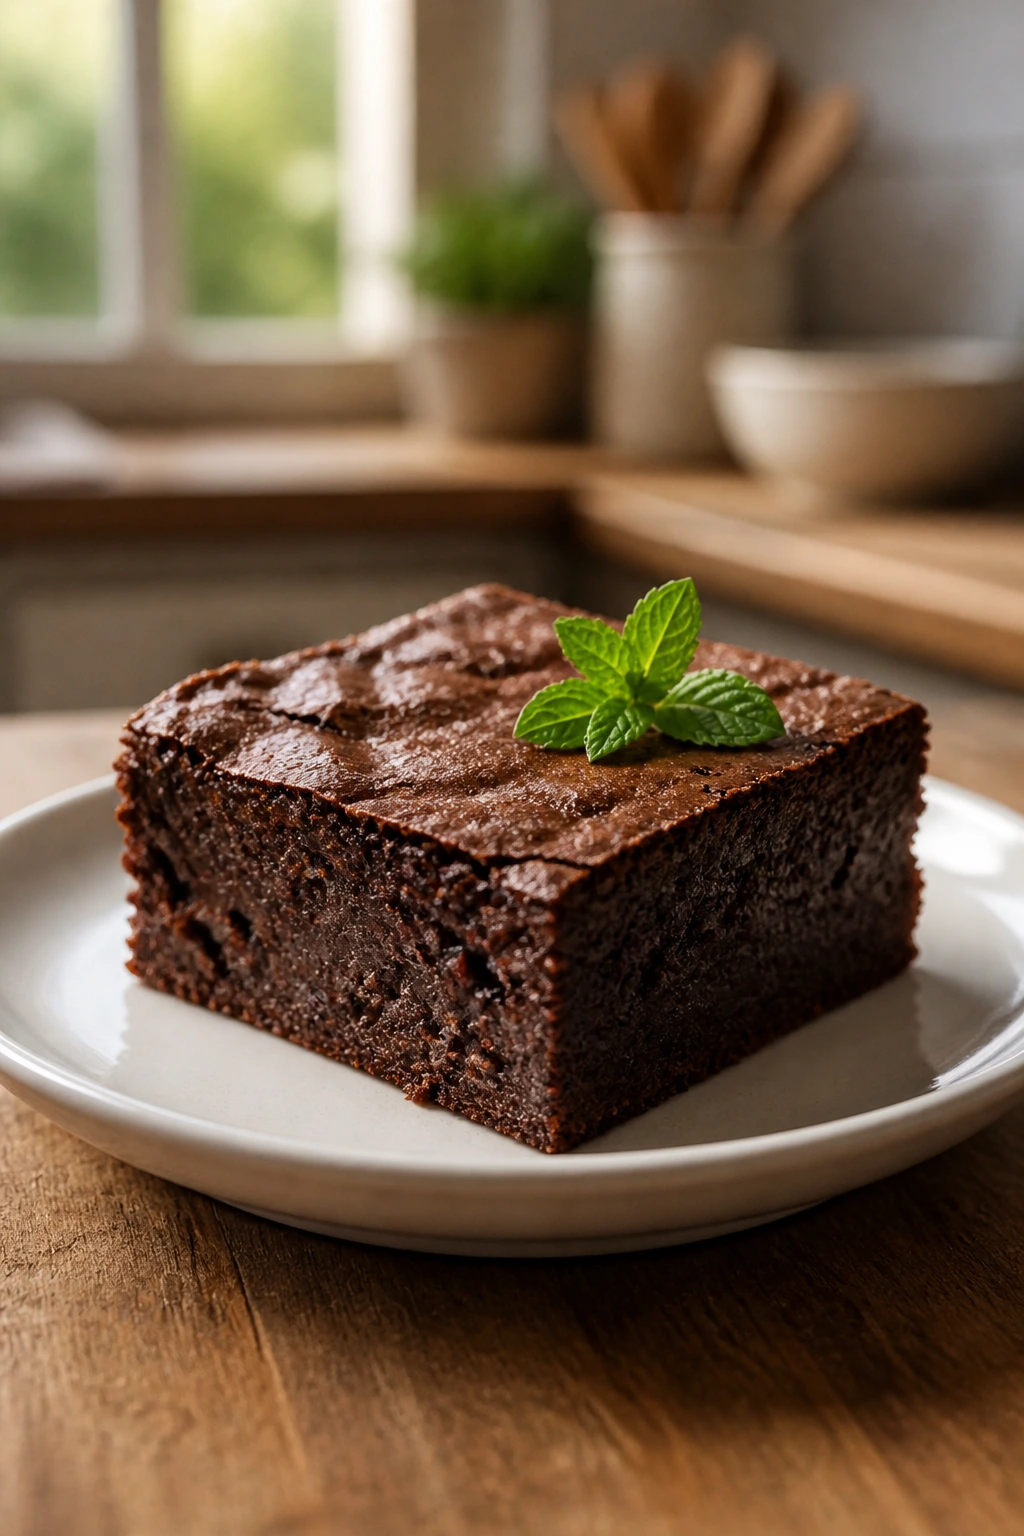
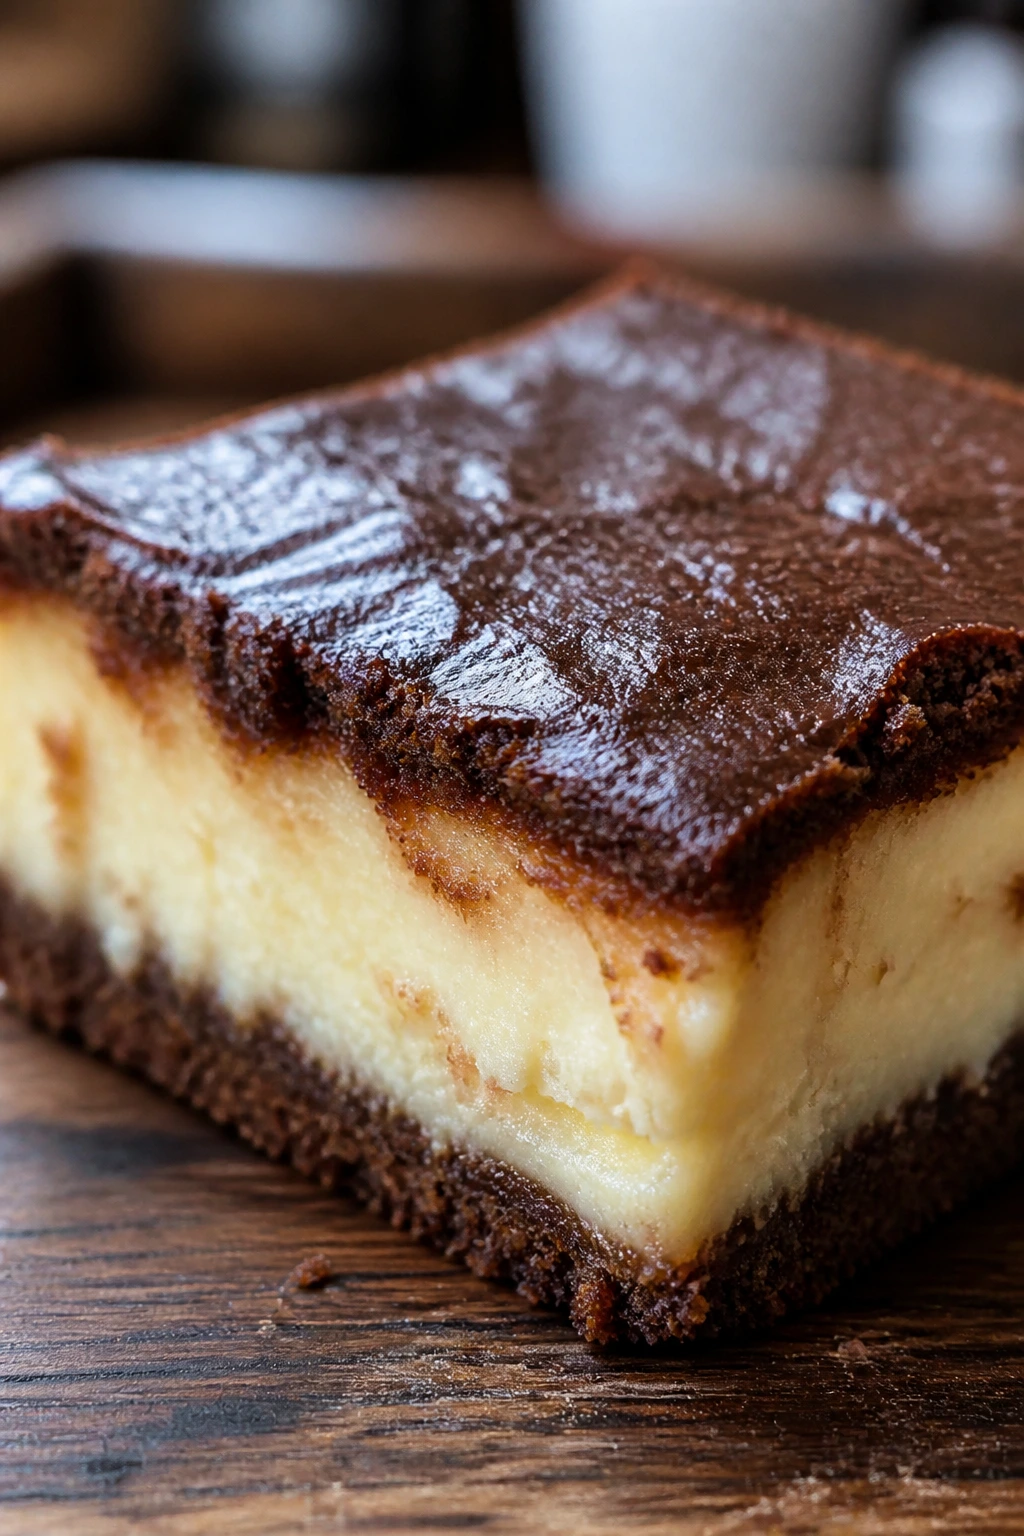
1. Browned Butter Cream Cheese Brownies
These are the brownies I reach for when I want something dark, dense, and a little wild around the edges. The browned butter brings a toasted, almost caramel note, while the cream cheese keeps the middle soft enough to press with a fork and leave a clean dent. They’re fudgy on day one and still slice beautifully two days later.
Why It Works:
Browned butter adds depth without adding carbs, and the cream cheese keeps the crumb from drying out in the fridge. Almond flour gives the structure, cocoa powder gives the bite, and a short bake at 325°F stops the edges from turning hard. The result is more truffle than cake.
Key Ingredients:
- 1/2 cup unsalted butter, browned for a nutty finish
- 4 oz cream cheese, softened so it blends smoothly
- 3/4 cup powdered allulose, for a soft texture
- 2 large eggs, room temperature for better emulsifying
- 1 teaspoon vanilla extract, to round out the cocoa
- 3/4 cup almond flour, blanched if possible
- 1/2 cup unsweetened cocoa powder, sifted
- 1/4 teaspoon fine salt, to sharpen the chocolate
- 1/2 cup sugar-free chocolate chips, optional but good
Quick Steps:
- Preheat the oven to 325°F (165°C) and line an 8×8-inch pan with parchment, leaving overhang on two sides.
- Brown the butter in a small saucepan over medium heat, swirling until it smells like toasted nuts and the milk solids turn golden, then cool for 5 minutes.
- Beat the cream cheese and allulose in a bowl until smooth, then mix in the eggs and vanilla.
- Whisk in the browned butter, almond flour, cocoa powder, and salt until the batter looks thick and glossy.
- Fold in the chocolate chips, spread the batter in the pan, and bake for 22 to 26 minutes until the center still has a soft wobble.
- Cool completely before lifting out and slicing. Do not cut early; the brownies need that rest to stay fudgy.
Equipment for This Recipe:
- 8×8-inch baking pan
- Parchment paper
- Small saucepan
- Mixing bowl and whisk
- Silicone spatula
How to Serve This Dish:
Cut these into small squares and pile them on a plate with a spoonful of whipped cream. A few raspberries make the chocolate taste deeper, not sweeter. They’re rich enough that a 2-inch square is plenty after dinner.
Pro Tips for This Recipe:
- Brown the butter until the foam subsides and you can see the solids; pale butter won’t give you the same flavor.
- If your cream cheese is still cold, the batter can look broken. Keep mixing until it smooths out.
- For a silkier center, chill the pan for an hour before cutting.
Variations on This Dish:
- Espresso Cut: Add 1 teaspoon instant espresso powder to the cocoa for a deeper chocolate edge.
- Peppermint Trim: Stir in 1/4 teaspoon peppermint extract and scatter a few crushed sugar-free mints on top.
- Walnut Corner: Fold in 1/2 cup chopped toasted walnuts for a little crunch against the soft crumb.
Common Mistakes to Avoid with This Dish:
- Overbaking the center: If the middle looks fully set in the oven, it’ll bake dry on the rack. Pull it while the center still trembles a little.
- Using coarse sweetener: Granulated erythritol can leave a gritty finish. Powdered allulose melts into the batter more cleanly.
- Skipping the parchment overhang: These brownies are soft when warm, and the overhang keeps the whole slab from tearing when you lift it out.
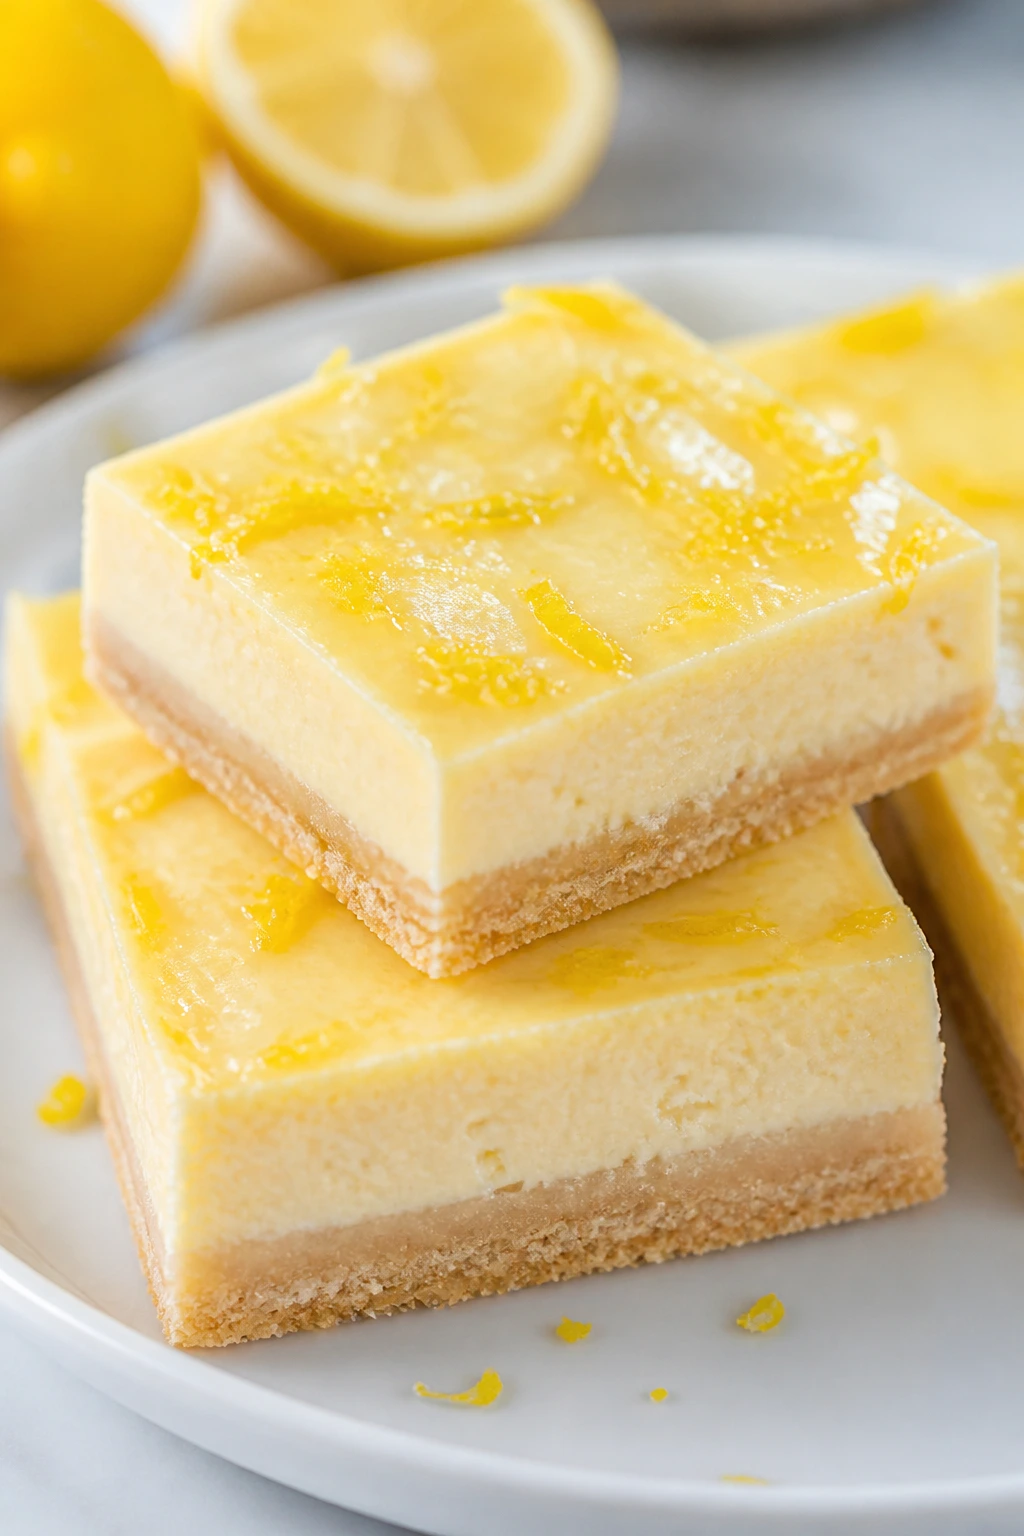
2. Lemon Cream Cheese Bars
Bright lemon bars can go chalky fast if they’re built on a dry crust. These don’t. The filling is plush, the crust is short and sandy in the good way, and the lemon zest gives the whole pan a clean, sharp scent the moment you slice it. If you like dessert that tastes cold and sunny straight from the fridge, this is your pan.
Why It Works:
Cream cheese and sour cream keep the filling smooth after chilling, and a pre-baked almond flour crust gives you structure without turning tough. Lemon juice and zest bring enough acid to cut through the fat, which keeps each bite lively. The bars stay sliceable after a full night in the fridge.
Key Ingredients:
- 1 1/2 cups almond flour
- 1/4 cup powdered allulose
- 1/4 cup melted butter
- Pinch of fine salt
- 8 oz cream cheese, softened
- 1/2 cup sour cream
- 2 large eggs
- 3/4 cup allulose
- 2 tablespoons lemon zest, packed
- 1/4 cup fresh lemon juice
- 1 teaspoon vanilla extract
Quick Steps:
- Preheat the oven to 350°F (175°C) and line a 9×9-inch pan with parchment.
- Mix the crust ingredients until the texture looks like damp sand, then press firmly into the pan.
- Bake the crust for 10 minutes until it smells toasty at the edges.
- Beat the cream cheese, sour cream, eggs, allulose, zest, lemon juice, and vanilla until smooth and pale.
- Pour the filling over the hot crust and bake for 22 to 26 minutes until the center jiggles slightly in the middle.
- Chill for at least 3 hours, then cut with a hot knife for clean edges.
Equipment for This Recipe:
- 9×9-inch baking pan
- Parchment paper
- Hand mixer
- Mixing bowls
- Microplane or fine grater for zest
How to Serve This Dish:
Serve these cold, with a little extra zest grated over the top right before serving. They cut best into neat squares, and the cold filling keeps the layers obvious. A small square with coffee works better than a giant wedge here.
Pro Tips for This Recipe:
- Press the crust with the bottom of a measuring cup so it bakes evenly.
- Use room-temperature lemon juice if your cream cheese is cold; it helps the filling stay smooth.
- For sharper lemon flavor, add 1/4 teaspoon lemon extract, but do not overdo it.
Variations on This Dish:
- Berry Ripple Bars: Swirl 2 tablespoons raspberry chia jam through the filling before baking.
- Coconut Lemon Bars: Add 1/4 cup unsweetened shredded coconut to the crust.
- Extra Tang Version: Swap 2 tablespoons of sour cream for full-fat Greek yogurt.
Common Mistakes to Avoid with This Dish:
- Cutting before chilling: The filling needs time to set. Warm bars slide and smear.
- Overbaking the center: A fully firm top usually means a dry bar. Stop when the middle still moves a little.
- Using bottled lemon juice only: Bottled juice can work in a pinch, but the zest is what makes the flavor smell fresh.
3. Soft Chocolate Chip Cookie Bars
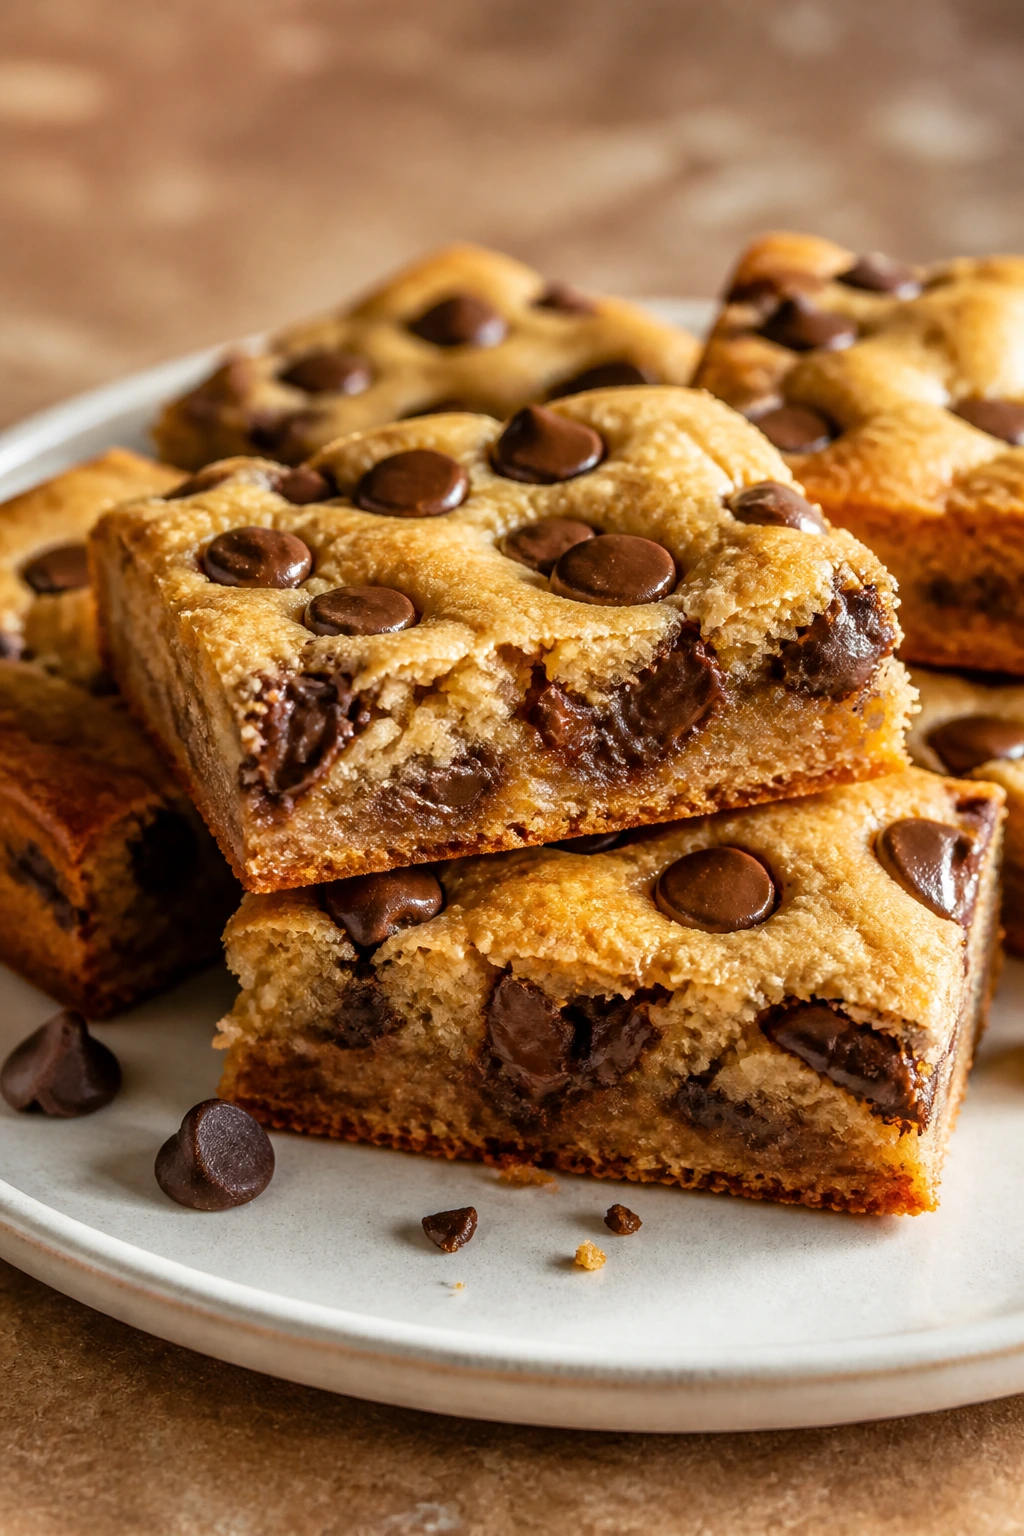
Cookie bars are the cheat code of soft keto baking. You get the edges of a cookie tray, the middle of a thick bakery cookie, and none of the labor of shaping dough one scoop at a time. These are chewy in the center, lightly crisp at the corners, and still tender on day four if you keep the lid on.
Why It Works:
A little coconut flour tightens the crumb without drying it out, while almond flour keeps the bars soft and dense. The extra egg yolk adds richness, and baking the slab in one pan keeps the center from overcooking before the edges are done. That’s the whole trick.
Key Ingredients:
- 1/2 cup unsalted butter, softened
- 3/4 cup powdered allulose or monk fruit-allulose blend
- 1 large egg
- 1 large egg yolk
- 1 teaspoon vanilla extract
- 1 3/4 cups almond flour
- 1/4 cup coconut flour
- 1/2 teaspoon baking soda
- 1/2 teaspoon fine salt
- 3/4 cup sugar-free chocolate chips
Quick Steps:
- Preheat the oven to 350°F (175°C) and line an 8×8-inch pan with parchment.
- Cream the butter and sweetener until fluffy, about 2 minutes.
- Beat in the egg, yolk, and vanilla until glossy.
- Stir in the almond flour, coconut flour, baking soda, and salt until the dough thickens.
- Fold in the chocolate chips and press the dough into the pan.
- Bake for 20 to 24 minutes until the top is lightly golden and the center still feels soft.
- Cool fully before slicing into bars.
Equipment for This Recipe:
- 8×8-inch baking pan
- Electric mixer or sturdy whisk
- Parchment paper
- Mixing bowl
- Offset spatula or the back of a spoon
How to Serve This Dish:
These are best in fat little squares, not giant slabs. Warm one for 8 to 10 seconds if you want the chocolate chips to soften again. A scoop of keto vanilla ice cream is almost unfair with these.
Pro Tips for This Recipe:
- Spoon the almond flour into the measuring cup; don’t pack it down.
- Press the dough evenly into the corners so the bars bake at the same pace.
- Pull them when the middle still looks a touch underdone. They set as they cool.
Variations on This Dish:
- Walnut Bakery Bar: Replace 1/2 cup chips with 1/2 cup chopped walnuts.
- Toffee Note: Add 1/4 teaspoon butter extract and a few sugar-free toffee bits.
- Double Chocolate: Stir in 2 tablespoons cocoa powder and reduce almond flour by the same amount.
Common Mistakes to Avoid with This Dish:
- Packing in the coconut flour: Too much and the bars go dry fast. Measure lightly.
- Baking until the top is firm all the way through: That produces a crumbly slab, not a chewy one.
- Skipping the full cool-down: Fresh bars are fragile and can break apart when sliced too early.
4. Coconut Flour Vanilla Sheet Cake
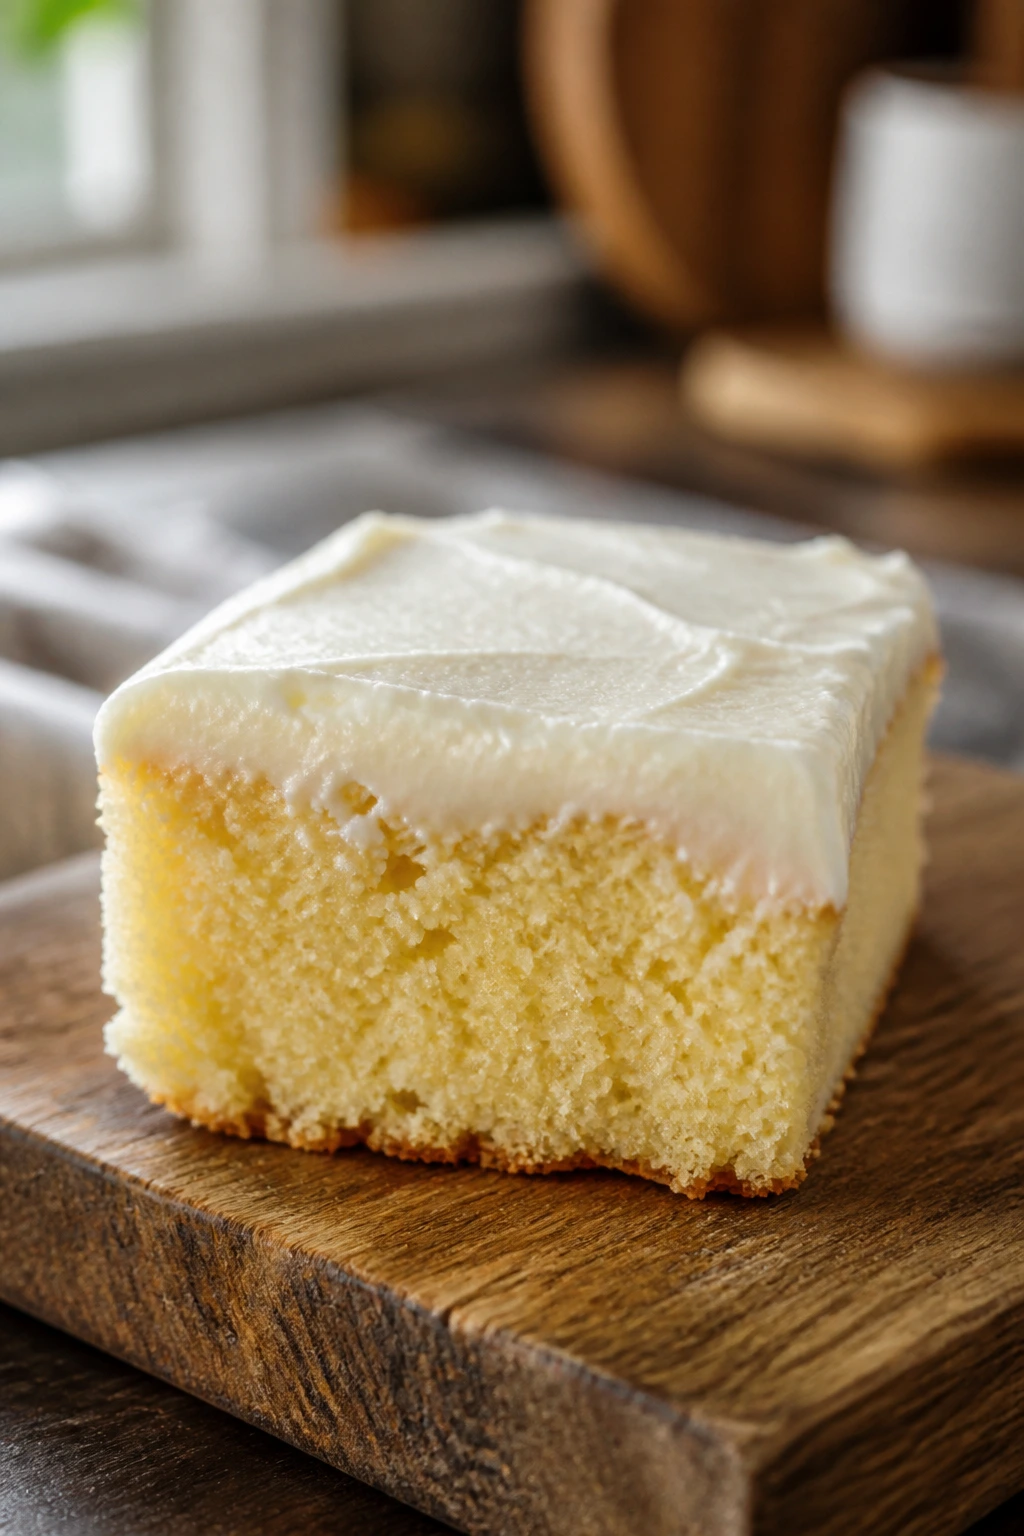
Coconut flour can make a cake feel dry and chalky if you lean on it too hard. Used properly, it gives you a fine, tender crumb that drinks in a cream cheese frosting without falling apart. This sheet cake tastes like vanilla pudding in cake form, which is a compliment in my kitchen.
Why It Works:
Coconut flour soaks up liquid fast, so the batter uses eggs, sour cream, and butter to keep the texture soft. A small amount of almond flour rounds out the crumb and keeps it from turning spongy. Bake it in a shallow pan and stop early; that’s how you keep it plush.
Key Ingredients:
- 1/2 cup unsalted butter, softened
- 3/4 cup allulose
- 4 large eggs
- 1/2 cup sour cream
- 1 teaspoon vanilla extract
- 1/2 cup coconut flour
- 1/4 cup almond flour
- 1 1/2 teaspoons baking powder
- Pinch of fine salt
- 4 oz cream cheese, for the frosting
- 2 tablespoons butter, for the frosting
- 1/3 cup powdered allulose, for the frosting
- 1 to 2 tablespoons heavy cream, as needed
Quick Steps:
- Preheat the oven to 350°F (175°C) and line a 9×9-inch pan with parchment.
- Beat the butter and allulose until pale, then add the eggs one at a time.
- Mix in the sour cream and vanilla.
- Whisk the coconut flour, almond flour, baking powder, and salt together, then stir into the batter.
- Spread the batter into the pan and bake for 24 to 28 minutes until the top springs back lightly.
- Cool completely, then frost with cream cheese frosting and chill for cleaner slices.
Equipment for This Recipe:
- 9×9-inch pan
- Hand mixer
- Mixing bowls
- Whisk
- Cooling rack
How to Serve This Dish:
Serve it cold or at room temperature with a thin layer of frosting, not a heavy one. The cake itself is delicate and does not need a mountain of topping. A few toasted coconut flakes on top look right and add a faint chew.
Pro Tips for This Recipe:
- Let the batter sit for 3 minutes before baking so the coconut flour hydrates.
- Use room-temperature eggs or the batter can look curdled.
- A toothpick should come out with a few moist crumbs, not wet batter.
Variations on This Dish:
- Lemon Vanilla Cake: Add 1 tablespoon lemon zest to the batter.
- Berry Layered Version: Spread a thin layer of raspberry chia jam between two half-inch cake layers.
- Chocolate Frosted Cut: Top with cocoa cream cheese frosting instead of plain vanilla.
Common Mistakes to Avoid with This Dish:
- Too much coconut flour: It drinks liquid fast and will punish a heavy hand.
- Baking until dry: Coconut flour cakes go from tender to dusty with one extra minute.
- Frosting while warm: The frosting melts, slides, and makes the cake soggy.
5. Peanut Butter Cloud Cookies
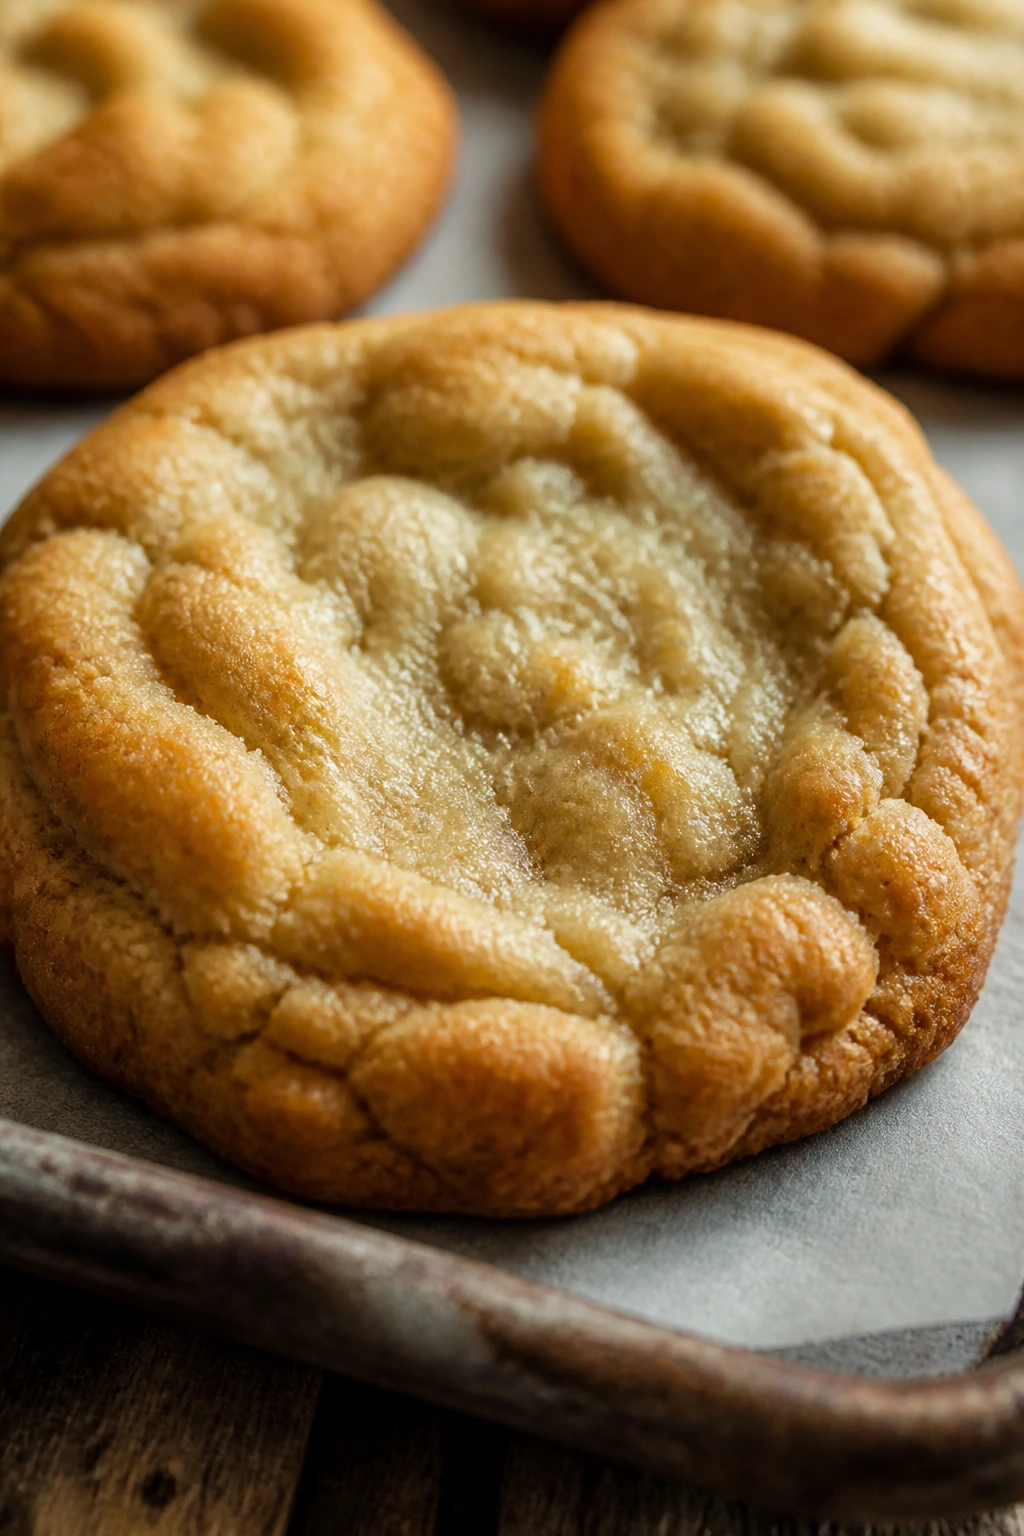
If you like a peanut butter cookie that stays soft enough to bend slightly when you pick it up, this is the one. The centers stay chewy, the edges stay tender, and the peanut flavor is loud without tasting sugary. They’re the kind of cookie you can make on a Sunday and still enjoy on Wednesday without microwaving them into submission.
Why It Works:
Peanut butter brings built-in fat and moisture, so the cookie doesn’t need much else to stay tender. One egg binds the dough, allulose keeps the bite soft, and a short bake leaves the centers a little underdone. They finish setting on the tray.
Key Ingredients:
- 1 cup natural peanut butter, well stirred
- 1/2 cup powdered allulose
- 1 large egg
- 1 teaspoon vanilla extract
- 1/2 teaspoon baking soda
- Pinch of fine salt
- 1/4 cup chopped roasted peanuts or sugar-free chocolate chips, optional
Quick Steps:
- Preheat the oven to 350°F (175°C) and line a sheet pan with parchment.
- Stir the peanut butter and sweetener together until smooth.
- Mix in the egg, vanilla, baking soda, and salt.
- Fold in peanuts or chocolate chips if you want them.
- Scoop 1 1/2-inch mounds onto the tray and flatten with a fork in a crisscross pattern.
- Bake for 10 to 12 minutes until the edges are set but the centers still look soft.
- Cool on the tray for 10 minutes before moving them.
Equipment for This Recipe:
- Sheet pan
- Parchment paper
- Mixing bowl
- Fork for crisscrossing
- Cookie scoop, if you want even size
How to Serve This Dish:
These are good with cold milk, keto or not, and even better tucked beside a spoonful of whipped cream. They pack neatly for lunchboxes or desk snacks because they don’t crumble like dry almond flour cookies. Two cookies is a normal portion; three is a choice.
Pro Tips for This Recipe:
- Use peanut butter with a smooth texture and no added sugar.
- If the dough feels greasy, chill it for 15 minutes before scooping.
- Pull the cookies before they look fully done in the middle.
Variations on This Dish:
- Chocolate Swirl: Drizzle cooled cookies with melted sugar-free chocolate.
- Almond Butter Swap: Replace peanut butter with almond butter for a milder taste.
- Salted Peanut Top: Press a few flakes of flaky salt on each cookie right after baking.
Common Mistakes to Avoid with This Dish:
- Overmixing the dough: It makes the cookies dense and a little tough.
- Flattening too much: Pressing them paper-thin makes them dry.
- Overbaking: Peanut butter cookies should still feel soft when they leave the oven.
6. Cinnamon Roll Cheesecake Bars
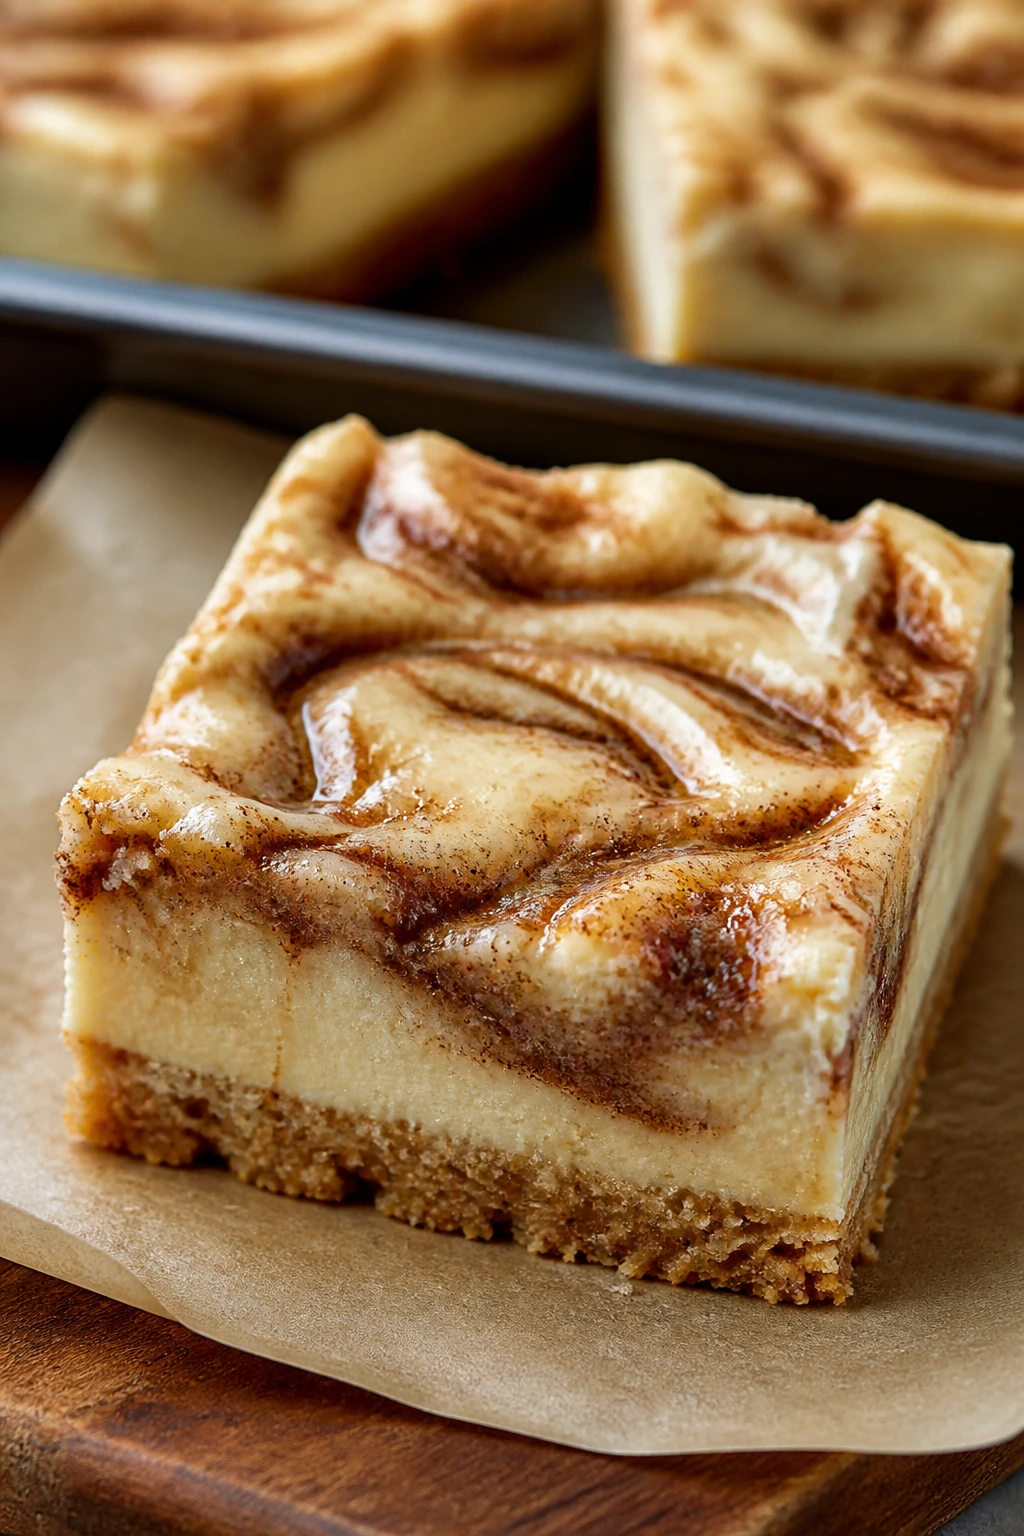
These bars taste like the center swirl of a cinnamon roll got rescued from a bakery case and crossed with cheesecake. The filling is creamy, the almond flour base is sturdy without being dry, and the cinnamon ribbon bakes into little pockets of caramel-like spice. Cold from the fridge, they’re almost too easy to keep eating.
Why It Works:
The cheesecake layer keeps the bars soft for days, while the almond flour crust gives you a shortbread-like base that doesn’t go stale fast. Cinnamon and butter in the swirl melt into the filling instead of sitting on top like dust. A lower bake temperature helps the cream cheese stay silky.
Key Ingredients:
- 1 1/2 cups almond flour
- 1/4 cup melted butter
- 2 tablespoons allulose
- Pinch of salt
- 16 oz cream cheese, softened
- 2 large eggs
- 2/3 cup allulose
- 1 teaspoon vanilla extract
- 1/4 cup sour cream
- 2 tablespoons melted butter, for the swirl
- 2 tablespoons allulose, for the swirl
- 1 1/2 teaspoons cinnamon
Quick Steps:
- Preheat the oven to 325°F (163°C) and line a 9×9-inch pan.
- Mix the crust ingredients and press them firmly into the pan.
- Bake the crust for 10 minutes.
- Beat the cream cheese, eggs, allulose, vanilla, and sour cream until smooth.
- Spread the filling over the crust, then drizzle on the swirl mixture and drag a knife through in loose loops.
- Bake for 22 to 26 minutes until the center jiggles slightly.
- Chill for at least 4 hours before cutting.
Equipment for This Recipe:
- 9×9-inch pan
- Parchment paper
- Hand mixer
- Mixing bowls
- Knife for swirling
How to Serve This Dish:
Cut these into narrow bars so the cinnamon pattern shows. They’re rich, so a small square works after dinner. A spoon of whipped cream is nice, but not necessary.
Pro Tips for This Recipe:
- Beat the filling until no cream cheese lumps remain.
- Don’t swirl too much or you’ll blend the layers into one pale filling.
- Chill fully; warm bars collapse at the knife.
Variations on This Dish:
- Walnut Roll: Sprinkle 1/4 cup chopped walnuts over the swirl before baking.
- Maple-Like Note: Add 1/4 teaspoon maple extract to the filling.
- Caramel Edge: Drizzle with sugar-free caramel after chilling.
Common Mistakes to Avoid with This Dish:
- Using cold cream cheese: Lumps stay behind and never bake out completely.
- Overbaking the cheesecake layer: It should still jiggle in the middle when you pull it.
- Cutting without chilling: The layers need time to settle.
7. Snickerdoodle Sandwich Cookies

A soft snickerdoodle is one of the better things almond flour can do, and turning it into a sandwich cookie makes the whole idea feel a little decadent. The cinnamon-sugar coating is sharp and warm, the cookie itself is tender, and the cream cheese filling keeps the middle from drying out. These are best after they’ve had a little time to sit, which is good news if you want to bake ahead.
Why It Works:
Cream of tartar gives the dough that snickerdoodle tang, while the cream cheese filling locks in moisture between the cookies. A mix of almond flour and a little coconut flour keeps the cookies soft but not flimsy. They soften even more overnight.
Key Ingredients:
- 1/2 cup unsalted butter, softened
- 1/2 cup allulose
- 1 large egg
- 1 teaspoon vanilla extract
- 1 3/4 cups almond flour
- 2 tablespoons coconut flour
- 1 teaspoon cream of tartar
- 1/2 teaspoon baking soda
- 1/4 teaspoon salt
- 2 tablespoons allulose, for coating
- 1 tablespoon cinnamon, for coating
- 4 oz cream cheese, softened
- 2 tablespoons butter, for filling
- 1/3 cup powdered allulose, for filling
- 1/2 teaspoon vanilla, for filling
Quick Steps:
- Preheat the oven to 350°F (175°C) and line two sheet pans with parchment.
- Cream the butter and allulose, then beat in the egg and vanilla.
- Stir in the almond flour, coconut flour, cream of tartar, baking soda, and salt.
- Scoop 1-tablespoon portions, roll them in the cinnamon-allulose coating, and place them apart on the tray.
- Bake for 10 to 12 minutes until the edges are set and the centers look slightly puffed.
- Cool completely, then sandwich with the cream cheese filling.
Equipment for This Recipe:
- Sheet pans
- Parchment paper
- Electric mixer
- Small bowl for coating
- Offset spatula or spoon for filling
How to Serve This Dish:
Let the assembled cookies sit for 20 minutes before serving if you want the filling to settle. They’re neat enough for a plate with tea, and soft enough to eat straight from the fridge without losing their shape.
Pro Tips for This Recipe:
- Chill the dough for 10 minutes if it feels too sticky.
- Bake until just set; pale cookies stay softer than deeply browned ones.
- Make the filling thick, not runny, or the sandwich will slip apart.
Variations on This Dish:
- Chocolate Snickerdoodle: Add 2 tablespoons cocoa to the dough.
- Orange Spice: Add 1 teaspoon orange zest to the filling.
- Extra Cinnamon Center: Mix a pinch of cinnamon into the cream cheese filling.
Common Mistakes to Avoid with This Dish:
- Overhandling the dough: It makes the cookies tough instead of tender.
- Skipping the cool-down: Warm cookies tear when you try to fill them.
- Too much filling: A thick layer squishes out the sides and makes the cookies slippery.
8. Raspberry Cheesecake Thumbprint Cookies
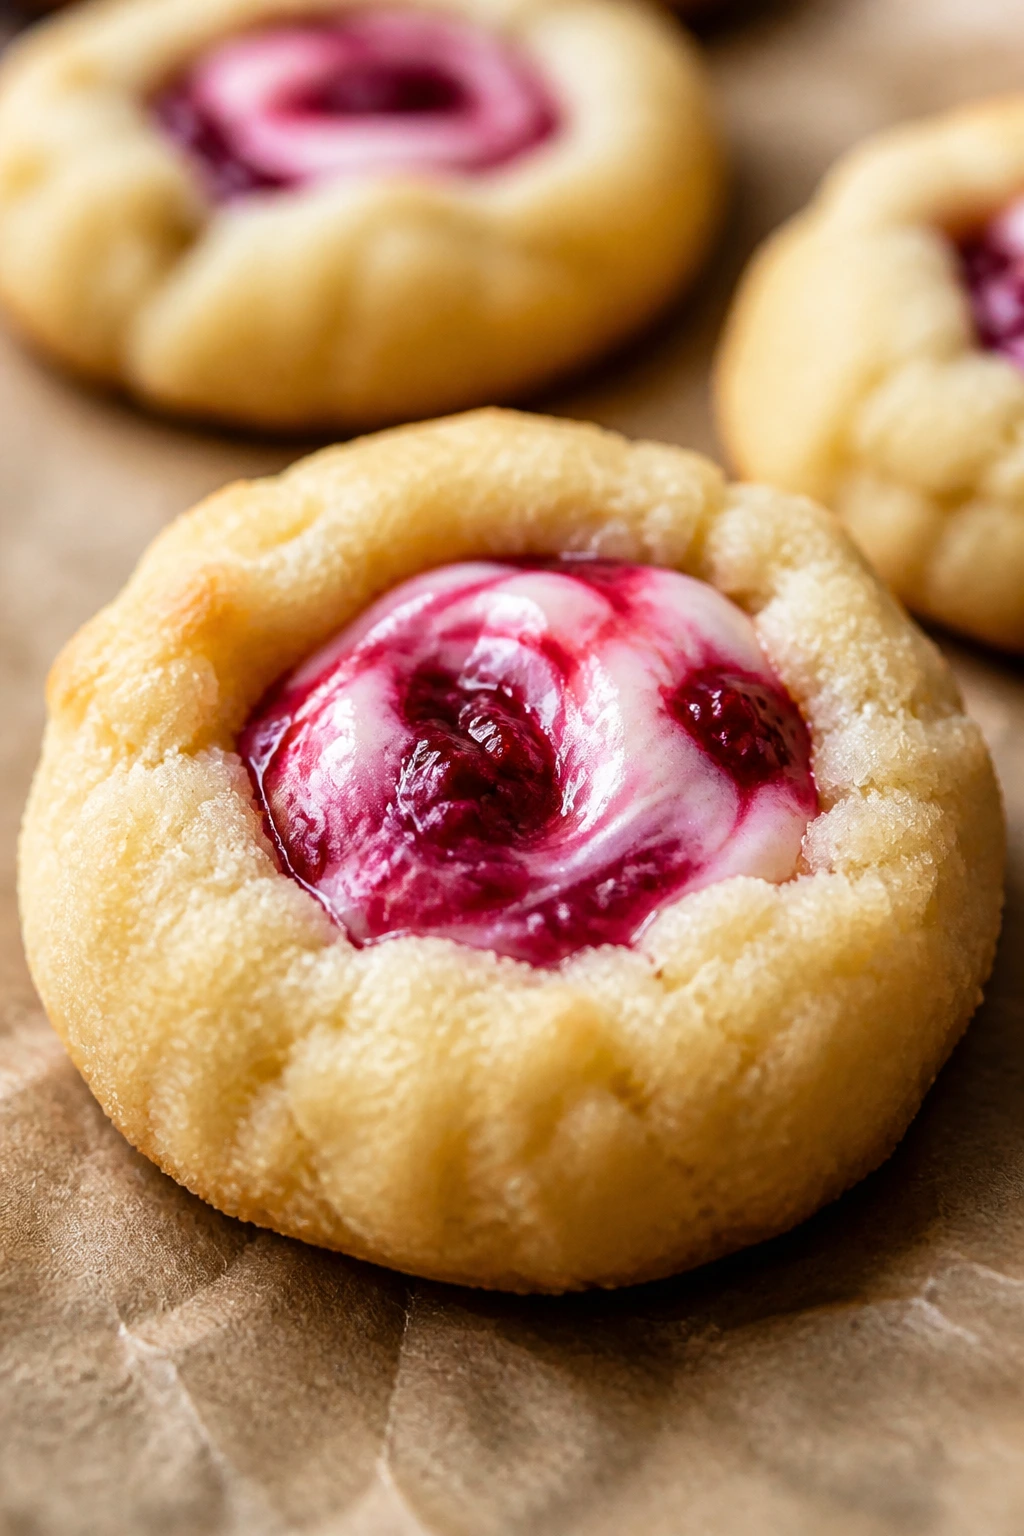
Thumbprints are smart keto baking because they give you two textures in one bite: a soft cookie base and a creamy, fruity center. These are buttery, lightly tangy, and just sweet enough to keep the raspberry from tasting flat. The best part is that they hold their shape in the fridge instead of drying into hard little coins.
Why It Works:
The cookie dough uses almond flour for body and a little coconut flour to keep the edges from spreading too much. The cheesecake filling bakes into the thumbprint and stays moist under the fruit. Raspberry chia jam adds brightness without making the center watery.
Key Ingredients:
- 1/2 cup unsalted butter, softened
- 1/3 cup allulose
- 1 large egg yolk
- 1 teaspoon vanilla extract
- 1 3/4 cups almond flour
- 1/4 cup coconut flour
- 1/2 teaspoon fine salt
- 4 oz cream cheese, softened
- 2 tablespoons powdered allulose
- 1 teaspoon lemon juice
- 1/4 teaspoon vanilla extract
- 1/3 cup raspberry chia jam
Quick Steps:
- Preheat the oven to 350°F (175°C) and line a sheet pan with parchment.
- Cream the butter and allulose, then mix in the egg yolk and vanilla.
- Stir in the almond flour, coconut flour, and salt until a soft dough forms.
- Scoop 1-tablespoon portions, roll into balls, and press a deep thumbprint into each one.
- Fill each center with a teaspoon of cream cheese mixture and a spoonful of raspberry chia jam.
- Bake for 11 to 13 minutes until the edges are set.
- Cool fully before moving them.
Equipment for This Recipe:
- Sheet pan
- Parchment paper
- Mixing bowl
- Small spoon or teaspoon
- Thumb or the back of a rounded measuring spoon for the wells
How to Serve This Dish:
These look best on a platter with the red jam showing in the center. They’re tidy enough for a brunch tray and soft enough to keep chilled until serving time. One or two cookies is enough unless you’re pretending otherwise.
Pro Tips for This Recipe:
- Make the thumbprint deep enough before baking; shallow wells puff closed.
- Chill the jam if it seems loose.
- Let the cookies cool on the pan so the centers set without sliding out.
Variations on This Dish:
- Blueberry Center: Swap the raspberry jam for blueberry chia jam.
- Lime Twist: Add lime zest to the cream cheese filling.
- Almond Fragrance: Add 1/4 teaspoon almond extract to the dough.
Common Mistakes to Avoid with This Dish:
- Using loose jam: Thin filling runs out and burns on the pan.
- Pressing the wells too small: They close in the oven.
- Removing too soon: The cookie base is fragile while hot.
9. Flourless Chocolate Torte

This is the dessert for people who want chocolate to taste dense and grown-up, not airy and sweet. It lands somewhere between a truffle and a baked custard, which is why it stays soft for days in the fridge. A spoonful of whipped cream on top is enough. More than that, and you risk drowning the chocolate.
Why It Works:
The texture comes from eggs, butter, and cream, not flour, so the cake stays rich rather than dry. A low-and-slow bake keeps the center soft and slightly pudding-like. Because there’s no starch in the way, the chocolate flavor comes through cleanly.
Key Ingredients:
- 1/2 cup unsalted butter
- 8 oz sugar-free dark chocolate, chopped
- 3/4 cup allulose
- 4 large eggs
- 1/4 cup unsweetened cocoa powder
- 1/4 cup sour cream
- 1 teaspoon vanilla extract
- 1/4 teaspoon fine salt
Quick Steps:
- Preheat the oven to 325°F (163°C) and line an 8-inch springform pan with parchment.
- Melt the butter and chocolate together until smooth.
- Whisk in the allulose, cocoa powder, sour cream, vanilla, and salt.
- Beat in the eggs one at a time until the batter turns glossy.
- Pour into the pan and bake for 20 to 24 minutes until the edges are set and the center still has a soft wobble.
- Cool completely, then chill for at least 2 hours before slicing.
Equipment for This Recipe:
- 8-inch springform pan
- Parchment paper
- Heatproof bowl or saucepan
- Whisk
- Offset spatula
How to Serve This Dish:
Serve chilled with whipped cream and a few shaved dark chocolate curls. A few raspberries work too, but keep the garnish small. The torte is the loud part.
Pro Tips for This Recipe:
- Chop the chocolate finely so it melts evenly.
- Don’t rush the chill time; the center firms as it cools.
- A warm knife slices cleaner than a cold one.
Variations on This Dish:
- Orange Chocolate: Add 1 tablespoon orange zest to the batter.
- Mocha Torte: Stir in 1 teaspoon espresso powder.
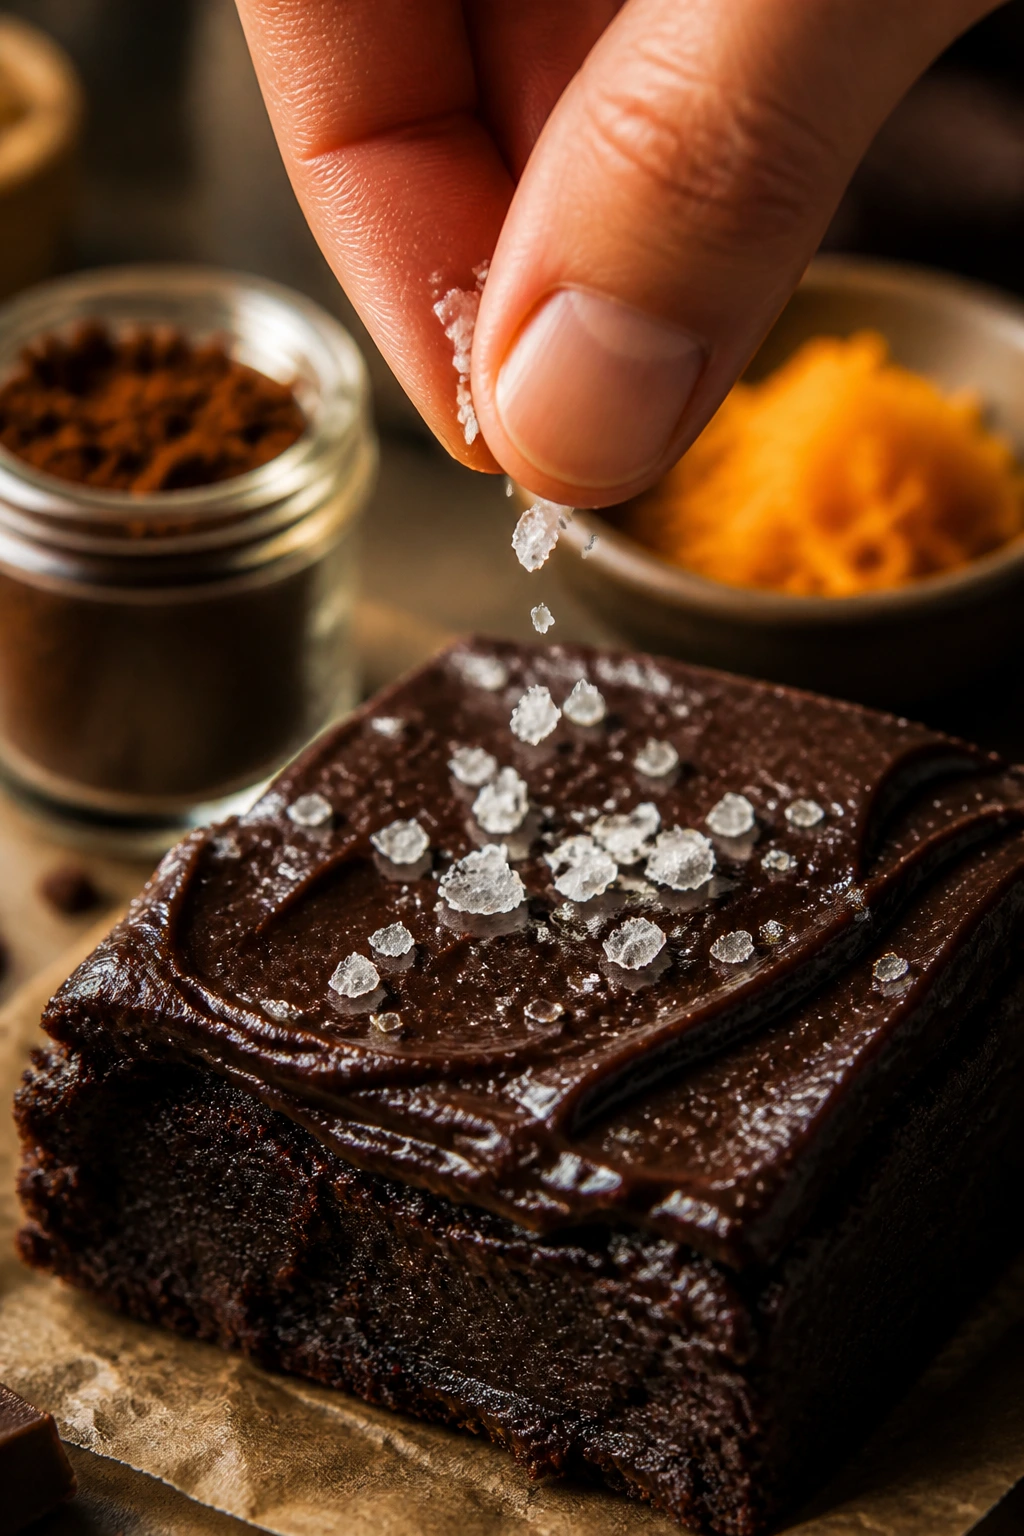
- Salted Top: Finish with flaky salt right after baking.
Common Mistakes to Avoid with This Dish:
- Baking until firm in the center: You’ll lose the truffle-like texture.
- Skipping the springform pan: A regular pan makes removal messy.
- Using low-quality chocolate: The flavor depends on the chocolate carrying the whole cake.
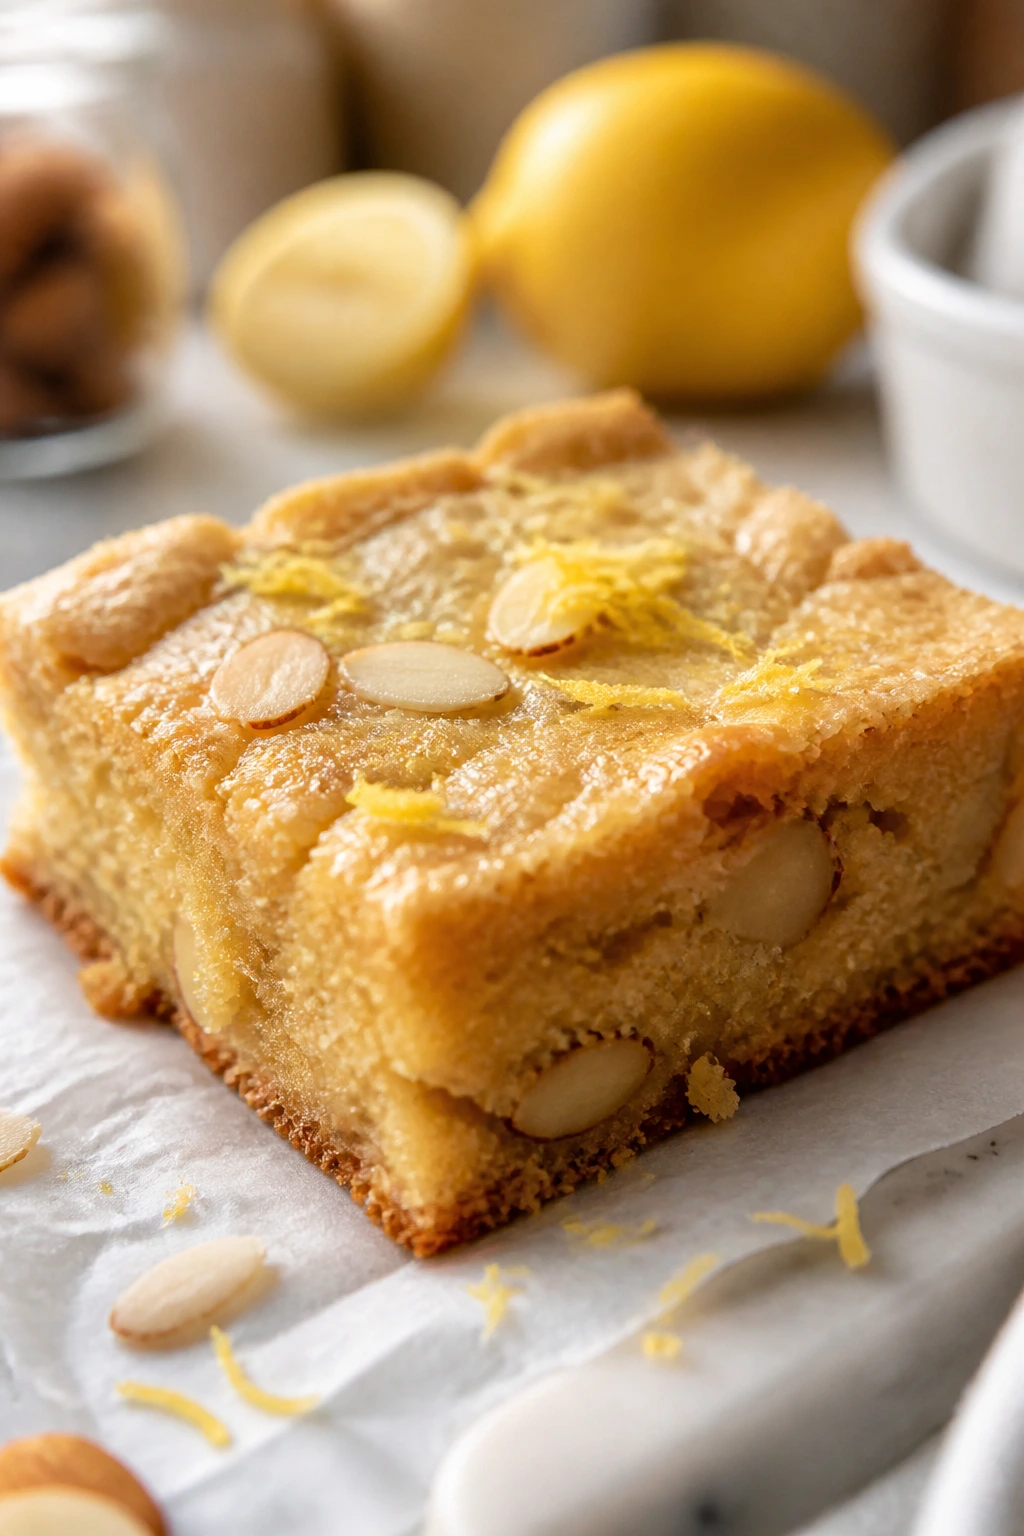
10. Almond Butter Blondies
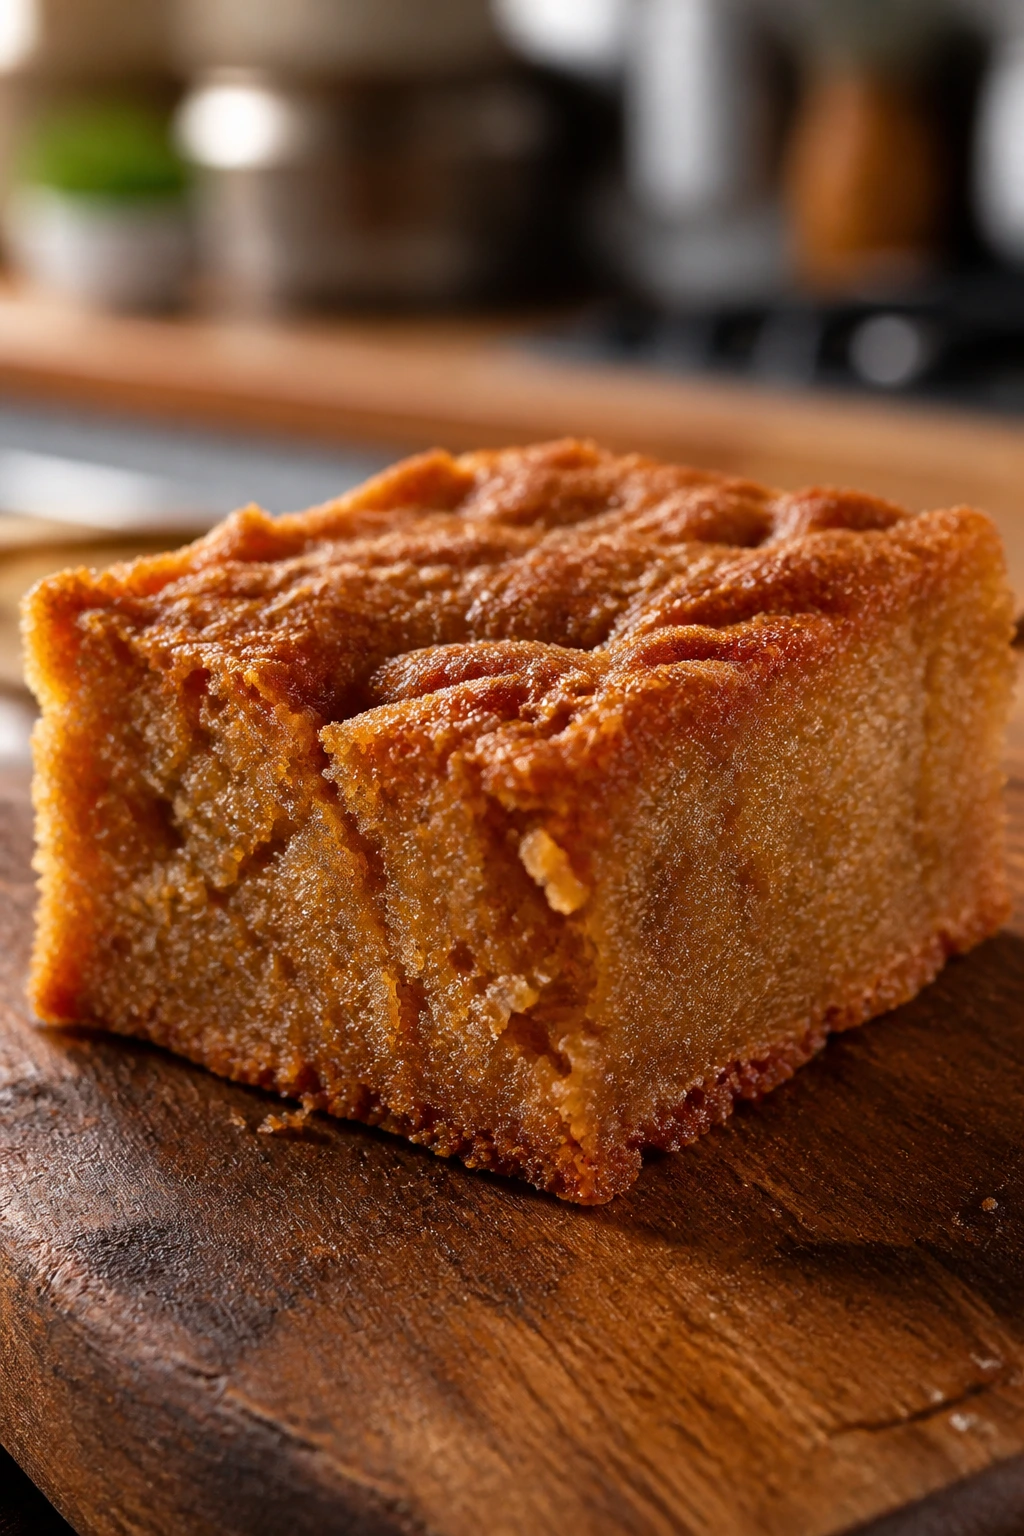
Almond butter blondies are what happen when you want a chewy bar that tastes warm and nutty instead of chocolaty. They’re soft in the middle, browned on the edges, and sturdy enough to pack for later without turning stale. If you like a dessert that leans rich rather than sweet, this one earns its spot.
Why It Works:
Almond butter contributes moisture and fat, which keeps the bars tender for days. A little coconut flour firms the batter just enough so the center doesn’t sink. A short bake at moderate heat leaves the bars chewy instead of dry.
Key Ingredients:
- 1 cup almond butter
- 1/2 cup allulose
- 2 large eggs
- 2 tablespoons melted butter
- 1 teaspoon vanilla extract
- 1/2 cup almond flour
- 1/4 cup coconut flour
- 1/2 teaspoon baking powder
- 1/2 teaspoon salt
- 1/2 cup sugar-free white chocolate chips or chopped pecans
Quick Steps:
- Preheat the oven to 350°F (175°C) and line an 8×8-inch pan.
- Whisk the almond butter, allulose, eggs, melted butter, and vanilla until smooth.
- Stir in the almond flour, coconut flour, baking powder, and salt.
- Fold in the chips or pecans.
- Spread the batter into the pan and bake for 18 to 22 minutes until the top is set and the center gives slightly when pressed.
- Cool fully before slicing.
Equipment for This Recipe:
- 8×8-inch baking pan
- Parchment paper
- Mixing bowl
- Whisk or spatula
- Cooling rack
How to Serve This Dish:
These bars are good plain, but a light drizzle of melted dark chocolate gives them a little more drama. Cut them into small rectangles, because the nut butter makes them filling fast. A cold glass of milk or almond milk works well here.
Pro Tips for This Recipe:
- Stir the almond butter well if the oil has separated.
- Do not overbake; blondies should still feel soft in the center.
- Chill before cutting if you want extra neat slices.
Variations on This Dish:
- Chocolate Chip Blondies: Swap pecans for chocolate chips.
- Cinnamon Roll Blondies: Add 1 teaspoon cinnamon to the batter.
- Maple-Style Note: Use a tiny splash of maple extract for a bakery flavor without the sugar.
Common Mistakes to Avoid with This Dish:
- Baking to a dry finish: The center should still be a little tender when you pull the pan.
- Using very runny nut butter: The bars can spread too much.
- Slicing hot: They need cooling time to settle.
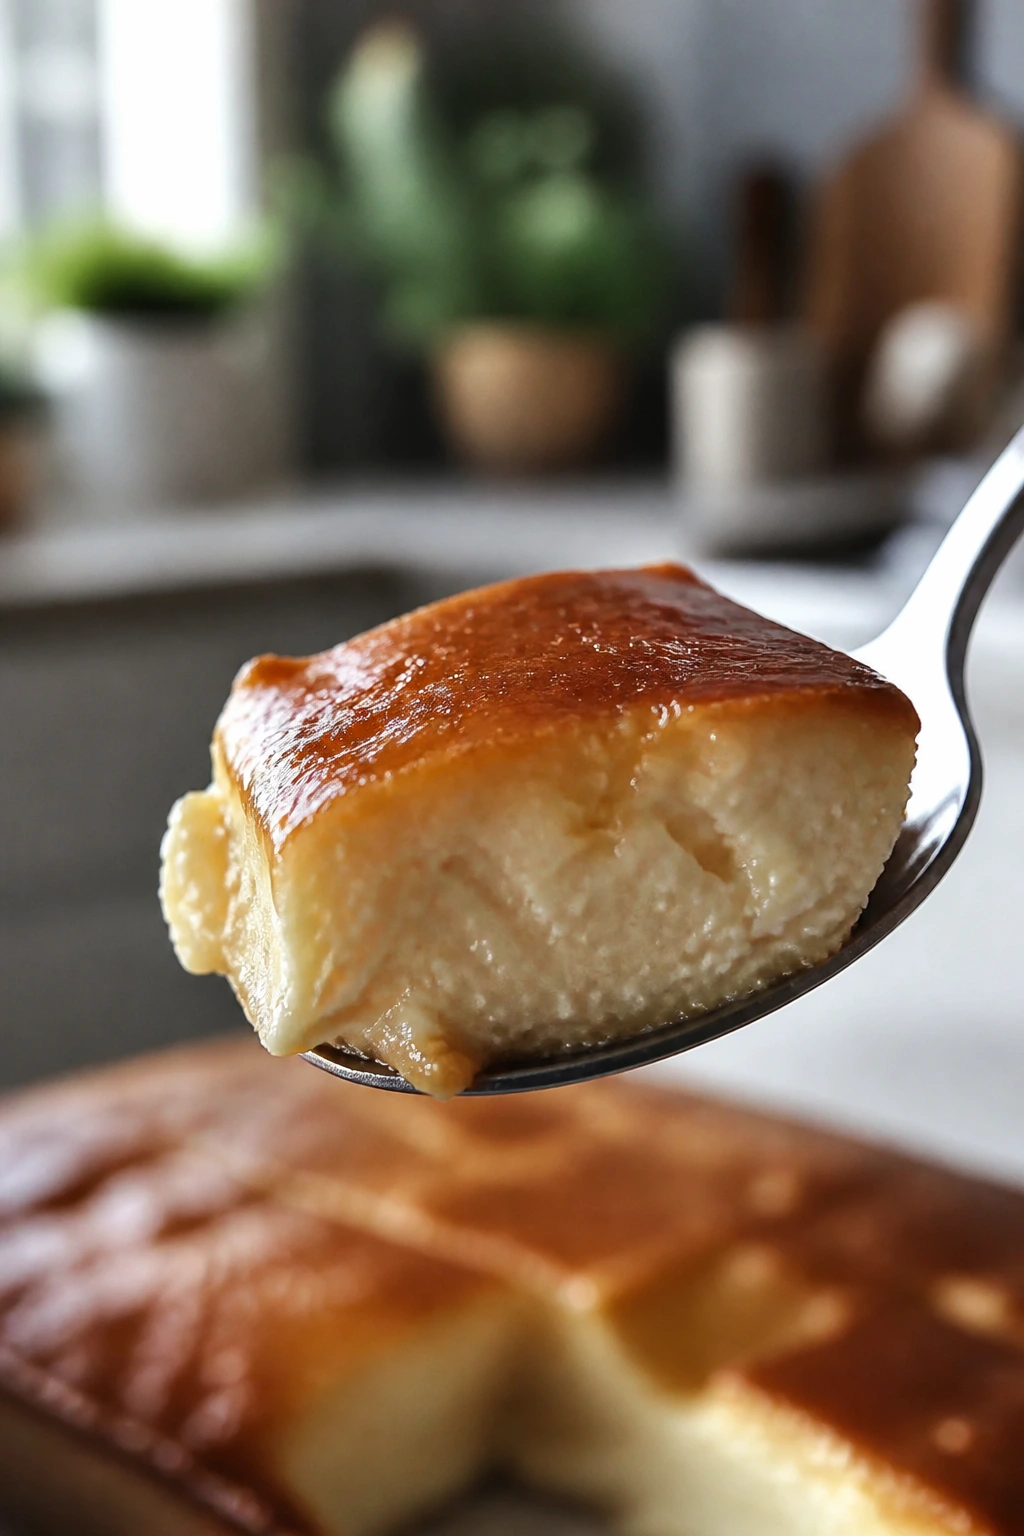
11. Tres Leches Keto Cupcakes
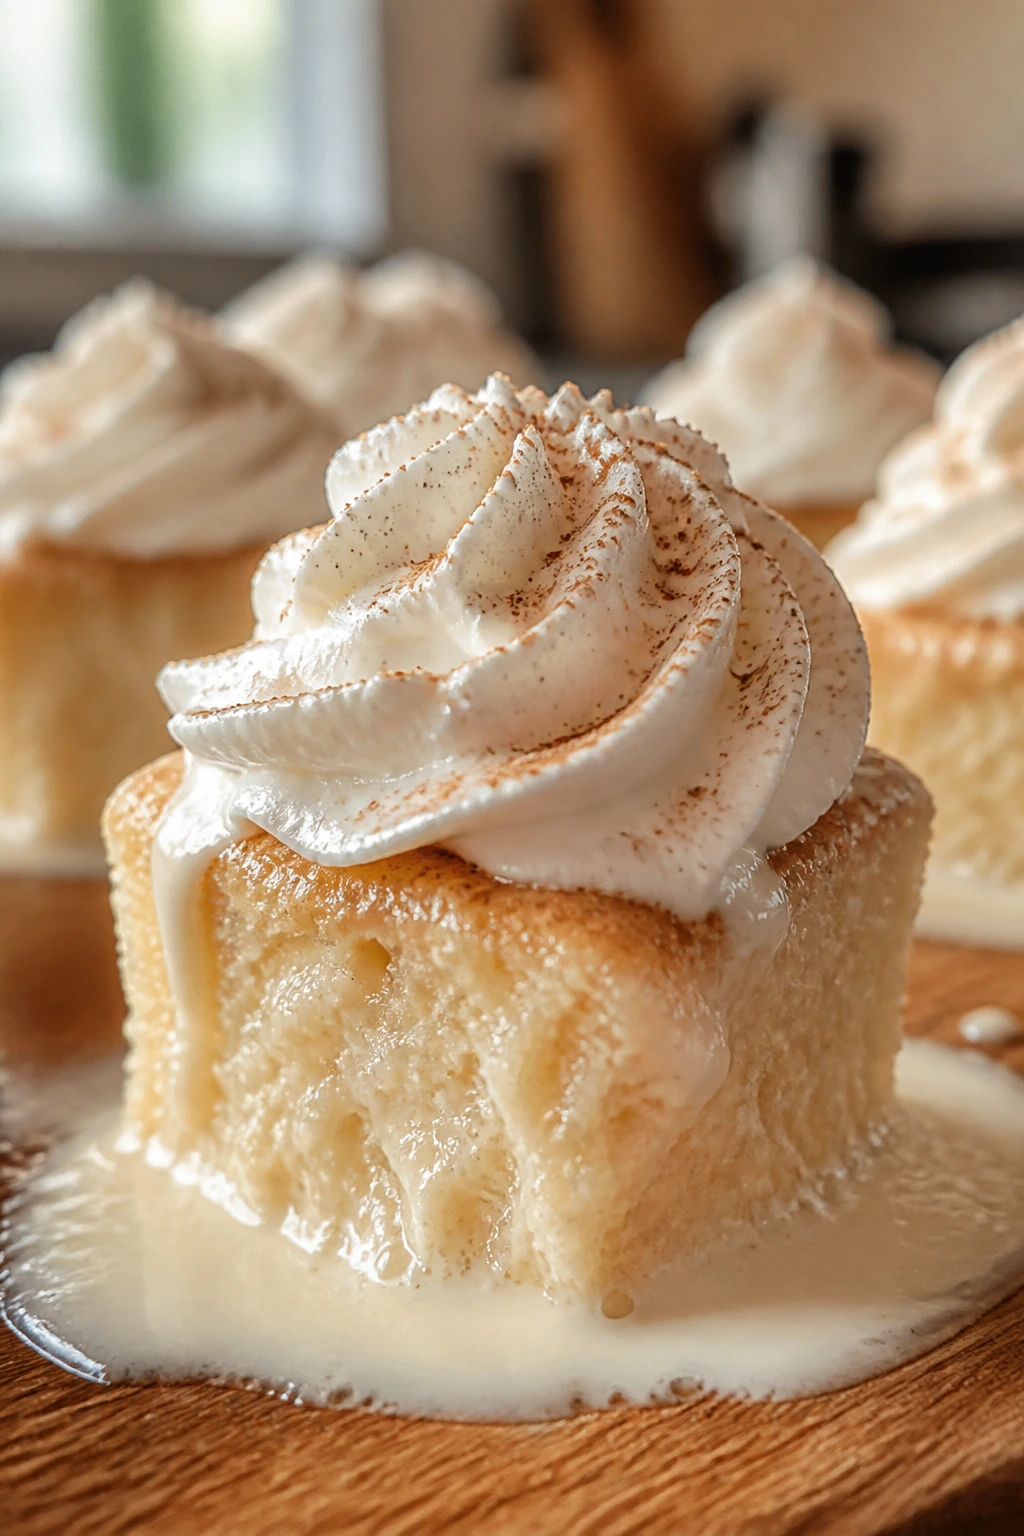
Tres leches is supposed to feel soaked and soft, and that is exactly why it works so well in a keto version. These cupcakes drink in a creamy milk mixture without falling apart, and the whipped topping keeps them cool and plush. They’re the most spoonable dessert in the collection, which is a nice change of pace.
Why It Works:
The sponge is light but sturdy enough to hold a milk soak. Heavy cream, almond milk, and coconut milk bring the moisture, while the cake itself has just enough flour to keep the structure intact. The whole thing improves after chilling, which makes it a great make-ahead dessert.
Key Ingredients:
- 4 large eggs
- 1/2 cup allulose
- 1/4 cup melted butter
- 1/4 cup almond flour
- 2 tablespoons coconut flour
- 1 teaspoon baking powder
- Pinch of salt
- 1 teaspoon vanilla extract
- 1/2 cup heavy cream, for soaking
- 1/2 cup unsweetened almond milk, for soaking
- 1/4 cup canned coconut milk, for soaking
- 3 tablespoons powdered allulose, for soaking
- 1 teaspoon vanilla, for soaking
- 1 cup heavy cream, for topping
- 2 tablespoons powdered allulose, for topping
- Cinnamon, for finishing
Quick Steps:
- Preheat the oven to 325°F (163°C) and line a 12-cup muffin tin.
- Beat the eggs and allulose until thick and pale, about 3 to 4 minutes.
- Mix in the melted butter and vanilla.
- Fold in the almond flour, coconut flour, baking powder, and salt.
- Bake for 18 to 20 minutes until the tops spring back lightly.
- Whisk the soaking mixture, poke holes in the warm cupcakes, and spoon it over the tops.
- Chill for at least 2 hours, then top with whipped cream and cinnamon.
Equipment for This Recipe:
- 12-cup muffin tin
- Paper liners
- Hand mixer
- Whisk
- Toothpick or skewer for poking holes
How to Serve This Dish:
Serve these straight from the fridge in their liners or on small dessert plates with a spoon. They’re soft enough to eat with a fork but creamy enough to lean into spoon territory. A dusting of cinnamon is enough; don’t pile on extra sweetness.
Pro Tips for This Recipe:
- Poke the holes while the cupcakes are still warm so the soak sinks in.
- Pour the soak slowly; if you dump it all at once, it runs off the sides.
- Use whipped cream that’s only softly whipped, not stiff and dry.
Variations on This Dish:
- Coconut Tres Leches: Add toasted coconut on top.
- Coffee Soak: Replace 2 tablespoons almond milk with cooled espresso.
- Berry Version: Add a spoonful of mashed strawberries between the soak and topping.
Common Mistakes to Avoid with This Dish:
- Trying to soak cold cupcakes: The milk doesn’t absorb as well.
- Overbaking the sponge: A dry cupcake cannot be rescued by soaking.
- Using stiff whipped cream: It can crack when spread over the soaked cake.
12. Carrot Cake Muffins with Cream Cheese Glaze
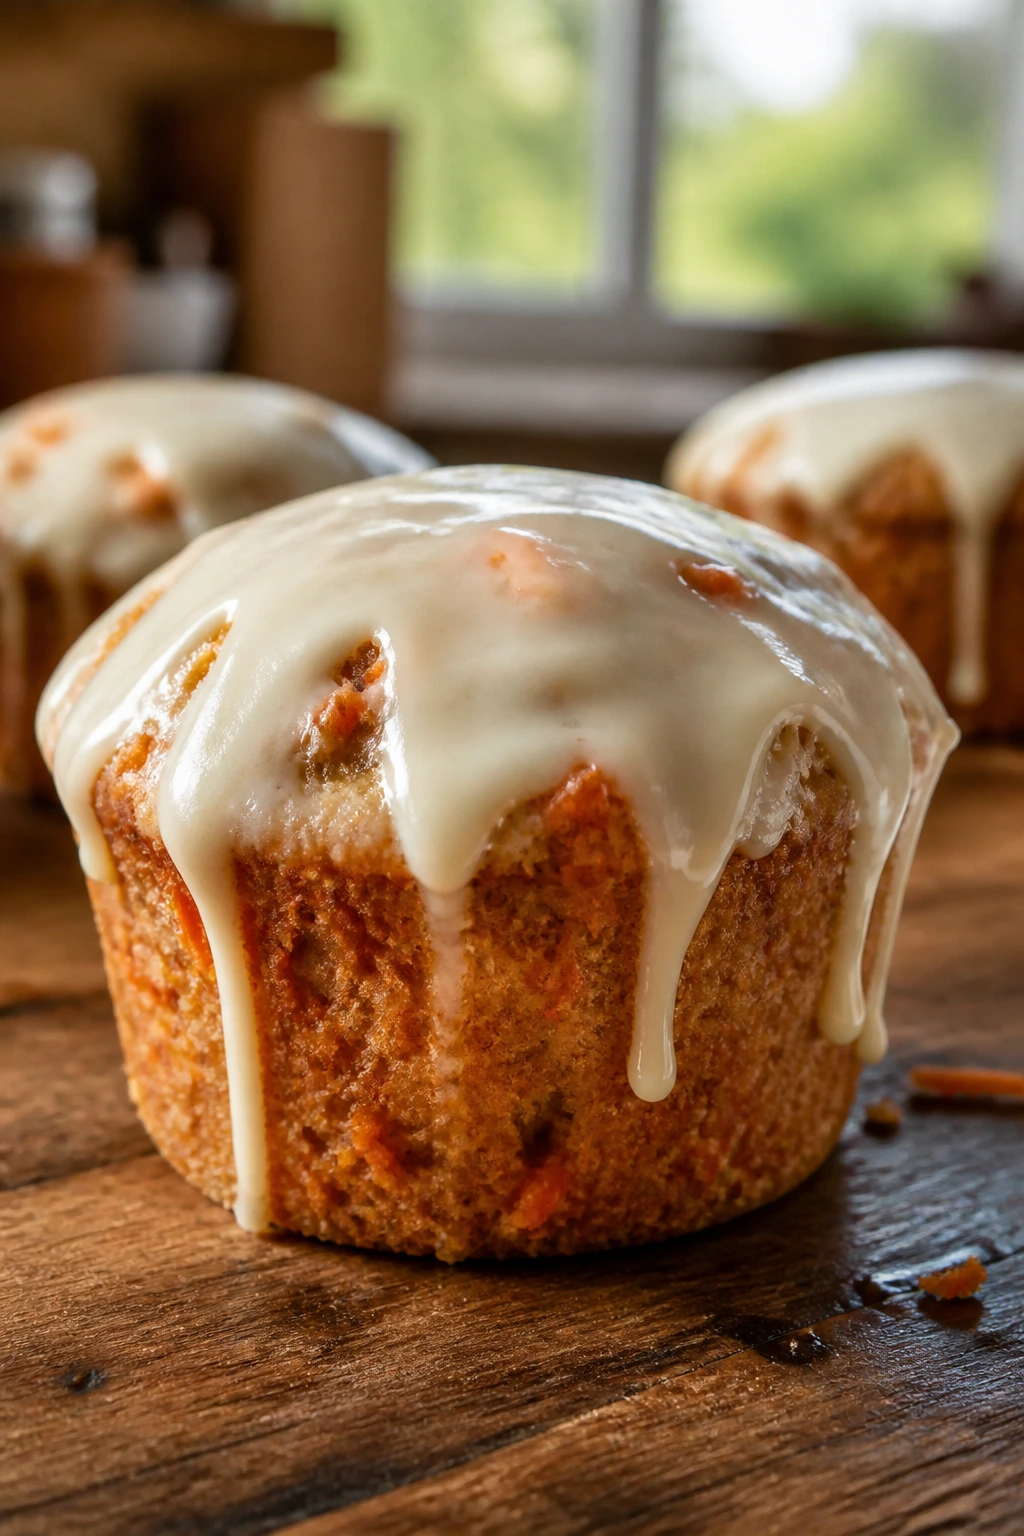
Carrot cake in muffin form solves a real problem: you get the spice and tenderness without having to slice a layer cake. These muffins stay moist because the carrots, sour cream, and oil all work together, and the glaze seals the top with a cool tang. They’re the sort of bake that tastes even better after a night in the fridge.
Why It Works:
Grated carrot keeps the crumb soft, and the coconut flour absorbs just enough liquid to prevent sogginess. The spice blend gives the batter enough character that you don’t miss the sugar. Cream cheese glaze on top adds moisture instead of drying out like a dry frosting can.
Key Ingredients:
- 1 1/2 cups almond flour
- 1/3 cup coconut flour
- 1 teaspoon baking powder
- 1 teaspoon cinnamon
- 1/4 teaspoon nutmeg
- 1/2 teaspoon salt
- 3 large eggs
- 1/2 cup finely grated carrot
- 1/3 cup melted coconut oil or butter
- 1/2 cup allulose
- 1/4 cup sour cream
- 1 teaspoon vanilla extract
- 1/3 cup chopped walnuts, optional
- 4 oz cream cheese, for glaze
- 2 tablespoons powdered allulose, for glaze
- 1 to 2 tablespoons heavy cream, for glaze
Quick Steps:
- Preheat the oven to 350°F (175°C) and line a 12-cup muffin tin.
- Whisk the dry ingredients together in one bowl.
- Beat the eggs, carrot, oil, allulose, sour cream, and vanilla in another bowl.
- Stir the dry mixture into the wet mixture, then fold in walnuts if using.
- Divide into muffin cups and bake for 18 to 22 minutes until a toothpick comes out with a few crumbs.
- Cool completely, then drizzle with cream cheese glaze.
Equipment for This Recipe:
- Muffin tin
- Paper liners
- Mixing bowls
- Box grater or food processor
- Small bowl for glaze
How to Serve This Dish:
These are good at room temperature or chilled, which makes them useful for breakfast-like dessert situations. Serve one muffin with a spoonful of extra glaze and a few chopped walnuts on the side. They hold together well enough for a napkin, but not so dry that you need one.
Pro Tips for This Recipe:
- Grate the carrot finely so it disappears into the crumb.
- Let the muffins cool before glazing or the icing slides off.
- Use fresh cinnamon; stale spice flattens the whole batch.
Variations on This Dish:
- Raisin-Free “Classic” Style: Keep it plain and add extra cinnamon instead of dried fruit.
- Pineapple Note: Add 1 tablespoon finely chopped unsweetened dried pineapple for a sharper flavor, if it fits your carb target.
- Pecan Top: Press a pecan half into each muffin before baking.
Common Mistakes to Avoid with This Dish:
- Using coarse carrot shreds: Big pieces can make the muffins break apart.
- Overmixing the batter: That toughens the crumb.
- Applying glaze while warm: It gets thin and drippy fast.
13. Blueberry Yogurt Loaf
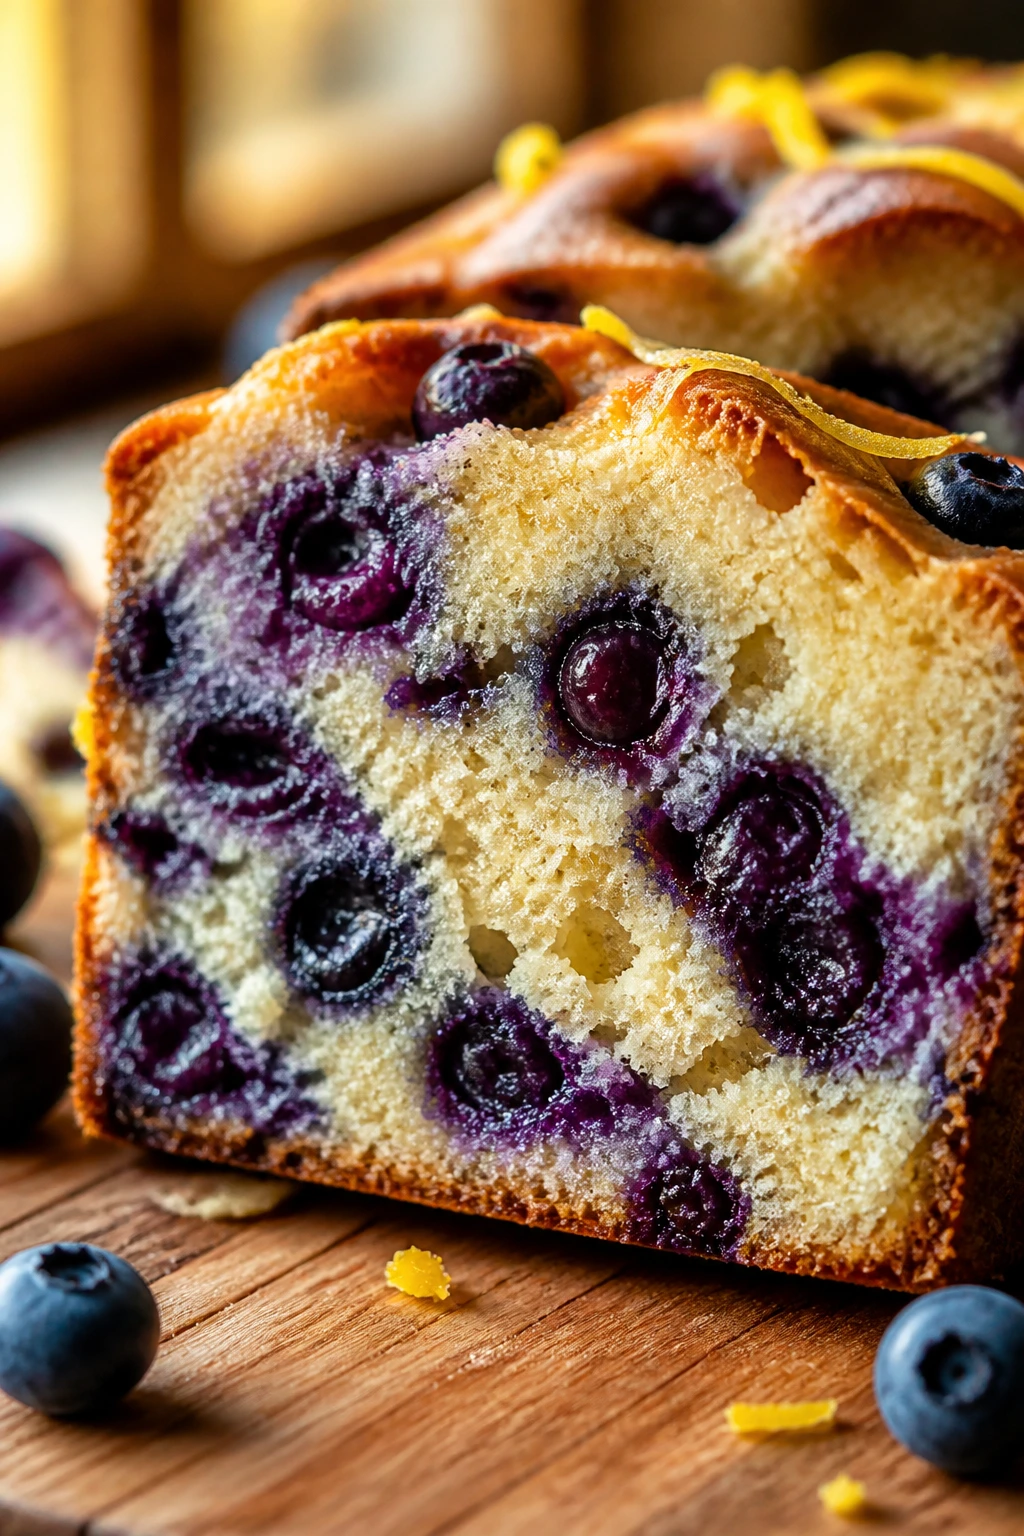
A good loaf cake should slice cleanly, smell like butter and vanilla, and still feel soft the next morning. This one does all three. The blueberries burst into little purple pockets, the yogurt keeps the crumb tender, and the lemon zest wakes the whole thing up without making it sour.
Why It Works:
Full-fat Greek yogurt brings moisture and a gentle tang, which is exactly what almond flour needs to avoid tasting heavy. Blueberries soften into the loaf instead of drying out the edges. A moderate bake and a slow cool-down keep the slices neat.
Key Ingredients:
- 2 cups almond flour
- 1/4 cup coconut flour
- 1 teaspoon baking powder
- 1/2 teaspoon salt
- 3 large eggs
- 1/2 cup full-fat Greek yogurt
- 1/3 cup melted butter
- 2/3 cup allulose
- 1 teaspoon vanilla extract
- Zest of 1 lemon
- 1 cup blueberries, tossed with 1 tablespoon almond flour
Quick Steps:
- Preheat the oven to 350°F (175°C) and line a 9×5-inch loaf pan.
- Whisk the almond flour, coconut flour, baking powder, and salt.
- Beat the eggs, yogurt, butter, allulose, vanilla, and lemon zest until smooth.
- Fold the dry ingredients into the wet batter, then gently stir in the blueberries.
- Bake for 45 to 55 minutes until the top is golden and a toothpick comes out mostly clean.
- Cool in the pan for 20 minutes, then lift out and cool fully before slicing.
Equipment for This Recipe:
- 9×5-inch loaf pan
- Parchment paper
- Mixing bowls
- Whisk and spatula
- Cooling rack
How to Serve This Dish:
Serve thick slices with butter or a thin smear of cream cheese. The loaf is sweet enough to stand alone, but not so sweet that it fights with coffee. A chilled slice from the fridge has a firmer, cake-like bite.
Pro Tips for This Recipe:
- Toss the berries in almond flour so they don’t sink.
- Tent loosely with foil if the top browns before the center sets.
- Slice only after the loaf is fully cool; warm slices can crumble.
Variations on This Dish:
- Lemon-Heavy Version: Double the lemon zest.
- Raspberry Swap: Use raspberries instead of blueberries for a sharper finish.
- Vanilla Bean Loaf: Add the seeds from half a vanilla bean if you want a more fragrant crumb.
Common Mistakes to Avoid with This Dish:
- Underbaking the center: The loaf should be set, not gooey in the middle.
- Skipping the berry flour toss: Without it, the fruit sinks and leaves wet pockets.
- Cutting too soon: A hot loaf falls apart easily.
14. Spiced Pumpkin Whoopie Pies
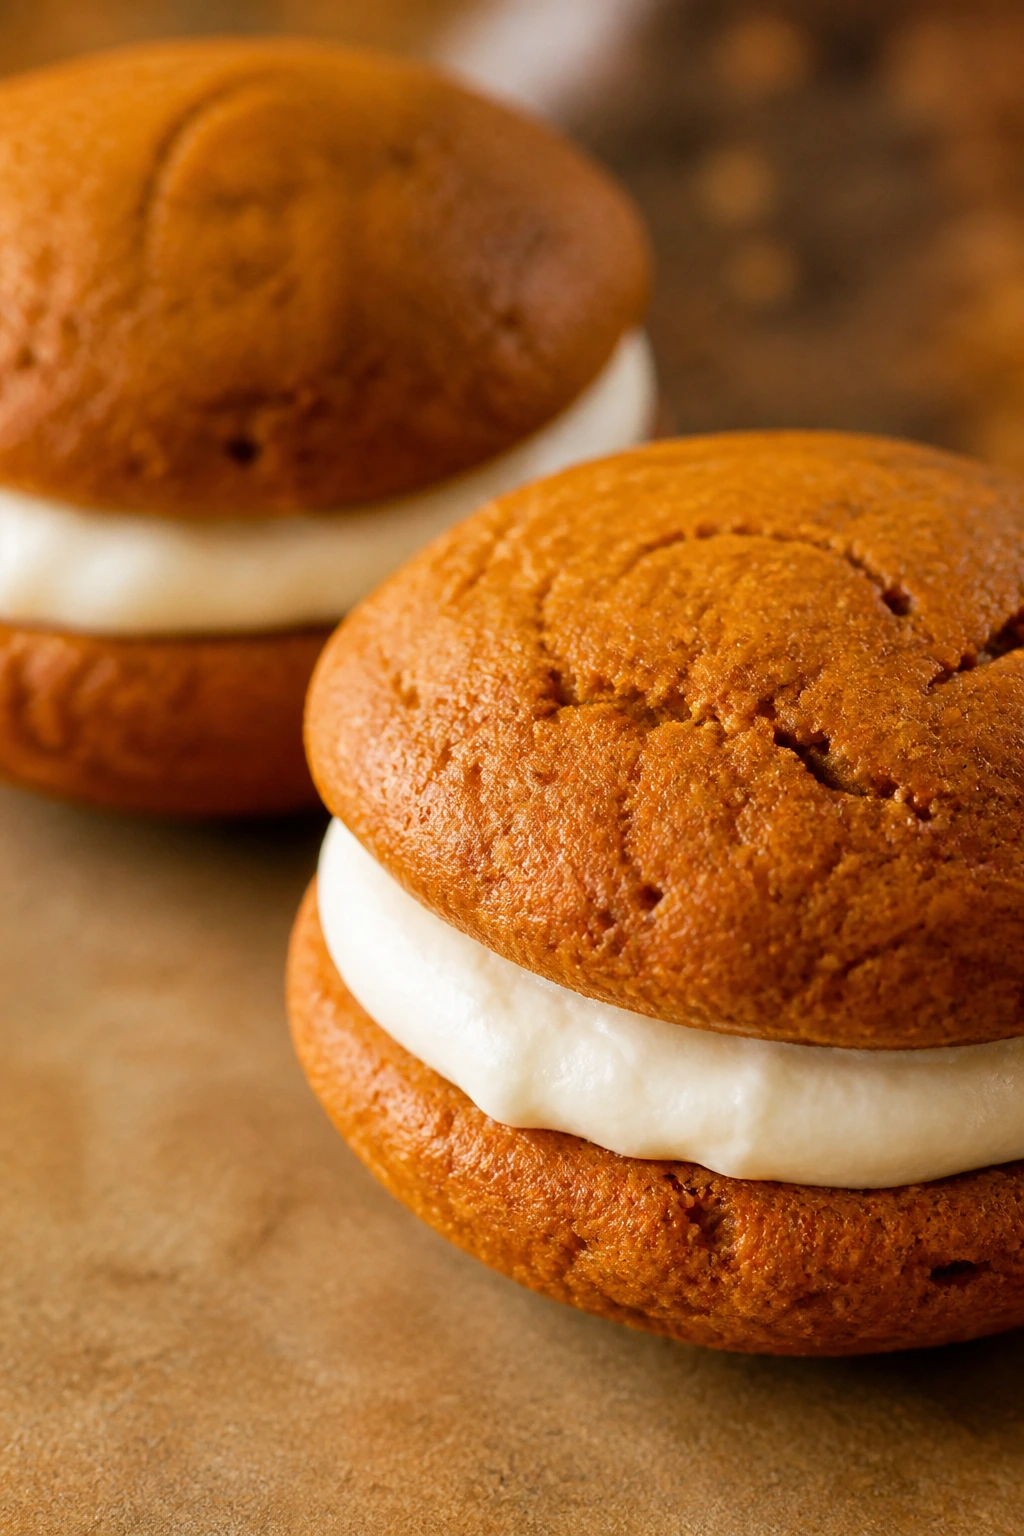
Whoopie pies are a soft-bake problem worth solving. Two pillowy cakes with a cream cheese filling in the middle give you a dessert that stays tender even after refrigeration. These are warm with spice, soft in the center, and a little messy in the best possible way.
Why It Works:
Pumpkin puree holds moisture, almond flour gives body, and coconut flour keeps the cake from spreading into flat rounds. The filling adds sweetness and fat, which helps the sandwich soften even more after it rests. They improve overnight, which is a nice quality for cookie-like desserts.
Key Ingredients:
- 1 cup almond flour
- 1/2 cup coconut flour
- 1 teaspoon baking powder
- 1 teaspoon cinnamon
- 1/2 teaspoon ground ginger
- 1/4 teaspoon ground cloves
- 1/2 teaspoon salt
- 3/4 cup pumpkin puree
- 3 large eggs
- 1/2 cup allulose
- 1/4 cup melted butter
- 1 teaspoon vanilla extract
- 6 oz cream cheese, for filling
- 3 tablespoons butter, for filling
- 1/2 cup powdered allulose, for filling
- 1 teaspoon vanilla, for filling
Quick Steps:
- Preheat the oven to 350°F (175°C) and line two sheet pans with parchment.
- Whisk the dry ingredients together.
- Mix the pumpkin, eggs, allulose, butter, and vanilla until smooth.
- Stir the dry ingredients into the wet mixture until you get a thick batter.
- Scoop tablespoon-sized mounds and bake for 10 to 12 minutes until set.
- Cool completely, then sandwich with the filling.
Equipment for This Recipe:
- Sheet pans
- Parchment paper
- Mixing bowls
- Cookie scoop
- Hand mixer for filling
How to Serve This Dish:
They’re best chilled long enough for the filling to firm up. Serve them as two-bite desserts, because the filling makes them rich fast. A dusting of cinnamon on top is enough.
Pro Tips for This Recipe:
- Keep the mounds small; giant whoopie pies spread awkwardly.
- Let the cakes cool fully before filling.
- If the batter feels too loose, let it sit for 5 minutes so the coconut flour absorbs moisture.
Variations on This Dish:
- Maple Spice: Add a few drops of maple extract to the filling.
- Chocolate Pumpkin: Stir 2 tablespoons cocoa into the batter and reduce almond flour slightly.
- Nutty Sandwich: Add chopped pecans to the filling for texture.
Common Mistakes to Avoid with This Dish:
- Making the cakes too large: They won’t bake evenly.
- Using warm filling: It turns slippery fast.
- Overbaking: You want soft cakes, not dry discs.
15. Strawberry Cheesecake Mousse Cups
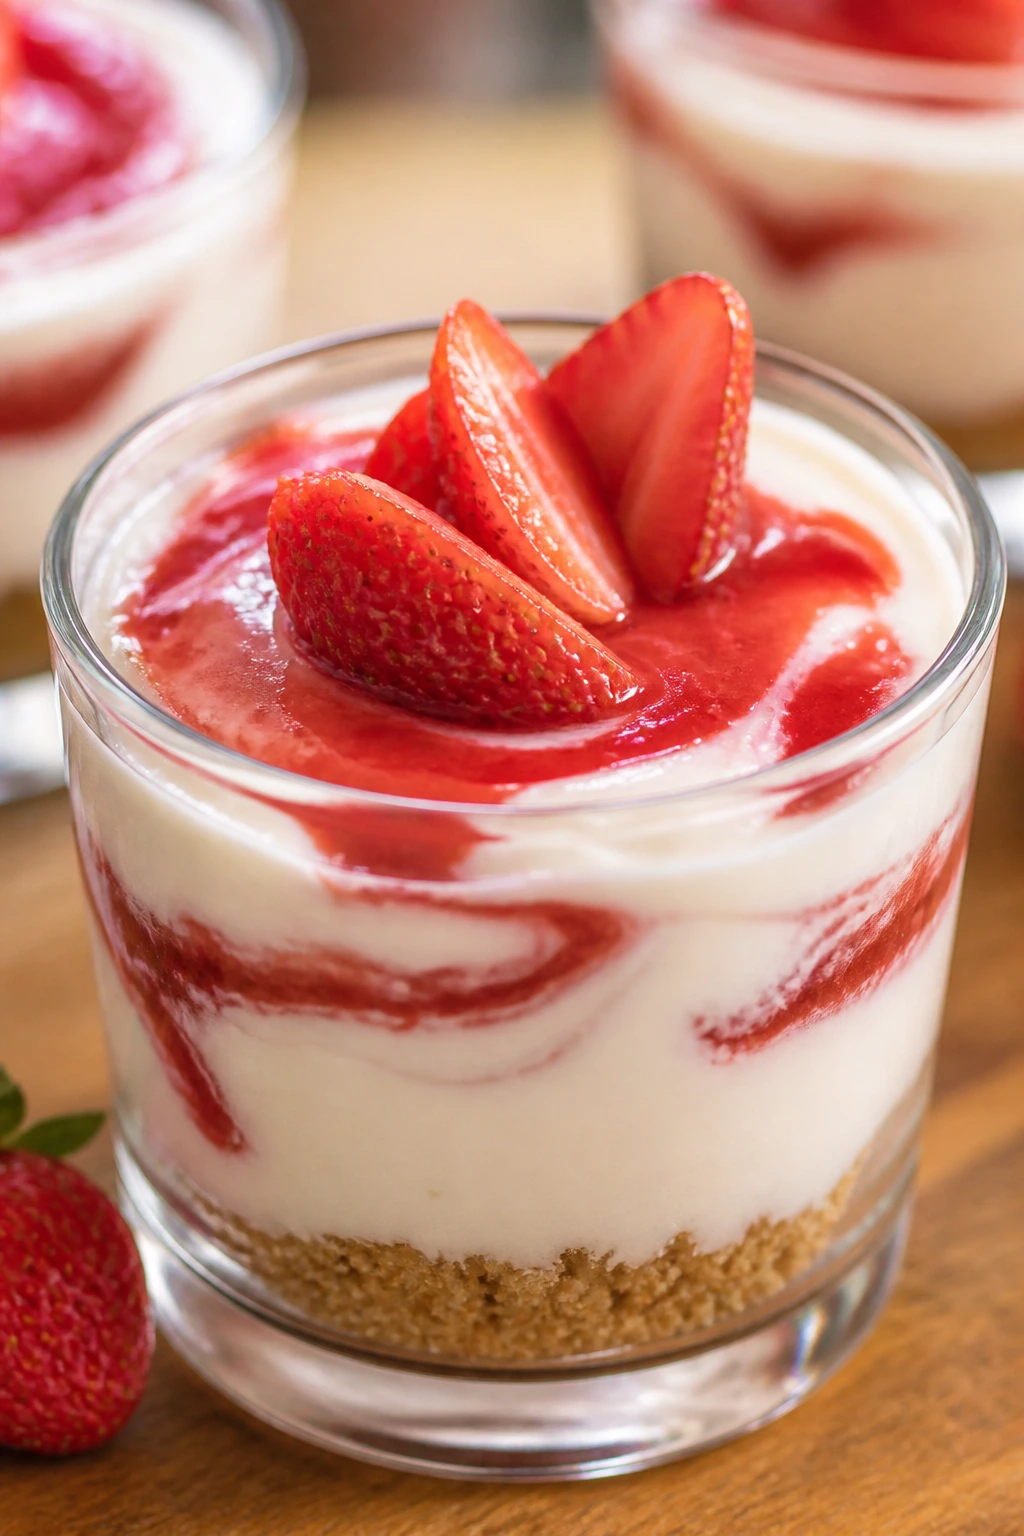
Some desserts are more about spooning than slicing, and that’s a good thing. These mousse cups are cool, creamy, and almost blank until the strawberry hits them, which is exactly why they work. They stay soft because nothing here is fighting to set into a hard structure.
Why It Works:
Mascarpone or cream cheese gives the mousse body, heavy cream gives it air, and strawberry puree keeps the flavor bright. A tiny crust layer is optional, but nice if you want crunch under the cream. Since there’s no baking beyond a short crust toast, the texture stays plush for days.
Key Ingredients:
- 8 oz cream cheese, softened
- 1 cup heavy cream
- 1/2 cup powdered allulose
- 1 teaspoon vanilla extract
- 1/2 cup strawberry puree
- 1 tablespoon lemon juice
- Pinch of salt
- 1 cup almond flour, optional crust
- 3 tablespoons melted butter, optional crust
- 2 tablespoons allulose, optional crust
Quick Steps:
- If using crust, preheat the oven to 350°F (175°C) and bake the almond flour crust mixture in small jars or a shallow dish for 8 minutes.
- Beat the cream cheese, allulose, vanilla, lemon juice, and salt until smooth.
- Whip the heavy cream to soft peaks.
- Fold the whipped cream into the cream cheese mixture, then swirl in the strawberry puree.
- Spoon into cups or jars and chill for 2 hours.
- Top with a little extra berry puree before serving.
Equipment for This Recipe:
- Hand mixer
- Mixing bowl
- Small jars or dessert cups
- Spatula
- Optional piping bag for neat layering
How to Serve This Dish:
Serve them cold with a spoon and a few sliced strawberries on top. The best version has a clear pink-and-white layer contrast, but it still tastes right if you just dollop it in. Small jars are enough; these are rich.
Pro Tips for This Recipe:
- Whip the cream only to soft peaks so the mousse stays smooth.
- Strain the strawberry puree if the seeds bother you.
- Chill at least 2 hours; the texture gets better, not worse.
Variations on This Dish:
- Raspberry Mousse Cups: Swap strawberry puree for raspberry puree.
- Chocolate Swirl: Fold in 2 tablespoons cocoa to part of the cream mixture.
- Lime Berry Cup: Add lime zest for a sharper edge.
Common Mistakes to Avoid with This Dish:
- Overwhipping the cream: It turns grainy and heavy.
- Using watery puree: Thin fruit makes the mousse loose.
- Serving too soon: The cups need chill time to set.
16. Pecan Pie Cheesecake Bars
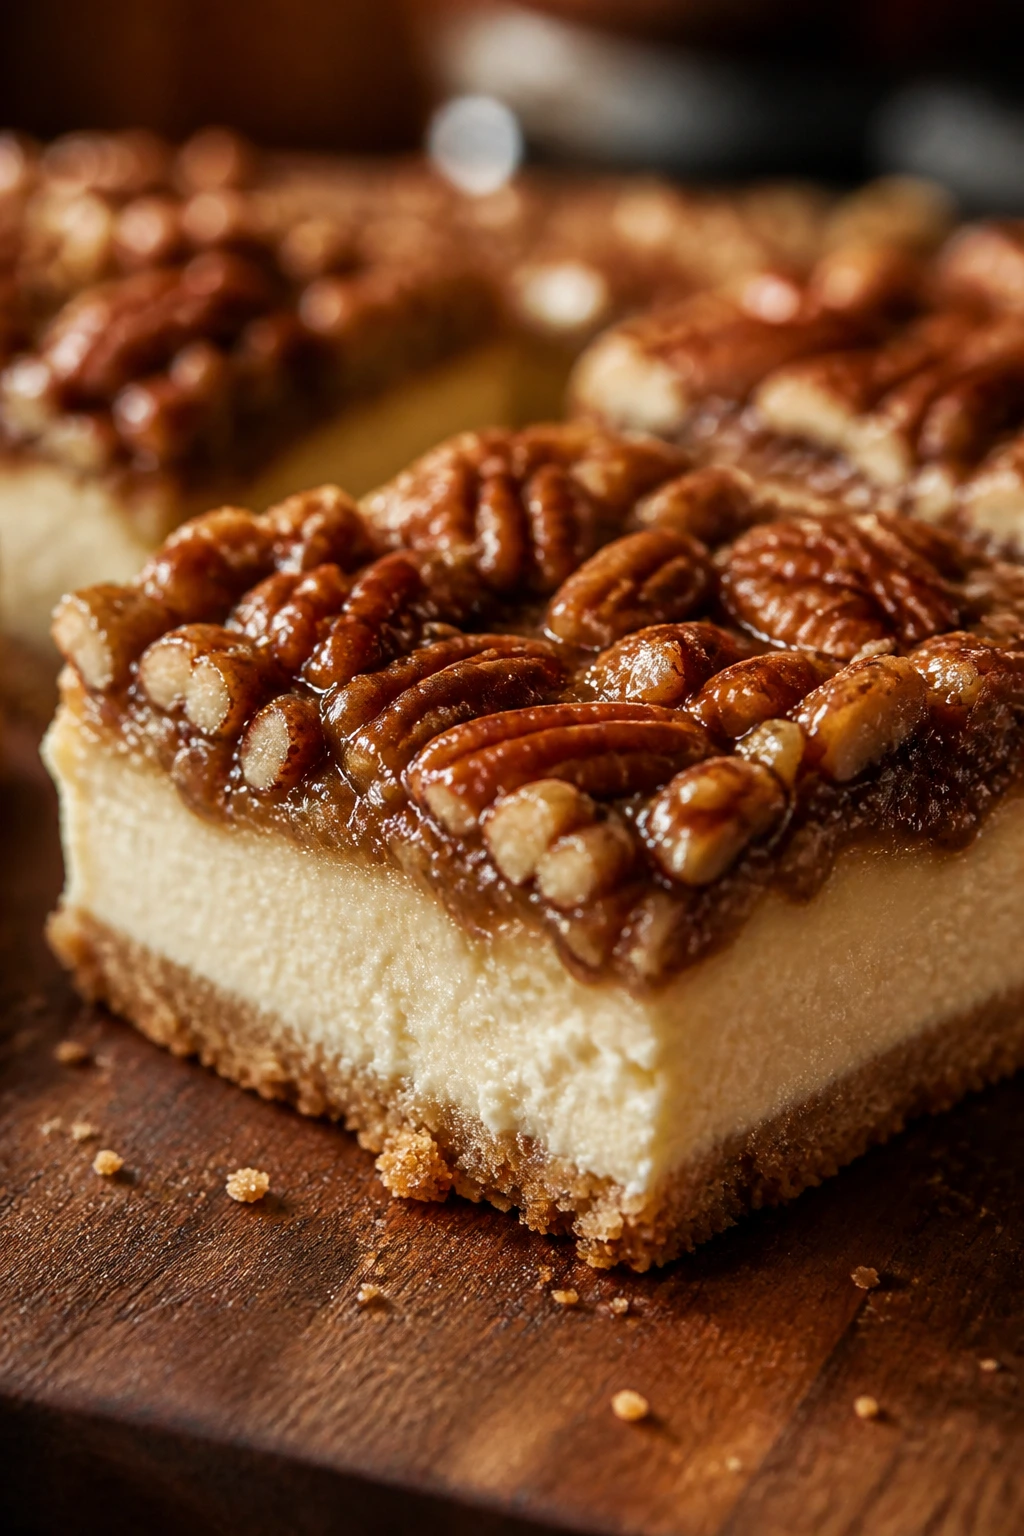
Pecan pie filling can go sticky and hard if it’s overcooked, but this version leans softer and more forgiving. The cheesecake base keeps everything creamy, the pecans toast in the topping, and the result is rich enough that a small square feels complete. It’s holiday-style dessert energy without the sugar crash.
Why It Works:
A cheesecake layer gives the bars a tender middle, while a short almond flour crust holds the structure. The pecan topping is cooked just enough to coat the nuts without turning into brittle candy. That keeps the bars soft even after they’ve chilled.
Key Ingredients:
- 1 1/2 cups almond flour
- 1/4 cup melted butter
- 2 tablespoons allulose
- Pinch of salt
- 16 oz cream cheese, softened
- 1/2 cup sour cream
- 2 large eggs
- 3/4 cup allulose
- 1 teaspoon vanilla extract
- 1 1/2 cups chopped pecans
- 1/4 cup butter
- 1/3 cup allulose
- 2 tablespoons heavy cream
- 1 teaspoon cinnamon
- Pinch of salt
Quick Steps:
- Preheat the oven to 325°F (163°C) and line a 9×9-inch pan.
- Mix and press the crust into the pan, then bake for 10 minutes.
- Beat the cheesecake layer ingredients until smooth and spread over the crust.
- Bake for 15 minutes while you make the pecan topping.
- Simmer the topping ingredients until glossy and lightly thickened, about 3 to 4 minutes, then spoon over the cheesecake layer.
- Bake for 8 to 10 minutes more, then chill for at least 4 hours.
Equipment for This Recipe:
- 9×9-inch pan
- Parchment paper
- Saucepan
- Hand mixer
- Mixing bowls
How to Serve This Dish:
Cut into small bars because the topping is rich. A little whipped cream on the side is enough if you want garnish. They’re best cold, with the pecan layer slightly sticky but not hard.
Pro Tips for This Recipe:
- Don’t overcook the pecan topping before it goes on the bars.
- Chill fully before slicing or the layers will slide.
- Use chopped pecans, not whole halves, for easier cutting.
Variations on This Dish:
- Chocolate Pecan Cut: Add a thin layer of melted sugar-free chocolate under the cheesecake.
- Orange Pecan: Add orange zest to the cheesecake layer.
- Salted Caramel Pecan: Finish with a light drizzle of sugar-free caramel.
Common Mistakes to Avoid with This Dish:
- Making the pecan topping too hard: It should coat the nuts, not turn brittle.
- Skipping the chill: The cheesecake layer needs time to set.
- Cutting with a dull knife: You’ll drag the topping across the bars.
17. Matcha Coconut Snack Cake
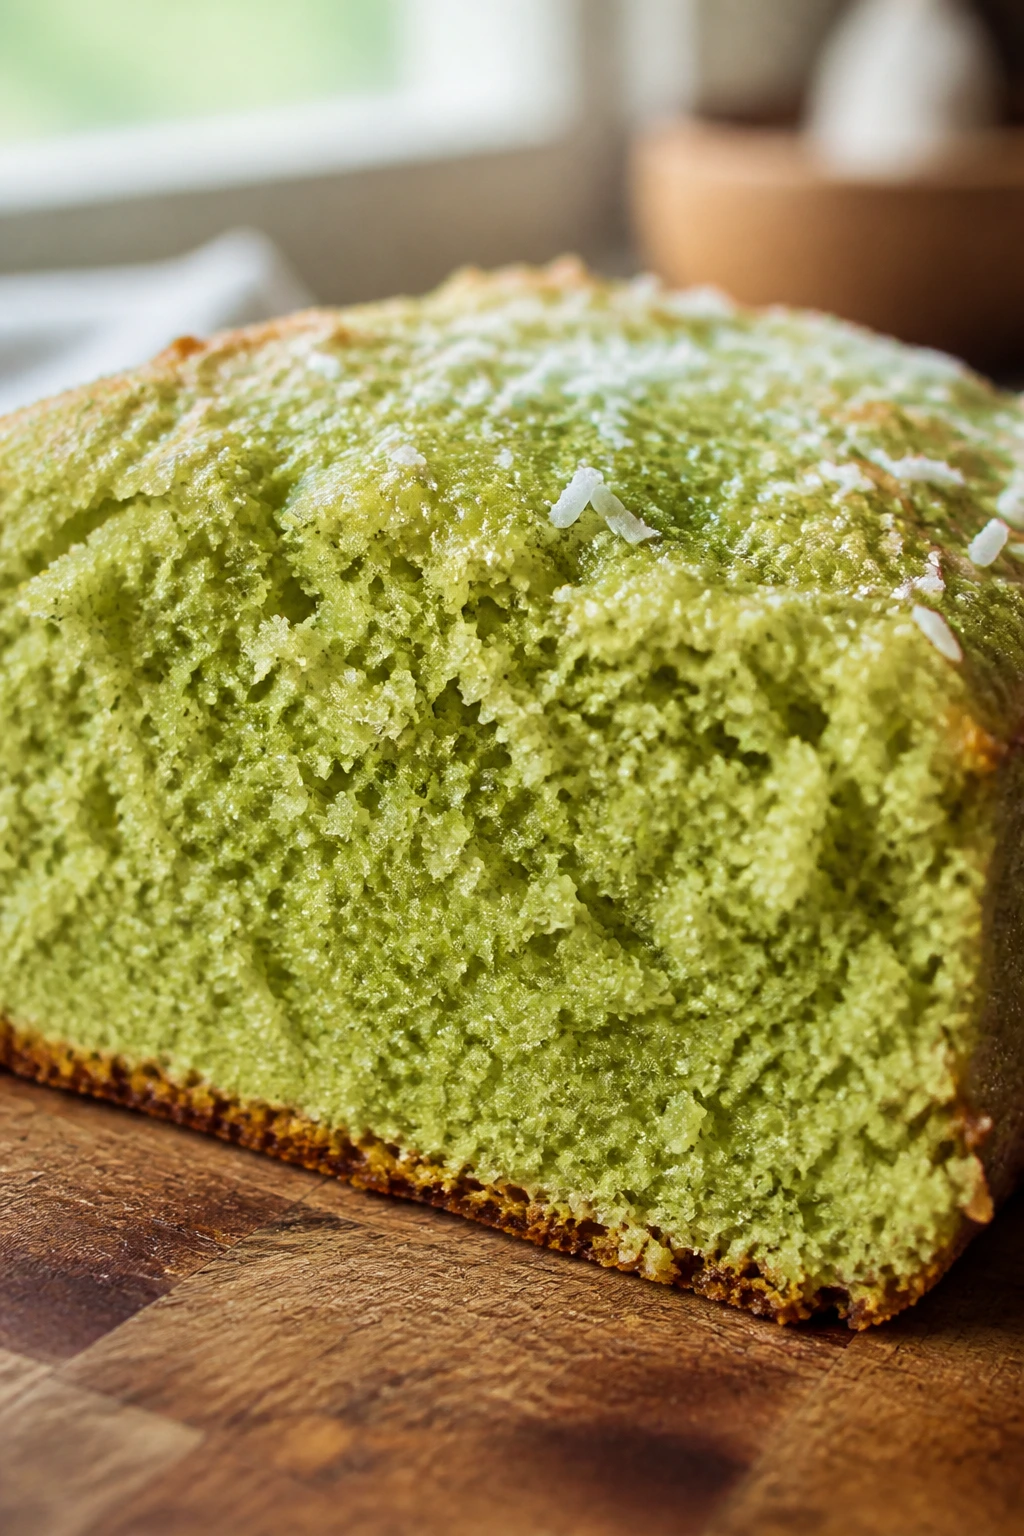
Matcha can taste grassy in the wrong hands, but here it lands as something creamy and slightly earthy, like the green edge of a good latte. The coconut adds sweetness, the sour cream keeps the crumb moist, and the cake slices cleanly enough to pack away for later. It’s softer than it looks, which is the nicest surprise a snack cake can give.
Why It Works:
Matcha needs fat to round out its sharpness, and this batter gives it plenty through butter and sour cream. Almond flour and a touch of coconut flour build a tender crumb that doesn’t collapse. The cake stays soft because it’s baked in a shallow layer and cooled completely before slicing.
Key Ingredients:
- 1 1/2 cups almond flour
- 1/4 cup coconut flour
- 1 tablespoon matcha powder
- 1 teaspoon baking powder
- 1/2 teaspoon salt
- 3 large eggs
- 1/2 cup sour cream
- 1/3 cup melted butter
- 2/3 cup allulose
- 1 teaspoon vanilla extract
- 1/2 cup unsweetened shredded coconut, optional topping
Quick Steps:
- Preheat the oven to 350°F (175°C) and line an 8×8-inch pan.
- Whisk the dry ingredients together, breaking up any matcha clumps.
- Beat the eggs, sour cream, butter, allulose, and vanilla until smooth.
- Fold the dry ingredients into the wet mixture and spread into the pan.
- Sprinkle coconut on top if using and bake for 25 to 30 minutes until the center springs back lightly.
- Cool fully before cutting.
Equipment for This Recipe:
- 8×8-inch pan
- Parchment paper
- Whisk
- Spatula
- Fine sieve, if your matcha clumps easily
How to Serve This Dish:
Serve with whipped cream and a few raspberries if you want contrast. The cake is subtle, so a thin glaze or a dusting of powdered allulose can help if you prefer a sweeter finish. One square goes a long way.
Pro Tips for This Recipe:
- Sift the matcha if it’s lumpy.
- Use good matcha; weak powder tastes flat and dusty.
- Don’t overbake or the coconut flour will dry the edges.
Variations on This Dish:
- Citrus Matcha: Add lime zest to sharpen the flavor.
- Chocolate Drizzle: Top cooled slices with melted sugar-free dark chocolate.
- Toasted Coconut Top: Toast the coconut first for a deeper flavor.
Common Mistakes to Avoid with This Dish:
- Using too much matcha: It turns bitter fast.
- Baking until firm all the way through: The crumb should stay soft.
- Skipping the clump check: Matcha lumps show up as green specks in the slice.
18. Tiramisu Chia Pudding Jars
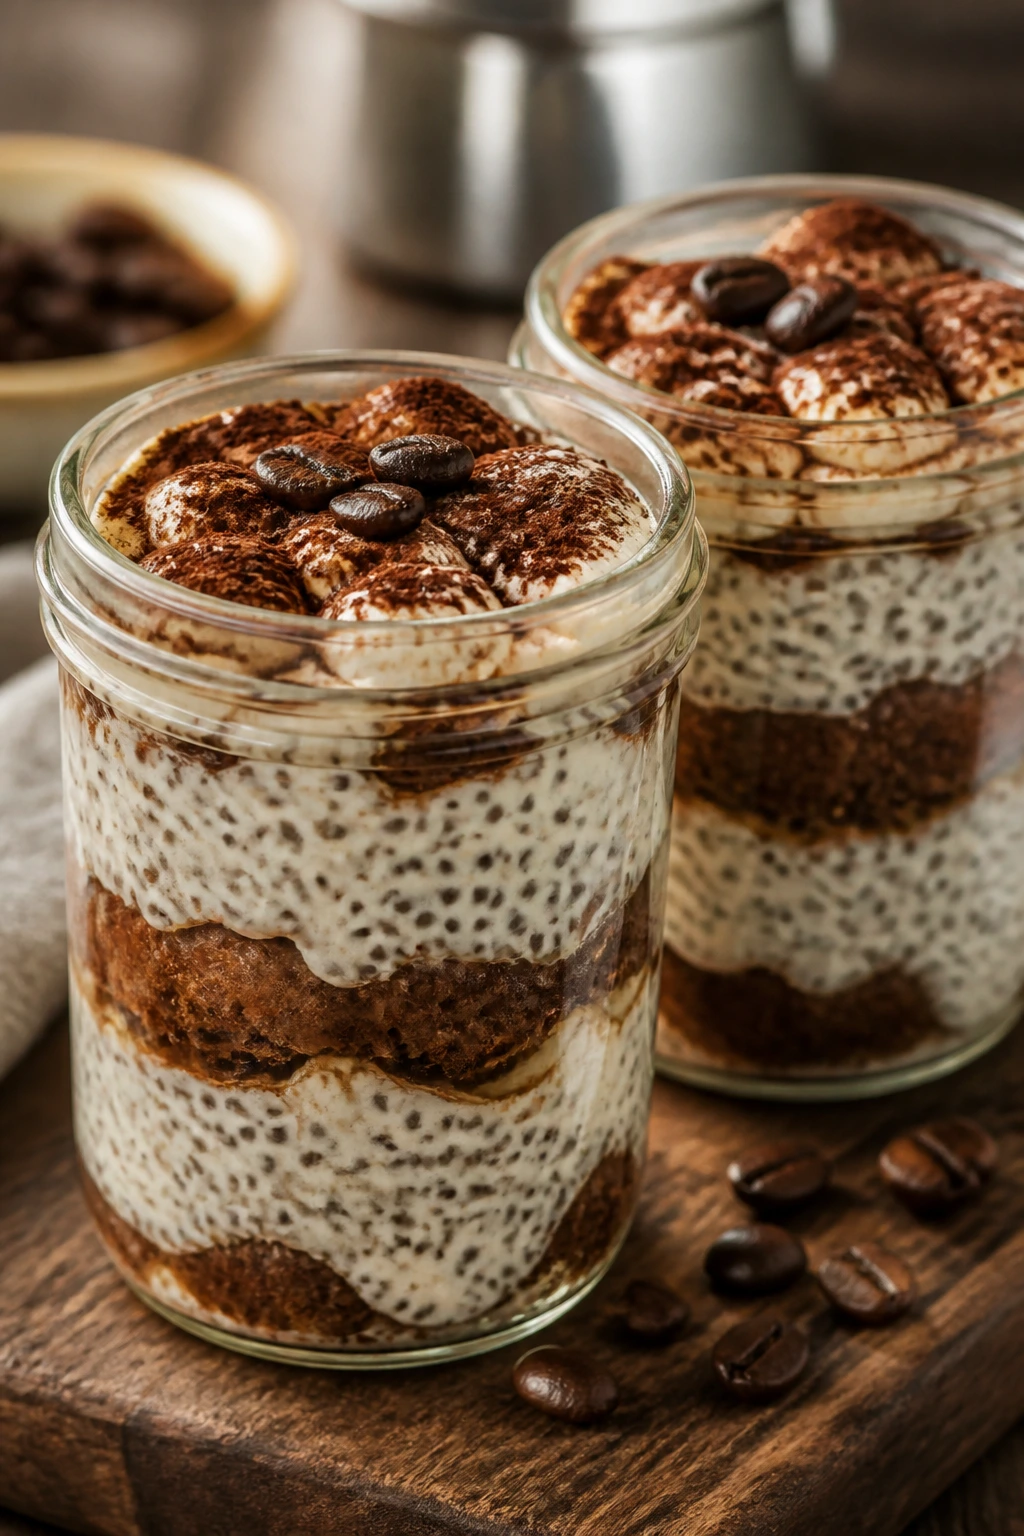
This is the lazy-gorgeous dessert in the group, and I mean that as praise. You get coffee, cream, vanilla, and cocoa layered in a jar, and the chia seeds thicken it into a spoonable pudding that stays soft for days. It scratches the tiramisu itch without a ladyfinger in sight.
Why It Works:
Chia seeds hold liquid instead of drying it out, which makes them a natural fit for make-ahead keto desserts. Espresso and mascarpone bring the tiramisu flavor, while heavy cream keeps the texture lush. The pudding gets better after a long chill because the chia softens fully.
Key Ingredients:
- 1/3 cup chia seeds
- 1 1/2 cups unsweetened almond milk
- 1/2 cup heavy cream
- 1/4 cup cooled espresso
- 1/3 cup powdered allulose
- 1 teaspoon vanilla extract
- 1/4 teaspoon salt
- 8 oz mascarpone
- 1/2 cup heavy cream, for the mascarpone layer
- 2 tablespoons powdered allulose, for the mascarpone layer
- Unsweetened cocoa powder, for dusting
Quick Steps:
- Whisk the chia seeds, almond milk, heavy cream, espresso, allulose, vanilla, and salt.
- Chill for 20 minutes, then whisk again to break up clumps.
- Refrigerate for at least 4 hours or overnight until thick.
- Beat the mascarpone, cream, and allulose until softly fluffy.
- Layer pudding and mascarpone into jars.
- Dust with cocoa just before serving.
Equipment for This Recipe:
- Mixing bowl
- Whisk
- Small jars
- Hand mixer
- Fine sieve for cocoa
How to Serve This Dish:
Serve cold, straight from the jar, with a spoon that can reach the bottom layers. The cocoa dusting should be light; too much looks muddy. Small jars are enough because the pudding is rich and filling.
Pro Tips for This Recipe:
- Whisk twice during the first 20 minutes so the chia distributes evenly.
- Use cooled coffee so the dairy doesn’t split.
- If you want a smoother pudding, blend the first mixture before chilling.
Variations on This Dish:
- Mocha Jar: Add 1 teaspoon cocoa to the pudding base.
- Vanilla Only: Skip the coffee and add extra vanilla for a softer flavor.
- Berry Layer: Add a few raspberries between the pudding and mascarpone.
Common Mistakes to Avoid with This Dish:
- Not stirring after the first chill: The seeds clump at the bottom.
- Adding warm espresso: It can thin the dairy.
- Dusting cocoa too early: The top looks muddy if it sits too long.
19. Dark Chocolate Peanut Butter Pie Cups
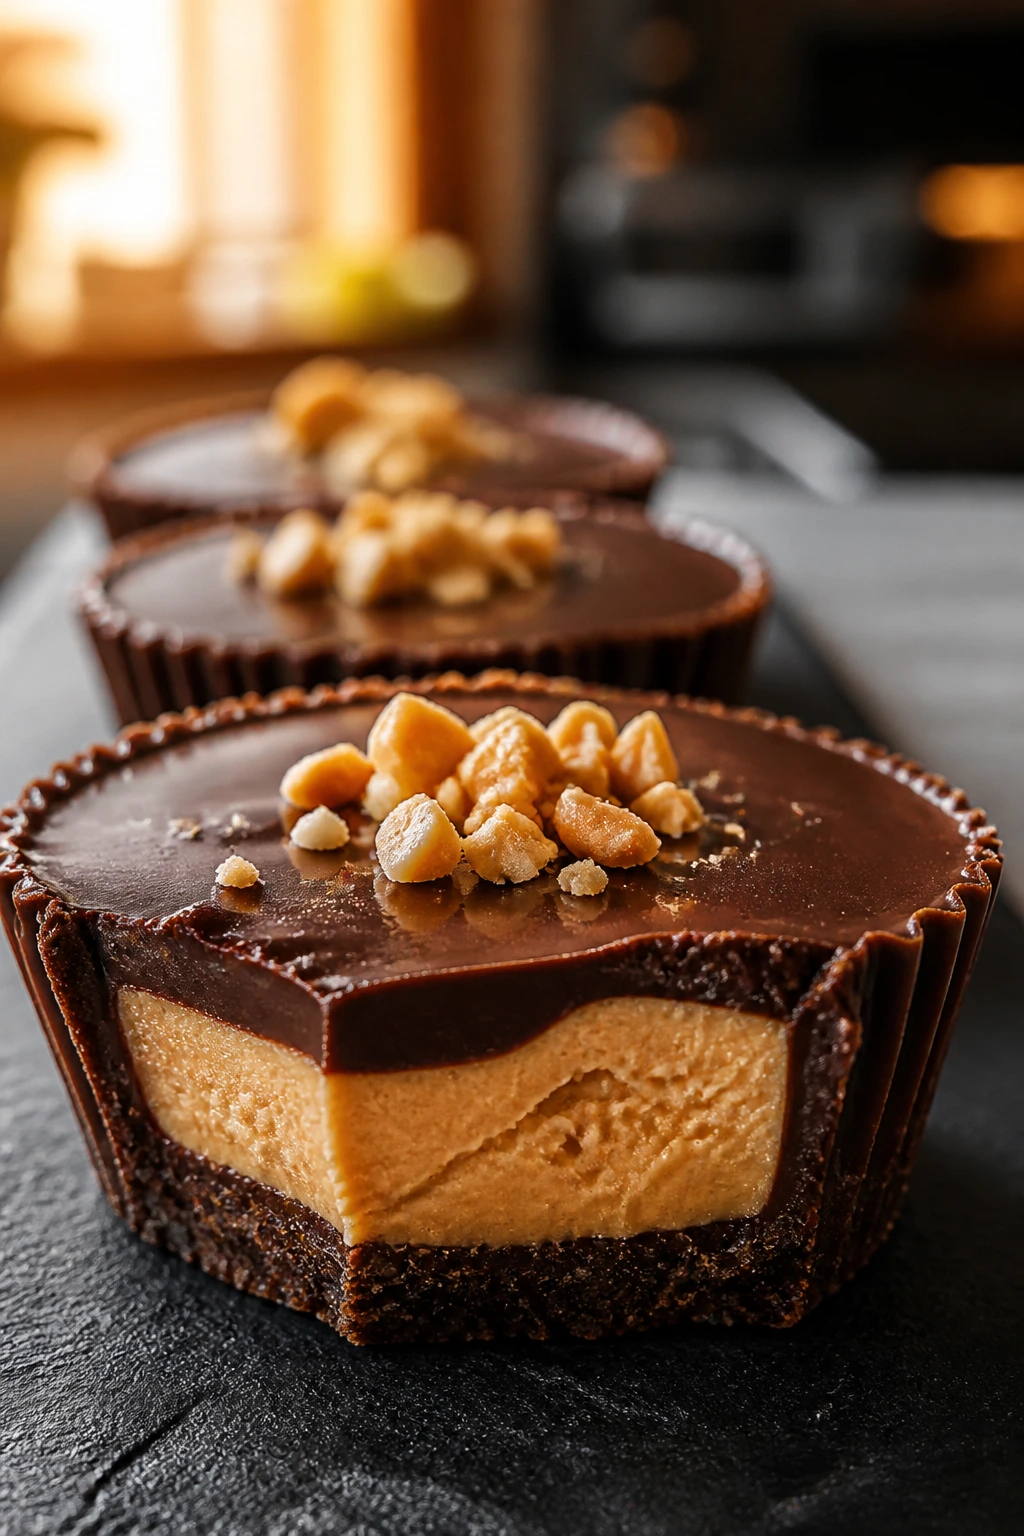
These pie cups are built for the person who wants creamy filling, a chocolate base, and no slicing drama. The peanut butter layer stays soft, the chocolate shell on top adds snap, and the almond flour crust keeps the bottoms from getting soggy. In the fridge, they taste like a cross between candy and cheesecake.
Why It Works:
Peanut butter and cream cheese make a filling that stays plush instead of airy, and the chilled ganache gives you a neat top layer. The crust uses just enough butter to hold together without turning brittle. Because the whole thing is cold-set, it doesn’t dry out the way baked pies can.
Key Ingredients:
- 1 cup almond flour
- 3 tablespoons melted butter
- 2 tablespoons cocoa powder
- 1 tablespoon allulose
- Pinch of salt
- 8 oz cream cheese, softened
- 1/2 cup peanut butter
- 1/2 cup heavy cream
- 1/3 cup powdered allulose
- 1 teaspoon vanilla extract
- 3 oz sugar-free dark chocolate
- 1/2 cup heavy cream, for ganache
Quick Steps:
- Mix the crust ingredients and press into small jars or ramekins.
- Whip the cream cheese, peanut butter, heavy cream, allulose, and vanilla until smooth.
- Spoon the filling over the crusts and chill for 30 minutes.
- Heat the cream for the ganache until steaming, then pour it over the chocolate and stir until glossy.
- Spread the ganache over the filling.
- Chill for at least 2 hours before serving.
Equipment for This Recipe:
- Small jars or ramekins
- Mixing bowls
- Hand mixer
- Small saucepan or microwave-safe bowl
- Spoon or offset spatula
How to Serve This Dish:
Serve these cold with a few chopped peanuts or a tiny pinch of salt on top. They’re rich enough to pass for a bakery dessert without much dressing up. One jar is a full portion unless you’re going straight for seconds.
Pro Tips for This Recipe:
- Soften the cream cheese fully or the filling stays lumpy.
- Chill the crust before adding filling if it feels loose.
- Ganache spreads best when it’s warm but not hot.
Variations on This Dish:
- Chocolate Mint Cups: Add a tiny drop of peppermint extract to the filling.
- Salted Peanut Version: Finish with flaky salt and chopped peanuts.
- Almond Butter Swap: Use almond butter instead of peanut butter for a milder jar.
Common Mistakes to Avoid with This Dish:
- Overheating the ganache: It can split and turn oily.
- Using crunchy peanut butter: The filling won’t smooth out as well.
- Skipping the chill time: The layers need time to firm before serving.
20. Coconut Lime Pudding Cake
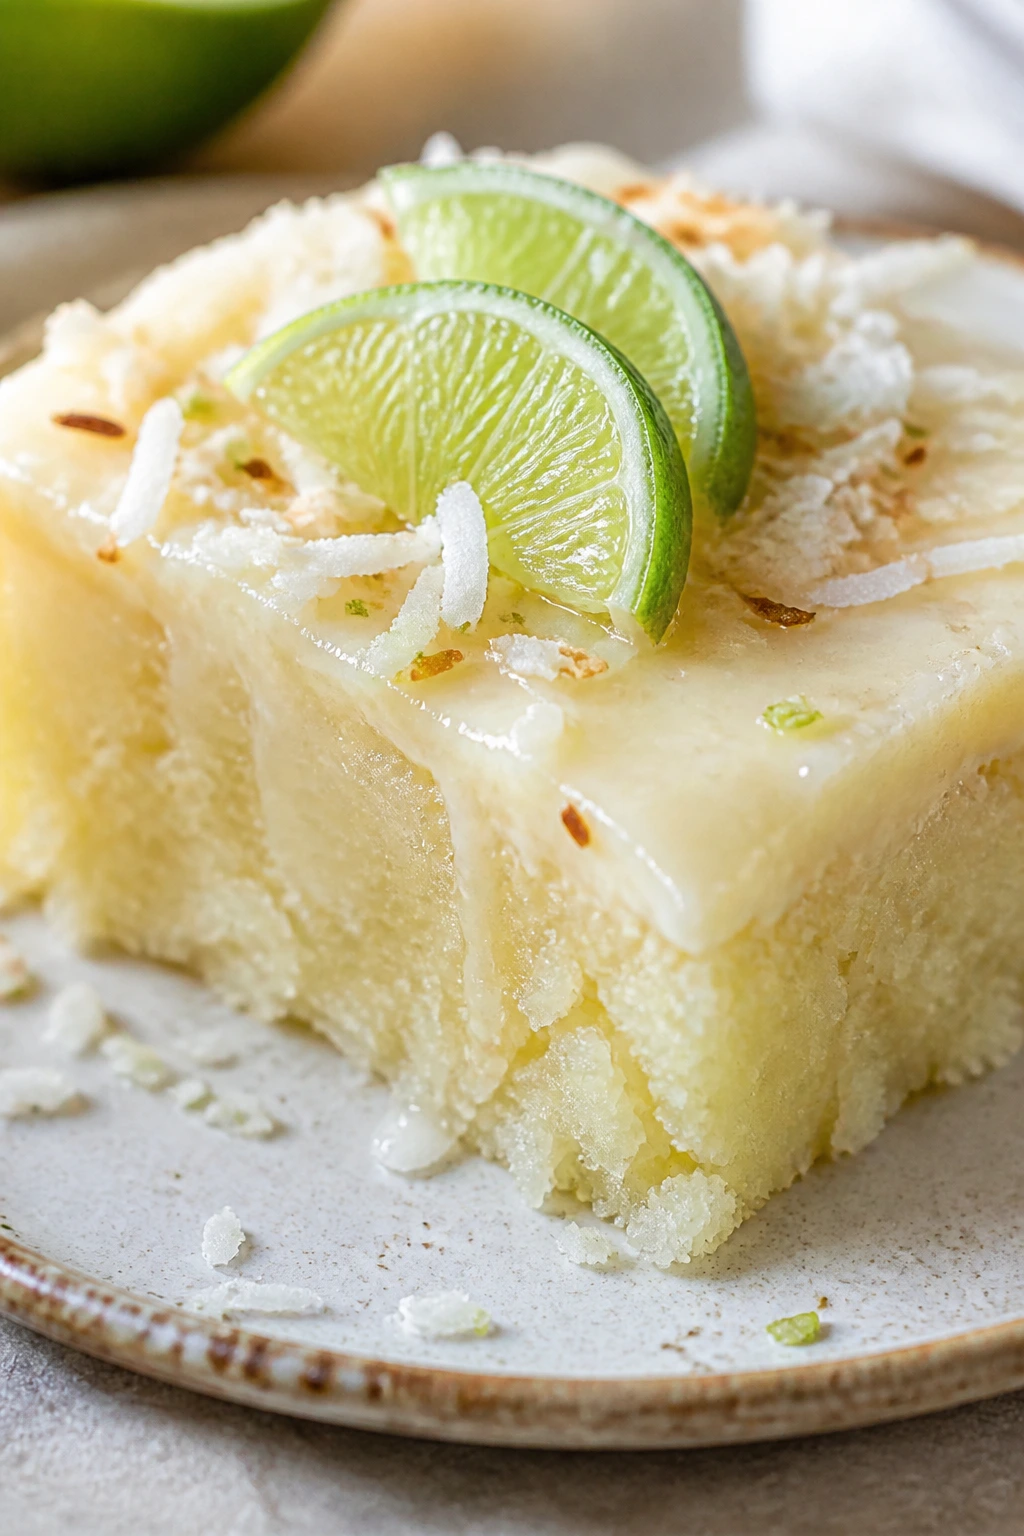
This one sits right on the line between cake and pudding, which is exactly why it stays soft for days. Coconut and lime give it a bright, tropical edge, while sour cream and butter keep the crumb tender. It slices cleanly after chilling, but the center stays supple and almost custardy.
Why It Works:
The batter uses a careful mix of almond flour and coconut flour so the cake sets without drying out. Lime juice and zest keep the flavor clean, and shredded coconut adds chew without making the crumb heavy. A light glaze on top locks in moisture while the cake cools.
Key Ingredients:
- 1/2 cup unsalted butter, softened
- 3 large eggs
- 2/3 cup allulose
- 1/2 cup sour cream
- 1/4 cup fresh lime juice
- Zest of 2 limes
- 1 cup almond flour
- 1/4 cup coconut flour
- 1 1/2 teaspoons baking powder
- Pinch of salt
- 1/2 cup unsweetened shredded coconut
- 1/4 cup powdered allulose, for glaze
- 2 tablespoons lime juice, for glaze
- 1 tablespoon heavy cream, for glaze
Quick Steps:
- Preheat the oven to 350°F (175°C) and line an 8×8-inch pan.
- Beat the butter and allulose until fluffy, then add the eggs one at a time.
- Mix in the sour cream, lime juice, and zest.
- Fold in the almond flour, coconut flour, baking powder, salt, and shredded coconut.
- Bake for 30 to 35 minutes until the top is set and the center gives only slightly.
- Cool fully, then drizzle with the glaze.
Equipment for This Recipe:
- 8×8-inch pan
- Parchment paper
- Hand mixer
- Zester or microplane
- Small bowl for glaze
How to Serve This Dish:
Serve it chilled or just barely cool, with a few extra curls of lime zest on top. A spoonful of whipped cream softens the lime and makes the texture feel even lighter. Cut modest squares; the cake is richer than it looks.
Pro Tips for This Recipe:
- Don’t overdo the lime juice or the batter can thin out.
- Let the cake cool before glazing so the topping doesn’t disappear.
- Coconut flour behaves fast; measure it lightly.
Variations on This Dish:
- Lemon Coconut Cake: Swap lime for lemon and keep the same ratios.
- Berry Glaze: Add a spoonful of berry puree to the glaze for color.
- Toasted Coconut Finish: Sprinkle toasted coconut on top after glazing.
Common Mistakes to Avoid with This Dish:
- Overbaking the pudding-style center: You want softness, not dryness.
- Packing the coconut flour: It can make the cake too dense.
- Glazing too early: The topping thins and runs off warm cake.
Why These Keto Desserts Work So Well
The real pattern across these keto dessert recipes is not fancy technique. It’s restraint. Short bakes. Enough fat. Enough moisture. Enough acid, coffee, citrus, or spice to keep the flavor awake. When low-carb baking gets bad, it usually gets bad because someone tried to make it behave like wheat flour baking. That road ends in dry crumbs and regret.
If you keep one principle in your pocket, make it this: pull the dessert a little earlier than your instinct says to. Bars can wobble. Cheesecake can jiggle. Cakes can spring back softly instead of bouncing hard. Once you get used to that softer finish, the fridge becomes your friend instead of the enemy. The texture settles in, the flavor deepens, and the dessert stops feeling like a compromise.
Essential Equipment for These Recipes
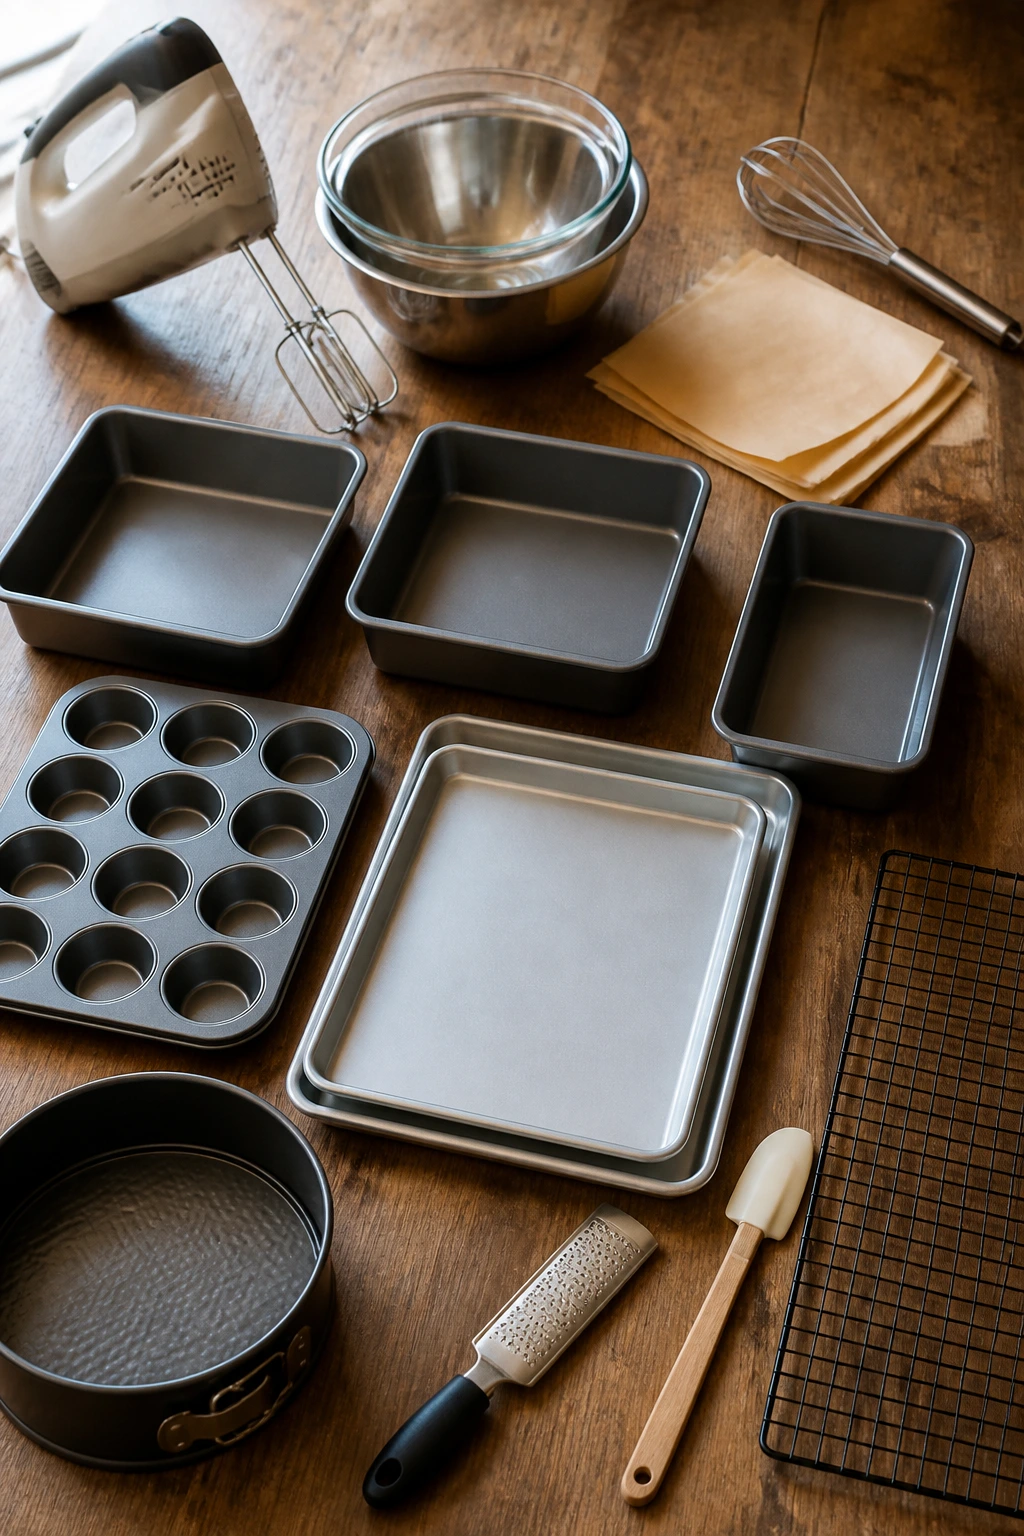
- 8×8-inch baking pan — The workhorse size for brownies, bars, and small cakes.
- 9×9-inch baking pan — Best for cheesecake bars and sheet-style desserts that need a little more surface area.
- Loaf pan — Useful for blueberry yogurt loaf and any cake you want to slice neatly.
- Muffin tin — Needed for cupcakes, muffins, and whoopie-style bakes.
- Sheet pans — Good for cookies, thumbprints, and sandwich cookies.
- Parchment paper — Keeps soft keto bakes from sticking and tearing.
- Hand mixer or stand mixer — Cream cheese and whipped fillings need real mixing power.
- Mixing bowls — At least two, preferably one large and one medium.
- Whisk and silicone spatula — The whisk gets things smooth; the spatula keeps you from overmixing.
- Microplane or fine grater — Best for citrus zest, which does more work than people expect.
- Cooling rack — Helps bars and cakes stop cooking at the right moment.
- Springform pan — Not mandatory, but lovely for torte-style desserts and anything delicate.
Smart Shopping and Ingredient Tips
A good keto dessert starts before the oven goes on. Almond flour should be fine and blanched, not coarse and meal-like, because coarse flour makes the crumb gritty and heavy. Coconut flour is powerful stuff; if a recipe calls for 1/4 cup, do not “eyeball” half a cup unless you want a dry brick. Spoon it lightly and level it off.
Sweetener choice changes texture more than most people think. Powdered allulose is one of the best bets for soft desserts because it dissolves smoothly and doesn’t leave the same cooling, gritty finish as some granulated blends. Monk fruit blends with allulose work well too. Erythritol can still be used in some recipes, but in soft bars and cheesecakes it tends to firm up harder in the fridge.
For dairy, buy the full-fat version. Cream cheese, sour cream, mascarpone, and Greek yogurt all help keep desserts soft, but only when they’re not reduced-fat stand-ins. Reduced-fat dairy brings more water and less body, which sounds helpful until the dessert bakes up thin and oddly squeaky. Room-temperature dairy also mixes better, which means fewer lumps and fewer overworked batters.
Eggs matter more than people admit. Use large eggs, and bring them toward room temperature when the recipe asks for a whipped batter or cheesecake filling. Cold eggs can make cream cheese seize into small lumps. That’s one of those annoying little baking problems that looks bigger than it is. A 20-minute sit on the counter fixes it.
For chocolate, choose one that tastes good plain. If you wouldn’t eat a square of it on its own, it will not rescue a brownie. The same goes for vanilla extract and citrus zest. In soft keto baking, the flavoring ingredients do more of the heavy lifting because there’s less sugar to blur the edges.
How to Serve These Recipes
Presentation:
Soft keto desserts usually look best with a clean cut and one clear garnish. A square brownie, a neat cheesecake bar, or a jar with visible layers tells the story better than a pile of extra toppings. Use a hot knife for bars and cakes, wipe it between slices, and keep garnishes small so the texture stays the main event.
Accompaniments:
Coffee is the easy answer, but not the only one. Brownies like whipped cream or raspberries. Lemon bars want fresh berries or a mint leaf. Cheesecake bars and torte slices work with a spoonful of unsweetened whipped cream. Loaf cakes and muffins can stand beside butter, cream cheese, or a thin glaze. For no-bake cups and jars, a few cocoa dustings or toasted nuts add just enough contrast.
Portions:
These desserts are richer than they look. A 2-inch brownie square, a narrow cheesecake bar, or one small jar is usually enough after a meal. Cakes and loaves should be sliced thinner than standard bakery servings because almond flour and cream cheese make each bite dense in the good way. If you’re serving a crowd, cut everything smaller than you think and let people come back for seconds.
Beverage Pairing:
Coffee works with almost all of them, especially the chocolate, caramel, and nut-based bakes. For fruit desserts, try black tea or a bright herbal tea with citrus notes. If you want a cold drink, unsweetened almond milk with a little vanilla is a tidy match for cookies and bars.
Additional Tips and Flavor Boosters
Flavor Enhancement:
A tiny pinch of flaky salt on brownies, chocolate cups, or peanut butter desserts can sharpen the whole bite. Espresso powder does the same thing for chocolate without making it taste like coffee. Citrus zest is the other quiet weapon; lemon and lime zest make a heavy keto dessert feel lighter without changing the recipe much.
Customization:
If you want more crunch, add toasted pecans, walnuts, or sliced almonds to the bars and cookies. If you want softer fruit flavor, use raspberry or strawberry chia jam instead of fresh berries in fillings. For a more bakery-style finish, swap part of the vanilla for almond extract in snickerdoodles, blondies, or loaf cakes.
Serving Suggestions:
Dust cakes and bars with powdered allulose through a small sieve. Top mousse cups with shaved chocolate. Scatter toasted coconut over matcha or lime cake. Keep garnishes small and intentional; a heavy topping can hide the soft texture you worked for.
Make-It-Yours:
For a dairy-free version, several of the bars and loafs can use coconut cream and dairy-free cream cheese, though the texture shifts a bit firmer. For a nut-free route, sunflower seed flour can replace some almond flour, but bake a test batch because it can turn greenish with baking soda. For a higher-protein approach, plain full-fat Greek yogurt can stand in for part of the sour cream in the loaf and cupcake recipes.
Make-Ahead, Storage, and Reheating Guidance
Most of these desserts keep well because softness and storage are friends when the ingredients are right. Bars, brownies, cheesecake squares, loaf cakes, and muffins usually hold for 4 to 5 days in the refrigerator in an airtight container. Cookies and sandwich cookies keep best for 3 to 4 days at cool room temperature if your kitchen is cool, or in the fridge if it isn’t. Mousse cups, jars, and no-bake pie cups should stay refrigerated the whole time and are best within 3 to 4 days.
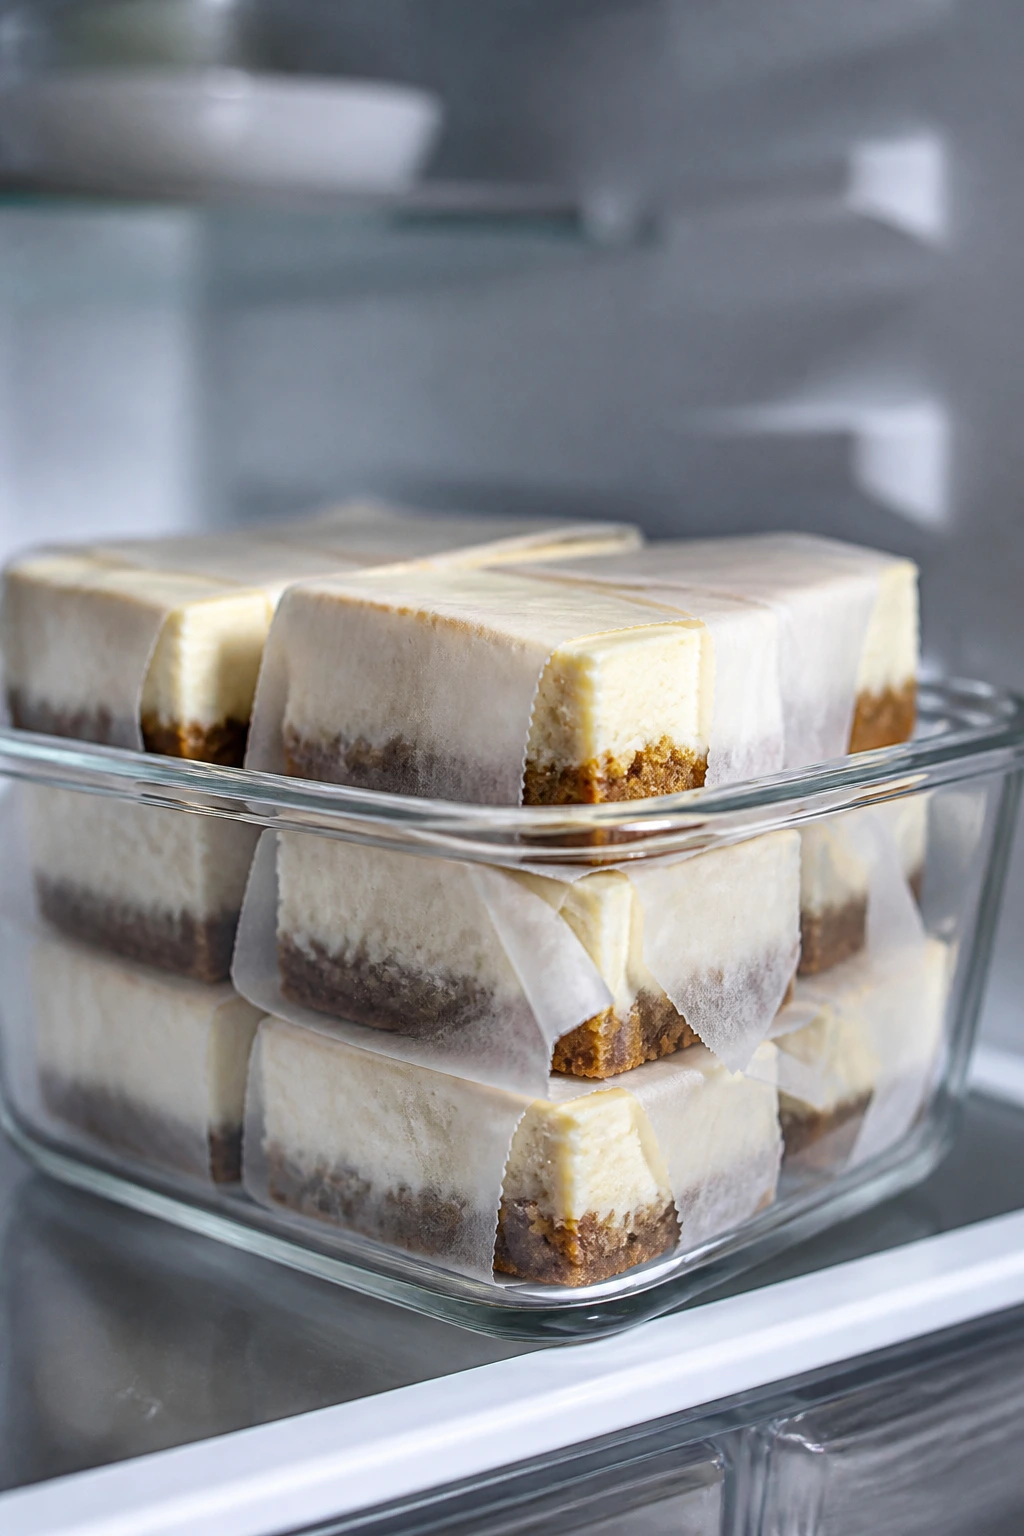
Freezing works better on baked items than on delicate chilled desserts. Wrap individual brownie squares, bars, muffins, or cake slices in parchment, then slide them into a freezer bag or airtight container. They’ll keep for up to 2 months frozen. Thaw overnight in the fridge or for an hour on the counter if the room is cool. Cheesecake-based bars usually thaw beautifully. Loaf cake and brownies often taste almost freshly made after a slow thaw.
For reheating, keep it light. A brownie square or cookie bar only needs 8 to 12 seconds in the microwave if you want it warm, not hot. Loaf cake can be warmed the same way, but only for a few seconds. Do not microwave mousse cups or chia jars; they’re meant to stay cold. If a chilled dessert seems a little firm after the fridge, let it sit at room temperature for 10 to 15 minutes before serving. That small pause softens the texture without wrecking the structure.
Some of these desserts improve overnight. Cheesecake bars, whoopie pies, tiramisu jars, and many loaf cakes settle into a better texture after a night in the fridge because the moisture spreads evenly. Cookies and brownies stay good too, though the texture shifts from bakery-soft to fridge-fudgy. That shift is part of the appeal.
Variations and Adaptations to Try
Allulose-Forward Softness:
If you want the softest possible result, lean on allulose for most of the sweetening and keep erythritol blends in the background. It dissolves better, stays smoother in chilled desserts, and tends to make cakes and bars taste less stiff on day two. If a recipe already uses allulose, that’s not an accident; follow it closely.
Nut-Free Baking With Sunflower Seed Flour:
Several of the cakes and bars can be adapted with sunflower seed flour in place of some almond flour. The batter may turn a faint green if you use baking soda, which is harmless and strangely common. That swap works best in brownies, muffins, and sheet cakes where the color doesn’t matter much.
Dairy-Light Swaps:
Coconut cream can replace part of the heavy cream in jars, mousse cups, and no-bake fillings. Dairy-free cream cheese can work in bars and sandwich cookies, though the texture is usually a little tighter. The flavor stays good if you add extra vanilla and a pinch of salt to keep it from tasting flat.
Berry and Citrus Reroutes:
If chocolate feels too heavy, move toward lemon, lime, raspberry, or blueberry. These flavors keep soft keto desserts from feeling dense in a tiring way. Zest is the quiet helper here. It doesn’t add carbs, and it gives the batter a smell that makes the dessert taste brighter before you even take a bite.
Holiday Spice Swaps:
Cinnamon, ginger, nutmeg, clove, and allspice can redirect a plain almond flour base into something warmer. Use them in the muffin, loaf, cake, and whoopie pie recipes, but keep a light hand with clove; it takes over fast. A quarter teaspoon can be enough.
Party-Size Pan Bakes:
If you want fewer moving parts, spread brownie, blondie, or bar batter into a larger 9×13-inch pan and shorten the bake time. Watch the center carefully. The edges will set first, and that soft middle is what keeps the dessert tender for days.
Common Mistakes to Avoid

Measuring almond flour like regular flour:
Scooping hard with the cup packs in too much flour and gives you a dry, heavy crumb. Spoon it in lightly, level it off, and don’t compress it. If a batter feels too thick before baking, that’s often the reason.
Baking until the center is fully firm:
Keto desserts almost always keep setting after they leave the oven. If you wait for a rock-solid center, you’ve already gone too far. Pull brownies, bars, cakes, and cheesecakes when the middle still has a slight wobble or spring.
Using cold cream cheese or eggs:
Cold dairy makes batters lumpy and harder to mix, which leads to overmixing. Overmixing leads to dense cake. Let the ingredients sit out long enough to soften and you’ll save yourself both problems.
Lean too hard on coconut flour:
Coconut flour is useful, but it drinks liquid like a sponge. Too much turns a soft dessert into a dry one with a strange crumb. Measure it carefully and respect the ratios.
Slicing too soon:
Bars and cakes often seem done before they’re ready to cut. If you try to slice them warm, the center tears and the edges crumble. Cooling fully isn’t optional here. It’s part of the recipe.
Storing uncovered in the fridge:
The fridge is drying, and keto desserts hate that. Wrap them or seal them in an airtight container. Uncovered brownies and loaf slices lose softness fast around the edges.
Frequently Asked Questions
Which sweetener keeps keto desserts soft the longest?
Powdered allulose usually does the best job when softness is the goal. It dissolves smoothly and tends to stay softer in the fridge than erythritol-heavy blends. Monk fruit blends with allulose are also useful if you want a lower-carb sweetener with a cleaner bite.
Can I swap coconut flour for almond flour in these recipes?
Not one-for-one. Coconut flour soaks up far more liquid, so replacing almond flour directly will dry out the batter. If you need to adjust, use much less coconut flour and add extra eggs or dairy to compensate.
Why do my keto cookies turn dry after a day?
Usually the bake went a little too long, or the dough used too much almond or coconut flour. A second culprit is coarse sweetener, which can make the texture feel harder in the fridge. Pull the cookies earlier and store them tightly wrapped.
Do these desserts need to be refrigerated?
Anything with cream cheese, sour cream, mascarpone, whipped cream, or custard-style filling should be refrigerated. Brownies, bars, and some cookies can sit out for a few hours, but the fridge keeps them softer for longer and helps the flavors settle.
Can I freeze cheesecake bars and cake slices?
Yes, and they usually thaw well. Wrap slices individually, then store them airtight so they do not pick up freezer smells. Thaw overnight in the fridge for the best texture.
How do I make these recipes nut-free?
Sunflower seed flour can replace some almond flour in several bakes, but the texture and color can change. It works best in brownies, muffins, and loaf cakes. You’ll need to test the recipe if the batter also uses baking soda, because the color can turn greenish.
What if my cream cheese filling looks lumpy?
Keep mixing. If the cream cheese was cold, lumps are common at first and usually smooth out with enough beating. If they don’t, press the batter through a fine sieve or warm the bowl very slightly over warm water for a minute.
Can I use frozen berries in the loaf or bars?
Yes, but don’t thaw them first. Toss frozen berries in a little almond flour and fold them in gently so they don’t bleed everywhere. Frozen berries can add a little extra bake time, so watch the center.
Are these desserts still good the next day?
A lot of them are better. Cheesecake bars, mousse cups, tiramisu jars, and loaf cakes usually soften and settle overnight. Cookies and brownies shift from freshly baked softness to fridge-fudgy softness, which is a trade I’m happy to make.
Keep the Crumb Tender
Soft keto desserts ask for a little more care than a boxed mix, but they pay you back with texture that stays pleasant after the first slice. That matters more than people think. A brownie that still tastes fudgy on day three, or a cheesecake bar that cuts cleanly after a night in the fridge, changes the whole experience.
The nice part is that once you get the feel for these bakes, the rules stop feeling fussy. Pull a little early. Use the right sweetener. Measure the flours with a light hand. Then let the fridge do the rest. That’s where these desserts settle into themselves, and that’s where they become worth making again.