
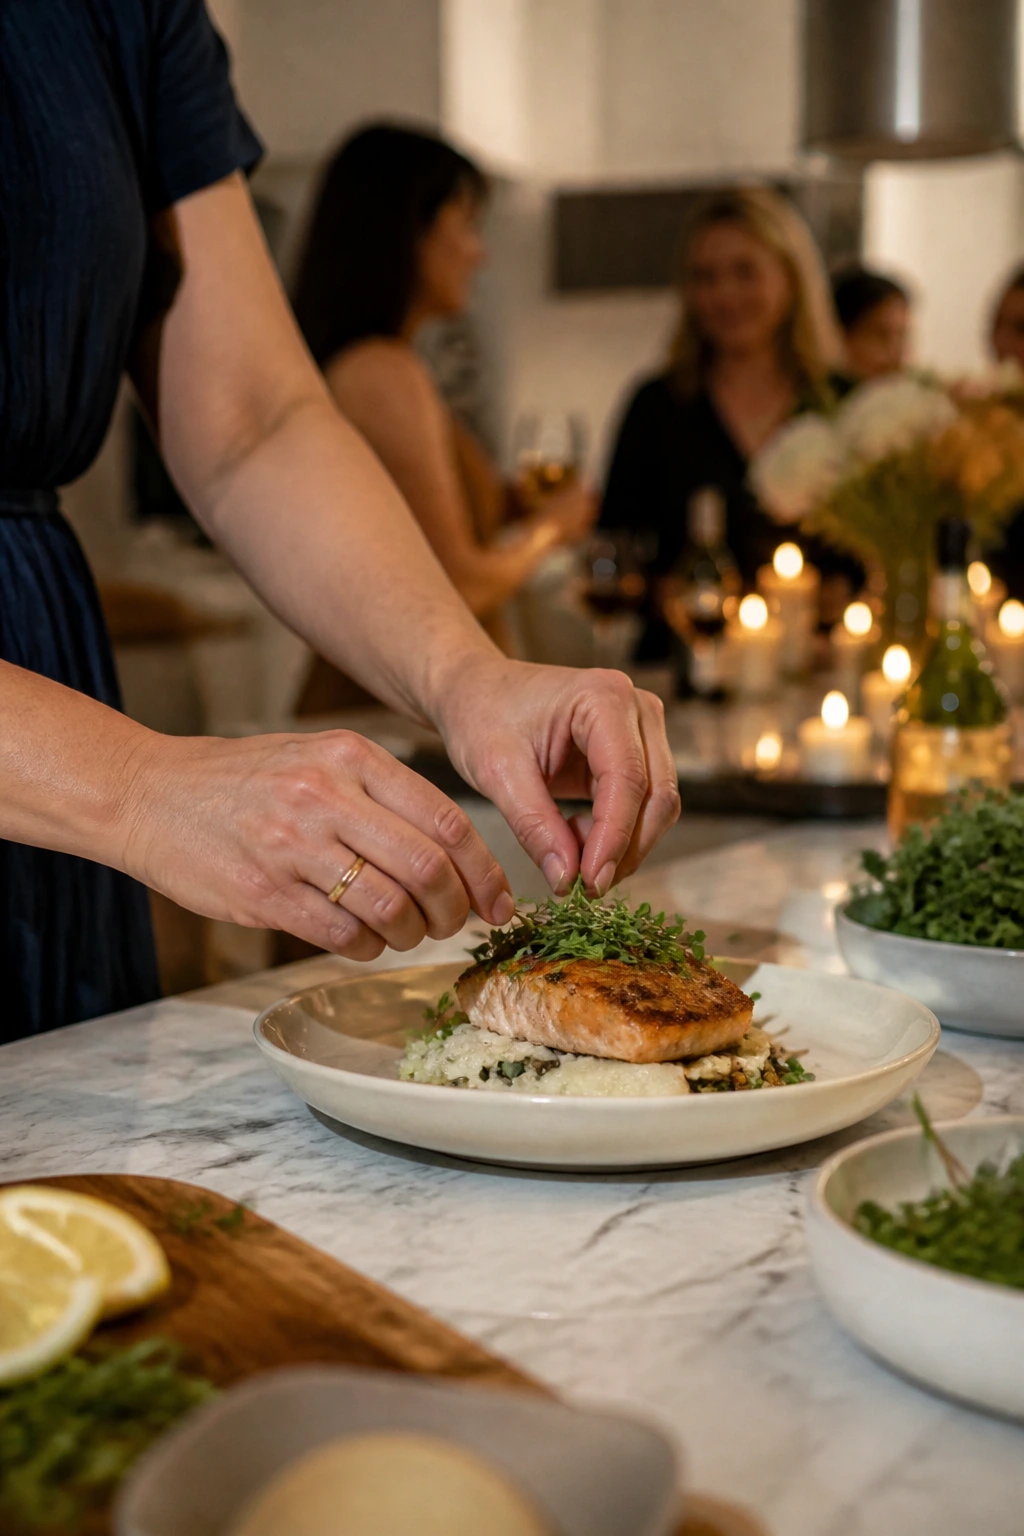
A good Mother’s Day dinner idea for hosting should smell like butter, lemon, and a clean plan. If the food is lovely but the kitchen feels like a traffic jam, the evening loses its charm fast. The best menus for this kind of gathering are the ones that let you cook with a steady hand, set things down at the right moment, and actually sit with your guests when the plates hit the table.
That’s the standard I keep coming back to. Not flashy. Not fussy. Just a dinner that feels special the second it comes out of the oven, and still lets you answer a question, pour a drink, or steal a quiet minute with the person you’re celebrating. A roast chicken with herbs, a glossy pan sauce, a bowl of pasta with something bright folded through it — these are the kinds of dishes that work because they look generous without asking for a circus.
And yes, “hosting” changes the game. You need recipes that can be timed, rested, warmed, or plated without panic. You want one or two dishes that carry the table, then a few that behave politely in the background. That’s the whole trick. The dinners below lean into that balance with spring vegetables, easy make-ahead moves, and enough variety that you can build a meal around the guest list instead of around stress.
Why These Mother’s Day Dinner Ideas Work So Well for Hosting
-
Calm Timing: Each recipe has a natural rhythm, so you can prep part of it early and finish it without racing the clock.
-
Looks Fancy, Acts Friendly: These dishes land on the table with a polished look, but the ingredient lists stay rooted in familiar grocery-store staples.
-
Flexible Guest Count: Most of them scale up cleanly, which matters when you’re feeding four people one week and eight the next.
-
Spring Flavors Do the Heavy Lifting: Lemon, dill, peas, asparagus, herbs, and tender greens keep the meal feeling fresh instead of heavy.
-
A Mix of Comfort and Lift: There’s enough richness for a celebration, but not so much that everyone needs a nap afterward.
-
Built for Real Kitchens: You’ll find oven-friendly mains, stovetop mains, and a few dishes that are happy to rest while you finish everything else.
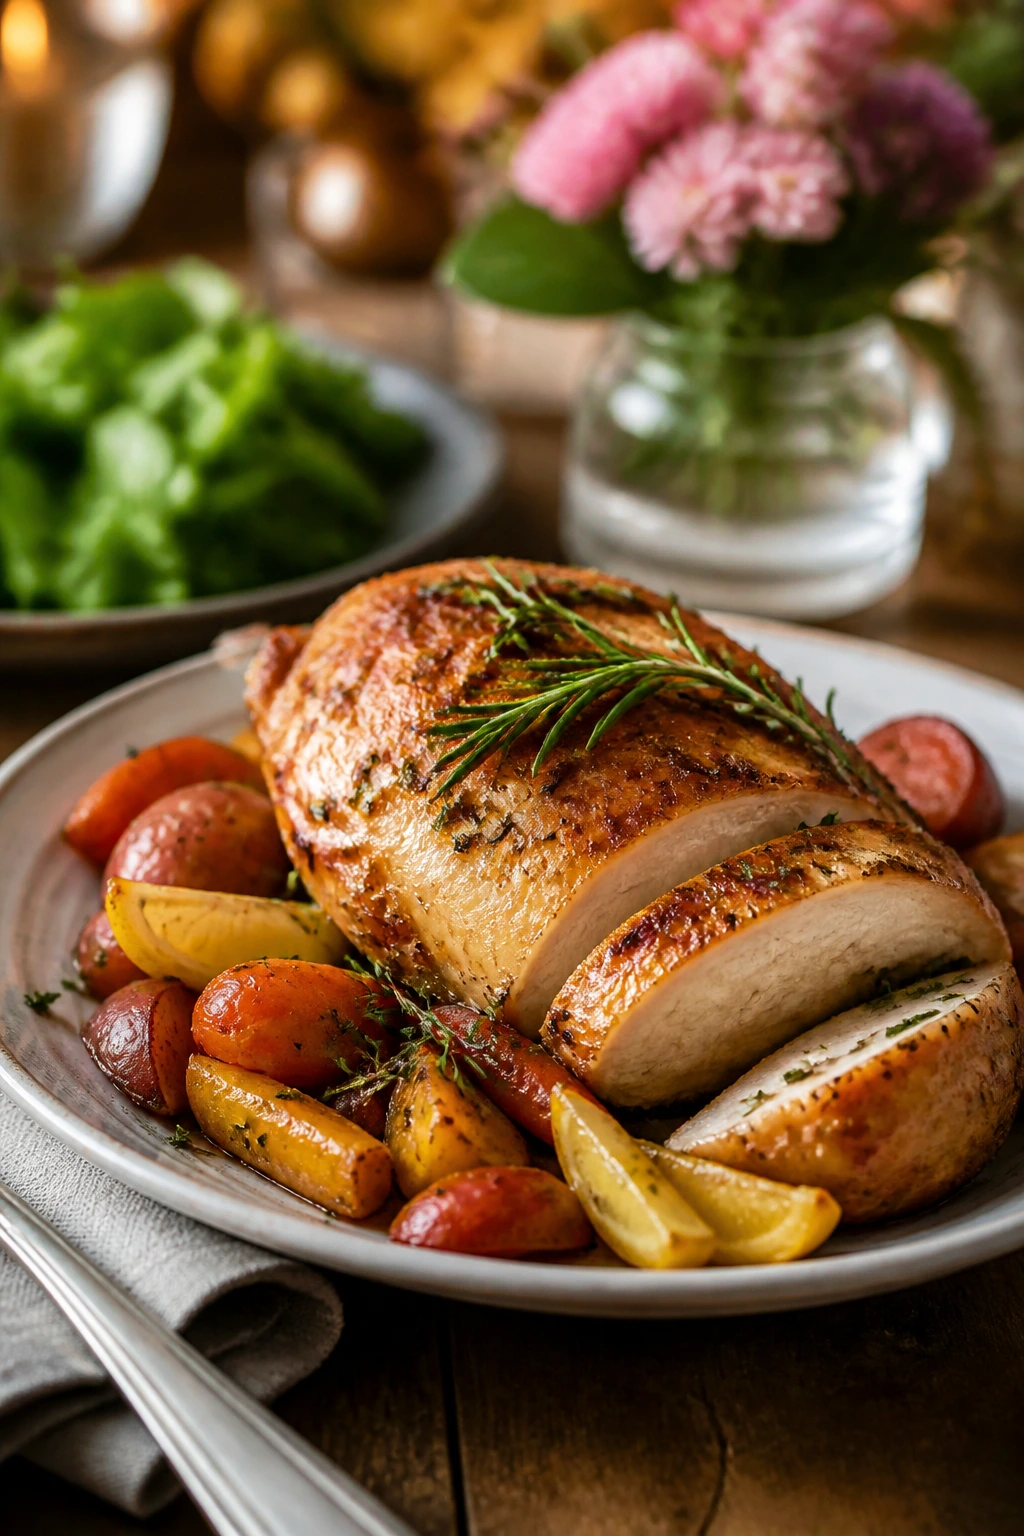
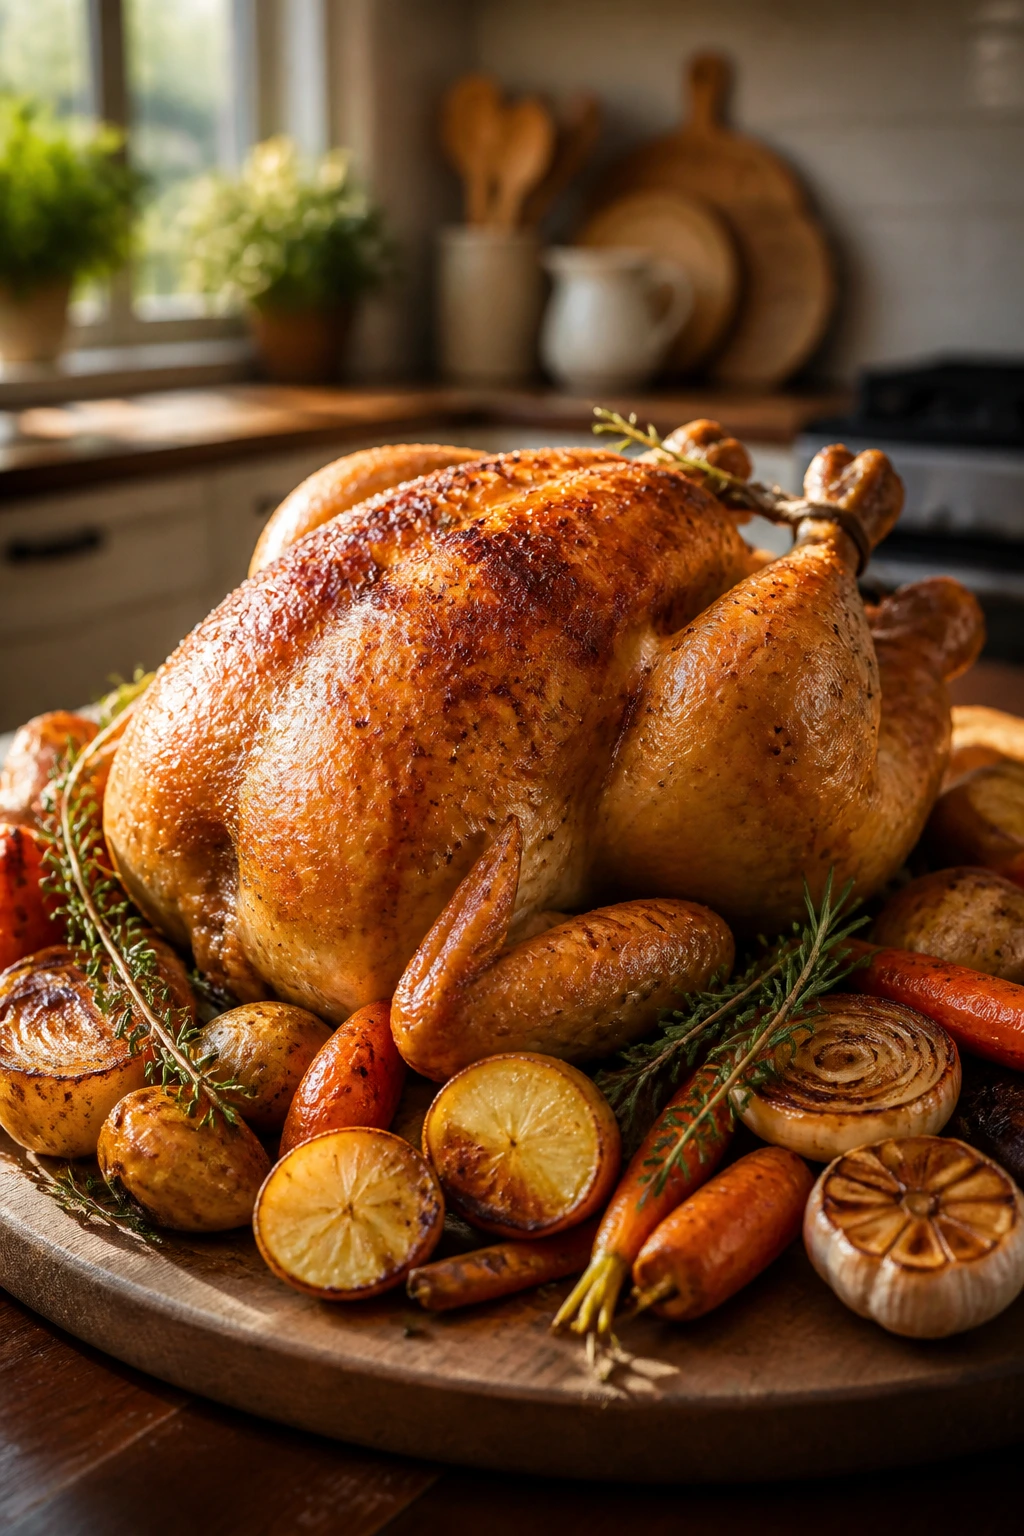
1. Lemon-Herb Roast Chicken with Spring Vegetables
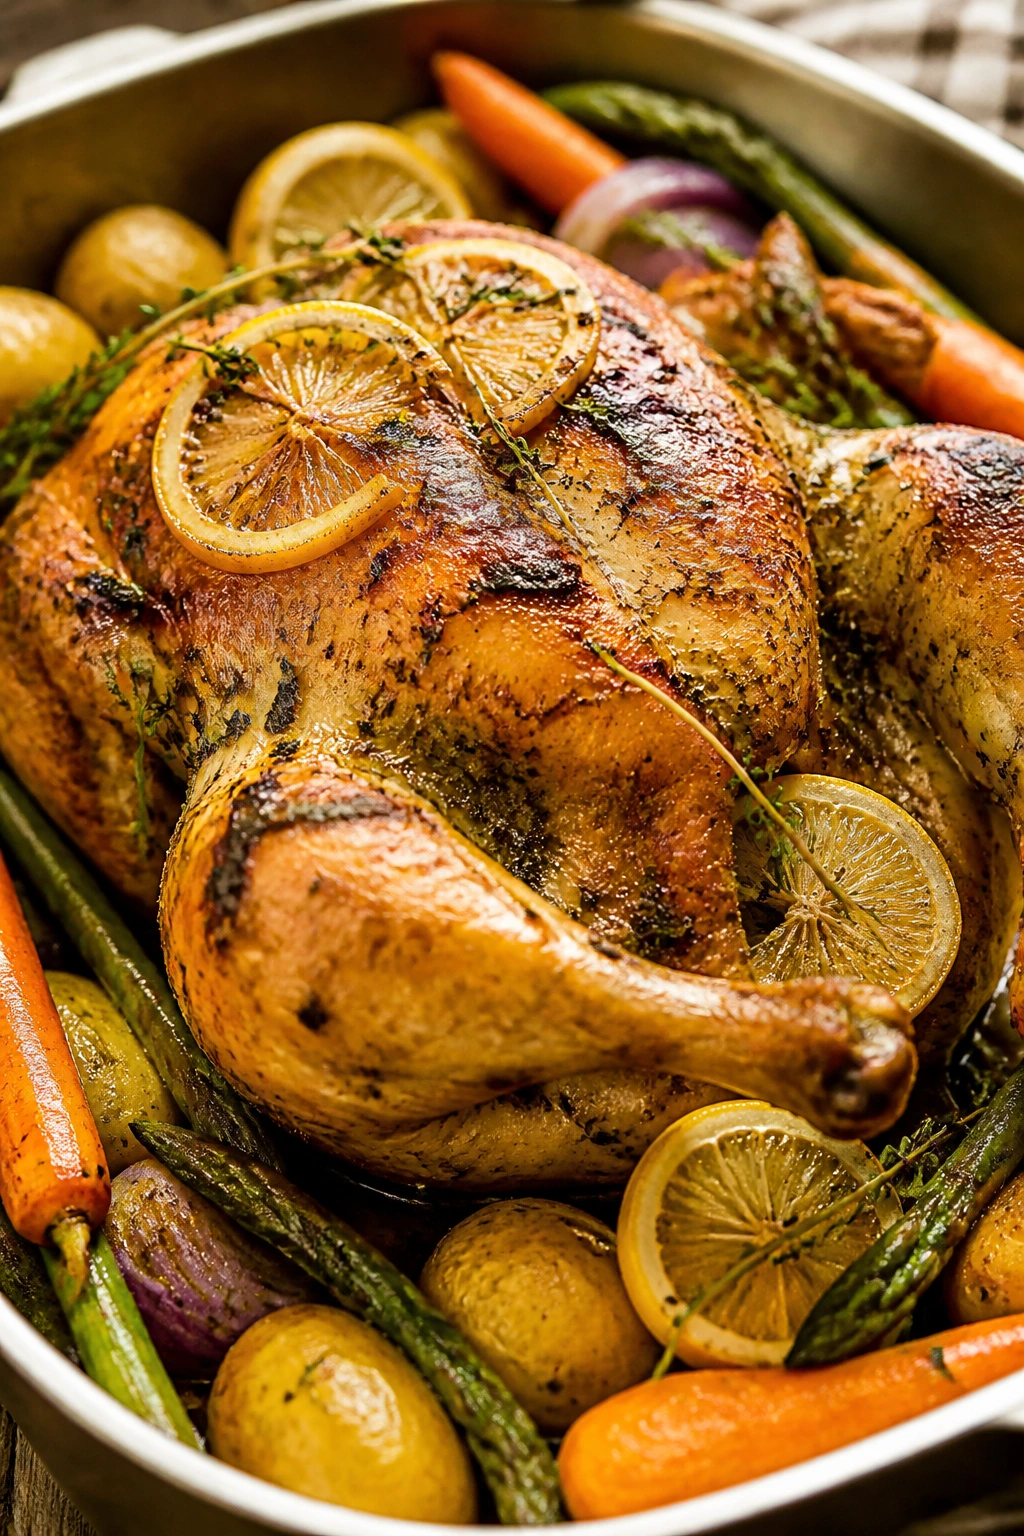
A roast chicken is one of those dishes that looks almost too simple until you smell it in the oven. Then it makes perfect sense. Lemon seeps into the skin, the garlic softens, the potatoes catch the drippings, and the whole pan turns into something that feels generous without being showy.
For a hosted dinner, that matters. You want a main that can sit at the center of the table and still leave room for conversation. This one does that. It’s familiar enough that people relax, but the herb-scented pan juices and roasted vegetables make it feel like you planned the evening, not like you just survived it.
Why It Works
Roast chicken is a host’s old reliable because it gives you two jobs instead of twelve: season well and don’t overcook it. The vegetables roast right underneath the bird, which means they pick up flavor from the drippings while the skin bronzes. If you pull the chicken at 165°F in the thigh and let it rest for 15 minutes, the juices settle back into the meat instead of spilling all over the cutting board.
Key Ingredients
- 1 whole chicken, 4 to 5 lb, patted very dry
- 2 tsp kosher salt
- 1 tsp black pepper
- 2 tbsp olive oil
- 1 lemon, zested and halved
- 1 lemon, thinly sliced
- 6 garlic cloves, smashed
- 4 thyme sprigs
- 2 rosemary sprigs
- 1½ lb baby Yukon Gold potatoes, halved
- 4 carrots, cut into 2-inch pieces
- 1 yellow onion, cut into wedges
- 1 bunch asparagus, trimmed
- 1 cup chicken stock
Quick Steps
-
Prep the chicken and pan: Heat the oven to 425°F and set a rack in the lower-middle position. Pat the chicken dry with paper towels, then season it all over with salt and pepper, including under the skin if you can get a hand in there.
-
Build the vegetable base: Toss the potatoes, carrots, and onion with 1 tablespoon of olive oil and a pinch of salt in a large roasting pan or oven-safe skillet. Scatter the lemon slices and a few garlic cloves around the vegetables.
-
Season the bird: Rub the chicken with the remaining olive oil, lemon zest, and another small pinch of salt. Stuff the cavity with the remaining lemon halves, garlic, thyme, and rosemary. Tie the legs if you like a neat shape.
-
Roast and reduce: Set the chicken on top of the vegetables and roast for 20 minutes. Reduce the oven to 375°F and continue roasting for 30 to 40 minutes, until the skin is deep golden and the thigh registers 165°F.
-
Add the asparagus late: Toss the asparagus with a little oil and salt, then add it to the pan for the last 10 to 12 minutes so it stays bright and barely crisp.
-
Rest and finish: Transfer the chicken to a cutting board and rest it for 15 minutes. Pour the stock into the hot pan, scrape up the browned bits, and spoon the juices over the carved chicken and vegetables.
Tips and Variations
- Make-Ahead Move: Salt the chicken and leave it uncovered in the fridge for 8 to 24 hours; the skin dries out and roasts better.
- Flavor Swap: Use tarragon instead of rosemary if you want a softer, more spring-like herb note.
- Serving Shortcut: Carve the bird in the kitchen and arrange it on a platter with the vegetables around it; it’s easier to serve that way when people are waiting.
2. Seared Salmon with Dill Cream and Asparagus
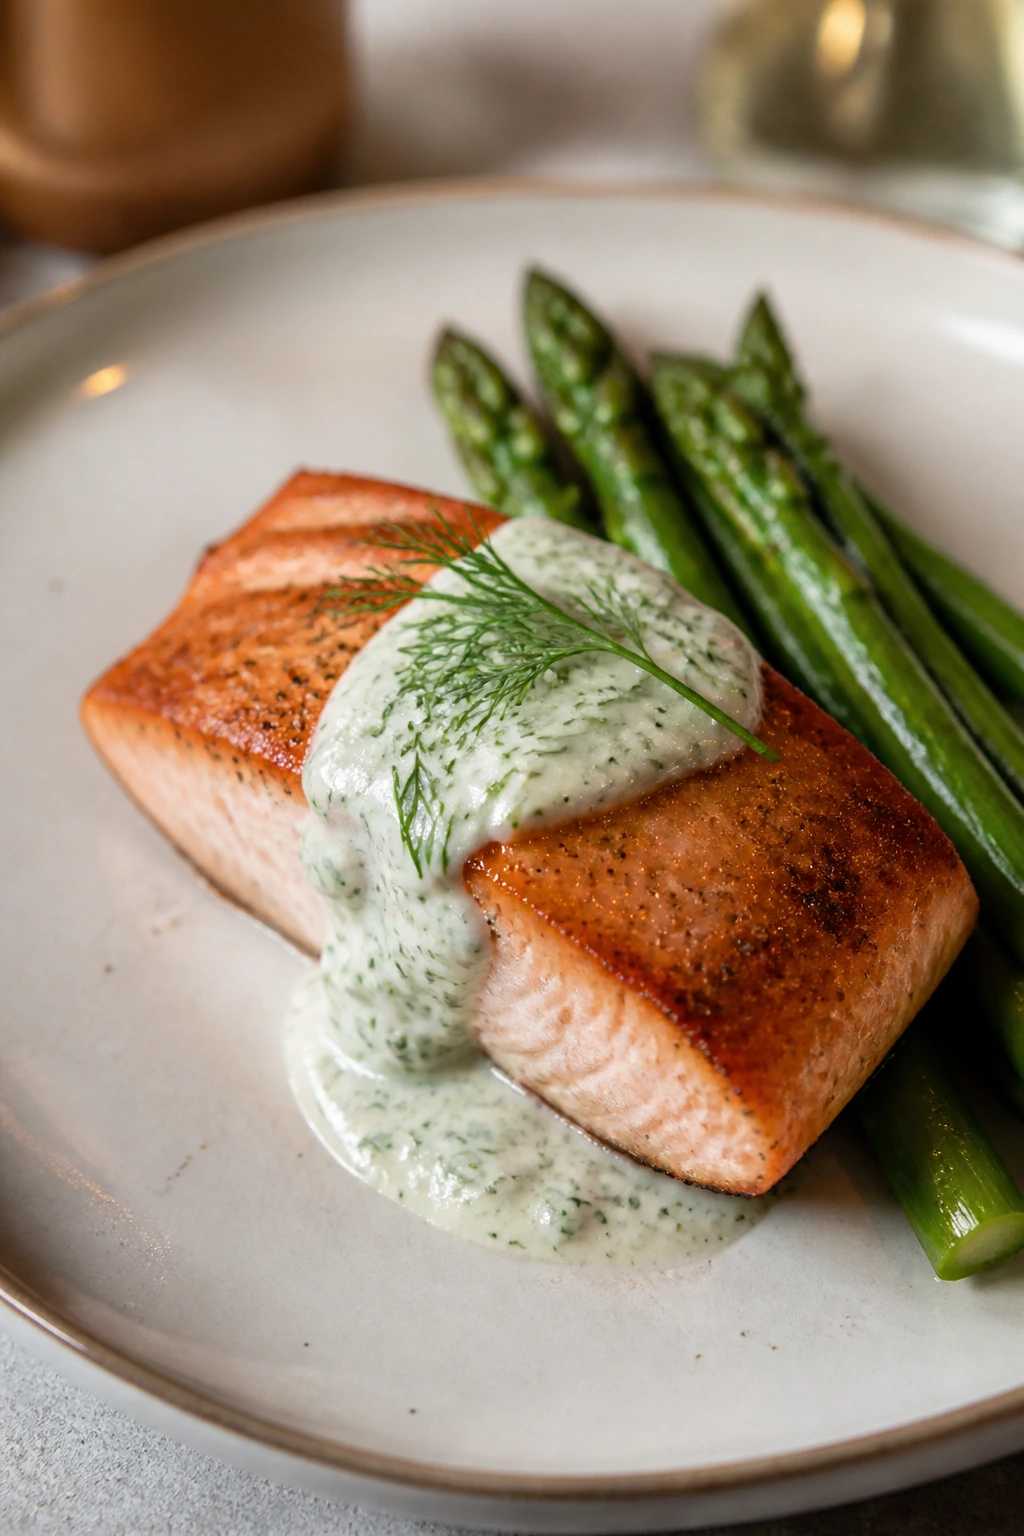
If the thought of fish at a hosted dinner makes you nervous, I get it. Overcooked salmon can go from elegant to chalky in a minute. But when you get the timing right, it’s a beautiful answer to a special-occasion meal: fast, bright, and polished without requiring a dozen moving parts.
This version keeps the flavors clean. Dill and lemon lift the salmon, asparagus brings a crisp green note, and the cream sauce gives the plate enough richness to feel like a celebration. It’s the dinner I’d make when I want something lighter but still unmistakably thoughtful.
Why It Works
Salmon needs heat and restraint, which is a nice lesson in itself. A quick sear gives the skin crisp edges and a little color, then a short oven finish keeps the center tender. The dill cream comes together while the fish rests, and because the sauce uses a splash of white wine or broth, it tastes bright instead of heavy.
Key Ingredients
- 4 salmon fillets, 6 oz each, skin on or off
- 1 tsp kosher salt
- ½ tsp black pepper
- 1 lb asparagus, woody ends trimmed
- 2 tbsp olive oil
- 2 tbsp butter
- 1 shallot, finely minced
- ½ cup dry white wine or low-sodium broth
- ¾ cup sour cream or crème fraîche
- 2 tbsp chopped dill
- 1 tbsp lemon juice
- 1 tsp lemon zest
Quick Steps
-
Start the asparagus: Heat the oven to 400°F. Toss the asparagus with olive oil, salt, and pepper, then spread it on a sheet pan and roast for 10 to 12 minutes until the tips are just tender.
-
Season the salmon: Pat the fillets dry and season both sides with salt and pepper. Dry fish sears better; damp fish steams, and nobody wants that.
-
Sear for color: Heat a large skillet over medium-high heat with 1 tablespoon of oil. Place the salmon skin-side down and press gently for 10 seconds so it stays flat. Cook for about 4 minutes until the skin is crisp.
-
Finish in the oven: Flip the fillets and transfer the skillet to the oven for 3 to 5 minutes, until the salmon flakes at the edges but still looks glossy in the center. Aim for 125 to 130°F if you like it medium.
-
Build the dill sauce: Melt the butter in a small saucepan over medium heat. Add the shallot and cook for 1 to 2 minutes until soft, then pour in the wine or broth and simmer until reduced by half. Stir in the sour cream, dill, lemon juice, and zest. Do not boil it after the dairy goes in.
-
Plate cleanly: Arrange the asparagus on a platter, top with the salmon, and spoon the dill cream over the fish or serve it on the side.
Tips and Variations
- Gentle Heat: If your fillets are thin, skip the oven and cook them mostly on the stovetop for a tighter time window.
- Dairy Swap: Greek yogurt can stand in for sour cream, but add it off the heat so it doesn’t turn grainy.
- Fresh Finish: A few capers on top are a good move if you like a briny edge with the lemon.
3. Creamy Mushroom Risotto with Peas and Parmesan
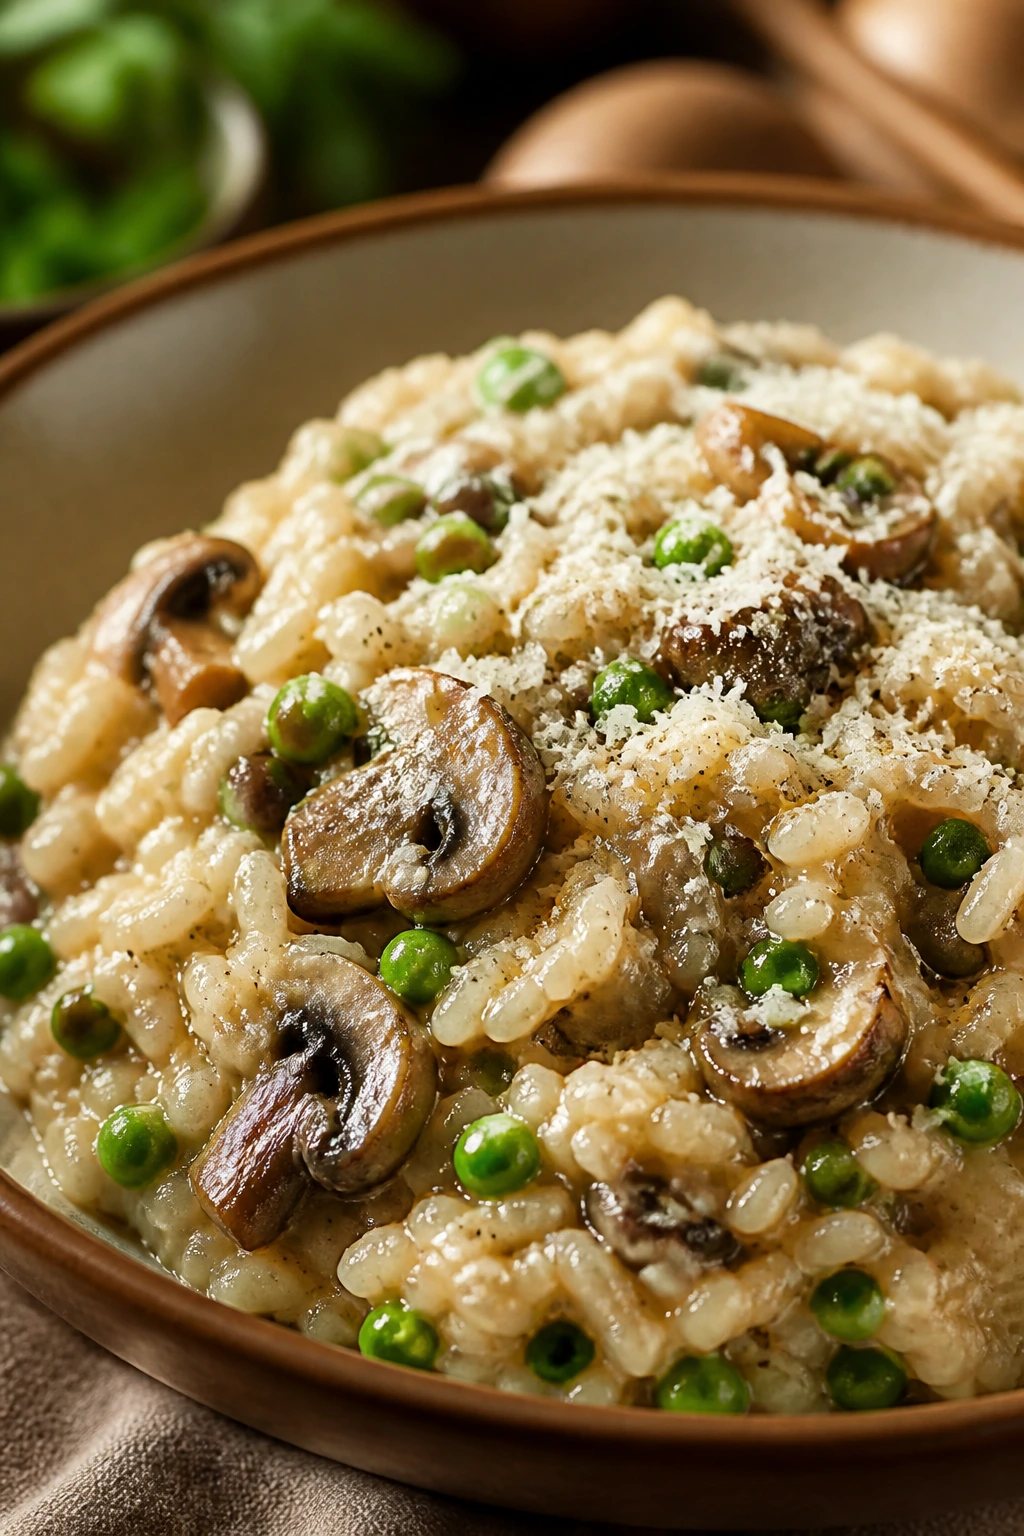
Risotto is the dish people call intimidating right up until they make it once. Then they realize it’s mostly patience, a warm broth pot, and a spoon. That said, it does ask for your attention. I think that’s part of why it feels right for a dinner meant to slow down a little.
The mushrooms bring earthiness, the peas break through with a sweet pop, and the Parmesan binds everything into something glossy and plush. On a Mother’s Day table, it’s the kind of side-dish-that-becomes-a-main that makes people sit up straighter.
Why It Works
Arborio rice releases starch as it cooks, which gives risotto its silkier texture. Browning the mushrooms first is not optional if you want flavor; that step puts real depth in the pan instead of a gray, watery mushroom note. Add the broth gradually, keep it warm, and stop when the rice is tender with a faint bite at the center.
Key Ingredients
- 6 cups low-sodium chicken or vegetable broth, kept hot
- 2 tbsp butter
- 2 tbsp olive oil
- 12 oz cremini mushrooms, sliced
- 1 small yellow onion, finely diced
- 2 garlic cloves, minced
- 1½ cups arborio rice
- ½ cup dry white wine
- 1 cup frozen peas
- 1 cup grated Parmesan
- 2 tbsp chopped parsley
- 1 tbsp lemon juice
Quick Steps
-
Warm the broth: Pour the broth into a saucepan and keep it at a gentle simmer on the back burner. Cold broth slows the rice and makes the texture uneven.
-
Brown the mushrooms: In a wide, heavy pan, heat the butter and olive oil over medium-high heat. Add the mushrooms and cook for 6 to 8 minutes, stirring now and then, until they’re deeply browned and the pan smells nutty. Remove half for later.
-
Soften the aromatics: Lower the heat to medium. Add the onion and cook for 4 minutes until translucent, then stir in the garlic and rice. Cook for 1 minute, letting the grains turn glossy at the edges.
-
Add the wine: Pour in the wine and stir until it mostly disappears into the rice. The pan should smell sharp for a moment, then settle.
-
Build the risotto: Add hot broth one ladle at a time, stirring often and waiting until each addition is nearly absorbed before adding the next. Keep going for 18 to 22 minutes until the rice is tender but still has a slight bite.
-
Finish with peas and cheese: Stir in the peas, reserved mushrooms, Parmesan, parsley, and lemon juice. Taste for salt. The risotto should spread slowly on the plate, not sit in a clump.
Tips and Variations
- Hosting Trick: Risotto holds for 10 to 15 minutes with a splash of broth stirred in right before serving.
- Make It Fuller: Fold in sautéed asparagus tips or a handful of baby spinach at the very end.
- Cheese Note: Use finely grated Parmesan, not the sandy stuff from a green can; texture matters here.
4. Garlic Butter Steak with Crispy Potatoes and Green Beans
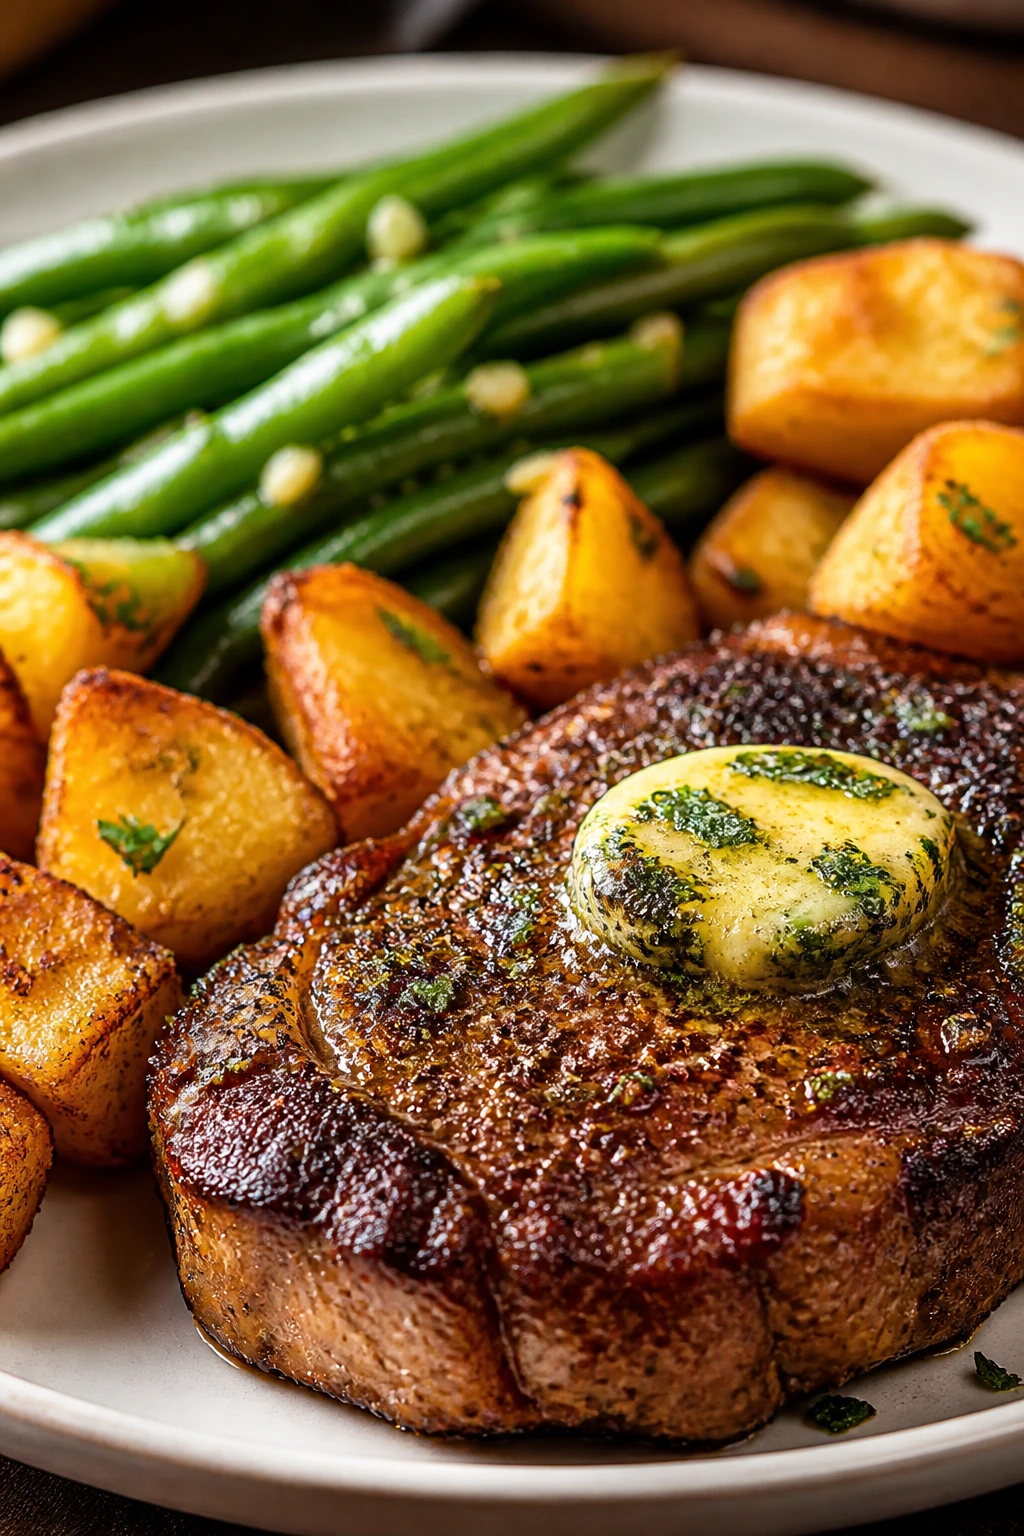
There’s something unapologetically celebratory about steak. It doesn’t whisper. It lands. And on a night when you want the table to feel a little more dressed up, that’s not a bad thing.
What makes this version work for hosting is the balance. The potatoes roast until their edges crackle, the green beans stay bright, and the garlic butter gives the steak a glossy finish that feels restaurant-like without any theater. I like this dinner when the guest list includes people who think “special” means a good sear and properly salted vegetables.
Why It Works
The steak gets its best crust when the surface is dry and the pan is hot enough to make the oil shimmer. A cast-iron skillet is useful here because it holds heat well, and a short butter baste near the end turns the pan drippings into something worth spooning over the sliced meat. The potatoes roast separately so the steak can rest properly instead of competing for space.
Key Ingredients
- 2 strip steaks or ribeyes, 1½ inches thick, about 1¾ lb total
- 1½ tsp kosher salt
- 1 tsp black pepper
- 1½ lb baby potatoes, halved
- 2 tbsp olive oil
- 3 tbsp butter
- 4 garlic cloves, smashed
- 2 rosemary sprigs
- 1 lb green beans, trimmed
- 1 lemon, cut into wedges
Quick Steps
-
Roast the potatoes first: Heat the oven to 425°F. Toss the potatoes with olive oil, half the salt, and a few grinds of pepper, then roast for 25 to 30 minutes until browned on the cut sides.
-
Prep the steak: Pat the steaks dry and let them sit at room temperature for 20 to 30 minutes if you have the time. Season both sides well with the remaining salt and pepper.
-
Sear hard: Heat a cast-iron skillet over medium-high until very hot. Add the steak and sear for 3 to 4 minutes per side for medium-rare, adjusting for thickness. The outside should be deeply browned, not pale.
-
Baste with butter: Lower the heat slightly, add the butter, garlic, and rosemary, and spoon the melted butter over the steaks for about 1 minute. If the butter starts smoking dark, the pan is too hot.
-
Rest before slicing: Move the steaks to a board and rest for 8 to 10 minutes. This is where the juices settle. Skip it and you’ll see them on the cutting board instead.
-
Finish the beans: Quickly sauté the green beans in the same skillet for 3 to 4 minutes with a little butter or olive oil. Toss with lemon juice right before serving.
Tips and Variations
- Temperature Check: Pull steaks at 125°F for medium-rare or 135°F for medium; they rise a little as they rest.
- Swap the Cut: Strip steak is friendlier for slicing, but filet mignon works if you want a softer bite.
- Shortcut Side: If the potatoes are too much, serve the steak with crusty bread and a big salad instead.
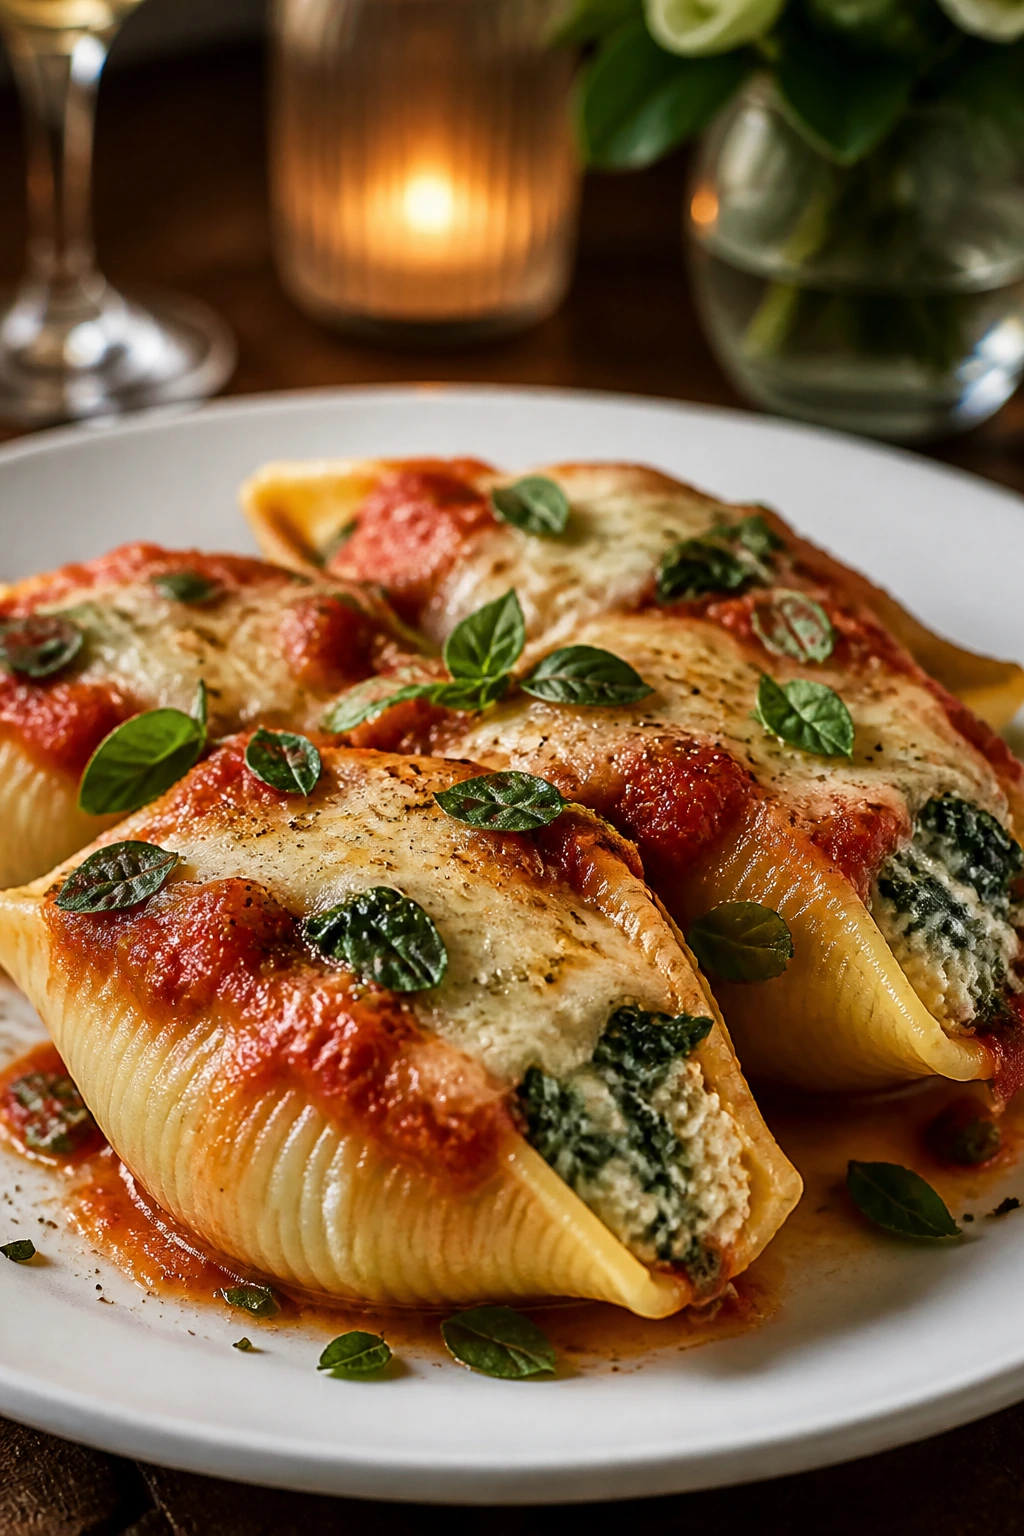
5. Spinach and Ricotta Stuffed Shells with Marinara
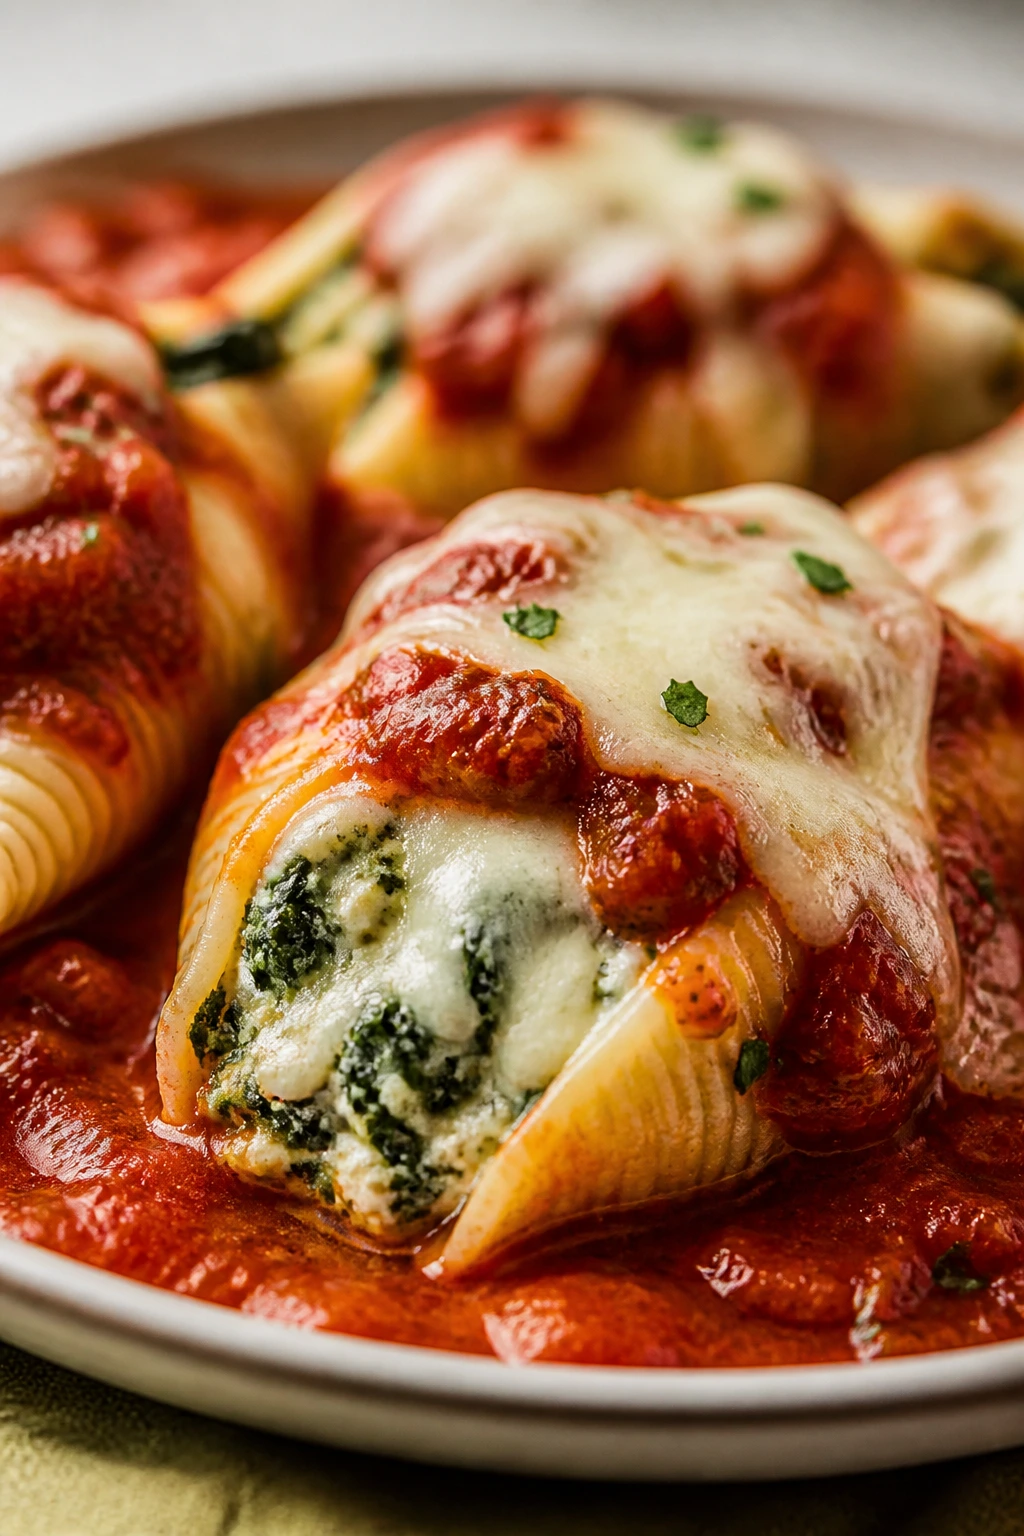
Stuffed shells are the kind of dinner that quietly feeds a crowd and gets better with every minute of planning you put into it. They’re not fancy in a showy way. They’re generous. And that’s exactly why they belong on a Mother’s Day table.
The filling is creamy but not sloppy, the marinara gives the dish a bright red backbone, and the baked cheese on top brings the whole thing together in a way that makes the room smell like you meant business. This is the pasta dish I make when I want people to feel taken care of.
Why It Works
Jumbo shells are built for hosting because they can be assembled ahead, baked in one dish, and portioned neatly. Spinach and ricotta give you a filling that stays tender after baking, while the marinara keeps the pasta from drying out. If you cover the dish for the first stretch of baking and uncover it near the end, the top browns without the shells going leathery.
Key Ingredients
- 20 jumbo pasta shells
- 1 tbsp salt for the pasta water
- 15 oz ricotta
- 1 egg
- 2 cups shredded mozzarella, divided
- ½ cup grated Parmesan
- 10 oz frozen spinach, thawed and squeezed dry
- 2 garlic cloves, minced
- 1 tsp Italian seasoning
- ½ tsp kosher salt
- ¼ tsp black pepper
- 3 cups marinara, warmed
- ¼ cup chopped basil
Quick Steps
-
Cook the shells: Bring a large pot of salted water to a boil and cook the shells until just shy of al dente, usually 1 to 2 minutes less than the box says. Drain and rinse under cool water so they’re easy to handle.
-
Mix the filling: In a large bowl, combine the ricotta, egg, 1 cup of mozzarella, Parmesan, spinach, garlic, Italian seasoning, salt, and pepper. Stir until the filling looks thick and speckled green.
-
Build the baking dish: Spread 1 cup of marinara in the bottom of a 9×13-inch baking dish. This keeps the shells from sticking and adds steam underneath.
-
Stuff the shells: Spoon the filling into each shell, packing it in without tearing the pasta. Arrange the shells seam-side up in the dish.
-
Add sauce and bake: Spoon the remaining marinara over the shells and scatter the rest of the mozzarella on top. Cover with foil and bake at 375°F for 20 minutes. Uncover and bake another 10 to 15 minutes until the cheese is bubbling and lightly browned.
-
Rest and finish: Let the dish rest for 10 minutes, then scatter basil over the top before serving.
Tips and Variations
- Make-Ahead Win: Assemble the shells up to 24 hours ahead, cover tightly, and bake when ready.
- Better Filling Texture: Squeeze the spinach dry with your hands or a clean towel; watery spinach is the fastest way to ruin the filling.
- Optional Add-In: A pinch of nutmeg in the ricotta gives the filling a softer, more old-school comfort note.
6. Pork Tenderloin with Dijon Cream Sauce
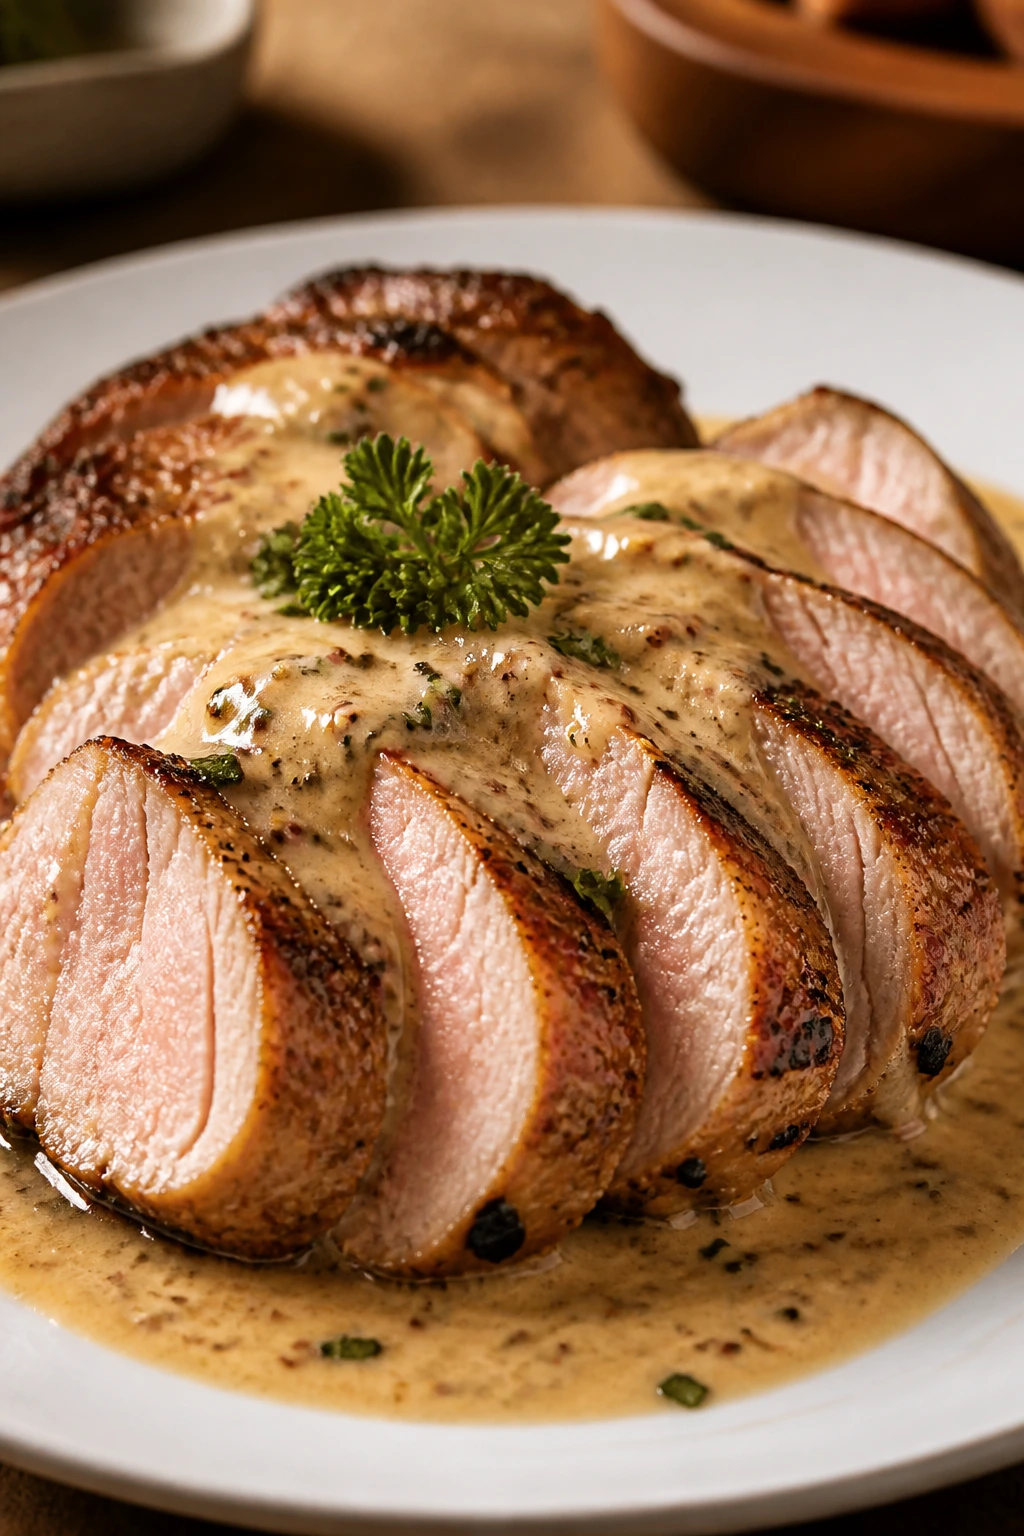
Pork tenderloin gets overlooked because people confuse it with the drier, less forgiving cuts. That’s a shame. When cooked properly, it’s lean, tender, and fast enough for a host who doesn’t want to spend the whole evening tending a roast.
The Dijon cream sauce does the polite, useful work here. It sharpens the meat, catches the browned bits in the pan, and gives you something spoonable that makes the plate feel finished. If you’re serving guests who like familiar flavors with a little polish, this one lands very well.
Why It Works
Tenderloin cooks fast because it’s narrow and lean, which makes temperature control the whole story. A quick sear builds flavor, then a short oven finish keeps the center juicy. The pan sauce uses the drippings, stock, and a little cream, so you get a sauce with depth instead of something that tastes like plain dairy.
Key Ingredients
- 2 pork tenderloins, 1 to 1¼ lb each
- 1½ tsp kosher salt
- 1 tsp black pepper
- 1 tsp smoked paprika
- 2 tbsp olive oil
- 1 shallot, minced
- ½ cup low-sodium chicken stock
- ½ cup heavy cream
- 2 tbsp Dijon mustard
- 1 tsp apple cider vinegar
- 1 tbsp butter
- 1 tbsp chopped parsley
Quick Steps
-
Heat the oven: Preheat to 425°F and set a rack in the center. Trim any silver skin from the pork if your butcher hasn’t already done it.
-
Season well: Rub the tenderloins with salt, pepper, and smoked paprika. Let them sit while the pan heats so the surface dries a bit.
-
Sear all sides: Heat the olive oil in a large oven-safe skillet over medium-high. Sear the pork for about 2 minutes per side until browned all over.
-
Roast to finish: Transfer the skillet to the oven and roast for 12 to 15 minutes, or until the thickest part reaches 140 to 145°F. Pork tenderloin dries out if pushed much farther.
-
Rest the meat: Move the pork to a board and tent it loosely with foil for 8 minutes. The temperature will climb a little, and the juices will settle.
-
Make the sauce: Set the skillet over medium heat. Add the shallot and cook for 1 minute, then pour in the stock and scrape the bottom. Stir in the cream, Dijon, vinegar, and butter, simmering gently until the sauce coats a spoon. Spoon it over the sliced pork and finish with parsley.
Tips and Variations
- Do Not Overcook: This cut goes from tender to dry fast, so use a thermometer instead of guessing.
- Flavor Swap: Whole-grain mustard gives the sauce a little texture and a sharper look.
- Good Partner: Serve with mashed potatoes or roasted carrots; the sauce loves something soft underneath it.
7. One-Pan Cod with Tomatoes, Olives, and Capers
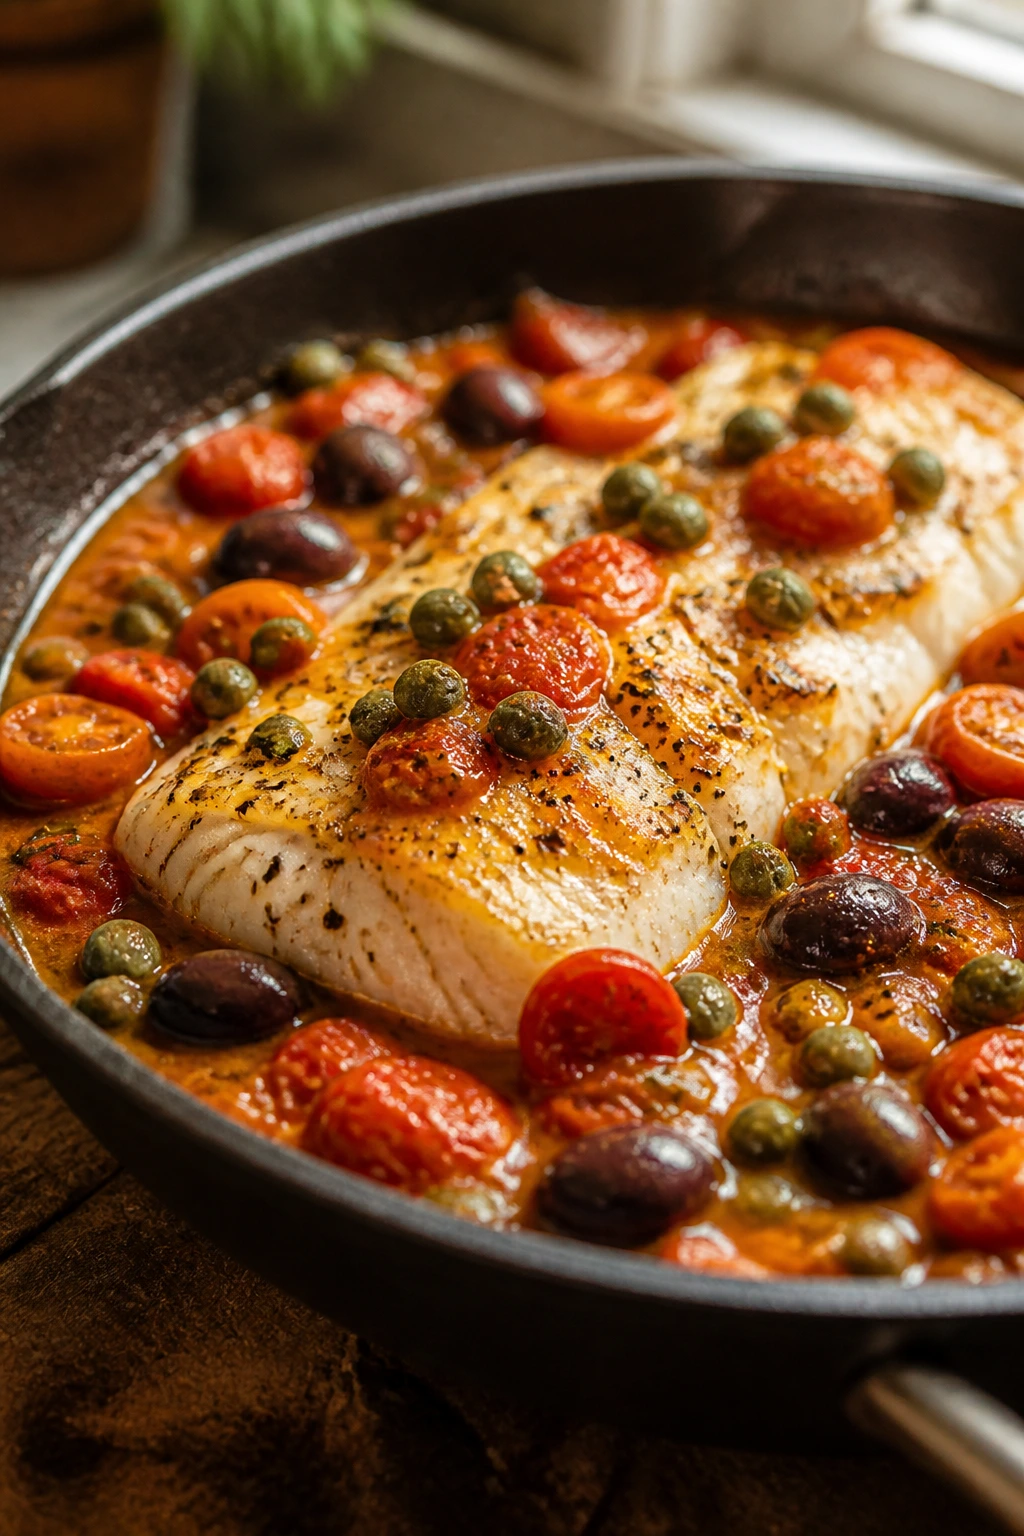
Cod has a cleaner, lighter feel than salmon, which makes it a smart choice when you want dinner to stay bright and relaxed. The tomato-olive sauce gives the fish enough flavor to feel deliberate, but it never turns heavy. That’s the point.
This is the sort of dish that makes a good host look calm because it cooks fast and plates elegantly. The sauce finishes in the same pan as the fish, so you’re not juggling five burners and a prayer. I like that.
Why It Works
Mild white fish benefits from a sauce with salt, acidity, and a little richness. Tomatoes bring body, olives and capers add briny punch, and a short covered simmer keeps the cod moist. If you add the fish only after the sauce has already reduced a bit, the pan stays saucy instead of watery.
Key Ingredients
- 4 cod fillets, 6 oz each, about 1 inch thick
- 1 tsp kosher salt
- ½ tsp black pepper
- 2 tbsp olive oil
- 1 small yellow onion, thinly sliced
- 3 garlic cloves, minced
- 1 can diced tomatoes, 14.5 oz
- ½ cup dry white wine or low-sodium stock
- ½ cup pitted Castelvetrano olives, halved
- 2 tbsp capers, rinsed
- ¼ tsp red pepper flakes
- 1 lemon, juiced
- 2 tbsp chopped parsley
Quick Steps
-
Start the sauce base: Heat the olive oil in a large skillet over medium heat. Add the onion and cook for 5 minutes until soft and translucent, with a little gold at the edges.
-
Add garlic and tomatoes: Stir in the garlic and red pepper flakes for 30 seconds, then add the tomatoes, wine or stock, olives, and capers. Simmer for 5 to 7 minutes until the sauce thickens slightly.
-
Season the fish: Pat the cod dry and season both sides with salt and pepper. Dry fish behaves better in the pan.
-
Cook gently: Nestle the cod into the sauce, cover the skillet, and cook over medium-low heat for 7 to 9 minutes, depending on thickness. The fish should turn opaque and flake easily with a fork.
-
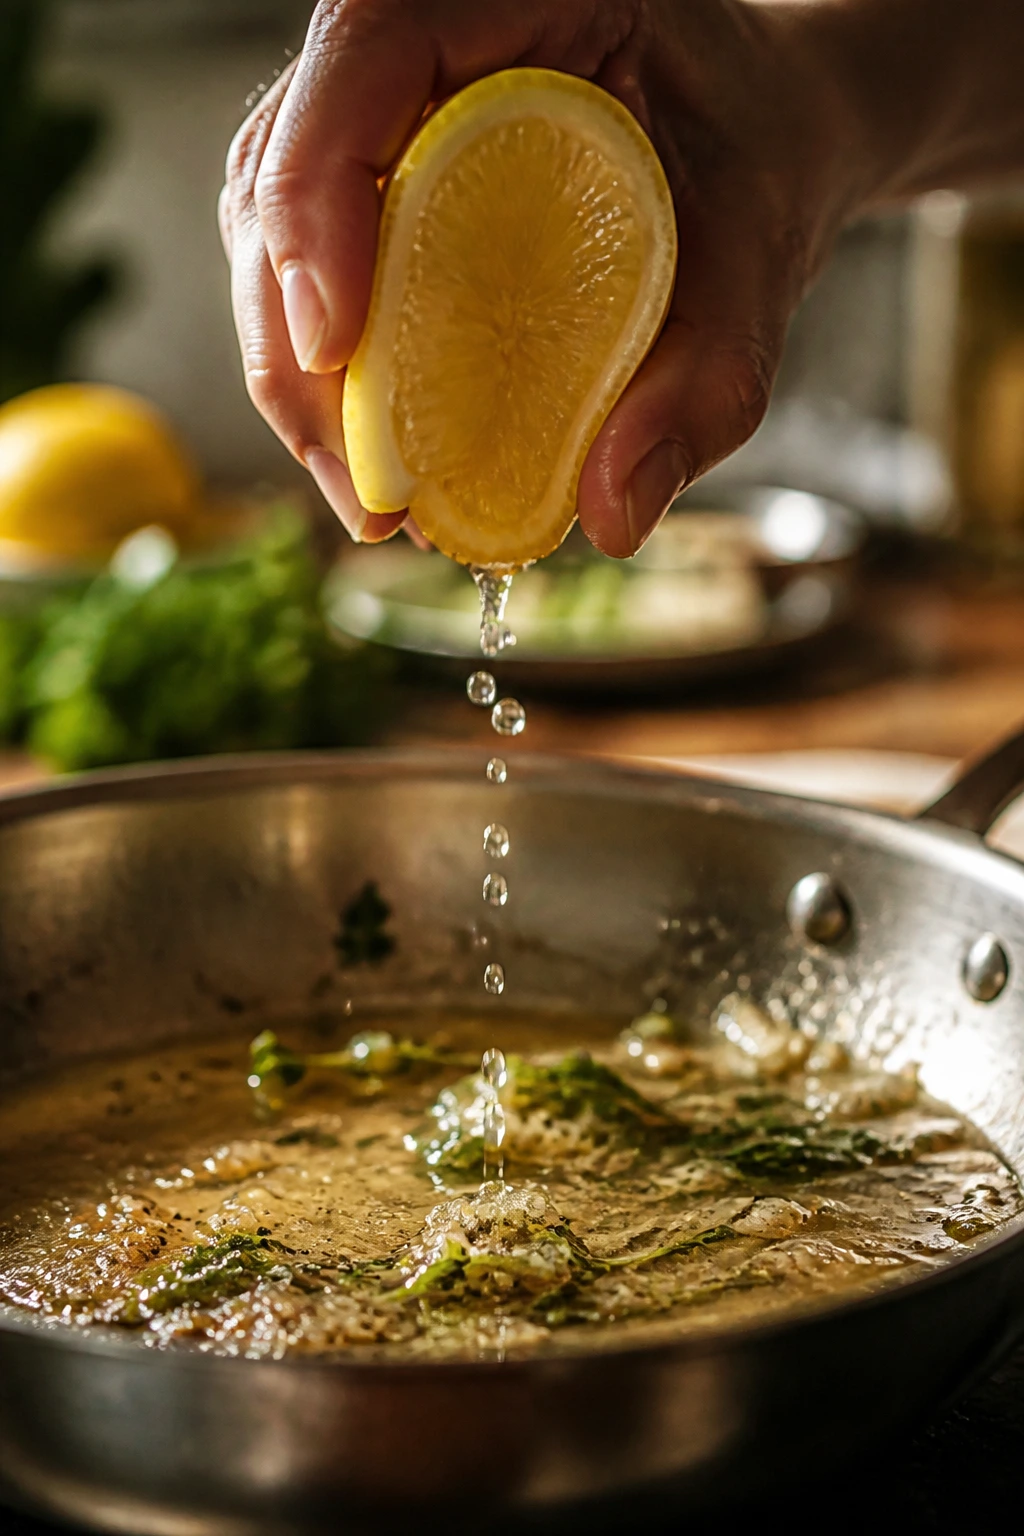
Finish bright: Squeeze in the lemon juice and scatter the parsley over the top. If the sauce looks too thick, add a splash of water or stock.
Tips and Variations
- Fish Choice: Haddock or halibut works if cod isn’t available, though thicker fillets may need an extra minute.
- Texture Note: Don’t stir once the fish is in the pan; you want the fillets to stay intact.
- Serving Move: Spoon the cod over polenta, rice, or toasted bread to catch the sauce.
8. Lemon Pasta with Peas, Herbs, and Burrata
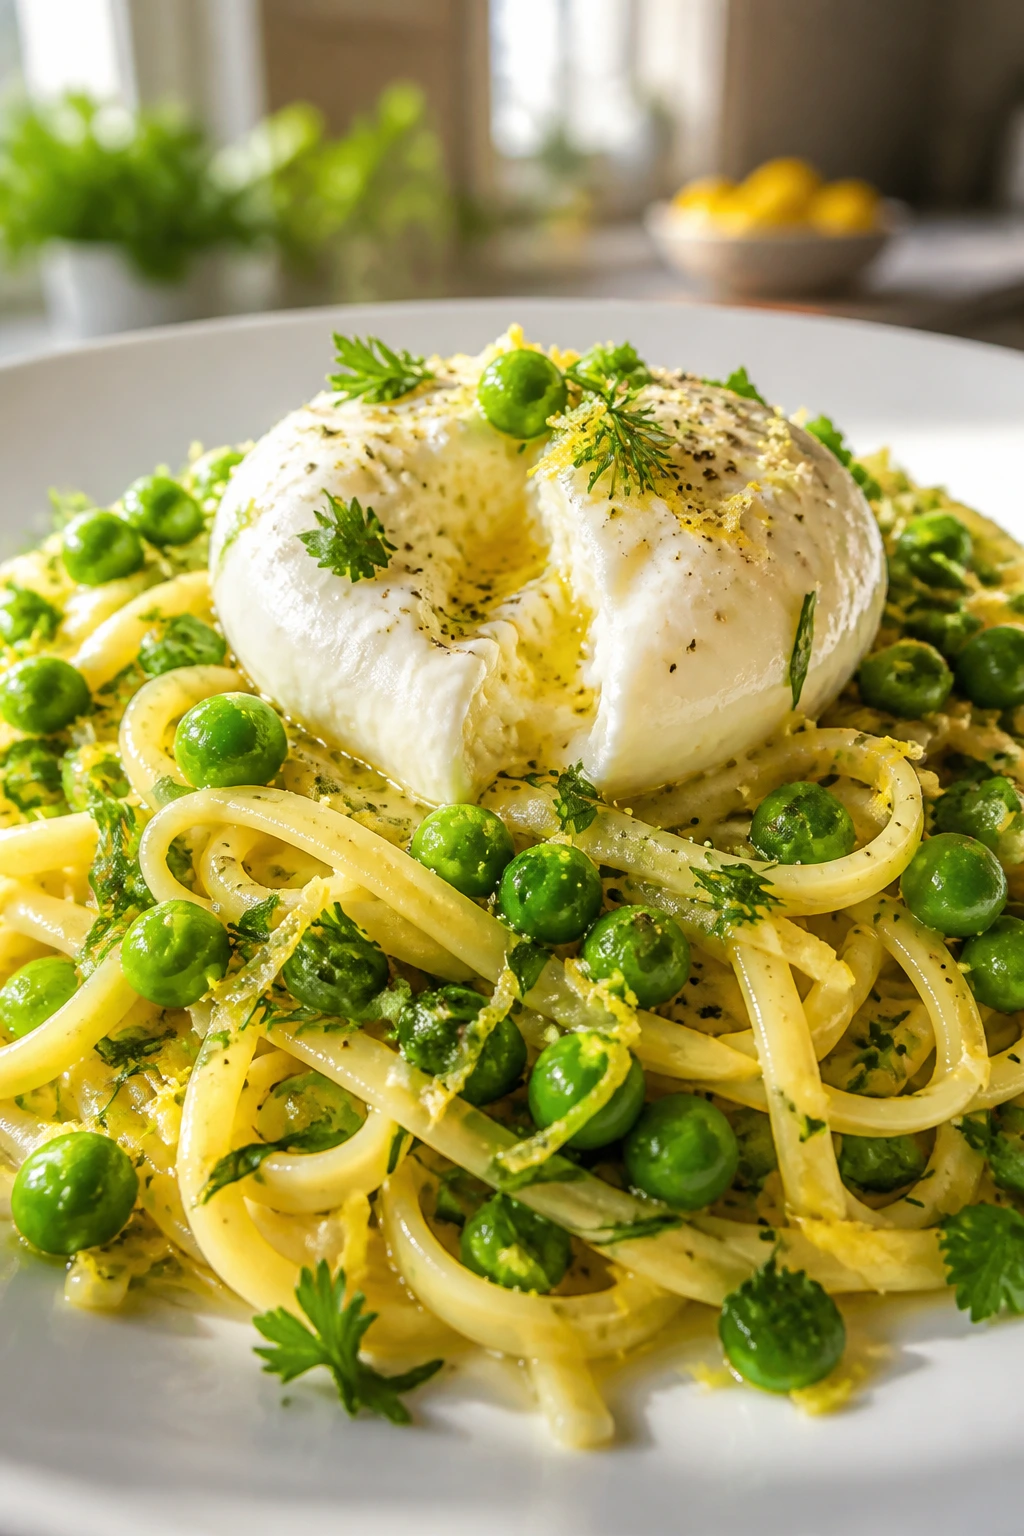
Some dinners have a way of looking fancier than they are. Lemon pasta is one of them. A bowl of glossy noodles, green peas, fresh herbs, and burrata in the middle looks like you spent an hour fussing, when the whole thing is actually brisk and cooperative.
For hosting, that’s gold. You can cook it just before people sit down, and the burrata melts into the warmth in a way that feels a little indulgent without becoming rich for the sake of it. It’s bright, it’s soft, it’s quick, and it tastes like someone paid attention.
Why It Works
The pasta water is the glue. Lemon juice and zest need that starchy water to turn into a sauce instead of a sharp puddle, and the butter adds a smooth base that carries the Parmesan. Burrata goes on at the end so it keeps its creamy center; if you try to cook it, you lose the whole point.
Key Ingredients
- 12 oz short pasta, such as orecchiette, rigatoni, or fusilli
- 2 cups frozen peas
- 3 tbsp butter
- 2 tbsp olive oil
- 2 garlic cloves, thinly sliced
- Zest of 2 lemons
- 3 tbsp lemon juice
- ¾ cup reserved pasta water, plus more if needed
- ¾ cup grated Parmesan
- 8 oz burrata, torn into pieces
- ¼ cup chopped basil
- 1 tbsp chopped mint
- Salt and black pepper
Quick Steps
-
Boil pasta and peas: Cook the pasta in well-salted water. Add the peas during the last 2 minutes so they stay green and sweet. Reserve at least 1 cup of pasta water before draining.
-
Build the sauce: In the empty pasta pot or a wide skillet, melt the butter with the olive oil over medium heat. Add the garlic and cook for 30 seconds until fragrant, not browned.
-
Add lemon and water: Stir in the lemon zest, lemon juice, and ½ cup pasta water. The liquid should look a little cloudy and smell bright.
-
Toss everything together: Add the pasta, peas, Parmesan, basil, and mint. Stir until the sauce clings to the noodles. Add more pasta water a splash at a time if it looks tight.
-
Finish with burrata: Plate the pasta and tear the burrata over the top. Season with black pepper and a pinch of salt if needed. Serve right away while the cheese is still soft.
Tips and Variations
- Crunch Option: Toasted pine nuts or breadcrumbs give you a little texture, which the dish appreciates.
- Herb Swap: Dill works well if you want a greener, more spring-forward profile.
- Hosting Advice: Keep the burrata chilled until the last minute, then let the hot pasta soften it naturally.
9. Red Wine Braised Short Ribs with Creamy Mashed Potatoes
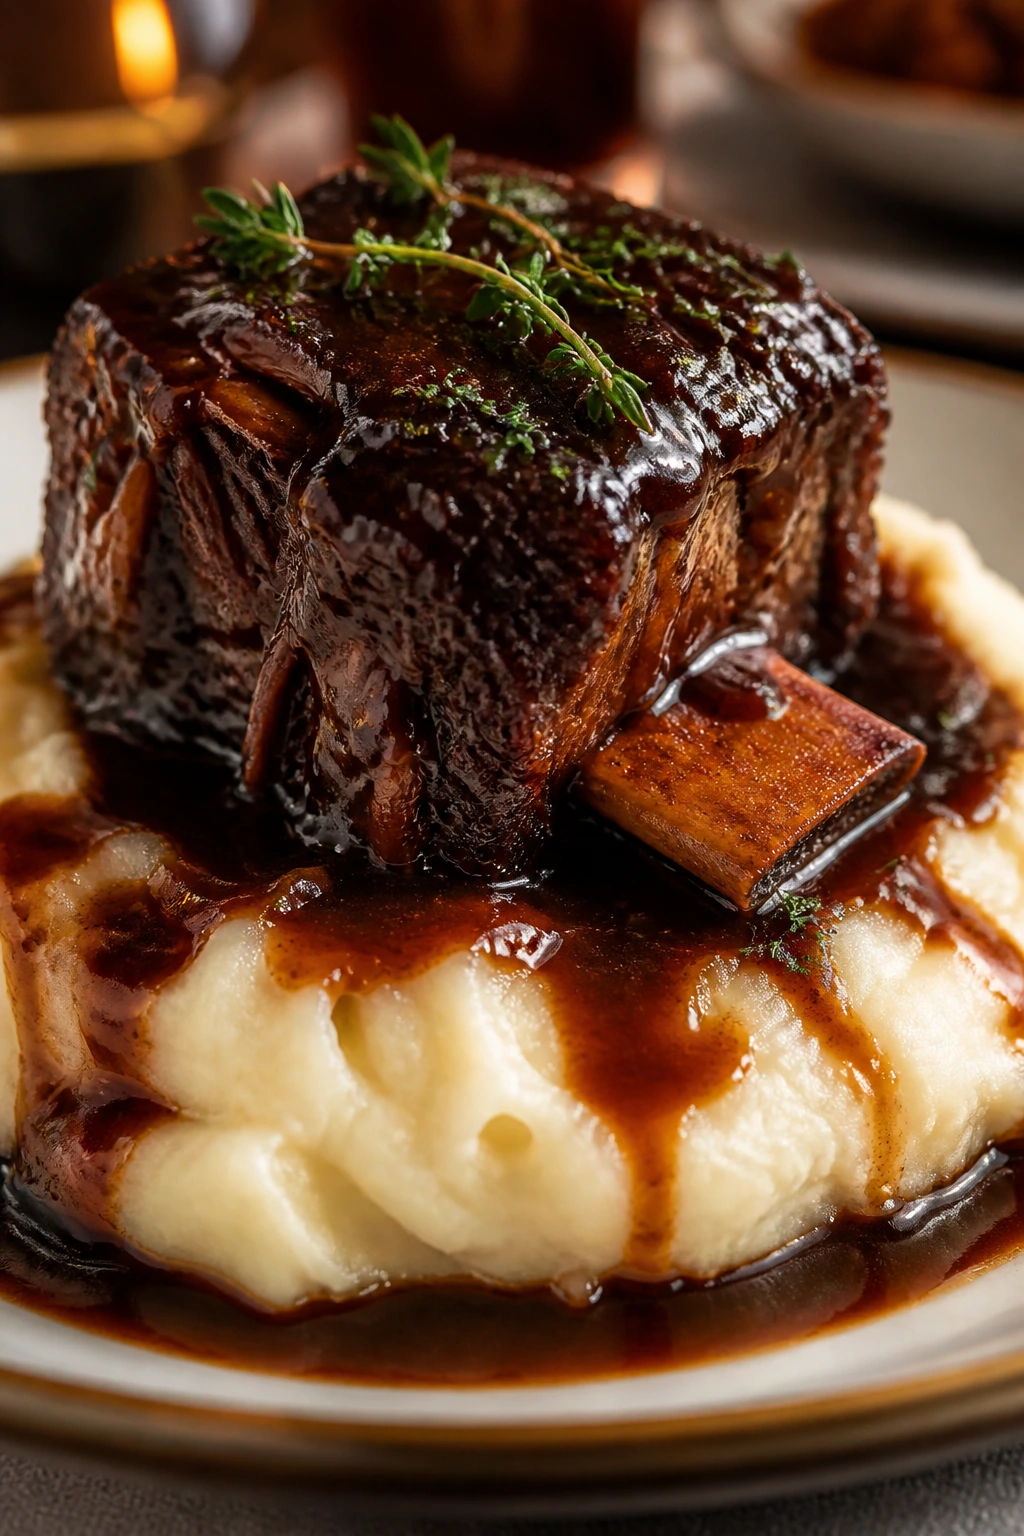
Short ribs are not shy. They take time, they perfume the house, and they reward patience with meat that falls apart under a fork. If you want a dinner that feels substantial and warm in the best way, this is the one.
For a special meal, the braise is almost unfairly useful. You can make it ahead, chill it, lift off the fat, and reheat it gently while you mash the potatoes. The sauce turns glossy and deep, and the whole plate feels like it came from someone who knows what they’re doing.
Why It Works
Collagen is the magic here. Long, slow heat turns tough connective tissue into silky richness, which is why short ribs need time more than they need attention. Browning the meat first matters because it gives the braise a darker, fuller flavor. Once the braise is done, the sauce can be reduced to a spoonable glaze that clings to the beef instead of running away from it.
Key Ingredients
- 4 lb bone-in beef short ribs, patted dry
- 2 tsp kosher salt
- 1 tsp black pepper
- 2 tbsp flour
- 2 tbsp oil
- 1 large onion, chopped
- 2 carrots, chopped
- 2 celery stalks, chopped
- 4 garlic cloves, smashed
- 2 tbsp tomato paste
- 2 cups dry red wine
- 2 cups beef stock
- 2 sprigs thyme
- 1 bay leaf
For the Mashed Potatoes:
- 3 lb Yukon Gold potatoes, peeled and chopped
- 4 tbsp butter
- ½ cup heavy cream
- ½ cup whole milk
- 1 tsp kosher salt, plus more to taste
Quick Steps
-
Brown the ribs: Heat the oven to 325°F. Season the short ribs with salt and pepper, then dust lightly with flour. Sear them in a Dutch oven with oil over medium-high heat until browned on all sides, about 8 to 10 minutes total. Remove to a plate.
-
Cook the vegetables: Add the onion, carrots, and celery to the pot and cook for 5 minutes, scraping up the browned bits. Stir in the garlic and tomato paste and cook for 1 minute until the paste darkens slightly.
-
Braise: Pour in the red wine and simmer for 3 minutes. Add the stock, thyme, bay leaf, and short ribs. The liquid should come partway up the meat, not drown it.
-
Slow roast: Cover the pot and braise in the oven for 2½ to 3 hours, until the meat is fork-tender and nearly falling from the bone.
-
Make the potatoes: Near the end of cooking, boil the potatoes in salted water until tender, about 15 minutes. Drain and mash with butter, cream, milk, and salt until smooth and fluffy.
-
Reduce the sauce: Remove the ribs and strain or skim the sauce if you want it tidy. Simmer it on the stove for a few minutes if you want it thicker and shinier.
-
Serve hot: Spoon potatoes onto warm plates, top with short ribs, and spoon the sauce over everything.
Tips and Variations
- Better Tomorrow: Braised short ribs often taste even better the next day after the flavors settle.
- Wine Choice: Pick a dry red you’d actually drink; the sauce will carry those flavors.
- Lazy-Proof Move: Chill the braise overnight and scrape off the solid fat before reheating. It’s easier and cleaner.
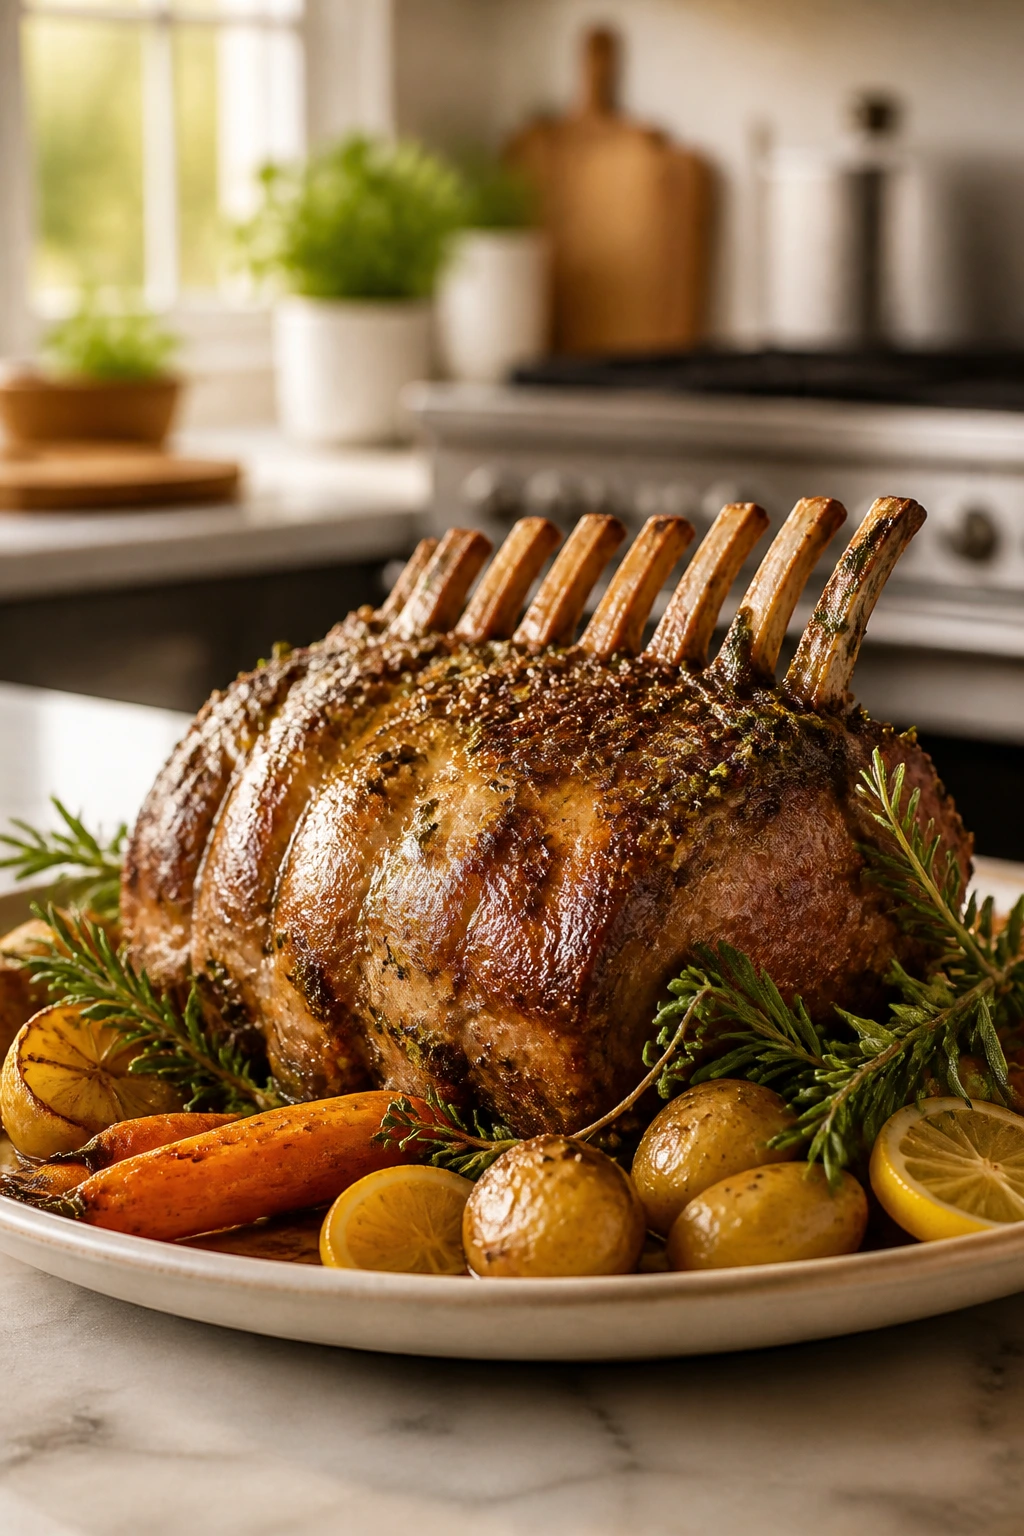
10. Herb-Crusted Lamb Chops with Mint Yogurt and Couscous
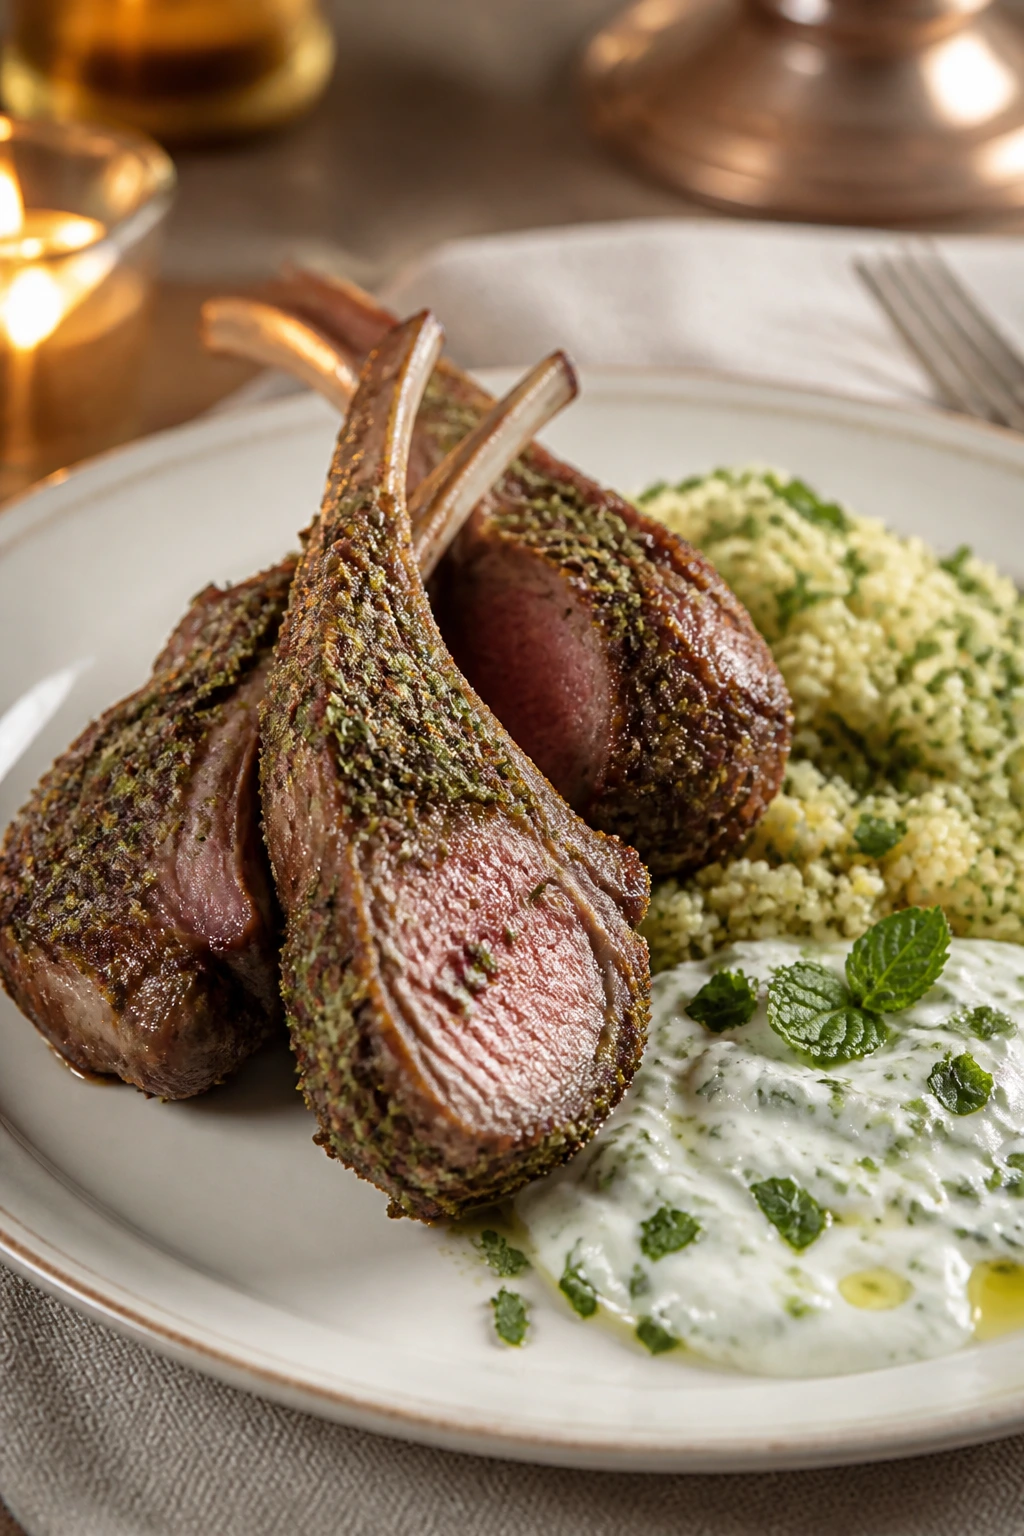
Lamb chops feel celebratory in a way that’s hard to fake. They cook fast, they look tidy on a platter, and they bring just enough richness to make the night feel special without dragging the meal into heaviness.
Mint yogurt keeps the flavor bright, couscous gives you a fast, fluffy base, and the herb crust adds crunch where lamb needs it most. If you like a dinner that feels a little more dressed up than roast chicken but far less demanding than a whole roast, this is a sweet spot.
Why It Works
Lamb chops need aggressive seasoning and a short, hot cook. The Dijon helps the herb crust stick, the panko browns quickly, and the meat itself stays tender if you stop around medium-rare. Couscous is useful because it absorbs the lamb juices without needing a lot of attention, and the yogurt cuts through the richness with a cool, tangy finish.
Key Ingredients
- 8 lamb rib chops, about 2 lb total
- 2 tsp kosher salt
- 1 tsp black pepper
- 2 tbsp Dijon mustard
- ½ cup panko breadcrumbs
- 2 tbsp chopped parsley
- 1 tbsp chopped mint
- 1 tbsp chopped rosemary
- 2 garlic cloves, grated or minced
- 2 tbsp olive oil
- 1 cup couscous
- 1¼ cups chicken stock or water
- ½ cup Greek yogurt
- 1 tbsp lemon juice
- ¼ cucumber, grated and squeezed dry
Quick Steps
-
Mix the crust: Combine the panko, parsley, mint, rosemary, garlic, 1 tablespoon of olive oil, and a pinch of salt in a small bowl. It should look damp, not soggy.
-
Prep the lamb: Pat the chops dry and season with salt and pepper. Brush the meaty side with Dijon mustard, then press the herb crumbs onto it.
-
Sear the chops: Heat the remaining olive oil in a skillet over medium-high. Sear the chops for 2 to 3 minutes per side, then transfer the pan to a 400°F oven for 2 minutes to set the crust, or broil briefly if your skillet isn’t oven-safe.
-
Cook the couscous: Bring the stock or water to a boil, pour it over the couscous in a bowl, cover, and let it sit for 5 minutes. Fluff with a fork and season lightly.
-
Stir the yogurt sauce: Mix the Greek yogurt, lemon juice, cucumber, and a pinch of salt. The sauce should be cool and spoonable, not watery.
-
Rest and serve: Let the chops rest for 5 minutes. Plate them over the couscous and spoon the mint yogurt alongside.
Tips and Variations
- Doneness Check: Aim for 130 to 135°F for medium-rare; lamb gets chewy when pushed too far.
- No Cucumber? Skip it and keep the yogurt straight mint-lemon if that feels cleaner.
- Serving Style: Arrange the chops in a fan on a platter with herbs scattered over the top; it looks intentional without needing much effort.
Why These Dinners Stay Manageable When Guests Arrive
A good hosting dinner is built around one simple truth: the food should not need you every second. The best dishes above have some kind of rest built in, or a sauce that can wait, or a component that finishes quickly while another one cools its heels. That’s not an accident. It’s the difference between cooking with your guests and cooking for the stove.
I also like that these recipes give you texture contrast without turning the menu into a puzzle. A roast chicken brings crisp skin and soft vegetables. Salmon gives you tender fish and a cool herb sauce. Risotto is soft and creamy, while steak and lamb bring chew and crust. That mix matters more than people think. A table full of soft food gets boring fast.
Keep One Thing That Can Wait
If you’re making a full dinner, let one item be patient. Braised short ribs, stuffed shells, and roast chicken are generous that way. They free you up to finish a fast side, pour a drink, or answer the door without staring at a timer like it owes you money.
Use Acid Like a Finishing Tool
Lemon juice, vinegar, Dijon, capers, and dill are not garnish here. They’re the things that keep richer dishes from feeling flat. A little sharpness at the end makes the whole menu taste more awake.
Don’t Try to Make Every Dish a Star
That’s the mistake. One star, two supporting players, done. If every plate is fighting for attention, the meal feels noisy. If one dish carries the room and the others behave, the whole dinner feels thoughtful.
Essential Equipment for These Recipes
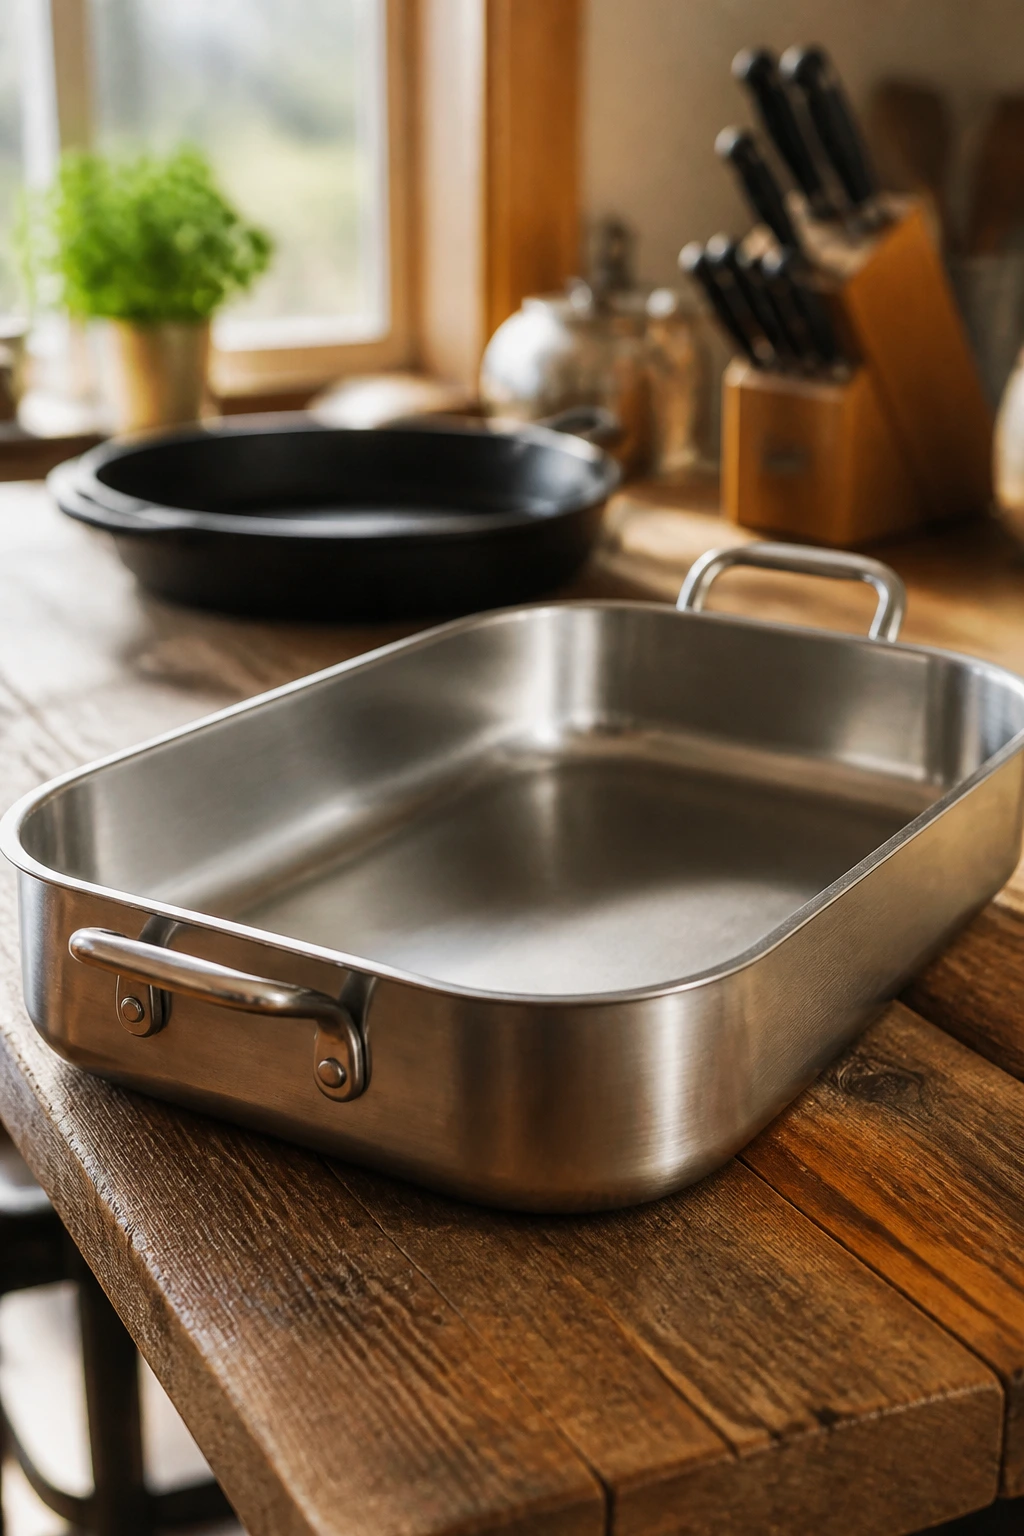
- Large roasting pan or sheet pan: Useful for roast chicken, salmon, and vegetables; a rimmed sheet pan works when you want easier cleanup.
- Cast-iron skillet: Best for steak, pork tenderloin, and lamb chops because it keeps heat steady and gives a better sear.
- Dutch oven or heavy braising pot: The right vessel for short ribs and a smart choice for anything that starts on the stove and finishes in the oven.
- Large nonstick or stainless sauté pan: Handy for risotto, cod, and quick sauces where you need room to stir.
- Instant-read thermometer: The single best tool for chicken, fish, steak, pork, and lamb. Guessing is how dinner gets dry.
- Fine-mesh colander: Makes pasta, peas, and potatoes easier to drain without losing half of them to the sink.
- Wooden spoon or heatproof spatula: Good for risotto, sauces, and deglazing the browned bits from the pan.
- Sharp chef’s knife: Essential for trimming vegetables, slicing herbs, and carving the chicken or lamb cleanly.
- Cutting board with a groove: Keeps juices from running onto the counter when you slice roasted meats.
- Microplane or fine grater: Useful for lemon zest, Parmesan, and garlic when you want a smooth finish.
- Airtight storage containers: Helpful for make-ahead sauces, leftover short ribs, and anything you want to chill before reheating.
Smart Shopping for a Mother’s Day Dinner Menu
Buy the meat and fish with the end result in mind, not just the label. A whole chicken should feel heavy for its size, with skin that looks intact and pale rather than torn. For salmon, look for fillets with firm flesh and a moist, clean smell; the center-cut pieces cook most evenly. Cod should be thick and translucent, not dry at the edges before it ever reaches your kitchen.
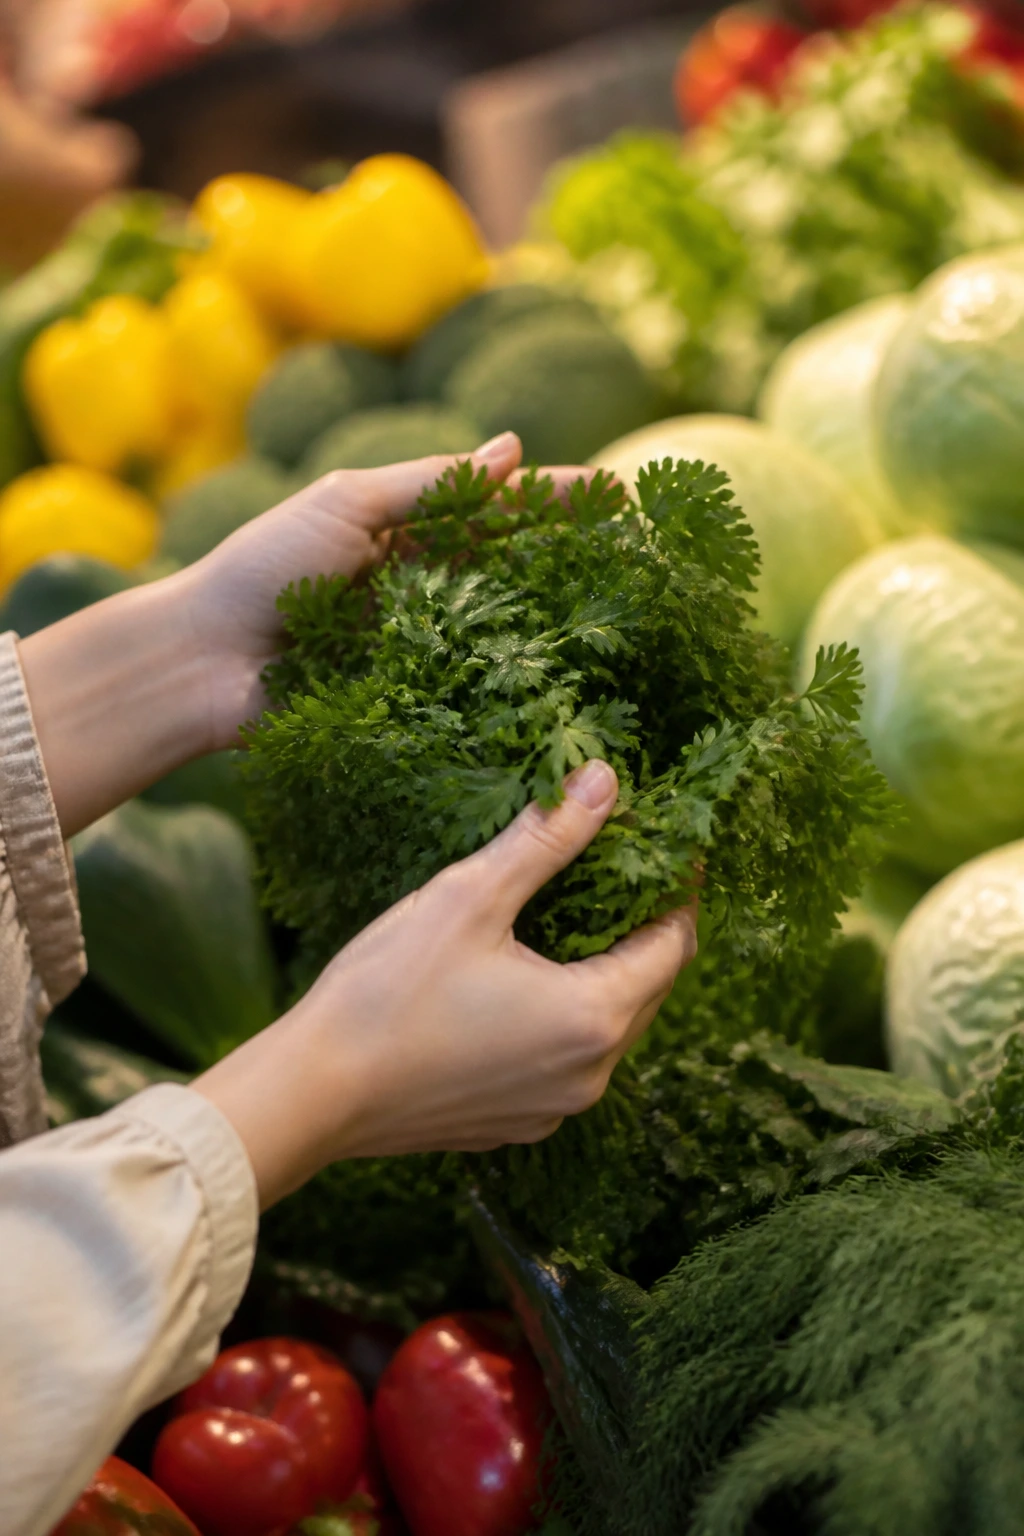
Herbs and produce matter more than people give them credit for. Dill, parsley, mint, thyme, rosemary, and basil should look perky, not wilted in the bunch. Asparagus is best when the tips are tight and the stalks are similar in thickness. For peas, frozen is perfectly fine and often better than tired fresh ones. I’d rather use frozen peas that taste sweet than fresh ones that feel like they’ve been sitting around all week.
Cheese and dairy deserve a little attention too. Buy ricotta that looks creamy rather than watery, Parmesan that you grate yourself if possible, and burrata that’s still within a comfortable date range. If you’re making cream sauces, crème fraîche holds up a little more gracefully than sour cream. That’s not a moral judgment. It’s just a texture thing.
Pantry items sound boring until they aren’t. Low-sodium broth gives you more control over seasoning, dry white wine adds a better edge to sauces than cooking wine ever will, and good olive oil makes a visible difference in pan sauces and roasted vegetables. You don’t need expensive ingredients everywhere. You do need decent ones in the places where flavor gets concentrated.
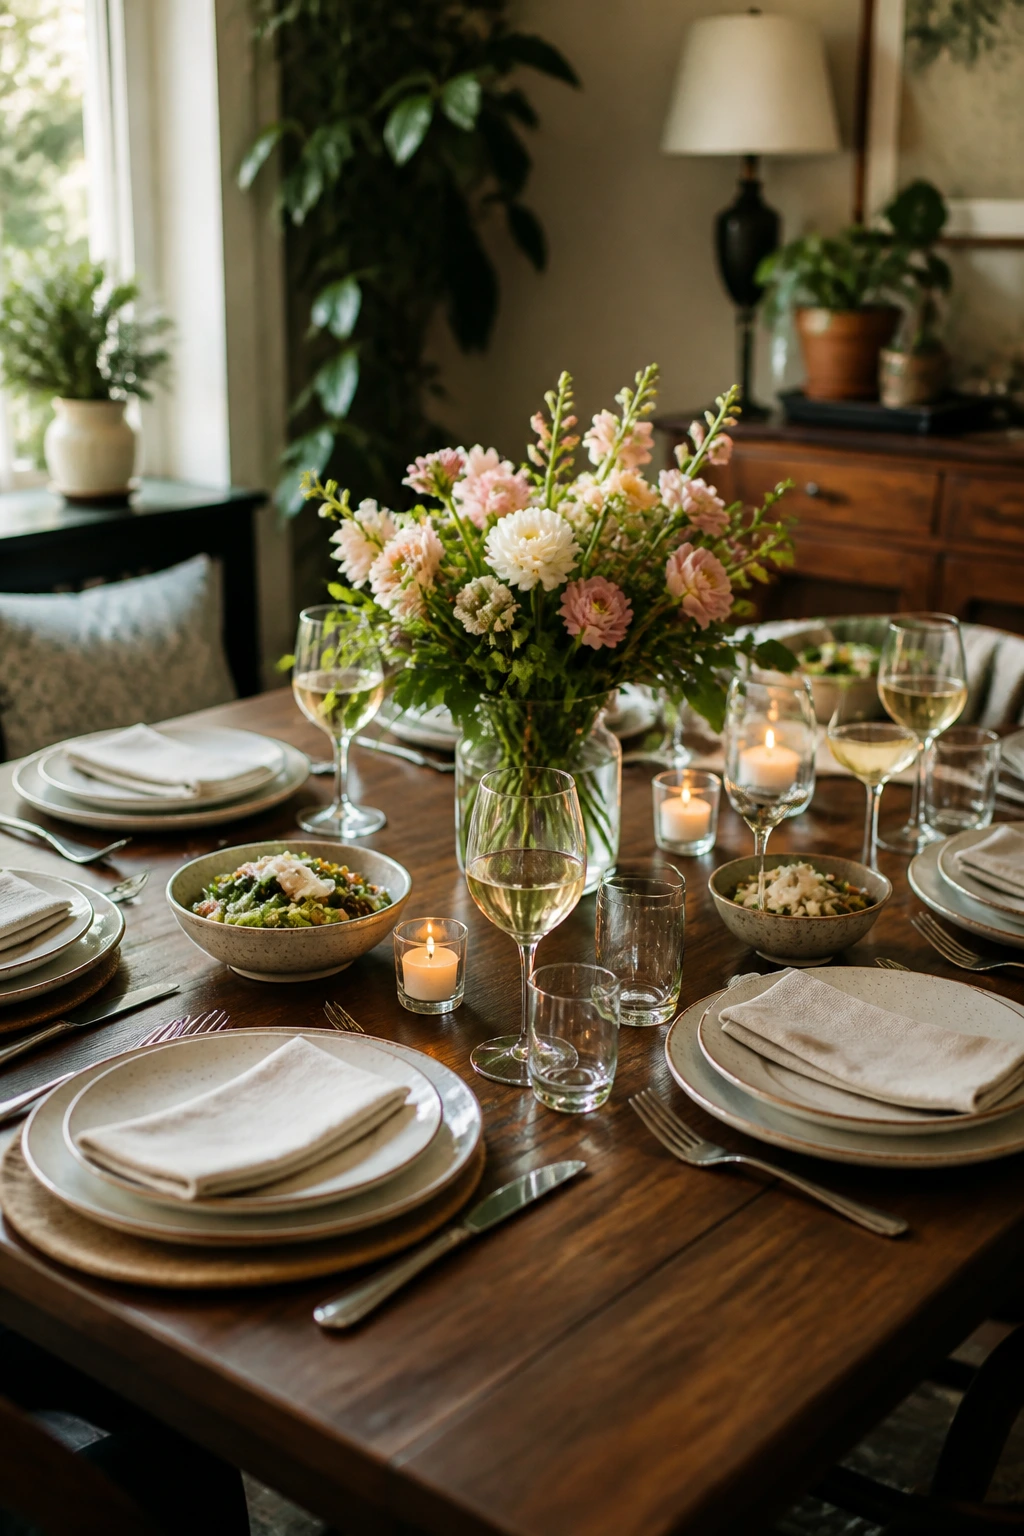
How to Serve These Recipes
Presentation: Use warm platters when you can. Roast chicken wants a big board with the vegetables tucked around it, while salmon and cod look best when the sauce is spooned beneath or around the fish instead of dumped over the top. A few herb leaves, lemon wedges, or a dusting of parsley go farther than a pile of random garnish.
Accompaniments: The easiest supporting cast is a simple green salad, crusty bread, and one starchy side that doesn’t create more work. For the richer mains, go with roasted carrots, green beans, or asparagus. For the lighter dishes, a loaf of good bread and a crisp salad make the meal feel full without crowding the plate.
Portions: Plan on 6 ounces of fish or steak per person, 1 chicken breast or a hearty serving of roast chicken when using a whole bird, and about 1½ cups of pasta or risotto per adult as a main course. Braised short ribs run richer, so 1 large rib per person is often enough if you’ve got mashed potatoes alongside. Scale up the sides before you scale up the protein.
Beverage Pairing: Lemon-heavy dishes like salmon and cod like a dry white wine or sparkling water with citrus. Steak, lamb, and short ribs lean toward a medium-bodied red. For a no-alcohol option, a citrus spritz with mint or a chilled ginger drink gives the table some lift.
Additional Tips and Flavor Boosters
Flavor Enhancement: A finishing hit of acid changes more than people expect. A squeeze of lemon over roast chicken, a spoon of vinegar in the short rib sauce, or a little extra Dijon in the pork pan sauce wakes up the whole plate. Don’t bury the dish in it. Use just enough to make the flavors move.
Customization: If your group likes more richness, add browned butter to the potatoes, a little extra Parmesan to the risotto, or crispy breadcrumbs over the stuffed shells. If they prefer lighter food, lean harder into herbs and vegetables and keep the sauces thinner and sharper. You can steer these recipes in either direction without tearing them apart.
Serving Suggestions: Crisp herbs on top of pasta, shaved Parmesan over chicken, chopped chives over steak, and a few dill fronds over salmon all do more than decorate. They give each plate a fresh smell the second it lands. That first smell matters. People eat with their noses before they touch the fork.
Make-It-Yours: Gluten-free guests can eat the roast chicken, salmon, cod, steak, pork, and lamb with simple starch swaps like potatoes, rice, or polenta. Dairy-free cooks can skip the cream sauces and use olive oil, broth, and herbs instead. Vegetarians have two easy anchors here already — the stuffed shells and lemon pasta — and both can be padded out with salad, bread, or extra vegetables.
Make-Ahead, Storage, and Reheating Guidance
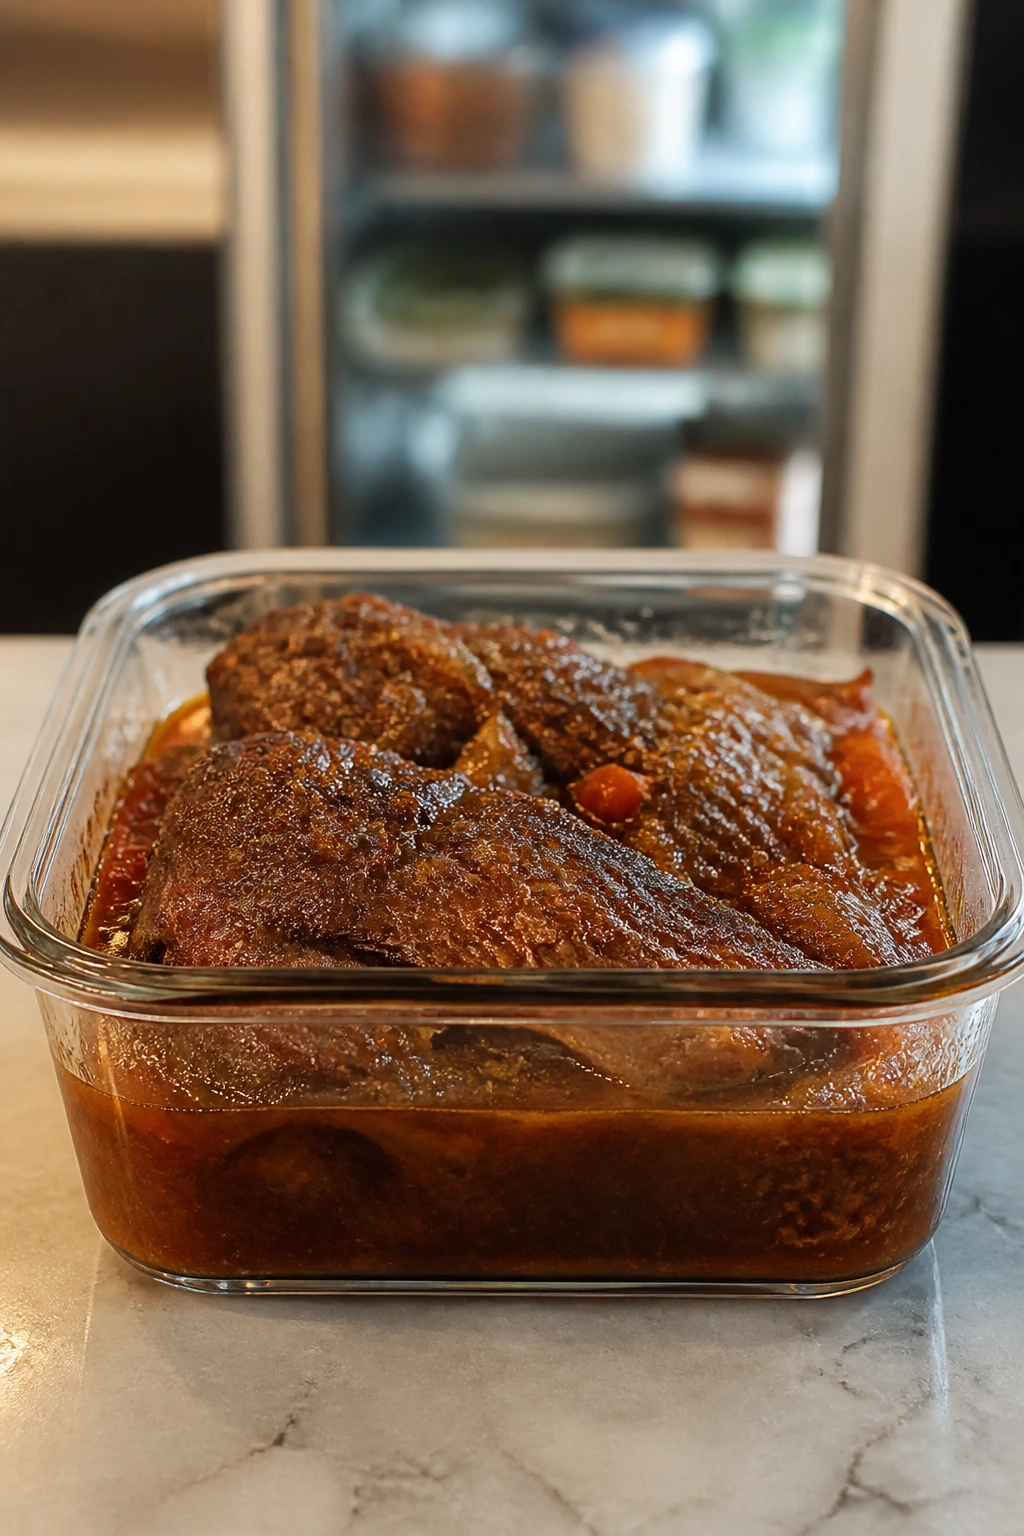
Roast chicken, stuffed shells, and braised short ribs are the most make-ahead-friendly dishes in the group. The chicken can be seasoned the night before, the shells can be assembled and chilled for up to 24 hours, and the short ribs often improve after a night in the refrigerator because the fat firms up and lifts off cleanly. Short ribs keep well for 3 to 4 days refrigerated and up to 2 months frozen. Reheat them slowly, covered, at 300°F with a splash of their braising liquid.
Fish is different. Salmon and cod are best cooked the same day, and leftovers are good for about 1 to 2 days in the fridge if you cool them promptly. Reheat gently at 275°F, wrapped loosely in foil, or flake the fish cold into salads or grain bowls. I would not blast fish in a hot oven unless you enjoy the smell of regret.
Pasta and risotto need a little care. Stuffed shells can be baked ahead and held in the fridge for 3 days, then warmed covered at 350°F until hot through. Lemon pasta tastes brightest fresh, but leftovers keep for 3 days and reheat best with a splash of water in a skillet over low heat. Risotto does not freeze well in my book; it turns gummy. If you have leftovers, turn them into arancini-style patties or loosen them with broth on the stove.
For steak, pork tenderloin, and lamb chops, store leftovers for 3 to 4 days in the fridge and slice them only when you’re ready to eat. That keeps the meat from drying out. Reheat low and slow, covered, then finish briefly in a hot pan if you want the exterior to wake back up.
Variations and Adaptations to Try
Gluten-Free Table Swap: The roast chicken, salmon, pork, cod, and lamb recipes are naturally easy to keep gluten-free if you skip flour dredges and use cornstarch or no thickener in sauces. Serve them with potatoes, rice, or polenta instead of bread-heavy sides. The stuffed shells and lemon pasta need gluten-free pasta, and the texture is best if you cook it just shy of done.
Dairy-Light Without Feeling Thin: Swap crème fraîche and sour cream for unsweetened Greek yogurt in the salmon sauce and lemon pasta. Use olive oil instead of some of the butter in the potato and couscous sides, then finish with extra herbs and lemon zest. The meal still feels complete; it just leans fresher.
Vegetarian Centerpiece Night: Make the stuffed shells the main event and add the lemon pasta as a second vegetarian anchor. Or turn the mushroom risotto into a full centerpiece by stirring in sautéed asparagus, spinach, or roasted artichokes. A green salad and warm bread do the rest.
Lower-Sodium, Brighter-Flavor Version: Cut back on the salt in the initial seasoning and make up the difference with lemon, herbs, black pepper, and a little vinegar. Capers, olives, and Parmesan already bring salt to the table, so taste before adding more. This works especially well for the fish and chicken dishes.
Smaller Crowd, Same Effort: Roast chicken can be scaled to a smaller bird, while short ribs and stuffed shells freeze well in half-batches. If you’re cooking for two or three, pick one star dish and one simple side rather than shrinking every recipe at once. A smaller table deserves just as much care, not a sad little plate.
Common Mistakes to Avoid
-
Trying to make every dish equally elaborate. The symptom is a kitchen full of half-finished pans and no clean serving plan. The fix is to choose one centerpiece and let the other dishes stay simple.
-
Overcooking the protein because the oven feels full of emotion. Chicken dries out, fish gets chalky, pork gets stringy, and steak loses its edge. Use a thermometer and pull things early enough to rest.
-
Ignoring resting time. Sliced too soon, roast chicken leaks, steak bleeds, and lamb chops lose their juices. Resting is not wasted time; it’s part of the recipe.
-
Under-seasoning the vegetables and starches. A beautifully seasoned main on top of bland potatoes or under-salted pasta feels strangely unfinished. Season each component as you go.
-
Making everything creamy and rich. The meal can start to taste flat after the third bite. Put something sharp, green, or briny on the table so the palate stays awake.
-
Leaving plating until guests are already standing there. That’s how food gets cold and the host gets flustered. Warm plates, ready garnishes, and a clear serving order make the whole evening easier.
Frequently Asked Questions

Which of these dinner ideas is easiest for a first-time host?
The roast chicken and stuffed shells are probably the most forgiving. Both can be handled in stages, both feed a group well, and neither punishes you for moving at a normal pace. If you want the least stressful combination, pair one of those with a salad and bread.
What should I make if one guest doesn’t eat meat?
The lemon pasta with peas and burrata is the cleanest vegetarian main, and the stuffed shells work well too. If you’re serving a mixed group, build the menu around one vegetarian dish and one meat or fish dish so everyone has a real choice, not a sad side plate.
Can I prep these recipes the day before?
Yes, several of them are built for that. The chicken can be seasoned ahead, the stuffed shells can be assembled, and the short ribs actually benefit from an overnight chill. Keep fish and pasta fresher, though; those taste better with less waiting.
How do I keep food warm without drying it out?
Use a low oven, around 200°F to 250°F, and cover dishes loosely with foil if they’re prone to drying. Saucy dishes like short ribs and stuffed shells hold well, while fish and steak should be served soon after cooking. Warm plates help more than people realize.
What if my oven only has room for one pan at a time?
Pick the dish that needs the oven longest and use the stovetop for faster items. Salmon, cod, risotto, pork tenderloin, and steak can all be managed with a skillet, while sides like potatoes or vegetables can be cooked in batches. That’s a lot less chaotic than trying to force everything into the oven at once.
Which recipe works best for a larger group?
Stuffed shells and roast chicken scale the easiest. Short ribs are also good for a crowd if you’re willing to braise them in a large pot, because they reheat beautifully and hold their shape. Steak and lamb are better when the guest count is smaller and you want a more intimate feel.
How do I stop salmon or cod from overcooking?
Dry the fish well, keep the heat moderate, and use the color of the fish as your clue. Salmon should still look a little glossy in the center when you take it off the heat, and cod should turn opaque and flake without falling into dry threads. A minute too long matters more than people think.
What if the sauce separates or gets too thick?
A splash of broth, pasta water, or even plain water can usually pull it back together over low heat. For cream sauces, stop the boil once the dairy goes in. If the sauce is already broken, whisking in a small knob of cold butter can sometimes smooth it out.
A Table Worth Sitting Down To
A good hosted dinner doesn’t need to be loud to feel generous. It needs clean flavors, a little planning, and enough breathing room that you can actually enjoy the people sitting across from you. That’s what these recipes have in common. They give you options, not pressure.
Pick the one that fits your kitchen and your crowd, then build around it with confidence. A calm host makes better food, and better food makes a calmer table. That’s the loop worth aiming for.