
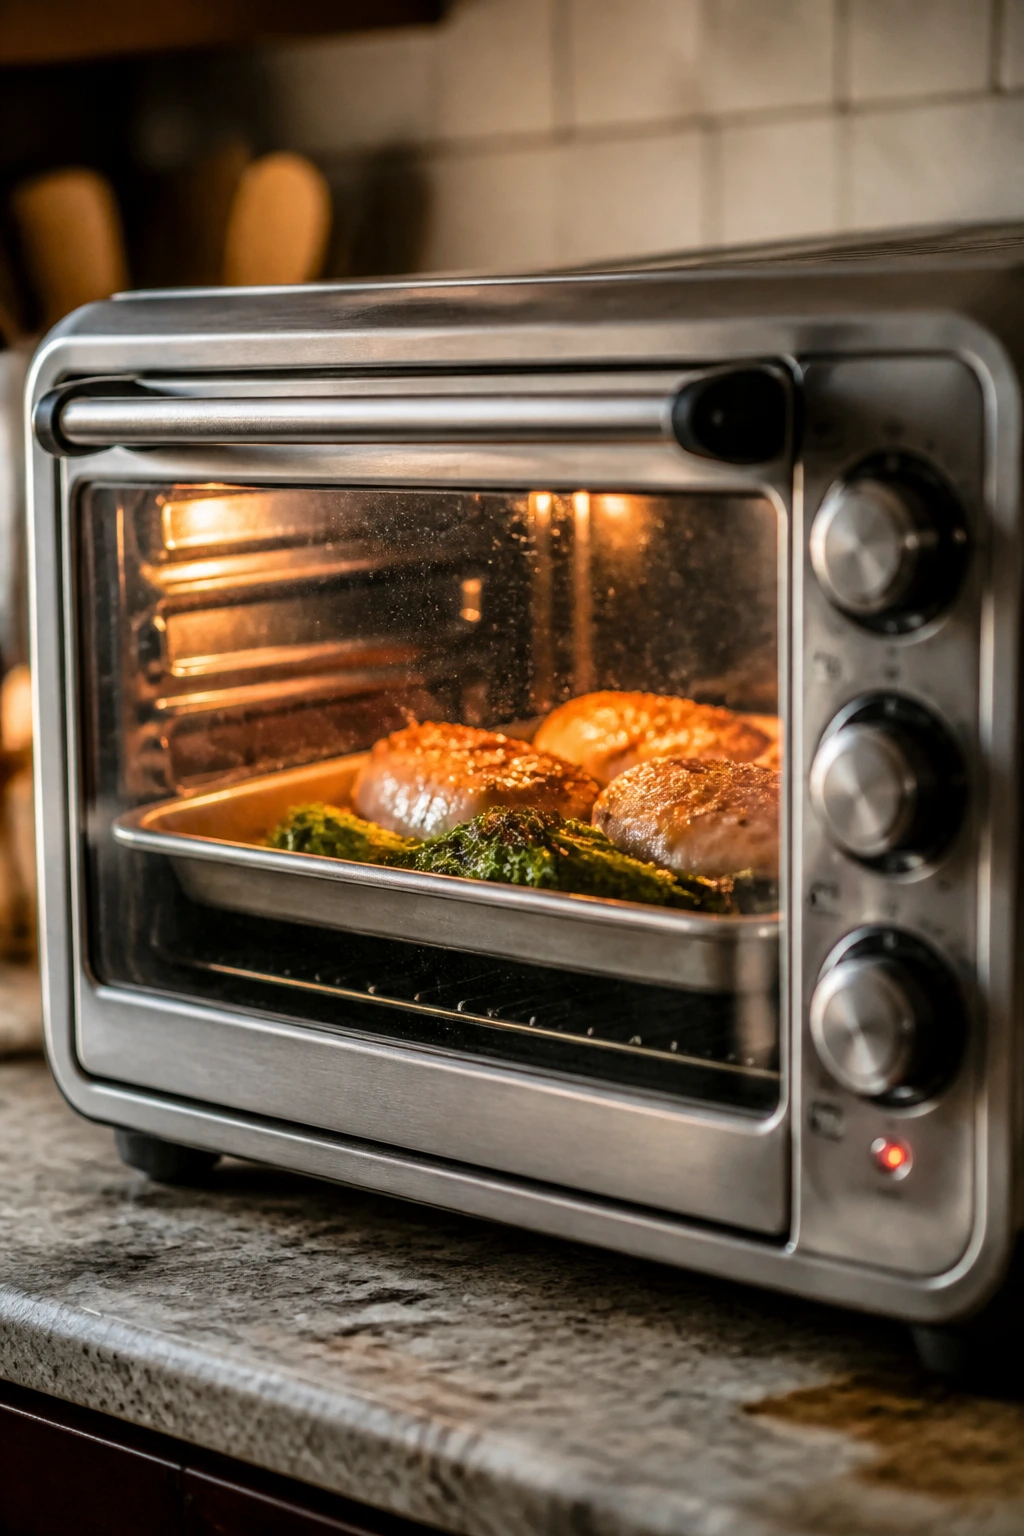
A toaster oven earns its place when you want dinner for two and refuse to heat a full-size oven for the privilege.
The little box gets hot fast, browns food hard, and makes a salmon fillet or a pair of chicken cutlets feel like a proper meal instead of a compromise. That matters more than people admit. Small-kitchen cooking can get sloppy in a hurry, and a countertop oven is one of the few tools that pushes you back toward crisp edges, bubbling cheese, and vegetables with a little color on them.
The trick is choosing recipes that like strong top heat and a small cooking space. Thin cuts, quick-roasting vegetables, shallow saucy bakes, personal pizzas — that’s the sweet spot. Ignore bulky roasts and giant casseroles; the toaster oven is at its best when the food has room to breathe.
I like these dinners because they solve the awkward middle ground between leftovers and takeout. You get a plate with protein, vegetables, and enough texture to keep dinner interesting, without standing over a stove for half the evening. A good toaster oven dinner should smell like garlic and browned cheese, not like a rescue mission.
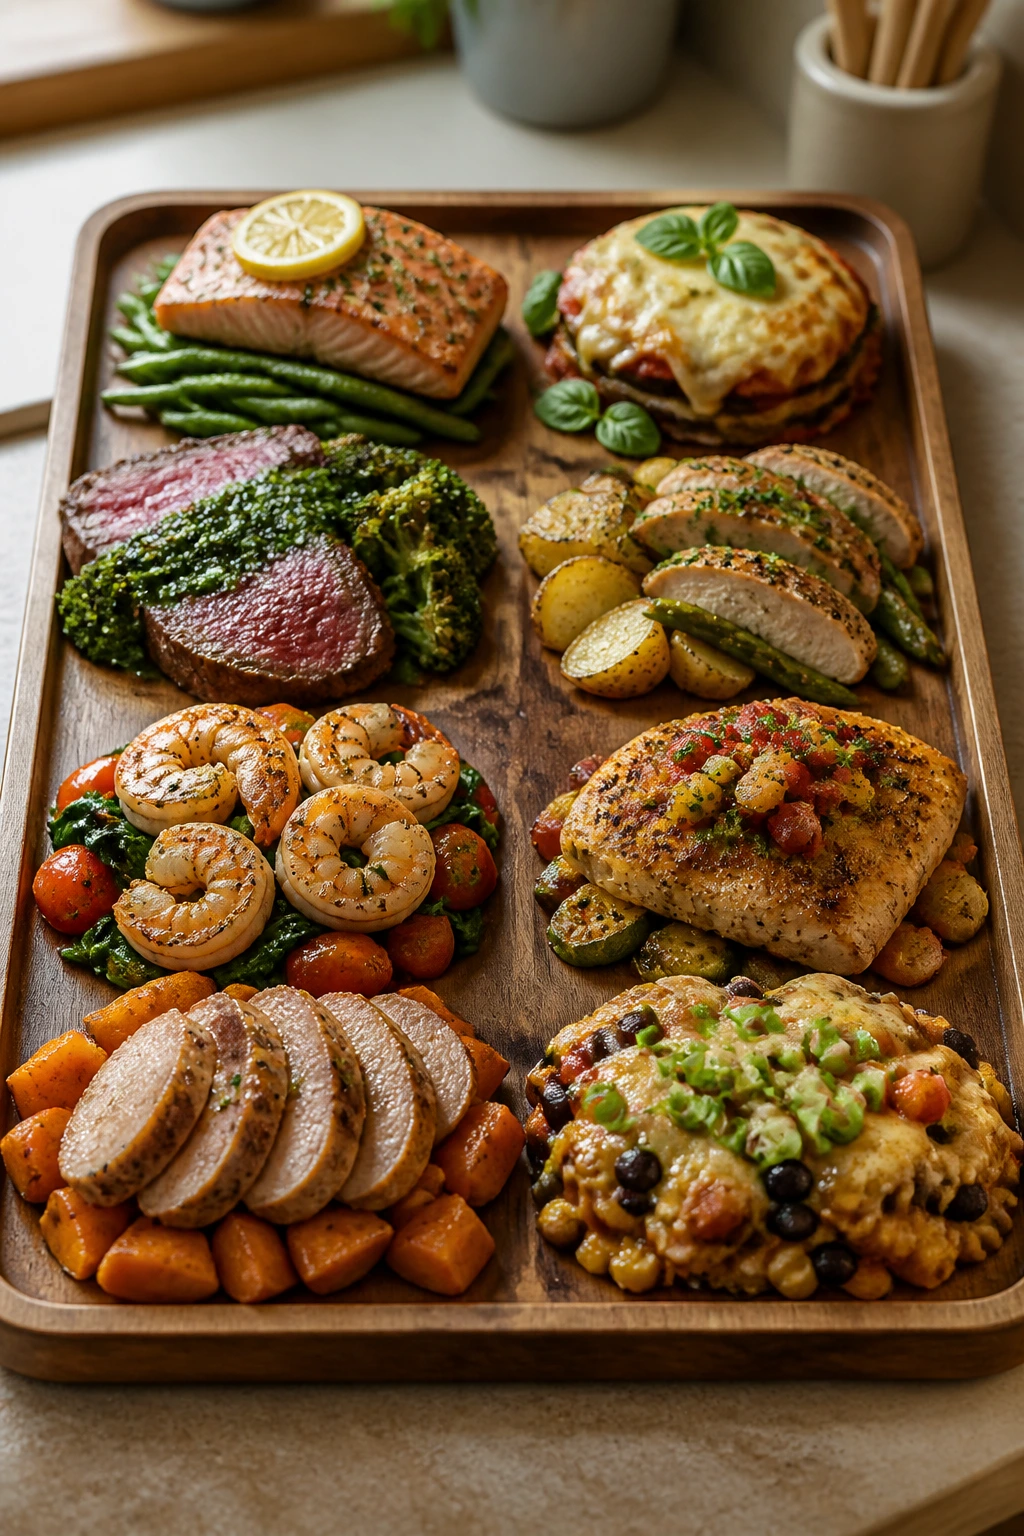
Why These Eight Dinners Earn Their Keep
-
Built for Two: Every recipe is portioned so you’re cooking a real dinner without staring at a mountain of leftovers for three days.
-
Fast Heat, Better Browning: A toaster oven preheats quickly and rewards small batches with crisp edges, blistered cheese, and browned vegetables.
-
Less Fuss, Fewer Pans: Most of these meals stay on one tray or in one small baking dish, which means the cleanup is mercifully short.
-
Good Weeknight Mix: There’s fish, poultry, pork, shrimp, pizza, and two meatless options, so you can rotate without falling into a rut.
-
Flexible Ingredients: Each dinner can take a swap or two if your pantry is thin or your fridge is doing that sad half-full thing.
-
Actual Dinner Energy: These aren’t snack plates pretending to be meals. They eat like supper, which is the whole point.
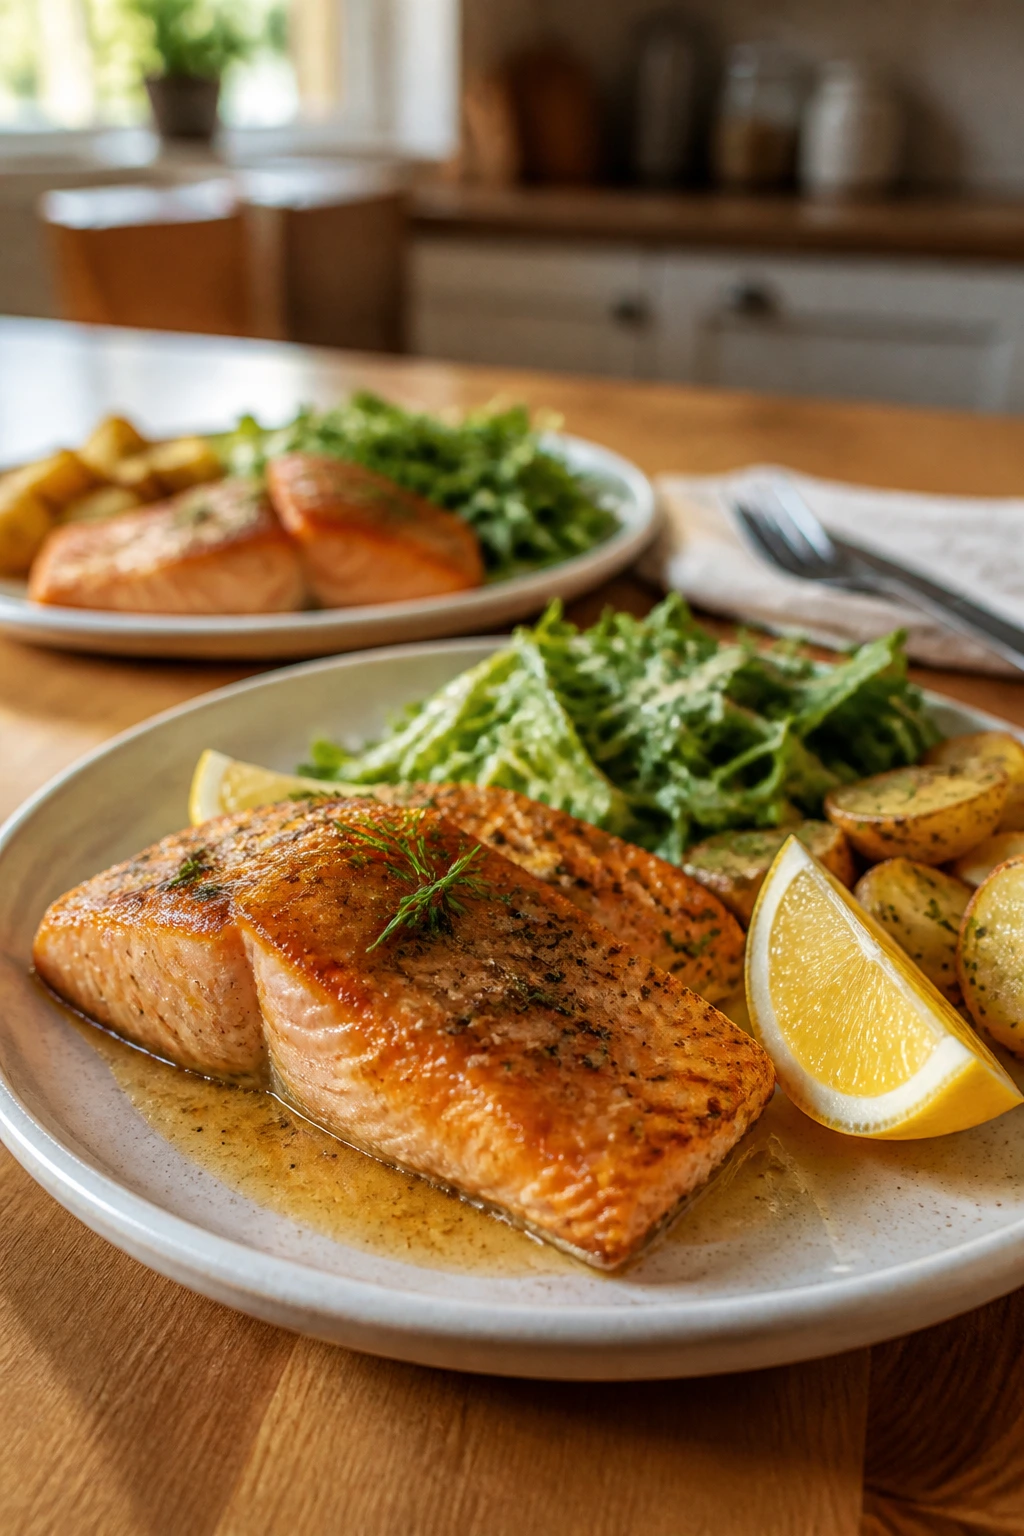
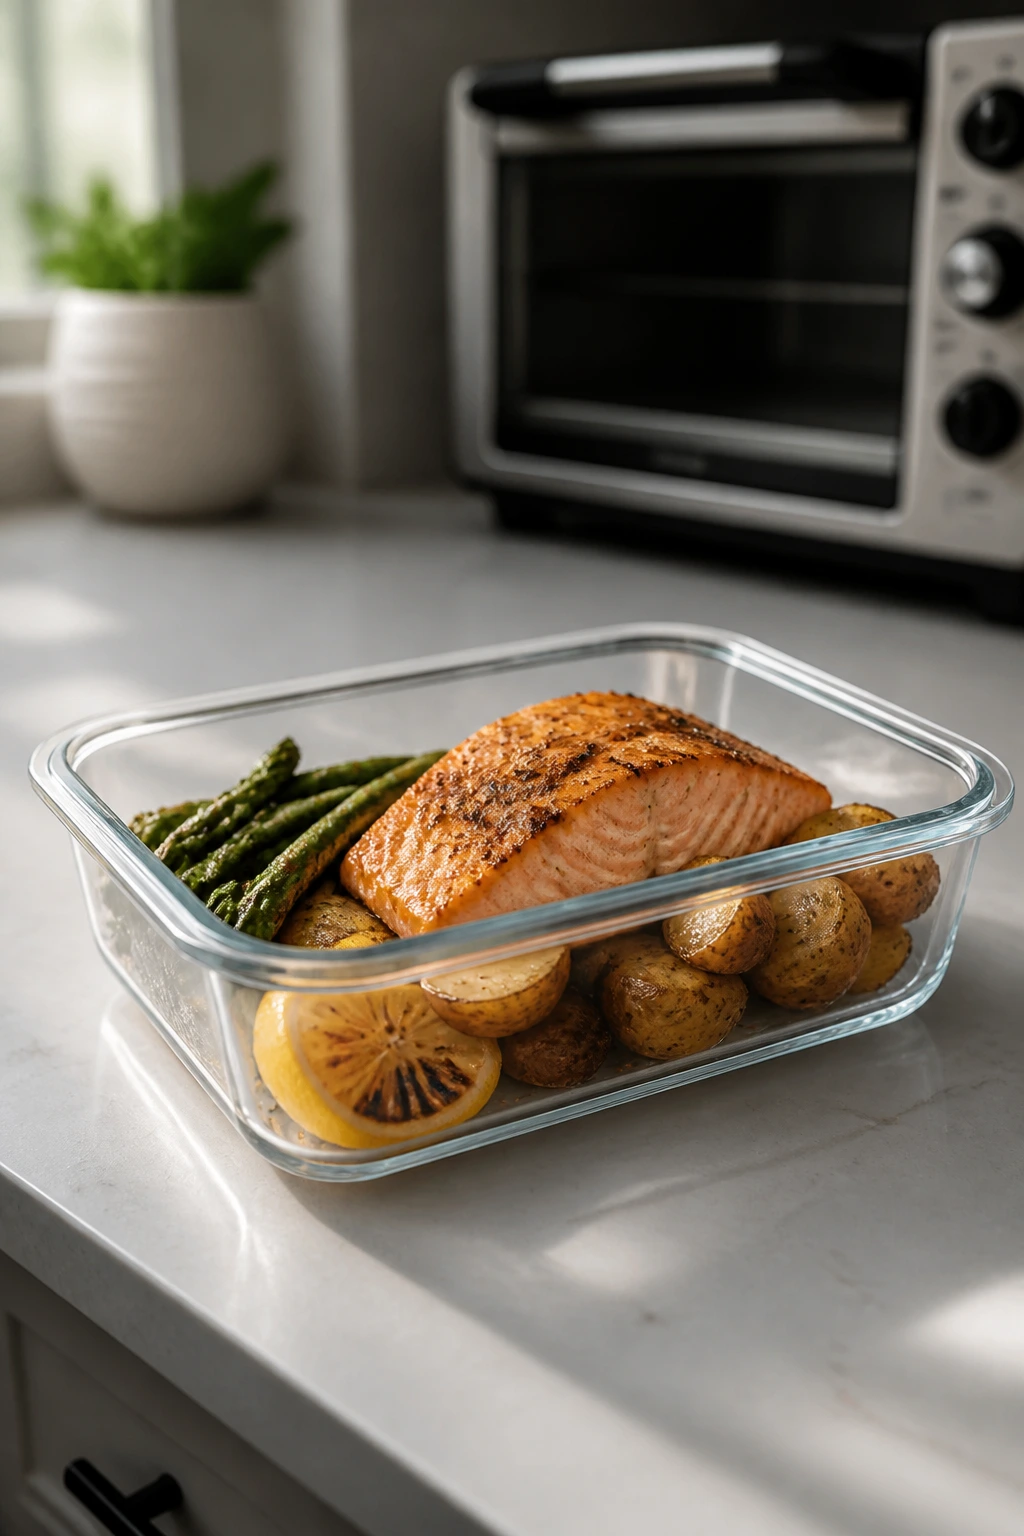
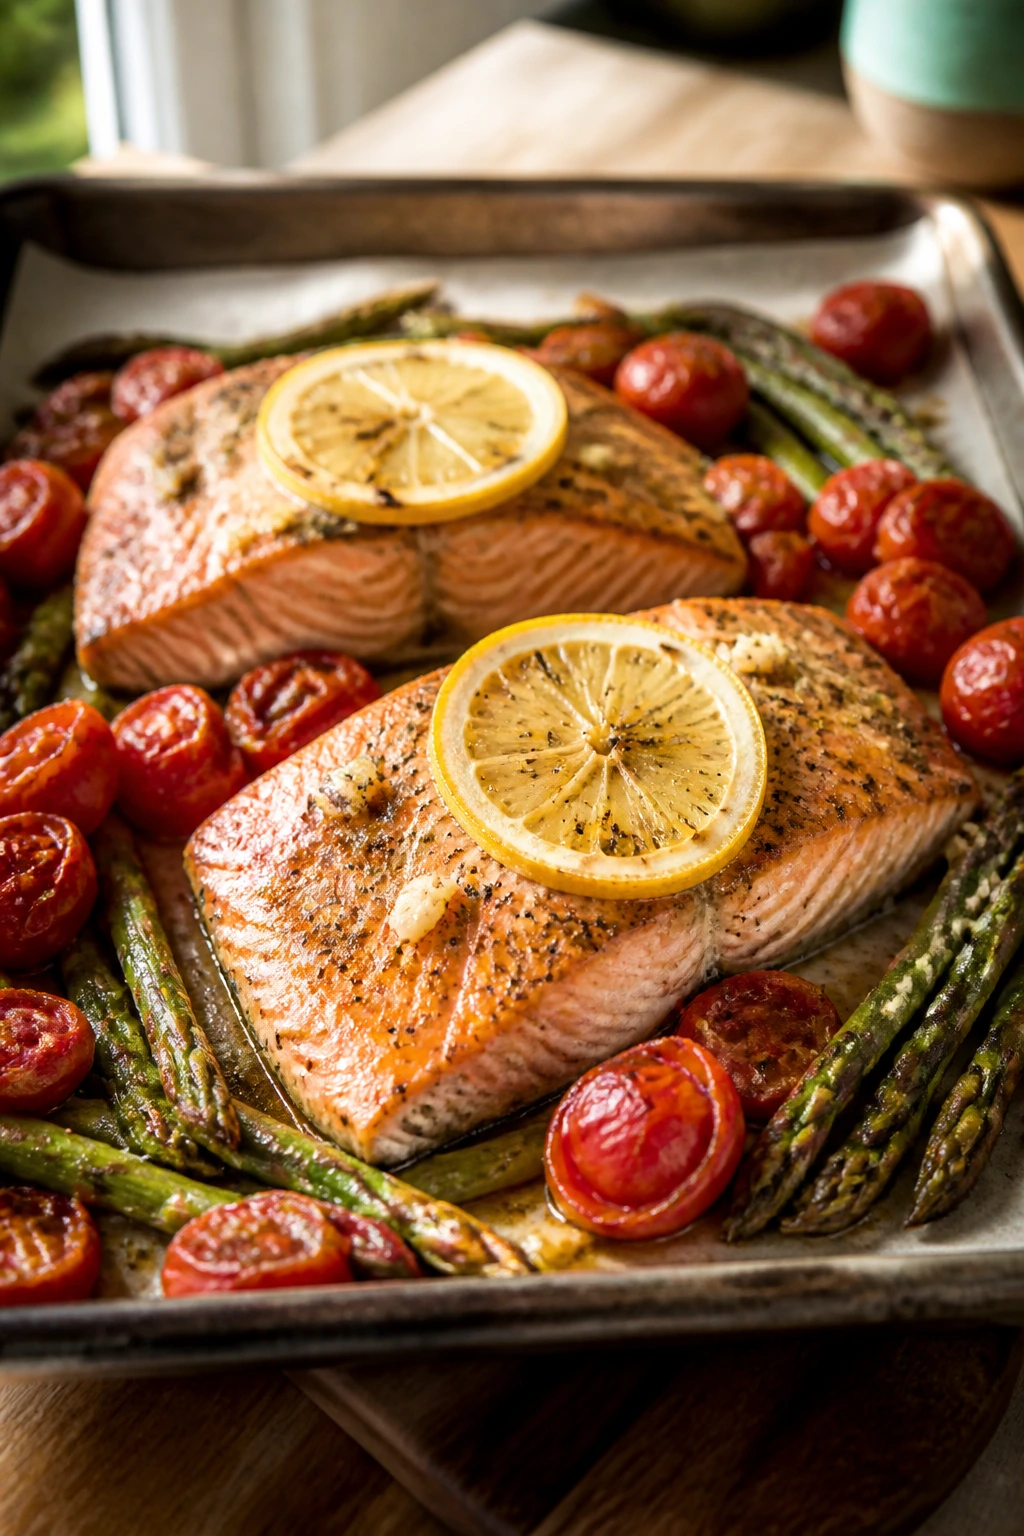
1. Lemon-Garlic Salmon with Asparagus and Tomatoes
Salmon is one of those foods that looks fancier than it behaves. In a toaster oven, that’s a gift. The fish turns silky in the center, the asparagus gets a little blistered, and the tomatoes collapse into sweet, jammy bursts that feel like built-in sauce.
This is the dinner I make when I want something light but not flimsy. The lemon keeps the salmon bright, the garlic gets a little sweet in the heat, and the vegetables roast on the same tray without drama. It smells clean and sharp while it cooks, then rich the second the oil and fish juices hit the plate.
Why It Works
Salmon and asparagus like the same hot, short roast, which is why this dinner works so well in a small oven. The vegetables start first, then the fish goes in once the tray is hot enough to give the asparagus some color without turning the salmon dry. That timing matters. If your toaster oven runs hot, the salmon will be ready in roughly 7 to 9 minutes, and the center should still look moist and just barely translucent before it flakes. That’s the sweet spot.
Key Ingredients
-
2 salmon fillets, 6 ounces each — Choose pieces that are close in thickness so they cook at the same pace.
-
12 ounces asparagus, woody ends trimmed — Thin or medium spears work best here; thick spears need a minute or two longer.
-
1 cup cherry tomatoes — They soften fast and create little pockets of sweet acidity on the tray.
-
2 tablespoons olive oil — Use enough to coat the vegetables and keep the fish from sticking.
-
2 garlic cloves, minced — Fresh garlic gives the best flavor; jarred garlic can taste harsh under high heat.
-
1 lemon, zested and juiced — The zest goes in early, the juice at the end.
-
1 teaspoon kosher salt — Split between the fish and vegetables.
-
1/2 teaspoon black pepper — Use fresh-ground if you’ve got it.
-
1 tablespoon chopped dill or parsley — Dill leans classic, parsley keeps things bright and clean.
-
1 teaspoon Dijon mustard, optional — Whisked with the lemon and oil, it gives the fish a light savory edge.
Quick Steps
Roast the Vegetables:
- Preheat the toaster oven to 425°F and line a quarter-sheet pan with parchment paper.
- Toss the asparagus and cherry tomatoes with 1 tablespoon olive oil, half the salt, and half the pepper. Spread them in a single layer and roast for 6 minutes.
Finish the Salmon: 3. Pat the salmon dry with paper towels. Stir the remaining olive oil, garlic, lemon zest, Dijon if using, and the rest of the salt and pepper together. 4. Pull the pan out, nudge the vegetables aside, and set the salmon fillets in the center of the pan. 5. Spoon the lemon-garlic mixture over the fish. Roast for 7 to 9 minutes, until the salmon flakes at the edges and reaches about 125°F to 130°F for a moist center, or 145°F if you prefer it more done. 6. Finish with lemon juice and herbs. If you want a touch more color, broil for 30 to 45 seconds — watch it like a hawk.
Tips and Variations
-
Swap the Greens: Broccolini or green beans work well if asparagus looks tired.
-
Add Briny Bite: A tablespoon of capers gives the tray a sharper, more savory finish.
-
Serve It Simply: Spoon the salmon and vegetables over couscous, rice, or buttered toast if you want a little starch.
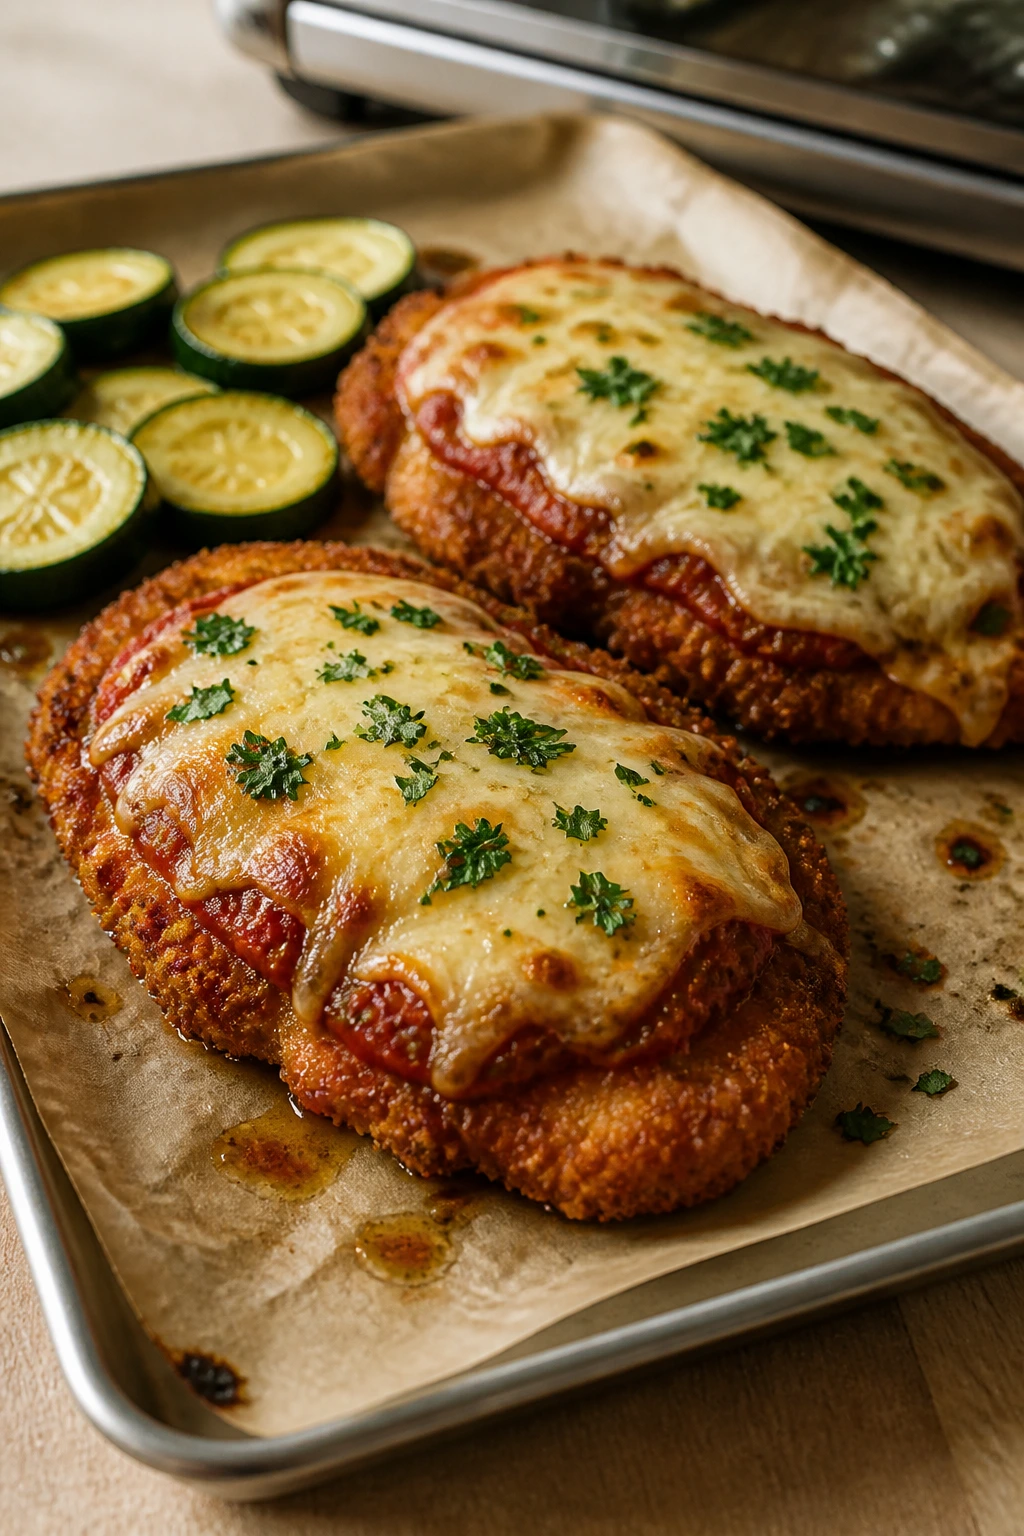
2. Crispy Chicken Parmesan for Two
Chicken Parmesan can be heavy-handed in a big oven, but in a toaster oven it gets tighter and better behaved. The breading crisps quickly, the cheese melts without turning the whole thing soggy, and the zucchini on the side roasts into a useful little pile of green.
I prefer this version as cutlets, not full thick breasts. Thin chicken cooks evenly in a small space, which keeps the breading from burning before the center is ready. And yes, the marinara goes on late. Early sauce is where crisp crusts go to die.
Why the Crispy Finish Matters
The whole point of Chicken Parmesan is contrast: crunchy exterior, juicy chicken, tangy sauce, and melted cheese that stretches instead of clumps. A toaster oven is excellent at that because it delivers intense heat from close range. The breading gets its color fast, and the chicken doesn’t need a long bake, which keeps the meat from drying out. If you’re using a convection setting, you may shave off a minute or two, but don’t rush the first bake. The coating needs a head start before the sauce goes on.
Key Ingredients
-
2 boneless, skinless chicken breasts, butterflied and pounded to 1/2 inch thick — Thin cutlets cook much more evenly than whole breasts.
-
1/2 cup all-purpose flour — Helps the egg cling to the chicken.
-
1 large egg, beaten — The glue in the breading line.
-
1 cup panko breadcrumbs — Panko gives you a lighter, crisper crust.
-
1/2 cup finely grated Parmesan — Use the real finely grated stuff, not the shelf-stable shaker if you can help it.
-
1 teaspoon Italian seasoning — A balanced herb mix keeps the crust from tasting flat.
-
1/2 teaspoon kosher salt — Season the breading, not just the sauce.
-
1/4 teaspoon black pepper — Enough to give the crust some edge.
-
2 tablespoons olive oil or melted butter — Brushed on top for extra browning.
-
1 cup marinara sauce — Use a thick sauce, not something watery.
-
1 cup shredded mozzarella — The melt matters here more than the brand name.
-
1 medium zucchini, sliced into half-moons — It roasts alongside the chicken and balances the plate.
Quick Steps
Prep and Bread the Chicken:
- Preheat the toaster oven to 425°F and line a quarter-sheet pan with parchment.
- Toss the zucchini with 1 tablespoon olive oil and a pinch of salt, then spread it on one side of the pan.
- Set up three shallow bowls: flour in one, beaten egg in one, and panko mixed with Parmesan, Italian seasoning, salt, and pepper in the third.
- Dredge each chicken cutlet in flour, then egg, then the breadcrumb mixture, pressing gently so the coating sticks.
Bake and Finish: 5. Place the breaded chicken on the pan beside the zucchini and brush the top with the remaining oil or melted butter. 6. Bake for 12 minutes, then spoon marinara over each cutlet and top with mozzarella. 7. Return the pan to the toaster oven for 5 to 7 minutes, until the chicken reaches 165°F and the cheese is bubbling. 8. Broil for 30 to 60 seconds if you want deeper browning. Do not walk away here. The line between golden and burnt is short.
Tips and Variations
-
Make It Eggplant Parm: Thick eggplant slices can take the same treatment; salt them first and pat them dry.
-
Use Gluten-Free Crumbs: Gluten-free panko works, though it browns a little faster, so check a minute early.
-
Serve With Something Starchy: Garlic bread, buttered spaghetti, or even a small pile of roasted potatoes makes this feel like a full dinner.
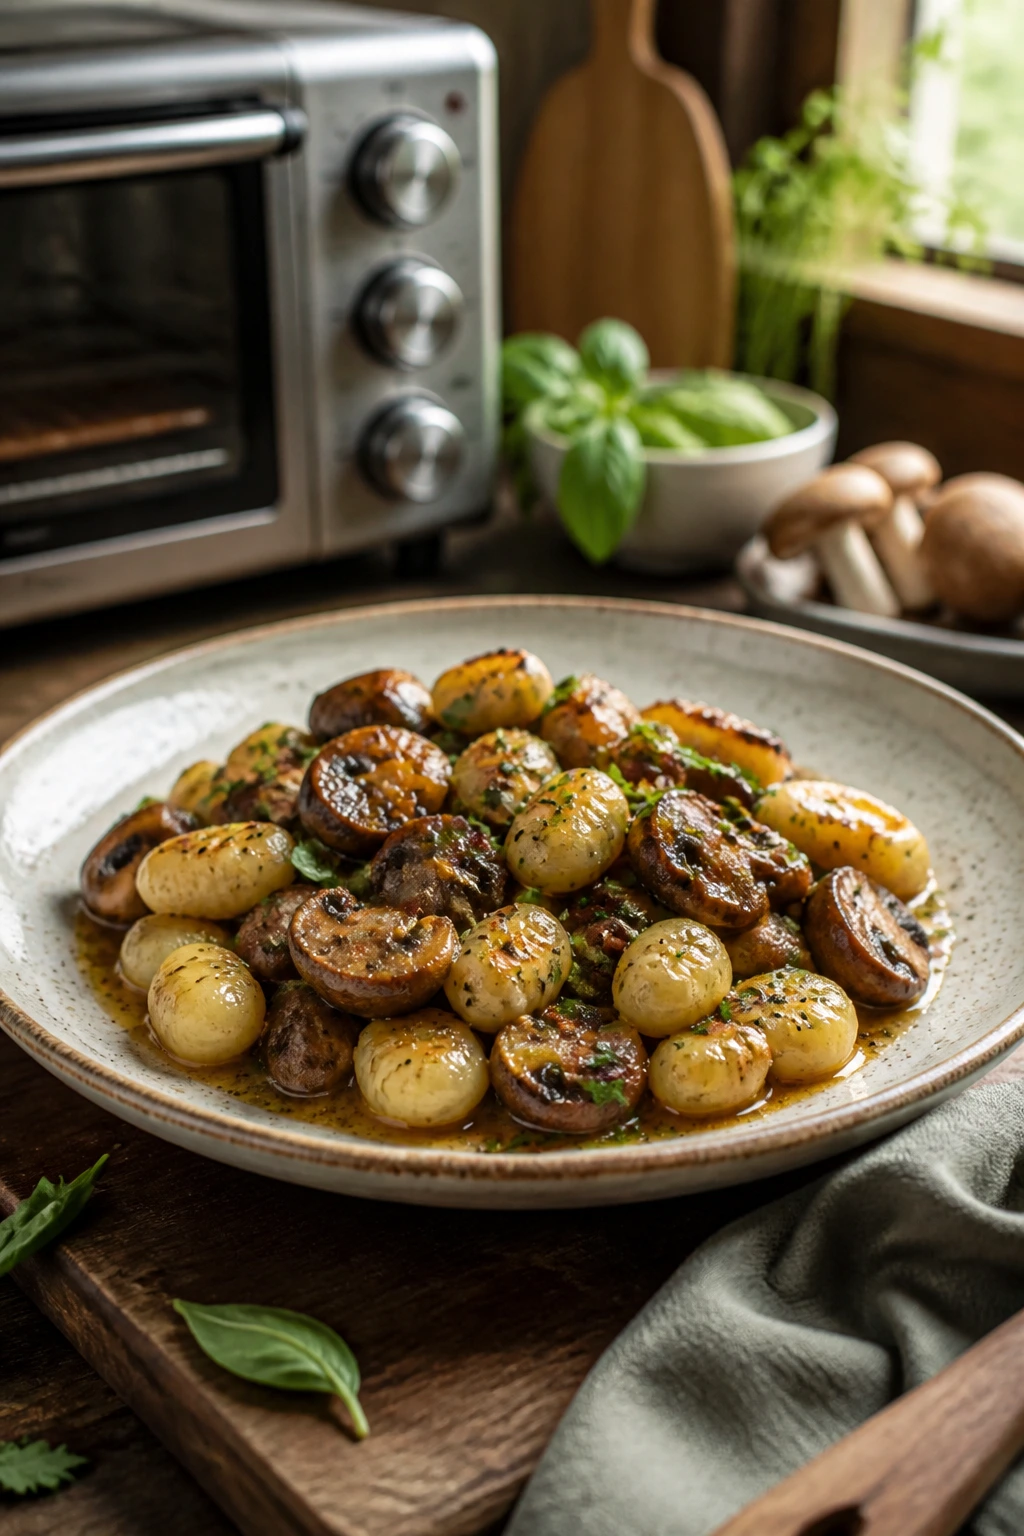
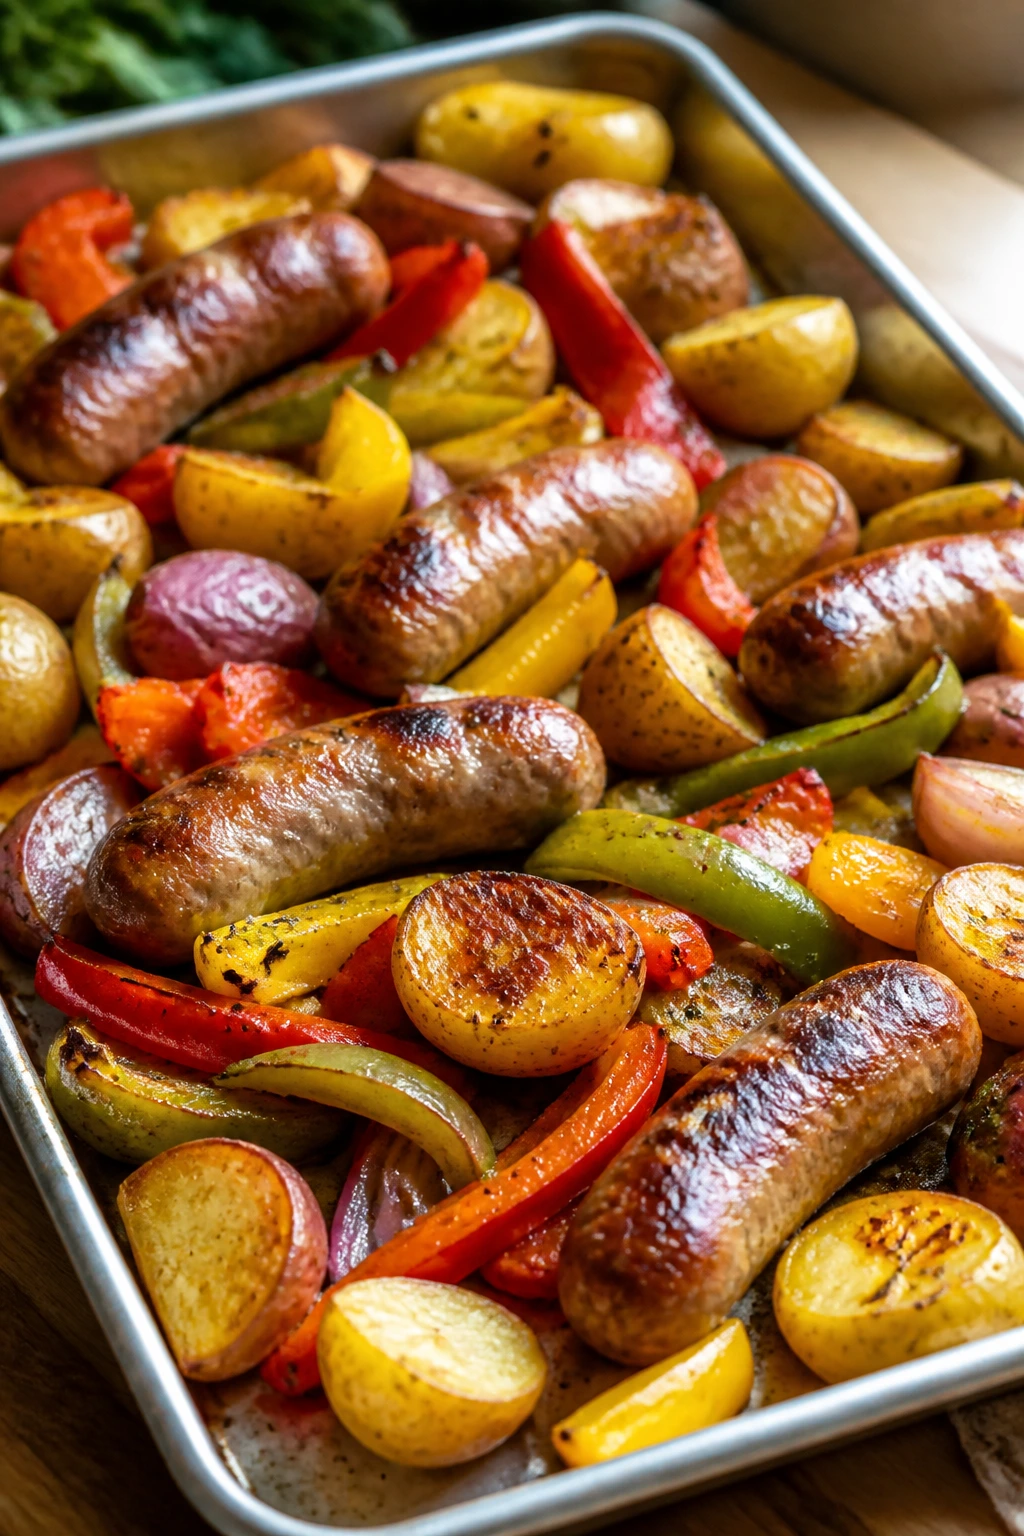
3. Sausage, Peppers, and Baby Potatoes
This is the kind of meal that feels like it should take longer than it does. The sausage browns, the peppers soften at the edges, and the potatoes pick up all the good drippings. You end up with a tray that smells faintly sweet, faintly smoky, and much more expensive than it actually was.
I like using baby potatoes because they keep their shape and roast cleanly in a toaster oven. Big potato chunks can work, but they take too long. Small ones give you that crisp skin, fluffy center thing without making you babysit the pan.
Why the Timing Works
Potatoes are the slowest item here, so they start first. Once they’re halfway cooked, the sausage and peppers join the party and finish in the flavorful fat that comes off the links. That’s the trick. The vegetables never have to stand alone, and the sausage gets enough heat to brown without splitting open too early. A toaster oven does this well because the hot air stays concentrated around the tray instead of wandering off into a big cavity.
Key Ingredients
-
1 pound baby potatoes, halved — Try to choose potatoes that are close in size.
-
2 tablespoons olive oil — Enough to coat the potatoes and help them brown.
-
1 teaspoon kosher salt — Salt the potatoes early so they taste seasoned all the way through.
-
1/2 teaspoon black pepper — Freshly ground gives the tray more life.
-
1 teaspoon dried oregano — Classic sausage flavor without extra work.
-
1/2 teaspoon crushed fennel seeds — Optional, but they make the sausage taste even more like sausage.
-
1 pound Italian sausage links — Sweet or hot both work; pick the one you actually want to eat.
-
2 bell peppers, sliced — A red and a yellow pepper bring the sweetest balance.
-
1 small red onion, sliced — It softens and sweetens in the heat.
-
2 garlic cloves, sliced — Large chunks are better than minced here.
-
1 tablespoon balsamic vinegar — Tossed in at the end for a sharp little finish.
-
1 tablespoon chopped parsley — Freshness matters after all that roast flavor.
Quick Steps
Start the Potatoes:
- Preheat the toaster oven to 425°F and line a quarter-sheet pan with foil or parchment.
- Toss the halved potatoes with olive oil, salt, pepper, oregano, and fennel seed.
- Spread them cut-side down and roast for 15 minutes.
Build the Tray: 4. Pull the pan out and add the sausage links, peppers, onion, and garlic. Toss everything lightly so the vegetables catch some of the oil. 5. Roast for another 15 to 18 minutes, turning the sausage once halfway through, until the potatoes are browned and the sausage reaches 160°F. 6. Drizzle with balsamic vinegar and toss with parsley before serving. 7. If the peppers need a little more color, broil for 1 minute at the very end.
Tips and Variations
-
Slice the Sausage After Roasting: If you want cleaner presentation, let the links rest for 3 minutes, then slice them on the bias.
-
Try Smoked Sausage: Use pre-cooked sausage if that’s what you have, but add it later so it doesn’t dry out.
-
Add Mustard on the Side: A spoonful of grainy mustard gives the tray a sharper, more diner-like finish.
4. Personal Margherita Pizzas with Arugula
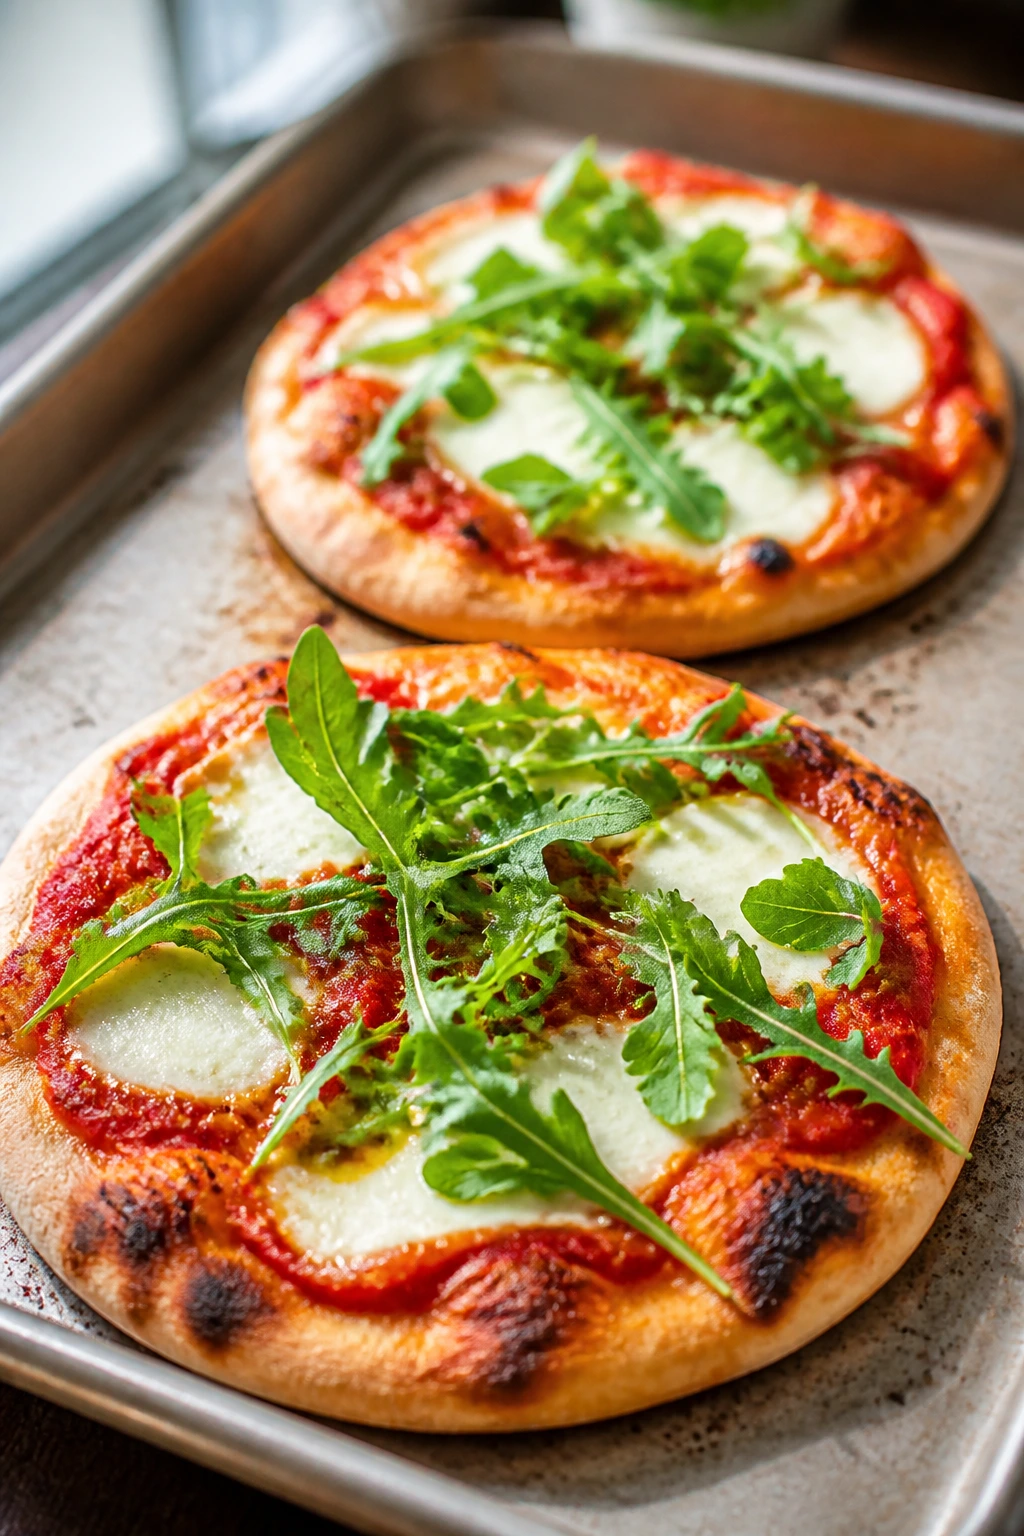
A toaster oven and personal pizza are a natural pair. You get a crisp crust, browned cheese, and enough room to make two separate pies without negotiating slice politics with anyone. The small scale is the whole point.
This version leans classic: tomato, mozzarella, basil, a little garlic, and a finish of peppery arugula if you want it. Keep the sauce thin. Keep the cheese dry. That’s how you get a pizza that tastes fresh instead of soggy and overbuilt.
Why This Pizza Keeps Its Shape
The toaster oven makes personal pizza work because the dough sits close to the heating element, which helps the bottom crisp before the toppings water everything down. Fresh mozzarella is lovely, but it carries moisture, so you need to blot it. That little habit matters more than most pizza advice people hear. A dry surface means the cheese melts rather than steaming the dough underneath.
Key Ingredients
-
8 ounces pizza dough, at room temperature — Store-bought or homemade both work, as long as the dough is relaxed.
-
1 tablespoon olive oil — Brush the dough lightly so the crust browns.
-
1/2 cup pizza sauce or crushed tomatoes — Use a thick, spoonable sauce.
-
4 ounces fresh mozzarella, torn and blotted dry — Water is the enemy here.
-
1 cup cherry tomatoes, halved — Optional, but nice if you want more tomato flavor.
-
1 tablespoon grated Parmesan — Adds salt and sharpness.
-
1 small garlic clove, finely grated — A little goes a long way.
-
Handful of basil leaves — Add after baking so they stay fragrant.
-
Pinch of kosher salt — A light touch is enough.
-
Red pepper flakes, optional — Good if you like a little heat.
Quick Steps
Shape and Top the Dough:
- Preheat the toaster oven to 450°F with the rack in the lower-middle position. If your pan fits, preheat it too.
- Divide the dough into 2 pieces and stretch each into a small round or oval on parchment paper.
- Brush the dough lightly with olive oil, then spread a thin layer of sauce over each one, leaving a small border.
- Add mozzarella, cherry tomatoes, Parmesan, garlic, and a pinch of salt.
Bake and Finish: 5. Slide the pizzas onto the hot pan and bake for 8 to 10 minutes, until the crust is browned at the edges and the cheese is bubbling. 6. Add basil and red pepper flakes after baking. If you want extra color, broil for 30 seconds only. 7. Let the pizzas rest for 2 minutes before slicing. The cheese settles a little, and you get cleaner cuts.
Tips and Variations
-
Use Pesto Instead of Sauce: A thin swipe of pesto makes a sharper, greener pizza with almost no extra work.
-
Add Prosciutto After Baking: The thin slices stay tender if you lay them on the hot pizza right before serving.
-
Go Half-and-Half: Make one pie classic and one with mushrooms or olives if you and your dinner partner don’t agree.
5. Shrimp Fajitas with Warm Tortillas
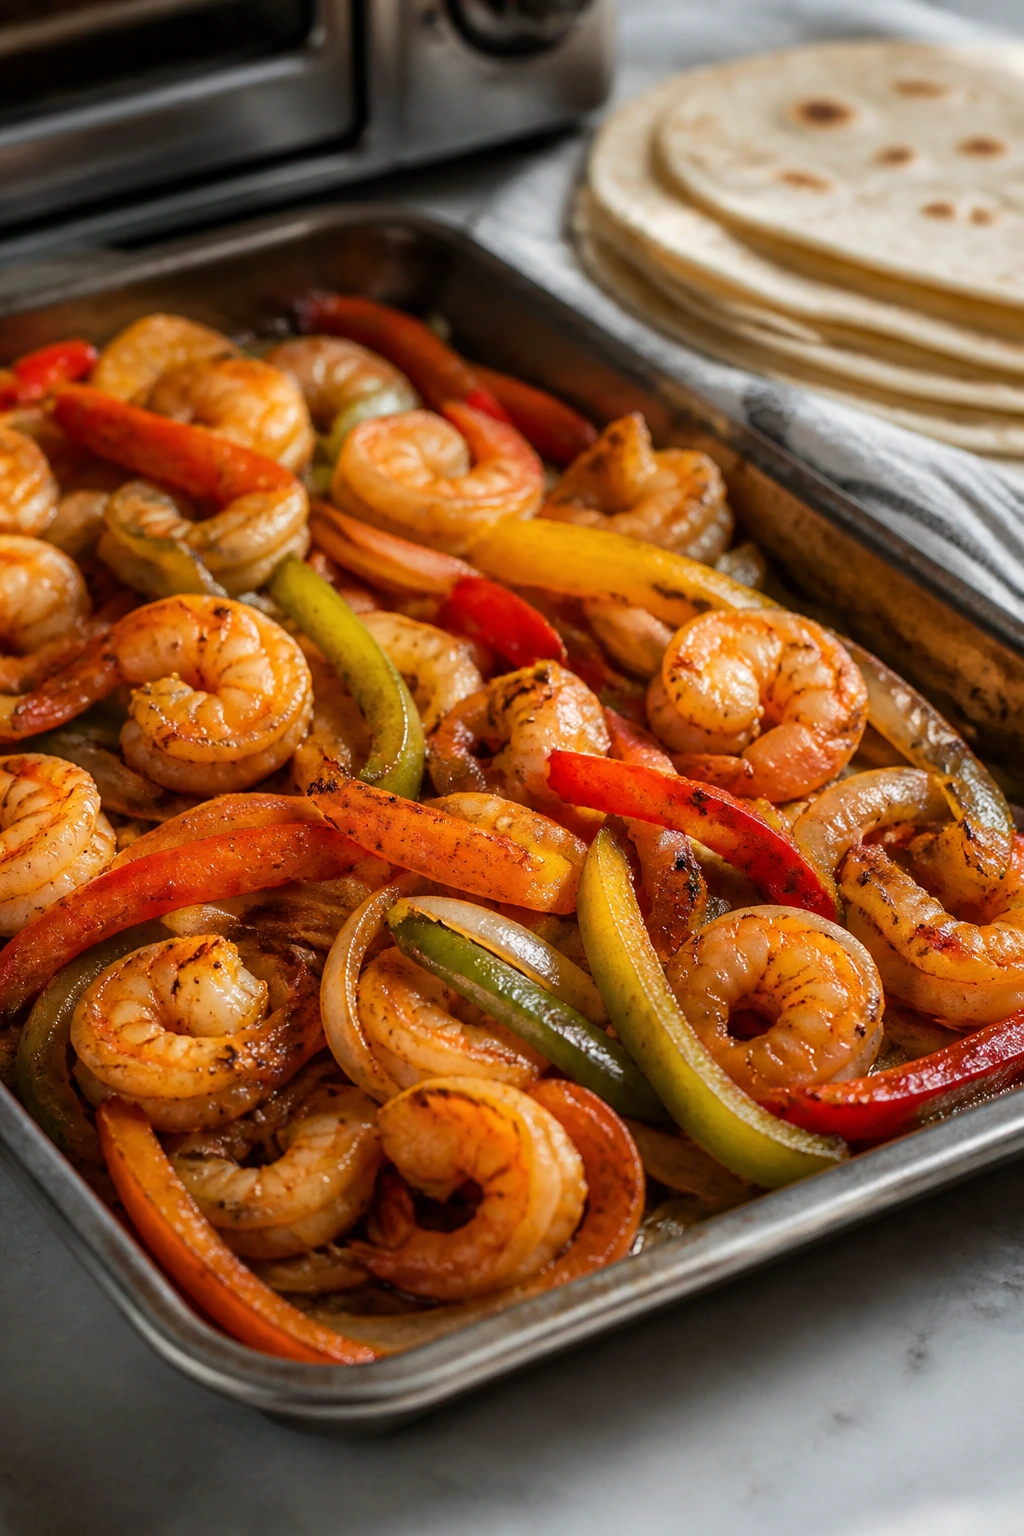
Shrimp fajitas are a toaster oven sweet spot. The shrimp cook fast, the peppers char at the edges, and the onions soften just enough to taste sweet without losing all structure. The whole tray smells like lime, cumin, and a little smoke. Good smell. The kind that makes people wander into the kitchen.
I like this dinner because it feels lively without being fussy. Shrimp can turn rubbery if you forget about it, but in a hot toaster oven that finish line comes quick. You get color on the vegetables, just-cooked seafood, and enough drippings on the pan to spoon over tortillas.
Why Shrimp Belongs in a Toaster Oven
Shrimp cooks so quickly that a toaster oven’s compact heat works in its favor. There’s no big empty space to wait around in, so the shrimp go from gray to pink with less time for mistakes. The peppers and onions get a head start, which gives them enough softness and edge-char to taste like fajitas instead of steamed vegetables. That balance is the whole meal.
Key Ingredients
-
1 pound large shrimp, peeled and deveined — Pat them dry so they roast instead of steam.
-
1 red bell pepper, sliced — Sweet and sturdy.
-
1 yellow or green bell pepper, sliced — A second pepper keeps the tray from tasting one-note.
-
1 small red onion, sliced — It softens fast and catches the seasoning well.
-
2 tablespoons olive oil — Divided so the vegetables and shrimp both get coated.
-
1 tablespoon chili powder — The main flavor here.
-
1 teaspoon ground cumin — Adds warmth and a little earthiness.
-
1/2 teaspoon garlic powder — Useful in a fast recipe like this.
-
1/2 teaspoon kosher salt — Enough to season the whole tray.
-
1/4 teaspoon black pepper — A small amount goes a long way.
-
1 lime, cut into wedges — The final squeeze wakes everything up.
-
4 small flour or corn tortillas — Warmed at the end.
-
1 avocado, sliced — Optional, but it cools the spice.
-
A small handful of cilantro — Fresh and bright right before serving.
Quick Steps
Roast the Vegetables:
- Preheat the toaster oven to 425°F and line a quarter-sheet pan with parchment or foil.
- Toss the peppers and onion with 1 tablespoon olive oil, half the chili powder, half the cumin, half the garlic powder, and a little salt.
- Spread the vegetables on the tray and roast for 6 minutes.
Add the Shrimp: 4. Toss the shrimp with the remaining olive oil, spices, salt, and pepper. 5. Pull the tray out, scatter the shrimp over the vegetables, and return it to the toaster oven for 5 to 6 minutes, until the shrimp are pink, opaque, and curled into a loose C shape. 6. Warm the tortillas in a foil packet on the rack for the last 2 to 3 minutes, or heat them in a dry skillet if that’s easier. 7. Finish with lime juice, avocado, and cilantro.
Tips and Variations
-
Use Medium Shrimp if Needed: They cook even faster, so check them at 4 minutes.
-
Add a Spoon of Salsa: Salsa verde or a smoky red salsa makes the tray taste fuller.
-
Turn It Into Bowls: Skip the tortillas and spoon everything over rice if you want a sturdier dinner.
6. Black Bean Stuffed Sweet Potatoes with Cotija and Lime
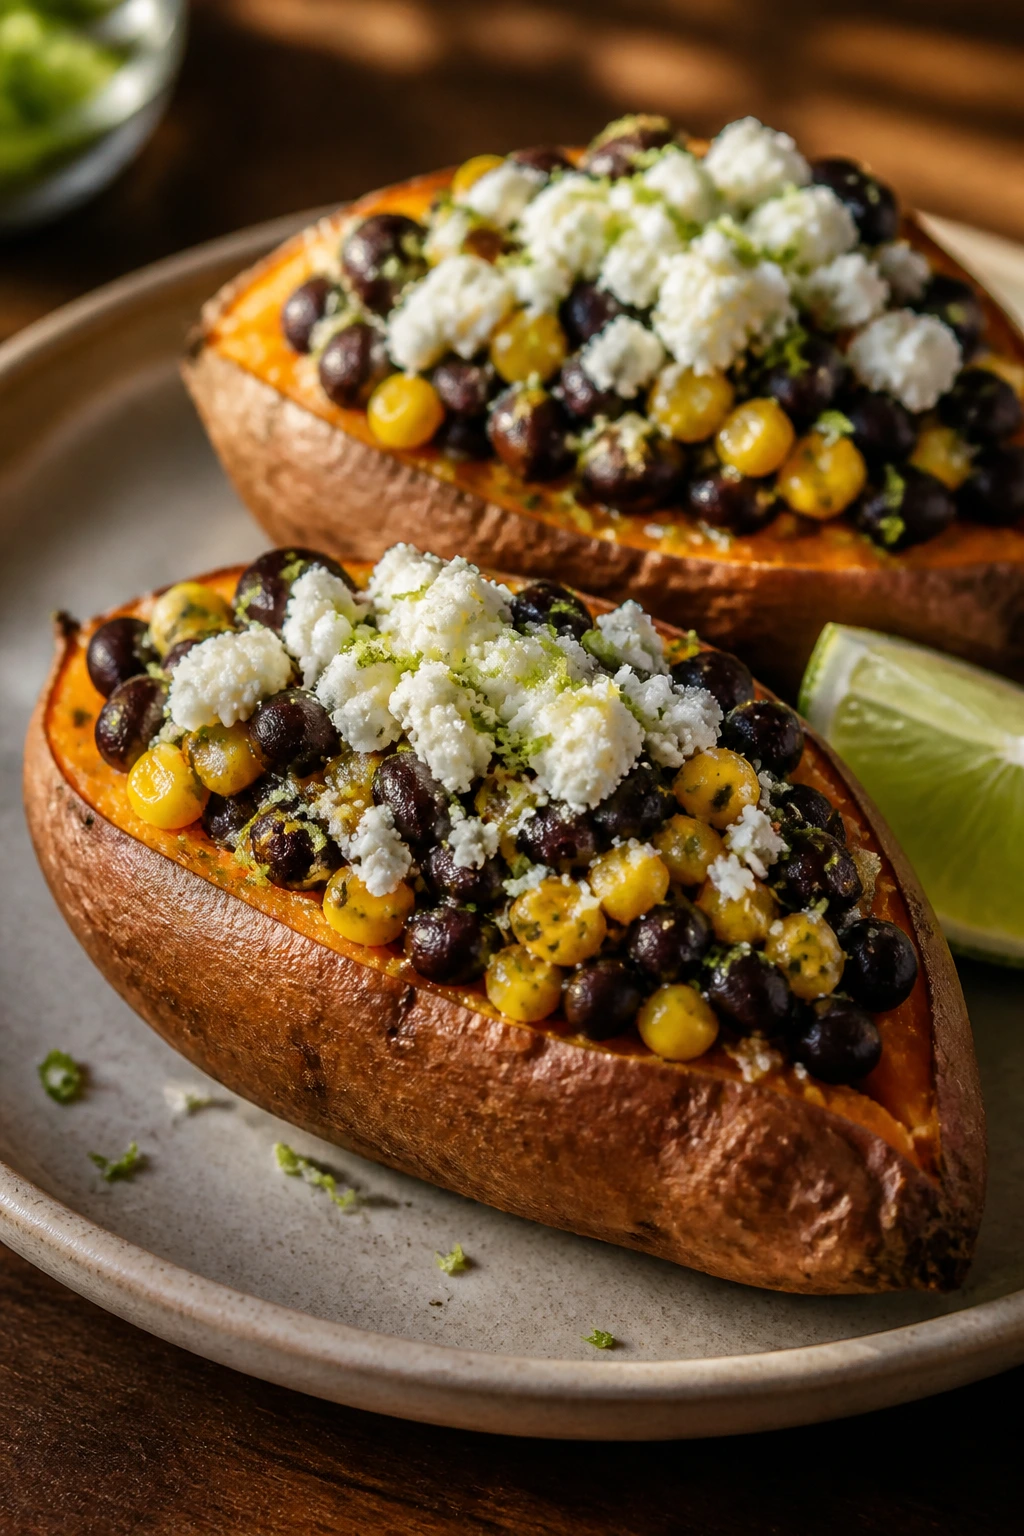
Sweet potatoes are made for this kind of dinner. Their soft, almost caramel flavor loves black beans, corn, chili powder, and a salty crumbly cheese on top. The oven does the slow part while you barely think about it.
This is one of the easiest meatless dinners in the bunch, but it doesn’t taste like compromise. The sweet potato goes creamy, the bean filling stays savory, and the lime keeps the whole thing from feeling heavy. If you want a meal that eats like actual dinner and not a side dish trying to do more, this is it.
Why the Filling Stays Tender
Sweet potatoes need time, but they don’t need attention. That’s why they’re so good in a toaster oven. Once they’re pierced and oiled, they bake evenly and turn soft without falling apart. The filling can warm in a small oven-safe dish during the last stretch, so the beans and corn stay bright and textured instead of turning mushy on the stovetop. It’s a tidy setup. No drama. Just dinner.
Key Ingredients
-
2 medium sweet potatoes, scrubbed and dried — Choose potatoes that are similar in size so they bake at the same pace.
-
1 tablespoon olive oil — Rubbed on the skins for better texture.
-
1 can black beans, drained and rinsed — Canned beans are fine here; just rinse off the salty liquid.
-
1 cup corn kernels, fresh or frozen — Frozen is completely fine.
-
1/4 cup diced red onion — Gives the filling a little bite.
-
1 teaspoon ground cumin — For warmth.
-
1 teaspoon chili powder — Keeps the filling from tasting flat.
-
1/2 teaspoon kosher salt — Season the bean mixture well.
-
1/4 teaspoon black pepper — Enough for depth.
-
1/2 cup salsa — Adds moisture and a little acidity.
-
1/2 cup crumbled cotija or feta — Cotija is saltier; feta works if that’s easier to find.
-
1/4 cup Greek yogurt or sour cream — For a cool finish.
-
1 lime, cut into wedges — The bright finish matters.
-
Cilantro, for garnish — Optional, but nice.
Quick Steps
Bake the Sweet Potatoes:
- Preheat the toaster oven to 400°F and line a tray with foil or parchment.
- Pierce each sweet potato 4 or 5 times with a fork, rub the skins with olive oil, and sprinkle with a little salt.
- Roast for 35 to 40 minutes, until a knife slides in easily and the centers feel soft.
Warm the Filling and Finish: 4. Stir the black beans, corn, onion, cumin, chili powder, salt, pepper, and salsa together in a small oven-safe dish. 5. Place the dish in the toaster oven for the last 8 to 10 minutes of the potato baking time, just until heated through. 6. Split the sweet potatoes open, fluff the insides with a fork, and spoon the bean mixture on top. 7. Finish with cotija, yogurt or sour cream, lime juice, and cilantro.
Tips and Variations
-
Add Avocado at the End: Sliced avocado gives you a cool, creamy contrast.
-
Make It Smokier: A pinch of smoked paprika changes the whole mood.
-
Skip the Dairy Easily: Use avocado or a spoon of tahini instead of yogurt and cheese.
7. Apple-Sage Pork Chops with Green Beans
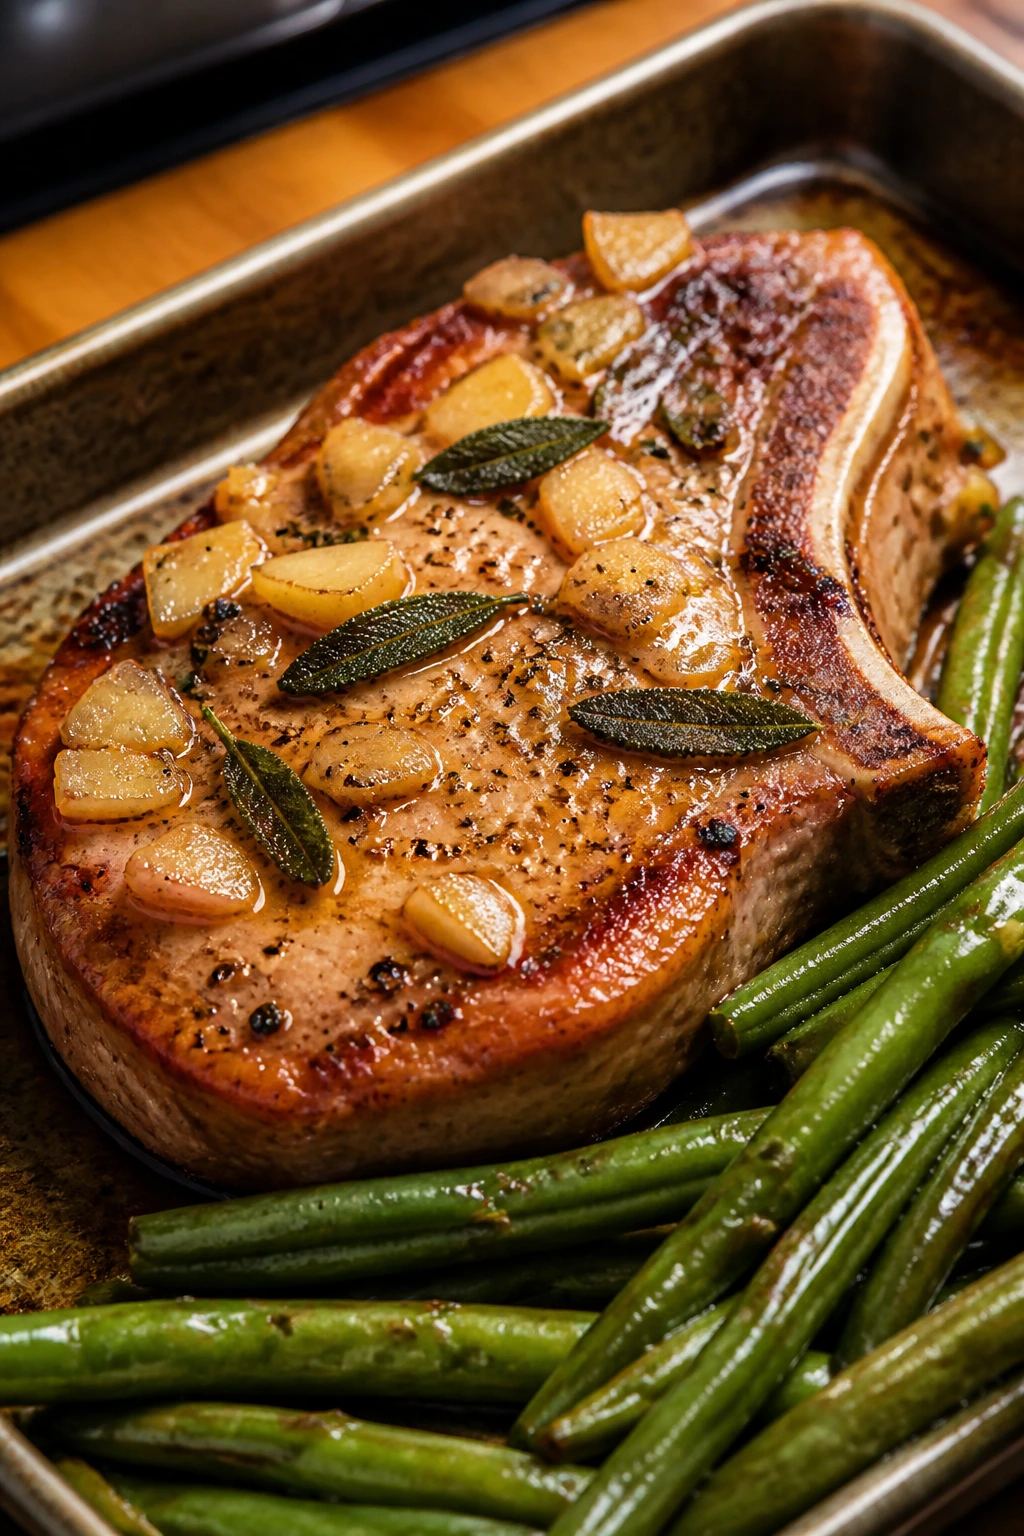
Pork chops in a toaster oven deserve more respect than they usually get. Done right, they stay juicy, the apples soften into a light glaze, and the green beans roast just enough to taste green and snappy instead of boiled to death. The plate ends up tasting like dinner from a place that pays attention.
Bone-in chops help here. They hold moisture better than thin boneless cuts, and they tolerate the toaster oven’s hot dry heat without turning into sawdust. The apple and sage combination leans classic in the best way. No gimmicks. Just warm, salty-sweet food that tastes settled.
Why the Pork Stays Juicy
A bone-in chop is more forgiving because the bone slows the cooking around the center, and a 1-inch thickness gives you enough margin to keep the meat from drying out before the edges overcook. The apples and shallots roast beside the pork and release a little juice, which gives the tray a light glaze without needing a full sauce. If you use a thermometer, this dinner gets much easier. Pull the chops when they hit 145°F and let them rest. That resting time matters more than people think.
Key Ingredients
-
2 bone-in pork chops, about 1 inch thick and 8 ounces each — Thick enough to stay juicy in the toaster oven.
-
1 tablespoon olive oil — For the pan and the green beans.
-
1 teaspoon kosher salt — Split between the meat and vegetables.
-
1/2 teaspoon black pepper — Fresh-ground if possible.
-
1 teaspoon chopped fresh sage or 1/2 teaspoon dried sage — Sage and pork are old friends.
-
1 teaspoon Dijon mustard — Brushed on the chops before roasting.
-
1 apple, cored and sliced into wedges — A firm apple holds its shape best.
-
1 small shallot, sliced — Sweeter than onion and less aggressive.
-
8 ounces green beans, trimmed — They roast quickly and round out the meal.
-
1 tablespoon apple cider vinegar or apple cider — A quick finish for the tray juices.
-
1 tablespoon butter, optional — Stirred in at the end if you want a richer pan sauce.
Quick Steps
Start the Vegetables:
- Preheat the toaster oven to 425°F and line a tray with parchment or foil.
- Toss the green beans with half the olive oil, a pinch of salt, and pepper. Spread them on the tray and roast for 8 minutes.
Roast the Chops: 3. Rub the pork chops with the remaining oil, salt, pepper, sage, and Dijon mustard. 4. Pull the tray out, move the green beans to one side, and add the apple wedges and shallot. 5. Set the pork chops on the tray and roast for 10 to 12 minutes, until the thickest part reaches 145°F. 6. Rest the chops for 5 minutes before cutting. Stir the cider vinegar and butter into the pan juices if you want a quick glaze. 7. Spoon the apples, shallots, and beans around the pork and serve.
Tips and Variations
-
Use Pears Instead of Apples: Firm pears work if you want a softer, sweeter finish.
-
Try Rosemary for a Different Herb Note: Rosemary makes the plate feel a little more rustic.
-
Don’t Skip the Rest: Cutting too soon sends the juices onto the board instead of keeping them in the meat.
8. Baked Gnocchi with Spinach and Mozzarella
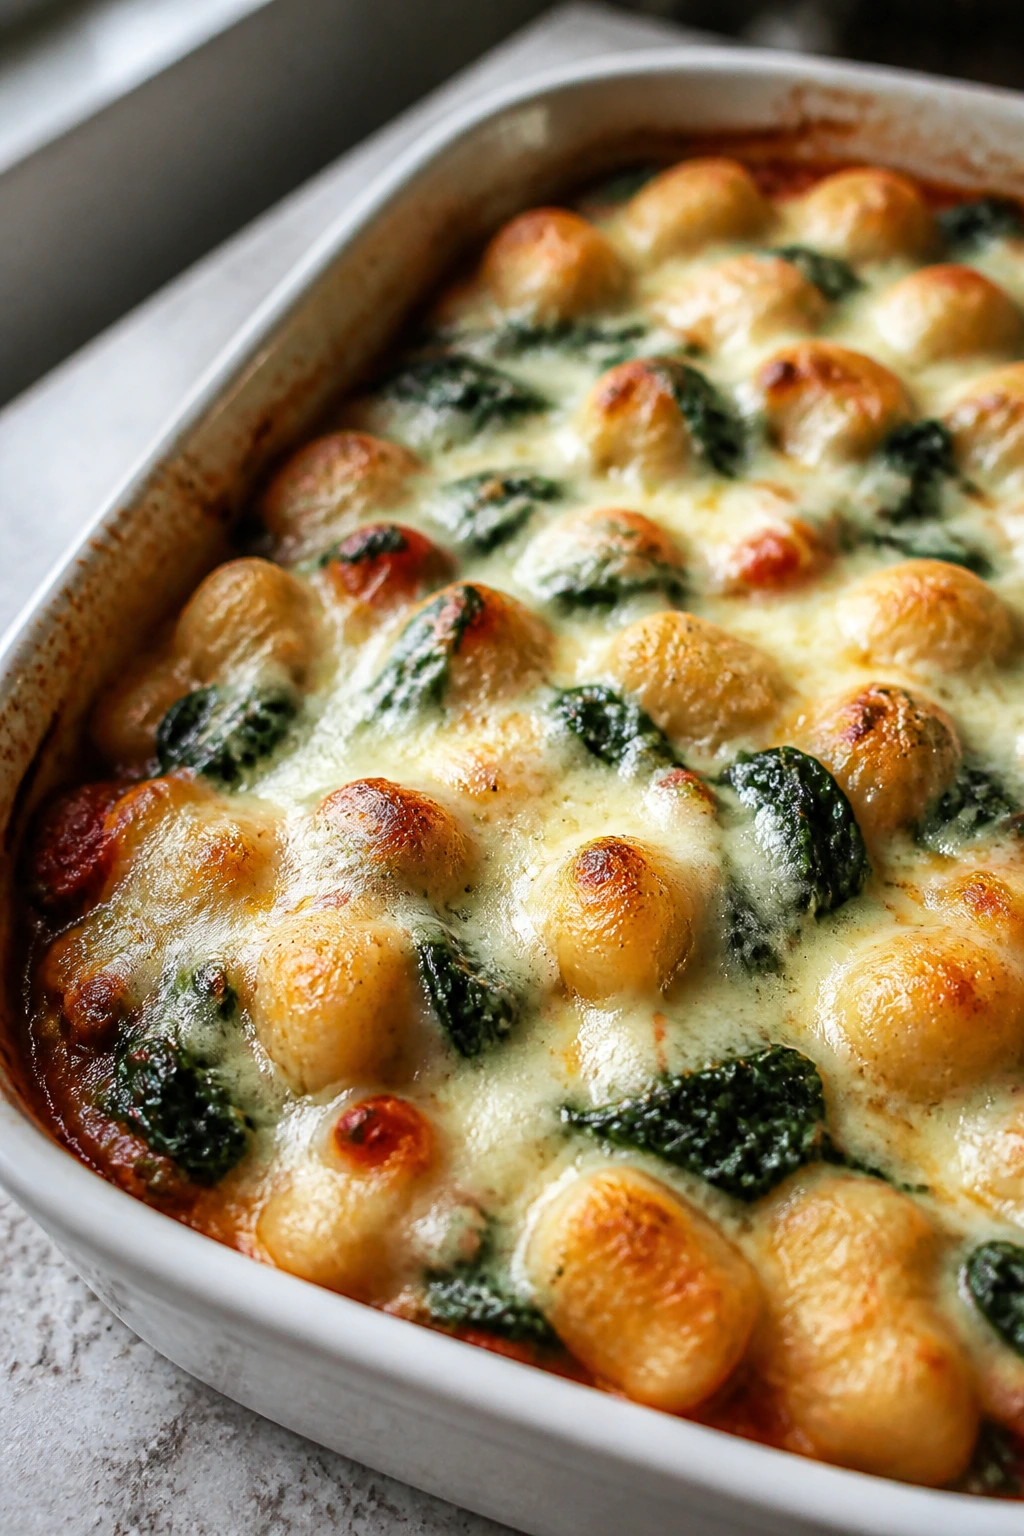
If you want a dinner that acts like a hug but still tastes like dinner, baked gnocchi is a very strong move. The sauce bubbles around the little dumplings, the spinach melts into the tomato, and the mozzarella turns into a browned top with stretchy spots underneath. It’s cozy without being mushy.
This is also the least fussy dish in the set. Shelf-stable gnocchi goes straight into the baking dish. No boiling. No straining. Just sauce, greens, cheese, heat, done. The toaster oven is exactly the right size for this kind of meal because the top browns fast while the gnocchi softens underneath.
Why the Gnocchi Bakes So Well
Gnocchi does something useful in the oven: it absorbs sauce around the edges while staying tender in the middle. The small size means it heats through quickly, which is handy when you’re cooking for two and don’t want a huge casserole sitting around. Spinach folds in almost invisibly, so you get a vegetable in the dish without making it feel like a salad with ambition. The mozzarella browns best if you give it a light, even layer instead of a heavy blanket.
Key Ingredients
-
1 pound shelf-stable potato gnocchi — No need to pre-boil.
-
1 1/2 cups marinara sauce — Thick sauce works best.
-
2 cups baby spinach — Packed loosely; it wilts down fast.
-
1 garlic clove, minced — Just enough to wake the sauce up.
-
1 tablespoon olive oil — For the dish and the garlic.
-
1 cup shredded mozzarella — The melt is the whole point.
-
1/4 cup grated Parmesan — Adds salt and a deeper brown top.
-
1/4 teaspoon crushed red pepper flakes — Optional, but good if you like a little heat.
-
1/4 teaspoon kosher salt — Keep it light because the cheese adds salt too.
-
Black pepper to taste — A few turns of the grinder is enough.
Quick Steps
Assemble the Bake:
- Preheat the toaster oven to 400°F and grease a small baking dish, about 8×8 inches or similar.
- Stir together the gnocchi, marinara, spinach, garlic, olive oil, salt, black pepper, and red pepper flakes if using.
- Spread the mixture evenly in the dish and press it down lightly so the sauce reaches the gnocchi.
Bake and Brown: 4. Top with mozzarella and Parmesan. 5. Bake for 18 to 20 minutes, until the sauce is bubbling around the edges and the gnocchi are tender when pierced with a fork. 6. Broil for 1 to 2 minutes if you want browned spots on top. Stay close; cheese can go from brown to burnt fast. 7. Rest for 3 to 5 minutes before serving so the sauce settles.
Tips and Variations
-
Add Sausage or Mushrooms: Browned Italian sausage or sliced mushrooms fit neatly into the same dish.
-
Use Ricotta Dollops: A few spoonfuls on top before baking make the dish creamier.
-
Finish With Basil: Fresh basil right after baking gives the whole thing a brighter, cleaner smell.
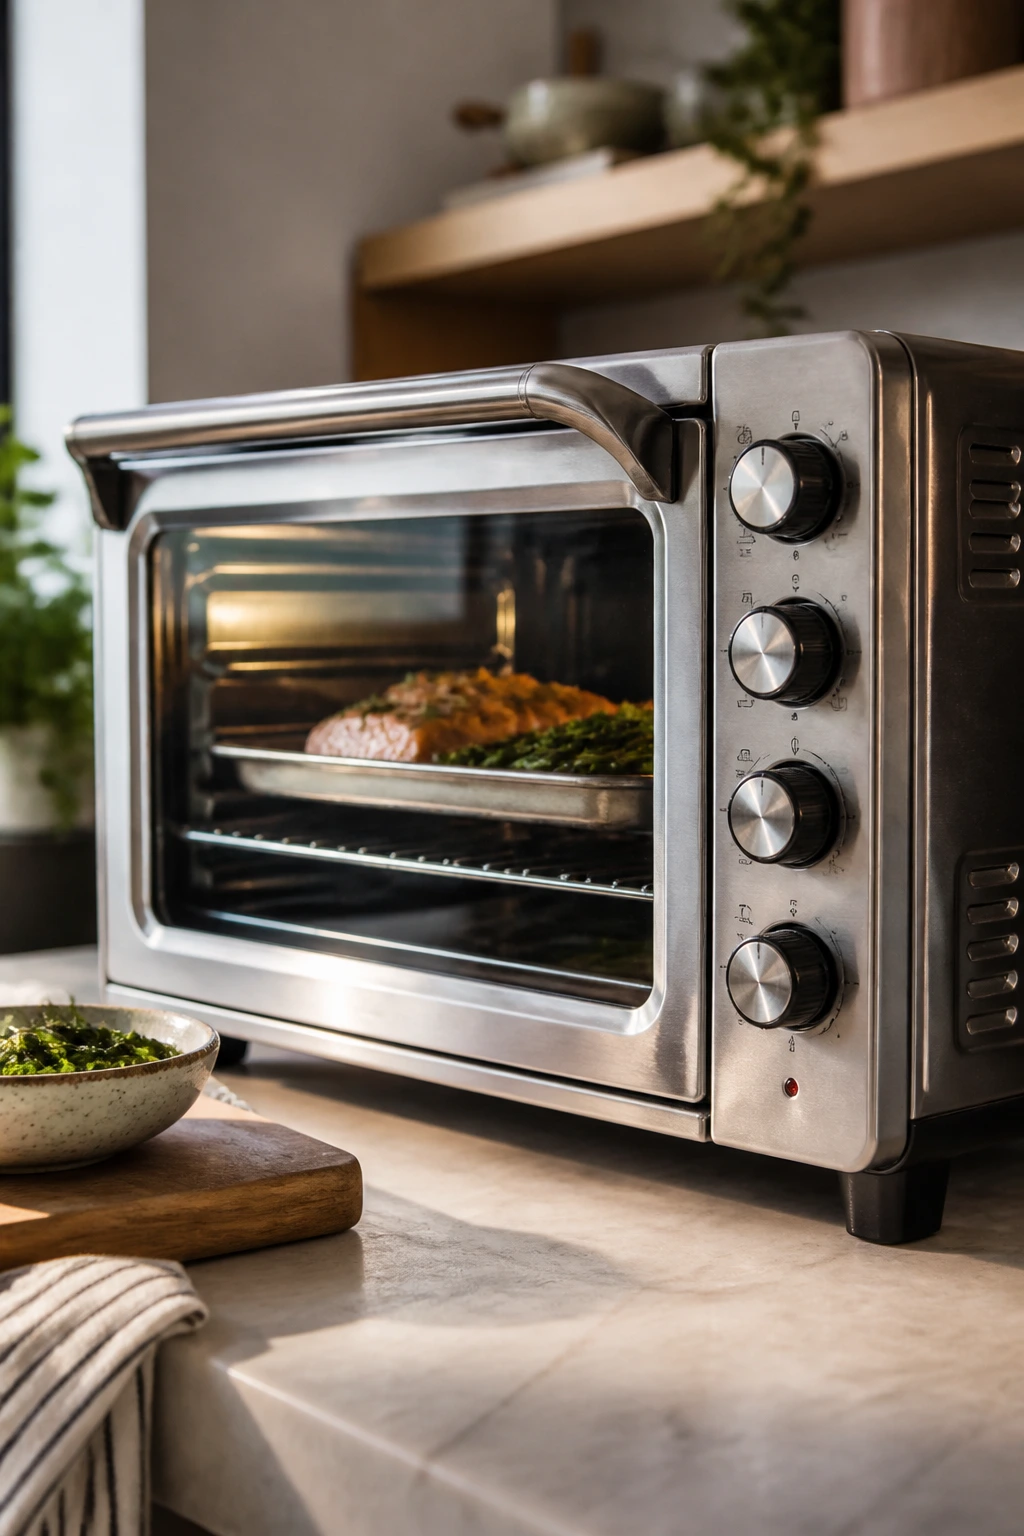
Why the Toaster Oven Works So Well on Busy Nights
A toaster oven rewards small, smart cooking. That’s the heart of the matter. It heats a tiny space fast, so a tray of salmon or a pan of vegetables gets real browning instead of languishing in a lukewarm box while the rest of dinner sulks.
The other advantage is control. In a full oven, a two-serving dinner can get lost on a big tray or dry out before the vegetables catch up. In a toaster oven, you’re working closer to the heat, which means timing matters a little more, but the payoff is sharper texture and faster service. That’s a trade I’ll take.
There’s also a quiet efficiency to small-batch cooking that people forget. You can preheat for a few minutes, roast one pan, and eat without feeling like you’ve staged a production. For couples, roommates, and solo cooks who like leftovers only in moderation, that’s a good place to be.
Essential Equipment for These Recipes
-
Toaster oven with bake and broil settings — A basic model works; a convection setting is a nice bonus, not a requirement.
-
Quarter-sheet pan — The best pan for most of these dinners because it fits well and gives food enough space.
-
Small baking dish, about 8×8 inches — Useful for the gnocchi bake and any saucy, shallow dinners.
-
Parchment paper — Keeps cleanup easy and prevents sticky spots on fish, chicken, and pizza.
-
Foil — Handy for lining trays or wrapping tortillas so they warm evenly.
-
Instant-read thermometer — The quickest way to stop guessing with chicken, pork, salmon, and shrimp.
-
Tongs — Good for turning sausage, moving vegetables, and handling hot pan edges.
-
Mixing bowls — You only need a couple, but they save time when a recipe has a seasoning step and an assembly step.
-
Microplane or fine grater — Great for lemon zest, Parmesan, and garlic when you want the flavor to spread evenly.
-
Sharp knife and cutting board — Especially useful for peppers, onions, apples, and all the small prep that makes these dinners cook evenly.
Smart Shopping and Ingredient Tips
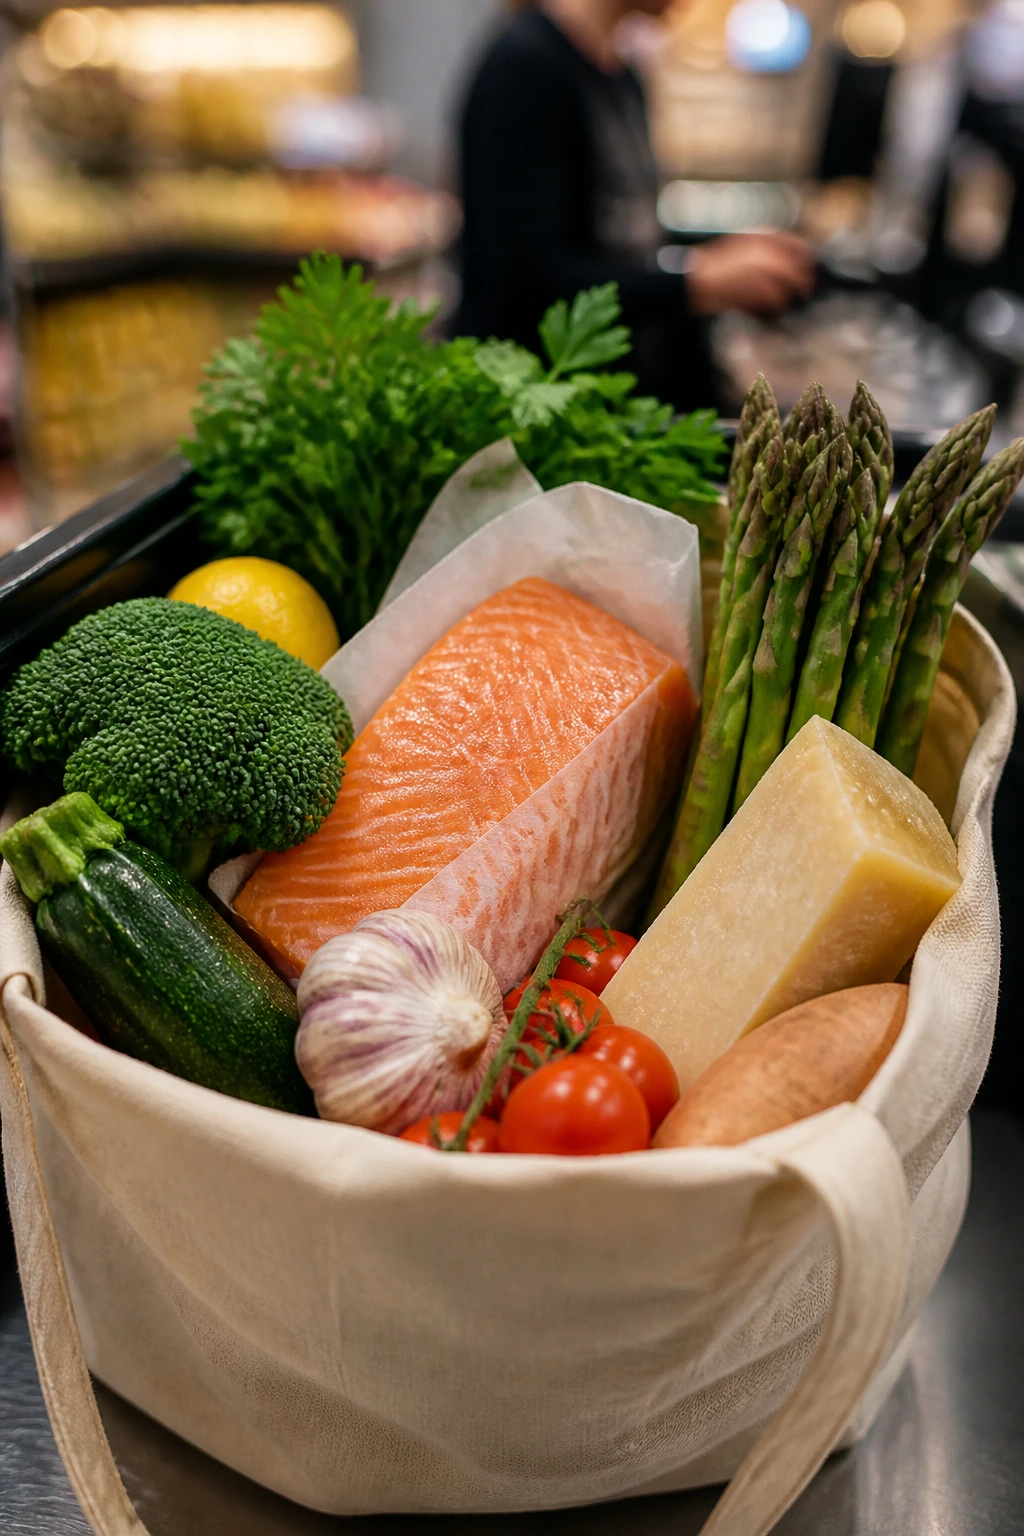
Choosing the right ingredients matters more in toaster oven cooking than people expect. You don’t have a lot of slack. Thin fish, evenly sized vegetables, and good cheese all make the difference between a tray that looks cooked and a tray that eats well. Salmon fillets should be similar in thickness so one isn’t dry while the other is still soft in the middle. Bone-in pork chops need to be thick enough to survive the heat without turning leathery. Chicken cutlets should be pounded to the same height so the breading browns at the same pace.
Vegetables deserve the same attention. Asparagus spears, potato halves, pepper strips, and green beans all cook at different speeds, so cut them with that in mind. Hard vegetables like potatoes and sweet potatoes need the early head start. Tender vegetables, tomatoes, spinach, and basil belong in later or finishing stages. That’s not fussy; it’s the difference between roast and steam.
For pantry staples, thick sauce is your friend. Thin marinara, watery salsa, and wet fresh mozzarella can wreck the texture of a small bake fast. Buy fresh mozzarella if you like it, but blot it well. If you’re shopping for shrimp, choose large shrimp that are already peeled and deveined unless you enjoy turning dinner into a shelling session. And when you see pre-cut vegetables, don’t dismiss them outright. If the pepper strips are dry and the potato chunks are uniform, they can save enough time to make dinner happen.
Pizza dough deserves a quick note too. Let it rest at room temperature so it stretches without snapping back. Cold dough fights you. Warm dough behaves.
How to Serve These Recipes
Presentation: Keep the plates warm if you can. Spoon salmon juices over the fish, nestle sausage and peppers in a loose pile instead of spreading them flat, and let melted cheese sit in one obvious center so the food looks inviting rather than scattered. A final shower of herbs, a lemon wedge, or a spoonful of yogurt gives each dish a finished look without extra effort.
Accompaniments: Most of these dinners are complete on their own, but a simple side can make them feel fuller. A green salad with sharp vinaigrette goes with the salmon, chicken parm, and pizza. Garlic bread or a piece of crusty loaf works with the gnocchi bake. Rice, couscous, or warm tortillas fit the shrimp fajitas and stuffed sweet potatoes if you want to stretch the plate.
Portions: Each recipe here serves two in a proper dinner-size way, not as a tasting menu. If you eat lightly, the sausage tray and chicken parm may leave leftovers. If you eat like a person who skipped lunch, pair the salmon or stuffed sweet potatoes with bread or a simple salad and you’ll be happy. Scaling up is straightforward if your toaster oven can handle the space; otherwise, make a second batch rather than crowding the pan.
Beverage Pairing: A crisp white wine works with the salmon and shrimp, while a light red or sparkling water with citrus suits the chicken parm and pork chops. For the vegetarian dishes, a dry rosé or a tart lemonade keeps the meal bright. Beer drinkers can lean on a pilsner for pizza, fajitas, and gnocchi without fighting the food.
Additional Tips and Flavor Boosters

Flavor Enhancement: Acid is your friend. A squeeze of lemon over salmon, a splash of balsamic on sausage, or a little lime over fajitas cuts through the browned edges and keeps the dish from tasting heavy. If a tray tastes flat, it usually needs brightness, not more salt.
Customization: Keep a few easy swaps in your back pocket. Broccolini can stand in for asparagus, tortillas can become rice bowls, and sweet potatoes can take black beans or leftover cooked chicken. The toaster oven doesn’t care much as long as the ingredients are cut to cook at the same pace.
Serving Suggestions: Fresh herbs matter more than most people think. Basil on pizza, dill on salmon, parsley on sausage, cilantro on fajitas — those last handfuls change the smell on the plate, which changes how the food tastes before the first bite. A little grated cheese or a spoon of yogurt can do the same thing.
Make-It-Yours: For a dairy-free path, use olive oil, herbs, and a finishing sprinkle of nutritional yeast where cheese would normally sit. For a lower-salt version, lean on lemon, garlic, onion, and pepper instead of extra cheese or heavy sauces. If you want more heat, add red pepper flakes or sliced jalapeños to the pan before baking so the spice softens into the food instead of landing on top like an afterthought.
Make-Ahead, Storage, and Reheating Guidance
These dinners are friendly to advance prep, but they do better when the final bake happens close to serving time. You can wash and trim vegetables, mix spice blends, grate cheese, and even bread chicken earlier in the day. Pizza dough can sit at room temperature until relaxed and ready. Pork chops can be seasoned an hour ahead and chilled. That little head start takes the pressure off the actual dinner hour.
For leftovers, most of these meals keep well in the refrigerator for 3 to 4 days. Salmon and shrimp are the most delicate; they’re best eaten within 2 days. Chicken Parmesan, sausage trays, stuffed sweet potatoes, and baked gnocchi all hold up nicely for 3 to 4 days if they’re cooled quickly and stored in airtight containers. Pizza keeps for 2 to 3 days and reheats well if you don’t drown it in extra sauce first.
Freezing is more selective. Chicken Parmesan, sausage and peppers, stuffed sweet potato filling, and baked gnocchi can be frozen for up to 2 months in airtight containers or wrapped tightly in freezer paper and foil. Fish and shrimp are less forgiving after freezing and thawing, so I’d rather cook those fresh than gamble on a rubbery reheat. Pork chops can be frozen, but the texture is best if you freeze the cooked meat with a bit of pan juice and reheat gently.
For reheating, the toaster oven is still the best tool. Use 325°F to 350°F for most leftovers, cover loosely with foil if you want to avoid drying the top too much, and warm until the center reaches 165°F. Pizza does best directly on the rack or on a preheated pan so the crust crisps again. Chicken Parmesan likes a covered first reheat, then a short uncovered finish to bring the crust back. Gnocchi and sausage trays can take a slightly higher heat and a longer rest under foil. Fish needs the softest touch of all — low heat, short time, and no broiling unless you enjoy dry salmon.
Variations and Adaptations to Try
Gluten-Free Crisp Route: Use gluten-free breadcrumbs for the chicken, serve the sausage tray over roasted potatoes or polenta, and choose a gluten-free pizza dough or flatbread. Gnocchi can be the tricky one, so look for potato gnocchi made without wheat or swap in roasted potatoes with the same sauce and cheese.
Dairy-Free Finish: Skip mozzarella, Parmesan, and cotija where needed, then build flavor with olive oil, herbs, capers, lemon zest, and a little nutritional yeast. The salmon, shrimp, sausage, and pork all work well this way because the meat and vegetables carry the meal on their own.
Vegetarian Shift: The sweet potato boats and baked gnocchi already fit the bill, and the others can tilt meatless with roasted mushrooms, chickpeas, or eggplant cutlets. The key is to keep the texture interesting; a tray of soft vegetables alone feels thin. Add something crisp or creamy to balance it out.
Spice-Lover’s Tray: Add red pepper flakes to the gnocchi, sliced jalapeños to the fajitas, and a little cayenne to the chicken breading. A spicy finish works best when it’s spread across the recipe, not dumped at the end. That way every bite has a small pulse of heat instead of one hot mouthful and six bland ones.
Lower-Sodium Pantry Plan: Use fresh herbs, lemon, lime, vinegar, and garlic to carry the flavor, then cut back on cheese, bottled sauces, and salty seasoning blends. Look for low-sodium marinara and rinse canned beans well. You can still get a bold dinner without the salt bomb.
Extra-Comfort Version: Add a little more cheese, a spoon of cream or ricotta, or a buttery breadcrumb topping where it fits. That works especially well on the gnocchi bake and chicken parm. Just keep the portioning honest so the meal still feels like dinner and not a midnight dare.
Common Mistakes to Avoid
Crowding the Pan: This is the easiest way to turn roast vegetables into steamed ones. If the pan is packed edge to edge, the food gives off moisture faster than it can brown. Use a quarter-sheet pan or split the batch across two trays if you have to. Space equals color.
Skipping the Preheat: A toaster oven comes up to temperature fast, but it still needs that head start. If you slide food into a lukewarm oven, the crust softens before it starts browning and the cooking time becomes guesswork. Give it the full preheat unless the recipe says otherwise.
Using Wet Ingredients Without Drying Them: Fresh mozzarella, washed greens, shrimp, and salmon all bring surface moisture that can sabotage browning. Pat fish and shrimp dry. Blot cheese. Shake water from spinach. It’s a small habit with a big effect.
Ignoring Thickness: Chicken breasts, pork chops, and potato pieces need to be close in size or they cook unevenly. One thick corner can still be raw while the thin edges burn. Pound, trim, or halve things so the tray behaves like one unit.
Walking Away During Broil: Broiling is useful, but it is not a hands-off setting. Cheese can darken in under a minute, and garlic can go bitter in a blink. Stay close, keep the oven door cracked only if your model allows it, and pull the tray the second it looks right.
Skipping the Thermometer: Guessing works sometimes. It also produces dry chicken and underdone pork. A thermometer takes the drama out of dinner and lets you pull food at the right moment instead of hoping the center will catch up while the edges continue to dry out.
Questions People Actually Ask About Toaster Oven Dinners for Two
Can I make all of these in a regular oven instead?
Yes. Use the same temperatures and add a few minutes for preheating and cooking, especially if the regular oven is large and the food is spread out. Watch the visual cues closely, because the browning can lag a little in a bigger cavity.
What size toaster oven do I need for these recipes?
A model that fits a quarter-sheet pan or an 8×8-inch baking dish is enough for all eight dinners. Bigger is nice, but not required. If your oven is small, use the lower end of the pan sizes and avoid stacking ingredients too thickly.
Can I use convection if my toaster oven has it?
Yes, and it usually helps with browning. Keep an eye on the food and expect it to finish a little sooner, often by 2 to 4 minutes. I’d rather check early than overshoot and dry something out.
Which recipe is the easiest for a beginner?
The baked gnocchi and the stuffed sweet potatoes are probably the gentlest. They have fewer moving parts, and the visual cues are easy to read: bubbling sauce, soft potato, melted cheese, heated filling. Salmon is simple too, as long as you don’t overcook it.
Can I prep these ahead for a weeknight?
Absolutely. Chop vegetables, grate cheese, mix spice blends, and portion proteins earlier in the day. Chicken can be breaded ahead and chilled, and the sausage, pork, and salmon dinners all benefit from having the sides ready before the toaster oven even turns on.
What if the top browns too fast before the center is done?
Drop the rack lower, tent loosely with foil, or reduce the heat by 25°F next time. This happens a lot with broiled cheese and thicker chicken cutlets. The fix is usually simple: move the food away from the element or cover the top for part of the bake.
Can I use foil instead of parchment paper?
Yes, especially for sausage, peppers, and potatoes. Foil helps with cleanup and gives the vegetables direct contact with the hot pan. Parchment is a better pick for sticky fish, chicken, and pizza dough.
How do I scale these for just one person?
Cook the recipe as written and save half, or cut every ingredient in half and use a smaller dish if your toaster oven fits it well. Some things — like pizza dough and chicken breading — are awkward to halve cleanly, so leftovers may be the easier route. They usually reheat fine.
Which recipes hold up best as leftovers?
Chicken Parmesan, sausage and peppers, stuffed sweet potatoes, and baked gnocchi keep their shape the best. Pizza is fine for a day or two. Fish and shrimp are best cooked fresh unless you like them reheated gently and eaten without high expectations.
Small Oven, Big Dinner
There’s a particular satisfaction in pulling a hot tray from a toaster oven and realizing dinner is done without a lot of ceremony. No giant oven to preheat. No leftovers you never wanted. Just two plates, a little browning, and food that tastes like somebody paid attention.
The smartest toaster oven dinners for two are the ones that respect the box they’re cooked in. They’re small, fast, and a little bit proud of it. Once you get comfortable with that rhythm, weeknight cooking stops feeling like a chore and starts feeling like the easiest part of the day.
Recipe Collection Quick Reference Table
| Recipe | Prep Time | Cook Time | Total Time | Servings | Standout Detail |
|---|---|---|---|---|---|
| Lemon-Garlic Salmon with Asparagus and Tomatoes | 15 min | 15 min | 30 min | 2 | bright lemon pan juices |
| Crispy Chicken Parmesan for Two | 20 min | 20 min | 40 min | 2 | crunchy crust under melted mozzarella |
| Sausage, Peppers, and Baby Potatoes | 15 min | 30 min | 45 min | 2 | one tray, deep roast flavor |
| Personal Margherita Pizzas with Arugula | 20 min | 10 min | 30 min | 2 | crisp crust and fresh basil finish |
| Shrimp Fajitas with Warm Tortillas | 15 min | 12 min | 27 min | 2 | fast-cooking shrimp with charred peppers |
| Black Bean Stuffed Sweet Potatoes with Cotija and Lime | 10 min | 40 min | 50 min | 2 | sweet-savory filling with lime and cheese |
| Apple-Sage Pork Chops with Green Beans | 15 min | 20 min | 35 min | 2 | juicy chops with roasted apples |
| Baked Gnocchi with Spinach and Mozzarella | 10 min | 20 min | 30 min | 2 | bubbling sauce and browned cheese top |