
Weeknight paleo dinners live or die on heat, timing, and a short ingredient list. If a chicken thigh needs a 45-minute marinade and three separate pans, it has already lost.
That’s why this kind of cooking works best when you lean on fast-cooking proteins, sturdy vegetables, and sauces that come together while the meat rests. A hot skillet, a decent knife, and a little salt can carry a shocking amount of dinner.
These are the paleo dinners for weeknights I keep coming back to when I want food that feels cooked, not assembled. You’ll see one-pan chicken, quick seafood, crisp-tender vegetables, and a few comfort-leaning plates that still stay inside paleo lines. The pace stays sane. The flavors don’t.
Why These Paleo Weeknight Dinners Earn a Place on the Table

-
Fast proteins do the heavy lifting: Chicken thighs, shrimp, salmon, ground meat, and pork tenderloin all cook fast enough to fit into a normal evening without a lot of babysitting.
-
Most of these use one pan, one bowl, or one pot: That means fewer dishes, less traffic around the sink, and less of that end-of-day feeling where dinner becomes a cleanup project.
-
The flavors stay bold without grains or dairy: Citrus, garlic, herbs, coconut milk, olives, tomato, and vinegar do the work that pasta and cheese usually do in other dinners.
-
Vegetables aren’t treated like a side note: Asparagus, broccoli, zucchini, cauliflower rice, lettuce cups, spinach, and sweet potatoes are built into the meal, not piled on at the end.
-
They handle leftovers well: A few of these taste even better the next day, especially the skillet dishes and slow-cooker barbacoa.
-
You can swap around the proteins and vegetables without wrecking the recipe: That flexibility matters on a weeknight, when the fridge gives you a shrug and not a plan.
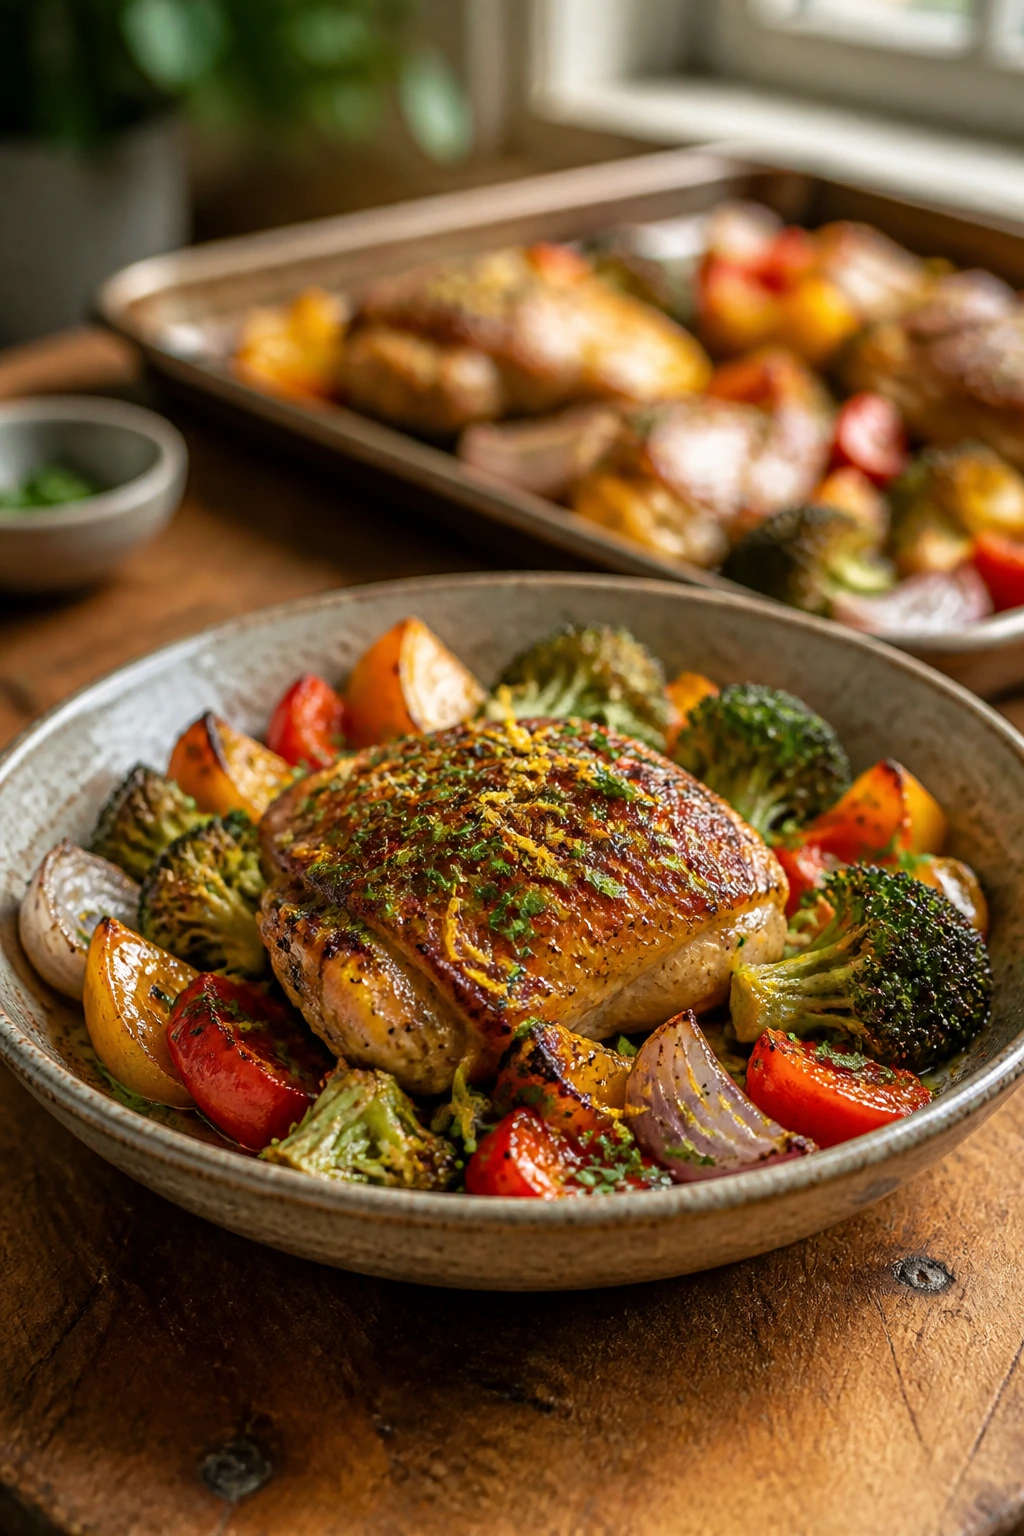
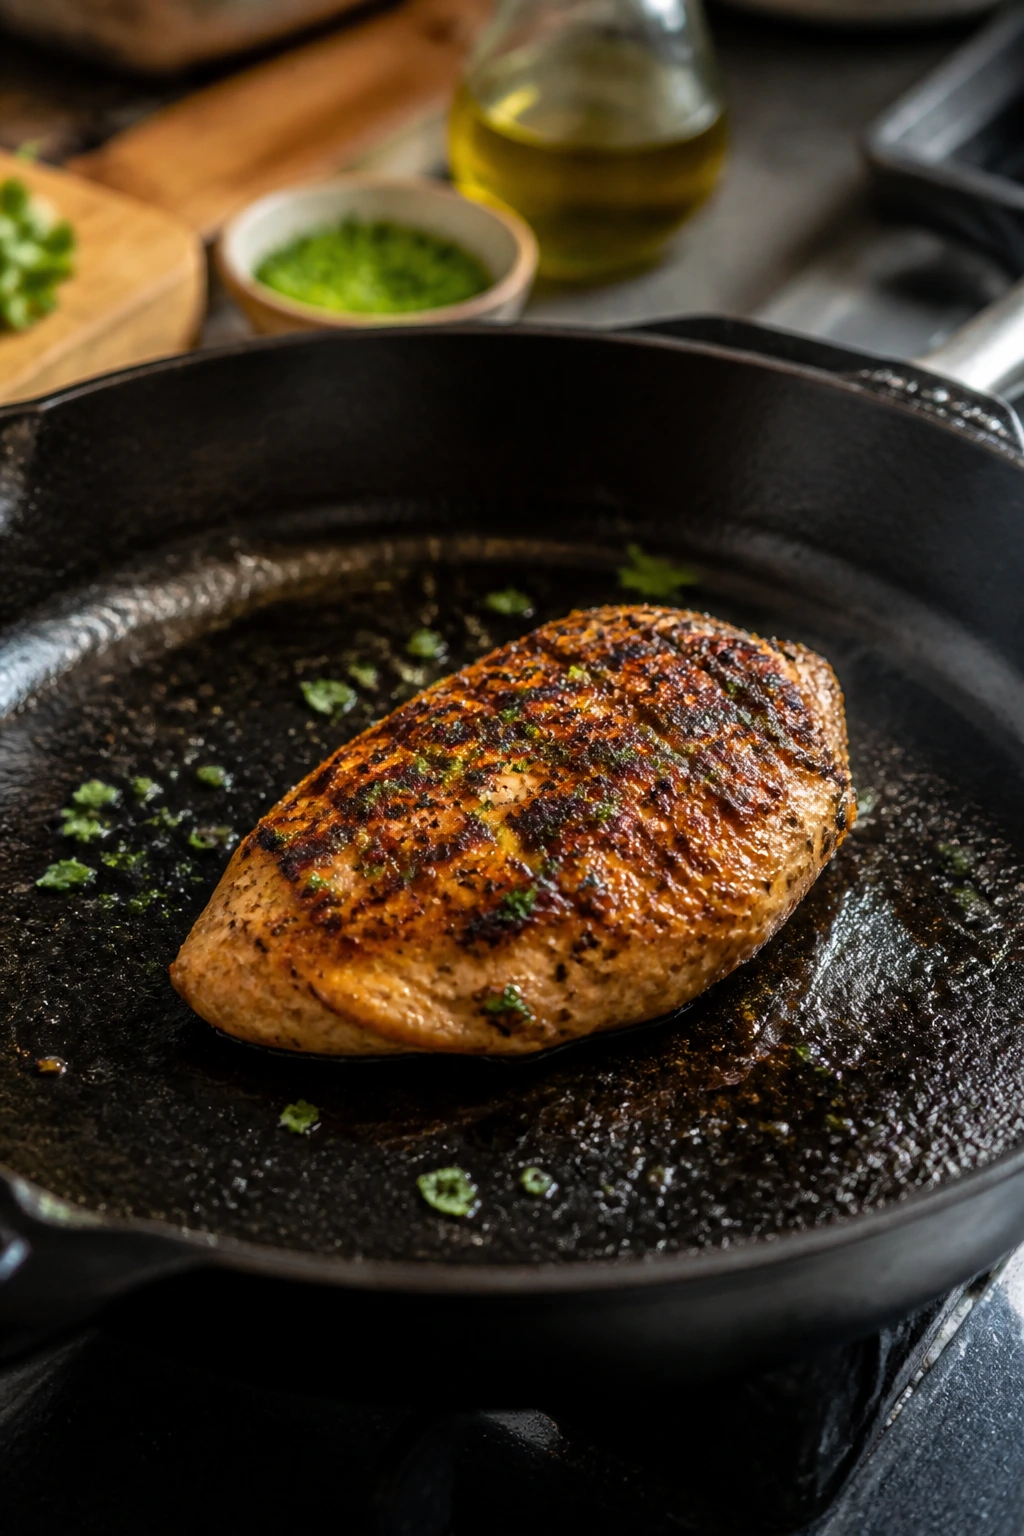
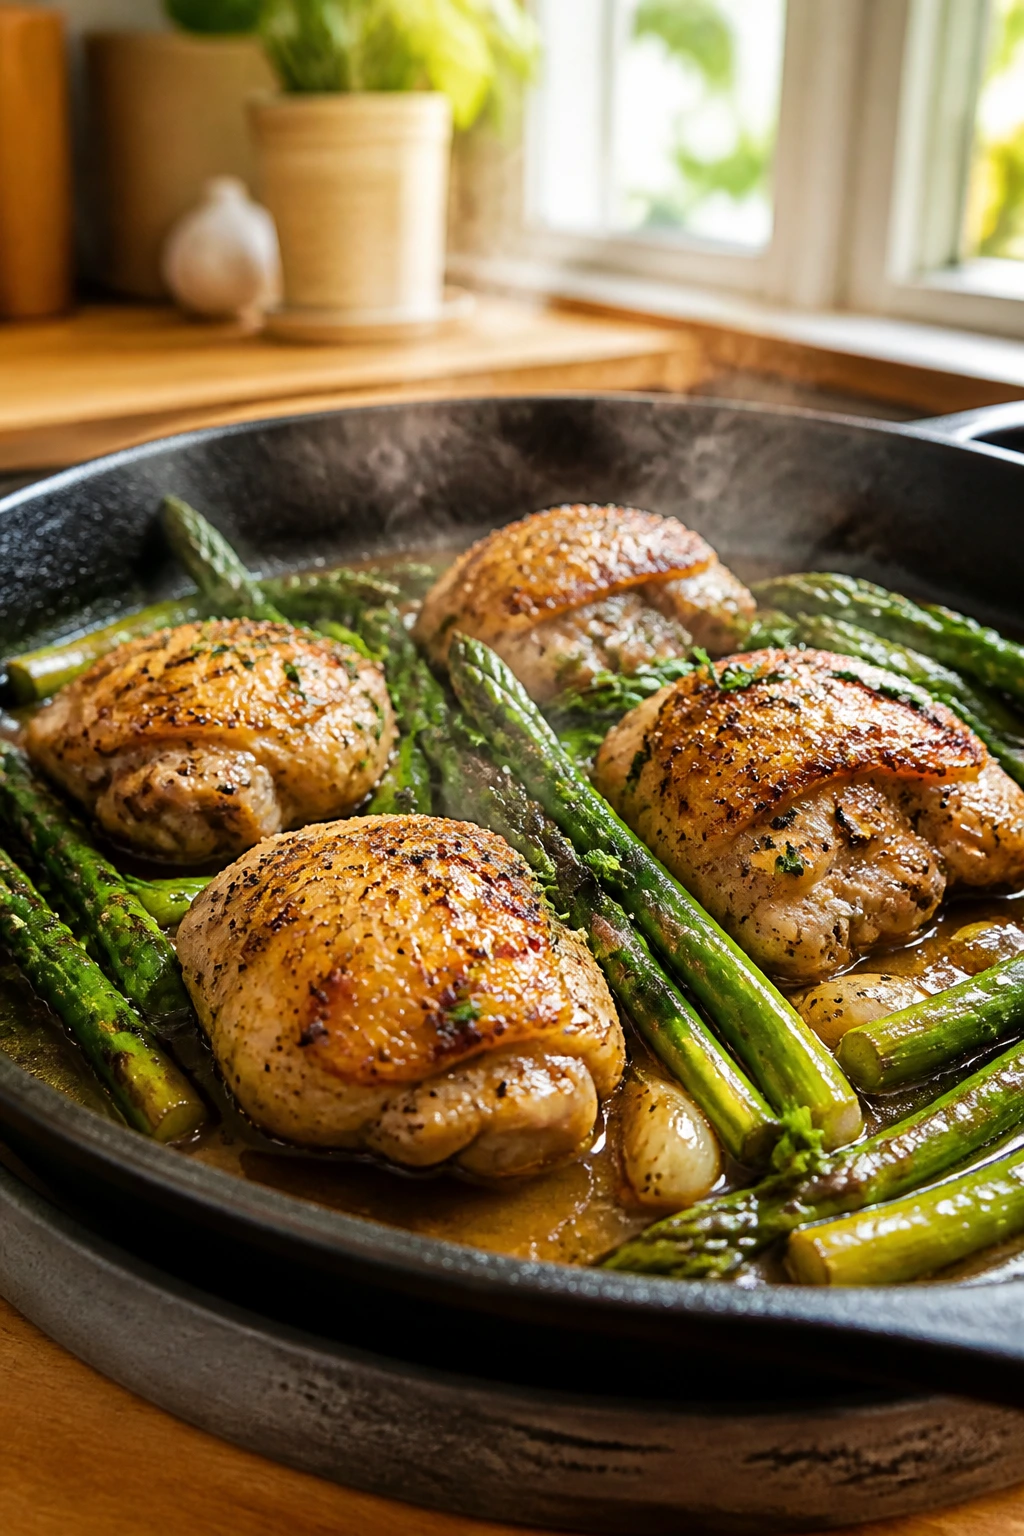
1. Lemon-Garlic Chicken Thighs with Asparagus
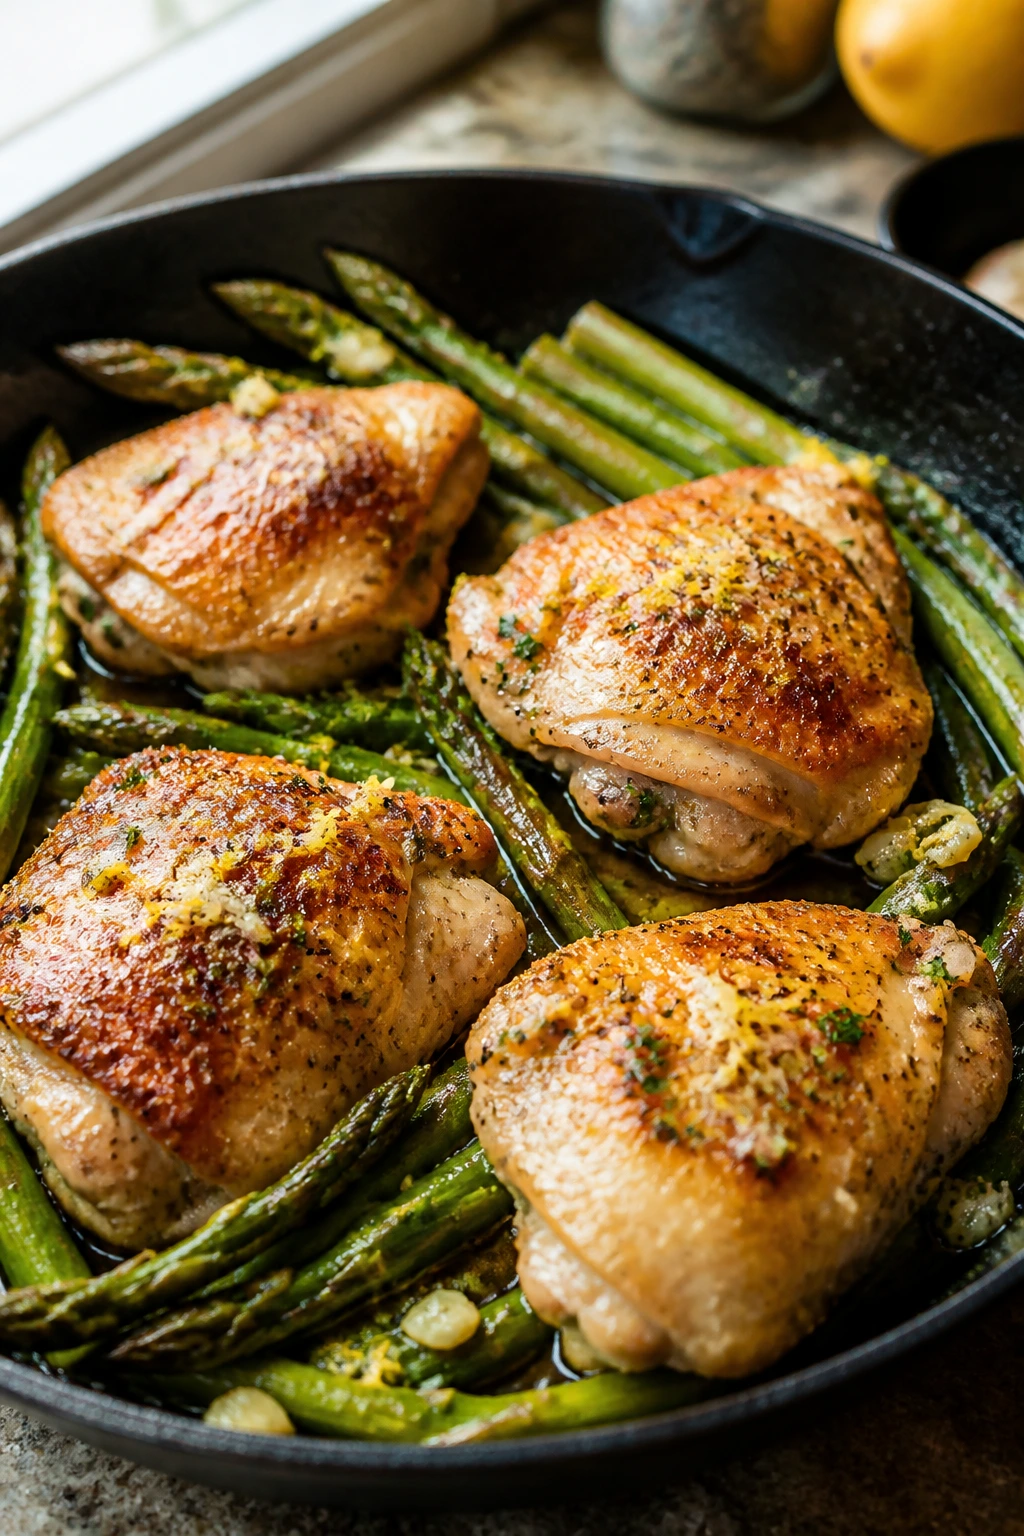
Juicy chicken thighs and asparagus make an easy pair because they like the same kind of treatment: hot pan, quick cook, bright finish. The chicken gets bronzed and savory, while the asparagus keeps a little snap instead of collapsing into soft green strings. Add lemon at the end, and the whole skillet wakes up.
This is one of those paleo dinners for weeknights that tastes like you spent more time than you did. You didn’t. The skillet does the work.
Why It Works
Chicken thighs stay forgiving even if your timing is a little loose, which is exactly what weeknight cooking needs. Asparagus cooks fast enough to finish in the same pan, and its mild bitterness gives the dish some backbone. The garlic and lemon are not decoration; they’re what keeps the whole plate from tasting flat after a quick sear.
Key Ingredients
- 1 1/2 pounds boneless, skinless chicken thighs
- 1 pound asparagus, trimmed
- 2 tablespoons avocado oil
- 4 garlic cloves, minced
- 1 lemon, zested and juiced
- 1 teaspoon kosher salt
- 1/2 teaspoon black pepper
- 1 teaspoon dried oregano
- 1/2 teaspoon paprika
- 1/4 teaspoon red pepper flakes, optional
Quick Steps
-
Season the chicken: Pat the thighs dry and season both sides with salt, pepper, oregano, paprika, and red pepper flakes if you want a little heat. Dry meat browns better. Wet meat steams.
-
Sear the chicken: Heat 1 tablespoon avocado oil in a large skillet over medium-high heat. Cook the thighs for 5 to 6 minutes per side, until deeply golden and cooked through to 165°F. Transfer to a plate.
-
Start the asparagus: Add the remaining oil to the pan, then toss in the asparagus. Cook for 3 minutes, stirring once, until it turns bright green and the tips look lightly blistered.
-
Add garlic and lemon: Stir in the minced garlic for 30 seconds, just until fragrant, then add half the lemon juice and all the zest. Do not let the garlic sit dry in a hot pan.
-
Finish together: Return the chicken to the skillet and spoon the pan juices over everything. Cook for 1 to 2 minutes more.
-
Rest and serve: Turn off the heat, add the remaining lemon juice, and let the chicken rest for 3 minutes before serving.
Tips and Variations
- Time-saver: Trim the asparagus earlier in the day and keep it wrapped in a damp towel in the fridge.
- Flavor switch: Add 1 tablespoon chopped capers at the end for a sharper, brinier finish.
- If your asparagus is thin: Reduce the second cook time to 1 minute so the stalks don’t wilt into mush.
2. Garlic Herb Steak and Mushroom Skillet
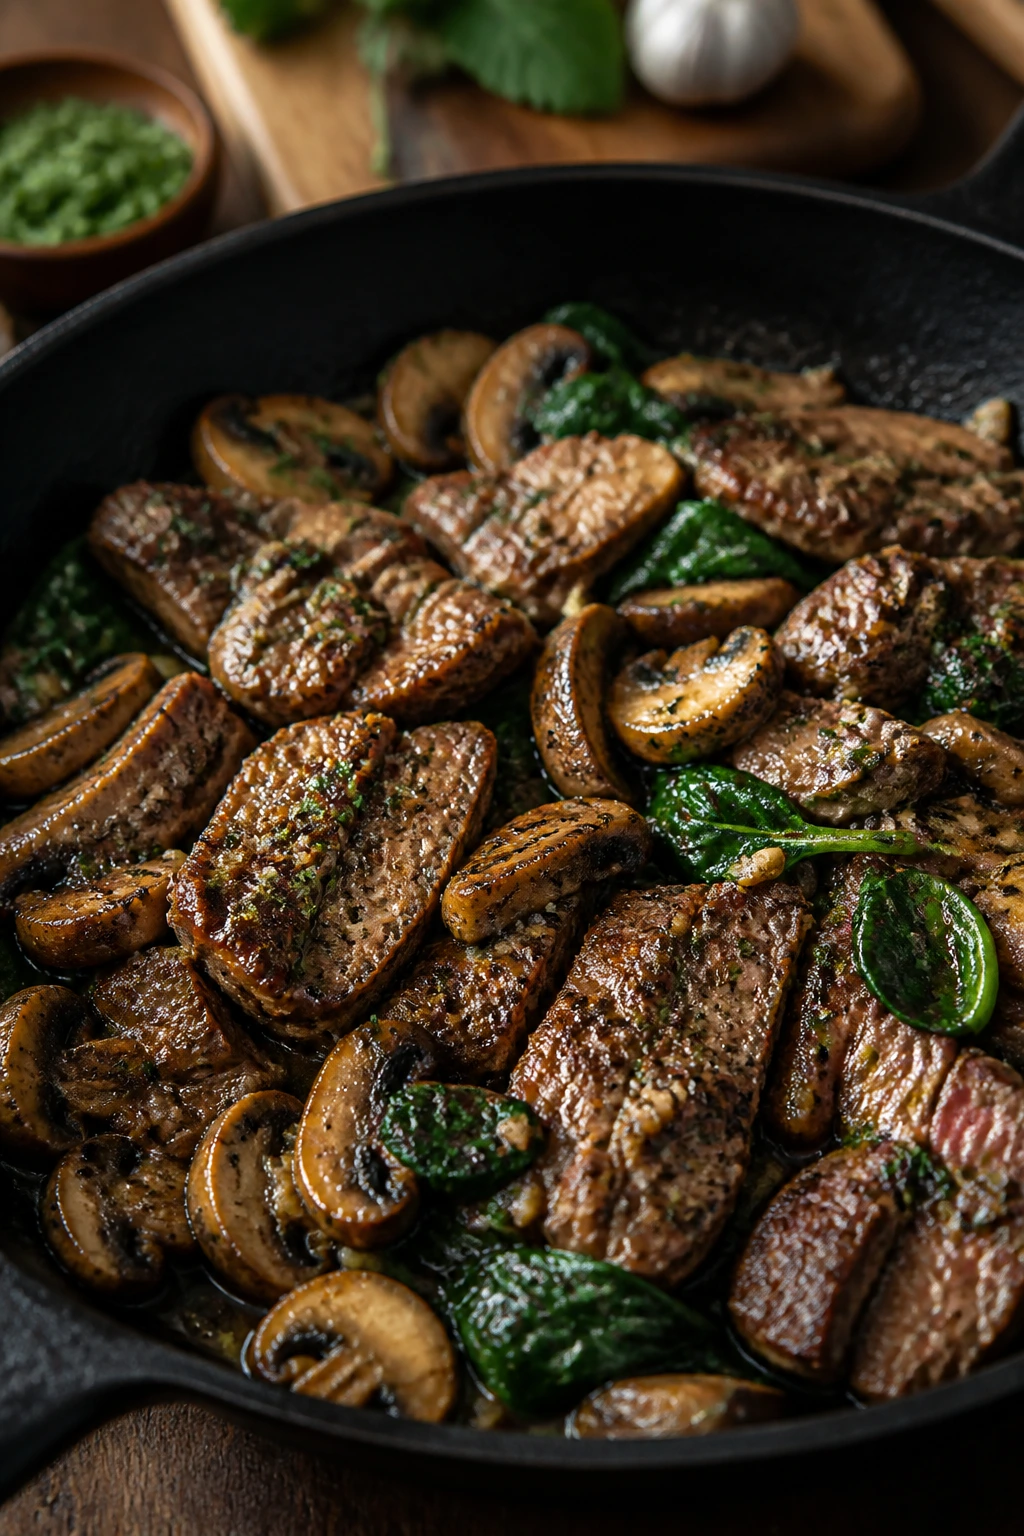
Steak on a weeknight sounds ambitious until you remember how fast a thin slice of beef cooks in a hot pan. Mushrooms drink up the pan drippings, garlic does its usual reliable thing, and a handful of spinach turns the skillet into a real dinner instead of a meat-and-side arrangement.
The best part is the texture contrast. You get browned edges on the steak, soft mushrooms, and spinach that barely wilts. That combination feels deliberate.
Why It Works
Thin-sliced steak cooks in minutes, which makes it a good fit for quick paleo dinners. Mushrooms add the savory depth people sometimes miss when they drop grains and dairy, and spinach brings a little freshness without asking for extra effort. A squeeze of lemon at the end sharpens everything and cuts through the richness of the beef.
Key Ingredients
- 1 1/2 pounds sirloin steak, sliced into 1/2-inch strips
- 12 ounces cremini mushrooms, sliced
- 4 cups baby spinach
- 2 tablespoons avocado oil
- 4 garlic cloves, minced
- 1 teaspoon kosher salt
- 1/2 teaspoon black pepper
- 1 teaspoon dried thyme
- 1 teaspoon chopped rosemary
- 1 tablespoon lemon juice
Quick Steps
-
Prep the steak: Pat the beef dry and season with salt, pepper, thyme, and rosemary. If the strips are very wet, they will not brown well.
-
Brown the beef: Heat 1 tablespoon avocado oil in a large skillet over high heat. Cook the steak in a single layer for 1 to 2 minutes per side, just until browned. Remove it before it overcooks.
-
Cook the mushrooms: Add the remaining oil and the mushrooms. Let them sit for 2 minutes without stirring, then cook another 3 minutes, until they release moisture and start to turn golden.
-
Add garlic and spinach: Stir in the garlic for 30 seconds, then add the spinach. Toss until it just wilts.
-
Bring the steak back: Return the beef and any juices to the pan. Toss for 1 minute to warm through.
-
Finish with lemon: Add the lemon juice, taste, and adjust salt if needed. Serve right away.
Tips and Variations
- For more sauce: Add 1/4 cup beef broth after the mushrooms brown and let it reduce for 2 minutes.
- For a richer finish: A spoonful of compliant pesto at the end gives the skillet a green, herby edge.
- Avoid this one thing: Don’t crowd the steak. If needed, sear it in two batches.
3. Sheet-Pan Salmon with Dill-Cucumber Relish
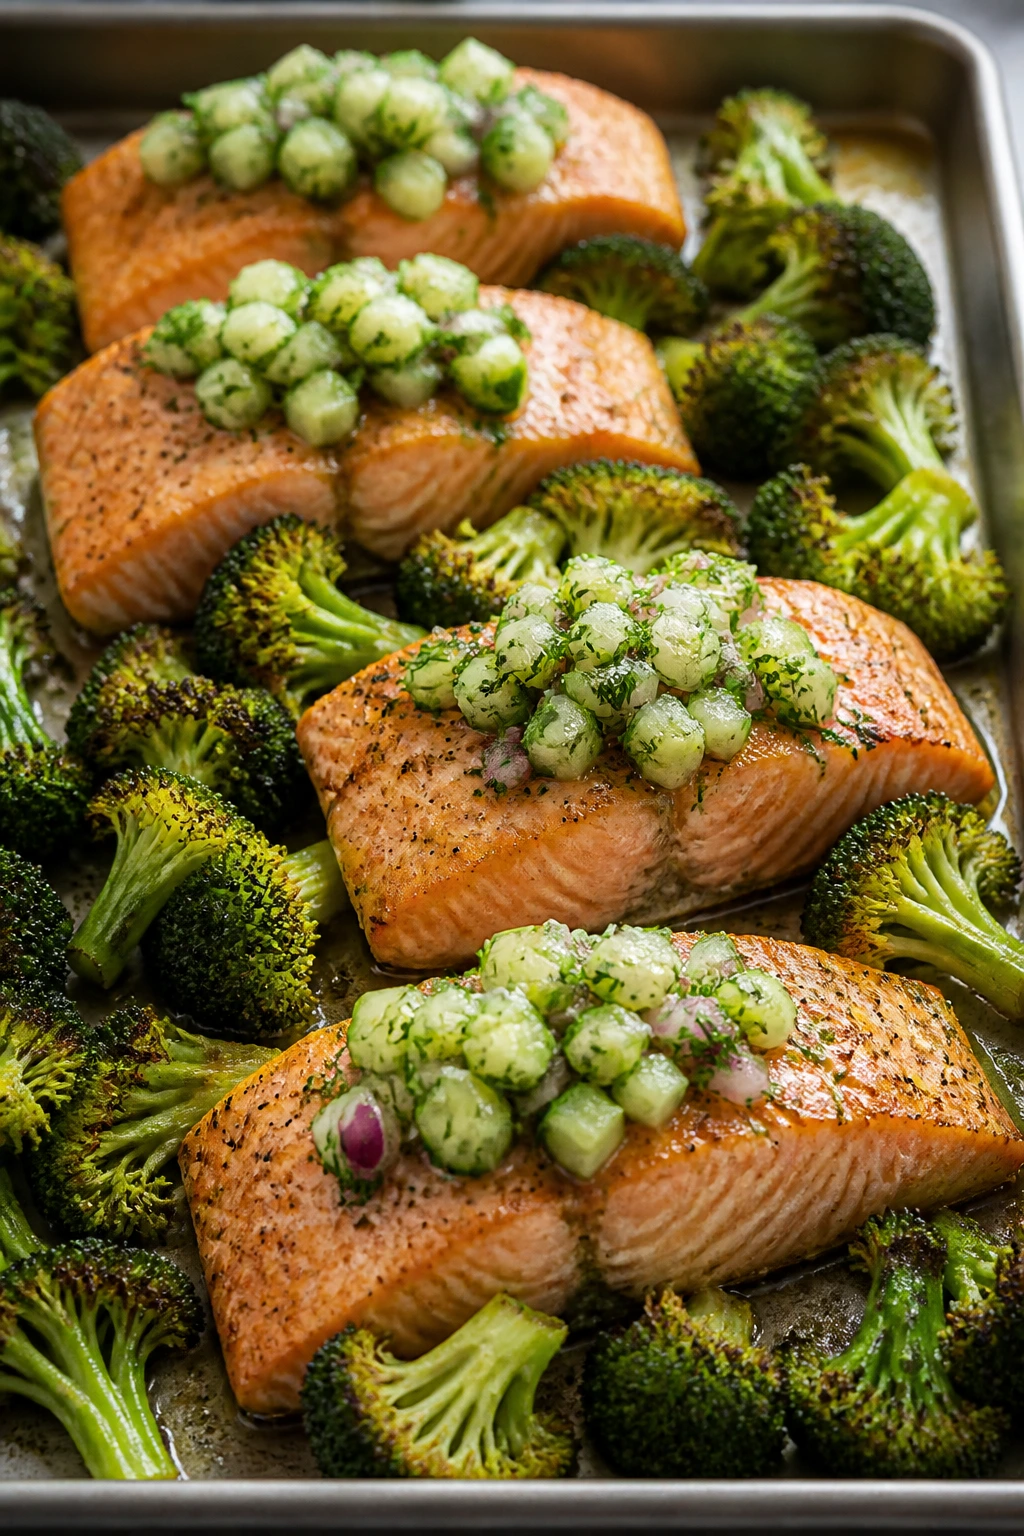
Salmon likes a hot oven, and broccoli does too, which is why this dinner feels more organized than it sounds. The fish turns silky in the center, the broccoli roasts into crisp edges, and the cucumber relish lands cold and herby on top. That contrast is the whole dish.
I’d make this when I wanted dinner to feel light but not boring. The relish keeps it lively. Without it, the meal would still work, but it would be missing its best line.
Why It Works
Salmon cooks fast enough to fit into a weeknight window, and sheet-pan roasting keeps the process simple. Broccoli can roast first so it gets color, then the salmon joins later for a short bake that protects the fish from drying out. The dill-cucumber relish adds acid, crunch, and coolness, which makes the warm fish taste brighter.
Key Ingredients
- 4 salmon fillets, about 6 ounces each
- 1 large head broccoli, cut into florets
- 2 tablespoons olive oil
- 1 teaspoon kosher salt
- 1/2 teaspoon black pepper
- 1 cucumber, diced
- 2 tablespoons chopped fresh dill
- 1 tablespoon minced red onion
- 1 tablespoon lemon juice
- 1 tablespoon olive oil
Quick Steps
-
Heat the oven: Set it to 425°F and line a sheet pan with parchment.
-
Roast the broccoli first: Toss the broccoli with 2 tablespoons olive oil, 1/2 teaspoon salt, and 1/4 teaspoon pepper. Spread it on the pan and roast for 10 minutes.
-
Mix the relish: Stir together the cucumber, dill, red onion, lemon juice, 1 tablespoon olive oil, and a pinch of salt. Set it aside so the flavors mingle.
-
Add the salmon: Push the broccoli to the sides and place the salmon in the center. Season the fillets with the remaining salt and pepper.
-
Finish roasting: Roast for 10 to 12 minutes more, until the salmon flakes easily and the center still looks moist.
-
Serve with relish: Spoon the dill-cucumber mixture over the fish and broccoli right before serving.
Tips and Variations
- If your salmon is thick: Give it an extra 2 minutes, then check the center with a fork.
- Swap option: Try asparagus or green beans instead of broccoli.
- Best texture move: Make the relish first so it stays crisp and cold on top of the warm fish.
4. Turkey Lettuce Wrap Skillet
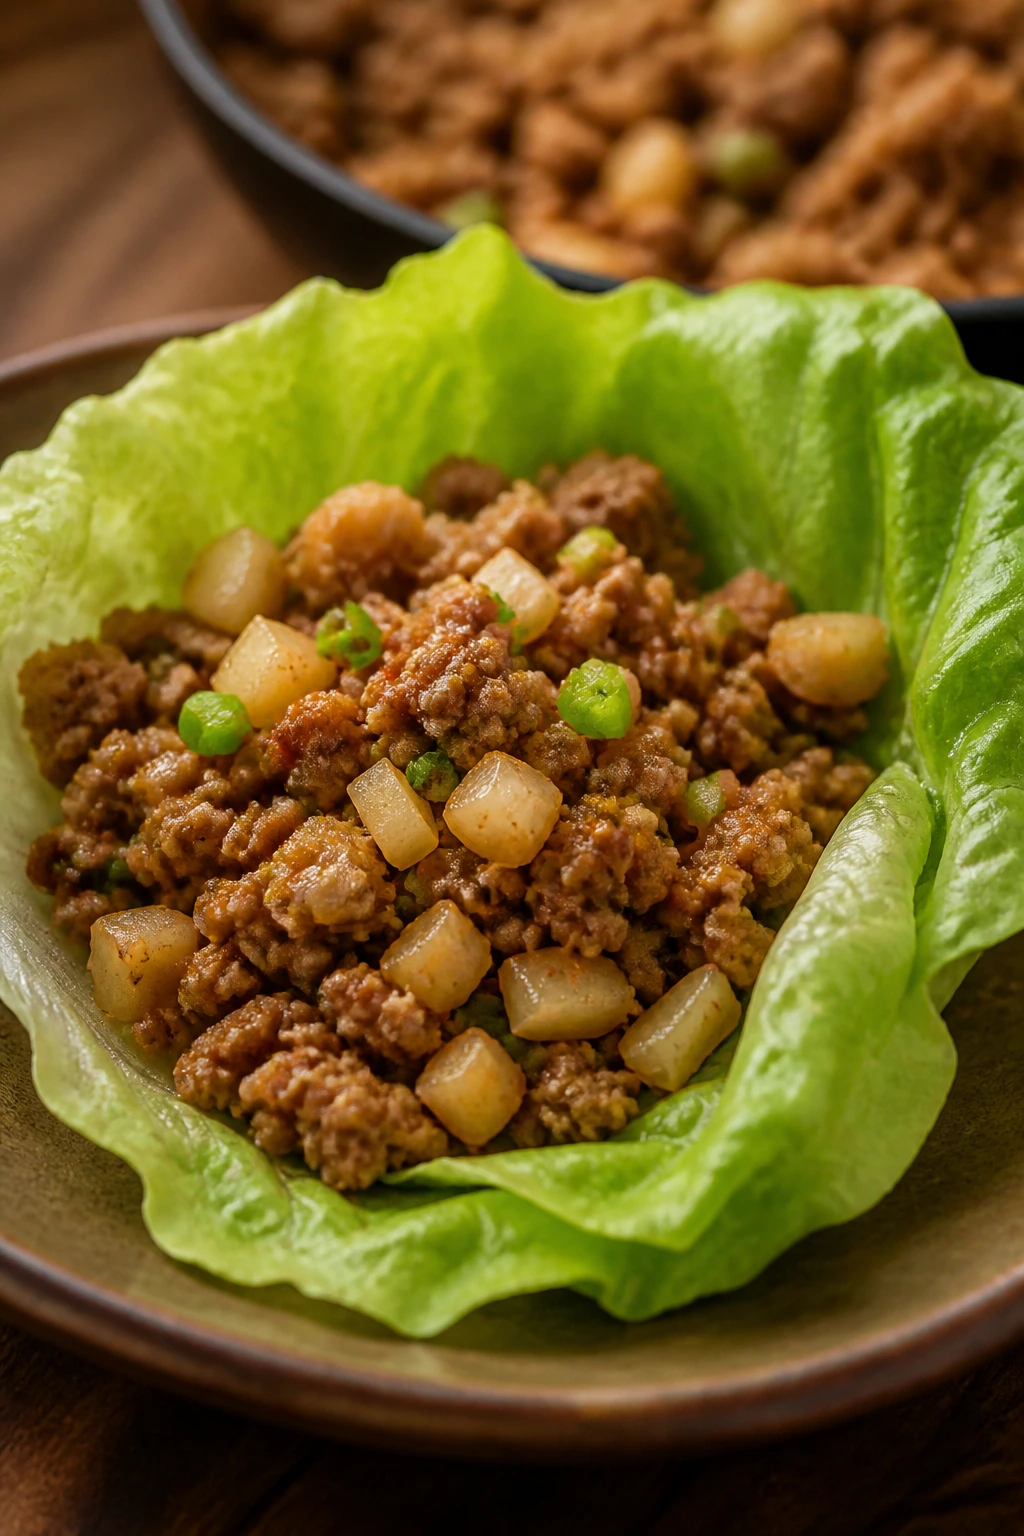
This is the kind of meal that looks casual and eats fast. Ground turkey takes on ginger, garlic, coconut aminos, and a little heat, then gets tucked into cool lettuce leaves that crack when you bite them. Water chestnuts keep the filling from turning soft and one-note.
Weeknight dinners need dishes like this. They’re quick, a little interactive, and easy to double if you’ve got more mouths than pans.
Why It Works
Ground turkey cooks in one skillet and absorbs flavor quickly, which makes it ideal for fast paleo dinners. Water chestnuts bring crunch without complicating the ingredient list, and lettuce leaves do the job of a wrapper without any grain or bread. Coconut aminos give you the salty-sweet base you want from an Asian-style skillet without reaching for soy sauce.
Key Ingredients
- 1 1/2 pounds ground turkey
- 1 tablespoon avocado oil
- 1 small yellow onion, finely diced
- 3 garlic cloves, minced
- 1 tablespoon fresh ginger, grated
- 1 red bell pepper, diced
- 1 can water chestnuts, 8 ounces, drained and chopped
- 1/4 cup coconut aminos
- 1 tablespoon apple cider vinegar
- 1/4 teaspoon red pepper flakes
- 2 heads butter lettuce, leaves separated
Quick Steps
-
Warm the skillet: Heat the avocado oil over medium heat.
-
Cook the onion and turkey: Add the onion and cook for 2 minutes, then add the ground turkey. Break it up with a spoon and cook for 5 to 6 minutes, until no pink remains.
-
Add the aromatics: Stir in the garlic and ginger for 30 seconds, until fragrant.
-
Fold in the vegetables: Add the red bell pepper and water chestnuts. Cook for 2 minutes so the pepper softens a little but keeps its shape.
-
Season the filling: Pour in the coconut aminos and apple cider vinegar, then add red pepper flakes. Cook for 1 to 2 minutes until the liquid coats the turkey.
-
Assemble: Spoon the filling into lettuce leaves and serve immediately.
Tips and Variations
- Meal prep move: Keep the filling and lettuce separate so the leaves stay crisp.
- Extra crunch: Top with sliced radishes or shredded carrots if you want more texture.
- Spice control: Skip the red pepper flakes and add a little lime at the end for a milder version.
5. Pork Tenderloin with Apple-Onion Pan Sauce

Pork tenderloin is one of the easiest proteins to underestimate. It looks lean and plain before cooking, then slices into tender rounds with a sweet-savory sauce clinging to the pan. Apples and onions do the heavy lifting here, turning the skillet into something that tastes closer to comfort food than a rushed dinner.
This one sits nicely in the paleo dinner for weeknights category because the ingredient list is short and the oven does the finishing. No hovering. No drama.
Why It Works
Pork tenderloin cooks quickly and stays tender if you don’t overdo it. Apples and onions soften in the same skillet, then pick up the browned bits left from the pork, which gives the sauce depth without needing flour or cream. A splash of apple cider vinegar keeps the sauce from leaning too sweet.
Key Ingredients
- 1 to 1 1/4 pounds pork tenderloin
- 2 tablespoons olive oil
- 1 teaspoon kosher salt
- 1/2 teaspoon black pepper
- 1 teaspoon dried sage
- 2 apples, thinly sliced
- 1 large onion, thinly sliced
- 2 garlic cloves, minced
- 1/2 cup chicken broth
- 1 tablespoon apple cider vinegar
Quick Steps
-
Preheat the oven: Set it to 400°F.
-
Season and sear the pork: Pat the tenderloin dry, then rub it with salt, pepper, and sage. Heat 1 tablespoon olive oil in an oven-safe skillet over medium-high heat and sear the pork for 2 minutes per side.
-
Roast the pork: Transfer the skillet to the oven and roast for 12 to 15 minutes, until the center reaches 145°F. Move the pork to a plate to rest.
-
Cook the apples and onions: Put the skillet back on the stove, add the remaining oil, and cook the apples and onions over medium heat for 6 to 8 minutes, until the onions are soft and the apples start to slump.
-
Build the sauce: Add the garlic, then pour in the chicken broth and apple cider vinegar. Scrape up the browned bits and simmer for 2 to 3 minutes.
-
Slice and serve: Cut the pork into medallions and spoon the sauce over the top.
Tips and Variations
- Flavor boost: A pinch of cinnamon works if you want the sauce to lean warmer and more autumnal.
- Shortcut: Use pre-sliced onions if you need to shave off prep time.
- Don’t skip the rest: Let the pork sit for 5 minutes before slicing so the juices stay inside.
6. Shrimp Stir-Fry with Cauliflower Rice and Snap Peas
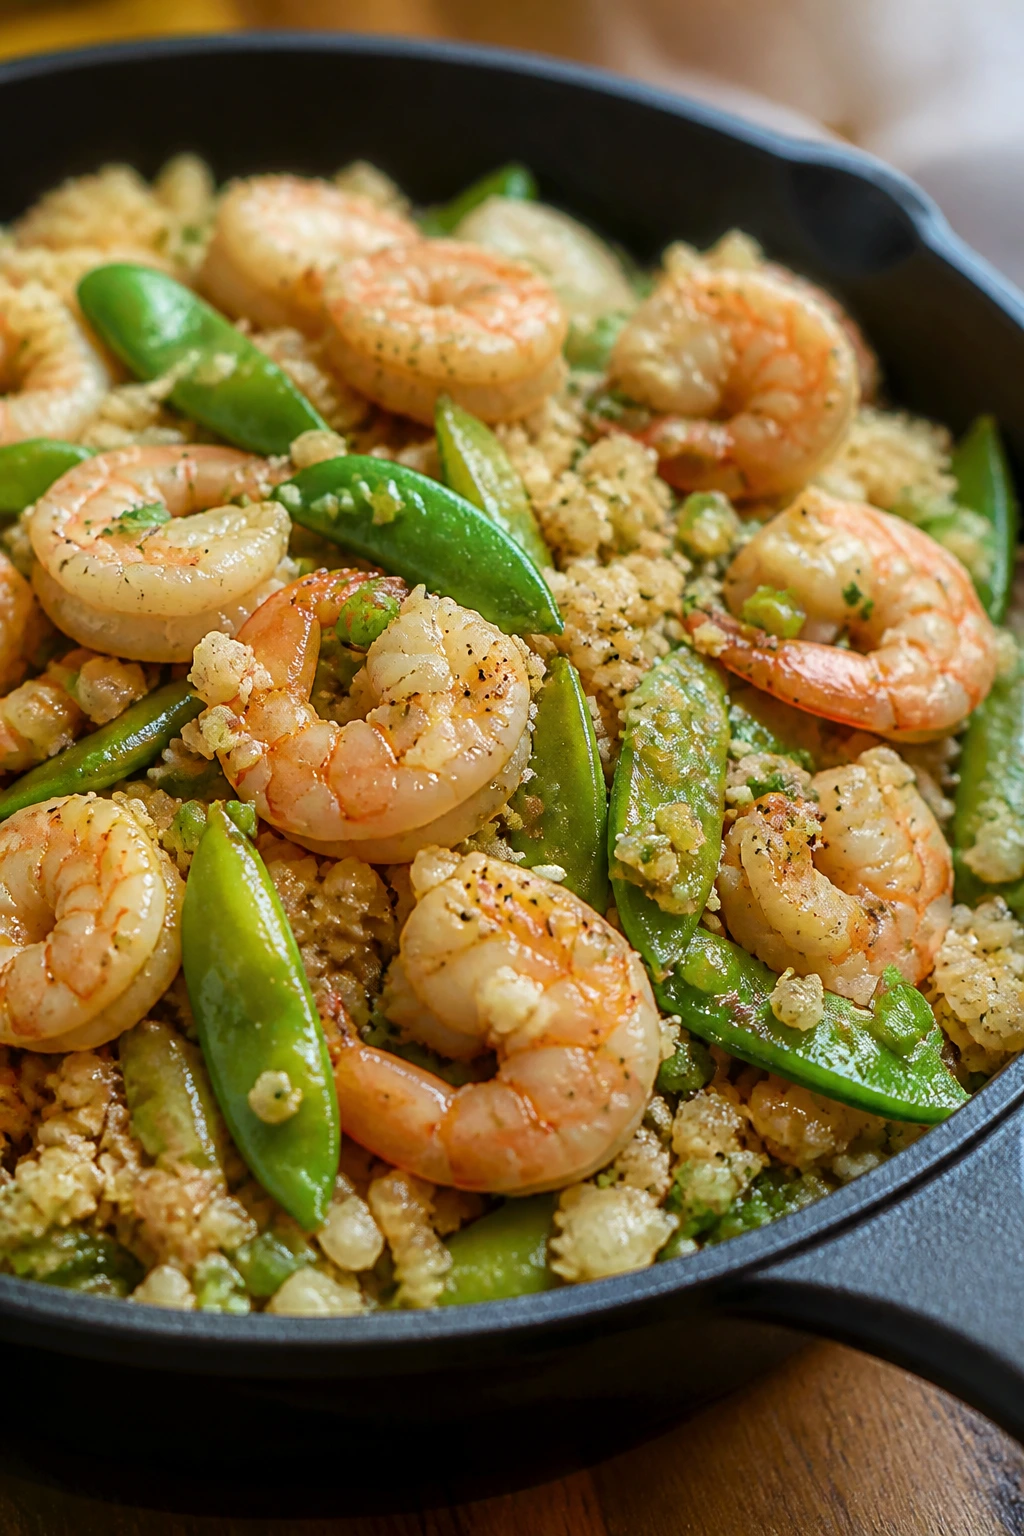
Shrimp is one of the best weeknight proteins because it asks so little from you. It turns pink fast, it carries flavor well, and it makes a skillet smell like dinner is actually under control. Cauliflower rice soaks up the garlicky, gingery sauce, while snap peas keep the whole thing fresh and crisp.
This is fast food in the best sense. Not drive-through fast. Just efficient.
Why It Works
Shrimp cooks in minutes, which keeps the whole dinner short. Cauliflower rice gives you the base feeling of a grain bowl without leaving the paleo lane, and snap peas stay snappy if you keep the heat high and the cooking time brief. Coconut aminos and lime make the sauce taste lively instead of heavy.
Key Ingredients
- 1 1/2 pounds large shrimp, peeled and deveined
- 4 cups cauliflower rice
- 8 ounces snap peas
- 1 red bell pepper, sliced
- 3 garlic cloves, minced
- 1 tablespoon fresh ginger, grated
- 3 tablespoons coconut aminos
- 1 tablespoon lime juice
- 2 tablespoons avocado oil
- 2 tablespoons chopped cilantro
Quick Steps
-
Dry the shrimp: Pat them with paper towels and season lightly with salt.
-
Cook the shrimp: Heat 1 tablespoon avocado oil in a large skillet over medium-high heat. Cook the shrimp for 1 to 2 minutes per side, until pink and curled. Remove them fast.
-
Stir-fry the vegetables: Add the remaining oil, then toss in the bell pepper and snap peas. Cook for 3 minutes, until the vegetables are bright and lightly blistered.
-
Add the aromatics and cauliflower rice: Stir in the garlic and ginger for 30 seconds, then add the cauliflower rice. Cook for 4 minutes, breaking up any clumps.
-
Season the skillet: Pour in the coconut aminos and lime juice. Toss until the cauliflower rice looks glossy and the liquid is mostly absorbed.
-
Finish with shrimp: Return the shrimp to the skillet, add cilantro, and toss for 1 minute to warm through.
Tips and Variations
- If you like heat: Add sliced chili or 1/4 teaspoon red pepper flakes with the garlic.
- Avoid watery rice: Don’t crowd the cauliflower. If it’s very wet, blot it first.
- Swap in: Thinly sliced zucchini works when snap peas aren’t around.
7. Beef Taco Bowls with Cauliflower Rice and Avocado Salsa
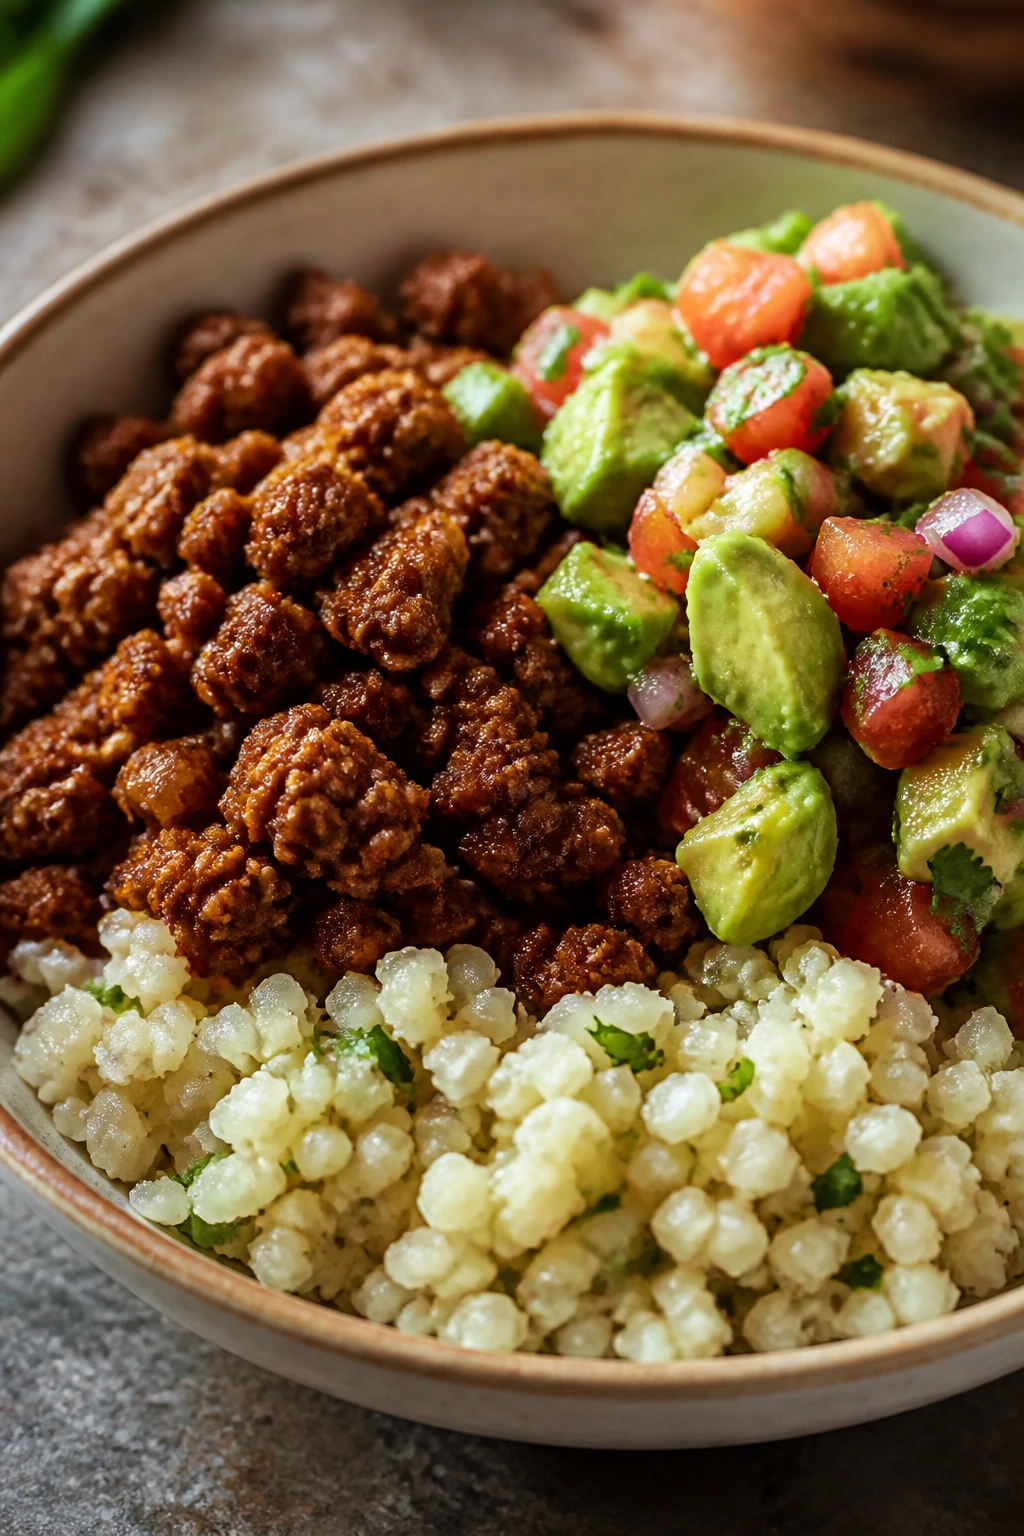
This is the dinner I make when everyone wants taco night energy without tortillas. The beef gets smoky and spiced, the cauliflower rice stands in for the usual base, and avocado salsa brings the creamy, bright finish that keeps the bowl from feeling sparse. It’s casual in the right way.
There’s a reason bowl dinners stick around. You can build them with what’s in the fridge, and they still look like you meant it.
Why It Works
Ground beef cooks quickly, and taco seasoning gives it instant direction. Cauliflower rice holds the rest of the bowl together without making the dish feel heavy, while avocado salsa gives you fat, acid, and freshness in one spoonful. The combination is sturdy enough for a hungry crowd and fast enough for one person after a long day.
Key Ingredients
- 1 1/2 pounds ground beef
- 1 tablespoon avocado oil
- 1 teaspoon kosher salt
- 1 teaspoon chili powder
- 1 teaspoon ground cumin
- 1/2 teaspoon smoked paprika
- 1/2 teaspoon garlic powder
- 1 bag cauliflower rice, about 12 ounces
- 1 avocado, diced
- 1 tomato, diced
- 1/4 red onion, minced
- 1 tablespoon lime juice
- 2 cups shredded lettuce
Quick Steps
-
Season the beef: Heat the avocado oil in a skillet over medium-high heat. Add the ground beef and break it up.
-
Cook the taco meat: Stir in salt, chili powder, cumin, smoked paprika, and garlic powder. Cook for 6 to 7 minutes, until browned and no liquid remains.
-
Warm the cauliflower rice: In a second skillet, or after removing the beef, cook the cauliflower rice for 4 to 5 minutes with a pinch of salt until hot and dry-looking.
-
Mix the salsa: Combine avocado, tomato, red onion, lime juice, and a pinch of salt in a bowl. Stir gently so the avocado doesn’t turn to paste.
-
Build the bowls: Divide lettuce, cauliflower rice, and taco beef among bowls.
-
Top and serve: Spoon the avocado salsa over the top and eat while the beef is still hot.
Tips and Variations
- Shortcut: Use frozen cauliflower rice straight from the freezer; just cook off the moisture.
- More punch: Add sliced jalapeños or a spoonful of compliant salsa.
- Family trick: Put the toppings in separate bowls so everyone can build their own.
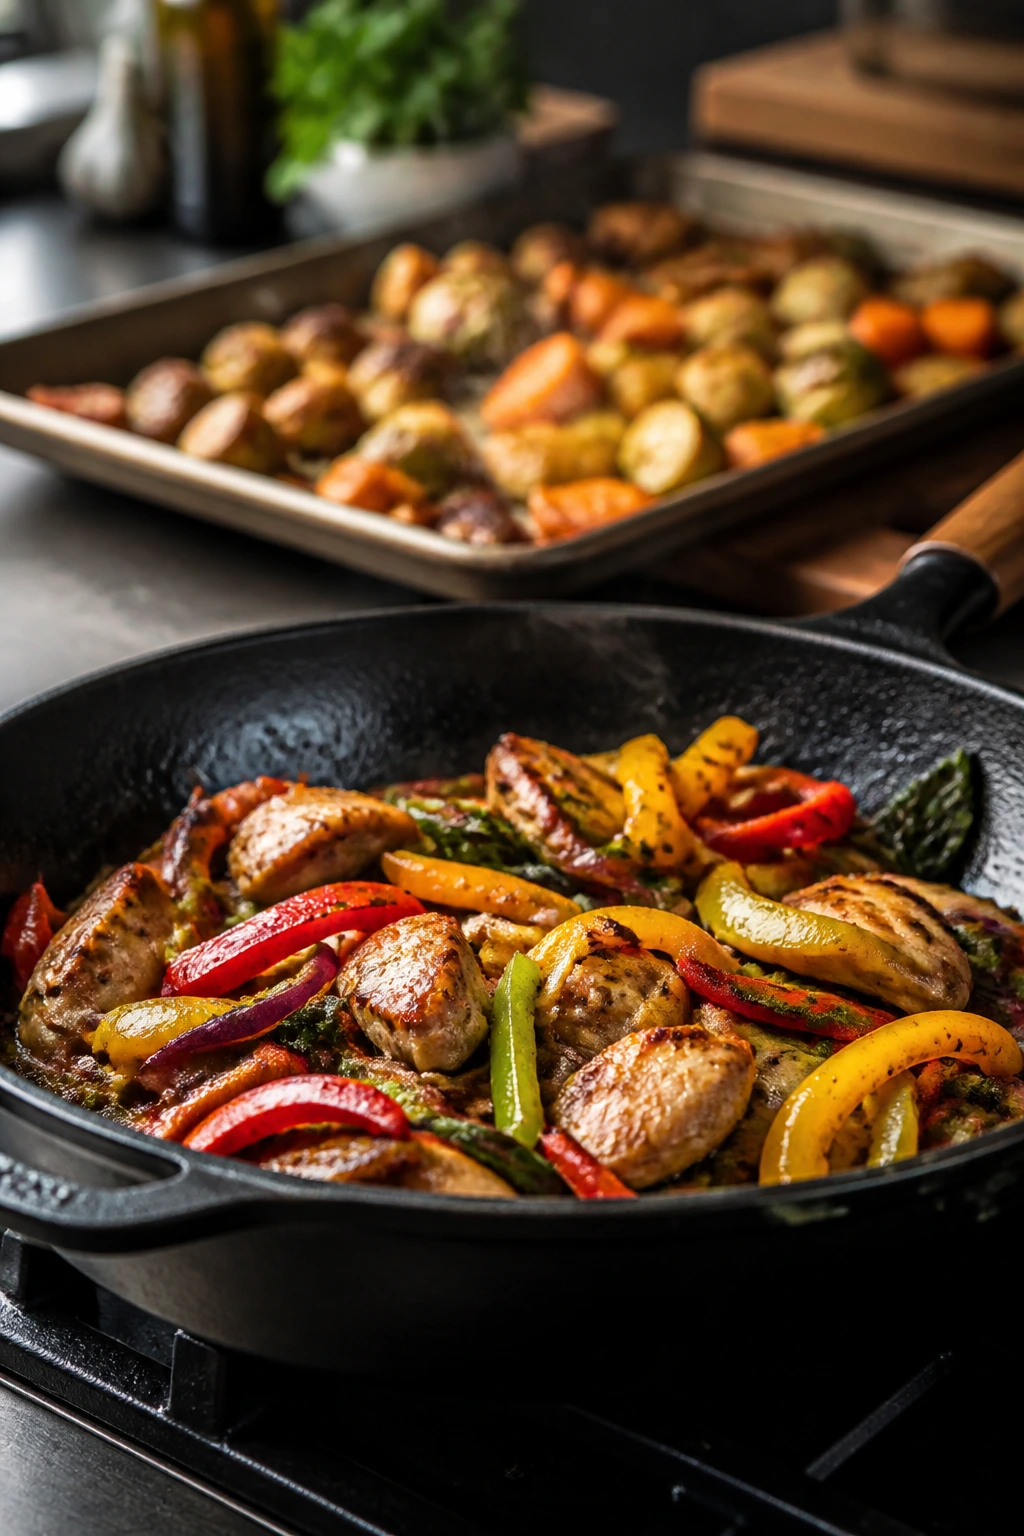
8. Sheet-Pan Chicken Meatballs with Peppers and Onions
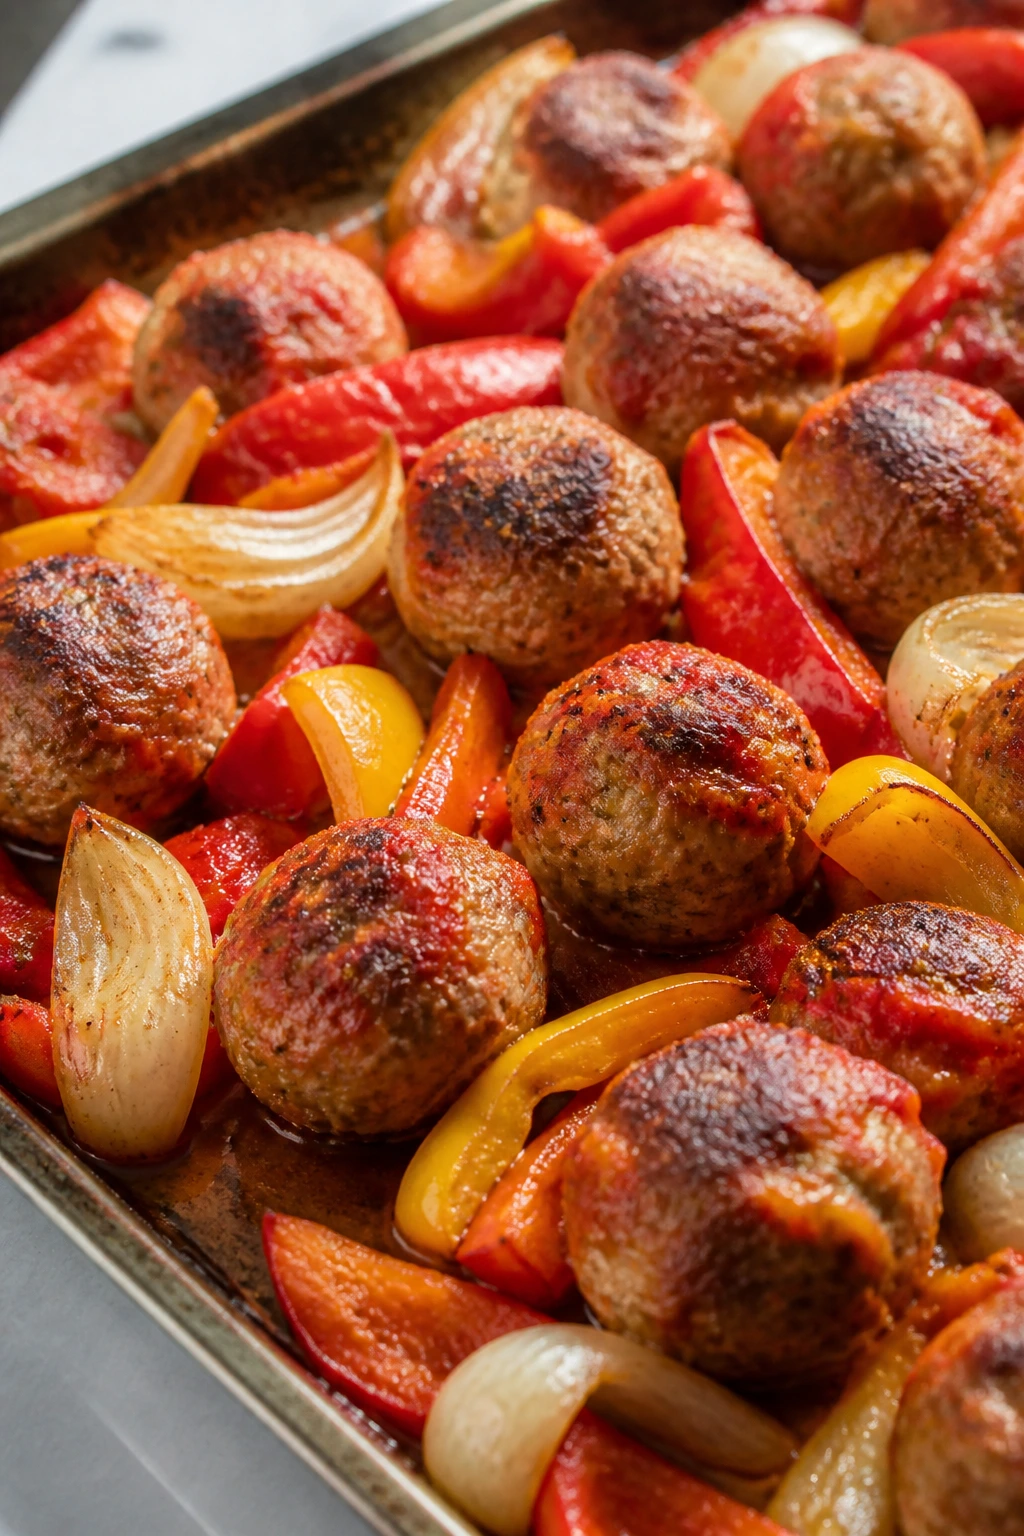
Chicken meatballs are the kind of dinner that sounds more involved than it is. Mix, roll, roast, and let the oven do the rest. The peppers and onions soften into sweet ribbons around the meatballs, and a sugar-free marinara turns the whole tray into something that feels halfway between meatballs and a baked skillet supper.
This is a solid answer when you want the comfort of meatballs without standing over a frying pan. Less splatter. Less fuss.
Why It Works
Ground chicken stays light and cooks quickly, but it needs a little help to hold together, which is where almond flour and egg come in. Roasting on a sheet pan gives you browning without extra oil, and the vegetables cook at the same rate as the meatballs if you slice them with some care. Marinara brings moisture and keeps the chicken from tasting dry.
Key Ingredients
- 1 1/2 pounds ground chicken
- 1 egg
- 1/2 cup almond flour
- 3 garlic cloves, minced
- 2 tablespoons chopped parsley
- 1 teaspoon kosher salt
- 1/2 teaspoon black pepper
- 2 bell peppers, sliced
- 1 red onion, sliced
- 2 tablespoons olive oil
- 1 cup sugar-free marinara sauce
Quick Steps
-
Heat the oven: Set it to 425°F and line a sheet pan.
-
Mix the meatballs: Combine the ground chicken, egg, almond flour, garlic, parsley, salt, and pepper. Mix gently until just combined. Overmixing makes them dense.
-
Shape the meatballs: Roll into 18 to 20 small meatballs and place them on the pan.
-
Add the vegetables: Toss the peppers and onion with olive oil and a pinch of salt, then scatter them around the meatballs.
-
Roast: Bake for 18 to 20 minutes, until the meatballs reach 165°F and the vegetables are soft with browned edges.
-
Finish with sauce: Spoon the marinara over the meatballs and return the pan to the oven for 3 minutes to warm through.
Tips and Variations
- Flavor move: Add 1 teaspoon Italian seasoning if you want a more familiar meatball profile.
- Sauce swap: Chimichurri works well if you want to skip tomato.
- Serving idea: Spoon the mix over cauliflower rice or tuck it into lettuce cups.
9. Coconut Chicken Curry with Spinach
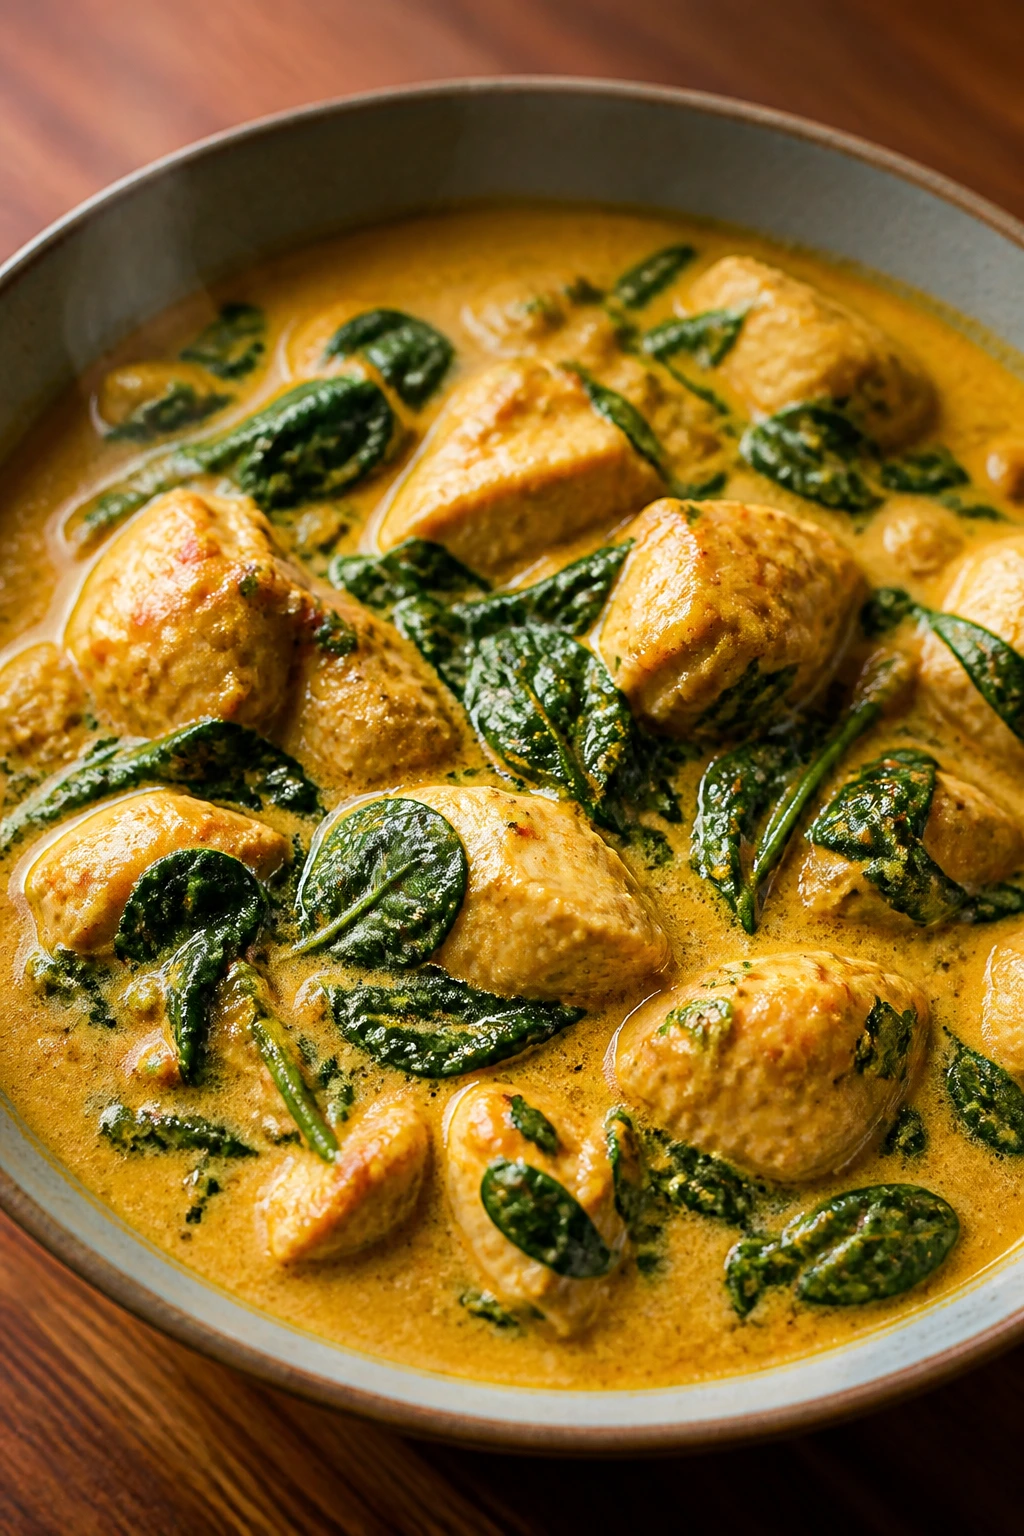
Coconut milk turns a plain chicken dinner into something with body and warmth, even when the ingredient list stays short. Ginger, garlic, curry powder, and spinach build a sauce that smells like it took far longer than 30 minutes. The spinach melts into the curry at the end, which is exactly where it should go.
I like this one for nights when I want a sauce-based dinner but don’t want to babysit anything on the stove. Once the curry comes together, it just simmers.
Why It Works
Coconut milk gives this curry richness without dairy, and chicken thighs or breasts both work if you watch the cook time. Curry powder does the seasoning heavy lifting, while spinach adds color and a soft vegetal note at the end. A little lime juice at the finish keeps the sauce from tasting heavy.
Key Ingredients
- 1 1/2 pounds boneless chicken thighs, cut into bite-size pieces
- 1 tablespoon avocado oil
- 1 small onion, diced
- 3 garlic cloves, minced
- 1 tablespoon fresh ginger, grated
- 2 tablespoons curry powder
- 1 can full-fat coconut milk, 13.5 ounces
- 1 cup chicken broth
- 4 cups baby spinach
- 1 tablespoon lime juice
Quick Steps
-
Sauté the onion: Heat the oil in a skillet over medium heat and cook the onion for 3 minutes, until soft.
-
Bloom the spices: Add the garlic, ginger, and curry powder. Stir for 30 seconds until fragrant.
-
Cook the chicken: Add the chicken and cook for 4 to 5 minutes, stirring until the outside loses its pink color.
-
Simmer the curry: Pour in the coconut milk and chicken broth. Bring to a gentle simmer and cook for 10 to 12 minutes, until the chicken is cooked through and the sauce looks slightly thickened.
-
Wilt the spinach: Stir in the spinach and let it collapse for 1 minute.
-
Finish bright: Add the lime juice and taste for salt before serving.
Tips and Variations
- Add more depth: A teaspoon of tomato paste gives the curry a rounder base.
- Vegetable option: Cauliflower florets can simmer in the sauce for 6 to 8 minutes.
- Best serving move: Serve over cauliflower rice so the sauce has somewhere to go.
10. Bunless Burger Bowls with Caramelized Onions
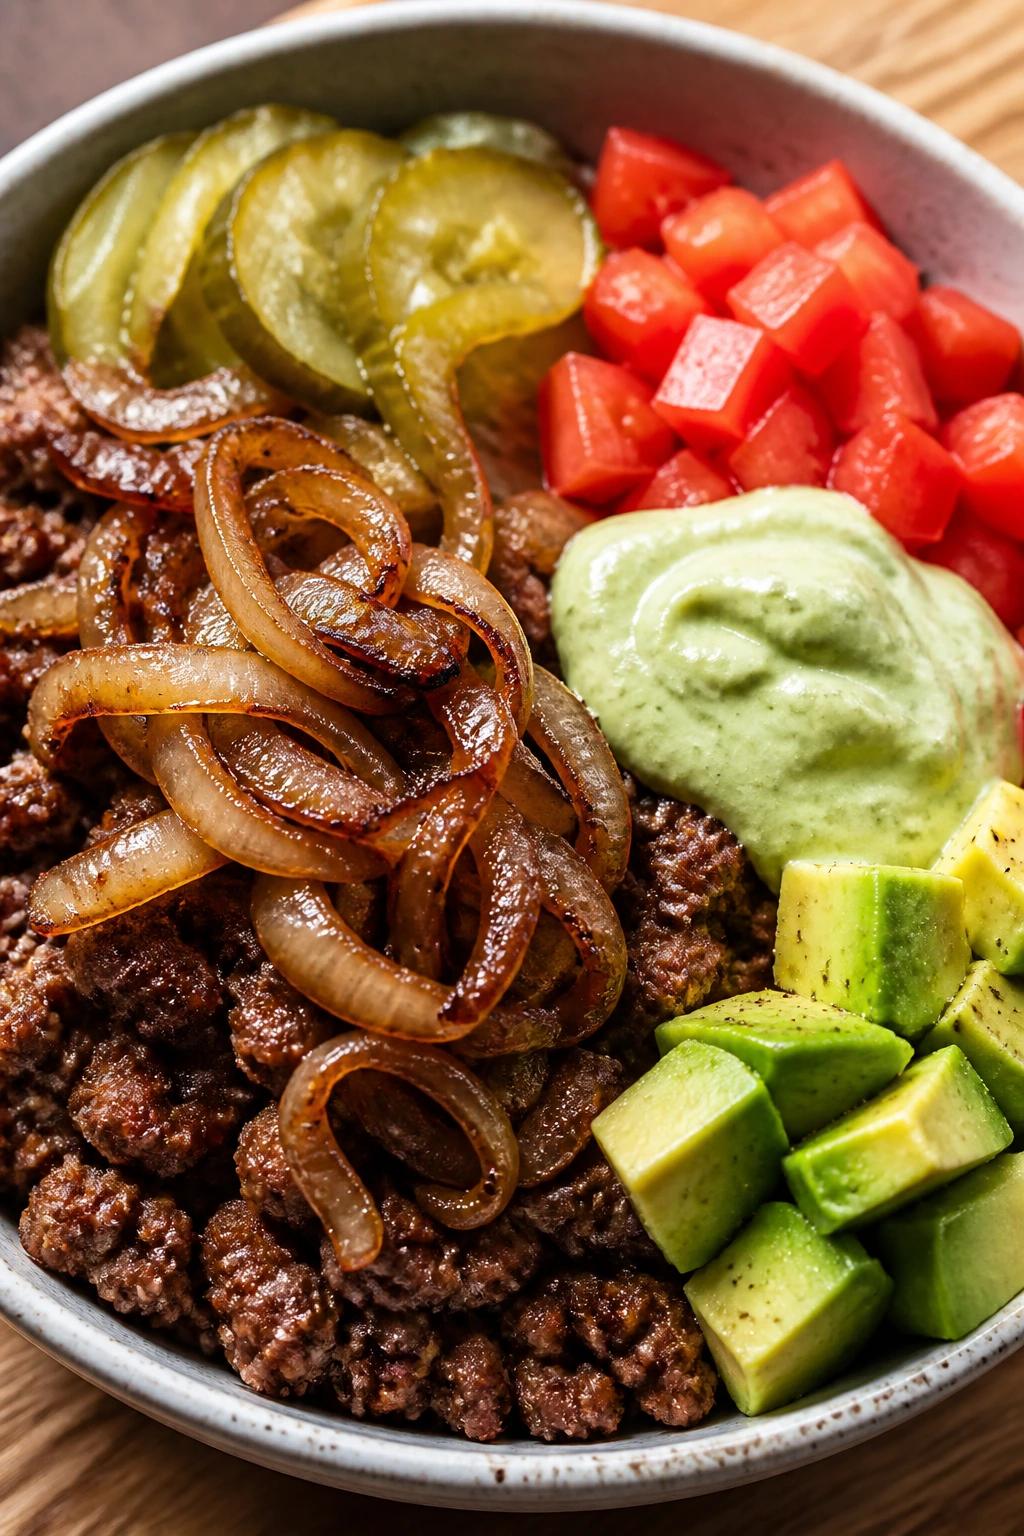
Burger night is easy to love even without the bun. You still get seared beef, sharp onions, cool tomatoes, pickles, and a creamy sauce, but the plate feels lighter and less fussy. The trick is making the bowl feel complete, not like you stripped something away.
This is one of those dinners that can rescue a fridge full of scraps. Half an avocado, a few pickles, a tomato that’s not perfect. Fine. Use them.
Why It Works
Ground beef is quick, satisfying, and easy to season, which is why it shows up in so many paleo weeknight dinners. Caramelized onions bring sweetness and softness, and the bowl format lets you layer textures instead of relying on bread to hold everything together. A simple avocado-mayo sauce gives you the burger-shop feel without dairy or sugar.
Key Ingredients
- 1 1/2 pounds ground beef
- 1 large onion, thinly sliced
- 2 tablespoons avocado oil
- 1 teaspoon kosher salt
- 1/2 teaspoon black pepper
- 1 teaspoon garlic powder
- 1 teaspoon paprika
- 1 avocado, sliced
- 1 tomato, sliced
- 1/2 cup pickle slices
- 1/4 cup avocado-oil mayonnaise
- 1 tablespoon pickle juice
Quick Steps
-
Caramelize the onions: Heat 1 tablespoon oil in a skillet over medium-low heat. Cook the onions for 15 to 18 minutes, stirring often, until golden and soft.
-
Season the beef: While the onions cook, mix the ground beef with salt, pepper, garlic powder, and paprika.
-
Cook the patties or crumbles: Use the remaining oil in another skillet and cook the beef as patties or crumbled meat, depending on how you like your bowls. Patties need about 4 minutes per side; crumbles need about 7 minutes total.
-
Mix the sauce: Stir together the mayonnaise and pickle juice. Thin with a teaspoon of water if needed.
-
Build the bowls: Add lettuce, beef, onions, avocado, tomato, and pickles to each bowl.
-
Drizzle and eat: Spoon the sauce over the top and serve right away.
Tips and Variations
- Fast version: Skip caramelizing and simply soften the onions for 4 minutes if you’re in a hurry.
- Cheeseburger mood without cheese: Add chopped dill pickle and a little mustard powder to the sauce.
- Lower-mess serving: Turn the beef into meatballs and keep everything spoonable.
11. Thai Basil Chicken
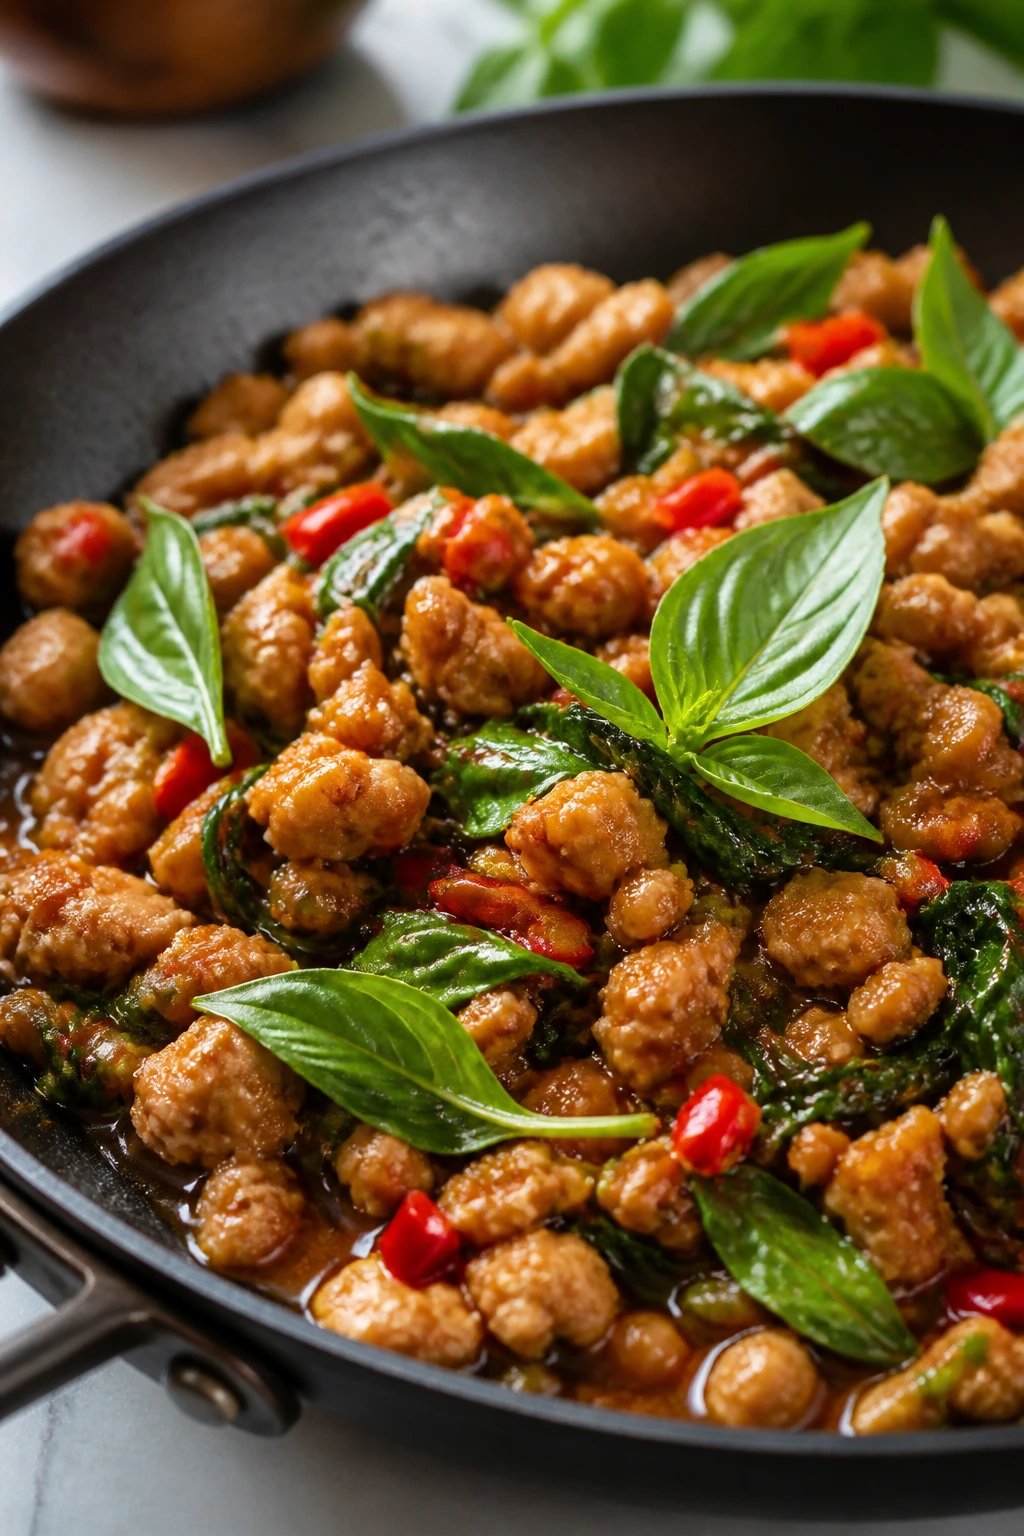
This dish has the kind of punch that makes you forget how quickly it came together. Garlic, chilies, coconut aminos, fish sauce, and basil create a savory-sweet skillet with a little heat and a lot of aroma. The basil should go in at the end and stay green, not turn into dark confetti.
It’s fast, bold, and a little addictive. Also, it reheats better than you’d expect, which helps.
Why It Works
Ground chicken or chopped chicken thigh cooks quickly and picks up the sauce in a way that feels almost sticky. Fish sauce brings deep savoriness, coconut aminos add body, and basil gives the dish its unmistakable fresh finish. The whole recipe depends on high heat and quick timing, which keeps the basil from losing its edge.
Key Ingredients
- 1 1/2 pounds ground chicken
- 2 tablespoons avocado oil
- 3 garlic cloves, minced
- 1 to 2 Thai chilies, thinly sliced, or 1 jalapeño
- 1 red bell pepper, thinly sliced
- 3 tablespoons coconut aminos
- 1 tablespoon fish sauce
- 1 tablespoon lime juice
- 2 cups packed basil leaves
- 1 small onion, thinly sliced
Quick Steps
-
Heat the oil: Warm the avocado oil in a large skillet over medium-high heat.
-
Cook the chicken: Add the ground chicken and onion. Break up the meat and cook for 4 to 5 minutes, until mostly cooked through.
-
Add heat and aroma: Stir in the garlic and chilies for 30 seconds.
-
Add the pepper: Toss in the bell pepper and cook for 2 minutes, keeping it crisp.
-
Season the skillet: Pour in coconut aminos and fish sauce. Cook for 1 to 2 minutes until the liquid clings to the meat.
-
Finish with basil: Turn off the heat, add lime juice and basil, and toss until the leaves just wilt.
Tips and Variations
- Mild version: Use jalapeño with the seeds removed.
- Extra fragrance: Add a few torn mint leaves with the basil.
- Serving idea: Spoon it over shredded cabbage for a crunchy base.
12. Shepherd’s Pie with Sweet Potato Mash
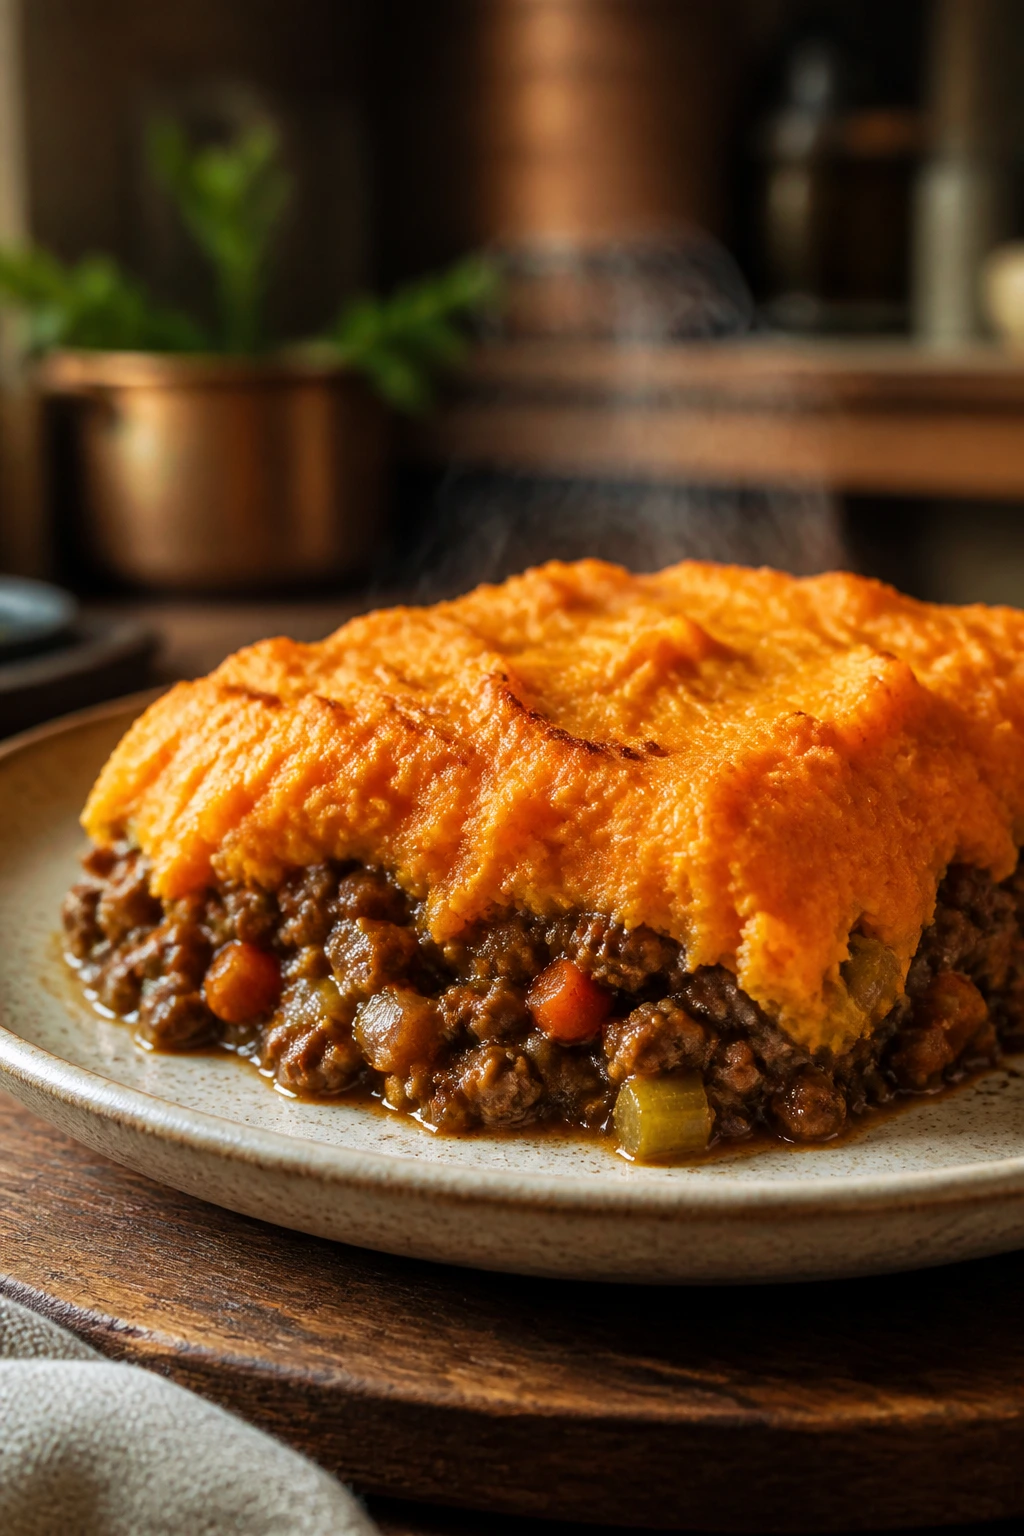
Shepherd’s pie earns its keep because it feels like comfort food and still works on a weeknight if you streamline it. The savory beef filling bubbles under a sweet potato topping that browns at the edges and stays creamy inside. It’s the kind of plate that makes sense when the evening needs something more substantial.
This is not a tiny, dainty dinner. Good. It should feel like dinner.
Why It Works
Sweet potatoes give you the mashy comfort of a classic pie topping without grains or dairy, and their natural sweetness plays well against the savory beef. Ground meat cooks fast, and the vegetables in the filling soften while the topping bakes. A little broth keeps the base moist so the pie doesn’t dry out under the mash.
Key Ingredients
- 1 1/2 pounds ground beef or lamb
- 1 large onion, diced
- 2 carrots, diced small
- 2 celery stalks, diced small
- 8 ounces mushrooms, chopped
- 3 garlic cloves, minced
- 2 tablespoons tomato paste
- 1/2 cup beef broth
- 2 large sweet potatoes, peeled and cubed
- 2 tablespoons olive oil
- 2 tablespoons coconut milk
- 1 teaspoon kosher salt
Quick Steps
-
Cook the sweet potatoes: Boil the sweet potatoes in salted water for 12 to 15 minutes, until fork-tender. Drain and mash with olive oil, coconut milk, and a pinch of salt.
-
Brown the meat: In a skillet, cook the onion, carrots, celery, and mushrooms for 5 minutes. Add the ground beef or lamb and cook until browned.
-
Build the filling: Stir in the garlic and tomato paste for 30 seconds, then add the broth. Simmer for 3 to 4 minutes until thickened.
-
Assemble: Spread the meat mixture in a baking dish and top with the sweet potato mash.
-
Bake: Cook at 400°F for 15 to 20 minutes, until the top is lightly browned.
-
Rest before serving: Let it sit for 5 minutes so the layers settle.
Tips and Variations
- Speed trick: Microwave the sweet potatoes until soft if you want to save time.
- Better browning: Run the pie under the broiler for 1 to 2 minutes at the end.
- Flavor swap: Use rosemary instead of thyme if you want a deeper, woodier note.
13. Baked Cod with Tomato-Olive Sauce
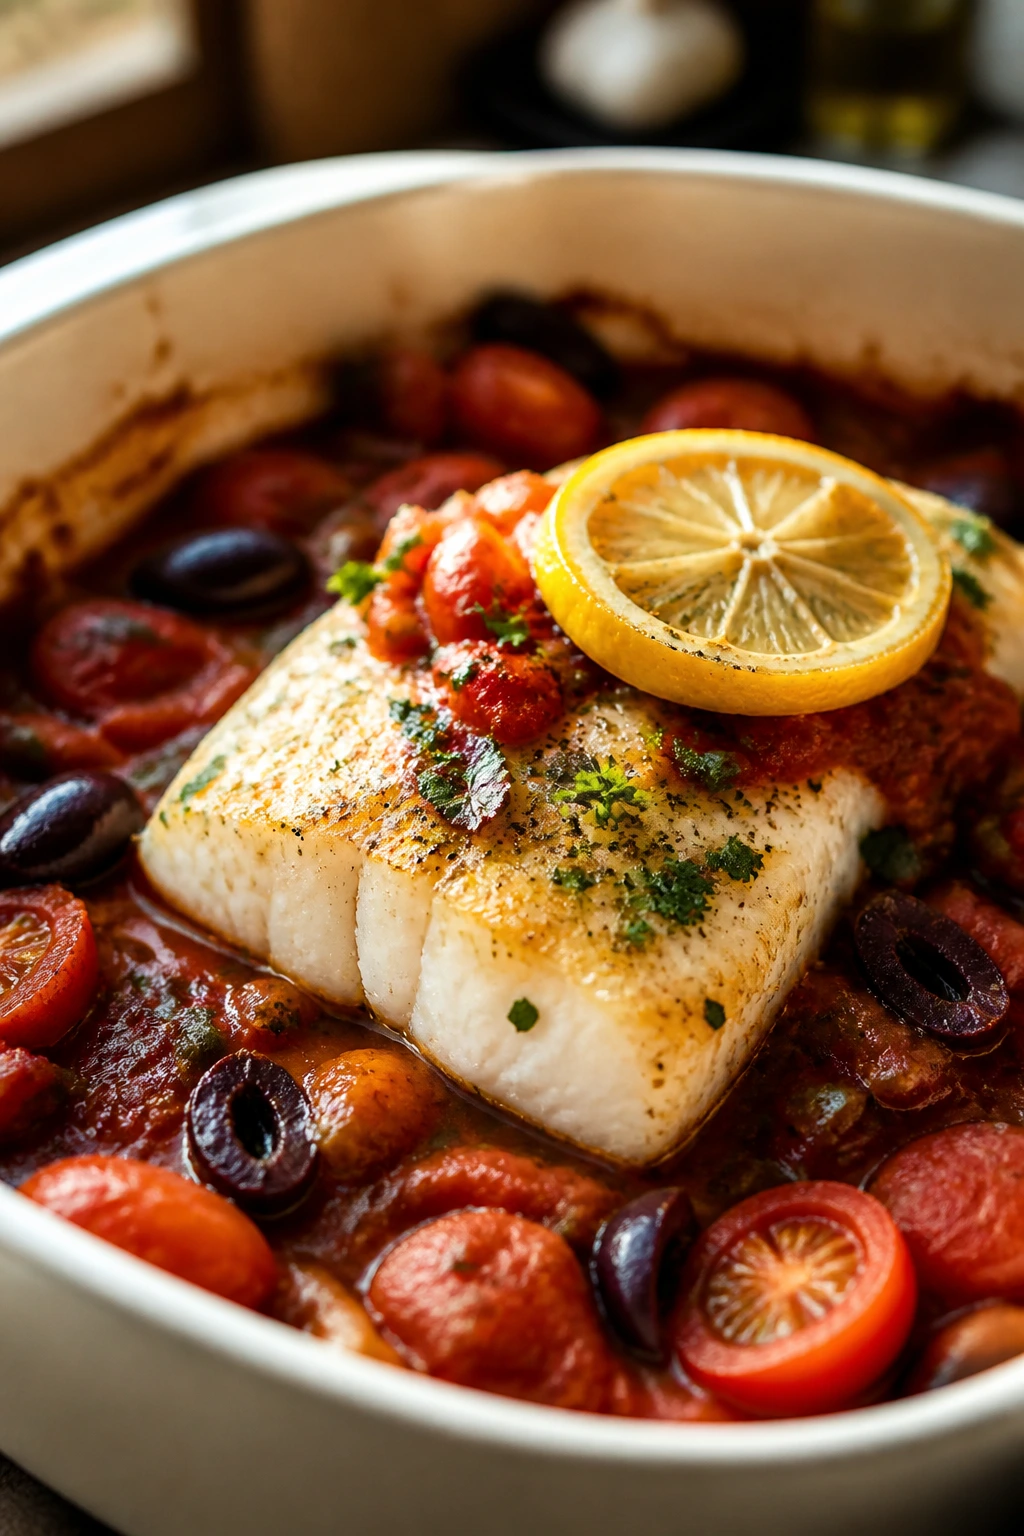
Cod is mild, which makes it a useful blank canvas for a fast dinner. The tomato-olive sauce brings salt, acidity, and a little heft, and the fish stays tender if you don’t leave it in the oven too long. This is simple food, but not plain food.
The sauce is the reason to make it. Without the tomatoes and olives, you’d have fish. With them, you have dinner.
Why It Works
Cod cooks quickly and likes a short bake. Tomatoes break down into a glossy sauce in the oven, olives add briny depth, and capers bring another sharp note if you use them. Because the sauce roasts right alongside the fish, you get a finished plate with very little stove time.
Key Ingredients
- 1 1/2 pounds cod fillets
- 2 cups cherry tomatoes
- 1/2 cup pitted olives
- 3 garlic cloves, thinly sliced
- 2 tablespoons olive oil
- 1 tablespoon capers
- 1 teaspoon kosher salt
- 1/2 teaspoon black pepper
- 1 lemon, sliced
- 2 tablespoons chopped parsley
Quick Steps
-
Heat the oven: Set it to 425°F.
-
Make the sauce base: Toss tomatoes, olives, garlic, olive oil, capers, salt, and pepper in a baking dish.
-
Start the tomatoes: Roast for 10 minutes so the tomatoes soften and burst.
-
Add the cod: Nestle the cod into the sauce and lay lemon slices on top.
-
Bake the fish: Return to the oven for 10 to 12 minutes, until the cod flakes easily.
-
Finish with parsley: Scatter parsley over the top and serve while hot.
Tips and Variations
- Best fish swap: Halibut works with the same timing if the fillets are not too thick.
- If you like more sauce: Add 1/4 cup water or broth before baking.
- Serving idea: Spoon the tomato mixture over roasted zucchini noodles or cauliflower mash.
14. Slow-Cooker Barbacoa with Lettuce Cups
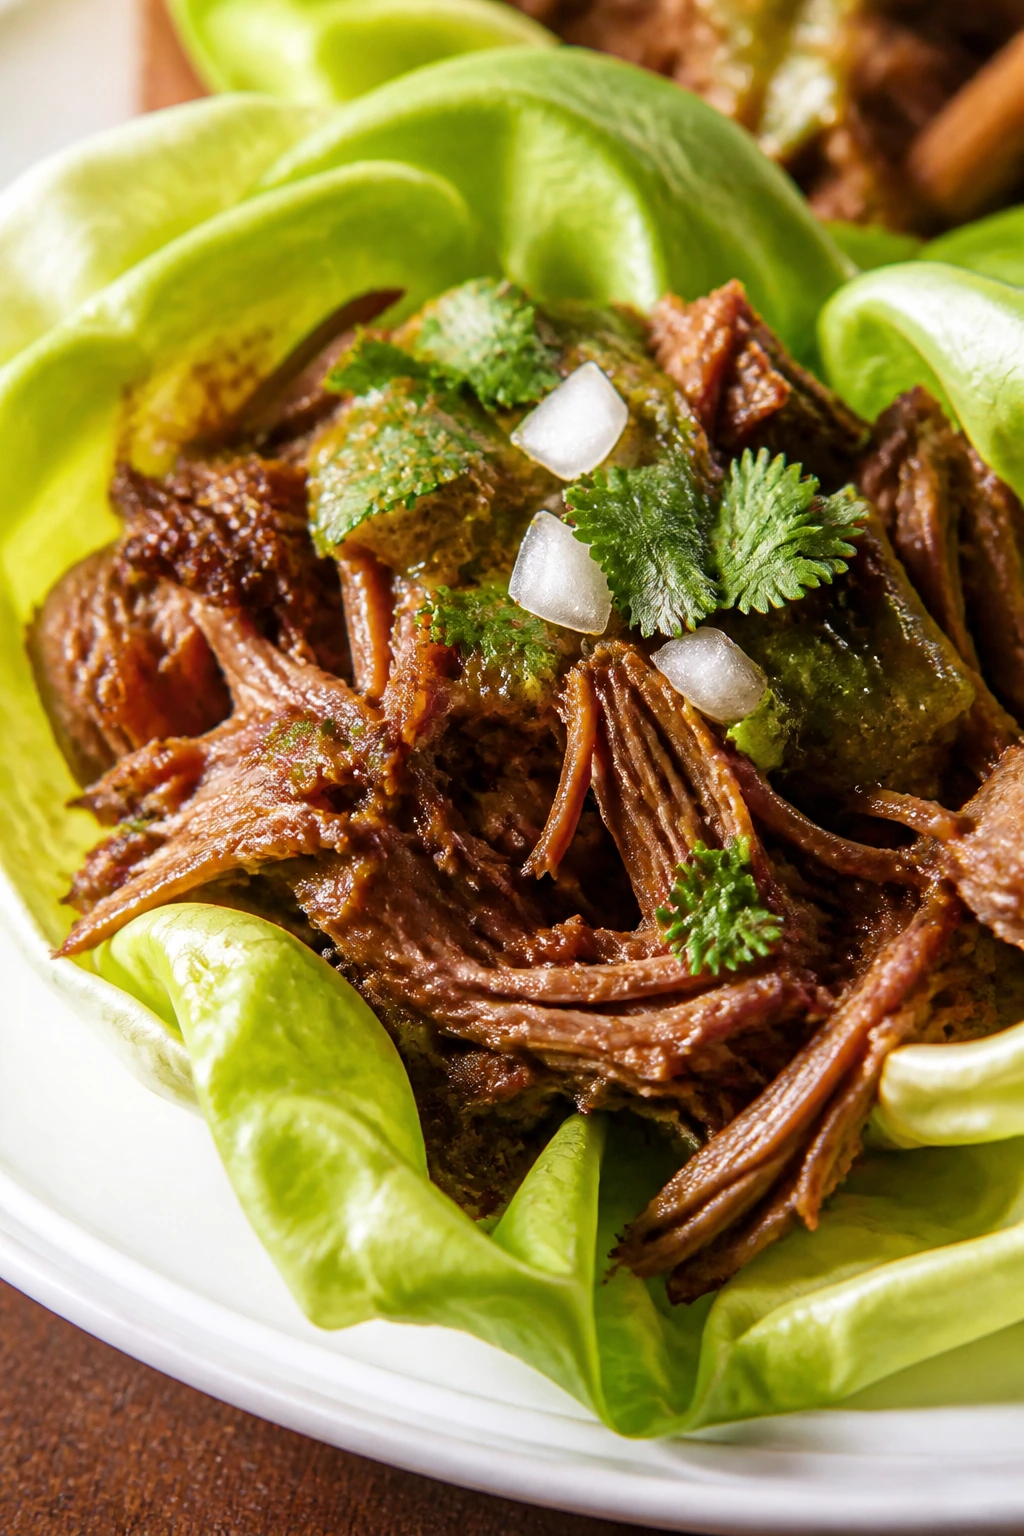
Slow-cooker meals have a different rhythm, and sometimes that’s exactly what weeknight cooking needs. You load the pot early, walk away, and come back to beef that shreds under a fork and smells like it’s been simmering far longer than it has. Lettuce cups keep the whole thing pale and crisp around the edges, which is a nice contrast to all that rich beef.
This is the one recipe here that asks for patience instead of speed. But the reward is enormous for the amount of real work involved.
Why It Works
Chuck roast has enough fat and connective tissue to handle a long, slow cook without drying out. Chipotle, cumin, garlic, and vinegar build the barbacoa flavor profile without needing a complicated marinade. Because the meat cooks in broth and its own juices, it stays soft enough to shred into loose ribbons.
Key Ingredients
- 3 pounds beef chuck roast
- 1 large onion, sliced
- 4 garlic cloves, minced
- 2 teaspoons ground cumin
- 2 teaspoons dried oregano
- 1 teaspoon smoked paprika
- 1 teaspoon kosher salt
- 1/2 teaspoon black pepper
- 1/4 cup apple cider vinegar
- 1/2 cup beef broth
- 1 lime, juiced
- Butter lettuce leaves, for serving
Quick Steps
-
Set up the slow cooker: Place the onion in the bottom of the cooker.
-
Season the beef: Rub the chuck roast with cumin, oregano, paprika, salt, and pepper.
-
Add liquid and aromatics: Put the beef on top of the onions, then add garlic, apple cider vinegar, and beef broth.
-
Cook slowly: Cover and cook on low for 8 hours, or on high for 5 to 6 hours, until the beef shreds easily.
-
Shred and season: Remove the beef, shred it with two forks, and stir it back into the juices. Add lime juice and taste for salt.
-
Serve in lettuce cups: Spoon into lettuce leaves and add any toppings you like.
Tips and Variations
- Better texture: Skim excess fat from the cooking liquid before returning the shredded beef.
- Topping idea: Diced onion, cilantro, and avocado keep it bright.
- Short on time: Use the high setting, but don’t rush past the point where the meat shreds easily.
Why Fast Skillets and Simple Trays Win on Paleo Weeknights
The real trick behind paleo dinners for weeknights is not some magical ingredient. It’s method. Skillets, sheet pans, and one-pot meals let you cook the protein and vegetables in the same hot environment, which means flavors actually mingle instead of getting dumped together at the table. That matters more than people think.
Heat control is half the game. A chicken thigh can handle a little sloppiness. Shrimp cannot. Salmon wants to come off the heat while the center is still moist, and cauliflower rice wants to lose its water before you ask it to taste like anything at all. Once you get a feel for those differences, dinner stops feeling like a gamble.
I also like that these methods keep the prep visible. You can see the onions soften, the mushrooms brown, the tomato skins split, the basil stay green. Cooking like that teaches you something every time, and on a busy evening, I’ll take a method that tells me what’s happening over a recipe that hides everything behind a sauce.
Essential Equipment for These Recipes
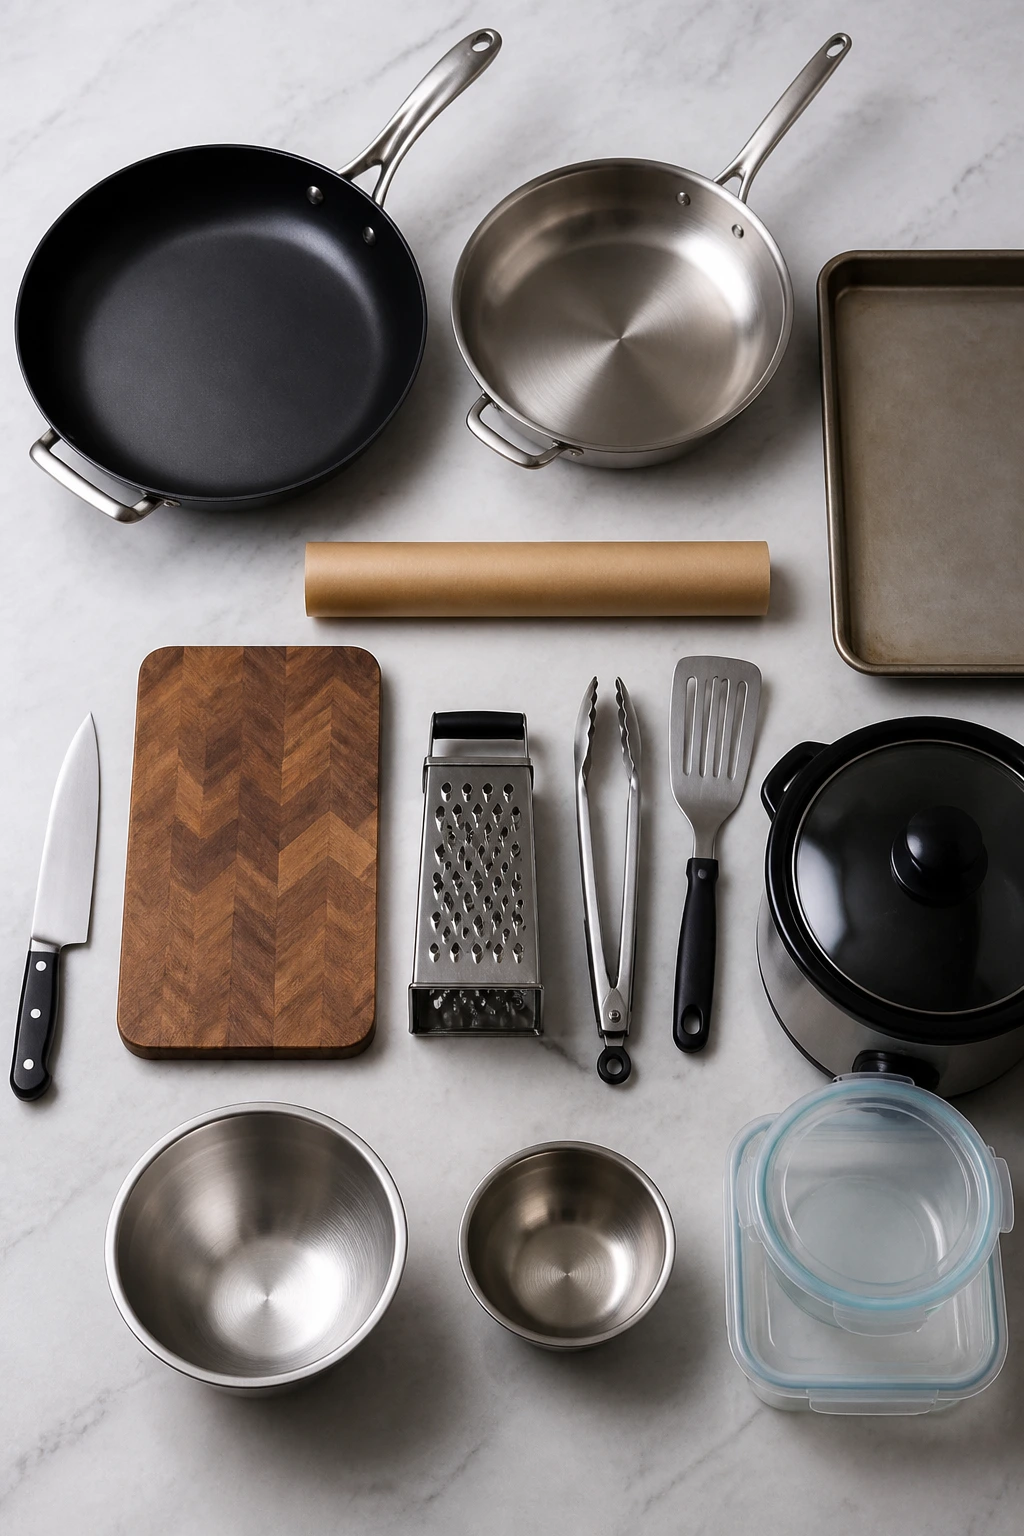
- Large skillet, 10 to 12 inches: The workhorse for chicken, beef, turkey, shrimp, and most fast sautéed dinners.
- Oven-safe skillet: Useful for pork tenderloin, steak, and any recipe that starts on the stove and finishes in the oven.
- Sheet pan: Needed for salmon, chicken meatballs, and any dinner that roasts protein and vegetables together.
- Parchment paper: Makes cleanup easier and helps prevent sticky marinades from bonding to the pan.
- Sharp chef’s knife: You’ll use it on onions, peppers, herbs, cucumber, sweet potatoes, and just about everything else.
- Cutting board with enough room: A crowded board slows you down more than people expect.
- Box grater or food processor: Handy for cauliflower rice, ginger, and quick vegetable prep.
- Tongs: Best for turning chicken thighs, steak strips, shrimp, and roasted vegetables without tearing them.
- Fish spatula: Not required, but excellent for salmon and cod because it slips under delicate fillets cleanly.
- Slow cooker: Needed for barbacoa and useful for any beef-based hands-off dinner.
- Mixing bowls, 2 to 3 sizes: For sauces, seasonings, and quick topping prep.
- Airtight storage containers: Important for leftovers, especially skillet dishes and shredded meat.
Smart Shopping and Ingredient Tips
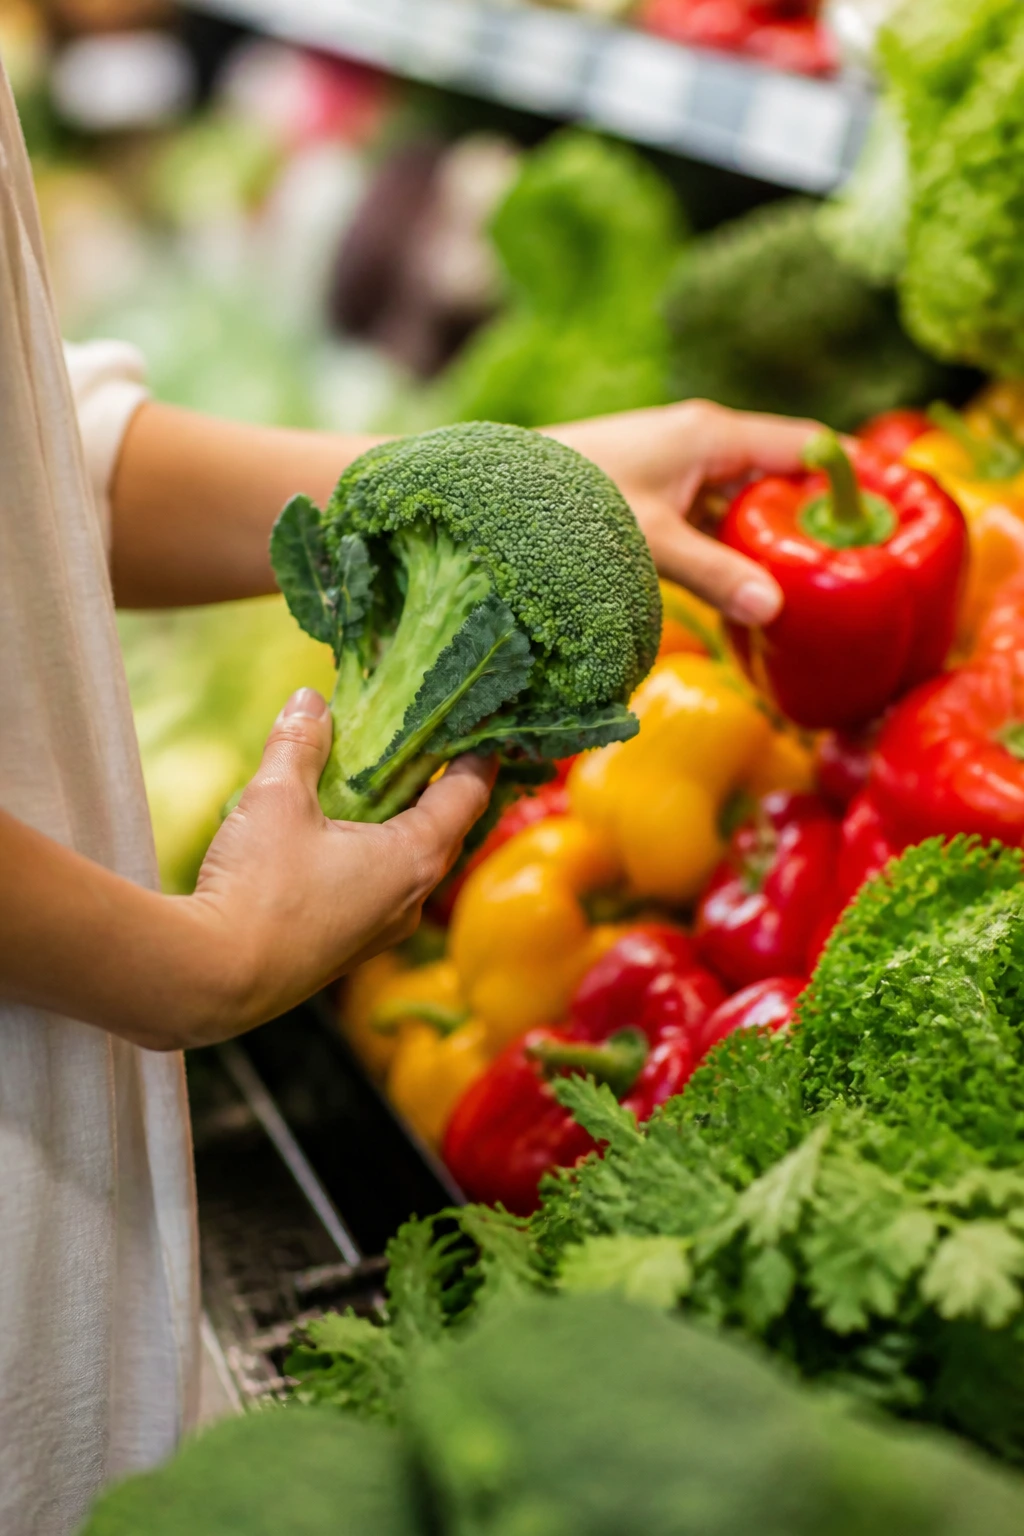
The quickest path to good paleo dinners for weeknights is not fancy shopping. It’s choosing ingredients that cook well and don’t fight you. Chicken thighs are more forgiving than breasts. Salmon fillets with even thickness cook more evenly than odd, tapered pieces. Ground turkey should be pale pink, not watery, and it should smell clean, not sour. That sounds basic, but bad protein turns a fast dinner into a regretful one.
For vegetables, buy with the cooking method in mind. Broccoli florets should be tight and deep green. Asparagus should snap, not bend like a rubber band. Bell peppers need to feel heavy for their size. Mushrooms should be dry, not slimy. If you’re making cauliflower rice from a head, choose one that feels dense and has no soft spots; if you’re buying frozen, look for a bag without big icy clumps, because that usually means thawing and refreezing happened somewhere along the line.
Paleo pantry items deserve a label check. Coconut aminos, broth, marinara, mayonnaise, sausage, curry paste, and fish sauce can all hide sugar, starch, or off-plan oils. I’m not precious about every label in life, but for this kind of cooking, it pays to read the back once and buy the same safe brands again. That saves time later.
A final note on herbs and citrus: buy them more often and in smaller amounts. A bruised lemon or limp parsley bunch can flatten a whole skillet. Fresh dill, basil, cilantro, and mint are worth their weight in dinner.
How to Serve These Recipes
Presentation: Serve skillet dinners in shallow bowls so the juices stay in the food instead of running all over the plate. Sheet-pan meals look best when you keep the protein centered and scatter the vegetables around it with a final hit of herbs or citrus zest. Bowls with toppings should have height; don’t flatten everything into one layer.
Accompaniments: Cauliflower rice shows up often for a reason, but roasted sweet potatoes, sautéed greens, simple cucumber salads, and steamed green beans fit these dinners too. For a little extra comfort, add a side of roasted carrots or mashed cauliflower to the pork, steak, or shepherd’s pie. Keep the sides plain enough that they don’t fight the main dish.
Portions: Most of these recipes serve 4, though a few—especially the barbacoa and burger bowls—stretch farther if you build them with plenty of vegetables. For lighter appetites, cut the protein portion to 4 to 5 ounces per person and let the vegetables carry more of the plate. For hungrier eaters, add an extra half-pound of protein and one more vegetable.
Beverage Pairing: Sparkling water with lime works with almost everything here. For something with more character, try unsweetened iced tea, cucumber water, or a dry white wine with salmon, cod, and shrimp. A crisp lager would normally fit a lot of these dinners, but if you’re keeping things paleo and simple, cold citrus water does the job just fine.
Additional Tips and Flavor Boosters
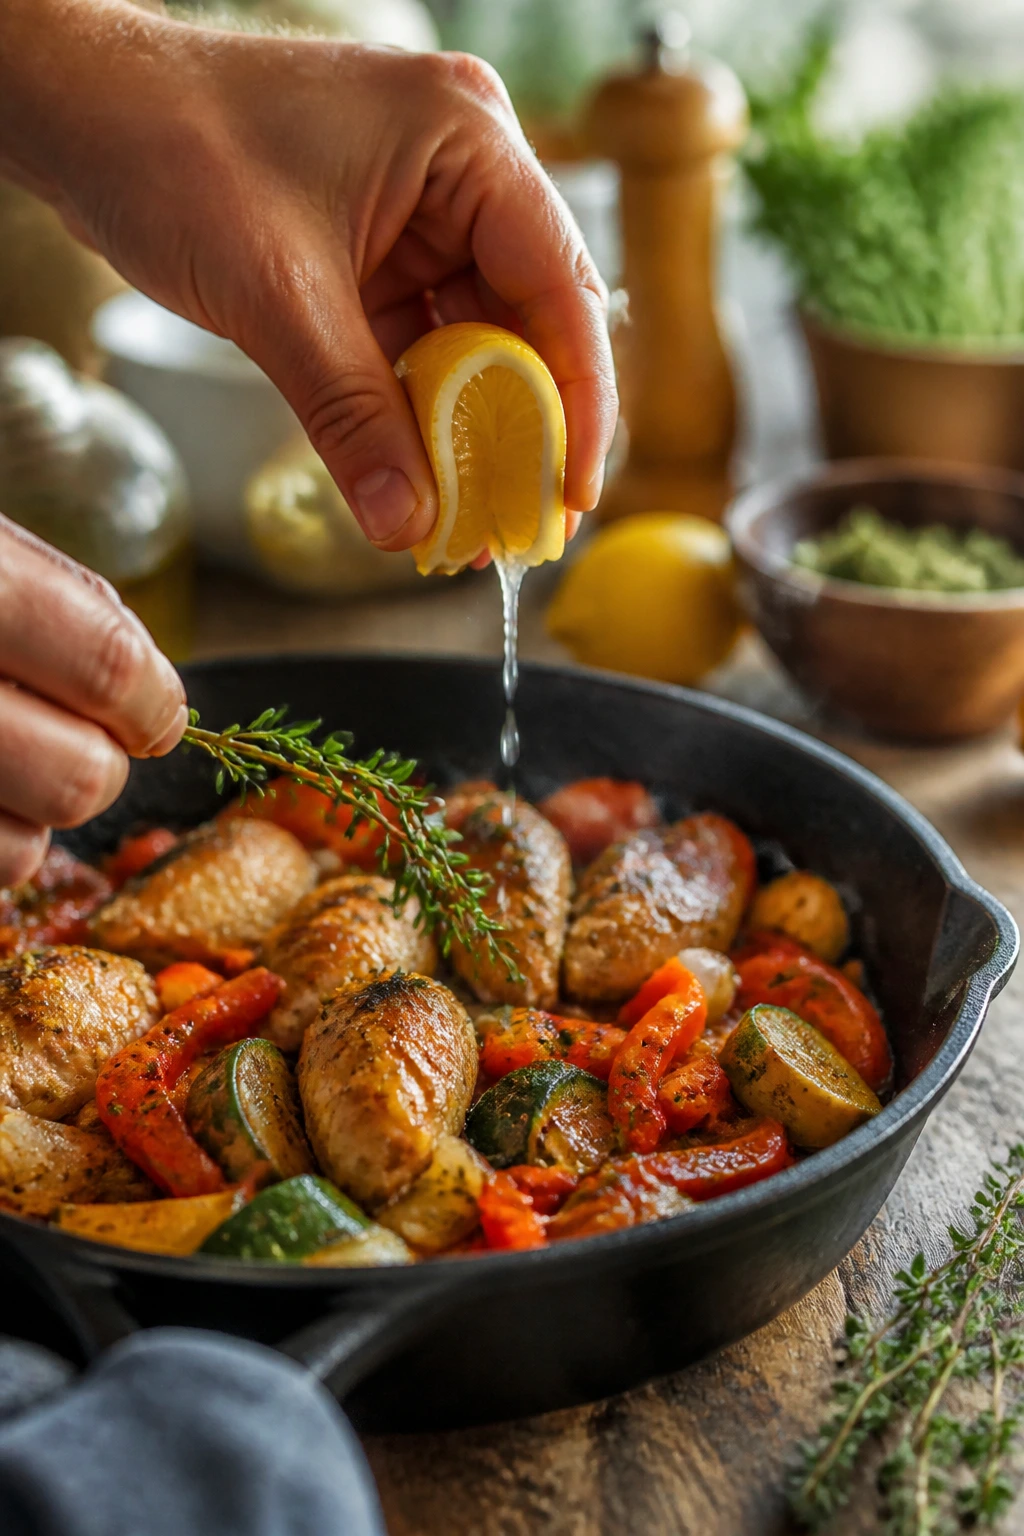
Flavor Enhancement: A finishing acid changes these dinners more than people expect. Lemon juice, lime juice, or apple cider vinegar added at the end sharpens the whole plate and makes the other flavors taste bigger. If a dish tastes good but a little flat, this is the first fix I reach for.
Customization: Add olives to chicken or cod, avocado to taco bowls, herbs to salmon, or sliced chilies to stir-fries. You do not need to change the recipe from the ground up to make it yours. One extra topping or one different herb can shift the whole mood.
Serving Suggestions: Fresh herbs are cheap and useful here. Parsley on chicken, dill on salmon, basil on Thai chicken, cilantro on taco bowls, and chopped mint on coconut curry all make the plate feel more alive. A sprinkle of flaky salt at the end is also a small move that pays off.
Make-It-Yours: If you prefer lower heat, skip chilies and build flavor with garlic, citrus, and herbs. If you want more richness, lean on avocado, olives, coconut milk, or a little extra olive oil. If you’re feeding kids, keep sauces on the side and let them choose the toppings. That keeps the dinner calmer and the table less argumentative.
Make-Ahead, Storage, and Reheating Guidance
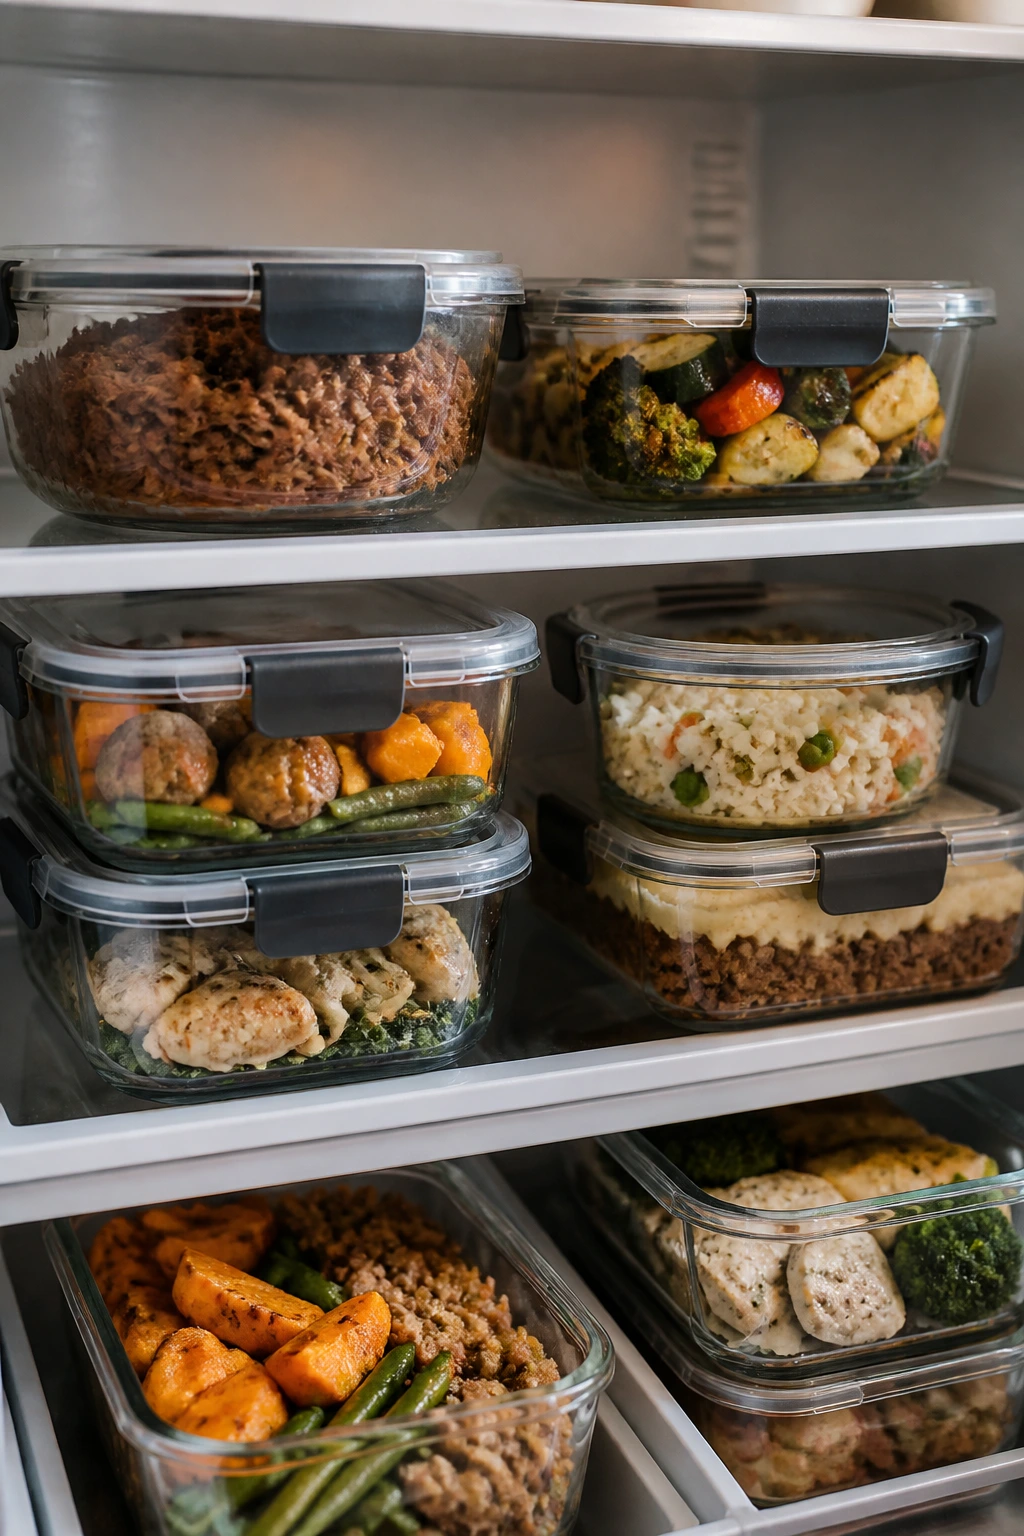
A few of these paleo dinners for weeknights are better fresh, but many hold up well if you plan ahead in a practical way. Cooked chicken, beef, pork, and turkey keep well in the fridge for 3 to 4 days in airtight containers. Salmon, cod, and shrimp are best within 2 days, because seafood turns dry and fishy faster than people want to admit. Slow-cooked barbacoa is the exception that keeps giving; it stays good for 4 days refrigerated and often tastes even better after the flavors settle.
Freezing works best for saucy or shredded dishes. Barbacoa freezes for up to 2 months. Shepherd’s pie also freezes well for about 2 months if you cool it completely before wrapping it tightly. Skillet meals with lots of vegetables can freeze, but the texture softens when they thaw, so I’d treat those as backup meals rather than first-choice freezer fare.
Reheat chicken, beef, pork, and turkey in a skillet over medium heat with a splash of broth or water so the meat loosens instead of drying out. Use the oven for shepherd’s pie at 350°F until the center is hot. Seafood is fussier; reheat it gently in a low oven, around 275°F, just until warm, or eat it cold over greens if that sounds better. Microwaves are fine for bowls and meat fillings, but stop halfway through and stir so the edges don’t get rubbery.
For make-ahead prep, chop vegetables, mix spice blends, and make sauces a day or two ahead. You can also trim asparagus, slice onions, and portion proteins earlier in the day so dinnertime feels less like a scramble. Some of these recipes—especially the curry, taco beef, and barbacoa—reward sitting overnight. Others, like salmon and shrimp, are best cooked close to serving time.
Variations and Adaptations to Try
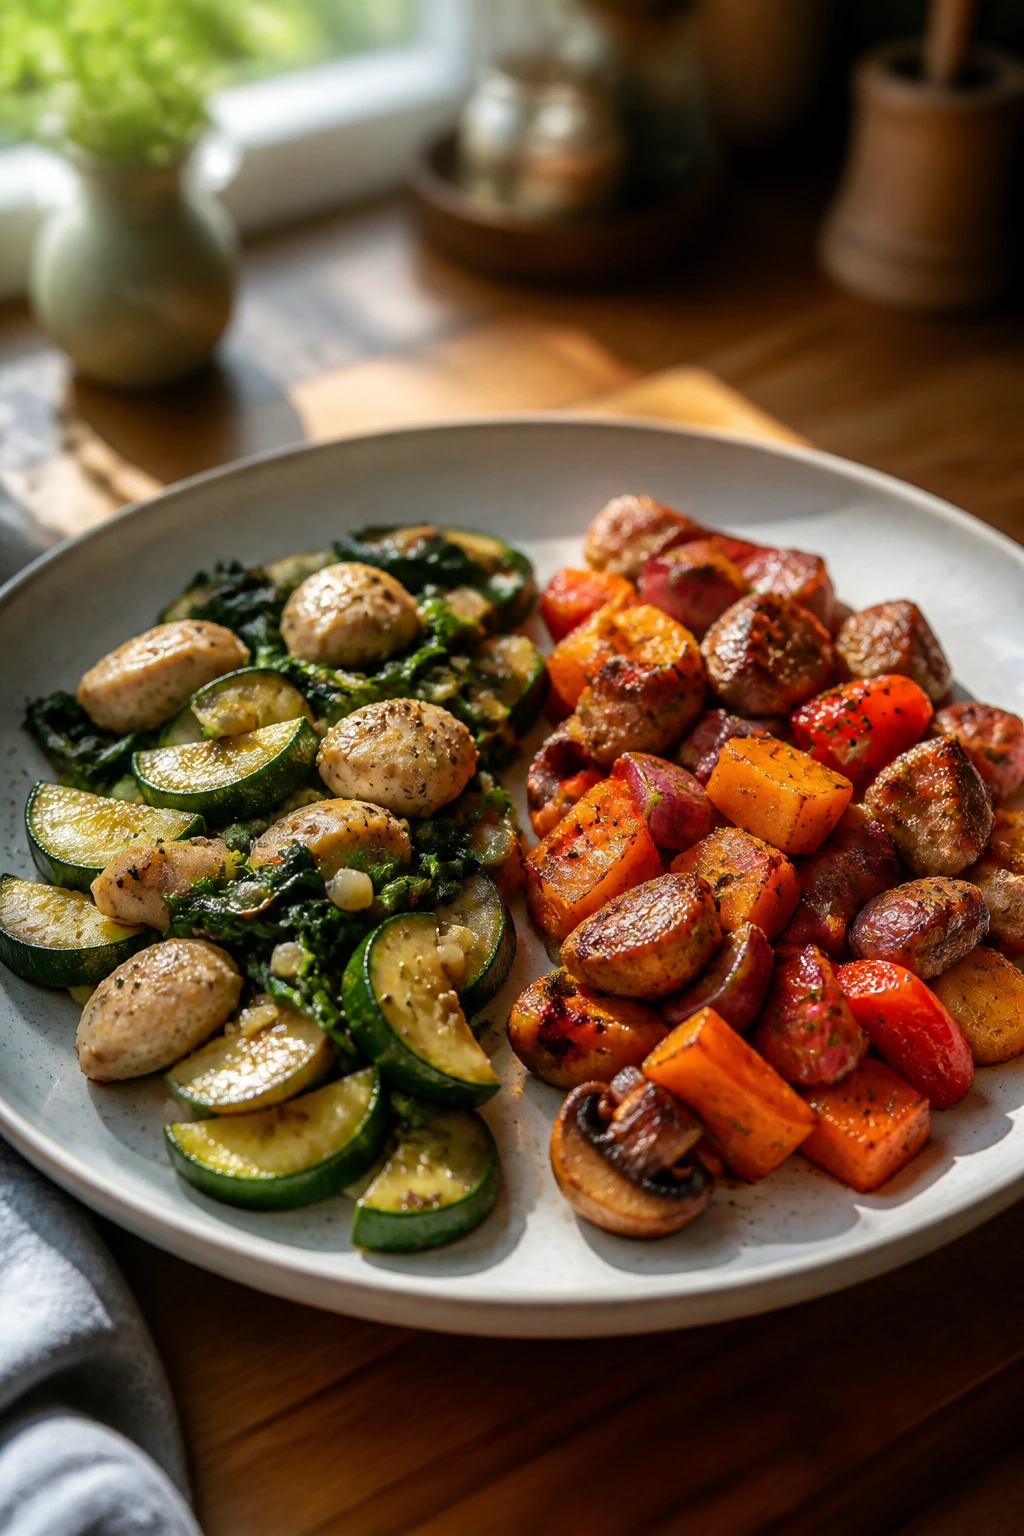
Green-and-Garlic Night: Swap in zucchini, green beans, or broccoli for most of the vegetables in the skillet and sheet-pan recipes. This version leans lighter and uses the same garlic-lemon backbone, so you can keep dinner familiar without repeating the exact same plate.
Low-Heat Family Version: Pull back on chilies, red pepper flakes, and smoked paprika, then finish with herbs and citrus instead. The food still tastes complete, just softer around the edges. That version works especially well for turkey lettuce wraps, Thai basil chicken, and taco bowls.
Bigger-Batch Sunday Prep: Double the barbacoa, taco beef, or coconut curry and portion it into containers with cauliflower rice or roasted vegetables. Those are the dinners that stand up best to reheating because the sauces keep the meat from drying out.
Seafood-First Swap: Replace chicken with salmon or cod in any meal that relies on a bright, acidic finish. Salmon with asparagus, cod with tomatoes, and shrimp with cauliflower rice all prove the same point: fast seafood loves simple seasoning and a clean side.
Comfort-Style Paleo: Use sweet potato mash, extra mushrooms, and roasted onions whenever you want the dinner to feel heartier. Shepherd’s pie obviously fits this lane, but pork tenderloin and burger bowls can also slide that way with one or two thoughtful additions.
Common Mistakes to Avoid
Crowding the pan: This is the fastest way to lose browning on chicken, steak, mushrooms, and shrimp. If the pan looks packed, cook in batches. You want sizzle, not steam.
Treating cauliflower rice like real rice: It does not behave the same way. If you cook it too long or leave it wet, it turns mushy. Keep the heat fairly high, spread it out, and stop once it’s hot and dry-looking.
Overcooking seafood: Salmon and cod go from tender to chalky in a short window. Check them early and pull them when they still look slightly translucent in the thickest part. The heat on the pan will finish the job.
Skipping seasoning because the meal is paleo: That is a bad shortcut. Paleo food needs salt, acid, herbs, and often a little heat to feel complete. Otherwise you get clean ingredients and a boring plate.
Choosing the wrong store-bought sauce: Marinara, mayonnaise, curry paste, and coconut aminos all vary a lot. Some have added sugar, starch, or off-plan oils. Read the label, or make the sauce yourself if the ingredient list looks suspiciously long.
Letting delicate herbs cook too long: Basil, dill, parsley, and cilantro should usually go in at the end. Cook them too early and they vanish into the background.
Frequently Asked Questions

Are these recipes good for meal prep?
Some are excellent for it, some are better cooked fresh. Barbacoa, taco beef, curry, burger bowls, and pork tenderloin all hold up well for a few days. Salmon, cod, and shrimp taste best when cooked close to serving time.
What’s the easiest recipe for a first try?
The lemon-garlic chicken thighs and the shrimp cauliflower rice are the simplest to execute. Both cook quickly, use common ingredients, and give you clear visual cues so you know when to stop.
Can I use frozen vegetables?
Yes, especially for cauliflower rice, broccoli, and snap peas. Just cook off the extra moisture so the pan doesn’t turn soggy. Frozen vegetables are a smart shortcut when the fresh produce aisle looks tired.
How do I keep chicken thighs from tasting bland?
Salt them well, dry the surface before cooking, and finish with lemon or vinegar. Chicken thighs can handle bold seasoning, so don’t be shy with garlic, herbs, or paprika.
Is sweet potato okay on paleo?
Yes, sweet potato is commonly used in paleo cooking. It’s especially useful in shepherd’s pie and bowl-style dinners because it gives you that starchy, comforting feel without grains.
What if my cauliflower rice turns watery?
Cook it in a hot pan and leave it alone long enough for the moisture to evaporate. If it’s still wet, spread it on a tray for a few minutes or blot it lightly before seasoning. That small step makes a big difference.
Can I swap ground turkey for ground chicken or beef?
Usually, yes. Ground turkey works well in lettuce wraps, meatballs, and skillet bowls, though it can taste leaner than beef. Add enough seasoning and a little oil so it doesn’t come off dry.
Do I need special ingredients for paleo cooking?
Not really. The main trick is buying sauces and condiments that don’t hide sugar, starch, or dairy. Once you’ve got coconut aminos, olive oil, avocado oil, broth, and a few herbs, you can build a lot of dinners from there.
How do I make these dinners feel less repetitive?
Change the finish. One night add lemon and parsley, the next night use avocado and lime, then olives and capers, then basil and chili. The protein can stay the same while the final flavor changes completely.
A Better Way to Handle Weeknight Dinner
The best paleo dinners for weeknights don’t ask for a full kitchen reset. They ask for a hot pan, a sharp knife, and a little confidence with seasoning. That’s it. Once you start thinking in terms of fast proteins, vegetables that cook on the same schedule, and sauces that finish the plate, dinner stops feeling like a scramble.
I’m partial to the skillet meals because they’re honest. You can see the food changing as it cooks, and that gives you a chance to fix things before they go sideways. But the slow-cooker barbacoa has its place too, especially when the day is already spoken for.
Pick two or three of these and keep them in rotation. Then add another when the first ones stop feeling new. That rhythm is what makes weeknight cooking sustainable, and it’s what keeps dinner from becoming a nightly negotiation.