
By 3:15, hunger stops behaving like hunger and starts acting like a personal grudge. Backpacks hit the floor, shoes get kicked off in a heap, and somebody opens the fridge with the haunted look of a person who has been betrayed by a single granola bar. That’s where after-school snacks either save the day or quietly turn into a second dinner.
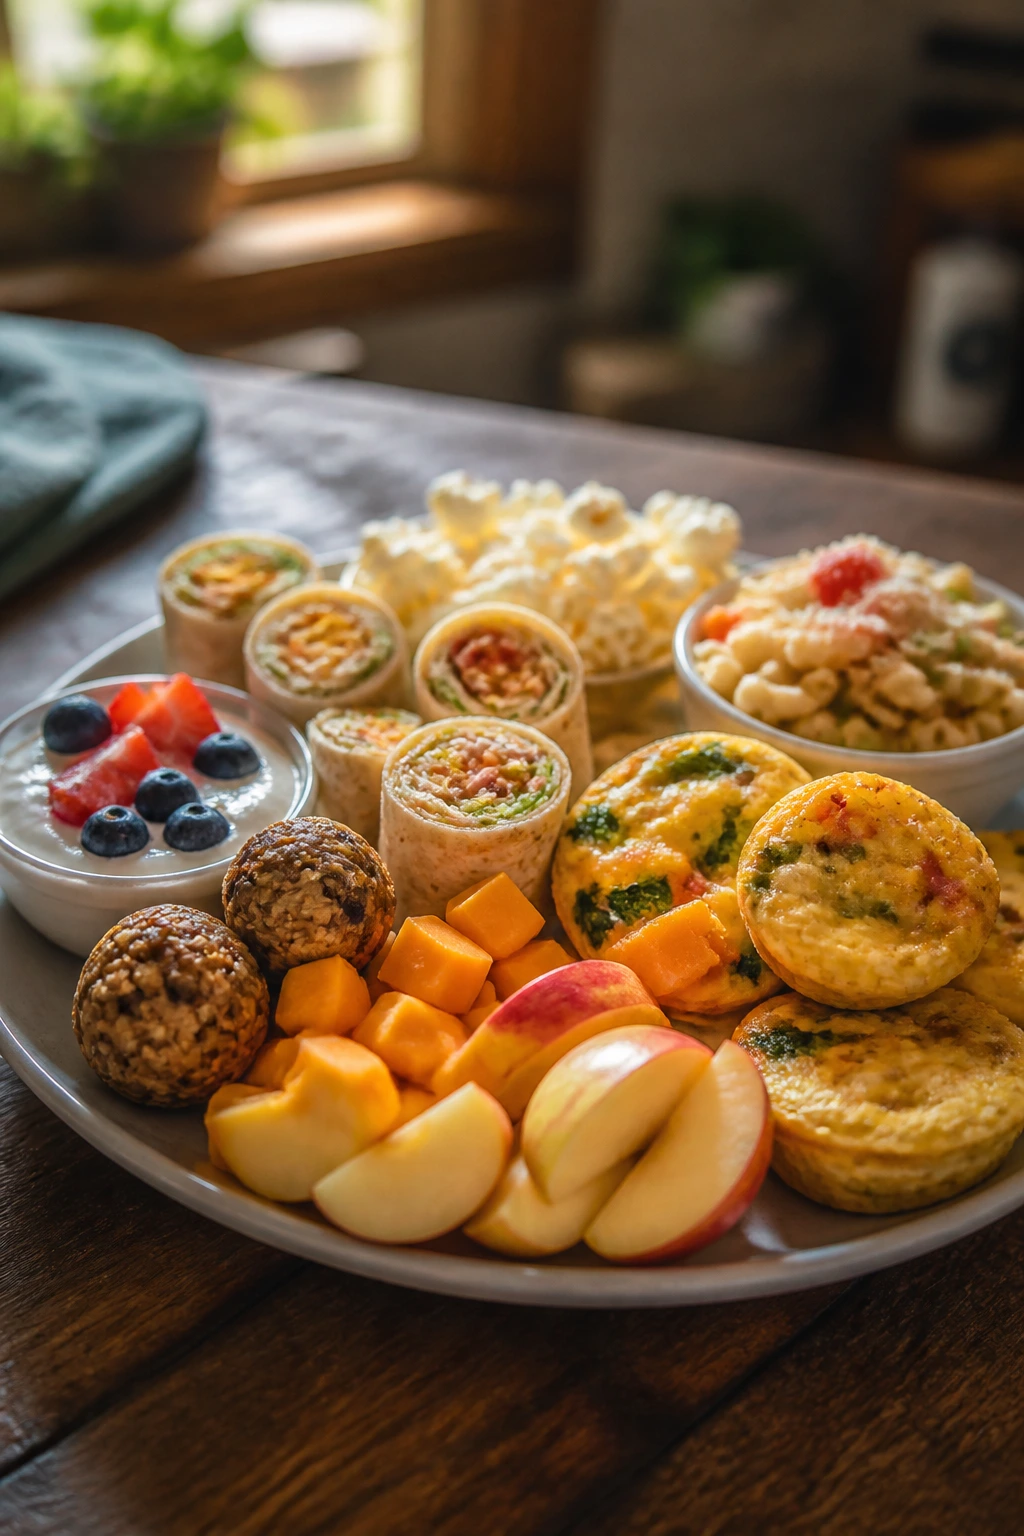
I have strong opinions about this window of the day. A bowl of crackers is a tease. Fruit alone vanishes fast and buys you maybe twelve minutes. What works better is something with a little salt, a little crunch, and enough protein or fat to stop the “I’m starving” chorus before it starts. A warm quesadilla, a pizza bagel, a tray of egg muffins, even a plate of apple nachos with peanut butter — these are not fancy, but they know their job.
The sweet spot is simple: food that feels fun, tastes familiar, and doesn’t require a full production. You want recipes that can come together fast, survive a lunchbox-style carry to the table, and still look appetizing when everyone is tired, noisy, and standing half-in and half-out of the kitchen. That’s the territory here.
Why These After-School Snacks Earn Their Keep
-
They hold kids until dinner: These recipes lean on cheese, eggs, yogurt, beans, chicken, peanut butter, or oats, so the snack has some staying power instead of disappearing in ten minutes.
-
They use ordinary groceries: Bagels, tortillas, apples, puff pastry, pasta, and yogurt show up here again and again because they’re easy to keep around and easy to turn into something that feels more thoughtful than a plain bowl of cereal.
-
They cover different moods: Some snacks are warm and crisp, some are cold and creamy, and some are grab-and-go for the car ride to practice or the last round of homework.
-
They’re forgiving: If you have leftover chicken, half a bell pepper, a stubborn block of cheese, or a few apples that need attention, there’s a place for them in this lineup.
-
They work for mixed ages: Little kids can pick at the parts they like, older kids can eat a bigger portion, and adults can stop pretending they’re only making food for everyone else.
-
They don’t all taste the same: That matters more than people think. One snack should crunch, another should melt, another should chill, because repeating the same texture every day gets old fast.
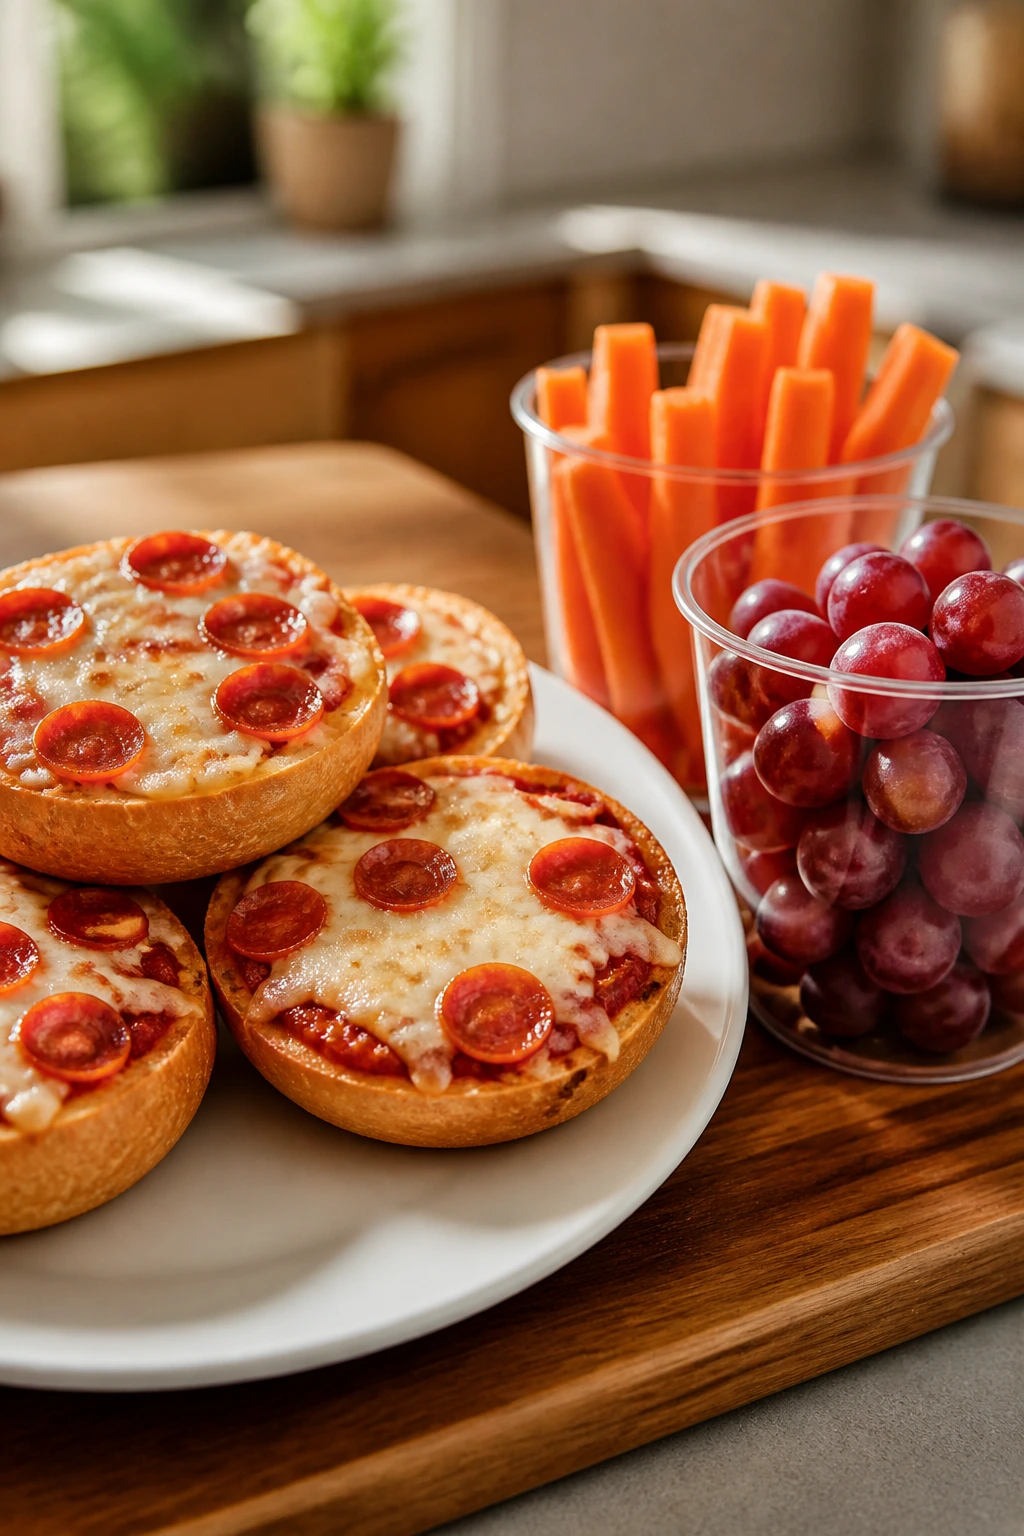
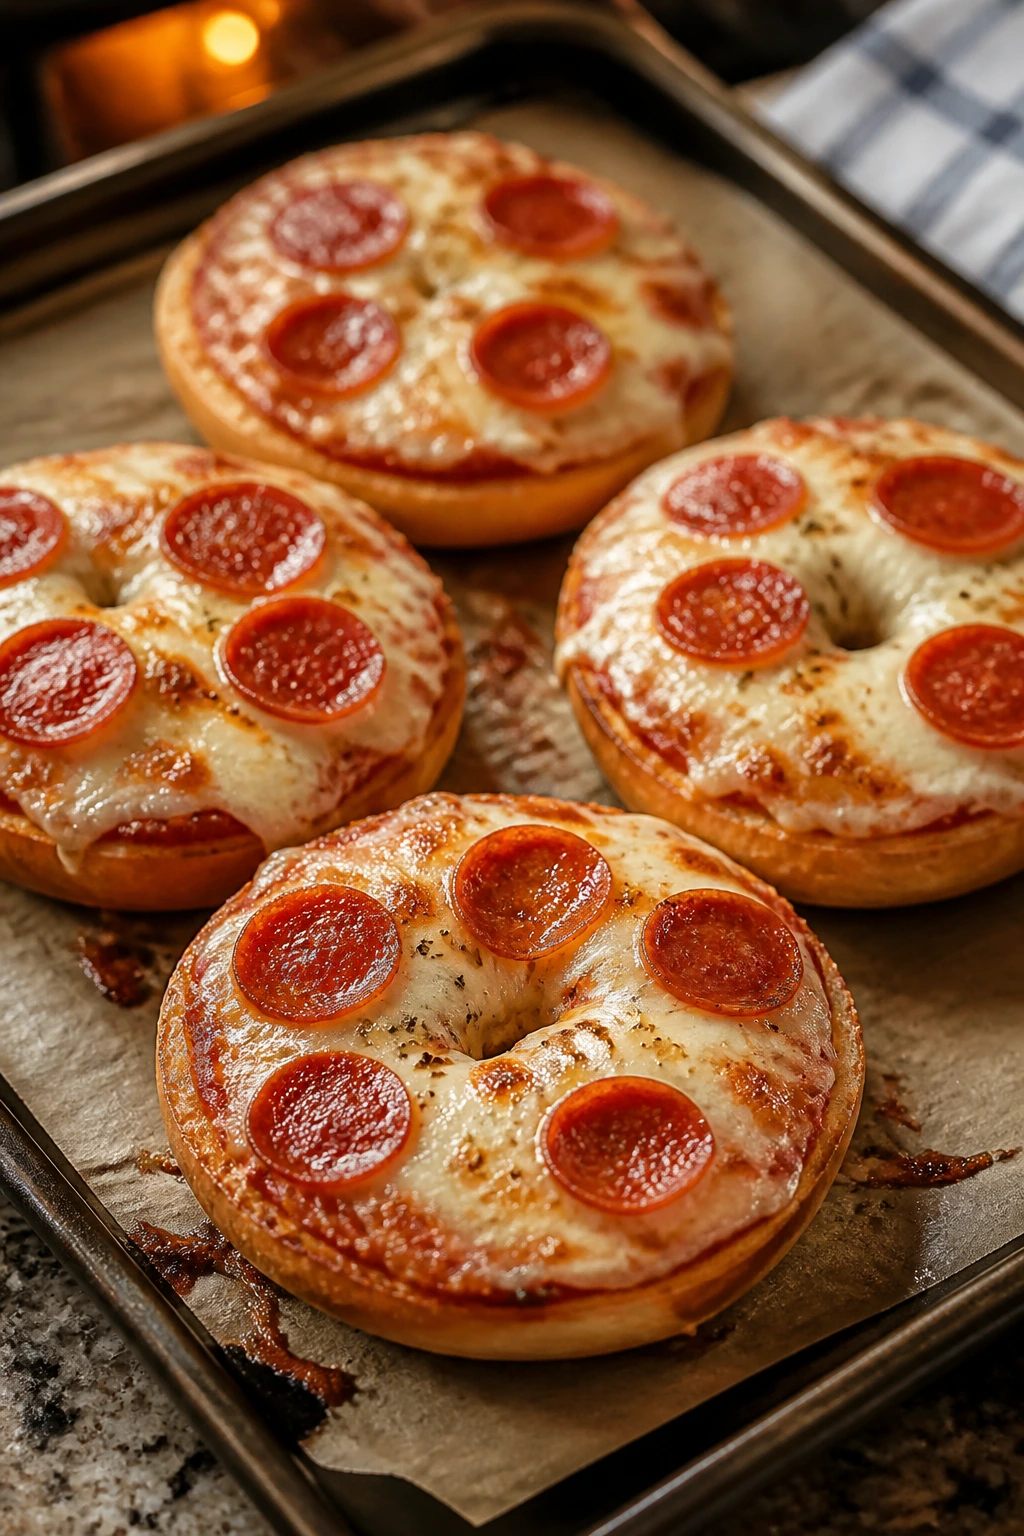
1. Mini Pizza Bagels
A good mini pizza bagel is loud in the best way: crisp edges, molten cheese, and that sweet-salty tomato smell that makes people wander into the kitchen before the tray is even out of the oven. I like these because they feel like a reward, but they’re still sturdy enough to count as a real snack.
Why It Works:
Pizza bagels hit the after-school sweet spot because they bake fast and give you three things kids usually want at once — bread, cheese, and tomato sauce. Toasting the bagels first keeps the bottoms from going damp, which matters more than most people expect. Once the cheese starts bubbling and the pepperoni curls at the edges, you know you’ve got a tray that will disappear quickly.
Key Ingredients:
- 4 mini plain bagels, split
- 1/2 cup pizza sauce
- 1 1/2 cups shredded mozzarella
- 16 pepperoni slices
- 1 tbsp grated parmesan
- 1/4 tsp dried oregano
- Optional: 2 tbsp sliced black olives or finely diced bell pepper
Quick Steps:
- Preheat the oven to 425°F (220°C) and line a baking sheet with parchment paper.
- Toast the split bagels for 3 minutes on the sheet, just until the cut sides feel dry and lightly crisp.
- Spread about 1 tablespoon of pizza sauce on each half. Keep it thin; a heavy layer makes the bagels soggy.
- Top with mozzarella, pepperoni, parmesan, and oregano. Add olives or bell pepper if you want a little extra color.
- Bake for 7 to 9 minutes, until the cheese is fully melted and the edges of the bagels are golden.
- Cool for 2 minutes before serving. The cheese settles fast, and that short pause keeps the toppings from sliding off.
Equipment for This Recipe:
- Rimmed baking sheet
- Parchment paper
- Small spoon or butter knife
- Oven or toaster oven
- Sharp knife for cutting bagels, if needed
How to Serve This Dish:
Serve two halves per child with cucumber spears or grapes on the side. For older kids, three or four halves feels more like a small meal. The plate looks best when the bagels are still hot and the cheese is just starting to set.
Pro Tips for This Recipe:
- Keep the sauce thin and the cheese generous; that ratio gives you the right melt without sogginess.
- If the bagels are very soft, toast them for an extra minute before topping.
- A pinch of parmesan on top gives you a saltier finish than mozzarella alone.
- Leftover cooked sausage or chopped ham works if you want to make a more filling version.
Variations on This Dish:
- Margherita Mini Bagels: Swap the pepperoni for thin tomato slices and torn basil. Add a little extra parmesan at the end.
- Veggie Patch Bagels: Use chopped mushrooms, bell peppers, and olives. Let the vegetables sit on paper towels first so they don’t water down the top.
- Breakfast Bagels: Replace pepperoni with scrambled egg bits and a little breakfast sausage. Sounds odd until you try it.
Common Mistakes to Avoid with This Dish:
- Using too much sauce: The bagels turn soft in the middle and slide apart when picked up. Thin layers fix it.
- Skipping the toast step: Untoasted bagels bake up pale and chewy instead of crisp.
- Overbaking the cheese: Leave them in too long and the mozzarella goes oily instead of stretchy.
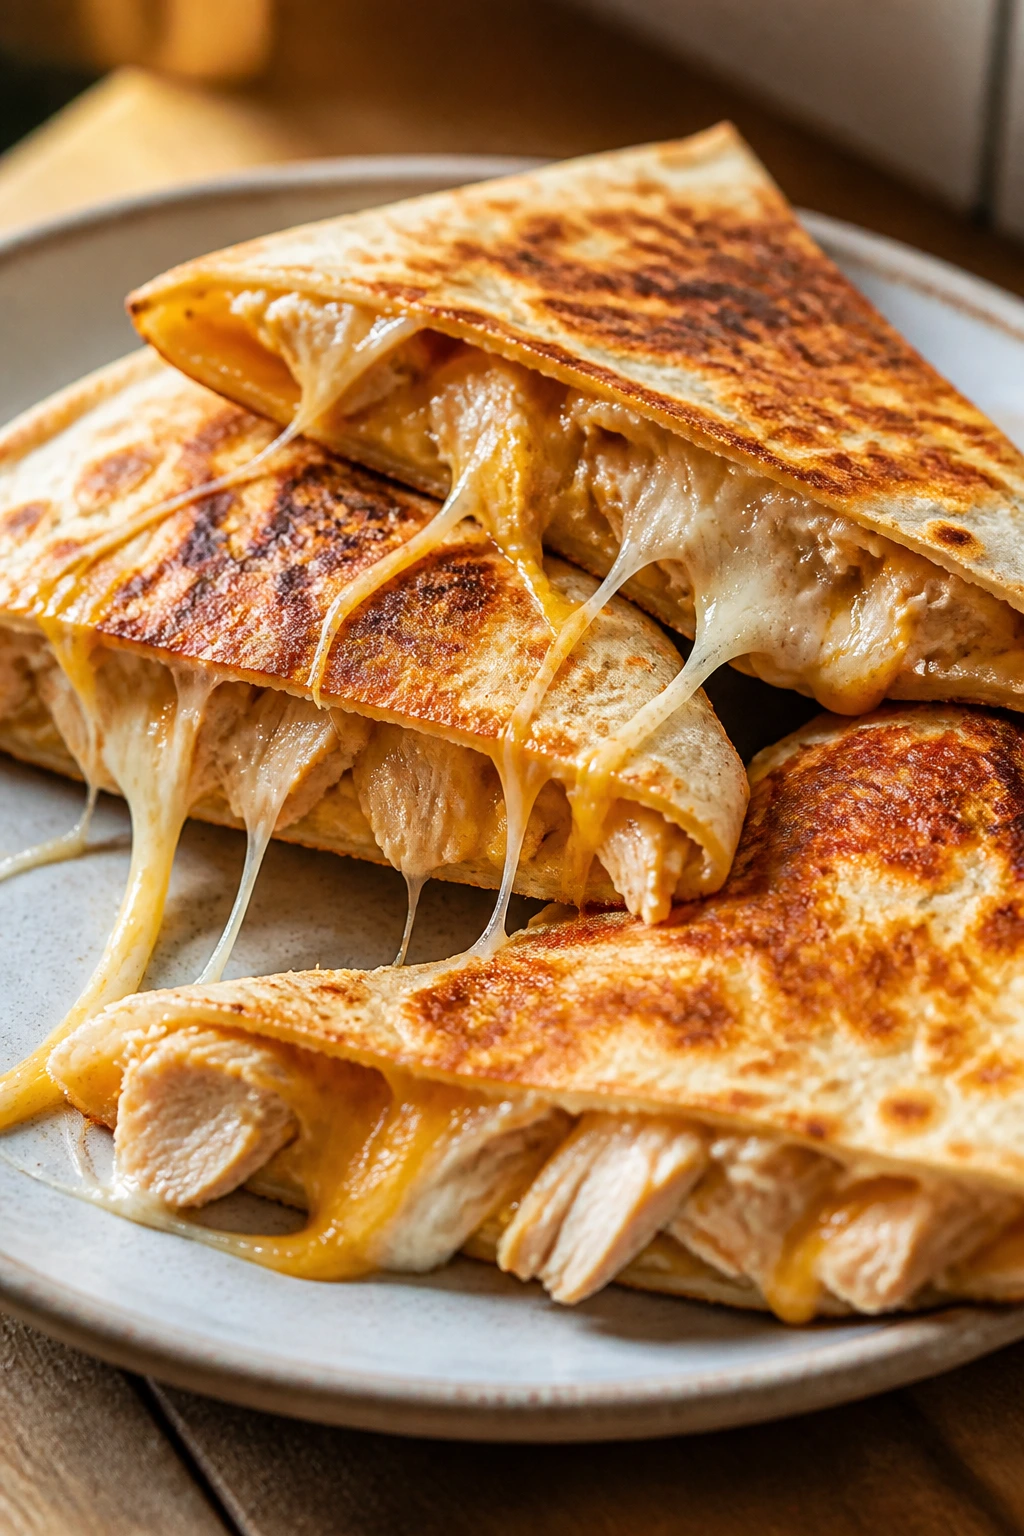
2. Cheesy Chicken Quesadilla Wedges
This is the snack that sounds casual and ends up behaving like dinner. The outside should be bronzed and crisp, the inside should pull apart in long strings, and the chicken should stay juicy, not dry. If you’ve got half a rotisserie chicken hanging around, this is one of the best places to put it.
Why It Works:
Quesadillas answer the after-school problem with almost annoying efficiency: hot pan, fast melt, easy slicing. A mix of cheddar and Monterey Jack gives you both flavor and stretch, while a little salsa tucked inside keeps the filling from tasting flat. The key is not overstuffing — a thinner quesadilla crisps better and eats cleaner, especially for smaller hands.
Key Ingredients:
- 4 large flour tortillas, 8-inch
- 2 cups shredded cooked chicken
- 1 cup shredded cheddar
- 1 cup shredded Monterey Jack
- 1/3 cup canned black beans, rinsed and drained
- 1/4 cup salsa, well drained
- 2 tsp butter or neutral oil
- Optional: sour cream and extra salsa for serving
Quick Steps:
- Warm a large skillet over medium heat.
- Lay one tortilla in the skillet and sprinkle half the cheese over one side.
- Add 1/2 cup chicken, a spoonful of black beans, and a little salsa, then top with more cheese and fold the tortilla over.
- Cook for 2 to 3 minutes per side until the tortilla is deep golden and the cheese is fully melted. Press lightly with a spatula; if it feels floppy, give it another 30 seconds.
- Transfer to a cutting board and rest for 1 minute before slicing into wedges.
- Repeat with the remaining tortillas, adding a tiny bit of butter or oil to the pan as needed.
Equipment for This Recipe:
- 12-inch skillet
- Spatula
- Cutting board
- Chef’s knife or pizza cutter
- Small bowl for the filling
How to Serve This Dish:
Set out the wedges with sour cream, salsa, and a pile of carrot sticks or sliced bell peppers. Two wedges are enough for a younger child; four can feel like a small meal for a bigger appetite. The quesadilla should be crisp enough to hold with one hand without leaking.
Pro Tips for This Recipe:
- Drain the salsa a little before using it. Wet salsa is one of the fastest ways to ruin the crust.
- Shred the chicken fairly fine so it distributes evenly and doesn’t tear the tortilla.
- Use medium heat, not high. High heat burns the tortilla before the cheese melts.
- If you’re making these ahead, cool the wedges on a rack so steam doesn’t soften them.
Variations on This Dish:
- Bean-and-Cheese Shortcut: Leave out the chicken and use 3/4 cup extra beans. Add a pinch of cumin.
- Buffalo Chicken Version: Stir 2 tablespoons of hot sauce into the chicken and add blue cheese crumbles if your crowd likes them.
- Green Quesadilla: Add chopped spinach and a few diced jalapeños for older kids or adults who want a sharper bite.
Common Mistakes to Avoid with This Dish:
- Too much filling: The tortilla tears, and the cheese escapes into the pan. Keep the layer thin.
- Cutting too soon: The filling spills out before the cheese settles. Give it a minute.
- Using cold chicken in a thick pile: It takes longer to warm through and can leave the center patchy. Shred it small.
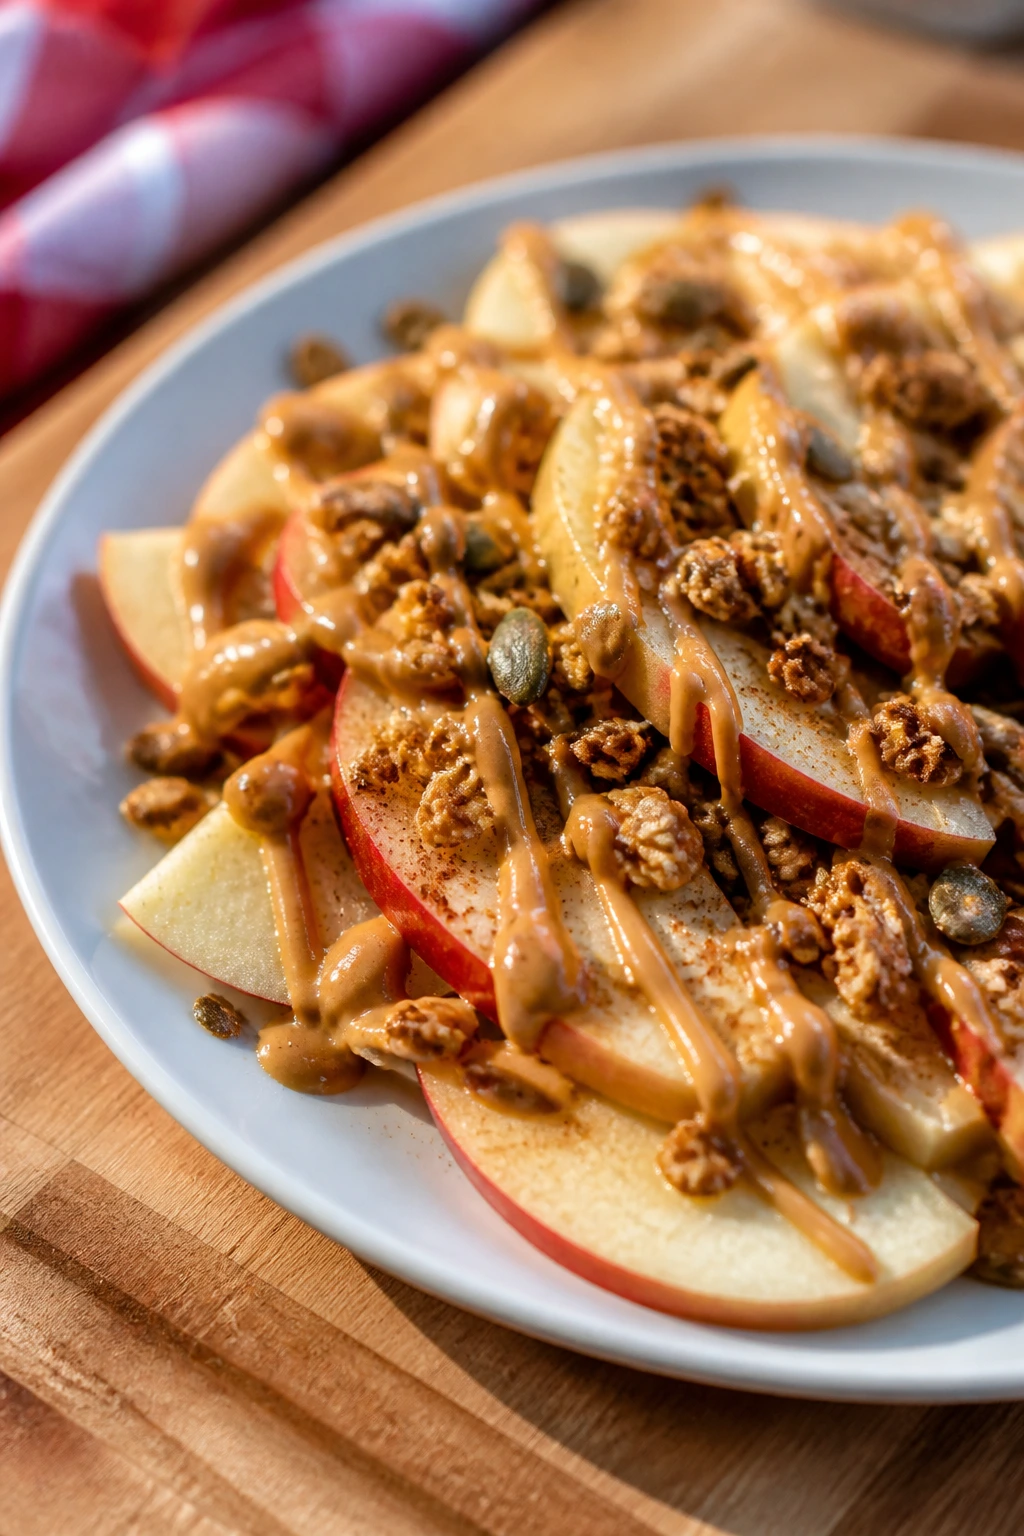
3. Apple Nachos with Peanut Butter Drizzle
There’s something almost mischievous about calling sliced apples “nachos,” but the name earns its keep. Crisp fruit, warm peanut butter, a little cinnamon, and a crunchy topping turn into a snack that feels playful without turning into dessert dressed as lunch. The apples should stay bright and snappy under everything.
Why It Works:
Apple nachos solve the “I want something sweet” problem without relying on a candy-heavy snack. Thin apple slices give you a cold, fresh base, and the peanut butter adds enough fat and salt to make the whole thing feel substantial. Granola and chopped nuts keep the texture lively, which is the real trick here — soft fruit alone doesn’t hold attention for long.
Key Ingredients:
- 3 large crisp apples
- 1/2 cup peanut butter
- 2 tbsp honey
- 1 to 2 tbsp warm water or milk
- 1 tsp ground cinnamon
- 1/3 cup granola
- 2 tbsp mini chocolate chips
- 2 tbsp chopped roasted peanuts or sunflower seeds
- Optional: 1/4 cup vanilla Greek yogurt
Quick Steps:
- Slice the apples into thin wedges and arrange them on a wide plate or tray.
- Stir the peanut butter, honey, cinnamon, and warm water together until the mixture is pourable but still thick.
- Drizzle the peanut butter mixture over the apples in zigzags.
- Scatter granola, chocolate chips, and peanuts or seeds over the top.
- Finish with a spoonful of yogurt if you want a cooler, creamier contrast.
- Serve immediately so the apples stay crisp and the granola stays crunchy.
Equipment for This Recipe:
- Cutting board
- Sharp knife
- Small bowl
- Spoon or whisk
- Wide plate or serving tray
How to Serve This Dish:
This works best on a platter in the middle of the table, with forks or toothpicks nearby. For a bigger after-school crowd, pair it with cheese cubes or a small handful of pretzels. If you want it to feel more like a meal, add a glass of milk or a yogurt cup alongside it.
Pro Tips for This Recipe:
- Use apples that snap when bitten: Honeycrisp, Fuji, Pink Lady, or Gala all work well.
- If the peanut butter is thick, warm it for 10 seconds in the microwave before mixing.
- Keep the granola off until the last second or it softens fast.
- A pinch of salt on the peanut butter makes the whole thing taste more polished.
Variations on This Dish:
- Sunflower Seed Swap: Use sunflower butter and sunflower seeds for a nut-free version.
- Caramel Apple Style: Swap the peanut butter drizzle for a thin caramel sauce and add crushed graham crackers.
- Berry Crunch Nachos: Add sliced strawberries or blueberries on top for extra freshness.
Common Mistakes to Avoid with This Dish:
- Slicing apples too early: They brown while you’re getting the other ingredients ready. Cut them last.
- Using a stiff peanut butter drizzle: It clumps instead of coating. Thin it a little.
- Overloading the toppings: Too many crunchy bits hide the apples and make the snack hard to eat.
4. Ham and Cheese Puff Pastry Pockets

Puff pastry is one of those ingredients that feels fancier than it is. Give it a little ham, a little cheese, and a swipe of mustard, and suddenly you have flaky pockets with crisp edges and a salty, savory middle that tastes like it took far more effort than it did. It did not.
Why It Works:
The pastry handles the heavy lifting. Once it bakes, it puffs around the filling and traps steam, which keeps the ham and cheese warm without drying out. Dijon gives the filling a tiny bit of bite, and that matters because ham and cheese can taste sleepy if you don’t wake them up somehow.
Key Ingredients:
- 1 sheet frozen puff pastry, thawed until pliable
- 6 oz ham, finely chopped
- 1 cup shredded Swiss or cheddar
- 1 tbsp Dijon mustard
- 1 egg, beaten with 1 tbsp water
- 1 tsp sesame seeds or poppy seeds
- Optional: 1 tbsp chopped parsley
Quick Steps:
- Preheat the oven to 400°F (200°C) and line a baking sheet with parchment paper.
- Roll the puff pastry into a rough 10-inch square on a lightly floured surface. Cut it into 4 equal squares.
- Mix the ham, cheese, Dijon, and parsley in a bowl. Spoon the mixture into the center of each square.
- Fold each square into a triangle or rectangle, then press the edges with a fork to seal.
- Brush the tops with egg wash and sprinkle with sesame seeds or poppy seeds.
- Bake for 16 to 18 minutes, until the pastry is deeply golden and the filling is hot.
- Cool for 5 minutes before serving; the cheese inside stays lava-hot for a minute or two.
Equipment for This Recipe:
- Baking sheet
- Parchment paper
- Rolling pin
- Fork
- Pastry brush
How to Serve This Dish:
Serve one pocket per child with grapes, sliced carrots, or a simple green salad if the snack is turning into dinner. They look best on a plate with the flaky top facing up and a few crumbs on the side. That’s part of the charm.
Pro Tips for This Recipe:
- Keep the pastry cold. If it starts getting sticky, chill it for 10 minutes before filling.
- Chop the ham small so the pockets seal cleanly.
- Don’t overfill. Puff pastry needs room to puff.
- A tiny slit on the top lets steam escape and prevents bursting.
Variations on This Dish:
- Turkey Club Pockets: Swap the ham for turkey and add a little shredded lettuce after baking.
- Pizza Pockets: Use mozzarella, pepperoni, and a spoonful of thick pizza sauce, but keep the sauce very restrained.
- Spinach Cheese Pockets: Add squeezed-dry spinach and use Swiss or feta for a sharper finish.
Common Mistakes to Avoid with This Dish:
- Letting the pastry thaw too much: It turns sticky and hard to handle. Thaw until bendable, not soft.
- Sealing with wet edges: The pockets open in the oven. Press the edges firmly.
- Skipping the egg wash: The pockets bake up pale instead of bronzed.
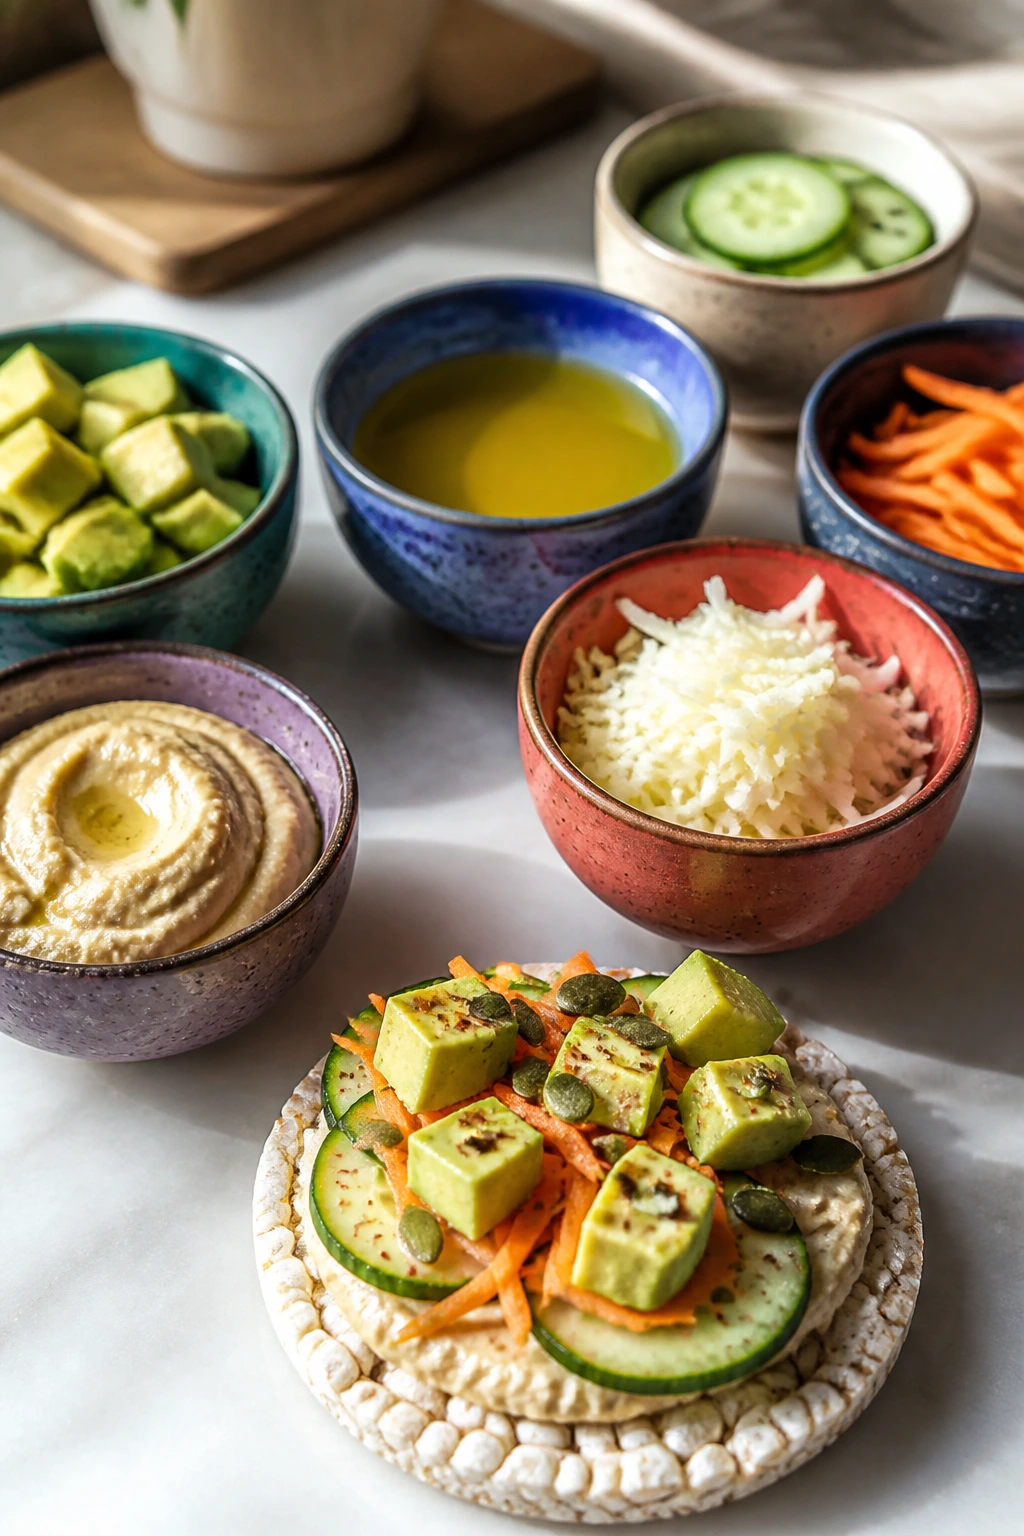
5. Veggie Hummus Snack Boxes
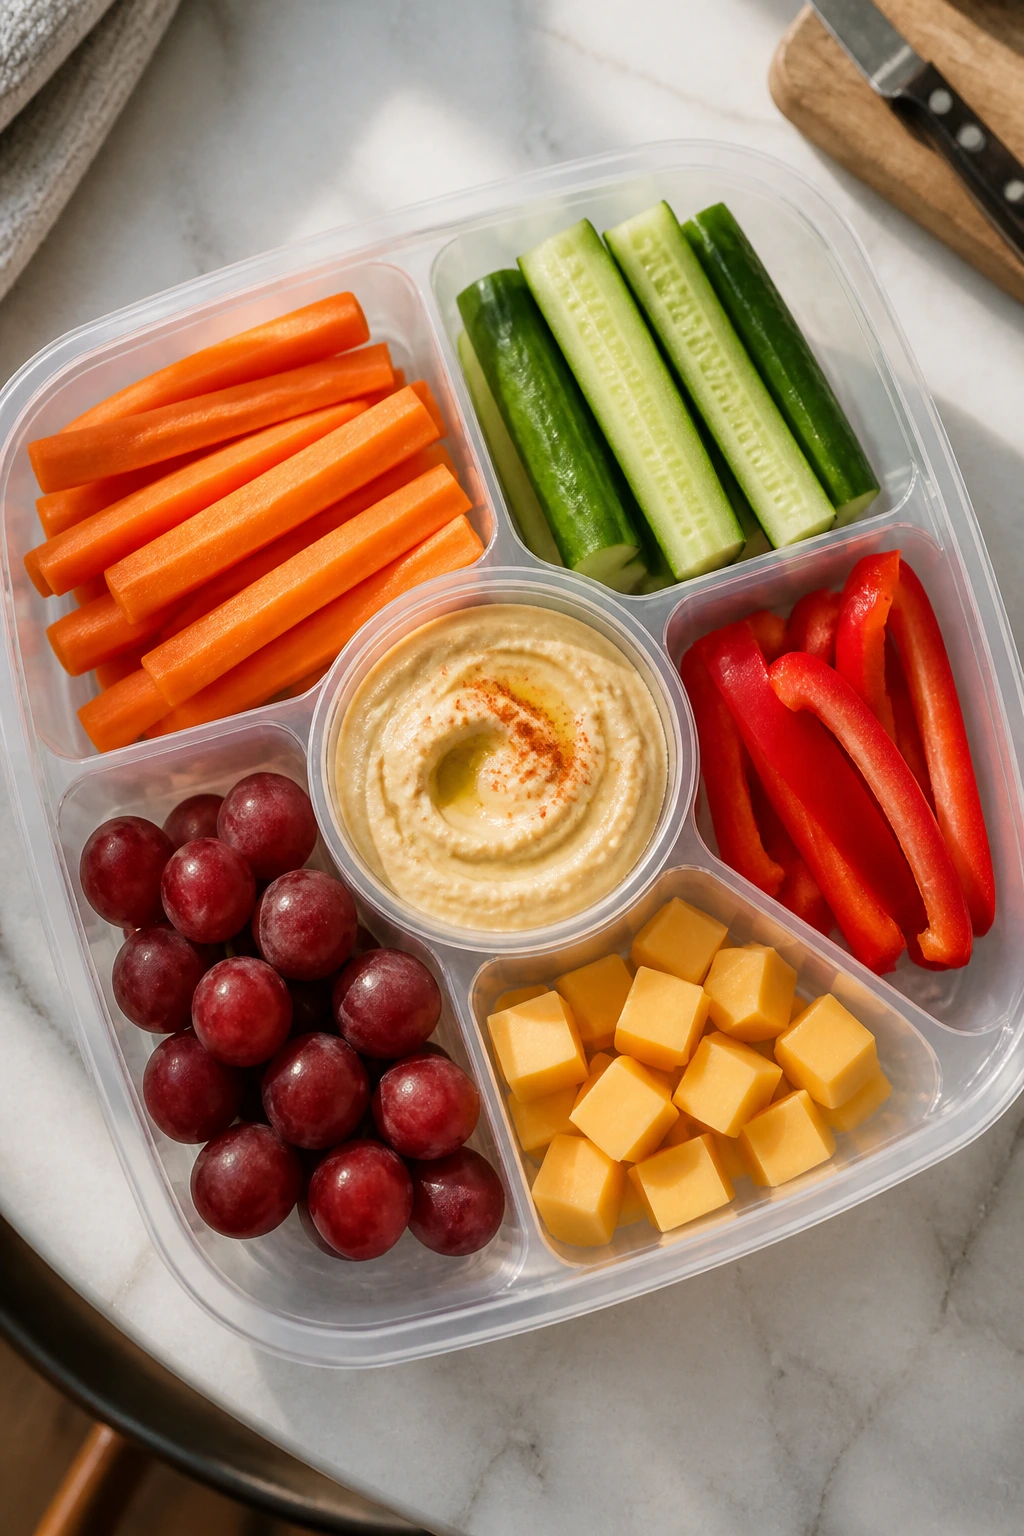
This is the snack I pull out when I want calm, not chaos. A good hummus box gives you cold crunch, creamy dip, and enough variety that nobody complains about being bored. It also works when you do not want to cook. That part matters.
Why It Works:
Snack boxes are less about a single big flavor and more about balance. Hummus brings protein and fat, vegetables bring freshness and crunch, and pita or crackers give you the starch that makes the whole thing feel like food instead of a tray of sides. If you pack the wet and dry parts separately, the textures stay intact for hours.
Key Ingredients:
- 2 cups hummus
- 4 small whole-wheat pitas, cut into wedges
- 2 carrots, peeled and cut into sticks
- 1 cucumber, cut into spears
- 1 red bell pepper, cut into strips
- 1 cup cherry tomatoes
- 8 oz cheese cubes or mozzarella balls
- 1 cup grapes or apple slices
- Optional: 2 hard-boiled eggs, halved
Quick Steps:
- Cut the vegetables and fruit into snackable pieces. Aim for shapes kids can grab without a fork.
- Warm the pita briefly if you want it softer, or leave it room temperature for a sturdier bite.
- Spoon the hummus into small compartments or a shallow container.
- Arrange the vegetables, fruit, pita wedges, and cheese in separate sections so nothing gets soggy.
- Add the hard-boiled eggs if you want the box to eat more like a mini meal.
- Pack the box right before serving, or refrigerate it with the wet ingredients sealed separately.
Equipment for This Recipe:
- Cutting board
- Chef’s knife
- Small lunchbox or compartment container
- Vegetable peeler
- Optional: egg slicer
How to Serve This Dish:
Serve the hummus box straight from the fridge with a napkin and maybe a few whole-grain crackers. For bigger appetites, add pretzel thins or a turkey roll-up on the side. The box should look neat, not crowded.
Pro Tips for This Recipe:
- Pat the cucumber and tomatoes dry before packing. Extra water turns the box into a puddle.
- If the hummus is thick, stir in a teaspoon of olive oil before serving.
- Cut the vegetables into similar lengths so the box feels organized and easier to eat.
- Lemon hummus or roasted garlic hummus gives you more flavor without changing the format.
Variations on This Dish:
- Mediterranean Box: Add olives, feta, and roasted red peppers.
- Ranch Veggie Box: Swap the hummus for ranch dip and include celery and broccoli.
- Protein Box: Add sliced turkey and an extra egg for a snack that sticks around longer.
Common Mistakes to Avoid with This Dish:
- Packing wet vegetables next to crackers: The crunch disappears. Keep them apart.
- Using limp produce: A soft cucumber or mealy carrot makes the whole box feel tired.
- Making it too large: Snack boxes work best when they still feel like a snack, not a buffet.
6. Mac and Cheese Muffins
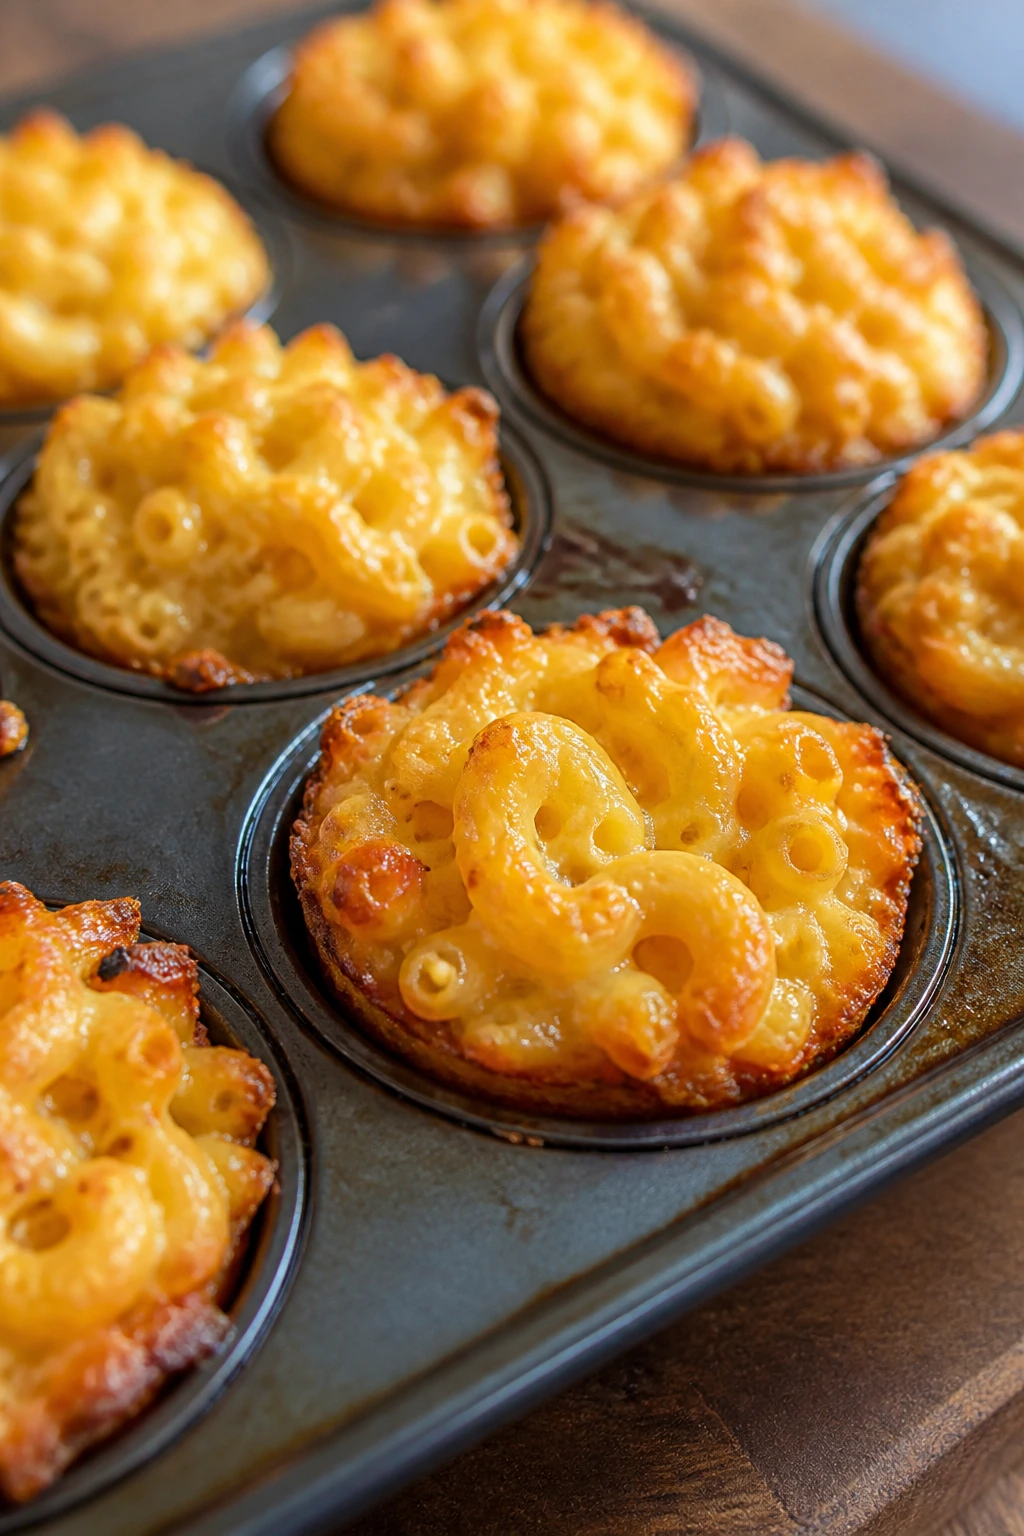
These are what happen when mac and cheese gets serious about portability. The edges turn crisp, the centers stay creamy, and each little muffin holds together well enough for small hands. They’re also one of the few snacks here that can be eaten warm or room temperature without losing their appeal.
Why It Works:
Baking macaroni in a muffin tin gives you built-in portion control and a top layer that gets a little browned and toasty. Egg binds the pasta so the cups stay together, while cheddar gives the familiar flavor everyone expects. They’re useful on days when dinner is far enough away to matter.
Key Ingredients:
- 8 oz elbow macaroni
- 2 cups shredded sharp cheddar
- 1/2 cup grated parmesan
- 2 large eggs
- 1 1/2 cups milk
- 3 tbsp melted butter
- 1/2 tsp salt
- 1/4 tsp paprika
- 1/2 cup breadcrumbs
Quick Steps:
- Preheat the oven to 375°F (190°C) and grease a 12-cup muffin tin very well.
- Cook the macaroni in salted water until just shy of tender, then drain it well.
- Whisk the eggs, milk, butter, salt, and paprika in a large bowl.
- Stir in the macaroni, cheddar, and parmesan until every piece is coated.
- Spoon the mixture into the muffin cups, pressing it down lightly. Sprinkle breadcrumbs over the tops.
- Bake for 18 to 22 minutes, until the tops are set and the edges are golden.
- Cool for 5 minutes, then loosen the edges with a butter knife and lift them out gently.
Equipment for This Recipe:
- 12-cup muffin tin
- Large pot
- Mixing bowl
- Whisk
- Measuring cups
How to Serve This Dish:
Two muffins make a solid snack for younger kids; three or four can stand in for a light meal. Serve them with apple slices or steamed broccoli if you want a little freshness next to the richness. A dab of ketchup on the side is not wrong, even if some people act like it is.
Pro Tips for This Recipe:
- Drain the pasta very well. Extra water makes the cups loose.
- Grease the tin generously or the cheesy edges will cling.
- Let them cool before removing; they need that set time.
- A pinch of mustard powder makes the cheese taste sharper without turning it into mustard.
Variations on This Dish:
- Broccoli Cheddar Cups: Stir in finely chopped steamed broccoli.
- Bacon Mac Cups: Add cooked crumbled bacon for a saltier version.
- Gluten-Free Version: Use gluten-free elbow pasta and make sure your breadcrumbs fit the bill.
Common Mistakes to Avoid with This Dish:
- Overcooking the pasta: Soft noodles turn mushy in the oven. Leave them slightly firm.
- Forgetting to grease the pan: The first muffin comes out looking like a crime scene.
- Packing them too loosely: They fall apart when lifted. Press the mixture down.
7. Turkey Pinwheel Roll-Ups
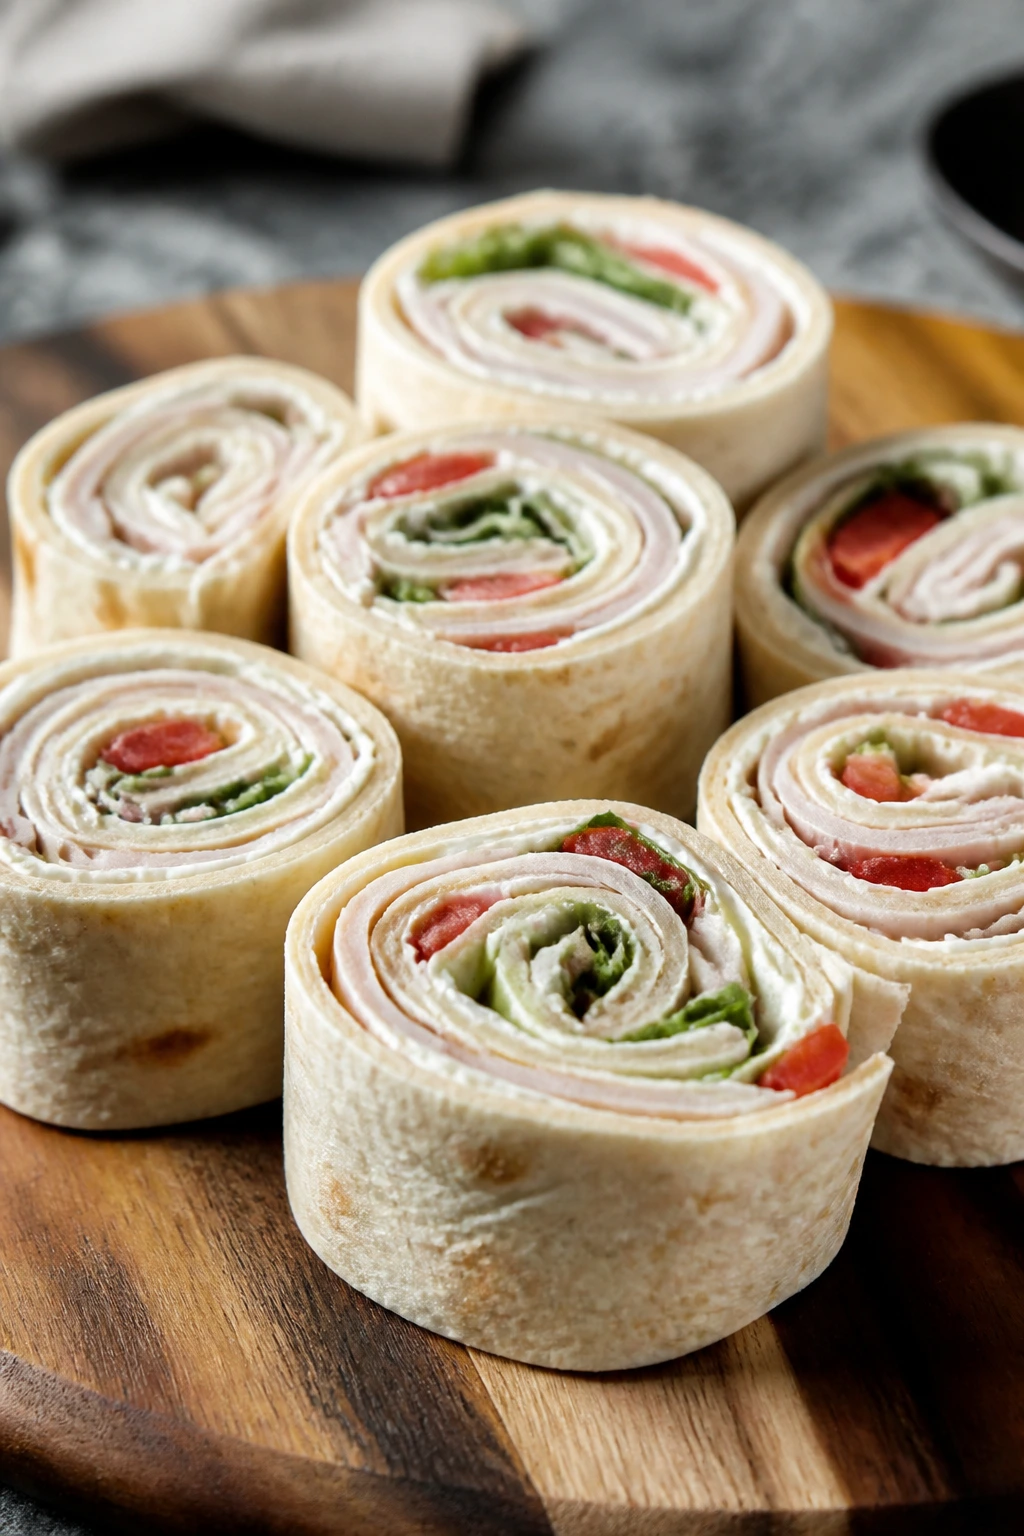
Pinwheel roll-ups are the snack version of a good clean haircut: neat, tidy, and easier to manage than most things in a family kitchen. They slice into little spirals that feel fun without needing a stove, and the cream cheese keeps the turkey and vegetables from drying out.
Why It Works:
The tortilla gives you the structure, the cream cheese gives you the glue, and the turkey turns the whole thing into something more filling than a regular sandwich. Chopping the vegetables fine matters. Big pieces make the wrap lumpy and hard to slice.
Key Ingredients:
- 4 large flour tortillas, 10-inch
- 8 oz cream cheese, softened
- 2 tsp Dijon mustard or ranch seasoning
- 8 oz sliced turkey
- 1 cup shredded carrots
- 1 cup baby spinach, chopped
- 1 cup shredded cheddar
- 1/4 tsp black pepper
Quick Steps:
- Stir the cream cheese with the Dijon and black pepper until smooth.
- Spread a thin layer over each tortilla, leaving a 1/2-inch border on one edge.
- Layer turkey, carrots, spinach, and cheddar over the cream cheese.
- Roll each tortilla up tightly from the long side, pressing as you go.
- Chill the rolls for 15 to 20 minutes so they slice cleanly.
- Cut into 1-inch pinwheels with a sharp knife. Wipe the blade if the filling starts to drag.
Equipment for This Recipe:
- Cutting board
- Sharp knife
- Mixing bowl
- Spatula or butter knife
- Plastic wrap or airtight container
How to Serve This Dish:
Serve the pinwheels with pickles, grapes, or a handful of crackers. Three to five pinwheels make a normal snack portion for a child; a full tortilla can become lunch for an adult. They look nicest when arranged in a tight spiral on a plate.
Pro Tips for This Recipe:
- Soften the cream cheese fully or it tears the tortilla.
- Chop the spinach if the leaves are large; whole leaves make the slices messy.
- Chill before slicing. Warm rolls squash instead of cut.
- If you want extra flavor, mix a spoonful of chopped dill pickles into the filling.
Variations on This Dish:
- Ham and Swiss Spirals: Swap turkey for ham and use shredded Swiss.
- Ranch Veggie Roll-Ups: Leave out the meat and add cucumbers and a spoonful of ranch seasoning.
- Hummus Wrap Spirals: Use hummus instead of cream cheese for a dairy-free version.
Common Mistakes to Avoid with This Dish:
- Overfilling the tortilla: The roll bursts open and won’t hold its shape.
- Slicing too soon: The spirals smear instead of cut.
- Using wet greens: Spinach that hasn’t been dried adds moisture and makes the wrap slippery.
8. Banana Oat Cookies
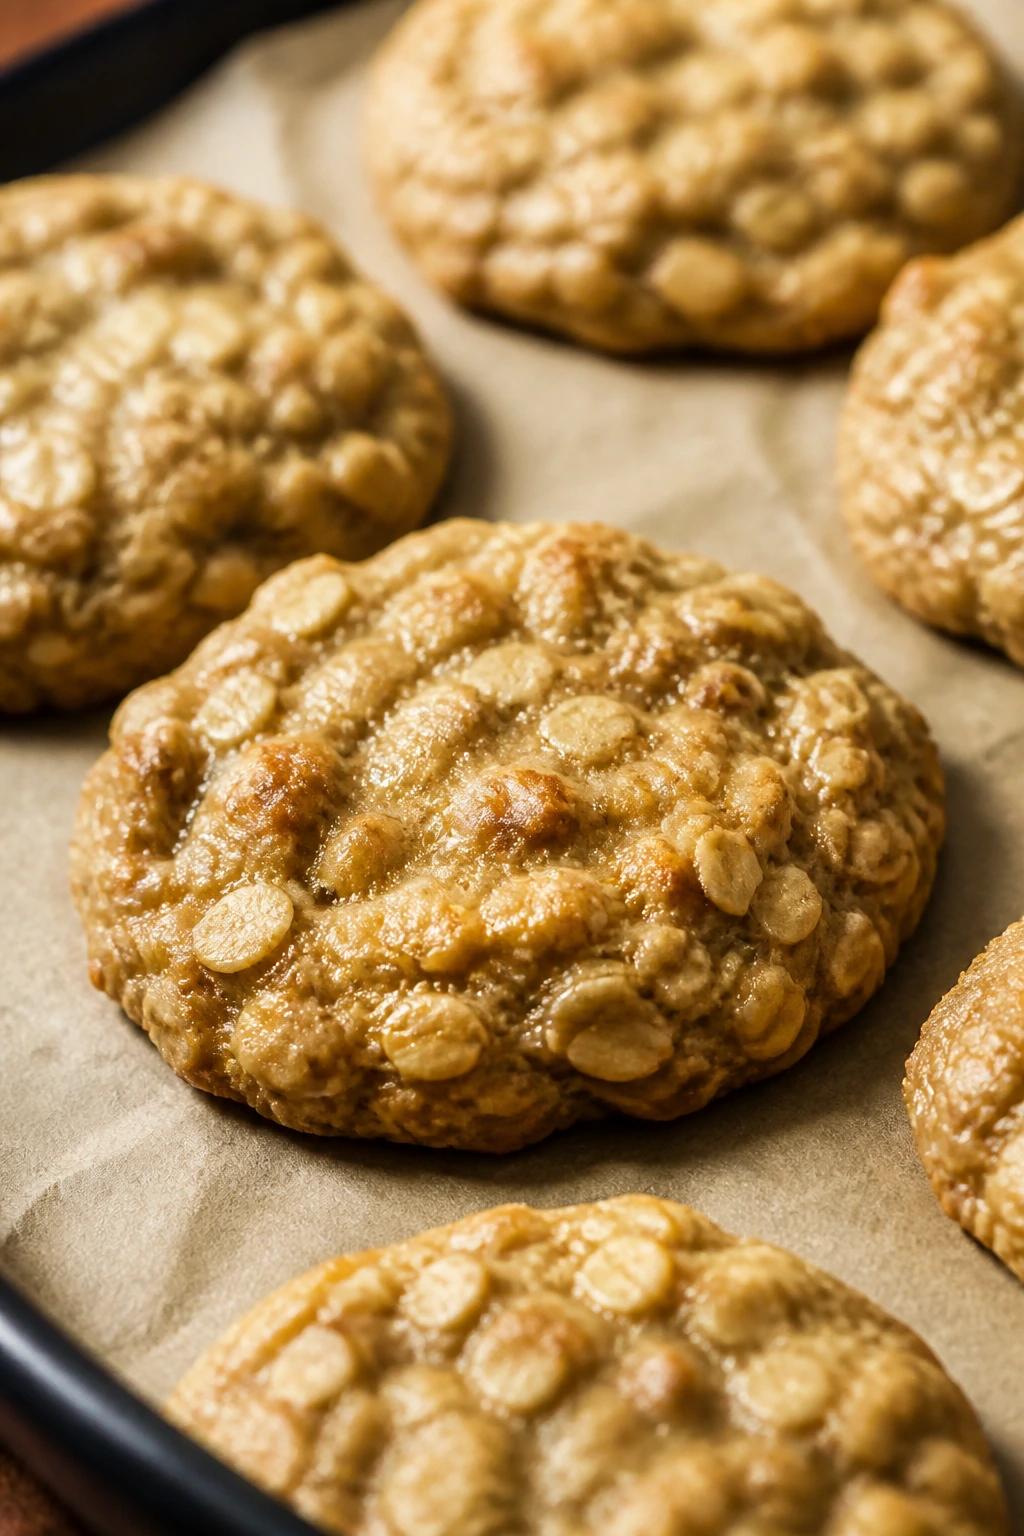
These are soft, chewy, and a little rustic in the best way. Don’t expect a crisp bakery cookie. Expect a warm banana-oat bite that tastes like the pantry finally made a sensible choice. They’re good when you want something sweet but not sticky-sweet.
Why It Works:
Bananas bring moisture and sweetness, oats bring structure, and peanut butter gives the cookies enough body to hold together without a lot of fuss. Because the batter is naturally soft, the cookies bake into tender rounds rather than fragile little discs. They are one of the easiest ways to use bananas that have gone heavily speckled on the counter.
Key Ingredients:
- 3 very ripe bananas, mashed
- 2 1/2 cups rolled oats
- 1/2 cup peanut butter
- 1 egg
- 1 tsp cinnamon
- 1/4 tsp salt
- 1 tsp vanilla extract
- 1/4 cup mini chocolate chips
Quick Steps:
- Preheat the oven to 350°F (175°C) and line a baking sheet with parchment paper.
- Mash the bananas in a bowl until mostly smooth.
- Stir in the peanut butter, egg, vanilla, cinnamon, and salt.
- Fold in the oats and chocolate chips until the mixture looks thick and scoopable.
- Drop rounded spoonfuls onto the baking sheet and flatten them slightly with the back of the spoon.
- Bake for 12 to 14 minutes, until the edges look set and the tops are dry.
- Cool on the sheet for 5 minutes before moving them. They firm up as they sit.
Equipment for This Recipe:
- Mixing bowl
- Fork or potato masher
- Baking sheet
- Parchment paper
- Spoon or cookie scoop
How to Serve This Dish:
Serve these with cold milk, a cheese stick, or a few berries if you want to make the plate feel more complete. Two cookies are enough for a smaller child; four can fill a bigger snack gap. They’re pleasant at room temperature, which makes them easy to pack.
Pro Tips for This Recipe:
- Use bananas that are almost black in spots. Pale bananas don’t bring enough sweetness.
- If the dough feels loose, add 2 tablespoons more oats.
- Press them down before baking or they stay in lumpy mounds.
- A small pinch of flaky salt on top after baking sharpens the banana flavor.
Variations on This Dish:
- Raisin Walnut Cookies: Swap the chocolate chips for raisins and chopped walnuts.
- Pumpkin Spice Version: Replace one banana with 1/3 cup pumpkin puree and add extra cinnamon.
- Sunflower Seed Version: Use sunflower butter for a nut-free batch.
Common Mistakes to Avoid with This Dish:
- Expecting a crisp cookie: These bake soft. That’s the point.
- Using under-ripe bananas: The mixture tastes flat and needs extra sweetener.
- Packing too much on the tray: They spread a little, so leave space.
9. Chicken and Cheese Taquitos

These come out crisp, golden, and a little addictive in the way only rolled-up food seems to be. The tortillas tighten around the filling in the oven, the cheese melts into the chicken, and the ends get brown enough to crunch without shattering into shards.
Why It Works:
Taquitos are a smart after-school move because they can be baked instead of fried and still taste like you put in real effort. The key is using tortillas that bend without cracking and a filling that isn’t too wet. A touch of salsa gives the chicken flavor, but you want it drained so the tortillas stay crisp.
Key Ingredients:
- 2 cups shredded cooked chicken
- 1 cup shredded Monterey Jack
- 1/2 cup salsa, well drained
- 8 small corn tortillas
- 2 tbsp neutral oil or cooking spray
- Optional: 1 tbsp chopped cilantro
- Optional: guacamole or sour cream for serving
Quick Steps:
- Preheat the oven to 425°F (220°C) and line a baking sheet with parchment paper.
- Warm the tortillas briefly in the microwave wrapped in a damp towel for 20 to 30 seconds so they bend without cracking.
- Mix the chicken, cheese, salsa, and cilantro in a bowl.
- Spoon the filling onto each tortilla and roll it tightly into a tube.
- Place the taquitos seam-side down on the baking sheet and brush or spray lightly with oil.
- Bake for 12 to 15 minutes, turning once halfway, until crisp and golden.
- Serve right away while the cheese is still stretchy.
Equipment for This Recipe:
- Baking sheet
- Parchment paper
- Mixing bowl
- Damp kitchen towel
- Pastry brush or oil spray
How to Serve This Dish:
Two or three taquitos with guacamole and sliced cucumbers is enough for a snack that feels like dinner without becoming a project. They’re best on a platter with the seam side down so they don’t open up. A little salsa on the side gives kids control over the heat level.
Pro Tips for This Recipe:
- Don’t skip the tortilla-warming step. Corn tortillas crack if they’re cold.
- Drain the salsa hard. Wet filling is the enemy of crunch.
- Put the taquitos seam-side down first so they stay rolled.
- Air frying works too, but give them a light oil spray so the outside actually browns.
Variations on This Dish:
- Bean Taquitos: Use mashed black beans and cheese instead of chicken.
- Spicy Version: Add chopped jalapeños or a spoonful of hot sauce.
- Breakfast Taquitos: Scrambled eggs and cheese make a surprisingly good after-school snack if you’re headed straight into evening practice.
Common Mistakes to Avoid with This Dish:
- Overfilling the tortillas: They split while baking.
- Using filling that’s too wet: The shells turn soft instead of crisp.
- Skipping the oil: The outside stays pale and leathery.
10. Mini Loaded Baked Potatoes
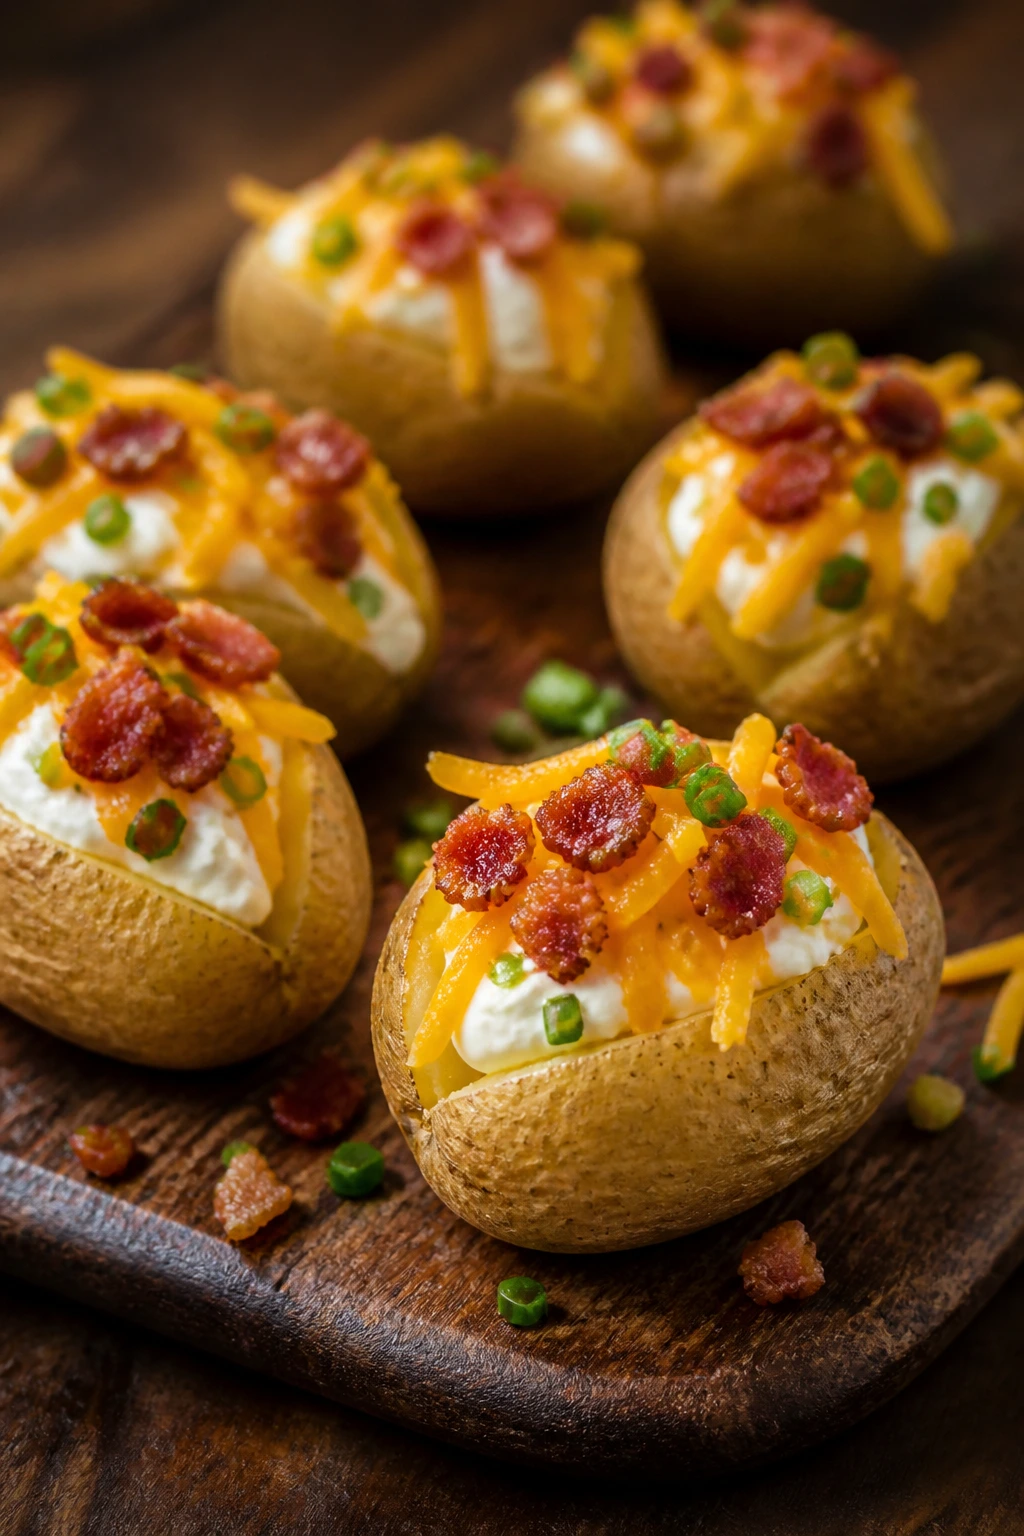
Baby potatoes are the kind of ingredient that make me trust the kitchen a little more. They roast up tender and earthy, then turn into tiny snack vessels for cheese, sour cream, bacon, and chives. Each one feels like a complete bite, which is useful when the goal is “hold everyone over,” not “start a whole dinner.”
Why It Works:
Mini potatoes cook faster than full-sized baked potatoes and don’t need much fuss. Because they’re small, the ratio of crisp skin to fluffy center stays high, which is exactly what you want for a snack. A little sour cream and cheddar turns them into something that disappears from the platter before anybody can ask what else is coming.
Key Ingredients:
- 1 1/2 lbs baby Yukon Gold or red potatoes
- 2 tbsp olive oil
- 3/4 tsp salt
- 1/2 tsp black pepper
- 1 cup shredded cheddar
- 1/2 cup sour cream
- 4 slices bacon, cooked and crumbled
- 2 tbsp chopped chives
Quick Steps:
- Preheat the oven to 425°F (220°C).
- Toss the potatoes with olive oil, salt, and black pepper on a baking sheet.
- Roast for 30 to 35 minutes, turning once, until a fork slides in easily.
- Split each potato open with a small knife and gently press the ends to make room for filling.
- Top with cheddar and return to the oven for 3 to 4 minutes, just until melted.
- Add sour cream, bacon, and chives while the potatoes are still warm.
Equipment for This Recipe:
- Rimmed baking sheet
- Sharp paring knife
- Mixing bowl
- Spoon
- Oven mitts
How to Serve This Dish:
Serve three or four potatoes per child with baby carrots or a side salad. They also work well on a buffet-style plate next to fruit, which keeps the snack from feeling heavy. If you’re feeding a bigger group, line them up on a platter and let everyone grab their own.
Pro Tips for This Recipe:
- Don’t crowd the pan. Space helps the skins crisp.
- Use small, even potatoes so they roast at the same pace.
- Sour cream thinned with a teaspoon of milk drizzles more cleanly.
- If you want extra flavor, toss the finished potatoes with a tiny bit of garlic powder before the cheese goes on.
Variations on This Dish:
- Broccoli Cheddar Potatoes: Add finely chopped steamed broccoli under the cheese.
- Ranch Potato Cups: Swap the sour cream for ranch dip and add scallions.
- Dairy-Free Version: Use olive oil, dairy-free cheese, and chopped herbs.
Common Mistakes to Avoid with This Dish:
- Using giant potatoes: They take too long and stop feeling like a snack.
- Under-roasting: The centers stay waxy instead of fluffy.
- Adding toppings too soon: Bacon and chives wilt if they sit on piping-hot potatoes too long before serving.
11. Pasta Salad Cups
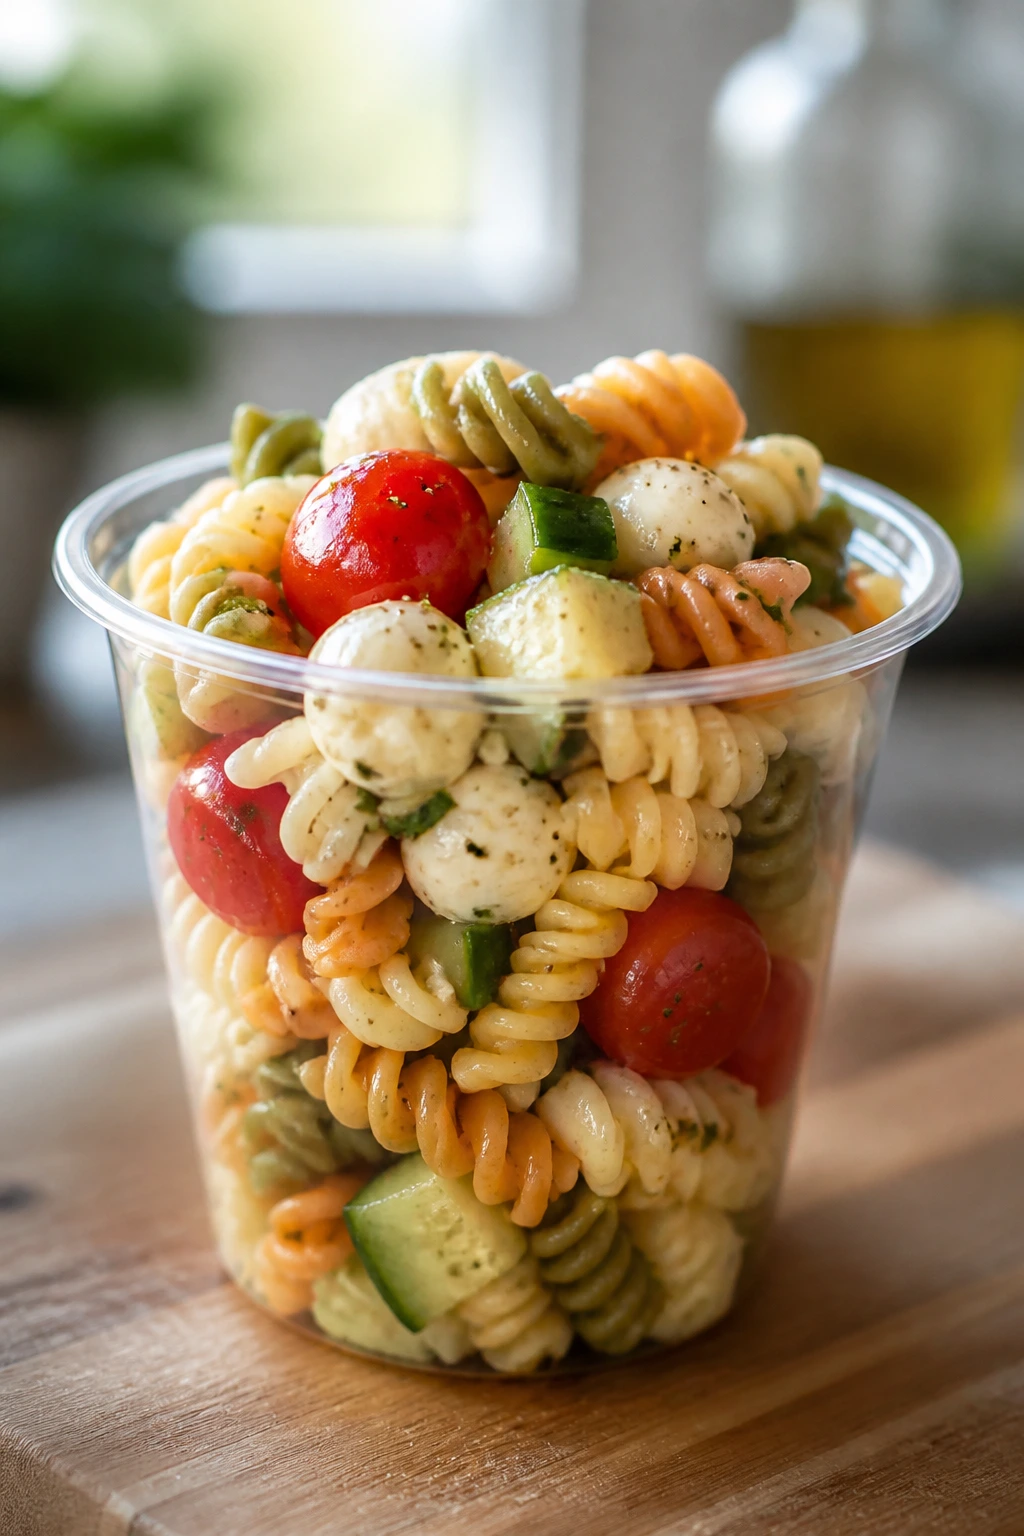
Pasta salad gets dismissed as a picnic side far too often. Packed into cups and made a little more colorful, it becomes an actual after-school option — cold, herby, salty, and easy to eat with a fork while somebody else is finishing a math worksheet at the table. The trick is keeping the pieces small and the dressing balanced.
Why It Works:
Rotini or bow ties catch dressing in their twists, so each bite tastes seasoned instead of watery. Mozzarella, tomatoes, cucumber, and olives keep the texture moving, and the whole thing holds well in the fridge for a few days. As snacks go, this one is nice when you want something that feels clean and refreshing without being flimsy.
Key Ingredients:
- 8 oz rotini or bow-tie pasta
- 1 cup cherry tomatoes, halved
- 1 cup cucumber, diced
- 1 cup mozzarella pearls
- 1/2 cup sliced olives
- 1/4 cup finely diced red onion
- 1/2 cup Italian dressing
- 2 tbsp grated parmesan
- 2 tbsp chopped basil
Quick Steps:
- Cook the pasta in salted water until just tender, then drain and rinse briefly under cool water.
- Toss the cooled pasta with the dressing so it absorbs flavor while still slightly warm.
- Add the tomatoes, cucumber, mozzarella, olives, red onion, parmesan, and basil.
- Chill for 15 minutes if you want the flavors to settle, or portion immediately into small cups.
- Serve with mini forks or spoons.
Equipment for This Recipe:
- Pot
- Colander
- Mixing bowl
- Measuring cups
- Small cups or containers
How to Serve This Dish:
Fill small cups halfway for a snack portion, or make them fuller if dinner is still far off. These pair nicely with turkey pinwheels or a handful of crackers. The colors look best when the ingredients are diced evenly rather than left in giant chunks.
Pro Tips for This Recipe:
- Salt the pasta water well. Bland pasta salad is a waste of everyone’s time.
- Don’t drown it in dressing. The pasta should glisten, not swim.
- If you’re making it ahead, hold back half the basil and add it right before serving.
- Cut the cucumber small so the cups are easier to eat with one utensil.
Variations on This Dish:
- Greek Pasta Cups: Use feta, lemon, and chopped peppers instead of mozzarella.
- Protein Pasta Cups: Add diced turkey, chickpeas, or chopped salami.
- Creamy Version: Mix in a few spoonfuls of mayo or Greek yogurt with the dressing.
Common Mistakes to Avoid with This Dish:
- Assembling it while the pasta is hot: The vegetables go soft and the cheese sweats.
- Leaving the pieces too big: Forks become a fight.
- Skipping the salt in the cooking water: The whole thing tastes dull even after dressing.
12. Berry Yogurt Parfaits with Crunch
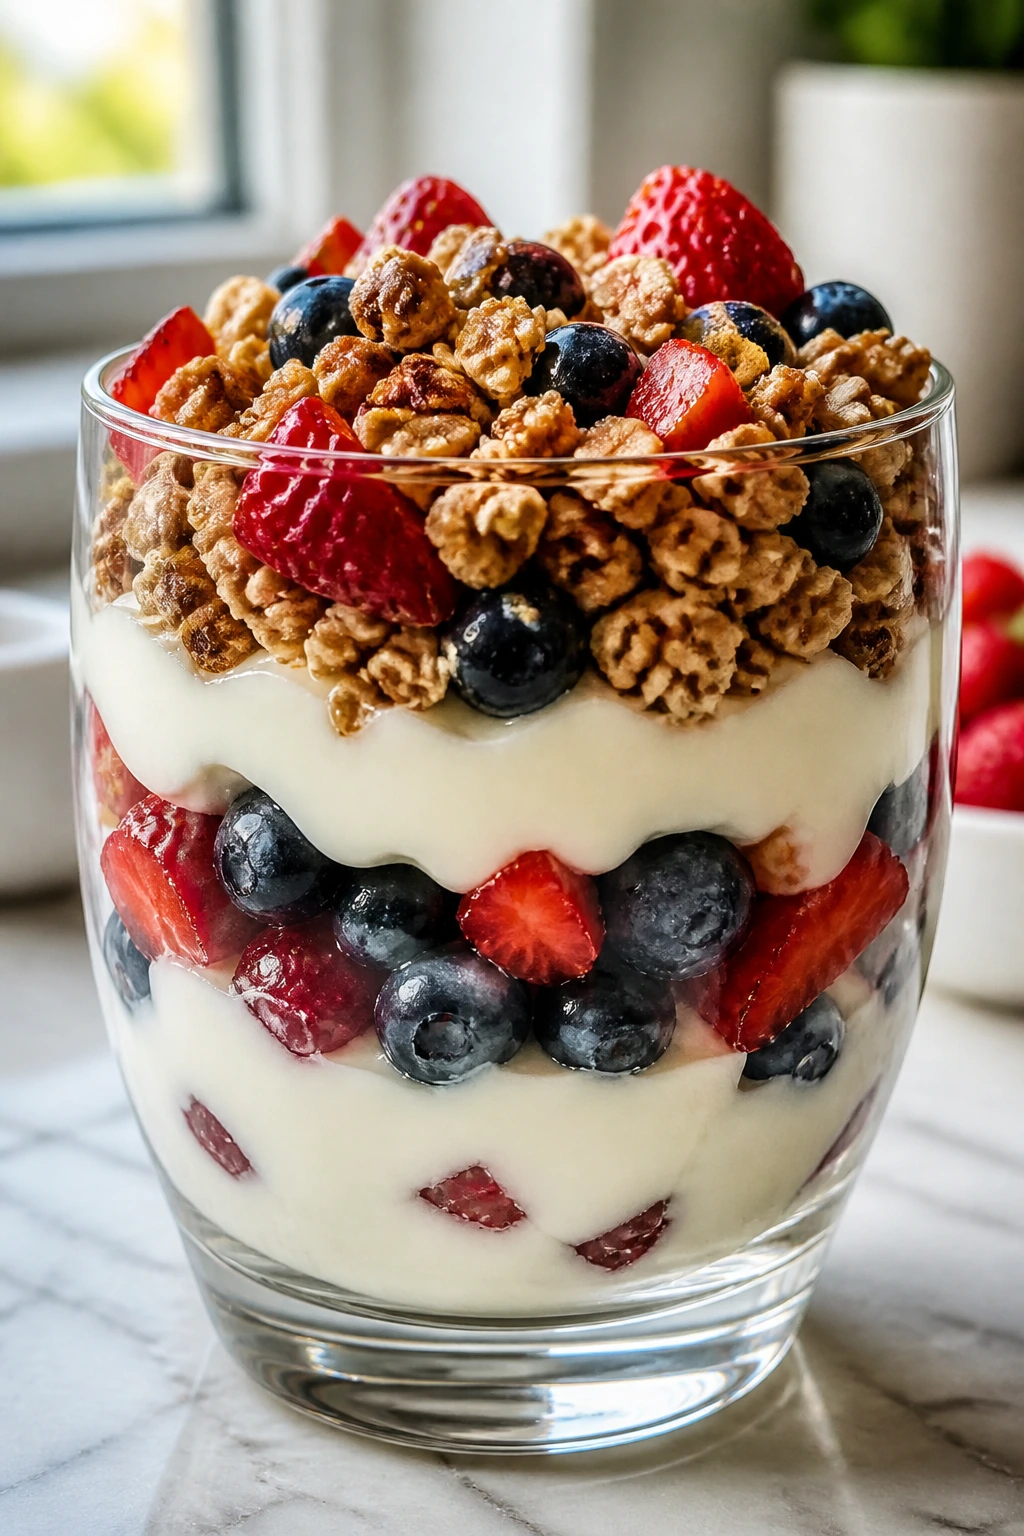
A parfait is what happens when you want something cool and polished but you still have children under the age of sixteen waiting to be fed. The layers matter: creamy yogurt, juicy berries, and a crisp top that stays crisp for as long as possible. If you build it right, it looks like a treat and eats like one too.
Why It Works:
Greek yogurt brings protein and a thick texture that won’t collapse immediately under the berries. Granola gives you crunch, and berries add the brightness that keeps the whole cup from feeling heavy. A tiny bit of honey and vanilla in the yogurt makes the whole thing taste more finished without making it sugary.
Key Ingredients:
- 2 cups plain Greek yogurt
- 2 tbsp honey
- 1 tsp vanilla extract
- 2 cups mixed berries
- 1 cup granola
- 2 tbsp chia seeds or hemp hearts
- Optional: a little lemon zest
Quick Steps:
- Stir the yogurt, honey, vanilla, and lemon zest together in a bowl.
- Spoon a layer of yogurt into the bottom of each glass or cup.
- Add berries and a sprinkle of granola.
- Repeat the layers once more, finishing with berries and a small spoonful of granola on top.
- Serve right away, or chill for a short time if you want it extra cold.
Equipment for This Recipe:
- Mixing bowl
- Spoon
- Small glasses, jars, or cups
- Measuring cups
- Citrus zester, optional
How to Serve This Dish:
Serve these as a snack with a cheese stick or a slice of toast if you want a little more substance. They’re best in clear cups because the layers do half the work. For older kids, a larger jar feels more like a proper snack break.
Pro Tips for This Recipe:
- Use thick yogurt. Thin yogurt turns loose fast.
- Keep the granola separate until the last moment if you’re making the cups ahead.
- Pat very juicy berries dry so the bottom layer doesn’t turn watery.
- A pinch of salt in the yogurt makes the honey taste brighter.
Variations on This Dish:
- Tropical Parfait: Use mango, pineapple, and toasted coconut.
- Chocolate Berry Parfait: Mix cocoa powder into the yogurt for a softer chocolate note.
- Nutty Crunch Parfait: Add chopped almonds or pecans instead of granola.
Common Mistakes to Avoid with This Dish:
- Assembling too far ahead: The granola softens and the layers blur.
- Using watery berries: The parfait turns soupy at the bottom.
- Skipping the flavor in the yogurt: Plain yogurt can taste flat without honey or vanilla.
13. Homemade Granola Bars
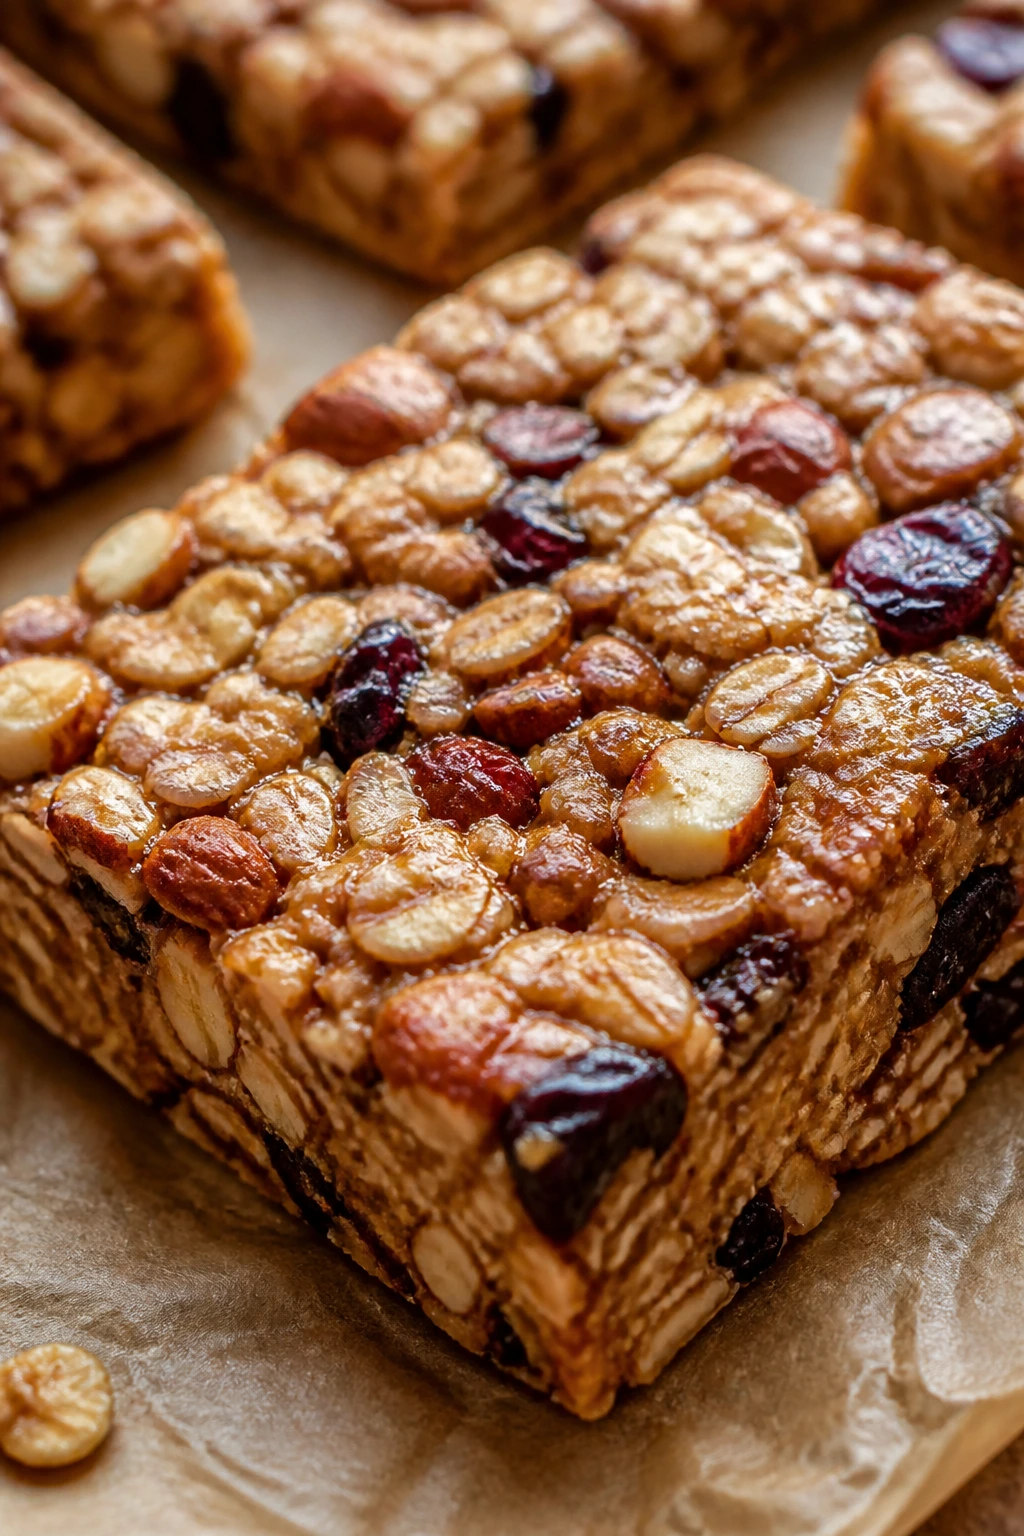
Store-bought bars are fine, but homemade bars are the ones that disappear fastest because they taste like someone paid attention. These are chewy, a little sticky in a good way, and sturdy enough to tuck into a lunchbox or hand over when everyone is already halfway out the door. They also use pantry ingredients you probably have.
Why It Works:
Rolled oats give the bars structure, peanut butter and honey hold them together, and dried fruit adds pockets of sweetness that keep each bite interesting. The key is pressing the mixture firmly into the pan so the bars set into one solid slab instead of crumbling into oat gravel. If you’ve ever opened a homemade bar and had it fall apart in your hand, that was probably the missing step.
Key Ingredients:
- 2 1/2 cups old-fashioned oats
- 1 cup peanut butter
- 1/2 cup honey
- 1/2 cup chopped almonds or pepitas
- 1/2 cup dried cranberries or raisins
- 1 tsp vanilla extract
- 1/4 tsp salt
- Optional: 1/4 cup mini chocolate chips
Quick Steps:
- Line an 8-inch square pan with parchment paper.
- Warm the peanut butter and honey in a small saucepan over low heat for 1 to 2 minutes, just until loose and glossy.
- Stir in the vanilla and salt.
- Mix the oats, nuts, dried fruit, and chocolate chips in a bowl, then pour the warm binder over them.
- Press the mixture into the pan very firmly, using the bottom of a measuring cup to compact it.
- Chill for at least 2 hours, then lift out and slice into bars.
Equipment for This Recipe:
- 8-inch square pan
- Parchment paper
- Small saucepan
- Mixing bowl
- Measuring cup for pressing
How to Serve This Dish:
One bar works for a quick snack, two if the afternoon has been long and complicated. They travel well with apple slices or a yogurt cup. Wrap them individually if you want them to disappear into backpacks without getting sticky.
Pro Tips for This Recipe:
- Press harder than you think you need to. Loose bars crumble.
- Let the mixture cool in the pan before cutting; warm bars are messy.
- If the mix seems dry, add another tablespoon of warm honey.
- Toasting the oats for 8 minutes before mixing gives the bars a deeper flavor.
Variations on This Dish:
- Chocolate Chip Trail Bars: Add chopped pretzels and extra chocolate chips.
- Seed Bar Version: Use pepitas and sunflower seeds instead of nuts.
- Coconut Cranberry Bars: Add 1/3 cup shredded coconut for a chewier finish.
Common Mistakes to Avoid with This Dish:
- Using quick oats: The bars lose their structure.
- Not compacting the mixture: They break into crumbs.
- Cutting too soon: Warm bars are soft and slouchy.
14. Veggie Egg Muffins
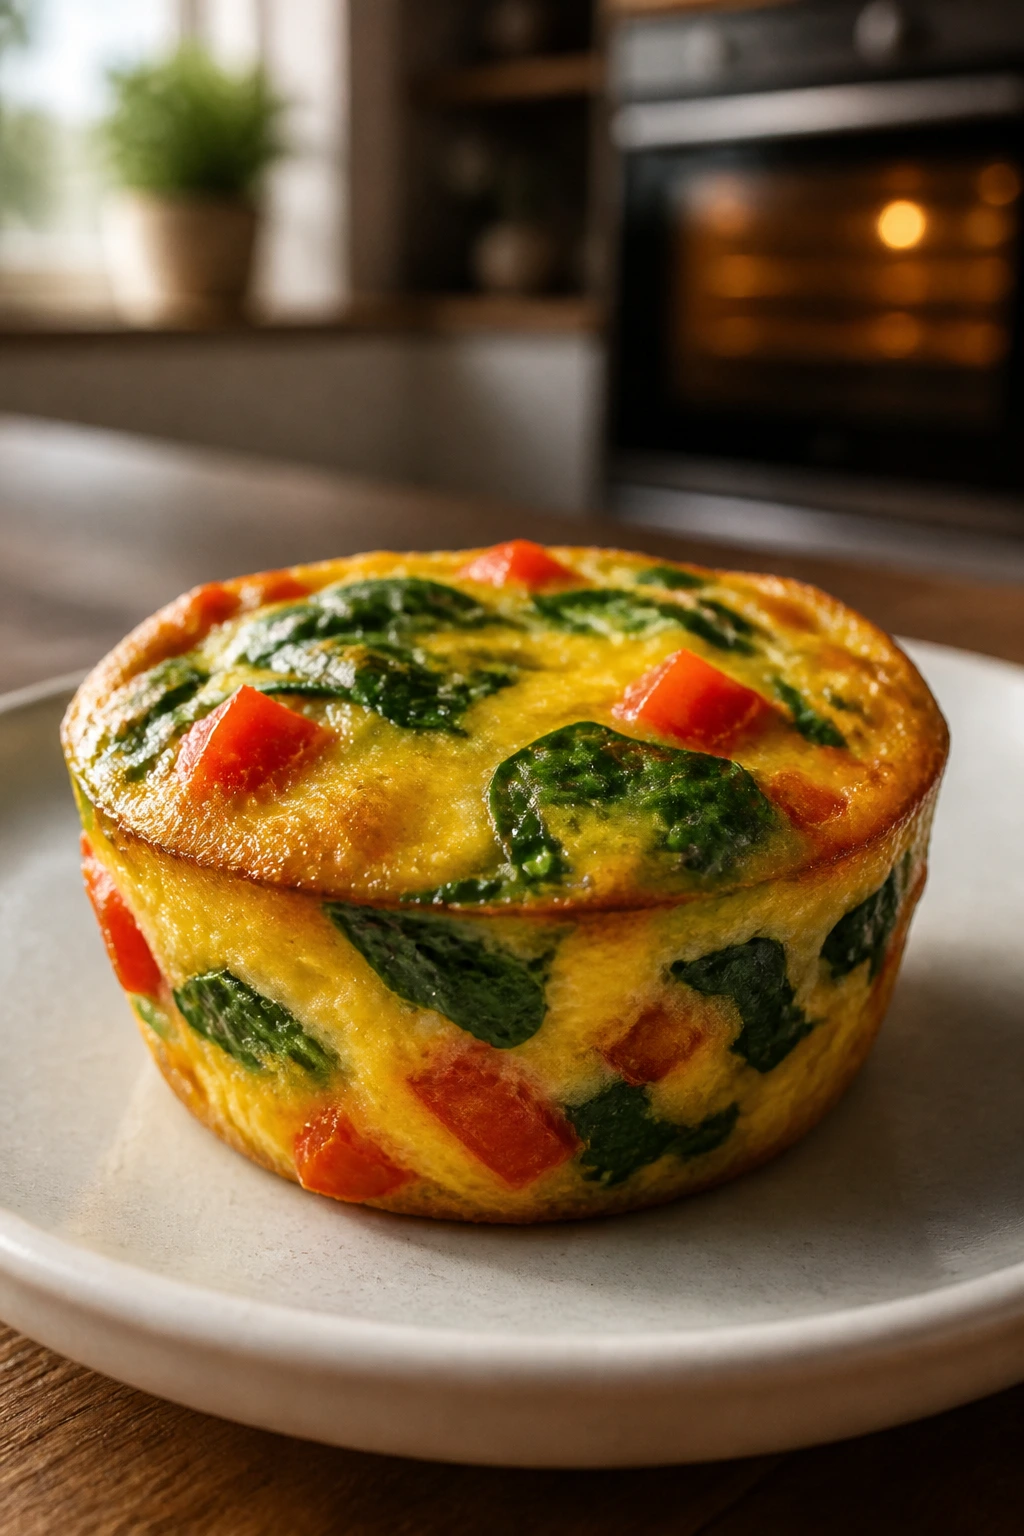
Egg muffins are the after-school snack that quietly does the most work. They’re salty, protein-rich, and easy to reheat, which means you can pull them from the fridge and have something warm on the table in under a minute. I like the ones with spinach and red pepper because they taste fresh instead of heavy.
Why It Works:
Eggs set quickly in a muffin tin, so you get neat little rounds instead of a skillet scramble that needs babysitting. The vegetables bring color and a little sweetness, and the cheese helps the tops brown. Because the texture stays tender, these are good even when the afternoon appetite is weird and nothing sounds right.
Key Ingredients:
- 8 large eggs
- 1/4 cup milk
- 1 cup chopped spinach
- 1/2 cup diced red bell pepper
- 1/2 cup shredded cheddar
- 2 tbsp chopped green onion
- 1/2 tsp salt
- 1/4 tsp black pepper
Quick Steps:
- Preheat the oven to 375°F (190°C) and grease a 12-cup muffin tin well.
- Whisk the eggs, milk, salt, and black pepper until smooth.
- Stir in the spinach, bell pepper, green onion, and cheddar.
- Pour the mixture into the muffin cups, filling each about 3/4 full.
- Bake for 18 to 20 minutes, until the centers are set and the tops are puffed.
- Cool for 5 minutes before loosening them with a butter knife.
Equipment for This Recipe:
- Muffin tin
- Mixing bowl
- Whisk
- Measuring cup with a spout, optional
- Knife or small spatula
How to Serve This Dish:
Two egg muffins with fruit make a tidy snack plate. Three or four can become a real light meal, especially with toast or a few roasted potatoes. They’re easiest to serve warm, but they hold up well at room temperature too.
Pro Tips for This Recipe:
- Dry the spinach a little after chopping so the muffins don’t weep.
- Fill the cups evenly; uneven cups bake unevenly.
- Use silicone or a very well-greased tin if you hate sticking.
- Add cooked sausage or diced ham if you need a bigger snack.
Variations on This Dish:
- Broccoli Cheddar Muffins: Use tiny broccoli florets instead of bell pepper.
- Sausage Egg Muffins: Add cooked crumbled sausage for a heartier batch.
- Dairy-Free Version: Skip the cheese and use a splash of olive oil in place of the milk.
Common Mistakes to Avoid with This Dish:
- Overfilling the cups: The egg spills and makes a mess in the oven.
- Using wet vegetables: The muffins turn watery and rubbery.
- Overbaking: They go from tender to springy fast, so pull them as soon as the centers set.
15. Mini Sloppy Joe Sliders
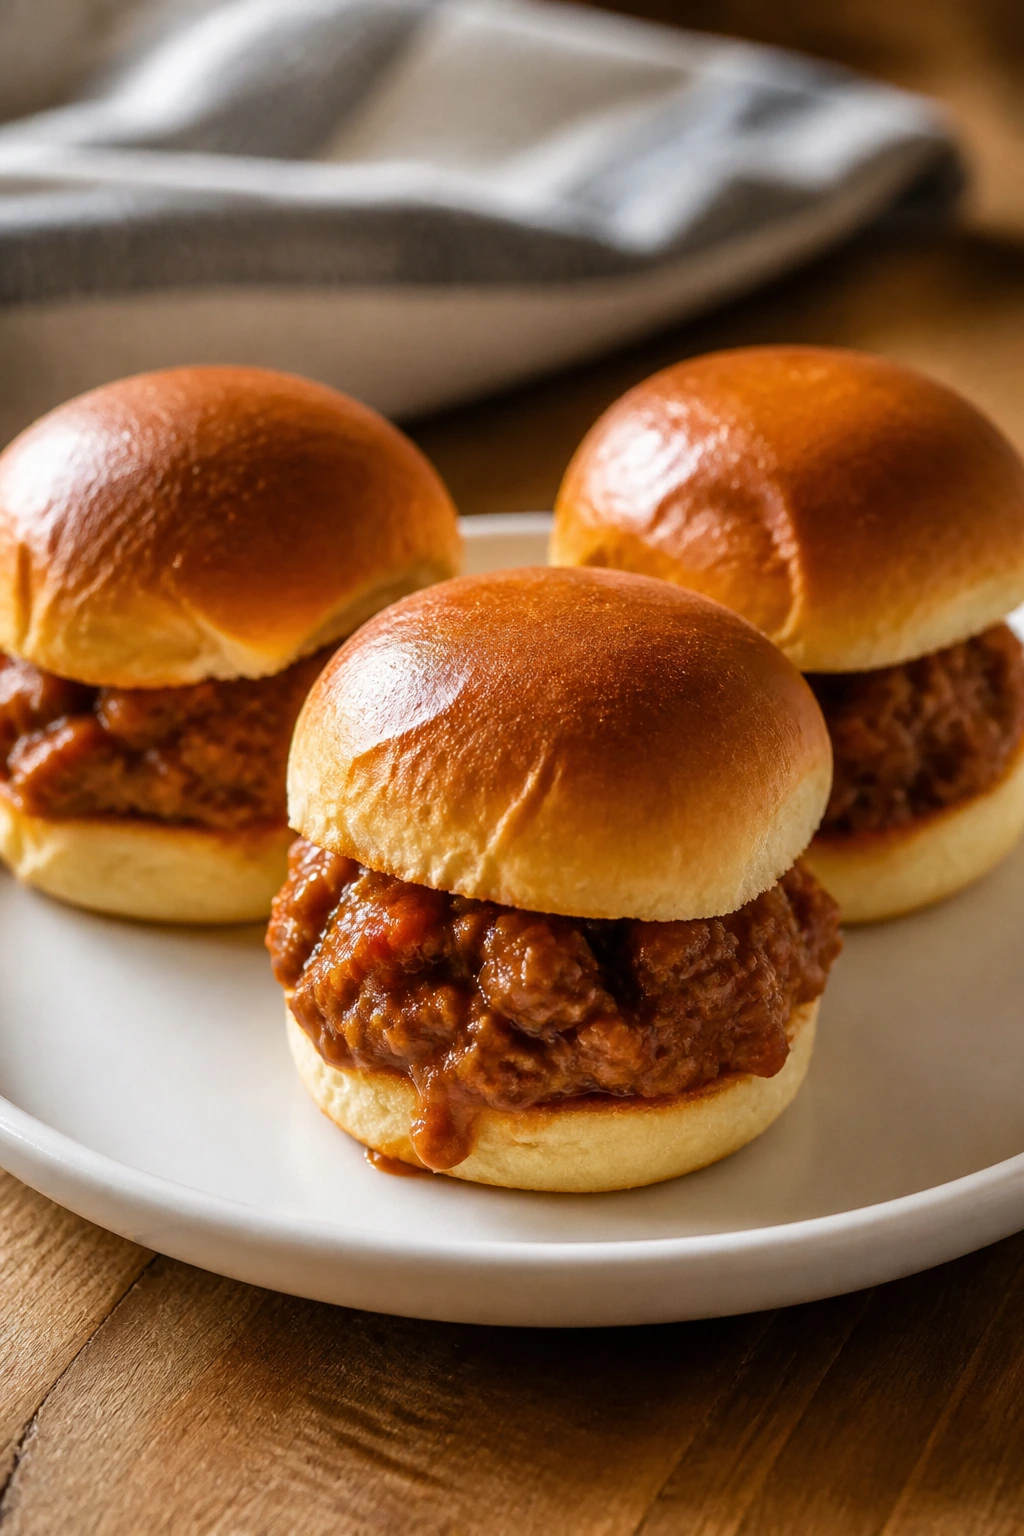
Sloppy joes are messy by nature, and that’s part of the appeal. Shrink them down, tuck the filling into slider buns, and you get a snack that feels like a full-on treat without needing a knife and fork. The sauce should be rich and thick enough to sit on the bun instead of pouring off the sides.
Why It Works:
Ground beef or turkey cooks quickly, and the tangy-sweet sauce clings well when you let it simmer long enough to thicken. Slider buns make the portion size manageable, which matters when you’re feeding kids who like to eat with one hand and keep the other one free for negotiations. A little cheddar on top doesn’t hurt.
Key Ingredients:
- 1 lb ground beef or ground turkey
- 1 small onion, finely minced
- 1 garlic clove, minced
- 1/2 cup ketchup
- 2 tbsp tomato paste
- 1 tbsp Worcestershire sauce
- 1 tbsp brown sugar
- 1 tsp yellow mustard
- 8 slider buns
- 4 slices cheddar, optional
- Optional: dill pickle chips for serving
Quick Steps:
- Brown the meat with the onion in a skillet over medium heat until the onion softens and the meat loses its pink color. Drain excess fat if needed.
- Add the garlic and cook for 30 seconds, just until fragrant.
- Stir in ketchup, tomato paste, Worcestershire, brown sugar, and mustard.
- Simmer for 8 to 10 minutes, stirring often, until the sauce thickens and coats the meat.
- Toast the slider buns lightly if you want them sturdier.
- Spoon the meat onto the buns, top with cheddar if using, and serve with pickles.
Equipment for This Recipe:
- Large skillet
- Wooden spoon or spatula
- Cutting board
- Knife
- Baking sheet, if toasting buns
How to Serve This Dish:
Two sliders with carrot sticks or cucumber rounds make a solid snack meal. For bigger appetites, serve three and add fruit on the side. The best plate has the buns slightly toasted and the filling piled high but not spilling over.
Pro Tips for This Recipe:
- Simmer long enough for the sauce to thicken. Runny sloppy joes make soggy buns.
- Toast the buns if you plan to hold them more than a few minutes.
- A spoonful of pickle juice in the sauce gives it more bite.
- If the sauce tastes flat, add a pinch of salt before serving. It usually needs it.
Variations on This Dish:
- Turkey Sloppy Joes: Use ground turkey for a lighter version.
- Lentil Sloppy Joes: Swap in cooked lentils and finely chopped mushrooms for a meat-free batch.
- Cheesy Sloppy Joes: Melt cheddar directly over the meat before spooning it onto the buns.
Common Mistakes to Avoid with This Dish:
- Skipping the simmer: Thin sauce soaks the buns immediately.
- Using too much bun for the amount of filling: The sandwich tastes dry.
- Serving without something crisp: The texture gets mushy fast, so pickles or raw vegetables help a lot.
Why a Snack Needs Protein, Crunch, and a Little Salt
The after-school slot has a very specific problem: people arrive hungry, but not patient enough for a full dinner project. A snack that is all sugar solves the mood for about five minutes and then sends the kitchen back into orbit. A snack with protein, a little fat, and some texture lasts longer, and that is the whole game here.
I also think the best snacks for this hour should feel active, not passive. A warm quesadilla, a cold parfait, a tray of egg muffins, and a plate of apple nachos all ask the eater to do a tiny bit of work — dip, bite, peel, pick up, crunch. That little bit of interaction matters. It slows the pace just enough that the food feels more satisfying.
There’s also the plain reality of family kitchens: one person wants sweet, another wants savory, and somebody else wants to stand in the doorway eating chips while complaining that nothing is ready. This collection gives you options without asking for a separate menu. That’s the part I like most.
Essential Equipment for These Recipes
- Rimmed baking sheets: Useful for pizza bagels, taquitos, puff pastry pockets, and potatoes; the raised edge catches melted cheese and oil.
- 12-cup muffin tin: Needed for mac and cheese muffins and egg muffins, and a handy backup for small batches of baked snacks.
- Large skillet: A 10- or 12-inch skillet handles quesadillas, sloppy joes, and quick fillings without crowding.
- Mixing bowls in two sizes: One medium bowl for fillings and one larger bowl for tossing oats, pasta, or yogurt mixtures makes life easier.
- Chef’s knife: You’ll use it for apples, vegetables, potatoes, onions, and anything that needs a clean cut.
- Cutting board: A sturdy one keeps prep fast and keeps sticky fillings off the counter.
- Parchment paper: Stops cheese from welding itself to the pan and makes cleanup feel civilized.
- Measuring cups and spoons: Helpful even for casual snack recipes; the difference between 1/4 cup and 1/2 cup of sauce is not small.
- Whisk or fork: Needed for egg muffins, yogurt mixtures, and any sauce you want smooth.
- Spatula: A thin flexible spatula helps with quesadillas, egg muffins, and potato flipping.
- Airtight storage containers: Especially useful for pinwheels, granola bars, pasta salad cups, and hummus boxes.
- Small lunchbox containers or cups: Good for apple nachos components, snack boxes, and layered parfaits.
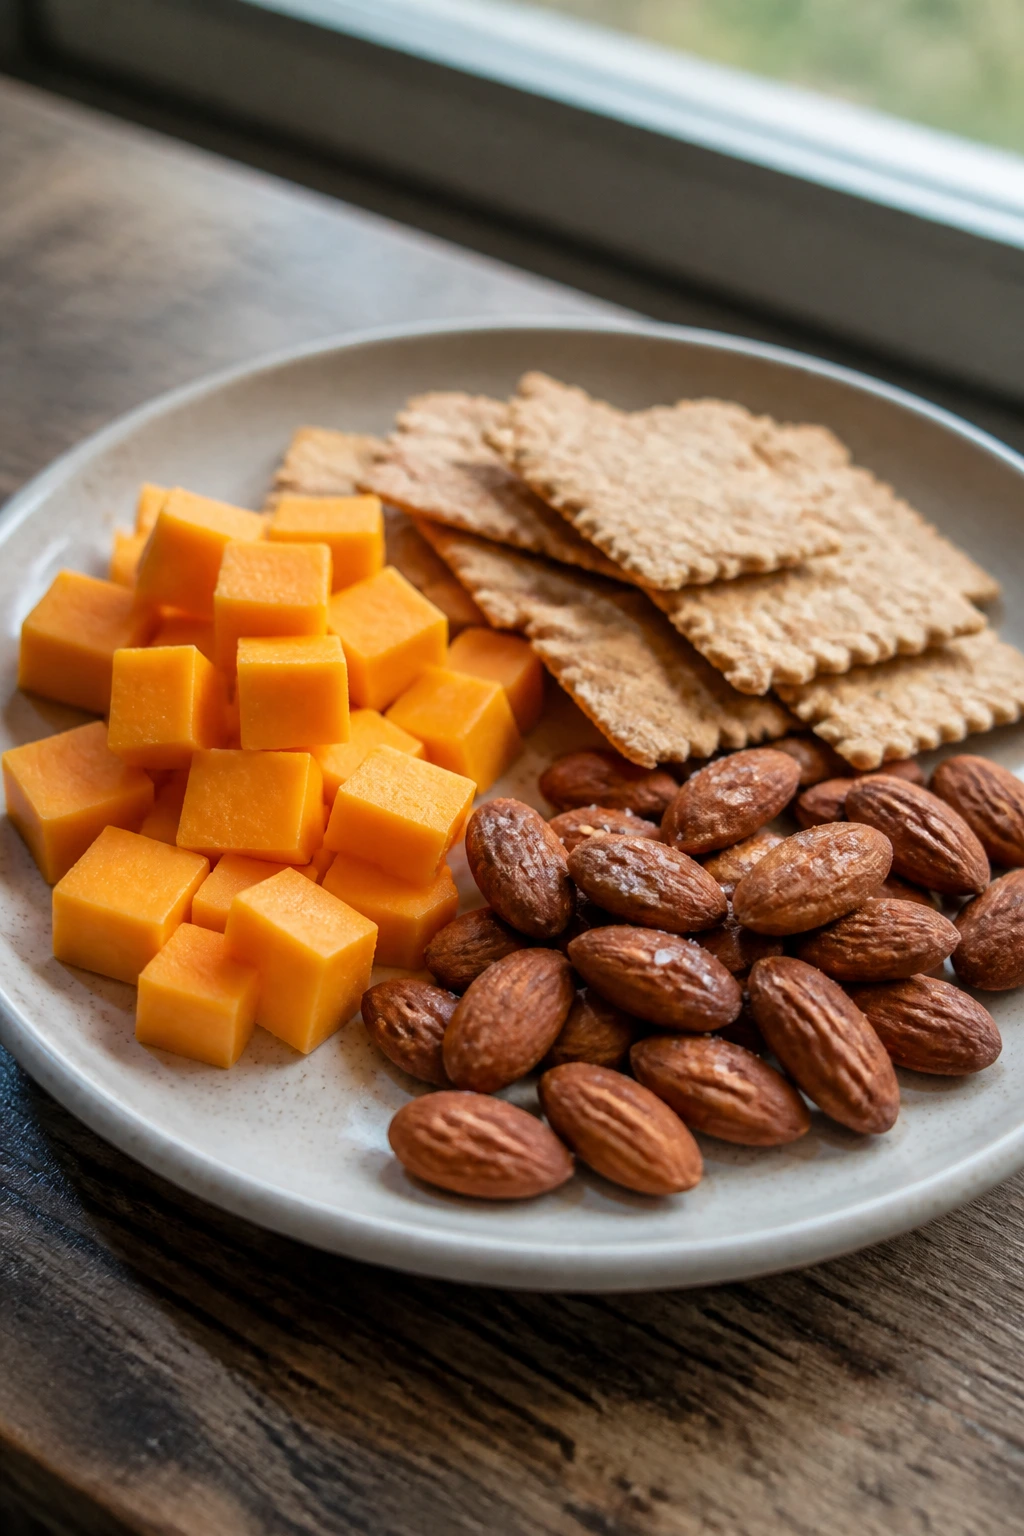
Smart Shopping for Cheese, Fruit, Tortillas, and Pantry Staples
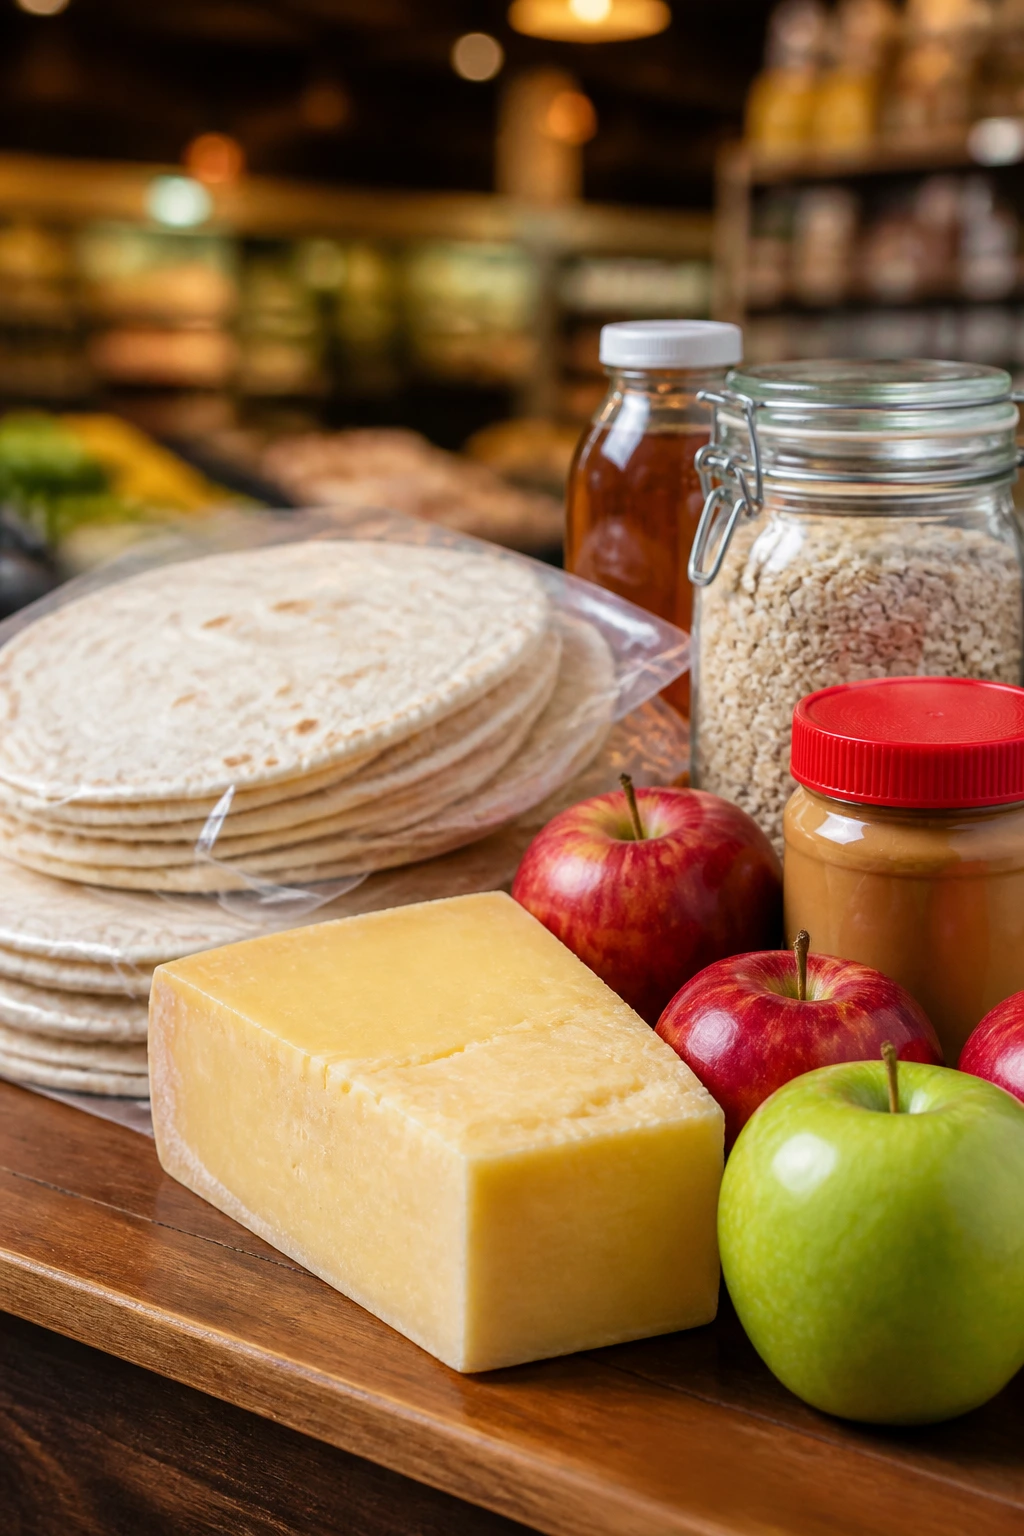
The easiest way to make after-school snacks better is to buy ingredients that behave well under pressure. For fruit snacks, choose apples that stay firm and crisp when sliced — Honeycrisp, Fuji, Pink Lady, and Gala hold up far better than soft mealy apples. For yogurt, go thicker rather than thinner; Greek yogurt gives parfaits more structure and keeps them from turning into a puddle at the bottom of the cup.
Cheese matters more than people expect. For quesadillas, taquitos, mac and cheese muffins, and pizza bagels, block cheese grated at home melts a little cleaner than bagged shreds because it doesn’t have quite as much coating on it. Bagged cheese still works in a pinch. I use it plenty. But if you want a smoother melt, grate your own for the recipes where cheese is doing the heavy lifting.
Tortillas and bread should be soft without being flimsy. Flour tortillas that crack when you bend them are already past their best use, and puff pastry should thaw just enough to fold without cracking but still feel cold to the touch. For the pantry side, keep rolled oats, honey, peanut butter, granola, tomato sauce, and a few cans of beans on hand. Those ingredients show up in more than one recipe here, which is the whole point of a good snack lineup.
For chicken, leftover rotisserie chicken is the fast lane. Shred it finely and trim off any big fatty or skin-heavy pieces. For ham, choose a slice thickness that chops neatly into small pieces instead of turning stringy. And for potatoes, smaller baby potatoes roast faster and give you better skin-to-filling ratio than the giant ones that belong in a jacket potato, not a snack plate.
How to Serve These Recipes
Presentation:
Stack warm, crisp snacks on a plain plate or wooden board and keep cold snacks in clear cups or compartment containers. That contrast does half the visual work. A tray with pizza bagels next to grapes and carrot sticks looks more intentional than three separate bowls dumped on the counter.
Accompaniments:
For savory snacks, pair one warm item with something fresh: cucumber spears, apple slices, berries, or cherry tomatoes. For the sweeter options, add a cheese stick, yogurt cup, or hard-boiled egg so the snack doesn’t drift into dessert territory. Crackers, pretzels, and pita wedges are useful when you need a second texture.
Portions:
A younger child usually needs one modest serving — two pizza bagel halves, two egg muffins, two taquitos, or one slider with fruit on the side. Bigger kids and teens usually want two servings or one larger portion. If snack time is carrying people all the way to dinner, treat it like a small meal and add a vegetable or fruit component.
Beverage Pairing:
Cold milk is still one of the best matches for cheesy or peanut butter-heavy snacks. Sparkling water or plain water suits the saltier items, and unsweetened iced tea works well with sliders, quesadillas, and puff pastry pockets. For the sweeter snacks, a small smoothie or a glass of milk keeps the whole plate balanced.
Additional Tips and Flavor Boosters
Flavor Enhancement:
A tiny pinch of flaky salt can make pizza bagels, apple nachos, potatoes, and yogurt cups taste more awake. I also like a squeeze of lemon over hummus or a little mustard in the turkey pinwheels. Small sharp flavors stop snack food from feeling sleepy.
Customization:
Set out toppings in little bowls when you can. Kids who refuse “mixed” food often eat a taco, a wrap, or a potato much more happily when they can build their own. Same food. Different attitude. It’s a funny thing.
Serving Suggestions:
Warm items feel more complete with something cold on the side, and cold snacks do better when you add one crunchy thing. That could be pretzels, granola, pita chips, or sliced vegetables. The little contrast keeps the plate from going flat.
Make-It-Yours:
For dairy-free versions, use hummus, olive oil, or dairy-free cheese where it makes sense. For gluten-free versions, use corn tortillas, gluten-free oats, rice crackers, or baked potatoes instead of bread. For nut-free households, sunflower butter and seeds are the easiest swaps, and they work cleanly in apple nachos, granola bars, and banana oat cookies.
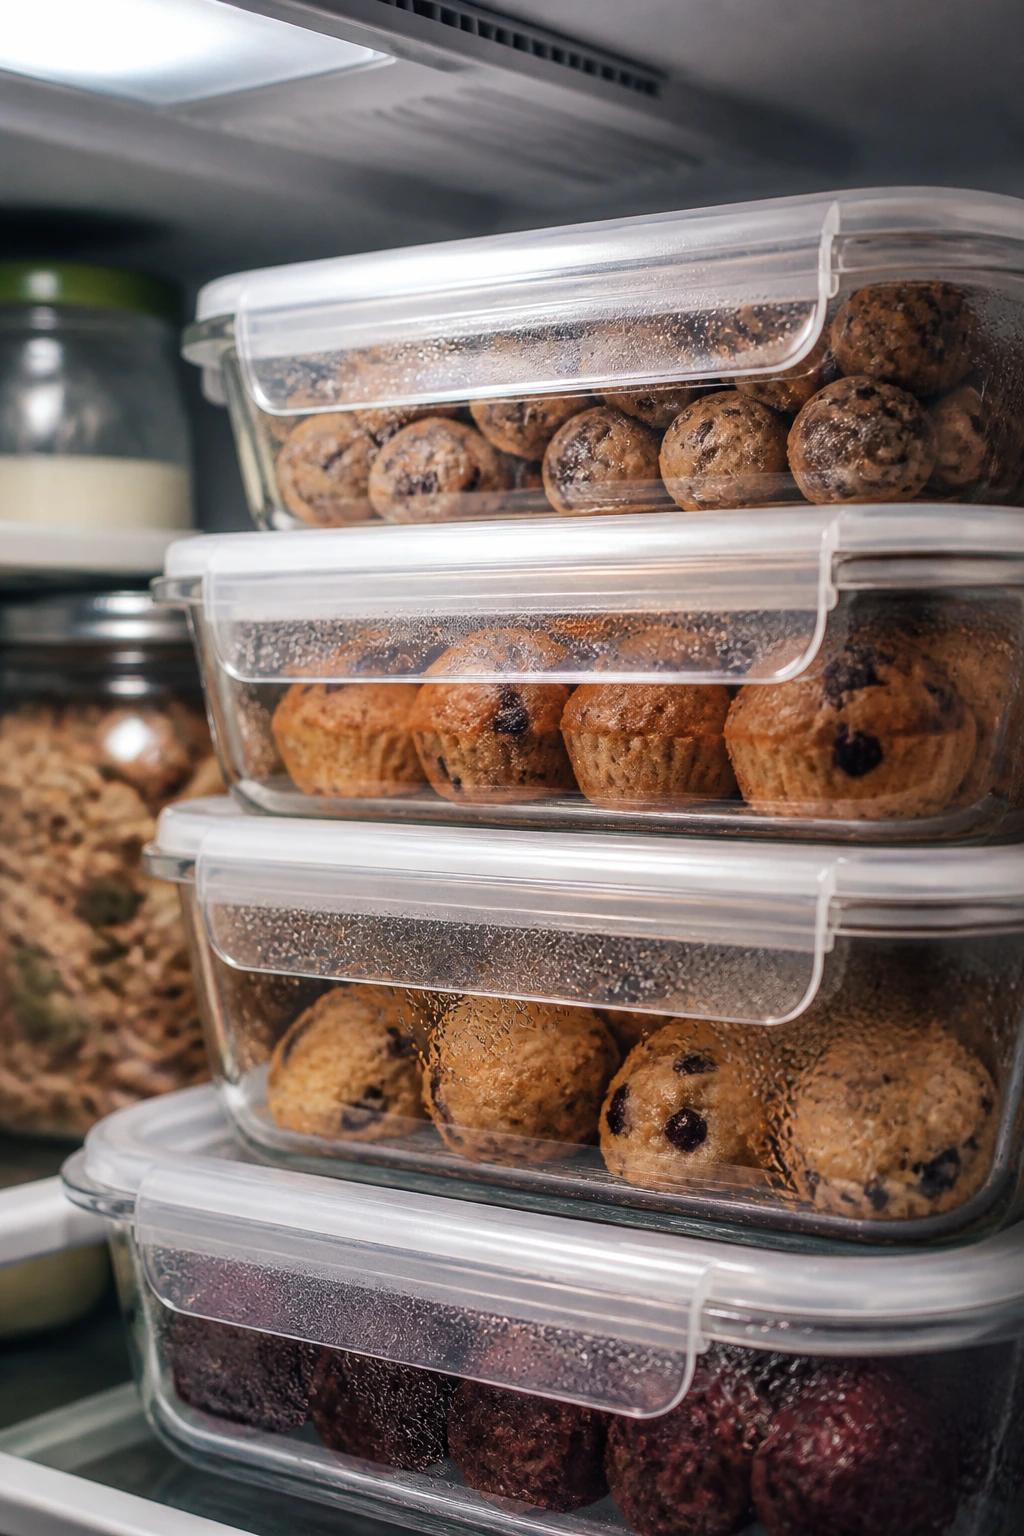
Make-Ahead, Storage, and Reheating Guidance
A few of these recipes are best eaten right away. Apple nachos and berry parfaits fall into that camp; they can be prepped in parts, but once they’re assembled the crunch starts fading. Keep the fruit, granola, and drizzle separate if you want them to taste fresh after school instead of tired by the time homework begins.
The baked snacks hold up well. Mini pizza bagels, puff pastry pockets, quesadillas, taquitos, mac and cheese muffins, egg muffins, mini baked potatoes, and sloppy joe filling all keep in the refrigerator for 3 to 4 days in airtight containers. Most of them freeze for up to 2 months if you cool them completely first. Reheat in a 350°F oven for 8 to 12 minutes or in an air fryer for 4 to 6 minutes until the center is hot and the edges crisp back up.
For colder snack boxes and roll-ups, think in shorter windows. Turkey pinwheel roll-ups, hummus boxes, and pasta salad cups are best within 3 days in the fridge. Keep watery vegetables dry and store dressings separately when you can. Granola bars are the exception: they keep well at room temperature for about 1 week in an airtight container, and a little longer in the fridge if your kitchen runs warm.
Egg muffins, banana oat cookies, and mac and cheese muffins can all be made ahead for the week. Let them cool on a rack first. That matters. If you pack warm food too soon, the trapped steam softens everything and turns the storage container damp. Not ideal. For easy mornings or frantic afternoons, I like making a batch on one day and pulling from the fridge as needed, which is about as close to peace as a family kitchen gets.
Variations and Adaptations to Try
The Dairy-Free Cart:
Build around hummus, olive oil, avocado, and dairy-free cheese where the texture makes sense. Hummus boxes, taquitos, pizza-style items, and potato toppings all adapt cleanly. Yogurt parfaits can shift to coconut yogurt, though you’ll want a thick one so the layers stay put.
The Gluten-Free Shift:
Use corn tortillas for taquitos, GF bread or rice crackers for snack boxes, and certified gluten-free oats for banana cookies and granola bars. Loaded potatoes, egg muffins, and parfaits already live comfortably here. The key is keeping the crunchy element in place so the snack still feels like a snack.
The Protein-First Fix:
Add hard-boiled eggs, turkey, chicken, Greek yogurt, cheese, beans, or peanut butter to every plate. If a snack is going to carry someone through sports practice or a long homework stretch, protein needs to show up in a visible way. I usually aim for one clear protein and one fruit or vegetable.
The Crunchy Kid Route:
Choose baked over soft whenever possible. Toast the bagels. Bake the taquitos. Roast the potatoes. Keep apples crisp and granola separate until serving. A lot of kids who claim to be picky are really texture picky, and this solves more of that than people admit.
The Pantry-Only Backup Plan:
Keep shelf-stable ingredients ready for the days when the fridge looks bare. Peanut butter, oats, crackers, canned beans, tuna if your family likes it, tomato sauce, tortillas, and jarred salsa can rescue more afternoons than a frozen pizza ever will. A snack doesn’t need to be elaborate to be useful.
Common Mistakes to Avoid
Building snacks with only fast carbs:
A handful of crackers or a plain sweet muffin gives you a quick rise and then a crash. The fix is simple: add cheese, eggs, yogurt, nuts, beans, or peanut butter so the snack has some staying power.
Packing wet ingredients with dry ones too early:
Granola softens, crackers go limp, bread gets damp, and no one is happy. Keep sauces, fruit juices, and dressings separate until the last minute whenever possible.
Overstuffing wraps, pockets, or taquitos:
The filling leaks out, the tortillas split, and the whole thing becomes hard to eat with one hand. If you think you’ve added enough, stop there and save the extra filling for a second round.
Choosing soft produce for crunchy snacks:
Mealy apples, sad cucumbers, and floppy lettuce can make even a good recipe feel dull. Use fruit and vegetables that snap, stay bright, and hold their shape after slicing.
Skipping the cooling step on baked snacks:
Cheese pockets, muffins, and potatoes need a minute or two to settle. If you cut or pack them while they’re still steaming, they turn soggy or fall apart.
Making every snack taste the same:
If every plate is just cheese plus bread, the table gets bored fast. Keep one sweet option, one savory option, one cold option, and one crunchy option in the mix so people have a reason to show up.
Frequently Asked Questions
How much should an after-school snack be before it turns into a meal?
A good rule is one protein element, one starch or fruit, and one crunchy or fresh thing. For a small child, that might be two pizza bagel halves and grapes. For a teenager, it might be a quesadilla with carrots and yogurt.
What can I make ahead on a Sunday and use all week?
Egg muffins, granola bars, mac and cheese muffins, sloppy joe filling, and baked taquitos hold up especially well. You can also prep vegetables, grate cheese, and cook chicken in advance so weekday assembly takes almost no time.
Which of these snacks travel best to sports practice or a car ride?
Granola bars, pinwheels, egg muffins, quesadillas cut into wedges, and hummus snack boxes are the easiest to pack. I’d avoid apple nachos and anything with loose sauce unless you want a sticky cupholder.
How do I keep apples from browning in apple nachos or snack boxes?
Slice them close to serving time, or toss the slices lightly with lemon juice and pat them dry before arranging. The lemon adds very little flavor if you use a small amount, but it buys you some time.
Can I freeze any of these snacks?
Yes. Taquitos, pizza bagels, mac and cheese muffins, egg muffins, puff pastry pockets, and sloppy joe filling all freeze well. Wrap them tightly and thaw in the fridge before reheating so the centers warm evenly.
What if my kid only eats plain food?
Start with familiar bases and keep the extras separate. A plain quesadilla wedge, a simple egg muffin, or a couple of pizza bagels without toppings is often enough to bridge the gap. The goal is not to win a food debate at 3:30 p.m.
Can I make these without an oven?
Absolutely. Quesadillas, sloppy joes, hummus boxes, pinwheels, parfaits, apple nachos, and pasta salad cups need no oven at all. A skillet, a knife, and a fridge can carry a surprising amount of the workload.
How do I scale these up for a group of kids?
Multiply the recipes, but keep the assembly simple. Pizza bagels, sliders, taquitos, and snack boxes are easiest in batches because they can be laid out on trays and portioned quickly. For mixed ages, make one plain batch and one more seasoned batch instead of trying to please everyone in one pan.
Feeding the After-School Rush Without Losing Your Mind
The point of after-school food is not perfection. It’s buying yourself a quieter half hour, putting something decent in front of hungry people, and avoiding the kind of pantry raiding that leaves crumbs in the butter. A warm snack, a cold snack, and one crunchy thing in rotation can carry a household farther than a complicated plan ever will.
If I had to narrow this whole pile down to the most useful rhythm, it would be this: keep one baked snack, one no-cook snack, and one make-ahead snack ready at all times. That gives you a fallback for the tired days and a little room to play when everyone walks in hungry and loud. Start with two recipes from this list, not fifteen. The afternoon will still be there tomorrow.