
Cold weather soup recipes have a way of rescuing a Sunday afternoon. A chopped onion, a pot, and forty minutes on the stove can turn a half-empty crisper drawer into dinner that smells like butter, garlic, and steam on the kitchen window.
Sunday is the day for soup with some patience in it. Not the thin, forgettable kind that disappears after three spoonfuls, but the bowls that get deeper as they sit: tomato soup with roasted edges, chicken noodle with lemon and dill, bean soups that thicken while you talk, chowders that cling to the spoon.
The trick is knowing which soups are worth the simmer and which ones need a little nudge to taste round and full. That matters more than people admit. A good pot can taste flat if you under-salt it, muddy if you rush the onions, or oddly thin if you add dairy at the wrong moment. Get those details right, though, and the whole kitchen changes.
Why You’ll Love This Collection
- Sunday-Friendly Pace: Most of these soups start with chopping, sautéing, or roasting, then they settle into a simmer while you do something else nearby.
- Leftovers That Improve: Bean soups, barley soups, and split pea soup pick up more body after a night in the fridge, which makes Monday lunch feel intentional.
- Pantry-Heavy, Not Fussy: Canned tomatoes, broth, beans, potatoes, onions, and a few herbs do most of the work here.
- Texture for Every Mood: You get clear broth, silky purées, chunky vegetable soups, creamy chowders, and a few bowls that sit in the middle.
- Cold-Night Payoff: Bacon, Parmesan rind, roasted squash, and long-simmered onions give these soups the kind of depth that makes a second bowl hard to resist.
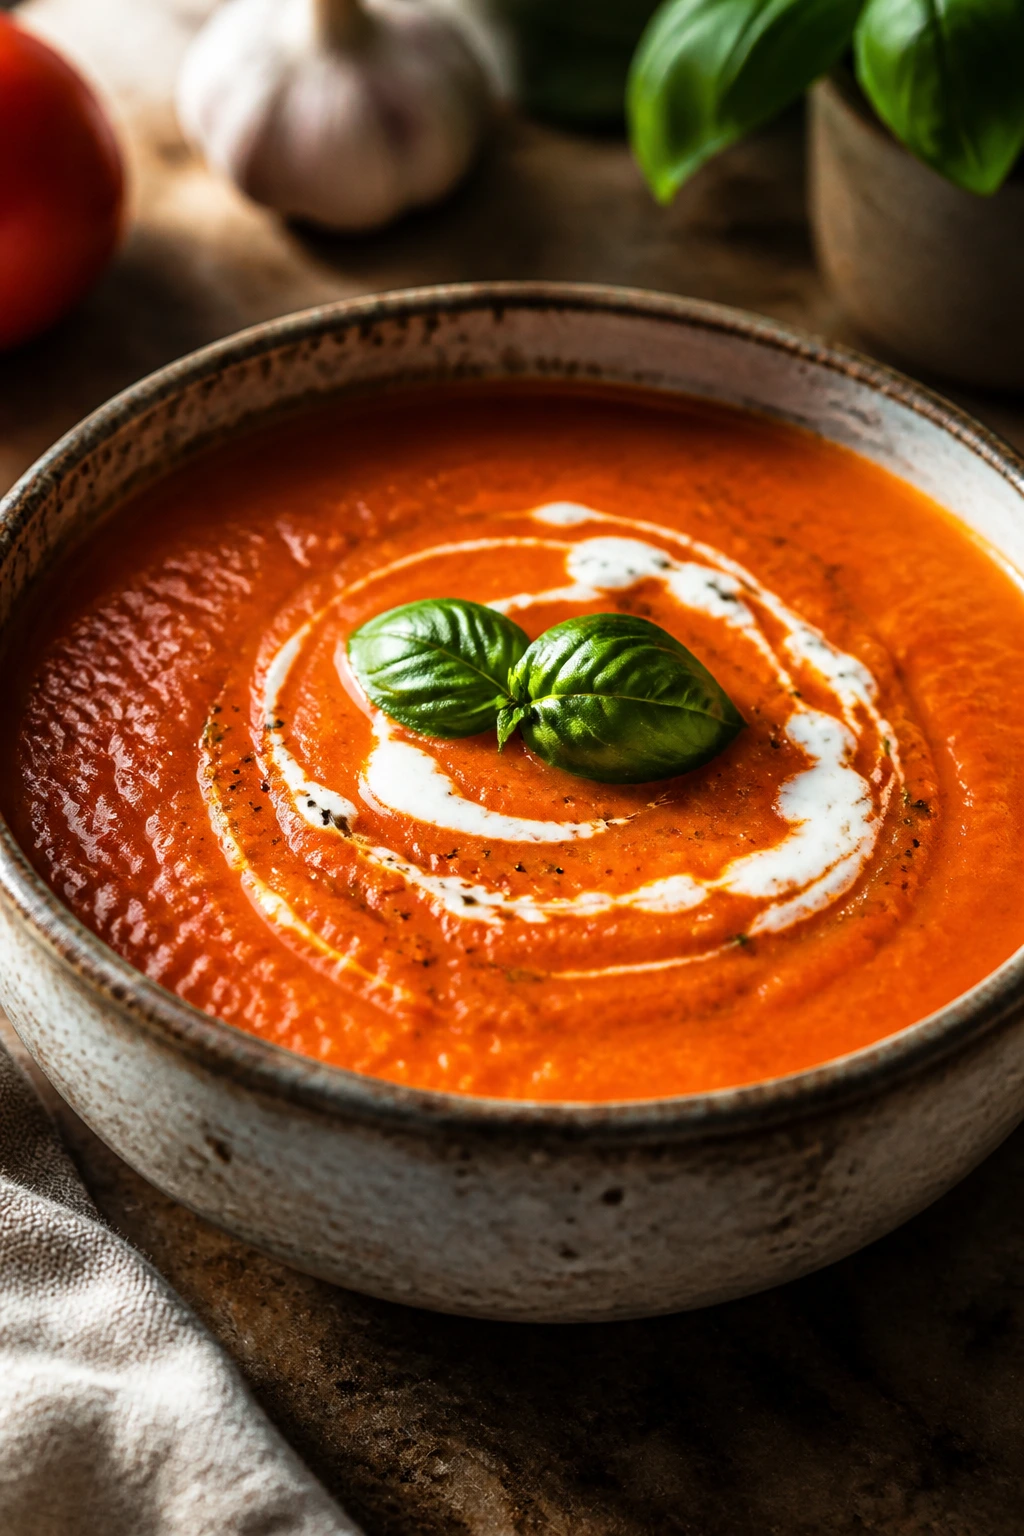
1. Roasted Tomato Basil Soup
This tastes like tomato soup after it has spent some time in a warm oven and come back with better manners. The tomatoes get sweeter, the onion edges darken a little, and the basil keeps the whole thing from feeling heavy. I like it with a grilled cheese that’s cut into narrow strips so you can drag it through the bowl.
Why It Works: Roasting the tomatoes, onion, and garlic at high heat pulls out some moisture and concentrates the flavor before the pot ever hits the stove. Tomato paste adds a darker, more savory note, while the cream goes in at the end so the soup stays bright instead of dull and beige. A small pinch of sugar is not cheating here; it just smooths the sharp edge that canned tomatoes can bring.
Key Ingredients:
- 2 (28-ounce) cans whole peeled tomatoes, drained lightly — whole tomatoes break down with better texture than diced.
- 1 large yellow onion, cut into wedges — big pieces roast without burning too fast.
- 4 garlic cloves, peeled — they soften and sweeten in the oven.
- 3 tablespoons olive oil — this keeps the vegetables from drying out.
- 2 tablespoons tomato paste — it deepens the color and body.
- 4 cups vegetable broth — use low-sodium so you can control the salt.
- 1 teaspoon sugar — just enough to round the acidity.
- 1/2 cup heavy cream — stir it in off the heat for a smooth finish.
- 1 cup packed fresh basil leaves — add these at the end so the flavor stays fresh.
- 1 teaspoon kosher salt and 1/2 teaspoon black pepper — season in layers, not once.
Quick Steps:
- Heat the oven: Preheat to 425°F and line a rimmed sheet pan with parchment.
- Roast the vegetables: Toss the tomatoes, onion, garlic, olive oil, tomato paste, salt, and pepper on the pan. Roast for 25 minutes, until the onion edges darken and the tomatoes look wrinkled and soft.
- Build the soup: Transfer everything to a Dutch oven, add the broth and sugar, and simmer for 10 to 15 minutes so the flavors meld.
- Blend smoothly: Use an immersion blender, or carefully blend in batches, until the soup is as smooth as you like. Hold the blender lid with a towel — hot tomato soup loves to splatter.
- Finish with basil and cream: Stir in the basil and cream off the heat. Taste and add more salt if needed.
- Serve hot: Ladle into warm bowls and add a crack of black pepper on top.
Equipment for This Recipe:
- Rimmed sheet pan — for roasting the tomatoes and onion in a single layer.
- 4- to 6-quart Dutch oven — ideal for the simmer and blending.
- Immersion blender or countertop blender — either works.
- Ladle — useful for smooth serving without drips.
How to Serve This Dish: Serve it with grilled cheese, garlic toast, or a fat slice of sourdough. A little extra basil on top makes the bowl look finished, and a swirl of cream gives a clean white ribbon through the red soup.
Pro Tips for This Recipe:
- Roast the tomatoes until the edges look a little shriveled; that’s where the sweet flavor lives.
- If the soup tastes too sharp, add another splash of cream before reaching for more sugar.
- Fresh basil beats dried basil here by a mile.
- For a silkier bowl, strain out the seeds after blending.
Variations on This Dish:
- Smoky Pepper Tomato: Roast a halved red bell pepper alongside the tomatoes for a smoky-sweet edge.
- Dairy-Free Tomato Basil: Swap the cream for canned coconut milk; the flavor changes, but the texture stays rich.
- Spicy Tomato Soup: Add 1/4 teaspoon red pepper flakes to the pan before roasting.
Common Mistakes to Avoid with This Dish:
- Crowding the pan: If the vegetables pile up, they steam instead of roast. Use two pans if needed.
- Boiling after the cream goes in: A hard boil can make the soup taste flat and look a little broken.
- Skipping the final taste test: Tomato soup often needs a pinch more salt after blending, not before.
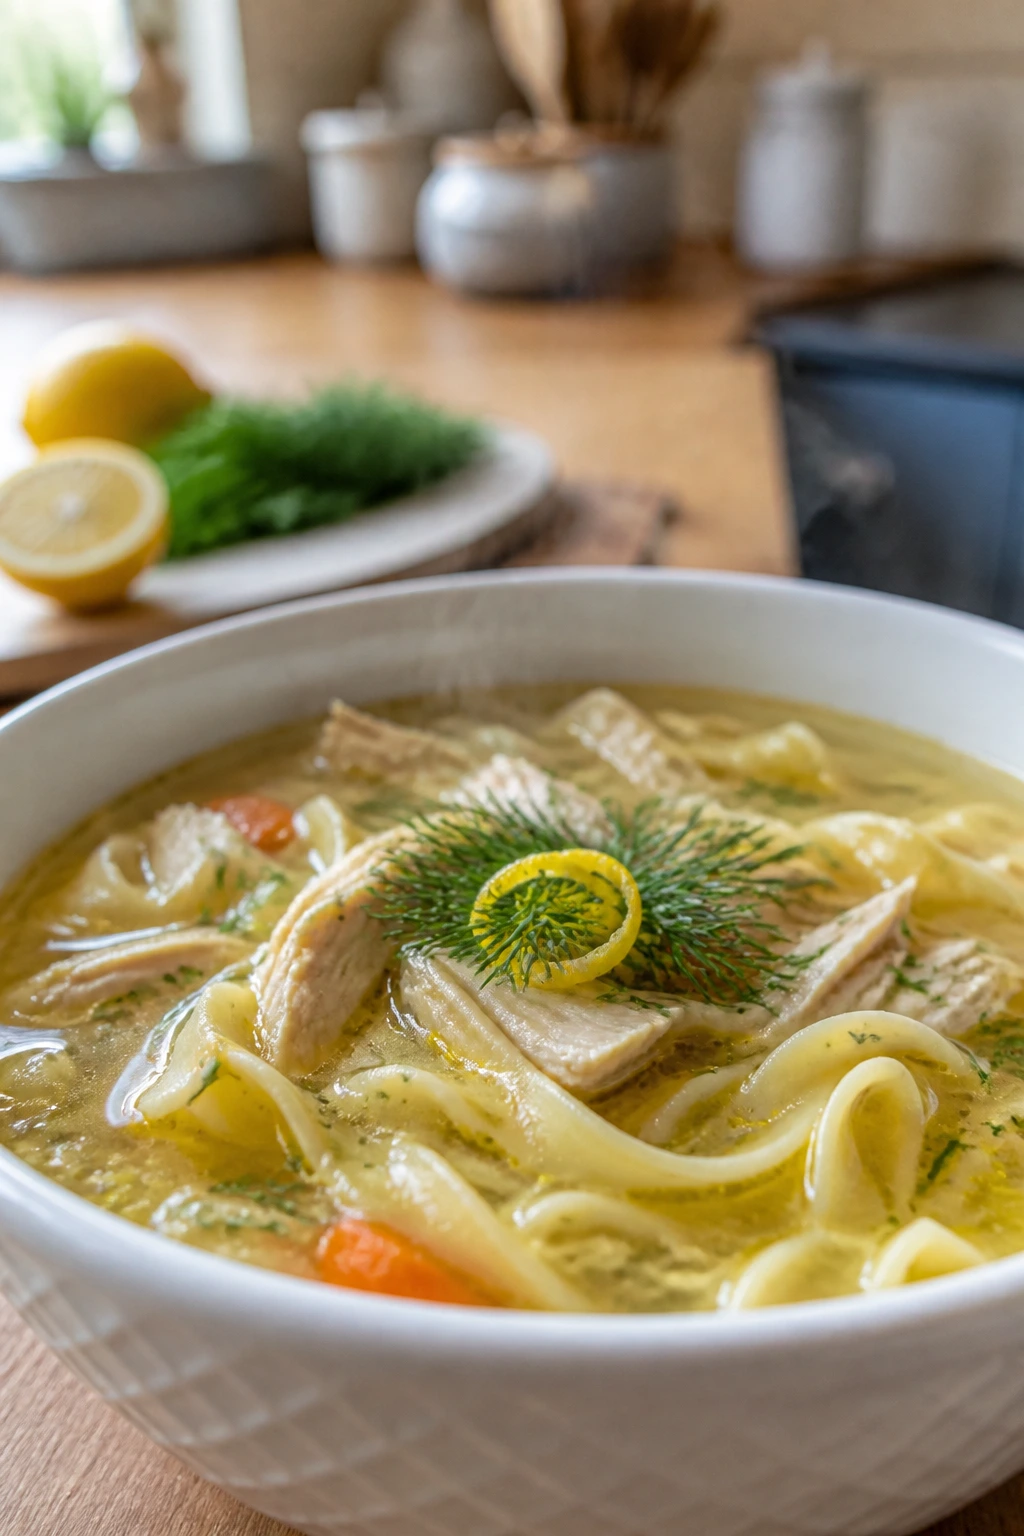
2. Lemon-Dill Chicken Noodle Soup
A good chicken noodle soup should smell like celery, lemon peel, and steam the second you lift the lid. This version has a bright finish from lemon juice and dill, which keeps it from sinking into plain broth territory. The noodles soak up the broth a little, but not so much that the bowl turns mushy after five minutes.
Why It Works: Boneless chicken thighs stay tender through simmering and shred into soft pieces that actually feel like part of the soup, not an afterthought. The lemon gets added at the end, which keeps the flavor fresh instead of cooked out. Dill belongs here because it lifts the broth without making it taste grassy or sharp.
Key Ingredients:
- 1 1/2 pounds boneless, skinless chicken thighs — they stay juicy in the broth.
- 2 tablespoons olive oil or butter — for the base.
- 1 large yellow onion, diced — this gives the broth body.
- 3 carrots, sliced into 1/4-inch rounds — they soften at the same pace as the celery.
- 3 celery stalks, sliced — classic soup backbone.
- 4 garlic cloves, minced — add them after the onions so they do not burn.
- 8 cups chicken broth — low-sodium keeps the seasoning under control.
- 2 bay leaves — they add a quiet, herbal depth.
- 6 ounces egg noodles — enough to make the soup feel full without taking over.
- 1 lemon, zested and juiced — use both for brightness.
- 3 tablespoons chopped fresh dill — the flavor is sharper and cleaner than dried dill.
- Kosher salt and black pepper — season as you go.
Quick Steps:
- Sauté the vegetables: Warm the oil or butter in a Dutch oven over medium heat. Cook the onion, carrots, and celery for 6 to 8 minutes, until the onion turns translucent and smells sweet.
- Add the garlic: Stir in the garlic and cook for 30 seconds, just until fragrant.
- Simmer the chicken: Add the broth, bay leaves, and chicken thighs. Bring to a gentle simmer, then cook for 18 to 22 minutes, until the chicken reaches 165°F and pulls apart easily.
- Shred the chicken: Lift the thighs onto a cutting board, shred them with two forks, and return the meat to the pot.
- Cook the noodles: Add the egg noodles and simmer for 6 to 8 minutes, until tender but still springy.
- Finish the soup: Stir in the lemon zest, lemon juice, and dill. Taste for salt and pepper, then serve right away.
Equipment for This Recipe:
- 6-quart Dutch oven — gives the noodles room to move.
- Tongs — handy for lifting out the chicken thighs.
- Cutting board and two forks — for shredding.
- Ladle — keeps the noodles from sliding out before the broth.
How to Serve This Dish: Pour it into wide, shallow bowls so the noodles do not disappear at the bottom. A slice of buttered toast or a plain cracker on the side is enough; the lemon and dill already give the broth plenty of personality.
Pro Tips for This Recipe:
- If you plan to store leftovers, cook the noodles separately and add them to each bowl.
- A strip of lemon peel simmered with the broth adds more fragrance than juice alone.
- Taste the broth before adding the noodles; once they go in, they soak up salt fast.
- Dill should go in last. Cook it too long and it goes dull.
Variations on This Dish:
- Rice Noodle Swap: Use thin rice noodles instead of egg noodles for a lighter bowl.
- Herb Garden Version: Replace half the dill with chopped parsley and a little thyme.
- Rotisserie Shortcut: Use shredded rotisserie chicken and add it during the last 5 minutes of simmering.
Common Mistakes to Avoid with This Dish:
- Overcooking the noodles: They turn bloated and break apart if you let them go too long.
- Adding lemon too early: The flavor fades when it cooks too long.
- Using dried dill as the main herb: It tastes dusty here; fresh dill makes the broth sing.
3. Creamy Potato Leek Soup
Leeks make potato soup taste polished without making it fussy. Their soft onion flavor is gentler than yellow onions, and once they’re cooked down in butter, the whole pot smells a little sweet and a little earthy. I like keeping part of the soup chunky so it doesn’t feel like mashed potatoes in a bowl.
Why It Works: Yukon Gold potatoes break down enough to thicken the soup while still giving a velvety texture after blending. Leeks need a long, patient sweat in butter, because their flavor changes from grassy to sweet once they soften. Half-and-half gives a creamy finish without pushing the soup into the kind of heaviness that sits in your chest.
Key Ingredients:
- 3 large leeks, white and pale green parts only, thinly sliced and rinsed well — grit hides between the layers.
- 3 tablespoons unsalted butter — for softening the leeks.
- 2 cloves garlic, minced — use them after the leeks start to soften.
- 2 pounds Yukon Gold potatoes, peeled and diced — these give body and a smooth finish.
- 4 cups chicken broth or vegetable broth — either works.
- 2 cups water — enough to keep the soup from getting too salty.
- 1 teaspoon fresh thyme leaves or 1/2 teaspoon dried thyme — a small amount goes a long way.
- 1 cup half-and-half or heavy cream — add it at the end.
- 1 teaspoon kosher salt and black pepper — layer the seasoning.
- Chopped chives for serving — they add a fresh onion bite.
Quick Steps:
- Clean the leeks well: Slice them, then swish them in a bowl of cold water and lift them out so the grit stays behind.
- Sweat the leeks: Melt the butter in a large pot over medium heat. Add the leeks and cook for 8 to 10 minutes, stirring often, until they are soft and glossy but not browned.
- Build the base: Stir in the garlic, potatoes, broth, water, thyme, salt, and pepper. Bring to a simmer and cook for 20 to 25 minutes, until the potatoes break apart with little effort.
- Blend the soup: Blend fully for a silky texture, or blend only half if you want a chunkier bowl.
- Add the cream: Stir in the half-and-half and warm gently for 2 to 3 minutes. Do not let it boil once the cream goes in.
- Serve with chives: Taste again, adjust salt, and finish with chopped chives.
Equipment for This Recipe:
- Large soup pot or Dutch oven — gives the leeks space to soften evenly.
- Immersion blender — easiest for controlling texture.
- Chef’s knife — leeks need a clean slice.
- Fine colander or bowl — for washing the leeks thoroughly.
How to Serve This Dish: Serve it with a hunk of crusty bread and a few chives scattered on top. A little extra black pepper looks good against the pale soup and sharpens the potato flavor.
Pro Tips for This Recipe:
- Rinse the leeks twice if they’re sandy. One rinse is not always enough.
- Keep the heat moderate while sweating them; browned leeks taste different from sweet leeks.
- If the soup gets too thick, thin it with a splash of broth instead of more cream.
- A squeeze of lemon at the end wakes up the whole pot.
Variations on This Dish:
- Bacon-Leek Version: Crisp 4 slices of bacon first, then cook the leeks in the fat and crumble the bacon on top.
- Garlicky Herb Potatoes: Add a smashed rosemary sprig and an extra garlic clove for a more savory bowl.
- Dairy-Free Potato Leek: Use olive oil and unsweetened oat milk, then blend in a peeled potato for extra creaminess.
Common Mistakes to Avoid with This Dish:
- Not washing the leeks well: Sand in the soup ruins the whole bowl.
- Blending everything until gluey: Overblended potatoes can turn pasty.
- Boiling the cream: High heat can make the texture break or turn grainy.
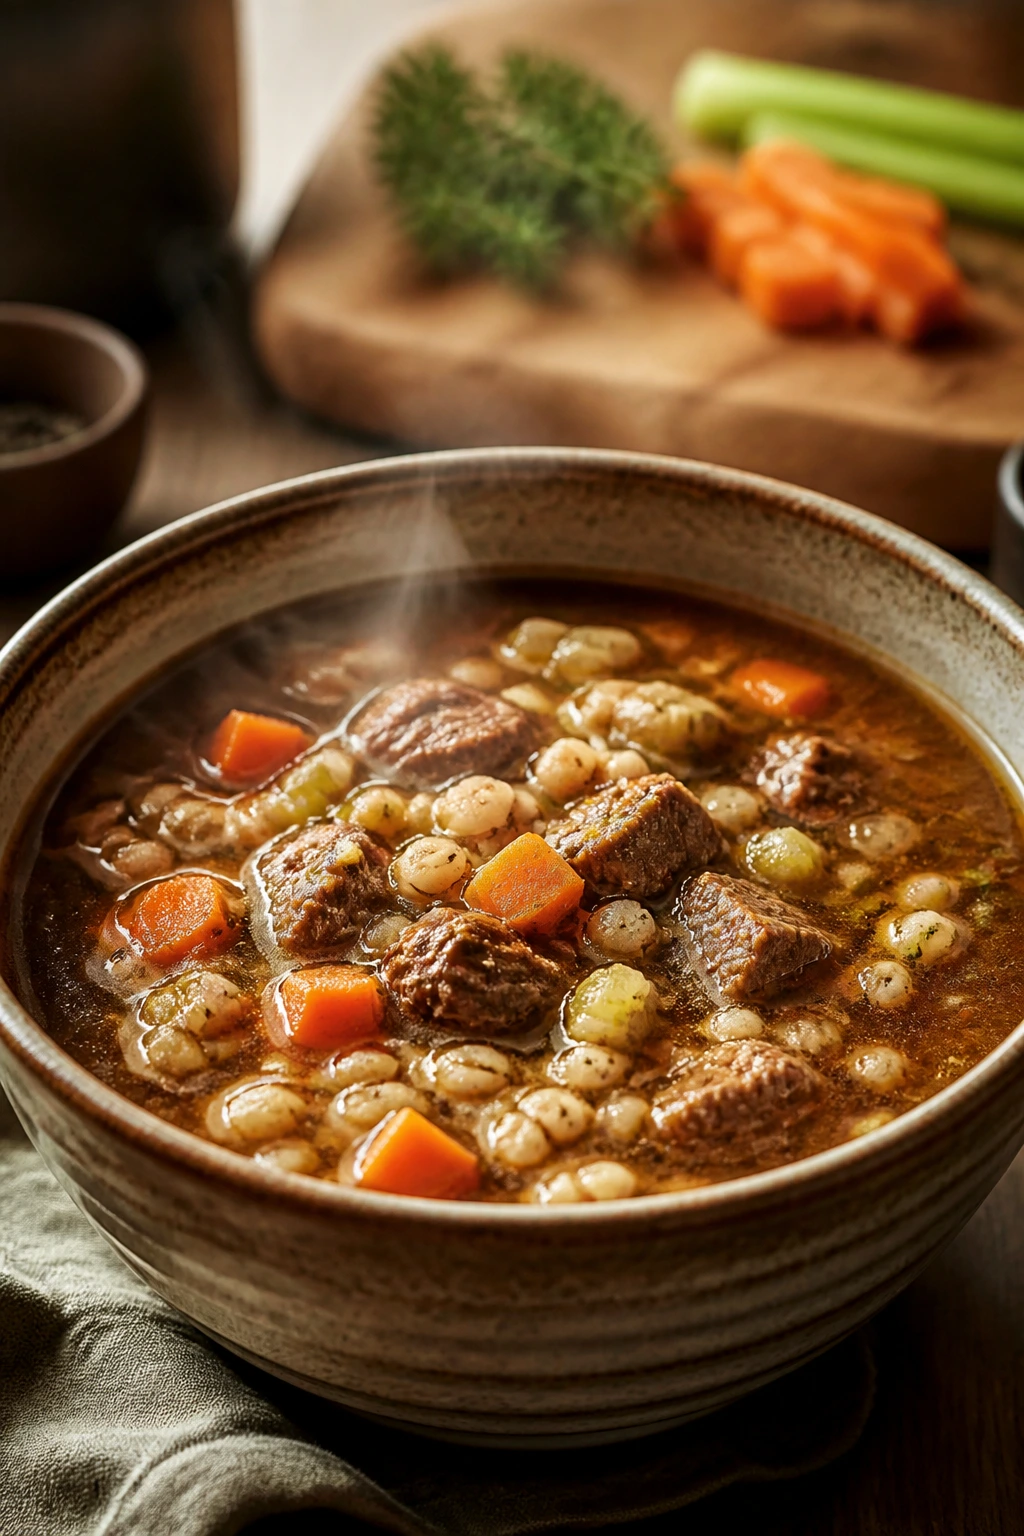
4. Beef Barley Soup
This is the soup that smells like a kitchen working hard. The beef sears first, the onions and carrots catch the drippings, and the barley softens into little chewy grains that hold the broth in place. It feels substantial in a way that thin soups do not.
Why It Works: Beef chuck has enough connective tissue to stay tender after a long simmer, and that same long simmer turns the broth deep and brown. Pearl barley brings starch and chew, which thickens the soup without flour. Tomato paste and a little wine or vinegar keep the broth from tasting flat after the beef has been cooking for an hour.
Key Ingredients:
- 2 pounds beef chuck, cut into 1-inch cubes — the marbling matters here.
- 2 tablespoons all-purpose flour — helps brown the beef and lightly thickens the broth.
- 2 tablespoons oil — for searing.
- 1 large onion, diced — a base layer of sweetness.
- 2 carrots, sliced — they break down into the broth.
- 2 celery stalks, sliced — classic soup flavor.
- 2 tablespoons tomato paste — this adds savory depth.
- 1 cup pearl barley, rinsed — it needs time to soften.
- 6 cups beef broth — low-sodium lets you season properly.
- 1 can diced tomatoes, 14 to 15 ounces — adds body and acidity.
- 1 bay leaf and 1 teaspoon dried thyme — simple, sturdy seasoning.
- 1 tablespoon red wine vinegar — added at the end to brighten the bowl.
Quick Steps:
- Brown the beef: Toss the beef with flour, salt, and pepper. Sear it in batches in a hot pot with oil, 3 to 4 minutes per side, until a dark crust forms.
- Soften the vegetables: Add the onion, carrots, and celery to the pot and cook for 6 minutes, scraping up the browned bits from the bottom.
- Toast the tomato paste: Stir in the tomato paste and cook for 1 minute until it darkens slightly.
- Simmer slowly: Add the broth, tomatoes, bay leaf, thyme, and beef. Bring to a gentle simmer, cover, and cook for 60 minutes.
- Add the barley: Stir in the barley and simmer for 30 to 40 minutes more, until the grains are tender and the beef falls apart easily.
- Finish the pot: Remove the bay leaf, stir in the vinegar, and taste for salt before serving.
Equipment for This Recipe:
- 6- to 8-quart Dutch oven — the best size for a long simmer.
- Slotted spoon — for lifting the beef if needed.
- Wooden spoon — good for scraping up the browned bits.
- Sharp knife — for cutting the chuck into even pieces.
How to Serve This Dish: Serve it in deep bowls with a thick slice of bread. A little parsley on top cuts through the beefy richness and makes the bowl look less heavy.
Pro Tips for This Recipe:
- Brown the beef in batches. Crowding the pot steams the meat instead of searing it.
- Add barley late enough that it keeps some chew.
- If the soup looks too thick after sitting, loosen it with a splash of broth.
- A splash of vinegar at the end makes the beef taste meatier, not sour.
Variations on This Dish:
- Mushroom Barley Beef: Add 8 ounces sliced mushrooms with the onions for a deeper, woodsy flavor.
- Parsnip Addition: Swap one carrot for a parsnip if you want a slightly sweeter broth.
- No-Barley Version: Use diced potatoes instead; they break down more and make the broth creamier.
Common Mistakes to Avoid with This Dish:
- Skipping the sear: Browned beef gives the soup its backbone.
- Adding barley too early: It can turn soft and lose its chew.
- Boiling hard for hours: A rough boil makes the beef stringy instead of tender.
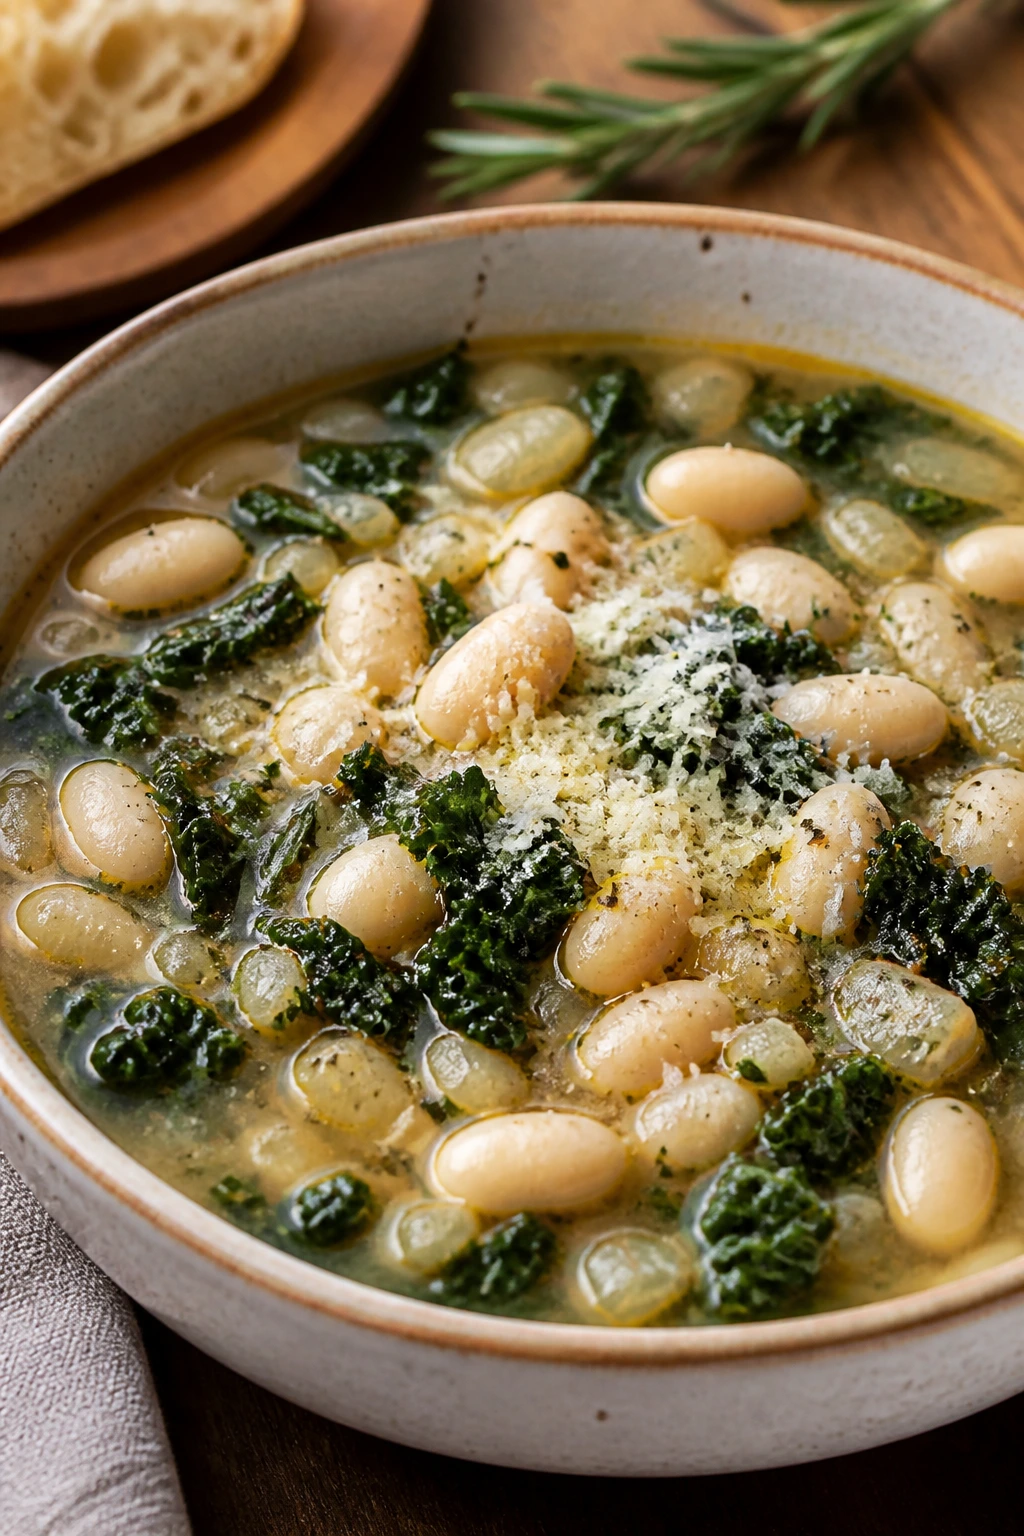
5. Tuscan White Bean Kale Soup
Beans are a quiet miracle in cold weather soup recipes. They do not need much, but give them garlic, rosemary, and a Parmesan rind, and they turn creamy without any cream at all. The kale stays bright if you add it late, which keeps the bowl from going muddy and overcooked.
Why It Works: Cannellini beans have a soft, buttery texture that breaks down easily when you mash a few against the side of the pot. The Parmesan rind dissolves flavor into the broth slowly, which is exactly why it belongs in the simmer. A splash of lemon at the end keeps the soup from tasting like a straight line of beans and broth.
Key Ingredients:
- 2 tablespoons olive oil — for the base.
- 1 large onion, diced — sweetens as it softens.
- 2 carrots, diced — adds color and mild sweetness.
- 2 celery stalks, diced — classic aromatic support.
- 4 garlic cloves, minced — use them after the vegetables soften.
- 2 cans cannellini beans, drained and rinsed — the main body of the soup.
- 1 medium Yukon Gold potato, diced — helps thicken the broth.
- 6 cups vegetable broth — a low-sodium version gives you more control.
- 1 Parmesan rind — this adds salty depth as it simmers.
- 1 teaspoon chopped rosemary — use sparingly; rosemary can take over.
- 4 cups chopped kale, ribs removed — add it near the end.
- 1 lemon — the juice wakes up the whole pot.
- Red pepper flakes, optional — a pinch gives the broth a little heat.
Quick Steps:
- Start the aromatics: Warm the olive oil over medium heat. Add the onion, carrots, and celery, then cook for 7 to 8 minutes until the onion turns soft and the vegetables smell sweet.
- Add the garlic and rosemary: Stir them in and cook for 30 seconds.
- Build the broth: Add the beans, potato, broth, Parmesan rind, salt, and pepper. Simmer for 20 to 25 minutes, until the potato is tender.
- Thicken the soup: Mash about 1 cup of the beans against the side of the pot with a spoon.
- Add the kale: Stir it in and simmer for 5 minutes, just until the leaves soften.
- Finish bright: Pull out the Parmesan rind, stir in lemon juice, and taste for salt.
Equipment for This Recipe:
- Large soup pot — plenty of room for the kale.
- Potato masher or spoon — for crushing some beans.
- Chef’s knife — for trimming kale and chopping vegetables.
- Microplane or citrus juicer — for the lemon.
How to Serve This Dish: Spoon it into bowls with toasted crusty bread or a piece of focaccia. A drizzle of olive oil and a few shavings of Parmesan on top give the bowl a polished finish.
Pro Tips for This Recipe:
- Mash only part of the beans; too much and the soup becomes heavy.
- Strip the kale stems out before chopping. They stay tough.
- If you do not have a Parmesan rind, use a small handful of grated Parmesan at the end.
- Lemon goes in at the end, not during the simmer.
Variations on This Dish:
- Sausage and Bean Version: Brown 1/2 pound of Italian sausage before the onions for a meatier bowl.
- Escarole Swap: Use chopped escarole instead of kale for a softer, milder green.
- Rosemary-Lemon Finish: Add a little lemon zest with the juice for a brighter top note.
Common Mistakes to Avoid with This Dish:
- Using too much rosemary: It can make the soup taste like a pine branch.
- Adding the kale too soon: It loses color and turns limp.
- Forgetting the acid: White bean soup needs lemon or the flavors stay muted.
6. Butternut Squash and Apple Soup
Butternut squash has a way of tasting like October even when the weather is refusing to cooperate. Add apple and a little sage, and the soup becomes sweet, earthy, and slightly savory all at once. I like this one with toasted pepitas because the crunch keeps the bowl from feeling too soft.
Why It Works: Roasting the squash before blending gives the soup a deeper flavor than boiling it straight in broth. Apples add sweetness, but the tart kind keeps the soup from tasting like dessert. Coconut milk or cream smooths everything out at the end, and a pinch of nutmeg ties the flavors together without turning the soup into pumpkin spice in disguise.
Key Ingredients:
- 1 large butternut squash, peeled, seeded, and cubed into 1-inch pieces — smaller cubes roast faster.
- 2 tart apples, peeled and chopped — Granny Smith or similar works well.
- 1 large onion, sliced — it softens and sweetens in the oven.
- 2 tablespoons olive oil — for roasting.
- 4 cups vegetable or chicken broth — enough to loosen the purée.
- 1 cup coconut milk or heavy cream — choose the finish you like best.
- 1 teaspoon dried sage or 2 teaspoons fresh sage, chopped — the herb belongs here.
- 1/4 teaspoon ground nutmeg — use a light hand.
- 1 teaspoon kosher salt and black pepper — season the squash before roasting.
- Toasted pepitas for serving — they give the bowl some bite.
Quick Steps:
- Roast the vegetables: Preheat the oven to 425°F. Toss the squash, apples, and onion with olive oil, salt, and pepper on a sheet pan. Roast for 30 to 35 minutes, until the squash is soft at the edges and lightly browned.
- Simmer briefly: Move the roasted vegetables to a pot, add the broth and sage, and simmer for 10 minutes.
- Blend smoothly: Blend until the soup is creamy and even.
- Add the dairy: Stir in the coconut milk or cream and the nutmeg. Warm for 2 to 3 minutes over low heat.
- Taste and adjust: Add more salt if the squash tastes flat, or more broth if the soup is too thick.
- Serve with crunch: Ladle into bowls and scatter pepitas on top.
Equipment for This Recipe:
- Rimmed sheet pan — for roasting.
- Blender or immersion blender — for a smooth purée.
- Dutch oven or soup pot — to finish the soup.
- Vegetable peeler — peeling squash by hand is not worth the trouble.
How to Serve This Dish: Serve it in warm bowls with toasted pepitas and a little black pepper. A side salad with sharp vinaigrette is a nice counterweight to the sweetness in the soup.
Pro Tips for This Recipe:
- Roast the squash until the edges brown; pale squash tastes flatter.
- If the apples are very sweet, add a squeeze of lemon at the end.
- Blend carefully; hot squash soup expands fast in a blender.
- A spoonful of yogurt or crème fraîche on top works if you want more tang.
Variations on This Dish:
- Ginger Squash Soup: Add a 1-inch piece of peeled ginger to the roasting pan.
- Coconut Curry Twist: Stir in 1 teaspoon curry powder with the sage.
- Maple-Sage Finish: Drizzle a teaspoon of maple syrup over each bowl and add extra sage.
Common Mistakes to Avoid with This Dish:
- Under-roasting the squash: Pale squash gives a dull, watery soup.
- Using sweet apples only: A tart apple keeps the flavor balanced.
- Blending while the lid is loose: Hot purée can blow the top off the blender.
7. Classic French Onion Soup

French onion soup is not complicated, but it is needy about time. The onions have to cook down into something deep brown and jammy, not just soft and pale. When it’s right, the broth tastes like caramel, thyme, and toast, with a cap of Gruyère that stretches in long strings when you lift the spoon.
Why It Works: Slow caramelization transforms sharp onions into something sweet and almost sticky, which is the whole point here. Sherry or white wine scrapes up the browned bits from the pan and folds them into the broth. Gruyère melts smoothly and has enough nutty flavor to stand up to the onion sweetness.
Key Ingredients:
- 4 large yellow onions, thinly sliced — the volume drops by a lot as they cook.
- 4 tablespoons unsalted butter — for richness.
- 1 tablespoon olive oil — helps keep the butter from scorching.
- 1 teaspoon kosher salt — draws moisture from the onions.
- 1 tablespoon all-purpose flour, optional — gives a little extra body.
- 1/2 cup dry sherry or dry white wine — for deglazing.
- 6 cups beef broth — use a broth that tastes clean, not muddy.
- 2 thyme sprigs or 1 teaspoon dried thyme — a small amount is enough.
- 1 baguette, sliced and toasted — the base under the cheese.
- 2 cups grated Gruyère — grate it yourself if possible.
Quick Steps:
- Caramelize the onions: Melt the butter and oil in a heavy pot over medium-low heat. Add the onions and salt, then cook for 45 to 60 minutes, stirring often, until the onions are deep brown and silky. Do not rush this part.
- Add the flour: If using it, stir in the flour and cook for 1 minute.
- Deglaze the pot: Pour in the sherry or wine and scrape up the browned bits from the bottom.
- Simmer the broth: Add the beef broth and thyme. Simmer for 20 minutes, then remove the thyme sprigs.
- Assemble the bowls: Ladle the soup into oven-safe bowls, top with toasted baguette slices, and pile on the Gruyère.
- Broil carefully: Broil for 2 to 4 minutes, until the cheese is melted and browned in spots.
Equipment for This Recipe:
- Heavy Dutch oven — thin pots can scorch the onions.
- Oven-safe bowls or crocks — needed for the final broil.
- Box grater — for the cheese.
- Sheet pan — for toasting the bread.
How to Serve This Dish: Serve it as the main event with a simple green salad on the side. A little thyme on top of the cheese makes the bowl look finished, and the broiled crust should be eaten while the top is still crackling.
Pro Tips for This Recipe:
- Keep the heat lower than you think. Dark onions are good; burned onions are bitter.
- If the onions stick, add a splash of water and scrape.
- Toast the bread first so it does not go soggy under the cheese.
- Gruyère melts best when freshly grated.
Variations on This Dish:
- Comté Swap: Use Comté instead of Gruyère if you want a slightly sweeter, nuttier cheese.
- Sherry-Free Version: Replace the wine with extra broth and a teaspoon of apple cider vinegar.
- Vegetarian Onion Soup: Swap in a deep vegetable broth and add a Parmesan rind for extra body.
Common Mistakes to Avoid with This Dish:
- Turning the heat up to hurry the onions: They brown on the outside and stay raw inside.
- Skipping the bread toast: Soft bread turns into a wet lump under the cheese.
- Broiling too far from the heat: The cheese melts unevenly and the top stays pale.
8. Lentil Vegetable Soup with Spinach
Lentil soup is the one I reach for when the crisper drawer looks tired and the week has gotten loud. Brown lentils hold their shape, the carrots and celery soften into the broth, and spinach slides in at the end without asking for attention. The result is earthy, sturdy, and far better than the sum of its pantry parts.
Why It Works: Brown or green lentils keep a little structure after simmering, which means the soup feels full instead of collapsed. Tomato, cumin, and smoked paprika give the broth a deeper, almost smoky edge. Spinach added at the end stays green and tender, which keeps the bowl from turning drab.
Key Ingredients:
- 2 tablespoons olive oil — for the base.
- 1 large onion, diced — starts the flavor.
- 2 carrots, diced — brings mild sweetness.
- 2 celery stalks, diced — classic soup support.
- 4 garlic cloves, minced — add after the onion softens.
- 2 cups brown or green lentils, rinsed — red lentils will get too soft here.
- 1 can diced tomatoes, 14 to 15 ounces — adds body and acid.
- 6 cups vegetable broth — use low-sodium if possible.
- 1 teaspoon ground cumin — gives the broth warmth.
- 1 teaspoon smoked paprika — adds a quiet smoky note.
- 2 cups spinach — stirred in at the end.
- Lemon juice — for finishing.
Quick Steps:
- Sweat the vegetables: Warm the oil in a soup pot over medium heat. Add the onion, carrots, and celery, and cook for 6 to 8 minutes until the onion turns soft.
- Add the garlic and spices: Stir in the garlic, cumin, and smoked paprika. Cook for 30 seconds.
- Simmer the lentils: Add the lentils, tomatoes, broth, salt, and pepper. Bring to a boil, then lower to a simmer and cook for 30 to 35 minutes.
- Check the texture: The lentils should be tender but not split apart. Add a splash of water if the soup gets too thick.
- Finish with spinach: Stir in the spinach and cook for 2 minutes until it wilts.
- Brighten the bowl: Add lemon juice, taste for salt, and serve.
Equipment for This Recipe:
- Large soup pot — needed for the lentils to move freely.
- Wooden spoon — for stirring the bottom.
- Fine strainer — for rinsing the lentils.
- Knife and cutting board — for the vegetables.
How to Serve This Dish: Serve it with warm pita, crusty bread, or a spoonful of rice if you want it more filling. A sprinkle of black pepper and a squeeze of lemon keep the bowl lively.
Pro Tips for This Recipe:
- Rinse the lentils well; dust makes the broth cloudy.
- Salt near the end if your broth is already seasoned.
- If you want a thicker soup, mash a cup of lentils against the side of the pot.
- Spinach only needs a minute or two. Long simmering bruises it.
Variations on This Dish:
- Curried Lentil Version: Replace the cumin and paprika with 1 tablespoon curry powder.
- Kale Swap: Use chopped kale instead of spinach for a sturdier green.
- Tomato-Free Bowl: Leave out the tomatoes and add a splash of red wine vinegar at the end.
Common Mistakes to Avoid with This Dish:
- Using red lentils by habit: They break down into puree and change the texture.
- Adding spinach too early: It turns dull and stringy.
- Forgetting acid at the end: Lentils need lemon or vinegar to taste finished.
9. Chicken Tortilla Soup

Tortilla soup wants smoke, acid, and crunch, and it gets cranky if you skip any one of them. The broth is darkened with chipotle and fire-roasted tomatoes, then loaded with shredded chicken, corn, and black beans. The tortilla strips on top are not decoration. They are part of the deal.
Why It Works: Chipotle in adobo gives the broth a slow, smoky heat that stays on the tongue without taking over. Fire-roasted tomatoes add depth, and black beans thicken the soup enough to feel substantial without using cream. Baking or crisping the tortilla strips separately keeps them crunchy long enough to matter.
Key Ingredients:
- 2 tablespoons oil — for the base.
- 1 large onion, diced — cooks down into the broth.
- 3 garlic cloves, minced — added after the onion softens.
- 1 tablespoon chili powder — the spice backbone.
- 1 teaspoon ground cumin — gives a warm, earthy note.
- 1 can fire-roasted tomatoes, 14 to 15 ounces — better flavor than plain diced tomatoes.
- 1 can black beans, drained and rinsed — adds body.
- 1 cup corn kernels — fresh, frozen, or thawed.
- 6 cups chicken broth — low-sodium works best.
- 1 to 2 chipotle peppers in adobo, chopped — use more only if you want real heat.
- 1 1/2 pounds chicken thighs or 3 cups shredded rotisserie chicken — both work.
- Corn tortillas, cut into strips — for crisping.
- Lime, cilantro, avocado — for serving.
Quick Steps:
- Start the flavor base: Warm the oil in a soup pot over medium heat. Cook the onion for 5 minutes, then add the garlic, chili powder, and cumin for 30 seconds.
- Build the broth: Add the tomatoes, broth, chipotle, and chicken thighs. Simmer for 18 to 22 minutes, until the chicken reaches 165°F.
- Shred the chicken: Remove the chicken, shred it, and return it to the pot.
- Add the beans and corn: Stir them in and simmer for 5 minutes.
- Crisp the tortillas: Toss the tortilla strips with a little oil and bake at 400°F for 8 to 10 minutes, until crisp and golden at the edges.
- Serve with toppings: Ladle the soup into bowls and top with tortillas, lime, cilantro, and avocado.
Equipment for This Recipe:
- Soup pot or Dutch oven — for the simmer.
- Sheet pan — for the tortilla strips.
- Sharp knife — for shredding and topping prep.
- Tongs — for moving the chicken.
How to Serve This Dish: Serve it in bowls with a mountain of tortilla strips on top and lime wedges on the side. A spoonful of avocado or a little crumbled queso fresco keeps the heat in check.
Pro Tips for This Recipe:
- Taste the broth before adding the toppings. It should be smoky and bright, not just spicy.
- Use rotisserie chicken if you want a shorter cooking path.
- Keep the tortilla strips separate until the last second.
- A squeeze of lime at the end makes the whole bowl pop.
Variations on This Dish:
- White Chicken Tortilla Soup: Swap the tomatoes for white beans and add a splash of cream.
- Smokier Version: Add a second chipotle pepper and a pinch of smoked paprika.
- Vegetarian Tortilla Soup: Skip the chicken and use extra beans, corn, and diced zucchini.
Common Mistakes to Avoid with This Dish:
- Putting the tortilla strips in too early: They go limp fast.
- Using too much chipotle: The smoke can bulldoze the other flavors.
- Skipping the lime: The broth needs that bright finish.
10. New England Clam Chowder

Clam chowder is a little temperamental, but not difficult. The trick is to keep the bacon crisp, the potatoes tender, and the dairy gentle. Done right, the broth is creamy without feeling gluey, and the clams stay tender instead of turning rubbery.
Why It Works: Bacon fat gives the chowder its first layer of flavor, and the onions and celery pick that up as they soften. Potatoes release starch as they cook, which thickens the broth without needing a lot of flour. The clams go in near the end so they stay soft, and the milk and cream are heated slowly so the chowder stays smooth.
Key Ingredients:
- 6 slices bacon, chopped — the fat becomes part of the soup base.
- 1 large onion, diced — softens in the bacon fat.
- 2 celery stalks, diced — adds the classic briny-sweet background.
- 2 pounds Yukon Gold potatoes, peeled and diced — these hold their shape well.
- 2 tablespoons butter — for extra richness.
- 2 tablespoons flour — helps thicken the broth.
- 2 cups clam juice — this carries the clam flavor.
- 2 cups chicken broth — balances the saltiness.
- 2 cups whole milk — keep the heat low once this goes in.
- 1 cup heavy cream — for a fuller texture.
- 2 cans chopped clams, drained, with juice reserved — add the clams late.
- 1 teaspoon thyme — enough to round out the bowl.
Quick Steps:
- Render the bacon: Cook the bacon in a large pot over medium heat until crisp. Remove it and leave about 2 tablespoons of fat in the pot.
- Cook the vegetables: Add the onion and celery and cook for 5 to 6 minutes until soft.
- Make the base: Stir in the butter and flour, cooking for 1 minute. Slowly add the clam juice and broth, whisking as you pour.
- Simmer the potatoes: Add the potatoes and thyme. Simmer for 15 to 20 minutes, until the potatoes are tender.
- Add the dairy and clams: Stir in the milk, cream, and clams. Warm gently for 3 to 4 minutes. Do not let it boil after the dairy goes in.
- Finish and serve: Crumble the bacon over the top and serve hot.
Equipment for This Recipe:
- Large heavy pot — helps hold gentle heat.
- Whisk — useful for the flour and liquid.
- Ladle — for serving without breaking the potatoes.
- Sharp knife — for clean, even dice.
How to Serve This Dish: Serve it with oyster crackers or a warm biscuit. A little extra bacon on top is never a bad idea, and the chowder should look thick enough to coat the spoon without turning stiff.
Pro Tips for This Recipe:
- Cut the potatoes evenly so they finish at the same time.
- Keep the heat low once milk and cream are in the pot.
- Reserve the clam juice from the cans if it tastes clean; it adds extra flavor.
- If you want a thicker chowder, mash a few potatoes against the side of the pot.
Variations on This Dish:
- Corn-and-Clam Chowder: Add 1 cup corn kernels for a sweeter, fuller bowl.
- Herbed Chowder: Stir in chopped parsley and chives at the end.
- Light Chowder: Use all milk and skip the cream, then add a little extra potato for body.
Common Mistakes to Avoid with This Dish:
- Boiling the chowder after the dairy goes in: It can split or turn grainy.
- Overcooking the clams: They go chewy fast.
- Using russet potatoes without care: They can fall apart too much if simmered hard.
11. Parmesan Minestrone
Minestrone gets better when the pot smells like Parmesan and garlic and a little tomato. This version has enough vegetables to feel busy, enough beans to feel filling, and a Parmesan rind that melts flavor into the broth while everything else cooks. It is the kind of soup that makes the kitchen smell alive.
Why It Works: A Parmesan rind gives the broth salty depth without needing a long list of seasonings. Beans and small pasta bring body, while zucchini and spinach keep some freshness in the bowl. Adding the pasta near the end stops it from drinking up half the broth before the soup reaches the table.
Key Ingredients:
- 2 tablespoons olive oil — for the base.
- 1 onion, diced — the first layer of flavor.
- 2 carrots, diced — adds sweetness.
- 2 celery stalks, diced — classic minestrone structure.
- 2 zucchini, diced — should go in later so they do not collapse.
- 3 garlic cloves, minced — cook briefly with the vegetables.
- 1 can cannellini beans, drained and rinsed — for creaminess.
- 1 can diced tomatoes, 14 to 15 ounces — gives the broth color.
- 1 Parmesan rind — the secret weapon.
- 6 cups vegetable broth — enough to keep it loose.
- 1 cup small pasta, like ditalini or elbow macaroni — added late.
- 2 cups spinach — stirred in at the end.
- Basil for serving — brightens the bowl.
Quick Steps:
- Soften the vegetables: Heat the oil in a pot and cook the onion, carrots, and celery for 6 to 7 minutes.
- Add the garlic and zucchini: Cook for 1 minute, then stir in the tomatoes, beans, broth, Parmesan rind, salt, and pepper.
- Simmer the soup: Cook for 15 minutes so the broth picks up flavor from the rind.
- Add the pasta: Stir it in and simmer until just tender, usually 8 to 10 minutes.
- Finish with greens: Stir in the spinach and cook for 1 minute until wilted.
- Serve with basil: Remove the rind, taste for salt, and top with basil.
Equipment for This Recipe:
- Soup pot — wide enough for the vegetables and pasta.
- Wooden spoon — for stirring without breaking the pasta.
- Knife and cutting board — for all the chopping.
- Ladle — for serving the mixed broth and vegetables.
How to Serve This Dish: Serve it with grated Parmesan and a thick slice of toasted bread. A drizzle of olive oil on top gives the soup a glossy finish and makes the vegetables look fresh.
Pro Tips for This Recipe:
- Pull the Parmesan rind out before serving, even if some soup cling to it.
- If the soup sits too long, the pasta keeps absorbing broth. Add a splash of water or stock before reheating.
- Use small pasta so the vegetables still get attention.
- A pinch of red pepper flakes gives the broth a little edge.
Variations on This Dish:
- Pesto Finish: Stir in a spoonful of pesto at the end for a basil-heavy version.
- Bean Swap: Use chickpeas instead of cannellini beans for more texture.
- Rice Version: Replace the pasta with cooked rice if you want a gluten-free bowl.
Common Mistakes to Avoid with This Dish:
- Cooking the pasta too early: It turns soft and swells in the broth.
- Adding zucchini too soon: It loses shape and disappears.
- Forgetting the rind: The broth tastes thinner without it.
12. Split Pea Soup with Ham

Split pea soup is not pretty in the way tomato soup is pretty. It’s thicker, greener, and more old-fashioned, and that is part of its charm. The ham gives it salt and smoke, and the peas cook down into a bowl that almost stands up on its own.
Why It Works: Split peas break down as they simmer, which naturally thickens the soup without flour or cream. Ham hock or diced ham adds salt, fat, and smoky depth that the peas need to taste complete. A small splash of vinegar at the end keeps the bowl from tasting heavy or one-note.
Key Ingredients:
- 1 tablespoon olive oil or butter — for the aromatics.
- 1 large onion, diced — softens into the base.
- 2 carrots, diced — adds sweetness.
- 2 celery stalks, diced — the usual backbone.
- 4 garlic cloves, minced — stir them in after the vegetables soften.
- 1 pound green split peas, rinsed — the main thickener.
- 1 ham hock or 2 cups diced ham — gives the soup its smoky depth.
- 8 cups chicken broth or water plus broth — enough liquid for a long simmer.
- 2 bay leaves — adds a quiet herbal note.
- 1 teaspoon dried thyme — a little goes far.
- 1 tablespoon apple cider vinegar — brightens the bowl at the end.
- Black pepper — ham brings salt, so taste first.
Quick Steps:
- Start the vegetables: Heat the oil in a large pot. Cook the onion, carrots, and celery for 6 minutes until softened.
- Add the garlic and herbs: Stir in the garlic, thyme, and bay leaves for 30 seconds.
- Build the soup: Add the split peas, ham hock, broth, and pepper. Bring to a boil, then lower to a gentle simmer.
- Cook slowly: Simmer for 60 to 75 minutes, stirring now and then, until the peas have broken down and the soup is thick.
- Shred the ham: If using a ham hock, remove it, pull off the meat, and return the meat to the pot.
- Finish with vinegar: Stir in the vinegar and adjust salt only after tasting.
Equipment for This Recipe:
- Heavy pot — important for a long simmer.
- Wooden spoon — for stirring the bottom.
- Tongs or slotted spoon — useful for lifting the ham hock.
- Bowl for picking the meat — keeps things tidy.
How to Serve This Dish: Serve it with rye toast or crackers. The soup should be thick enough to hold a spoon upright for a second or two, and a little black pepper on top keeps the bowl from feeling too dense.
Pro Tips for This Recipe:
- Rinse the peas so the broth stays cleaner.
- Stir every so often; split peas can stick at the bottom.
- If the soup gets too thick, add hot water or broth in small splashes.
- The vinegar matters. It keeps the smoky ham flavor from flattening out.
Variations on This Dish:
- Smoked Turkey Version: Use a smoked turkey leg instead of ham.
- Vegetarian Split Pea: Leave out the meat and add 1 teaspoon smoked paprika plus a Parmesan rind.
- Chunkier Style: Stir in diced potatoes for a more textured pot.
Common Mistakes to Avoid with This Dish:
- Not stirring during the simmer: The peas settle and scorch.
- Over-salting too early: Ham can make the soup saltier as it cooks down.
- Expecting a thin broth: Split pea soup is supposed to be thick and substantial.
13. Thai Coconut Curry Chicken Soup

This is the soup I make when I want steam, spice, and something that smells expensive without being difficult. Red curry paste blooms in oil, coconut milk softens the heat, and lime at the end keeps the whole pot bright. Mushrooms and carrots make it feel like dinner instead of just a broth with personality.
Why It Works: Red curry paste needs a minute in oil to wake up its spices and deepen its flavor. Coconut milk adds body and a silky texture, while fish sauce gives the broth a salty edge that plain broth can’t carry on its own. Lime juice at the end is non-negotiable; it keeps the soup from tasting flat against the richness.
Key Ingredients:
- 1 tablespoon coconut oil or neutral oil — for blooming the paste.
- 2 tablespoons red curry paste — more if you want stronger heat.
- 1 tablespoon fresh ginger, grated — gives the broth a warm snap.
- 3 garlic cloves, minced — add with the ginger.
- 1 pound chicken thighs, sliced into strips — they cook quickly and stay tender.
- 1 can coconut milk, 13.5 ounces — the creamy base.
- 4 cups chicken broth — use low-sodium if possible.
- 1 cup mushrooms, sliced — they soak up the curry.
- 1 carrot, julienned or thinly sliced — adds a little sweetness.
- 1 tablespoon fish sauce — for salty depth.
- 1 lime, juiced — for finishing.
- Cilantro and rice noodles, optional — both fit well.
Quick Steps:
- Bloom the curry paste: Heat the oil in a soup pot over medium heat. Add the curry paste and cook for 1 minute, stirring, until it smells vivid and a little toasty.
- Add the aromatics: Stir in the ginger and garlic and cook for 30 seconds.
- Build the broth: Add the chicken, coconut milk, broth, mushrooms, carrot, and fish sauce. Simmer for 10 to 12 minutes, until the chicken is cooked through.
- Add noodles if using: Stir in rice noodles and cook just until tender.
- Finish with lime: Take the pot off the heat and stir in lime juice.
- Serve with herbs: Top with cilantro and serve immediately.
Equipment for This Recipe:
- Soup pot — enough room for the coconut milk and noodles.
- Microplane or grater — for the ginger.
- Tongs — useful for moving the chicken.
- Ladle — for serving without breaking the noodles.
How to Serve This Dish: Serve it in shallow bowls with cilantro on top and lime wedges on the side. If you want a fuller meal, add a little jasmine rice underneath instead of noodles.
Pro Tips for This Recipe:
- Bloom the curry paste long enough to wake it up, but not so long that it burns.
- Add lime only after the heat is off.
- If the coconut milk separates in the can, whisk it before pouring.
- Thin rice noodles only need a short soak; do not let them overcook in the pot.
Variations on This Dish:
- Shrimp Curry Soup: Swap the chicken for peeled shrimp and simmer them for just a few minutes.
- Vegetarian Curry Bowl: Use tofu and extra mushrooms, plus vegetable broth instead of chicken broth.
- Milder Version: Use 1 tablespoon curry paste and add a little more coconut milk.
Common Mistakes to Avoid with This Dish:
- Skipping the curry bloom: The paste tastes flatter if it never hits the oil.
- Boiling hard after adding coconut milk: The texture can split.
- Adding lime too early: The bright edge disappears.
14. Mushroom Wild Rice Soup
Mushrooms brown in layers, not all at once, which is why this soup rewards patience. Wild rice brings a nutty chew, and the cream at the end rounds out the broth without covering up the mushroom flavor. It feels woodsy and a little elegant, but not precious.
Why It Works: Mushrooms need enough heat to give up their water and then brown properly, which is where the deep flavor comes from. Wild rice takes longer than white rice, but that extra time gives the soup a chewy, satisfying texture. A little soy sauce adds umami in a way that makes the broth taste fuller without turning it into a mushroom soy bowl.
Key Ingredients:
- 1 1/2 pounds mixed mushrooms, sliced — cremini, shiitake, or button all work.
- 2 tablespoons butter and 1 tablespoon oil — butter for flavor, oil for browning.
- 1 large onion, diced — the base.
- 2 celery stalks, diced — gives the soup shape.
- 3 garlic cloves, minced — stir in after the vegetables soften.
- 3/4 cup wild rice, rinsed — this takes the longest.
- 6 cups chicken or vegetable broth — keep it low-sodium.
- 1 teaspoon thyme — a classic match for mushrooms.
- 1 tablespoon soy sauce — boosts the savory flavor.
- 1 cup half-and-half — added at the end.
- Parsley for serving — brings freshness.
Quick Steps:
- Brown the mushrooms: Heat the butter and oil in a heavy pot over medium-high heat. Add the mushrooms in batches and cook until browned and the liquid has cooked off.
- Cook the aromatics: Add the onion and celery and cook for 5 minutes. Stir in the garlic for 30 seconds.
- Add the rice: Pour in the broth, thyme, soy sauce, salt, pepper, and wild rice. Bring to a simmer and cook for 45 to 50 minutes, until the rice splits open and the grains are tender.
- Check the texture: Add more broth if the rice drinks up too much liquid.
- Finish with cream: Stir in the half-and-half and warm gently for 2 minutes.
- Serve with parsley: Taste and adjust salt before serving.
Equipment for This Recipe:
- Heavy soup pot — helps with mushroom browning.
- Wooden spoon — for scraping the bottom.
- Sharp knife — for slicing mushrooms evenly.
- Measuring cup — wild rice needs the right liquid.
How to Serve This Dish: Serve it with a slice of sourdough or a grilled cheese if you want a richer meal. A sprinkle of parsley or a crack of black pepper keeps the bowl from looking too brown and heavy.
Pro Tips for This Recipe:
- Do not crowd the mushrooms. Brown them in batches if needed.
- Wild rice takes time; if it still tastes tough, keep simmering.
- Add the cream after the rice is tender, not before.
- A splash of white wine at the start can deepen the flavor if you want more complexity.
Variations on This Dish:
- Chicken and Mushroom Version: Add shredded chicken near the end for a fuller bowl.
- Dairy-Free Mushroom Soup: Skip the half-and-half and blend in a peeled potato for body.
- Herb-Heavy Style: Add rosemary and parsley at the finish for a brighter aroma.
Common Mistakes to Avoid with This Dish:
- Crowding the pan with mushrooms: They steam and go gray instead of brown.
- Rushing the rice: Wild rice needs time to open.
- Adding too much soy sauce: It can take over fast.
15. Italian Wedding Soup
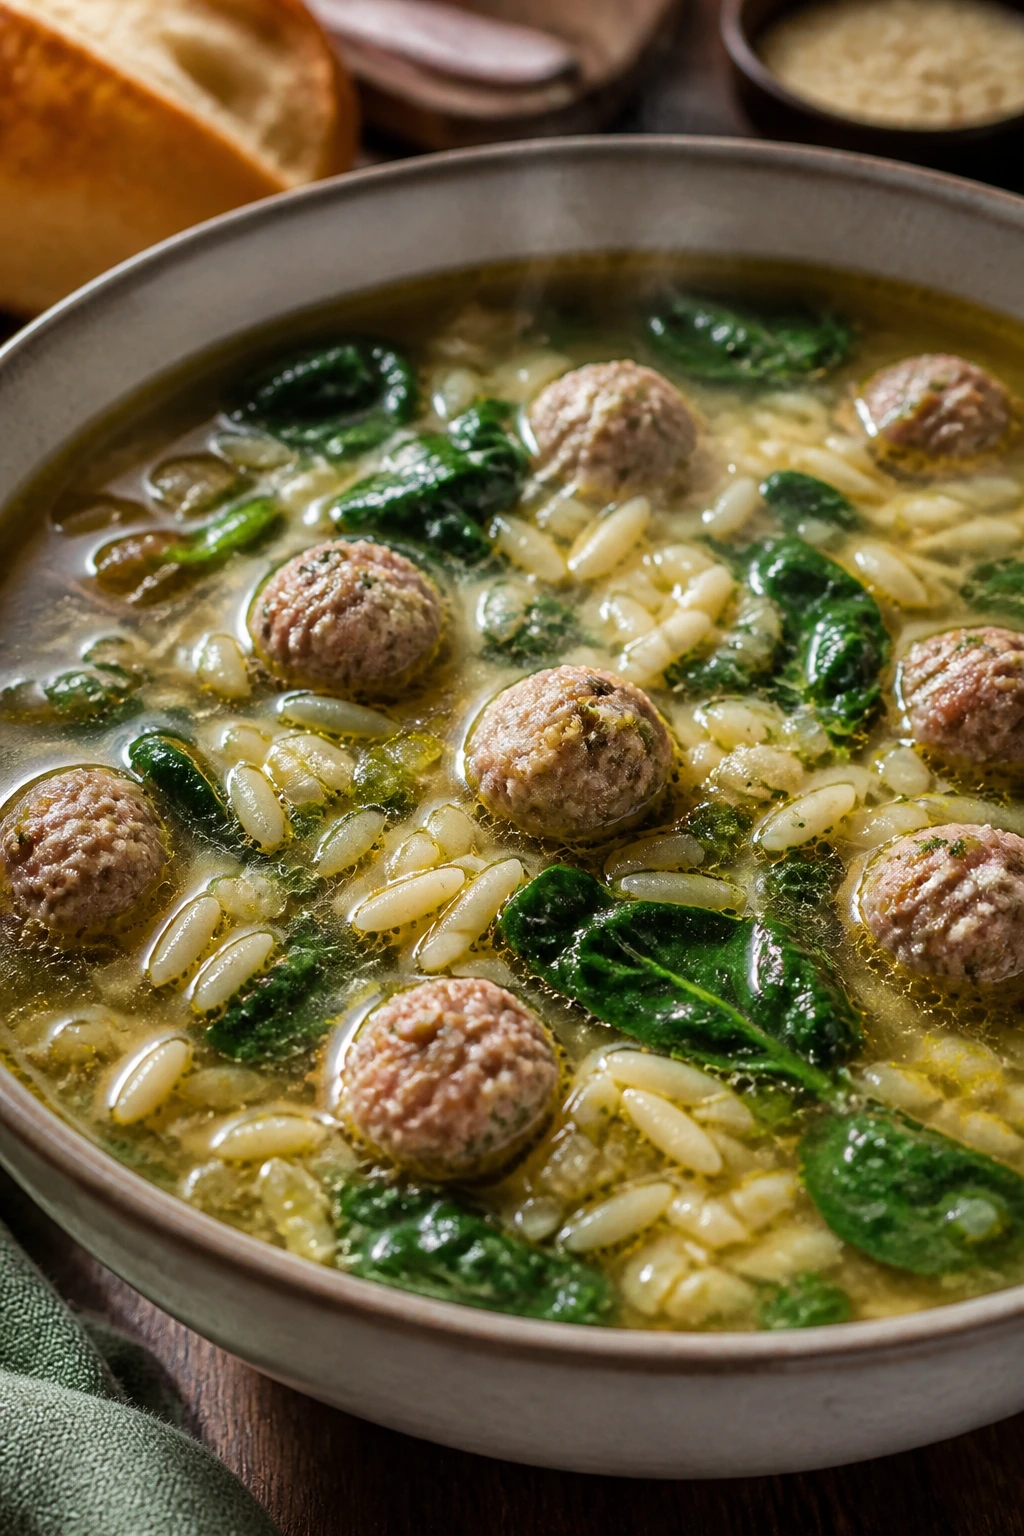
Tiny meatballs are the whole charm here. They bob in the broth with spinach and little pasta, and the soup tastes like it has more effort in it than it actually does. It’s one of those bowls that looks cheerful in a way a lot of cold weather food does not.
Why It Works: Small meatballs cook quickly and stay tender, which matters because they simmer right in the broth. Acini di pepe or orzo makes the soup feel finished without taking over the bowl. Spinach goes in at the end so it stays green and soft instead of collapsing into the background.
Key Ingredients:
- 1/2 pound ground beef — adds flavor to the meatballs.
- 1/2 pound ground pork — keeps the meatballs tender.
- 1/2 cup breadcrumbs — binds the mixture.
- 1/4 cup grated Parmesan — adds savory depth.
- 1 egg — helps hold everything together.
- 2 tablespoons chopped parsley — fresh flavor in the meatballs.
- 8 cups chicken broth — the soup base.
- 1 onion, diced — for the broth.
- 2 carrots, diced — adds sweetness.
- 2 celery stalks, diced — classic support.
- 1 cup acini di pepe or orzo — small pasta that cooks fast.
- 4 cups baby spinach — stirred in at the end.
Quick Steps:
- Mix the meatballs: Combine the beef, pork, breadcrumbs, Parmesan, egg, parsley, salt, and pepper. Roll into 1-inch meatballs.
- Cook the vegetables: In a soup pot, cook the onion, carrots, and celery in a little oil for 6 minutes.
- Add the broth: Pour in the chicken broth and bring to a simmer.
- Add the meatballs: Drop them in gently and simmer for 8 to 10 minutes, until cooked through.
- Cook the pasta: Stir in the acini di pepe or orzo and simmer until tender.
- Finish with spinach: Add the spinach and cook for 1 minute, just until wilted.
Equipment for This Recipe:
- Soup pot — roomy enough for the meatballs.
- Small bowl — for mixing the meatball mixture.
- Sheet pan or tray — to hold the rolled meatballs.
- Spoon or small scoop — keeps the meatballs evenly sized.
How to Serve This Dish: Serve it with extra Parmesan and crusty bread. The broth should look clear enough to see the meatballs and greens, not cloudy or overloaded.
Pro Tips for This Recipe:
- Make the meatballs small. Big ones lose the charm and take longer to cook.
- Do not stir too aggressively after adding them.
- If you plan leftovers, cook the pasta separately.
- A squeeze of lemon at the end sharpens the broth nicely.
Variations on This Dish:
- Turkey Meatball Version: Use ground turkey instead of beef and pork for a lighter bowl.
- Escarole Swap: Replace spinach with chopped escarole for a more bitter, old-school flavor.
- Gluten-Free Version: Use almond flour or gluten-free breadcrumbs in the meatballs and rice instead of pasta.
Common Mistakes to Avoid with This Dish:
- Making oversized meatballs: They take longer and the soup loses its balance.
- Overcooking the pasta: It gets mushy quickly in broth.
- Skipping the seasoning in the meatballs: Bland meatballs make the whole soup feel flat.
16. Broccoli Cheddar Soup

Broccoli cheddar soup is all about the texture of the cheese and the shape of the broccoli. The base needs enough body to carry the cheese, but not so much flour that it turns pasty. When it works, the soup tastes like sharp cheddar, butter, and broccoli stems softened just enough.
Why It Works: A roux gives the soup structure so the cheese melts into a smooth, spoonable base. Sharp cheddar brings enough bite to stand up against the sweet carrots and broccoli. Adding the cheese off the heat keeps it from turning stringy or grainy, which is the mistake that ruins most home versions.
Key Ingredients:
- 4 tablespoons unsalted butter — for the base.
- 1 large onion, diced — softens into the roux.
- 1 carrot, grated or finely diced — adds sweetness and color.
- 1/4 cup all-purpose flour — thickens the soup.
- 3 cups chicken or vegetable broth — keeps the texture pourable.
- 4 cups broccoli florets, chopped small — smaller pieces cook more evenly.
- 2 cups milk — use whole milk for the best texture.
- 3 cups shredded sharp cheddar — block cheese melts smoother than pre-shredded.
- 1 teaspoon Dijon mustard — sharpens the cheese flavor.
- Pinch of nutmeg — not enough to taste, just enough to round the edge.
- Salt and black pepper — taste after the cheese melts.
Quick Steps:
- Cook the vegetables: Melt the butter in a pot over medium heat. Add the onion and carrot and cook for 5 minutes until softened.
- Make the roux: Stir in the flour and cook for 1 minute, whisking so it does not taste raw.
- Add the liquid: Slowly whisk in the broth, then the milk, until smooth.
- Cook the broccoli: Add the broccoli and simmer for 12 to 15 minutes, until tender.
- Melt the cheese: Lower the heat and stir in the cheddar and Dijon. Do not let the soup boil after the cheese goes in.
- Adjust and serve: Taste, add nutmeg and more salt if needed, and serve hot.
Equipment for This Recipe:
- Heavy saucepan or soup pot — helps prevent scorching.
- Whisk — important for the roux.
- Box grater — for the cheese.
- Sharp knife — to chop broccoli into small pieces.
How to Serve This Dish: Serve it with extra cheddar on top or in a bread bowl if you want the full diner-style effect. A few broccoli florets set aside before blending look nice and keep the soup from seeming too smooth.
Pro Tips for This Recipe:
- Grate the cheese yourself. It melts better.
- Keep the heat low once the cheese goes in.
- Chop the broccoli small so it cooks at the same pace as the carrots.
- A splash of hot sauce or mustard at the end can sharpen the flavor.
Variations on This Dish:
- Cauliflower Swap: Replace half the broccoli with cauliflower for a softer flavor.
- Smoked Cheddar Version: Use smoked cheddar for a stronger, campfire-like edge.
- Dairy-Light Bowl: Use evaporated milk and a little less cheese for a lighter version.
Common Mistakes to Avoid with This Dish:
- Using pre-shredded cheese only: It often melts less smoothly.
- Boiling the soup after cheese is added: The texture can go grainy.
- Leaving the broccoli in huge florets: They cook unevenly and make the bowl awkward.
17. Sausage, Spinach, and Tortellini Soup

This is the soup that behaves like dinner without turning into a casserole situation. Sausage gives the broth its first hit of seasoning, tortellini makes the bowl feel complete, and spinach keeps the whole thing from looking too heavy. I like this one on the nights when the kitchen needs to smell like something is happening.
Why It Works: Italian sausage seasons the broth from the start, so you do not need to build much else around it. Refrigerated tortellini cook quickly and bring a cheesy chew that pairs well with the sausage. Spinach goes in late to keep its color and to stop the bowl from turning dense.
Key Ingredients:
- 1 pound Italian sausage, casings removed — sweet or hot both work.
- 1 large onion, diced — for the base.
- 2 carrots, diced — adds a little sweetness.
- 3 garlic cloves, minced — stir in after the sausage browns.
- 6 cups chicken broth — low-sodium is best.
- 1 teaspoon Italian seasoning — simple and enough.
- 1 (9-ounce) package refrigerated cheese tortellini — the soup’s soft center.
- 4 cups baby spinach — for color and freshness.
- 1 cup heavy cream — gives the broth a smooth finish.
- Red pepper flakes, optional — for extra heat.
- Grated Parmesan for serving — a salty finish.
Quick Steps:
- Brown the sausage: Cook it in a soup pot over medium heat until browned and cooked through, breaking it into small pieces.
- Cook the vegetables: Add the onion and carrots and cook for 5 minutes. Stir in the garlic for 30 seconds.
- Add the broth: Pour in the chicken broth and Italian seasoning and bring to a simmer.
- Cook the tortellini: Add the tortellini and simmer for 3 to 5 minutes, until tender.
- Finish with cream and spinach: Stir in the cream and spinach and cook for 1 minute until the spinach wilts.
- Serve with Parmesan: Taste, add pepper flakes if you want heat, and serve hot.
Equipment for This Recipe:
- Large soup pot — enough room for the pasta.
- Wooden spoon — for breaking up the sausage.
- Ladle — for serving without tearing the tortellini.
- Cutting board and knife — for the vegetables.
How to Serve This Dish: Serve it with Parmesan, black pepper, and crusty bread. The broth should look creamy and glossy, with the tortellini floating enough to be seen instead of sinking completely.
Pro Tips for This Recipe:
- Brown the sausage well; pale sausage gives a flatter soup.
- Add tortellini near the end so they stay tender.
- If you want to make it ahead, cook the tortellini separately.
- A splash of lemon can brighten the cream and sausage together.
Variations on This Dish:
- Tomato Sausage Tortellini: Stir in 1 cup crushed tomatoes for a red broth.
- Turkey Sausage Version: Use turkey sausage for a lighter bowl.
- Kale Swap: Use chopped kale instead of spinach if you want a tougher green.
Common Mistakes to Avoid with This Dish:
- Overcooking the tortellini: They fall apart fast.
- Letting the cream boil: It can separate or look greasy.
- Using too little broth: The tortellini soak up a lot as they sit.
18. Bacon Corn Chowder with Red Pepper

Corn chowder can be sweet, but it should never be one-note. Bacon brings smoke, red pepper gives a little lift, and potatoes make the whole thing feel thick enough to count as a meal. This is the soup that turns a few ears of corn or a bag of frozen kernels into something far better than you expected.
Why It Works: Bacon fat gives the chowder its first layer of flavor, and the onions and celery pick that up as they soften. Potatoes thicken the broth from the inside, while corn adds little bursts of sweetness. A partial blend makes the chowder creamy without erasing the pieces of corn and pepper.
Key Ingredients:
- 6 slices bacon, chopped — the smoke carries the soup.
- 1 large onion, diced — the flavor base.
- 2 celery stalks, diced — adds freshness.
- 1 red bell pepper, diced — brings sweetness and color.
- 2 medium Yukon Gold potatoes, diced — these give body.
- 3 cups corn kernels, fresh or frozen — frozen is fine here.
- 4 cups chicken broth — low-sodium helps control salt.
- 1 tablespoon flour — thickens the base slightly.
- 1 cup milk — for the creamy body.
- 1 cup heavy cream or half-and-half — for the finish.
- 1 teaspoon thyme — works well with corn.
- Chives for serving — sharp and green.
Quick Steps:
- Cook the bacon: Render the bacon in a soup pot over medium heat until crisp. Remove it and leave about 2 tablespoons of fat in the pot.
- Soften the vegetables: Add the onion, celery, and red pepper and cook for 5 to 6 minutes.
- Build the chowder base: Stir in the flour and cook for 1 minute. Slowly add the broth, whisking so the flour disappears.
- Simmer the potatoes: Add the potatoes, corn, thyme, salt, and pepper. Simmer for 15 to 18 minutes, until the potatoes are tender.
- Add the dairy: Stir in the milk and cream, then warm gently for 2 to 3 minutes.
- Finish and serve: Mash a few potato pieces against the side of the pot if you want a thicker texture. Top with bacon and chives.
Equipment for This Recipe:
- Large soup pot — enough room for the potatoes.
- Whisk — to keep the flour smooth.
- Potato masher, optional — for a thicker finish.
- Sharp knife — for the red pepper and vegetables.
How to Serve This Dish: Serve it with oyster crackers, cornbread, or a buttered biscuit. The bacon on top should stay crisp, so scatter it over each bowl right before serving.
Pro Tips for This Recipe:
- Frozen corn works well here; thaw it first so the soup does not cool down.
- Do not overblend. Some texture is part of the charm.
- If the chowder tastes too sweet, add a little black pepper or a splash of vinegar.
- Keep the heat gentle after the dairy goes in.
Variations on This Dish:
- Shrimp Corn Chowder: Add peeled shrimp during the last 3 minutes of cooking.
- Smoky Paprika Version: Add 1/2 teaspoon smoked paprika with the flour.
- Dairy-Free Chowder: Use oat milk and skip the cream, then blend a cup of potatoes for body.
Common Mistakes to Avoid with This Dish:
- Letting the flour clump: Whisk as you add the broth.
- Boiling after the cream goes in: The texture can separate.
- Blending every last kernel: A little texture keeps the chowder lively.
Why a Slow Simmer Fits a Cozy Sunday
A good Sunday soup has more in common with a long conversation than with a quick dinner. It starts with a hot pot and a few cut vegetables, but the real work happens while the onions soften, the herbs drift into the broth, and the starch from barley, rice, or potatoes quietly thickens the bowl. That slow shift is what turns soup from a task into a ritual.
There is also a practical reason these soups belong on Sundays. They forgive interruptions. You can answer the door, sort laundry, or set the table while a pot of broth keeps doing its thing at a low simmer. A soup that wants your attention in ten-minute bursts is one thing. A soup that rewards you for coming back to it is better.
The best cold weather bowls also hold up after the first serving. Bean soups deepen. Barley soups settle. Chicken noodle gets a little softer and more settled. That is not a flaw. It is the point of cooking something that is meant to live in the fridge long enough to matter twice.
Essential Equipment for These Soup Recipes
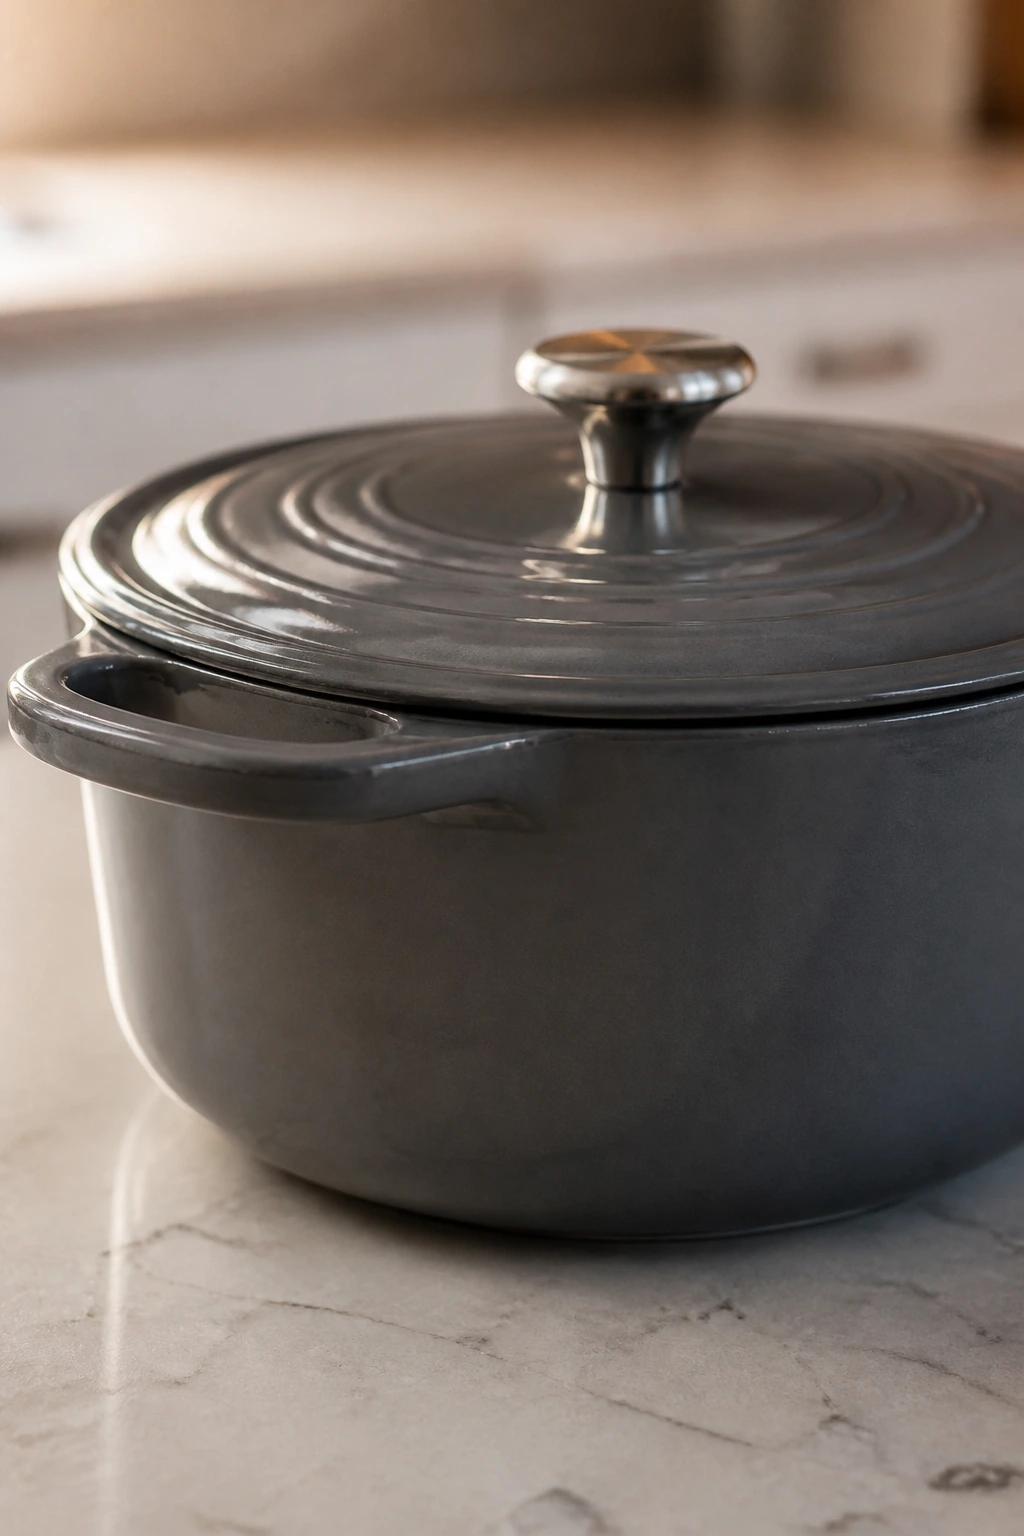
- 6- to 8-quart Dutch oven: The best choice for long simmers, browning, and soups that start on the stove and finish there.
- Heavy soup pot: A good fallback for brothy soups or smaller batches.
- Sharp chef’s knife: Soup lives or dies on even chopping.
- Cutting board: A wide board gives onions, carrots, and celery room to pile up without sliding off.
- Wooden spoon or silicone spatula: Useful for scraping browned bits off the bottom of the pot.
- Immersion blender: The easiest tool for tomato soup, squash soup, and chowders.
- Countertop blender: Best for the smoothest purées, as long as you blend in batches.
- Fine-mesh strainer or colander: Handy for rinsing lentils, beans, and leeks.
- Ladle: Makes serving cleaner and keeps noodles or potatoes from getting crushed.
- Sheet pan: Needed for roasting tomatoes, squash, onions, or tortilla strips.
- Box grater: Useful for cheese soups and fresh-grated Parmesan.
- Small bowls or prep cups: They save time once the pot starts moving.
Smart Shopping and Ingredient Tips
The easiest way to make soup taste expensive is not to buy expensive things. It is to buy the right ones. Start with broth. Low-sodium broth gives you room to season the pot yourself, which matters when bacon, ham, sausage, Parmesan rind, or cheese are already bringing salt into the mix. If the broth tastes flat out of the carton, it will not wake up in the pot.
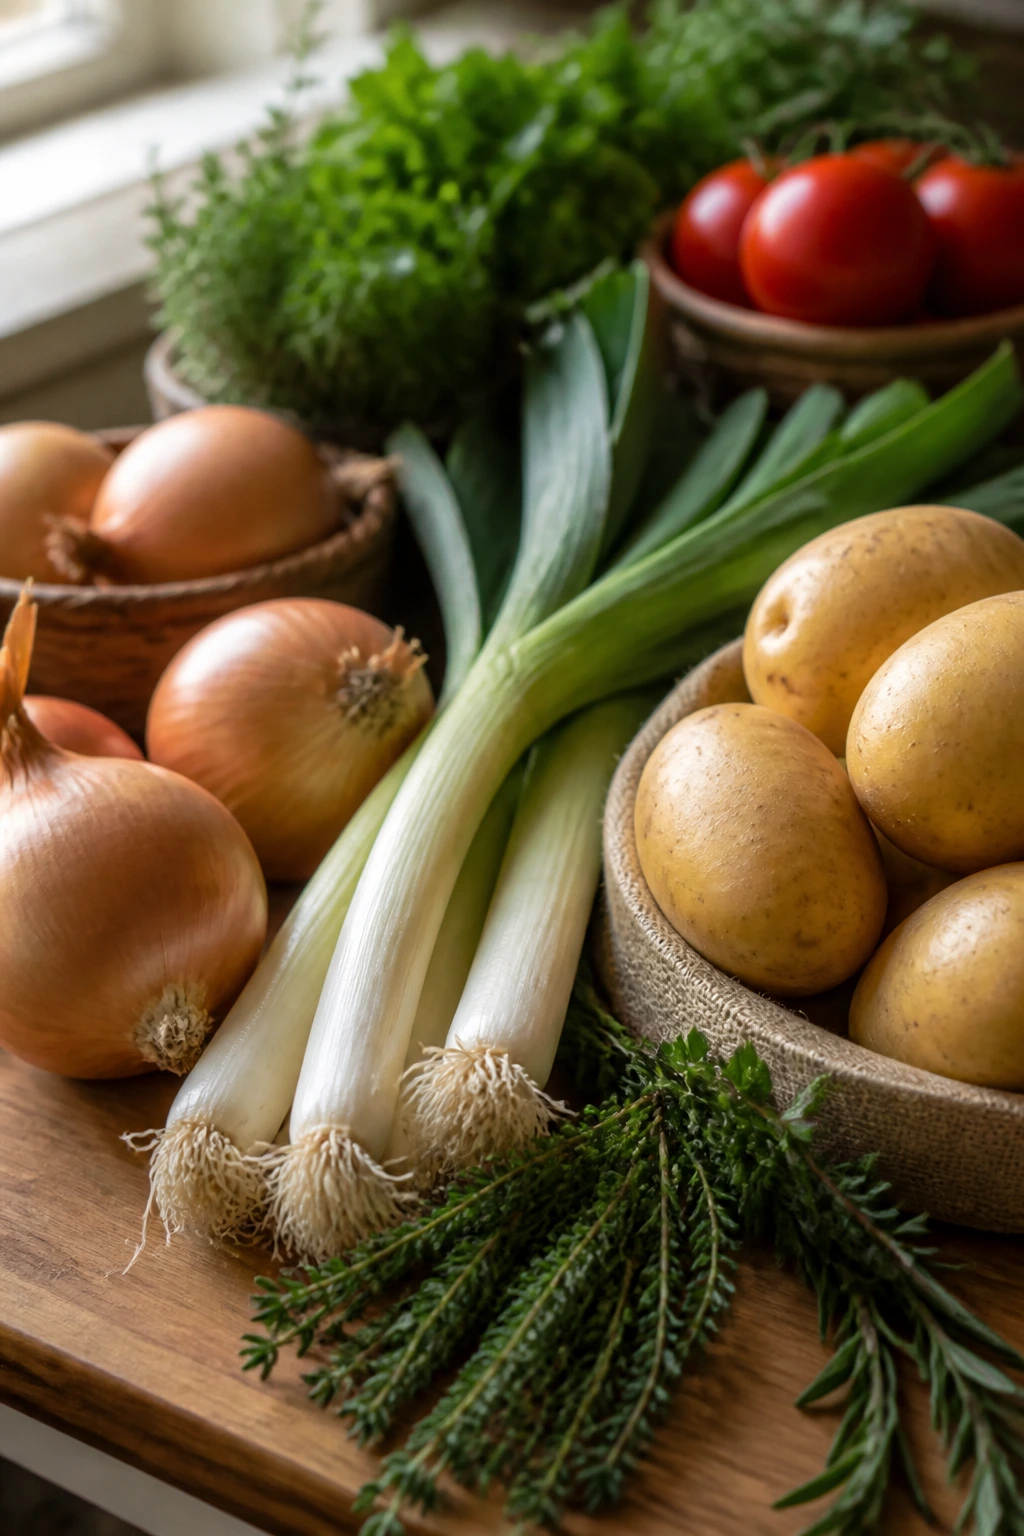
Onions matter more than people think. Yellow onions are the workhorse for most of these soups because they soften into sweetness without vanishing. Leeks should feel firm, not slimy, and the white and pale green parts are the only parts worth paying for in soup. Potatoes are another place where the choice changes the bowl: Yukon Golds keep their shape in chowder and chowder-like soups, while Russets break down faster and make the broth thicker.
Canned tomatoes are worth choosing carefully. Whole peeled tomatoes usually taste better than pre-diced because they keep more of their texture and juiciness. Beans should be rinsed unless you want the canned liquid to cloud the soup. Fresh herbs are best added near the end, where they still smell green instead of cooked down and sleepy.
A few ingredients can be frozen without suffering much. Corn, spinach, broth, and chicken stock are all fine from the freezer. That makes a winter pot easier to start from what you already have. The one thing I would not skimp on is cheese in soups that depend on it. Use a block and grate it yourself when the recipe leans on cheddar, Gruyère, or Parmesan. It melts cleaner, and the texture shows it.
How to Serve These Recipes

Presentation: Warm the bowls first if you can. Soup looks and tastes better when the first spoonful stays hot, and a warm bowl keeps the top from cooling into a skin. For brothy soups, leave a little space at the rim and keep the garnish simple; for chowders and purées, a swirl of cream, olive oil, or yogurt gives the surface some movement.
Accompaniments: Sourdough, baguette, cornbread, oyster crackers, and grilled cheese are the obvious partners for a reason. A crisp salad with sharp vinaigrette works next to creamy soups like broccoli cheddar, potato leek, and corn chowder. For tomato and roasted squash soups, garlic toast or a plain buttered sandwich is enough. Richer bowls like beef barley or split pea want bread that can stand up to them, not delicate slices that dissolve on contact.
Portions: Brothy soups usually run about 1 1/2 cups per person, while thicker chowders and chowder-adjacent bowls often land closer to 2 cups. If soup is the main dinner, I plan a little extra, because people always seem to want a second ladle once the bread shows up. For lunch, smaller bowls keep things tidy and stop the meal from feeling too heavy.
Beverage Pairing: Dry cider works beautifully with tomato soup, chicken noodle, and squash soup because the acidity keeps the meal bright. For richer bowls like French onion, beef barley, clam chowder, and sausage tortellini, a crisp lager or a light red wine like Pinot Noir keeps the meal from getting tired. If you want something nonalcoholic, sparkling water with lemon or unsweet iced tea cuts through the cream and cheese.
Additional Tips and Flavor Boosters
Flavor Enhancement: A spoonful of acid at the end does more than most people expect. Lemon juice, sherry vinegar, apple cider vinegar, or a splash of wine can pull a soup out of the heavy zone and make the salt taste cleaner. Use a small amount first. You can always add more, but you cannot pull it back.
Customization: If you want a soup to feel fuller without making it thicker in a flour-heavy way, add beans, barley, wild rice, tortellini, or diced potatoes. Those ingredients change the body of the soup in a way that feels natural. On the other side of the spectrum, if you want a lighter bowl, leave the pasta out and add extra greens or mushrooms instead.
Serving Suggestions: Crispy toppings matter more than they get credit for. Toasted breadcrumbs, fried onions, bacon crumbles, tortilla strips, croutons, pepitas, and grated cheese all give a soft soup a second texture. A small handful on top can make a simple bowl feel finished without asking you to cook anything else.
Make-It-Yours: Dairy-free cooks can lean on coconut milk, oat milk, or puréed potatoes for body. Gluten-free cooks can skip flour and thicken with potatoes, beans, or a cornstarch slurry. If you like heat, red pepper flakes, chipotle, or curry paste can add it without changing the whole character of the bowl.
Make-Ahead, Storage, and Reheating Guidance
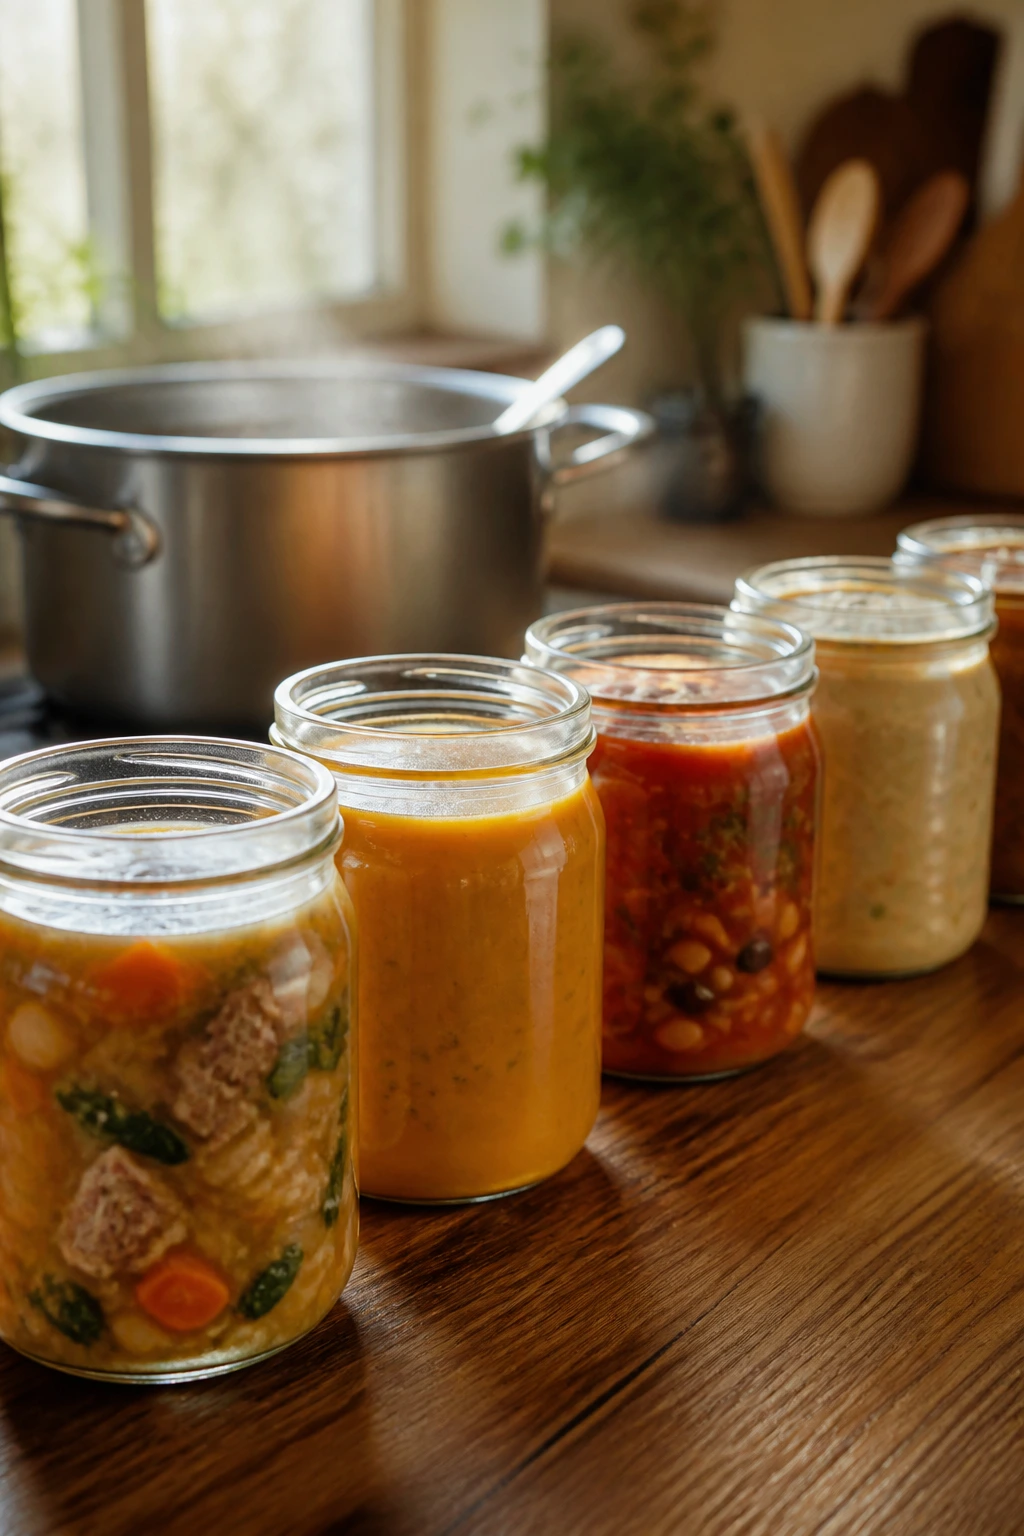
Most of these soups keep well in the refrigerator for 3 to 4 days. Brothy chicken soups, lentil soups, bean soups, and beef soups usually improve after a night in the fridge because the flavors settle together. Creamy soups are a little more delicate, and I would aim for 3 days when dairy is involved.
Freezing depends on what is in the pot. Tomato soup, bean soups, lentil soups, beef barley, split pea, and many vegetable soups freeze well for up to 2 to 3 months. Chowders and soups with a lot of cream can still freeze, but the texture may loosen a bit after thawing. If you want the cleanest result, freeze them before adding the cream, then stir the cream in while reheating.
Pasta and noodles are the most annoying leftovers. They soak up broth fast and can go soft by the next day. If you know you are making a soup with egg noodles, tortellini, or orzo, cook the pasta separately and store it apart from the broth. Then combine them in the bowl when you reheat.
Reheat everything gently over medium-low heat on the stove. Boiling is the enemy of dairy, delicate noodles, and soft greens. Add a splash of broth or water if the soup thickens too much in storage. For frozen soups, thaw overnight in the fridge when you can; if not, reheat slowly from frozen in a covered pot, breaking it up as it loosens. Stir now and then so the bottom does not catch.
Variations and Adaptations to Try

Dairy-Free Bowls: Use olive oil or coconut oil instead of butter, and finish with coconut milk, oat milk, or a puréed potato base. This works best in squash soup, tomato soup, curry soup, and lentil soup where the flavor has enough backbone to stand on its own.
Gluten-Free Sundays: Skip flour roux and use potatoes, beans, or corn to build body. Rice, wild rice, and gluten-free pasta are easy swaps, but add them with an eye on texture so the soup does not turn starchy or soft too fast.
Slow-Cooker Mornings: Brown the onions, garlic, sausage, or beef first, then move everything to the slow cooker. Long-cook soups like beef barley, split pea, and bean soups do well there because the gentle heat makes the broth taste rounded and steady.
Freezer-First Batches: If you are cooking for later, leave out pasta, dairy, and delicate greens until reheating day. Tomato soup, vegetable soup, lentil soup, and beef soup are the easiest candidates for this approach because they freeze without much drama.
Heat-Lover Bowls: Chipotle, red pepper flakes, curry paste, cayenne, and smoked paprika can all sharpen a soup without turning it harsh. Add heat early if you want it to spread through the broth, or add it at the end if you only want a little lift on the tongue.
Vegetable-Heavy Swaps: Replace some of the starch with extra mushrooms, zucchini, kale, spinach, or cauliflower. This keeps the soup lighter but still full, which is useful when you want the bowl to feel generous without relying on cream or cheese.
Common Mistakes to Avoid
-
Under-seasoning the broth at the start: Soups need salt in layers, not a rescue mission at the end. Taste after the vegetables soften, taste again after the main simmer, and taste one more time before serving.
-
Boiling dairy soups hard: Broccoli cheddar, chowder, creamy potato leek, and tortellini soup can all turn grainy or split if the heat is too aggressive. Keep the stove at a lazy simmer once milk, cream, or cheese enters the pot.
-
Adding pasta too early: Noodles, orzo, and tortellini drink broth fast and can go soft in storage. If you are making leftovers, cook them separately or undercook them slightly and add them near serving time.
-
Cutting vegetables in uneven pieces: A giant carrot chunk and a tiny carrot slice do not finish at the same time. Even knife work matters more in soup than in a lot of other cooking, because the broth shows every mistake.
-
Skipping the finishing acid: Tomato soup, bean soup, chowder, lentil soup, and creamy soups often need a small splash of lemon, vinegar, or wine at the end to wake up the flavor. The pot can taste fine without it, but it usually tastes sharper and more complete with it.
-
Using a pot that is too small: Overfilled pots make stirring awkward and raise the risk of boiling over. A wide, heavy pot gives the vegetables room to move and keeps the simmer calmer.
Frequently Asked Questions
Can I freeze creamy soups like broccoli cheddar or clam chowder?
You can, but the texture may loosen after thawing. For the cleanest result, freeze the base before the dairy goes in, then add milk or cream while reheating.
Should I cook noodles, tortellini, or rice directly in the soup?
You can, but it is not the best choice if you want leftovers. Pasta and rice keep absorbing broth, so if you expect the soup to sit for more than a day, cook them separately and add them to each bowl.
How do I fix soup that tastes flat?
Start with salt, then add a little acid. A squeeze of lemon, a spoonful of vinegar, a splash of wine, or a grated Parmesan rind can wake up a pot faster than more herbs.
What broth should I buy?
Use low-sodium broth whenever possible. It gives you room to adjust for bacon, ham, cheese, sausage, and canned tomatoes, which all bring their own salt to the party.
Can I use frozen vegetables?
Yes. Frozen corn, peas, spinach, and even chopped onions can work well in soup. They are especially handy for chowders, lentil soup, and quick chicken soups where the texture does not have to be perfect.
How do I thicken soup without flour?
Mash some of the potatoes, beans, or lentils against the side of the pot. You can also blend part of the soup, which works well in tomato soup, squash soup, bean soups, and chowders.
How much soup should I plan per person?
For brothy soups, plan about 1 1/2 cups per person. For thicker bowls like chowder, beef barley, or potato leek, 2 cups per person is safer if soup is the main dinner.
Can I make these in an Instant Pot or slow cooker?
Yes, especially the bean soups, beef soups, split pea soup, and chicken soups. Still, I like to brown onions, sausage, beef, or tomato paste on the stove first when possible; that extra step gives the broth more depth than the slow cooker alone.
A Pot Worth Starting on a Cold Sunday

A good soup does not need to be complicated to feel generous. It needs time, a little salt discipline, and the nerve to let onions soften long enough to taste sweet. Once you get that part right, the rest tends to fall into place.
The nicest thing about these bowls is that they cover a lot of moods without asking much from the pantry. Some are creamy, some are brothy, some are thick enough to hold a spoon, and a few are happiest with bread dunked right into the center. Pick the one that fits the weather, or the groceries, or the size of the crowd, and let the pot do its work.
The next cold afternoon is the right excuse to put one of these soups on the stove and keep the kitchen warm for a while.