
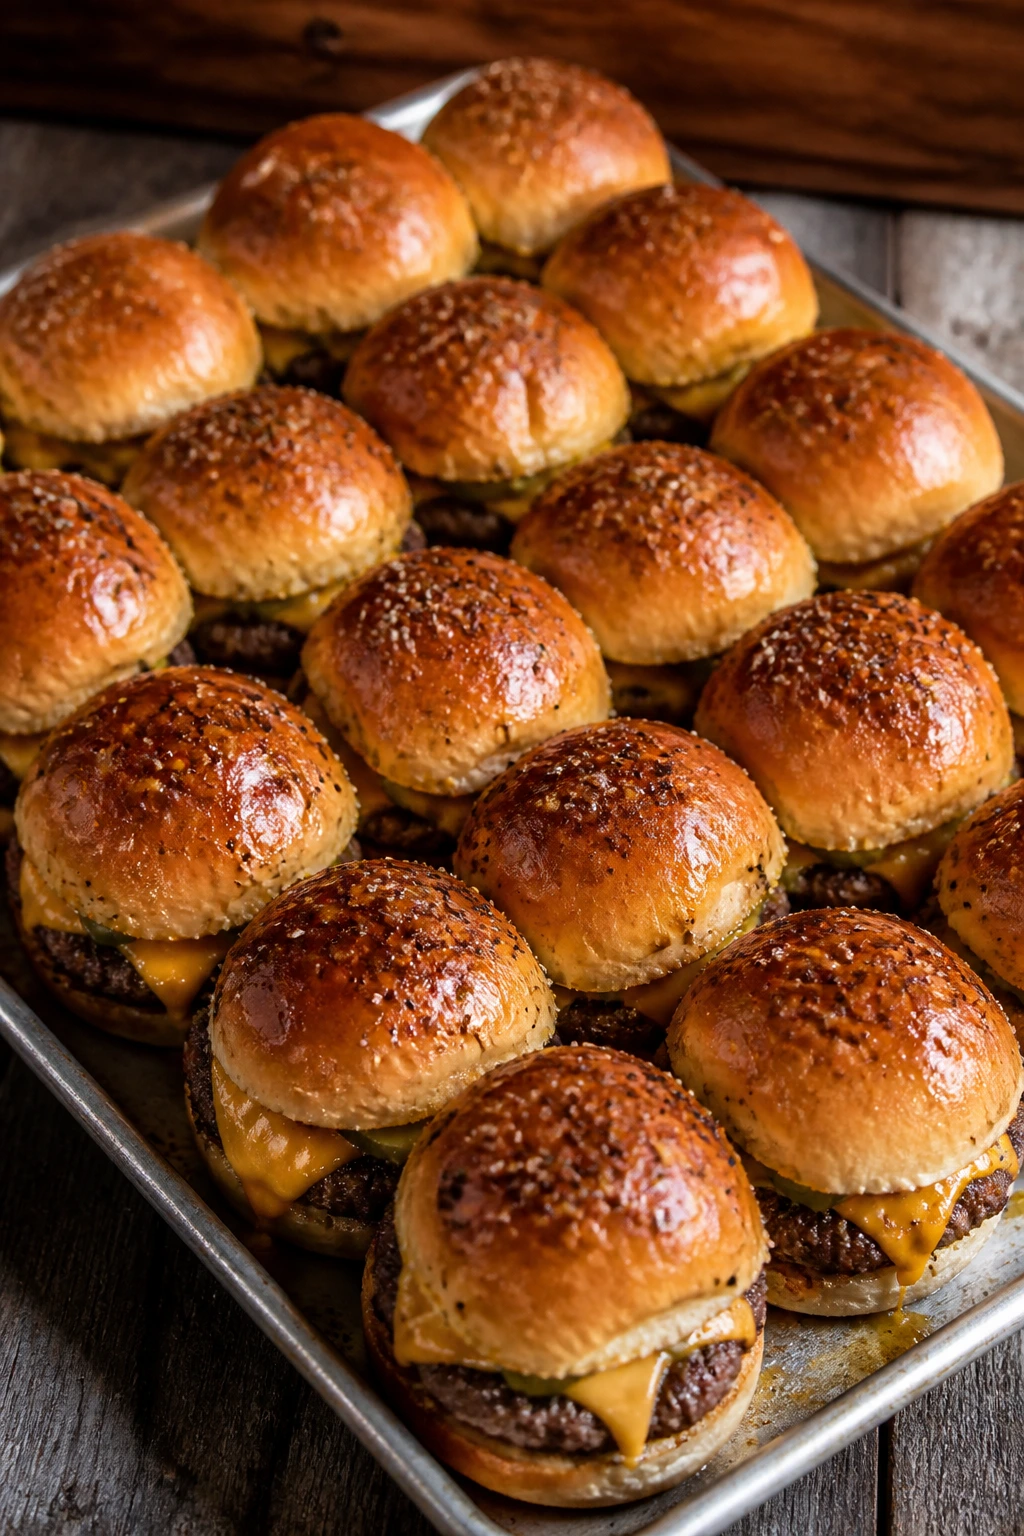
A good hamburger slider disappears in two bites. Maybe three, if the bun is soft and the cheese is still stretching when you lift it off the tray. That’s the charm of hamburger sliders: they’re small enough to cook fast, but they still give you the browned beef crust, the pickle snap, the melted cheese, and the little hit of salt that makes a burger taste like a burger.
What makes mini burgers worth caring about is not their size. It’s the ratio. A slider can have more crust per bite than a big patty, which is why the best ones taste beefier than you expect. A 2-ounce patty sears fast, a slider bun toasts before it turns leathery, and the whole thing can be built around one strong idea instead of a pile of random toppings.
That’s where these hamburger sliders recipes earn their keep. Some lean classic and diner-style. Some go smoky, spicy, messy, sweet, or sharp. A few are the kind of thing you make when a tray has to feed people who all want something different, which is to say: almost every gathering that involves food and a table.
Why These Mini Burgers Keep Disappearing
- Fast to cook: Small patties hit a proper browned crust in a few minutes, so you can get a full tray on the table without babysitting a grill for half an hour.
- Easy to scale: Two pounds of ground beef usually makes 10 to 12 sliders, and that math is useful when you’re feeding a crowd that keeps circling back.
- Flexible toppings: Cheese, pickles, onions, sauces, slaw, bacon, peppers, and jalapeños all fit the format without falling apart if you keep the buns toasted.
- Better bite-to-bun balance: A slider gives you a little more beef in relation to bread, which is why the first bite feels punchier than a regular burger sometimes does.
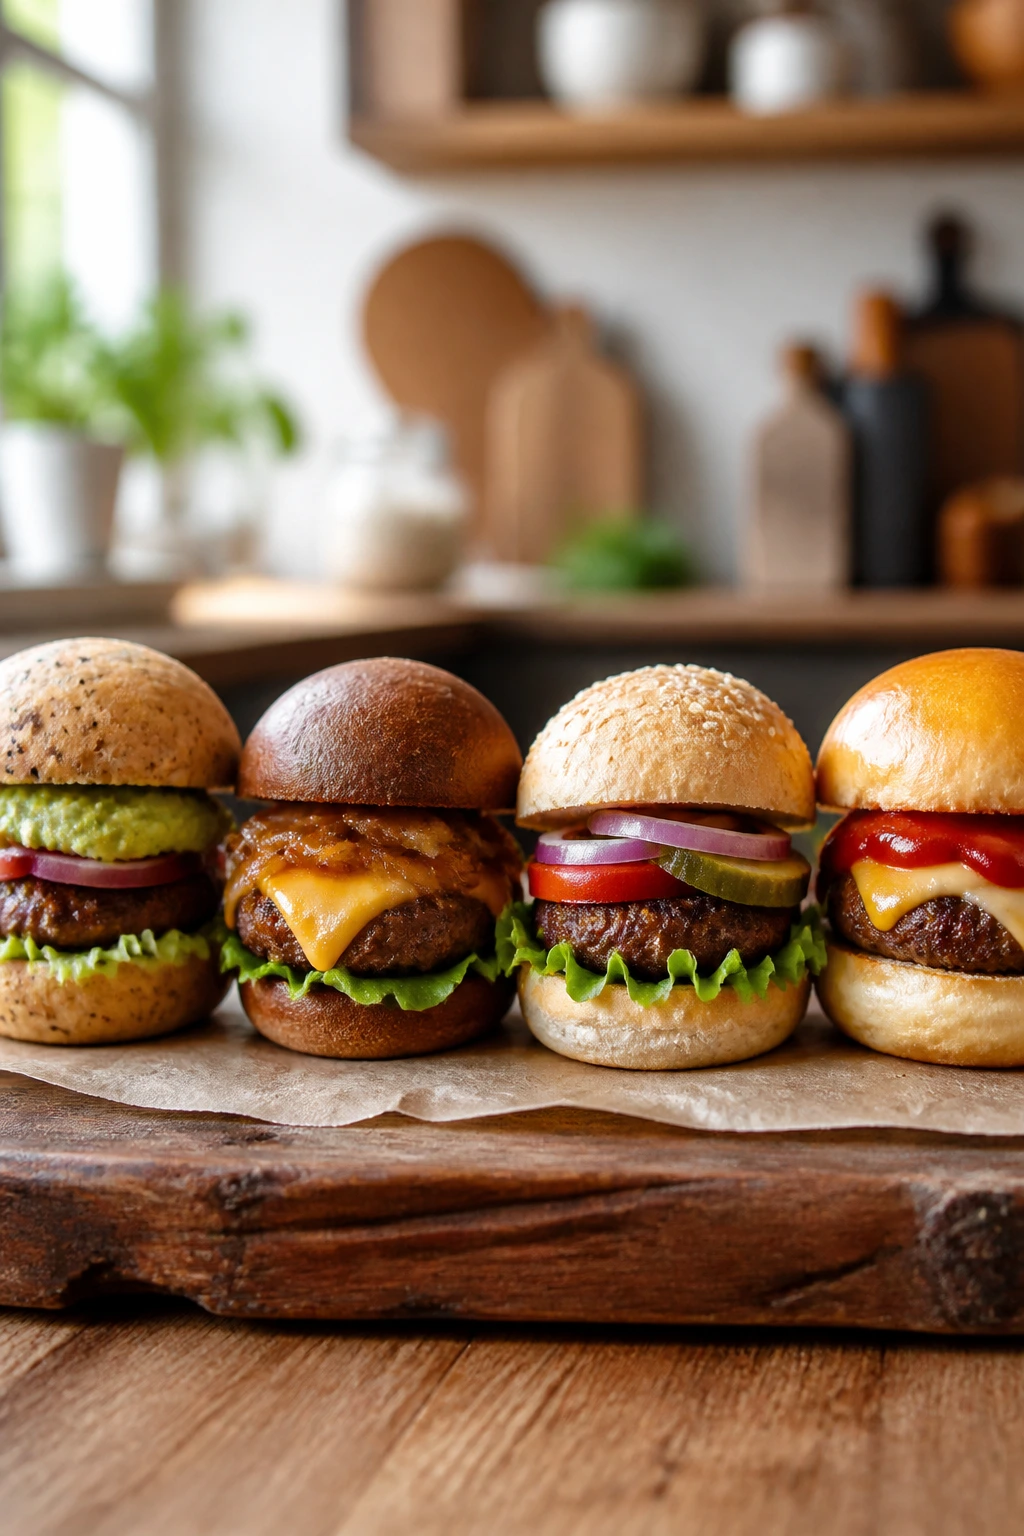
- Good for mix-and-match trays: Put out three or four styles and people can sample instead of committing to one big burger.
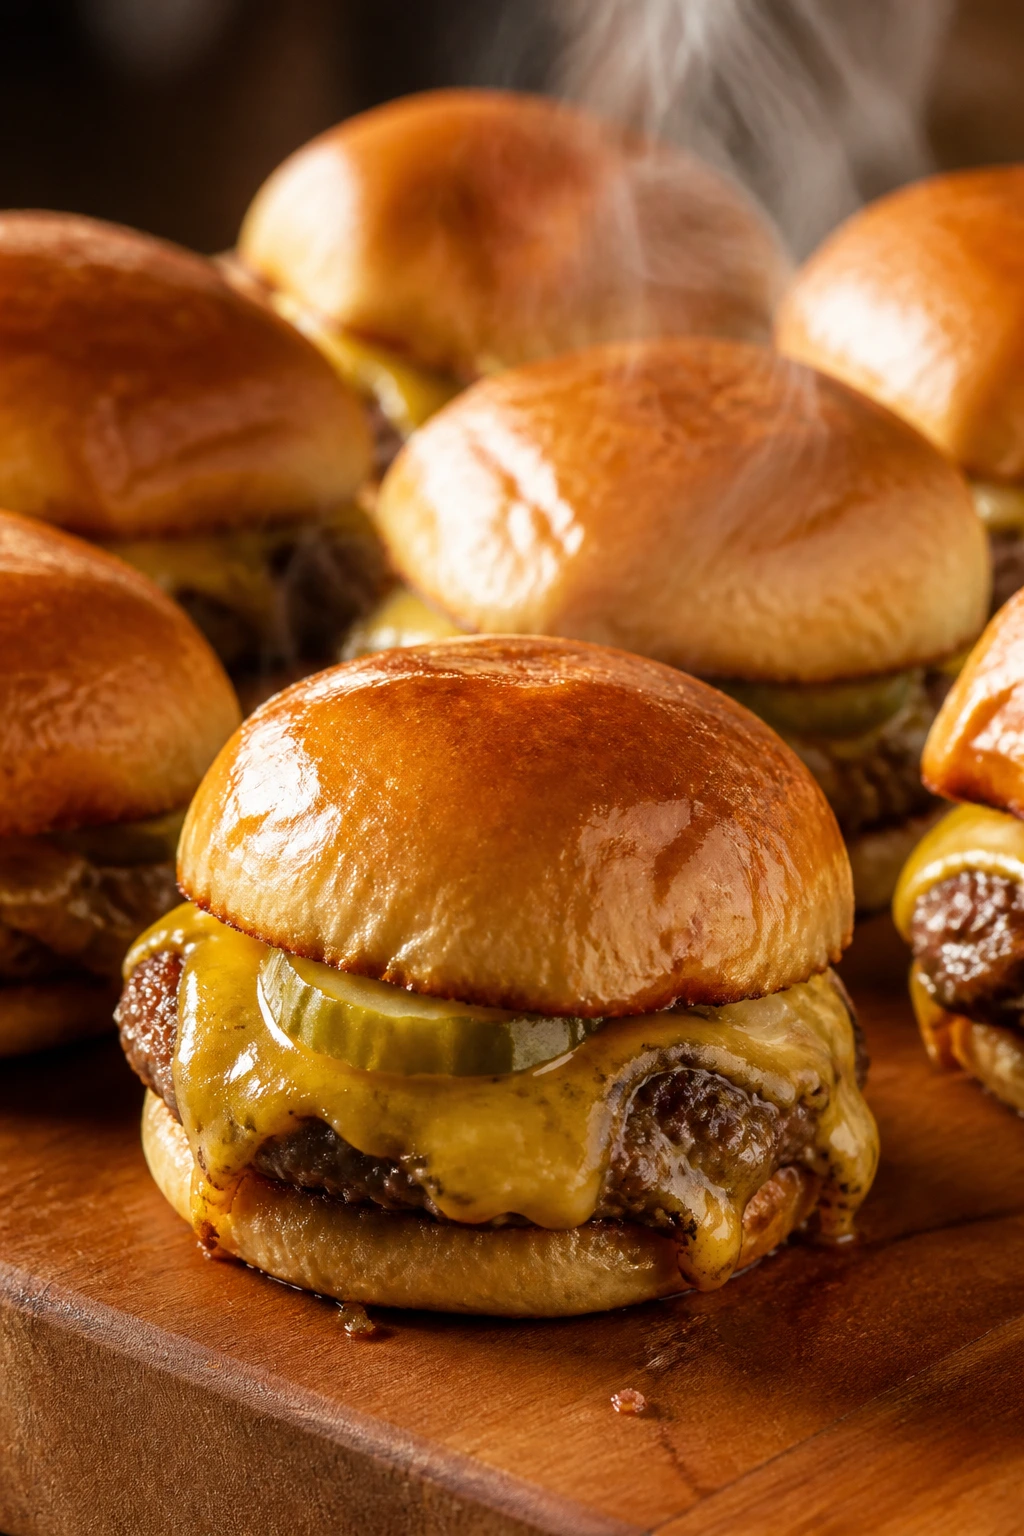
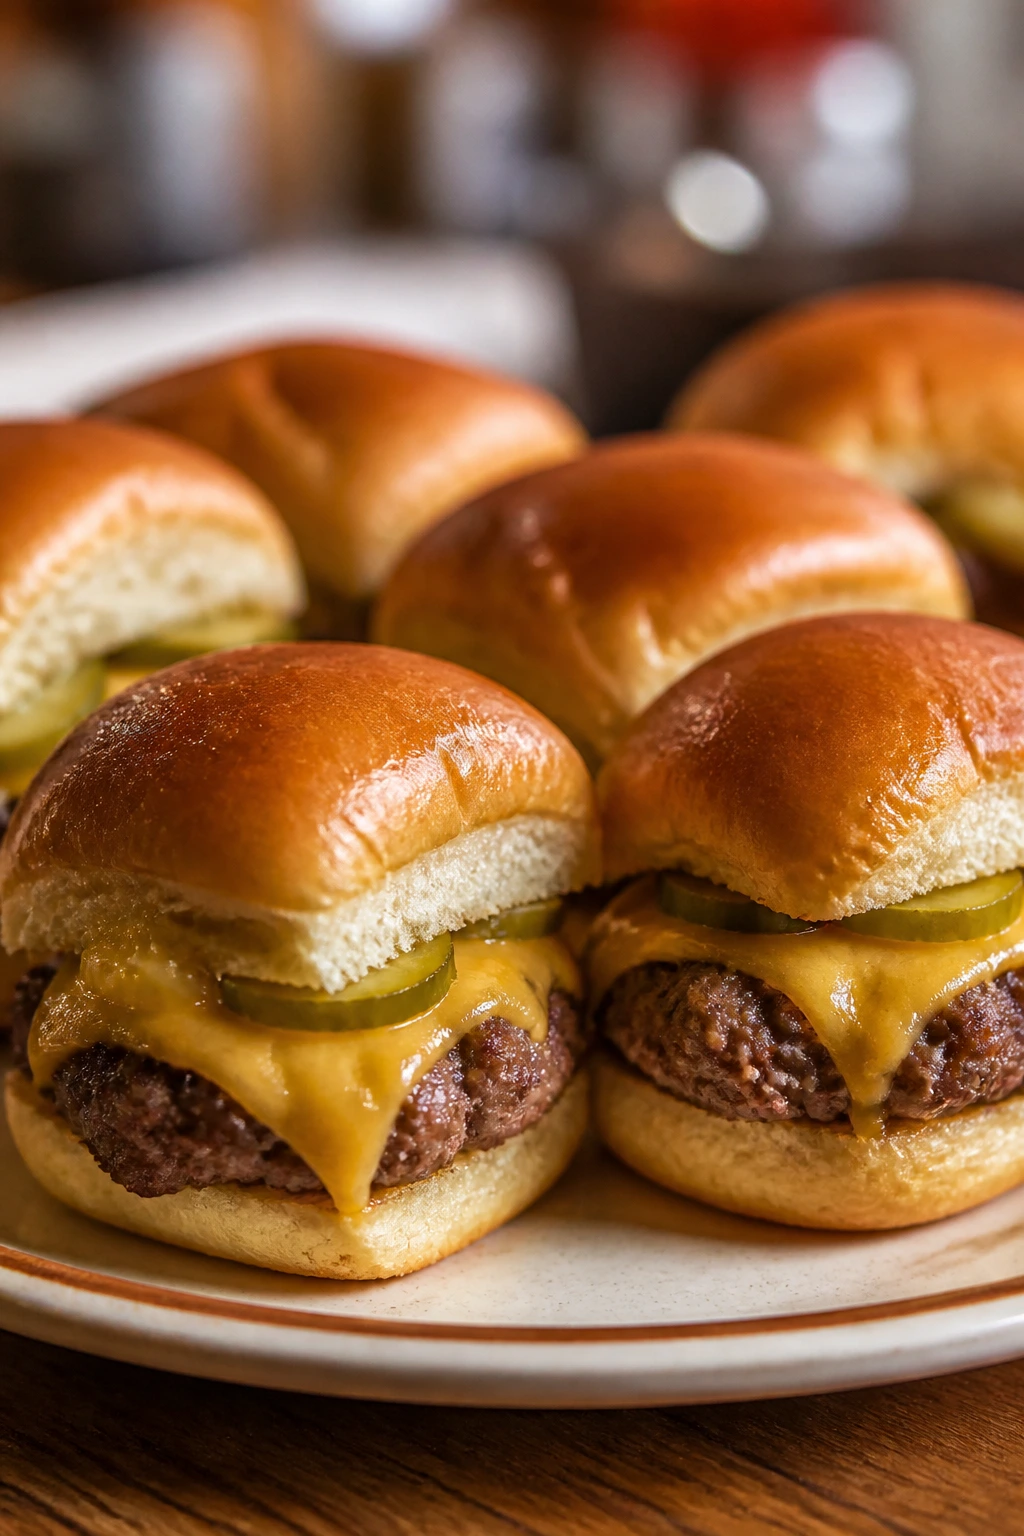
1. Diner-Style Cheeseburger Sliders
These taste like the burger you get after a long road trip when the fries are crisp, the pickles are cold, and the cheese has melted into the edges of the meat. There’s nothing shy here. The beef is seasoned simply, the buns are buttered, and the whole thing lands in that clean, nostalgic lane where ketchup and mustard still make sense together.
Why It Works:
A simple cheeseburger slider only works if the beef is juicy and the buns are properly toasted. The 80/20 grind gives you enough fat for browning, and the quick sear keeps the center from drying out. American cheese is the smart choice here because it melts into a smooth blanket instead of breaking into greasy spots. Keep the patties small and even, and they’ll cook to 160°F before the buns have a chance to go stale.
Key Ingredients:
- 2 lbs ground beef, 80/20 — the fat keeps the sliders juicy and gives you a real crust.
- 1 1/2 teaspoons kosher salt — seasons the meat all the way through.
- 1 teaspoon black pepper — adds a little bite without taking over.
- 1 teaspoon onion powder — gives the beef that diner-burger edge.
- 1/2 teaspoon garlic powder — rounds out the seasoning.
- 2 teaspoons Worcestershire sauce — deepens the beef flavor fast.
- 12 slider buns — soft buns hold up best if you toast the cut sides.
- 6 slices American cheese, halved — the melt is the whole point.
- 2 tablespoons unsalted butter, melted — for toasting the buns.
- 1 tablespoon sesame seeds — optional, but they make the tops feel finished.
- 12 dill pickle chips — the acid cuts through the beef.
- 2 tablespoons ketchup and 2 tablespoons yellow mustard — serve on the side or spread thinly.
Quick Steps:
- Preheat and Prep: Heat a cast-iron skillet or griddle over medium-high heat. Split the slider buns and brush the cut sides with melted butter.
- Season the Beef: In a bowl, gently mix the ground beef with salt, pepper, onion powder, garlic powder, and Worcestershire sauce. Stop as soon as the seasoning disappears into the meat. Do not overmix or the patties turn dense.
- Shape the Patties: Divide the beef into 12 portions, about 2 ounces each, and press them into thin patties slightly wider than the buns. Make a shallow dimple in the center of each one so they stay flat.
- Cook and Melt: Sear the patties for 2 to 3 minutes per side, until browned and the internal temperature reaches 160°F (71°C). Add a half slice of American cheese to each patty during the last 30 seconds and cover the pan.
- Toast and Assemble: Toast the buns cut-side down until golden. Stack each slider with a cheeseburger patty, pickle chips, ketchup, and mustard. Sprinkle sesame seeds on the bun tops if you like the diner look.
Equipment for This Recipe:
- 12-inch cast-iron skillet or griddle — gets you the browning you want.
- Wide metal spatula — easier for flipping small patties cleanly.
- Mixing bowl — just large enough to mix without crushing the beef.
- Pastry brush — for buttering the buns.
- Instant-read thermometer — the surest way to hit 160°F without guessing.
How to Serve This Dish:
Stack these on a parchment-lined tray and slide in a small bowl of extra pickles between the rows. They pair nicely with kettle chips, crisp fries, or a vinegar slaw that cuts the richness. Two sliders make a solid plate; three is the number people usually call “one more” before they stop counting.
Pro Tips for This Recipe:
- Form the patties cold and cook them right away for the best shape.
- Toast the buns before the cheese goes on the burger; once the cheese melts, you don’t want to juggle the sandwich.
- Use American cheese if you want a smooth, even melt. Sharp cheddar tastes good, but it can split if the heat gets too high.
- If your skillet runs hot, lower it slightly after the first batch so the buns don’t scorch while the last patties finish.
Variations on This Dish:
- Double-Stack Diner Style: Make 16 thinner patties and use two per slider with a single half slice of cheese.
- Lettuce-Loaded Version: Add a small square of iceberg lettuce under the patty for extra crunch and a cooler bite.
- Dijon Swap: Replace yellow mustard with Dijon for a sharper finish.
Common Mistakes to Avoid with This Dish:
- Pressing the patties while they cook: That squeezes out the fat and leaves you with dry burgers.
- Skipping the bun toast: Soft buns look fine for a minute, then they go soggy under the cheese and pickle juice.
- Using thick patties for sliders: Small buns need small patties; a thick burger throws off the whole bite.
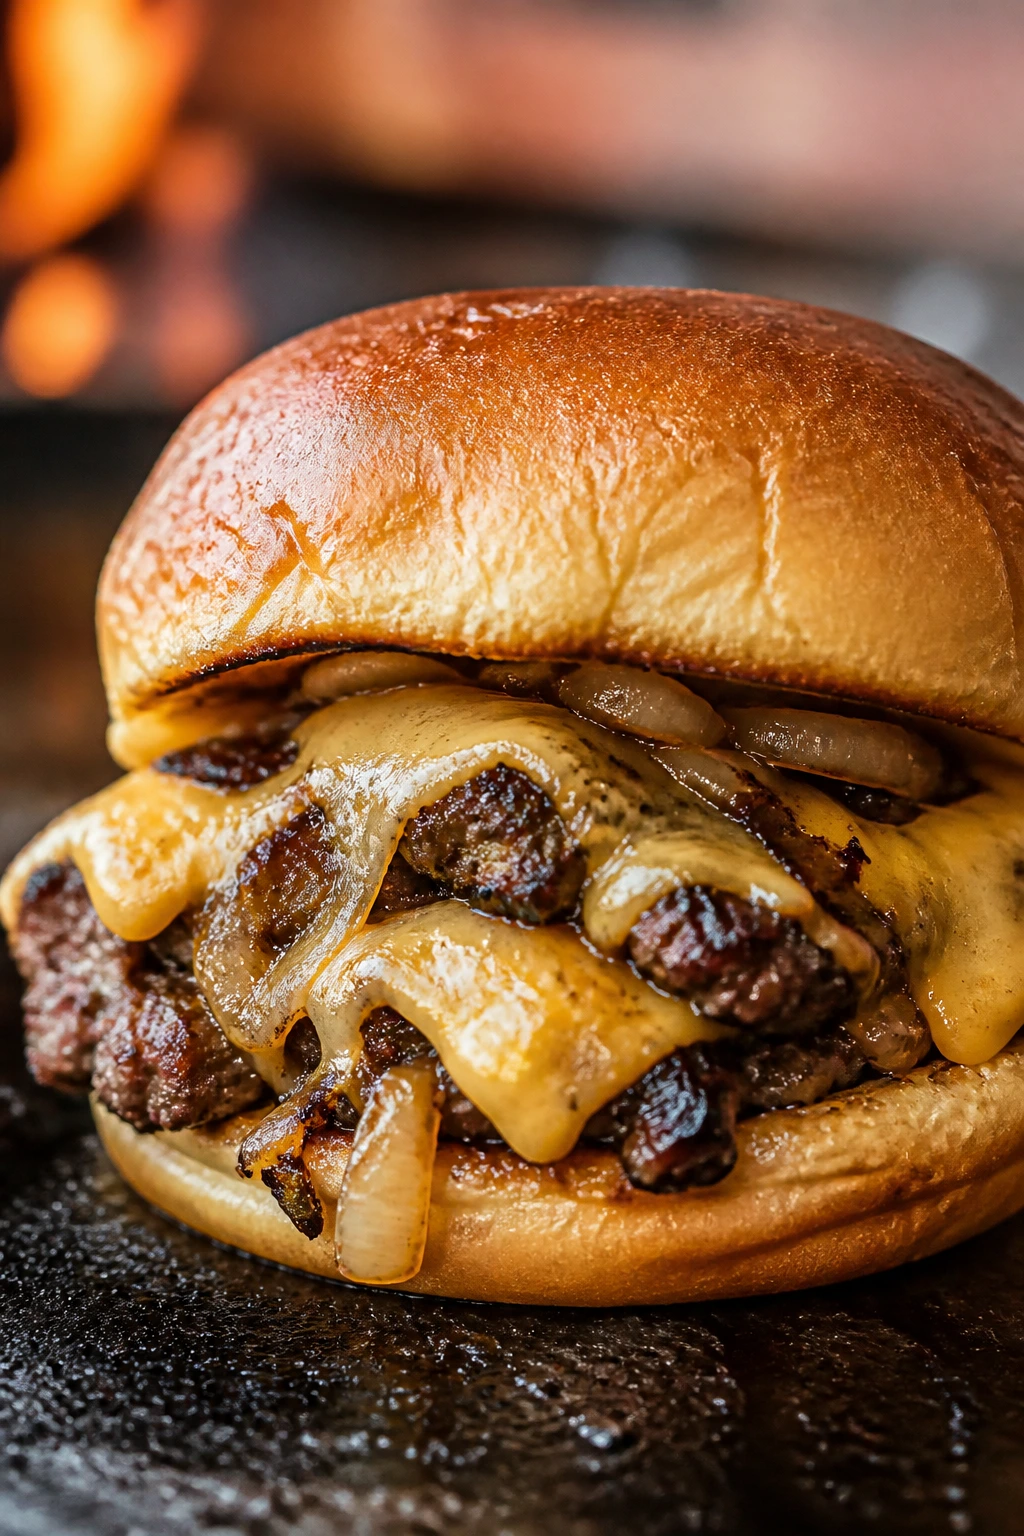
2. Oklahoma Onion Smash Sliders
These are for anyone who likes onions to do more than sit on top of the burger. Thin onion shreds cook right into the beef, turn sweet at the edges, and leave a savory smell on the pan that hangs around long after the sliders are gone. They taste blunt, salty, and a little addictive.
Why It Works:
Smash-style sliders work because thin patties hit the hot surface all at once. The onions underneath soften, steam for a moment, then brown into the beef as the burger crust develops. That quick contact gives you more flavor than a thicker patty ever could. The onion layer also keeps the beef from sticking if you leave it alone long enough to brown.
Key Ingredients:
- 2 lbs ground beef, 80/20 — best for smash patties because the fat renders fast.
- 2 large yellow onions, peeled and sliced very thin — the onions should almost melt into strings.
- 1 1/2 teaspoons kosher salt — split between the beef and the onions.
- 1 teaspoon black pepper — keeps the meat from tasting flat.
- 1 tablespoon Worcestershire sauce — adds a little depth.
- 6 slices American cheese, halved — soft melt, no fuss.
- 12 slider buns — plain buns are fine; the onions do most of the work.
- 1 tablespoon yellow mustard — the sharp edge balances the sweet onions.
- 12 dill pickle chips — cold and bright against the hot beef.
- 2 tablespoons neutral oil or beef fat — helps the onions start browning.
Quick Steps:
- Start the Onions: Heat a skillet over medium-high heat with the oil. Add the sliced onions and a pinch of salt, then cook for 8 to 10 minutes, stirring often, until they soften and pick up brown edges.
- Shape the Beef: Divide the beef into 12 loose balls. Don’t pack them tight; a loose shape smashes better.
- Smash and Sear: Place a beef ball directly on top of a small mound of onions in the skillet. Press it firmly with a spatula until very thin, then season the exposed side with salt and pepper. Cook for 1 1/2 to 2 minutes without moving it. Let the crust form before you flip.
- Flip and Add Cheese: Turn each patty, top with a half slice of American cheese, and cook 30 to 45 seconds more. Cover the pan if you want a faster melt.
- Toast and Build: Toast the buns in the same skillet, then stack each slider with onions, cheese, mustard, and pickles.
Equipment for This Recipe:
- Heavy skillet or flat griddle — needed for the smash and the browning.
- Wide, stiff spatula — thin patties need a firm press.
- Bench scraper or small bowl — for dividing the beef evenly.
- Lid or sheet pan — useful for melting cheese quickly.
How to Serve This Dish:
Serve these hot, with the onions still carrying a little sweetness and the cheese just barely oozy. They’re excellent with potato salad or plain chips because the burger itself already has plenty going on. If you’re feeding a crowd, keep them on a warm tray instead of stacking them deep; the crust softens fast if steam gets trapped.
Pro Tips for This Recipe:
- Slice the onions thinner than you think you should. Thick slices stay crunchy in the wrong way.
- Use a spatula with a long handle and some leverage. Smash once, hard, and leave it alone.
- If the onions start to burn before the beef is ready, lower the heat slightly and keep going.
Variations on This Dish:
- Cheddar Onion Smash: Swap American for mild cheddar if you want a firmer, sharper melt.
- Spicy Onion Smash: Add a pinch of red pepper flakes to the onions while they cook.
- Garlic Mayo Finish: Spread garlic mayo on the buns instead of mustard.
Common Mistakes to Avoid with This Dish:
- Trying to move the burger too soon: The crust sticks at first, then releases cleanly when it’s ready.
- Using too much onion: You want a thin, lacy layer, not a heap that steams the meat.
- Smashing twice: One hard smash is enough. After that, you’re just pushing out juice.
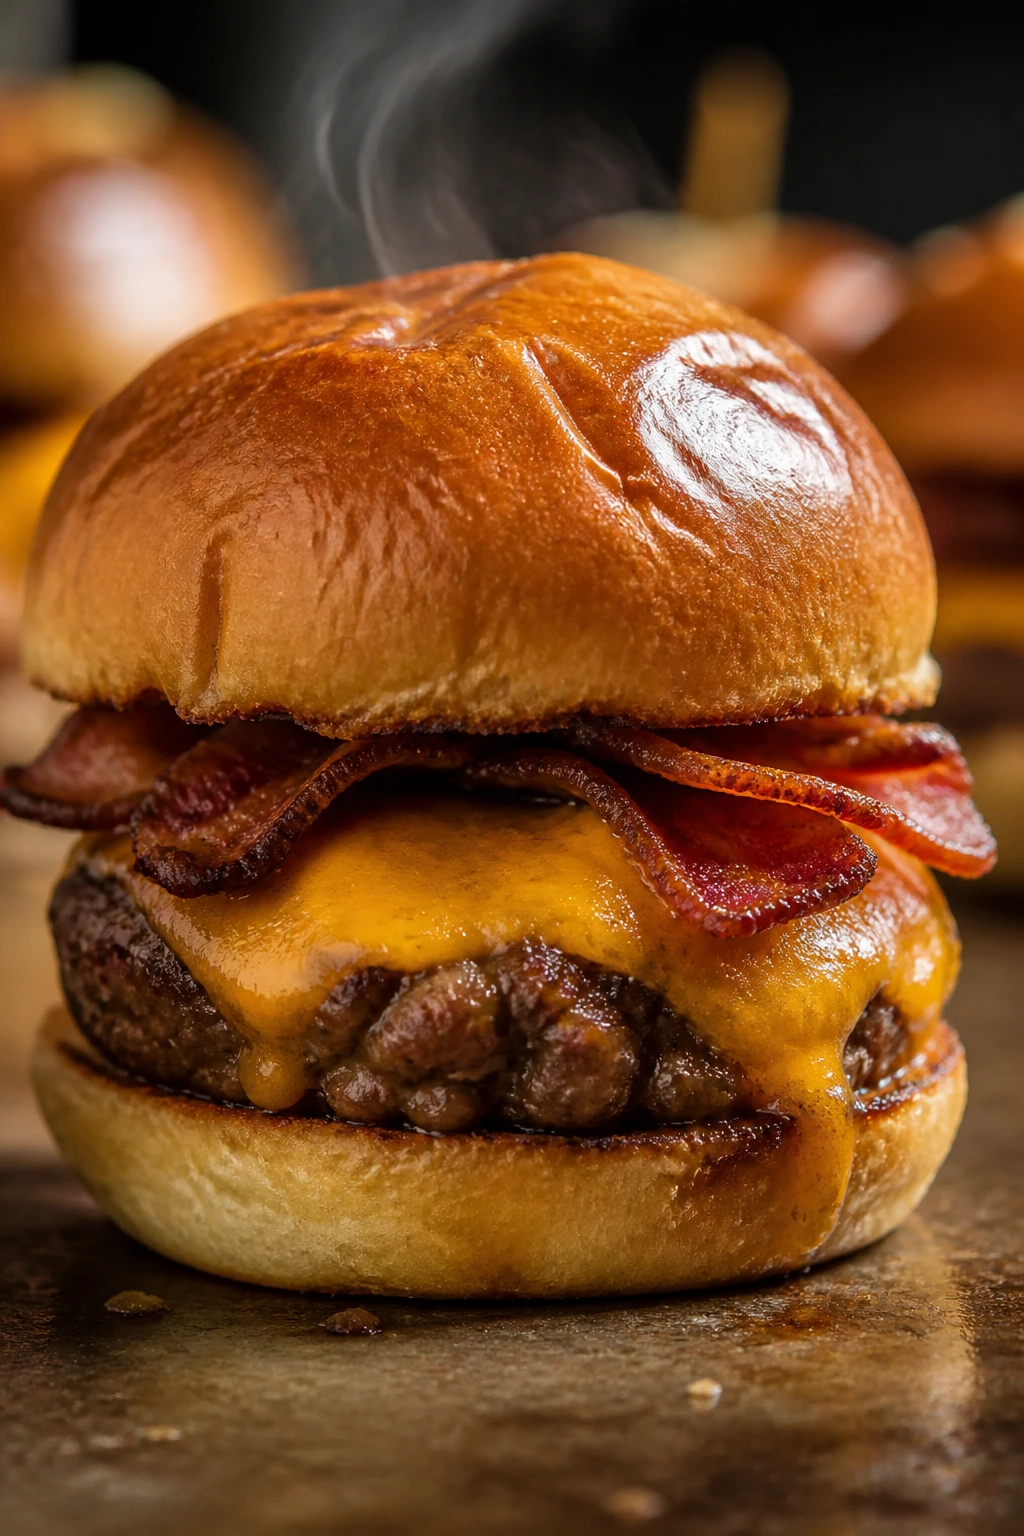
3. Bacon Cheddar Slider Burgers
Bacon changes the whole mood of a slider. The smell hits first, then the sharp little crackle when you bite through it into the beef and cheddar underneath. These are the kind of mini burgers that get picked up before the tray is fully set down, which is both annoying and flattering.
Why It Works:
Bacon adds salt, smoke, and a second texture that makes a small burger feel bigger than it is. Cooking the beef in a little reserved bacon fat builds flavor, but only if you keep the pan hot enough to sear instead of soaking everything in grease. Sharp cheddar gives you a stronger cheese note than American, which matters when the bacon is already doing the heavy lifting.
Key Ingredients:
- 2 lbs ground beef, 85/15 — a touch leaner works here because the bacon brings extra fat.
- 1 1/2 teaspoons kosher salt — enough to season the beef without fighting the bacon.
- 1 teaspoon black pepper — sharpens the meat.
- 1 teaspoon smoked paprika — echoes the bacon’s smoke.
- 8 slices thick-cut bacon — cooked until crisp, then broken to fit the buns.
- 6 slices sharp cheddar cheese, halved — sturdier than American and bold enough for bacon.
- 12 slider buns — brioche or potato buns both work well.
- 1/4 cup mayonnaise — keeps the inside soft and adds richness.
- 12 dill pickle chips — the acid keeps the slider from tasting heavy.
- 1 tablespoon neutral oil, if needed — for the pan if the bacon doesn’t release enough fat.
Quick Steps:
- Cook the Bacon: Fry the bacon in a skillet over medium heat until crisp, 6 to 8 minutes. Transfer it to paper towels, then reserve 1 tablespoon of the drippings.
- Form the Patties: Mix the beef with salt, pepper, and smoked paprika. Shape into 12 thin patties, slightly wider than the buns.
- Sear the Burgers: Heat the skillet over medium-high and cook the patties in the reserved bacon fat for 2 to 3 minutes per side. If the fat starts smoking hard, lower the heat a notch.
- Melt the Cheese: Add a half slice of cheddar to each patty during the final minute and cover just until melted.
- Toast and Assemble: Toast the buns in the same skillet, spread mayo on the cut sides, then stack bacon, burger, and pickles.
Equipment for This Recipe:
- Large skillet — for both bacon and patties.
- Tongs — easier than a fork for keeping the bacon crisp.
- Paper towel-lined plate — drains excess fat fast.
- Wide spatula — flips the sliders without tearing them.
How to Serve This Dish:
These like a simple side: fries, chips, or a bowl of slaw with a vinegar bite. They hold up well on a platter, but keep the bacon visible so people know what they’re reaching for. Two sliders feel right for most adults, though three disappears faster than anyone plans for.
Pro Tips for This Recipe:
- Cook the bacon first so you can use a little of the drippings for the beef.
- Break the bacon into pieces that fit inside the bun. Long strips slip out on the first bite.
- If the cheddar refuses to melt, cover the pan for 20 seconds instead of leaving the burgers in too long.
Variations on This Dish:
- Maple Bacon Cheddar: Brush the bacon with a teaspoon of maple syrup during the last minute.
- Chipotle Mayo Version: Mix chipotle in adobo into the mayonnaise for a smoky heat.
- Double Bacon Crunch: Add a spoonful of crispy fried onions for extra texture.
Common Mistakes to Avoid with This Dish:
- Letting the bacon get limp on the tray: It softens fast under steam, so drain it well.
- Using very lean beef: The sliders taste dry next to the bacon if there isn’t enough fat in the patty.
- Stacking too much mayo: A thin swipe is enough; heavy mayo turns the bottom bun slippery.
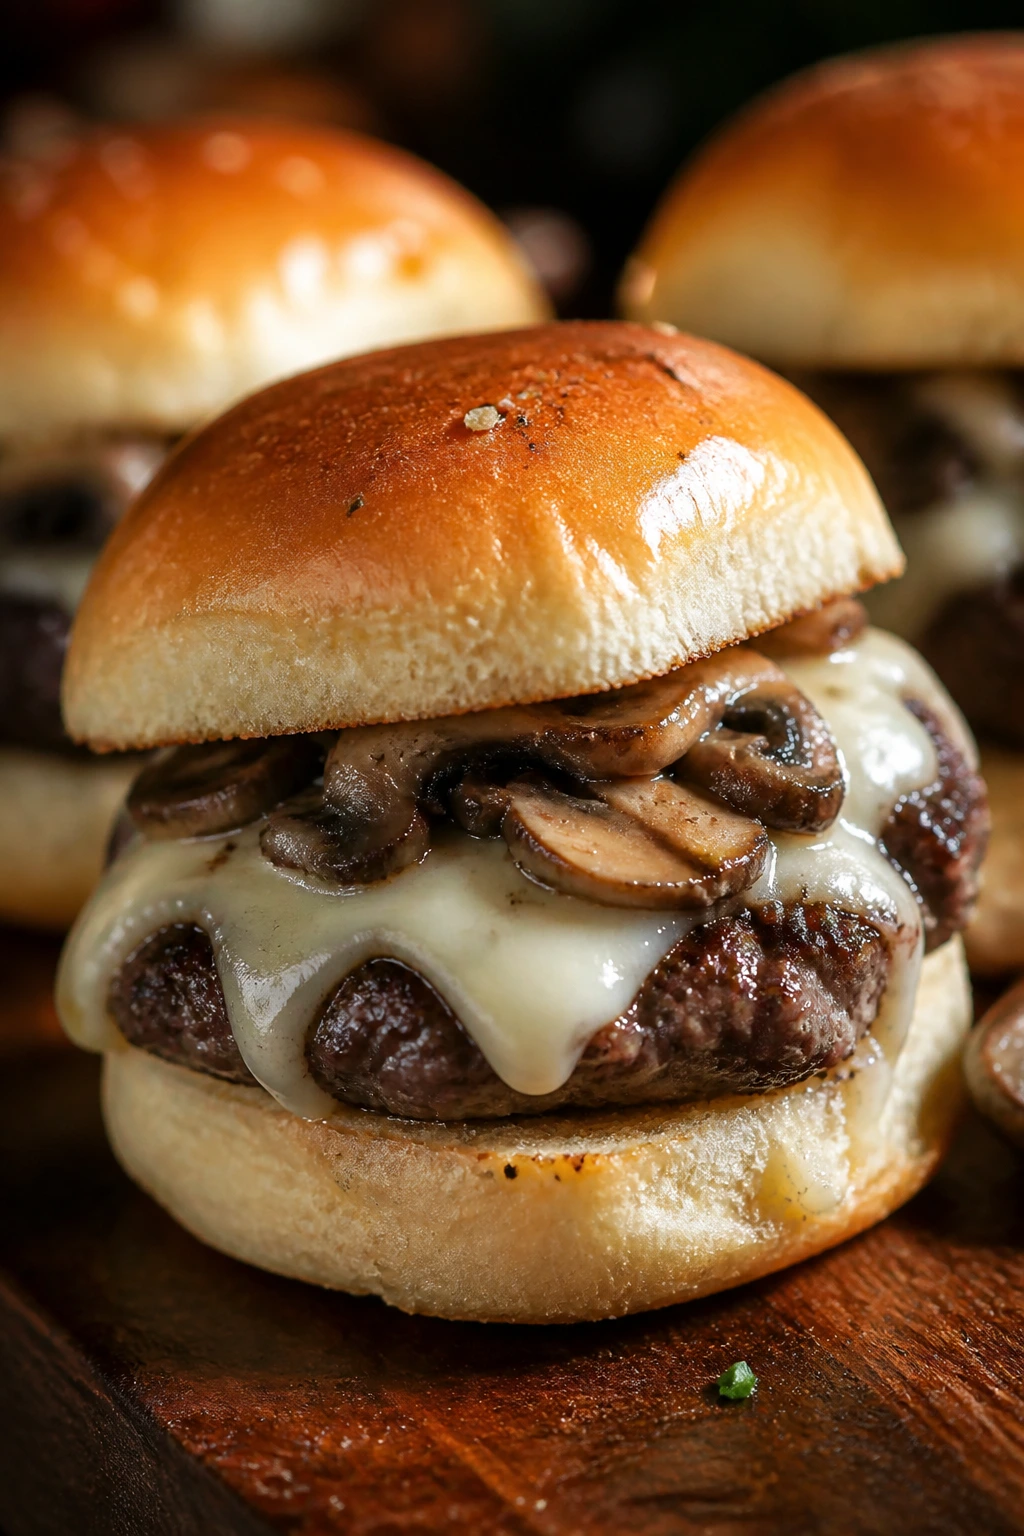
4. Mushroom Swiss Slider Burgers
There’s something old-school about mushrooms and Swiss on a burger. The mushrooms should be dark at the edges and almost glossy, not pale and watery. When they’re done right, the sliders taste earthy, buttery, and a little sharp from the cheese — the sort of combination that makes a small burger feel like a proper meal.
Why It Works:
Mushrooms bring moisture and umami, which is exactly why they need to be cooked first and cooked hard. If you overcrowd the pan, they steam and turn limp; if you give them room, they brown and deepen. Swiss cheese melts into the warm mushrooms in a way that feels clean rather than heavy, and Dijon adds a bright line through the richness.
Key Ingredients:
- 2 lbs ground beef, 85/15 — slightly leaner works because the mushrooms and butter add richness.
- 1 1/2 teaspoons kosher salt — seasons the beef.
- 1 teaspoon black pepper — gives the patties a little snap.
- 1 teaspoon onion powder — supports the mushroom flavor.
- 12 oz cremini mushrooms, sliced — cremini hold their shape and brown well.
- 2 tablespoons unsalted butter — for the mushrooms.
- 1 teaspoon fresh thyme leaves or 1/2 teaspoon dried thyme — gives a woodsy note.
- 6 slices Swiss cheese, halved — melts smoothly over the beef.
- 12 slider buns — toasted so they don’t go soft under the mushrooms.
- 1 tablespoon Dijon mustard — sharpens the whole sandwich.
Quick Steps:
- Brown the Mushrooms: Melt the butter in a skillet over medium-high heat. Add the mushrooms and thyme, then cook for 8 to 10 minutes, stirring occasionally, until the pan is nearly dry and the mushrooms are deep brown.
- Season and Shape: Mix the beef with salt, pepper, and onion powder. Form 12 small patties and keep them slightly thicker than a smash burger.
- Cook the Patties: Sear the patties in a hot skillet for 2 to 3 minutes per side until browned and cooked to 160°F (71°C).
- Add the Cheese: Place Swiss on the patties and cover for 30 to 45 seconds until melted.
- Toast and Build: Toast the buns, spread Dijon on the bottom halves, then add the patties and a spoonful of mushrooms.
Equipment for This Recipe:
- Large skillet — one for mushrooms, one for burgers, or a wide pan if you work in batches.
- Slotted spoon — helps drain excess mushroom moisture.
- Spatula — for flipping the patties.
- Small bowl — for the Dijon and any finishing sauce.
How to Serve This Dish:
Serve these with roasted potatoes or a green salad dressed with lemon and olive oil. The mushroom topping can slide if you overfill the bun, so keep the spoonful modest. They’re best eaten warm, when the Swiss is still soft and the mushrooms have that glossy, just-cooked look.
Pro Tips for This Recipe:
- Don’t salt the mushrooms at the start. Salt pulls moisture out early and slows the browning.
- Keep the mushrooms in a single layer if you can. Crowding is what gives you rubbery results.
- Dijon works better here than ketchup. The sharpness wakes up the mushrooms.
Variations on This Dish:
- Garlic Mushroom Swiss: Add 1 minced garlic clove to the mushrooms in the last minute.
- Herb Butter Version: Finish the mushrooms with a small pat of herb butter.
- Blue Cheese Swap: Replace Swiss with blue cheese if you want a stronger, funkier finish.
Common Mistakes to Avoid with This Dish:
- Using watery mushrooms as-is: They need time in the pan to cook off the liquid.
- Assembling too early: Wait until the bun is toasted and the cheese has actually melted.
- Skipping the mustard: It seems minor, but the slider tastes flatter without it.
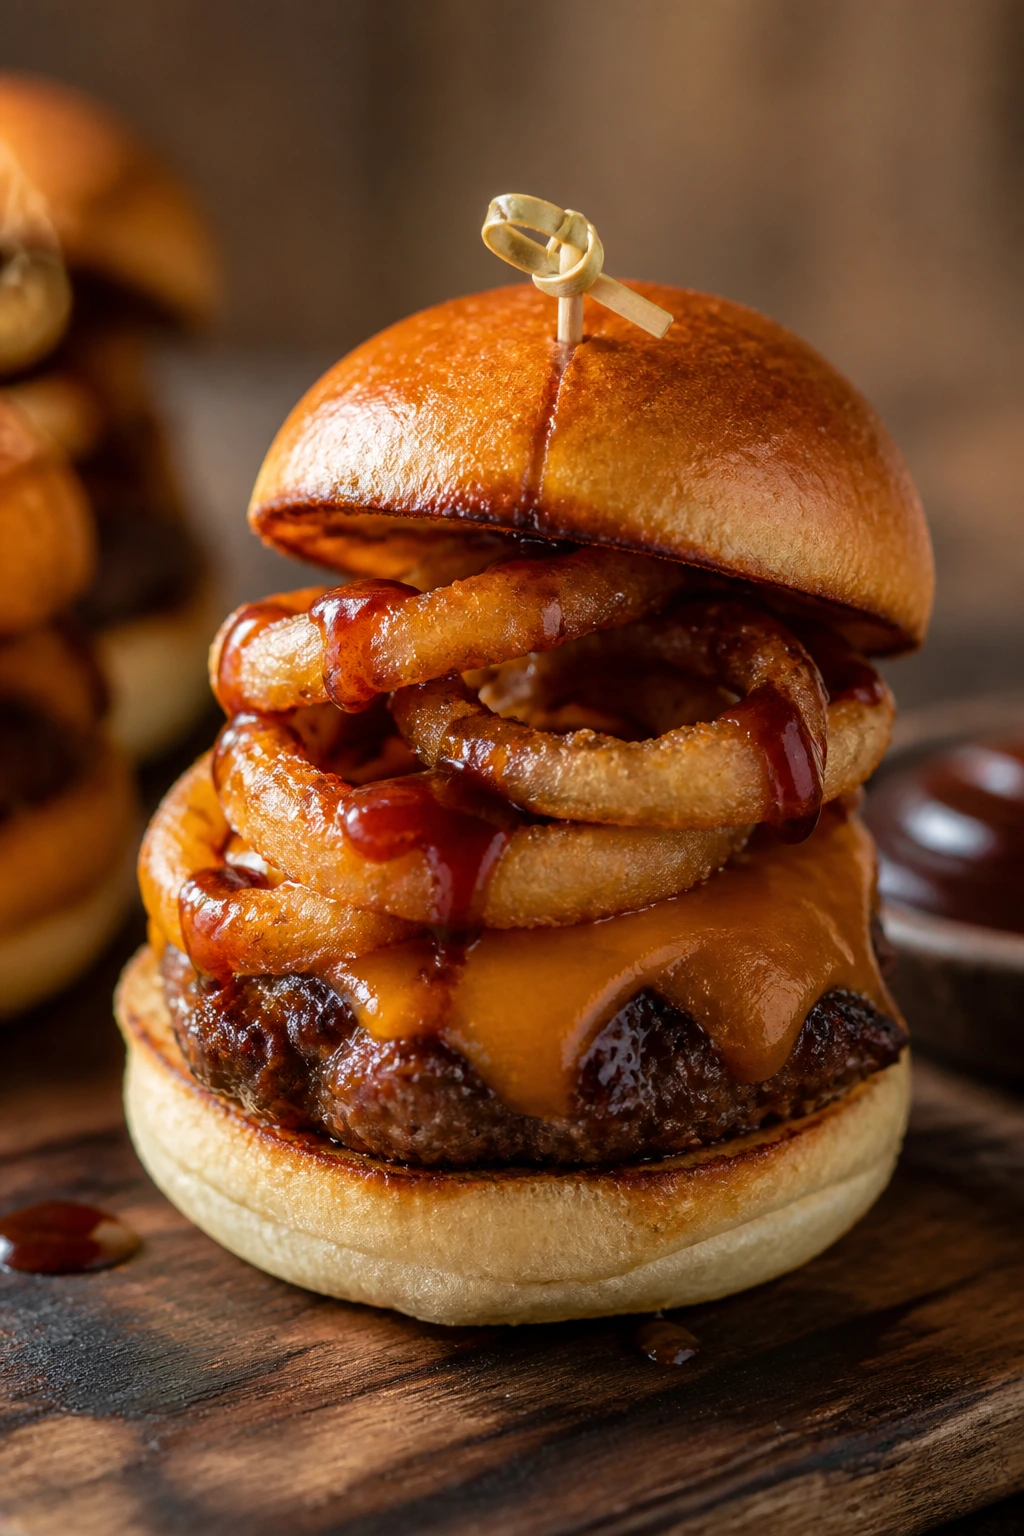
5. BBQ Crispy Onion Ring Sliders
These are messy in the best way. Sweet barbecue sauce, crunchy onion rings, and a beef patty with just enough smoke to keep the whole thing from tipping into candy territory. If you like a burger that arrives with some personality, this one shows up loud.
Why It Works:
Barbecue sauce gives these sliders a sticky glaze, but the trick is using it sparingly so the buns don’t go damp. Onion rings bring the crunch that regular sautéed onions can’t, and cheese keeps the sweet-salty balance in check. Pepper jack is a smart choice if you want a little heat to cut through the sauce.
Key Ingredients:
- 2 lbs ground beef, 80/20 — the fat keeps the patties juicy under the sauce.
- 1 1/2 teaspoons kosher salt — enough to season the beef cleanly.
- 1 teaspoon black pepper — helps the patties taste savory rather than sweet.
- 1 teaspoon smoked paprika — supports the barbecue flavor.
- 12 frozen onion rings — bake them until very crisp.
- 1/2 cup barbecue sauce — use a thick one that clings to the burger.
- 6 slices pepper jack or cheddar cheese, halved — pepper jack adds heat; cheddar keeps it classic.
- 12 slider buns — sturdy enough to hold the onion ring on top.
- 12 pickle chips — bright, cold, and useful against the sweetness.
- 2 tablespoons melted butter — for toasting buns if you want extra flavor.
Quick Steps:
- Bake the Onion Rings: Prepare the onion rings according to the package directions and bake until crisp, not pale. Keep them on a rack if you have one.
- Shape and Season the Beef: Form the beef into 12 patties and season both sides with salt, pepper, and smoked paprika.
- Cook the Patties: Sear over medium-high heat for 2 to 3 minutes per side, until browned and cooked through.
- Glaze and Melt: Brush each patty lightly with barbecue sauce in the final minute, top with cheese, and cover until melted.
- Toast and Stack: Toast the buns, then build each slider with the patty, a pickle chip, and one crisp onion ring on top.
Equipment for This Recipe:
- Sheet pan — for baking onion rings.
- Skillet or griddle — for the patties.
- Pastry brush — for the barbecue sauce.
- Wire rack, if you have one — keeps the onion rings crisp.
How to Serve This Dish:
These belong with baked beans, slaw, or plain potato chips. The onion ring is the showpiece, so build them right before serving while the rings are still crunchy. If you’re carrying them to the table, use toothpicks; otherwise the top bun tends to wander.
Pro Tips for This Recipe:
- Bake the onion rings until they’re a shade darker than the package says. Pale rings soften too fast.
- Use a thick barbecue sauce. Thin sauce runs straight into the bun.
- Keep the pickle slice under the burger, not on top of the onion ring, so the crunch stays intact.
Variations on This Dish:
- Bacon BBQ Ring Sliders: Add a half strip of bacon under the onion ring.
- Spicy Smokehouse Version: Mix a little chipotle into the barbecue sauce.
- Cheddar-Only Version: Skip the pepper jack if you want the sweetness to stay front and center.
Common Mistakes to Avoid with This Dish:
- Putting the sauce on too early: It burns before the burger is done.
- Using limp onion rings: Soft rings collapse into the bun and lose the whole point.
- Overloading the slider: One ring is enough; two turns it into a balancing act.
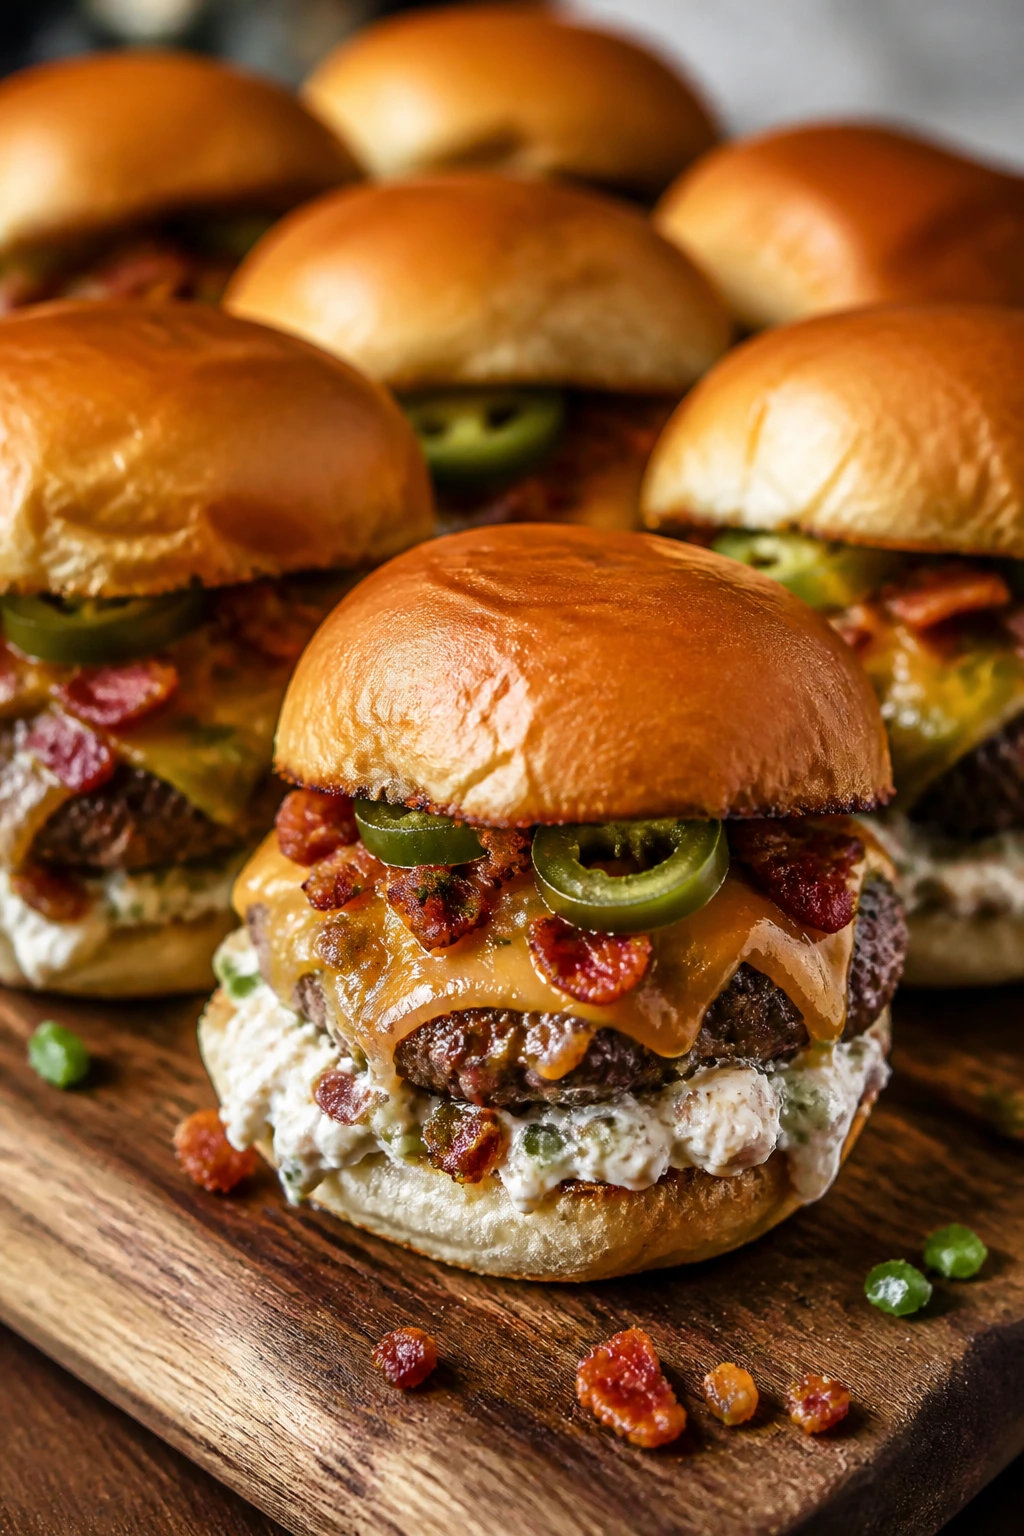
6. Jalapeño Popper Sliders
These are the sliders I make when I want heat, creaminess, and a little bacon all in the same bite. The pepper taste is fresh and grassy at first, then the cream cheese settles in and smooths everything out. They’re rich, but not dull. That matters.
Why It Works:
The jalapeño popper idea works because cream cheese gives the sliders a cool, thick middle that protects the bun from the pepper juice. Cheddar adds structure, bacon brings salt, and the beef underneath stays simple so the toppings can do their job. Seeded jalapeños keep the heat under control; leave some seeds in if you want more bite.
Key Ingredients:
- 2 lbs ground beef, 80/20 — enough fat for juicy sliders.
- 1 1/2 teaspoons kosher salt — seasons the beef.
- 1 teaspoon black pepper — keeps the beef savory.
- 4 oz cream cheese, softened — creates the creamy popper layer.
- 1 cup shredded cheddar — gives the filling some melt and body.
- 2 jalapeños, seeded and minced — or leave in a few seeds for more heat.
- 4 slices bacon, cooked crisp and crumbled — for salt and crunch.
- 12 slider buns — soft buns work well with the creamy topping.
- 1 tablespoon ranch dressing or mayonnaise — a thin spread helps the bun.
- 1 tablespoon melted butter — for the bun tops.
- 1 tablespoon chopped scallions — a fresh finish.
Quick Steps:
- Mix the Popper Filling: Stir the cream cheese, cheddar, jalapeños, and bacon together in a small bowl until combined.
- Shape the Patties: Divide the beef into 12 small patties and season them with salt and pepper.
- Cook the Burgers: Sear the patties over medium-high heat for 2 to 3 minutes per side, until the centers reach 160°F (71°C).
- Top with Filling: Spoon a small mound of the jalapeño-cheese mixture onto each patty and cover the pan for 30 to 60 seconds, just until softened and warm.
- Toast and Finish: Toast the buns lightly, spread a thin layer of ranch or mayonnaise on the bottom halves, and add scallions on top.
Equipment for This Recipe:
- Skillet with a lid — the lid helps soften the cheese topping.
- Mixing bowl — for the filling.
- Small spoon — for portioning the popper mixture.
- Spatula — for flipping the patties cleanly.
How to Serve This Dish:
Serve these with celery sticks, potato wedges, or a simple cabbage slaw. They’re rich enough that a sharp side matters. If the crowd likes heat, put extra sliced jalapeños on the side so people can tune the burn without changing the whole batch.
Pro Tips for This Recipe:
- Let the cream cheese soften first. Cold cream cheese clumps instead of spreading.
- Keep the jalapeño pieces small so the topping stays put.
- If you want a smoother finish, use a piping bag or zip-top bag to place the filling.
Variations on This Dish:
- Milder Popper Sliders: Swap jalapeños for finely diced green bell pepper.
- Extra Hot Version: Add a few dashes of hot sauce to the filling.
- Baconless Option: Leave out the bacon and add a pinch of smoked paprika.
Common Mistakes to Avoid with This Dish:
- Using too much filling: A small mound is enough; too much slides off the bun.
- Cooking the patties all the way before adding the topping: The cheese needs a short covered melt, not a second round of frying.
- Leaving the jalapeño seeds in by accident: That’s how you end up with a slider that tastes hotter than the tray promised.
7. Special Sauce Sliders
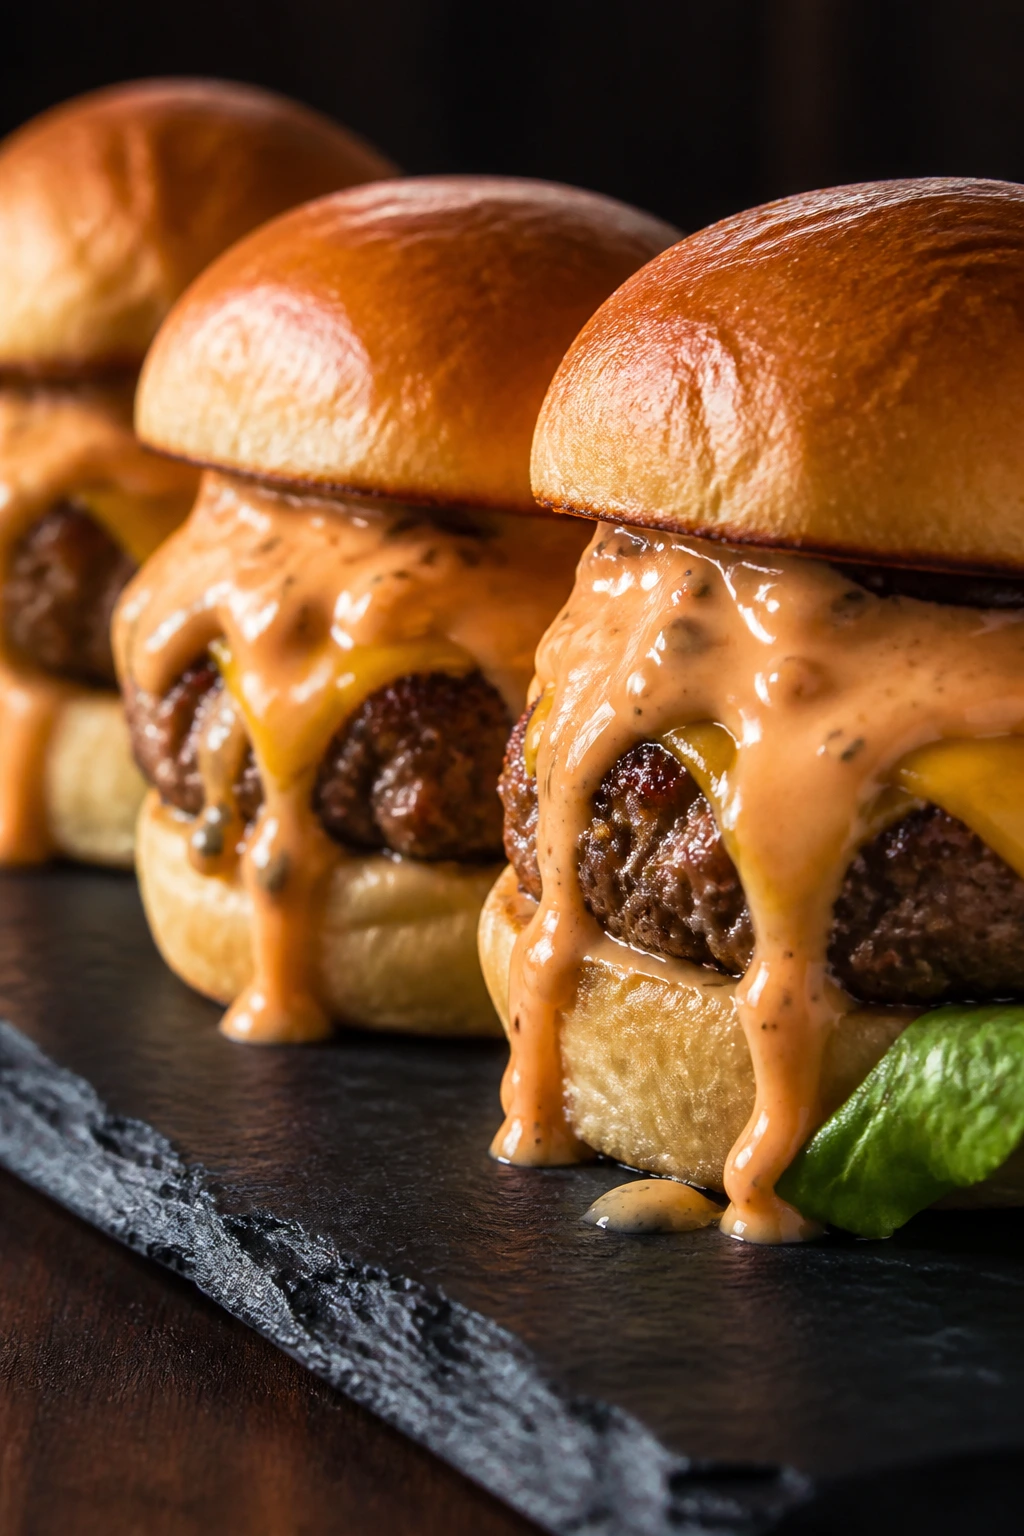
If you’ve ever eaten a burger and thought the sauce mattered more than the toppings, this is your slider. The special sauce is tangy, creamy, and a little sweet, with relish giving it crunch and vinegar keeping it awake. The beef stays plain on purpose. The sauce gets the spotlight.
Why It Works:
A special sauce slider only works if the sauce is thick enough to cling and sharp enough to cut through beef fat. Mayo gives the base, ketchup adds sweetness, relish brings texture, and vinegar keeps the flavor from going flat. The patties can stay seasoned simply because the sauce is doing the heavy lifting; that balance is what makes the slider taste finished rather than overloaded.
Key Ingredients:
- 2 lbs ground beef, 85/15 — a slightly leaner grind keeps the sauce from feeling too rich.
- 1 1/2 teaspoons kosher salt — all the seasoning the beef really needs.
- 1 teaspoon black pepper — keeps the flavor clean.
- 1 teaspoon onion powder — supports the sauce.
- 12 slider buns — soft, split, and toasted.
- 6 slices American cheese, halved — optional, but it melts into the sauce nicely.
- 1 cup shredded iceberg lettuce — crisp and cold.
- 12 dill pickle chips — for brightness.
- 1/4 cup mayonnaise — base of the sauce.
- 2 tablespoons ketchup — adds sweet tomato flavor.
- 1 tablespoon dill relish — gives crunch.
- 1 teaspoon white vinegar — sharpens the sauce.
- 1/2 teaspoon paprika — adds color and a little warmth.
Quick Steps:
- Mix the Sauce: Stir the mayonnaise, ketchup, relish, vinegar, and paprika in a small bowl until smooth. Let it sit while you cook so the flavors settle.
- Season and Shape: Form the beef into 12 thin patties and season with salt, pepper, and onion powder.
- Cook the Patties: Sear over medium-high heat for 2 to 3 minutes per side, until browned and cooked to 160°F (71°C).
- Melt the Cheese: If using cheese, add it during the last 30 seconds and cover briefly.
- Toast and Assemble: Toast the buns, spread special sauce on both sides, then layer lettuce, patty, and pickle.
Equipment for This Recipe:
- Small bowl — for mixing the sauce.
- Whisk or fork — enough to blend the ingredients.
- Skillet or griddle — for the patties.
- Knife and cutting board — for shredding lettuce or slicing pickles.
How to Serve This Dish:
These are best plated with the sauce visible so people know what they’re getting. Add potato chips, fries, or onion rings, and keep extra sauce on the side for dipping. Two sliders with a pile of chips makes a proper lunch; three is where they start becoming a problem in the best way.
Pro Tips for This Recipe:
- Make the sauce 15 minutes ahead if you can; it tastes less sharp and more rounded.
- Spread the sauce thinly on both bun halves instead of piling it all in one place.
- Iceberg lettuce gives you a better crunch than soft spring mix here.
Variations on This Dish:
- Garlic Special Sauce: Add a small grated garlic clove for more bite.
- Spicy Sauce Slider: Stir in a little hot sauce or chipotle powder.
- Dill-Forward Version: Increase the relish if you like a sharper pickle note.
Common Mistakes to Avoid with This Dish:
- Using watery relish: Drain it a little first or the sauce gets thin.
- Putting sauce on a cold, untoasted bun: It soaks in fast and turns the bottom mushy.
- Overseasoning the beef: The sauce already brings salt and tang.
8. Taco Burger Sliders
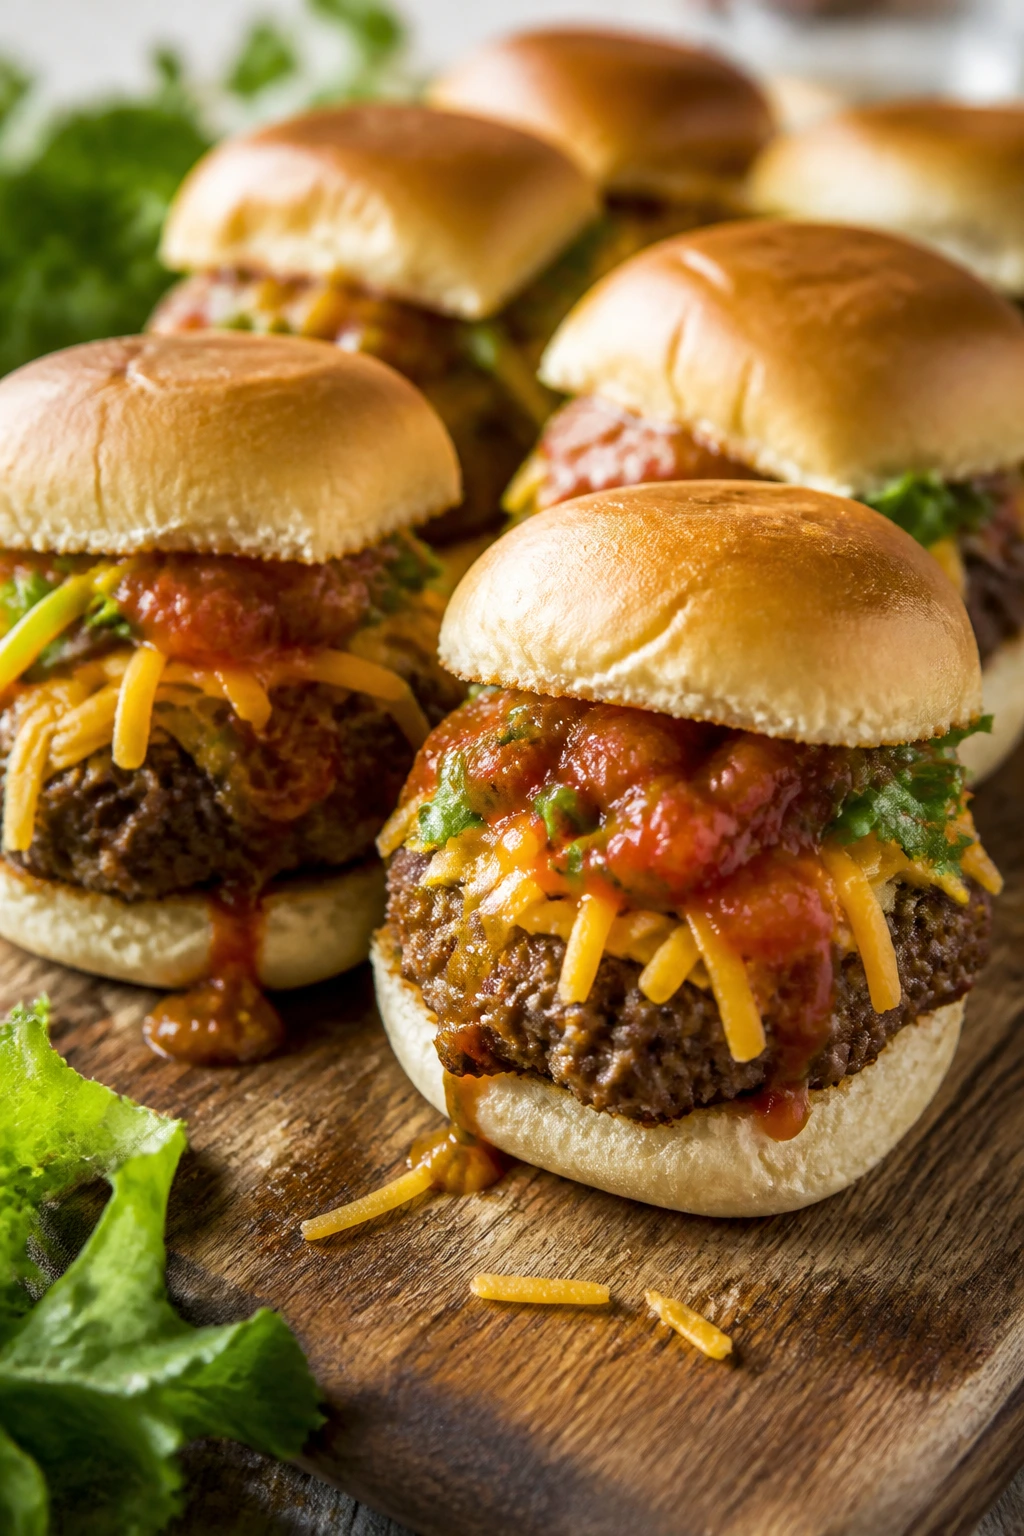
These are what happen when burger night and taco night stop arguing and decide to share a tray. The beef gets taco seasoning, the toppings lean bright and crunchy, and the whole slider lands somewhere between a cheeseburger and a taco salad. It shouldn’t work as cleanly as it does. But it does.
Why It Works:
Taco seasoning gives the beef cumin, chili, and garlic in one shot, which is perfect when the sliders are small and need flavor that reads fast. Salsa adds moisture, but it has to be spooned on lightly or the buns go soft. Tortilla chips bring a dry crunch that stands in for lettuce chips or a taco shell crack without fighting the beef.
Key Ingredients:
- 2 lbs ground beef, 80/20 — the fat carries the taco seasoning well.
- 2 tablespoons taco seasoning — use a low-salt blend if yours runs salty.
- 1/2 teaspoon kosher salt — only if your seasoning is unsalted.
- 1 cup shredded cheddar — melts right over the spiced beef.
- 1/2 cup salsa, drained slightly — too much liquid will soak the bun.
- 1 cup shredded lettuce — adds the cool, fresh layer.
- 1 medium tomato, diced — use firm pieces, not watery pulp.
- 1/4 cup sour cream — or Mexican crema if you want it thinner.
- 1/2 cup crushed tortilla chips — add at the end so they stay crisp.
- 12 slider buns — a plain bun keeps the taco flavors clear.
Quick Steps:
- Season the Beef: Mix the beef with taco seasoning and salt, then form 12 patties. Keep them on the thin side so they cook fast.
- Cook the Patties: Sear in a hot skillet for 2 to 3 minutes per side until browned and 160°F (71°C).
- Melt the Cheese: Add cheddar during the last minute and cover the pan until soft.
- Toast the Buns: Toast the buns lightly so they can handle the salsa and sour cream.
- Assemble: Add the patty, a spoonful of salsa, lettuce, tomato, sour cream, and crushed tortilla chips.
Equipment for This Recipe:
- Skillet — for the patties.
- Small bowl — to drain and hold the salsa.
- Spoon — for neat layering.
- Knife and cutting board — for the tomato.
How to Serve This Dish:
Serve these with corn salad, black beans, or roasted potatoes. Put the crushed chips on right before eating; if they sit too long, they lose the crunch and the whole point changes. A squeeze of lime over the tray helps more than most people expect.
Pro Tips for This Recipe:
- Drain the salsa a little before using it.
- Add the chips last, not first.
- If your taco seasoning has a lot of salt, skip the extra kosher salt entirely.
Variations on This Dish:
- Chipotle Taco Sliders: Stir a little chipotle into the sour cream.
- Street-Corn Style: Add a spoonful of elote-style corn salad on top.
- Mild Kid Version: Use mild salsa and skip the crushed chips if the texture feels too busy.
Common Mistakes to Avoid with This Dish:
- Using watery salsa: It turns the slider into a wet mess fast.
- Overstuffing with lettuce: The bun starts sliding apart before the first bite.
- Forgetting the cheese: Taco seasoning is strong; the cheese helps the burger taste round instead of sharp.
9. Hawaiian Teriyaki Sliders
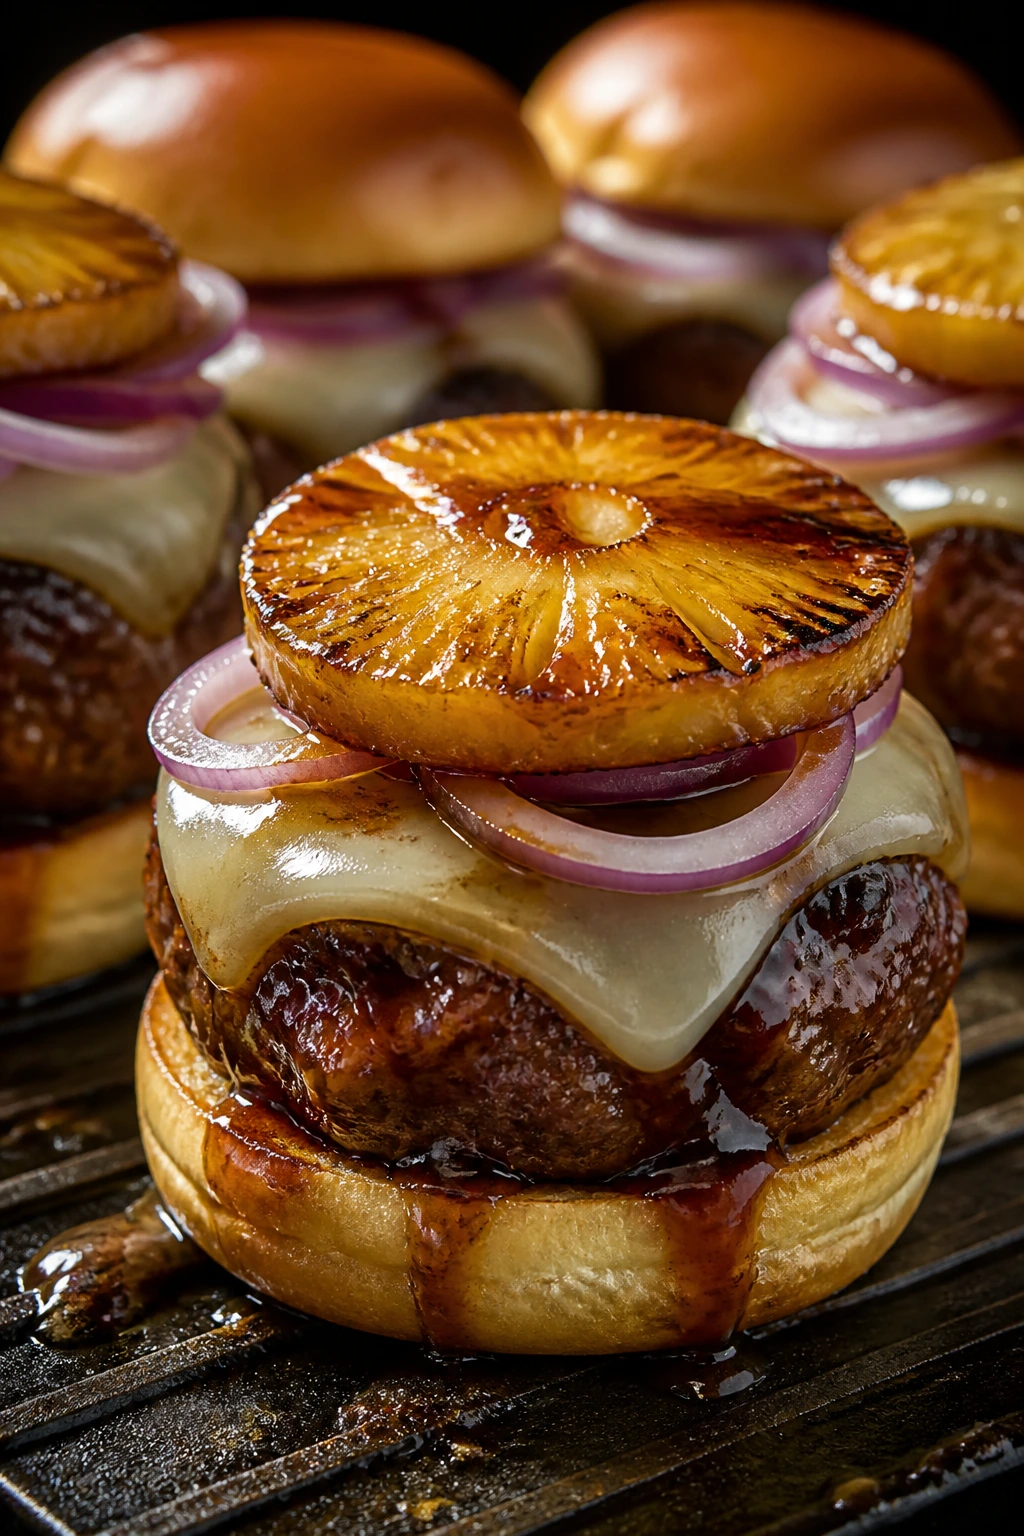
These are sweet in a way that feels deliberate, not sugary. Pineapple caramelizes fast, the teriyaki sauce goes glossy on the beef, and the red onion gives you a sharp bite that keeps the whole thing from drifting off into dessert territory. If you like burgers with a little shine, this is your lane.
Why It Works:
Teriyaki sauce is strongest when it’s used as a glaze instead of a bath. A little in the beef and a little on the pineapple is enough to get that salty-sweet edge without making the bun soggy. Pineapple needs direct heat so the surface browns and the juice thickens; cold pineapple on a burger tastes flat and watery.
Key Ingredients:
- 2 lbs ground beef, 80/20 — enough fat for a juicy patty under the glaze.
- 2 tablespoons teriyaki sauce — mixed lightly into the beef.
- 1 1/2 teaspoons kosher salt — use a little less if your teriyaki is salty.
- 1 teaspoon black pepper — balances the sweetness.
- 12 pineapple rings or 1 cup pineapple tidbits, patted dry — choose what fits your bun.
- 1 small red onion, thinly sliced — sharp and colorful.
- 6 slices provolone or Swiss cheese, halved — both melt nicely with the pineapple.
- 12 slider buns — brioche works well with the sweet topping.
- 1 tablespoon sesame seeds — optional, but they fit the flavor.
- 1 tablespoon butter — for toasting the buns.
Quick Steps:
- Prep the Pineapple: Pat the pineapple dry and set it aside. Wet fruit won’t caramelize cleanly.
- Season the Beef: Mix the beef with teriyaki sauce, salt, and pepper, then form 12 patties.
- Cook the Pineapple and Onion: Sear the pineapple in a hot skillet for 1 to 2 minutes per side until browned. Cook the onion just until softened and lightly caramelized.
- Cook the Patties: Sear the burgers for 2 to 3 minutes per side, then add cheese during the last 30 seconds.
- Toast and Build: Butter and toast the buns, then stack patty, pineapple, onion, and sesame seeds.
Equipment for This Recipe:
- Skillet — for the pineapple, onion, and patties.
- Tongs — better for turning fruit without tearing it.
- Pastry brush — if you want to butter the buns neatly.
- Small plate — for holding the pineapple after browning.
How to Serve This Dish:
These pair well with cucumber salad, slaw, or plain rice if you want to lean into the sweet-salty mood. Serve them immediately; pineapple lets go of juice as it sits. A few extra red onion slices on the tray help anyone who wants more bite.
Pro Tips for This Recipe:
- Dry the pineapple before it hits the pan.
- Keep the teriyaki amount modest. The beef should taste seasoned, not marinated.
- Use a cheese that melts cleanly and doesn’t disappear under the pineapple.
Variations on This Dish:
- Spicy Teriyaki Sliders: Add a little sriracha to the teriyaki.
- Grilled Version: Cook the patties and pineapple on a grill for more char.
- Pineapple-Free Option: Swap in sautéed bell peppers if you want the same sweet-savory feel without fruit.
Common Mistakes to Avoid with This Dish:
- Using soggy pineapple: It waters down the bun and hides the caramelized flavor.
- Adding too much sauce: Teriyaki should glaze the beef, not flood it.
- Skipping the onion: Without a sharp note, the slider can taste one-note sweet.
10. Patty Melt Sliders
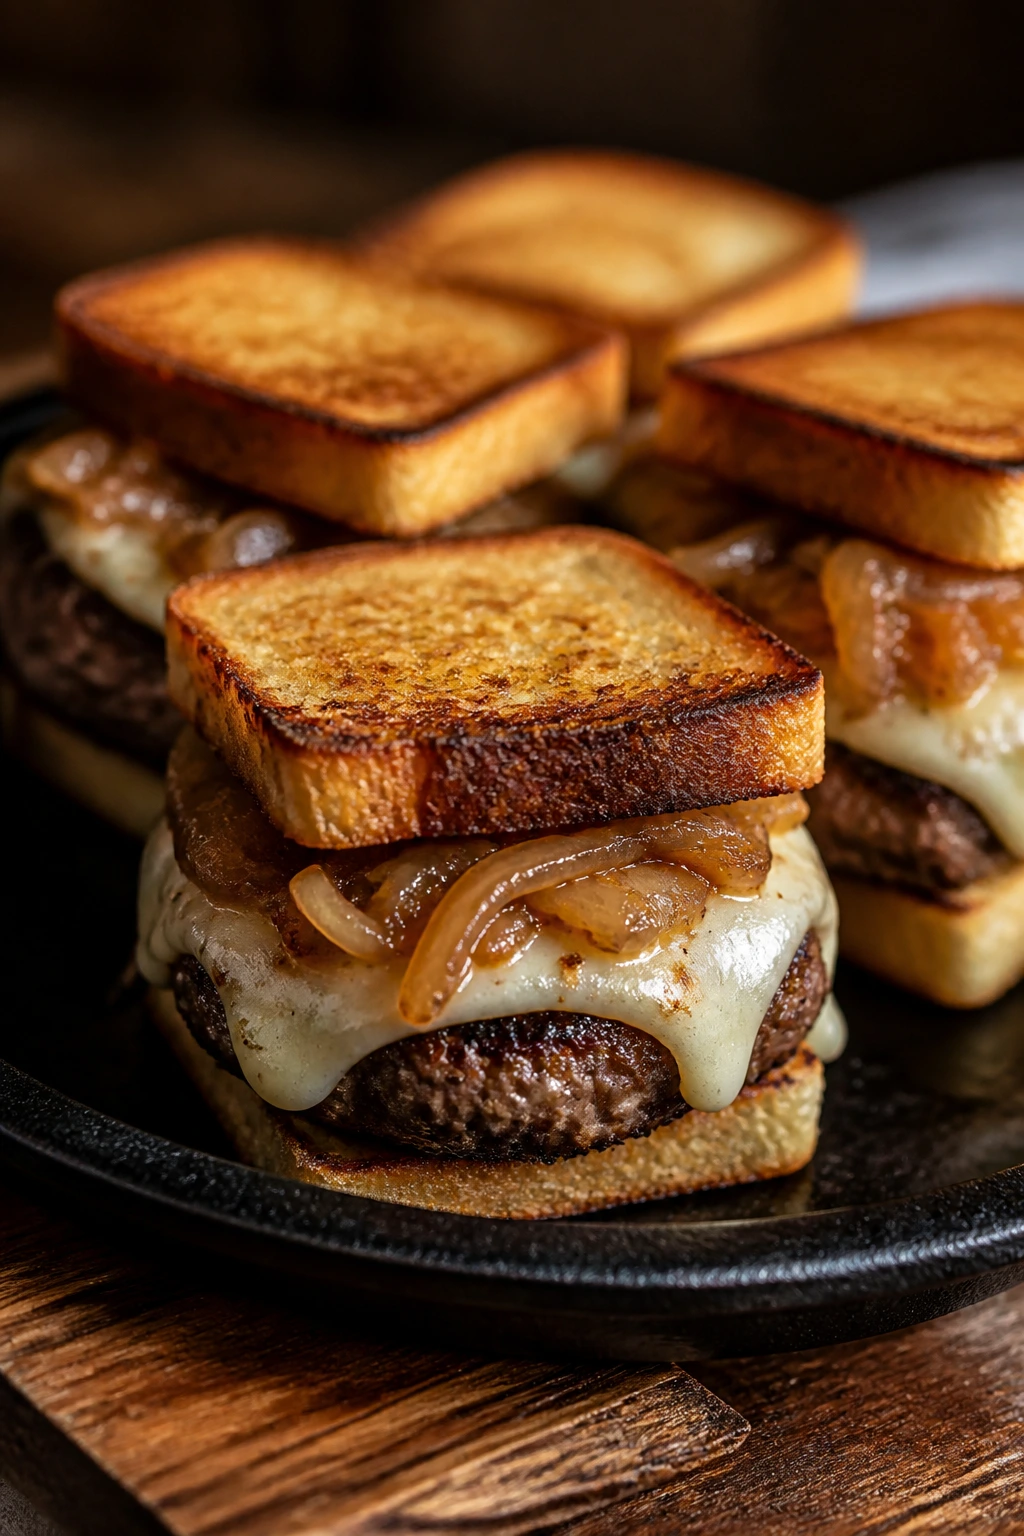
A patty melt is a burger with diner manners and grilled-cheese instincts. The onions are slow and soft, the Swiss is melted all the way to the edges, and the bread gets buttery and crisp in a way regular burger buns never quite manage. On a slider tray, they feel almost too easy to eat.
Why It Works:
Patty melts need bread that can stand up to butter and onions without collapsing. Rye rolls or mini rye buns bring a little caraway flavor that matches the beef and cuts through the cheese. The onions need patience; if they are not soft and golden, the whole sandwich tastes rushed.
Key Ingredients:
- 2 lbs ground beef, 85/15 — a slightly leaner grind works because the onions bring richness.
- 1 1/2 teaspoons kosher salt — seasons the patties.
- 1 teaspoon black pepper — keeps the beef from tasting dull.
- 2 large yellow onions, thinly sliced — for the soft onion layer.
- 2 tablespoons unsalted butter — for the onions and the bread.
- 6 slices Swiss cheese, halved — the classic patty melt cheese.
- 12 mini rye buns or rye slider rolls — the caraway notes matter.
- 1/3 cup thousand island dressing — just enough for tang.
- 1 teaspoon caraway seeds, optional — if your buns are plain and you want that rye note.
- 1 tablespoon mayonnaise — useful if you want a lighter spread under the bread.
Quick Steps:
- Cook the Onions Slowly: Melt the butter in a skillet over medium heat. Add the onions and a pinch of salt, then cook for 15 to 20 minutes, stirring often, until soft, golden, and sweet.
- Shape and Cook the Patties: Form the beef into 12 patties and season both sides with salt and pepper. Cook in a hot skillet for 2 to 3 minutes per side.
- Add the Cheese: Top each patty with Swiss during the last 30 seconds and cover until melted.
- Toast the Bread: Butter the rye buns lightly and toast them cut-side down until crisp.
- Assemble: Spread thousand island on the bread, add the patty, then spoon a little onion over the top before closing.
Equipment for This Recipe:
- Large skillet — for onions and patties.
- Wooden spoon — good for slow onions.
- Spatula — for flipping the burgers.
- Butter knife — for spreading the dressing and butter.
How to Serve This Dish:
Serve these with pickles and fries, or cut the sliders in half and set them beside a bowl of soup if you want a diner-style lunch plate. Keep the onions warm until assembly so they don’t congeal into a clump. They’re best eaten while the bread is still crisp.
Pro Tips for This Recipe:
- Cook the onions low enough that they soften before they brown hard.
- Rye bread is worth it here. Plain buns make the sandwich feel incomplete.
- A thin swipe of mayo under the bread helps with browning and keeps the dressing from soaking through.
Variations on This Dish:
- Sharp Cheddar Melt: Swap Swiss for cheddar if you want a stronger cheese note.
- Mushroom Patty Melt: Add sautéed mushrooms to the onions.
- Spicy Thousand Island: Stir a little horseradish or hot sauce into the dressing.
Common Mistakes to Avoid with This Dish:
- Rushing the onions: You lose the sweet, jammy middle that makes the sandwich work.
- Using soft bread without toasting: It won’t stand up to the dressing.
- Overfilling with onions: A thin layer is enough; the burger should still taste like a burger.
11. Pizza Burger Sliders
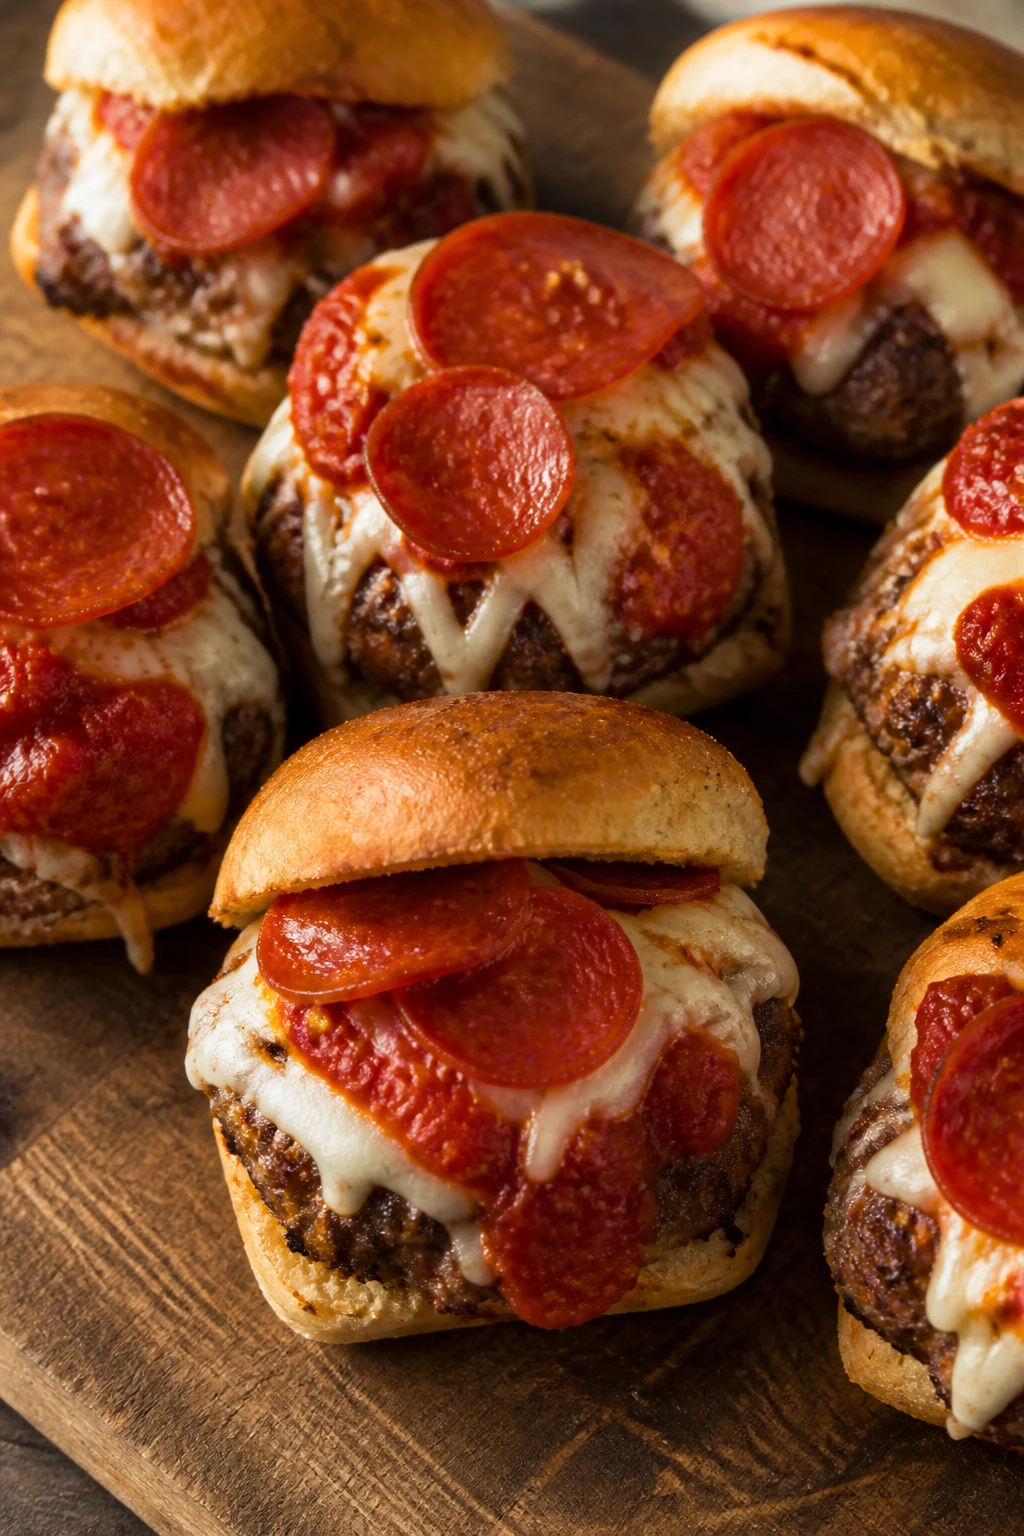
These taste like a Friday-night compromise that turned out better than either original plan. Tomato sauce, mozzarella, and pepperoni all land on top of a beef slider in a way that’s unabashedly fun. The trick is keeping the sauce thick so the buns don’t collapse under the weight of all that red and white.
Why It Works:
Pizza flavors work on a slider because the beef gives the sandwich some backbone. Marinara needs to be spooned in a small amount, and mozzarella melts better when it’s not buried under too many wet ingredients. A little Parmesan on top brings a sharper finish, which keeps the whole thing from tasting like warm pasta sauce on bread.
Key Ingredients:
- 2 lbs ground beef, 80/20 — enough fat for flavor and browning.
- 1 1/2 teaspoons kosher salt — seasons the beef.
- 1 teaspoon black pepper — keeps the flavor grounded.
- 1 teaspoon Italian seasoning — pushes the burger toward pizza territory.
- 1 cup thick marinara sauce — simmered down if it’s thin.
- 8 oz shredded mozzarella — melts into the burger and sauce.
- 18 pepperoni slices — one or two per slider, depending on size.
- 12 slider buns — soft but sturdy.
- 1 tablespoon grated Parmesan — a salty finish.
- A few basil leaves, torn — optional, but fresh basil makes the tray smell like an actual pizzeria.
Quick Steps:
- Warm the Sauce: Simmer the marinara for 3 to 5 minutes if it seems loose. You want spoonable, not runny.
- Season and Shape: Mix the beef with salt, pepper, and Italian seasoning, then form 12 patties.
- Cook the Patties: Sear the burgers in a hot skillet for 2 to 3 minutes per side until browned.
- Sauce and Melt: Spoon a thin layer of marinara over each patty, add mozzarella, and cover until melted. A quick broiler pass works too if your skillet is broiler-safe.
- Toast and Finish: Toast the buns lightly, add pepperoni and Parmesan, then finish with torn basil.
Equipment for This Recipe:
- Skillet or broiler-safe pan — for the patties and melting cheese.
- Small saucepan — to thicken the marinara if needed.
- Spoon — for saucing the patties carefully.
- Tongs — for lifting the pepperoni if you crisp it slightly.
How to Serve This Dish:
Serve these with Caesar salad, roasted peppers, or plain chips. They’re best assembled right before eating so the buns stay sturdy and the cheese still stretches a little. If you want a cleaner tray, keep extra marinara in a cup instead of drizzling it over the whole batch.
Pro Tips for This Recipe:
- Reduce a watery marinara before using it.
- Don’t drown the patty in sauce. A thin layer is enough to register.
- Fresh basil belongs on top, not cooked under the cheese.
Variations on This Dish:
- Supreme Pizza Sliders: Add sautéed peppers and mushrooms.
- Pepperoni-Heavy Version: Crisp the pepperoni briefly in a dry skillet first.
- White Pizza Version: Swap marinara for garlic cream sauce and use mozzarella plus Parmesan.
Common Mistakes to Avoid with This Dish:
- Using thin sauce: It soaks into the bun and turns the slider mushy.
- Forgetting to toast the buns: Pizza toppings need structure.
- Adding too much basil too early: It wilts and loses its smell.
12. Chili Cheese Sliders
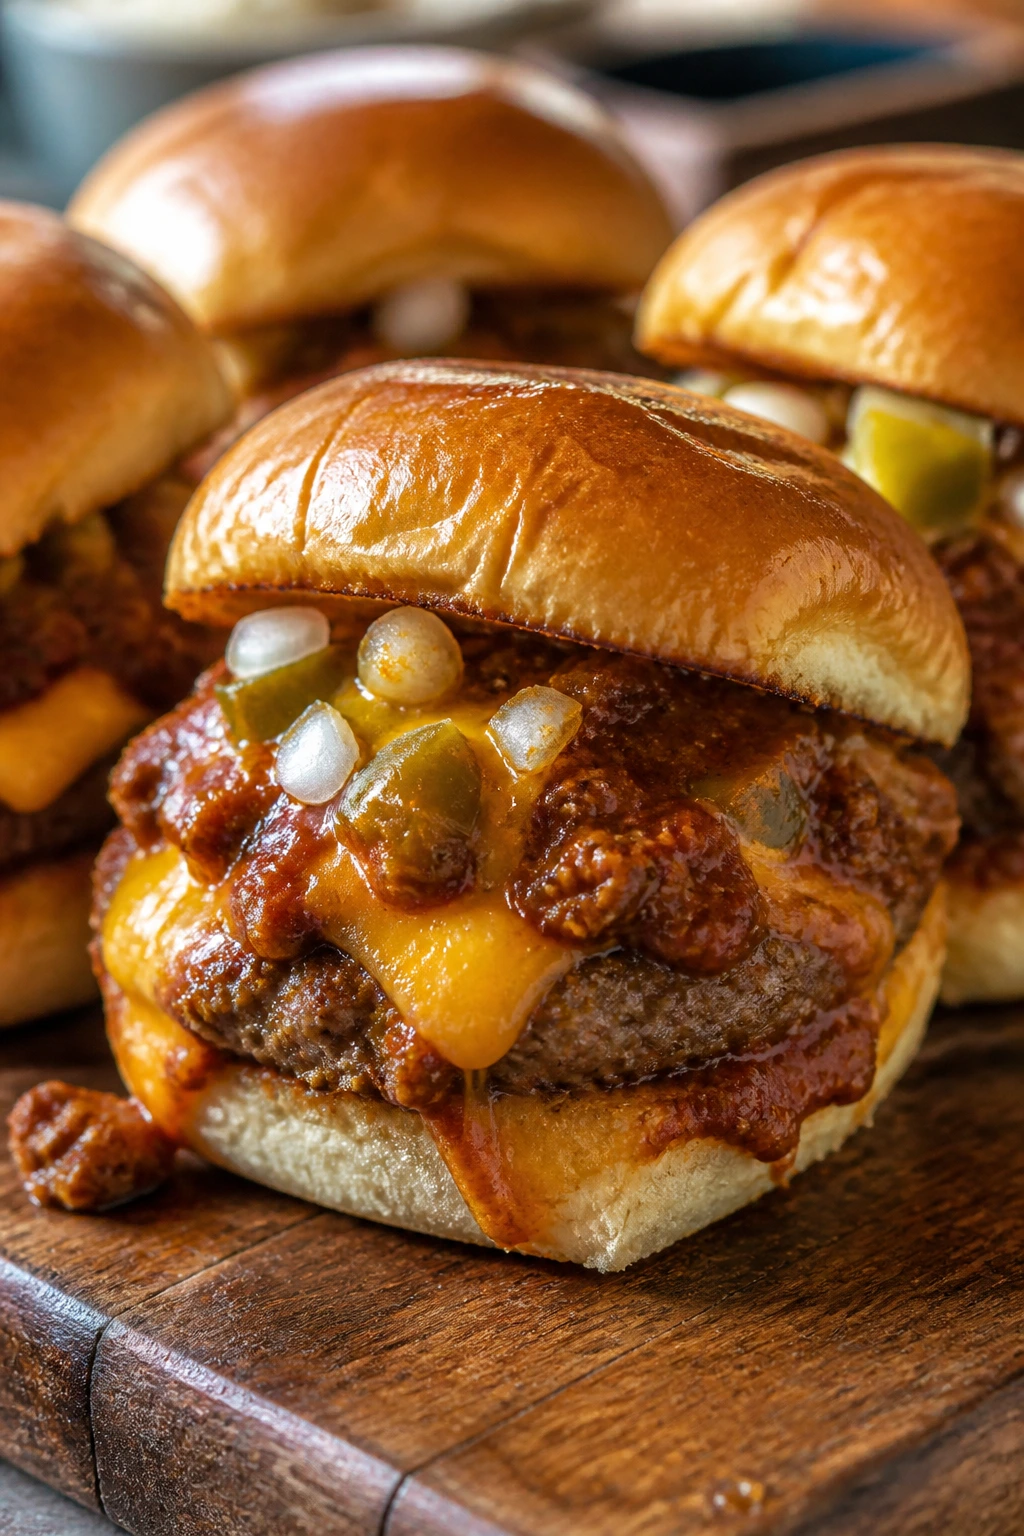
These are sticky, warm, and a little unruly. The chili drapes over the beef, the cheese melts into the gaps, and the bun does what it can. This is not a neat slider. It’s the one people need a napkin for, and honestly, that’s the right mood.
Why It Works:
Chili cheese works because the chili acts like both topping and sauce. It needs to be thick enough to sit on the burger, not run through the bread. Sharp cheddar gives the slider a clean hit of dairy, while pickled jalapeños cut the richness and keep the flavor from going flat.
Key Ingredients:
- 2 lbs ground beef, 80/20 — for juicy patties.
- 1 1/2 teaspoons kosher salt — for the burger patties.
- 1 teaspoon black pepper — keeps the meat savory.
- 2 cups thick chili — homemade or canned, but it should be spoonable.
- 1 cup shredded sharp cheddar — melts over the chili.
- 1/4 cup diced onion — raw or lightly pickled.
- 12 slider buns — toasted so they can handle the topping.
- 1/4 cup pickled jalapeños — optional, but they wake up the whole tray.
Quick Steps:
- Warm the Chili: Heat the chili in a small saucepan until thick and steaming. If it looks loose, simmer it for a few minutes.
- Season and Shape: Form the beef into 12 patties and season with salt and pepper.
- Cook the Burgers: Sear the patties over medium-high heat for 2 to 3 minutes per side, until browned and fully cooked.
- Add Chili and Cheese: Spoon a tablespoon or two of chili over each patty, then add cheddar and cover briefly until the cheese melts.
- Toast and Build: Toast the buns, place the chili-cheese patty inside, and top with onion and jalapeños.
Equipment for This Recipe:
- Skillet — for the patties.
- Small saucepan — for heating the chili.
- Ladle or spoon — for controlled topping.
- Lid — for quick cheese melting.
How to Serve This Dish:
Put these on a tray with extra napkins and a bowl of chips or slaw on the side. They’re best while the chili is thick and the bun still has some structure. If you’re serving a crowd, keep the chili warm separately and spoon it on at the last second.
Pro Tips for This Recipe:
- Thick chili is nonnegotiable.
- Toast the buns more than usual so they can handle the weight.
- Sharp cheddar melts better here than super-aged cheese, which can turn grainy.
Variations on This Dish:
- Bean Chili Sliders: Use a bean-heavy chili for a slightly lighter tray.
- Smoky Chili Version: Add a pinch of chipotle powder to the chili.
- Frito Slider Style: Add a few crushed corn chips on top right before serving.
Common Mistakes to Avoid with This Dish:
- Using runny chili: It destroys the bun fast.
- Assembling too early: Chili keeps softening the bread every minute it sits.
- Skipping the onions or jalapeños: The slider gets heavy without a bright, crunchy note.
13. Mediterranean Feta Sliders
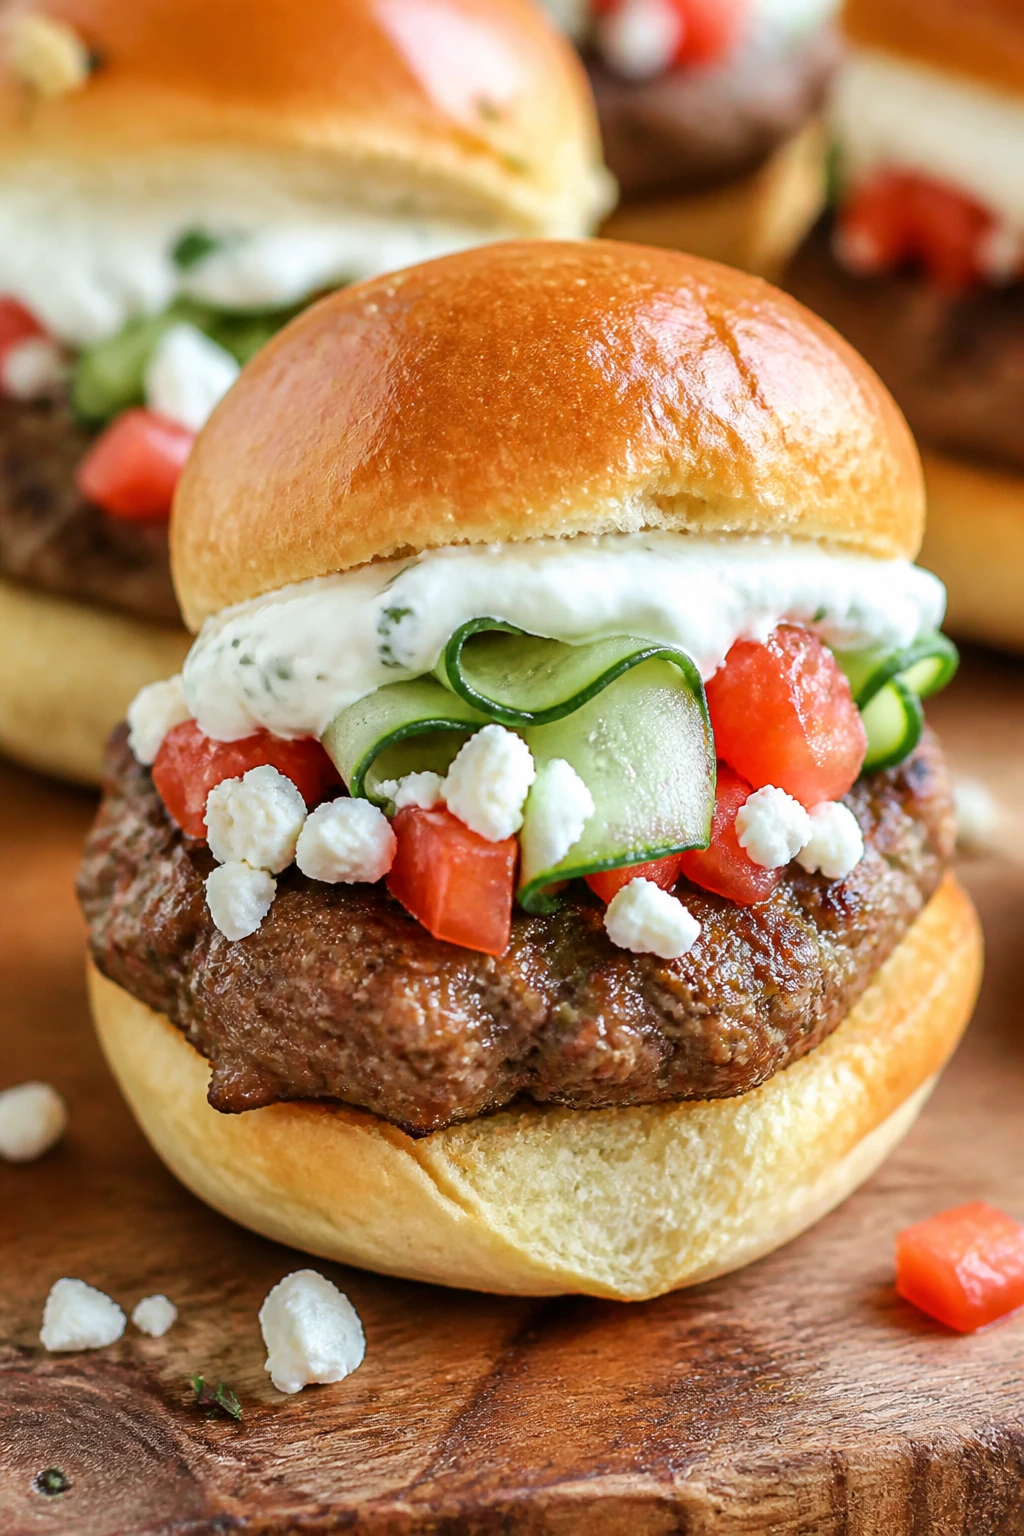
These feel lighter on the tongue, though not on flavor. Oregano, cumin, feta, cucumber, and tomato give the beef a bright, salty finish that tastes a little sunlit even when the kitchen light is terrible. I like these on small buns because the herbs make the whole thing smell fresh before anyone takes a bite.
Why It Works:
Mediterranean flavors work on hamburger sliders because the beef can carry herbs, tang, and dairy without getting lost. Feta brings salt and crumble, tzatziki brings coolness, and cucumber keeps the slider from feeling dense. The trick is to keep the vegetables dry; any extra water turns the bun into a sponge.
Key Ingredients:
- 2 lbs ground beef, 85/15 — rich enough for the herbs.
- 1 teaspoon dried oregano — gives the beef a Mediterranean note.
- 1/2 teaspoon ground cumin — adds warmth.
- 1/2 teaspoon garlic powder — keeps the flavor grounded.
- 1 1/2 teaspoons kosher salt — seasons the patties.
- 4 oz feta, crumbled — salty and sharp.
- 1/2 cup tzatziki — thick enough to spread.
- 1 cucumber, seeded and thinly sliced or diced — pat dry first.
- 1 small red onion, thinly sliced — adds bite.
- 1 tomato, sliced or diced and drained — use firm flesh, not watery centers.
- 12 slider buns — plain buns let the herbs stand out.
Quick Steps:
- Season the Beef: Mix the beef with oregano, cumin, garlic powder, salt, and pepper. Shape into 12 patties.
- Cook the Patties: Sear over medium-high heat for 2 to 3 minutes per side, until browned and cooked through.
- Toast the Buns: Toast the buns lightly so the tzatziki doesn’t soak in right away.
- Build the Slider: Spread tzatziki on the bottom bun, add the patty, then scatter feta, cucumber, red onion, and tomato over the top.
- Finish Cleanly: Close the sliders gently so the vegetables stay in place instead of slipping out.
Equipment for This Recipe:
- Skillet — for the patties.
- Small bowl — for the tzatziki.
- Knife and cutting board — for the cucumber, onion, and tomato.
- Paper towels — to dry the vegetables before assembly.
How to Serve This Dish:
These belong next to olives, lemon potatoes, or a simple chopped salad. They taste best when the cucumber is cold and the beef is just cooked, so don’t let them sit under a cloche or in a closed container for long. A pinch of extra oregano on the tray smells nice, too.
Pro Tips for This Recipe:
- Drain the tomato and pat the cucumber dry.
- Use thick tzatziki, not a runny dip.
- If you want a cleaner bite, crumble the feta over the hot patty so it softens slightly.
Variations on This Dish:
- Minty Version: Add a little chopped mint to the tzatziki.
- Goat Cheese Swap: Use goat cheese instead of feta for a creamier finish.
- Olive Tapenade Version: Spread a thin layer of tapenade under the patty.
Common Mistakes to Avoid with This Dish:
- Leaving the vegetables wet: That’s how the bun turns soggy.
- Overdoing the cumin: You want a hint, not a curry-like note.
- Using thin tzatziki: It runs straight out the bottom of the slider.
14. Reuben-Style Sliders
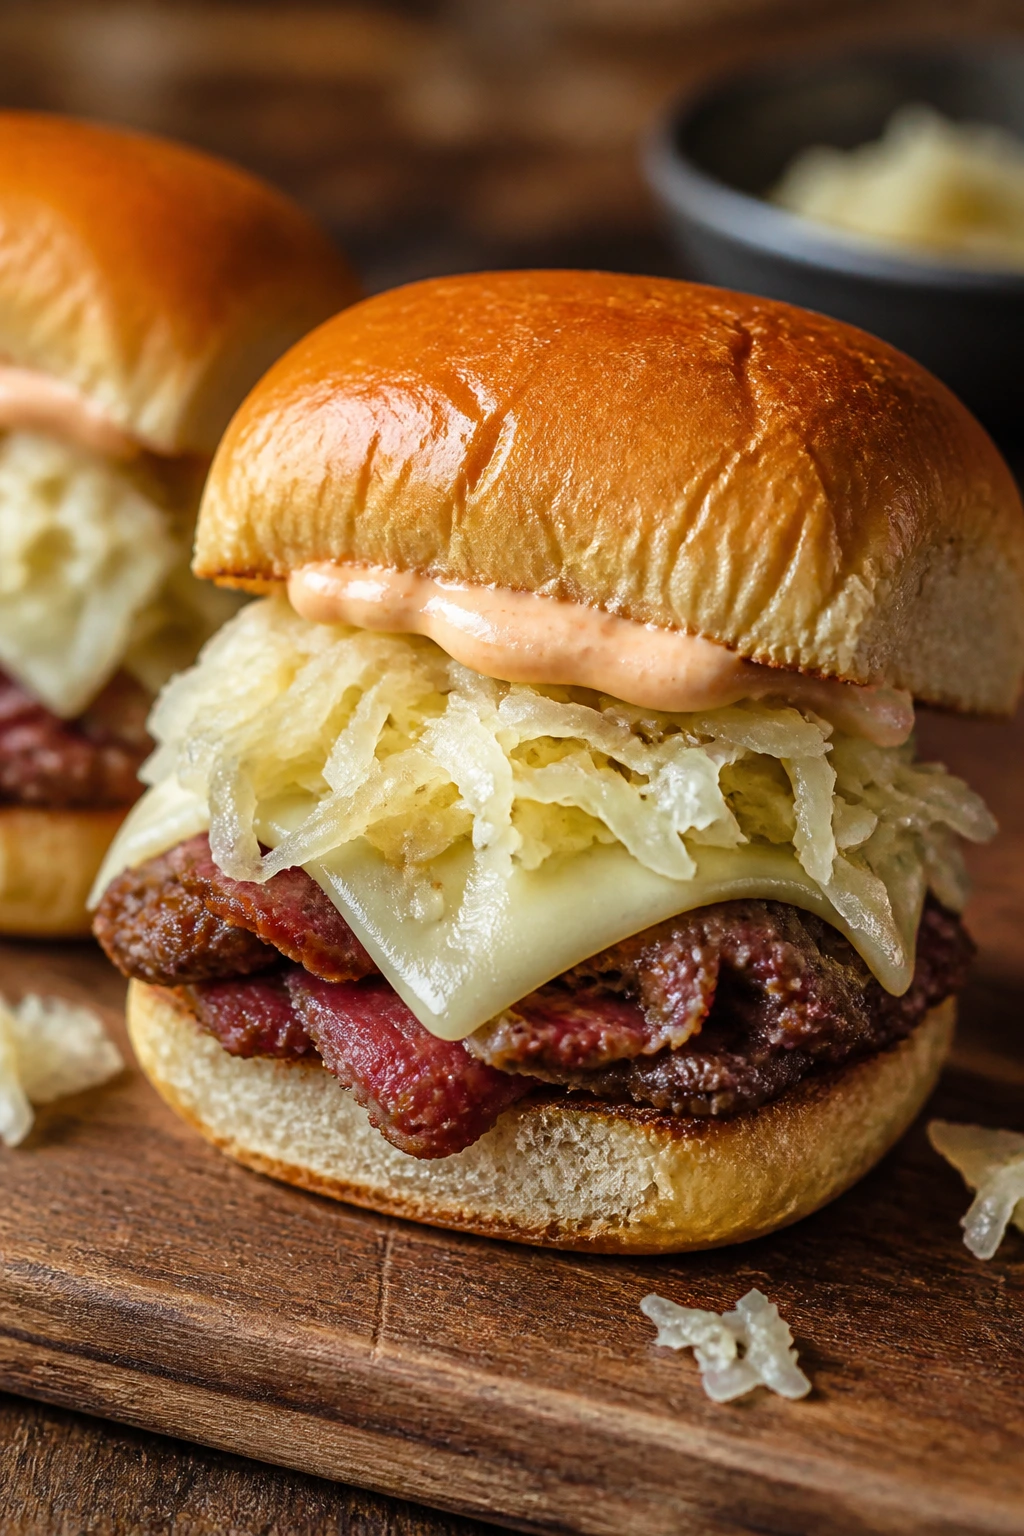
A Reuben in slider form keeps all the best parts and trims the bulk. You still get the tang of sauerkraut, the creamy dressing, and the Swiss cheese melt, but the bun gives you a softer, more casual bite than rye bread slices sometimes do. These are briny, savory, and a little old-fashioned in a way I love.
Why It Works:
Reuben flavors need acid and salt to keep the beef from tasting heavy. Sauerkraut does that job, but only if it’s drained well; otherwise, the sandwich turns wet fast. Swiss cheese is the natural fit because it melts cleanly and doesn’t fight the dressing or kraut.
Key Ingredients:
- 2 lbs ground beef, 85/15 — enough richness for the tangy toppings.
- 1 1/2 teaspoons kosher salt — for the patties.
- 1 teaspoon black pepper — keeps the burger savory.
- 1 cup sauerkraut, drained and squeezed dry — the drier, the better.
- 6 slices Swiss cheese, halved — the classic Reuben cheese.
- 1/3 cup thousand island dressing — the creamy, tangy layer.
- 12 rye slider buns or pumpernickel buns — rye flavor makes sense here.
- 1 tablespoon butter — for toasting the buns.
- 1 teaspoon caraway seeds, optional — use if your buns are plain.
Quick Steps:
- Dry the Kraut: Drain the sauerkraut in a colander and squeeze it lightly with paper towels so it won’t flood the buns.
- Shape and Cook the Patties: Form the beef into 12 patties and season them with salt and pepper. Sear in a hot skillet for 2 to 3 minutes per side.
- Add the Cheese: Top each patty with Swiss during the last 30 seconds and cover until melted.
- Toast the Buns: Butter the cut sides and toast them in the skillet until lightly crisp.
- Assemble: Spread thousand island on the bun, add the burger, then top with kraut and close.
Equipment for This Recipe:
- Skillet — for the patties and bun toasting.
- Colander — for draining sauerkraut.
- Paper towels — to squeeze the kraut drier.
- Spatula — for flipping the burgers.
How to Serve This Dish:
Serve these with pickle spears, potato chips, or a simple cucumber salad. The sauerkraut is the loudest flavor on the tray, so the side dish should stay plain. If you want to keep the buns from getting soggy, put the kraut on top of the cheese instead of under it.
Pro Tips for This Recipe:
- Dry the sauerkraut more than you think you need to.
- Rye buns help the flavor feel intentional.
- Toast the buns with butter, not oil, so the bread gets a fuller flavor.
Variations on This Dish:
- Pastrami-Style Slider: Add a little chopped pastrami under the kraut.
- Spicy Reuben: Mix horseradish into the thousand island.
- Extra-Dill Version: Add chopped dill pickles for more brightness.
Common Mistakes to Avoid with This Dish:
- Using wet sauerkraut: It turns the slider soggy almost immediately.
- Forgetting to toast the buns: The dressing needs a little barrier.
- Loading on too much dressing: A thin smear is enough; too much buries the kraut.
15. Philly Cheesesteak Sliders
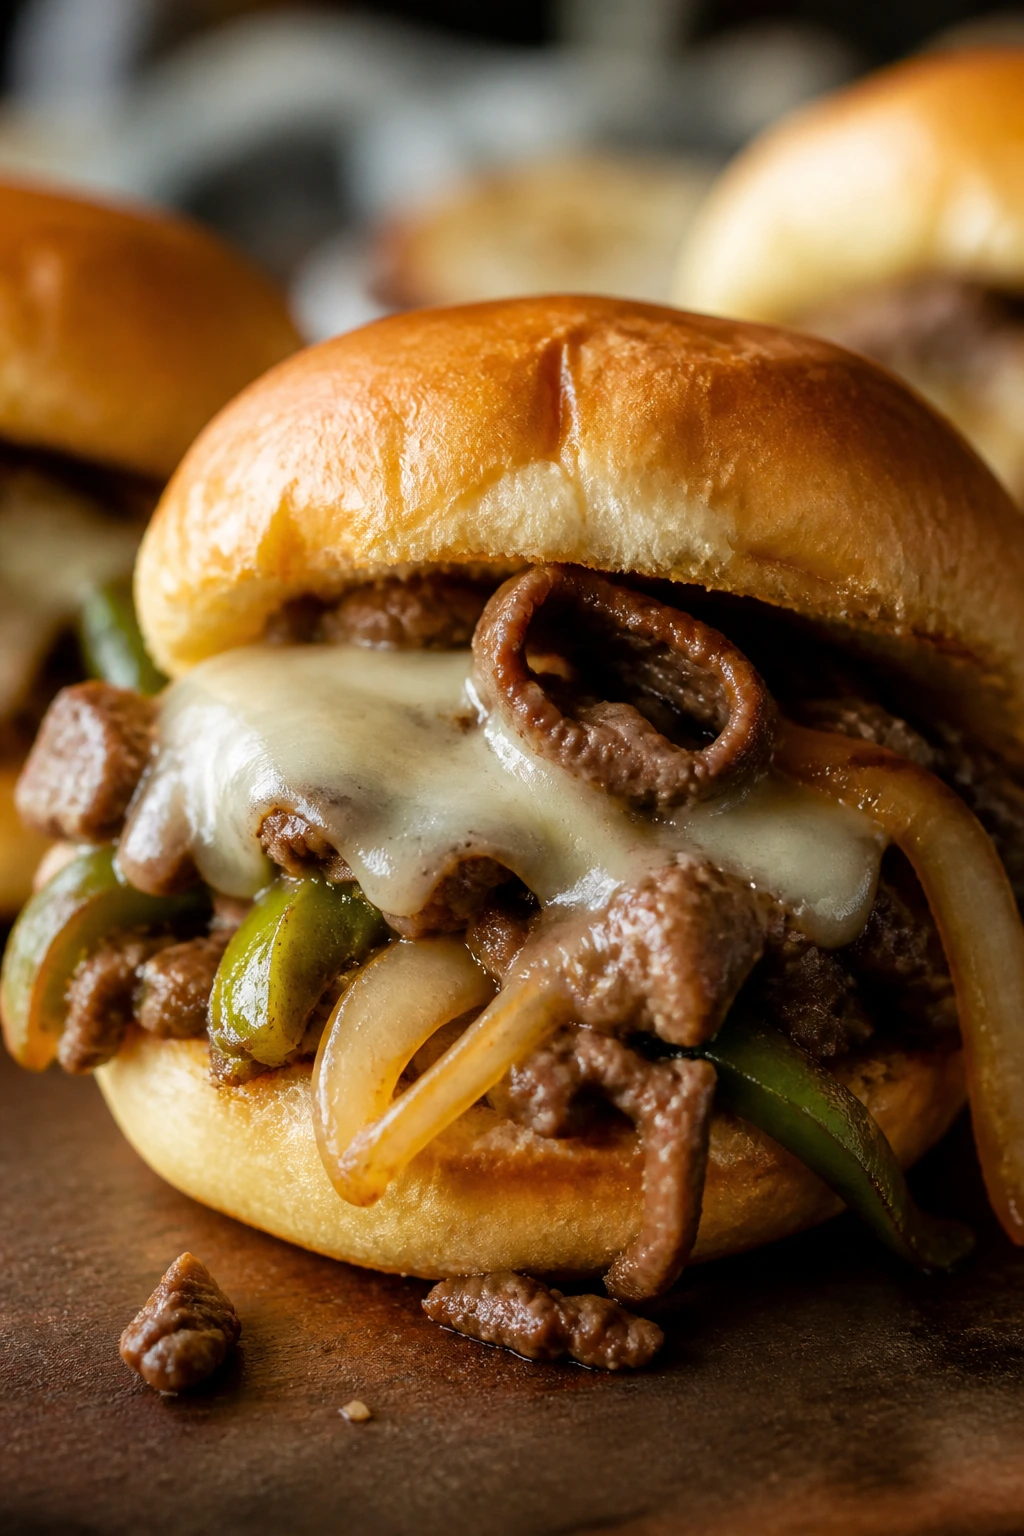
These blur the line between burger and steak sandwich in a way that makes sense the second you bite in. Peppers and onions go soft and sweet, the provolone turns stretchy, and the beef gives you enough heft to keep it from feeling like a side dish. They’re messy. They should be.
Why It Works:
Philly flavors work because the vegetables and cheese bring everything the slider needs besides the beef itself. The onions and peppers need enough heat to soften and pick up a little color, but not so much that they lose shape entirely. Provolone melts neatly and doesn’t overwhelm the vegetables, which is why it plays better here than a sharper cheese would.
Key Ingredients:
- 2 lbs ground beef, 80/20 — gives the sliders a juicy center.
- 1 1/2 teaspoons kosher salt — for the beef.
- 1 teaspoon black pepper — keeps the flavor balanced.
- 1 green bell pepper, thinly sliced — classic Philly flavor.
- 1 yellow onion, thinly sliced — sweetens as it cooks.
- 1 cup mushrooms, sliced, optional — if you like a heavier filling.
- 1 tablespoon Worcestershire sauce — boosts the beef.
- 6 slices provolone, halved — melts without fuss.
- 12 slider buns — split and toasted.
- 1 tablespoon mayonnaise — a light spread helps the bun stay soft but not damp.
Quick Steps:
- Cook the Vegetables: Sauté the peppers, onion, and mushrooms in a skillet over medium-high heat for 8 to 10 minutes, until soft and lightly browned.
- Season the Beef: Mix the beef with salt, pepper, and Worcestershire, then shape into 12 patties.
- Cook the Patties: Sear the patties for 2 to 3 minutes per side, until browned and cooked to 160°F (71°C).
- Melt the Provolone: Add cheese to the patties during the last 30 seconds and cover to melt.
- Build the Slider: Toast the buns, spread a thin layer of mayo, add the burger, then pile the peppers and onions on top.
Equipment for This Recipe:
- Skillet — for both the vegetables and patties.
- Spatula — to flip the beef.
- Tongs — useful for moving the vegetables without mashing them.
- Lid — to melt the cheese quickly.
How to Serve This Dish:
Serve these with fries, chips, or a simple green salad dressed with oil and vinegar. They’re filling enough that two sliders can stand in for dinner without any apologies. Keep the veggies warm until the last second; once they cool, the whole sandwich loses some of its appeal.
Pro Tips for This Recipe:
- Cook the vegetables first and keep them warm while you make the patties.
- Don’t drown the slider in mayo. It’s there to smooth the bite, not to become the flavor.
- Provolone should melt soft and glossy; if it starts to stiffen, cover the pan one more time for a few seconds.
Variations on This Dish:
- Whiz Version: Use cheese sauce if you want the most classic cheesesteak feel.
- Mushroom-Heavy Version: Double the mushrooms and reduce the onions a little.
- Hot Pepper Version: Add sliced long hots or pepperoncini.
Common Mistakes to Avoid with This Dish:
- Letting the vegetables stay crunchy: Philly-style filling needs to be soft enough to fold into the sandwich.
- Using too much mayo: The bun gets slippery fast.
- Skipping the cheese melt: Provolone should be warm and loose, not just sitting on top.
16. Breakfast Burger Sliders
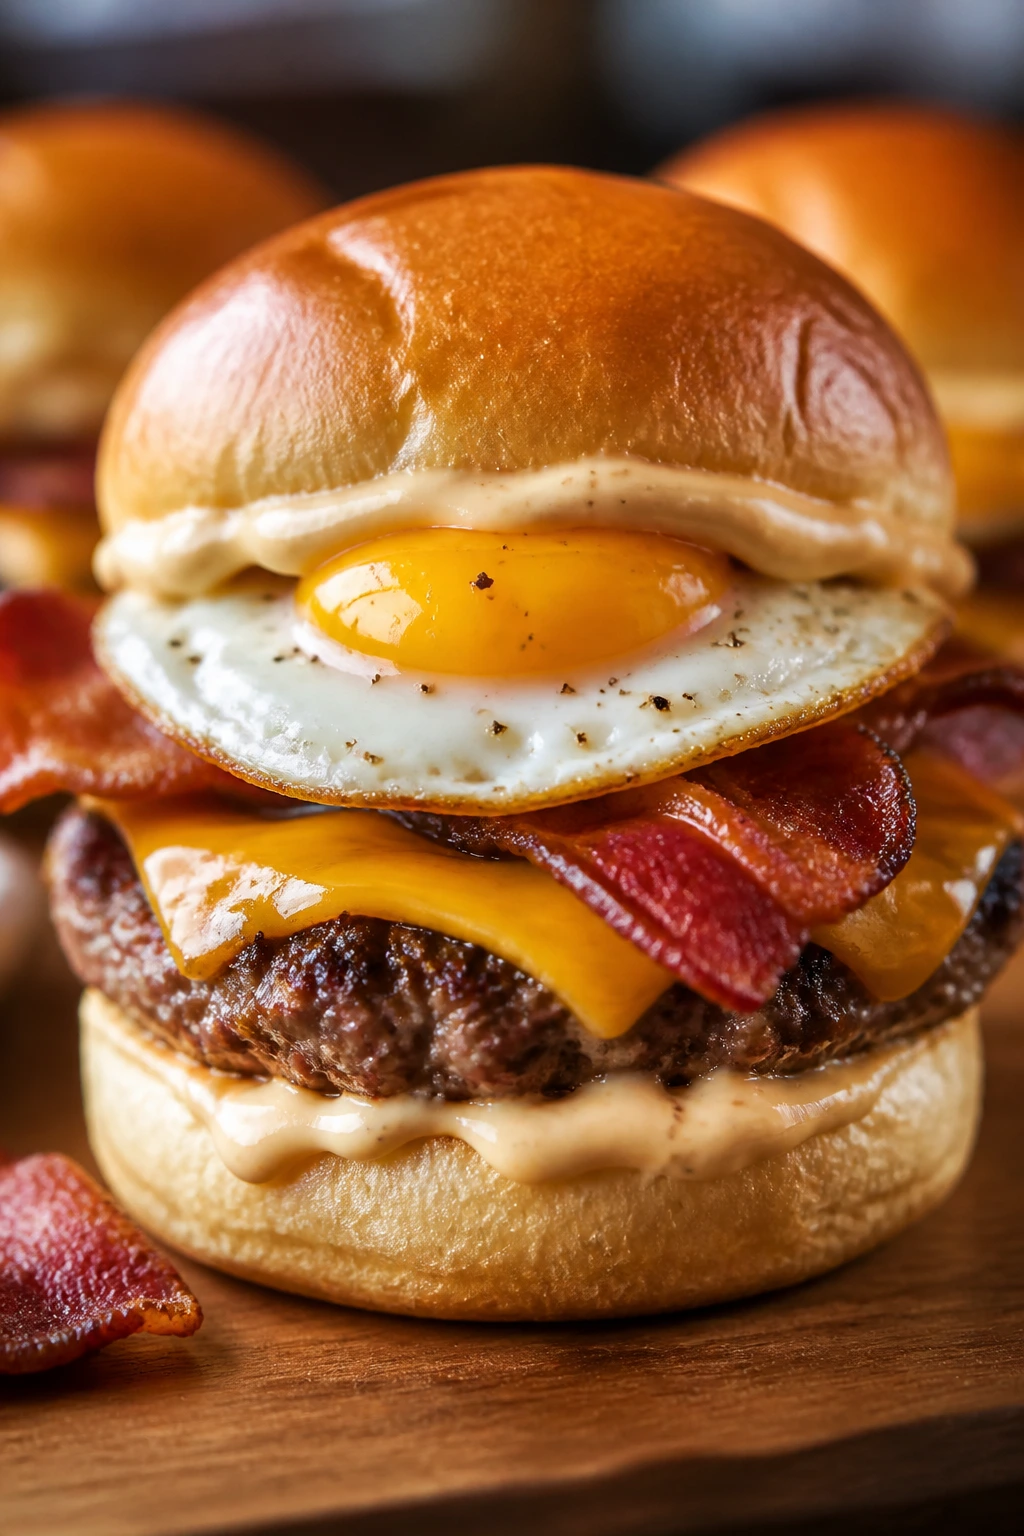
These are the ones people eat standing up, usually while talking with their hands. A fried egg drapes over the beef, bacon adds salt, and a touch of maple mayo gives the bun a little morning sweetness without turning the slider into dessert. It’s breakfast, but with more structure.
Why It Works:
Breakfast flavors like egg, bacon, and cheese all benefit from a burger that’s small enough to eat in a few bites. A slider bun keeps the whole thing neat enough for a brunch tray, and the runny yolk adds a sauce that you didn’t have to whisk. The trick is to keep the eggs just set so they don’t flood the bread.
Key Ingredients:
- 2 lbs ground beef, 80/20 — for juicy patties.
- 1 1/2 teaspoons kosher salt — for the beef.
- 1 teaspoon black pepper — keeps the patties savory.
- 6 slices cheddar cheese, halved — a natural match for breakfast.
- 6 slices bacon — cooked crisp and cut to fit.
- 6 large eggs — fried sunny-side up or over easy.
- 2 tablespoons mayonnaise — for the maple spread.
- 1 tablespoon maple syrup — mixed into the mayo.
- 12 slider buns — toasted lightly.
- 1 tablespoon butter — for the eggs and buns.
- 1 cup crisp hash browns, optional — if you want a fuller breakfast feel.
Quick Steps:
- Cook the Bacon: Fry the bacon until crisp and drain it well.
- Mix the Spread: Stir the mayonnaise and maple syrup together in a small bowl.
- Shape and Cook the Patties: Form the beef into 12 patties, season with salt and pepper, and cook for 2 to 3 minutes per side.
- Add Cheese and Eggs: Melt the cheddar on the patties, then fry the eggs in butter until the whites are set and the yolks are still soft.
- Build the Sliders: Toast the buns, spread maple mayo on the bottom, add burger, bacon, egg, and hash browns if using.
Equipment for This Recipe:
- Skillet — for bacon, burgers, and eggs.
- Small bowl — for the maple mayo.
- Spatula — for delicate eggs.
- Paper towels — to keep the bacon crisp.
How to Serve This Dish:
These are good with fruit, roasted potatoes, or a bowl of yogurt on the side if the tray is leaning heavy. Serve them quickly after the eggs come off the pan; once the yolk firms up, the whole idea gets less interesting. A little chopped chive over the top looks good and tastes better than it sounds.
Pro Tips for This Recipe:
- Cook the eggs last so they stay soft.
- Don’t overdo the maple syrup. You want a whisper of sweetness, not pancake territory.
- Cut the bacon in half if your buns are small; long strips poke out and make the first bite awkward.
Variations on This Dish:
- Sausage Breakfast Slider: Swap bacon for a thin sausage patty.
- Hot Sauce Version: Add a few drops of hot sauce to the maple mayo.
- Egg-and-Cheese Only: Skip the bacon if you want a cleaner breakfast bite.
Common Mistakes to Avoid with This Dish:
- Overcooking the eggs: A runny or soft yolk is what makes the slider feel breakfast-ish.
- Using sweet buns and heavy maple at the same time: Too much sweetness pushes the whole sandwich off balance.
- Building them too early: Egg yolk waits for nobody.
17. Buffalo Blue Sliders
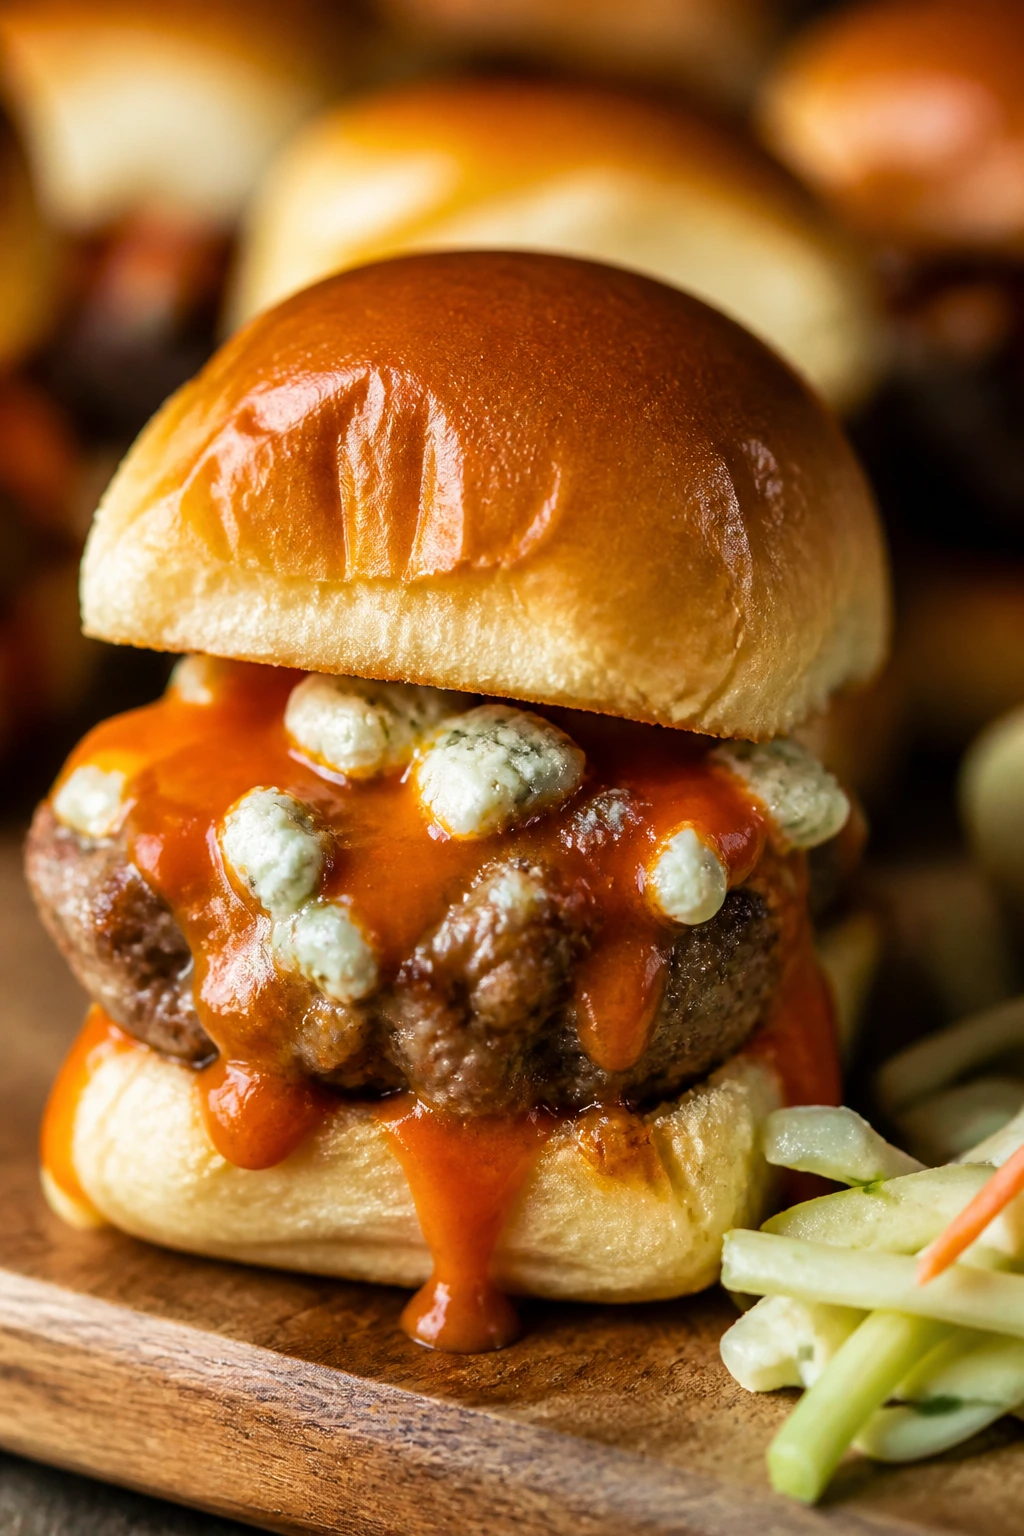
These bring the bar-food energy, and they don’t apologize for it. Buffalo sauce gives the beef a tangy kick, blue cheese adds that salty funk, and celery slaw keeps the bite cool enough that you can go back for another one without burning out your mouth. They’re sharp. In a good way.
Why It Works:
Buffalo sauce is strongest when it’s added after the burger cooks, not before. That keeps the beef from steaming in its own sauce and lets the patty stay browned. Blue cheese needs a cool counterpoint, which is why celery or a thin slaw matters so much here. Without that crunch, the slider can taste one-note and heavy.
Key Ingredients:
- 2 lbs ground beef, 80/20 — for juicy patties.
- 1 1/2 teaspoons kosher salt — for the meat.
- 1 teaspoon black pepper — keeps the flavor clean.
- 1/3 cup buffalo sauce — enough to coat without flooding.
- 6 slices blue cheese or 3/4 cup crumbled blue cheese — use more or less depending on how sharp you like it.
- 1 cup thinly sliced celery or celery slaw — for crunch.
- 1/4 cup ranch or blue cheese dressing — a light cool layer.
- 12 slider buns — toasted so the sauce doesn’t sink in.
- 2 tablespoons butter — for the buns if you want extra flavor.
Quick Steps:
- Make the Slaw: Toss the celery with a spoonful of dressing and set it aside.
- Shape and Cook the Beef: Form 12 patties, season them, and sear over medium-high heat for 2 to 3 minutes per side.
- Sauce the Patties: Brush or toss the patties lightly with buffalo sauce during the last minute, then top with blue cheese.
- Toast the Buns: Toast the buns cut-side down until warm and lightly crisp.
- Assemble: Spread a little ranch on the bottom bun, add the patty, then finish with celery slaw.
Equipment for This Recipe:
- Skillet — for the patties.
- Small bowl — for the slaw.
- Spoon or brush — for the buffalo sauce.
- Lid — helps the blue cheese soften quickly.
How to Serve This Dish:
Serve these with carrot sticks, potato chips, or a pile of fries and extra dressing on the side. They are best while the sauce is warm and the slaw is still crunchy. If the crowd likes heat, keep a bottle of buffalo sauce nearby instead of dunking the patties in it upfront.
Pro Tips for This Recipe:
- Sauce the burgers after they’re cooked so the crust stays intact.
- Use celery slaw instead of big sticks if you want a more stable bite.
- Blue cheese crumbles taste stronger than sliced blue cheese, so adjust the amount accordingly.
Variations on This Dish:
- Mild Buffalo Slider: Mix ranch into the buffalo sauce to soften the heat.
- Extra Crunch Version: Add crushed celery leaves or shredded cabbage to the slaw.
- Pepper Jack Swap: Use pepper jack if blue cheese is too sharp for your crowd.
Common Mistakes to Avoid with This Dish:
- Saucing the meat too early: That leads to steamed, soft patties.
- Skipping the crunchy element: Without celery, the slider feels heavy.
- Overdoing the blue cheese: A little goes a long way.
18. Cowboy BBQ Sliders

These taste like barbecue smoke, pickles, and a little bit of dirt-road attitude. The sauce is sticky, the onions add crunch, and the cheddar gives the beef a salty finish that sticks around. If you want a tray that feels casual but still intentional, this is the one I’d put down first.
Why It Works:
Cowboy-style flavors work because they mix sweet, smoky, and salty in a very direct way. Barbecue sauce brings the smoke note, crispy onions keep the texture alive, and pickles prevent the whole thing from tasting too sweet. Sharp cheddar is better than mild here because it can stand up to the sauce without disappearing.
Key Ingredients:
- 2 lbs ground beef, 80/20 — juicy enough for barbecue.
- 1 1/2 teaspoons kosher salt — for the patties.
- 1 teaspoon black pepper — keeps the beef savory.
- 1 teaspoon smoked paprika — gives the sliders a subtle smoke note.
- 1/2 cup barbecue sauce — thick enough to brush on.
- 6 slices cheddar or pepper jack, halved — cheddar is classic; pepper jack brings heat.
- 1/2 cup crispy fried onions — the crunchy finish.
- 12 slider buns — sturdy enough for saucy burgers.
- 12 dill pickle slices — bright and sharp.
- 2 tablespoons butter — for toasting buns.
Quick Steps:
- Season and Shape: Mix the beef with salt, pepper, and smoked paprika, then form 12 patties.
- Cook the Burgers: Sear over medium-high heat for 2 to 3 minutes per side until browned and cooked to 160°F (71°C).
- Glaze and Melt: Brush each patty lightly with barbecue sauce during the last minute, add cheese, and cover until melted.
- Toast the Buns: Butter the buns and toast them cut-side down until golden.
- Build the Sliders: Add the patty, pickles, and crispy fried onions, then close the buns gently.
Equipment for This Recipe:
- Skillet — for the patties.
- Pastry brush — for the barbecue sauce.
- Spatula — for flipping.
- Small bowl — to hold the crispy onions so they stay dry.
How to Serve This Dish:
These go well with baked beans, slaw, or potato salad. Put the crispy onions on last so they keep their crunch, and serve extra barbecue sauce on the side instead of drenching the tray. They’re the kind of sliders that people reach for twice because the first one disappears too fast.
Pro Tips for This Recipe:
- Use a thick barbecue sauce so it stays on the burger.
- Add the crispy onions right before serving.
- Keep the pickles cold; their snap is part of the payoff.
Variations on This Dish:
- Bacon Cowboy Sliders: Add a half strip of bacon under the cheese.
- Spicy Ranch Version: Mix a little ranch seasoning into the barbecue sauce.
- Onion-Heavy Version: Swap crispy onions for caramelized onions if you want a softer finish.
Common Mistakes to Avoid with This Dish:
- Brushing on barbecue sauce too early: It burns and turns bitter.
- Letting the crispy onions sit under steam: They soften and lose the point.
- Using sweet buns without any acidity: The slider can get cloying without pickles.
Why Sliders Make More Sense Than Full Burgers for a Crowd
There’s a reason tray-baked mini burgers keep showing up at parties and game-day tables: they’re easier to manage without tasting like a compromise. A slider patty gets heat from more sides at once, which means better browning in less time. That crust matters. It’s the part most people remember after the tray is empty.
A full burger asks the eater to commit. A slider invites sampling, which is a much better fit when you’ve got one tray and four opinions about cheese. You can make two or three flavors in the same cooking window, keep everything warm on a sheet pan, and still serve something that tastes handmade instead of assembled from random leftovers.
The other thing people underestimate is bun management. Small buns toast quickly, hold together better, and recover from sauce or pickle juice far better than a giant roll. If you’ve ever watched a burger collapse halfway through dinner, you already know why that matters.
Essential Equipment for These Recipes
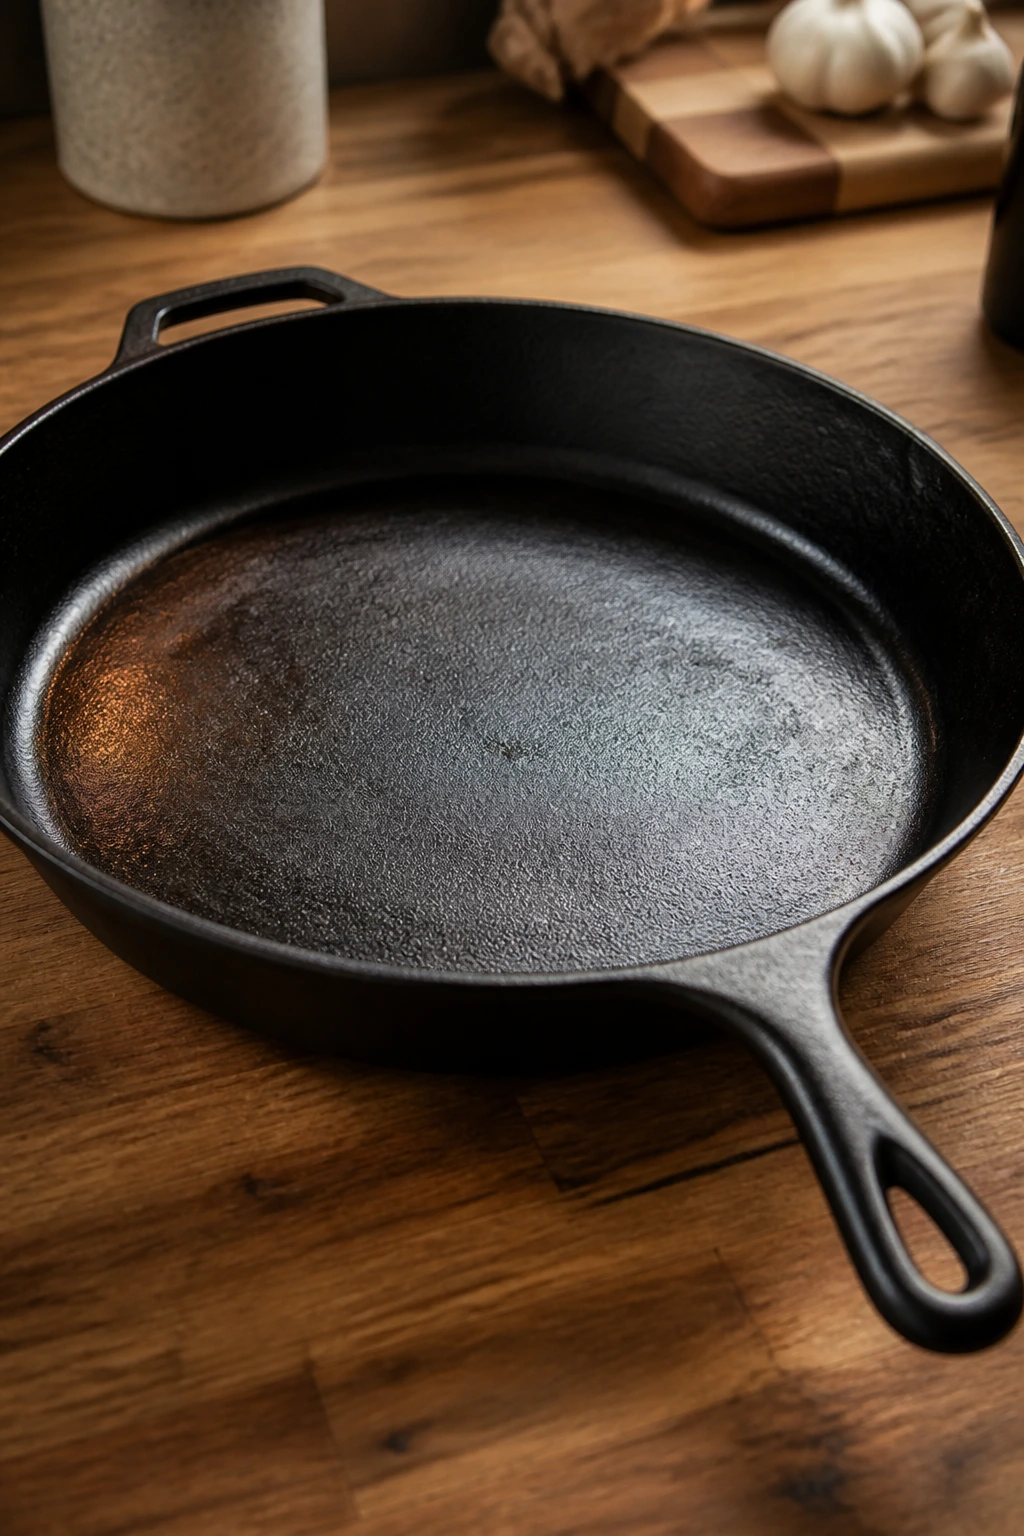
- 12-inch cast-iron skillet or heavy griddle — the best tool for getting a brown crust on small patties.
- Wide metal spatula — thin slider patties flip more cleanly with a stiff spatula than a flimsy one.
- Sheet pans — useful for toasting buns, holding cooked patties, or warming a batch in the oven.
- Mixing bowls — you’ll want at least two: one for the beef and one for sauces or toppings.
- Instant-read thermometer — the easiest way to know when the beef has reached 160°F (71°C).
- Knife and cutting board — for onions, pickles, tomatoes, celery, and any other topping that needs trimming.
- Tongs — handy for bacon, onions, pineapple, and other toppings that are easier to turn than burgers.
- Pastry brush — for buttering buns or glazing patties without dumping on too much fat.
- Colander or paper towels — especially useful for sauerkraut, salsa, mushrooms, or any topping that carries extra moisture.
Smart Shopping and Ingredient Tips
Ground beef matters more than people want to admit. For most hamburger sliders, I reach for 80/20 ground chuck because the fat helps the patties brown and stay juicy in such a short cook time. If you’re making a topping-heavy slider like mushroom Swiss or Reuben-style, an 85/15 grind can work too, but go too lean and the sliders start tasting dry before they’re even plated.
Slider buns are not all equal. The softest ones are the easiest to bite through, but they also go soggy fastest. I like buns that are soft in the middle and lightly structured at the edge — brioche, potato rolls, and mini sesame buns all work well if you toast the cut side. If the package feels like compressed cotton, skip it.
Cheese should melt on command. American is still the easiest if you want that diner-style stretch. Cheddar, provolone, Swiss, pepper jack, and Monterey Jack all have a place here, but use slices where you can and keep shredded cheese for toppings that need to blanket the patty quickly. A block of sharp cheddar is fine for grating over chili or pizza-style sliders, though I wouldn’t ask it to behave like American.
Watch the wet toppings. Salsa, sauerkraut, pineapple, tomatoes, mushrooms, and barbecue sauce all need a little draining or reducing before they meet the bun. That one step saves you from soggy bottoms and sliding sliders. And yes, pickles matter more than people expect. A plain burger with a good dill pickle tastes more complete than one with six toppings and no acid.
How to Serve These Recipes
Presentation:
Lay the sliders on a parchment-lined sheet pan or a wide wooden board so people can see the different toppings right away. If you’re serving more than one style, give each row a small garnish cue — pickles for the diner version, cilantro for the taco one, crispy onions for the cowboy tray. Tiny labels help too, especially when several sliders look similar from above.
Accompaniments:
Fries are the obvious partner, but these sliders also work with kettle chips, potato salad, slaw, roasted vegetables, baked beans, or a simple green salad with a sharp dressing. Sour sides do a lot of useful work here. Anything with vinegar, pickle brine, lemon, or mustard helps clear the palate between richer bites.
Portions:
Plan on 2 to 3 sliders per adult if you’re serving sides, or 3 to 4 if the sliders are the whole meal. For kids, 1 to 2 usually covers it, depending on how loaded the toppings are. If you’re mixing styles, make a few extras of the plainest one; those disappear first because people trust them.
Beverage Pairing:
Cold lager, pale ale, cola, sparkling water with lime, or unsweetened iced tea all fit this kind of tray. For sweeter or barbecue-heavy sliders, lean toward something crisp and not sugary. For spicy versions, a cold beer or plain soda is more forgiving than anything with a lot of sweetness.
Additional Tips and Flavor Boosters
Flavor Enhancement: A thin swipe of mayonnaise or butter on the cut sides of the buns before toasting gives you more browning and keeps the bread from feeling dry. It’s a small move that changes the whole first bite.
Customization: Treat each tray like a set of building blocks. Use the same beef patties, then change the cheese, sauce, and finishing crunch to shift from diner-style to barbecue to Buffalo without reinventing dinner. That’s the trick with sliders — the base stays steady while the toppings do the talking.
Serving Suggestions: Keep a few finishing touches on the table instead of burying them in the recipe. Chopped pickles, sliced scallions, extra mustard, hot sauce, celery leaves, and shredded lettuce let people tune their slider without you making six separate batches. It also keeps the tray from looking overworked.
Make-It-Yours: For a dairy-free tray, use a plant-based cheese that melts cleanly or skip the cheese and add more saucy, crunchy toppings. For a lower-carb version, serve the patties and toppings over lettuce cups or small romaine leaves, though I’d still toast buns for the rest of the crowd because the texture is half the fun. For heat lovers, add pickled jalapeños or chipotle mayo to just one row so the whole tray doesn’t get loud.
Make-Ahead, Storage, and Reheating Guidance
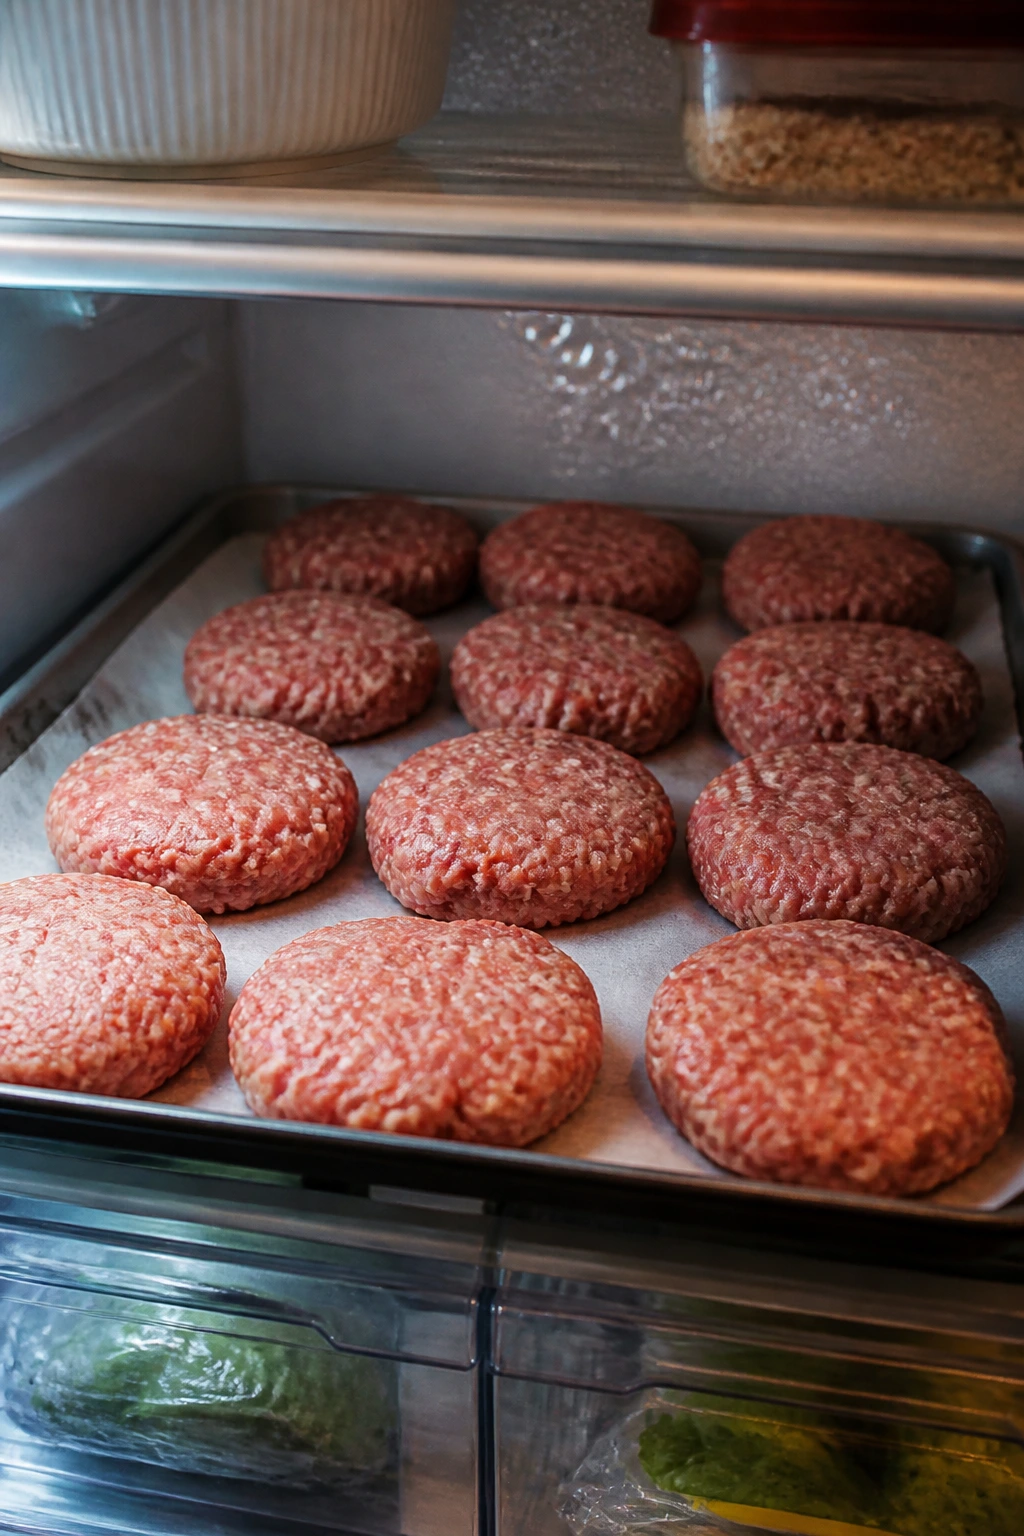
Raw slider patties can be shaped and refrigerated on a parchment-lined tray for up to 24 hours. I like to cover them loosely with plastic wrap so they stay cold without smearing into one another. If you need more lead time, freeze the patties raw for up to 2 months, separated with parchment, then thaw them in the fridge before cooking.
Cooked patties keep in the refrigerator for 3 to 4 days in an airtight container. The important part is storing the buns separately. Once the bread absorbs meat juices or sauce, it stops behaving like a bun and starts behaving like wet bread, which is a different thing entirely. Toppings with lots of moisture — tomatoes, sauerkraut, salsa, pineapple, slaw — should also live in separate containers.
For reheating, use a 300°F (150°C) oven for about 8 to 12 minutes if you’re warming cooked patties and buns. Wrap the patties loosely in foil so they don’t dry out, and toast the buns separately for the last few minutes. If you’re reheating a saucy slider like chili cheese or BBQ, reheat the components separately and assemble afterward; that keeps the bread from collapsing before it gets to the table.
Microwaves work in a pinch, but they’re rough on buns. If you must use one, heat the patties on a lower setting and keep the buns out of it unless you enjoy rubbery bread. Some sliders, especially onion smash and patty melt styles, lose a little crust after storage. That’s normal. Re-crisping the bun and heating the patty properly gets you most of the way back.
Variations and Adaptations to Try
Gluten-Free Slider Tray:
Use certified gluten-free slider buns and keep the patties and toppings separate until the last minute. The rest of the recipe stays the same. Toast the buns carefully, though, because gluten-free bread goes from pale to brittle fast.
Dairy-Free Build:
Skip the cheese or use a meltable dairy-free slice, then lean harder on pickles, caramelized onions, avocado, or a thick sauce for richness. The best dairy-free versions usually work better when the bun is toasted a little longer. You need that extra structure.
Lower-Sodium Batch:
Use unsalted butter, choose a lower-sodium spice blend, and dial back the pickles, sauerkraut, or barbecue sauce if they’re already salty. Add more black pepper, onion, and acid from mustard or vinegar instead of reaching for more salt. The flavors still come through, just a little cleaner.
Kid-Friendly Plain-Jane Sliders:
Set aside a row of simple cheeseburger sliders with cheese, bun, and a little ketchup only. Kids often like the plain ones more than the fancy versions, and adults usually end up eating them too because they’re easy to reach for. Keep the pickles and onions on the side instead of inside.
Heat-Seeker Tray:
Build one or two rows with jalapeños, pepper jack, hot sauce, chipotle mayo, or Buffalo sauce, then leave the rest mild. People like being able to choose their own heat level, and a mixed tray avoids forcing the whole batch into one flavor lane. A little heat goes a long way in slider form.
Common Mistakes to Avoid
The biggest mistake is making the patties too thick. Sliders should cook fast and fit the bun without towering over it. A thick slider feels like a burger wearing a costume. Shape them thin enough that the bun and beef can actually meet in one bite.
Another common error is overloading the fillings. A slider is small; that means the toppings need to be chosen, not stacked like you’re trying to win a contest. If you add cheese, sauce, onions, and pickles, that may be enough. If you add all of that plus three more things, the sandwich gets unstable and messy in the wrong way.
Wet toppings are the silent problem. Salsa, tomatoes, sauerkraut, mushrooms, pineapple, and barbecue sauce all need either draining or reduction before they touch the bun. If the slider starts with soggy bread, no amount of cheese will save it.
People also under-toast the buns. Soft bread is fine for a minute, then it absorbs heat and moisture and starts collapsing. A light golden toast on the cut side gives you a barrier and a little flavor. Don’t skip it.
Finally, don’t cook every slider the same way if the toppings aren’t the same. A chili slider needs a sturdier bun than a classic cheeseburger. A jalapeño popper slider needs a cooler, creamier topping. A Reuben-style slider needs dry kraut and a toasted bun. Matching the method to the topping is what keeps the tray from turning into a pile of guesses.
Frequently Asked Questions
How many sliders does one pound of ground beef make?
Usually 5 to 6 sliders, depending on how large you shape them. For party trays, 2 pounds is the sweet spot because it gives you a full batch without making the patties awkwardly small. If you want extra-thin smash-style sliders, you can stretch it a little farther.
What is the best ground beef for hamburger sliders?
I’d use 80/20 ground chuck for most of them. The fat helps with browning and keeps the sliders juicy, which matters more in small burgers because they cook so fast. If the recipe has a lot of cheese, bacon, or sauce, 85/15 can work too.
Can I bake slider patties instead of cooking them in a skillet?
Yes. A hot oven, around 425°F (220°C), works well for tray-style sliders, especially if you want to cook a lot at once. You won’t get the same crust as a skillet, but you gain convenience, and for some party recipes that tradeoff is worth it.
Should I toast slider buns?
Yes, unless you want soggy bottoms. Even a quick 1-minute toast on the cut side gives the buns more structure and a little flavor. For saucy sliders like chili cheese or BBQ, toasting is not optional in my book.
Can I make the patties ahead of time?
You can shape them up to a day ahead and keep them refrigerated. Put parchment between layers if you’re stacking them, and keep them covered so the surface doesn’t dry out. If you’re using onion or seasoning-heavy mixtures, cook them as soon as practical so the flavors stay bright.
How do I keep sliders warm for a party?
Hold the cooked patties on a sheet pan in a 200°F (95°C) oven for a short stretch, then toast and assemble near serving time. If the sliders are already built, they’ll keep for a little while covered loosely with foil, but the buns soften the longer they sit. Separate components always hold up better than a fully assembled tray.
What cheese melts the best on mini burgers?
American cheese melts the smoothest and fastest. Provolone and Swiss also behave well, while cheddar gives you stronger flavor but can be a little less silky. For sliders with wet toppings, I’d choose a cheese that melts cleanly instead of one that needs a long melt time.
Why do my sliders shrink so much?
Usually the patties were overworked, started too warm, or were pressed too hard in the pan. A little shrinkage is normal, but if they’re pulling back a lot, try shaping them slightly wider than the buns and stop handling the meat once it’s mixed. The beef should stay loose enough to sear.
Can I freeze cooked slider patties?
Yes, cooked patties freeze well for about 2 months if they’re wrapped tightly and cooled before freezing. Reheat them gently in the oven so they don’t dry out. I would freeze the patties and the buns separately, because bread is the first thing to suffer.
A Tray Worth Repeating
Hamburger sliders work because they solve a few dinner problems at once. They cook fast, they travel well, and they let you make one tray that feels varied without turning the kitchen into a circus. That’s the sweet spot: familiar, but not boring.
The best part is how forgiving they are once you respect the basics — hot pan, small patties, toasted buns, and toppings that know their place. Keep those pieces in order and you can go classic, smoky, spicy, briny, or saucy without losing the thing that makes a slider worth serving in the first place.