
A cold day changes the rules at dinner. A salad feels rude. A skillet meal asks you to stand over the stove when all you want is a chair, a blanket, and something hot that smells like onions, garlic, and salt. That’s where crockpot sandwiches earn their keep: they turn tough cuts, cheap rolls, and a few pantry odds and ends into something you can pile high, hand to people, and eat with both hands around the heat.
I have a soft spot for slow cooker sandwiches because they solve the best winter problem without pretending to be elegant about it. The filling gets long, steady heat. The bread gets toasted or split at the last second. The saucy part does what it should do: drip a little, not flood everything. And when the house smells like braising beef, citrusy pork, or peppery chicken, dinner feels less like a chore and more like the place you want to be.
The trick is choosing sandwiches that actually make sense in a crockpot. Not every filling belongs there. The best ones have enough fat, enough moisture, and enough time to soften into something spoonable without losing their shape. That’s the lane here. Big flavors. Hot fillings. Bread that can take a beating. The good stuff.
Why These Crockpot Sandwiches Hit the Mark
-
Built for rough weather: These fillings stay hot, rich, and satisfying long after the slow cooker lid comes off, which matters when dinner is happening in a drafty kitchen or after a long day outside.
-
Tough cuts do the heavy lifting: Pork shoulder, chuck roast, and chicken thighs turn tender in low heat, so you get better texture without paying for fussy cuts.
-
Bread becomes part of the job: Hoagie rolls, slider buns, rye, naan, and ciabatta all bring different strengths, from crust to chew to soak-up power.
-
Sauce is not an afterthought: The best sandwich filling leaves a little jus or glaze in the crockpot, and that liquid is what makes the bite feel complete.
-
Make-ahead friendly by design: Most of these fillings taste even better after a short rest, which means lunch the next day can be better than dinner the night you made it.
-
Wide enough for a mixed table: Meat lovers, spice seekers, and even the occasional vegetarian can all find something here without anyone acting like they’ve been punished.
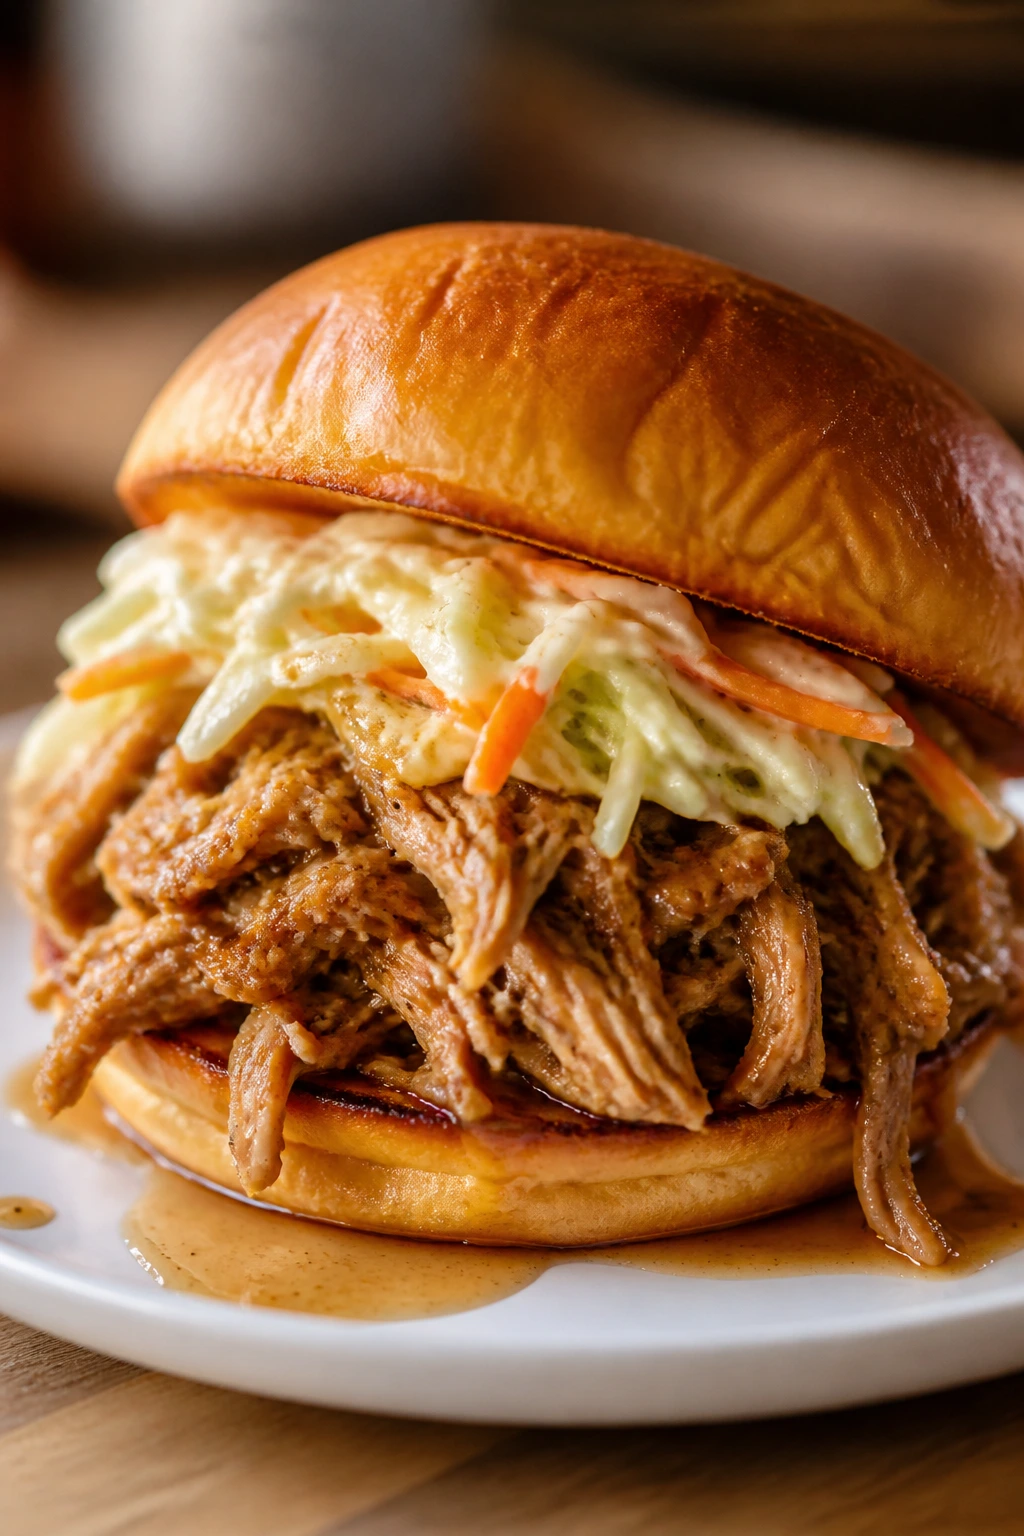
1. Pulled Pork Sandwiches with Tangy Slaw
The first bite should be messy in the right way: smoky pork, a little vinegar snap, soft bun, cool slaw. That’s the appeal here. A pork shoulder doesn’t rush, and neither should this sandwich. The long cook turns it into strands that still have some bite, not dry confetti, and the slaw keeps the whole thing from feeling heavy.
Why It Works:
Pork shoulder has enough fat and connective tissue to break down beautifully over 8 to 10 hours on LOW. The apple cider vinegar keeps the meat from tasting flat, while a little BBQ sauce or ketchup gives the juices body. Toasted buns matter here more than people think. A soft bun goes limp fast; a lightly toasted one gives the sandwich some spine.
Key Ingredients:
- 4 lb boneless pork shoulder, trimmed of any thick surface fat
- 1 large yellow onion, thinly sliced
- 4 garlic cloves, minced
- 1 tablespoon kosher salt
- 2 teaspoons smoked paprika
- 1 teaspoon black pepper
- 1/2 cup apple cider vinegar
- 1 cup apple juice or low-sodium broth
- 1/2 cup BBQ sauce or ketchup
- 8 sandwich buns
For the Tangy Slaw:
- 4 cups shredded green cabbage
- 1/4 cup mayonnaise
- 2 tablespoons apple cider vinegar
- 1 teaspoon sugar
- Pinch of salt
Quick Steps:
- Season the pork: Rub the pork shoulder with salt, smoked paprika, and black pepper, pressing the spices into every side.
- Build the base: Scatter the onion and garlic in the bottom of the slow cooker, then set the pork on top.
- Add the liquid: Pour in the vinegar, apple juice, and BBQ sauce. The pork should sit in a shallow bath, not be buried.
- Cook low and slow: Cover and cook on LOW for 8 to 10 hours, or HIGH for 5 to 6 hours, until the pork shreds with almost no resistance.
- Shred and season: Pull the pork apart with two forks, stir it back into the juices, and let it sit on WARM for 15 minutes.
- Mix the slaw: Toss the cabbage with mayo, vinegar, sugar, and salt until lightly coated.
- Assemble: Pile the pork onto toasted buns and top with a loose handful of slaw.
Equipment for This Recipe:
- 6-quart slow cooker
- Two forks for shredding
- Large mixing bowl for the slaw
- Measuring cups and spoons
How to Serve This Dish:
Serve it hot with a mound of slaw on top or on the side if you want cleaner hands. I like it with kettle chips and pickles; the salt and crunch work hard against the rich pork. If you’re feeding a crowd, keep the shredded meat on WARM and let people build their own.
Pro Tips for This Recipe:
- Use pork shoulder, not pork loin. Loin dries out before it gets tender enough to shred.
- Toast the buns cut-side down in a dry skillet for 1 to 2 minutes. That small move saves the sandwich.
- Taste the juices before serving. If they need more bite, add a splash of vinegar.
- Keep the slaw cold until the last minute so it stays crisp.
Variations on This Dish:
- Carolina Vinegar Twist: Skip the BBQ sauce and double the vinegar for a sharper, more old-school pulled pork flavor.
- Smoky Chipotle Version: Stir in 1 chopped chipotle in adobo for a deeper burn and a darker sauce.
- Slider Party Format: Spoon the pork onto Hawaiian rolls and add just a little slaw so the sliders stay easy to grab.
Common Mistakes to Avoid with This Dish:
- Using pork loin: It looks cheaper, but the lean cut turns stringy and dry before it becomes properly shreddable.
- Adding the slaw too early: Wet cabbage on a hot sandwich turns floppy in minutes.
- Skipping the resting time: Letting the pork sit in its juices for 10 to 15 minutes makes the strands taste seasoned all the way through.
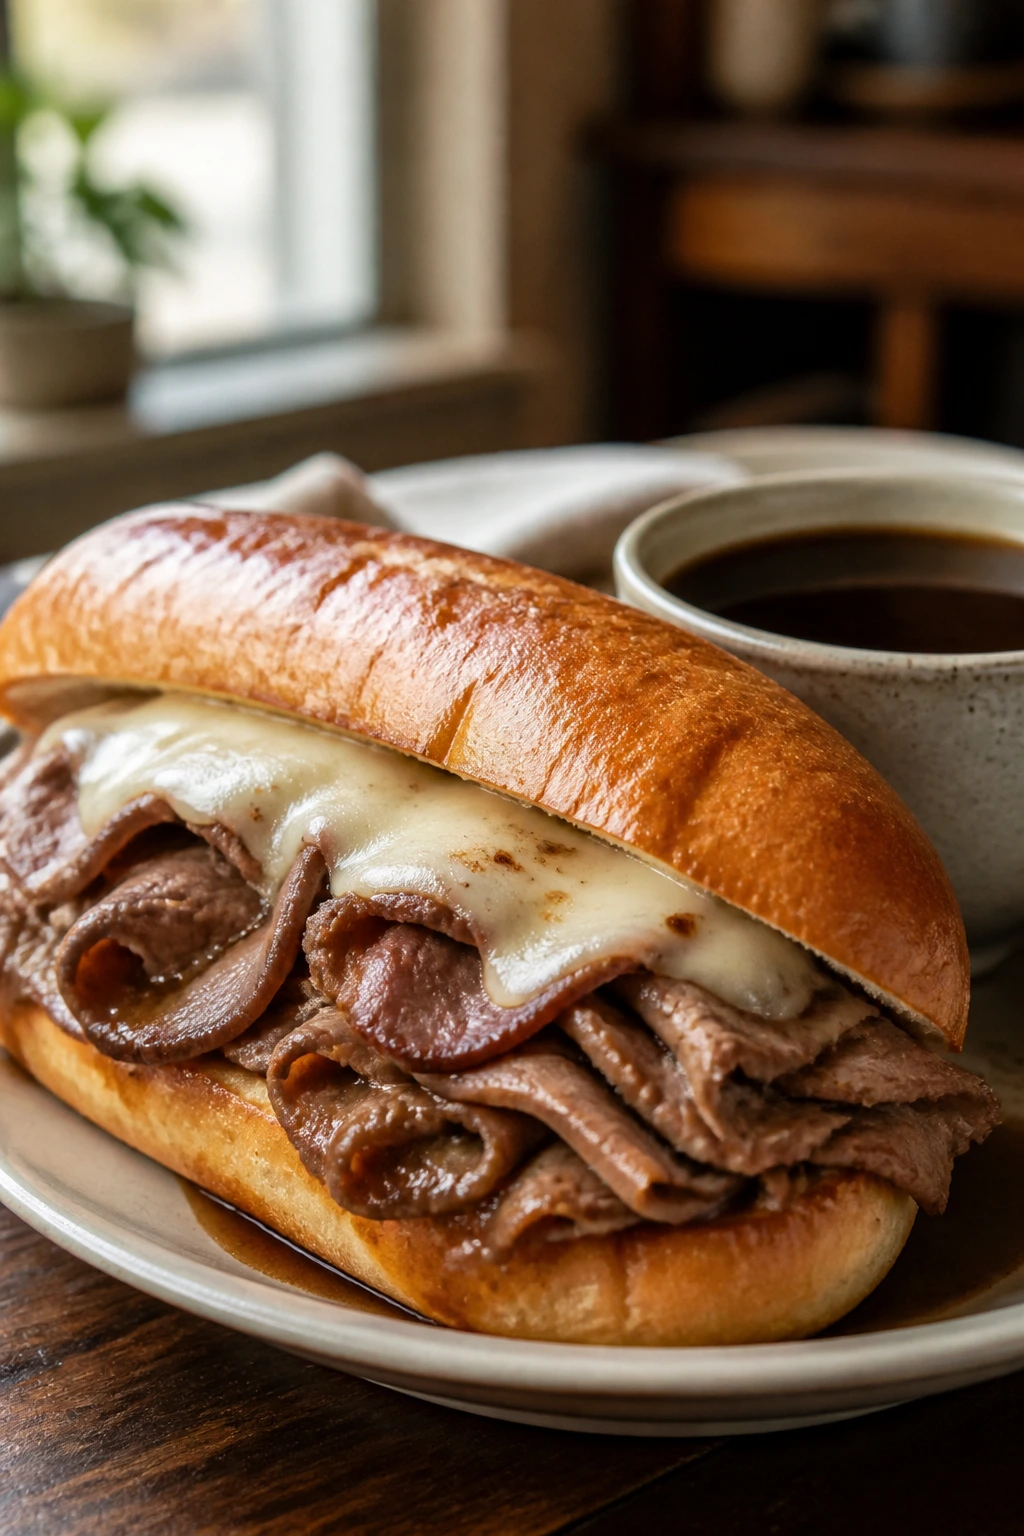
2. French Dip Roast Beef Hoagies
French dip is the sandwich I make when I want dinner to feel a little more serious without doing more work. The jus should taste like beef, onion, and thyme with a dark, savory edge. The bread should give a little when you bite into it, then soak up the broth without collapsing in your hands. That balance is the whole point.
Why It Works:
Chuck roast has the collagen and fat needed for a long braise. The slow cooker pulls that beef apart while the broth, Worcestershire, and onions build a jus worth spooning over everything. A French dip also gives you a rare perk: the filling and the dipping liquid are the same dish, just in two forms.
Key Ingredients:
- 3 1/2 lb chuck roast
- 2 large yellow onions, sliced
- 4 garlic cloves, smashed
- 4 cups beef broth
- 2 tablespoons Worcestershire sauce
- 1 teaspoon dried thyme
- 1 bay leaf
- 1 teaspoon black pepper
- 8 hoagie rolls
- 8 slices provolone
Quick Steps:
- Layer the onions: Spread the onions and garlic in the slow cooker, then set the roast on top.
- Season and pour: Add broth, Worcestershire, thyme, bay leaf, and black pepper.
- Cook until tender: Cover and cook on LOW for 8 to 9 hours, or until the roast falls apart when you press it with a fork.
- Shred the beef: Remove the roast, shred it, and return it to the slow cooker for 10 minutes so the meat drinks up some jus.
- Build the rolls: Split the hoagies, add beef, and top each with provolone.
- Melt and serve: Broil the open sandwiches for 1 to 2 minutes until the cheese bubbles at the edges.
- Strain the jus: Ladle the broth through a fine-mesh strainer into small cups for dipping.
Equipment for This Recipe:
- 6-quart slow cooker
- Fine-mesh strainer
- Rimmed baking sheet for broiling
- Tongs
How to Serve This Dish:
Serve the sandwiches open-faced for a minute under the broiler, then close them if you want less mess. I like a pile of salted potato chips and a dill pickle spear on the side. The jus deserves its own cup; don’t drown the bread before the first bite.
Pro Tips for This Recipe:
- If you have 10 extra minutes, sear the roast first. The crust deepens the broth.
- Strain the jus before serving so you don’t get onion strings hanging out in the cup.
- Use rolls with some crust. Soft sandwich bread turns soggy in a hurry.
- Add a teaspoon of horseradish to the jus if you want more bite.
Variations on This Dish:
- Mushroom Swiss Dip: Add 8 ounces sliced mushrooms during the last 2 hours and swap provolone for Swiss.
- Peppery Pub Style: Stir in extra black pepper and a spoonful of prepared horseradish.
- Open-Faced Knife-and-Fork Version: Serve the beef over toasted bread and pour jus over the top.
Common Mistakes to Avoid with This Dish:
- Using too much broth: The roast should braise, not float. Too much liquid makes the jus thin and less beefy.
- Skipping the broil: Cold cheese on warm beef is fine, but melted cheese seals the sandwich.
- Letting the bread sit in the jus too long: Dip the sandwich at the table; don’t pre-soak it.
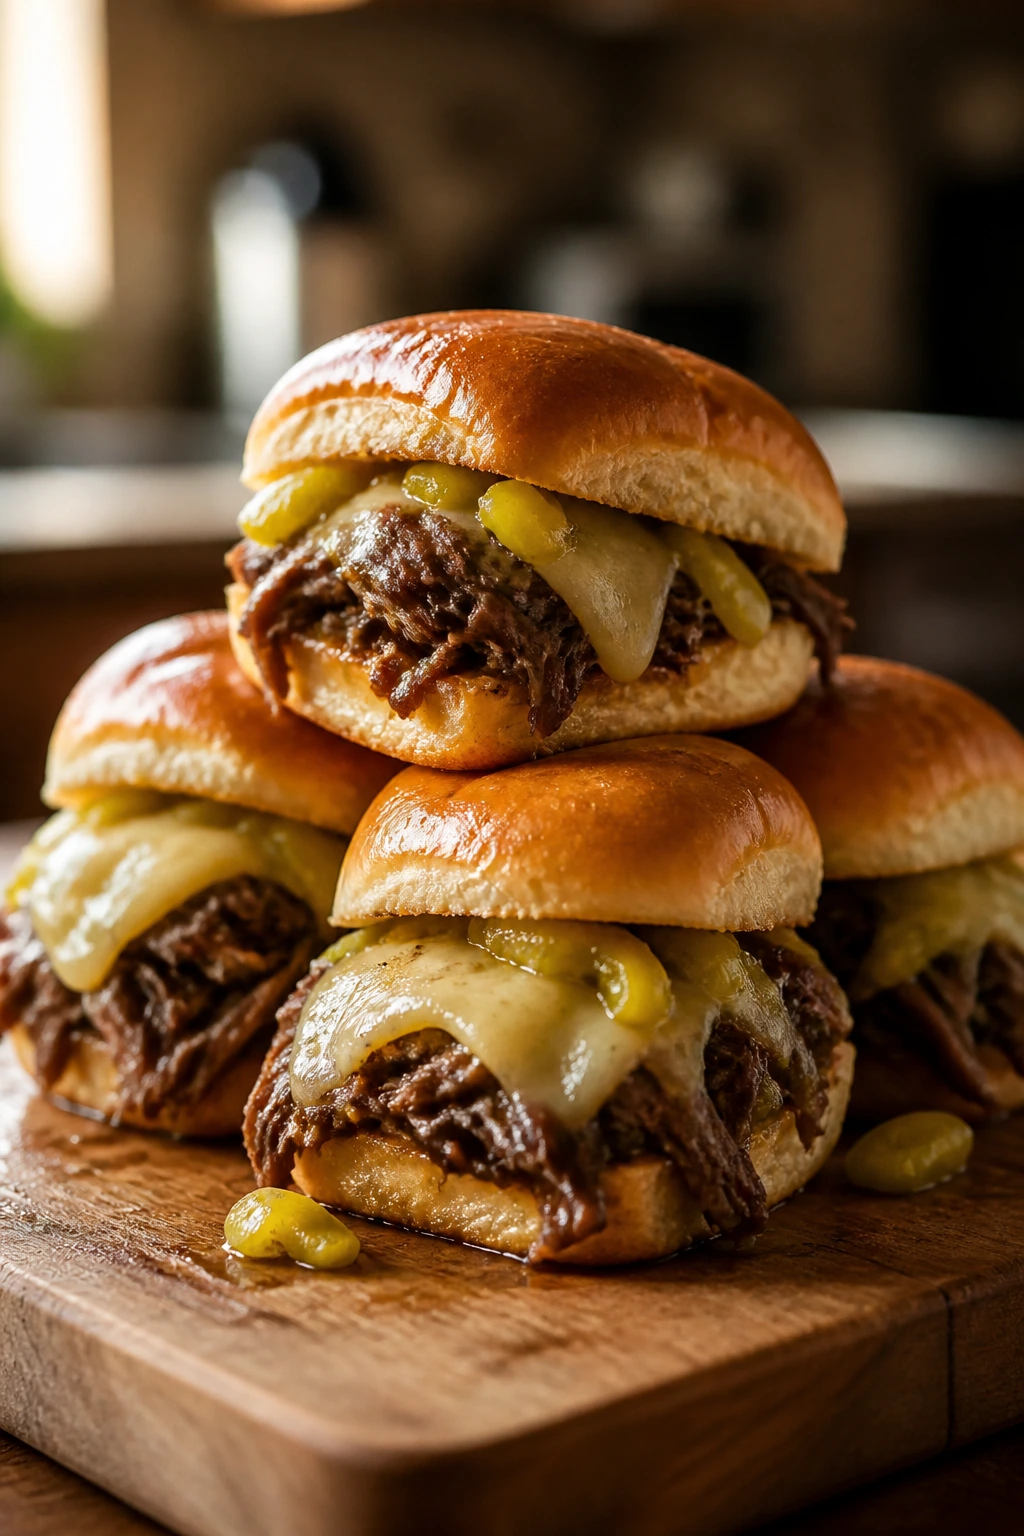
3. Mississippi Pot Roast Sliders
These sliders taste like someone took pot roast, stripped out the ceremony, and put the best parts on soft buns. The pepperoncini give the beef a salty, tangy edge that keeps the butter and ranch from turning heavy. It’s a sharp, buttery sandwich, and that contrast is why people keep reaching for seconds.
Why It Works:
Chuck roast turns silky in a crockpot, and the pepperoncini brine cuts through the richness in a way plain broth never could. The butter melts into the seasoning packets and helps create a glossy, savory coating. On slider buns, the whole thing feels snackable, which is dangerous in the nicest way.
Key Ingredients:
- 3 lb chuck roast
- 1 packet ranch seasoning mix
- 1 packet au jus gravy mix
- 1 cup pepperoncini peppers, whole or sliced
- 1/4 cup pepperoncini brine
- 4 tablespoons unsalted butter, sliced
- 12 slider buns
- 8 slices provolone or mozzarella
Quick Steps:
- Set the roast in place: Put the chuck roast in the slow cooker with no oil or searing required.
- Season the top: Sprinkle the ranch mix and au jus mix evenly over the meat.
- Add the heat and tang: Scatter the pepperoncini around the roast and pour in the brine.
- Finish with butter: Lay the butter slices over the top.
- Cook low and slow: Cover and cook on LOW for 8 hours, until the roast shreds with almost no effort.
- Shred and moisten: Pull the beef apart, stir it through the juices, and let it sit for 10 minutes.
- Assemble the sliders: Fill the buns with beef and cheese, then spoon a little jus over the meat before closing them.
Equipment for This Recipe:
- 6-quart slow cooker
- Two forks
- Small cutting board
- Sheet pan if you want to toast the buns
How to Serve This Dish:
Slide them onto a platter while the buns are still warm and a little glossy from the jus. They’re good with crunchy coleslaw or a simple cucumber salad. I would not bother with anything fussy here; the sliders are the point.
Pro Tips for This Recipe:
- Don’t add extra salt. The seasoning packets and pepperoncini already bring plenty.
- If the roast seems dry after shredding, stir in 2 or 3 tablespoons of the cooking liquid.
- Toast the buns lightly so they don’t collapse under the beef.
- Use provolone if you want a cleaner melt than mozzarella.
Variations on This Dish:
- Extra-Spicy Jar: Add sliced jalapeños with the pepperoncini for more heat.
- Mushroom Gravy Style: Stir in 8 ounces sliced mushrooms during the last 2 hours.
- Full-Size Sandwiches: Serve the beef on hoagie rolls with extra jus on the side.
Common Mistakes to Avoid with This Dish:
- Over-salting the roast: The packets do the seasoning work for you.
- Skipping the rest after shredding: Ten minutes in the juices makes the beef taste cohesive instead of separate.
- Using buns that are too soft: Slider buns need at least a little structure or they turn into mush under the beef.
4. Buffalo Chicken Sandwiches
Buffalo chicken has a specific job on a cold day: bring heat, bring acid, and don’t apologize. I like it when the chicken stays juicy enough to cling to the sauce, not so wet that it drips straight through the bun. A handful of celery slaw or a crisp lettuce layer keeps the sandwich from feeling like a one-note hammer.
Why It Works:
Chicken thighs handle slow cooking better than breasts and stay tender after shredding. Buffalo sauce brings vinegar and heat, while a little butter softens the edges. The slow cooker keeps the meat saucy without asking you to babysit a skillet.
Key Ingredients:
- 2 1/2 lb boneless, skinless chicken thighs
- 1 cup buffalo sauce
- 1/2 cup low-sodium chicken broth
- 1 tablespoon butter
- 1 teaspoon garlic powder
- 1/2 teaspoon kosher salt
- 8 sandwich buns
- 1 cup celery slaw or shredded lettuce
- Ranch or blue cheese dressing for serving
Quick Steps:
- Load the cooker: Place the chicken thighs in the slow cooker in a single layer.
- Add the sauce: Pour buffalo sauce and broth over the chicken, then sprinkle with garlic powder and salt.
- Cook until shreddable: Cover and cook on LOW for 4 hours, or until the chicken pulls apart easily.
- Shred and finish: Shred the chicken, stir in the butter, and let it sit for 10 minutes on WARM.
- Toast the buns: Give the buns a quick toast so they can stand up to the sauce.
- Build the sandwiches: Pile on the buffalo chicken, then top with celery slaw and a drizzle of ranch or blue cheese.
Equipment for This Recipe:
- Slow cooker
- Two forks
- Mixing bowl for slaw
- Tongs or a wide spoon
How to Serve This Dish:
Serve with celery sticks, carrot sticks, and a cold, crunchy side to calm the heat. I like these on soft buns because the sandwich wants a little cushion. If you want it neater, keep the dressing on the side and let people add their own.
Pro Tips for This Recipe:
- Thighs stay juicier than breasts. If you use breasts, check them early so they don’t dry out.
- Add the butter after shredding, not before. It smooths the sauce instead of disappearing into the bottom.
- Celery slaw is the right crunch here. It’s sharper than lettuce and holds up better.
- If the sauce feels too thin, remove the lid for the last 15 minutes on HIGH.
Variations on This Dish:
- Blue Cheese Crumble Version: Add crumbled blue cheese on top for a stronger, saltier finish.
- Milder Ranch Route: Mix half buffalo sauce and half ranch dressing for less heat.
- Buffalo Wrap Style: Spoon the chicken into tortillas with lettuce and shredded carrot.
Common Mistakes to Avoid with This Dish:
- Cooking the chicken too long: Dry strands are the result, and no sauce fully saves them.
- Using too much dressing inside the sandwich: Keep the ranch on top or on the side so the bun doesn’t go soft.
- Skipping the crunch: Buffalo chicken needs contrast or it turns dull fast.
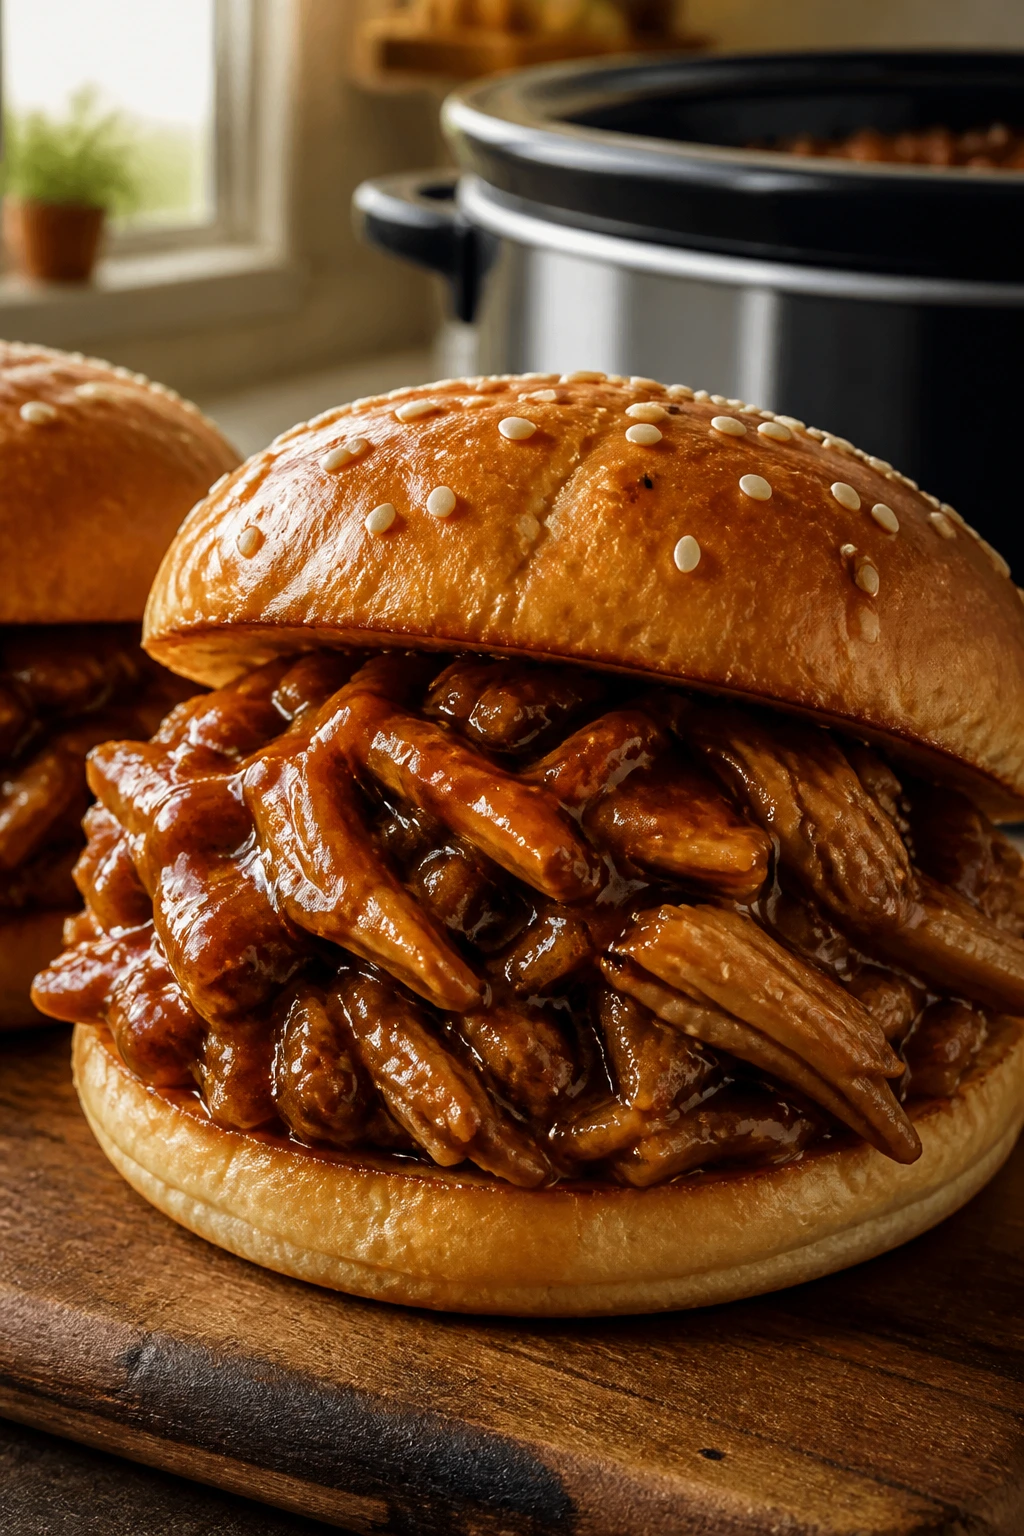
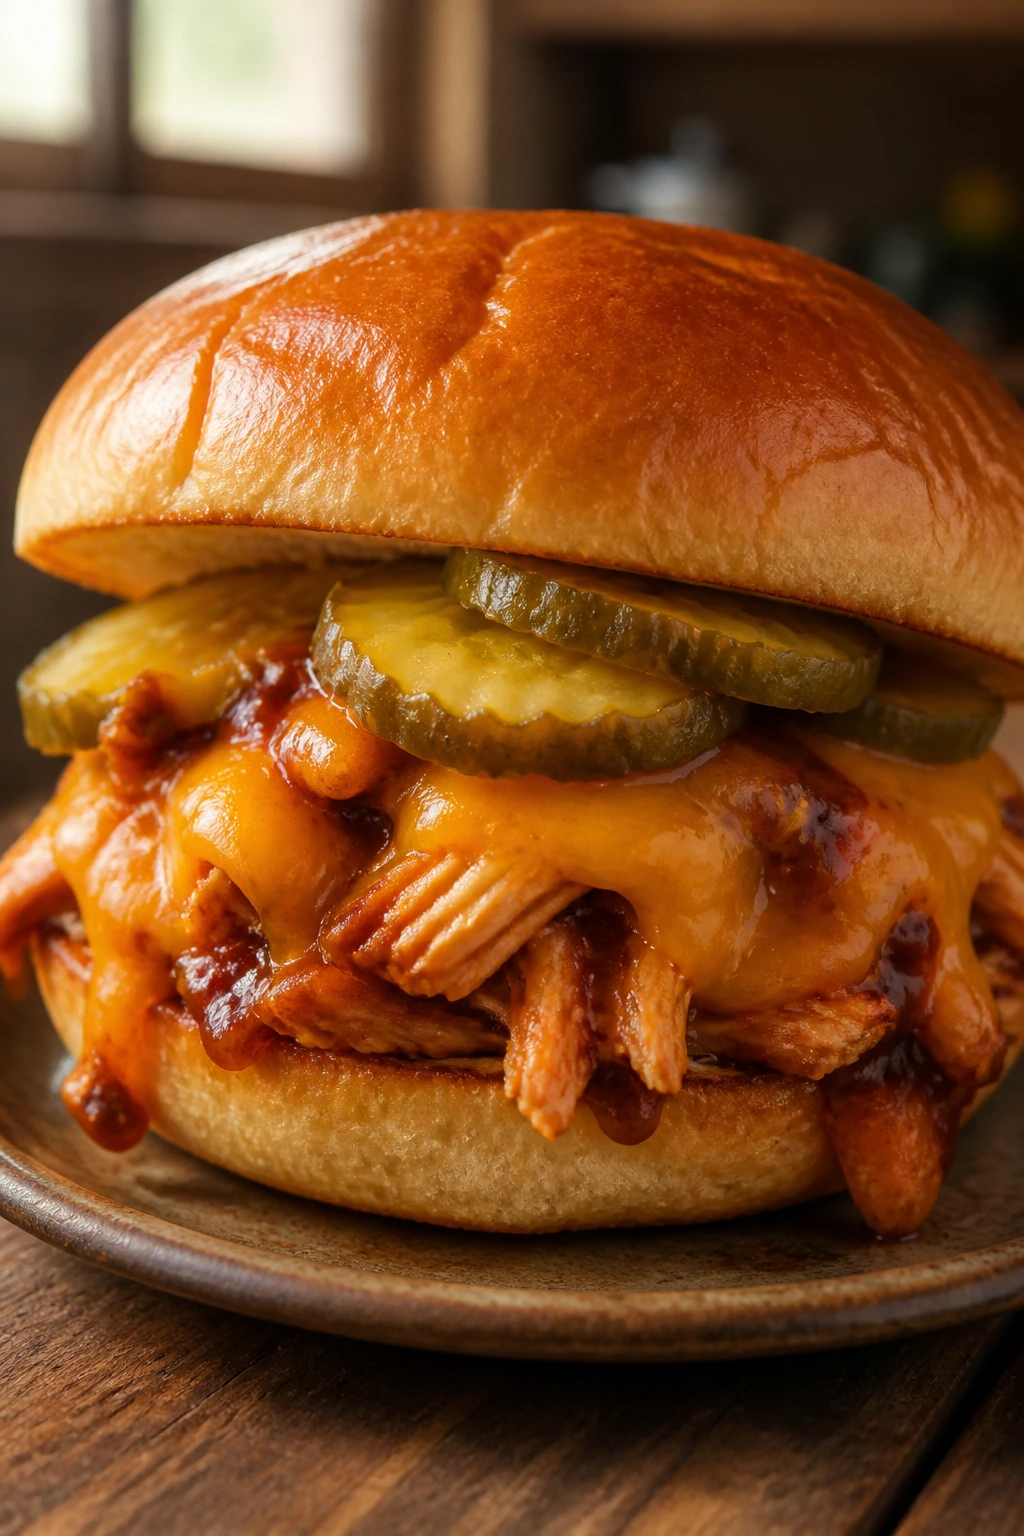
5. BBQ Chicken Cheddar Sandwiches
This is the sandwich version of standing near the stove in a wool sweater and smelling smoke and tomato in the same breath. It should be sticky in a good way, sharp at the edges, and rich enough that the cheddar actually matters. A pickle chip or two on top makes the whole thing come alive.
Why It Works:
Chicken thighs or breasts both work here, but thighs give you a softer shred and more forgiveness. BBQ sauce reduces down in the slow cooker, and the apple cider vinegar keeps the sweetness from taking over. Cheddar adds a salty, melty finish that fits the sauce instead of fighting it.
Key Ingredients:
- 2 1/2 lb boneless, skinless chicken thighs
- 1 1/2 cups BBQ sauce
- 1/2 cup diced onion
- 2 tablespoons apple cider vinegar
- 1 tablespoon brown sugar
- 1 teaspoon smoked paprika
- 1 1/2 cups shredded sharp cheddar
- 8 sandwich buns
- Dill pickle chips, for serving
Quick Steps:
- Start the base: Add the onion to the bottom of the slow cooker.
- Season and sauce: Place the chicken on top, then pour over the BBQ sauce, vinegar, brown sugar, and smoked paprika.
- Cook gently: Cover and cook on LOW for 4 to 5 hours, until the chicken shreds cleanly.
- Shred and thicken: Pull the chicken apart and stir it back into the sauce. Leave the lid off for 10 minutes if the sauce looks thin.
- Add the cheddar: Sprinkle the cheese over the chicken and cover for 5 minutes so it melts.
- Build the sandwiches: Spoon the cheesy chicken onto buns and top with pickle chips.
Equipment for This Recipe:
- Slow cooker
- Two forks
- Measuring cups
- Small spoon for stacking the filling
How to Serve This Dish:
Serve it with potato salad, coleslaw, or baked beans if you want a full diner-style plate. Toasted buns help the sandwich hold together once the sauce starts moving. The pickle chips are not decorative; they matter.
Pro Tips for This Recipe:
- Pick a BBQ sauce that’s thick enough to cling. Thin sauce makes the sandwich sloppy in the wrong way.
- Add vinegar even if the sauce tastes fine from the bottle. It wakes the chicken up.
- Let the cheese melt on top of the filling instead of mixing it in. You get better pockets of melt.
- If using breasts, check them at 3 1/2 hours so they don’t dry out.
Variations on This Dish:
- Smoky Chipotle BBQ: Stir in chopped chipotle peppers for heat and a darker sauce.
- Hawaiian Sweet Heat: Add 1/2 cup pineapple chunks near the end for a sweeter finish.
- Carolina-Style Swap: Replace some BBQ sauce with vinegar and mustard for more bite.
Common Mistakes to Avoid with This Dish:
- Using watery sauce: The bun will suffer. Start with a thick BBQ sauce.
- Skipping the acid: Vinegar keeps the sandwich from tasting sticky-sweet.
- Adding the cheese too early: It clumps and disappears into the sauce instead of sitting on top.
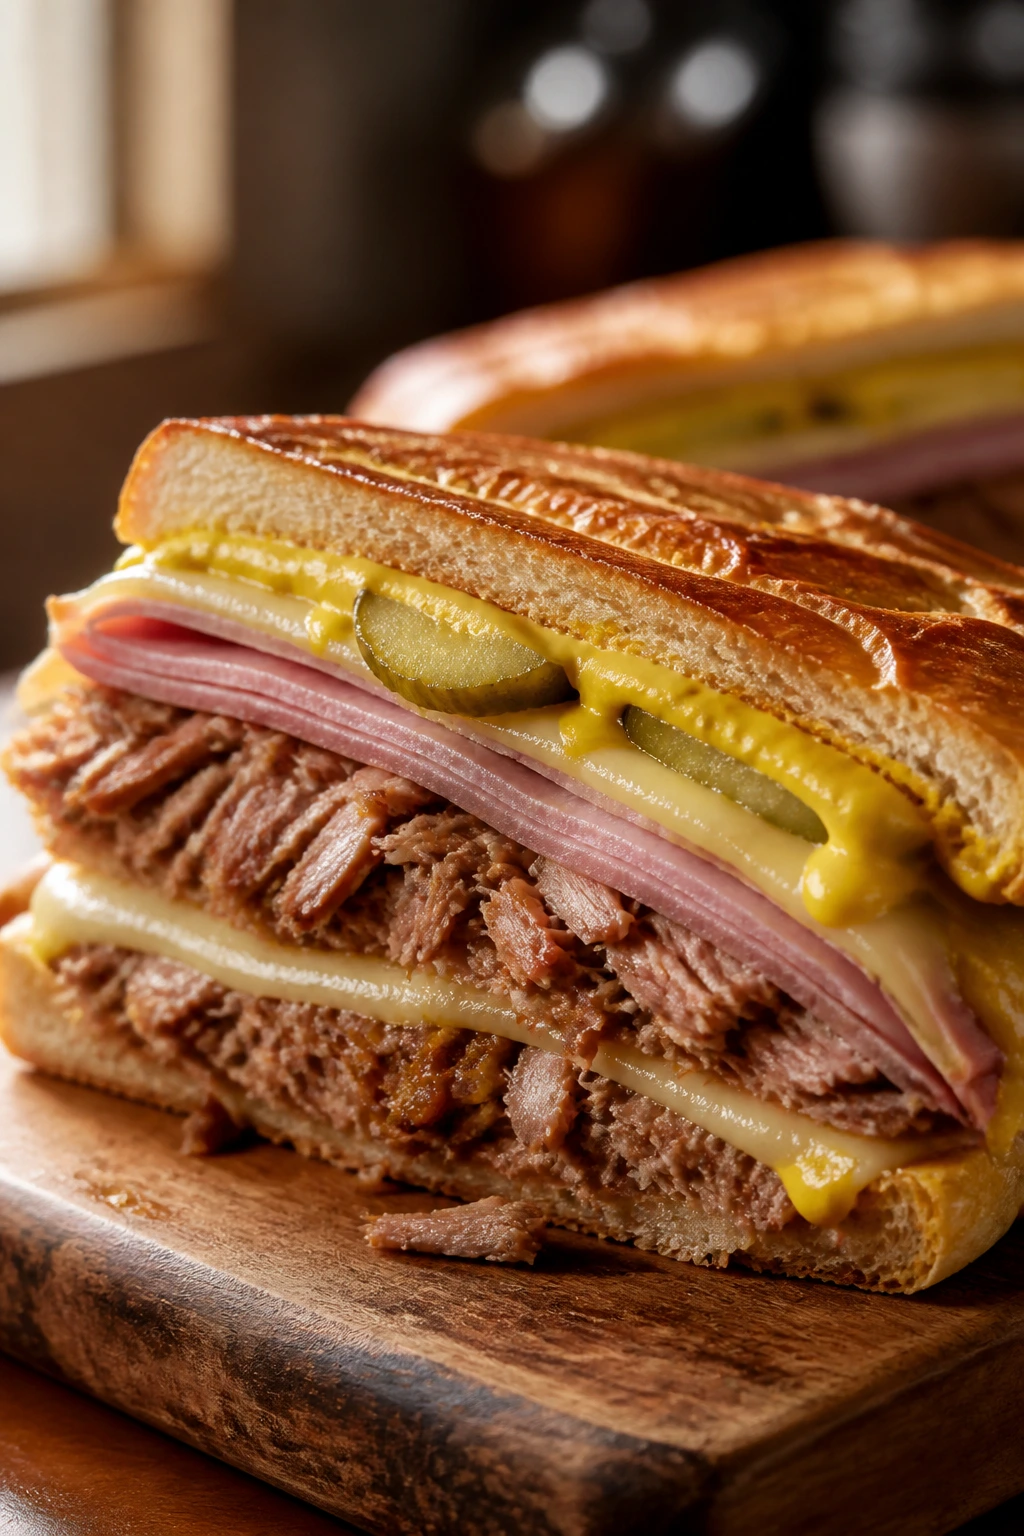
6. Cuban Mojo Pork Sandwiches
A good Cuban sandwich has a little tension in it. Citrus against pork. Mustard against ham. Pickles against melted Swiss. This slow cooker version keeps that push and pull, even if you’re not pressing the sandwich into a literal brick. I still like to give it a hot skillet press at the end. It feels right.
Why It Works:
Orange juice, lime juice, garlic, and oregano make a bright mojo that cuts through pork shoulder’s richness. The slow cooker turns the pork tender enough to shred, while ham, Swiss, and pickles layer in the classic Cuban profile. The final press tightens everything and warms the bread without turning it brittle.
Key Ingredients:
- 4 lb pork shoulder
- 1 cup orange juice
- 1/4 cup lime juice
- 6 garlic cloves, minced
- 2 teaspoons dried oregano
- 1 teaspoon ground cumin
- 1 teaspoon kosher salt
- 1 large onion, sliced
- 8 slices deli ham
- 8 slices Swiss cheese
- Dill pickle slices and yellow mustard
- 8 Cuban rolls or hoagie rolls
Quick Steps:
- Mix the mojo: Combine orange juice, lime juice, garlic, oregano, cumin, and salt.
- Set up the cooker: Place the onion in the bottom, add the pork, and pour the mojo over the top.
- Cook until tender: Cover and cook on LOW for 8 hours, until the pork falls apart easily.
- Shred and drain slightly: Remove the pork, shred it, and spoon off some excess liquid if the filling looks too wet.
- Assemble with layers: Split the rolls, spread mustard, add pork, ham, Swiss, and pickle slices.
- Press and finish: Heat a skillet over medium and press the sandwich for 2 to 3 minutes per side until the bread is crisp and the cheese melts.
Equipment for This Recipe:
- Slow cooker
- Skillet or panini press
- Tongs
- Sharp knife
How to Serve This Dish:
Serve these hot and pressed, cut on the diagonal if you want them easier to handle. A dill pickle spear on the side makes sense, and so does a small pile of plantain chips if you’re feeling generous. The sandwich is rich; the pickles are there to keep it honest.
Pro Tips for This Recipe:
- Don’t skip the mustard. It’s part of the structure, not a garnish.
- Drain off some cooking liquid before assembling or the roll will slide apart.
- Use Swiss that melts cleanly. Pre-sliced is fine.
- A hot skillet does the pressing job better than a lukewarm one.
Variations on This Dish:
- Spicy Mojo Cuban: Add sliced jalapeños or a pinch of crushed red pepper to the mojo.
- Turkey Cuban: Swap in thick-sliced turkey breast if you want a leaner sandwich.
- Pork-Only Shortcut: Skip the ham layer and use extra pork for a simpler version.
Common Mistakes to Avoid with This Dish:
- Too much liquid in the roll: Drain the pork a bit or the bread goes soggy fast.
- Skipping the press: A warm sandwich is fine. A pressed one is the point.
- Using sweet pickles: They fight the mustard and orange in a weird way.
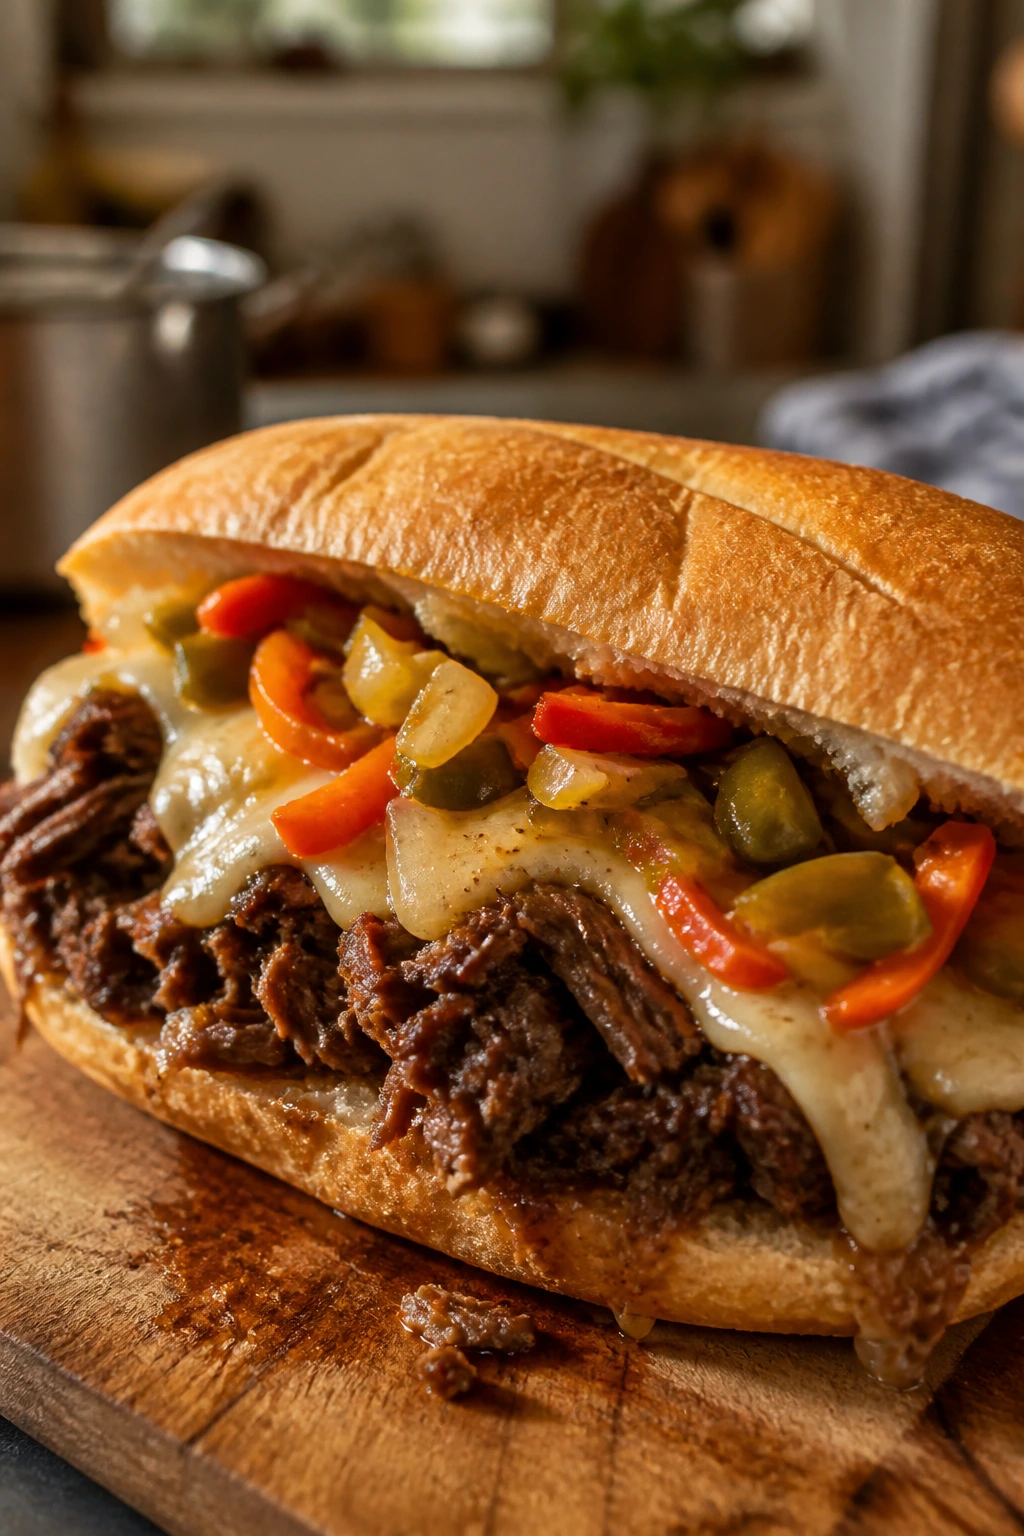
7. Italian Beef Sandwiches with Giardiniera
Italian beef is what I reach for when I want the house to smell like pepperoncini, garlic, and roasted meat for hours. The sandwich should be juicy enough that you need napkins, but not so wet that you can’t lift it. Giardiniera brings the crunch and vinegar punch that keeps every bite from blurring together.
Why It Works:
Chuck roast braises into tender shreds in beef broth and Italian seasoning, and pepperoncini give the jus a briny edge. The jus is the whole trick here; it should be savory enough to dunk the bread into without tasting like plain soup. Provolone softens over the beef and giardiniera cuts through the richness.
Key Ingredients:
- 3 1/2 lb chuck roast
- 1 large onion, sliced
- 4 garlic cloves, minced
- 4 cups beef broth
- 1 packet Italian dressing mix or 2 tablespoons Italian seasoning
- 1 cup pepperoncini with 1/4 cup juice
- 1 tablespoon Worcestershire sauce
- 8 crusty hoagie rolls
- 8 slices provolone
- 1 cup giardiniera, drained
Quick Steps:
- Build the braise: Place the onion and garlic in the slow cooker, then set the roast on top.
- Add the flavor: Pour in the broth, Italian seasoning, pepperoncini, pepperoncini juice, and Worcestershire.
- Cook low and slow: Cover and cook on LOW for 8 to 9 hours, until the beef shreds easily.
- Shred the beef: Pull the roast apart, return it to the juices, and let it soak for 10 minutes.
- Warm the rolls: Split the bread and toast it lightly so it can handle the jus.
- Assemble: Fill each roll with beef, add provolone, and top with giardiniera.
- Serve with jus: Spoon a little of the cooking liquid into a cup for dipping.
Equipment for This Recipe:
- Slow cooker
- Two forks
- Sheet pan for toasting
- Small bowl for giardiniera
How to Serve This Dish:
Serve it hot with extra jus on the side and a handful of chips or fries if you want to go full deli mode. I like it open for a minute under the broiler, then folded once the cheese softens. If the bread is too soft, it’s the sandwich telling you the braise went a little too far.
Pro Tips for This Recipe:
- Use a crusty roll. Soft bread gives up immediately.
- Giardiniera should be drained well or it will leak oil into the sandwich.
- Pepperoncini juice is worth keeping. It brightens the whole pot.
- If the jus tastes flat, add a splash more Worcestershire.
Variations on This Dish:
- Hot Giardiniera Version: Use the spicy jar if you want more heat.
- Mushroom Beef Style: Add sliced mushrooms for a deeper, earthier pot.
- Cheesy Bake: Top the assembled sandwiches with extra provolone and broil briefly.
Common Mistakes to Avoid with This Dish:
- Using bread that can’t hold the jus: The sandwich collapses before you finish it.
- Not seasoning the braise enough: The broth should taste like a reason to dip.
- Skipping the rest after shredding: Ten minutes in the liquid gives the beef its final flavor.
8. Slow Cooker Meatball Subs
Meatball subs are one of those sandwiches that make you feel like you’ve ordered yourself a small win. The sauce should be thick enough to cling to the meatballs, and the cheese should melt into the tomato so it stretches when you pull the roll apart. There’s nothing delicate here. Good. It shouldn’t be.
Why It Works:
Frozen meatballs are one of the few shortcuts I never argue with in a slow cooker. They hold their shape, soak up sauce, and save you from rolling meatballs by hand when the day is already long. The slow simmer softens the edges and turns the marinara into a richer, deeper sauce.
Key Ingredients:
- 2 lb frozen beef or turkey meatballs
- 1 jar marinara sauce, 24 ounces
- 1/2 cup crushed tomatoes
- 2 garlic cloves, minced
- 1 teaspoon Italian seasoning
- 8 sub rolls
- 2 cups shredded mozzarella
- 1/4 cup grated Parmesan
- Fresh basil, torn, for serving
Quick Steps:
- Start the sauce: Pour marinara, crushed tomatoes, garlic, and Italian seasoning into the slow cooker.
- Add the meatballs: Stir in the frozen meatballs so they’re coated.
- Cook until hot and tender: Cover and cook on LOW for 4 to 5 hours, until the meatballs are heated through and the sauce is thick.
- Prepare the rolls: Split the sub rolls and place them on a baking sheet.
- Fill and cheese: Spoon meatballs and sauce into each roll, then top with mozzarella and Parmesan.
- Melt the cheese: Broil for 1 to 2 minutes until the cheese is bubbling.
- Finish with basil: Add basil right before serving so it stays bright.
Equipment for This Recipe:
- Slow cooker
- Baking sheet
- Spoon or small ladle
- Broiler-safe oven setup
How to Serve This Dish:
Serve with extra sauce for dipping if you like a wet sub. A simple green salad or some roasted broccoli is enough to make the plate feel complete. These are best eaten soon after broiling, while the cheese still stretches instead of setting up.
Pro Tips for This Recipe:
- Use a thick marinara. Thin sauce makes the roll soggy and sad.
- Toast the inside of the rolls if they’re very soft.
- Stir once halfway through so the meatballs heat evenly.
- Parmesan on top gives salt and a little dryness that helps the sandwich hold together.
Variations on This Dish:
- Turkey and Basil Version: Use turkey meatballs and a heavier hand with fresh basil.
- Sausage Blend Subs: Mix sausage meatballs with beef for a richer filling.
- Creamy Red Sauce Style: Stir in 2 tablespoons of cream cheese at the end for a softer sauce.
Common Mistakes to Avoid with This Dish:
- Using watery sauce: It will soak the roll before the cheese even melts.
- Overstuffing the bread: A meatball sub should be full, not physically impossible.
- Skipping the broiler: Melted cheese ties the whole thing together.
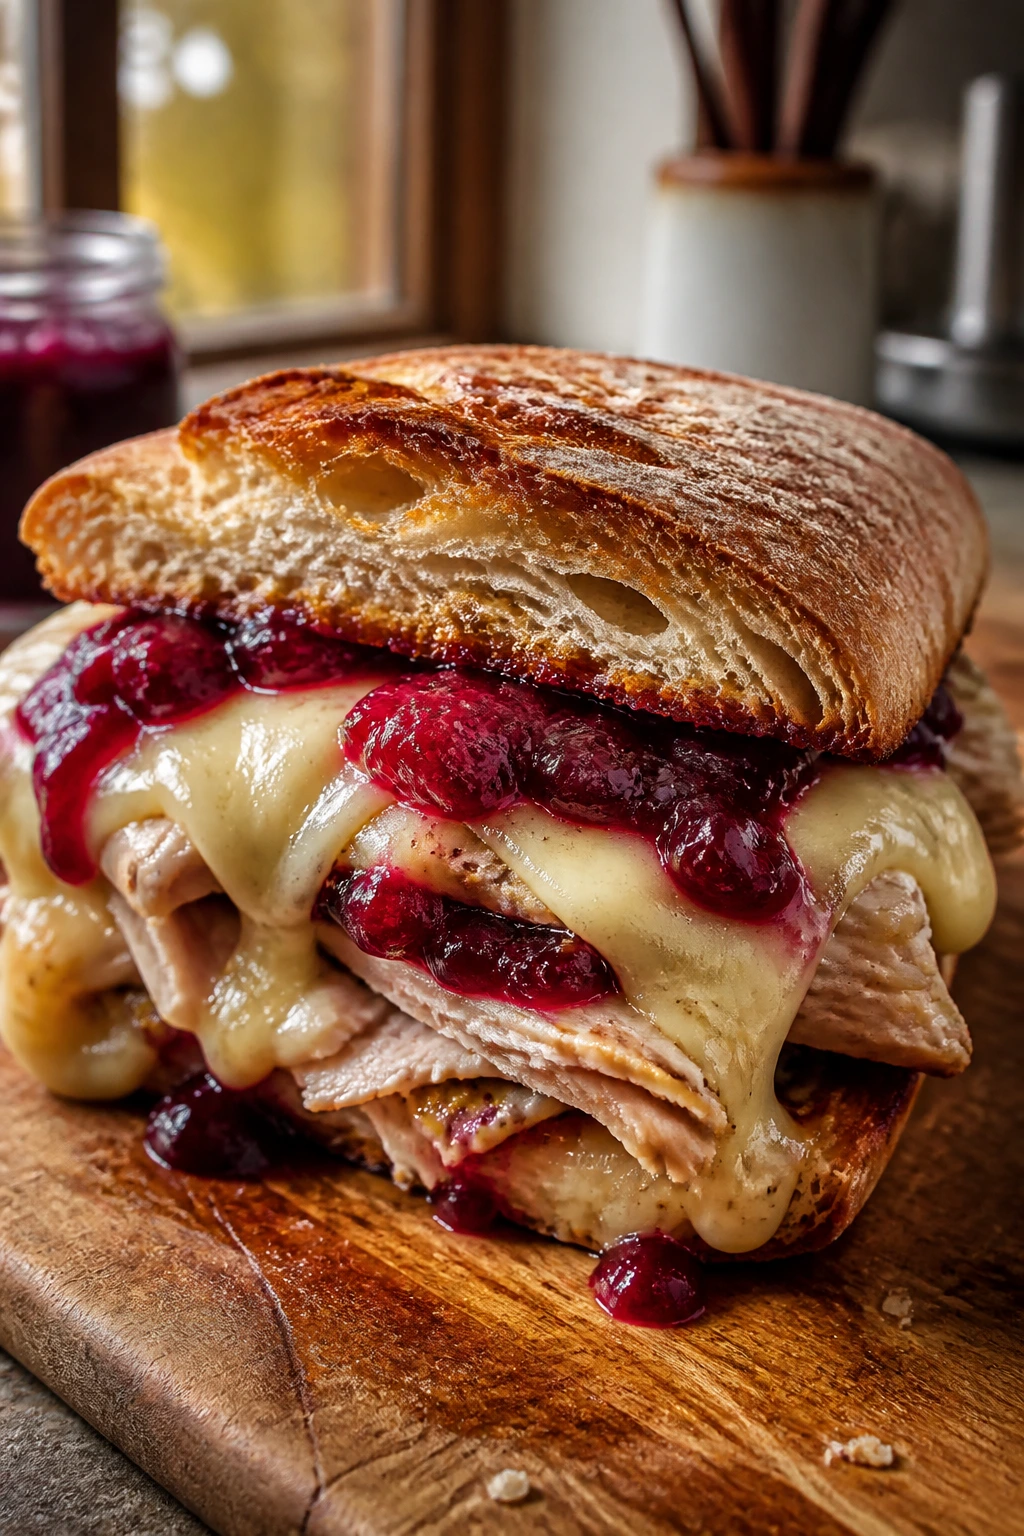
9. Turkey Cranberry Melts
This sandwich has the clean, sharp flavor of leftover holiday logic without actually needing leftovers. The cranberry gives sweetness, the Dijon keeps it awake, and Swiss melts into everything in a way that feels almost suspiciously neat. On a cold day, that sweet-salty thing lands better than people expect.
Why It Works:
Turkey breast can dry out if you bully it, so the slow cooker’s low heat and a little broth keep the meat tender enough to shred. Cranberry sauce and Dijon make a quick glaze that tastes brighter than standard mayo-heavy sandwiches. Swiss cheese melts into the turkey and keeps the whole thing from feeling dry.
Key Ingredients:
- 2 1/2 lb boneless turkey breast or turkey thighs
- 1 cup low-sodium chicken broth
- 1 small onion, sliced
- 1 teaspoon kosher salt
- 1/2 teaspoon black pepper
- 1 cup cranberry sauce
- 1 tablespoon Dijon mustard
- 8 slices Swiss cheese
- 8 ciabatta rolls or sourdough rolls
- 2 tablespoons mayonnaise, optional
Quick Steps:
- Set the turkey in the cooker: Add the onion, broth, turkey, salt, and pepper.
- Cook gently: Cover and cook on LOW for 4 to 5 hours, until the turkey is cooked through and shreds with a fork.
- Shred the meat: Remove the turkey and shred it into bite-size strands.
- Make the cranberry glaze: Stir cranberry sauce and Dijon into the cooking liquid, then return the turkey to the pot.
- Heat through: Let it sit on WARM for 10 minutes so the turkey picks up the glaze.
- Build the melts: Spoon turkey onto rolls, top with Swiss, and broil for 1 to 2 minutes.
- Serve immediately: The cheese should be soft and the bread lightly crisp.
Equipment for This Recipe:
- Slow cooker
- Forks for shredding
- Baking sheet
- Broiler-safe oven setup
How to Serve This Dish:
Serve with a peppery salad or roasted carrots if you want something that doesn’t compete with the cranberry. The sandwich tastes especially good on a sturdy roll with a little crust. If you like mayonnaise, spread a whisper of it on the bread before adding the turkey.
Pro Tips for This Recipe:
- Use thighs if you want more forgiveness. They stay juicier than breast.
- Don’t dump in extra cranberry sauce; it should coat, not jam up.
- Broil just until the cheese melts. Swiss goes from smooth to greasy if you forget it.
- A hearty roll is better than soft sandwich bread here.
Variations on This Dish:
- Brie and Cranberry Version: Swap Swiss for brie if you want a softer, richer melt.
- Apple Slice Twist: Add thin apple slices for crunch and a sharper fruit note.
- Leftover Turkey Shortcut: This works well with cooked turkey shredded into the glaze.
Common Mistakes to Avoid with This Dish:
- Overcooking the turkey: Dry turkey and cranberry sauce do not save each other.
- Using too much mayo: The glaze should be the star.
- Skipping the broil: You want the cheese soft and the edges of the bread set.
10. Philly Cheesesteak-Style Sandwiches
A proper cheesesteak has fast energy, but the slow cooker version has its own charm: the beef goes soft, the onions melt down, and the peppers soften into the broth. It tastes less like a street cart and more like a steady winter lunch you’d actually have time for. I like the messiness here. It should leak a little.
Why It Works:
Chuck roast gives you a beefy base that survives slow cooking better than very lean sliced steak. Onions and peppers break down into the cooking liquid, which means the sandwich gets flavor in every layer. Provolone melts smoothly, and the rolls catch the juices without disintegrating.
Key Ingredients:
- 3 lb chuck roast
- 2 large onions, sliced
- 2 bell peppers, sliced
- 8 ounces mushrooms, sliced
- 4 cups beef broth
- 1 tablespoon Worcestershire sauce
- 1 teaspoon garlic powder
- 1 teaspoon kosher salt
- 8 hoagie rolls
- 8 slices provolone
Quick Steps:
- Layer the vegetables: Put onions, peppers, and mushrooms in the bottom of the slow cooker.
- Add the beef: Set the chuck roast on top and season with garlic powder, salt, and Worcestershire.
- Pour in broth: Add just enough broth to come partway up the roast.
- Cook until tender: Cover and cook on LOW for 8 hours, until the beef shreds easily.
- Shred and stir: Pull the beef apart and mix it with the vegetables and juices.
- Add cheese: Spoon the filling into rolls and top with provolone.
- Melt briefly: Broil for 1 to 2 minutes until the cheese melts and the edges brown.
Equipment for This Recipe:
- Slow cooker
- Forks for shredding
- Baking sheet
- Sharp knife for slicing vegetables
How to Serve This Dish:
Serve with hot fries or potato wedges if you want the full sandwich shop feel. A napkin stack is not optional. These also taste excellent with a little hot pepper spread on the side if you want the beef to have more bite.
Pro Tips for This Recipe:
- Don’t overload the pot with broth. The vegetables release a lot of liquid.
- Slice the onions fairly thin so they melt into the filling.
- Use provolone or another mellow melting cheese; strong cheeses fight the beef.
- Let the beef rest in the juices for 10 minutes before assembling.
Variations on This Dish:
- Spicy Pepper Version: Add sliced cherry peppers for more heat.
- Onion-Heavy Melt: Double the onions if you like a softer, sweeter filling.
- White Cheddar Swap: Use white cheddar for a sharper cheese profile.
Common Mistakes to Avoid with This Dish:
- Leaving the rolls soft: Toast them lightly or they’ll fold under the filling.
- Using too many peppers without balancing them: Bell peppers should support, not dominate.
- Skipping the cheese melt: The cheese is part of the sandwich structure.
11. Birria-Style Beef Sandwiches
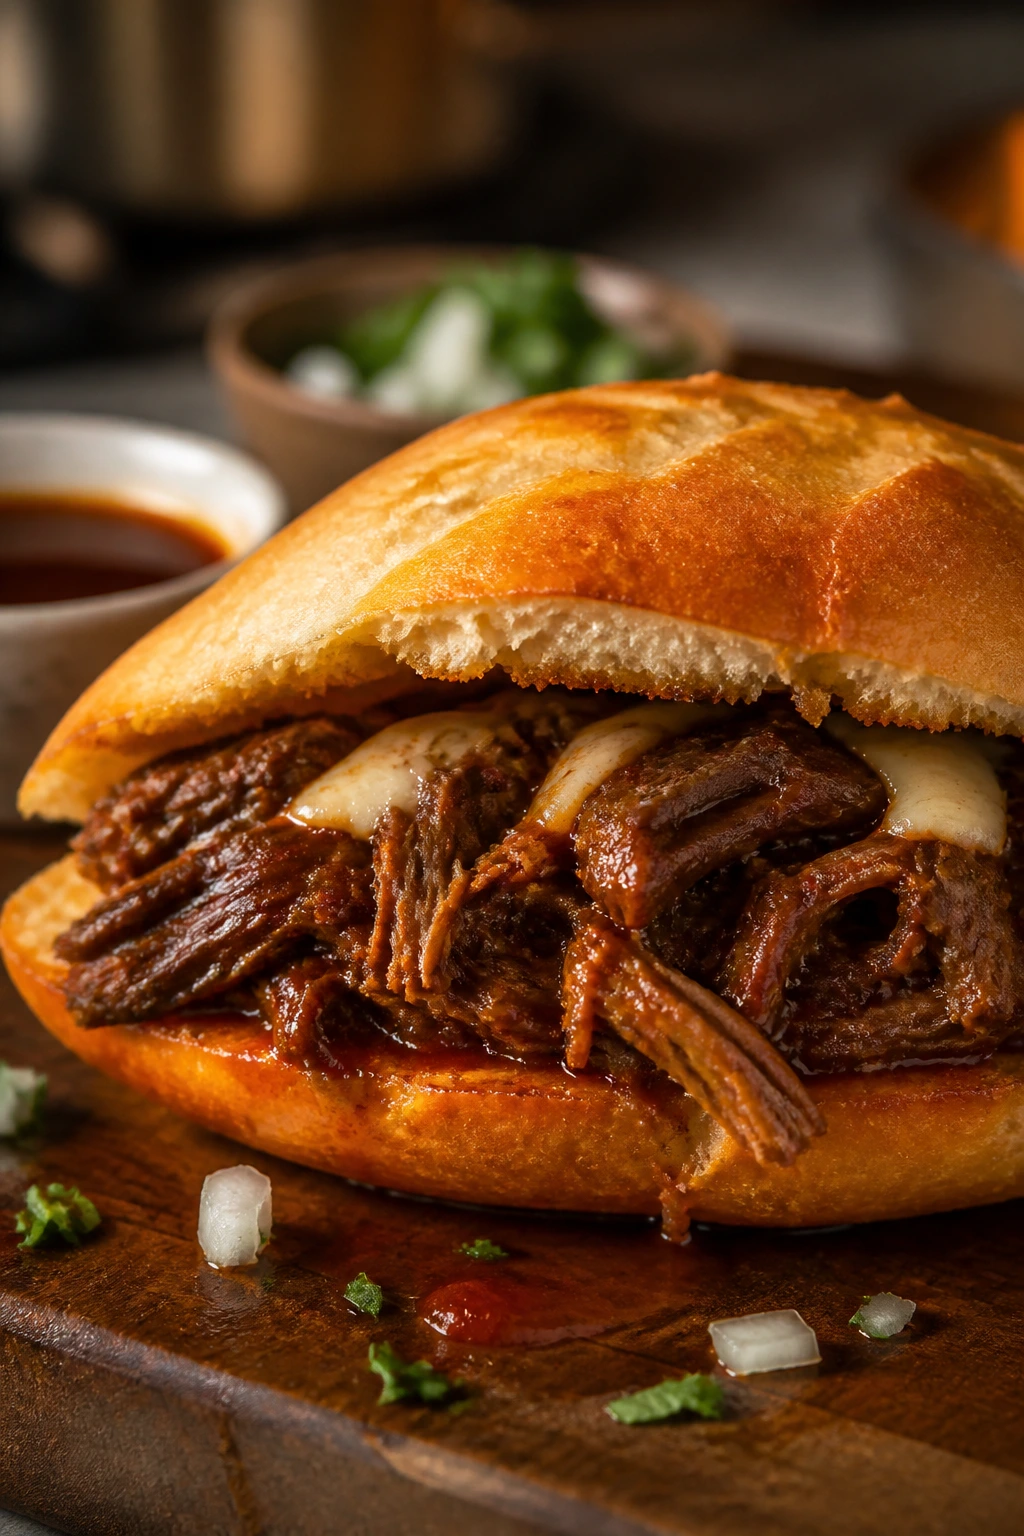
Birria sandwiches are not neat. That’s part of the appeal. The beef is rich, the chile sauce is dark and a little smoky, and the bread gets dipped and crisped so every bite tastes like it has an edge. It’s one of the few sandwiches that can feel almost dramatic without being fussy.
Why It Works:
Dried chiles, beef broth, and chuck roast make a sauce that goes deep rather than loud. Slow cooking softens the meat until it wants to shred, and the broth turns into consommé that you can use for dipping or pan-crisping the bread. A little cheese inside gives the sandwich that molten pull people want from birria.
Key Ingredients:
- 3 1/2 lb chuck roast
- 3 dried guajillo chiles, stemmed and seeded
- 2 dried ancho chiles, stemmed and seeded
- 1 chipotle pepper in adobo
- 1 onion, quartered
- 5 garlic cloves
- 2 cups beef broth
- 1 teaspoon cumin
- 1 teaspoon oregano
- 1/2 teaspoon cinnamon
- 1 tablespoon apple cider vinegar
- 8 rolls or bolillo-style buns
- 2 cups shredded mozzarella or Oaxaca cheese
- Chopped cilantro and onion for serving
Quick Steps:
- Soften the chiles: Toast the dried chiles in a dry skillet for 10 to 15 seconds per side, then soak them in hot water for 10 minutes.
- Blend the sauce: Blend the softened chiles with chipotle, onion, garlic, broth, cumin, oregano, cinnamon, and vinegar until smooth.
- Braise the beef: Place the chuck roast in the slow cooker, pour the sauce over it, and cook on LOW for 8 to 9 hours.
- Shred the meat: Remove the beef, shred it, and return it to the pot.
- Crisp the bread: Dip the cut sides of the rolls into the top layer of sauce and toast them in a skillet or on a griddle.
- Fill and melt: Add cheese and beef to the rolls, then cook briefly until the cheese melts.
- Finish with fresh toppings: Add cilantro and onion just before serving.
Equipment for This Recipe:
- Slow cooker
- Blender
- Skillet or griddle
- Tongs
How to Serve This Dish:
Serve it with a small bowl of the cooking liquid for dipping. A few lime wedges on the side help the richness. If you have extra time, crisp the sandwich in a skillet with a spoon of the fat from the top of the pot. Worth it.
Pro Tips for This Recipe:
- Blend the sauce until it’s smooth; rough chile bits can taste harsh.
- Use cinnamon sparingly. It should whisper, not shout.
- Let the bread touch the sauce briefly before crisping. Too much and it will fall apart.
- Fresh onion on top matters; it gives the sandwich a sharp finish.
Variations on This Dish:
- Milder Birria: Use fewer chiles and skip the chipotle if you want less heat.
- Chicken Birria Style: Swap in chicken thighs and cut the cook time way down.
- Taco-to-Sandwich Hybrid: Serve the filling in tortillas instead of rolls if you want smaller bites.
Common Mistakes to Avoid with This Dish:
- Overdoing cinnamon: The sauce should taste savory first.
- Skipping the blender: Whole chile bits make the texture rough.
- Not crisping the bread: The contrast between soft filling and toasted bread is half the experience.
12. Honey Garlic Chicken Sandwiches
This is the sticky, glossy one. Honey garlic chicken should taste like soy, garlic, and a little warmth from ginger, not like dessert. When it’s done right, the sauce clings to the shredded chicken in a shiny coat and the bun catches a little of it without dissolving. That’s the sweet spot.
Why It Works:
Chicken thighs keep their texture after slow cooking and absorb the sweet-salty sauce well. Honey brings body, soy sauce adds depth, and rice vinegar stops the whole thing from tasting flat. A quick cornstarch finish thickens the sauce enough to hold on the sandwich instead of running off the sides.
Key Ingredients:
- 2 1/2 lb boneless, skinless chicken thighs
- 1/2 cup soy sauce
- 1/3 cup honey
- 6 garlic cloves, minced
- 1 tablespoon fresh ginger, grated
- 2 tablespoons rice vinegar
- 1 tablespoon sesame oil
- 1 tablespoon cornstarch mixed with 2 tablespoons water
- 8 sandwich buns
- Sesame seeds and sliced scallions for topping
Quick Steps:
- Mix the sauce: Stir soy sauce, honey, garlic, ginger, vinegar, and sesame oil together.
- Add the chicken: Place the thighs in the slow cooker and pour the sauce over them.
- Cook until tender: Cover and cook on LOW for 4 hours, until the chicken shreds easily.
- Shred the meat: Remove the chicken, shred it, and return it to the pot.
- Thicken the sauce: Stir in the cornstarch slurry and cook for 10 to 15 minutes on HIGH, until glossy.
- Serve on buns: Spoon the chicken onto buns and top with scallions and sesame seeds.
Equipment for This Recipe:
- Slow cooker
- Small bowl for slurry
- Two forks
- Spoon for saucing
How to Serve This Dish:
Serve with crunchy cucumber salad or quick-pickled carrots if you want something fresh on the plate. I also like it on a toasted potato bun because the sweetness feels right there. The sesame seeds are small, but they make the sandwich look and taste finished.
Pro Tips for This Recipe:
- Thighs are safer than breasts here. Breasts can go stringy under long heat.
- Don’t add the slurry until after shredding. It thickens the sauce properly that way.
- Taste before serving. If it needs more brightness, add a teaspoon of vinegar.
- Scallions should go on at the end so they stay sharp.
Variations on This Dish:
- Spicy Sriracha Honey: Add 1 to 2 teaspoons of sriracha for heat.
- Orange-Ginger Version: Replace part of the honey with orange juice for a citrus lift.
- Lettuce Cup Swap: Serve the filling in lettuce cups if you want less bread.
Common Mistakes to Avoid with This Dish:
- Sauce that stays thin: Use the slurry and give it time to thicken.
- Overcooking the chicken breasts: If you choose breasts, watch them closely.
- Too much sweetness: The vinegar and soy should stay noticeable.
13. Jerk Pulled Chicken Sandwiches
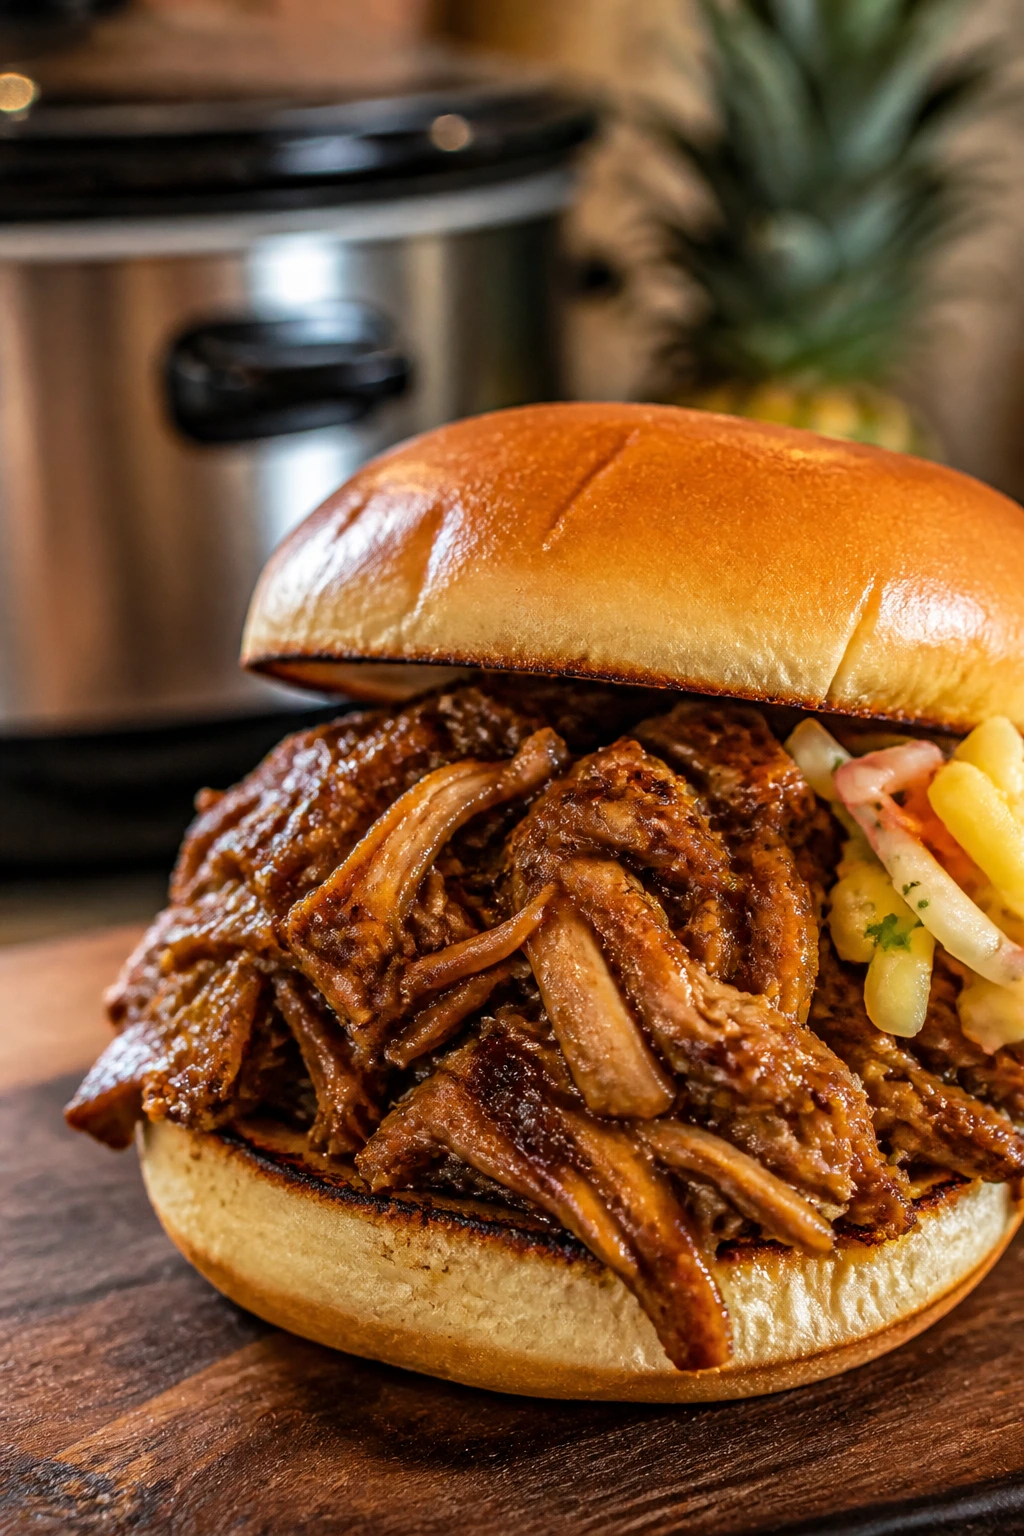
Jerk seasoning does a specific kind of winter work: it brings heat without feeling heavy. The chicken should come out fragrant, a little smoky, and sharp enough to wake you up when the weather has gone flat and gray. I like this one with pineapple slaw because the sweet crunch softens the spice without talking over it.
Why It Works:
Chicken thighs carry jerk seasoning well and stay juicy in the slow cooker. Onion, garlic, thyme, and allspice deepen the flavor, while lime at the end keeps the filling from tasting dull. The result is a sandwich that has heat, fruit, and enough savor to keep you coming back.
Key Ingredients:
- 2 1/2 lb boneless, skinless chicken thighs
- 2 tablespoons jerk seasoning
- 1 large onion, sliced
- 4 garlic cloves, minced
- 1 tablespoon brown sugar
- 1/2 cup low-sodium chicken broth
- 1 lime, juiced
- 8 sandwich buns
- 1 cup pineapple slaw or shredded cabbage
- Chopped cilantro, optional
Quick Steps:
- Season the chicken: Coat the thighs with jerk seasoning and brown sugar.
- Set up the cooker: Add onion and garlic to the slow cooker, then set the chicken on top.
- Add broth: Pour in the broth, cover, and cook on LOW for 4 hours.
- Shred and brighten: Shred the chicken and stir in lime juice.
- Rest briefly: Let the filling sit on WARM for 10 minutes so the flavors settle.
- Assemble: Pile the chicken onto buns and top with pineapple slaw and cilantro.
Equipment for This Recipe:
- Slow cooker
- Two forks
- Citrus juicer or spoon
- Mixing bowl for slaw
How to Serve This Dish:
Serve with rice and peas if you want a fuller plate, or keep it as a sandwich with a crunchy slaw. The lime should be fresh, not bottled. That small sharp hit at the end makes the whole thing better.
Pro Tips for This Recipe:
- Jerk seasoning brands vary a lot. Taste yours first so you don’t oversalt the chicken.
- Lime juice at the end matters. Heat can flatten citrus if you add it too early.
- Pineapple slaw should stay crisp, not drenched.
- Use thighs, not breast, if you want the chicken to stay juicy.
Variations on This Dish:
- Mango Slaw Version: Swap pineapple for mango if that’s what you have.
- Milder Island Style: Use half the jerk seasoning and add more thyme.
- Coconut Finish: A spoonful of coconut milk stirred into the sauce softens the heat.
Common Mistakes to Avoid with This Dish:
- Too much jerk seasoning: It can turn salty fast.
- Skipping the lime: The sandwich needs the acid at the end.
- Letting the slaw sit in the hot filling: It should stay crunchy.
14. Sloppy Joe Sandwiches
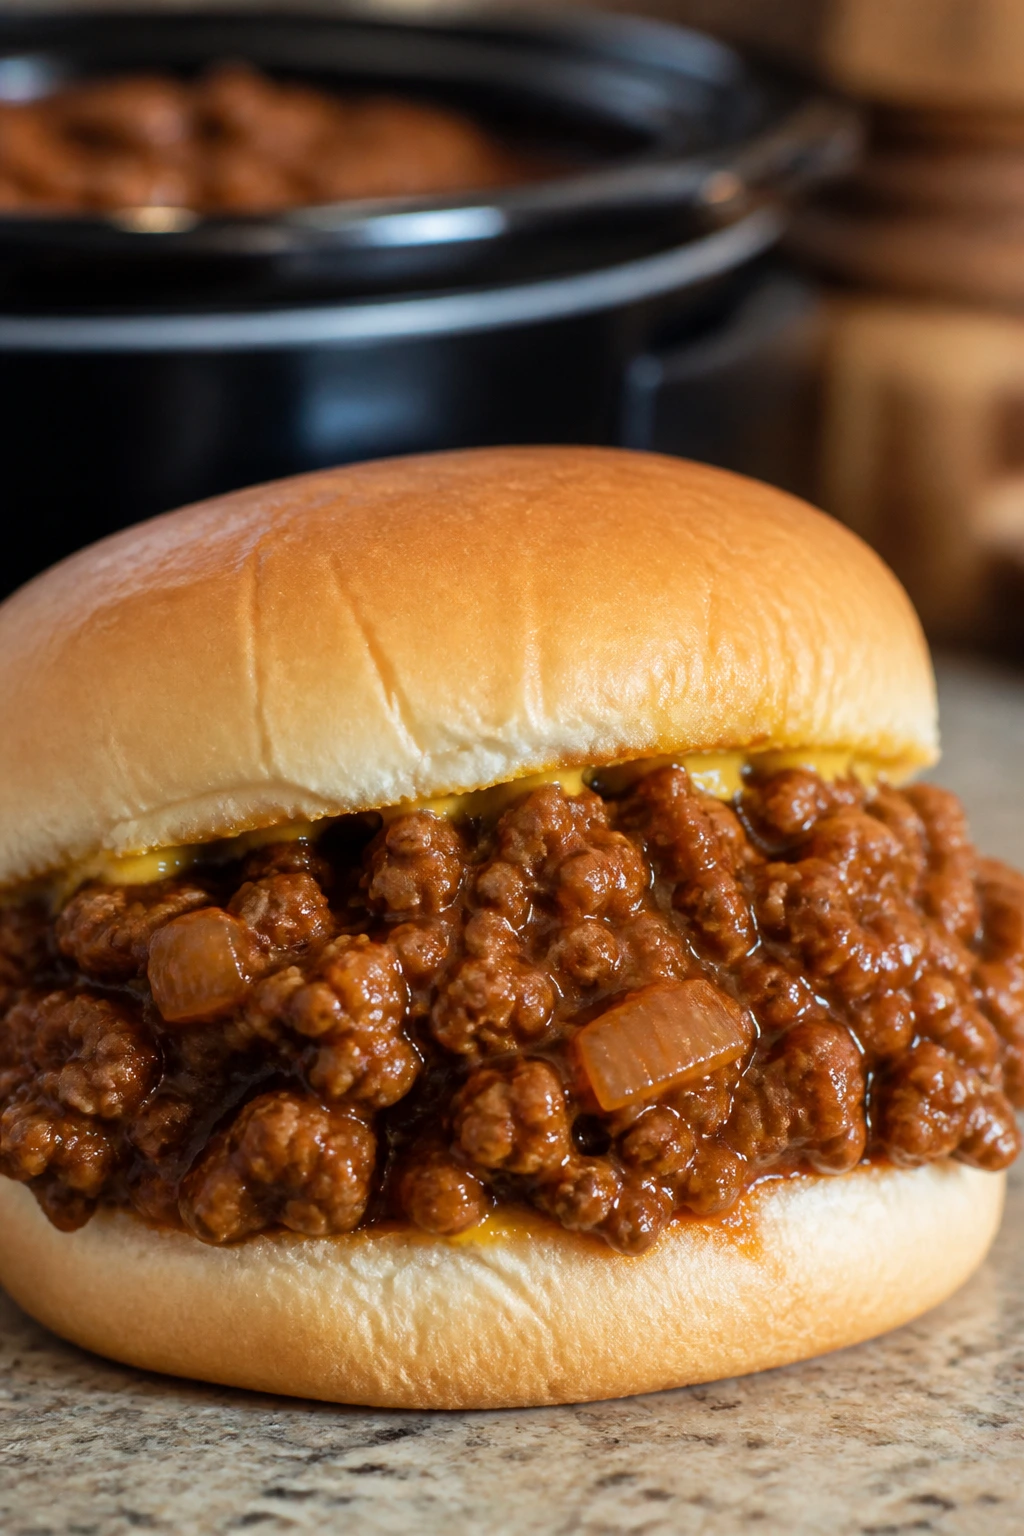
Sloppy joes are the noisy, old-school answer to a cold day. They should be saucy enough to need a napkin but thick enough not to slide off the bun in one sad piece. I like mine with a little mustard edge and a faint bell pepper crunch, not the sweet tomato paste version that tastes like it forgot to try.
Why It Works:
Ground beef needs to be browned first, which gives the filling a deeper flavor and keeps it from tasting gray. The slow cooker lets the tomato sauce, Worcestershire, mustard, and spices merge without you standing at the stove while it bubbles. A little time off the lid at the end thickens the mixture just enough to scoop.
Key Ingredients:
- 2 lb ground beef
- 1 large onion, diced
- 1 green bell pepper, diced
- 2 garlic cloves, minced
- 1 1/2 cups tomato sauce
- 1/2 cup ketchup
- 2 tablespoons Worcestershire sauce
- 1 tablespoon yellow mustard
- 1 tablespoon brown sugar
- 1 teaspoon chili powder
- 8 hamburger buns
Quick Steps:
- Brown the beef: Cook the ground beef in a skillet over medium-high heat until no pink remains, then drain the fat.
- Add the vegetables: Stir in onion, bell pepper, and garlic and cook for 3 minutes.
- Move to the slow cooker: Transfer the mixture to the crockpot and add tomato sauce, ketchup, Worcestershire, mustard, brown sugar, and chili powder.
- Cook briefly: Cover and cook on LOW for 2 to 3 hours, stirring once or twice.
- Thicken if needed: Leave the lid off for the last 15 minutes if the mixture looks loose.
- Serve on buns: Spoon onto toasted hamburger buns.
Equipment for This Recipe:
- Skillet
- Slow cooker
- Wooden spoon
- Slotted spoon if the beef releases extra fat
How to Serve This Dish:
Serve with potato chips, dill pickles, or a sharp green salad if you want to pretend balance is happening. Toasted buns help a lot here; soft buns get overwhelmed by the sauce. I like to keep a pile of napkins nearby and stop pretending otherwise.
Pro Tips for This Recipe:
- Drain the beef well after browning or the filling will taste greasy.
- Toast the buns. This is not optional if you want the sandwich to survive.
- Adjust the sugar at the end, not at the start. Some ketchup is sweeter than others.
- If the filling tastes flat, add a small splash more Worcestershire before serving.
Variations on This Dish:
- Turkey Joe: Swap in ground turkey and add a little extra oil when browning.
- Smoky Joe: Use smoked paprika instead of some of the chili powder.
- Bean Stretch Version: Stir in a cup of mashed beans to make the filling go farther.
Common Mistakes to Avoid with This Dish:
- Skipping the browning step: Raw ground beef in the crockpot tastes flat.
- Using buns that collapse: A decent bun keeps the filling where it belongs.
- Making the sauce too sweet: It should taste balanced, not candy-like.
15. Ham, Swiss, and Dijon Cream Sandwiches
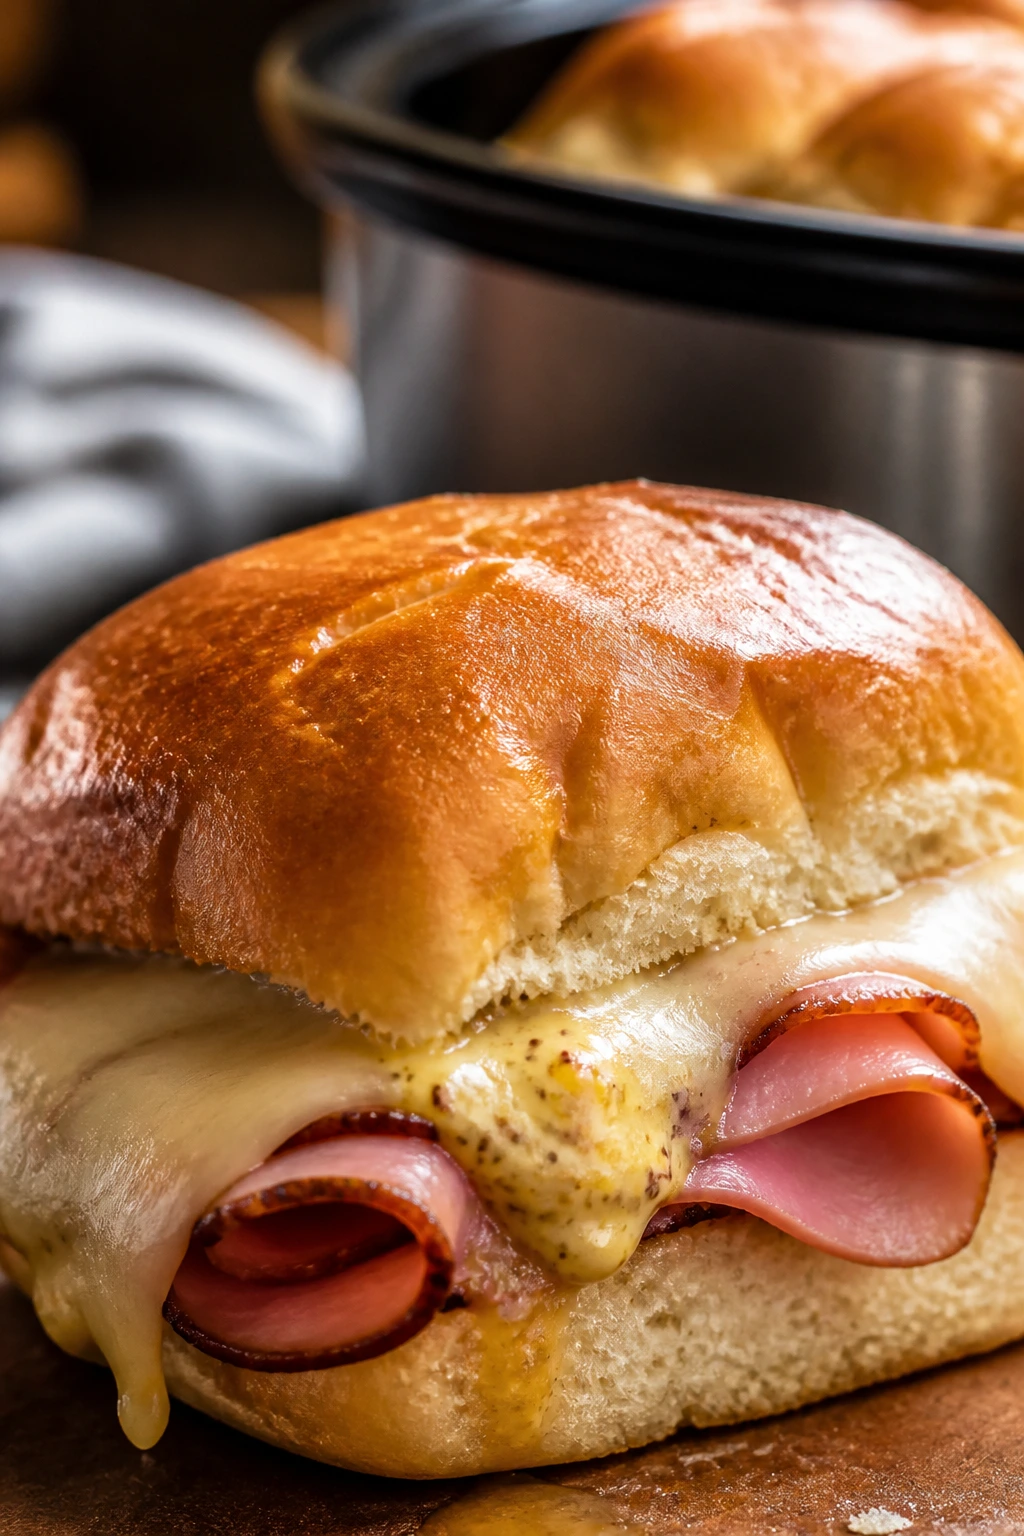
This is the sleeper hit of the whole group. It sounds simple, then you bite into warm ham, melted Swiss, and a sharp Dijon spread and realize simple was the point. The slow cooker keeps the ham warm and the filling soft, which is ideal when you want something hot and don’t feel like negotiating with the oven.
Why It Works:
Ham is already cooked, so the slow cooker’s job is to heat it gently and melt the cheese without drying it out. Dijon and a little cream cheese make a spread that tastes tangy instead of heavy. On slider buns or soft rolls, it becomes the sort of sandwich people eat faster than they expected.
Key Ingredients:
- 2 lb sliced deli ham or thinly sliced leftover ham
- 4 ounces cream cheese, softened
- 1/4 cup Dijon mustard
- 1 tablespoon honey
- 8 slices Swiss cheese
- 8 slider buns or dinner rolls
- 2 tablespoons melted butter
- 1 teaspoon poppy seeds
Quick Steps:
- Mix the spread: Stir cream cheese, Dijon, and honey until smooth.
- Layer the sandwiches: Split the buns, spread the Dijon cream on the bottoms, and pile on the ham and Swiss.
- Set in the cooker: Place the assembled sliders in the slow cooker or wrap them tightly in foil and set them inside a larger crockpot-safe insert if needed.
- Warm gently: Cover and cook on LOW for 45 to 60 minutes, just until the cheese softens and the ham is hot.
- Finish the tops: Brush the buns with butter and sprinkle with poppy seeds.
- Serve warm: Pull apart and serve immediately.
Equipment for This Recipe:
- Slow cooker
- Small mixing bowl
- Pastry brush
- Foil if you want a neater setup
How to Serve This Dish:
Serve with a bowl of mustard or pickle chips on the side. These are easy party sandwiches, but they also make a fine cold-night lunch with soup. I’d choose a roll with a little structure over a very soft bun.
Pro Tips for This Recipe:
- Thin slices of ham melt into the sandwich better than thick chunks.
- Don’t leave the sliders in the cooker for hours. They’re a warm-up job, not a braise.
- The honey in the spread keeps the Dijon from feeling harsh.
- If you want a stronger cheese pull, add an extra slice of Swiss.
Variations on This Dish:
- Peppered Ham Version: Use black pepper ham for a little more edge.
- Honey Mustard Style: Replace some Dijon with a sweeter mustard if you want less bite.
- Open-Faced Melt: Serve on toast instead of rolls and broil until the cheese bubbles.
Common Mistakes to Avoid with This Dish:
- Overheating the ham: It dries fast if you forget it.
- Using too much cream cheese: The spread should taste sharp, not thick and heavy.
- Skipping the butter on top: It gives the rolls color and a little shine.
16. Sausage and Peppers Hoagies

Sausage and peppers tastes like a street corner wrapped in foil and handed to you hot. The sausage should stay juicy, the peppers should go soft but not disappear, and the tomatoes should make a light sauce that gathers at the bottom of the roll. There’s nothing shy about it, which is part of the pleasure.
Why It Works:
Italian sausage brings fat and seasoning that hold up to long cooking. Bell peppers and onions soften slowly and add sweetness, while crushed tomatoes keep the mixture spoonable. A hoagie roll can handle this because it has enough crust to catch the juices.
Key Ingredients:
- 2 lb Italian sausage links, sweet or hot
- 3 bell peppers, sliced
- 2 large onions, sliced
- 1 can crushed tomatoes, 28 ounces
- 4 garlic cloves, minced
- 1 teaspoon fennel seed
- 1/2 teaspoon red pepper flakes
- 1 teaspoon kosher salt
- 8 hoagie rolls
- 8 slices provolone
Quick Steps:
- Optional browning: Brown the sausage in a skillet for 5 minutes if you want extra color.
- Build the pot: Add peppers, onions, garlic, crushed tomatoes, fennel, red pepper flakes, and salt to the slow cooker.
- Nestle in the sausage: Set the links on top.
- Cook until tender: Cover and cook on LOW for 5 to 6 hours, until the sausage is cooked through and the peppers are soft.
- Slice and return: Slice the sausage into chunks and stir it back into the vegetables.
- Assemble: Spoon the mixture into hoagie rolls and top with provolone.
- Melt briefly: Broil for 1 minute if you want the cheese softened.
Equipment for This Recipe:
- Slow cooker
- Skillet for browning, optional
- Sharp knife
- Baking sheet
How to Serve This Dish:
Serve with roasted potatoes or a simple arugula salad if you want a little bitterness on the plate. The sandwich is hearty enough to stand alone, and it likes a roll with some crust. If the peppers are especially sweet, a few pickled peppers on top fix the balance.
Pro Tips for This Recipe:
- Brown the sausage if you have the time. It deepens the flavor.
- Don’t chop the peppers too fine or they turn mushy.
- Provolone melts cleanly and won’t fight the tomato sauce.
- Let the filling sit for 10 minutes after cooking so the sauce settles.
Variations on This Dish:
- Hot Sausage Heat: Use hot sausage and extra red pepper flakes.
- Mild Family Tray: Use sweet sausage and skip the flakes.
- Extra Sauce Version: Add a spoonful of tomato paste if you want a thicker base.
Common Mistakes to Avoid with This Dish:
- Overcooking the peppers: They should be soft, not vanished.
- Using a flimsy roll: You need a hoagie with some toughness.
- Not slicing the sausage before serving: Bigger chunks make the sandwich easier to manage.
17. Chicken Tikka Sandwiches on Naan
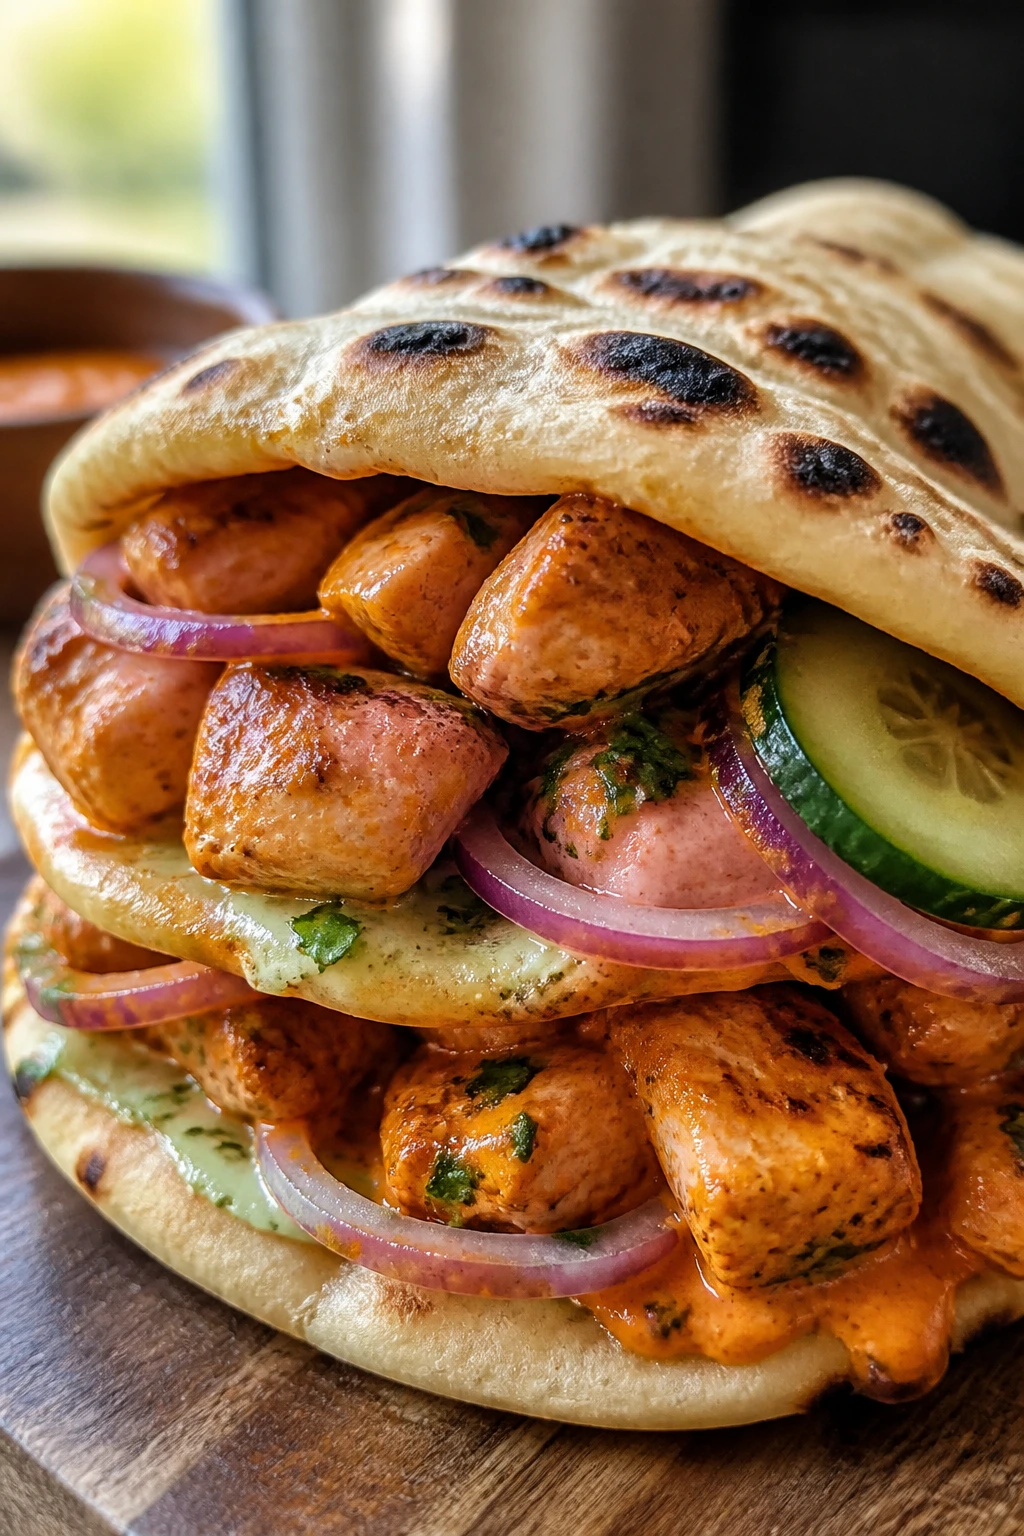
Chicken tikka in sandwich form sounds slightly rebellious, and that’s what makes it good. The sauce should be warm, spiced, and a little creamy, while the naan gives you a chewy flatbread that can carry the filling without cracking. Cucumber and onion on top keep it from feeling too rich. Clean, sharp, hot. That’s the move.
Why It Works:
Chicken thighs soak up yogurt, ginger, garlic, and tikka spices without drying out. Tomato puree and a bit of cream or coconut milk create a sauce that thickens in the slow cooker and clings to the chicken. Naan is better than standard bread here because it folds instead of collapsing.
Key Ingredients:
- 2 1/2 lb boneless, skinless chicken thighs
- 1 cup plain yogurt
- 2 tablespoons tikka masala spice blend
- 1 tablespoon grated ginger
- 4 garlic cloves, minced
- 1 can tomato puree, 14 ounces
- 1/2 cup heavy cream or coconut milk
- 8 naan breads or flatbreads
- 1/2 cup sliced red onion
- 1/2 cup chopped cucumber
- Chopped cilantro
- Mint yogurt or plain yogurt for serving
Quick Steps:
- Coat the chicken: Mix yogurt, spice blend, ginger, and garlic, then coat the chicken well.
- Set the base: Add tomato puree to the slow cooker, then place the chicken on top.
- Cook until tender: Cover and cook on LOW for 4 hours, until the chicken shreds with ease.
- Finish the sauce: Stir in cream or coconut milk and shred the chicken into the sauce.
- Warm the naan: Heat the naan in a dry skillet or the oven until pliable.
- Assemble: Spoon chicken onto naan and top with onion, cucumber, cilantro, and mint yogurt.
Equipment for This Recipe:
- Slow cooker
- Mixing bowl
- Skillet or oven for naan
- Forks for shredding
How to Serve This Dish:
Serve folded like a wrap or open-faced if you want it less messy. A few lemon wedges are nice, though not mandatory. The cucumber should stay cold and crisp against the warm chicken. That contrast matters.
Pro Tips for This Recipe:
- Use thighs. Breasts can dry out too easily here.
- If your spice blend is salty, reduce the added salt elsewhere.
- Mint yogurt is worth the extra bowl.
- Warm naan before assembling or it cracks when you fold it.
Variations on This Dish:
- Coconut Tikka: Use coconut milk instead of cream for a softer finish.
- Paneer Swap: Replace chicken with cubes of paneer added near the end.
- Extra-Herb Version: Add chopped mint and cilantro to the yogurt sauce.
Common Mistakes to Avoid with This Dish:
- Using cold naan: It tears at the fold.
- Skipping the yogurt base: It helps the spice cling and keeps the chicken tender.
- Adding too much cream too early: Wait until the chicken is cooked so the sauce stays balanced.
18. Portobello and White Bean Sandwiches
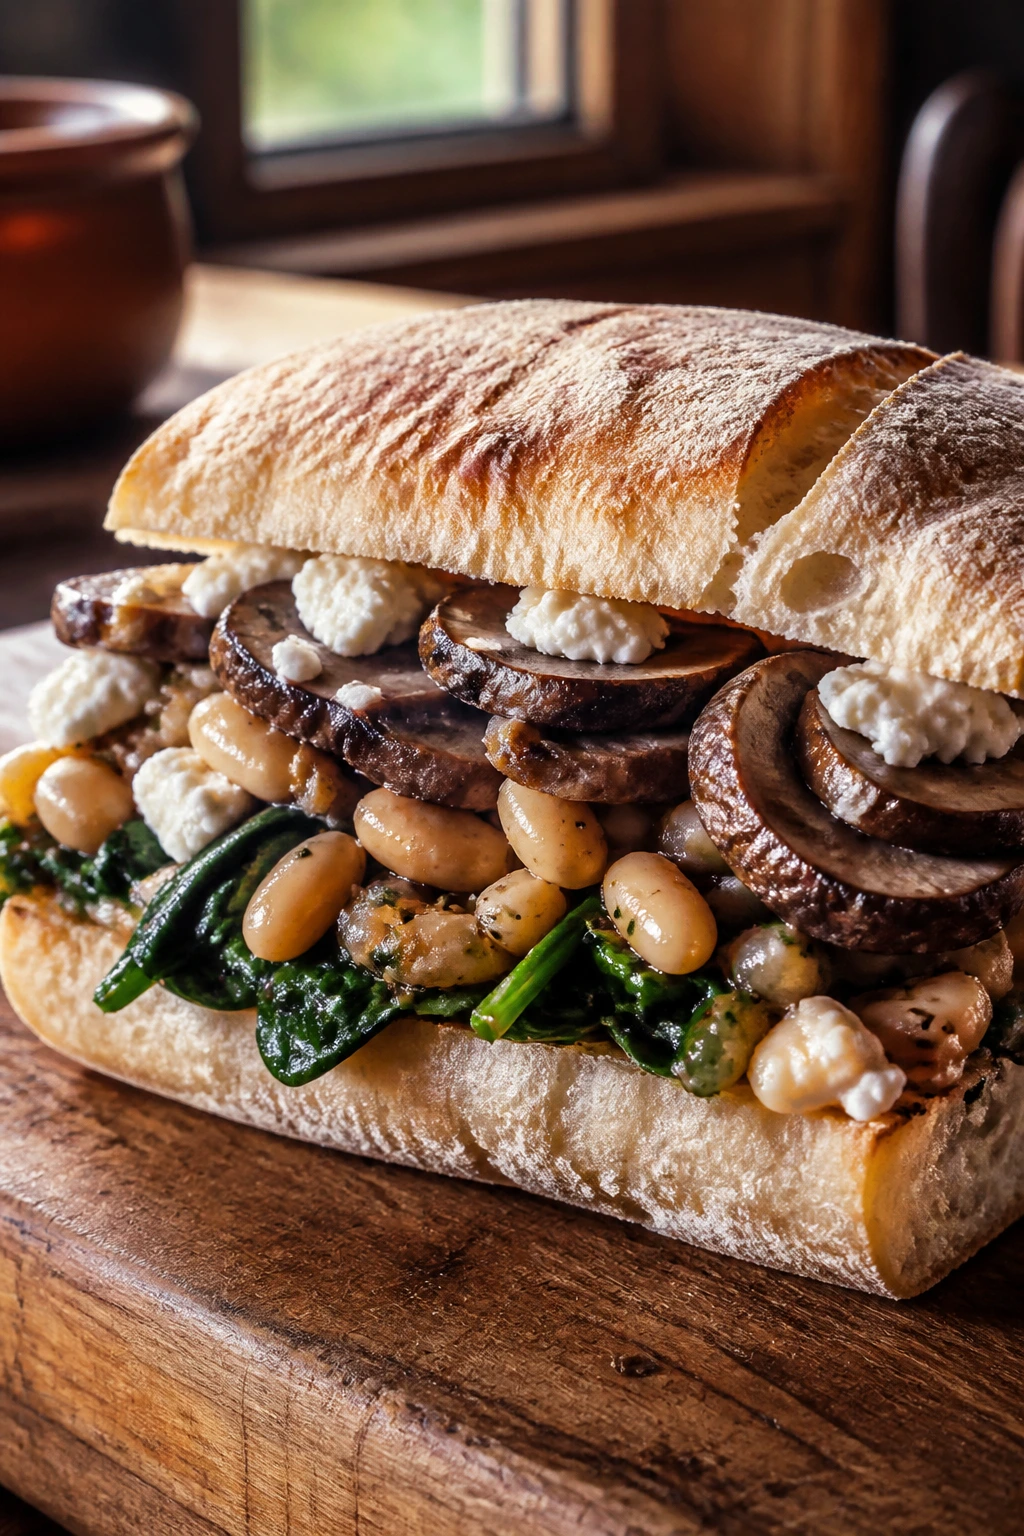
Not every winter sandwich needs meat to feel substantial. Portobellos bring a meaty chew, white beans give the filling body, and balsamic gives the whole thing a dark, savory shine. This is the sandwich I make when I want something hearty but don’t want the heaviness that comes with a roast.
Why It Works:
Mushrooms release liquid, which sounds like a problem until you realize that liquid becomes part of the sauce. Cannellini beans soften and thicken the filling without turning it into paste. Rosemary and balsamic keep the flavor in a savory lane instead of letting it slide into bland vegetable territory.
Key Ingredients:
- 6 large portobello caps, sliced
- 2 cans cannellini beans, drained and rinsed
- 1 large onion, sliced
- 3 garlic cloves, minced
- 1 cup vegetable broth
- 1 tablespoon balsamic vinegar
- 1 teaspoon dried rosemary
- 1 teaspoon dried thyme
- 1 teaspoon kosher salt
- 8 ciabatta rolls
- 4 ounces goat cheese or mozzarella
- 2 cups baby spinach
Quick Steps:
- Add the vegetables: Put the mushrooms, onion, garlic, beans, broth, balsamic, rosemary, thyme, and salt into the slow cooker.
- Cook until softened: Cover and cook on LOW for 3 to 4 hours, until the mushrooms are tender and the beans are creamy around the edges.
- Thicken slightly: Remove the lid for the last 15 minutes if the mixture looks watery.
- Toast the rolls: Split and toast the ciabatta so it can hold the filling.
- Assemble: Spoon the mushroom-bean mixture onto the bread, add spinach, and finish with goat cheese or mozzarella.
- Serve immediately: The cheese should soften against the warm filling.
Equipment for This Recipe:
- Slow cooker
- Cutting board and knife
- Spoon
- Baking sheet if toasting the rolls
How to Serve This Dish:
Serve it with tomato soup or a simple salad if you want a very winter dinner. Ciabatta gives the best chew, but any sturdy roll will do. The spinach adds freshness, so don’t skip it just because it seems small.
Pro Tips for This Recipe:
- Drain the mushrooms slightly if the filling looks too loose.
- Goat cheese gives tang; mozzarella gives melt. Pick the one that fits your mood.
- A little extra balsamic at the end wakes up the beans.
- Don’t use flimsy bread. The filling has some weight.
Variations on This Dish:
- Vegan Finish: Skip the cheese and add olive oil and black pepper at the end.
- Italian Herb Version: Stir in basil and oregano for a red-sauce feel.
- Spicy Mushroom Bean: Add red pepper flakes for a little heat.
Common Mistakes to Avoid with This Dish:
- Leaving too much liquid in the pot: The sandwich gets soupy fast.
- Under-salting the mushrooms: They need seasoning or they taste thin.
- Using bread with no crust: It won’t support the filling.
19. French Onion Beef Sandwiches
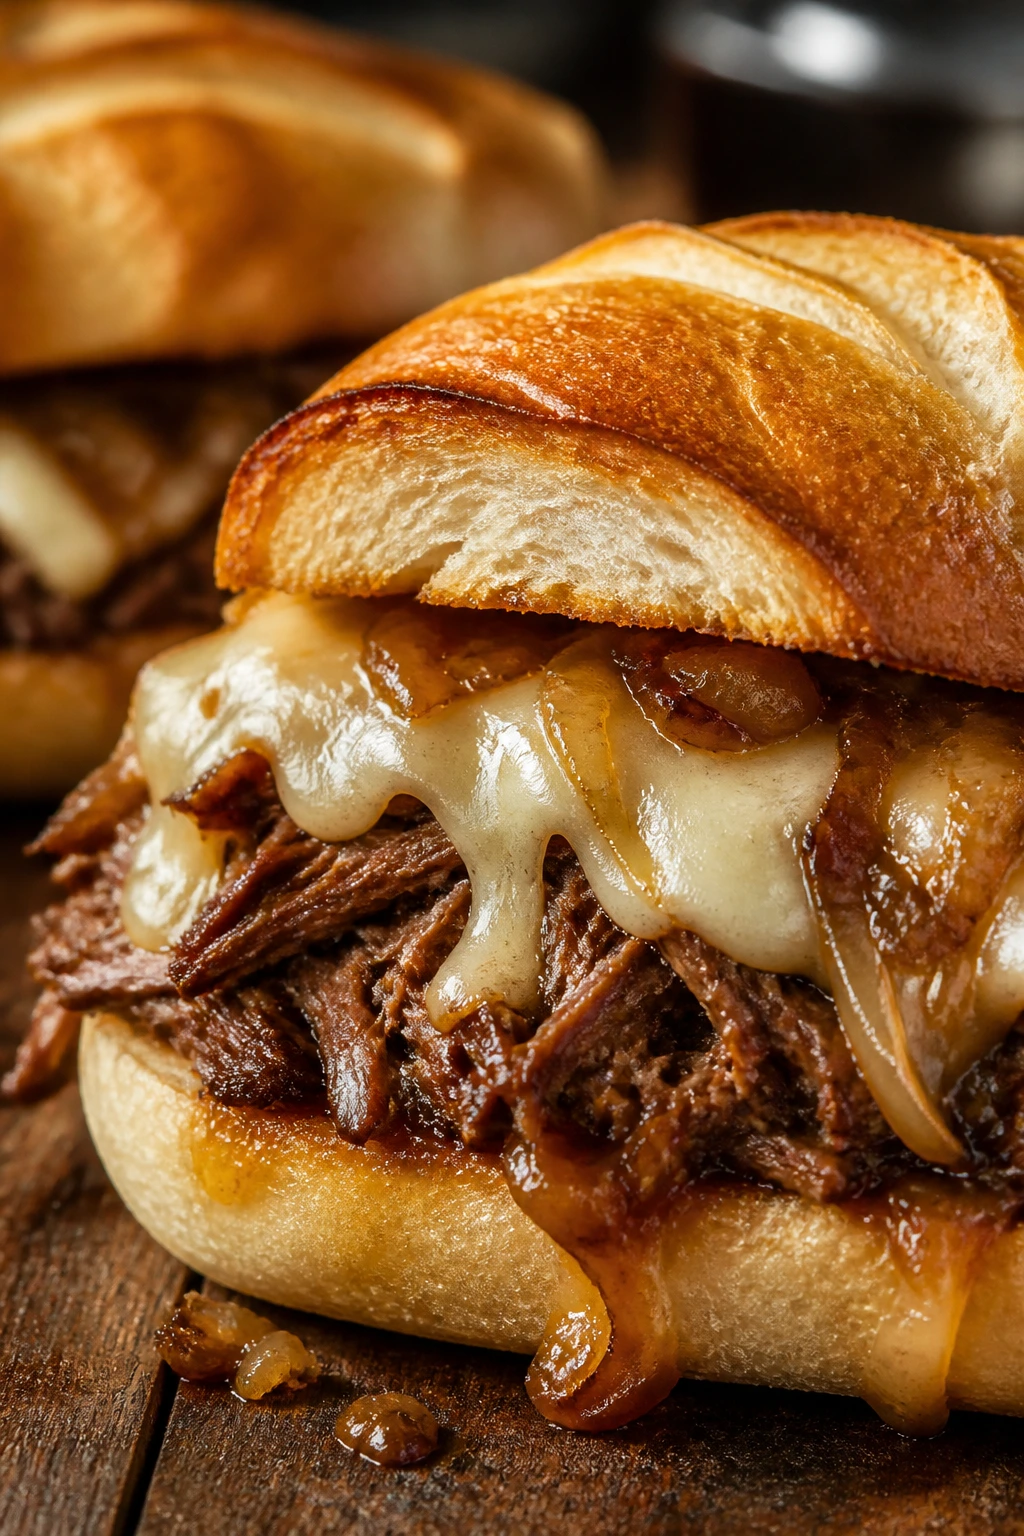
This one tastes like a bowl of French onion soup turned into a sandwich with better posture. The onions should get soft and jammy, the beef should shred into the broth, and the cheese should melt into little salty puddles over the top. It’s rich, yes, but in a way that feels earned.
Why It Works:
Slow-cooked onions release sweetness and depth as they soften for hours. Chuck roast adds enough beef body to keep the sandwich from tasting like soup on bread, while thyme and Worcestershire sharpen the broth. Gruyère is ideal, but provolone will do the melting job if you want something easier to find.
Key Ingredients:
- 3 1/2 lb chuck roast
- 4 large yellow onions, thinly sliced
- 4 cups beef broth
- 2 tablespoons Worcestershire sauce
- 1 tablespoon balsamic vinegar
- 1 teaspoon dried thyme
- 1 bay leaf
- 1 teaspoon kosher salt
- 8 baguette-style rolls
- 8 slices Gruyère or provolone
Quick Steps:
- Pack the onions: Layer the sliced onions in the bottom of the slow cooker.
- Add the roast: Set the beef on top and season with salt, thyme, and bay leaf.
- Pour in the liquid: Add broth, Worcestershire, and balsamic.
- Cook until tender: Cover and cook on LOW for 8 to 9 hours, until the beef shreds easily and the onions are soft and golden.
- Shred and stir: Remove the beef, shred it, and return it to the pot.
- Build the sandwiches: Spoon filling onto rolls and top with cheese.
- Melt: Broil until the cheese bubbles.
Equipment for This Recipe:
- Slow cooker
- Two forks
- Baking sheet
- Knife for slicing onions
How to Serve This Dish:
Serve with a bowl of broth on the side if you want the full soup-sandwich experience. A bitter green salad also helps cut the richness. I’d keep the portion size moderate here; the sandwich is bigger than it looks.
Pro Tips for This Recipe:
- Slice the onions thin so they melt into the filling.
- A small splash of balsamic at the end can sharpen the broth.
- Gruyère gives the best French onion flavor, but it’s okay to use provolone.
- Toast the rolls a little before filling them.
Variations on This Dish:
- Mushroom Onion Beef: Add mushrooms with the onions for extra depth.
- Open-Faced Melt: Serve the filling on toasted bread and broil the cheese over the top.
- Swiss Swap: Use Swiss if you want a milder cheese.
Common Mistakes to Avoid with This Dish:
- Using too little onion: The onions are the point.
- Skipping the cheese melt: That browned, melted top is part of the flavor.
- Using bread that’s too soft: It can’t hold the filling and jus.
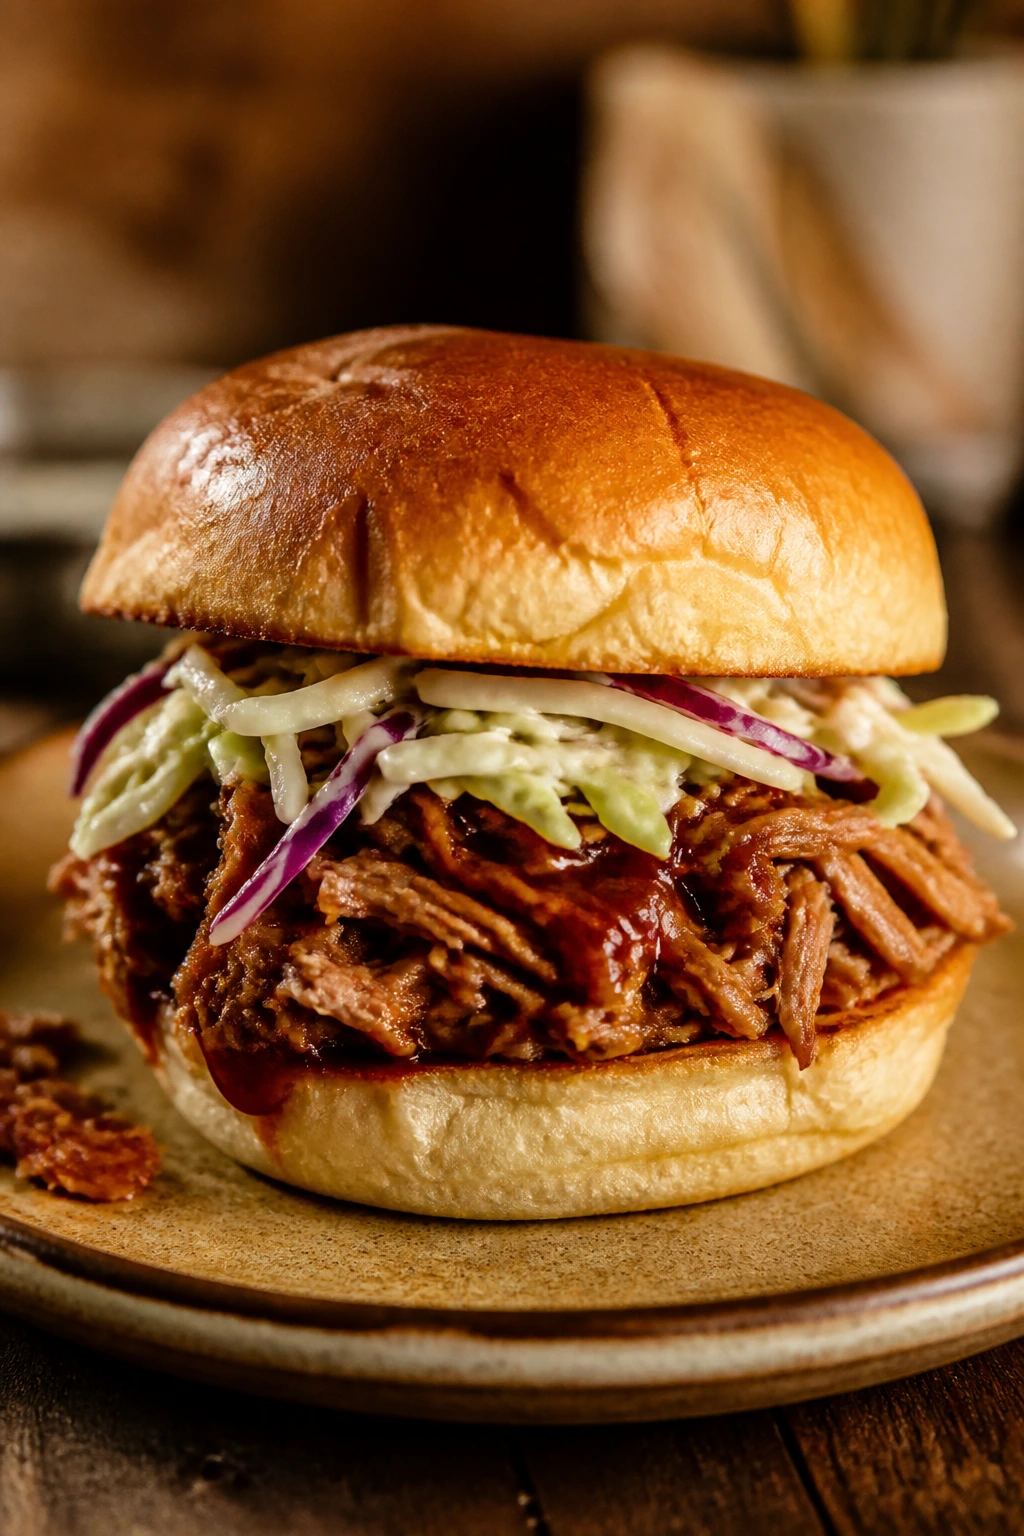
20. Carolina Pulled Chicken Sandwiches
This is the vinegar-bright cousin of standard BBQ chicken, and it hits harder on a cold day than sweeter versions do. The sauce should taste sharp first, then a little sweet, then peppery. Coleslaw on top isn’t decoration. It cools the heat and gives the sandwich a dry crunch.
Why It Works:
Chicken thighs stay moist in a vinegar-based sauce and shred into strands that hold the seasoning well. Apple cider vinegar keeps the flavor lively, mustard adds edge, and ketchup gives just enough body to make the sauce cling. It’s a simple formula, but the balance matters.
Key Ingredients:
- 2 1/2 lb boneless, skinless chicken thighs
- 1 cup apple cider vinegar
- 1/2 cup ketchup
- 2 tablespoons yellow mustard
- 2 tablespoons brown sugar
- 1 teaspoon red pepper flakes
- 1 teaspoon kosher salt
- 8 sandwich buns
- 2 cups coleslaw, lightly dressed
Quick Steps:
- Mix the sauce: Stir vinegar, ketchup, mustard, brown sugar, red pepper flakes, and salt together.
- Add the chicken: Place the thighs in the slow cooker and pour the sauce over them.
- Cook until tender: Cover and cook on LOW for 4 hours.
- Shred and simmer: Remove the chicken, shred it, and return it to the pot for 10 minutes.
- Taste and adjust: Add a splash more vinegar if it tastes too sweet.
- Assemble: Spoon onto buns and top with coleslaw.
Equipment for This Recipe:
- Slow cooker
- Two forks
- Mixing bowl
- Spoon for saucing
How to Serve This Dish:
Serve with cornbread, chips, or fried okra if you want to lean into the Southern lane. The coleslaw should be lightly dressed so it stays crisp. This sandwich is best when the vinegar stays noticeable all the way through the bite.
Pro Tips for This Recipe:
- Don’t over-sweeten it. Carolina-style sauce should stay sharp.
- Use thighs for the best texture.
- A little extra black pepper at the end helps.
- Coleslaw belongs on top or beside, never mixed into the pot.
Variations on This Dish:
- Eastern Carolina Style: Skip the ketchup and lean harder into straight vinegar.
- Mustard-Heavy Version: Add more mustard for a tangier finish.
- Spicier Pot: Increase the red pepper flakes by half.
Common Mistakes to Avoid with This Dish:
- Making it too much like BBQ: You want tang, not syrup.
- Letting the slaw sit in the sauce: It goes limp fast.
- Using breasts and forgetting to watch them: They dry sooner than thighs.
21. Reuben-Style Corned Beef Sandwiches
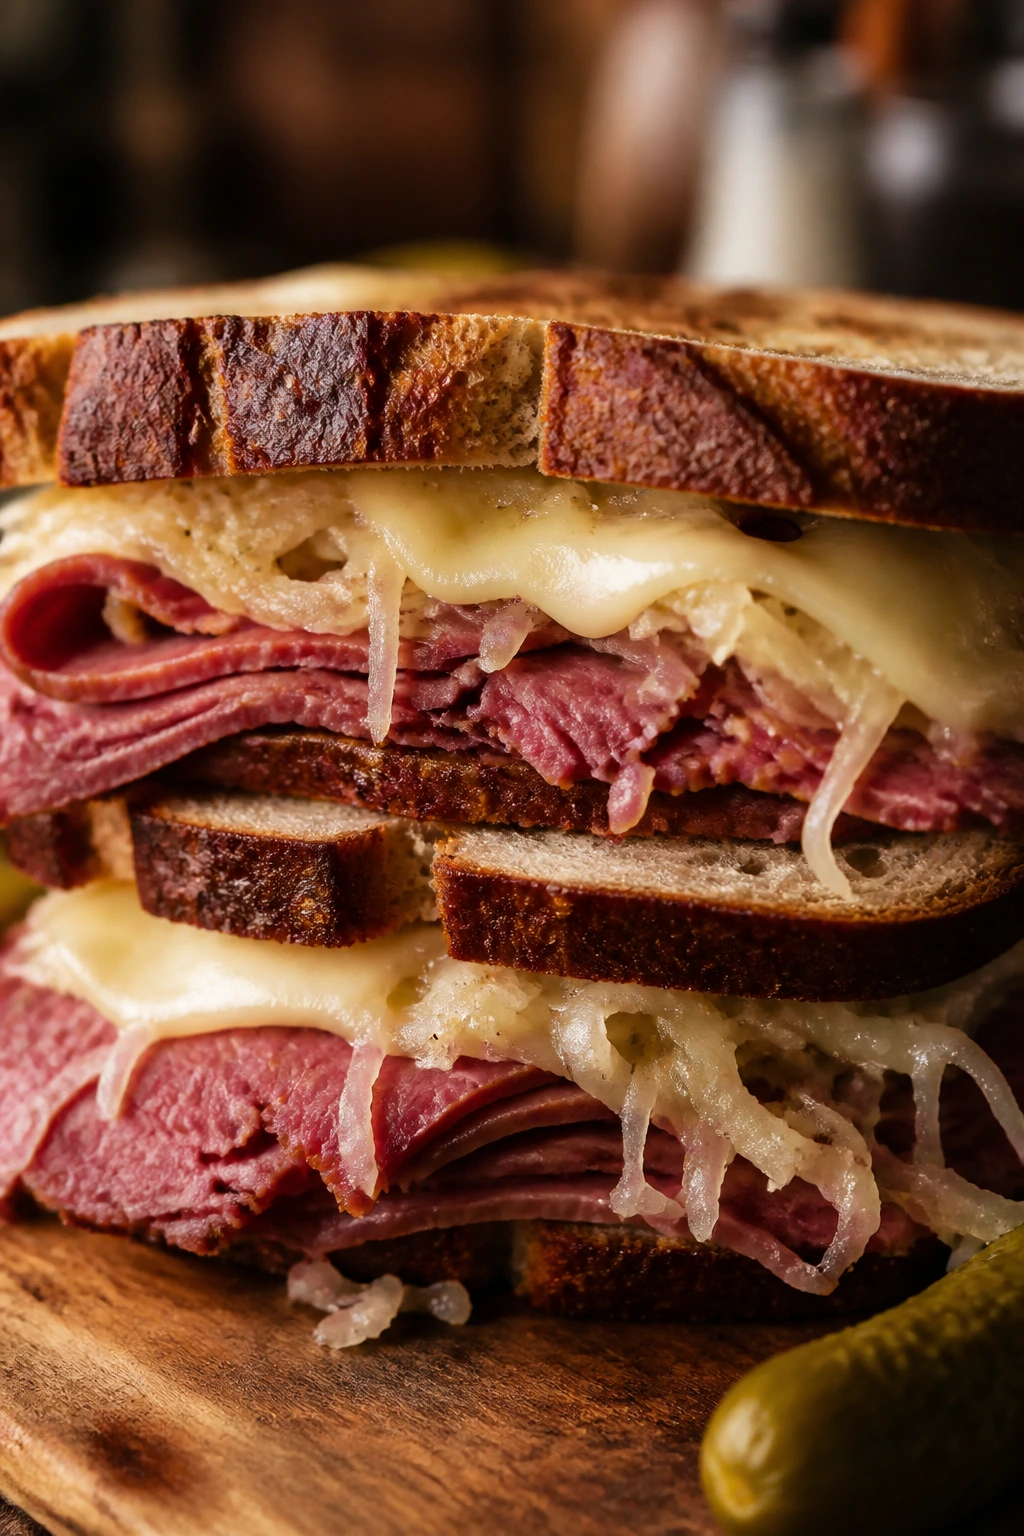
A Reuben is one of those sandwiches that knows exactly what it is. It’s salty, tangy, a little creamy, and happiest when the rye is toasted enough to stand up to the kraut. In the slow cooker, corned beef becomes tender enough to slice cleanly, and the seasoning in the pot makes the whole sandwich smell like a deli worth lingering in.
Why It Works:
Corned beef brisket needs long, gentle heat to soften into slices that don’t fight the bread. Pickling spice and onion deepen the beef, while sauerkraut and Thousand Island bring the acid and creaminess the sandwich needs. Rye is the correct bread here because it can handle the salt without disappearing.
Key Ingredients:
- 3 lb corned beef brisket with spice packet
- 1 large onion, sliced
- 2 cups low-sodium beef broth
- 1 tablespoon pickling spice
- 8 slices rye bread or rye rolls
- 2 cups sauerkraut, drained well
- 8 slices Swiss cheese
- 1/2 cup Thousand Island dressing
Quick Steps:
- Rinse the brisket: Rinse the corned beef quickly under cold water to remove some surface salt.
- Set up the cooker: Add onion, broth, pickling spice, and the brisket.
- Cook until sliceable: Cover and cook on LOW for 8 to 9 hours, until the beef is very tender.
- Slice or shred: Slice against the grain if it holds together, or shred if it falls apart.
- Toast the bread: Rye should be toasted to give the sandwich some support.
- Build the Reuben: Layer beef, sauerkraut, Swiss, and dressing.
- Grill lightly if you want: Press in a skillet until the bread is crisp and the cheese soft.
Equipment for This Recipe:
- Slow cooker
- Sharp knife
- Skillet or griddle
- Tongs
How to Serve This Dish:
Serve with potato salad, pickles, or a dill-heavy side. I like a little extra dressing on the side because some people want the sandwich wetter than others. Rye gives the whole thing its personality, so don’t swap it lightly.
Pro Tips for This Recipe:
- Drain the sauerkraut well or it will flood the bread.
- Slice against the grain for the cleanest bite.
- A little crust on the rye helps more than you’d think.
- Don’t skip the press if you want the classic Reuben feel.
Variations on This Dish:
- Rachel Style: Swap the corned beef for turkey and keep the kraut.
- Open-Faced Version: Serve on toasted rye with cheese melted over the top.
- Extra Tangy Reuben: Add a little mustard to the dressing.
Common Mistakes to Avoid with This Dish:
- Not rinsing the brisket: Corned beef can be saltier than expected.
- Using soggy sauerkraut: Drain it well or the sandwich slips apart.
- Cutting with the grain: The meat turns chewy instead of tender.
22. Apple Cider Pork Sandwiches
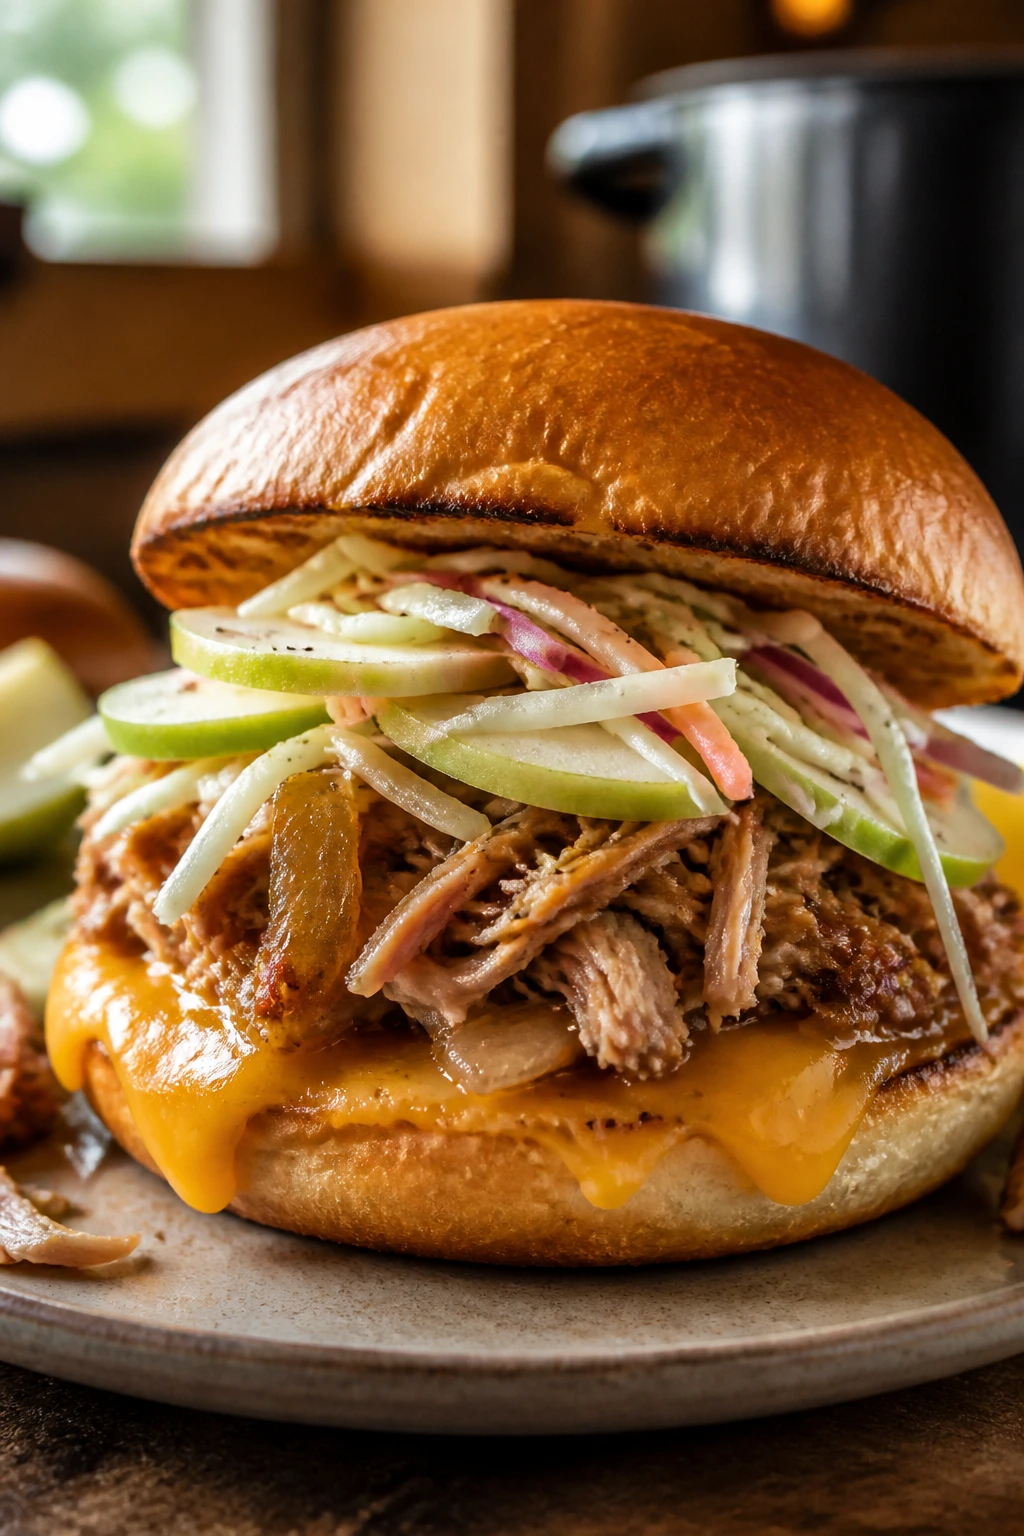
Apple cider pork has the kind of smell that makes people wander into the kitchen and ask questions they didn’t plan to ask. The pork should be tender, the apple flavor should stay savory, and the sandwich should land somewhere between roast dinner and deli lunch. I like it with a little cheddar and a sharp apple slaw. That gives the whole thing some snap.
Why It Works:
Pork shoulder and apple cider are old friends for a reason. The cider softens the meat and adds sweetness without turning it into dessert, while onion, garlic, and mustard keep the flavor grounded. A lightly tart slaw or sliced apples on top keeps the sandwich from feeling too soft.
Key Ingredients:
- 4 lb pork shoulder
- 1 cup apple cider
- 1 apple, thinly sliced
- 1 large onion, sliced
- 4 garlic cloves, minced
- 1 tablespoon Dijon mustard
- 1 teaspoon dried sage
- 1 teaspoon kosher salt
- 1/2 teaspoon black pepper
- 8 sandwich buns
- 8 slices sharp cheddar
- Apple slaw or thin apple slices for serving
Quick Steps:
- Build the base: Add onion, garlic, and apple slices to the slow cooker.
- Season the pork: Rub the shoulder with salt, pepper, sage, and Dijon.
- Add the cider: Pour apple cider into the pot and place the pork on top.
- Cook until tender: Cover and cook on LOW for 8 to 10 hours, until the pork shreds easily.
- Shred and finish: Pull the pork apart and stir it back into the juices.
- Build the sandwiches: Pile the pork onto buns, add cheddar, and top with apple slaw or a few thin apple slices.
- Warm through if needed: Let the cheddar soften against the hot pork before serving.
Equipment for This Recipe:
- Slow cooker
- Two forks
- Knife and cutting board
- Spoon for the juices
How to Serve This Dish:
Serve with roasted carrots, fries, or a green salad with sharp vinaigrette. The cheddar should be a little melty, not fully liquefied. If you want extra contrast, add thin apple slices right before serving so they stay crisp.
Pro Tips for This Recipe:
- Use real cider, not vinegar or overly sweet bottled drink mix.
- Sage belongs here, but keep it modest. Too much tastes like stuffing.
- Sharp cheddar works better than mild because it can stand up to the cider.
- If the juices are too thin, remove the lid for the last 20 minutes.
Variations on This Dish:
- Maple Cider Pork: Add 1 tablespoon maple syrup if you want a rounder sweetness.
- Onion-Heavy Version: Double the onions for a deeper savory base.
- Mustard Finish: Add a little extra Dijon on the bun for a sharper bite.
Common Mistakes to Avoid with This Dish:
- Using a cider that tastes like candy: The sandwich gets too sweet fast.
- Skipping the cheddar: The sharp cheese keeps the pork grounded.
- Letting apple slices cook too long: Fresh slices on top are better than mush in the pot.
Why the Slow Cooker Wins on Cold Days
A slow cooker is at its best when the weather makes stove duty feel irritating. It takes cuts that would be stubborn in a skillet and turns them supple over hours, which is exactly what pork shoulder, chuck roast, chicken thighs, and corned beef want. You get soft meat, a flavorful liquid at the bottom, and a kitchen that smells like dinner without the stovetop spitting at you.
The other advantage is practical, and I mean that in the least glamorous way possible. A slow cooker keeps the filling hot while you toast buns, broil cheese, or get distracted by a pair of mittens that still needs drying. That matters more than people admit. Hot sandwich filling waits patiently. Bread does not.
There’s also a texture lesson hiding in plain sight here. The best crockpot sandwiches pair soft filling with something that pushes back: toasted buns, crusty hoagies, rye, naan, or slider rolls with enough structure to survive the sauce. When the bread choice is lazy, the sandwich feels sloppy in the wrong sense. When it’s right, the whole thing feels deliberate.
Essential Equipment for These Recipes
- 6-quart slow cooker: The workhorse size for most pork, beef, chicken, and bean fillings.
- Two forks: You’ll use them to shred pork, chicken, beef, and turkey without fighting the grain.
- Sharp chef’s knife: Thin onion slices, even pepper strips, and clean bread cuts all depend on it.
- Cutting board: A sturdy board keeps all the slicing from turning into a mess.
- Measuring cups and spoons: Slow cooker recipes forgive some looseness, but not all.
- Rimmed baking sheet: Useful for broiling cheese-topped sandwiches or toasting rolls.
- Fine-mesh strainer: Best for separating jus from onion bits when you want a cleaner dip.
- Tongs: Handy for lifting roasts, sausage, or sandwich halves without tearing them apart.
- Mixing bowls: You’ll need at least one for slaw, sauces, or quick toppings.
- Slotted spoon: Helpful for loading fillings onto buns without overloading them with liquid.
Smart Shopping and Ingredient Tips
The best crockpot sandwiches start in the meat case, not with the sauce packet aisle. For pork and beef, look for pieces with visible fat and some marbling. Pork shoulder, chuck roast, and brisket are built for long, wet heat. Leaner cuts can work, but they demand more attention and usually give you less interesting texture. Chicken thighs have the same advantage over breasts. They stay juicier and more forgiving when the cooker runs a little long.
Bread matters more than it seems. Hoagie rolls should have a light crust and enough chew to hold broth. Slider buns should be soft but not paper-thin. Rye should taste like rye. Naan should be pliable. If a bread tears when you press it with a finger, it will surrender under hot filling.
Sauce quality is another place where the cheap shortcut can be fine, but only if you know what you’re buying. Thick BBQ sauce is better than watery. Marinara should taste tomato-heavy rather than sugary. Buffalo sauce should be vinegar-forward. If you’re using canned ingredients like pepperoncini, giardiniera, or chipotles in adobo, don’t assume they all bring the same heat. Taste a little first. A jar can surprise you.
For vegetables, onions are worth buying in quantity because they nearly always disappear into the pot in a good way. Bell peppers and cabbage should be firm. Fresh herbs are mostly a finishing move here, so buy them late and use them at the end. That little hit of green on top is not decoration; it keeps the sandwich from tasting cooked all the way through.
How to Serve These Recipes

Presentation:
Pile the filling high enough that it looks generous, then let the bread show around the edges. A little spillover is good. For saucy sandwiches like French dip or Italian beef, serve the jus in a small cup or ramekin so the plate doesn’t turn into a swamp.
Accompaniments:
Keep sides simple and crunchy: kettle chips, pickles, slaw, roasted potatoes, green salads with sharp dressing, or a bowl of soup if the day is especially cold. The goal is contrast. If the sandwich is rich and soft, the side should be crisp or bright.
Portions:
Most of these fillings serve 6 to 8 sandwiches, depending on how generously you stuff them. For slider recipes, plan on 2 to 3 per person if the rest of the plate is light. For hoagies and full-size rolls, one sandwich is usually enough unless you’re feeding people who skipped lunch on purpose.
Beverage Pairing:
A malty beer, iced tea with lemon, or sparkling water with citrus all work across the board. For richer beef sandwiches, I like something cold and plain so the sandwich stays the main event. For spicy chicken, lemonade or a crisp lager cuts through the heat cleanly.
Additional Tips and Flavor Boosters
Flavor Enhancement:
A small splash of acid at the end changes more than people expect. Vinegar, lemon juice, lime juice, or pickle brine can wake up pork, chicken, and beef that taste a little sleepy after hours in the crockpot.
Customization:
If a sandwich runs too rich, add crunch. Slaw, pickles, giardiniera, shaved onion, or celery all help. If it runs too lean, add cheese or a spoon of buttered jus. The filling tells you what it needs if you taste it before serving.
Serving Suggestions:
Toast the buns whenever the filling is saucy. Broil cheese-topped sandwiches for 1 to 2 minutes if you want a melty top. Add fresh herbs, sliced scallions, or chopped pickles right at the end so they stay sharp.
Make-It-Yours:
For gluten-free eaters, put the filling on baked potatoes, rice bowls, or gluten-free rolls with some structure. For dairy-free versions, skip the cheese and lean harder on pickles, mustard, or slaw. For spice lovers, keep hot sauce, jalapeños, or pepper flakes at the table instead of building the whole pot around them.
Make-Ahead, Storage, and Reheating Guidance
Most of these fillings keep well in the refrigerator for 3 to 4 days in airtight containers. Beef, pork, chicken, and sausage fillings all do fine with a short rest overnight; the flavor usually settles in a little more, and the sauce thickens as it cools. Keep the bread separate. Always. A soggy roll is the fastest way to ruin leftovers.
For freezing, portion the filling into containers or freezer bags and press out the air. Two months frozen is the range I like best for quality, though some fillings stay usable a little longer if they’re not overly cheesy or vegetable-heavy. Thaw overnight in the refrigerator before reheating. Don’t microwave a frozen brick and expect grace.
Reheat beef and pork fillings in a covered saucepan over low heat with a splash of broth or water. Chicken fillings can go in a skillet or saucepan the same way; just keep the heat gentle so the strands don’t dry out. Meatball and sausage fillings reheat well in a small pot over medium-low heat. For sandwiches with cheese, warm the filling first, then assemble and melt the cheese right before serving. That order matters.
If you’re making sandwiches for a party, keep the filling on the slow cooker’s WARM setting for up to 2 hours after cooking. Longer than that and the texture starts to slip, especially with chicken. Bread should be toasted or warmed at the last second, not earlier. If you remember only one thing here, remember that.
Variations and Adaptations to Try
Gluten-Free Bread Basket:
Use sturdy gluten-free buns, baked potatoes, or lettuce cups. The key is choosing something that can handle sauce without falling apart in three bites.
Dairy-Free and Cheese-Light Route:
Skip the cheese and lean on pickles, mustard, slaw, or fresh herbs for contrast. A little extra acid replaces some of the richness you’d lose.
Slider Tray for a Crowd:
Any pork, chicken, or beef filling can be tucked into slider buns and served on a sheet pan. This works especially well for game-day setups or potlucks where people want smaller portions.
Lower-Sodium Cooking:
Use low-sodium broth, skip extra salt until the end, and rely on aromatics, vinegar, and herbs. A final taste at the table usually tells you more than the recipe does.
Vegetarian Swap Board:
Portobello-and-bean filling, barbecue jackfruit, or mushroom-onion mixtures can stand in for meat without making the sandwich feel like a compromise. Just keep the texture chunky enough to stay interesting.
Heat Level Control:
Make the base filling mild, then set out hot sauce, pepperoncini, jalapeños, or chili crisp on the side. That keeps the whole batch flexible for different palates without watering it down.
Common Mistakes to Avoid

The biggest mistake is choosing bread that can’t keep up. If the filling is juicy, the bread needs some crust or chew. Soft white buns can work for a minute, then they fold into the sauce and give up. Toasting helps more than people want to admit.
Another common problem is under-seasoning the meat before it goes into the slow cooker. Long cooking softens flavors as much as it softens meat. If you start timid, the finished sandwich can taste flat. Salt, acid, and at least one browned or smoked note matter.
People also rush the texture. Shredded meat that hasn’t rested in its own juices tastes separate, not integrated. Give it 10 minutes after shredding. It’s not a dramatic wait. It’s just enough for the filling to stop acting like a pile and start acting like dinner.
Overfilling the sandwich is its own trap. More filling sounds generous until the bread splits and the first bite falls apart. Stack high, sure, but keep the load within the bun’s limits. There’s no prize for the heaviest hoagie.
Finally, don’t forget the finishing acid. Pickles, vinegar slaw, mustard, giardiniera, lime, lemon, or pepper brine all prevent a slow cooker sandwich from tasting too soft or too rich. A little sharpness on top changes the whole bite.
Frequently Asked Questions
Can I make the fillings a day ahead?
Yes, and a lot of them taste better after a night in the fridge. Reheat gently with a splash of broth or sauce, then assemble the sandwiches just before serving.
What bread holds up best for crockpot sandwiches?
Hoagie rolls with a crust, ciabatta, rye, naan, and sturdy slider buns all work well. The bread needs enough structure to handle hot filling without turning soggy in the first minute.
Do I need to brown the meat first?
Not always, but it helps with beef and sausage especially. Browning adds a darker flavor and better color, while pork shoulders and some chicken recipes can skip the extra step without falling apart.
Can I put frozen meat into the slow cooker?
I wouldn’t. Frozen meat spends too long warming up, which is a food safety problem and can also leave you with uneven texture. Thaw it first.
How do I keep sandwiches warm for a party?
Keep the filling on WARM in the slow cooker and toast or warm the bread in batches. Assemble in small waves so the buns stay decent and the cheese melts at the right time.
What if the filling comes out too watery?
Take the lid off for the last 15 to 20 minutes on HIGH, or spoon off a little liquid and reduce it in a saucepan. For saucy beef or chicken, a cornstarch slurry can also help if the recipe supports it.
Can I use chicken breasts instead of thighs?
Yes, but you need to watch them more closely because they dry out faster. Thighs stay juicier and forgive longer cook times, which is why they show up so often here.
What can I serve with these besides chips?
Pickles, slaw, potato salad, roasted vegetables, fries, simple greens, or a bowl of soup all fit the theme. The best sides bring crunch, acid, or both.
Warm Buns, Hot Filling
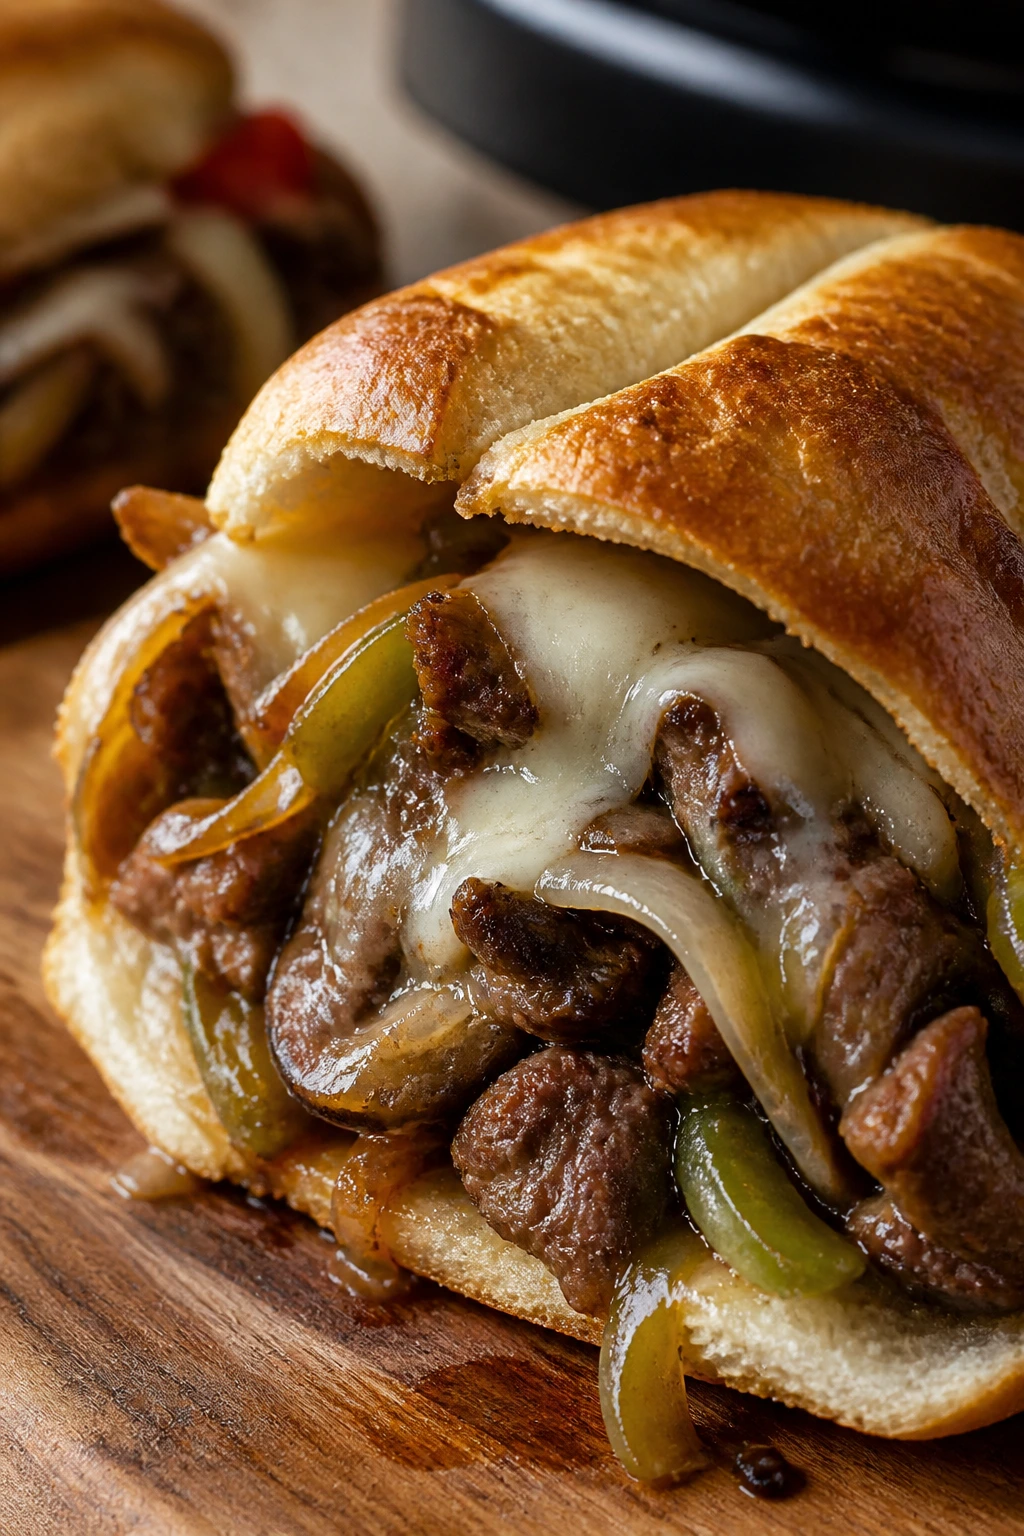
There’s a reason crockpot sandwiches keep showing up when the weather turns mean. They make use of long heat, cheap-ish cuts, and bread that wants a little help. They also do something that feels almost old-fashioned: they let dinner sit there and wait for you instead of the other way around.
I’d start with one beef sandwich, one chicken sandwich, and one pork sandwich, then keep the rest in the back pocket for the next cold spell. Once you’ve got the rhythm—salt the meat, respect the bread, finish with acid—the whole category starts to feel easy in the best possible way. Not careless. Just calm.