
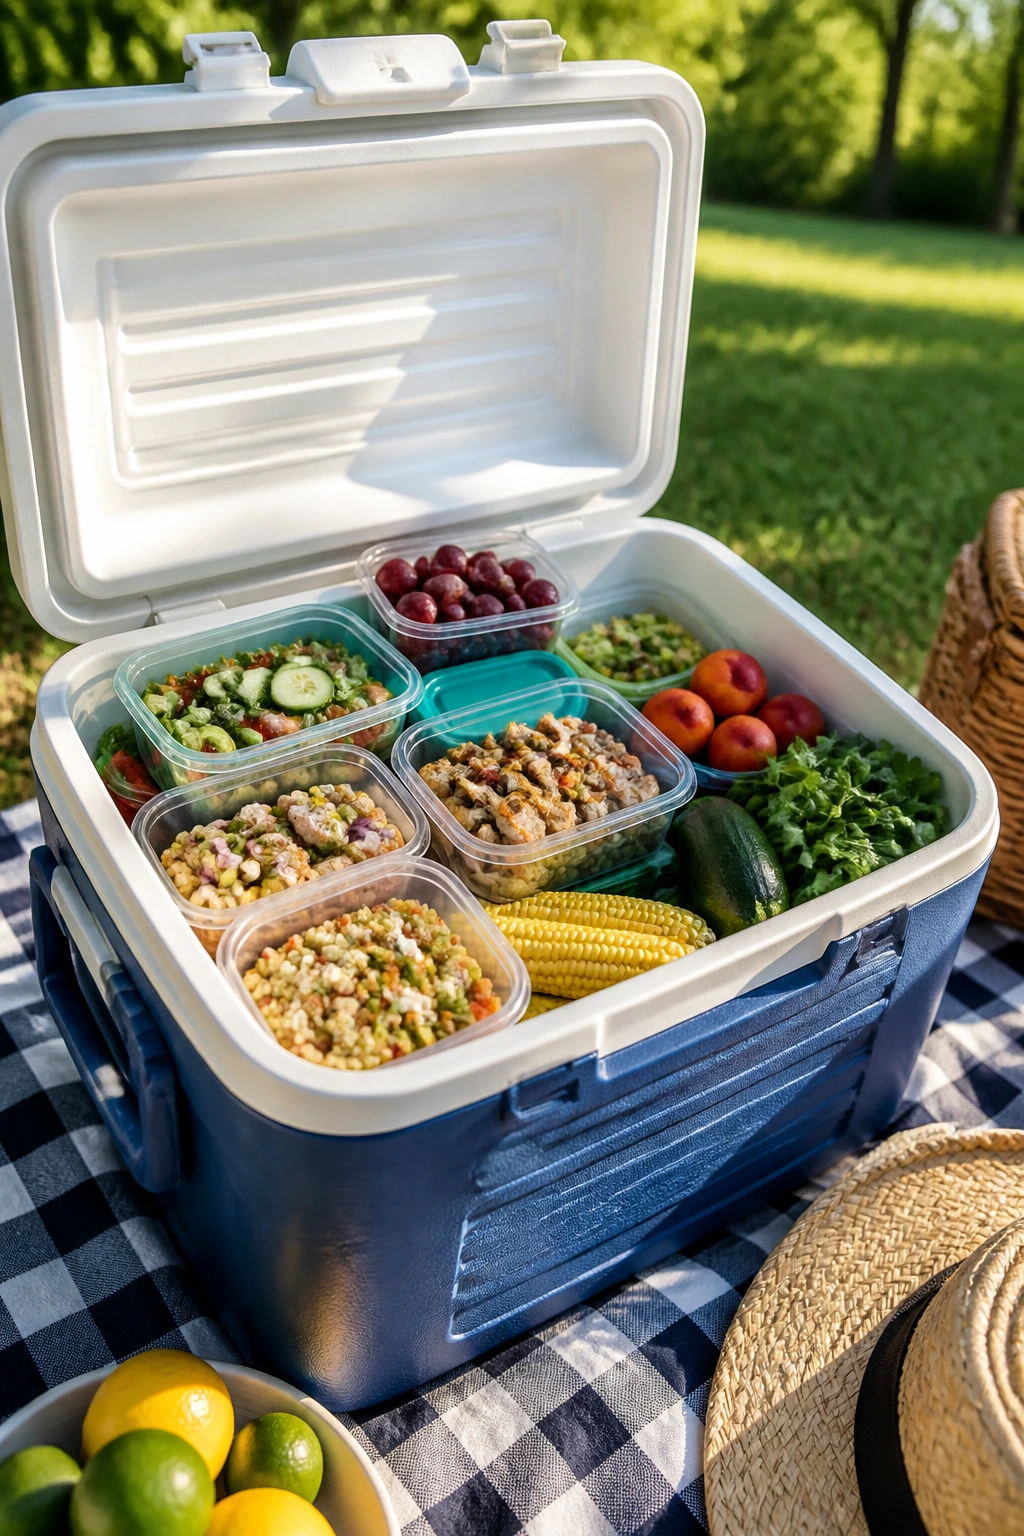
Late summer dinner ideas for a summer picnic have one job: stay good after the lid comes off the container. Not just “fine.” Good enough that the last person to eat isn’t left staring at soggy bread, limp greens, or chicken that tastes like it spent the afternoon on the wrong side of a heat lamp.
That’s why the smartest picnic dinners lean into what late summer actually gives you. Tomatoes that smell like tomatoes. Corn that still pops with juice. Peaches that perfume the basket before you even unwrap them. Chicken thighs that stay tender after a 20-minute drive and a half-hour on a blanket. Cold noodles. Pasta salads with enough acidity to wake them up. Wraps that don’t collapse the minute you pick them up. The best picnic food is not delicate. It’s sturdy in the right ways.
A good picnic dinner also understands human behavior. People arrive hungry. Kids reach for the easiest thing first. Someone always wants “just one more bite” while standing up. So the recipes here are built around that reality: hand-held when possible, fork-friendly when needed, and capable of sitting for a bit without turning muddy or lifeless. A few are grill-friendly, a few are cold and sharp, and a few are the kind of thing I’d pack when I want dinner to feel relaxed instead of logistical.
Why These Picnic Dinners Earn Space in the Cooler
- They travel well: Each recipe is built to survive a drive, a blanket, and a little waiting time without falling apart into a mess.
- Late-summer produce does the heavy lifting: Tomatoes, corn, peaches, zucchini, basil, cucumbers, and watermelon show up where they taste best.
- You get both hot and cold options: Some dishes are nicest warm from the grill, while others are better chilled and dressed ahead.
- Most of them scale cleanly: Double the sliders, stretch the grain bowls, or make extra salad jars and you’ve got dinner for a bigger group without much extra work.
- Nothing here depends on a perfect picnic setup: If you’ve got a cooler, a sheet pan, and a few airtight containers, you’re in business.
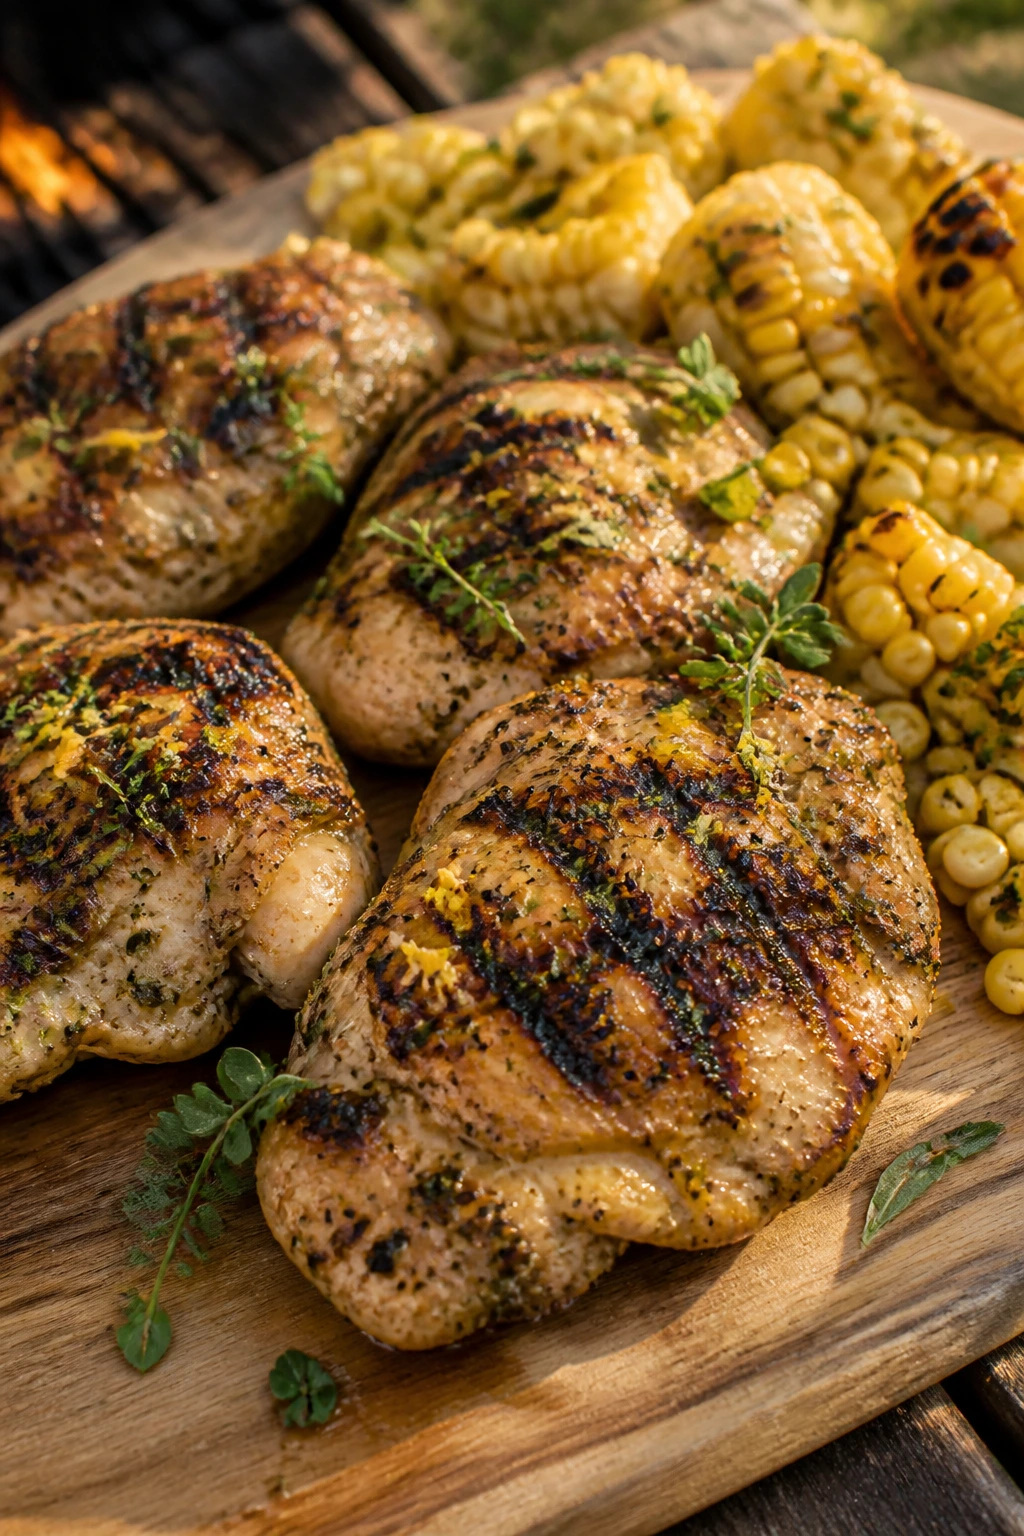
1. Grilled Lemon-Herb Chicken Thighs with Charred Corn
The first bite is all contrast: smoky skin, bright lemon, and sweet corn that tastes almost creamy once the kernels blister. Chicken thighs earn their keep here because they stay juicy even after a ride to the park, and the corn feels like a late-summer flex in the best possible way.
Why It Works:
Boneless thighs handle direct heat better than breasts, so you can grill them hard enough to get real color without drying out the meat. A lemon-garlic marinade keeps the flavor sharp, and the corn brings enough sweetness to balance it. This one still tastes good after a short rest, which matters more at a picnic than it does in a dining room.
Key Ingredients:
- 2 lb boneless, skinless chicken thighs
- 3 tbsp olive oil
- 2 lemons, juiced and zested
- 4 garlic cloves, grated
- 2 tsp dried oregano
- 2 ears corn, husked
- 2 tbsp chopped parsley
- 1 tsp kosher salt
- 1/2 tsp black pepper
Quick Steps:
- Whisk the olive oil, lemon juice, zest, garlic, oregano, salt, and pepper in a bowl, then coat the chicken and rest it for 20 to 30 minutes.
- Heat a grill to medium-high, oil the grates, and place the corn on first. Grill, turning every few minutes, until the kernels have dark spots and smell sweet, about 10 minutes.
- Grill the chicken for 5 to 7 minutes per side, until the thickest part reaches 165°F and the juices run clear.
- Rest the chicken for 5 minutes, slice it, then finish with parsley and extra lemon over the corn.
Equipment for This Recipe:
- Grill or grill pan
- Tongs
- Instant-read thermometer
How to Serve This Dish:
Pile sliced chicken onto a platter with the corn cut into thirds. A little extra lemon juice right before serving sharpens everything up. Serve with a stack of napkins; this one is juicy in a good way.
Pro Tips for This Recipe:
- Pat the chicken dry before marinating if the thighs look wet from the package.
- Grill the corn first if the grates are crowded; it holds heat better than the chicken.
- Slice against the grain so the meat stays tender in the container.
Variations on This Dish:
- Smoky Paprika Thighs: Add 1 tsp smoked paprika to the marinade for a deeper grill flavor.
- Herb-Yogurt Finish: Spoon over a quick sauce made with 1/2 cup Greek yogurt, 1 tbsp lemon juice, and a pinch of salt.
Common Mistakes to Avoid with This Dish:
- Skipping the thermometer: Chicken thighs are forgiving, but guessing still leads to dry edges. Pull them at 165°F.
- Letting the corn burn too long: A few char marks are good; blackening the whole ear makes it taste bitter.
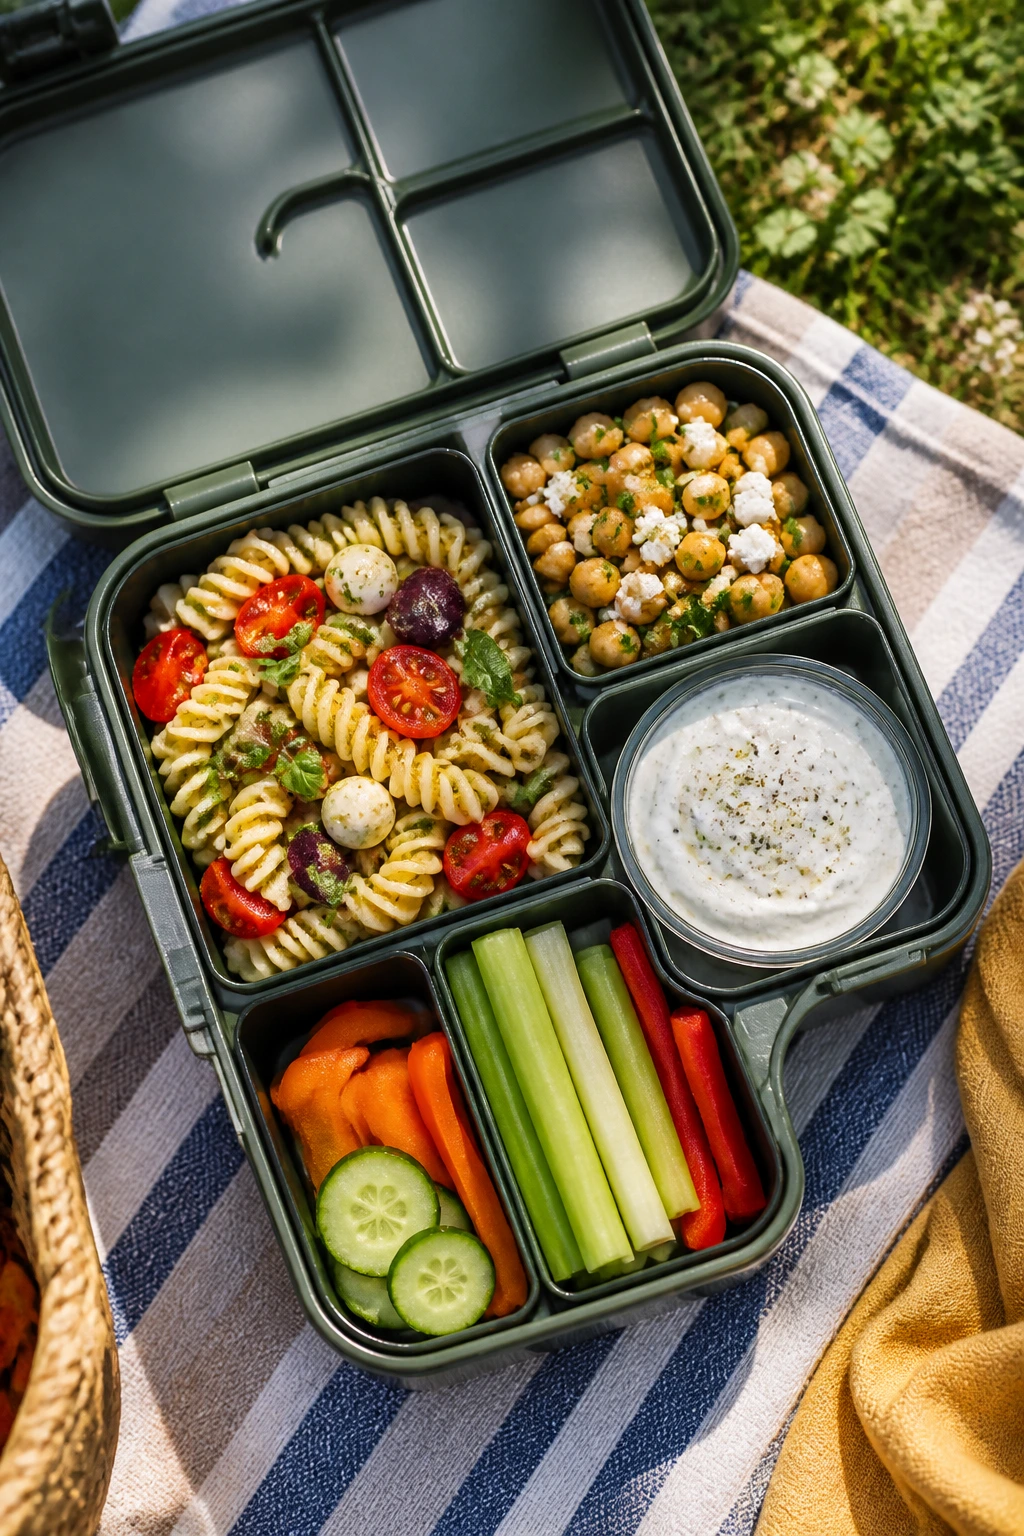
2. Tomato-Basil Pesto Pasta Salad with Mozzarella
This is the bowl that disappears first when the temperature climbs and nobody wants to stand near a hot stove. The pesto clings to the pasta, the tomatoes burst if you bite them at the right moment, and the mozzarella brings that cool, milky bite that makes the whole thing feel complete.
Why It Works:
Short pasta catches pesto in every ridge and curve, so you get flavor in every forkful instead of a greasy gloss on top. Cherry tomatoes hold their shape better than large, sliced tomatoes, and mozzarella pearls don’t leak as fast as fresh slices. Make it a few hours ahead and the flavors settle in without getting tired.
Key Ingredients:
- 1 lb rotini or fusilli
- 1 cup basil pesto
- 2 cups cherry tomatoes, halved
- 8 oz mozzarella pearls
- 1/4 cup thinly sliced red onion
- 2 tbsp lemon juice
- 2 tbsp olive oil
- 1/4 cup chopped basil
- 1 tsp kosher salt
Quick Steps:
- Boil the pasta in salted water until just al dente, then drain and rinse briefly under cool water to stop the cooking.
- Toss the pasta with olive oil first so it doesn’t clump while it cools.
- Fold in pesto, lemon juice, tomatoes, mozzarella, onion, salt, and basil until evenly coated.
- Chill for at least 20 minutes before packing, then give it one more stir before serving.
Equipment for This Recipe:
- Large pot
- Colander
- Big mixing bowl
How to Serve This Dish:
Scoop it into a shallow bowl so the tomatoes and mozzarella stay visible. It sits nicely beside grilled chicken, sliced salami, or a simple green salad. Cold, it holds its shape; at room temperature, it opens up a little more.
Pro Tips for This Recipe:
- Save 2 tablespoons of pasta water if the pesto seems tight; a splash loosens the coating.
- Add the basil at the end so it stays green and doesn’t bruise.
- Salt the pasta water well. Bland pasta dulls the whole bowl.
Variations on This Dish:
- Sun-Dried Tomato Toss: Add 1/3 cup chopped sun-dried tomatoes for a deeper, sweeter bite.
- Gluten-Free Bowl: Swap in a sturdy chickpea pasta and rinse it gently so it doesn’t stick.
Common Mistakes to Avoid with This Dish:
- Adding the mozzarella too early if the pasta is hot: It softens into a greasy smear. Cool the pasta first.
- Using too much pesto at once: Start with 3/4 cup, then add more after tasting.
3. BBQ Pulled Chicken Sliders with Crunchy Slaw
These are messy in the exact way picnic food should be messy. Soft buns, sticky barbecue sauce, and slaw that stays crisp enough to cut through all that sweetness. If you want something people can eat with one hand while balancing a paper plate in the other, this is a strong move.
Why It Works:
Pulled chicken reheats better than most picnic meats because the sauce keeps it moist. The slaw adds crunch, and the vinegar in it keeps the sliders from tasting flat. Small buns mean better portion control, which sounds dull until you’re the person making the sandwiches and trying not to run out halfway through.
Key Ingredients:
- 2 lb boneless chicken breasts or thighs
- 1 1/2 cups barbecue sauce
- 1 small yellow onion, sliced
- 1 tbsp apple cider vinegar
- 3 cups shredded cabbage
- 1 cup shredded carrots
- 1/4 cup mayonnaise
- 12 slider buns
- 1/2 tsp kosher salt
Quick Steps:
- Simmer the chicken with the onion and 1 cup water in a covered skillet over medium heat until it shreds easily, about 20 minutes.
- Shred the chicken, stir in barbecue sauce, and simmer 5 minutes until glossy.
- Mix cabbage, carrots, mayo, vinegar, and salt for the slaw.
- Spoon chicken into buns, top with slaw, and pack the extra slaw separately so the buns don’t soften.
Equipment for This Recipe:
- Large skillet with lid
- Two forks
- Mixing bowl
How to Serve This Dish:
Serve the sliders warm or room temperature with extra sauce on the side. I like them with pickle chips and a sharp, vinegary side salad. Put the slaw on right before eating if you want the crunch to stay loud.
Pro Tips for This Recipe:
- Use thighs if you want richer meat; breasts work, but they need the sauce to stay interesting.
- Toast the buns lightly if you’re serving at home before the picnic.
- Pack the slaw in a separate container and spoon it on at the last minute.
Variations on This Dish:
- Carolina Sliders: Swap in a tangier vinegar-forward barbecue sauce and add extra slaw.
- Cheddar Melt Version: Add a thin slice of sharp cheddar to each bun while the chicken is still warm.
Common Mistakes to Avoid with This Dish:
- Over-saucing the chicken: It turns the filling sloppy and slides out of the bun. Coat it, don’t drown it.
- Packing everything hot in one container: The steam softens the bread fast. Separate the components.
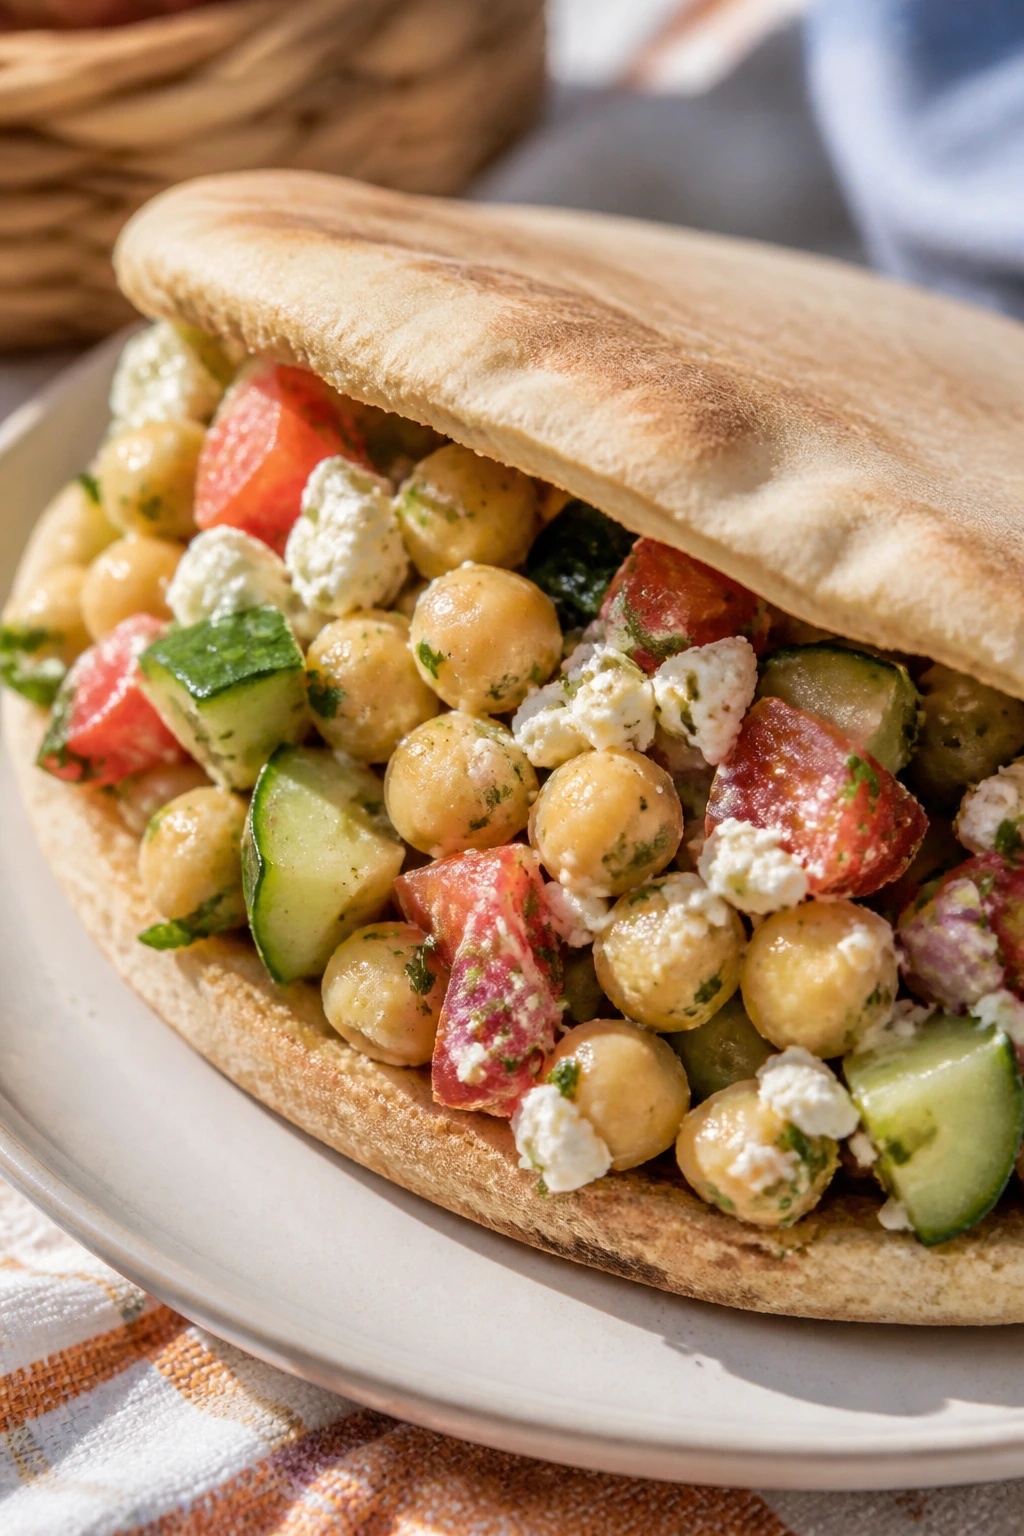
4. Mediterranean Chickpea Salad Pitas
Cold, bright, and built on pantry staples, these pita pockets taste like they were made for a blanket and a paper napkin. The chickpeas stay pleasantly firm, the cucumber brings crunch, and feta gives you little salty hits that keep each bite from getting sleepy.
Why It Works:
Chickpeas hold their shape far better than softer beans, so the filling stays chunky instead of turning into hummus by accident. Lemon and olive oil create a dressing that doesn’t separate badly after a few hours, and pita pockets make the whole thing portable without a knife.
Key Ingredients:
- 2 cans chickpeas, drained and rinsed
- 1 cucumber, diced
- 1 cup cherry tomatoes, quartered
- 1/2 red onion, finely chopped
- 1/2 cup crumbled feta
- 3 tbsp olive oil
- 2 tbsp lemon juice
- 1 tbsp chopped dill
- 4 pita rounds
Quick Steps:
- Pat the chickpeas dry so the dressing sticks instead of sliding off.
- Toss chickpeas, cucumber, tomatoes, onion, feta, olive oil, lemon juice, dill, salt, and pepper in a bowl.
- Chill for 15 minutes so the lemon can soften the onion bite.
- Spoon into pitas just before packing or serving.
Equipment for This Recipe:
- Mixing bowl
- Chef’s knife
- Measuring spoons
How to Serve This Dish:
Cut the pitas in half and pack the filling separately if you want the bread to stay firm. Add a few olives or a handful of arugula on the side. They’re sturdy enough for dinner and light enough that you won’t feel weighed down afterward.
Pro Tips for This Recipe:
- Finely chop the onion; large chunks can bulldoze the rest of the filling.
- If the chickpeas are firm from the can, mash about 1/4 cup of them to help bind the salad.
- A little sumac on top gives it a lemony edge without extra liquid.
Variations on This Dish:
- White Bean Pita Filling: Swap chickpeas for cannellini beans if you want a softer, creamier texture.
- Tahini Crunch Pitas: Stir 2 tbsp tahini into the dressing for a nuttier finish.
Common Mistakes to Avoid with This Dish:
- Overfilling the pitas: They split fast. Spoon lightly and pack the rest alongside.
- Skipping the drying step: Wet chickpeas water down the dressing and make the salad feel slippery.
5. Grilled Peach, Prosciutto, and Burrata Flatbread
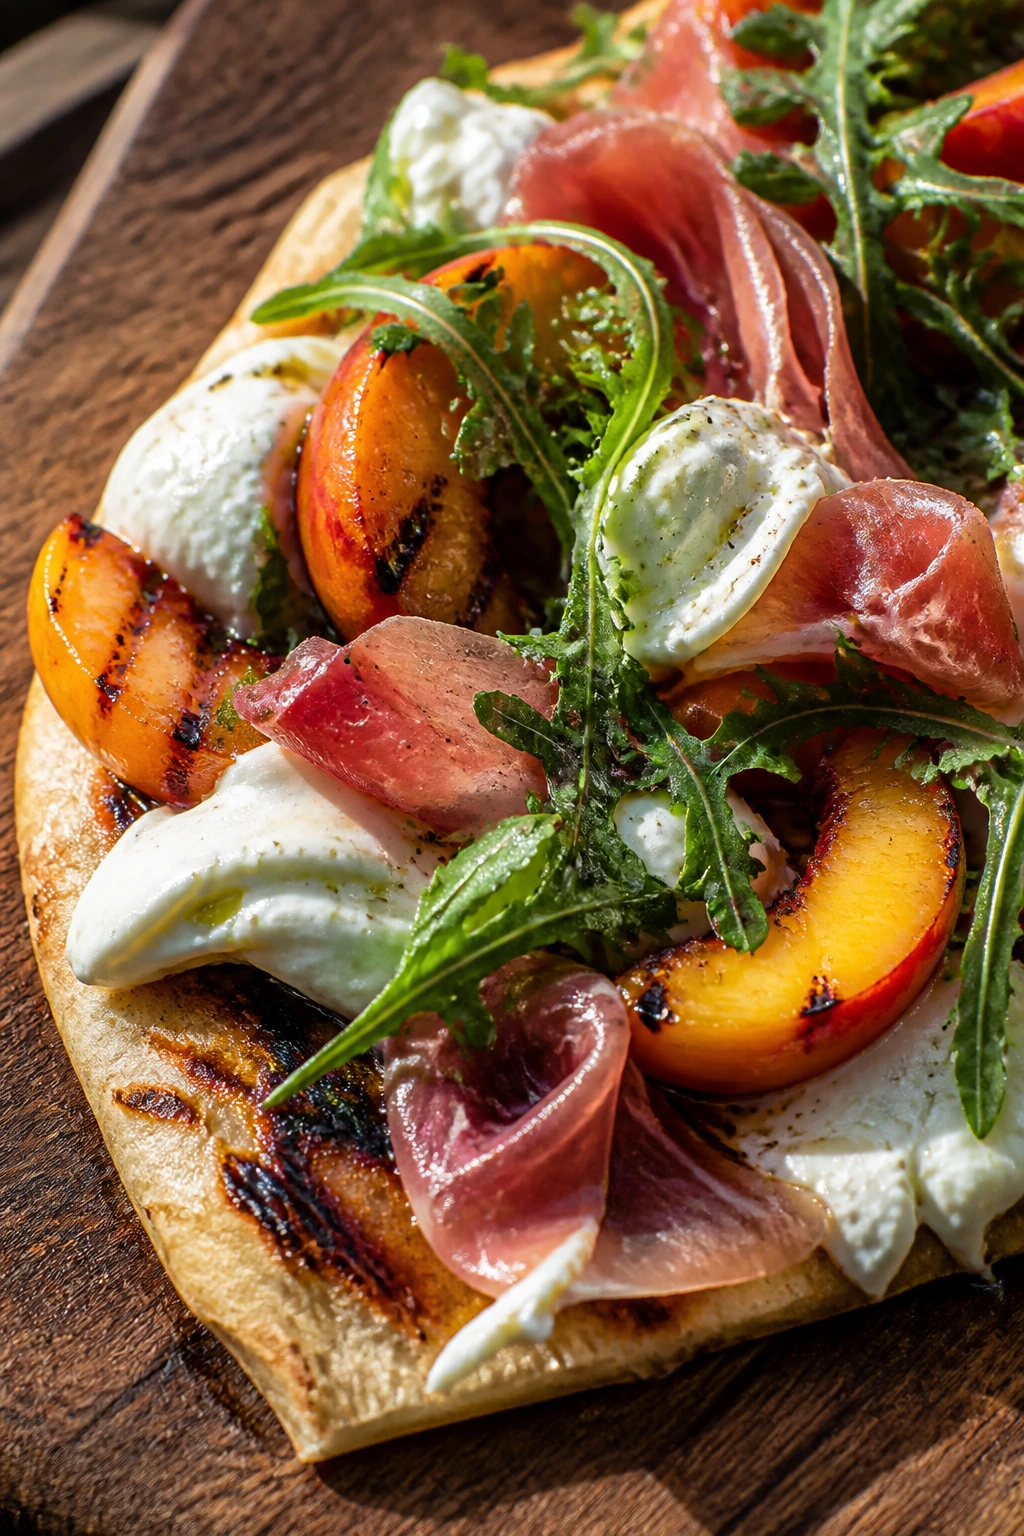
Sweet peaches and salty prosciutto are one of those combinations that feels a little too obvious until you eat it and understand why everyone keeps making it. Burrata turns the whole thing creamy in the middle, and the grilled flatbread gives you enough structure to carry the toppings without flopping.
Why It Works:
The grill adds smoke to the flatbread and pulls extra sweetness out of the peaches. Burrata melts into the warm crust, prosciutto stays silky, and arugula cuts through the richness with a peppery finish. This is the kind of picnic food that looks fancy but comes together fast.
Key Ingredients:
- 2 naan or flatbreads
- 2 peaches, sliced
- 1 tbsp olive oil
- 4 oz prosciutto
- 8 oz burrata
- 2 cups arugula
- 1 tbsp balsamic glaze
- 1/4 tsp flaky salt
Quick Steps:
- Brush peaches and flatbreads with olive oil.
- Grill the flatbreads for 1 to 2 minutes per side and the peaches for 2 to 3 minutes per side until marked.
- Spread burrata over the warm flatbreads, then layer on peaches and prosciutto.
- Finish with arugula, balsamic glaze, and flaky salt.
Equipment for This Recipe:
- Grill or grill pan
- Tongs
- Serving board
How to Serve This Dish:
Slice into narrow strips for easier picnic handling. It’s best warm, but not hot enough to melt the burrata into soup. Serve it first, before people get distracted by chips.
Pro Tips for This Recipe:
- Use peaches that yield slightly to pressure; rock-hard fruit won’t caramelize well.
- Tear the burrata instead of spreading it aggressively so the center stays luscious.
- A tiny pinch of salt on the peaches makes the sweetness taste louder.
Variations on This Dish:
- Fig-and-Prosciutto Version: Swap peaches for ripe figs and skip the grill for a softer, jammy topping.
- Vegetarian Burrata Flatbread: Leave off the prosciutto and add toasted pistachios for crunch.
Common Mistakes to Avoid with This Dish:
- Overgrilling the flatbread: It dries out fast. You want light char, not cracker texture.
- Using too much balsamic glaze: A thin drizzle is enough; the whole point is balance.
6. Cold Sesame Noodle Salad with Cucumber and Edamame
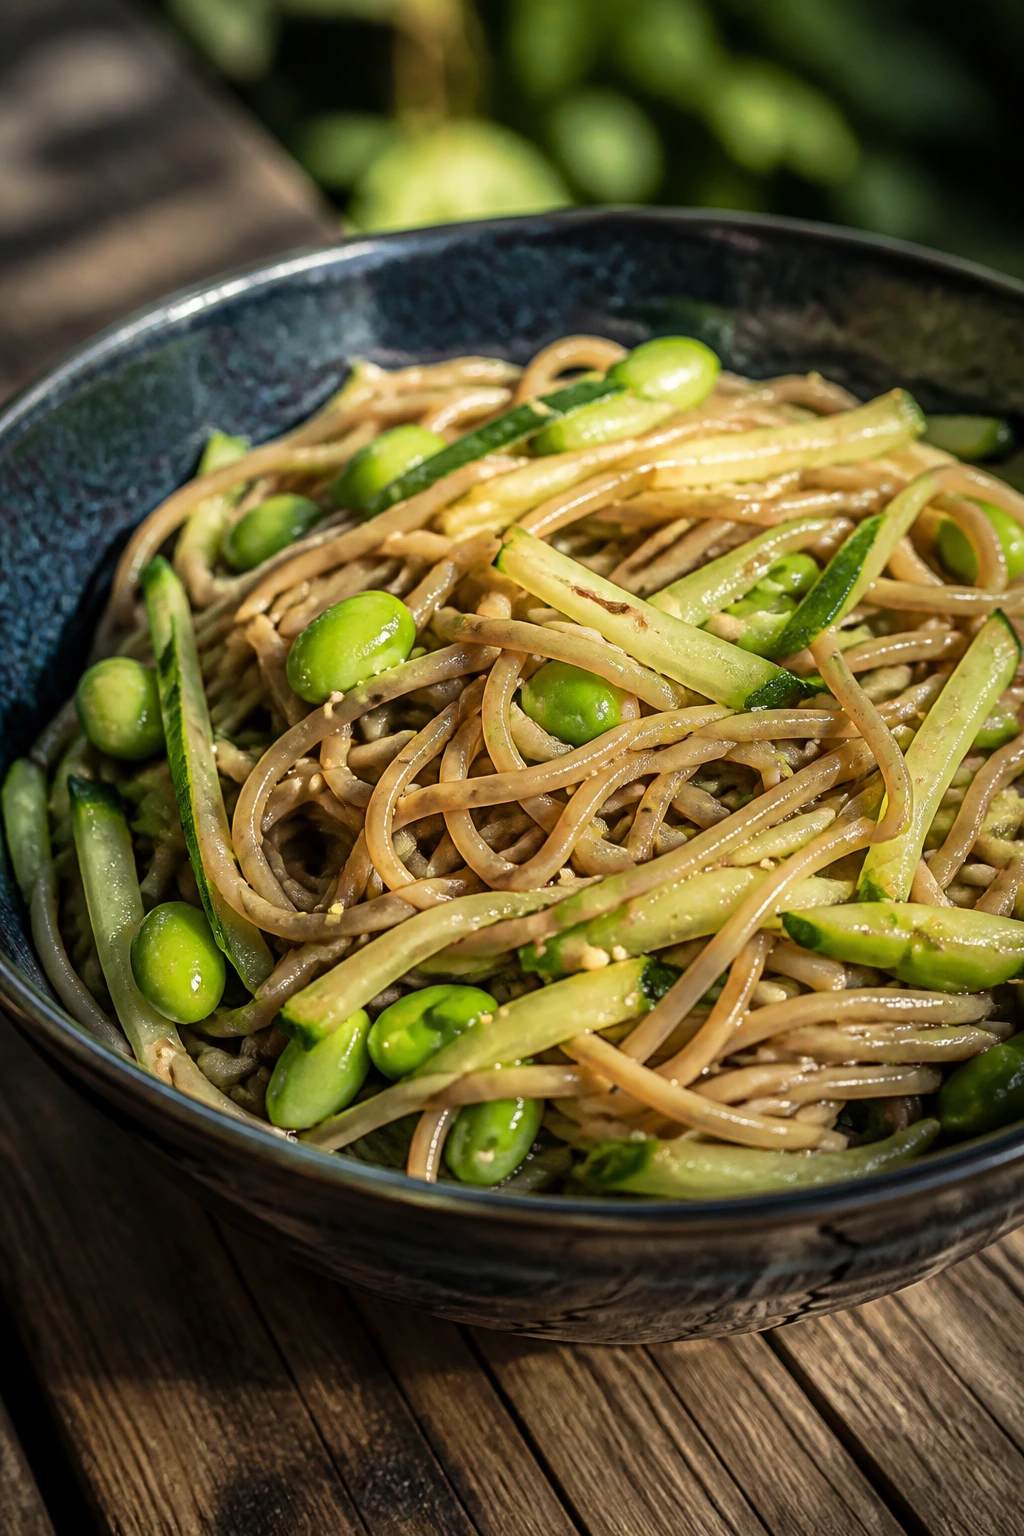
Cold sesame noodles have an almost unfair amount of picnic value. They’re slippery, savory, a little nutty, and they taste even better once the sauce settles into the noodles. The cucumber and edamame keep the bowl fresh instead of heavy.
Why It Works:
Soba or spaghetti both handle the sesame dressing without falling apart. Peanut butter or tahini gives the sauce body, soy sauce brings salt, and rice vinegar keeps it from tasting thick and dull. The vegetables add enough crunch to make the texture feel awake after chilling.
Key Ingredients:
- 12 oz soba noodles or spaghetti
- 1 cup shelled edamame
- 1 cucumber, julienned
- 3 tbsp sesame oil
- 3 tbsp peanut butter
- 2 tbsp soy sauce
- 2 tbsp rice vinegar
- 1 tbsp honey
- 2 scallions, sliced
Quick Steps:
- Cook the noodles until just tender, then rinse under cold water until fully cool.
- Whisk sesame oil, peanut butter, soy sauce, rice vinegar, honey, and 2 tbsp warm water into a smooth sauce.
- Toss noodles, edamame, cucumber, and scallions with the dressing.
- Chill for 20 minutes before packing.
Equipment for This Recipe:
- Pot
- Colander
- Whisk
- Large bowl
How to Serve This Dish:
Serve it in shallow containers so the cucumber stays visible and the sauce coats the top instead of pooling at the bottom. A few sesame seeds on top make it look finished, but they also add a little bite. This works as a main or as the cold side next to grilled meat.
Pro Tips for This Recipe:
- Toss the noodles with a tiny bit of sesame oil after rinsing if they seem sticky.
- Warm water helps the sauce emulsify; cold water tends to make peanut butter seize up.
- Add cucumbers at the end if you want maximum crunch.
Variations on This Dish:
- Spicy Chili Crisp Noodles: Stir 1 to 2 tbsp chili crisp into the dressing.
- Peanut-Free Version: Use tahini instead of peanut butter and add an extra teaspoon of honey.
Common Mistakes to Avoid with This Dish:
- Serving it straight from the fridge without loosening it: Cold noodles tighten up. Let the bowl sit 10 minutes.
- Under-seasoning the sauce: Sesame oil smells strong, but soy and vinegar still need to be bold enough to stand up to the noodles.
7. Steak and Chimichurri Skewers
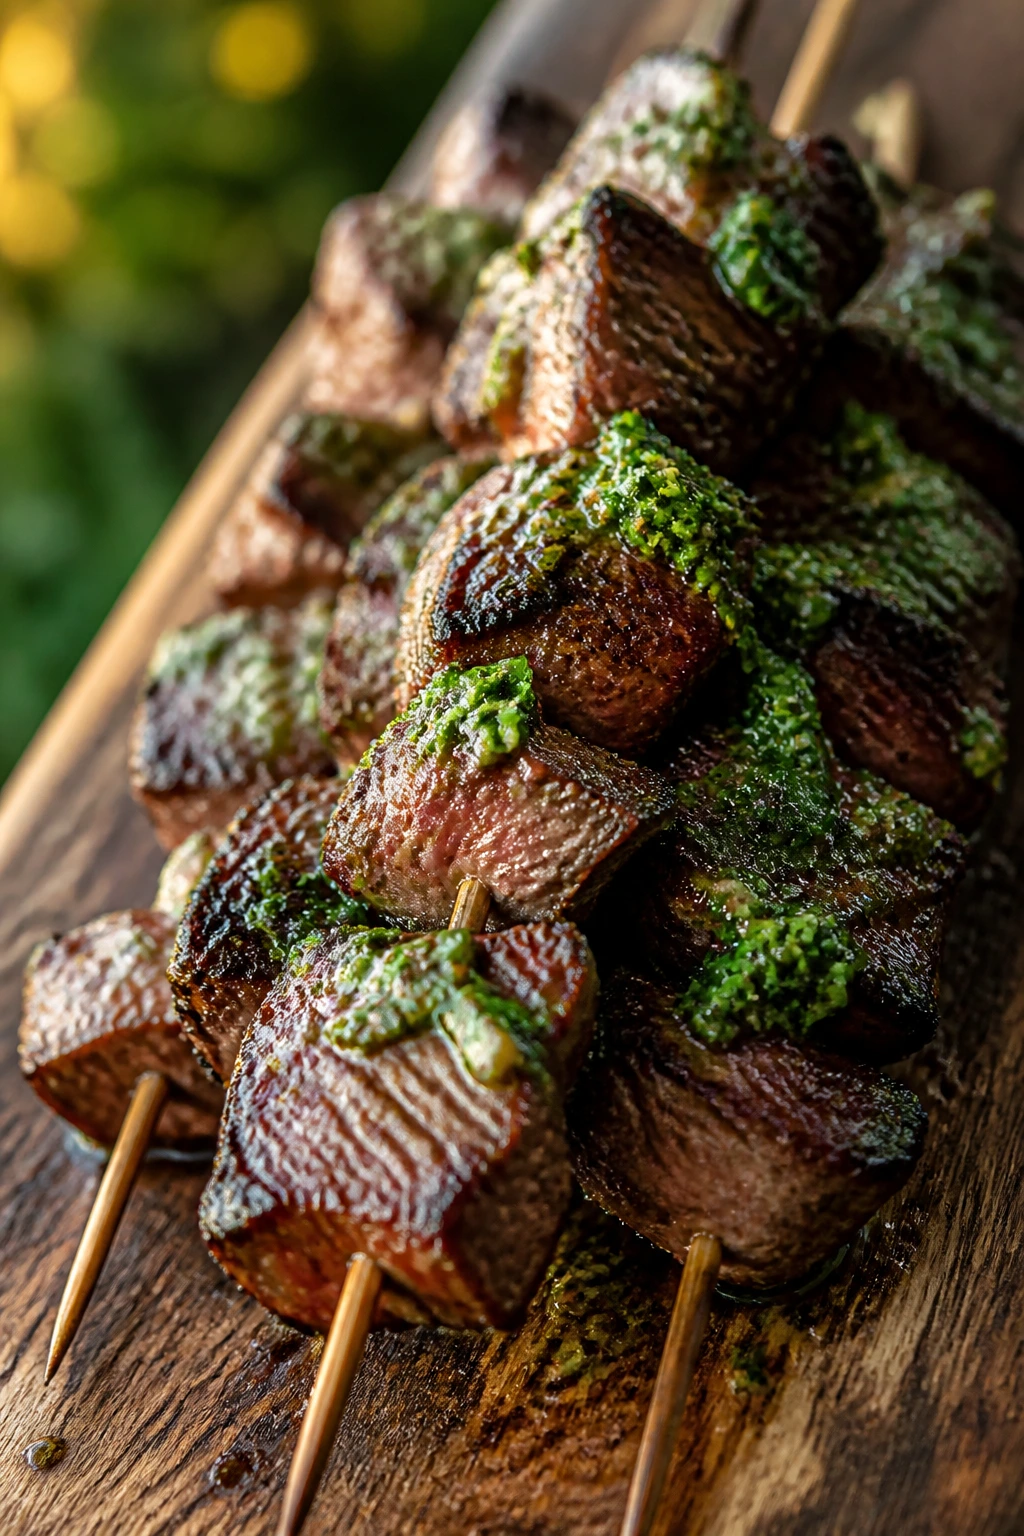
Charred steak on a stick is hard to beat when the evening air cools off and the grill is still warm. The chimichurri brings the acid and herbs that steak needs, and the skewers make serving easy enough that nobody has to hover over a cutting board.
Why It Works:
Skewers cook fast and evenly when the pieces are cut to a steady size, and flank steak takes a nice sear without getting fancy. Chimichurri cuts through the richness with parsley, garlic, vinegar, and olive oil. Served at room temperature, it still has enough punch to feel fresh.
Key Ingredients:
- 1 1/2 lb flank steak, cut into 1 1/2-inch cubes
- 2 tbsp olive oil
- 1 tsp kosher salt
- 1/2 tsp black pepper
- 1 cup parsley, chopped
- 2 garlic cloves, minced
- 2 tbsp red wine vinegar
- 1/3 cup olive oil
- 8 wooden or metal skewers
Quick Steps:
- Toss steak with olive oil, salt, and pepper, then thread onto skewers.
- Blend or stir parsley, garlic, vinegar, olive oil, and a pinch of salt for the chimichurri.
- Grill the skewers over medium-high heat for 2 to 3 minutes per side for medium-rare, or until they reach your preferred doneness.
- Rest 5 minutes and spoon chimichurri over the top right before serving.
Equipment for This Recipe:
- Grill
- Skewers
- Cutting board
- Knife
How to Serve This Dish:
Slide the meat off the skewers onto a platter if you want easier picnic eating. Add grilled onions, a cold potato salad, or warm pita on the side. Chimichurri is best served generously, not politely.
Pro Tips for This Recipe:
- Cut the steak against the grain after grilling if you skip the skewers.
- Soak wooden skewers for 30 minutes so they don’t scorch.
- Make the chimichurri earlier in the day; it tastes sharper after sitting.
Variations on This Dish:
- Skirt Steak Shortcut: Use skirt steak strips folded onto skewers for faster grilling.
- Garlic-Lime Version: Replace the vinegar with lime juice for a brighter sauce.
Common Mistakes to Avoid with This Dish:
- Cutting the steak too small: Tiny pieces overcook before the grill marks develop.
- Saucing too early: Chimichurri on a hot skewer can lose its fresh herb edge; add it at the end.
8. Caprese Stuffed Turkey Burgers
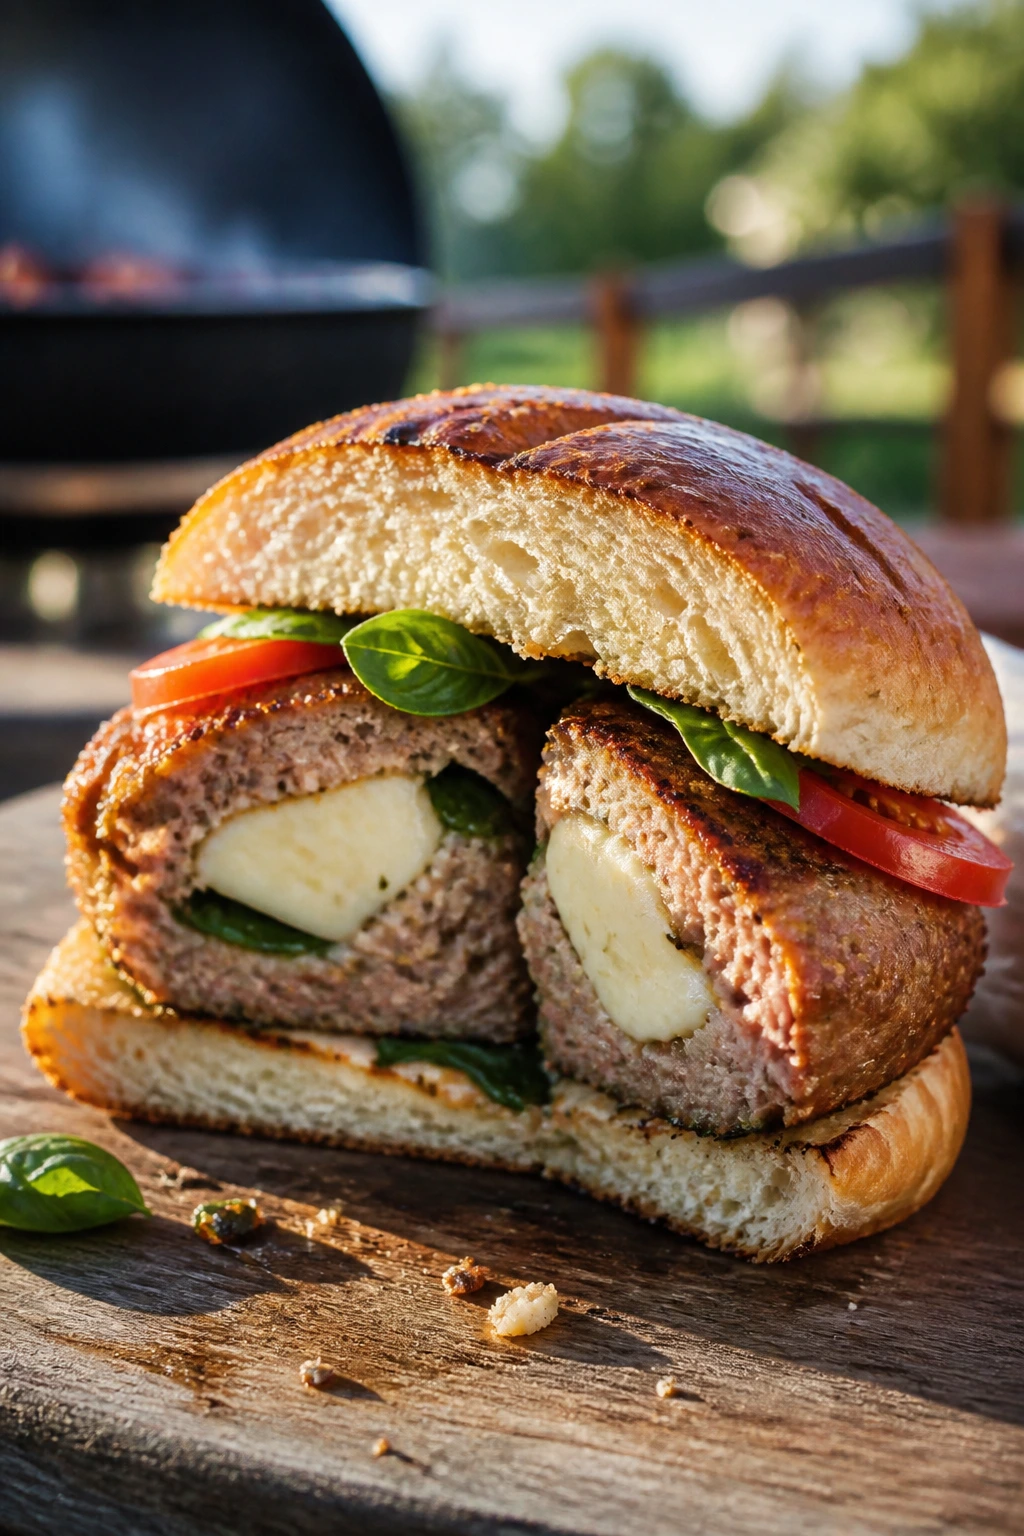
These burgers lean picnic-friendly without turning bland. Basil, tomato, and mozzarella keep the turkey from tasting dry, and the whole thing holds together better than you’d expect if you chill the patties for a few minutes before cooking.
Why It Works:
Turkey needs help from fat and moisture, and mozzarella tucked into the center solves both. Caprese flavors keep the burger tied to late summer, where tomatoes are worth eating plain and basil smells like the garden edge. The patties cook quickly on a grill or skillet, which makes timing less fussy.
Key Ingredients:
- 1 1/2 lb ground turkey
- 1/2 cup breadcrumbs
- 1 egg
- 1 tsp kosher salt
- 1/2 tsp black pepper
- 4 oz mozzarella, cut into small cubes
- 1 cup sliced tomato
- 1/4 cup basil leaves
- 4 burger buns
Quick Steps:
- Mix turkey, breadcrumbs, egg, salt, and pepper just until combined.
- Shape into 4 patties, press 1 or 2 mozzarella cubes into the center, and seal the meat around them.
- Grill or skillet-cook over medium heat for 5 to 6 minutes per side, until the center reaches 165°F.
- Rest briefly, then top with tomato and basil before packing into buns.
Equipment for This Recipe:
- Grill or skillet
- Spatula
- Mixing bowl
How to Serve This Dish:
Serve with arugula or basil mayo if you want a little more bite. They’re best warm, but not piping hot, so the cheese settles instead of blasting out everywhere on the first cut. Keep extra napkins nearby.
Pro Tips for This Recipe:
- Chill the formed patties for 15 minutes so they keep their shape.
- Press a shallow thumbprint in the center before cooking to stop puffing.
- Add tomato slices after cooking, not during, or the buns get soggy.
Variations on This Dish:
- Basil-Pesto Burgers: Mix 2 tbsp pesto into the turkey for more herb flavor.
- No-Melt Cheese Version: Use provolone if you want a slightly firmer, less oozy center.
Common Mistakes to Avoid with This Dish:
- Overmixing the turkey: It turns springy and dry. Stop as soon as the ingredients come together.
- Under-seasoning the meat: Turkey needs salt or it tastes oddly flat beside the tomato.
9. Corn, Zucchini, and Feta Fritters with Yogurt Dip
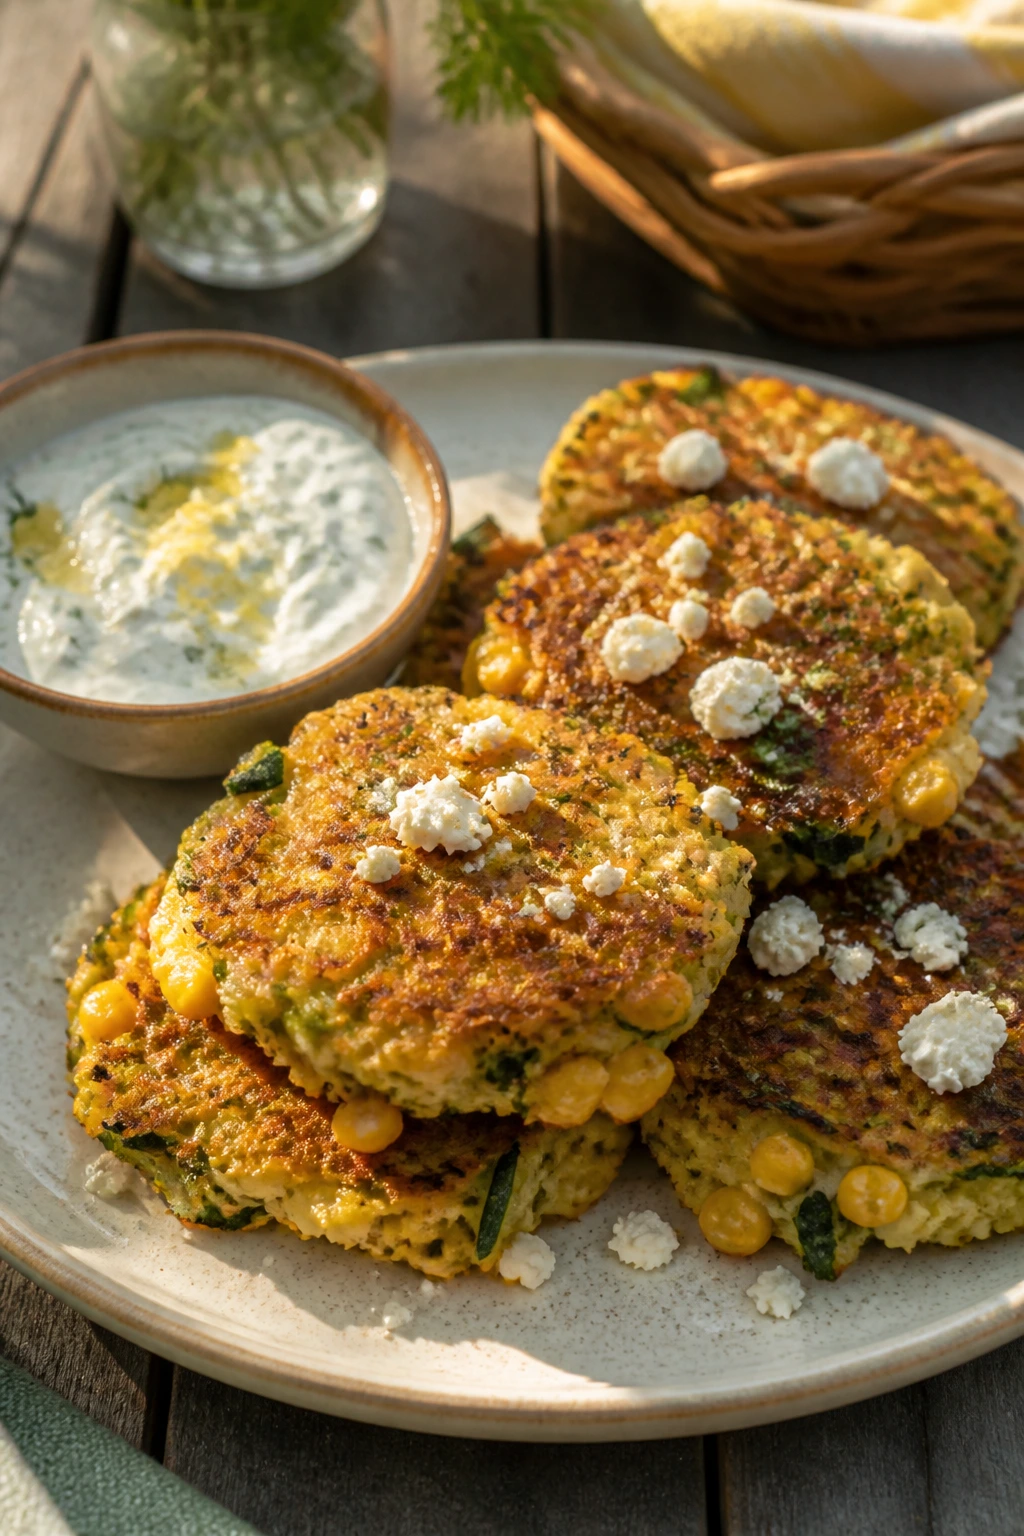
These fritters smell like sweet corn and browned edges, which is enough to make people wander over before they even know what’s in the pan. Zucchini keeps them tender, feta brings salt, and the yogurt dip cools the whole plate down.
Why It Works:
Corn and zucchini are both high in moisture, so the batter needs egg and flour to hold together without becoming heavy. Pan-frying gives the fritters crisp edges, and the yogurt dip adds the cold, tangy element that picnic food sometimes forgets. They’re best warm, but they do not fall apart when cooled.
Key Ingredients:
- 2 cups grated zucchini, squeezed dry
- 1 1/2 cups corn kernels
- 1/2 cup crumbled feta
- 2 eggs
- 1/2 cup flour
- 2 scallions, sliced
- 2 tbsp olive oil
- 1 cup Greek yogurt
- 1 tbsp lemon juice
Quick Steps:
- Squeeze the zucchini hard in a towel until most of the liquid is gone.
- Mix zucchini, corn, feta, eggs, flour, scallions, salt, and pepper into a thick batter.
- Pan-fry spoonfuls in olive oil over medium heat for 2 to 3 minutes per side until deep golden.
- Stir yogurt and lemon juice together for dipping.
Equipment for This Recipe:
- Box grater
- Skillet
- Spatula
- Clean kitchen towel
How to Serve This Dish:
Stack the fritters on parchment so they don’t steam themselves soft. The yogurt dip should go in a separate container, not drizzled on top until serving. A simple tomato salad beside them is enough to turn this into dinner.
Pro Tips for This Recipe:
- Squeeze the zucchini until your hands complain; watery batter makes pale fritters.
- Don’t crowd the skillet or they’ll steam instead of brown.
- A pinch of smoked paprika gives the batter more depth without changing the feel.
Variations on This Dish:
- Jalapeño Corn Fritters: Add 1 minced jalapeño for heat.
- Herb Garden Version: Fold in chopped dill and parsley for a greener flavor.
Common Mistakes to Avoid with This Dish:
- Making the batter too loose: It should hold shape on a spoon.
- Flipping too early: Wait for the edges to set and turn brown before turning them over.
10. Salmon Salad Lettuce Cups with Dill
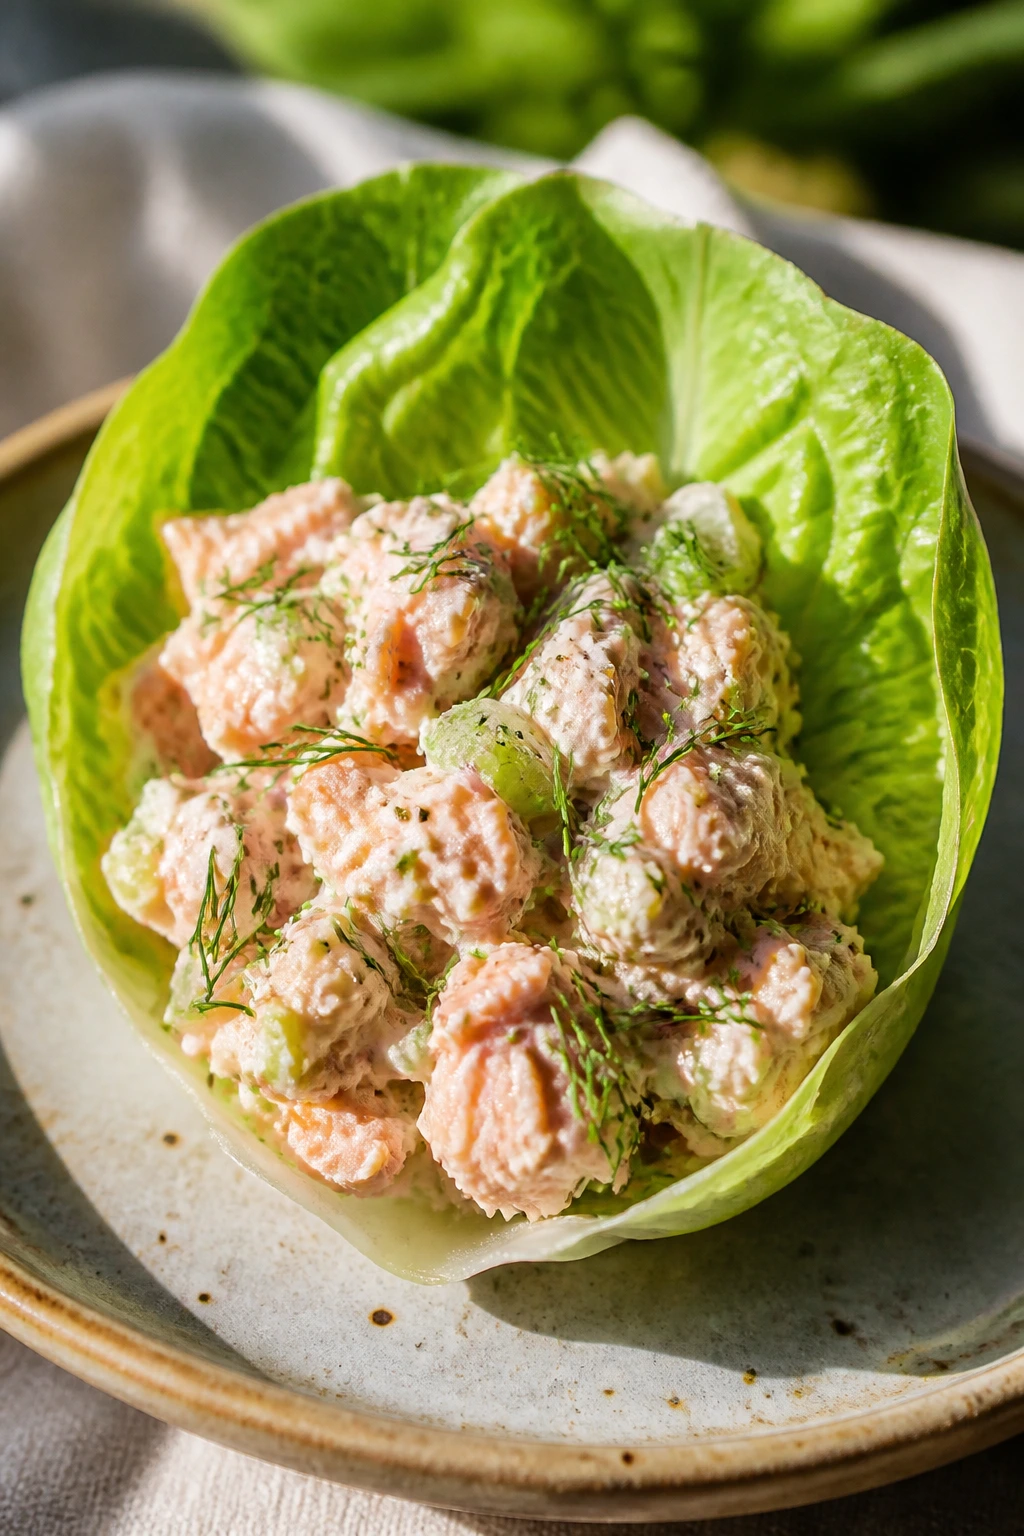
These are crisp, cool, and a little more polished than the average picnic sandwich, though they’re still easy to eat with one hand. The salmon is rich enough to satisfy, and the lettuce cup keeps things fresh instead of bready.
Why It Works:
Canned salmon or leftover cooked salmon both work because the dressing does most of the heavy lifting. Dill and lemon keep the flavor bright, celery adds crunch, and lettuce cups make the filling portable without getting soggy. This is one of those recipes that tastes better after a short chill.
Key Ingredients:
- 2 cans salmon, drained and flaked
- 1/3 cup mayonnaise
- 2 tbsp Greek yogurt
- 1 celery stalk, finely chopped
- 2 tbsp chopped dill
- 1 tbsp lemon juice
- 8 romaine leaves or butter lettuce leaves
- 1 tbsp capers, optional
Quick Steps:
- Mix salmon, mayo, yogurt, celery, dill, lemon juice, salt, pepper, and capers.
- Chill the mixture for 15 minutes so the flavors settle.
- Spoon into lettuce leaves right before serving or packing.
Equipment for This Recipe:
- Mixing bowl
- Fork
- Spoon
How to Serve This Dish:
Serve the cups on a tray with lemon wedges and sliced cucumbers. If you’re packing them for travel, keep the filling and leaves separate until the last minute. They’re light, but they’re not insubstantial.
Pro Tips for This Recipe:
- Flake the salmon with a fork so you don’t end up with big dense chunks.
- Butter lettuce is softer, romaine is sturdier; pick based on travel distance.
- A teaspoon of Dijon adds depth if the salad tastes too soft.
Variations on This Dish:
- Dijon Dill Salmon: Add 1 tsp Dijon mustard for a sharper finish.
- Tuna Salad Swap: Use canned tuna if salmon isn’t in the cupboard.
Common Mistakes to Avoid with This Dish:
- Overdressing the filling: It should hold together, not pool.
- Packing lettuce with the dressing too early: The cups wilt fast once they sit.
11. Rotisserie Chicken Picnic Wraps with Avocado
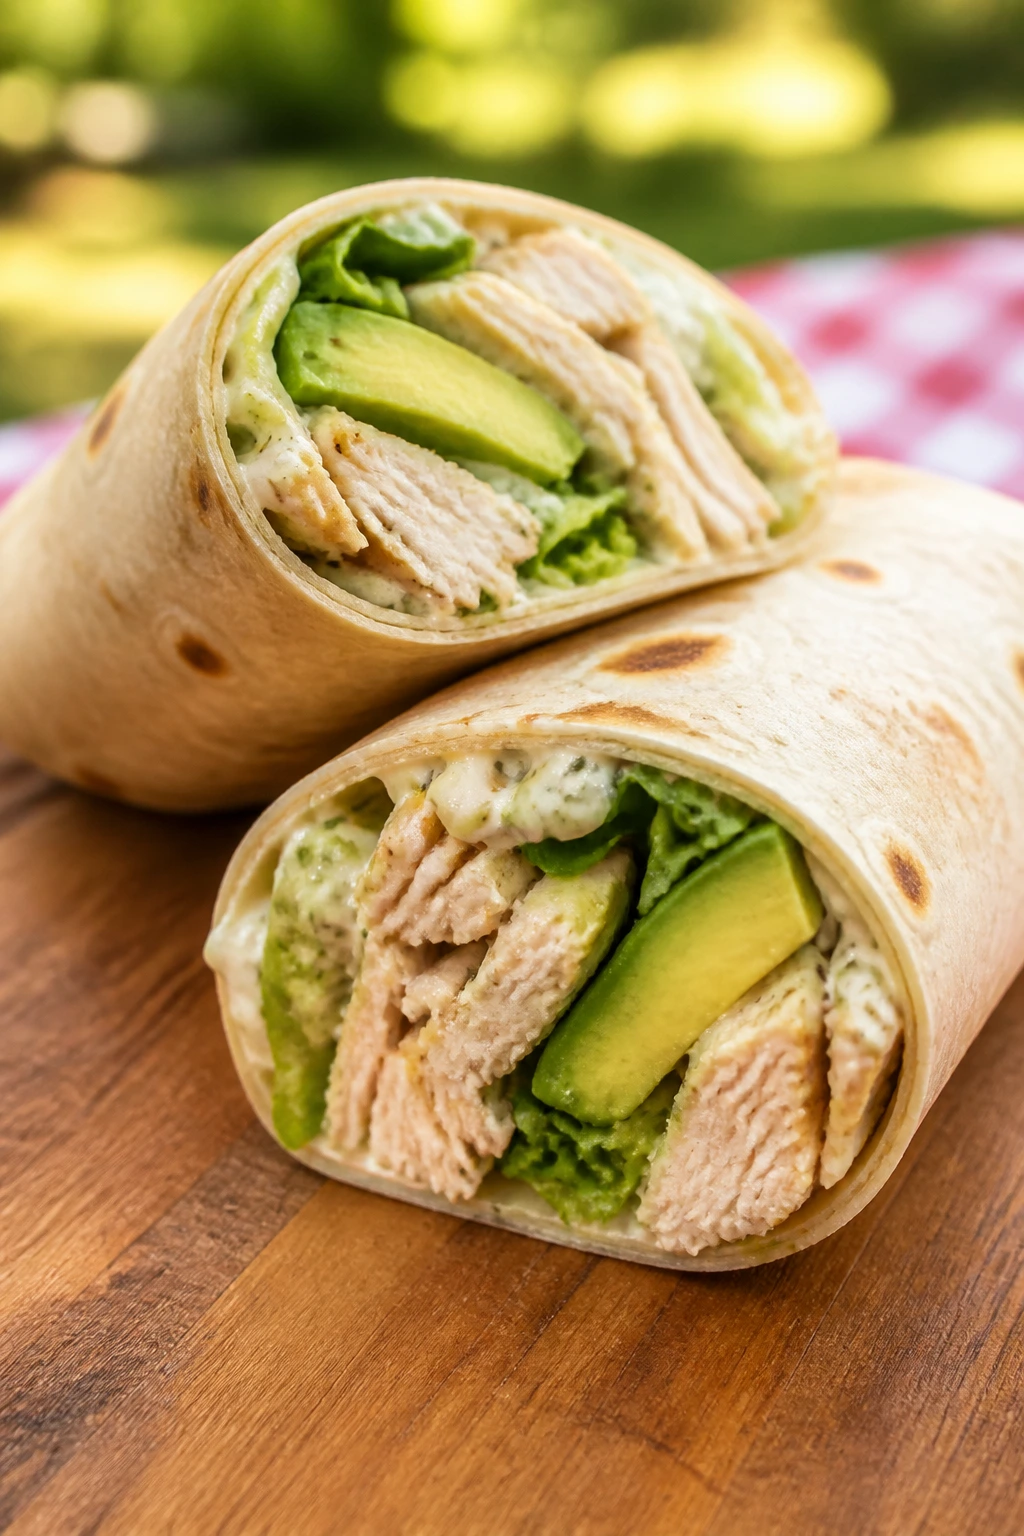
This is the kind of recipe that quietly saves the whole evening. Rotisserie chicken, ripe avocado, crisp lettuce, and a little sauce wrapped into a tight tortilla — no stove, no drama, no mystery.
Why It Works:
Store-bought chicken is already seasoned and cooked, which means the rest of the work is just texture and balance. Avocado adds creaminess, lettuce adds crunch, and a spread keeps the wrap from tasting dry after a few hours in the cooler. Wraps are one of the easiest picnic dinners to scale.
Key Ingredients:
- 3 cups shredded rotisserie chicken
- 2 large flour tortillas
- 1 avocado, sliced
- 1 cup shredded lettuce
- 1/2 cup diced tomato
- 1/4 cup ranch or chipotle mayo
- 1/4 cup shredded cheddar
- 1 tbsp lime juice
Quick Steps:
- Toss the chicken with lime juice, salt, and a spoonful of the mayo if you want it extra moist.
- Lay the tortillas flat and spread the remaining sauce down the center.
- Layer chicken, avocado, lettuce, tomato, and cheddar.
- Roll tightly, tuck the ends, and slice in half.
Equipment for This Recipe:
- Knife
- Cutting board
- Plastic wrap or parchment for packing
How to Serve This Dish:
Slice the wraps diagonally and pack them snugly so they don’t unroll. Serve with grapes, chips, or a jarred slaw on the side. The avocado makes them feel richer than they look.
Pro Tips for This Recipe:
- Warm the tortillas for 10 seconds so they bend without cracking.
- Keep the tomato in the middle, not against the tortilla edge, or things get wet.
- Wrap each one in parchment if the trip is long.
Variations on This Dish:
- Buffalo Chicken Wraps: Swap the sauce for buffalo sauce plus a little blue cheese.
- Southwest Wraps: Add black beans, corn, and a pinch of cumin.
Common Mistakes to Avoid with This Dish:
- Overstuffing the tortilla: It splits fast and makes a mess.
- Using overripe avocado: It turns mushy and slips out before the first bite.
12. Watermelon, Cucumber, and Halloumi Skewers
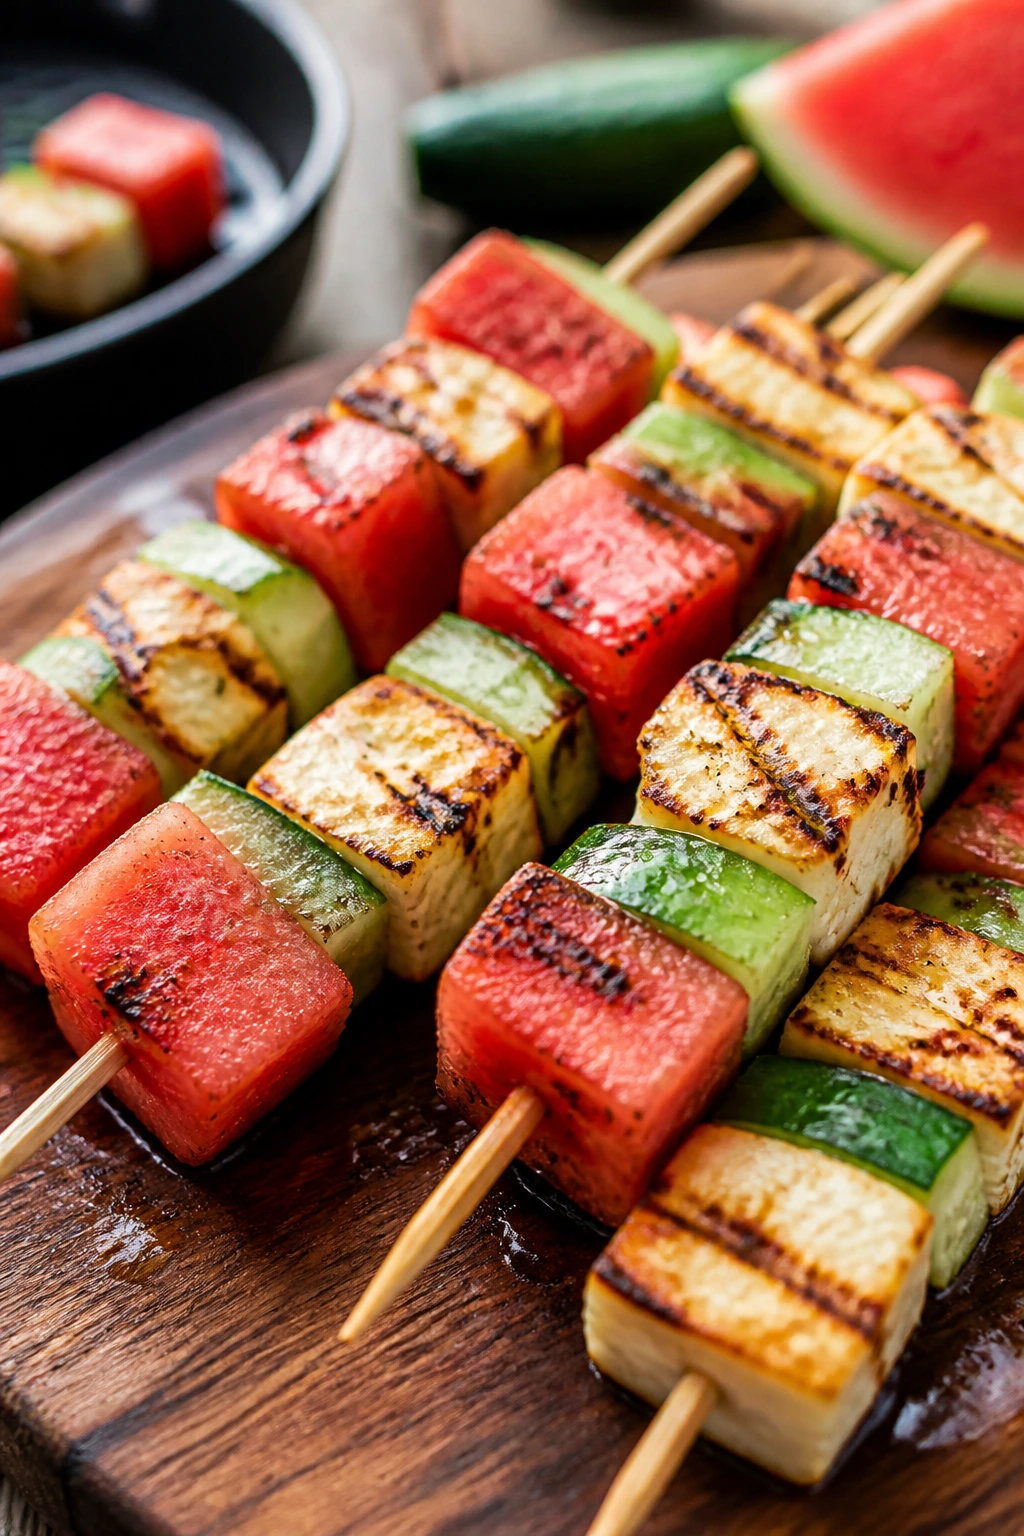
Sweet, salty, and cold enough to make the whole basket feel more refreshing. Halloumi grills into chewy little slabs that can hold their own beside watermelon, and the cucumber keeps everything crisp.
Why It Works:
Halloumi is one of the rare cheeses that gets better on a hot surface, so it’s ideal for picnics where the grill is already going. Watermelon gives juicy sweetness, cucumber adds snap, and mint plus lime keep the skewers from tasting like a snack platter. They work as a side, but they can carry a dinner plate, too.
Key Ingredients:
- 8 oz halloumi, cut into cubes
- 2 cups watermelon cubes
- 1 cucumber, cut into chunks
- 1 tbsp olive oil
- 1 tbsp lime juice
- 1 tbsp chopped mint
- Wooden skewers
- Pinch of flaky salt
Quick Steps:
- Thread halloumi, watermelon, and cucumber onto skewers.
- Brush the halloumi lightly with olive oil.
- Grill or sear the cheese for 1 to 2 minutes per side until browned.
- Finish with lime, mint, and flaky salt.
Equipment for This Recipe:
- Grill pan or skillet
- Skewers
- Small brush
How to Serve This Dish:
Arrange them on a chilled platter and serve immediately after grilling. They’re a sharp counterpoint to richer mains like burgers or skewers. If you want them as dinner, add grain salad or grilled bread.
Pro Tips for This Recipe:
- Pat the halloumi dry or it will stick and smear instead of browning.
- Use seedless watermelon if you want to keep the prep clean.
- Dress the skewers at the very end so the mint stays bright.
Variations on This Dish:
- Herbed Citrus Skewers: Add basil or dill if mint feels too cool and sweet.
- No-Grill Version: Skip the heat and serve everything chilled with extra lime.
Common Mistakes to Avoid with This Dish:
- Overcooking halloumi: It gets rubbery once it goes past browning.
- Assembling too far ahead: Watermelon starts leaking into the cucumbers.
13. Smashed Potato Salad with Pickles and Herbs
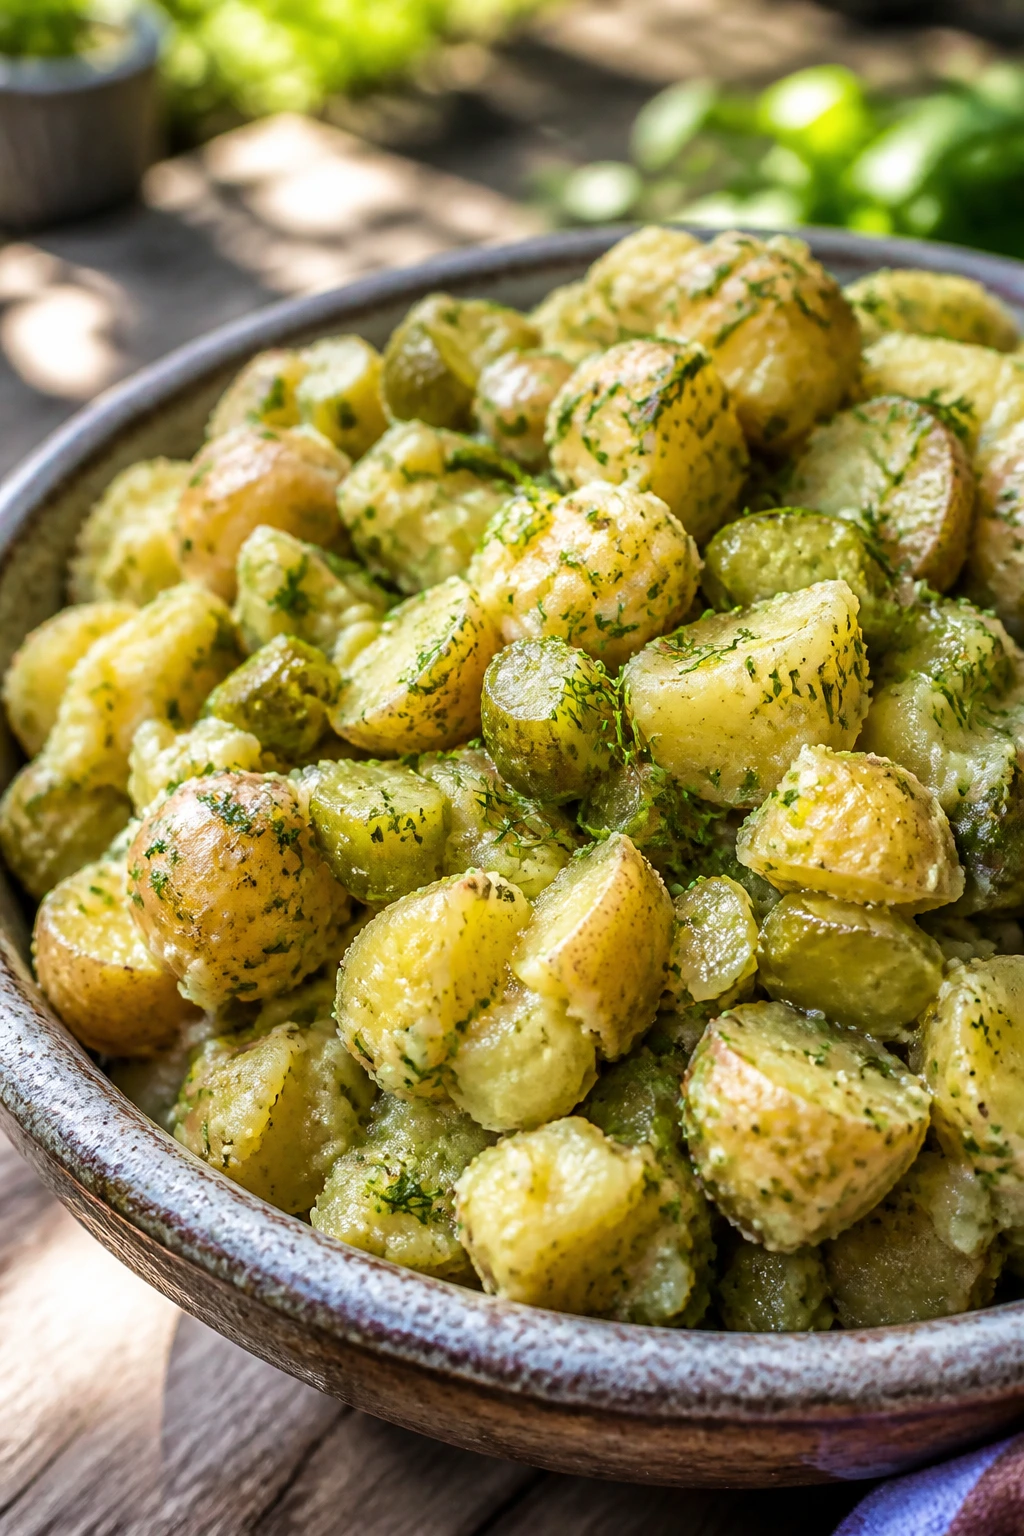
Forget the creamy, uniform potato salad that tastes like a deli tub. Smashed potatoes bring craggy edges, actual texture, and enough surface area for mustardy dressing to cling to. The pickles add bite, which is exactly what you want beside grilled food.
Why It Works:
Small potatoes hold their shape after boiling, then get better after a rough smash because the edges pick up more dressing. Pickle brine, mustard, and herbs keep the salad sharp instead of heavy. It’s a picnic staple with more personality than the usual version.
Key Ingredients:
- 2 lb baby potatoes
- 1/3 cup mayonnaise
- 2 tbsp Dijon mustard
- 2 tbsp pickle brine
- 1/2 cup chopped pickles
- 1/4 cup chopped parsley
- 2 tbsp chopped dill
- 1 tbsp olive oil
Quick Steps:
- Boil the potatoes in salted water until tender, about 15 minutes.
- Drain, let them steam-dry for 5 minutes, then smash each one lightly with the bottom of a glass.
- Toss with olive oil, mayo, mustard, pickle brine, pickles, parsley, dill, salt, and pepper.
- Chill or serve room temperature.
Equipment for This Recipe:
- Pot
- Colander
- Mixing bowl
- Glass or potato masher
How to Serve This Dish:
Spoon it into a wide bowl so the smashed edges stay visible. It pairs with anything grilled and makes a strong case for being the first side to vanish. Serve it slightly cool, not icy.
Pro Tips for This Recipe:
- Salt the boiling water well; potatoes take seasoning better while hot.
- Smash gently if you want chunkier pieces, harder if you want more crisp edges.
- Add herbs last so they stay green.
Variations on This Dish:
- Mustard-Dill Potato Salad: Increase the Dijon to 3 tbsp and reduce the mayo a little.
- Vinegar-Forward Version: Replace half the mayo with extra pickle brine and olive oil.
Common Mistakes to Avoid with This Dish:
- Boiling the potatoes until they fall apart: They’ll turn mushy when tossed.
- Dressing them while screaming hot: The mayo loosens too much and the salad gets greasy.
14. Black Bean and Sweet Corn Quesadillas
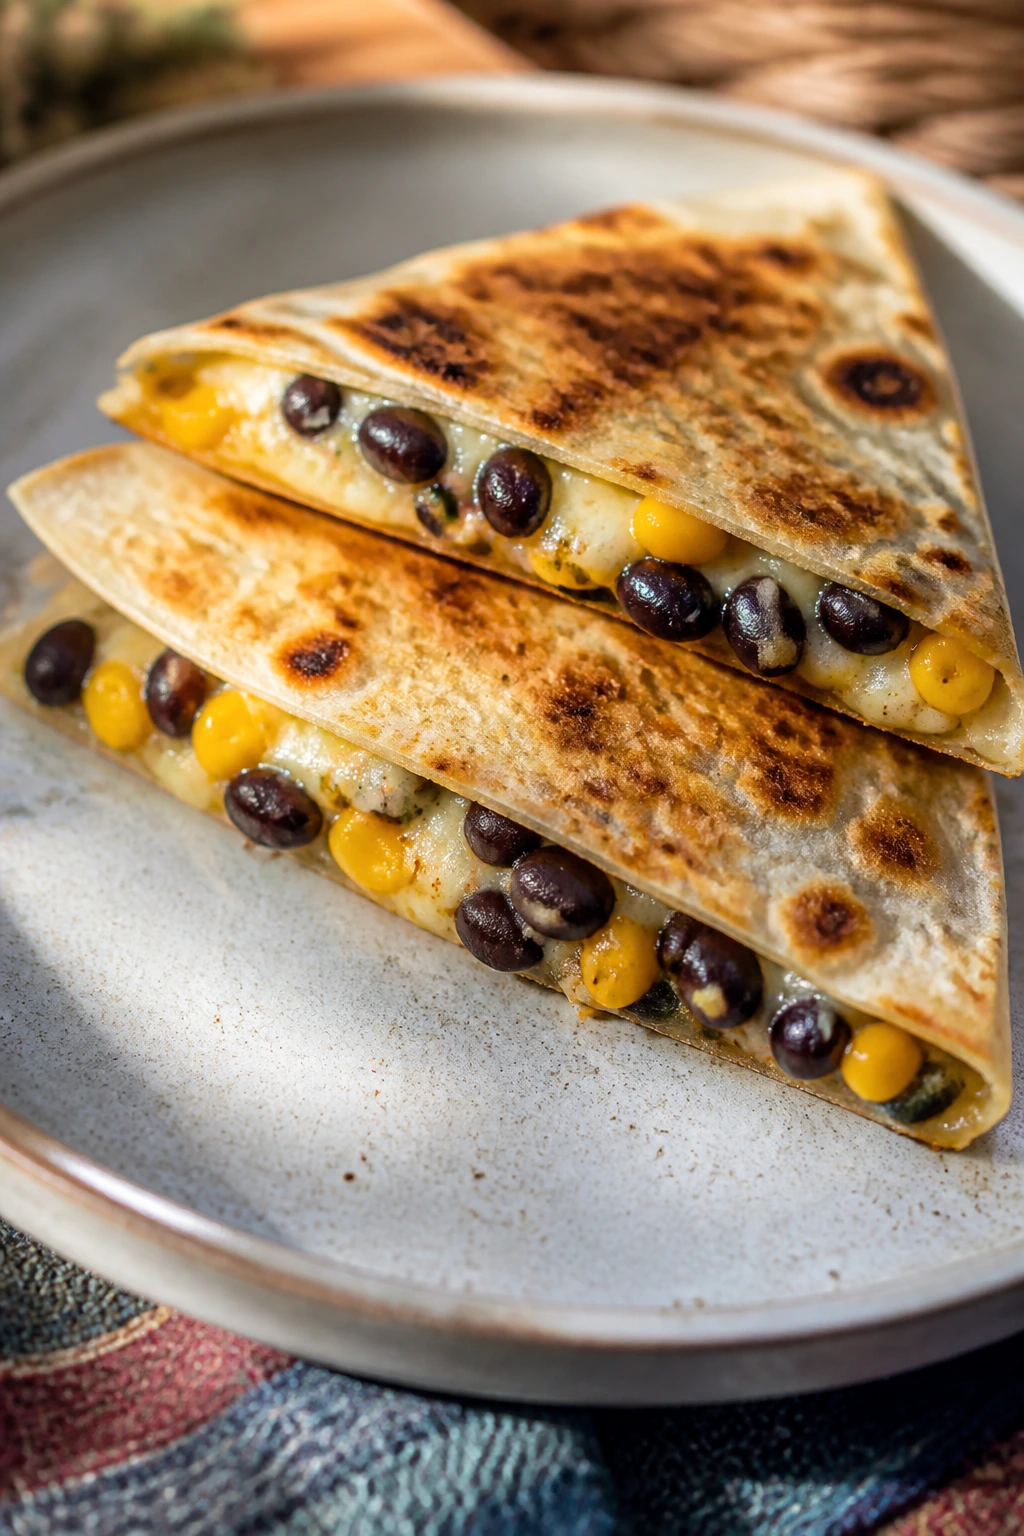
These are the kind of picnic dinner that can be packed as wedges and eaten hot, warm, or honestly even at room temperature if the day gets complicated. Black beans make them filling, corn brings sweetness, and melted cheese ties the whole thing together.
Why It Works:
The filling is already flavorful before it ever touches the pan, so the quesadillas don’t rely on sauce to feel complete. Tortillas crisp fast in a skillet, and the bean-corn mixture holds together without leaking out the sides. Cut them into wedges and they behave nicely in a lunchbox or cooler.
Key Ingredients:
- 4 large flour tortillas
- 1 can black beans, drained and rinsed
- 1 1/2 cups corn kernels
- 1 1/2 cups shredded Monterey Jack or cheddar
- 1/4 cup chopped cilantro
- 1/2 tsp cumin
- 1 tbsp butter or oil
- Salsa for serving
Quick Steps:
- Mix black beans, corn, cilantro, cumin, salt, and pepper in a bowl.
- Layer cheese and filling on half of each tortilla, then fold closed.
- Cook in a skillet over medium heat with butter or oil for 2 to 3 minutes per side until browned and the cheese melts.
- Rest 2 minutes before slicing into wedges.
Equipment for This Recipe:
- Skillet
- Spatula
- Knife or pizza cutter
How to Serve This Dish:
Serve with salsa or a small container of sour cream on the side. They work well as the main event with a chopped salad, or as a hearty side alongside grilled sausages. The wedges should look crisp at the edges, not flabby.
Pro Tips for This Recipe:
- Don’t overload the tortilla or the filling slips out during flipping.
- Use medium heat; high heat browns the outside before the cheese melts.
- A sprinkle of lime juice over the filling wakes it up.
Variations on This Dish:
- Chicken Quesadilla Version: Add 1 cup shredded cooked chicken for a bigger dinner.
- Roasted Poblano Upgrade: Mix in chopped roasted poblanos for a deeper flavor.
Common Mistakes to Avoid with This Dish:
- Cooking on heat that’s too high: Burnt tortillas and cold cheese are a bad combination.
- Skipping the rest: Slicing immediately makes the filling spill out.
15. Shrimp Salad Rolls with Lemon Aioli
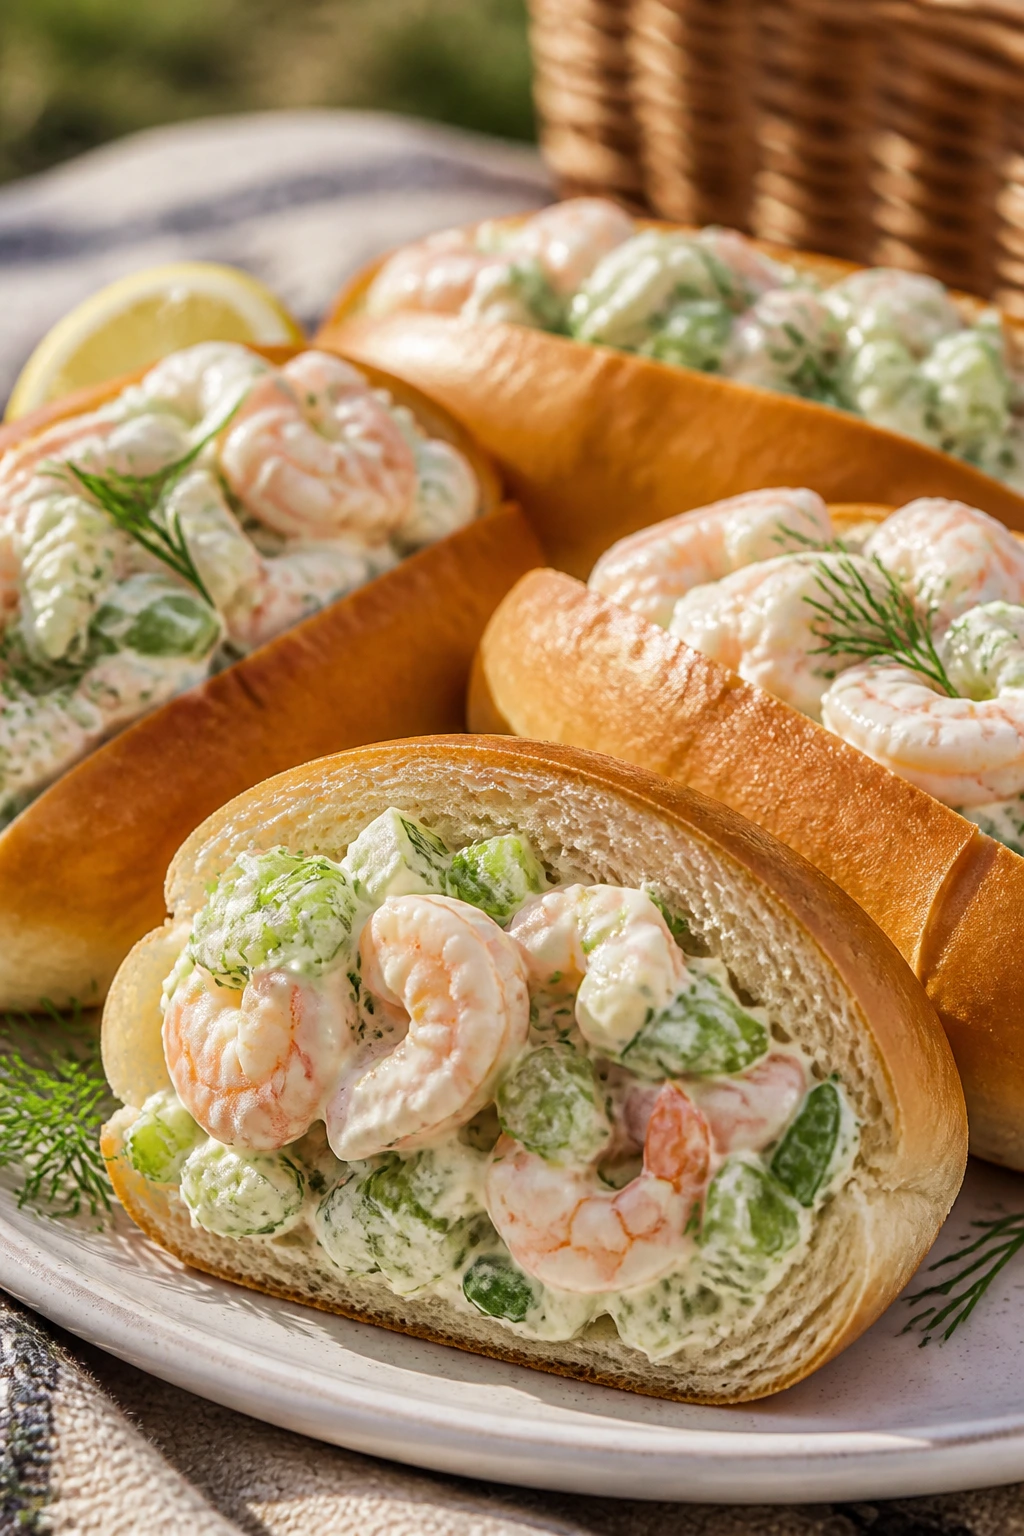
These feel slightly coastal, which is a nice trick to pull when you’re eating outside and want the meal to feel breezy. The shrimp stay sweet, the lemon aioli keeps the filling bright, and the soft roll gives you enough structure without fighting the seafood.
Why It Works:
Shrimp cook in minutes, so you can make these without heating the kitchen for long. The filling is cool and creamy, but not so heavy that it turns the roll into a brick. Celery or herbs give you crunch and make each bite feel sharper.
Key Ingredients:
- 1 lb shrimp, peeled and deveined
- 4 soft split-top rolls
- 1/3 cup mayonnaise
- 1 tbsp lemon juice
- 1 tsp lemon zest
- 1 celery stalk, finely chopped
- 2 tbsp chopped dill
- 2 tbsp butter
Quick Steps:
- Poach or sauté the shrimp until pink and just firm, about 2 to 3 minutes per side, then cool and chop.
- Stir mayo, lemon juice, zest, celery, dill, salt, and pepper into a quick salad.
- Split the rolls, butter the insides lightly, and toast them if you want extra structure.
- Fill and pack the rolls just before heading out.
Equipment for This Recipe:
- Skillet or saucepan
- Mixing bowl
- Knife
How to Serve This Dish:
Serve with potato chips or a cucumber salad for crunch. These should feel cool, creamy, and slightly briny — not overloaded with sauce. A few lettuce leaves under the filling help the rolls stay drier.
Pro Tips for This Recipe:
- Chill the shrimp before mixing so the mayo doesn’t get loose.
- Use small shrimp pieces so the rolls are easier to eat.
- Add a pinch of Old Bay if you want more depth.
Variations on This Dish:
- Spicy Remoulade Roll: Swap half the mayo for remoulade or add hot sauce.
- Herb-Lemon Version: Use parsley and chives instead of dill if you want a greener flavor.
Common Mistakes to Avoid with This Dish:
- Overcooking shrimp: They get rubbery fast. Pull them as soon as they turn pink.
- Drowning the rolls in dressing: Keep the salad thick so the bread stays intact.
16. Sausage, Pepper, and Onion Hoagies
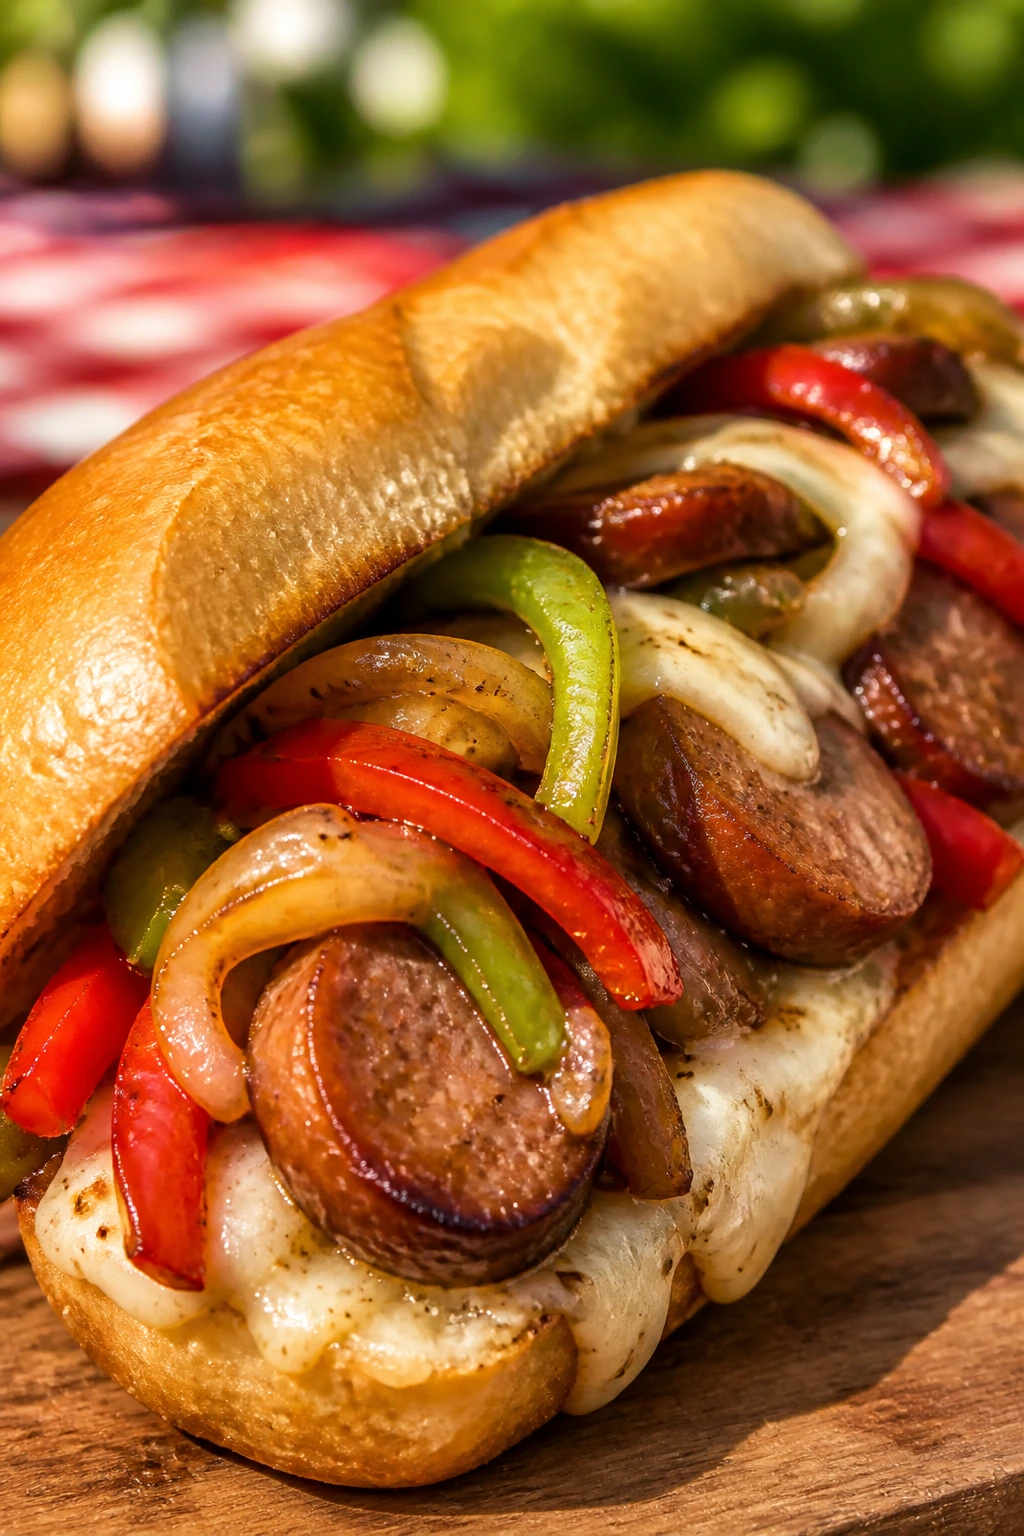
If you want something that tastes like a cookout without requiring a plate full of sides, this is it. The sausage brings fat and spice, the peppers soften into sweetness, and the onions go jammy at the edges. Wrapped in a hoagie roll, it holds together better than a burger in the wind.
Why It Works:
Sausage is built for high heat and does not mind being packed and reheated. Peppers and onions can be cooked ahead, then warmed or served room temperature. A sturdy roll keeps the filling from collapsing into the bag.
Key Ingredients:
- 4 Italian sausage links
- 2 bell peppers, sliced
- 1 large onion, sliced
- 2 tbsp olive oil
- 4 hoagie rolls
- 4 slices provolone
- 1 tbsp red wine vinegar
Quick Steps:
- Cook the sausage in a skillet or on the grill until browned and fully cooked, about 12 to 15 minutes.
- Sauté peppers and onions in olive oil over medium heat until soft and golden, about 10 minutes.
- Splash in red wine vinegar and cook 30 seconds.
- Pile sausage, peppers, onions, and provolone into rolls.
Equipment for This Recipe:
- Skillet or grill
- Tongs
- Sheet pan
How to Serve This Dish:
Serve with mustard, pickled peppers, or a handful of potato chips. These make a stronger main than most picnic sandwiches, so one hoagie is usually enough. They’re best when the peppers still have a little bite.
Pro Tips for This Recipe:
- Prick the sausages only if you want some of the fat to render out; otherwise leave them alone.
- Toast the rolls lightly so they hold the juices.
- Slice peppers into long strips, not tiny dice.
Variations on This Dish:
- Chicken Sausage Hoagies: Use chicken sausage if you want a lighter filling.
- Spicy Pepper Version: Add sliced cherry peppers for heat.
Common Mistakes to Avoid with This Dish:
- Under-cooking the onions: Raw onion overwhelms the sandwich. Cook them until soft and sweet.
- Using flimsy rolls: The filling will break through the bread by the second bite.
17. Greek Orzo Salad with Grilled Chicken
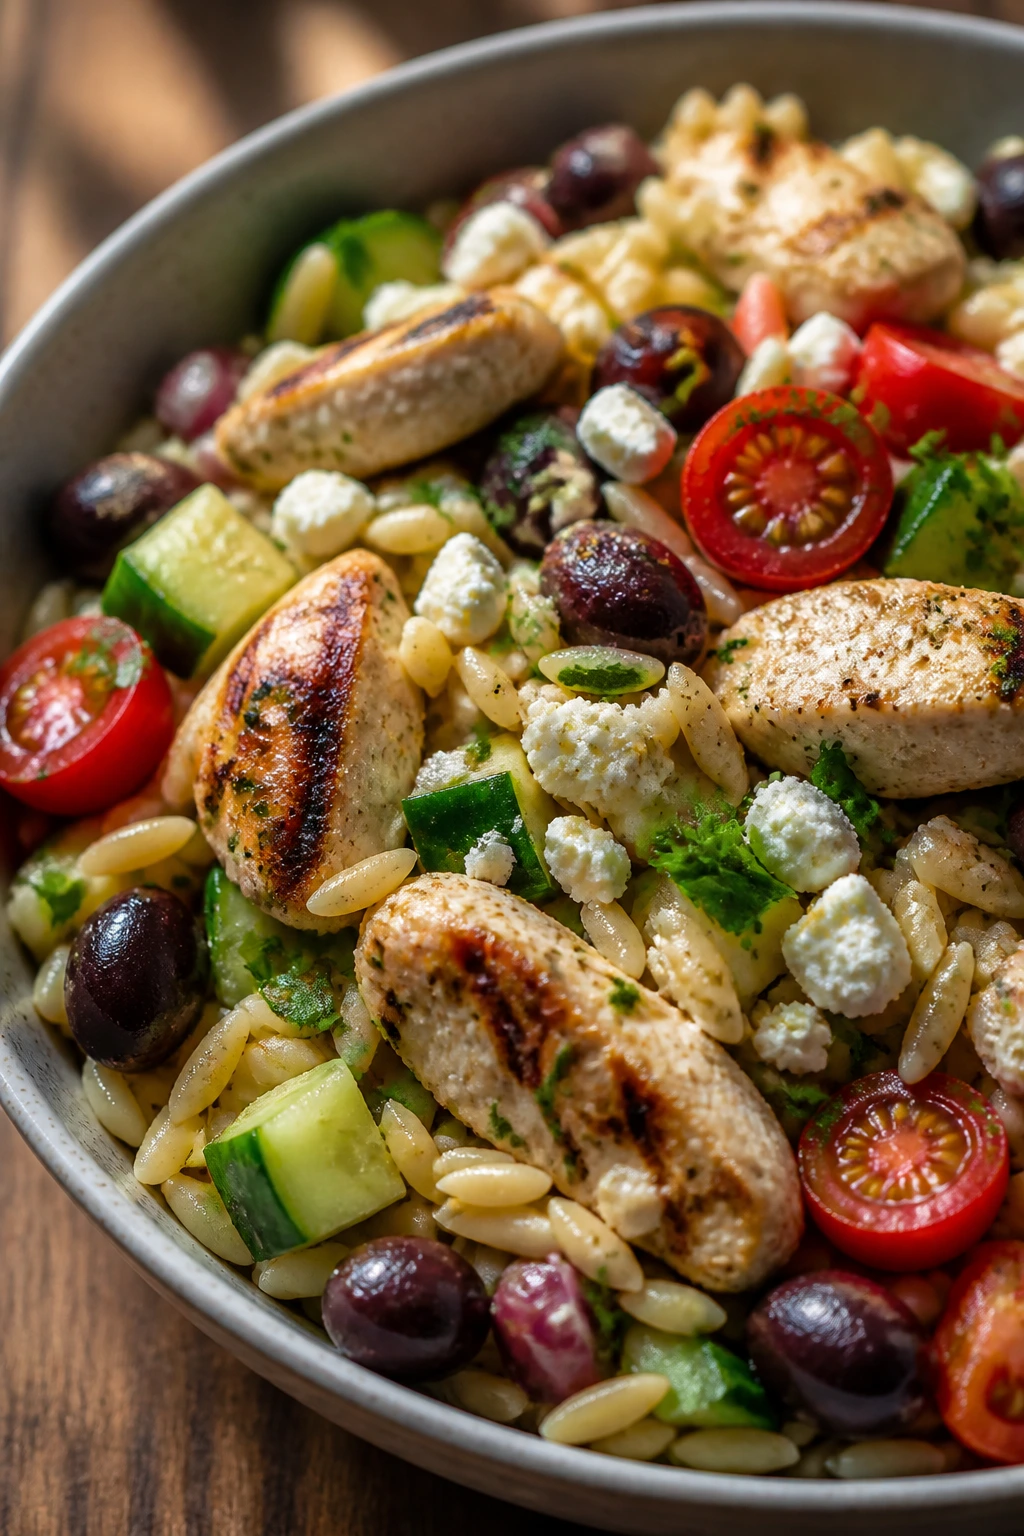
This is the salad I make when I need something that sits well, tastes better after a rest, and still eats like dinner. Orzo gives the bowl body, grilled chicken makes it filling, and feta plus olives keep every forkful salty and alive.
Why It Works:
Orzo is small enough to catch vinaigrette without getting heavy. Cucumber, tomato, and olive give you enough crunch and brine to keep the dish from feeling one-note. It travels better than a leafy salad because the pasta keeps the dressing anchored.
Key Ingredients:
- 1 lb orzo
- 2 cups grilled chicken, chopped
- 1 cucumber, diced
- 1 1/2 cups cherry tomatoes, halved
- 3/4 cup crumbled feta
- 1/2 cup kalamata olives, halved
- 1/4 cup olive oil
- 2 tbsp red wine vinegar
- 1 tsp dried oregano
Quick Steps:
- Cook the orzo until al dente, drain, and cool it slightly.
- Whisk olive oil, vinegar, oregano, salt, and pepper.
- Toss the orzo with chicken, cucumber, tomatoes, feta, olives, and dressing.
- Chill for 20 minutes before packing.
Equipment for This Recipe:
- Pot
- Colander
- Mixing bowl
How to Serve This Dish:
Spoon it into a big bowl with extra feta on top. It stands alone as dinner, but it’s also the cold side that can sit beside grilled vegetables or pita. The best version tastes lemony and salty, not drowned in dressing.
Pro Tips for This Recipe:
- Cool the pasta before adding feta so the cheese stays crumbly.
- Chop the chicken small enough to mix through every bite.
- Add a squeeze of lemon just before serving if the salad tastes mellow.
Variations on This Dish:
- No-Chicken Version: Add chickpeas instead of chicken for a vegetarian bowl.
- Rice Salad Swap: Use cooled rice instead of orzo if that’s what’s in the kitchen.
Common Mistakes to Avoid with This Dish:
- Using too little salt in the pasta water: The whole salad tastes flat.
- Adding the cucumber too early if it’s watery: Pat it dry first so the bowl doesn’t pool.
18. Pimento Cheese Tea Sandwiches with Tomato
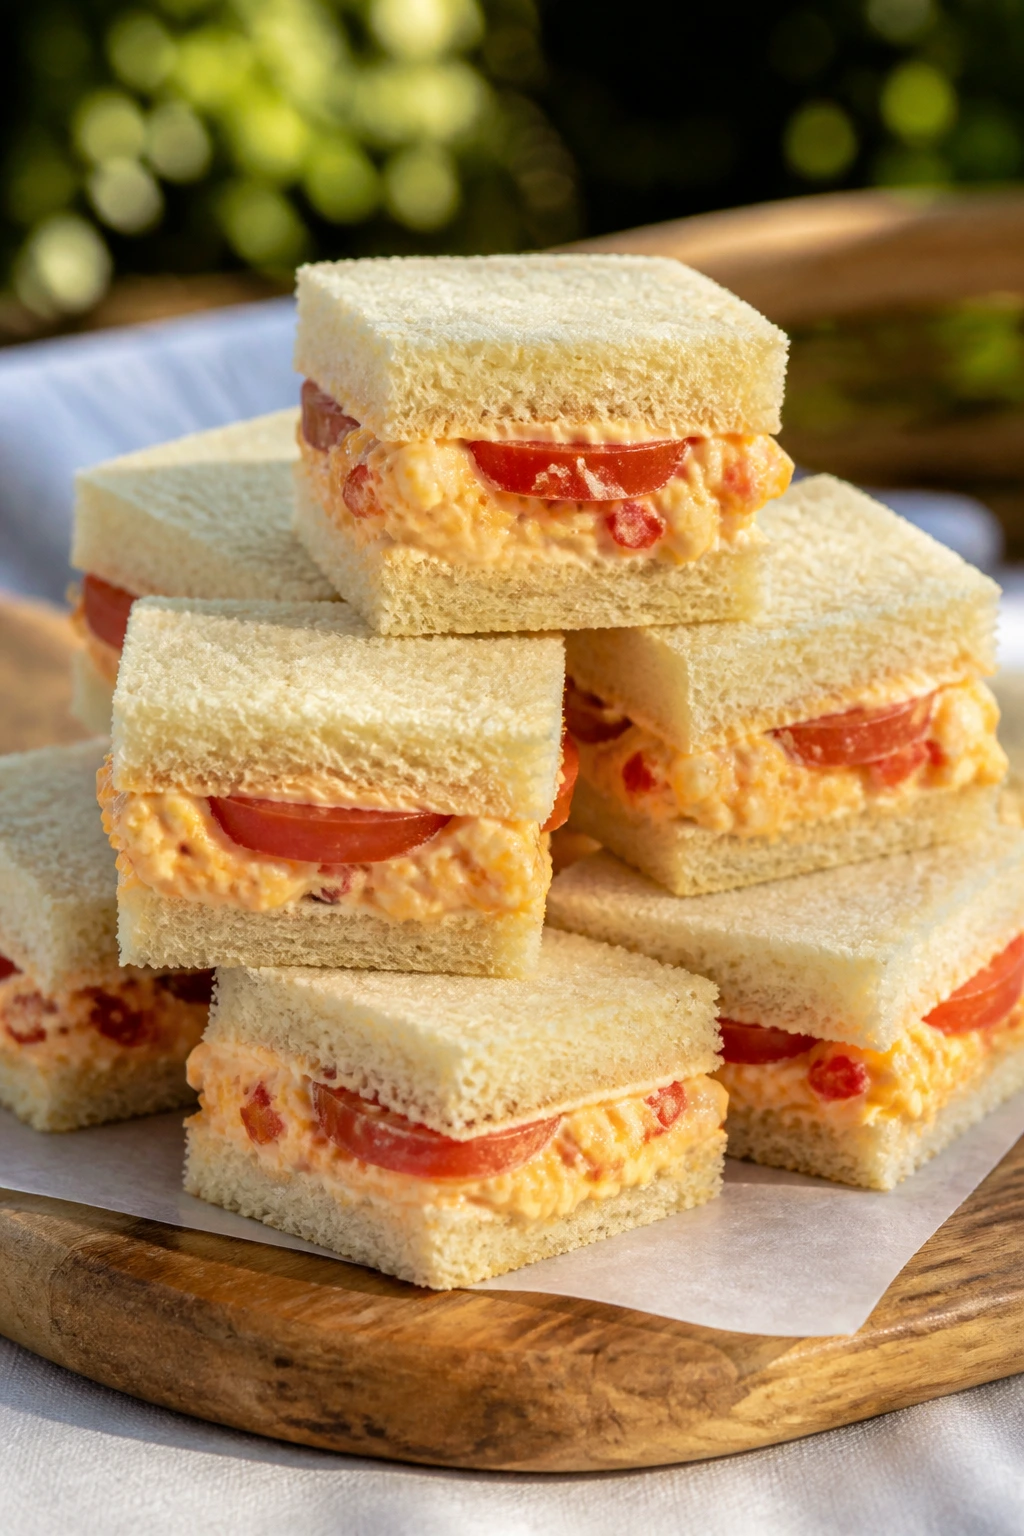
These little sandwiches are small on purpose, and that’s a strength. The bread stays soft, the pimento cheese is sharp and creamy, and tomato slices make the whole thing feel like a nod to the best part of summer.
Why It Works:
Pimento cheese has enough fat and tang to stay interesting even when cold. Tea sandwiches are tidy, stackable, and easy to pack in layers with parchment between them. They’re more useful than they look, especially if your picnic leans into lots of small bites.
Key Ingredients:
- 8 slices soft sandwich bread
- 1 cup pimento cheese
- 1 large tomato, sliced thin
- 2 tbsp softened butter
- 1 tbsp chopped chives
- Pinch of black pepper
Quick Steps:
- Butter the bread lightly on the inside to protect it from the tomato.
- Spread pimento cheese on half the slices and layer tomato on top.
- Sprinkle with chives and pepper, then close the sandwiches.
- Trim crusts if you want neat edges and cut into quarters.
Equipment for This Recipe:
- Knife
- Cutting board
- Butter knife
- Parchment paper
How to Serve This Dish:
Stack them in rows on a platter or pack them in a flat container so they don’t get crushed. They pair well with fruit, chips, or a green salad with a sharp vinaigrette. They’re dainty, yes, but not flimsy.
Pro Tips for This Recipe:
- Use firm tomatoes and blot the slices with a paper towel.
- Assemble close to serving time for the cleanest texture.
- Peppery arugula can replace chives if you want more bite.
Variations on This Dish:
- Open-Face Version: Serve the sandwiches without the top slice for a less crowded bite.
- Cucumber-Added Sandwiches: Add thin cucumber slices if the tomatoes are extra juicy.
Common Mistakes to Avoid with This Dish:
- Using wet tomatoes straight from the cutting board: They soak the bread fast.
- Choosing bread that’s too crusty: The point is soft, neat bites.
19. Teriyaki Chicken Skewers with Pineapple
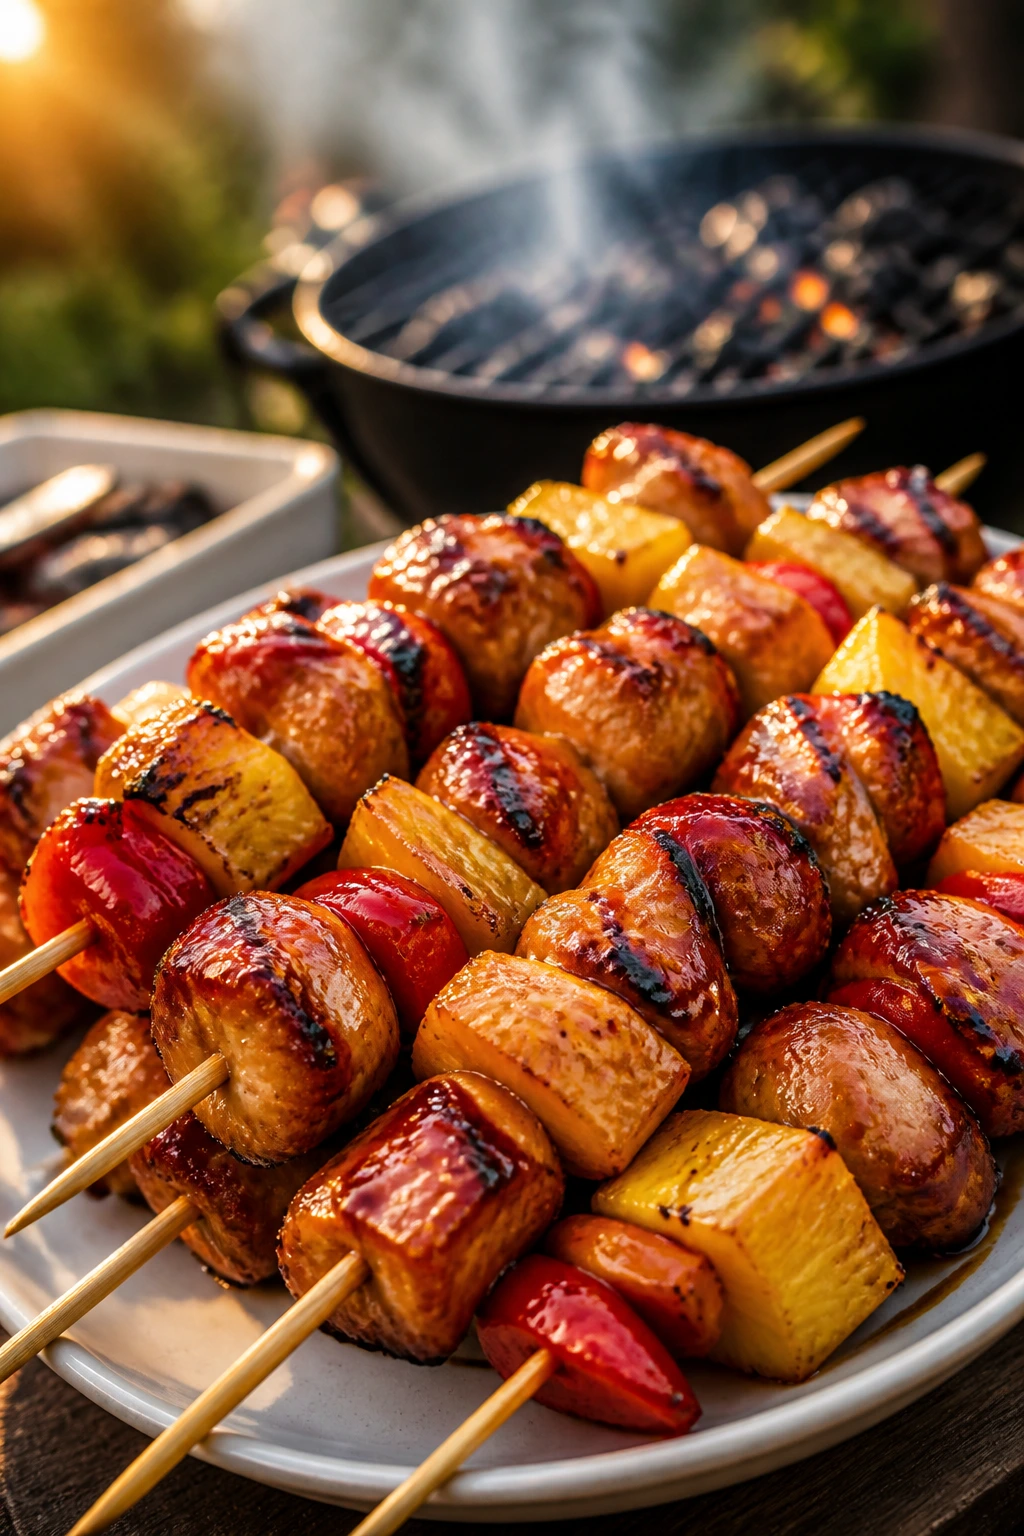
Sticky, salty, sweet, and just smoky enough to earn that charcoal edge. Pineapple caramelizes fast on the grill, and teriyaki glaze turns the chicken glossy in a way that feels very picnic-friendly when you’re eating with your hands.
Why It Works:
Chicken thighs stay juicy while the glaze thickens. Pineapple gives acid and sweetness, which keeps the skewers from tasting like straight sugar. Because the pieces are small, they cook quickly and stay easy to pack.
Key Ingredients:
- 2 lb chicken thighs, cut into chunks
- 1 cup teriyaki sauce
- 2 cups pineapple chunks
- 1 red bell pepper, cut into chunks
- 2 tbsp sesame seeds
- 4 scallions, sliced
- 8 skewers
Quick Steps:
- Marinate the chicken in half the teriyaki sauce for 20 to 30 minutes.
- Thread chicken, pineapple, and pepper onto skewers.
- Grill over medium-high heat for 10 to 12 minutes, turning and brushing with the remaining sauce.
- Finish with sesame seeds and scallions.
Equipment for This Recipe:
- Grill
- Skewers
- Tongs
- Small brush
How to Serve This Dish:
Slide the pieces off the skewers onto a platter if you want easier picnic eating. A simple rice salad or cold noodles beside them makes this feel like a full meal. The glaze should look shiny, not burned.
Pro Tips for This Recipe:
- Keep the pineapple chunks large enough that they don’t fall apart on the grill.
- Boil the leftover marinade first if you plan to use it as a sauce.
- Don’t crowd the skewers; leave a little space between pieces.
Variations on This Dish:
- Ginger Teriyaki Version: Add grated ginger to the marinade for more bite.
- Vegetable-Heavy Skewers: Double the pepper and add zucchini rounds if you want more produce.
Common Mistakes to Avoid with This Dish:
- Using sauce with too much sugar over high flame: It burns before the chicken cooks through.
- Cutting the chicken pieces unevenly: Some pieces dry out while others lag behind.
20. Turkey Meatballs with Herbed Couscous
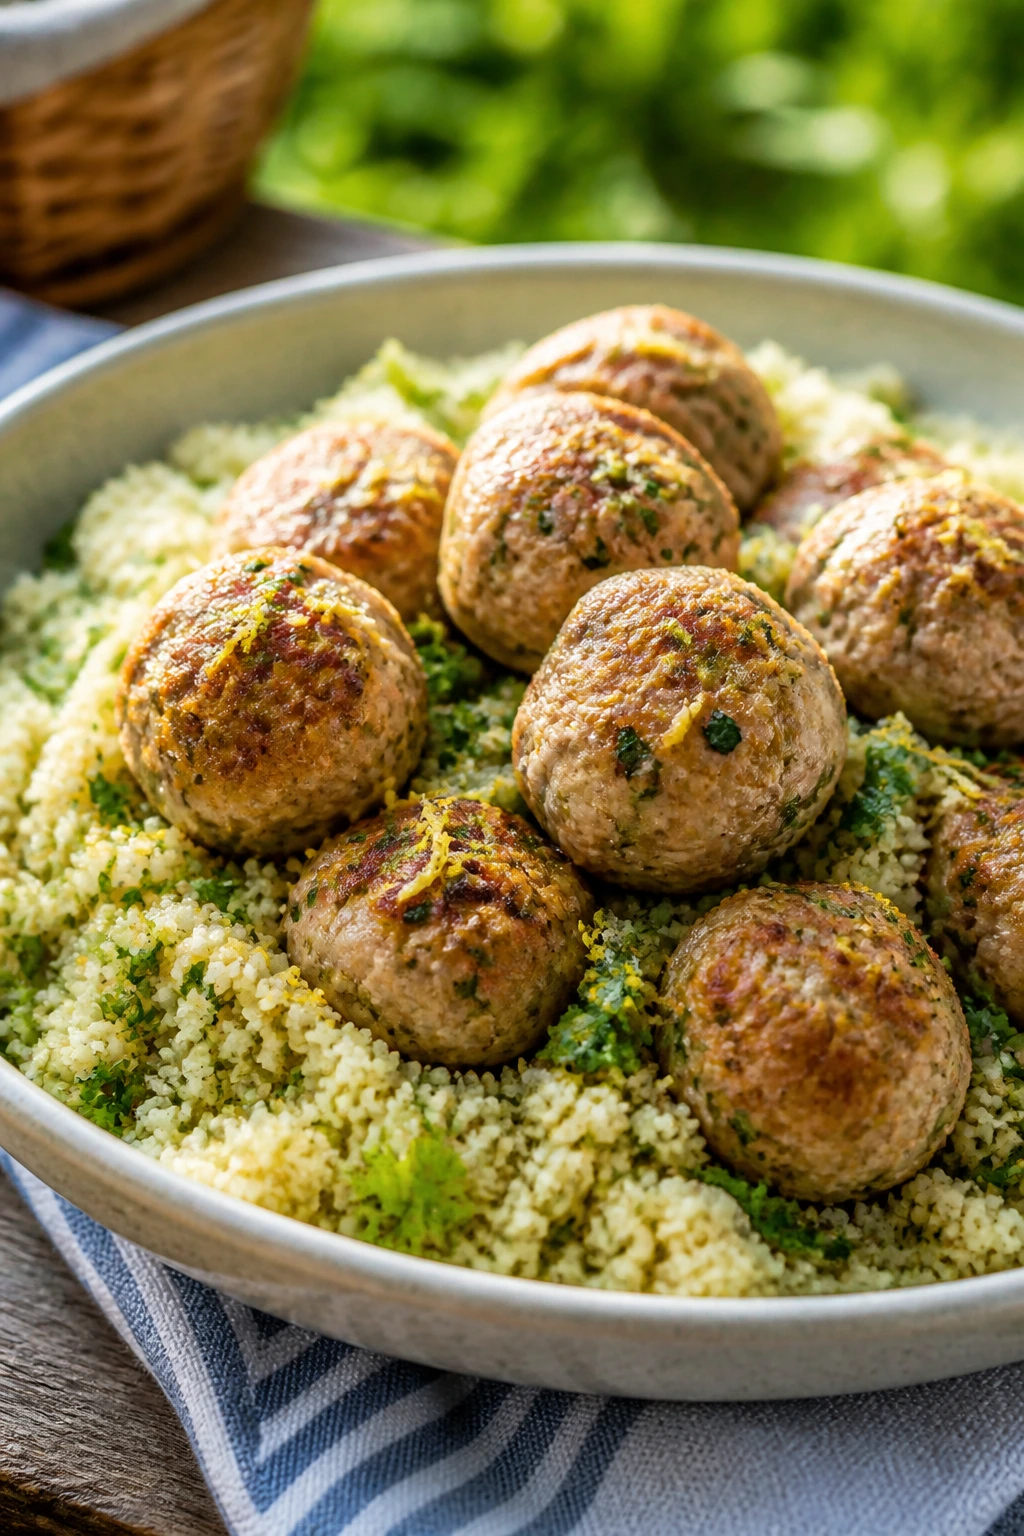
Meatballs feel a little fancy in a picnic basket, which is part of the charm. Turkey keeps them lighter than beef, the couscous soaks up the juices, and herbs make the whole thing taste bright enough to serve at room temperature.
Why It Works:
Turkey meatballs can be baked ahead and still hold together after chilling. Couscous cooks in minutes and turns fluffy with a splash of broth or lemon. Together, they make a dinner that can be eaten warm or room temperature without losing its shape.
Key Ingredients:
- 1 1/2 lb ground turkey
- 1/2 cup breadcrumbs
- 1 egg
- 2 tbsp grated Parmesan
- 1 tsp kosher salt
- 1 cup couscous
- 1 1/4 cups chicken broth
- 2 tbsp chopped parsley
- 1 tbsp lemon juice
Quick Steps:
- Mix turkey, breadcrumbs, egg, Parmesan, salt, and pepper, then form into 1 1/2-inch meatballs.
- Bake at 400°F for 15 to 18 minutes, until the centers reach 165°F.
- Pour hot broth over couscous, cover for 5 minutes, then fluff with a fork.
- Stir in parsley and lemon, then serve the meatballs over the couscous.
Equipment for This Recipe:
- Rimmed baking sheet
- Mixing bowl
- Fork
- Saucepan or kettle
How to Serve This Dish:
Pack the couscous in one container and the meatballs in another if you want the texture to stay cleaner. A dollop of yogurt or tzatziki works well on the side. This is one of the few picnic dinners that can still feel like a proper plate.
Pro Tips for This Recipe:
- Wet your hands before shaping the meatballs so the mixture doesn’t stick.
- Don’t overpack the breadcrumbs; too much makes the meatballs dry.
- A squeeze of lemon right before serving brightens the whole tray.
Variations on This Dish:
- Tzatziki Meatballs: Add chopped dill and serve with cucumber yogurt sauce.
- Beef-Turkey Blend: Swap in half ground beef for a richer flavor.
Common Mistakes to Avoid with This Dish:
- Baking until the meatballs look dry: Pull them as soon as they hit 165°F.
- Leaving couscous unfluffed: It clumps if you stir too early.
21. Niçoise-Style Picnic Salad Jars
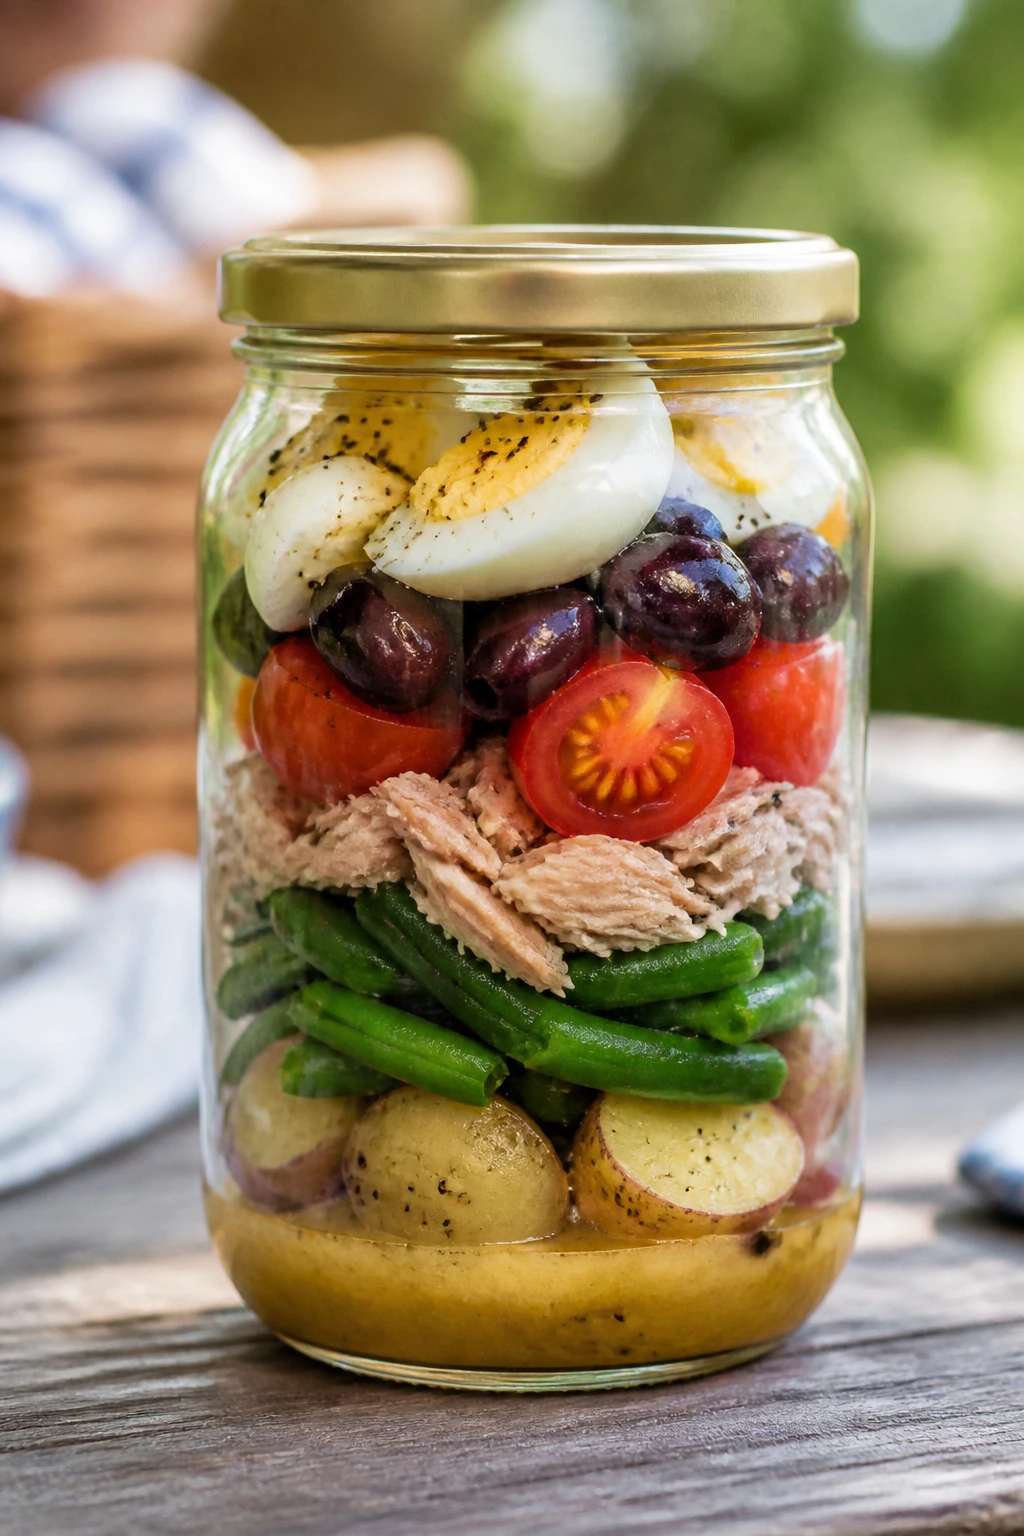
Layered salads sound fussy until you need dinner that can ride in a cooler without collapsing. These jars keep the potatoes, beans, eggs, tuna, and tomatoes separated just long enough to arrive intact, then everything tumbles together when you shake or dump it into a bowl.
Why It Works:
The order of the layers matters, because sturdy ingredients protect delicate ones from dressing. Green beans and potatoes hold their shape, tuna gives protein, and olives plus eggs add enough richness to make the salad feel finished. It’s a smart move when the picnic needs individual portions.
Key Ingredients:
- 2 cups baby potatoes, halved
- 1 cup green beans, trimmed
- 4 hard-boiled eggs, quartered
- 2 cans tuna, drained
- 1 cup cherry tomatoes
- 1/2 cup olives
- 1/4 cup vinaigrette
- 4 wide-mouth jars or containers
Quick Steps:
- Boil potatoes until tender and green beans until just crisp, then cool both.
- Layer vinaigrette, potatoes, green beans, tuna, tomatoes, olives, and eggs into jars.
- Seal and chill until packing time.
- Shake into a bowl when ready to eat, or eat straight from the jar with a fork.
Equipment for This Recipe:
- Pot
- Colander
- Wide-mouth jars or containers
How to Serve This Dish:
Dump each jar into a shallow bowl if you want it to look more like dinner than lunch. A piece of bread on the side is enough to handle the vinaigrette. This is practical food, but it doesn’t look plain when layered cleanly.
Pro Tips for This Recipe:
- Let the vegetables cool before layering so the eggs don’t get weird.
- Put the dressing at the bottom only if the jar will be inverted before eating.
- Use jars with a wide mouth; narrow ones are annoying to eat from.
Variations on This Dish:
- Anchovy-Free Version: Skip anchovies in the vinaigrette if you want a milder flavor.
- Salmon Jar Salad: Swap tuna for flaked salmon.
Common Mistakes to Avoid with This Dish:
- Packing wet potatoes and green beans: They turn the jar soggy. Cool them first.
- Putting tomatoes against the dressing layer: They break down too fast.
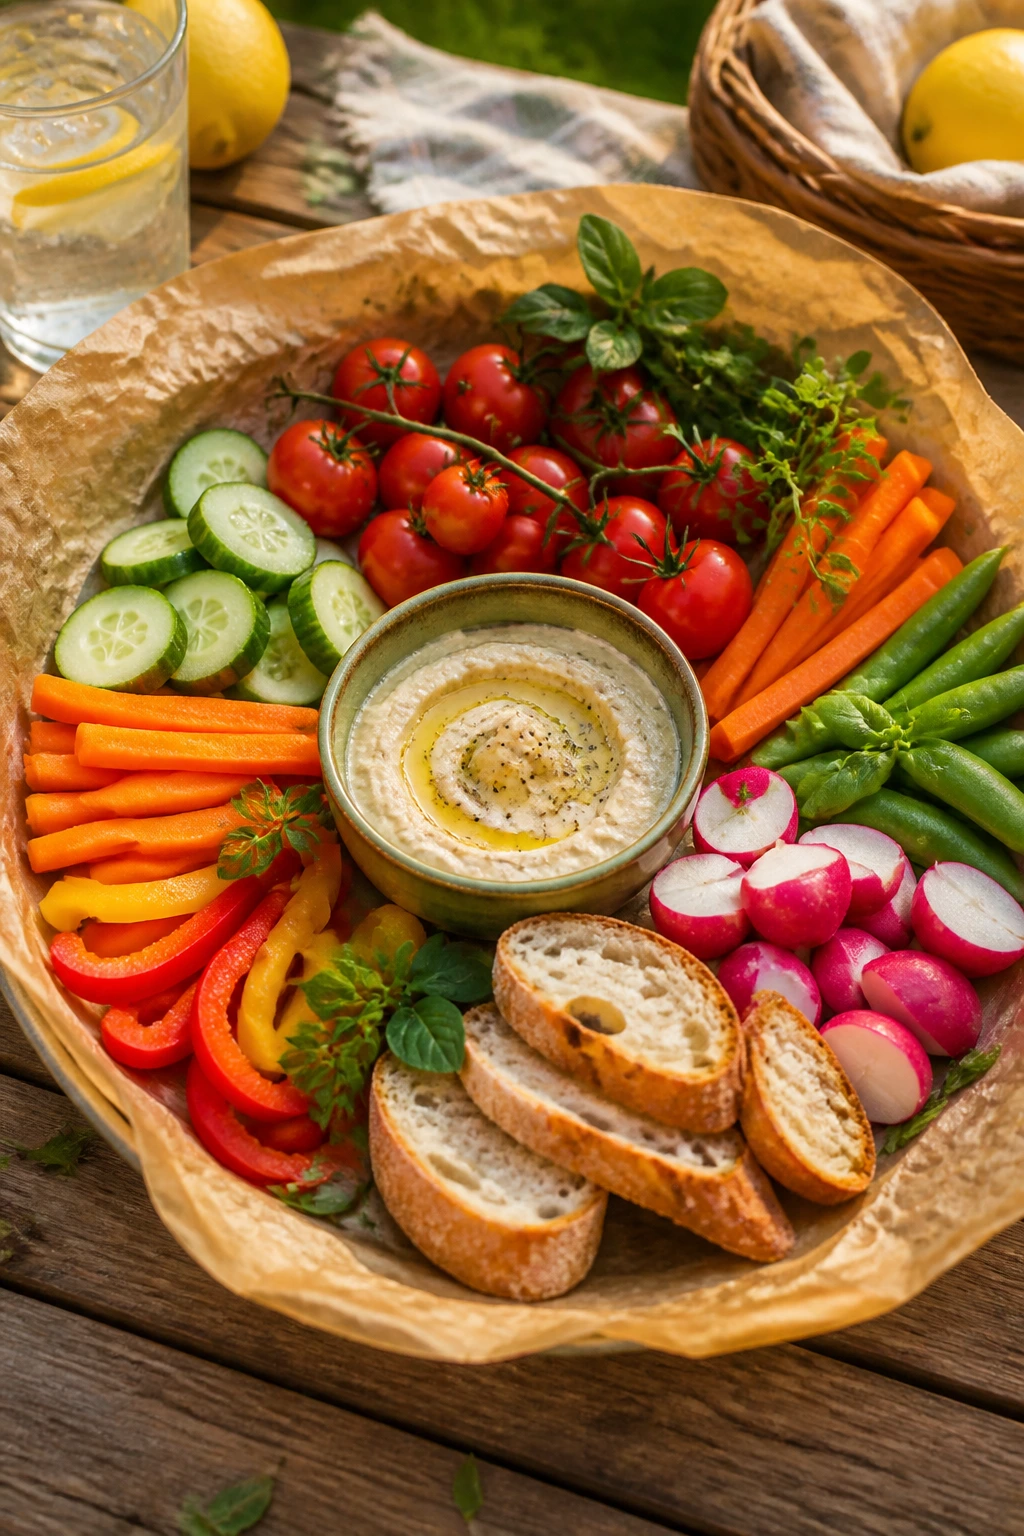
22. Grilled Vegetable and Hummus Grain Bowls
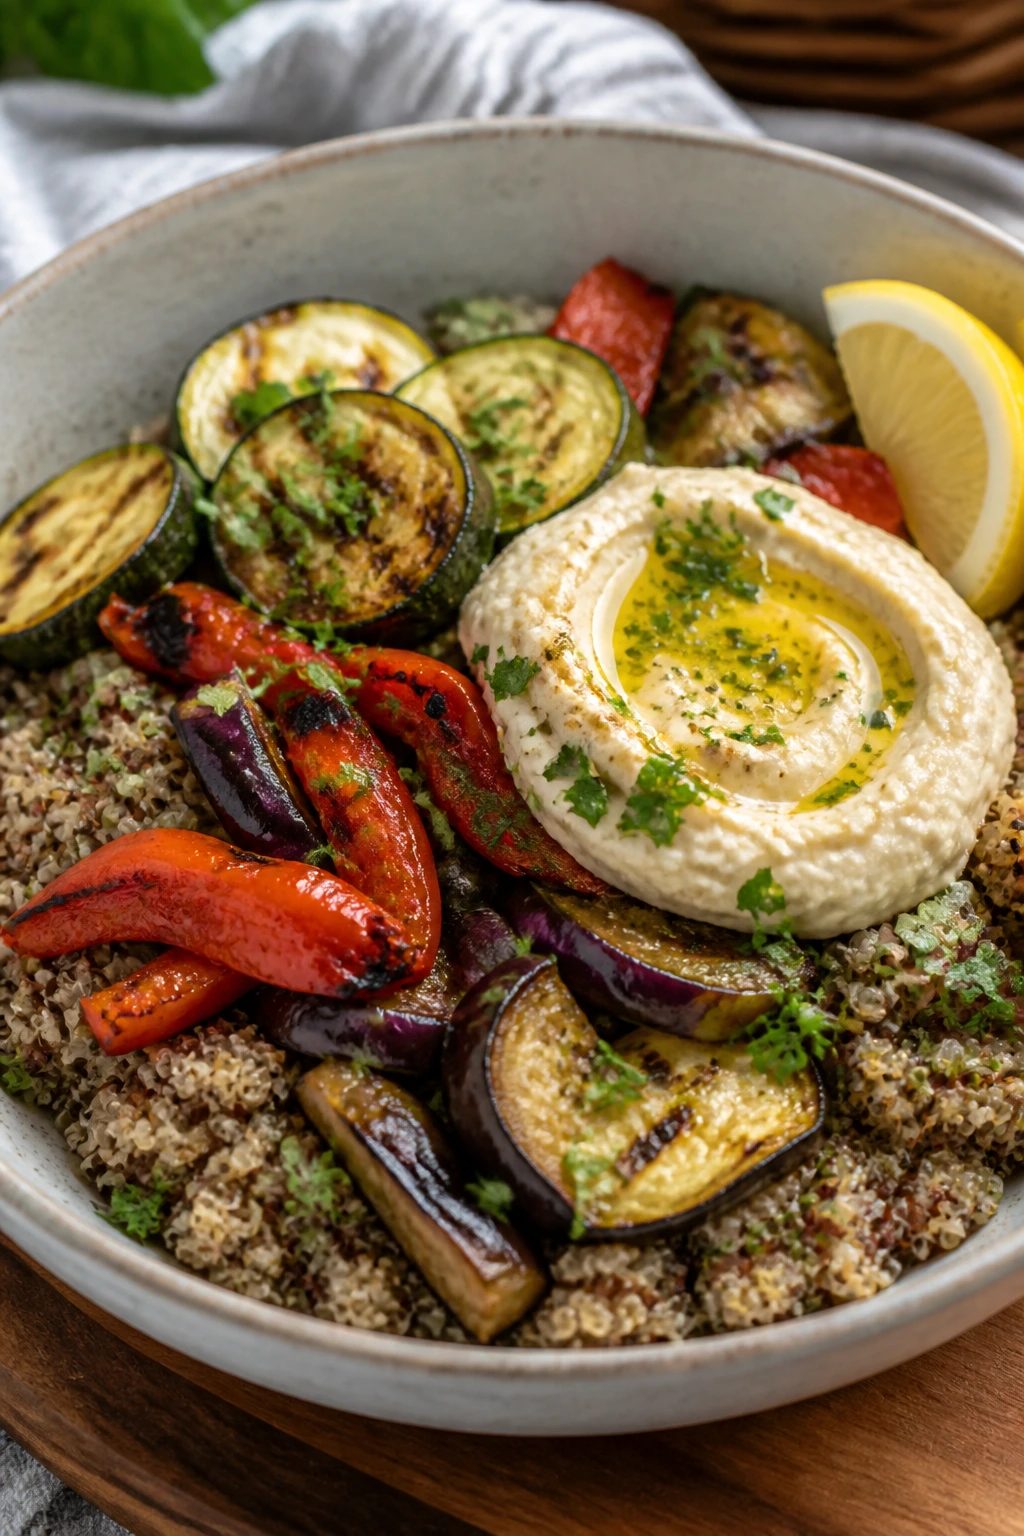
This is the kind of picnic dinner that feels relaxed but still organized. Charred zucchini, peppers, and eggplant give you smoke and sweetness, hummus adds creaminess, and grains keep the bowl substantial enough to count as dinner.
Why It Works:
Grilled vegetables hold up well in a cooler because they like being eaten at room temperature. Farro or quinoa gives the bowl structure, while hummus acts as a sauce and a spread at the same time. A squeeze of lemon right before eating keeps the whole thing from tasting flat.
Key Ingredients:
- 1 cup farro or quinoa
- 1 zucchini, sliced
- 1 red bell pepper, sliced
- 1 small eggplant, sliced
- 2 tbsp olive oil
- 1 cup hummus
- 1 tbsp lemon juice
- 2 tbsp chopped parsley
- 1/4 tsp smoked paprika
Quick Steps:
- Cook the grain and let it cool slightly.
- Toss vegetables with olive oil, salt, pepper, and smoked paprika, then grill until tender and marked.
- Spoon hummus into containers, top with grain and vegetables, then finish with lemon and parsley.
- Pack everything so the hummus stays underneath until serving.
Equipment for This Recipe:
- Grill or grill pan
- Pot
- Container with lid
- Tongs
How to Serve This Dish:
Serve in bowls or wide containers with pita on the side. If you want it to feel fuller, add chickpeas or feta. The vegetables should look browned and soft, not collapsed into mush.
Pro Tips for This Recipe:
- Cut the vegetables thick enough that they don’t fall through the grill grates.
- Cool the grain before adding hummus so it doesn’t melt into soup.
- A spoonful of pickled onions gives the bowl extra spark.
Variations on This Dish:
- Lentil Bowl Version: Use lentils instead of farro for a softer base.
- Dairy Add-In: Add feta if you want more salt and richness.
Common Mistakes to Avoid with This Dish:
- Overcooking eggplant: It turns limp and oily if you leave it too long.
- Packing hummus on top of hot grains: It thins out fast.
23. Bacon, Lettuce, and Tomato Pasta Salad
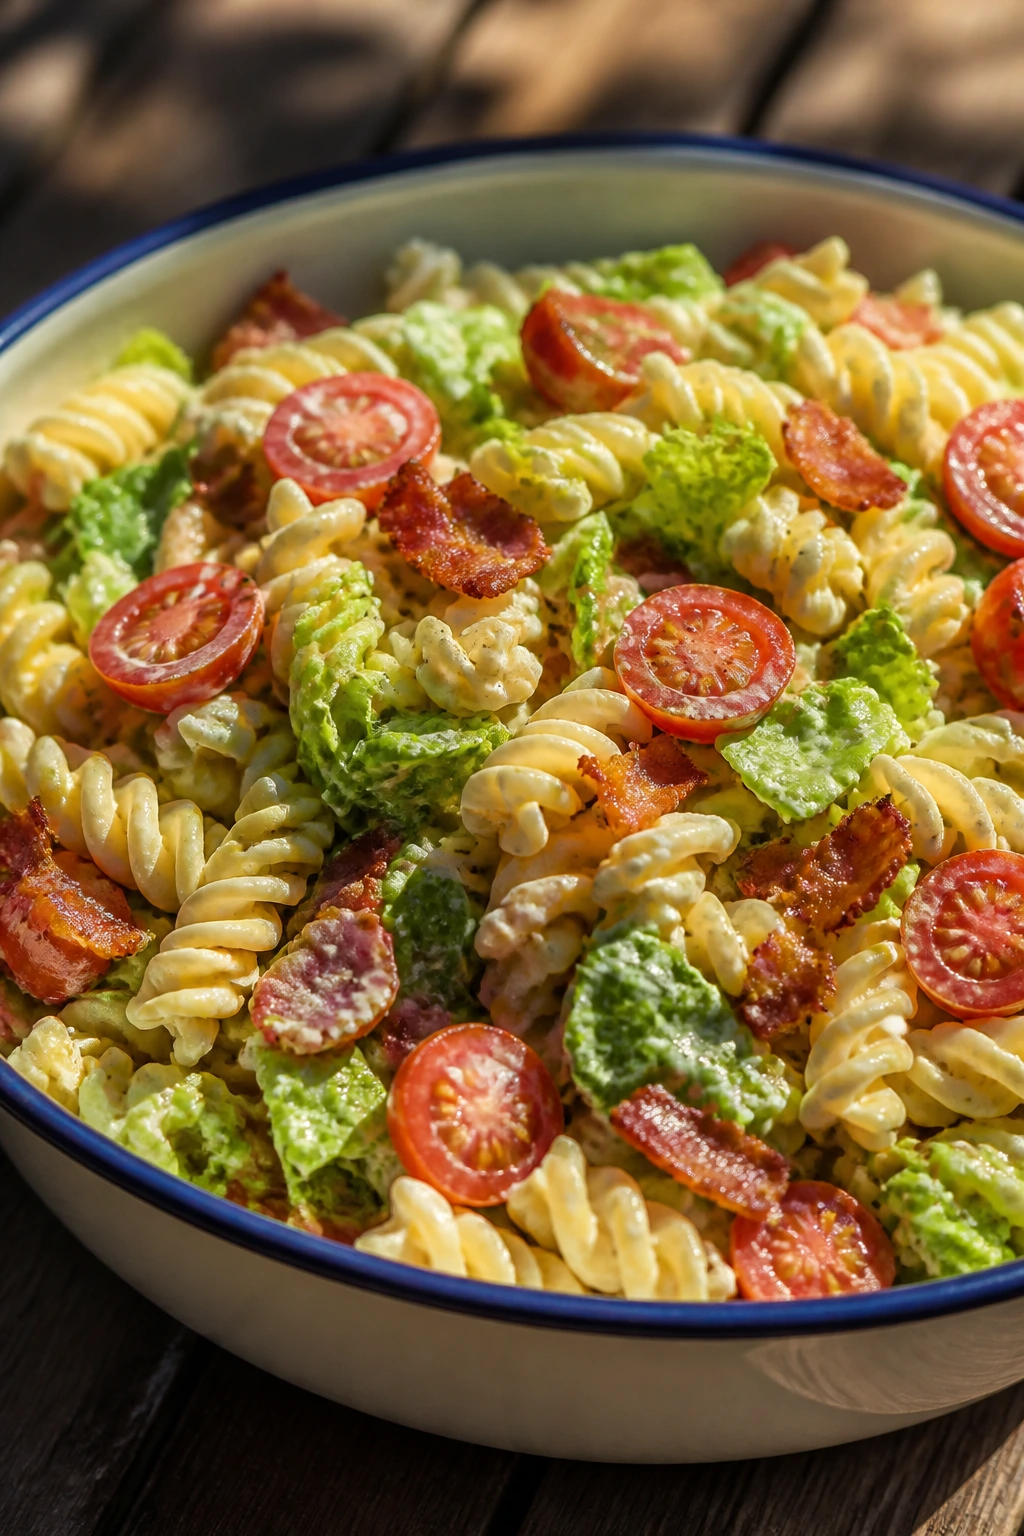
This one tastes like a BLT that wandered into a picnic bowl and decided to stay. Bacon gives the smoke, tomatoes bring the sweetness, and lettuce — added at the right moment — keeps it from feeling too heavy.
Why It Works:
Pasta holds the dressing, bacon brings salt and crunch, and tomatoes keep the whole thing anchored to late summer. The trick is adding the lettuce just before serving so it stays crisp instead of collapsing under the sauce. It’s familiar in a way that makes people go back for a second scoop.
Key Ingredients:
- 1 lb short pasta
- 8 slices bacon, cooked and chopped
- 2 cups cherry tomatoes, halved
- 2 cups chopped romaine
- 1/3 cup mayonnaise
- 2 tbsp sour cream
- 1 tbsp lemon juice
- 1 tsp black pepper
Quick Steps:
- Cook and cool the pasta.
- Stir mayo, sour cream, lemon juice, salt, and pepper into a dressing.
- Toss pasta with tomatoes and dressing, then fold in bacon.
- Add romaine just before serving so it stays crisp.
Equipment for This Recipe:
- Pot
- Skillet
- Large bowl
How to Serve This Dish:
Serve it cold in a broad bowl with extra bacon on top. It works as a main if you add grilled chicken or as a side with burgers and sandwiches. The lettuce should still have some snap when you fork into it.
Pro Tips for This Recipe:
- Let the bacon drain well or the dressing gets greasy.
- Chill the pasta before adding romaine to avoid wilting.
- A few chopped scallions add a green, oniony edge.
Variations on This Dish:
- Avocado BLT Pasta: Add diced avocado right before serving.
- Ranch-Style Version: Swap part of the mayo for ranch dressing.
Common Mistakes to Avoid with This Dish:
- Adding lettuce too early: It loses crunch and looks tired.
- Using too much dressing: BLT pasta should be coated, not soupy.
24. Crispy Tofu Peanut Slaw Wraps
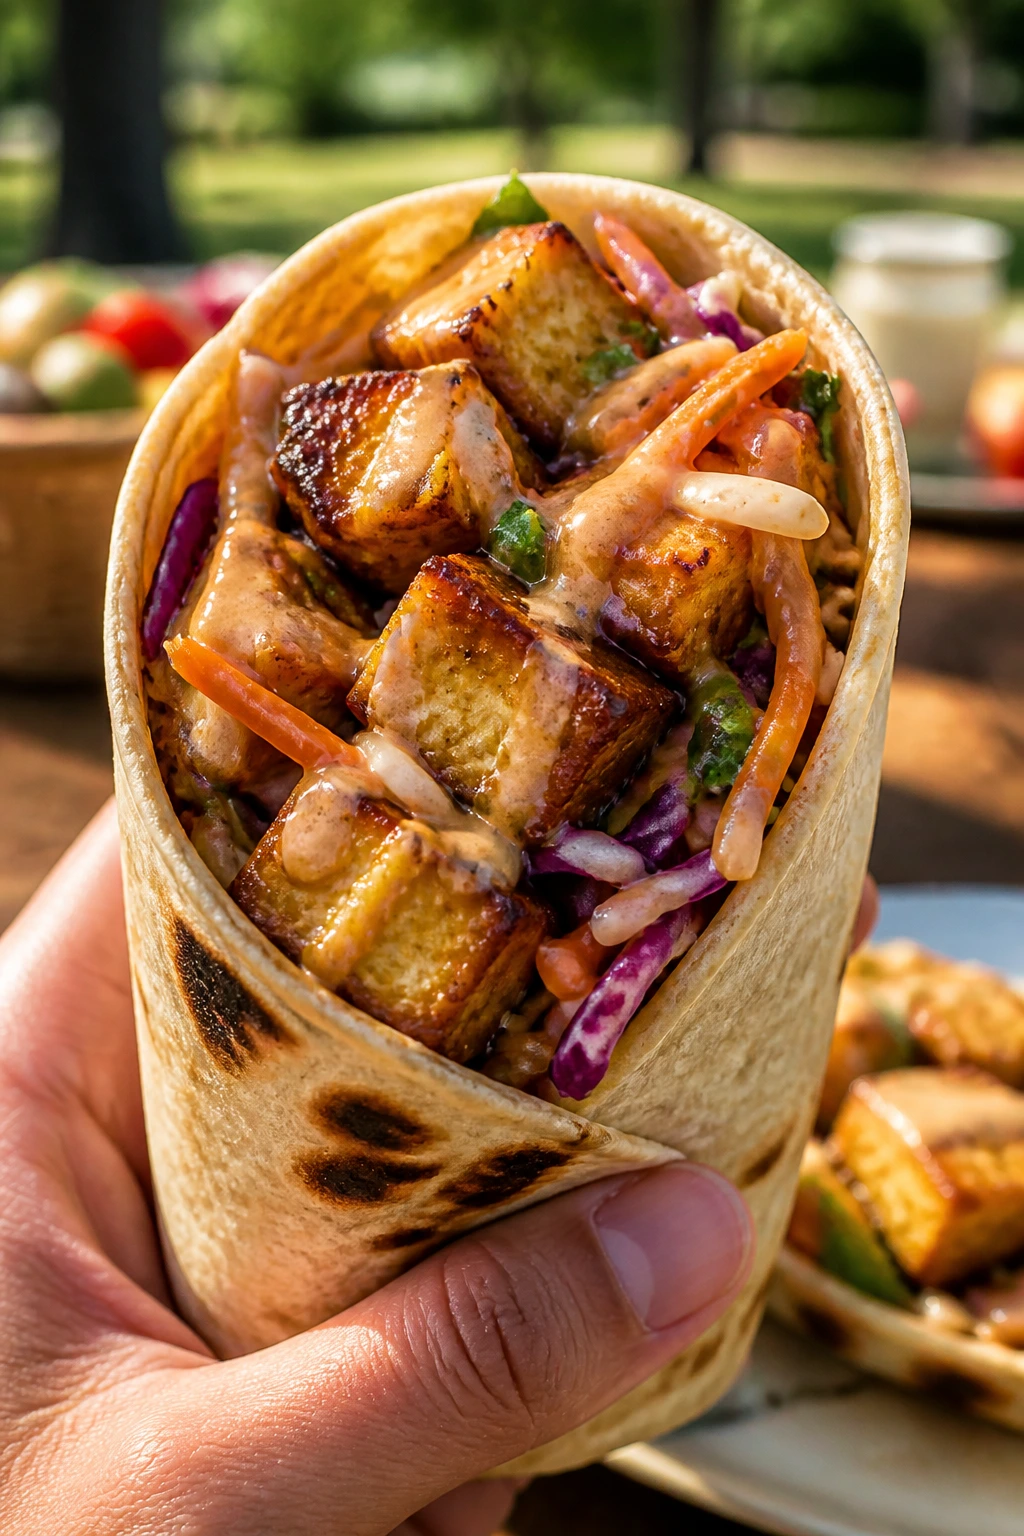
These wraps are crunchy, creamy, and a little sticky in the best possible way. Crispy tofu gives you substance, peanut sauce brings richness, and the slaw keeps every bite bright enough that you don’t get bored halfway through.
Why It Works:
Tofu takes on a crisp shell when pressed and baked or pan-fried. Peanut sauce sticks to the tofu and slaw alike, and cabbage stays crunchy for hours, which is a rare and useful picnic trait. The wraps are sturdy enough to pack, especially if you keep the sauce thick.
Key Ingredients:
- 1 block extra-firm tofu, pressed and cubed
- 2 tbsp cornstarch
- 2 tbsp oil
- 3 cups shredded cabbage
- 1 cup shredded carrots
- 1/3 cup peanut butter
- 2 tbsp soy sauce
- 1 tbsp lime juice
- 4 tortillas or large lettuce leaves
Quick Steps:
- Toss tofu with cornstarch and oil, then bake at 425°F for 20 to 25 minutes or pan-fry until crisp.
- Whisk peanut butter, soy sauce, lime juice, and a little warm water into a thick sauce.
- Toss cabbage and carrots with enough sauce to coat lightly.
- Fill tortillas or lettuce leaves with tofu and slaw.
Equipment for This Recipe:
- Baking sheet or skillet
- Mixing bowl
- Whisk
- Press or towel for tofu
How to Serve This Dish:
Pack the filling and wraps separately if you’re traveling far. These are best built right before eating so the tortillas don’t soften too soon. A sprinkle of chopped peanuts gives the whole thing a louder crunch.
Pro Tips for This Recipe:
- Press the tofu well; wet tofu browns poorly.
- Keep the sauce thick enough to cling, not drip.
- Rice paper works if you want a softer wrap, but it’s fussier.
Variations on This Dish:
- Spicy Peanut Wraps: Add sriracha or chili paste to the sauce.
- Rice Bowl Version: Skip the wrap and serve everything over cooled rice.
Common Mistakes to Avoid with This Dish:
- Skipping tofu pressing: The cubes stay pale and soft.
- Overdressing the slaw: It should glisten, not swim.
25. Fresh Tomato Tart Squares with Basil and Goat Cheese
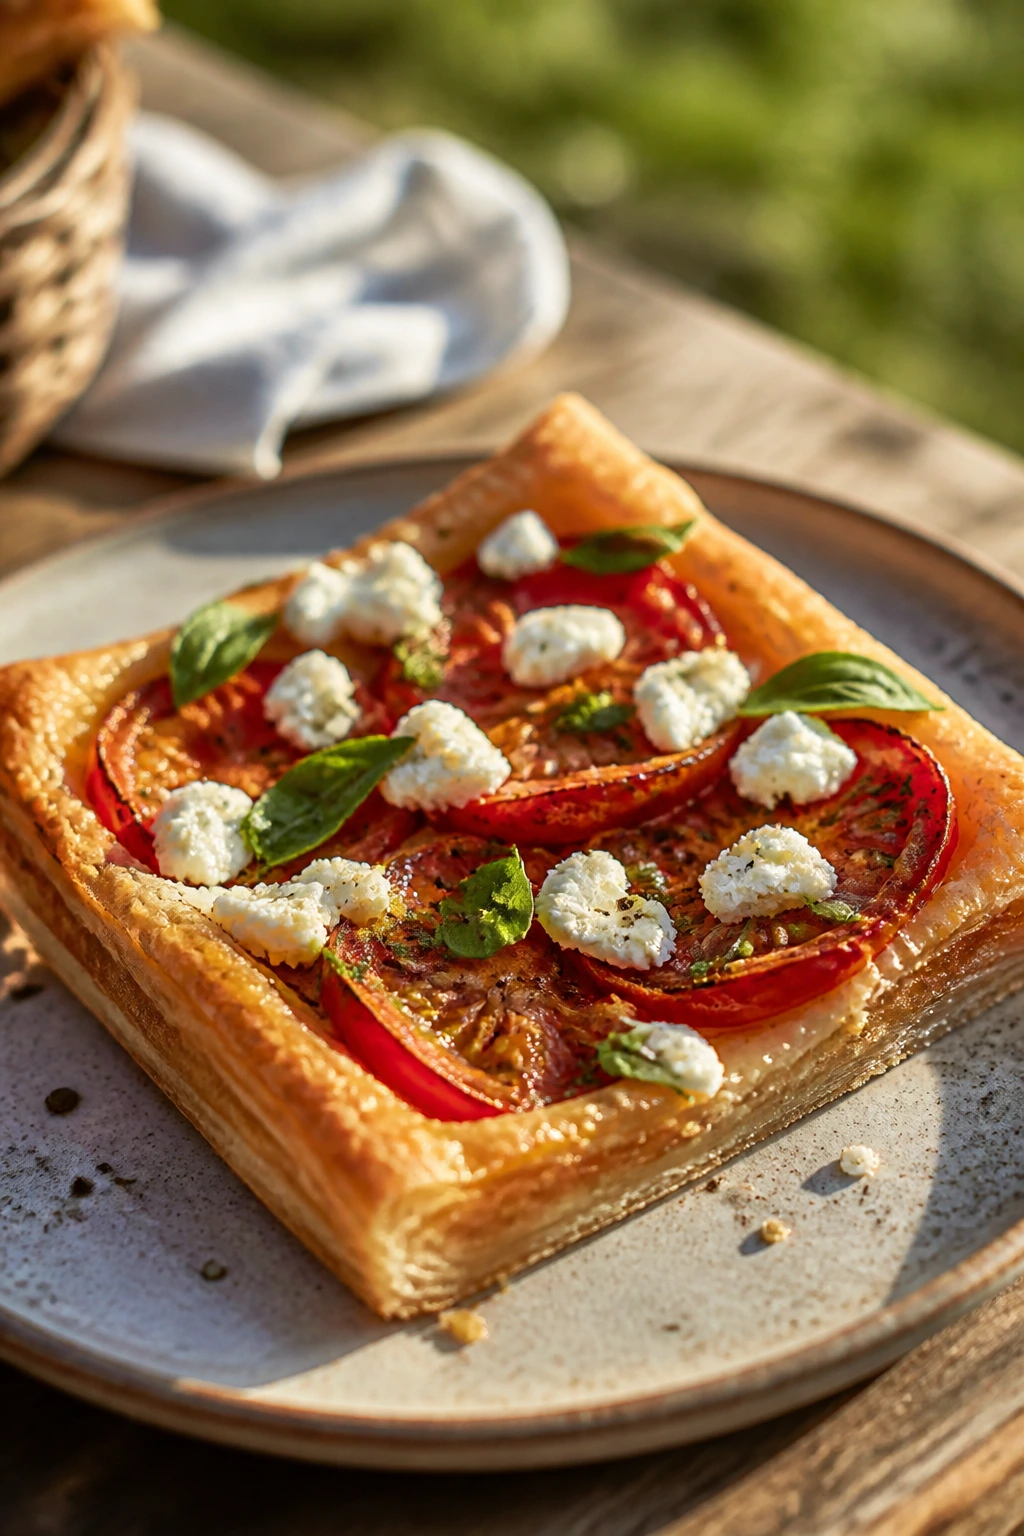
This is the dish that looks like you made more effort than you did. Puff pastry gives you crisp edges, tomatoes go soft and savory in the oven, and goat cheese adds a tangy base that keeps every square from feeling heavy.
Why It Works:
Tomatoes roast down and concentrate, which is exactly what you want when the crop is at its best and too juicy for a sandwich. Puff pastry bakes into flaky layers that cut neatly into squares, and goat cheese gives the tart enough tang to balance the sweetness. It’s easy to serve at room temperature, which is why it belongs on a picnic table.
Key Ingredients:
- 1 sheet puff pastry, thawed
- 2 large tomatoes, sliced and patted dry
- 4 oz goat cheese
- 1 egg, beaten
- 1 tbsp olive oil
- 1 tbsp chopped basil
- 1/2 tsp kosher salt
- 1/4 tsp black pepper
Quick Steps:
- Heat the oven to 400°F and line a sheet pan with parchment.
- Unfold the pastry, prick the center with a fork, and leave a 1-inch border untouched.
- Spread goat cheese over the center, layer on tomatoes, brush the border with egg, and drizzle with olive oil.
- Bake for 20 to 25 minutes until puffed and deep golden, then finish with basil.
Equipment for This Recipe:
- Sheet pan
- Parchment paper
- Knife
- Pastry brush
How to Serve This Dish:
Cut into squares once it has cooled for 10 minutes so the layers don’t slide. These work as a picnic centerpiece with a green salad, or as the vegetable-heavy thing that balances the rest of the basket. They hold at room temperature better than most pastry does.
Pro Tips for This Recipe:
- Pat the tomato slices dry or the pastry will steam instead of crisp.
- Keep the border clean so the edges rise properly.
- A little flaky salt at the end sharpens the tomato flavor.
Variations on This Dish:
- Caramelized Onion Tart Squares: Add a thin layer of onions under the tomatoes for extra sweetness.
- Ricotta-Basil Version: Swap goat cheese for ricotta if you want a milder filling.
Common Mistakes to Avoid with This Dish:
- Using wet tomatoes: The pastry turns soggy fast.
- Skipping the border: If you cover the whole sheet with filling, you lose the puff.
Why Picnic Dinners Work Best When They’re Built for the Box
Picnic food is different from dinner on a plate. It has to survive a cooler, a basket, or a paper-lined container; it has to taste good after sitting for a bit; and it has to forgive small mistakes. A dish that needs perfect heat and immediate serving can still be delicious, but it is a lousy picnic choice.
That’s why so many of the best picnic dinners here share the same traits: sturdy starches, bold seasoning, and ingredients that don’t panic when they cool down. Pasta salad keeps its shape. Chickpeas hold firm. Chicken thighs stay juicy. Even the more delicate things — burrata, lettuce, burrata again because it’s worth saying twice — are paired with sharper, drier, or crisper ingredients that keep them in line.
There’s also a timing trick hiding underneath all this. Picnic dinners taste better when at least one part of them was made ahead. That could be a vinaigrette, a slaw, a sauce, or the whole dish. The point isn’t to make everything a day early. The point is to remove the last-minute panic so the food can settle into itself before you pack it.
Essential Equipment for These Recipes
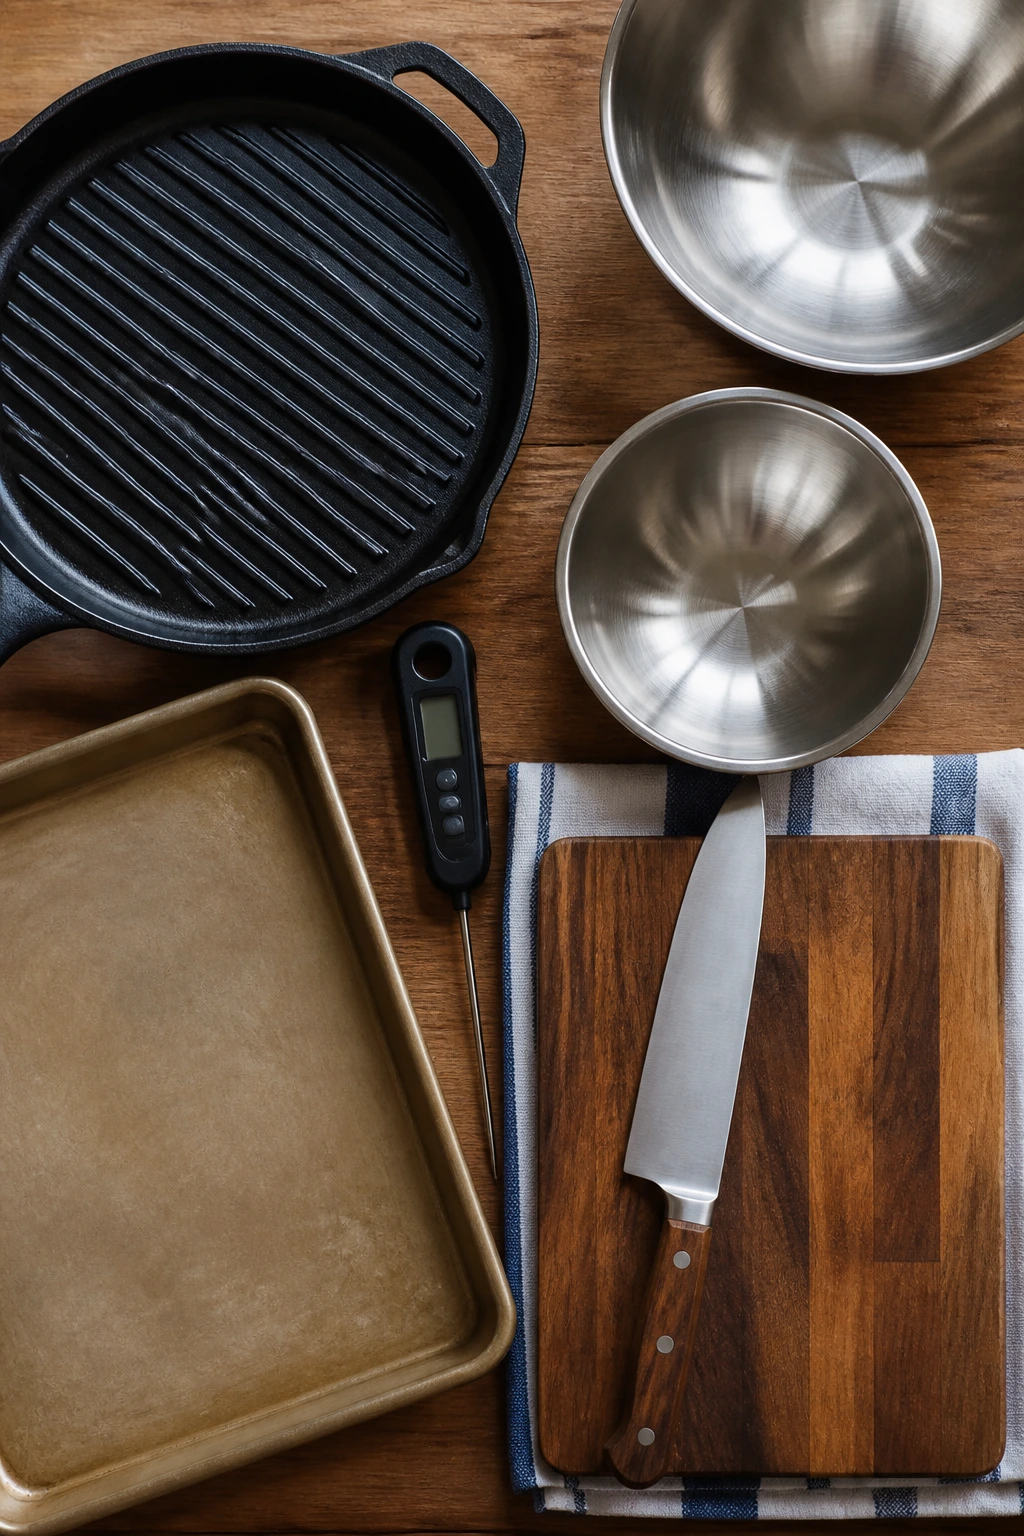
- Grill or grill pan: Needed for chicken, steak, peaches, halloumi, skewers, and flatbread.
- Large skillet: Useful for fritters, sausage, shrimp, and quesadillas.
- Sheet pans: The easiest way to bake meatballs, tart squares, and tofu.
- Instant-read thermometer: Especially useful for chicken, turkey, and steak.
- Mixing bowls in 2 to 3 sizes: One small, one medium, one large covers most of these recipes.
- Colander: Needed for pasta, potatoes, or orzo.
- Tongs: Safer than a fork for grilling and turning skewers.
- Sharp chef’s knife: Non-negotiable for tomatoes, peaches, cucumber, and onions.
- Cutting board with a towel underneath: Stops sliding when you’re slicing for a picnic.
- Airtight containers: Keep salads, sauces, and wraps from drying out in the cooler.
- Parchment paper: Helps separate sandwiches, wraps, and tart squares.
- Small jar or lidded container: Best for vinaigrettes, dressings, and extra sauce.
Smart Shopping and Ingredient Tips
Late summer shopping rewards people who pay attention to smell, weight, and texture. Tomatoes should feel heavy and smell green-sweet at the stem. Peaches need a little give, not mush. Corn is best when the kernels still look plump and tightly packed. If the husks are dry and papery all the way through, keep walking.
Pick sturdy greens and breads for picnic work. Romaine, butter lettuce, pita, hoagie rolls, slider buns, and soft tortillas all behave better than fragile bread with a brittle crust. For pasta salads, use shapes with ridges or curls — rotini, fusilli, or orzo — because they hold dressing instead of letting it run off. For grain bowls, farro and quinoa stay separate after chilling, while rice can clump if it is not cooled properly.
Proteins deserve the same blunt shopping logic. Chicken thighs are more forgiving than breasts on the grill. Turkey needs salt and fat or it tastes thin. Tofu should be extra-firm and pressed. Halloumi should feel springy, not wet. Canned tuna and salmon are both fine here, and in a picnic context I’d rather use a good canned fish than an expensive fresh one that needs fussing.
A final note on dressings and sauces: make them a touch stronger than you would for a hot plated dinner. Cold food dulls salt and acid. A vinaigrette that tastes a little sharp in the bowl usually lands right once it cools and mingles with bread, pasta, or grain.
How to Serve These Recipes
Presentation:
Picnic food looks better when it isn’t buried. Use shallow containers, wide bowls, and platters lined with parchment so the colors stay visible. Tomatoes, herbs, and grilled edges do a lot of visual work on their own, so give them room.
Accompaniments:
Pair richer dishes with something crisp: cucumber salad, pickles, chips, or a green salad with a punchy vinaigrette. Bread belongs next to anything saucy — sliders, chicken salad, meatballs, and grain bowls all benefit from a roll, pita, or flatbread. If the main dish is cold and sharp, add something warm or smoky beside it.
Portions:
For a mixed picnic spread, plan on one hearty main per person and one or two supporting dishes to share. Sliders, wraps, and skewers work well at 2 to 3 pieces per adult, while pasta salads and grain bowls land closer to 1 1/2 cups per serving. If kids are involved, smaller portions pack better than large, overstuffed sandwiches.
Beverage Pairing:
Lemon water with mint works across nearly everything here. For something a little more grown-up, a dry rosé or sparkling water with citrus slices fits the salty, grilled, and herb-heavy dishes especially well.
Additional Tips and Flavor Boosters

Flavor Enhancement: A final hit of acid changes a picnic dish faster than almost anything else. Keep lemon wedges, vinegar, balsamic glaze, or pickle brine on hand and add them at the end, not during the main mix.
Customization: Pack one extra topping for flexibility: pickled onions for grain bowls, chili crisp for noodles, chopped herbs for salads, or toasted nuts for wraps. One small add-on makes a whole platter feel tailored instead of assembled.
Serving Suggestions: Flaky salt belongs on grilled peaches, tomatoes, and burrata. A little grated lemon zest wakes up chicken, fish, and pasta salads. Fresh herbs should go on at the end, because the heat from a hot pan or a warm container makes basil and dill fade fast.
Make-It-Yours: For gluten-free eaters, swap in corn tortillas, rice, quinoa, or gluten-free pasta where needed. For dairy-free versions, use hummus, olive oil dressings, or tahini sauces instead of cheese-heavy fillings. For extra heat, add sliced jalapeño, calabrian chili paste, or a mild hot sauce on the side so people can decide for themselves.
Make-Ahead, Storage, and Reheating Guidance
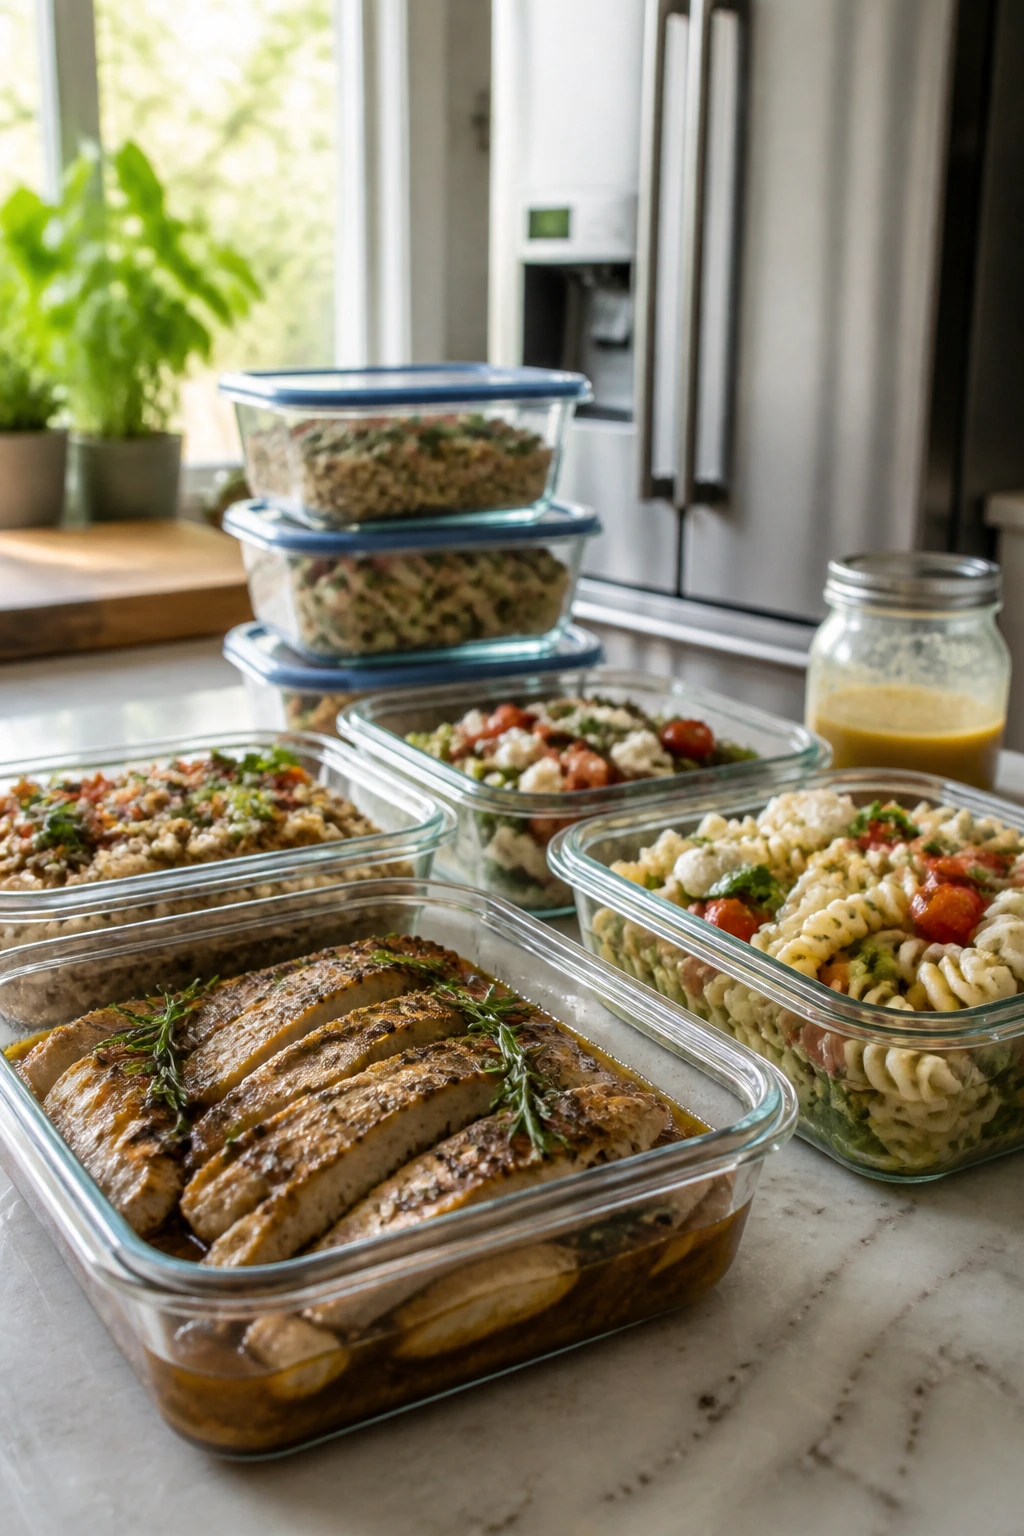
Most of these recipes behave well for 3 to 4 days in the fridge, though the crisp parts need separate storage if you want them to stay crisp. Pasta salads, grain bowls, slaws, and marinated chicken can usually be assembled the day before. Sandwiches, wraps, and tea sandwiches are best packed the same day, ideally within a few hours of serving.
Freezing is more useful for the cooked components than the finished picnic meal. Pulled chicken, meatballs, and some grilled chicken portions can be frozen for up to 2 months in airtight containers. Pasta salads, lettuce cups, tomato tarts, and cucumber-heavy dishes do not freeze well; the texture goes weird, and no amount of optimism fixes it.
For reheating, use the method that respects the food. Reheat chicken, sausage, meatballs, and pulled chicken gently in a covered skillet over low heat with a tablespoon or two of water or sauce. Quesadillas and flatbreads do better in a 350°F oven for 8 to 10 minutes so the outside stays crisp. If you have grilled vegetables or potatoes, a hot skillet brings them back better than a microwave, which tends to make them limp.
Keep cold items cold until the last possible minute. Pack dressings in separate jars, lettuce in dry containers with paper towels, and hot foods in insulated carriers if they need to stay warm. A picnic basket rewards good layering: sturdy things on the bottom, delicate things on top, and sauces in their own little kingdom.
Variations and Adaptations to Try
Gluten-Free Picnic Basket:
Use corn tortillas, lettuce cups, rice, quinoa, or gluten-free pasta in place of bread and wheat pasta. This works especially well for the chickpea pitas, noodle salad, and BLT pasta salad, where texture matters more than the flour itself.
Dairy-Light Setup:
Skip burrata, mozzarella, feta, and pimento cheese, then lean harder on olives, herbs, hummus, avocado, and vinaigrettes. The food still feels complete if you keep the seasoning sharp and the vegetables in good shape.
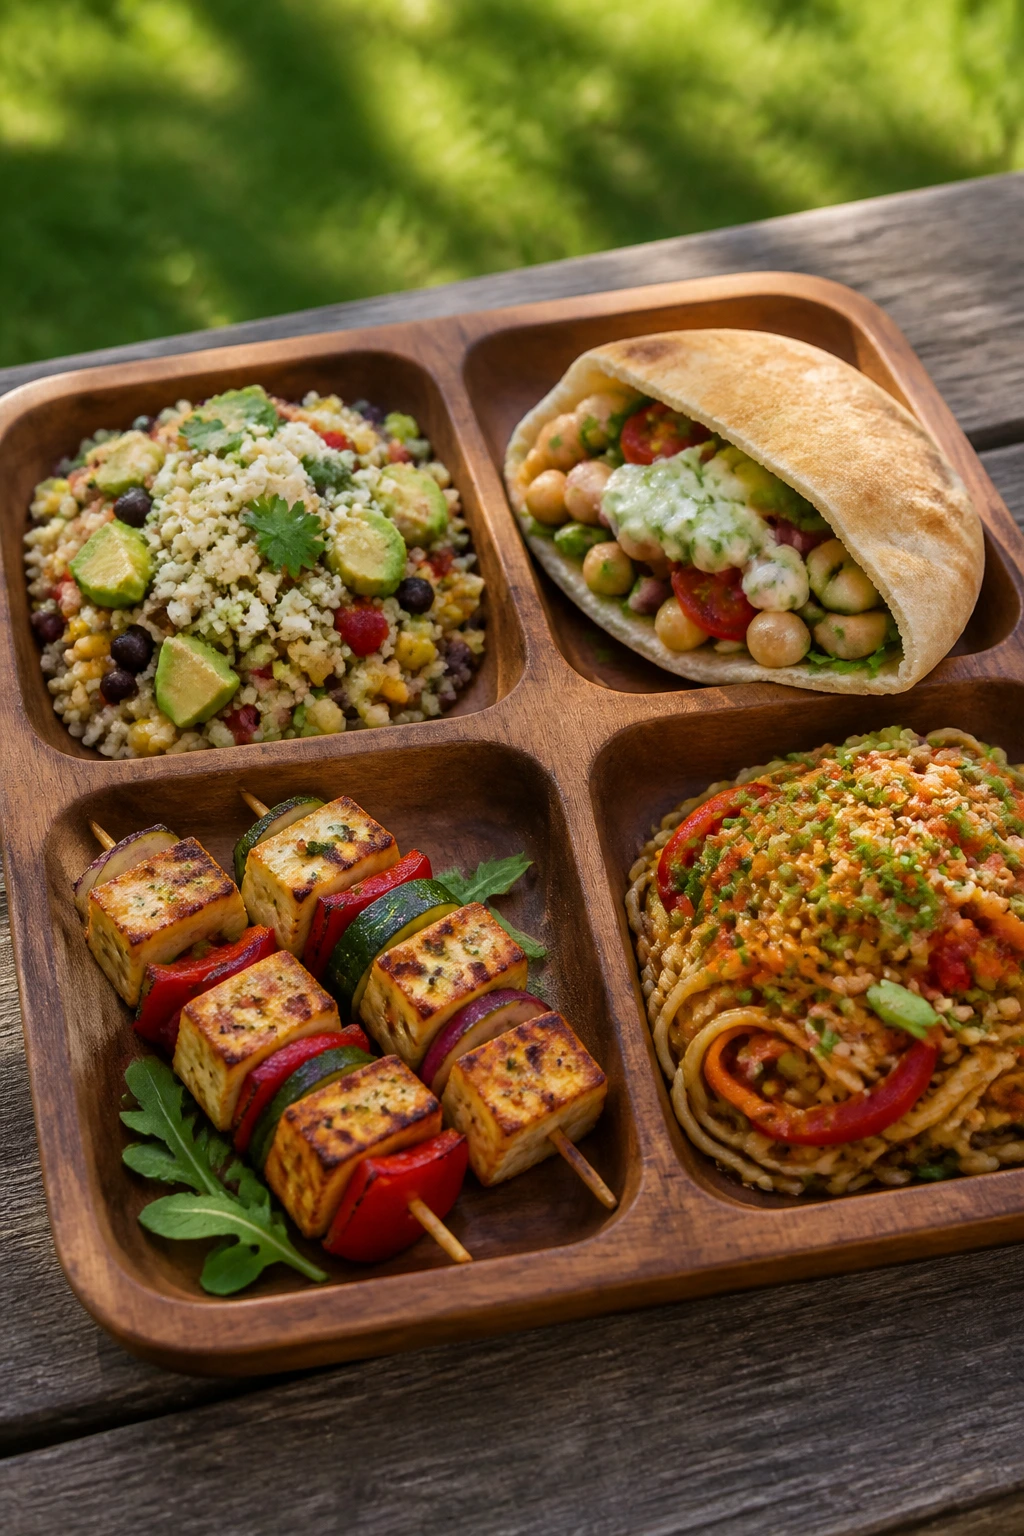
Vegetarian Main Plate:
Build a picnic around the chickpea pitas, tofu wraps, grain bowls, halloumi skewers, fritters, and tomato tart squares. Put them with one cold salad and one carb-heavy side, and nobody will feel shorted.
Heat-Seeker’s Basket:
Add chili crisp, jalapeños, hot sauce, or pepper flakes to noodles, wraps, chicken, or queso-style fillings. Put the heat on the side whenever possible; that keeps the whole spread usable for everyone instead of making one dish too aggressive.
Kid-Friendly Mild Version:
Keep dressings lighter on garlic, vinegar, and onion, then offer sauces separately. Sliders, wraps, fritters, quesadillas, and turkey burgers usually work well when cut small and kept simple.
Coastal Picnic Style:
Push salmon, shrimp, dill, lemon, cucumber, and herbed potatoes to the front. That set of flavors reads clean and cool, which is handy when the evening still feels warm and you want the meal to breathe a little.
Common Mistakes to Avoid

Packing everything while it is still steaming is the fastest way to ruin a picnic dinner. Heat creates condensation, condensation turns bread soft, and soft bread turns into regret. Let hot items cool a little before sealing them up, and keep wet ingredients separated whenever you can.
Another common misstep is under-seasoning cold food. Pasta salad, grain bowls, and chickpea salads always taste a little flatter once they cool. The fix is simple: season boldly in the bowl, then taste again after chilling and add a pinch more salt, lemon, or vinegar if needed.
People also overload wraps, pitas, and sliders. A sandwich that looks generous on the cutting board often becomes impossible to eat in the wild. Keep fillings compact and leave some space at the edges. The food will be easier to hold, and the first bite won’t send the filling down your shirt.
A related mistake: dressing leafy ingredients too early. Romaine, arugula, basil, and lettuce all wilt faster than home cooks expect, especially in a warm container. Store them dry and add them at the end unless you want a damp, tired result.
And then there’s the grill problem. A lot of picnic food gets overcooked because people think “portable” means “cook it until it’s well done just in case.” That’s backwards. Use a thermometer, pull chicken at 165°F, beef at your preferred temperature, and let carryover heat finish the job while the meat rests.
Frequently Asked Questions
How far ahead can I make picnic dinner recipes?
Most of the cold salads, slaws, grain bowls, and pasta dishes can be made the day before and held for 3 to 4 days. Wraps, sandwiches, and anything with lettuce or tomato are better assembled closer to serving time so the texture stays clean.
What food stays safest in a picnic cooler?
Foods with a low moisture shift and a stable texture do best: grilled chicken, pasta salad, potato salad, grain bowls, and hard-cooked eggs. Keep them in sealed containers with ice packs underneath and around them so they stay cold and don’t sweat.
Can I swap chicken thighs for chicken breasts in most of these recipes?
Yes, but breasts need closer attention because they dry out faster. If you use them on the grill or in sliders, pull them as soon as they hit 165°F and give them a short rest before slicing or shredding.
Which recipes travel best without refrigeration for a short time?
Skewers, flatbread squares, sausage hoagies, fritters, and potato salad handle a short wait better than lettuce-heavy dishes. That said, food safety still matters; keep cold food cold and hot food hot as long as you can.
What if I do not have a grill?
A grill pan, heavy skillet, or oven broiler can stand in for most grilled items. Chicken thighs, steak skewers, flatbread, peaches, and halloumi all adapt well, though you’ll want to watch them closely under the broiler because the line between charred and burnt is thin.
How do I stop sandwiches and wraps from getting soggy?
Use a barrier layer: butter, cheese, lettuce, or hummus between the bread and the wet ingredients. Pack tomatoes separately if you’re traveling farther than a few minutes, and wrap each sandwich in parchment before sealing it in a container.
Can I make these recipes vegetarian or vegan without wrecking them?
Absolutely. Chickpeas, tofu, hummus, grilled vegetables, grain bowls, and fritters make it easy to build a vegetarian picnic dinner. For vegan versions, swap dairy cheeses for hummus, tahini, avocado, or a sharp vinaigrette and keep the seasoning bold.
What’s the best way to keep food cold on the way to the picnic?
Use a pre-chilled cooler, then pack food in layers with ice packs on the bottom and sides. Cold items do better when they start cold, so refrigerate everything fully before you leave instead of trying to chill warm food on the drive.
Do I need to serve every dish chilled?
No. Some of the best picnic dinners are warm or room temperature — grilled chicken, sausage hoagies, fritters, and flatbreads all fall into that camp. The trick is to pick one temperature and protect it with good packing, not to make everything icy or steaming.
Packed for Sunset
Picnic dinners work best when they’re built with a little common sense and a little swagger. A dish that can sit, travel, and still taste bright at the end of the evening is worth more than one that arrives dramatic and then collapses into a mess. That’s the whole appeal of late-summer cooking: the ingredients are good enough that they do half the work for you.
Pick one grilled main, one cold salad, and one hand-held thing, and the basket starts to feel generous without becoming chaotic. Add a few crisp sides, keep the wet stuff separate, and the food will taste like the season instead of like a compromise.