
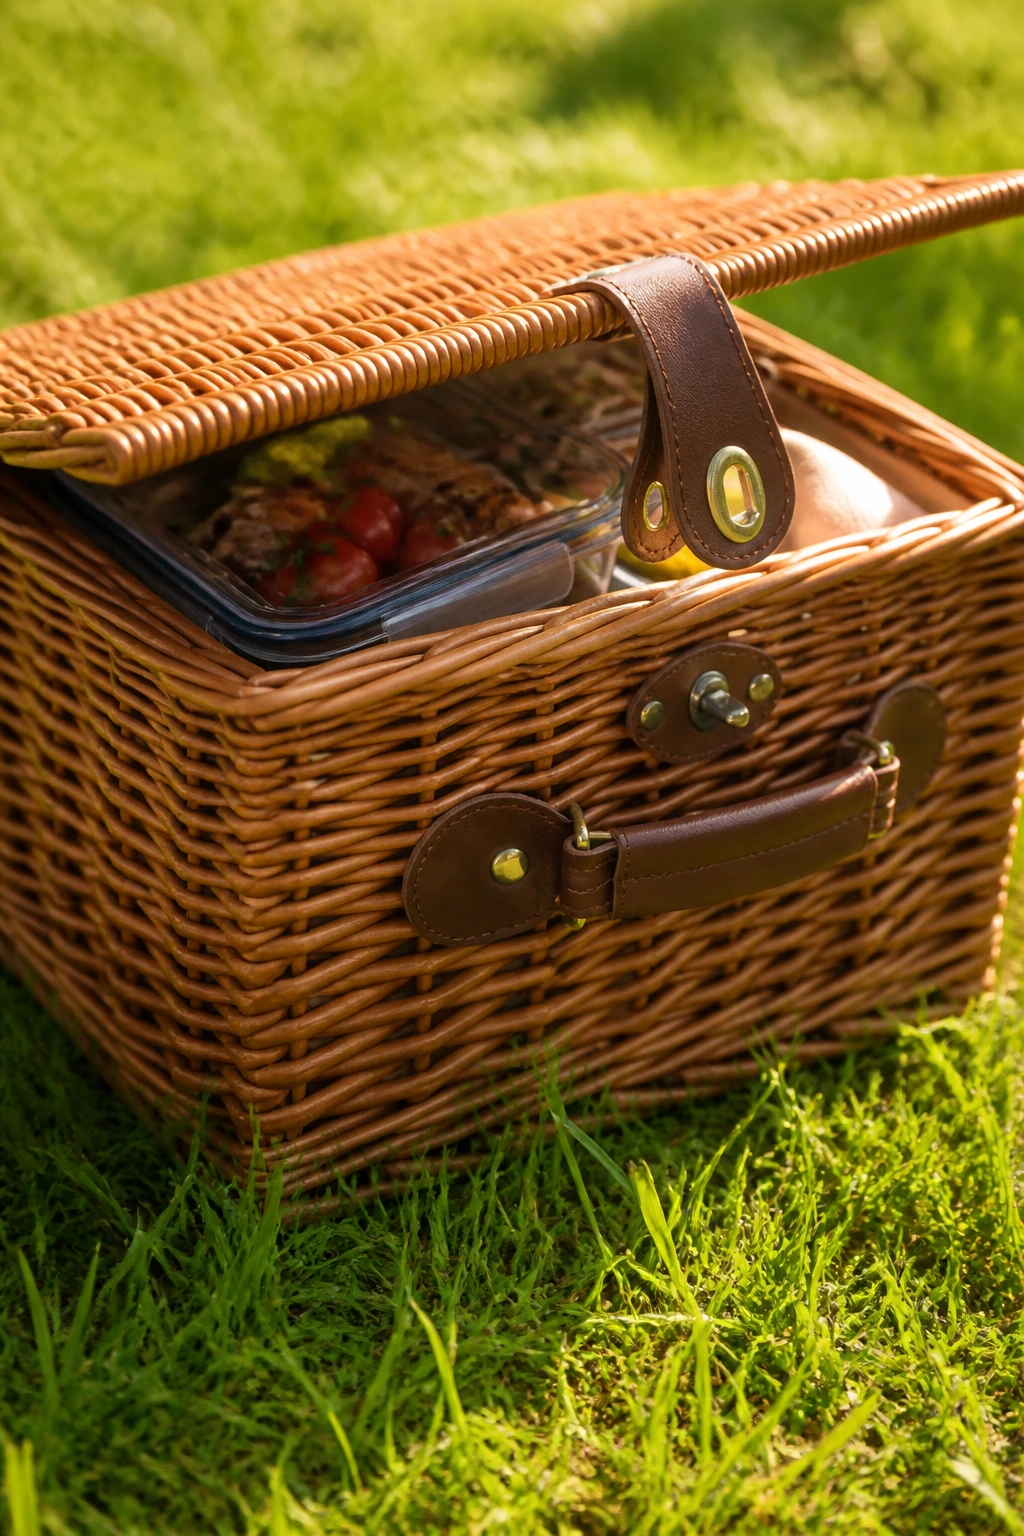
A picnic basket can go wrong fast. Bread sweats, soft cheese slumps, and that neat little stack of sandwiches turns into a damp, squashed mess before anyone has even shaken out the blanket. The best picnic basket food ideas are the ones that survive a warm car ride, a slightly crooked basket, and a few impatient hands reaching in early.
That’s why the smartest picnic food is rarely fussy. It’s sturdy. It has a little structure under the fingers. It tastes good cold, or at room temperature, or after a short rest in the shade while everyone argues about where to sit. I’ve always liked picnic foods that bring contrast: something creamy next to something crunchy, something salty beside something bright and juicy, something sweet at the end that doesn’t melt into a puddle by noon.
So this basket leans into foods that travel well and still taste like themselves when you finally open the lid. A few are make-ahead classics, a few are the sort of thing you grab with one hand, and a few are there because every picnic needs a little sugar, a little crunch, and one dish that makes people say, “Oh, good, you brought that.”
Why This Picnic Basket Works on Real Grass and Real Heat
-
No-soggy-bread logic: Several of these picnic basket food ideas are built around thick bread, rolls, wraps, or container-friendly fillings, so you can pack them without ending up with a wet middle layer.
-
Cooler-friendly timing: The egg dishes, chicken dishes, creamy dips, and cheese-forward bites all hold up better when they’re packed cold and kept in a bag with ice packs or frozen water bottles.
-
Mix-and-match texture: You get crisp celery, juicy tomatoes, tender pasta, flaky pastry, chewy blondies, and crunchy crackers in one spread, which keeps the basket from feeling samey.
-
Easy to eat without a table: Skewers, roll-ups, bars, hand pies, and cups all make sense on a blanket. No one needs a knife and fork for everything.
-
Make-ahead peace of mind: Most of these can be cooked, chilled, or assembled the night before, which matters more than people admit when the picnic blanket is already in the trunk.
-
Sweet and savory balance: A good basket needs something salty, something fresh, and one sweet item that doesn’t melt into despair halfway through the outing.
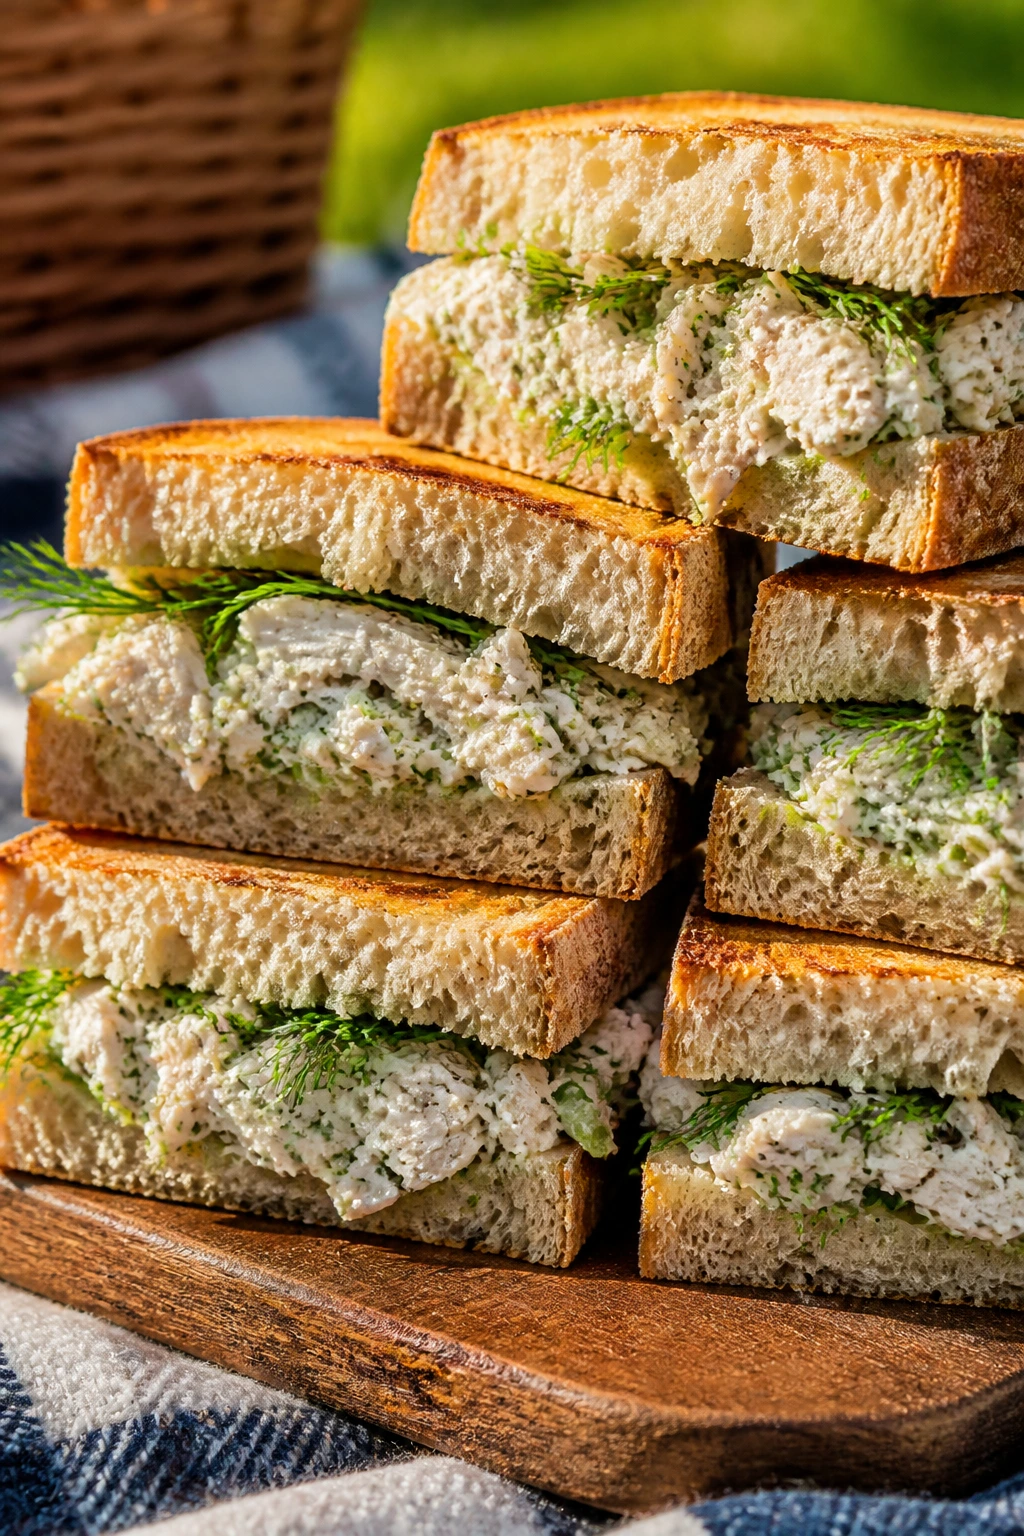
1. Lemon-Herb Chicken Salad Sandwiches
Intro: Cold chicken salad is one of those foods that lives or dies by balance. Too much mayo, and it feels heavy; too little, and it eats like dry shreds on bread. This version stays bright with lemon, dill, and a little Dijon, and the celery gives it the crisp snap a picnic sandwich needs.
Why It Works: The mix is sturdy enough to make ahead, and the chicken holds its texture better when it’s shredded instead of chopped into mush. A short chill in the fridge lets the lemon and herbs settle into the mayo, so the filling tastes seasoned all the way through instead of like dressing stuck to the outside.
Key Ingredients:
- 2 cups cooked chicken, shredded into small pieces
- 1/3 cup mayonnaise
- 2 tablespoons plain Greek yogurt
- 1 celery rib, finely diced
- 2 tablespoons chopped dill
- 1 tablespoon lemon juice
- 1 teaspoon Dijon mustard
- 1/2 teaspoon kosher salt
- 1/4 teaspoon black pepper
- 8 slices sturdy sandwich bread or 4 soft rolls
- Butter lettuce leaves, for layering
Quick Steps:
- In a bowl, whisk the mayo, yogurt, lemon juice, Dijon, salt, and pepper until smooth.
- Fold in the shredded chicken, celery, and dill until every piece looks lightly coated.
- Chill the mixture for 20 to 30 minutes so the filling firms up and the flavor settles.
- Toast the bread lightly if you want extra protection against sogginess, then cool it for a minute.
- Layer lettuce on the bread, spoon on the chicken salad, and close the sandwiches. Wrap each one in parchment or wax paper before packing.
Equipment for This Recipe:
- Medium mixing bowl
- Chef’s knife and cutting board
- Spoon or rubber spatula
- Toaster or skillet for light toasting
How to Serve This Dish: Cut the sandwiches on a diagonal and stack them upright in the basket so the filling stays put. A handful of kettle chips and a dill pickle on the side make the whole thing feel deliberate instead of thrown together.
Pro Tips for This Recipe:
- Use chicken that’s been chilled before mixing; warm chicken loosens the dressing and turns the filling greasy.
- Shred the meat by hand if you can. It gives you longer, softer strands that sit better in the bread.
- Pack lettuce separately if the sandwiches will sit for more than an hour.
- If the bread is soft and thin, toast only one side. That side becomes your moisture shield.
Variations on This Dish:
- Curry Chicken Salad: Stir in 1 teaspoon curry powder and 2 tablespoons chopped raisins for a sweet-savory version.
- Cranberry-Pecan Chicken Salad: Swap dill for parsley and add 1/4 cup chopped pecans for crunch.
- Avocado Herb Fill: Replace half the mayo with mashed avocado and serve the filling in wraps instead of bread.
Common Mistakes to Avoid with This Dish:
- Using wet chicken: Warm or freshly rinsed chicken makes the salad loose. Cool it first.
- Skipping the chill time: The filling tastes sharper and less blended if you stuff the sandwiches right away.
- Overloading the bread: Thick filling looks generous, then falls out on the first bite. Keep it to a neat layer.
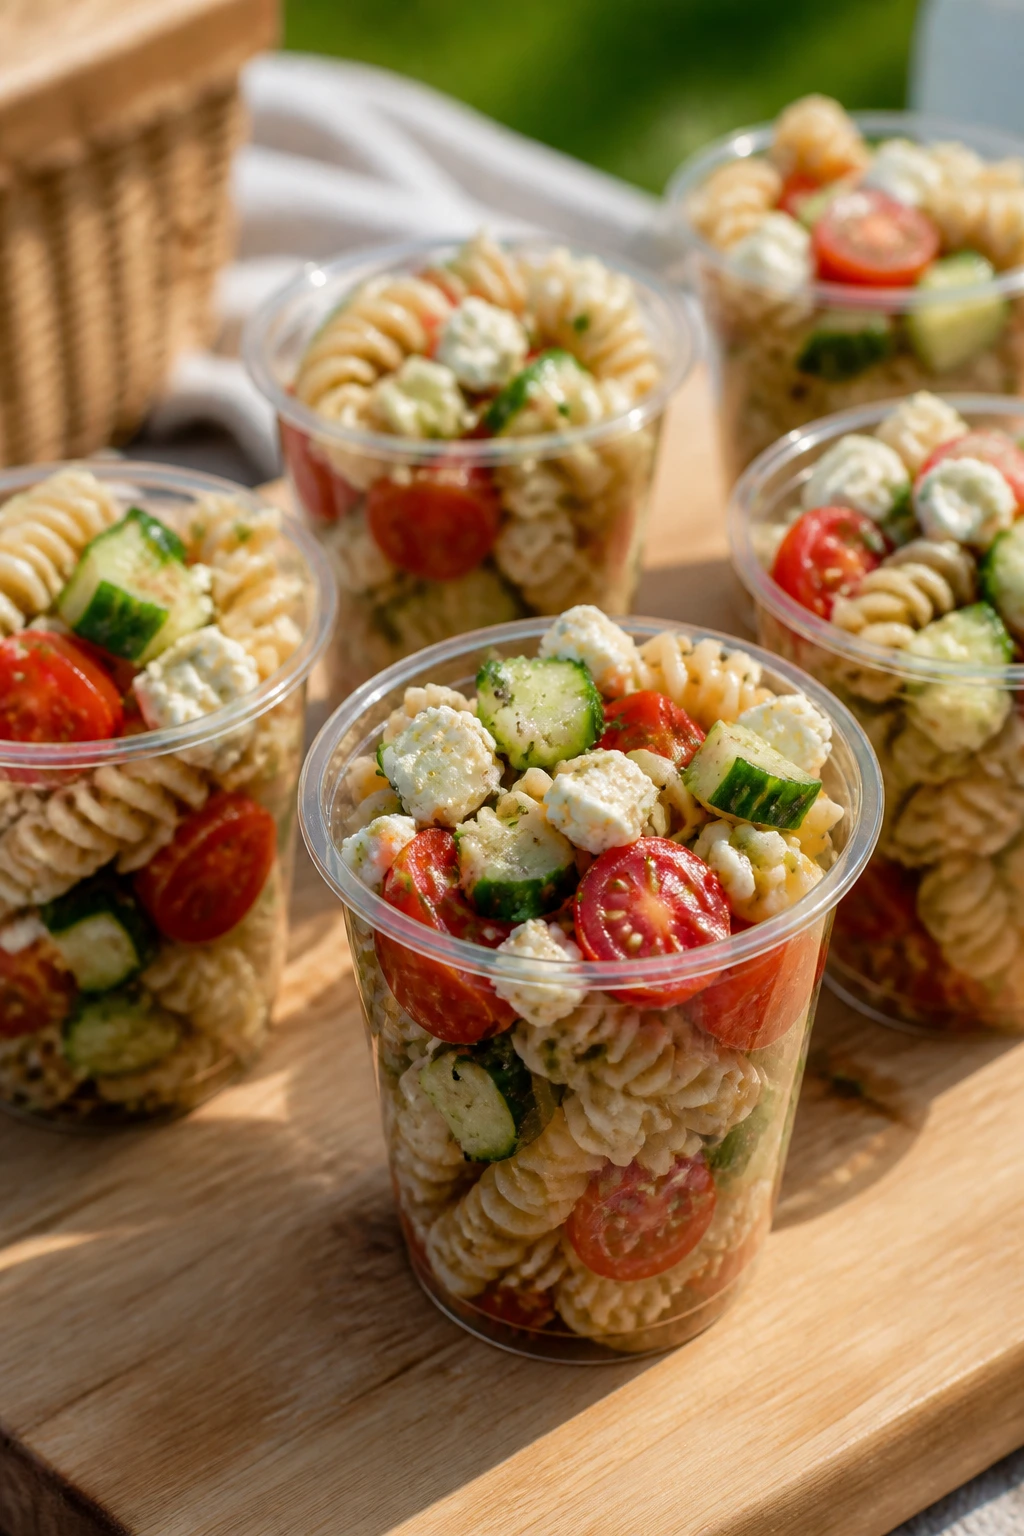
2. Tomato-Cucumber Feta Pasta Salad Cups
Intro: Pasta salad can be boring if it’s clumped, bland, or drowned in dressing. This one stays lively because the tomatoes burst, the cucumber brings cold crunch, and the feta gives you those salty little hits that make people keep scooping.
Why It Works: Short pasta catches the vinaigrette in its ridges, and serving it in cups keeps it from collapsing into a giant serving bowl at the picnic. The vegetables are sturdy enough to handle a quick toss, and the whole thing tastes better after a short rest because the vinegar wakes up the tomatoes.
Key Ingredients:
- 8 ounces short pasta, like rotini or bow ties
- 1 cup cherry tomatoes, halved
- 1 cucumber, diced
- 1/2 small red onion, thinly sliced
- 1/2 cup crumbled feta
- 1/4 cup olive oil
- 2 tablespoons red wine vinegar
- 1 teaspoon dried oregano
- 1/2 teaspoon kosher salt
- 1/4 teaspoon black pepper
- Small paper or plastic cups for serving
Quick Steps:
- Boil the pasta in well-salted water until al dente, then drain and rinse under cool water.
- Whisk the olive oil, vinegar, oregano, salt, and pepper in a large bowl.
- Add the cooled pasta, tomatoes, cucumber, and red onion, then toss until everything glistens.
- Fold in the feta last so it stays in soft crumbles instead of disappearing.
- Spoon into cups and chill for at least 15 minutes before packing.
Equipment for This Recipe:
- Large pot
- Colander
- Mixing bowl
- Measuring cups and spoons
How to Serve This Dish: Spoon the salad into small cups right before you leave, then tuck a fork into each one if the picnic is more than finger-food casual. It plays nicely beside grilled chicken, olives, or a pile of salty crackers.
Pro Tips for This Recipe:
- Salt the pasta water until it tastes like broth. Bland pasta makes a bland salad.
- Dice the cucumber small so it doesn’t dump water into the bottom of the cup.
- Let the pasta cool before dressing it or the oil will slide off instead of clinging.
- Add the feta at the end so it stays distinct and creamy.
Variations on This Dish:
- Chickpea Pasta Salad: Add 1 cup rinsed chickpeas for more heft and a slightly nuttier bite.
- Orzo Picnic Cups: Swap the rotini for orzo if you want a finer, spoonable texture.
- Herb Garden Version: Add chopped parsley, basil, and a little mint for a fresher finish.
Common Mistakes to Avoid with This Dish:
- Overcooking the pasta: Soft pasta goes gluey once it chills. Stop at al dente.
- Using watery cucumber chunks: Big cubes leak. Small dice is better.
- Dressing while the pasta is hot: The salad goes oily and slippery instead of coated.
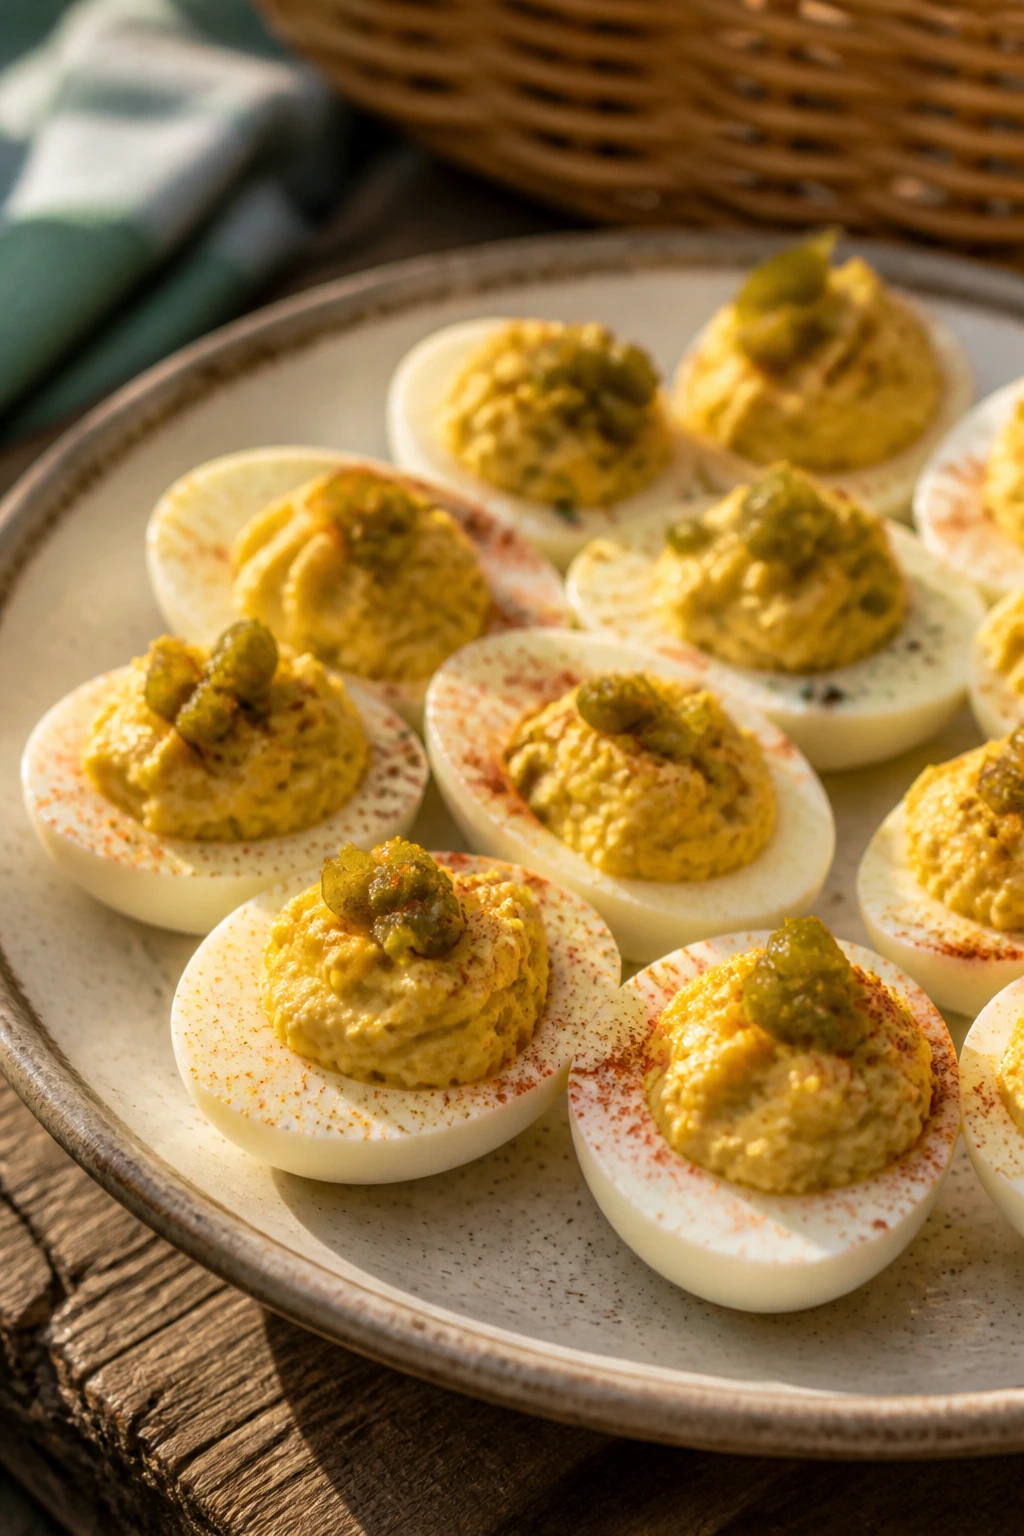
3. Classic Deviled Eggs with Pickle Relish
Intro: Deviled eggs disappear at picnics for a reason. They’re cold, salty, creamy, and easy to eat in one or two bites, which is exactly what you want when someone’s already halfway into the potato chips.
Why It Works: The filling is rich enough to feel special, but the pickle relish and mustard keep it from tasting flat. Deviled eggs also pack neatly in a rigid container, which matters because a soft basket bottom and a tray of eggs do not get along.
Key Ingredients:
- 6 large eggs
- 3 tablespoons mayonnaise
- 1 teaspoon yellow mustard
- 1 teaspoon pickle relish, drained
- 1 teaspoon white vinegar
- 1/4 teaspoon kosher salt
- 1/8 teaspoon black pepper
- Paprika, for dusting
- Chopped chives, for garnish
Quick Steps:
- Place the eggs in a saucepan, cover with cold water, and bring to a boil.
- Turn off the heat, cover the pan, and let the eggs sit for 10 to 11 minutes.
- Move the eggs to an ice bath and chill until fully cool, then peel them.
- Slice each egg in half lengthwise and scoop the yolks into a bowl.
- Mash the yolks with mayo, mustard, relish, vinegar, salt, and pepper until smooth.
- Spoon or pipe the filling back into the egg whites, then dust with paprika and chives.
Equipment for This Recipe:
- Medium saucepan
- Slotted spoon
- Mixing bowl
- Deviled egg tray or snug container
How to Serve This Dish: Keep them chilled until the basket is opened, then set them out in one layer with a little paprika on top. A few dill pickle spears beside them make the plate feel sharp and tidy.
Pro Tips for This Recipe:
- Older eggs peel more easily than very fresh ones.
- Chill the eggs before peeling; the shells usually come off cleaner.
- A small piping bag makes the filling neater, but a zip-top bag with the corner snipped works fine.
- Pack them in a single layer. Stacking is a mess waiting to happen.
Variations on This Dish:
- Smoked Paprika Eggs: Swap the garnish for smoked paprika and a pinch of cayenne.
- Dill Pickle Eggs: Use chopped dill pickles instead of relish for more crunch.
- Bacon-Chive Eggs: Top each one with a crisp bacon crumb and extra chives.
Common Mistakes to Avoid with This Dish:
- Overcooking the eggs: Gray-green yolks taste fine, but the texture dries out. Pull them on time.
- Packing them warm: Warm eggs sweat in the container and loosen the filling.
- Overmixing the yolk filling: Beat it until smooth, not airy. Fluffy deviled eggs can look strange and melt on the tray.
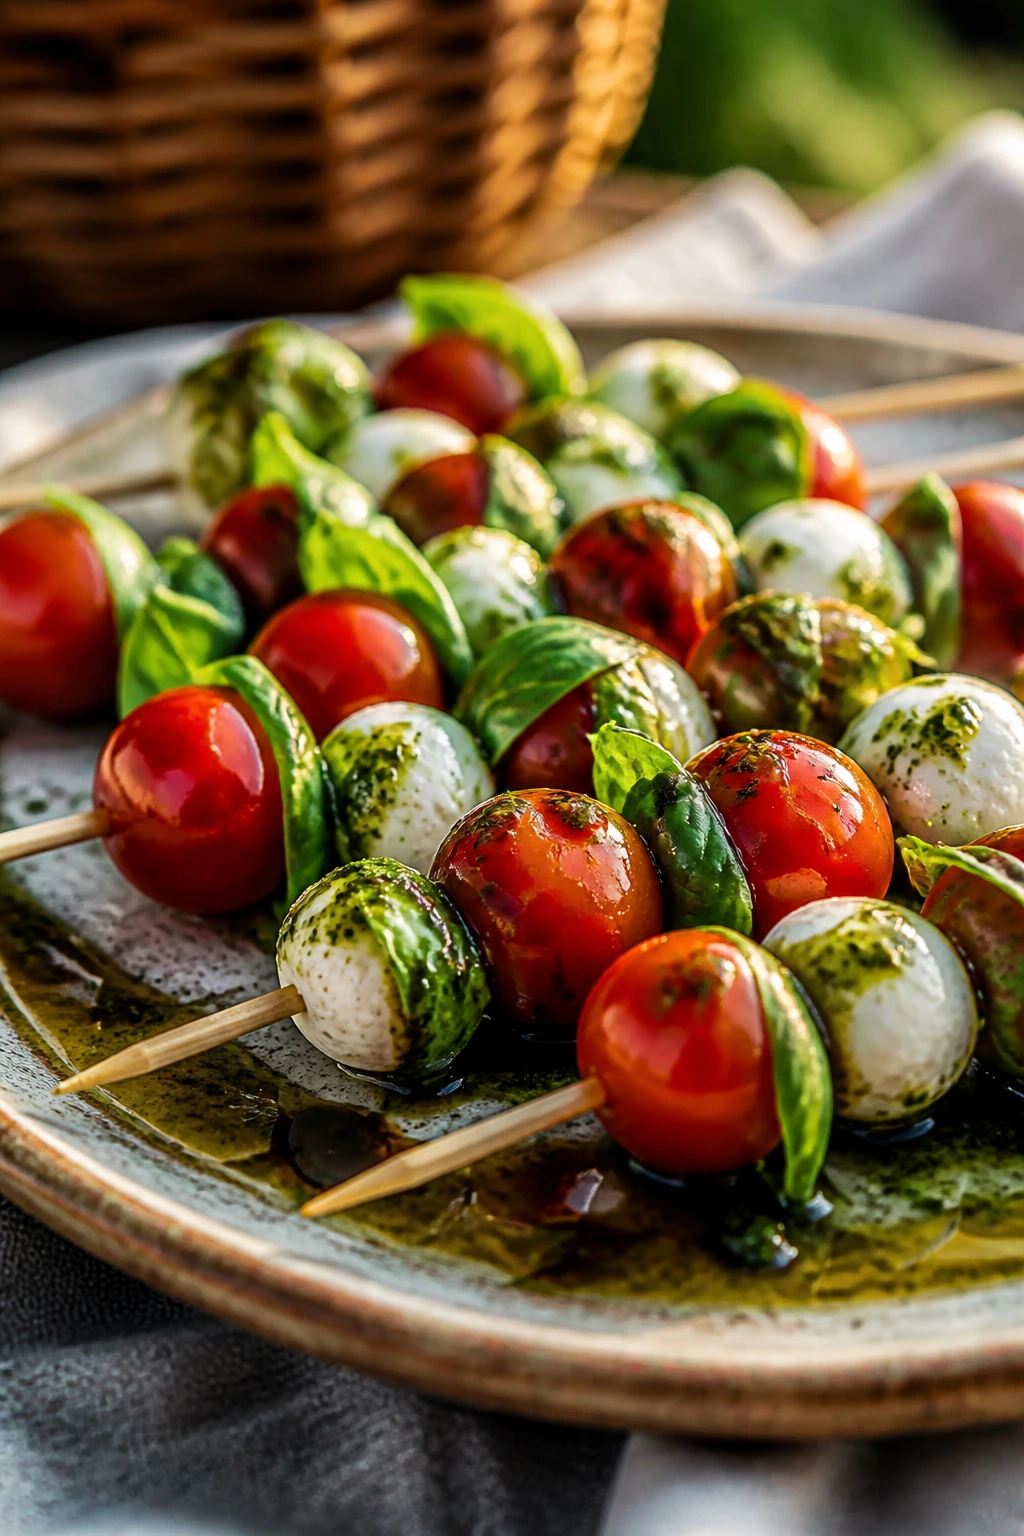
4. Caprese Skewers with Basil Oil
Intro: These are the pretty little bites that make a picnic spread look planned. Tomato, mozzarella, and basil is a classic for a reason, and on a skewer it becomes portable instead of precious.
Why It Works: Low-moisture mozzarella holds shape better than soft balls packed in extra liquid, and the basil oil keeps the herbs from bruising. A small drizzle of balsamic glaze gives just enough sweetness to make the tomatoes taste louder.
Key Ingredients:
- 1 pint cherry tomatoes
- 8 ounces mozzarella pearls or ciliegine
- 1 packed cup basil leaves
- 3 tablespoons olive oil
- 1 tablespoon balsamic glaze
- 1/2 teaspoon kosher salt
- 1/4 teaspoon black pepper
- Small skewers or toothpicks
Quick Steps:
- Pat the tomatoes and mozzarella dry with paper towels.
- Blend or finely chop the basil with the olive oil until the oil turns green and fragrant.
- Thread a tomato, a basil leaf, and a mozzarella pearl onto each skewer.
- Arrange the skewers on a plate, then drizzle with basil oil and balsamic glaze.
- Finish with salt and pepper just before packing.
Equipment for This Recipe:
- Small bowl
- Spoon or mini whisk
- Skewers or toothpicks
- Paper towels
How to Serve This Dish: Lay the skewers in a shallow container or on a platter lined with parchment. They pair nicely with crackers, olives, and any food that needs a bright, cool bite next to it.
Pro Tips for This Recipe:
- Dry the cheese well. Wet mozzarella slides off the skewer and dilutes the flavor.
- Add the basil oil close to serving if you want the leaves to stay vivid.
- If the tomatoes are very juicy, salt them lightly after assembling.
- Use the shortest skewers you can. They pack better.
Variations on This Dish:
- Peach Caprese: Swap half the tomatoes for firm peach wedges.
- Pesto Caprese: Brush the mozzarella with a thin layer of pesto instead of basil oil.
- Prosciutto Wrap: Add a strip of prosciutto if the picnic menu leans more savory.
Common Mistakes to Avoid with This Dish:
- Using basil that’s wet from washing: It bruises and turns dark fast.
- Packing the skewers in a deep pile: The bottom ones get smashed.
- Making them hours too early with glaze already on: The tomatoes weep and the plate gets slippery.
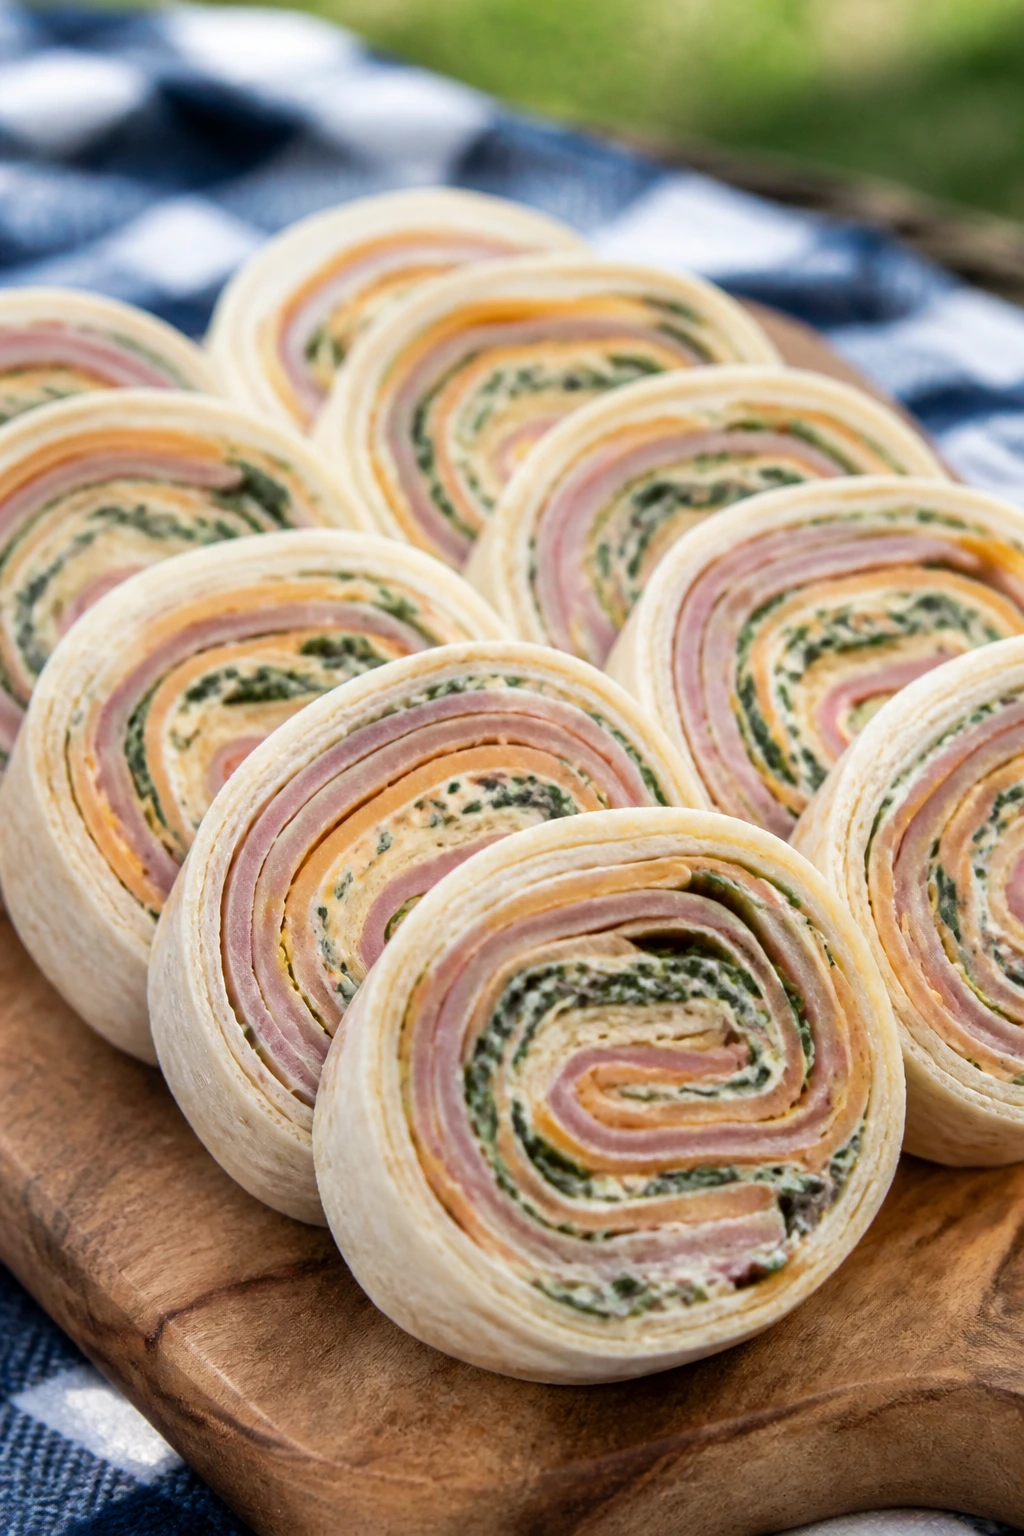
5. Ham, Cheddar, and Dijon Pinwheels
Intro: Pinwheels look childish in the best way. They’re neat little spirals with a tidy bite, and they hold together far better than a floppy sandwich when the picnic basket gets bumped in the trunk.
Why It Works: Cream cheese acts like glue, while the tortilla gives you a thin, flexible wrap that slices cleanly after chilling. The Dijon cuts through the ham and cheddar, so the filling tastes sharp instead of dense.
Key Ingredients:
- 4 large flour tortillas
- 4 ounces cream cheese, softened
- 2 teaspoons Dijon mustard
- 8 ounces sliced ham
- 8 ounces sliced cheddar
- 1 cup baby spinach leaves
- Black pepper, to taste
Quick Steps:
- Stir the cream cheese and Dijon together until smooth.
- Spread the mixture over each tortilla, leaving a narrow border.
- Layer on the ham, cheddar, spinach, and a little black pepper.
- Roll each tortilla tightly, then wrap in plastic or parchment and chill for at least 30 minutes.
- Slice into 1-inch pinwheels with a sharp knife.
Equipment for This Recipe:
- Cutting board
- Sharp knife or serrated knife
- Mixing bowl
- Plastic wrap or parchment
How to Serve This Dish: Pile the slices upright in a container so the spirals show. They do fine beside fruit, chips, or a handful of pickles, and they’re one of the easiest things to grab while standing.
Pro Tips for This Recipe:
- Let the cream cheese soften or it will tear the tortillas.
- Pat the spinach dry; one wet leaf can make the whole roll slip.
- Chill before slicing. Warm rolls squish instead of spiraling.
- Use a sharp, clean knife and wipe it between cuts.
Variations on This Dish:
- Turkey Club Pinwheels: Swap the ham for turkey and add crisp bacon bits.
- Veggie Pinwheels: Leave out the meat and add shredded carrots plus sliced cucumber.
- Spicy Mustard Roll-Ups: Mix a little horseradish or hot mustard into the cream cheese.
Common Mistakes to Avoid with This Dish:
- Overfilling the tortilla: It looks generous, then unravels.
- Slicing too soon: The filling hasn’t set, so the pinwheels lean and smear.
- Using thin, brittle tortillas: They crack at the edge and fall apart when rolled.
6. Crispy Buttermilk Fried Chicken Pieces
Intro: Fried chicken is not subtle. That is the point. A good piece still has crunch when it cools a little, the meat underneath stays juicy, and the seasoning reaches all the way to the bone instead of sitting only on the crust.
Why It Works: Buttermilk tenderizes the chicken and gives the flour something to cling to, while cornstarch in the coating helps the crust stay crisp longer. For a picnic, pieces beat a whole bird because they pack better and can be eaten without a knife.
Key Ingredients:
- 2 pounds chicken thighs and drumsticks
- 2 cups buttermilk
- 1 tablespoon hot sauce
- 2 cups all-purpose flour
- 1/2 cup cornstarch
- 2 teaspoons paprika
- 2 teaspoons garlic powder
- 2 teaspoons kosher salt
- 1 teaspoon black pepper
- Neutral oil, for frying
Quick Steps:
- Mix the buttermilk and hot sauce in a large bowl, then add the chicken and chill for at least 4 hours.
- Combine the flour, cornstarch, paprika, garlic powder, salt, and pepper in a wide dish.
- Remove the chicken from the buttermilk and dredge each piece in the flour mixture, pressing so the coating sticks.
- Fry in 325°F to 350°F oil until deeply golden and the internal temperature reaches 165°F, usually 12 to 16 minutes depending on size.
- Drain on a wire rack, not paper towels, so the crust stays crisp as it cools.
Equipment for This Recipe:
- Heavy Dutch oven or deep skillet
- Thermometer
- Wire rack
- Tongs
How to Serve This Dish: Let the chicken cool before packing, then nestle it into a paper-lined container with pickles or hot sauce on the side. It tastes best when the crust still has bite, so don’t bury it under warm bread or damp salad.
Pro Tips for This Recipe:
- Season the flour mix well; fried chicken tastes flat if the coating is under-salted.
- Fry in batches. Crowding the pan drops the oil temp and gives you greasy skin.
- Rest the chicken on a rack for 10 minutes before packing.
- A little extra paprika in the flour deepens the color and gives the crust a warm, almost rusty look.
Variations on This Dish:
- Spicy Picnic Chicken: Add cayenne and a spoon of hot sauce to the dredge.
- Oven-Fried Version: Bake at 425°F on a rack after a light oil spray if you want less splatter.
- Gluten-Free Chicken: Use rice flour and cornstarch for the coating.
Common Mistakes to Avoid with This Dish:
- Frying too hot: The crust darkens before the meat cooks through.
- Packing while steaming hot: Steam softens the crust in minutes.
- Skipping the thermometer: Guessing at doneness leads to dry chicken or undercooked bone-in pieces.
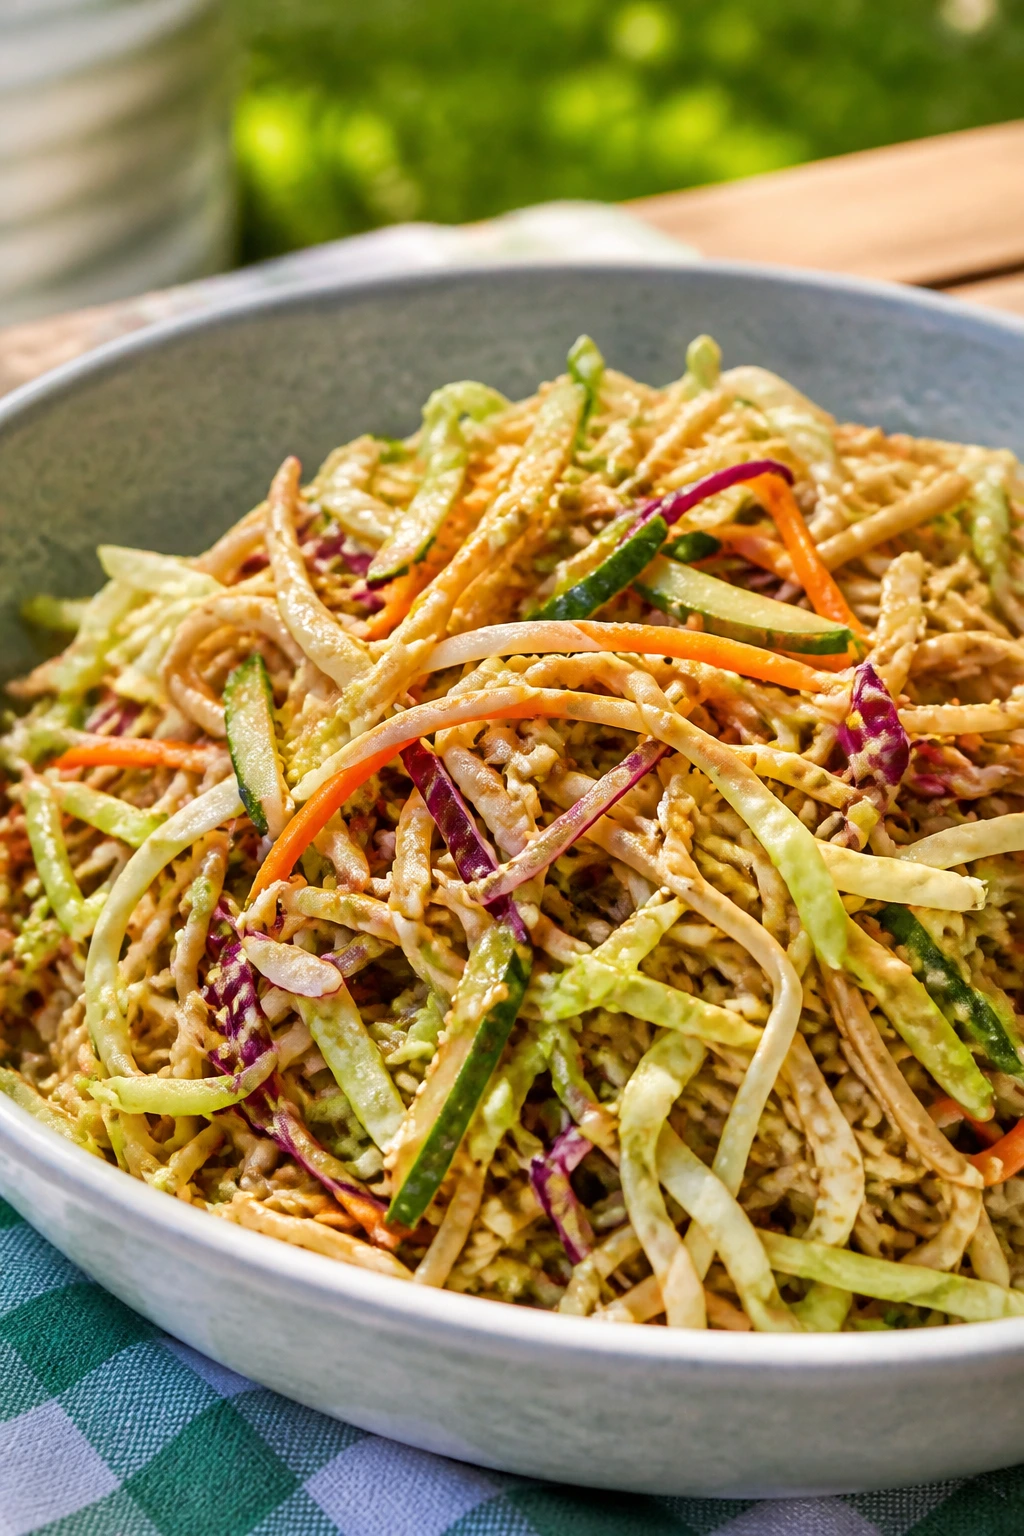
7. Cold Sesame Noodle Salad with Crunchy Cabbage
Intro: Cold noodle salad is a picnic workhorse. It’s filling, it’s easy to fork up, and it tastes even better when the peanut-sesame dressing soaks into the noodles for a little while.
Why It Works: Sesame oil and peanut butter give the dressing body, while cabbage and carrot keep the bowl from turning soft. A splash of rice vinegar cuts the richness, which matters when the weather is warm and nobody wants a heavy lunch.
Key Ingredients:
- 8 ounces noodles, such as soba, ramen, or spaghetti
- 2 cups shredded cabbage
- 1 carrot, julienned or grated
- 2 scallions, thinly sliced
- 1 cucumber, cut into thin strips
- 2 tablespoons sesame oil
- 3 tablespoons soy sauce
- 2 tablespoons rice vinegar
- 1 tablespoon peanut butter
- 1 tablespoon honey
- 1 teaspoon sesame seeds
- Lime wedges, for serving
Quick Steps:
- Cook the noodles until just tender, then rinse well under cold water.
- Whisk the sesame oil, soy sauce, vinegar, peanut butter, and honey until smooth. Add a spoonful of warm water if the sauce is too thick.
- Toss the noodles with cabbage, carrot, scallions, and cucumber.
- Pour on the dressing and mix until every strand is coated.
- Finish with sesame seeds and a squeeze of lime before chilling.
Equipment for This Recipe:
- Large pot
- Colander
- Mixing bowl
- Tongs or chopsticks for tossing
How to Serve This Dish: Spoon it into a shallow container or little deli cups so the vegetables stay on top and the noodles don’t compress into one brick. A few chopped peanuts or extra scallions at the last minute sharpen the flavor.
Pro Tips for This Recipe:
- Rinse the noodles until they are fully cool. Residual heat makes them stick.
- Cut the cabbage fine; big chunks fight the noodles.
- Thin the dressing a little if it clings too hard in the fridge.
- Hold cucumber aside if the salad will sit for a long stretch.
Variations on This Dish:
- Tahini Noodles: Use tahini instead of peanut butter for a deeper, sesame-heavy dressing.
- Spicy Crisp Version: Add chili crisp or a pinch of red pepper flakes.
- Edamame Salad: Toss in a cup of shelled edamame for more protein.
Common Mistakes to Avoid with This Dish:
- Overcooking the noodles: They turn soft after chilling if they start out mushy.
- Using too little dressing: Dry noodles tangle and taste flat.
- Packing while the noodles are warm: The salad sweats, and the cabbage wilts.
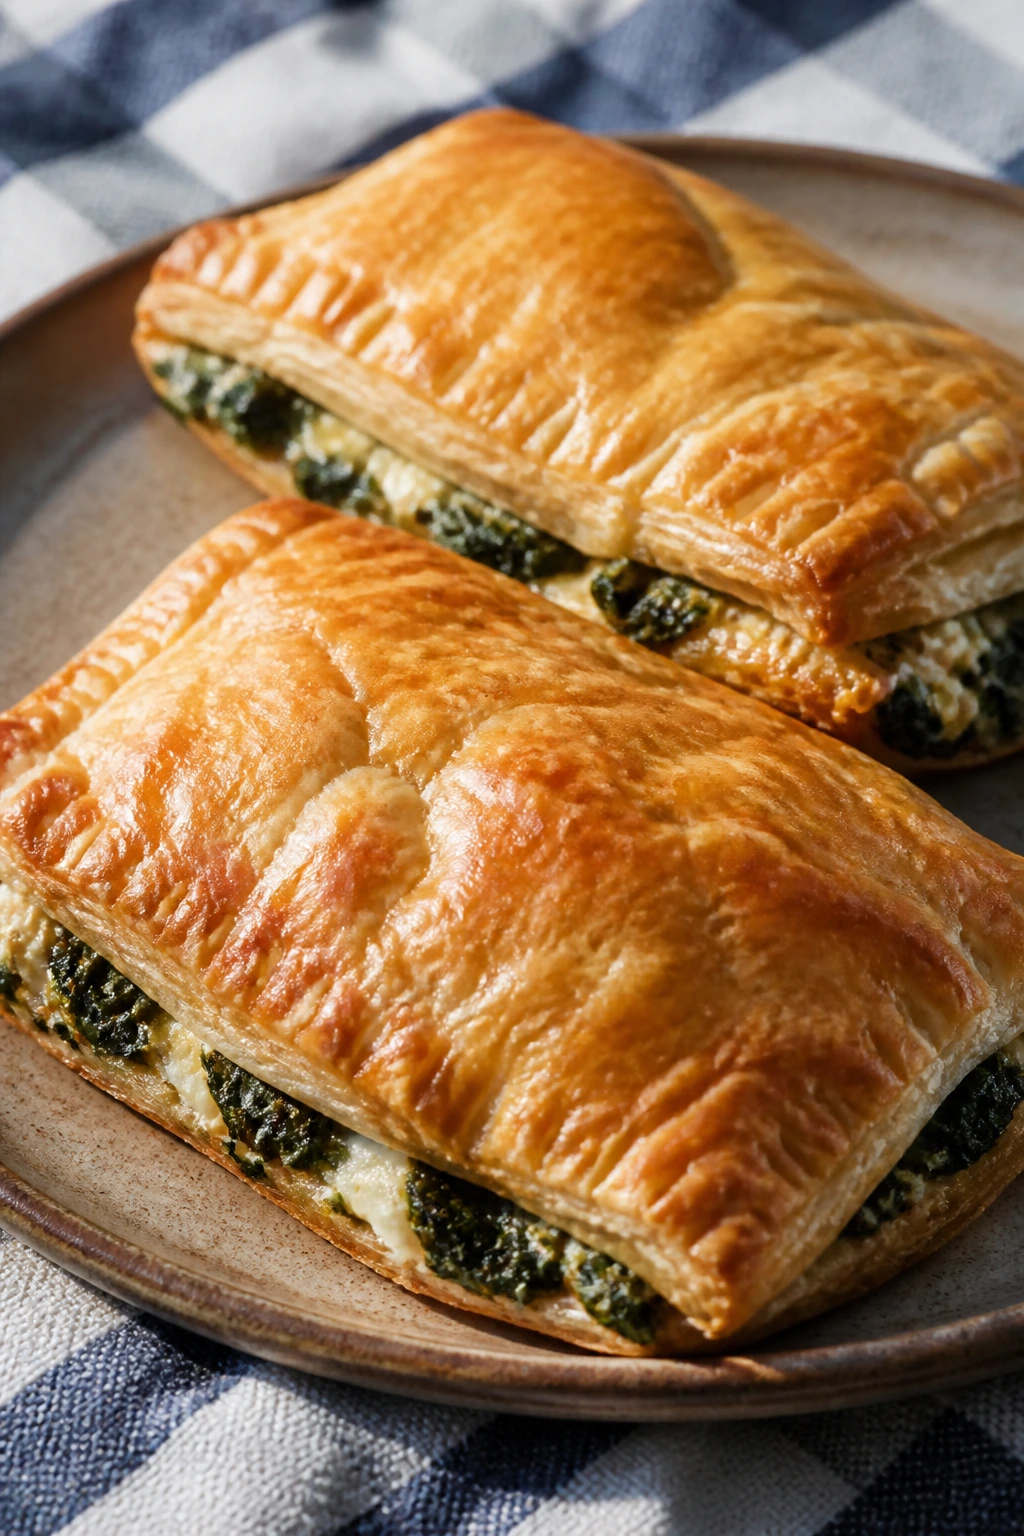
8. Spinach and Feta Hand Pies
Intro: Hand pies make a picnic feel like someone in the kitchen had manners. They’re contained, flaky, and easy to eat with one hand while the other hand is busy holding a drink or a child or a blanket corner.
Why It Works: The filling stays inside because the spinach is cooked down first, which removes the extra water that ruins pastry. Feta brings salt, dill brings lift, and puff pastry gives you a crisp shell that still tastes good at room temperature.
Key Ingredients:
- 1 sheet puff pastry, thawed
- 4 cups fresh spinach
- 1/2 cup crumbled feta
- 1/4 cup finely chopped onion
- 1 clove garlic, minced
- 1 egg, beaten
- 1 tablespoon chopped dill
- Salt and black pepper
Quick Steps:
- Cook the onion and garlic in a skillet until soft and fragrant, then add the spinach and cook until all moisture has evaporated.
- Let the filling cool, then stir in feta, dill, and a little salt and pepper.
- Cut the puff pastry into squares or circles and spoon a small mound of filling onto half of them.
- Brush the edges with egg, fold, crimp, and vent the tops with a fork.
- Bake at 400°F until puffed and golden, usually 18 to 22 minutes.
Equipment for This Recipe:
- Skillet
- Baking sheet
- Parchment paper
- Pastry brush
How to Serve This Dish: These are good warm or room temperature, which is half the reason I keep making them. Pack them in a single layer, and serve with a little lemon wedge if you want the spinach and feta to taste sharper.
Pro Tips for This Recipe:
- Cool the filling completely before assembling, or the pastry will soften before it hits the oven.
- Do not overfill. A spoonful too much and the seam opens.
- Brush the tops with egg wash for a deep, glossy color.
- Let them rest 10 minutes after baking so the steam inside settles.
Variations on This Dish:
- Mushroom-Feta Pies: Replace half the spinach with finely chopped cooked mushrooms.
- Ricotta Herb Pies: Swap feta for ricotta and add parsley and lemon zest.
- Crustless Mini Bake: Spoon the filling into muffin cups if you want a lighter format.
Common Mistakes to Avoid with This Dish:
- Leaving moisture in the spinach: Wet filling bursts the pastry.
- Skipping the vent holes: The pies balloon and split.
- Trying to move them too soon: Hot pastry tears before it firms up.
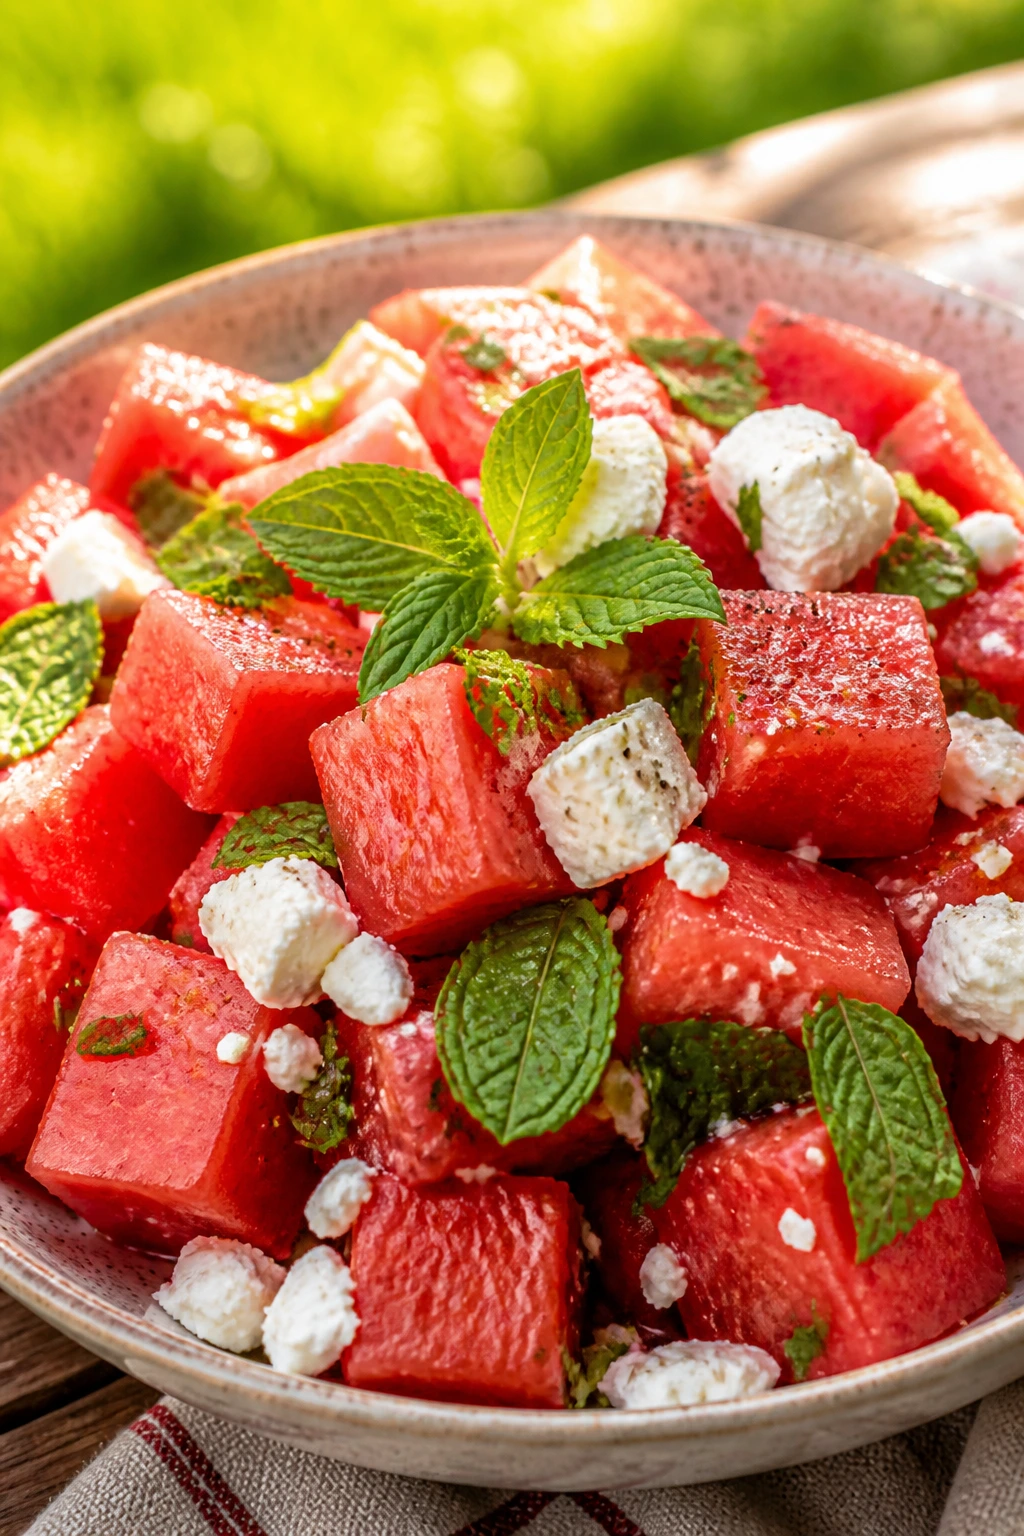
9. Watermelon, Mint, and Feta Salad
Intro: Watermelon salad sounds simple until you get a bowl that tastes like cold air and fruit juice. The trick is to keep the pieces firm, the mint fresh, and the feta in enough chunks that you can taste the salt without turning the whole bowl milky.
Why It Works: Watermelon brings the sweetness and the juice, feta brings the salt, and mint gives a cool finish that feels right on a hot day. A tiny splash of lime keeps it from reading as plain fruit salad.
Key Ingredients:
- 6 cups seedless watermelon, cut into 1-inch cubes
- 3/4 cup feta, crumbled or cubed
- 1/4 cup fresh mint leaves
- 1 tablespoon lime juice
- 1 teaspoon olive oil
- Black pepper, to taste
- Pinch of flaky salt, optional
Quick Steps:
- Cut the watermelon into firm cubes and drain off any obvious excess juice.
- Tear or chop the mint just before using so it stays bright.
- Toss the watermelon with lime juice and olive oil very gently.
- Add feta and mint last, then finish with black pepper.
- Chill briefly and serve soon after mixing.
Equipment for This Recipe:
- Sharp knife
- Large bowl
- Measuring spoons
- Slotted spoon, if needed for draining
How to Serve This Dish: Serve it in a shallow bowl or individual cups so the juice doesn’t pool. A little black pepper on top sounds odd until the first bite; then it makes sense.
Pro Tips for This Recipe:
- Choose watermelon that feels heavy and firm, not soft at the ends.
- Don’t stir like you mean it. The goal is to coat, not crush.
- If the melon is especially juicy, drain it for a few minutes first.
- Add the mint close to serving so it doesn’t darken.
Variations on This Dish:
- Cucumber Watermelon Bowl: Add cucumber for extra crunch.
- Basil Watermelon Salad: Swap mint for torn basil leaves.
- Chili-Lime Finish: Add a pinch of chili flakes for a sharper edge.
Common Mistakes to Avoid with This Dish:
- Using overripe melon: The cubes collapse and flood the bowl.
- Salting too early: Salt pulls out water faster than you want.
- Mixing too hard: The salad turns mushy and pink.
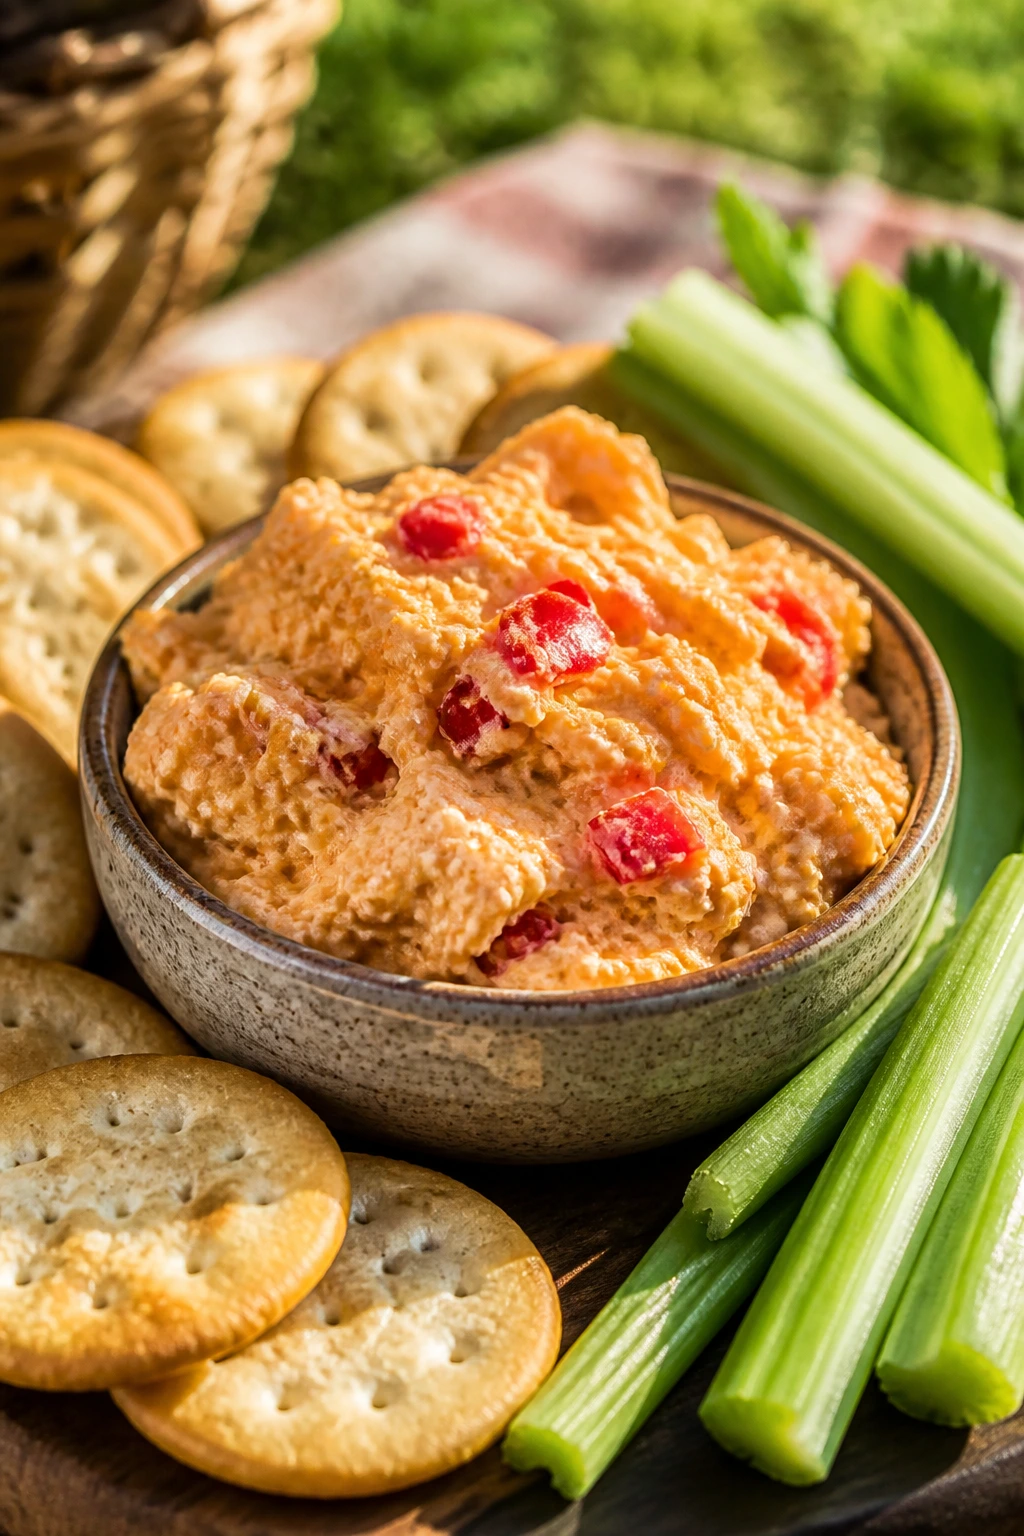
10. Pimento Cheese with Crackers and Celery
Intro: Pimento cheese is picnic food with a backbone. It spreads, scoops, and sits on a cracker without sliding off, which is more than can be said for half the dairy aisle.
Why It Works: Sharp cheddar carries the flavor, cream cheese gives body, and pimentos add tiny sweet notes without making the dip watery. It’s a make-ahead spread that actually improves after a short rest in the fridge.
Key Ingredients:
- 8 ounces sharp cheddar, grated
- 4 ounces cream cheese, softened
- 1/4 cup mayonnaise
- 1/3 cup diced pimentos, drained
- 1/2 teaspoon paprika
- Pinch of cayenne
- 1 teaspoon Worcestershire sauce
- Crackers and celery sticks, for serving
Quick Steps:
- Stir the cream cheese and mayo together until smooth.
- Fold in the cheddar, pimentos, paprika, cayenne, and Worcestershire.
- Chill for at least 1 hour so the spread firms and the flavors blend.
- Pack it in a tight container with crackers and celery packed separately.
Equipment for This Recipe:
- Mixing bowl
- Box grater, if starting from a block
- Rubber spatula
- Airtight container
How to Serve This Dish: Serve the pimento cheese in a small bowl with crackers fanned around it and celery tucked beside them. It also works well in a sandwich if the picnic leans more lunch than snack.
Pro Tips for This Recipe:
- Grate your own cheese if possible. Pre-shredded cheese can feel grainy here.
- Add a spoonful of pickle juice if you want a sharper, looser spread.
- Make it a few hours ahead. The fridge time does the work.
- Keep crackers dry and separate until serving.
Variations on This Dish:
- Jalapeño Pimento Cheese: Add minced jalapeño for heat and crunch.
- Smoked Gouda Spread: Swap part of the cheddar for smoked gouda.
- Light Yogurt Version: Use Greek yogurt in place of part of the mayo for a tangier spread.
Common Mistakes to Avoid with This Dish:
- Too much mayo: The spread turns loose and greasy.
- Packing warm celery against the dip: The moisture runs into the cheese.
- Using mild cheddar only: The flavor goes flat. Sharp cheese matters here.
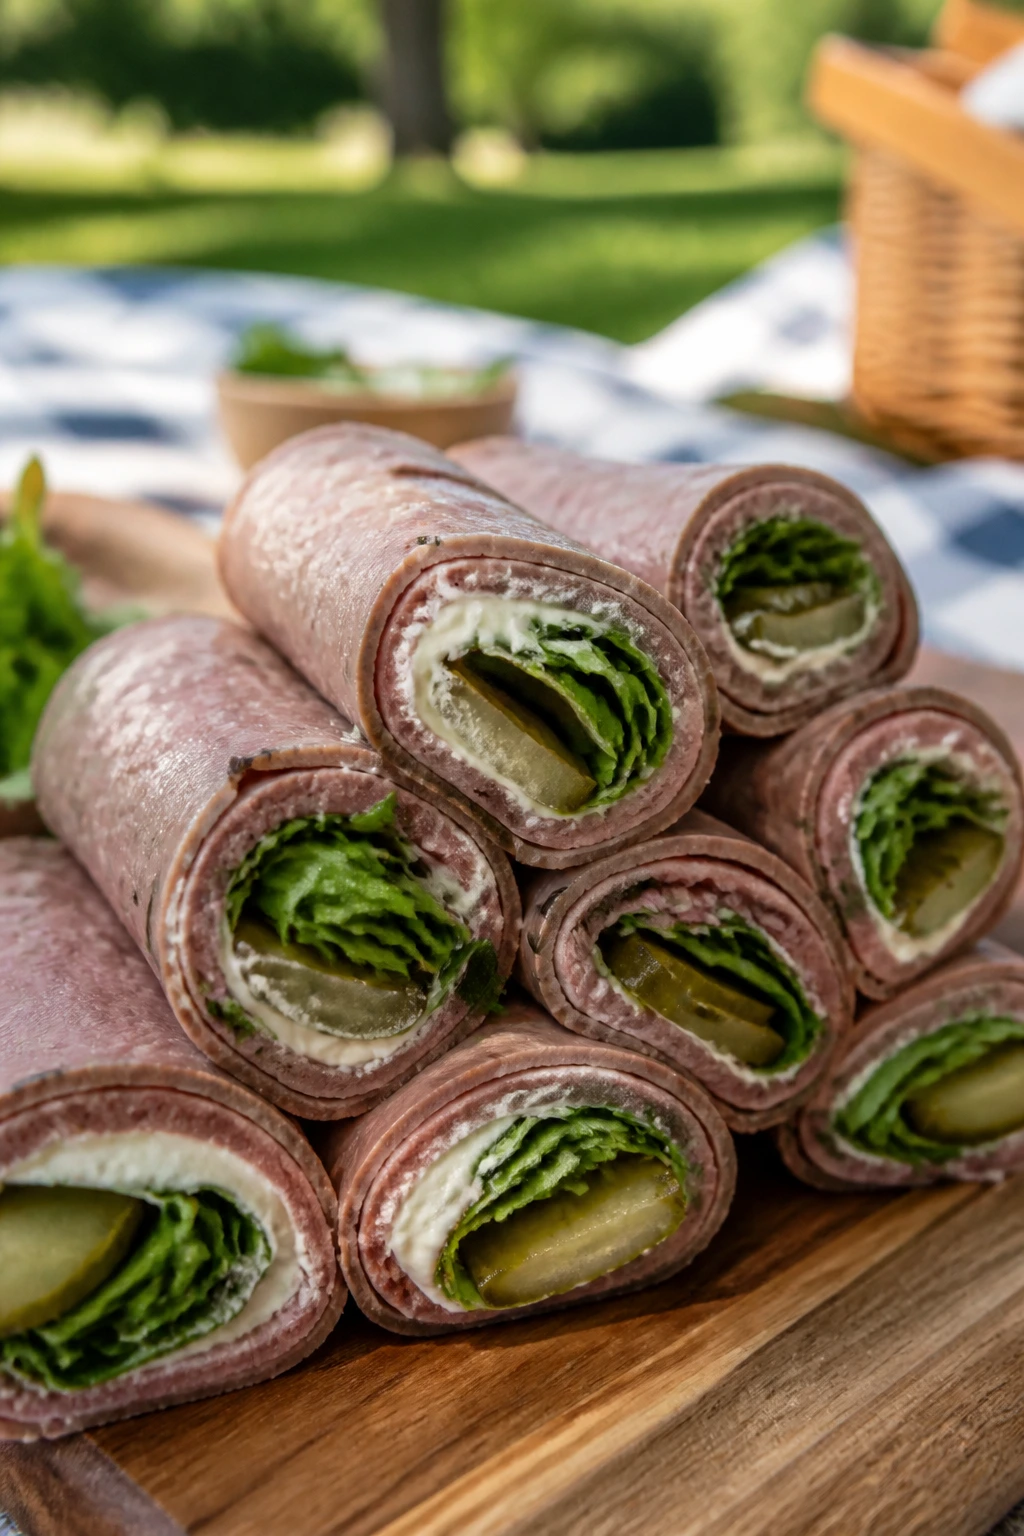
11. Roast Beef and Horseradish Roll-Ups
Intro: Roast beef roll-ups are what I reach for when I want something savory that won’t collapse before the blanket opens. They’re salty, a little sharp, and easy to eat without juggling a big sandwich.
Why It Works: Horseradish cuts through the richness of the beef, and a spread on the wrap helps keep everything together. The arugula adds peppery bite, which keeps the flavor from going heavy.
Key Ingredients:
- 4 large flour tortillas or sandwich wraps
- 6 ounces cream cheese, softened
- 2 tablespoons prepared horseradish
- 8 ounces sliced roast beef
- 1 cup arugula
- 1/4 cup thin pickle strips or cornichons, patted dry
- Black pepper, to taste
Quick Steps:
- Mix the cream cheese and horseradish until smooth.
- Spread the mixture over each wrap, leaving a border at the edge.
- Layer on roast beef, arugula, pickles, and black pepper.
- Roll tightly, chill for 20 to 30 minutes, then slice into thick rounds.
- Pack the slices snugly so they hold shape.
Equipment for This Recipe:
- Cutting board
- Sharp knife
- Mixing bowl
- Parchment or plastic wrap
How to Serve This Dish: These are best packed cold and eaten within a few hours. Serve them with mustard, chips, or a crunchy slaw if you want more than one salty thing on the blanket.
Pro Tips for This Recipe:
- Dry the pickles well so the wraps don’t get slick.
- Use soft tortillas that bend without cracking.
- Chill before slicing for clean edges.
- Keep the horseradish moderate unless you want everyone to blink hard on the first bite.
Variations on This Dish:
- Turkey-Horseradish Wraps: Swap the beef for turkey and keep the same filling.
- Mustard-Dill Version: Replace the horseradish with grainy mustard and chopped dill.
- Lettuce-Cup Roll-Ups: Use large lettuce leaves for a lower-carb version.
Common Mistakes to Avoid with This Dish:
- Using wet pickles: The wrap slips and tears.
- Rolling too loosely: The slices fall apart before they reach the blanket.
- Too much filling at the edge: It smears when you cut it.
12. Greek Chickpea Salad
Intro: Chickpea salad is the kind of thing that gets better the longer it sits, which makes it especially useful for a picnic basket. The beans carry the dressing, the cucumbers and tomatoes bring freshness, and the olives give you those briny hits that keep people coming back.
Why It Works: Chickpeas hold their shape and absorb lemon and olive oil without turning mushy. This is one of those picnic basket food ideas that can sit in a cooler and still taste good after the rest of the spread has started to soften.
Key Ingredients:
- 2 cans chickpeas, drained and rinsed
- 1 cucumber, chopped
- 1 cup cherry tomatoes, halved
- 1/2 red onion, thinly sliced
- 1/2 cup kalamata olives, halved
- 1/2 cup feta
- 3 tablespoons olive oil
- 2 tablespoons lemon juice
- 1 teaspoon dried oregano
- 1/2 teaspoon salt
- Black pepper, to taste
Quick Steps:
- Rinse and drain the chickpeas well.
- Whisk the olive oil, lemon juice, oregano, salt, and pepper in a large bowl.
- Add the chickpeas, cucumber, tomatoes, onion, and olives.
- Toss gently, then fold in the feta last.
- Chill for 20 minutes or more before packing.
Equipment for This Recipe:
- Large bowl
- Colander
- Knife and cutting board
- Serving spoon
How to Serve This Dish: Serve it in a lidded container with pita wedges or crackers on the side. It also works as a filling for lettuce cups if you want something lighter once the picnic starts.
Pro Tips for This Recipe:
- Pat the chickpeas dry after rinsing so the dressing sticks better.
- Slice the onion thin enough that it softens under the lemon.
- Use ripe but firm tomatoes; soft ones collapse too fast.
- A little extra oregano on top right before serving wakes everything up.
Variations on This Dish:
- Quinoa Chickpea Bowl: Mix in 1 cup cooked quinoa for a more substantial salad.
- No-Feta Version: Skip the cheese and add more olives plus chopped parsley.
- Pepperoncini Twist: Toss in sliced pepperoncini for a sharper, tangier bite.
Common Mistakes to Avoid with This Dish:
- Not rinsing the chickpeas: The canned liquid muddies the flavor.
- Cutting tomatoes too small: Juice floods the bowl.
- Underseasoning: Chickpeas need salt more than people expect.
13. Mini Bacon-Chive Quiches
Intro: Mini quiches are picnic food with a little composure. They hold shape, travel well, and taste good warm or cool, which is the sort of flexibility you want when you’re loading a basket and hoping the sun behaves.
Why It Works: Eggs and cream bake into a custardy filling, while bacon and chives keep the flavor grounded and savory. The small size means they set faster and cool faster, so they’re easier to pack than a full pie.
Key Ingredients:
- 1 sheet pie dough or 12 phyllo cups
- 4 large eggs
- 1/2 cup heavy cream or whole milk
- 1/2 cup cooked bacon, chopped
- 1/3 cup shredded cheddar
- 2 tablespoons chopped chives
- 1/4 teaspoon salt
- 1/4 teaspoon black pepper
Quick Steps:
- Preheat the oven to 375°F and prepare a muffin tin or mini tart pan.
- Line the cups with pie dough or set out the phyllo cups on a sheet tray.
- Whisk the eggs, cream, salt, and pepper until smooth.
- Divide the bacon, cheddar, and chives among the cups, then pour in the egg mixture.
- Bake until the centers are just set and the tops are lightly golden, about 15 to 20 minutes.
- Cool for 10 minutes before removing and packing.
Equipment for This Recipe:
- Muffin tin or mini tart pan
- Mixing bowl
- Whisk
- Baking sheet, if using phyllo cups
How to Serve This Dish: These are good warm, room temp, or cold, which is why they earn their basket space. Add a little fruit or sliced tomatoes beside them and the plate starts to look like lunch, not a snack pile.
Pro Tips for This Recipe:
- Do not overfill the cups; the custard rises and spills if pushed too far.
- Bake until the center barely jiggles.
- Cool before removing, or the bottoms can tear.
- Bacon should be cooked crisp enough to stay snappy after chilling.
Variations on This Dish:
- Spinach-Mushroom Quiches: Replace bacon with sautéed mushrooms and spinach.
- Ham-Swiss Version: Swap cheddar for Swiss and use diced ham.
- Crustless Mini Bake: Bake the filling in greased muffin cups without dough.
Common Mistakes to Avoid with This Dish:
- Pulling them too soon: The center stays wet and collapses.
- Skipping the cool-down: They break apart when lifted.
- Using watery fillings: Sauté vegetables first so they don’t leak into the custard.
14. Broccoli Salad with Sunflower Seeds
Intro: Broccoli salad is one of those picnic sides people dismiss until they taste the sweet-salty crunch of it. The raw broccoli has to be chopped small, though. Big florets feel like a chore; tiny ones feel like a good idea.
Why It Works: The dressing softens the broccoli just enough without turning it limp, and bacon plus sunflower seeds give you the crunch that keeps every bite from feeling one-note. Raisins or dried cranberries add little pockets of sweetness that play well against the vinegar.
Key Ingredients:
- 4 cups broccoli florets, cut small
- 4 slices bacon, cooked and chopped
- 1/3 cup sunflower seeds
- 1/4 cup red onion, finely chopped
- 1/4 cup raisins or dried cranberries
- 1/3 cup mayonnaise
- 1 tablespoon apple cider vinegar
- 1 tablespoon honey or sugar
- Salt and black pepper
Quick Steps:
- Cut the broccoli into very small florets so it’s easy to eat.
- Whisk the mayo, vinegar, honey, salt, and pepper into a creamy dressing.
- Toss the broccoli with the onion, bacon, seeds, and dried fruit.
- Stir in the dressing until the pieces are coated.
- Chill for at least 30 minutes so the broccoli softens slightly.
Equipment for This Recipe:
- Large bowl
- Sharp knife
- Small whisk
- Measuring spoons
How to Serve This Dish: Serve it cold, in a shallow bowl, with a spoon that can scoop from the bottom. It pairs well with grilled meat, sandwiches, or anything that needs something crisp and green beside it.
Pro Tips for This Recipe:
- Chop the broccoli small. That is the whole trick.
- Add the seeds close to serving if you want them extra crunchy.
- Taste after chilling; broccoli sometimes wants a pinch more salt.
- If the dressing seems too thick, loosen it with a spoonful of water or vinegar.
Variations on This Dish:
- Apple Broccoli Salad: Add diced apple for a sharper sweet crunch.
- No-Bacon Version: Skip the bacon and add more sunflower seeds and a few pumpkin seeds.
- Tangier Dressing: Use more vinegar and less honey if you prefer a sharper salad.
Common Mistakes to Avoid with This Dish:
- Leaving the broccoli in huge pieces: The salad eats rough instead of crisp.
- Adding too much dressing: It pools at the bottom and makes the bowl heavy.
- Skipping the chill time: The flavors taste separate, not blended.
15. Strawberry Shortcake Bars
Intro: Strawberry shortcake is lovely until it falls apart in your hand. Bars solve that problem. They give you the same buttery crust, bright berries, and creamy top, but in a shape that stays put in a basket.
Why It Works: A baked crust supports the fruit layer, and a short chill after baking helps the bars cut cleanly. The strawberries bring enough moisture to feel juicy, while a little cornstarch keeps the filling from running all over the pan.
Key Ingredients:
- 1 1/2 cups all-purpose flour
- 1/2 cup sugar
- 3/4 cup cold butter, cubed
- 1/4 teaspoon salt
- 2 cups strawberries, sliced
- 2 tablespoons sugar
- 1 tablespoon cornstarch
- 1 teaspoon lemon juice
- 1 cup whipped cream or lightly sweetened cream cheese topping
Quick Steps:
- Mix flour, sugar, and salt, then cut in the butter until the mixture looks like damp sand.
- Press most of the mixture into a lined baking pan and bake until lightly golden.
- Stir strawberries with sugar, cornstarch, and lemon juice, then spoon over the crust.
- Sprinkle the remaining crumb over the top and bake until the berries bubble.
- Cool completely, chill, and top with cream before slicing into bars.
Equipment for This Recipe:
- Baking pan
- Parchment paper
- Mixing bowl
- Pastry cutter or fork
How to Serve This Dish: Cut them into neat squares and pack them between sheets of parchment so they don’t stick. These are best chilled, then served with the cream added right before eating if the picnic is long.
Pro Tips for This Recipe:
- Use strawberries that are ripe but still firm.
- Cool the bars fully before slicing or the filling will smear.
- Add cream only when you’re ready to serve.
- Parchment with a little overhang makes lifting the bars out much easier.
Variations on This Dish:
- Mixed Berry Bars: Use raspberries and blueberries with the strawberries.
- Almond Crumb Bars: Add sliced almonds to the topping for more crunch.
- Gluten-Free Crust: Swap in a cup-for-cup gluten-free flour blend.
Common Mistakes to Avoid with This Dish:
- Cutting warm bars: They collapse and look ragged.
- Using berries that are too soft: The filling gets watery.
- Skipping the cornstarch: The fruit layer runs loose in the pan.
16. Lemon Bars with Powdered Sugar
Intro: Lemon bars bring the kind of sharp, clean sweetness that resets a picnic palate. After fried chicken, cheese, and dip, a square of tart lemon feels like cold water on a hot day.
Why It Works: The shortbread crust is firm and buttery enough to hold the bright lemon filling, and the powdered sugar on top gives just enough sweetness to balance the acid. These travel well once they’re fully chilled, which is the part most people rush.
Key Ingredients:
- For the crust:
- 1 cup all-purpose flour
- 1/4 cup powdered sugar
- 1/2 cup cold butter, cubed
- Pinch of salt
- For the filling:
- 2 large eggs
- 3/4 cup sugar
- 2 tablespoons flour
- 1/3 cup lemon juice
- 1 teaspoon lemon zest
- Powdered sugar, for dusting
Quick Steps:
- Mix the crust ingredients until crumbly, then press into a lined 8-inch or 9-inch pan.
- Bake the crust at 350°F until just lightly golden around the edges.
- Whisk the filling ingredients until smooth and pour over the hot crust.
- Bake again until the center is set with only a slight wobble.
- Chill completely, then dust with powdered sugar and cut into squares.
Equipment for This Recipe:
- Baking pan
- Whisk
- Mixing bowl
- Zester or fine grater
How to Serve This Dish: Keep them cold and cut with a dry, sharp knife so the topping stays neat. A single square after the savory foods feels right; two squares after a long walk also makes sense.
Pro Tips for This Recipe:
- Chill before dusting with powdered sugar, or the sugar disappears into the top.
- Use fresh lemon juice. Bottled juice tastes muddy here.
- Line the pan with parchment for easier lifting.
- Cut with a wiped knife between slices for clean edges.
Variations on This Dish:
- Lime Bars: Replace lemon with lime juice and zest.
- Meyer Lemon Version: Use Meyer lemons for a softer, floral flavor.
- Coconut Crust: Stir a little shredded coconut into the crust for extra aroma.
Common Mistakes to Avoid with This Dish:
- Not chilling long enough: Warm lemon bars are too soft to slice cleanly.
- Overbaking the filling: The top cracks and the texture turns rubbery.
- Dusting too early: The powdered sugar melts into the surface.
17. Fresh Fruit Salad with Honey-Lime Syrup

Intro: Fruit salad can be a sad bowl of leftovers, or it can be the thing everyone keeps spooning onto a paper plate between bites of salt and cheese. The difference is fruit that’s cut with care and syrup that stays in the background.
Why It Works: Honey and lime give the fruit a shiny, bright finish without drowning it. Using mostly firm fruit keeps the bowl from turning to juice, and a little mint makes the whole thing taste cooler than it is.
Key Ingredients:
- 2 cups strawberries, halved
- 1 1/2 cups blueberries
- 2 cups melon, cubed
- 1 1/2 cups seedless grapes, halved if large
- 1 cup pineapple, cubed
- 2 tablespoons honey
- 1 tablespoon lime juice
- 1 teaspoon lime zest
- 2 tablespoons chopped mint
Quick Steps:
- Wash and dry all fruit well before cutting.
- Whisk the honey, lime juice, and zest in a small bowl.
- Combine the fruit in a large bowl and drizzle with the syrup.
- Toss gently, then fold in the mint at the end.
- Chill until serving.
Equipment for This Recipe:
- Large bowl
- Sharp knife
- Small whisk
- Citrus zester
How to Serve This Dish: Serve the fruit salad in a chilled bowl or small cups with a spoon. It makes a good palate reset between richer items like quiche, fried chicken, and cheese spread.
Pro Tips for This Recipe:
- Dry the fruit after washing so the syrup clings instead of sliding off.
- Keep bananas out unless you’re eating immediately.
- Use fruit that is ripe but still firm enough to hold a cut edge.
- Mint bruises easily, so chop it right before tossing.
Variations on This Dish:
- Berry-Only Bowl: Use strawberries, blueberries, and raspberries for a softer texture.
- Peach-Melon Mix: Add sliced peaches if they’re firm enough to hold shape.
- Chili-Lime Fruit: Add a tiny pinch of chili powder for a sharper finish.
Common Mistakes to Avoid with This Dish:
- Choosing overripe fruit: The bowl turns watery fast.
- Mixing too early: Soft berries collapse and stain everything pink.
- Using too much syrup: The fruit should glisten, not swim.
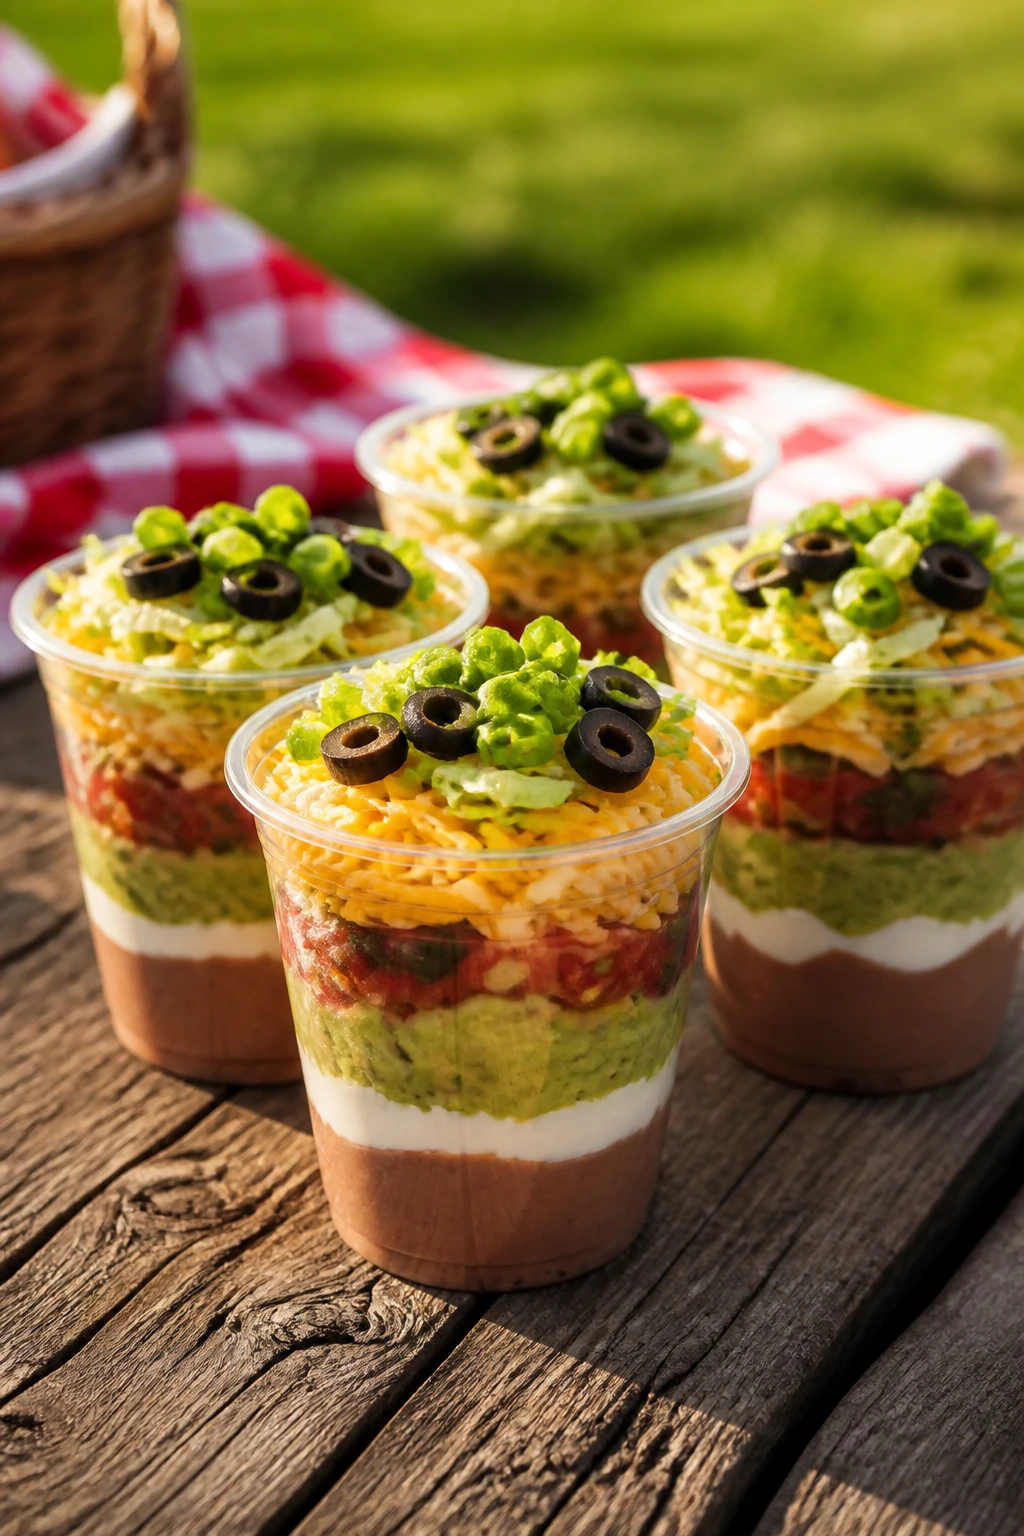
18. Seven-Layer Dip Cups
Intro: Seven-layer dip is a party dish that actually behaves when portioned into cups. No one has to fight the edge of a huge dish, and the layers stay distinct instead of collapsing into one beige scoop.
Why It Works: Individual cups protect the guacamole from turning brown too fast and keep the salsa from flooding the beans. It’s messy in the good way: each bite gives you a little of everything, which is exactly the point.
Key Ingredients:
- 1 can refried beans
- 1 cup guacamole
- 1 cup sour cream
- 3/4 cup salsa, drained if watery
- 1 cup shredded cheese
- 1 cup shredded lettuce
- 1/3 cup sliced olives
- 2 tablespoons sliced scallions
- Tortilla chips, packed separately
Quick Steps:
- Spoon refried beans into the bottom of each cup.
- Add a layer of sour cream, then guacamole, then salsa.
- Top with cheese, lettuce, olives, and scallions.
- Chill the cups until ready to pack.
- Keep tortilla chips in a separate bag or container so they stay crisp.
Equipment for This Recipe:
- Small cups with lids
- Spoon
- Small bowl
- Airtight container for chips
How to Serve This Dish: Hand each person a cup and a small stack of chips. That setup keeps the basket tidy and means nobody digs into a shared bowl with a broken chip and a grudge.
Pro Tips for This Recipe:
- Drain watery salsa or the layers slide apart.
- Make the cups a few hours ahead, then keep them cold.
- Press the beans flat with the back of a spoon so the layers stay even.
- Add lettuce close to serving if you want it extra crisp.
Variations on This Dish:
- Black Bean Cups: Swap refried beans for mashed black beans.
- Spicy Layered Cups: Add chopped jalapeños or hot salsa.
- Dairy-Free Cups: Use dairy-free sour cream and cheese alternatives.
Common Mistakes to Avoid with This Dish:
- Packing chips in the cups early: They turn soft and useless.
- Using a watery guacamole or salsa: The whole cup slides.
- Overfilling: The lid smears the top and ruins the layers.
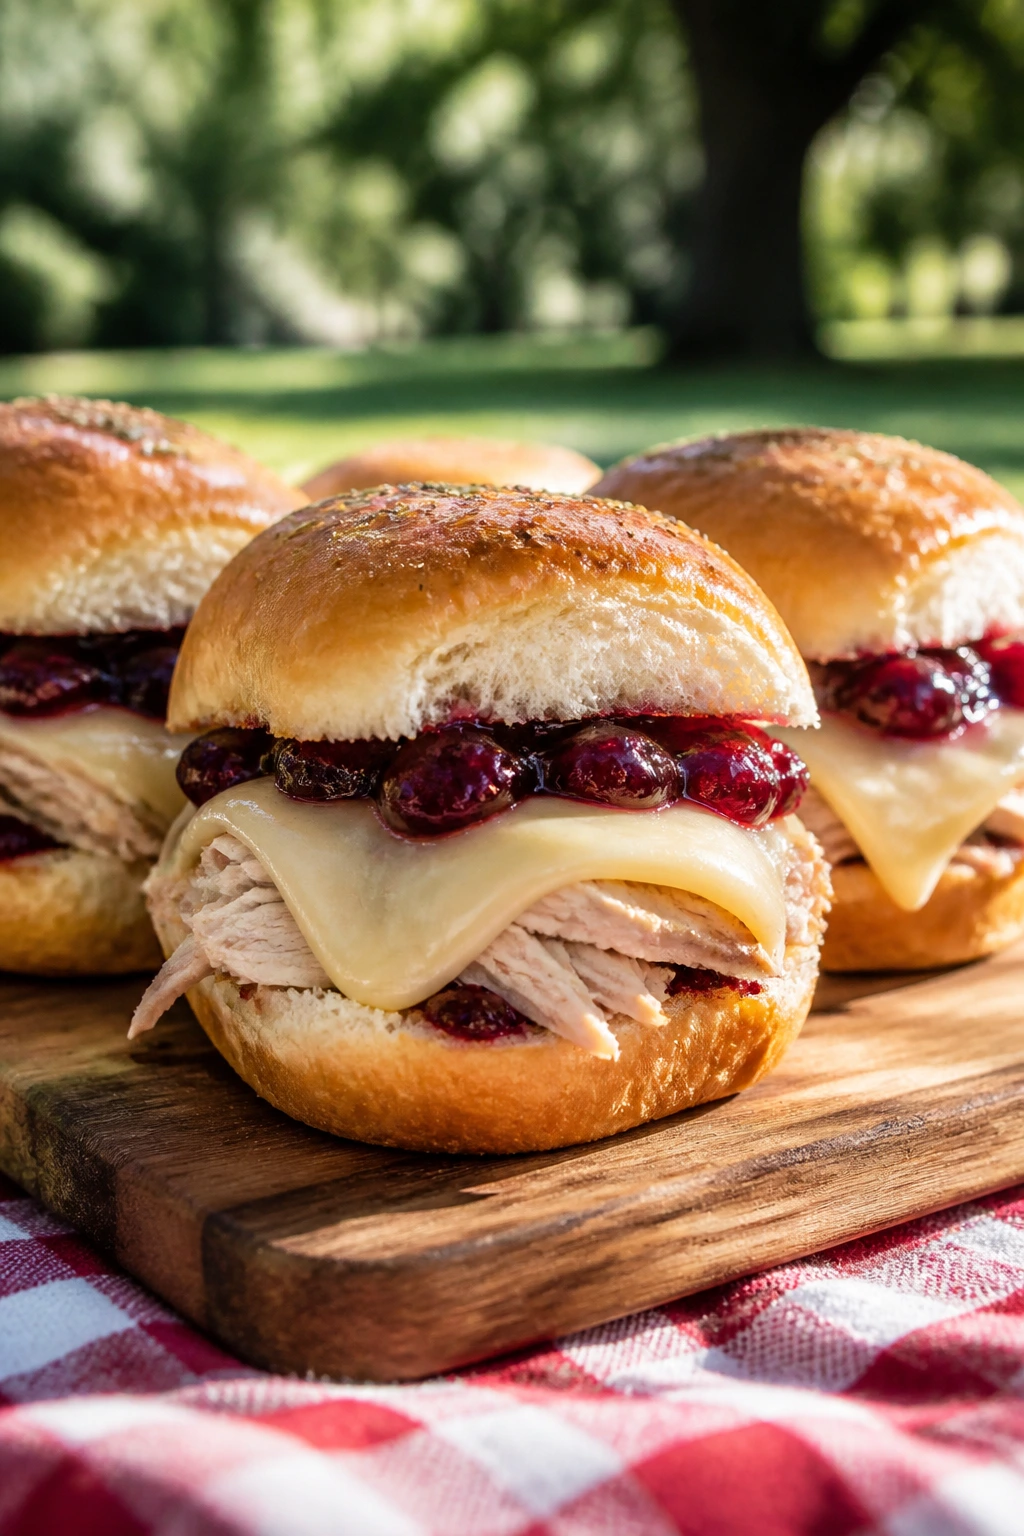
19. Turkey and Cranberry Sliders
Intro: Sliders bring a little warmth to a picnic basket without demanding a full table setting. Turkey, cranberry, and melty cheese on soft rolls is familiar enough to please a crowd and compact enough to carry without drama.
Why It Works: The cranberry adds a sweet-tart note that keeps the turkey from tasting dry, and the cheese gives the rolls enough structure to stay together after they’re sliced. If you want a picnic sandwich that feels a little more substantial than a wrap, this is the one.
Key Ingredients:
- 12 slider buns
- 1 pound sliced turkey
- 1 cup cranberry sauce
- 6 slices Swiss or provolone
- 2 tablespoons mayonnaise
- 2 tablespoons melted butter
- 1 tablespoon Dijon mustard
- Arugula, optional
Quick Steps:
- Slice the buns in half as a sheet if they’re connected, or split them individually.
- Stir the mayonnaise and Dijon together and spread lightly on the buns.
- Layer turkey, cranberry sauce, cheese, and arugula.
- Brush the tops with melted butter if you plan to warm them briefly.
- Pack wrapped in foil or parchment, then chill or warm gently before serving.
Equipment for This Recipe:
- Baking sheet, if warming
- Mixing spoon
- Knife
- Foil or parchment
How to Serve This Dish: Serve warm if you can, but room temperature still works if the rolls are sturdy. A few chips or a crunchy slaw beside them keeps the plate from feeling too soft.
Pro Tips for This Recipe:
- Use rolls that hold together after cutting, not airy dinner rolls that collapse.
- Don’t drown the buns in cranberry sauce; a thin layer is enough.
- Let warm sliders cool for a few minutes before packing so the bread doesn’t steam.
- Arugula adds a clean peppery bite if you like a sharper sandwich.
Variations on This Dish:
- Ham and Swiss Sliders: Swap the turkey for ham and keep the cranberry.
- Pesto Turkey Sliders: Replace mayonnaise with pesto for a greener profile.
- Open-Face Mini Bites: Skip the top bun and serve them like tiny sandwiches.
Common Mistakes to Avoid with This Dish:
- Soggy buns from too much sauce: Use cranberry as an accent, not a flood.
- Using very soft rolls: They compress in the basket.
- Packing them hot and sealed: Steam softens the bread fast.
20. Pesto Tortellini Skewers
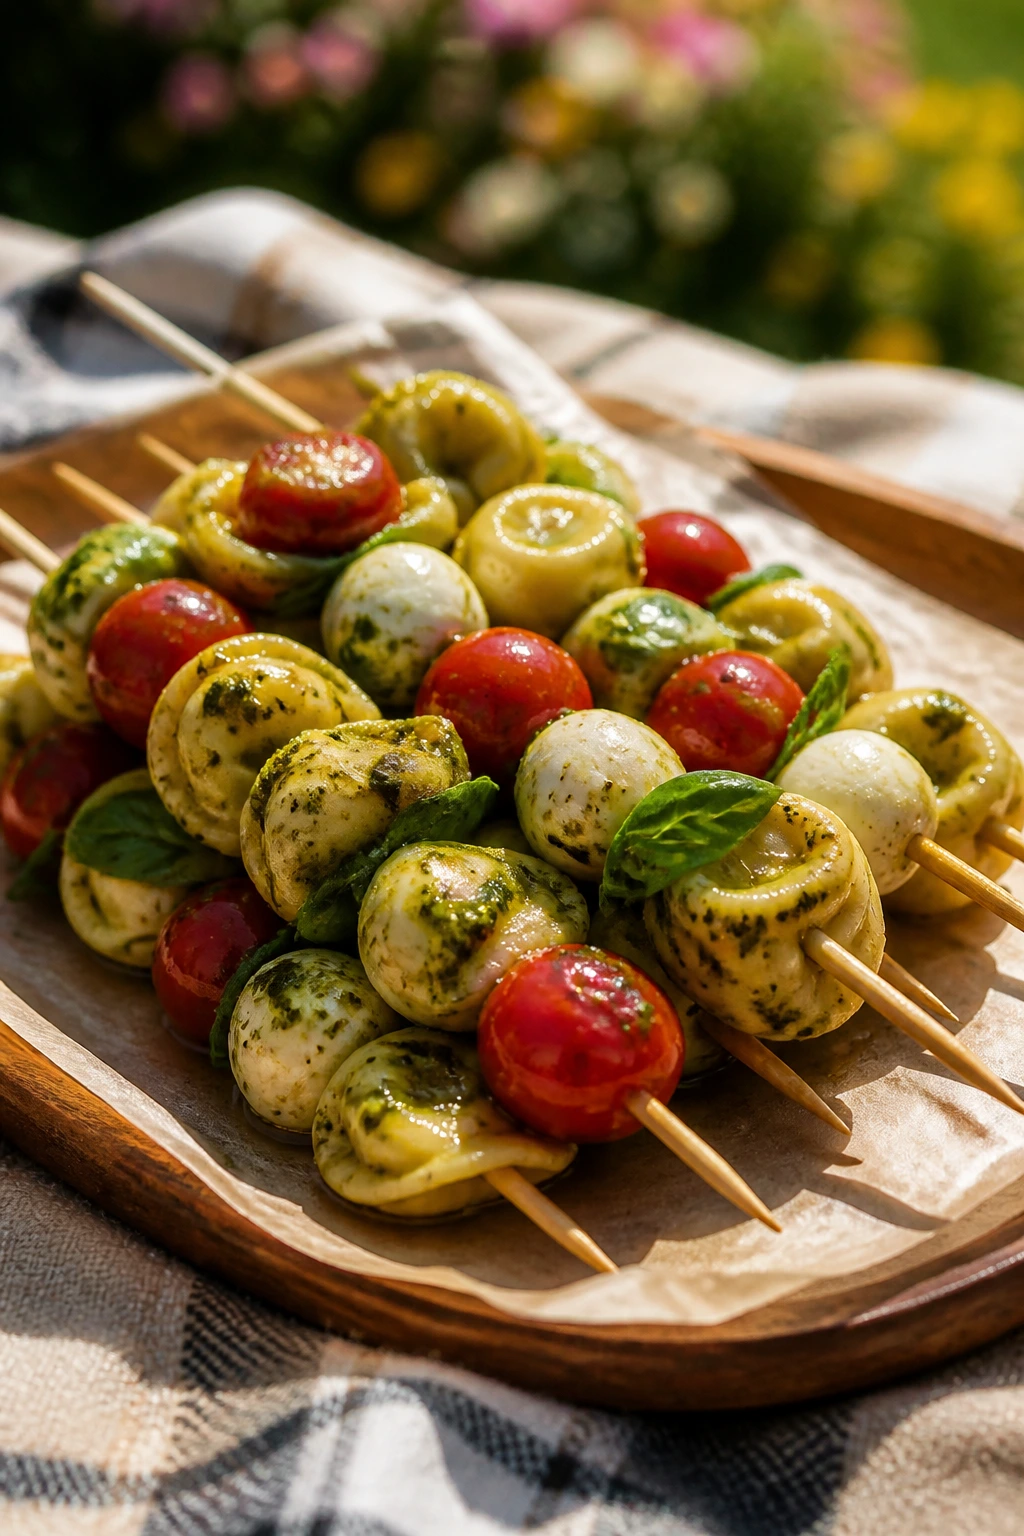
Intro: Tortellini skewers look cheerful before anyone even bites one. They bring pasta, cheese, and herbs together in a format that doesn’t require a bowl, which is exactly why they work so well for a picnic.
Why It Works: Cheese tortellini stay pleasantly chewy when cooled, and pesto clings to the folds of the pasta instead of running away. Threading them with tomatoes and mozzarella gives you a built-in caprese feel without any assembly at the blanket.
Key Ingredients:
- 9 ounces cheese tortellini
- 1/3 cup pesto
- 1 pint cherry tomatoes
- 8 ounces mozzarella balls
- Fresh basil leaves
- Small skewers
- Salt and black pepper, to taste
Quick Steps:
- Cook the tortellini until tender, then drain and cool them completely.
- Toss the tortellini with pesto while they’re still lightly warm so the sauce coats well.
- Thread tortellini, tomatoes, mozzarella, and basil onto the skewers.
- Season lightly with salt and pepper.
- Chill before packing.
Equipment for This Recipe:
- Pot
- Colander
- Large bowl
- Small skewers
How to Serve This Dish: Lay the skewers in a shallow container lined with parchment so the pasta doesn’t drag across the lid. They’re good straight from the cooler and even better with a little extra pesto for dipping.
Pro Tips for This Recipe:
- Toss the pasta with pesto while it’s just warm, not hot.
- Use shorter skewers so they fit in a flat container.
- If the pesto is very thick, loosen it with a teaspoon of olive oil.
- Pick small mozzarella balls so the skewers feel balanced.
Variations on This Dish:
- Sun-Dried Tomato Skewers: Swap pesto for sun-dried tomato spread.
- Veggie Skewers: Add cucumber chunks and skip any meat add-ins.
- Dairy-Free Version: Use a dairy-free pesto and a firm plant-based cheese.
Common Mistakes to Avoid with This Dish:
- Overstuffing the skewers: They twist and poke through the lid.
- Packing while the tortellini are warm: Condensation loosens the pesto.
- Using too much sauce: The skewers become slick instead of flavorful.
21. Peanut Butter Oat Energy Bites
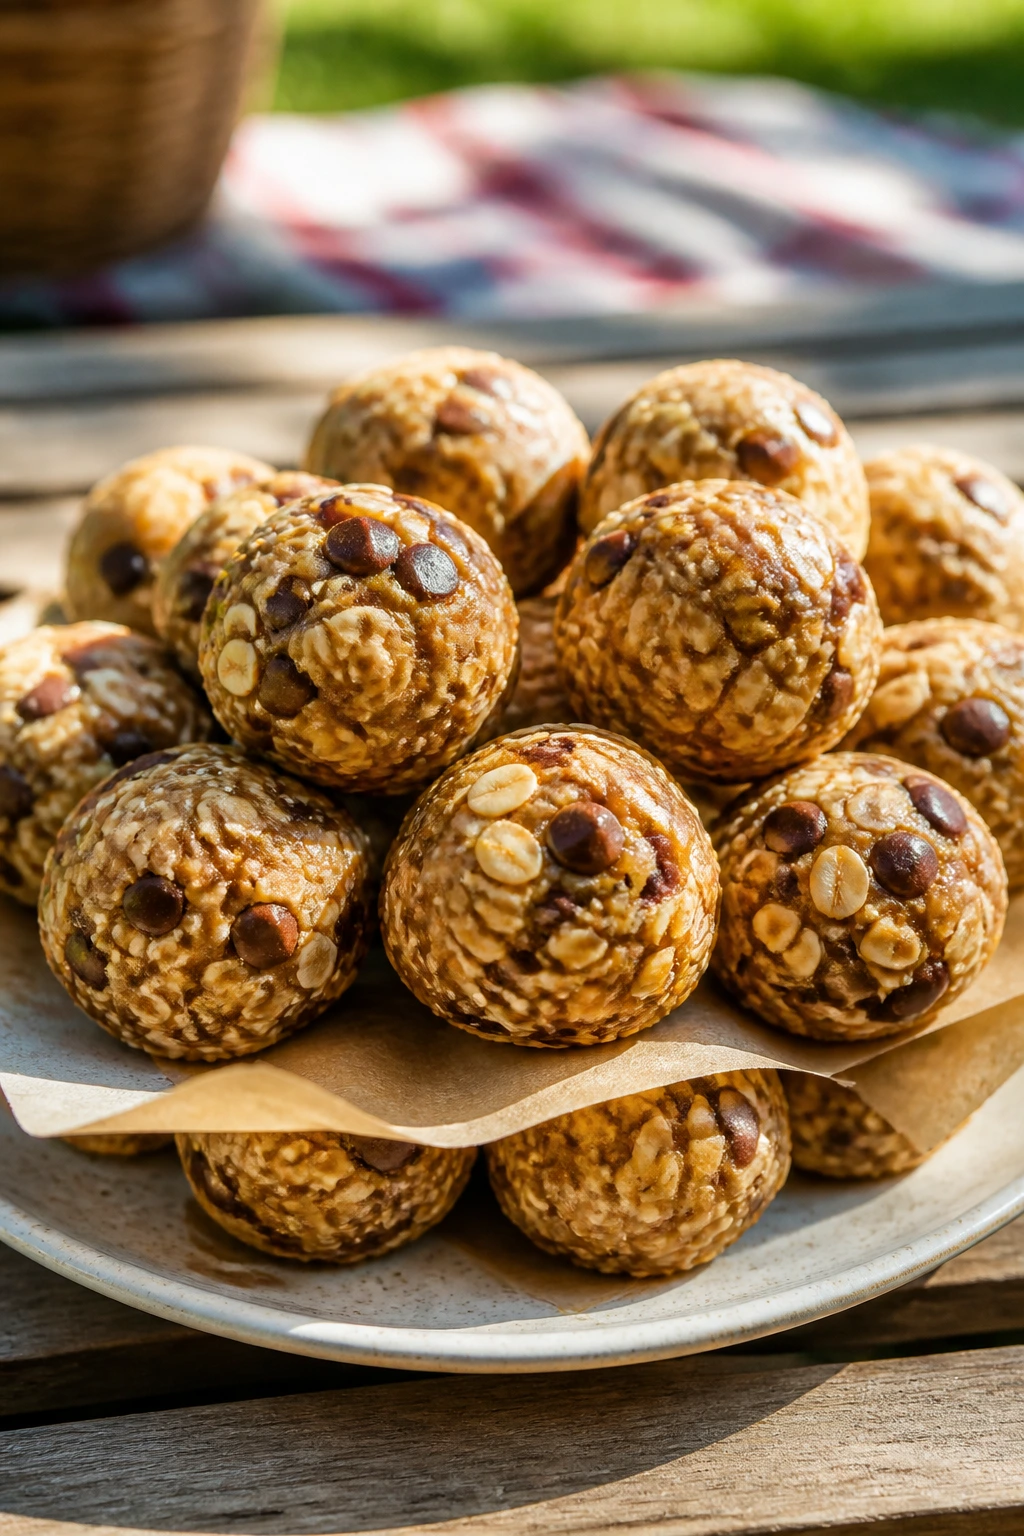
Intro: Not every picnic food needs to be savory or chilled. These little bites are the thing you grab when the basket is almost empty and you want one more sweet, chewy mouthful without unwrapping a whole dessert.
Why It Works: Oats give the bites structure, peanut butter holds them together, and honey adds enough stickiness that they roll cleanly. They’re shelf-stable for a stretch, which makes them one of the easier sweets to pack when the rest of the basket needs ice.
Key Ingredients:
- 1 1/2 cups old-fashioned oats
- 1/2 cup peanut butter
- 1/3 cup honey
- 2 tablespoons ground flaxseed
- 1/4 cup mini chocolate chips
- 1/2 teaspoon cinnamon
- Pinch of salt
Quick Steps:
- Stir all the ingredients together in a bowl until the mixture holds together when pressed.
- Chill the mixture for 15 to 20 minutes so it firms up.
- Roll into 1-inch balls with lightly damp hands.
- Chill again until set.
Equipment for This Recipe:
- Mixing bowl
- Spoon
- Small tray or plate
- Airtight container
How to Serve This Dish: Pack them in a small tin or container with parchment between layers. They’re handy for kids, but adults also seem to keep reaching in once they notice the chocolate chips.
Pro Tips for This Recipe:
- Use old-fashioned oats for better texture; quick oats make the bites pasty.
- If the mix feels dry, add another teaspoon of honey or peanut butter.
- If it feels wet, add a spoonful more oats.
- Keep them cold if the weather is warm so they stay firm.
Variations on This Dish:
- Almond Butter Bites: Swap the peanut butter for almond butter.
- Coconut Version: Add a few tablespoons of shredded coconut.
- Nut-Free Bites: Use sunflower seed butter for a school-friendly option.
Common Mistakes to Avoid with This Dish:
- Rolling before chilling: The mixture sticks to everything.
- Too little salt: The bites taste flat instead of balanced.
- Using overly runny peanut butter: The balls won’t hold shape.
22. Brown Butter Chocolate Chip Blondies
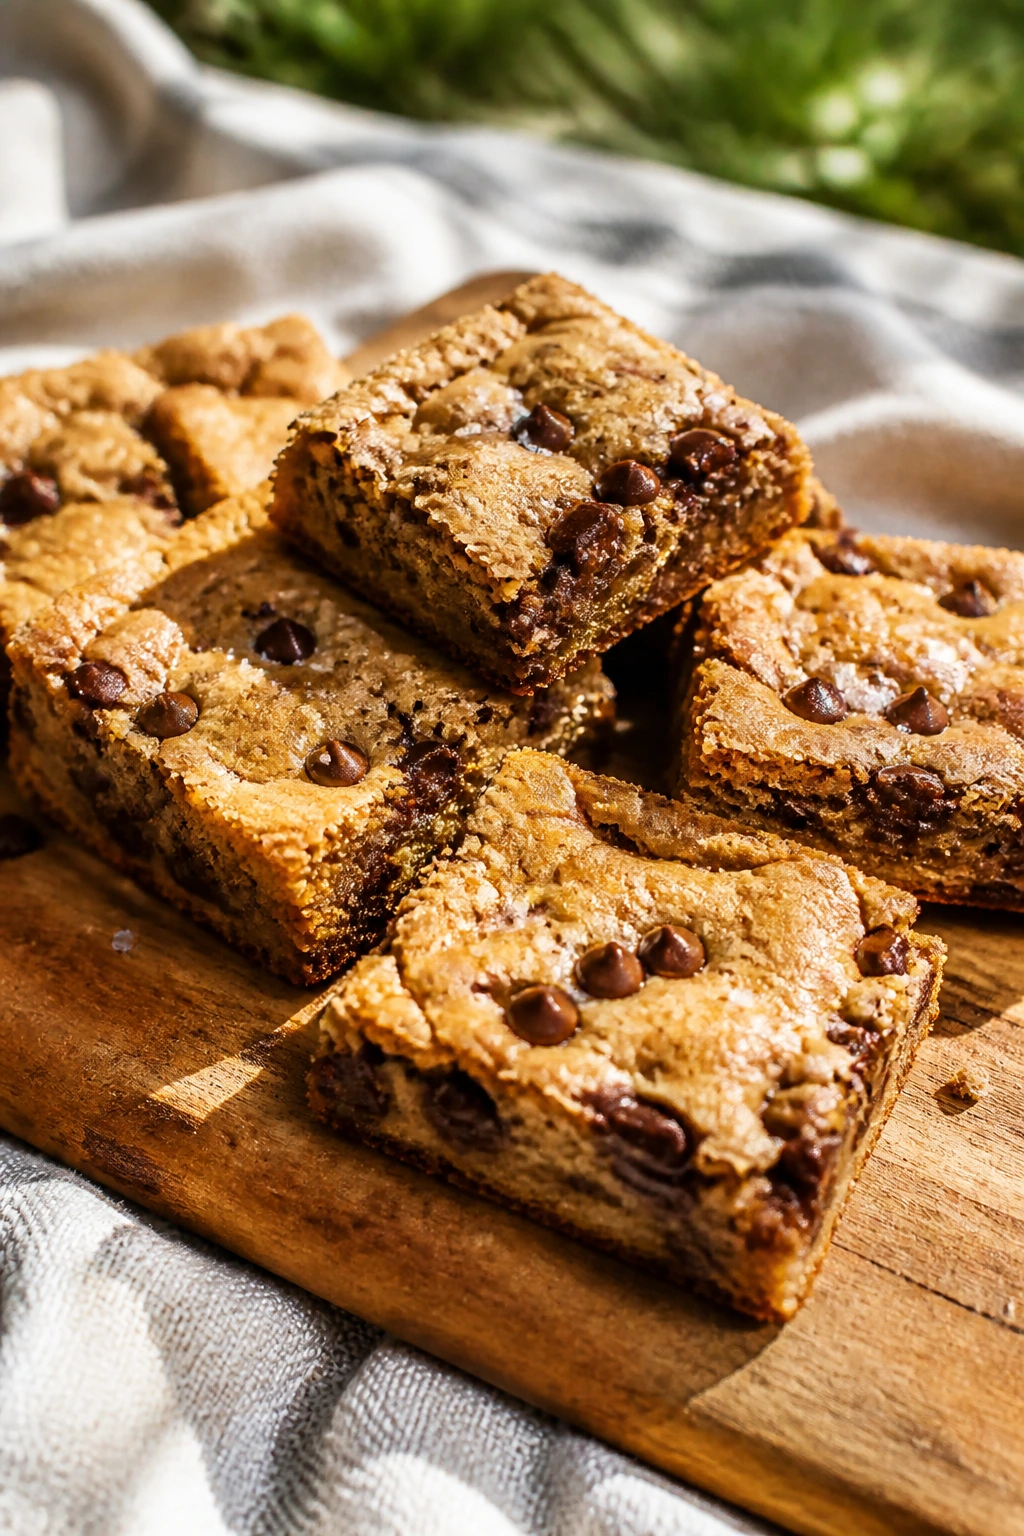
Intro: Blondies are the end-of-picnic dessert that doesn’t need a fork and doesn’t melt in the sun. Brown butter gives them a toasty edge, and the chocolate chips keep the bars from feeling one-note.
Why It Works: Brown sugar and butter make a dense, chewy crumb that cuts neatly once cooled. Because the bars travel as a slab and get sliced later, they’re less fragile than frosted cake or cream-heavy sweets.
Key Ingredients:
- 1 cup unsalted butter
- 1 1/2 cups brown sugar
- 2 large eggs
- 2 teaspoons vanilla extract
- 2 cups all-purpose flour
- 1 teaspoon baking powder
- 1/2 teaspoon salt
- 1 cup chocolate chips
- Flaky salt, for finishing
Quick Steps:
- Brown the butter in a saucepan until it smells nutty and the solids turn amber, then cool it slightly.
- Whisk the brown butter with the sugar, eggs, and vanilla until smooth.
- Fold in the flour, baking powder, salt, and chocolate chips.
- Spread the batter into a lined pan and bake at 350°F until the edges are set and the center still looks a touch soft.
- Cool completely, then sprinkle with flaky salt and cut into bars.
Equipment for This Recipe:
- Saucepan
- Mixing bowl
- 8-inch or 9-inch baking pan
- Parchment paper
How to Serve This Dish: Stack the bars in a container with parchment between layers so the corners stay clean. They are good at room temperature and even better after the butter flavor has had time to settle.
Pro Tips for This Recipe:
- Brown the butter slowly; burnt butter tastes harsh, not nutty.
- Pull the bars when the center still has a little give. They finish setting as they cool.
- Line the pan for easy lifting.
- A pinch of flaky salt on top makes the chocolate taste deeper.
Variations on This Dish:
- White Chocolate Macadamia Blondies: Swap the chips and add chopped nuts.
- Pecan Brown Butter Bars: Use toasted pecans for a more toasted, bakery-style flavor.
- Gluten-Free Blondies: Use a cup-for-cup flour blend and bake until just set.
Common Mistakes to Avoid with This Dish:
- Cutting while warm: The bars smear and lose their shape.
- Burning the butter: The flavor goes bitter fast.
- Overbaking: Dry blondies are the downfall of many picnic desserts.
What Makes Picnic Food Hold Up in the Heat
A picnic basket needs food with some backbone. Soft fruit salad has its place, but if every item in the basket leaks, melts, or goes limp after twenty minutes, the whole spread starts to feel tired before anyone takes a second bite.
The foods that work best outdoors usually share a few traits. They are either naturally sturdy, like chickpeas, pasta, and hand pies, or they have a built-in container, like skewers, rolls, bars, and cups. They also tend to like a little acid or salt. Lemon, vinegar, mustard, feta, pickles, and herbs keep flavors awake when the weather is warm and the air is doing that flat, sleepy thing summer air does.
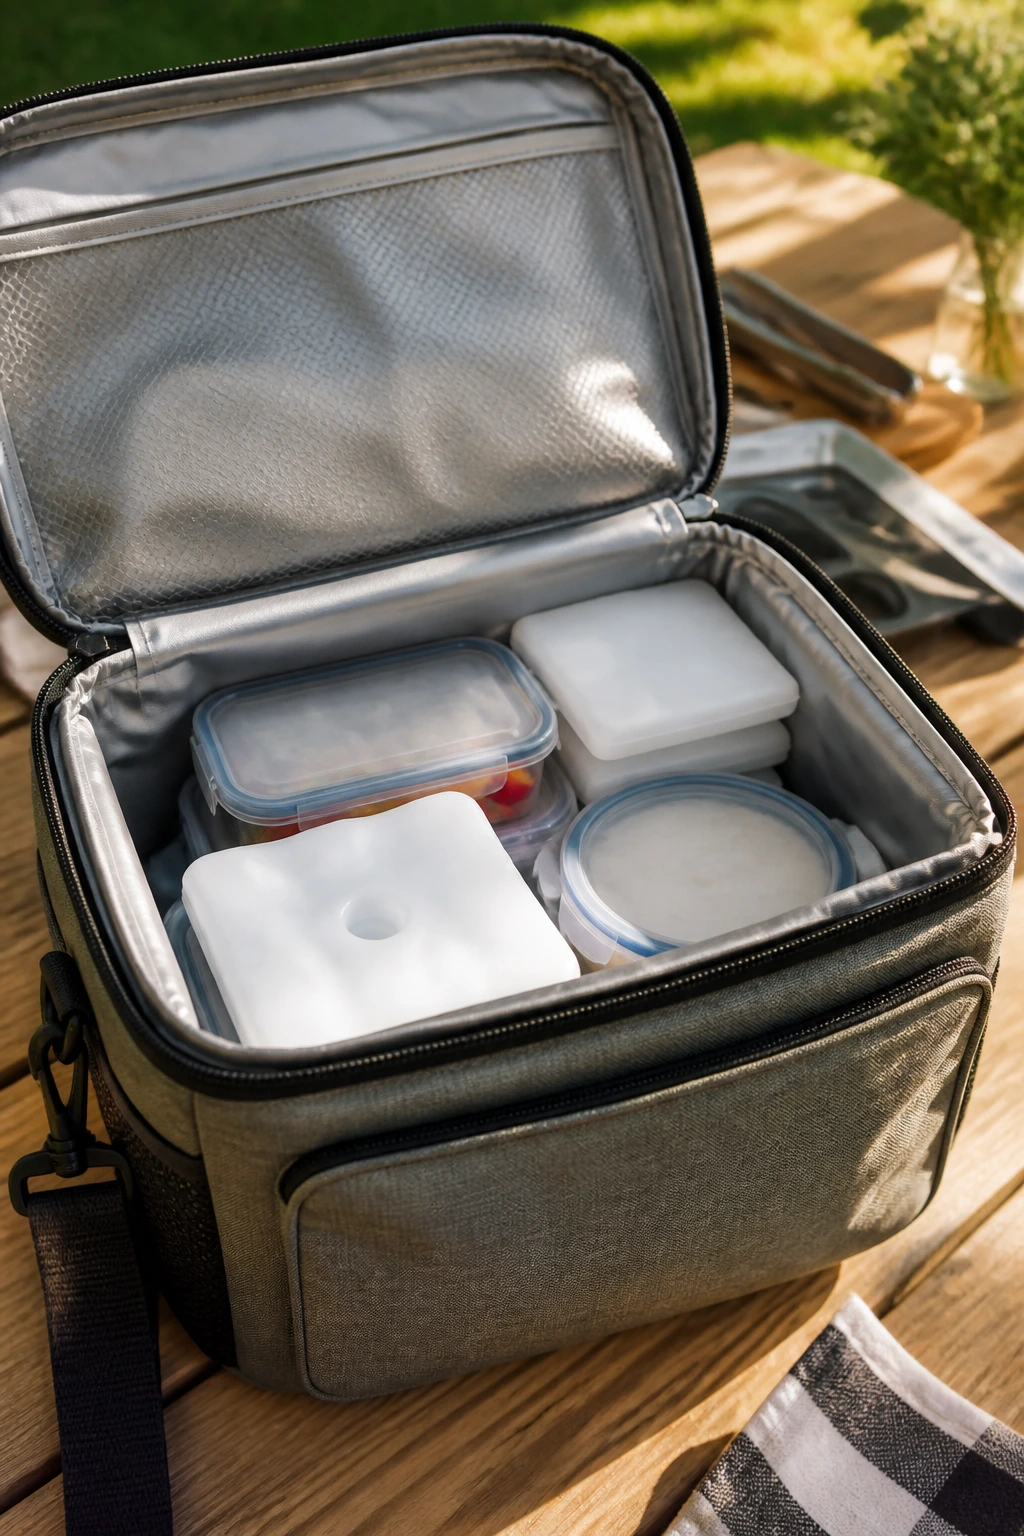
Temperature matters more than people think. Creamy fillings, eggs, chicken, cheese, and dairy-based dips should travel in a cooler with ice packs or frozen water bottles tucked along the sides. Foods meant to be eaten cold should go into shallow containers so they chill quickly and stay below 40°F. If something sits out longer than 2 hours, or 1 hour when it’s hot outside, it’s time to stop being sentimental and toss it. Food safety is not where I get heroic.
Essential Equipment for These Recipes
-
Insulated cooler or cooler bag: Keeps chicken, eggs, cheese, and creamy salads cold long enough to matter.
-
Ice packs or frozen water bottles: These hold temperature better than loose ice and don’t soak the basket if they thaw.
-
Rigid food containers with tight lids: Use these for bars, skewers, quiches, and anything that gets crushed easily.
-
Parchment paper: Wraps sandwiches, separates stacked bars, and keeps sticky foods from welding themselves to the container.
-
Small tongs or serving forks: Useful for skewers, salad cups, and fried chicken pieces.
-
Sharp knife: Clean slices matter for pinwheels, sliders, blondies, and bars.
-
Cutting board: A full picnic prep board saves you from assembling on a wobbly counter with wet lettuce.
-
Muffin tin or mini tart pan: Handy for quiches and any small baked item that needs shape.
-
Small skewers or toothpicks: Keep Caprese bites and tortellini skewers neat and portable.
-
Reusable napkins or paper towels: Not glamorous. Necessary.
Smart Shopping and Ingredient Tips
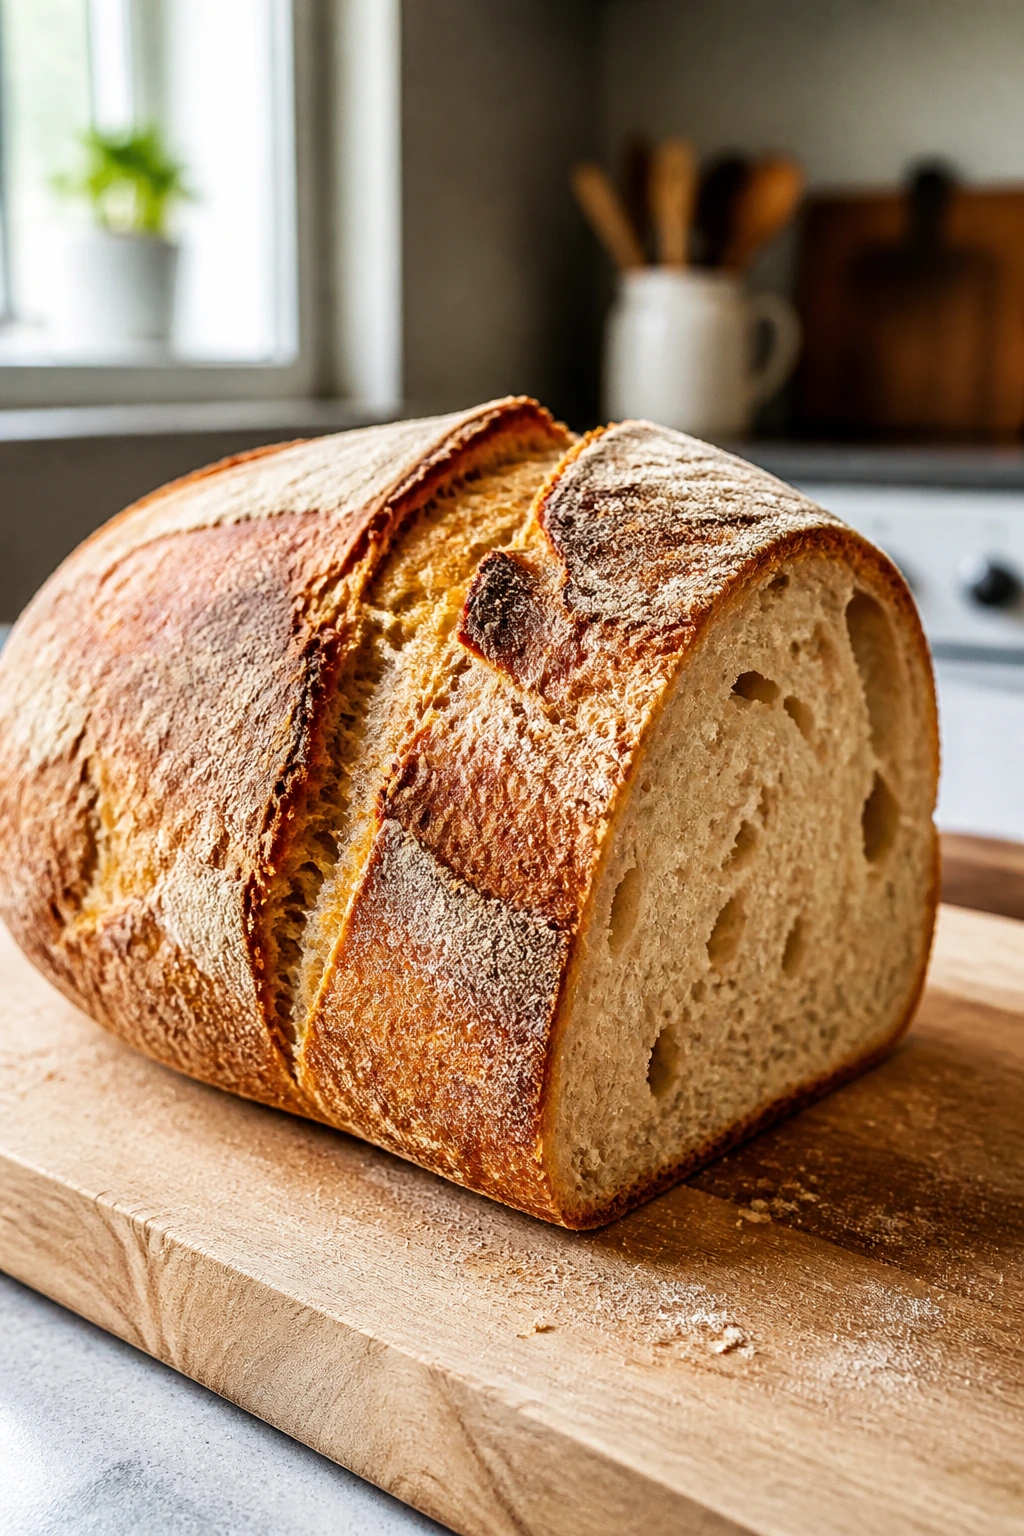
The easiest picnic basket to pack starts in the grocery aisle, not the kitchen. Sturdy bread matters more than fancy bread. Think rolls with a little chew, tortillas that bend without cracking, and sandwich loaves that can take a light toast. Thin, airy bakery bread looks lovely on a shelf and turns to mush once it meets creamy filling.
For cheese, block cheese usually tastes and melts better than pre-shredded. That matters in pimento cheese, quiche, and pinwheels. Low-moisture mozzarella works better than the wetter kind for skewers, and feta packed in brine should be drained and patted dry before it goes anywhere near a salad or skewer.
Choose produce with travel in mind. Cherry tomatoes hold up better than large slicing tomatoes. Persian or English cucumbers have fewer seeds and less watery collapse. Watermelon should feel heavy and firm. Strawberries need to be ripe but not soft enough to slump in your palm. If the fruit is already bruised at the store, it will not improve in the basket.
Protein is where people get careless. Buy chicken or deli meat that has been handled cold, keep it cold on the trip home, and use a cooler the day of the picnic. Eggs should be cooked and chilled promptly. Mayonnaise-based dishes are fine for a picnic when they stay cold; they are not fine when they sit in warm air on a blanket for an hour while everyone chats. That’s the boring part. It’s also the part that keeps the whole spread safe.
How to Serve These Recipes
Presentation: Build the basket with layers that make sense when unpacked. Put rigid containers on the bottom, lighter items on top, and line the basket with parchment or a clean towel so the contents don’t slide. If you want the spread to look generous, group foods by shape: a row of sandwiches, a container of skewers, a cup of salad, a stack of bars.
Accompaniments: Salty chips, crackers, sliced baguette, pickles, olives, and a plain green salad all play well with this mix. I like to pack at least one crunchy side and one fresh side because they keep the basket from leaning too soft. A small bottle of mustard or hot sauce can also rescue a plate fast.
Portions: For a light picnic lunch, figure on 2 to 3 savory items per person plus one sweet item to share. If the picnic runs long, add a little more protein and something starchy, like sliders or pasta salad. For a small basket, choose one sandwich or roll-up, one cold salad, one crunchy bite, and one dessert per person.
Beverage Pairing: Lemon water, iced tea, sparkling water with citrus, or a light beer all make sense here. For a sweeter basket, a chilled lemonade or unsweetened tea keeps the whole spread from feeling sugary. Drinks in a separate cooler are worth the extra space.
Additional Tips and Flavor Boosters
Flavor Enhancement: A few finishing touches do more work than another ingredient. Lemon zest on chicken salad, flaky salt on blondies, black pepper on watermelon, and extra chopped herbs on chickpea salad all wake the food up without making it fussy.
Customization: Build the basket in layers of comfort. One creamy item, one sharp item, one crunchy item, one fruit item, and one dessert keeps the balance easy to manage. If you know the crowd likes heat, add cayenne to deviled eggs or chili crisp to sesame noodles instead of trying to make every dish spicy.
Serving Suggestions: Pack tiny garnish bags if you want the food to look fresh after unpacking. Chives for eggs, mint for fruit, basil for Caprese, and scallions for dip can all be added at the last minute. That little final sprinkle changes the whole mood.
Make-It-Yours: For gluten-free eaters, the easiest swaps are rice noodle salad, chickpea salad, fruit salad, deviled eggs, and energy bites. For dairy-free guests, the safest bets are fruit, chickpea salad, noodle salad with a dairy-free pesto, and watermelon salad without feta. For nut-free baskets, use sunflower seed butter in the energy bites and skip the peanut dressing in the noodle salad.
Make-Ahead, Storage, and Reheating Guidance
Most of these foods are at their best when prepped the day before and assembled the morning of the picnic. Chicken salad, chickpea salad, pimento cheese, pasta salad, quiche, and blondies all keep well in the fridge for 3 to 4 days, though the texture of fresh herbs and crunchy vegetables softens after the first day. Fruit salad is shorter-lived; it’s best within 1 day, and the mint should go in close to serving.
Bars and blondies travel well at room temperature for a short stretch, but perishable fillings do not. Keep egg dishes, chicken dishes, cheese spreads, and anything with mayo or dairy in a cooler until the basket opens, and return leftovers to the fridge within 2 hours, or within 1 hour if the weather is hot enough to make the air feel heavy. That rule is not glamorous, but it is the one that matters.
For reheating, only a few items actually benefit. Fried chicken comes back to life in a 375°F oven for about 10 to 15 minutes on a wire rack. Hand pies and mini quiches do well at 325°F to 350°F for 8 to 12 minutes. Sliders can be wrapped in foil and warmed gently at 325°F until the cheese loosens. Microwaves are faster, but they soften crusts, turn fried coating limp, and make bread chew oddly.
Items like tortellini skewers, deviled eggs, fruit salad, and Caprese bites should be served chilled or cold rather than reheated. Energy bites, lemon bars, and blondies can sit in an airtight container for several days and even freeze well for up to 2 months, which makes them the quiet heroes of the basket. Sandwich fillings are best stored separately from the bread if you want the whole thing to taste like lunch instead of damp cardboard.
Variations and Adaptations to Try
Gluten-Free Basket: Lean on deviled eggs, fruit salad, watermelon salad, chickpea salad, energy bites, and gluten-free blondies. Swap the bread in sandwiches for lettuce cups or certified gluten-free rolls, and use rice noodles for the sesame salad. The basket still feels full, which is the point.
Dairy-Light Basket: Use avocado or a thinner mayo blend in chicken salad, skip the feta in watermelon salad, and choose chickpea salad, fruit salad, and sesame noodles with a dairy-free sauce base. Pesto can work too if it’s made without cheese. This version still has plenty of flavor because acid and herbs are doing the heavy lifting.
Kid-Friendly Basket: Mini sandwiches, pinwheels, fruit cups, energy bites, and blondies are the easy wins. Keep mustard, horseradish, and too much black pepper off the main path, and cut things small enough that little hands can grab them without collapsing the stack. Kids tend to love anything with a stripe, spiral, or square shape.
Heat-Smart Basket: When the day is warm and long, choose the foods that stay happy chilled: pasta salad cups, chickpea salad, deviled eggs, Caprese skewers, fruit salad, and bars. Pack the creamier items in the center of the cooler, where the temperature stays steadier, and keep a cold drink tucked beside them.
Vegetarian Picnic Spread: Skip the chicken, turkey, roast beef, and fried chicken, then lean on tortellini skewers, hand pies, pimento cheese, seven-layer dip cups, chickpea salad, fruit salad, and lemon bars. That combination gives you salt, crunch, freshness, and dessert without feeling like a compromise.
Common Mistakes to Avoid with This Picnic Basket
-
Packing wet and dry foods together: A sandwich wrapped next to juicy tomatoes or fruit salad will soften faster than you think. Keep juicy foods in their own containers and wrap bread separately.
-
Ignoring the chill chain: Creamy salads, eggs, chicken, and cheese need insulation. If they’re warm on arrival, the texture slips and the food safety window shrinks fast.
-
Using fragile bread or weak containers: Thin bread squashes, and soft containers bend. Use sturdy rolls, tortillas, or parchment-wrapped sandwiches in rigid boxes.
-
Overdressing salads before the picnic starts: Pasta salad and chickpea salad can take dressing, but greens and fruit need restraint. Too much liquid makes the basket sloppy and the bottom soggy.
-
Forgetting utensils and napkins: Someone always forgets a spoon. Pack more napkins than you think you need and at least one small serving utensil for each messy dish.
-
Cutting bars, pies, or quiches before they cool: Warm bakes look tidy in the pan and ragged in the basket. Cool them fully so the slices hold their shape.
Frequently Asked Questions
What foods are safest to pack in a picnic basket?
Foods that stay good cold or at room temperature are the easiest choices: bars, blondies, sandwiches with sturdy bread, chickpea salad, pasta salad, deviled eggs, and hand pies. Anything with mayo, eggs, chicken, or dairy should be kept chilled until serving.
How do I keep sandwiches from getting soggy?
Toast the bread lightly, add a layer of lettuce or cheese against the bread, and keep juicy ingredients separate until you’re ready to eat. Wrapping each sandwich in parchment also helps because it keeps the bread from sweating against plastic.
Can I pack mayonnaise-based foods for a summer picnic?
Yes, if they stay cold. Chicken salad, pimento cheese, and deviled eggs are all fine in a cooler with ice packs, but they should not sit in warm air for hours. Once the food warms up, the texture changes and the safety window gets shorter.
What should I make if I do not have a cooler?
Choose the foods that do not need one: lemon bars, blondies, energy bites, fruit salad if the trip is short, chickpea salad for a brief window, and dry sandwiches wrapped tightly. Anything with eggs, mayo, or cooked chicken should wait for a cooler.
How far ahead can I prep a picnic basket menu?
Most of the savory fillings and baked items can be made 1 day ahead. Some, like chickpea salad, pimento cheese, and chicken salad, taste better after a short rest in the fridge. Fresh fruit, basil, and sliced avocado are the things I would leave for the last minute.
What are the best vegetarian picks from this list?
Caprese skewers, tomato-cucumber pasta salad, chickpea salad, spinach hand pies, fruit salad, seven-layer dip cups, energy bites, and both bar desserts work well. That mix gives you protein, crunch, and sweet items without relying on meat.
How do I keep fruit from turning watery?
Use firm fruit, dry it after washing, and keep the dressing light. Watermelon, berries, melon, grapes, and pineapple hold better than softer fruit. If you’re using mint or basil, add the herbs at the end so they don’t darken.
What if the picnic lasts longer than planned?
Treat the cooler like the main event. Keep cold foods below 40°F, refresh ice packs if you can, and don’t leave mayonnaise, eggs, dairy, or chicken out beyond the 2-hour mark, or 1 hour if it’s hot. When in doubt, pack a second container for items that need to stay chilled.
Can I turn these into a potluck spread instead of a basket picnic?
Absolutely. The same foods work on a table, and a potluck gives you more room for bowls and serving spoons. If anything, the basket version is the harder test, which is why these recipes translate so well once you give them a little more space.
A Basket Worth Carrying
The best picnic basket has a rhythm to it. Something creamy, something crisp, something salty, something bright, and one sweet square at the end. If you build the spread that way, the whole meal feels balanced without needing a long shopping list or a kitchen full of equipment.
What I like most about these picnic basket food ideas is that they do not fall apart the moment they leave the counter. They hold shape. They keep their flavor. They still taste like the cook meant them to taste when the lid comes off and the blanket finally settles flat.
Pack the cold foods cold, keep the bread dry, and give yourself at least one dessert that can survive a napkin, a breeze, and a second helping. That’s the kind of basket people remember, and it’s the kind that makes the next picnic easier to plan.