
The 4 p.m. hunger crash has a way of making a whole house louder. Shoes by the door. Sports bags on the floor. Somebody asking for food before the backpack even hits the chair.
These Sunday dinner recipes for after-school snacks are built for that exact hour. They lean into the flavors that usually show up on a Sunday table—meatloaf, pot pie, baked pasta, roast chicken, cheesy casseroles—but they shrink those flavors into hand-held pieces, muffin-tin portions, sliders, cups, and crisp little bakes that can be reheated without turning sad and soggy.
I like this kind of cooking because it solves two problems at once. You get something that tastes like supper, and you get a snack that can survive a hungry kid, a distracted parent, and a short window before dinner. A lot of these recipes are freezer-friendly, which matters more than people admit. When the oven is already warm and the first batch comes out looking golden and a little ridiculous in the best way, the whole afternoon feels less chaotic.
Why This Collection Works for the After-School Gap

- Leftovers finally have a job: Roast chicken, pulled pork, pot roast, turkey, and baked pasta all reappear in forms that feel intentional instead of reheated.
- Handheld beats fork-and-knife: Sliders, hand pies, muffin cups, roll-ups, and bites fit into one hand, which is useful when someone is still half zipped into a soccer jacket.
- Most of these reheat cleanly: A quick run through the oven or air fryer brings the edges back instead of leaving you with a limp microwave square.
- The flavors are familiar but not boring: Ketchup glaze, cheddar, gravy, marinara, biscuit dough, and puff pastry are recognizable enough for kids, but still taste like real food.
- Batch cooking actually pays off here: One tray can become snacks for today and lunchbox fillers for tomorrow without much extra work.
- You can scale them up or down fast: Half batches work for one child and one adult; double batches make sense when the whole block of kids seems to arrive at once.
1. Mini Meatloaf Muffins With Tangy Glaze
A meatloaf muffin sounds almost too neat, which is part of the appeal. The edges get a little crusty, the centers stay tender, and the ketchup glaze turns sticky in the oven instead of sliding off the way it does on a big loaf.
Why It Works:
These bake in about 20 minutes, so they fit between pickup and homework. The muffin tin gives you crisp sides in every portion, and that matters more than people think. Mini meatloaf also cools faster, which means fewer burned tongues at the counter.
Key Ingredients:
- 1 lb ground beef, 85/15 for flavor
- 1/2 cup plain breadcrumbs, for structure
- 1 large egg, to bind the mixture
- 1/4 cup finely grated onion, so the texture stays smooth
- 1/3 cup milk, to keep the crumb soft
- 1/2 cup ketchup, divided, for the glaze
- 1 tablespoon brown sugar, for the glaze
- 1 teaspoon Worcestershire sauce, for depth
Quick Steps:
- Preheat the oven to 400°F (200°C) and grease a 12-cup muffin tin.
- Mix the beef, breadcrumbs, egg, onion, milk, 1/4 cup ketchup, Worcestershire, salt, and pepper until just combined.
- Press the mixture into 10 muffin cups and smooth the tops.
- Stir the remaining ketchup with the brown sugar, then spoon a little glaze over each cup.
- Bake for 18 to 20 minutes, until the centers reach 160°F and the glaze looks glossy.
- Rest for 5 minutes before lifting them out.
Equipment for This Recipe:
- 12-cup muffin tin
- Mixing bowl
- Small spoon for glazing
- Instant-read thermometer
How to Serve This Dish:
Set two muffins on a plate with mashed potatoes or a few carrot sticks and call it a snack that pretends to be dinner. They also tuck into lunch boxes once they cool.
Pro Tips for This Recipe:
- Use a light hand when mixing. Packed meatloaf turns dense fast.
- Grate the onion instead of dicing it; it disappears better into the mixture.
- If the tops look dry at minute 15, brush on a second thin layer of glaze.
Variations on This Dish:
- BBQ Muffins: Swap ketchup glaze for barbecue sauce and skip the brown sugar.
- Turkey Version: Use ground turkey and add 1 tablespoon olive oil so the muffins do not dry out.
Common Mistakes to Avoid with This Dish:
- Overfilling the tin: The mixture rises a little, so stop at about 3/4 full or the glaze will spill.
- Skipping the rest: Pull them out too early and they crumble when you lift them.
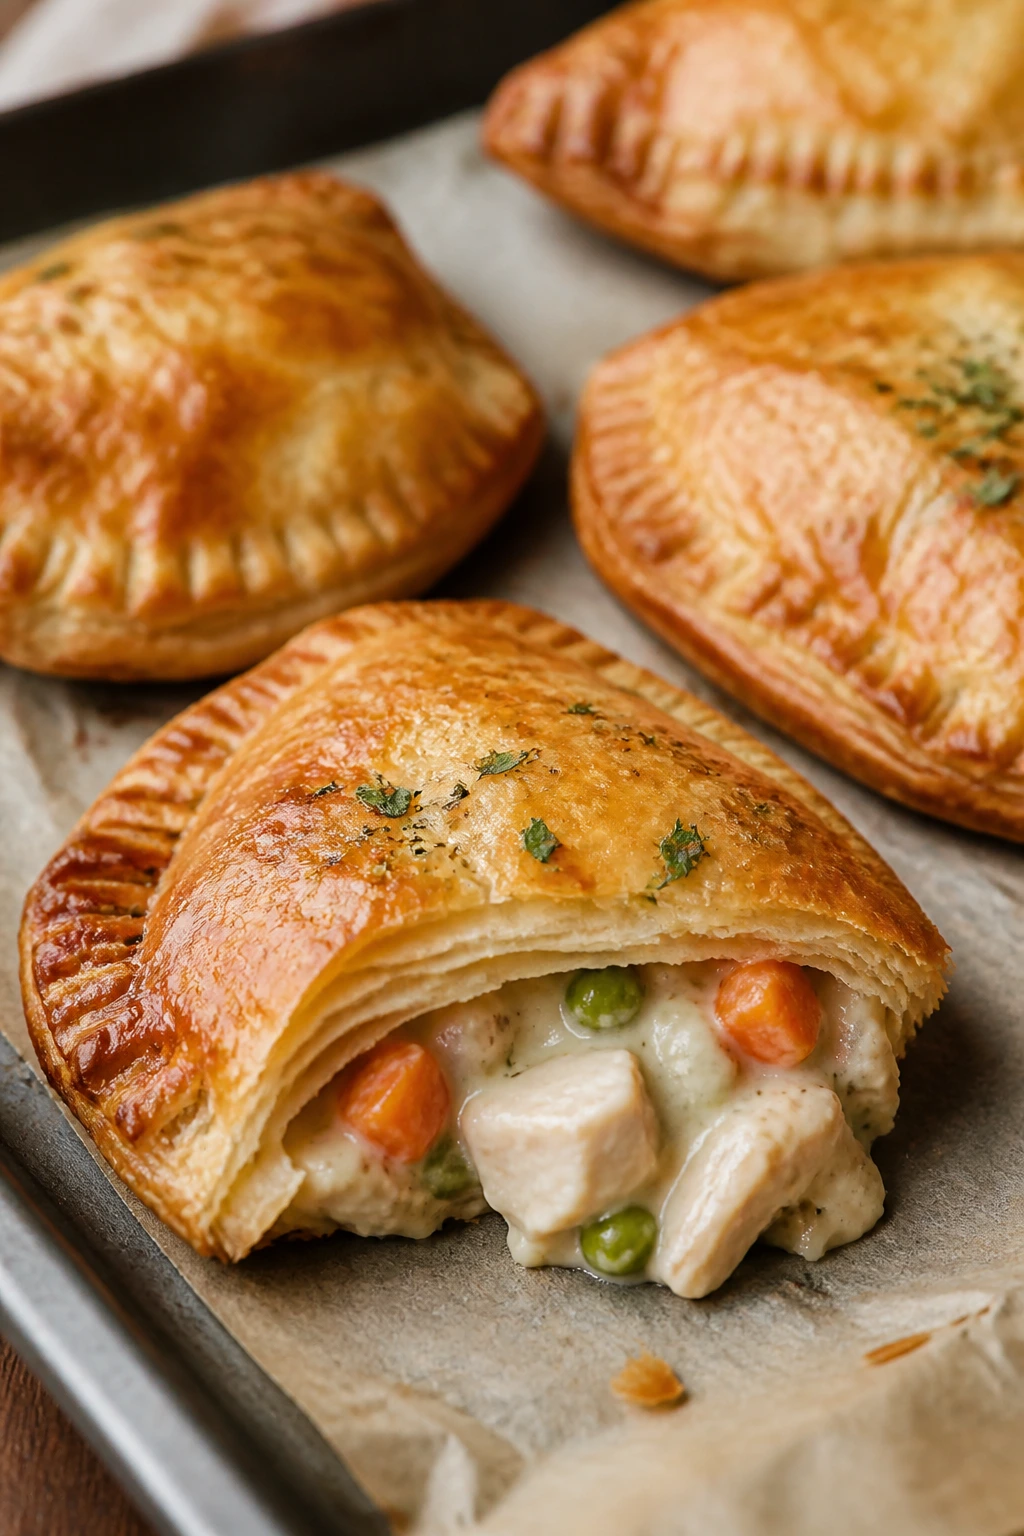
2. Chicken Pot Pie Hand Pies
These taste like the creamy middle of a chicken pot pie, except you can hold them by the crust. That is the whole trick. Flaky pastry on the outside, thick chicken filling inside, and no one needs a fork.
Why It Works:
Puff pastry bakes faster than pie crust and gives a louder crunch when you bite in. The filling stays thick if you cook off the moisture first, which keeps the bottom from turning gummy. I prefer these warm, not scorching hot, because the chicken flavor comes through better once the steam settles down.
Key Ingredients:
- 2 sheets puff pastry, thawed
- 2 cups cooked shredded chicken
- 1 cup frozen peas and carrots
- 1/2 cup diced celery
- 1/4 cup diced onion
- 2 tablespoons butter
- 2 tablespoons all-purpose flour
- 1 1/2 cups chicken broth
- 1/4 cup heavy cream
Quick Steps:
- Preheat the oven to 425°F (220°C) and line a baking sheet with parchment.
- Cook the onion and celery in butter for 4 minutes, then stir in the flour.
- Pour in the broth and cream, simmer until thick, then fold in chicken and vegetables.
- Cut the pastry into 6-inch squares, spoon filling on one side, and seal the edges with a fork.
- Brush with egg wash and cut a small steam vent in each pie.
- Bake for 18 to 22 minutes, until deeply golden and crisp.
Equipment for This Recipe:
- Rimmed baking sheet
- Parchment paper
- Small saucepan
- Fork or pastry crimper
How to Serve This Dish:
Serve with apple slices or a little cup of tomato soup. One hand pie is enough for a smaller snack; two make a real mini meal.
Pro Tips for This Recipe:
- Chill the filling for 10 minutes before assembling if it feels loose.
- Cut the vents after sealing so the pies do not burst open.
- If your pastry softens while you work, pop it back in the fridge for 5 minutes.
Variations on This Dish:
- Turkey Pot Pie: Use leftover turkey and swap peas and carrots for corn and diced green beans.
- Herb Garden Version: Add thyme and chopped parsley to the filling for a fresher finish.
Common Mistakes to Avoid with This Dish:
- Wet filling: If the mixture runs, the pastry will leak. Cook it until a spoon dragged through leaves a clear trail.
- Warm pastry: Puff pastry needs to stay cold or it bakes flat instead of flaky.
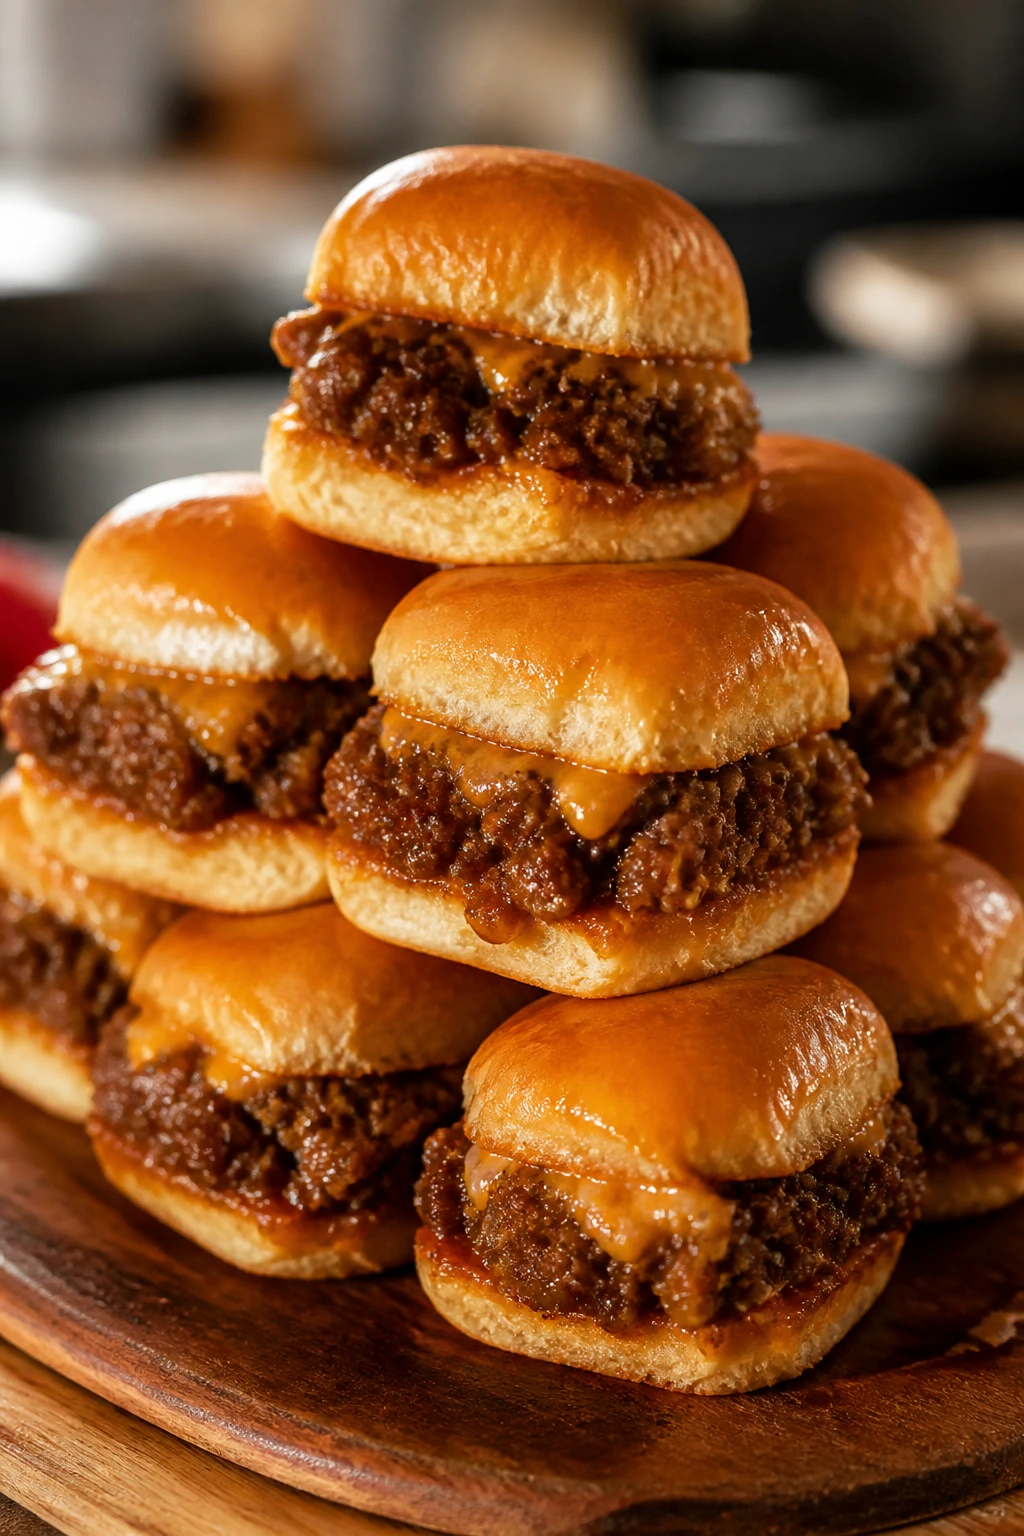
3. Sloppy Joe Slider Buns
Sloppy Joes can be messy in a good way, but mini sliders make the mess more manageable. The sauce clings to the beef, the buns get a little soft under the filling, and the top bun soaks up just enough juice without collapsing.
Why It Works:
This is one of those recipes that tastes better after the sauce simmers for a few minutes. The tomato, brown sugar, and Worcestershire cook down into something sticky and sharp, which is exactly what you want in a tiny sandwich. It also reheats well, which is a small miracle.
Key Ingredients:
- 1 lb ground beef
- 1/2 cup finely diced onion
- 1/2 cup ketchup
- 2 tablespoons tomato paste
- 1 tablespoon brown sugar
- 1 tablespoon Worcestershire sauce
- 1 teaspoon yellow mustard
- 8 slider buns
- 1 cup shredded cheddar
Quick Steps:
- Brown the beef and onion in a skillet over medium heat, then drain off excess fat.
- Stir in ketchup, tomato paste, brown sugar, Worcestershire, mustard, salt, and pepper.
- Simmer for 6 to 8 minutes until the sauce turns thick and glossy.
- Split the slider buns and spoon the beef mixture onto the bottoms.
- Add cheddar, set the tops on, and bake at 375°F (190°C) for 5 minutes if you want the cheese melted.
- Serve warm with pickle chips on the side.
Equipment for This Recipe:
- Large skillet
- Wooden spoon
- Baking sheet
- Sharp knife for slicing buns
How to Serve This Dish:
Pile them on a tray with carrot sticks and pickles, and people will graze through them fast. Two sliders usually work as a snack; three move into supper territory.
Pro Tips for This Recipe:
- Drain the beef well or the buns turn soggy fast.
- Toast the cut sides of the buns for 2 minutes if you want extra structure.
- A spoonful of pickle relish in the sauce gives the filling a sharper edge.
Variations on This Dish:
- Cheesy Joe Sliders: Add American cheese under the top bun for a softer melt.
- Turkey Joe Sliders: Use ground turkey and a splash of olive oil in the skillet.
Common Mistakes to Avoid with This Dish:
- Sauce too thin: If it runs off the bun, simmer another 2 minutes.
- Skipping the toast: Soft buns are fine; collapsing buns are not.
4. Mac and Cheese Muffin Cups
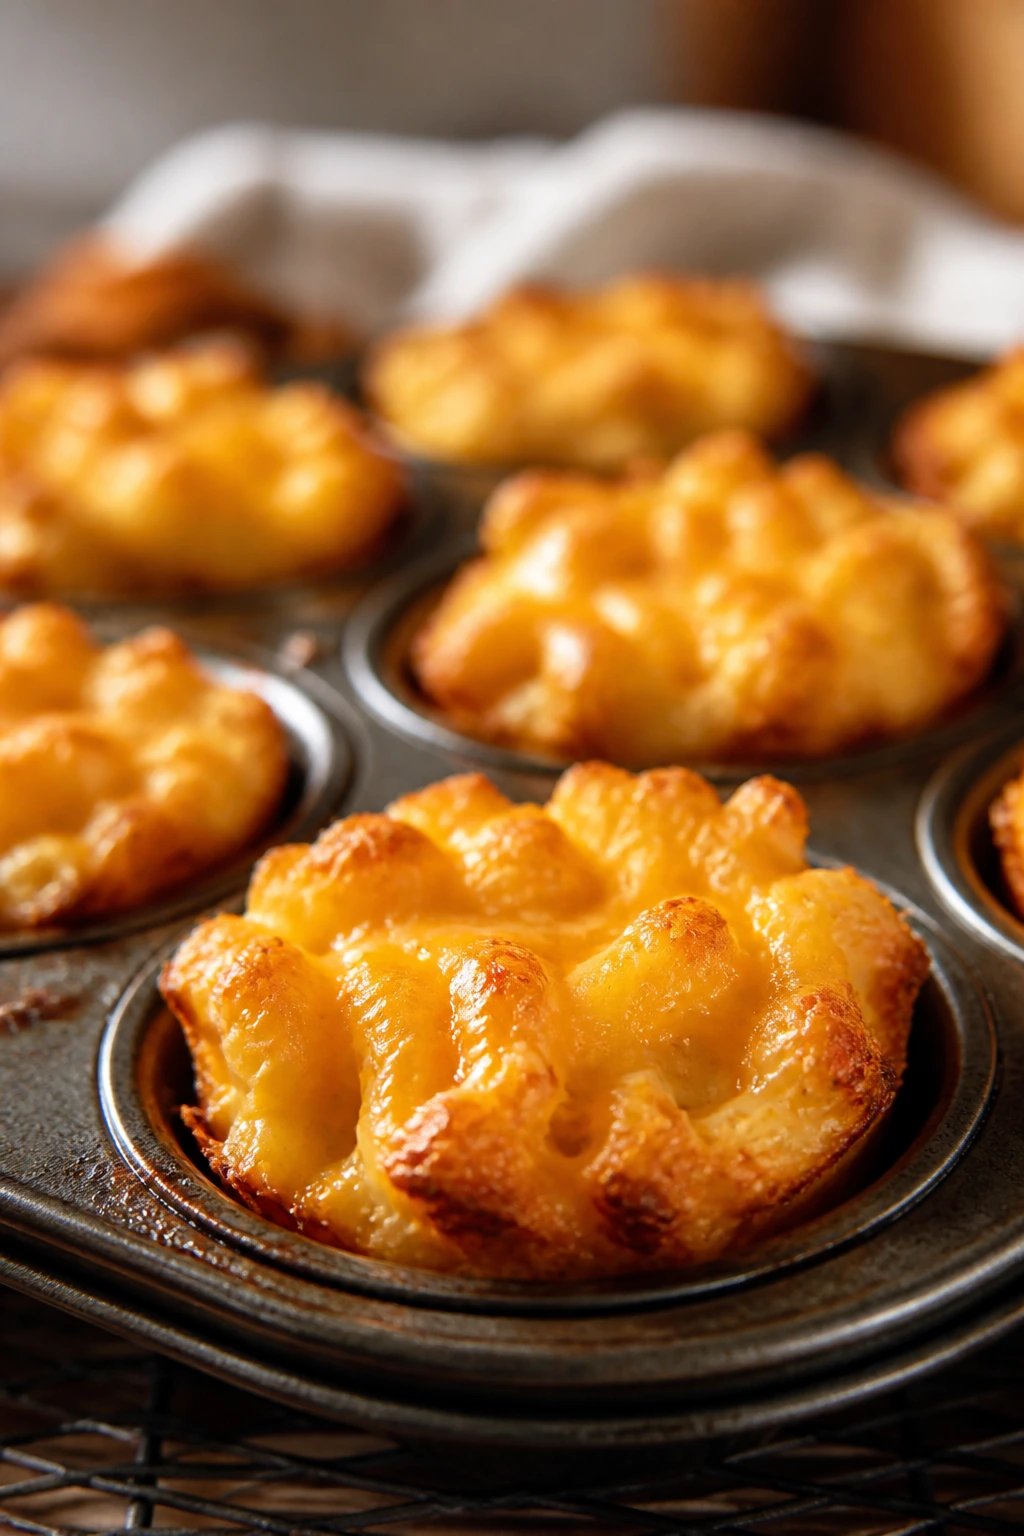
Mac and cheese in a muffin tin has one major advantage: the edges go brown. Not pale. Brown. That browned cheese crust is where the flavor lives, and it gives the whole thing more bite than a scoop from a casserole dish.
Why It Works:
Eggs help the pasta hold together, so the cups can be picked up with a napkin instead of a spoon. A little flour in the cheese sauce keeps it from breaking when it cools. These are the sort of snacks that vanish while you are still setting down the tray.
Key Ingredients:
- 8 oz elbow macaroni
- 2 tablespoons butter
- 2 tablespoons all-purpose flour
- 1 cup milk
- 2 cups shredded cheddar
- 2 large eggs, beaten
- 1/2 teaspoon dry mustard
- 1/2 cup breadcrumbs
Quick Steps:
- Cook the macaroni until just shy of tender, then drain and cool slightly.
- Melt butter in a saucepan, whisk in flour, and cook for 1 minute.
- Whisk in milk, then stir in cheddar and mustard until smooth.
- Fold in the pasta and eggs, then spoon into a greased muffin tin.
- Top with breadcrumbs and bake at 375°F (190°C) for 20 to 22 minutes.
- Cool for 5 minutes before removing.
Equipment for This Recipe:
- Muffin tin
- Medium saucepan
- Whisk
- Large bowl
How to Serve This Dish:
I like these with a few tomato slices or a cup of applesauce, because the sharp-salty cheese likes something bright nearby. They are also sturdy enough for lunchbox leftovers.
Pro Tips for This Recipe:
- Cook the pasta 1 minute under the box directions so it does not turn mushy.
- Shred the cheese yourself if you can; it melts smoother.
- Pack the cups lightly, not hard, so they stay tender.
Variations on This Dish:
- Bacon Mac Cups: Stir in 1/2 cup chopped cooked bacon.
- Broccoli Version: Fold in 1 cup finely chopped steamed broccoli.
Common Mistakes to Avoid with This Dish:
- Overcooking the pasta: It keeps cooking in the oven.
- Skipping the rest time: The cups need a few minutes to set or they fall apart.
5. Shepherd’s Pie Potato Cups
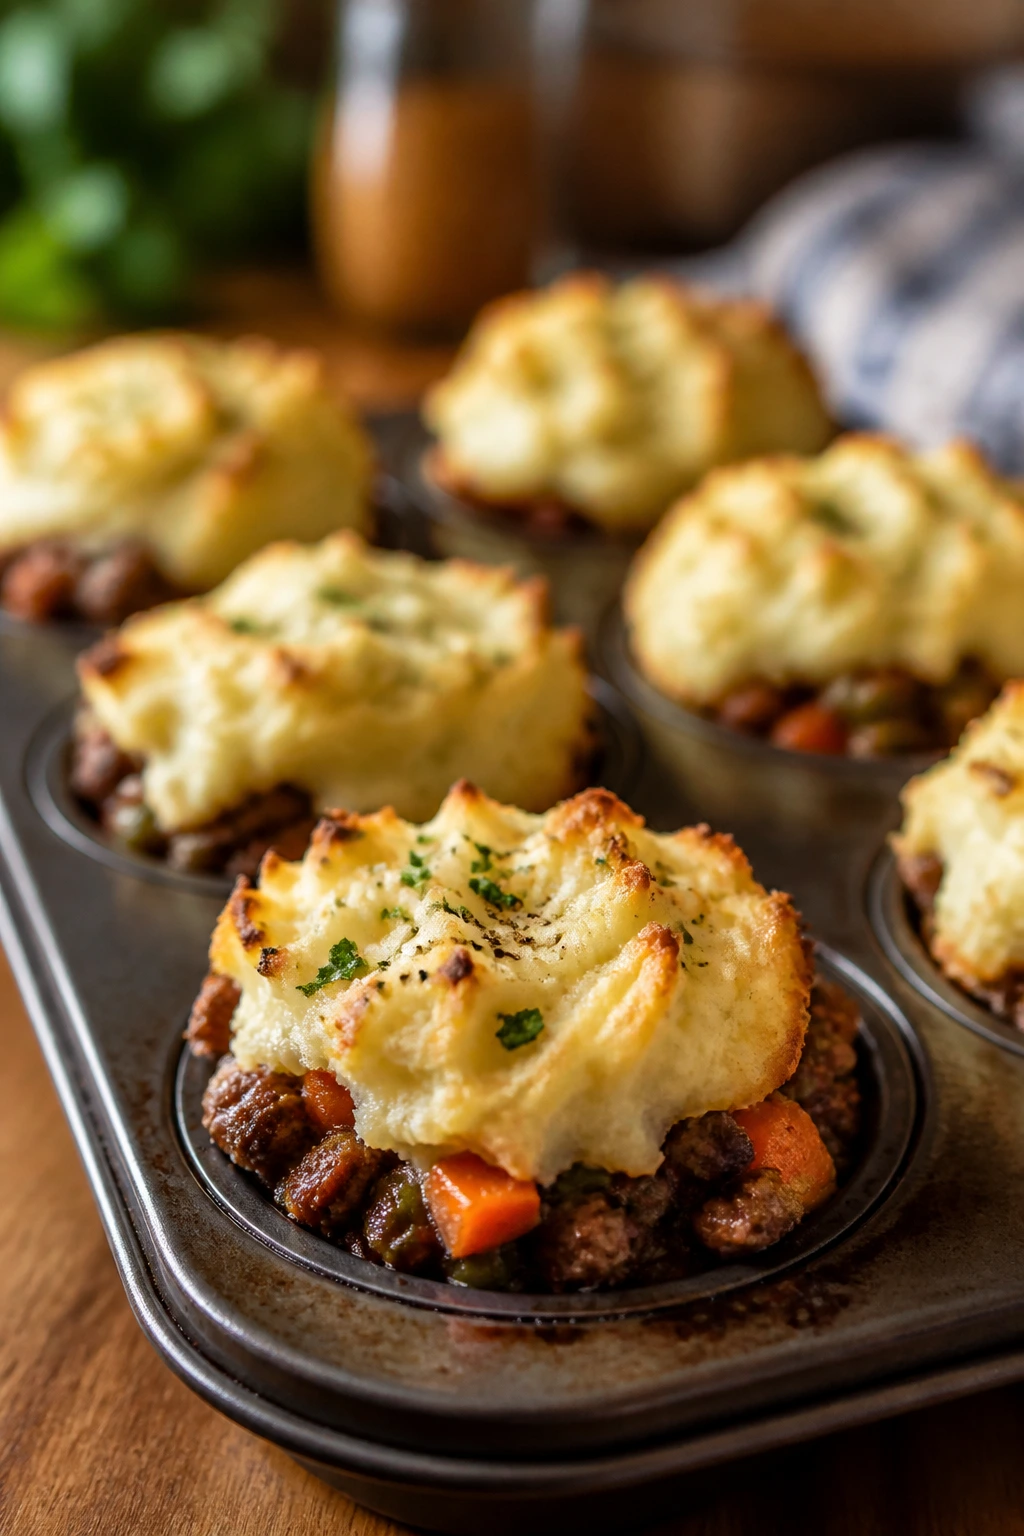
Shepherd’s pie gets a little more fun when the mashed potato sits on top like a tiny cloud. The beef filling stays savory and thick, the potato browns at the peaks, and each cup tastes like the best part of the casserole.
Why It Works:
Using muffin cups gives you a higher ratio of topping to filling, which is the whole point. A thick meat mixture keeps the base from leaking into the potato layer. These are especially good if you have leftover mashed potatoes that need a second life.
Key Ingredients:
- 1 lb ground beef
- 1/2 cup diced onion
- 1 cup frozen peas and carrots
- 2 tablespoons tomato paste
- 1 tablespoon flour
- 1/2 cup beef broth
- 2 cups mashed potatoes
- 1/2 cup shredded cheddar
Quick Steps:
- Brown the beef and onion, then stir in tomato paste and flour.
- Add the broth and simmer until the filling is thick enough to hold its shape.
- Fold in peas and carrots, then spoon the mixture into a greased muffin tin.
- Pipe or spoon mashed potatoes on top and sprinkle with cheddar.
- Bake at 400°F (200°C) for 15 to 18 minutes, until the tops are lightly browned.
- Rest 5 minutes before serving.
Equipment for This Recipe:
- Muffin tin
- Skillet
- Potato masher or spoon
- Piping bag or zip-top bag, optional
How to Serve This Dish:
These work well beside a crisp green salad or even just a few cucumber sticks. One or two cups make a good snack; four are dinner.
Pro Tips for This Recipe:
- Let the filling thicken before you spoon it into the tin.
- Cold mashed potatoes pipe cleaner and hold their shape better.
- If you want extra browning, run them under the broiler for 1 minute.
Variations on This Dish:
- Lamb Shepherd’s Pie Cups: Use ground lamb and add chopped rosemary.
- Turkey Cottage Pie Cups: Swap in ground turkey and a touch of soy sauce for depth.
Common Mistakes to Avoid with This Dish:
- Watery filling: Thin meat juice softens the potato cap.
- Potato layer too thick: Too much mash hides the filling and bakes unevenly.
6. BBQ Pulled Pork Quesadilla Wedges
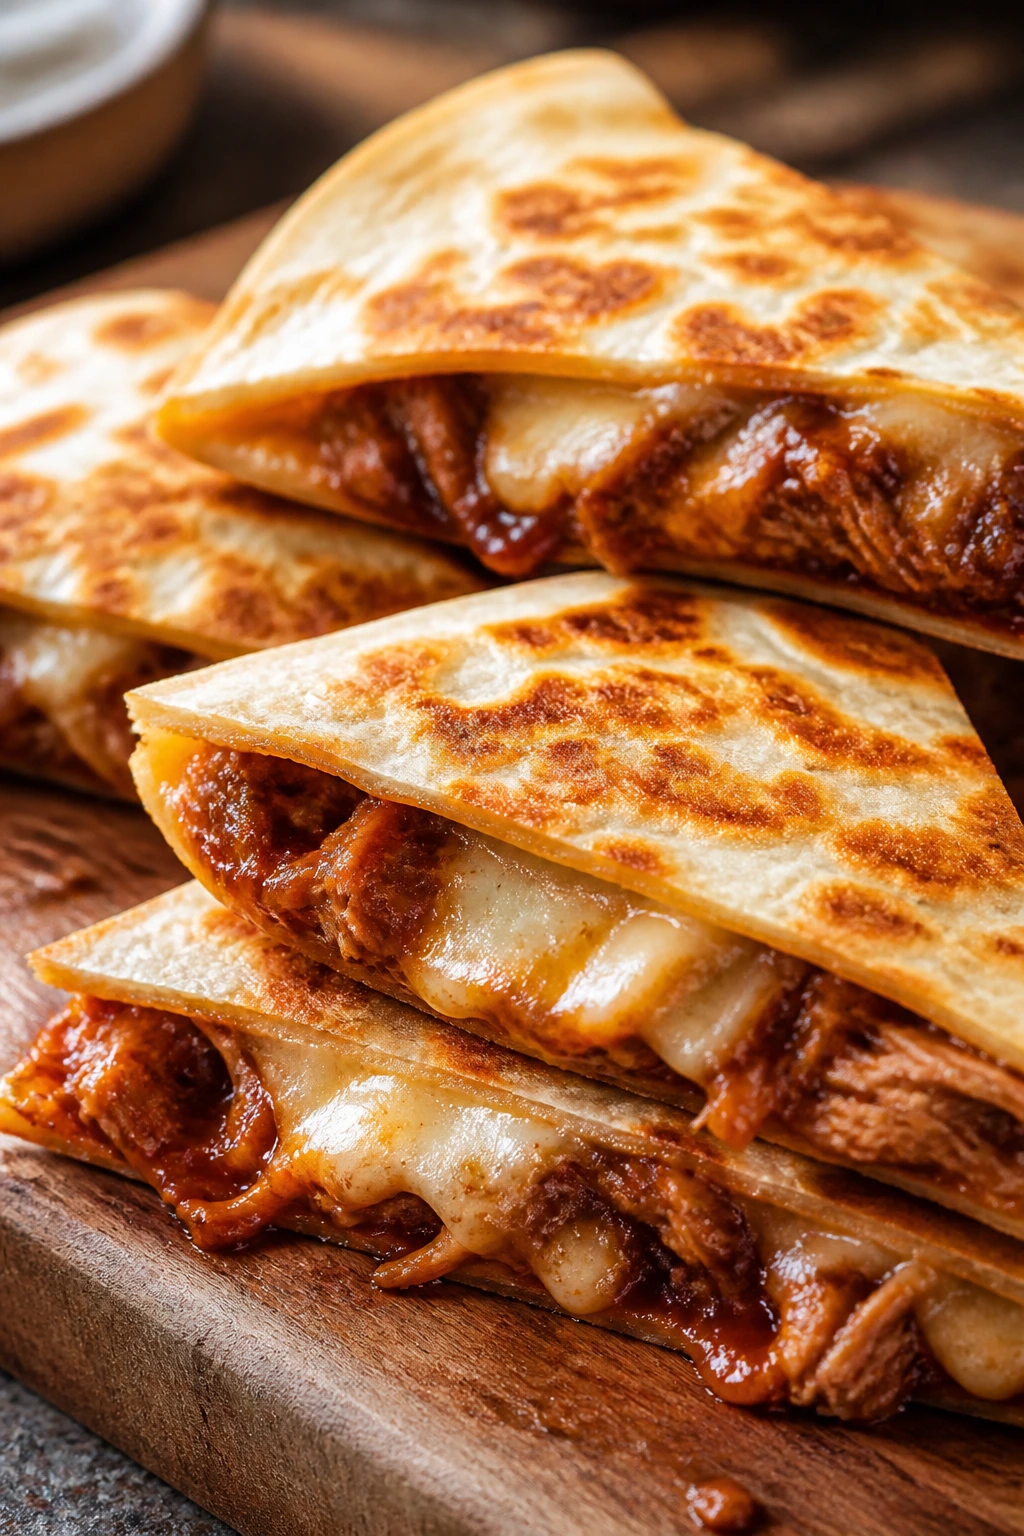
A good quesadilla can carry more than cheese, and pulled pork is proof. The barbecue sauce clings to the pork, the tortilla crisps in the pan, and the melted cheese acts like edible glue between the layers.
Why It Works:
This is one of the fastest ways to turn leftover pork into something kids will actually reach for. A hot skillet gives the tortilla those browned spots that taste toasted, not greasy. Cut into wedges, it feels snackable instead of heavy.
Key Ingredients:
- 2 cups cooked pulled pork
- 1/2 cup barbecue sauce
- 2 cups shredded Monterey Jack cheese
- 4 large flour tortillas
- 1/2 small red onion, thinly sliced
- 1 tablespoon butter
Quick Steps:
- Toss the pulled pork with barbecue sauce in a bowl.
- Heat a skillet over medium heat and melt a little butter.
- Lay down one tortilla, sprinkle cheese on half, add pork and onion, then more cheese.
- Fold and cook for 2 to 3 minutes per side until crisp and the cheese melts.
- Rest for 1 minute, then cut into wedges.
- Repeat with the remaining tortillas.
Equipment for This Recipe:
- 12-inch skillet
- Spatula
- Sharp knife or pizza cutter
- Mixing bowl
How to Serve This Dish:
Serve with ranch, pickles, or a spoonful of extra barbecue sauce for dipping. Two wedges are a snack; four wedges with slaw is a meal.
Pro Tips for This Recipe:
- Keep the filling centered so the tortilla seals cleanly.
- Use medium heat. High heat browns the tortilla before the cheese melts.
- A little onion goes a long way here; too much makes the quesadilla slide apart.
Variations on This Dish:
- Spicy Smokehouse: Add sliced jalapeños and a pinch of smoked paprika.
- Cheddar Crunch: Swap Monterey Jack for sharp cheddar and add crushed tortilla chips inside.
Common Mistakes to Avoid with This Dish:
- Overstuffing: If the tortilla cannot close flat, the filling will escape.
- Cutting immediately: Let it sit a minute so the cheese firms up.
7. Sausage and Pepper Puff Pastry Twists
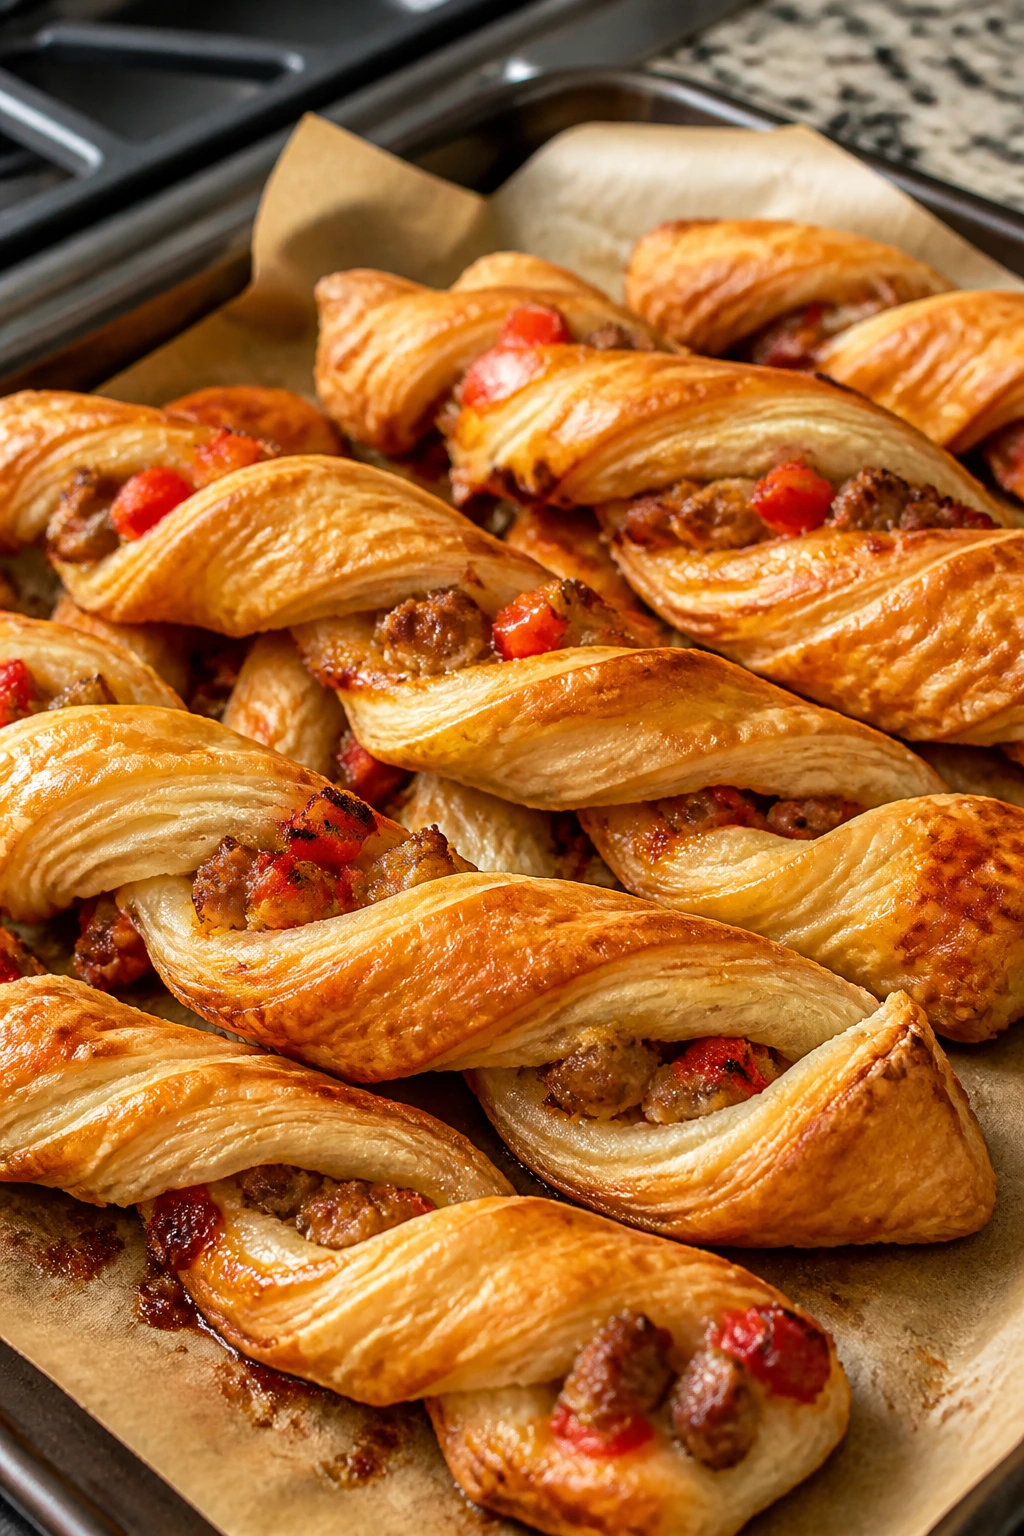
These twists look fancier than they are, which is useful when you want a snack that feels special without touching a knife more than necessary. The sausage gives you savory heft, the peppers stay sweet, and the pastry shatters a little when you bite it.
Why It Works:
Puff pastry does the heavy lifting here. Once the filling is cooked down and fairly dry, you can twist the strips without them tearing apart. The result is part appetizer, part after-school rescue mission.
Key Ingredients:
- 1 sheet puff pastry, thawed
- 8 oz Italian sausage, casings removed
- 1/2 red bell pepper, finely diced
- 1/2 yellow onion, finely diced
- 1 cup shredded mozzarella
- 1 large egg, beaten
Quick Steps:
- Cook the sausage, pepper, and onion in a skillet until browned and dry.
- Cool the filling for 10 minutes, then stir in mozzarella.
- Roll the puff pastry slightly and cut it into long strips.
- Spoon filling onto half of each strip, fold, and twist.
- Brush with egg wash and bake at 400°F (200°C) for 15 to 18 minutes.
- Cool on a rack so the bottoms stay crisp.
Equipment for This Recipe:
- Baking sheet
- Parchment paper
- Skillet
- Sharp knife or pizza cutter
How to Serve This Dish:
These are good with marinara, but they also work plain, which is rare for something this flaky. A few twists and some grapes make a solid snack plate.
Pro Tips for This Recipe:
- Cook the filling until no liquid remains.
- Keep the pastry cold while you shape it.
- Twist gently; if you tug hard, the pastry stretches and snaps back.
Variations on This Dish:
- Pizza Twists: Use pepperoni, a little marinara, and mozzarella.
- Mild School-Night Version: Swap hot sausage for sweet sausage and add extra onion.
Common Mistakes to Avoid with This Dish:
- Wet filling: Steam ruins the twist.
- Overbaking: Puff pastry goes from golden to bitter quickly.
8. Roast Chicken Biscuit Sliders
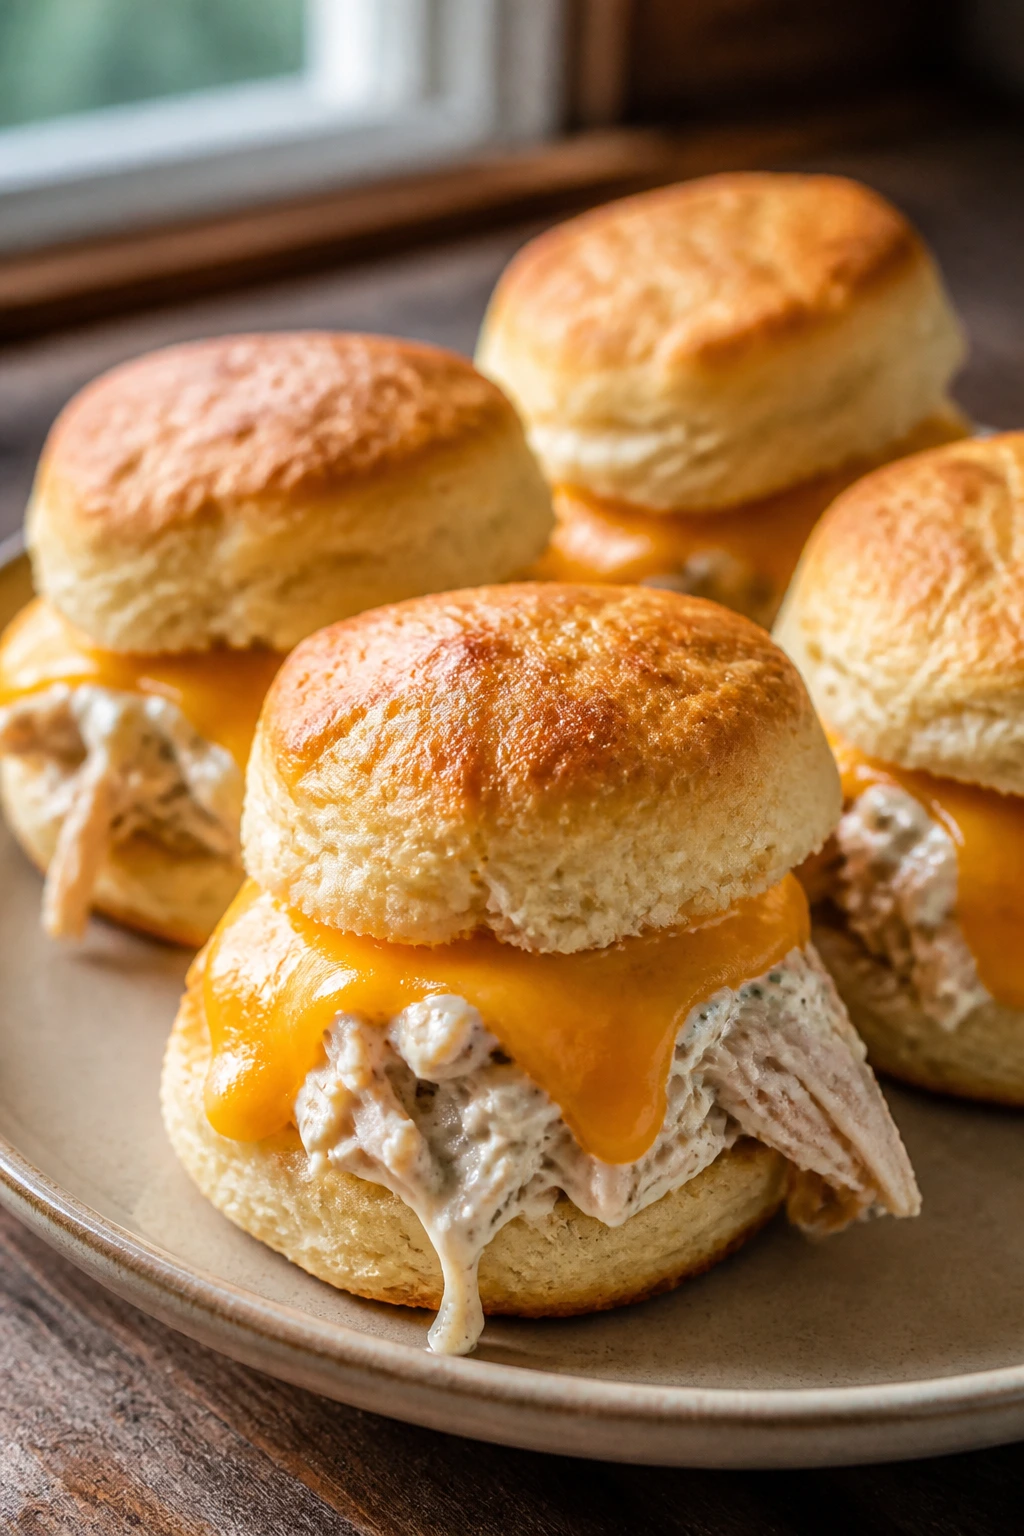
A biscuit slider is one of those foods that makes sense the second you bite it. Soft biscuit, shredded chicken, a little creamy spread, and a buttery top that flakes onto your plate.
Why It Works:
This is where leftover roast chicken earns its keep. The biscuit dough bakes fast, so you can have warm sliders on the table in under 20 minutes if the chicken is already cooked. They hold together better than a sandwich on sliced bread, which is why I keep making them.
Key Ingredients:
- 1 can refrigerated biscuit dough, 8 biscuits
- 2 cups shredded cooked chicken
- 1/3 cup mayonnaise
- 1 tablespoon Dijon mustard
- 1/4 cup diced celery
- 2 tablespoons chopped chives
- 1 cup shredded cheddar
Quick Steps:
- Bake the biscuits according to the package directions, then split them.
- Stir chicken, mayo, mustard, celery, chives, salt, and pepper together.
- Spoon the chicken mixture onto the bottom halves.
- Add cheddar, then set on the tops.
- Warm the sliders in a 350°F (175°C) oven for 4 minutes.
- Serve while the biscuits are still soft.
Equipment for This Recipe:
- Baking sheet
- Mixing bowl
- Spoon
- Bread knife
How to Serve This Dish:
I like these with cucumber coins or a small bowl of chicken gravy for dipping. Two sliders usually satisfy a hungry kid; four work as a light supper.
Pro Tips for This Recipe:
- Let the biscuits cool 5 minutes before splitting or they tear.
- If the filling seems dry, add another spoonful of mayo.
- A thin layer of butter on the biscuit tops makes them taste bakery-soft.
Variations on This Dish:
- Buffalo Chicken Sliders: Add 2 tablespoons hot sauce and swap cheddar for blue cheese crumbles.
- Cranberry Chicken Sliders: Stir in 2 tablespoons cranberry sauce for a sweet-tart edge.
Common Mistakes to Avoid with This Dish:
- Overloading the biscuit: Too much filling makes them slide apart.
- Serving cold cheese: Warm it just enough to melt or the texture feels flat.
9. Tuna Melt English Muffins
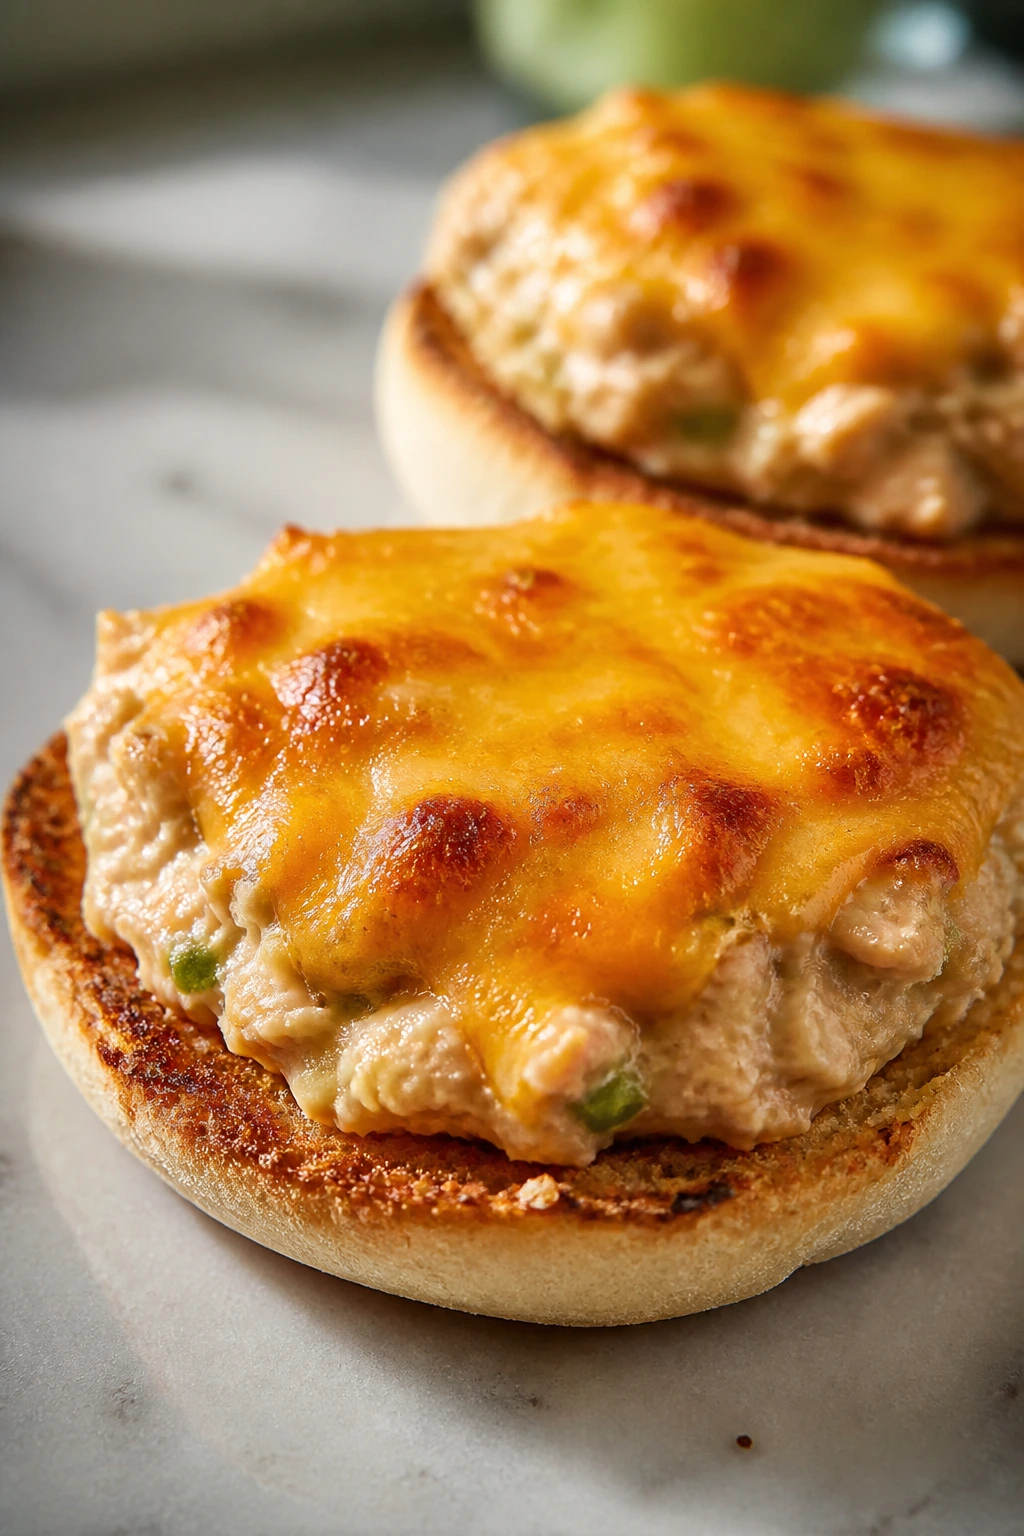
A tuna melt has no business being dull, and on an English muffin it gets the right amount of crunch. The nooks catch the tuna salad, the cheese bubbles on top, and the whole thing tastes like a diner lunch that wandered into snack hour.
Why It Works:
English muffins toast from the inside out, so the base stays firm under the tuna. Tuna salad with a little celery and pickle relish gives you crunch, salt, and a sharp note that cuts through the cheese. It is cheap, fast, and more satisfying than it has any right to be.
Key Ingredients:
- 2 cans tuna, drained
- 1/3 cup mayonnaise
- 2 tablespoons chopped celery
- 1 tablespoon sweet pickle relish
- 4 English muffins, split
- 4 slices cheddar cheese
- 1 tablespoon butter
Quick Steps:
- Mix tuna, mayo, celery, relish, salt, and pepper.
- Toast the English muffins lightly.
- Spoon tuna onto each half and top with cheddar.
- Broil for 1 to 2 minutes until the cheese melts and spots brown.
- Brush the edges with a little butter if you want extra richness.
- Serve immediately.
Equipment for This Recipe:
- Baking sheet
- Broiler-safe tray
- Mixing bowl
- Fork
How to Serve This Dish:
Pair with tomato soup or a handful of grapes. One half makes a small snack; two halves make a sturdy after-school plate.
Pro Tips for This Recipe:
- Drain the tuna well or the muffins soften too fast.
- Chop the celery small so it does not fall out in big crunchy pieces.
- Broil close to the heat for fast melting, but watch it closely.
Variations on This Dish:
- Tuna Melt Deluxe: Add thin tomato slices under the cheese.
- Mayo-Light Version: Use half mayo and half plain Greek yogurt.
Common Mistakes to Avoid with This Dish:
- Using soggy bread: Toast first, or the melt collapses.
- Broiling too long: The cheese goes from melted to burnt in a blink.
10. Lasagna Roll-Up Pinwheels
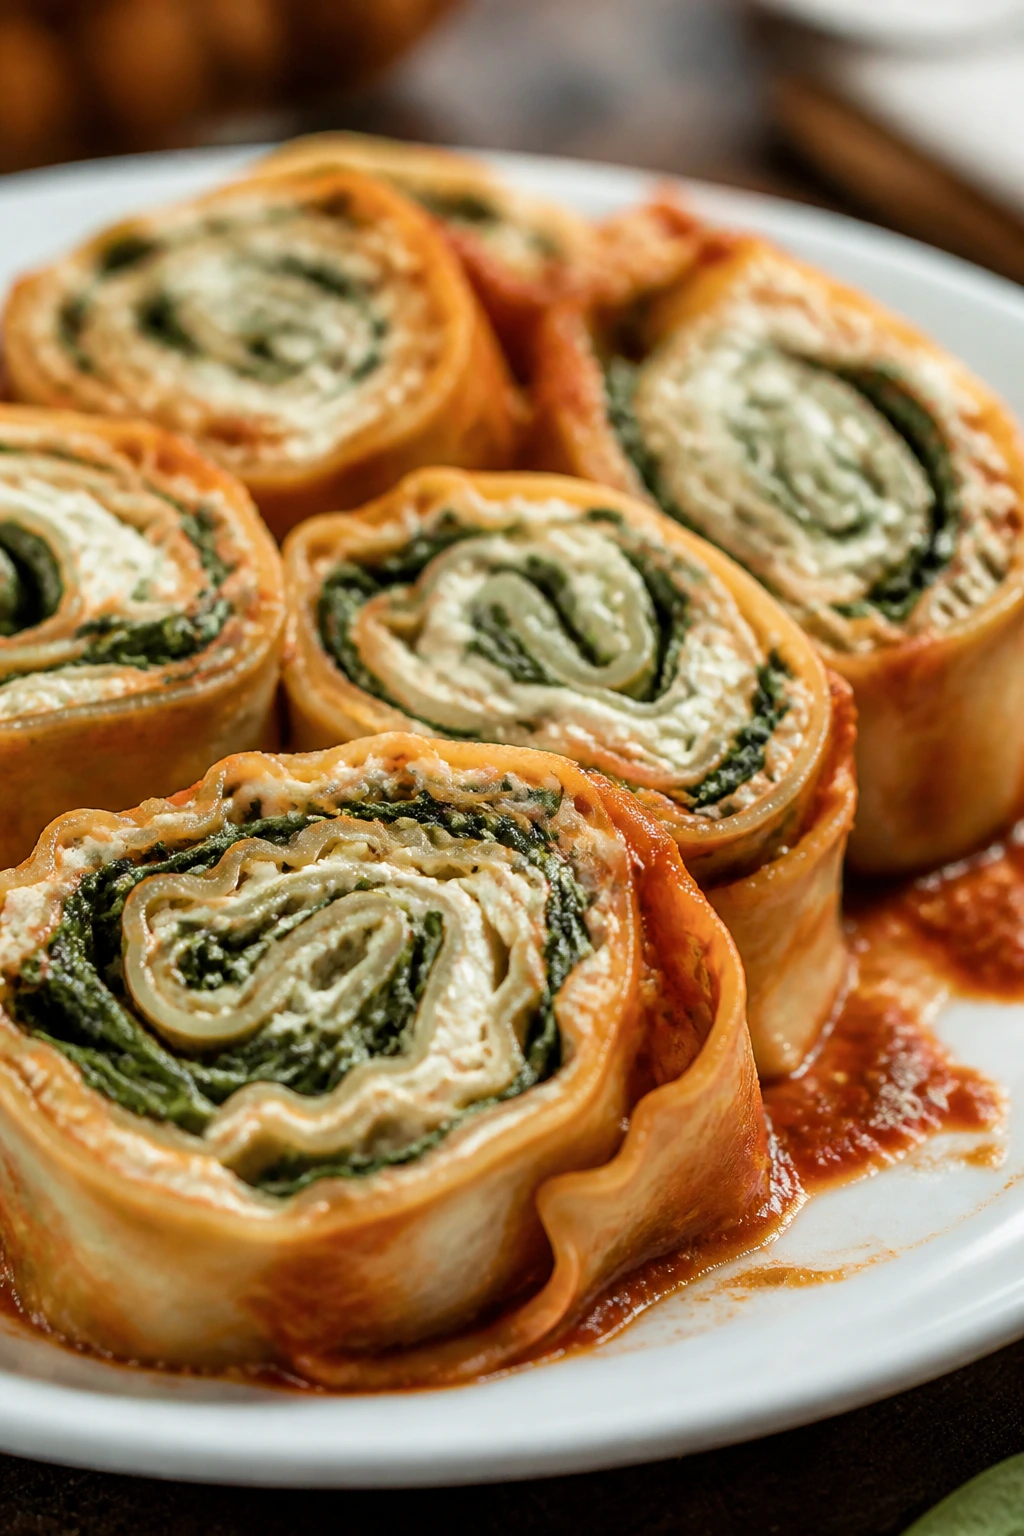
Lasagna does not need to be trapped in a huge pan. Rolled up and sliced, it becomes neat little spirals of ricotta, mozzarella, and sauce, which feels almost civilized for something this rich.
Why It Works:
The pasta layers cook evenly when they are rolled thin. You get cheese in every bite, not just a thick center in the middle of a square. These are also easier to portion than a baking dish of lasagna, which matters when the snack crowd is unpredictable.
Key Ingredients:
- 8 lasagna noodles
- 1 1/2 cups ricotta cheese
- 1 cup shredded mozzarella
- 1/4 cup grated Parmesan
- 1 egg
- 1 1/2 cups marinara sauce
- 1 cup chopped spinach, squeezed dry
Quick Steps:
- Boil the noodles until just tender, then lay them flat.
- Mix ricotta, mozzarella, Parmesan, egg, spinach, salt, and pepper.
- Spread filling over each noodle and roll tightly.
- Slice each roll into 2 to 3 pinwheels and arrange in a sauced baking dish.
- Spoon marinara on top and bake at 375°F (190°C) for 20 minutes.
- Rest 5 minutes so the filling sets.
Equipment for This Recipe:
- 9×13-inch baking dish
- Pot for boiling noodles
- Mixing bowl
- Sharp knife
How to Serve This Dish:
These taste good with a side salad, but they are also fine standing alone on a small plate. Three or four pinwheels are enough for a snack; more if nobody ate lunch.
Pro Tips for This Recipe:
- Cool the noodles before filling or the ricotta slides.
- Squeeze the spinach dry with a towel; water ruins the texture.
- Use a thick marinara so the rolls do not swim in sauce.
Variations on This Dish:
- Meaty Roll-Ups: Add cooked Italian sausage to the filling.
- White Lasagna Version: Replace marinara with Alfredo-style sauce.
Common Mistakes to Avoid with This Dish:
- Overcooked noodles: They tear while rolling.
- Too much filling: Thick spirals split open in the oven.
11. Meatball Sub Bites
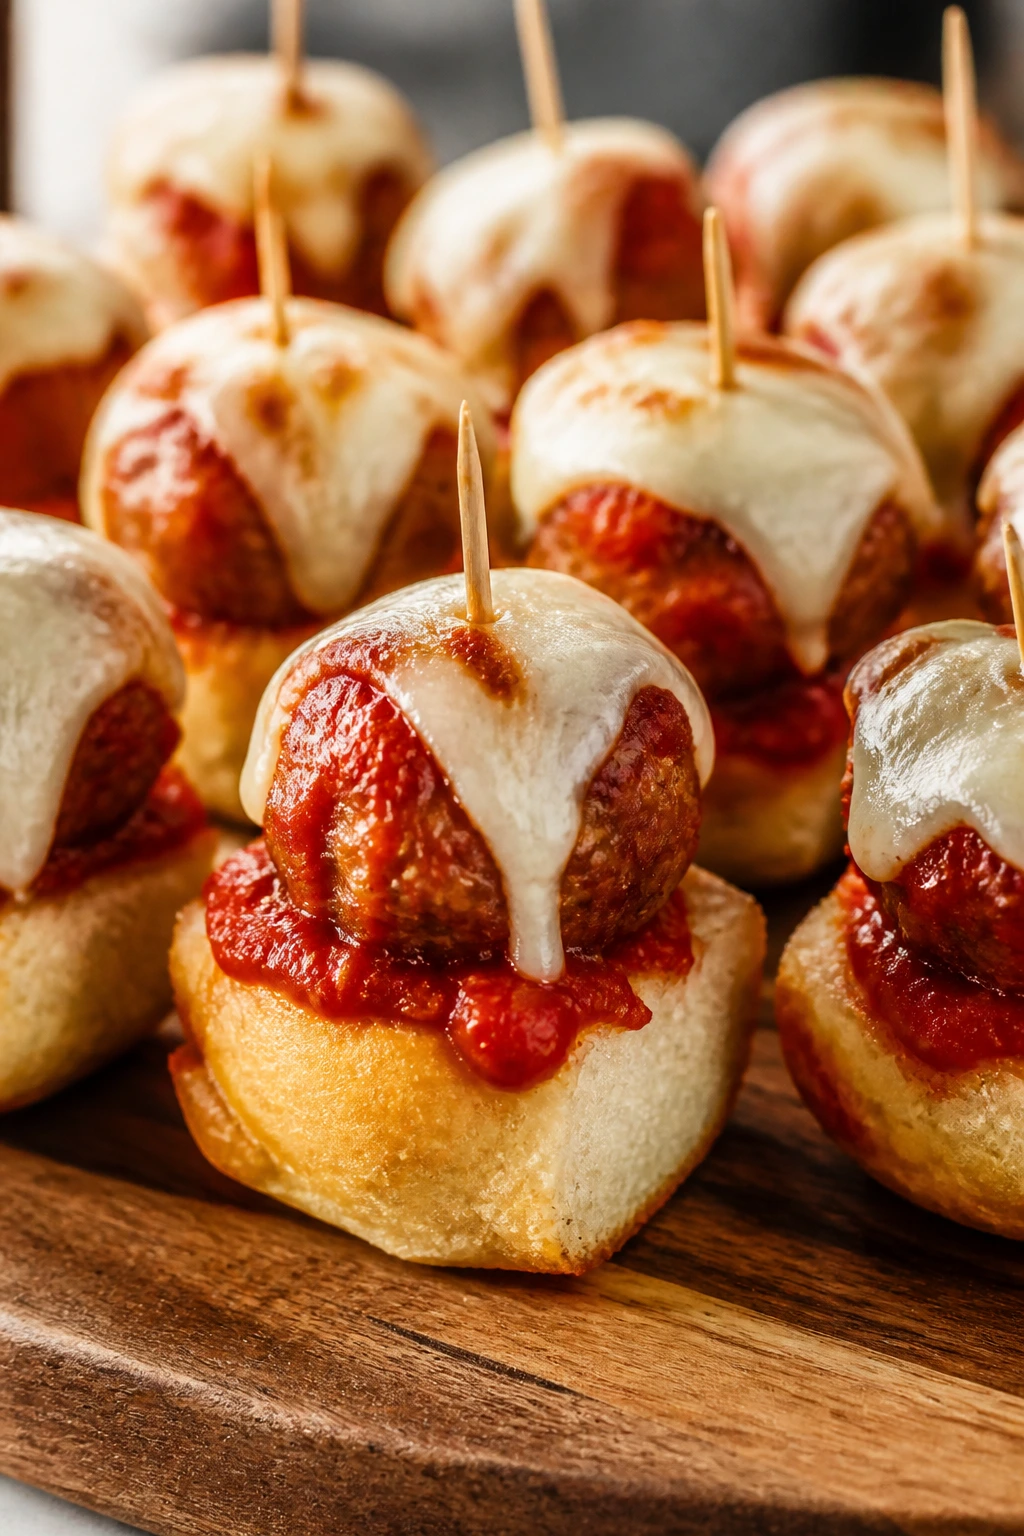
Meatball subs get more snack-friendly when you cut them down to bite size and keep the sauce thick. You still get the red sauce, the melted cheese, and the garlicky bread, just without the full sandwich slump.
Why It Works:
This is a smart way to use frozen or homemade meatballs without turning dinner into a project. Toasting the bread first keeps it from absorbing all the sauce. Kids tend to trust meatballs more than strange new textures, which is useful.
Key Ingredients:
- 12 small cooked meatballs
- 1 cup marinara sauce
- 1 baguette or small Italian loaf
- 1 cup shredded mozzarella
- 2 tablespoons grated Parmesan
- 1 tablespoon olive oil
Quick Steps:
- Warm the meatballs in marinara until hot through.
- Slice the bread into 1-inch pieces and brush lightly with olive oil.
- Toast the bread at 400°F (200°C) for 5 minutes.
- Top each piece with a meatball, a spoon of sauce, and mozzarella.
- Broil for 1 minute until the cheese bubbles.
- Finish with Parmesan.
Equipment for This Recipe:
- Baking sheet
- Saucepan
- Spoon
- Broiler-safe tray
How to Serve This Dish:
Serve on a platter with toothpicks if you want them to stay neat. Four bites work as a snack; six become a quick supper with fruit on the side.
Pro Tips for This Recipe:
- Keep the sauce thick so it does not soak into the bread.
- Cut the loaf after toasting if you want cleaner edges.
- A little Parmesan on the bread before broiling adds a salty crust.
Variations on This Dish:
- Turkey Meatball Bites: Use turkey meatballs and a spoon of pesto in the sauce.
- Spicy Marinara Version: Add red pepper flakes to the sauce.
Common Mistakes to Avoid with This Dish:
- Skipping the toast: The bread turns soggy fast.
- Using giant meatballs: Bite-size matters here.
12. Cheddar Cornbread Squares With Turkey Chili
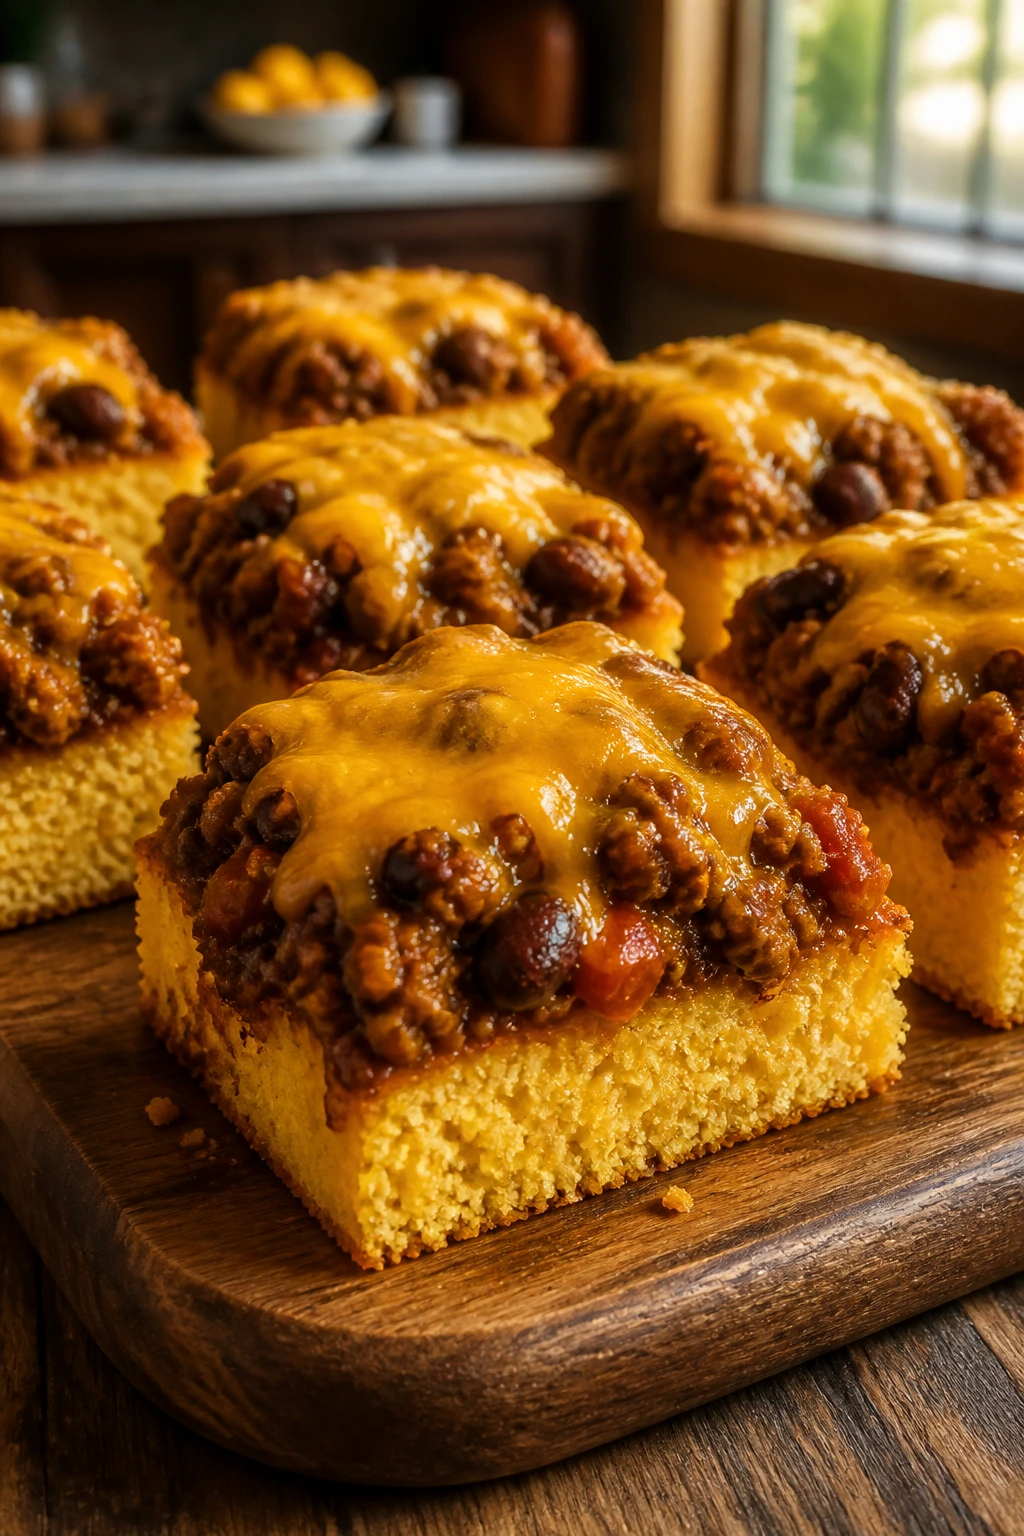
Cornbread and chili are old friends, and cutting them into squares makes them easier to hand off one at a time. The cornbread stays tender, the chili adds heat and depth, and the cheddar on top melts into a salty lid.
Why It Works:
A thick chili layer turns cornbread from a side dish into a snack with enough protein to hold someone over. The trick is to keep both layers dense enough that the square can be lifted cleanly. I like these when the afternoon feels chilly and the house smells like cumin and baked corn.
Key Ingredients:
- 1 box cornbread mix
- 1 cup shredded cheddar
- 1 lb ground turkey
- 1/2 cup diced onion
- 1 can kidney beans, drained
- 1 cup tomato sauce
- 1 tablespoon chili powder
Quick Steps:
- Bake the cornbread batter in a greased 9×9-inch pan.
- Cook turkey and onion in a skillet until no pink remains.
- Stir in beans, tomato sauce, chili powder, salt, and pepper, then simmer 5 minutes.
- Cut the cornbread into squares and spoon chili over each piece.
- Sprinkle with cheddar and warm at 350°F (175°C) for 5 minutes.
- Serve warm.
Equipment for This Recipe:
- 9×9-inch baking pan
- Skillet
- Sharp knife
- Spoon
How to Serve This Dish:
These taste fine on their own, but a dollop of sour cream or sliced scallions sharpens the whole thing. Two squares are snack size; one square is not enough if the chili is good.
Pro Tips for This Recipe:
- Let the cornbread cool slightly before cutting so it does not crumble.
- Simmer the chili until it is spoon-thick.
- Use mild or hot chili powder depending on who is eating.
Variations on This Dish:
- Beef Chili Squares: Swap ground turkey for beef and add corn.
- Vegetarian Version: Use black beans and diced zucchini instead of turkey.
Common Mistakes to Avoid with This Dish:
- Wet chili: It soaks through the cornbread.
- Cutting too soon: Warm cornbread falls apart under the spoon.
13. Roast Beef and Cheddar Crescent Roll-Ups

These are the sort of roll-ups that disappear before the tray reaches the table. Roast beef, cheddar, and a little horseradish spread tucked into crescent dough make a snack that tastes like a tiny deli sandwich with better manners.
Why It Works:
Crescent dough bakes into soft layers that kids can tear apart without effort. The roast beef stays tender if you do not overfill, and the cheddar melts into the folds. It is a good way to use deli meat that needs to move before it dries out in the fridge.
Key Ingredients:
- 1 can crescent roll dough
- 8 oz sliced roast beef
- 1 cup shredded cheddar
- 2 tablespoons horseradish mayo
- 1 tablespoon melted butter
- 1 teaspoon sesame seeds
Quick Steps:
- Unroll the crescent dough and separate into triangles.
- Spread each triangle with a thin layer of horseradish mayo.
- Add roast beef and cheddar, then roll from the wide end to the tip.
- Brush with melted butter and sprinkle with sesame seeds.
- Bake at 375°F (190°C) for 11 to 13 minutes.
- Cool for 2 minutes before serving.
Equipment for This Recipe:
- Baking sheet
- Parchment paper
- Pastry brush
- Knife
How to Serve This Dish:
Set them out with pickles or carrot sticks. Two roll-ups feel snack-sized; three stretch toward a light dinner.
Pro Tips for This Recipe:
- Spread the filling thin or the dough will split.
- Seal the tips under the roll so they do not uncoil.
- Warm roast beef folds easier than cold roast beef.
Variations on This Dish:
- Swiss Deli Roll-Ups: Swap cheddar for Swiss and add a little mustard.
- Pastrami Version: Use pastrami and dill pickles for a sharper bite.
Common Mistakes to Avoid with This Dish:
- Overstuffing: Crescent dough cannot hold a deli counter inside it.
- Skipping the butter: The tops bake pale and bland without it.
14. Loaded Baked Potato Skins
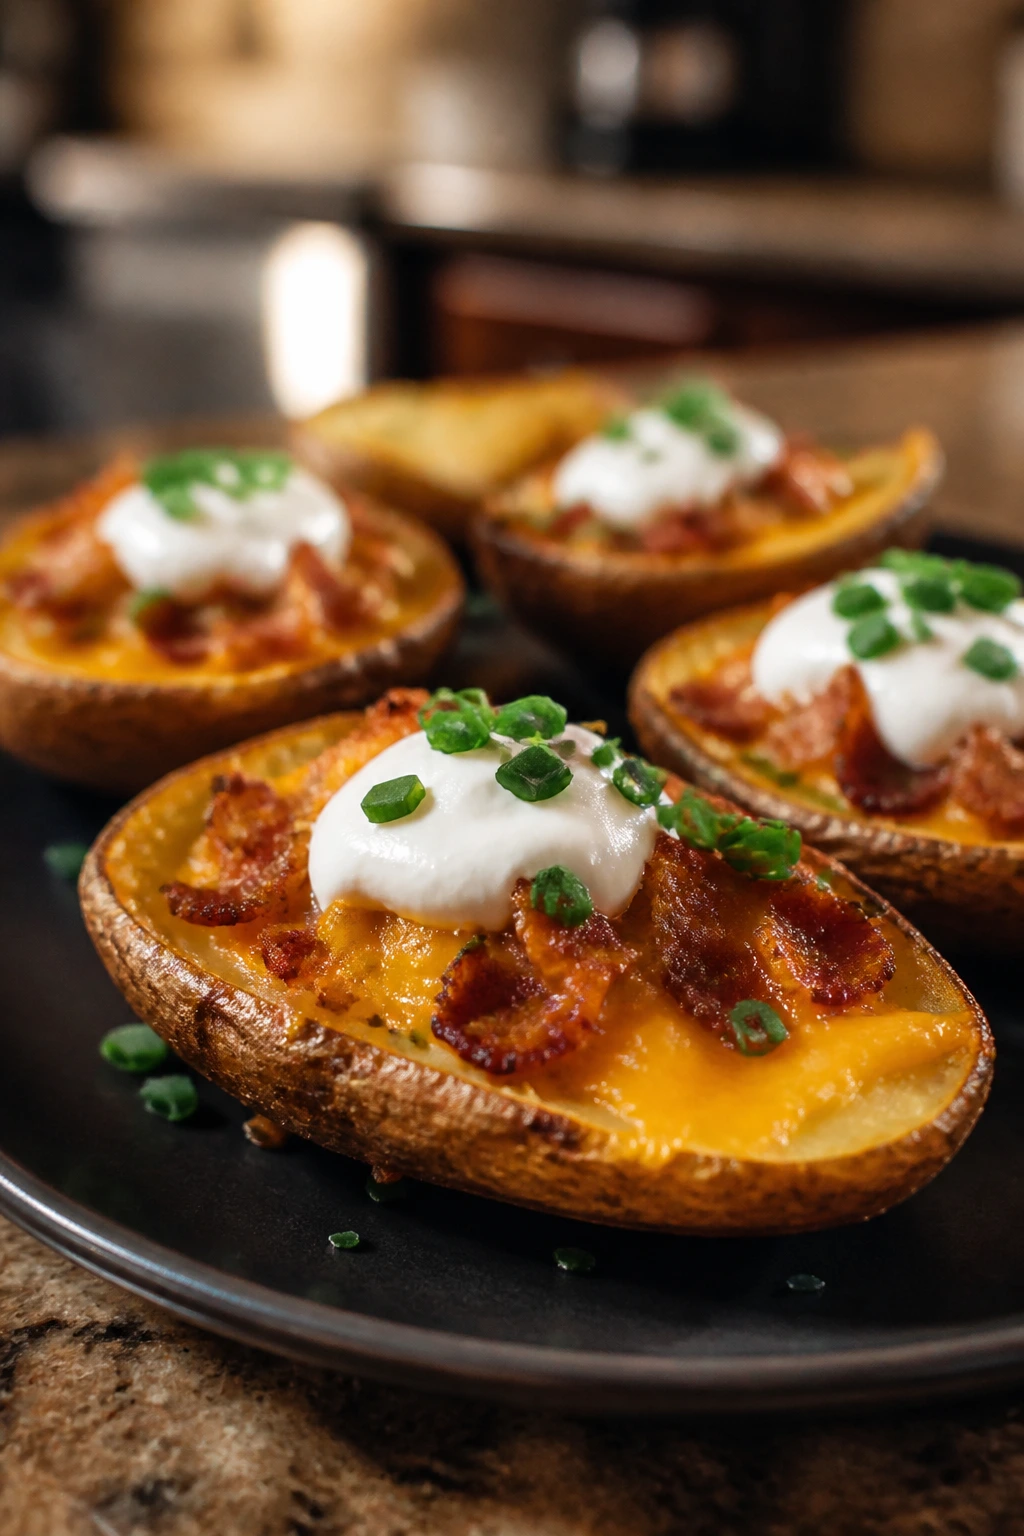
Potato skins are the snack that makes people hover around the oven. Crisp shell, soft inside, bacon, cheese, and sour cream. There is not much to argue with there.
Why It Works:
Baking the potatoes first and then crisping the shells gives you a better texture than trying to shortcut the process. The cheese melts into the warm potato flesh, and the bacon adds the smoky crunch that makes these feel finished. They are a little more effort than chips, but not by much.
Key Ingredients:
- 4 russet potatoes
- 2 tablespoons olive oil
- 1 cup shredded cheddar
- 6 slices cooked bacon, chopped
- 1/2 cup sour cream
- 2 tablespoons chopped chives
Quick Steps:
- Bake the potatoes at 400°F (200°C) for 45 to 55 minutes until tender.
- Cool slightly, halve them, and scoop out most of the flesh.
- Brush the skins with oil and bake cut-side up for 10 minutes.
- Fill with cheddar and bacon, then bake 5 more minutes.
- Top with sour cream and chives.
- Serve hot.
Equipment for This Recipe:
- Baking sheet
- Spoon
- Pastry brush
- Knife
How to Serve This Dish:
Serve with extra sour cream or ranch, and maybe a salad if you are pretending this is light. Two halves make a solid snack; four can anchor a casual dinner.
Pro Tips for This Recipe:
- Leave a thin layer of potato inside the skin so it does not tear.
- Bake the shells cut-side up for better crisping.
- Use a sharp cheddar so the flavor cuts through the bacon.
Variations on This Dish:
- Broccoli Cheddar Skins: Add chopped steamed broccoli with the cheese.
- Buffalo Skins: Stir a little hot sauce into the sour cream.
Common Mistakes to Avoid with This Dish:
- Scooping too hard: You need some potato left inside.
- Loading wet toppings too early: Add sour cream after baking, not before.
15. Ham and Cheese Crescent Bake

This is the kind of bake that smells like a diner breakfast crossed with a family supper. The ham stays salty, the cheese melts into the dough, and the whole pan comes out in tidy squares once it cools a bit.
Why It Works:
Crescent dough puffs around the filling and holds together better than sliced bread ever could. A little Dijon gives the ham some bite, which keeps it from tasting flat. It is fast, cheap, and useful when you have leftover holiday ham in the fridge.
Key Ingredients:
- 2 cans crescent roll dough
- 2 cups diced ham
- 2 cups shredded Swiss or cheddar
- 2 tablespoons Dijon mustard
- 1 tablespoon melted butter
- 1 teaspoon poppy seeds
Quick Steps:
- Preheat the oven to 375°F (190°C) and grease a 9×13-inch dish.
- Press one can of dough into the bottom of the dish.
- Spread mustard, then layer ham and cheese on top.
- Cover with the second sheet of dough and brush with butter.
- Sprinkle poppy seeds and bake for 20 to 25 minutes.
- Rest 10 minutes before cutting.
Equipment for This Recipe:
- 9×13-inch baking dish
- Pastry brush
- Knife
- Mixing spoon
How to Serve This Dish:
Cut into squares and serve with apple slices or mustard for dipping. One square is a snack; two squares and a handful of grapes move into lunch.
Pro Tips for This Recipe:
- Press the bottom dough all the way to the corners.
- Let it cool before cutting or the layers slide.
- Cheddar gives a sharper flavor; Swiss melts softer.
Variations on This Dish:
- Turkey and Cheese Bake: Swap ham for turkey and add cranberry sauce.
- Everything Bagel Version: Replace poppy seeds with everything seasoning.
Common Mistakes to Avoid with This Dish:
- Cutting too soon: The filling needs time to set.
- Too much mustard: Keep it thin or it dominates the ham.
16. Broccoli Cheddar Bites

Broccoli gets treated better when it shows up inside a cheesy bite-sized bake. The florets soften, the cheddar binds everything together, and the edges brown enough to make the vegetables feel more appealing than “healthy.”
Why It Works:
These are built like little savory cakes, so they hold their shape without much fuss. Broccoli gives you texture and color, while eggs and cheese do the work of glue. They are a smart bridge between snack and side dish.
Key Ingredients:
- 2 cups finely chopped steamed broccoli
- 1 1/2 cups shredded cheddar
- 2 large eggs
- 1/2 cup breadcrumbs
- 1/4 cup grated Parmesan
- 2 tablespoons diced onion
Quick Steps:
- Preheat the oven to 375°F (190°C) and grease a mini muffin tin.
- Mix broccoli, cheddar, eggs, breadcrumbs, Parmesan, onion, salt, and pepper.
- Spoon into the muffin tin and press lightly.
- Bake for 15 to 18 minutes until set and browned at the edges.
- Cool 5 minutes before removing.
- Serve warm.
Equipment for This Recipe:
- Mini muffin tin
- Mixing bowl
- Spoon
- Measuring cups
How to Serve This Dish:
They are good with ranch, marinara, or plain yogurt mixed with a pinch of garlic powder. Four to six bites make a snack; a dozen can sit next to soup.
Pro Tips for This Recipe:
- Steam the broccoli until just tender, not soft.
- Chop it small so the bites hold together.
- If the mix feels wet, add 1 more tablespoon breadcrumbs.
Variations on This Dish:
- Cauliflower Bites: Replace broccoli with finely chopped steamed cauliflower.
- Spicy Cheddar Bites: Add a pinch of cayenne or chopped jalapeño.
Common Mistakes to Avoid with This Dish:
- Large broccoli pieces: They poke out and break the bite apart.
- Undercooked centers: Give them a minute or two more if the middle looks loose.
17. Turkey Cranberry Mini Sliders
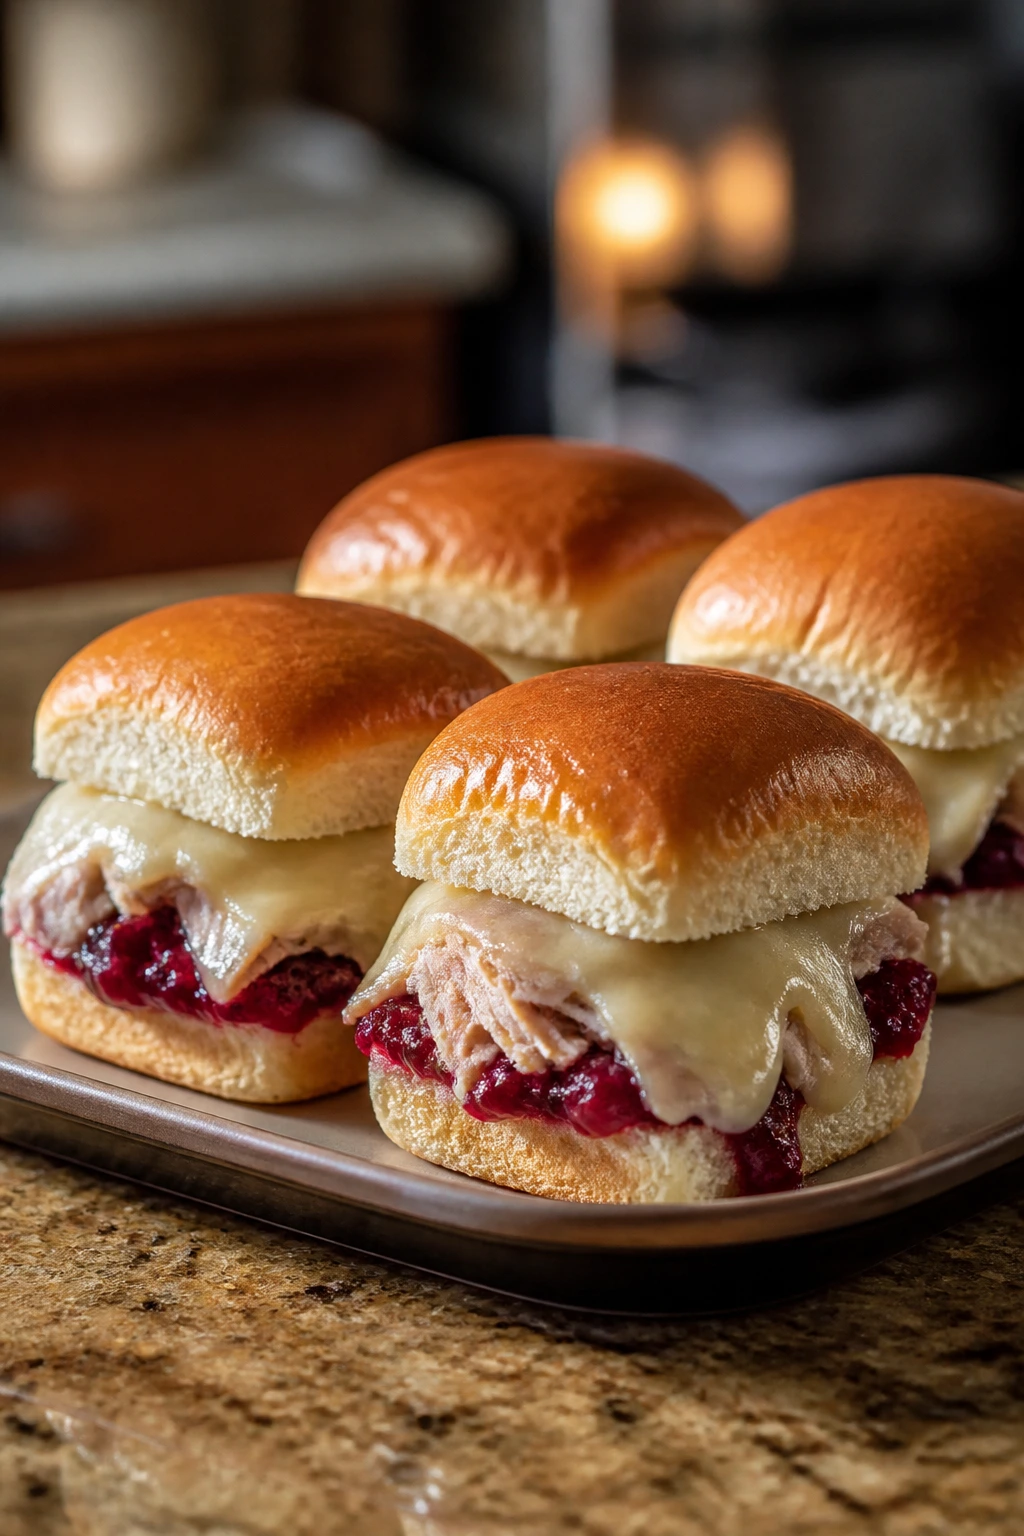
Turkey and cranberry do not have to wait for a holiday plate. Put them on soft rolls with a little cheese and the whole snack turns sweet, salty, and slightly ridiculous in the best way.
Why It Works:
These sliders use the flavor contrast people already like, but in a smaller, easier format. The cranberry keeps the turkey from tasting dry, and the cheese softens the sharp sweet edge. They are especially good with leftover roast turkey that needs moisture.
Key Ingredients:
- 8 mini brioche rolls
- 2 cups cooked shredded turkey
- 1/3 cup cranberry sauce
- 1 cup shredded Swiss or white cheddar
- 2 tablespoons mayonnaise
- 1 tablespoon melted butter
Quick Steps:
- Split the rolls and set the bottoms in a baking dish.
- Mix turkey with mayonnaise and a pinch of salt.
- Spread cranberry sauce on the rolls, then add turkey and cheese.
- Set the tops in place and brush with melted butter.
- Bake at 350°F (175°C) for 10 minutes, until the cheese melts.
- Serve warm.
Equipment for This Recipe:
- Baking dish
- Mixing bowl
- Pastry brush
- Spoon
How to Serve This Dish:
They look best lined up in one neat row and cut apart after baking. Two sliders are snack size; three make a small meal with crunchy celery sticks.
Pro Tips for This Recipe:
- Use a thick cranberry sauce, not a runny jelly.
- Warm the turkey before assembling so the cheese melts faster.
- A little Dijon in the turkey mix gives it more spine.
Variations on This Dish:
- Brie Turkey Sliders: Swap Swiss for brie and add thyme.
- Spicy Cranberry Version: Stir in a spoonful of hot pepper jelly.
Common Mistakes to Avoid with This Dish:
- Too much cranberry: The rolls get slippery.
- Dry turkey: Add mayo or a splash of gravy if needed.
18. Parmesan Chicken Tenders
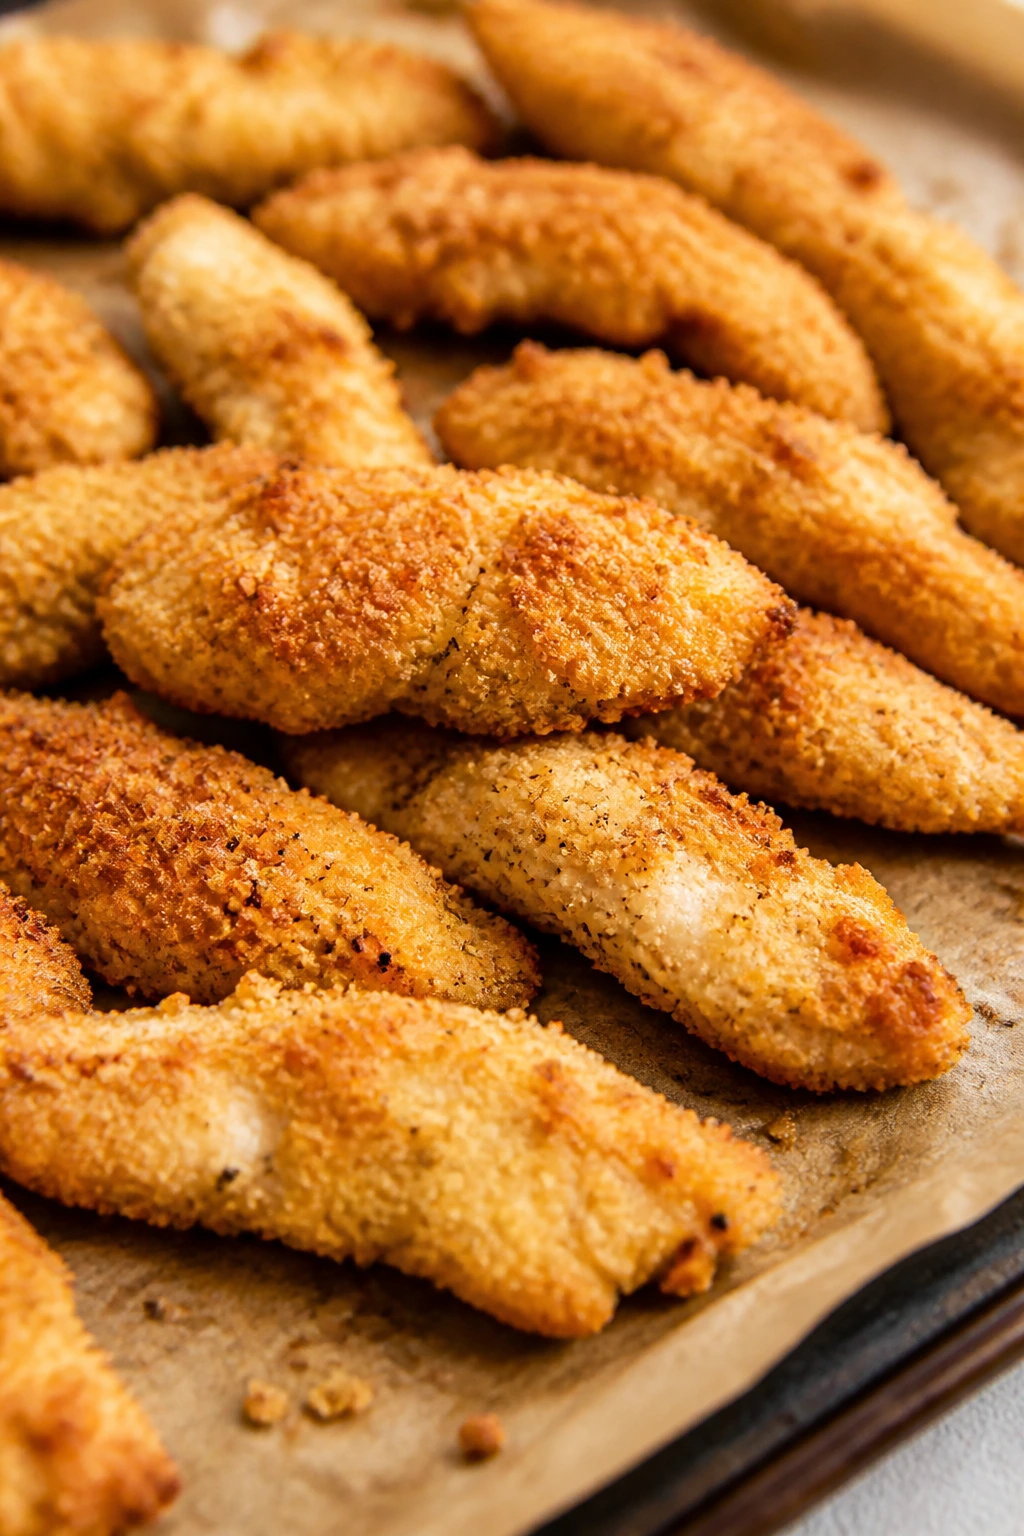
Chicken tenders are not a surprise, but Parmesan tends to make them taste more like something you planned. The crust gets crisp, the cheese browns, and the chicken inside stays juicy if you do not overbake it.
Why It Works:
A panko-Parmesan coating gives better crunch than plain breadcrumbs. Baking instead of frying keeps cleanup easy, and the tenders still develop enough color to feel worth serving. They are one of the most dependable after-school options on this list.
Key Ingredients:
- 1 1/2 lbs chicken tenders
- 1/2 cup flour
- 2 large eggs
- 1 1/2 cups panko breadcrumbs
- 1/2 cup grated Parmesan
- 1 teaspoon Italian seasoning
Quick Steps:
- Set up flour, beaten eggs, and panko mixed with Parmesan and seasoning.
- Dredge each tender in flour, then egg, then crumb mixture.
- Place on a greased baking sheet and spray lightly with oil.
- Bake at 425°F (220°C) for 16 to 18 minutes, flipping once.
- Cook until the centers reach 165°F.
- Serve hot with marinara or ranch.
Equipment for This Recipe:
- Rimmed baking sheet
- Three shallow bowls
- Tongs
- Thermometer
How to Serve This Dish:
Pile them next to dipping sauce, cucumber sticks, or fries. Three tenders are a snack; five are dinner.
Pro Tips for This Recipe:
- Press the crumbs on firmly so they stay put.
- Use a wire rack on the baking sheet if you want extra crisp bottoms.
- Spray the coating lightly with oil for better browning.
Variations on This Dish:
- Lemon Parmesan Tenders: Add lemon zest to the crumb mix.
- Spicy Coating: Mix a pinch of cayenne into the breadcrumbs.
Common Mistakes to Avoid with This Dish:
- Skipping the oil spray: The coating can look dry.
- Overbaking: Chicken tenders dry out fast.
19. Pot Roast Empanadas

This is one of my favorite ways to use leftover pot roast because it hides nothing and fixes almost everything. Tender beef, soft carrots, and gravy wrapped in pastry turns an ordinary leftover into a snack that feels cooked on purpose.
Why It Works:
Empanada dough or pie crust bakes into a sturdy shell, which makes it better than a sandwich for juicy fillings. The key is to keep the mixture thick and cool before sealing. They travel well too, which is handy when the snack needs to leave the house.
Key Ingredients:
- 2 cups chopped cooked pot roast
- 1/2 cup chopped cooked carrots
- 1/2 cup chopped cooked potatoes
- 1/3 cup beef gravy
- 1 package empanada discs or 2 pie crusts
- 1 egg, beaten
Quick Steps:
- Mix the pot roast, vegetables, and gravy in a bowl.
- Roll out the dough and cut into circles if needed.
- Spoon filling into the center, fold, and seal edges with a fork.
- Brush with egg wash and cut a small vent.
- Bake at 400°F (200°C) for 18 to 20 minutes.
- Cool for 5 minutes before serving.
Equipment for This Recipe:
- Baking sheet
- Parchment paper
- Fork
- Rolling pin, if using pie crust
How to Serve This Dish:
Serve with a little gravy for dipping or plain if the filling is already rich. One empanada is a snack; two are a satisfying lunch.
Pro Tips for This Recipe:
- Chop the filling small so the dough seals cleanly.
- Chill the filling if it seems loose.
- Pinch out as much air as you can before baking.
Variations on This Dish:
- Mushroom Pot Roast Empanadas: Add sautéed mushrooms for extra savoriness.
- Cheddar Beef Version: Mix shredded cheddar into the filling.
Common Mistakes to Avoid with This Dish:
- Too much gravy: The pastry will leak.
- Poor sealing: Crimp the edges firmly or they burst open.
20. Chicken Noodle Soup Pot Pies
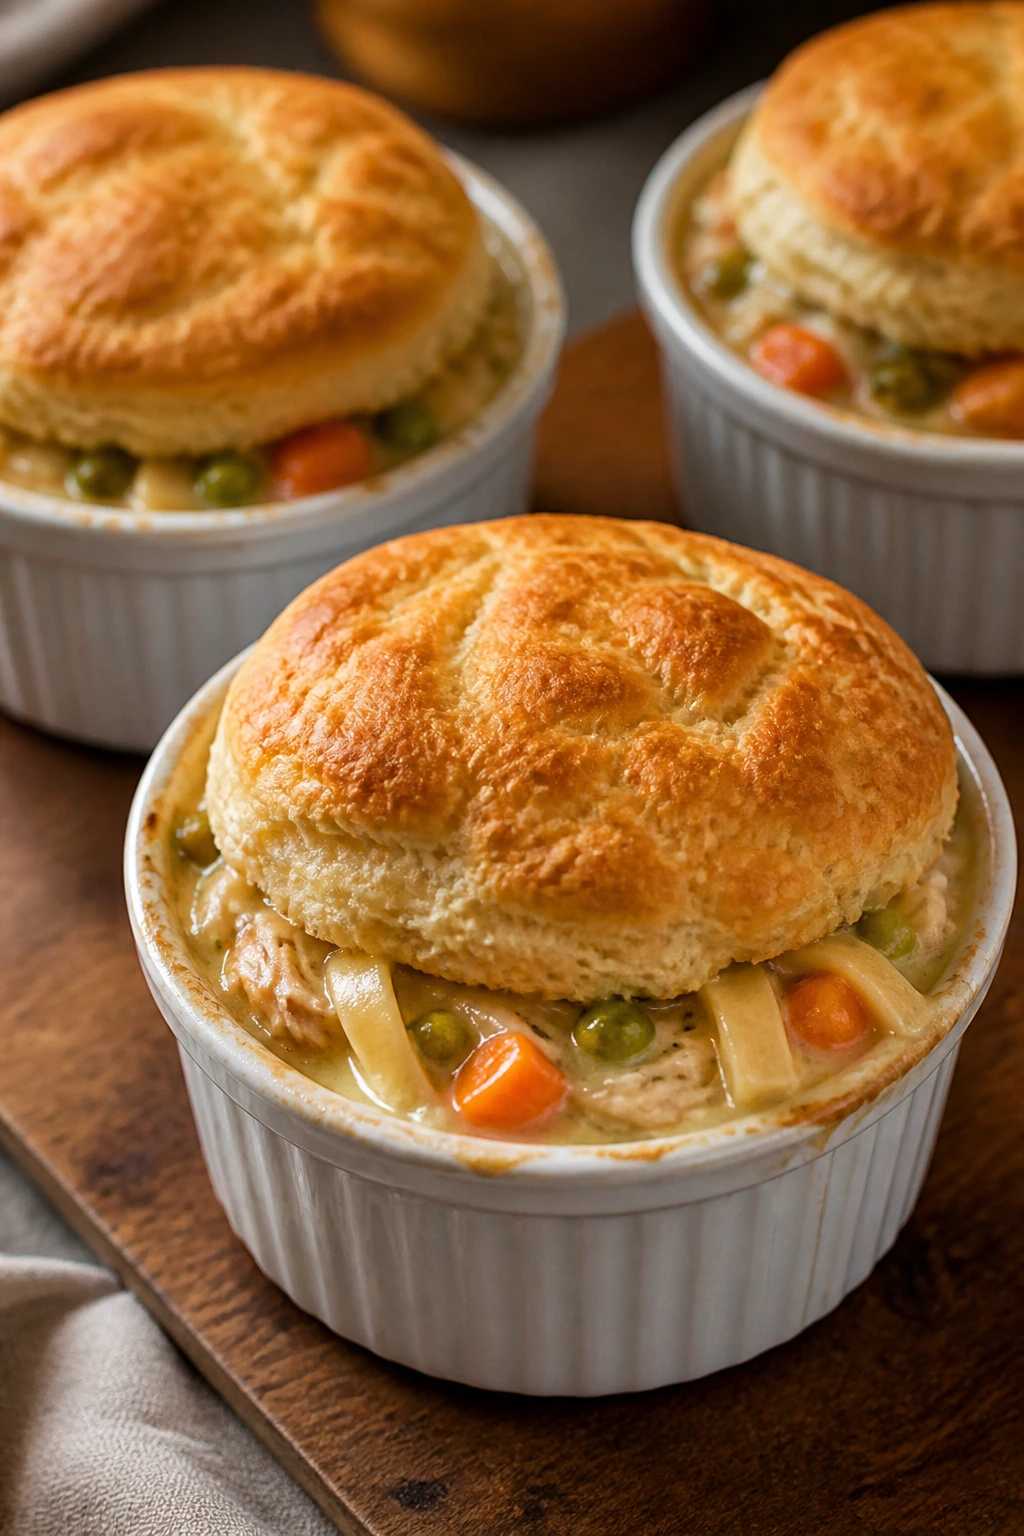
Chicken noodle soup already knows how to comfort people. Put it under a biscuit or pastry lid and it becomes a snack that tastes like a proper meal in miniature, with broth tucked away under a golden top.
Why It Works:
The filling needs to be thick, not watery, so the crust stays crisp. A little cream or flour helps it cling to the noodles and chicken. These are especially good when the family wants soup but not the chore of bowls and spoons.
Key Ingredients:
- 2 cups cooked shredded chicken
- 1 cup cooked egg noodles
- 1 cup frozen peas and carrots
- 2 tablespoons butter
- 2 tablespoons flour
- 2 cups chicken broth
- 1/4 cup heavy cream
- 1 can refrigerated biscuit dough or 1 sheet pie crust
Quick Steps:
- Cook butter and flour together for 1 minute.
- Whisk in broth and cream, then simmer until thick.
- Fold in chicken, noodles, and vegetables.
- Spoon into ramekins or a small baking dish.
- Top with biscuit dough or crust and bake at 375°F (190°C) until golden.
- Rest 5 minutes before eating.
Equipment for This Recipe:
- Ramekins or baking dish
- Saucepan
- Whisk
- Baking sheet
How to Serve This Dish:
Serve in the ramekins for a little drama, or scoop into bowls if you do not want to wait. One small pot pie is a snack; two work as a late-afternoon supper.
Pro Tips for This Recipe:
- Keep the filling thick before baking.
- Vent the top so steam can escape.
- Let the noodles cool a bit or they drink too much broth.
Variations on This Dish:
- Turkey Noodle Version: Use leftover turkey and turkey broth.
- Bisquick Topper: Replace crust with a quick biscuit batter.
Common Mistakes to Avoid with This Dish:
- Thin broth: It softens the crust.
- No resting time: The filling is lava-hot right out of the oven.
21. Baked Ziti Cups
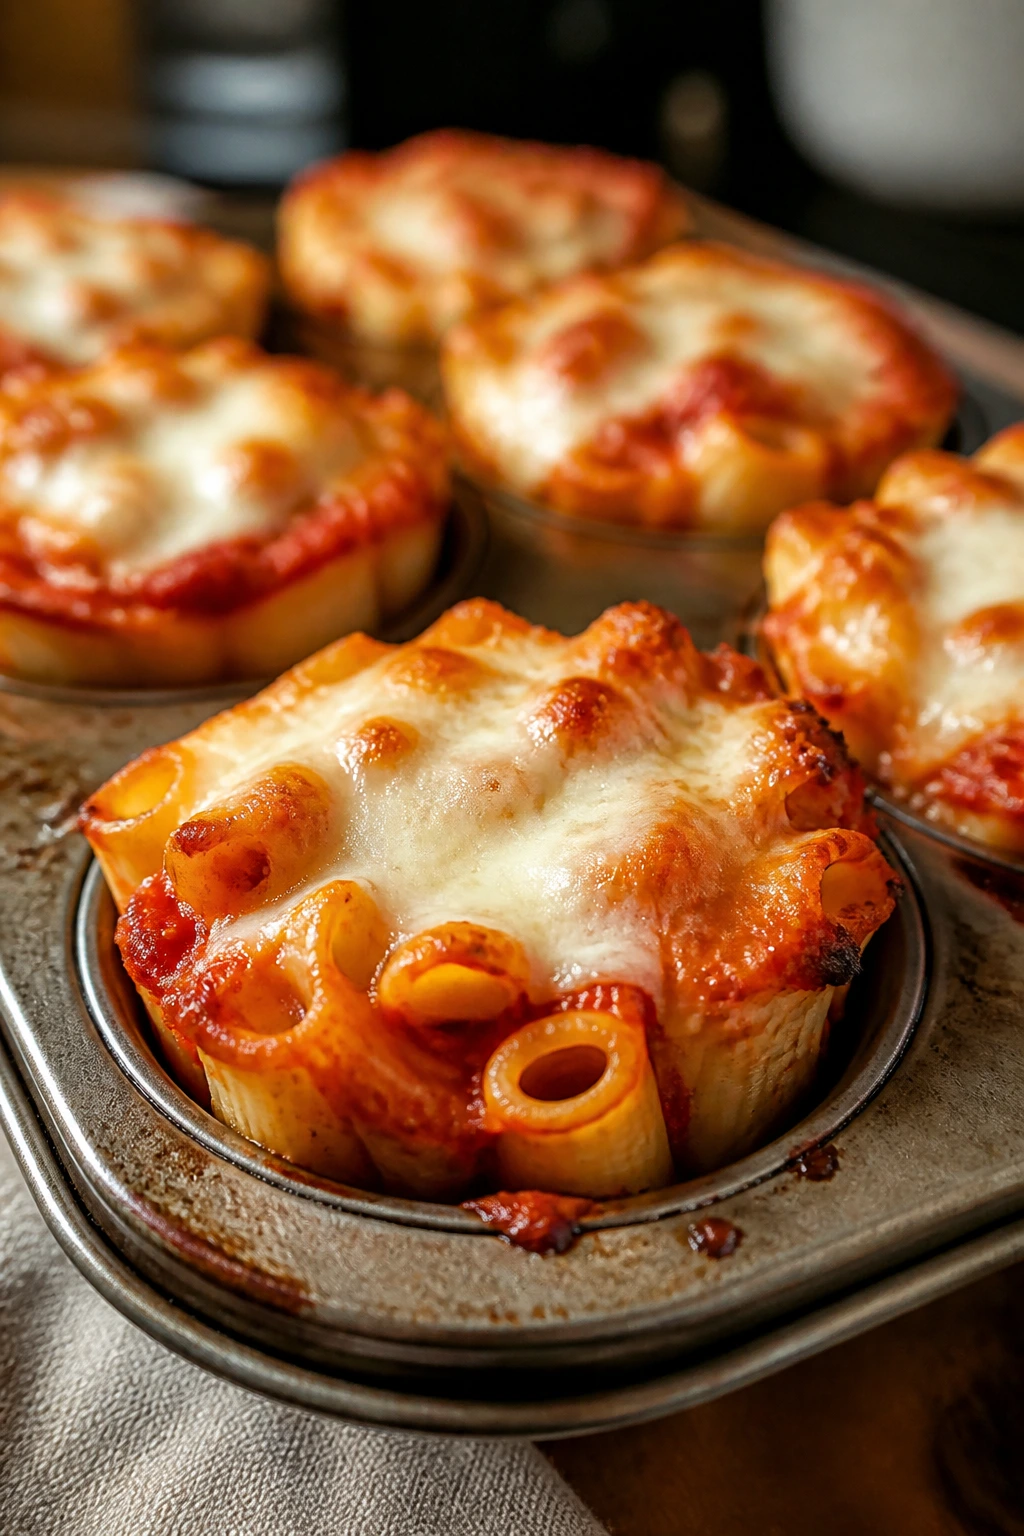
Baked ziti in cup form is one of those ideas that should have happened sooner. The noodles cling to the sauce, the cheese browns at the edges, and every portion comes out with the right ratio of pasta to gooey top.
Why It Works:
A muffin tin creates crisp pasta edges that a casserole dish cannot. Ricotta and egg help the pasta hold shape, so the cups do not flop when you lift them. They are also a smart use for leftover ziti that has gotten a little too thick in the fridge.
Key Ingredients:
- 8 oz ziti
- 1 1/2 cups marinara sauce
- 1 cup ricotta cheese
- 1 cup shredded mozzarella
- 1/4 cup grated Parmesan
- 1 large egg
- 1 teaspoon Italian seasoning
Quick Steps:
- Cook the ziti until just tender, then drain.
- Mix pasta with marinara, ricotta, egg, seasoning, and half the mozzarella.
- Spoon into a greased muffin tin and pack lightly.
- Top with remaining mozzarella and Parmesan.
- Bake at 375°F (190°C) for 18 to 20 minutes.
- Rest 5 minutes before unmolding.
Equipment for This Recipe:
- Muffin tin
- Large bowl
- Spoon
- Pot for pasta
How to Serve This Dish:
These are easy to stack on a plate with a little marinara for dipping. Two cups are snack size; four can anchor dinner with a salad.
Pro Tips for This Recipe:
- Underboil the pasta by 1 minute.
- Press the mix down lightly so the cups hold together.
- Let them cool before lifting or the cheese tears.
Variations on This Dish:
- Meaty Ziti Cups: Stir in browned sausage or beef.
- Veggie Ziti Cups: Add chopped spinach and mushrooms.
Common Mistakes to Avoid with This Dish:
- Overstuffing the tin: The cups puff and break.
- Too much sauce: The pasta gets slippery.
22. BBQ Chicken Biscuit Bombs
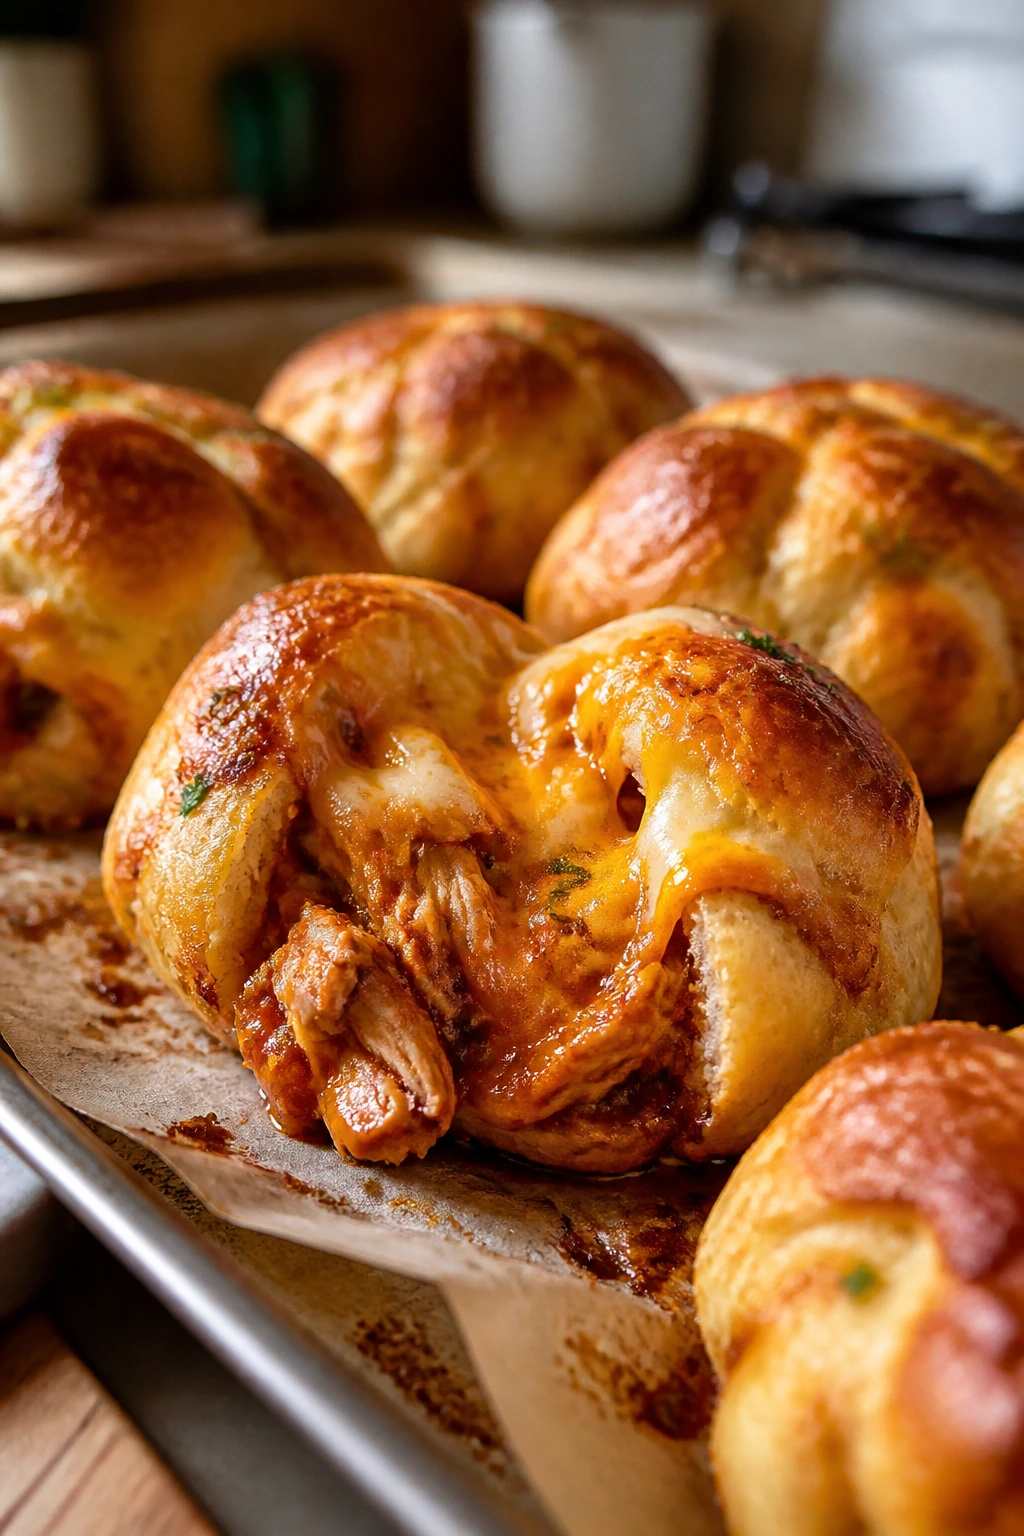
These are messy in a controlled way, which is the best kind of snack. Biscuit dough wraps around barbecue chicken and cheese, then bakes into a pull-apart ball that smells like a backyard cookout.
Why It Works:
The biscuit dough seals in the filling and browns fast enough to keep the chicken moist. A little cheese helps bind the filling, and barbecue sauce adds sweetness without needing a long ingredient list. If you need something kids can hold, this is it.
Key Ingredients:
- 1 can refrigerated biscuit dough, 8 biscuits
- 2 cups shredded cooked chicken
- 1/2 cup barbecue sauce
- 1 cup shredded cheddar
- 2 tablespoons melted butter
- 1 teaspoon garlic powder
Quick Steps:
- Mix chicken, barbecue sauce, and cheddar.
- Flatten each biscuit into a 4-inch round.
- Spoon filling into the center and pinch shut.
- Place seam-side down on a baking sheet.
- Brush with butter and garlic powder, then bake at 375°F (190°C) for 14 to 16 minutes.
- Cool 3 minutes before serving.
Equipment for This Recipe:
- Baking sheet
- Parchment paper
- Mixing bowl
- Pastry brush
How to Serve This Dish:
Serve with extra barbecue sauce or ranch for dipping. Two bombs are snack size; four probably means dinner got delayed.
Pro Tips for This Recipe:
- Do not overfill or the biscuit splits.
- Pinch the seams hard and place them down.
- Let the filling cool a little so it does not steam the dough apart.
Variations on This Dish:
- Buffalo Chicken Bombs: Swap barbecue sauce for hot sauce and a little ranch.
- Ham and Cheese Bombs: Use chopped ham and cheddar with a touch of mustard.
Common Mistakes to Avoid with This Dish:
- Loose seams: They pop open in the oven.
- Cold filling from the fridge: It can make the biscuit bake unevenly.
23. Tomato Soup Grilled Cheese Dippers
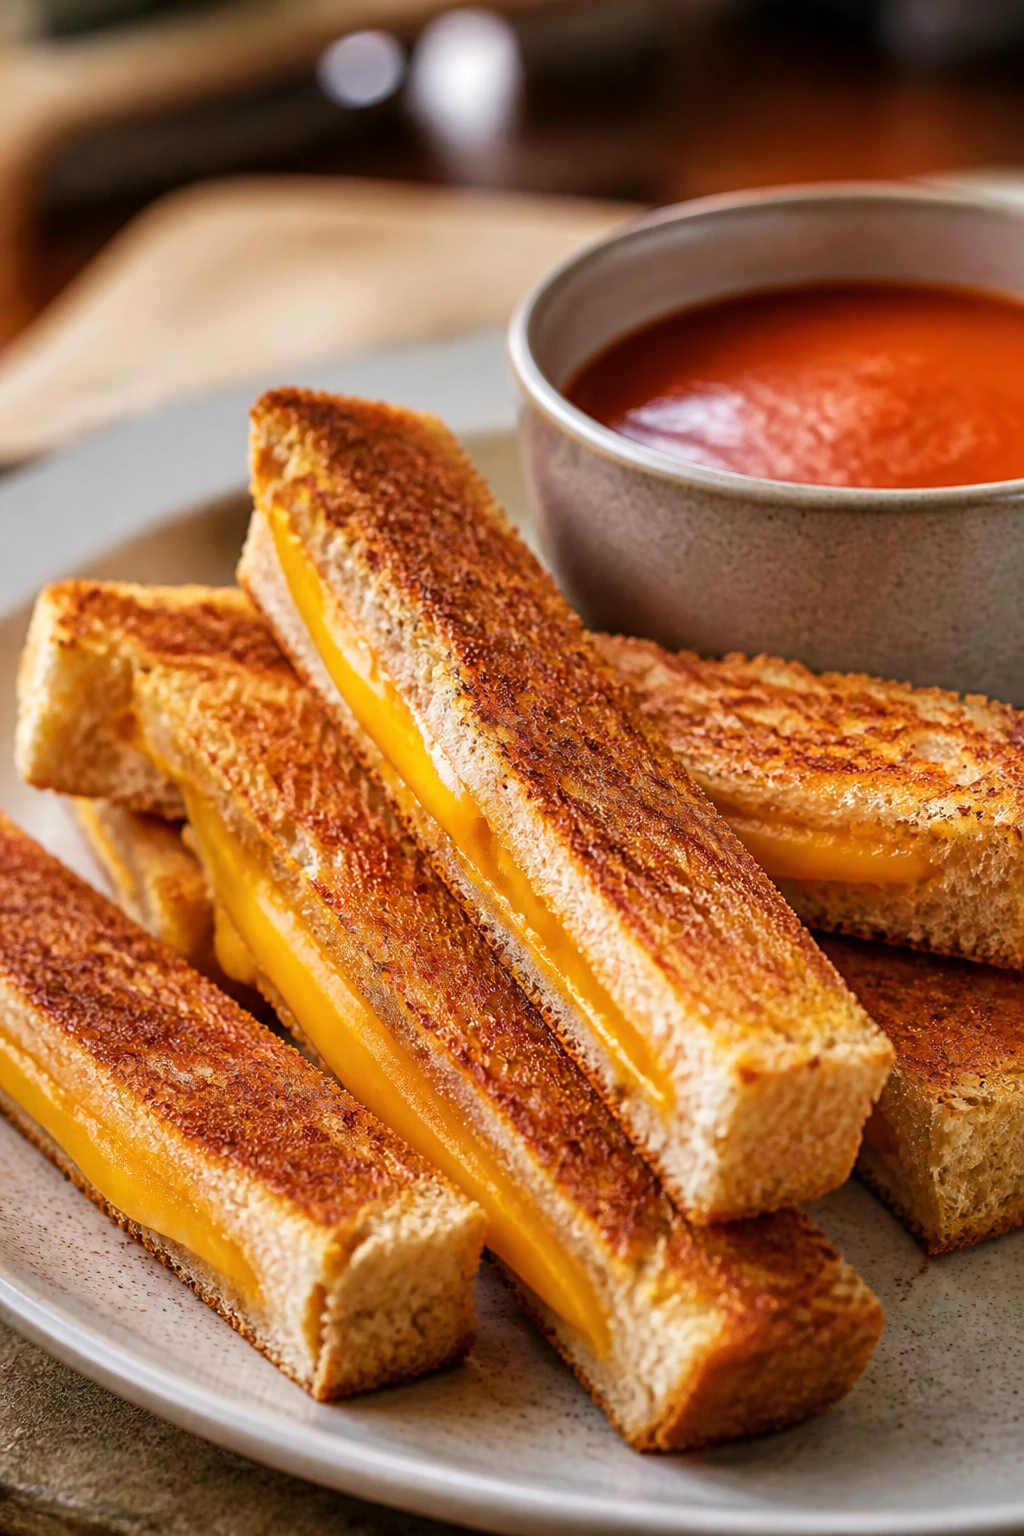
Grilled cheese already does half the work. Cut it into fingers, add a mug of thick tomato soup, and suddenly the snack feels complete enough to calm down a room full of tired kids.
Why It Works:
The bread browns better when the sandwich is sliced after cooking. Thick soup gives you something to dip into without soaking the sandwich apart. This one earns points because it is familiar and still feels like an event.
Key Ingredients:
- 8 slices sandwich bread
- 8 slices cheddar cheese
- 4 tablespoons butter
- 2 cups tomato soup
- 1 tablespoon milk, optional
- Pinch of dried basil
Quick Steps:
- Butter the bread and make 4 grilled cheese sandwiches.
- Cook in a skillet over medium heat until golden on both sides.
- Warm the tomato soup with milk and basil, if using.
- Cut each sandwich into 3 strips.
- Serve the strips with soup in mugs or small bowls.
- Keep the soup hot while serving.
Equipment for This Recipe:
- Skillet
- Spatula
- Soup pot
- Knife
How to Serve This Dish:
The best version is one sandwich cut into fingers with a bowl of thick soup on the side. Two strips and a mug are enough for a snack; a full sandwich and soup is dinner.
Pro Tips for This Recipe:
- Use medium heat so the cheese melts before the bread burns.
- Let the sandwich rest 1 minute before slicing.
- A sharper cheddar gives the soup more personality.
Variations on This Dish:
- Mozzarella Basil Dippers: Swap in mozzarella and a little pesto.
- Pepper Jack Version: Use pepper Jack for a little heat.
Common Mistakes to Avoid with This Dish:
- Too-thin soup: It will not cling to the bread.
- Slicing too soon: Hot cheese runs everywhere.
24. Cheeseburger Stuffed Dinner Rolls
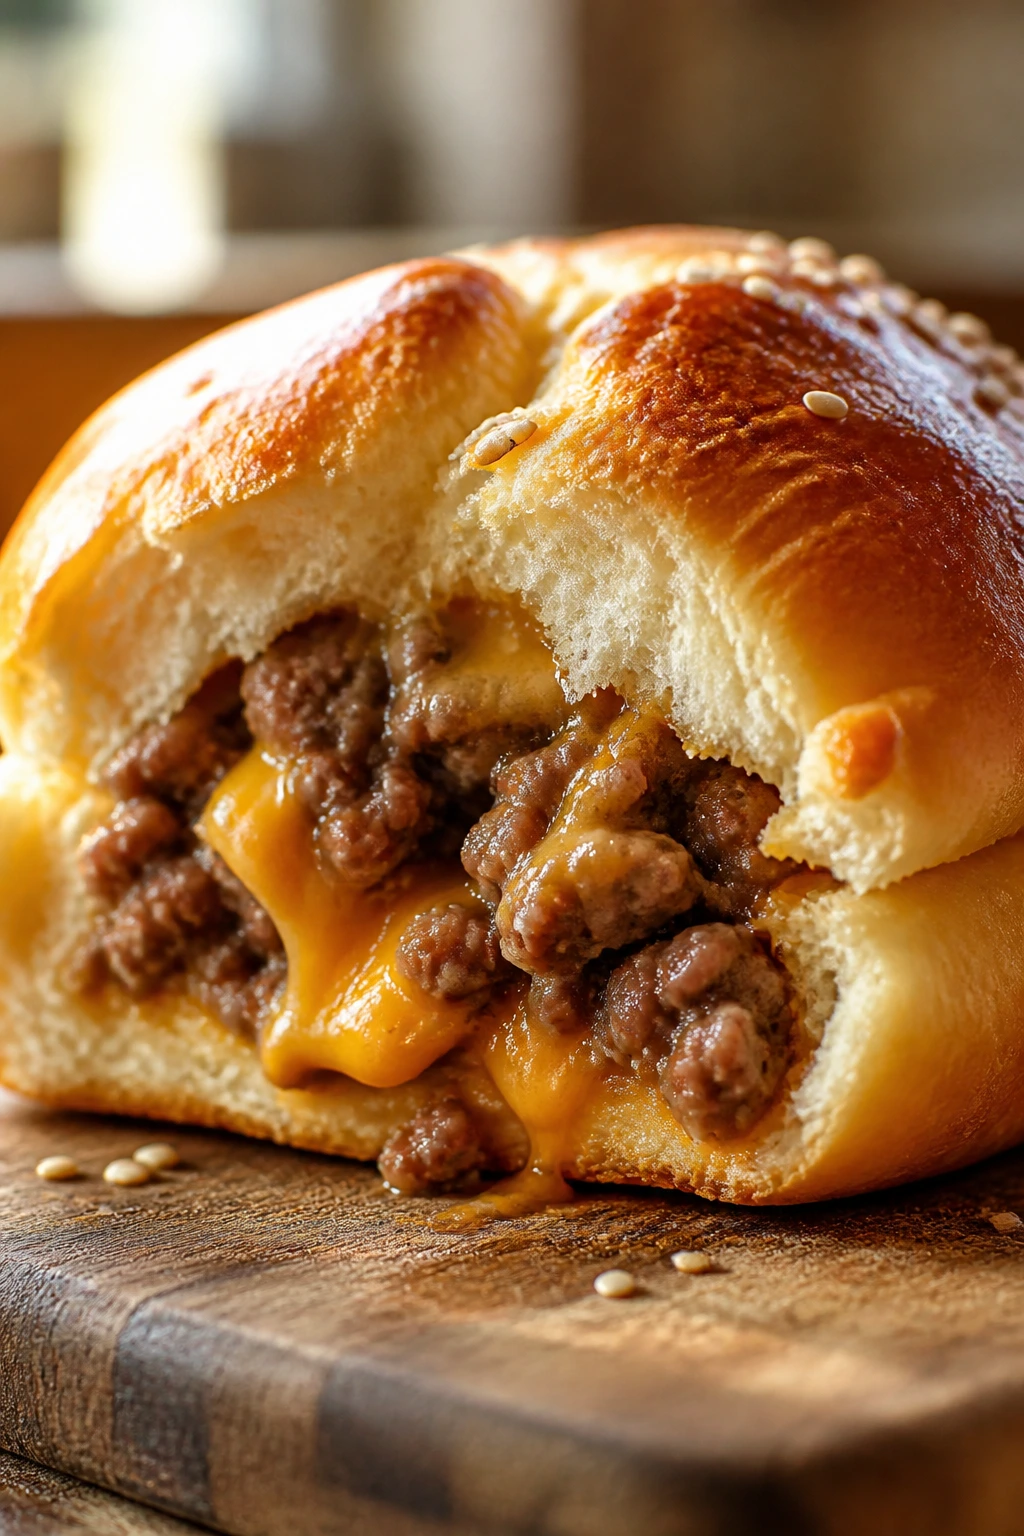
These taste like a cheeseburger that wandered into a dinner roll and decided to stay. Beef, onion, cheese, and a little mustard make the filling taste familiar, while the soft roll keeps everything manageable.
Why It Works:
Stuffed rolls are easier to eat than full burgers when nobody has time to sit down for real dinner. The bread bakes around the filling, so each bite gets meat and cheese together. They are especially good for game-day style after-school grazing.
Key Ingredients:
- 1 lb ground beef
- 1/2 cup diced onion
- 1 tablespoon yellow mustard
- 1 tablespoon ketchup
- 1 cup shredded cheddar
- 12 dinner roll dough portions or frozen roll dough
- 1 tablespoon sesame seeds
Quick Steps:
- Brown the beef and onion, then drain.
- Stir in mustard, ketchup, salt, and pepper, then cool slightly.
- Flatten the dough pieces and fill with beef and cheddar.
- Pinch shut and place seam-side down on a baking sheet.
- Brush with egg wash and sprinkle with sesame seeds.
- Bake at 375°F (190°C) for 15 to 18 minutes.
Equipment for This Recipe:
- Baking sheet
- Skillet
- Mixing spoon
- Pastry brush
How to Serve This Dish:
Put them on a platter with pickles and a little ketchup on the side. Two rolls work as a snack; four can stand in for supper.
Pro Tips for This Recipe:
- Cool the beef filling so it does not melt the dough.
- Seal the seams well or cheese leaks out.
- A tiny bit of pickle relish in the filling adds sharpness.
Variations on This Dish:
- Bacon Cheeseburger Rolls: Add chopped cooked bacon.
- Slider-Style Version: Bake in a close cluster and pull apart after cooling.
Common Mistakes to Avoid with This Dish:
- Too much filling: The dough will not close.
- Hot filling: It can make the rolls split.
25. Creamy Turkey and Stuffing Pinwheels
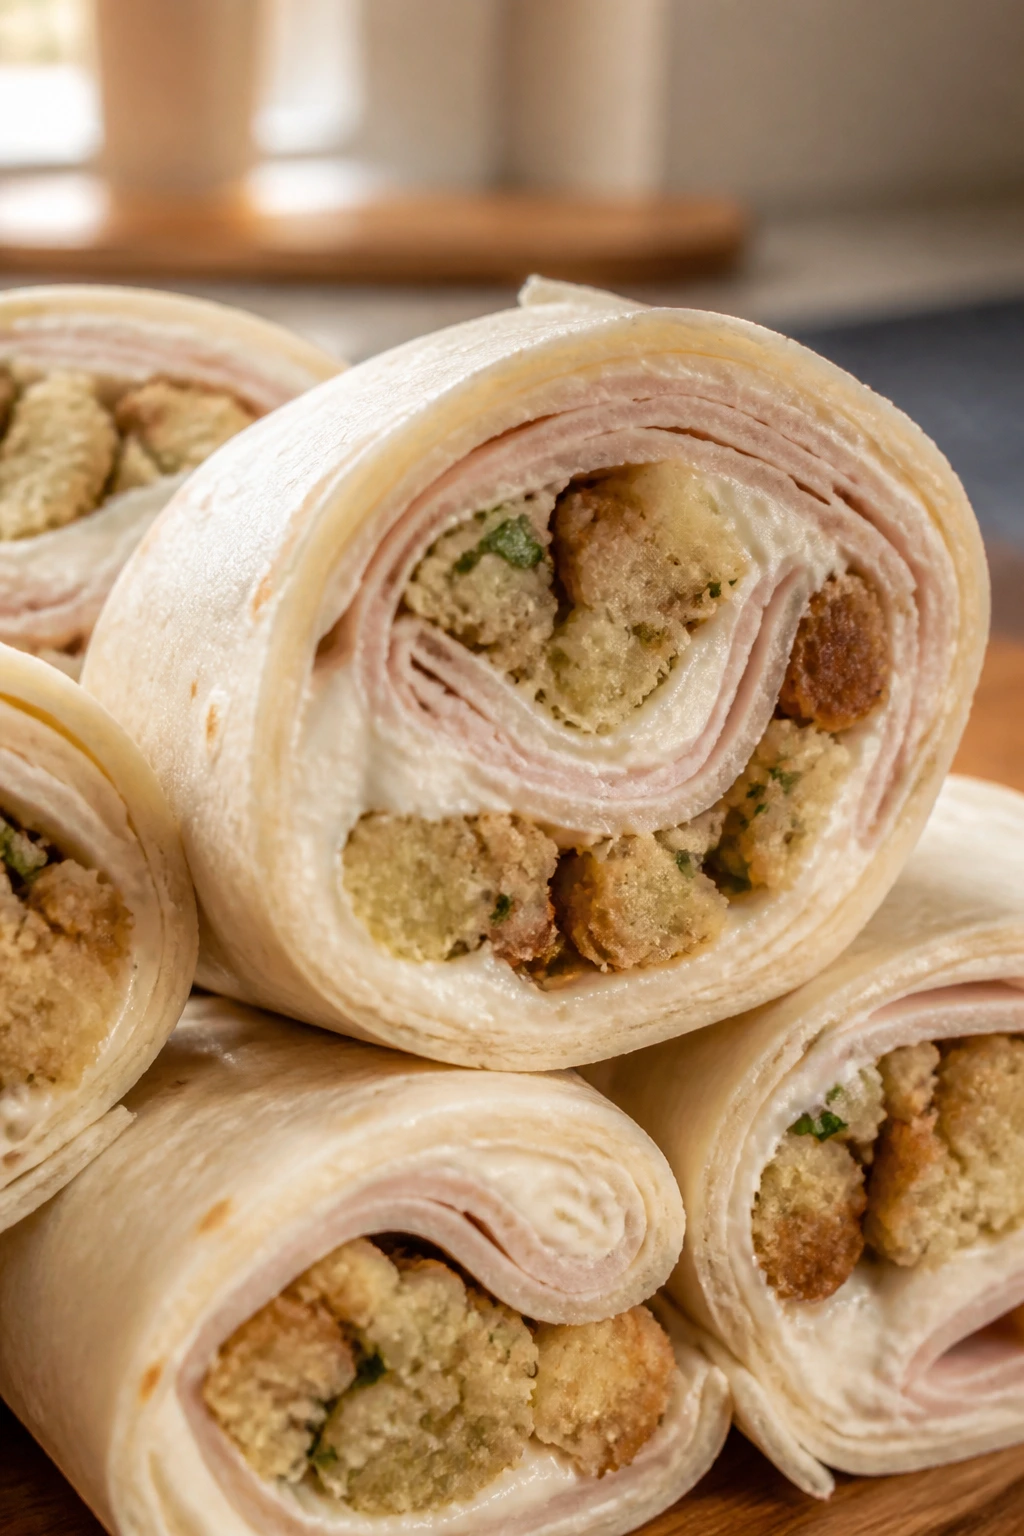
This is what happens when holiday leftovers get a clean haircut. Turkey, stuffing, and a little cream cheese roll up into neat spirals that taste like the best slice of a full plate.
Why It Works:
The cream cheese acts like glue and keeps the stuffing from falling out. Tortillas or thin flatbread roll tightly, and once chilled, the pinwheels slice into tidy rounds. They are good cold, which is useful when the oven is full of everything else.
Key Ingredients:
- 2 large flour tortillas
- 1 cup shredded cooked turkey
- 1 cup prepared stuffing, cooled
- 4 oz cream cheese, softened
- 2 tablespoons cranberry sauce
- 2 tablespoons chopped parsley
Quick Steps:
- Mix cream cheese with parsley and a pinch of salt.
- Spread over the tortillas, leaving a small border.
- Layer turkey, stuffing, and a thin line of cranberry sauce.
- Roll tightly and chill for 20 minutes.
- Slice into 1-inch pinwheels with a sharp knife.
- Serve chilled or lightly warmed.
Equipment for This Recipe:
- Cutting board
- Sharp knife
- Mixing bowl
- Plastic wrap, optional
How to Serve This Dish:
These sit nicely on a snack board with apple slices and celery. Four to six pinwheels are snack size; a whole tortilla can feed a hungry teen.
Pro Tips for This Recipe:
- Chill before slicing or the rounds squish.
- Keep the cranberry in a thin line so the rolls do not slip.
- If the stuffing is dry, add a spoonful of gravy.
Variations on This Dish:
- Chicken and Stuffing Pinwheels: Swap turkey for chicken.
- Warm Bake Version: Arrange the pinwheels in a dish and warm for 8 minutes.
Common Mistakes to Avoid with This Dish:
- Overfilling the tortilla: It tears before you can roll.
- Using hot stuffing: It melts the cream cheese and gets sloppy.
26. Lemon Herb Salmon Cakes
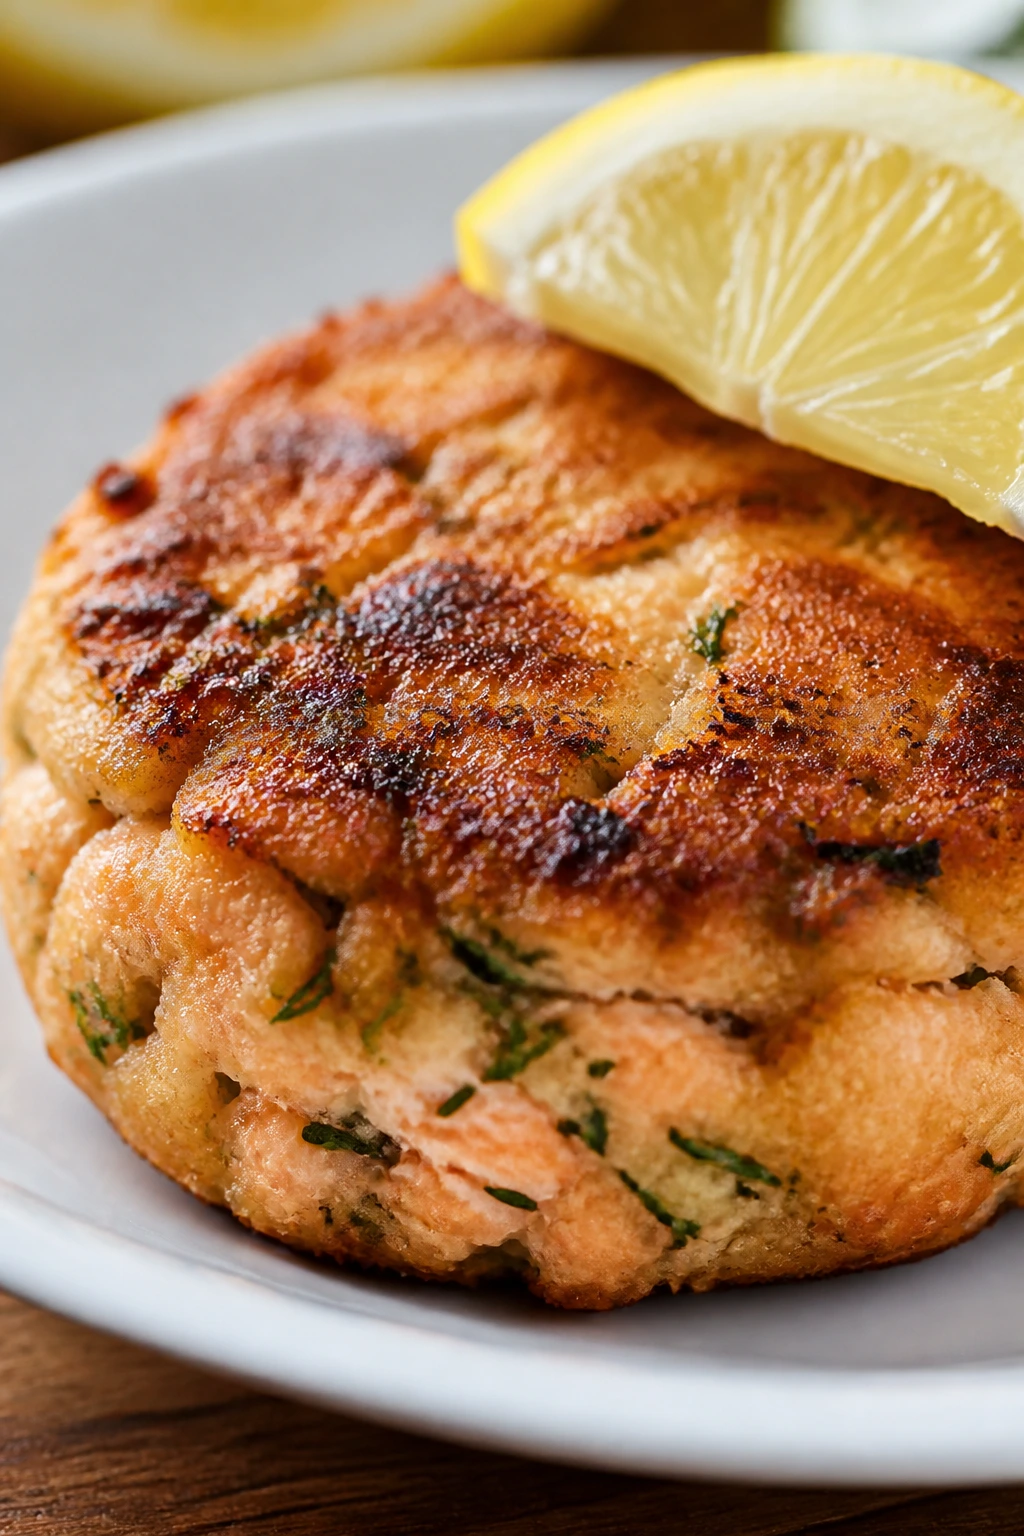
Salmon cakes are the snack nobody expects to disappear first, and then they do. The lemon cuts through the richness, the herbs keep them bright, and the outside crisps into a shell that makes them feel finished.
Why It Works:
Canned salmon or leftover cooked salmon both work, which is part of the charm. Breadcrumbs and egg help the cakes hold shape, while lemon zest keeps them from tasting heavy. They are a nice change when the week has been too brown and beige.
Key Ingredients:
- 1 14.75 oz can salmon, drained and flaked
- 1 large egg
- 1/2 cup breadcrumbs
- 2 tablespoons mayonnaise
- 1 tablespoon lemon juice
- 1 teaspoon lemon zest
- 2 tablespoons chopped dill or parsley
- 2 tablespoons oil for the pan
Quick Steps:
- Mix salmon, egg, breadcrumbs, mayo, lemon, zest, herbs, salt, and pepper.
- Shape into 8 small cakes and chill 10 minutes.
- Heat oil in a skillet over medium heat.
- Cook 3 to 4 minutes per side until browned and heated through.
- Drain on paper towels.
- Serve warm with lemon wedges.
Equipment for This Recipe:
- Skillet
- Mixing bowl
- Spatula
- Paper towels
How to Serve This Dish:
They are good with cucumber salad, tartar sauce, or plain yogurt with dill. Two small cakes work as a snack; four make a proper meal with rice.
Pro Tips for This Recipe:
- Chill the cakes before frying so they hold together.
- Do not overmix or the salmon turns paste-like.
- Add a pinch of Dijon if you want more bite.
Variations on This Dish:
- Spicy Salmon Cakes: Add chopped jalapeño or hot sauce.
- Baked Version: Bake at 400°F (200°C) for 15 minutes, flipping once.
Common Mistakes to Avoid with This Dish:
- Too wet a mix: Add another spoon of breadcrumbs.
- Crowding the skillet: The cakes steam instead of crisp.
27. Spinach and Cheese Puff Squares
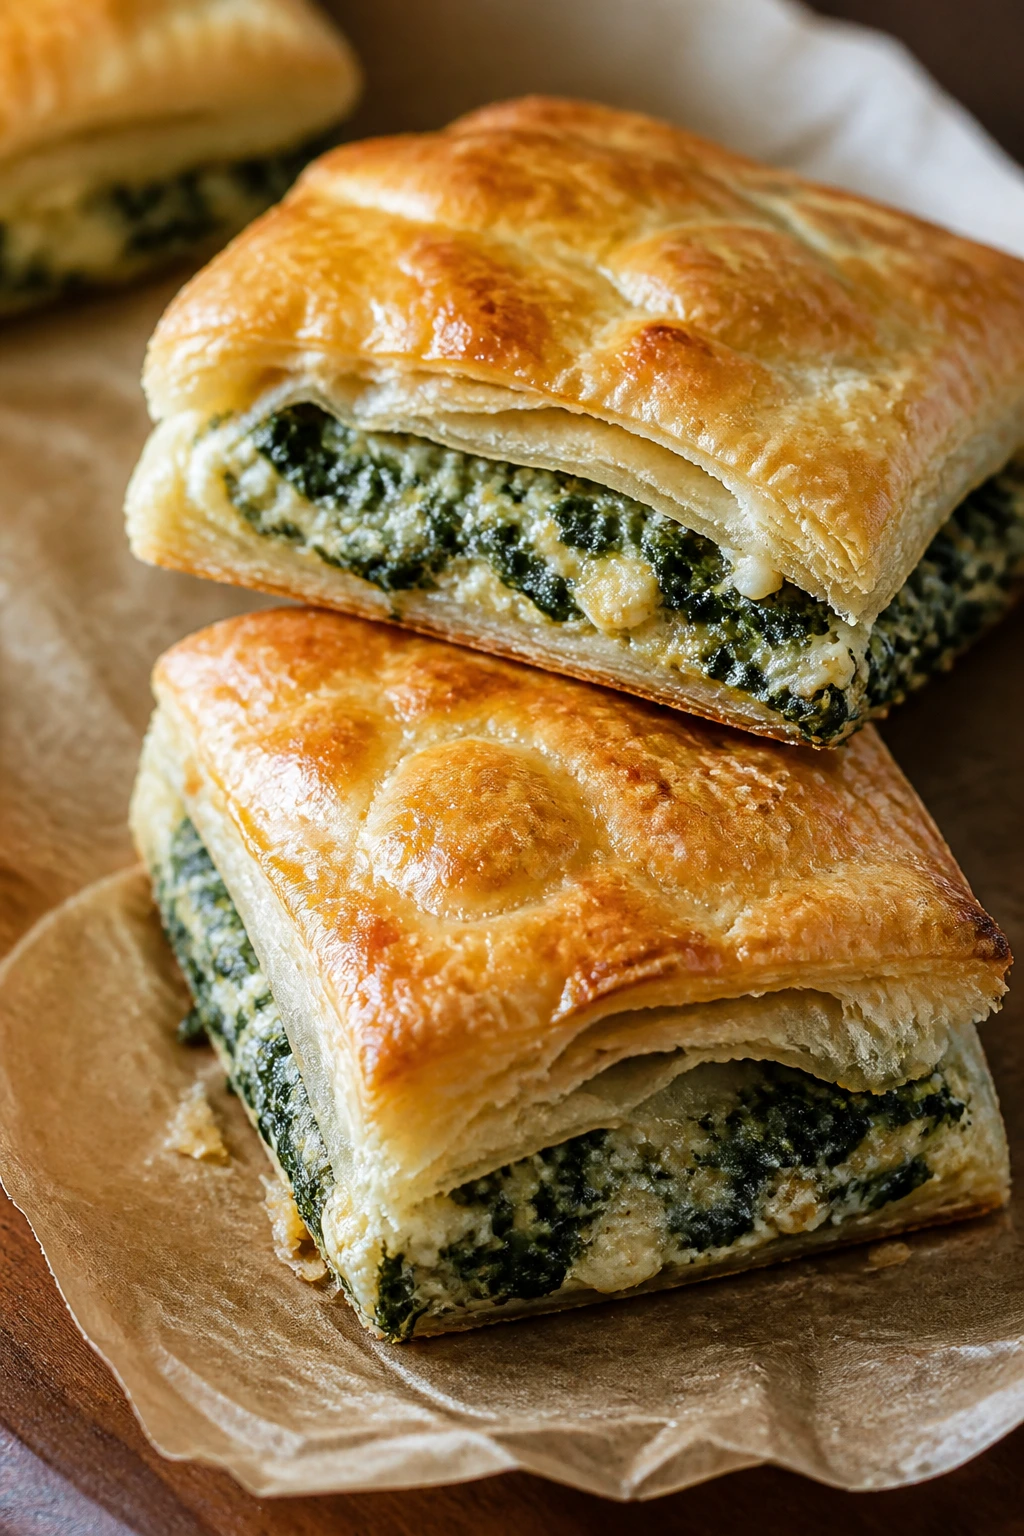
Puff pastry makes spinach feel less like a duty and more like a treat. The cheese melts into the greens, the edges puff up into crisp layers, and every square breaks with a little shatter.
Why It Works:
The filling needs to be dry and well-seasoned, which is why frozen spinach works so well once squeezed out properly. Ricotta and feta bring both creaminess and salt. Cut into squares, these are easy to stack, pack, and reheat.
Key Ingredients:
- 1 sheet puff pastry, thawed
- 1 cup frozen spinach, thawed and squeezed dry
- 1/2 cup ricotta
- 1/2 cup crumbled feta
- 1 large egg
- 1 clove garlic, minced
Quick Steps:
- Mix spinach, ricotta, feta, egg, garlic, salt, and pepper.
- Roll the pastry into a 10×10-inch square.
- Spread filling over half, fold, and seal the edges.
- Cut into 9 squares and place on a baking sheet.
- Bake at 400°F (200°C) for 15 to 18 minutes until puffed and golden.
- Cool 5 minutes before serving.
Equipment for This Recipe:
- Baking sheet
- Parchment paper
- Mixing bowl
- Knife or pizza cutter
How to Serve This Dish:
Serve with yogurt dip or marinara if you want a little contrast. Two squares are a snack; four can replace a side dish.
Pro Tips for This Recipe:
- Squeeze the spinach hard or the pastry goes soggy.
- Keep the pastry cold until it hits the oven.
- A little nutmeg works if you like the filling old-school.
Variations on This Dish:
- Cheddar Spinach Squares: Replace feta with cheddar.
- Mushroom Spinach Version: Add chopped sautéed mushrooms.
Common Mistakes to Avoid with This Dish:
- Wet spinach: It ruins the puff.
- Cutting before cooling: The filling slides out.
28. Green Bean Casserole Hand Pies
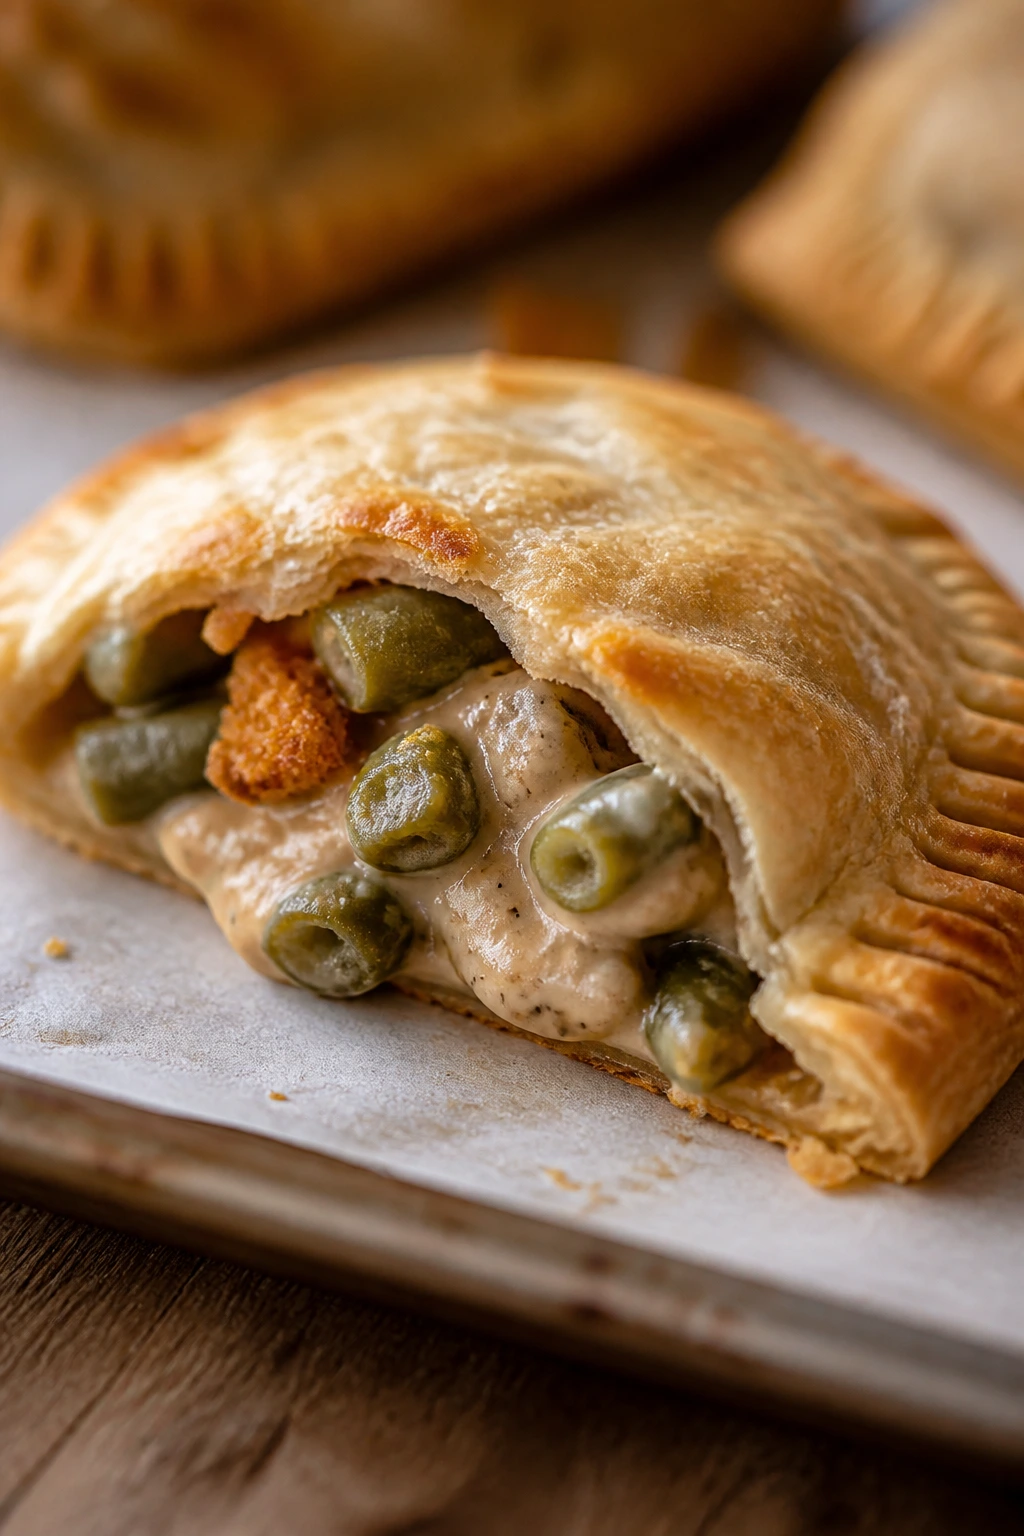
Green bean casserole does not usually show up in a portable form, which is too bad. Wrap the creamy filling in pastry and the whole thing becomes a crisp, savory pocket with fried onions tucked inside for crunch.
Why It Works:
This recipe keeps the classic mushroom-and-green-bean flavor but solves the texture problem by locking the filling inside dough. The trick is using a thick sauce, not a watery one. It is a clever use for leftover casserole, too, if you have some.
Key Ingredients:
- 2 cups cooked green beans, chopped
- 1 cup cooked mushrooms
- 1/2 cup cream of mushroom soup
- 1/2 cup crispy fried onions
- 1 package pie dough or puff pastry
- 1 egg, beaten
- 1/2 cup shredded cheddar, optional
Quick Steps:
- Mix green beans, mushrooms, soup, and half the fried onions.
- Roll the dough and cut into circles or squares.
- Fill, fold, and seal with a fork.
- Brush with egg wash and sprinkle with remaining onions.
- Bake at 400°F (200°C) for 18 to 20 minutes.
- Cool 5 minutes before serving.
Equipment for This Recipe:
- Baking sheet
- Fork
- Rolling pin
- Mixing bowl
How to Serve This Dish:
These are rich, so I like them with something sharp like apple slices or pickles. One hand pie is enough for a snack; two can stand in for a side dish.
Pro Tips for This Recipe:
- Keep the filling thick and cool.
- Crumble the fried onions lightly so they do not poke through the dough.
- If using puff pastry, work fast before it warms.
Variations on This Dish:
- Cheesy Casserole Pies: Add cheddar for a richer filling.
- Turkey Dinner Version: Stir in chopped leftover turkey.
Common Mistakes to Avoid with This Recipe:
- Too much sauce: It leaks through the crust.
- Overbaking the onions: They turn bitter fast.
29. Cranberry-Brie Puff Bites

These little bites taste like a holiday platter got scaled down to snack size. The brie melts into the pastry, the cranberry brings acidity, and the whole thing lands somewhere between fancy and extremely easy.
Why It Works:
Puff pastry is the right vessel because it bakes fast and gives the brie time to melt without escaping entirely. A small dab of cranberry is enough; too much and it floods the pastry. I like these when I want one snack on the tray that feels a little more grown-up.
Key Ingredients:
- 1 sheet puff pastry, thawed
- 4 oz brie, cut into small pieces
- 1/3 cup cranberry sauce
- 1 egg, beaten
- 2 tablespoons chopped walnuts
- 1 teaspoon thyme leaves
Quick Steps:
- Cut puff pastry into 12 squares and press into mini muffin cups or onto a sheet.
- Add a piece of brie and a small spoon of cranberry to each.
- Sprinkle with walnuts and thyme.
- Brush exposed pastry with egg wash.
- Bake at 400°F (200°C) for 12 to 15 minutes until puffed and golden.
- Cool slightly before serving.
Equipment for This Recipe:
- Mini muffin tin or baking sheet
- Parchment paper
- Knife
- Pastry brush
How to Serve This Dish:
These work on a snack board with grapes and crackers, or just piled on a plate with nothing else. Two or three bites are enough because brie does not fool around.
Pro Tips for This Recipe:
- Use cold brie so it stays in the pastry a little longer.
- Keep the cranberry small and centered.
- If walnuts are not your thing, skip them; they are optional.
Variations on This Dish:
- Apple-Brie Bites: Swap cranberry for thin apple slices and a pinch of cinnamon.
- Prosciutto Version: Add a tiny fold of prosciutto under the brie.
Common Mistakes to Avoid with This Recipe:
- Too much cranberry: It boils over.
- Serving hot from the oven: The filling can burn mouths fast.
30. Apple-Cheddar Hand Pies
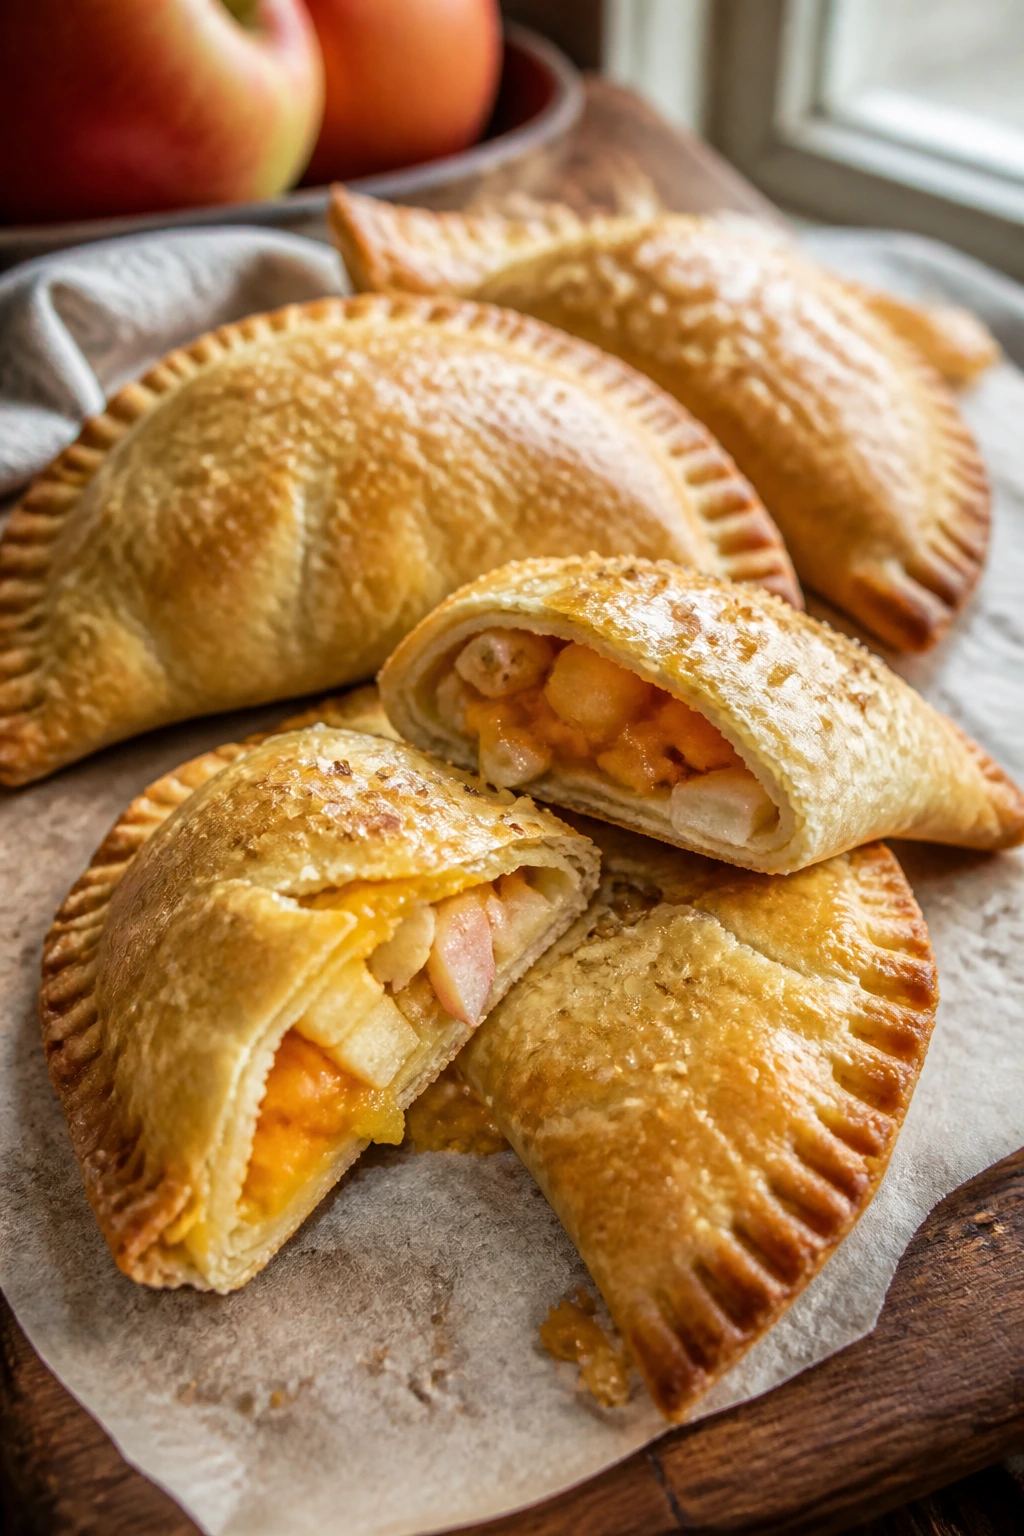
Sweet apple and sharp cheddar is a combination people argue about until they taste it together. In hand pie form, the two finally make sense: flaky crust, soft fruit, a little salty cheese, and a bite that lands somewhere between snack and dessert.
Why It Works:
These give the after-school tray a quieter ending after all the savory food. The apples cook down just enough to soften, while the cheddar keeps the filling from becoming all sugar. A little cinnamon helps, but I would not bury the cheese under too much of it.
Key Ingredients:
- 2 cups peeled diced apples
- 1/3 cup shredded sharp cheddar
- 2 tablespoons brown sugar
- 1 teaspoon cinnamon
- 1 tablespoon butter
- 1 package pie dough or puff pastry
- 1 egg, beaten
Quick Steps:
- Cook apples, butter, brown sugar, and cinnamon in a skillet for 5 to 6 minutes until softened.
- Cool the filling, then stir in cheddar.
- Cut dough into circles or squares and fill each center.
- Fold, seal, and brush with egg wash.
- Bake at 400°F (200°C) for 18 to 20 minutes until golden.
- Cool 5 minutes before eating.
Equipment for This Recipe:
- Skillet
- Baking sheet
- Fork
- Parchment paper
How to Serve This Dish:
These are good warm with milk, coffee, or a small scoop of vanilla ice cream if snack time has drifted into dessert. One hand pie is enough for a child; two work for a grown-up who skipped lunch.
Pro Tips for This Recipe:
- Cook the apples until the liquid mostly evaporates.
- Use a tart apple so the filling stays lively.
- A tiny pinch of salt makes the cheddar taste clearer.
Variations on This Dish:
- Caramel Apple Version: Add 1 tablespoon caramel sauce to the filling.
- Pear-Cheddar Pies: Swap apples for pears and reduce the sugar slightly.
Common Mistakes to Avoid with This Dish:
- Runny apple filling: It leaks and softens the crust.
- Using too much cinnamon: It can bury the cheese.
Why Sunday Dinner Flavors Work So Well at Snack Time
The trick with these recipes is not that they are fancy. It is that they are stable. Meat, cheese, sauce, dough, potatoes, pasta, and breadcrumbs all hold up when they are cut small and baked or reheated in portions that do not punish you for being hungry at the wrong hour.
That matters more than people think. After-school food has to survive a small stampede, a short delay, and usually at least one request for “something with cheese.” Sunday dinner flavors already bring comfort, but when you turn them into hand pies, sliders, cups, and bites, they pick up a useful new skill: they can wait on a tray without turning into mush.
I also think these kinds of snacks help parents stop making separate food for different people. One tray can hold chicken pot pie hand pies, broccoli cheddar bites, and a few cranberry sliders. Everyone gets to choose, and the leftovers are still useful later. That is not glamorous. It is better than glamorous.
Essential Equipment for These Recipes
- Muffin tins, standard and mini: Great for meatloaf cups, mac and cheese cups, broccoli bites, and shepherd’s pie portions.
- Rimmed baking sheets: You will use these constantly for hand pies, sliders, pastry bites, and tenders.
- 12-inch skillet: Best for sloppy Joes, quesadillas, salmon cakes, and grilled cheese.
- Mixing bowls in two sizes: One for fillings, one for dry or wet coatings.
- Parchment paper: Keeps pastry and cheese-heavy snacks from sticking and makes cleanup quicker.
- Sharp knife and pizza cutter: Good for clean cuts on roll-ups, pinwheels, and dough.
- Whisk and spatula: For sauces, egg washes, and folding fillings without smashing them.
- Instant-read thermometer: Useful for meatloaf, chicken, and salmon cakes when you want certainty.
- Pastry brush: Handy for egg wash and buttering tops.
- Airtight storage containers: Essential if you plan to freeze or pack leftovers.
Smart Shopping for Fast-Finish Comfort Food
Start with ingredients that already know how to behave under heat. Puff pastry, crescent dough, biscuit dough, and slider rolls are your easy wins because they brown fast and hold fillings without much drama. Keep them in the freezer or fridge and you have the backbone for half this collection.
For meat, I reach for 85/15 ground beef, shredded roast chicken, cooked turkey, and leftover pulled pork when I can. Leaner beef can work, but it dries faster in small portions. If you are buying chicken for leftovers on purpose, roast thighs stay juicier than breasts and shred without turning stringy.
Cheese matters more than people admit. Block cheese shredded at home melts smoother in mac cups, roll-ups, and hand pies. Pre-shredded is fine when convenience matters, but it has a drier finish. For the sharper recipes—sliders, ziti cups, meatball bites—keep a block of cheddar or Parmesan around and grate it as needed.
Veggies should be chosen for low water content. Frozen peas, carrots, spinach, and chopped broccoli all work if you squeeze or drain them properly. Fresh onions, celery, and peppers add flavor, but they need a quick cook first or they stay crunchy in the wrong way.
How to Serve These Recipes
Presentation:
Use one big tray instead of a lot of small plates. Stack the hand-held foods in loose rows, not perfect grids, and tuck in parchment squares or little ramekins of dip so the tray looks intentional. If you have three different snacks on one board, keep the colors separated a bit; bright pickles next to brown pastry can make everything look tired.
Accompaniments:
Pick one crunchy thing and one fresh thing. Carrot sticks, apple slices, cucumber coins, grapes, slaw, or a small green salad all work. Tomato soup, ranch, marinara, mustard, gravy, and ketchup each fit different parts of the collection, but you do not need all of them at once. That only clutters the table.
Portions:
For younger kids, count on 2 to 3 bites, 1 slider, or 2 mini cups. Older kids usually want 4 to 6 pieces, especially if the snack is running in place of dinner. If you are feeding a mixed group, make a rule for yourself: one savory bite, one cheese-heavy bite, one vegetable bite. It keeps the tray balanced without making anybody feel trapped in a nutrition lecture.
Beverage Pairing:
Milk works with the cheesy snacks. Sparkling water is good beside the richer ones. I also like iced tea with the barbecue and roast beef items, and plain apple cider with the apple hand pies or cranberry bites.
Additional Tips and Flavor Boosters
Flavor Enhancement:
A spoon of Dijon in chicken, turkey, and roast beef fillings does more work than a second handful of cheese. It sharpens the whole tray without screaming mustard.
Customization:
If one child hates onions, mince them finer or grate them into the filling. If another likes heat, keep a little hot sauce or crushed red pepper on the side instead of forcing the whole batch spicy.
Serving Suggestions:
Fresh herbs matter at the end. Chopped chives, parsley, dill, or thyme make baked snacks taste less heavy and help the tray look awake. A little flaky salt on pastry right after baking is also worth doing.
Make-It-Yours:
For dairy-free versions, use olive oil, dairy-free cheese that melts well, and an egg wash made with plant milk. For gluten-free swaps, choose a sturdy gluten-free pastry or use potato-cake style bites instead of dough. For lower-sodium cooking, season the filling yourself and reduce the canned soup, sauce, or deli meat where you can.
Make-Ahead, Storage, and Reheating Guidance
Most of these snacks keep 3 to 4 days in the refrigerator once cooled, though creamy pasta, soup-based fillings, and seafood lean closer to 2 to 3 days. Freeze the sturdier ones—meatloaf muffins, sliders, hand pies, roll-ups, pastry bites, and chicken bombs—for up to 2 months in a sealed container or freezer bag with parchment between layers.
For reheating, the oven wins most of the time. A 350°F (175°C) oven for 8 to 12 minutes brings back pastry, biscuit dough, potato skins, and sliders without turning them rubbery. An air fryer at 350°F for 4 to 6 minutes works especially well for tenders, hand pies, and rolls. Use the microwave only when texture does not matter much, or when you are warming a soft filling that will not turn sad.
Let everything cool before wrapping it. Warm food traps steam, and steam is the enemy of crisp edges. If you are freezing a dish with sauce, freeze it in a thin layer or in individual portions so it thaws quickly and evenly. Reheat casseroles and pasta cups until the center is steaming hot, not just warm at the edges.
Variations and Adaptations to Try
Gluten-Free Pantry Swap:
Use gluten-free puff pastry, gluten-free breadcrumbs, and corn tortillas or potato cups where dough would normally show up. The fillings in this collection already do most of the work, so the swap is usually easier than people expect.
Dairy-Light Version:
Cut the cheese by a third and lean on mustard, herbs, and tomato sauce for flavor. Chicken, turkey, and pork fillings can carry more seasoning than you think, especially if you add a little lemon or vinegar at the end.
Air Fryer Night:
Chicken tenders, potato skins, hand pies, roll-ups, and puff pastry bites all crisp nicely in the air fryer. Keep the basket uncrowded and work in batches so the outer layers do not steam.
Vegetarian Bench Players:
Broccoli cheddar bites, spinach puff squares, mac cups, tomato soup grilled cheese, and apple hand pies already fit. For the others, swap in mushrooms, beans, or extra vegetables with a thick sauce so the filling stays substantial.
Lower-Sodium School-Night Fix:
Use unsalted broth, reduced-sodium cheese, and plain cooked meat instead of salty deli versions. Then season with pepper, garlic, lemon, and herbs so the food still tastes alive.
Mild Kid-Only Batch:
Split the tray before adding hot sauce, pepper flakes, horseradish, or too much onion. That keeps one batch friendly and lets adults sharpen their own portions later.
Common Mistakes to Avoid
Making everything too wet:
Wet fillings are the fastest way to ruin hand pies, rolls, and pastry snacks. If the spoon leaves a puddle, simmer the mixture longer or add a spoonful of breadcrumbs, flour, or cheese to tighten it up.
Ignoring size:
These are snack recipes, which means smaller is better. Oversized sliders, giant hand pies, and overloaded muffin cups collapse faster and take longer to reheat.
Forgetting to cool before packing:
Hot snacks steam themselves soft inside containers. Let them cool on a rack first, then pack them with a dry paper towel if you need to keep them crisp.
Using too much sauce at the table:
Dipping sauce is useful. Flooding the food is not. A little on the side keeps the outside crisp and stops kids from turning one snack into a soup bowl.
Baking every item the same way:
Pastry, cheese-heavy cups, and meat-filled dough need different treatment. Puff pastry likes high heat. Cheese cups like steady heat. Biscuits and rolls need enough time for the centers to warm through, not just color on top.
Frequently Asked Questions
Can I make these recipes from leftovers on purpose?
Yes, and that is the smartest way to use them. Leftover roast chicken, turkey, pot roast, pulled pork, mashed potatoes, stuffing, and pasta all fit naturally here as long as they are cooled and not watery.
Which recipes freeze best?
Mini meatloaf muffins, chicken pot pie hand pies, slider rolls, empanadas, sausage twists, and pastry bites freeze especially well. Cream-based pasta cups and soup-style pot pies can freeze too, but the texture softens more after thawing.
What is the easiest recipe for a beginner?
Sloppy Joe sliders and tuna melt English muffins are the quickest wins. They use simple fillings, short cook times, and little more than a skillet or broiler.
How do I keep the snacks from getting soggy?
Cook off extra liquid before assembling, toast bread or rolls first when you can, and cool fillings before they meet pastry. Sogginess usually starts with steam, not with the recipe itself.
Can I make these ahead for the week?
Yes. Bake or assemble them ahead, then store them in shallow containers so they cool evenly. Most reheat well in the oven or air fryer, and a few—like pinwheels and some sliders—can even be served cold or room temperature.
What if my kids do not like visible vegetables?
Grate onion, mince celery small, chop spinach fine, and fold vegetables into cheese or sauce-heavy fillings. Broccoli cheddar bites and mac cups are especially good for hiding the green stuff in plain sight.
Can I swap the meat in most of these recipes?
Usually. Chicken can stand in for turkey, turkey can stand in for beef in some cases, and pulled pork can become pulled chicken if the sauce and texture stay similar. Just watch moisture and seasoning.
Is the air fryer better than the oven for any of these?
For crisp snacks, yes. Hand pies, tenders, potato skins, and some roll-ups come out with sharper edges in the air fryer, but the oven is still better for big batches and anything saucy.
The After-School Snack Table Wins Twice
The best thing about this style of cooking is that it stops the clock from feeling so mean. You get the comfort of Sunday dinner without committing to a full roast, full casserole, or full plate situation at 4 p.m. And when the snack is built well, it buys you time before the real dinner even starts.
Pick two or three recipes that match what lives in your fridge, make a double batch if your freezer has room, and let the snacks do the heavy lifting for a change. The afternoon goes quieter when the food is already handled.