
By the time Friday evening rolls around, nobody in the house wants a dinner that behaves like a project. That’s the whole reason Friday night family dinner ideas need their own category: the meal has to be forgiving, fast enough to survive a tired brain, and flexible enough to handle one kid who wants “no green stuff” and another who wants extra sauce on everything.
The best Friday-night food has a certain attitude. It comes off the stove or out of the oven looking like it took more effort than it did. A pan of sizzling peppers, a bubbling pasta bake, a skillet loaded with rice and chicken, a tray of sliders with melted cheese running into the seams — that kind of dinner feels like a reset button. Not fancy. Just right.
And Friday is the perfect night for recipes that can lean on shortcuts without tasting lazy: rotisserie chicken, frozen vegetables, canned tomatoes, store-bought dough, pre-cooked rice, tortillas, pasta, ground meat, a big handful of cheese. Use the smart stuff. Save the heroic cooking for another day.
Why These Dinners Earn a Spot in the Friday Rotation
-
Fast cleanup: Most of these meals use one skillet, one sheet pan, or a single baking dish, which means fewer dishes waiting in the sink when everyone is already tired.
-
Picky-eater friendly: Build-your-own dinners, cheesy bakes, tacos, sliders, and bowls give kids some control without turning the table into a negotiation.
-
Pantry-backed: Canned beans, pasta, rice, tortillas, tomato sauce, and frozen vegetables show up again and again because they stretch a grocery run without making dinner feel repetitive.
-
Comfort without heaviness: These recipes hit the sweet spot between satisfying and manageable. They fill plates without demanding a long stew, a roast, or a complicated sauce.
-
Easy to scale: Most of the dinners below can be doubled for guests, stretched with a salad or bread, or halved when the family crew is smaller than usual.
-
Leftovers that still behave: A lot of Friday-night food either reheats well or turns into lunch the next day without getting weird, and that matters more than people admit.
1. Sheet-Pan Chicken Fajitas
Chicken fajitas have a nice Friday-night swagger: loud color, smoky edges, and just enough char on the peppers to make the kitchen smell like a restaurant line. When you slice the chicken thin and let the pan do the work, dinner lands with almost no fuss.
Why It Works:
High heat and thin slices are the whole trick here. A 425°F oven sears the vegetables at the edges before the chicken dries out, and the spice blend sticks to the oil instead of slipping into a watery mess. That gives you browned onion, tender peppers, and chicken that still has some juice left.
Key Ingredients:
- 1 1/2 lbs boneless, skinless chicken thighs, sliced into thin strips
- 3 bell peppers, sliced into 1/2-inch strips
- 1 large yellow onion, sliced
- 2 tablespoons olive oil
- 2 tablespoons fajita seasoning
- 1 teaspoon kosher salt
- 8 small flour tortillas, warmed
- 1 lime, cut into wedges
- 1 avocado, sliced, for serving
Quick Steps:
- Preheat the oven to 425°F and line a rimmed sheet pan with foil or parchment.
- Toss the chicken, peppers, onion, oil, fajita seasoning, and salt in a large bowl until everything is lightly coated.
- Spread the mixture on the pan in one even layer. Do not crowd the pan or the vegetables will steam instead of brown.
- Roast for 18 to 22 minutes, stirring once halfway through, until the chicken reaches 165°F and the onion edges are browned.
- Warm the tortillas, pile on the fajita mixture, and finish with lime and avocado.
Equipment for This Recipe:
- Rimmed sheet pan
- Large mixing bowl
- Tongs or a spatula
How to Serve This Dish:
Serve the fajitas family-style right on the sheet pan or piled into a wide serving bowl. Warm tortillas on the stove for 20 seconds per side, then set out salsa, sour cream, and shredded cheese so everyone builds their own.
Pro Tips for This Recipe:
- Cut the chicken into even strips so it finishes at the same time as the peppers.
- If your onions are thick, they’ll stay crunchy; go for thin half-moons.
- A squeeze of lime at the end wakes everything up, especially if your seasoning blend is salty.
- If you like a little edge, add 1/2 teaspoon smoked paprika to the seasoning mix.
Variations on This Dish:
- Steak Fajitas: Swap in 1 1/2 lbs skirt steak and roast for 12 to 14 minutes for a more beefy version.
- Veggie Fajitas: Use 2 extra bell peppers, 8 oz mushrooms, and 1 zucchini instead of chicken.
- Chipotle Heat: Stir 1 chopped chipotle pepper in adobo into the oil for a smoky, warm finish.
Common Mistakes to Avoid with This Dish:
- Overcrowding the pan: If the pan looks piled up, use two pans. Steam ruins the browned edges.
- Cutting everything too thick: Thick peppers and chicken take longer and often finish unevenly.
- Skipping the lime: The acid matters here. Without it, the fajitas taste flat and a little heavy.
2. Cheesy Baked Ziti
Baked ziti is the kind of dinner that looks like you spent the whole afternoon on it, even if you mostly stirred, layered, and let the oven do the final work. The top gets bronzed and bubbly, the middle stays saucy, and the spoon comes out with a cheese pull every single time.
Why It Works:
You get all the comfort of lasagna without the tedious stacking. Boiling the pasta just shy of done means it finishes in the sauce instead of turning soft and mushy. The ricotta adds creaminess, while mozzarella on top gives you that stretchy, browned lid that kids tend to stare at before digging in.
Key Ingredients:
- 1 lb ziti pasta
- 1 lb Italian sausage, casings removed
- 1 tablespoon olive oil
- 4 cloves garlic, minced
- 4 cups marinara sauce
- 1 cup ricotta cheese
- 2 cups shredded mozzarella
- 1/2 cup grated Parmesan
- 2 tablespoons chopped fresh basil
- 1 teaspoon kosher salt
Quick Steps:
- Preheat the oven to 375°F and grease a 9×13-inch baking dish.
- Boil the ziti in salted water for 2 minutes less than the package says, then drain.
- Brown the sausage in olive oil over medium-high heat, stirring in the garlic for the last 30 seconds.
- Mix the pasta, sausage, marinara, ricotta, half the mozzarella, and Parmesan in a large bowl.
- Transfer to the dish, top with the remaining mozzarella, and bake for 25 to 30 minutes until bubbling and lightly browned.
Equipment for This Recipe:
- Large pot
- 9×13-inch baking dish
- Large mixing bowl
How to Serve This Dish:
Scoop it into shallow bowls so the sauce stays in the center and the cheese stays visible on top. Garlic bread and a simple green salad with sharp vinaigrette are the two sides I reach for most often here.
Pro Tips for This Recipe:
- Use a marinara you actually like straight from the jar; weak sauce makes the whole bake dull.
- Let the pasta cool for a minute before mixing so the ricotta doesn’t melt into a grainy mess.
- If the top browns too fast, tent the dish with foil for the last 10 minutes.
Variations on This Dish:
- Meatless Ziti: Skip the sausage and add 8 oz sautéed mushrooms with 1 chopped zucchini.
- Spinach Ziti: Fold in 4 packed cups baby spinach while the pasta is still warm.
- Spicy Baked Ziti: Add 1/2 teaspoon red pepper flakes and use hot Italian sausage.
Common Mistakes to Avoid with This Dish:
- Overcooking the pasta first: It keeps cooking in the oven. Pull it early.
- Using too little sauce: Dry ziti is the enemy. The pasta should look slick before baking.
- Serving it straight from the oven: Let it sit 10 minutes so the layers settle and slice cleanly.
3. One-Pan Taco Skillet
A taco skillet is what happens when taco night decides it wants fewer dishes and a little more speed. It tastes like a taco bar in one hot pan: seasoned beef, melted cheese, beans, salsa, and enough warmth to make tortillas disappear fast.
Why It Works:
Ground beef cooks quickly, salsa adds moisture without needing a separate sauce, and black beans stretch the filling in a way that keeps dinner affordable. The skillet also keeps the taco mixture hot at the table, which matters if your household eats in shifts.
Key Ingredients:
- 1 lb ground beef
- 1 tablespoon olive oil
- 1 small onion, diced
- 2 tablespoons taco seasoning
- 1 cup salsa
- 1 can black beans, drained and rinsed
- 1 cup frozen corn
- 1 1/2 cups shredded cheddar
- 8 small tortillas
- Chopped cilantro and sour cream, for serving
Quick Steps:
- Heat the olive oil in a large skillet over medium-high heat.
- Cook the onion and ground beef for 6 to 8 minutes, breaking up the meat until it’s browned and no pink remains.
- Stir in the taco seasoning, salsa, black beans, and corn, then simmer for 3 to 4 minutes until thickened.
- Scatter the cheddar over the top, cover, and cook for 2 minutes until melted.
- Serve with warm tortillas and toppings on the side.
Equipment for This Recipe:
- Large skillet
- Wooden spoon or spatula
- Small saucepan or skillet for warming tortillas
How to Serve This Dish:
Set the skillet in the center of the table and let everyone scoop their own filling into tortillas. A pile of shredded lettuce, diced tomatoes, and sliced avocado makes the table look fuller without adding much work.
Pro Tips for This Recipe:
- Drain excess beef fat if your ground beef is over 85% lean.
- A splash of water can loosen the mixture if the salsa is thick.
- Fresh lime over the top gives the beans and beef a cleaner finish.
Variations on This Dish:
- Turkey Taco Skillet: Use ground turkey and add 1 extra tablespoon oil so it doesn’t dry out.
- Veggie Taco Skillet: Swap the meat for 2 cups diced mushrooms and 1 extra can beans.
- Crunchy Nacho Version: Spoon the filling over tortilla chips and bake at 400°F until the cheese melts.
Common Mistakes to Avoid with This Dish:
- Using too much salsa: The skillet turns soupy fast. Start with 1 cup and add more only if needed.
- Skipping the browning step: The flavor comes from color, not just seasoning.
- Forgetting a fresh topping: Sour cream, lime, or cilantro keeps the skillet from tasting heavy.
4. Creamy Tomato Spinach Pasta
This is the pasta I make when I want dinner to feel calm. The sauce goes from bright tomato to creamy and pink in one pan, and the spinach melts down just enough to look like it belongs there, not like a token green tossed in at the end.
Why It Works:
Canned tomatoes and cream are old friends in a skillet. The acid from the tomatoes softens into the dairy, and the starch from the pasta helps everything cling together instead of sliding off. Spinach wilts in about a minute, which means you get some color and texture without having to plan around it.
Key Ingredients:
- 12 oz penne or rotini
- 2 tablespoons olive oil
- 4 cloves garlic, minced
- 1 can crushed tomatoes, 28 oz
- 3/4 cup heavy cream
- 4 packed cups baby spinach
- 1/2 cup grated Parmesan
- 1 teaspoon kosher salt
- 1/2 teaspoon black pepper
- 1/4 teaspoon red pepper flakes
Quick Steps:
- Boil the pasta in salted water until just al dente, then reserve 1 cup of the pasta water and drain.
- Warm the olive oil in a large skillet over medium heat and cook the garlic for 30 seconds until fragrant.
- Add the crushed tomatoes, salt, pepper, and red pepper flakes, then simmer for 8 minutes.
- Stir in the cream, spinach, Parmesan, and pasta, loosening with a splash of pasta water until the sauce coats the noodles.
- Serve right away while the sauce is glossy.
Equipment for This Recipe:
- Large pot
- Large skillet
- Colander
How to Serve This Dish:
Ladle it into bowls with extra Parmesan and a little black pepper on top. I like a piece of toasted bread for swiping the skillet clean, because the sauce tends to gather in the bottom in the best way.
Pro Tips for This Recipe:
- Reserve more pasta water than you think you need. One splash often saves the texture.
- Use crushed tomatoes, not diced, or the sauce stays too chunky for this style.
- If the cream curdles, the heat was too high; lower it before adding dairy.
Variations on This Dish:
- Sausage Tomato Pasta: Brown 1 lb Italian sausage before the garlic step.
- Chicken Tomato Pasta: Add 2 cups shredded rotisserie chicken with the spinach.
- Mushroom Cream Pasta: Sauté 8 oz sliced mushrooms until browned before the tomatoes.
Common Mistakes to Avoid with This Dish:
- Boiling the sauce hard after adding cream: That can split it. Keep the simmer gentle.
- Skipping the pasta water: It helps the sauce cling instead of pooling.
- Under-salting the water: The noodles need seasoning from the inside out.
5. BBQ Chicken Sliders
BBQ chicken sliders are pure Friday-night energy: sticky, saucy, a little sweet, and small enough that nobody complains about the bun-to-filling ratio. They also disappear from the tray in about half the time it takes to make them, which I count as a compliment.
Why It Works:
Rotisserie chicken keeps the process short, Hawaiian rolls bring a soft, pillowy base, and a brief bake melts the cheese without drying out the filling. A little butter brushed on top gives the buns a glossy finish and keeps them from tasting like an afterthought.
Key Ingredients:
- 3 cups shredded cooked chicken
- 3/4 cup barbecue sauce
- 12 slider rolls
- 1 1/2 cups shredded cheddar
- 2 tablespoons melted butter
- 1 tablespoon Dijon mustard
- 2 tablespoons chopped pickles or jalapeños, optional
- 1 tablespoon sesame seeds, optional
- 1/2 teaspoon garlic powder
Quick Steps:
- Preheat the oven to 350°F and line a baking dish with parchment.
- Mix the chicken with barbecue sauce and Dijon until evenly coated.
- Slice the rolls in half as a group, place the bottoms in the dish, and pile on the chicken and cheddar.
- Top with the bun lids, brush with melted butter and garlic powder, and sprinkle on sesame seeds if you like.
- Bake for 12 to 15 minutes until the cheese melts and the tops are warm and slightly crisp.
Equipment for This Recipe:
- 9×13-inch baking dish
- Mixing bowl
- Pastry brush or spoon
How to Serve This Dish:
Serve the sliders straight from the baking dish with a stack of napkins. A crunchy coleslaw or carrot sticks on the side keeps the plate from leaning too sweet.
Pro Tips for This Recipe:
- Use thick barbecue sauce so the bottom buns don’t go soggy.
- If the rolls are extra soft, toast the cut sides for 1 minute before assembling.
- Add pickles after baking if you want them bright and crisp.
Variations on This Dish:
- Buffalo Sliders: Swap barbecue sauce for Buffalo sauce and use blue cheese or ranch.
- Pulled Pork Sliders: Replace the chicken with 3 cups pulled pork.
- Tex-Mex Sliders: Use salsa verde, pepper jack, and chopped pickled jalapeños.
Common Mistakes to Avoid with This Dish:
- Over-saucing the chicken: The sliders turn slippery and hard to eat.
- Skipping the butter on top: The tops dry out faster without it.
- Baking too long: The cheese should melt, not turn rubbery.
6. Lemon Garlic Salmon with Green Beans
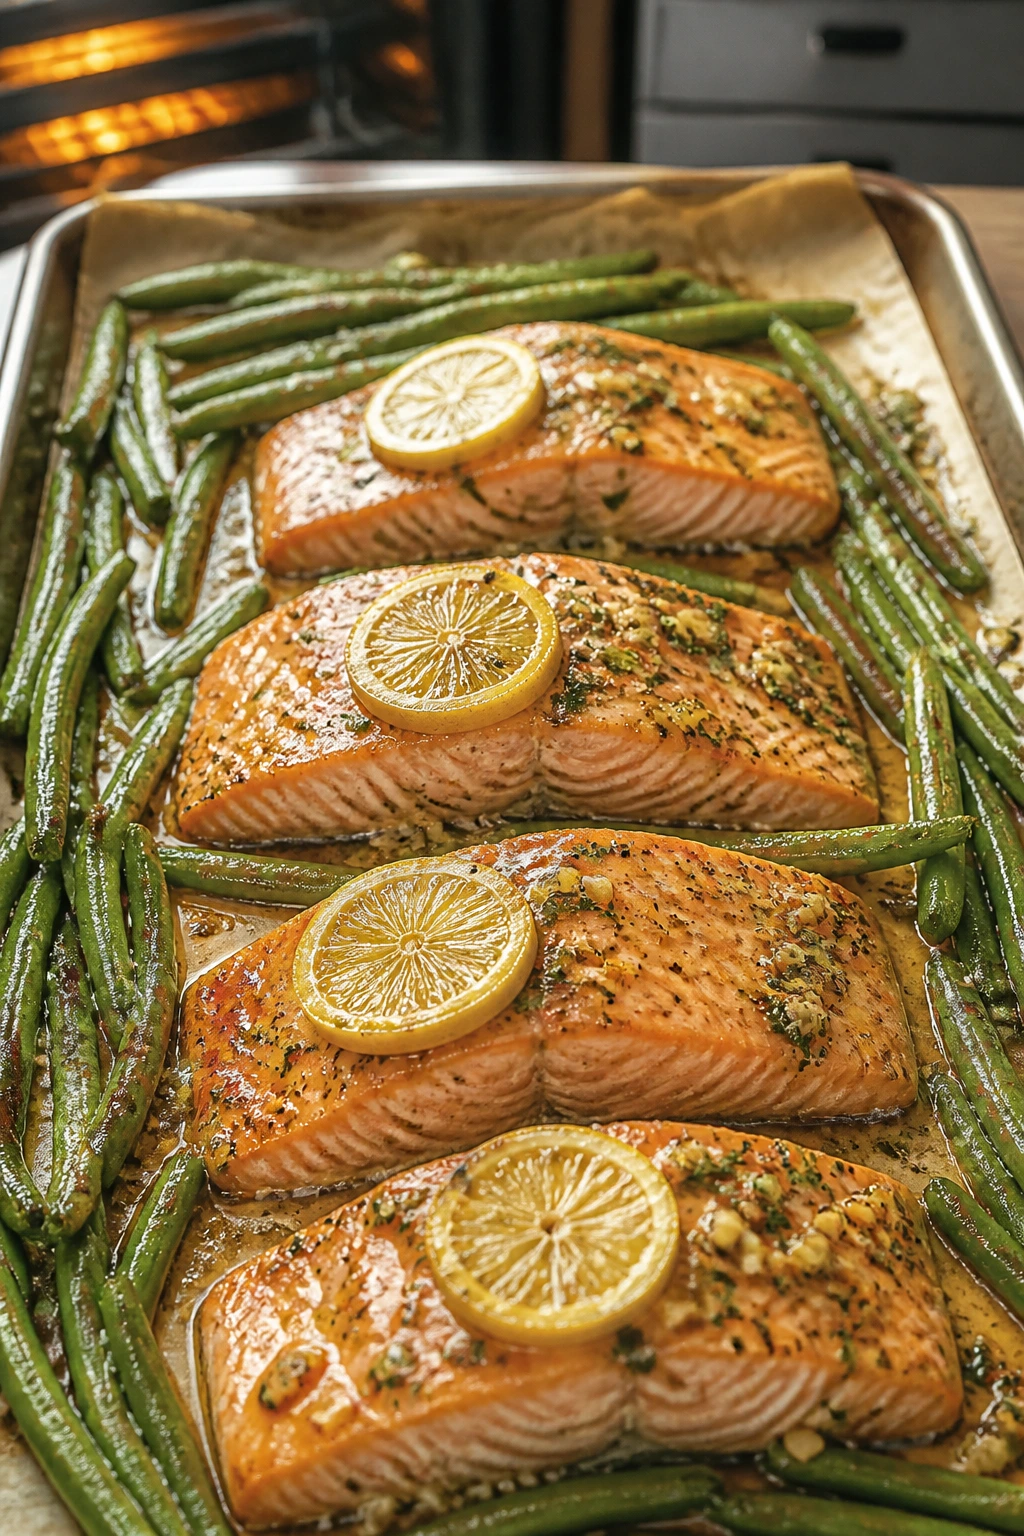
Salmon and green beans on one pan feels polished without being fussy. The fish comes out tender and flaky, the beans pick up browned spots around the edges, and the lemon slices perfume the whole tray while it roasts.
Why It Works:
Salmon likes hot ovens and short cooking times. Green beans can handle the same heat, especially if you coat them lightly in oil first. The garlic butter drips onto the vegetables as the fish cooks, which gives the pan a built-in sauce without adding a separate pot.
Key Ingredients:
- 4 salmon fillets, about 6 oz each
- 1 lb green beans, trimmed
- 2 tablespoons olive oil
- 3 tablespoons melted butter
- 3 cloves garlic, minced
- 1 lemon, sliced
- 1 teaspoon kosher salt
- 1/2 teaspoon black pepper
- 1 tablespoon chopped parsley
Quick Steps:
- Preheat the oven to 425°F and line a sheet pan with parchment.
- Toss the green beans with half the olive oil, half the salt, and half the pepper.
- Arrange the salmon on the pan, brush with the butter, garlic, and remaining oil, then season again.
- Roast for 12 to 15 minutes until the salmon flakes easily and the beans are tender with browned spots.
- Finish with lemon juice and parsley before serving.
Equipment for This Recipe:
- Rimmed sheet pan
- Small bowl
- Fish spatula or thin spatula
How to Serve This Dish:
Plate the salmon over the beans or next to them with lemon wedges on the side. Rice, couscous, or roasted potatoes all work if you want the meal to feel more complete.
Pro Tips for This Recipe:
- Choose salmon fillets that are similar in thickness so they finish together.
- If the beans are very thick, give them a 3-minute head start before adding salmon.
- Don’t leave the garlic in clumps on the fish or it can brown too fast.
Variations on This Dish:
- Dill Salmon: Swap parsley for dill and add a spoon of sour cream on the side.
- Honey Lemon Salmon: Add 1 tablespoon honey to the butter for a sweeter glaze.
- Asparagus Version: Replace the green beans with asparagus spears and shorten the roast by 2 minutes.
Common Mistakes to Avoid with This Dish:
- Overcooking salmon: Pull it when the center still looks slightly translucent.
- Using wet green beans: Pat them dry or they’ll steam.
- Skipping the acid: Lemon is what keeps the fish from tasting flat.
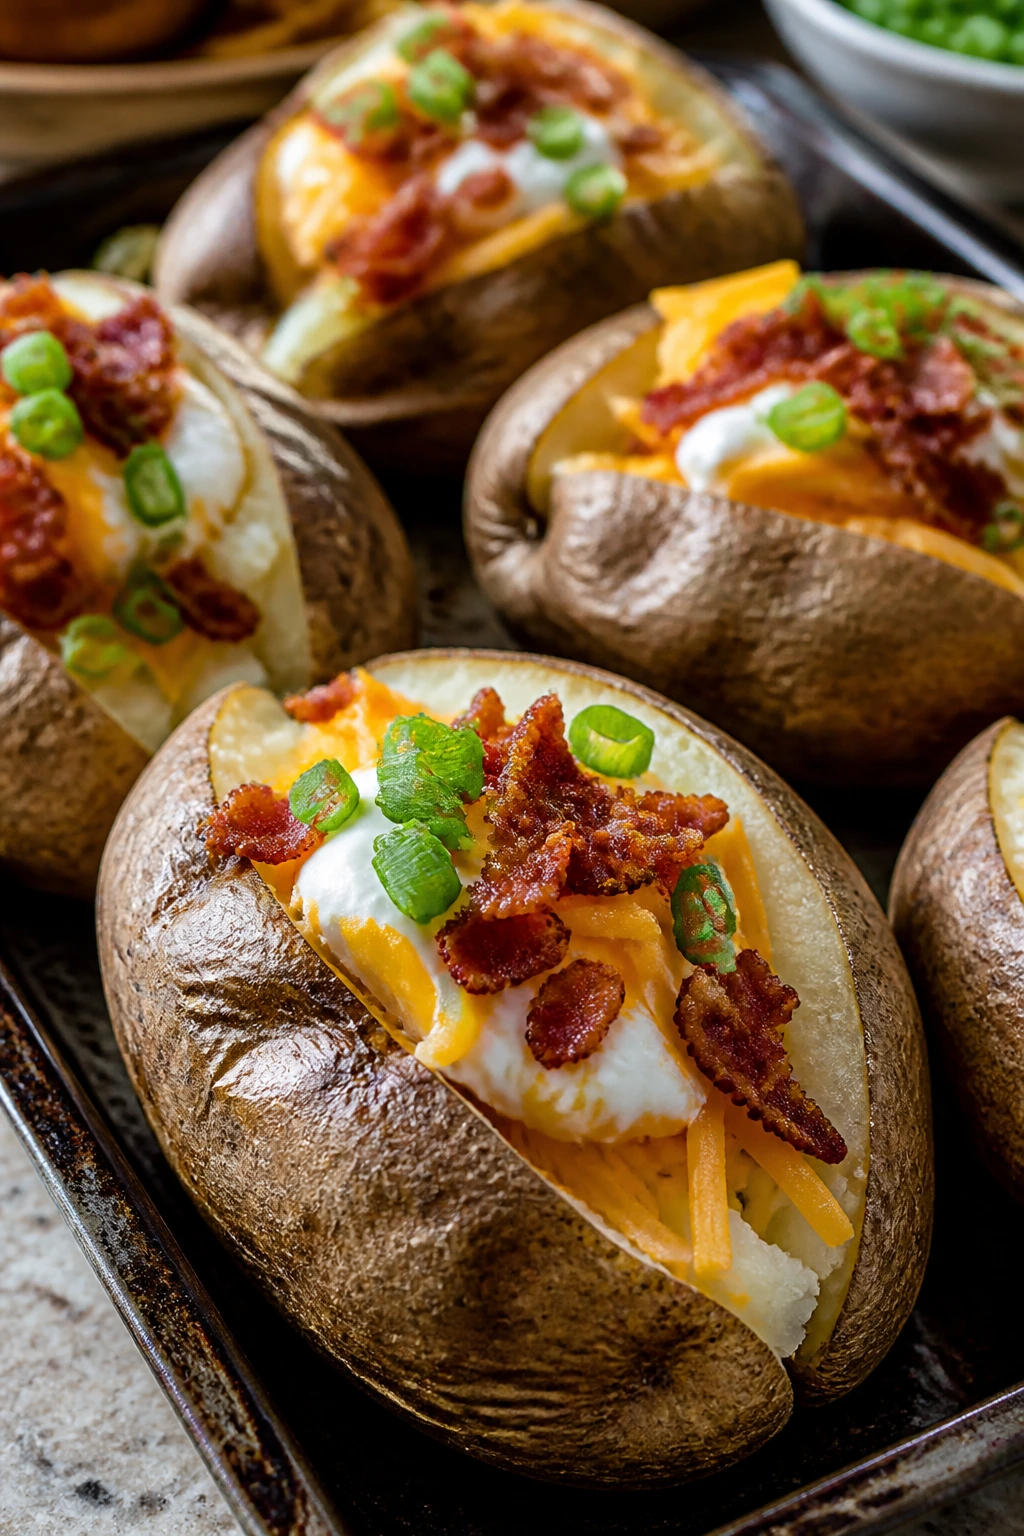
7. Sloppy Joe Stuffed Baked Potatoes
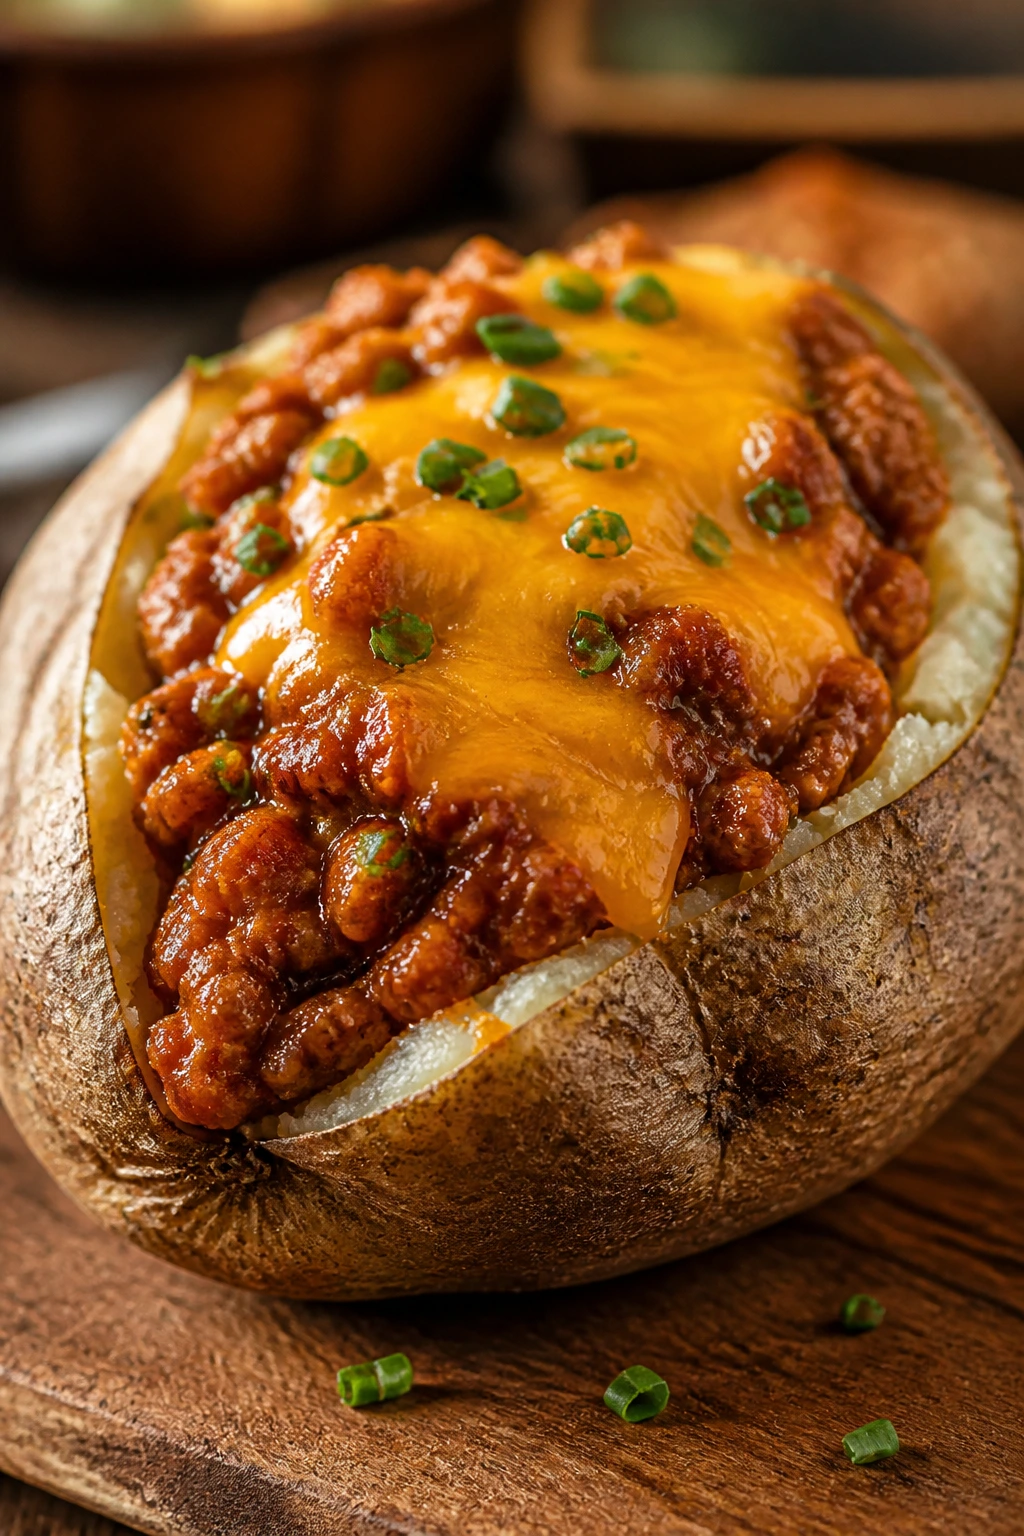
This is the dinner equivalent of putting work clothes into sweatpants. A baked potato gets split open, loaded with tangy meat sauce, and covered with cheese, which means the plate looks playful and the appetite stays happy.
Why It Works:
Sloppy Joe filling gives baked potatoes a saucy center without making them soggy if you spoon it on right before serving. The starchy potato absorbs some of the sauce, the cheese melts into the hot filling, and every bite has a mix of soft skin, fluffy interior, and savory topping.
Key Ingredients:
- 4 large russet potatoes
- 1 lb ground beef
- 1 small onion, diced
- 1 cup ketchup
- 1 tablespoon Worcestershire sauce
- 1 tablespoon yellow mustard
- 1 tablespoon brown sugar
- 1 teaspoon kosher salt
- 1 cup shredded cheddar
- 2 tablespoons chopped chives
Quick Steps:
- Bake the potatoes at 400°F for 50 to 60 minutes, or microwave them until tender if you need a faster route.
- Brown the beef and onion in a skillet over medium-high heat for 6 to 8 minutes.
- Stir in the ketchup, Worcestershire, mustard, brown sugar, and salt, then simmer for 5 minutes until thick.
- Split the potatoes and fluff the centers with a fork.
- Top with the sloppy joe mixture, cheddar, and chives.
Equipment for This Recipe:
- Sheet pan
- Large skillet
- Sharp knife and fork
How to Serve This Dish:
Serve the potatoes on plates with a fork and a spoon, because the filling wants to wander. A simple green salad or steamed broccoli keeps the meal from feeling too heavy.
Pro Tips for This Recipe:
- Bake the potatoes directly on the oven rack for the driest, fluffiest skin.
- If the filling seems too loose, simmer it a minute or two longer before spooning it on.
- A dab of sour cream on top cuts the sweetness of the sauce nicely.
Variations on This Dish:
- BBQ Joe Potatoes: Replace ketchup with barbecue sauce and skip the mustard.
- Turkey Version: Use ground turkey and add an extra tablespoon of oil.
- Chili Potato Bake: Spoon on leftover chili instead of Sloppy Joe filling.
Common Mistakes to Avoid with This Dish:
- Underbaking the potatoes: The insides should feel soft all the way through.
- Making the filling too wet: It should mound on the potato, not run off.
- Leaving the skins plain: Salt the outside before baking for better flavor.
8. Teriyaki Chicken Rice Bowls
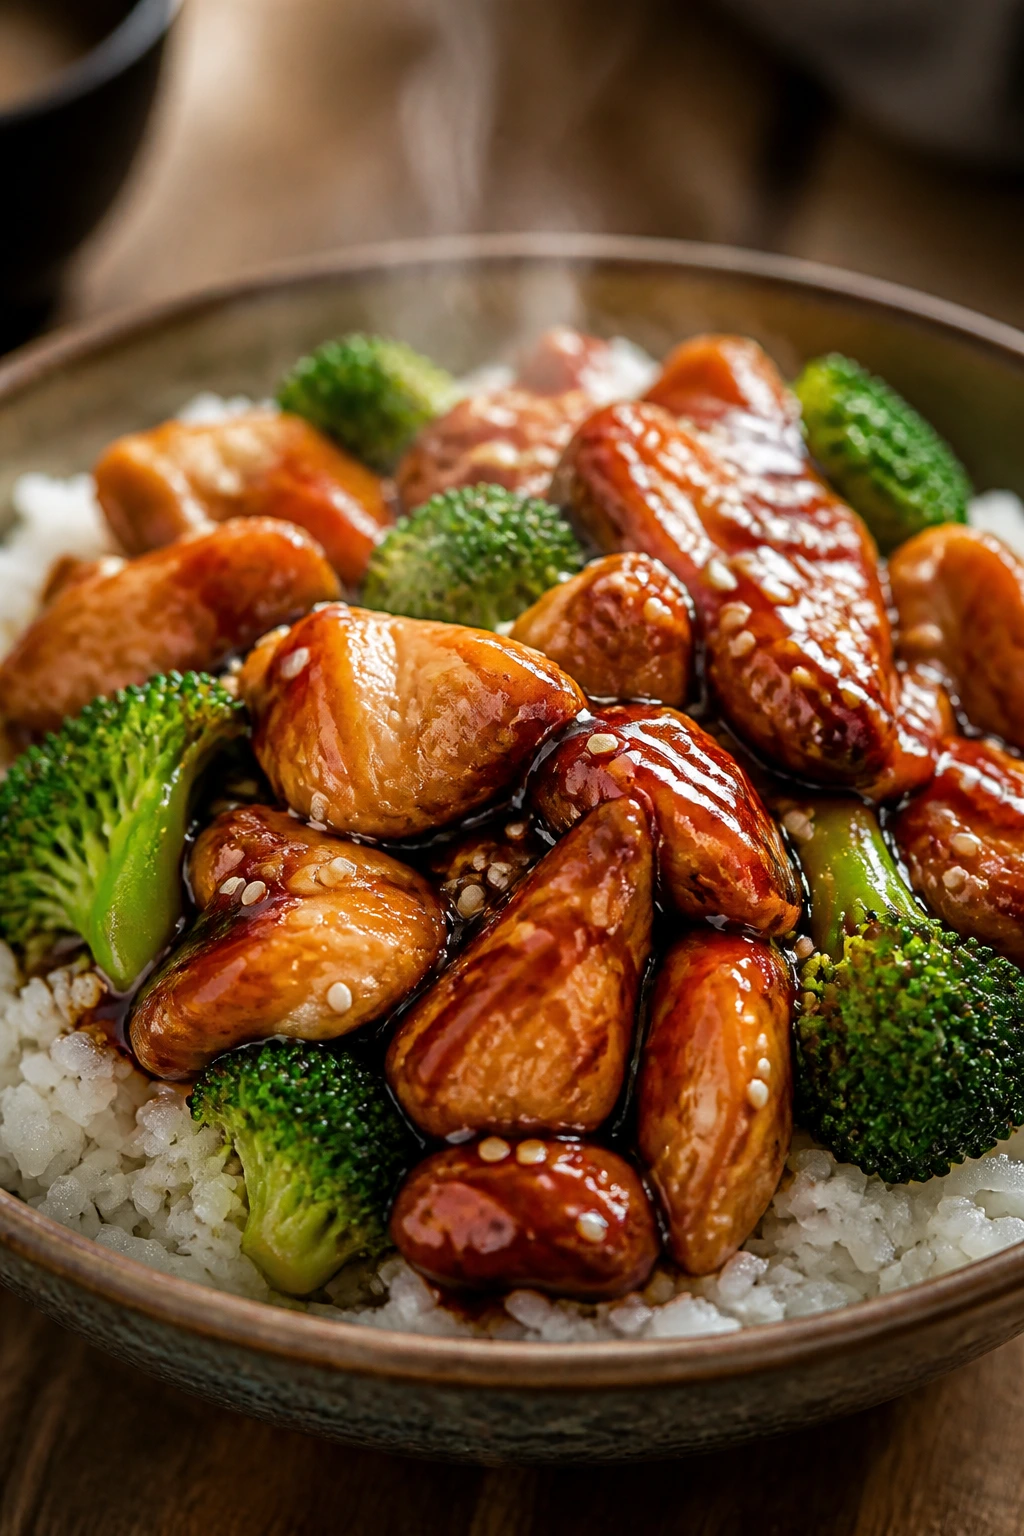
These bowls have the clean, glossy look that makes a weeknight dinner feel organized instead of chaotic. Sweet-salty chicken, steamed rice, and crisp vegetables give you separate textures in one bowl, which is a small but very real pleasure.
Why It Works:
Teriyaki sauce cooks down into a shiny glaze fast, and chicken thighs stay juicy even if the heat goes a little high. Rice acts like a sponge for the sauce, and broccoli or snap peas bring enough crunch to stop the bowl from turning soft.
Key Ingredients:
- 1 1/2 lbs boneless chicken thighs, cut into bite-size pieces
- 2 cups cooked white rice
- 2 cups broccoli florets
- 1 tablespoon sesame oil
- 1/2 cup teriyaki sauce
- 2 cloves garlic, minced
- 1 teaspoon grated ginger
- 2 tablespoons sliced scallions
- 1 tablespoon sesame seeds
Quick Steps:
- Steam or microwave the broccoli until bright green and crisp-tender.
- Heat sesame oil in a skillet over medium-high heat and cook the chicken for 6 to 8 minutes.
- Add garlic and ginger, then pour in the teriyaki sauce and simmer 2 to 3 minutes until glazed.
- Spoon rice into bowls and top with chicken, broccoli, scallions, and sesame seeds.
- Serve while the sauce is still glossy.
Equipment for This Recipe:
- Large skillet
- Medium saucepan or rice cooker
- Sharp knife
How to Serve This Dish:
Keep the toppings separate if your family likes to assemble their own bowls. A few cucumber slices or shredded carrots on the side make the bowls look brighter and give kids something to nibble on first.
Pro Tips for This Recipe:
- Pat the chicken dry before cooking so it browns instead of steaming.
- If your teriyaki sauce is very sweet, add 1 teaspoon rice vinegar for balance.
- Use day-old rice if you want firmer grains and less clumping.
Variations on This Dish:
- Pineapple Teriyaki: Add 1/2 cup pineapple chunks with the sauce.
- Beef Bowl: Swap chicken for thinly sliced flank steak and shorten the cook time.
- Veggie Bowl: Use tofu cubes and add extra broccoli and carrots.
Common Mistakes to Avoid with This Dish:
- Using soggy rice: Freshly cooked rice can clump. Let it rest a few minutes before serving.
- Overcrowding the chicken: Give the pieces room to brown.
- Adding sauce too early: It can burn if the pan is too hot before the chicken is cooked through.
9. Turkey Meatball Subs
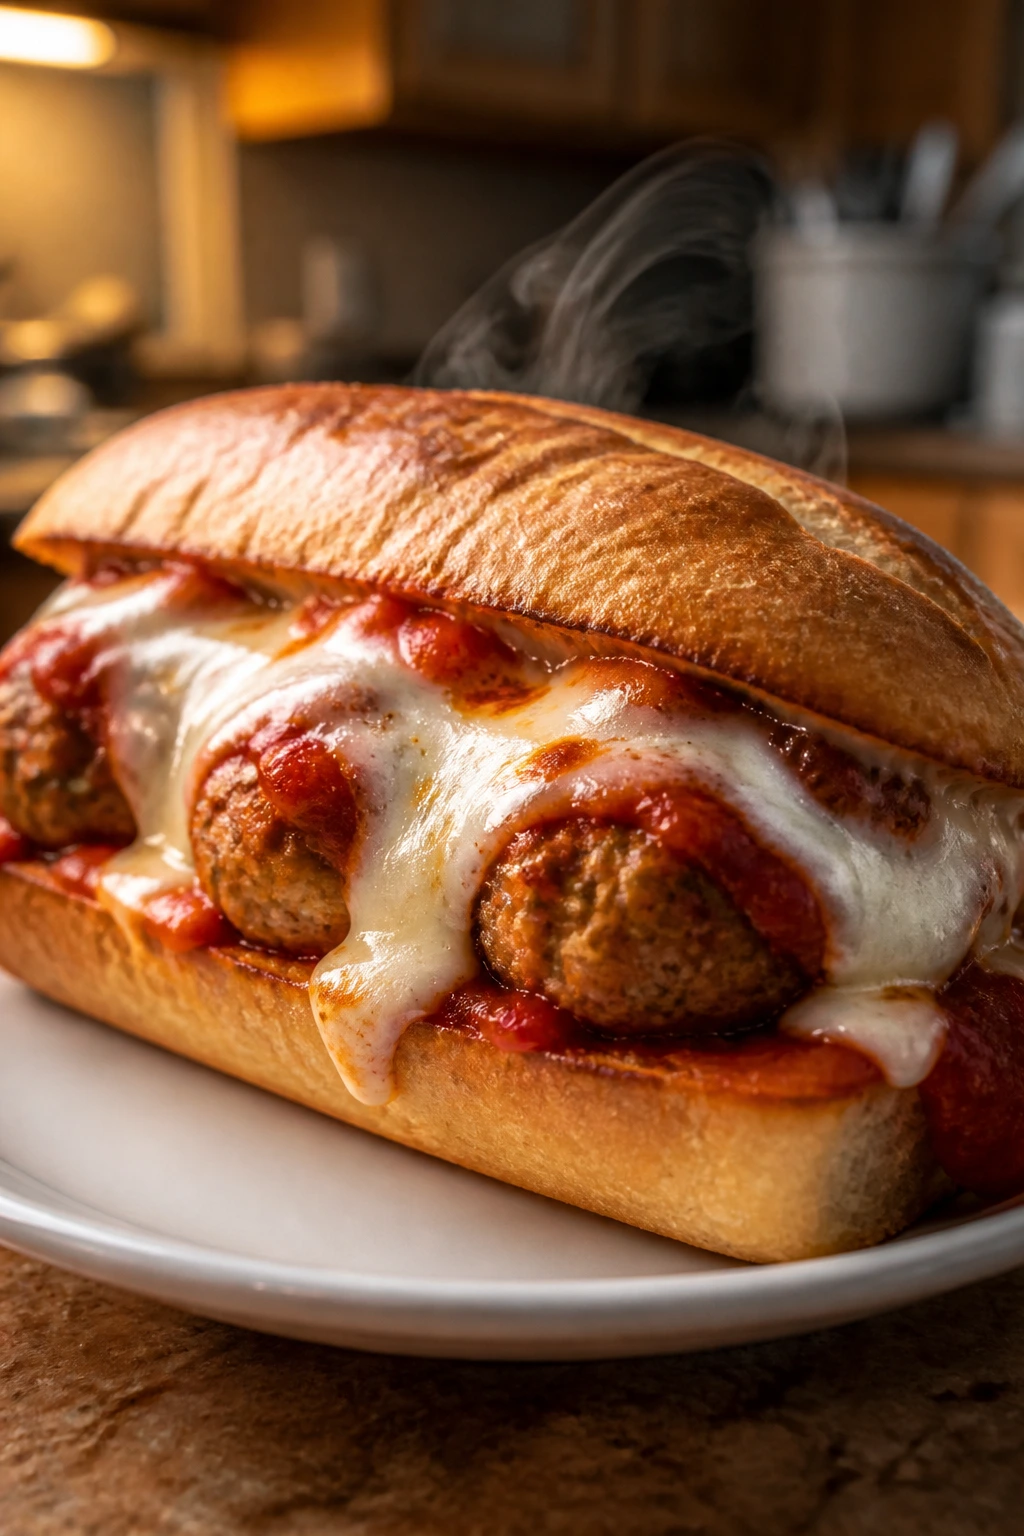
Turkey meatball subs hit that sweet spot between hearty and manageable. The meatballs are lighter than beef, the marinara keeps them juicy, and the melted cheese running down into toasted rolls gives the whole thing a little Friday-night drama.
Why It Works:
Turkey meatballs cook fast and soak up sauce well, which keeps them from drying out. Baking them instead of frying makes the process cleaner, and finishing the subs in the oven melts the cheese right into the bread. You get the messy, satisfying part without standing at the stove forever.
Key Ingredients:
- 1 lb ground turkey
- 1/2 cup breadcrumbs
- 1 egg
- 2 tablespoons grated Parmesan
- 1 teaspoon Italian seasoning
- 2 cups marinara sauce
- 4 sub rolls
- 1 1/2 cups shredded mozzarella
- 1 tablespoon olive oil
Quick Steps:
- Preheat the oven to 425°F and line a baking sheet with parchment.
- Mix the turkey, breadcrumbs, egg, Parmesan, Italian seasoning, and a pinch of salt.
- Form into 16 small meatballs and bake for 12 to 14 minutes until cooked through.
- Warm the marinara in a skillet, add the meatballs, and simmer for 2 minutes.
- Load the rolls with meatballs, sauce, and mozzarella, then bake 3 to 4 minutes until melted.
Equipment for This Recipe:
- Baking sheet
- Mixing bowl
- Skillet or saucepan
How to Serve This Dish:
Serve the subs with extra napkins and maybe a handful of chips. A crisp pickle or a chopped salad helps balance the soft bread and cheese.
Pro Tips for This Recipe:
- Wet your hands before rolling the meatballs so the mixture doesn’t stick.
- Make the meatballs small; they fit the rolls better and cook faster.
- Toast the rolls lightly before filling if you want them to hold up longer.
Variations on This Dish:
- Spicy Subs: Add red pepper flakes and use pepper jack.
- Meat Sauce Version: Skip the meatballs and use the turkey mix as a loose sauce.
- Chicken Meatball Subs: Ground chicken works the same way, but watch the cook time closely.
Common Mistakes to Avoid with This Dish:
- Overmixing the meatball mixture: That makes the texture dense.
- Skipping the sauce simmer: Meatballs taste better after a minute in the marinara.
- Overstuffing the rolls: They’ll split if you pile in too much filling.
10. Breakfast-for-Dinner Pancake and Sausage Platter

Some Friday nights call for a meal that feels a little playful, and breakfast for dinner always gets a reaction. Pancakes, sausage, eggs, and fruit make the table look abundant without demanding much more than a couple of pans and a hot skillet.
Why It Works:
Breakfast foods cook fast, and the ingredients are usually already hanging around the kitchen. Pancake batter comes together in minutes, sausage browns quickly, and scrambled eggs stay soft if you pull them early. The whole meal is a mix-and-match situation, which suits a tired end of week.
Key Ingredients:
- 2 cups pancake mix
- 1 1/2 cups milk
- 2 eggs
- 1 tablespoon melted butter
- 8 breakfast sausage links
- 4 large eggs, for scrambling
- 2 tablespoons milk, for scrambling
- 1 cup berries
- Maple syrup, for serving
Quick Steps:
- Cook the sausage links in a skillet over medium heat for 8 to 10 minutes until browned and cooked through.
- Whisk the pancake mix, milk, eggs, and melted butter until just combined.
- Pour 1/4-cup rounds onto a lightly greased griddle and cook 2 to 3 minutes per side.
- Scramble the remaining eggs with milk over low heat until soft and glossy.
- Serve the pancakes, sausage, eggs, and berries with syrup on the side.
Equipment for This Recipe:
- Nonstick skillet or griddle
- Mixing bowl
- Whisk and spatula
How to Serve This Dish:
Put everything on one big platter and let people build their own plates. A bowl of sliced bananas, strawberries, or apples makes the plate look fresher and keeps the meal from feeling too heavy.
Pro Tips for This Recipe:
- Stop mixing pancake batter as soon as the flour disappears; a few lumps are fine.
- Keep cooked pancakes warm on a sheet pan in a 200°F oven.
- Cook the eggs low and slow so they stay soft instead of rubbery.
Variations on This Dish:
- Blueberry Pancake Night: Fold berries directly into the batter.
- Savory Version: Add shredded cheddar and chopped chives to the pancakes.
- French Toast Swap: Use thick bread slices instead of pancakes if that’s what you have.
Common Mistakes to Avoid with This Dish:
- Cooking pancakes on too hot a griddle: The outsides burn before the centers set.
- Overcrowding the skillet with sausage: They brown more evenly with space.
- Scrambling eggs over high heat: They turn dry fast.
11. Crispy Baked Chicken Tenders
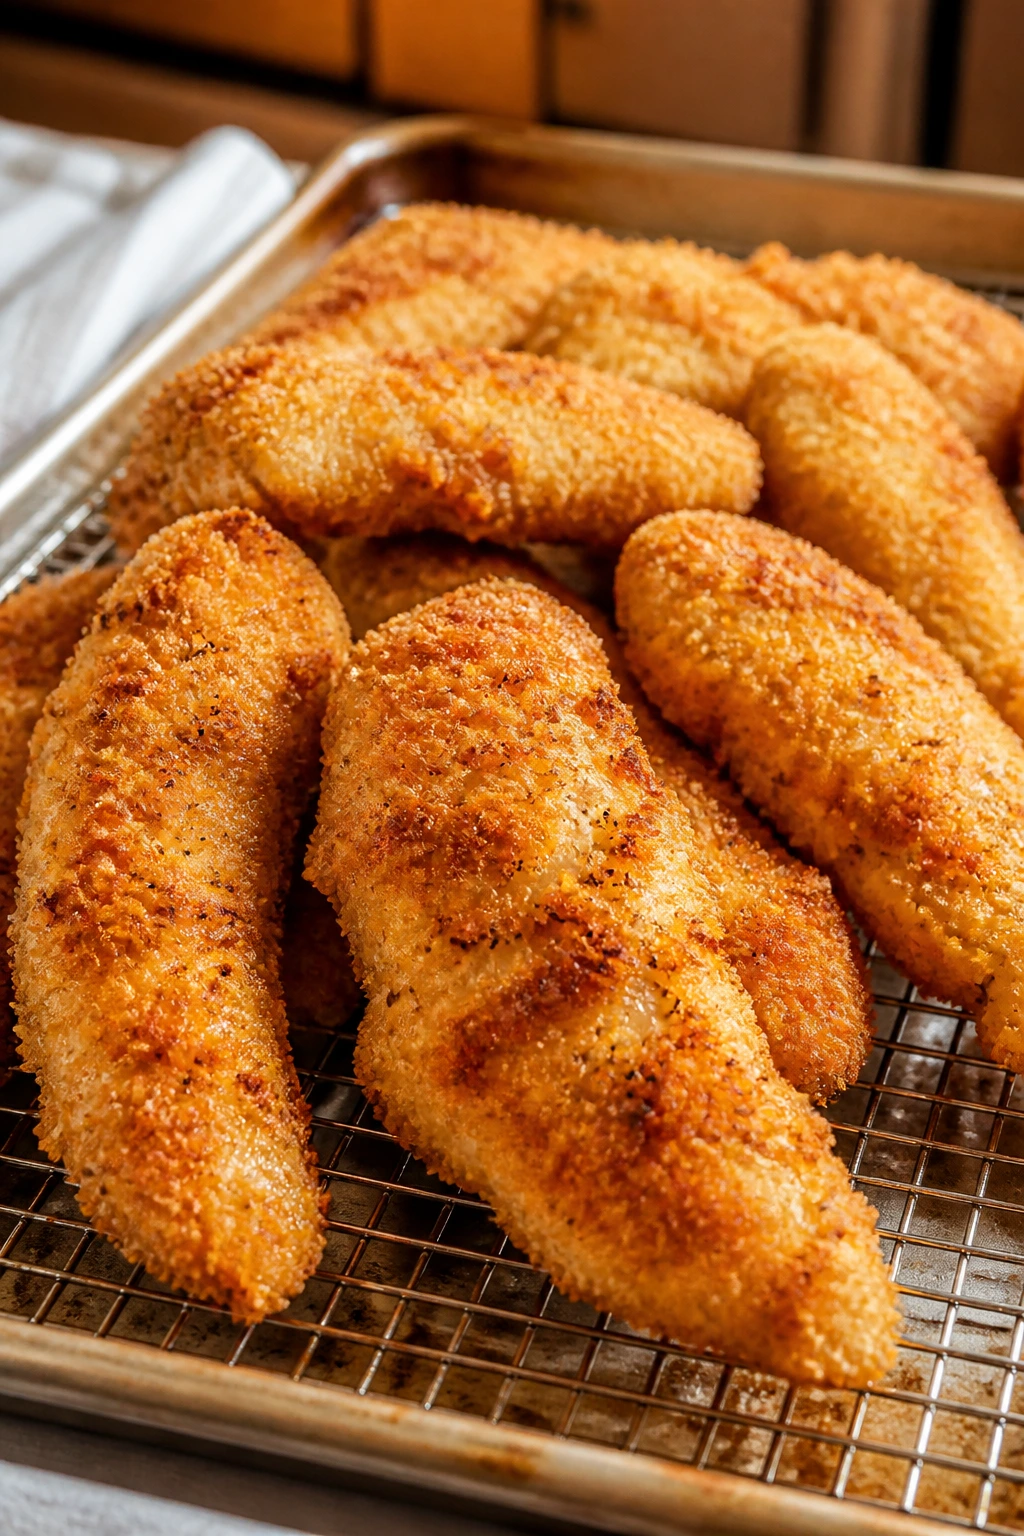
Chicken tenders are one of those dinners that disappear faster than you expect. The outside gets crunchy, the inside stays juicy, and the dip situation can be as simple or extra as you want it to be.
Why It Works:
Panko gives a lighter, crisper crust than regular breadcrumbs, and baking on a rack keeps the bottoms from going soggy. A little oil or melted butter on the coating helps the crumbs brown in the oven instead of drying out pale and dusty.
Key Ingredients:
- 2 lbs chicken tenders
- 1 cup flour
- 2 eggs
- 2 tablespoons milk
- 2 cups panko breadcrumbs
- 1 teaspoon paprika
- 1 teaspoon garlic powder
- 1 teaspoon kosher salt
- 1/2 teaspoon black pepper
- 2 tablespoons olive oil spray
Quick Steps:
- Preheat the oven to 425°F and set a wire rack on a baking sheet.
- Set up three shallow bowls with flour, beaten eggs with milk, and panko mixed with spices.
- Dredge each tender in flour, then egg, then panko, pressing so the crumbs stick.
- Arrange on the rack, spray lightly with oil, and bake for 15 to 18 minutes until golden and cooked through.
- Rest for 3 minutes before serving.
Equipment for This Recipe:
- Wire rack
- Rimmed baking sheet
- Three shallow bowls
How to Serve This Dish:
Serve the tenders with ketchup, honey mustard, or ranch and a pile of roasted potatoes. If you’ve got raw vegetables in the fridge, cut them up and call it a side. It works.
Pro Tips for This Recipe:
- Salt the flour lightly so the coating doesn’t taste flat.
- Press the panko onto the chicken with your fingertips for better coverage.
- If you want extra color, broil for 1 minute at the end and watch closely.
Variations on This Dish:
- Parmesan Tenders: Add 1/2 cup grated Parmesan to the panko.
- Spicy Tenders: Mix cayenne into the breadcrumb mix.
- Air Fryer Version: Cook at 400°F for 10 to 12 minutes, flipping once.
Common Mistakes to Avoid with This Dish:
- Skipping the rack: The bottoms soften on a plain pan.
- Using wet chicken: Pat the tenders dry first or the coating slides off.
- Overbaking: They should be juicy, not leathery.
12. Beef and Broccoli Stir-Fry
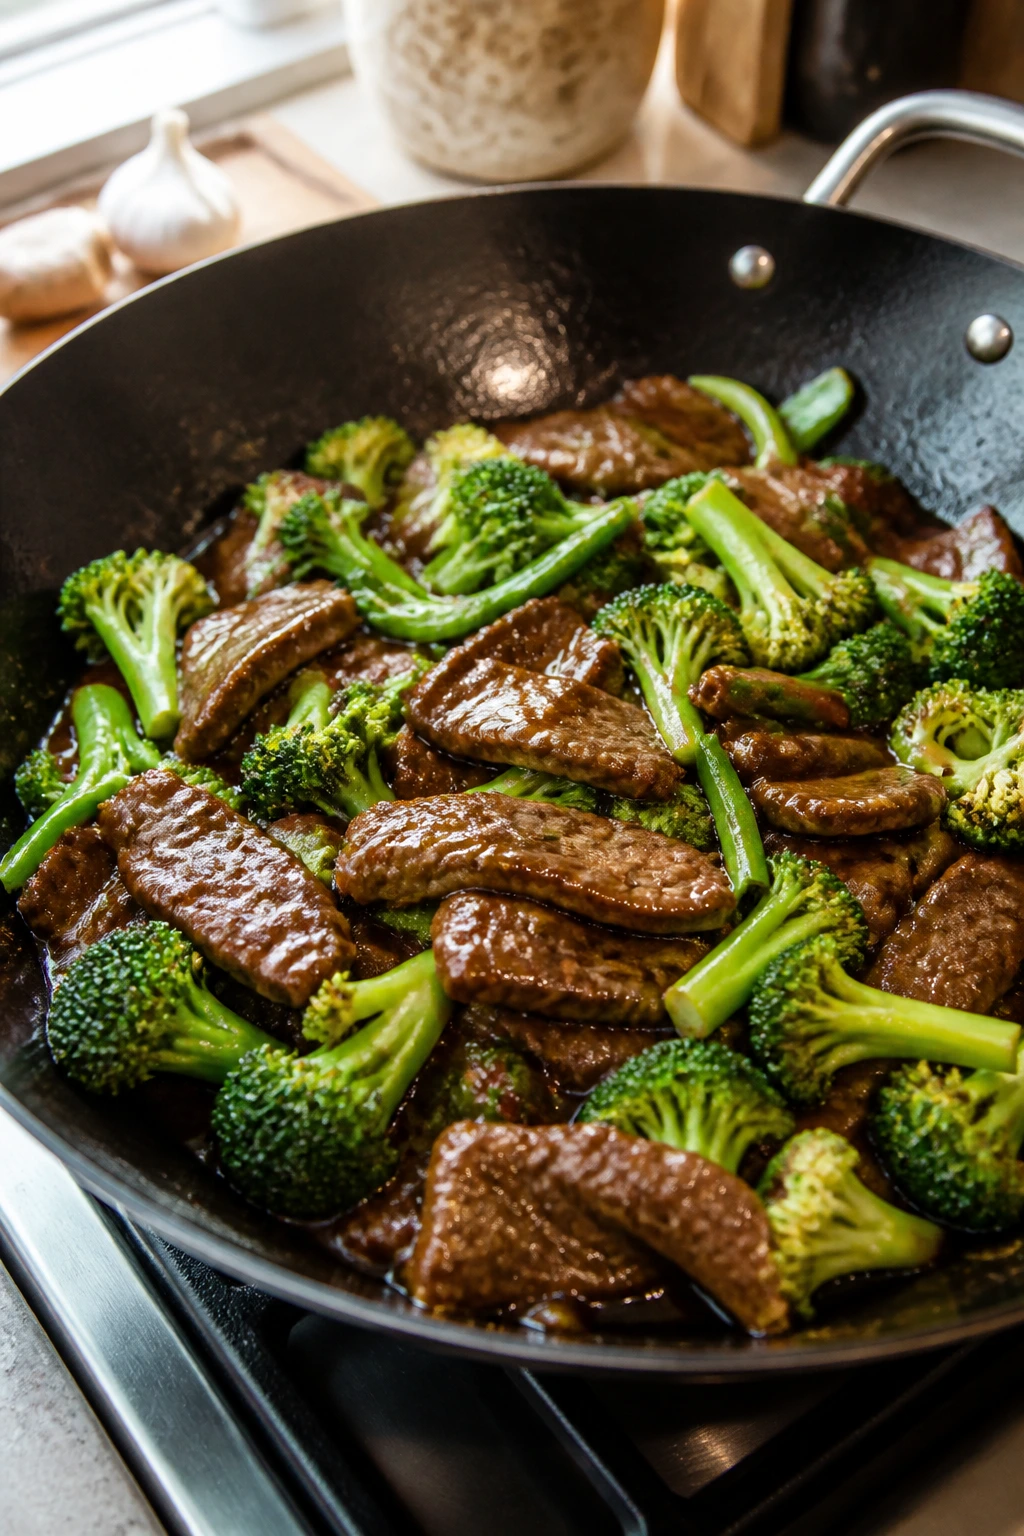
Beef and broccoli has that dependable takeout feel, only it hits the pan fresher and usually with less salt. The sauce turns glossy, the broccoli stays green and snappy, and the beef gets just enough sear to taste like dinner made a decision.
Why It Works:
Thin slices of beef cook in minutes, and broccoli loves a quick steam in the same skillet. The sauce thickens fast thanks to a little cornstarch, so you get a clingy, savory finish instead of a watery one.
Key Ingredients:
- 1 1/2 lbs flank steak, sliced thin against the grain
- 4 cups broccoli florets
- 2 tablespoons oil
- 3 cloves garlic, minced
- 1 tablespoon grated ginger
- 1/2 cup soy sauce
- 1/4 cup beef broth
- 2 tablespoons brown sugar
- 1 tablespoon cornstarch
- 3 cups cooked rice
Quick Steps:
- Whisk the soy sauce, broth, brown sugar, and cornstarch in a small bowl.
- Sear the beef in hot oil over medium-high heat for 2 to 3 minutes, then remove it.
- Cook the broccoli with a splash of water for 3 minutes until bright green and just tender.
- Add garlic and ginger, then return the beef and pour in the sauce.
- Stir for 1 to 2 minutes until glossy and thick, then serve over rice.
Equipment for This Recipe:
- Large skillet or wok
- Sharp knife
- Small bowl and whisk
How to Serve This Dish:
Pile it over steamed rice and spoon extra sauce over the top. A few sesame seeds or sliced scallions make it look finished without adding work.
Pro Tips for This Recipe:
- Freeze the flank steak for 15 minutes before slicing; it makes thin cuts easier.
- Don’t crowd the pan with beef or you’ll lose the sear.
- Keep the sauce mixture whisked right before pouring so the cornstarch doesn’t settle.
Variations on This Dish:
- Chicken Broccoli Stir-Fry: Use chicken breast or thigh strips instead of beef.
- Ginger-Lime Version: Add 1 tablespoon lime juice at the end.
- Extra Veg Version: Toss in carrots and snap peas with the broccoli.
Common Mistakes to Avoid with This Dish:
- Cutting the beef with the grain: That makes it chewy.
- Overcooking broccoli: It should stay bright and crisp.
- Adding cornstarch too early: It thickens best once the liquid is hot.
13. Chicken Parmesan Casserole
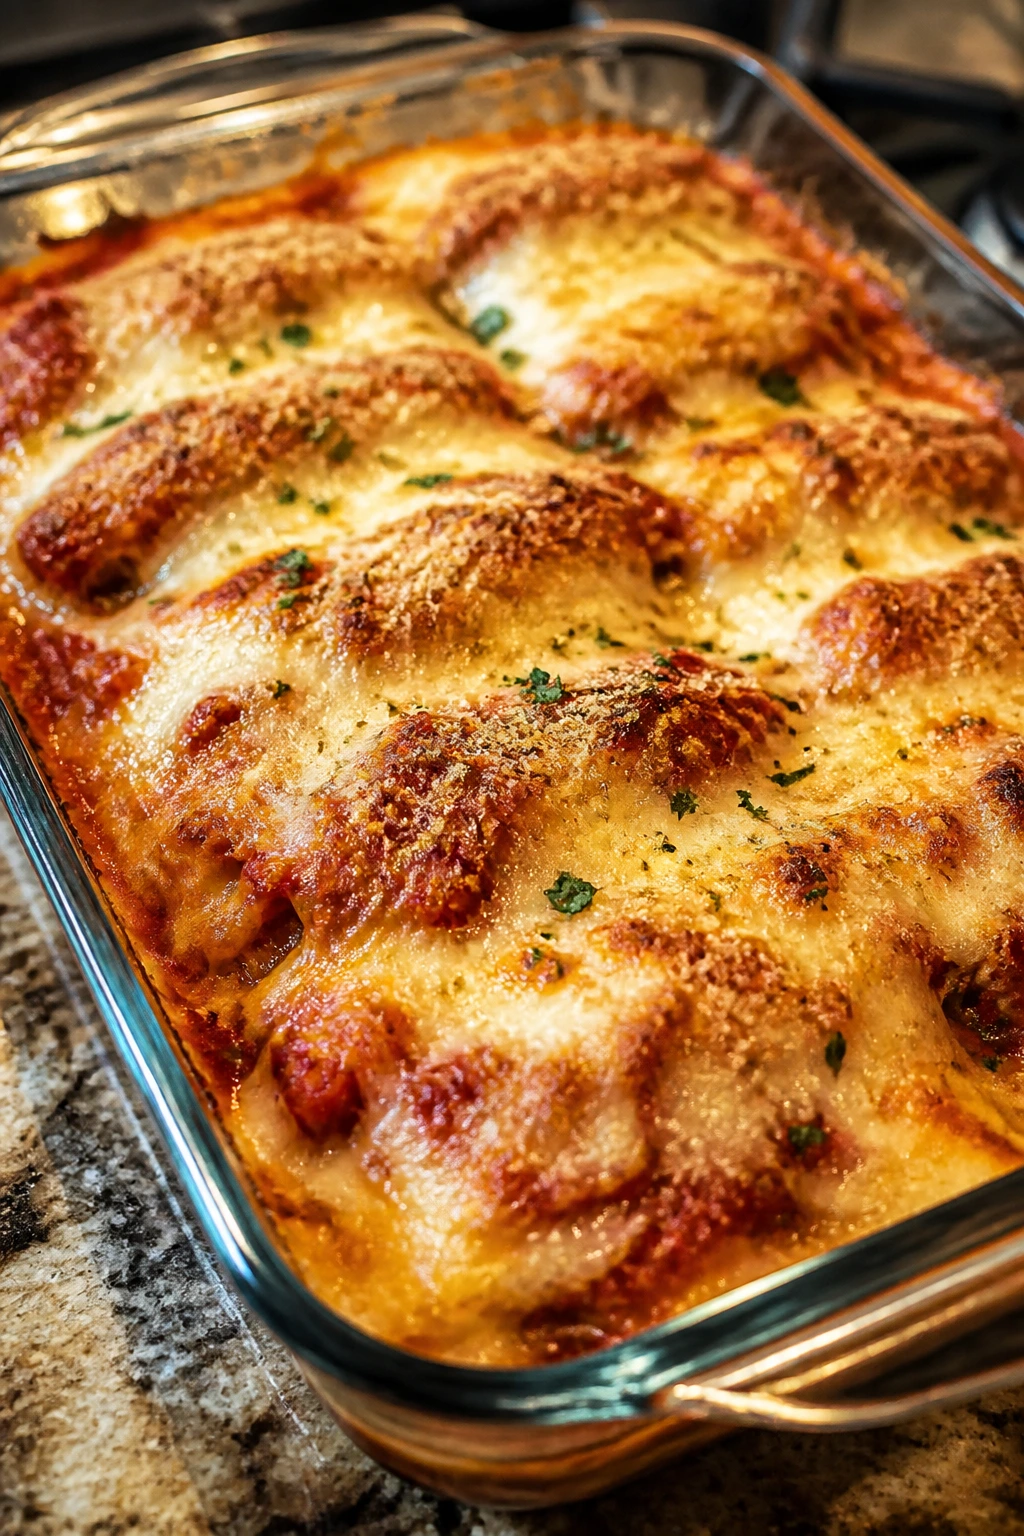
Chicken Parmesan in casserole form keeps all the parts kids usually love — sauce, cheese, pasta, breadcrumbs — and removes the fiddly breading step. It’s the kind of bake that comes out bubbling and smells like garlic and tomato the second you open the oven.
Why It Works:
Using cooked chicken speeds everything up, and the pasta soaks up sauce while the casserole bakes. Breadcrumbs on top bring the crunch that plain baked pasta often misses, so the whole dish feels a bit more complete.
Key Ingredients:
- 12 oz penne pasta
- 3 cups chopped cooked chicken
- 3 cups marinara sauce
- 2 cups shredded mozzarella
- 1/2 cup grated Parmesan
- 1 cup breadcrumbs
- 2 tablespoons melted butter
- 1 teaspoon Italian seasoning
- 2 tablespoons chopped basil
Quick Steps:
- Preheat the oven to 375°F and grease a 9×13-inch baking dish.
- Boil the pasta until just al dente, then drain.
- Mix the pasta, chicken, marinara, half the mozzarella, and half the Parmesan.
- Top with the remaining mozzarella, Parmesan, and breadcrumbs mixed with melted butter and Italian seasoning.
- Bake for 25 minutes until bubbling and golden, then finish with basil.
Equipment for This Recipe:
- Large pot
- 9×13-inch baking dish
- Mixing bowl
How to Serve This Dish:
Scoop it into bowls and serve with a crunchy Caesar salad or green beans. A spoonful of extra sauce on top never hurts, especially if the pasta has been sitting a few minutes.
Pro Tips for This Recipe:
- Use chopped rotisserie chicken for the fastest version.
- If the top looks dry before the center bubbles, cover loosely with foil.
- Toast the breadcrumbs in a skillet first if you want an extra crisp top.
Variations on This Dish:
- Meatball Parm Bake: Swap the chicken for sliced meatballs.
- Eggplant Parm Casserole: Replace the chicken with roasted eggplant slices.
- Spicy Parm: Add red pepper flakes to the sauce and breadcrumb mix.
Common Mistakes to Avoid with This Dish:
- Using too little sauce: The pasta can dry out in the oven.
- Not salting the pasta water: The whole dish tastes flatter without it.
- Skipping the rest time: Let it sit 10 minutes so the casserole firms up.
14. Mini Meatloaf Muffins
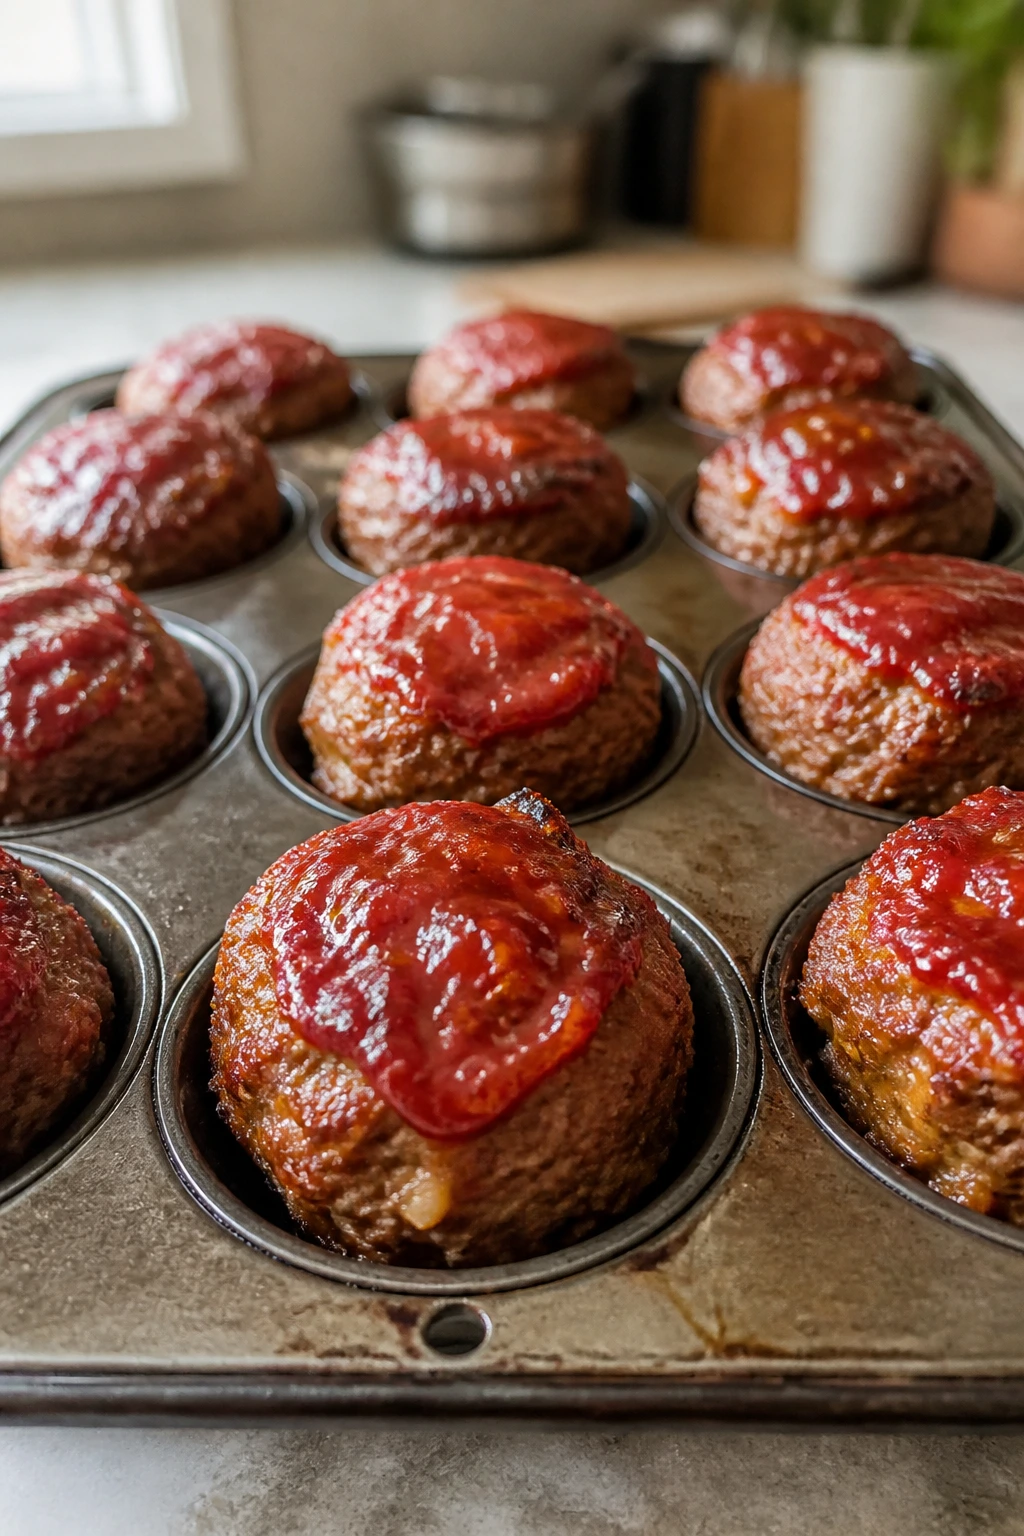
Mini meatloaf muffins are a smart move when you want the comfort of meatloaf without waiting forever for a full loaf to cook through. The ketchup glaze caramelizes a little on top, and the individual portions make serving easy.
Why It Works:
Muffin tins give you built-in portion control and a shorter bake time. The smaller shape means more surface area for browning, which gives you those darker edges that make meatloaf taste better than it looks in theory.
Key Ingredients:
- 1 1/2 lbs ground beef
- 1 cup breadcrumbs
- 2 eggs
- 1 small onion, grated or finely minced
- 1/2 cup milk
- 2 tablespoons Worcestershire sauce
- 1 teaspoon salt
- 1/2 teaspoon black pepper
- 1/2 cup ketchup
- 1 tablespoon brown sugar
Quick Steps:
- Preheat the oven to 400°F and grease a 12-cup muffin tin.
- Mix the beef, breadcrumbs, eggs, onion, milk, Worcestershire, salt, and pepper until just combined.
- Divide the mixture among the muffin cups and smooth the tops.
- Stir the ketchup and brown sugar together and spoon a little over each cup.
- Bake for 20 to 22 minutes until the centers reach 160°F.
Equipment for This Recipe:
- 12-cup muffin tin
- Mixing bowl
- Spoon or scoop
How to Serve This Dish:
Serve two muffins per plate with mashed potatoes or roasted carrots. The little domes look cute on the plate, but they’re still meatloaf, which means they want something soft and starchy underneath.
Pro Tips for This Recipe:
- Grated onion blends into the meat more smoothly than diced.
- Don’t press the mixture too hard into the tin or the muffins turn dense.
- Let them rest a few minutes before lifting them out.
Variations on This Dish:
- Turkey Muffins: Use ground turkey and add 1 tablespoon olive oil.
- BBQ Muffins: Replace the ketchup glaze with barbecue sauce.
- Cheddar Muffins: Fold 1 cup shredded cheddar into the mix.
Common Mistakes to Avoid with This Dish:
- Overmixing: It makes the meatloaf tough.
- Skipping the thermometer: Guessing leads to dry or undercooked centers.
- Using too much glaze: A thin spoonful is enough.
15. Quesadilla Night with Rotisserie Chicken
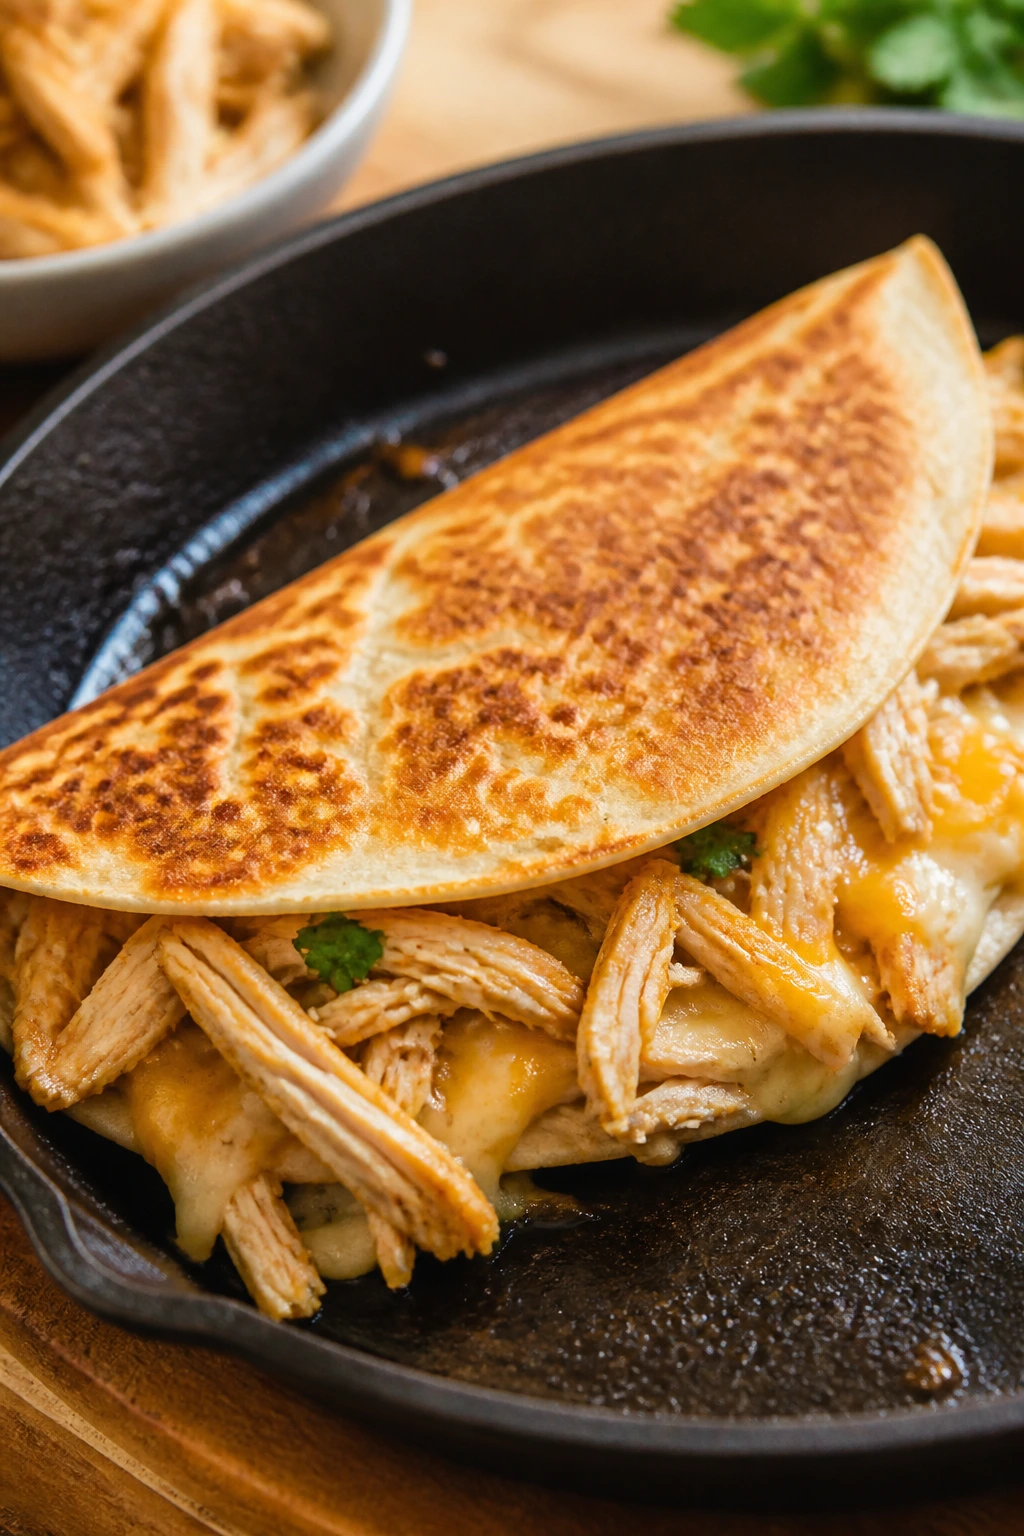
A quesadilla night is less a single recipe and more a family dinner strategy, which is one reason it survives so many busy Fridays. You set out tortillas, cheese, chicken, and fillings, then let the skillet do the last minute of drama.
Why It Works:
Rotisserie chicken keeps prep low, shredded cheese melts in seconds, and a hot skillet gives you that crisp exterior without a lot of grease. Because each quesadilla is assembled individually, picky eaters can dodge the peppers, double up on cheese, or go plain and nobody has to make a speech about it.
Key Ingredients:
- 3 cups shredded rotisserie chicken
- 8 flour tortillas
- 2 cups shredded Monterey Jack or cheddar
- 1 cup diced bell peppers
- 1/2 cup canned black beans, drained
- 2 tablespoons butter
- 1 teaspoon taco seasoning
- Salsa and sour cream, for serving
Quick Steps:
- Warm the chicken with taco seasoning in a skillet for 2 minutes.
- Heat a large skillet over medium heat and melt a little butter.
- Layer one tortilla with cheese, chicken, peppers, and beans, then top with a second tortilla or fold it in half.
- Cook for 2 to 3 minutes per side until crisp and golden.
- Slice into wedges and serve hot.
Equipment for This Recipe:
- Large skillet or griddle
- Spatula
- Cutting board and knife
How to Serve This Dish:
Put the wedges on a platter with salsa, guacamole, and a pile of lettuce or tomato. If you want a fuller meal, add corn, fruit, or a simple bean salad on the side.
Pro Tips for This Recipe:
- Use medium heat; high heat burns the tortilla before the cheese melts.
- Keep the filling light or the quesadilla will spill when you flip it.
- Let it rest 1 minute before slicing so the cheese settles.
Variations on This Dish:
- Veggie Quesadillas: Use sautéed mushrooms and spinach instead of chicken.
- Pepper Jack Version: Add jalapeños and pepper jack for more heat.
- Pizza Quesadilla Hybrid: Swap taco seasoning for Italian seasoning and use mozzarella.
Common Mistakes to Avoid with This Dish:
- Overfilling: That’s the fastest route to a broken quesadilla.
- Cooking too hot: A burned outside and cold center is a sad trade.
- Skipping the butter or oil: The crust needs a little fat to crisp.
16. One-Pot Cheeseburger Macaroni
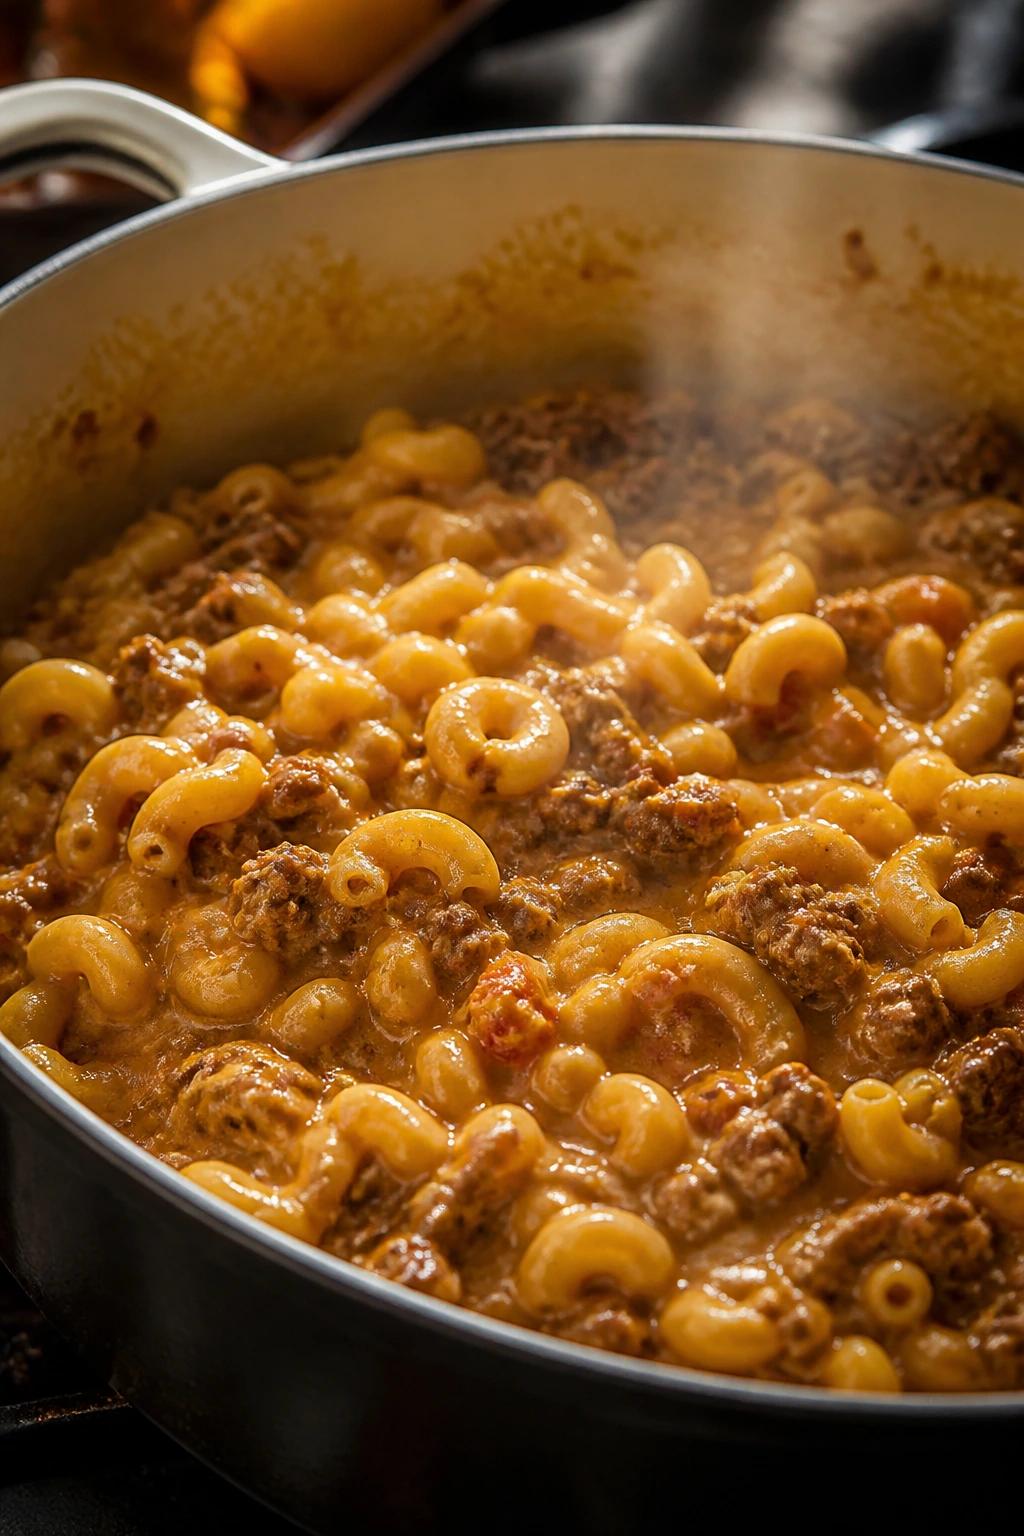
Cheeseburger macaroni is the kind of recipe that looks humble and gets eaten like a favorite. It tastes like a cross between a skillet burger and boxed mac, but the sauce is richer, the noodles are softer in the right way, and the cheese actually melts into the pan.
Why It Works:
The pasta cooks right in the seasoned beef broth, so it absorbs flavor instead of just getting coated afterward. A little tomato sauce and cheddar turn the broth into a creamy, savory sauce without needing a separate cheese sauce or flour roux.
Key Ingredients:
- 1 lb ground beef
- 1 small onion, diced
- 2 cloves garlic, minced
- 2 cups elbow macaroni
- 2 cups beef broth
- 1 cup tomato sauce
- 2 cups shredded cheddar
- 1 tablespoon Worcestershire sauce
- 1 teaspoon salt
- 1/2 teaspoon black pepper
Quick Steps:
- Brown the beef and onion in a large pot over medium-high heat for 6 to 8 minutes.
- Stir in the garlic, macaroni, broth, tomato sauce, Worcestershire, salt, and pepper.
- Bring to a simmer, cover loosely, and cook for 10 to 12 minutes, stirring once or twice, until the pasta is tender.
- Turn off the heat and stir in the cheddar until melted and creamy.
- Serve right away while the sauce is loose and glossy.
Equipment for This Recipe:
- Large pot or Dutch oven
- Wooden spoon
- Measuring cups
How to Serve This Dish:
Serve it in bowls with a sprinkle of extra cheddar or chopped pickles if your crew likes burger flavors. A side of steamed peas or sliced cucumbers keeps the plate from feeling too dense.
Pro Tips for This Recipe:
- Keep the heat at a steady simmer so the pasta cooks evenly.
- Stir once near the end so nothing sticks to the bottom.
- If the sauce gets too thick, add a splash of broth or water.
Variations on This Dish:
- Bacon Cheeseburger Mac: Stir in 4 chopped cooked bacon slices.
- Spicy Burger Mac: Add 1 teaspoon mustard powder and a spoon of hot sauce.
- Pickle Burger Mac: Top with chopped pickles and a little pickle juice at the end.
Common Mistakes to Avoid with This Dish:
- Letting the pot boil hard: The noodles can turn mushy.
- Adding cheese over high heat: It can get grainy.
- Using too little liquid: The pasta needs enough broth to finish cooking.
17. Slow Cooker Pulled Pork Sandwiches
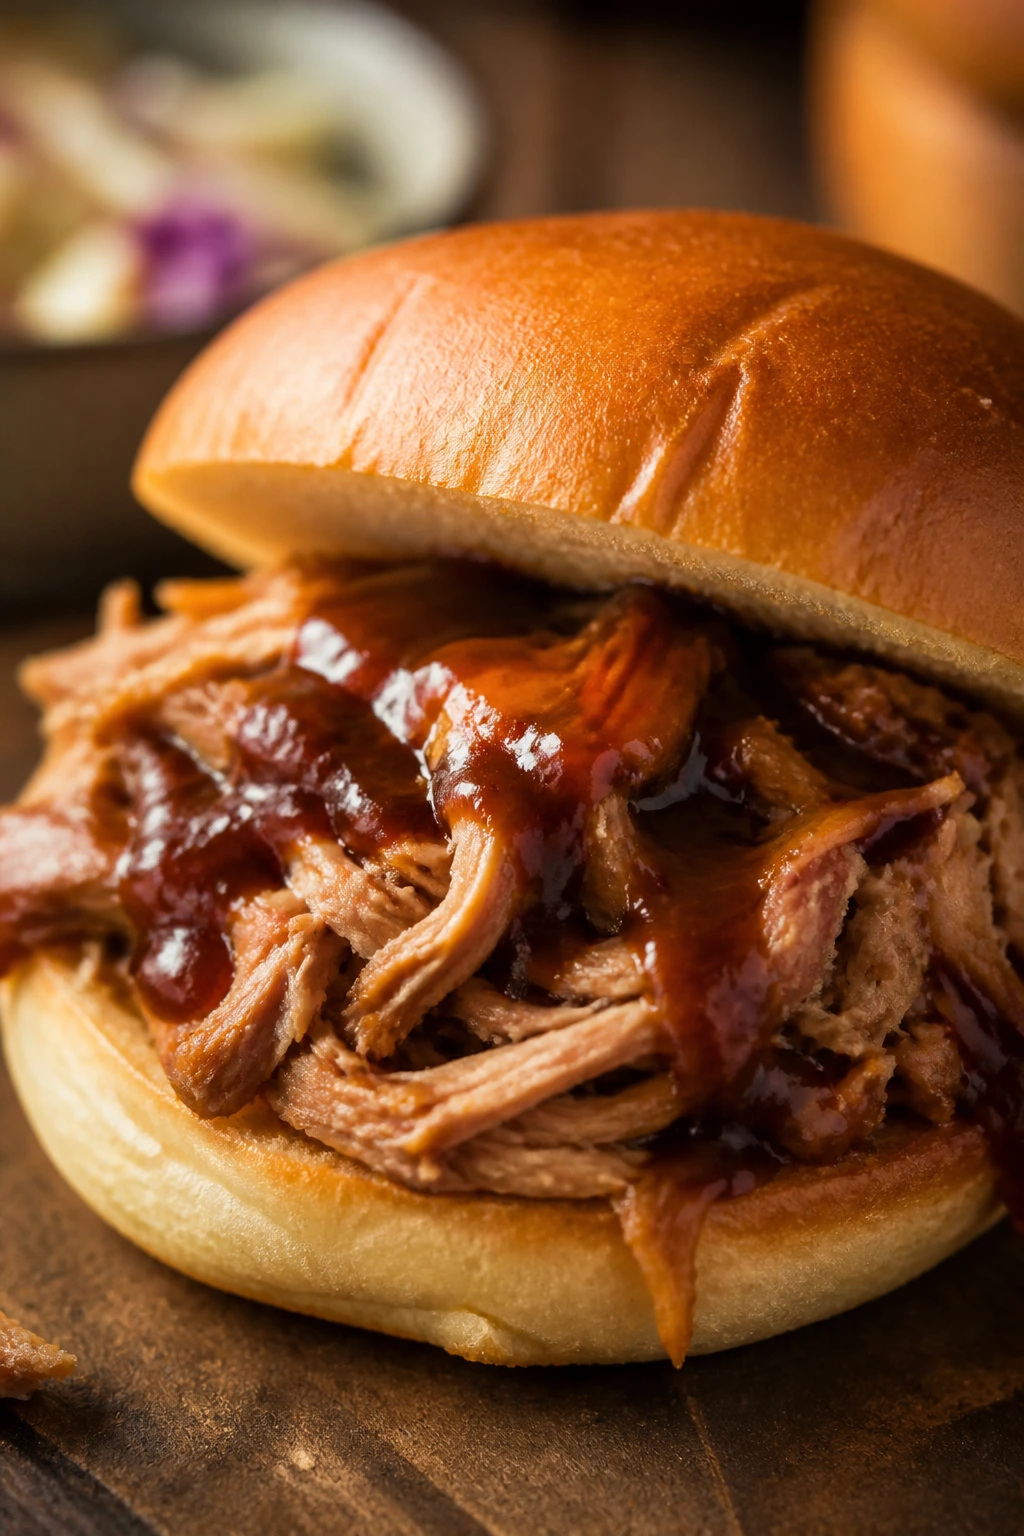
Pulled pork sandwiches earn their place because they turn a little planning into a dinner that feels abundant. The pork gets soft enough to shred with a fork, the sauce soaks into the bread, and the house smells like barbecue for hours.
Why It Works:
A pork shoulder has enough fat to stay moist through long cooking. The slow cooker handles the low, even heat, which means you can walk away and come back to meat that falls apart instead of drying into strings. This is a hands-off recipe with real payoff.
Key Ingredients:
- 3 to 4 lbs pork shoulder
- 1 onion, sliced
- 1 cup barbecue sauce
- 1/2 cup chicken broth
- 2 tablespoons apple cider vinegar
- 2 tablespoons brown sugar
- 1 tablespoon smoked paprika
- 1 teaspoon salt
- 8 sandwich buns
- Coleslaw, for serving
Quick Steps:
- Place the onions in the bottom of the slow cooker.
- Season the pork with salt, paprika, and brown sugar, then set it on top.
- Pour in the barbecue sauce, broth, and vinegar.
- Cook on low for 8 hours or high for 4 to 5 hours until the pork shreds easily.
- Shred the meat, stir it back into the sauce, and pile it onto buns.
Equipment for This Recipe:
- Slow cooker
- Two forks
- Cutting board
How to Serve This Dish:
Serve the pork on soft buns with coleslaw on top or on the side if the kids prefer to build their own. A tray of pickles and chips makes the whole meal feel complete without much extra work.
Pro Tips for This Recipe:
- Don’t trim every bit of fat; some of it keeps the pork tender.
- Toast the buns if you want them to hold up to the sauce.
- Shred the pork while it’s hot, because it’s much easier.
Variations on This Dish:
- Carolina Style: Use more vinegar and less barbecue sauce.
- Spicy Pork: Add chipotle powder or a chopped jalapeño.
- Pulled Pork Bowls: Serve over rice instead of buns.
Common Mistakes to Avoid with This Dish:
- Using lean pork loin: It dries out too easily for this method.
- Skipping the liquid: The cooker still needs moisture.
- Shredding too early: Wait until the pork gives way with almost no resistance.
18. Veggie-Packed Fried Rice
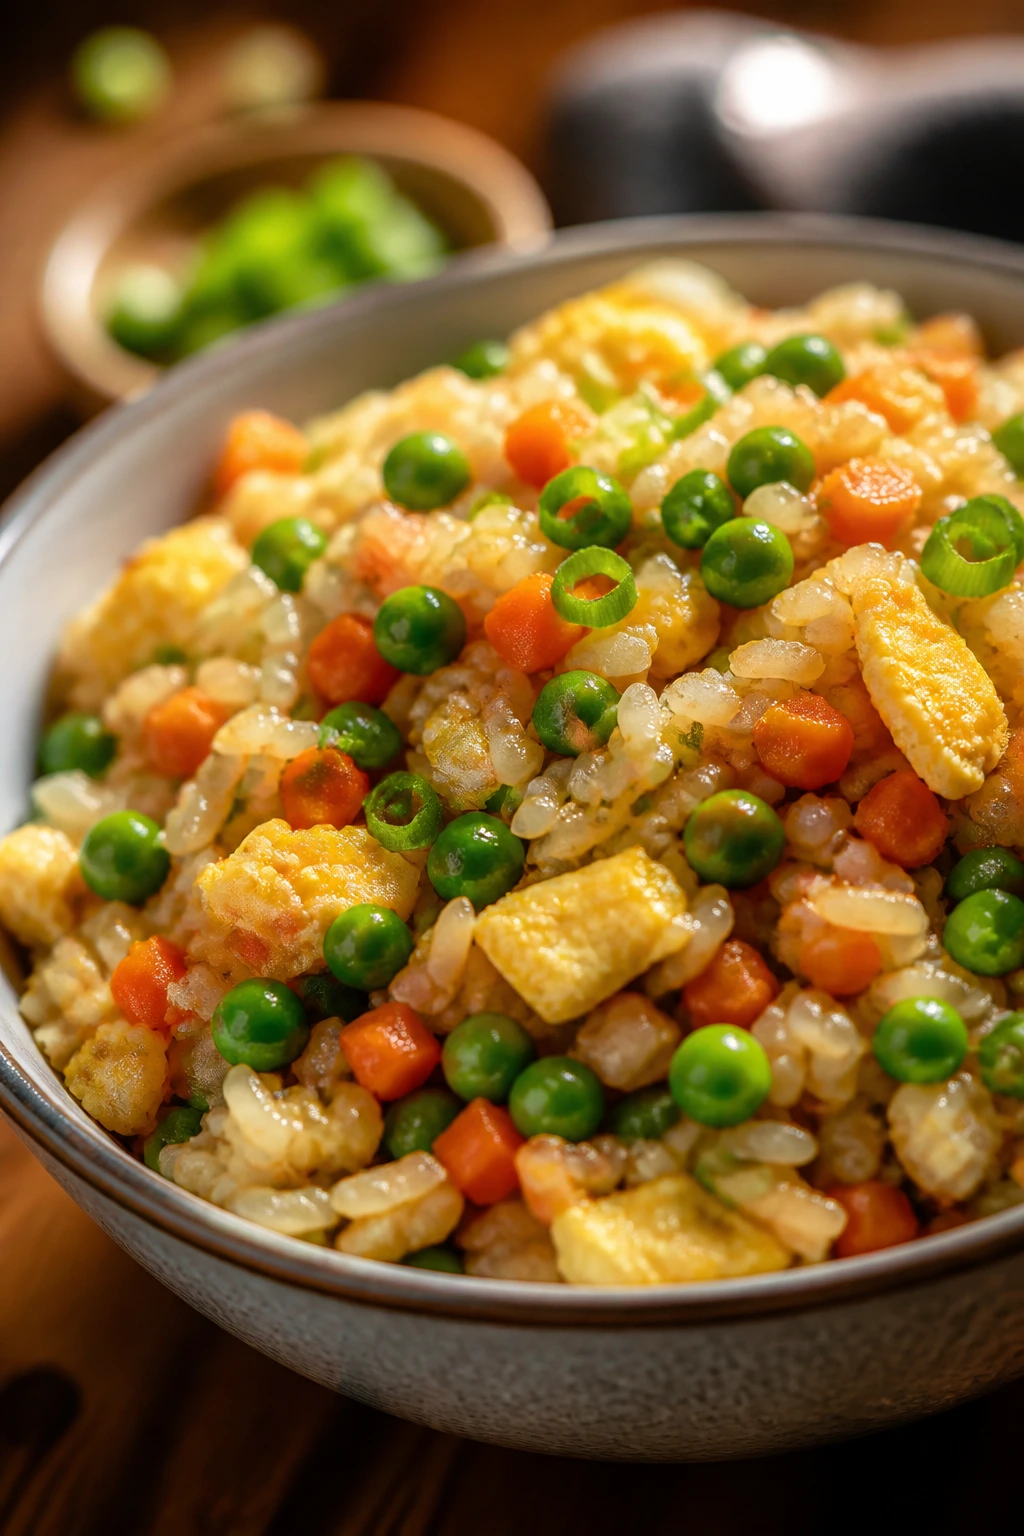
Fried rice is one of my favorite Friday fixes because it turns leftover rice into dinner that tastes deliberate. The grains stay separate, the eggs thread through everything, and the vegetables bring enough color that the bowl doesn’t look like an afterthought.
Why It Works:
Cold rice fries better than fresh rice because the grains dry out a little and don’t clump as easily. A hot skillet gives you the tiny browned bits that make fried rice taste like more than rice tossed with soy sauce. Eggs, peas, carrots, and scallions build the meal fast.
Key Ingredients:
- 4 cups cooked and chilled rice
- 2 tablespoons oil
- 3 eggs, beaten
- 1 cup frozen peas and carrots
- 3 scallions, sliced
- 2 tablespoons soy sauce
- 1 teaspoon sesame oil
- 1 clove garlic, minced
- 1 tablespoon butter
- 1 cup cooked chicken or tofu, optional
Quick Steps:
- Heat the oil in a large skillet over medium-high heat.
- Scramble the eggs in the pan, then remove them when just set.
- Cook the peas, carrots, garlic, and scallions for 2 minutes.
- Add the rice, breaking up clumps, then stir in soy sauce, sesame oil, butter, and any optional protein.
- Fold the eggs back in and cook 1 more minute until hot.
Equipment for This Recipe:
- Large skillet or wok
- Spatula
- Small bowl for eggs
How to Serve This Dish:
Serve it in shallow bowls with extra scallions on top. A side of sliced cucumbers or mandarin oranges gives a clean, fresh contrast to the salty rice.
Pro Tips for This Recipe:
- Use day-old rice if you can; it fries up cleaner.
- Keep the pan hot, but not smoking, or the soy sauce can scorch.
- A pat of butter at the end gives the rice a rounder flavor.
Variations on This Dish:
- Shrimp Fried Rice: Add cooked shrimp near the end and warm through.
- Pineapple Fried Rice: Stir in pineapple chunks for a sweet contrast.
- Kimchi Fried Rice: Swap some of the vegetables for chopped kimchi.
Common Mistakes to Avoid with This Dish:
- Using fresh sticky rice: It clumps and turns soft.
- Overloading the pan: A crowded skillet makes steam.
- Pouring soy sauce too early: It can darken and taste harsh.
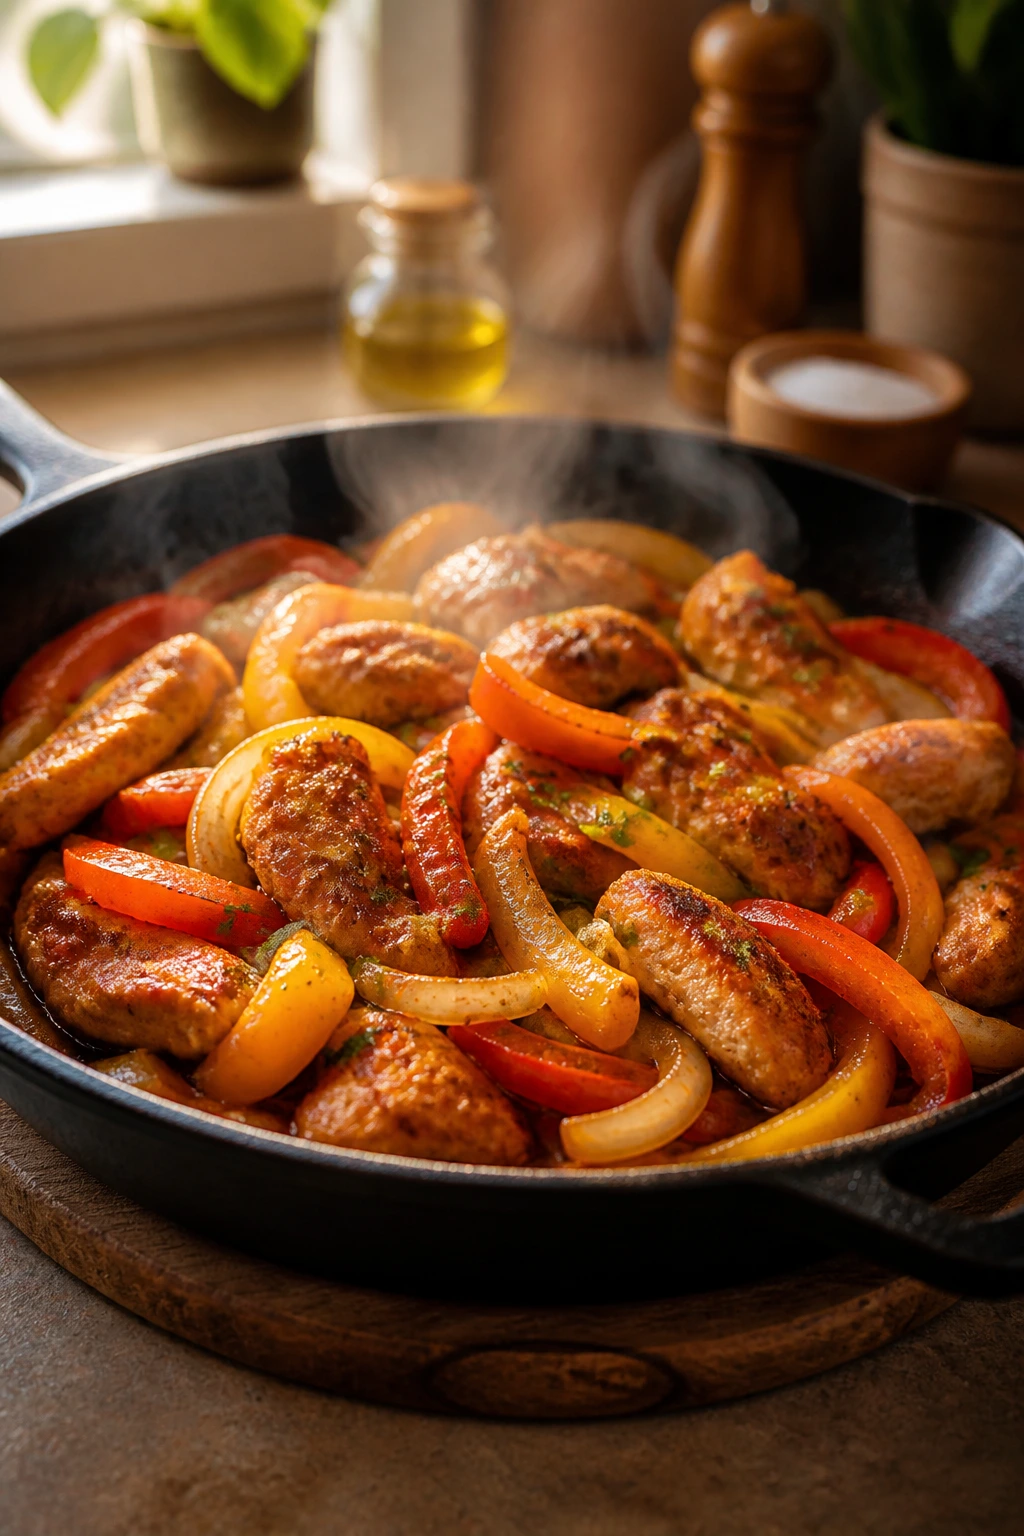
19. Sausage and Peppers Subs
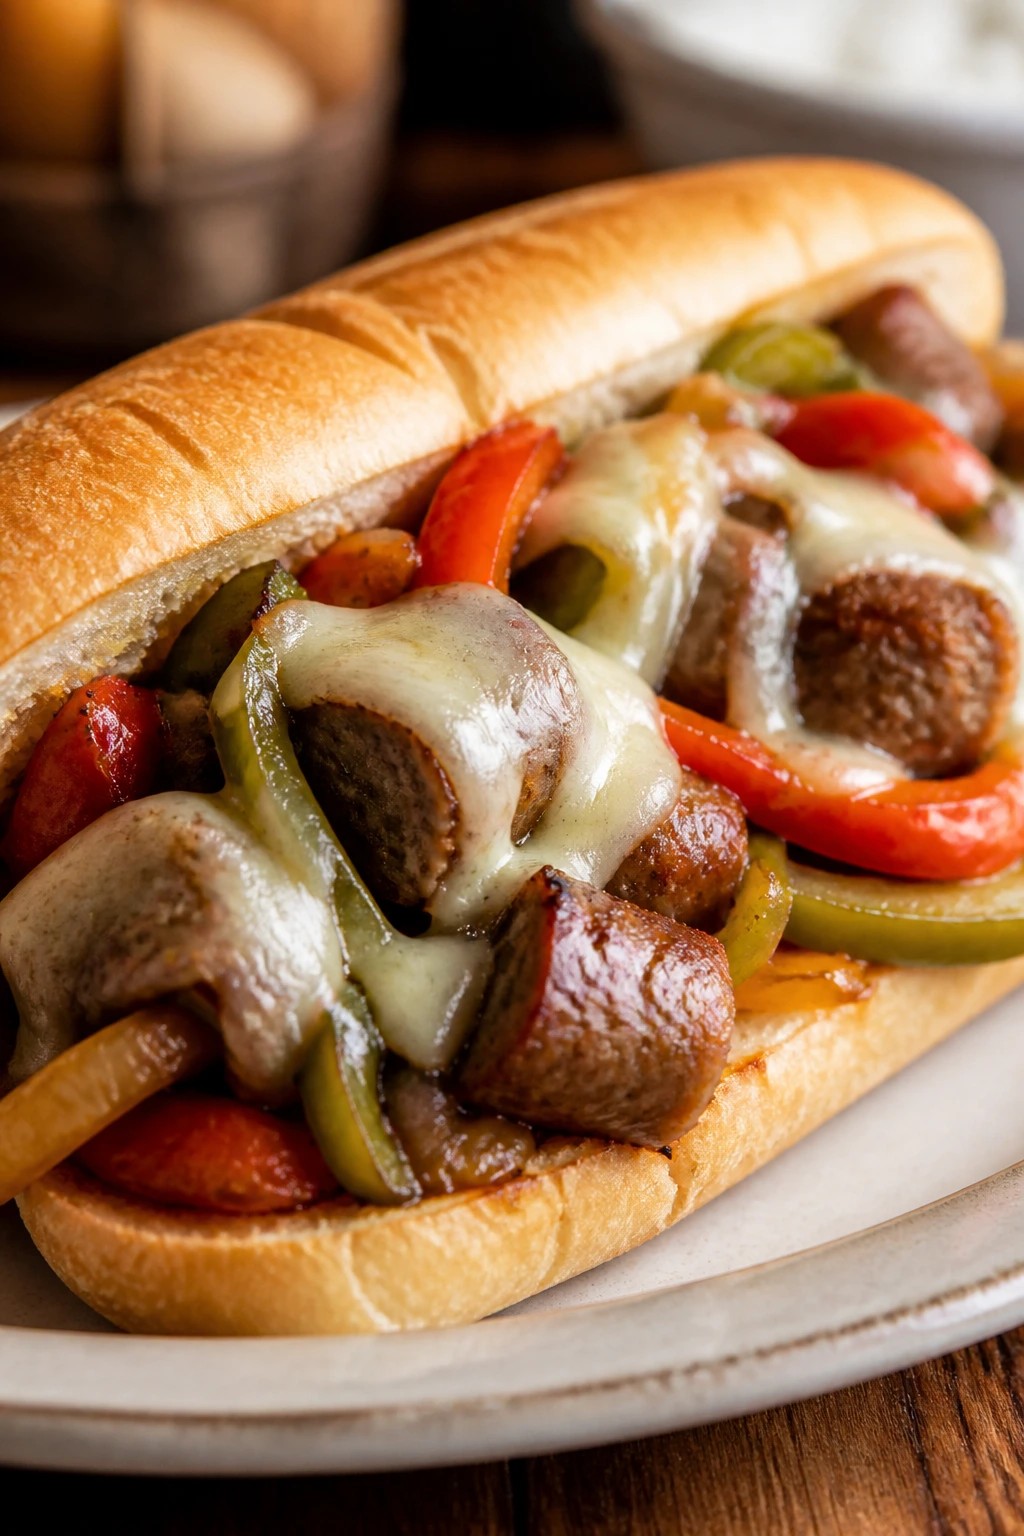
Sausage and peppers in a toasted roll is the kind of dinner that feels bigger than the effort it takes. The sausages brown on the outside, the peppers soften into sweet strips, and the roll catches just enough sauce to keep the whole thing together.
Why It Works:
The combination of sausage fat and sweet peppers is almost impossible to mess up if you cook the sausage first and let the vegetables pick up the flavor in the same pan. A little marinara or chicken broth keeps the onions and peppers from burning while they soften.
Key Ingredients:
- 6 Italian sausage links
- 2 bell peppers, sliced
- 1 large onion, sliced
- 2 tablespoons olive oil
- 1/2 cup marinara sauce
- 4 sub rolls
- 1 cup shredded mozzarella
- 1 teaspoon Italian seasoning
- 1/2 teaspoon black pepper
Quick Steps:
- Brown the sausages in a skillet over medium heat for 8 to 10 minutes.
- Remove the sausages and cook the peppers and onion in the same pan with oil for 6 minutes.
- Stir in marinara, Italian seasoning, and black pepper, then nestle the sausage back in.
- Simmer for 5 minutes until the peppers are soft and the sausage is cooked through.
- Pile into rolls, top with mozzarella, and broil briefly if you want the cheese melted.
Equipment for This Recipe:
- Large skillet
- Tongs
- Sheet pan or broiler-safe tray
How to Serve This Dish:
Serve the sausages whole in the rolls or slice them first if that’s easier for kids. Potato chips or a fennel-free slaw make a tidy side.
Pro Tips for This Recipe:
- Prick the sausages lightly only if they’re very thick; too many holes leak juices.
- Keep the peppers in long strips so they don’t disappear.
- Toast the rolls before filling if you want structure.
Variations on This Dish:
- Sweet Version: Use sweet Italian sausage and extra onions.
- Spicy Version: Use hot sausage and a pinch of red pepper flakes.
- Hoagie Bowl: Skip the roll and serve over rice or polenta.
Common Mistakes to Avoid with This Dish:
- Cooking the peppers until mushy: They should still have some shape.
- Using dry rolls: Toast them or the bottom gets soggy.
- Skipping the simmer: The sausages need a final minute in the sauce.
20. Creamy Chicken and Rice Skillet
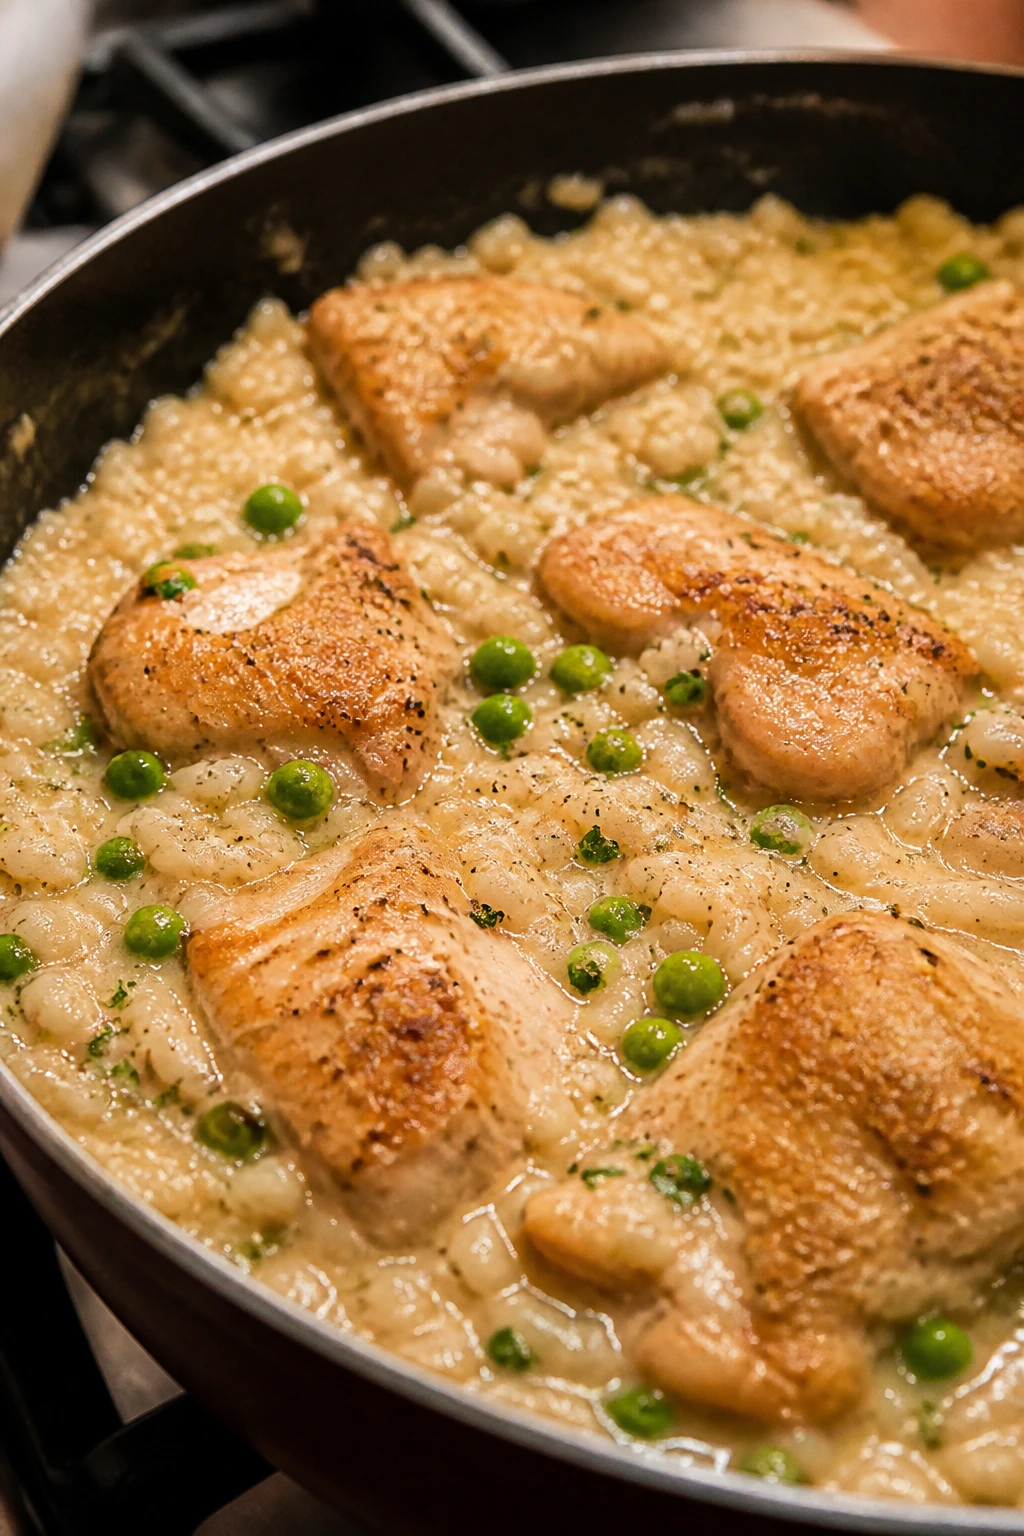
This skillet has the soft, soothing look of a meal that knows how to behave on a Friday. Chicken, rice, peas, and a creamy sauce come together without needing a casserole dish, which is one reason I keep coming back to it.
Why It Works:
Rice cooks in the same pan as the chicken and broth, so it absorbs flavor instead of being a separate side. A little cream or milk at the end turns the skillet from plain to cozy, and peas add pops of color and sweetness that keep the dish from feeling muddy.
Key Ingredients:
- 1 1/2 lbs chicken thighs, cut into chunks
- 1 tablespoon olive oil
- 1 cup long-grain rice
- 2 1/2 cups chicken broth
- 1/2 cup heavy cream
- 1 cup frozen peas
- 1 small onion, diced
- 2 cloves garlic, minced
- 1 teaspoon salt
- 1/2 teaspoon pepper
Quick Steps:
- Brown the chicken in olive oil in a deep skillet over medium-high heat for 4 to 5 minutes.
- Add the onion and garlic and cook for 2 minutes.
- Stir in the rice, broth, salt, and pepper.
- Cover and simmer on low for 18 minutes until the rice is tender and the liquid is mostly absorbed.
- Finish with cream and peas, cook 2 minutes more, and serve warm.
Equipment for This Recipe:
- Deep skillet with lid
- Wooden spoon
- Measuring cups
How to Serve This Dish:
Spoon it into bowls and top with chopped parsley if you have it. A crisp apple salad or sliced tomatoes gives a fresh edge against the creamy rice.
Pro Tips for This Recipe:
- Use a skillet with a snug lid so the rice steams properly.
- Don’t stir the rice too much once the lid is on.
- If the rice seems dry before it’s tender, add 1/4 cup broth.
Variations on This Dish:
- Mushroom Chicken Rice: Add 8 oz sliced mushrooms with the onion.
- Lemon Chicken Rice: Add lemon zest and juice at the end.
- Turkey Version: Swap in ground turkey and reduce the browning time.
Common Mistakes to Avoid with This Dish:
- Using instant rice: It can turn mushy here.
- Cooking on too high heat: The bottom can scorch before the rice is done.
- Adding cream too early: It can dull the flavor and thicken unevenly.
21. Black Bean and Sweet Potato Enchiladas
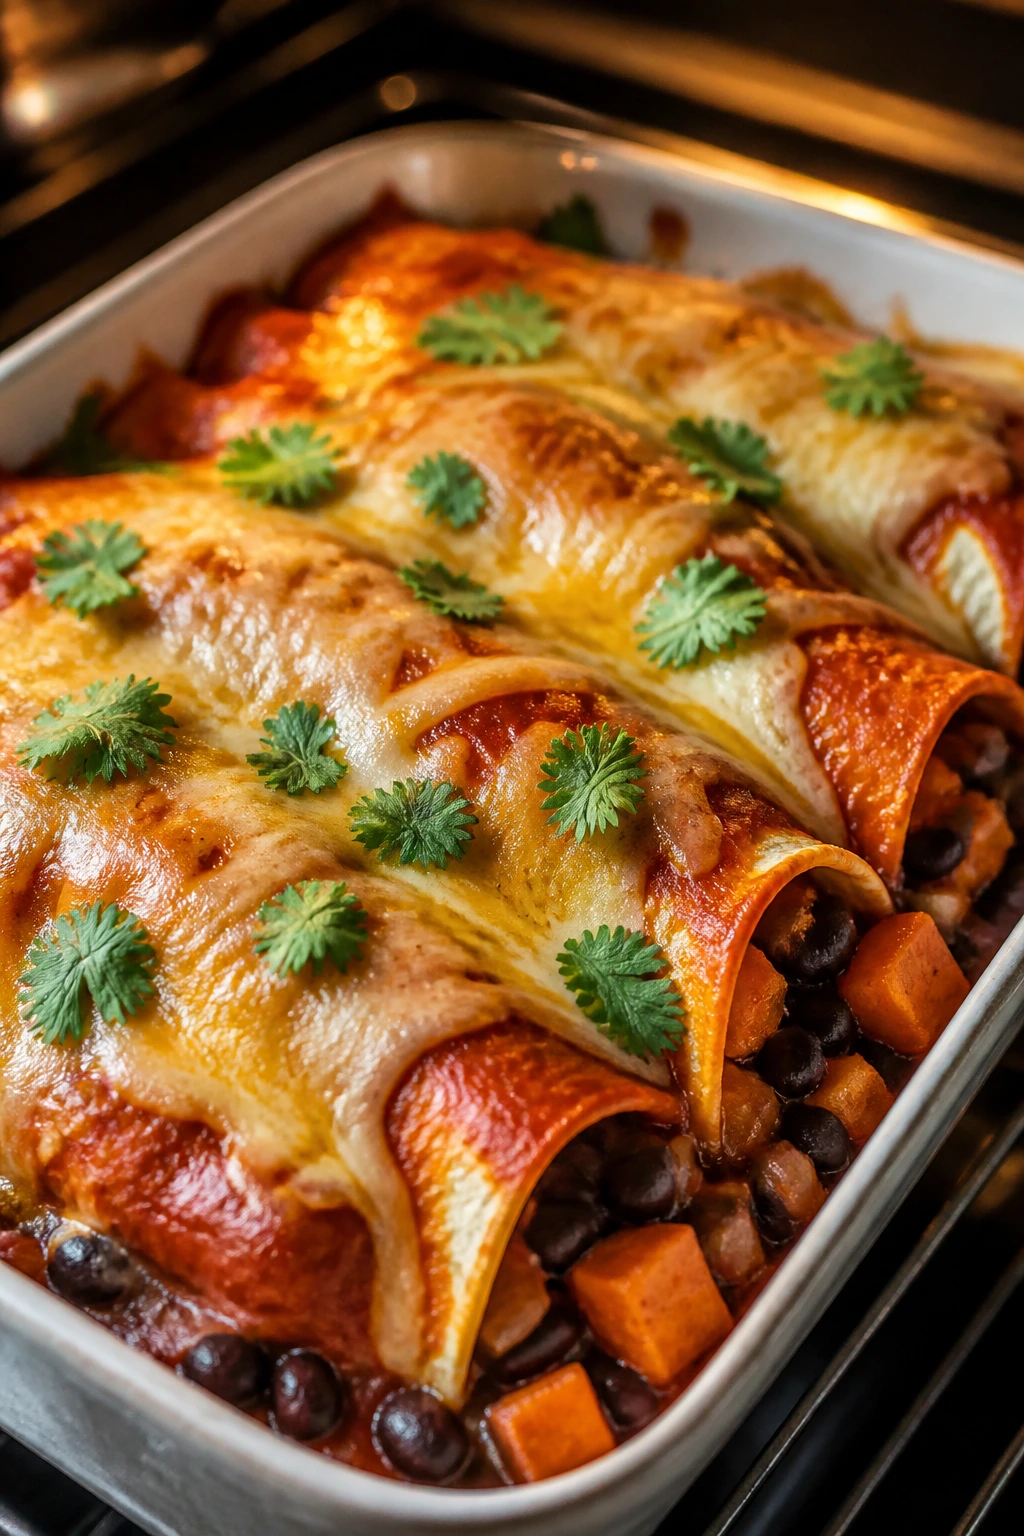
These enchiladas have a soft, sweet-savory thing going on that works especially well when you want a meatless dinner that still feels substantial. The sweet potatoes get creamy in the oven, the black beans keep the filling hearty, and the sauce gives everything a red, glossy finish.
Why It Works:
Roasted sweet potatoes bring body without needing meat, and black beans give the filling protein and a little bite. Corn tortillas are sturdy enough to hold the filling once they’re warmed, and enchilada sauce keeps the whole dish from drying out in the oven.
Key Ingredients:
- 2 medium sweet potatoes, peeled and diced
- 1 tablespoon olive oil
- 1 can black beans, drained and rinsed
- 1 teaspoon cumin
- 8 corn tortillas
- 2 cups enchilada sauce
- 2 cups shredded Monterey Jack
- 1/2 cup chopped cilantro
- 1 avocado, sliced
Quick Steps:
- Roast the sweet potatoes at 400°F with oil for 20 minutes until tender.
- Mix the sweet potatoes with black beans and cumin.
- Warm the tortillas so they don’t crack, then fill and roll them.
- Arrange seam-side down in a baking dish, cover with enchilada sauce and cheese.
- Bake at 375°F for 20 minutes until hot and bubbling.
Equipment for This Recipe:
- Baking sheet
- 9×13-inch baking dish
- Mixing bowl
How to Serve This Dish:
Serve with avocado slices and cilantro on top, plus a scoop of sour cream if your family likes it. A pile of shredded lettuce on the side gives a fresh crunch between bites.
Pro Tips for This Recipe:
- Warm corn tortillas briefly in a skillet so they roll without tearing.
- Don’t overfill the tortillas or they’ll split in the pan.
- Let the baked dish rest 5 minutes so the sauce settles.
Variations on This Dish:
- Chicken Enchiladas: Add 2 cups shredded chicken to the filling.
- Green Enchiladas: Use salsa verde instead of red enchilada sauce.
- Extra Veggie Version: Add sautéed spinach or zucchini.
Common Mistakes to Avoid with This Dish:
- Using cold tortillas: They crack on the roll.
- Skipping the roast on the sweet potatoes: They need that dry heat for better flavor.
- Flooding the dish with sauce: Enough to coat is better than enough to drown.
22. Baked Fish Tacos

Baked fish tacos are light on effort and big on payoff, especially if your family likes dinners that can be assembled at the table. The fish flakes into tender pieces, the slaw stays crisp, and the tacos feel bright instead of heavy.
Why It Works:
White fish cooks quickly in a hot oven and takes seasoning well. Baking instead of frying saves time and cleanup, and a quick slaw gives you texture that cuts through the soft fish and tortilla. A little crema or yogurt keeps everything from tasting dry.
Key Ingredients:
- 1 1/2 lbs cod or tilapia fillets
- 2 tablespoons olive oil
- 1 tablespoon taco seasoning
- 8 corn or flour tortillas
- 3 cups shredded cabbage
- 1/2 cup sour cream or Greek yogurt
- 1 lime, juiced
- 1 avocado, sliced
- 1/4 cup chopped cilantro
Quick Steps:
- Preheat the oven to 425°F and line a sheet pan.
- Brush the fish with oil and season with taco seasoning.
- Bake for 10 to 12 minutes until the fish flakes easily with a fork.
- Toss the cabbage with sour cream and lime juice for a quick slaw.
- Fill the tortillas with fish, slaw, avocado, and cilantro.
Equipment for This Recipe:
- Sheet pan
- Mixing bowl
- Fish spatula or fork
How to Serve This Dish:
Serve the tacos with lime wedges and extra slaw in the middle of the table. Rice and beans work if you want a fuller plate, but the tacos themselves already carry the meal.
Pro Tips for This Recipe:
- Pat the fish dry before seasoning so it roasts instead of steaming.
- Don’t overbake; fish should flake, not crumble dry.
- Warm tortillas in a dry skillet for better flavor.
Variations on This Dish:
- Crispy Fish Tacos: Use panko-coated fillets instead.
- Spicy Slaw: Add hot sauce to the sour cream.
- Shrimp Tacos: Swap fish for shrimp and roast for 6 to 8 minutes.
Common Mistakes to Avoid with This Dish:
- Using fish that’s too thin: It can dry out fast.
- Skipping acid in the slaw: Lime keeps it lively.
- Assembling too early: Tacos get soggy fast if they sit.
23. One-Skillet Gnocchi with Sausage
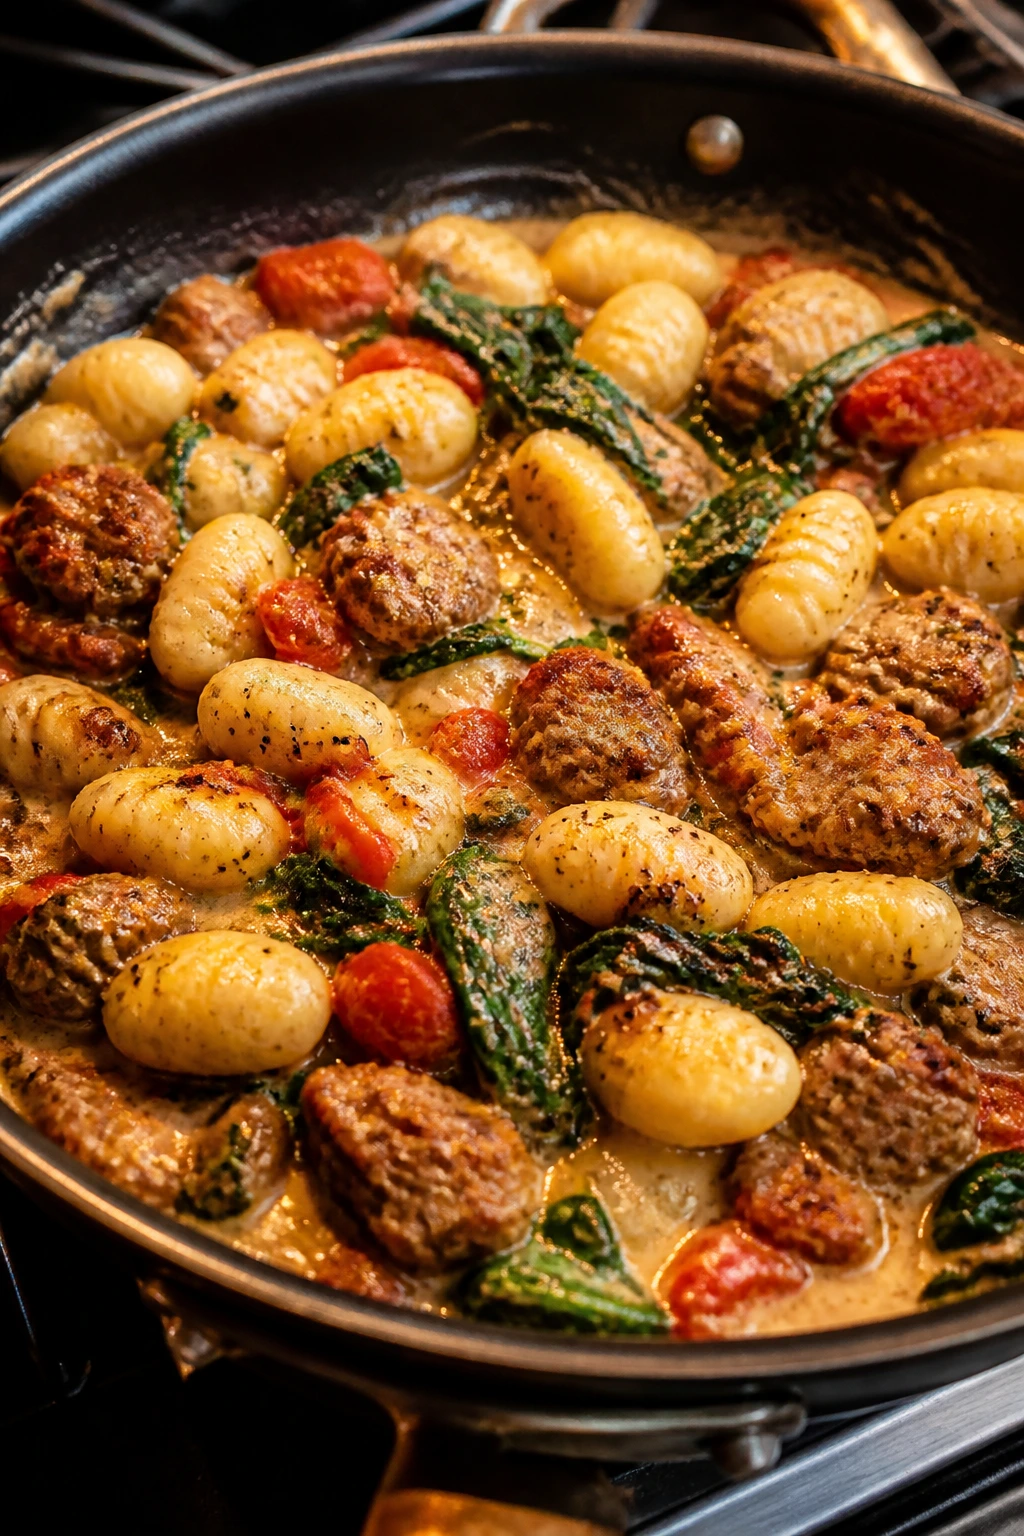
Gnocchi is the shortcut pasta that still feels a little special. It softens in the skillet, soaks up sausage drippings, and turns into a glossy, one-pan dinner that tastes far more polished than it is.
Why It Works:
Shelf-stable gnocchi cooks fast and gets a nice golden edge if you give it a hot pan. Sausage adds built-in seasoning, tomatoes add moisture, and a handful of spinach melts in at the end without changing the texture much.
Key Ingredients:
- 1 lb Italian sausage
- 1 package shelf-stable gnocchi, 16 oz
- 1 tablespoon olive oil
- 1 can diced tomatoes, 14.5 oz
- 2 cups baby spinach
- 1/2 cup heavy cream
- 2 cloves garlic, minced
- 1/4 teaspoon red pepper flakes
- 1/2 cup grated Parmesan
Quick Steps:
- Brown the sausage in a large skillet over medium-high heat.
- Add the garlic and gnocchi, letting the gnocchi brown lightly for 3 to 4 minutes.
- Stir in tomatoes, red pepper flakes, and cream.
- Simmer for 5 minutes until the sauce thickens and the gnocchi is tender.
- Fold in spinach and Parmesan until wilted and creamy.
Equipment for This Recipe:
- Large skillet with sides
- Wooden spoon
- Measuring cup
How to Serve This Dish:
Serve it in bowls with extra Parmesan and a little black pepper. A simple salad or roasted broccoli is enough to round out the plate.
Pro Tips for This Recipe:
- Let the gnocchi sit untouched for a minute so the bottoms brown.
- Use a skillet with enough room to stir without spilling.
- If the sauce gets too thick, loosen it with a splash of water.
Variations on This Dish:
- Chicken Gnocchi: Swap sausage for cooked chicken.
- Cream-Free Version: Use extra tomatoes and a spoon of ricotta at the end.
- Mushroom Gnocchi: Replace half the sausage with browned mushrooms.
Common Mistakes to Avoid with This Dish:
- Boiling gnocchi separately: You lose the skillet flavor.
- Stirring constantly: It prevents browning.
- Adding spinach too early: It disappears before the sauce is ready.
24. Turkey Chili with Cornbread
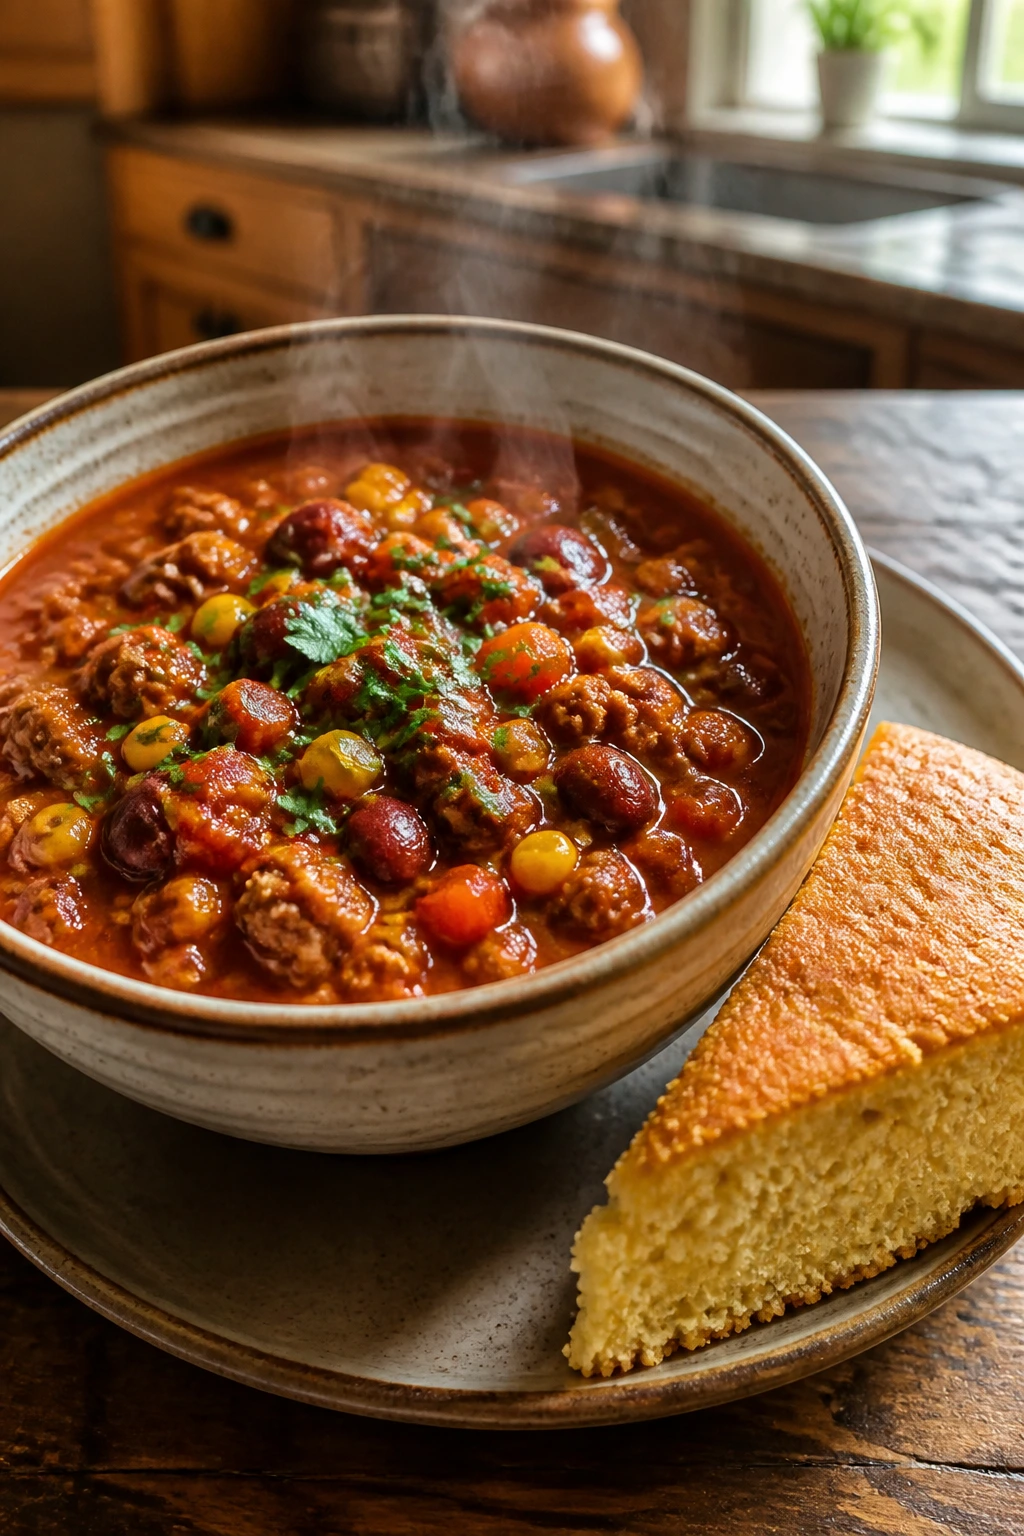
Chili is one of the easiest ways to make a Friday night feel settled. This turkey version is lighter than beef but still hearty, and the cornbread on the side gives you a sweet, crumbly contrast that works better than people expect.
Why It Works:
Turkey takes on the seasoning well, beans and tomatoes build body, and a long simmer lets the flavors blend without requiring much attention. Chili also rewards a little extra time on the stove; it tastes even better after the first 15 minutes of resting.
Key Ingredients:
- 1 lb ground turkey
- 1 onion, diced
- 2 cloves garlic, minced
- 1 can kidney beans, drained
- 1 can black beans, drained
- 1 can diced tomatoes, 28 oz
- 2 tablespoons chili powder
- 1 teaspoon cumin
- 1 teaspoon salt
- Cornbread, for serving
Quick Steps:
- Brown the turkey and onion in a pot over medium heat for 6 to 8 minutes.
- Add garlic, chili powder, cumin, and salt, stirring for 30 seconds.
- Pour in tomatoes and beans, then bring to a simmer.
- Cook uncovered for 20 to 25 minutes, stirring now and then, until thick.
- Serve with warm cornbread and toppings.
Equipment for This Recipe:
- Large pot
- Wooden spoon
- Measuring spoons
How to Serve This Dish:
Ladle it into bowls and top with shredded cheese, sour cream, or chopped onions. Cornbread on the side is the move, though crackers or tortilla chips work if that’s what’s in the pantry.
Pro Tips for This Recipe:
- Let the onions cook with the turkey so they sweeten a bit.
- If the chili tastes sharp, a pinch of sugar smooths it out.
- A little extra cumin deepens the flavor without making it hot.
Variations on This Dish:
- Bean-Heavy Chili: Use 3 cans beans and less turkey.
- White Chili: Swap in chicken, white beans, and green chiles.
- Smoky Chili: Add a spoon of chipotle in adobo.
Common Mistakes to Avoid with This Dish:
- Serving it too soon: Chili needs a short simmer to settle.
- Using too little salt: Beans need seasoning.
- Making it too thin: Simmer off some liquid if it looks soupy.
25. Ham and Cheese Sheet-Pan Pizza
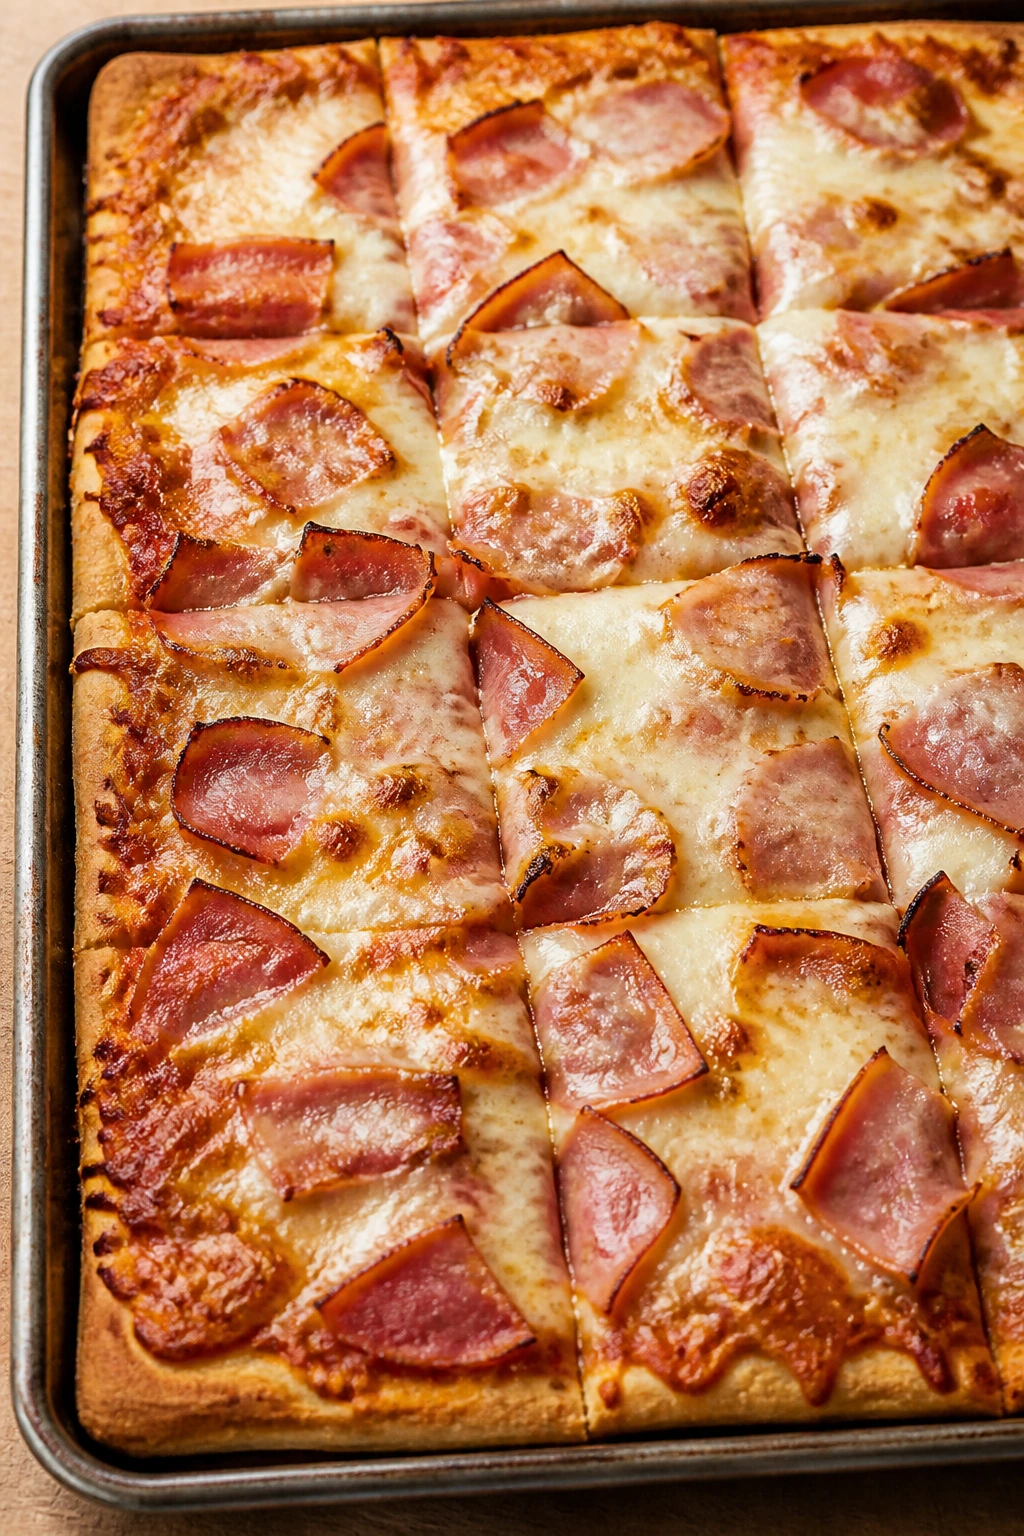
Pizza is already a Friday classic, but sheet-pan pizza makes it practical for a family because it feeds people without making the cook stand over individual pies. Ham and cheese is simple, familiar, and very easy to customize without chaos.
Why It Works:
A sheet pan gives you a thin, even crust with crisp edges and a softer center. Ham stays salty and savory under the cheese, and the larger surface area means more browned crust per slice, which is half the charm of homemade pizza anyway.
Key Ingredients:
- 1 lb pizza dough
- 1 tablespoon olive oil
- 1/2 cup pizza sauce
- 2 cups shredded mozzarella
- 1 cup diced ham
- 1/2 cup shredded cheddar
- 1 teaspoon dried oregano
- 1 tablespoon cornmeal, optional
- Crushed red pepper, optional
Quick Steps:
- Preheat the oven to 450°F and oil a rimmed sheet pan lightly.
- Stretch the dough to fit the pan, letting it rest if it springs back.
- Spread the sauce over the dough, then add mozzarella, ham, cheddar, and oregano.
- Bake for 15 to 18 minutes until the crust is golden and the cheese is bubbling.
- Rest for 5 minutes before slicing.
Equipment for This Recipe:
- Rimmed sheet pan
- Rolling pin or your hands
- Pizza cutter or knife
How to Serve This Dish:
Slice it into squares and serve with a salad so the table feels balanced. If you’ve got ranch or hot honey on hand, both are solid finishers.
Pro Tips for This Recipe:
- Stretch the dough on a lightly oiled pan, not a flour-dusted one, for easier shaping.
- Let the dough rest 10 minutes if it keeps shrinking.
- Add a little cheese near the edge for crisp, browned corners.
Variations on This Dish:
- Pepperoni Pizza: Replace the ham with pepperoni slices.
- Hawaiian-Style: Add pineapple if your house is divided on the issue.
- White Pizza: Use ricotta and garlic instead of pizza sauce.
Common Mistakes to Avoid with This Dish:
- Overloading the toppings: Too much makes the crust soggy.
- Skipping the rest on the dough: Cold, tight dough fights back.
- Cutting too soon: Hot cheese slides everywhere if you rush.
26. Chicken Alfredo Bake
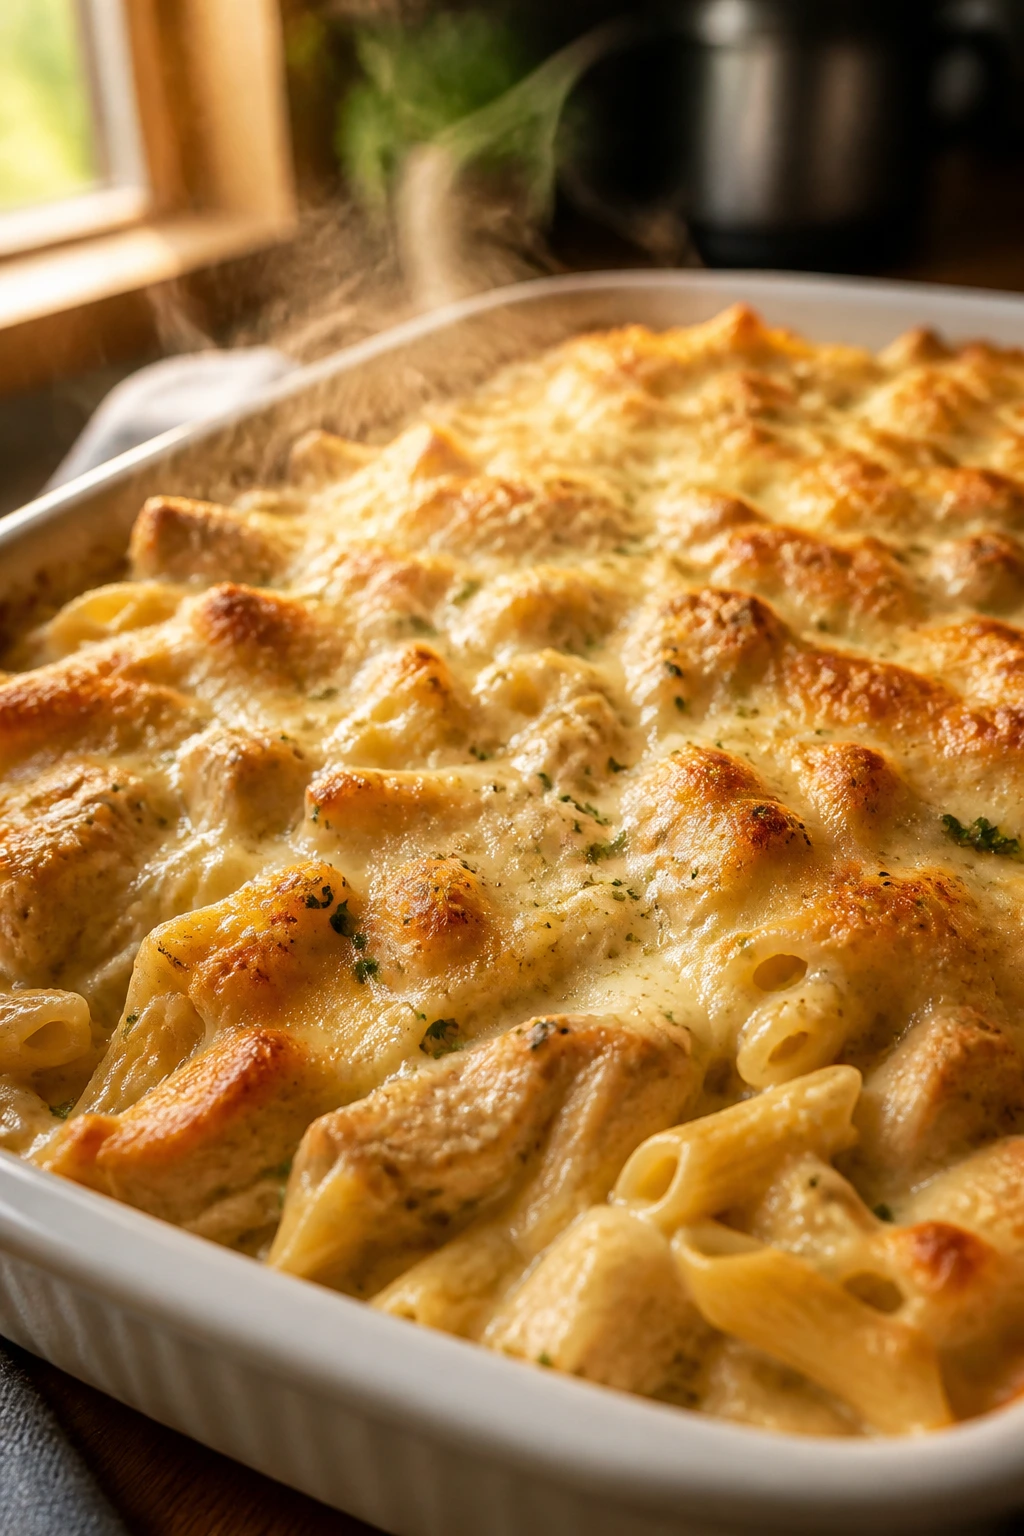
Chicken Alfredo bake is rich, creamy, and exactly the kind of casserole people want after a long week. The sauce clings to the pasta, the chicken keeps it filling, and the top develops a pale golden lid that cracks softly under the spoon.
Why It Works:
Alfredo sauce and pasta are already a strong pair, so baking them together only improves the texture. A little broccoli or peas can break up the richness, but even without them, the dish stays balanced if you salt the pasta water and use enough cheese.
Key Ingredients:
- 12 oz penne or rigatoni
- 3 cups chopped cooked chicken
- 2 cups Alfredo sauce
- 1 cup heavy cream
- 1 cup shredded mozzarella
- 1/2 cup grated Parmesan
- 2 cups broccoli florets, optional
- 1 teaspoon black pepper
Quick Steps:
- Preheat the oven to 375°F and grease a casserole dish.
- Boil the pasta until just underdone, then drain.
- Mix pasta, chicken, Alfredo sauce, cream, pepper, and broccoli if using.
- Top with mozzarella and Parmesan.
- Bake for 25 to 30 minutes until hot and lightly browned.
Equipment for This Recipe:
- Large pot
- Casserole dish
- Mixing bowl
How to Serve This Dish:
Serve it with a sharp green salad or roasted asparagus to cut through the cream. A little parsley on top makes the dish look less heavy and more finished.
Pro Tips for This Recipe:
- Use cooked chicken that isn’t overly seasoned so the sauce stays central.
- If the sauce is already thick, add a splash of milk before baking.
- Broil for 1 minute at the end if you want a more browned top.
Variations on This Dish:
- Spinach Alfredo Bake: Add a few handfuls of baby spinach.
- Garlic Alfredo Bake: Sauté 2 extra cloves garlic in butter and stir in.
- Bacon Alfredo Bake: Add chopped cooked bacon for more salt and crunch.
Common Mistakes to Avoid with This Dish:
- Using too much cream: The dish can turn heavy fast.
- Overcooking the pasta before baking: It turns soft.
- Skipping seasoning: Alfredo needs pepper and salt to wake up.
27. Loaded Baked Potato Bar
A baked potato bar is not a cop-out. It’s a smart Friday move, especially when people are hungry at different times and have different opinions about what dinner should be. You bake the potatoes, set out toppings, and let the table do the rest.
Why It Works:
Potatoes are cheap, sturdy, and easy to prep ahead. Once they’re baked, they become a blank canvas for bacon, cheese, broccoli, sour cream, scallions, chili, or whatever else the fridge can support. It’s one of the few dinners that feels casual and complete at the same time.
Key Ingredients:
- 6 large russet potatoes
- 2 tablespoons olive oil
- 1 teaspoon kosher salt
- 1 1/2 cups shredded cheddar
- 1 cup sour cream
- 6 strips cooked bacon, chopped
- 1/2 cup chopped scallions
- 1 cup steamed broccoli florets
- 1/2 cup chili, optional
Quick Steps:
- Preheat the oven to 425°F.
- Rub the potatoes with oil and salt, then bake for 50 to 60 minutes until tender.
- Warm the toppings while the potatoes finish.
- Split the potatoes and fluff the centers with a fork.
- Set out all the toppings and let everyone build their own.
Equipment for This Recipe:
- Sheet pan
- Oven mitts
- Small bowls for toppings
How to Serve This Dish:
Serve the potatoes on a big tray with toppings arranged in bowls around them. A crisp salad or fruit bowl makes the meal feel less like a starchy event.
Pro Tips for This Recipe:
- Bake potatoes directly on the rack for better skin.
- Hold the cooked potatoes in a 200°F oven if people are eating in shifts.
- Salt the skins generously before baking.
Variations on This Dish:
- Chili Bar: Set out warm chili as the main topper.
- Vegetarian Bar: Use broccoli, beans, cheese, and sour cream.
- Loaded Breakfast Potato: Add scrambled eggs and sausage.
Common Mistakes to Avoid with This Dish:
- Undercooking the potatoes: They should yield easily when squeezed with a towel.
- Forgetting salt on the skins: The outside needs seasoning too.
- Overloading with cold toppings: Warm the chili or broccoli first.
28. Pesto Tortellini with Cherry Tomatoes
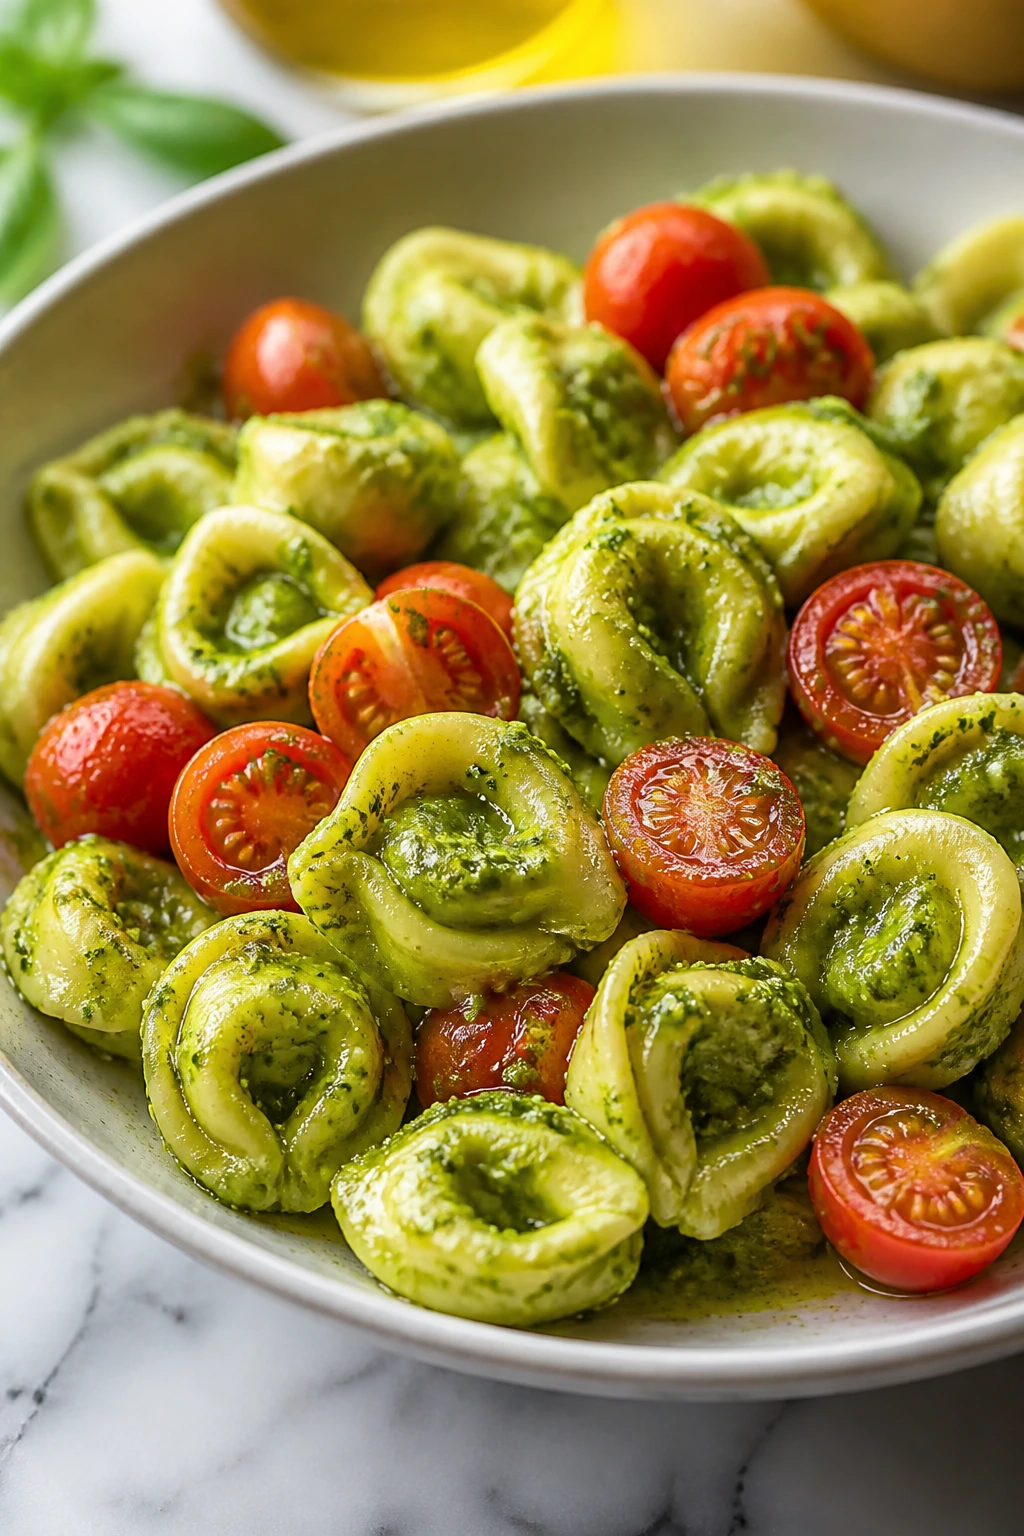
Pesto tortellini is one of those dinners that looks much fancier than the effort required. The cheese-filled pasta cooks fast, the pesto coats everything in green gloss, and the tomatoes burst just enough to make their own little sauce.
Why It Works:
Fresh or refrigerated tortellini cooks in a matter of minutes, so this dinner comes together fast even without a big plan. Pesto adds bold flavor without needing cream, and the warm tomatoes soften into something jammy that keeps the dish from tasting one-note.
Key Ingredients:
- 20 oz cheese tortellini
- 1 tablespoon olive oil
- 2 cups cherry tomatoes
- 1/2 cup basil pesto
- 1/2 cup grated Parmesan
- 2 cups baby spinach
- 1/4 teaspoon salt
- 1/4 teaspoon black pepper
- 1/2 cup mozzarella pearls, optional
Quick Steps:
- Boil the tortellini according to the package directions, then drain.
- Warm the olive oil in a skillet and cook the cherry tomatoes for 4 to 5 minutes until some burst.
- Stir in pesto, salt, and pepper.
- Add the tortellini, spinach, and Parmesan, tossing until the spinach wilts.
- Finish with mozzarella pearls if you want extra richness.
Equipment for This Recipe:
- Large pot
- Skillet
- Colander
How to Serve This Dish:
Serve it in shallow bowls so the pesto coats every bite. Garlic bread is the natural partner, but a simple cucumber salad also works if you want something cooler beside it.
Pro Tips for This Recipe:
- Use a pesto you like straight from the jar; this dish leans on it hard.
- Don’t overcook tortellini or it gets heavy fast.
- If the sauce seems too thick, add a splash of pasta water.
Variations on This Dish:
- Sun-Dried Tomato Version: Add chopped sun-dried tomatoes with the pesto.
- Chicken Pesto Tortellini: Stir in shredded chicken.
- Creamy Pesto: Add 1/4 cup cream for a softer sauce.
Common Mistakes to Avoid with This Dish:
- Rinsing the tortellini: You’ll wash off starch that helps the sauce cling.
- Using too much pesto: It can take over the whole bowl.
- Skipping the tomatoes: They add needed brightness.
29. Honey Mustard Pork Chops with Apples
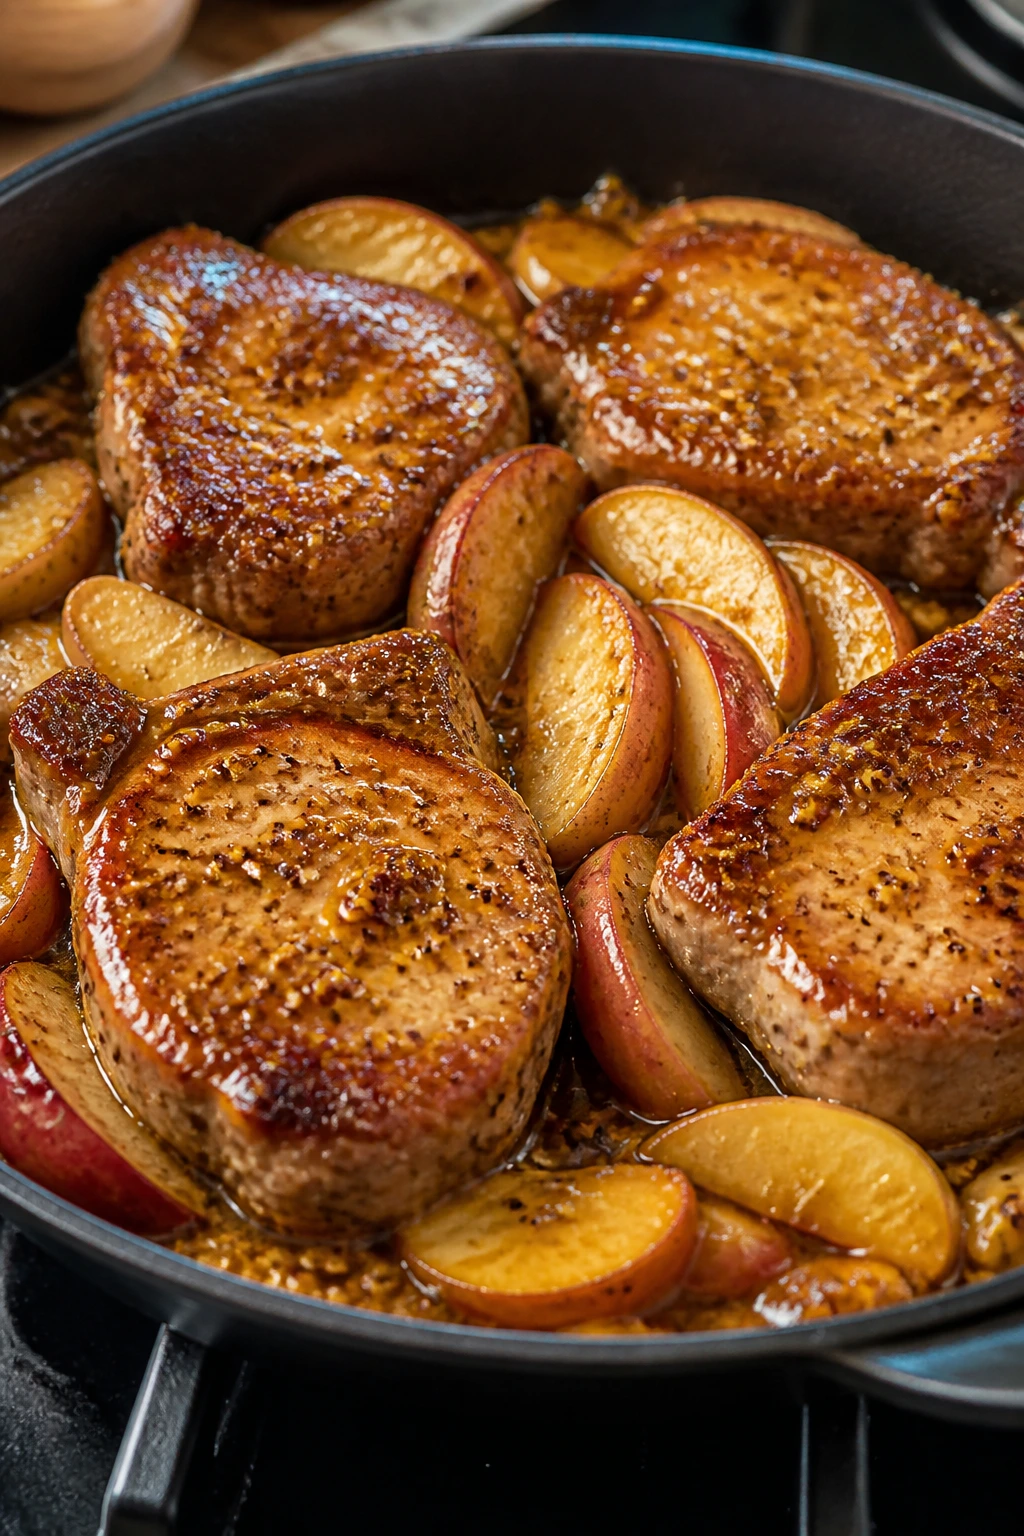
Pork chops and apples have been hanging out together for a long time, and for good reason. The honey mustard glaze caramelizes in the pan, the apples soften at the edges, and the pork stays juicy if you don’t overcook it into a dry little slab.
Why It Works:
A quick pan sear gives the pork color, then a short finish in the oven lets the inside come up to temperature without burning the glaze. Apples add sweetness and moisture, which balance the sharp mustard and keep the dish from feeling too rich.
Key Ingredients:
- 4 bone-in pork chops, about 1-inch thick
- 2 apples, sliced
- 1 tablespoon oil
- 2 tablespoons Dijon mustard
- 2 tablespoons honey
- 1 tablespoon apple cider vinegar
- 1 teaspoon salt
- 1/2 teaspoon black pepper
- 1 teaspoon thyme
Quick Steps:
- Preheat the oven to 400°F.
- Season the pork chops with salt and pepper.
- Sear in oil for 2 to 3 minutes per side until browned.
- Whisk mustard, honey, vinegar, and thyme, then pour into the pan with the apples.
- Bake for 8 to 10 minutes until the pork reaches 145°F.
Equipment for This Recipe:
- Oven-safe skillet
- Whisk
- Tongs
How to Serve This Dish:
Serve with mashed potatoes, rice, or buttered noodles to catch the glaze. The apples can stay in the pan or be piled on the chops, whichever looks better at the moment.
Pro Tips for This Recipe:
- Bone-in chops stay juicier than thin boneless ones.
- Don’t cook past 145°F; pork dries out quickly after that.
- If the glaze seems thin, let it bubble for a minute before serving.
Variations on This Dish:
- Maple Mustard Pork: Replace honey with maple syrup.
- Pear Version: Use sliced pears instead of apples.
- Herby Pork: Add rosemary with the thyme.
Common Mistakes to Avoid with This Dish:
- Cooking chops straight from the fridge: Let them sit 15 minutes first.
- Using very thin chops: They overcook fast.
- Burning the glaze: Watch the sugar carefully in the hot pan.
30. Stuffed Bell Peppers

Stuffed peppers feel like a classic family dinner for a reason: each pepper is its own little serving bowl. The rice and meat filling is cozy, the pepper softens just enough, and the cheese on top gives the whole dish a baked-casserole finish.
Why It Works:
Peppers hold their shape in the oven, and the filling can be built from whatever ground meat, rice, and sauce you have. Because the filling is pre-cooked, the bake mainly softens the peppers and melts the cheese, which keeps the process simple.
Key Ingredients:
- 6 bell peppers
- 1 lb ground beef or turkey
- 1 cup cooked rice
- 1 small onion, diced
- 1 cup tomato sauce
- 1 teaspoon Italian seasoning
- 1 teaspoon salt
- 1/2 teaspoon pepper
- 1 1/2 cups shredded mozzarella
Quick Steps:
- Preheat the oven to 375°F.
- Slice the peppers in half and remove seeds.
- Brown the meat with onion, then stir in rice, tomato sauce, seasoning, salt, and pepper.
- Fill the peppers and place them in a baking dish with a little water in the bottom.
- Bake for 35 to 40 minutes, then top with mozzarella and bake 5 minutes more.
Equipment for This Recipe:
- Baking dish
- Skillet
- Spoon
How to Serve This Dish:
Serve two pepper halves per plate with a small salad or crusty bread. The peppers themselves are the main event, so a simple side is enough.
Pro Tips for This Recipe:
- Pre-bake the pepper halves for 10 minutes if you like them extra soft.
- Use medium-sized peppers that sit flat in the dish.
- Add a little extra sauce under the peppers so the bottom doesn’t dry out.
Variations on This Dish:
- Mexican Stuffed Peppers: Use taco seasoning, black beans, and cheddar.
- Italian Stuffed Peppers: Use marinara and Parmesan.
- Vegetarian Peppers: Use quinoa and mushrooms instead of meat.
Common Mistakes to Avoid with This Dish:
- Overfilling the peppers: Leave a little room for the cheese.
- Skipping liquid in the dish: It helps steam the peppers.
- Using raw rice in the filling: The bake time isn’t long enough for that.
31. Sesame Noodle Chicken Bowls

Sesame noodles make a weeknight feel brighter without making dinner complicated. The sauce is nutty and salty, the noodles are soft but not heavy, and the chicken plus crunchy vegetables keep the bowl from collapsing into one texture.
Why It Works:
This bowl depends on contrast: cool cucumber, warm chicken, slippery noodles, and a sauce that’s bold enough to coat everything. A sesame-soy dressing comes together fast, and chilled or room-temperature noodles are fine here, which makes it flexible if people eat at different times.
Key Ingredients:
- 12 oz noodles or spaghetti
- 2 cups cooked chicken, sliced
- 1 cucumber, thinly sliced
- 1 carrot, julienned
- 3 tablespoons soy sauce
- 2 tablespoons sesame oil
- 1 tablespoon rice vinegar
- 1 tablespoon peanut butter or tahini
- 1 teaspoon honey
- 2 tablespoons sliced scallions
Quick Steps:
- Cook the noodles until al dente, then rinse briefly if you want them cooler.
- Whisk soy sauce, sesame oil, vinegar, peanut butter, and honey into a smooth dressing.
- Toss the noodles with half the dressing.
- Top with chicken, cucumber, carrots, and scallions.
- Drizzle the remaining dressing over the bowls.
Equipment for This Recipe:
- Large pot
- Mixing bowl
- Whisk
How to Serve This Dish:
Serve the bowls chilled or lightly warm, depending on what the evening asks for. A sprinkle of sesame seeds or chopped peanuts adds crunch if you want a little more texture.
Pro Tips for This Recipe:
- Thin the dressing with a teaspoon of warm water if it’s too thick.
- Slice the vegetables very fine so the bowls eat easily.
- Use chicken that’s already cooked and seasoned lightly.
Variations on This Dish:
- Spicy Sesame Noodles: Add chili crisp or sriracha.
- Tofu Bowl: Replace chicken with pan-seared tofu.
- Peanut Noodle Version: Increase the peanut butter and add lime juice.
Common Mistakes to Avoid with This Dish:
- Overcooking the noodles: They should still have bite.
- Using too much dressing: Start modest and add more if needed.
- Skipping crunch: The vegetables matter here.
32. Pizza Quesadillas
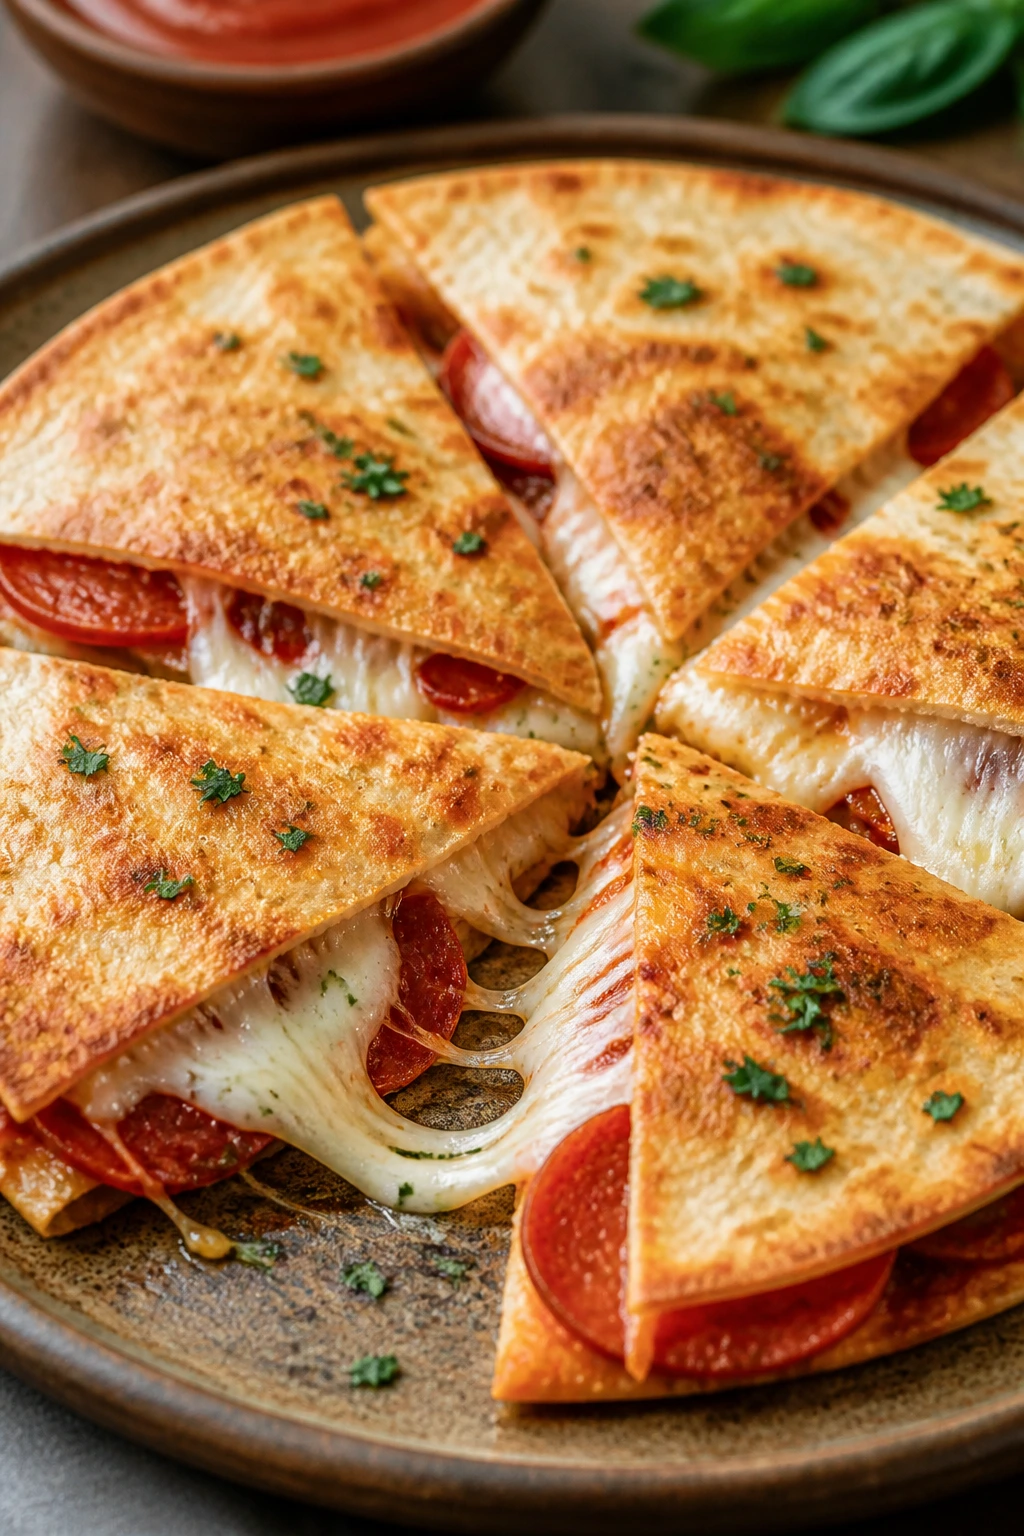
Pizza quesadillas are the sort of Friday-night trick that feels a little mischievous in the best way. They give you the flavors kids ask for — cheese, sauce, pepperoni — with the crisp, pan-fried shell of a quesadilla, which means they vanish fast.
Why It Works:
The tortilla acts like a fast-cooking crust, and the fillings melt together before they have a chance to get watery. Because you cook them in a skillet, you get both the pizza flavor and the browned tortilla edges that make the whole thing more interesting than a plain folded tortilla.
Key Ingredients:
- 8 flour tortillas
- 1 cup pizza sauce
- 2 cups shredded mozzarella
- 1 cup sliced pepperoni
- 1/2 cup sliced mushrooms, optional
- 2 tablespoons olive oil or butter
- 1 teaspoon Italian seasoning
Quick Steps:
- Heat a skillet over medium heat and add a little oil or butter.
- Spread pizza sauce on one tortilla and sprinkle with mozzarella, pepperoni, mushrooms, and Italian seasoning.
- Top with a second tortilla or fold it in half.
- Cook for 2 to 3 minutes per side until crisp and the cheese melts.
- Slice into wedges and serve hot.
Equipment for This Recipe:
- Large skillet
- Spatula
- Knife or pizza cutter
How to Serve This Dish:
Serve with extra pizza sauce for dipping. A side salad or some sliced peppers gives the plate enough freshness to balance the cheese.
Pro Tips for This Recipe:
- Don’t overfill or the filling will spill when you flip.
- Keep the heat moderate so the tortilla browns slowly and the cheese has time to melt.
- Let them sit for 30 seconds before cutting so the cheese doesn’t run everywhere.
Variations on This Dish:
- Supreme Version: Add olives and bell peppers.
- Cheese-Stuffed Version: Use extra mozzarella and no sauce inside, then dip outside.
- Breakfast Pizza Quesadilla: Replace pepperoni with scrambled eggs and breakfast sausage.
Common Mistakes to Avoid with This Dish:
- Too much sauce: It makes the tortilla soggy.
- Cooking on high heat: Burnt tortillas happen fast.
- Cutting immediately: The filling needs a brief rest.
33. One-Pot Mac and Cheese with Peas
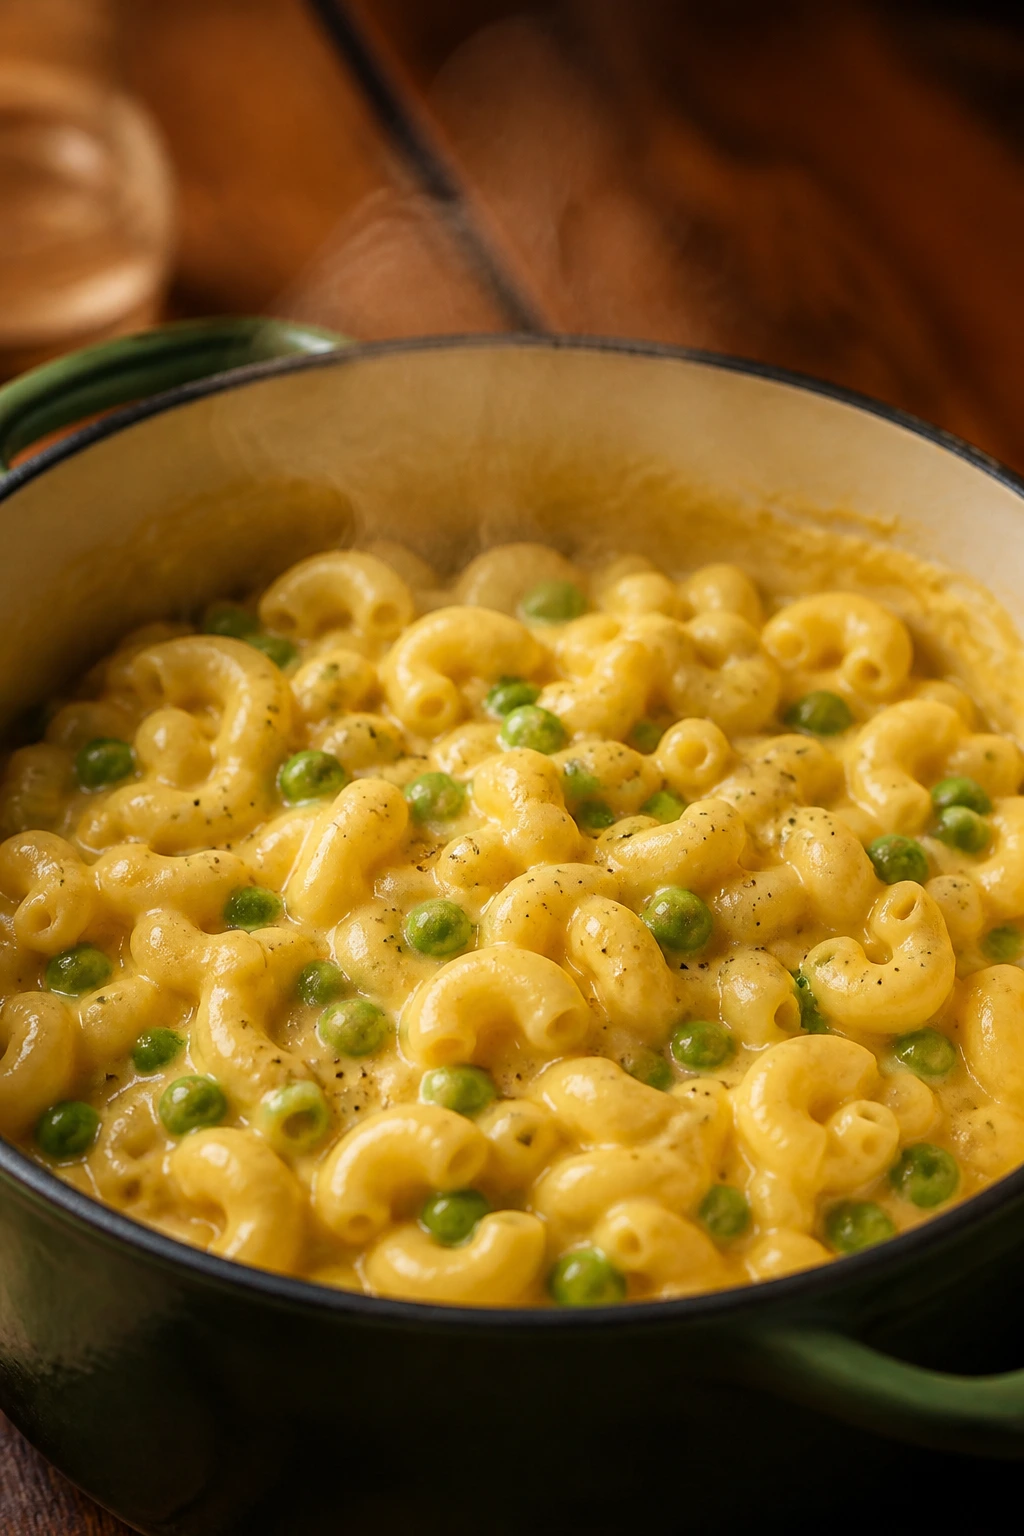
Mac and cheese with peas is one of those dinners that feels like it belongs on a Friday because it’s soft, warm, and a little nostalgic. Cooking the pasta in the sauce means everything turns creamy in one pot instead of taking over the sink.
Why It Works:
The pasta releases starch into the milk as it cooks, which thickens the sauce naturally. Peas bring color and a mild sweetness that plays well against sharp cheddar, and the whole dish stays simple enough that kids who are suspicious of “mixed food” usually still eat it.
Key Ingredients:
- 12 oz elbow macaroni
- 3 cups milk
- 2 cups water
- 2 tablespoons butter
- 2 cups shredded cheddar
- 1 cup frozen peas
- 1 teaspoon salt
- 1/2 teaspoon black pepper
- 1/4 teaspoon garlic powder
Quick Steps:
- Combine macaroni, milk, water, butter, salt, pepper, and garlic powder in a large pot.
- Bring to a gentle simmer over medium heat, stirring often, for 10 to 12 minutes until the pasta is tender.
- Stir in the peas and cook for 2 minutes more.
- Remove from heat and add cheddar in handfuls, stirring until melted.
- Serve while the sauce is creamy and loose.
Equipment for This Recipe:
- Large pot
- Wooden spoon
- Measuring cups
How to Serve This Dish:
Serve it in bowls with extra black pepper on top. If you want a side, a sliced tomato salad or steamed broccoli gives a clean, plain contrast.
Pro Tips for This Recipe:
- Stir frequently so the milk doesn’t scorch.
- Use a sharp cheddar for better flavor.
- If it thickens too much, add a splash of milk before serving.
Variations on This Dish:
- Bacon Mac: Add chopped cooked bacon at the end.
- Broccoli Mac: Swap the peas for small broccoli florets.
- Creamy Four-Cheese Mac: Mix in mozzarella or Monterey Jack with the cheddar.
Common Mistakes to Avoid with This Dish:
- Boiling too hard: The milk can scorch and the pasta can stick.
- Adding cheese while the pot is roaring: It can turn grainy.
- Letting it sit too long: It thickens quickly as it cools.
34. Meatball Marinara Bake
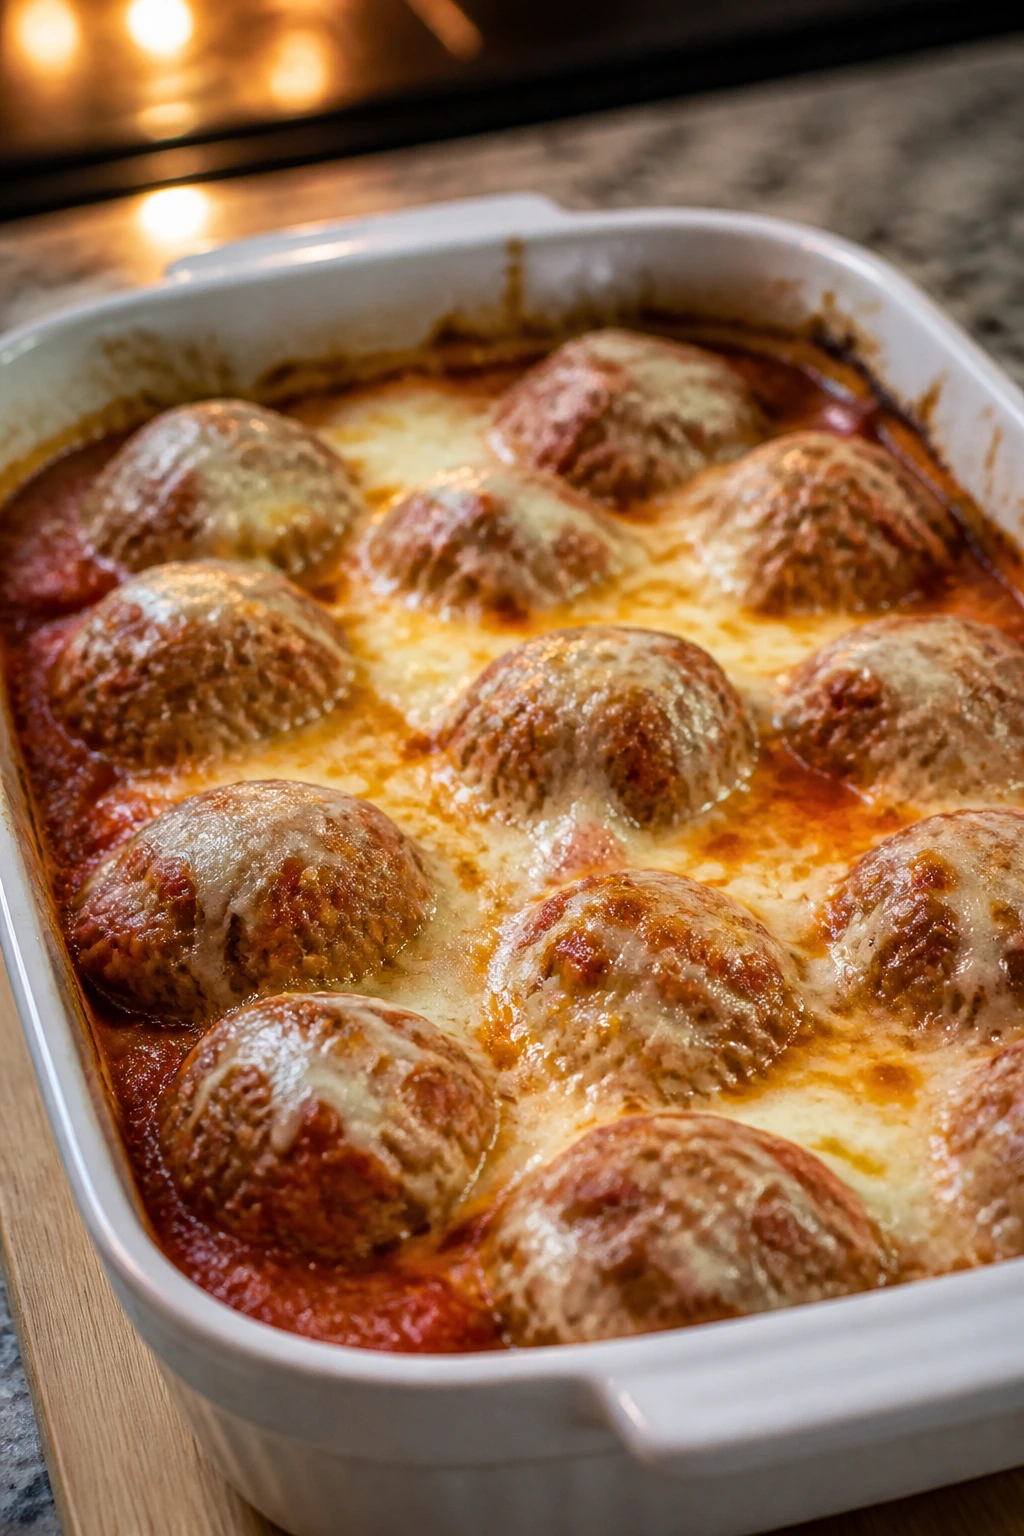
This is the sort of baked dinner that feels generous the minute it comes out of the oven. Meatballs tucked into marinara with melted cheese on top give you the same comfort as a pasta dinner, but with fewer moving parts.
Why It Works:
Frozen or cooked meatballs save time, and the marinara keeps them moist in the oven. A short bake lets the cheese melt and the sauce bubble, which makes the whole dish feel like it came from a much longer process than it did.
Key Ingredients:
- 24 cooked meatballs, homemade or frozen
- 3 cups marinara sauce
- 2 cups shredded mozzarella
- 1/4 cup grated Parmesan
- 1 teaspoon Italian seasoning
- 1 tablespoon chopped basil
- Crusty bread or cooked pasta, for serving
Quick Steps:
- Preheat the oven to 375°F.
- Spread marinara in a baking dish and arrange the meatballs in one layer.
- Top with mozzarella, Parmesan, and Italian seasoning.
- Bake for 20 to 25 minutes until bubbling and hot through.
- Finish with basil before serving.
Equipment for This Recipe:
- Baking dish
- Spoon
- Foil, optional
How to Serve This Dish:
Serve the meatballs over spaghetti, tucked into rolls, or with bread for dipping. A green salad is enough to keep the plate from feeling too one-note.
Pro Tips for This Recipe:
- If using frozen meatballs, thawing helps the sauce heat evenly.
- Cover with foil for the first 15 minutes if the cheese browns too fast.
- Add crushed red pepper if you want the sauce to have a little edge.
Variations on This Dish:
- Meatball Sub Bake: Pile the baked meatballs into toasted rolls.
- Spicy Marinara Bake: Add red pepper flakes and extra garlic.
- Veggie Meatball Bake: Use plant-based meatballs if that’s your lane.
Common Mistakes to Avoid with This Dish:
- Using too little sauce: Meatballs need enough liquid to stay tender.
- Baking uncovered from the start: Cheese can overbrown before the center heats.
- Skipping the basil or parsley: A fresh finish helps a lot.
35. Tortilla Soup with Chicken
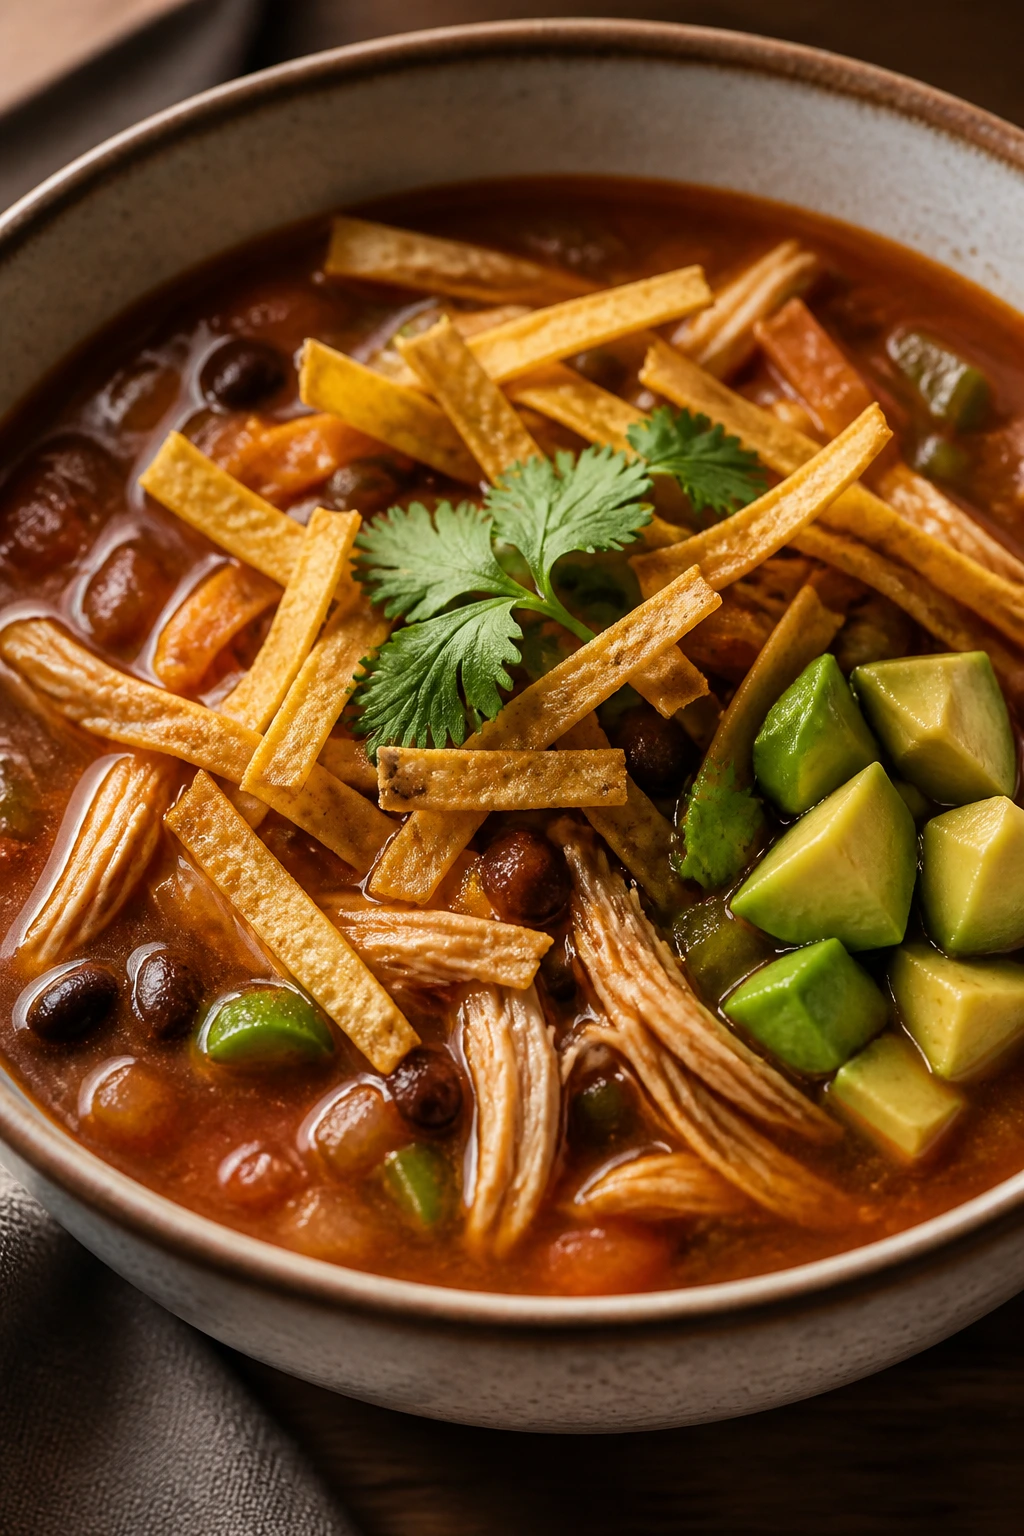
Tortilla soup has a way of tasting brighter than it looks in the pot. The broth is smoky and tomato-rich, the chicken makes it filling, and the tortilla strips give the whole thing a crisp, crackly top that makes spoonfuls more interesting.
Why It Works:
This soup depends on a good broth base and fast toppings. Rotisserie chicken cuts the prep time, while tortilla strips and avocado add the textures that keep the bowl from feeling like plain chicken soup with a different name.
Key Ingredients:
- 3 cups cooked shredded chicken
- 1 tablespoon oil
- 1 onion, diced
- 2 cloves garlic, minced
- 1 can diced tomatoes, 14.5 oz
- 4 cups chicken broth
- 1 teaspoon cumin
- 1 teaspoon chili powder
- 6 corn tortillas, cut into strips
- 1 avocado, diced
Quick Steps:
- Bake or crisp the tortilla strips at 400°F for 8 to 10 minutes, or toast them in a skillet.
- Cook onion in oil for 4 minutes, then add garlic for 30 seconds.
- Pour in tomatoes, broth, cumin, and chili powder and simmer for 10 minutes.
- Stir in the chicken and warm through for 5 minutes.
- Serve topped with tortilla strips and avocado.
Equipment for This Recipe:
- Soup pot
- Baking sheet
- Knife and cutting board
How to Serve This Dish:
Serve the soup in deep bowls and pile the tortilla strips on top right before eating so they stay crisp. Lime wedges, shredded cheese, and a spoon of sour cream are all worth setting out.
Pro Tips for This Recipe:
- Crisp the tortilla strips separately so they don’t go limp.
- A little lime juice at the end makes the broth taste cleaner.
- If you like a thicker soup, blend a cup of the tomatoes and broth first.
Variations on This Dish:
- Bean Tortilla Soup: Add a can of black beans.
- Creamy Version: Stir in a little cream or crema at the end.
- Spicy Version: Add chopped jalapeño or hot sauce.
Common Mistakes to Avoid with This Dish:
- Adding tortilla strips too early: They go soft fast.
- Under-seasoning the broth: The toppings can’t fix a bland base.
- Boiling the chicken hard: It only needs warming through.
36. Shrimp and Grits Skillet
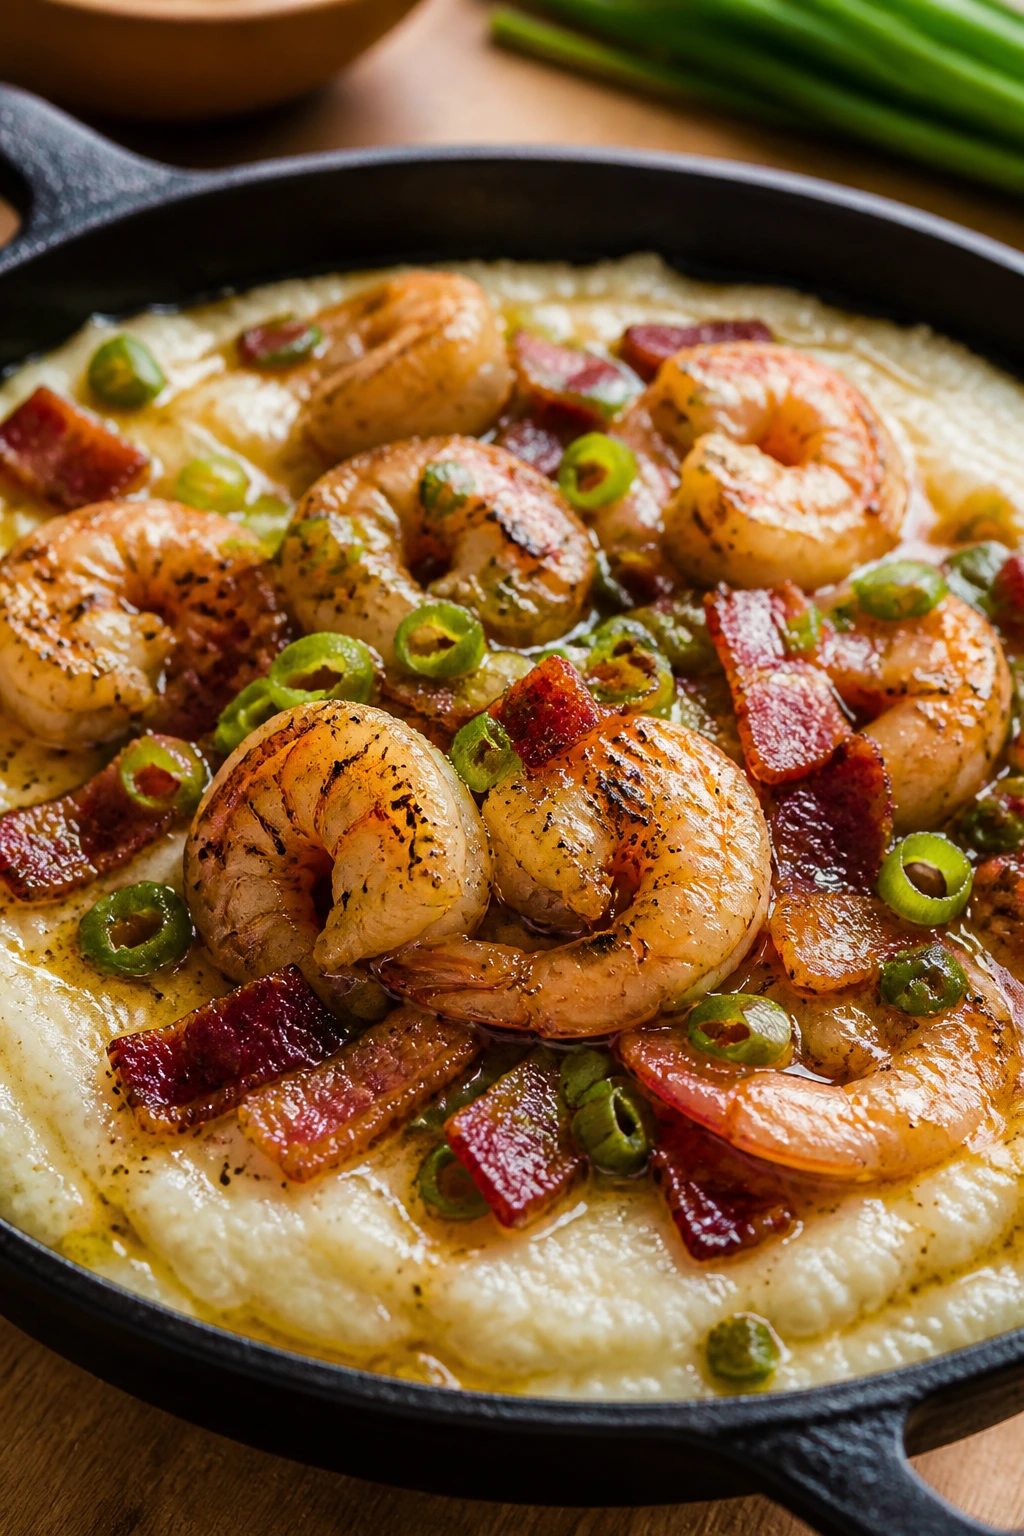
Shrimp and grits feels like a special occasion meal that somehow comes together on a weeknight. The grits turn creamy, the shrimp cook in minutes, and a little bacon or scallion on top makes the whole skillet feel finished.
Why It Works:
Grits make a soft, savory base that can hold strong flavors without getting heavy. Shrimp cook fast and stay tender if you pull them early, and the skillet lets you build a pan sauce from the bacon drippings or butter without much ceremony.
Key Ingredients:
- 1 cup quick grits
- 4 cups water or broth
- 1/2 cup shredded cheddar
- 1 lb shrimp, peeled and deveined
- 4 strips bacon, chopped
- 2 tablespoons butter
- 2 cloves garlic, minced
- 2 scallions, sliced
- 1/2 teaspoon salt
- 1/4 teaspoon black pepper
Quick Steps:
- Cook the grits in water or broth according to the package, then stir in cheddar.
- Brown the bacon in a skillet until crisp, then remove it and keep 1 tablespoon drippings.
- Cook garlic in the drippings for 30 seconds, then add shrimp, salt, and pepper.
- Sauté the shrimp for 2 to 3 minutes per side until pink and just firm.
- Serve the shrimp over the grits with bacon and scallions.
Equipment for This Recipe:
- Medium saucepan
- Skillet
- Whisk
How to Serve This Dish:
Spoon the creamy grits into shallow bowls and set the shrimp on top so the sauce runs into the edges. A green vegetable like sautéed spinach or broccoli makes a good side if you want more balance.
Pro Tips for This Recipe:
- Keep the grits warm and loose with a splash of broth if they thicken too much.
- Don’t overcook the shrimp; they get rubbery fast.
- A little hot sauce on the table helps the dish wake up.
Variations on This Dish:
- Andouille Version: Add sliced andouille sausage with the bacon.
- Creamy Herb Grits: Stir chopped parsley or chives into the grits.
- Vegetable Grits: Skip the shrimp and add sautéed mushrooms and spinach.
Common Mistakes to Avoid with This Dish:
- Cooking shrimp too long: They only need a few minutes.
- Letting grits clump: Stir often enough while they cook.
- Skipping seasoning in the grits: Plain grits taste flat.
37. Spinach and Ricotta Stuffed Shells
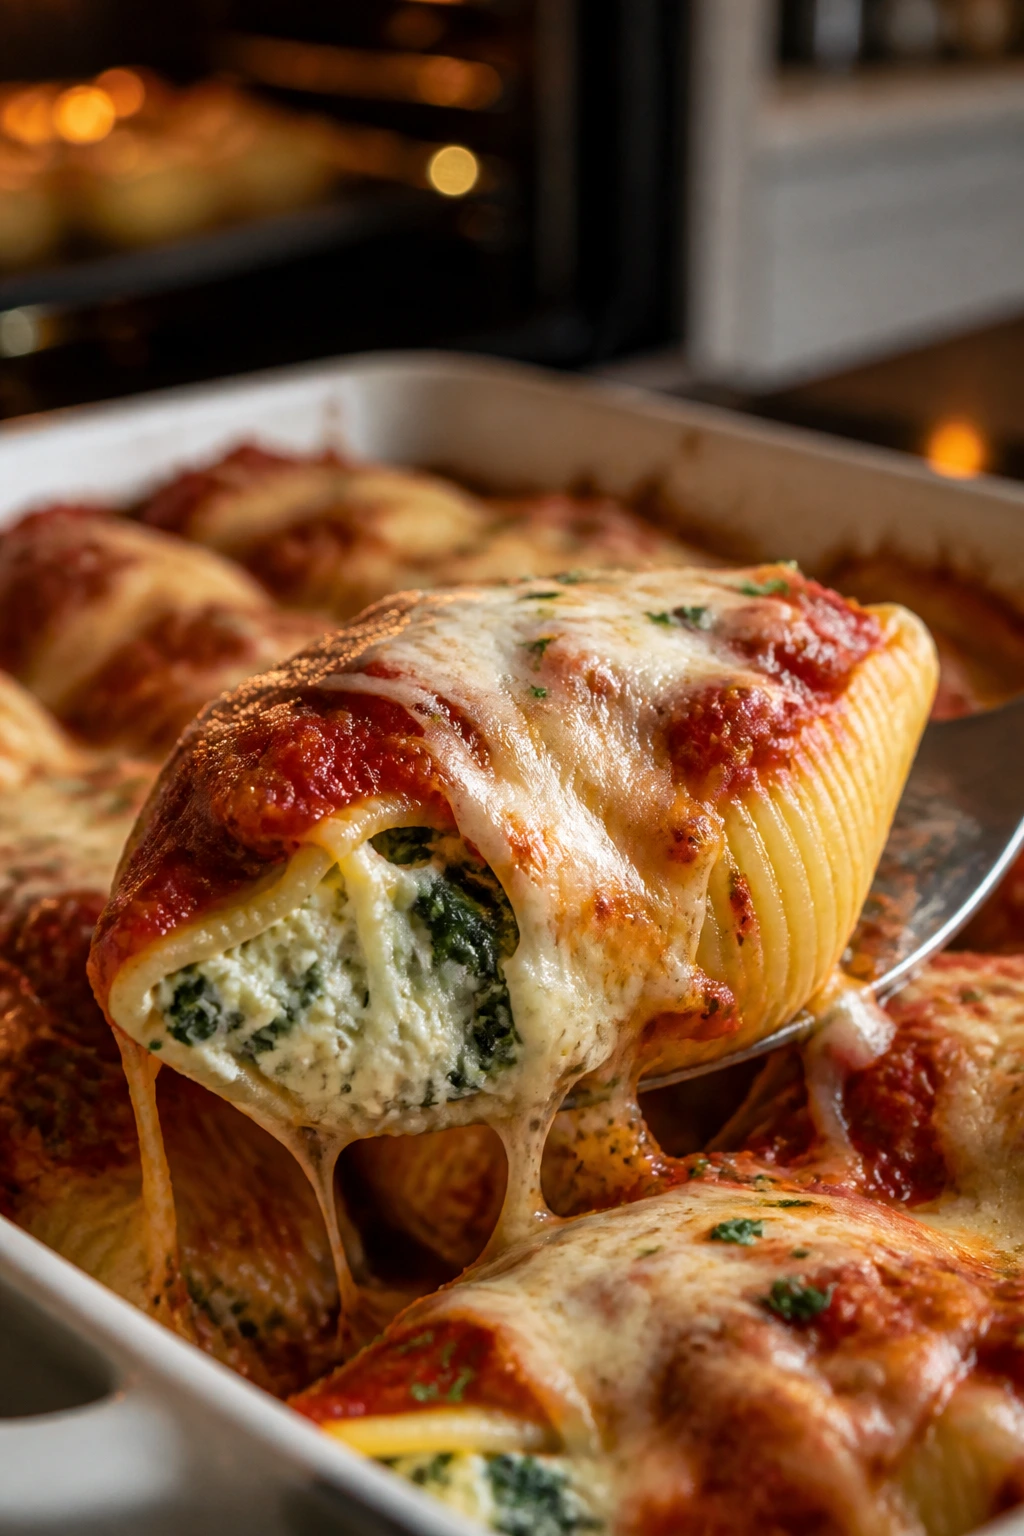
Stuffed shells look like a project and eat like comfort. The ricotta filling stays soft, the spinach cuts the richness, and the marinara under and over the shells keeps every bite juicy.
Why It Works:
The shells are easy to fill once they’re cooked al dente, and the spinach-ricotta mixture stays creamy under the sauce. Baking them covered first protects the filling from drying out, then a short uncovered finish gives the cheese a browned top.
Key Ingredients:
- 20 jumbo pasta shells
- 15 oz ricotta cheese
- 2 cups chopped cooked spinach, squeezed dry
- 1 egg
- 1 cup shredded mozzarella
- 1/2 cup grated Parmesan
- 3 cups marinara sauce
- 1 teaspoon salt
- 1/2 teaspoon black pepper
- 1 teaspoon Italian seasoning
Quick Steps:
- Boil the shells until just al dente, then drain and cool slightly.
- Mix ricotta, spinach, egg, half the mozzarella, Parmesan, salt, pepper, and Italian seasoning.
- Spread marinara in a baking dish.
- Fill each shell and nestle them into the sauce.
- Top with remaining marinara and mozzarella, then bake at 375°F for 25 minutes covered and 10 minutes uncovered.
Equipment for This Recipe:
- Large pot
- Baking dish
- Spoon or piping bag
How to Serve This Dish:
Serve three or four shells per person with garlic bread or a green salad. If you have basil, a few leaves torn on top make the whole pan look brighter.
Pro Tips for This Recipe:
- Squeeze the spinach dry or the filling gets watery.
- Use a spoon to fill the shells if you don’t want to fuss with a piping bag.
- Keep extra sauce in the dish so the bottom doesn’t dry out.
Variations on This Dish:
- Meat Shells: Add cooked ground beef or sausage to the filling.
- Lemon Ricotta Shells: Stir in lemon zest for a brighter flavor.
- Four-Cheese Shells: Swap in fontina or provolone for part of the mozzarella.
Common Mistakes to Avoid with This Dish:
- Overcooking the shells: They split when you try to fill them.
- Not squeezing the spinach dry: The filling can turn loose.
- Baking uncovered too long: The cheese dries before the center heats.
38. Chili Cheese Nachos with All the Fixings
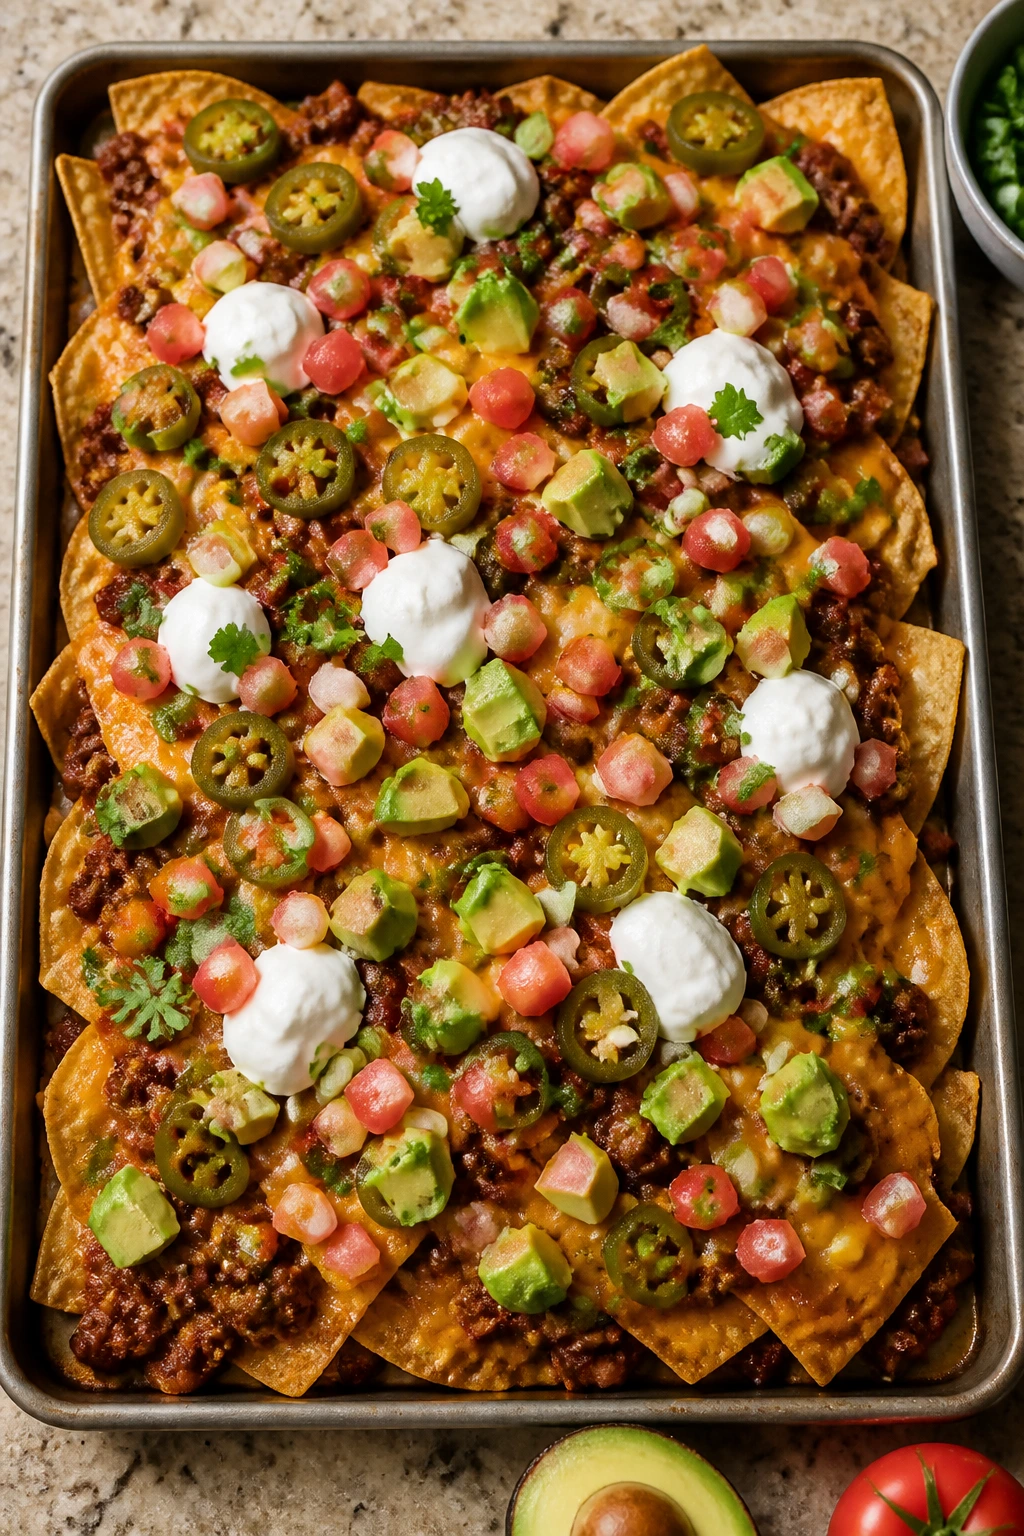
Nachos are not subtle, and that’s part of the appeal. A layer of chips, chili, and melted cheese turns into a tray that feels fun before anyone even sits down, which makes it a very useful Friday dinner when the mood needs lifting.
Why It Works:
Warm chili protects the chips from going stale too quickly, and cheese acts like the glue that holds the toppings in place. Because the dish is built in layers, you can make one mild tray for the kids and a second hotter one for everyone else without much extra work.
Key Ingredients:
- 1 large bag tortilla chips
- 2 cups chili
- 2 cups shredded cheddar
- 1/2 cup sliced jalapeños
- 1 cup diced tomatoes
- 1/2 cup sour cream
- 1 avocado, diced
- 2 tablespoons chopped cilantro
- 1/4 cup sliced scallions
Quick Steps:
- Preheat the oven to 400°F.
- Spread chips on a sheet pan in a single layer.
- Spoon warm chili over the chips and scatter with cheddar and jalapeños.
- Bake for 8 to 10 minutes until the cheese melts.
- Top with tomatoes, sour cream, avocado, cilantro, and scallions.
Equipment for This Recipe:
- Rimmed sheet pan
- Spoon
- Small bowls for toppings
How to Serve This Dish:
Serve nachos right off the tray while the chips are still crisp around the edges. If you want to make it a full meal, add a simple bean salad or a bowl of fruit on the side.
Pro Tips for This Recipe:
- Use sturdy chips so they don’t collapse under the chili.
- Warm the chili before assembling; cold chili cools the whole tray down.
- Add cold toppings after baking so they stay fresh.
Variations on This Dish:
- Chicken Nachos: Swap chili for shredded chicken and salsa.
- Bean Nachos: Use black beans and corn for a vegetarian version.
- Breakfast Nachos: Add scrambled eggs and breakfast sausage.
Common Mistakes to Avoid with This Dish:
- Overloading chips with chili: Some chips need room to breathe.
- Baking too long: The chips can burn fast.
- Adding all toppings before baking: Sour cream and avocado belong on after.
39. Greek Chicken Pitas
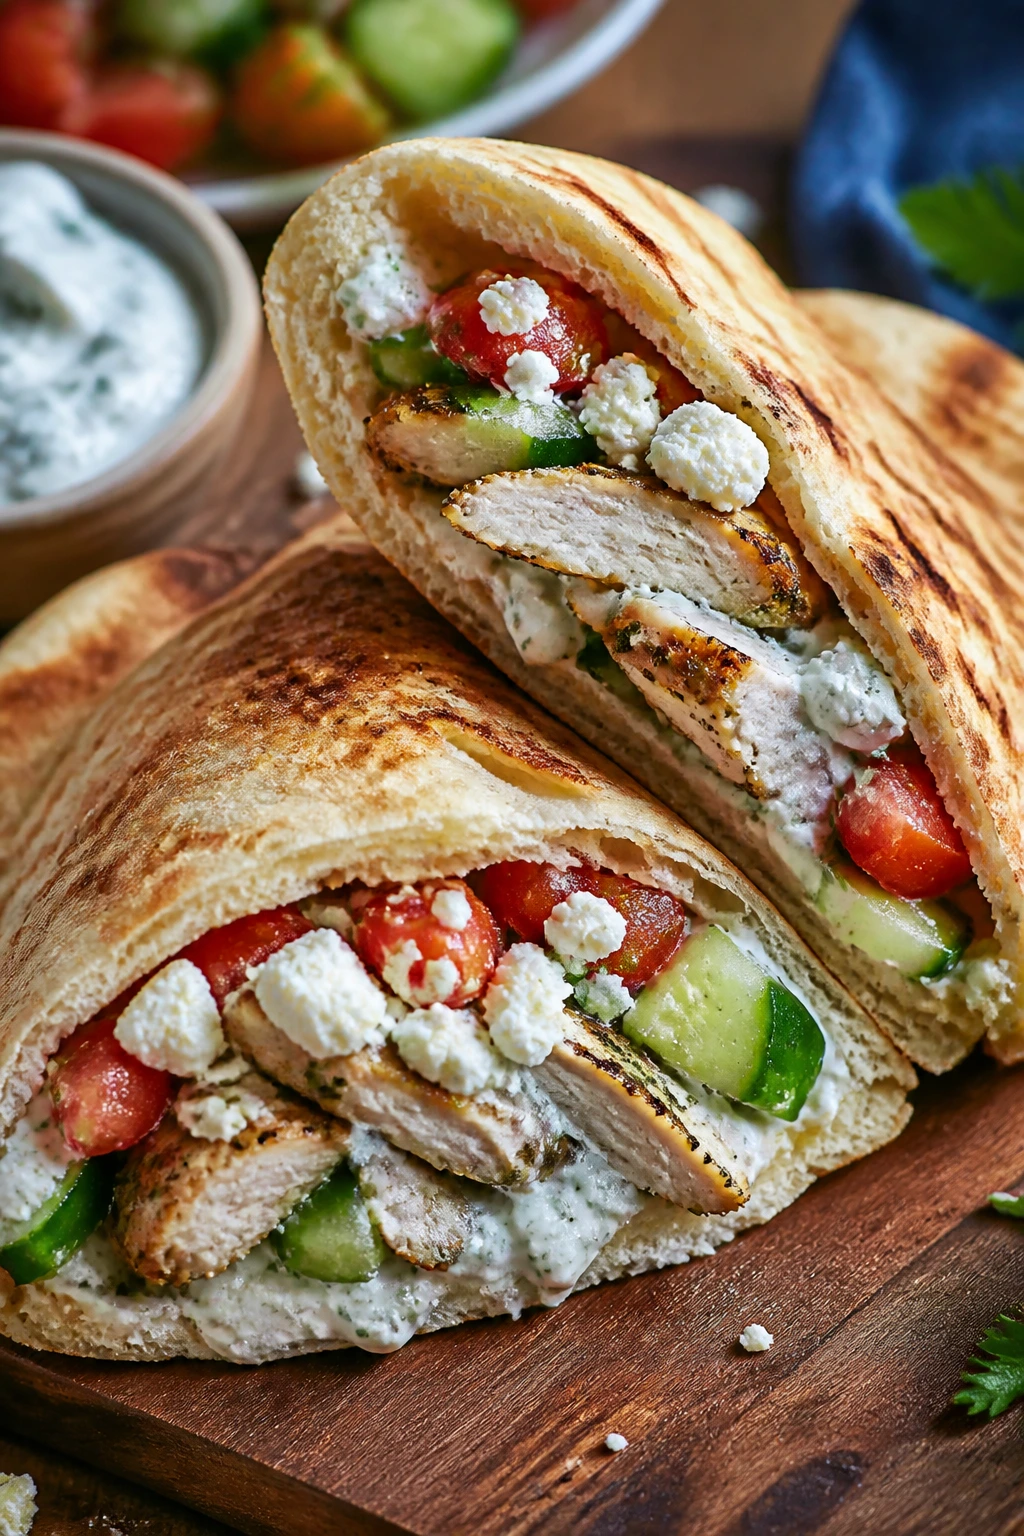
Greek chicken pitas feel fresh, but not in a fussy way. Warm chicken, cool cucumber, tomato, and tangy sauce tucked into pita bread make a dinner that tastes built, not thrown together, even when the prep is minimal.
Why It Works:
A simple yogurt-and-lemon marinade softens the chicken and gives it flavor fast. Pitas are forgiving, easy to fill, and perfect for people who like to customize their own dinner without turning the kitchen into a buffet line.
Key Ingredients:
- 1 1/2 lbs chicken breast or thighs, sliced
- 1/2 cup plain yogurt
- 2 tablespoons lemon juice
- 2 cloves garlic, minced
- 1 teaspoon oregano
- 1 teaspoon salt
- 4 pita breads
- 1 cucumber, diced
- 1 cup cherry tomatoes, halved
- 1/2 cup tzatziki
- 1/2 cup crumbled feta
Quick Steps:
- Mix yogurt, lemon juice, garlic, oregano, and salt, then coat the chicken.
- Cook the chicken in a skillet over medium-high heat for 6 to 8 minutes until browned and cooked through.
- Warm the pitas briefly in a dry skillet or oven.
- Stuff each pita with chicken, cucumber, tomatoes, tzatziki, and feta.
- Serve right away while the chicken is warm.
Equipment for This Recipe:
- Skillet
- Mixing bowl
- Knife and cutting board
How to Serve This Dish:
Lay the fillings out separately if your family likes to build their own. A handful of olives or a simple rice pilaf rounds out the plate if you want more than pita and chicken.
Pro Tips for This Recipe:
- Slice the chicken before marinating so the flavor gets in fast.
- Don’t overcook chicken breast; pull it as soon as it’s done.
- Warm pita bread so it bends instead of tearing.
Variations on This Dish:
- Lamb Pitas: Use ground lamb with the same seasoning.
- Falafel Pitas: Swap the chicken for falafel and extra cucumber.
- Rice Bowl Version: Serve everything over rice instead of in pita.
Common Mistakes to Avoid with This Dish:
- Using dry pita: Warm it first or it cracks.
- Overfilling the pockets: They split open fast.
- Skipping the acid in the marinade: Lemon is what keeps the chicken lively.
40. Chicken Biscuit Bake
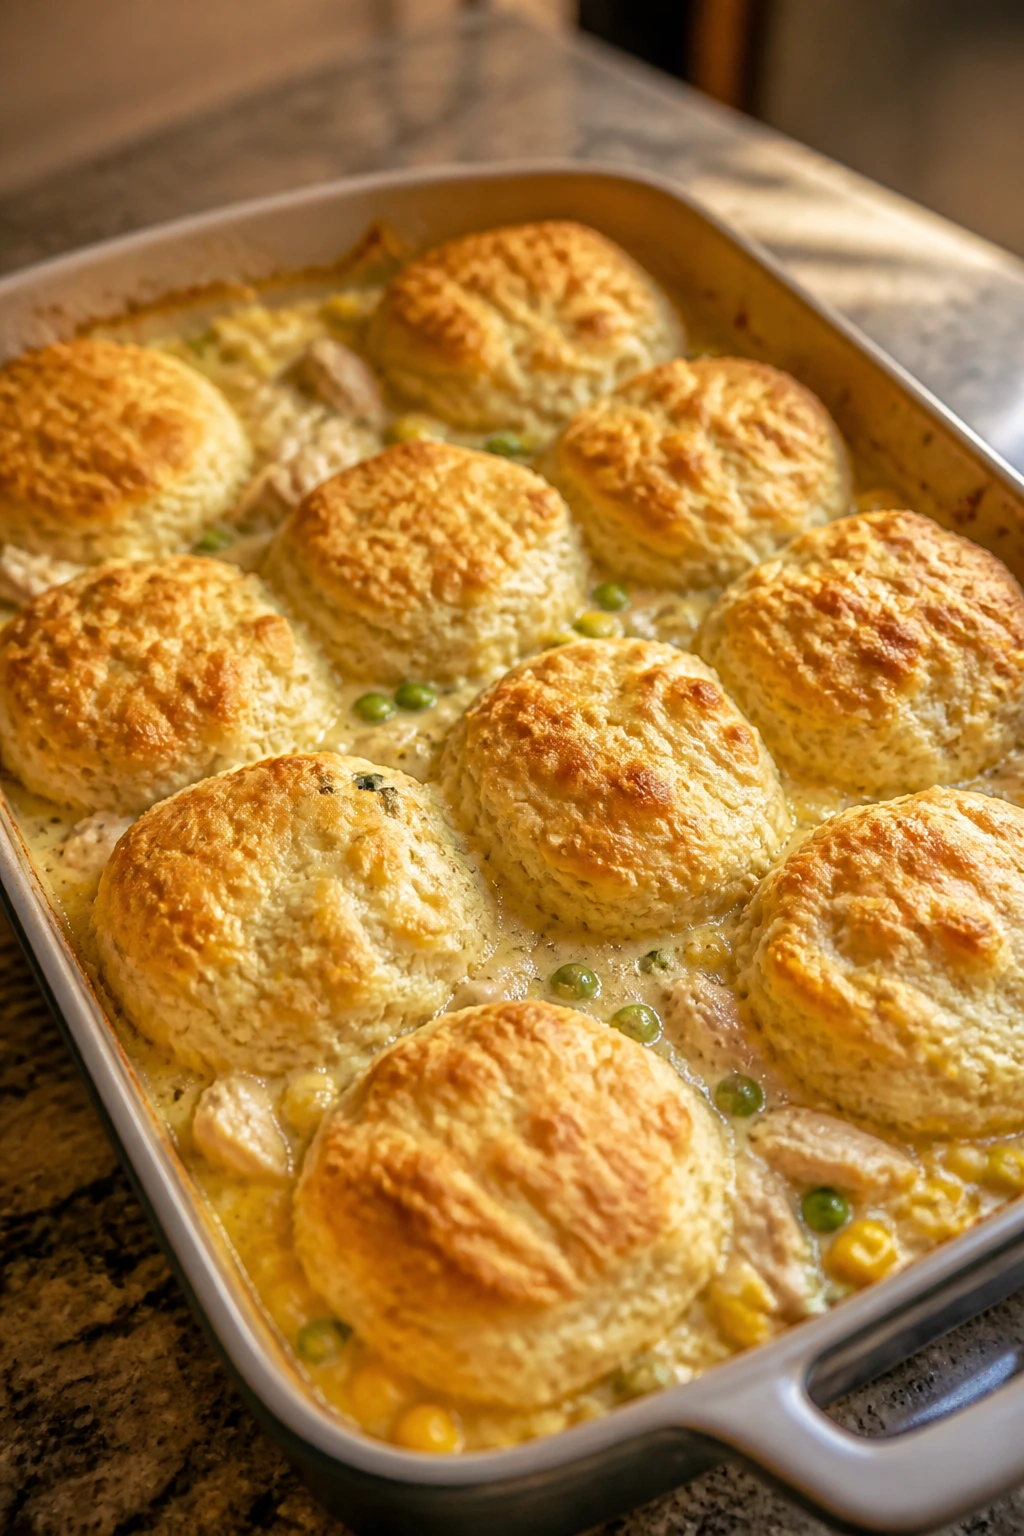
Chicken biscuit bake is the kind of dinner that lands like a warm blanket. Creamy chicken and vegetables sit under or around golden biscuits, so every spoonful gives you sauce, tender filling, and a soft top with a little browning at the edges.
Why It Works:
Rotisserie chicken shortens the prep, frozen vegetables keep the filling easy, and refrigerated biscuits bake quickly enough to make this feel like a weeknight dish instead of a Sunday one. The biscuits soak up a little sauce on the bottom and stay fluffy on top, which is exactly the texture you want here.
Key Ingredients:
- 3 cups chopped cooked chicken
- 2 cups frozen mixed vegetables
- 2 tablespoons butter
- 1/4 cup flour
- 2 cups chicken broth
- 1/2 cup milk
- 1 teaspoon salt
- 1/2 teaspoon black pepper
- 1 can refrigerated biscuits, 8-count
- 1 teaspoon dried thyme
Quick Steps:
- Preheat the oven to 375°F and grease a baking dish.
- Melt the butter in a skillet, whisk in flour, then slowly add broth and milk to make a thick sauce.
- Stir in chicken, vegetables, salt, pepper, and thyme.
- Pour the filling into the dish and arrange biscuits on top.
- Bake for 25 to 30 minutes until the biscuits are golden and the filling bubbles at the edges.
Equipment for This Recipe:
- Skillet
- Baking dish
- Whisk
How to Serve This Dish:
Serve it in bowls so the sauce doesn’t run off the plate. I like a tart side salad or sliced cucumbers with this, because the filling is rich and the fresh crunch helps.
Pro Tips for This Recipe:
- If the biscuits brown too quickly, cover them loosely with foil for the last 10 minutes.
- Make sure the filling is thick before it goes in the oven or the biscuits sink.
- Cut larger biscuits in half if you want the top to cook more evenly.
Variations on This Dish:
- Turkey Pot Bake: Swap in cooked turkey and a little sage.
- Cheddar Biscuit Bake: Sprinkle cheese over the filling before adding biscuits.
- Vegetable Biscuit Bake: Skip the chicken and use mushrooms, carrots, and peas.
Common Mistakes to Avoid with This Dish:
- Making the sauce too thin: It should be gravy-like, not soupy.
- Underbaking the biscuits: The centers need to cook through.
- Adding too many vegetables straight from frozen: They can water down the filling if you don’t keep the sauce thick.
Why These Friday Night Dinners Work So Well
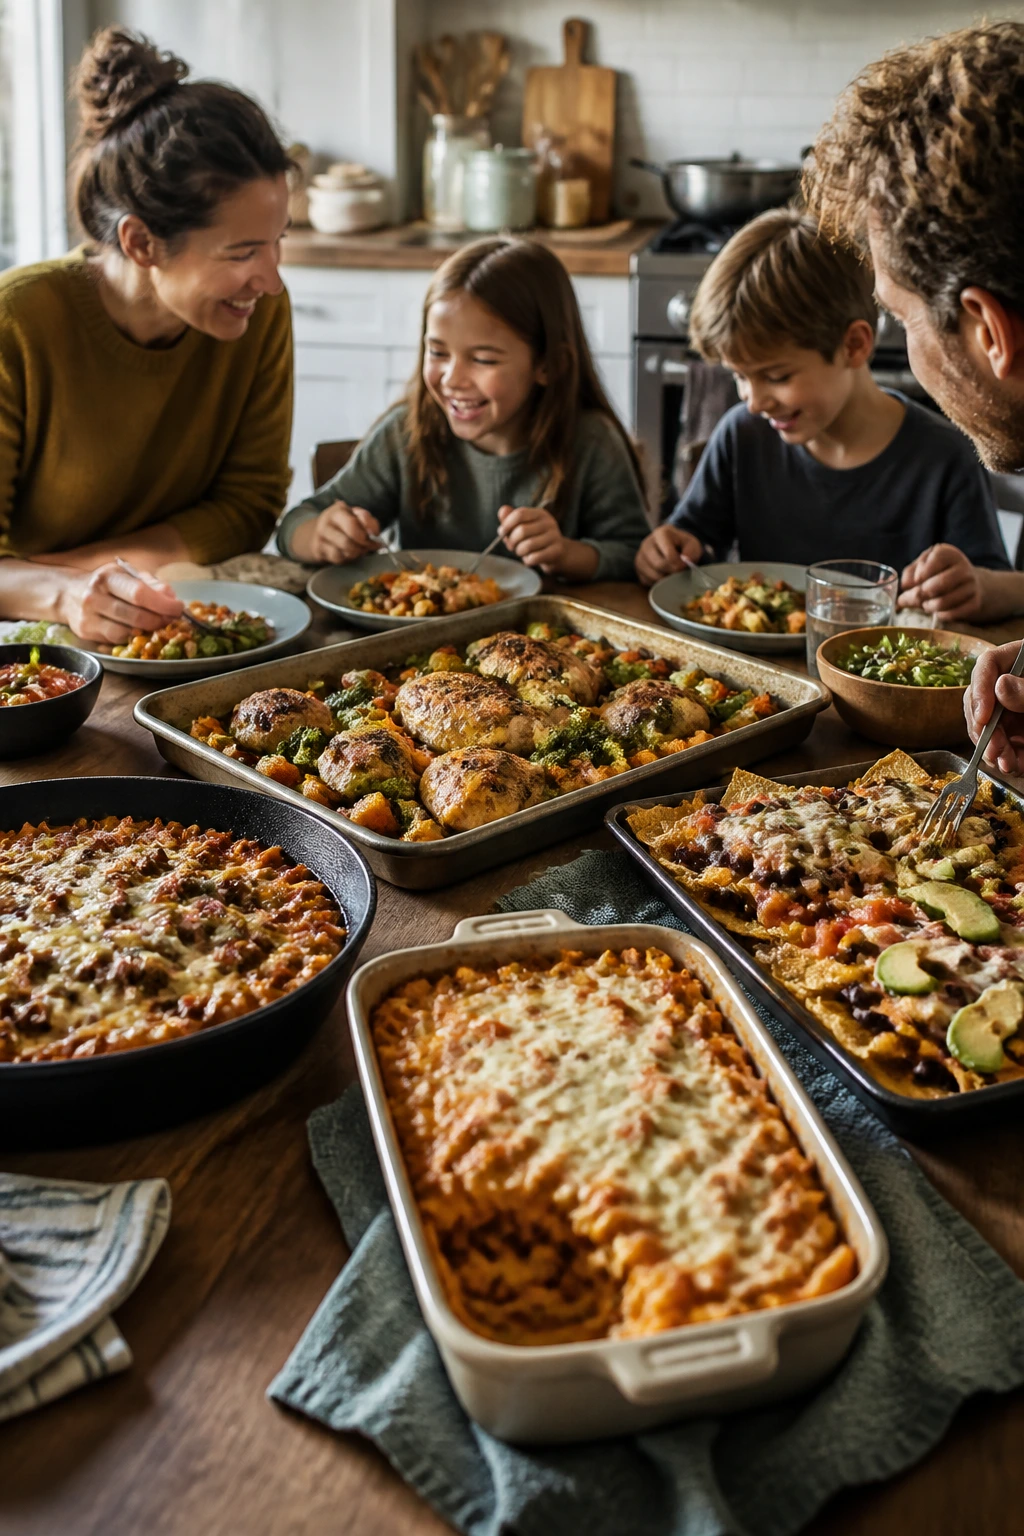
Friday night dinner needs a different personality than Tuesday dinner. Tuesday can be efficient and dutiful; Friday needs to feel like the week is loosening its grip. That’s why these meals work so well in practice. They lean on familiar flavors, but they do not feel tired. They use shortcuts, but not the sloppy kind that leave you with bland food or a mountain of dishes.
The common thread here is structure. A sheet pan keeps peppers and chicken moving in the same direction. A skillet traps flavor and heat. A casserole makes the oven do the heavy lifting while you clear the counter or help with homework or just sit down for a minute. Even the build-your-own dinners — tacos, quesadillas, baked potatoes, nachos — are doing real work because they hand off some of the decision-making to the people eating.
I also like that these dinners are forgiving in the ways family meals need to be forgiving. If someone is late, a baked dish can wait. If your grocery budget is thin, beans and pasta show up to help. If one child lives for sauce and another wants everything on the side, there’s room for both without making two separate dinners. That matters more than it sounds.
Essential Equipment for These Recipes
- Large rimmed sheet pans: They’re the backbone of fajitas, fish, nachos, pizza, and anything else that needs hot oven space without spilling.
- 12-inch skillet: A deep, sturdy skillet handles stir-fries, skillet pastas, chicken, and quick sauces without crowding.
- Dutch oven or heavy soup pot: Best for chili, soup, macaroni, and anything that needs even heat and a little simmer time.
- 9×13-inch baking dish: The workhorse for ziti, casseroles, enchiladas, stuffed shells, and baked chicken bakes.
- Mixing bowls in two sizes: One for sauces and one for bigger assembly jobs saves time and keeps the counter cleaner.
- Sharp chef’s knife: Thin slices matter for fajitas, stir-fries, peppers, onions, and potatoes.
- Cutting board with a damp towel underneath: Keeps it from sliding while you chop onions or peppers.
- Tongs: Useful for flipping chicken, moving sausage, handling hot tortillas, and turning vegetables on a pan.
- Whisk: Helps with sauces, gravies, egg mixtures, and quick dressings.
- Measuring cups and spoons: Especially helpful for the saucy dinners where too much liquid changes the texture fast.
- Instant-read thermometer: Handy for chicken, pork, fish, and meatballs; it removes the guesswork.
- Colander: Needed for pasta, potatoes, tortellini, and any cooked noodles that need draining fast.
- Airtight storage containers: Important for leftovers, because Friday dinner often becomes Saturday lunch.
- Optional slow cooker: Worth keeping around for pulled pork and a few other hands-off meals.
- Optional wire rack: Makes baked chicken tenders and some sheet-pan meals crisper on the bottom.
Smart Shopping and Ingredient Tips
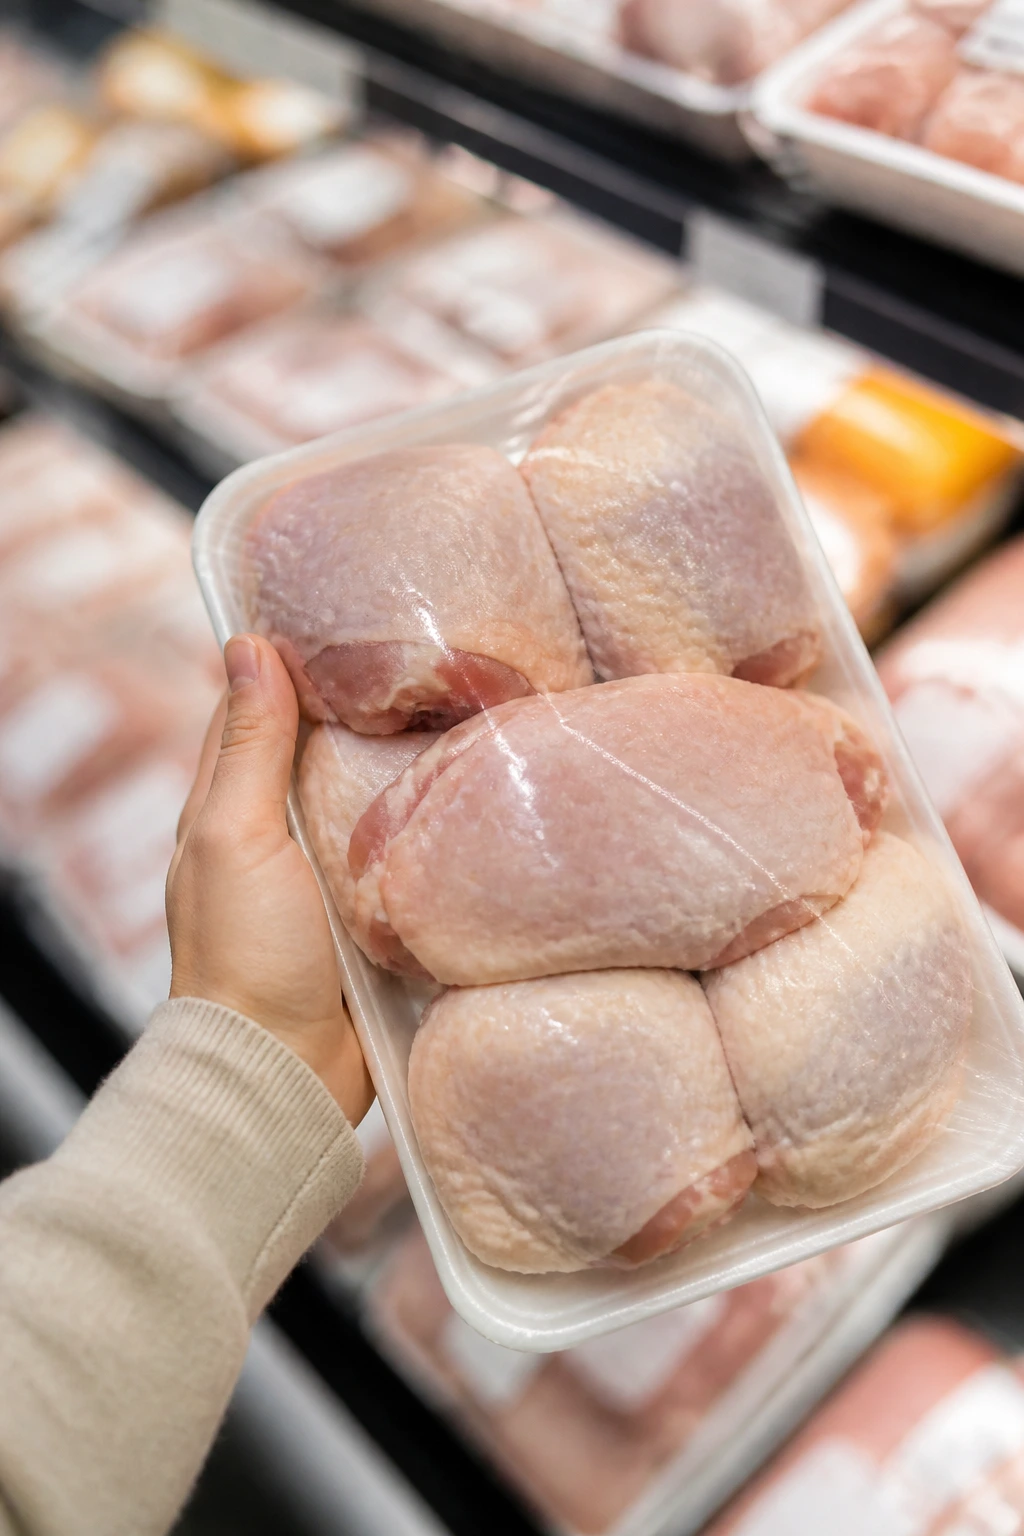
The smartest way to shop for Friday-night dinners is to think in categories, not recipes. Buy 2 or 3 proteins you can use more than one way — chicken thighs, ground beef or turkey, sausage, salmon, shrimp, or a rotisserie chicken — and then back them up with pasta, rice, tortillas, potatoes, and a couple of sauces. That gives you enough flexibility to decide on the day without making another grocery run.
Chicken thighs are the sleeper hit in this whole collection. They stay juicy in sheet-pan dinners, rice skillets, bowls, and stir-fries, and they forgive a few extra minutes in the pan. Chicken breast can work, but it dries out faster, especially in baked dishes. If you buy breast meat, slice it thin and cook it fast.
Cheese deserves a little strategy too. For baked casseroles and pizza, pre-shredded cheese is convenient and perfectly fine. For melty sauces, block cheese grated at home tends to melt a little smoother. That said, I’ll happily use the bagged stuff if it gets dinner on the table. Friday is no place for cheese purity tests.
Use canned tomatoes and jarred sauce without guilt. Good marinara saves a baked ziti, a meatball bake, or a chicken Parmesan casserole from tasting vague. If a jar tastes sharp and thin on its own, it will taste sharp and thin in the dish, so buy the one that already tastes balanced to you.
Frozen vegetables are worth their freezer space. Peas, corn, broccoli, mixed vegetables, and chopped spinach all pull their weight in fried rice, skillet dinners, soups, and casseroles. They’re picked at the right moment, and they save you from washing and chopping when the clock is already tight. The one caveat: thaw or cook off excess moisture if you’re using them in a skillet, or they’ll water things down.
And one more practical note. Buy tortillas, buns, pizza dough, and biscuits that match the dinner you actually want to eat, not the idealized one in your head. Soft flour tortillas are easier for kids, sturdier buns hold sliders better, and refrigerated biscuits turn a chicken bake into a meal that looks more finished than a plain casserole ever could.
How to Serve These Recipes
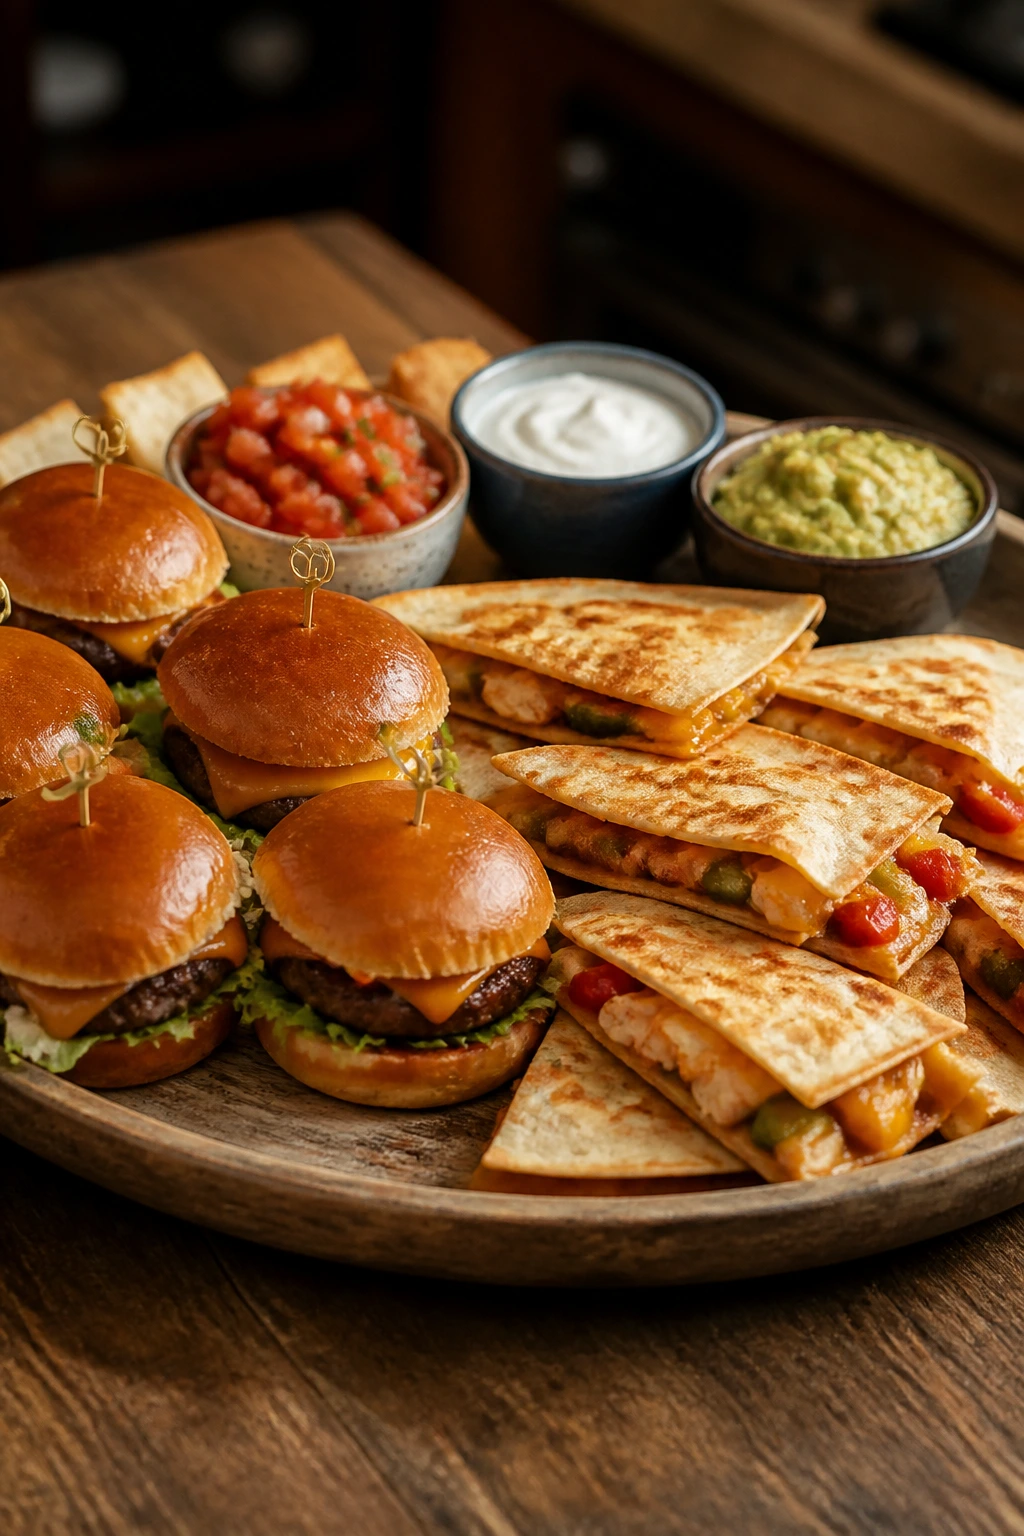
Presentation:
Family dinners look better when you stop trying to plate them like restaurant specials and start serving them like the group meals they are. Use shallow bowls for saucy pasta, wide plates for sheet-pan dinners, and big platters for sliders, quesadillas, or pizza slices. A final scatter of chopped herbs, scallions, or a squeeze of lime changes the look instantly and takes maybe 10 seconds.
Accompaniments:
Keep the sides simple and opposite in texture. Crunchy salads, roasted broccoli, steamed green beans, sliced cucumbers, fruit, coleslaw, garlic bread, cornbread, or a quick bean salad all work across this collection. If the main dish is rich, pick something fresh and crisp. If the main dish is light, add bread, rice, potatoes, or a biscuit.
Portions:
Most of these dinners serve 4 to 6 people as written, though a few of the build-your-own meals stretch farther because people serve themselves at different levels. For hungrier crowds, add bread, chips, rice, or salad instead of doubling everything. That usually works better than just making the main dish heavier.
Beverage Pairing:
Sparkling water with lemon or lime fits almost all of these meals. For something warmer, unsweetened iced tea is a safe, steady choice, especially with BBQ, taco, and fried dinners. If the dinner is tomato-heavy or creamy, a cold glass of milk or a lightly sweetened tea also makes sense. No need to get fancy.
Additional Tips and Flavor Boosters
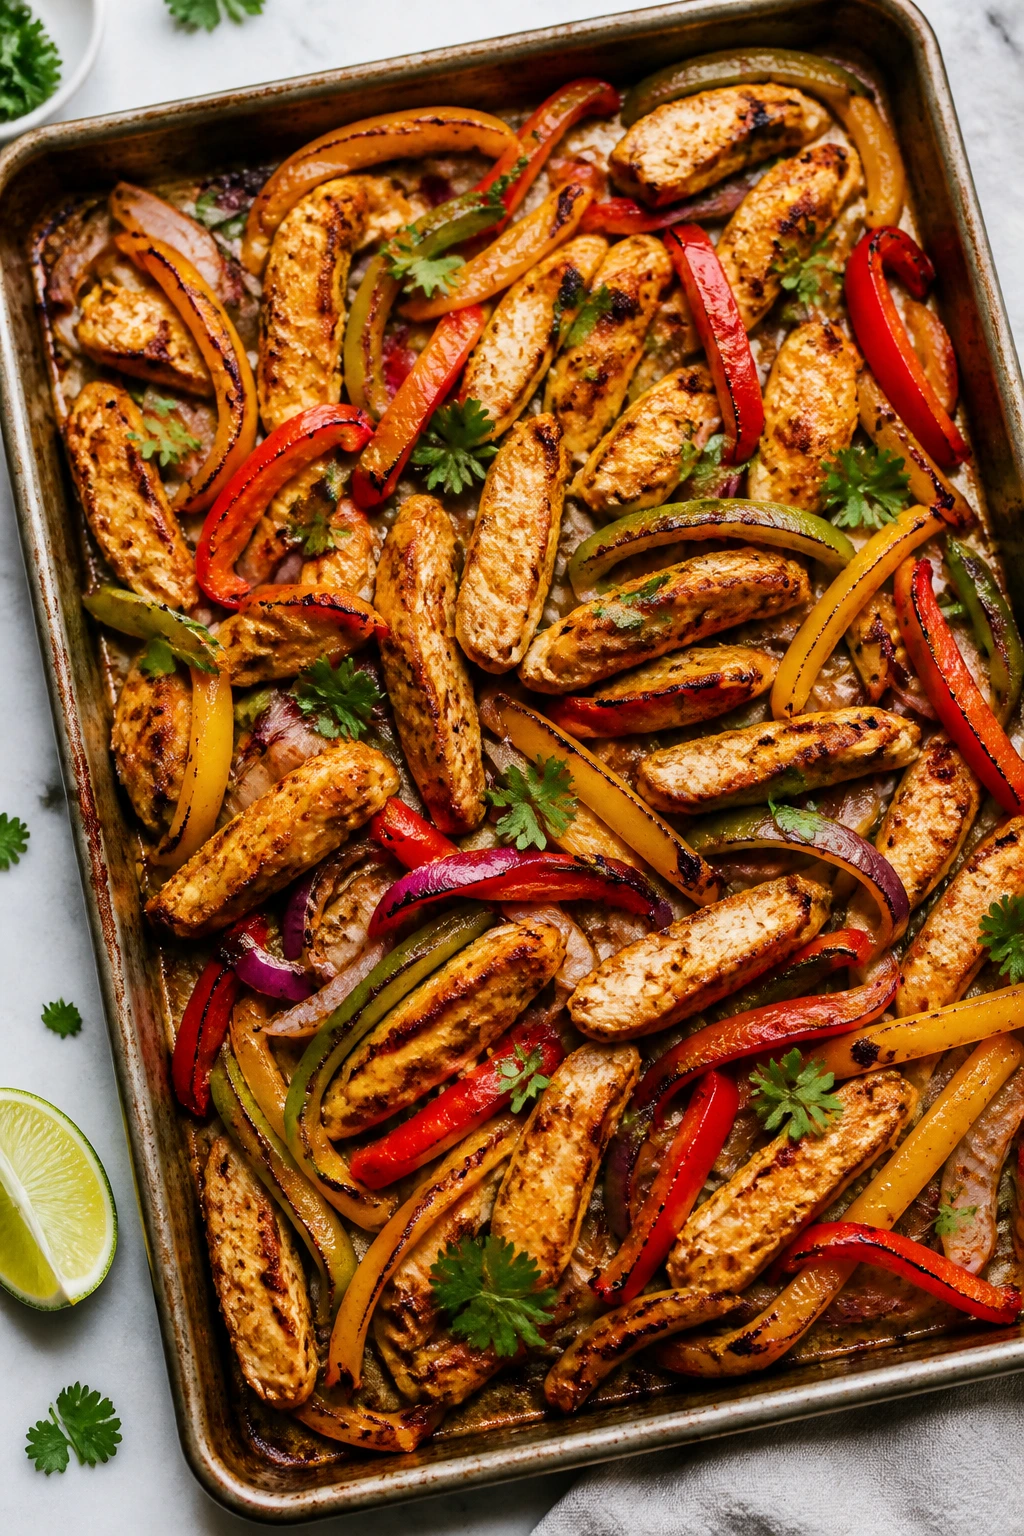
Flavor Enhancement:
A finishing acid changes a lot of these dinners more than an extra sprinkle of cheese. Lemon on fish, lime on fajitas, vinegar in pulled pork, or a splash of rice vinegar in stir-fry sauce keeps the flavors from flattening out under heat.
Customization:
If your table runs picky, set up one or two dinners a week as build-your-own nights. Tacos, pitas, baked potatoes, quesadillas, nachos, and sliders all benefit from a topping bar, and that keeps the main cooking simple while still giving kids some control.
Serving Suggestions:
Keep crunchy things in play. Pickles with sliders, toasted breadcrumbs on pasta bakes, sesame seeds on noodle bowls, tortilla strips on soup, or chopped scallions on rice dishes make the plates feel more complete. Small textures matter more than people think.
Make-It-Yours:
For gluten-free eating, lean on rice bowls, chili, grilled fish, roasted chicken, stuffed peppers, and baked potatoes. For dairy-free meals, use olive oil, salsa, broth, and tomato-based sauces more often, and skip the cheese when it’s not pulling its weight. For lighter eating, choose fish, chicken thighs, bean-based dinners, and soup rather than stacked bakes every time. For a bigger appetite, pair the dinner with bread, potatoes, or rice instead of just piling more protein on the plate.
Make-Ahead, Storage, and Reheating Guidance
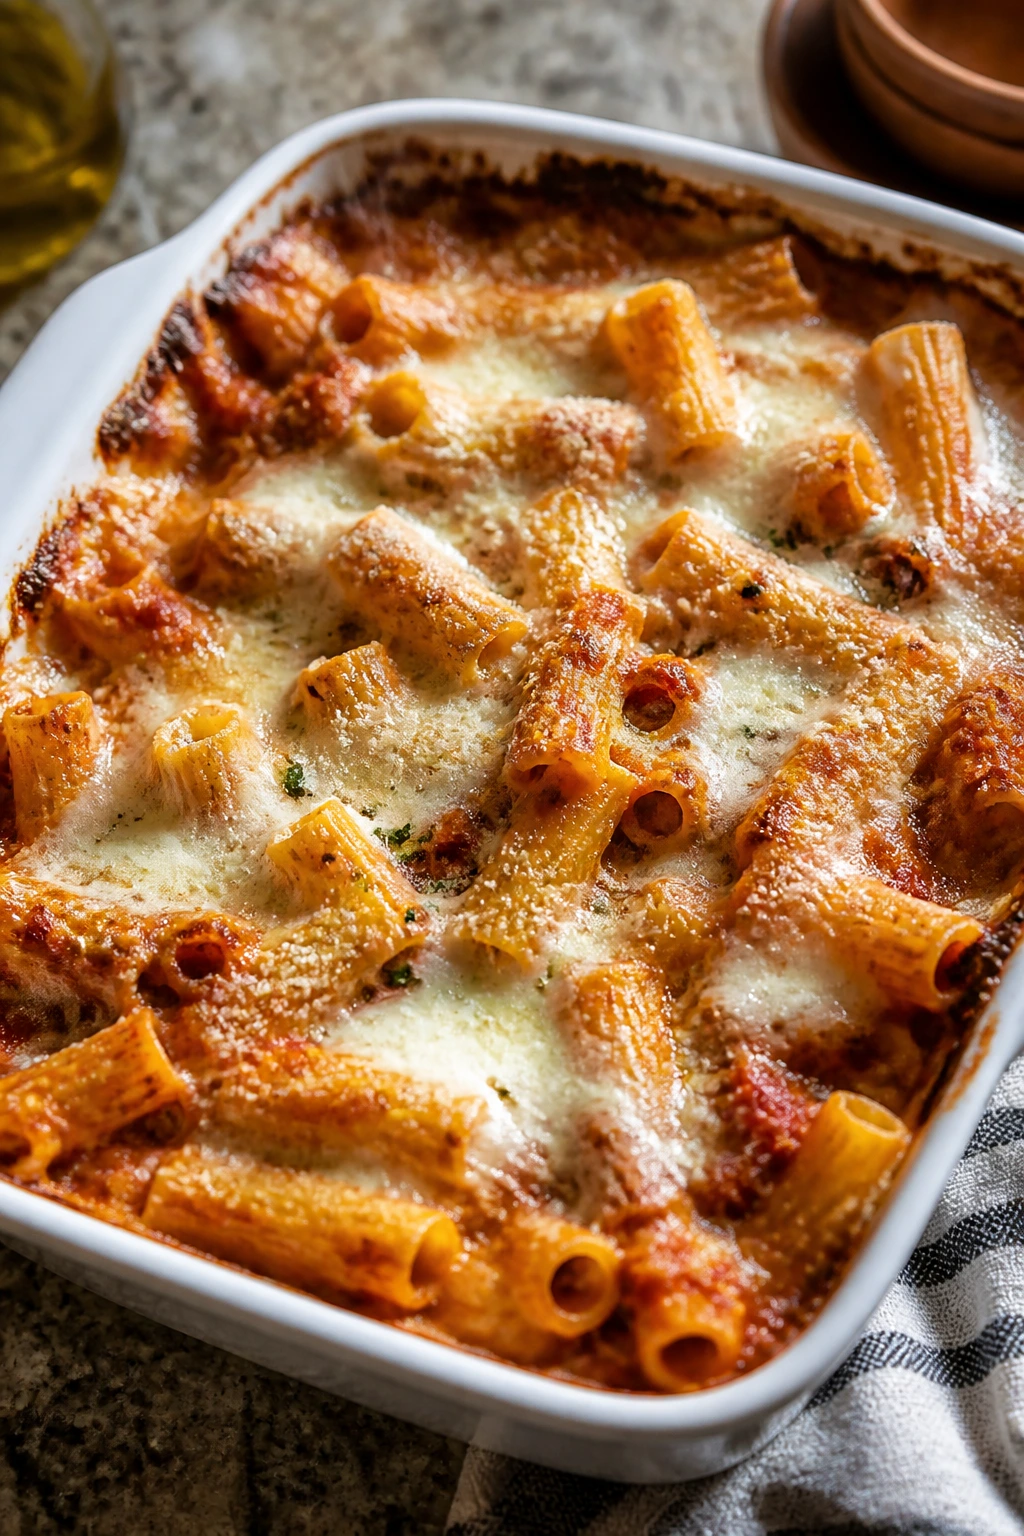
A lot of these dinners hold up well for leftovers, but the texture rules are not the same for every type. Most cooked chicken, pasta bakes, chili, soups, rice dishes, and meat sauces will keep in the refrigerator for 3 to 4 days in sealed containers. Fish is the exception; it’s best eaten within 1 to 2 days, because reheated fish gets dry and a little loud in flavor.
For the freezer, the best bets are chili, meatballs in sauce, pulled pork, baked ziti, stuffed shells, stuffed peppers, and chicken bakes. Those usually hold for up to 2 to 3 months if wrapped well and cooled before freezing. Tortillas, crisp chicken tenders, quesadillas, and fried rice are less freezer-friendly because the textures slip on reheating.
Reheat casseroles and baked pastas in a 350°F oven, covered with foil, until the center is hot and the edges are bubbling again. That usually takes 20 to 30 minutes for a chilled dish and longer from frozen. Add a spoonful of water or extra sauce if the dish looks dry. For skillet dinners and rice, a skillet over medium-low heat with a splash of broth or water works better than blasting the microwave. Stir gently and keep the lid on for a minute so the steam helps.
Soups and chili can be reheated on the stovetop over medium-low heat until they simmer at the edges. Quesadillas, sliders, and pizza are best in the oven or air fryer if you want the bread to crisp back up. Microwaving works in a pinch, but the bread goes soft fast. For dishes with sauce and cheese, I like to underheat them a little in the microwave, then finish in a hot oven or skillet if I have the energy. It makes a difference.
If you want to get ahead, do the easy parts early. Chop vegetables in the afternoon, mix marinades in the morning, cook rice a day ahead, or make sauce before work and hold it cold. Some of these dinners — chili, pulled pork, baked ziti, stuffed shells — taste even better after a night in the fridge because the flavors settle in. Others, like fish tacos and quesadillas, are better made at the last minute. That split is worth remembering.
Variations and Adaptations to Try
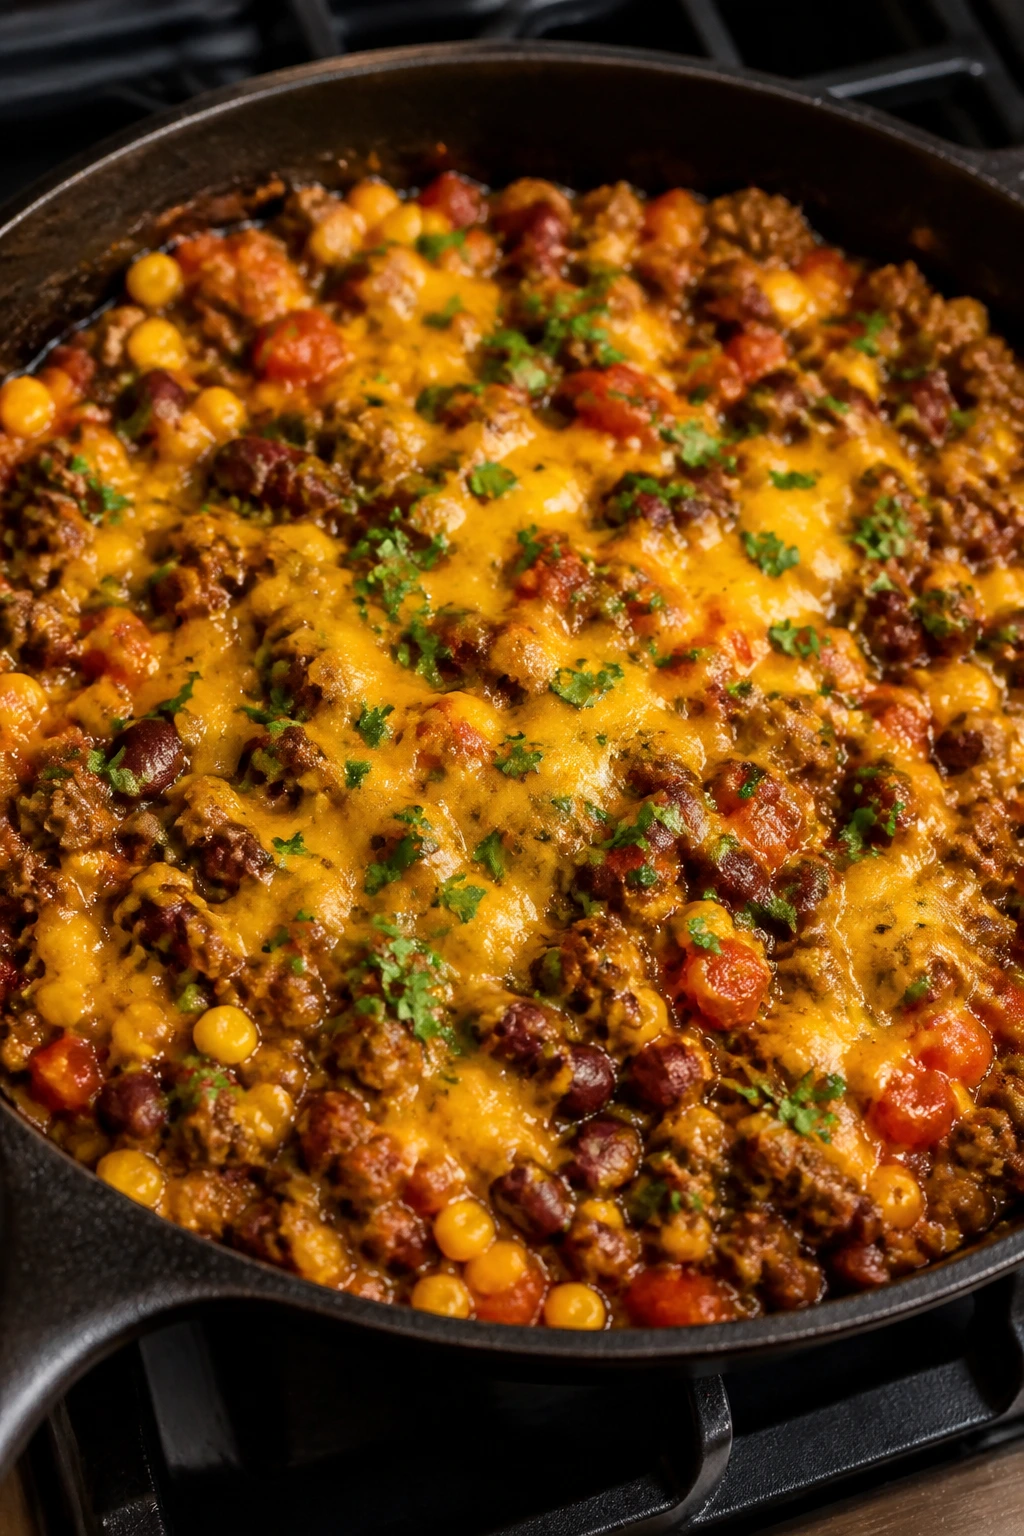
Gluten-Free Friday:
Lean on fajitas, taco skillets, chili, grilled salmon, rice bowls, stuffed peppers, and potato bars. Use corn tortillas, rice, potatoes, or gluten-free pasta where needed, and check sauces so the soy or gravy components are safe.
Dairy-Lighter Night:
Choose tomato-based sauces, chicken skewers, soup, fried rice, pulled pork, or fish tacos and skip the cheese-heavy finish. Olive oil, salsa, broth, and fresh herbs carry more weight here than you’d expect, especially with a squeeze of lemon or lime.
Extra-Veggie Add-On:
Toss in spinach, broccoli, zucchini, mushrooms, peppers, or peas wherever they fit. I like to use vegetables that already belong in the texture profile of the dish, not random extras that fight the main event. Mushrooms in pasta, broccoli in rice, spinach in casseroles, and cabbage in tacos all make sense.
Spice-It-Up Version:
Use hot sausage, red pepper flakes, chipotle, jalapeños, pepper jack, or hot sauce to give the dinner more edge. The trick is to push heat in one place, not everywhere at once. A spicy sauce plus spicy topping tends to get noisy fast.
Budget Pantry Swap:
Ground beef, beans, rice, pasta, tortillas, frozen vegetables, canned tomatoes, and store-brand cheese can carry a whole week of Friday dinners. Rotisserie chicken helps too when you want to stretch a small amount of meat across sliders, quesadillas, soup, or casserole.
Kid-Controlled Dinner Night:
Pick meals where the family builds the plate at the end: tacos, nachos, baked potatoes, pitas, sliders, quesadillas, and bowls. That lets the adults season the base well while still giving kids a chance to avoid the stuff they swear they hate.
Common Mistakes to Avoid
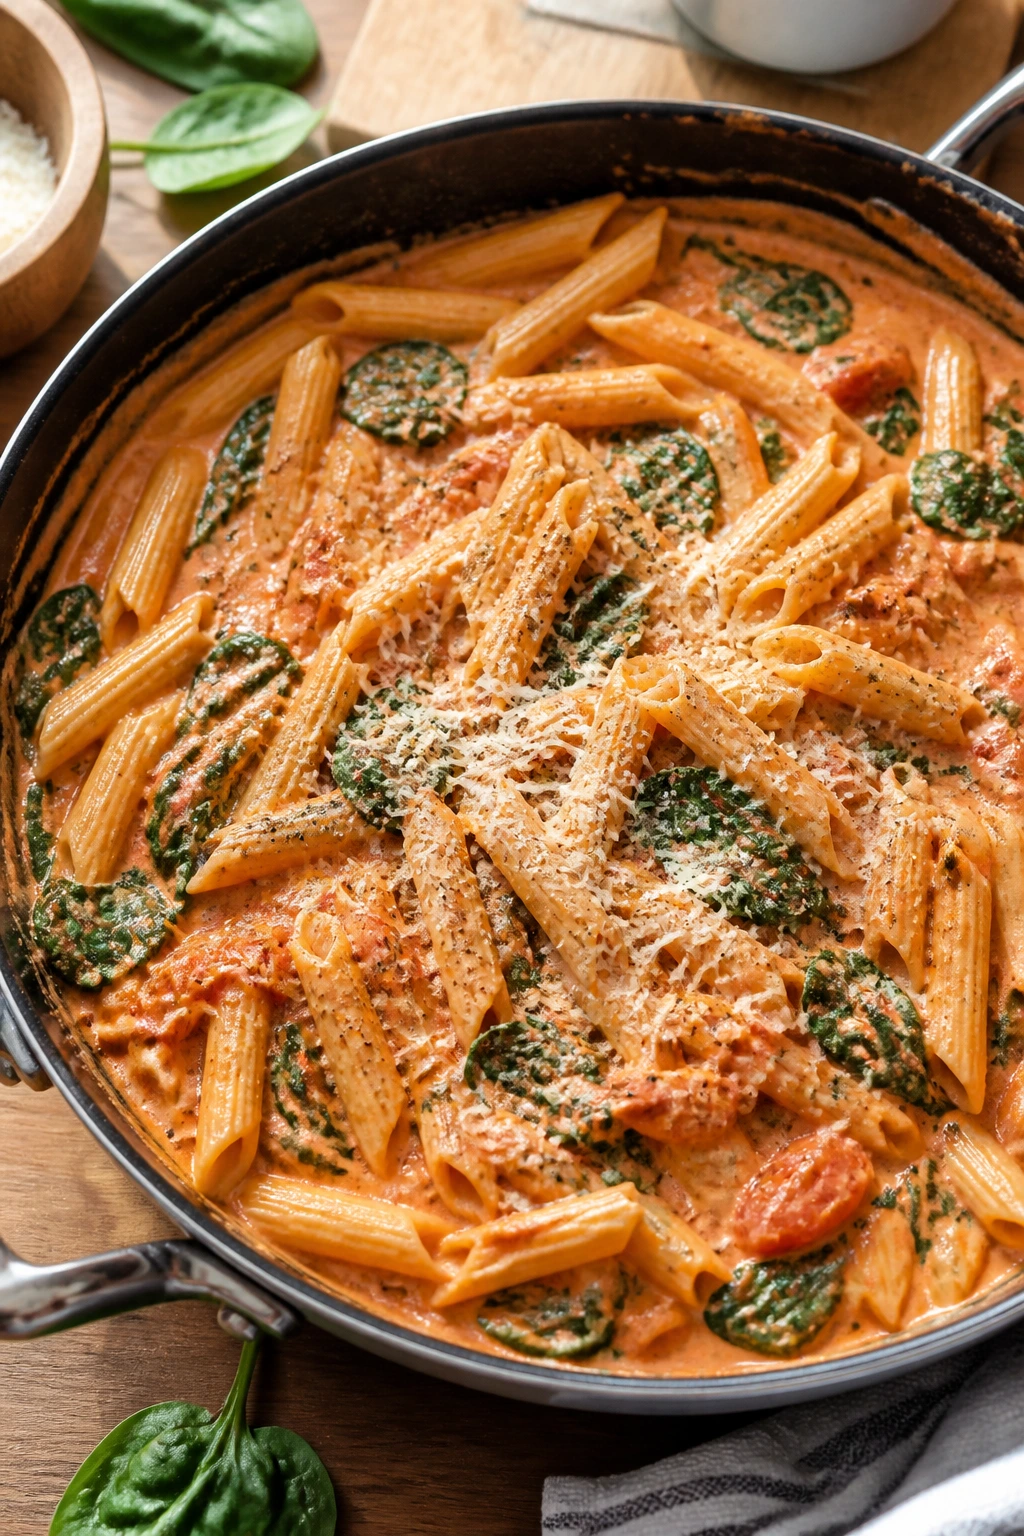
The first mistake is overcomplicating Friday. People sometimes decide the evening needs a project, then wonder why they’re tired halfway through. A Friday dinner works best when at least one major piece is a shortcut — rotisserie chicken, jarred sauce, store-bought dough, pre-cooked rice, or a one-pan method. You do not need to prove anything to the stove.
The second mistake is crowding pans and casseroles. Sheet-pan meals need room to brown, skillet dinners need enough surface to sear, and casseroles need enough sauce so the pasta or rice doesn’t dry out. If the pan looks cramped, split it. If the sauce looks stingy, add more before baking. That simple adjustment fixes a lot.
The third mistake is under-seasoning the base because toppings will “take care of it.” They won’t. Cheese, sour cream, salsa, and herbs can only do so much if the chicken, rice, pasta, or beans underneath are flat. Salt the cooking water, season the meat, and taste sauces before they hit the pan.
The fourth mistake is overcooking the protein in an effort to be safe. Chicken thighs, fish, shrimp, pork chops, and meatballs all have their own doneness windows, and pushing them past that point turns a decent dinner into dry, chewy food. A thermometer helps. So does knowing what the meat looks like when it’s done.
The fifth mistake is letting wet ingredients make crispy things soggy. Tortilla strips go on soup at the end. Sour cream and avocado go on nachos after baking. Biscuit tops need room to brown. Sliders need a thick sauce, not a swimming pool. Texture is fragile, and once it gets soft, there is no bringing it back.
The last one is forgetting that Friday night is still a real night with real timing. If people eat at different hours, choose dinners that hold well — chili, baked pasta, pulled pork, rice skillets, casseroles. If everyone sits together, lean into fast-finish meals like tacos, fish, quesadillas, or pizza. Matching the recipe to the rhythm of the night matters more than choosing the fanciest thing on the list.
Frequently Asked Questions
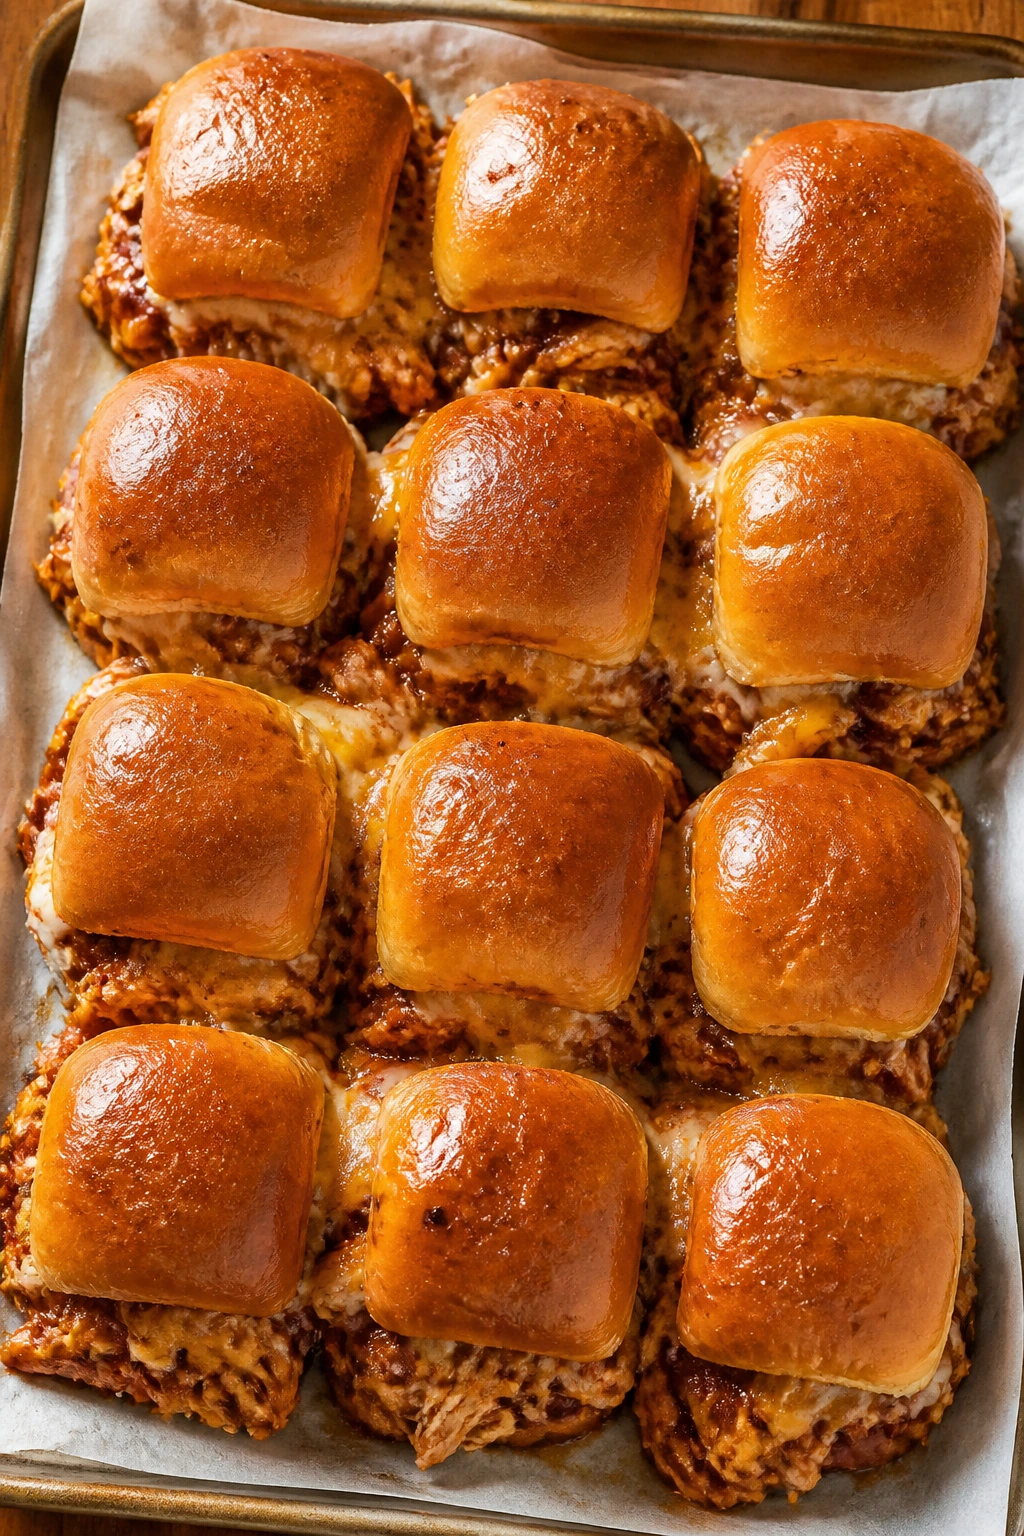
Can I make these Friday night dinners ahead of time?
Yes, and some of them benefit from it. Chili, baked ziti, meatballs in sauce, stuffed shells, pulled pork, and casseroles can all be assembled earlier in the day or even the night before. Keep crisp toppings and bread separate until serving so they don’t go soft.
What’s the fastest option if I get home late?
Quesadillas, pizza quesadillas, fried rice, chicken tenders, taco skillet, and pesto tortellini are the quickest group. If you already have cooked rice or rotisserie chicken, dinner can land in 15 to 20 minutes without feeling like bare minimum food.
Which of these recipes is best for picky eaters?
Build-your-own dinners usually win: tacos, sliders, baked potatoes, quesadillas, nachos, and pitas. Those let the eater control the toppings while you still make one base recipe. It’s less stressful than making separate plates from scratch.
Can I use rotisserie chicken in more than one recipe?
Absolutely. It works in quesadillas, chicken Alfredo bake, chicken Parmesan casserole, tortilla soup, chicken biscuit bake, sliders, and rice bowls. Buy one bird and treat it like a shortcut ingredient, not a one-off meal.
How do I keep sheet-pan dinners from getting soggy?
Use a hot oven, don’t crowd the pan, and dry the vegetables or protein first if they’re wet. A rimmed sheet pan with enough space for steam to escape makes a much bigger difference than most people expect.
What can I do if my sauce turns too thick?
Add a small splash of broth, water, milk, or pasta water, depending on the dish. Stir, let it heat for a minute, and check the texture again before adding more. Tiny adjustments work better than dumping in a big pour.
Which dinners freeze the best?
Baked pasta, chili, pulled pork, meatballs in sauce, stuffed peppers, stuffed shells, and chicken pot pie filling all freeze well. Creamy dishes usually freeze better if you keep the sauce a little looser before freezing, because they thicken as they reheat.
Can I make these without an oven?
Several of them work on the stovetop alone: taco skillet, cheeseburger macaroni, fried rice, stir-fry, soup, chili, shrimp and grits, and sesame noodle bowls. A few others can be adapted with a skillet lid or slow cooker, which makes them easier on hot nights or when the oven is already full.
How do I scale these recipes for a bigger family?
For skillet dinners and casseroles, increase the ingredients by half and use a bigger pan rather than cramming more into the same one. For build-your-own meals, it’s usually smarter to scale the fillings and toppings separately so no one runs out of cheese, tortillas, buns, or sauce.
What if I want a Friday dinner that feels special but still easy?
Pick one of the “looks fancy, cooks fast” meals: salmon with green beans, honey mustard pork chops with apples, shrimp and grits, or stuffed shells. They don’t ask for much attention, but they still land on the table looking like somebody planned ahead.
A Friday Night Menu That Doesn’t Fight Back
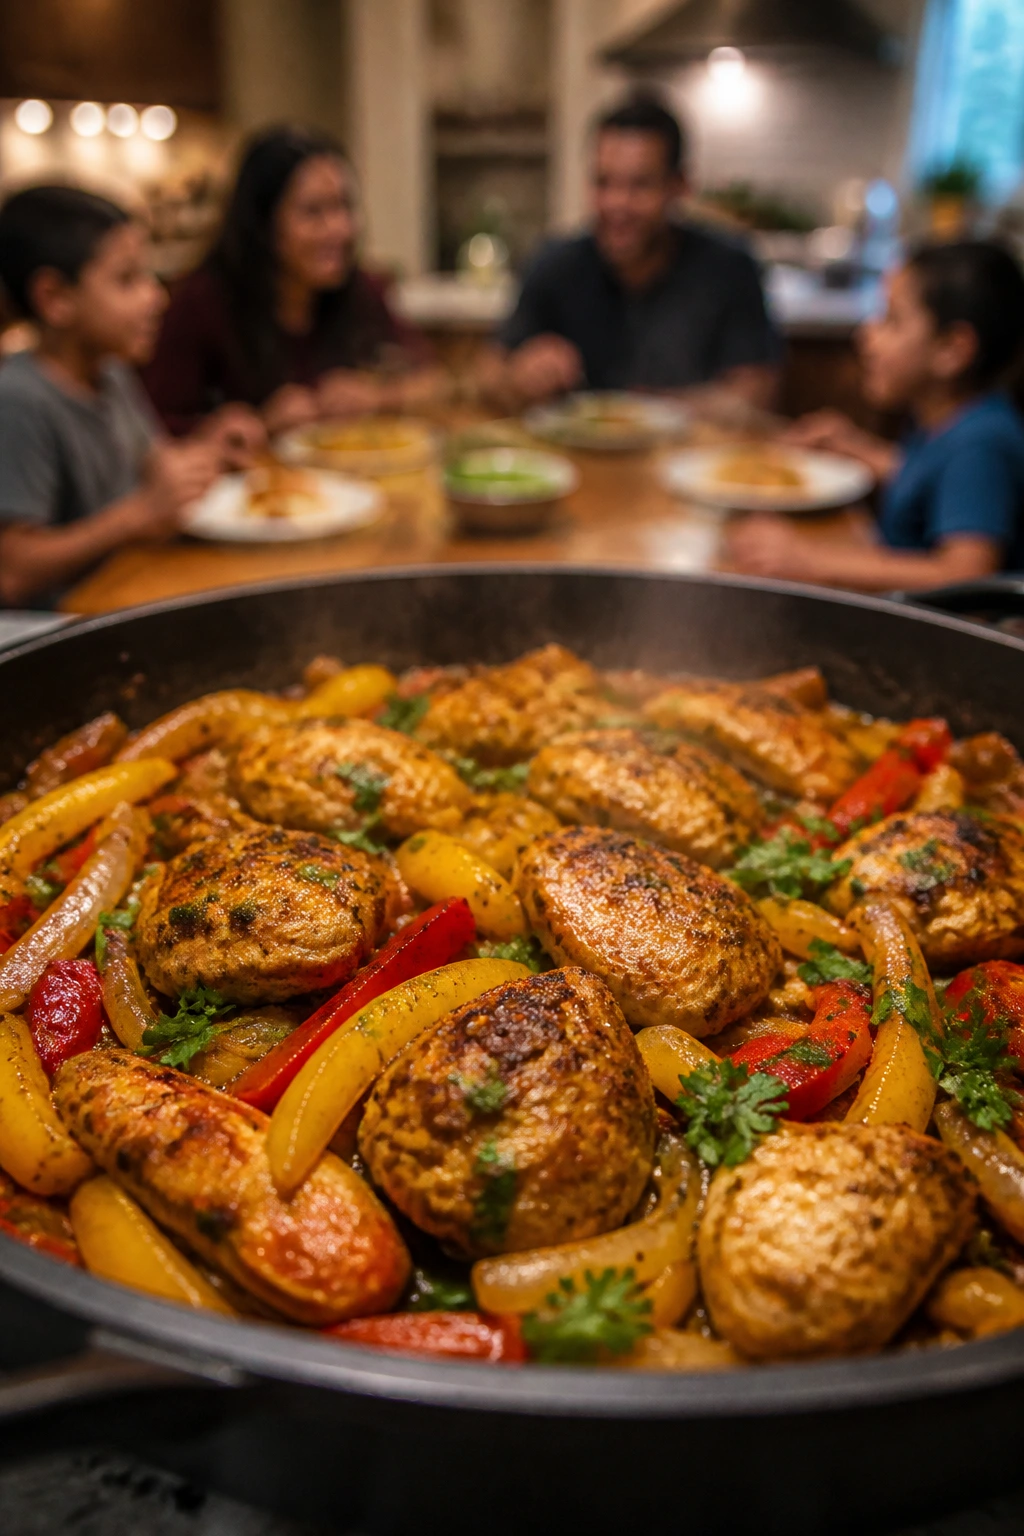
Friday dinner should feel like a release, not another task to manage. The best part of these meals is how quickly they get you from hungry to fed without turning the kitchen into a crime scene. Some are saucy and cozy. Some are crisp and bright. Some let everyone build their own plate and keep the peace.
Keep a few of these in rotation, keep the pantry stocked with the usual suspects, and Friday stops feeling like a problem you have to solve from scratch. It becomes a night with a rhythm of its own — one sheet pan, one skillet, one casserole, one table full of people who are glad you kept it simple enough to enjoy.