
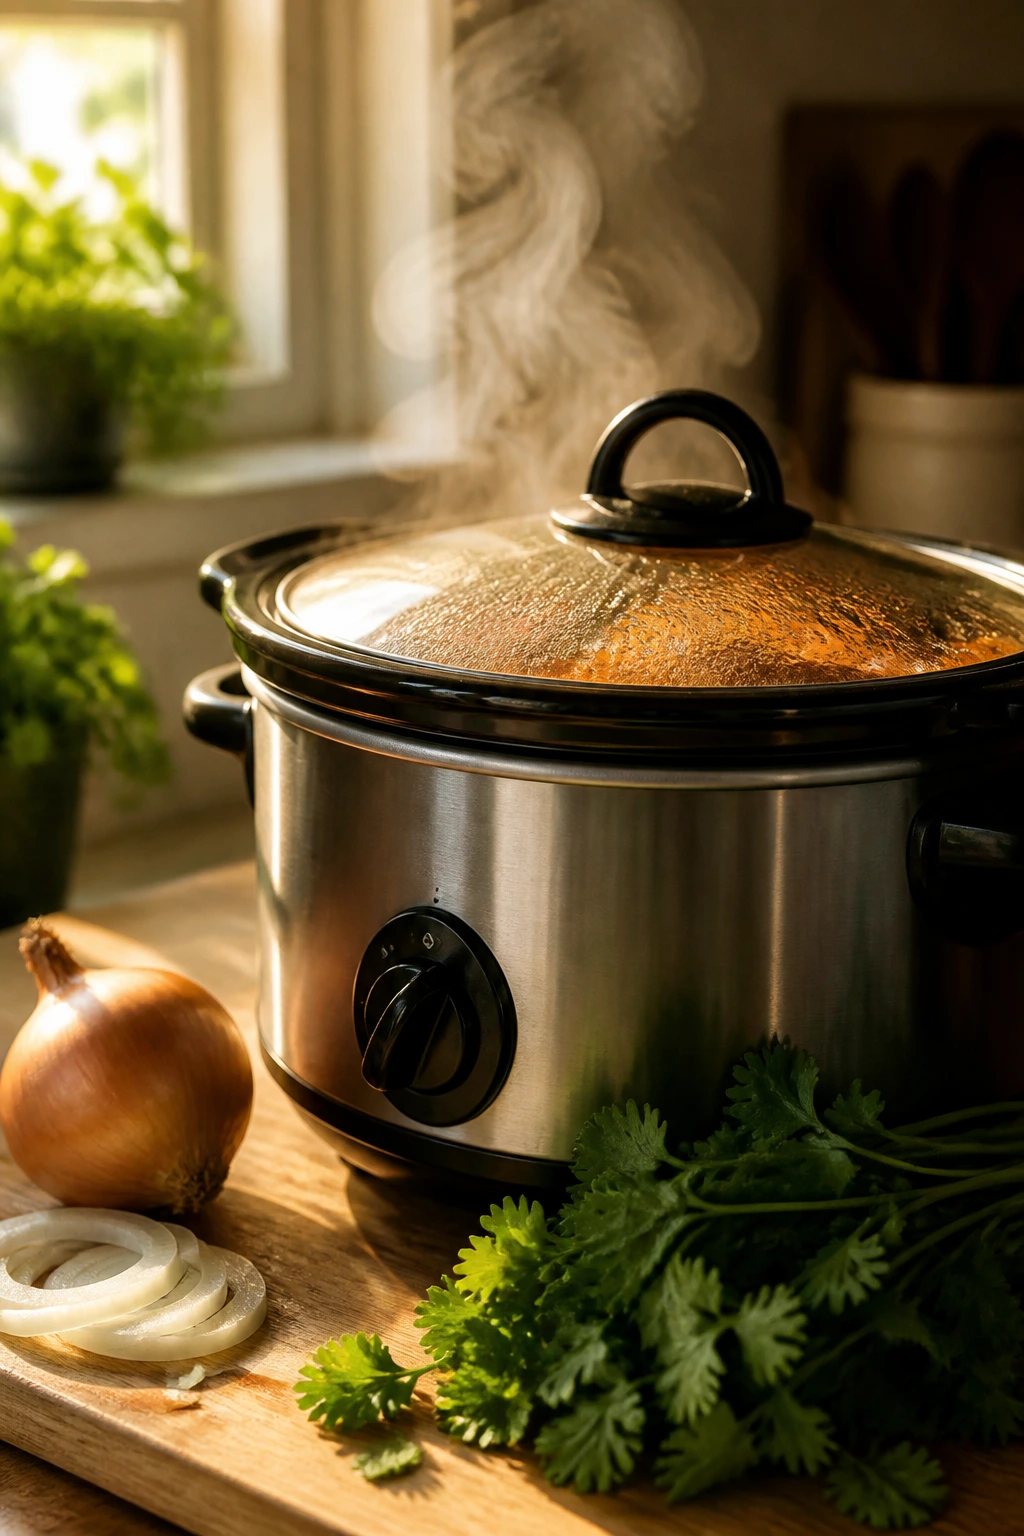
Backpacks are half-zipped, somebody is hunting for a missing sneaker, and the clock has a mean little red glow to it. Dinner does not care that the permission slip still isn’t signed. Dinner still needs to happen.
That’s why the best dinners for busy school mornings are not the ones that demand constant attention at 6 p.m. They’re the ones you can start while the coffee’s still hot, the ones that sit happily in a slow cooker, the ones that bake while you’re at the bus stop, and the ones that taste like you worked harder than you did. A good weeknight dinner does not need drama. It needs timing, a lid, and a plan.
I’ve always liked meals that let the morning do some of the heavy lifting. Chop the onions before school drop-off. Mix the sauce while the breakfast dishes are still on the counter. Toss everything into a pan, cover it, and leave the kitchen looking calm instead of clawed up. That’s the real luxury here: not fancy ingredients, just a dinner that doesn’t wait until everyone is tired and hungry to ask for attention.
Why These Dinners Earn Their Place in the Morning Rush
-
Set-It-and-Leave-It Comfort: Slow cooker meals like salsa chicken, taco soup, and barbacoa can start before the first school bell and be ready when shoes hit the floor at night.
-
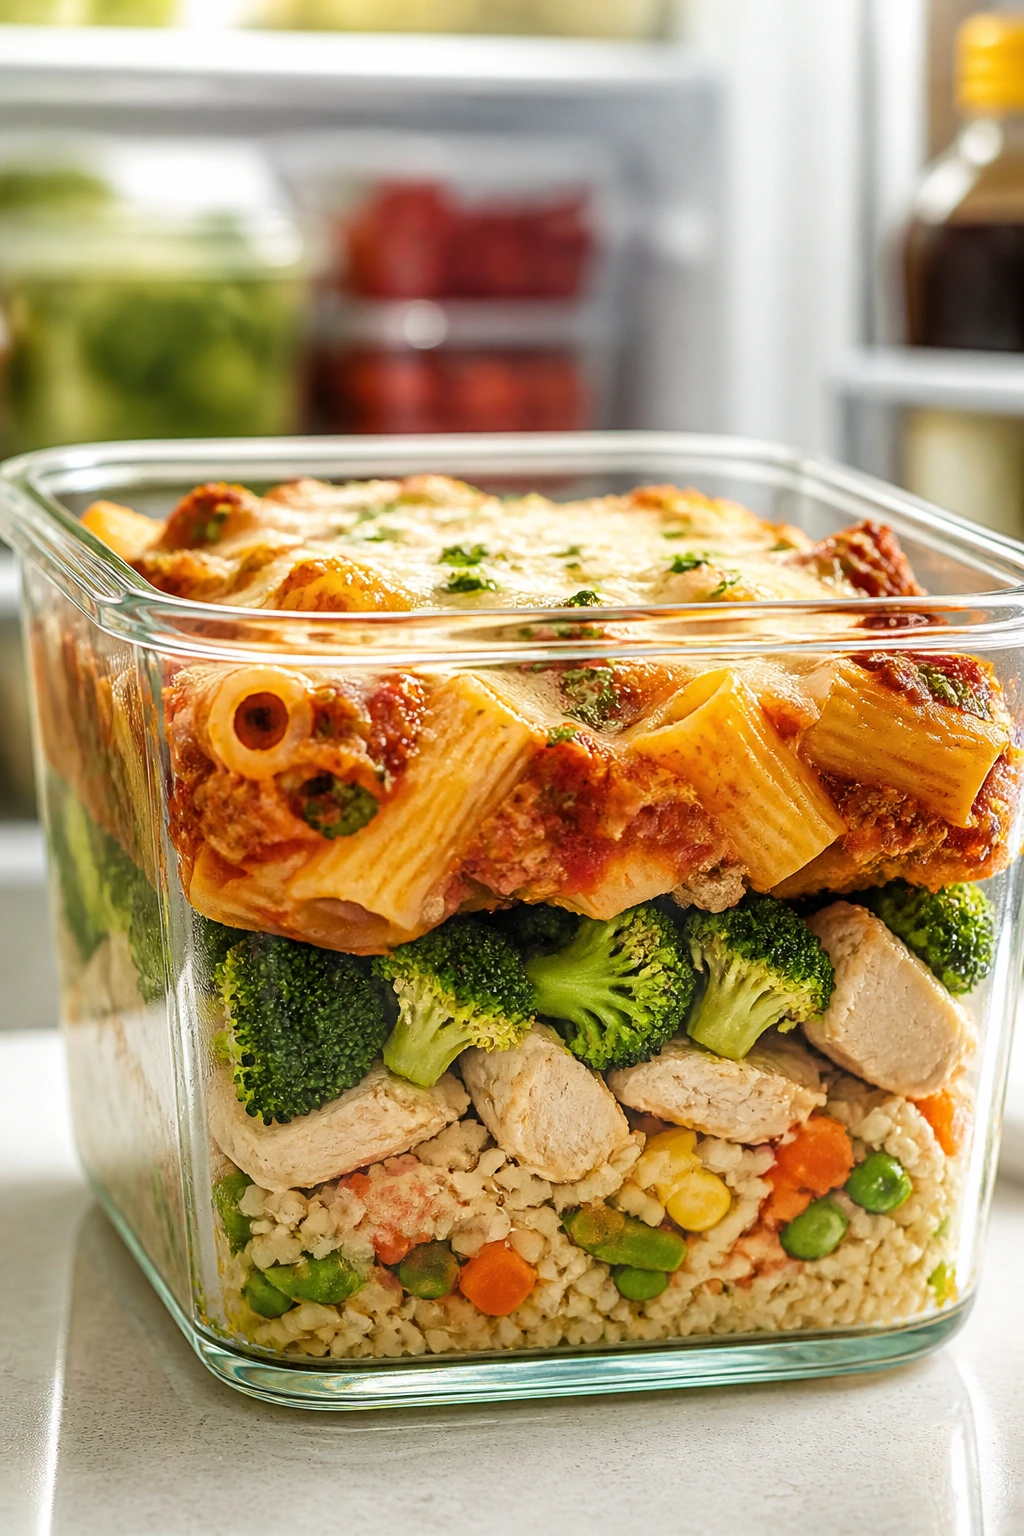
Assembly Beats Scrambling: Casseroles and sheet-pan dinners let you do the cutting and mixing in one quiet stretch, then slide the whole thing into the fridge until dinner.
-
Leftovers That Hold Up: These recipes are built to survive a second trip through the fridge without turning watery, dry, or sad.
-
Kid-Friendly Flavor, Not Baby Food: Most of these lean on cheese, tomatoes, mild spices, or sweet-savory sauces, so they land well without needing a separate meal for the adults.
-
One Pan, One Pot, One Less Mess: There’s no point making dinner if the cleanup takes longer than the cooking. These recipes keep the sink from becoming a project.
-
Real Dinner, Not Placeholder Food: You won’t find a bunch of “good enough” suggestions here. These are the kinds of meals that can anchor a school-night table and still feel like an actual dinner.
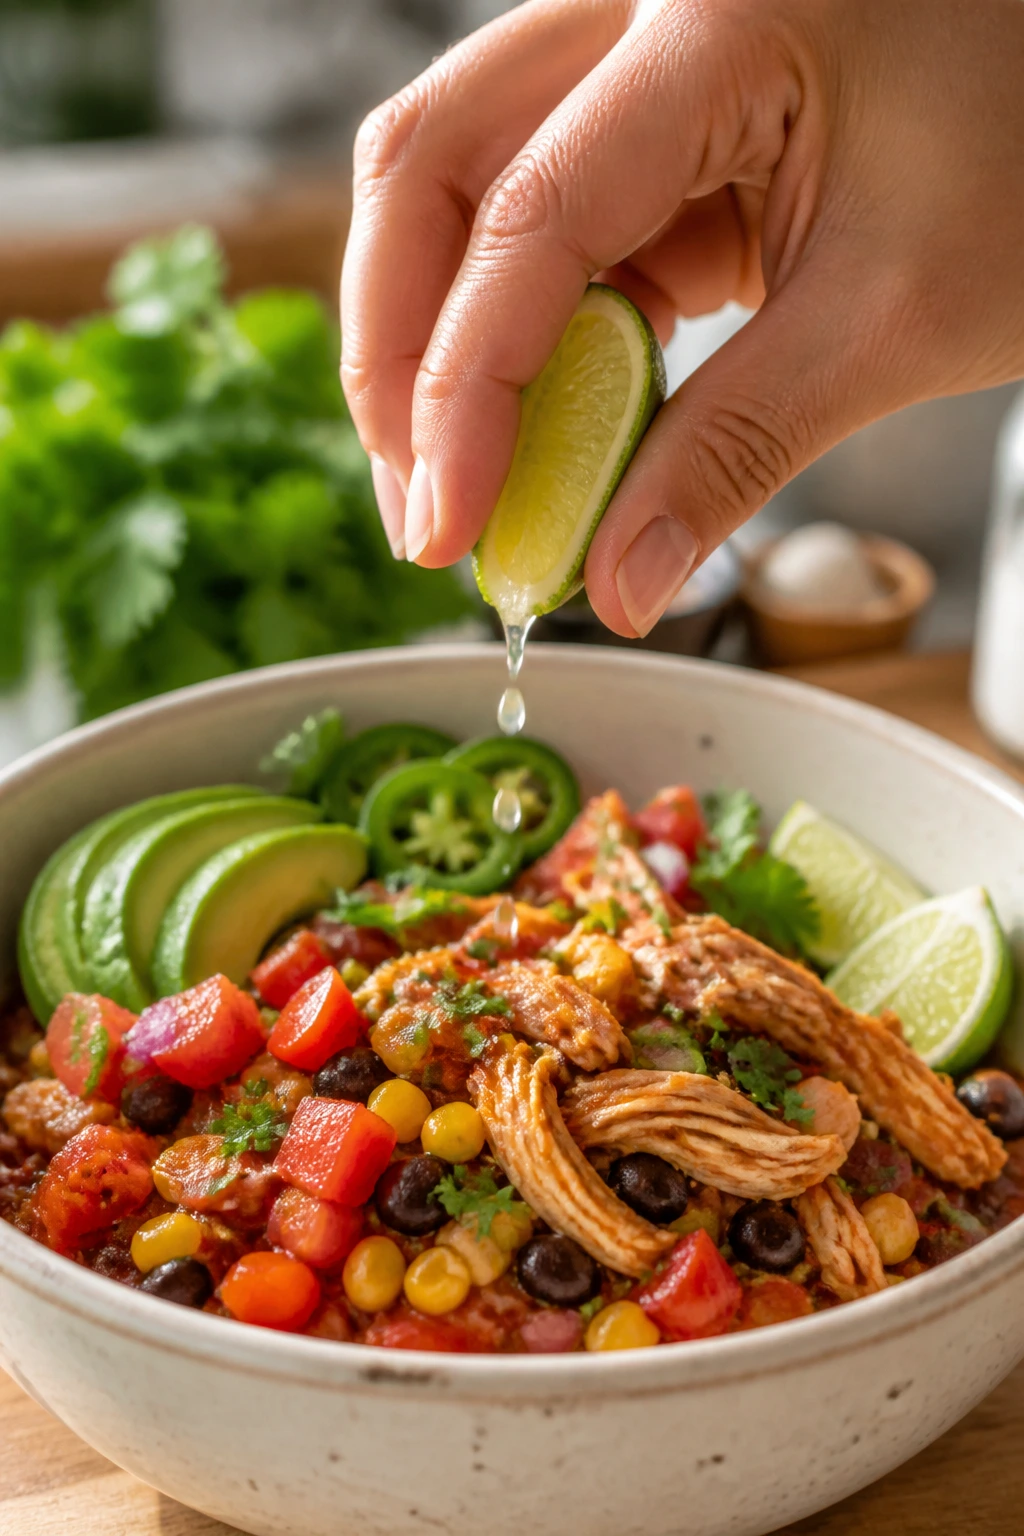
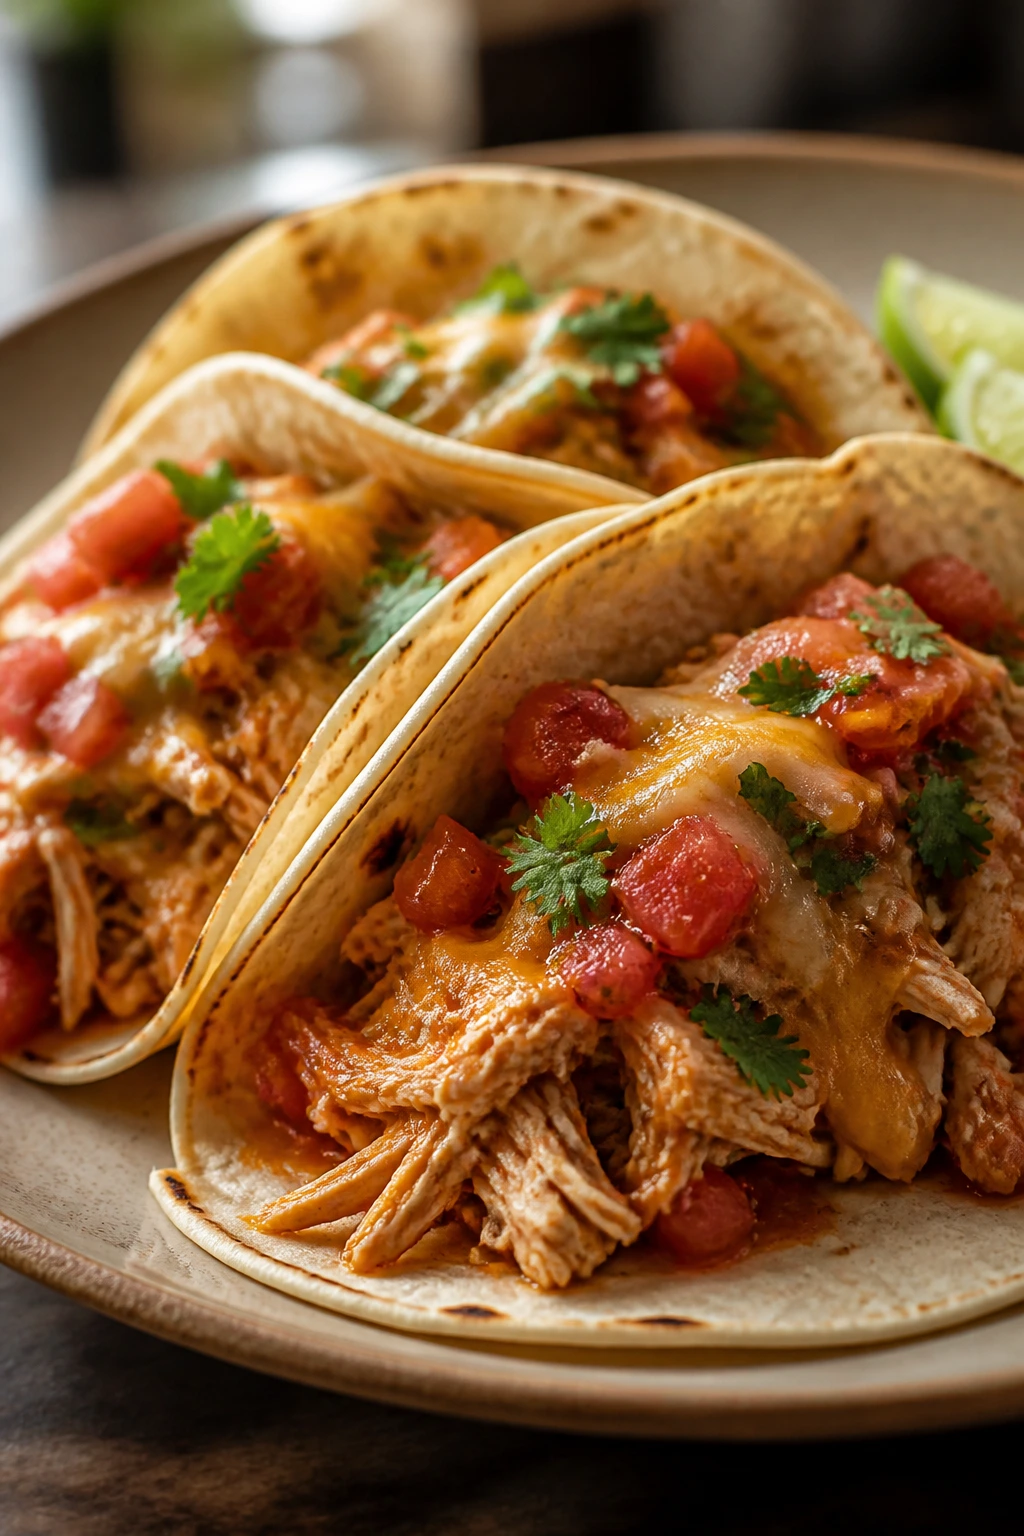
1. Slow Cooker Salsa Chicken Tacos
The smell alone gives this one away. Chicken thighs, salsa, cumin, and onion soften into something that tastes like you spent all day hovering over the stove, when really you spent about ten minutes stacking ingredients into a slow cooker and walking away.
It’s the kind of dinner that behaves itself during the long middle of the day. The chicken turns shreddable without drying out, the salsa thickens into a light sauce, and the onions disappear into the meat instead of sitting there like little raw intruders.
Why It Works:
Chicken thighs are the right cut here because they stay juicy after hours of gentle heat. Salsa brings the tomato, onion, and seasoning in one move, which saves you from building a sauce from scratch at 7:00 in the morning. The slow cooker does the easy part well: low heat, steady moisture, and no hovering.
Key Ingredients:
- 2 lbs boneless, skinless chicken thighs
- 1 (16 oz) jar salsa
- 1 medium yellow onion, thinly sliced
- 2 tsp ground cumin
- 1 tsp chili powder
- 1 tsp kosher salt
- 2 cloves garlic, minced
- 1 lime, cut into wedges
- 12 small corn or flour tortillas
- 1 cup shredded Monterey Jack or cheddar
- 1/2 cup chopped cilantro
Quick Steps:
- Layer the sliced onion in the bottom of a 5- to 6-quart slow cooker.
- Season the chicken thighs with cumin, chili powder, salt, and garlic, then nestle them on top of the onion.
- Pour the salsa over the chicken, cover, and cook on low for 6 to 7 hours, or on high for 3 to 4 hours, until the chicken shreds with a fork.
- Shred the chicken прямо in the cooker, squeeze in the lime juice, and stir so the meat drinks up the sauce.
- Warm the tortillas, spoon in the chicken, and finish with cheese and cilantro.
Equipment for This Recipe:
- 5- to 6-quart slow cooker
- Two forks for shredding
- Cutting board and sharp knife
- Small skillet or dry pan for warming tortillas
How to Serve This Dish:
Pile the shredded chicken into warm tortillas and let everyone build their own. I like to put out chopped tomatoes, avocado, and a little sour cream, then keep the filling in the center of the table so the tortillas don’t get soggy before anyone sits down.
Pro Tips for This Recipe:
- Use thighs, not breasts, if the slow cooker will run past 6 hours. Breasts can go stringy in a hurry.
- If your salsa is very thin, leave the lid cracked for the last 20 minutes to thicken the juices a bit.
- Add the lime at the end. Early lime can fade into the background and leave the filling tasting flat.
Variations on This Dish:
- Green Chile Chicken Tacos: Swap the red salsa for salsa verde and add a handful of chopped cilantro at the end.
- Bean-Heavy Version: Stir in one can of drained black beans during the last 30 minutes for a more filling taco spread.
- Smoky Chipotle Spin: Add 1 minced chipotle pepper in adobo if your crew likes a little heat with the smoke.
Common Mistakes to Avoid with This Dish:
- Using too much liquid: A flooded slow cooker makes the tacos sloppy instead of saucy. Keep to one jar of salsa unless you want to drain some off before shredding.
- Cooking breast meat too long: It will still shred, but it can dry out around the edges. Thighs are safer for a morning-to-evening schedule.
- Skipping the lime: That hit of acid keeps the salsa from tasting heavy after hours of cooking.
2. Sheet Pan Honey-Dijon Chicken and Potatoes
This is one of those sheet-pan dinners that smells like the house is doing you a favor. Sweet honey, sharp Dijon, garlic, and browned chicken skin all hit the air at once, and the potatoes pick up the drippings on the way to getting crisp at the edges.
It works because the ingredients are sturdy. Potatoes can take the heat, chicken thighs stay tender, and green beans only need the last stretch in the oven so they don’t go dull and khaki.
Why It Works:
The honey-Dijon mixture clings to the chicken and the potatoes, then turns glossy in the oven. Chicken thighs give you a forgiving window if you’re juggling school backpacks or answering one more email. Roasting at 425°F gives the potatoes enough heat to brown instead of steaming.
Key Ingredients:
- 2 lbs boneless, skinless chicken thighs
- 1 1/2 lbs baby potatoes, halved
- 1 lb green beans, trimmed
- 3 tbsp Dijon mustard
- 2 tbsp honey
- 2 tbsp olive oil
- 2 tsp garlic powder
- 1 tsp paprika
- 1 tsp kosher salt
- 1/2 tsp black pepper
- 1 lemon, cut into wedges
Quick Steps:
- Preheat the oven to 425°F and line a rimmed sheet pan with parchment.
- Toss the halved potatoes with half the olive oil, half the garlic powder, half the salt, and half the pepper; spread them on the pan and roast for 15 minutes.
- While the potatoes start, mix Dijon, honey, the rest of the olive oil, garlic powder, paprika, salt, and pepper.
- Coat the chicken thighs in the honey-Dijon mixture and add them to the pan after the first 15 minutes.
- Roast 15 minutes more, add the green beans, then roast 10 to 12 minutes until the chicken hits 165°F and the potatoes are browned at the cut edges.
Equipment for This Recipe:
- Large rimmed sheet pan
- Mixing bowl
- Tongs
- Instant-read thermometer
How to Serve This Dish:
Serve the chicken whole or sliced over the potatoes so the pan juices run into everything. A simple green salad or a pile of buttered peas keeps the plate from feeling heavy, and the lemon wedge at the end wakes up the honey.
Pro Tips for This Recipe:
- Give the potatoes a head start. If they go on at the same time as the chicken, they often come out pale.
- Don’t crowd the pan. If the ingredients are packed tightly, they steam instead of browning.
- Pull the chicken as soon as it reaches 165°F in the thickest part. A few extra minutes can dry out the honey coating.
Variations on This Dish:
- Maple Mustard Version: Swap the honey for maple syrup and add a pinch of thyme.
- Lemony Herb Sheet Pan: Use oregano and rosemary instead of paprika for a brighter, more savory tray.
- Root Vegetable Swap: Use carrots or parsnips in place of the green beans during colder months; they need the same oven time as the potatoes.
Common Mistakes to Avoid with This Dish:
- Skipping the potato head start: Raw potatoes are stubborn. They need a little time alone before the chicken joins them.
- Using too much sauce: A thick coat is enough. A puddle turns the pan sticky and scorched.
- Forgetting the thermometer: Thighs are forgiving, but guessing still leads to either undercooked chicken or dry meat.
3. One-Pot Turkey Chili Mac
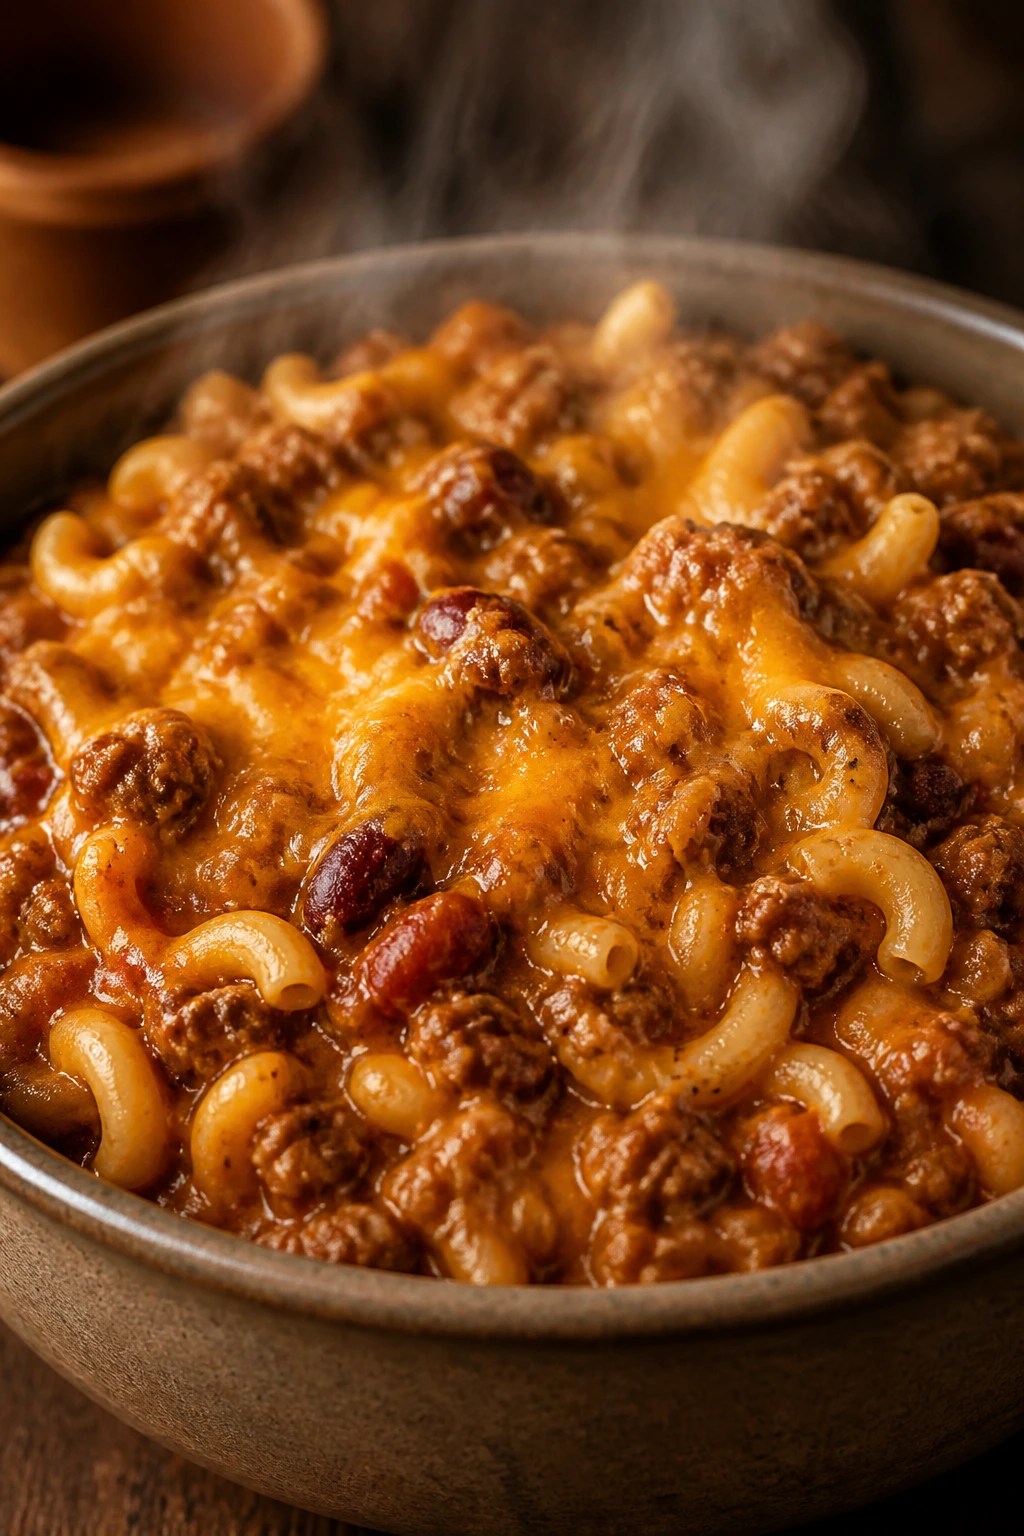
Chili mac has a certain school-night honesty to it. It’s hearty, a little messy, and built to be eaten by kids who are already thinking about tomorrow’s spelling quiz. Ground turkey keeps it lighter than the beef version, but the pasta and cheese make sure no one leaves the table hungry.
The best part is the way it reheats. A splash of broth brings it right back, and the sauce thickens enough to coat every elbow macaroni curve without becoming gluey.
Why It Works:
This recipe starts like chili and ends like comfort food. Browning the turkey builds flavor fast, the tomatoes and broth make a quick sauce, and the pasta cooks right in the pot so it drinks in the seasoning. That means fewer dishes and a better-tasting noodle than if you boiled it separately.
Key Ingredients:
- 1 lb ground turkey
- 1 medium yellow onion, diced
- 2 cloves garlic, minced
- 1 (14.5 oz) can diced tomatoes
- 1 (15 oz) can tomato sauce
- 2 cups low-sodium chicken broth
- 2 cups elbow macaroni
- 1 (15 oz) can kidney beans, drained and rinsed
- 1 tbsp chili powder
- 1 tsp ground cumin
- 1 1/2 cups shredded cheddar
- Salt and black pepper to taste
Quick Steps:
- Brown the turkey and onion in a large pot over medium-high heat until the meat is no longer pink and the onion is soft.
- Stir in the garlic, chili powder, cumin, salt, and pepper for 30 seconds.
- Add the tomatoes, tomato sauce, broth, macaroni, and kidney beans. Bring to a simmer.
- Cover and cook for 10 to 12 minutes, stirring once or twice, until the pasta is tender and the sauce looks glossy.
- Stir in the cheddar off the heat and let it sit for 2 minutes before serving.
Equipment for This Recipe:
- Large Dutch oven or heavy pot
- Wooden spoon
- Measuring cups
- Box grater or pre-shredded cheese bag
How to Serve This Dish:
Scoop it into shallow bowls and let the cheese stretch a little before you sit down. A pile of cut apple slices or a green salad with crunchy lettuce gives the meal some lift, which helps when the main pot is this rich.
Pro Tips for This Recipe:
- Stir the pasta once during simmering so it doesn’t settle and cling to the bottom.
- If the pot looks too thick before the pasta is done, add 1/2 cup extra broth.
- Let the cheddar melt off the heat. Boiling cheese tends to go grainy and stubborn.
Variations on This Dish:
- Southwest Chili Mac: Add a diced bell pepper and swap in pepper jack for part of the cheddar.
- Bean-Free Version: Leave out the kidney beans and use an extra 1/2 pound of turkey for a meatier pot.
- Cornbread Sidekick: Serve it with leftover cornbread crumbled on top instead of crackers.
Common Mistakes to Avoid with This Dish:
- Adding pasta too early: It keeps cooking as it sits. Pull it when it’s just tender, not soft.
- Using high heat the whole time: The sauce can scorch before the noodles cook through. A steady simmer works better.
- Dumping in the cheese too soon: Heat it off the burner or it can clump instead of melting.
4. Baked Ziti with Spinach and Mozzarella
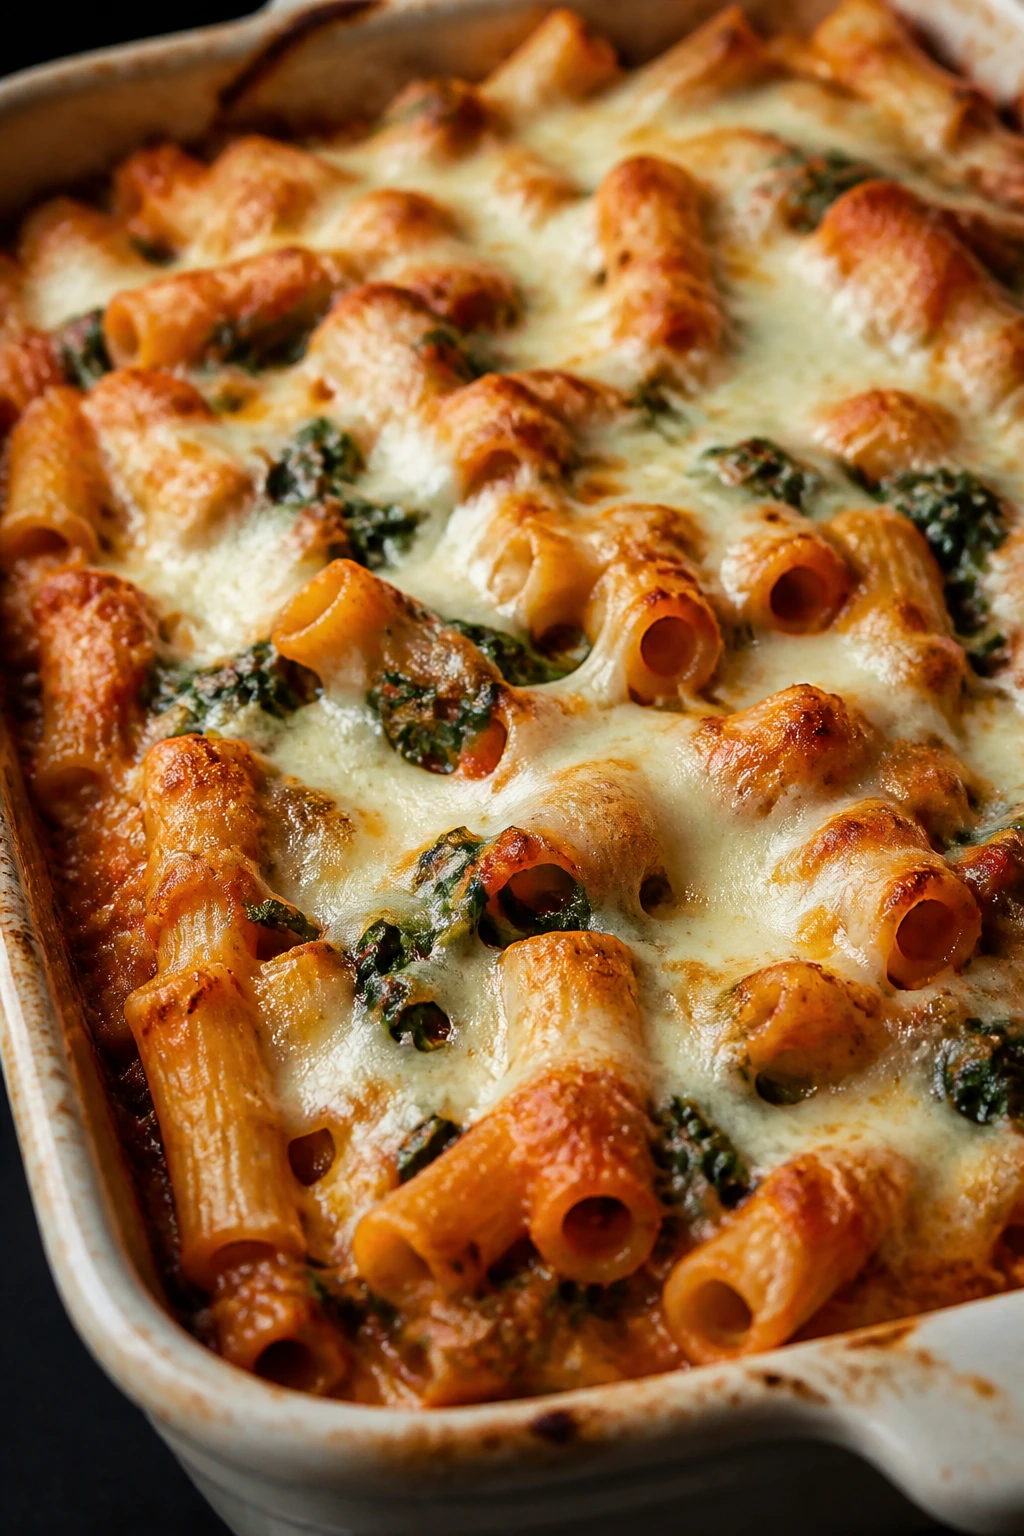
Baked ziti is a casserole with a good backbone. Sauce, pasta, cheese, spinach. No tricks, no fluff. What makes it useful on a school morning is that you can assemble the whole thing early, park it in the fridge, and bake it when the afternoon gets noisy.
The edges turn a little chewy in the oven, which is the part I always fight my family over. The center stays saucy, and the spinach disappears into the ricotta so even the suspicious eaters usually stop asking questions.
Why It Works:
This dish holds together because the pasta is mixed with enough sauce to stay loose during baking, but not so much that it slides apart on the plate. Ricotta gives the filling a creamy middle, mozzarella melts into long, stretchy threads, and spinach adds bulk without making the casserole watery if it’s squeezed dry.
Key Ingredients:
- 1 lb ziti or penne
- 2 tbsp olive oil
- 1 medium onion, finely diced
- 3 cloves garlic, minced
- 4 cups marinara sauce
- 15 oz ricotta cheese
- 1 large egg
- 5 oz fresh spinach, chopped
- 2 cups shredded mozzarella
- 1 cup grated Parmesan
- 1 tsp Italian seasoning
- Salt and black pepper to taste
Quick Steps:
- Cook the pasta in salted water until just shy of al dente, then drain.
- Sauté the onion in olive oil until soft, add the garlic for 30 seconds, then stir in the marinara.
- Mix ricotta, egg, spinach, half the mozzarella, half the Parmesan, Italian seasoning, salt, and pepper in a large bowl.
- Fold the pasta and sauce into the ricotta mixture, then pour into a greased baking dish and top with the remaining cheese.
- Bake at 375°F for 25 to 30 minutes, until bubbling at the edges and browned in spots.
Equipment for This Recipe:
- Large pot
- Colander
- Large mixing bowl
- 9×13-inch baking dish
How to Serve This Dish:
Cut it into squares and serve with a big spoon rather than trying to slice it perfectly. A bitter greens salad or roasted broccoli gives a nice contrast to all the cheese, and a piece of garlic bread never hurts here.
Pro Tips for This Recipe:
- Undercook the pasta by about 2 minutes. It will finish in the oven.
- Squeeze the spinach dry after chopping. Extra water turns the center loose.
- Let the casserole sit 10 minutes before serving so the layers settle.
Variations on This Dish:
- Sausage Ziti Bake: Brown 1 lb Italian sausage with the onions and use it in place of the spinach-heavy version.
- Vegetable-Loaded Ziti: Add sautéed mushrooms and zucchini if you want more vegetables without changing the texture much.
- Dairy-Light Version: Use part-skim ricotta and cut the mozzarella down to 1 1/2 cups for a lighter top.
Common Mistakes to Avoid with This Dish:
- Overcooking the pasta: Mushy ziti breaks apart in the bake. Stop shy of fully tender.
- Using watery spinach: Fresh spinach needs to be chopped and squeezed. Frozen spinach needs to be thawed and wrung out even harder.
- Serving it straight from the oven: A short rest keeps the slices from slumping into sauce.
5. Creamy Chicken and Rice Casserole
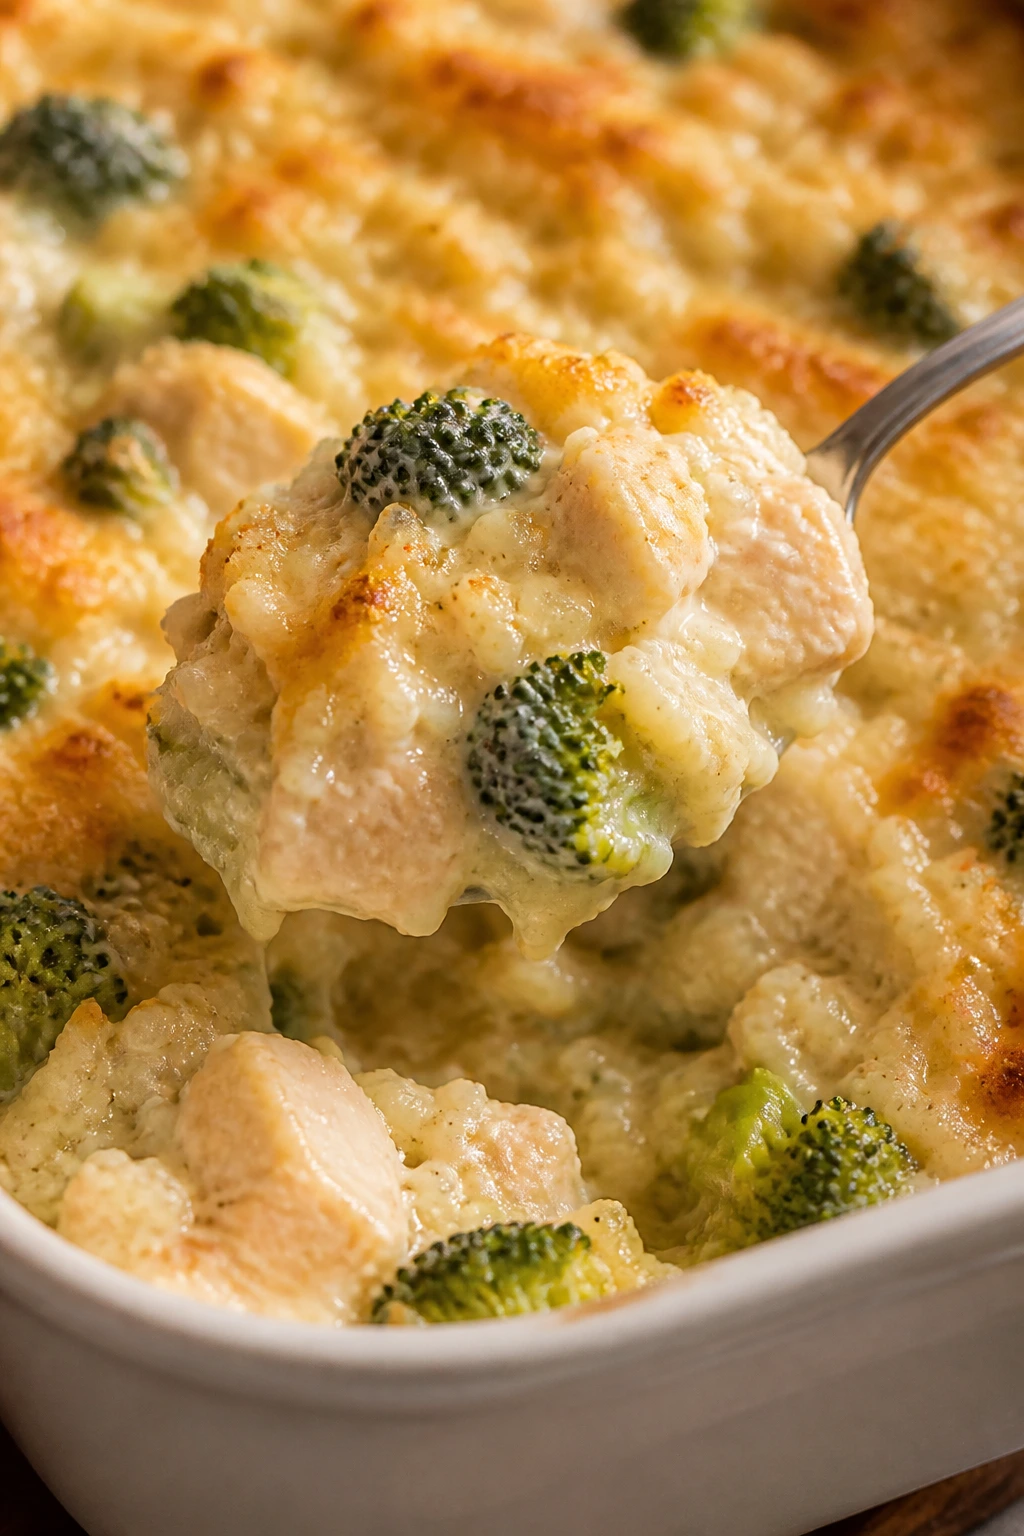
This one tastes like the casserole dish equivalent of clean socks and a locked front door. It is steady, warm, and strangely calming. The rice soaks up the creamy sauce, the chicken stays tender, and the top gets just a little browned where the cheese reaches the heat.
Using cooked chicken and rice is the trick. You can do the chopping and mixing in the morning, then bake it at dinner without standing over a skillet when everyone is already asking what’s for food.
Why It Works:
Pre-cooked rice is what keeps the texture from turning gummy. The sour cream and broth loosen the sauce just enough to coat everything, while cheddar melts into a top layer that smells like dinner the second the foil comes off. If you have leftover rotisserie chicken, this casserole feels almost unfairly efficient.
Key Ingredients:
- 3 cups cooked shredded chicken
- 4 cups cooked white rice
- 1 medium onion, diced
- 2 cups broccoli florets, chopped small
- 1 can cream of chicken soup
- 1 cup sour cream
- 1 cup chicken broth
- 1 1/2 cups shredded cheddar
- 1 tsp garlic powder
- 1 tsp kosher salt
- 1/2 tsp black pepper
Quick Steps:
- Heat the oven to 375°F and grease a 9×13-inch baking dish.
- Stir together the cream of chicken soup, sour cream, broth, garlic powder, salt, and pepper in a large bowl.
- Fold in the chicken, rice, onion, broccoli, and 1 cup of the cheddar until everything is coated.
- Spread the mixture into the dish and top with the remaining cheddar.
- Bake for 25 to 30 minutes, until the center is hot and the cheese is melted and speckled with brown spots.
Equipment for This Recipe:
- 9×13-inch baking dish
- Large mixing bowl
- Wooden spoon
- Foil for covering if the top browns too fast
How to Serve This Dish:
Serve it with a crisp cucumber salad or a pile of steamed peas so the plate has one cool, fresh thing on it. A scoop is plenty for younger kids; adults usually want a second spoonful because the rice gets especially cozy around the edges.
Pro Tips for This Recipe:
- Use rice that has had time to cool a bit. Freshly cooked rice can turn mushy in the oven.
- Chop the broccoli small so it softens in the bake instead of staying crunchy in a weird way.
- If the casserole looks dry before baking, add 1/4 cup extra broth.
Variations on This Dish:
- Mushroom Chicken Bake: Replace the broccoli with sautéed mushrooms and a little thyme.
- Cheddar-Broccoli Route: Use an extra cup of broccoli and swap half the chicken for more rice if you need to stretch the pan.
- Dairy-Free Shortcut: Use a dairy-free cream soup substitute and a shredded plant-based topping that melts well.
Common Mistakes to Avoid with This Dish:
- Using hot rice straight from the pot: It can keep steaming inside the casserole and go past the good texture line.
- Skipping the seasoning in the sauce: Cream soups need salt and garlic or they taste flat.
- Baking uncovered too early: If the top browns before the middle is hot, tent it with foil for the first 15 minutes.
6. Slow Cooker Beef and Broccoli Rice Bowls
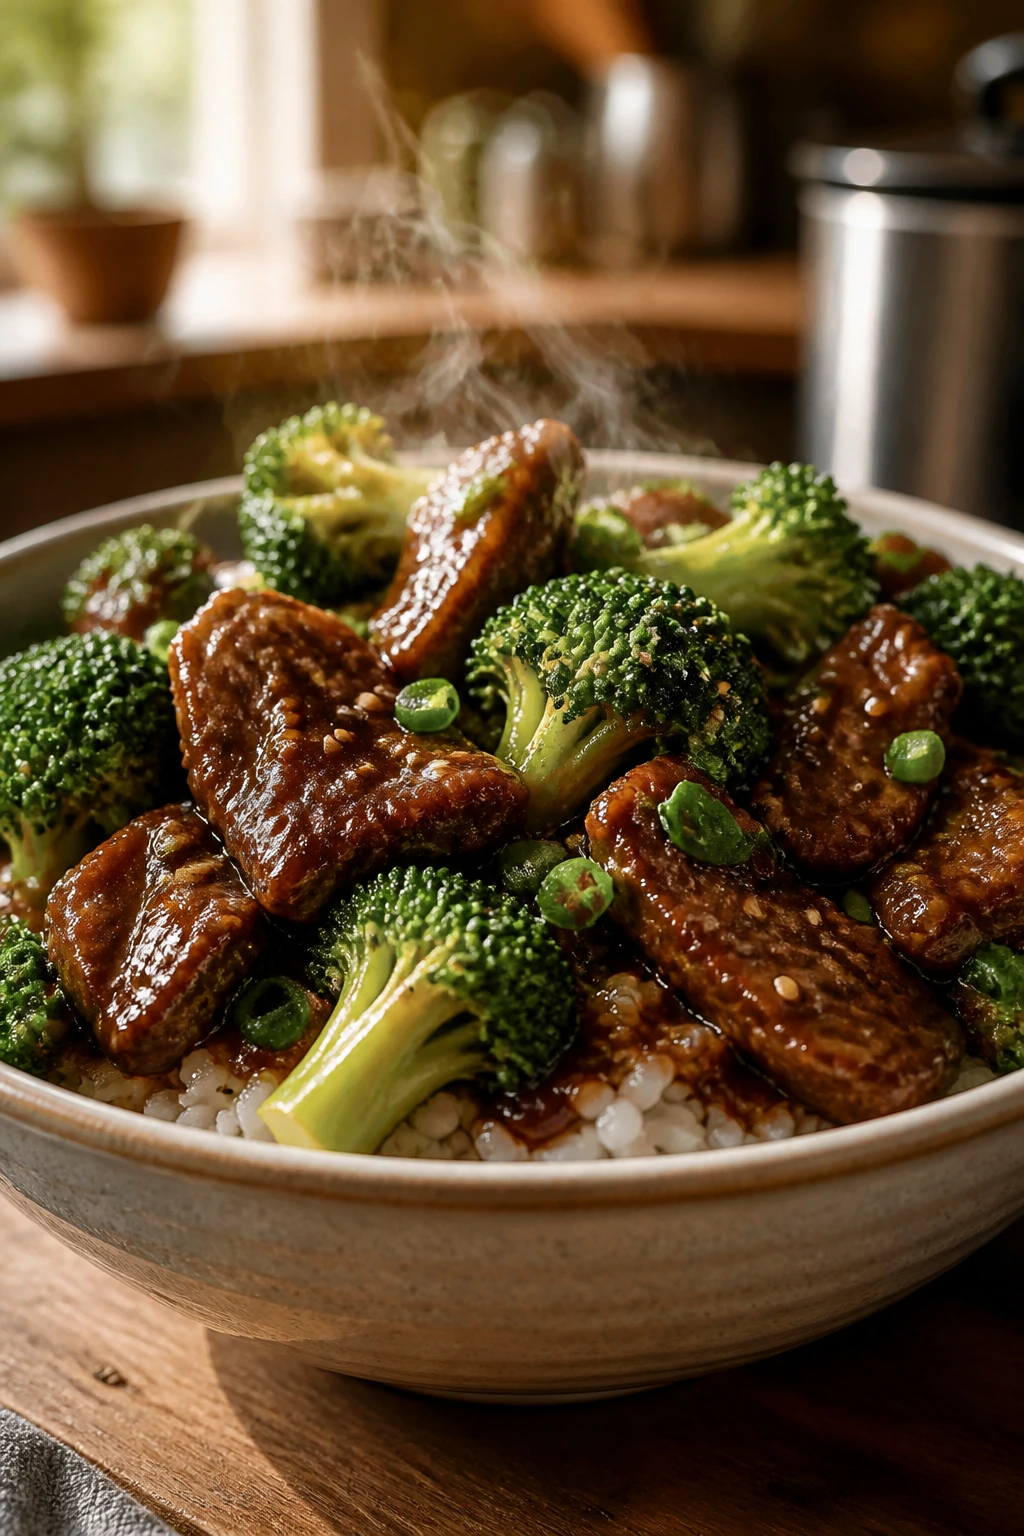
Beef and broccoli gets a lot of praise for being fast, but the slow cooker version has its own charm. The beef turns spoon-tender, the sauce thickens into a glossy brown coat, and the broccoli goes in late enough to keep a little snap instead of turning to green mush.
This is one of the best make-ahead dinners in the stack because the rice can be cooked earlier in the day or even the day before. When the house smells like soy, ginger, and garlic around dinnertime, you know the evening is about to get easier.
Why It Works:
Flank steak or sirloin sliced thin cooks down beautifully in a soy-based sauce. A little cornstarch at the end makes the sauce cling to the beef instead of pooling at the bottom of the bowl. Broccoli added near the finish keeps its color and structure, which matters more than people think.
Key Ingredients:
- 2 lbs flank steak or sirloin, sliced thin against the grain
- 1/2 cup low-sodium soy sauce
- 1/4 cup brown sugar
- 1 cup beef broth
- 3 cloves garlic, minced
- 1 tbsp fresh ginger, grated
- 2 tbsp rice vinegar
- 2 tbsp cornstarch
- 4 cups broccoli florets
- 3 cups cooked rice
- 2 tsp sesame oil
- Sesame seeds for serving
Quick Steps:
- Whisk soy sauce, brown sugar, broth, garlic, ginger, rice vinegar, and sesame oil in the slow cooker.
- Add the sliced beef, turn it to coat, cover, and cook on low for 5 to 6 hours.
- Stir the cornstarch with 2 tbsp cold water, then mix it into the slow cooker during the last 20 minutes.
- Add the broccoli for the final 15 to 20 minutes, just until it turns bright green and tender-crisp.
- Spoon over rice and finish with sesame seeds.
Equipment for This Recipe:
- 5- to 6-quart slow cooker
- Sharp knife
- Cutting board
- Small bowl for cornstarch slurry
How to Serve This Dish:
Use wide bowls so the sauce can pool a little around the rice. A few slices of cucumber or a simple cabbage slaw on the side bring crunch, which is useful because this bowl is soft in the best possible way.
Pro Tips for This Recipe:
- Slice the beef thin and against the grain so it doesn’t turn chewy.
- Don’t add the broccoli at the start. It will lose its bite and turn drab.
- Taste the sauce before serving. If your soy sauce is extra salty, a squeeze of lime can balance it.
Variations on This Dish:
- Sesame Beef Bowl: Add 1 tbsp extra sesame oil and a handful of scallions at the end.
- Chicken Version: Swap in boneless chicken thighs and keep the same timing.
- Ginger-Heavy Bowl: Double the ginger if you like the sharp, warm finish that lingers at the back of the throat.
Common Mistakes to Avoid with This Dish:
- Using a too-thick beef slice: Thick strips can stay firm even after hours of cooking. Thin is better here.
- Adding the broccoli too early: It should be green and crisp-tender, not tired.
- Skipping the slurry: Without a little cornstarch, the sauce can stay thin and slide right off the rice.
7. Lemon Herb Salmon with Green Beans and Couscous
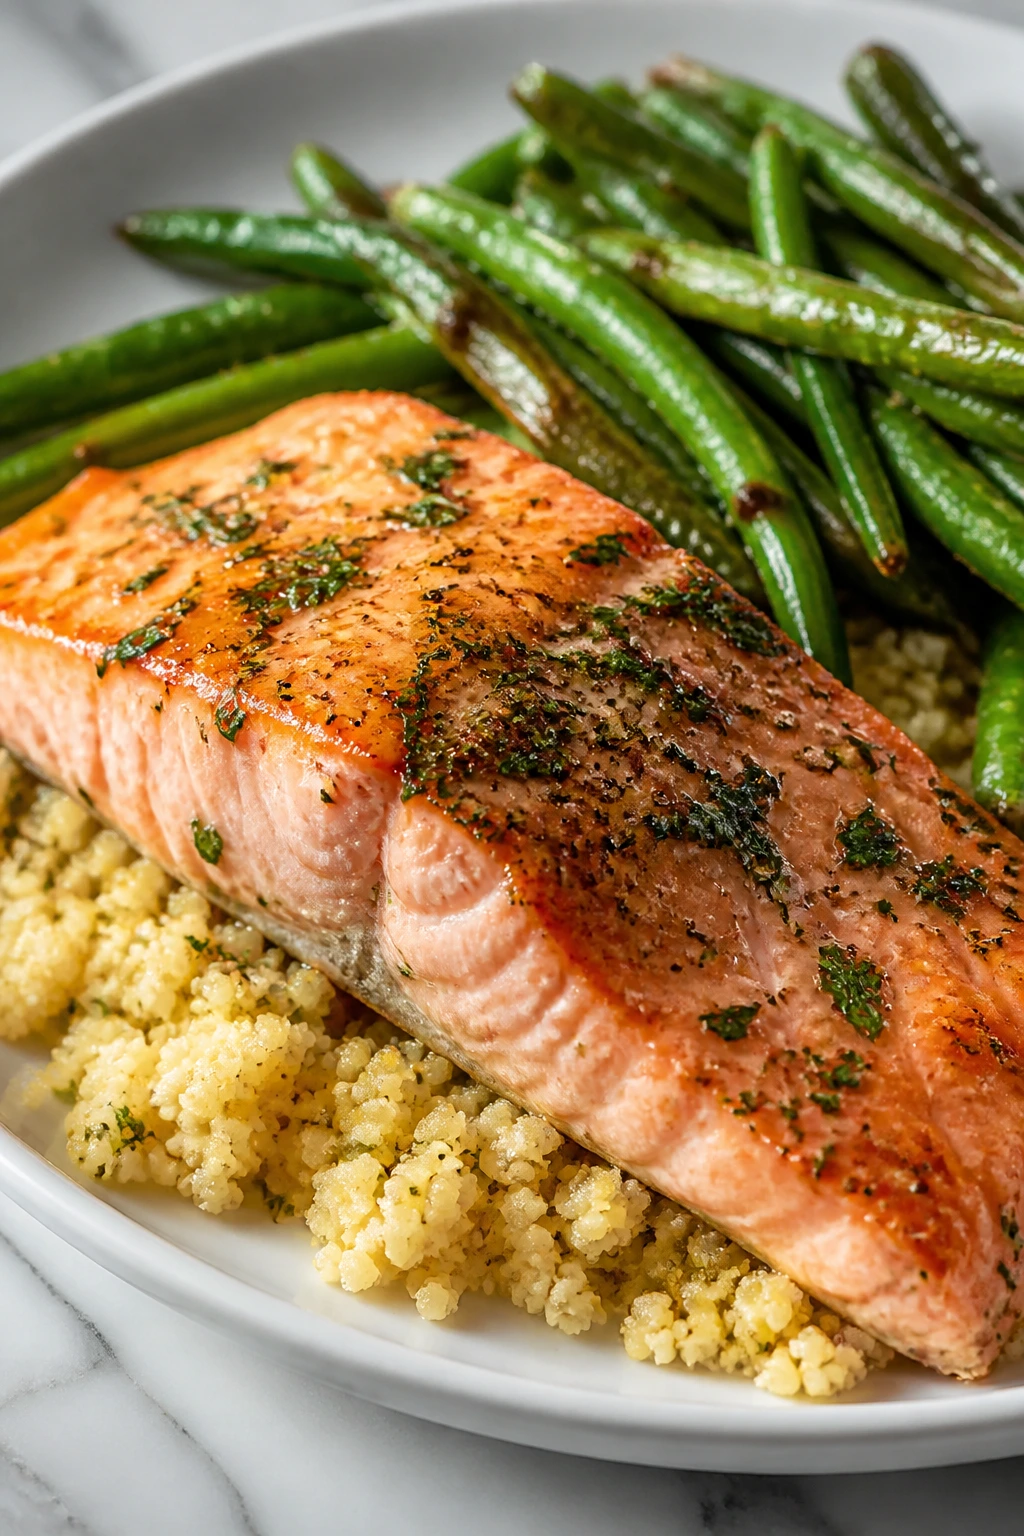
Salmon is the fast-moving train of this collection. It doesn’t need all day, just a little morning organization and a hot oven later. The lemon and herbs keep it bright, the green beans roast right beside it, and the couscous takes five minutes with hot water, which feels almost rude in a good way.
I like this one on nights when I want dinner to look planned even if the day was chaos. The plate ends up clean and sharp: pink salmon, green beans with browned tips, a fluff of couscous, and lemon on the side.
Why It Works:
Salmon cooks fast and stays moist if you pull it the moment it flakes. Green beans roast well at the same temperature, so the sheet pan can handle both without a fight. Couscous is a smart side here because it soaks up lemony pan juices and doesn’t need another pot babysat on the stove.
Key Ingredients:
- 4 salmon fillets, about 6 oz each
- 1 lb green beans, trimmed
- 1 cup couscous
- 1 1/4 cups boiling water or broth
- 2 tbsp olive oil
- 1 lemon, half sliced and half juiced
- 2 cloves garlic, minced
- 1 tsp dried dill or 1 tbsp fresh dill
- 1 tsp kosher salt
- 1/2 tsp black pepper
Quick Steps:
- Heat the oven to 400°F and line a sheet pan with parchment.
- Toss the green beans with 1 tbsp olive oil, half the garlic, half the salt, and half the pepper. Spread them out on the pan.
- Mix the remaining oil, garlic, dill, salt, pepper, and lemon juice, then brush it over the salmon.
- Roast the green beans for 8 minutes, add the salmon and lemon slices, and roast 10 to 12 minutes more until the fish flakes easily.
- Pour the boiling water or broth over the couscous, cover, and let it sit for 5 minutes before fluffing with a fork.
Equipment for This Recipe:
- Rimmed sheet pan
- Small bowl
- Fork for fluffing couscous
- Fish spatula or wide turner
How to Serve This Dish:
Serve the salmon over the couscous so the lemony juices soak in. A spoonful of plain yogurt with dill on top makes a sharp, cool sauce, and a few cherry tomatoes on the side give the plate color without much effort.
Pro Tips for This Recipe:
- Buy salmon fillets of similar thickness so they finish at the same time.
- Roast the green beans first; they need a head start.
- Pull the fish when it still looks slightly glossy in the center. It keeps cooking after it leaves the oven.
Variations on This Dish:
- Dill Yogurt Salmon: Stir dill and lemon zest into plain yogurt and spoon it over the fish.
- Garlic Butter Version: Swap the olive oil for melted butter if you want a richer finish.
- Asparagus Swap: Use asparagus instead of green beans when the spears are thin and fresh.
Common Mistakes to Avoid with This Dish:
- Overbaking the salmon: It dries fast. Watch for flaking, not toughness.
- Overcrowding the pan: The green beans need room to roast, not steam.
- Cooking couscous too long: It only needs a soak. Boiling it turns it pasty.
8. Sloppy Joe Stuffed Sweet Potatoes
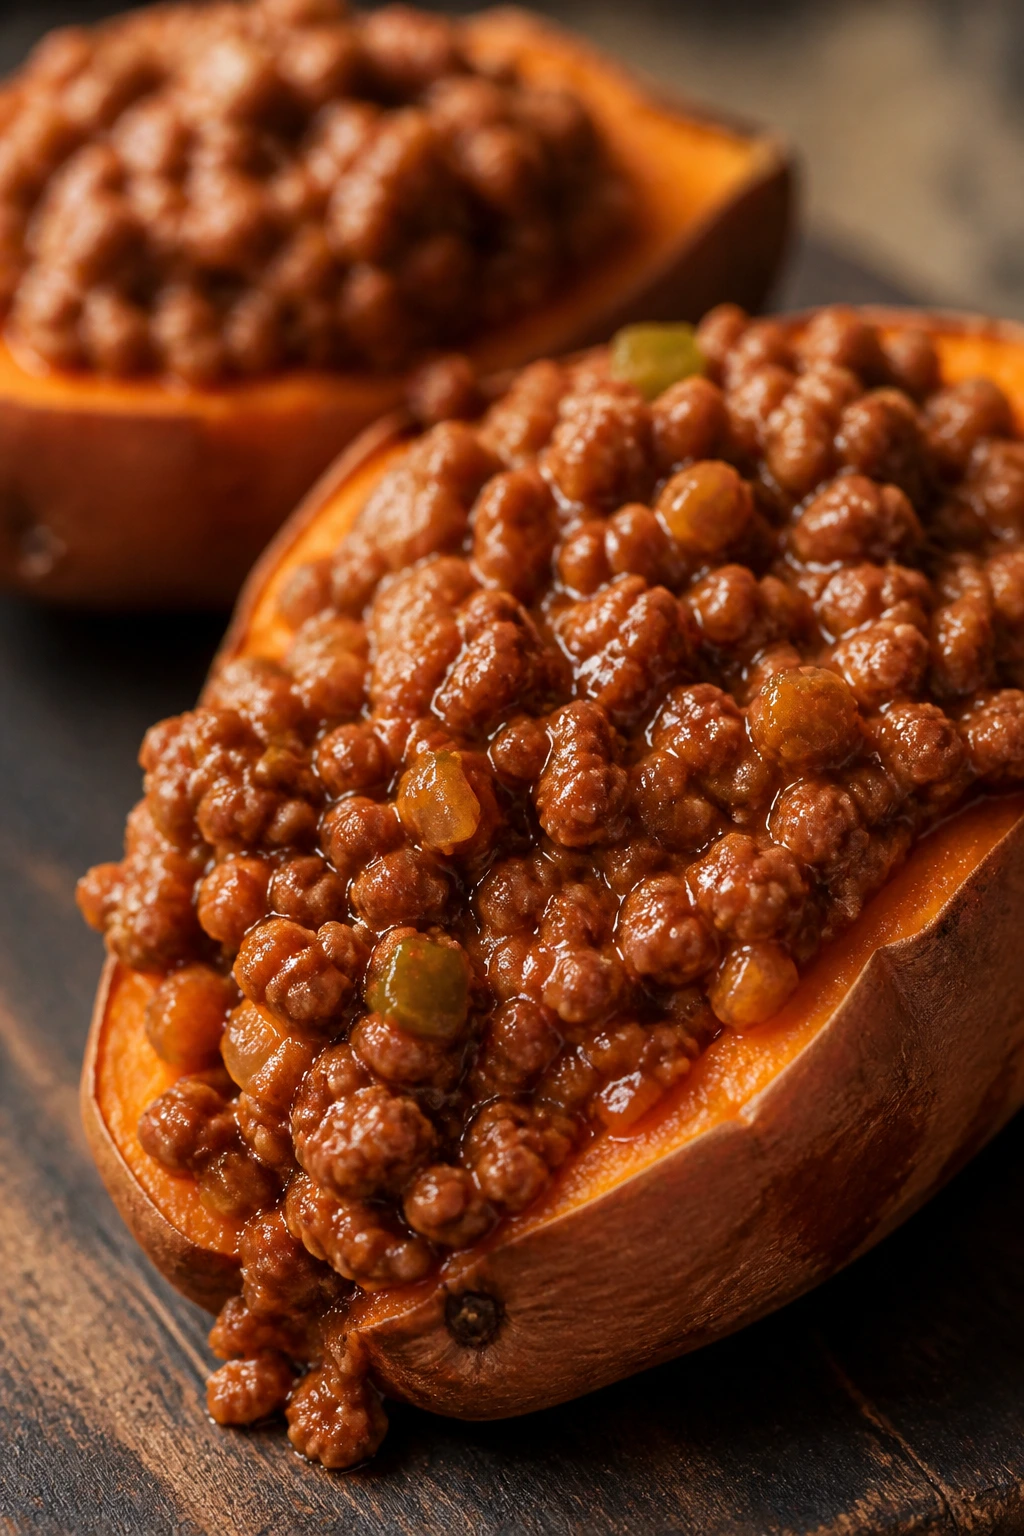
This one is gloriously low-fuss. A sweet potato gives you a built-in bowl, and the sloppy joe filling brings the tangy, saucy middle that kids tend to trust because it tastes familiar. It’s messy in the right way.
You can roast the sweet potatoes ahead, make the filling in the morning, and then reheat and assemble at dinner. That’s the part I like most: no one is waiting around at 6 p.m. while a potato slowly gives up on life.
Why It Works:
Sweet potatoes have enough body to hold a saucy filling without collapsing. The savory beef or turkey mixture leans on ketchup, tomato paste, and Worcestershire for the classic sloppy joe flavor, and the sweet potato keeps the whole thing from tasting too sharp. It’s one of those rare meals that doesn’t need bread on the side to feel complete.
Key Ingredients:
- 4 medium sweet potatoes
- 1 lb ground beef or ground turkey
- 1 small onion, diced
- 1 bell pepper, diced
- 2 cloves garlic, minced
- 1/2 cup ketchup
- 2 tbsp tomato paste
- 1 tbsp Worcestershire sauce
- 1 tsp yellow mustard
- 1 tsp smoked paprika
- Salt and black pepper to taste
- 1 cup shredded cheddar
Quick Steps:
- Bake the sweet potatoes at 400°F for 45 to 55 minutes, or microwave them until soft, then split them open.
- Brown the beef or turkey with the onion and bell pepper in a skillet until the meat is cooked through and the vegetables soften.
- Stir in the garlic, ketchup, tomato paste, Worcestershire, mustard, paprika, salt, and pepper. Simmer for 5 minutes until glossy.
- Spoon the sloppy joe filling into the sweet potatoes and top with cheddar.
- Broil for 1 to 2 minutes, just until the cheese melts and starts to bubble.
Equipment for This Recipe:
- Baking sheet
- Large skillet
- Sharp knife
- Spoon for scooping
How to Serve This Dish:
Serve one stuffed potato per person with a crisp slaw or a pile of green beans. The plate looks better when you leave the skins intact and spoon the filling high enough to spill a little over the edge.
Pro Tips for This Recipe:
- Choose medium sweet potatoes, not giant ones. They cook more evenly and hold better on the plate.
- If the filling looks loose, simmer it another 2 minutes before stuffing.
- Broil carefully. Cheese goes from melted to scorched faster than you expect.
Variations on This Dish:
- Turkey Taco Potato: Swap the sloppy joe seasonings for taco seasoning and finish with avocado.
- Black Bean Filling: Replace half the meat with black beans for a cheaper, meat-light version.
- Pepper Jack Finish: Use pepper jack instead of cheddar if your crowd likes a little kick.
Common Mistakes to Avoid with This Dish:
- Undercooking the sweet potatoes: They should be soft enough to split easily with a fork.
- Making the filling too watery: Simmer it until the spoon leaves a trail.
- Skipping the cheese or garnish: A little melted cheese or chopped green onion gives the dish a finished look and better flavor.
9. Pork Tenderloin with Apples and Onions
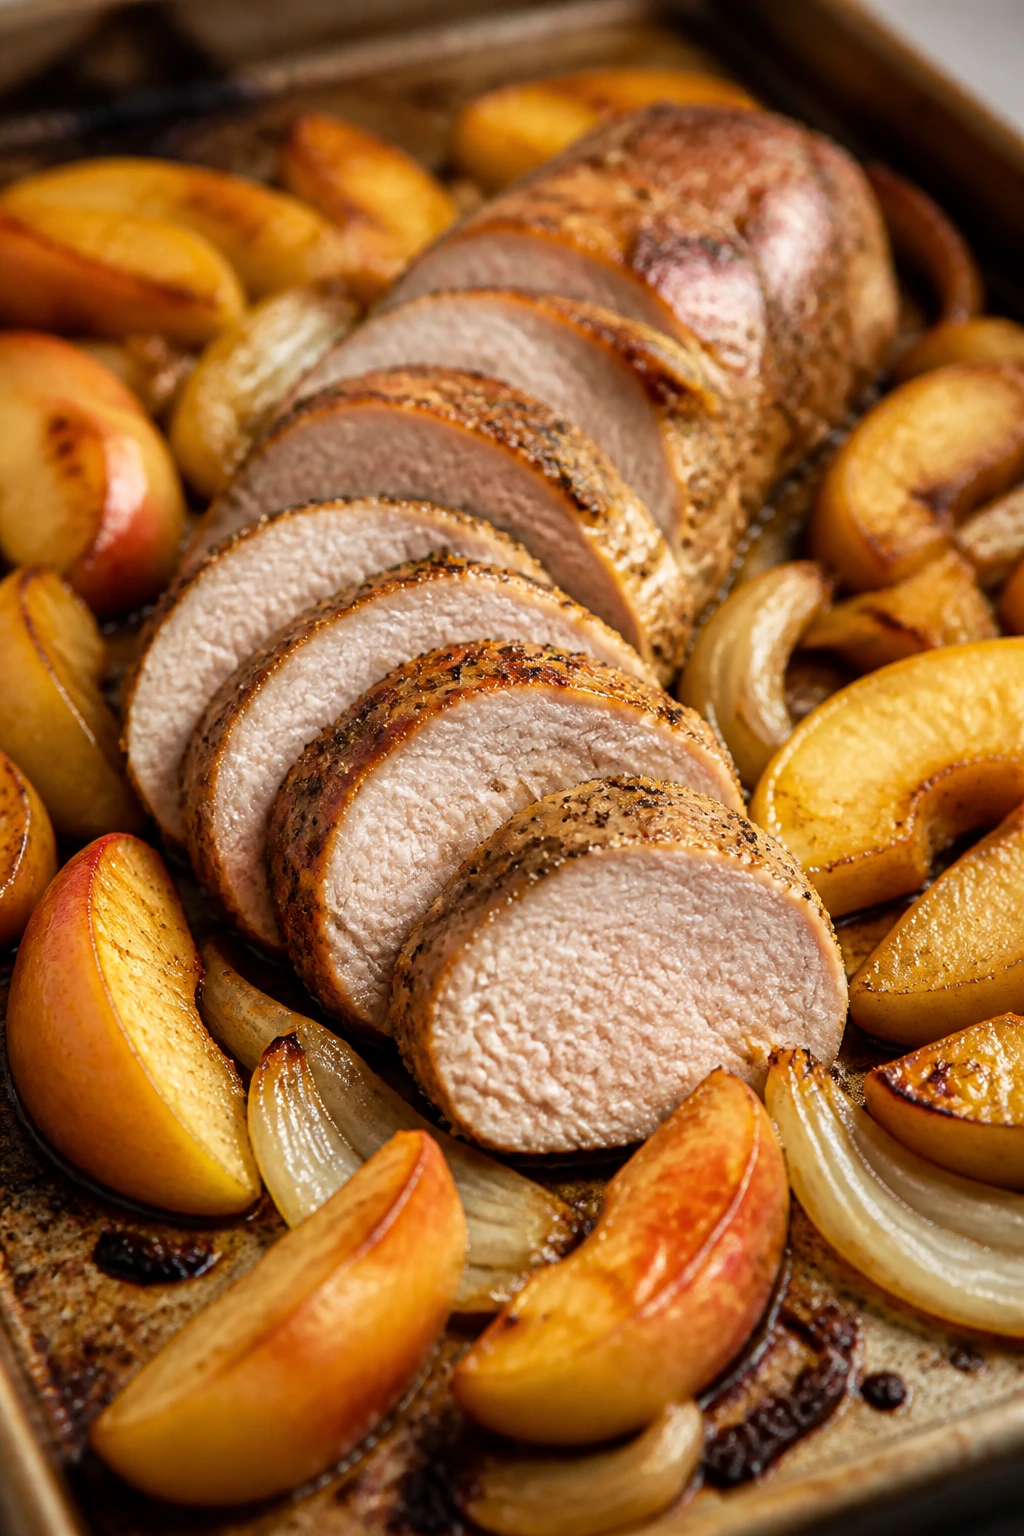
Pork tenderloin and apples is one of those combinations that sounds almost too simple until you taste it. The pork stays lean and tender, the apples melt into soft wedges, and the onions get sweet around the edges. It smells like a kitchen that knows how to roast.
This is a nice dinner to prep in the morning because everything can be sliced, seasoned, and left ready to go. Then all you need at dinner is a hot oven and a thermometer.
Why It Works:
Pork tenderloin cooks quickly, which makes it a useful choice on nights when time is tight. Apples and onions roast at the same pace, and a little Dijon plus cider vinegar keeps the dish from tasting sweet in a flat way. The whole pan finishes in under half an hour, which feels almost aggressive compared with the slow-cooker meals in this list.
Key Ingredients:
- 2 pork tenderloins, about 2 lbs total
- 2 apples, cored and sliced
- 1 large onion, sliced
- 2 tbsp olive oil
- 1 tbsp Dijon mustard
- 1 tsp dried thyme
- 1 tsp kosher salt
- 1/2 tsp black pepper
- 1 tbsp apple cider vinegar
- 1 tbsp butter
Quick Steps:
- Heat the oven to 425°F and line a baking sheet or roasting pan.
- Rub the pork with olive oil, Dijon, thyme, salt, and pepper.
- Toss the apples and onions with the cider vinegar and butter, then spread them on the pan.
- Nestle the pork tenderloins among the apples and onions and roast for 18 to 22 minutes, until the pork reaches 145°F in the center.
- Rest the pork for 5 minutes before slicing so the juices stay in the meat.
Equipment for This Recipe:
- Rimmed baking sheet or roasting pan
- Instant-read thermometer
- Sharp knife
- Cutting board
How to Serve This Dish:
Slice the pork into medallions and tuck the apples and onions around the meat. Mashed potatoes or buttered noodles make a good base, but a pile of roasted carrots works too if you want the plate to stay lighter.
Pro Tips for This Recipe:
- Don’t overcook tenderloin. It goes from juicy to dry in a narrow window.
- Choose apples that hold their shape, like Honeycrisp or Fuji, instead of mealy ones.
- Resting matters. A 5-minute pause keeps the slicing board from getting flooded.
Variations on This Dish:
- Mustard Sage Pork: Use fresh sage and extra Dijon for a more savory roast.
- Apple Cider Pan Sauce: Remove the pork, deglaze the pan with 1/3 cup apple cider, and spoon the sauce over the slices.
- Pear Swap: Use firm pears instead of apples if they’re what you have on hand.
Common Mistakes to Avoid with This Dish:
- Choosing soft apples: They collapse into mush and vanish into the pan.
- Skipping the thermometer: Tenderloin needs a precise pull point.
- Slicing immediately: The juices need a short rest or they spill everywhere.
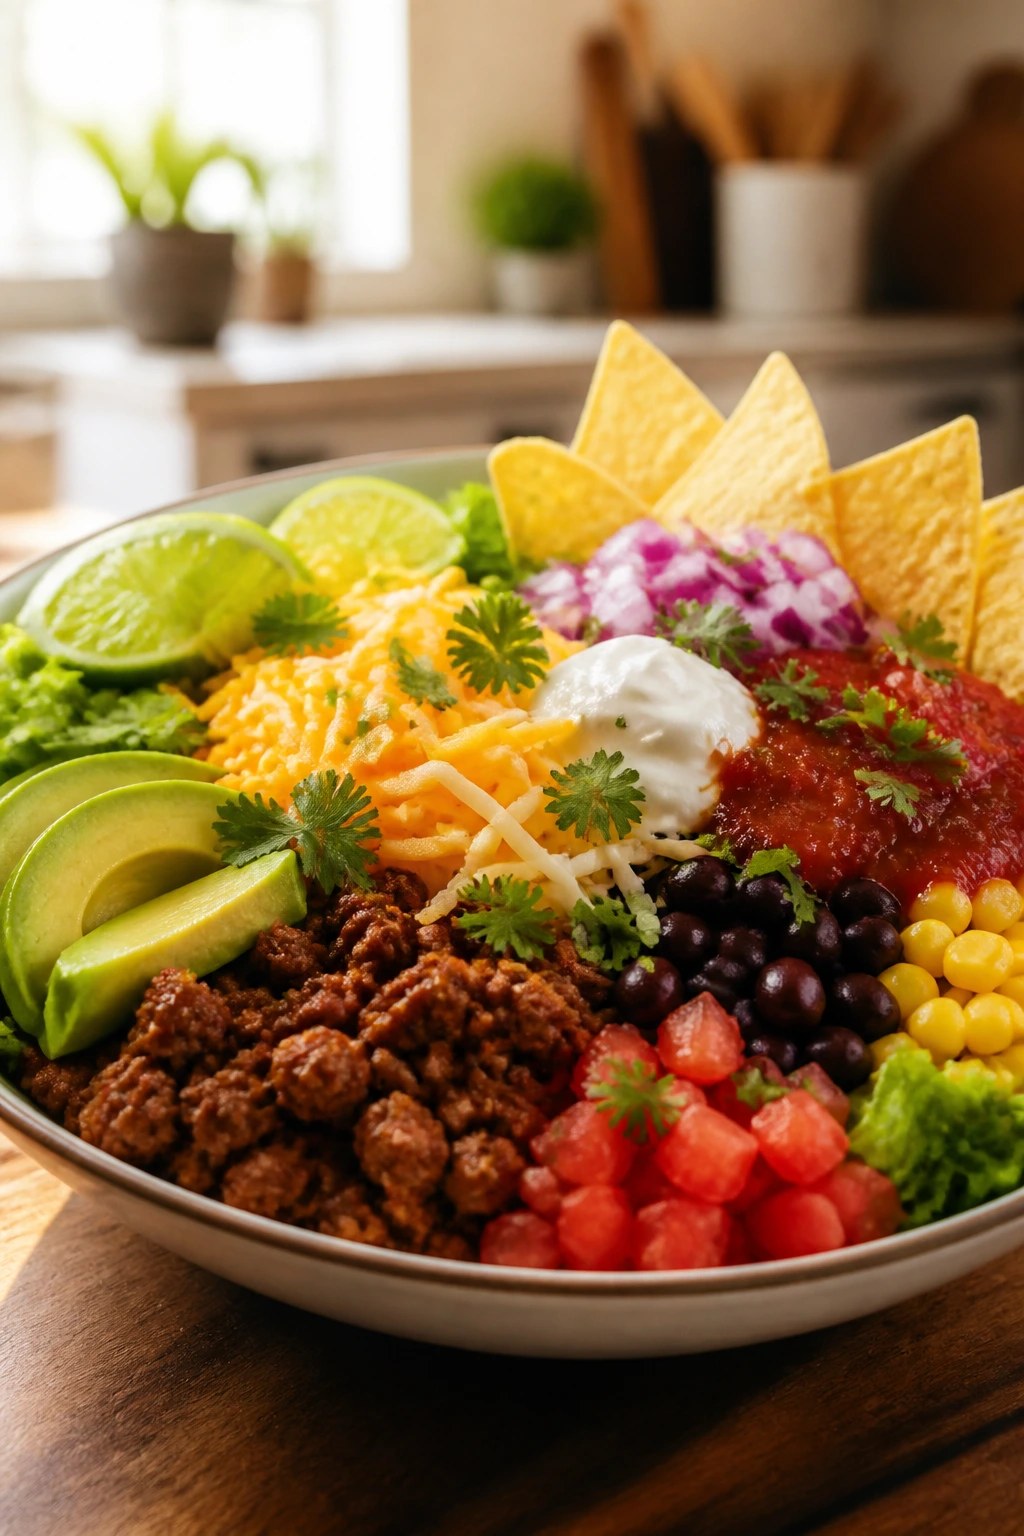
10. Slow Cooker Taco Soup
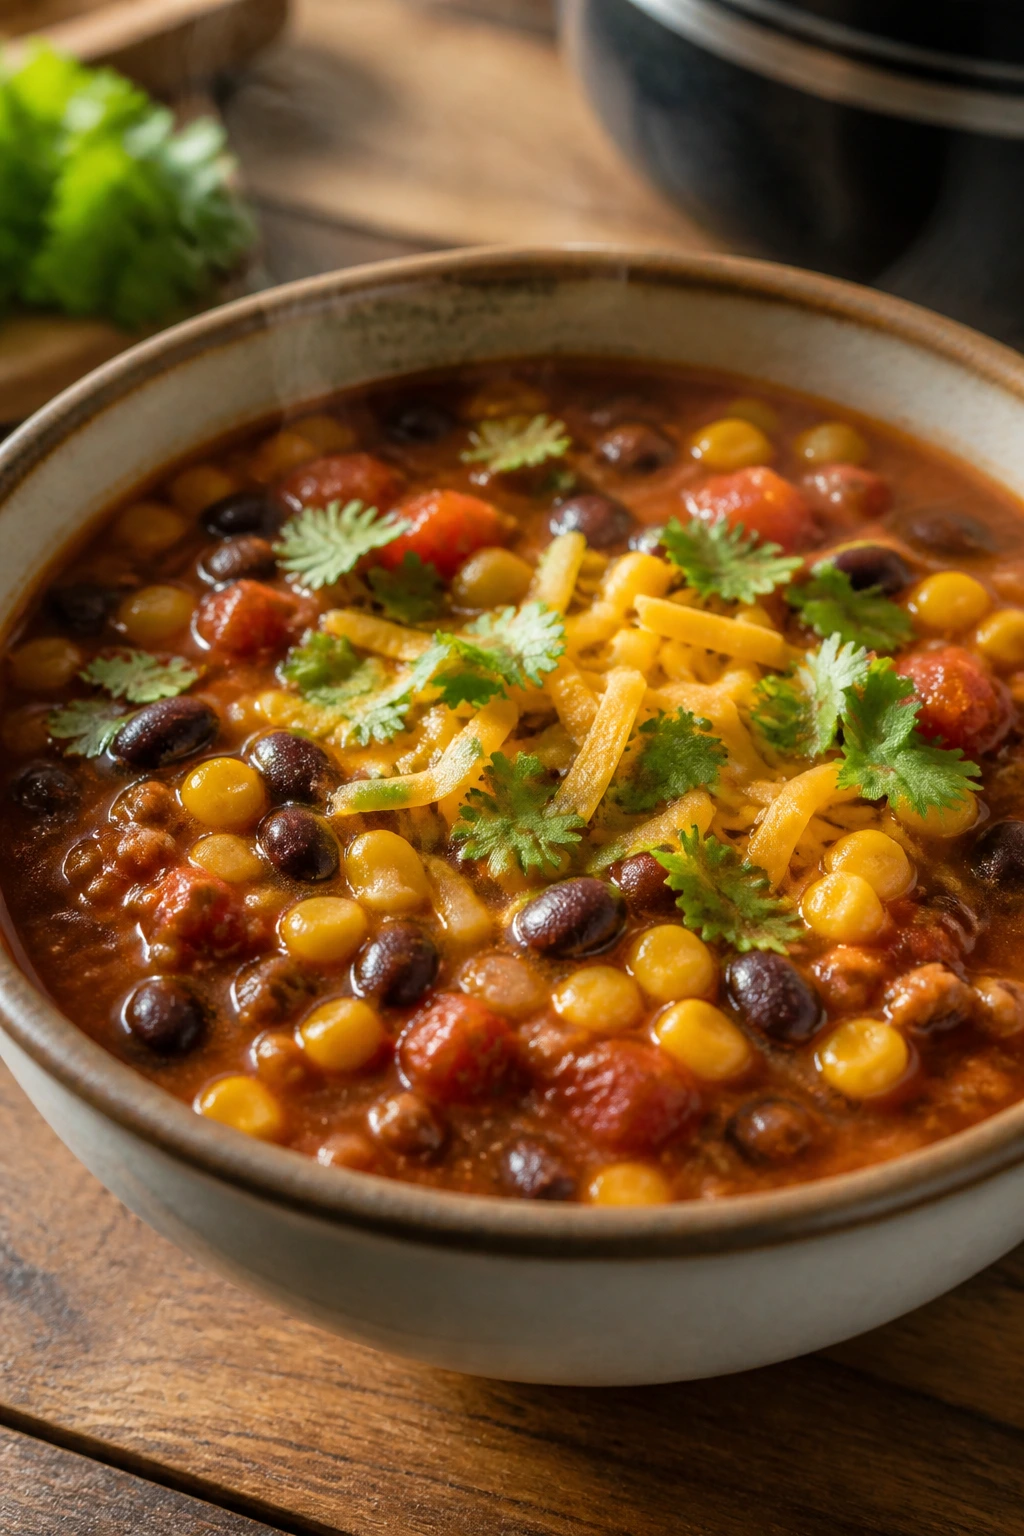
Taco soup is the kind of thing that looks casual and eats like a full meal. Beans, corn, tomatoes, beef or turkey, and taco seasoning simmer together until the broth tastes layered instead of thin. Add the toppings and it turns into a dinner that feels built for a packed day.
This is one of the easiest school-morning starts in the list. Brown the meat if you want deeper flavor, dump in the rest, and let the slow cooker do the steady work while you handle the day.
Why It Works:
The mix of beans and tomatoes creates body, which means the soup doesn’t need cream or flour to feel substantial. Taco seasoning wakes everything up, while the broth keeps it spoonable. It’s also forgiving with toppings, which means picky eaters can add cheese or chips and leave the rest alone.
Key Ingredients:
- 1 lb ground beef or ground turkey
- 1 medium onion, diced
- 2 cloves garlic, minced
- 1 packet taco seasoning or 2 tbsp homemade taco seasoning
- 1 (15 oz) can black beans, drained and rinsed
- 1 (15 oz) can pinto beans, drained and rinsed
- 1 (15 oz) can corn, drained
- 2 (10 oz) cans diced tomatoes with green chilies
- 4 cups low-sodium broth
- 1 cup salsa
- 1 cup shredded cheddar
- Tortilla chips, sour cream, and cilantro for serving
Quick Steps:
- Brown the meat with the onion in a skillet, then stir in the garlic for 30 seconds.
- Add the meat mixture to the slow cooker with the taco seasoning, beans, corn, tomatoes, broth, and salsa.
- Cover and cook on low for 6 to 8 hours or high for 3 to 4 hours.
- Taste and adjust the salt near the end.
- Ladle into bowls and top with cheese, chips, sour cream, and cilantro.
Equipment for This Recipe:
- Slow cooker
- Skillet for browning
- Ladle
- Can opener
How to Serve This Dish:
Serve it in deep bowls with a handful of crushed tortilla chips on top so they stay a little crunchy. A side of cornbread or a small chopped salad gives the meal some contrast without asking for another big recipe.
Pro Tips for This Recipe:
- Brown the meat first if you have ten extra minutes. The soup tastes deeper.
- Add the chips only at the table. If they sit in the broth too long, they go soft and sad.
- A squeeze of lime at the end keeps the beans and tomatoes from tasting flat.
Variations on This Dish:
- Chicken Taco Soup: Swap the beef for shredded chicken thighs or breasts.
- Creamy Taco Soup: Stir in a block of cream cheese during the last 20 minutes for a richer bowl.
- Bean-Heavy Version: Leave out the meat and add another can of beans plus a chopped bell pepper.
Common Mistakes to Avoid with This Dish:
- Using too little seasoning: Beans need more flavor than you think.
- Putting in toppings too early: Chips, cheese, and sour cream belong at the end.
- Forgetting to taste before serving: The broth usually needs a final salt check.
11. Chicken Parmesan Meatballs
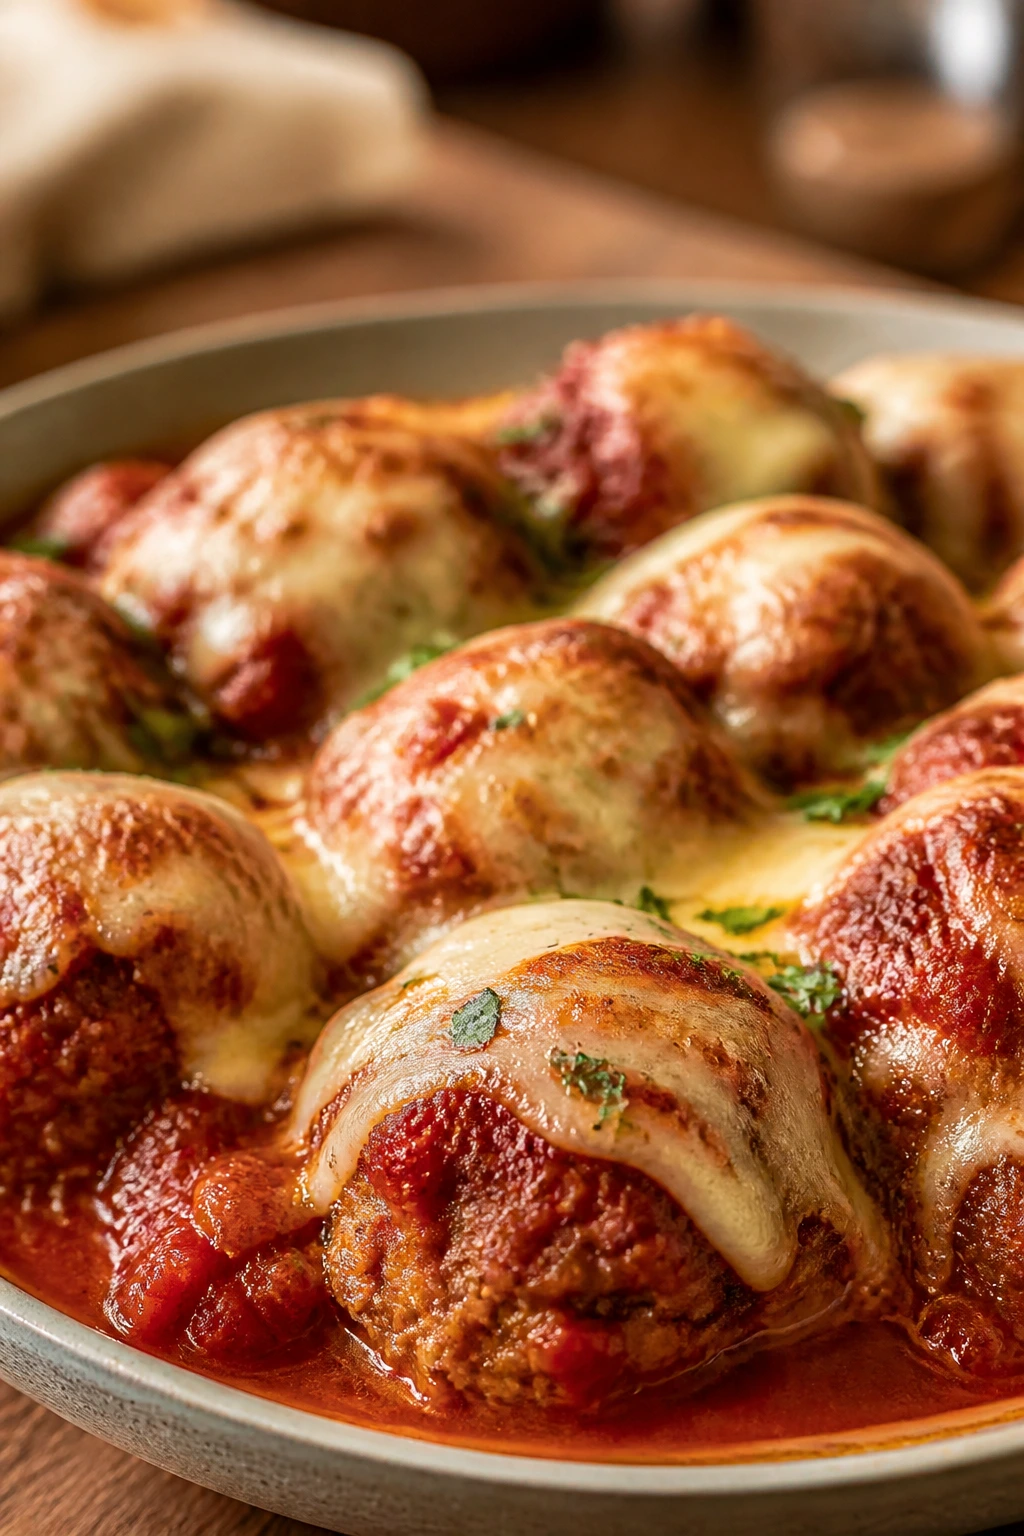
These meatballs have all the good parts of chicken parmesan and none of the fragile, pan-frying chaos. They bake in the oven, tuck into marinara, and end up under a layer of mozzarella that turns stretchy and browned at the top. It’s neat enough for a school night and still feels like a proper event.
I like this recipe because it can be mixed in the morning and baked at dinnertime. Once the meatballs are formed, the rest is almost boring. That’s a compliment.
Why It Works:
Ground chicken needs help staying juicy, and breadcrumbs, egg, and Parmesan give it enough structure to bake without drying out. Simmering the meatballs in marinara after baking keeps them tender and adds more sauce to the pan. The mozzarella melts into a top blanket that makes the dish feel bigger than the ingredient list.
Key Ingredients:
- 1 1/2 lbs ground chicken
- 1/2 cup plain breadcrumbs
- 1 large egg
- 1/3 cup grated Parmesan
- 2 cloves garlic, minced
- 2 tbsp chopped parsley
- 1 tsp kosher salt
- 1/2 tsp black pepper
- 2 cups marinara sauce
- 1 1/2 cups shredded mozzarella
- 12 oz spaghetti or 1 loaf crusty bread, for serving
Quick Steps:
- Heat the oven to 400°F and line a baking sheet.
- Mix ground chicken, breadcrumbs, egg, Parmesan, garlic, parsley, salt, and pepper until just combined.
- Roll into 1 1/2-inch meatballs and bake for 14 to 16 minutes until cooked through.
- Warm the marinara in an ovenproof skillet, add the meatballs, and spoon sauce over them.
- Top with mozzarella and broil for 1 to 2 minutes until melted and lightly browned.
Equipment for This Recipe:
- Rimmed baking sheet
- Large bowl
- Ovenproof skillet or baking dish
- Cookie scoop or spoon for portioning
How to Serve This Dish:
Serve the meatballs over spaghetti for a classic plate, or pile them into toasted rolls if sandwiches are easier on a busy night. Add a simple salad or roasted zucchini to keep the meal from leaning too heavily into red sauce alone.
Pro Tips for This Recipe:
- Mix only until combined. Overworking ground chicken makes the meatballs tight.
- Wet your hands before rolling so the mixture doesn’t cling.
- Broil with the oven door cracked a little and watch closely. Cheese burns fast.
Variations on This Dish:
- Turkey Parm Meatballs: Swap in ground turkey without changing the rest of the method.
- Gluten-Free Version: Use gluten-free breadcrumbs and serve over polenta instead of pasta.
- Spicy Marinara Twist: Add red pepper flakes to the sauce if the kids can handle a little heat.
Common Mistakes to Avoid with This Dish:
- Packing the meatballs too firmly: They turn dense instead of tender.
- Skipping the bake before the sauce: Browning them first helps them hold their shape.
- Overbroiling the cheese: Two minutes can be enough; three can ruin the top.
12. Egg Roll in a Bowl with Rice
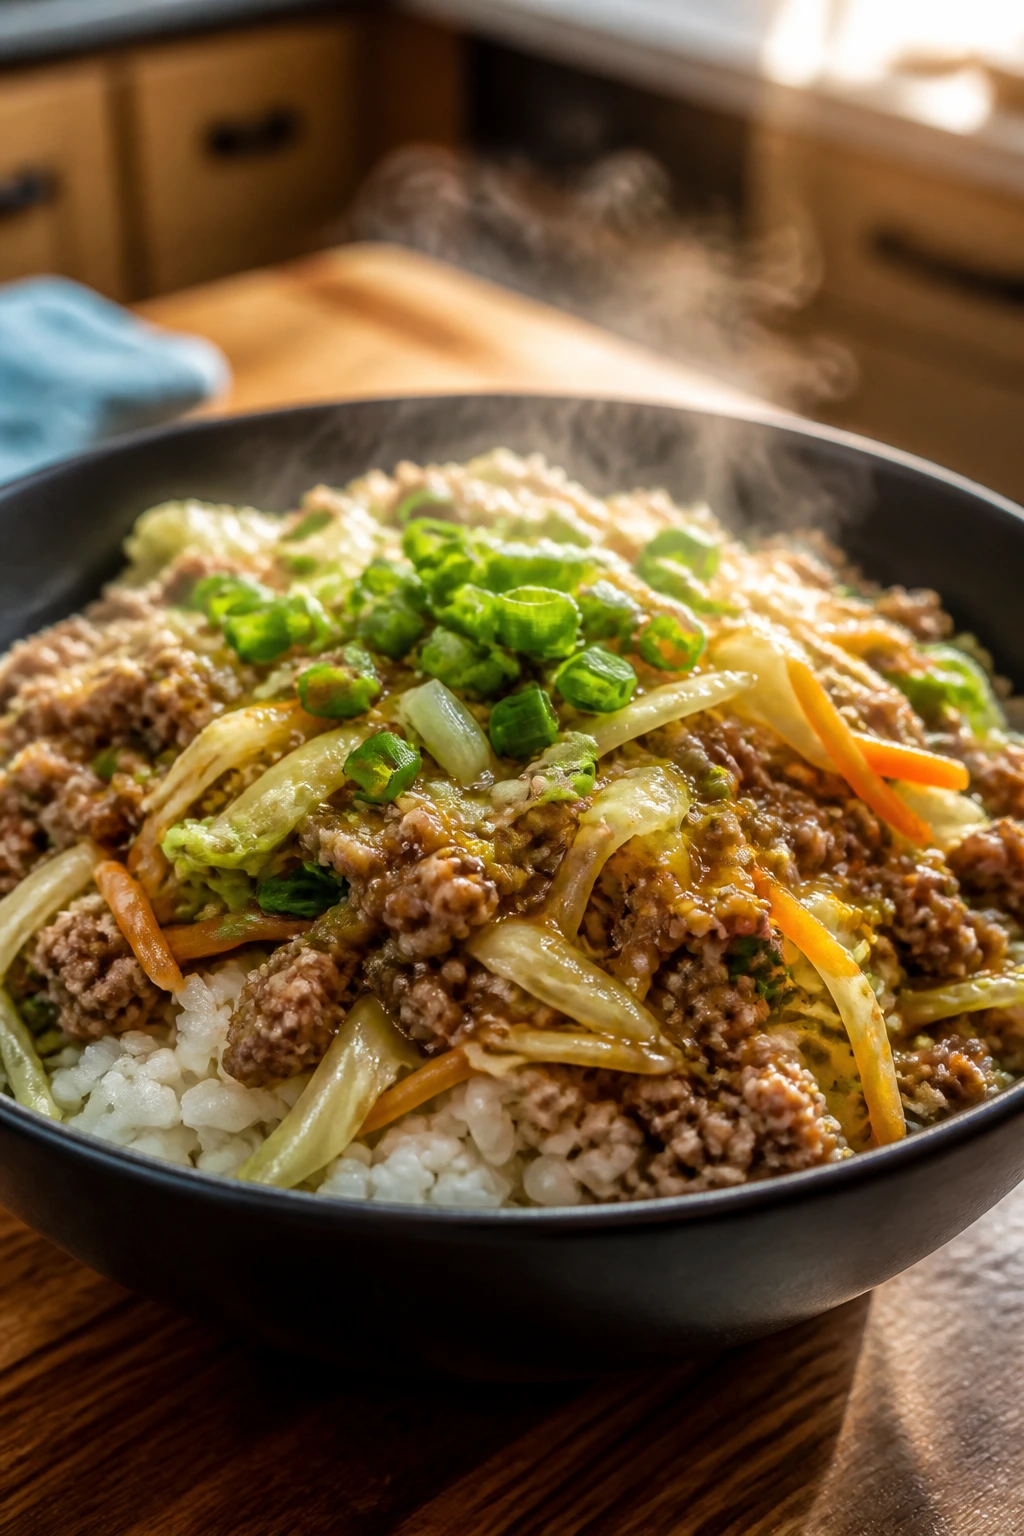
Egg roll in a bowl is the cleanest way to get takeout-ish flavor without the wrapper work. Ground turkey, cabbage, garlic, and ginger cook into something savory and fast, and the rice underneath makes it feel like a real dinner instead of a snack pretending to be one.
This one’s useful when you have ten quiet minutes in the morning and not much else. It reheats well, which is the whole point of a school-day dinner that starts before the day itself gets chaotic.
Why It Works:
Coleslaw mix cuts the prep time down to almost nothing, and cabbage softens quickly in the skillet without turning watery if you don’t overcook it. Soy sauce and sesame oil deliver the familiar flavor fast. The rice under it soaks up the sauce and gives the bowl enough weight to satisfy bigger appetites.
Key Ingredients:
- 1 lb ground turkey
- 1 tbsp neutral oil
- 1 small onion, diced
- 2 cloves garlic, minced
- 1 tbsp fresh ginger, grated
- 1 (14 oz) bag coleslaw mix
- 3 tbsp low-sodium soy sauce
- 1 tbsp sesame oil
- 1 tbsp rice vinegar
- 2 cups cooked rice
- 2 sliced scallions
- Sesame seeds for topping
Quick Steps:
- Brown the turkey in a large skillet with the oil and onion until the meat is no longer pink.
- Add the garlic and ginger and stir for 30 seconds.
- Toss in the coleslaw mix, soy sauce, sesame oil, and rice vinegar. Cook for 4 to 5 minutes until the cabbage softens but still has some bite.
- Serve over warm rice.
- Finish with scallions and sesame seeds.
Equipment for This Recipe:
- Large skillet or wok
- Wooden spoon
- Box grater or microplane for ginger
- Rice cooker or saucepan for the rice
How to Serve This Dish:
Serve it in wide bowls so the rice and cabbage can mix without spilling over the edges. A drizzle of sriracha on the adult portions and a few cucumber spears on the side make the meal feel fresher.
Pro Tips for This Recipe:
- Don’t overcook the cabbage. It should soften, not collapse.
- Use cold rice if you have it. Day-old rice gives better texture.
- Taste before salting. Soy sauce can vary a lot.
Variations on This Dish:
- Pork Version: Use ground pork for a richer, more traditional take.
- Spicy Bowl: Add chili crisp or a pinch of red pepper flakes.
- Vegetable-Only Bowl: Skip the meat and use mushrooms plus an extra cup of cabbage.
Common Mistakes to Avoid with This Dish:
- Crowding the skillet: If the pan is too full, the cabbage steams instead of searing a little.
- Using too much sesame oil: It should perfume the dish, not drown it.
- Serving it without rice when the crowd is hungry: The rice is what makes this dinner feel finished.
13. Sausage and Pepper Pasta Bake
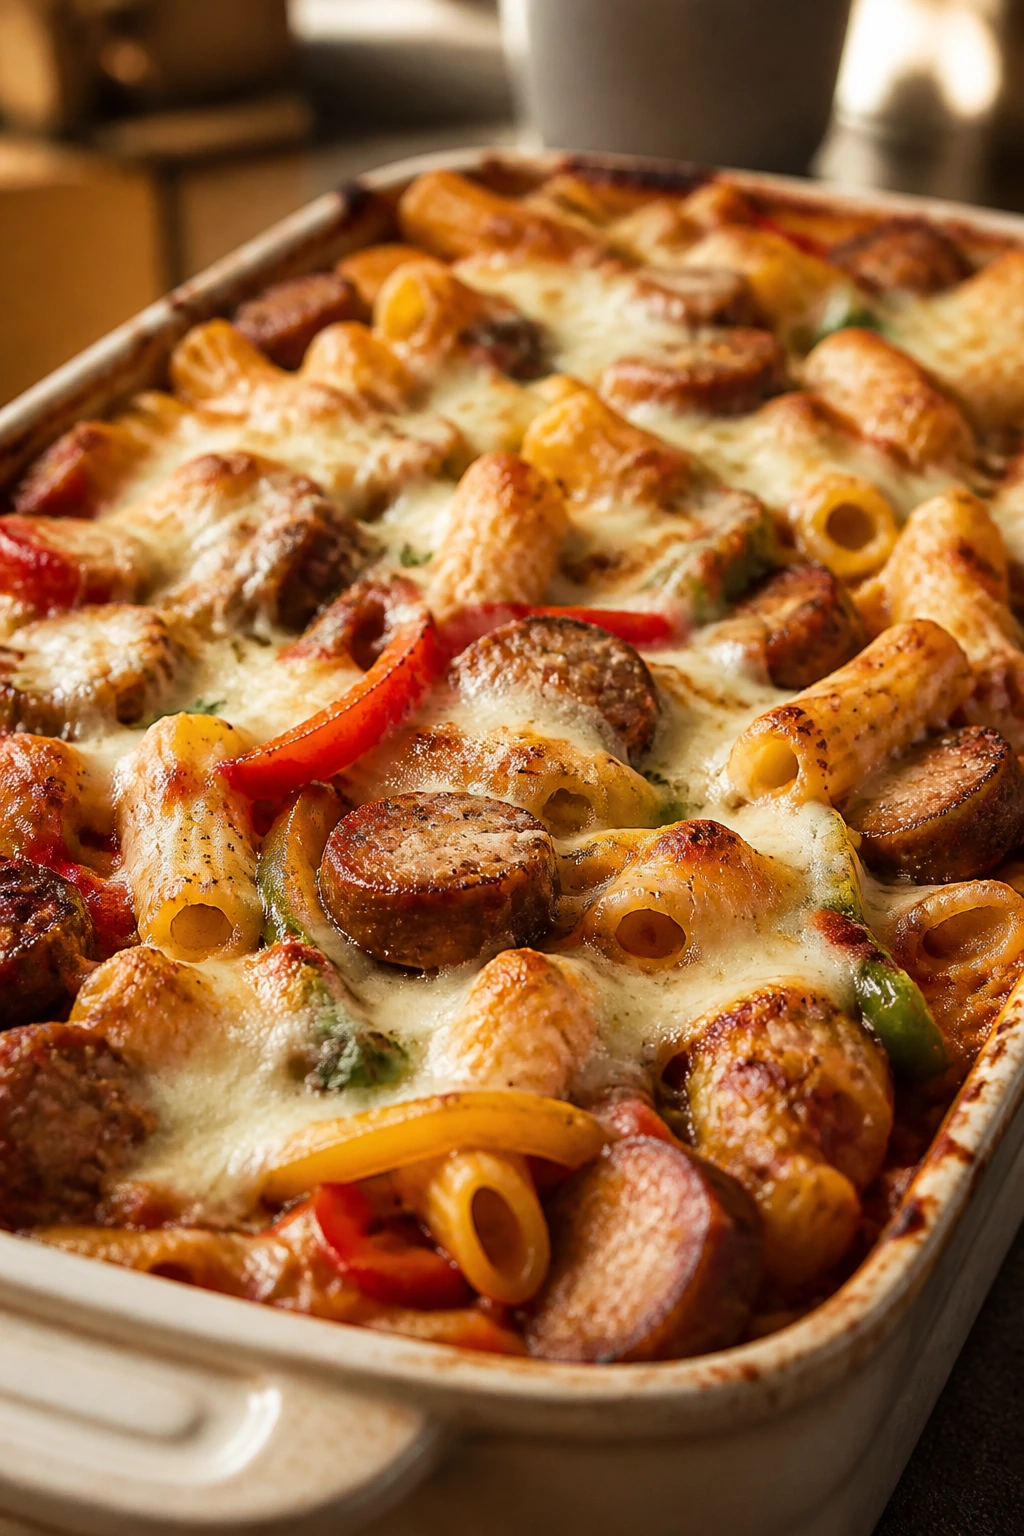
Sausage and peppers already taste like a dinner that knows what it’s doing. Bake them with pasta and mozzarella, and the whole thing turns into a pan you can assemble early, forget about, and still serve hot and bubbling later.
The beauty here is the short ingredient list and the long payoff. The peppers soften, the sausage seasons the sauce, and the top goes just a little brown where the cheese meets the heat.
Why It Works:
Italian sausage carries its own seasoning, so the sauce doesn’t need much help. The peppers and onions give the bake sweetness and color, while pasta catches the sauce in its ridges. Once everything is combined, the oven does the last bit of work and turns the top into a slightly crisp, cheesy lid.
Key Ingredients:
- 1 lb Italian sausage, casings removed if needed
- 1 medium onion, sliced
- 3 bell peppers, sliced
- 3 cloves garlic, minced
- 12 oz penne or rigatoni
- 24 oz marinara sauce
- 2 cups shredded mozzarella
- 1/2 cup grated Parmesan
- 1 tsp Italian seasoning
- 1 tbsp olive oil
- Salt and black pepper to taste
Quick Steps:
- Cook the pasta until just shy of tender, then drain.
- Brown the sausage in a skillet with olive oil, onion, and peppers until the sausage is cooked and the vegetables begin to soften.
- Stir in the garlic, Italian seasoning, marinara, salt, and pepper.
- Combine the sauce with the pasta, spread into a baking dish, and top with mozzarella and Parmesan.
- Bake at 375°F for 20 to 25 minutes until bubbling and browned on top.
Equipment for This Recipe:
- Large skillet
- Large pot for pasta
- 9×13-inch baking dish
- Colander
How to Serve This Dish:
Use a wide spoon to scoop big portions so you get pasta, sauce, sausage, and peppers in one bite. A green salad with a sharp vinaigrette keeps the meal from becoming too rich, and garlic bread is the predictable side that still makes sense.
Pro Tips for This Recipe:
- Drain off extra fat from the sausage if it looks greasy.
- Cook the pasta underdone by 1 to 2 minutes.
- Let the baked dish rest before scooping so it doesn’t slide apart.
Variations on This Dish:
- Spicy Sausage Bake: Use hot Italian sausage and add red pepper flakes.
- Chicken Sausage Version: Swap in chicken sausage if you want a lighter pan.
- Extra Veggie Bake: Add sliced mushrooms or zucchini with the peppers.
Common Mistakes to Avoid with This Dish:
- Overcooking the pasta before baking: It turns soft by the time the pan comes out.
- Not seasoning the sauce enough: Marinara can dull a little once it’s mixed with pasta.
- Skipping the rest time: A short pause helps the bake cut and scoop cleanly.
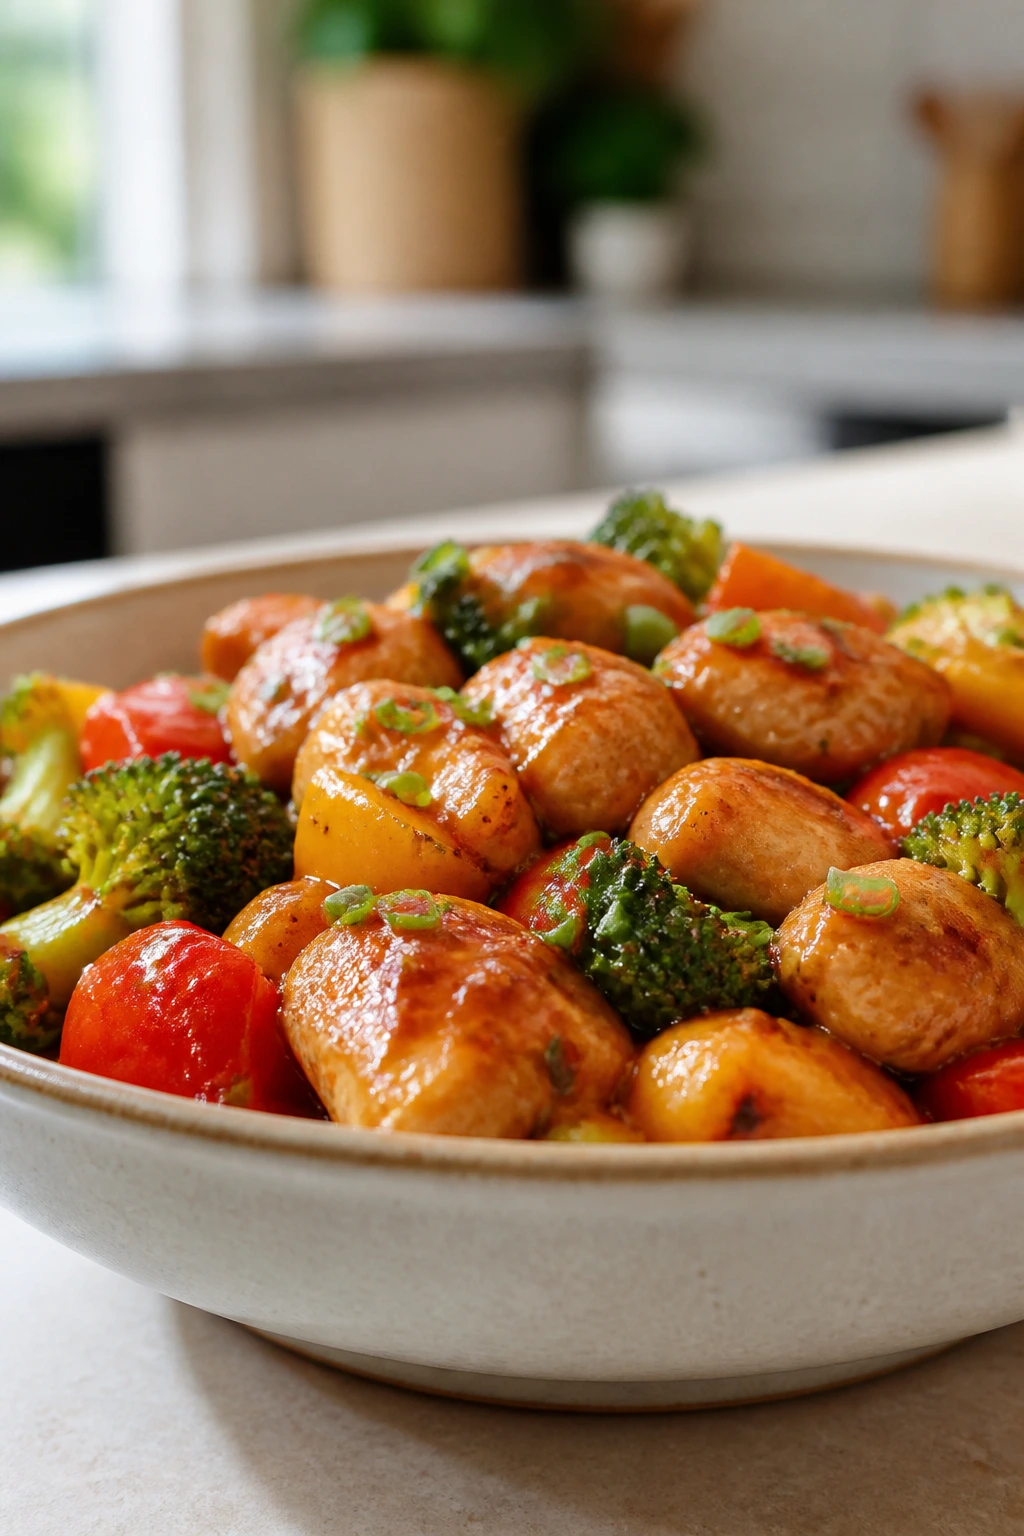
14. Teriyaki Meatballs and Rice
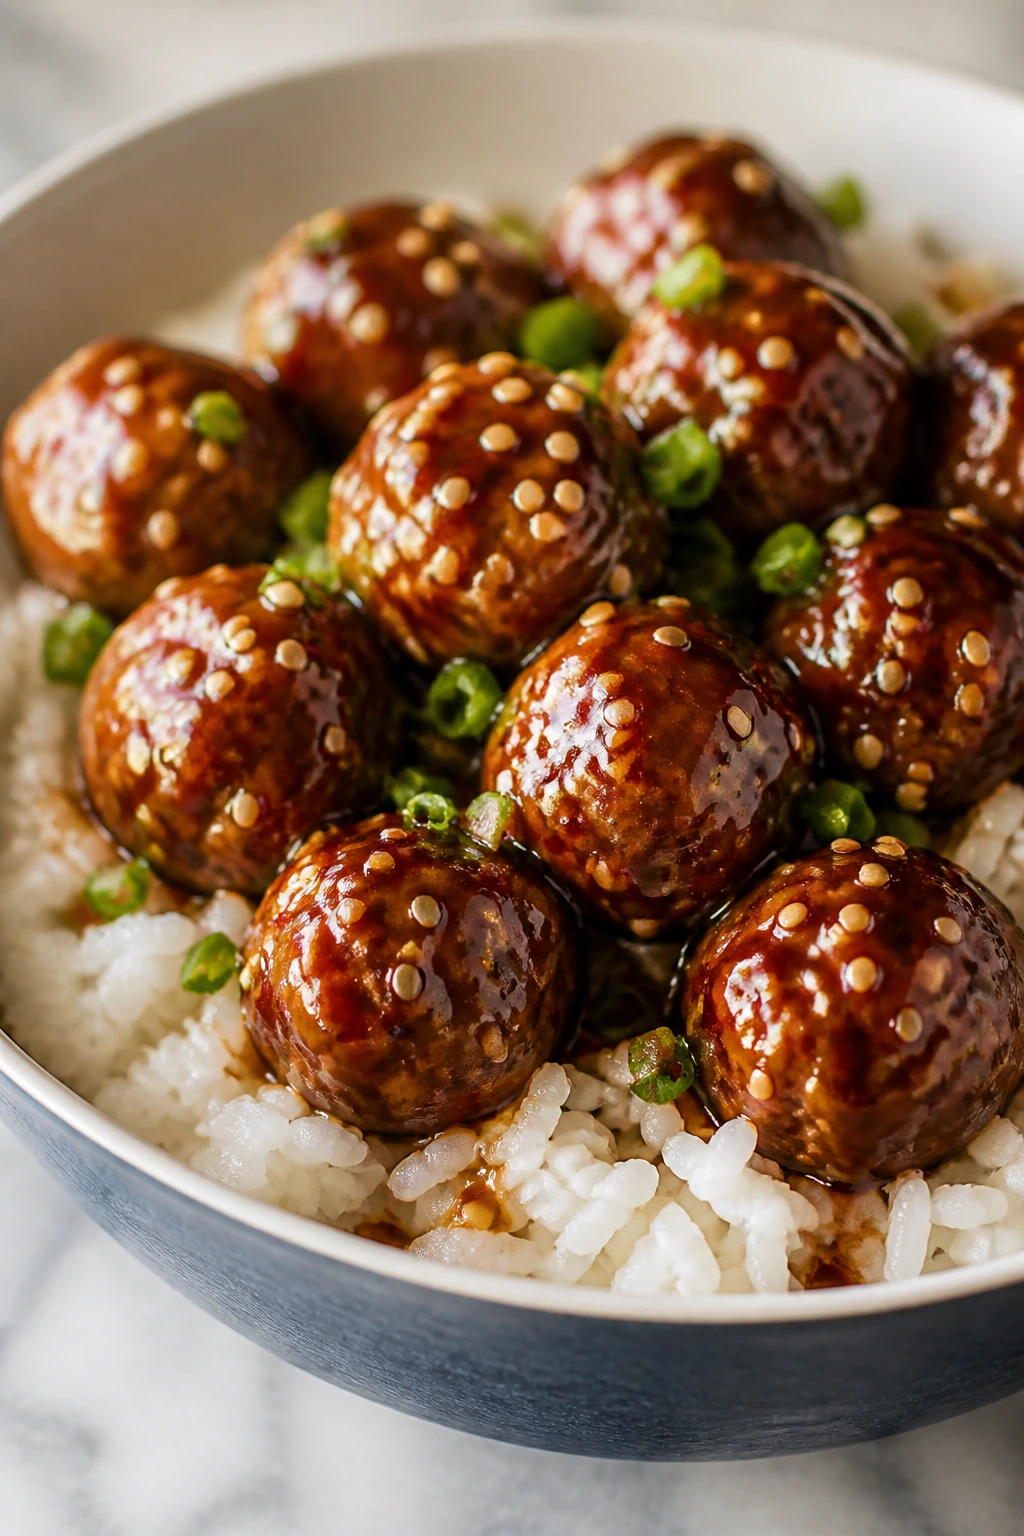
Frozen meatballs earn their shelf space here. They save time, they’re dependable, and once they’re coated in a homemade teriyaki sauce, nobody is thinking about shortcuts. The sauce goes glossy, the meatballs soak it up, and the rice underneath catches every drop.
This is one of the fastest dinners in the collection, which makes it useful when the morning swallowed the whole family schedule. Five minutes of sauce, a pot of rice, and you’re done.
Why It Works:
A quick teriyaki sauce made from soy sauce, brown sugar, vinegar, honey, and cornstarch sticks to the meatballs better than bottled sauce alone. Frozen meatballs are already cooked, so they only need to heat through and take on flavor. Rice makes the whole thing feel like dinner instead of appetizer food.
Key Ingredients:
- 2 lbs frozen fully cooked meatballs
- 1/2 cup low-sodium soy sauce
- 1/3 cup brown sugar
- 1/4 cup rice vinegar
- 2 tbsp honey
- 2 tsp sesame oil
- 1 tbsp cornstarch
- 1 cup water
- 3 cups cooked rice
- 1 cup pineapple chunks, optional
- 2 sliced scallions
- Sesame seeds for topping
Quick Steps:
- Whisk soy sauce, brown sugar, vinegar, honey, sesame oil, cornstarch, and water in a large skillet or saucepan.
- Bring to a simmer over medium heat and cook for 1 to 2 minutes until the sauce turns glossy and slightly thick.
- Add the meatballs and pineapple, if using, and simmer for 8 to 10 minutes until hot through.
- Spoon over rice and top with scallions and sesame seeds.
Equipment for This Recipe:
- Large skillet or saucepan
- Whisk
- Measuring cups
- Pot or rice cooker for the rice
How to Serve This Dish:
Serve the meatballs in bowls with the rice underneath and the sauce spooned generously over the top. Steamed broccoli or snap peas fit naturally here and keep the bowl from leaning too sweet.
Pro Tips for This Recipe:
- Warm the sauce before adding the meatballs so it thickens evenly.
- If the sauce gets too thick, splash in a tablespoon or two of water.
- Use low-sodium soy sauce unless you enjoy a saltier dinner than you planned for.
Variations on This Dish:
- Orange Teriyaki Meatballs: Add 1/4 cup orange juice and a little zest.
- Vegetable Bowl: Stir in steamed broccoli or snow peas at the end.
- Cauliflower Rice Option: Serve over cauliflower rice for a lighter bowl.
Common Mistakes to Avoid with This Dish:
- Boiling the sauce too hard: It can turn sticky and overly thick.
- Using unheated frozen meatballs straight from the bag: They need enough simmer time to warm through evenly.
- Forgetting the sesame oil at the end: It gives the sauce the toasted note that makes the dish taste finished.
15. Black Bean Enchilada Skillet
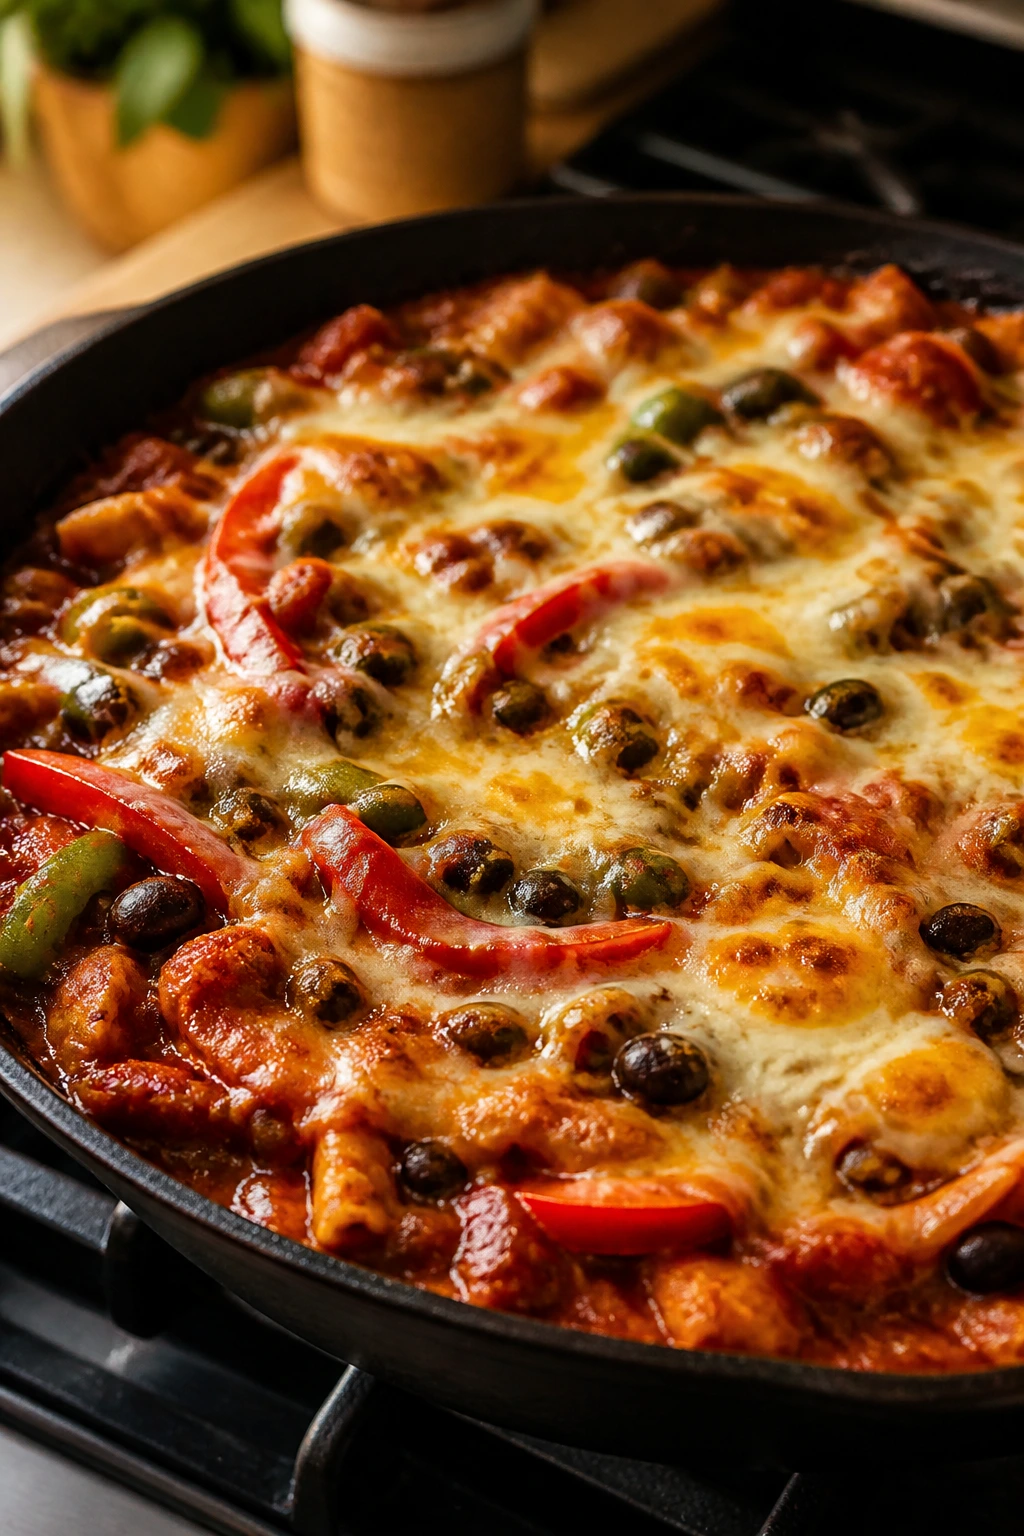
This skillet dinner has the kind of structure I trust on a busy day: vegetables first, beans and sauce next, tortillas at the end, cheese on top. It lands somewhere between enchiladas and a casserole, which is handy because there’s no rolling involved.
The flavors are familiar enough for picky eaters but not so mild that adults get bored. And because everything happens in one pan, you can move from stove to table with a lot less drama than a tray of separate enchiladas would bring.
Why It Works:
Corn tortillas cut into strips soak up sauce and act like the starch without needing a full bake. Black beans bring protein and body, while enchilada sauce keeps the flavor line clear and simple. The cheese at the end seals the whole thing together, which is useful because otherwise the skillet would feel too loose.
Key Ingredients:
- 1 tbsp olive oil
- 1 medium onion, diced
- 2 bell peppers, diced
- 2 cloves garlic, minced
- 2 (15 oz) cans black beans, drained and rinsed
- 1 (15 oz) can corn, drained
- 2 cups red enchilada sauce
- 6 to 8 small corn tortillas, cut into strips
- 2 cups shredded cheddar or Mexican blend
- 1 tsp ground cumin
- 1 avocado, sliced, for serving
Quick Steps:
- Heat the oil in a large oven-safe skillet and sauté the onion and peppers for 6 to 8 minutes until softened.
- Stir in the garlic and cumin for 30 seconds.
- Add the beans, corn, enchilada sauce, and tortilla strips.
- Cook for 3 to 4 minutes until the tortillas soften, then top with cheese.
- Cover until the cheese melts, or broil briefly if your skillet is oven-safe.
Equipment for This Recipe:
- Large oven-safe skillet
- Wooden spoon
- Sharp knife
- Cutting board
How to Serve This Dish:
Spoon it into shallow bowls and add avocado, cilantro, or a little sour cream if you want extra richness. It pairs nicely with a crunchy cabbage slaw, which gives the meal a fresher bite than rice would.
Pro Tips for This Recipe:
- Cut the tortillas into strips before you start cooking. Scrambling to do it later gets messy.
- Use a skillet large enough that the tortillas can move a little.
- If the sauce tastes flat, a small squeeze of lime wakes it up fast.
Variations on This Dish:
- Chicken Enchilada Skillet: Add cooked shredded chicken along with the beans.
- Roasted Corn Version: Use fire-roasted corn for a sweeter, deeper flavor.
- Green Sauce Swap: Replace red enchilada sauce with salsa verde for a sharper skillet.
Common Mistakes to Avoid with This Dish:
- Using too little sauce: The tortillas need enough liquid to soften.
- Letting the cheese overcook under the broiler: It should melt, not blacken.
- Skipping the cumin: Beans and corn need that warm backbone.
16. Slow Cooker Beef Barbacoa Bowls
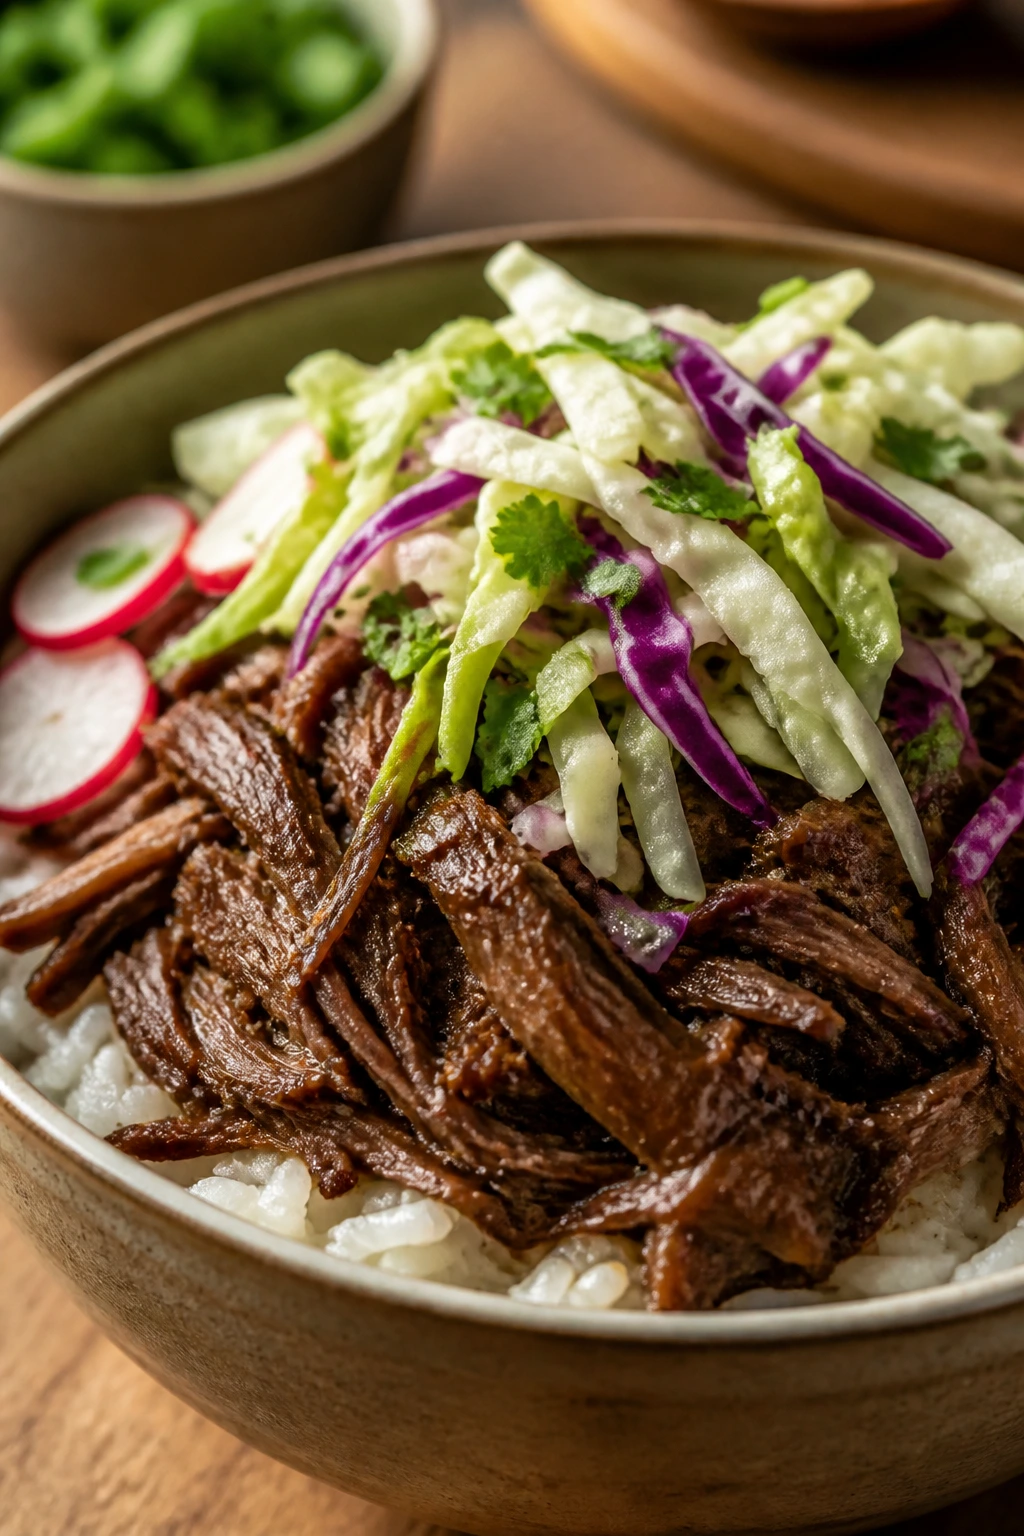
Beef barbacoa is what happens when a tough cut gets patient. The chuck roast breaks down into silky shreds, the chipotle and lime build a dark, smoky sauce, and the whole thing tastes like it had more attention than it did. Bowls are the right move here because you can keep the toppings separate and let everyone build their own plate.
This recipe is one of the strongest morning starts in the lineup because it genuinely improves while you leave it alone. That’s not true of everything. Here, it is.
Why It Works:
Chuck roast has enough fat and connective tissue to turn tender over a long cook. Chipotle peppers in adobo bring smoke and heat in one ingredient, while lime keeps the beef from feeling heavy. The braising liquid gets absorbed back into the meat as it shreds, which is the part that makes the bowl taste complete.
Key Ingredients:
- 3 lbs chuck roast, trimmed and cut into large chunks
- 1 medium onion, sliced
- 4 cloves garlic, minced
- 2 chipotle peppers in adobo, chopped
- 2 tsp ground cumin
- 2 tsp dried oregano
- 1 tsp kosher salt
- 1/2 tsp black pepper
- 1/2 cup beef broth
- 2 tbsp lime juice
- 3 cups cooked rice
- 1 can black beans, drained and rinsed
- 1 cup shredded cabbage or slaw mix
- Fresh cilantro for serving
Quick Steps:
- Put the onion, garlic, chipotle, cumin, oregano, salt, and pepper in the slow cooker.
- Add the beef and pour the broth and lime juice over the top.
- Cover and cook on low for 8 to 9 hours, until the meat falls apart with a fork.
- Shred the beef in the cooker and stir it into the sauce.
- Spoon into bowls over rice with beans, cabbage, and cilantro.
Equipment for This Recipe:
- Large slow cooker
- Two forks
- Cutting board and knife
- Serving bowls
How to Serve This Dish:
Build the bowls with rice first, then beef, then beans and slaw so the cooler toppings stay crisp. A few pickled onions or sliced radishes bring sharpness, which is nice against the smoky beef.
Pro Tips for This Recipe:
- Don’t rush the chuck roast. It needs the long cook to shred properly.
- Taste the sauce after shredding and add more lime if it needs brightness.
- If the sauce seems thin, leave the lid off for the last 20 minutes.
Variations on This Dish:
- Barbacoa Tacos: Spoon the beef into small tortillas and add chopped onion.
- Cauliflower Rice Bowl: Use cauliflower rice if you want a lighter base.
- Smokier Heat: Add an extra chipotle pepper if your family likes stronger spice.
Common Mistakes to Avoid with This Dish:
- Using a lean roast: You want chuck, not something that dries out before it softens.
- Adding too much broth: Barbacoa should be saucy, not soupy.
- Skipping the rest after shredding: Let the beef sit in the sauce a few minutes so it soaks up more flavor.
17. BBQ Pulled Chicken Sandwiches
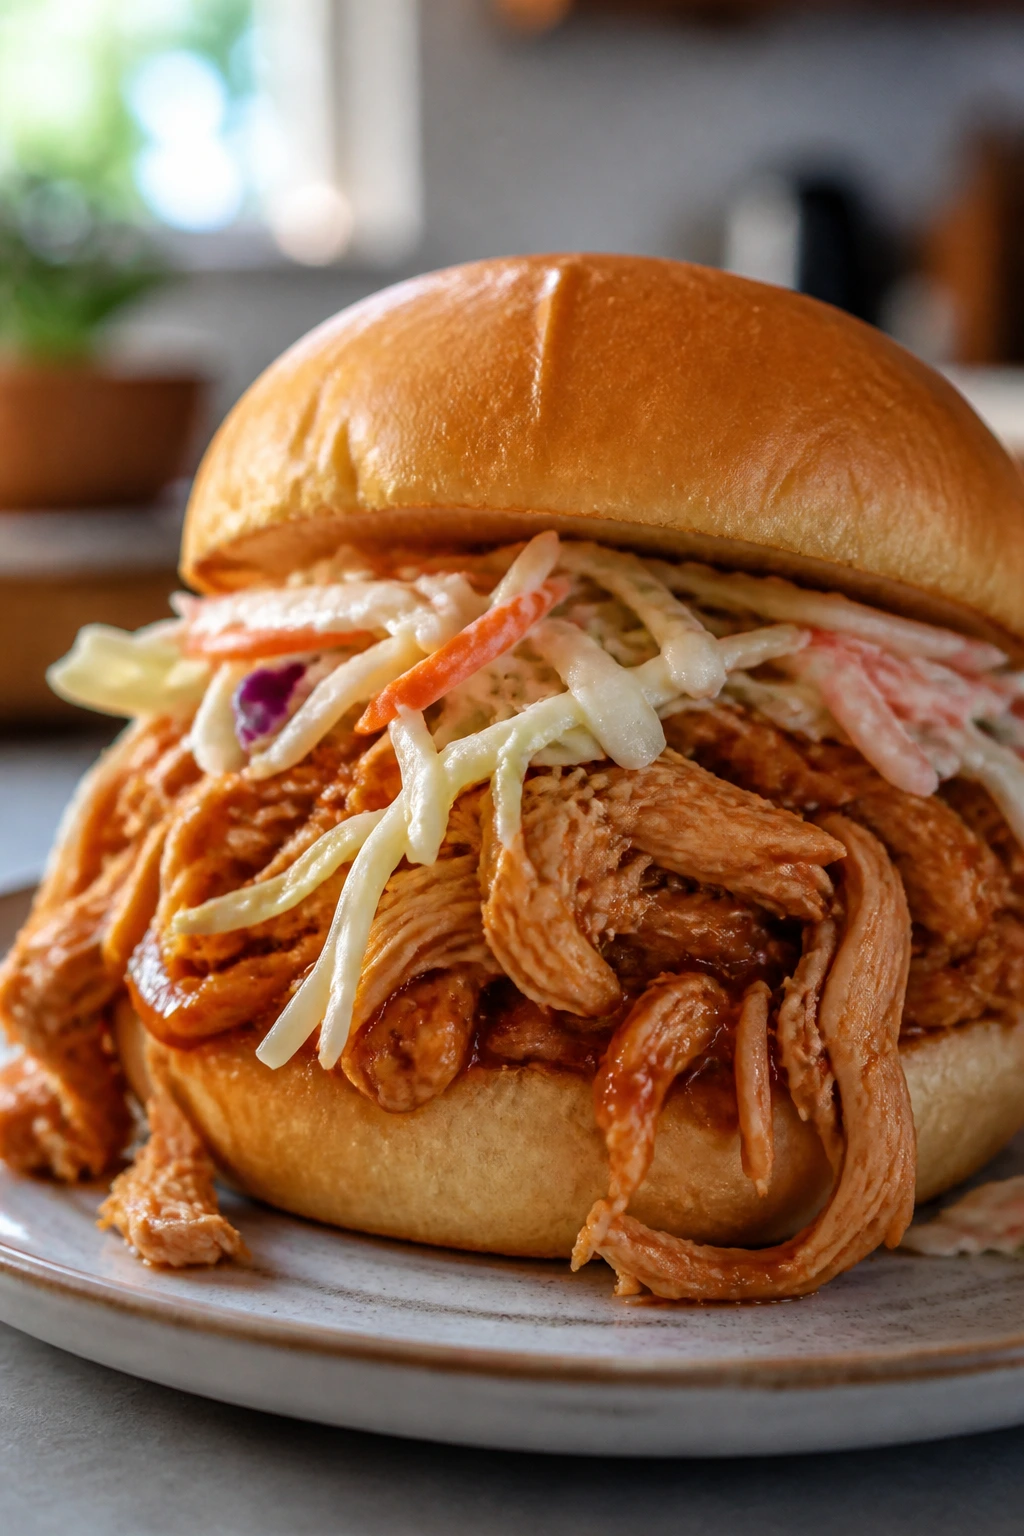
Pulled chicken is one of the kinder things a slow cooker can do. It takes a plain pile of chicken thighs, a bottle of barbecue sauce, and a little onion, then turns them into something that makes dinner feel inevitable in the best way. Sandwiches keep it casual and kid-friendly.
The texture matters here. You want the chicken shredded but still moist, and the barbecue sauce should cling to the meat instead of pooling under it like a bad apology.
Why It Works:
Chicken thighs or breasts both work, though thighs stay juicier if the cooker runs long. A little broth keeps the meat from drying out before it releases its own juices. Once shredded, the chicken absorbs more sauce, so the final mix tastes better than the sauce alone would suggest.
Key Ingredients:
- 2 lbs boneless, skinless chicken thighs or breasts
- 1 medium onion, sliced
- 1 cup barbecue sauce
- 1/2 cup chicken broth
- 1 tsp smoked paprika
- 1 tsp kosher salt
- 1/2 tsp black pepper
- 8 sandwich buns
- 2 cups coleslaw for topping or serving
- Pickles, optional
Quick Steps:
- Put the onion in the bottom of the slow cooker.
- Place the chicken on top, season with smoked paprika, salt, and pepper, and pour over the barbecue sauce and broth.
- Cover and cook on low for 6 to 7 hours, or high for 3 to 4 hours.
- Shred the chicken in the slow cooker and stir it back into the sauce.
- Pile onto buns and top with coleslaw or pickles.
Equipment for This Recipe:
- Slow cooker
- Two forks
- Tongs
- Small bowl for coleslaw, if using
How to Serve This Dish:
Serve the pulled chicken on soft buns with coleslaw tucked right on top or on the side if you’re dealing with cautious kids. Potato wedges or baked beans make the plate feel complete without making more work for you.
Pro Tips for This Recipe:
- Use a barbecue sauce with enough acidity to balance the sweetness.
- Toast the buns if you want them to hold up better against the sauce.
- If the chicken looks dry after shredding, stir in a few spoonfuls of the cooking juices.
Variations on This Dish:
- Spicy BBQ Chicken: Add hot sauce or chipotle barbecue sauce for more bite.
- Hawaiian Style: Top with pineapple rings or spoon in a little crushed pineapple.
- Pulled Chicken Sliders: Use slider buns for smaller hands and smaller appetites.
Common Mistakes to Avoid with This Dish:
- Overcooking breast meat: It can go stringy fast. Thighs are safer if your day runs long.
- Serving on cold buns: Toasted buns keep the sandwich from feeling soggy.
- Skipping the coleslaw or crunchy topping: The texture break matters here.
18. Shepherd’s Pie with Mashed Potato Top
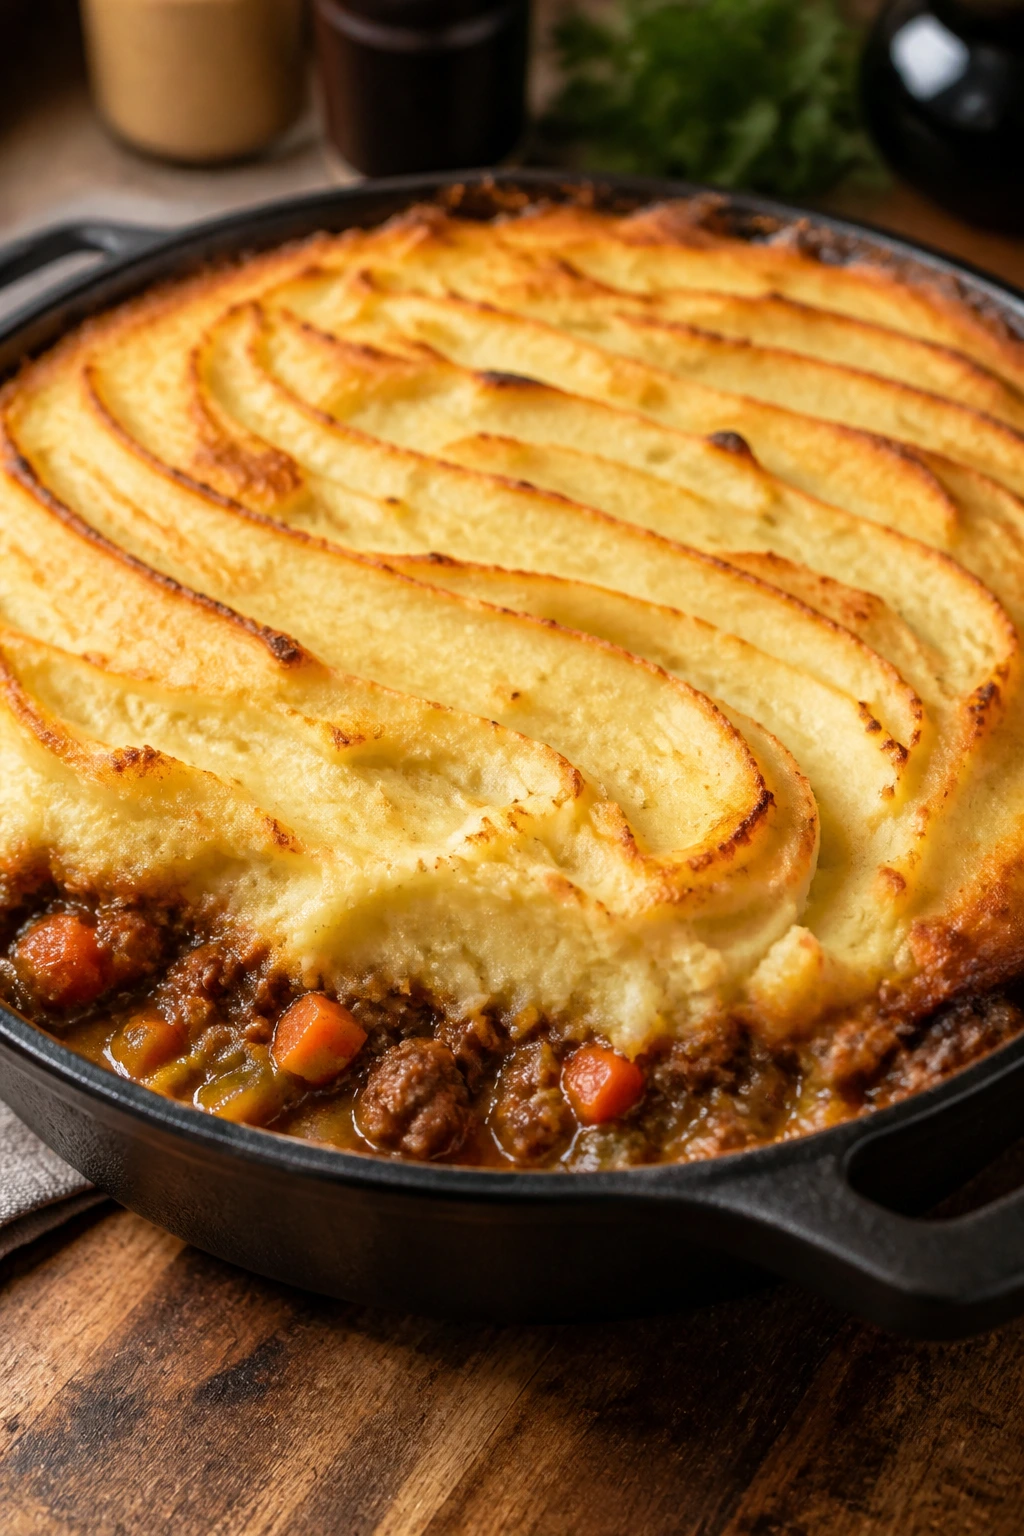
Shepherd’s pie has a very specific sort of comfort: savory meat underneath, mashed potatoes on top, and a browned surface that promises dinner is finished. It’s not delicate. It’s not trying to be. It’s a full pan of food that can sit in the fridge during the day and still come out looking like someone planned ahead.
This is one of the better make-ahead casseroles in the set because the filling and potatoes can be prepared separately in the morning. Put the layers together before dinner, then bake until the top gets those pale gold ridges that everyone seems to fight over.
Why It Works:
The beef filling gets its richness from tomato paste, broth, and carrots, which give it enough body to support the mashed potato lid. The potato topping acts like insulation, trapping heat and letting the filling bubble underneath. That means every spoonful pulls from both layers instead of one sad half of the pan.
Key Ingredients:
- 2 lbs ground beef
- 1 medium onion, diced
- 2 carrots, diced small
- 1 cup frozen peas
- 2 tbsp tomato paste
- 1 cup beef broth
- 1 tbsp Worcestershire sauce
- 1 tsp dried thyme
- 4 cups prepared mashed potatoes
- 1 cup shredded cheddar, optional
- Salt and black pepper to taste
Quick Steps:
- Brown the beef with the onion in a skillet, then stir in the carrots and cook for 3 to 4 minutes.
- Add tomato paste, broth, Worcestershire, thyme, salt, pepper, and peas, then simmer until the mixture looks thick rather than soupy.
- Spoon the filling into a baking dish.
- Spread mashed potatoes over the top, roughing up the surface with a fork.
- Bake at 400°F for 20 to 25 minutes until the top is browned and the edges are bubbling.
Equipment for This Recipe:
- Large skillet
- Baking dish
- Potato masher, if making the topping from scratch
- Fork for texturing the potatoes
How to Serve This Dish:
Let it sit for 10 minutes, then scoop it into shallow bowls. A bright green side, like peas or a simple salad, helps cut the richness of the potatoes and beef.
Pro Tips for This Recipe:
- Make the filling thick enough to hold its shape under the potatoes.
- Rough up the top of the mash. The little ridges brown better than a smooth surface.
- If using leftover mashed potatoes, add a splash of milk so they spread easily.
Variations on This Dish:
- Lamb Version: Use ground lamb for a more traditional flavor.
- Sweet Potato Top: Swap in mashed sweet potatoes for a slightly sweeter finish.
- Veggie Shepherd’s Pie: Replace the beef with lentils and mushrooms.
Common Mistakes to Avoid with This Dish:
- Making the filling too loose: It will seep up through the potatoes and turn the top messy.
- Spreading cold mashed potatoes in a lump: Warm them slightly first so they smooth out.
- Serving it too fast: The filling needs a few minutes to settle.
19. Creamy Tomato Tortellini Soup with Garlic Bread

This soup is the closest thing to a rescue plan in a bowl. It’s rich without being heavy, tomato-forward without tasting sharp, and the cheese tortellini make it feel like more than soup. If you need dinner to be ready after a morning of chaos, this is the sort of pot that doesn’t argue.
I like to make the base earlier in the day and hold the tortellini for later. That keeps them tender instead of swollen, which matters. Pasta has feelings. It needs timing.
Why It Works:
Crushed tomatoes and broth build a strong, simple base that doesn’t require a lot of fuss. Cream softens the edges, spinach adds color and a little green, and tortellini turn the soup into a full meal. If you cook the pasta at the end, the texture stays firm instead of bloated.
Key Ingredients:
- 2 tbsp butter
- 1 medium onion, diced
- 3 cloves garlic, minced
- 1 (28 oz) can crushed tomatoes
- 4 cups chicken or vegetable broth
- 1 cup heavy cream or half-and-half
- 1 (20 oz) package refrigerated cheese tortellini
- 3 cups fresh spinach
- 1/2 cup grated Parmesan
- 1 tsp kosher salt
- 1/2 tsp black pepper
- Garlic bread, for serving
Quick Steps:
- Melt the butter in a soup pot and cook the onion until soft, about 6 minutes.
- Add the garlic for 30 seconds, then stir in the tomatoes, broth, salt, and pepper.
- Simmer for 15 minutes, then add the cream.
- Stir in the tortellini and cook until they float and feel tender, about 4 to 6 minutes.
- Add the spinach and Parmesan just before serving.
Equipment for This Recipe:
- Large soup pot
- Wooden spoon
- Ladle
- Baking sheet if you’re toasting garlic bread
How to Serve This Dish:
Ladle it into wide bowls and put the garlic bread beside, not on top, so it stays crisp for dipping. A little extra Parmesan and cracked pepper on the surface make the soup look finished without asking for much.
Pro Tips for This Recipe:
- Add the tortellini at the end, not at the beginning.
- If the soup tastes too sharp, a pinch of sugar can round out the tomatoes.
- Use a broth with enough flavor on its own; weak broth makes the whole pot taste thin.
Variations on This Dish:
- Sausage Tomato Tortellini Soup: Brown Italian sausage with the onion for a meatier bowl.
- Dairy-Free Tomato Soup: Use full-fat coconut milk instead of cream if you need a dairy-free version.
- Spinach Swap: Kale works too, but it needs an extra few minutes to soften.
Common Mistakes to Avoid with This Dish:
- Overcooking tortellini: They go from tender to swollen fast.
- Adding cream at a rolling boil: Keep the heat gentle or it can separate.
- Forgetting salt: Tomatoes need more seasoning than people expect.
20. Breakfast-for-Dinner Frittata and Roasted Potatoes

A frittata is one of the cleanest ways to get dinner on the table when the day has already eaten your attention. Eggs, potatoes, cheese, and whatever vegetables or meat you have around. It slices well, travels well, and does not demand the kind of precision that a quiche or omelet would.
The roasted potatoes give the meal some backbone, and the frittata uses up odds and ends in a way that feels intentional instead of desperate. That’s a useful trick on school days, honestly.
Why It Works:
Eggs set quickly and accept a lot of fillings without falling apart. Roasted potatoes bring a crisp edge that balances the soft interior of the frittata, and cheese helps the whole pan feel finished. It’s a good dinner when you want something that looks like effort but only asks for a little organization.
Key Ingredients:
- 1 1/2 lbs Yukon gold potatoes, diced
- 2 tbsp olive oil
- 1 tsp kosher salt, divided
- 1/2 tsp black pepper
- 10 large eggs
- 1/2 cup milk
- 1 cup shredded cheddar
- 2 cups chopped spinach
- 1 cup diced ham or cooked breakfast sausage
- 1/4 cup sliced green onions
Quick Steps:
- Roast the potatoes at 425°F with olive oil, half the salt, and pepper for 25 to 30 minutes until browned and crisp.
- Whisk the eggs, milk, remaining salt, and half the cheese in a bowl.
- Warm an oven-safe skillet, add the ham or sausage and spinach, and cook just until the spinach wilts.
- Pour in the egg mixture and cook over low heat for 3 to 4 minutes until the edges start to set.
- Sprinkle the top with the remaining cheese, transfer the skillet to the oven, and bake at 375°F for 10 to 12 minutes until the center is just set.
Equipment for This Recipe:
- Sheet pan
- Oven-safe skillet, 10- or 12-inch
- Whisk
- Mixing bowl
How to Serve This Dish:
Cut the frittata into wedges and serve with the roasted potatoes beside it, not under it, so both stay crisp and distinct. A little fruit on the side—orange slices or grapes—makes the plate feel more complete and keeps the meal from leaning too heavy.
Pro Tips for This Recipe:
- Keep the heat low once the eggs go in. High heat makes the bottom tough before the top sets.
- Don’t overfill the skillet. Eggs need room to puff a little.
- Let the frittata rest 5 minutes before cutting so the slices hold together.
Variations on This Dish:
- Veggie-Only Frittata: Skip the ham and add mushrooms or zucchini.
- Southwest Version: Use pepper jack, salsa on the side, and a few chopped peppers in the filling.
- Leftover Roast Chicken Swap: Dice cooked chicken into the egg mixture if that’s what’s in the fridge.
Common Mistakes to Avoid with This Dish:
- Using a skillet that is too large: The eggs spread too thin and dry out.
- Leaving the center runny: Pull it when it’s just set; carryover heat finishes the job.
- Serving potatoes under the frittata: The crisp edges disappear if they sit in contact too long.
Why Morning-Started Dinners Feel Calmer at 6 p.m.
The reason this kind of cooking works is simple: you move the hardest choices earlier. In the morning, you still have a little quiet. You can chop an onion without someone asking for a missing soccer sock every thirty seconds. You can mix a sauce, lay out a casserole, or dump a slow cooker without the timer blinking at you.
That changes the whole evening. Dinner stops being a rescue mission and starts acting like a decision you already made. I like that about this style of cooking. It’s not flashy. It’s better than flashy.
A lot of these meals also forgive interruptions, which is priceless in a house with school forms, sports gear, and people wandering in and out looking for snacks. Slow cooker dinners can wait. Casseroles can chill. Sheet-pan meals can be prepped and parked. The kitchen keeps moving even if you don’t stand in it.
Essential Equipment for These Recipes

- 5- to 6-quart slow cooker: Big enough for taco soup, barbacoa, salsa chicken, and BBQ pulled chicken without crowding.
- Large rimmed sheet pans: Use sturdy pans for chicken, salmon, potatoes, and roasted vegetables so they brown instead of steaming.
- Oven-safe skillet: Handy for enchilada skillet, frittata, and any dinner that finishes under the broiler.
- 9×13-inch baking dish: The workhorse for ziti, casserole, shepherd’s pie, and pasta bakes.
- Large Dutch oven or soup pot: Essential for chili mac, tomato tortellini soup, and any one-pot dinner that needs room to simmer.
- Instant-read thermometer: The easiest way to keep chicken, pork, and salmon from going past done into dry.
- Sharp chef’s knife: Saves time on onions, peppers, apples, and all the chopping that makes these meals possible.
- Cutting board with a damp towel underneath: Stops the board from skating around when you’re slicing quickly before school runs start.
- Colander: For pasta, tortellini, and ziti; it’s boring, but so are broken noodles.
- Airtight storage containers: Useful for make-ahead portions, leftovers, and lunchbox transfers.
Smart Shopping and Ingredient Tips
The meat matters more than the recipe title sometimes. For slow cooker chicken and tacos, thighs give you the easiest route to juicy shreds. For pork tenderloin, buy a uniform piece, not one that tapers sharply at one end. For beef and broccoli or barbacoa, pick cuts that can stand up to longer cooking without turning dry or stringy. Chuck roast, flank steak, and sirloin each behave differently, and that difference shows up on the plate.
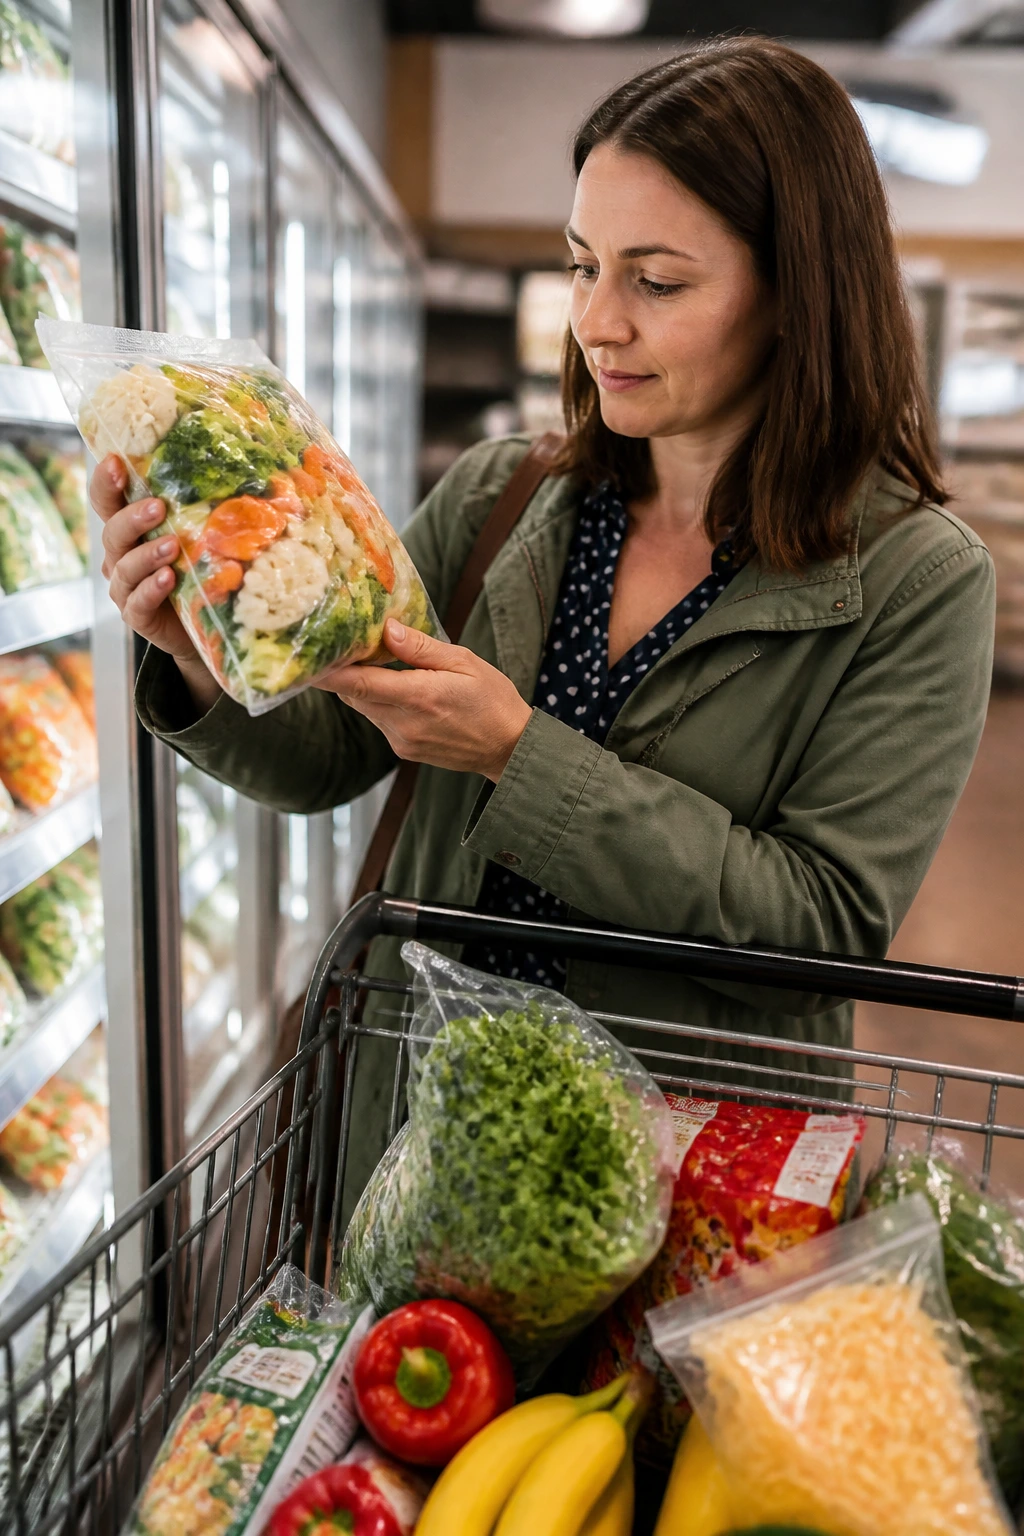
Frozen vegetables are not a compromise here. Frozen corn, peas, and broccoli can save a morning when the cutting board already looks busy. Just don’t use them the same way every time. Frozen broccoli belongs near the end of a slow cook or right at the finish in a skillet; frozen peas can go in almost anywhere because they soften quickly. That little distinction keeps the texture from going muddy.
For cheese, the block still beats the bag in flavor, but pre-shredded has its place in a weeknight kitchen. Use block mozzarella or cheddar when you want better melt and a smoother pull; use the bag when the morning is already loud and you need speed. Both are fine. The wrong move is buying cheese with a lot of starch clinging to it and then wondering why the sauce feels grainy.
Tomatoes deserve a quick word too. Diced tomatoes with green chilies, crushed tomatoes, marinara, and salsa all look similar on the shelf, but they do different jobs. Salsa carries seasoning. Crushed tomatoes give soup body. Marinara is already cooked down. A can with lower sodium gives you more room to season the pot yourself, which matters when you are stacking flavors into a dinner that has to hold for hours.
How to Serve These Recipes
Presentation:
Serve the saucy meals in shallow bowls so the sauce has room to show up. Sheet-pan dinners look better when you pile the chicken and vegetables in loose layers instead of flattening everything into one spread. For casseroles, let the top brown before cutting so you get cleaner squares and a more finished look.
Accompaniments:
Keep the sides simple and crisp. A green salad with sharp vinaigrette works with the richer casseroles and pasta bakes. Apple slices, cucumber spears, steamed peas, roasted broccoli, and buttered rolls are all good companions because they don’t ask for more oven time. Garlic bread belongs beside the tomato soups and ziti, and a bowl of pickles or slaw does real work next to pulled chicken or barbacoa.
Portions:
Most of these dishes feed 4 to 6 people, though the slow cooker meals often stretch farther if you have rice, tortillas, or buns on the side. For younger kids, start with smaller servings and keep toppings separate. For hungry teenagers, plan on one and a half portions if the dish is bean-heavy or soup-based.
Beverage Pairing:
Sparkling water with lime, unsweetened iced tea, or a light lemonade all fit the table without clashing with the sauces. For adults, a crisp lager with the barbecue or taco meals and a chilled white wine with salmon or pork both make sense.
Additional Tips and Flavor Boosters
Flavor Enhancement: A squeeze of lime at the end changes more dinners than people expect. It wakes up salsa chicken, taco soup, barbacoa, and even the tomato soup without making the food taste obviously acidic. If a dish feels flat, acid is usually the fastest fix.
Customization: Keep a few family-specific add-ons in bowls on the table. Pickled onions, shredded lettuce, sliced jalapeños, chopped cilantro, sour cream, and hot sauce let everyone steer their own bowl or taco without forcing a second meal out of one pan.
Serving Suggestions: Toasted buns, warm tortillas, crunchy slaw, and grated cheese are not afterthoughts. They’re the parts that keep saucy dinners from feeling sloppy in the wrong way. Even a plain casserole feels more finished with a browned top and something fresh beside it.
Make-It-Yours: If you need a dairy-free path, lean on olive oil, broth, salsa, tomato sauce, and cheese alternatives that melt well. For gluten-free meals, use corn tortillas, rice, polenta, or gluten-free pasta, and don’t be shy about thickening sauces with cornstarch rather than flour. For a lower-sodium batch, use no-salt-added tomatoes and broth, then season at the end where you can taste what’s happening.
Make-Ahead, Storage, and Reheating Guidance
Most of these dinners keep well for 3 to 4 days in the refrigerator if they’re cooled and packed within 2 hours of cooking. Slow cooker meats, soups, casseroles, and pasta bakes all fit that window nicely. For freezer storage, the meaty ones and the baked casseroles usually hold for up to 2 to 3 months; tomato soups and shredded chicken freeze well too, though pasta-heavy dishes are better if you freeze the sauce or filling separately and cook the noodles fresh.
Reheat casseroles and baked pasta covered at 325°F until hot in the center, usually 20 to 30 minutes for a family-size pan. A splash of broth or a spoonful of water under the foil helps keep the rice and pasta from drying out. For slow cooker leftovers, the microwave works fine in short bursts, or you can warm them in a pot over low heat with a lid on.
Chicken, beef, and pork should be reheated to 165°F. That part is not optional. If you’re reheating salmon, do it gently in a low oven around 300°F so it doesn’t dry out and smell stronger than you’d like in the lunchroom-style way. Tortellini soup is best with the pasta added fresh to the warmed base if you know you’ll be keeping leftovers; otherwise the tortellini keeps drinking broth and the pot gets thick.
A few of these recipes can be assembled earlier in the day and held in the fridge before cooking. Baked ziti, shepherd’s pie, sheet-pan chicken, and meatball dishes all do fine with a morning prep and evening bake. Just let cold casserole dishes sit on the counter while the oven preheats so they don’t go from fridge-cold to cracked dish in one unhappy moment.
Variations and Adaptations to Try
Gluten-Free Weeknight Swap:
Use corn tortillas in place of flour tortillas, gluten-free pasta for the ziti and pasta bake, and cornstarch instead of flour when a sauce needs thickening. A lot of these dinners already lean close to gluten-free without much extra effort, which makes the swap less painful than people expect.
Dairy-Light Route:
Leave the cheese off the taco bowls, use a smaller amount on casseroles, and reach for yogurt or a dairy-free cream substitute where a recipe calls for sour cream or heavy cream. The food still has body; it just leans more on broth, tomatoes, and herbs.
Lower-Sodium Batch:
Start with low-sodium broth, no-salt-added canned tomatoes, and reduced-sodium soy sauce. Then season at the end. That lets you keep the flavor clear without crossing into salty, tired territory.
Kid-Calm Version:
Pull out a portion before adding heat, then spice up the adult half. This works especially well for taco soup, barbacoa, enchilada skillet, and pulled chicken. It saves you from negotiating with a child who sees a red pepper flake and acts like the meal has attacked them.
Vegetable-Heavy Edit:
Add more bell peppers, spinach, broccoli, cabbage, carrots, or zucchini to the casseroles and skillet meals. The trick is to cut them small enough to cook in the same window as the main ingredients so the dinner stays balanced instead of watery.
Comfort-Food-to-Freezer Strategy:
Make a double batch of the tomato soup, chili mac, taco soup, or barbacoa and freeze half in meal-sized containers. A good freezer meal should thaw into something that tastes cooked, not rescued, and these four do that better than most.
Common Mistakes to Avoid
Trying to do too much in the morning:
A school morning is not the moment for a complicated sauce reduction or a five-pan assembly line. If you need a recipe to survive the hour before leaving the house, keep the prep to chopping, measuring, and layering. If you’re sweating over the stove while the backpack search is still underway, the recipe is asking for too much.
Overcooking the proteins:
Chicken breasts, salmon, pork tenderloin, and meatballs each have a narrow lane. Go past it and the texture gets dry or chalky. An instant-read thermometer is worth its drawer space here because guessing usually costs you dinner quality.
Forgetting to build enough flavor early:
Beans, rice, pasta, and potatoes all absorb seasoning. If the sauce or broth tastes a little bold before cooking, that’s often the right place to stop. A bland base stays bland after it cooks. A well-seasoned base settles down into a finished meal.
Letting pasta sit too long in liquid:
Tortellini, ziti, chili mac, and pasta bakes all suffer if you leave them swimming. The noodles keep softening, and the dinner turns heavy. If a recipe includes pasta, undercook it a little and keep an eye on the bake or simmer time.
Using toppings at the wrong stage:
Crispy tortilla chips, fresh cilantro, sour cream, scallions, and avocado should usually wait until the end. Add them too early and they lose their job. The same goes for cheese on broiled dishes — it should melt, not turn into a browned memory.
Ignoring the rest time:
Roasts, casseroles, and even shepherd’s pie need a few minutes before serving. The food settles, the juices move back where they belong, and the slices or scoops hold together better. Ten quiet minutes can change the whole plate.
Frequently Asked Questions

Can I make most of these dinners entirely in the morning and reheat them at night?
Yes, especially the soups, slow cooker meats, casseroles, and pasta bakes. If a dish includes pasta or delicate fish, hold those parts back when you can and finish them closer to dinner so the texture stays right.
Which of these recipes freeze best?
Salsa chicken, taco soup, barbacoa, pulled chicken, chili mac, shepherd’s pie filling, and tomato soup all freeze well. Casseroles freeze nicely too, though they reheat best when wrapped tightly and thawed before baking.
What if I only have chicken breasts instead of thighs?
Use them, but shorten the cook time and watch them closely. Breasts are leaner and can dry out in a slow cooker or under a hot oven faster than thighs, so pull them the moment they’re done.
Can I swap fresh vegetables for frozen ones?
Absolutely. Frozen corn, peas, broccoli, and mixed vegetables work especially well in soups, casseroles, and skillet dinners. Add them near the end so they don’t lose all texture.
How do I keep rice from getting mushy in make-ahead bowls?
Cool it before storing, and don’t drown it in sauce until serving time. Rice that has been fully cooled and reheated with a little broth or water tends to hold together better than rice that’s been kept hot for hours.
What’s the best way to reheat a casserole without drying it out?
Cover it with foil and warm it in the oven at 325°F until hot in the center. A spoonful of broth under the foil helps with rice, pasta, and chicken casseroles.
Can I prep the ingredients the night before if the morning is too tight?
Yes, and that’s often the easiest answer. Chop the vegetables, mix the sauce, and store everything in separate containers so the morning move becomes a quick assembly job instead of a cooking session.
Do these dinners still work if the family gets home later than planned?
The slow cooker meals handle that best because they can sit on warm for a while without collapsing. For casseroles and baked dishes, it’s better to turn off the oven, cover loosely, and serve once everyone is home, rather than overbaking the edges.
What should I make when I want one dinner that pleases adults and kids without separate meals?
Start with salsa chicken tacos, pulled chicken sandwiches, chili mac, baked ziti, or frittata. Those dishes hit familiar flavors, hold well, and leave enough room for toppings or sides to keep the table calm.
The Hour You Get Back
A busy school morning doesn’t have to steal the whole day from dinner. Once the prep moves earlier, the evening changes shape. There’s less scrambling, fewer last-minute substitutions, and a lot less standing in front of the fridge hoping something useful appears.
That’s the quiet value of these meals. They are not trying to be clever. They are trying to get dinner on the table with enough sanity left over to enjoy it, and that’s a better promise than most recipes make. Start the pot before the bus comes, and let the day take care of itself for a while.