
The hardest part of after-school cooking isn’t the cooking. It’s the five minutes between backpacks hitting the floor and the first snack request, when everyone is hungry, loud, and somehow already bored of whatever is in the fridge. That is where kid-friendly meals earn their keep: not in the fancy first bite, but in the small, practical moment when dinner has to happen fast and nobody feels like negotiating.
The best kid-friendly meals have a very specific shape. They’re warm, familiar, easy to hold, and forgiving if you leave them in the oven for two minutes too long. Cheese can brown a little. Pasta can wait under foil. Tortillas, bagels, buns, and biscuits do a lot of the heavy lifting because they make food feel like a snack even when it’s doing dinner duty.
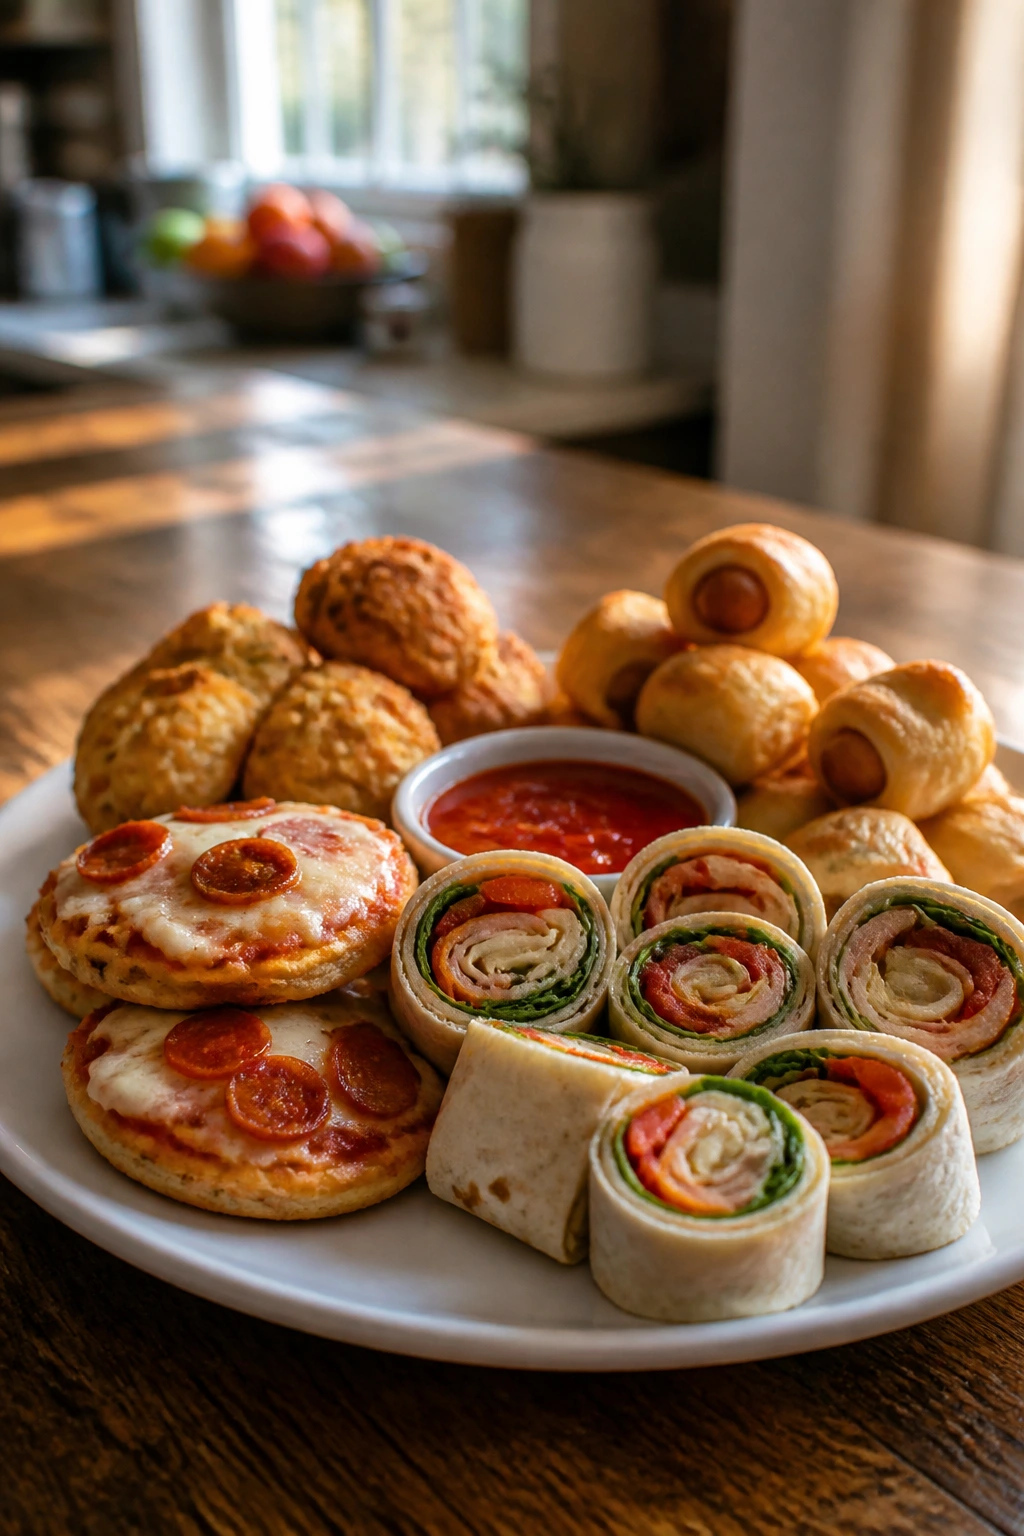
I like meals that pull double duty. A tray of mini pizza bagels can calm the after-school chaos, then reappear with fruit and a salad for dinner. A bowl of chicken noodle soup with star pasta feels gentle enough for a tired child and substantial enough for a parent who still needs to cook, answer questions, and find the missing soccer cleat.
Why These Meals Keep the Afternoon From Sliding Off the Rails
- Fast food with real ingredients: These recipes lean on familiar pantry foods, but they still taste like something made at home rather than poured from a box.
- Built for small hands: Handheld food buys you a few quiet minutes, which is sometimes the difference between a calm table and a full-scale kitchen mutiny.
- Easy to scale up or down: Most of these recipes stretch with bread, pasta, rice, or tortillas, so you can feed two children or a crowd without rewriting the whole plan.
- Leftovers that still make sense: Several of these dishes hold up the next day, which matters when after-school snacks turn into second dinner.
- Simple to customize: Keep the base mild, then add hot sauce, herbs, extra vegetables, or a sharper cheese for the adults.
- Works for dinner and snack time: That overlap is the whole trick here; the food should feel casual enough for a counter snack and complete enough for a school-night meal.
1. Mini Pizza Bagels
Warm sauce, melted mozzarella, and a toasted bagel edge make this one feel like a tiny pizza shop at home. Mini pizza bagels are one of those kid-friendly meals that disappear fast because they sit between snack and dinner without pretending to be anything else.
Why It Works: The bagel base stays sturdy under sauce, which is more than I can say for a lot of bread. A short bake at 425°F gives you bubbling cheese and crisp edges before the bagels dry out. They also reheat well, which is rare for anything this fun.
Key Ingredients:
- 4 plain bagels, split
- 1 cup pizza sauce
- 2 cups shredded low-moisture mozzarella
- 1/2 cup mini pepperoni
- 1/2 cup diced bell pepper
- 1 teaspoon dried oregano
Quick Steps:
- Prep the Tray: Heat the oven to 425°F (220°C) and line a baking sheet with parchment.
- Build the Base: Set the bagel halves cut-side up and spread 1 tablespoon sauce on each half.
- Add the Toppings: Scatter mozzarella, pepperoni, bell pepper, and oregano over the bagels.
- Bake Until Bubbly: Bake for 8 to 10 minutes, until the cheese melts and the edges toast.
- Rest Briefly: Let them sit for 2 minutes so the cheese settles instead of sliding off the first bite.
Equipment for This Recipe:
- Rimmed baking sheet
- Parchment paper
- Small spoon
How to Serve This Dish: Pile two or three on a plate with apple slices and carrot sticks for an after-school snack. For dinner, add a simple salad and call it done.
Pro Tips for This Recipe:
- Toast the bagels for 2 minutes before topping if you want extra crunch.
- Use low-moisture mozzarella; fresh mozzarella makes the centers wet.
- Keep the sauce thin so the bagels do not turn soggy.
Variations on This Dish:
- Breakfast Bagels: Swap the pepperoni for scrambled egg and crumbled bacon.
- Veggie Patch: Use mushrooms, olives, and spinach for a softer, less salty version.
Common Mistakes to Avoid with This Dish:
- Over-saucing the bagels: The bread gets gummy fast; a thin layer is enough.
- Loading on wet toppings: Too much tomato or watery vegetables will flatten the crust.
2. Chicken Quesadilla Wedges
This is the kind of dinner that smells done before it is even plated. Chicken quesadillas give you crisp tortillas, stretchy cheese, and enough built-in comfort to pass the after-school test without much drama.
Why It Works: Tortillas brown in a skillet in about 3 minutes per side, which means you get real texture without waiting around. The melted cheese acts like glue, so you can slice neat wedges that kids can actually hold. Rotisserie chicken makes this move faster, but leftover roast chicken works just as well.
Key Ingredients:
- 2 cups shredded cooked chicken
- 2 cups shredded cheddar
- 4 flour tortillas, 8-inch
- 1/2 cup mild salsa
- 2 tablespoons butter
- 2 tablespoons chopped green onion
Quick Steps:
- Warm the Skillet: Set a large skillet over medium heat and melt 1/2 tablespoon butter.
- Fill One Side: Lay down one tortilla, add chicken, cheese, green onion, and a spoonful of salsa on one half.
- Fold and Toast: Fold it over and cook for 2 to 3 minutes per side, until the tortilla is golden and the cheese melts.
- Repeat in Batches: Add more butter as needed and keep the heat moderate so the tortillas do not scorch.
- Slice and Cool: Cut into wedges and rest for 1 minute before serving.
Equipment for This Recipe:
- 12-inch skillet
- Spatula
- Sharp knife or pizza cutter
How to Serve This Dish: Serve with sour cream, more salsa, and a handful of grapes. For a fuller dinner, add corn or black beans on the side.
Pro Tips for This Recipe:
- Shred the chicken fine so the quesadilla seals cleanly.
- Use medium heat; high heat burns tortillas before the cheese melts.
- Keep fillings on one side only, or the wedge falls apart.
Variations on This Dish:
- Bean Swap: Replace half the chicken with black beans for a cheaper meat-light version.
- Pepper Jack Kick: Use pepper jack cheese for older kids who like a little heat.
Common Mistakes to Avoid with This Dish:
- Overfilling the tortilla: It bursts when you try to flip it.
- Using cold chicken straight from the fridge: Warm it first so the cheese melts before the tortilla overbrowns.
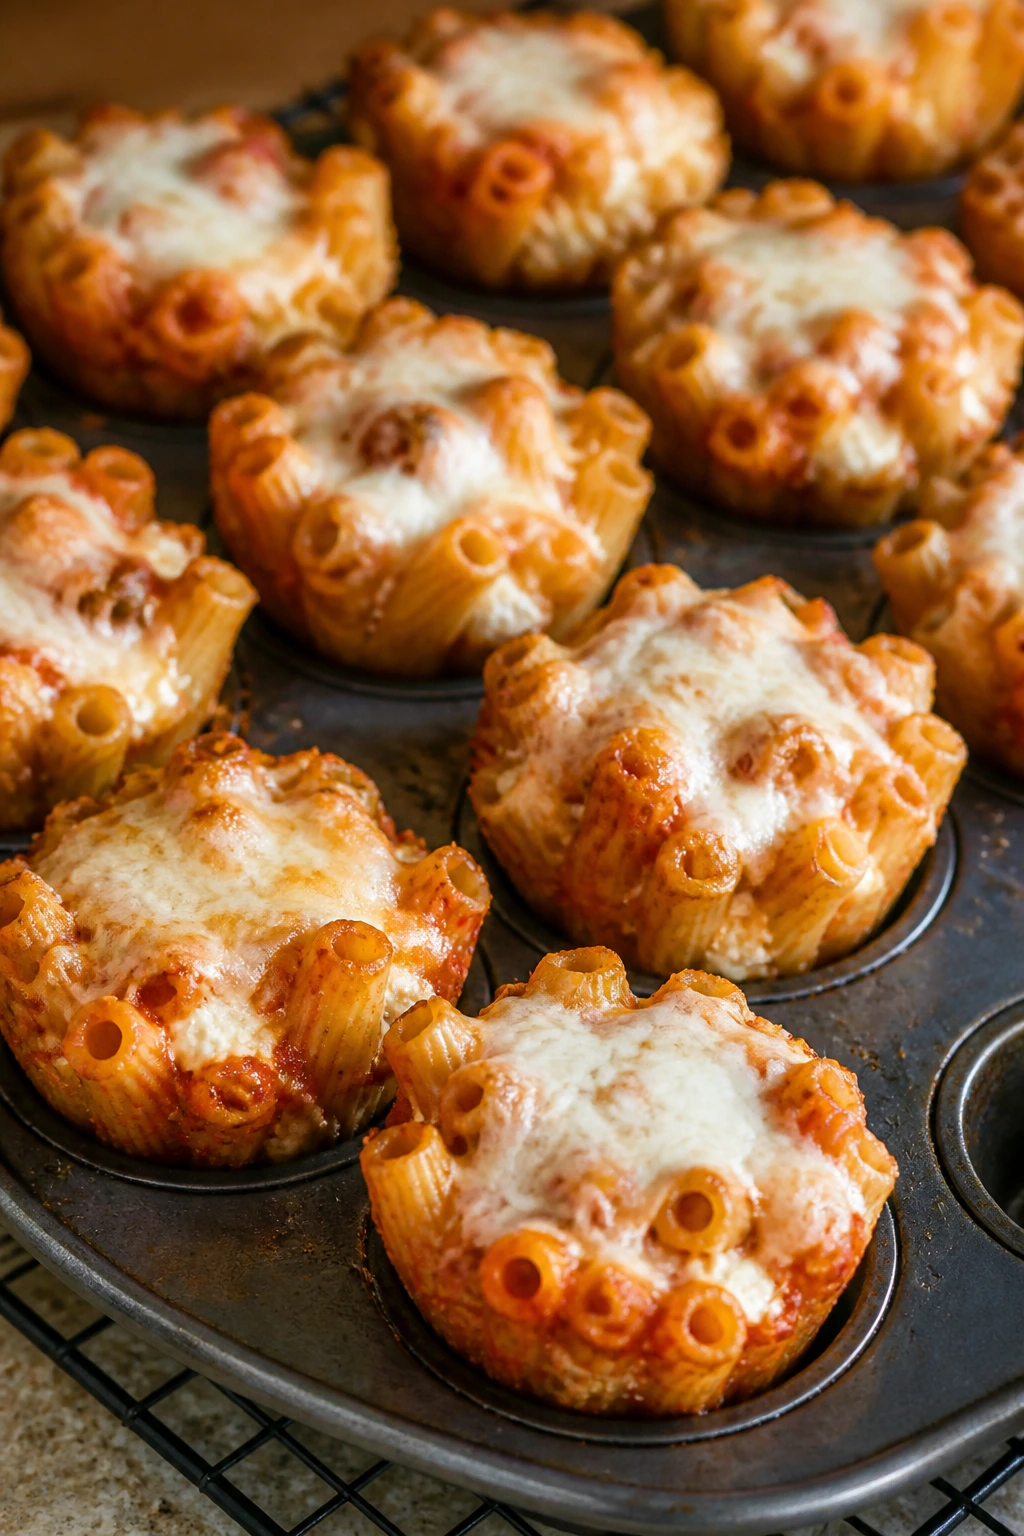
3. Baked Mac and Cheese Cups

Mac and cheese gets friendlier when it comes in muffin-sized portions. These little cups have crisp edges, a soft center, and enough structure that nobody has to chase noodles around a plate.
Why It Works: Baking the pasta in a muffin tin gives you a crunchy top and a tender middle. A quick cheese sauce clings to the noodles better than canned soup, and the individual cups are easy to hand over after school when everyone is grazing.
Key Ingredients:
- 8 ounces elbow macaroni
- 2 tablespoons butter
- 2 tablespoons all-purpose flour
- 1 cup milk
- 2 cups shredded sharp cheddar
- 1/2 teaspoon salt
- 1/4 teaspoon paprika
Quick Steps:
- Boil the Pasta: Cook macaroni in salted water until just shy of tender, then drain.
- Make the Sauce: Melt butter, whisk in flour, then add milk and stir until thick enough to coat a spoon.
- Melt in Cheese: Stir in cheddar, salt, and paprika until smooth, then fold in the pasta.
- Pack the Cups: Spoon the mixture into a greased muffin tin and press lightly.
- Bake and Set: Bake at 375°F (190°C) for 15 to 18 minutes, until the tops are set and golden.
Equipment for This Recipe:
- Muffin tin
- Medium saucepan
- Whisk
How to Serve This Dish: Serve warm with cucumber slices and a little ketchup or marinara for dipping. Two cups make a solid snack; four cups and a vegetable side make dinner.
Pro Tips for This Recipe:
- Undercook the macaroni by 1 minute so it does not turn mushy in the oven.
- Let the cups cool 5 minutes before lifting them out.
- Sharp cheddar gives more flavor than mild cheese.
Variations on This Dish:
- Broccoli Fold-In: Add finely chopped cooked broccoli for a more complete dinner.
- Breadcrumb Top: Sprinkle buttered breadcrumbs over the cups before baking for extra crunch.
Common Mistakes to Avoid with This Dish:
- Using too much milk: The cups will collapse instead of holding shape.
- Skipping the muffin tin grease: The edges stick and tear when you try to lift them out.
4. Turkey Sloppy Joe Sliders
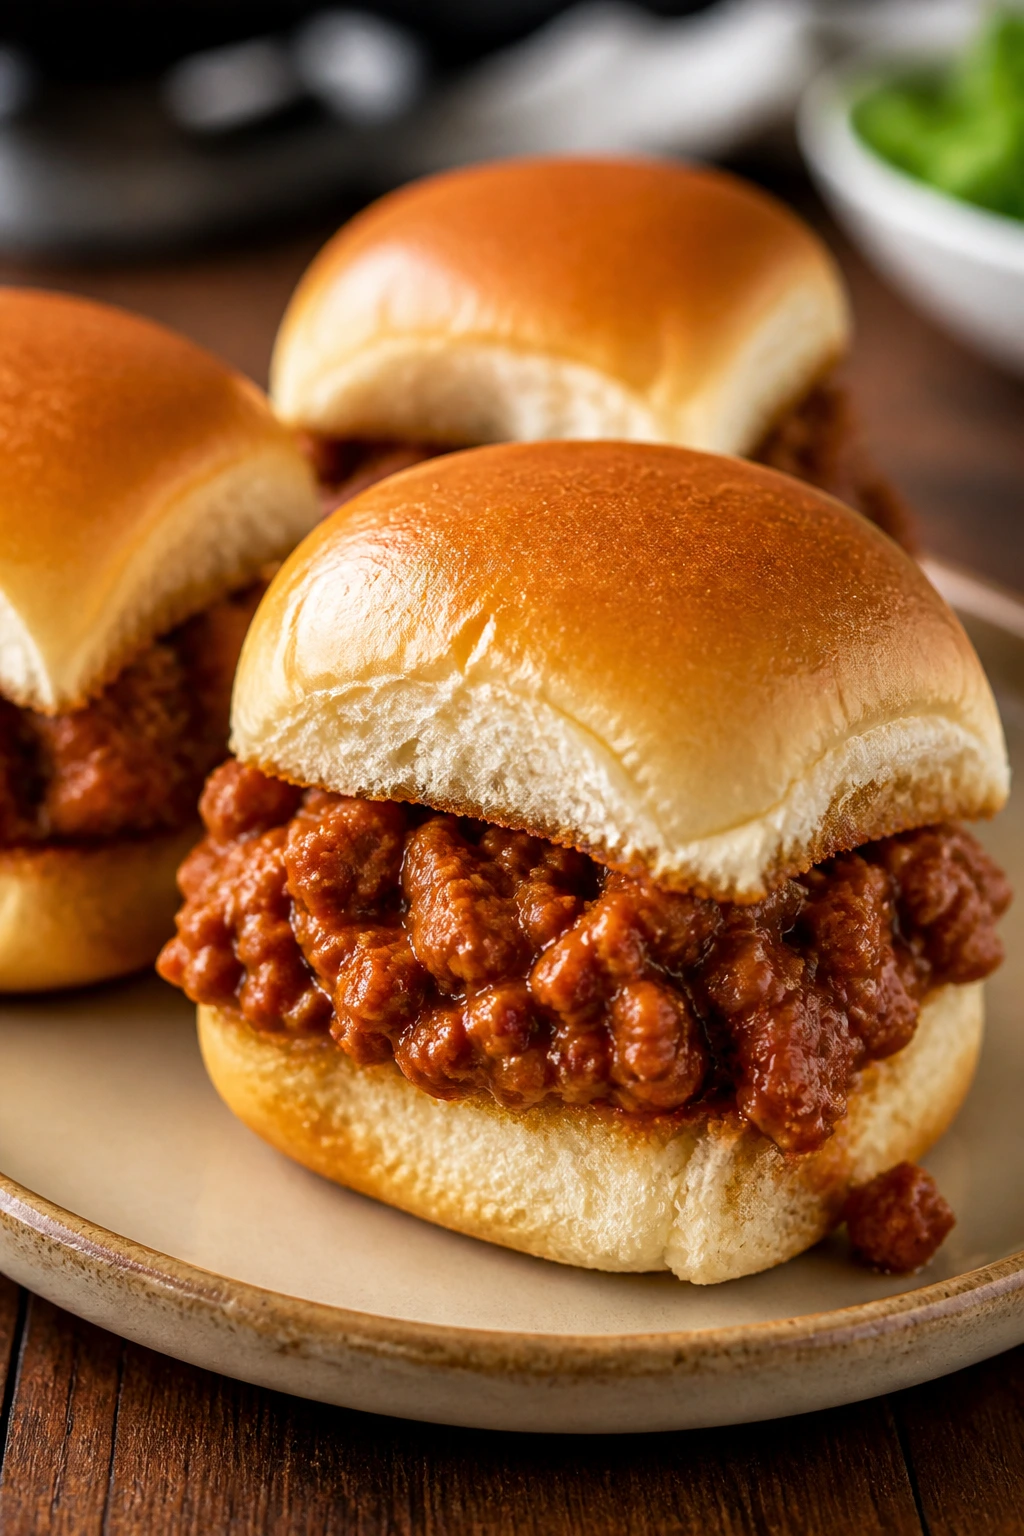
Messy, yes. Worth it, also yes. Turkey sloppy joe sliders bring the sweet-savory sauce and soft bun combo that kids usually love, but in a size that keeps the plate from turning into a landslide.
Why It Works: Ground turkey cooks fast and takes on flavor well when you give it onion, tomato paste, and a little ketchup. Sliding the filling into soft buns and baking them for a few minutes helps the tops warm through without drying out the meat.
Key Ingredients:
- 1 pound ground turkey
- 1 small onion, finely diced
- 1/4 cup ketchup
- 2 tablespoons tomato paste
- 1 tablespoon Worcestershire sauce
- 12 slider buns
- 1 cup shredded cheddar
Quick Steps:
- Brown the Turkey: Cook turkey and onion in a skillet over medium heat for 6 to 7 minutes, until the meat loses its pink color.
- Build the Sauce: Stir in ketchup, tomato paste, Worcestershire sauce, and 1/4 cup water.
- Simmer and Thicken: Cook for 4 to 5 minutes, until the filling looks glossy and spoonable.
- Fill the Sliders: Split the buns, spoon on the filling, and add cheddar.
- Warm Through: Bake at 375°F (190°C) for 5 to 7 minutes, until the cheese melts and the buns soften.
Equipment for This Recipe:
- Large skillet
- 9×13-inch baking dish
- Spoon
How to Serve This Dish: Serve with pickle chips, baby carrots, and a few orange wedges. The sliders are best eaten warm, right as the cheese turns stringy.
Pro Tips for This Recipe:
- Keep the filling thick; runny sauce soaks the buns.
- Brush the top buns with melted butter if you want extra shine.
- Add a pinch of garlic powder if you like the sauce a little deeper.
Variations on This Dish:
- BBQ Sloppy Joes: Swap part of the ketchup for barbecue sauce.
- Cheddar Melt: Add a slice of American cheese under the filling for a softer melt.
Common Mistakes to Avoid with This Dish:
- Making the filling too wet: It leaks through the buns.
- Skipping the rest time: The sauce needs 2 minutes to thicken before assembly.
5. Pesto Pea Pasta

This one tastes bright without asking much from you. Pesto pea pasta is a smart after-school dinner because it feels green and fresh, but it still leans on pasta and cheese so nobody complains that dinner is “weird.”
Why It Works: Hot pasta loosens pesto into a coating instead of a clump, and the peas warm through in the last minute so they stay sweet. A splash of pasta water gives the sauce a silky finish, which is the difference between a bowl that clings and one that slides.
Key Ingredients:
- 12 ounces short pasta
- 1 cup frozen peas
- 1/2 cup basil pesto
- 1/2 cup grated Parmesan
- 1 tablespoon olive oil
- 1/2 teaspoon black pepper
Quick Steps:
- Cook the Pasta: Boil pasta in salted water until al dente, then reserve 1/2 cup pasta water.
- Warm the Peas: Add peas to the pot during the last 1 minute of cooking.
- Toss the Sauce: Drain, return pasta to the pot, and stir in pesto, olive oil, and Parmesan.
- Loosen the Bowl: Add pasta water 1 tablespoon at a time until the sauce coats the noodles.
- Finish and Serve: Season with black pepper and serve immediately while glossy.
Equipment for This Recipe:
- Large pot
- Colander
- Wooden spoon
How to Serve This Dish: Serve it in bowls with cherry tomatoes on the side and a few extra shavings of Parmesan. It works as a snack portion for small kids or a full dinner with garlic bread.
Pro Tips for This Recipe:
- Salt the pasta water well; pesto tastes flat in under-seasoned noodles.
- Use frozen peas, not canned, for better texture.
- Stir the pesto in off the heat so it stays bright.
Variations on This Dish:
- Chicken Version: Fold in shredded rotisserie chicken for a more filling meal.
- Sunflower Pesto Swap: Use sunflower-seed pesto for a nut-free version.
Common Mistakes to Avoid with This Dish:
- Dumping pesto into dry pasta: It clumps and coats unevenly.
- Skipping the pasta water: The sauce will feel thick and pasty instead of slick.
6. Crispy Oven Chicken Tenders
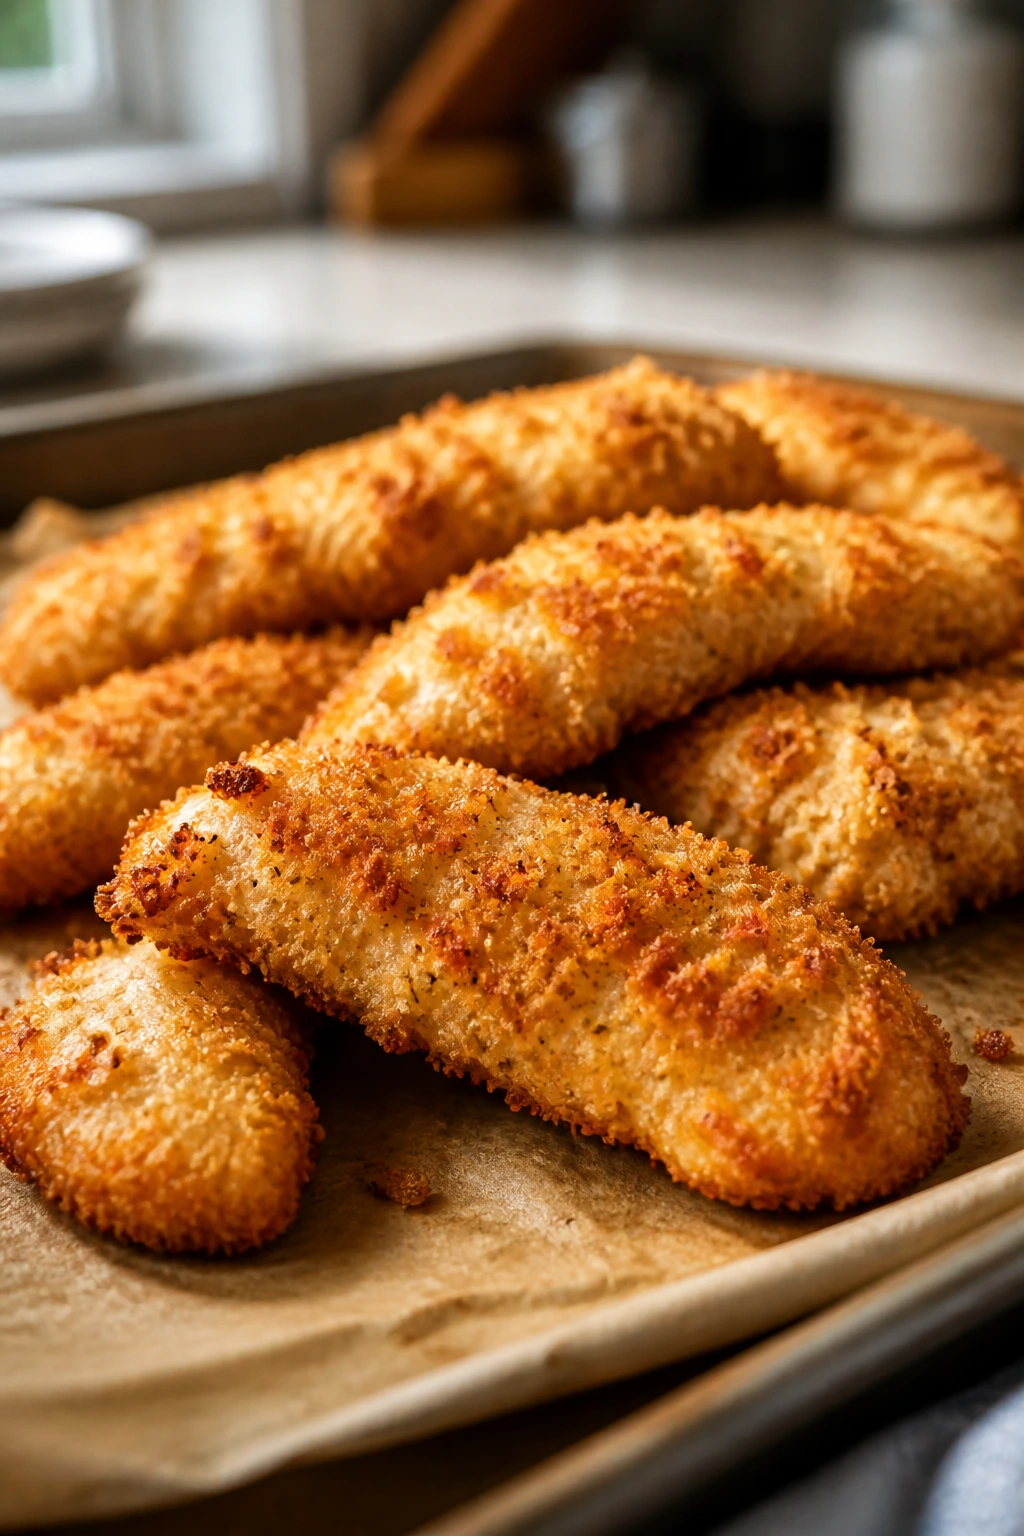
Crispy chicken tenders never spend long on a plate. These are the kind of kid-friendly meals that feel familiar on the first bite and still work for adults who want something crunchy without frying a whole skillet of oil.
Why It Works: A flour-egg-breadcrumb breading gives you a crisp shell in the oven if you bake hot and give the tenders space. The 425°F oven sets the coating quickly, so the chicken stays juicy instead of turning dry.
Key Ingredients:
- 1 1/2 pounds chicken tenders
- 1/2 cup all-purpose flour
- 2 large eggs
- 1 1/2 cups panko breadcrumbs
- 1 teaspoon salt
- 1/2 teaspoon garlic powder
- 2 tablespoons olive oil
Quick Steps:
- Set Up the Breading Station: Put flour in one bowl, beaten eggs in another, and panko mixed with salt and garlic powder in a third.
- Coat the Chicken: Dredge each tender in flour, dip in egg, then press into panko.
- Arrange on the Sheet: Place on a parchment-lined baking sheet and drizzle with olive oil.
- Bake Until Crisp: Bake at 425°F (220°C) for 15 to 18 minutes, flipping halfway, until the coating is deep golden.
- Check for Doneness: The chicken should hit 165°F (74°C) in the center and feel firm, not rubbery.
Equipment for This Recipe:
- Rimmed baking sheet
- 3 shallow bowls
- Instant-read thermometer
How to Serve This Dish: Serve with ranch, honey mustard, or ketchup, plus steamed broccoli or fries. They also work cold in lunchboxes, which is a small miracle.
Pro Tips for This Recipe:
- Press the breadcrumbs on firmly so they do not fall off.
- Give each tender room on the tray; crowded chicken steams.
- A light oil drizzle helps the panko brown instead of drying pale.
Variations on This Dish:
- Parmesan Crust: Mix grated Parmesan into the panko for a saltier crust.
- Spice-Free Toddler Batch: Skip the garlic powder and keep the seasoning plain.
Common Mistakes to Avoid with This Dish:
- Crowding the tray: The breading turns patchy and soft.
- Pulling them too early: The center needs to reach 165°F or the texture goes stringy.
7. Ham and Cheese Pinwheels
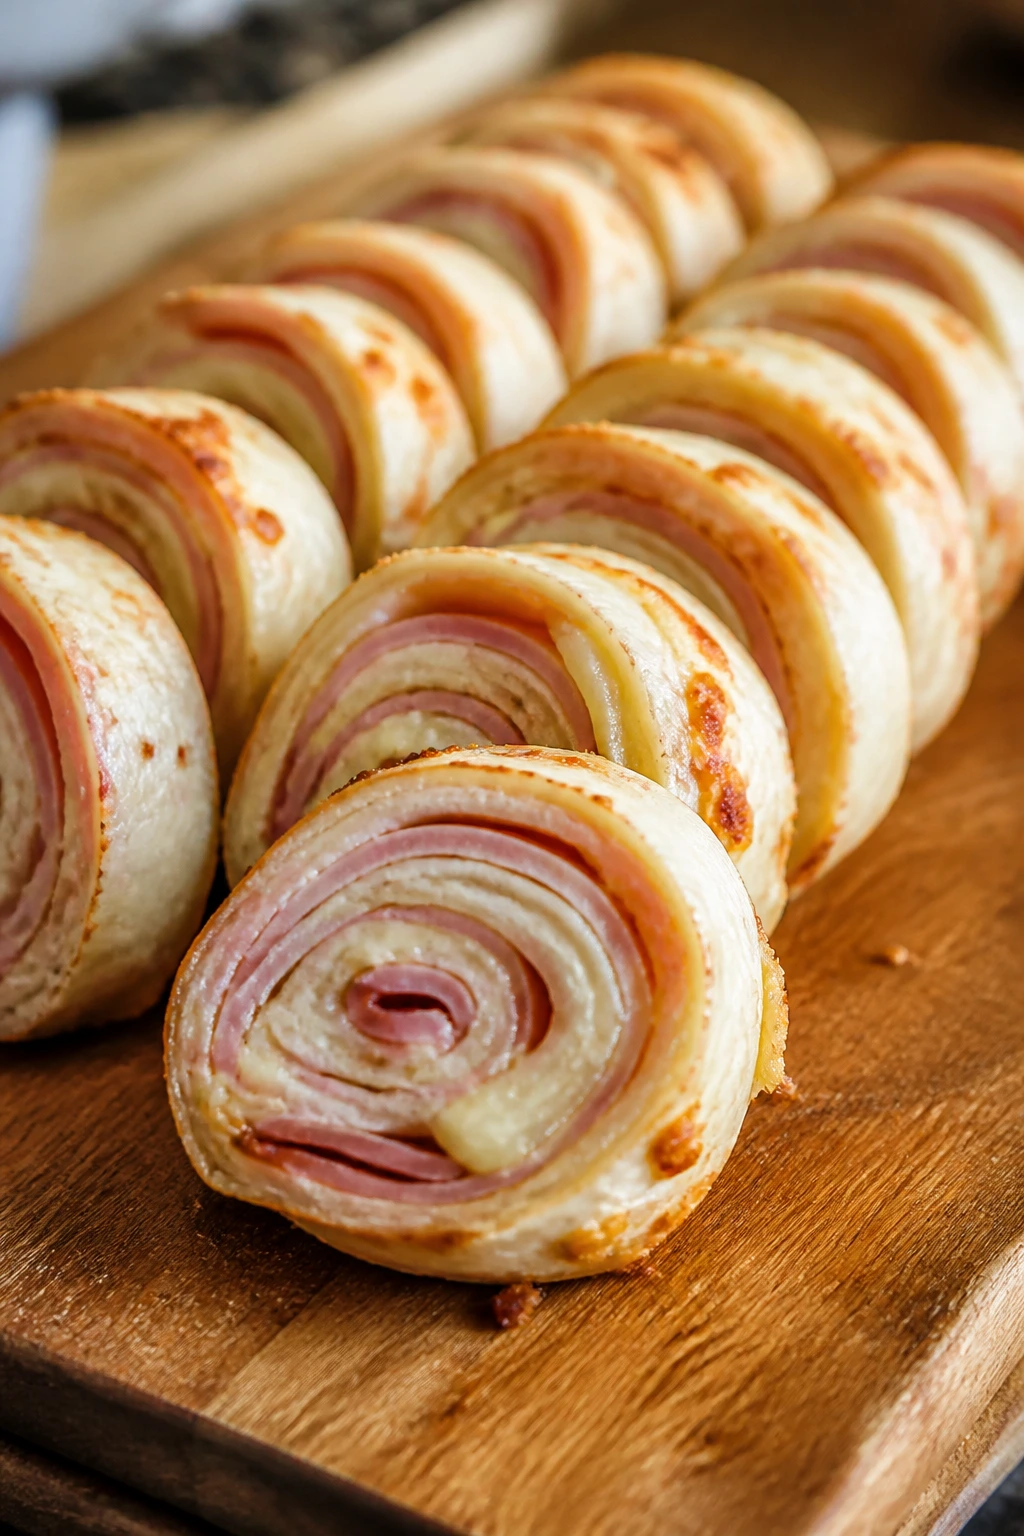
These look playful, taste mild, and vanish from the tray faster than a stack of napkins. Ham and cheese pinwheels are one of those after-school snacks that can slide into dinner if you add fruit, soup, or a handful of crackers.
Why It Works: Cream cheese keeps the filling from drying out, and a quick bake makes the tortilla edges crisp while the middle stays soft. Rolling them tightly before slicing keeps the spirals neat, which matters when kids judge food with their eyes first.
Key Ingredients:
- 4 large flour tortillas
- 8 ounces cream cheese, softened
- 8 ounces sliced deli ham
- 1 cup shredded cheddar
- 1 tablespoon Dijon mustard
- 1 tablespoon chopped chives
Quick Steps:
- Mix the Spread: Stir cream cheese with mustard and chives until smooth.
- Assemble the Rolls: Spread the mixture over each tortilla, then layer ham and cheddar.
- Roll Tight: Roll each tortilla firmly into a log and chill for 10 minutes.
- Slice and Bake: Cut into 1-inch spirals, arrange cut-side up, and bake at 400°F (205°C) for 10 minutes.
- Serve Warm: Let them cool for 2 minutes so the cheese stops ooze-lunging across the tray.
Equipment for This Recipe:
- Cutting board
- Sharp knife
- Baking sheet
How to Serve This Dish: Serve with grapes and a little mustard or ranch on the side. They also make a tidy lunchbox leftover if you let them cool first.
Pro Tips for This Recipe:
- Chill the roll before slicing or the spirals squish.
- Use thin deli ham so the roll seals easily.
- A tight roll prevents gaps that leak cheese.
Variations on This Dish:
- Turkey Swap: Use sliced turkey instead of ham for a milder taste.
- Pizza Roll Version: Swap mustard for pizza sauce and add mozzarella.
Common Mistakes to Avoid with This Dish:
- Overfilling the tortilla: It tears when you roll it.
- Skipping the chill time: The slices flatten instead of holding shape.
8. Taco Rice Bowls
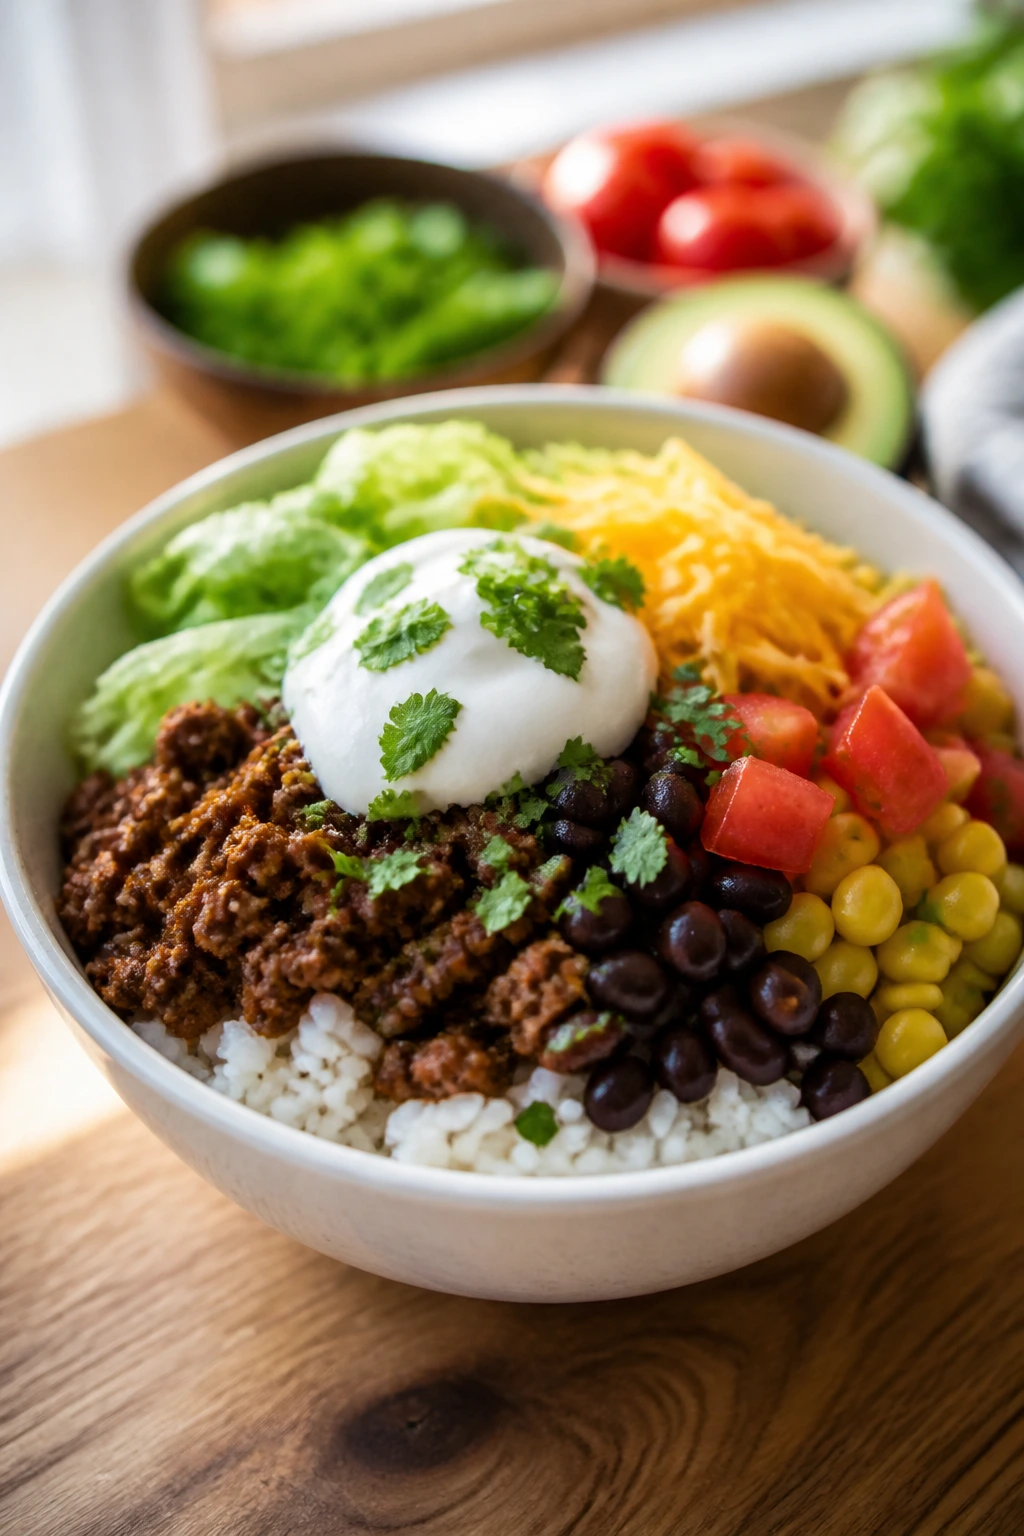
A bowl meal buys you flexibility, and that matters on a weekday when everybody wants dinner a little differently. Taco rice bowls let each kid control the toppings, which is half the battle won before the rice even hits the table.
Why It Works: Seasoned ground beef or turkey gives the bowl flavor fast, while rice and beans stretch the meal without making it feel skimpy. The warm base softens cheese just enough to melt around the edges, which is a better texture than you get from a fully loaded taco.
Key Ingredients:
- 1 pound ground beef or turkey
- 2 cups cooked rice
- 1 packet taco seasoning
- 1 cup black beans, rinsed
- 1 cup corn
- 1 cup shredded cheddar
- 1 cup diced tomatoes
Quick Steps:
- Cook the Meat: Brown the beef or turkey in a skillet over medium heat for 6 to 8 minutes.
- Season the Filling: Stir in taco seasoning and 1/3 cup water, then simmer 2 minutes.
- Warm the Extras: Heat beans and corn until steaming.
- Build the Bowls: Spoon rice into bowls, then top with meat, beans, corn, cheese, and tomatoes.
- Serve Right Away: Let the cheese soften for 1 minute before digging in.
Equipment for This Recipe:
- Skillet
- Small saucepan
- Serving bowls
How to Serve This Dish: Put out salsa, avocado, and sour cream so everyone can build their own bowl. A few tortilla chips on the side make it feel a little more like a treat.
Pro Tips for This Recipe:
- Rinse canned beans so the bowl does not taste muddy.
- Keep toppings separate if you want leftover rice to stay fresh.
- Add a squeeze of lime if the flavor needs waking up.
Variations on This Dish:
- Bean-Only Bowl: Skip the meat and double the beans for a vegetarian version.
- Mild Cheese Melt: Use Monterey Jack if you want a softer, creamier finish.
Common Mistakes to Avoid with This Dish:
- Overseasoning the meat for kids: Taco seasoning can get salty fast; taste before adding more.
- Packing the bowl too wet: Too much salsa makes the rice soggy.
9. Mini Meatballs in Marinara
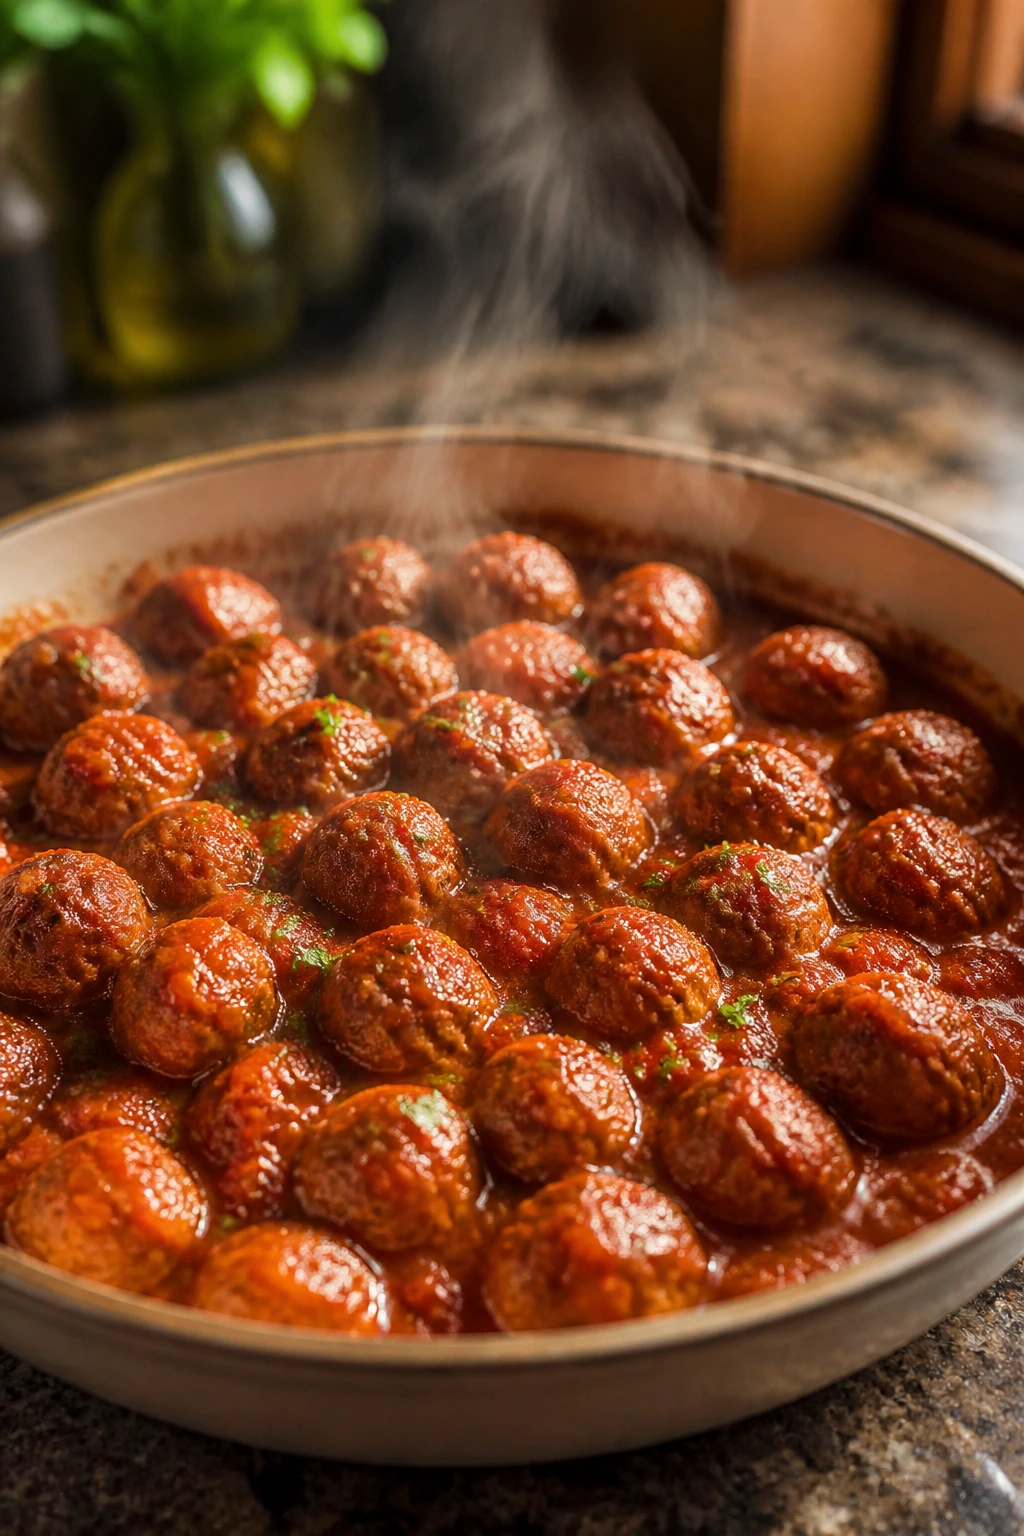
A bowl of tiny meatballs in red sauce feels classic in a way kids usually trust. They are tender, saucy, and easy to eat with toothpicks, forks, or straight from the bowl if the after-school mood is chaotic enough.
Why It Works: Mixing breadcrumbs and egg into the meat keeps the meatballs soft after baking. Finishing them in marinara for a few minutes lets the sauce cling to every little edge, which makes them taste richer than plain baked meat.
Key Ingredients:
- 1 pound ground beef
- 1/2 pound ground pork
- 1/2 cup breadcrumbs
- 1 large egg
- 1/4 cup grated Parmesan
- 2 cups marinara sauce
- 1 teaspoon Italian seasoning
Quick Steps:
- Mix the Meatballs: Combine beef, pork, breadcrumbs, egg, Parmesan, and seasoning until just mixed.
- Shape Small Balls: Roll into 1-inch meatballs and set on a lined sheet.
- Bake Until Browned: Bake at 400°F (205°C) for 12 to 14 minutes, until the outside is set.
- Simmer in Sauce: Warm marinara in a skillet and add the meatballs for 5 minutes.
- Serve Hot: Spoon over pasta, rice, or toothpicks for a snack plate.
Equipment for This Recipe:
- Baking sheet
- Large skillet
- Mixing bowl
How to Serve This Dish: Serve with breadsticks or over buttered noodles for dinner, or set out toothpicks and a small bowl of sauce for snack time. They are especially good with a little extra Parmesan.
Pro Tips for This Recipe:
- Mix gently; overworking makes the meatballs dense.
- Keep the meatballs small so they cook through quickly.
- Bake first, then sauce, so they hold their shape.
Variations on This Dish:
- Turkey Meatballs: Use ground turkey for a lighter version.
- Cheese Center: Tuck a small mozzarella cube inside each meatball.
Common Mistakes to Avoid with This Dish:
- Making them too large: They take longer to cook and can dry out.
- Skipping the sauce simmer: Straight-from-the-oven meatballs taste flatter.
10. Grilled Cheese and Tomato Soup
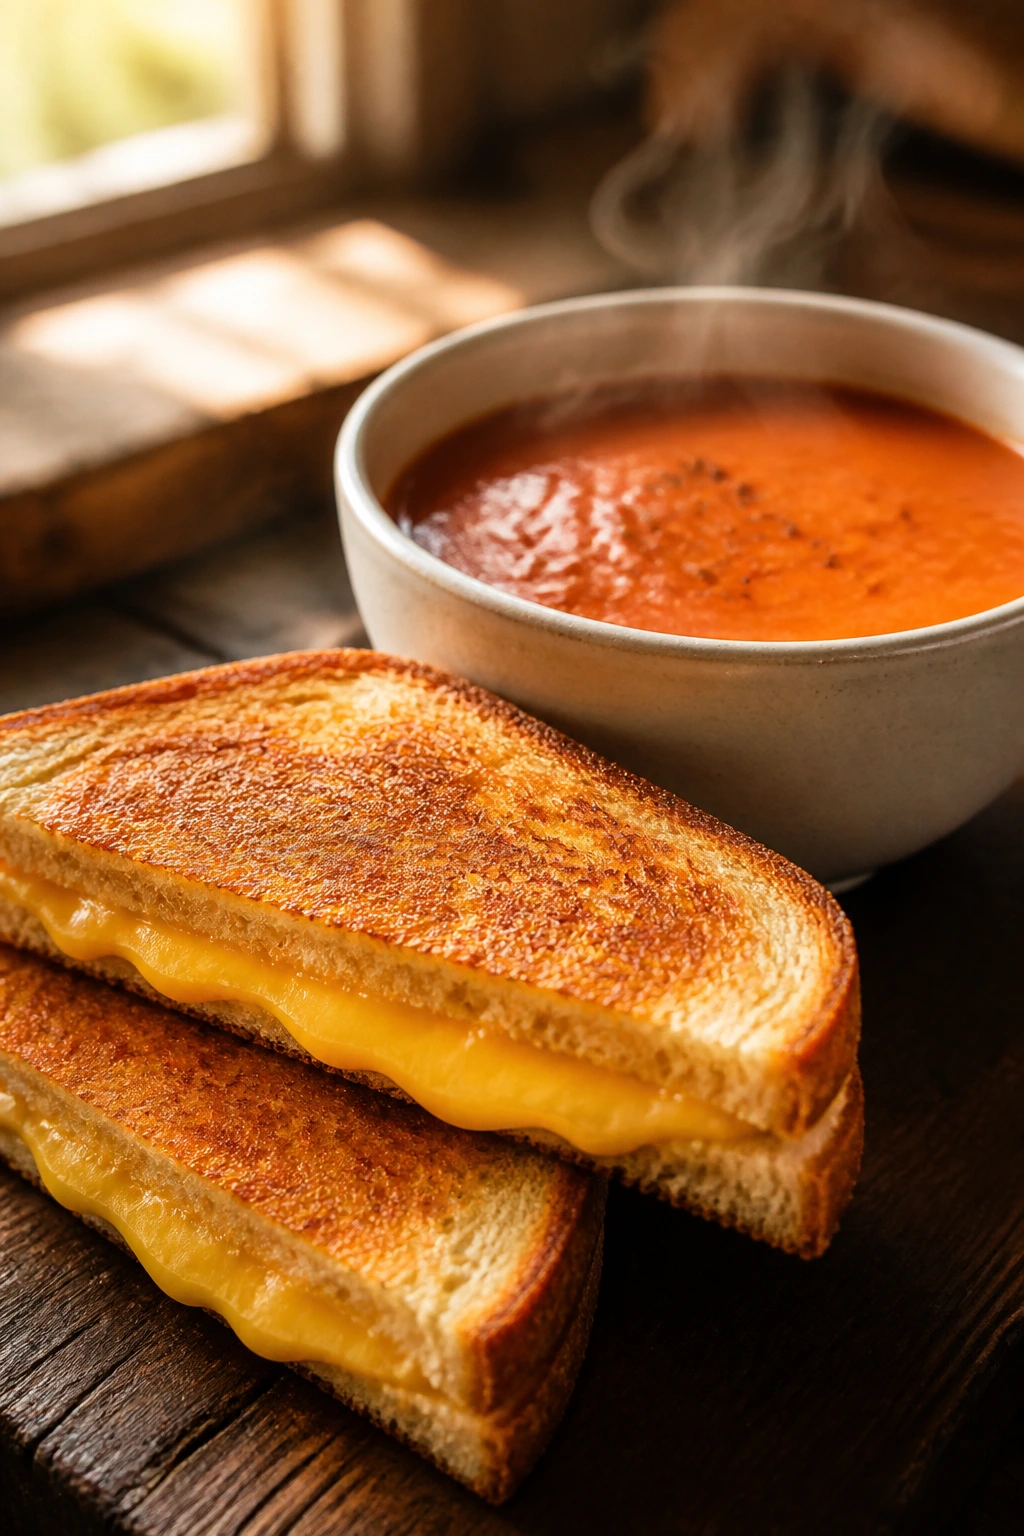
Some dinners win because they feel like a blanket. Grilled cheese and tomato soup is one of the few kid-friendly meals that can calm a tired house without asking for much from anyone.
Why It Works: The sandwich gives you crunch and cheese pull, while the soup brings acidity and warmth. If you keep the soup thick enough to cling to a spoon, the whole meal feels deliberate instead of rushed, even if you threw it together in 20 minutes.
Key Ingredients:
For the Soup:
- 2 tablespoons butter
- 1 small onion, diced
- 2 cloves garlic, minced
- 1 can (28 ounces) crushed tomatoes
- 2 cups vegetable or chicken broth
- 1/4 cup heavy cream
- 1 teaspoon sugar
- Salt and pepper
For the Sandwiches:
- 8 slices sandwich bread
- 2 cups shredded cheddar
- 2 tablespoons softened butter
Quick Steps:
- Start the Soup Base: Sauté onion in butter for 4 minutes, until soft and translucent, then stir in garlic for 30 seconds.
- Simmer the Tomatoes: Add tomatoes, broth, and sugar; cook for 15 minutes until slightly thickened.
- Blend and Finish: Blend if you want it smooth, then stir in cream and season to taste.
- Grill the Sandwiches: Butter the bread, fill with cheddar, and cook in a skillet over medium heat for 3 to 4 minutes per side.
- Serve Together: Ladle the soup into bowls and cut the sandwiches into strips for dipping.
Equipment for This Recipe:
- Medium pot
- Immersion blender or regular blender
- Skillet
How to Serve This Dish: Serve with celery sticks or an apple on the side. I like cutting the sandwiches into thirds because children always seem to think a smaller triangle tastes better.
Pro Tips for This Recipe:
- Use medium heat on the skillet so the bread browns before the cheese burns.
- A pinch of sugar smooths out sharp tomatoes.
- If the soup seems thin, simmer it 5 minutes longer before adding cream.
Variations on This Dish:
- Mozzarella Swap: Use mozzarella for a milder grilled cheese.
- Herb Soup: Stir in basil or oregano for a more savory tomato base.
Common Mistakes to Avoid with This Dish:
- Rushing the soup: Thin tomato soup tastes flat and watery.
- Using high heat on the sandwich: The bread scorches before the cheese melts.
11. Chicken and Veggie Fried Rice
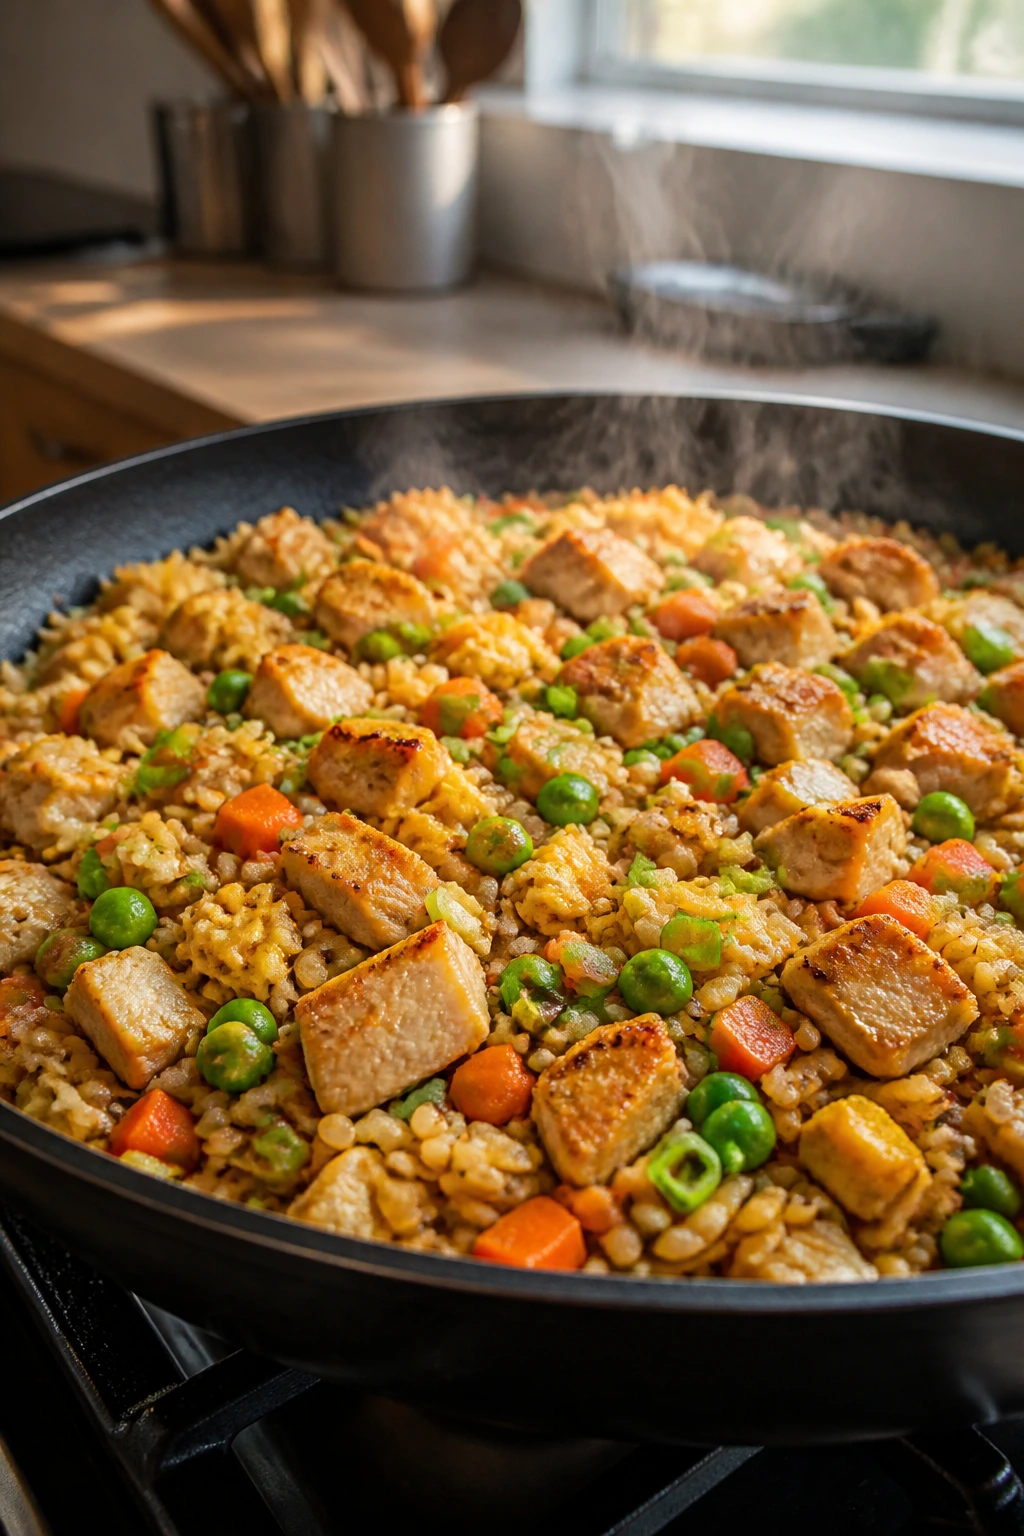
This is the clean-out-the-fridge meal that somehow feels planned. Chicken and veggie fried rice gives you protein, rice, and vegetables in one hot pan, and the whole thing is ready before the arguments about homework really start.
Why It Works: Cold rice fries better than warm rice, because it dries enough to separate in the pan. Eggs and soy sauce pull the dish together, while peas and carrots add sweet pops that usually land well with kids.
Key Ingredients:
- 3 cups cooked, chilled rice
- 1 1/2 cups cooked chicken, diced
- 2 eggs, beaten
- 1 cup frozen peas and carrots
- 3 tablespoons soy sauce
- 1 tablespoon sesame oil
- 2 green onions, sliced
Quick Steps:
- Scramble the Eggs: Cook the eggs in a hot skillet, then slide them onto a plate.
- Sauté the Veggies: Add peas and carrots to the pan and cook for 2 minutes.
- Fry the Rice: Stir in rice and chicken, breaking up clumps as it heats.
- Season the Pan: Add soy sauce and sesame oil, then cook until the rice looks lightly glossy.
- Finish and Serve: Stir in eggs and green onions, then serve hot.
Equipment for This Recipe:
- Large skillet or wok
- Spatula
- Mixing bowl
How to Serve This Dish: Serve with sliced cucumbers or mandarin oranges to freshen the plate. A small bowl of extra soy sauce works for kids who like a saltier bite.
Pro Tips for This Recipe:
- Use day-old rice if you can.
- Keep the heat medium-high so the rice fries instead of steaming.
- Dice the chicken small so every bite has a little of everything.
Variations on This Dish:
- Ham Fried Rice: Use diced ham instead of chicken.
- Egg-Heavy Version: Add one extra egg if you want it softer and more filling.
Common Mistakes to Avoid with This Dish:
- Using fresh rice: It clumps and turns mushy.
- Overcrowding the pan: The rice steams and loses its fried texture.
12. Pasta Salad Snack Cups
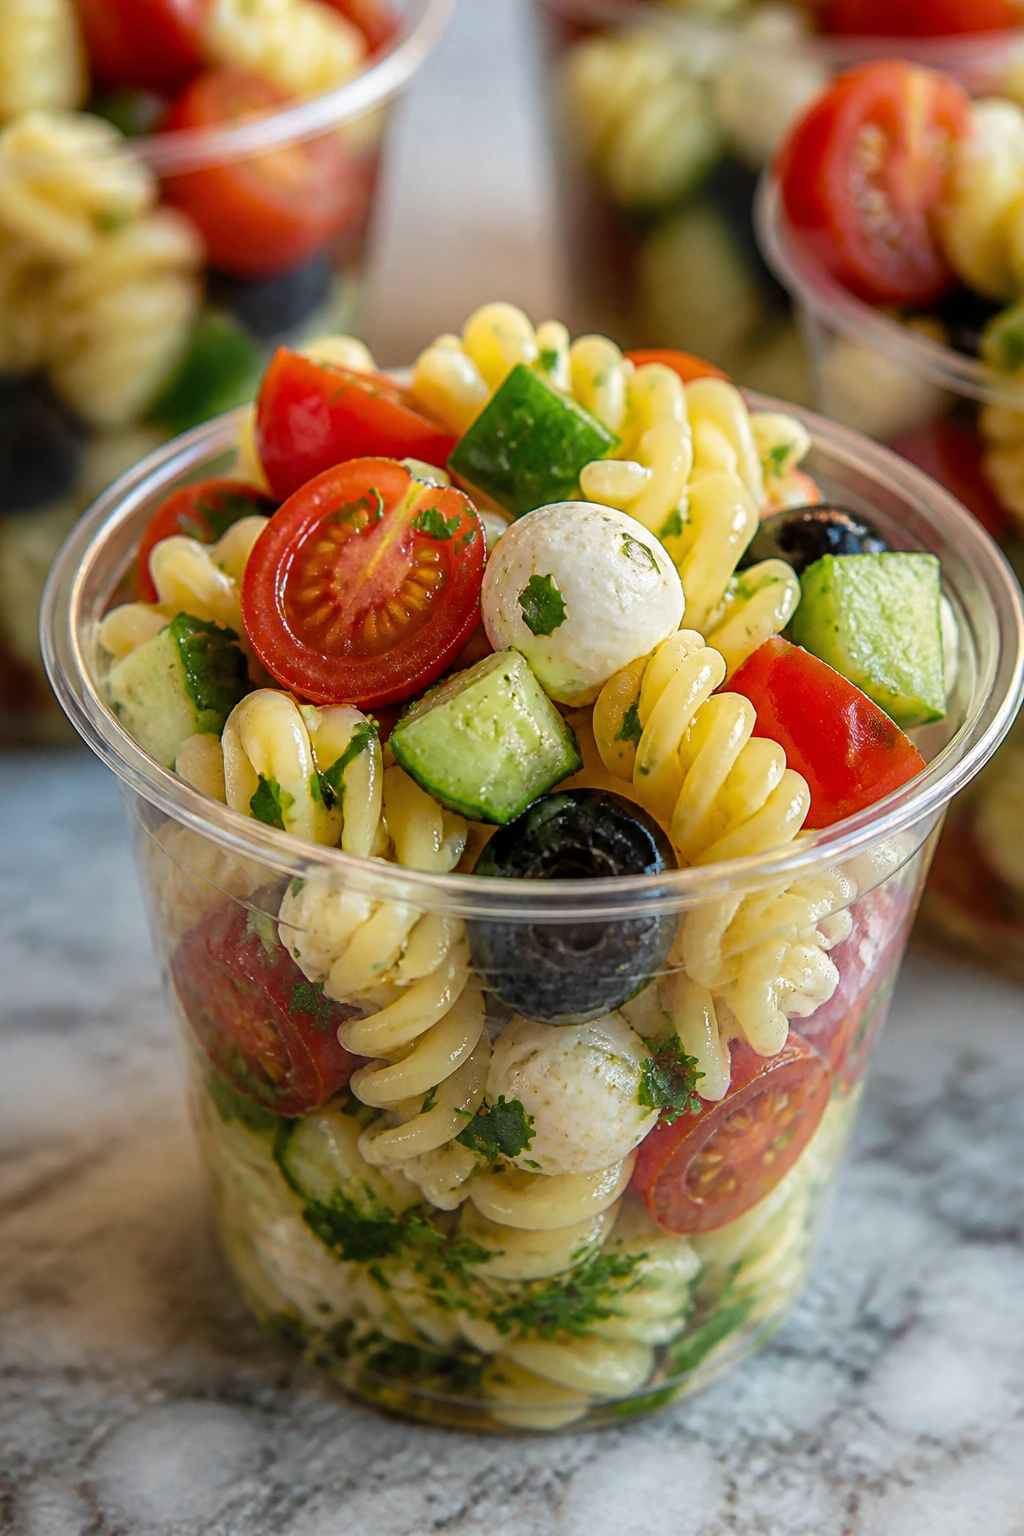
Pasta salad cups are the one item on this list that feels almost suspiciously easy. They work because you can make them ahead, chill them, and hand them over cold when the after-school crowd starts circling the kitchen like it owns the place.
Why It Works: Short pasta holds dressing in the curves, and small cubes of cheese or vegetables keep each bite varied. Serving it in cups makes the food feel snackable without turning the meal into a free-for-all.
Key Ingredients:
- 12 ounces rotini pasta
- 1 cup cherry tomatoes, halved
- 1 cup cucumber, diced
- 1 cup mozzarella cubes
- 1/3 cup Italian dressing
- 1/4 cup sliced olives
- 2 tablespoons chopped parsley
Quick Steps:
- Cook and Cool the Pasta: Boil rotini until al dente, drain, and rinse under cool water.
- Mix the Bowl: Toss pasta with tomatoes, cucumber, mozzarella, olives, and parsley.
- Dress Lightly: Add Italian dressing and stir until coated but not slick.
- Chill Briefly: Refrigerate for 15 minutes so the flavors settle.
- Portion into Cups: Spoon into small cups or bowls and serve cold.
Equipment for This Recipe:
- Large pot
- Colander
- Mixing bowl
How to Serve This Dish: Serve with crackers or a turkey roll-up for a fuller snack plate. It also works well beside grilled chicken if you want to turn it into dinner.
Pro Tips for This Recipe:
- Cut the vegetables small so picky eaters are less likely to pick them out.
- Dress it lightly at first; pasta absorbs more dressing as it sits.
- Use mozzarella cubes, not shredded cheese, so the salad keeps its shape.
Variations on This Dish:
- Ranch Version: Swap Italian dressing for ranch.
- Pepperoni Twist: Add sliced pepperoni for a pizza-salad feel.
Common Mistakes to Avoid with This Dish:
- Adding too much dressing at once: The pasta gets slick and heavy.
- Serving it warm: The flavor and texture improve after a short chill.
13. Savory Egg Muffins
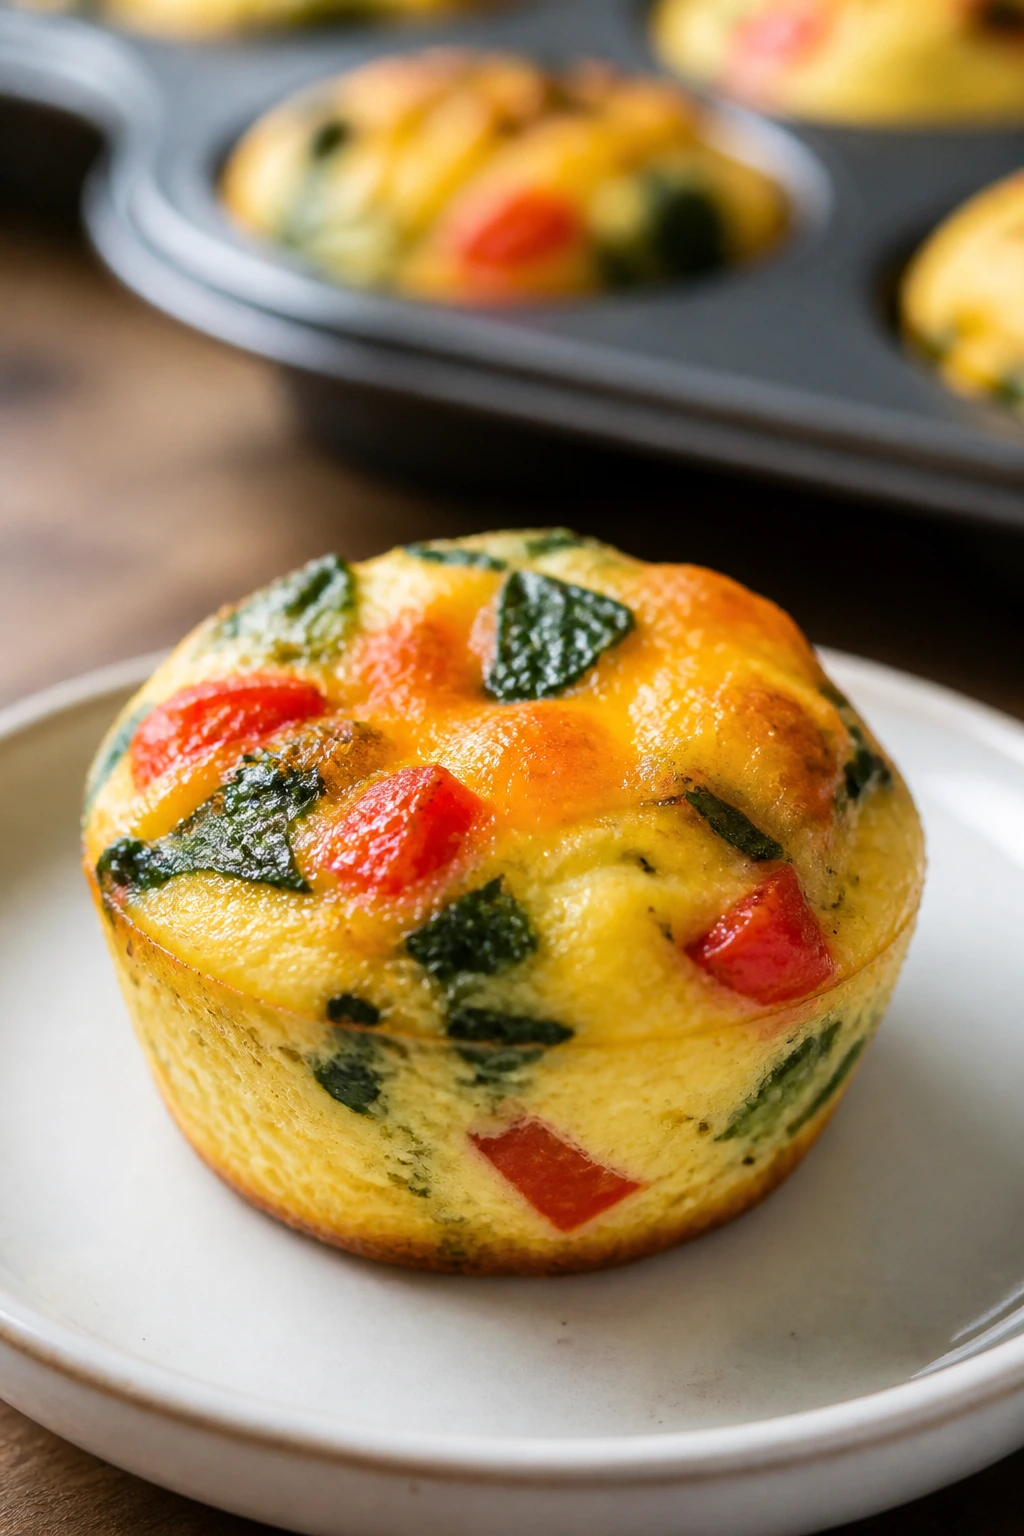
These are breakfast-food cousins that moonlight as after-school snacks. Savory egg muffins give you a soft, cheesy center and a tidy hand-held shape, which is a rare combination when kids are hungry and impatient.
Why It Works: Eggs set quickly in a muffin tin, and small add-ins like spinach or bell pepper disappear into the custard instead of dominating it. They reheat well, and they stay neat enough to pack in a lunchbox without a mess.
Key Ingredients:
- 8 large eggs
- 1/4 cup milk
- 1 cup shredded cheddar
- 1/2 cup chopped spinach
- 1/2 cup diced bell pepper
- 1/4 teaspoon salt
- 1/4 teaspoon black pepper
Quick Steps:
- Heat the Oven: Set it to 350°F (175°C) and grease a muffin tin well.
- Whisk the Eggs: Beat eggs, milk, salt, and pepper until blended.
- Add the Fillings: Stir in cheddar, spinach, and bell pepper.
- Bake Until Set: Fill the cups about 3/4 full and bake for 18 to 20 minutes, until puffed and just firm in the center.
- Cool Slightly: Let them rest 5 minutes so they release cleanly.
Equipment for This Recipe:
- Muffin tin
- Mixing bowl
- Whisk
How to Serve This Dish: Serve two muffins with fruit and toast for a quick dinner, or set out one muffin with yogurt for a snack. They are good warm or at room temperature.
Pro Tips for This Recipe:
- Grease the tin generously or use silicone liners.
- Chop vegetables very small so the muffins hold together.
- Do not overbake; they go rubbery fast.
Variations on This Dish:
- Ham and Cheddar: Add diced ham for more protein.
- Mild Tomato: Stir in a spoonful of drained diced tomatoes for a softer flavor.
Common Mistakes to Avoid with This Dish:
- Filling the cups too full: They spill over and bake unevenly.
- Pulling them before the centers are set: They deflate and stay wet inside.
14. Broccoli Cheddar Bites
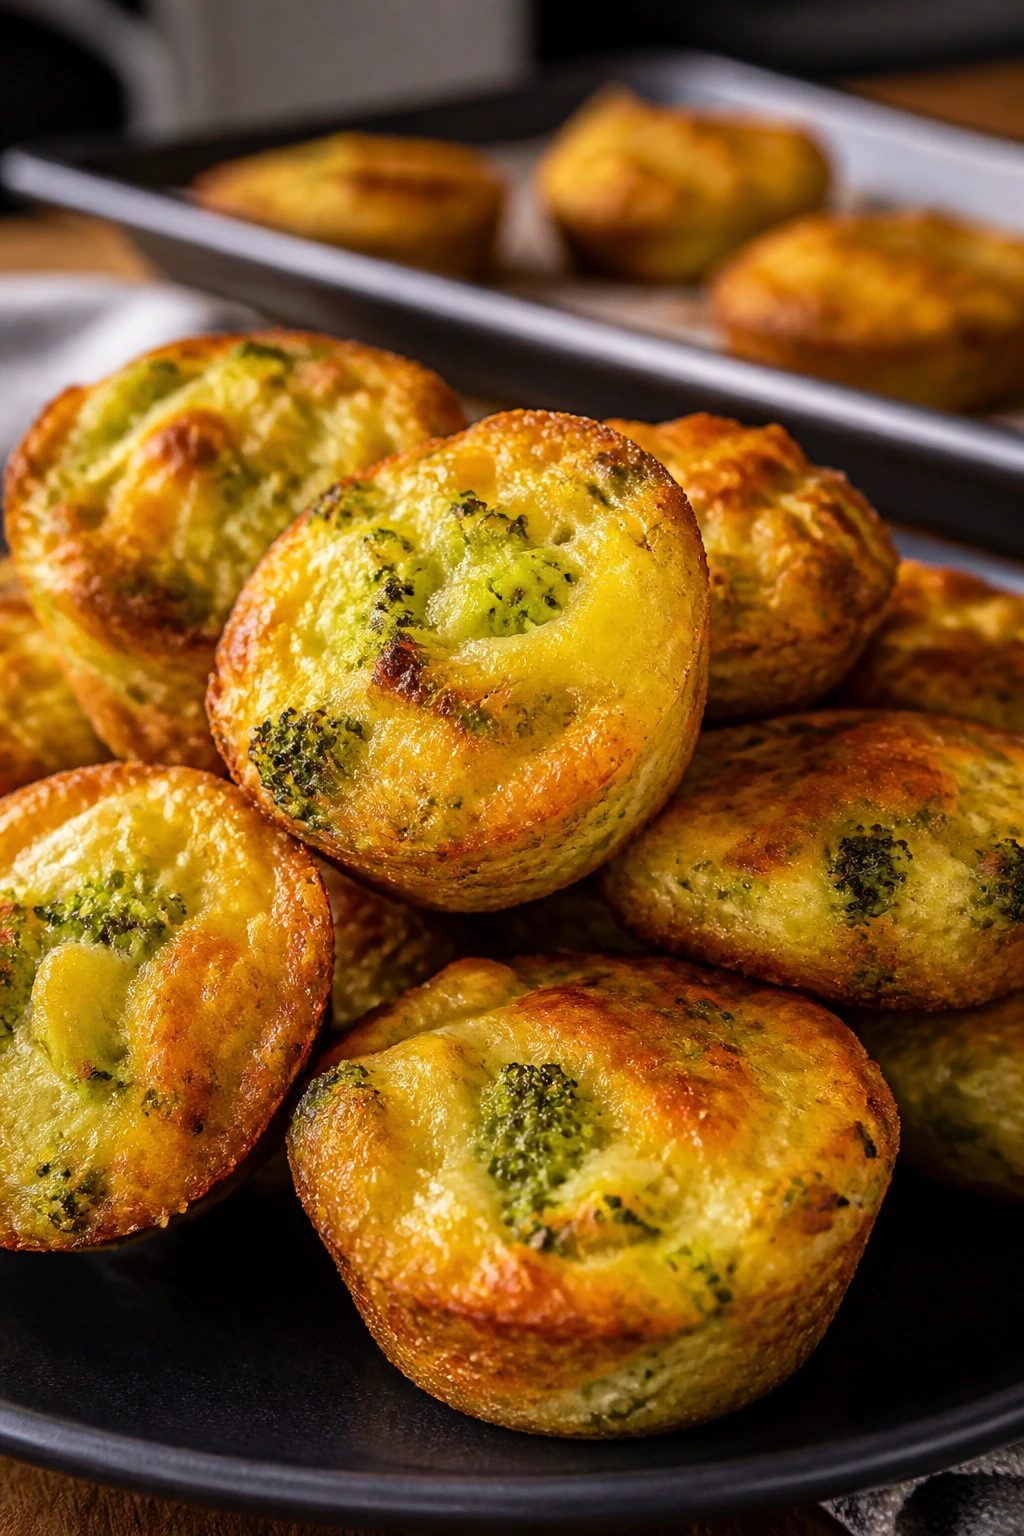
Broccoli cheddar bites are what happens when vegetables stop acting like a lecture. These little baked rounds are cheesy, salty, and sturdy enough to survive the walk from oven to plate without collapsing.
Why It Works: Finely chopped broccoli disappears into a cheesy mixture, so the bites taste familiar instead of vegetal. Baking them on a tray gives crisp edges and a soft center, which is usually the texture kids trust faster than steamed broccoli on a fork.
Key Ingredients:
- 2 cups finely chopped cooked broccoli
- 1 1/2 cups shredded cheddar
- 1 cup breadcrumbs
- 2 large eggs
- 1/4 cup grated Parmesan
- 1/2 teaspoon garlic powder
- Salt and pepper
Quick Steps:
- Mix the Base: Combine broccoli, cheddar, breadcrumbs, eggs, Parmesan, garlic powder, salt, and pepper.
- Shape the Bites: Roll into small 1-inch rounds and place on a lined sheet.
- Flatten Slightly: Press each one down a little so they bake evenly.
- Bake Until Golden: Bake at 400°F (205°C) for 15 minutes, until the edges brown.
- Cool Before Serving: Let them sit 3 minutes so they set up.
Equipment for This Recipe:
- Baking sheet
- Mixing bowl
- Measuring scoop or spoon
How to Serve This Dish: Serve with ranch, marinara, or a little ketchup. They work as a snack plate item, but they also slide next to chicken or pasta at dinner.
Pro Tips for This Recipe:
- Squeeze out excess water if the broccoli was steamed.
- Use finely chopped broccoli so the bites hold together.
- A little Parmesan sharpens the flavor and helps browning.
Variations on This Dish:
- Cauliflower Swap: Use chopped cooked cauliflower instead of broccoli.
- Cheddar-Jack Version: Mix in Monterey Jack for a softer melt.
Common Mistakes to Avoid with This Dish:
- Leaving the broccoli wet: The bites fall apart in the oven.
- Making them too large: They bake unevenly and get soft in the center.
15. Bean and Cheese Nachos
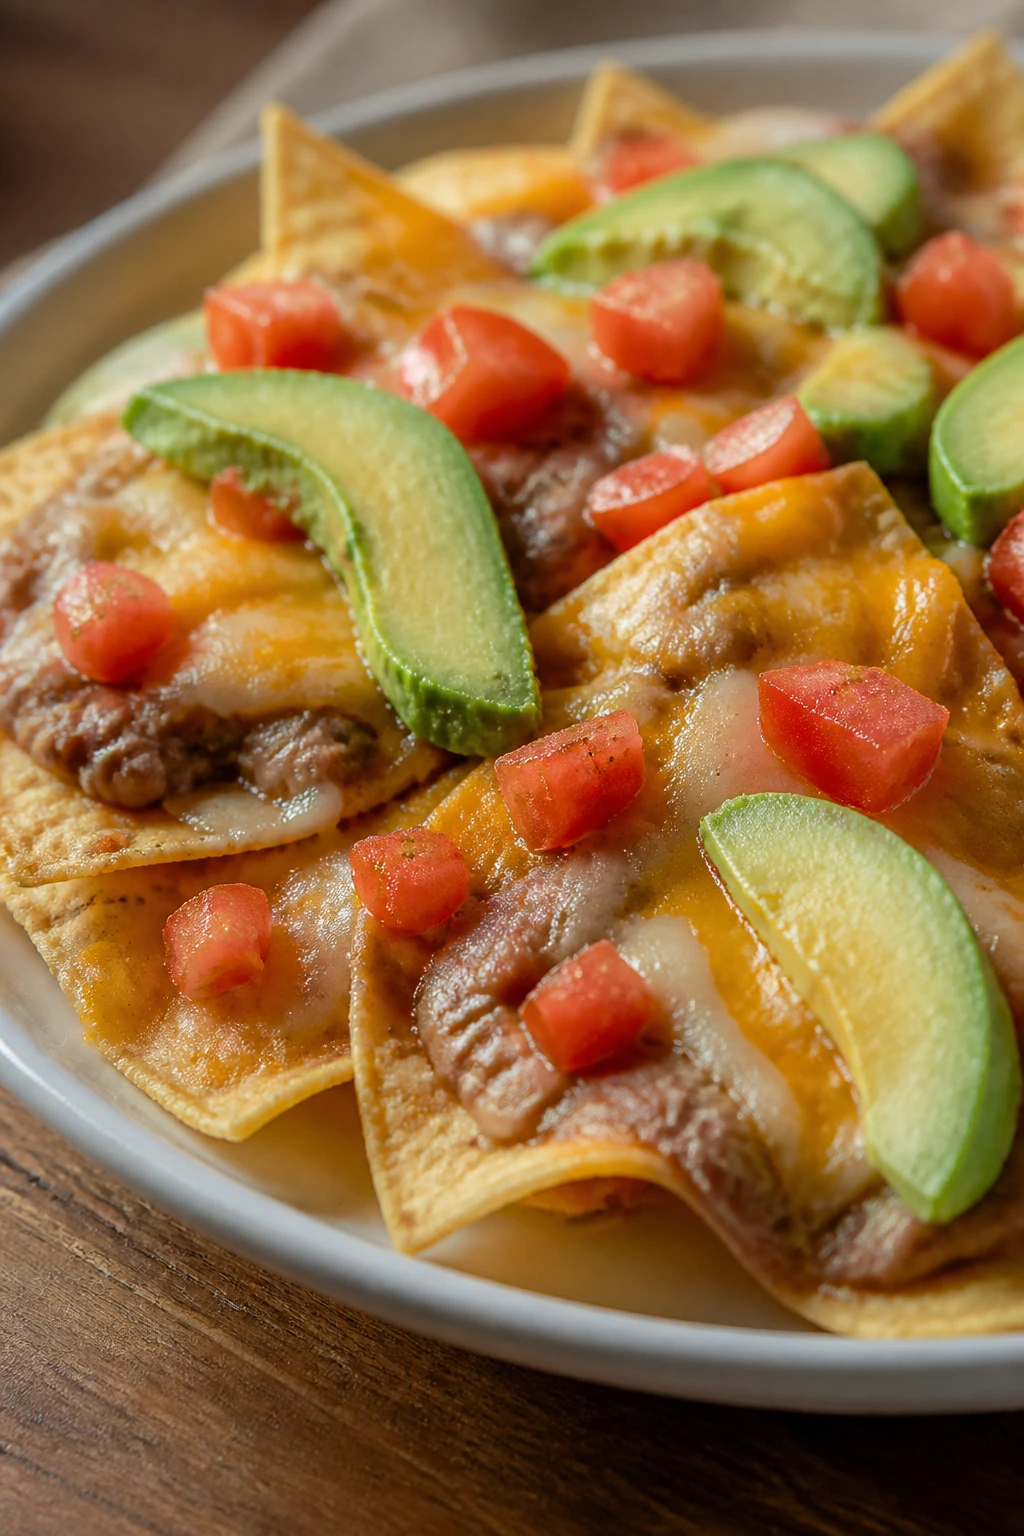
Nachos feel like a treat, but bean and cheese nachos can actually carry a weekday evening if you put a few fresh things next to them. The key is giving the chips enough support so the whole tray does not become a pile of broken corners.
Why It Works: Refried beans cling to the chips better than loose taco filling, and cheese melts fast under the broiler. That means you get a hot, snackable dinner in a few minutes, which is useful when everyone is already asking if food is ready.
Key Ingredients:
- 1 bag tortilla chips
- 1 can refried beans
- 2 cups shredded cheddar or Monterey Jack
- 1 cup diced tomatoes
- 1 avocado, sliced
- 1/4 cup sliced jalapeños, optional
- Sour cream for serving
Quick Steps:
- Prep the Tray: Heat the oven broiler and line a sheet pan with foil.
- Layer the Chips: Spread chips in one even layer, then dollop with warmed beans.
- Add Cheese: Sprinkle cheese over the top so it melts into the beans and chips.
- Broil Briefly: Broil for 1 to 2 minutes, watching closely until the cheese bubbles.
- Finish Fresh: Top with tomatoes, avocado, and sour cream right before serving.
Equipment for This Recipe:
- Baking sheet
- Foil
- Spoon
How to Serve This Dish: Serve with a fruit plate or a simple salad if you want the meal to feel more complete. For younger kids, keep jalapeños on the side instead of on the tray.
Pro Tips for This Recipe:
- Warm the beans first so they spread easily.
- Use sturdy chips; thin chips break under the toppings.
- Do not walk away from the broiler even for a minute.
Variations on This Dish:
- Chicken Nachos: Add shredded chicken between the chips and cheese.
- Mild Bean Tray: Skip jalapeños and serve with mild salsa.
Common Mistakes to Avoid with This Dish:
- Overloading the chips: The bottom layer turns soggy.
- Broiling too long: Cheese goes from melted to scorched fast.
16. Sheet Pan Sausage and Potatoes
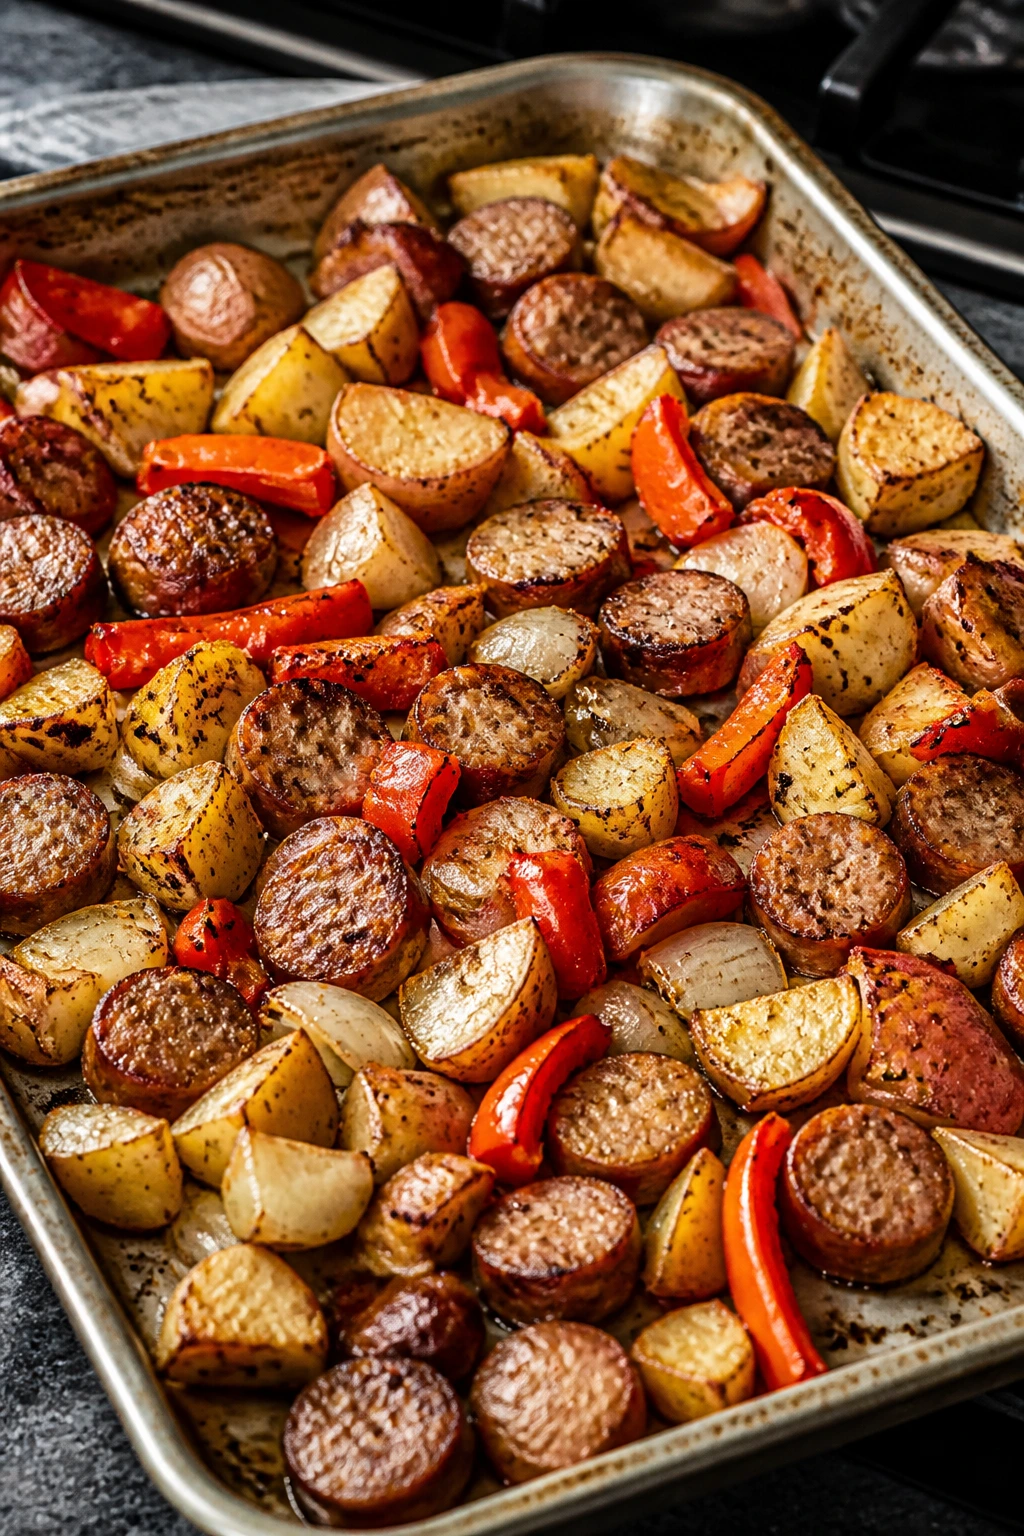
This is the kind of dinner that fills the kitchen with the smell of roasted onions and browned sausage, which is doing a lot of work in your favor. Sheet pan sausage and potatoes is simple, but it has enough crisp edges to feel like a proper meal.
Why It Works: Roasting everything at 425°F lets the potatoes brown instead of steaming. The sausage renders a little fat onto the pan, which flavors the vegetables as they cook and saves you from building a separate sauce.
Key Ingredients:
- 1 pound smoked sausage, sliced
- 1 1/2 pounds baby potatoes, halved
- 1 red bell pepper, sliced
- 1 yellow onion, sliced
- 2 tablespoons olive oil
- 1 teaspoon paprika
- Salt and pepper
Quick Steps:
- Heat the Oven: Set it to 425°F (220°C) and line a sheet pan.
- Toss Everything: Mix potatoes, sausage, pepper, onion, oil, paprika, salt, and pepper.
- Spread Evenly: Arrange in one layer so the pieces roast instead of steam.
- Roast and Stir: Bake for 25 to 30 minutes, stirring once halfway through.
- Serve Hot: Pull it when the potatoes are browned and tender at the center.
Equipment for This Recipe:
- Rimmed sheet pan
- Large bowl
- Spatula
How to Serve This Dish: Serve with mustard, ketchup, or a simple yogurt dip. A slice of crusty bread on the side makes the pan feel more complete if you want dinner to stretch further.
Pro Tips for This Recipe:
- Cut the potatoes small so they cook on the same schedule as the sausage.
- Use a big pan; cramped vegetables stew instead of roast.
- Stir once, not constantly, or you lose the browned edges.
Variations on This Dish:
- Chicken Sausage Version: Swap in chicken sausage for a lighter plate.
- Garlic Herb Finish: Add chopped parsley and a squeeze of lemon after roasting.
Common Mistakes to Avoid with This Dish:
- Using a crowded pan: The potatoes stay pale and soft.
- Skipping the oil: The vegetables dry out before they brown.
17. Ham Biscuit Bombs

These are pure lunchbox energy, but they also play well as a fast dinner with soup or fruit. Ham biscuit bombs come out warm, cheesy, and slightly dramatic, which is exactly the kind of energy snack time needs.
Why It Works: Refrigerated biscuit dough bakes into a soft, buttery shell that seals around the ham and cheese. The filling stays tucked inside, so every bite gives you both salt and melt instead of a messy pile on the plate.
Key Ingredients:
- 1 can refrigerated biscuit dough, 8 biscuits
- 8 slices deli ham
- 8 small cubes or slices cheddar
- 2 tablespoons melted butter
- 1/2 teaspoon garlic powder
- 1 teaspoon chopped parsley
Quick Steps:
- Flatten the Biscuits: Press each biscuit into a 4-inch round.
- Add the Filling: Place ham and cheddar in the center of each round.
- Seal Tight: Fold the dough over the filling and pinch closed underneath.
- Bake Until Golden: Brush with butter mixed with garlic powder and bake at 375°F (190°C) for 12 to 14 minutes.
- Finish and Serve: Sprinkle parsley over the tops and let them cool 3 minutes.
Equipment for This Recipe:
- Baking sheet
- Pastry brush
- Small bowl
How to Serve This Dish: Serve with fruit, baby carrots, or a little mustard for dipping. They are best warm, but the leftovers are still good at room temperature.
Pro Tips for This Recipe:
- Pinch the seam firmly or the cheese leaks out.
- Put the seam side down on the tray.
- Use small cheese pieces so the biscuit seals cleanly.
Variations on This Dish:
- Pizza Bombs: Use mozzarella and a dab of pizza sauce instead of ham.
- Turkey and Swiss: Swap the filling for turkey and Swiss cheese.
Common Mistakes to Avoid with This Dish:
- Overfilling the dough: It bursts in the oven.
- Not sealing the seam: The filling escapes and burns on the tray.
18. BBQ Chicken Flatbread
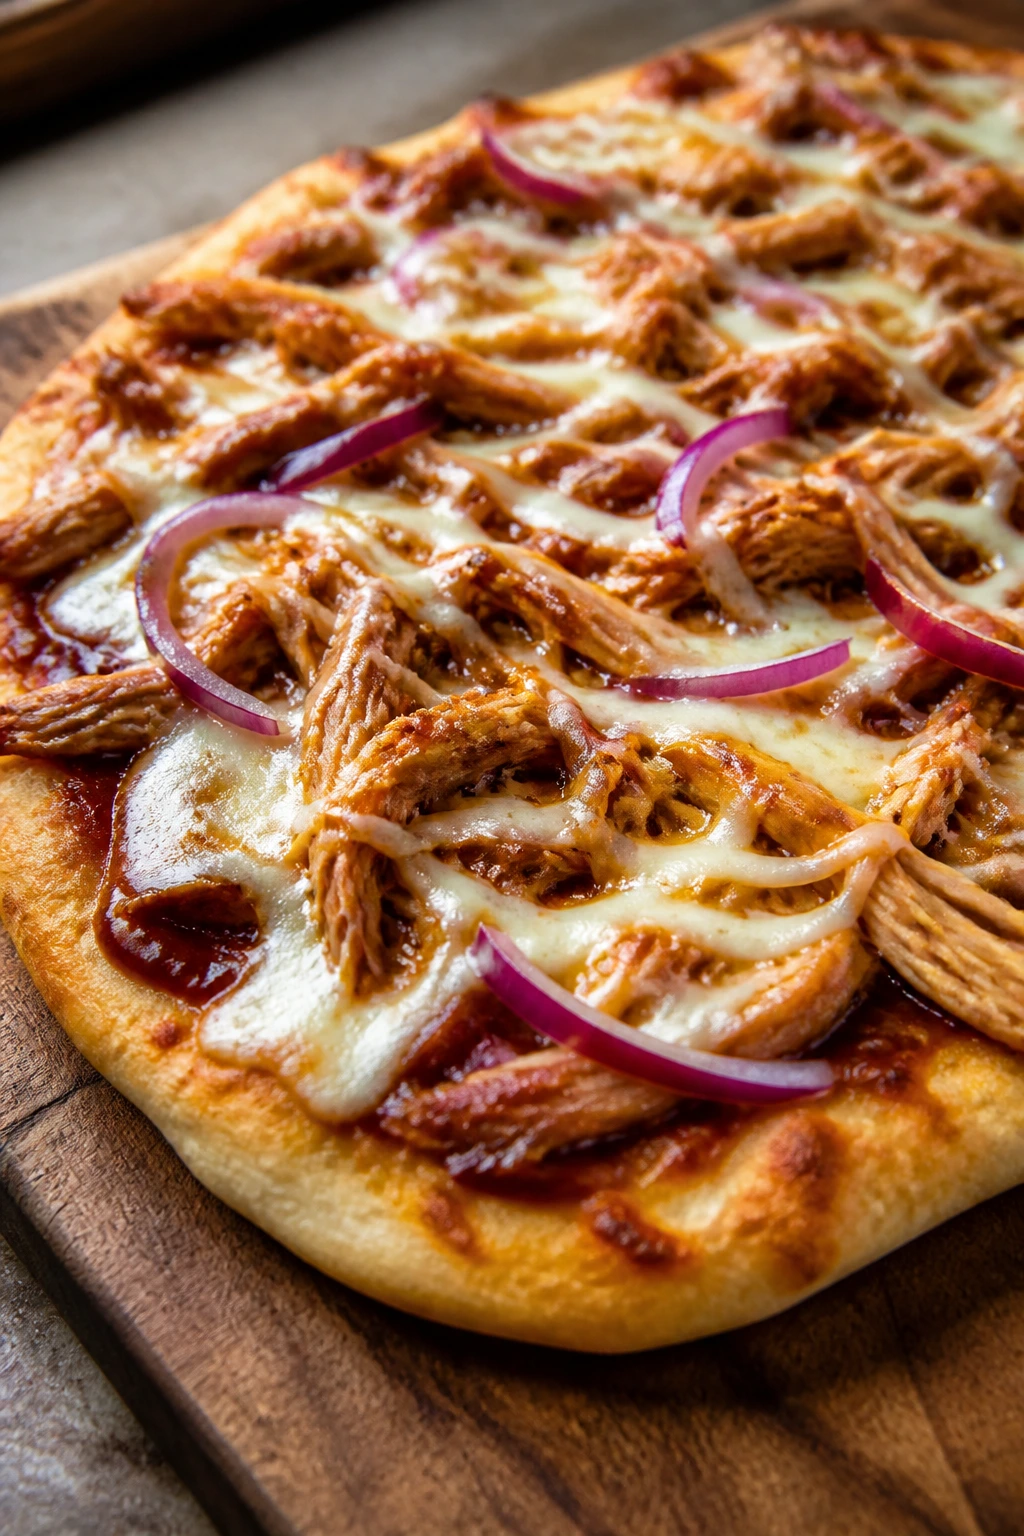
Flatbread is one of those cheat codes that makes dinner feel more intentional than it is. BBQ chicken flatbread gives you sweet sauce, melted cheese, and a crisp edge in less time than it takes to convince everyone to sit down.
Why It Works: The flatbread acts like a thin crust that bakes quickly, so the toppings warm through before the base gets tough. Using cooked chicken keeps the process fast, and the barbecue sauce adds enough flavor that you do not need a long list of extras.
Key Ingredients:
- 2 flatbreads or naan rounds
- 1 cup shredded cooked chicken
- 1/3 cup barbecue sauce
- 1 1/2 cups shredded mozzarella
- 1/4 cup thinly sliced red onion
- 1 tablespoon chopped cilantro
Quick Steps:
- Heat the Oven: Set it to 425°F (220°C).
- Dress the Bread: Spread barbecue sauce over each flatbread.
- Add Toppings: Scatter chicken, mozzarella, and onion over the top.
- Bake Until Golden: Bake for 8 to 10 minutes, until the cheese melts and the edges crisp.
- Finish Fresh: Add cilantro after baking and slice into strips.
Equipment for This Recipe:
- Baking sheet
- Knife or pizza cutter
- Spoon
How to Serve This Dish: Serve with corn, carrot sticks, or a simple coleslaw. Cut it into strips for an after-school snack, or into wedges for a fast dinner plate.
Pro Tips for This Recipe:
- Use cooked chicken that is not too wet.
- A light hand with sauce keeps the flatbread from soaking through.
- Red onion should be sliced thin so it softens in the oven.
Variations on This Dish:
- Hawaiian-Style: Add pineapple chunks if your household likes sweet-savory pizza.
- Ranch Drizzle: Finish with a little ranch instead of cilantro.
Common Mistakes to Avoid with This Dish:
- Over-saucing the flatbread: The crust softens before it crisps.
- Using too much chicken: The center gets heavy and bakes unevenly.
19. Mini Calzones

Mini calzones are the answer when pizza sounds good but you want something that feels a little more like a meal. They’re sealed, hand-held, and packed with the sort of filling that makes kids feel like they’re eating something special without needing a knife.
Why It Works: Folding the dough over the filling traps the cheese inside, so you get a molten center instead of toppings sliding off. Baking them hot gives you a browned outside in about 15 minutes, which is fast enough for the after-school window.
Key Ingredients:
- 1 pound pizza dough
- 1 cup ricotta
- 1 cup shredded mozzarella
- 1/2 cup mini pepperoni
- 1/4 cup grated Parmesan
- 1 egg, beaten for egg wash
- 1/2 cup marinara for dipping
Quick Steps:
- Divide the Dough: Cut pizza dough into 8 pieces and roll each into a small circle.
- Fill the Centers: Spoon ricotta, mozzarella, pepperoni, and Parmesan onto one half of each round.
- Seal the Edges: Fold over, press the rim shut, and brush with egg wash.
- Bake Until Browned: Bake at 425°F (220°C) for 12 to 15 minutes, until puffed and golden.
- Serve with Sauce: Let them cool 5 minutes and serve with marinara.
Equipment for This Recipe:
- Baking sheet
- Pastry brush
- Fork
How to Serve This Dish: Serve with a bowl of marinara and a few sliced cucumbers. Two mini calzones usually make a solid snack; three or four become dinner.
Pro Tips for This Recipe:
- Do not overfill, or the dough tears.
- Pinch the seam well and crimp with a fork.
- A little egg wash gives the crust a better color.
Variations on This Dish:
- Veggie Calzones: Add spinach or mushrooms instead of pepperoni.
- Three-Cheese Version: Use ricotta, mozzarella, and provolone for a softer filling.
Common Mistakes to Avoid with This Dish:
- Filling the dough while it is warm: It stretches and tears more easily.
- Skipping the rest after baking: The cheese needs a minute to settle or it runs out.
20. Tater Tot Casserole Bake
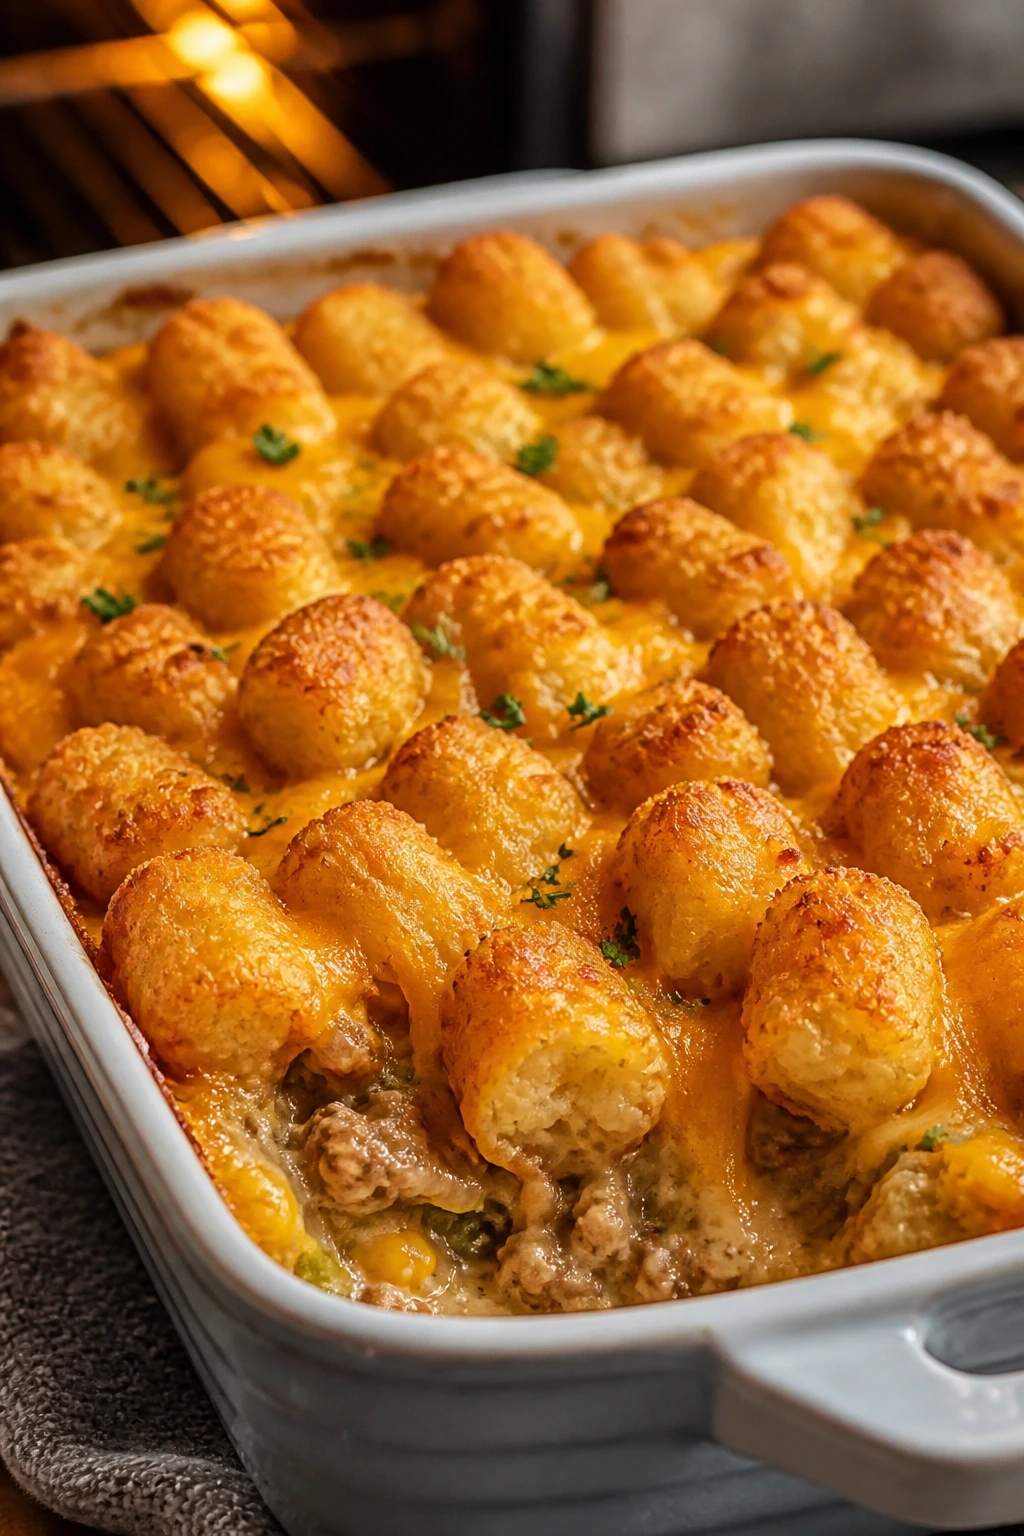
This is the tray that wins when everybody wants comfort and nobody wants a long explanation. Tater tot casserole bake gives you a crispy top, a savory base, and enough heft to count as dinner without pretending to be delicate.
Why It Works: Browning the meat first keeps the bottom from tasting flat, and the tater tots on top turn golden while the filling stays hot underneath. The contrast is the whole point: crunchy on top, soft and creamy below.
Key Ingredients:
- 1 pound ground beef
- 1 small onion, diced
- 1 can cream of mushroom soup
- 1 cup frozen peas and carrots
- 2 cups shredded cheddar
- 1 bag frozen tater tots
- Salt and pepper
Quick Steps:
- Brown the Meat: Cook beef and onion in a skillet until no pink remains, then season lightly.
- Mix the Filling: Stir in soup, peas and carrots, and 1 cup cheddar.
- Spread in the Dish: Transfer to a greased 9×13-inch baking dish.
- Top with Tots: Arrange tater tots in a single layer and sprinkle the remaining cheese.
- Bake Until Crisp: Bake at 400°F (205°C) for 30 to 35 minutes, until the tots are browned.
Equipment for This Recipe:
- Large skillet
- 9×13-inch baking dish
- Spatula
How to Serve This Dish: Serve with a crisp salad or steamed green beans so the meal does not turn into pure starch. A spoonful of ketchup on top is not fancy, but it works.
Pro Tips for This Recipe:
- Drain excess fat from the beef so the casserole stays rich, not greasy.
- Keep the tots frozen until the last minute.
- Let it rest 5 minutes before scooping.
Variations on This Dish:
- Turkey Swap: Use ground turkey instead of beef.
- Cheddar-Chive Top: Sprinkle chives over the finished dish for a little brightness.
Common Mistakes to Avoid with This Dish:
- Thawing the tater tots first: They collapse into the filling.
- Using too much soup: The casserole turns loose and soupy.
21. Buttered Noodles with Peas
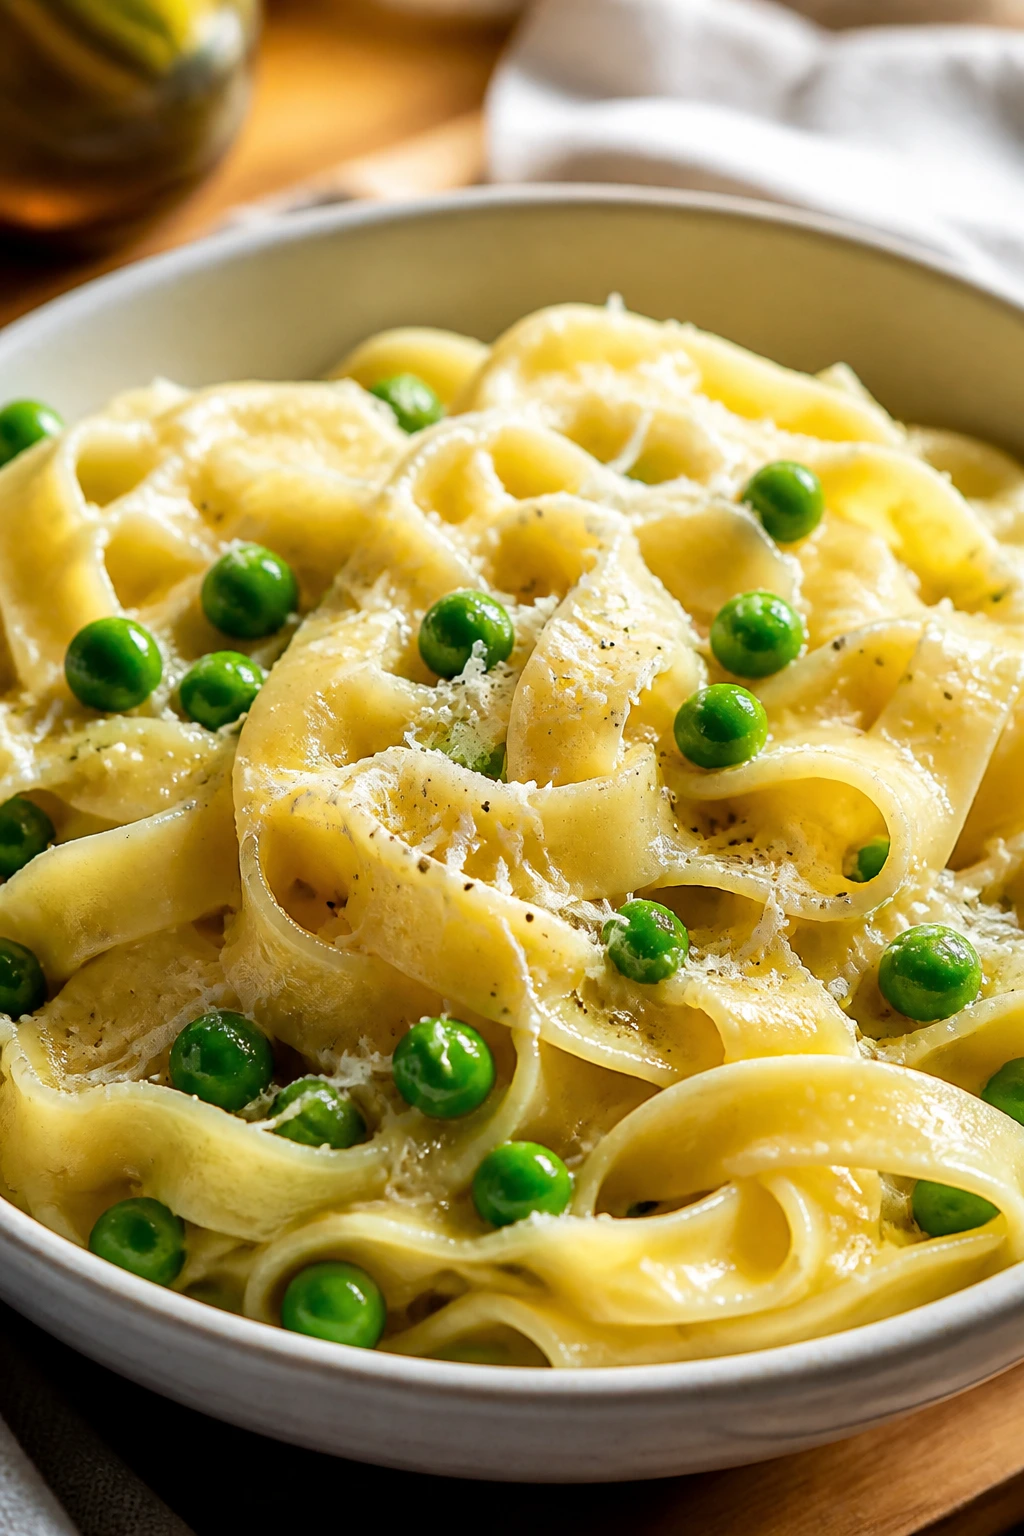
There is no trick here, and that is the charm. Buttered noodles with peas are plain in the best sense: warm, soft, fast, and easy to eat when everybody is already tired of making decisions.
Why It Works: Butter and Parmesan coat the noodles in a way that feels complete without a heavy sauce. The peas bring a little sweetness and color, and because they thaw in the hot pasta, they stay bright instead of turning mushy.
Key Ingredients:
- 12 ounces spaghetti or linguine
- 3 tablespoons butter
- 1 cup frozen peas
- 1/2 cup grated Parmesan
- 1/4 teaspoon salt
- 1/4 teaspoon black pepper
- 1 tablespoon pasta water or milk
Quick Steps:
- Cook the Pasta: Boil noodles in salted water until al dente.
- Warm the Peas: Add peas during the last minute of cooking.
- Drain and Toss: Drain, return to the pot, and add butter.
- Finish the Bowl: Stir in Parmesan, salt, pepper, and a splash of pasta water or milk.
- Serve Immediately: The noodles are best when glossy and hot.
Equipment for This Recipe:
- Large pot
- Colander
- Wooden spoon
How to Serve This Dish: Serve as a side with chicken, or turn it into a snack bowl with extra cheese and a few cherry tomatoes. A little garlic bread on the side never hurts.
Pro Tips for This Recipe:
- Salt the water well or the noodles taste flat.
- Use enough butter to coat, not drown.
- Add the peas late so they stay sweet.
Variations on This Dish:
- Garlic Butter Version: Add minced garlic to the butter for 30 seconds.
- Lemon Finish: Add a squeeze of lemon for a brighter bowl.
Common Mistakes to Avoid with This Dish:
- Overcooking the pasta: Soft noodles turn gluey fast.
- Skipping the Parmesan: The dish tastes too plain without it.
22. Teriyaki Chicken Meatballs
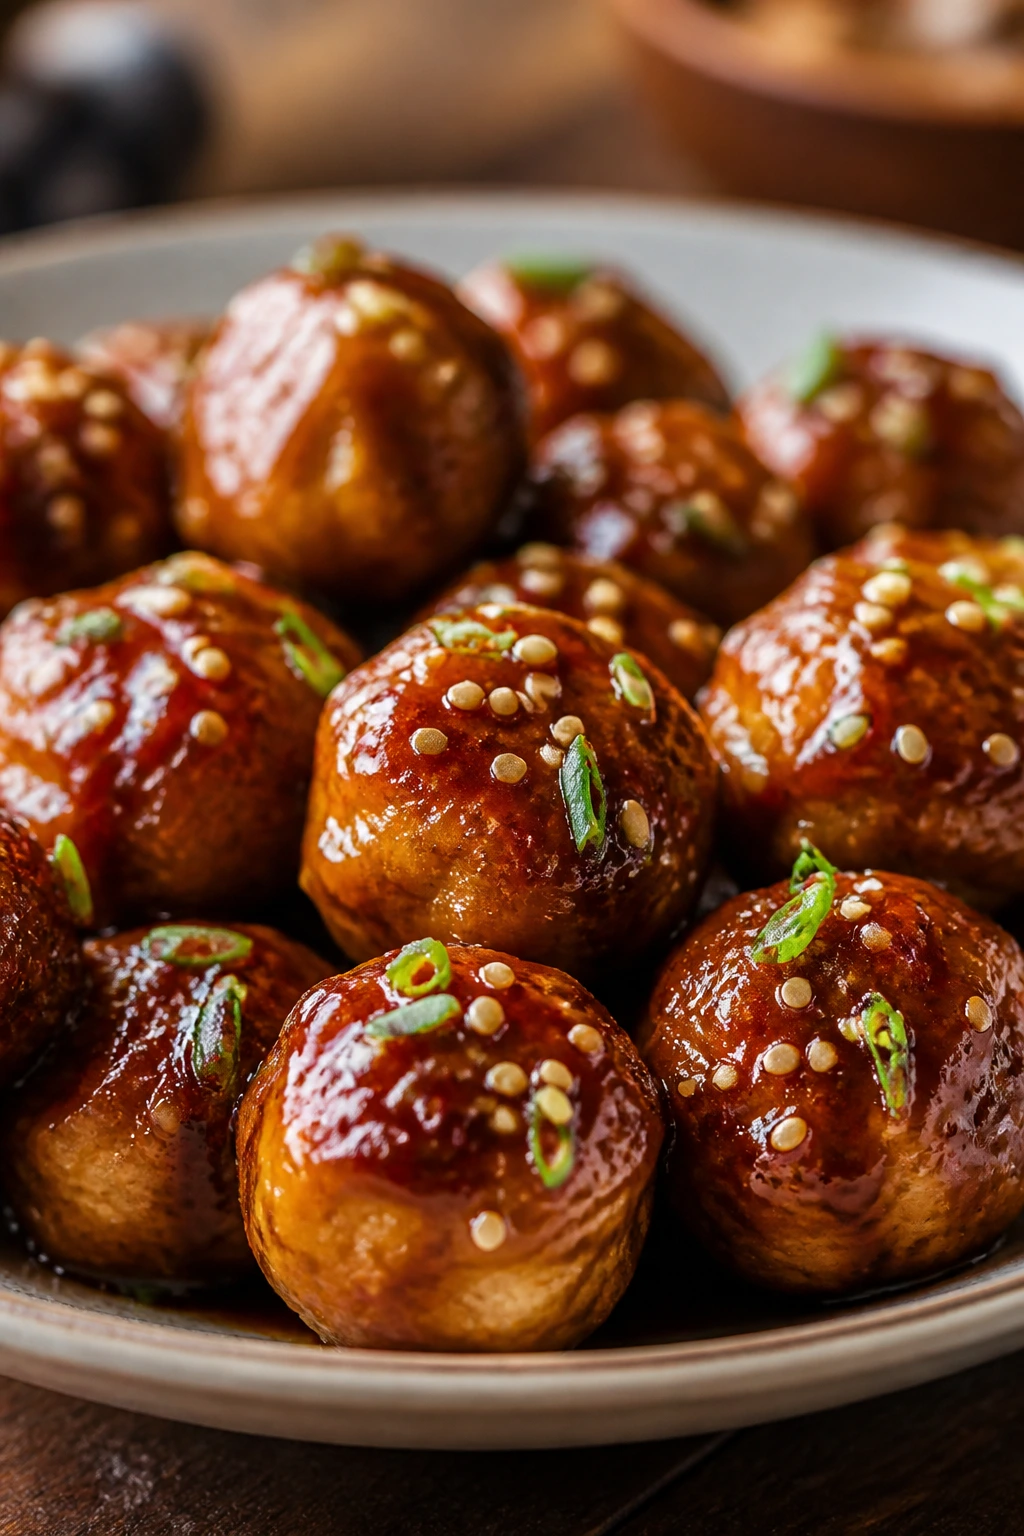
These meatballs are sticky in the right way. Teriyaki chicken meatballs give you a glossy glaze and a bite-sized shape that works for dinner forks, toothpicks, or the kind of snack plate kids quietly empty while standing up.
Why It Works: Ground chicken keeps the meatballs light, and panko helps them stay tender after baking. The teriyaki glaze clings best if you toss it on when the meatballs are hot, which gives each one that shiny finish people always reach for first.
Key Ingredients:
- 1 pound ground chicken
- 1/2 cup panko breadcrumbs
- 1 large egg
- 2 tablespoons soy sauce
- 1 teaspoon grated ginger
- 1 cup teriyaki sauce
- 1 tablespoon sesame seeds
Quick Steps:
- Mix the Meatballs: Combine chicken, panko, egg, soy sauce, and ginger.
- Shape Small Balls: Roll into 1-inch meatballs and place on a lined baking sheet.
- Bake Through: Bake at 400°F (205°C) for 15 minutes, until cooked through.
- Glaze the Meatballs: Warm teriyaki sauce and toss the hot meatballs until coated.
- Finish with Seeds: Sprinkle sesame seeds on top and serve.
Equipment for This Recipe:
- Baking sheet
- Mixing bowl
- Small saucepan
How to Serve This Dish: Serve over rice with cucumber slices, or spear them with toothpicks for a snack plate. They also work well with steamed broccoli if you want the meal to lean more dinner than appetizer.
Pro Tips for This Recipe:
- Wet your hands slightly when shaping the meatballs.
- Do not overmix or they get dense.
- Glaze them while hot so the sauce sticks.
Variations on This Dish:
- Turkey Meatballs: Use ground turkey for a similar texture.
- Spicy Teriyaki: Stir a little sriracha into the sauce for grown-up plates.
Common Mistakes to Avoid with This Dish:
- Making the meatballs too large: They take longer and dry out.
- Adding the glaze too early: It burns before the meatballs finish baking.
23. Veggie Pizza Pockets
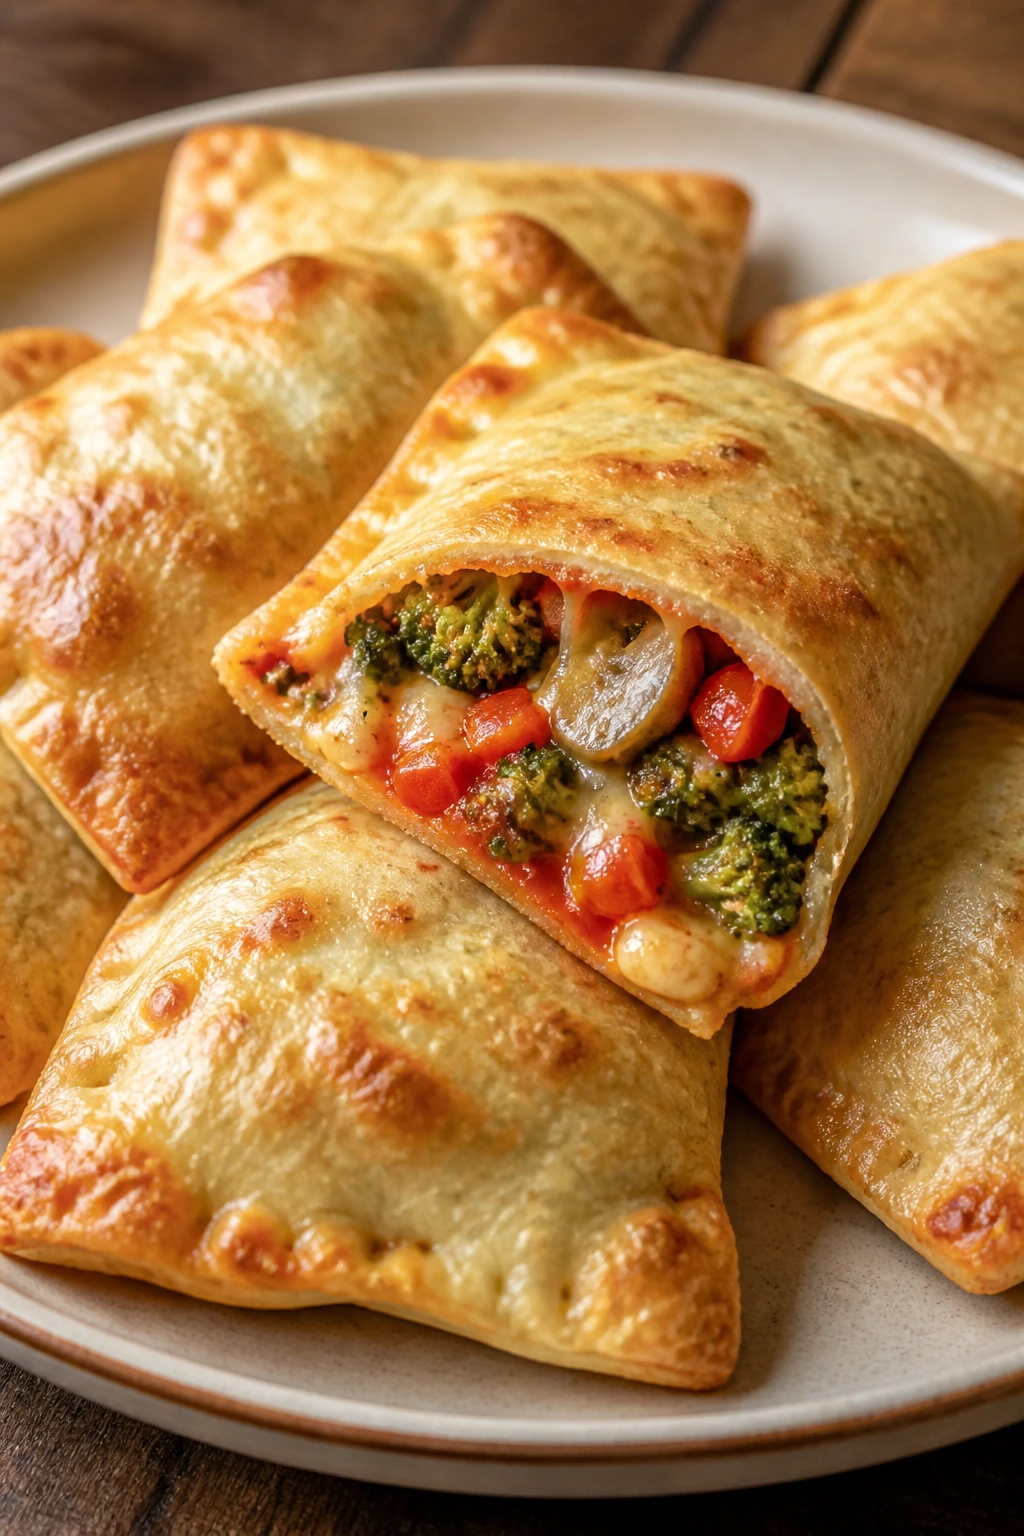
Pizza pockets are the kind of food that makes vegetables feel sneaky instead of responsible. Veggie pizza pockets use a soft crust and a cheesy center to hide bell peppers, mushrooms, or spinach in a way most kids will accept without a speech.
Why It Works: Crescent dough or pizza dough seals well around a small filling, so the sauce stays inside instead of leaking across the tray. Baking them hot gives you a crisp outside and a melty middle in under 15 minutes.
Key Ingredients:
- 1 can crescent dough or 1 pound pizza dough
- 1/2 cup pizza sauce
- 1 cup shredded mozzarella
- 1/2 cup finely chopped mushrooms
- 1/2 cup finely chopped bell pepper
- 1 tablespoon grated Parmesan
- 1 egg, beaten
Quick Steps:
- Prepare the Dough: Divide the dough into 8 pieces and flatten each into a small circle.
- Fill Lightly: Add sauce, mozzarella, mushrooms, bell pepper, and Parmesan to one side.
- Seal the Pockets: Fold over and crimp the edges with a fork.
- Brush and Bake: Brush with egg wash and bake at 375°F (190°C) for 12 to 14 minutes.
- Cool Before Serving: Let them sit 3 minutes so the filling does not spill out.
Equipment for This Recipe:
- Baking sheet
- Fork
- Pastry brush
How to Serve This Dish: Serve with marinara for dipping and a few orange slices on the side. They are easy to pack once cooled, which makes them useful for school pickup nights.
Pro Tips for This Recipe:
- Chop the vegetables very fine so the pockets seal.
- Keep the filling modest; excess sauce causes leaks.
- Crimp the edges twice if your dough is stretchy.
Variations on This Dish:
- Pepperoni Pocket: Add a few slices of pepperoni for a meatier version.
- Spinach Ricotta Pocket: Swap mushrooms for spinach and add ricotta.
Common Mistakes to Avoid with This Dish:
- Overfilling the dough: The pockets burst open.
- Leaving the edges unsealed: Cheese leaks onto the pan.
24. Corn Dog Muffins

These are pure school-cafeteria nostalgia, but with a better crust. Corn dog muffins hit that sweet-salty note kids usually chase, and the muffin shape makes them easier to serve than anything on a stick.
Why It Works: A cornmeal batter bakes around chopped hot dogs and turns into a soft, slightly sweet muffin with a savory center. They are fast, filling, and less fussy than frying anything in batter.
Key Ingredients:
- 1 cup cornmeal
- 1 cup all-purpose flour
- 1 tablespoon baking powder
- 1 cup milk
- 2 large eggs
- 4 hot dogs, chopped
- 1 cup shredded cheddar
- 2 tablespoons melted butter
Quick Steps:
- Heat the Oven: Set it to 400°F (205°C) and grease a muffin tin.
- Mix the Batter: Whisk cornmeal, flour, baking powder, milk, eggs, and butter until smooth.
- Fold in Fillings: Stir in hot dog pieces and cheddar.
- Bake Until Set: Fill the cups and bake for 12 to 15 minutes, until the tops spring back lightly.
- Cool Briefly: Rest 5 minutes before serving.
Equipment for This Recipe:
- Muffin tin
- Mixing bowl
- Whisk
How to Serve This Dish: Serve with ketchup, mustard, and a few apple slices. They work nicely as a dinner with a salad or as an after-school snack on their own.
Pro Tips for This Recipe:
- Cut the hot dogs small so every bite gets some.
- Do not overmix the batter or the muffins get tough.
- A little extra cheddar on top browns nicely.
Variations on This Dish:
- Mini Jalapeño Version: Add a little diced jalapeño for older kids.
- Turkey Dog Swap: Use turkey hot dogs for a lighter flavor.
Common Mistakes to Avoid with This Dish:
- Baking too long: The muffins dry out fast.
- Using too much hot dog: The batter cannot hold the pieces evenly.
25. Turkey and Cheese Roll-Ups
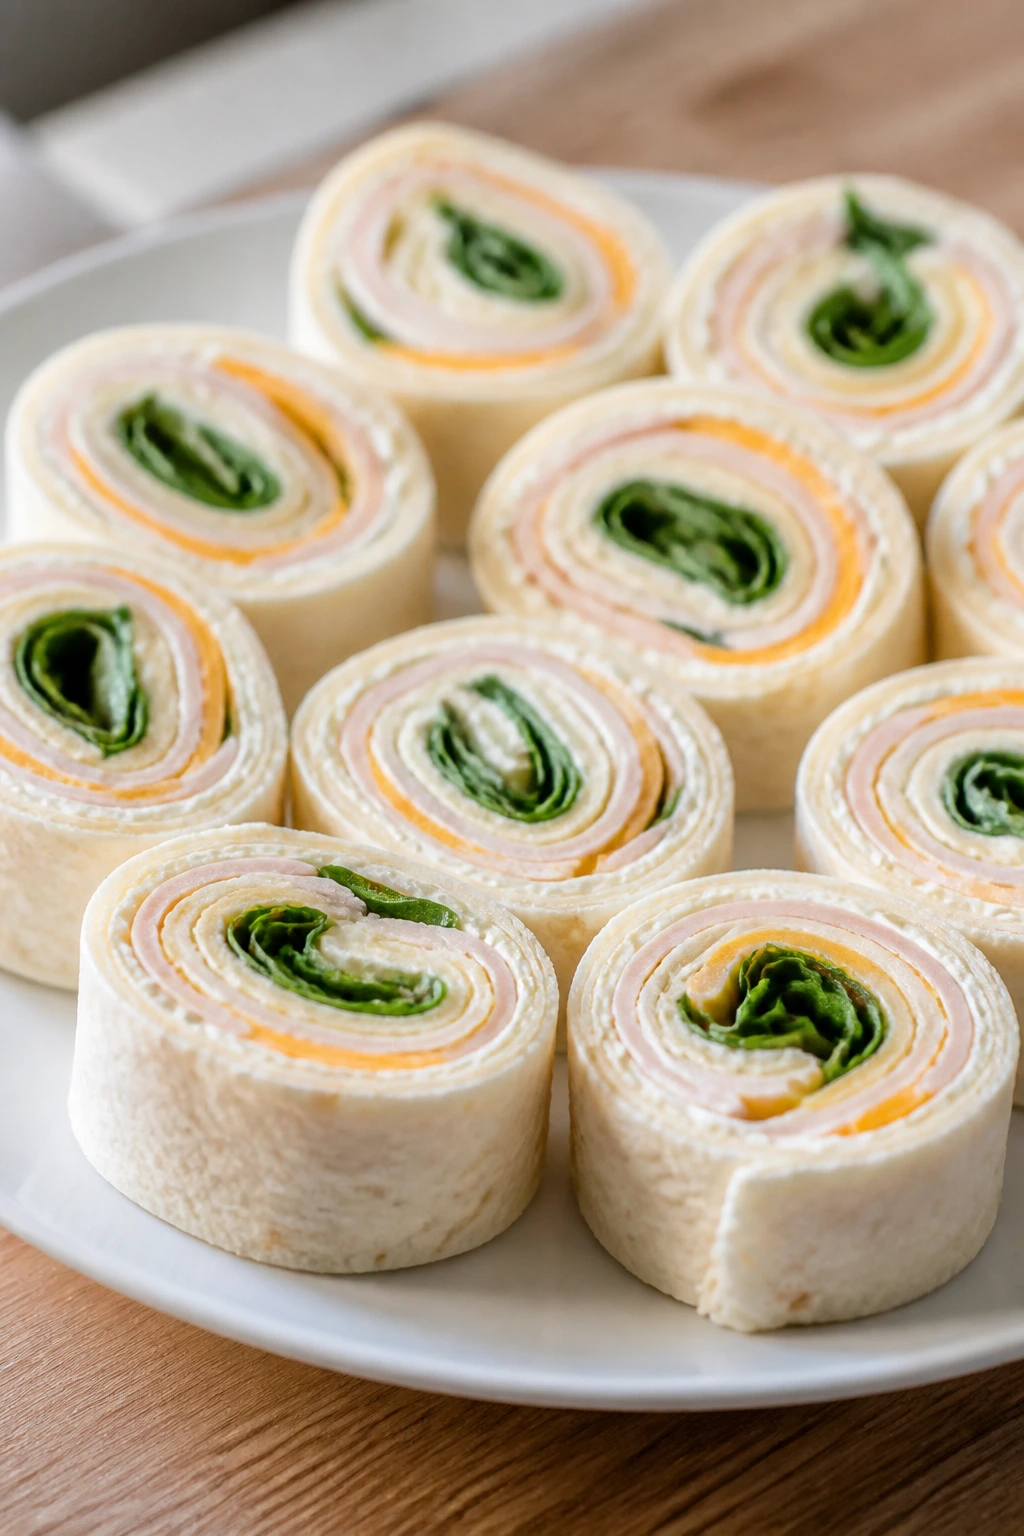
This is the cold lunch trick that pulls double duty as snack food. Turkey and cheese roll-ups are fast, neat, and useful when you need something that feels like dinner on a plate but does not require turning anything on.
Why It Works: A spreadable layer keeps the tortilla from tearing, and the rolling step turns a few basic ingredients into tidy spirals. Because there is no cooking, these are ideal when the schedule is already too full for a pan.
Key Ingredients:
- 4 large flour tortillas
- 4 ounces cream cheese, softened
- 8 slices deli turkey
- 4 slices cheddar cheese
- 1 cup baby spinach
- 1 tablespoon mustard
Quick Steps:
- Spread the Base: Mix cream cheese and mustard, then spread on each tortilla.
- Layer the Fillings: Add turkey, cheddar, and spinach in an even line.
- Roll Firmly: Roll each tortilla into a tight log.
- Chill and Slice: Chill for 10 minutes, then cut into 1-inch rounds.
- Serve Cold or Cool: Pack or plate right away.
Equipment for This Recipe:
- Cutting board
- Sharp knife
- Small bowl
How to Serve This Dish: Serve with grapes, cucumber spears, or pretzels for a snack tray. For a dinner plate, pair them with soup or a handful of crackers.
Pro Tips for This Recipe:
- Dry spinach leaves before rolling so the tortilla does not slip.
- Chill the logs before slicing for clean spirals.
- Thin deli slices roll better than thick-cut meat.
Variations on This Dish:
- Ham Roll-Ups: Swap turkey for ham and use Swiss.
- Hummus Roll-Up: Replace cream cheese with hummus for a dairy-light version.
Common Mistakes to Avoid with This Dish:
- Using too much filling: The tortilla tears.
- Skipping the chill: The slices squash instead of holding shape.
26. One-Pot Cheeseburger Pasta
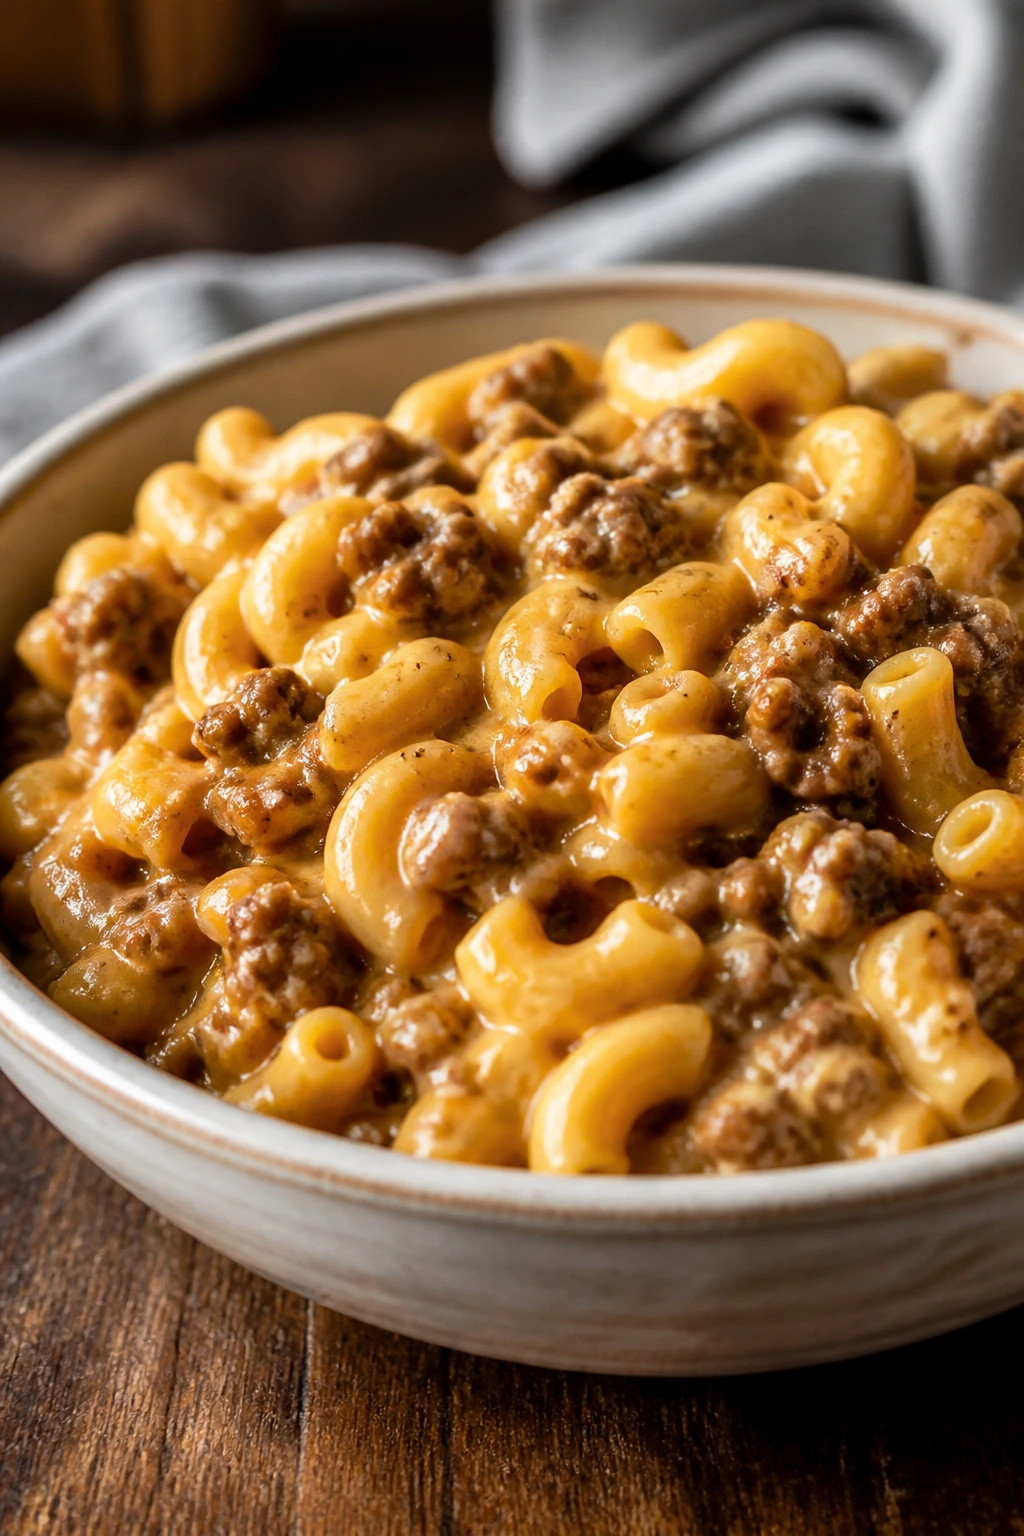
This one tastes like a burger and eats like a bowl of pasta, which is why kids tend to trust it immediately. One-pot cheeseburger pasta is a solid answer when you want dinner to feel hearty without making a separate sauce and side.
Why It Works: The pasta cooks in the same pot with the meat and sauce, so it soaks up flavor instead of tasting boiled and separate. Cheddar melts into the broth at the end and turns the whole thing creamy without a long cheese sauce.
Key Ingredients:
- 1 pound ground beef
- 1 small onion, diced
- 2 cups uncooked elbow macaroni
- 3 cups beef broth
- 1 cup tomato sauce
- 1 1/2 cups shredded cheddar
- 1 tablespoon mustard
Quick Steps:
- Brown the Beef: Cook beef and onion in a large pot until the meat is no longer pink.
- Add the Liquids: Stir in broth, tomato sauce, and mustard.
- Cook the Pasta: Add macaroni and simmer, stirring often, for 10 to 12 minutes.
- Melt the Cheese: Turn off the heat and stir in cheddar until creamy.
- Serve Hot: Let it sit 2 minutes so the sauce thickens.
Equipment for This Recipe:
- Large pot with lid
- Wooden spoon
- Grater
How to Serve This Dish: Serve with dill pickles or steamed broccoli on the side. It tastes even more like a cheeseburger if you add a little ketchup at the table.
Pro Tips for This Recipe:
- Stir often so the pasta does not stick.
- Use broth, not plain water, or the dish tastes thin.
- Add cheese off the heat so it melts smoothly.
Variations on This Dish:
- Turkey Burger Pasta: Swap in ground turkey.
- Bacon Cheeseburger Version: Add a little cooked bacon for a smoky edge.
Common Mistakes to Avoid with This Dish:
- Letting the pot boil too hard: The pasta breaks down.
- Adding cheese while the pot is boiling: It can clump.
27. Baked Ziti Cups
Baked ziti cups are what happen when a pasta bake gets repackaged into something easier to serve. The edges get a little crisp, the center stays saucy, and the muffin-tin shape makes them feel snackable instead of formal.
Why It Works: Ricotta and mozzarella give you the soft, stretchy center people expect from baked pasta, while the muffin tin keeps the portions neat. Individual cups also reheat better than a giant casserole, which is useful when a school-night ends in staggered waves.
Key Ingredients:
- 12 ounces ziti
- 1 1/2 cups ricotta
- 2 cups marinara sauce
- 2 cups shredded mozzarella
- 1/4 cup grated Parmesan
- 1 egg
- 1 tablespoon chopped basil
Quick Steps:
- Cook the Pasta: Boil ziti until just al dente, then drain.
- Mix the Filling: Stir pasta with ricotta, egg, 1 cup mozzarella, marinara, Parmesan, and basil.
- Pack the Cups: Spoon into a greased muffin tin or small baking dish.
- Top and Bake: Sprinkle remaining mozzarella over the top and bake at 375°F (190°C) for 18 minutes.
- Rest and Release: Cool 5 minutes before lifting them out.
Equipment for This Recipe:
- Muffin tin or small casserole dish
- Mixing bowl
- Spoon
How to Serve This Dish: Serve with a little extra marinara and a green salad. Three or four cups make a full dinner, while one or two work as an after-school snack.
Pro Tips for This Recipe:
- Underboil the pasta slightly so it stays firm after baking.
- Grease the tin well or the cups stick.
- Let them cool before removing, or they break apart.
Variations on This Dish:
- Meat Sauce Cups: Add cooked ground beef to the marinara.
- Spinach Bake: Fold in chopped spinach for extra color.
Common Mistakes to Avoid with This Dish:
- Overcooking the pasta first: The cups turn mushy.
- Packing them too tightly: They do not heat through evenly.
28. Chicken Noodle Soup with Stars
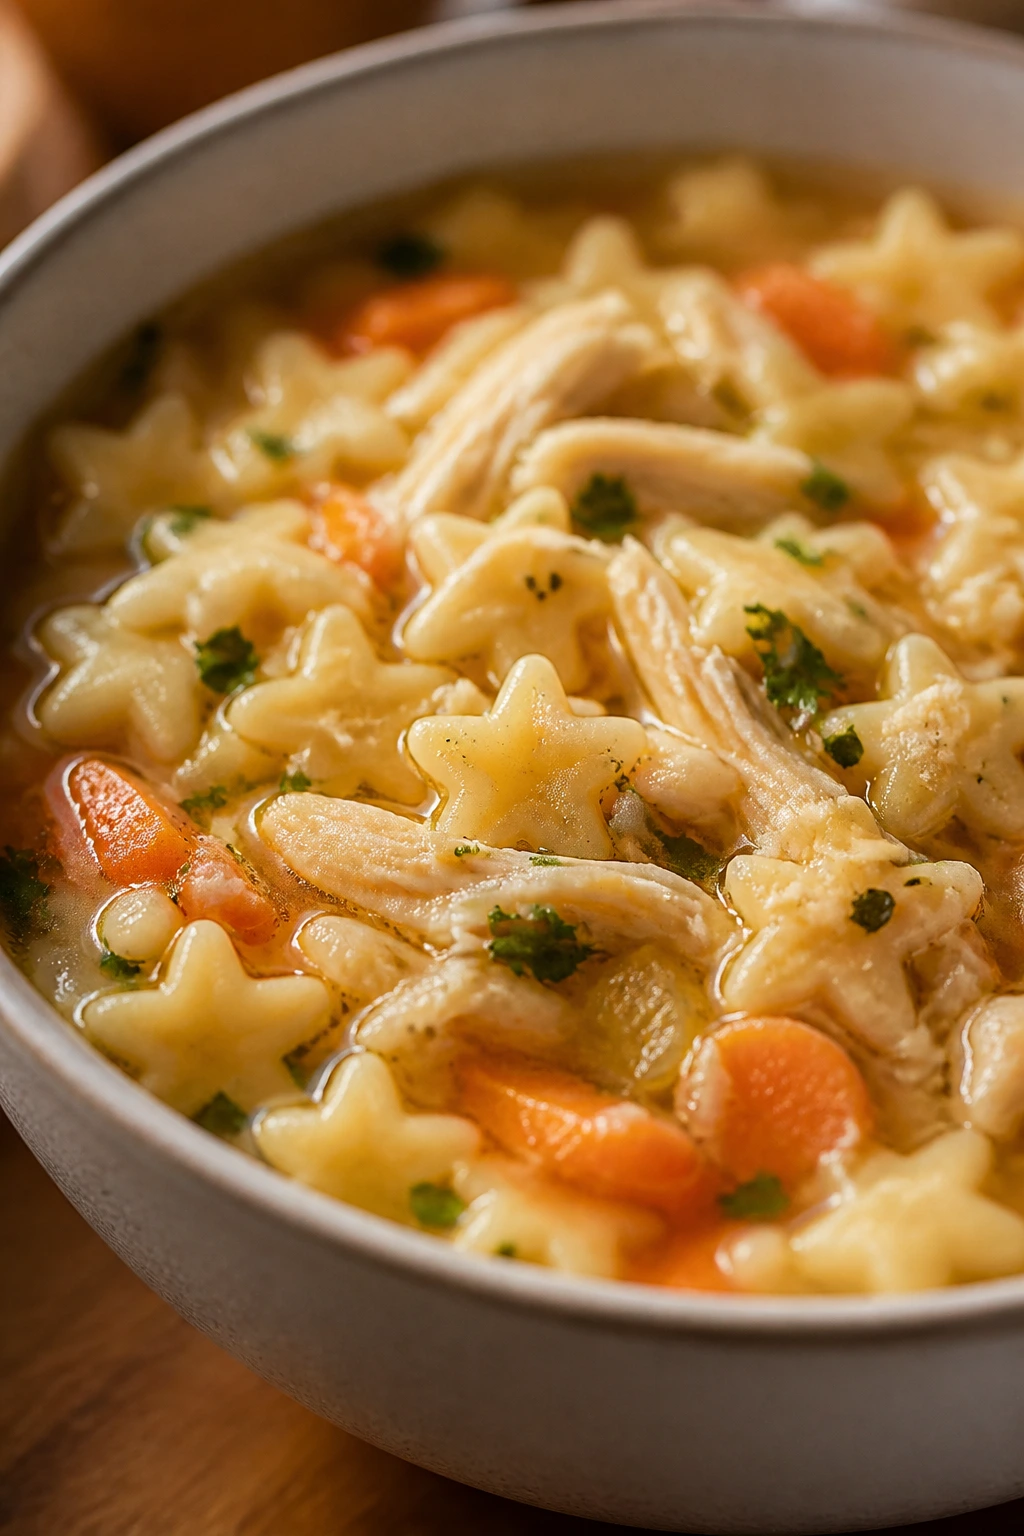
Star pasta makes soup feel playful before anyone has even taken a spoonful. Chicken noodle soup with stars is soft, warm, and easy on a child who comes home tired, hungry, and maybe a little over it.
Why It Works: The broth carries all the flavor, so you do not need a complicated base. Tiny pasta cooks quickly, and shredded chicken makes the soup filling without turning it into a heavy stew.
Key Ingredients:
- 1 tablespoon olive oil
- 1 small onion, diced
- 2 carrots, sliced
- 2 celery stalks, sliced
- 6 cups chicken broth
- 2 cups cooked shredded chicken
- 1 cup star pasta
- Salt and pepper
Quick Steps:
- Start the Vegetables: Sauté onion, carrots, and celery in oil for 5 minutes until slightly soft.
- Add the Broth: Pour in broth and bring to a gentle boil.
- Cook the Pasta: Stir in star pasta and simmer for 7 to 9 minutes.
- Add the Chicken: Stir in shredded chicken and heat for 2 more minutes.
- Season and Serve: Taste, adjust salt and pepper, and serve hot.
Equipment for This Recipe:
- Soup pot
- Ladle
- Cutting board
How to Serve This Dish: Serve with crackers or buttered toast. A small bowl is enough for a snack, but a big bowl and fruit on the side makes a full dinner.
Pro Tips for This Recipe:
- Add the pasta near the end so it does not overcook.
- Use low-sodium broth if you want more control over seasoning.
- Shred the chicken small so it stays soft in each spoonful.
Variations on This Dish:
- Lemon Chicken Soup: Add a squeeze of lemon at the end.
- Rice Version: Swap the pasta for cooked rice if that is what you have.
Common Mistakes to Avoid with This Dish:
- Cooking the pasta too long: It falls apart and clouds the broth.
- Adding too little broth: The soup turns into a thick stew faster than you want.
29. Apple Cinnamon Oat Bars
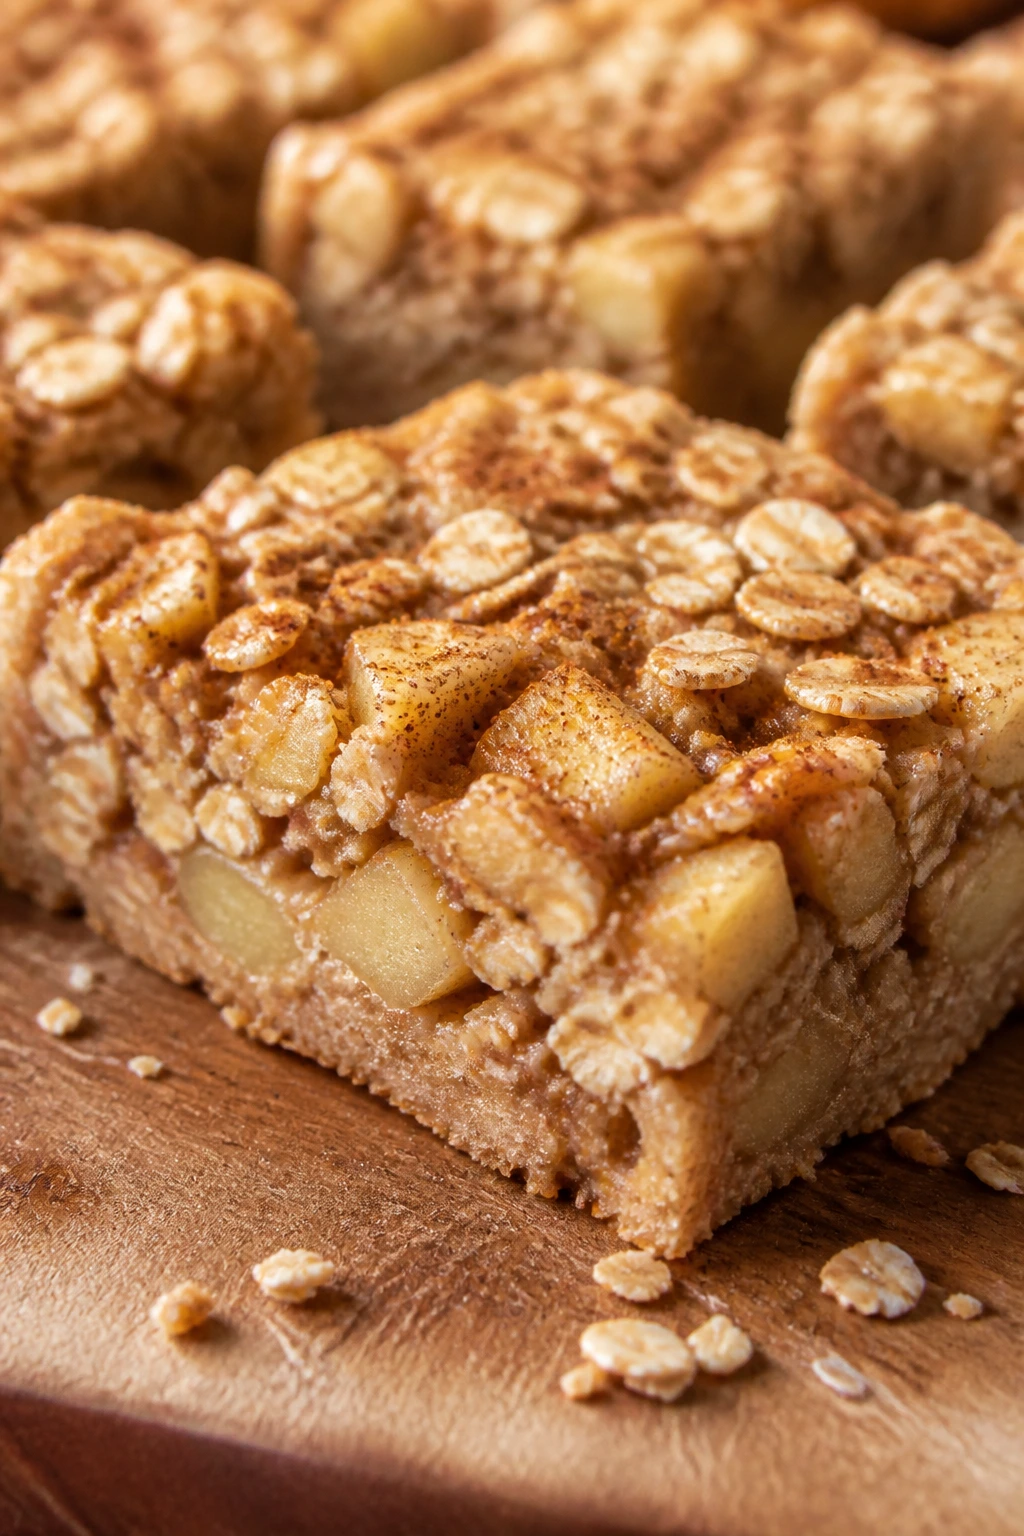
These bars land right in the zone between snack and dessert, which is probably why they disappear so quickly. Apple cinnamon oat bars are soft, a little chewy, and just sweet enough to feel like a reward after school.
Why It Works: Oats and chopped apples bake into a sturdy bar that holds together once cooled. Cinnamon warms the flavor without making the bars taste like cake, and that balance is what makes them useful at both snack time and breakfast.
Key Ingredients:
- 2 cups rolled oats
- 1 cup all-purpose flour
- 1/2 cup brown sugar
- 1 teaspoon cinnamon
- 1/2 cup melted butter
- 1 large egg
- 1 1/2 cups peeled diced apples
Quick Steps:
- Mix the Dry Ingredients: Stir oats, flour, sugar, and cinnamon together.
- Add the Wet Ingredients: Mix in butter and egg until the mixture looks crumbly but holds when pressed.
- Fold in Apples: Stir in the diced apples and press into a lined baking pan.
- Bake Until Set: Bake at 350°F (175°C) for 25 to 30 minutes, until the top is lightly golden.
- Cool Completely: Let it cool before slicing so the bars hold together.
Equipment for This Recipe:
- 8×8-inch baking pan
- Mixing bowl
- Parchment paper
How to Serve This Dish: Serve with milk or yogurt for an after-school snack. They also work in lunchboxes because they do not crumble too badly once cooled.
Pro Tips for This Recipe:
- Dice the apples small so the bars cut cleanly.
- Let them cool fully or they fall apart.
- A tart apple keeps the bars from tasting too sweet.
Variations on This Dish:
- Raisin Version: Add a handful of raisins with the apples.
- Nutty Top: Sprinkle chopped walnuts over the pan before baking if your house uses nuts.
Common Mistakes to Avoid with This Dish:
- Slicing while warm: The bars crumble.
- Using overly juicy apples: The center stays wet.
30. Yogurt Parfait Crunch Cups

When the afternoon gets chaotic, a cold snack that feels layered and bright can save the mood. Yogurt parfait crunch cups are quick, clean, and much more satisfying than handing a child a spoonful of yogurt in a hurry.
Why It Works: The layers keep the granola from going soggy too soon, and the fruit gives a fresh bite next to the creamy yogurt. It is one of the easiest kid-friendly meals to prep in advance if you keep the crunchy bits separate until serving.
Key Ingredients:
- 2 cups plain or vanilla Greek yogurt
- 1 cup strawberries, chopped
- 1 cup blueberries
- 1 cup granola
- 1 tablespoon honey
- 1 tablespoon chia seeds
- Mint leaves for garnish, optional
Quick Steps:
- Build the Base: Spoon a layer of yogurt into small cups.
- Add Fruit: Scatter strawberries and blueberries over the yogurt.
- Top with Crunch: Add granola and chia seeds right before serving.
- Drizzle Lightly: Finish with a thin drizzle of honey.
- Serve Cold: Add mint if you want a fresher look.
Equipment for This Recipe:
- Small cups or jars
- Spoon
- Knife and cutting board
How to Serve This Dish: Serve as an after-school snack or a light breakfast-for-dinner side. If you want it more filling, add a boiled egg or a handful of toast.
Pro Tips for This Recipe:
- Keep granola separate until the last minute.
- Use thick yogurt so the cups do not collapse.
- Cut fruit small enough to scoop easily.
Variations on This Dish:
- Peach Parfait: Swap berries for sliced peaches.
- Chocolate Crunch: Use chocolate granola for a dessert-leaning version.
Common Mistakes to Avoid with This Dish:
- Assembling too early: The granola softens.
- Using thin yogurt: The layers slide around.
31. Fruit and Cheese Kabobs
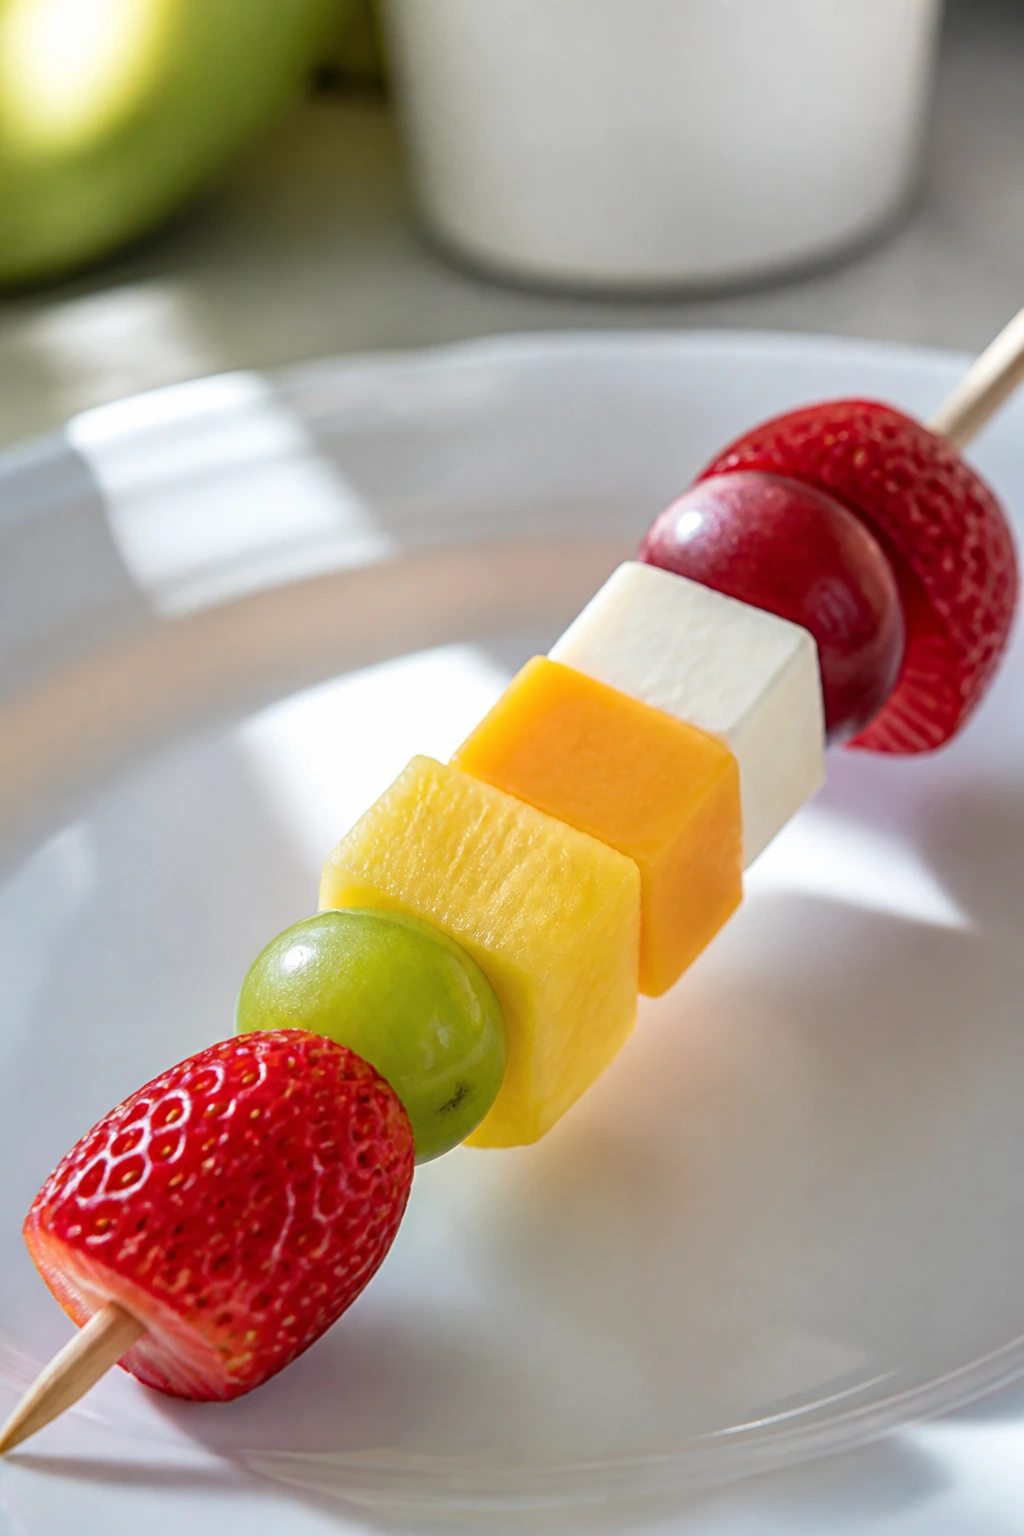
This is snack food with zero pretense, and sometimes that’s exactly what works. Fruit and cheese kabobs give you color, crunch, sweetness, and a salty bite in a format kids can handle without a fork.
Why It Works: The mix of juicy fruit and firm cheese gives the palate a little reset between bites. Threading everything onto skewers makes the plate look intentional, even though it took barely any time.
Key Ingredients:
- 1 cup strawberries, hulled
- 1 cup seedless grapes
- 1 cup pineapple chunks
- 1 cup cheddar cubes
- 1 cup mozzarella cubes
- 1 tablespoon lemon juice
- Small skewers or toothpicks
Quick Steps:
- Prep the Fruit: Wash, dry, and cut the fruit into bite-size pieces.
- Assemble the Kabobs: Thread fruit and cheese onto skewers, alternating colors.
- Add a Bright Finish: Brush lightly with lemon juice if the fruit needs freshness.
- Chill Briefly: Refrigerate for 10 minutes if you want them extra cold.
- Serve Right Away: Keep them simple and easy to grab.
Equipment for This Recipe:
- Small skewers or toothpicks
- Cutting board
- Paring knife
How to Serve This Dish: Serve alongside crackers, hummus, or a sandwich for a fuller snack plate. They also make a good side for fried chicken or sliders.
Pro Tips for This Recipe:
- Pat the fruit dry so the cheese does not slip.
- Use firm cheese cubes so they stay on the skewer.
- Keep the pieces roughly the same size for neat threading.
Variations on This Dish:
- Melon Swap: Use melon chunks instead of pineapple.
- Grape and Colby Jack: Change the cheese for a milder flavor.
Common Mistakes to Avoid with This Dish:
- Using overly ripe fruit: It falls apart on the skewer.
- Making the pieces too big: Kids struggle to eat them neatly.
32. Hummus Pita Dippers
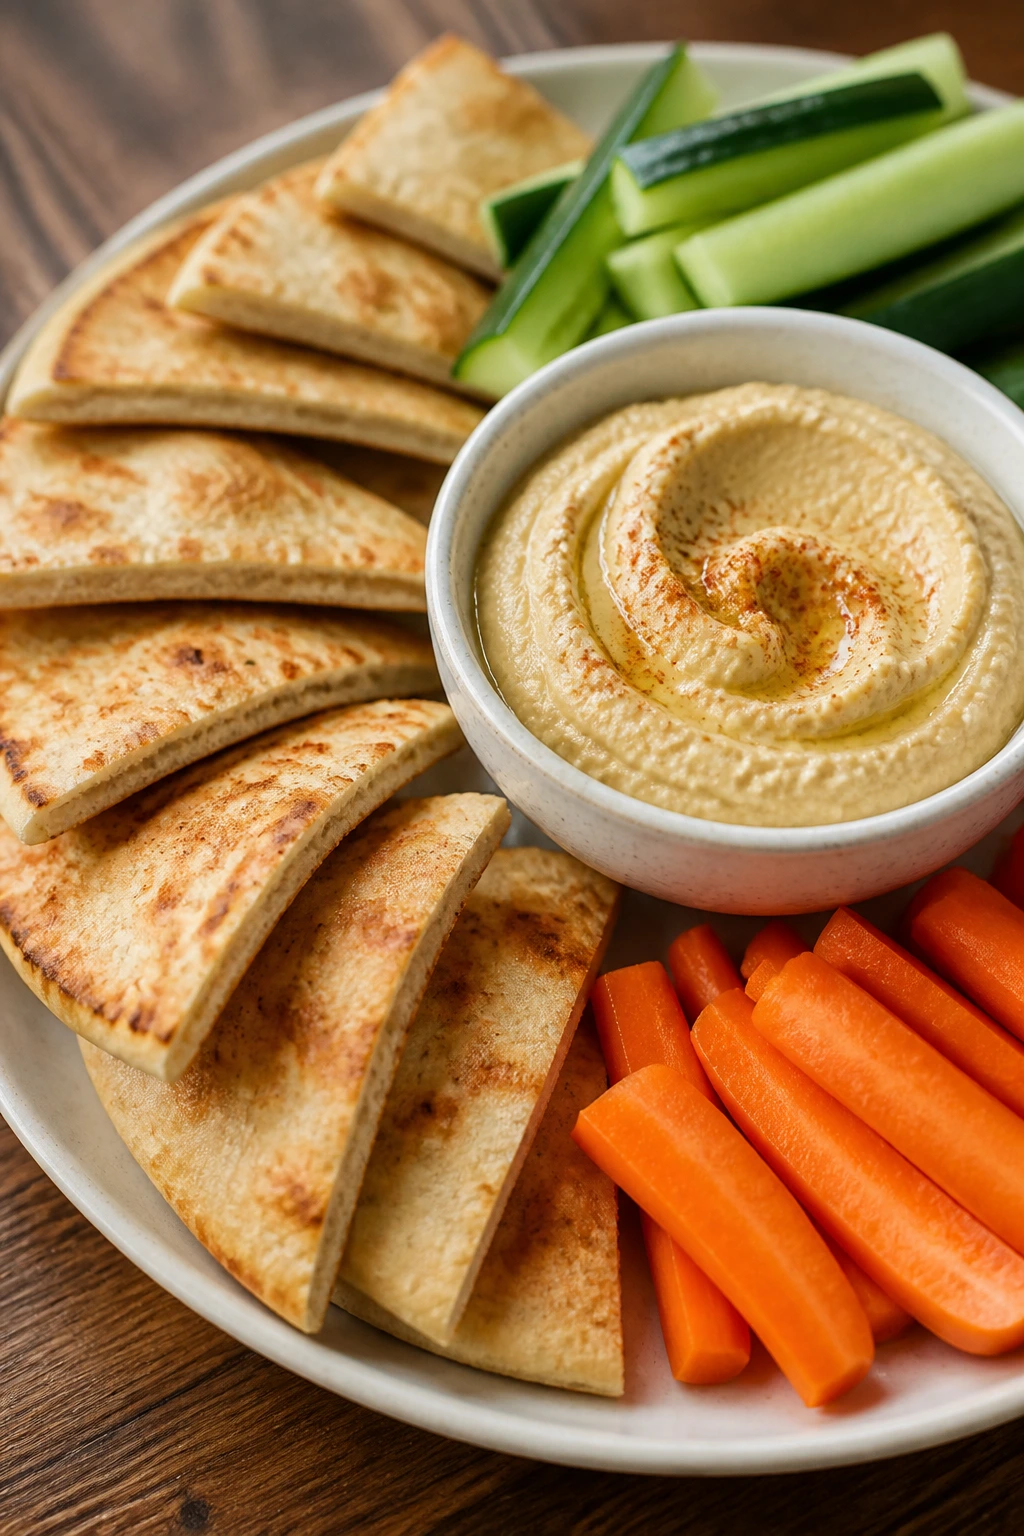
Hummus and pita are the reliable friends of the snack world. Hummus pita dippers work because they invite dunking, and dunking tends to win with kids more often than plain vegetables ever will.
Why It Works: Creamy hummus gives the vegetables something to cling to, and warm pita triangles feel more substantial than raw breadsticks. It is a simple plate, but the dip-and-scoop setup keeps it from feeling like an afterthought.
Key Ingredients:
- 1 cup hummus
- 2 pita breads
- 1 cucumber, sliced
- 2 carrots, cut into sticks
- 1 cup cherry tomatoes
- 1 tablespoon olive oil
- Pinch of paprika
Quick Steps:
- Warm the Pita: Toast pita at 350°F (175°C) for 4 minutes, then cut into triangles.
- Prep the Veggies: Slice the cucumber, carrots, and tomatoes into easy dipping pieces.
- Season the Hummus: Stir in olive oil and paprika if you want a little more flavor.
- Plate Everything: Arrange the dip, pita, and vegetables on a board or plate.
- Serve Fresh: Eat while the pita is still warm.
Equipment for This Recipe:
- Knife
- Cutting board
- Plate or platter
How to Serve This Dish: Serve as an after-school snack, or add cheese and fruit if you want it to count as a light dinner. It also travels well if the hummus stays chilled.
Pro Tips for This Recipe:
- Warm pita briefly so it bends instead of cracking.
- Cut the vegetables into sturdy pieces, not tiny bits.
- Use a thick hummus so it does not slide off the pita.
Variations on This Dish:
- Roasted Garlic Hummus: Use roasted garlic hummus for more depth.
- Everything Bagel Sprinkle: Add a little seasoning mix on top for extra crunch.
Common Mistakes to Avoid with This Dish:
- Letting pita cool completely: It gets dry and brittle.
- Using watery vegetables only: The plate feels thin and unsatisfying.
33. Mini Pancake Sandwiches
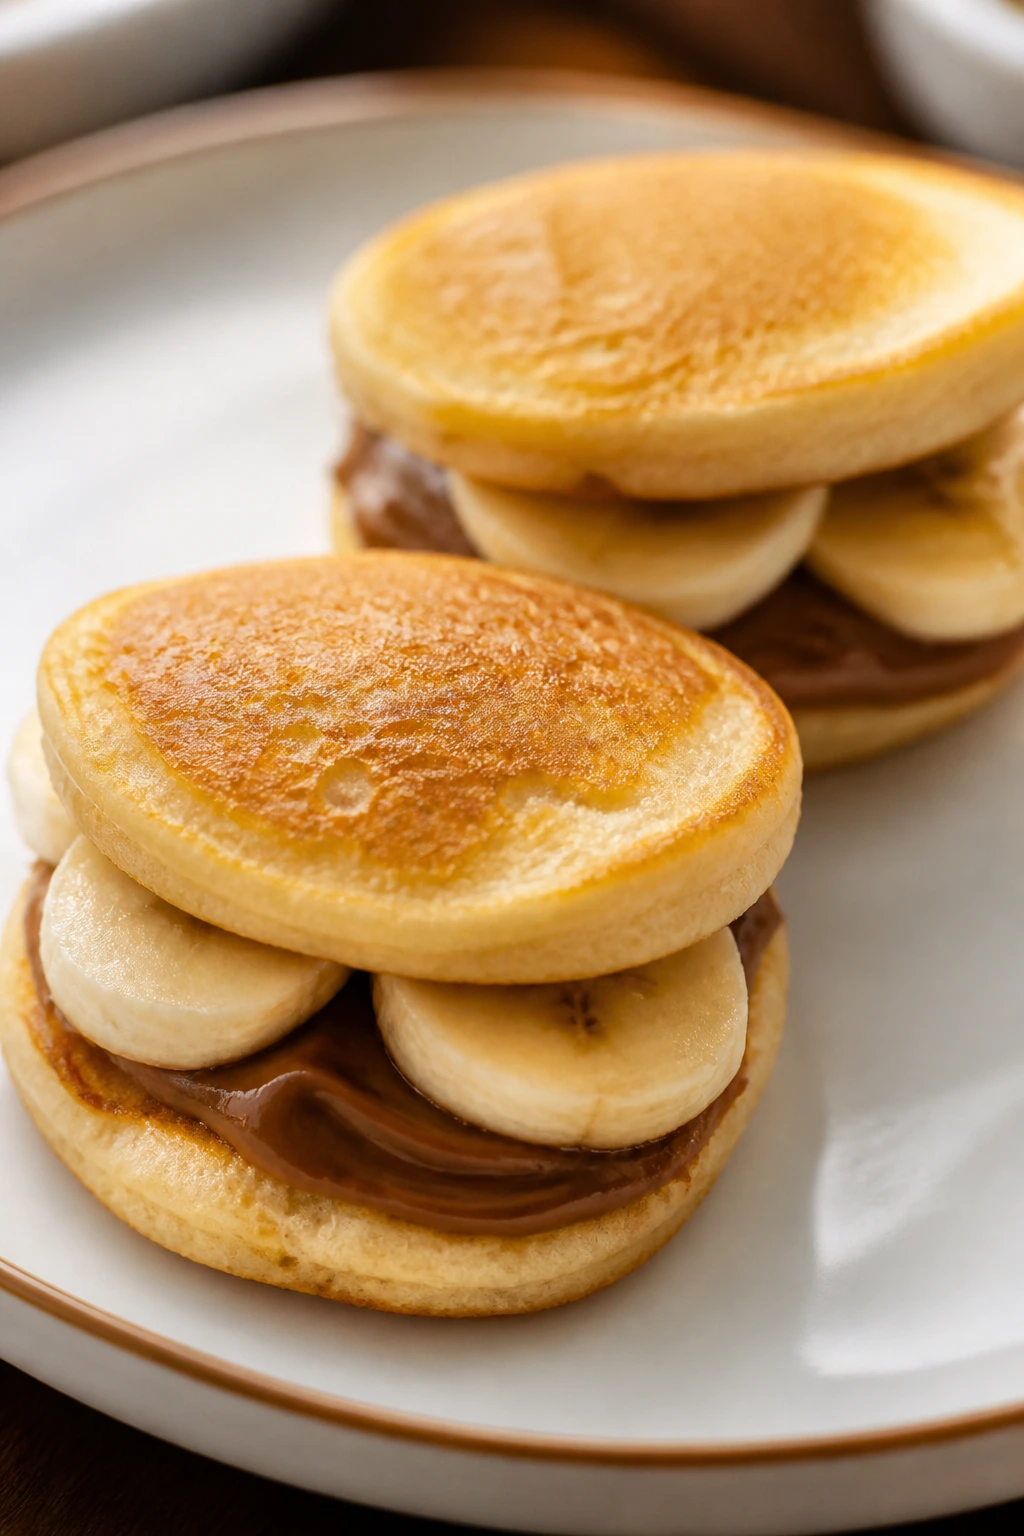
Mini pancake sandwiches feel playful enough for snack time and substantial enough for a light dinner if you add fruit and yogurt. They also give you a good excuse to make tiny pancakes, which children somehow find fascinating.
Why It Works: Small pancakes cook fast and stay soft, which makes them easy to sandwich around banana or peanut butter. Because the filling is mild, you can keep the sweetness in check and lean into a more balanced bite.
Key Ingredients:
- 1 cup all-purpose flour
- 1 tablespoon sugar
- 1 teaspoon baking powder
- 1 cup milk
- 1 large egg
- 1 banana, sliced
- 1/4 cup peanut butter or yogurt
- Butter for the pan
Quick Steps:
- Mix the Batter: Whisk flour, sugar, baking powder, milk, and egg until smooth.
- Cook Small Pancakes: Melt butter in a skillet and cook tablespoon-sized pancakes for 1 to 2 minutes per side.
- Add the Filling: Spread peanut butter or yogurt on one pancake and top with banana slices.
- Close the Sandwiches: Press a second pancake over the filling.
- Serve Warm: They are best right away, while soft.
Equipment for This Recipe:
- Skillet
- Mixing bowl
- Spatula
How to Serve This Dish: Serve with berries or a glass of milk for an after-school snack. For dinner, add scrambled eggs and call it breakfast night.
Pro Tips for This Recipe:
- Keep the pancakes small or the sandwiches get awkward.
- Let them cool for 1 minute before filling so the spread does not melt instantly.
- Use thick peanut butter if you want less mess.
Variations on This Dish:
- Strawberry Jam Version: Use jam instead of banana.
- Cream Cheese Filling: Swap yogurt for sweetened cream cheese.
Common Mistakes to Avoid with This Dish:
- Making the pancakes too large: The sandwiches become floppy.
- Overfilling with spread: The filling squeezes out every time you bite.
34. Spinach Ricotta Stuffed Shells

Stuffed shells are dinner that looks more complicated than it is. Spinach ricotta stuffed shells bring soft pasta, creamy filling, and enough red sauce to make the pan feel generous without much effort.
Why It Works: Jumbo shells hold a good amount of filling without breaking if you cook them just to al dente. Ricotta keeps the filling light, spinach adds color, and marinara under and over the shells prevents anything from drying out.
Key Ingredients:
- 20 jumbo pasta shells
- 2 cups ricotta
- 1 1/2 cups chopped cooked spinach, squeezed dry
- 1 egg
- 2 cups marinara sauce
- 1 1/2 cups shredded mozzarella
- 1/4 cup grated Parmesan
Quick Steps:
- Cook the Shells: Boil shells until al dente, then drain carefully.
- Mix the Filling: Stir ricotta, spinach, egg, and Parmesan together.
- Stuff the Shells: Fill each shell with the ricotta mixture and place in a sauced baking dish.
- Add Sauce and Cheese: Spoon marinara over the top and sprinkle mozzarella.
- Bake Until Hot: Bake at 375°F (190°C) for 25 minutes, until bubbling.
Equipment for This Recipe:
- Large pot
- Baking dish
- Spoon
How to Serve This Dish: Serve with garlic bread and a simple salad. Two or three shells make a snack-sized plate; five or six make dinner.
Pro Tips for This Recipe:
- Do not overcook the shells or they split while filling.
- Squeeze the spinach dry or the filling turns watery.
- Keep some sauce on the bottom of the dish so the pasta does not stick.
Variations on This Dish:
- Meat-Filled Shells: Add cooked ground beef to the filling.
- Lighter Version: Use part-skim ricotta if you want a less rich bowl.
Common Mistakes to Avoid with This Dish:
- Stuffing the shells too full: They tear open in the dish.
- Skipping the bottom layer of sauce: The pasta sticks and dries out.
35. Oven-Baked Fish Sticks
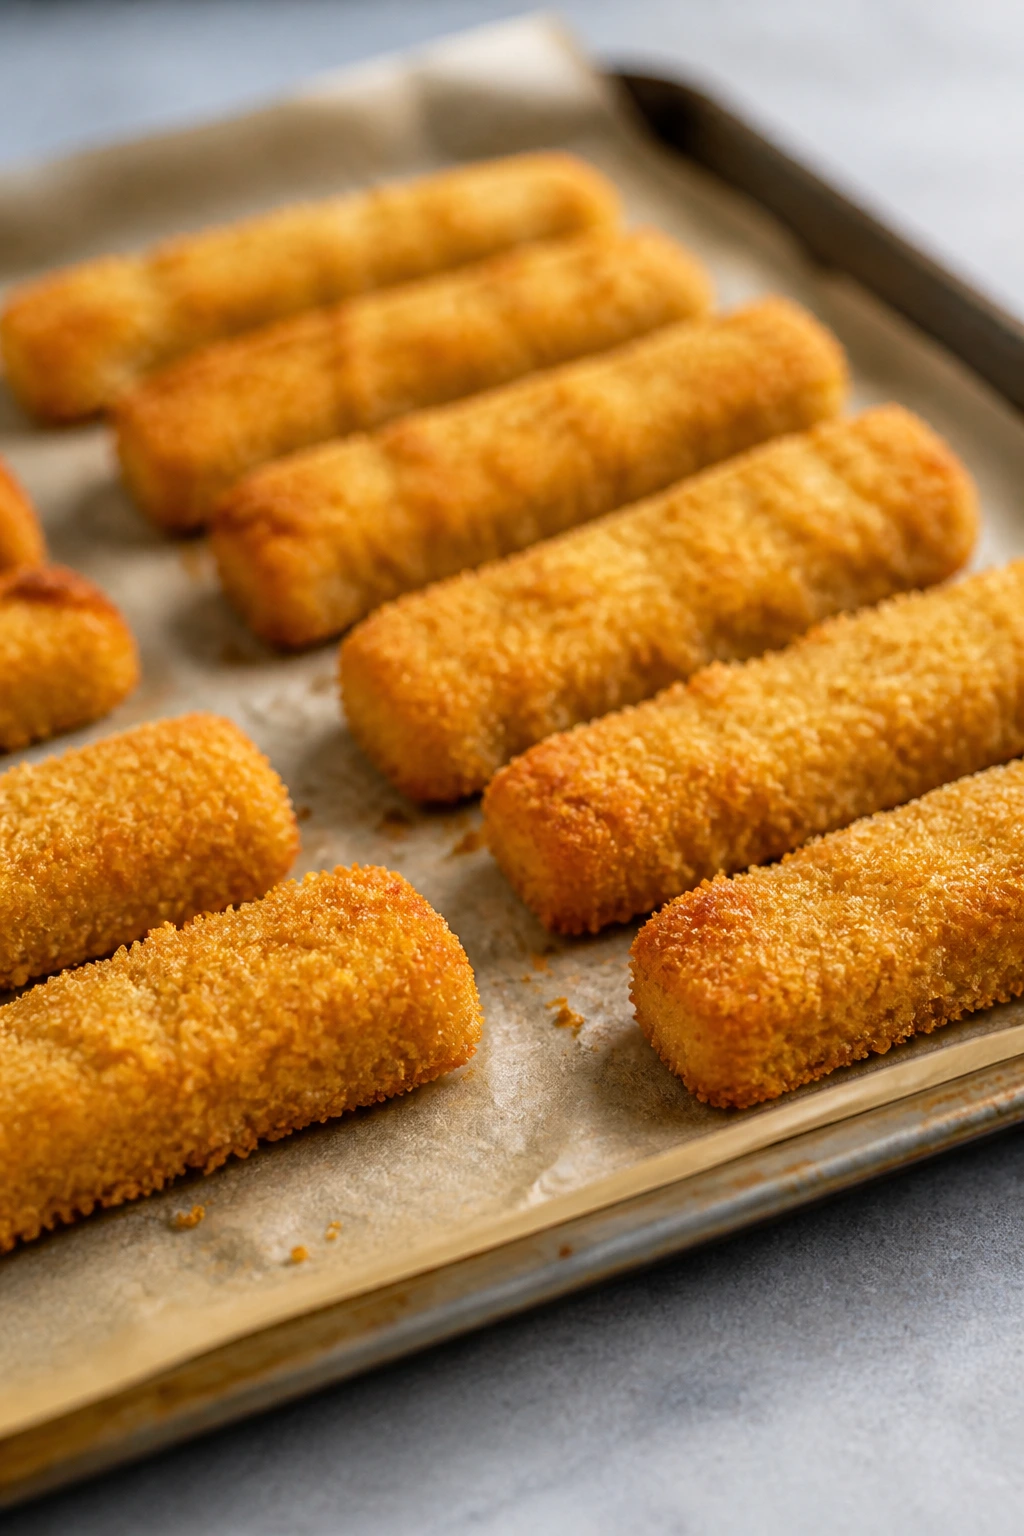
Fish sticks get a bad reputation from cardboard versions, which is a shame. Baked fish sticks can be crisp, mild, and much better than the frozen kind if you bread them well and keep the pieces even.
Why It Works: A dry breading coats the fish and browns in the oven without frying, so you get crunch with less mess. Cutting the fish into even strips helps them cook at the same speed, which keeps the centers tender.
Key Ingredients:
- 1 1/2 pounds white fish fillets, cut into strips
- 1/2 cup flour
- 2 large eggs
- 1 1/2 cups breadcrumbs or panko
- 1 teaspoon paprika
- 1/2 teaspoon salt
- 2 tablespoons olive oil
Quick Steps:
- Set Up the Breading: Put flour, beaten eggs, and seasoned breadcrumbs in three bowls.
- Coat the Fish: Dip each strip in flour, egg, then breadcrumbs.
- Arrange on the Tray: Place on a lined baking sheet and drizzle lightly with olive oil.
- Bake Until Crisp: Bake at 425°F (220°C) for 12 to 15 minutes, flipping once.
- Serve with Dip: They are done when the coating is golden and the fish flakes easily.
Equipment for This Recipe:
- Baking sheet
- Three shallow bowls
- Spatula
How to Serve This Dish: Serve with tartar sauce, lemon wedges, and fries or peas. For a snack plate, keep the portions smaller and add cucumber sticks.
Pro Tips for This Recipe:
- Pat the fish dry before breading.
- Use panko if you want more crunch.
- Do not overbake or the fish dries out.
Variations on This Dish:
- Parmesan Crust: Mix Parmesan into the breadcrumbs.
- Mild Cajun: Add a tiny bit of Cajun seasoning for older kids.
Common Mistakes to Avoid with This Dish:
- Wet fish going into the breading: The coating slides off.
- Crowding the tray: The sticks steam and lose crunch.
36. Sweet Potato Fries with Yogurt Dip
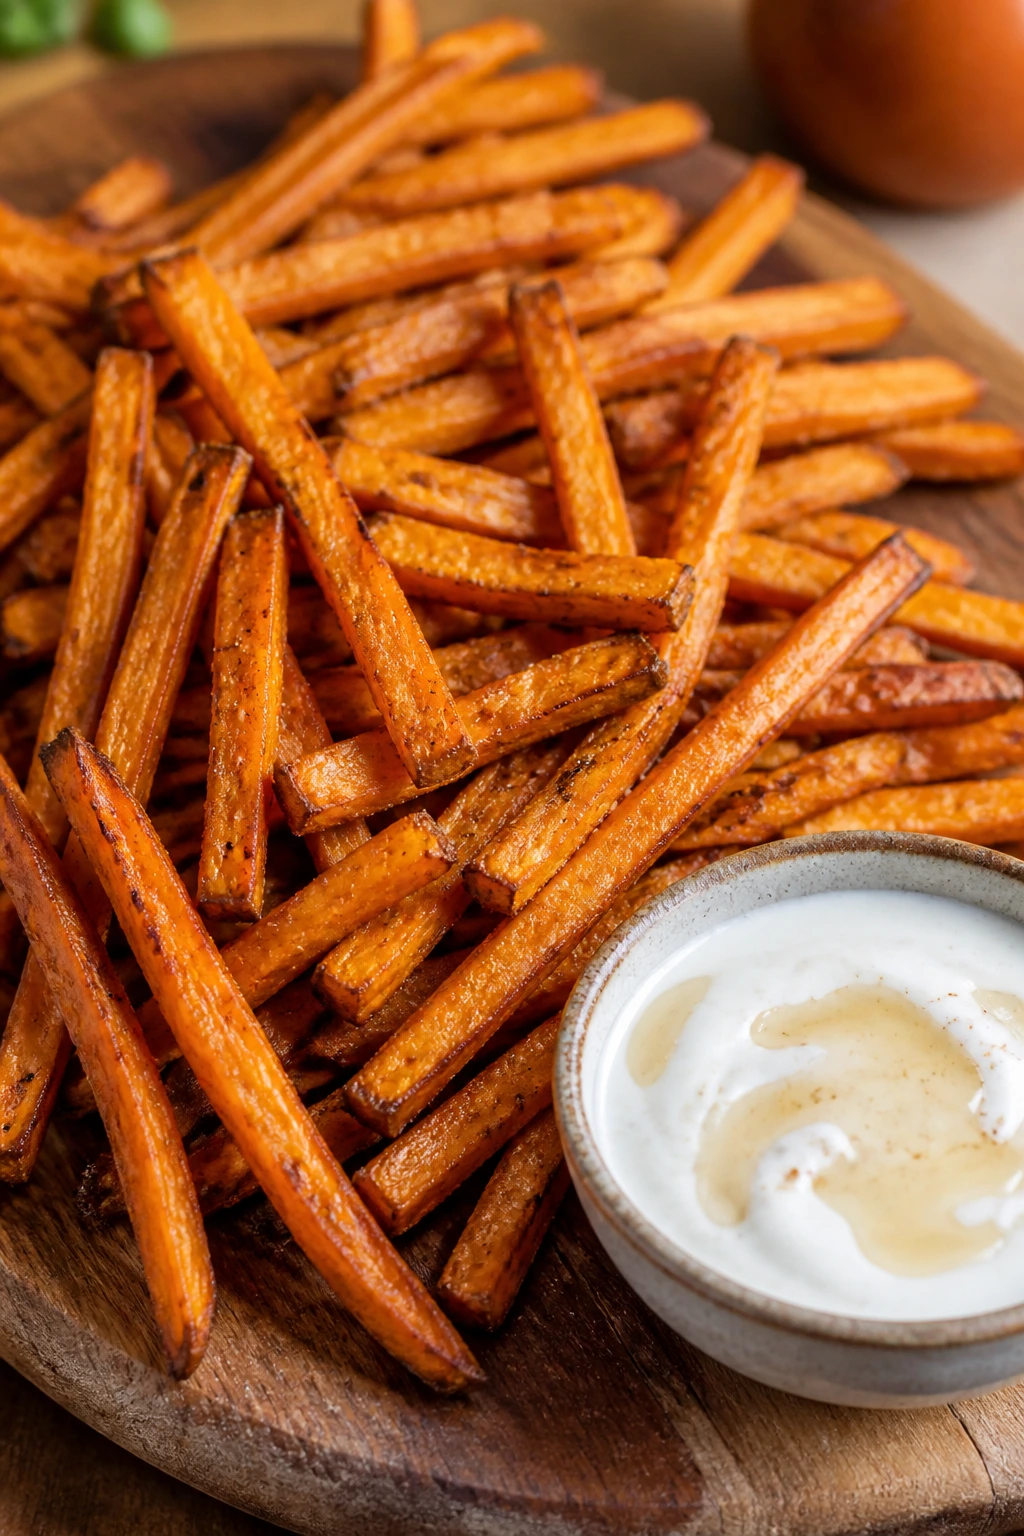
These fries are the side dish that quietly becomes dinner. Sweet potato fries with yogurt dip bring a little sweetness, a little salt, and enough crunch to feel like a real plate rather than a pile of leftovers.
Why It Works: Thin fries roast better because the edges brown before the centers go soft. A creamy dip gives kids something to dunk into, and the contrast makes the whole plate feel more fun than a plain bowl of vegetables.
Key Ingredients:
- 2 large sweet potatoes
- 2 tablespoons olive oil
- 1 teaspoon cornstarch
- 1/2 teaspoon salt
- 1/2 teaspoon paprika
- 1 cup plain yogurt
- 1 tablespoon honey
Quick Steps:
- Cut the Fries: Slice sweet potatoes into thin sticks.
- Season Well: Toss with oil, cornstarch, salt, and paprika.
- Roast Hot: Spread on a sheet pan and bake at 425°F (220°C) for 25 to 30 minutes, flipping once.
- Mix the Dip: Stir yogurt and honey together.
- Serve Immediately: Eat while the fries still have crisp edges.
Equipment for This Recipe:
- Baking sheet
- Bowl
- Knife
How to Serve This Dish: Serve with chicken tenders, sliders, or eggs. The dip also works well as a snack dip for carrot sticks if you have extra.
Pro Tips for This Recipe:
- Do not crowd the pan or the fries steam.
- Cornstarch helps the edges crisp up.
- Cut the fries about the same thickness so they finish together.
Variations on This Dish:
- Cinnamon Sugar Batch: Use cinnamon and a light sprinkle of sugar for a sweeter snack version.
- Savory Dip: Swap honey for garlic powder and lemon juice in the yogurt.
Common Mistakes to Avoid with This Dish:
- Too much oil: The fries go limp.
- Turning them too early: They need a chance to brown before flipping.
37. Mini Breakfast Burritos

Breakfast burritos make more sense than people think when the school day runs long. Mini breakfast burritos are compact, filling, and easy to hold, which makes them a strong candidate for dinner when everyone wants something quick and familiar.
Why It Works: Eggs, cheese, and a little potato or bean filling create a soft center that reheats well. Keeping the burritos small helps them seal properly and makes them ideal for after-school eating or freezing ahead.
Key Ingredients:
- 6 small flour tortillas
- 6 large eggs
- 1 cup diced cooked potatoes
- 1/2 cup black beans
- 1 cup shredded cheddar
- 2 tablespoons salsa
- Salt and pepper
Quick Steps:
- Scramble the Eggs: Cook the eggs softly with salt and pepper.
- Warm the Fillings: Heat potatoes and beans until steaming.
- Fill the Tortillas: Add eggs, potatoes, beans, cheese, and a spoonful of salsa.
- Roll Tightly: Fold in the sides and roll into small burritos.
- Toast or Bake: Warm in a skillet or bake at 375°F (190°C) for 8 minutes to set the seams.
Equipment for This Recipe:
- Skillet
- Spoon
- Baking sheet, optional
How to Serve This Dish: Serve with fruit and extra salsa. They are ideal for grabbing on the way to homework or packing into a lunchbox the next day.
Pro Tips for This Recipe:
- Keep the filling modest so the burritos seal.
- Warm the tortillas first to prevent cracking.
- Freeze them individually if you plan to reheat later.
Variations on This Dish:
- Sausage Burritos: Add cooked breakfast sausage.
- Bean and Cheese Only: Skip eggs for a simpler vegetarian version.
Common Mistakes to Avoid with This Dish:
- Overstuffing the tortilla: It splits while rolling.
- Skipping the seam-side-down rest: The burrito opens up in the pan.
38. Hidden Veggie Sloppy Joes
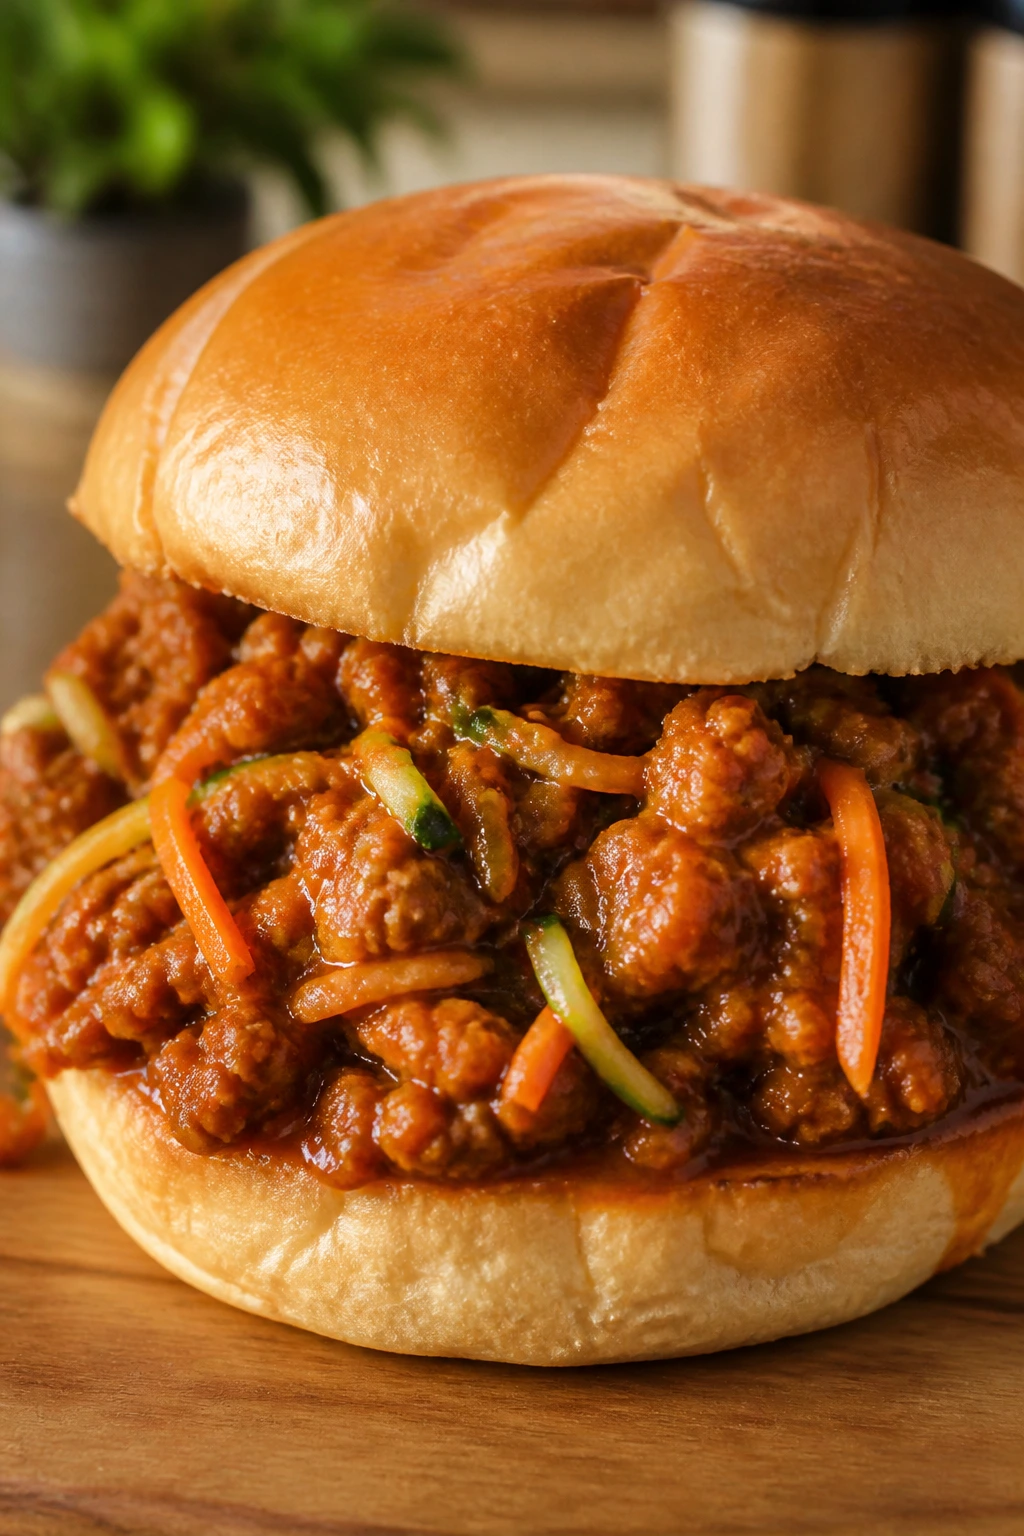
Hidden veggie sloppy joes do the old-school sloppy joe job, but they sneak in a little more color without making a fuss about it. This is one of those kid-friendly meals that works because the sauce is still sweet and familiar, even with vegetables tucked inside.
Why It Works: Grated carrot and zucchini melt into the meat mixture and disappear after a short simmer. The sauce gets thicker and sweeter as it cooks, which helps it cling to the bun without turning watery.
Key Ingredients:
- 1 pound ground beef or turkey
- 1 small onion, diced
- 1 carrot, grated
- 1 small zucchini, grated and squeezed dry
- 1/3 cup ketchup
- 2 tablespoons tomato paste
- 1 tablespoon Worcestershire sauce
- 8 soft buns
Quick Steps:
- Brown the Meat: Cook meat and onion in a skillet until the pink is gone.
- Add the Veggies: Stir in carrot and zucchini and cook for 3 minutes.
- Build the Sauce: Add ketchup, tomato paste, Worcestershire sauce, and 1/4 cup water.
- Simmer Until Thick: Cook for 5 minutes, until the filling is glossy and spoonable.
- Pile Onto Buns: Spoon onto soft buns and serve warm.
Equipment for This Recipe:
- Large skillet
- Grater
- Spoon
How to Serve This Dish: Serve with pickles, potato chips, or sliced cucumbers. A few fruit slices on the side keep the meal from feeling too heavy.
Pro Tips for This Recipe:
- Squeeze the zucchini dry so it does not water down the sauce.
- Let the filling simmer long enough to thicken.
- Toast the buns lightly if you want them sturdier.
Variations on This Dish:
- BBQ Veggie Joe: Swap some ketchup for barbecue sauce.
- Mushroom Boost: Add finely chopped mushrooms with the onions.
Common Mistakes to Avoid with This Dish:
- Leaving the zucchini wet: The filling gets loose.
- Serving the sauce too soon: It slides right off the bun.
39. Chicken Parmesan Sliders
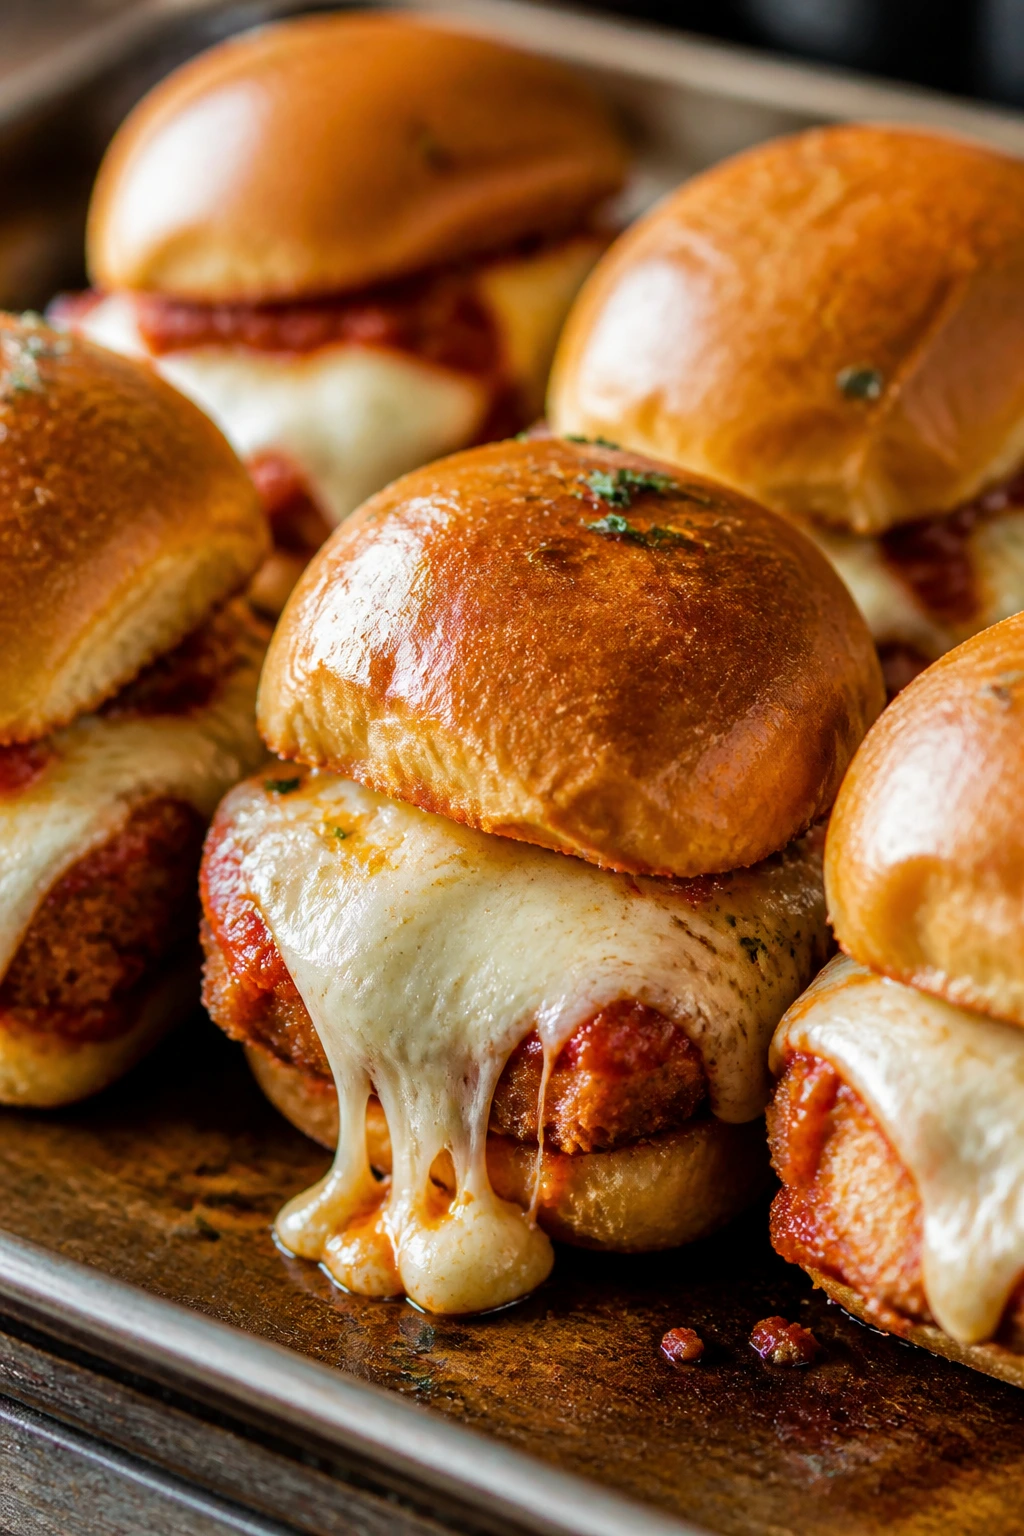
Chicken Parmesan sliders are what happen when a sandwich decides to dress up a little. They give you saucy chicken, melted cheese, and soft rolls that hold together well enough for kids to eat without a fork.
Why It Works: The chicken stays crisp enough to feel like chicken Parmesan, but the slider size keeps it manageable. A short bake melts the cheese and warms the rolls, so the whole tray comes out cohesive instead of scattered.
Key Ingredients:
- 12 slider rolls
- 8 cooked chicken tenders or cutlets
- 1 cup marinara sauce
- 2 cups shredded mozzarella
- 1/4 cup grated Parmesan
- 2 tablespoons melted butter
- 1 teaspoon Italian seasoning
Quick Steps:
- Prep the Rolls: Split the rolls in half and place the bottoms in a baking dish.
- Layer the Filling: Add chicken, a spoonful of marinara, mozzarella, and Parmesan.
- Top and Butter: Close with the top rolls and brush with butter mixed with Italian seasoning.
- Bake Until Melty: Bake at 375°F (190°C) for 10 to 12 minutes, until the cheese melts.
- Serve Warm: Pull apart and serve with extra marinara.
Equipment for This Recipe:
- Baking dish
- Pastry brush
- Spoon
How to Serve This Dish: Serve with a green salad or roasted broccoli. These also work well for game-night snack plates when you want something a little more substantial than chips.
Pro Tips for This Recipe:
- Use cooked chicken that is crisp enough to stand up to sauce.
- Do not drown the sliders in marinara or the rolls get soggy.
- Butter the tops for better browning.
Variations on This Dish:
- Meatball Slider: Swap the chicken for sliced meatballs.
- Garlic Herb Top: Add garlic powder to the butter for extra flavor.
Common Mistakes to Avoid with This Dish:
- Using too much sauce: The buns turn mushy.
- Skipping the butter on top: The rolls bake up pale and flat.
40. Cheesy Tortilla Roll-Ups
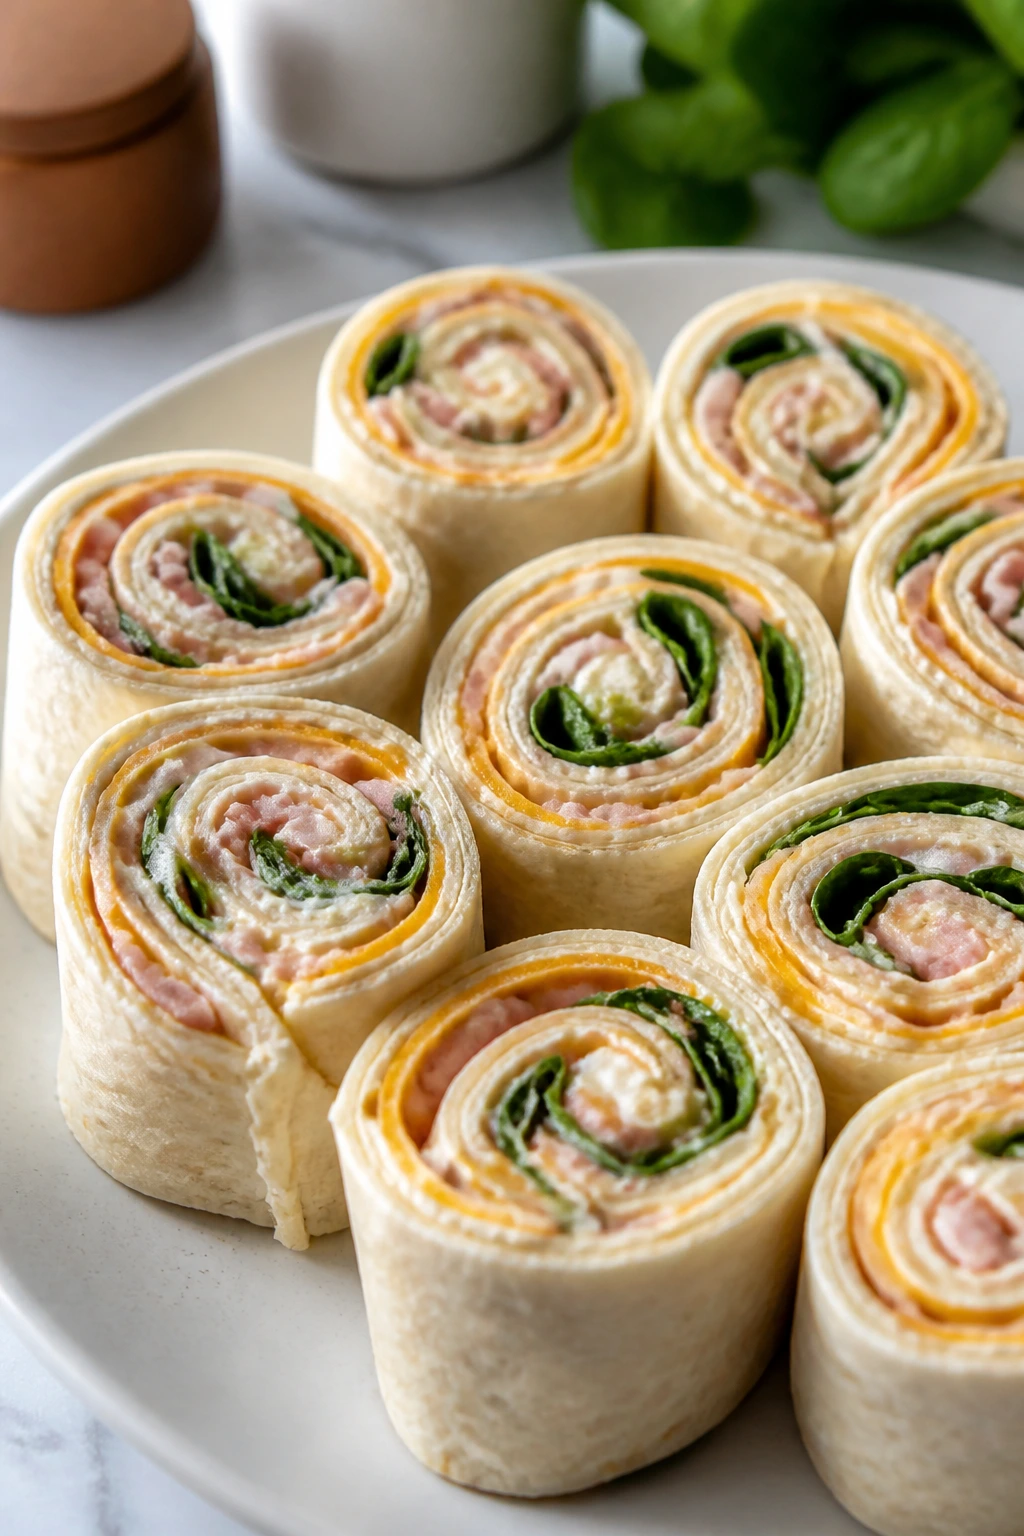
Cheesy tortilla roll-ups are the kind of low-effort food that still feels nice when it’s sliced into neat spirals. They work as an after-school snack, a lunchbox filler, or a lazy dinner plate that gets rescued by fruit and a crunchy side.
Why It Works: The filling is soft enough to spread, and the roll-up shape keeps the whole thing neat until you slice it. Because there is no real cooking, this is one of the quickest kid-friendly meals on the list when you need food on the table immediately.
Key Ingredients:
- 4 large flour tortillas
- 4 ounces cream cheese, softened
- 1 cup shredded cheddar
- 8 slices deli ham, chopped
- 1 tablespoon finely chopped chives
- 1 teaspoon mild mustard
- 1 cup spinach leaves, optional
Quick Steps:
- Mix the Filling: Stir cream cheese, cheddar, mustard, and chives together.
- Spread and Layer: Spread the mixture over each tortilla and add ham and spinach.
- Roll Tight: Roll each tortilla into a firm log.
- Chill and Slice: Chill for 10 minutes, then cut into 1-inch rounds.
- Serve Cold: Arrange on a plate or pack for later.
Equipment for This Recipe:
- Cutting board
- Knife
- Small bowl
How to Serve This Dish: Serve with grapes, cucumber sticks, or pretzels. They make a good little snack board if you add cheese cubes and a dip.
Pro Tips for This Recipe:
- Keep the filling soft, not runny.
- Chill before slicing for clean spirals.
- Use a sharp knife so the rolls do not squish.
Variations on This Dish:
- Deli Turkey Version: Swap ham for turkey.
- Pizza Roll-Up: Use pizza sauce and mozzarella instead of mustard and cheddar.
Common Mistakes to Avoid with This Dish:
- Overfilling the tortillas: They split when rolled.
- Cutting them immediately: The spirals flatten and smear.
Why Quick-Build Meals Work So Well After School
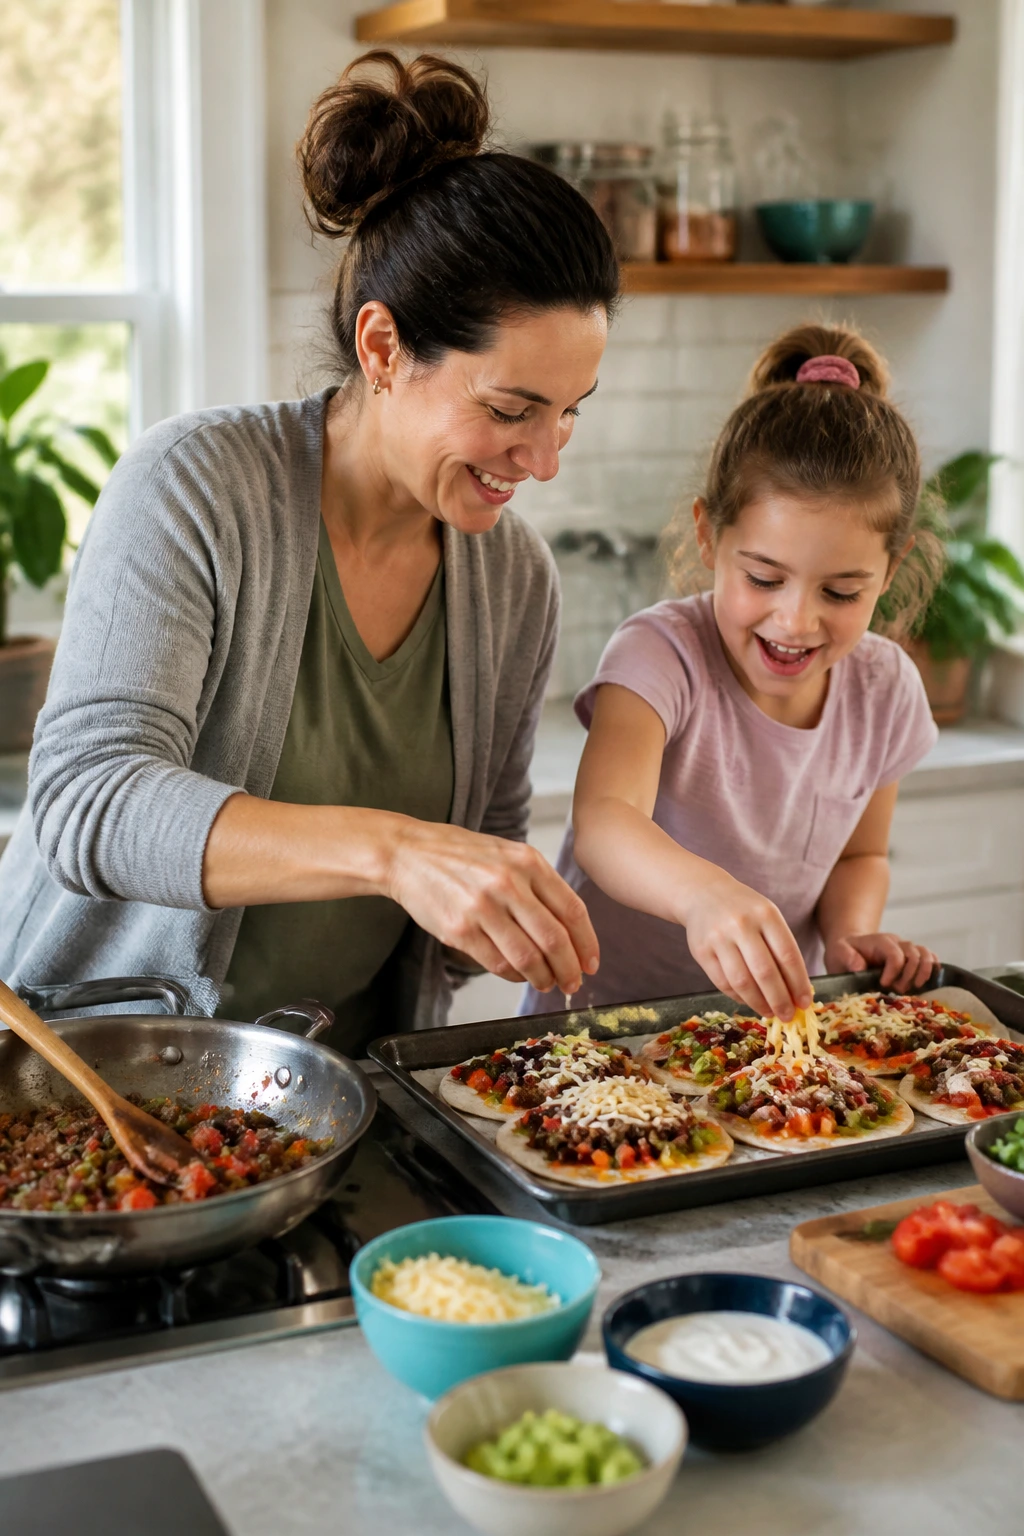
The strongest meals in this collection have one thing in common: they do not ask for a full reset of the kitchen. A skillet, a sheet pan, a pot, or a tray is usually enough. That matters after school, when you are already juggling backpacks, permission slips, math worksheets, and one child who has decided they are starving at a volume level usually reserved for fire alarms.
Quick-build meals also work because the ingredients stay familiar. Pasta, tortillas, bread, rice, cheese, chicken, and eggs are foods most kids already recognize. That is not a boring choice. It is a strategic one. Familiar bases lower resistance, and once the food is accepted, you can slide in peas, spinach, carrots, beans, or zucchini without a fight every single time.
I also like the overlap between snack food and dinner food. A good after-school meal should not punish you for being hungry early. It should be able to stand on its own as a small plate and still feel complete when you add fruit, vegetables, or soup. That flexibility is what keeps these recipes useful across a long stretch of ordinary days.
Essential Equipment for These Recipes
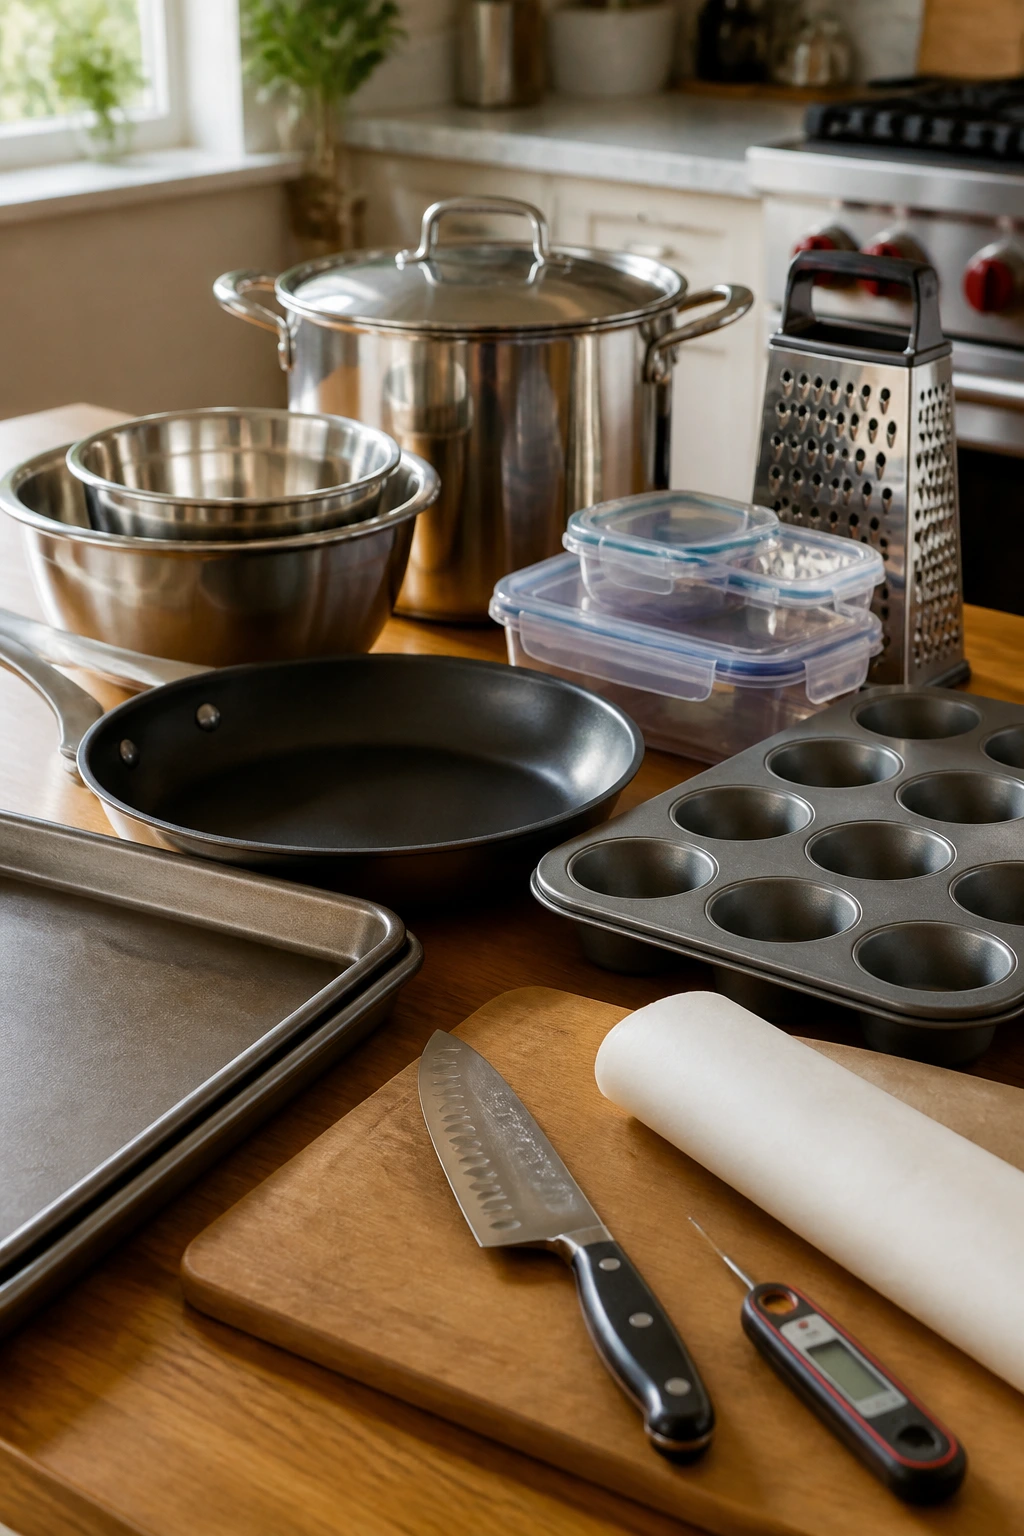
- Rimmed baking sheets: These handle pizza bagels, tenders, fries, meatballs, flatbreads, and anything that needs room to brown.
- 12-inch skillet: A good skillet covers quesadillas, fried rice, sloppy joes, and grilled cheese without crowding.
- Muffin tin: Useful for mac and cheese cups, egg muffins, corn dog muffins, and baked ziti cups.
- Large pot: Needed for pasta, soup, fried rice, and one-pot dinners that should not scorch.
- Mixing bowls in two sizes: One small bowl for sauces and one big one for tossing pasta, meat, or batter.
- Sharp knife and cutting board: The quiet heroes for veggies, fruit, cheese, and anything that needs clean slicing.
- Parchment paper or foil: Makes cleanup easier and helps sticky foods release from the pan.
- Box grater: Better than pre-shredded cheese when you want smoother melting and a cleaner sauce.
- Airtight storage containers: Essential for leftovers, snack cups, burritos, and anything you plan to reheat.
- Instant-read thermometer: Not glamorous, but it keeps chicken and fish from going underdone or dry.
Smart Shopping and Ingredient Tips
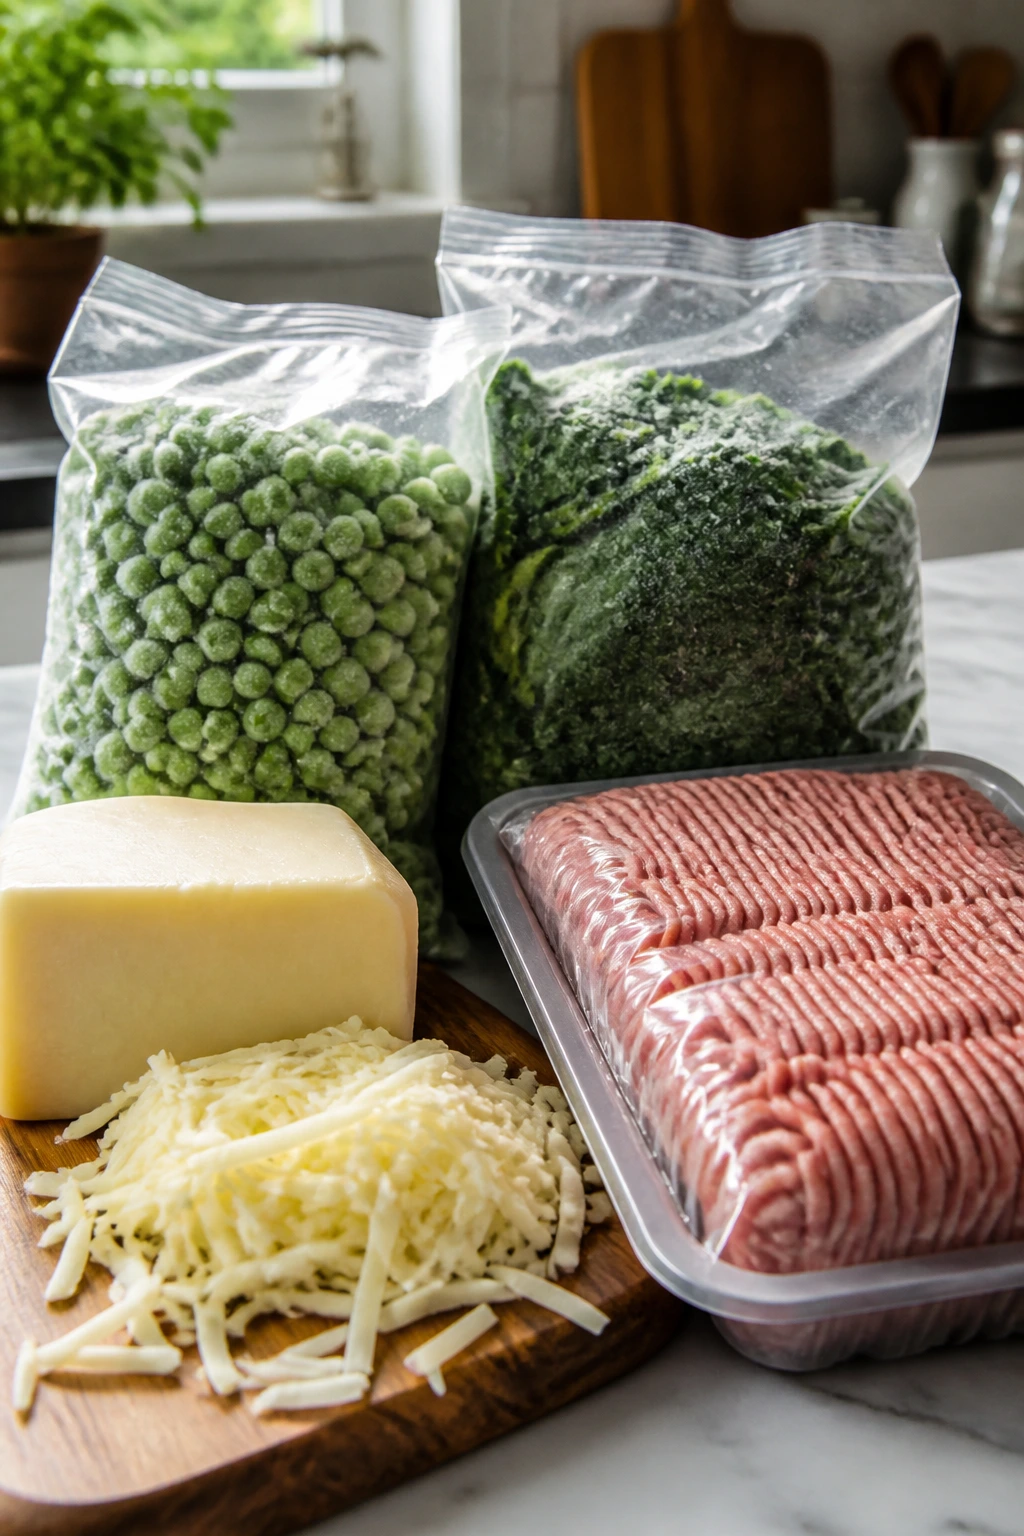
For this kind of cooking, the smartest shopping move is not buying fancy ingredients. It is buying the right kind of ordinary ones. Low-moisture mozzarella melts better on pizza bagels, flatbreads, and sliders than fresh mozzarella, which tends to leak water and turn the bread soft. Shredding cheese from a block also gives you better melt than many pre-bagged options, especially in sauces and casseroles.
Frozen vegetables earn their space here. Peas, corn, carrots, and spinach are often better than “fresh” produce that has been sitting in the crisper drawer for too long. Frozen peas go straight from freezer to pasta, fried rice, soup, and casserole without complaint. Frozen spinach works too, as long as you squeeze out the water before adding it to stuffed shells or egg muffins.
For meat, buy the cut that fits the job. Ground turkey is good for sloppy joes, taco bowls, meatballs, and pasta bakes because it cooks fast and takes seasoning well. Rotisserie chicken is a gift for quesadillas, flatbreads, fried rice, calzones, and sliders because you can shred it once and use it three different ways. Smoked sausage, deli ham, and hot dogs are not fancy, but they are dependable, and this collection is built on dependable.
Bread matters more than people think. Soft slider buns, sturdy bagels, flour tortillas, pita, and pizza dough all behave differently under heat and sauce. If you want crisp, choose something that browns well and can handle a little oil. If you want soft and easy, choose buns or tortillas that bend instead of crack.
How to Serve These Recipes
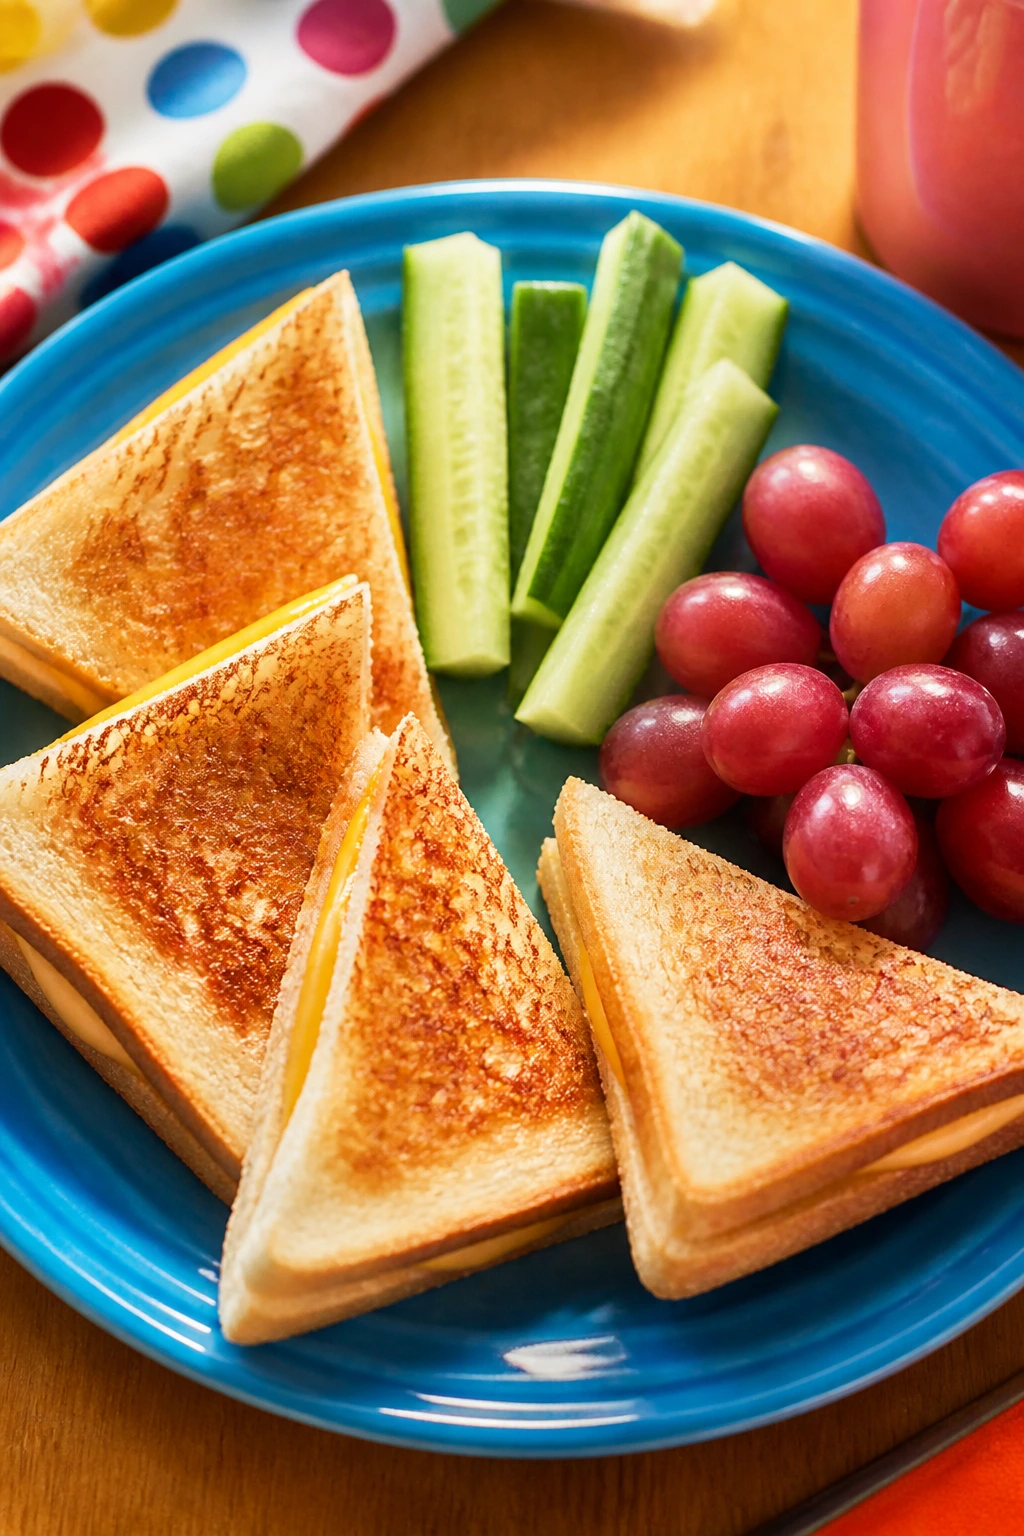
Presentation: Put the food in a shape kids can read at a glance. Wedges, spirals, cups, sticks, sliders, and bowls feel friendlier than a loose pile, and they tend to disappear faster because they look manageable.
Accompaniments: Keep one fresh thing beside every hot dish. Apple slices, cucumber spears, grapes, carrot sticks, tomatoes, or a simple salad keep the plate from leaning too heavily on cheese and bread. A dip—ranch, marinara, yogurt sauce, salsa, mustard—goes a long way here.
Portions: For after-school eating, most kids do well with one to three small pieces plus fruit or vegetables. For dinner, think one protein or starch main and one or two sides. Adults usually need a larger scoop than kids, especially with the lighter snack-style dishes.
Beverage Pairing: Milk is still the easiest match for cheesy or saucy dishes, while sparkling water or diluted fruit juice works with snack plates and flatbreads. For soup and pasta nights, plain water with lemon keeps the meal from feeling too heavy.
Additional Tips and Flavor Boosters
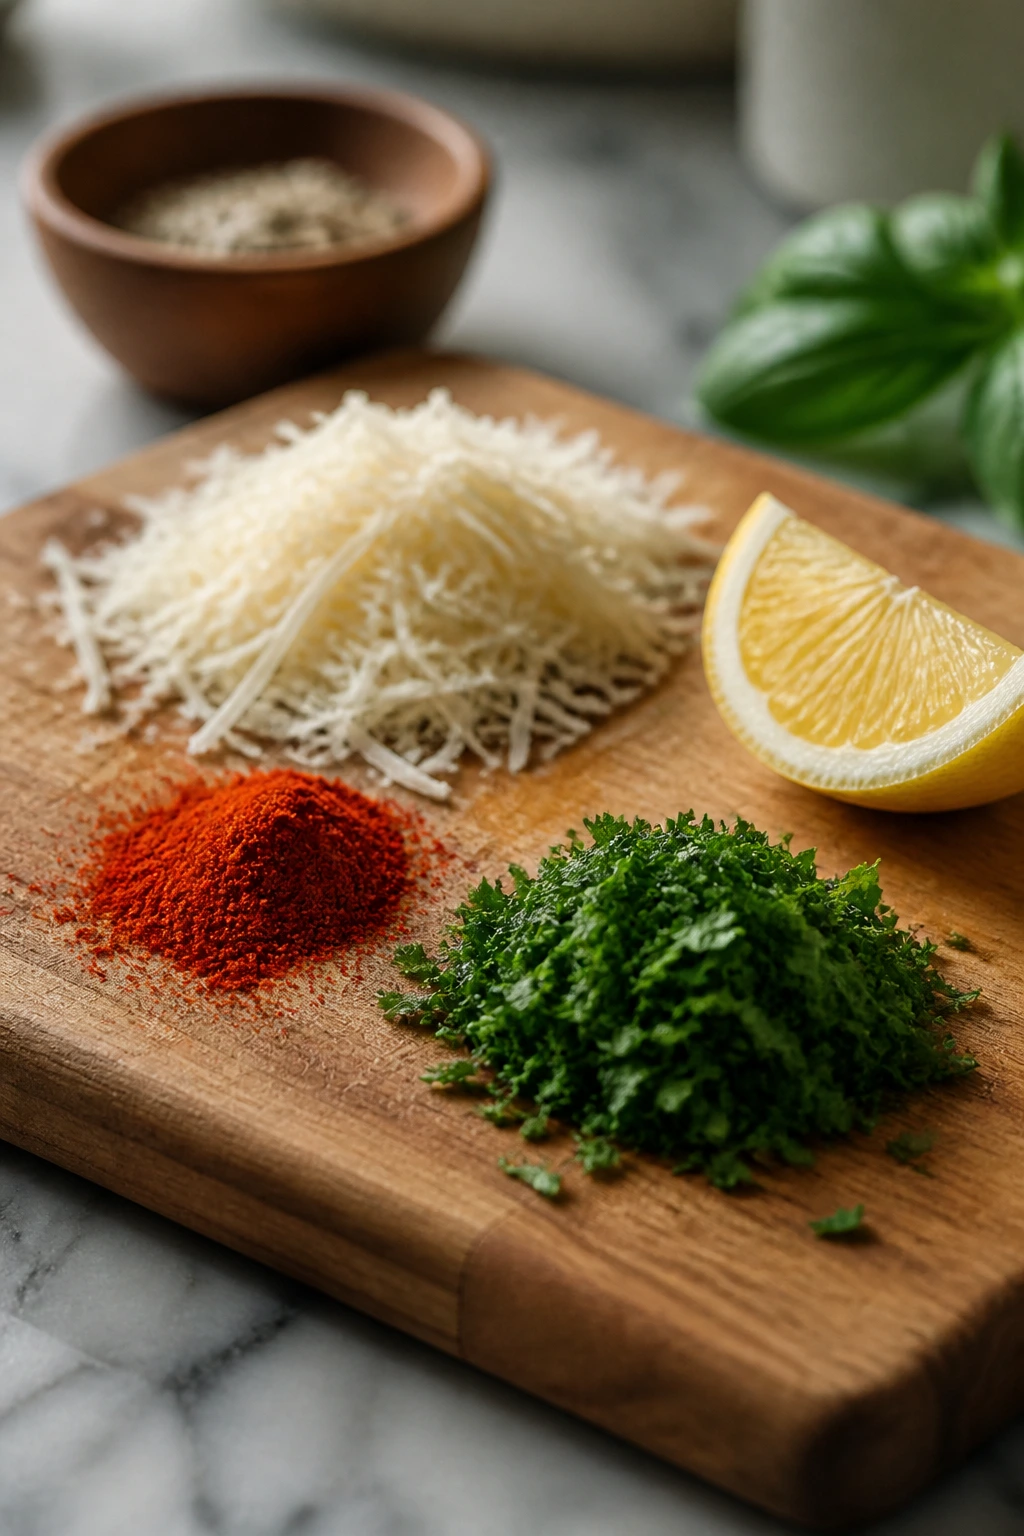
Flavor Enhancement: A tiny finishing move changes more than people expect. A sprinkle of Parmesan on pasta, a pinch of paprika on potatoes, a few chopped herbs on sliders, or a squeeze of lemon over fish sticks makes the food taste more finished without making it complicated.
Customization: Keep a neutral base and set out toppings in small bowls. Salsa, pickles, shredded lettuce, diced tomatoes, extra cheese, or hot sauce let the adults adjust their own plates without starting over for the kids. That little bit of self-service keeps dinner calmer.
Serving Suggestions: Pair one hot item with one cold or crisp item. A grilled cheese beside grapes, meatballs beside cucumber sticks, or fish sticks beside slaw gives the meal some contrast. Soft food gets dull fast if everything around it is also soft.
Make-It-Yours: For dairy-free plates, use olive oil, hummus, avocado, or a dairy-free shred in the recipes that need cheese. For gluten-free meals, lean on rice bowls, soups, nachos, eggs, and kabobs, then swap in certified gluten-free pasta, tortillas, or breadcrumbs where needed. For spice-sensitive kids, keep the heat out of the base and add it at the table.
Make-Ahead, Storage, and Reheating Guidance
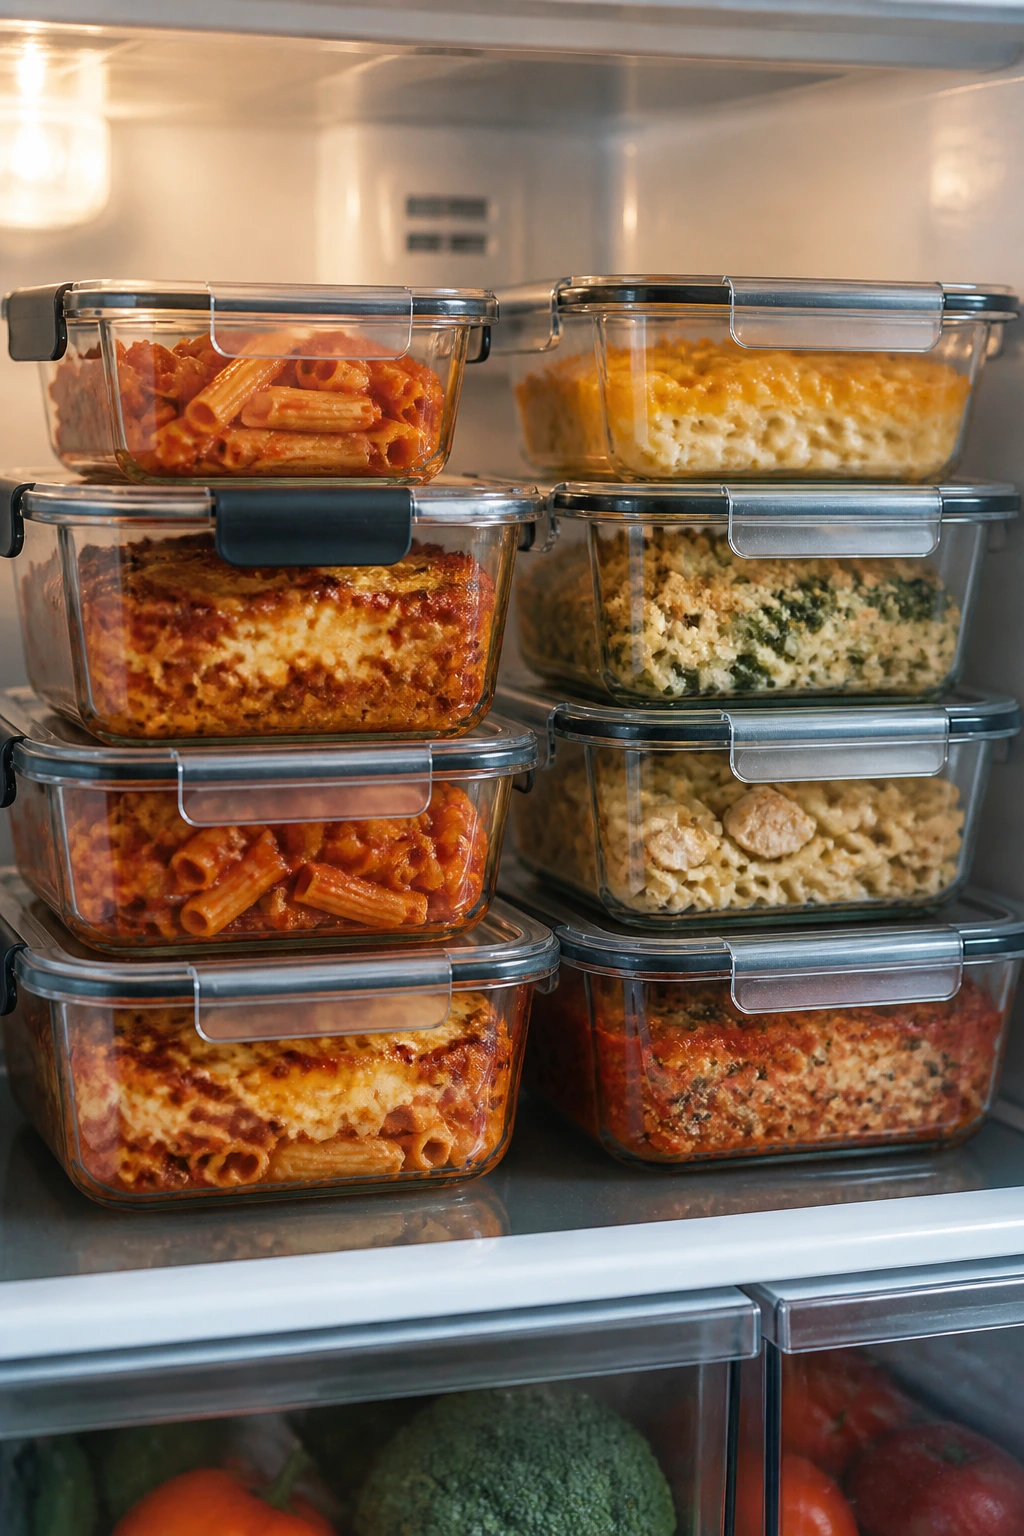
A lot of these recipes are friendlier the next day than they are the minute they finish cooking. Saucy dishes like sloppy joes, meatballs, soup, cheeseburger pasta, taco rice bowls, and ziti cups usually keep 3 to 4 days in the refrigerator in airtight containers. Casseroles and baked pasta also freeze well for up to 2 months, especially if you cool them first and wrap them tightly.
Crispy foods need a different plan. Chicken tenders, fish sticks, sweet potato fries, pizza bagels, calzones, and sliders taste best reheated in a 375°F to 400°F oven or air fryer for 5 to 12 minutes, depending on size. Put them on a rack or lined tray so air can move underneath; that keeps the bottoms from steaming into sadness.
No-cook items like roll-ups, parfait cups, kabobs, and hummus trays should usually be assembled the same day. You can prep the parts ahead—wash fruit, slice vegetables, mix fillings—but keep crunchy and wet ingredients apart until serving. That matters more than people think. Granola softens fast, tortilla spirals slump if they sit too long, and cut fruit gets tired if it is left swimming in juice.
For reheating, use the method that matches the texture. Soup and pasta do well on the stove with a splash of broth or milk. Meatballs and sloppy joes warm slowly in a skillet over low heat. Burritos and roll-ups are best wrapped loosely and warmed just until the center is hot, not steaming. If a dish started crisp, reheat it crisp. If it started soft, reheat it soft. Fighting the texture never ends well.
Easy Swaps and Adaptations to Try
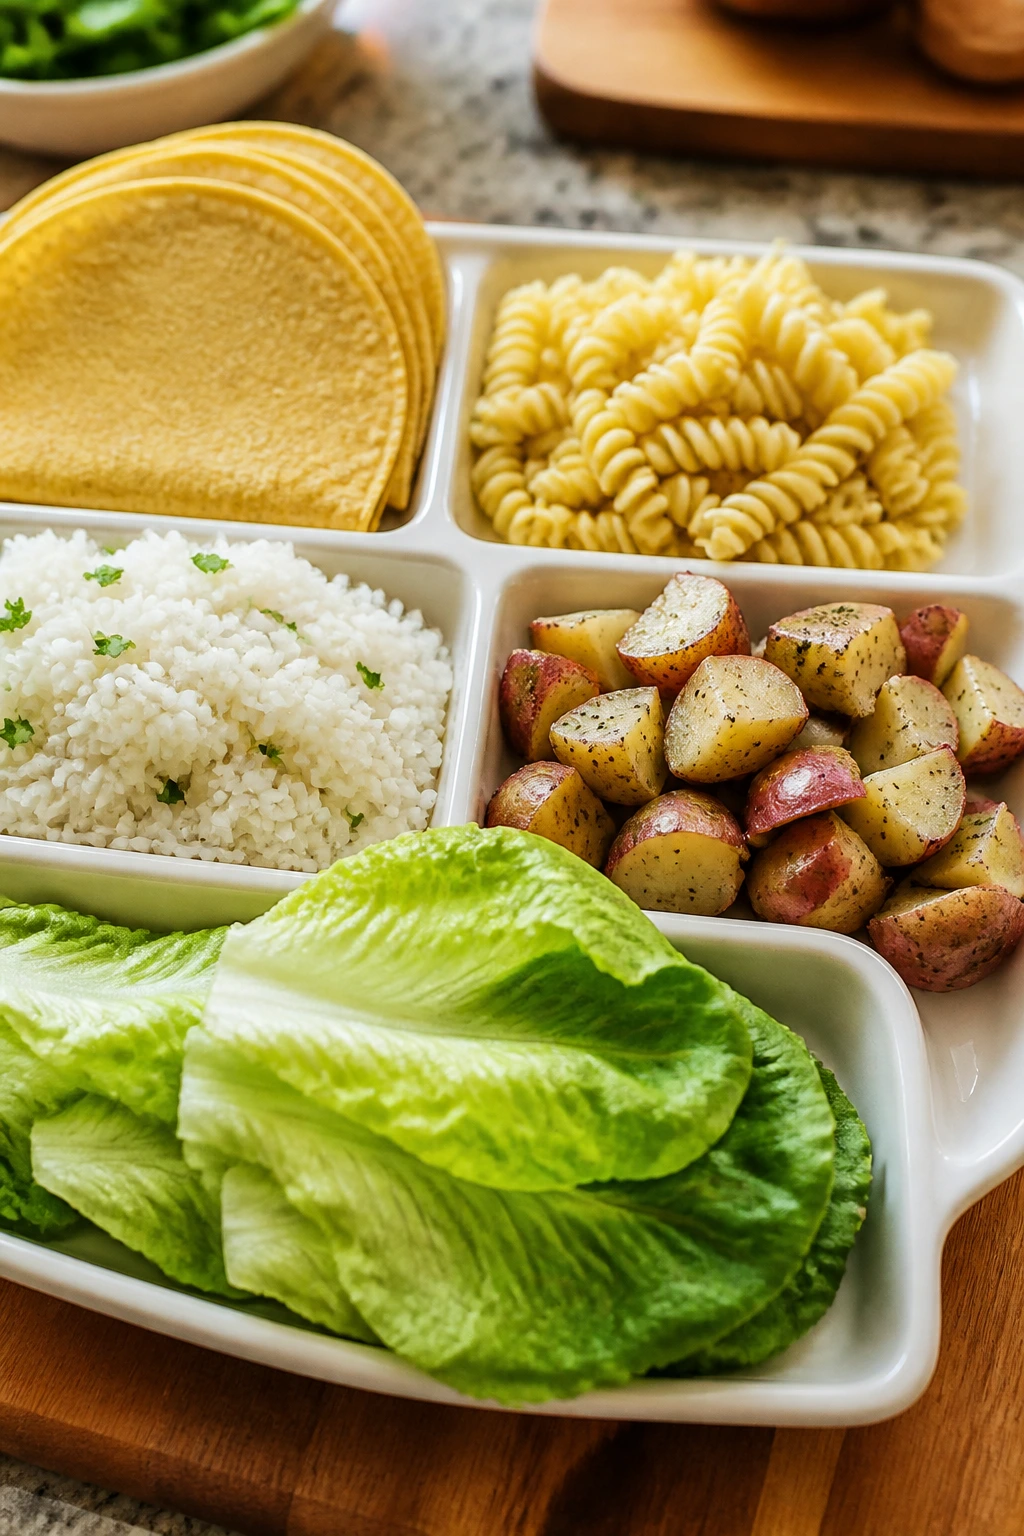
-
Gluten-Free Snack Tray: Use corn tortillas, gluten-free pasta, rice, potatoes, or lettuce wraps in place of bread and wheat pasta. This works especially well for taco bowls, rice bowls, soup, nachos, and egg-based dishes that do not rely on flour.
-
Dairy-Free School-Night Swap: Replace cheese with avocado, hummus, dairy-free shreds, or a drizzle of olive oil where it makes sense. Quesadillas, flatbreads, burrito bowls, fried rice, and pasta can all survive this switch if you keep the sauces flavorful.
-
Protein-First Plates: If a child needs more staying power, add egg, chicken, turkey, beans, or meatballs to the snack-style dishes. Roll-ups, mac and cheese cups, fried rice, and pasta cups all take well to a protein boost without changing the whole personality of the meal.
-
Vegetable Sneak-Ins: Grate carrots into sloppy joes, fold spinach into egg muffins, add peas to pasta, or mix broccoli into cheese bites. Finely chopped vegetables disappear better than large chunks, which is why they work here instead of in a big bowl of obvious salad.
-
Freezer-Batch Sunday: Make double batches of meatballs, burritos, tenders, egg muffins, or ziti cups, then freeze them flat in portions. That turns one cooking session into several future dinners, which is useful when the week gets away from you.
-
Lunchbox Leftover Remix: Turn leftover quesadillas into strips, fried rice into a cold rice bowl, meatballs into a sub, or chicken tenders into slider filling. Leftovers that change shape feel new, and kids usually trust them more the second time around.
Common Mistakes to Avoid with This Theme
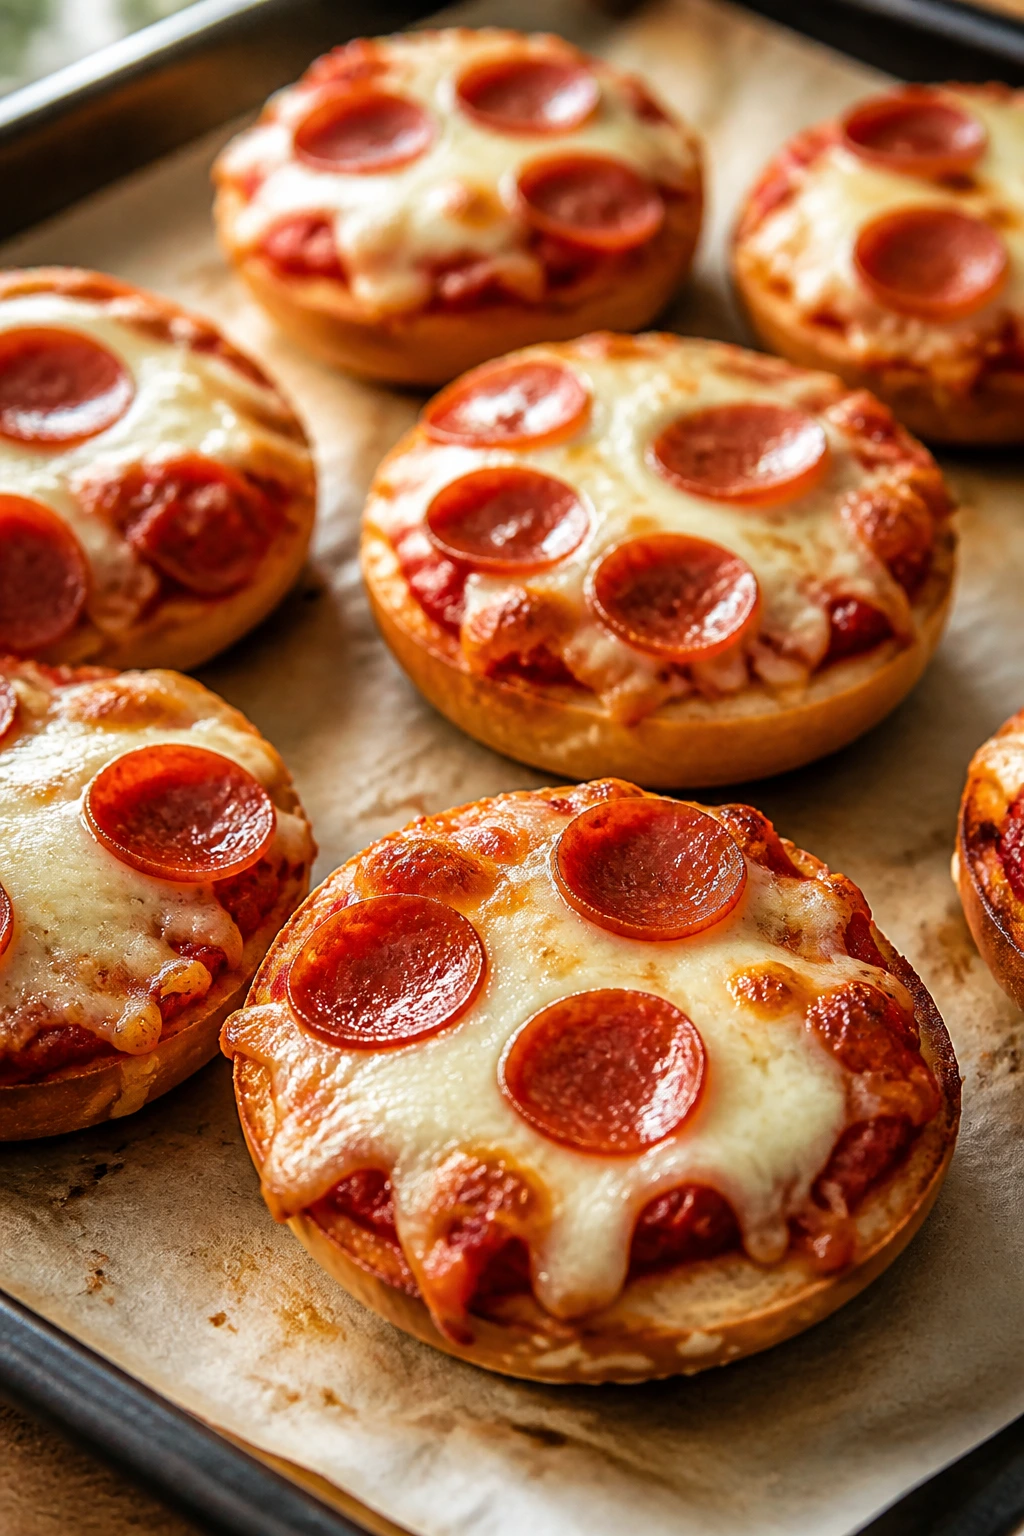
-
Making every meal soft and beige: Kids may eat it, but they will not stay excited about it. Give them contrast—crisp bread, juicy fruit, a cool dip, something with a little edge.
-
Skipping salt and seasoning because the food is “for kids”: Mild is not the same as bland. Even a little garlic powder, Parmesan, mustard, or paprika changes the whole bowl.
-
Overstuffing handheld food: Sliders, roll-ups, calzones, burritos, and quesadillas all fail the same way when they are packed too full. The filling leaks, the bread tears, and the whole thing becomes a fork situation.
-
Using the wrong heat: Too low, and nothing browns. Too high, and cheese scorches while the center stays cold. Medium heat and a preheated oven solve more problems than fancy ingredients do.
-
Packing food before it cools: Steam turns crisp food soggy in minutes. Let baked or fried items breathe before sealing them in containers or lunchboxes.
-
Forgetting the side dish: A plate with only one texture gets old fast. Fruit, raw vegetables, soup, or a dip makes even the simplest meal feel complete.
Frequently Asked Questions
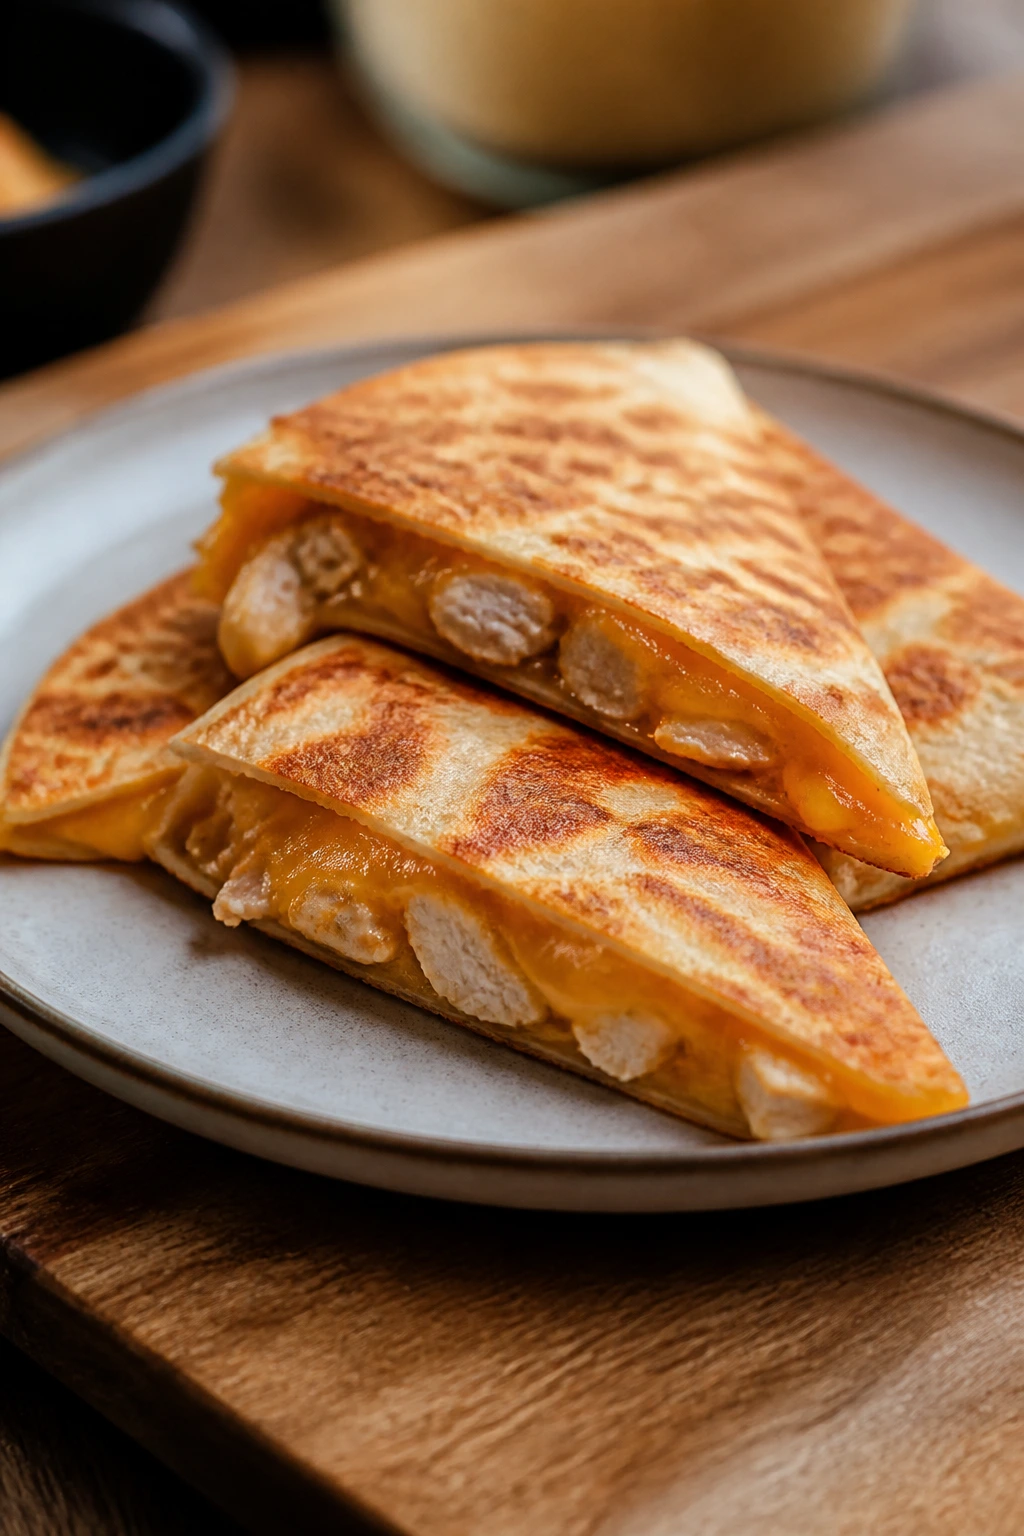
Can I make these kid-friendly meals ahead of time?
Yes, and in some cases they get easier if you do. Meatballs, sloppy joe filling, burritos, rice bowls, soup, and baked pasta can all be cooked ahead and reheated later. For crisp items, prep the coating or filling in advance and cook them just before serving.
Which recipes freeze best?
Mini meatballs, chicken tenders, breakfast burritos, ziti cups, calzones, and sloppy joe filling freeze well for up to 2 months. Let them cool first, wrap tightly, and reheat from thawed or partially thawed for the best texture.
What if my child is picky about vegetables?
Use vegetables that disappear into the base instead of sitting on top like a warning. Finely grated carrot, chopped spinach, peas, corn, and small bits of bell pepper blend into mac and cheese cups, egg muffins, sloppy joes, and pasta dishes without drawing too much attention.
How do I keep crispy food from getting soggy?
Bake or fry hot foods on a rack or a parchment-lined tray, not in a sealed container. Reheat them in the oven or air fryer instead of the microwave whenever possible, and let them cool for a few minutes before storing.
Can I swap turkey for chicken or beef in most of these recipes?
Usually, yes. Ground turkey works well in sloppy joes, meatballs, taco bowls, and casseroles. Shredded chicken can replace turkey in quesadillas, sliders, flatbreads, and rice bowls without changing the method much.
What are the fastest options on the list?
Pizza bagels, roll-ups, parfait cups, hummus pita dippers, buttered noodles, and fruit kabobs are the quickest because they need little or no cooking. Quesadillas and grilled cheese are also fast if you already have the fillings ready.
Can I pack these for lunch the next day?
Many of them travel well once cooled. Roll-ups, egg muffins, pasta salad cups, meatballs, mac and cheese cups, and burritos are especially good lunchbox candidates if you pack them in airtight containers and keep cold foods chilled.
How do I make these meals more filling without making them heavy?
Add one protein and one fresh side. A handful of beans in a bowl, an egg in a burrito, or chicken in pasta gives the dish more staying power, while fruit or raw vegetables keep the plate from feeling weighed down.
A Kinder Way to End the Afternoon

When the day gets noisy and the “I’m hungry” chorus starts early, a short list of dependable meals can save your sanity. That is the real value here: not novelty, not perfection, just a set of foods that move quickly, taste familiar, and let you get dinner on the table without turning the evening into a production.
Keep a sheet pan, a skillet, a pot, and a few of these snack-friendly recipes in your back pocket, and the after-school rush gets much easier to manage. The house will still be loud. The backpacks will still land in the wrong place. But at least the food part will be handled.