
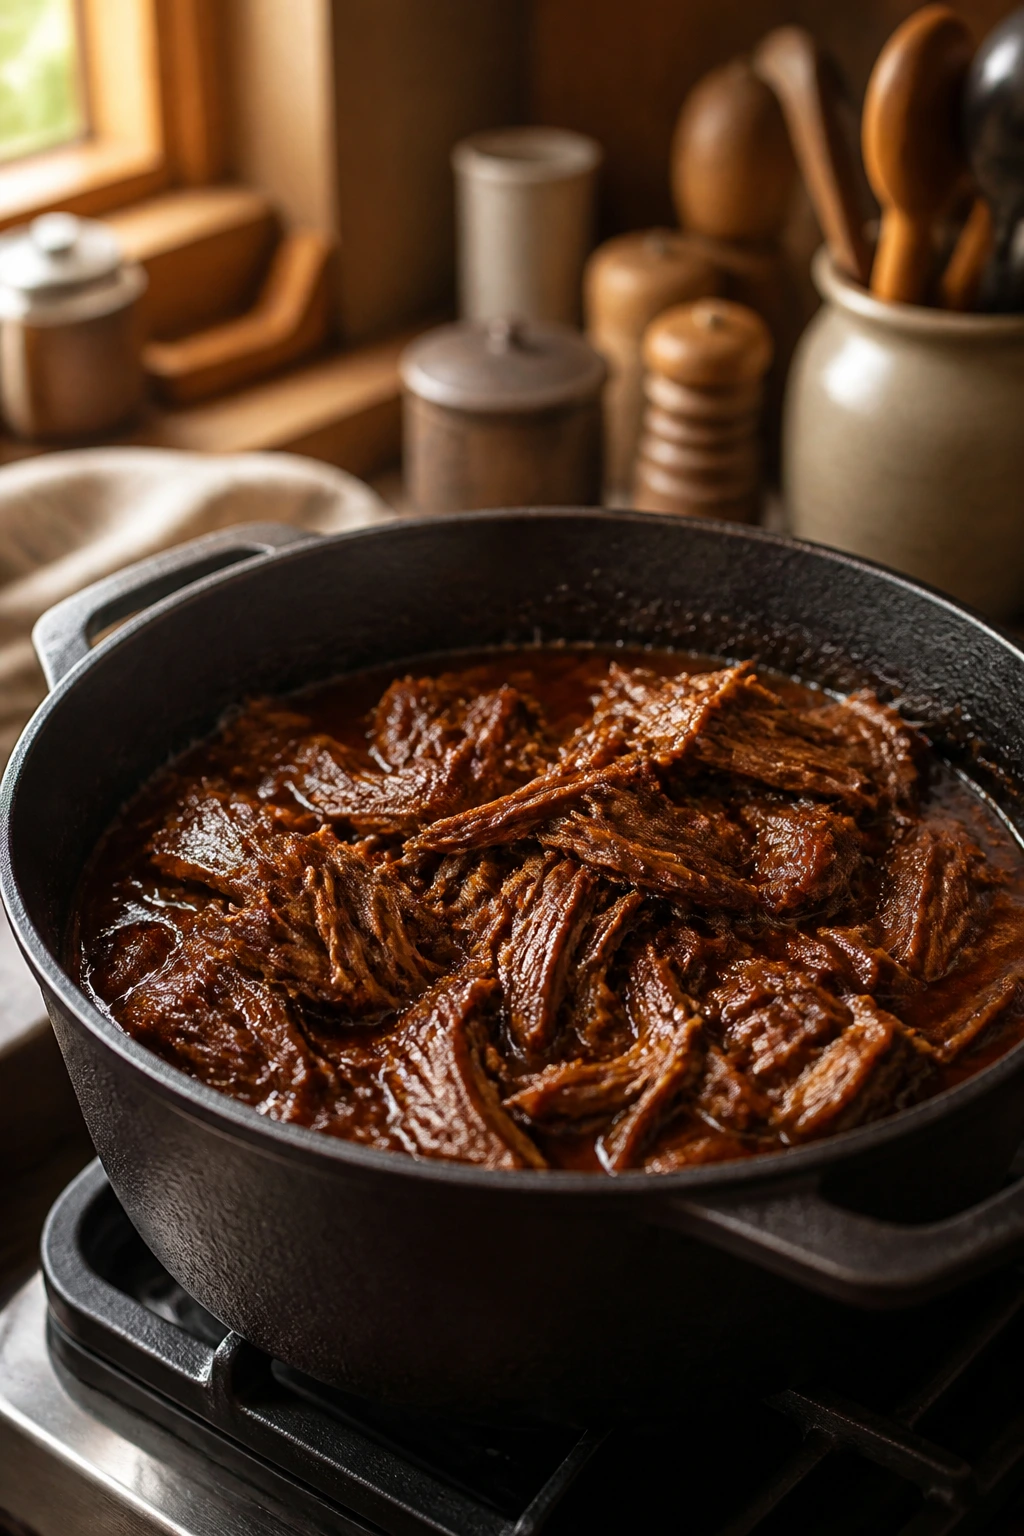
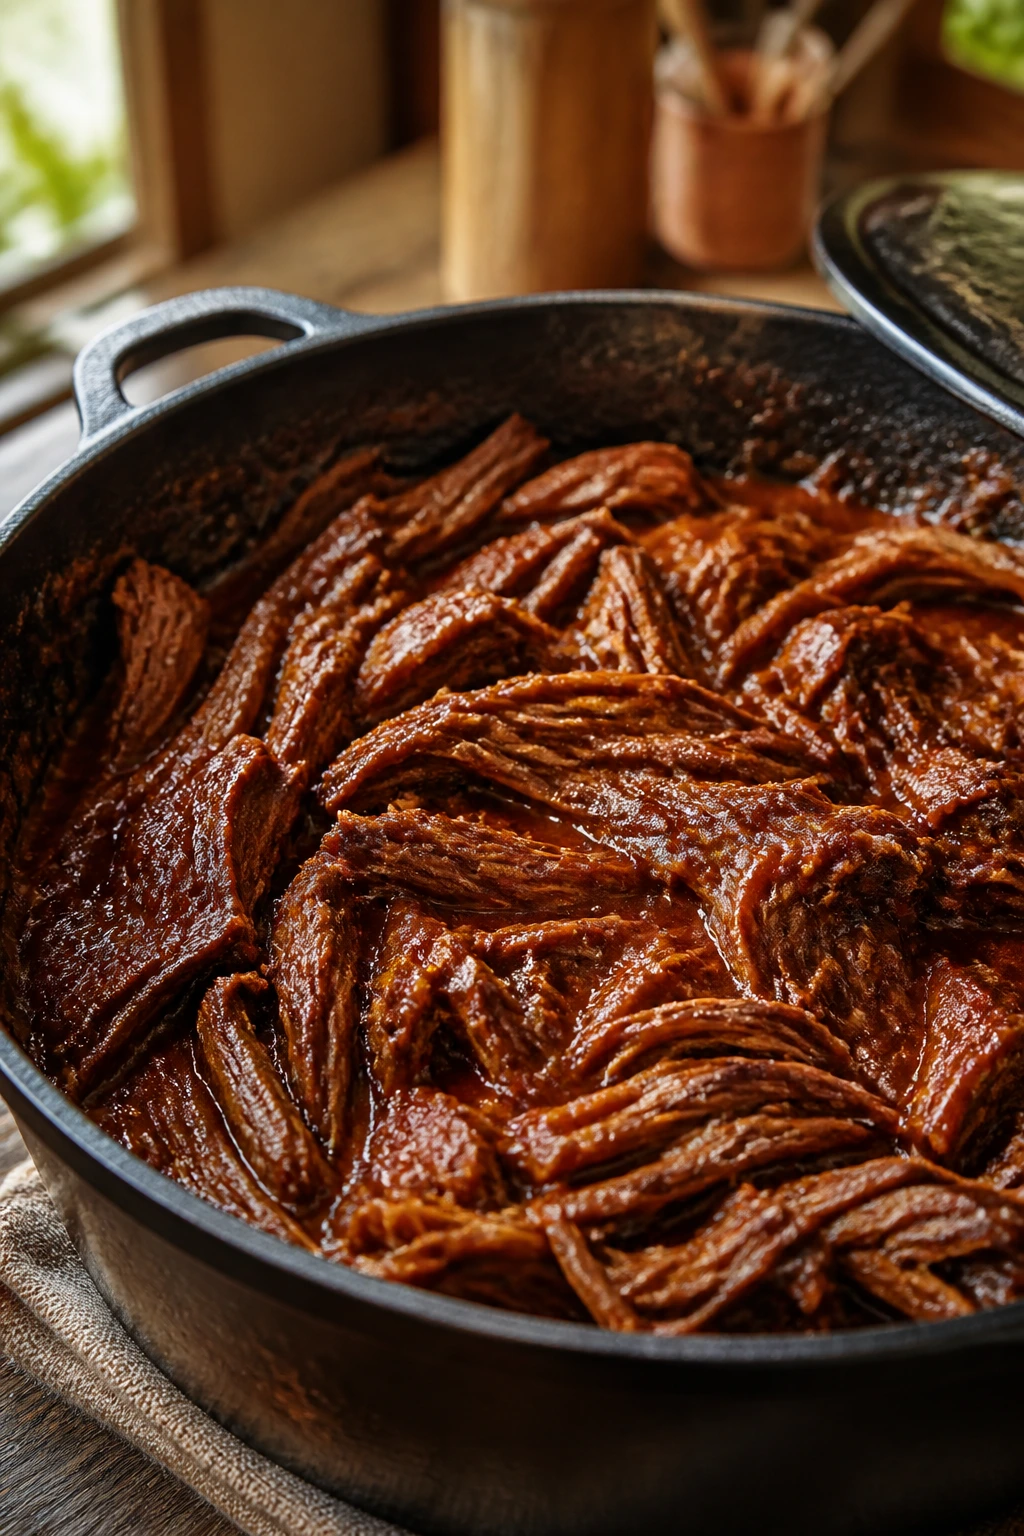
Classic BBQ beef has a funny trick: it smells like a backyard cookout while it braises in a covered pot, and by the time you lift the lid the meat has gone from a solid roast to glossy strands that cling to a spoon. No smoker required. No outdoor fire. Just a chuck roast, a hot Dutch oven, and enough patience for the connective tissue to melt instead of fight back.
I like this style of barbecue beef because it respects what the cut actually needs. Chuck roast is not lean, tidy meat. It has seams of fat and collagen that look stubborn on the cutting board, then turn silky after a few hours at low heat. That is the whole point. The sauce does not cover up the beef; it sinks into it, sharp from apple cider vinegar, sweet from brown sugar, and deepened by tomato paste, Worcestershire, and smoked paprika.
Serve it on toasted rolls and it feels like the most honest sandwich in the room. Spoon it over mashed potatoes, and it becomes the kind of dinner that makes people reach for seconds before they finish the first plate. The first decision worth getting right is the cut, because no amount of good sauce can rescue the wrong roast.
Why You’ll Keep Coming Back to This BBQ Beef
-
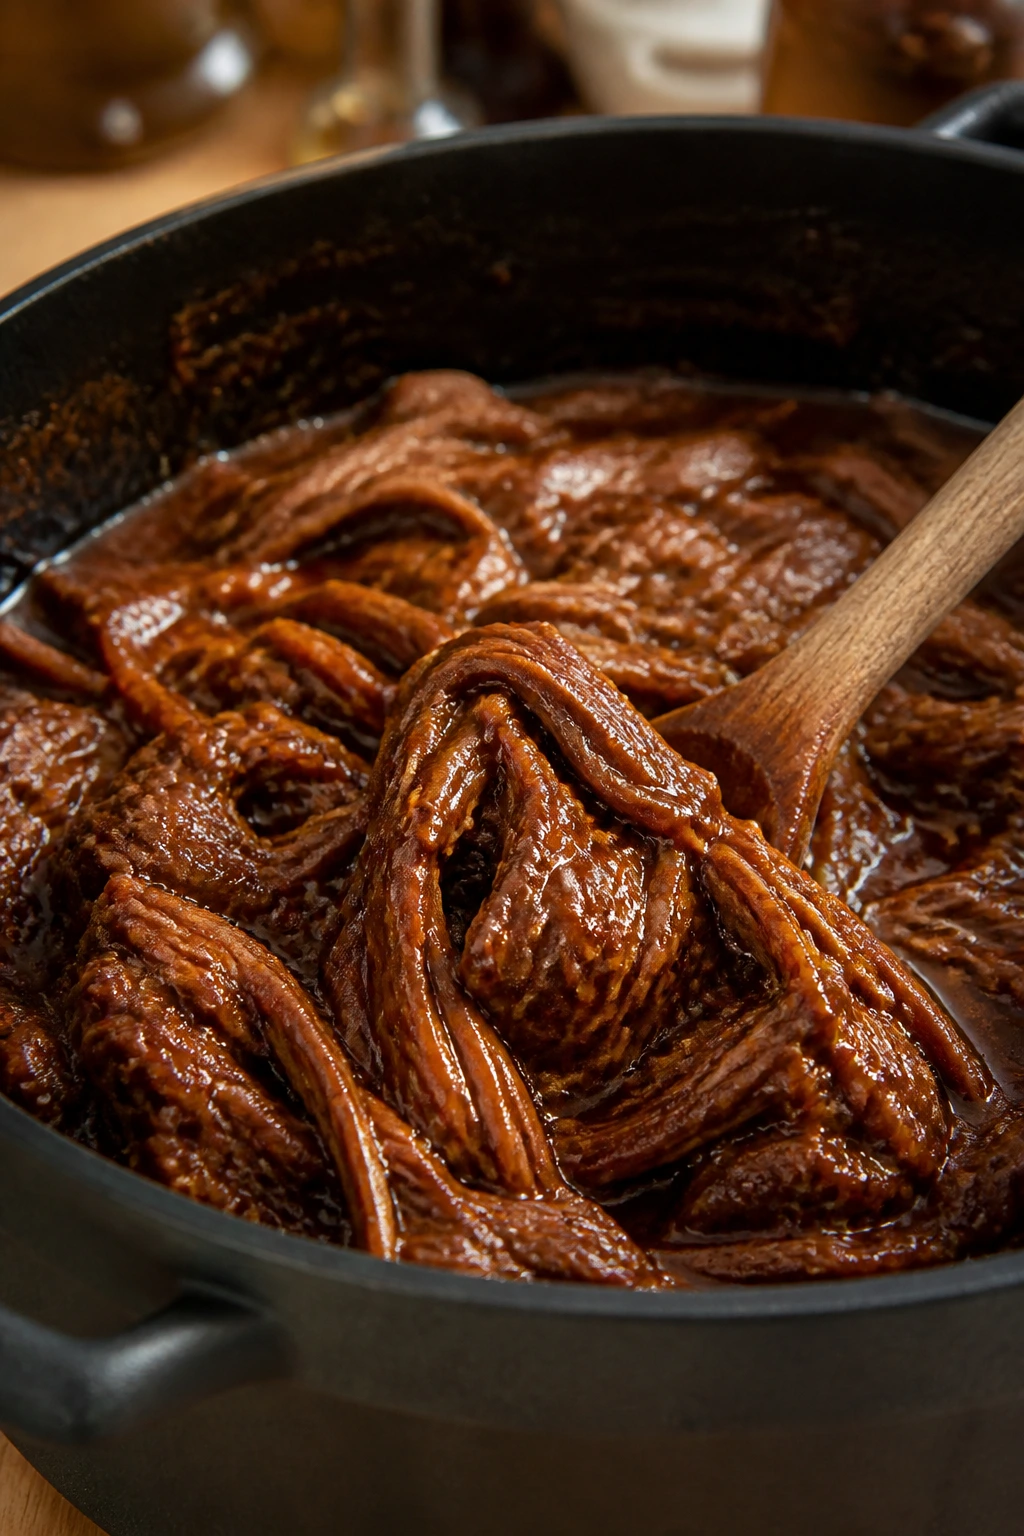
The sauce clings instead of running off: The ketchup-vinegar-brown sugar mixture reduces into something glossy and thick enough to coat every strand of beef, not leave a puddle at the bottom of the pot.
-
Chuck roast does the heavy lifting: Its marbling and connective tissue break down in the oven, so you get shreds and not dry slices.
-
One pot keeps the flavor in the pot: The browned bits from searing turn into the backbone of the sauce, which is where the deep, savory note comes from.
-
It works on buns or plates: Pile it onto toasted rolls for a sandwich dinner, or spoon it beside mashed potatoes when you want a more old-school plated meal.
-
Leftovers hold up: The beef drinks the sauce back in after a night in the fridge, so the second round tastes fuller, not tired.
Where This Style of BBQ Beef Comes From
This dish sits halfway between pot roast and barbecue, and that middle ground is exactly why it stays useful. A lot of home cooks want barbecue flavor without lighting charcoal or babysitting a smoker, and a covered braise answers that problem with less drama. The sauce does not need smoke to taste right; it needs acid, sweetness, onion, and enough time to thicken around the beef.
I prefer chuck roast here over brisket when I want dinner to feel generous and not fussy. Brisket can be lovely, but it asks for more attention and punishes sloppy timing. Chuck is uglier in the package and usually friendlier at the store, which is part of the charm. Once it turns tender, the grain pulls apart in long, glossy strands that catch sauce in every little ridge.
There is also a practical reason this style survives. It feeds people. A single roast can turn into sandwiches one night, baked potatoes the next, and maybe a quesadilla after that. That kind of stretch matters more than polish. Good dinner food should do something useful.
A Quick Look at Yield, Time, and Difficulty
Time matters here because chuck roast wants a long, steady bath, not a quick blast. Cut the braise short and you get chewy slices; cook it until a fork twists through with almost no resistance and you get the soft strands people remember. The sauce matters too, because a thin, rushed sauce leaves the beef tasting half-finished.
Yield: Serves 6 to 8
Prep Time: 20 minutes
Cook Time: 3 hours 20 minutes
Total Time: About 3 hours 40 minutes
Difficulty: Intermediate — the method is straightforward, but the browning and braise cues matter.
Rest Time: 10 minutes before shredding
Best Served: Hot, as soon as the sauce has been reduced and the beef is back in the pot
Ingredient List for Classic BBQ Beef
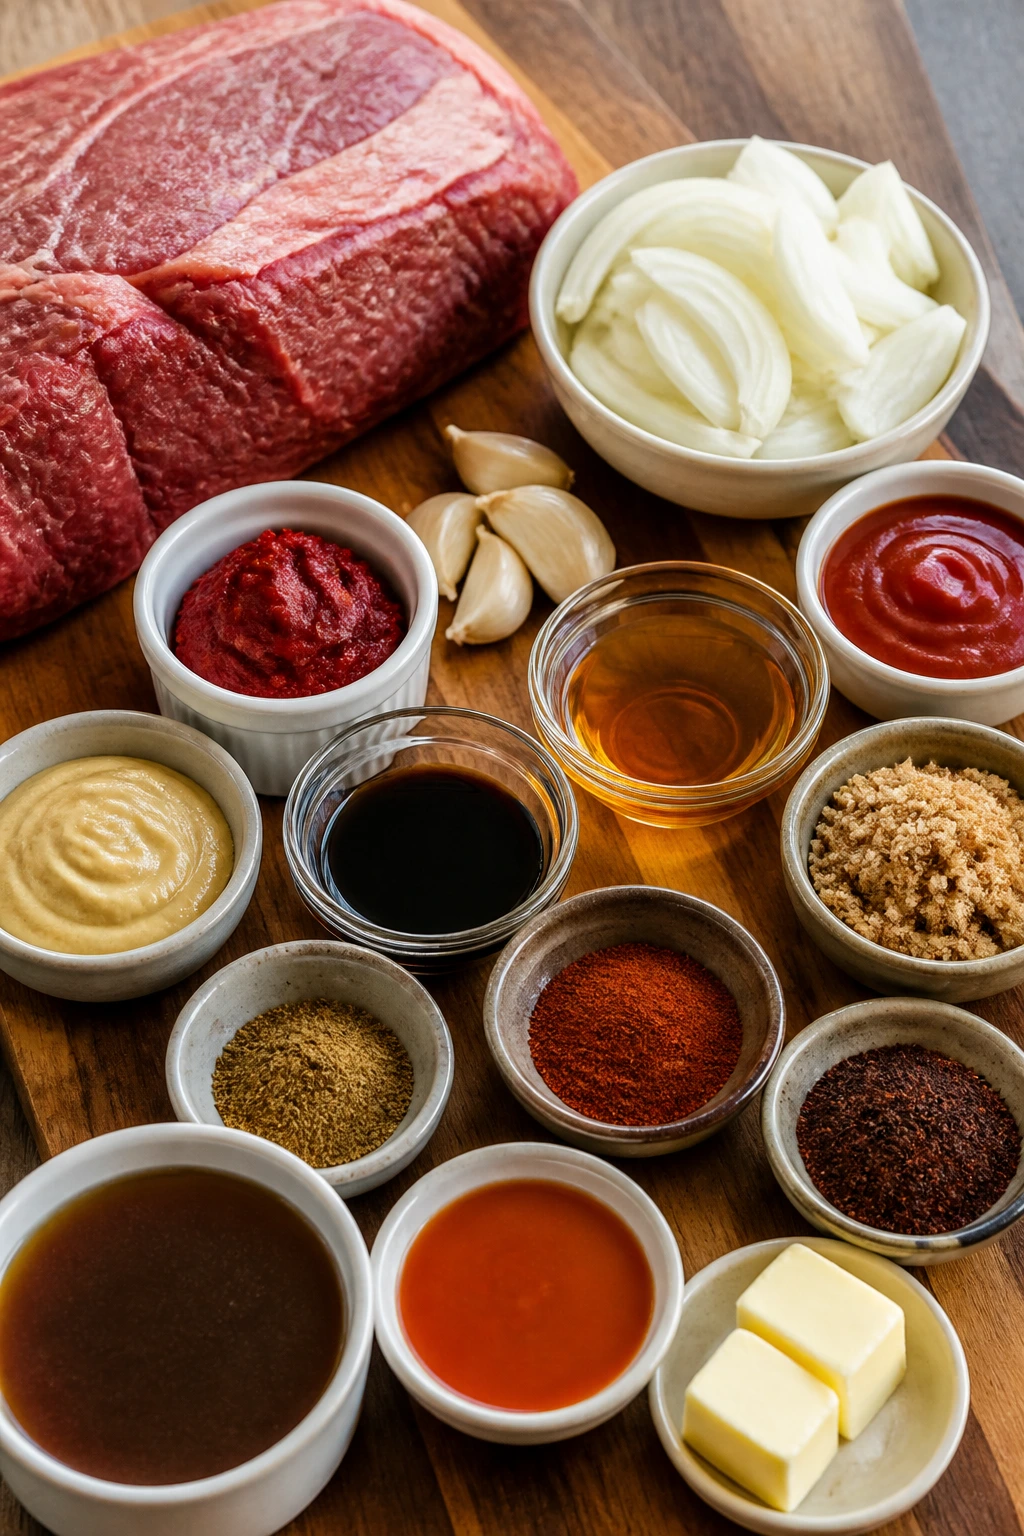
I keep the ingredient list tight on purpose. Every item here does a job, and there are no decorative extras hiding in the pot.
For the Beef
- 3 to 4 lb boneless beef chuck roast, trimmed of only the hard outside fat and patted very dry
- 1 1/2 teaspoons kosher salt
- 1 teaspoon freshly ground black pepper
- 2 tablespoons neutral oil, such as canola or avocado, for searing
For the BBQ Sauce
- 1 large yellow onion, thinly sliced
- 4 garlic cloves, minced
- 2 tablespoons tomato paste
- 1 cup ketchup
- 1/2 cup apple cider vinegar
- 1/3 cup packed light brown sugar
- 2 tablespoons Worcestershire sauce
- 1 tablespoon Dijon mustard
- 1 tablespoon smoked paprika
- 1 teaspoon chili powder
- 1/2 teaspoon ground cumin
- 1 cup low-sodium beef broth
- 1 to 2 teaspoons hot sauce, optional, for a little heat
- 1 tablespoon unsalted butter, cold and cut into pieces
For Serving
- 8 soft sandwich rolls or brioche buns, split and toasted, or mashed potatoes for plating
- 2 tablespoons chopped parsley or sliced scallions, optional, for a fresh finish
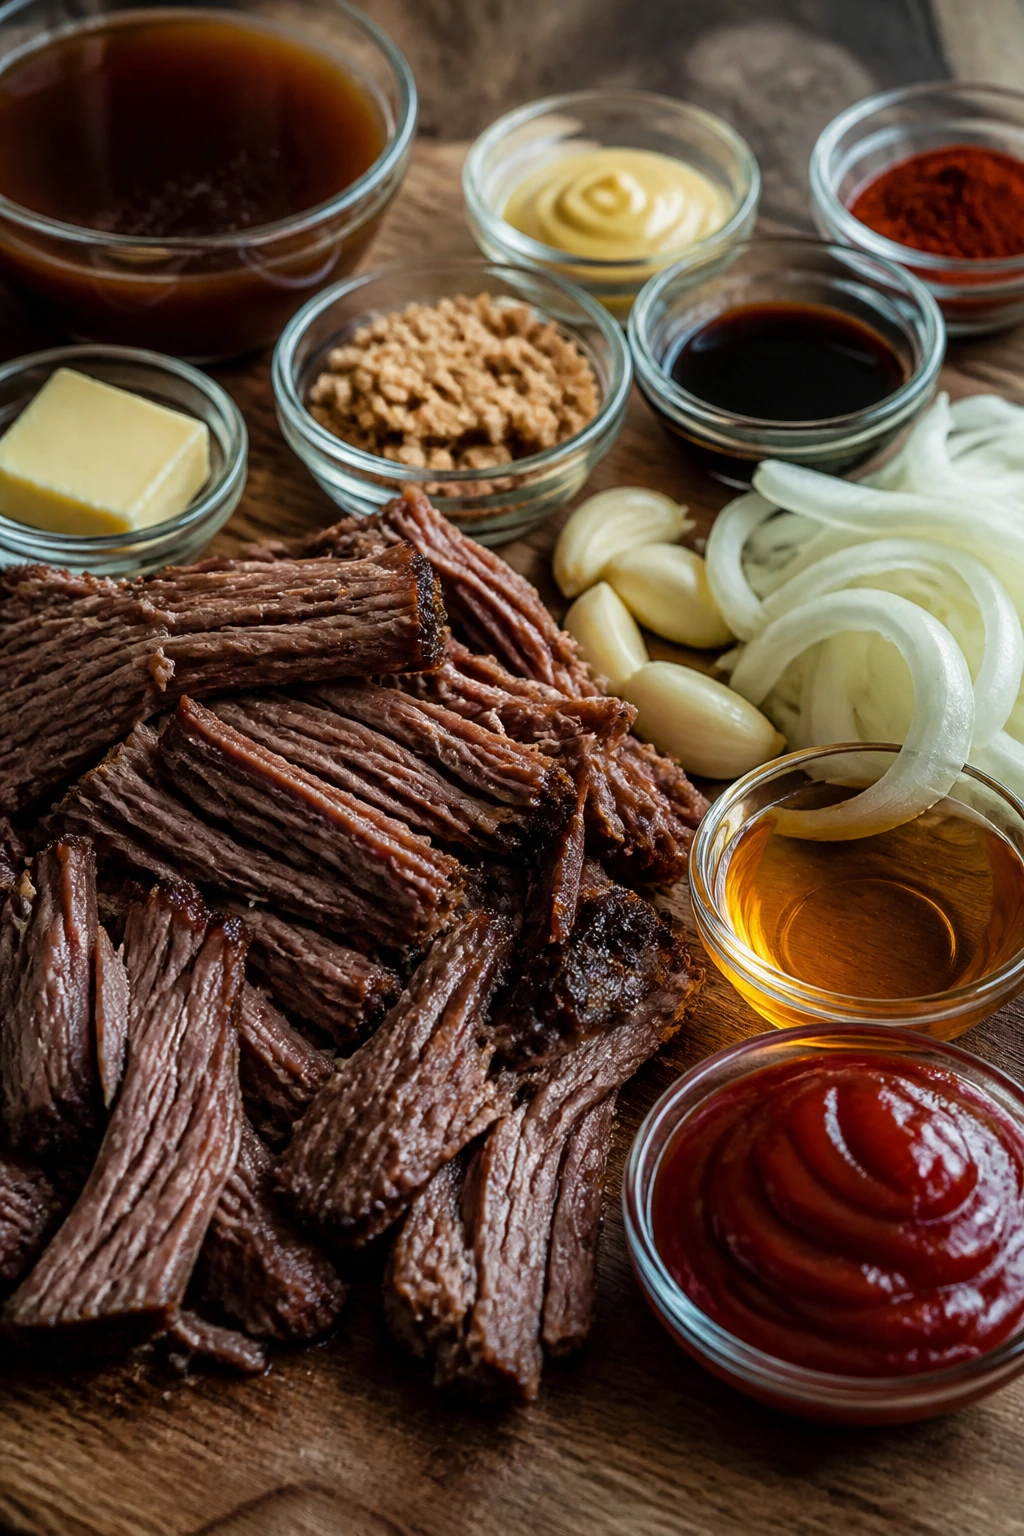
Why Each Ingredient Pulls Its Weight
The Beef
What to use: 3 to 4 lb boneless chuck roast, ideally with thin ribbons of fat running through the meat. That marbling is not a flaw; it is the reason the roast turns tender instead of stringy.
Preparation: Trim off thick, hard fat on the outside, but leave the marbling alone. Pat the roast dry with paper towels so the crust forms properly when it hits the hot pot.
Substitutions: Boneless blade roast or shoulder roast works almost the same way. Brisket works too, though it usually needs a little more time and a bit more patience.
Tips: A roast with visible marbling will shred in longer strands and stay moister after reheating. If the package says “lean,” leave it on the shelf.
The Tangy-Sweet Sauce Base
What to use: 1 cup ketchup, 1/2 cup apple cider vinegar, 1/3 cup brown sugar, 2 tablespoons Worcestershire sauce, 1 tablespoon Dijon mustard, and 1 cup low-sodium beef broth. That combination is the backbone of the dish.
Preparation: Stir the sauce together after the onions and tomato paste have cooked. That keeps the sugar from scorching and lets the onion flavor settle into the liquid.
Substitutions: Tomato puree can replace ketchup in a pinch, though you may want another tablespoon of sugar to balance it. If you need a gluten-free version, use a gluten-free Worcestershire sauce or tamari-based substitute.
Tips: Taste the sauce before it goes in the oven and again after reduction. Acid and sweetness change when they heat, and a sauce that tastes sharp early can taste balanced after three hours.
The Aromatics
What to use: 1 large yellow onion, 4 garlic cloves, and 2 tablespoons tomato paste. These are the parts that keep the sauce from tasting like ketchup wearing a costume.
Preparation: Slice the onion thin so it softens into the sauce, and mince the garlic finely so it disappears rather than stays aggressive. Cook the tomato paste long enough to darken.
Substitutions: Red onion makes the sauce a little sweeter, while shallots give it a softer edge. Garlic powder can stand in if necessary, but fresh garlic is cleaner and less muddy here.
Tips: Let the tomato paste turn brick red before you add liquid. That small step gives the sauce a roasted, fuller taste and keeps it from reading as canned.
The Seasonings and Finish
What to use: Smoked paprika, chili powder, cumin, butter, hot sauce, salt, and pepper. The paprika adds a smoky note, the chili powder rounds the sauce, and the cumin gives it a little bass note that people can’t always name but notice when it’s missing.
Preparation: Add the spices before the liquid so they bloom in the onion fat. Finish with the butter once the sauce has reduced.
Substitutions: Regular paprika plus a pinch of chipotle powder can stand in for smoked paprika. If you want a sweeter finish, a teaspoon of molasses can replace part of the brown sugar.
Tips: Butter at the end smooths the edges and gives the sauce a slight shine. Use it sparingly; too much makes the sauce taste heavy instead of rounded.
The ingredient list looks pantry-simple, but each piece has a specific role. That is why the dish tastes deliberate rather than thrown together.
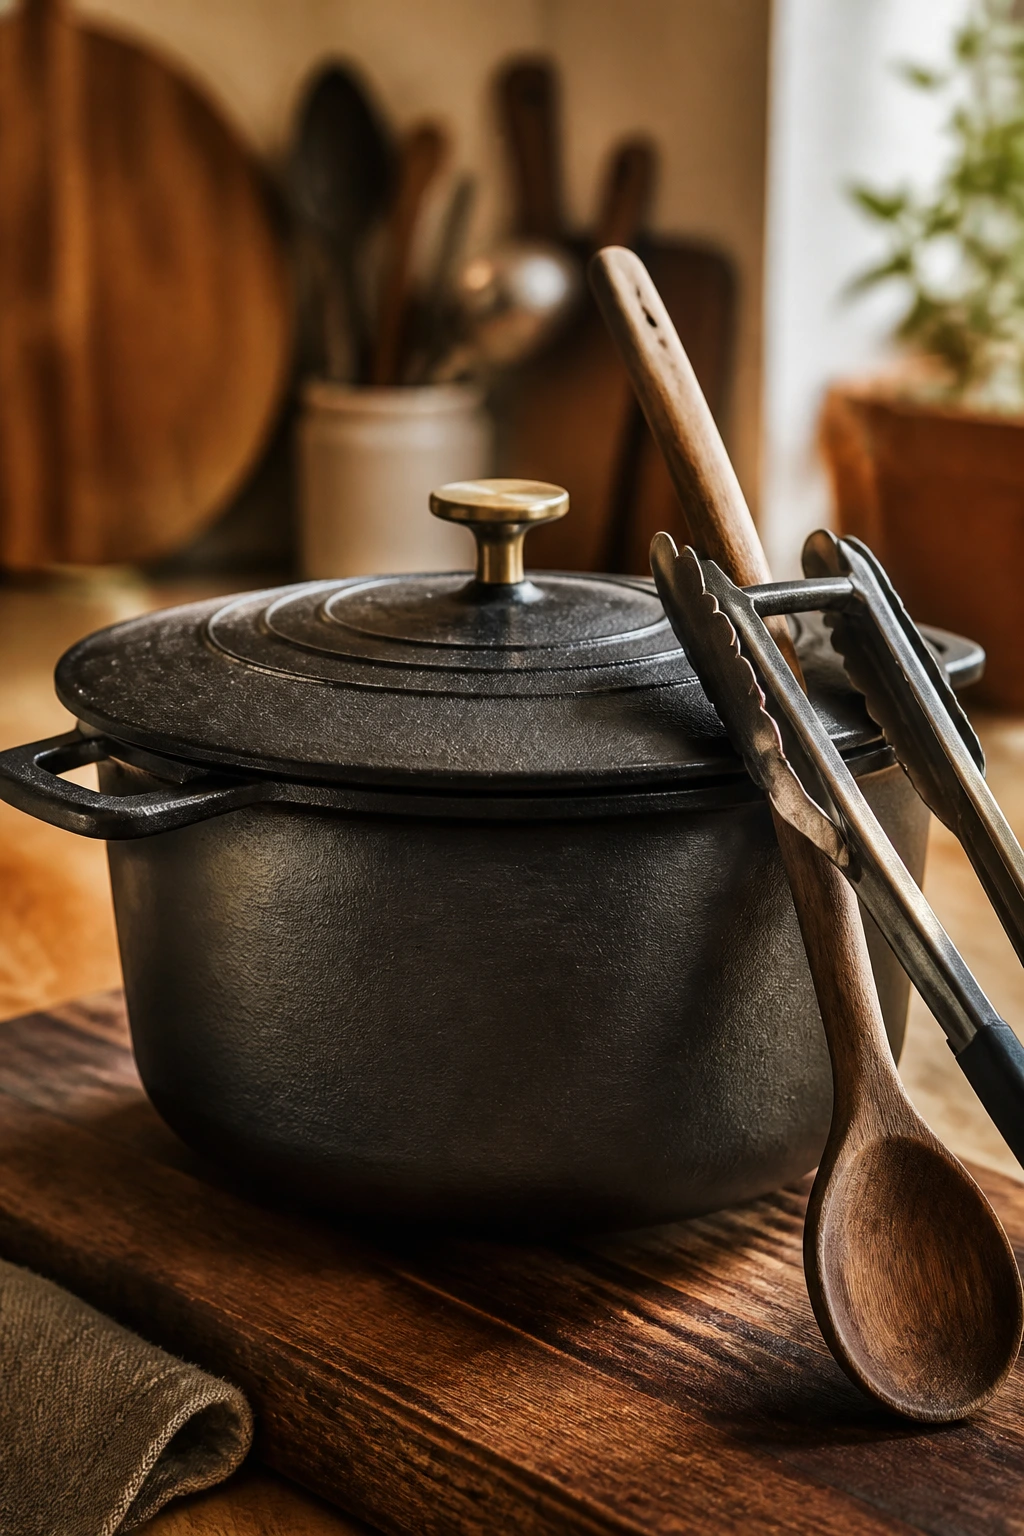
The Pot, Pan, and Tools I’d Reach For
You do not need a pile of gear for classic BBQ beef. You do need the right few things, because this recipe rewards heat control and a pot that holds it.
-
6-quart Dutch oven or heavy oven-safe pot with a lid: This is the best vessel for even heat and enough room to sear the roast without crowding it.
-
Tongs: Useful for turning the roast while you brown it and lifting it out without tearing the crust.
-
Wooden spoon or flat spatula: Handy for scraping the browned bits off the bottom when the sauce goes in.
-
Instant-read thermometer: Not fancy, just useful. The roast is tender in a temperature zone, not a guess zone.
-
Sharp chef’s knife and cutting board: Thin onion slices and clean garlic work better than chunky pieces that stay separate in the sauce.
-
Two forks or meat claws: Either one shreds the finished roast quickly. Meat claws are optional; two forks work just fine.
-
Rimmed baking sheet or tray: Nice to have for resting the beef and catching the juices that drip while you shred it.
-
Lid or heavy-duty foil: If your pot does not have a tight-fitting lid, foil is the workable substitute. The roast needs steam trapped inside the pot.
How Low Heat Turns Chuck Roast into Dinner
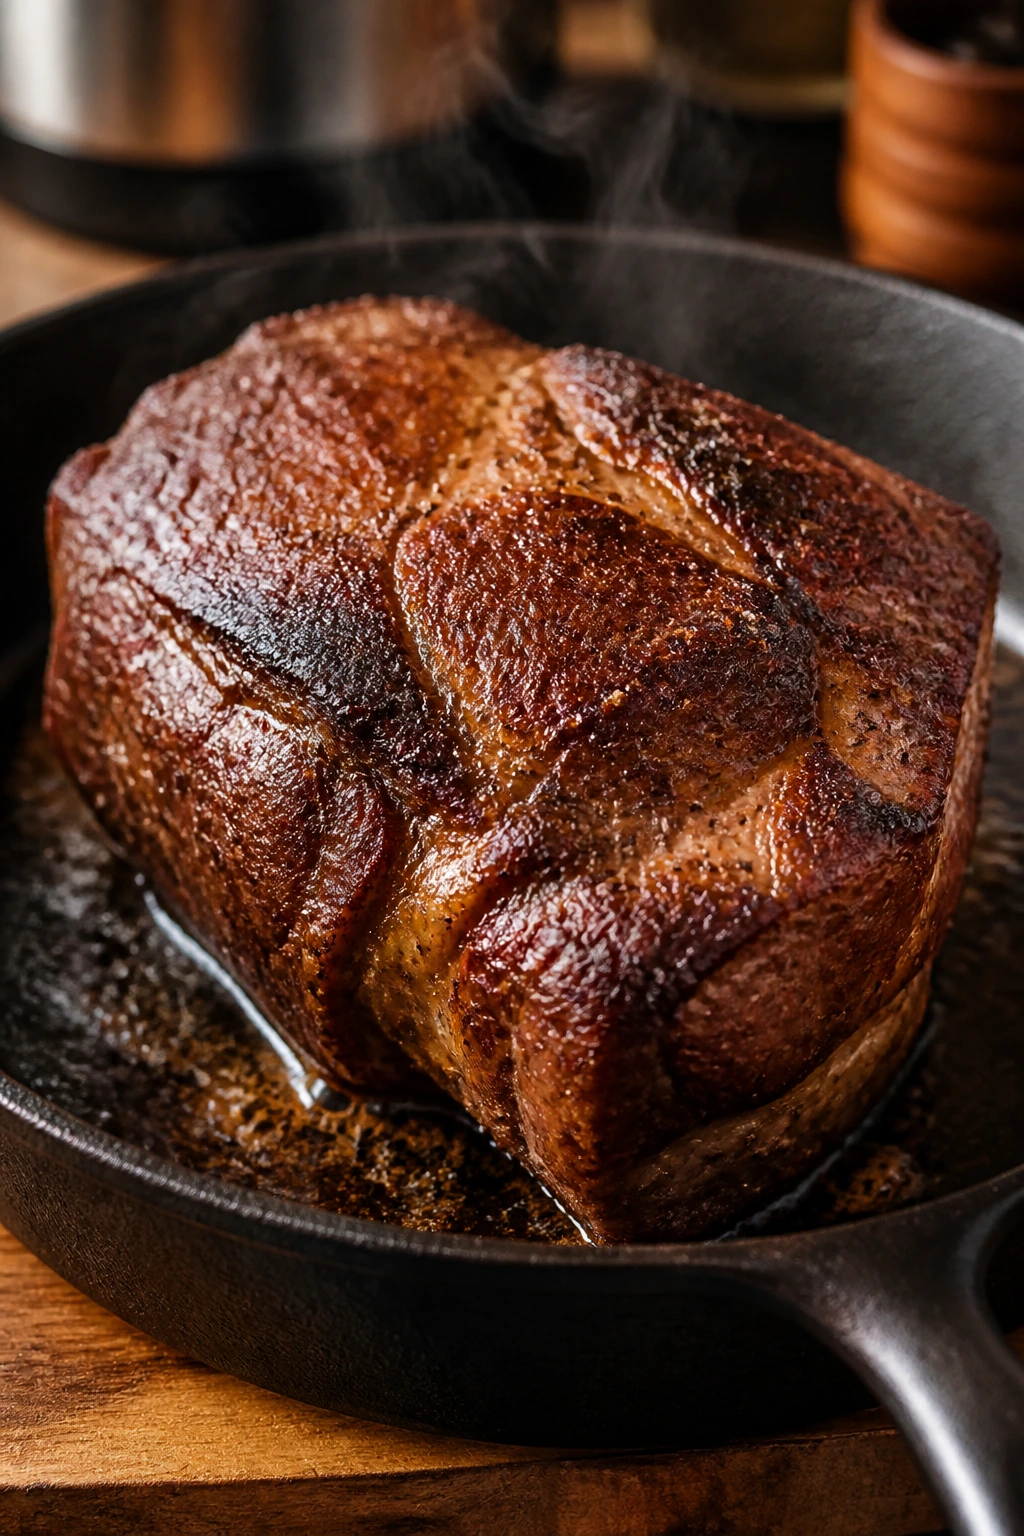
Why the Sear Matters
The crust is not decoration. It gives the sauce a roasted, beefy base and keeps the final pot from tasting like everything was boiled together. You are not trying to char the roast black; you want a dark brown surface that smells nutty and savory when you turn it.
There is also a practical reason to respect the sear. Browning builds flavor in a way simmering never will, and those browned bits on the bottom become part of the sauce once the vinegar and broth go in. Skip that step and you lose a layer of depth that is hard to fake later.
What Low Heat Does to Chuck Roast
Chuck roast is loaded with collagen. At a low, steady heat, that collagen softens and turns into gelatin, which thickens the sauce and keeps the shredded beef juicy. A hot, fast cook does the opposite: the outer layers tighten before the center has time to relax.
This is why 300°F works better than a blasting oven. The liquid in the pot stays at a lazy simmer, which is hot enough to break the roast down but not so harsh that it squeezes the moisture out. A hard boil makes the sauce greasy and the meat stubborn.
The Doneness Cue You Can Trust
The USDA safe temperature for beef is one thing. Tender braised beef is another. For this recipe, the sweet spot is around 195 to 205°F, where a fork slides through with almost no resistance and the meat starts to tear into long shreds.
Do not stare at the clock alone. If the roast still feels springy in the middle or resists when you twist a fork, it needs more time. If it is so soft that it nearly falls apart when you lift it, that is a good thing here. That is the texture you paid for.
Step-by-Step: From Searing to Shredding
Prep the Beef
-
Preheat the oven to 300°F (150°C) and move a rack to the lower-middle position. Pat the chuck roast dry on all sides with paper towels, then season it evenly with the salt and pepper.
-
Heat the oil in a 6-quart Dutch oven over medium-high heat until it shimmers. Sear the roast for 4 to 5 minutes per side until a dark brown crust forms. Do not move it early; if it sticks at first, it will release when the crust is ready.
Build the Sauce
-
Lower the heat to medium. Add the sliced onion and a pinch of salt, then cook for 6 to 8 minutes, stirring now and then, until the onion softens and the edges start to color.
-
Stir in the garlic and tomato paste. Cook for 1 minute, stirring constantly, until the tomato paste darkens and the garlic smells sweet rather than sharp.
-
Add the ketchup, apple cider vinegar, brown sugar, Worcestershire sauce, Dijon mustard, smoked paprika, chili powder, cumin, beef broth, and hot sauce if you are using it. Scrape the bottom of the pot with a wooden spoon, then bring the sauce to a gentle simmer.
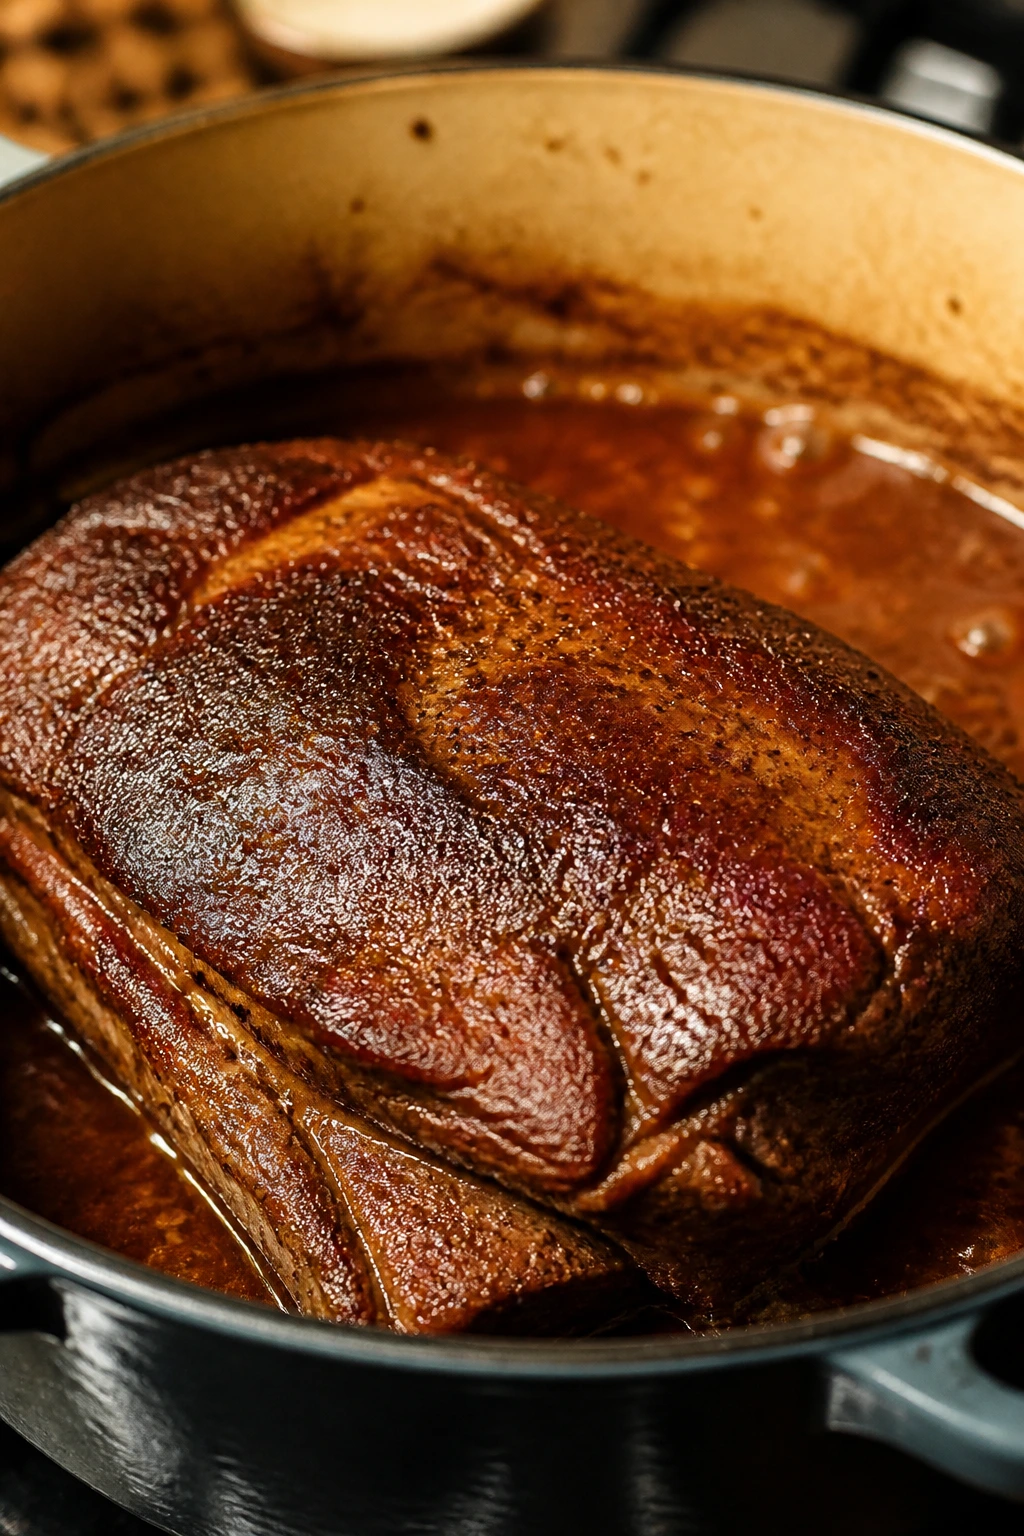
Braise the Roast
-
Return the beef and any juices to the pot, nestling the roast into the sauce. Cover with the lid and move the pot to the oven.
-
Braise for 3 to 3 1/2 hours, turning the roast once halfway through if the top begins to look dry, until a fork slides in with almost no resistance and the internal temperature reads 195 to 205°F. The sauce should bubble lazily, not boil hard.
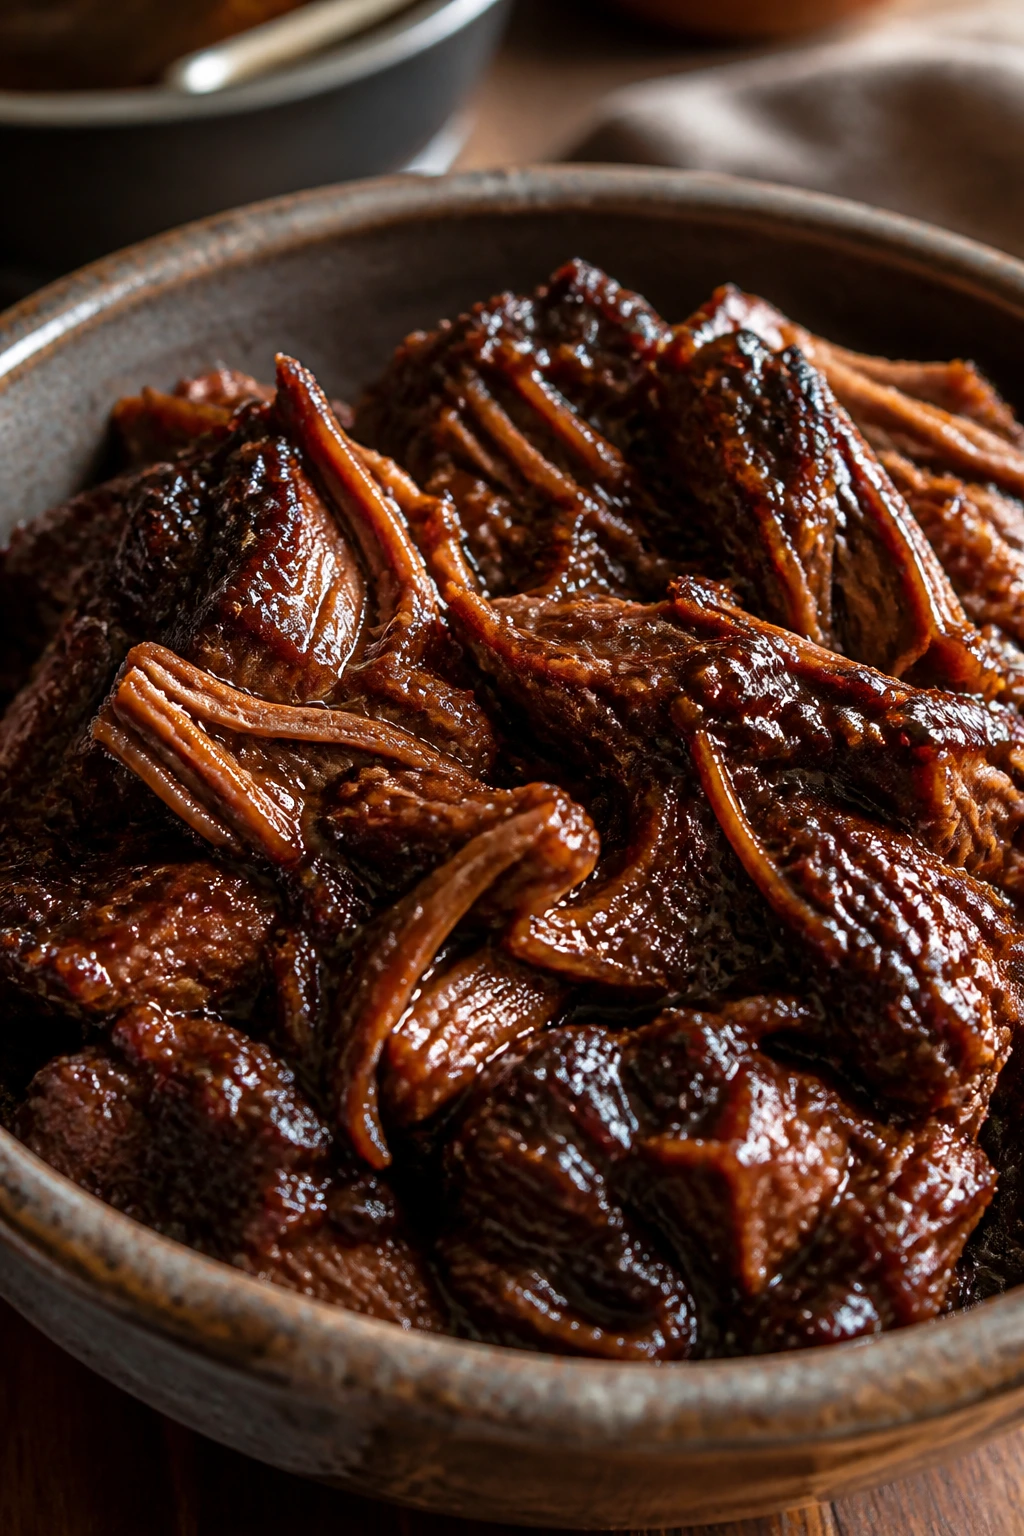
Finish and Serve
-
Transfer the roast to a cutting board or tray and let it rest for 10 minutes. Skim any fat from the surface of the sauce, then simmer the sauce uncovered on the stove for 10 to 15 minutes until glossy and slightly thickened.
-
Shred the beef with two forks, removing large seams of fat as you go. Return the meat to the pot, stir to coat it fully, and let it sit for 5 minutes before serving so the sauce can soak back in.
A small aside that matters: if the sauce tastes a little sharp right after the braise, that is normal. It settles as the beef sits in it.
How to Serve It on a Hearty Dinner Plate

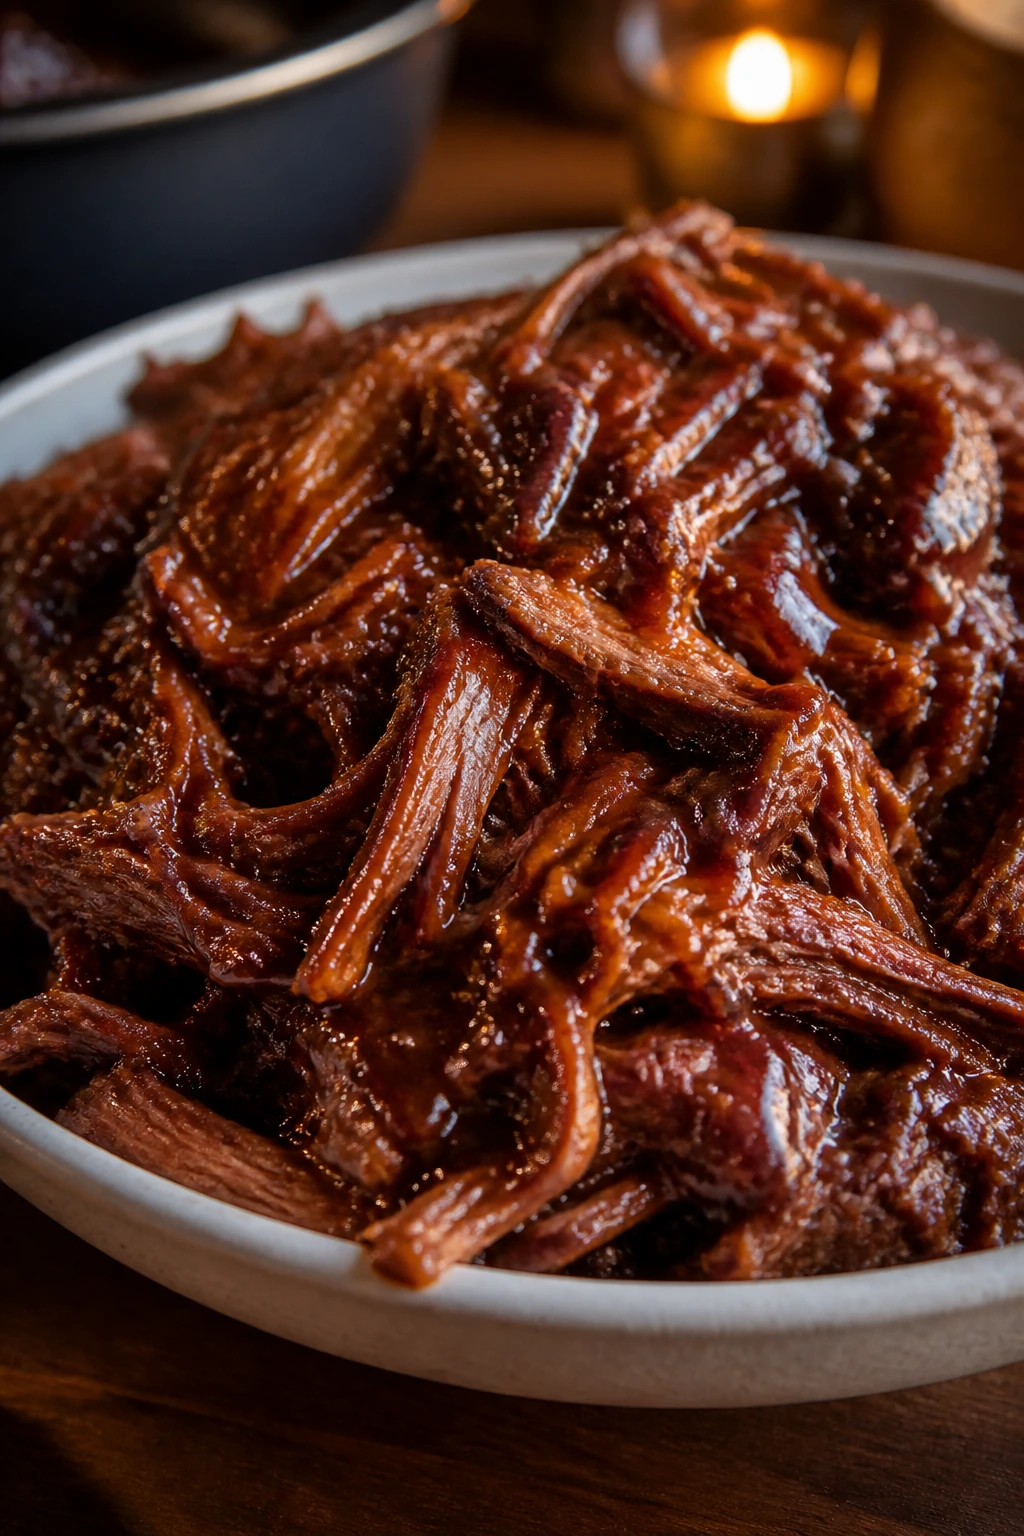
Presentation: Spoon the beef high in the center of a warm platter, or pile it into toasted rolls and let the sauce drip down the sides. I like a few onion strands and a scatter of parsley or scallions on top, not because it needs decoration, but because the green gives the plate a cleaner look against the dark sauce.
Accompaniments: Vinegar slaw is the best match if you want something crisp and sharp next to the richness. Dill pickles, baked beans, cornbread, buttered corn, or mashed potatoes all fit the mood. If you are serving it plated instead of in buns, potatoes or rice do a better job catching the sauce than plain bread.
Portions: Plan on about 6 ounces of cooked beef per adult for sandwiches or 8 ounces for a plated dinner. If the table is loaded with sides, you can pull that back to 4 or 5 ounces and still leave everyone full.
Beverage Pairing: Cold lager or a malty amber ale works well because the beer can handle the sweet-tangy sauce without fighting it. For a nonalcoholic drink, iced tea with lemon is the safe move, and a cold cola is not a bad idea either.
Practical Tips for Better BBQ Beef
-
Flavor Enhancement: Stir 1 teaspoon of apple cider vinegar into the finished sauce after it has reduced. That tiny hit wakes up the brown sugar and keeps the beef from tasting muddy or flat.
-
Time-Saver: Mix the sauce ingredients together in a measuring jug while the beef sears. You waste less time measuring after the roast comes out of the pot, and the pan stays hot enough to move quickly.
-
Texture Move: If you want the sauce to cling more like a glaze, simmer it uncovered for the last few minutes until a spoon dragged across the bottom leaves a clear path for a second or two. That’s your cue to stop.
-
Cost-Saver: Buy chuck roast when it’s on sale and freeze it raw. The cut handles freezing well, and because the recipe braises it anyway, you do not lose much by buying ahead.
-
Serving Shortcut: Toast the rolls cut-side down in a dry skillet for 30 seconds. It gives you better structure than a soft bun straight from the package, and the sandwich holds together much longer.
A real bonus move if you have extra time: shred the beef, then let it sit in the sauce for 10 minutes before serving. That soak is not glamorous. It works.
Common Mistakes That Leave It Dry or Harsh
-
Choosing a lean roast because it looks tidy: A lean cut will dry out before the sauce gets where it needs to go, and the beef ends up stringy instead of plush. Stick with chuck, blade roast, or shoulder roast with visible marbling.
-
Letting the pot boil hard: A rolling boil tightens the meat fibers and can make the sauce greasy. Keep the pot at a lazy simmer in the oven, and if the liquid is bubbling hard, lower the heat.
-
Skipping the browning step: Without a deep brown crust, the sauce tastes flat and a little one-note. Give the roast time to sear properly, even if it looks slow at first.
-
Pulling the beef too early: If the fork still meets resistance, the roast needs more time. Cook by tenderness, not by the clock alone; the texture should be close to shreddable before you stop.
-
Reducing the sauce before tasting it: Once the liquid cooks down, the salt and sugar concentrate fast. Taste after reduction, then adjust with a small splash of vinegar or a teaspoon of brown sugar if needed.
-
Shredding while the roast is scorching hot: The meat tears unevenly and you lose more juice than you should. Rest it for 10 minutes first; the fibers relax, and the shred goes cleaner.
One of those mistakes is enough to change the whole pot. Two of them, and dinner starts feeling like work.
Variations for Different Kitchens and Tastes
Smoky Chipotle BBQ Beef
Add 1 chopped chipotle pepper in adobo plus 1 tablespoon of adobo sauce when you build the sauce. It gives the dish a darker, smokier heat that cuts through the brown sugar, and I like it on toasted buns with vinegar slaw.
Honey-Mustard Pot Roast Style
Swap 2 tablespoons of the brown sugar for honey and increase the Dijon mustard to 2 tablespoons. The sauce gets rounder and a little more deli-style than backyard-cookout style, which is nice over mashed potatoes.
Slow-Cooker Sunday Pot
Sear the roast and build the sauce on the stove, then move everything to a slow cooker and cook on LOW for 8 to 9 hours. I still reduce the sauce on the stovetop at the end, because slow cookers leave things looser than a Dutch oven and the beef needs something thicker to cling to.
Lower-Sugar Plate Dinner
Drop the brown sugar to 2 tablespoons and add another tablespoon of vinegar plus 1 extra teaspoon of tomato paste. The sauce turns sharper and less glossy, which works well if you are serving it over rice or potatoes where the starch softens the edge.
Gluten-Free Bowl Version
Use a gluten-free Worcestershire sauce and make sure your broth is gluten-free, then serve the beef over rice or mashed potatoes instead of buns. The flavor stays the same; the only thing that changes is the base on the plate.
Make-Ahead, Storage, and Reheating
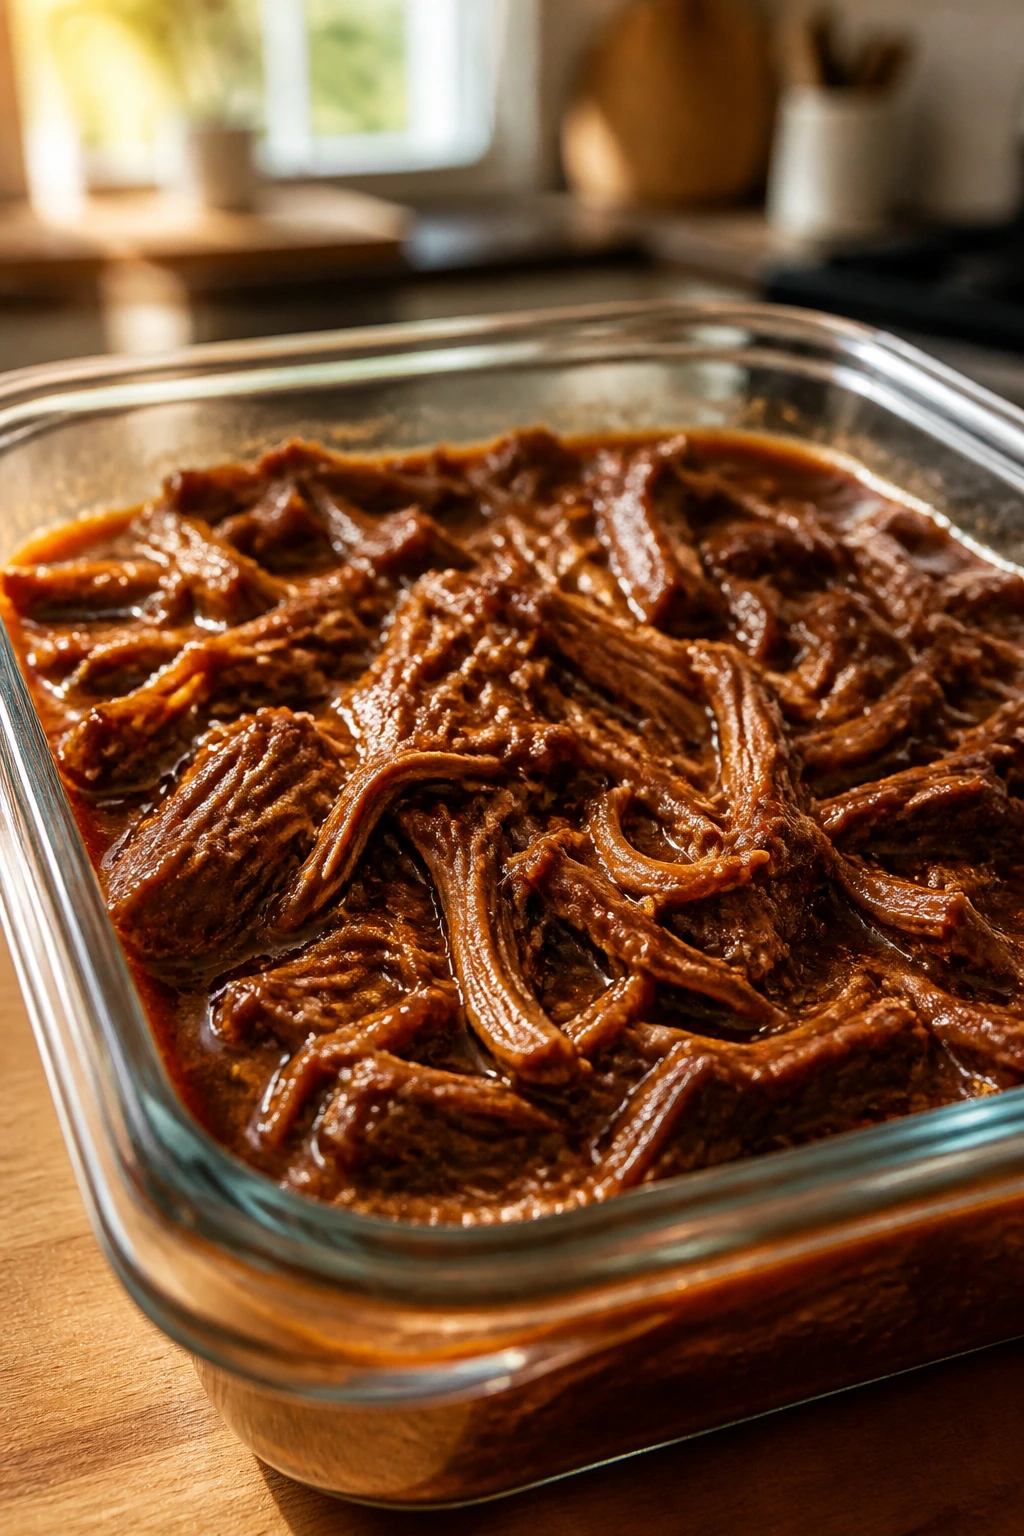
If you want to make life easier, make the beef a day ahead. Classic BBQ beef actually settles in nicely overnight, because the sauce has time to coat the shredded meat more evenly. The flavor gets rounder, and the texture goes from “hot and good” to “hot and slightly more integrated,” which is the version I reach for when I have guests.
Room temperature: Do not leave the beef out longer than 2 hours. After that, the sauce and meat need to go into shallow containers and into the fridge.
Refrigerator: Store the beef and sauce together in an airtight container for up to 4 days. Keeping them together matters; dry shredded beef reheats badly, while beef stored in sauce stays supple.
Freezer: Freeze in freezer-safe bags or containers for up to 2 months. Flattening the bags helps them thaw faster and saves space, which is one of those small things that matters later when the freezer is full of mystery containers.
Reheating on the stovetop: Put the beef and sauce in a covered skillet or saucepan with a splash of beef broth or water. Warm over low heat, stirring now and then, until the meat is hot and the sauce loosens again.
Reheating in the oven: Put the beef in a covered baking dish and warm at 300°F until heated through, usually 20 to 25 minutes for a medium batch. Add a spoonful of broth if the sauce has tightened too much in the fridge.
Microwave reheating: Use 50% power in short bursts, stirring between rounds. A damp paper towel over a sandwich portion keeps the edges from drying out.
If you are making it for a party, cook it fully, cool it, and reheat it in the sauce. It is the cleanest path. It also keeps the beef from drying out while the rest of dinner gets sorted.
Questions People Ask Before Making BBQ Beef
Can I make this in a slow cooker instead of the oven?
Yes. Sear the roast first, build the sauce on the stove, then cook it on LOW for 8 to 9 hours. A slow cooker gives you softer timing, but the sauce usually needs a final reduction on the stove so it clings to the beef instead of running thin.
What cut of beef works if I can’t find chuck roast?
Boneless blade roast or beef shoulder roast are the closest substitutes. Brisket also works, though it often needs a longer braise and can be a little fattier, so I would treat it as a different mood rather than a direct swap.
Do I really need to sear the beef first?
I would not skip it. The sear gives you browned bits on the bottom of the pot, and those bits carry a big chunk of the final flavor. If you skip browning, the sauce can still work, but it tastes flatter and less built.
What if my roast is still tough after the full cook time?
Keep cooking it in 20-minute stretches, covered, until the fork slides in with little resistance. Tough braised beef usually means the connective tissue has not fully relaxed yet, not that something is broken. Patience fixes it more often than panic does.
Can I make the sauce less sweet without ruining the recipe?
Yes. Cut the brown sugar down to 2 or 3 tablespoons and add a little more vinegar at the end. If you want sharper barbecue beef, a little extra acid is the cleaner fix than piling on more spices.
Can I freeze the beef already shredded in sauce?
That is the best way to freeze it. The sauce protects the meat from drying out, and the texture holds up much better than freezing the roast plain and saucing it later. Thaw it overnight in the fridge before reheating.
What should I serve with it if I want a true hearty dinner?
Mashed potatoes, buttered corn, and vinegar slaw make the plate feel complete without getting fussy. If you want something more substantial, add cornbread or toasted rolls, but do not skip the sharp side dish—rich beef needs a crisp edge beside it.
Can I use bottled barbecue sauce instead of making my own?
You can, but you will want to reduce or even skip the brown sugar and taste carefully before salting. Bottled sauces are often sweeter than you think, and the finished beef turns better when the sweetness stays in check.
A Bowl Full of Sauce and Tender Beef
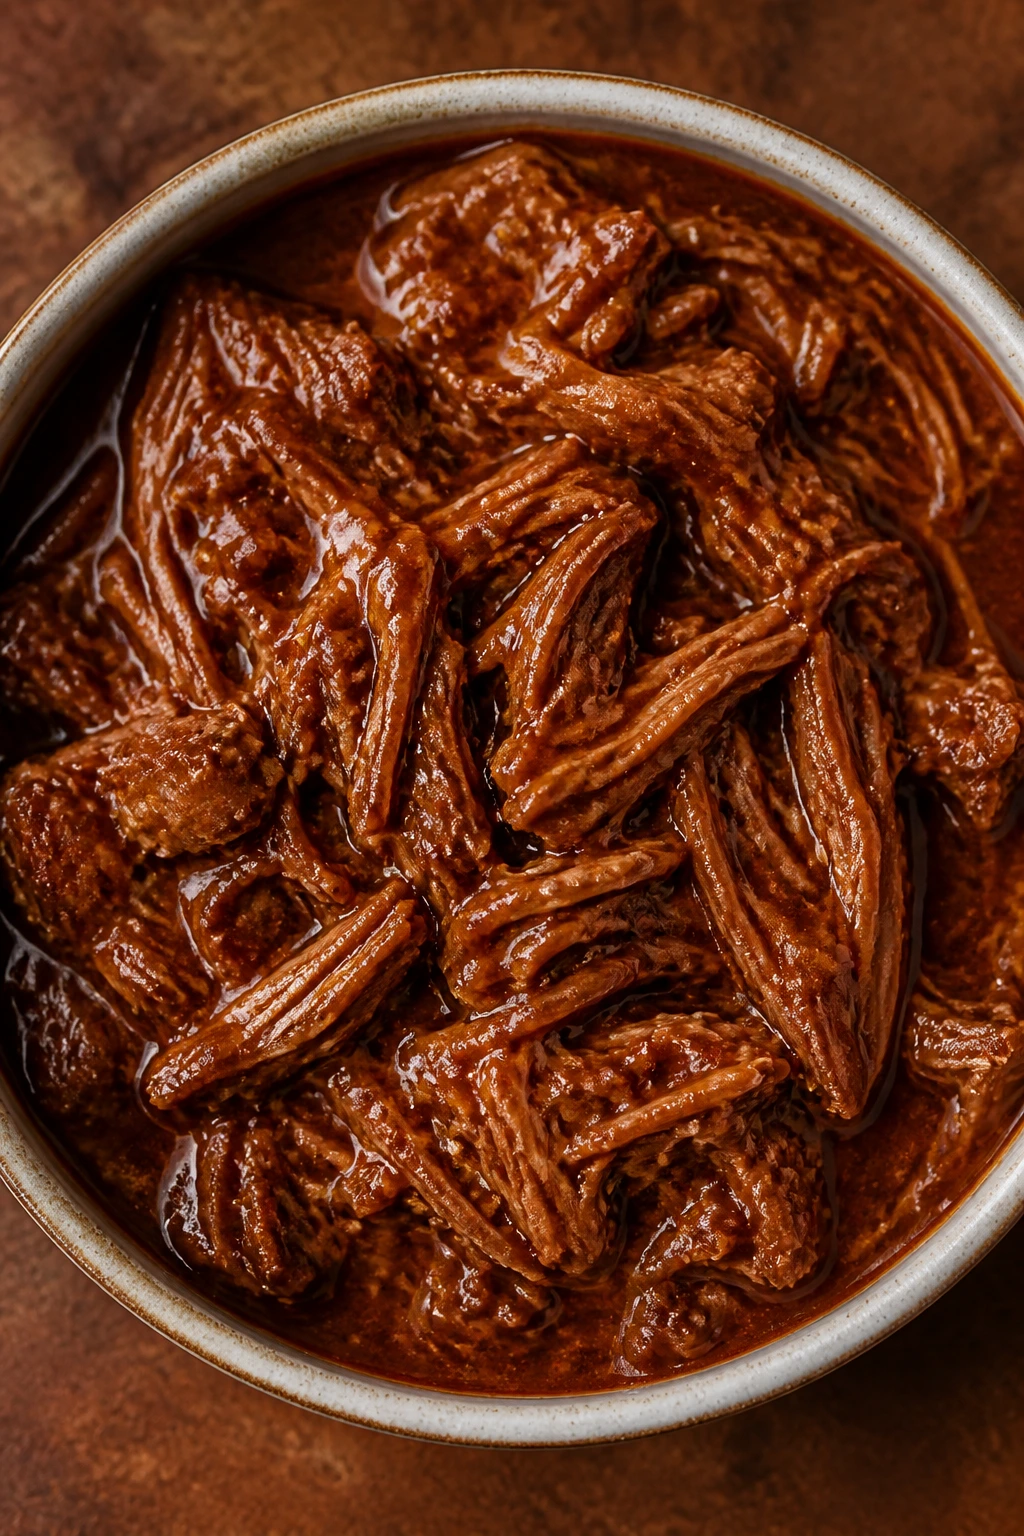
There is a reason classic BBQ beef keeps showing up on tables where people want something filling without being fussy. A chuck roast, a covered pot, and a sauce that knows when to stop sweetening—that’s enough to make a plate that looks modest and eats like a feast.
The detail that changes everything is patience. Low heat, a full braise, and a short reduction at the end give you meat that shreds cleanly and sauce that actually sticks. Get those pieces right, and the beef will do the rest.
Leftovers may be the real prize. Pile them into a roll, spoon them over potatoes, or tuck them into an omelet if you want to bend dinner in a different direction tomorrow.
Classic BBQ Beef for a Hearty Dinner — Recipe Card
Recipe Name: Classic BBQ Beef for a Hearty Dinner
Description: Slow-braised chuck roast in a tangy, smoky barbecue sauce until it shreds into rich strands. Serve it on toasted rolls, over mashed potatoes, or spooned over rice.
Prep Time: 20 minutes
Cook Time: 3 hours 20 minutes
Total Time: About 3 hours 40 minutes
Course: Main Course
Cuisine: American
Servings: 6 to 8
Calories: About 500 kcal per serving
Ingredients
- 3 to 4 lb boneless beef chuck roast, trimmed of only the hard outside fat and patted very dry
- 1 1/2 teaspoons kosher salt
- 1 teaspoon freshly ground black pepper
- 2 tablespoons neutral oil, such as canola or avocado, for searing
- 1 large yellow onion, thinly sliced
- 4 garlic cloves, minced
- 2 tablespoons tomato paste
- 1 cup ketchup
- 1/2 cup apple cider vinegar
- 1/3 cup packed light brown sugar
- 2 tablespoons Worcestershire sauce
- 1 tablespoon Dijon mustard
- 1 tablespoon smoked paprika
- 1 teaspoon chili powder
- 1/2 teaspoon ground cumin
- 1 cup low-sodium beef broth
- 1 to 2 teaspoons hot sauce, optional
- 1 tablespoon unsalted butter, cold and cut into pieces
- 8 soft sandwich rolls or brioche buns, split and toasted, or mashed potatoes for plating
- 2 tablespoons chopped parsley or sliced scallions, optional, for serving
Instructions
-
Preheat the oven to 300°F (150°C). Pat the chuck roast dry, then season it with the salt and pepper.
-
Heat the oil in a Dutch oven over medium-high heat. Sear the roast for 4 to 5 minutes per side until deeply browned, then transfer it to a plate.
-
Lower the heat to medium. Cook the onion for 6 to 8 minutes until soft, then add the garlic and tomato paste and cook for 1 minute more.
-
Stir in the ketchup, vinegar, brown sugar, Worcestershire, Dijon, smoked paprika, chili powder, cumin, broth, and hot sauce if using. Scrape the pot bottom and bring the sauce to a gentle simmer.
-
Return the beef and any juices to the pot, cover, and braise in the oven for 3 to 3 1/2 hours until fork-tender and 195 to 205°F internally.
-
Rest the beef for 10 minutes. Skim excess fat from the sauce, simmer it uncovered for 10 to 15 minutes if needed, then shred the beef and stir it back into the sauce.
-
Serve on toasted rolls, brioche buns, mashed potatoes, or rice. Finish with parsley or scallions if you like.
Notes: Taste the sauce after reduction, not before. A splash of vinegar sharpens it, and a little brown sugar softens it. Store the beef in its sauce for the juiciest leftovers.