
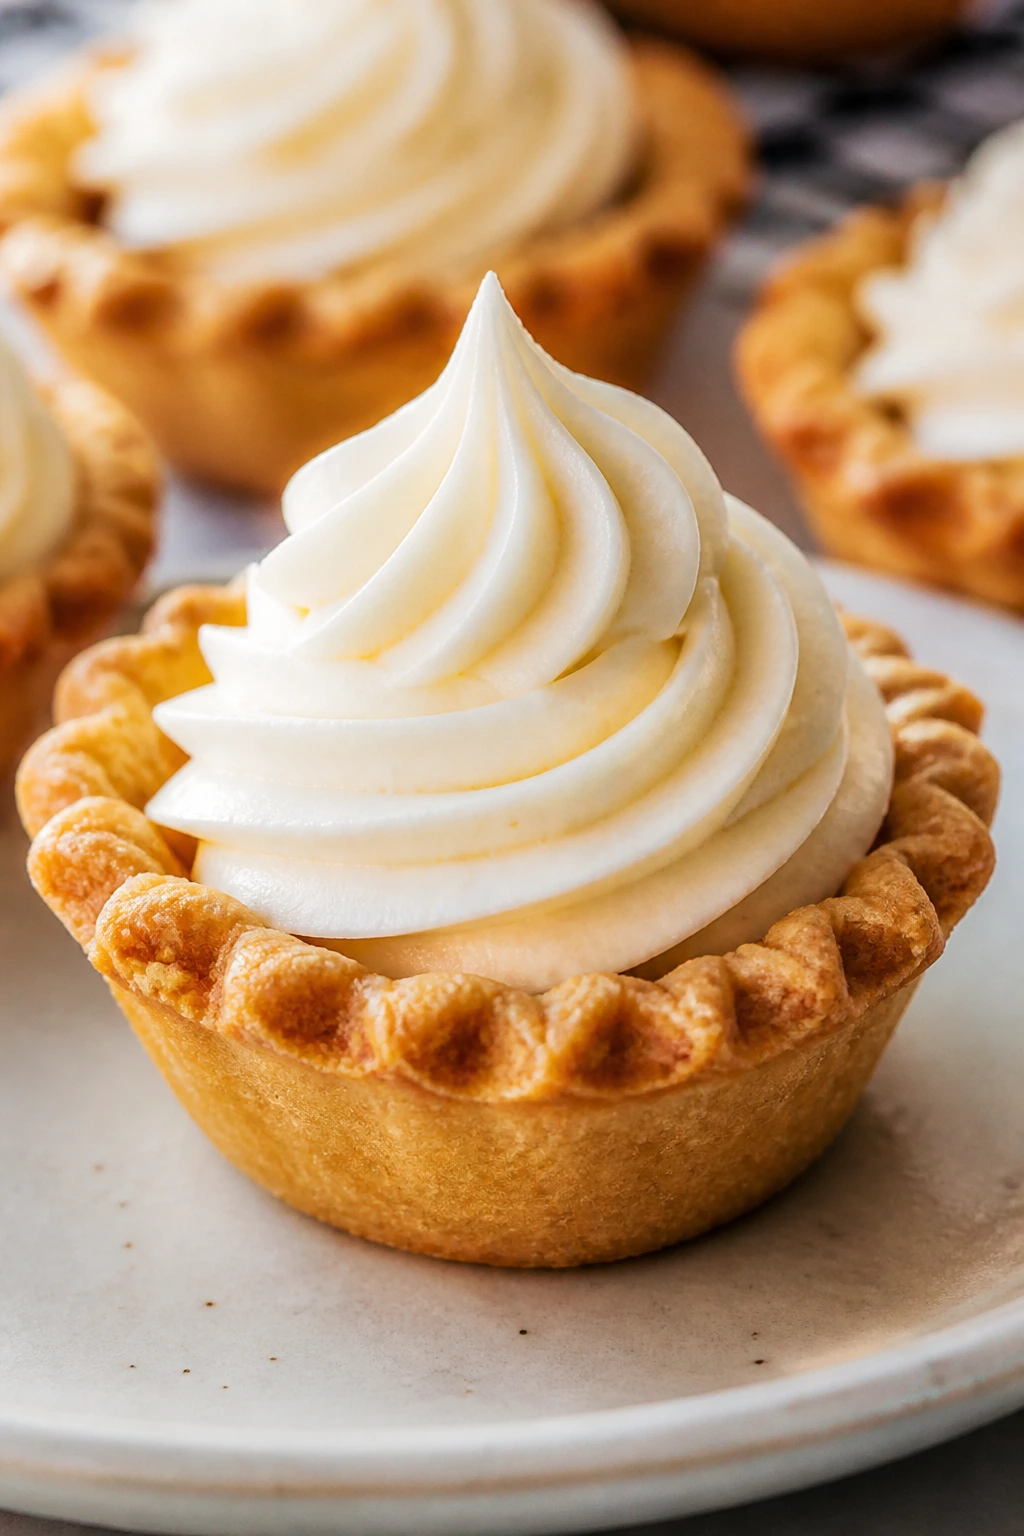
Mini pie crusts have a way of disappearing before the coffee cups are empty. A tray that starts out looking generous can shrink to a few crumbs and one lonely berry in no time, especially when the shells are buttery and the filling leans cool, tangy, and not too sweet. Decadent Mini Pie Crust with Cream Cheese Frosting does exactly that kind of damage: crisp edges, a soft center of frosting, and that little salt-and-vanilla hum that keeps each bite from turning flat.
The whole charm is in the ratio. A big pie asks for a slice and a fork and a little ceremony; these ask for one clean bite and a quick second look at the tray. If the crust is handled cold and baked properly, it stays snappy under the frosting instead of collapsing into a damp little carpet. That’s the part most recipes gloss over. They shouldn’t.
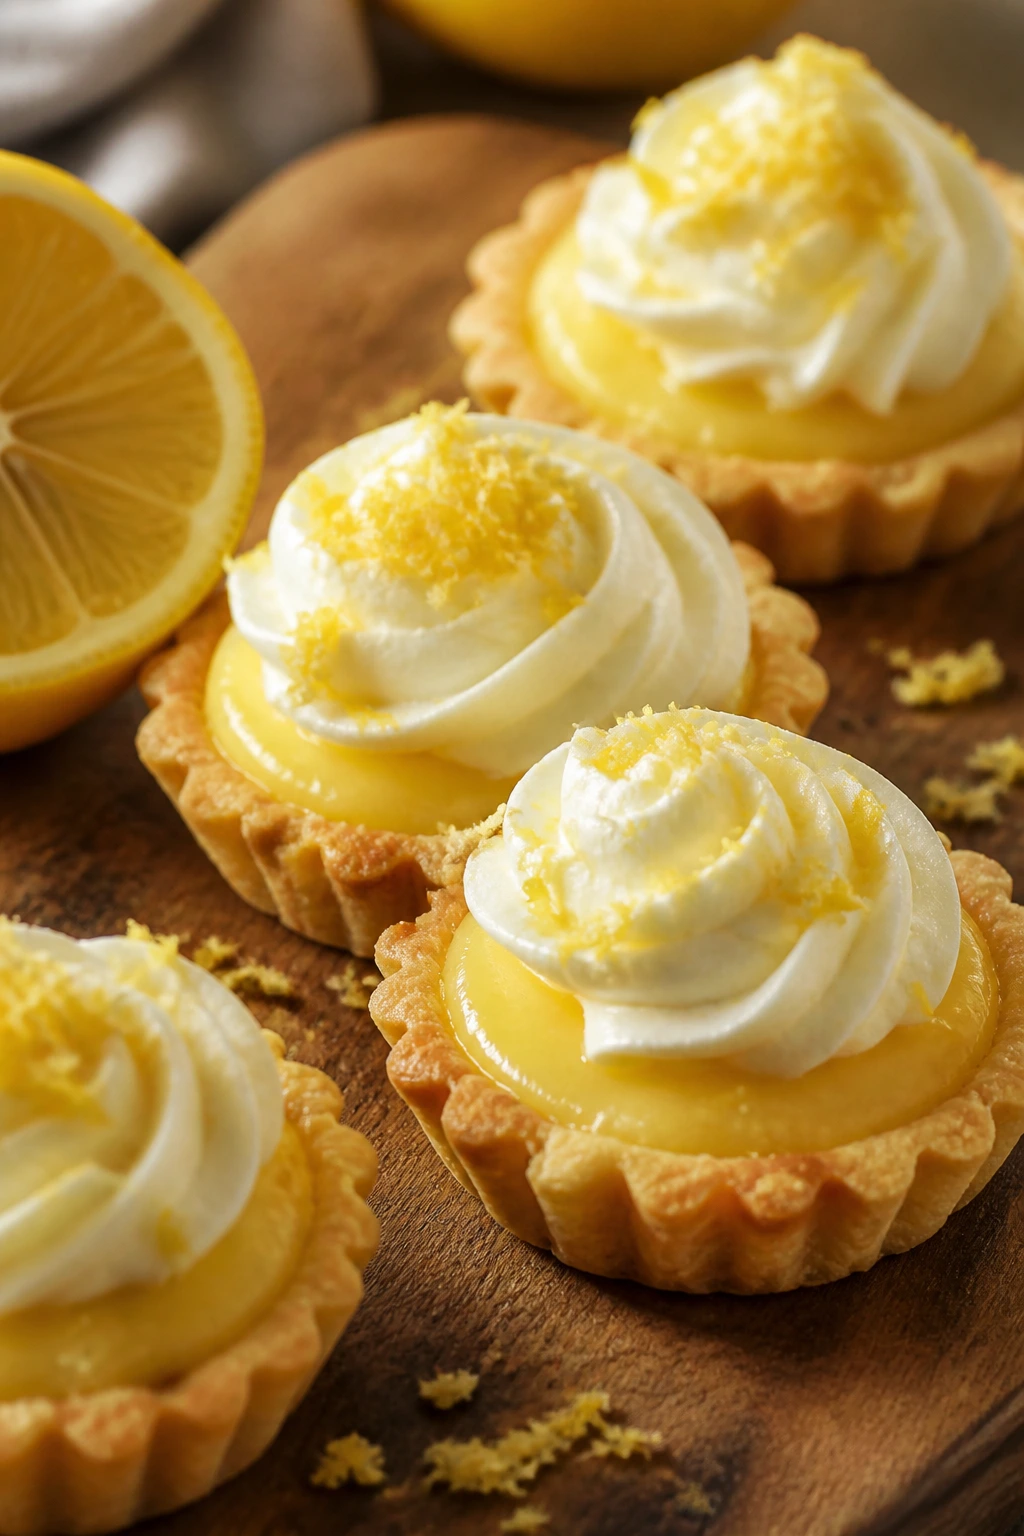
I’ve always preferred mini desserts that feel finished without much fuss. These do. A few shells, a smooth swirl of cream cheese frosting, maybe a berry or a scrape of lemon zest, and you’ve got a dessert that looks deliberate without demanding a pastry degree or a pile of decorating tools. The first thing worth getting right is why it works at all.
Why Mini Pie Crusts With Cream Cheese Frosting Feel Special
Mini desserts live or die by texture, and this one has a very good story to tell. The crust gives you that short, sandy snap you want from pie dough, while the frosting brings the cool, creamy finish people usually associate with cheesecake. Put them together and you get a dessert that lands somewhere between a tart, a cookie, and a cupcake — but without the muddy middle where all three can go wrong.
The size helps, too. A full pie can hide a soggy bottom under a pretty top; tiny shells show everything. That sounds unforgiving, but it’s actually useful. You know immediately whether the dough was cold enough, whether the pan was baked long enough, and whether the frosting waited for the shells to cool. There’s nowhere for bad technique to hide. That honesty is part of the appeal.
I like that these can play formal or casual without changing the recipe. On a white platter, they feel like bakery tartlets. On a picnic tray, they feel like the dessert version of finger food. Same dough. Same frosting. Different mood.
And because the filling is frosting rather than custard, you get to skip the whole “will it set?” guessing game. No wobble. No slicing. No waiting for a fruit layer to thicken. Just crisp shells and a cool top that holds its shape long enough to serve properly.
Why You’ll Love These Mini Tartlets
-
The crust bakes fast: Mini muffin cups need only about 12 to 14 minutes in the oven, so you get crisp shells without a long blind-bake ordeal.
-
The frosting pipes cleanly: Cream cheese and butter make a filling that holds ridges from a star tip, which means the tops look finished even if you don’t garnish them.
-
They travel well when assembled carefully: If you keep the shells and frosting separate until the last minute, you can move them to a party tray without a meltdown.
-
They taste richer than they look: The powdered sugar sweetness gets balanced by salt and tang, so each bite tastes more like a small bakery tart than a sugar bomb.
-
The base is flexible: Once you know the shell formula, you can swap toppings, add citrus, or tuck in a spoon of jam and still keep the same crust.
-
They use familiar ingredients: Flour, butter, cream cheese, sugar. Nothing strange. Nothing that requires a special store run just to make dessert happen.
Yield: 24 mini tartlets
Prep Time: 35 minutes
Cook Time: 15 minutes
Total Time: 50 minutes active + 1 hour 10 minutes chilling and cooling
Difficulty: Intermediate — the dough needs cold handling and a blind bake, but the steps are straightforward once you keep the butter cold.
Chill/Rest Time: 45 minutes for the dough, 15 minutes after shaping, and about 10 minutes for the filled tartlets to firm up
Best Served: The day they’re assembled, after the shells are fully cool and the frosting is freshly piped
What Goes Into the Crust and Frosting
The Crust Base
What to use: 2 1/2 cups all-purpose flour, 2 tablespoons granulated sugar, and 1 teaspoon fine sea salt.
Preparation: Whisk these together before the butter goes in so the salt and sugar are spread evenly through the flour.
Substitutions: Pastry flour will give you a softer shell, and if you want the crust less sweet you can drop the sugar to 1 tablespoon.
Tips: Spoon and level the flour instead of packing it. Too much flour turns the shell dry and makes the dough crack when you roll it.
Cold Butter and Richness
What to use: 1 cup (2 sticks) unsalted butter, cut into 1/2-inch cubes and kept very cold.
Preparation: Cube the butter, then chill it again if your kitchen is warm. The goal is small cold pieces, not soft little smears.
Substitutions: A half-and-half mix of butter and shortening makes the shells a little sturdier, though I still prefer all-butter for flavor.
Tips: The butter should look like a mix of pea-size bits and thin flakes by the time you stop cutting it in. That unevenness is what creates a crisp, layered bite.
Egg Yolk, Water, and Vinegar
What to use: 1 large egg yolk, 6 to 8 tablespoons ice water, and 1 teaspoon apple cider vinegar.
Preparation: Whisk the yolk with the vinegar, then add the water slowly, one tablespoon at a time, until the dough just comes together.
Substitutions: Lemon juice can stand in for vinegar if that’s what you have. The flavor disappears in the crust, so the swap is safe.
Tips: The dough should feel slightly rough, not smooth like bread dough. If it’s smooth and stretchy, it’s already been worked too much.
The Cream Cheese Frosting Base
What to use: 8 ounces full-fat block cream cheese and 1/2 cup (1 stick) unsalted butter, both softened to cool room temperature.
Preparation: Beat the cream cheese and butter together until the mixture is smooth and fluffy before adding sugar.
Substitutions: Mascarpone makes the frosting silkier and a little richer; Neufchâtel makes it lighter, though it can be softer.
Tips: Use block cream cheese, not the spreadable tub kind. Tub cream cheese carries extra water and usually makes the frosting looser than you want.
Powdered Sugar, Vanilla, Salt, and Cream
What to use: 2 1/2 to 3 cups powdered sugar, 1 teaspoon pure vanilla extract, 1/4 teaspoon fine sea salt, and 1 to 2 tablespoons heavy cream or whole milk only if needed.
Preparation: Sift the sugar if it’s lumpy, then add it in stages so the frosting stays smooth instead of powdery.
Substitutions: Almond extract can replace half the vanilla for a more bakery-style flavor, and orange zest works well if you want a brighter finish.
Tips: Add the cream at the end and only a teaspoon or so at a time. Too much liquid turns the frosting slack fast.
The Tools That Keep the Edges Clean

-
24-cup mini muffin pan: Two standard 12-cup pans make batch work easier; a single pan is fine if you don’t mind baking in two rounds.
-
Rolling pin: You want a sturdy one that can roll the dough to an even 1/8-inch thickness without tearing the surface.
-
3-inch round cutter or drinking glass: This is what gives you the shell size; a floured glass rim works if you don’t own a cutter.
-
Pastry cutter or food processor: Either one cuts the butter into the flour quickly enough to keep the dough cold.
-
Mixing bowls: One for the crust, one for the frosting. Larger than you think. Dough always takes up more space than you expect.
-
Fork: For docking the shells before baking so steam doesn’t puff the centers into little domes.
-
Wire rack: The shells need airflow underneath or the bottoms will trap steam and soften.
-
Hand mixer or stand mixer: A hand mixer is enough for the frosting, though a stand mixer makes the final texture a bit smoother.
-
Small offset spatula or piping bag with star tip: The spatula keeps things rustic, and the piping bag gives you those tidy bakery swirls.
From Cold Dough to Crisp Little Shells
Make the Dough
-
Whisk the dry ingredients. In a large bowl, whisk together the 2 1/2 cups flour, 2 tablespoons sugar, and 1 teaspoon salt until the mixture looks even and fine.
-
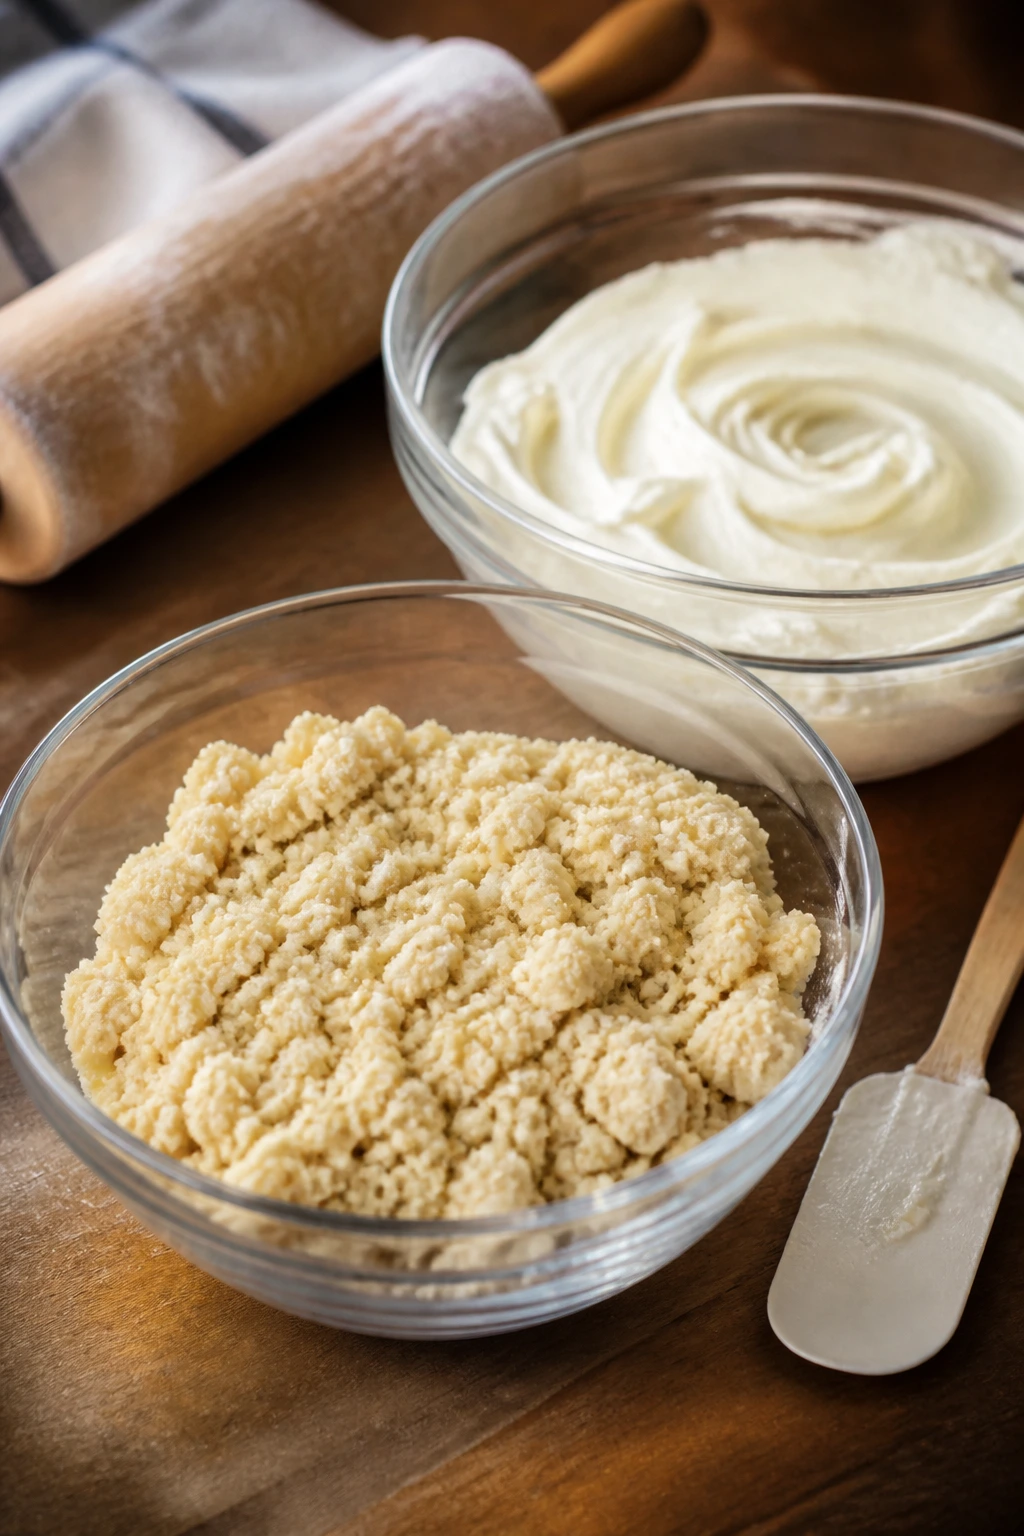
Cut in the butter. Add the 1 cup cold butter cubes and cut them in with a pastry cutter or pulse them in a food processor until the mixture looks like coarse crumbs with some pea-size pieces still visible. Do not let the butter soften into a paste — those cold pieces are what make the crust flaky.
-
Add the yolk and liquid slowly. In a small cup, whisk the 1 egg yolk with 1 teaspoon apple cider vinegar and 4 tablespoons of the ice water. Drizzle it into the flour mixture, then add more water 1 tablespoon at a time only until the dough clumps when squeezed.
-
Form and chill the dough. Divide the dough into 2 discs, flatten each one to about 1 inch thick, wrap tightly, and chill for 45 minutes. The dough should feel firm, not sticky. If it feels warm or greasy, give it another 10 minutes in the fridge.
Shape and Blind-Bake the Shells
-
Preheat the oven and prep the pans. Heat the oven to 375°F (190°C) and grease two 12-cup mini muffin pans very lightly with butter or nonstick spray.
-
Roll and cut the dough. On a lightly floured surface, roll one disc to about 1/8 inch thick. Cut out 3-inch circles, rerolling scraps once if needed. You should have enough for about 24 rounds total.
-
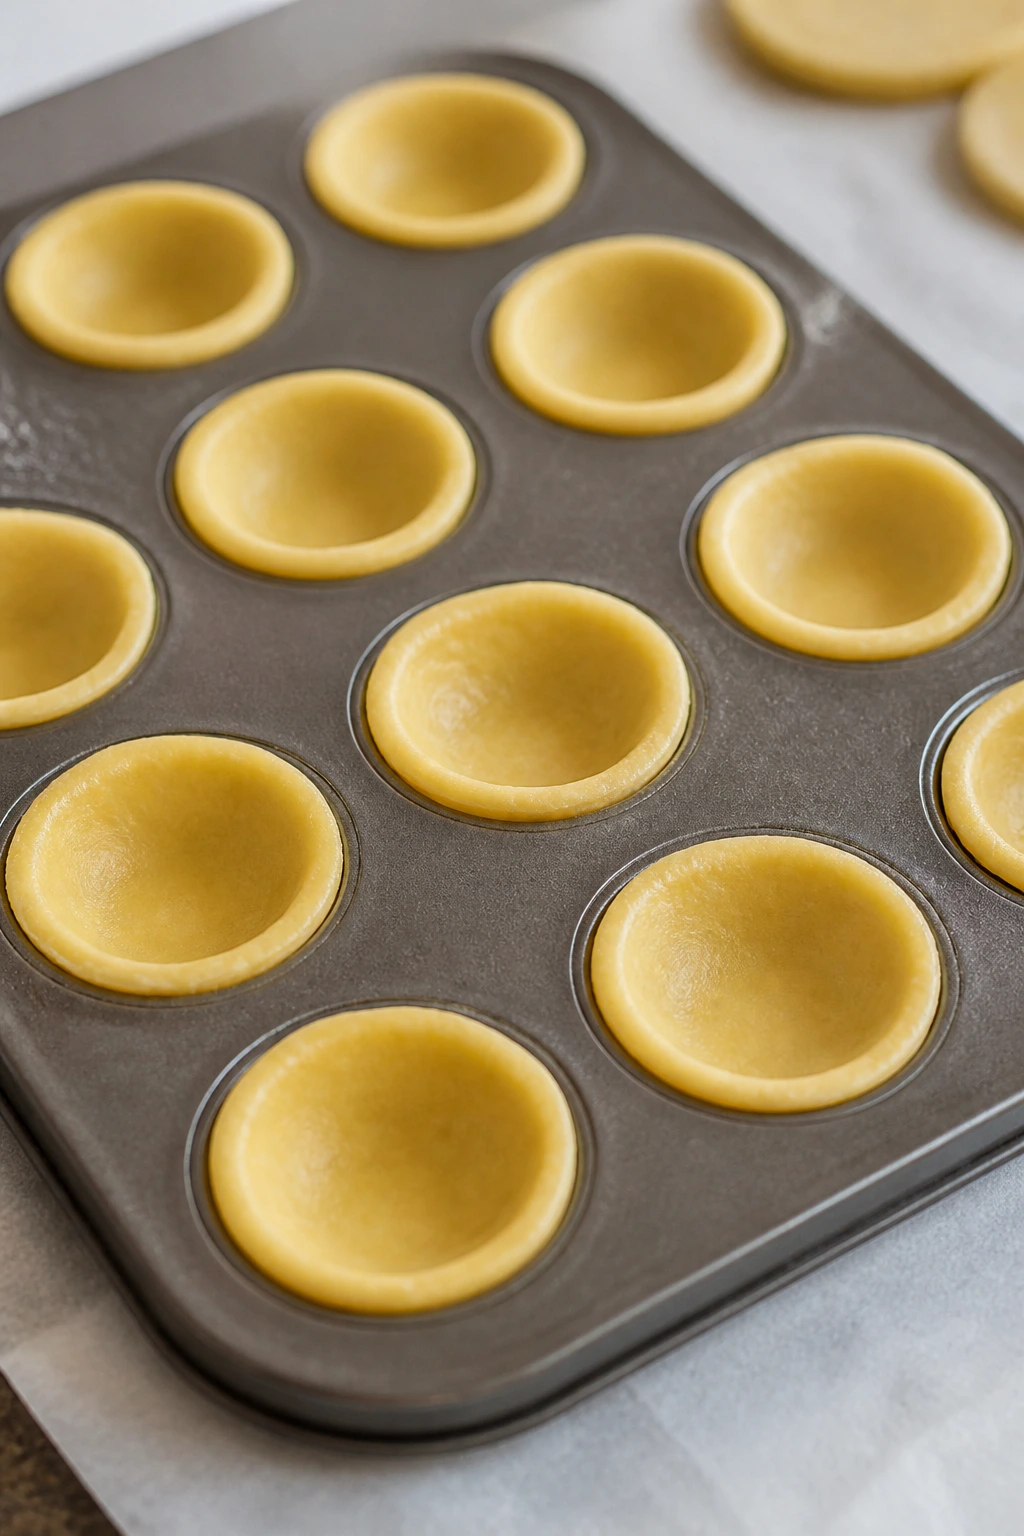
Press the dough into the cups. Fit one round into each mini muffin cup and gently press it into the bottom and up the sides without stretching it. If the dough tears, patch it with a scrap. Do not pull it upward to make it fit — that’s the fastest way to make it shrink back in the oven.
-
Chill the shaped shells. Put the filled pans in the refrigerator for 15 minutes, or the freezer for 10 minutes, until the dough feels firm again. This extra chill keeps the edges neat.
-
Dock and bake. Prick the bottom of each shell once or twice with a fork, then bake for 12 to 14 minutes, rotating the pans halfway through, until the edges are light golden and the centers look dry. If a center puffs a little, press it down gently with the back of a spoon as soon as the pans come out of the oven.
-
Cool the shells completely. Let them sit in the pans for 10 minutes, then lift them out and cool on a wire rack until no warmth remains. Never fill a warm shell — the frosting will soften and the crust will lose its snap.
Whip and Finish the Frosting
-
Beat the cream cheese and butter. In a clean bowl, beat the softened cream cheese and butter together for 1 to 2 minutes, until the mixture is smooth, pale, and free of lumps.
-
Add the sugar and flavoring. Beat in the powdered sugar in 3 additions, then mix in the vanilla, salt, and 1 tablespoon cream. If the frosting looks too stiff for piping, add the second tablespoon of cream a teaspoon at a time until it holds a soft peak. Pipe or spoon the frosting into the cooled shells, then chill the finished tartlets for 10 minutes if you want them to set before serving.
How to Serve Them on a Dessert Tray
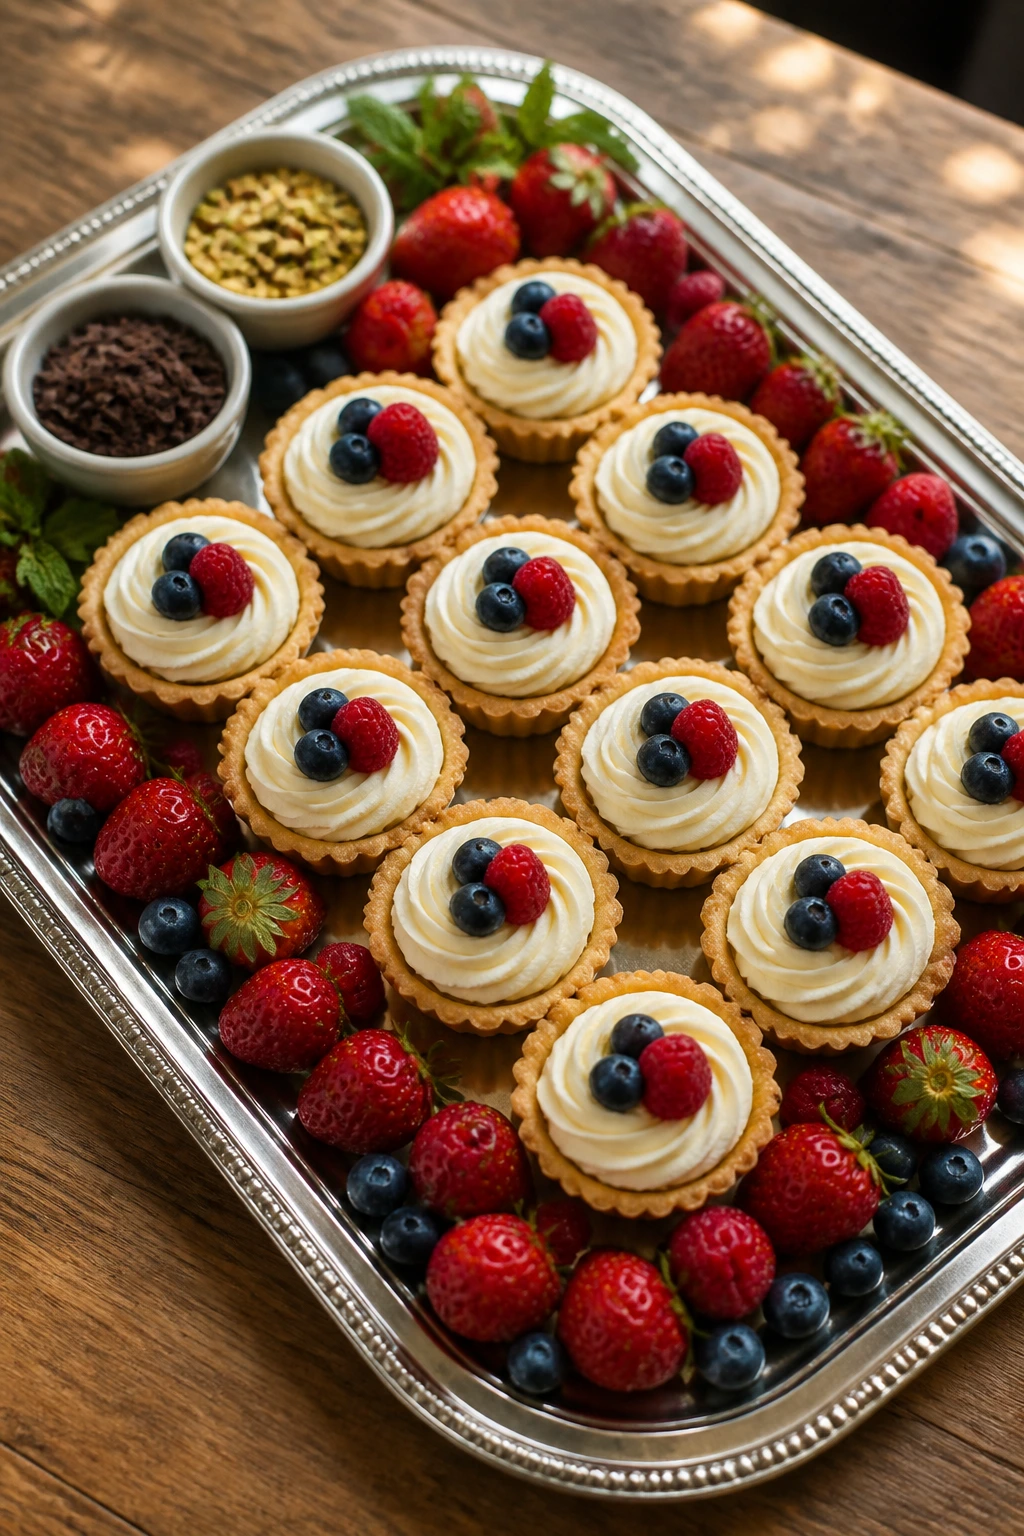
Presentation: Arrange the tartlets on a flat platter or cake stand with a little breathing room between each one. A few berries scattered around the edges look better than a crowded pile, and a light dusting of powdered sugar can soften the whole tray if you’re serving them at a party.
Accompaniments: Fresh raspberries, sliced strawberries, or a few slivers of citrus zest all work without fighting the frosting. If you want a fuller dessert plate, add a bowl of mixed berries or a few butter cookies on the side. I like these next to coffee and nothing else, but a small scoop of vanilla ice cream turns them into a much richer dessert.
Portions: Plan on 2 tartlets per person after dinner, or 3 if this is the only sweet thing on the table. They’re tiny enough that people tend to reach for a second one, which is why the tray should be larger than you think. If you’re scaling up for a crowd, the dough and frosting both double cleanly.
Beverage Pairing: Strong coffee works best if you want the frosting to taste less sweet. Black tea with a little milk is another smart match, and a glass of cold milk makes the whole thing taste like a very polished version of an after-school treat.
Practical Ways to Improve the Batch
Flavor Enhancement: A fine strip of lemon zest in the frosting wakes everything up without turning the dessert into lemon tart. If you want an even cleaner finish, beat in 1/4 teaspoon almond extract and use it sparingly — a little goes a long way in cream cheese frosting.
Time-Saver: Roll the dough between two sheets of parchment instead of adding more bench flour. The dough slides, the scraps stay together, and you spend less time scrubbing flour off the counter. It also makes rerolling easier because the dough stays cool.
Pro Move: Brush the cooled shells with a whisper-thin coat of melted white chocolate before frosting them if you’re making them several hours ahead. It sounds fussy, but it creates a moisture barrier that keeps the crust from softening too fast.
Texture Fix: If your frosting feels too loose after beating, pop the bowl into the fridge for 10 minutes, then beat it again briefly. That tiny rest firms the fat back up without making the frosting grainy.
Make-It-Yours: For a brighter dessert, top the swirls with chopped pistachios or a single blueberry. For a deeper, richer version, a tiny drizzle of melted dark chocolate works better than a full dip. Keep the garnish small; the crust is supposed to stay visible.
Mistakes That Make Mini Tartlets Fall Flat
-
Using butter that’s too soft: The dough smears instead of flaking, and the shells shrink or bake up greasy. Fix it by chilling the butter cubes again if they start to feel pliable while you’re mixing.
-
Stretching the dough into the cups: The shells look fine before baking, then pull back and leave a gap around the edge. Press the dough in gently instead of tugging it upward. If a circle doesn’t reach high enough, use a slightly larger cutter next time.
-
Skipping the second chill: Warm dough slumps in the pan, which gives you rounded, uneven shells instead of neat little cups. Fifteen minutes in the fridge makes a visible difference.
-
Frosting warm shells: The frosting slides, the shell softens, and the whole thing starts looking tired before it reaches the table. Wait until the shells are fully cool, not “mostly cool.”
-
Adding too much cream to the frosting: One extra splash can turn a pipeable frosting into a soft spread. Add liquid only by the teaspoon and stop when the frosting holds a ridge on the spatula.
-
Overbaking the crust: Pale gold is the goal. Dark brown edges taste bitter in a tiny dessert because there’s nowhere for that flavor to hide. Pull the shells when the bottoms are dry and the edges just begin to color.
Variations That Change the Mood
Lemon Cloud Tartlets
Beat 2 teaspoons of lemon zest and 1 teaspoon of lemon juice into the frosting. The filling turns brighter and cleaner, which is useful if you want the dessert to feel a little less rich and a little more springy. A tiny twist of zest on top is enough; you do not need a full citrus parade.
Strawberry Jam Center
Spread 1/2 teaspoon of thick strawberry preserves into each cooled shell before piping the frosting. It adds a soft, fruity middle that tastes like a nod to pie without making the crust soggy. This one is especially good if you have a jar of good preserves that needs using.
Chocolate Ribbon Tartlets
Drizzle the inside of each cooled shell with melted dark chocolate and let it set for 5 minutes before filling. The chocolate forms a slim shell that keeps the crust crisp a little longer and gives the whole bite a sharper, darker edge. It’s a nice move when you want the dessert to lean richer.
Almond Bakery Style
Swap half the vanilla in the frosting for almond extract and top each tartlet with a sliced almond or two. The flavor turns more old-school bakery counter than cheesecake stand, which I happen to like with coffee. Keep the almond extract light; too much turns medicinal fast.
Gluten-Free Mini Tartlets
Use a 1:1 gluten-free flour blend in place of the all-purpose flour and chill the dough an extra 15 minutes before rolling. Gluten-free crusts usually benefit from a more patient handling, because the dough can feel crumbly before it comes together. The frosting stays the same.
Storing, Freezing, and Making Ahead
The crust and frosting behave best when they are stored separately. Baked, unfilled shells keep in an airtight container at room temperature for up to 2 days, or in the freezer for up to 1 month. If they lose a little crispness, warm them on a sheet pan at 300°F (150°C) for 4 to 5 minutes, then cool completely before filling.
Cream cheese frosting can be refrigerated for up to 4 days in a tightly covered container. Before using it again, let it sit at room temperature for 20 to 30 minutes, then beat it briefly to smooth out the texture. If it feels stiff from the fridge, one teaspoon of cream at a time brings it back without making it runny.
Once the tartlets are assembled, the clock moves faster. They’ll keep in the refrigerator for about 24 hours, and they’re best on the same day they’re filled. After that, the crust starts to soften from the moisture in the frosting. If you plan to add fresh fruit, do it right before serving so the berries don’t bleed into the swirls.
For make-ahead work, bake the shells a day ahead, make the frosting the same day or the day before, and assemble everything the morning you plan to serve it. That schedule keeps the crust crisp and saves the kind of last-minute panic that always seems to happen when guests are already on the way.
Questions People Ask Before They Bake
Can I use store-bought pie dough instead of making the crust from scratch?
Yes, and it’s a perfectly sensible shortcut. Store-bought dough usually bakes a little less flaky than homemade, but for mini tartlets the difference is smaller than you’d think. Keep the same rolling, chilling, and baking times, then watch the edges closely because packaged dough can brown faster.
How do I keep the mini pie crusts from shrinking?
Cold dough and no stretching. That’s the whole game. If the dough feels soft after pressing into the pan, chill it again before baking, and don’t pull it up the sides to make it taller than it naturally wants to be.
Can I make the frosting less sweet?
You can reduce the powdered sugar a little, but don’t drop it so far that the frosting stops holding its shape. If you want a less sweet finish, use 2 1/2 cups powdered sugar and add a pinch more salt or a little lemon zest instead of lowering the sugar too much.
What if my frosting turns loose?
It usually means the cream cheese was too warm or too much liquid went in. Chill the bowl for 10 to 15 minutes, then beat it again. If it still feels soft, add powdered sugar 1 tablespoon at a time until it firms up enough to pipe.
Can I freeze the baked shells?
Yes. Freeze them in a single layer first, then move them to a container once they’re solid. Thaw at room temperature, and if they’ve softened, warm them briefly in a 300°F oven before filling.
Do these work in a regular muffin pan?
They do, but the bake time changes. Regular muffin cups need more dough and usually run closer to 16 to 18 minutes, so the shells come out larger and less bite-size. If you go that route, cut 4-inch circles instead of 3-inch ones.
Can I put fruit under the frosting?
Absolutely, as long as the fruit layer is thick and not watery. Jam, compote, or very well-drained berries work better than loose fresh fruit, which can leak into the crust and soften it early.
Why I’d Make These Again
There’s a reason this dessert keeps showing up in my own baking rotation: it looks finished without acting difficult. The shells bring the crisp, the frosting brings the cool richness, and the whole thing depends on a handful of small choices — cold butter, enough chill time, no warm filling, no sloppy shortcuts. That’s not fussy. It’s just good baking.
What I like most is how forgiving the idea becomes once you’ve made it once. The crust formula stays steady. The frosting can lean lemony, chocolatey, jammy, or plain. And the tray always looks more deliberate than the effort it took to make it. That’s a useful dessert to have in your pocket.
Decadent Mini Pie Crust with Cream Cheese Frosting — Recipe Card
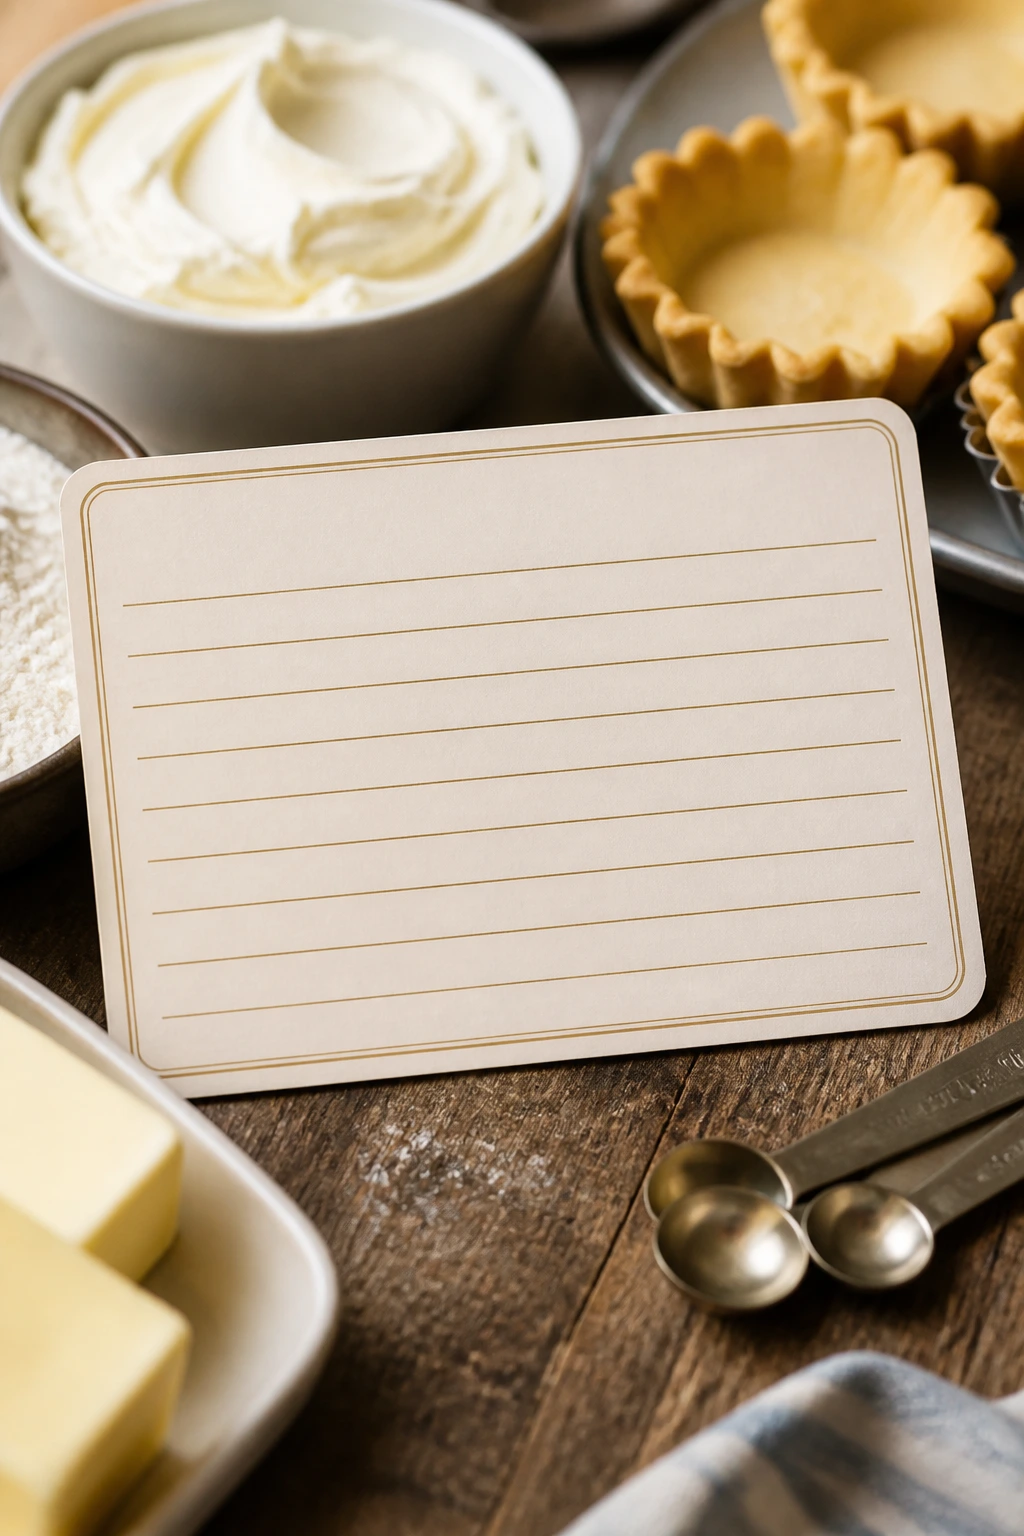
Recipe Name: Decadent Mini Pie Crust with Cream Cheese Frosting
Description: Crisp mini pie crust shells filled with smooth cream cheese frosting and finished like tiny bakery tartlets. The crust stays buttery and flaky, while the frosting adds a cool, tangy finish.
Prep Time: 35 minutes
Cook Time: 15 minutes
Total Time: 50 minutes active + 1 hour 10 minutes chilling and cooling
Course: Dessert
Cuisine: American
Servings: 24 mini tartlets
Calories: About 170 kcal per tartlet
Ingredients
For the Mini Pie Crusts:
- 2 1/2 cups all-purpose flour, plus more for dusting
- 2 tablespoons granulated sugar
- 1 teaspoon fine sea salt
- 1 cup (2 sticks) unsalted butter, very cold and cut into 1/2-inch cubes
- 1 large egg yolk
- 6 to 8 tablespoons ice water
- 1 teaspoon apple cider vinegar
For the Cream Cheese Frosting:
- 8 ounces full-fat block cream cheese, softened to cool room temperature
- 1/2 cup (1 stick) unsalted butter, softened to cool room temperature
- 2 1/2 to 3 cups powdered sugar, sifted
- 1 teaspoon pure vanilla extract
- 1/4 teaspoon fine sea salt
- 1 to 2 tablespoons heavy cream or whole milk, as needed for consistency
Instructions
-
Whisk together the flour, sugar, and salt in a large bowl.
-
Cut in the cold butter until the mixture looks like coarse crumbs with pea-size pieces.
-
Whisk the egg yolk, vinegar, and 4 tablespoons ice water, then add to the flour mixture gradually until the dough clumps.
-
Divide the dough into 2 discs, wrap, and chill for 45 minutes.
-
Preheat the oven to 375°F (190°C) and grease two 12-cup mini muffin pans.
-
Roll one disc to 1/8 inch thick and cut 3-inch circles.
-
Press the dough rounds into the mini muffin cups without stretching, then chill the pans for 15 minutes.
-
Dock the bottoms with a fork and bake for 12 to 14 minutes, until the edges are lightly golden.
-
Cool the shells in the pans for 10 minutes, then transfer to a wire rack and cool completely.
-
Beat the cream cheese and butter until smooth, then add the powdered sugar, vanilla, salt, and enough cream to make a pipeable frosting.
-
Pipe or spoon the frosting into the cooled shells.
-
Chill the filled tartlets for 10 minutes if you want the frosting to firm slightly before serving.
Notes: Keep the shells and frosting separate until you’re close to serving. If the frosting softens, chill it for 10 minutes and beat briefly before using. Add fruit or zest at the last minute so the crust stays crisp.