
The first thing you notice about sticky rice cakes is the shine. Not the sugary kind of shine that comes from a thick frosting sitting on top, but the softer glow of coconut milk, pandan, sesame, or fruit settling into a chewy crumb that pulls a little when you cut it. A good slice looks polished before it even hits the plate. A great one looks almost suspiciously delicate, the kind of dessert you hesitate to serve because it looks like it belongs behind glass.
And then you taste it. That’s where sticky rice cakes earn their keep. The texture is the whole show: tender, springy, faintly elastic, with edges that can go bronzed and crisp if you bake them right. Some lean floral and pale green, some come out deep purple or glossy black, and some wear fresh mango or berries like jewelry. The common thread is glutinous rice flour or cooked sticky rice doing what it does best — giving you a crumb that feels plush instead of dry, even after the cake cools.
I’ve always liked desserts that do one thing cleanly and confidently, and sticky rice cakes do that better than most. They don’t need layers of fondant tricks or a dozen fussy fillings. They need good starch, enough fat, a careful hand with liquid, and a cool slice before serving. Get that right and you end up with desserts that photograph like a dream, yes, but more importantly hold together on the fork and keep their chew on day two.
Why You’ll Love This Collection
- Chewy in the center, tender at the edges: These sticky rice cakes give you that mochi-like bite without turning heavy or gummy.
- Pretty without extra fuss: A few mango slices, toasted sesame, or a dusting of coconut is usually enough to make the whole pan look finished.
- Flavor swings from floral to nutty to bright: Pandan, matcha, black sesame, lychee, ube, and citrus all live comfortably in this format.
- Most of these bake in one pan: You’re not stacking thin layers or piping precision decorations; the batter or rice base does the work.
- Good warm, good cool, still good the next day: That’s rare for a dessert with this much texture, and it makes them practical for sharing.
- Easy to dress up or keep plain: Serve a neat square with tea, or go all in with fruit, cream, coconut, and syrup.
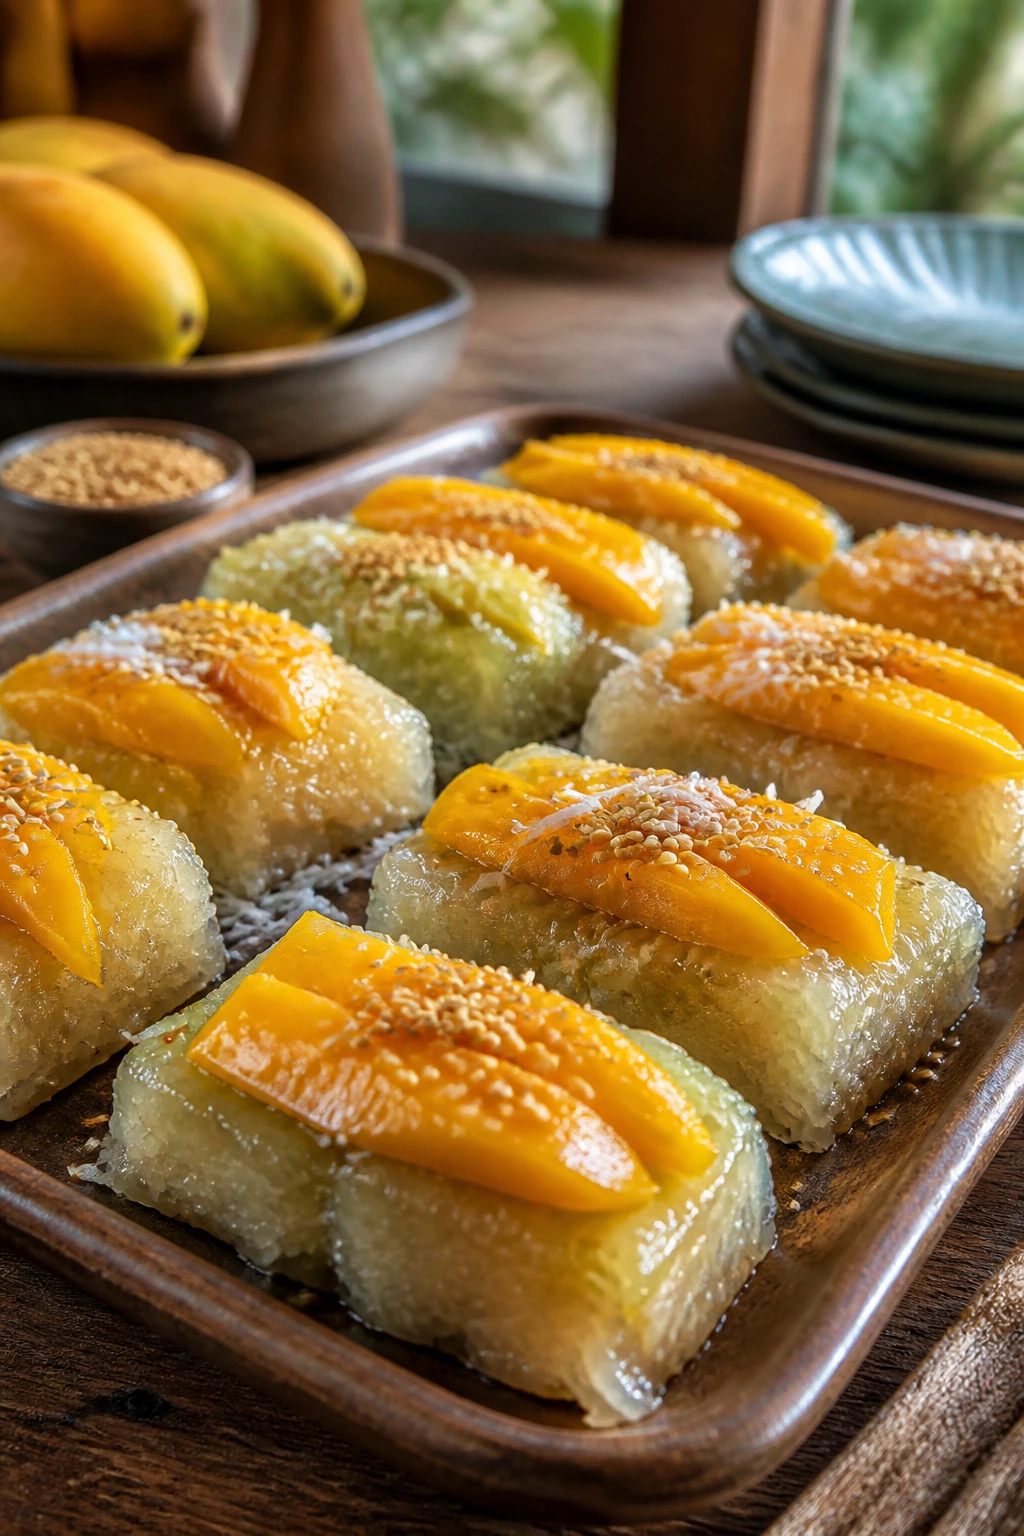
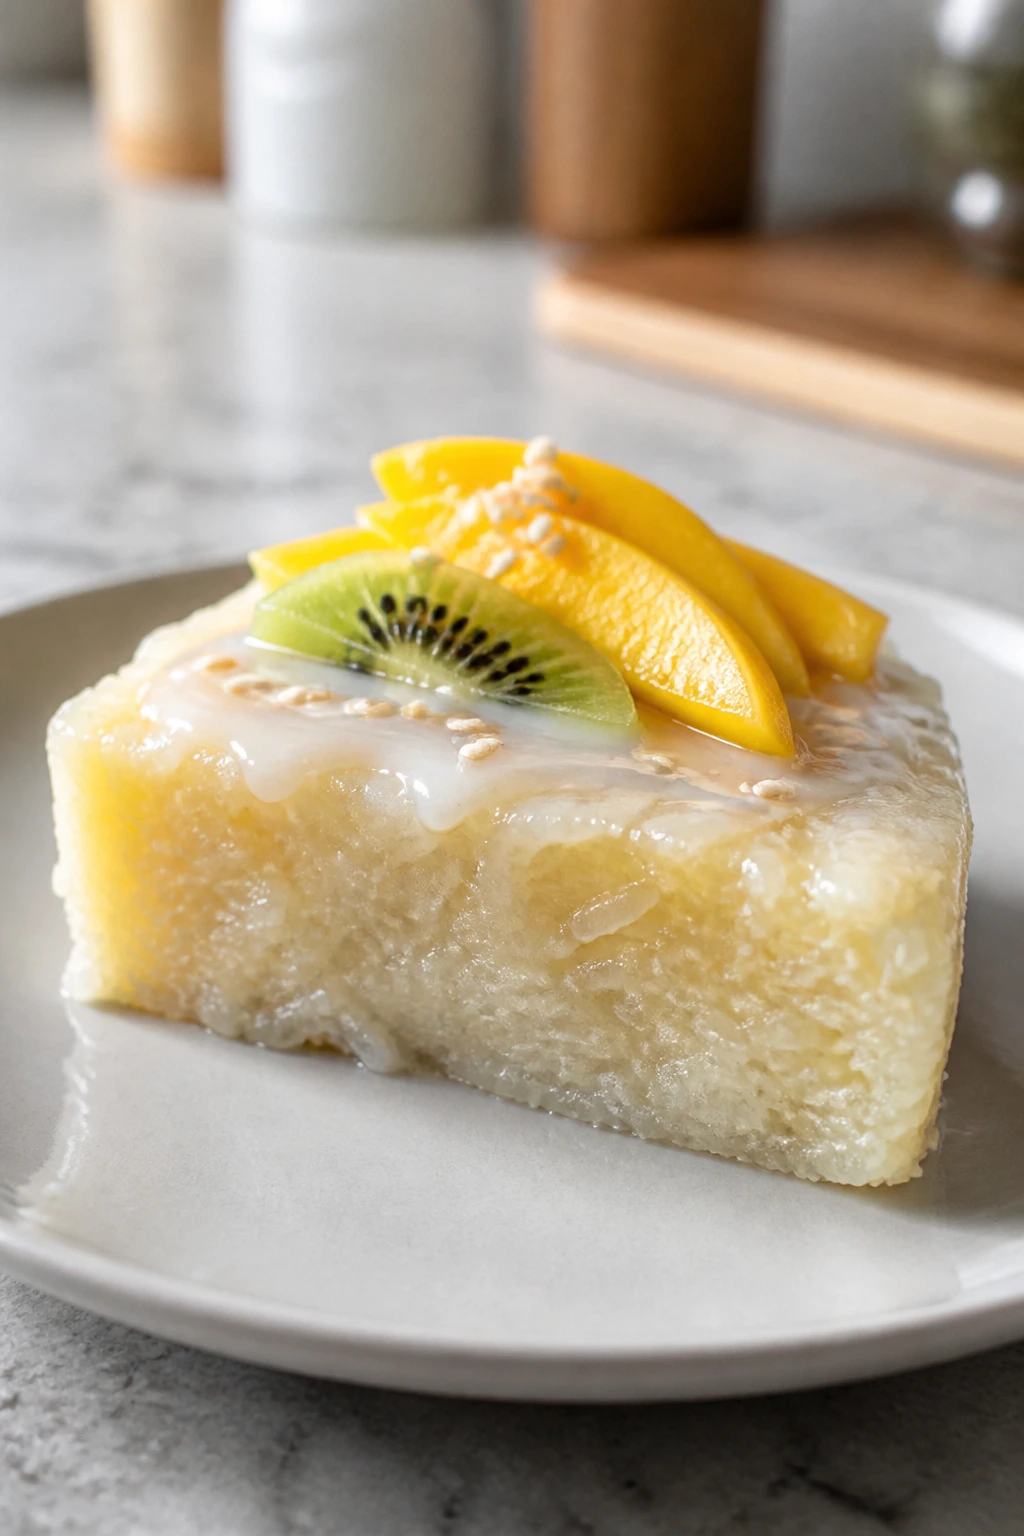
1. Coconut Pandan Mochi Cake with Mango Fans
The smell alone is enough to slow you down. Coconut milk and pandan make a cake that tastes like a warm breeze through a sweet kitchen, and the mango on top cuts through all that richness with a bright, juicy finish. This is the one I’d bring out when I want the first slice to look a little dramatic without involving anything difficult.
Why It Works:
Sweet rice flour gives the crumb its bounce, while coconut milk keeps it plush instead of dry. Pandan adds that grassy, vanilla-like aroma that makes the whole cake feel more polished than the ingredient list suggests. A 350°F bake lets the top turn golden while the center stays chewy, not wet.
Key Ingredients:
- 2 cups sweet rice flour
- 3/4 cup granulated sugar
- 2 teaspoons baking powder
- 1/2 teaspoon fine salt
- 2 large eggs
- 1 1/2 cups full-fat coconut milk
- 4 tablespoons unsalted butter, melted and cooled
- 1 teaspoon pandan extract
- 1 teaspoon vanilla extract
- 1 ripe mango, thinly sliced
- 2 tablespoons toasted shredded coconut
Quick Steps:
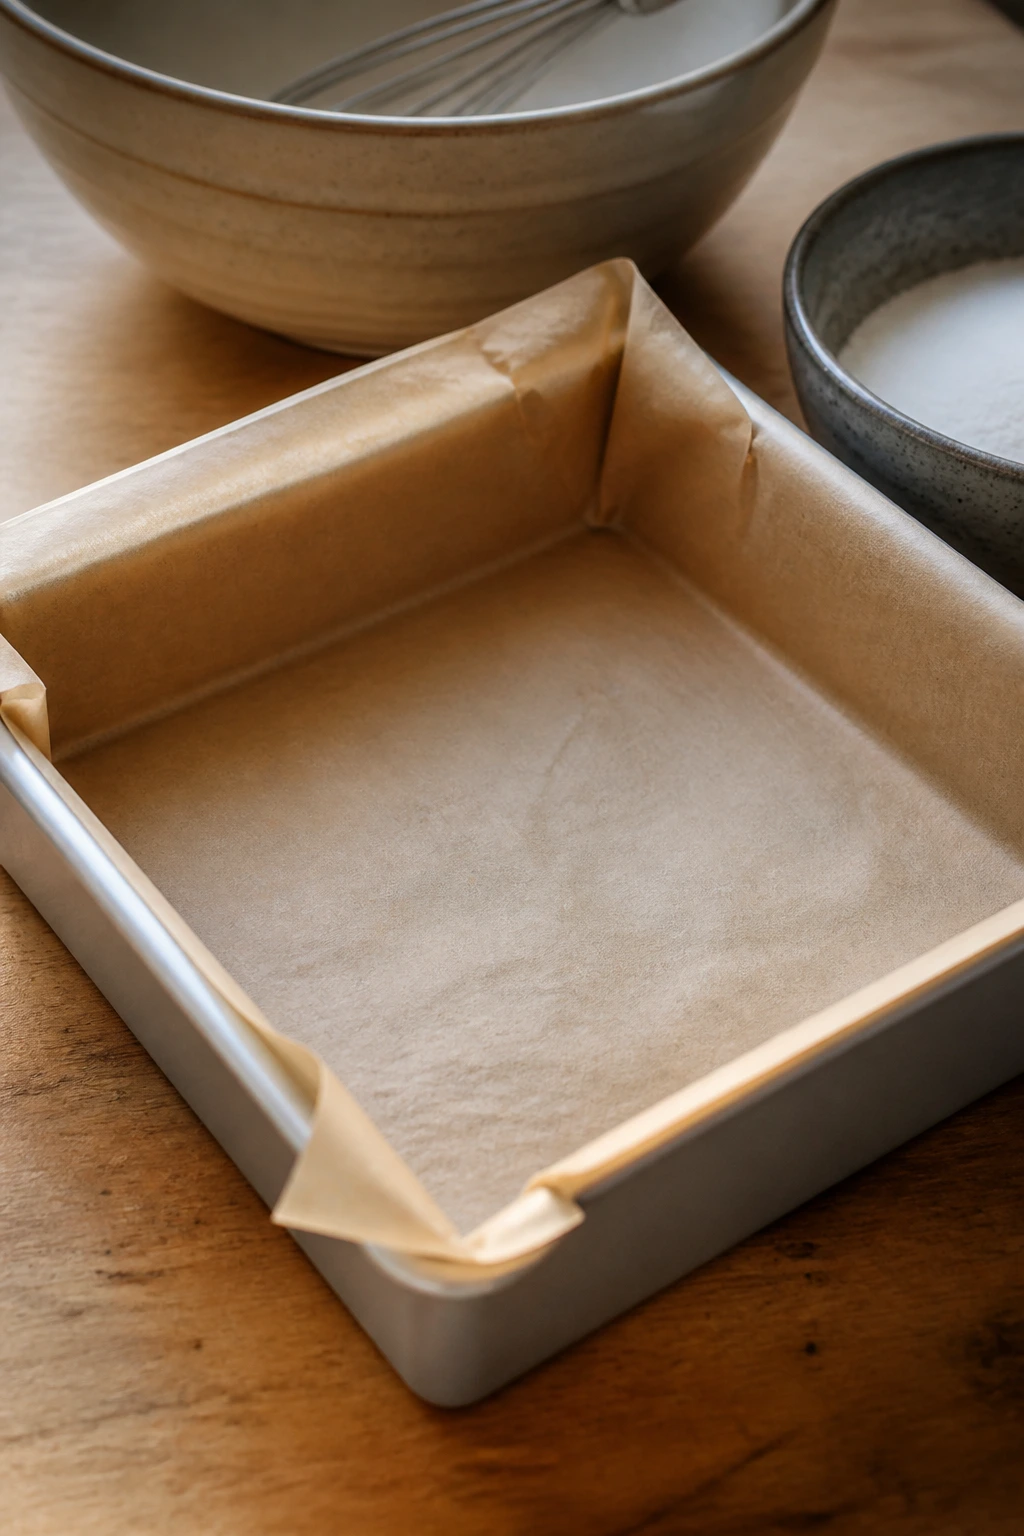
- Preheat the oven to 350°F (175°C). Grease an 8-inch square pan and line it with parchment, leaving overhang.
- Whisk the sweet rice flour, sugar, baking powder, and salt in a large bowl.
- In another bowl, whisk the eggs, coconut milk, melted butter, pandan extract, and vanilla until smooth.
- Stir the wet mixture into the dry mixture until no dry pockets remain. Do not overmix; the batter should look glossy and thick, not whipped.
- Pour into the pan and bake for 35 to 42 minutes, until the top is set, lightly bronzed, and springs back when pressed.
- Cool completely before slicing. Top with mango fans and toasted coconut just before serving.
Equipment for This Recipe:
- 8-inch square baking pan
- Parchment paper
- Mixing bowls
- Whisk and rubber spatula
How to Serve This Dish:
Cut it into tidy squares and fan the mango over the top so each slice gets a little fruit. A spoonful of lightly sweetened coconut cream beside the cake looks especially nice, though it’s not necessary. Serve it at room temperature, not hot from the pan.
Pro Tips for This Recipe:
- Use ripe mango that slices cleanly; stringy fruit turns the top messy fast.
- If your pandan extract is strong, start with 3/4 teaspoon and taste the batter.
- Toast the coconut in a dry skillet until pale gold; that extra minute gives the finish a nuttier edge.
- Let the cake cool all the way before cutting, or the center will drag and smear.
Variations on This Dish:
- Pineapple Swap: Replace the mango with thin pineapple wedges and add 1 teaspoon lime zest to the batter.
- Rose-Pandan Version: Add 1 tablespoon rosewater and top with sliced strawberries for a floral, pale pink finish.
- Coconut Cream Finish: Spoon thick coconut cream over each square instead of fruit when you want a softer, richer plate.
Common Mistakes to Avoid with This Dish:
- Using regular rice flour: The crumb turns grainy and dry. Sweet rice flour is the right starch here.
- Cutting too soon: Warm sticky rice cake tears easily. Wait until it’s fully cool.
- Baking until the top goes dark: You want light golden color, not a hard shell.
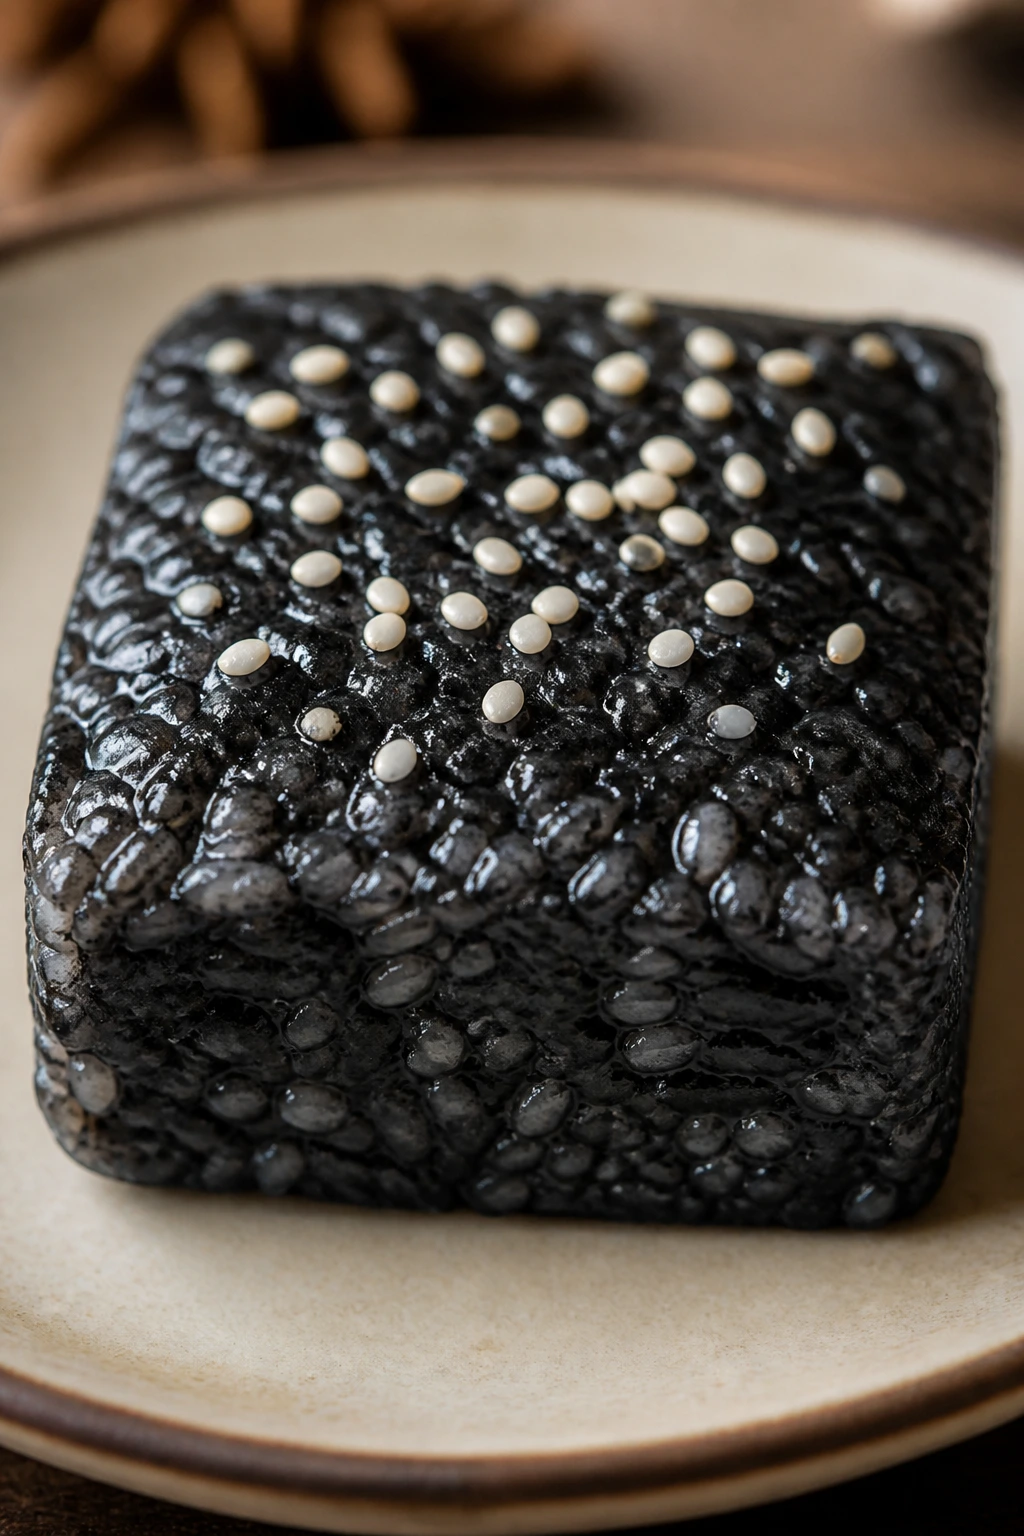
2. Black Sesame Sticky Rice Squares
Black sesame gives the cake a deep, toasty flavor and a dark, dramatic color that looks almost velvety on the plate. It’s a quieter dessert than the pandan-mango version, but I think that’s the charm. The flavor lands somewhere between halva, tahini fudge, and a soft mochi bar, and the finish looks cleaner than most chocolate cakes.
Why It Works:
Black sesame paste brings fat and nuttiness, which keeps the crumb from reading flat or chalky. Sweet rice flour supplies the chew, and the sugar balances the sesame’s natural bitterness. A short bake keeps the center tender so the squares slice without cracking.
Key Ingredients:
- 2 cups sweet rice flour
- 3/4 cup granulated sugar
- 2 teaspoons baking powder
- 1/2 teaspoon fine salt
- 2 large eggs
- 1 1/4 cups whole milk
- 1/2 cup black sesame paste
- 4 tablespoons melted unsalted butter
- 1 teaspoon vanilla extract
- 2 tablespoons toasted white sesame seeds
Quick Steps:
- Heat the oven to 350°F (175°C). Line an 8-inch square pan with parchment.
- Whisk the flour, sugar, baking powder, and salt together.
- In a separate bowl, whisk the eggs, milk, black sesame paste, melted butter, and vanilla until smooth and dark.
- Combine the wet and dry mixtures and stir until the batter looks evenly gray-black with no flour streaks.
- Pour into the pan, sprinkle with white sesame seeds, and bake for 32 to 38 minutes until the top is set and the center springs back.
- Cool completely before lifting out and slicing into squares.
Equipment for This Recipe:
- 8-inch square pan
- Parchment paper
- Medium mixing bowls
- Whisk
- Offset spatula, if you want clean edges
How to Serve This Dish:
I like these in neat squares with a little unsweetened whipped cream on the side. The dark sesame color looks best against a white plate, and a few extra sesame seeds over the top make the texture obvious. Serve them with tea rather than milk.
Pro Tips for This Recipe:
- Stir the sesame paste well before measuring; the oil separates and hides at the top of the jar.
- If the batter feels too thick, add milk 1 tablespoon at a time.
- Pull the cake when the center still has a tiny wobble; it firms as it cools.
- A pinch of flaky salt on top sharpens the sesame flavor more than extra sugar does.
Variations on This Dish:
- Tahini Twist: Swap half the black sesame paste for tahini if you want a lighter nutty edge.
- Honey Finish: Drizzle with 2 tablespoons warm honey after cooling for a softer, floral sweetness.
- Chocolate Stripe: Add 2 tablespoons cocoa powder to one-third of the batter and swirl it in before baking.
Common Mistakes to Avoid with This Dish:
- Not loosening the sesame paste first: Thick paste clumps and leaves dark streaks.
- Overbaking: Black sesame cakes go dry fast once the edges pull away too far.
- Serving warm: The flavor is better after a full cool-down; warm slices can taste muddy.
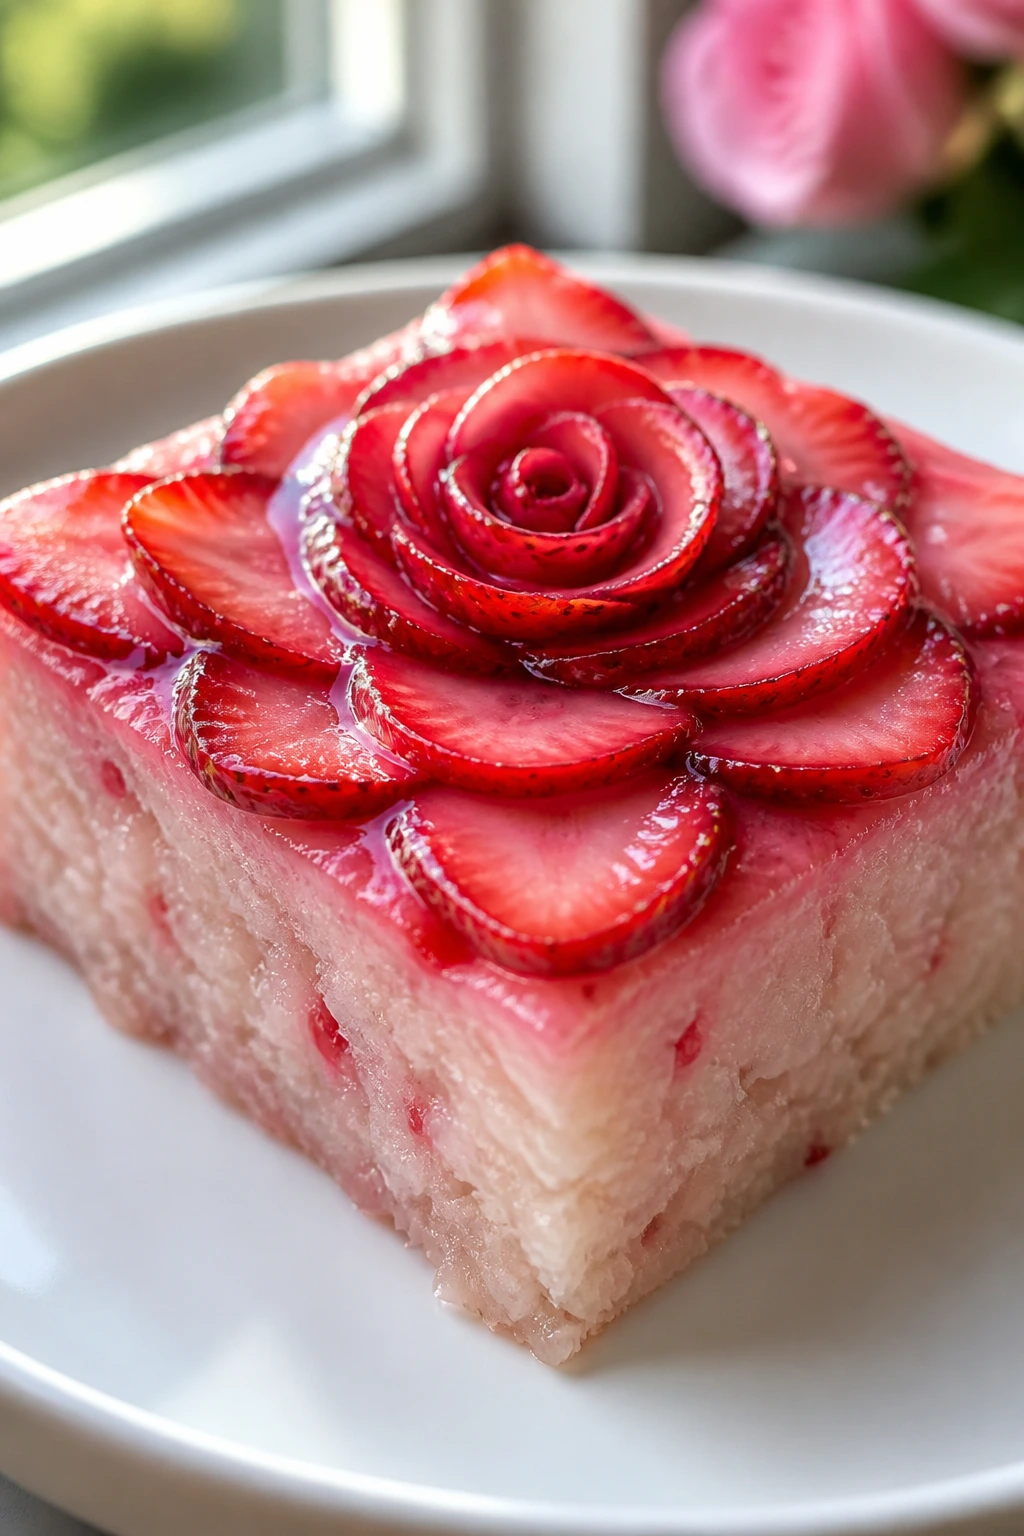
3. Strawberry Rose Coconut Rice Cake
This one looks like spring in a square pan. The batter bakes pale and fragrant, then the strawberries on top settle into glossy little pools of juice while the rosewater gives the cake a perfume that feels lifted instead of heavy. If you want a dessert that looks elegant without turning sugary or fussy, this is the one.
Why It Works:
Strawberries add moisture and bright acidity, which keeps the coconut base from feeling dense. Rosewater needs restraint, but used lightly it makes the fruit taste clearer, not floral in a candle-shop way. The sweet rice flour holds the berries in place while the top bakes to a soft gold.
Key Ingredients:
- 2 cups sweet rice flour
- 3/4 cup granulated sugar
- 2 teaspoons baking powder
- 1/2 teaspoon fine salt
- 2 large eggs
- 1 cup full-fat coconut milk
- 1/4 cup whole milk
- 4 tablespoons melted unsalted butter
- 1 tablespoon rosewater
- 1 teaspoon vanilla extract
- 1 cup diced strawberries, tossed with 1 tablespoon sweet rice flour
- 1/2 cup sliced strawberries for the top
- 2 tablespoons chopped pistachios
Quick Steps:
- Preheat the oven to 350°F (175°C). Line an 8-inch square pan with parchment.
- Whisk the flour, sugar, baking powder, and salt in one bowl.
- Whisk the eggs, coconut milk, milk, melted butter, rosewater, and vanilla in another bowl.
- Stir the wet mixture into the dry, then fold in the diced strawberries coated in flour.
- Spread the batter into the pan, arrange the strawberry slices on top, and sprinkle with pistachios.
- Bake for 36 to 41 minutes, until the center is set and the fruit looks glossy.
- Cool fully before slicing. The cake slices better once the strawberry juices settle.
Equipment for This Recipe:
- 8-inch square pan
- Parchment paper
- Mixing bowls
- Whisk and spatula
How to Serve This Dish:
Serve it in thin squares with a few extra strawberry slices tucked beside the cake. A spoonful of unsweetened yogurt works if you want a tart edge, but plain is fine. The pistachios give enough crunch on their own.
Pro Tips for This Recipe:
- Tossing the diced strawberries with flour keeps them from sinking.
- Use rosewater sparingly; too much makes the whole cake taste soapy.
- Slice the top strawberries thin so they soften without turning watery.
- A little lemon zest in the batter wakes up the fruit if your berries are sweet but flat.
Variations on This Dish:
- Raspberry Swap: Replace the strawberries with raspberries and skip the flour toss.
- Orange Blossom Version: Swap the rosewater for 1 teaspoon orange blossom water and top with sliced almonds.
- Cream Finish: Add a light whipped cream layer on top just before serving.
Common Mistakes to Avoid with This Dish:
- Adding too much rosewater: The floral note should sit behind the strawberry, not push it off the plate.
- Using wet berries straight from the wash: Dry them well or the batter turns loose around the fruit.
- Cutting before it cools: Strawberry juices need time to thicken back into the crumb.
4. Ube Coconut Sticky Rice Loaf
A purple loaf never fails to get attention, but this one earns it. Ube brings a soft vanilla-like flavor with a faint nuttiness, and the coconut keeps the loaf plush from end to end. I like it best sliced thick and served on a plain plate so the color can do the talking.
Why It Works:
Ube halaya adds both flavor and moisture, which helps the sweet rice flour bake into a slice that bends a little before it breaks. Coconut milk rounds out the purple yam’s earthy note. A loaf pan gives the edges more browning than a square pan, and that contrast matters here.
Key Ingredients:
- 2 cups sweet rice flour
- 3/4 cup granulated sugar
- 2 teaspoons baking powder
- 1/2 teaspoon fine salt
- 2 large eggs
- 1 cup full-fat coconut milk
- 1/2 cup ube halaya
- 4 tablespoons melted coconut oil
- 1 teaspoon vanilla extract
- 2 tablespoons coconut flakes, toasted
- 1 tablespoon powdered sugar, for dusting
Quick Steps:
- Heat the oven to 350°F (175°C). Grease and line a 9×5-inch loaf pan with parchment.
- Whisk the flour, sugar, baking powder, and salt in a bowl.
- In another bowl, whisk the eggs, coconut milk, ube halaya, coconut oil, and vanilla until smooth and evenly purple.
- Stir the wet ingredients into the dry until the batter is thick and streak-free.
- Pour into the loaf pan and bake for 48 to 55 minutes, until a toothpick comes out with a few moist crumbs.
- Cool in the pan for 15 minutes, then lift out and cool fully on a rack.
- Dust with powdered sugar and toasted coconut before slicing.
Equipment for This Recipe:
- 9×5-inch loaf pan
- Parchment paper
- Mixing bowls
- Whisk
- Cooling rack
How to Serve This Dish:
Slice the loaf thick and fan the pieces slightly off-center so the color shows. A small spoon of coconut whipped cream beside each slice makes sense, though it’s optional. I’d serve this with strong tea or black coffee.
Pro Tips for This Recipe:
- If your ube halaya is stiff, warm it for 10 seconds so it mixes smoothly.
- Coconut oil should be melted, not hot, or it can scramble the eggs.
- Check the loaf early; ube cakes can look set before the middle is done.
- Let it cool before dusting or the sugar disappears into the crust.
Variations on This Dish:
- Purple Swirl: Reserve 1/4 cup batter, mix in 1 teaspoon cocoa, and marble it through the top.
- Extra Coconut: Fold in 1/3 cup shredded coconut for more texture.
- Dairy Swap: Use coconut oil and coconut milk only for a fully dairy-free loaf.
Common Mistakes to Avoid with This Dish:
- Undermixing the ube halaya: Streaks of yam paste leave an uneven crumb.
- Overbaking until dry: Pull it when a few moist crumbs cling to the tester.
- Slicing hot: The loaf needs a full cool-down or it squishes in the middle.
5. Matcha White Chocolate Mochi Cake
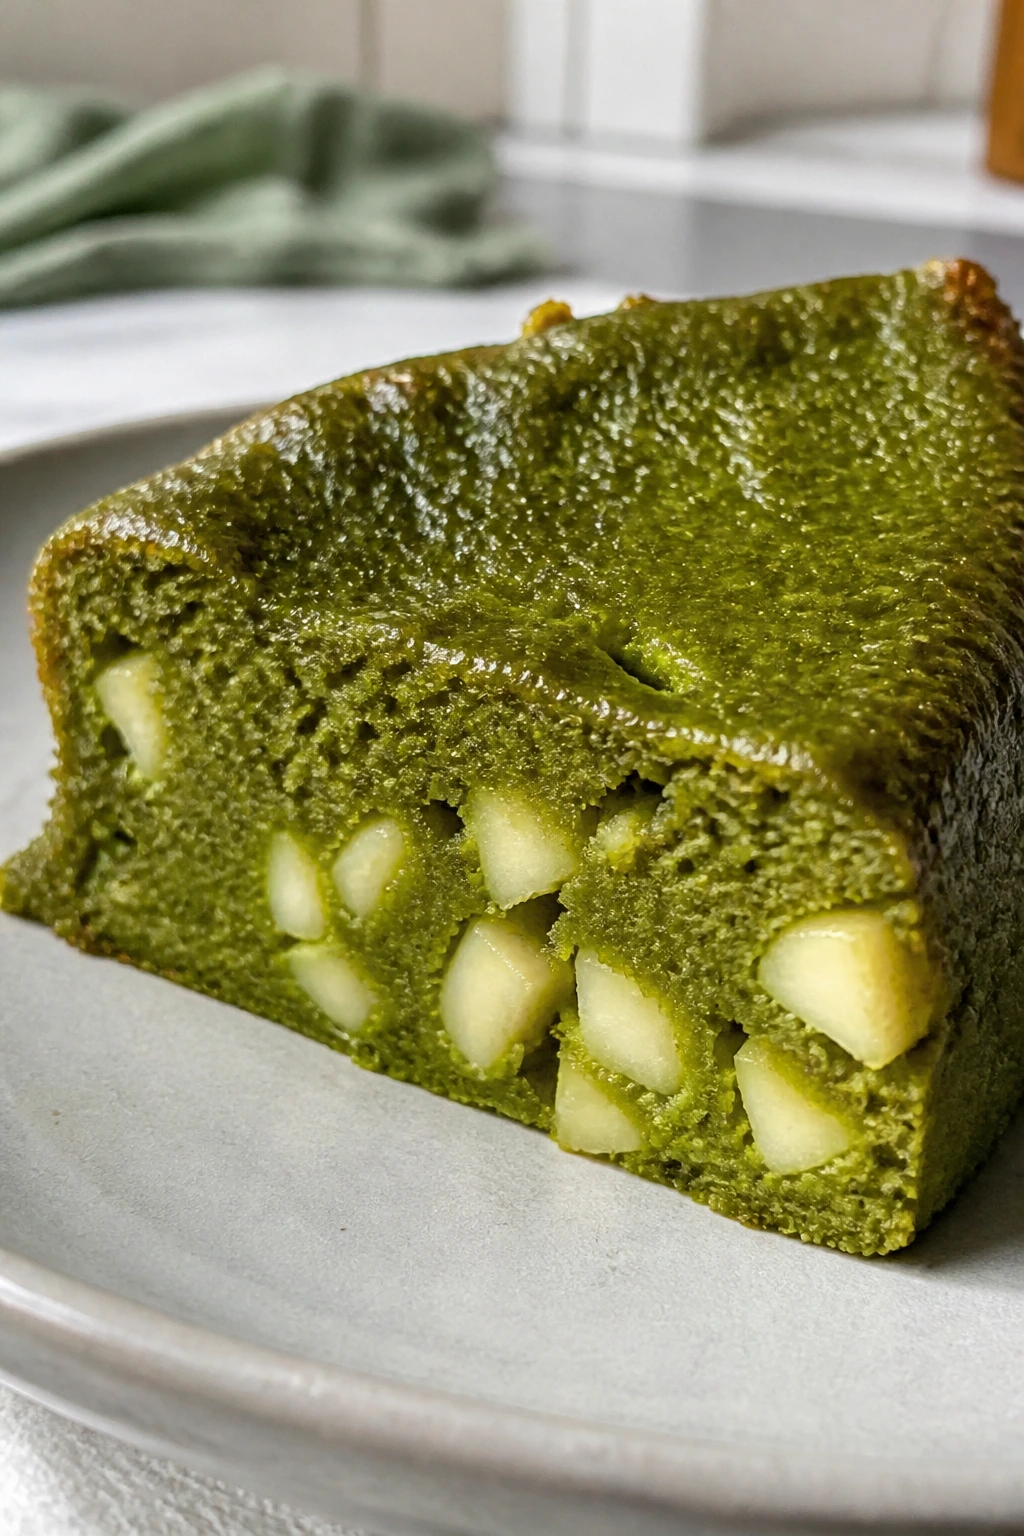
Matcha and white chocolate are a little theatrical together, and I mean that kindly. The matcha brings a clean, grassy bitterness, the white chocolate softens the edges, and the finished cake looks striking with those pale chips peeking through green batter. It’s the dessert I’d serve when I want something modern-looking without making a fragile layer cake.
Why It Works:
Matcha can taste dusty if it’s not buffered by fat and sugar, so the white chocolate does real work here. Sweet rice flour keeps the texture chewy, while butter and milk give the crumb enough richness to carry the tea flavor. A 350°F bake gives the batter time to set before the chocolate over-melts into one pale layer.
Key Ingredients:
- 2 cups sweet rice flour
- 3/4 cup granulated sugar
- 2 tablespoons matcha powder
- 2 teaspoons baking powder
- 1/2 teaspoon fine salt
- 2 large eggs
- 1 1/2 cups whole milk
- 4 tablespoons melted unsalted butter
- 3/4 cup white chocolate chunks
- 1 tablespoon powdered sugar, for dusting
- 1 teaspoon matcha powder, for finishing
Quick Steps:
- Preheat the oven to 350°F (175°C). Line an 8-inch square pan with parchment.
- Whisk the flour, sugar, matcha, baking powder, and salt in a bowl until the color looks even.
- Whisk the eggs, milk, and melted butter in another bowl.
- Stir the wet into the dry, then fold in the white chocolate chunks.
- Bake for 34 to 40 minutes, until the center is set and the top has tiny pale cracks.
- Cool completely, dust with powdered sugar and a little matcha, and cut into squares.
Equipment for This Recipe:
- 8-inch square pan
- Parchment paper
- Mixing bowls
- Whisk
- Fine sieve for dusting, optional
How to Serve This Dish:
Serve these in small squares because the matcha flavor is more satisfying when it doesn’t get over-poured. A few raspberries on the side sharpen the sweetness and make the green color pop. Keep the plate clean; this cake likes spare presentation.
Pro Tips for This Recipe:
- Sift the matcha if it’s clumpy; little green freckles look fine, but dusty patches don’t.
- Use good white chocolate, not candy coating, or the flavor gets waxy.
- Let the cake rest after baking so the chips settle and the crumb firms.
- A pinch of flaky salt on top keeps the sweetness from taking over.
Variations on This Dish:
- Dark Chocolate Edge: Swap half the white chocolate for chopped dark chocolate.
- Sesame Matcha: Add 1 tablespoon tahini to the batter for a nutty undertone.
- Citrus Lift: Add 1 teaspoon orange zest to brighten the tea flavor.
Common Mistakes to Avoid with This Dish:
- Using too much matcha: The cake turns bitter and muddy. Two tablespoons is enough.
- Skipping the cool-down: Warm matcha mochi cake slices like pudding.
- Baking until fully browned: The top should set before it darkens too much.
6. Mango Sticky Rice Layer Cake
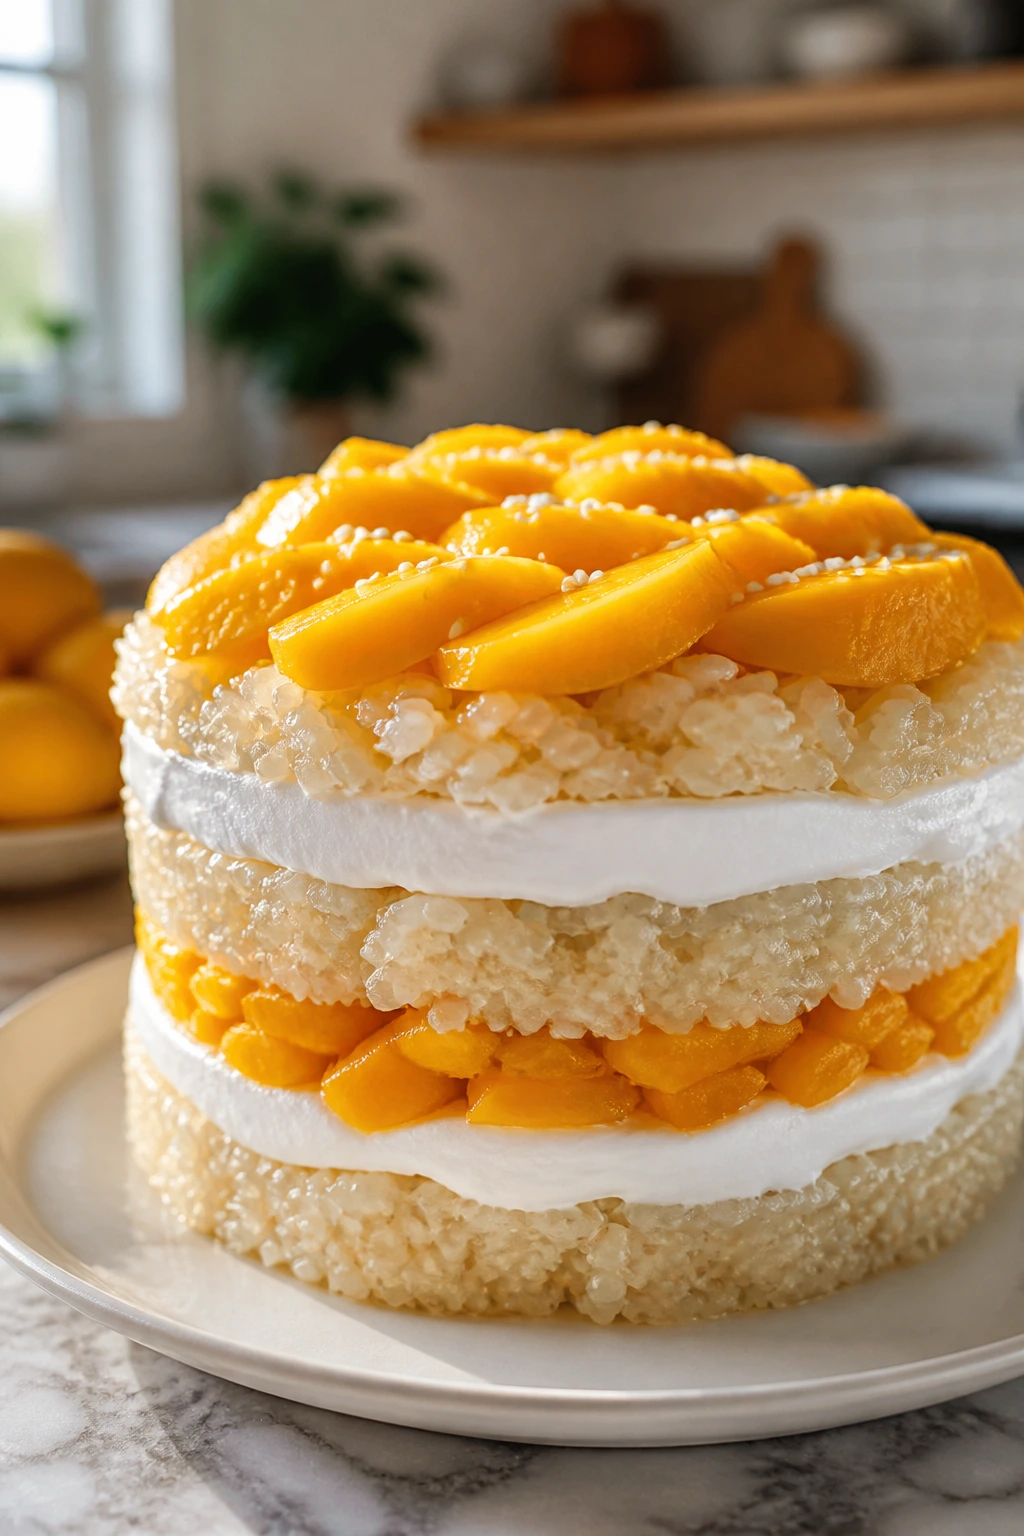
This is the showpiece. It’s not a fussy bakery torte, but it has enough structure to slice cleanly and enough softness to taste like the dessert table version of a warm hug. Sweet sticky rice, whipped coconut cream, and ripe mango make each layer do a different job, which is why the whole thing feels richer than a single bowl of mango sticky rice.
Why It Works:
Cooked sticky rice has a firmer bite than mochi batter, so it can hold shape inside a springform pan. Coconut milk seasons the rice all the way through, and the whipped cream gives the cake lift without needing flour. Mango adds freshness and a bright, juicy top that keeps the dessert from feeling dense.
Key Ingredients:
- 2 cups glutinous rice, rinsed well and soaked for 4 hours
- 1 1/2 cups coconut milk
- 1/2 cup granulated sugar
- 1/2 teaspoon fine salt
- 2 ripe mangoes, peeled and sliced
- 2 cups cold heavy cream
- 1/4 cup powdered sugar
- 1 teaspoon vanilla extract
- 1 tablespoon lime juice
- 1/2 cup toasted coconut flakes
Quick Steps:
- Steam or cook the soaked rice until tender and sticky, about 20 to 25 minutes after soaking, then let it rest covered for 10 minutes.
- Warm the coconut milk with sugar and salt until dissolved, then fold it into the hot rice.
- Line a 7- or 8-inch springform pan with parchment. Press half the sticky rice into the bottom in an even layer.
- Whip the cream with powdered sugar, vanilla, and lime juice to soft peaks.
- Spread half the whipped cream over the rice, add mango slices, then repeat with the remaining rice and cream.
- Chill for at least 2 hours, then release the pan and top with more mango and coconut flakes.
Equipment for This Recipe:
- Steamer basket or rice cooker
- 7- or 8-inch springform pan
- Parchment paper
- Mixing bowl and electric mixer
- Offset spatula
How to Serve This Dish:
Use a warm knife wiped clean between cuts so the layers stay neat. A wedge looks nicest when the mango is arranged in overlapping strips on top. Serve chilled but not icy cold; the rice tastes softer after 10 minutes out of the fridge.
Pro Tips for This Recipe:
- Soak the rice long enough or the texture will stay chalky in the center.
- Press the rice firmly into the pan so it slices in distinct layers.
- Chill before unmolding; if you rush this, the sides slump.
- Use mango that’s fragrant and supple, not fibrous and underripe.
Variations on This Dish:
- Pandan Cream Version: Add 1 teaspoon pandan extract to the whipped cream.
- Berry-Forward Cake: Replace half the mango with strawberries or raspberries.
- Smaller Trifle Build: Layer the same components in glasses for easier serving.
Common Mistakes to Avoid with This Dish:
- Using rice that isn’t sticky enough: Regular rice won’t hold the cake together.
- Skipping the chill: The slice needs time to set or it collapses.
- Overwhipping the cream: Stiff cream looks fine until it cracks on the plate.
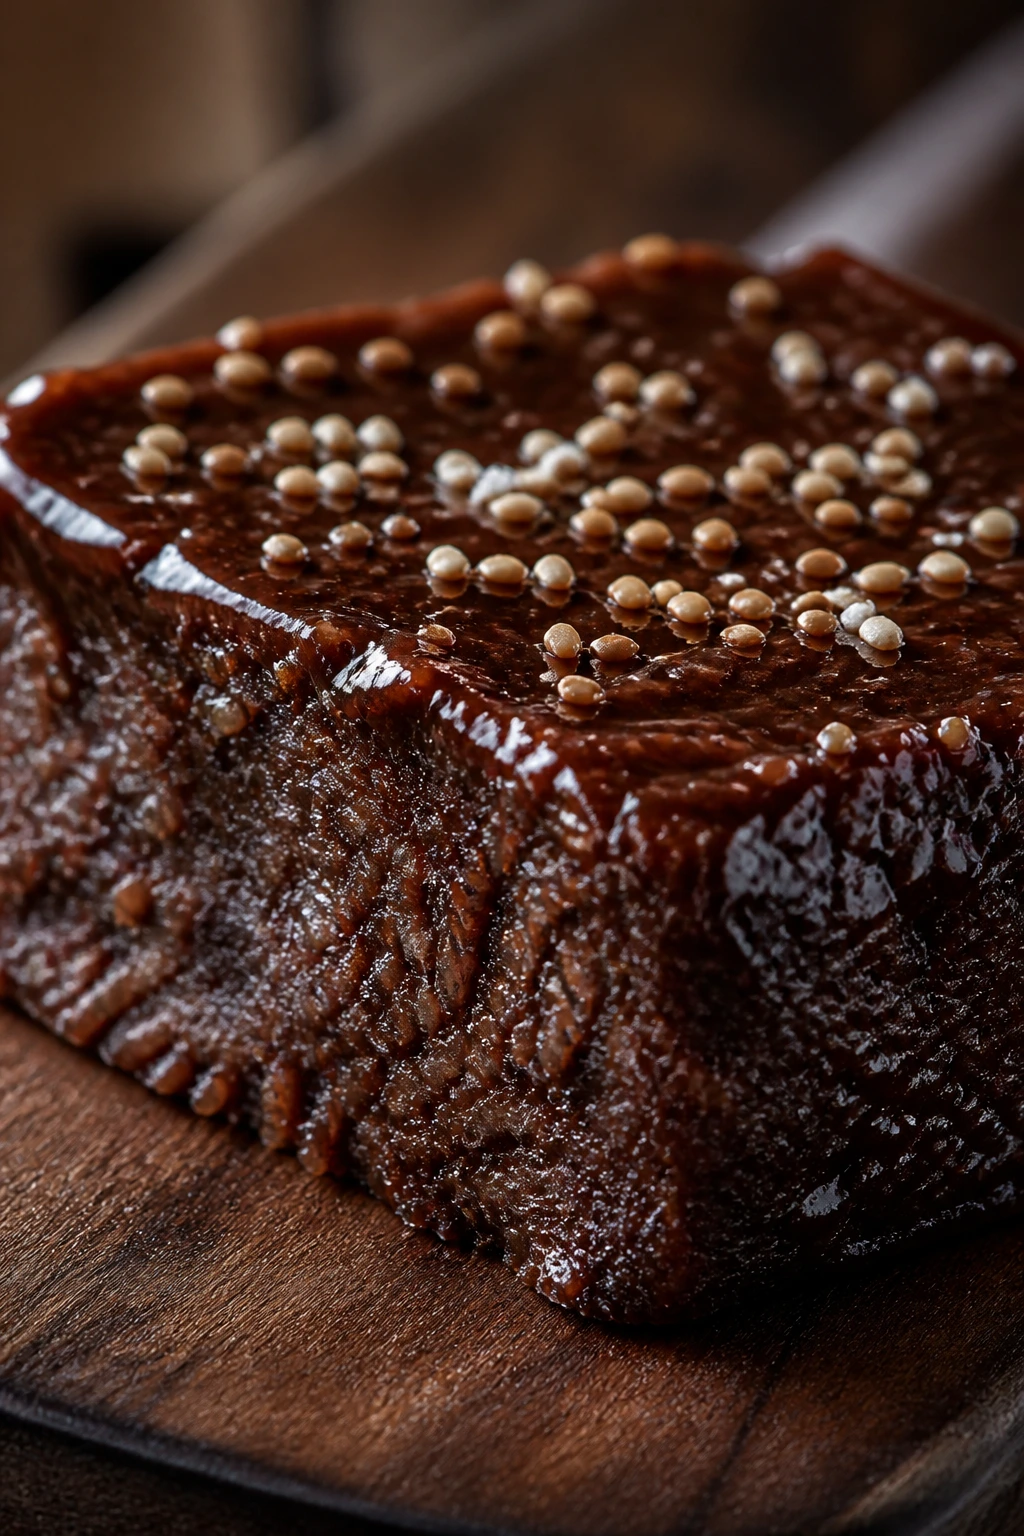
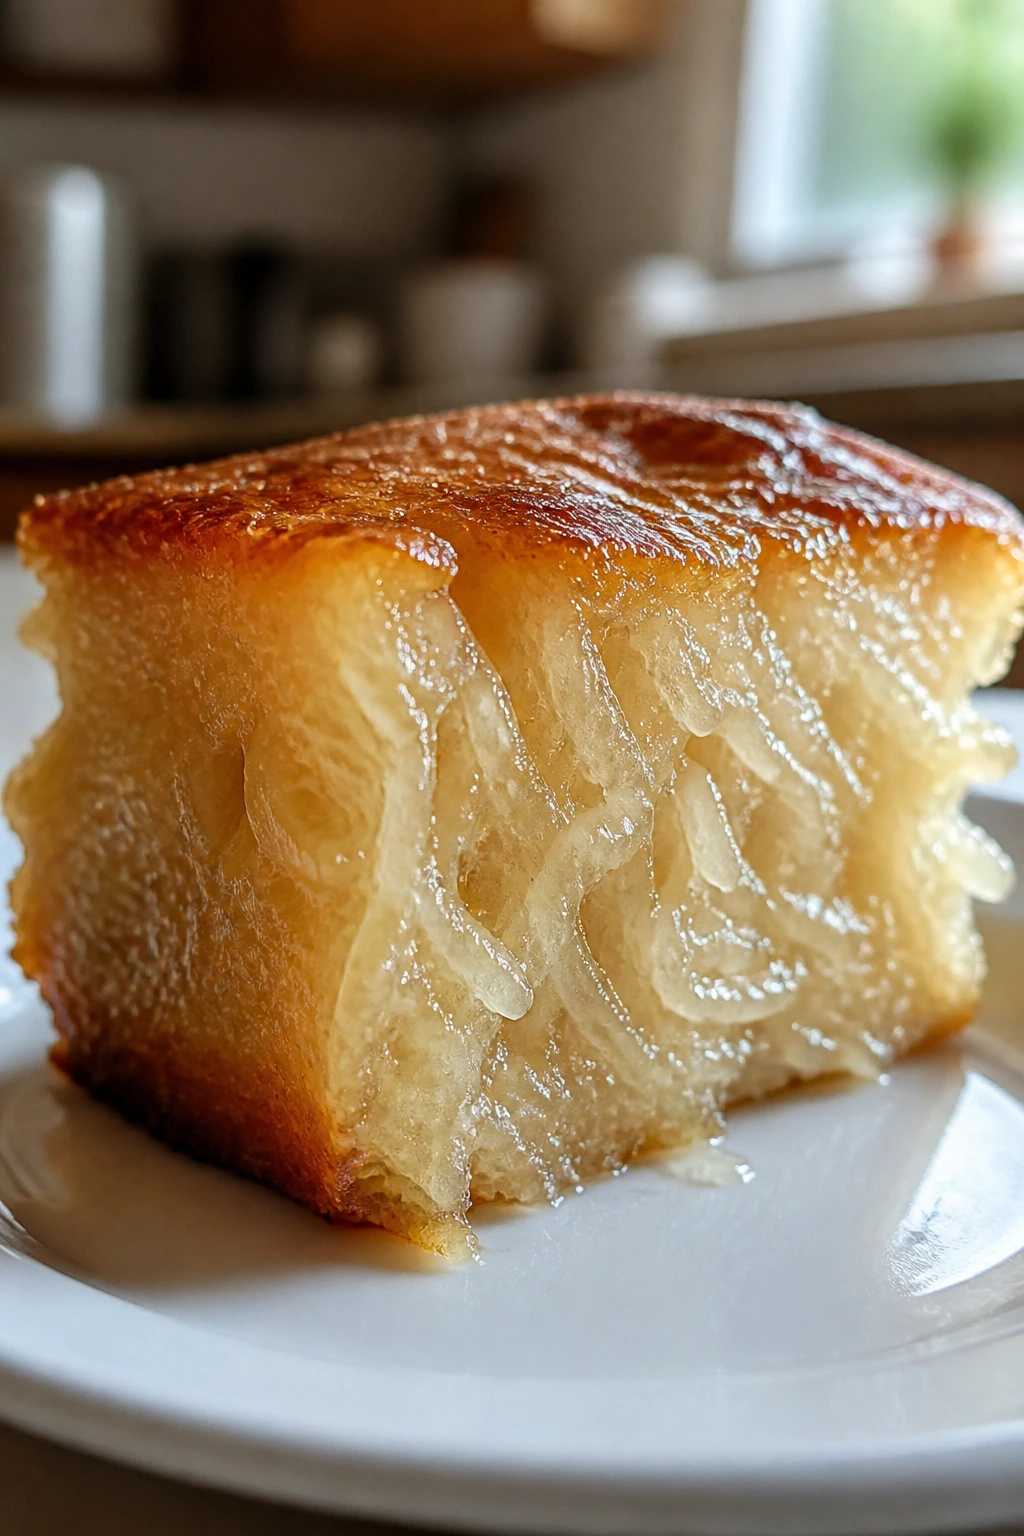
7. Biko with Latik
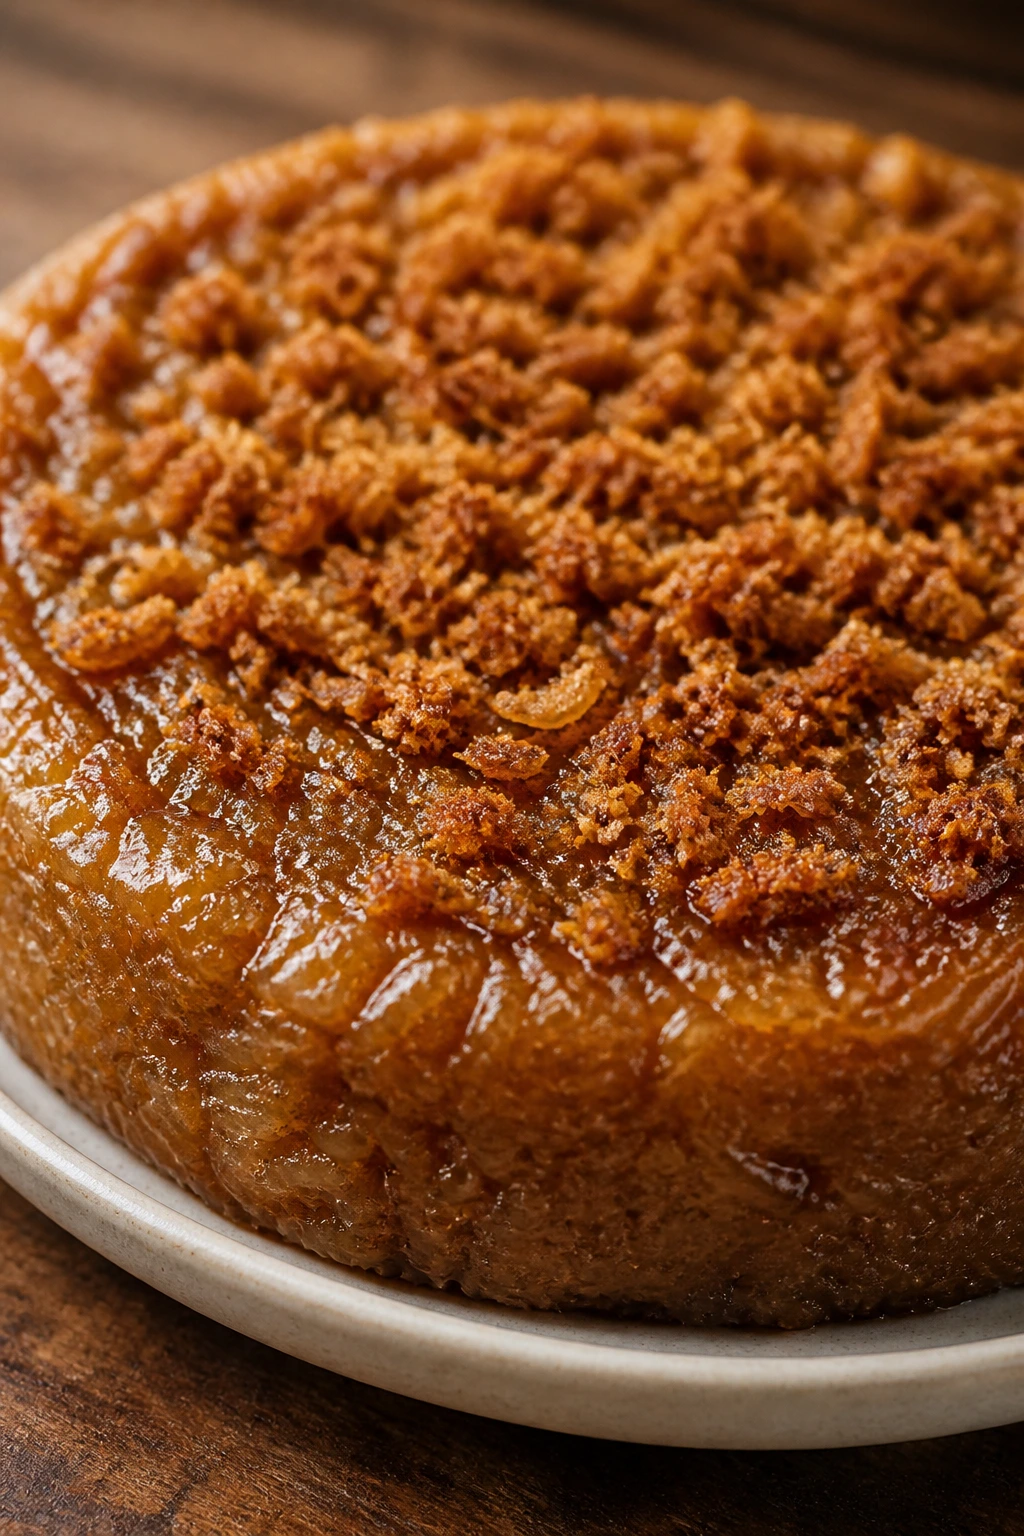
Biko is the old soul in this lineup. It’s glossy, caramel-colored, and built from cooked sticky rice that gets folded into coconut milk and brown sugar until the spoon starts dragging through a thick, shiny pan. The latik on top — those toasted coconut curds — is what gives it that unmistakable finish.
Why It Works:
Cooking the rice first gives the dessert a chewy structure that can stand up to a rich coconut syrup. Brown sugar deepens the flavor without needing extra spices, and the latik adds both crunch and a toasted coconut note. Baking it for a short spell at the end dries the surface just enough to help with slicing.
Key Ingredients:
- 2 cups glutinous rice, rinsed
- 2 1/2 cups water
- 2 cans coconut milk, divided
- 1 cup dark brown sugar
- 1/2 teaspoon fine salt
- 1 cup coconut cream, for latik
- 2 tablespoons unsalted butter, for the pan
Quick Steps:
- Cook the rinsed rice with water until tender and sticky, then let it steam off the heat for 10 minutes.
- In a wide pan, simmer 1 can of coconut milk with the brown sugar and salt until the sugar dissolves and the mixture looks glossy.
- Stir in the cooked rice and the second can of coconut milk. Cook over medium-low heat, stirring often, until the mixture thickens and pulls from the pan, about 12 to 15 minutes.
- Grease an 8-inch square baking dish with butter and spread the biko in an even layer.
- Simmer the coconut cream separately until it turns into golden latik curds, then spoon them over the top.
- Bake at 350°F (175°C) for 10 minutes, cool, and cut with an oiled knife.
Equipment for This Recipe:
- Wide saucepan or deep skillet
- Baking dish
- Wooden spoon
- Fine strainer or slotted spoon for latik
How to Serve This Dish:
Biko is dense, so smaller squares make sense. I like it on a plate with no garnish beyond the latik, because the finish is already busy enough. It’s excellent with black coffee or hot tea.
Pro Tips for This Recipe:
- Stir the rice often once the coconut milk goes in; it burns in a heartbeat.
- Keep the heat moderate. High heat turns the bottom to glue before the top thickens.
- Latik needs patience and a watchful eye; it goes from gold to bitter fast.
- Oiling the knife between cuts keeps the slices neat and glossy.
Variations on This Dish:
- Pandan Biko: Add 1 teaspoon pandan extract to the coconut milk.
- Ube Biko: Stir 1/2 cup ube halaya into the rice for a purple version.
- Crispier Top: Broil for 1 to 2 minutes after baking if you want a darker top.
Common Mistakes to Avoid with This Dish:
- Undercooking the rice before the coconut mixture goes in: The center stays hard.
- Leaving latik unattended: It can burn in seconds once the curds form.
- Serving in thick slabs: Biko is rich; small squares are easier to eat and prettier on the plate.
8. Sesame Peanut Sticky Rice Cups
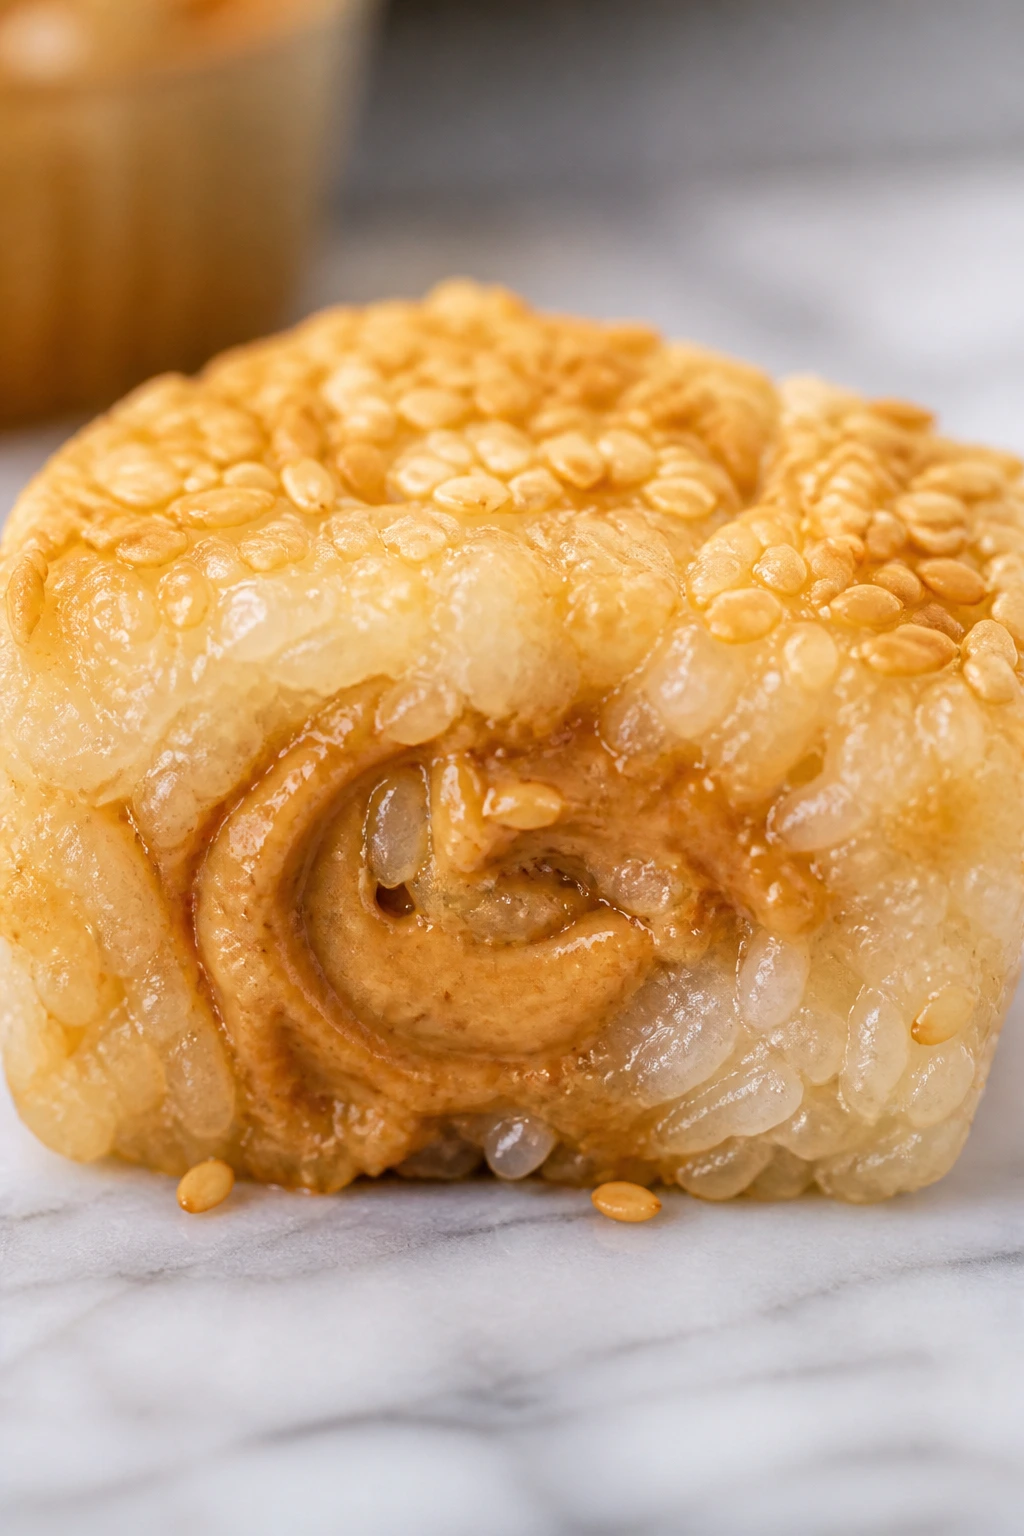
These little cups have a bakery case look that’s hard to fake. They’re nutty, golden, and neatly portioned, with a peanut butter swirl that turns each one into its own miniature pattern. I like them because they don’t need decorating tricks; the cross-section does the work for you.
Why It Works:
Sweet rice flour keeps the crumb bouncy, while peanut butter and sesame give the cakes a savory-sweet edge that feels deeper than straight sugar. Baking them in muffin wells gives you browned sides and easy portions. The sesame seeds on top add texture and keep the tops from looking plain.
Key Ingredients:
- 2 cups sweet rice flour
- 3/4 cup granulated sugar
- 2 teaspoons baking powder
- 1/2 teaspoon fine salt
- 2 large eggs
- 1 1/2 cups whole milk
- 1/3 cup creamy peanut butter
- 2 tablespoons tahini
- 4 tablespoons melted unsalted butter
- 2 tablespoons sesame seeds
- 2 tablespoons chopped roasted peanuts
Quick Steps:
- Preheat the oven to 350°F (175°C). Grease a 12-cup muffin tin well.
- Whisk the flour, sugar, baking powder, and salt.
- In another bowl, whisk the eggs, milk, butter, peanut butter, and tahini until smooth.
- Stir the wet into the dry. Spoon the batter into the muffin cups, filling each about 3/4 full.
- Sprinkle sesame seeds and chopped peanuts over each cup.
- Bake for 22 to 26 minutes, until the tops spring back and the edges pull from the pan.
- Cool for 10 minutes before removing.
Equipment for This Recipe:
- 12-cup muffin tin
- Mixing bowls
- Whisk
- Small ice cream scoop or spoon
How to Serve This Dish:
These are best served warm or room temperature with tea. They’re easy to stack on a platter, and the peanut sesame top gives them enough visual texture that they don’t need much else. A dusting of powdered sugar is optional, not required.
Pro Tips for This Recipe:
- Warm the peanut butter slightly so it blends smoothly.
- Don’t overfill the cups or the batter will mushroom and lose shape.
- Let them rest before popping them out; they’re delicate right out of the oven.
- Use roasted sesame seeds, not raw, for more aroma.
Variations on This Dish:
- Chocolate Drizzle: Add melted dark chocolate over the cooled cups.
- Banana Peanut Version: Fold in 1/2 cup mashed banana for a softer, fruitier crumb.
- Nut-Free Option: Replace peanut butter with sunflower seed butter.
Common Mistakes to Avoid with This Dish:
- Dry batter from too much flour: Spoon and level, don’t pack the flour into the cup.
- Skipping grease in the muffin tin: These cakes cling hard if the pan is bare.
- Pulling them too early: The centers need a minute to set after baking.
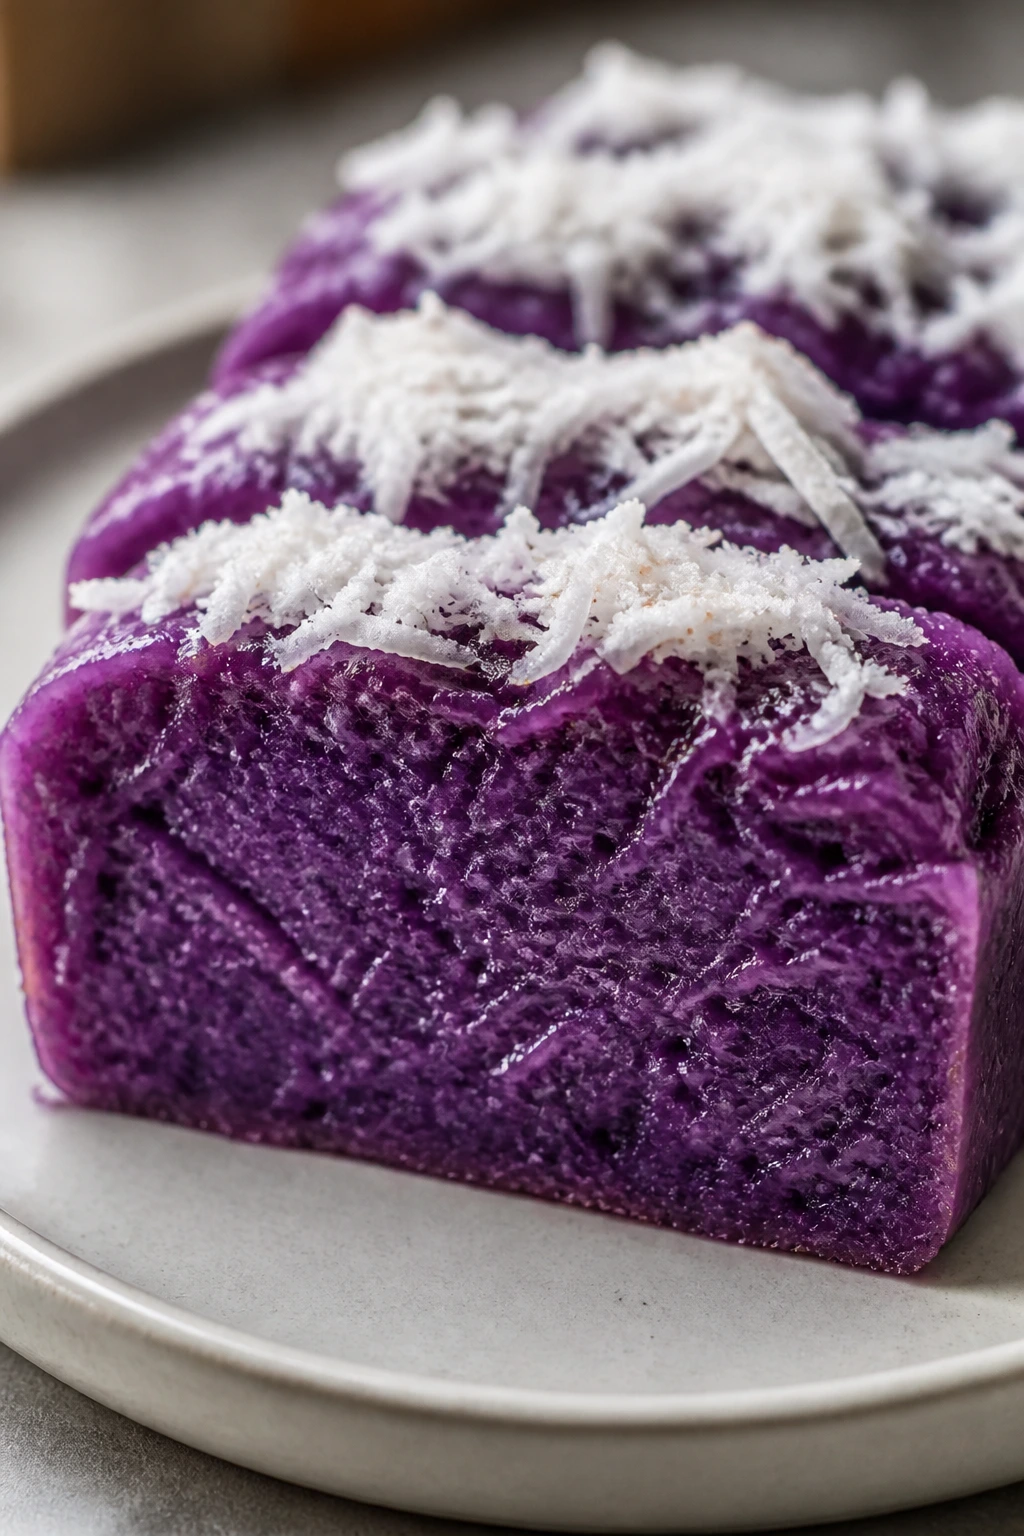
9. Purple Sweet Potato Sticky Rice Cake
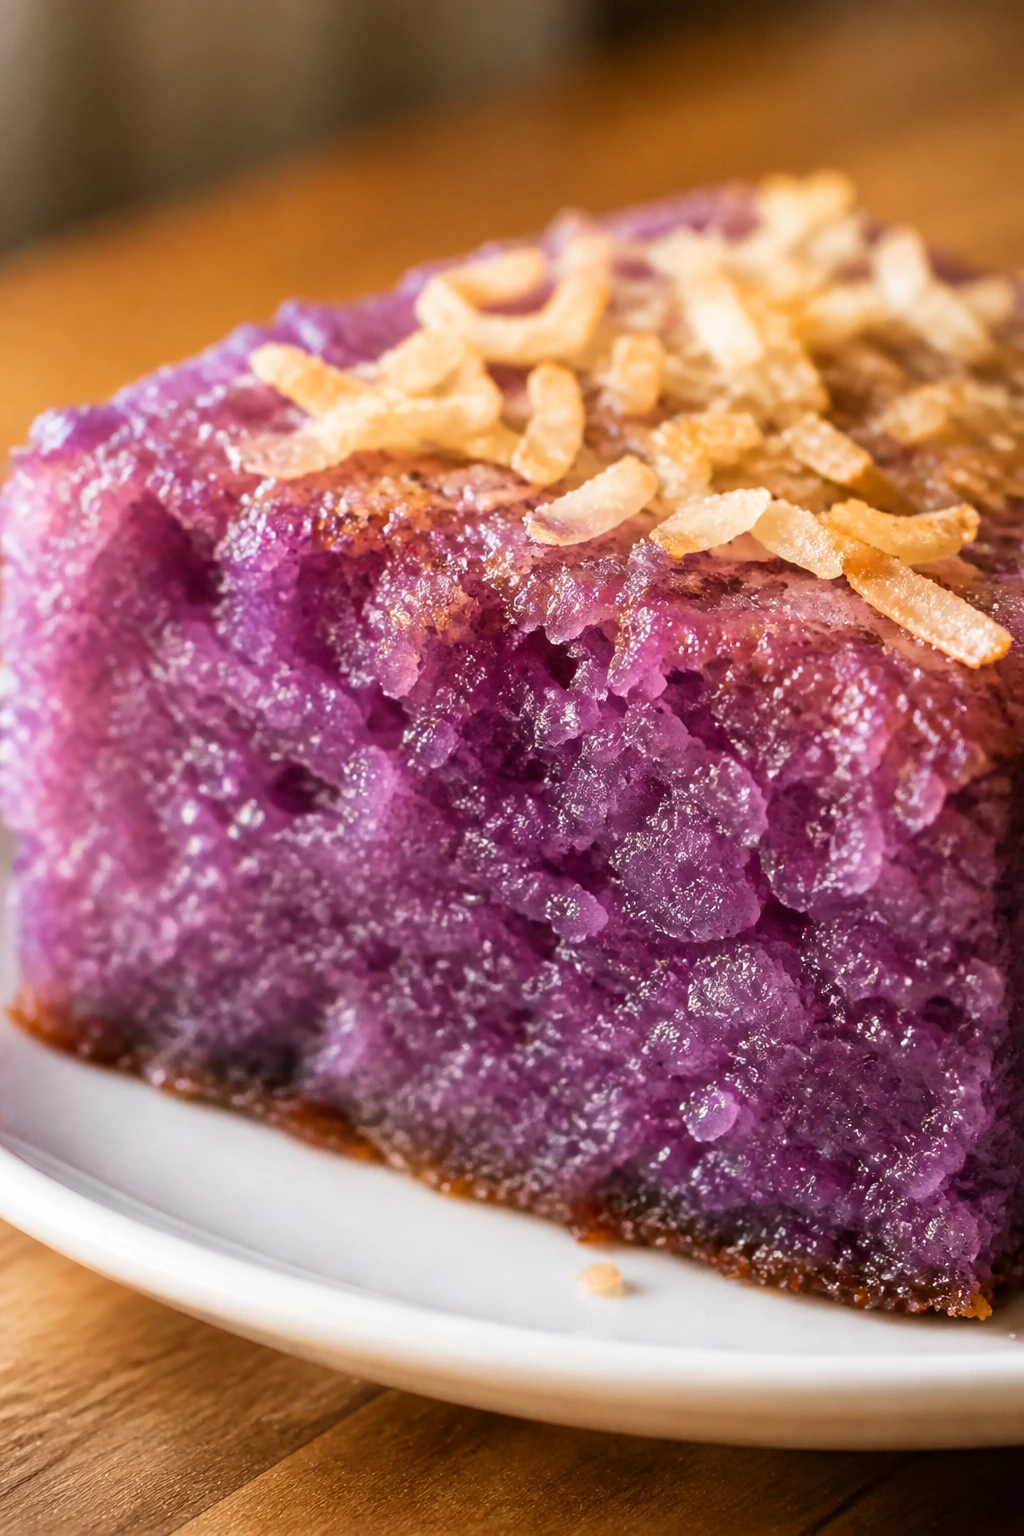
This cake has that deep violet color that makes people stop mid-sentence. Purple sweet potato gives the crumb a creamy, earthy sweetness, and the coconut keeps it from feeling too dense. The result is soft enough to bend a little at the edges, which is exactly what I want from a cake like this.
Why It Works:
Cooked purple sweet potato adds body and moisture without making the cake wet. Sweet rice flour supplies chew, and coconut milk gives the crumb a plush finish. A modest bake preserves the color better than a long one, which matters because overbaked purple batter can dull into brown.
Key Ingredients:
- 2 cups sweet rice flour
- 3/4 cup granulated sugar
- 2 teaspoons baking powder
- 1/2 teaspoon fine salt
- 1 cup mashed cooked purple sweet potato
- 2 large eggs
- 1 cup full-fat coconut milk
- 4 tablespoons melted unsalted butter
- 1 teaspoon vanilla extract
- 2 tablespoons toasted coconut flakes
Quick Steps:
- Preheat the oven to 350°F (175°C) and line an 8-inch square pan with parchment.
- Whisk the flour, sugar, baking powder, and salt in one bowl.
- In another bowl, whisk the mashed purple sweet potato, eggs, coconut milk, butter, and vanilla until smooth.
- Stir the wet mixture into the dry until the batter is evenly purple and thick.
- Pour into the pan and bake for 38 to 44 minutes, until the center springs back and the edges are lightly browned.
- Cool completely and top with toasted coconut before cutting.
Equipment for This Recipe:
- 8-inch square pan
- Parchment paper
- Mixing bowls
- Whisk and spatula
How to Serve This Dish:
I like this cake in slim rectangles with a little coconut cream on the side. The color is strong enough that it doesn’t need much decoration, and the toasted coconut gives just enough contrast. It holds up well at room temperature, which makes it good for a buffet.
Pro Tips for This Recipe:
- Mash the sweet potato until smooth; stringy bits show up in the slice.
- If the batter seems stiff, add coconut milk 1 tablespoon at a time.
- Let the cake cool before adding toppings or the coconut flakes soften.
- Use orange-fleshed sweet potato only if you can’t find purple; the flavor shifts, but the texture still works.
Variations on This Dish:
- Taro Swap: Replace the purple sweet potato with taro puree for a paler, more floral crumb.
- Pandan Swirl: Reserve a few tablespoons of batter, tint with pandan, and swirl lightly.
- Coconut Glaze: Drizzle with a thin coconut icing for a shinier top.
Common Mistakes to Avoid with This Dish:
- Using watery puree: Excess moisture makes the cake sink in the center.
- Overmixing: The batter can turn heavy fast once the starch is worked too much.
- Serving it hot: Purple cakes slice much cleaner after cooling.
10. Hojicha Brown Sugar Bars
Hojicha brings a roasted, almost caramelized tea flavor that feels warmer than matcha and less sharp. Paired with brown sugar, it gives the bars a tea-and-toffee profile that looks understated in the pan but comes alive on the plate. I like these when I want a sticky rice cake that leans cozy instead of floral.
Why It Works:
The roasted tea powder slips into the batter without tasting grassy, so the sweetness can stay deeper and darker. Brown sugar helps the bars brown evenly, and sweet rice flour gives the chewy base that keeps them from turning cakey. A short drizzle of caramel or syrup finishes the tea flavor nicely.
Key Ingredients:
- 2 cups sweet rice flour
- 3/4 cup packed light brown sugar
- 2 tablespoons hojicha powder
- 2 teaspoons baking powder
- 1/2 teaspoon fine salt
- 2 large eggs
- 1 1/2 cups whole milk
- 4 tablespoons melted unsalted butter
- 1 teaspoon vanilla extract
- 2 tablespoons caramel sauce, for drizzling
Quick Steps:
- Preheat the oven to 350°F (175°C). Line an 8-inch square pan with parchment.
- Whisk the flour, brown sugar, hojicha powder, baking powder, and salt.
- Whisk the eggs, milk, butter, and vanilla in a separate bowl.
- Combine the wet and dry ingredients until the batter is smooth and evenly tan-brown.
- Bake for 33 to 39 minutes, until the top is set and the center springs back.
- Cool fully, drizzle with caramel, and cut into bars.
Equipment for This Recipe:
- 8-inch square pan
- Parchment paper
- Mixing bowls
- Whisk
- Spoon for drizzling
How to Serve This Dish:
These bars look best cut into narrow rectangles and lined up on a tray. A little caramel goes a long way, so keep the drizzle thin. Serve them with coffee, strong black tea, or even a milky oolong.
Pro Tips for This Recipe:
- Sift the hojicha powder if it clumps.
- Brown sugar adds moisture, so don’t bake past set just because the bars look pale.
- A pinch of flaky salt on the caramel makes the roasted notes clearer.
- If the top browns too fast, tent with foil for the last 10 minutes.
Variations on This Dish:
- Miso-Caramel Finish: Stir 1 teaspoon white miso into the caramel sauce.
- Milk Tea Version: Replace 1/4 cup milk with strong brewed tea for a softer tea note.
- Sesame Top: Sprinkle toasted sesame seeds over the batter before baking.
Common Mistakes to Avoid with This Dish:
- Using too much tea powder: Hojicha can go bitter if you pile it on.
- Skipping the parchment: Brown sugar bars stick like glue to bare pans.
- Overbaking for color: These bars are meant to be tan, not dry and dark.
11. Lychee Coconut Sticky Rice Cake
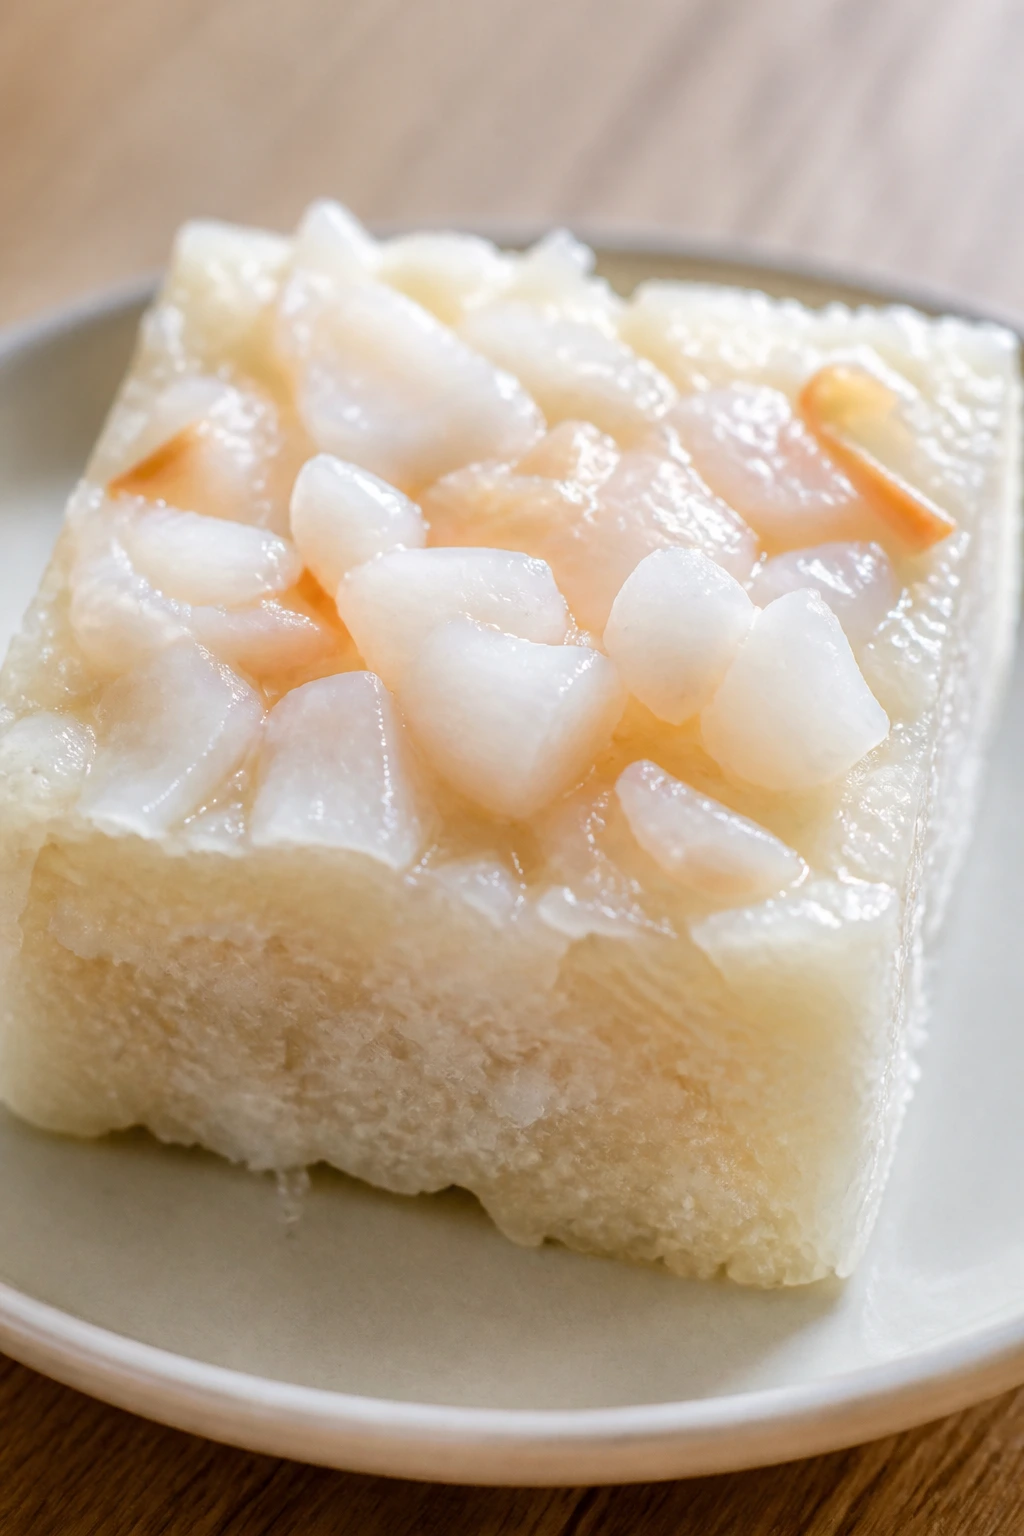
Lychee has a clean, perfumed sweetness that plays well with coconut and barely needs help. In cake form, it looks almost delicate, especially when you scatter the fruit over the top with a few rose petals or sliced almonds. The flavor is light, but not bland. There’s a difference.
Why It Works:
Lychee syrup or puree gives the batter fragrance without making it heavy, and chopped lychees add little bursts of juicy sweetness. Coconut milk anchors the cake so it still feels like dessert, not fruit bread. A gentle bake keeps the fruit from collapsing into the crumb.
Key Ingredients:
- 2 cups sweet rice flour
- 3/4 cup granulated sugar
- 2 teaspoons baking powder
- 1/2 teaspoon fine salt
- 2 large eggs
- 1 cup full-fat coconut milk
- 1/2 cup lychee syrup or lychee puree
- 4 tablespoons melted unsalted butter
- 1 cup chopped drained lychees
- 2 tablespoons sliced almonds
- 1 tablespoon edible rose petals, optional
Quick Steps:
- Preheat the oven to 350°F (175°C) and line an 8-inch square pan.
- Whisk the flour, sugar, baking powder, and salt together.
- Whisk the eggs, coconut milk, lychee syrup, and butter in another bowl.
- Stir the wet into the dry, then fold in the chopped lychees.
- Spread the batter in the pan, sprinkle almonds over the top, and bake for 34 to 40 minutes until set.
- Cool completely, top with rose petals if using, and slice.
Equipment for This Recipe:
- 8-inch square pan
- Parchment paper
- Mixing bowls
- Whisk
- Fine knife for chopping lychees
How to Serve This Dish:
Serve this one chilled or at room temperature with a few extra lychees around the plate. The rose petals are optional, but they make the dessert look finished in a way that feels light rather than ornate. A chilled jasmine tea suits it well.
Pro Tips for This Recipe:
- Drain the lychees well; extra syrup can make the batter loose.
- If using canned lychees, blot them dry before chopping.
- Keep the almond topping light so it doesn’t crowd the fruit.
- Rose petals should be food-grade and used sparingly.
Variations on This Dish:
- Mango-Lychee Mix: Swap half the lychees for diced mango.
- Coconut Cream Top: Add a thin layer of sweetened coconut cream after cooling.
- Lemon Zest Lift: A little lemon zest cuts through the floral sweetness.
Common Mistakes to Avoid with This Dish:
- Using too much fruit syrup: The crumb needs structure, not extra liquid.
- Overdoing the rose petals: A few petals look elegant; too many look like potpourri.
- Serving before the cake sets: The fruit needs time to settle into the starch.
12. Pineapple Coconut Upside-Down Sticky Rice Cake
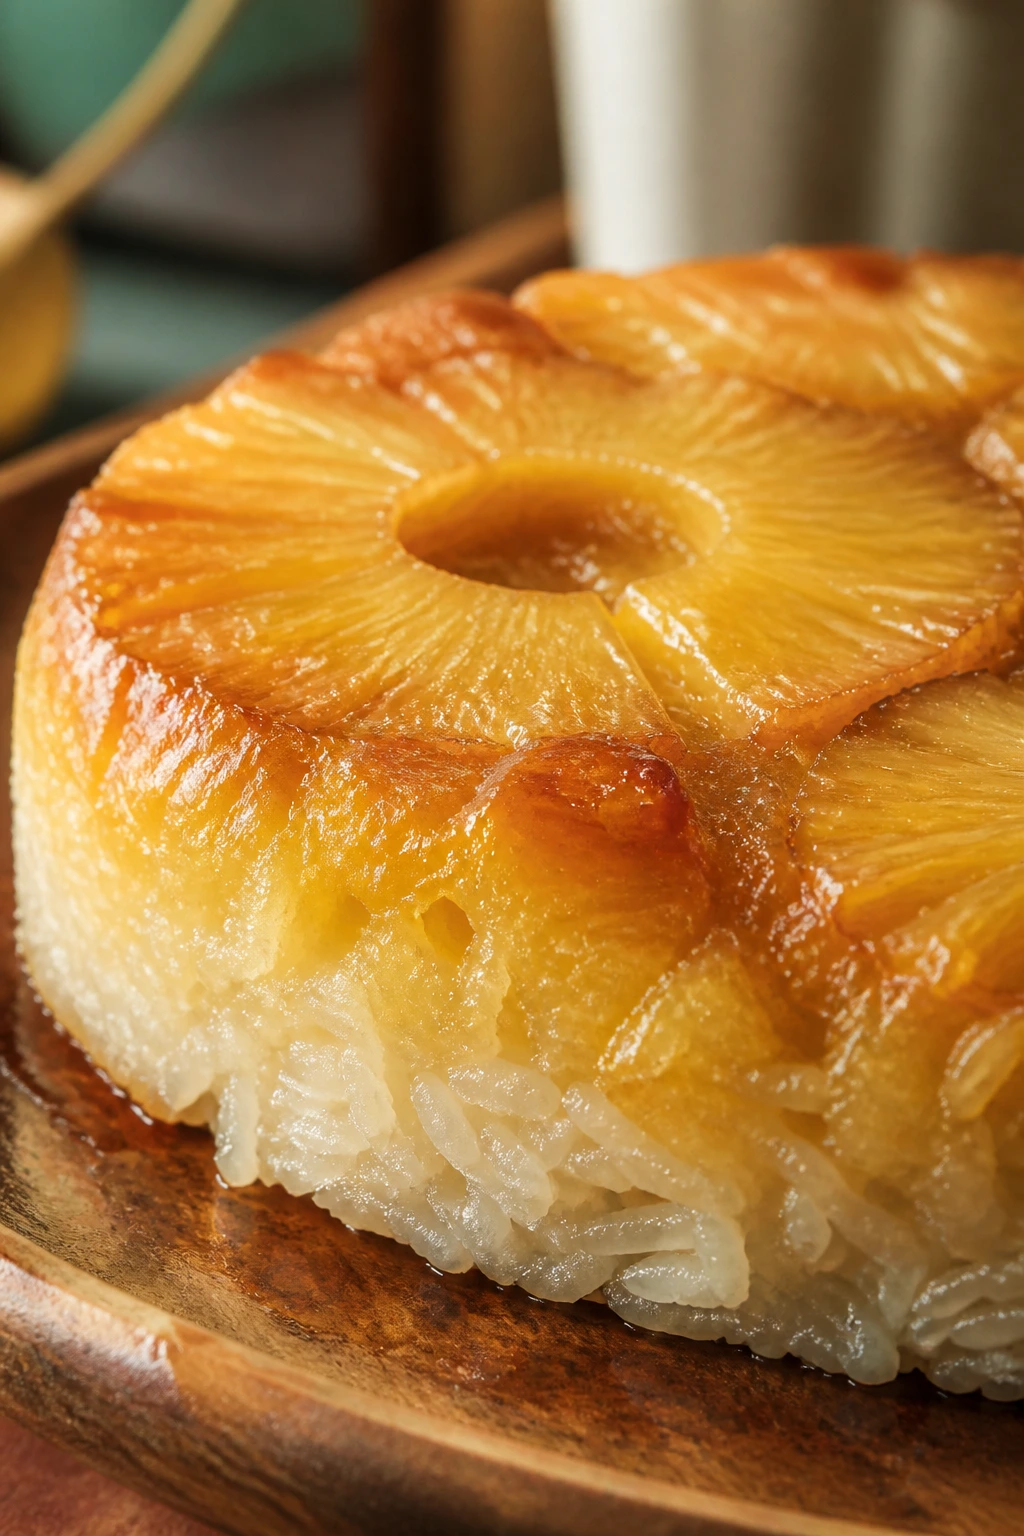
This one has a retro streak, and I like that. Pineapple rings caramelize into glossy gold, the coconut batter bakes up beneath them, and when you flip the cake out of the pan, it looks like you planned it all along. The sticky rice base makes it softer and chewier than the standard pineapple upside-down cake, which is exactly why it works.
Why It Works:
Brown sugar and butter create a caramel layer that clings to the pineapple. Sweet rice flour gives the cake a tender chew that doesn’t go dry under the fruit. Coconut milk softens the pineapple’s sharp edges and keeps the whole slice from reading too sweet.
Key Ingredients:
- 2 cups sweet rice flour
- 3/4 cup granulated sugar
- 2 teaspoons baking powder
- 1/2 teaspoon fine salt
- 2 large eggs
- 1 cup full-fat coconut milk
- 4 tablespoons melted unsalted butter
- 1 teaspoon vanilla extract
- 4 pineapple rings, patted dry
- 1/3 cup packed brown sugar
- 2 tablespoons butter, for the topping
- 4 maraschino cherries, optional
Quick Steps:
- Preheat the oven to 350°F (175°C). Melt the 2 tablespoons butter in an 8-inch round pan and sprinkle the brown sugar over it.
- Arrange the pineapple rings in the pan. Place cherries in the centers if using.
- Whisk the flour, sugar, baking powder, and salt in a bowl.
- Whisk the eggs, coconut milk, melted butter, and vanilla in another bowl.
- Combine the mixtures, pour over the pineapple, and bake for 38 to 44 minutes until the center is set.
- Cool for 10 to 15 minutes, flip onto a plate, and let the caramel settle before slicing.
Equipment for This Recipe:
- 8-inch round baking pan
- Parchment circle, optional
- Mixing bowls
- Whisk
- Serving plate for flipping
How to Serve This Dish:
Flip it onto a platter and let the pineapple side face up, because that’s the point. A scoop of coconut cream or vanilla ice cream fits nicely, but the cake can stand on its own. Cut wedges like a tea cake, not thick slabs.
Pro Tips for This Recipe:
- Dry the pineapple well or the caramel loosens.
- Don’t leave the cake in the pan too long after baking or the caramel sticks hard.
- Use a round pan so the fruit pattern looks intentional when flipped.
- A little extra coconut extract in the batter deepens the tropical flavor.
Variations on This Dish:
- Rum-Caramel Version: Add 1 tablespoon dark rum to the topping before baking.
- Pineapple-Mango Mix: Layer thin mango slices between the pineapple rings.
- Cherry-Free Finish: Skip the cherries and use thin lime zest instead.
Common Mistakes to Avoid with This Dish:
- Overfilling the pan with fruit: The batter needs room to rise around the pineapple.
- Flipping too soon or too late: Too soon and the cake breaks; too late and the caramel sticks.
- Using wet canned fruit without blotting: Extra liquid makes the topping runny.
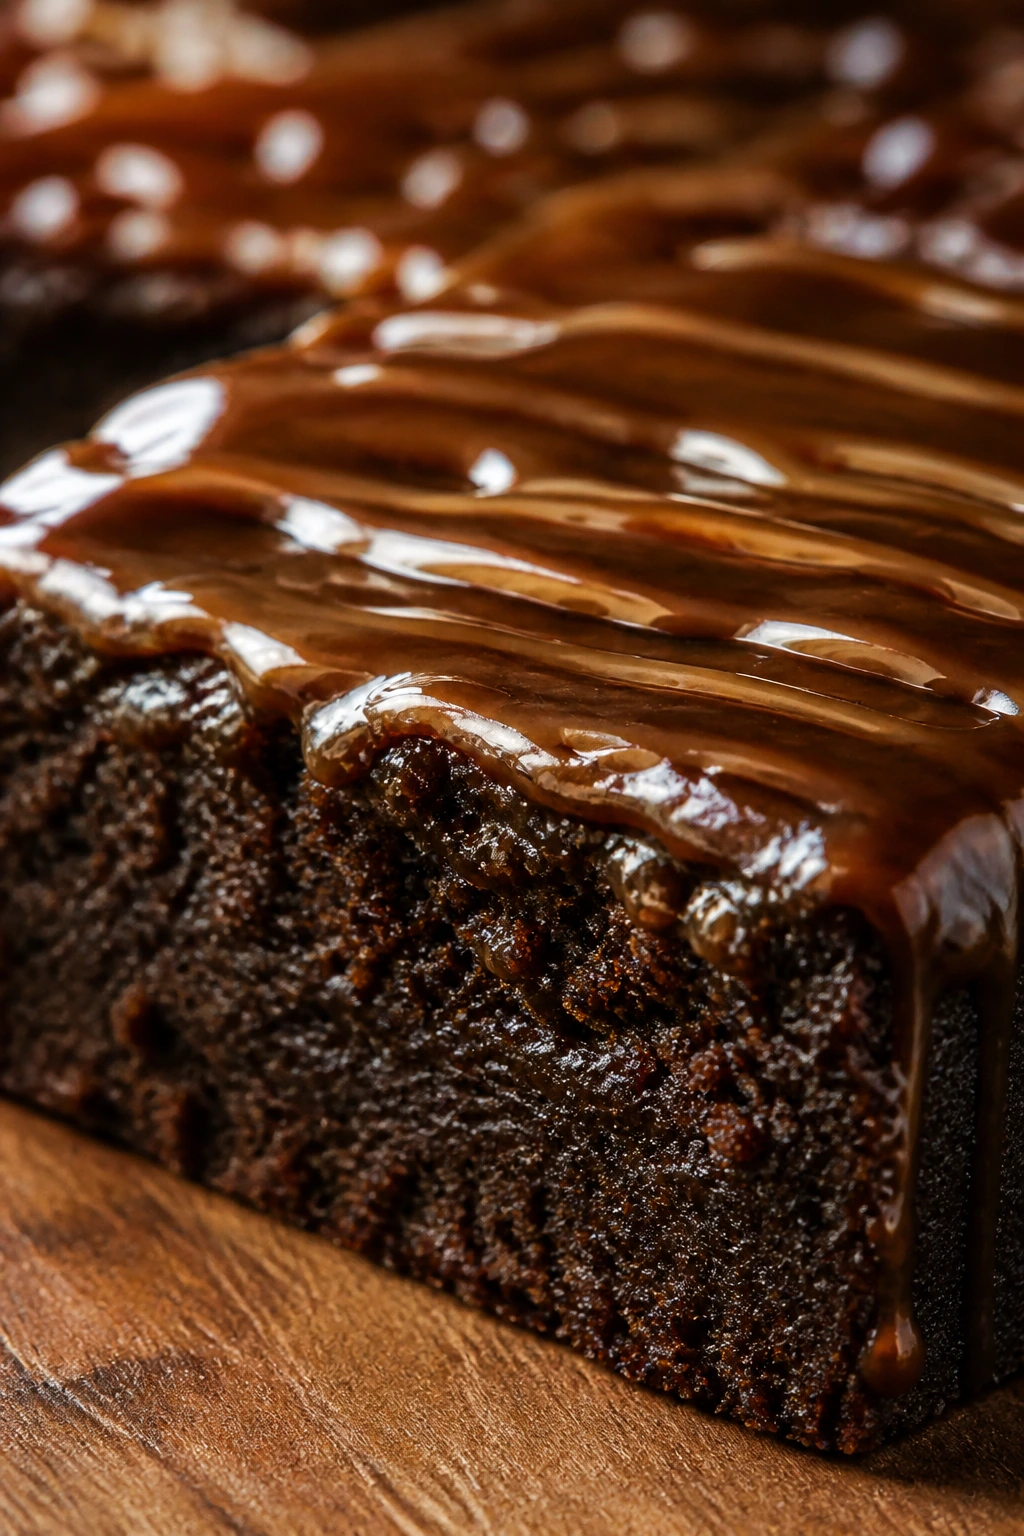
13. Chocolate Tahini Sticky Rice Cake
Chocolate and tahini don’t shout. They hum. The cake comes out dark and glossy, with a faint sesame note that keeps the cocoa from tasting flat or one-note. It’s the kind of slice that looks elegant in a moody, almost savory way, especially with a little flaky salt on top.
Why It Works:
Cocoa powder gives the cake its color and depth, while tahini adds fat and a subtle bitterness that suits chocolate well. Sweet rice flour keeps the crumb springy, and the melted butter makes the texture feel more like a dense brownie than a dry loaf. A pinch of salt on top wakes the whole thing up.
Key Ingredients:
- 2 cups sweet rice flour
- 3/4 cup unsweetened cocoa powder
- 1 cup granulated sugar
- 2 teaspoons baking powder
- 1/2 teaspoon fine salt
- 2 large eggs
- 1 1/2 cups whole milk
- 4 tablespoons melted unsalted butter
- 1/3 cup tahini
- 2 tablespoons sesame seeds
- Flaky salt, for finishing
Quick Steps:
- Preheat the oven to 350°F (175°C). Line an 8-inch square pan with parchment.
- Whisk the flour, cocoa, sugar, baking powder, and salt.
- Whisk the eggs, milk, butter, and tahini in another bowl until smooth.
- Stir the wet into the dry until the batter is dark and even, then pour into the pan.
- Bake for 33 to 39 minutes until the center is set and the top looks matte.
- Cool completely, scatter sesame seeds over the top, and finish with flaky salt.
Equipment for This Recipe:
- 8-inch square pan
- Parchment paper
- Mixing bowls
- Whisk and spatula
How to Serve This Dish:
Serve small squares with coffee or strong tea. The sesame seeds make the top look finished, so you do not need frosting. If you want a softer plate, add a spoonful of whipped cream, but keep it plain if you like clean flavors.
Pro Tips for This Recipe:
- Sift the cocoa if it’s clumpy; dry pockets don’t disappear on their own.
- Tahini should be stirred smooth before measuring.
- Pull the cake when the center is just set; cocoa cakes can dry out fast.
- Flaky salt is not a garnish here. It’s part of the flavor.
Variations on This Dish:
- Orange-Chocolate Version: Add 1 tablespoon orange zest and a few drops of orange extract.
- Halva Finish: Sprinkle chopped halva over the top after baking.
- Swirl Pattern: Reserve a bit of batter, mix with extra tahini, and marble it through.
Common Mistakes to Avoid with This Dish:
- Using too much cocoa without enough sugar: The cake turns harsh.
- Overbaking until the surface cracks hard: You want a set top, not a brittle shell.
- Skipping the salt: The chocolate tastes flatter without it.
14. Cherry Almond Mochi Cake
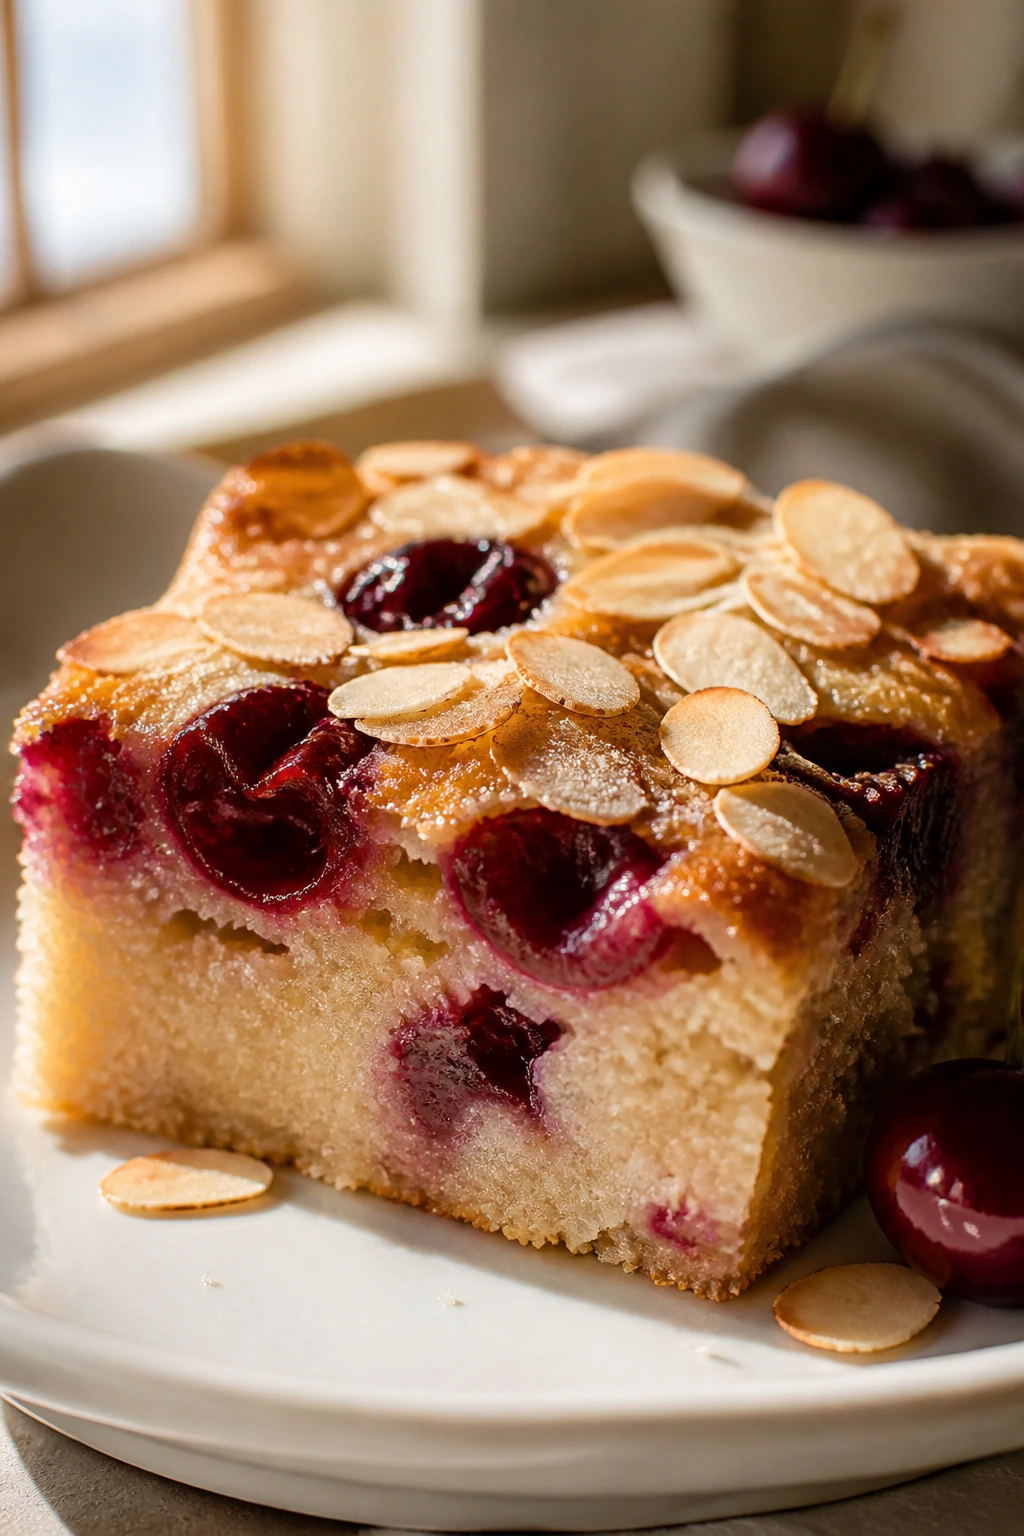
Cherry and almond have that old bakery charm, but the sticky rice base keeps this version from feeling old-fashioned in a dusty way. The cherries burst as the cake bakes, the almond extract smells like warm marzipan, and the whole thing comes out looking like a picnic dessert that somehow got dressed up for dinner.
Why It Works:
Sweet rice flour gives the cake enough chew to hold the cherry juices. Almond extract amplifies the fruit and makes the crumb taste richer without adding extra fat. Sliced almonds on top toast as the cake bakes, so you get a little crunch on the first bite.
Key Ingredients:
- 2 cups sweet rice flour
- 3/4 cup granulated sugar
- 2 teaspoons baking powder
- 1/2 teaspoon fine salt
- 2 large eggs
- 1 1/2 cups whole milk
- 4 tablespoons melted unsalted butter
- 1 teaspoon almond extract
- 1 cup pitted cherries, halved if large
- 2 tablespoons sliced almonds
- 1 tablespoon powdered sugar
Quick Steps:
- Preheat the oven to 350°F (175°C) and line an 8-inch square pan.
- Whisk the flour, sugar, baking powder, and salt.
- Whisk the eggs, milk, butter, and almond extract in another bowl.
- Stir the wet into the dry, then fold in the cherries.
- Spread the batter in the pan, top with sliced almonds, and bake for 35 to 42 minutes until the center springs back.
- Cool completely and dust lightly with powdered sugar before slicing.
Equipment for This Recipe:
- 8-inch square pan
- Parchment paper
- Mixing bowls
- Whisk
- Small knife for pitting and halving cherries
How to Serve This Dish:
This one looks nicest cut into long rectangles with the cherries visible in the crumb. A dusting of powdered sugar gives it that bakery-window look without hiding the fruit. Serve with tea, or a small scoop of vanilla ice cream if you want a colder contrast.
Pro Tips for This Recipe:
- Dry the cherries after pitting so the batter doesn’t get loose.
- Go easy on almond extract; it takes over fast.
- Let the cake cool before dusting or the sugar melts into the top.
- Slice with a sharp knife and wipe between cuts for cleaner edges.
Variations on This Dish:
- Black Forest Angle: Add a handful of chopped dark chocolate to the batter.
- Apricot Almond Version: Replace cherries with dried apricots soaked in hot water.
- Lemon Almond Finish: Add lemon zest for a brighter, sharper top note.
Common Mistakes to Avoid with This Dish:
- Using overly juicy cherries without drying them: The center turns wet.
- Adding too much almond extract: It can taste harsh and perfumey.
- Cutting while warm: Cherry cakes need a proper cool-down or they collapse slightly.
15. Lemon Coconut Sticky Rice Tea Cake
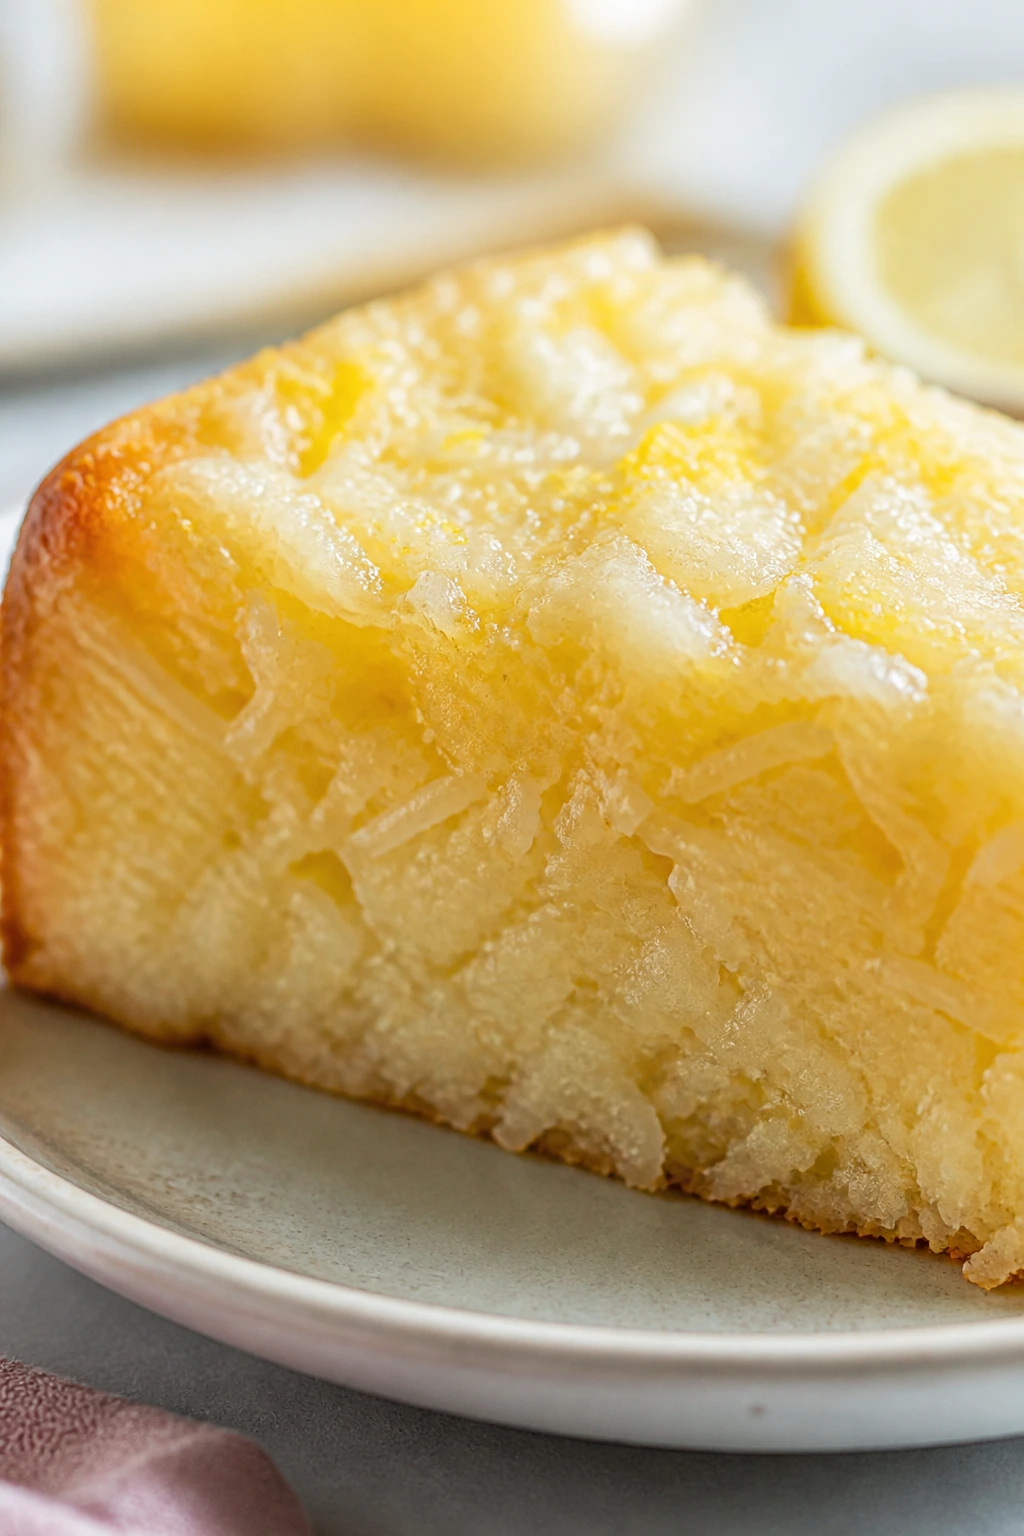
This is the bright one at the end of the table. Lemon zest lifts the coconut, the crumb stays chewy in a way that feels almost custard-like, and the glaze on top gives it a thin, shiny finish that makes each slice look newly set. If some of the other cakes lean rich or earthy, this one cleans the palate.
Why It Works:
Coconut milk and sweet rice flour make a dense, tender base that can handle sharp citrus. Lemon zest gives the cake fragrance without thinning the batter, while a light glaze on top adds gloss and extra brightness. The trick is balance: enough lemon to wake it up, not so much that it turns sour.
Key Ingredients:
- 2 cups sweet rice flour
- 3/4 cup granulated sugar
- 2 teaspoons baking powder
- 1/2 teaspoon fine salt
- 2 large eggs
- 1 1/4 cups full-fat coconut milk
- 4 tablespoons melted unsalted butter
- Zest of 2 lemons
- 2 tablespoons fresh lemon juice
- 1 cup powdered sugar, for glaze
- 1 to 2 tablespoons lemon juice, for glaze
- 1 tablespoon toasted coconut flakes
Quick Steps:
- Preheat the oven to 350°F (175°C). Line an 8-inch square pan with parchment.
- Whisk the flour, sugar, baking powder, salt, and lemon zest together.
- Whisk the eggs, coconut milk, melted butter, and lemon juice in another bowl.
- Stir the wet into the dry until the batter is smooth and thick.
- Bake for 34 to 40 minutes until the center is set and the edges are lightly golden.
- Cool completely, whisk the powdered sugar with enough lemon juice to make a thin glaze, drizzle over the cake, and finish with toasted coconut.
Equipment for This Recipe:
- 8-inch square pan
- Parchment paper
- Mixing bowls
- Whisk
- Small bowl for the glaze
How to Serve This Dish:
Serve this in thin squares with the glaze set just enough to stop running. A few extra curls of lemon zest on top make the whole thing look sharper. It’s especially good with tea that has a little smoke or floral character.
Pro Tips for This Recipe:
- Zest the lemons before juicing them; it’s much easier.
- Keep the glaze thin so it doesn’t hide the cake’s texture.
- If you like a brighter finish, add a little extra zest to the glaze.
- Toast the coconut lightly — pale gold is enough.
Variations on This Dish:
- Lime-Coconut Version: Swap lemon for lime and add a pinch of flaky salt.
- Lavender-Lemon Touch: Add a tiny pinch of culinary lavender to the glaze.
- Berry Glaze: Stir a teaspoon of berry jam into the icing for a soft pink tint.
Common Mistakes to Avoid with This Dish:
- Using too much lemon juice in the batter: The cake can get loose and sour.
- Glazing while hot: The icing melts into a sticky puddle.
- Skipping the zest: Juice alone won’t give the cake enough citrus perfume.
Why These Sticky Rice Cakes Set Up So Well
Sticky rice cake batter works because the starch in sweet rice flour gelatinizes into a springy, glossy crumb when it meets heat and moisture. That’s why these cakes feel tender even when they’re cool. Regular flour cakes can go dry and crumbly; these stay a little elastic, which is the whole point.
Coconut milk, butter, or another fat source matters more than people think. Fat coats the starch, slows drying, and gives each slice that soft, slightly rich finish. Sugar does more than sweeten, too. It helps with browning and keeps the crumb from turning chalky, especially in cakes that use a lot of rice flour.
The other quiet trick is restraint. These cakes do not want to be overbaked into a dry slab. Pull them when the center is set and the top springs back lightly under a fingertip. If you’re used to testing a sponge cake with a bone-dry skewer, adjust your instincts here — a few moist crumbs are fine, and a little chew is the whole attraction.
Essential Equipment for These Recipes
- 8-inch square baking pan: The sweet spot for most mochi-style cakes and bars; it gives you a decent thickness without making the center soggy.
- 9×5-inch loaf pan: Best for denser batters like ube or tea loaf styles that need a little extra height.
- Springform pan: Handy for the mango sticky rice layer cake because it releases cleanly without wrecking the sides.
- Mixing bowls: Use at least two so the wet and dry ingredients stay separate until the last minute.
- Whisk and rubber spatula: The whisk breaks up lumps; the spatula gets into the corners without overworking the batter.
- Parchment paper: Worth every inch of it. Sticky rice cakes cling to metal in ways that feel personal.
- Fine sieve: Helpful for matcha, cocoa, or powdered sugar so the finish stays even.
- Sharp chef’s knife or serrated knife: A hot knife gives cleaner slices, especially on chilled cakes.
- Cooling rack: Keeps the bottom from steaming itself soft after baking.
- Steamer basket or rice cooker: Needed for the cakes that start with cooked glutinous rice instead of batter.
Smart Shopping for Sweet Rice Flour, Coconut Milk, and Toppings
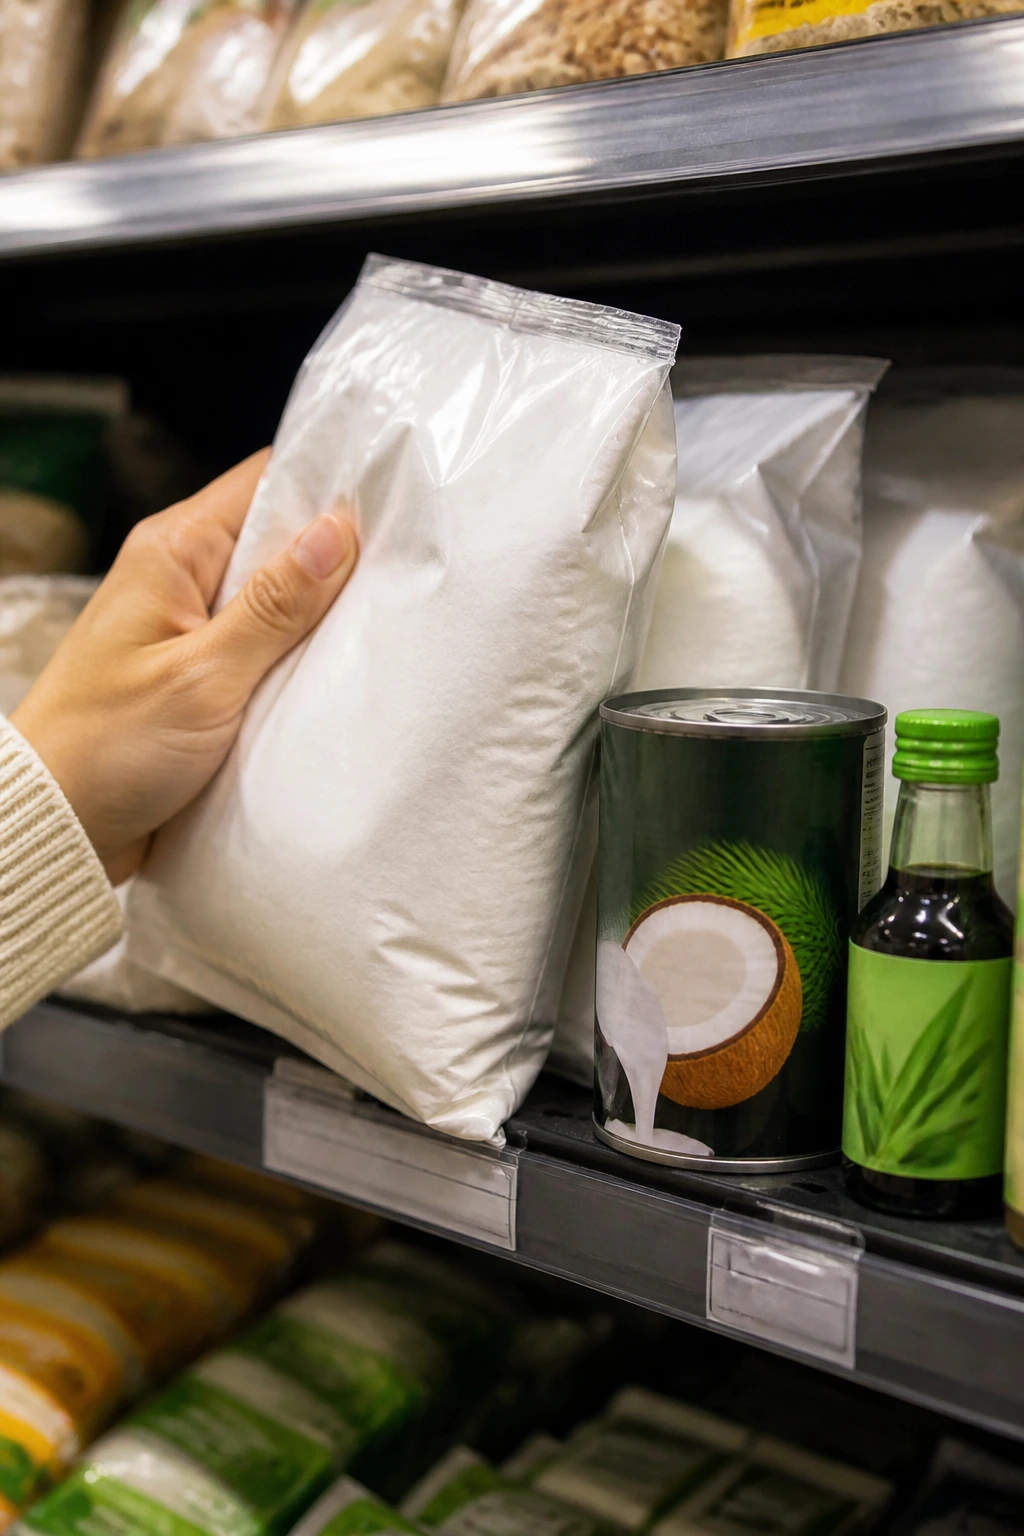
The first thing to buy correctly is the flour. You want sweet rice flour, also sold as mochiko or glutinous rice flour. Regular rice flour is a different animal; it bakes dry and sandy, which is exactly wrong here. If the package doesn’t say sweet, glutinous, or mochiko somewhere on the label, put it back.
Coconut milk matters almost as much as the flour. Choose full-fat canned coconut milk with a short ingredient list, and shake the can before opening if the store hasn’t stored it upright. That thick, creamy layer is what gives the cakes their soft crumb. Light coconut milk can work in a pinch, but the texture loses some of its roundness and the cakes bake up a little flatter.
For the flavored cakes, buy the extra ingredient in a form that actually carries flavor. Good pandan extract should smell grassy and vanilla-like, not like cough syrup. Matcha should be bright green and fresh-smelling, not gray. Black sesame paste should be smooth enough to whisk into batter without leaving grainy streaks. Ube halaya should taste like cooked yam, not cloying sugar.
Fresh fruit is where these cakes can look either polished or sloppy. Choose mango that slices cleanly, strawberries that are dry on the surface, cherries that are firm, and lychee that isn’t swimming in syrup unless you plan to reduce that syrup first. And if you’re using toppings like toasted coconut, sliced almonds, or sesame seeds, toast them yourself. A quick 3 to 5 minutes in a dry skillet changes the smell in the pan and makes the finished cake look more deliberate.
How to Serve These Recipes
Presentation:
Sticky rice cakes look best sliced with a hot knife wiped clean between cuts. Stack the pieces slightly offset on a platter instead of lining them up in a stiff row, and let the toppings — fruit fans, sesame seeds, coconut flakes, powdered sugar, or glaze — stay visible. If the cake has a dark crumb, serve it on a pale plate. If it’s pale, use a dark plate. The contrast does half the decorating for you.
Accompaniments:
For the fruit cakes, a small spoon of coconut cream or lightly sweetened yogurt works well. For the nutty or tea-based cakes, plain whipped cream, fresh berries, or a side of sliced fruit keeps the plate from feeling too heavy. Most of these pair nicely with jasmine tea, oolong, black coffee, or a simple iced tea with no extra sugar. I’d avoid very rich sauces unless the cake itself is plain.
Portions:
An 8-inch square pan usually gives 9 tidy squares if you cut it into thirds both ways, or 12 slimmer pieces for a tea tray. The layer cake serves 6 to 8 depending on how thick you slice it. Biko and the denser chocolate cakes are richer than they look, so smaller portions are usually smarter than giant slabs.
Beverage Pairing:
Jasmine tea fits the floral cakes, roasted oolong suits matcha and hojicha, and plain black coffee is my pick for biko, chocolate tahini, or black sesame. If you want something cold, a lightly sweet iced tea works better than soda, which tends to flatten the coconut and fruit.
Extra Tricks for Better Texture and Brighter Flavor
Flavor Enhancement: A pinch of salt on top is not decoration; it wakes up coconut, sesame, chocolate, and fruit in a way sugar can’t.
Customization: If a cake feels too rich, add tart fruit — raspberries, cherries, lime zest, or a little lemon glaze. If it feels too plain, toasted coconut, sesame seeds, or chopped pistachios give it enough texture to read as finished.
Serving Suggestions: Cut cakes right before serving, then add the glossy stuff last: glaze, powdered sugar, fruit slices, or whipped cream. That keeps the surfaces clean and stops the toppings from sliding off the first slice.
Make-It-Yours: For dairy-free baking, use coconut milk and coconut oil or a neutral oil in place of butter. For a nut-free version, skip pistachios, almonds, and tahini, then lean on coconut, sesame, or fruit. For a lower-sugar slice, trim the sugar by 1/4 cup in most of these recipes, but keep the fat and salt where they are; the texture holds better that way.
Make-Ahead, Storage, and Reheating Guidance
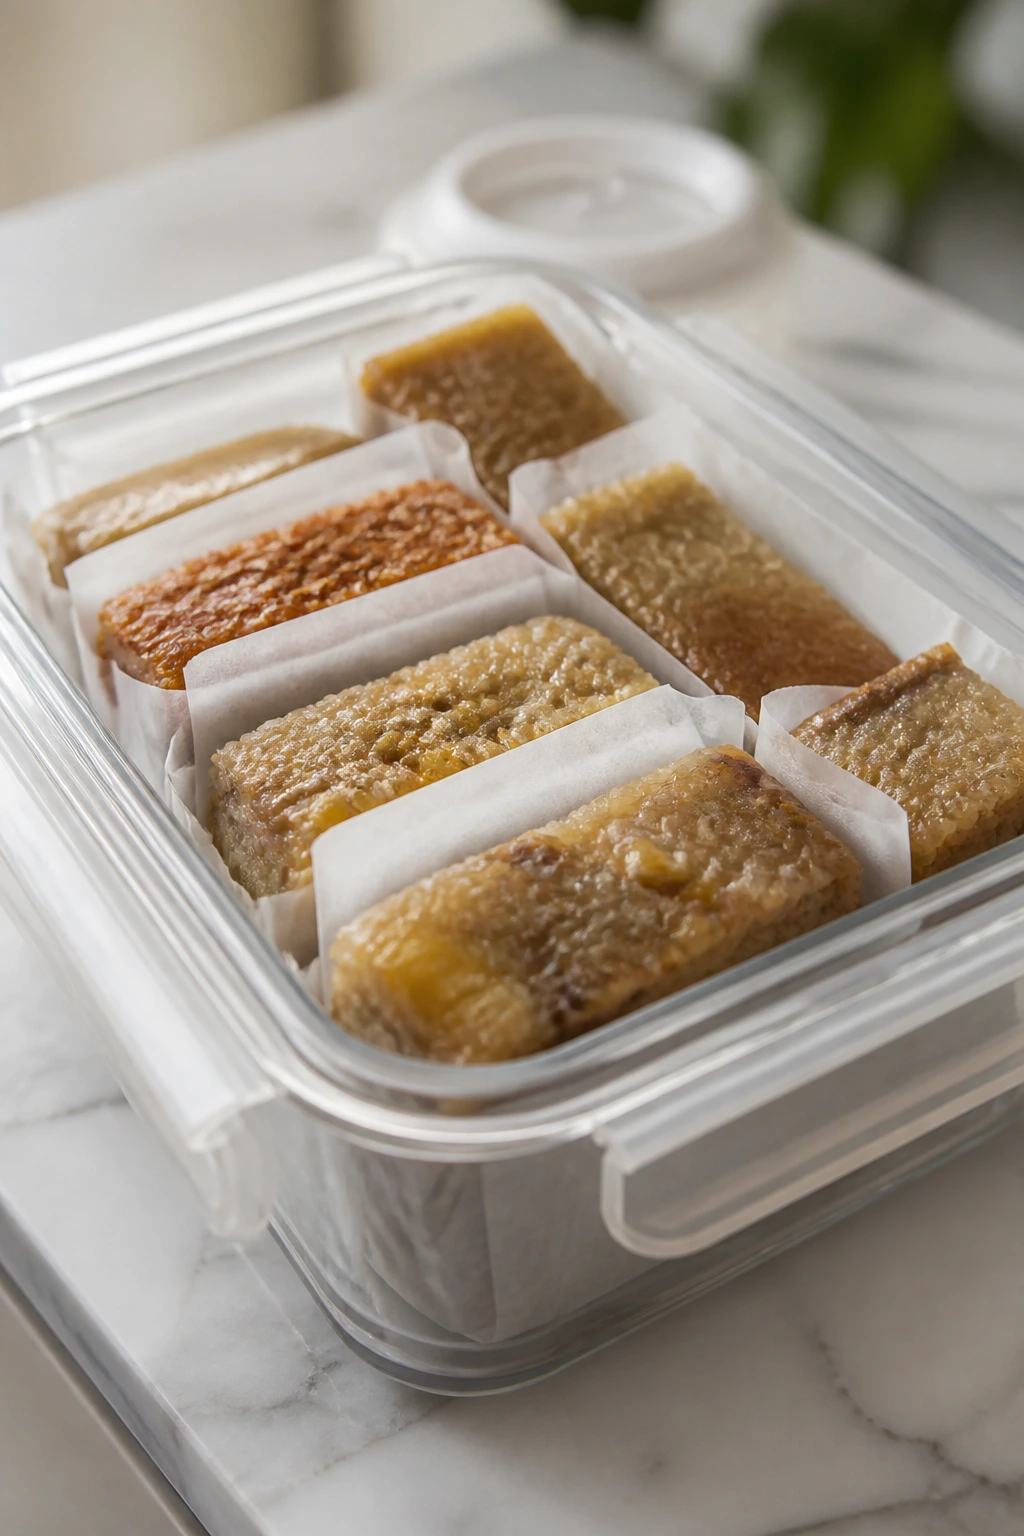
Most sticky rice cakes keep well, but they change character in the fridge. The crumb firms up a bit, which isn’t a flaw so much as a tradeoff. For baked mochi cakes, store the cake tightly wrapped or in an airtight container at room temperature for up to 1 day, or in the refrigerator for 3 to 4 days. Fruit-topped cakes are better if you keep the topping separate and add it just before serving.
Freezing works better than you might think. Wrap individual slices in parchment, then slide them into a freezer bag or container for up to 2 months. Thaw in the fridge overnight, then bring to room temperature before reheating. A short 10- to 15-second burst in the microwave softens the chew without making the cake mushy; if you want a slightly crisp edge, warm slices in a 300°F oven for 6 to 8 minutes.
For cooked-rice desserts like biko or the mango layer cake, keep them covered and chill promptly if they contain cream or fresh fruit. Biko itself can sit at room temperature for a few hours, but once it’s cut and served, I’d move it to the fridge. The mango layer cake is best within a day because the fruit weeps and the whipped cream loosens. If you’re making ahead, cook the rice base and prep the toppings separately, then assemble closer to serving. That’s the part worth protecting.
Adaptations and Variations to Try
The Lighter Citrus Slice
Use lemon, lime, or yuzu zest in any of the coconut-based cakes and cut the sugar slightly. Citrus makes the crumb taste cleaner, which helps when you’re serving a rich dessert after a big meal. I’d start with 1 tablespoon zest per 2 cups flour.
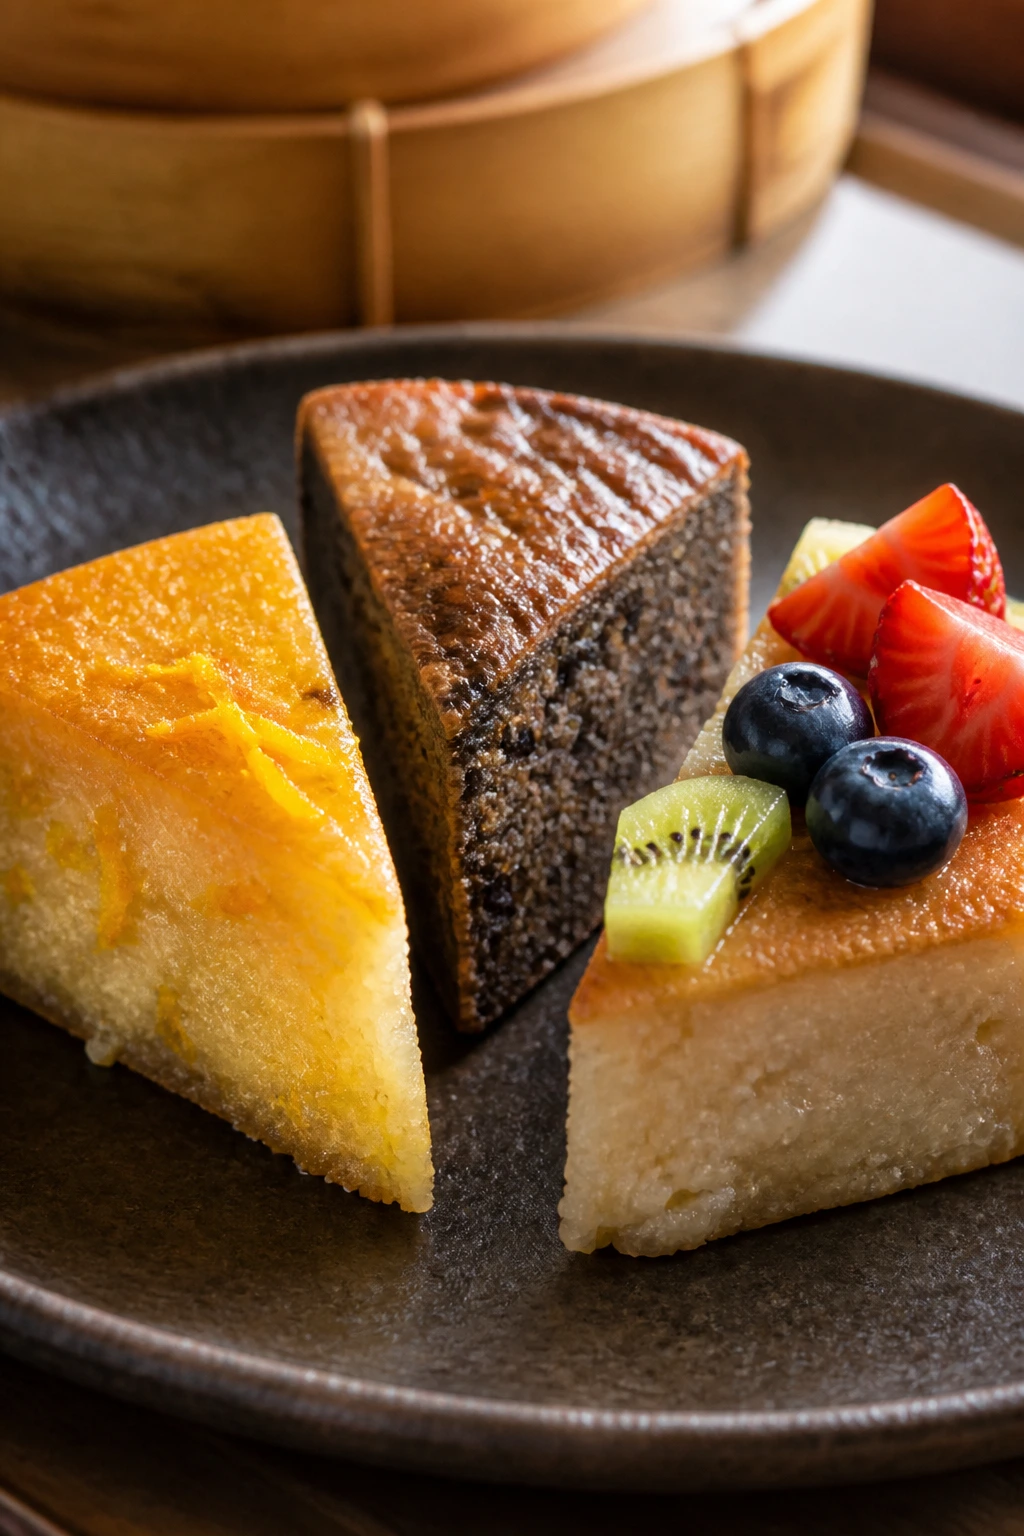
The Dark Roasted Set
Swap in black sesame, hojicha, or cocoa with tahini if you want deeper color and a more grown-up flavor. These versions hold up well with a dusting of flaky salt or a thin caramel drizzle. They’re also the easiest ones to serve on a white plate without garnish overkill.
The Fruit-First Finish
Make the base a little plainer, then load the top with mango, cherries, strawberries, pineapple, or lychee. This works especially well if you want the fruit to stay bright and keep the slice from becoming too sweet. Keep wet fruit dry and add it just before serving.
The Dairy-Free Coconut Line
Use coconut milk, coconut oil, and coconut cream throughout. That keeps the texture plush and removes the need to juggle substitutions one by one. It also makes the cakes carry fruit and pandan especially well.
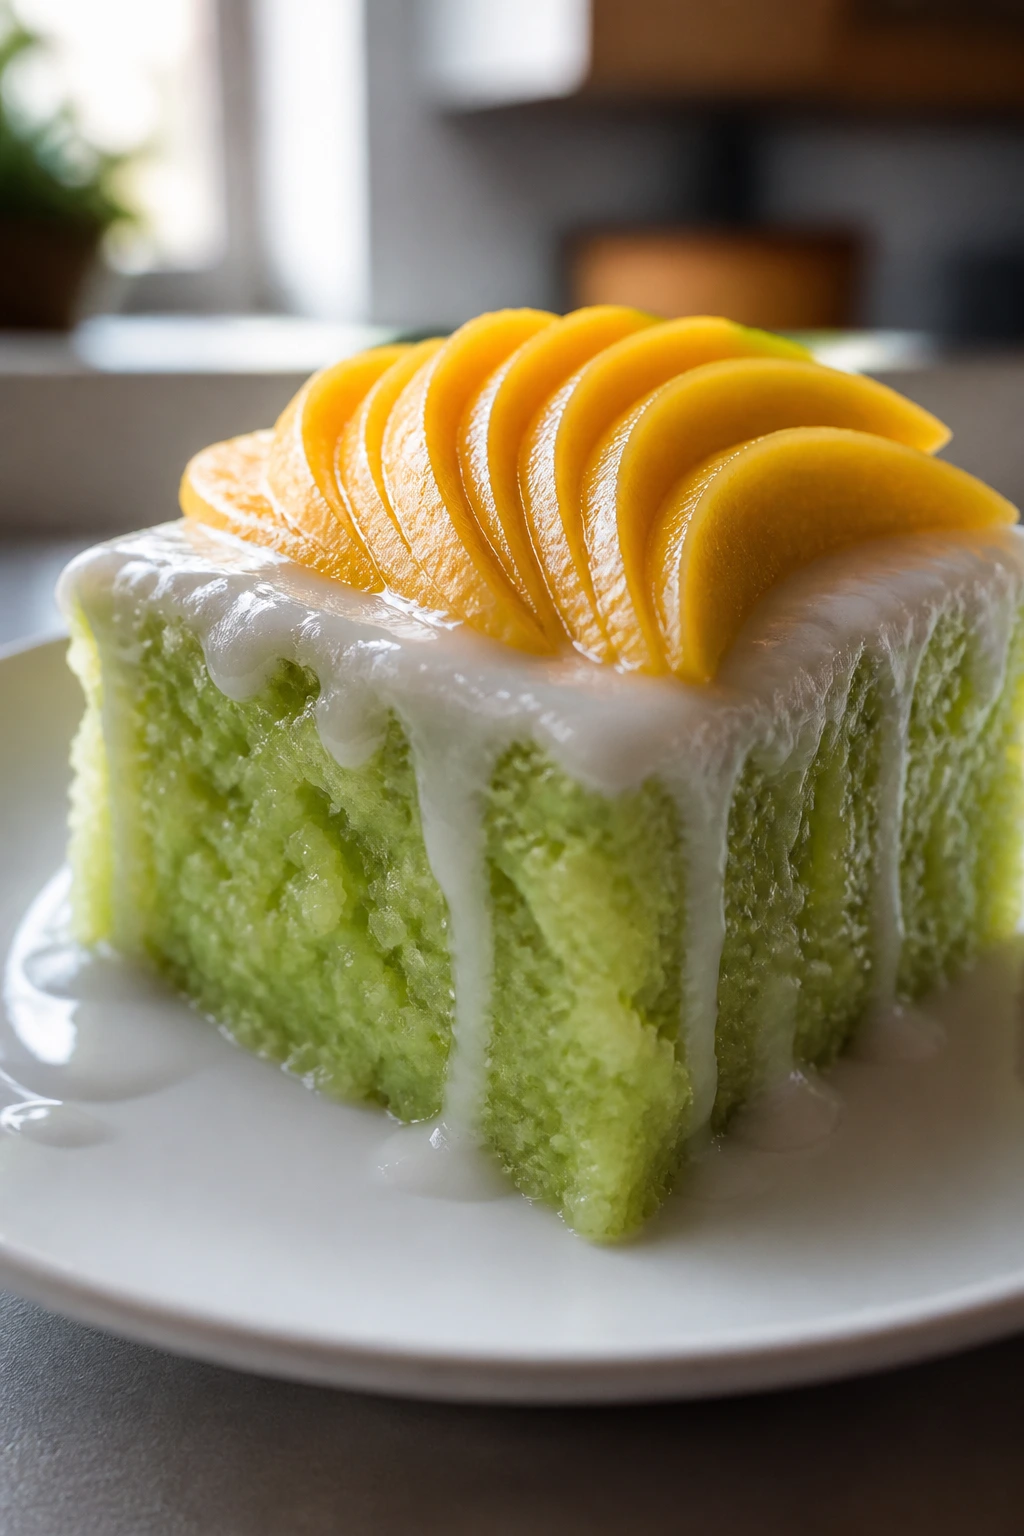
The Steamed Version
If you prefer a softer, more custard-like texture, some of these batters can be steamed in a lined pan instead of baked. The color stays a touch brighter, and the crumb comes out less bronzed. It’s a good choice for pandan, ube, and plain coconut cakes.
The Smaller-Servings Swap
Turn any square cake into muffin-sized portions by baking the batter in a lined muffin tin for 18 to 24 minutes. That gives you faster cooling, cleaner serving, and fewer broken slices. It’s the version I’d use for a party tray or lunchbox dessert.
Common Mistakes to Avoid
Using the wrong flour: Regular rice flour is not the same as sweet rice flour. If you use the wrong one, the cake loses its chew and bakes up sandy.
Overbaking for color: Sticky rice cakes should look set and lightly bronzed, not deeply browned all over. Once they dry out, the texture goes from springy to stubborn.
Cutting before the cake cools: Warm slices smear, tear, and cling to the knife. Cool completely before you even think about portioning.
Adding too much liquid fruit: Mango, lychee syrup, berries, and pineapple all bring moisture. If you don’t dry or balance them, the crumb can collapse around the fruit.
Ignoring the pan prep: These cakes bond to bare metal with no shame. Parchment is cheap insurance, and buttering the sides matters even when you line the bottom.
Storing fruit-topped cakes too long: The toppings look best fresh. If you know you’re making ahead, keep the toppings separate and assemble at the end.
Sticky Rice Cake Questions People Actually Ask
Can I use regular rice flour instead of sweet rice flour?
Not if you want the signature chew. Regular rice flour bakes drier and more crumbly, while sweet rice flour gives these cakes their elastic, almost mochi-like texture.
Do these recipes taste like actual rice?
A little, but not in a savory way. The flavor is mild and mostly serves as a base for coconut, fruit, tea, sesame, or chocolate.
Can I make these cakes ahead of time?
Yes, and many of them hold up well overnight. Baked cakes can be wrapped and stored, then finished with fruit or glaze right before serving.
Why did my cake turn gummy in the middle?
Usually because it needed more baking time or the batter had too much liquid. Sticky rice cake should be chewy, not wet, so give the center time to set and let the cake cool fully.
Can I freeze slices?
Absolutely. Wrap each slice well and freeze for up to 2 months. Thaw in the fridge and warm briefly if you want the texture softer.
What if I don’t have coconut milk?
Whole milk works in many of the baked versions, but the cake will taste flatter. If you’re already using pandan, mango, or ube, coconut milk is worth buying for the depth it gives.
How do I get clean slices?
Use a sharp knife, wipe it between cuts, and wait until the cake is completely cool. For especially sticky cakes, lightly oil the blade or dip it in warm water and dry it before cutting.
Can I bake these in a different pan size?
Yes, but watch the thickness. A smaller pan makes a taller, softer center and needs more baking time; a larger pan bakes faster and can dry out at the edges. Keep an eye on the center rather than the clock alone.
A Tray Full of Glossy Slices
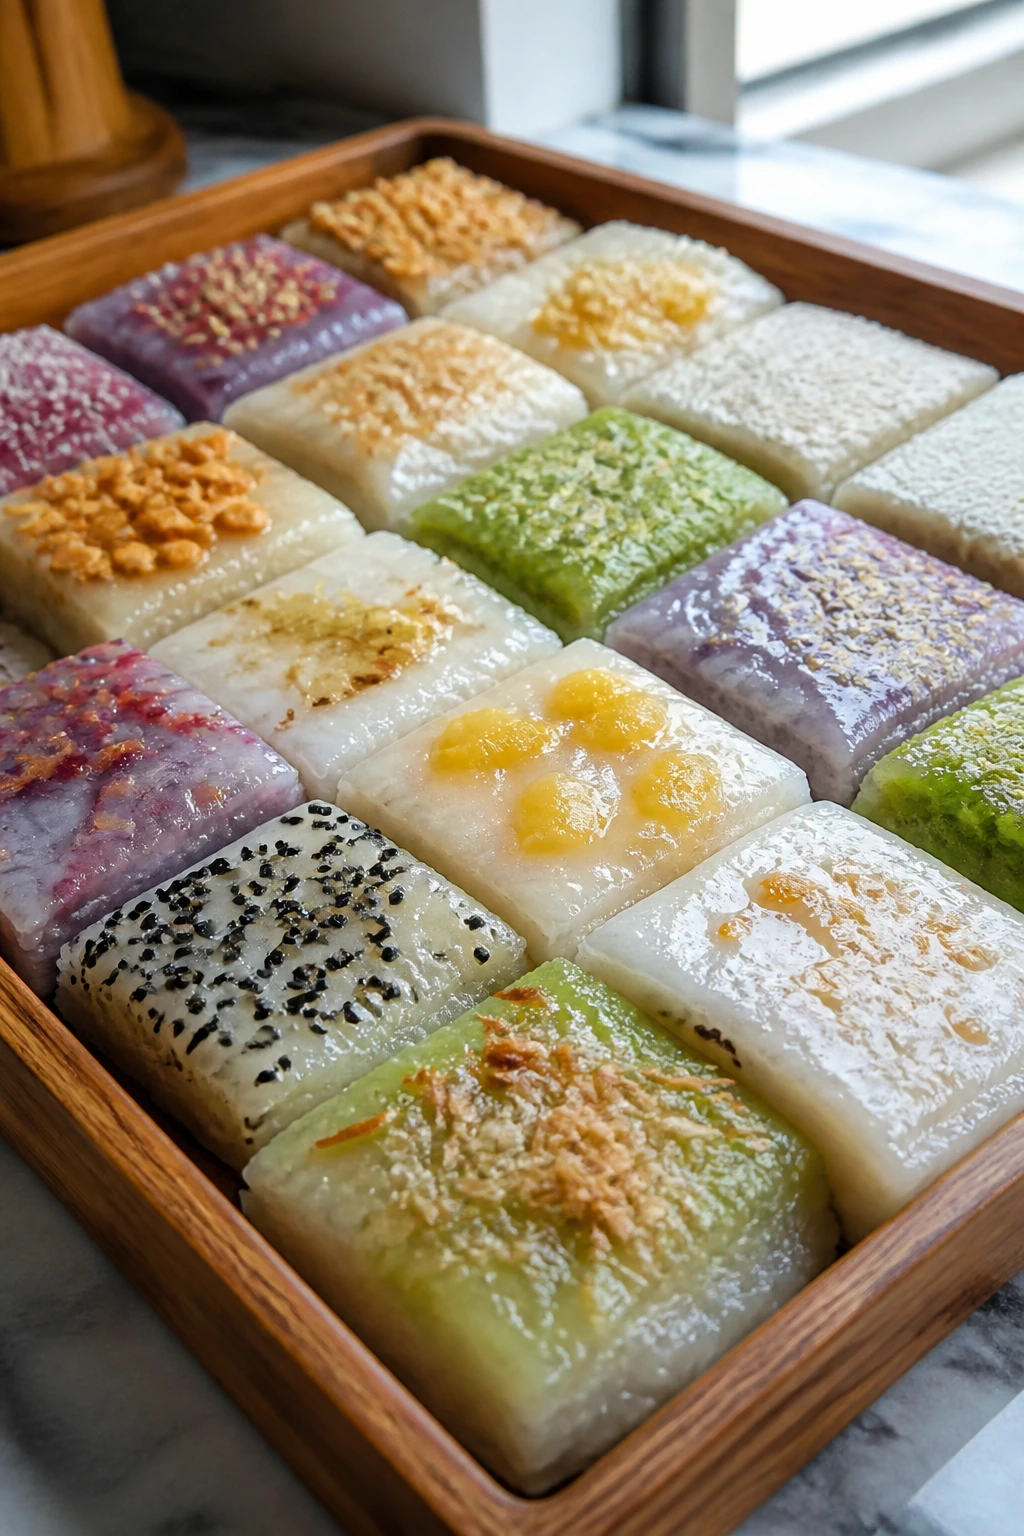
Sticky rice cakes have a way of looking delicate even when they’re built from sturdy, practical ingredients. That’s part of their appeal. Coconut, fruit, sesame, tea, and purple yam all behave differently in the pan, but the shared texture — that springy, soft chew — ties the whole collection together.
If you like desserts that can carry a little drama without becoming fragile, this is a good place to stay. Slice them clean, let the toppings do their work, and keep the cakes out where people can see them before they disappear. One pan rarely lasts long.