
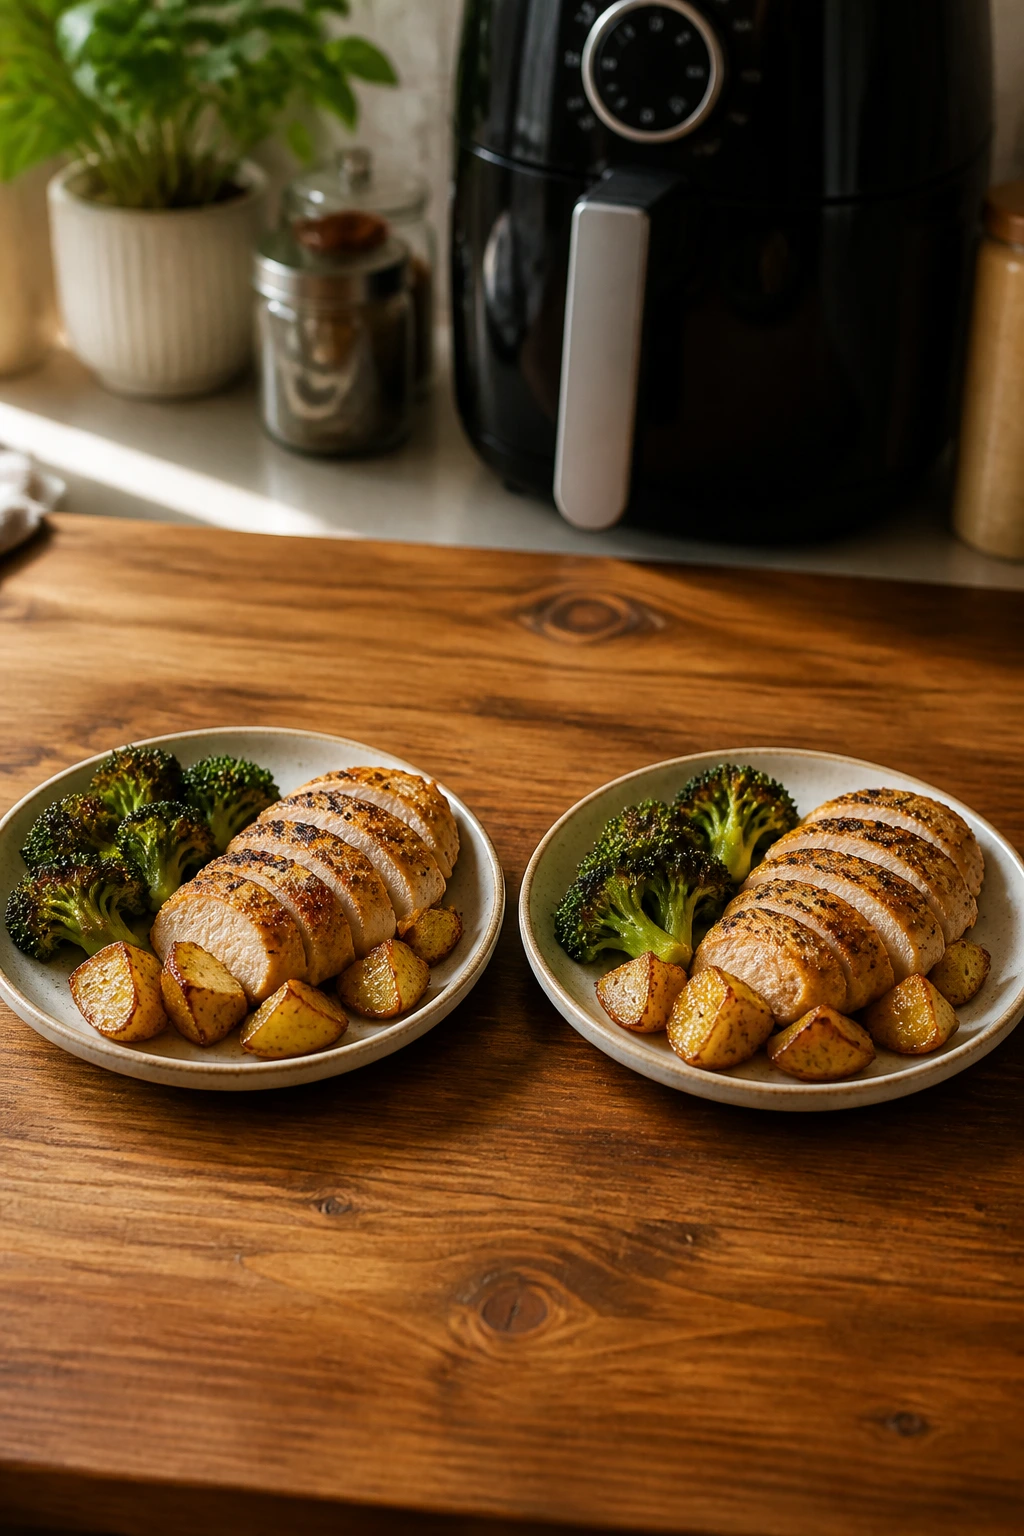
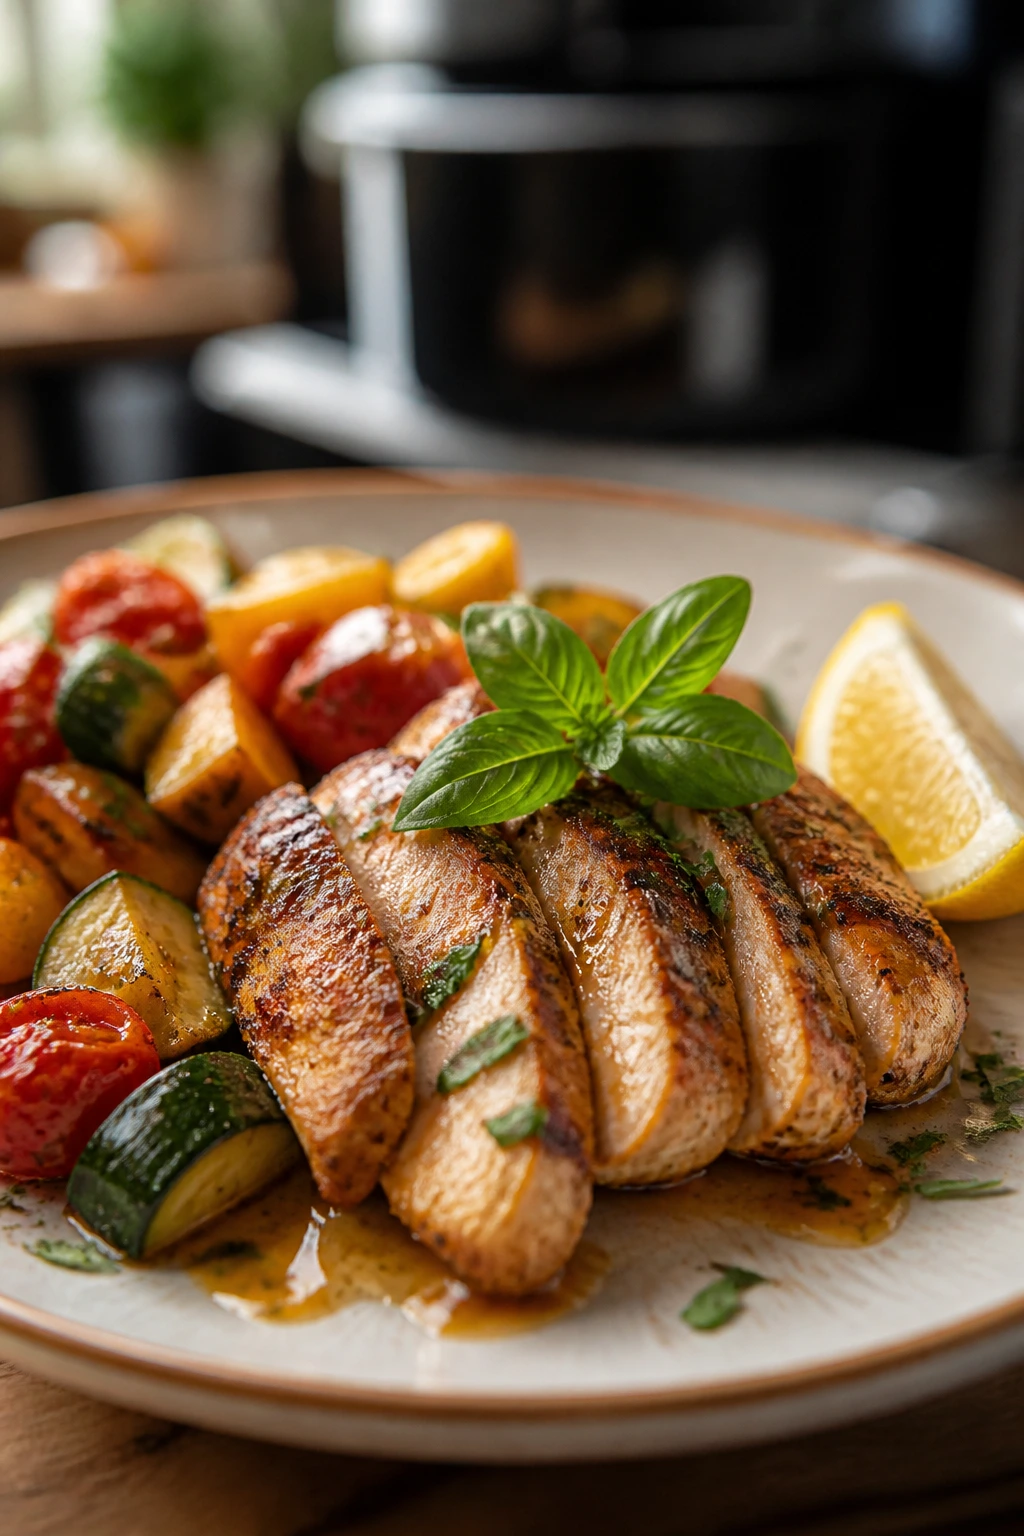
A good air fryer dinner for two should do three things at once: make enough food to feel like dinner, stay crisp instead of soggy, and leave you with a basket that wipes clean in under a minute. That’s the sweet spot. Not a sad little snack on a plate. Not a full-family production that leaves leftovers haunting the fridge for days. Just a focused, two-plate meal with the edges browned, the center juicy, and the timing tight enough that you can eat before you lose interest.
That’s where the air fryer earns its place on the counter. It handles small batches with a kind of ruthless efficiency that an oven can’t quite match. Chicken gets its crunch back. Salmon stays moist if you don’t bully it. Vegetables pick up bronzed edges in minutes. And when you’re cooking for two, the air fryer stops feeling like a novelty and starts behaving like a very useful little heat machine.
The trick is knowing what works in the basket and what needs a gentler touch. Thin cutlets, even-sized vegetables, flaky fish, saucy finishes, salty cheeses, and quick-cooking proteins all do especially well here. You do not need complicated sides or three pans. You need timing, a hot basket, and recipes that understand small-batch cooking.
Why These 12 Air Fryer Dinners Keep Showing Up on My Menu
- Built for Two: Every recipe here is portioned so you’re not stretching one dinner into four sad lunches unless you want to.
- Fast Enough to Matter: These meals lean on quick-cooking proteins and vegetables, which means you can get from fridge to table without a long wait.
- Crisp Where It Counts: The air fryer gives you browned edges, crunchy crumbs, and caramelized vegetables without a vat of oil.
- Not a One-Note Lineup: You’ll get chicken, fish, pork, beef, shrimp, tofu, halloumi, and a couple of meat-and-vegetable combinations that actually feel like dinner.
- Easy to Scale Up or Down: Most of these recipes can be doubled for a bigger appetite night or cut back if you’re cooking for one and planning leftovers.
- Less Cleanup, Less Drama: A basket, a bowl, a cutting board, maybe one sauce cup. That’s the kind of weeknight math I like.
1. Crispy Air Fryer Chicken Parmesan for Two
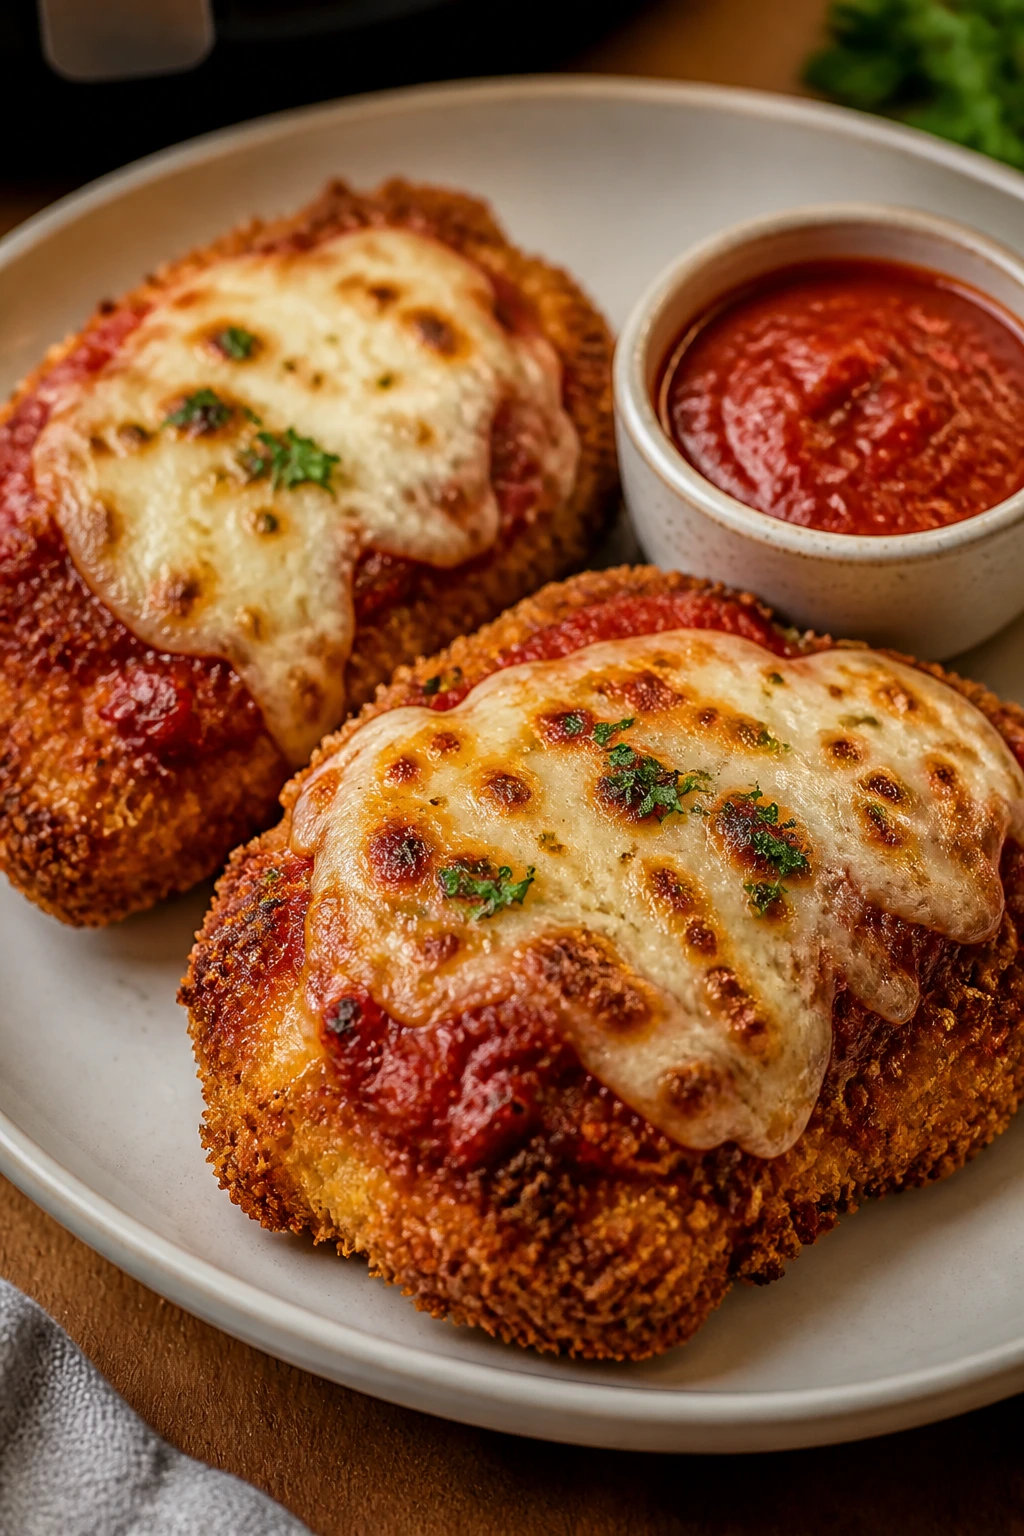
This is the chicken parm I make when I want the crunchy, saucy comfort of the original without the frying pan splatter. The coating turns golden and shattery in the air fryer, the mozzarella melts into little puddles, and the marinara stays in its lane instead of soaking the crust into submission. It smells like garlic, toasted breadcrumbs, and the kind of dinner that makes the kitchen feel warmer than it is.
Why It Works
Chicken Parmesan can go wrong fast when the breading gets greasy or the sauce gets heavy. The air fryer fixes the first problem by blasting hot air around every side of the cutlet, and it fixes the second by letting you add the marinara only at the end. Panko is the right breadcrumb here because it stays lighter and crisper than fine crumbs, and a thin cutlet cooks through before the coating overbrowns. A 390°F basket is hot enough to brown the crust but not so aggressive that the cheese burns before the chicken is done.
Key Ingredients
- 2 boneless, skinless chicken breasts, about 10 to 12 ounces each — Pound them to an even 1/2-inch thickness so they cook at the same pace.
- 1/2 teaspoon kosher salt — Season the chicken before breading so every bite tastes seasoned, not just the crust.
- 1/4 teaspoon black pepper — A small amount, but it keeps the flavor from going flat.
- 1/2 cup all-purpose flour — The dry layer helps the egg stick.
- 1 large egg + 1 tablespoon water — Whisked together to make the breading adhesive.
- 3/4 cup panko breadcrumbs — These make the crust airy and crisp.
- 1/4 cup grated Parmesan — Adds salty depth right into the coating.
- 1 teaspoon Italian seasoning — Gives the crust a savory herb note.
- Cooking spray — A light mist helps the breading brown evenly.
- 1/2 cup marinara sauce — Keep it modest so the crust stays crisp.
- 1/2 cup shredded mozzarella — Enough to melt into a blanket without drowning the cutlet.
- 2 tablespoons chopped basil or parsley — A fresh finish that cuts through the richness.
Quick Steps
-
Pound and season the chicken. Place each breast between two sheets of parchment or plastic and pound to an even 1/2-inch thickness. Pat dry, then season both sides with salt and pepper.
-
Set up the breading station. Put the flour in one shallow dish, the egg and water in a second dish, and the panko, Parmesan, and Italian seasoning in a third dish.
-
Coat the cutlets. Dredge each chicken breast in flour, shake off the excess, dip in the egg mixture, then press firmly into the breadcrumb mixture so the crumbs cling. Lay them on a plate and let them sit for 5 minutes.
-
Air fry until crisp. Preheat the air fryer to 390°F and mist the basket lightly with cooking spray. Cook the chicken for 8 to 10 minutes, flipping halfway, until the crust is deep golden and the thickest part reaches 160 to 165°F.
-
Add the sauce and cheese. Spoon about 1/4 cup marinara over each cutlet, then top with mozzarella. Air fry for 2 to 3 minutes more, just until the cheese melts.
-
Rest and finish. Let the chicken sit for 3 minutes before serving. Scatter basil or parsley over the top and serve right away.
Tips and Variations
- Crispier Crust: Spray the breaded chicken lightly with oil before air frying; that little mist makes a bigger difference than people expect.
- Lighter Swap: Use thin chicken cutlets instead of full breasts if you want a faster cook and a more even result.
- Gluten-Free Move: Swap in gluten-free flour and gluten-free panko without changing the method.
2. Lemon-Dill Air Fryer Salmon with Asparagus
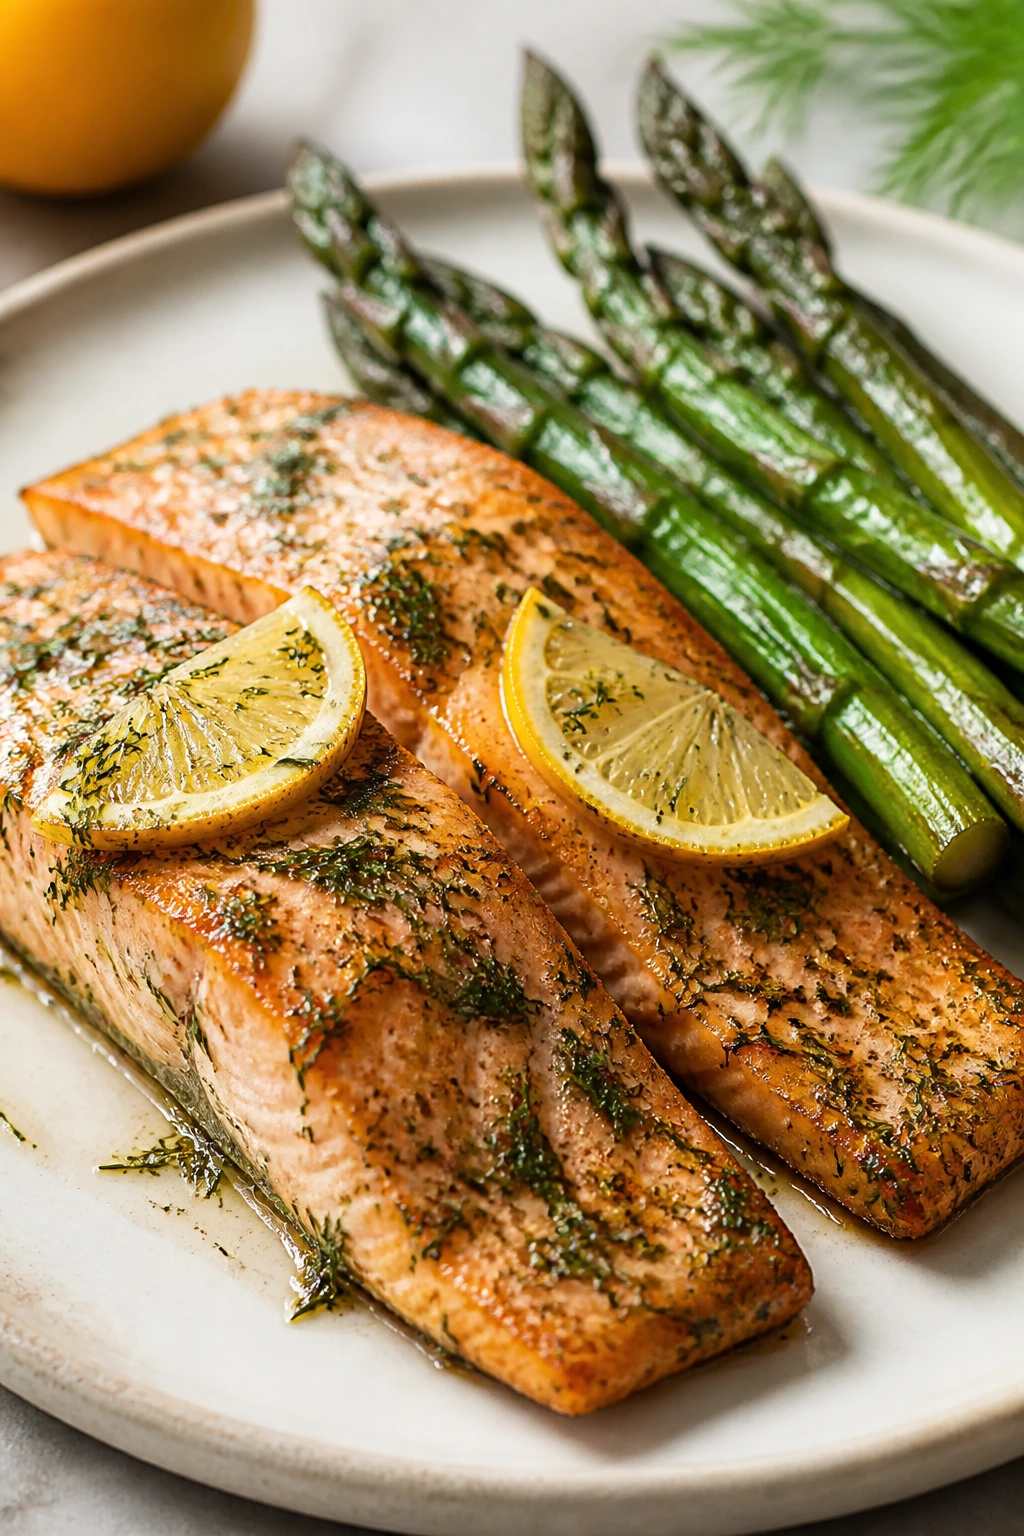
Salmon and asparagus belong together the way sharp lemon belongs with fresh dill: clean, bright, and a little bit fancy without being fussy. The salmon turns tender and glossy, the asparagus picks up roasted edges, and the whole plate smells like lemon zest when it comes out of the basket. I like this one when I want dinner to feel light but not skimpy.
Why It Works
Fish and asparagus are both quick-cooking, which makes them a natural fit for small air fryer dinners. The asparagus gets a short head start so it doesn’t go limp before the salmon is done, and the salmon cooks just long enough to flake without drying out. Dijon mustard helps the lemon, dill, and garlic cling to the fish instead of sliding off. If your fillets are the same thickness, the basket works with you instead of against you.
Key Ingredients
- 2 salmon fillets, about 6 ounces each and roughly 1 inch thick — Center-cut fillets cook most evenly.
- 8 ounces asparagus, trimmed — Look for spears with tight tips and firm stalks.
- 1 tablespoon olive oil — Helps the asparagus brown and keeps the salmon from sticking.
- 1/2 teaspoon kosher salt — Enough to season both fish and vegetables without overpowering them.
- 1/4 teaspoon black pepper — A small kick that plays nicely with lemon.
- 1 teaspoon Dijon mustard — Acts like a light glaze and adds depth.
- 1 teaspoon lemon zest — The most fragrant part of the lemon, and worth the extra minute.
- 1 tablespoon lemon juice — Brightens the fish right before and after cooking.
- 1 small garlic clove, minced — Keep it fine so it doesn’t burn.
- 1 tablespoon chopped dill — Fresh dill is best, though dried works in a pinch.
- Lemon wedges for serving — Always useful at the table.
Quick Steps
-
Mix the glaze. Stir together the Dijon, lemon zest, lemon juice, minced garlic, and dill in a small bowl.
-
Season the asparagus. Toss the trimmed asparagus with olive oil, salt, and pepper until lightly coated.
-
Start the vegetables first. Preheat the air fryer to 390°F and cook the asparagus for 3 minutes, just until it starts to soften and pick up color.
-
Prep the salmon. Pat the fillets dry with paper towels, then brush the tops with the lemon-Dijon mixture. Set them skin-side down if they have skin.
-
Cook the salmon. Add the salmon to the basket and air fry for 6 to 8 minutes, depending on thickness, until the fish flakes and reaches 145°F or to your preferred doneness if you like it a touch softer.
-
Serve immediately. Toss the asparagus again with a little dill if you want, add lemon wedges, and plate while everything is hot.
Tips and Variations
- Moisture Matters: Pat the salmon dry before glazing or the surface can steam instead of lightly brown.
- Different Herb, Same Idea: Parsley or chives can stand in for dill if that jar in the fridge has gone sad.
- Extra Rich: Add a small knob of butter on top of the salmon during the last minute if you want a silkier finish.
3. Air Fryer Pork Chops with Apples and Red Onions
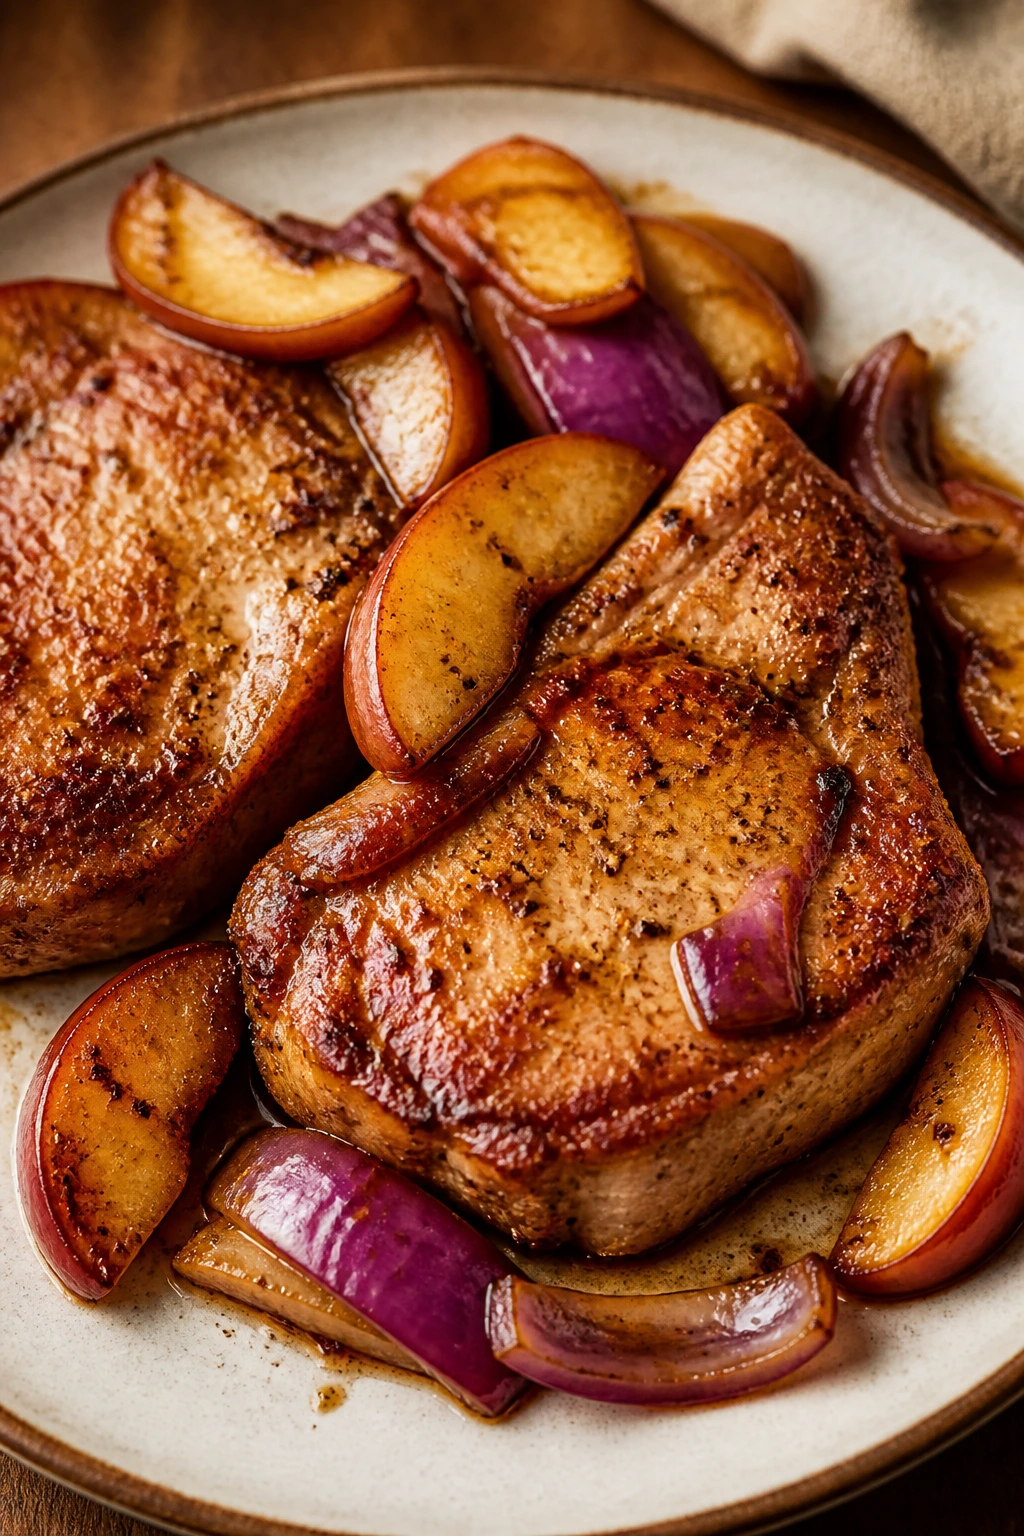
If pork chops have ever disappointed you, this version is the apology note. The chops stay juicy, the apples soften into sweet-tart wedges, and the onions pick up a caramel edge that makes the whole basket smell like dinner is doing something smart. I like using a firm apple here because it holds its shape instead of melting into sauce.
Why It Works
Bone-in pork chops are more forgiving than lean boneless ones, especially in the high heat of an air fryer. The bones help buffer the heat, and a 1-inch thickness gives the meat a little room to stay juicy while the outside browns. Apples and onions are not just filler; they catch some of the pork drippings and create a sticky, savory-sweet layer that makes the plate taste fuller than the ingredient list suggests. A short finish with apple cider vinegar wakes everything up.
Key Ingredients
- 2 bone-in pork chops, about 8 to 10 ounces each and 1 inch thick — Thicker chops are easier to cook well.
- 1 large firm apple, thinly sliced — Honeycrisp, Gala, or Pink Lady all hold up nicely.
- 1 small red onion, cut into wedges — The wedges soften without disappearing.
- 1 tablespoon olive oil — Helps the apples and onions brown.
- 1 teaspoon Dijon mustard — Adds tang and helps the seasoning stick.
- 1 teaspoon maple syrup — Just enough to round out the savory flavor.
- 1/2 teaspoon kosher salt — Season the pork and the fruit mixture.
- 1/2 teaspoon smoked paprika — Gives the chops a warm color and a little depth.
- 1/2 teaspoon dried thyme — Works well with pork and apples.
- 1/4 teaspoon black pepper — Keeps the flavor lively.
- 1 tablespoon apple cider vinegar — A small splash at the end keeps the dish from tasting heavy.
- 1 tablespoon butter, optional — Nice if you want a glossier finish.
Quick Steps
-
Season the pork. Stir together the Dijon, maple syrup, smoked paprika, thyme, salt, and pepper, then rub it over both sides of the pork chops.
-
Prep the fruit and onion. Toss the apple slices and onion wedges with olive oil and a pinch of salt so they cook evenly.
-
Give the apples a head start. Air fry the apples and onions at 380°F for 4 minutes, shaking once halfway through.
-
Add the pork chops. Nestle the chops in the basket with the fruit and cook for 10 to 12 minutes, flipping once, until the pork reaches 145°F at the thickest point.
-
Rest and finish. Pull the basket out and let the chops rest for 3 minutes. Toss the apples and onions with the vinegar and butter while they’re still hot.
-
Serve immediately. Spoon the apples and onions over the chops and get them to the table before the juices run off the plate.
Tips and Variations
- Skip Thin Chops: Very thin chops cook too fast and dry out before the apples are done.
- More Savory: Add a few rosemary leaves if you want a woodsy note instead of extra sweetness.
- No Bone? Boneless chops work too, but shave 2 to 3 minutes off the cook time and watch them closely.
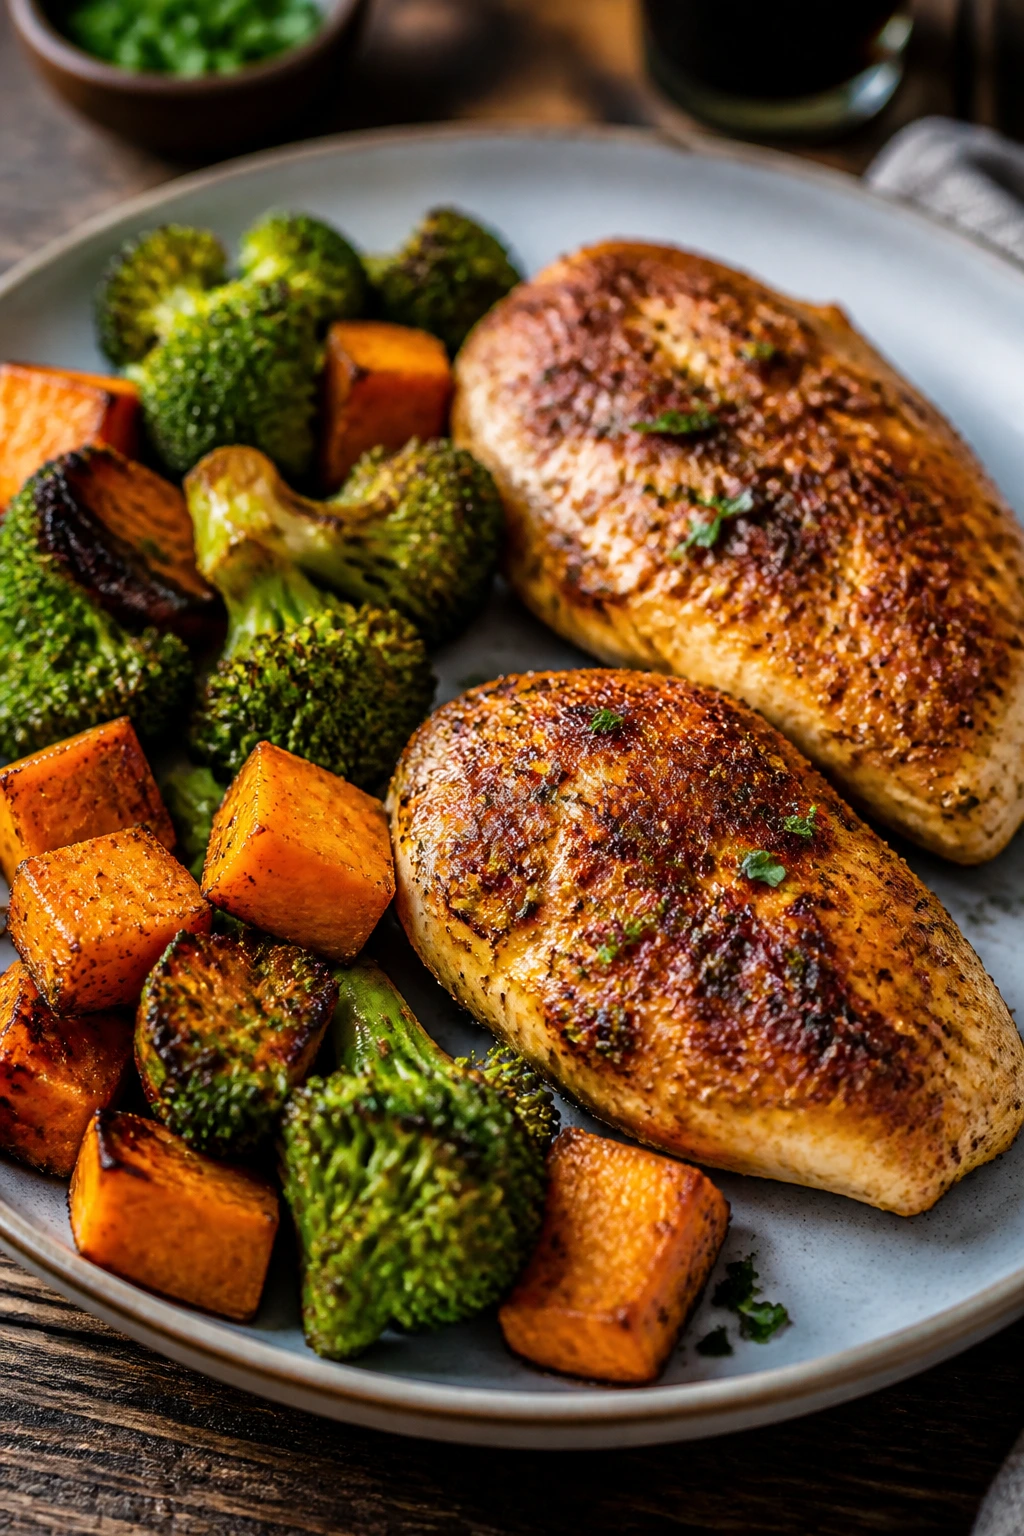
4. Air Fryer Steak Bites with Mushrooms and Broccoli
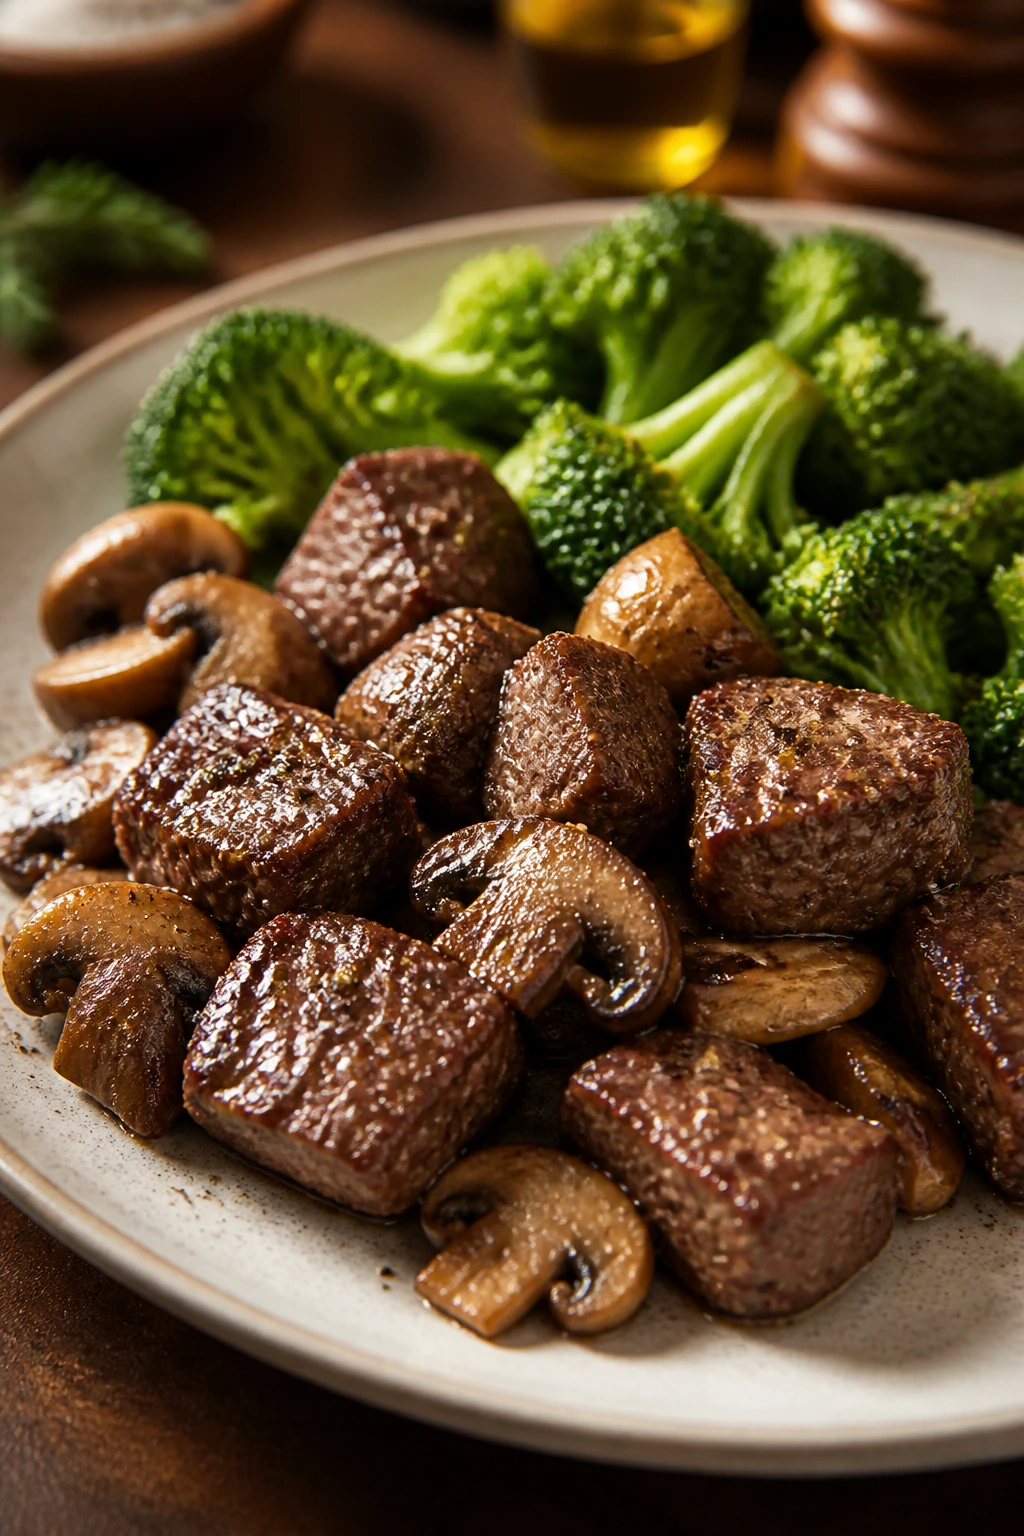
This is the closest thing the air fryer has to a little steakhouse dinner without the price tag or the waiting. The steak bites brown fast, the mushrooms soak up the beefy juices, and the broccoli gets crisp edges that make it worth eating instead of pushing around the plate. I like this one because it feels hearty without needing potatoes to prove itself.
Why It Works
Steak bites are ideal for the air fryer because small cubes sear quickly before they have time to dry out. Broccoli and mushrooms can share the basket because they both like hot, dry heat and neither one needs a long cook. The mushrooms give up some moisture, then pick it back up with the steak seasoning and butter at the end. A quick rest after cooking keeps the juices where they belong.
Key Ingredients
- 12 ounces sirloin steak, cut into 1-inch cubes — Sirloin is tender enough to stay pleasant but sturdy enough for high heat.
- 8 ounces broccoli florets — Medium florets brown better than tiny ones.
- 6 ounces cremini mushrooms, halved — Cremini have more flavor than plain white mushrooms.
- 1 tablespoon olive oil — Needed for both the steak and vegetables.
- 1 tablespoon soy sauce — Adds salt and a savory edge.
- 1 teaspoon Worcestershire sauce — Gives the steak a deeper, beefier taste.
- 2 cloves garlic, minced — Keep it small so it doesn’t burn.
- 1/2 teaspoon kosher salt — Enough to season the whole basket.
- 1/4 teaspoon black pepper — Classic, and still the right move here.
- 1/2 teaspoon onion powder — Helps fill in the flavor fast.
- 1 tablespoon butter — Melts over the hot steak at the end.
- 1 teaspoon chopped parsley — A fresh finish that keeps the plate from looking heavy.
Quick Steps
-
Season the steak. Toss the steak cubes with soy sauce, Worcestershire, garlic, salt, pepper, and onion powder. Let them sit while you prep the vegetables.
-
Prep the vegetables. Toss the broccoli and mushrooms with olive oil and a pinch of salt.
-
Start with the broccoli and mushrooms. Preheat the air fryer to 400°F and cook the vegetables for 4 minutes to get them going.
-
Add the steak bites. Shake the basket, add the seasoned steak, and cook for 4 to 5 minutes more, shaking once halfway through.
-
Check the doneness. Pull the steak when it reaches about 130 to 135°F for medium, or a touch higher if you like it more done. The mushrooms should look browned and a little wrinkled.
-
Finish with butter. Toss the hot steak and vegetables with butter and parsley before serving.
Tips and Variations
- Dry Steak Sear Better: Pat the steak cubes dry before seasoning if they came from a very wet package.
- Want a Saucy Plate? Spoon a little extra Worcestershire mixed with melted butter over the top at the end.
- More Veg, Same Time: Bell peppers work well here, but cut them thicker than the broccoli so they don’t collapse.
5. Shrimp Fajita Bowls
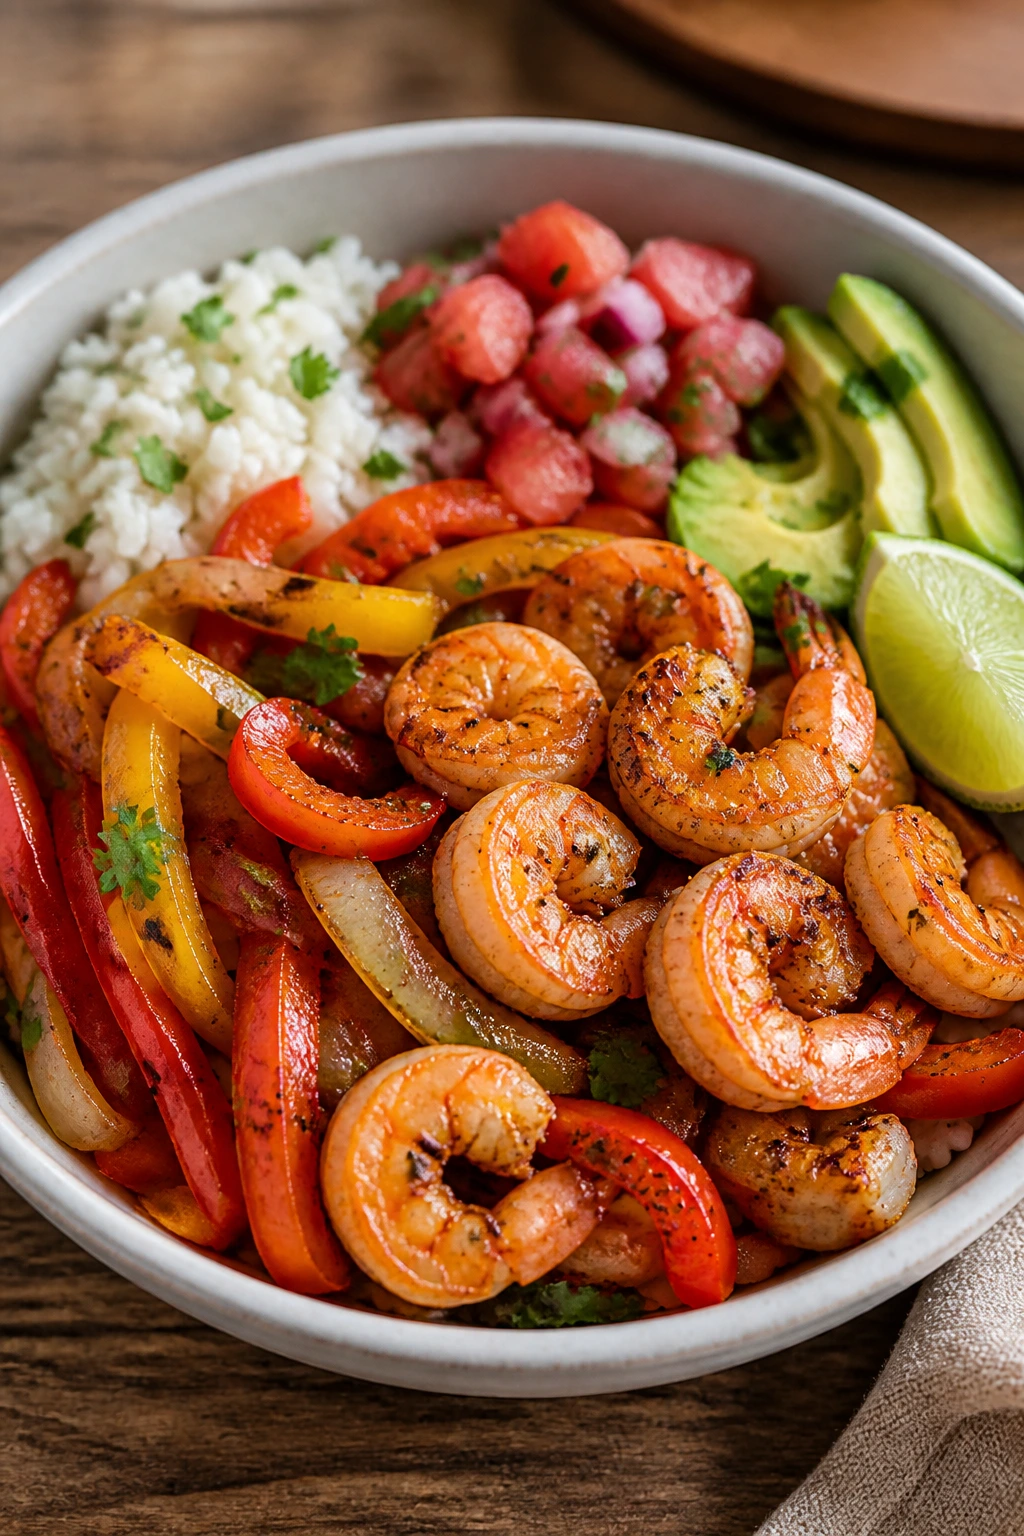
Shrimp fajita bowls are all about speed, color, and a little char on the edges. The peppers soften and blister, the shrimp turn pink and curled, and the lime at the end makes the whole thing taste brighter than the cook time suggests. This is one of those dinners that looks like more effort than it really was.
Why It Works
Shrimp cook so quickly that they’re almost built for the air fryer, but they need a vegetable partner that can get a head start. Peppers and onions are perfect because they soften without falling apart, and their natural sweetness plays well with chili powder and cumin. The basket’s dry heat gives the vegetables those browned edges you’d normally get from a hot skillet. A bowl build lets you keep the rice underneath and the shrimp right on top, which is smart and practical.
Key Ingredients
- 12 ounces large shrimp, peeled and deveined, tails off — Large shrimp hold their texture better than tiny ones.
- 1 red bell pepper, sliced — A sweet, sturdy pepper that softens well.
- 1 yellow bell pepper, sliced — Keeps the bowl colorful and balanced.
- 1 small red onion, sliced — Adds a little sharpness and sweetness.
- 1 tablespoon olive oil — Helps the vegetables blister.
- 1 teaspoon chili powder — The main fajita flavor.
- 1/2 teaspoon ground cumin — Gives the dish its warm, earthy note.
- 1/2 teaspoon garlic powder — Helps the shrimp and vegetables taste seasoned all the way through.
- 1/2 teaspoon kosher salt — Necessary for both the shrimp and the peppers.
- 1/4 teaspoon black pepper — Small but useful.
- 1 lime, cut into wedges — Adds fresh acid at the end.
- 1 cup cooked rice or cauliflower rice — The base that turns this into dinner.
- 2 tablespoons salsa — For moisture and extra flavor.
- 1/4 avocado, sliced — Optional, but I like the creaminess.
- A handful of cilantro — Brightens the bowl.
Quick Steps
-
Season the vegetables. Toss the peppers and onion with olive oil, half the chili powder, half the cumin, half the garlic powder, and a little salt.
-
Start the vegetables first. Preheat the air fryer to 390°F and cook the vegetables for 5 minutes, shaking once if needed.
-
Season the shrimp. Toss the shrimp with the remaining chili powder, cumin, garlic powder, salt, and pepper.
-
Add the shrimp. Put the shrimp into the basket with the peppers and onions and cook for 4 to 5 minutes, just until the shrimp are pink and curled.
-
Build the bowls. Spoon rice into two bowls, top with the shrimp and vegetables, then add salsa, avocado, and cilantro.
-
Finish with lime. Squeeze fresh lime over the top right before eating.
Tips and Variations
- Don’t Overcook Shrimp: Shrimp go from tender to rubbery fast, so check early.
- Add Heat: A pinch of cayenne or sliced jalapeño works if you want the bowl spicier.
- Tortilla Night: Skip the rice and serve everything in warm tortillas with a little shredded cabbage.
6. Turkey Meatballs with Zucchini and Marinara
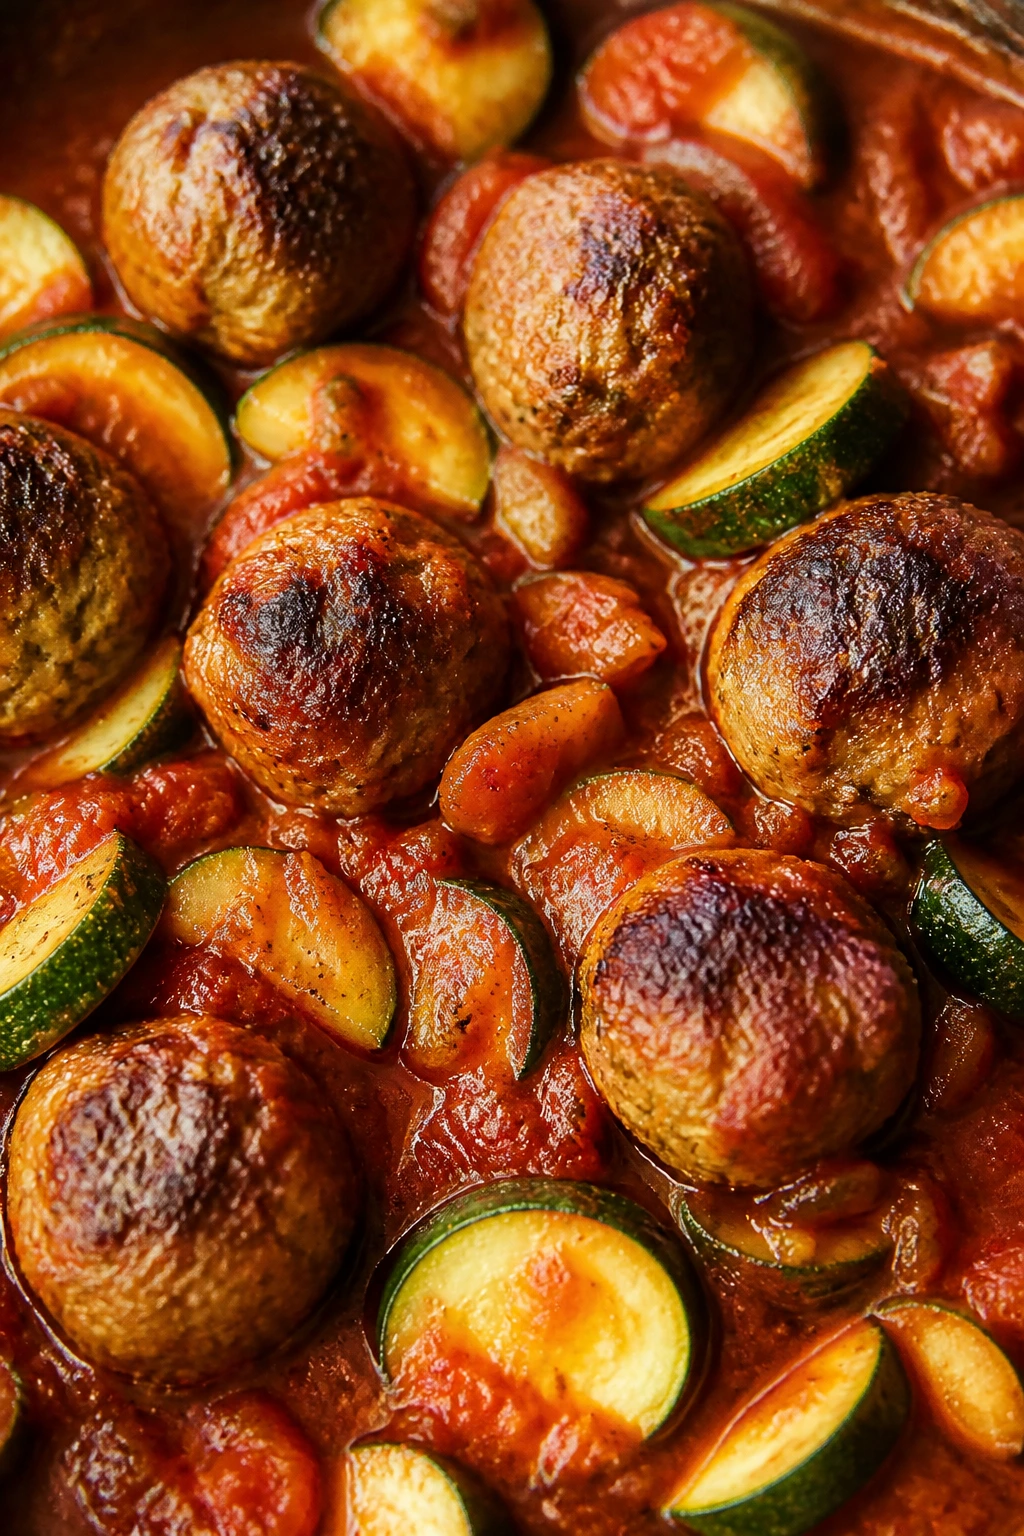
Turkey meatballs can be bland if nobody respects them, and I’m tired of pretending otherwise. Here, they’re seasoned properly, browned in the air fryer, then tucked into marinara with zucchini that softens just enough to catch the sauce. It’s cozy without being heavy, which is a useful thing to have in rotation.
Why It Works
Ground turkey needs help from fat, seasoning, and a light hand. The egg and breadcrumbs keep the meatballs together, while Parmesan and Italian seasoning add the flavor turkey sometimes lacks on its own. The air fryer gives the outside a little crust before the center overcooks, and the zucchini cooks quickly enough to join the party instead of turning to mush. Warm sauce pulled over the top at the end ties everything together without making the meatballs waterlogged.
Key Ingredients
- 1 pound ground turkey — Use 93% lean if you want a little more moisture.
- 1/4 cup panko breadcrumbs — Helps the meatballs stay tender.
- 1 large egg — Binds the mixture.
- 2 tablespoons grated Parmesan — Gives the meatballs more flavor.
- 1 teaspoon Italian seasoning — Keeps the profile classic.
- 1/2 teaspoon kosher salt — Important; turkey needs it.
- 1/4 teaspoon black pepper — Keeps the flavor from flattening out.
- 1 medium zucchini, cut into half-moons — A quick-cooking vegetable that works well with tomato sauce.
- 1 cup marinara sauce — Warmed and spooned over the finished meatballs.
- 1 tablespoon olive oil — For the zucchini.
- 1 tablespoon chopped parsley — Freshness at the end.
- Red pepper flakes, optional — Nice if you want a little heat.
Quick Steps
-
Mix the meatballs. Combine the ground turkey, breadcrumbs, egg, Parmesan, Italian seasoning, salt, and pepper in a bowl. Mix just until combined; overworking makes them dense.
-
Shape them evenly. Form 8 small meatballs, about 1 1/2 inches across, so they cook at the same rate.
-
Air fry the meatballs. Preheat the air fryer to 380°F and cook the meatballs for 8 minutes, shaking once halfway through.
-
Add the zucchini. Toss the zucchini with olive oil and a pinch of salt, then add it to the basket and cook 5 to 6 minutes more.
-
Check the temperature. The meatballs should reach 165°F in the center and look browned on the outside.
-
Sauce and serve. Warm the marinara, spoon it over the meatballs and zucchini, and finish with parsley.
Tips and Variations
- Wet Hands Help: Lightly wet your hands before shaping to keep the turkey mixture from sticking everywhere.
- Extra Tender: Add 1 tablespoon of milk to the mix if you want a softer meatball.
- No Zucchini? Use sliced bell peppers or mushrooms with the same timing.
7. Crispy Tofu and Broccoli with Peanut Sauce
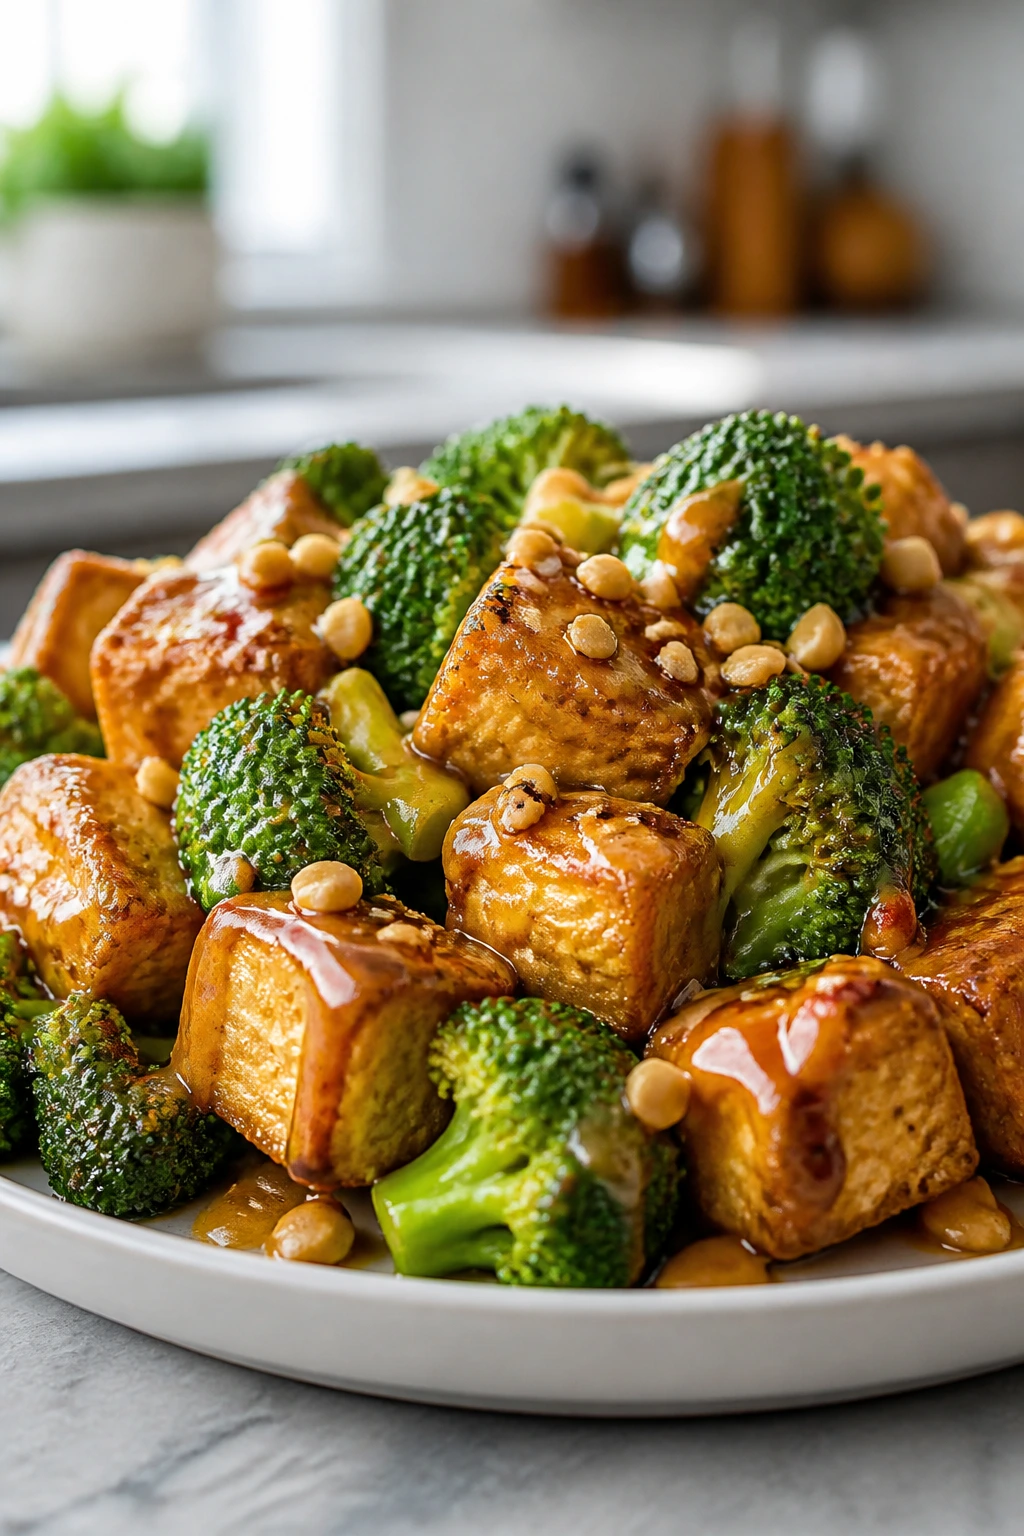
People talk about tofu like it’s a compromise. That usually means they’ve been cooking it badly. Pressed, seasoned, and air fried, tofu gets a crisp shell and a creamy center that’s more interesting than most quick dinners. The peanut sauce pulls everything together with salt, tang, and a little sweetness, and the broccoli gives the plate some crunch that keeps it from feeling soft all the way through.
Why It Works
Extra-firm tofu is the right pick because it can stand up to high heat without collapsing. Pressing it matters more than people think; get the water out and the edges get crisp instead of rubbery. Cornstarch gives the cubes a dry coating that browns fast in the air fryer, and broccoli cooks in just enough time to get a little char without losing its bite. Peanut sauce is a practical finish because it adds richness with almost no effort.
Key Ingredients
- 14 ounces extra-firm tofu, pressed and cut into cubes — Press for 15 to 20 minutes if you can.
- 8 ounces broccoli florets — Small to medium florets crisp best.
- 1 tablespoon cornstarch — The key to a crisp shell.
- 1 tablespoon soy sauce or tamari — Seasons the tofu.
- 1 tablespoon neutral oil or sesame oil — Helps everything brown.
- 1/2 teaspoon garlic powder — Easy flavor that works with peanut sauce.
- 1/4 teaspoon salt — Use a light hand because the soy sauce brings salt too.
- 2 tablespoons peanut butter — Smooth or natural both work.
- 1 tablespoon soy sauce — For the sauce.
- 1 tablespoon lime juice — Cuts the richness.
- 1 teaspoon honey or maple syrup — Balances the salt.
- 1 teaspoon grated ginger — Fresh if you have it.
- 1 to 2 tablespoons warm water — Loosens the sauce to a drizzly texture.
- Pinch of chili flakes — Optional, but good.
- 1 cup cooked rice — The base.
- 1 tablespoon sesame seeds and 2 sliced scallions — For the finish.
Quick Steps
-
Press and cube the tofu. Pat the tofu dry, then press it under a towel with something heavy for 15 to 20 minutes. Cut into 1-inch cubes.
-
Season the tofu. Toss the cubes with soy sauce, oil, cornstarch, garlic powder, and salt until lightly coated.
-
Air fry the tofu. Preheat the air fryer to 390°F and cook the tofu for 10 minutes, shaking the basket once.
-
Add the broccoli. Toss the broccoli with a little oil and a pinch of salt, then add it to the basket and cook 5 to 6 minutes more until the tofu is crisp and the broccoli has browned edges.
-
Stir the sauce. Mix peanut butter, soy sauce, lime juice, honey, ginger, and warm water until smooth.
-
Serve over rice. Spoon rice into bowls, top with tofu and broccoli, then drizzle with peanut sauce and finish with sesame seeds and scallions.
Tips and Variations
- Perforated Parchment Helps: If your basket tends to stick, use air fryer parchment with holes so the tofu still crisps.
- No Peanut Butter? Almond butter or cashew butter can stand in, though the flavor gets milder.
- Add Crunch: Toasted peanuts on top make this feel more finished.
8. Cod Tacos with Slaw and Lime Crema
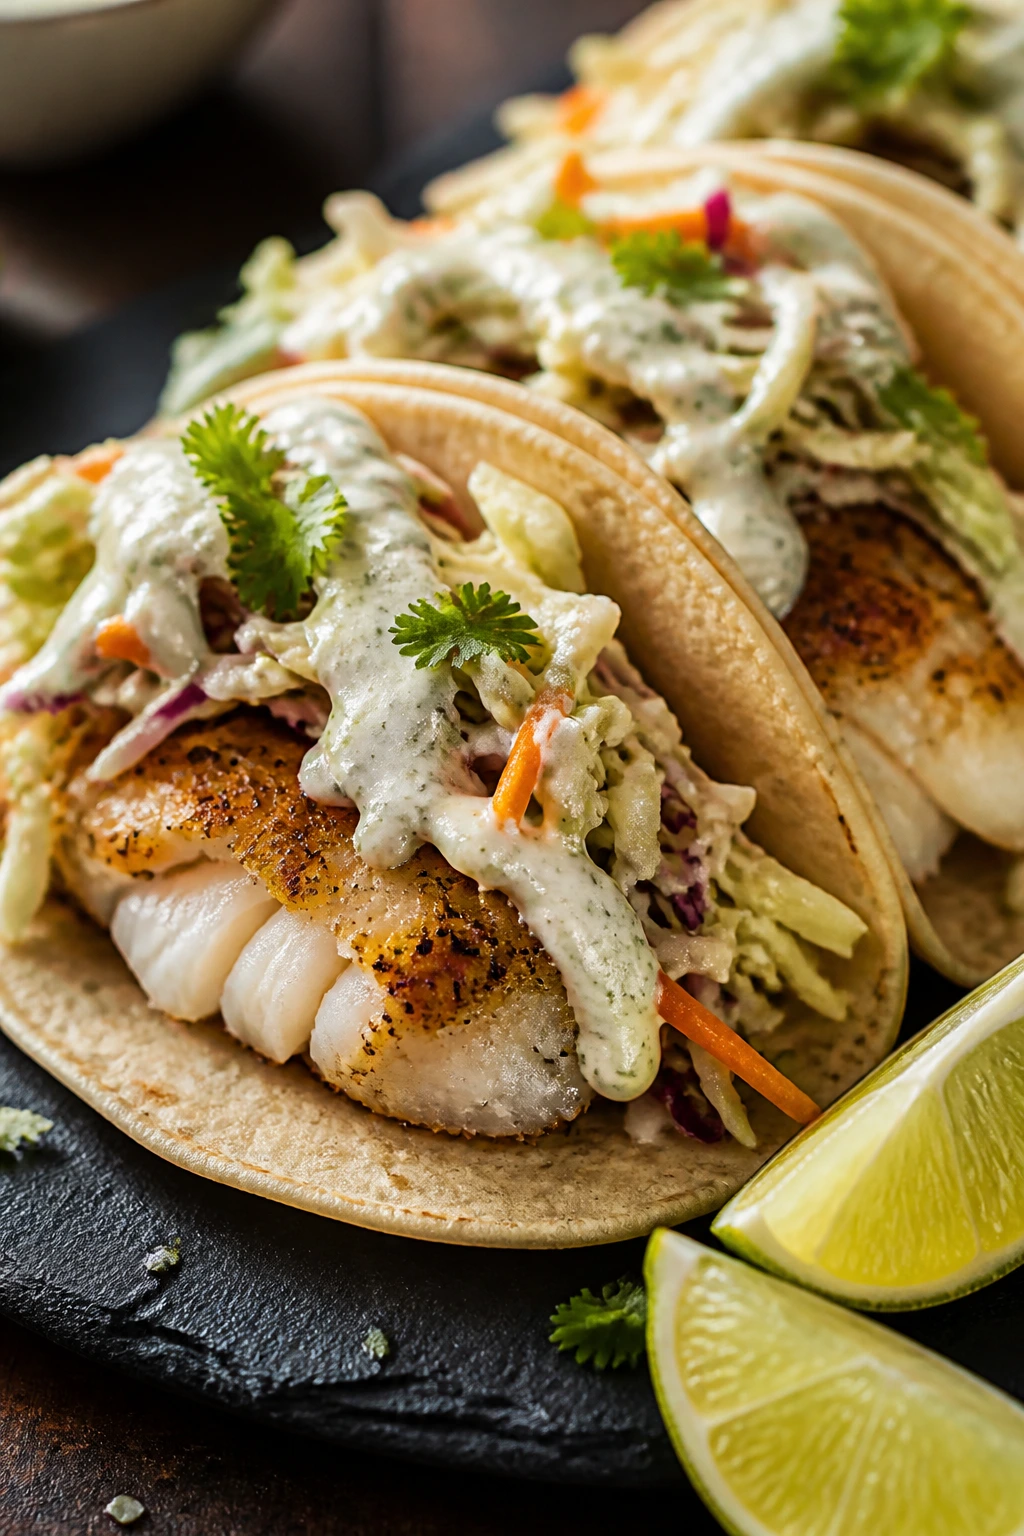
Cod is mild in a way that makes it easy to underestimate. That’s a mistake. It flakes beautifully, picks up seasoning fast, and turns into an excellent taco filling when you give it a little chili powder and lime. The slaw adds crunch, the crema adds coolness, and the whole thing lands on the table looking much more deliberate than the effort required.
Why It Works
Cod is one of the best fish for the air fryer because it cooks quickly and holds together long enough to move from basket to taco without falling apart. The dry heat firms the outside while keeping the interior soft and flaky. A light spice rub gives the fish flavor without masking its clean taste, and the slaw keeps the tacos from feeling flat. I’d rather eat two of these than a sad stack of overloaded tacos any day.
Key Ingredients
- 2 cod fillets, about 6 ounces each and roughly 1 inch thick — Thicker fillets are easier to manage.
- 1 tablespoon olive oil — Helps the seasoning stick.
- 1 teaspoon chili powder — Gives the fish a warm, taco-friendly flavor.
- 1/2 teaspoon ground cumin — Adds a little earthiness.
- 1/2 teaspoon kosher salt — Needed for the mild fish.
- 1/4 teaspoon black pepper — A small but useful amount.
- 6 small corn or flour tortillas — Warmed before serving.
- 2 cups shredded cabbage or coleslaw mix — The crunch in the taco.
- 1 tablespoon lime juice — For the slaw.
- 1 tablespoon mayonnaise or Greek yogurt — Keeps the slaw from drying out.
- 1/4 cup sour cream or Greek yogurt — For the lime crema.
- 1 teaspoon lime zest — Makes the crema taste brighter.
- Cilantro, avocado, and salsa — Good finishing pieces.
Quick Steps
-
Make the slaw and crema. Toss the cabbage with lime juice, mayonnaise or yogurt, and a pinch of salt. Stir together the sour cream or yogurt with lime juice, zest, and a pinch of salt.
-
Season the cod. Rub the fillets with olive oil, chili powder, cumin, salt, and pepper.
-
Air fry the fish. Preheat the air fryer to 390°F and cook the cod for 8 to 10 minutes, depending on thickness, until it flakes and reaches 145°F.
-
Warm the tortillas. Give the tortillas 30 to 45 seconds in the air fryer or a quick pass over a dry skillet.
-
Assemble the tacos. Divide the slaw between the tortillas, add cod, then spoon on the lime crema.
-
Finish with extras. Add avocado, cilantro, or salsa if you want a little more richness or heat.
Tips and Variations
- Dry Fish First: A paper towel makes a big difference with cod.
- Corn Tortilla Better? I think so, especially if you like a little more texture.
- Shortcut Slaw: Use bagged coleslaw mix on busy nights and nobody needs to know.
9. Air Fryer Stuffed Bell Peppers with Beef and Rice
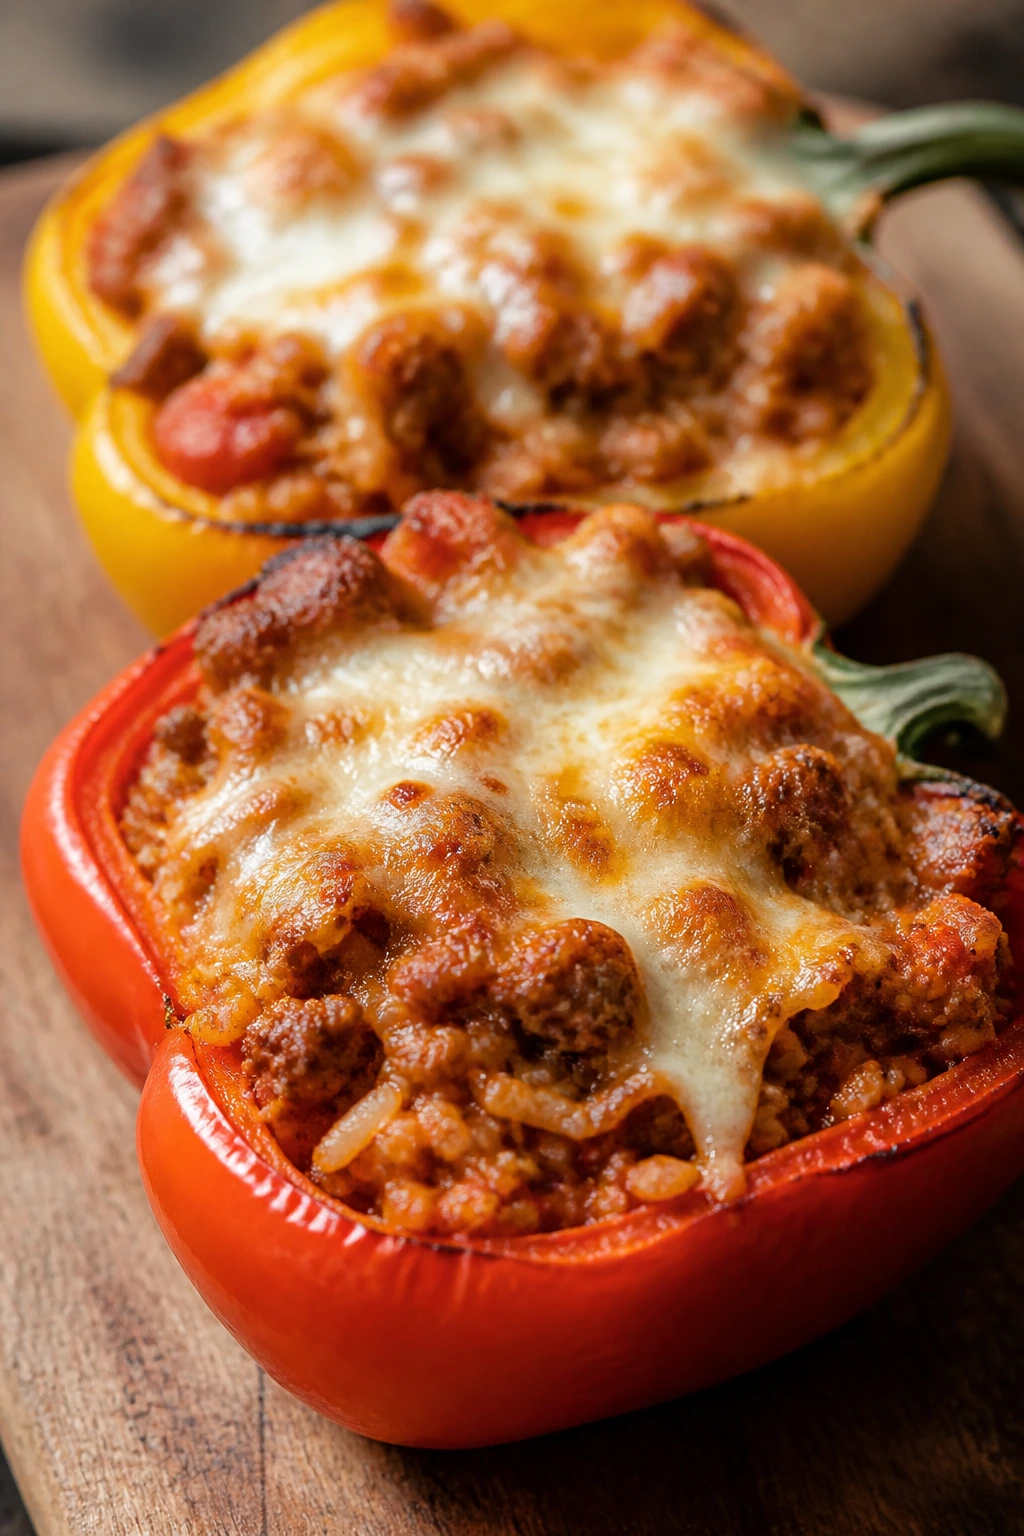
Stuffed peppers ask for a little more effort, but they repay you with the kind of dinner that looks organized on the plate. The peppers soften at the edges, the filling gets savory and saucy, and the melted cheese on top pulls the whole thing together. This is a good one when you want a complete meal without a separate starch on the side.
Why It Works
The air fryer is strong enough to soften bell peppers while browning the top of the filling, which is exactly what stuffed peppers need. Pre-cooking the beef mixture keeps the peppers from overcooking while the filling is still raw, and using cooked rice keeps the whole process quick. The peppers act like little edible baking dishes, which is one of those cooking ideas that sounds obvious once you’ve done it. Still, people keep overcomplicating it.
Key Ingredients
- 2 large bell peppers, halved lengthwise and seeded — Choose peppers that can sit flat in the basket.
- 1/2 pound ground beef — Adds richness and body.
- 1 cup cooked rice — White or brown rice both work.
- 1/2 cup marinara sauce — Makes the filling moist and savory.
- 1/4 cup finely diced onion — Adds flavor to the beef.
- 1 clove garlic, minced — Keeps the filling from tasting dull.
- 1 teaspoon Italian seasoning — A classic fit.
- 1/2 teaspoon kosher salt — Needed for the beef.
- 1/4 teaspoon black pepper — A small but important amount.
- 1 tablespoon olive oil — For the peppers.
- 1/4 cup shredded mozzarella — Melts nicely on top.
- 1 tablespoon chopped parsley — Fresh finish.
Quick Steps
-
Brown the beef. Cook the ground beef and onion in a skillet over medium heat for 6 to 7 minutes until the beef is no longer pink. Add the garlic for the last 30 seconds.
-
Build the filling. Stir in the cooked rice, marinara, Italian seasoning, salt, and pepper. The mixture should look saucy, not soupy.
-
Prep the peppers. Brush the cut peppers with olive oil and place them cut side up in the air fryer basket.
-
Start the peppers. Cook at 360°F for 4 minutes so they soften slightly before filling.
-
Fill and top. Spoon the beef mixture into the peppers and sprinkle mozzarella over the top.
-
Finish cooking. Air fry for 8 to 10 minutes more, until the peppers are tender and the cheese is melted and lightly browned. Finish with parsley.
Tips and Variations
- Choose a Flat Pepper: Peppers that wobble in the basket make the whole thing annoying.
- Make It Lighter: Swap half the beef for chopped mushrooms or lentils.
- Extra Saucy: Spoon a little more marinara under the peppers before serving.
10. Italian Sausage, Peppers, and Onions

This is the dinner that looks a little chaotic in the basket and tastes exactly like you hoped. The sausage gets browned and juicy, the peppers soften without turning limp, and the onions pick up a sweet edge that makes the whole thing smell like a good deli. Serve it in rolls or over polenta and it becomes a proper two-person meal, not a side dish pretending to be one.
Why It Works
Italian sausage brings its own seasoning and fat, which is why this dish works so well in the air fryer. The vegetables cook in that savory heat, and the basket’s airflow gives them enough browning to taste roasted instead of steamed. If you use links of roughly the same size, the timing stays simple. This is one of those recipes that rewards not messing with it too much.
Key Ingredients
- 2 Italian sausage links, about 10 to 12 ounces total — Sweet or hot both work.
- 1 red bell pepper, sliced — Sweetness and color.
- 1 yellow bell pepper, sliced — More sweetness and a different texture.
- 1 small onion, sliced — Yellow or white onions both work.
- 1 tablespoon olive oil — Helps the vegetables brown.
- 1 teaspoon Italian seasoning — Keeps the flavor cohesive.
- 1/2 teaspoon garlic powder — Useful with sausage and peppers.
- 1/4 teaspoon kosher salt — Use lightly because sausage already brings salt.
- 2 hoagie rolls or 1 cup cooked polenta — Pick the base you actually want to eat.
- 1 tablespoon pesto or mustard, optional — Adds extra flavor if you want it.
- Crushed red pepper, optional — For heat.
Quick Steps
-
Prep the vegetables. Toss the peppers and onion with olive oil, Italian seasoning, garlic powder, and a pinch of salt.
-
Start the sausage. Preheat the air fryer to 380°F and cook the sausage links for 5 minutes.
-
Add the vegetables. Shake the basket, add the peppers and onions, and cook for 10 to 12 minutes more, turning the sausage once and stirring the vegetables halfway through.
-
Check the sausage. The links should reach 160°F and look browned in spots.
-
Slice and serve. Cut the sausage on the bias, pile it with peppers and onions into rolls or over polenta, and add pesto or mustard if you want more punch.
Tips and Variations
- Cooked Sausage Shortcut: Pre-cooked sausage links save a few minutes and still taste good.
- Roll Upgrade: Toast the rolls for 1 minute so they don’t go soggy.
- More Veg: Add sliced mushrooms if you want a deeper, earthier pan.
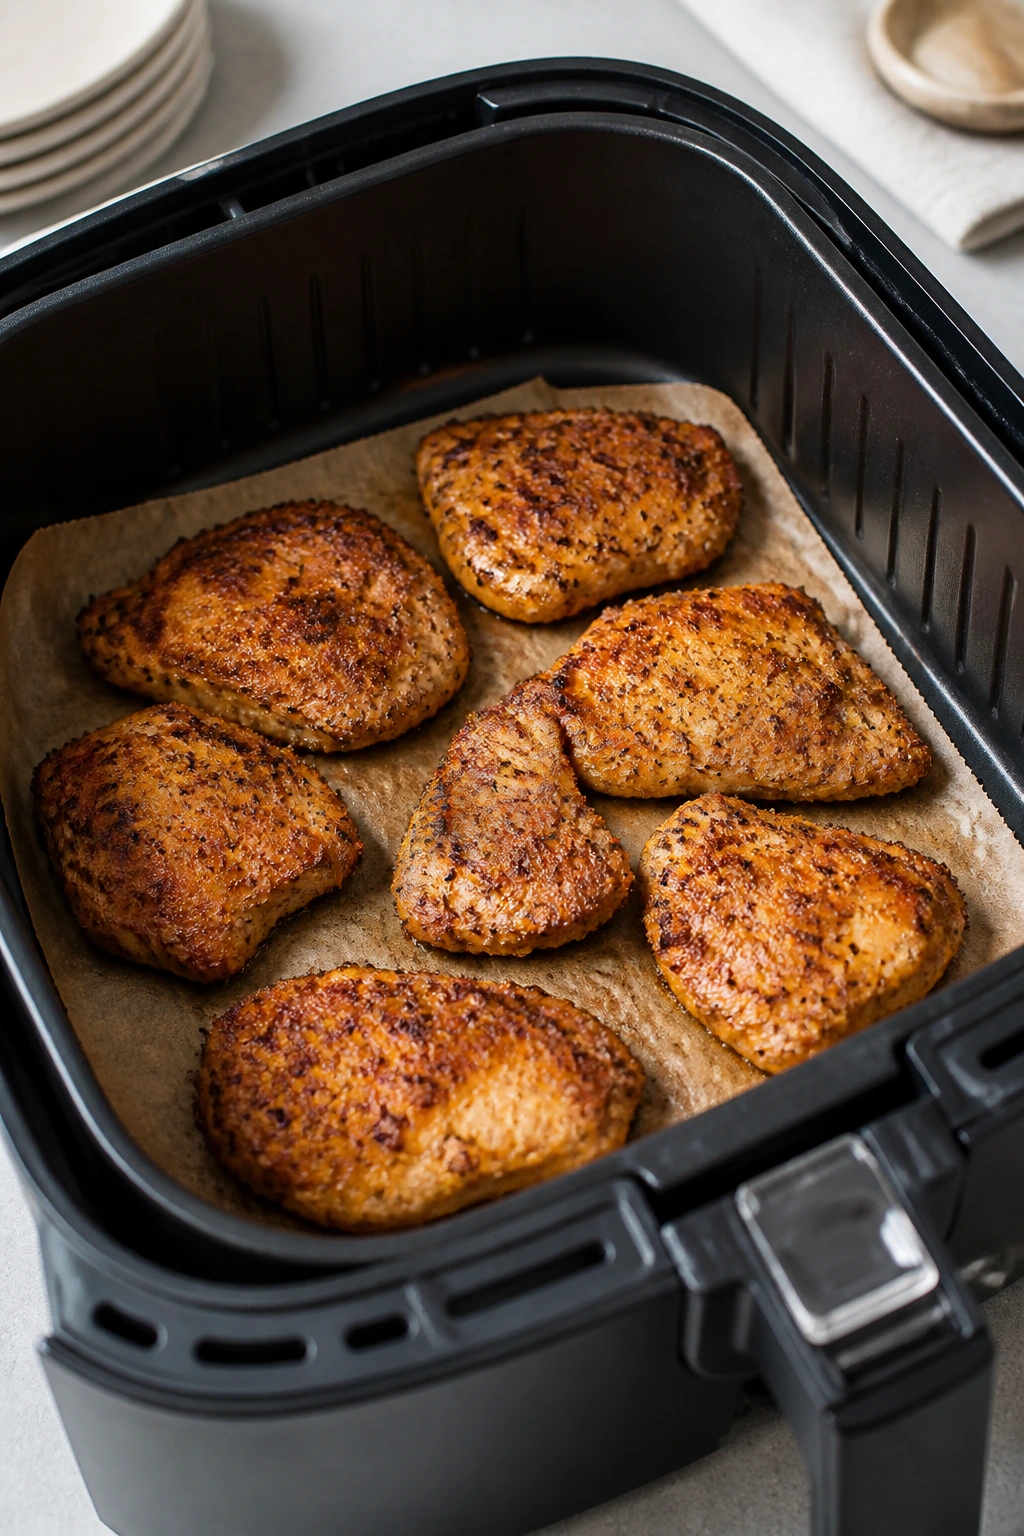
11. Garlic Butter Chicken Thighs with Brussels Sprouts
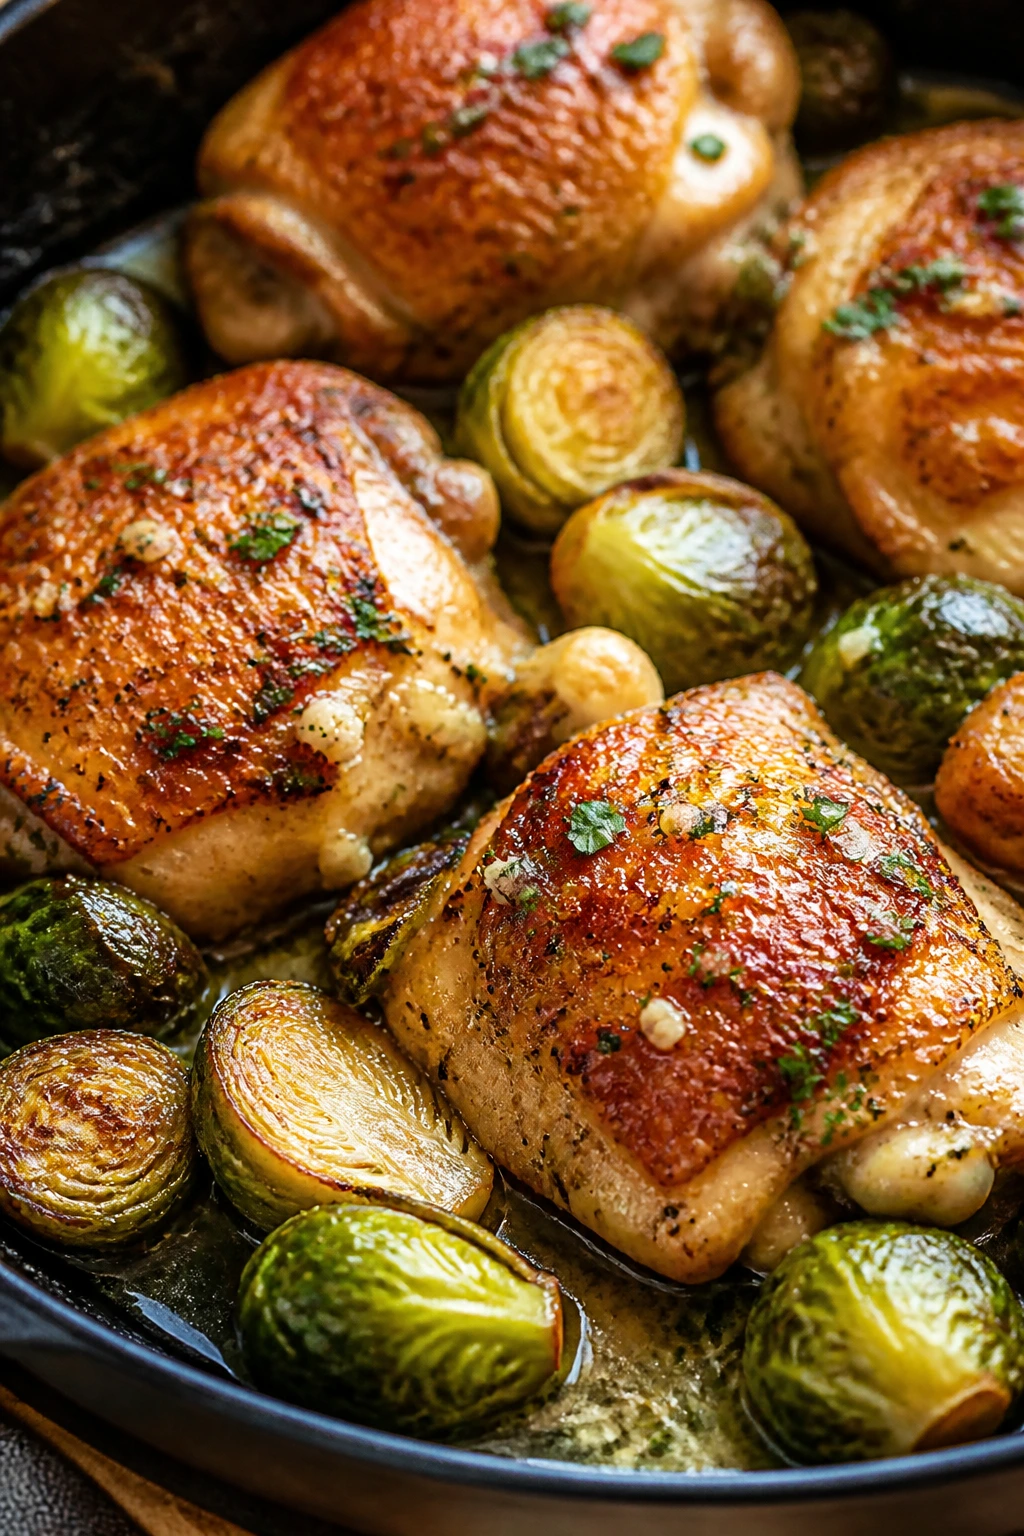
Chicken thighs are the no-drama answer to weeknight dinner. They stay juicy, they like high heat, and they forgive the minute when life gets in the way and you glance at the clock too late. Brussels sprouts make a better partner than people think; their edges crisp, their leaves turn nutty, and the whole thing gets a garlic butter finish that makes the plate feel complete.
Why It Works
Boneless chicken thighs are naturally forgiving because they have enough fat to stay moist under intense heat. Brussels sprouts brown quickly in the air fryer, especially when you cut them in half and give them room. A simple garlic butter brushed on near the end adds flavor without risking burned garlic at the start. If you’ve ever cooked chicken breasts and wished they were less needy, this is the easy answer.
Key Ingredients
- 4 boneless, skinless chicken thighs, about 1 pound total — They’re the most forgiving cut in the basket.
- 10 ounces Brussels sprouts, trimmed and halved — Smaller sprouts cook a little faster.
- 1 tablespoon olive oil — For the vegetables and a little on the chicken.
- 1 teaspoon garlic powder — Easy, even seasoning.
- 1/2 teaspoon smoked paprika — Gives the chicken color and warmth.
- 1/2 teaspoon kosher salt — Necessary for both chicken and sprouts.
- 1/4 teaspoon black pepper — Keeps the flavor balanced.
- 2 tablespoons butter, melted — The finish.
- 1 small garlic clove, minced — Stirred into the butter at the end.
- 1 teaspoon lemon juice — Cuts through the richness.
- 1 tablespoon chopped parsley — Freshness and color.
- Lemon wedge, optional — Good if you like the plate brighter.
Quick Steps
-
Season the chicken and sprouts. Toss the Brussels sprouts with olive oil, salt, pepper, and a pinch of garlic powder. Rub the chicken thighs with the remaining garlic powder and smoked paprika.
-
Start the sprouts. Preheat the air fryer to 390°F and cook the Brussels sprouts for 6 minutes.
-
Add the chicken. Nestle the thighs in with the sprouts and cook for 12 to 14 minutes, flipping the chicken halfway through.
-
Check the temperature. The chicken should reach 165°F in the thickest part and the sprouts should have browned edges.
-
Make the garlic butter. Stir the melted butter with minced garlic, lemon juice, and parsley.
-
Finish and serve. Brush the hot chicken with garlic butter, toss the sprouts in any butter left in the bowl, and plate immediately.
Tips and Variations
- Leave Space: Crowded sprouts turn soft instead of crisp.
- Bone-In Works Too: Bone-in thighs need extra time, usually 5 to 7 minutes more.
- Add Heat: A pinch of crushed red pepper in the butter is a nice move.
12. Halloumi and Chickpea Pitas with Cucumber Salad
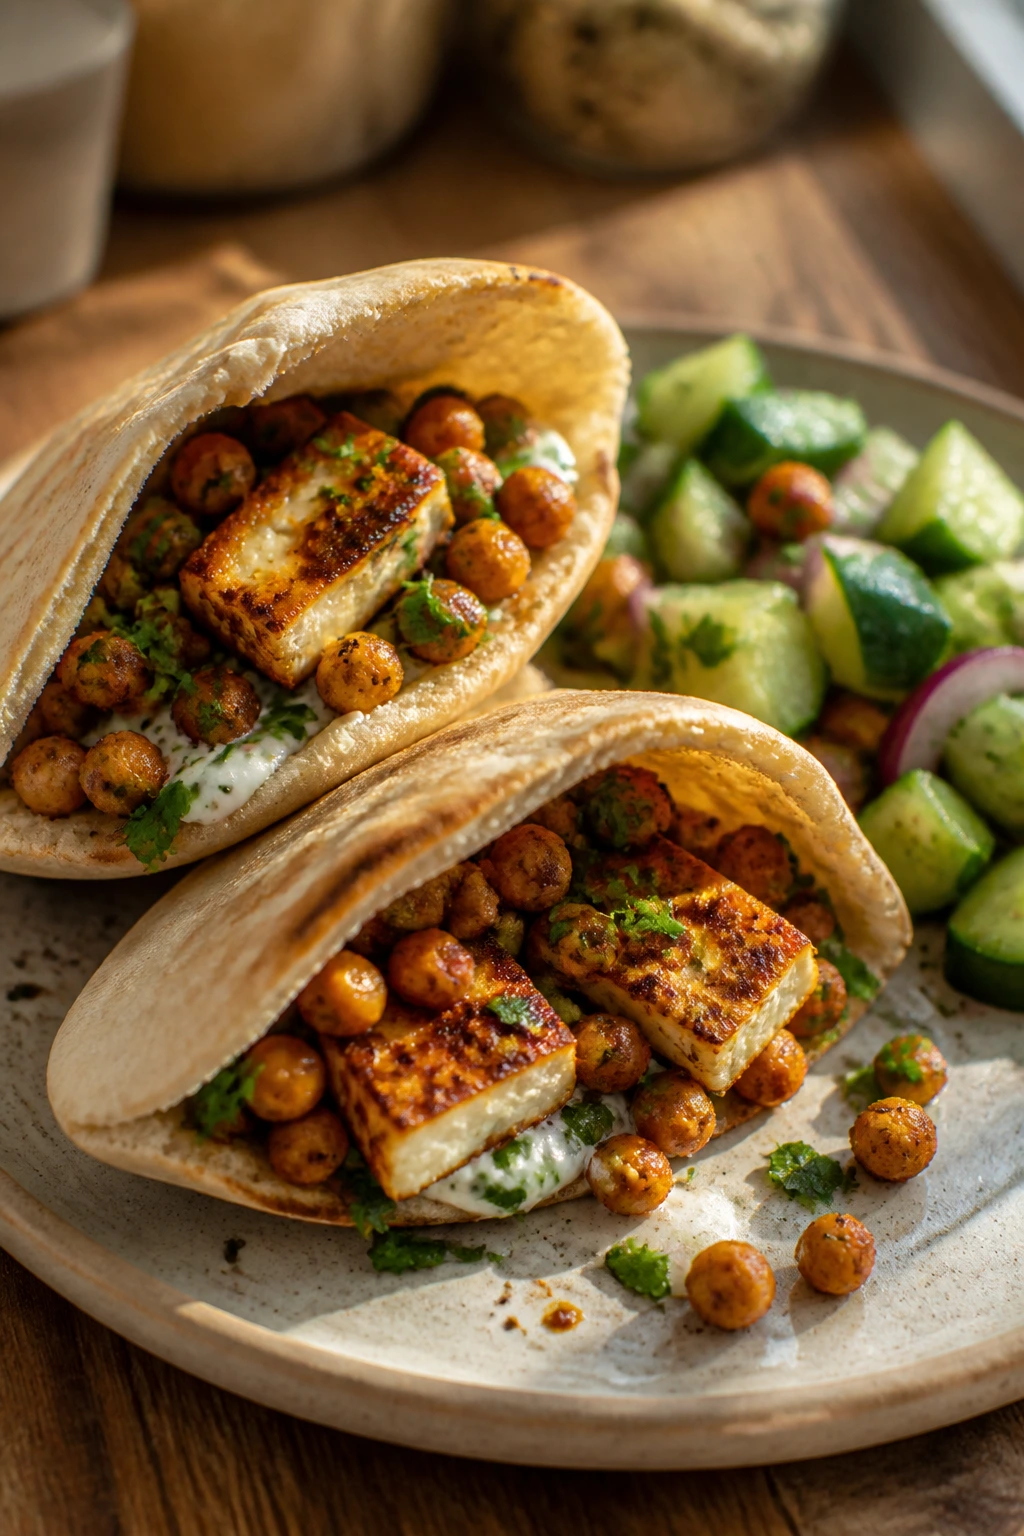
This is the vegetarian dinner that tastes like it took more planning than it did. Halloumi gets golden and salty, chickpeas turn crisp around the edges, and the cool cucumber salad keeps the whole pita from feeling too rich. I like this one when I want a meatless meal that still feels sturdy enough to count as dinner.
Why It Works
Halloumi is built for heat. It browns instead of melting away, which makes it one of the easiest cheeses to cook in the air fryer. Chickpeas dry out and crisp nicely once they’re drained well and coated with a little oil and spice. The cucumber salad adds the fresh, cool bite that keeps all that salt from piling up. It’s a good balance, and balance matters here more than drama.
Key Ingredients
- 8 ounces halloumi, cut into 1/2-inch slabs — Keep the slices thick so they don’t split.
- 1 can chickpeas, 15 ounces, rinsed, drained, and patted dry — Dry chickpeas crisp much better.
- 1 tablespoon olive oil — For the chickpeas.
- 1/2 teaspoon smoked paprika — Gives the chickpeas a warm flavor.
- 1/2 teaspoon ground cumin — Adds a little depth.
- 1/4 teaspoon kosher salt — Use lightly because halloumi is salty.
- 2 pita breads — The pocket for everything.
- 1 cup diced cucumber — Cool and crisp.
- 1/2 cup halved cherry tomatoes — Sweet and juicy.
- 2 tablespoons finely diced red onion — Sharp but useful.
- 1 tablespoon lemon juice — For the salad.
- 1 tablespoon olive oil — For the salad.
- 1 pinch salt — Just enough to wake up the vegetables.
- 2 tablespoons tzatziki or Greek yogurt — A creamy finish.
- Mint or parsley — Optional, but good.
Quick Steps
-
Prep the chickpeas. Pat the chickpeas very dry, then toss them with olive oil, smoked paprika, cumin, and salt.
-
Air fry the chickpeas. Preheat the air fryer to 390°F and cook them for 10 to 12 minutes, shaking halfway through, until they look crisp and a little blistered.
-
Add the halloumi. Put the halloumi slices in the basket and cook for 4 to 5 minutes more, just until golden on both sides.
-
Mix the salad. Combine cucumber, tomatoes, red onion, lemon juice, olive oil, and a pinch of salt in a bowl.
-
Warm the pitas. Give the pitas 30 seconds in the air fryer so they’re flexible.
-
Assemble. Stuff the pitas with chickpeas, halloumi, cucumber salad, and tzatziki. Finish with mint or parsley if you have it.
Tips and Variations
- Dry Chickpeas First: Wet chickpeas steam; dry chickpeas crisp.
- No Tzatziki? Plain Greek yogurt with lemon and salt does the job.
- More Bite: Add sliced olives or roasted red peppers if you want a stronger Mediterranean feel.
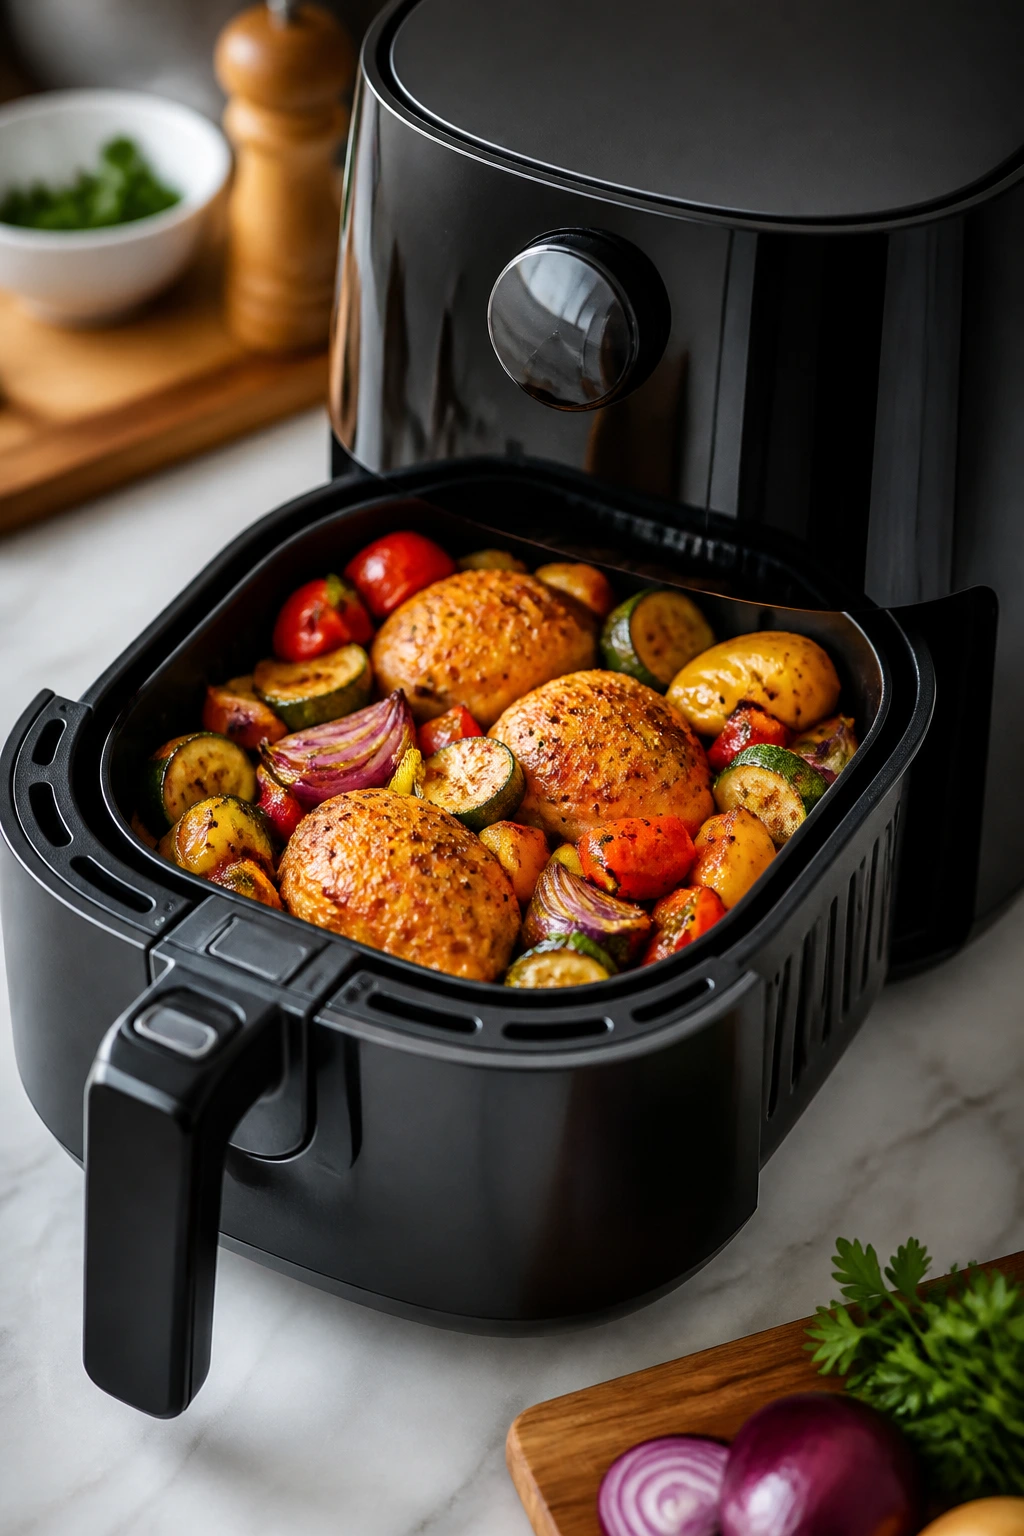
Why the Air Fryer Works So Well for Two-Plate Dinners
The air fryer is at its best when the food can sit in a single layer and get hit with hot air from all sides. That’s the whole trick. For two servings, you’re not fighting the size of the basket the way you do with a full family meal, so the machine can actually do what it promises: brown the surface, keep the center juicy, and move dinner along fast enough that you still feel like eating it while it’s hot.
It also changes the way you build a meal. Instead of planning for a giant casserole or a full tray of roasted vegetables, you can choose ingredients that finish at the same pace. That makes quick-cooking shrimp a better fit than thick bone-in chicken unless you adjust for time, and it makes things like halved Brussels sprouts or trimmed asparagus easy to slot into the same basket. I find that the best air fryer dinners for two are not the ones with the most ingredients. They’re the ones with the cleanest timing.
There’s one more practical advantage, and it’s a big one. Smaller batches mean less oil, less mess, and less regret when you’ve had a long day and do not want to scrub a baking sheet. That matters more than people admit. A dinner that leaves the kitchen calm is a dinner you’ll make again.
Essential Equipment for These Recipes
- Basket-style air fryer, 4 to 6 quarts — Big enough for two portions without forcing you to stack everything.
- Instant-read thermometer — The easiest way to keep chicken, pork, and fish from getting overcooked.
- Tongs — Useful for flipping chicken, fish, sausage, and vegetables without tearing the coating.
- Mixing bowls in two sizes — One for seasoning, one for sauces or slaws.
- Small sheet pan or plate — Handy for breaded items before they go into the basket.
- Cutting board and sharp chef’s knife — Especially useful for slicing peppers, onions, and proteins evenly.
- Microplane or fine grater — Good for lemon zest, Parmesan, and garlic.
- Silicone brush — Helps spread glazes and butter without dumping too much on one spot.
- Cooking spray or oil mister — A light coat helps browning; use it sparingly.
- Perforated parchment liners, optional — Great for tofu, fish, or sticky marinades when you want easier cleanup.
Smart Shopping and Ingredient Tips
Shopping for air fryer dinners for two is less about buying more and more about buying smarter. The basket works best when the pieces are close in size, so pick chicken breasts that are similar in thickness, salmon fillets that match each other, and vegetables that are cut to the same general scale. A 1-inch pork chop cooks more predictably than a thin one. Large shrimp are easier to manage than tiny shrimp because they stay juicy long enough to finish with the rest of the plate.
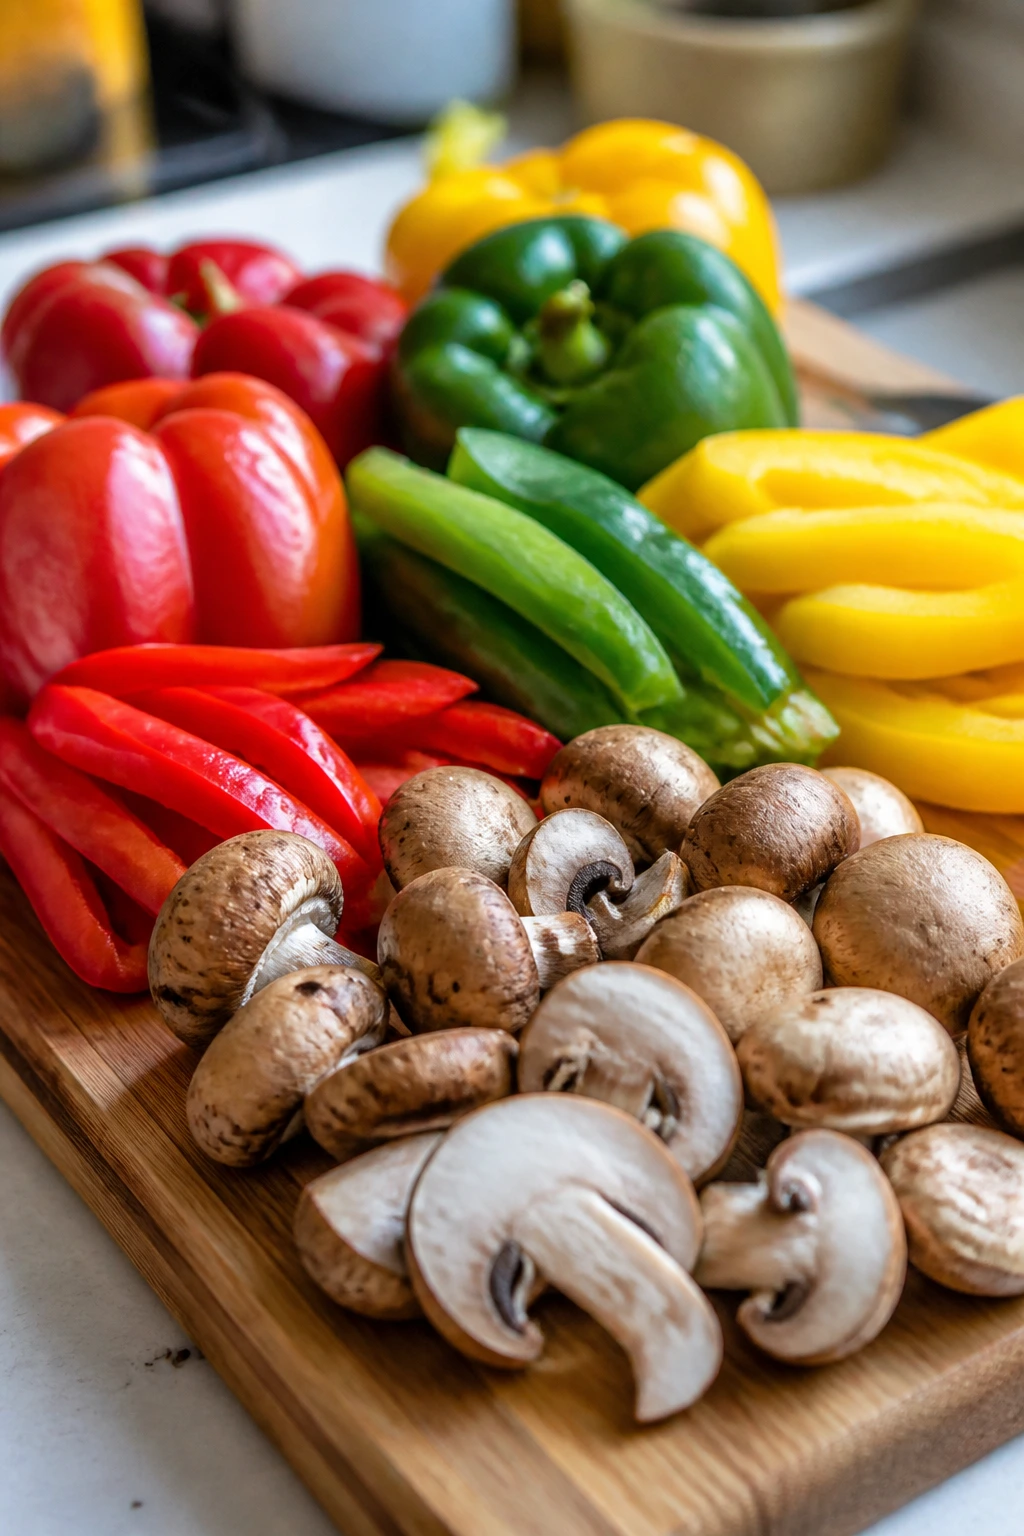
For vegetables, look for firm produce that can take heat without turning watery. Asparagus should have tight tips and stalks that snap, not bend like rubber. Brussels sprouts should feel heavy for their size with leaves packed tight. Bell peppers should have smooth skin and thick walls, which makes them better for stuffing or slicing into fajita strips. If you’re buying mushrooms, cremini usually give you more flavor than the plain white kind, and they brown better too.
The same logic applies to pantry staples. Use panko for breaded chicken because it stays airy. Choose a marinara with a short ingredient list and a flavor you’d actually eat off a spoon, because that sauce matters when it’s only a thin layer. Buy tamari or soy sauce that tastes balanced, not harsh. And if you’re making bowls or tacos, smaller tortillas and pitas fit the air fryer basket better than oversized wraps that wilt when you look at them.
One last thing: don’t buy proteins that are wildly different in thickness just because they were on sale. A basket dinner lives and dies by even cooking. If the pieces are uneven, you’ll be juggling hot spots and dry edges while the center catches up. That is not where the fun is.
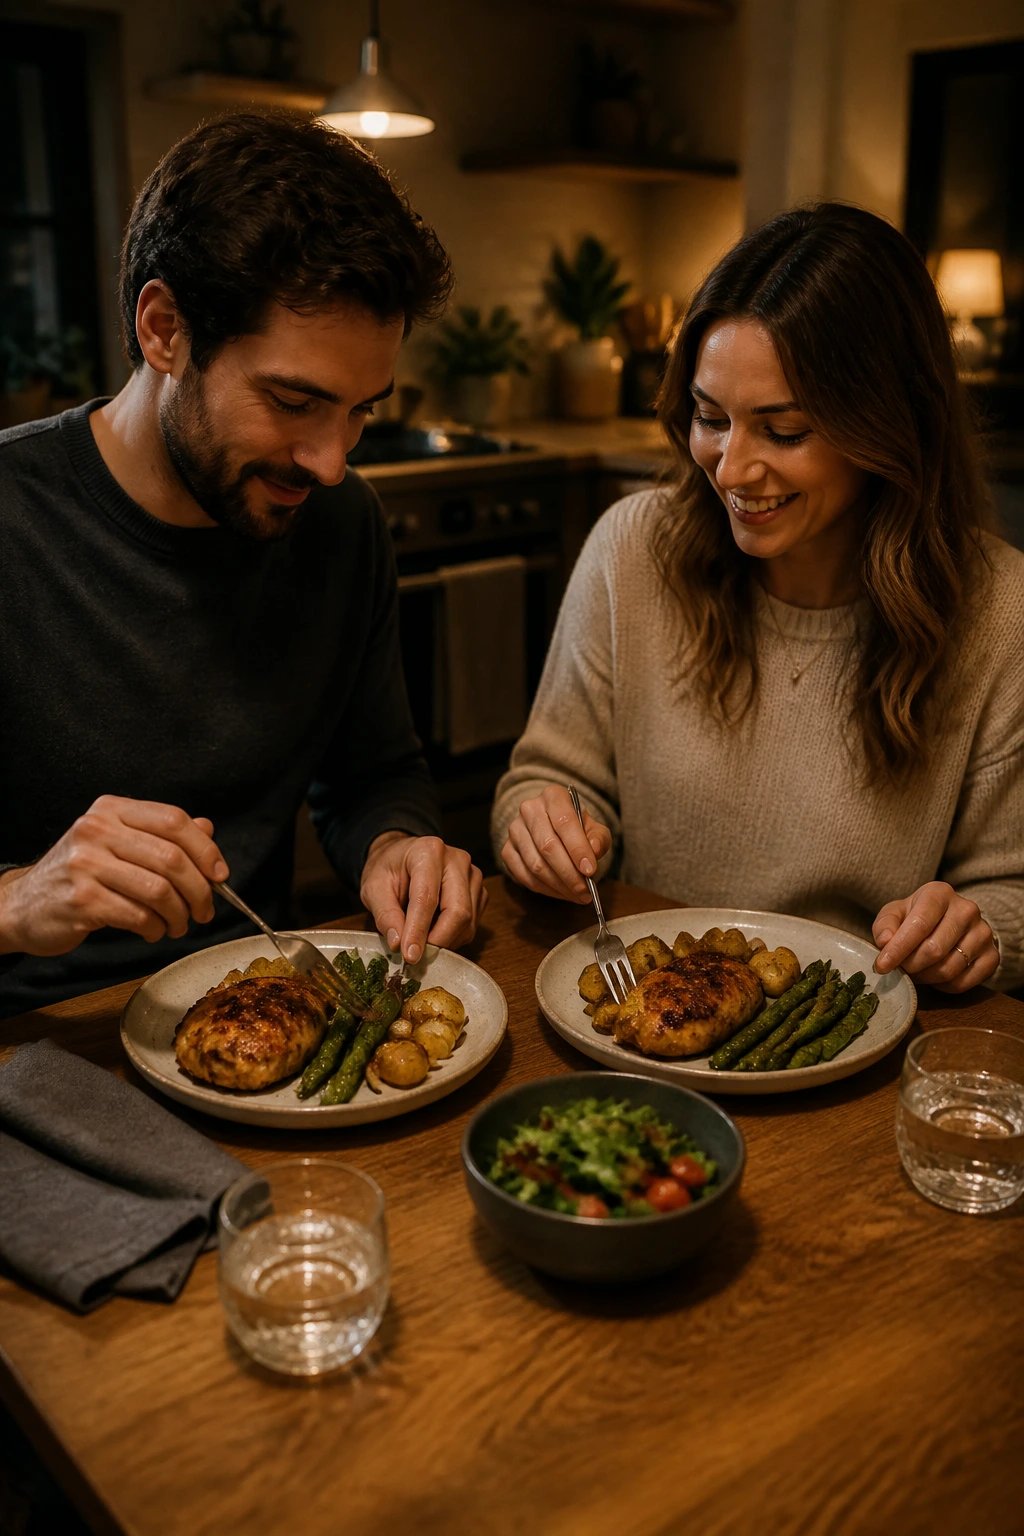
How to Serve These Air Fryer Dinners for Two
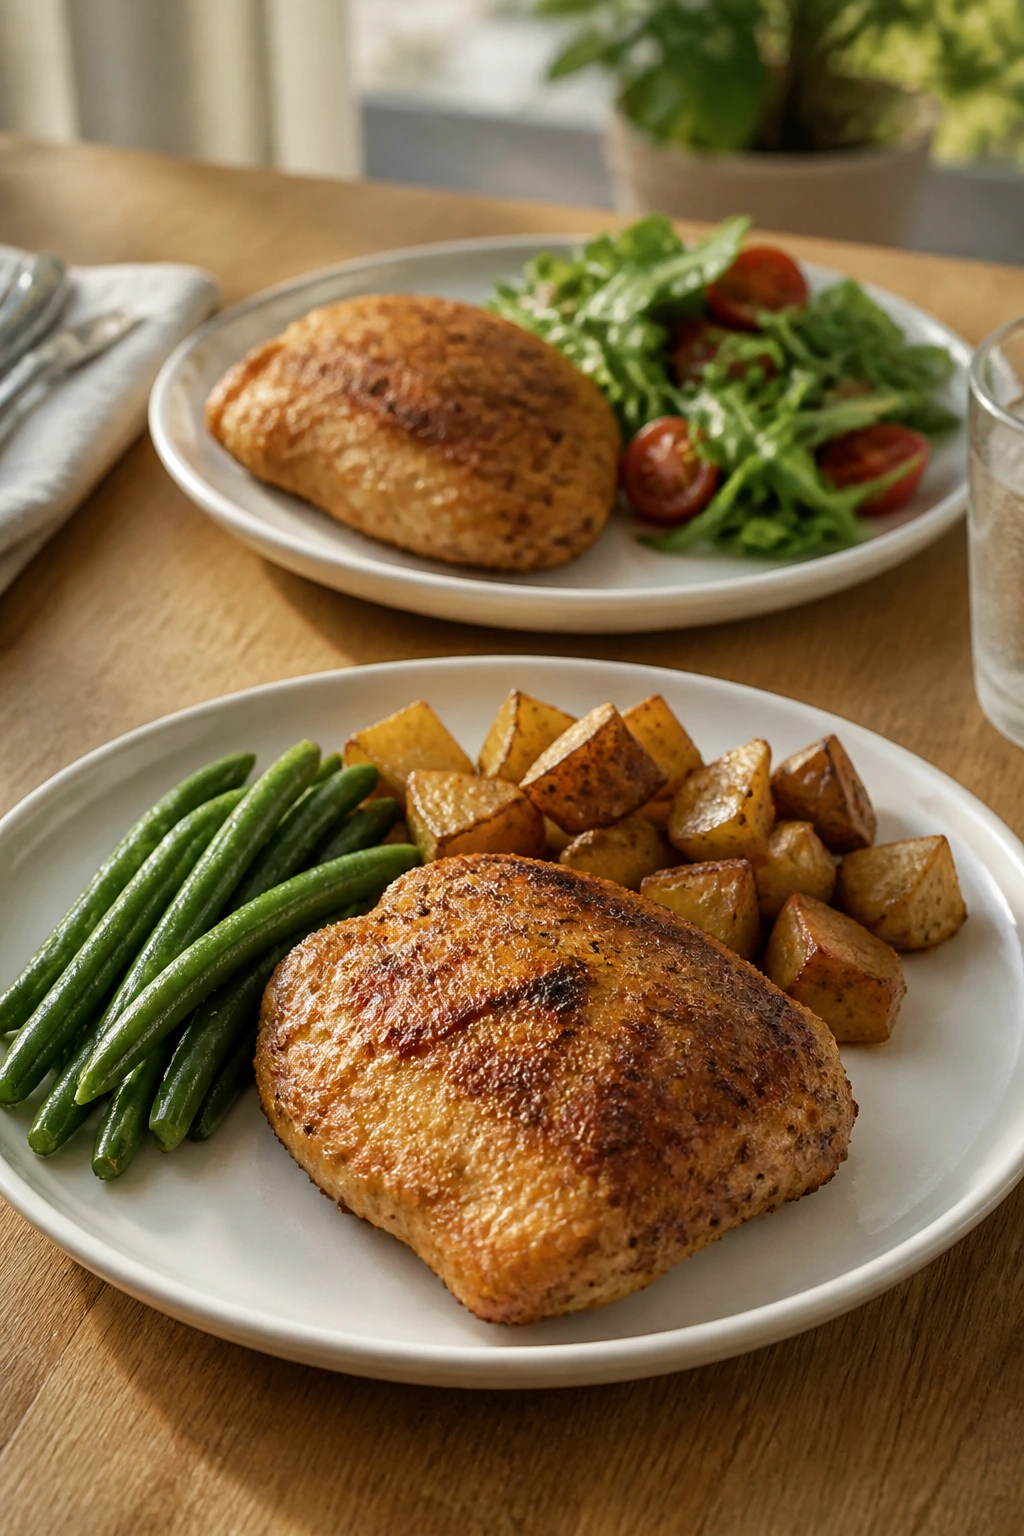
Presentation: Keep the plating simple and let the color do the work. A mound of rice under shrimp fajita bowls, a lemon wedge beside salmon, a scatter of parsley over chicken parm, or a little extra slaw tucked into cod tacos goes farther than a pile of extra sauce. Warm plates help more than people think, especially for fish and breaded chicken.
Accompaniments: The easiest sides here are the ones that don’t pull attention away from the main dish. A green salad, garlicky rice, roasted potatoes, toasted pita, buttered noodles, or a crisp cucumber salad all fit naturally alongside these dinners. If you want a little bread, keep it small and sturdy so it doesn’t go limp under the sauce.
Portions: Every recipe here is built for two generous servings. If you’re both hungry, stick to the portions as written and add one simple side. If you want a bigger spread, it’s smarter to increase the vegetables than to double the protein without adjusting the basket.
Beverage Pairing: Light white wine works well with salmon, cod, and shrimp. A cold lager or pale ale fits chicken parm and sausage dinners without fighting the seasoning. For nonalcoholic drinks, sparkling water with lemon, cucumber, or lime keeps the plate feeling fresh.
Additional Tips and Flavor Boosters
Flavor Enhancement: A finish of acid is the easiest upgrade in the box. Lemon juice on salmon, lime on shrimp, or a tiny splash of vinegar over pork chops makes the flavors snap into place. If something tastes flat, this is usually the fix before you reach for more salt.
Customization: Keep a few add-ins on hand and let the meal shift by mood. Crushed red pepper works for chicken parm and sausage. Sesame seeds and scallions push tofu toward a more takeout-style plate. A spoonful of pesto, salsa, or tzatziki can change the personality of the dinner without asking you to cook anything extra.
Serving Suggestions: Fresh herbs should go on at the end, not halfway through the cook. Parsley, dill, cilantro, basil, and mint all do more as a finish than as a basket ingredient. A small handful on top makes the food look and taste fresher.
Make-It-Yours: If you need gluten-free meals, use gluten-free crumbs, tamari, corn tortillas, and rice. For dairy-free plates, skip cheese finishes and lean on herb oil, citrus, or a dairy-free yogurt sauce. For lower-carb dinners, swap rice for cauliflower rice, tuck fillings into lettuce cups, or serve the protein and vegetables straight from the basket with a side salad.
Make-Ahead, Storage, and Reheating Guidance
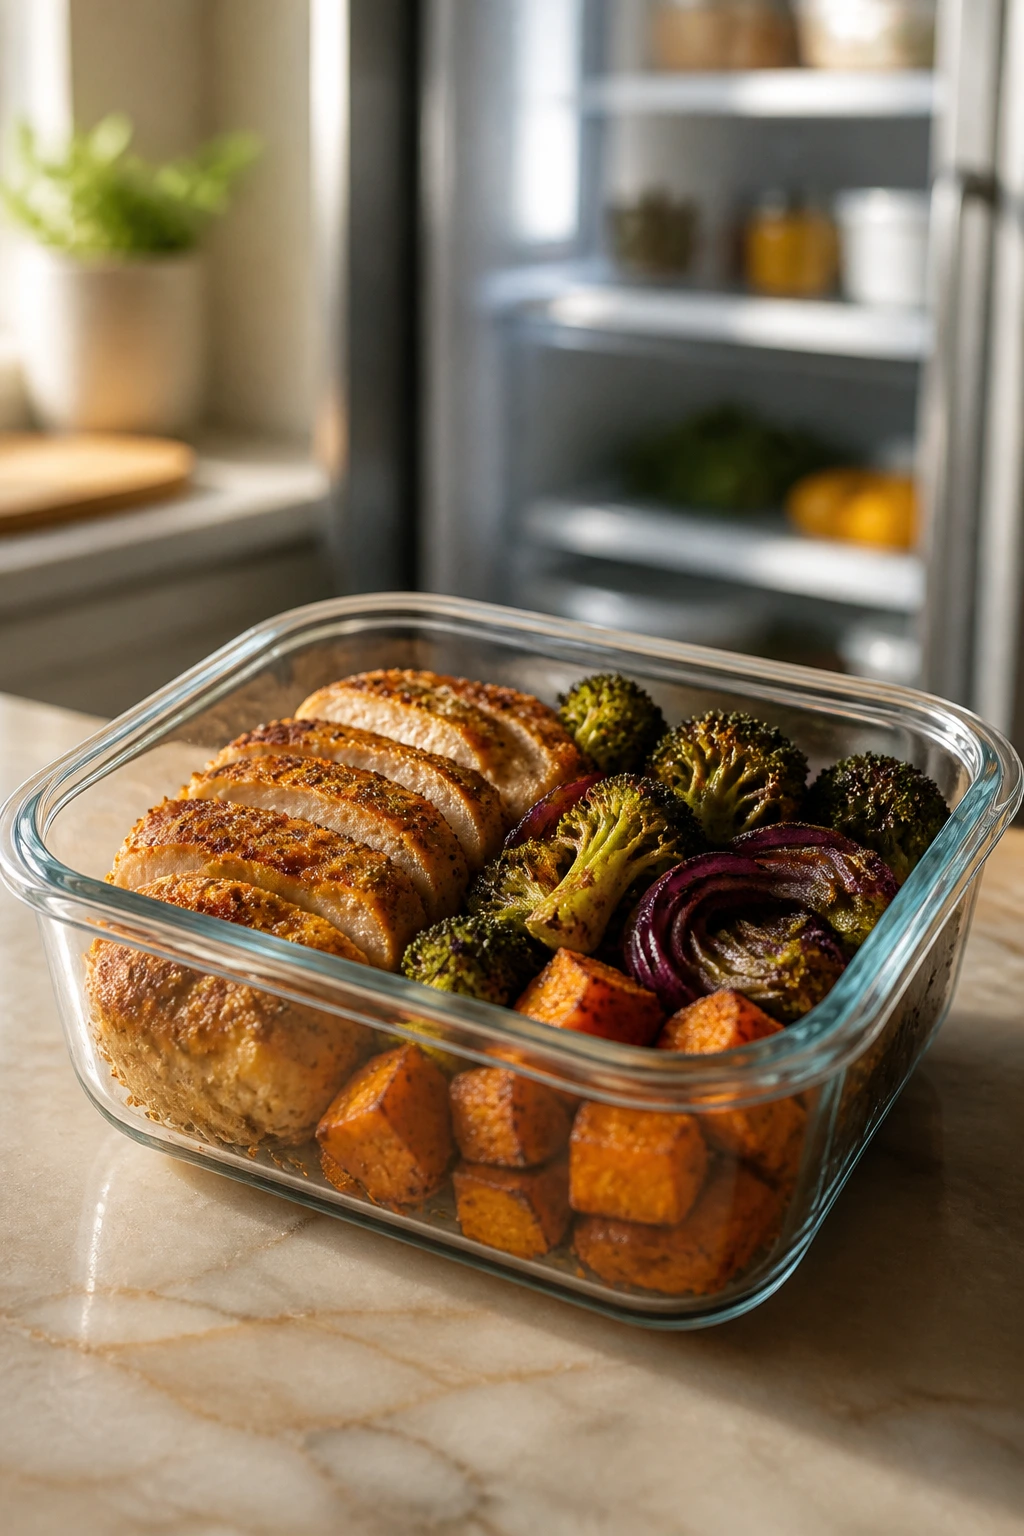
Most of these air fryer dinners keep well in the fridge for 3 to 4 days, with a few seafood exceptions that are better eaten sooner. Salmon, cod, and shrimp are best within 1 to 2 days because the texture softens faster than chicken or pork. Frozen storage works for many of the meatier recipes for up to 2 months, though breaded chicken and stuffed peppers hold up better than fish. Cool leftovers within 2 hours and store them in shallow containers so they chill quickly.
For reheating, the air fryer is still your best tool. Breaded items like chicken Parmesan or halloumi should go back in at 350°F for 3 to 5 minutes until hot and crisp again. Chicken thighs, pork chops, meatballs, sausage, and stuffed peppers do well at 325°F to 350°F for 4 to 6 minutes depending on thickness. Fish needs a gentler hand; use 300°F to 325°F for 3 to 4 minutes or reheat it in short bursts so it doesn’t dry out.
Sauced dishes need a little judgment. If the sauce is already on top, the microwave can be fine in short intervals, but the crust on breaded chicken will soften. My preference is to reheat the protein first, then add fresh sauce or cheese for the last minute. Tofu and chickpeas re-crisp nicely in the air fryer, while rice-based bowls often do best with the rice warmed separately and the toppings added after. A damp paper towel over rice in the microwave keeps it from turning hard around the edges.
You can also prep parts ahead. Bread the chicken a few hours early and keep it chilled on a tray. Mix meatballs in the morning. Slice peppers and onions ahead of time. Stir sauces and slaws before you cook. Those small head starts matter on nights when even dinner feels like a scheduling problem.
Variations and Adaptations to Try

Gluten-Free Crunch Box: Use gluten-free panko on the chicken parm, tamari instead of soy sauce, and corn tortillas for the cod tacos. The texture stays close enough that nobody feels shortchanged, especially if you still use the air fryer for the final crisp.
Dairy-Free Finish Line: Skip the mozzarella on chicken parm and finish with extra marinara, chopped basil, and a drizzle of olive oil. For the creamy elements, use dairy-free yogurt on the tacos or a lemon-herb oil over salmon and chicken thighs.
Lower-Sodium Reset: Choose low-sodium marinara, low-sodium soy sauce, and a lighter hand with salt in the rubs. Then push flavor with lemon zest, fresh herbs, garlic, and vinegar. You won’t miss the salt as much if the other parts are doing their job.
Mild-Heat Family Style: Cut the chili powder in the shrimp bowls and cod tacos by half and leave the heat on the table in the form of salsa or hot sauce. That way the plate stays approachable, and anyone who wants more burn can add it.
Vegetarian Rotation Night: If you like the tofu and halloumi recipes, you can also adapt the chicken or sausage nights by swapping in thick portobello slices, extra-firm tofu, or meatless sausage links. Keep the same seasoning patterns and timing cues, then check texture instead of chasing a perfect copy of the original.
Common Mistakes to Avoid
Crowding the Basket: If the food overlaps too much, the air fryer steams it instead of browning it. The fix is boring but effective: cook in two rounds if you have to, or trim the portions so the pieces sit in a single layer.
Skipping the Dry Step: Wet chicken, wet fish, and wet tofu all cook worse. Moisture on the surface blocks browning, so pat everything dry with paper towels before seasoning.
Using the Wrong Heat for the Job: Salmon and cod need enough heat to cook quickly, but not so much that they dry out. Breaded chicken and sausage can take the hotter end of the range. If you use the same temperature for everything, the delicate foods usually lose.
Saucing Too Early: Marinara, cheese, crema, and other wet finishes should go on at the end unless the recipe says otherwise. Put them on too soon and you’ll soften the crust or wash away the seasoning.
Cutting Pieces Unevenly: One thick pepper strip and one thin one will not finish together. The same goes for chicken breasts with a bulge in the middle or steak bites cut at random sizes. Uniform pieces cook uniformly. That’s not glamorous, but it works.
Forgetting the Rest Time: Pork chops, chicken, and steak need a few minutes off the heat so the juices settle. Skip that, and the cutting board gets all the good stuff instead of the plate.
Frequently Asked Questions

Can I double these air fryer dinners for two?
You can double the ingredients, but the basket may not hold everything in one layer. If the food starts stacking, cook in batches so you keep the browning, not the steam.
Do I have to preheat the air fryer every time?
For most of these dinners, yes. A hot basket helps breaded chicken, salmon, shrimp, and vegetables brown right away instead of slowly drying out while the unit climbs in temperature.
What if my air fryer runs hotter than expected?
Start checking food a couple of minutes early and trust the thermometer more than the clock. Hotter units often cook breaded items fast on the outside, so a slight temperature drop can save the crust.
Can I use frozen shrimp or fish?
You can, but thaw them first if you want the best texture. Frozen seafood releases water as it cooks, which can leave you with soft edges and uneven seasoning.
How do I keep breaded chicken from getting soggy?
Use panko, spray lightly with oil, and keep the sauce for the end. If you let the chicken sit under sauce too long, the crust loses its crunch no matter how good the breading was.
What’s the best way to reheat leftovers without drying them out?
Use the air fryer for crisp foods and the microwave only for saucy or rice-based dishes. Lower heat, shorter time, and a quick rest after reheating usually keep the texture in a decent place.
Can I cook all the vegetables at the same temperature?
Not really. Asparagus, broccoli, Brussels sprouts, peppers, and onions all behave a little differently, so it helps to give the softer vegetables a head start or cut the sturdier ones smaller.
Do I need special liners or accessories?
No, but perforated parchment liners can make tofu, fish, and saucy foods easier to handle. A thermometer and good tongs matter more than fancy add-ons.
Can I make these without a basket-style air fryer?
Yes. Oven-style air fryers work too, though you may need to rotate the trays and add a minute or two for even browning. The same timing logic still applies: single layer, hot air, and a close eye on doneness.
Small Batches, Real Dinner
A two-person dinner does not have to feel like a compromise. Done well, it feels sharper and more satisfying than a giant tray meal because every ingredient has a job and no one is eating leftovers out of obligation. That’s what makes air fryer dinners for two worth keeping around: they’re quick, compact, and just generous enough.
I like recipes that respect the size of the meal. These do that. They use the basket the way it wants to be used, give you crisp edges where you want them, and keep the cleanup short enough that you can actually enjoy the night instead of managing it.