
Air fryer dinners have a habit of rescuing the hour between school pickup and the last hungry complaint. They’re fast, yes, but the real charm is sharper than speed alone: crisp edges, juicy centers, and a cleanup trail that doesn’t look like a small food tornado passed through the kitchen.
That matters on nights when everyone wants something different, someone is already asking what’s for dinner, and the sink contains exactly one clean bowl — somehow still damp. A good air fryer turns ordinary ingredients into food that feels finished. Chicken gets a crust. Salmon gets bronzed. Potatoes lose their floppy middle-school vibe and come out with actual character.
I’m picky about weeknight cooking, and for good reason. Plenty of “easy” dinners still leave you juggling three pans, a sauce, and a prayer. These air fryer dinners for busy families keep the moving parts small without tasting like you took the scenic route through convenience. A few are bold and saucy. A few lean lighter and fresher. A few are the kind of cozy, familiar meals that disappear before the plates make it to the dishwasher.
Why These Dinners Earn a Spot in the Weekly Rotation

-
Fast enough for real life: Most of these meals land in the 25- to 40-minute range, which is the sweet spot when the evening is already sliding away from you.
-
Less cleanup, less friction: The air fryer does the browning work, so you’re not washing a stack of pans after dinner.
-
Built for mixed appetites: Crispy chicken, salmon, tacos, sliders, meatballs, tofu — there’s enough variety here to keep everyone from staging a revolt at the table.
-
Easy to pair with whatever’s in the fridge: A bag of broccoli, a few potatoes, rice, tortillas, or a simple salad can stretch these into full dinners without a lot of extra thinking.
-
Better texture than a microwave shortcut: The air fryer gives leftovers a second life, especially breaded foods, roasted vegetables, and anything that should be crisp rather than soft.
-
Friendly to batch cooking: A few of these recipes scale up cleanly, so you can make enough for tomorrow’s lunch without cooking twice.
1. Crispy Air Fryer Chicken Parmesan
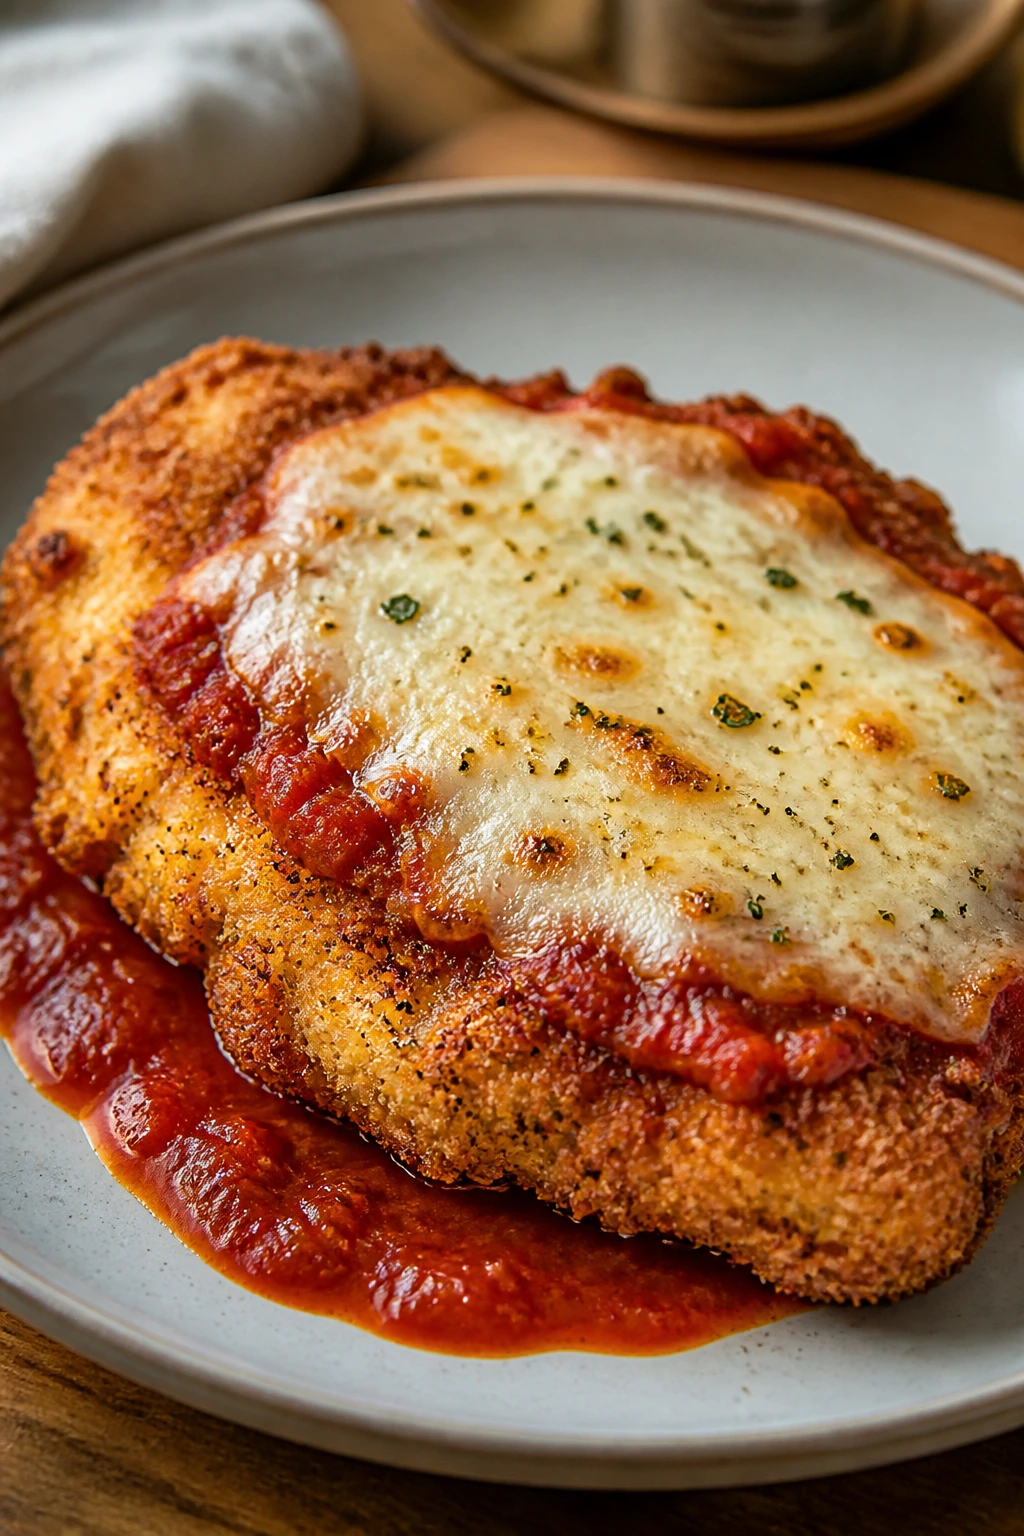
Chicken Parmesan can be a little dramatic in the best way. Crunchy coating, tomato sauce, melted cheese, a little basil on top — it’s a dinner that feels familiar and a touch celebratory, even when you make it on a Tuesday. The air fryer keeps the crust crisp without the oil bath, which is exactly why I keep coming back to it.
The trick is simple: thin cutlets, a dry breading station, and sauce added only at the end. That gives you the shattering edge people want from chicken parm, instead of the soft, soggy version that sometimes shows up when the sauce goes on too soon.
Why It Works:
Panko is the hero here because it browns quickly in the air fryer and stays crunchy under the cheese if you treat it right. Thin chicken cutlets cook evenly at 380°F, and the final blast with marinara and mozzarella melts fast enough that the crust doesn’t have time to go limp. That last two-minute finish matters more than most people think.
Key Ingredients:
- 2 boneless, skinless chicken breasts, about 1 1/2 pounds, sliced horizontally into 4 cutlets
- 1 teaspoon kosher salt
- 1/2 teaspoon black pepper
- 1/2 cup all-purpose flour
- 2 large eggs, beaten
- 1 cup panko breadcrumbs
- 1/2 cup finely grated Parmesan
- 2 teaspoons Italian seasoning
- Cooking spray
- 1 cup marinara sauce
- 1 cup shredded mozzarella
- 1 tablespoon chopped fresh basil, for finishing
Quick Steps:
- Prep the chicken: Slice each breast into thinner cutlets, then lightly pound them to an even 1/2-inch thickness. Season both sides with salt and pepper.
- Set up the breading station: Put the flour in one shallow dish, the beaten eggs in another, and combine panko, Parmesan, and Italian seasoning in a third.
- Bread the cutlets: Coat each cutlet in flour, dip in egg, then press firmly into the breadcrumb mixture so every surface is covered.
- Preheat and cook: Preheat the air fryer to 380°F. Spray the basket lightly, add the chicken in a single layer, and cook for 8 minutes. Flip, spray the tops, then cook 5 to 7 minutes more until golden and the thickest part reaches 165°F.
- Add sauce and cheese: Spoon about 1/4 cup marinara over each cutlet, top with mozzarella, and air fry 2 to 3 minutes until melted and bubbling.
- Finish and serve: Rest the chicken for 2 minutes, then scatter basil over the top before serving.
Tips and Variations:
- If your cutlets are thicker than 1/2 inch, cook time stretches fast, so pound them down instead of hoping for the best.
- Swap in provolone for part of the mozzarella if you want a sharper melt.
- Serve with spaghetti, garlic bread, or a simple Caesar salad so the plate feels complete, not crowded.
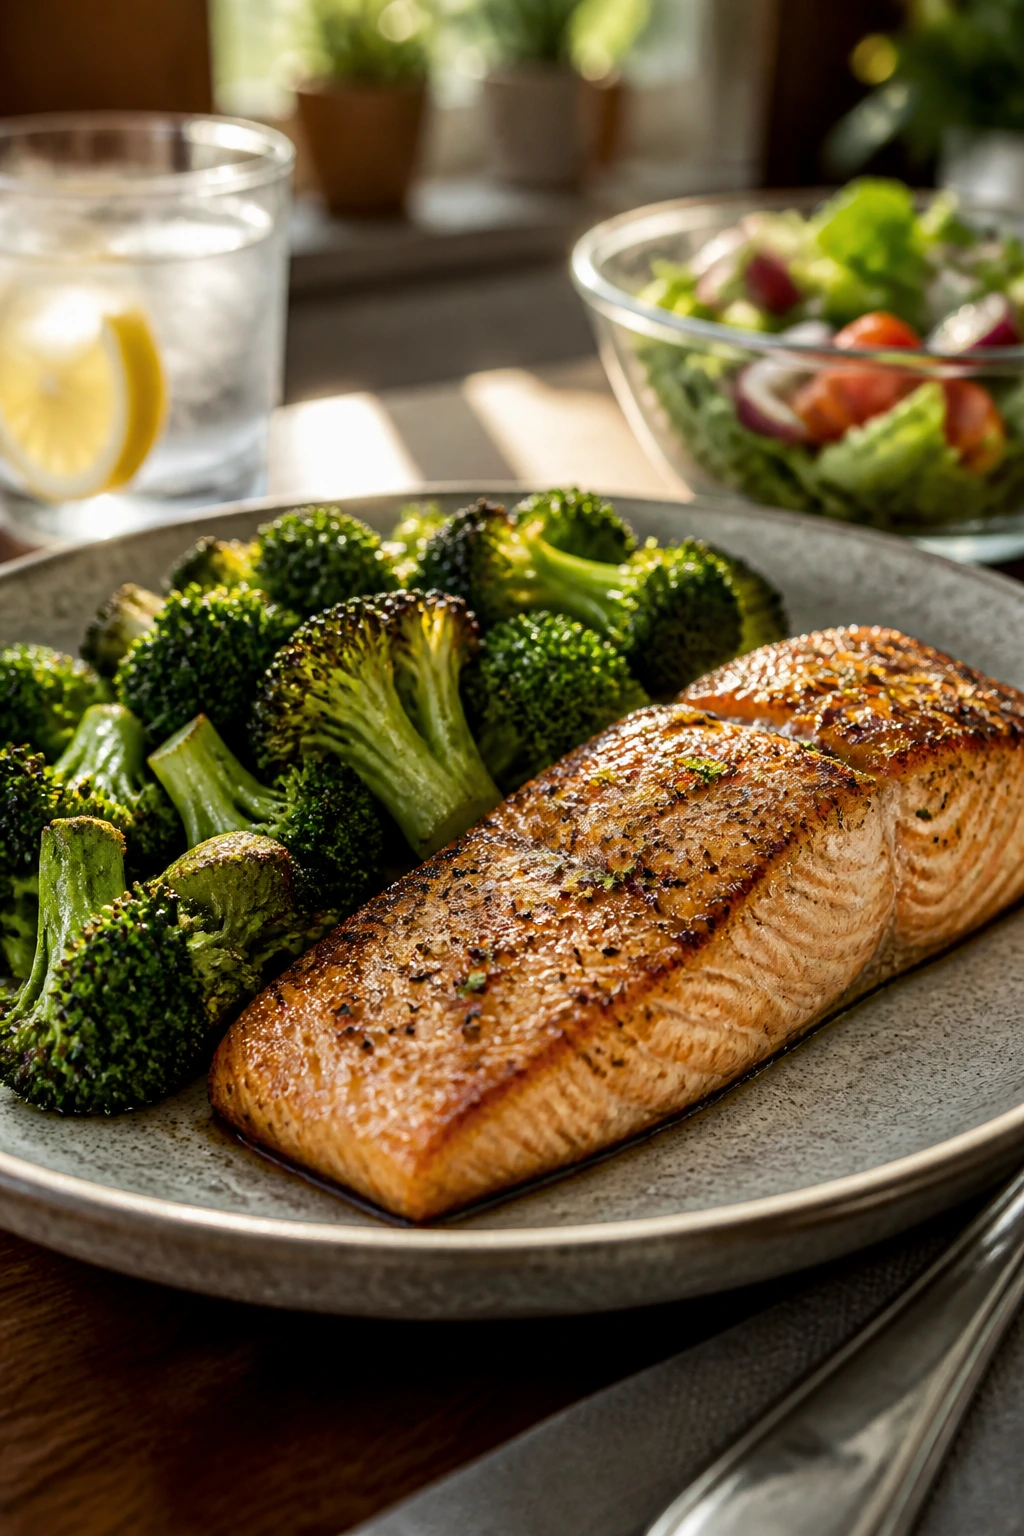
2. Lemon Garlic Salmon with Broccoli
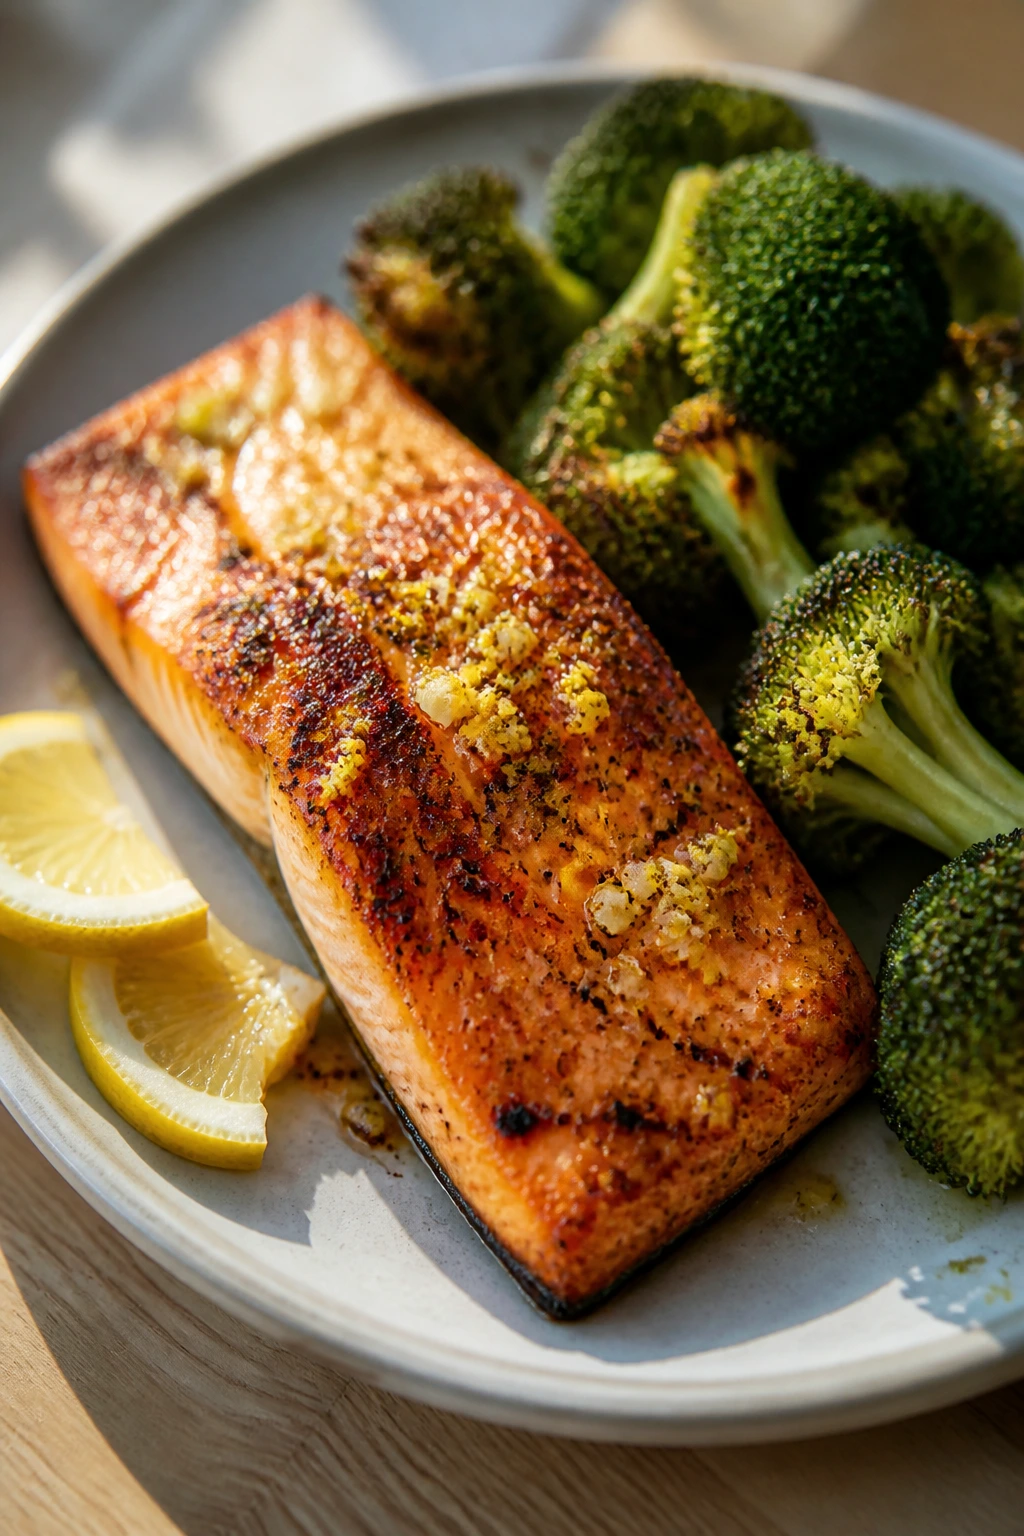
Salmon is one of those proteins that can go from silky to dry in a blink, which is why the air fryer earns its keep here. It cooks quickly, it browns the edges, and it handles broccoli on the same tray-like space without making everything taste steamed and sad. Lemon and garlic keep the whole thing bright.
This is a dinner I trust when the evening is already loud. The fish cooks in minutes, the broccoli gets little crispy spots, and the whole pan smells like dinner should smell: warm, garlicky, and clean.
Why It Works:
Salmon has enough natural fat to handle high heat, so the air fryer’s fast circulation gives you color without overcooking the center. Broccoli likes that same heat. The florets pick up browned edges while the stems stay tender, which gives you a full meal with one timing rhythm instead of two separate juggling acts.
Key Ingredients:
- 4 salmon fillets, 5 to 6 ounces each, skin on or off
- 1 pound broccoli florets, cut into bite-size pieces
- 2 tablespoons olive oil
- 3 garlic cloves, minced
- 1 lemon, zested and juiced
- 1 teaspoon kosher salt
- 1/2 teaspoon black pepper
- 1 teaspoon honey
- 1 tablespoon chopped fresh dill or parsley
Quick Steps:
- Season the broccoli: Toss the broccoli with 1 tablespoon olive oil, half the garlic, half the salt, and a few grinds of pepper.
- Start the vegetables: Preheat the air fryer to 390°F. Cook the broccoli for 4 to 5 minutes to give it a head start.
- Dress the salmon: Stir the remaining olive oil, garlic, lemon zest, lemon juice, honey, salt, and pepper together, then brush it over the salmon fillets.
- Cook together: Push the broccoli to the edges of the basket or use a second tray if needed, add the salmon, and cook 7 to 9 minutes until the fish flakes and the broccoli has browned tips.
- Check doneness: The salmon should flake easily with a fork and still look moist in the middle. If the fillets are thick, give them another minute.
- Finish: Sprinkle with dill or parsley and serve with lemon wedges.
Tips and Variations:
- Cut the broccoli into even florets so the small bits don’t scorch before the thicker stalk pieces are tender.
- Asparagus works beautifully in place of broccoli; just shave a minute or two off the veggie time.
- A spoonful of Greek yogurt with lemon makes a quick sauce if you want something creamy on the side.
3. Turkey Meatballs with Marinara
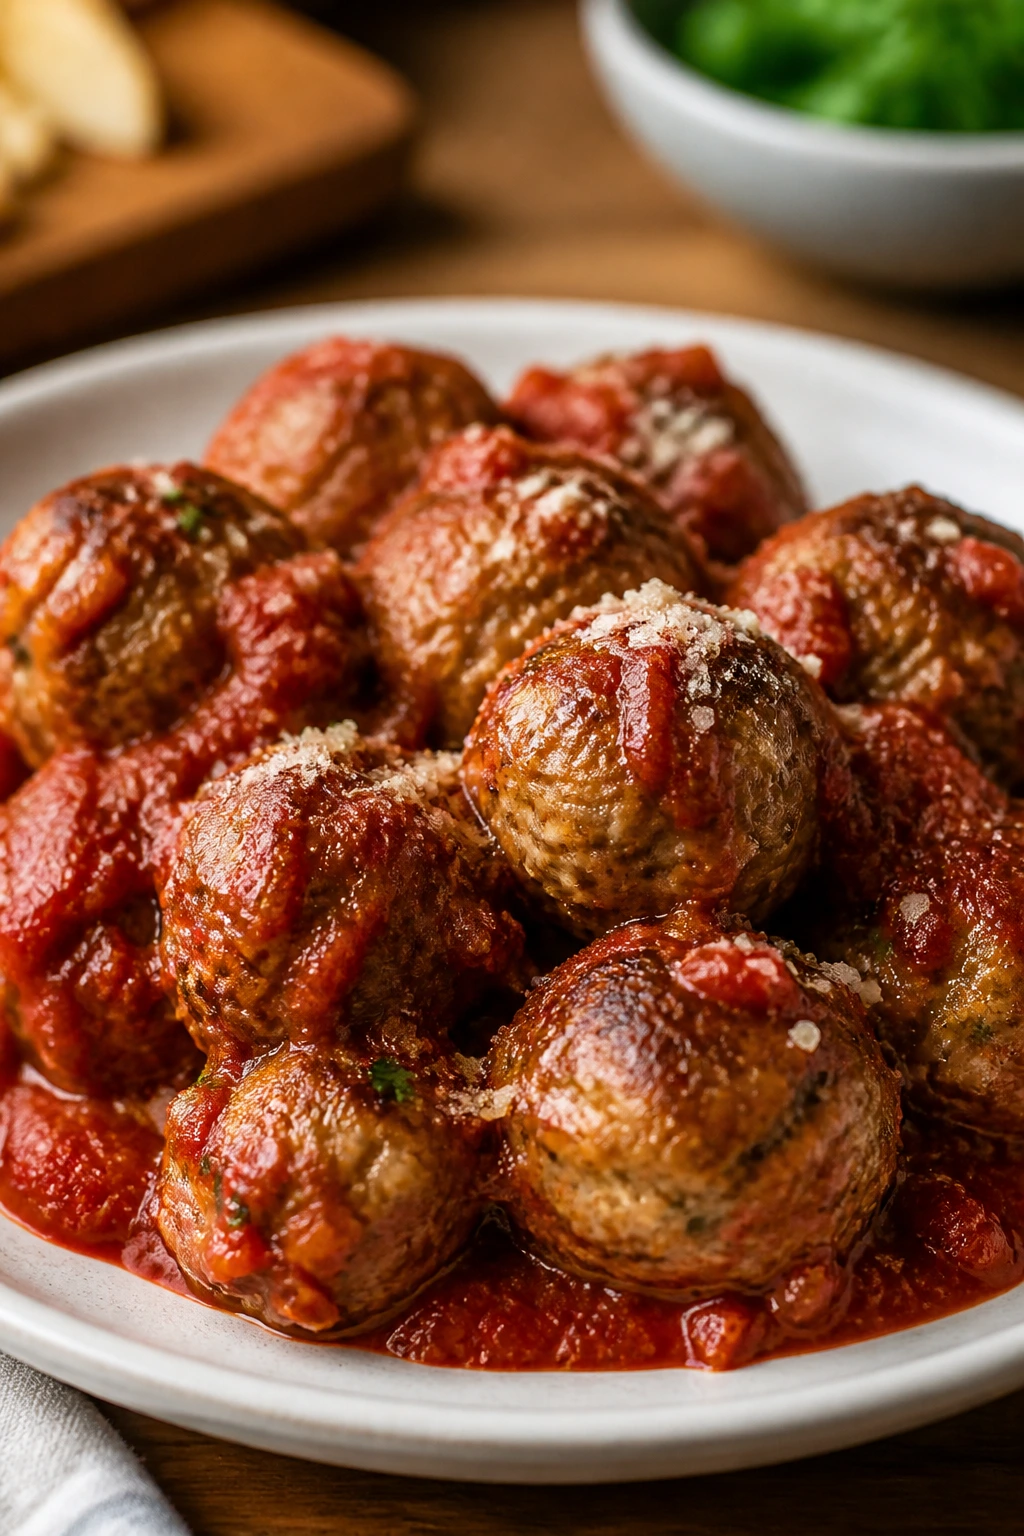
Meatballs earn their keep when the whole family wants something familiar and you don’t want to stand over a skillet shaping perfect little spheres. These are lean enough to feel practical, but they still get browning and a little crust in the air fryer, which is where a good meatball starts to taste like dinner instead of a project.
I like this recipe because it’s flexible in ways that matter. You can serve the meatballs over pasta, tuck them into rolls, or pile them next to roasted vegetables. The base stays sturdy either way.
Why It Works:
Ground turkey benefits from the air fryer because it browns fast without needing a pan full of oil. The egg and breadcrumbs hold the meatballs together, while Parmesan adds salt and a bit of savory depth. A 380°F basket gives you a browned outside in under 15 minutes, which is exactly the kind of efficiency busy evenings need.
Key Ingredients:
- 1 pound ground turkey
- 1/2 cup plain breadcrumbs
- 1 large egg
- 1/4 cup grated Parmesan
- 2 garlic cloves, minced
- 1 teaspoon kosher salt
- 1/2 teaspoon black pepper
- 1 teaspoon dried Italian seasoning
- 1 cup marinara sauce
- 1 tablespoon chopped parsley, for garnish
Quick Steps:
- Mix the meatball base: In a bowl, combine the turkey, breadcrumbs, egg, Parmesan, garlic, salt, pepper, and Italian seasoning. Mix gently until just combined.
- Shape evenly: Form the mixture into 16 meatballs, each about 1 1/2 inches wide. Keep your hands slightly damp so the mixture doesn’t stick.
- Preheat and arrange: Preheat the air fryer to 380°F. Lightly spray the basket and place the meatballs in a single layer with space between them.
- Cook and turn: Air fry for 10 to 12 minutes, shaking the basket once halfway through, until the meatballs are browned and reach 165°F.
- Warm the sauce: While the meatballs cook, heat the marinara in a small saucepan or microwave-safe bowl.
- Serve: Toss the meatballs in sauce or spoon sauce over the top, then finish with parsley.
Tips and Variations:
- Don’t pack the mixture tightly. Loose mixing makes a tender meatball; squeezing it hard makes it dense.
- Swap in half ground pork if you want a richer flavor.
- Leftovers make excellent meatball subs the next day, especially if you toast the rolls first.
4. Pork Chops with Apples and Mustard Glaze
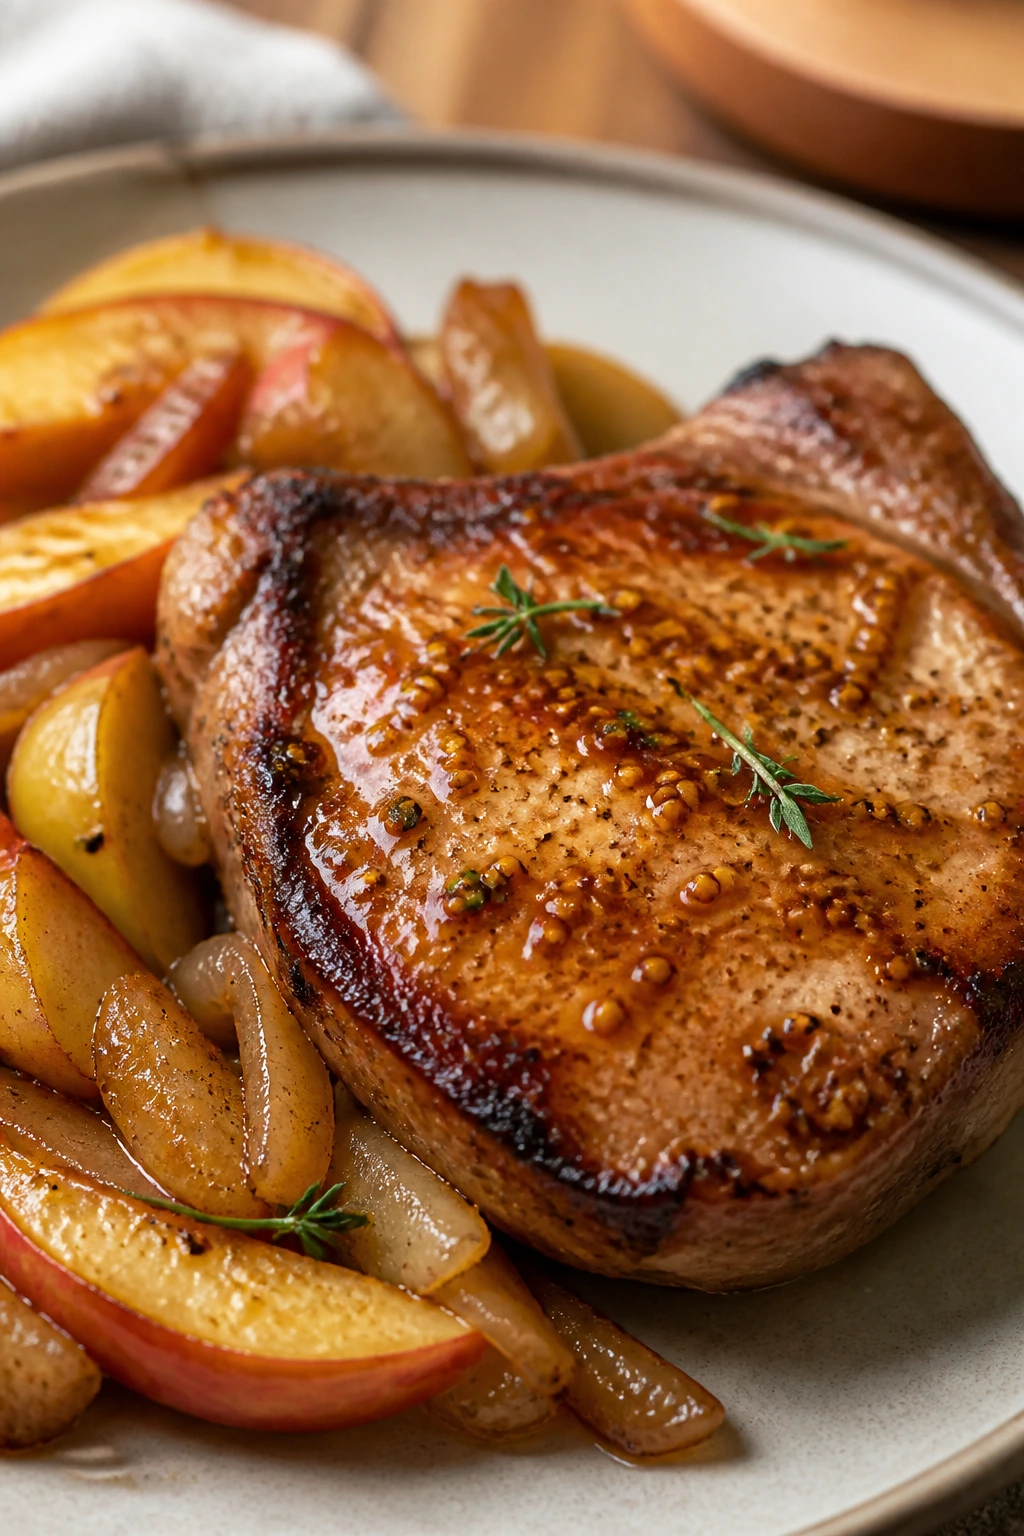
Pork chops get unfairly blamed for being dry. Usually the problem is size, heat, or both. In the air fryer, thin-boned, evenly cut chops cook fast enough to stay juicy, and apples bring a sweet edge that keeps the dish from feeling heavy.
I like the apple-and-mustard combination because it tastes like you spent more effort than you did. The fruit softens in the basket, the onions pick up color, and the glaze pulls the whole thing together with a little tang.
Why It Works:
Pork chops only need a short run in the air fryer, which is why they do better here than in a slow, dry oven. The apples and onions release just enough juice to coat the bottom of the basket, helping the glaze cling to the meat. A quick 390°F cook keeps the chops from tightening up, and the rest time is where the juices settle back in.
Key Ingredients:
- 4 boneless pork chops, about 1 inch thick
- 1 1/2 teaspoons kosher salt
- 1/2 teaspoon black pepper
- 1 tablespoon Dijon mustard
- 1 tablespoon olive oil
- 2 apples, cored and sliced into wedges
- 1 small yellow onion, sliced
- 1 teaspoon dried thyme
- 1 tablespoon maple syrup
Quick Steps:
- Season the chops: Pat the pork chops dry, then rub them with salt, pepper, Dijon, and maple syrup.
- Prep the fruit and onion: Toss the apples and onion with olive oil and thyme.
- Start the basket: Preheat the air fryer to 390°F. Add the apples and onion first, then cook for 4 to 5 minutes so they begin to soften.
- Add the pork chops: Nestle the chops into the basket in a single layer and cook 10 to 12 minutes, turning once halfway through.
- Check the temperature: Pull the chops when they hit 145°F at the thickest point.
- Rest and serve: Let the pork rest 3 minutes, then spoon the apples and onions over the top.
Tips and Variations:
- Bone-in chops work too, but they need a few extra minutes and a thermometer matters even more.
- Use tart apples like Honeycrisp or Pink Lady if you want the sauce to stay lively, not mushy.
- A little sage in place of thyme gives the dish a more fall-like flavor without changing the method.
5. Shrimp Fajita Bowls
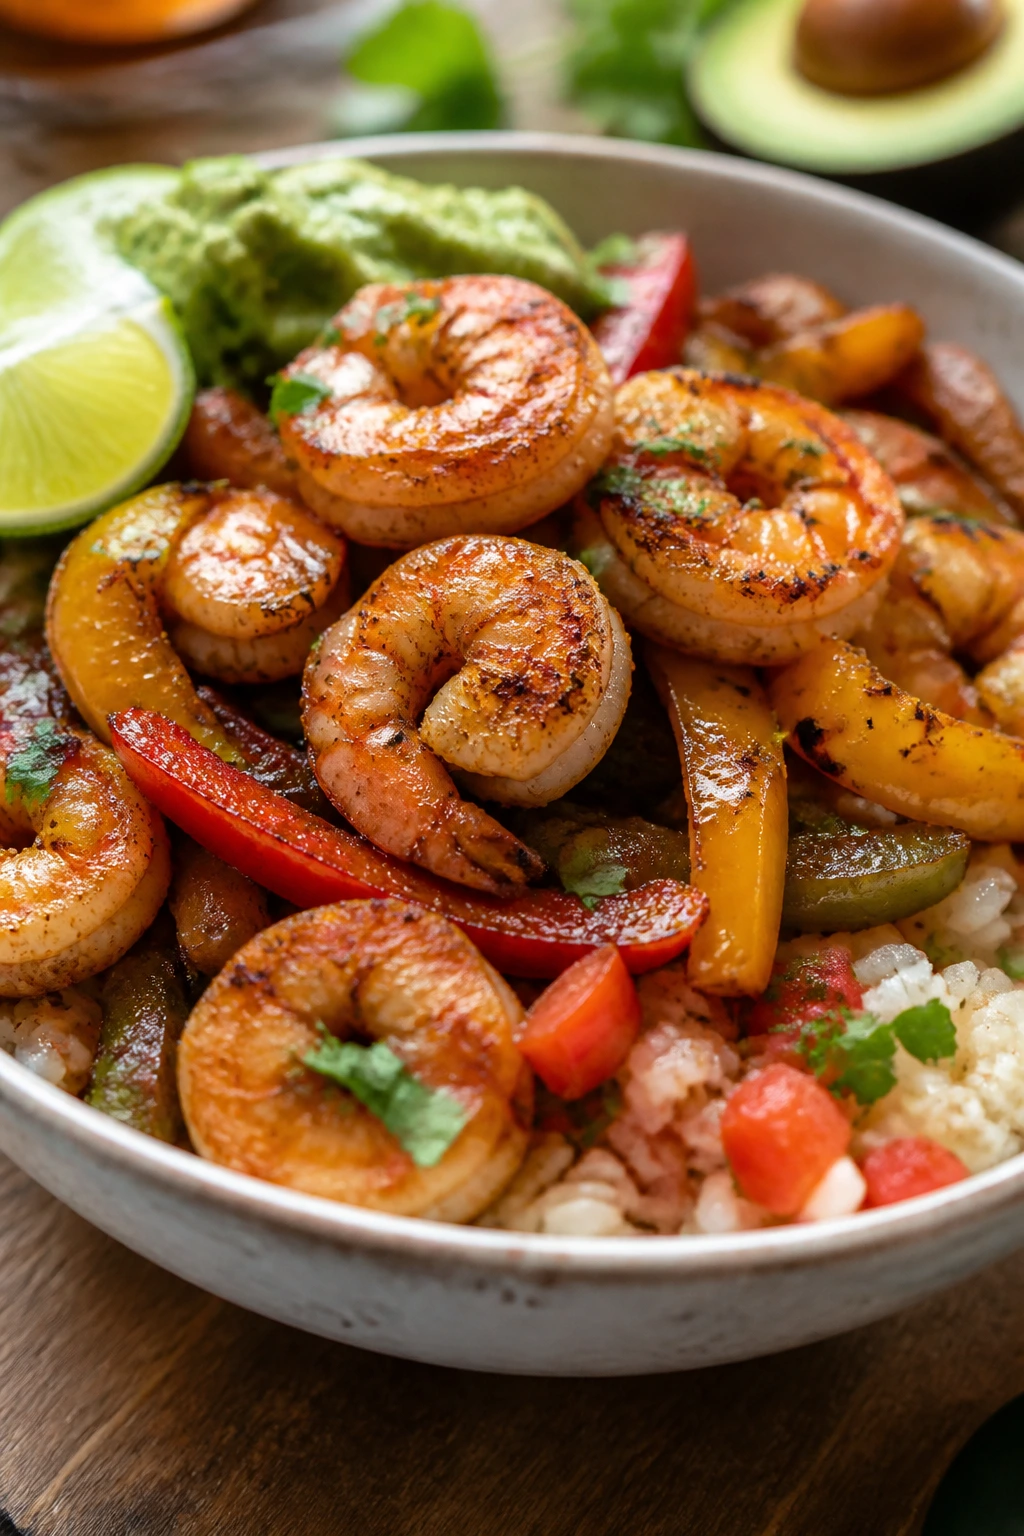
Shrimp fajitas are the closest thing to cheating on a weeknight. They cook fast, they taste bright, and they don’t need much more than a few peppers, onions, and rice to turn into dinner that feels complete. The air fryer gives the vegetables charred edges without a skillet smoking up the kitchen.
This is one of those meals where the final bowl looks more layered than the effort suggests. A few squeezes of lime, some avocado, maybe a spoon of salsa, and suddenly you’ve got something that feels planned.
Why It Works:
Shrimp cooks in a narrow window, which makes the air fryer a good match. The heat is strong enough to blister the peppers and onions before the shrimp turn rubbery. Cooking the vegetables first for a few minutes also keeps everything from going soft at the same pace.
Key Ingredients:
- 1 1/2 pounds raw shrimp, peeled and deveined
- 2 bell peppers, sliced
- 1 red onion, sliced into wedges
- 2 tablespoons olive oil
- 1 tablespoon fajita seasoning
- 2 cups cooked rice
- 1 lime, cut into wedges
- 1 avocado, sliced
- 1/2 cup salsa
- 2 tablespoons chopped cilantro
Quick Steps:
- Prep the shrimp and vegetables: Pat the shrimp dry. Toss the peppers and onion with olive oil and half the seasoning.
- Cook the vegetables first: Preheat the air fryer to 400°F and cook the peppers and onion for 5 minutes.
- Add the shrimp: Toss the shrimp with the remaining seasoning, then add them to the basket and cook 4 to 5 minutes more, shaking once.
- Watch the color: The shrimp should be pink, curled, and opaque. Pull them the moment they lose translucence.
- Build the bowls: Spoon rice into bowls, top with the shrimp and vegetables, then add avocado and salsa.
- Finish: Squeeze lime over everything and scatter cilantro on top.
Tips and Variations:
- Dry shrimp brown better. Wet shrimp steam, and steam is the enemy of fajita flavor.
- Use cauliflower rice if you want a lighter bowl without changing the topping game.
- A spoonful of sour cream or Greek yogurt cools the spice if your seasoning blend runs hot.
6. Sausage, Peppers, and Potatoes
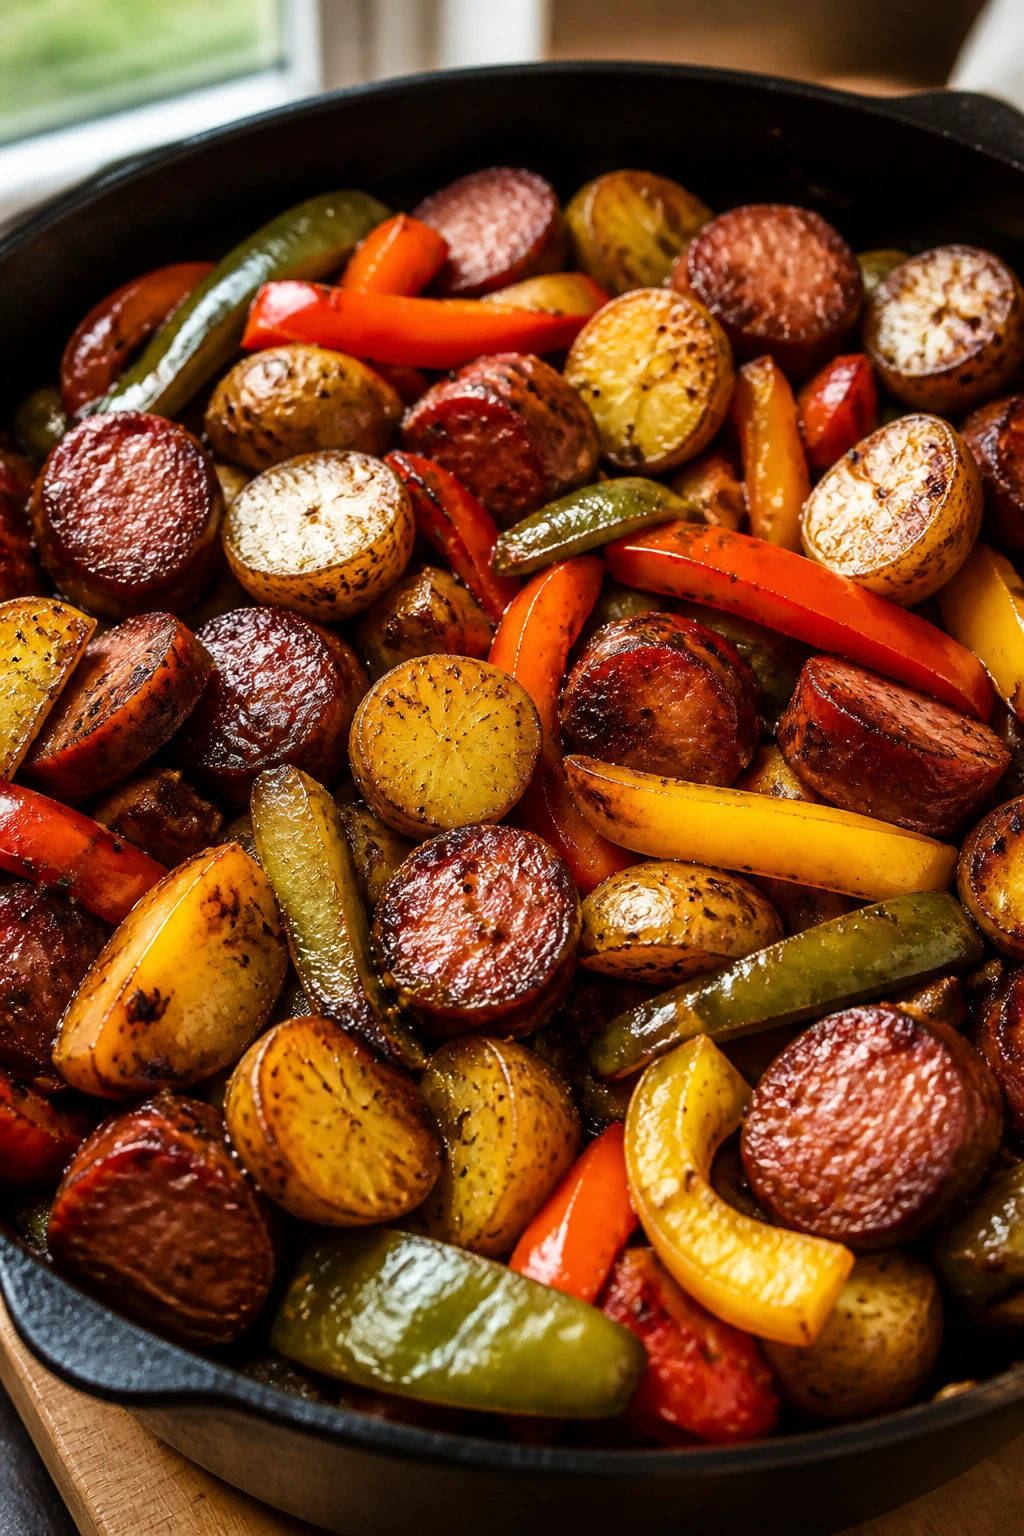
Sausage, peppers, and potatoes has old-school comfort written all over it. It smells like dinner before you’ve even pulled the basket out, and that matters on evenings when everyone is drifting toward the kitchen on scent alone. The air fryer handles the potatoes first, which is the part that usually takes forever.
I love this meal because it doesn’t need a sauce to feel finished. The sausage gives richness, the peppers bring sweetness, and the potatoes catch the drippings. Simple. Good. Honest food.
Why It Works:
Baby potatoes need more time than sausage or peppers, so the air fryer’s staged cooking solves a real timing issue. Start the potatoes alone and you avoid the sad mix of underdone potatoes and overcooked sausage. Once the potatoes are mostly tender, everything else cooks into the same basket and picks up flavor from the sausage fat.
Key Ingredients:
- 1 1/2 pounds baby potatoes, halved
- 12 ounces smoked sausage, sliced into 1-inch pieces
- 3 bell peppers, sliced
- 1 medium yellow onion, sliced
- 2 tablespoons olive oil
- 1 teaspoon garlic powder
- 1 teaspoon dried Italian seasoning
- 1 teaspoon kosher salt
- 1/2 teaspoon black pepper
Quick Steps:
- Season the potatoes: Toss the potatoes with olive oil, garlic powder, Italian seasoning, salt, and pepper.
- Start the potatoes first: Preheat the air fryer to 390°F. Cook the potatoes for 10 minutes, shaking once.
- Add the sausage and vegetables: Stir in the sausage, peppers, and onion, then cook 10 to 12 minutes more.
- Look for browning: The potatoes should be tender inside and browned at the edges, and the peppers should have softened with a little char.
- Taste and adjust: Add another pinch of salt if the sausage is mild.
- Serve hot: Spoon into bowls while the potatoes are still crisp on the outside.
Tips and Variations:
- Slice the potatoes in half so they cook at the same speed as the sausage.
- Chicken sausage works well if you want a lighter result, but give it the same browning time.
- A little mustard on the side is excellent here. It wakes the whole plate up.
7. Steak Bites and Mushrooms
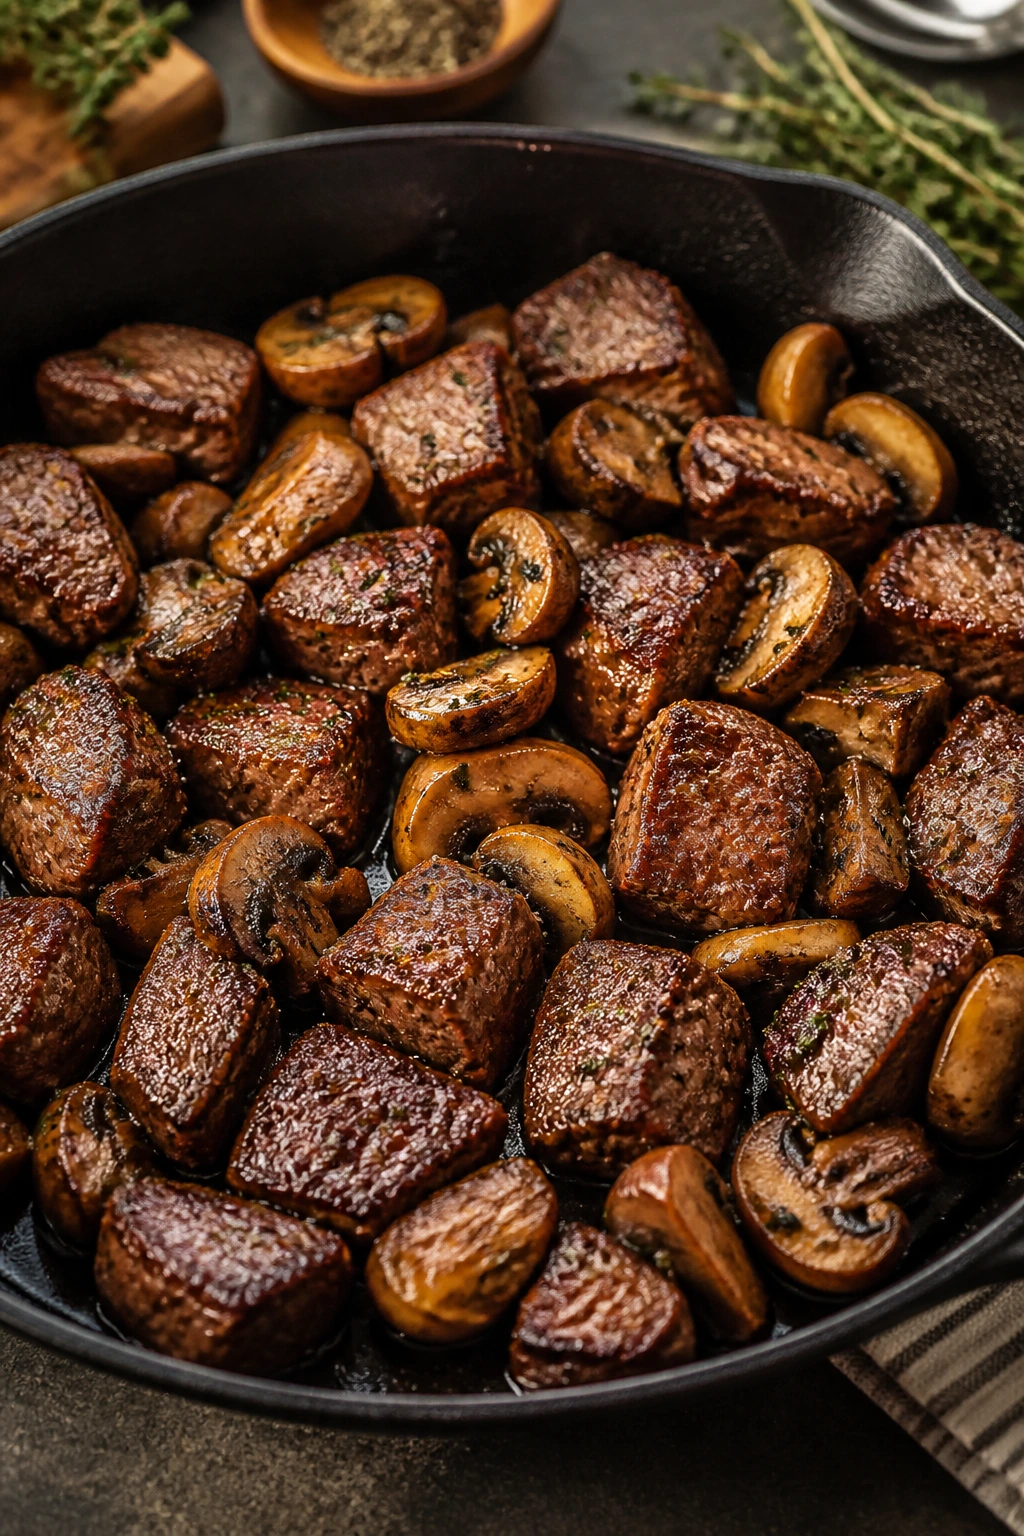
Steak bites are for nights when you want dinner to feel bigger than the effort it asks for. Small pieces mean fast cooking, and fast cooking means you’re not standing around waiting for a thick steak to rest while everybody else gets impatient. Mushrooms fit right in because they soak up the seasoning and take on a meaty edge of their own.
This recipe is one of my favorites for a low-fuss, high-payoff meal. Serve it with potatoes or a salad, and it feels like a plate you’d order somewhere nicer than your own kitchen — which is flattering, really.
Why It Works:
Sirloin has enough structure to handle high heat without turning chewy, especially when you cut it into even chunks. The air fryer gives the exterior a quick sear, and the mushrooms soften while still holding their shape. Worcestershire adds depth without making the recipe taste like a bottle of sauce.
Key Ingredients:
- 1 1/2 pounds sirloin steak, cut into 1 1/2-inch cubes
- 8 ounces cremini mushrooms, halved
- 2 tablespoons olive oil
- 1 teaspoon kosher salt
- 1/2 teaspoon black pepper
- 1 teaspoon garlic powder
- 1 tablespoon Worcestershire sauce
- 1 tablespoon chopped parsley
- Optional: 1 tablespoon butter for finishing
Quick Steps:
- Prep the steak: Pat the steak cubes dry and toss them with olive oil, salt, pepper, garlic powder, and Worcestershire.
- Add the mushrooms: Toss the mushrooms with a little extra oil and a pinch of salt.
- Preheat and load: Preheat the air fryer to 400°F. Add the steak and mushrooms in a single layer.
- Cook quickly: Air fry for 6 to 8 minutes, shaking the basket once halfway through.
- Check the steak: The outside should be browned, and the centers should still feel tender. Pull it before it dries out.
- Finish: Toss with parsley and butter if using, then serve right away.
Tips and Variations:
- Cut the steak into even pieces or the smaller bits will overcook before the bigger ones catch up.
- A little blue cheese crumbled over the top is sharp and good if your family likes strong flavors.
- Serve with mashed potatoes, roasted green beans, or warm rolls if you want the meal to stretch.
8. Stuffed Bell Peppers with Beef and Rice
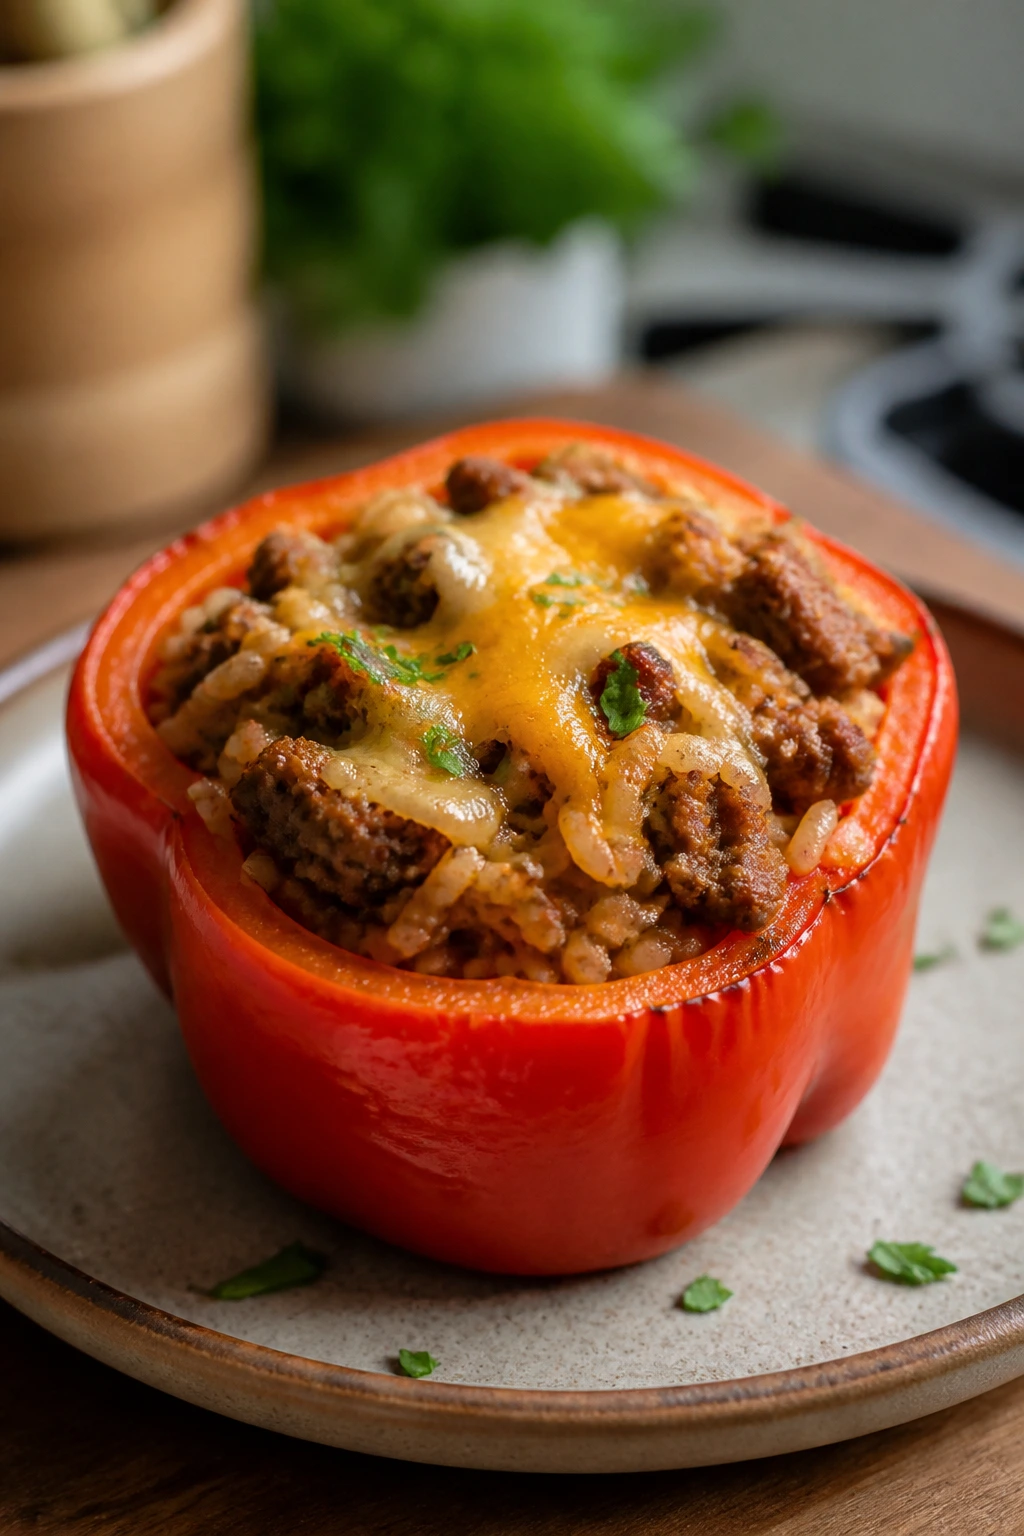
Stuffed peppers sound fussy until you realize the air fryer cuts the waiting down and keeps the peppers from collapsing into mush. The filling is familiar: beef, rice, tomato, cheese. The peppers are the built-in bowl, which saves you from washing one more dish than necessary. I’m always in favor of that.
These are especially good when you already have cooked rice in the fridge. The rest is mostly mixing and filling, which makes this a smart use of leftovers instead of a recipe that demands a fresh start.
Why It Works:
The air fryer softens the peppers just enough before the filling goes in, which prevents the skins from staying raw and bitter. A pre-cooked beef and rice mixture keeps the cook time short and predictable. Cheese on top melts fast and gives you that browned finish people expect from stuffed peppers.
Key Ingredients:
- 4 large bell peppers, halved and seeded
- 1 pound ground beef
- 1 small yellow onion, diced
- 2 garlic cloves, minced
- 1 cup cooked rice
- 1 cup marinara sauce
- 1 teaspoon Italian seasoning
- 1 teaspoon kosher salt
- 1/2 teaspoon black pepper
- 1 cup shredded cheddar or mozzarella
Quick Steps:
- Soften the peppers: Preheat the air fryer to 380°F. Place the pepper halves cut-side up and cook for 5 minutes.
- Cook the filling: Brown the beef and onion in a skillet over medium heat for 6 to 8 minutes, then stir in garlic, rice, marinara, Italian seasoning, salt, and pepper.
- Fill the peppers: Spoon the beef mixture into the softened pepper halves, mounding it slightly.
- Top with cheese: Sprinkle cheese over each pepper.
- Finish in the air fryer: Return the peppers to the basket and cook 8 to 10 minutes until the cheese melts and the peppers are tender.
- Rest briefly: Let them sit for 2 minutes so the filling settles instead of sliding out.
Tips and Variations:
- Use leftover taco meat or turkey instead of cooking beef from scratch.
- If you want firmer peppers, shave 1 to 2 minutes off the first cook.
- A spoon of sour cream on top balances the tomato nicely.
9. Fish Tacos with Cabbage Slaw
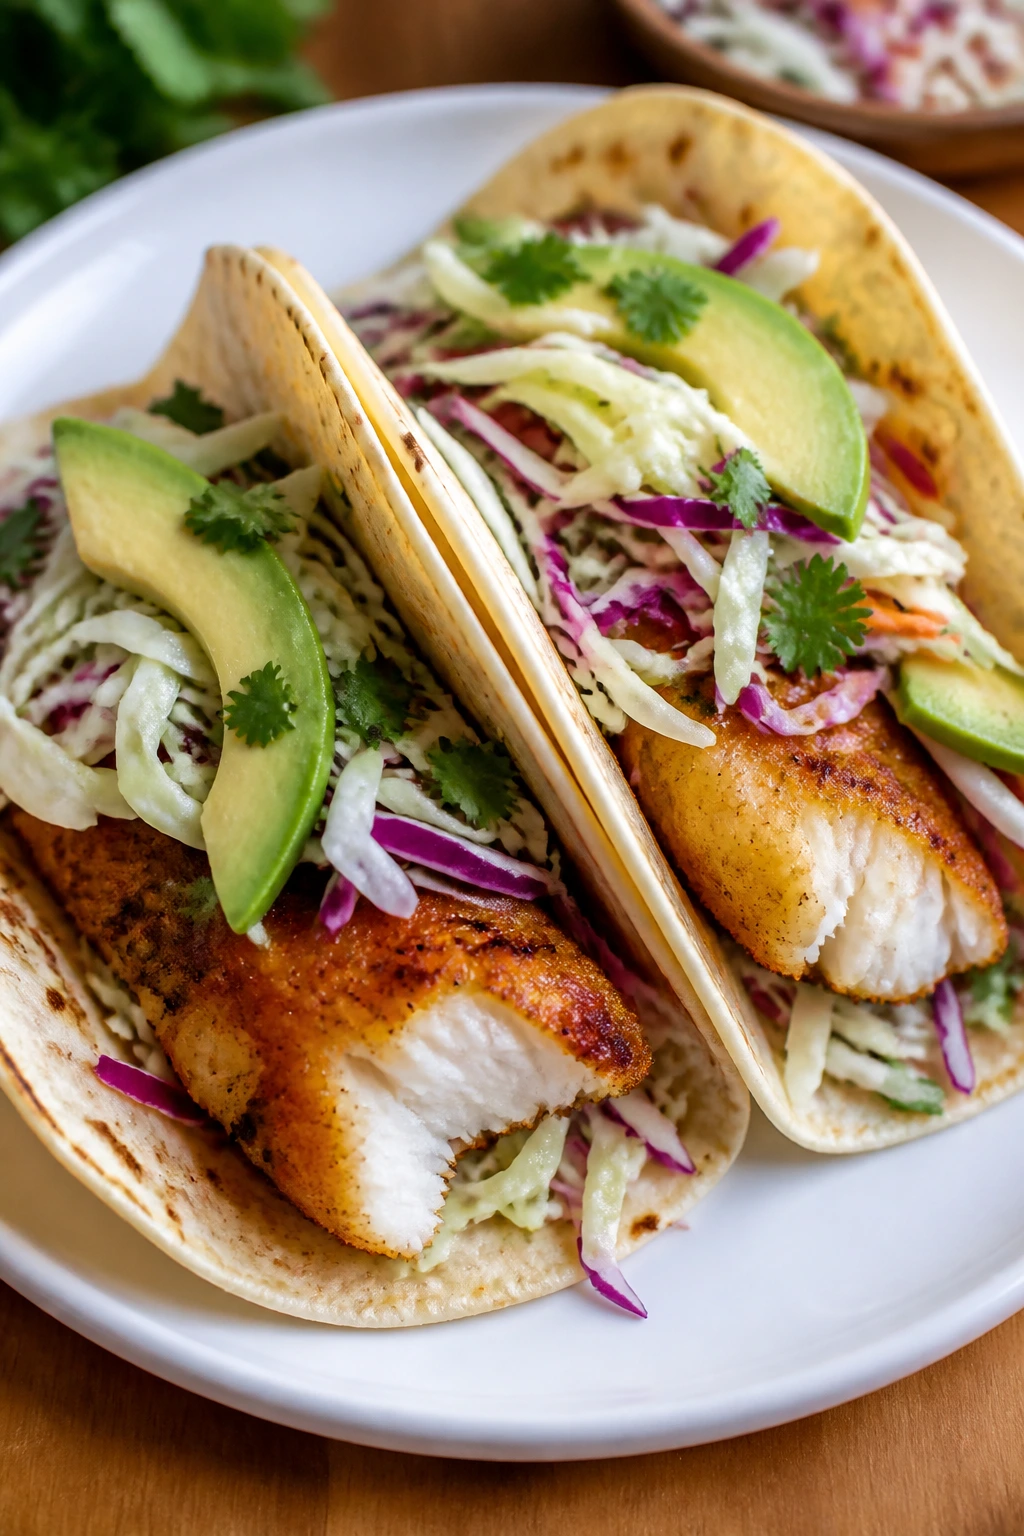
Fish tacos work best when the fish is crisp enough to stand up to the slaw instead of collapsing into it. The air fryer handles that part with no drama. A little seasoning, a quick cook, warm tortillas, and you’re in business.
These feel like a brighter dinner than most of the list, which I like. They’re quick without feeling plain, and you can make the slaw while the fish cooks. That kind of timing makes dinner feel tidy.
Why It Works:
White fish cooks fast and stays tender when you keep the pieces fairly thick and give them enough space in the basket. Panko or a light seasoning crust adds crunch without turning the fillets heavy. The cabbage slaw supplies the cold, crisp contrast that makes the tacos worth assembling in the first place.
Key Ingredients:
- 1 1/2 pounds cod, tilapia, or haddock fillets
- 1 cup panko breadcrumbs
- 1 teaspoon chili powder
- 1 teaspoon ground cumin
- 1 teaspoon kosher salt
- 2 tablespoons olive oil
- 8 small corn or flour tortillas
- 3 cups shredded cabbage or coleslaw mix
- 1 lime, juiced
- 1/4 cup sour cream or plain yogurt
- 1 avocado, sliced
- 1/4 cup chopped cilantro
Quick Steps:
- Mix the slaw: Toss the cabbage with lime juice, a pinch of salt, and a spoon of sour cream or yogurt.
- Prep the fish: Pat the fillets dry, brush with olive oil, and coat lightly with panko, chili powder, cumin, and salt.
- Preheat and cook: Preheat the air fryer to 390°F. Cook the fish for 8 to 10 minutes, depending on thickness, until it flakes easily.
- Warm the tortillas: Heat tortillas in a dry skillet or wrap them in foil and warm them briefly in the air fryer.
- Assemble: Break the fish into pieces and tuck it into tortillas with slaw, avocado, and cilantro.
- Serve with lime: A squeeze of lime at the end keeps everything sharp.
Tips and Variations:
- Don’t drown the slaw in dressing; it should stay crisp enough to crunch.
- If the fish is very thin, reduce cook time by a minute or two and check early.
- A drizzle of hot sauce or chipotle mayo gives the tacos more edge if your family likes heat.
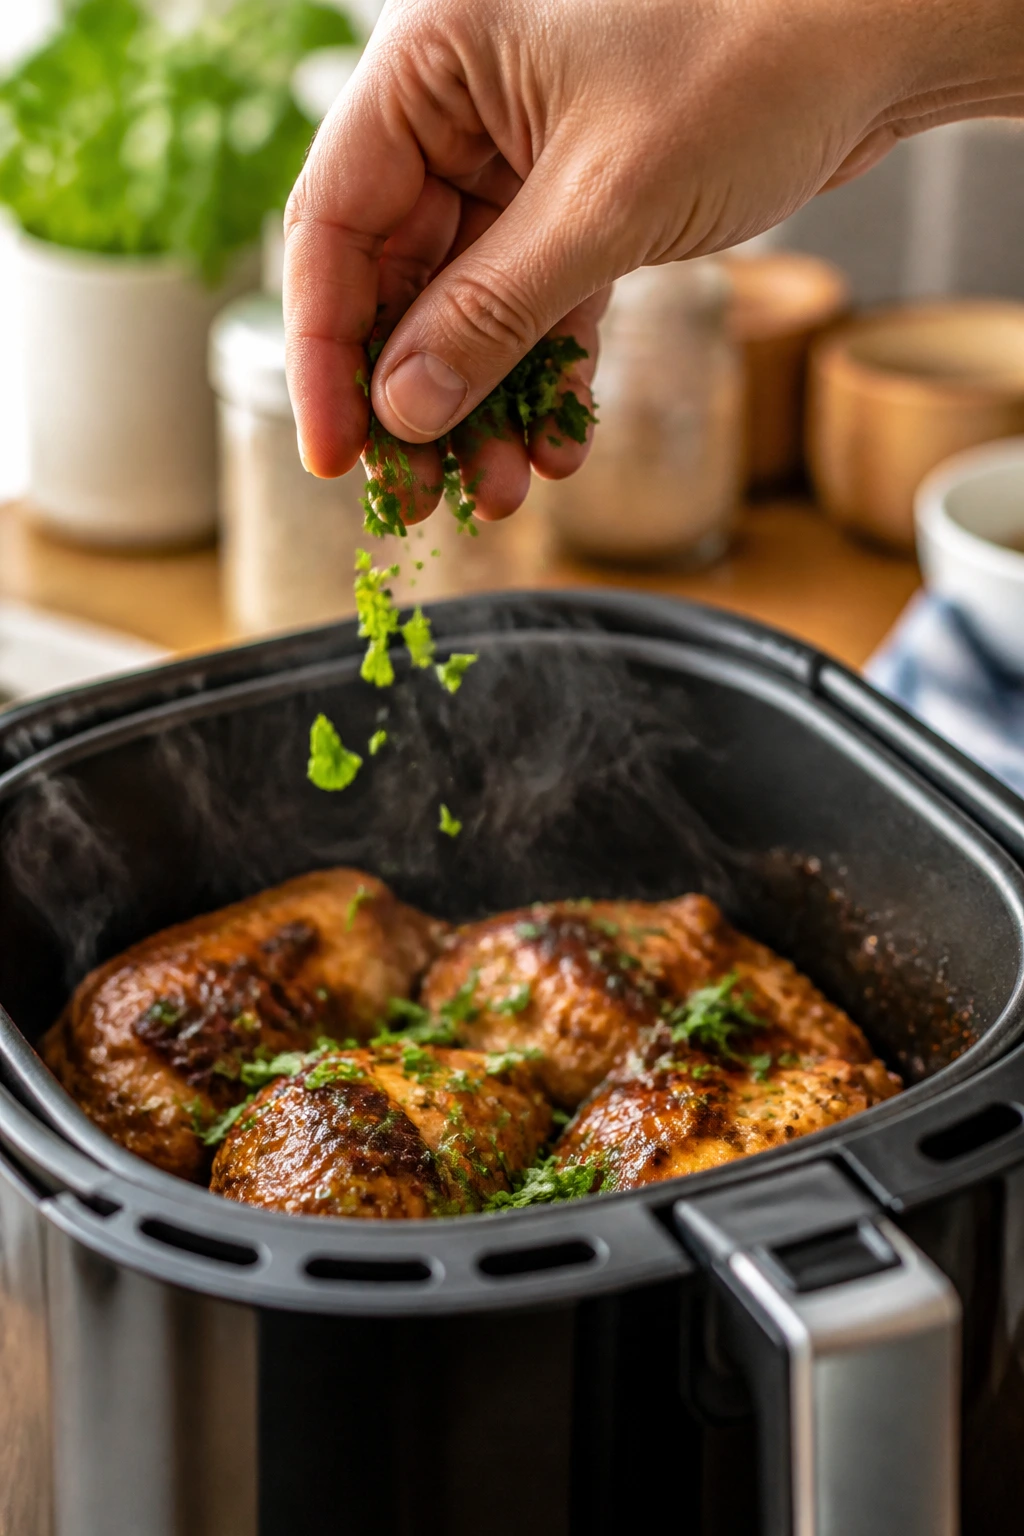
10. Chicken Thighs with Brussels Sprouts and Potatoes
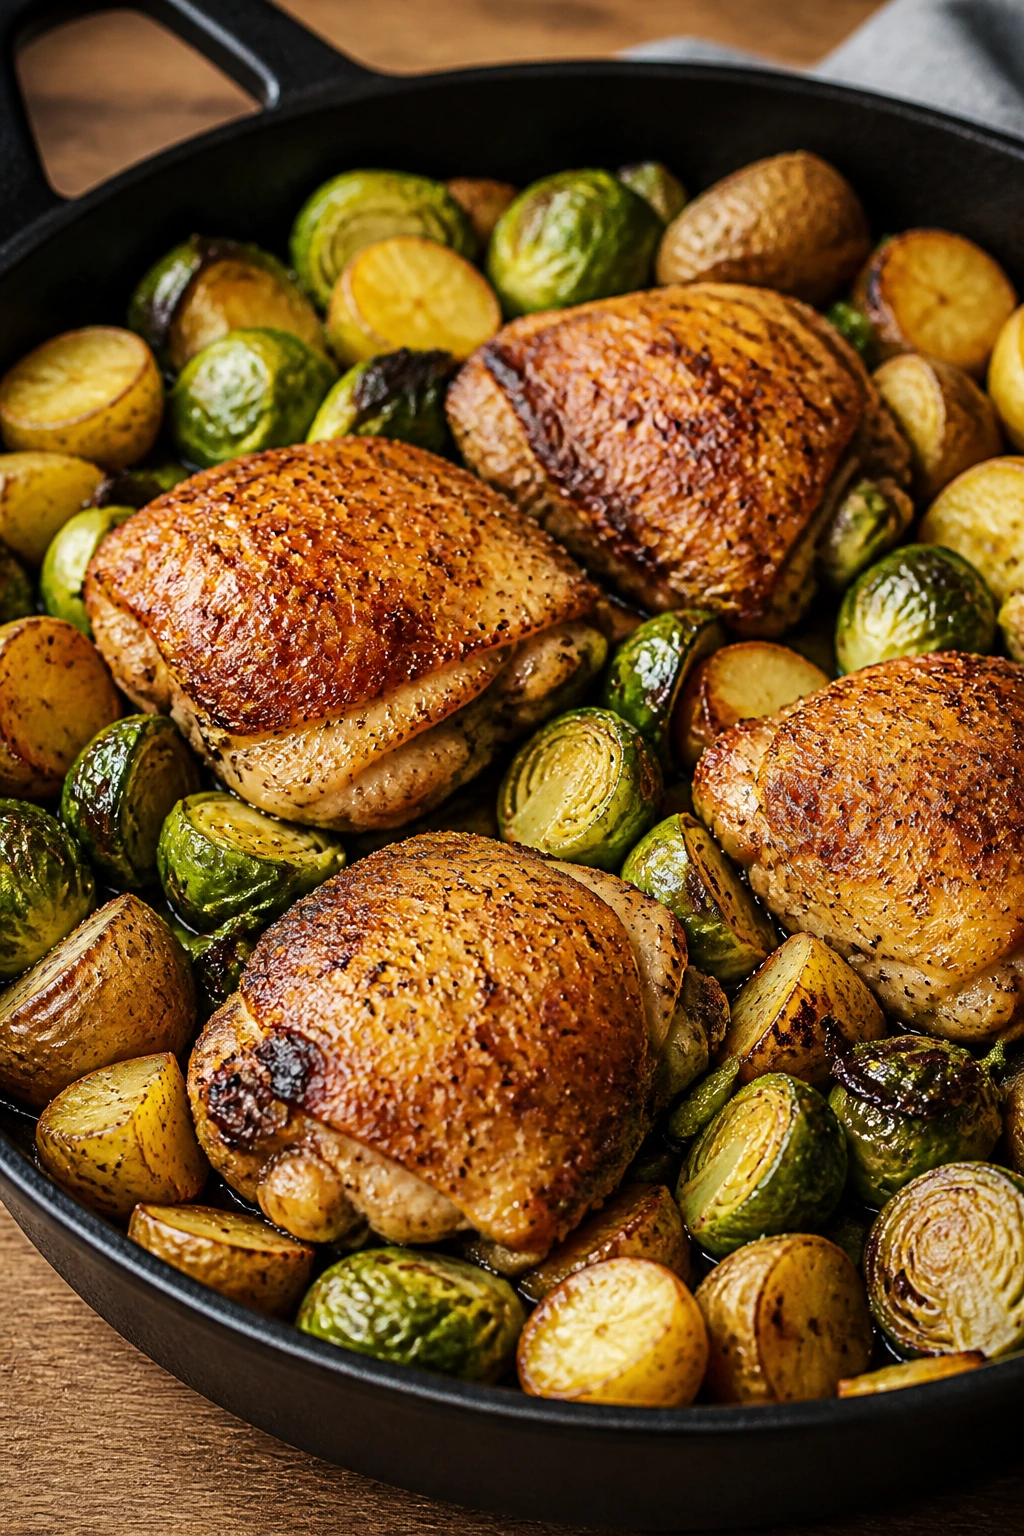
Chicken thighs are the quiet overachievers of the air fryer basket. They stay juicy, they brown well, and they forgive you if the evening gets messy while you’re cooking. Brussels sprouts and potatoes turn this into a full tray dinner, which is the kind of practical move I always appreciate.
This is the meal I reach for when I want something sturdy and not fussy. It tastes like you roasted it for longer than you did, and that’s a lovely little lie to tell the table.
Why It Works:
Thighs have enough fat to stay tender at higher heat, which is why they do so well in the air fryer. Potatoes need a head start, and Brussels sprouts tolerate the last part of the cook without giving up. The result is a basket where everything finishes close to the same time, with browning on all the right edges.
Key Ingredients:
- 6 boneless, skinless chicken thighs, about 2 pounds
- 1 pound Brussels sprouts, trimmed and halved
- 1 pound baby potatoes, halved
- 2 tablespoons olive oil
- 1 teaspoon paprika
- 1 teaspoon garlic powder
- 1 teaspoon kosher salt
- 1/2 teaspoon black pepper
- 1 lemon, cut into wedges
Quick Steps:
- Season everything: Toss the potatoes and Brussels sprouts with olive oil, paprika, garlic powder, salt, and pepper.
- Start with the potatoes: Preheat the air fryer to 390°F. Cook the potatoes for 8 to 10 minutes.
- Add the chicken and sprouts: Toss the chicken thighs lightly with salt and pepper, then add them with the Brussels sprouts.
- Finish cooking: Air fry 14 to 16 minutes more, turning the thighs once, until the chicken reaches 165°F and the vegetables are browned.
- Check the potatoes: They should be tender enough to pierce easily with a fork.
- Serve with lemon: A squeeze of lemon brightens the whole basket.
Tips and Variations:
- Bone-in thighs need longer, but they’re worth the wait if you like deeper flavor.
- Toss the Brussels sprouts with a little maple syrup if your family likes a sweet-savory edge.
- If the basket is crowded, cook the potatoes first, then add the rest in a second round.
11. Mini Meatloaf with Green Beans
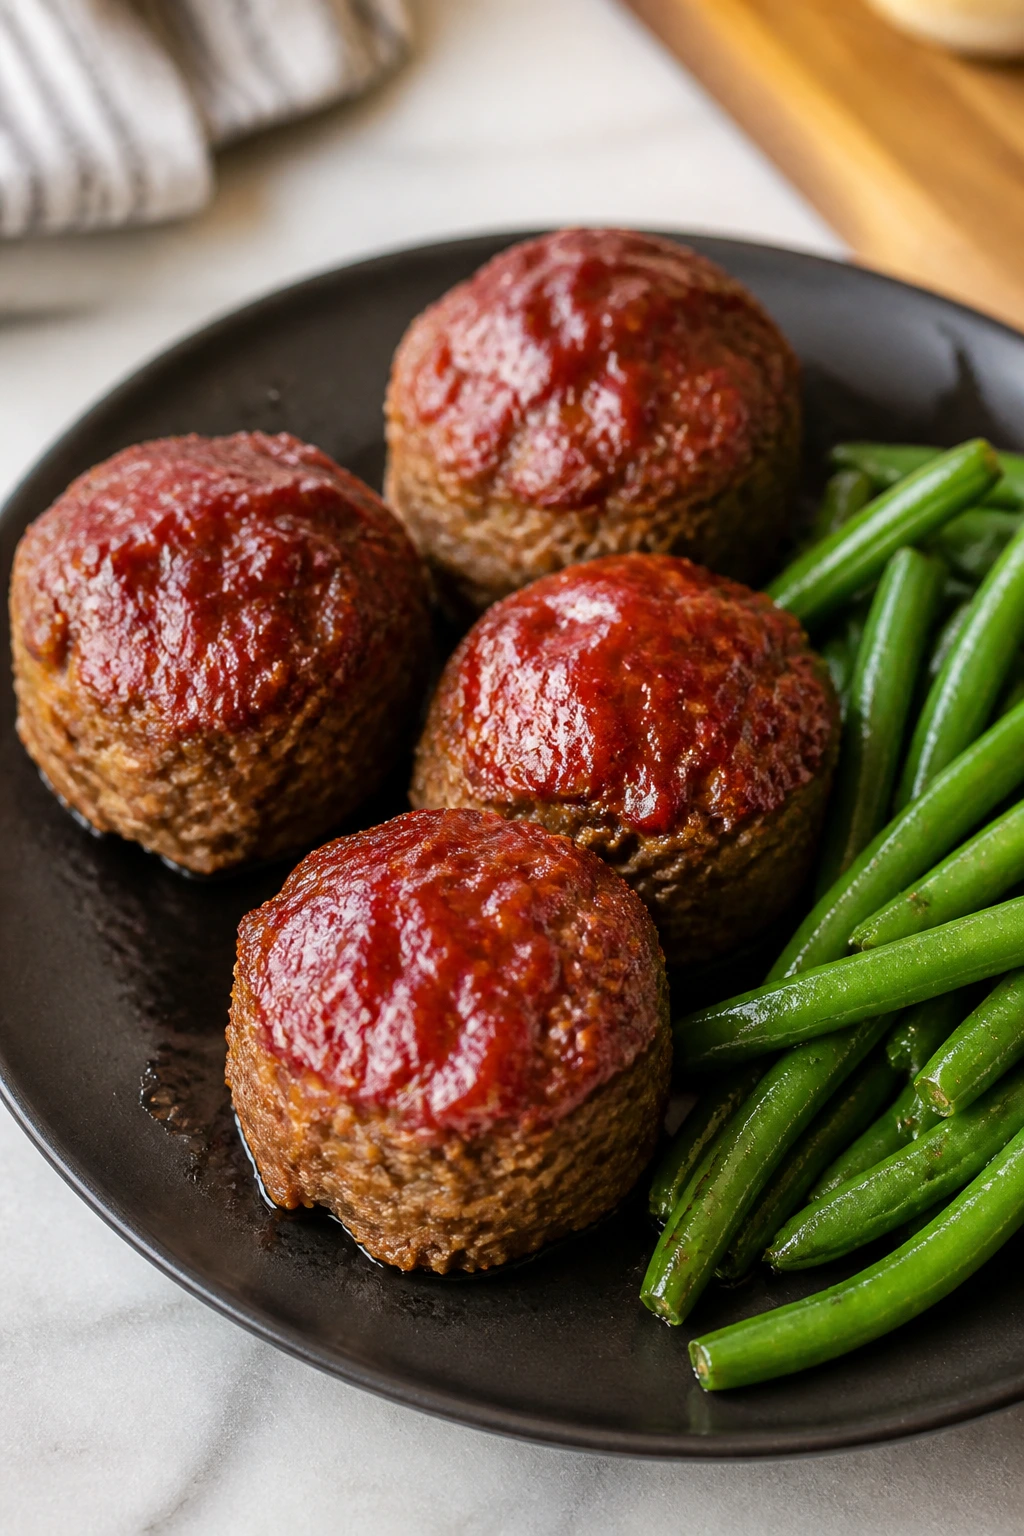
Mini meatloaf solves the old meatloaf problem: the center is done before the edges dry out. Small loaves cook faster, they brown more evenly, and they’re easier to portion when you’ve got a family table full of different appetites. Green beans round out the plate without asking for much attention.
I’m fond of this kind of dinner because it feels homemade in the best sense. Not precious. Just solid food that lands well.
Why It Works:
Meatloaf in small portions cooks more evenly than one large loaf, which suits the air fryer’s fast, direct heat. The glaze caramelizes nicely because it only needs a short final burst. Green beans add a fresh green side without needing a separate pan, so dinner stays contained.
Key Ingredients:
- 1 pound ground beef
- 1/2 pound ground turkey
- 1 large egg
- 1/2 cup breadcrumbs
- 1/4 cup ketchup, plus 2 tablespoons for glazing
- 1 tablespoon Worcestershire sauce
- 1 small onion, finely diced
- 1 teaspoon kosher salt
- 1/2 teaspoon black pepper
- 8 ounces green beans, trimmed
- 1 tablespoon olive oil
Quick Steps:
- Make the meat mixture: Combine the beef, turkey, egg, breadcrumbs, ketchup, Worcestershire, onion, salt, and pepper.
- Shape mini loaves: Form 4 oval loaves, each about 3/4-inch thick, so they cook evenly.
- Preheat and start: Preheat the air fryer to 370°F. Place the loaves in the basket and cook for 10 minutes.
- Add the glaze: Brush the tops with the remaining ketchup, then cook 4 to 5 minutes more.
- Cook the green beans: Toss the green beans with olive oil and salt, then cook them in the basket for the last 6 to 8 minutes, shaking once.
- Rest: Let the meatloaves rest 5 minutes before serving.
Tips and Variations:
- If you only have beef, that works too; the turkey just keeps the loaf a little lighter.
- Put the glaze on only at the end or it can burn before the meat is done.
- Mashed potatoes make this feel like a full Sunday-style dinner, even when it’s not Sunday.
12. Crispy Tofu and Snap Peas with Peanut Sauce
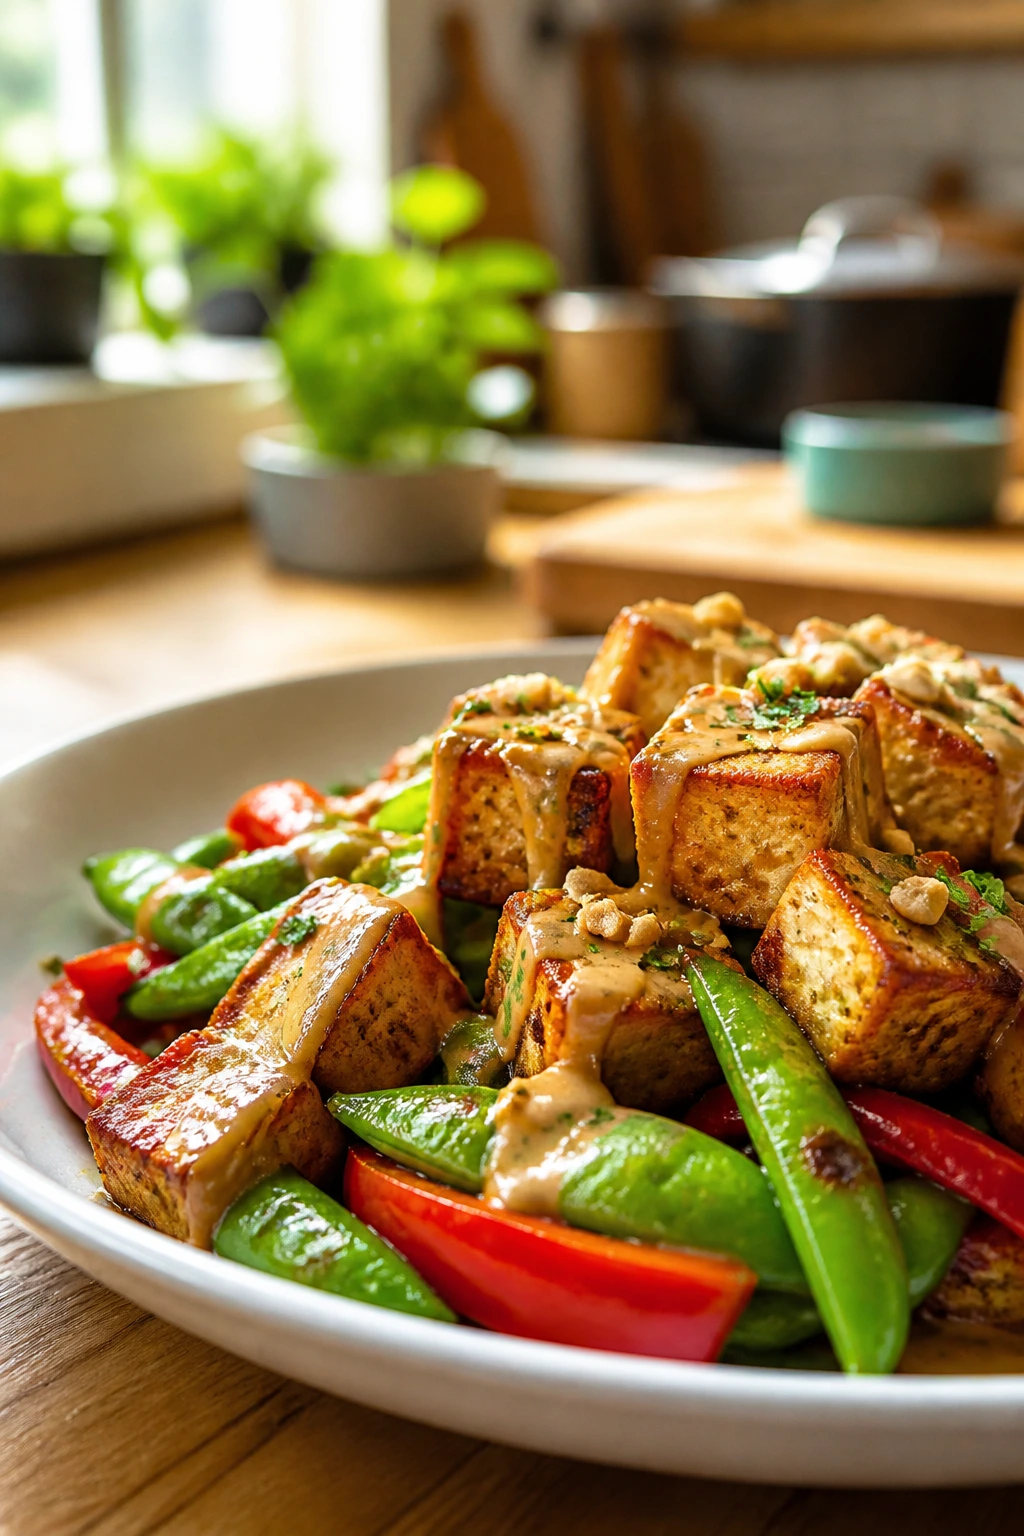
Tofu only gets a bad reputation when it’s treated like an afterthought. Press it, season it, crisp it, and it turns into something with actual texture. The air fryer is good at this part. It dries the outside enough to give you a bite instead of a soft block that nobody is excited about.
I like this dinner because it gives plant-based food some muscle. Snap peas bring crunch, red pepper brings sweetness, and peanut sauce ties it together without a long ingredient list.
Why It Works:
Extra-firm tofu needs two things to behave: moisture removal and heat. Once you press it and coat it lightly in cornstarch, the air fryer builds a thin crisp shell in minutes. The vegetables cook quickly alongside it, and the peanut sauce adds richness without making the basket greasy.
Key Ingredients:
- 1 block extra-firm tofu, 14 to 16 ounces
- 2 tablespoons cornstarch
- 1 tablespoon soy sauce or tamari
- 1 tablespoon olive oil
- 8 ounces snap peas
- 1 red bell pepper, sliced
- 1/4 cup peanut butter
- 1 tablespoon lime juice
- 1 tablespoon honey
- 1 teaspoon grated fresh ginger
Quick Steps:
- Press and cube the tofu: Drain the tofu, press it for 15 minutes, then cut it into 1-inch cubes.
- Season the tofu: Toss the cubes with soy sauce, cornstarch, and olive oil until lightly coated.
- Preheat and crisp: Preheat the air fryer to 400°F. Cook the tofu for 12 minutes, shaking the basket halfway through.
- Add the vegetables: Toss the snap peas and bell pepper into the basket and cook 4 to 5 minutes more.
- Make the sauce: Stir peanut butter, lime juice, honey, ginger, and a splash of warm water until smooth.
- Serve: Drizzle the sauce over the tofu and vegetables or serve it on the side for dipping.
Tips and Variations:
- Tamari keeps the dish gluten-free without changing the flavor much.
- A sprinkle of sesame seeds or chopped scallions gives the bowl a little lift.
- If your family wants more protein, add edamame or serve over rice.
13. Chicken Quesadillas with Black Beans
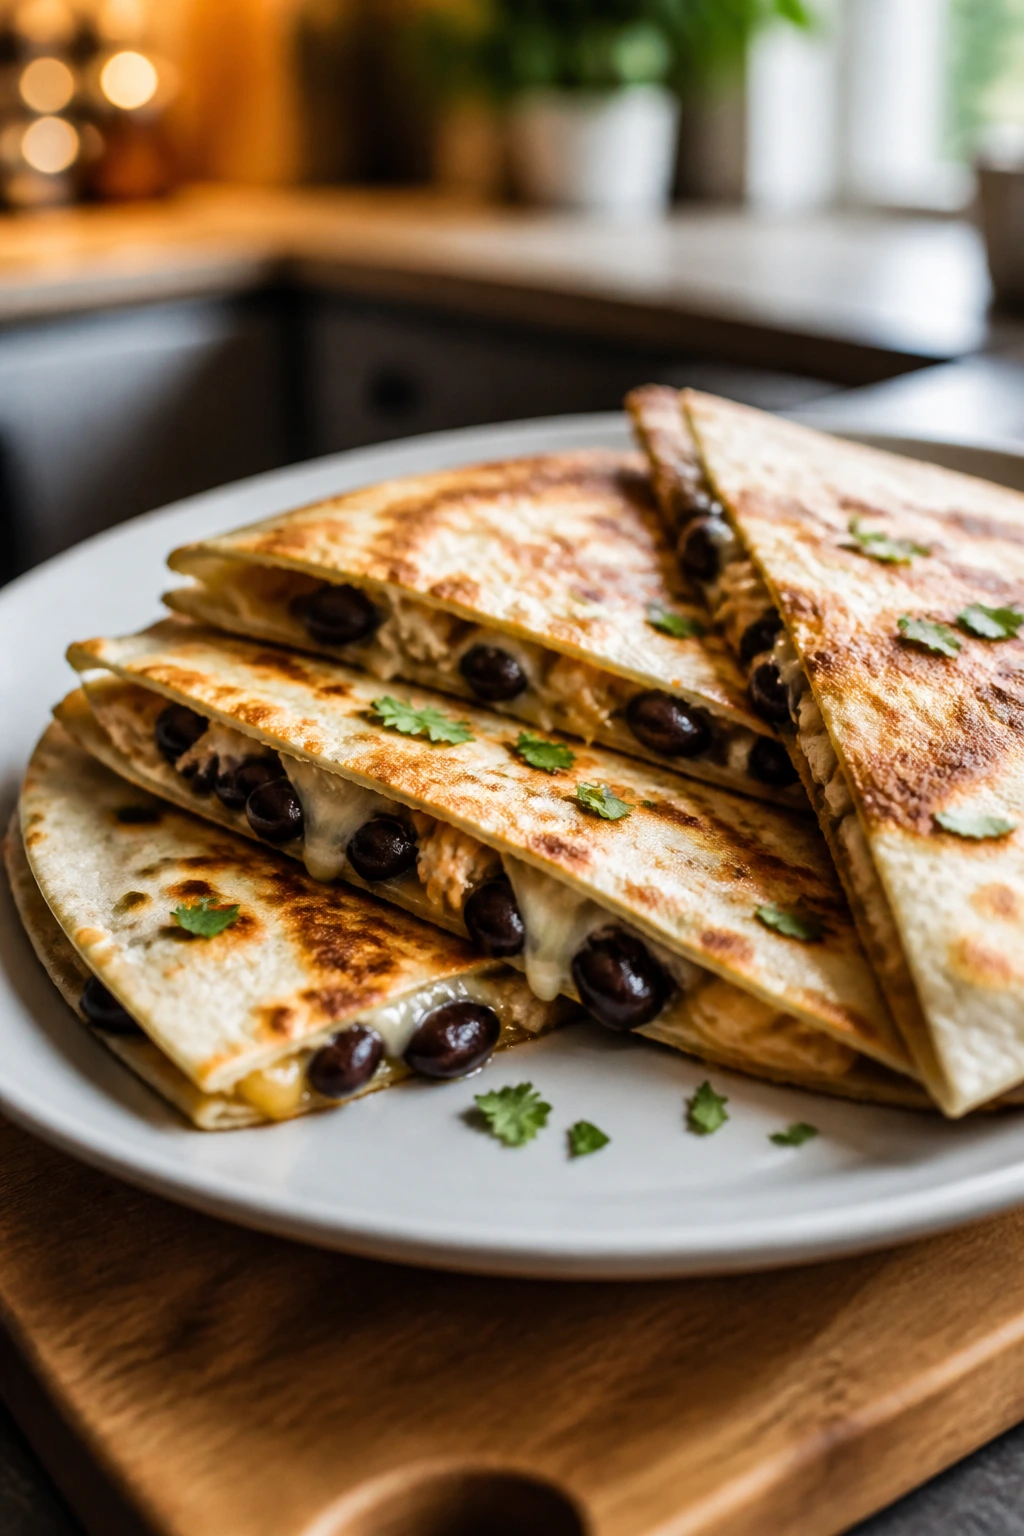
Quesadillas are not glamorous. They are useful, and that is better on a Tuesday. The air fryer crisps the tortilla on both sides without forcing you to babysit a skillet, and the filling can be built from leftovers or cooked chicken. Black beans make the whole thing more satisfying without making it heavier.
This is one of the best “everybody’s hungry right now” dinners on the list. Cut into wedges, it disappears fast, which is usually the compliment I care about most.
Why It Works:
The air fryer gives tortillas an even, dry heat that helps them turn crisp instead of limp. Cheese acts like glue, black beans add body, and cooked chicken keeps the filling meaty enough to serve as dinner, not just a snack. The basket also handles multiple quesadillas in rounds with little fuss.
Key Ingredients:
- 2 cups cooked shredded chicken
- 1 cup canned black beans, drained and rinsed
- 1 1/2 cups shredded cheddar or Monterey Jack
- 4 large flour tortillas
- 1/2 cup salsa
- 1 teaspoon ground cumin
- 1 tablespoon chopped cilantro
- Cooking spray
- Sour cream, for serving
Quick Steps:
- Mix the filling: Stir together the chicken, black beans, half the cheese, salsa, cumin, and cilantro.
- Assemble the quesadillas: Spoon the filling onto half of each tortilla, then fold them over and press gently.
- Preheat and spray: Preheat the air fryer to 360°F and lightly spray both sides of the tortillas with cooking spray.
- Cook in batches: Air fry for 4 minutes, flip, then cook 2 to 3 minutes more until the tortillas are golden and the cheese is melted.
- Rest briefly: Let them sit 1 minute so the filling settles.
- Slice and serve: Cut into wedges and serve with sour cream or extra salsa.
Tips and Variations:
- Don’t overfill the tortillas or the cheese will escape before the center melts.
- Swap chicken for leftover taco meat or rotisserie turkey if that’s what you have.
- A few slices of jalapeño add a sharper edge for the adults at the table.
14. Cod with Cherry Tomatoes and Olives
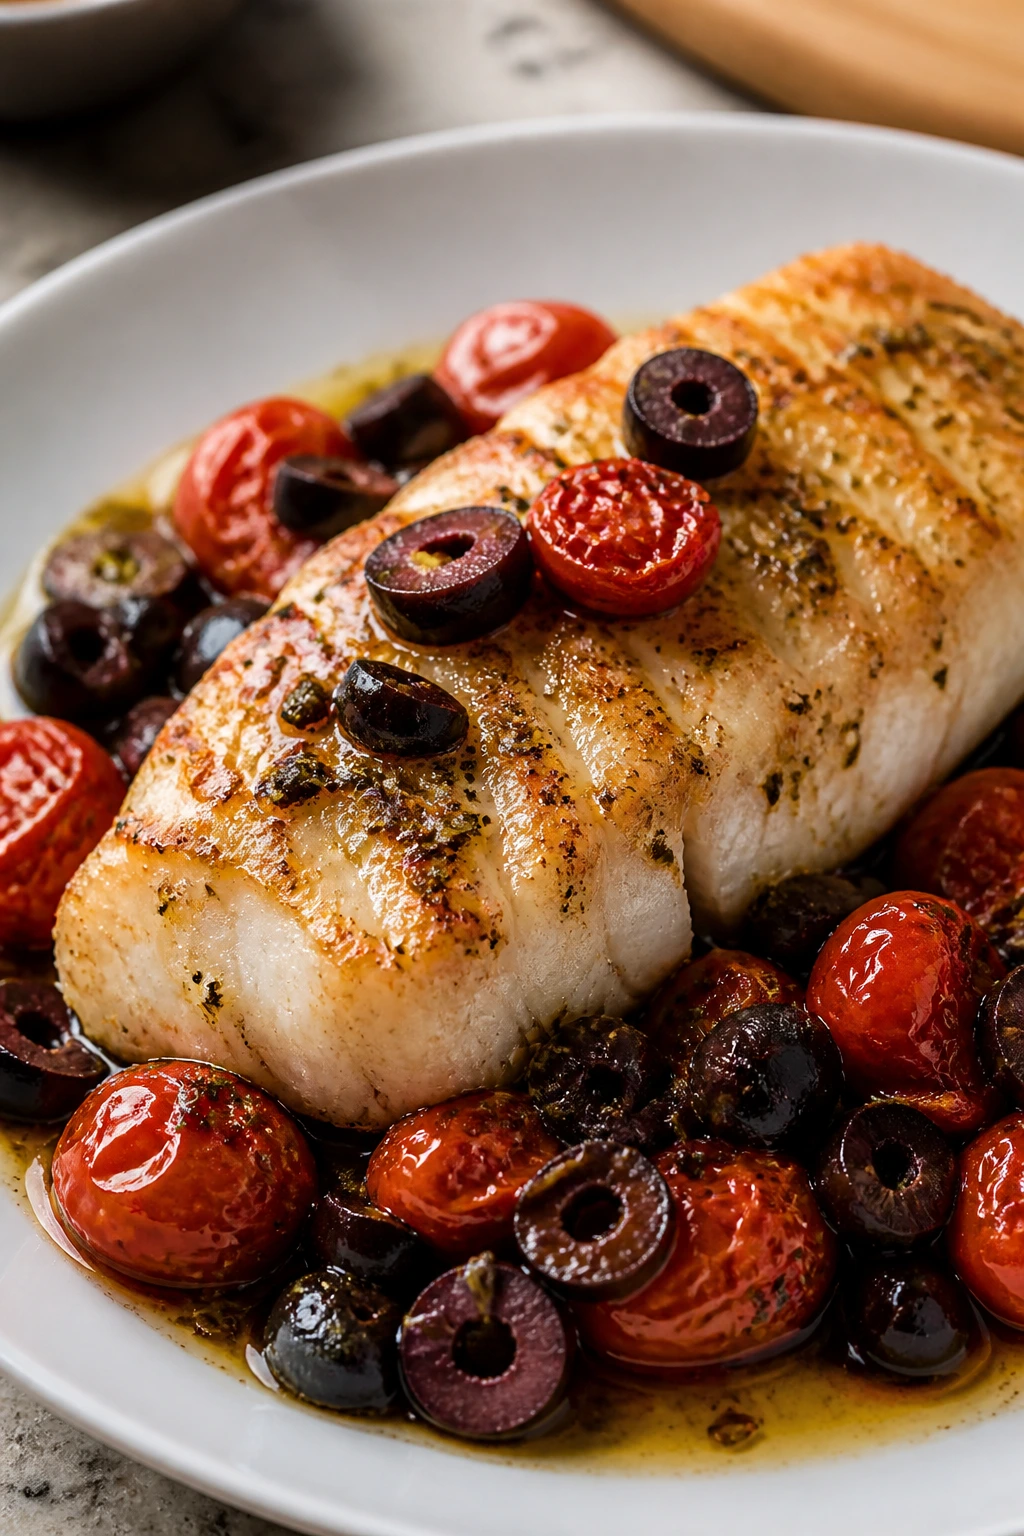
Cod can be delicate in the best way, which is another way of saying it needs a little respect. Cherry tomatoes and olives give it a built-in sauce without asking you to make one from scratch, and the air fryer does the quick cooking gently enough to keep the fish from shredding apart.
This is a dinner that feels a little lighter than the rest of the list, but not skimpy. The tomatoes burst, the olives turn briny, and the whole basket smells like it borrowed something from a coastal kitchen.
Why It Works:
Cod likes short, hot cooking, and the air fryer gives it that without drowning it in oil. Cherry tomatoes collapse into a saucy base while the fish cooks on top, so you get moisture without extra pans. Olives add salt and depth, which keeps the dish from tasting flat.
Key Ingredients:
- 4 cod fillets, about 6 ounces each
- 1 pint cherry tomatoes
- 1/2 cup pitted olives, sliced
- 2 tablespoons olive oil
- 3 garlic cloves, minced
- 1 teaspoon dried oregano
- 1 teaspoon kosher salt
- 1/2 teaspoon black pepper
- 1 lemon, cut into wedges
- 1/4 cup crumbled feta
Quick Steps:
- Prep the tomatoes: Toss the cherry tomatoes, olives, olive oil, garlic, oregano, salt, and pepper together.
- Start the sauce base: Preheat the air fryer to 390°F. Cook the tomato mixture for 5 to 6 minutes until the tomatoes start to burst.
- Add the cod: Nestle the fish fillets into the tomato mixture.
- Cook gently: Air fry 8 to 10 minutes more, until the cod flakes easily and looks opaque through the center.
- Finish with feta: Sprinkle feta over the top and let it sit for 1 minute so the cheese softens.
- Serve with lemon: A squeeze of lemon brightens the saltiness of the olives.
Tips and Variations:
- Line the basket with perforated parchment if you don’t want the tomatoes sticking.
- Halibut or haddock work too; just adjust for thickness.
- A handful of baby spinach stirred in at the end wilts fast and makes the dish feel fuller.
15. Cheeseburger Sliders

Sliders are the dinner equivalent of a small crowd moving fast. They’re easy to portion, easy to top, and easy to serve without anyone trying to negotiate over the last burger. In the air fryer, the little patties cook quickly and get a good crust, which is what makes the whole thing feel like more than a snack.
I like sliders for family dinners because they invite customization without turning into a toppings bar disaster. Keep the bases simple, set out a few extras, and let everyone build the version they’ll actually eat.
Why It Works:
Small beef patties cook evenly in the air fryer because the heat reaches all sides at once. That means you get a browned exterior before the meat dries out. Adding cheese at the end gives you the classic burger melt without needing a stovetop or grill.
Key Ingredients:
- 1 1/2 pounds ground beef, ideally 80/20
- 1 teaspoon kosher salt
- 1/2 teaspoon black pepper
- 1 teaspoon Worcestershire sauce
- 12 slider buns
- 6 slices American or cheddar cheese
- Dill pickle slices
- Thinly sliced onion
- Ketchup and mustard, for serving
Quick Steps:
- Shape the patties: Divide the beef into 12 small patties, flattening each one slightly wider than the buns.
- Season lightly: Sprinkle both sides with salt and pepper, then brush with Worcestershire sauce.
- Preheat and cook: Preheat the air fryer to 400°F. Cook the patties for 5 minutes, flip, then cook 2 to 3 minutes more.
- Add cheese: Top each patty with cheese and cook 1 minute more until melted.
- Warm the buns: Slide the buns in for 30 to 45 seconds, just until soft and warm.
- Assemble: Build the sliders with pickles, onion, ketchup, and mustard.
Tips and Variations:
- Make the patties thin enough to cook through fast, but not so thin that they dry out.
- Add shredded lettuce or tomato only after cooking so the buns stay sturdy.
- These are easy to double if you’ve got a large crowd; just cook in batches and keep the first round warm in a low oven.
Why the Air Fryer Wins on Busy Nights
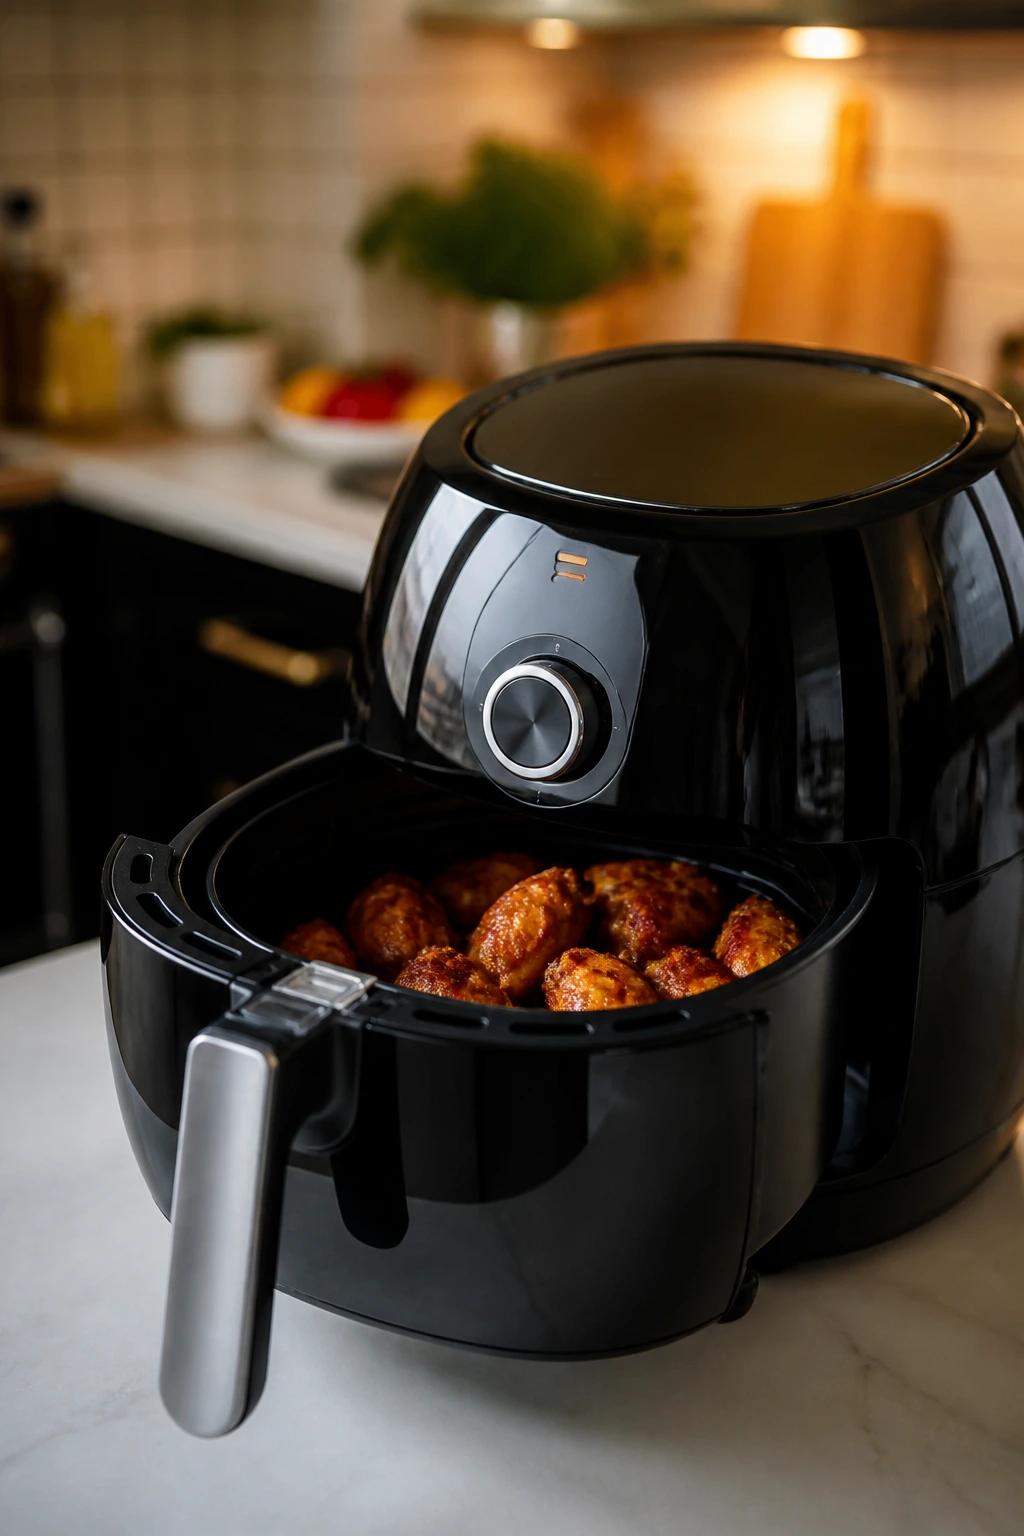
The air fryer works because it removes the two things that usually drag dinner out: waiting and babysitting. It preheats fast, it moves hot air around food from all sides, and it browns the surface without asking you to stand there with a spatula in one hand and a timer in the other. That’s not magic. It’s just useful.
It also favors the kinds of foods families actually make on weekdays: cutlets, fish fillets, small potatoes, vegetables, meatballs, sausage, tofu, sliders. Big roasts and long braises have their place, but they are not the same kind of problem. Busy dinners need food that cooks in a tight window and tastes good the first time it hits the plate.
The sweet spot is preparation, not perfection. Cut the food to a similar size. Dry it off. Give it a little oil. That’s often enough. A lot of air fryer disappointment comes from treating it like a tiny oven with no rules, when it really wants space, surface area, and a bit of attention to timing.
Essential Equipment for These Dinners
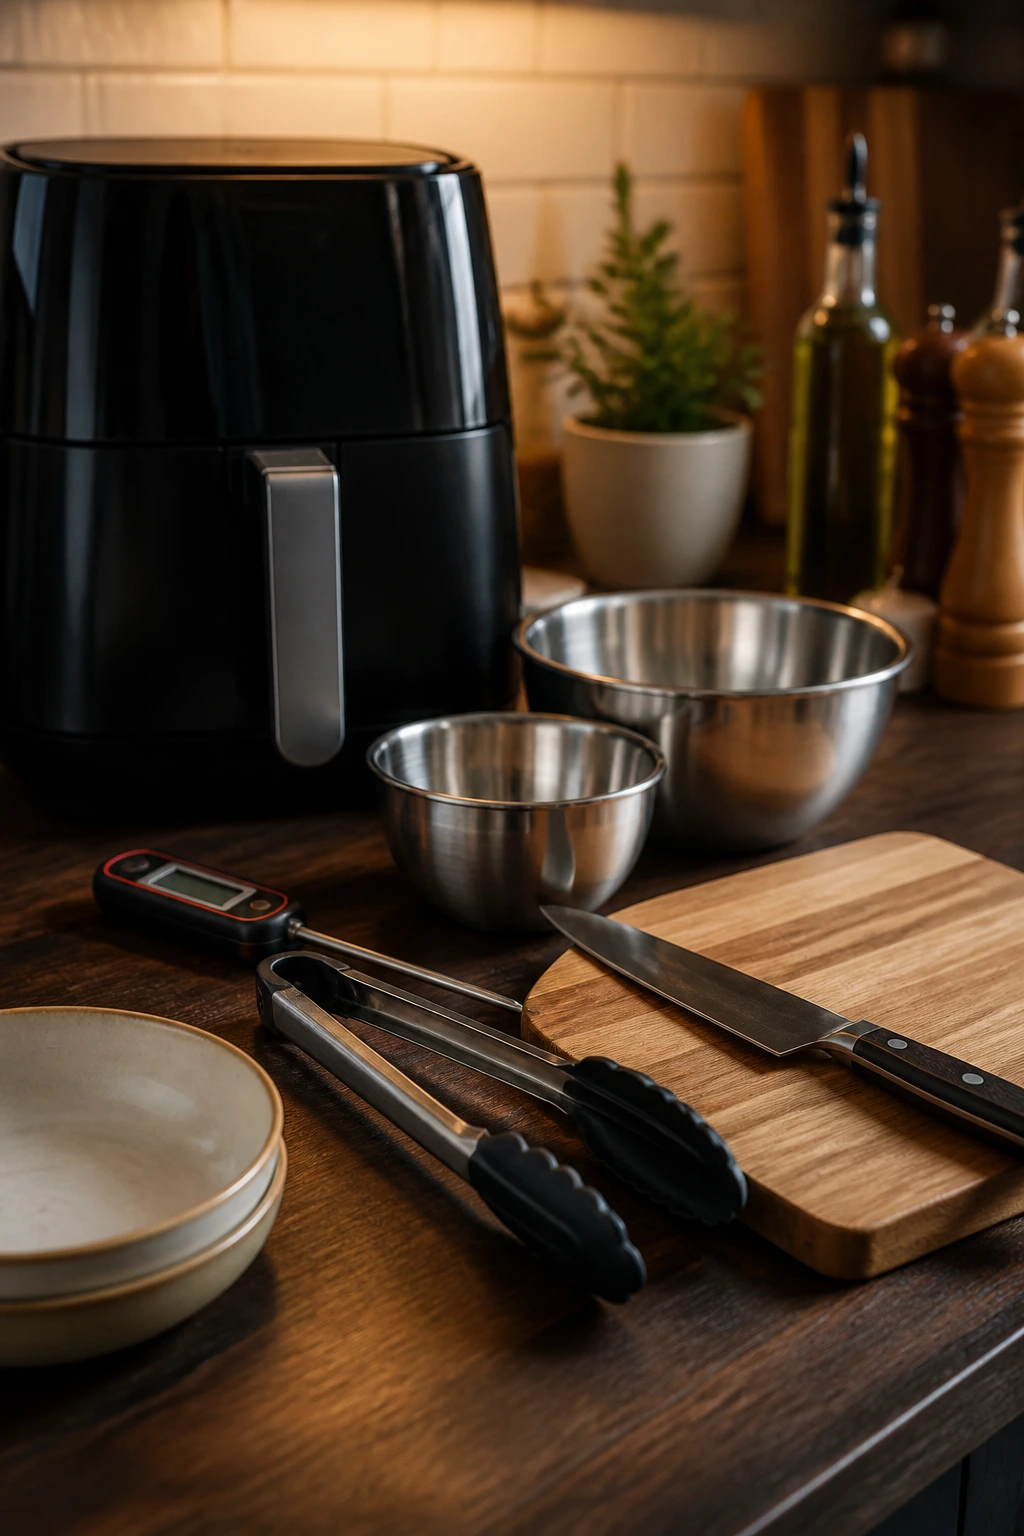
- Air fryer basket or oven-style air fryer: Either works, but basket models usually brown faster and more evenly for smaller batches.
- Instant-read thermometer: The fastest way to avoid dry chicken, underdone pork, or fish that’s overcooked by guesswork.
- Large mixing bowls: Useful for tossing vegetables, coating chicken, or mixing meatballs and meatloaf without spilling.
- Tongs: Better than forks for flipping cutlets, fish, sausage, and vegetables without scraping off the breading.
- Sharp knife and sturdy cutting board: Uniform cuts matter more in the air fryer than they do in a slow oven.
- Shallow dishes or plates: Handy for breading stations, especially for chicken parmesan and fish tacos.
- Cooking spray or oil mister: A light coat helps browning and keeps breaded food from turning chalky.
- Perforated parchment liners: Optional, but handy for sticky foods like fish, tomatoes, or saucy fillings.
- Small whisk or fork: Useful for sauces, glazes, and egg washes.
- Sheet pan or tray: Good for holding prepped ingredients and for catching anything you pull from the basket before serving.
Smart Shopping and Ingredient Tips

The air fryer rewards good shopping more than people expect. It does not hide bad chicken, limp vegetables, or fish that’s already on the edge. Buy pieces with similar thickness so they finish together. A thick salmon fillet beside a thin one is just a recipe for disappointment.
For chicken, thighs are more forgiving than breasts, and breasts are better when you slice them into even cutlets. Pork chops should be at least 1 inch thick if you want them juicy. With shrimp, look for raw shrimp that are peeled and deveined; the basket is no place to wrestle shells. Fish fillets should smell clean, not fishy, and they should be firm enough to hold together when moved.
Vegetables matter too. Brussels sprouts should feel tight and heavy. Bell peppers should be glossy and firm, not soft near the stem. Potatoes should be small and similar in size so the halves finish at the same time. Frozen vegetables can work, but they need to be thawed and patted dry first or they’ll steam instead of crisp.
Seasoning blends are worth using when they’re short and balanced. Fajita seasoning, Italian seasoning, paprika, garlic powder, and dried oregano all do real work in the basket. Marinara is another place where a clean label helps; you want tomato to be the first flavor you taste, not sugar. And when a recipe calls for breadcrumbs, panko usually gives a lighter crunch than the fine stuff.
How to Serve These Air Fryer Dinners
Presentation:
Build contrast on the plate. Put salmon on a bed of broccoli, tuck slaw into fish tacos, or scatter chopped herbs over chicken parmesan so the food looks finished without extra fuss. A lemon wedge, a handful of parsley, or a spoon of sauce does more than people think.
Accompaniments:
Rice, roasted potatoes, buttered noodles, a green salad, garlic bread, slaw, or warm tortillas all make sense across this collection. If you’re feeding bigger appetites, add one starch and one vegetable. If the dinner already includes potatoes or peppers, a simple salad usually does the job.
Portions:
Most of these recipes comfortably serve 4. For teens or adults with larger appetites, plan on 5 to 6 ounces of protein per person and add a second side. For smaller kids, sliders, meatballs, tacos, and chicken cutlets are easy to split and stretch.
Beverage Pairing:
Sparkling water with lime works across almost everything here. Iced tea fits the more savory recipes. For adults, a dry cider, light beer, or crisp white wine plays nicely with salmon, chicken, and fish tacos without crowding the meal.
Additional Tips and Flavor Boosters
Flavor Enhancement:
A finishing squeeze of lemon, a shower of fresh herbs, or a little grated Parmesan right after cooking can change a good basket dinner into one that tastes deliberate. Hot food takes seasoning better than cold food, so taste at the end and adjust with salt, acid, or a small pat of butter.
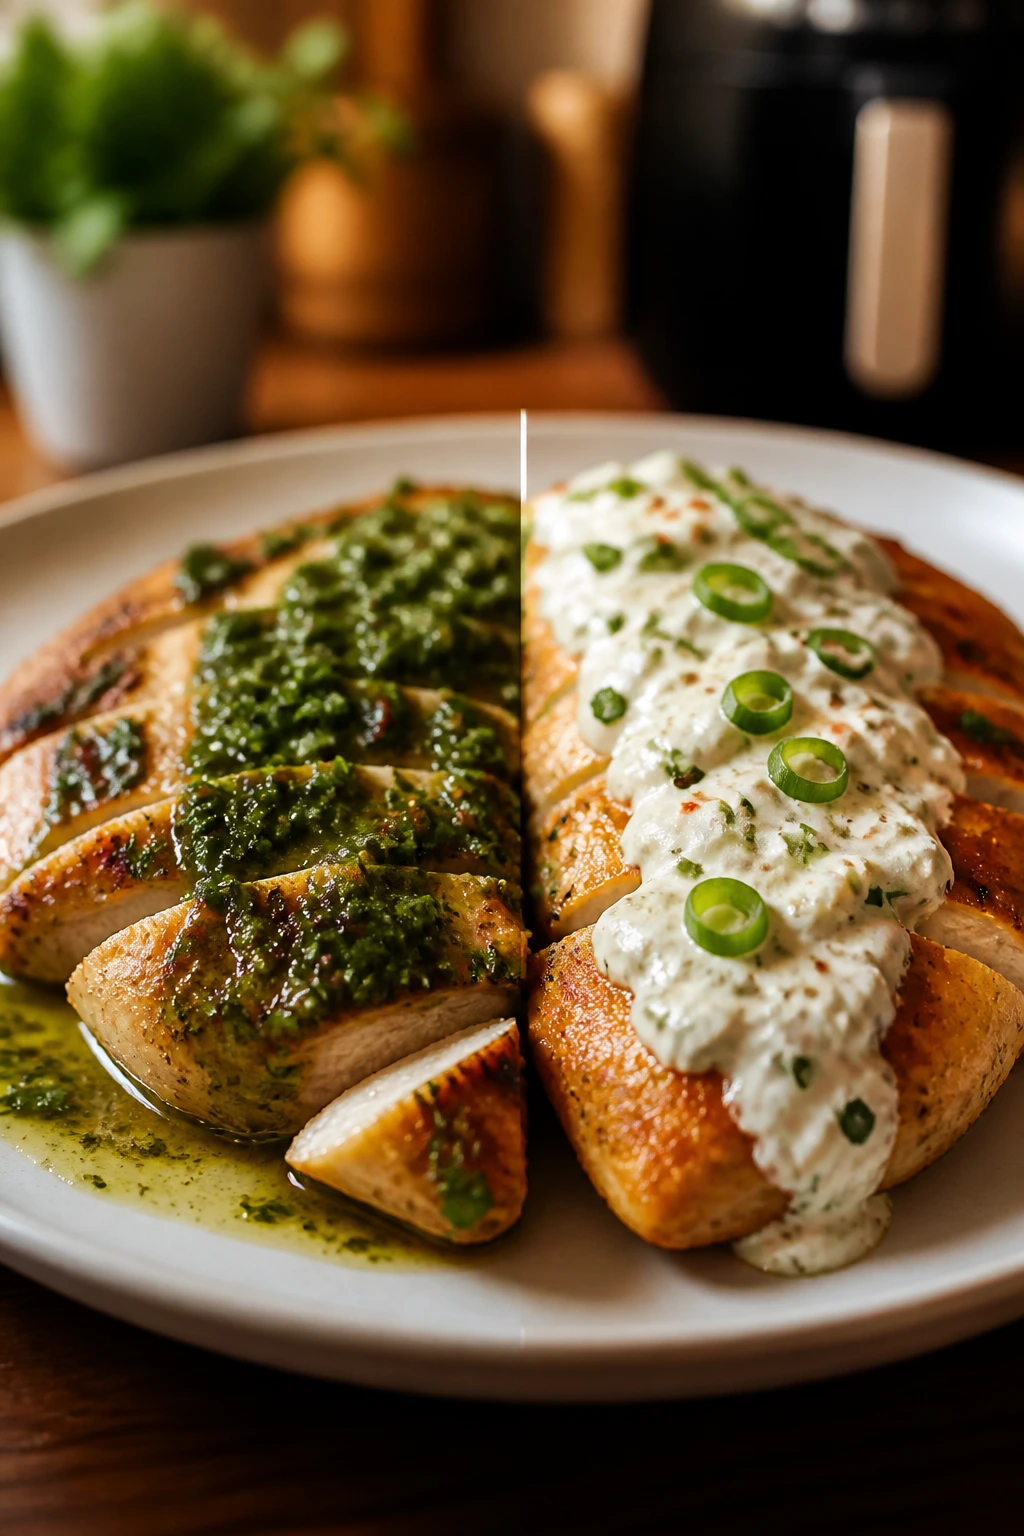
Customization:
Keep one hot sauce or spice level for the adults and one milder version for kids. The same chicken, fish, or tofu can split into two flavor lanes if you hold back the spicy sauce until serving time. That tiny bit of flexibility keeps dinner calm.
Serving Suggestions:
Use a creamy drizzle when a dish feels dry, especially for salmon, fish tacos, and tofu bowls. Use crunchy toppings when a dish feels soft — pickled onions, sesame seeds, toasted breadcrumbs, or sliced scallions all help. If the meal already has a lot of richness, lean on something bright and sharp instead.
Make-It-Yours:
For gluten-free diners, swap in gluten-free breadcrumbs or corn tortillas. For dairy-free plates, skip the cheese and add more herbs, citrus, or avocado. For lower-carb dinners, reduce the starch and load the basket with vegetables that crisp well, like broccoli, peppers, Brussels sprouts, or green beans.
Make-Ahead, Storage, and Reheating Guidance
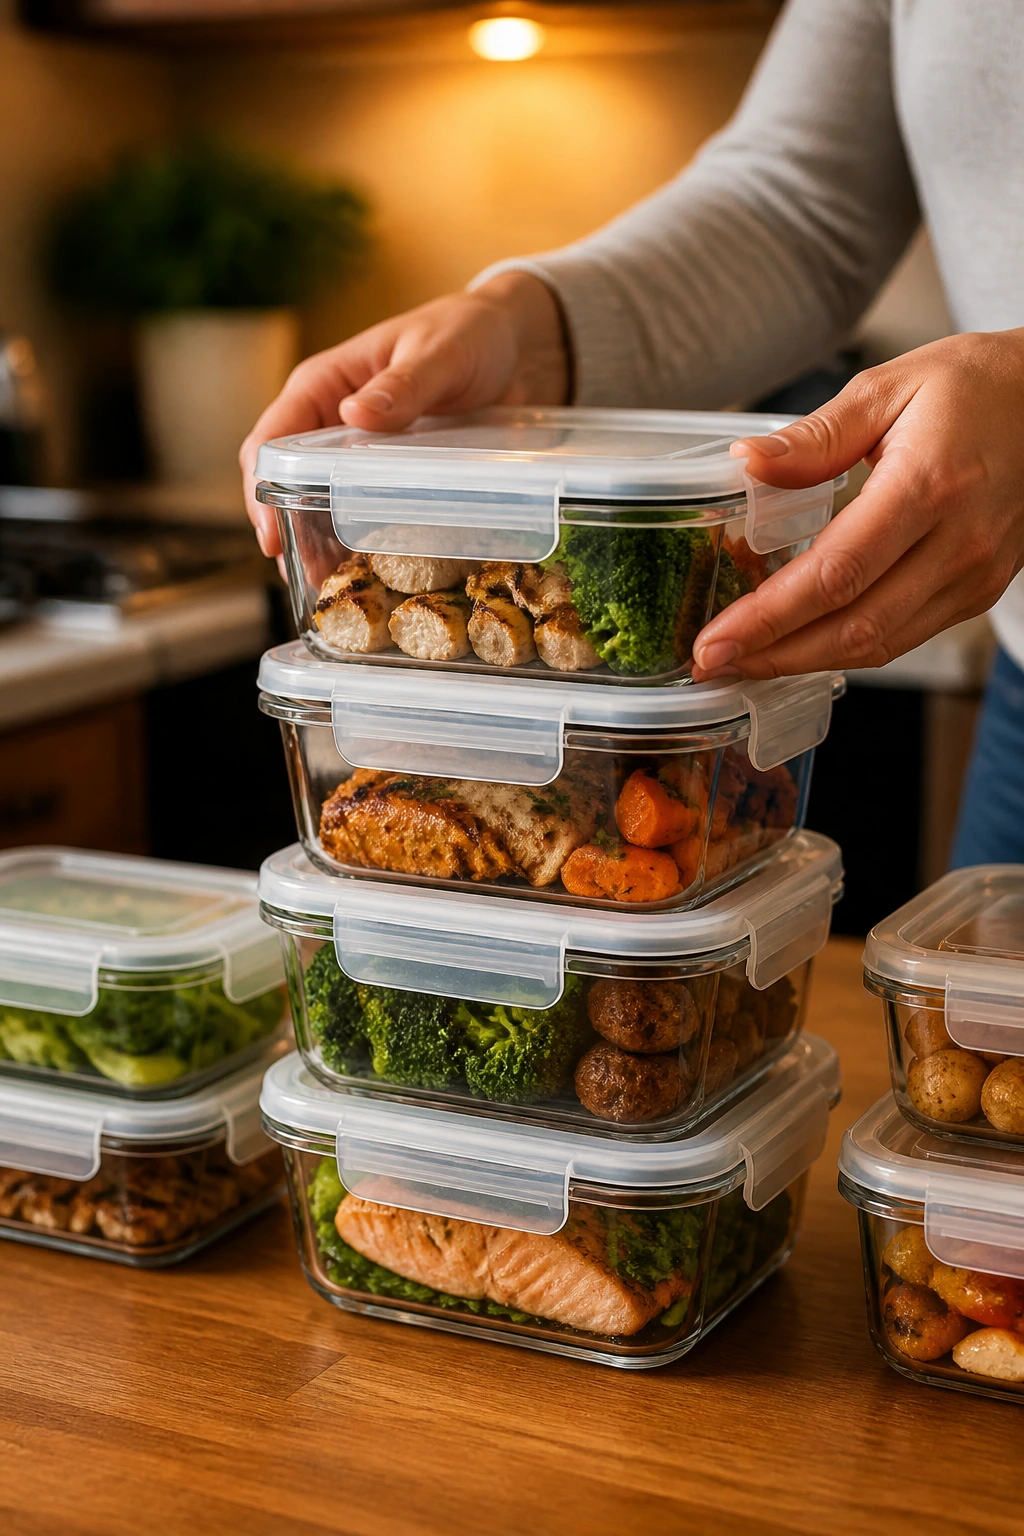
Most cooked air fryer dinners keep well for 3 to 4 days in the refrigerator when stored in airtight containers. Seafood is the exception; fish and shrimp are best eaten within 2 days because they dry out faster than chicken, pork, or beef. If you’re packing lunches, keep sauces separate so the crusts stay crisp.
Freezing works best for meatballs, mini meatloaves, burger patties, and stuffed peppers. Those can hold for up to 2 months in the freezer if wrapped tightly and packed with the air removed. Breaded items like chicken parmesan, fish fillets, and quesadillas freeze less gracefully because the coating softens, but they’re still usable if you reheat them in the air fryer instead of the microwave.
For reheating, the air fryer is usually the right tool. Breaded or crispy foods reheat well at 350°F for 4 to 6 minutes, depending on size. Saucy items do better at 325°F for 8 to 10 minutes, covered loosely with foil if the top is already dark enough. Meatballs, sliders, and chicken thighs can be reheated until the center reaches 165°F.
Make-ahead prep helps even more than full make-ahead cooking. Chop peppers, slice onions, and trim Brussels sprouts a day ahead. Mix meatballs or meatloaf the night before and keep them covered in the fridge. Bread chicken cutlets earlier in the day and hold them on a tray in the refrigerator for a short while before cooking. That one move saves time and keeps dinner from feeling like a standing challenge.
Variations and Adaptations to Try
Gluten-Free Crunch Swap:
Use gluten-free panko or crushed gluten-free cornflakes in place of standard breadcrumbs. Corn tortillas work better than flour tortillas for fish tacos if you want the whole meal to stay naturally gluten-free. Tamari replaces soy sauce cleanly in the tofu recipe.
Dairy-Free Dinner Fix:
Leave out the cheese on chicken parmesan and stuffed peppers, then add a finishing spoon of olive oil, fresh basil, or a handful of dairy-free shreds if your family likes them. The recipes still work because the browning and seasoning do most of the heavy lifting.
Low-Sodium Route:
Use unsalted seasoning blends, reduced-sodium marinara, and fresh citrus to brighten the food instead of leaning on extra salt. Sausage and cheese dishes need the most care here, so use less salt in the mix and let the toppings do more work.
Kid-Mild Version:
Keep spice blends light, skip hot sauce at the table, and serve dips on the side. Quesadillas, sliders, meatballs, and chicken cutlets are easy to scale back for younger eaters without changing the base recipe.
Vegetable-Heavy Basket:
Double the vegetables in recipes like salmon, chicken thighs, tofu bowls, and sausage with peppers. Cut the starch portion in half, add a green salad, and you’ve got a dinner that feels fuller without taking longer.
Budget-Bin Swap:
Use chicken thighs instead of salmon, frozen broccoli instead of fresh, and ground turkey instead of beef where the recipe allows it. Air fryer dinners are forgiving when the seasoning is solid and the cuts are chosen with a little common sense.
Common Mistakes to Avoid
Crowding the basket:
When food is stacked on top of itself, it steams instead of browns. The fix is simple: cook in two batches or choose smaller pieces. If the surface looks pale and wet at the end, crowding is probably the reason.
Skipping the preheat:
A cold basket slows browning and makes breaded food sit there getting soggy before the crisping starts. Give the air fryer a few minutes to heat up, especially for chicken parmesan, fish, and sliders.
Using pieces of different size:
A thick chicken breast with a thin one, or small potatoes mixed with giant ones, makes timing a mess. Cut everything as evenly as you can before cooking. The air fryer is fast, but it is not psychic.
Forgetting the thermometer:
Chicken, pork, and fish can look done before they are. Check the thickest part, not the edge, and pull at the right temperature. That one habit saves dinner from dryness or guesswork.
Saucing too early:
Marinara, glaze, and sticky sauces can burn before the food is fully cooked. Add them near the end, especially on chicken parmesan, meatballs, and pork chops with apples and mustard.
Not drying the food first:
Wet chicken, shrimp, tofu, and vegetables won’t brown properly. Pat them dry with paper towels before seasoning. It sounds small. It isn’t.
Frequently Asked Questions

Can I cook a full family dinner in the air fryer without the food finishing at different times?
Yes, if you plan in layers. Start the slower item first — potatoes, Brussels sprouts, or peppers — then add the fast-cooking protein later. That staged approach is the difference between a dinner that works and one that turns into guesswork.
What size air fryer do I need for these meals?
A larger basket makes life easier, but you can cook all of these recipes in a smaller one if you work in batches. Two adults and two kids fit more comfortably in a 5-quart-or-larger basket, especially when you’re cooking cutlets, potatoes, or sliders.
Can I use frozen ingredients?
Frozen vegetables can work well once they’re thawed and patted dry. Frozen fish or chicken is trickier because moisture is the enemy of browning, so thawing first gives you better texture. If you’re in a rush, frozen shrimp are the easiest shortcut because they thaw fast under cold water.
How do I keep breaded food crisp?
Use a light oil spray, don’t overcrowd the basket, and reheat leftovers in the air fryer instead of the microwave. Sauce should go on at the end, not before. That one rule saves chicken parmesan, fish tacos, and quesadillas more often than people admit.
What if the outside browns before the inside is done?
Lower the temperature by 25 degrees and extend the cook time a few minutes. That usually happens with thicker chicken breasts, stuffed peppers, or oversized fish fillets. A thermometer helps here, because color can lie.
Can I make any of these ahead for meal prep?
Yes. Meatballs, meatloaf, sliders, and stuffed peppers are especially friendly to prep ahead. You can also chop vegetables and mix sauces early, then cook the main part fresh so the texture stays better.
What’s the best way to adapt these dinners for picky eaters?
Keep sauces on the side, cut food into small pieces, and let people build their own plates. Sliders, quesadillas, meatballs, and tacos give you a lot of wiggle room without making a second meal.
Do I need to flip everything in the air fryer?
Not everything, but most things do better with at least one turn or shake. Steak bites, potatoes, meatballs, and chicken cutlets brown more evenly when you move them halfway through. Delicate fish sometimes only needs a gentle check instead of a full flip.
A Fast Dinner Habit Worth Keeping
The best thing about air fryer dinners for busy families is not that they are fast, though they are. It’s that they make weeknight cooking feel manageable without shrinking dinner into a compromise. You still get crisp chicken, juicy salmon, browned potatoes, and meals that look like someone meant to make them.
That matters more than it sounds. Dinner shapes the mood of the rest of the evening, and a solid, low-fuss plate can pull a messy day back into line. The air fryer is good at that kind of work. Not flashy. Just useful.
The first time you pull a basket of chicken parmesan, blistered peppers, or salmon with crisp broccoli out of one machine and realize you didn’t have to juggle three burners to do it, the habit starts to stick. And once it sticks, busy nights get a little easier to live with.