
Two plates, one skillet, and a sink that doesn’t look like a disaster zone. That’s the whole appeal here, and honestly, it’s a strong one. A good skillet dinner for two should feel calm but not boring, fast but not thin, and generous without leaving you with three days of leftovers you never asked for.
The nicest thing about one skillet dinners for two is how they behave when the portions are smaller. The sauce gets a little more concentrated. The browned bits matter more. A 12-inch skillet gives you enough room to sear without steaming, while a 10-inch pan can make a compact little supper that feels tucked together and intentional. Small batch cooking exposes sloppy technique, too, which is why these recipes reward a steady hand more than flashy ingredients.
These dinners also solve the dullest part of weekday cooking: the part where you don’t want to cook at all because the cleanup feels like punishment. One pan changes the mood. A handful of ingredients, a little heat, and dinner starts looking like something you’d actually sit down for instead of shovel into a bowl.
Why You’ll Love These One Skillet Dinners for Two
-
Fast Cleanup: One pan means fewer dishes, fewer splatters, and less of that “why did I do this to myself?” feeling after dinner.
-
Small-Batch Balance: These recipes are built for two people, so you get enough food to feel satisfied without turning the fridge into a leftover warehouse.
-
Real Flavor, Not Compromise: Browning the protein first and cooking the sauce in the same skillet gives you deeper flavor than a pile of separate pans ever will.
-
Flexible Enough for Real Life: A few of these lean on pantry staples, a few are great for using up vegetables, and several can bend toward chicken, beef, seafood, or meatless eating.
-
Dinner Looks More Effortful Than It Is: A skillet of glossy sauce, tender vegetables, and a good finish of herbs or cheese makes a weeknight plate feel thoughtful.
-
Easy to Scale Up: If one more person shows up hungry, most of these can stretch without much trouble; if you want a lighter dinner, they shrink cleanly.
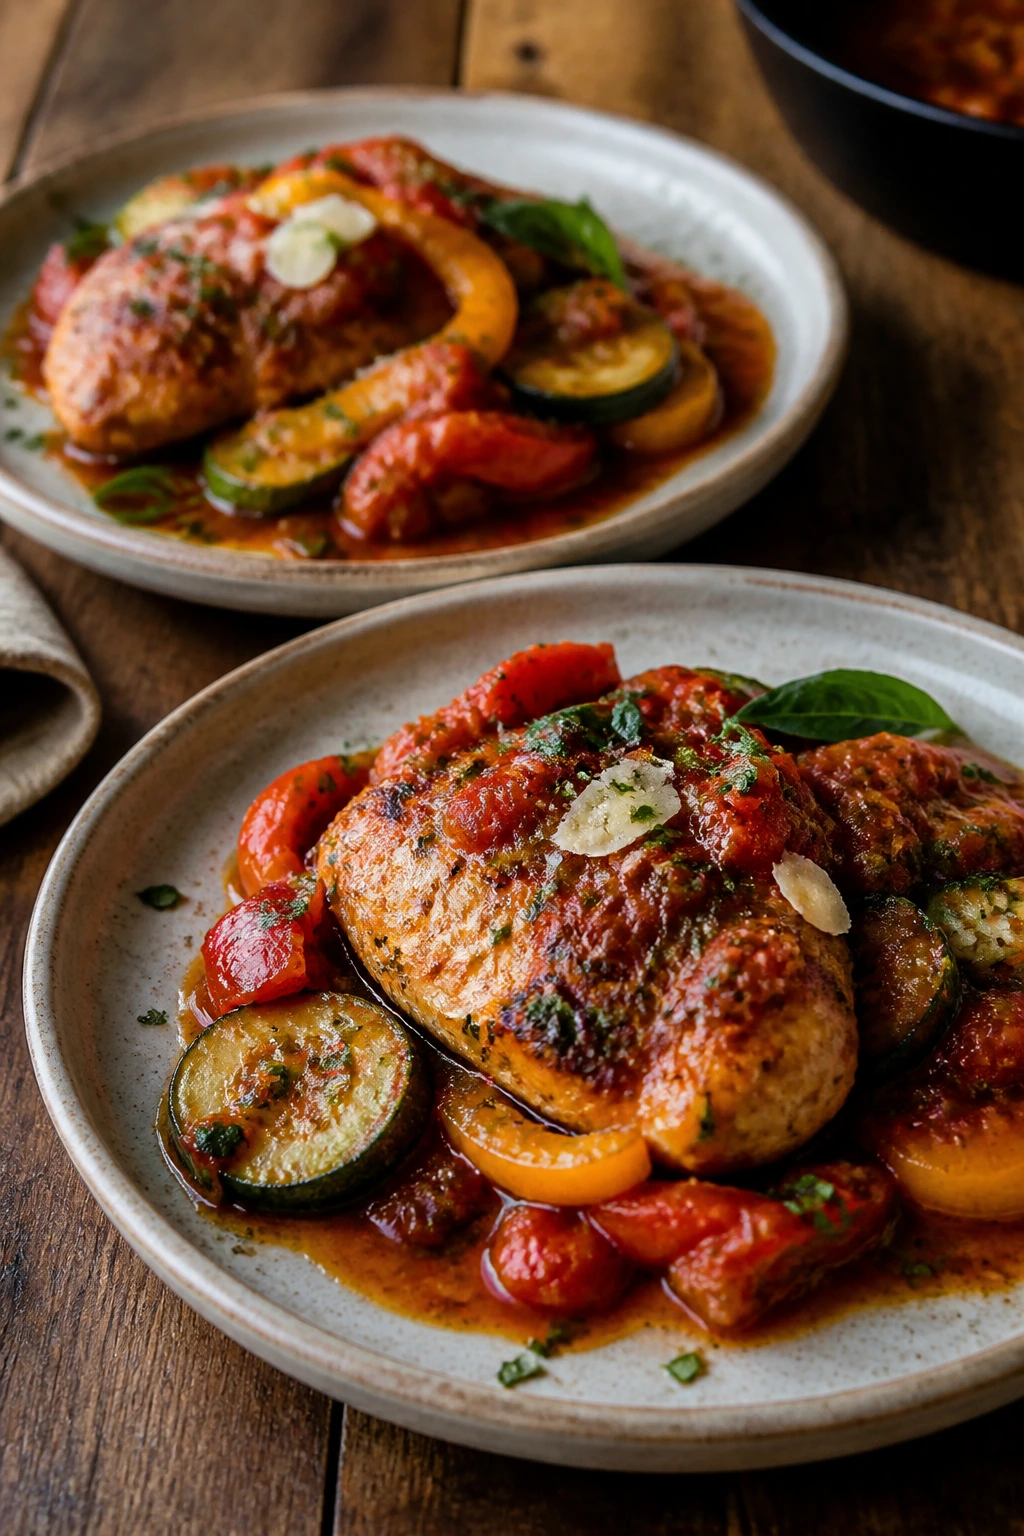
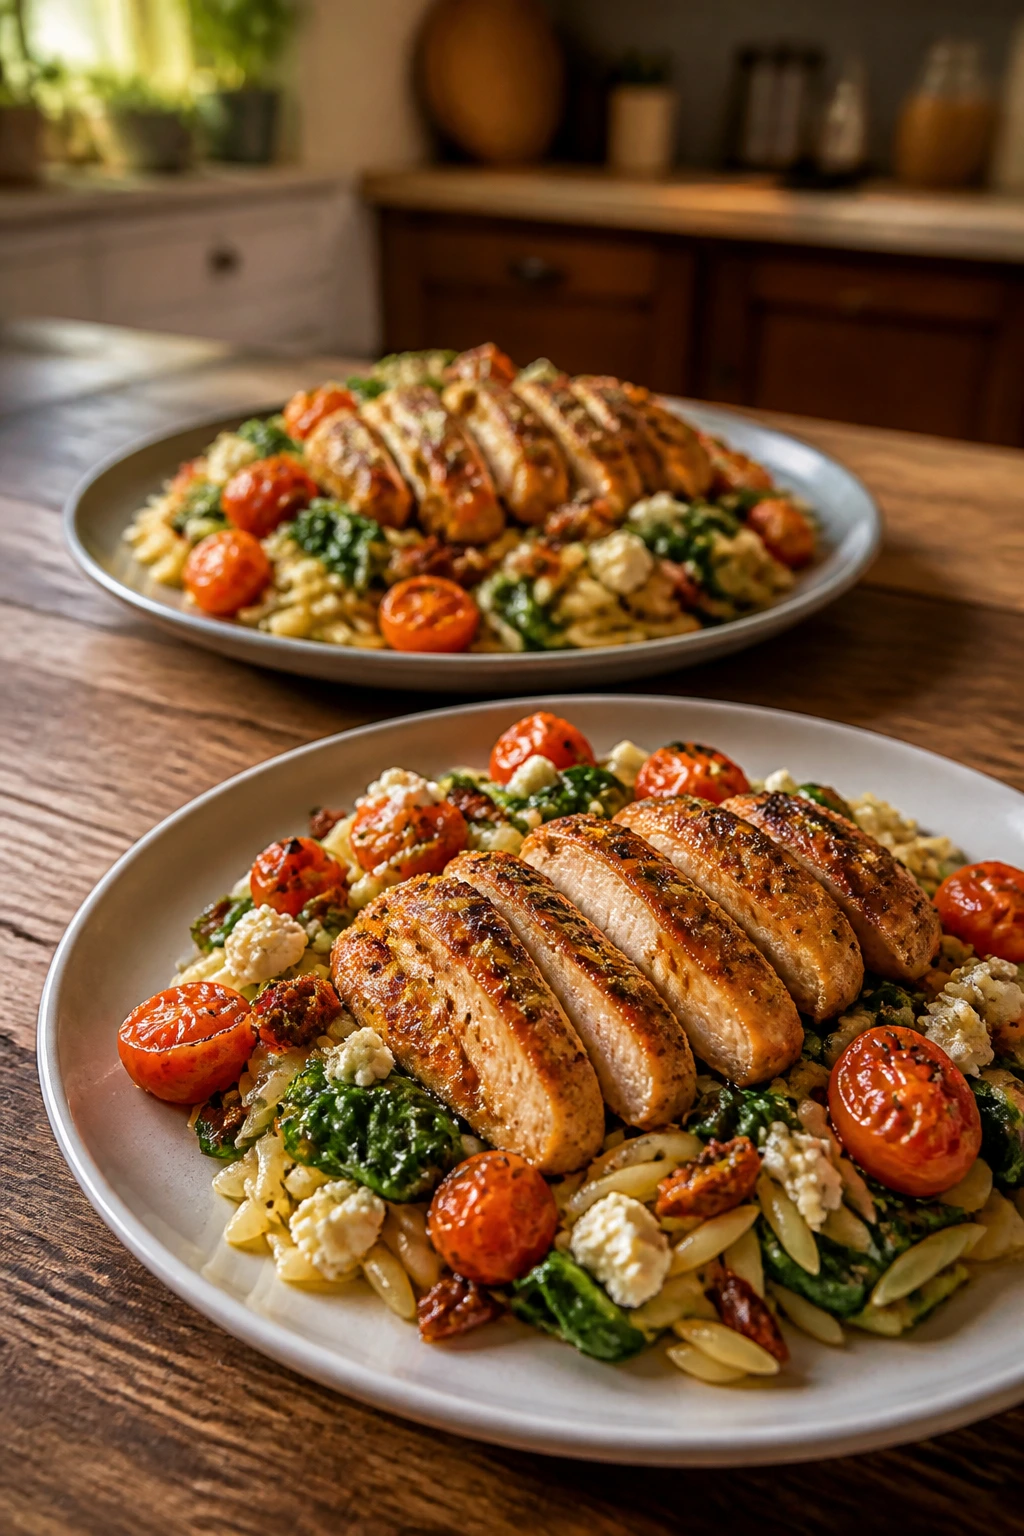
1. Lemon Garlic Chicken and Orzo
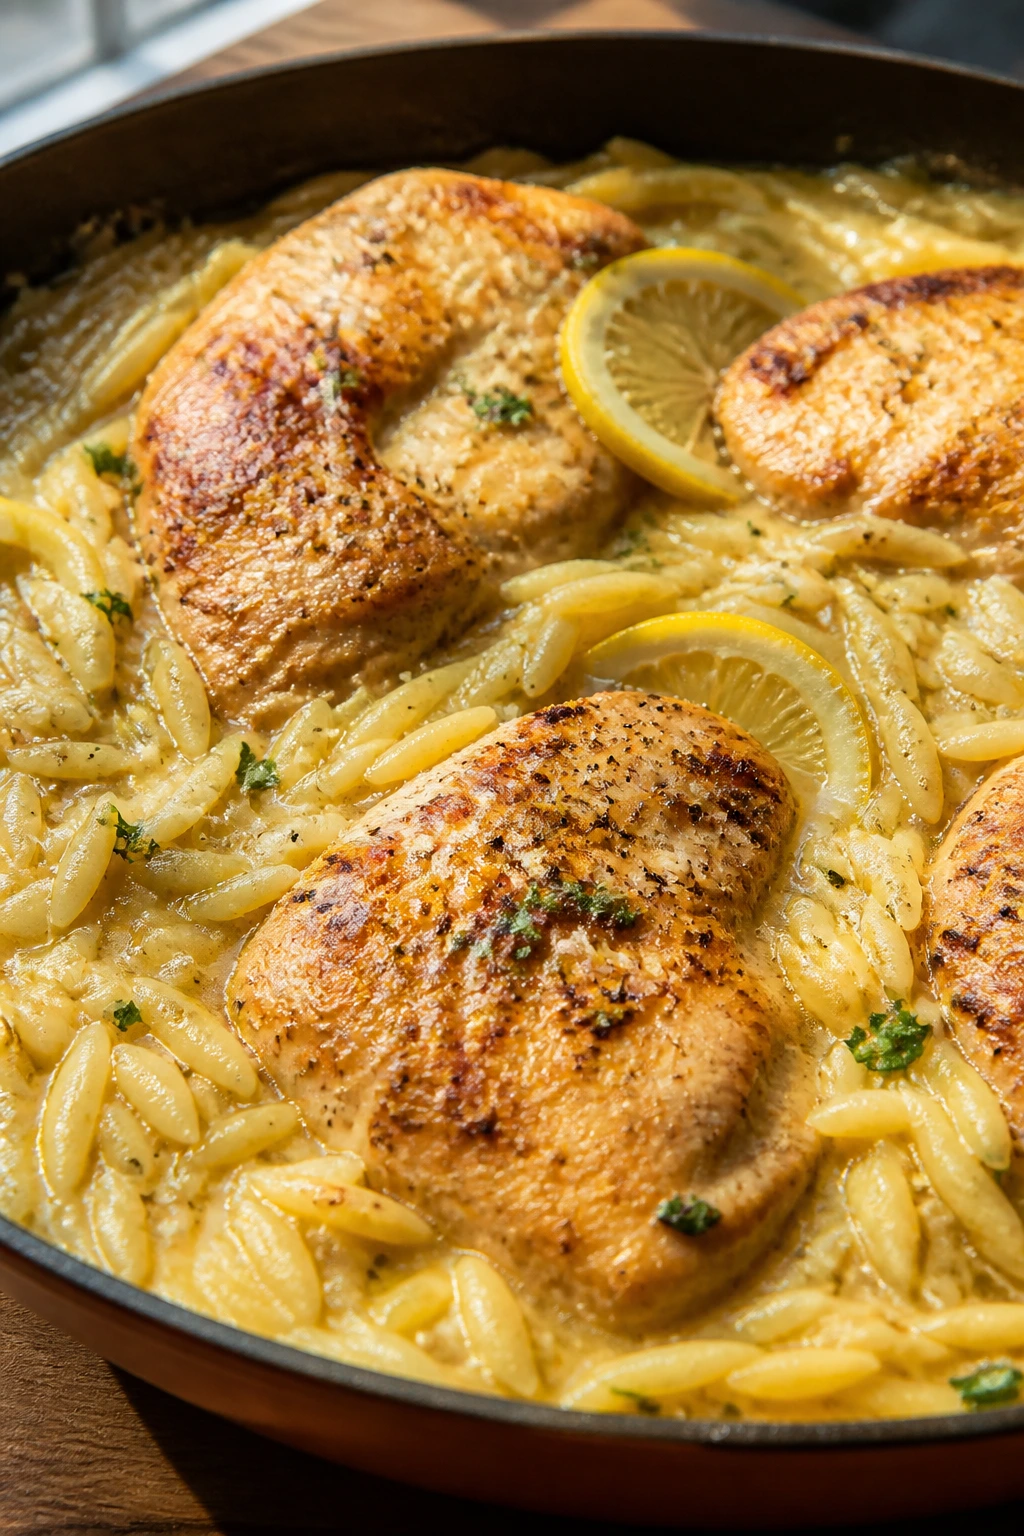
The first thing you notice is the smell. Garlic softening in olive oil, lemon zest hitting the heat, chicken browning just enough at the edges to look serious. Orzo has a way of making a skillet dinner feel more polished than rice does, and I love it here because it drinks up the chicken broth and turns creamy without any actual cream.
Why It Works
Orzo behaves like a tiny pasta and a tiny risotto at the same time, which is exactly why it fits a one-pan dinner. The starch released during simmering thickens the broth, so the lemon and Parmesan cling instead of pooling at the bottom of the pan. Thin chicken cutlets cook fast enough that the orzo can finish beside them without either one going dull or dry. Keep the liquid ratio tight: 3/4 cup orzo to 2 cups total liquid is the sweet spot here.
For the skillet:
- 2 boneless, skinless chicken breasts, about 10 to 12 oz each, sliced horizontally into cutlets — thinner pieces cook fast and stay juicy.
- 1 tsp kosher salt — season the chicken before it hits the pan.
- 1/2 tsp black pepper — keeps the chicken from tasting flat.
- 1 tsp dried oregano — gives the dish that lemony, herb-flecked backbone.
- 2 tbsp olive oil — enough for browning without burning.
- 1 small shallot, minced — sweeter than onion and better with lemon.
- 3 garlic cloves, minced — add this after the chicken so it doesn’t scorch.
- 3/4 cup uncooked orzo — this is the starch that carries the sauce.
- 1 1/2 cups low-sodium chicken broth — the main cooking liquid.
- 1/2 cup water — keeps the orzo from getting too salty.
- 2 cups baby spinach, packed — wilts at the end and lightens the whole skillet.
- 1/3 cup grated Parmesan — melts into the sauce and thickens it.
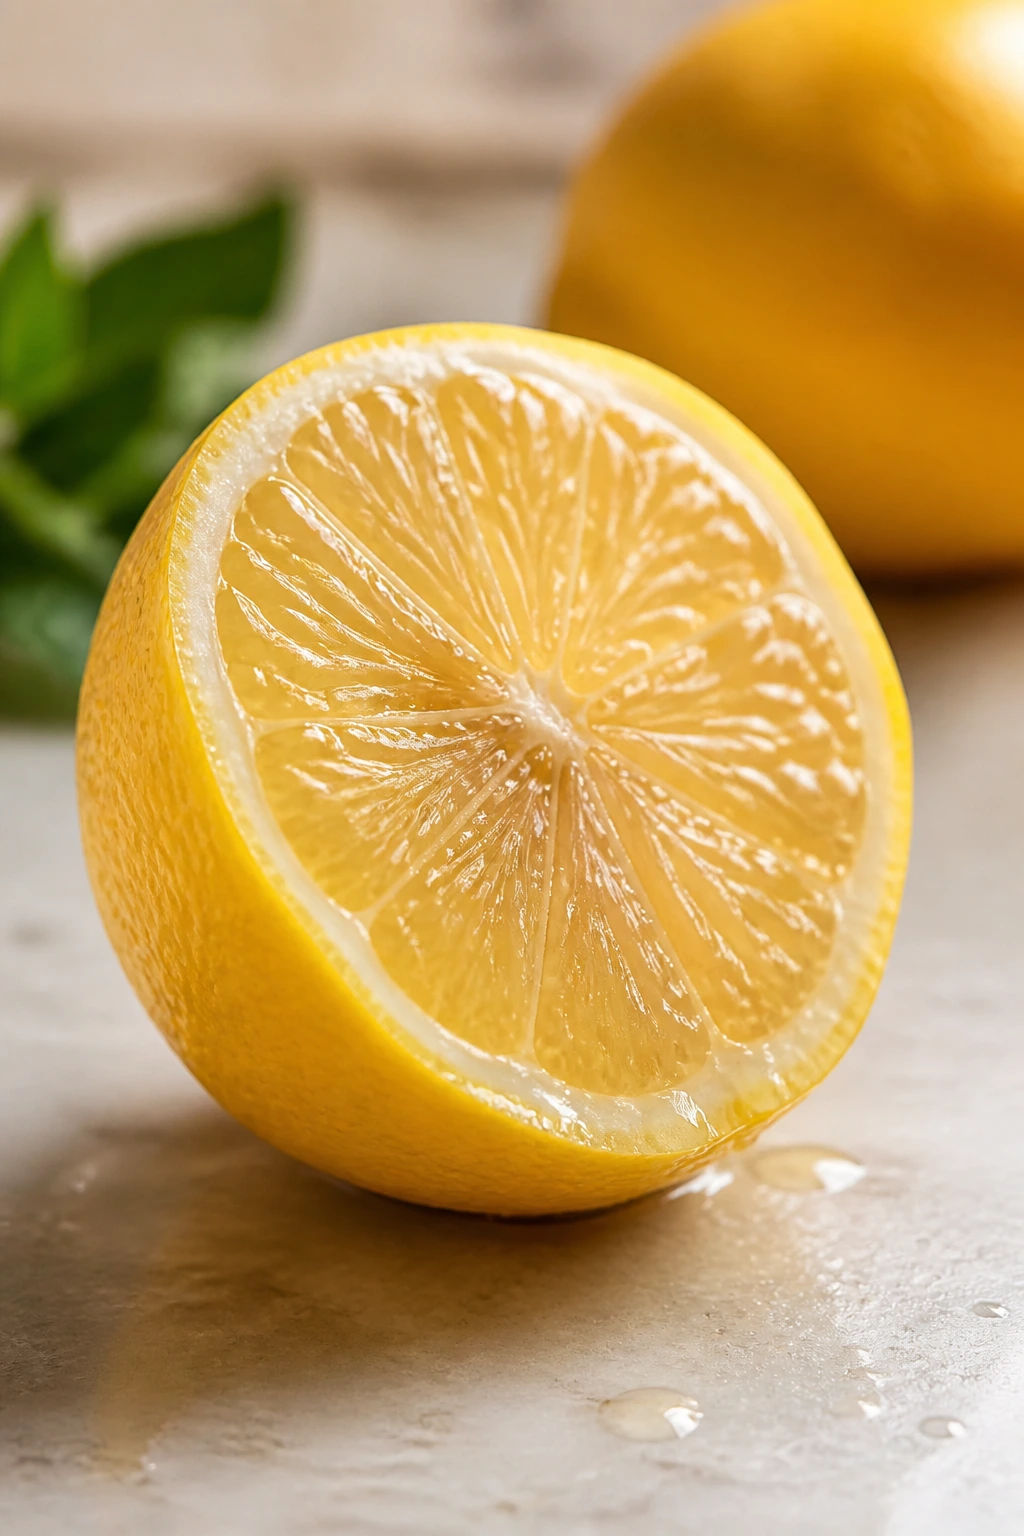
- Zest and juice of 1 lemon — use both; the zest carries the perfume.
- 1 tbsp unsalted butter — gives the sauce a soft finish.
Quick Steps
- Season the chicken. Pat the cutlets dry, season both sides with salt, pepper, and oregano, and let them sit while you preheat the pan.
- Sear until golden. Heat the olive oil in a large skillet over medium-high heat. Cook the chicken for 3 to 4 minutes per side until browned and the center is nearly cooked through. Remove to a plate.
- Soften the aromatics. Lower the heat to medium. Add the shallot and stir for 1 minute, then add the garlic and stir for 30 seconds until fragrant, not brown.
- Toast the orzo. Stir in the orzo and cook for 1 minute so the edges pick up a little color. Pour in the broth and water, scraping up the browned bits from the pan.
- Simmer together. Nestle the chicken back into the skillet, reduce the heat to medium-low, cover, and cook for 7 to 9 minutes until the chicken reaches 165°F and the orzo is tender.
- Finish with the bright stuff. Stir in the spinach, Parmesan, lemon zest, lemon juice, and butter. Let it sit for 2 minutes so the sauce thickens and the spinach wilts.
Tips and Variations
- Make it richer: Add 1 tablespoon of mascarpone or cream at the very end if you want a softer, silkier sauce.
- Swap the greens: Arugula works if you like a peppery finish; kale works if you give it a few extra minutes.
- Watch the orzo: If the pan looks dry before the pasta is tender, add a splash of hot water, not cold water.
This is the skillet I make when I want something that feels orderly. It’s warm, lemony, and a little creamy without becoming heavy. And if you serve it straight from the pan, no one complains.
2. Creamy Tuscan Shrimp and White Beans
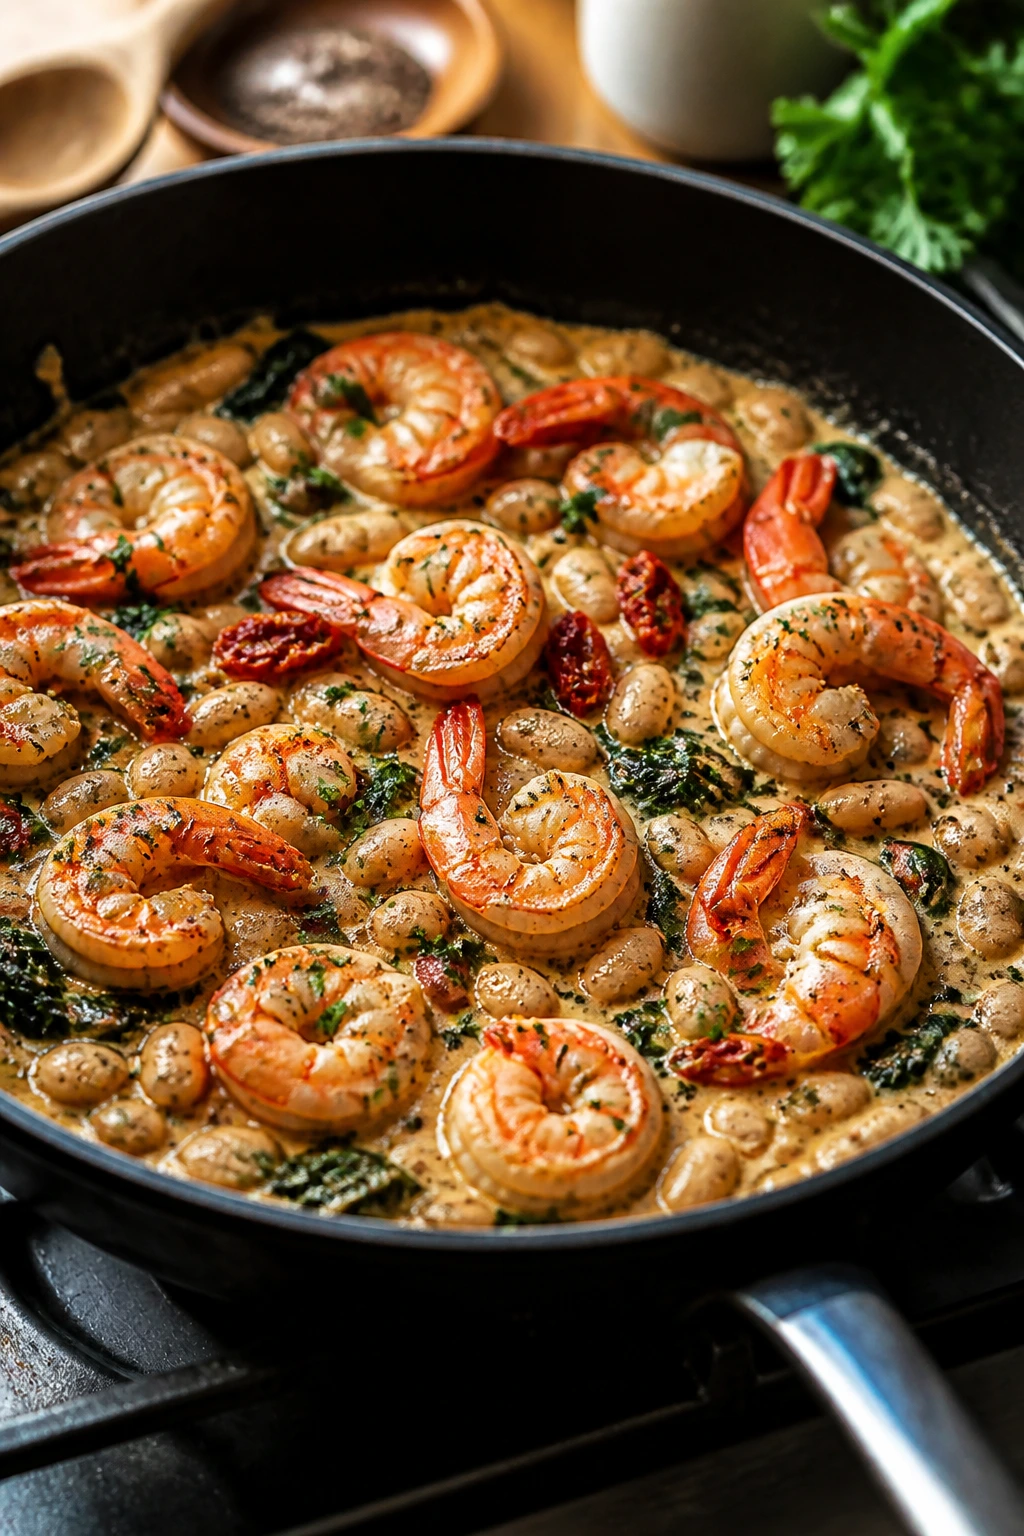
Shrimp cooks so fast that people either nail it or overdo it into rubber. This recipe stays on the right side of that line because the shrimp sear first, leave the pan, and come back only at the end. The sauce gets built in the same skillet with tomatoes, beans, cream, and Parmesan, and the result tastes richer than the ingredient list suggests.
Why White Beans Matter
White beans are doing more than filling space. They give the dish body, make the sauce cling, and turn a shrimp pan into an actual dinner rather than a starter. Cannellini beans stay soft and creamy, which matters here because you want something that melts into the sauce instead of standing apart from it. The tomatoes blister, the cream softens the edges, and the shrimp give the whole thing a clean, briny finish.
For the skillet:
- 1 lb large shrimp, peeled and deveined — size 16/20 or 21/25 works well.
- 1 tsp kosher salt, divided — season the shrimp and the sauce.
- 1/2 tsp black pepper — enough to wake up the cream.
- 1/2 tsp smoked paprika — gives the shrimp a little color and depth.
- 2 tbsp olive oil — for a clean sear.
- 2 tbsp butter — helps the sauce taste rounded.
- 3 garlic cloves, minced — the base flavor of the pan.
- 1/4 cup dry white wine or low-sodium broth — for deglazing.
- 1 cup cherry tomatoes, halved — they burst and sweeten in the heat.
- 1 can (15 oz) cannellini beans, rinsed and drained — the creamy bulk of the dish.
- 3/4 cup heavy cream — for the Tuscan-style sauce.
- 1/3 cup grated Parmesan — thickens and salts the sauce.
- 2 cups baby spinach — folds in at the end.
- 1 tsp Italian seasoning — keeps the flavor from drifting.
- 1 tbsp lemon juice — sharpens the whole skillet.
- Pinch of red pepper flakes, optional — for a little heat.
Quick Steps
- Season and dry the shrimp. Pat the shrimp dry, then toss them with half the salt, pepper, and smoked paprika.
- Sear quickly. Heat the olive oil in a large skillet over medium-high heat. Cook the shrimp for 1 to 2 minutes per side until pink and just curled, then move them to a plate.
- Build the sauce base. Lower the heat to medium. Melt the butter, add the garlic, and stir for 30 seconds. Pour in the wine or broth and scrape the bottom of the pan.
- Cook the tomatoes and beans. Add the cherry tomatoes and cook for 2 to 3 minutes until they start to burst. Stir in the beans, cream, Italian seasoning, remaining salt, and Parmesan.
- Wilt the spinach. Let the sauce simmer for 2 to 3 minutes until it lightly coats a spoon. Add the spinach and stir until it collapses.
- Return the shrimp. Slide the shrimp back into the skillet, add the lemon juice, and warm everything for 1 minute. Stop as soon as the shrimp are hot.
- Serve right away. Spoon into shallow bowls and crack a little more black pepper over the top.
Tips and Variations
- Bread is not optional in my house: A slice of crusty bread turns the sauce into the best part of the meal.
- Use broth if wine isn’t your thing: The dish still has enough flavor from tomatoes, garlic, and Parmesan.
- Do not overcook the shrimp: Once they curl tightly into little C-shapes, they’re done.
This one lands in that sweet spot between quick and lush. It feels like more work than it is, which is a nice trick to have on hand.
3. Ground Beef and Broccoli Rice Skillet
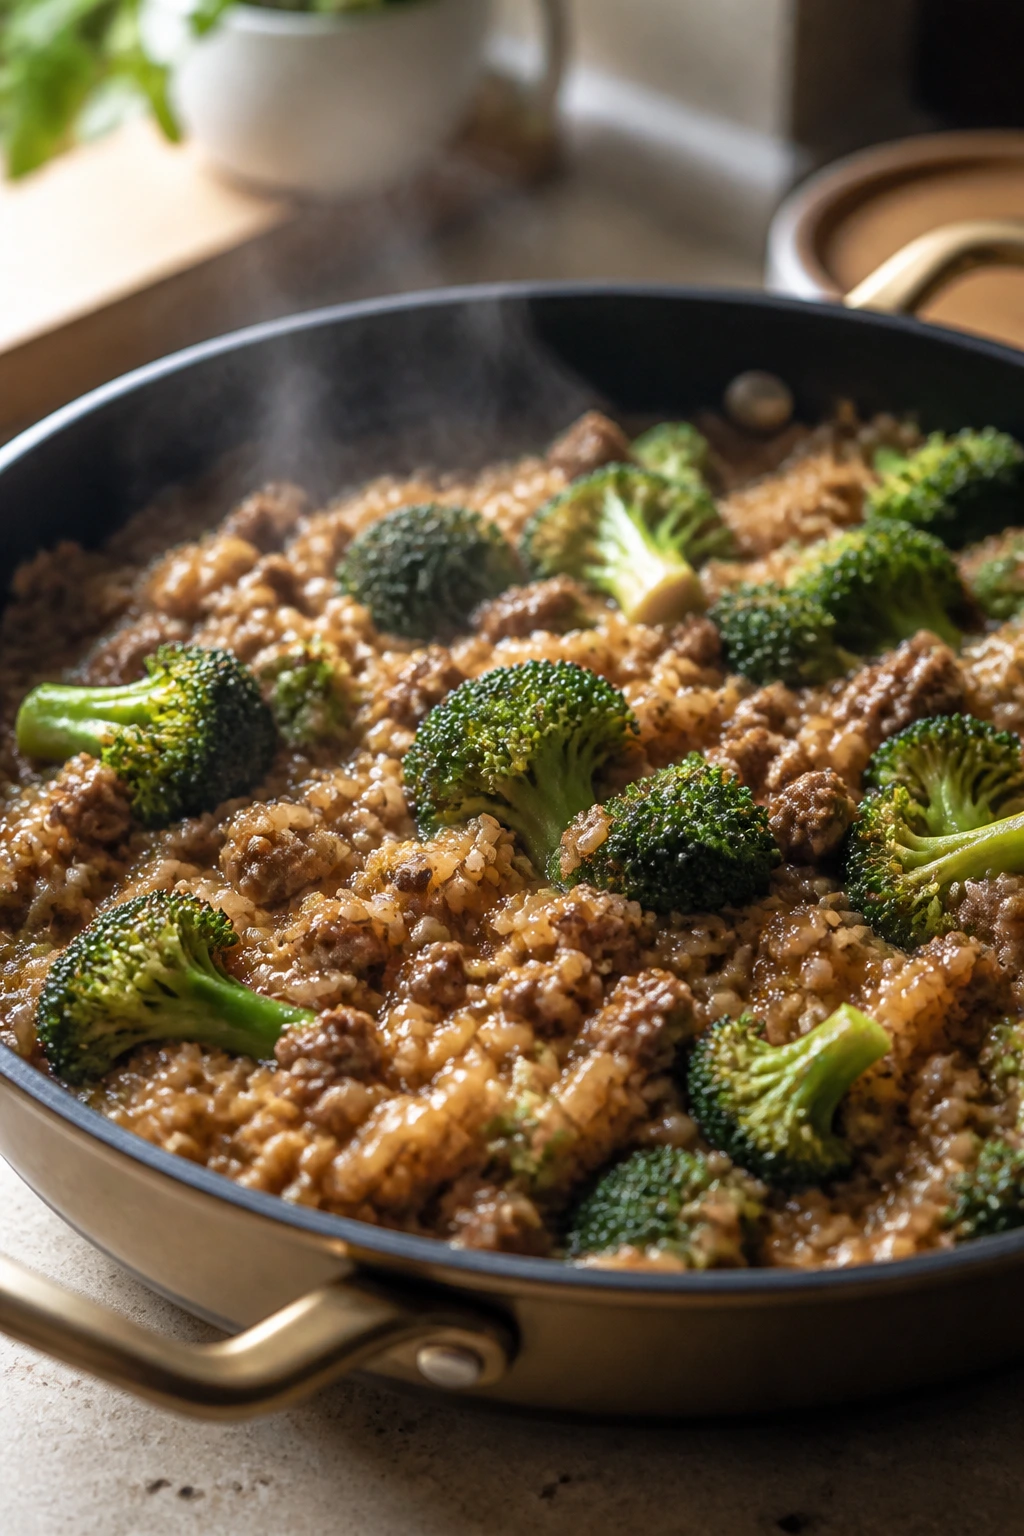
Ground beef gets dismissed as everyday meat, which is a shame. In a skillet with ginger, soy sauce, broccoli, and rice, it turns into a compact, savory dinner with real backbone. The rice cooks right in the pan, soaking up the broth and sauce, and the broccoli stays bright if you add it near the end instead of boiling it into a green blur.
What Makes the Rice Texture Work
The rice needs enough liquid to cook through, but not so much that the skillet turns soupy. Rinsing the grains helps keep them from clumping into one heavy block, and letting the pan rest for a few minutes after cooking keeps the bottom from sticking when you fluff it. The broccoli goes on top during the last stretch so it steams just enough to turn tender-crisp. I like this with jasmine rice, but long-grain white rice works too.
For the skillet:
- 8 oz lean ground beef — 85/15 or 90/10 both work.
- 1 tbsp sesame oil — gives the beef a nutty edge.
- 1 small yellow onion, finely diced — the first layer of sweetness.
- 2 garlic cloves, minced — added after the beef browns.
- 1 tsp fresh ginger, grated — brightens the whole skillet.
- 3/4 cup long-grain white rice, rinsed — the grain that drinks up the sauce.
- 1 1/2 cups low-sodium beef broth — enough to cook the rice.
- 2 tbsp soy sauce — the main salty note.
- 1 tbsp hoisin sauce — adds a little sweetness and gloss.
- 1 tbsp rice vinegar — keeps the sauce from feeling heavy.
- 2 cups broccoli florets, cut small — small pieces cook more evenly.
- 1 small carrot, julienned or grated — adds color and a little sweetness.
- 2 green onions, sliced — for finishing.
- 1 tsp sesame seeds — optional, but nice.
Quick Steps
- Brown the beef. Heat the sesame oil in a large skillet over medium-high heat. Add the ground beef and cook until browned, breaking it up as it cooks.
- Add the aromatics. Stir in the onion and cook for 3 minutes until softened. Add the garlic and ginger and cook for 30 seconds.
- Start the rice. Stir in the rinsed rice, broth, soy sauce, hoisin, rice vinegar, and carrot. Bring the skillet to a gentle boil.
- Simmer covered. Lower the heat, cover the skillet, and cook for 12 to 15 minutes until the rice is nearly tender and most of the liquid is absorbed.
- Steam the broccoli. Scatter the broccoli over the top, cover again, and cook for 4 to 5 minutes until bright green and crisp-tender.
- Finish and fluff. Remove from the heat, let it sit for 3 minutes, then fluff the rice and fold the broccoli through. Garnish with green onions and sesame seeds.
Tips and Variations
- Cut the broccoli small: Large florets need too long and can make the rice overcook.
- Add heat if you like it: A teaspoon of chili garlic sauce or a pinch of red pepper flakes works well.
- Use beef broth with low sodium: Soy and hoisin already bring salt, so don’t let the pan get away from you.
This is the skillet I reach for when I want dinner to taste tidy and complete. One pan. One grain. One strong flavor path. That’s enough.
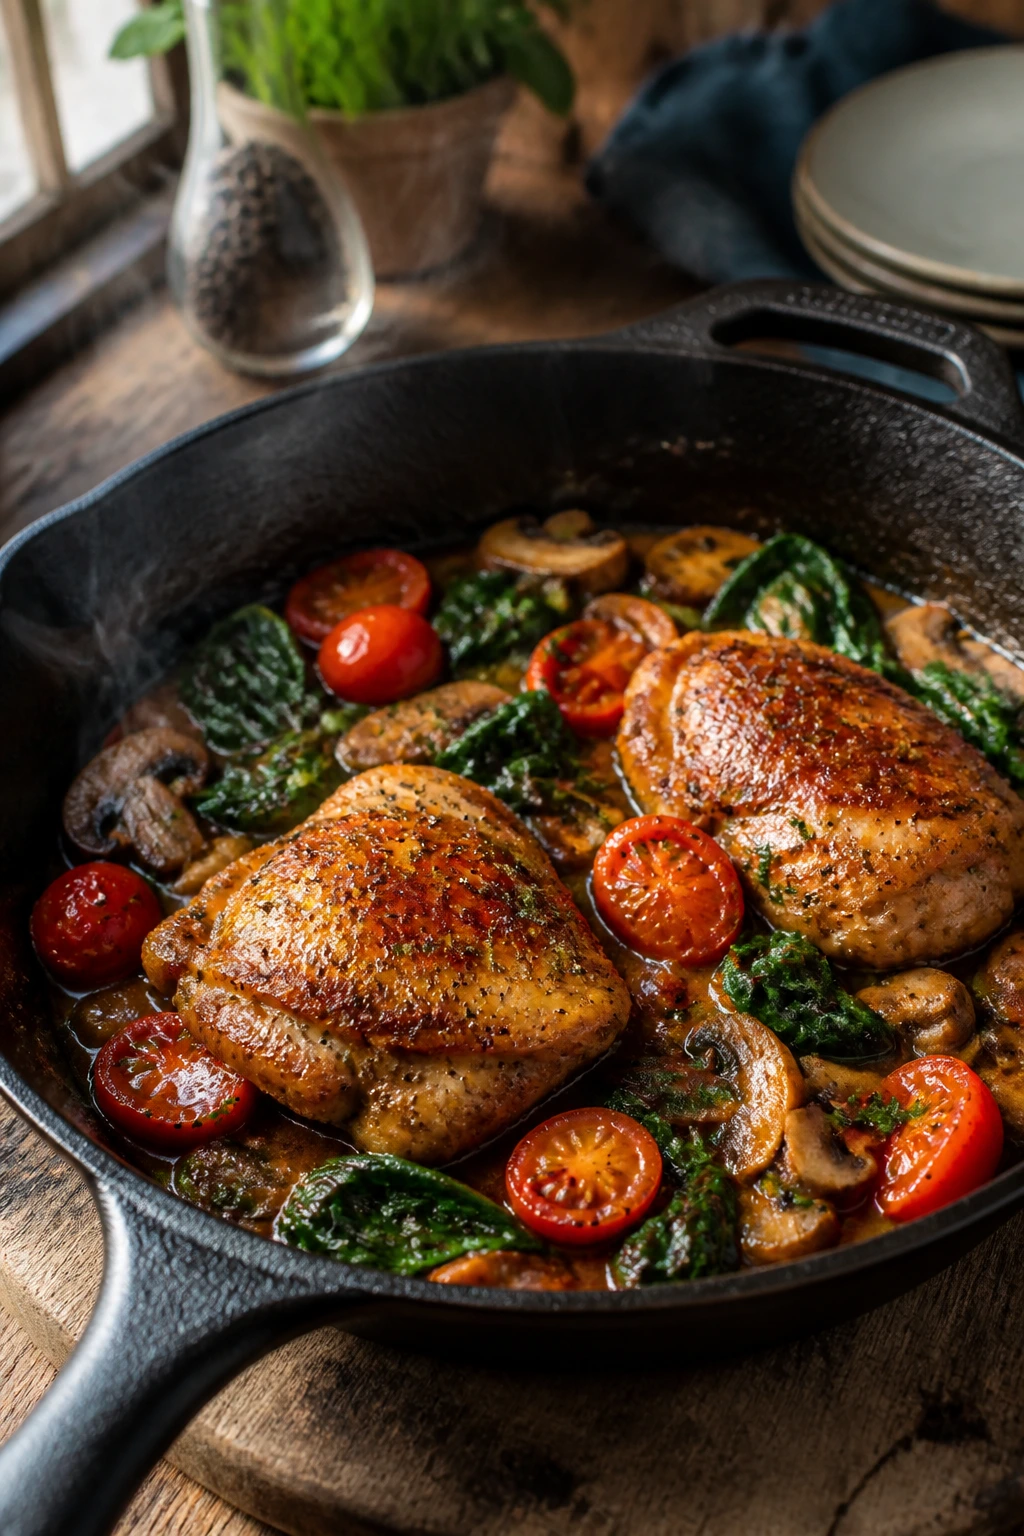
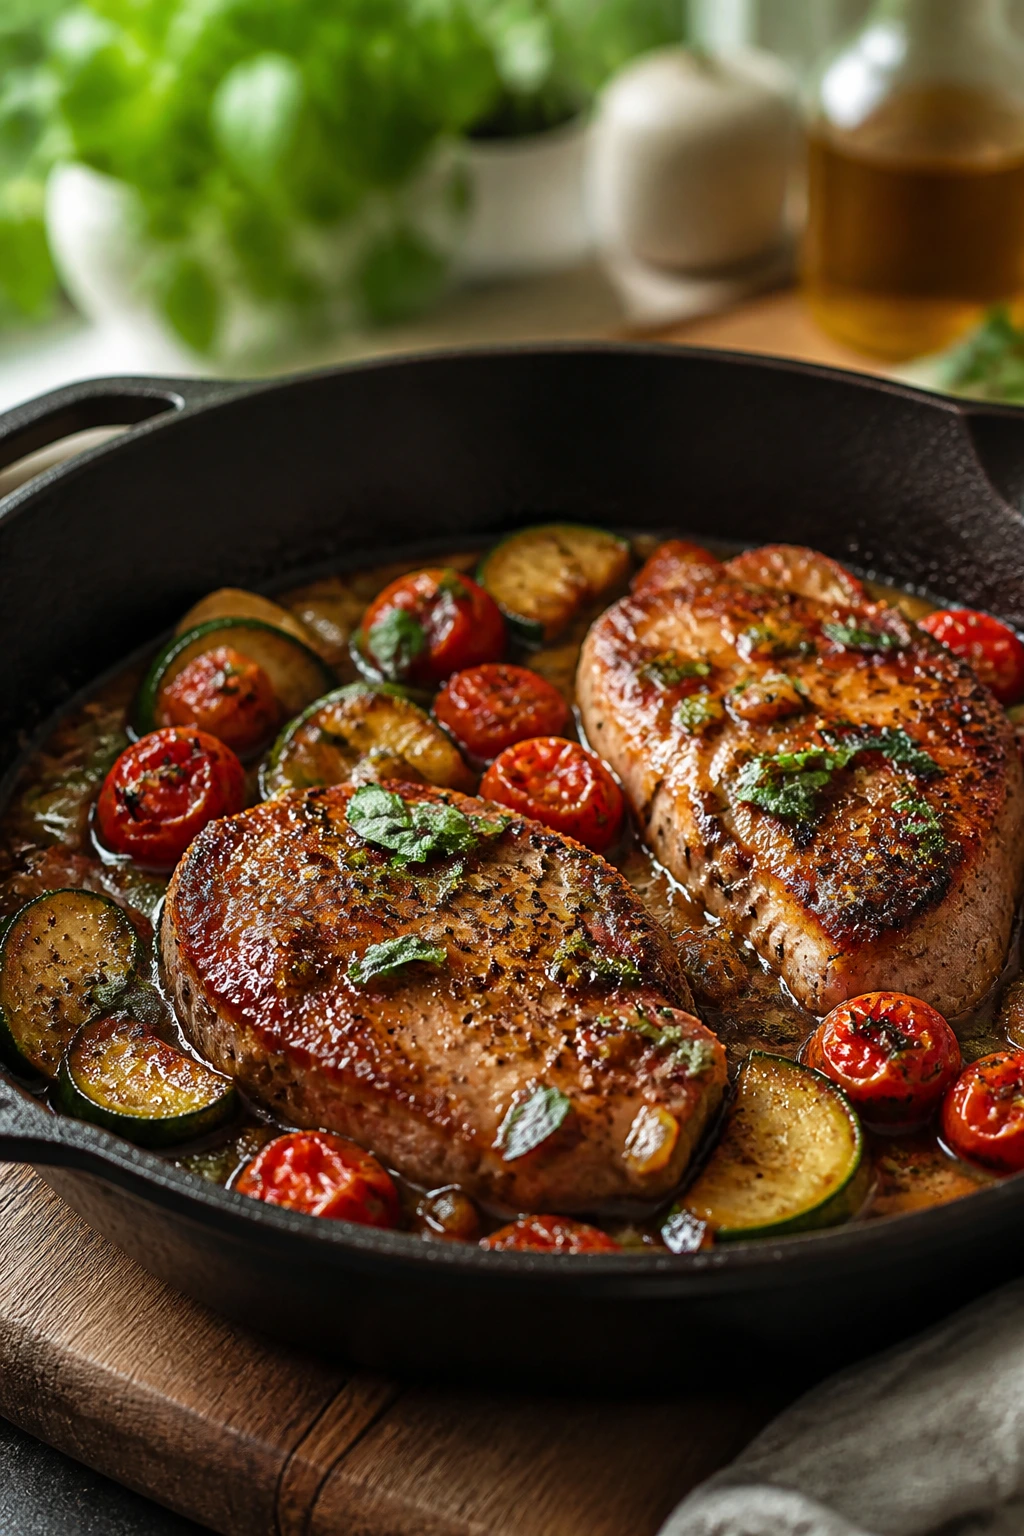
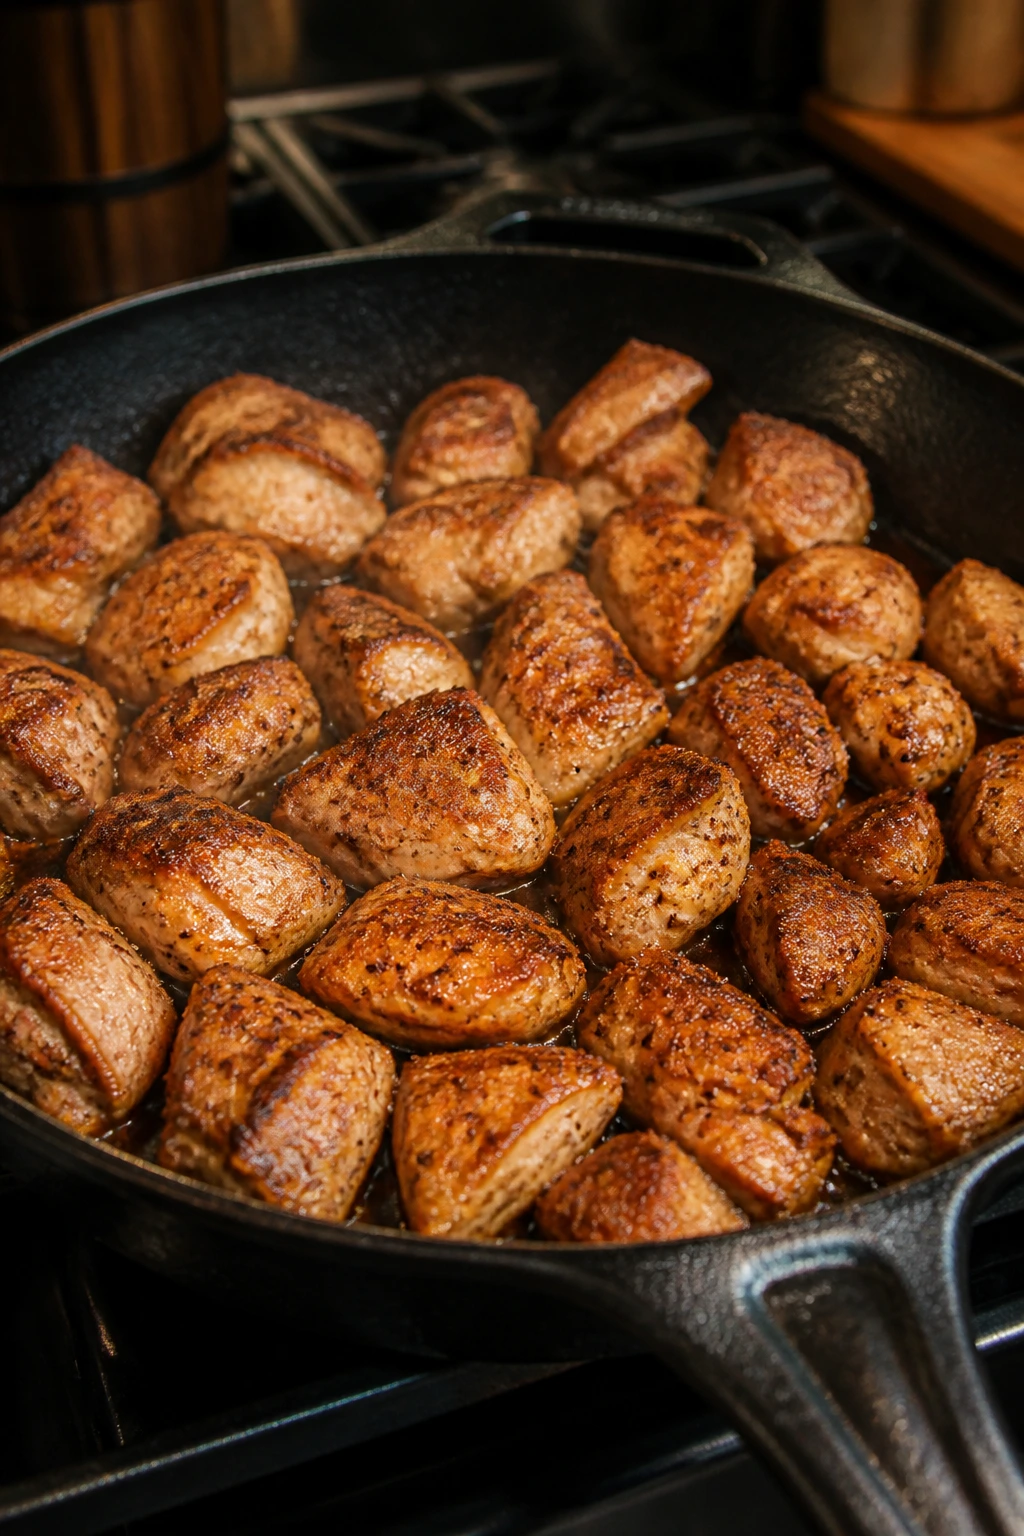
4. Pork Chops with Apples and Dijon Pan Sauce
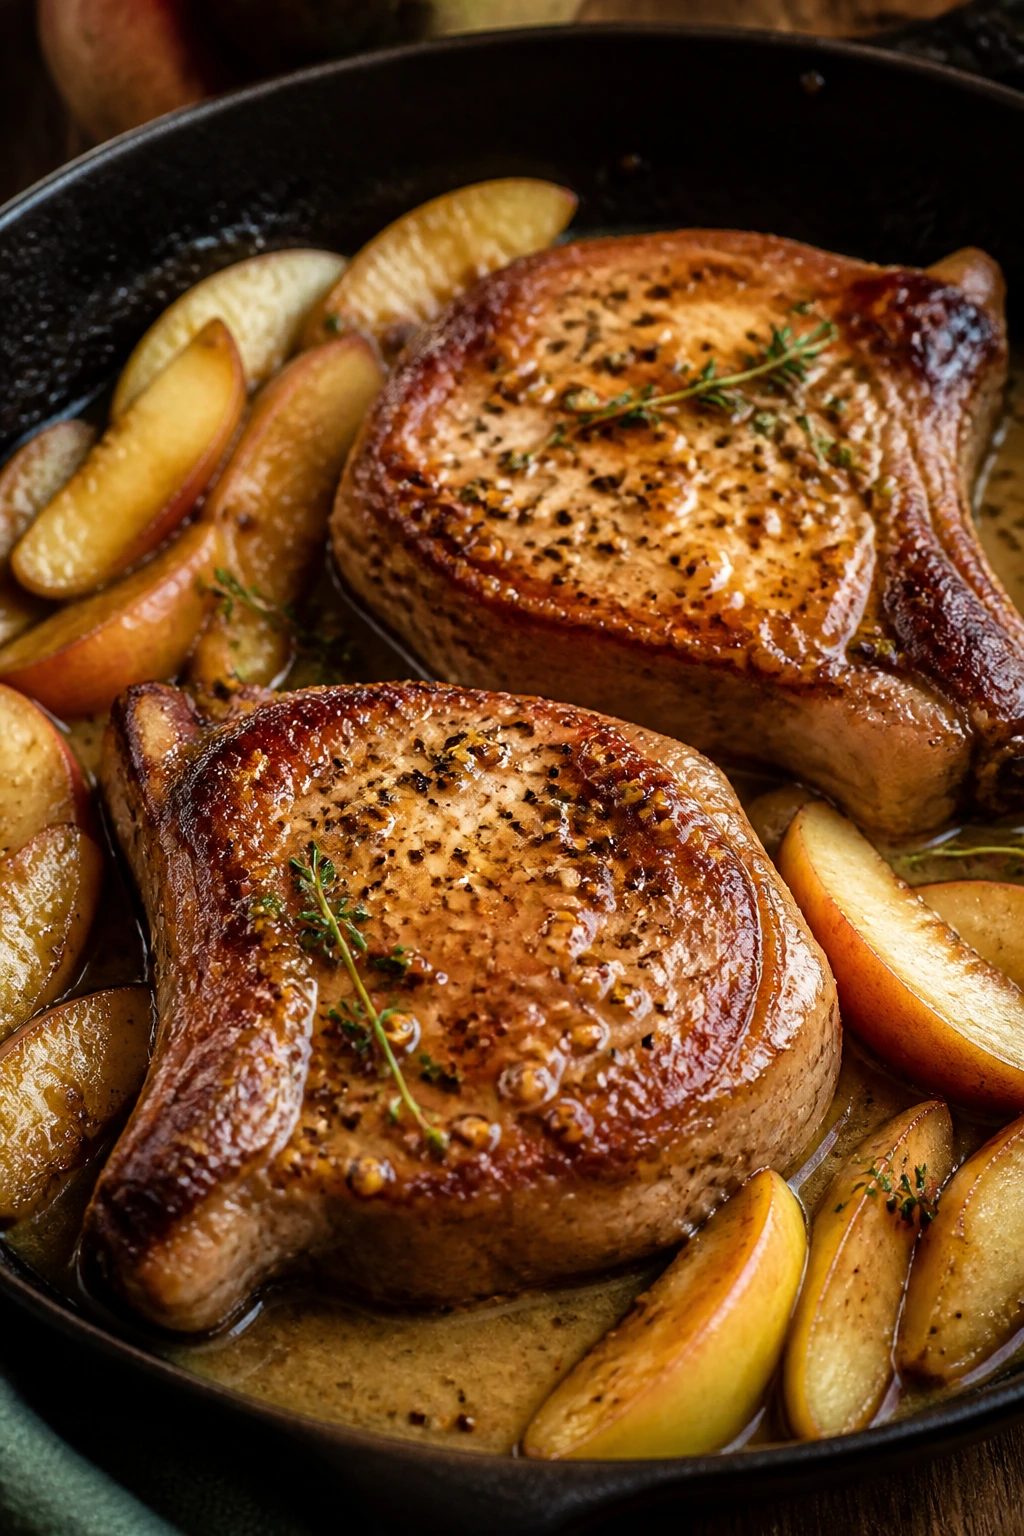
Pork chops and apples sound old-school, and I mean that in a good way. The combo survives because it works: savory meat, sweet fruit, a little acid, and a sauce that picks up every browned bit from the pan. The apples soften into ribbons, the onion gets sweet, and Dijon gives the whole thing a sharper spine.
The Sauce Trick
What makes this taste composed instead of sweet is the Dijon. It cuts the fruit and ties the pork to the sauce without turning anything mustardy in a loud way. A splash of apple cider vinegar does the same job from a different angle. If you use a tart apple like Granny Smith or a firm sweet one like Honeycrisp, you get slices that hold shape instead of dissolving into mush.
For the skillet:
- 2 bone-in pork chops, about 1 inch thick and 8 oz each — bone-in chops stay juicier.
- 1 tsp kosher salt — season both sides.
- 1/2 tsp black pepper — keep it simple.
- 1/2 tsp dried thyme — fits pork and apples.
- 1 tbsp olive oil — for the first sear.
- 1 tbsp butter — for the apples and sauce.
- 1 small yellow onion, sliced — gives the sauce depth.
- 1 medium apple, thinly sliced — peel it only if the skin is thick.
- 1/2 cup low-sodium chicken broth — deglazes the pan.
- 1 tbsp Dijon mustard — sharpens the sauce.
- 1 tsp apple cider vinegar — keeps the sauce lively.
- 1 tsp maple syrup — rounds off the edges.
- 1 tbsp chopped parsley — a fresh finish.
Quick Steps
- Season the chops. Pat the pork dry, season both sides with salt, pepper, and thyme, and let them sit for 10 minutes.
- Sear until browned. Heat the olive oil in a skillet over medium-high heat. Cook the chops for 3 to 4 minutes per side until they have a deep golden crust. Remove them to a plate.
- Soften the onion and apple. Lower the heat to medium and melt the butter. Add the onion and cook for 2 minutes, then add the apple and cook for another 3 minutes until the slices start to soften.
- Build the pan sauce. Pour in the broth and scrape the bottom of the pan. Stir in the Dijon, vinegar, and maple syrup.
- Finish the pork. Return the chops and any juices to the skillet, cover, and cook for 3 to 5 minutes until the pork reaches 145°F at the thickest point.
- Rest and serve. Let the chops sit for 3 minutes off the heat, then spoon the apples and sauce over the top. Finish with parsley.
Tips and Variations
- Choose the right apple: Firm apples hold shape; mealy apples turn to paste.
- Use a thermometer: Pork is done at 145°F, and guessing usually means overcooking.
- Add sage if you want a woodsy note: A few chopped leaves in the butter are enough.
This is the dinner that makes a pan smell like you planned ahead, even if you didn’t. The sauce does a lot of the heavy lifting.
5. Chicken Enchilada Skillet with Black Beans and Corn
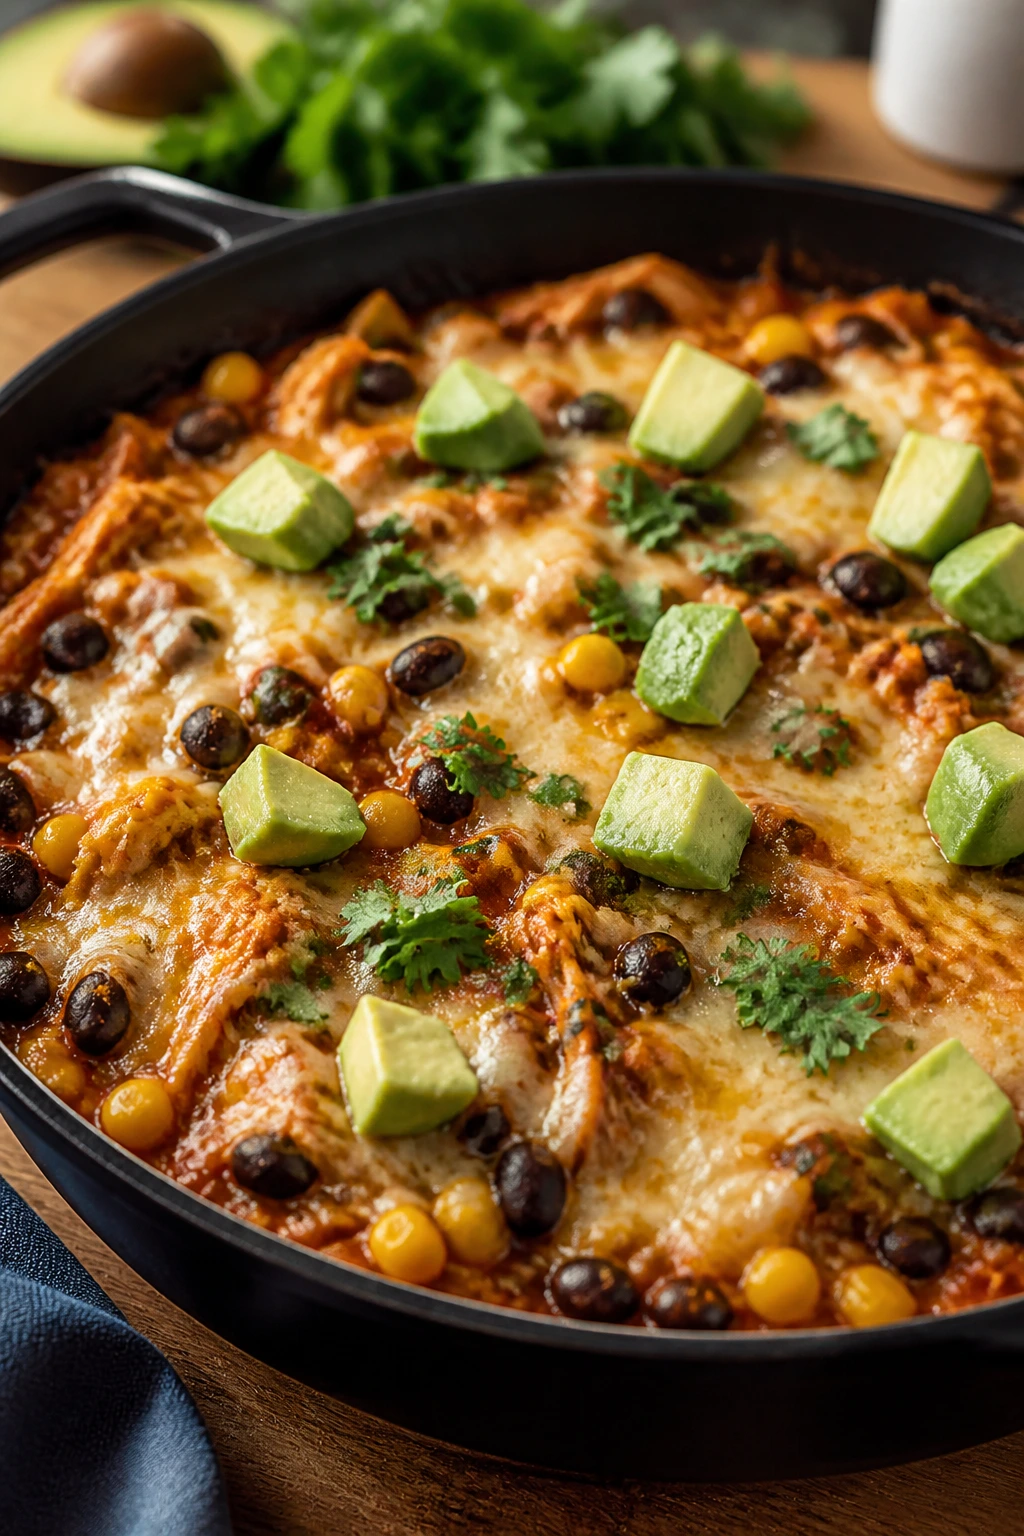
This is the skillet for nights when you want dinner to lean bold instead of delicate. The chicken gets coated with chili powder and cumin, the tortillas soak up the enchilada sauce, and the beans and corn turn the whole pan into a proper meal. It’s messy in the right way. The cheese melts over the top and pulls everything together without needing a separate casserole dish.
What the Tortillas Do
The tortilla strips are not a garnish. They thicken the sauce and give the skillet some soft edges, almost like the filling of a fast enchilada bake. Corn tortillas hold up better than flour tortillas here because they don’t vanish completely after a few minutes in the sauce. If you want more structure, add them in the last 5 minutes; if you want them softer, let them simmer a little longer.
For the skillet:
- 1 lb boneless, skinless chicken thighs, cut into 1-inch pieces — thighs stay tender in a saucy skillet.
- 1 tsp kosher salt — for seasoning the chicken.
- 1 tsp chili powder — brings mild heat and color.
- 1 tsp ground cumin — gives the filling its taco-shelf flavor.
- 1/2 tsp garlic powder — layers in with the fresh garlic.
- 2 tbsp olive oil — for browning.
- 1/2 small onion, diced — the base of the sauce.
- 2 garlic cloves, minced — stir in after the onion softens.
- 1 cup red enchilada sauce — the main flavor source.
- 1/2 cup low-sodium chicken broth — loosens the sauce.
- 1 can (15 oz) black beans, rinsed and drained — adds body and protein.
- 1 cup frozen corn — sweet and easy.
- 4 small corn tortillas, cut into strips — they thicken and soften.
- 1 cup shredded cheddar or Mexican blend — for melting.
- 2 tbsp chopped cilantro — fresh finish.
- 1 avocado, sliced, plus lime wedges — for serving.
Quick Steps
- Season and brown the chicken. Toss the chicken with salt, chili powder, cumin, and garlic powder. Heat the olive oil in a large skillet over medium-high heat and cook the chicken for 4 to 5 minutes until browned on all sides.
- Soften the onion. Add the onion and cook for 2 minutes until translucent. Stir in the garlic for 30 seconds.
- Pour in the sauce. Add the enchilada sauce and broth, scraping the browned bits from the bottom of the skillet.
- Add the filling. Stir in the black beans, corn, and tortilla strips. Reduce the heat and simmer for 5 to 7 minutes until the chicken is cooked through and the tortilla strips soften.
- Melt the cheese. Sprinkle the cheese over the top, cover the skillet, and cook for 2 minutes until melted and glossy.
- Finish with fresh toppings. Turn off the heat, add cilantro, avocado, and a squeeze of lime.
Tips and Variations
- Use rotisserie chicken if you’re short on time: Add it after the sauce simmers so it stays tender.
- Choose the sauce level with care: Mild enchilada sauce keeps the dish broad; spicy sauce pushes it harder.
- Hold the avocado until the end: Warm avocado turns odd fast.
I like this one because it eats like a full dinner without needing rice on the side. It’s saucy, a little smoky, and built for scooping.
6. Kielbasa, Potatoes, and Green Beans Skillet
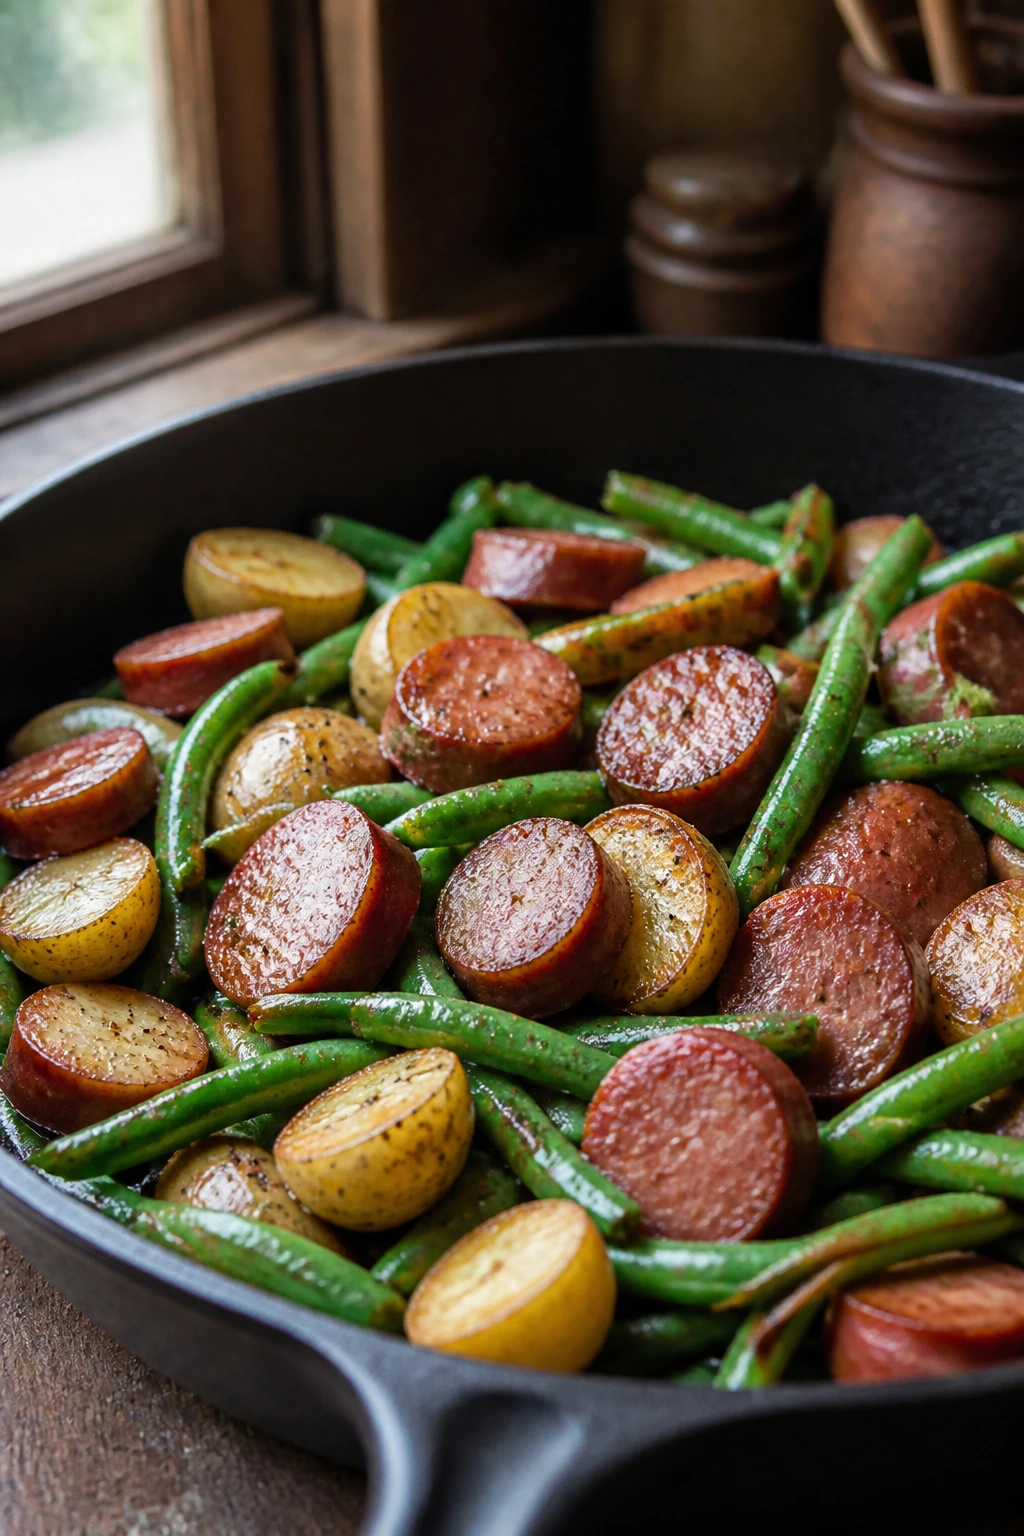
Smoked sausage is one of the most useful shortcuts in the kitchen, and it earns its spot here. The kielbasa browns in the pan, the potatoes soak up the fat and broth, and the green beans stay bright enough to keep the skillet from feeling heavy. This is the sort of dinner that tastes like it took a long time because it has layers. It didn’t.
Why This Skillet Feels Hearty
The trick is giving the potatoes enough head start. Cut them small enough to soften under a lid, then bring in the sausage and green beans once the pan has some steam and some color. Dijon and chicken broth make a quick glaze that keeps the whole thing from tasting greasy. A little butter at the end smooths the edges, which sounds like a small thing and isn’t.
For the skillet:
- 8 oz smoked kielbasa, sliced on a bias — the browned edges matter.
- 12 oz baby potatoes, halved — small potatoes cook fast enough for a skillet.
- 1 cup green beans, trimmed — crisp-tender is the goal.
- 1 small onion, thinly sliced — helps build the pan flavor.
- 2 tbsp olive oil — for browning.
- 2 garlic cloves, minced — add after the sausage and potatoes start cooking.
- 1/2 tsp smoked paprika — adds a little campfire note.
- 1/2 cup low-sodium chicken broth — steams the potatoes.
- 1 tbsp Dijon mustard — sharpens the glaze.
- 1 tbsp butter — finish the sauce.
- Salt and pepper, to taste — go easy until the end.
- Chopped parsley, optional — for color.
Quick Steps
- Start the potatoes. Heat the olive oil in a large skillet over medium heat. Add the potatoes, cut side down, and the onion. Cook for 5 minutes without stirring so the bottoms begin to brown.
- Add broth and cover. Pour in the chicken broth, cover the skillet, and cook for 8 to 10 minutes until the potatoes are almost tender.
- Bring in the sausage. Stir in the kielbasa and cook for 3 minutes so the slices pick up some color.
- Add the beans. Toss in the green beans, garlic, and smoked paprika. Cook uncovered for 4 to 5 minutes, stirring once or twice, until the beans are crisp-tender and the liquid has reduced.
- Finish the glaze. Stir in the Dijon and butter. Taste before adding salt; kielbasa brings plenty of its own.
- Serve hot. Spoon it onto plates or into shallow bowls and add parsley if you want a fresher finish.
Tips and Variations
- Cut the potatoes evenly: Uneven pieces mean some stay hard while others turn mealy.
- Use fully cooked kielbasa: This recipe assumes the sausage only needs browning.
- A splash of cider vinegar works too: If you want the glaze brighter, add 1 teaspoon at the end.
This is the dinner I trust when the fridge has good intentions and not much else. Potatoes, sausage, and green beans cover the basics without becoming dull.
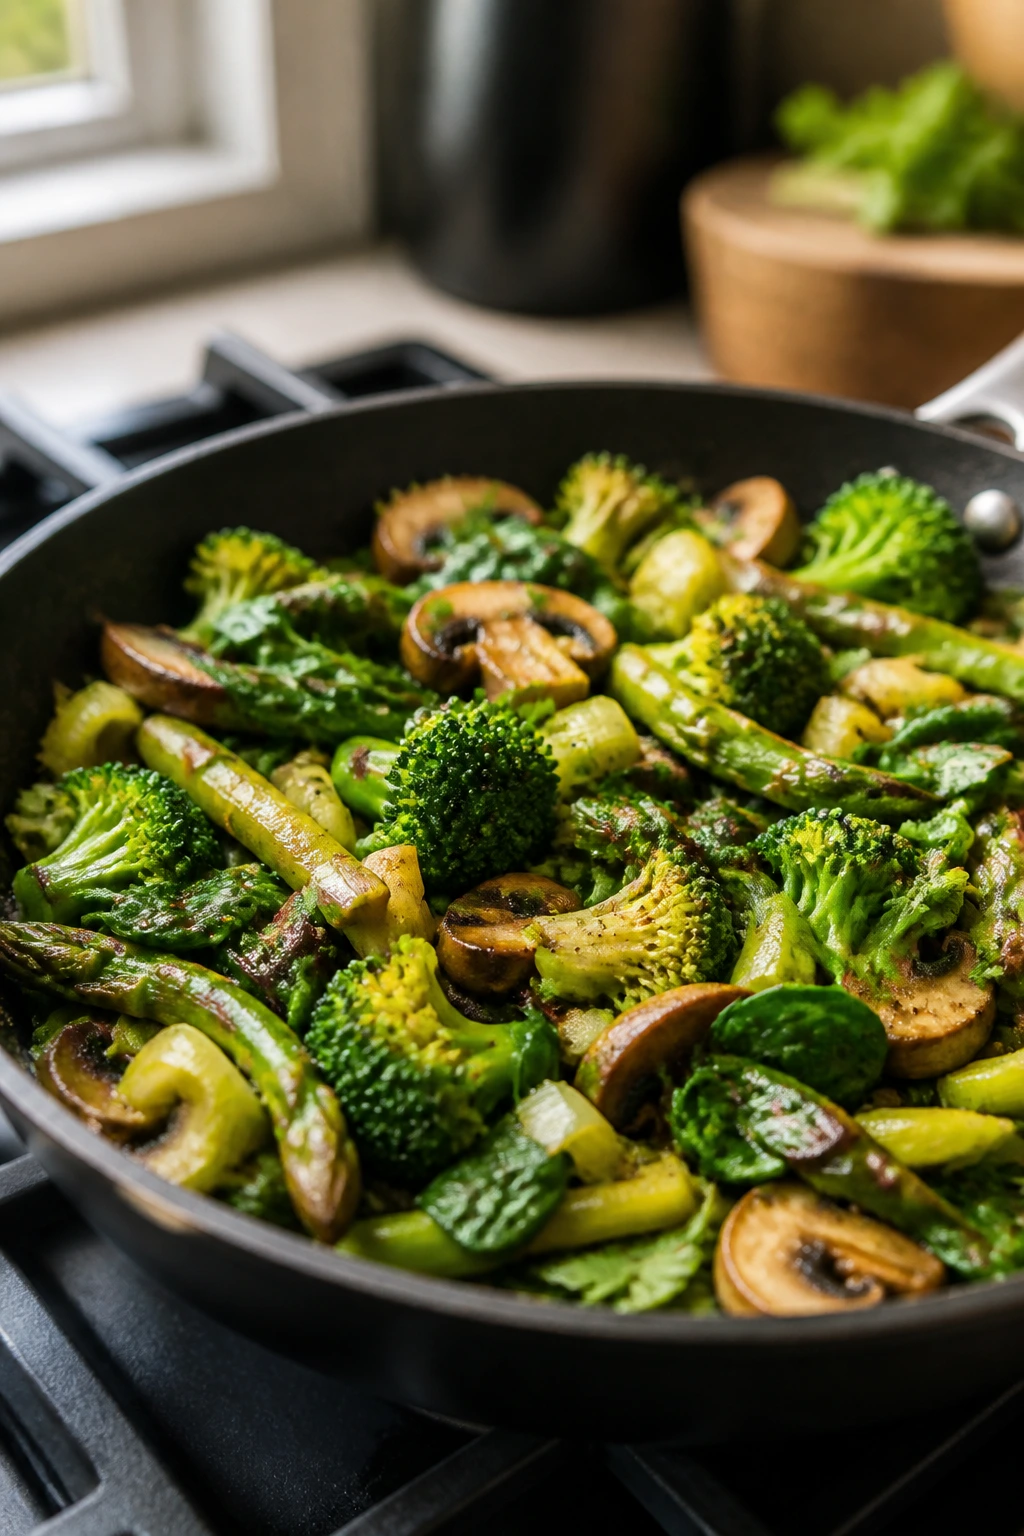
7. Salmon with Dill, Potatoes, and Asparagus
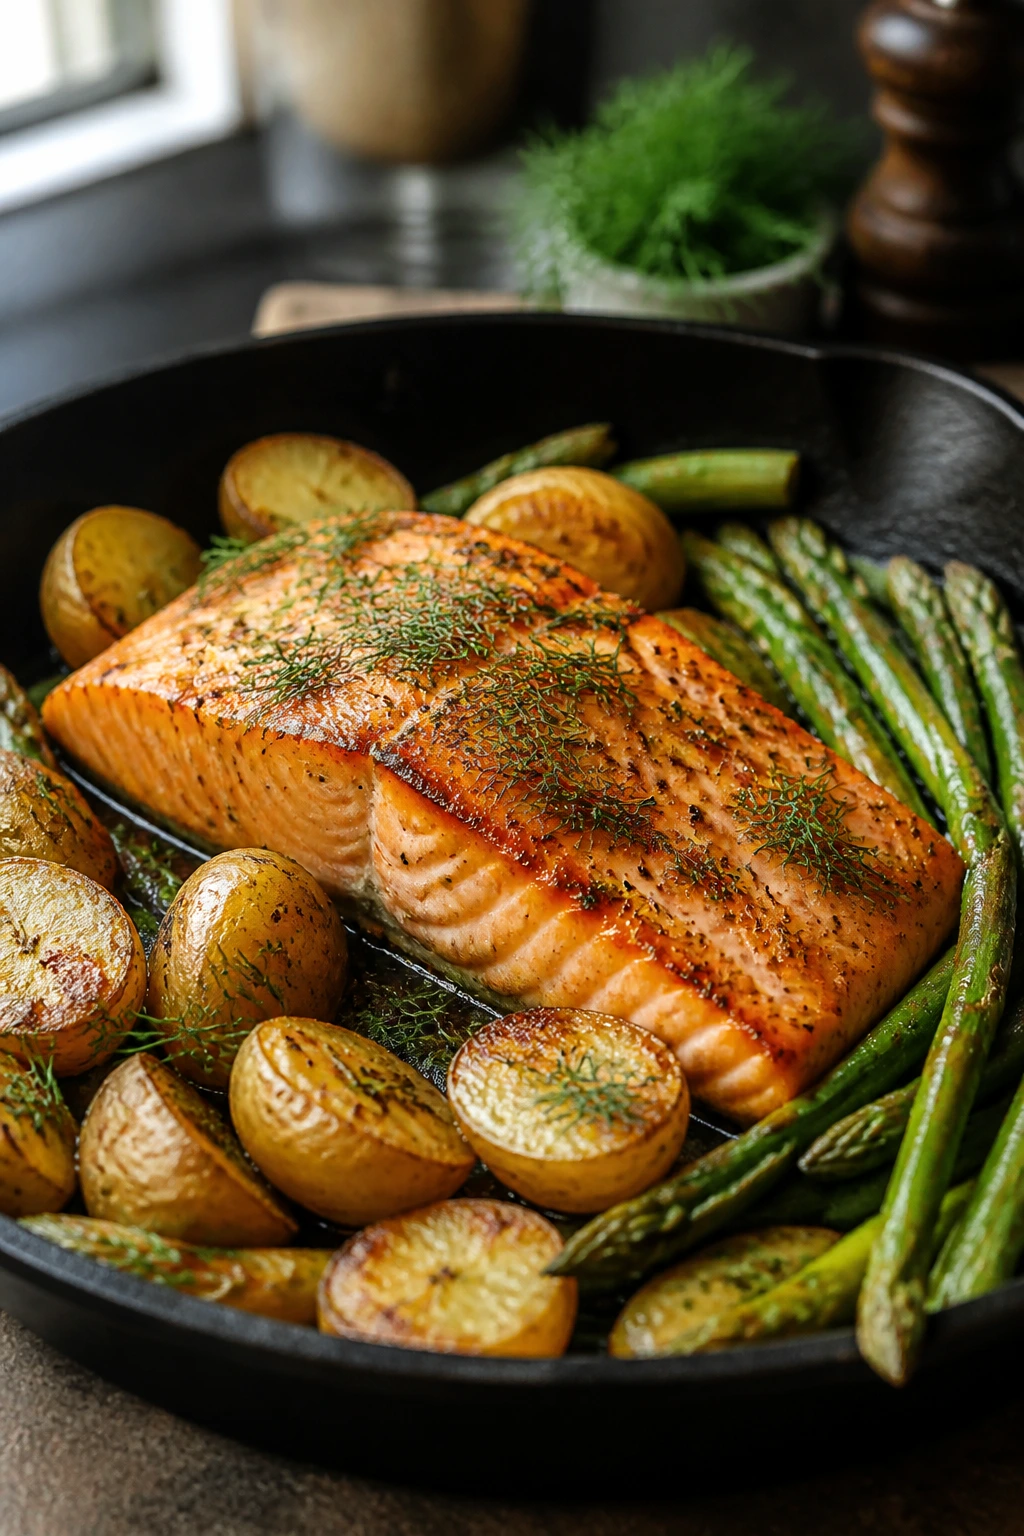
Salmon can feel delicate, but a skillet gives it structure. The potatoes start first, the asparagus joins later, and the salmon comes in when the pan is hot and the vegetables are nearly done. Dill and lemon keep the whole thing sharp and fresh, while butter rounds it out just enough to feel like dinner instead of a worksheet.
Keeping Salmon Tender
The biggest mistake people make with salmon is leaving it alone too long. A good fillet needs contact with the pan so the skin or flesh can develop color, but it also needs a short path to the plate. I like to aim for 125°F to 130°F if I want it just barely translucent in the center, or 145°F if I want it fully cooked by the standard food-safety finish. Dry the fillets first. That matters more than people think.
For the skillet:
- 2 salmon fillets, about 6 oz each — skin on or off.
- 12 oz baby potatoes, halved — the base of the skillet.
- 1 bunch asparagus, woody ends trimmed — add near the end.
- 2 tbsp olive oil — for the potatoes and salmon.
- 1 tsp kosher salt — season in layers.
- 1/2 tsp black pepper — enough for the fish and vegetables.
- 2 garlic cloves, minced — stir in with the final sauce.
- 1/4 cup low-sodium chicken broth or dry white wine — helps steam the potatoes.
- 2 tbsp butter — for basting and finishing.
- Zest and juice of 1/2 lemon — brightens the salmon.
- 2 tbsp chopped fresh dill — the herb that makes it feel right.
- 1 tbsp capers, optional — for a briny edge.
Quick Steps
- Cook the potatoes first. Heat 1 tablespoon of the olive oil in a large skillet over medium heat. Add the potatoes, salt, and pepper, cut side down, and cook for 4 minutes.
- Steam them until nearly tender. Pour in the broth or wine, cover the skillet, and cook for 8 to 10 minutes until a knife slides into the potatoes with little resistance.
- Add the asparagus. Uncover the skillet, stir in the asparagus and garlic, and cook for 2 minutes until the asparagus turns bright green.
- Sear the salmon. Push the vegetables to the sides of the skillet. Add the remaining olive oil, place the salmon in the center, and cook for 3 to 4 minutes on the first side.
- Finish gently. Flip the salmon, add the butter, lemon zest, lemon juice, dill, and capers if using. Spoon the butter over the fish and cook for 2 to 3 minutes more until the salmon flakes and reaches your preferred doneness.
- Rest briefly. Pull the skillet from the heat and let everything sit for 2 minutes before serving.
Tips and Variations
- Use small potatoes: Large chunks slow everything down and make the salmon sit too long.
- A fish spatula helps: It slides under the fillet without tearing the crust.
- Skip the capers if you want softer flavors: The dill and lemon are enough on their own.
This one tastes bright and a little luxurious without requiring any special ceremony. The skillet keeps the vegetables warm, the fish tender, and the whole plate coherent.
8. Mushroom Spinach Gnocchi Skillet
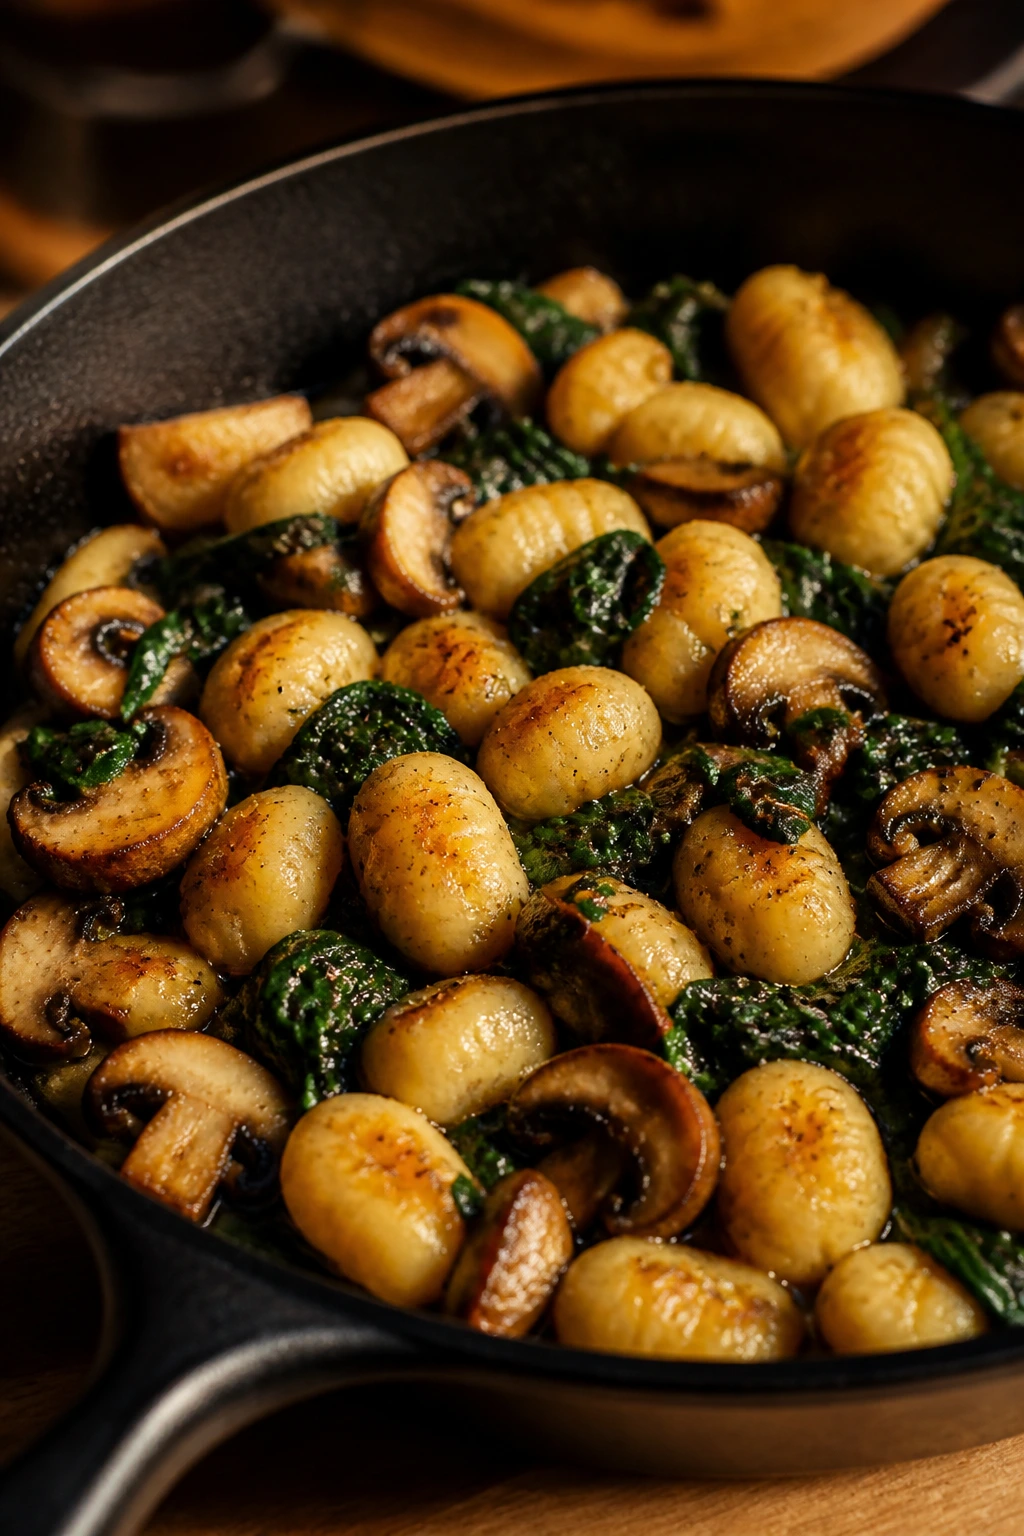
Shelf-stable gnocchi is the pantry item that keeps a weeknight from feeling thin. It goes from package to pan in minutes, and when it browns in butter and olive oil, the outside turns a little crisp while the inside stays soft and dense. The mushrooms bring a deep, earthy note, and spinach keeps the dish from sinking under its own creaminess.
Why Gnocchi Belongs in a Skillet
Gnocchi doesn’t need a pot of boiling water if you treat it right. In a skillet, it can toast directly in the fat, which gives the dumplings a better texture than a quick boil and drain ever could. The mushrooms build a dark base, the broth loosens the browned bits, and the half-and-half gives you a sauce without the heaviness of a full cream reduction. It’s a useful little trick, and a satisfying one.
For the skillet:
- 1 lb shelf-stable potato gnocchi — the kind sold in the pasta aisle.
- 8 oz cremini mushrooms, sliced — brown them well.
- 2 tbsp butter — flavor and browning.
- 1 tbsp olive oil — keeps the butter from burning.
- 2 garlic cloves, minced — add after the mushrooms color.
- 1 tsp fresh thyme leaves or 1/2 tsp dried thyme — earthy and soft.
- 1/2 cup vegetable broth — loosens the pan.
- 1 cup half-and-half — makes the sauce creamy.
- 2 cups baby spinach — wilts quickly.
- 1/2 cup grated Parmesan — finishes the sauce.
- Pinch of nutmeg, optional — works quietly with cream and spinach.
- Salt and pepper, to taste — add after the cheese.
Quick Steps
- Brown the mushrooms. Heat the butter and olive oil in a large skillet over medium-high heat. Add the mushrooms and cook for 5 to 6 minutes until browned and the liquid they release has cooked off.
- Toast the gnocchi. Add the gnocchi directly to the skillet and cook for 2 to 3 minutes, stirring once or twice, until a few pieces pick up golden edges.
- Add garlic and thyme. Stir in the garlic and thyme for 30 seconds.
- Build the sauce. Pour in the broth and half-and-half, scraping the bottom of the skillet. Bring to a gentle simmer.
- Thicken and finish. Cook for 3 to 4 minutes until the sauce coats the gnocchi. Stir in the spinach and Parmesan until the greens wilt and the sauce turns glossy.
- Taste and serve. Season with salt, pepper, and a tiny pinch of nutmeg if you want extra warmth.
Tips and Variations
- Don’t boil the gnocchi first: It turns soft and misses the best texture.
- Use a wide skillet: Crowding makes the gnocchi steam instead of brown.
- Add peas or peas and lemon zest: If you want something a little brighter, both fit neatly here.
This is the skillet I make when I want dinner to feel cozy but not sleepy. It has enough cream to feel indulgent and enough mushroom flavor to keep it grounded.
9. Turkey Taco Rice Skillet
Ground turkey has a bad reputation because people treat it like a blank square. Give it taco seasoning, onion, pepper, rice, beans, and salsa, and it stops being bland in a hurry. The rice absorbs the tomato and broth, the beans round it out, and the cheese melts over everything in that pleasing, slightly messy way taco dinners should.
Why Rice Works Better Than Chips Here
Rice turns the skillet into a real meal. Tortilla chips are fun, but they go soft fast and never carry much substance. Rice keeps its shape, absorbs the spices, and gives you a bowl that eats like dinner instead of snack food dressed up for the table. If you want a little heat, use a salsa with chunks of roasted chile or stir in minced jalapeño with the onion.
For the skillet:
- 1 lb ground turkey — lean but not dry if you cook it with enough fat.
- 1 tbsp olive oil — for the first sauté.
- 1 small onion, diced — the savory start.
- 1 bell pepper, diced — adds sweetness and color.
- 2 garlic cloves, minced — stir in once the turkey browns.
- 2 tbsp taco seasoning — use a low-sodium blend if possible.
- 1 cup long-grain white rice, rinsed — the grain that holds the skillet together.
- 1 1/2 cups low-sodium chicken broth — cooks the rice.
- 1 cup salsa or diced tomatoes — brings moisture and flavor.
- 1 can black beans, rinsed and drained — adds heft.
- 1 cup frozen corn — easy, sweet, and useful.
- 1 cup shredded pepper jack or cheddar — melts at the end.
- 2 tbsp chopped cilantro — for brightness.
- Sour cream and avocado, for serving — cool the spice at the table.
- Lime wedges — not optional if you like a clean finish.
Quick Steps
- Brown the turkey. Heat the olive oil in a large skillet over medium-high heat. Add the turkey, onion, and bell pepper. Cook for 5 to 6 minutes until the turkey loses its pink color and the vegetables soften.
- Season the pan. Stir in the garlic and taco seasoning for 30 seconds.
- Add the rice and liquid. Stir in the rinsed rice, broth, salsa, beans, and corn. Bring the skillet to a simmer.
- Cover and cook. Lower the heat, cover, and cook for 15 to 18 minutes until the rice is tender and the liquid is absorbed.
- Melt the cheese. Sprinkle the cheese over the top, cover again, and let it melt for 2 minutes.
- Finish with fresh toppings. Add cilantro, sour cream, avocado, and lime just before serving.
Tips and Variations
- Brown the turkey well: Pale turkey tastes flat no matter how much seasoning you use.
- Use salsa if you want a louder flavor: Diced tomatoes make it milder; salsa makes it punchier.
- Leftover rice can work: If you use cooked rice, add it after the turkey and reduce the broth to a few tablespoons.
This is the skillet I’d make for someone who says they need dinner to be easy but still feel like a full meal. It does that cleanly.
10. Steak and Mushrooms with Creamy Polenta
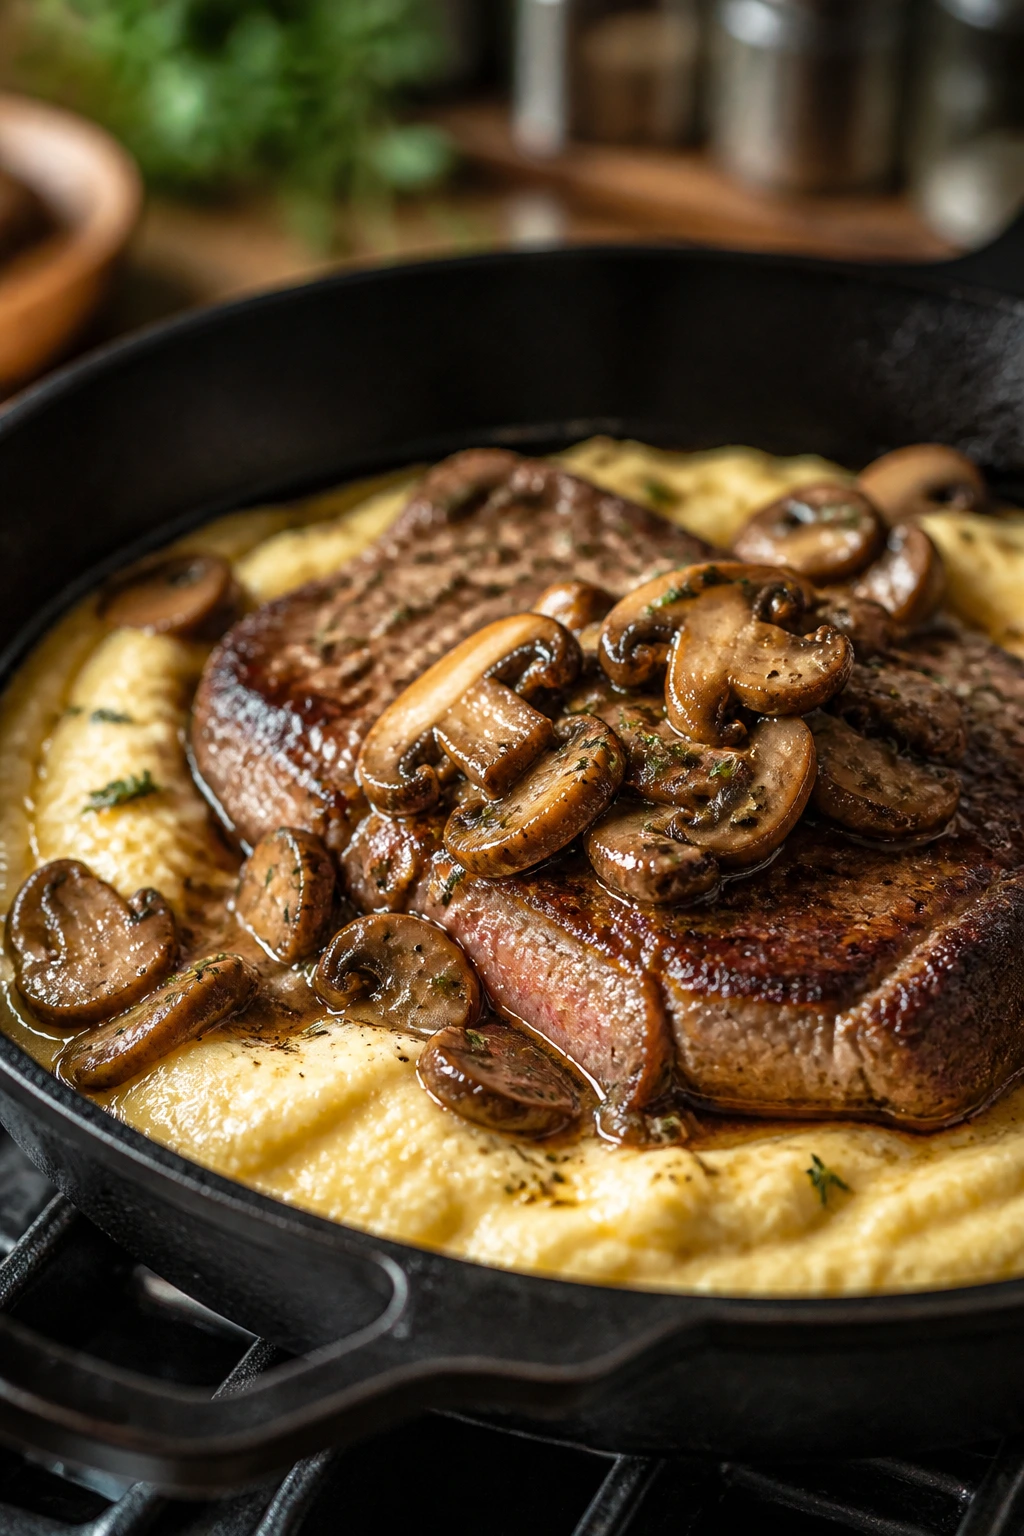
A good steak skillet should feel calm, not showy. Salt the meat, get the pan hot, and let the browned bits build a sauce worth keeping. Creamy polenta makes the whole dish feel complete because it catches the mushroom juices and gives you something soft under the steak. It’s the sort of dinner that looks restaurant-ish without asking you to behave like a restaurant cook.
The Creamy Polenta Trick
Quick-cooking polenta is forgiving if you whisk often and don’t leave it alone long enough to form lumps. I like it in a skillet because the same pan that sears the steak can handle the mushrooms and then the polenta, which means the fond stays in play the whole time. That browned residue is not something to wash away. It’s dinner.
For the skillet:
- 2 sirloin steaks, about 6 oz each and 1 inch thick — a tidy size for two.
- 1 tsp kosher salt — season the steak.
- 1/2 tsp black pepper — enough to crust the surface.
- 1 tbsp olive oil — for searing.
- 8 oz cremini mushrooms, sliced — the sauce base.
- 2 garlic cloves, minced — add after the mushrooms color.
- 1 tbsp Worcestershire sauce — deepens the savory note.
- 1/2 cup low-sodium beef broth — for deglazing.
- 1/4 cup dry red wine or more broth — gives the sauce depth.
- 3/4 cup quick-cooking polenta — cooks fast and stays smooth.
- 2 1/2 cups water or broth — the liquid for the polenta.
- 2 tbsp butter — for richness.
- 1/3 cup grated Parmesan — finishes the polenta.
- 2 cups baby spinach — wilts into the base.
- 1 tbsp chopped parsley — to freshen the plate.
Quick Steps
- Season and sear the steak. Pat the steaks dry and season both sides with salt and pepper. Heat the olive oil in a large skillet over medium-high heat and sear the steaks for 3 to 4 minutes per side for medium-rare, or a little longer if you want them more done. Transfer to a plate to rest.
- Cook the mushrooms. Reduce the heat to medium. Add the mushrooms and cook for 5 minutes until browned and their moisture cooks off.
- Build the pan sauce. Stir in the garlic and Worcestershire sauce for 30 seconds, then pour in the broth and wine, scraping the bottom of the pan clean.
- Make the polenta. Add the water or broth and bring it to a simmer. Whisk in the polenta in a steady stream and cook for 4 to 5 minutes, stirring often, until thick and smooth.
- Finish the base. Stir in the butter, Parmesan, and spinach until the greens wilt and the polenta turns glossy.
- Slice and serve. Slice the steak against the grain, spoon the mushrooms over the top, and serve it right from the skillet.
Tips and Variations
- Rest the steak: Five minutes off the heat keeps the juices where they belong.
- Use broth instead of water for the polenta: It adds a savory background without much extra work.
- Stir the polenta often: Quick-cooking polenta thickens fast and can catch at the bottom if you walk away.
This is the richest skillet in the bunch, and I mean that in a practical way. It feels like dinner with a little more weight, a little more silence at the table.
What Makes One Skillet Dinners for Two Work So Well
A two-person skillet meal succeeds because the pan never has to stretch itself thin. That sounds obvious, but it matters. With smaller portions, you can actually sear the protein instead of crowding it, and you can build a sauce that tastes like itself rather than like watered-down leftovers. The food gets to sit in one layer of heat, which is why the browned edges, glossy sauce, and tender vegetables show up at all.
A wide skillet is the secret hero here. A cast-iron skillet holds heat well and gives strong browning, which is useful for steak, chicken, pork, and sausage. Stainless steel is lighter and easier to manage if you want quick deglazing and sharp fond. Nonstick has its place, especially for eggs or delicate fish, but for these dinners I prefer something that can take a proper sear without whining about it.
The smaller batch also makes timing easier. Chicken breasts are cut into cutlets, shrimp cook for just a couple of minutes per side, rice and orzo simmer in a narrow pool of liquid, and vegetables can be added in stages instead of dumped in all at once. That rhythm keeps the pan from turning into a mush factory. It also keeps the flavors clean, which is half the pleasure.
Essential Equipment for These Skillet Meals
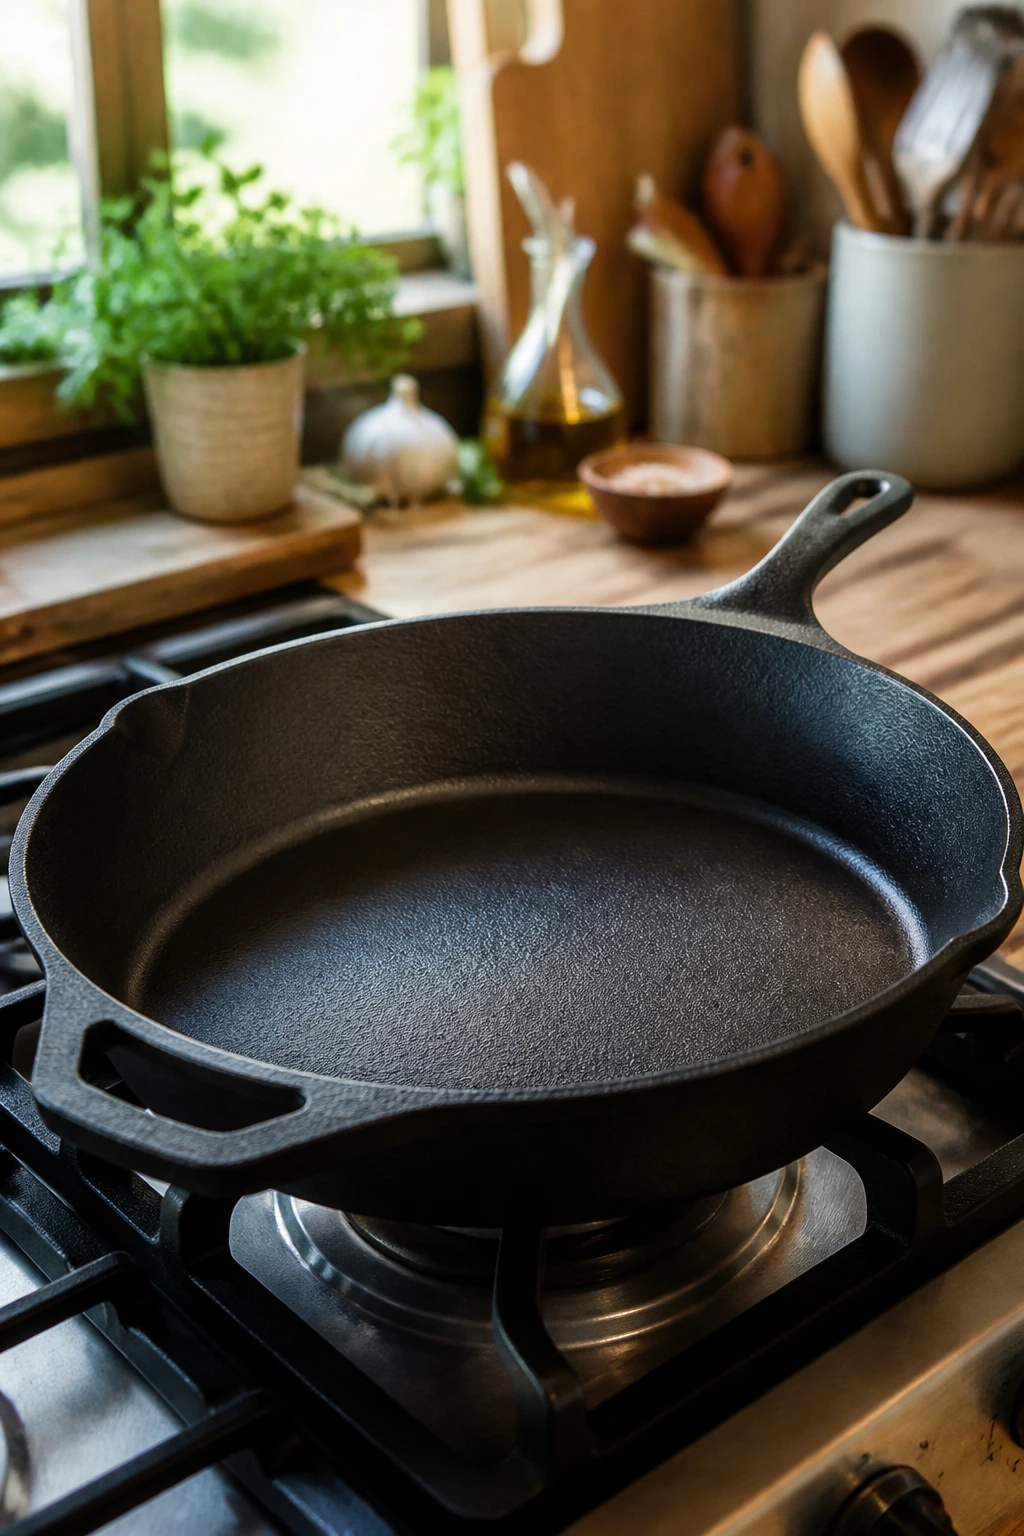
- 10- or 12-inch skillet: A heavy skillet gives you room to brown and simmer without crowding.
- Tight-fitting lid: Handy for potatoes, rice, or anything that needs a little steam to finish.
- Tongs: Best for turning chicken, sausage, pork chops, and steak without stabbing the meat.
- Fish spatula: Especially useful for salmon; it slides under the fillet without tearing it.
- Instant-read thermometer: The simplest way to avoid overcooking chicken, pork, shrimp, and fish.
- Wooden spoon or silicone spatula: Good for scraping up browned bits and stirring sauce without scratching the pan.
- Microplane or fine grater: Useful for lemon zest, Parmesan, garlic, or ginger.
- Measuring cups and spoons: Small-batch recipes get weird fast if the liquid is off.
- Sharp chef’s knife: Chopping onions, peppers, and herbs cleanly saves more time than people think.
- Cutting board: A sturdy one matters when you’re slicing cutlets or steak.
Smart Shopping and Ingredient Tips
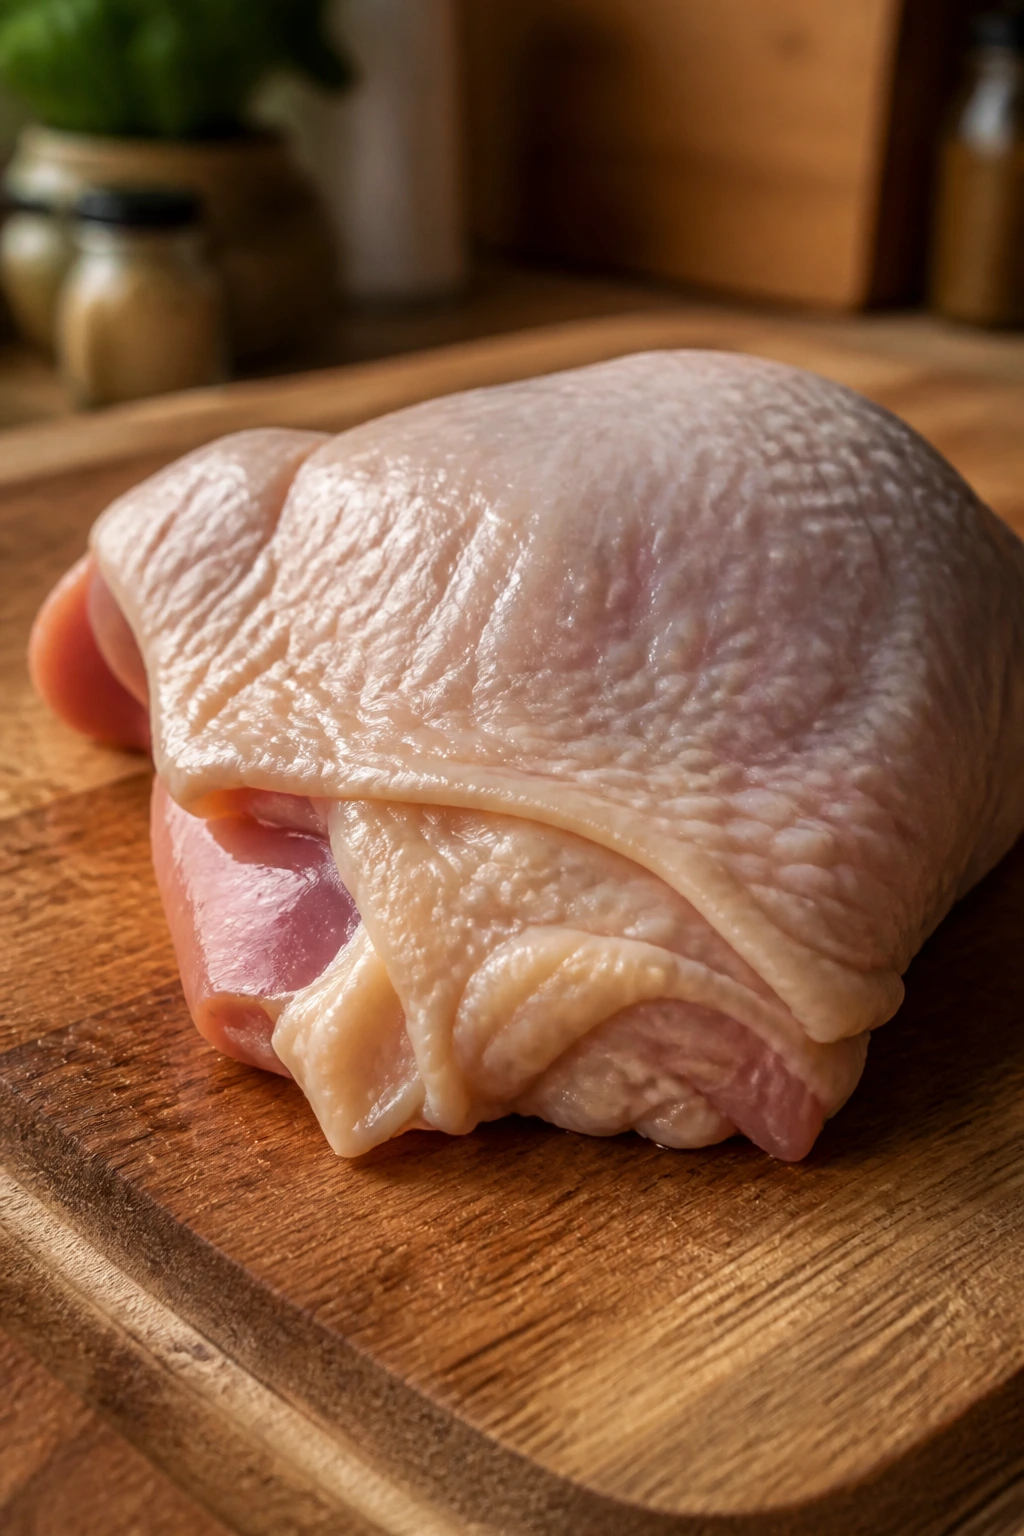
Buy the protein for the job, not just the sale price. Chicken thighs stay forgiving in saucy skillets, while chicken breasts are better when they’re sliced thin and cooked fast. Shrimp should smell clean and briny, never fishy; if you buy frozen shrimp, thaw them in the fridge or under cold water and pat them dry before cooking. For pork chops, look for 1-inch bone-in chops when you can. They hold moisture better than thin boneless cuts.
Small vegetables are your friend in a skillet. Baby potatoes, small broccoli florets, thin onion slices, and asparagus with woody ends trimmed off all cook more evenly than oversized pieces. If you’re buying mushrooms, choose dry caps with tight gills and no slimy spots. For beans, rinse and drain canned varieties so the sauce doesn’t pick up that canned taste; for corn, frozen is usually better than out-of-season fresh.
Rice, orzo, gnocchi, and polenta each behave differently, so buy the type that fits the recipe rather than substituting at random. Long-grain rice stays separate, while arborio-style rice would make the beef skillet too sticky. Shelf-stable gnocchi cooks straight from the package. Quick-cooking polenta is not the same as stone-ground polenta, and the wrong one can turn a fast dinner into a longer project than anyone planned.
How to Serve These One Skillet Dinners for Two
Presentation: Spoon saucy dishes into shallow bowls so the sauce spreads in a thin layer instead of disappearing under the food. Slice pork chops, steak, or salmon before serving if you want the plates to look fuller without adding extra food. A few herbs, lemon wedges, or scallions go a long way when the skillet itself is doing most of the work.
Accompaniments: The saucier dishes love bread, especially the shrimp, chicken enchilada, and Tuscan-style skillet. A simple green salad with lemon vinaigrette works beside the richer ones like steak and polenta or kielbasa and potatoes. If you want a starch on the side, keep it plain: crusty bread, boiled potatoes, or a small bowl of rice is enough.
Portions: These recipes are written for two hungry adults, not two people nibbling politely. If you eat lightly, most of them will give you one generous dinner and a small lunch. If you’re feeding bigger appetites, add a salad or bread instead of doubling the skillet and crowding the pan.
Beverage Pairing: Dry white wine suits the chicken, shrimp, and salmon dishes. A light red works better with pork, steak, and kielbasa. If you’re skipping alcohol, sparkling water with lemon or iced tea with a slice of orange keeps the meal feeling sharp instead of flat.
Additional Tips and Flavor Boosters
Flavor Enhancement: Finish rich skillet dinners with acid at the end, not the start. Lemon juice, lime juice, apple cider vinegar, or a splash of white wine wakes up cream, cheese, and butter in a way salt alone cannot. A small spoonful changes the whole pan.
Customization: Swap the vegetables to match what you already have. Spinach can become arugula or kale, green beans can become asparagus, and black beans can turn into pinto beans without causing trouble. If you want more heat, use chili flakes, chipotle powder, or a spoon of salsa verde instead of dumping in extra salt.
Serving Suggestions: Fresh herbs matter more than people give them credit for. Parsley, dill, cilantro, and green onion add a clean finish and make a skillet dinner taste finished rather than merely cooked. A dusting of Parmesan or a scattering of sesame seeds can do the same thing when a dish needs a little texture.
Make-It-Yours: For gluten-free eating, lean on rice, potatoes, polenta, and certified gluten-free gnocchi. For dairy-light cooking, use broth-based sauces and finish with olive oil, herbs, and citrus instead of cream-heavy sauces. For vegetarian plates, the mushroom gnocchi skillet is already there, and the beef or chicken recipes can often take on extra mushrooms and beans if you want to lighten the meat load.
Common Mistakes to Avoid
-
Crowding the skillet: If the pan is packed, protein steams instead of browns. Cook in batches or use a larger skillet; that extra surface area is the difference between color and gray.
-
Starting with wet ingredients: Wet chicken, fish, and mushrooms make the pan noisy and dull. Pat proteins dry and wipe mushrooms clean with a damp towel so they brown instead of simmer.
-
Adding everything at once: Rice, potatoes, and tougher vegetables need a head start. Delicate things like spinach, shrimp, and asparagus go in late or they turn limp and bitter.
-
Salting too late: If you season only at the end, the food tastes flat even when the salt level is technically fine. Salt the protein first, then taste the sauce at the end and adjust there.
-
Walking away from the sauce: Many skillet dinners rely on a short reduction. A sauce that looks thin for two minutes can turn perfect in one more minute, and then it can jump straight to sticky if you ignore it.
-
Using the wrong pan: Thin pans can scorch the outside before the inside is done. A heavier skillet gives you more control, especially with chicken cutlets, salmon, and polenta.
Variations and Adaptations to Try
Gluten-Free Pantry Swap
Use the salmon, pork, beef, or chicken recipes as written and pair them with potatoes, rice, or polenta instead of orzo or regular gnocchi. For the beef and broccoli skillet, the recipe already works cleanly if you use rice. Check the labels on broth, enchilada sauce, and sausage, because those are the ingredients most likely to hide gluten.
Dairy-Light Dinner Night
Skip the cream-heavy finish in the shrimp and gnocchi recipes and use extra broth with a spoonful of olive oil instead. Lemon zest, herbs, and a little extra Parmesan can still carry plenty of flavor if you keep the sauce looser. This style works best when the pan already has strong seasoning from garlic, mustard, or soy.
Vegetable-Heavy Skillet
Double the broccoli, spinach, asparagus, mushrooms, or green beans in any of the recipes that can handle it. Keep the protein the same and let the vegetables make the plate larger without making the cooking more complicated. This is the easiest way to stretch a two-person skillet into a lighter meal.
Spice-Forward Version
Add chili flakes to the chicken or shrimp, a spoon of chipotle in adobo to the taco skillet, or cayenne in the polenta. Heat works best when it has something creamy or starchy beside it, so the shrimp, enchilada, and mushroom dishes take to it nicely. Keep the amount small at first; you can always add more, but you cannot pull it back.
Lower-Sodium Skillet
Use unsalted broth, rinse canned beans well, and choose a sausage or enchilada sauce that isn’t already loaded with salt. Citrus, vinegar, garlic, herbs, and pepper can carry more flavor than people think when the salt isn’t doing all the work. A squeeze of lemon at the end helps more than adding more cheese.
Budget-Smart Swaps
Chicken thighs, ground turkey, dried herbs, frozen vegetables, and store-brand beans keep these dinners economical without making them feel stripped down. Frozen shrimp is usually cheaper than fresh and often better handled, provided you thaw and dry it properly. A good skillet meal is about technique first, not fancy shopping.
Frequently Asked Questions About One Skillet Dinners for Two

What size skillet works best for these recipes?
A 10- or 12-inch skillet covers most of them. If you’re searing chicken, steak, or salmon, the larger size gives you more room and better browning; if you’re cooking rice or orzo for two, the smaller side can help the liquid stay pooled where it should.
Can I use cast iron instead of stainless steel?
Yes, and for several of these recipes I’d even prefer it. Cast iron holds heat well, which helps with browning meat and sausage, while stainless steel is a bit easier if you want quick deglazing and fast temperature changes.
Which recipes are best for meal prep?
The chicken, beef, pork, kielbasa, and turkey skillet dinners hold up best for the fridge. Shrimp and salmon are better eaten within a day or two because seafood gets tired faster, and creamy dishes may need a splash of liquid when reheated.
Can I scale these recipes up for more people?
Most of them double without much trouble, but use a wider skillet or cook in batches if the pan starts to feel crowded. The biggest risk when scaling is not the math; it’s the loss of browning and the drift toward steaming.
How do I keep chicken from drying out?
Use cutlets or thigh meat, and don’t cook by the clock alone. Chicken is done when it reaches 165°F, but cutlets often finish a little before that if they’re thin, so pulling them at the right time matters more than adding extra minutes.
Can I freeze these skillet dinners?
Chicken, beef, pork, turkey, and bean-based skillet meals freeze fairly well for up to 2 months if you cool them fast and store them in shallow containers. Seafood is a weaker candidate after freezing, and cream-based sauces can separate a little, so I’d rather keep those fresh when possible.
What if my sauce gets too thick?
Add a splash of broth or water and stir over low heat until it loosens. If the dish is creamy, a small spoon of milk or cream helps keep the texture smooth; if it’s tomato or soy based, broth keeps the flavor more balanced.
What if my sauce is too thin?
Give it one more minute over medium heat with the lid off, and let evaporation do the work. If the recipe uses pasta, rice, or polenta, those starches will often finish thickening the skillet as it rests, so don’t panic too early.
Two Plates
There’s something satisfying about a dinner that lands in one pan and ends up on two plates without drama. You get real browning, a sauce with personality, and enough food to feel fed instead of managed.
Start with the recipe that matches what’s already in your fridge. The rest are there for the next night when you want the same ease, but with a different flavor path and a different mood at the table.