
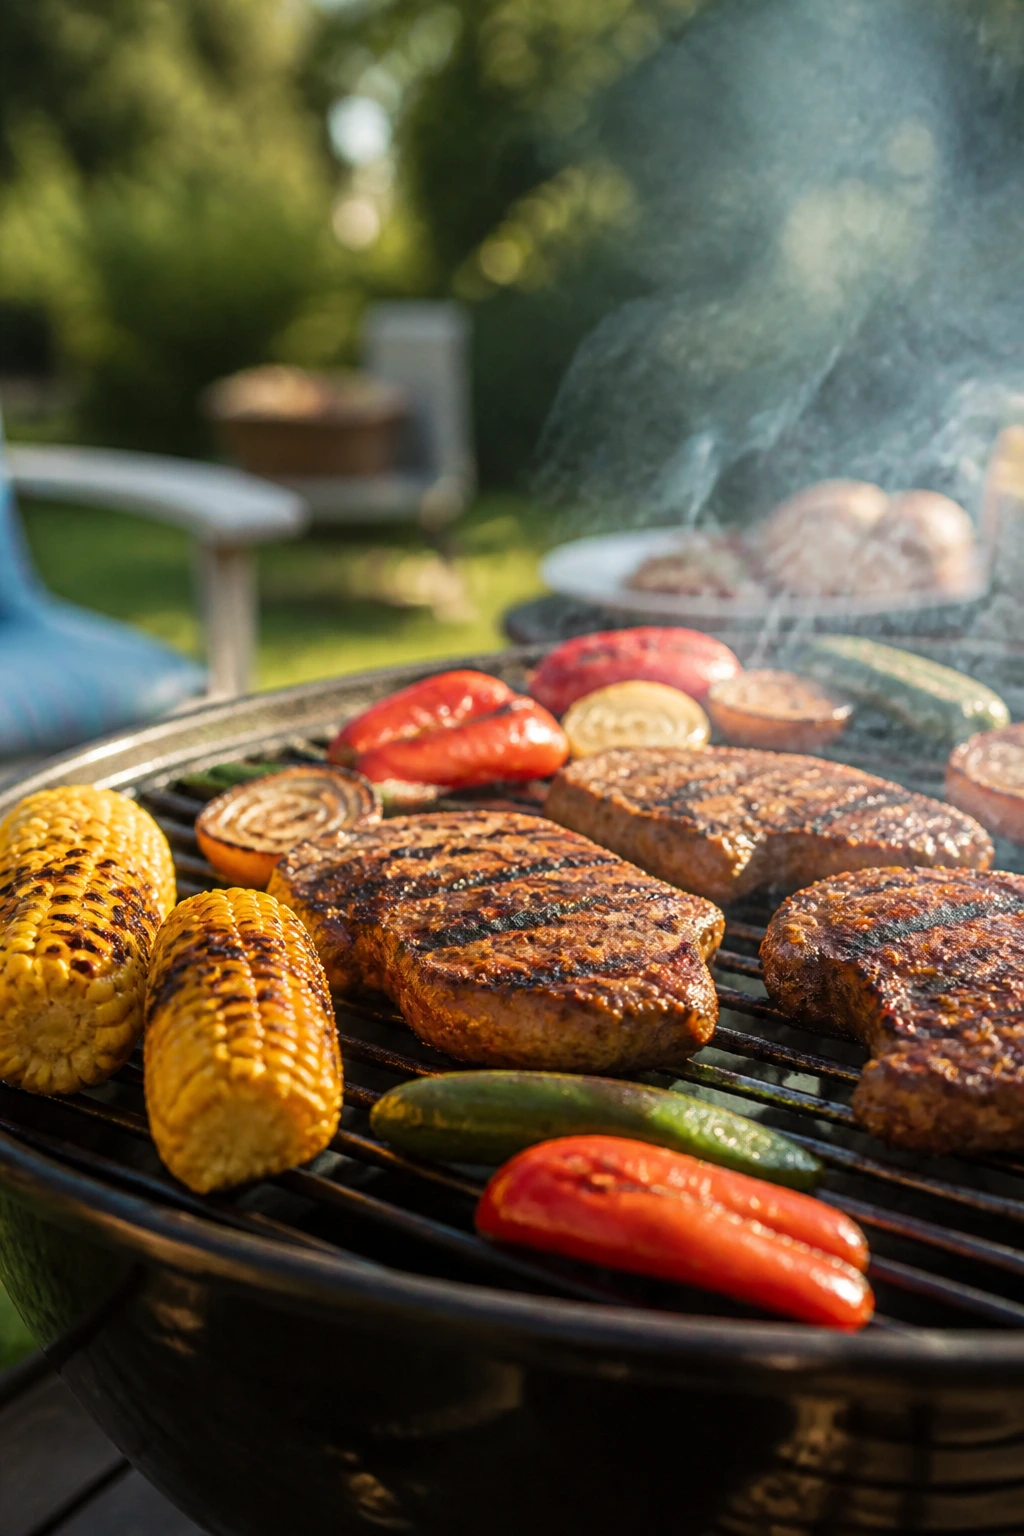
A backyard dinner has a different rhythm than one cooked under a ceiling. You hear the tongs tap the grill grate, smell smoke curling into sweet corn and peppers, and watch people drift toward the food the way moths drift toward porch lights. That’s the charm of Labor Day backyard cooking: the meal isn’t hidden in a kitchen, so it becomes part of the evening itself.
The best Labor Day dinners for the backyard are the ones that can handle a little smoke, a little heat, and a little chaos. Maybe a kid wants an extra bun. Maybe a cousin shows up with an appetite that borders on heroic. Maybe the grill has one hot side and one moody side. Good outdoor food forgives all of that. It tastes even better when the table is crowded and nobody is pretending dinner has to be polite.
I’ve always thought the smartest backyard menus lean on a mix of fast-cooking dishes and one or two anchor recipes that can sit quietly while everyone else finishes up. That way the whole meal doesn’t hinge on timing one thing to the minute. The recipes below are built for that kind of evening — generous, practical, and good with paper plates or real ones.
Why This Collection Works on a Backyard Table
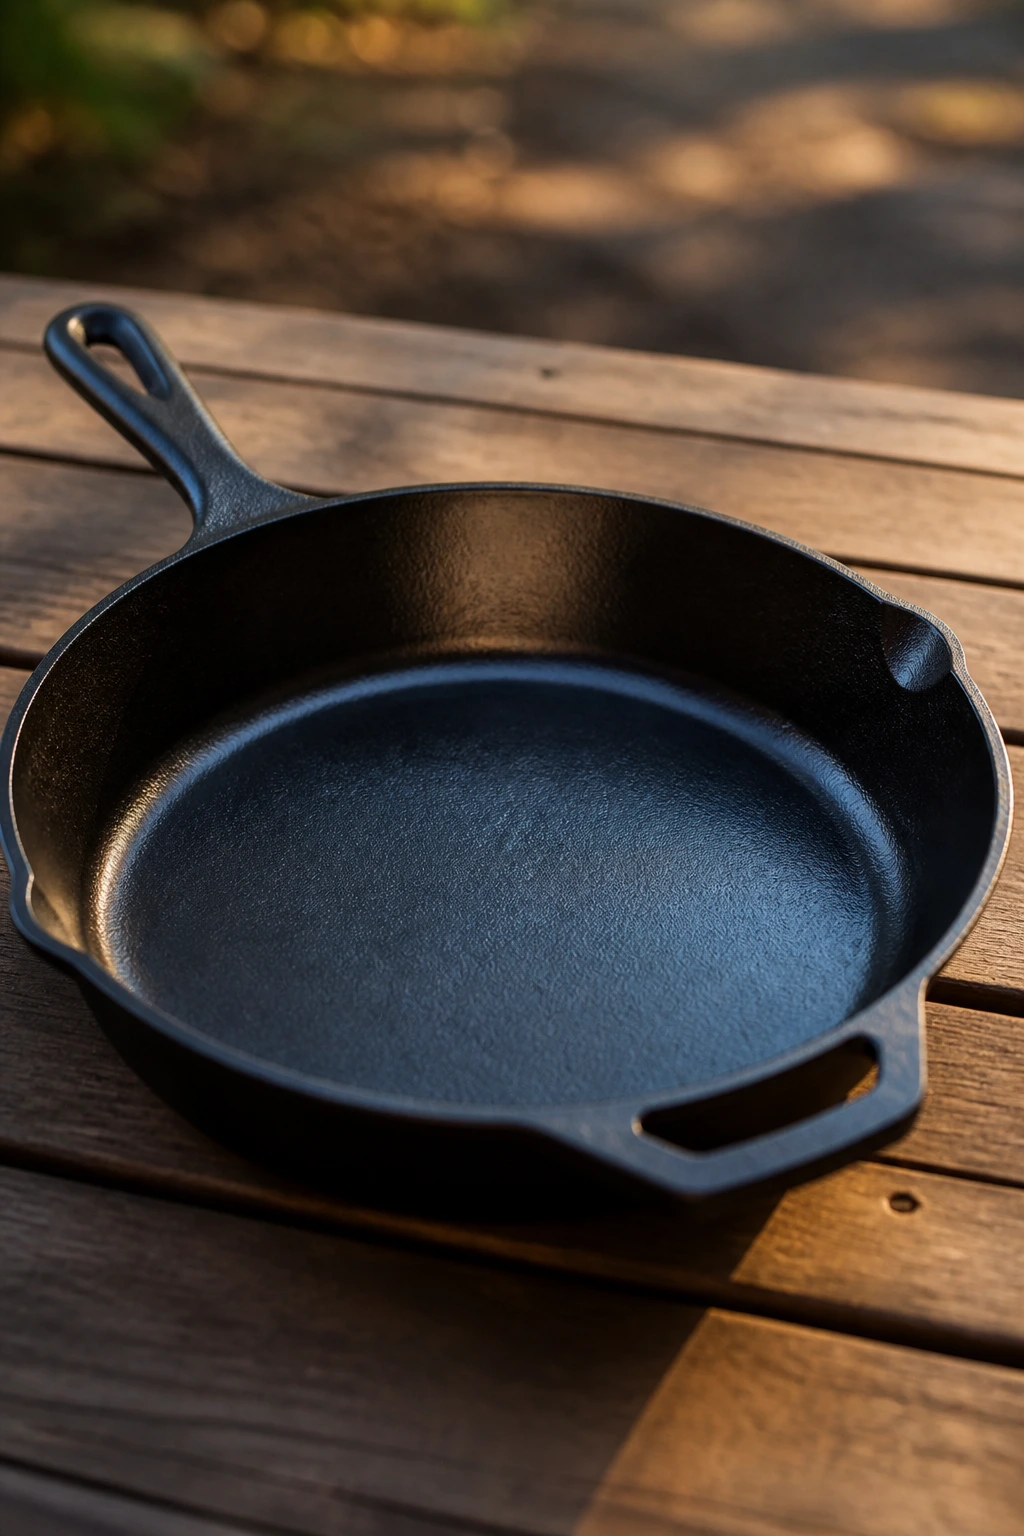
- Grill-Friendly Variety: Every recipe here can live outdoors, whether it cooks directly on the grate, in foil, or in a cast-iron pan on the grill.
- Mix-and-Match Crowd Appeal: You get chicken, beef, pork, seafood, and one meatless main, so the table doesn’t feel one-note.
- Built for Passing Around: These are the kinds of dinners people can grab, stack, and eat while standing near the yard lights.
- Smart Make-Ahead Moves: Several recipes can be seasoned, marinated, or sauced before guests arrive, which keeps you out of the weeds.
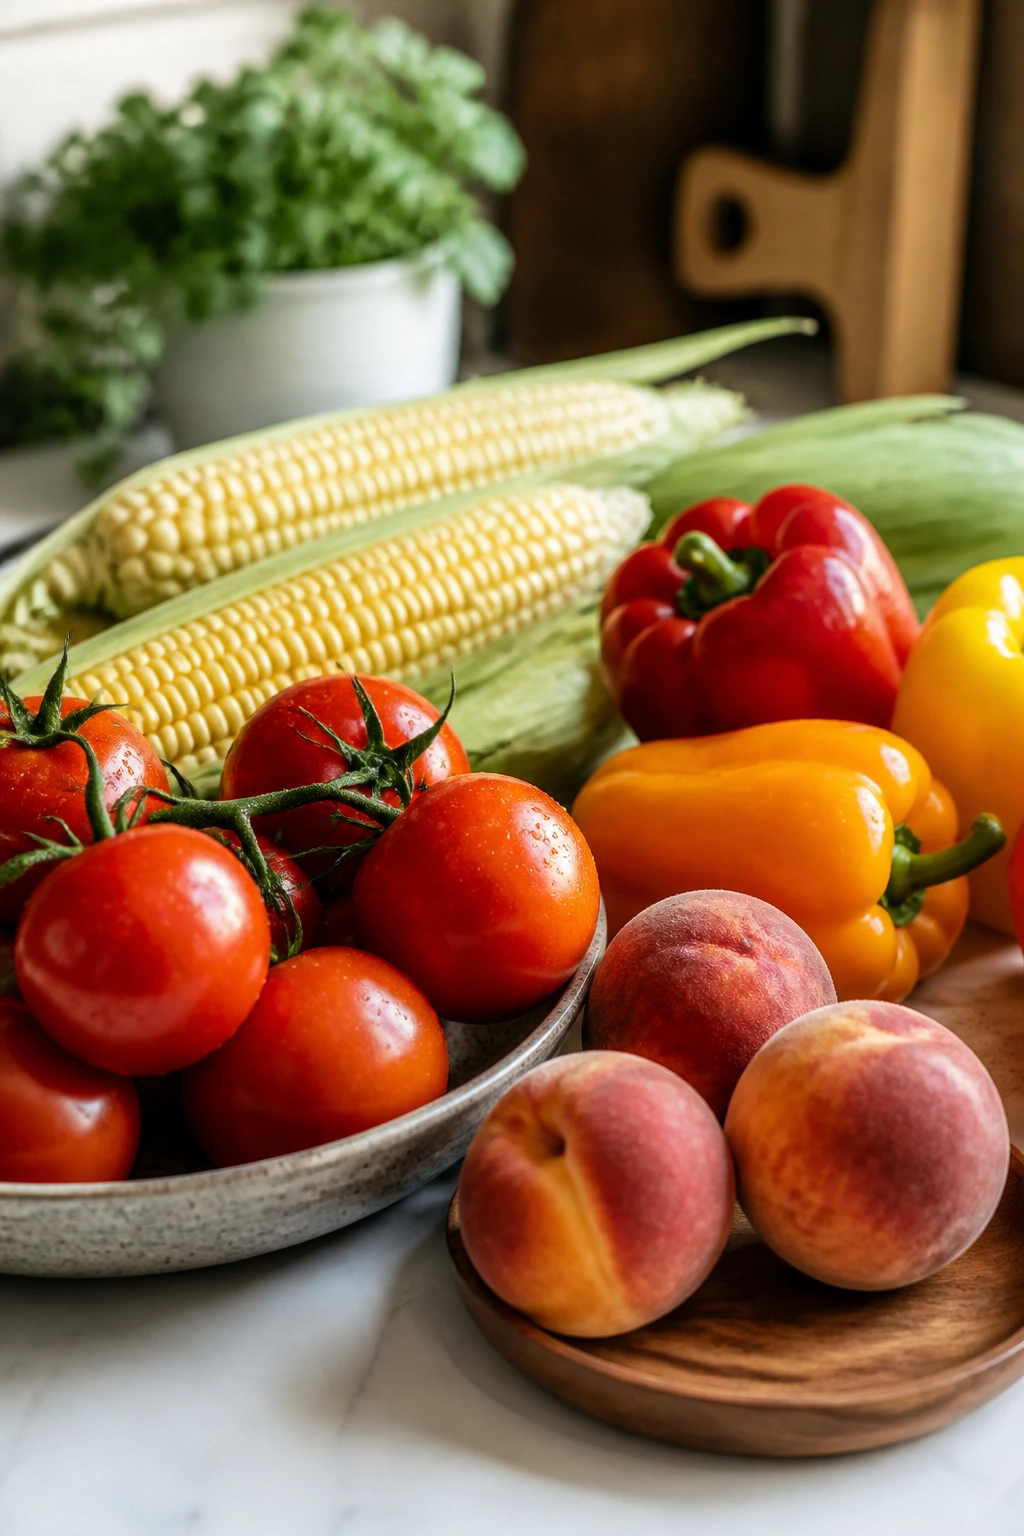
- Late-Summer Ingredients Shine: Peaches, corn, tomatoes, herbs, and peppers do real work here instead of showing up as decoration.
- Relaxed Serving Style: None of this needs perfect plating. A big platter, a stack of napkins, and a good sauce go a long way.
1. Honey-Lime Grilled Chicken Thighs with Peach Salsa
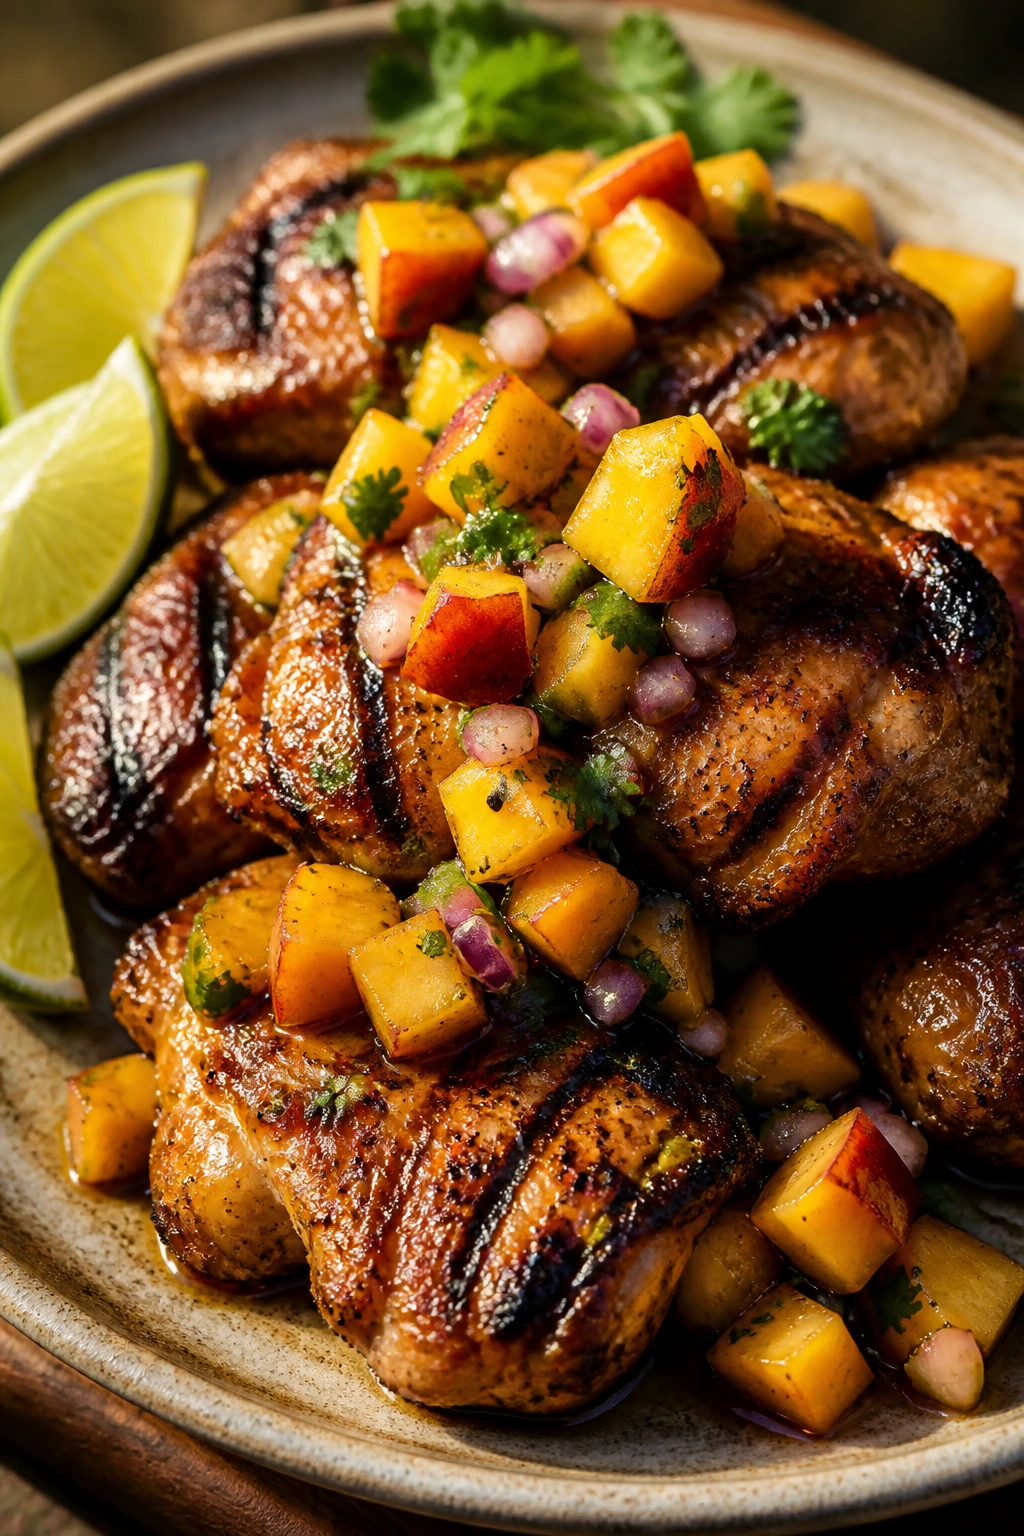
These chicken thighs are the kind of backyard dinner that disappears before you’ve even found the serving spoon. The honey-lime marinade hits the meat with sweetness and brightness, then the grill gives you those little dark edges that make people lean in for another piece. The peach salsa is not a garnish; it’s the point. Juicy fruit, sharp onion, lime, and a little jalapeño turn the whole plate into something lively.
Why It Works
Chicken thighs belong on a hot grill because they stay tender even when the heat gets a little bossy. Breasts can dry out in a hurry, but thighs bring their own fat and flavor, which means you get more room to char without turning the meat stringy. The peach salsa adds acid and freshness, and that matters more than people admit. A grilled piece of chicken with no bright finish can feel heavy by the second bite. This one doesn’t.
Key Ingredients
- 2 1/2 lbs boneless, skinless chicken thighs
- 3 tablespoons olive oil
- 3 tablespoons honey
- Zest and juice of 2 limes
- 4 garlic cloves, minced
- 1 1/2 teaspoons kosher salt
- 1 teaspoon black pepper
- 2 ripe peaches, diced
- 1/2 red onion, finely diced
- 1 jalapeño, seeded and minced
- 2 tablespoons chopped cilantro
Quick Steps
- Whisk together the olive oil, honey, lime zest and juice, garlic, salt, and pepper in a large bowl.
- Add the chicken thighs and toss until coated. Cover and marinate for at least 30 minutes, or up to 4 hours in the fridge.
- Mix the peaches, red onion, jalapeño, and cilantro in a medium bowl. Add a pinch of salt and a squeeze of lime.
- Preheat the grill to medium-high, around 400°F. Oil the grates well.
- Grill the chicken for 5 to 6 minutes per side, until the outside is browned and the thickest part reaches 165°F.
- Rest the chicken for 5 minutes, then spoon the peach salsa on top.
Tips and Variations
- No peaches? Nectarines or diced mango work with the same soft, sunny sweetness.
- More smoke: Add 1 teaspoon smoked paprika to the marinade for a deeper grill flavor.
- Serving move: Put the salsa in a wide bowl instead of on top of the chicken so people can add as much as they want.
2. Smash Burgers with Quick Pickles and Special Sauce
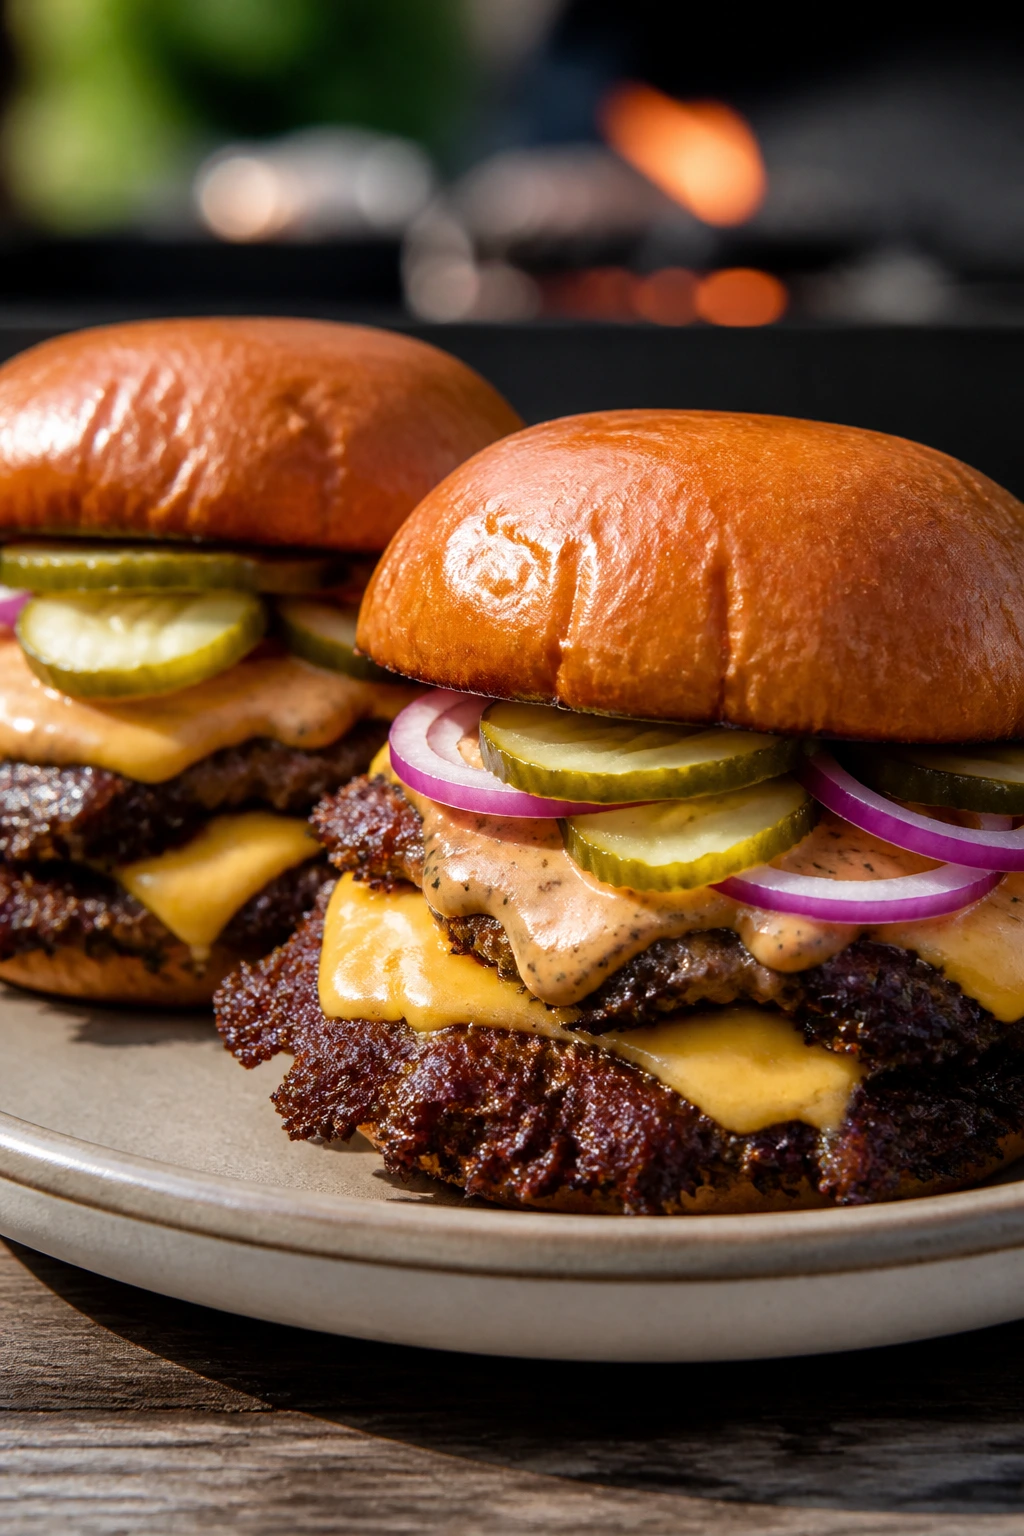
A good smash burger is loud food. It sizzles. It browns fast. It asks for napkins. That’s part of the pleasure. These burgers get crisp edges from a hot griddle or cast-iron skillet on the grill, then pick up tang from a quick pickle and a sauce that tastes like the burger stand you remember from summer road trips.
Why This One Belongs on the Grill
Smash burgers work because of contact. A hot cooking surface turns the outside of the beef into a browned crust in under two minutes, and that crust carries more flavor than a thick burger patty ever can. You don’t need fancy seasoning. You need high heat, good beef with enough fat, and cheese that melts without fuss. The quick pickles cut through all that richness so the burger doesn’t sit like a brick.
Key Ingredients
- 2 lbs ground beef, 80/20 blend
- 2 teaspoons kosher salt
- 1 teaspoon black pepper
- 8 brioche buns, split
- 8 slices American cheese
- 1 red onion, thinly sliced
- 1/2 cup apple cider vinegar
- 1/2 cup water
- 1 tablespoon sugar
- 1 teaspoon salt, for pickling
- 1/2 cup mayonnaise
- 2 tablespoons ketchup
- 1 tablespoon yellow mustard
- 1 tablespoon pickle relish
- 1 head butter lettuce or 4 leaves, torn
- 2 tomatoes, sliced
Quick Steps
- Stir together the vinegar, water, sugar, and 1 teaspoon salt in a bowl. Add the sliced red onion and let it sit while you cook.
- Mix the mayonnaise, ketchup, mustard, and pickle relish in a small bowl. Set aside.
- Divide the beef into 8 loose balls, about 4 ounces each. Do not pack them tight.
- Heat a cast-iron skillet or griddle on the grill until very hot. Butter the buns lightly and toast the cut sides.
- Place the beef balls on the hot surface and smash them flat with a sturdy spatula or burger press. Season with salt and pepper.
- Cook for 90 seconds to 2 minutes, flip, add cheese, and cook 1 minute more until the cheese melts.
- Build the burgers with sauce, lettuce, tomato, quick pickled onion, and the second bun half.
Tips and Variations
- Hot surface, fast cook: If the skillet isn’t hot enough, the burger steams instead of crusting.
- Swap the cheese: Cheddar works if you want more bite, but American melts more cleanly.
- Make-ahead trick: The sauce and pickled onion can sit in the fridge all day.
3. Cedar-Plank Salmon with Dill Yogurt
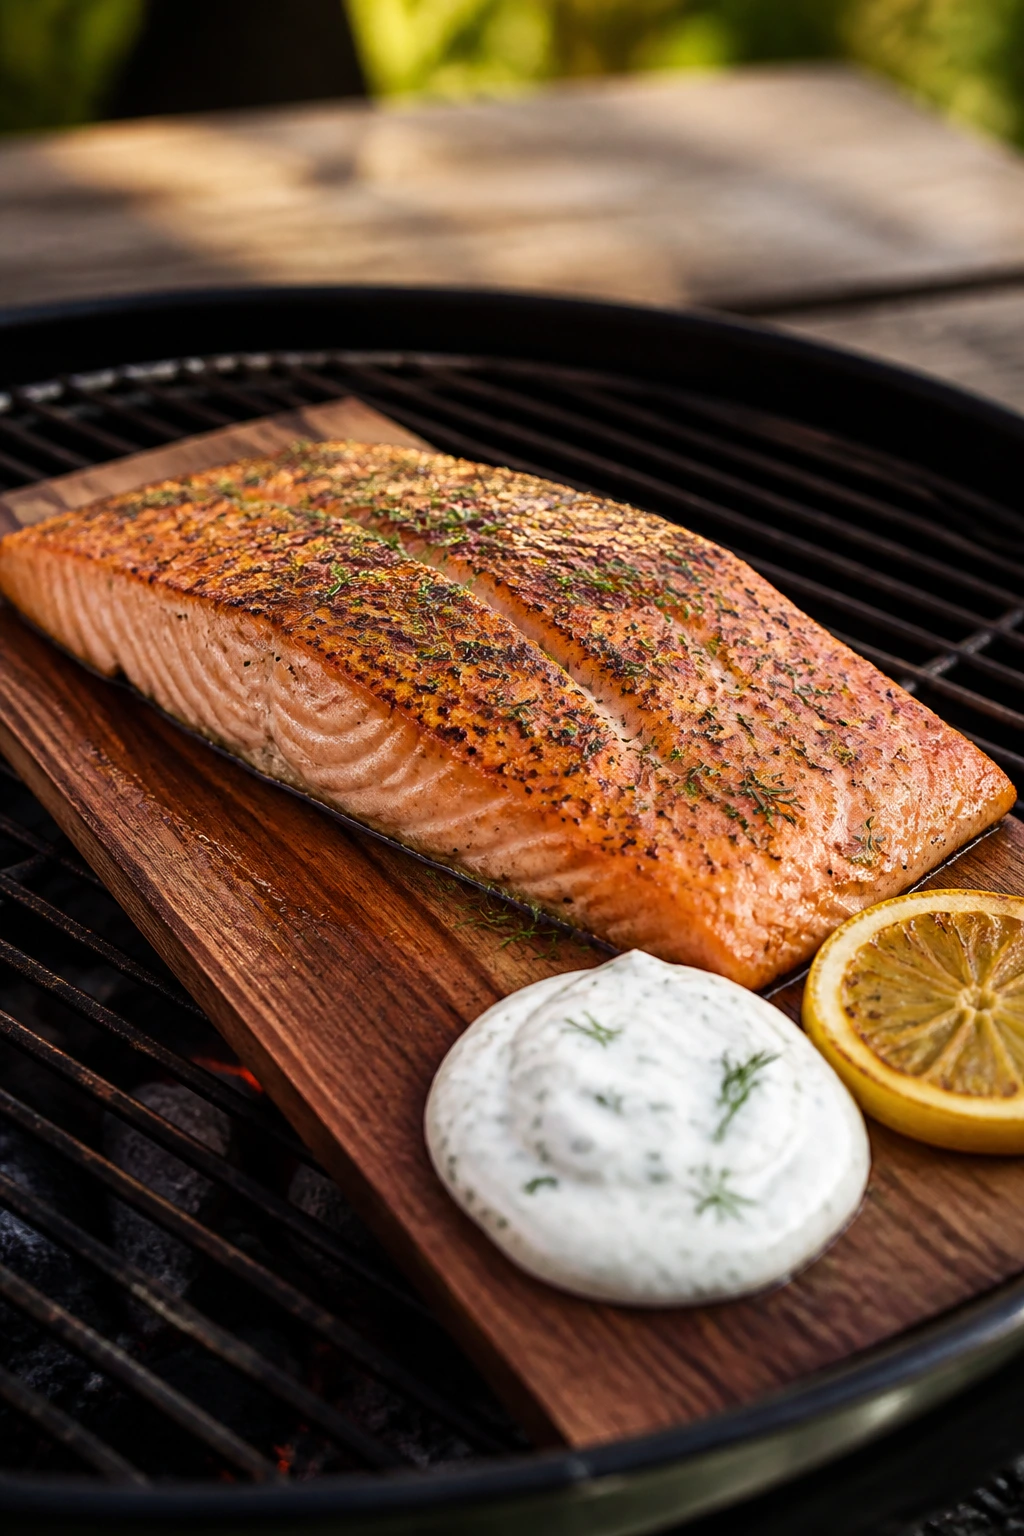
This is the quiet sleeper of a backyard menu. People always crowd around the burgers first, then they notice the salmon because it smells like lemon, dill, and warm cedar. The plank keeps the fish from sticking and gives the whole thing a soft woodsy note that feels a little old-school in the best way.
What Makes It Shine Outside
Salmon is one of the few fish that can handle open-air cooking without getting fragile and fussy. The cedar plank buffers the heat, so the flesh cooks gently while the skin side protects the bottom. Dill yogurt brings coolness, which is what salmon wants when it’s been over a flame. The result feels rich but not heavy, and that’s a rare balance on a warm evening.
Key Ingredients
- 2 cedar planks, soaked in water for at least 1 hour
- 2 lbs salmon fillet, skin on
- 2 tablespoons olive oil
- 1 lemon, sliced
- 1 teaspoon kosher salt
- 1/2 teaspoon black pepper
- 1 cup plain Greek yogurt
- 2 tablespoons chopped fresh dill
- 1 tablespoon lemon juice
- 1 small garlic clove, grated
- Pinch of salt
- Chopped chives, for serving
Quick Steps
- Soak the cedar planks in water for 1 hour or longer so they don’t burn immediately.
- Stir together the Greek yogurt, dill, lemon juice, garlic, and pinch of salt. Chill it until serving.
- Brush the salmon with olive oil and season it with salt and pepper. Lay the lemon slices over the top.
- Heat the grill to medium, about 375°F. Set the plank on the grates and let it warm for 2 minutes.
- Place the salmon on the plank, close the lid, and cook for 12 to 15 minutes, until the fish flakes easily and reaches your preferred doneness.
- Spoon the dill yogurt over the salmon or serve it alongside.
Tips and Variations
- No cedar plank? Use a foil packet with lemon slices, though you’ll lose the wood smoke.
- Herb swap: Chopped parsley and tarragon work if dill isn’t your thing.
- Best texture: Pull the salmon off a little before you think it’s done; carryover heat finishes the job.
4. Sticky BBQ Baby Back Ribs
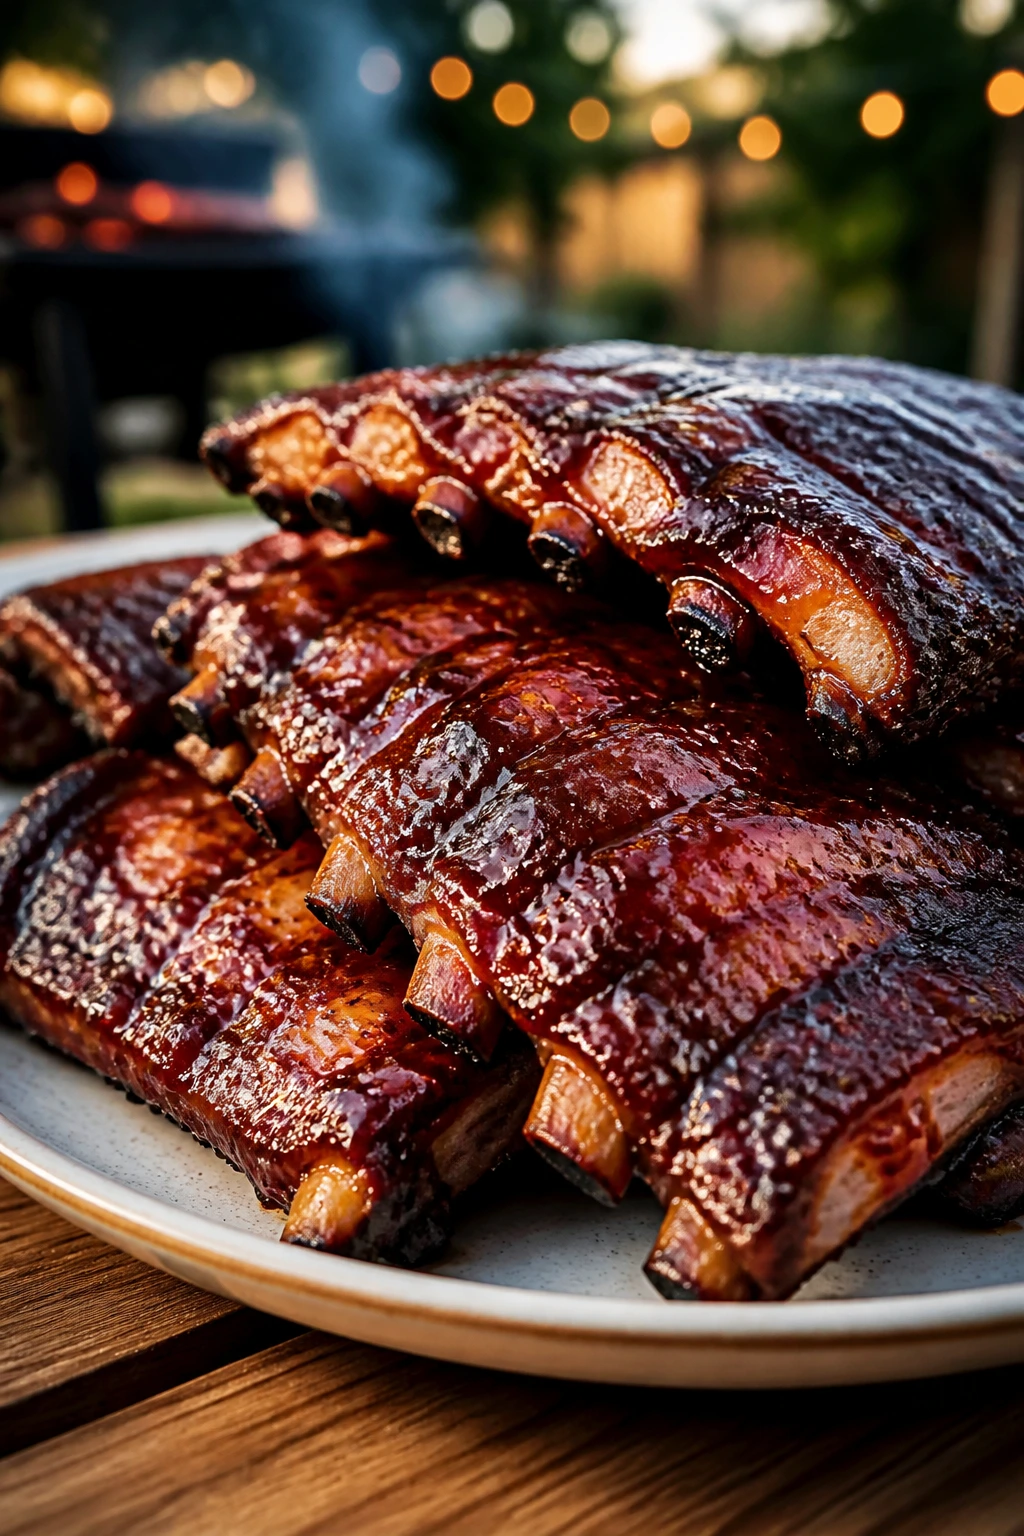
Ribs are a commitment. Nobody buys them by accident. But when you want the backyard to feel like a real event, they bring the kind of drama that makes people linger by the grill and ask questions they already know the answer to. These are sweet, smoky, sticky, and just messy enough to feel worth it.
Why They Earn Their Place
Baby back ribs are forgiving if you cook them with indirect heat and patience. The fat renders slowly, the meat loosens from the bone, and the sauce caramelizes at the end instead of burning too early. I like a dry rub with a little brown sugar because it builds a crust before the barbecue sauce shows up. That crust is where half the flavor lives.
Key Ingredients
- 2 racks baby back ribs
- 2 tablespoons yellow mustard
- 1/4 cup brown sugar
- 2 tablespoons paprika
- 1 tablespoon kosher salt
- 1 tablespoon black pepper
- 1 tablespoon garlic powder
- 1 teaspoon onion powder
- 1 teaspoon chili powder
- 1/2 teaspoon cayenne
- 1/2 cup apple juice
- 1 1/2 cups barbecue sauce
- 2 tablespoons apple cider vinegar
- 1 tablespoon butter
Quick Steps
- Remove the membrane from the back of each rack of ribs.
- Rub the ribs with mustard, then coat them evenly with the brown sugar, paprika, salt, pepper, garlic powder, onion powder, chili powder, and cayenne.
- Preheat the grill for indirect cooking at 275°F. Set a drip pan under the grates if you have one.
- Place the ribs bone-side down over indirect heat. Add a small pan of apple juice nearby or wrap the ribs in foil with a splash of juice after 2 hours.
- Cook for about 2 1/2 hours total, until the meat has pulled back from the bones and a probe slides in with little resistance.
- Stir the barbecue sauce with the vinegar and butter, brush it on the ribs, and cook 10 more minutes over indirect heat to set the glaze.
- Rest the ribs for 10 minutes before slicing.
Tips and Variations
- Sauce later, not sooner: Early sauce can burn before the ribs are tender.
- If the rack looks dry: A light spritz of apple juice helps during the last hour.
- Crowd tip: Slice the racks between every other bone if you want easier grabbing at the table.
5. Steak and Pepper Kabobs with Garlic Butter
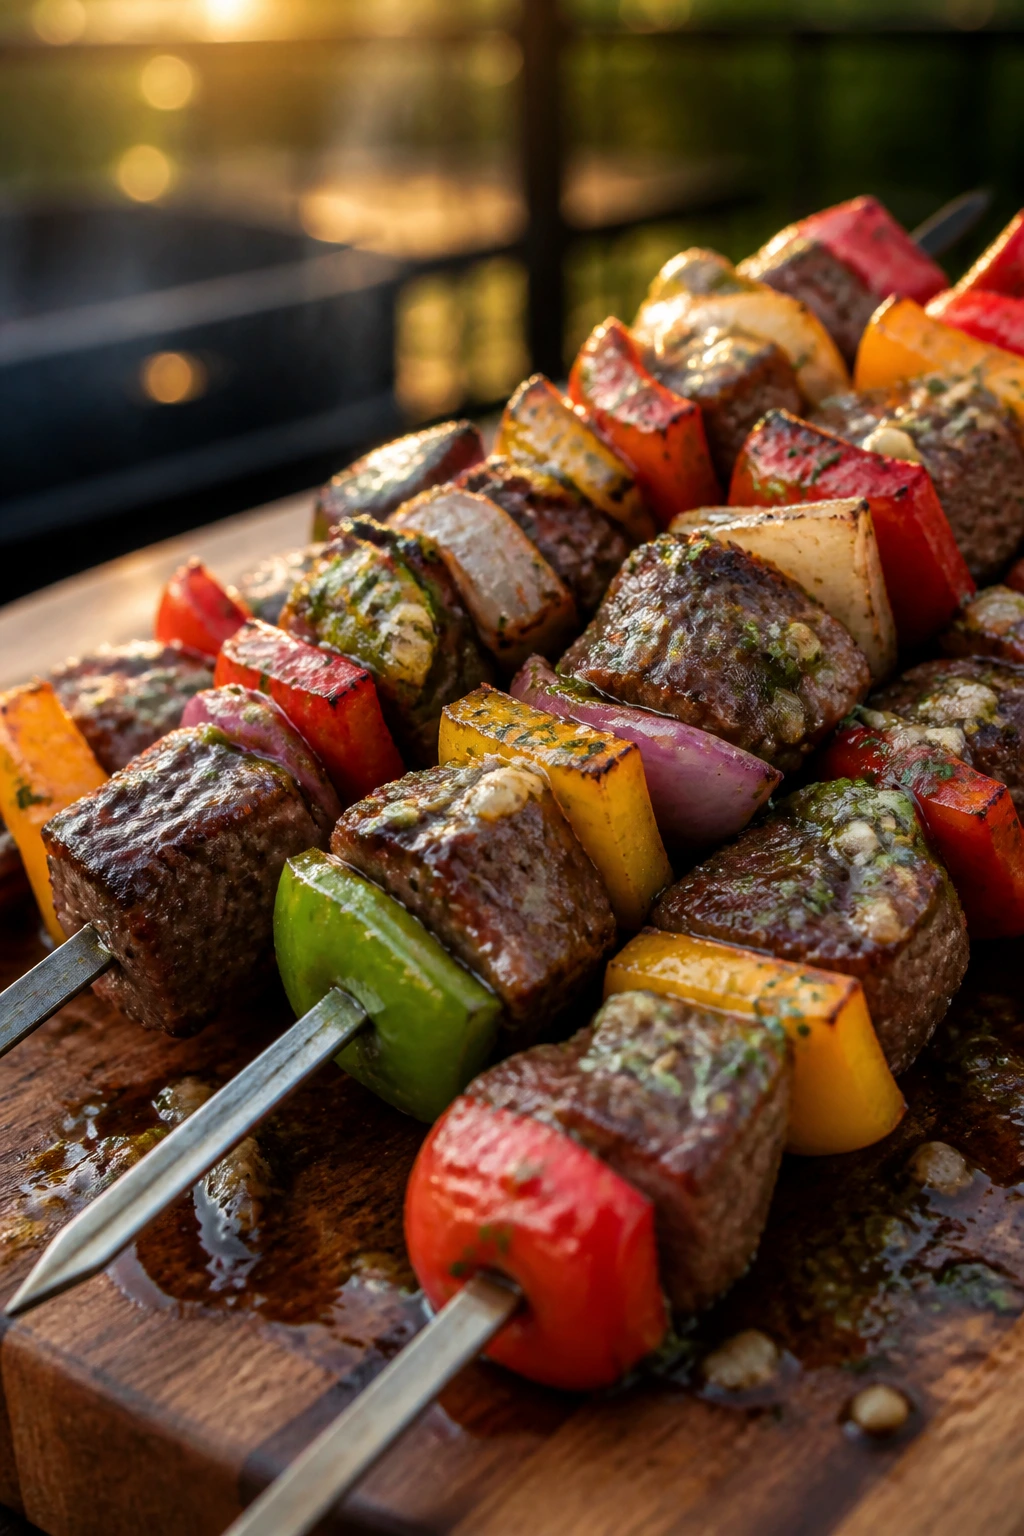
Kabobs feel festive in a way regular steaks don’t. Maybe it’s the skewer. Maybe it’s the combination of meat and vegetables in one line. Either way, these deliver all the backyard pleasure without forcing you to juggle ten side dishes. The garlic butter at the end is not a flourish. It’s the part that ties the whole thing together.
Why They Work So Well on Skewers
Sirloin is sturdy enough for the grill but still tender if you cut it right and don’t overcook it. The peppers and onions add sweetness as they char, which gives the beef somewhere to go besides “more beef.” Skewers also cook fast, which matters when guests are hovering and asking whether dinner is ready. It usually is.
Key Ingredients
- 2 lbs sirloin steak, cut into 1 1/2-inch cubes
- 2 bell peppers, cut into 1 1/2-inch pieces
- 1 large red onion, cut into wedges
- 8 oz button or cremini mushrooms
- 1/4 cup olive oil
- 3 tablespoons soy sauce
- 2 tablespoons Worcestershire sauce
- 2 garlic cloves, minced
- 1 teaspoon kosher salt
- 1 teaspoon black pepper
- 4 tablespoons unsalted butter
- 1 tablespoon chopped parsley
- 1 teaspoon lemon juice
- Metal or soaked wooden skewers
Quick Steps
- Whisk the olive oil, soy sauce, Worcestershire, garlic, salt, and pepper in a bowl.
- Toss the steak pieces with the marinade and let them sit for 20 to 30 minutes. Keep the vegetables separate so they don’t soften too much.
- Thread the steak, peppers, onion, and mushrooms onto skewers, leaving a little space between pieces.
- Preheat the grill to medium-high. Oil the grates.
- Grill the skewers for 8 to 10 minutes total, turning every 2 to 3 minutes, until the steak reaches your preferred doneness and the vegetables have charred edges.
- Melt the butter with the parsley and lemon juice in a small pan or microwave-safe bowl.
- Brush the kabobs with garlic butter right before serving.
Tips and Variations
- Even cooking: Cut the beef and vegetables to a similar size so nothing finishes too early.
- Swap the mushroom: Cherry tomatoes work, but add them near the end because they soften fast.
- Serving idea: Slide everything off the skewers onto a platter if you want easier serving for a crowd.
6. Sausage, Peppers, and Onions Hoagies
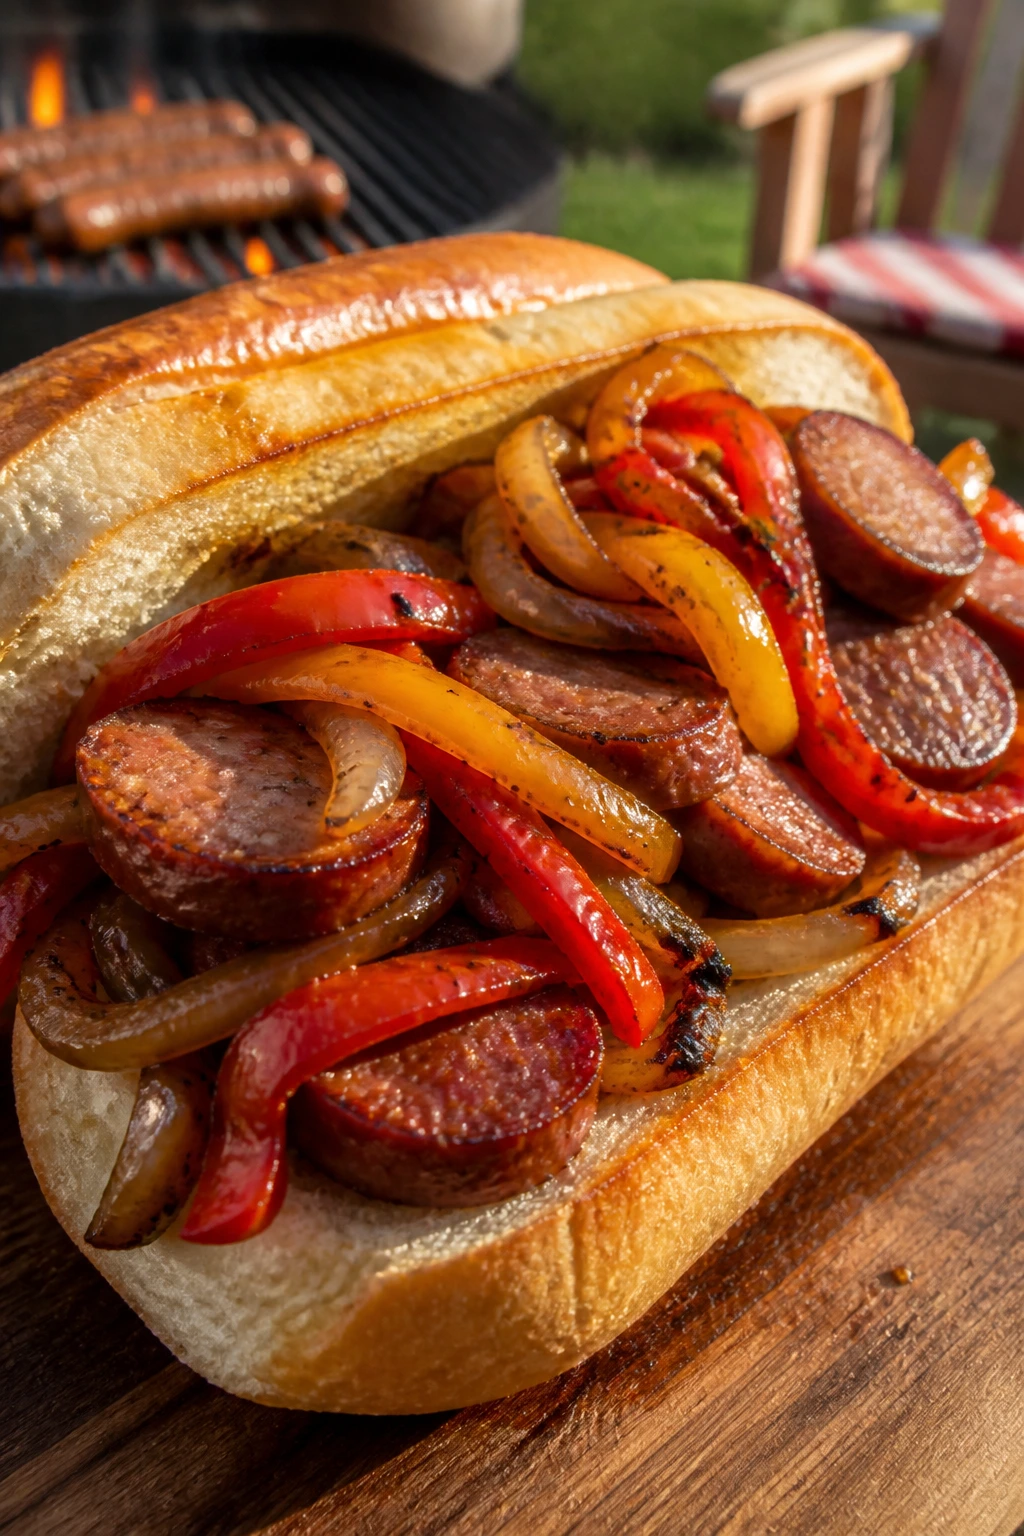
This is the backyard dinner I make when I want maximum payoff for minimal fuss. Sausage does a lot of the flavor work for you. Peppers and onions get soft and sweet in the pan. Put the whole thing in a toasted roll and people start acting like you planned a much bigger production than you did.
Why It’s Such a Good Holiday Meal
Italian sausage loves heat. The casing blisters, the fat renders, and the inside stays juicy if you don’t stab it ten times like a tiny porcupine. Cooking the peppers and onions in a cast-iron skillet on the grill gives you the smoky edge of outdoor cooking without losing the saucy, soft texture that makes this sandwich so satisfying. It’s not delicate. That’s the charm.
Key Ingredients
- 8 Italian sausages, sweet or hot
- 2 tablespoons olive oil
- 3 bell peppers, sliced
- 2 large yellow onions, sliced
- 3 garlic cloves, minced
- 1 teaspoon kosher salt
- 1/2 teaspoon black pepper
- 1 teaspoon dried oregano
- Pinch of red pepper flakes
- 2 tablespoons red wine vinegar
- 8 hoagie rolls
- 8 slices provolone cheese
Quick Steps
- Preheat the grill to medium heat, about 375°F.
- Grill the sausages over direct heat for 10 to 12 minutes, turning often, until browned and cooked through.
- While the sausages cook, heat the olive oil in a cast-iron skillet on the grill or over a side burner. Add the peppers and onions.
- Cook the vegetables for 10 to 12 minutes, stirring now and then, until they’re soft and a little browned at the edges.
- Add the garlic, salt, pepper, oregano, red pepper flakes, and vinegar. Cook for 1 more minute.
- Toast the rolls cut-side down for 1 minute, then fill them with sausage, peppers, onions, and provolone.
- Close the hoagies in foil for 2 minutes if you want the cheese melted through.
Tips and Variations
- Hot or sweet: Sweet sausage feels softer and kid-friendly; hot sausage brings more bite.
- Bread matters: A sturdy roll beats a soft one here, because the juices can get away from you.
- Extra punch: A spoonful of jarred giardiniera on top wakes everything up.
7. Garlic-Lime Shrimp Skewers with Grilled Corn Salad
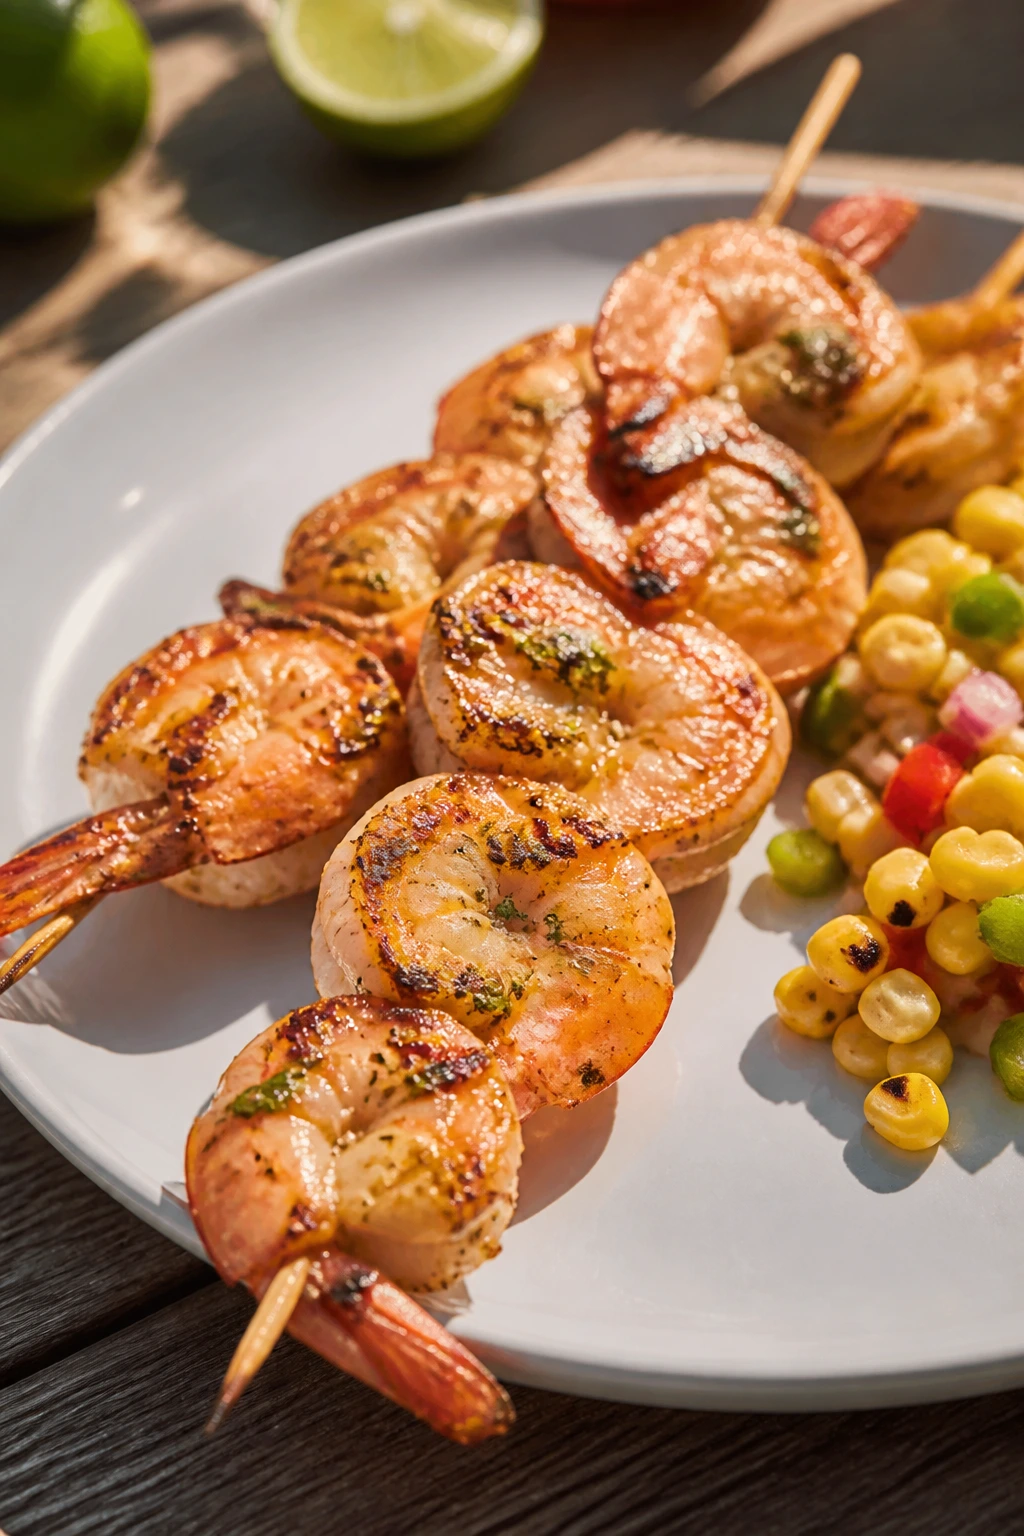
Shrimp are fast, which is handy when the evening is already full of people and somewhere in the background someone is asking for a lighter dinner. These skewers cook in minutes, pick up smoke quickly, and taste best with something crisp and sweet beside them. That’s where the corn salad comes in — smoky kernels, tomatoes, avocado, and lime turning into a side dish that could steal the whole plate.
Why It’s a Smart Backyard Choice
Shrimp are easy to overcook, which is exactly why they reward a hot grill and a short timeline. Get them on, get them turned, get them off. Done. The lime and garlic give them enough flavor to stand up to char, and the corn salad adds texture in a way plain rice never could. This meal feels light, but not small.
Key Ingredients
- 2 lbs large shrimp, peeled and deveined
- 3 tablespoons olive oil
- 3 garlic cloves, minced
- Zest and juice of 2 limes
- 1 teaspoon kosher salt
- 1/2 teaspoon smoked paprika
- 1/4 teaspoon red pepper flakes
- 4 ears corn, husked
- 1 pint cherry tomatoes, halved
- 1 avocado, diced
- 1/4 cup chopped cilantro
- 2 tablespoons olive oil, for the salad
- 1 tablespoon lime juice, for the salad
- Salt and pepper, to taste
- Wooden or metal skewers
Quick Steps
- Toss the shrimp with 3 tablespoons olive oil, garlic, lime zest and juice, salt, smoked paprika, and red pepper flakes. Let sit for 15 minutes.
- Preheat the grill to medium-high.
- Grill the corn for 8 to 10 minutes, turning often, until lightly charred. Let it cool, then slice the kernels off the cob.
- Mix the corn with the cherry tomatoes, avocado, cilantro, 2 tablespoons olive oil, 1 tablespoon lime juice, salt, and pepper.
- Thread the shrimp onto skewers.
- Grill the shrimp for 2 to 3 minutes per side, until opaque and curled.
- Serve the shrimp over the corn salad or alongside it.
Tips and Variations
- Don’t marinate too long: Lime juice can start to “cook” the shrimp if it sits for hours.
- Use a grill basket: If your shrimp are small, a basket is easier than wrestling with skewers.
- Add heat: Diced jalapeño or a spoonful of hot sauce in the salad works well.
8. Pulled Pork Sandwiches with Tangy Slaw
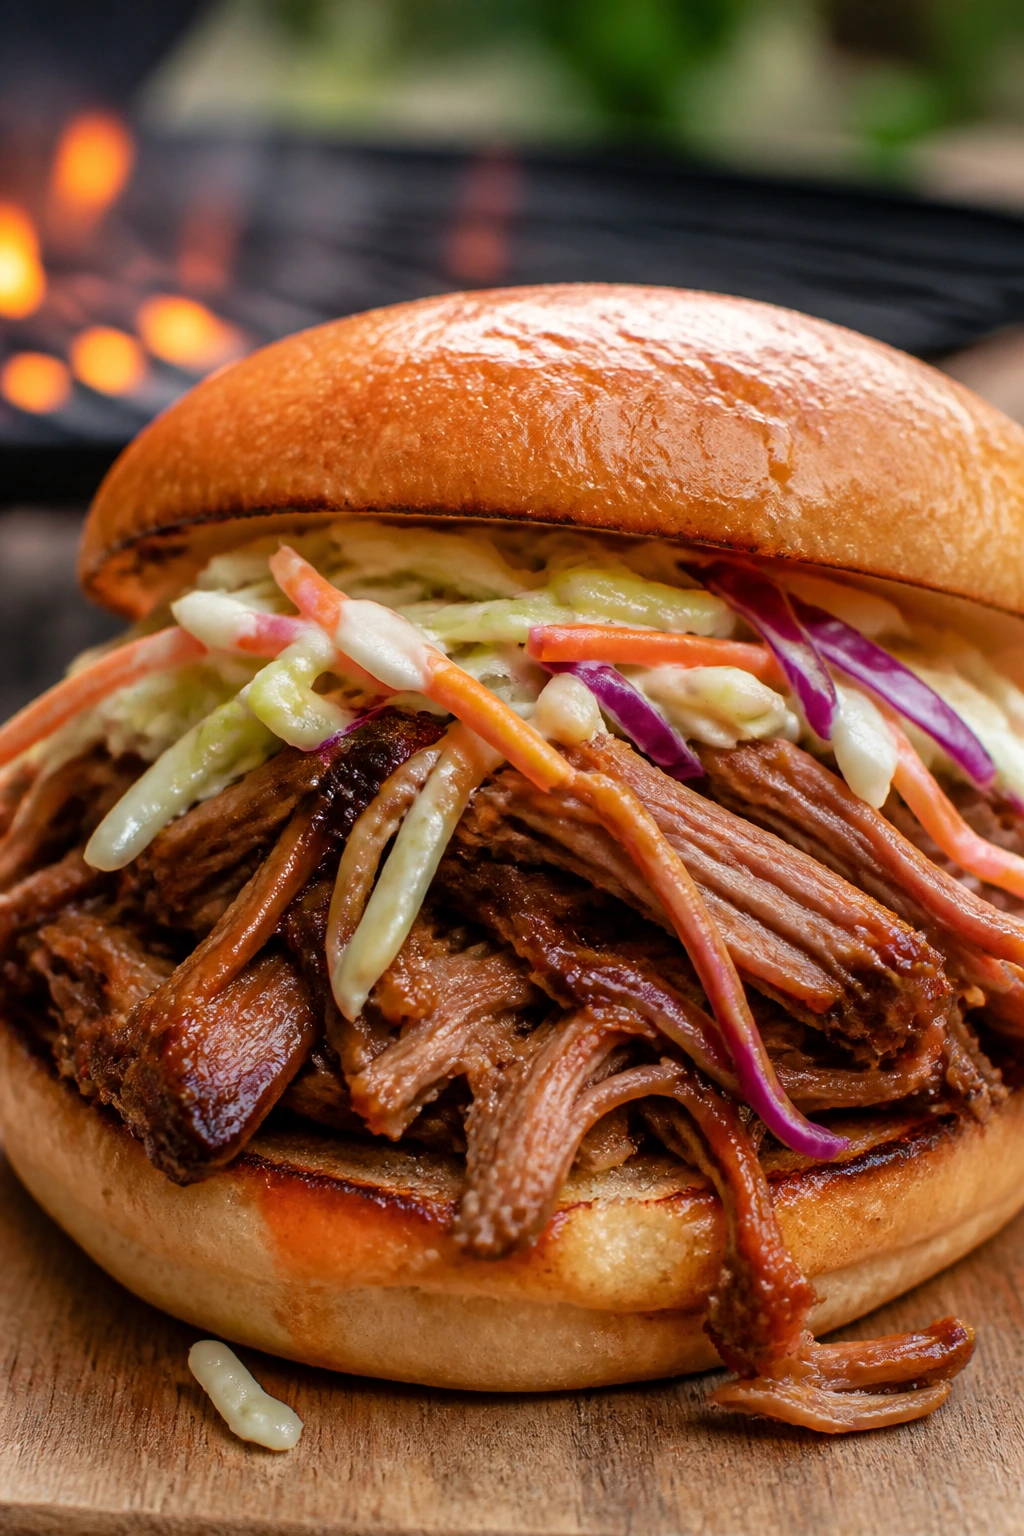
Pulled pork is the slow answer to a party. It asks for time, not attention, which is a useful trade on a holiday weekend. The meat comes off the grill smoky and shreddable, then the slaw adds crunch and vinegar snap so the sandwich doesn’t collapse into softness. That contrast is what keeps people going back for seconds.
Why It Deserves a Place in the Menu
Pork shoulder is built for long, indirect cooking. The fat renders, the connective tissue softens, and the meat turns spoon-tender without drying out. A vinegar-bright sauce keeps the sandwich from feeling sticky in a one-note way. I like a tangy slaw on top because it cuts through the richness better than a pile of extra barbecue sauce ever will.
Key Ingredients
- 4 lbs pork shoulder or pork butt
- 2 tablespoons yellow mustard
- 2 tablespoons kosher salt
- 1 tablespoon black pepper
- 2 tablespoons paprika
- 2 tablespoons brown sugar
- 1 tablespoon garlic powder
- 1 tablespoon onion powder
- 1 teaspoon mustard powder
- 1 cup apple cider vinegar
- 1/2 cup apple juice
- 1 cup barbecue sauce
- 1 bag coleslaw mix, about 14 oz
- 1/4 cup mayonnaise
- 2 tablespoons apple cider vinegar, for slaw
- 1 tablespoon sugar
- 1 teaspoon celery seed
- 8 sandwich buns
Quick Steps
- Rub the pork shoulder with mustard, then coat it all over with salt, pepper, paprika, brown sugar, garlic powder, onion powder, and mustard powder.
- Preheat the grill for indirect cooking at 275°F. Set a drip pan under the meat if possible.
- Place the pork over indirect heat with a small pan of apple cider vinegar and apple juice nearby. Cook for about 4 to 5 hours, turning once or twice, until the meat reaches 195°F to 203°F and shreds easily.
- Rest the pork for 20 minutes, then shred it with forks.
- Stir barbecue sauce into the shredded meat to taste.
- Toss the coleslaw mix with mayonnaise, vinegar, sugar, celery seed, and a pinch of salt.
- Pile the pork onto buns and top with slaw.
Tips and Variations
- Best rest of the day: Pulled pork holds well, so you can cook it earlier and rewarm it gently.
- If the bark is too dark: Wrap the pork in foil partway through the cook to soften the crust.
- Serving move: Keep the slaw separate until the last minute so the buns stay dry.
9. Grilled Veggie and Halloumi Skewers with Herbed Couscous
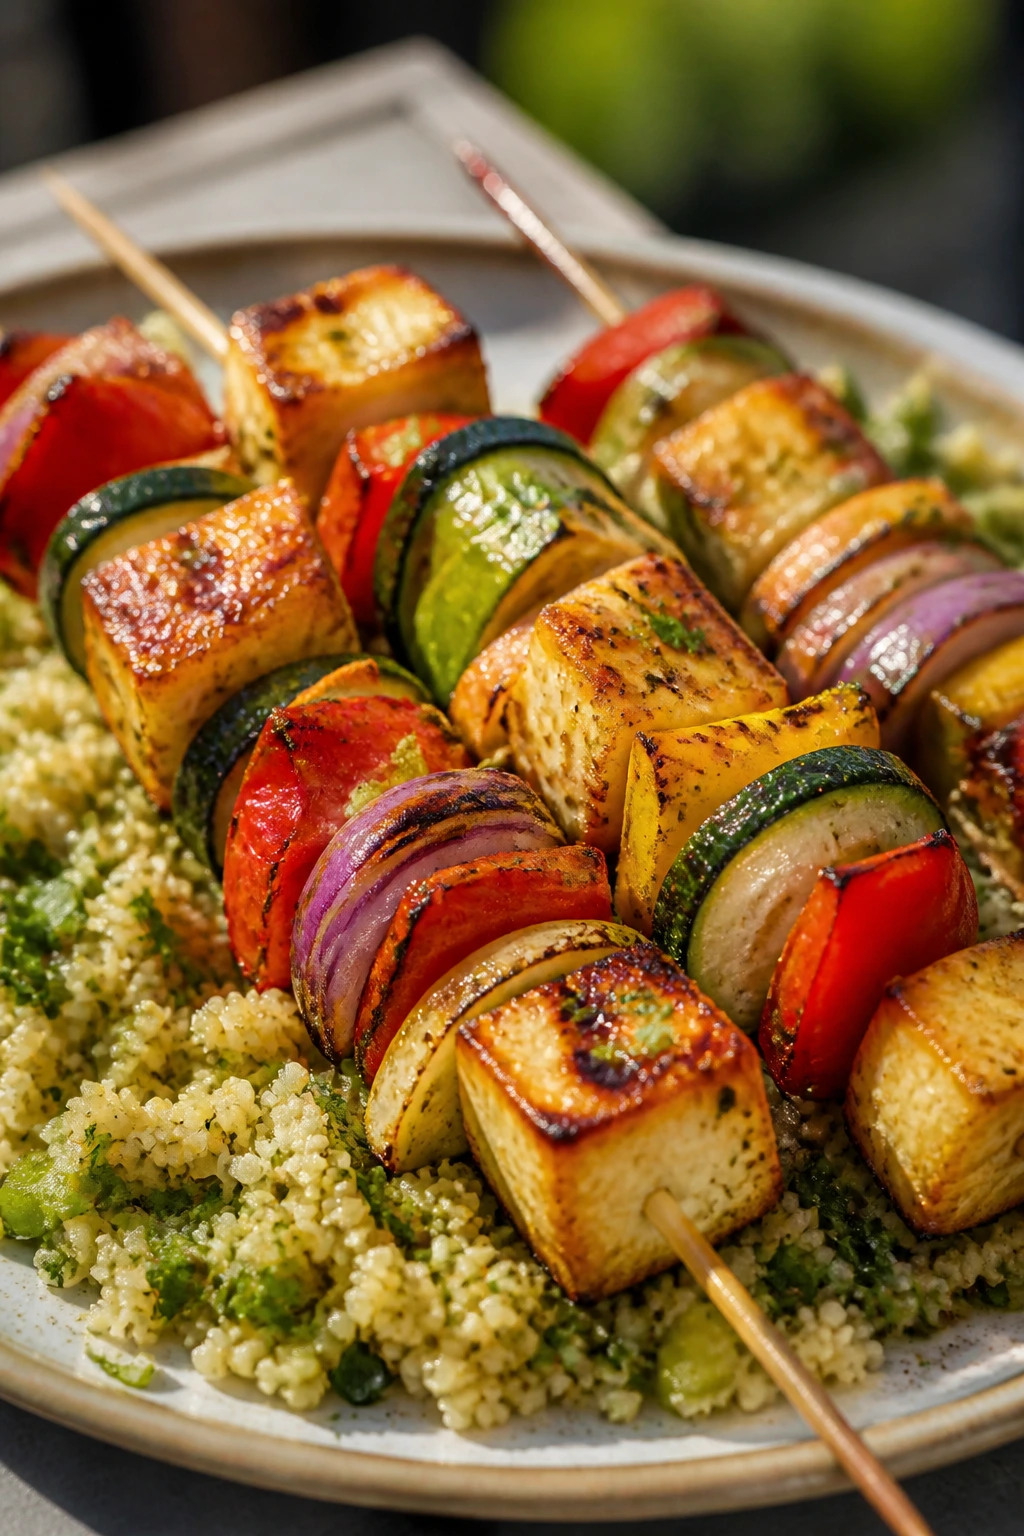
Some backyard dinners need a meatless main that doesn’t feel like an apology. Halloumi does the job. It grills into salty, squeaky slabs with crisp edges, and when you stack it with zucchini, peppers, onions, and tomatoes, the skewers look like the sort of thing that should be on a patio menu for a lot more money than you spent. The couscous underneath catches the juices and makes the plate feel complete.
Why It’s Worth Making for a Mixed Crowd
Halloumi is one of the few cheeses that can sit on a grill without melting into a puddle. That gives you real structure and a serious bite. Couscous cooks fast with hot water, so it doesn’t drag the whole recipe into long prep. The herbs and lemon keep the dish from feeling heavy, which matters when the rest of the table is full of richer food.
Key Ingredients
- 1 1/2 cups couscous
- 1 3/4 cups boiling water or hot vegetable broth
- 2 tablespoons olive oil
- 1 lemon, zested and juiced
- 14 oz halloumi, cut into 1-inch pieces
- 2 zucchini, sliced into thick rounds
- 2 bell peppers, cut into squares
- 1 red onion, cut into chunks
- 1 pint cherry tomatoes
- 2 tablespoons olive oil, for grilling
- 1 teaspoon kosher salt
- 1/2 teaspoon black pepper
- 1/2 cup chopped parsley
- 1/4 cup chopped mint
- 2 tablespoons crumbled feta, optional
- Skewers
Quick Steps
- Put the couscous in a bowl. Pour over the boiling water or broth, cover, and let stand for 5 minutes.
- Fluff the couscous with a fork, then stir in 2 tablespoons olive oil, lemon zest and juice, parsley, mint, salt, and pepper.
- Thread the halloumi and vegetables onto skewers.
- Brush the skewers with olive oil and season lightly with salt and pepper.
- Grill over medium-high heat for 6 to 8 minutes, turning once or twice, until the halloumi has golden edges and the vegetables are tender with char marks.
- Spoon the couscous onto a platter and lay the skewers on top.
- Finish with feta if you want a little extra salt.
Tips and Variations
- No couscous? Use cooked farro or quinoa, though couscous stays the quickest.
- Add a sauce: A spoonful of pesto or garlic yogurt makes the whole thing feel richer.
- Watch the halloumi: It should brown, not melt. If it starts to slump, pull it off.
10. Chicken Fajita Foil Packets
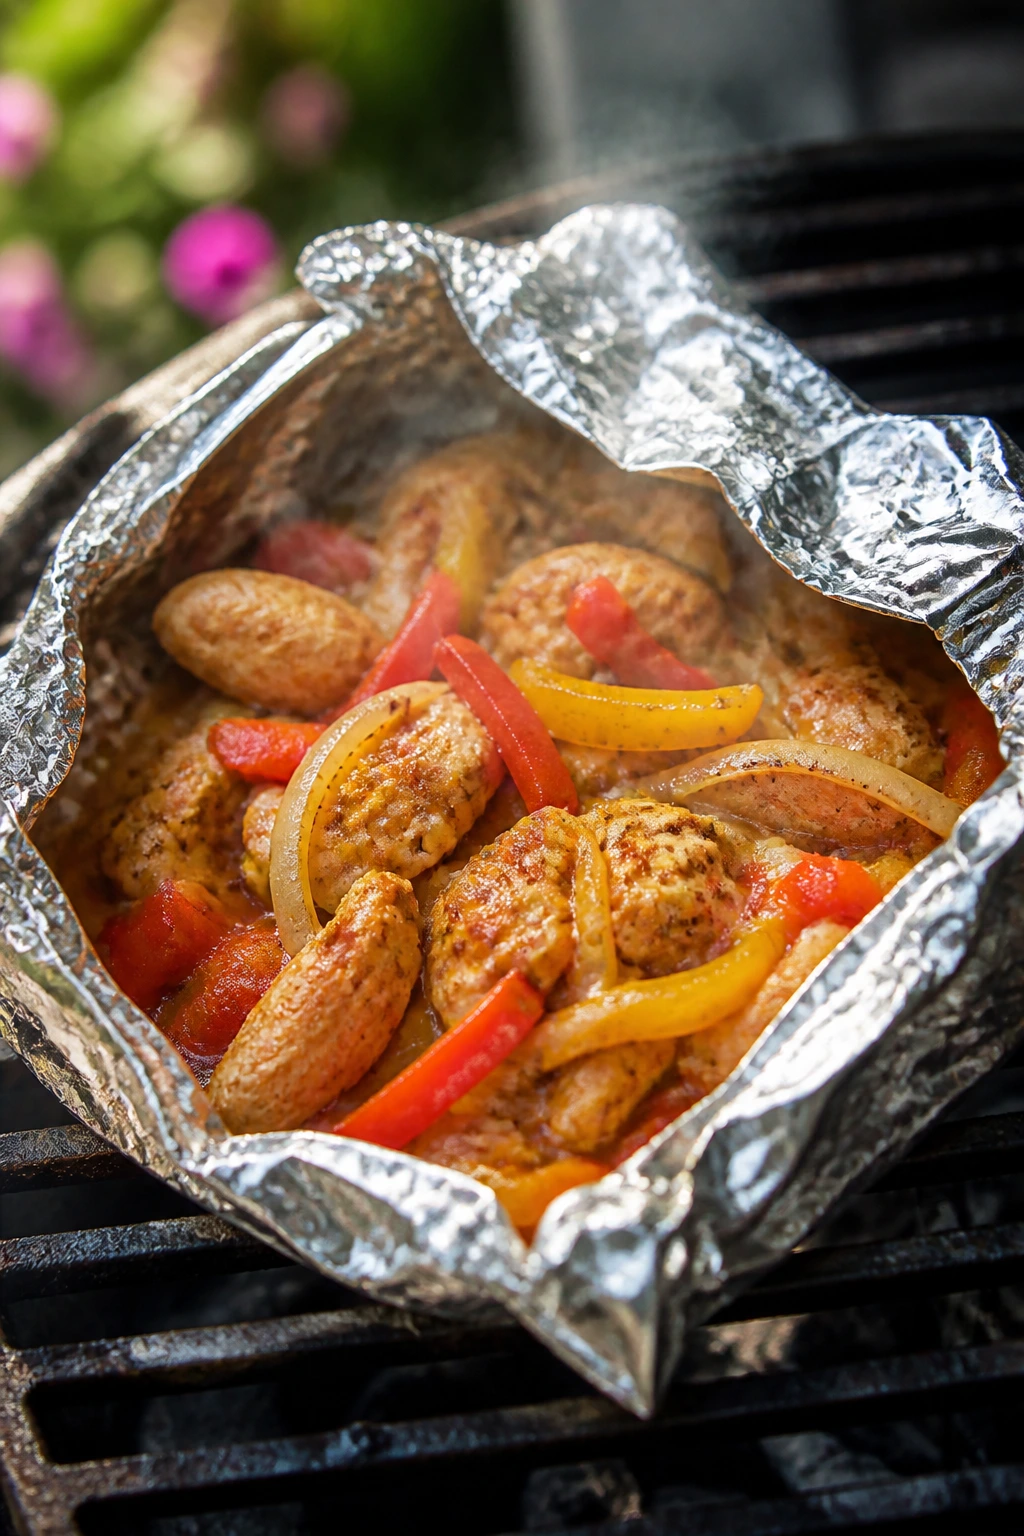
Foil packets are not glamorous. They are, however, brilliant when you want dinner to happen with very little clean-up and a lot of flavor. The chicken steams inside the packet while still picking up grill heat, which leaves you with juicy meat, softened peppers, and onions that taste like they spent more time over the fire than they did. That’s useful on a busy night.
Why They’re a Backyard Favorite
The foil packet method traps heat and seasoning in one tidy bundle. It also protects chicken pieces from the dry edge that can happen when the grill gets too aggressive. Fajita seasoning brings enough spice to season the meat and vegetables at once, and the lime at the end keeps everything from feeling boxed in. It’s a practical recipe with a good amount of smoke character.
Key Ingredients
- 2 lbs boneless, skinless chicken thighs or breasts, cut into strips
- 3 bell peppers, sliced
- 1 large onion, sliced
- 2 tablespoons olive oil
- 2 tablespoons fajita seasoning
- 1 teaspoon kosher salt, if your seasoning is low-salt
- 1 lime, cut into wedges
- 8 small flour or corn tortillas
- 1 cup shredded cheddar or Monterey Jack
- 1/2 cup sour cream
- 1 cup salsa
- 1 avocado, sliced
- Chopped cilantro, for topping
- Heavy-duty foil
Quick Steps
- Toss the chicken, peppers, and onion with olive oil, fajita seasoning, and salt.
- Divide the mixture among 4 large foil sheets. Fold each into a tight packet, leaving a little room for steam.
- Preheat the grill to medium-high, then place the packets on the grate.
- Cook for 20 to 25 minutes, flipping once, until the chicken reaches 165°F and the vegetables are tender.
- Open the packets carefully — the steam is hot.
- Serve the filling in tortillas with cheese, sour cream, salsa, avocado, cilantro, and lime.
- If you want a little char, leave the open packets on the grill for 1 to 2 minutes more.
Tips and Variations
- Use thighs if you can: They stay juicier than breasts and forgive a longer cook.
- Make it stretch: Add sliced mushrooms or extra onions if you need to feed more people.
- Better texture: Don’t overfill the packets; cramped food steams unevenly.
11. Pork Tenderloin with Mustard Herb Sauce
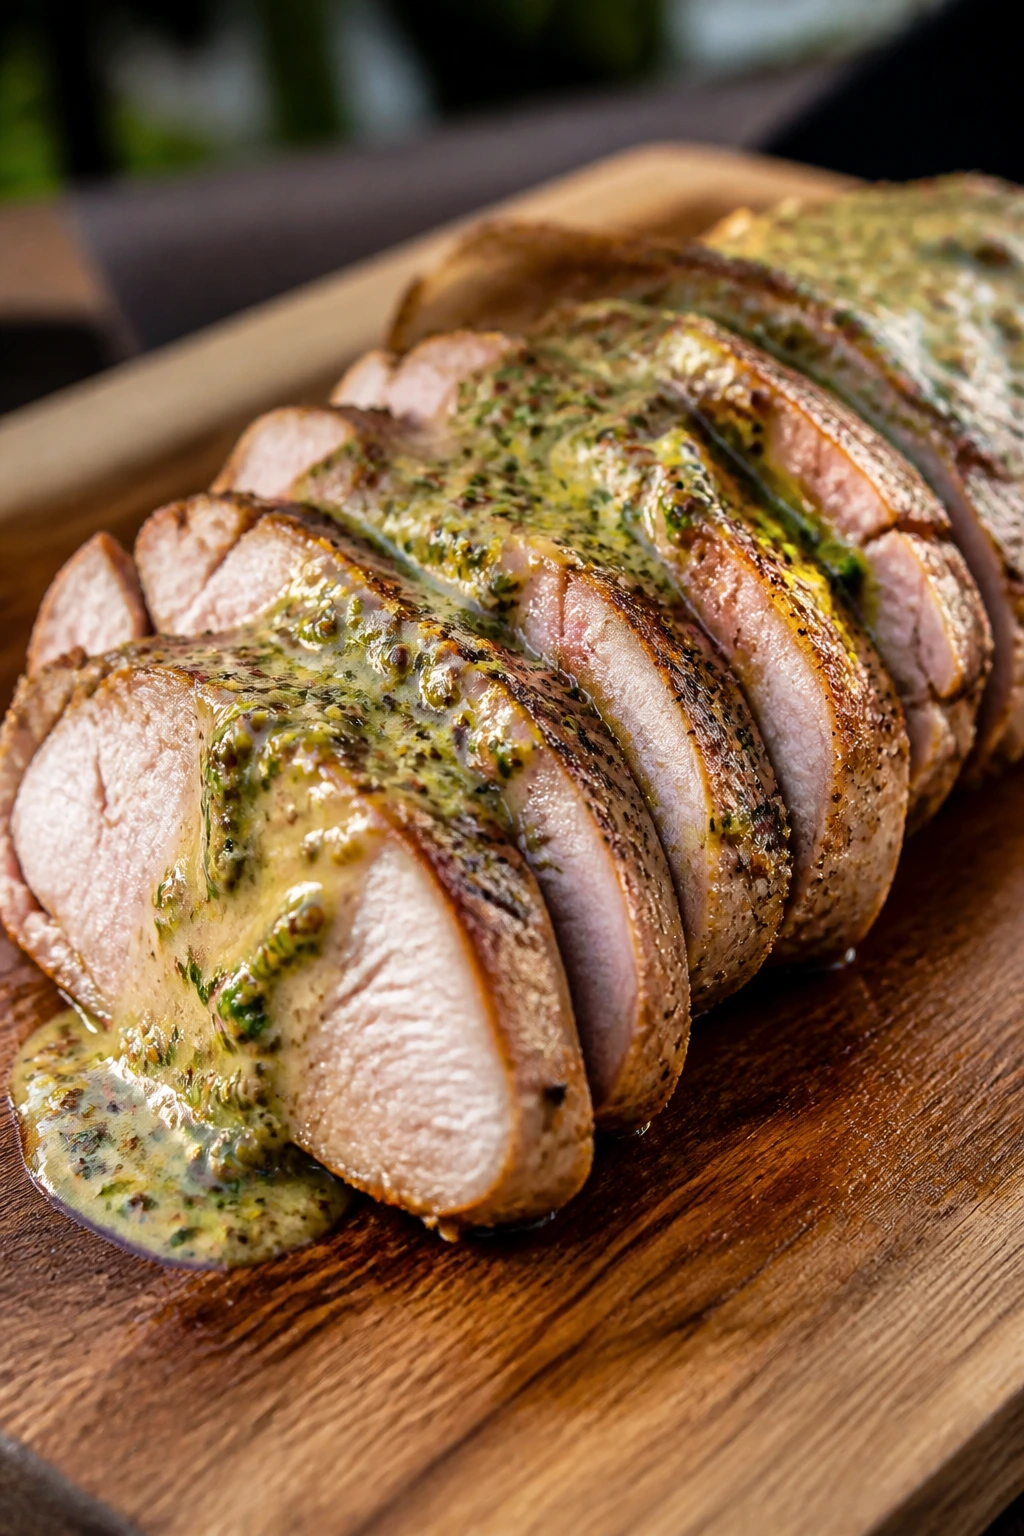
Pork tenderloin is the fast, elegant cousin of pulled pork. It cooks in a fraction of the time, slices neatly, and still feels like a proper dinner when the plate is crowded with potatoes or grilled vegetables. The mustard herb sauce brings sharpness and freshness, which keeps this from tasting like a plain piece of meat with a drizzle on top.
Why It’s a Strong Backyard Move
Tenderloin is lean, so the trick is to keep the heat moderate and stop cooking before it dries out. That’s easier than it sounds if you use a thermometer and pull the meat at the right point. The mustard sauce adds bite, honey softens the sharp edges, and chopped herbs give the whole thing a late-summer feel. It’s a good recipe for people who want something a touch more refined without turning dinner into a project.
Key Ingredients
- 2 pork tenderloins, about 2 lbs total
- 2 tablespoons olive oil
- 2 teaspoons kosher salt
- 1 teaspoon black pepper
- 1 teaspoon garlic powder
- 1 teaspoon smoked paprika
- 1/4 cup Dijon mustard
- 2 tablespoons whole-grain mustard
- 2 tablespoons honey
- 1 tablespoon apple cider vinegar
- 2 tablespoons chopped parsley
- 1 tablespoon chopped thyme or rosemary
- 2 tablespoons olive oil, for the sauce
Quick Steps
- Pat the tenderloins dry and rub them with olive oil, salt, pepper, garlic powder, and smoked paprika.
- Preheat the grill to medium, about 375°F, with one cooler zone available.
- Grill the tenderloins for 15 to 18 minutes total, turning every few minutes, until the thickest part reaches 145°F.
- Rest the meat for 8 to 10 minutes before slicing. Do not skip this.
- Whisk together the Dijon, whole-grain mustard, honey, vinegar, parsley, thyme, and olive oil.
- Slice the pork into medallions and spoon the sauce over the top.
- Serve the extra sauce at the table.
Tips and Variations
- Carryover matters: Tenderloin keeps cooking after it leaves the grill, so pull it a little early.
- Herb swap: Sage works if you want a deeper, colder-weather note.
- Serving idea: Slice it thin for sandwiches the next day. It holds up well.
12. Grilled Flatbread Pizzas with Mozzarella, Tomatoes, and Basil
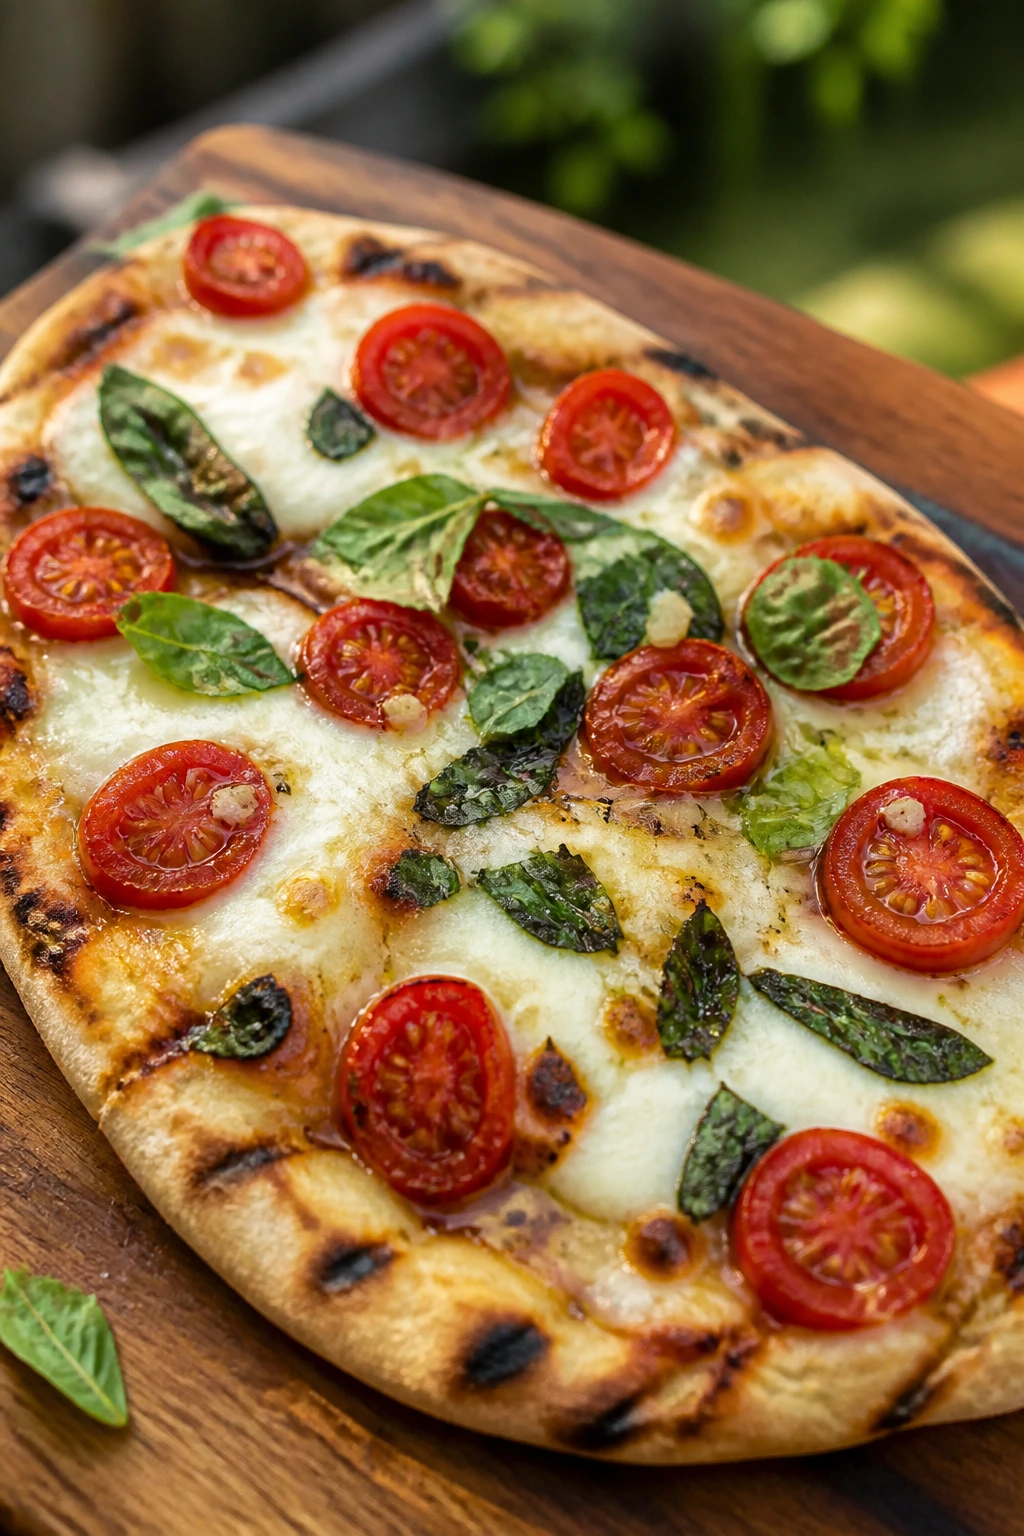
This is the recipe that saves the evening when everyone is still hanging around and nobody wants to stop eating. Flatbread pizzas go from grill to hands in minutes, and they feel casual in a good way. Charred edges, melted cheese, sweet tomatoes, basil, and a hit of garlic make a dinner that’s part cookout, part snack board, part small triumph.
Why It’s a Clever Ending to the Menu
The grill acts like a pizza oven if you’re patient and keep the heat under control. Flatbread cooks fast enough to crisp before the toppings get soggy, which is the whole battle with grilled pizza. Using naan or another sturdy flatbread means you don’t need to fuss with dough stretches or peel tricks unless you enjoy that sort of thing. I don’t, on a busy night.
Key Ingredients
- 4 naan or sturdy flatbreads
- 1 tablespoon olive oil
- 1 garlic clove, finely grated
- 1 cup pizza sauce or crushed tomatoes
- 2 cups shredded mozzarella
- 1 cup fresh mozzarella, torn or sliced
- 1 pint cherry tomatoes, halved
- 1/2 teaspoon kosher salt
- 1/4 teaspoon black pepper
- 1/4 cup grated Parmesan
- 1/2 cup fresh basil leaves
- Red pepper flakes, optional
- Extra olive oil for brushing
Quick Steps
- Mix the olive oil with the grated garlic and brush it lightly over one side of each flatbread.
- Preheat the grill to medium-high, then lower it to medium before cooking the flatbreads.
- Grill the flatbreads, garlic side down, for 1 minute to 2 minutes until lightly charred.
- Flip the flatbreads and spread with pizza sauce. Top with mozzarella, fresh mozzarella, tomatoes, salt, pepper, and Parmesan.
- Close the grill lid and cook for 3 to 5 minutes, until the cheese melts and the edges crisp.
- Remove the pizzas, scatter basil over the top, and finish with red pepper flakes if you want heat.
- Slice and serve right away.
Tips and Variations
- Topping restraint: Too many toppings make the flatbread floppy.
- If the grill runs hot: Cook the flatbread on the cooler side after the first char.
- Best finish: A drizzle of good olive oil and a few torn basil leaves go a long way.
Why Backyard Cooking Wins the Holiday Table
Backyard dinners work because they give each dish a job. The grill gives smoke and char. The table gives you a place to pile on sauce, slaw, herbs, and lemon wedges. And the cook — you, probably — gets to stay in the center of the action without being stuck in one room staring at a timer.
There’s also a practical truth hiding in the fun of it. Outdoor cooking keeps strong-smelling heat, grease, and big pans away from the kitchen, which makes cleanup easier and the whole evening feel more relaxed. I’d rather juggle tongs outside than wash three heavy skillets indoors. Most people would.
Essential Equipment for These Recipes
- Gas or charcoal grill: Either one works; charcoal gives more smoke, gas gives easier heat control.
- Instant-read thermometer: The simplest way to avoid dry chicken, undercooked pork, or overdone salmon.
- Long-handled tongs: Short tools near a live fire are a bad idea.
- Cast-iron skillet or griddle: Useful for smash burgers, peppers and onions, and halloumi.
- Metal or soaked wooden skewers: Needed for kabobs and shrimp.
- Heavy-duty foil: Foil packets, rib wraps, and easy cleanup all depend on it.
- Large mixing bowls: You’ll want room for marinades, slaws, and salsa without sloshing over the side.
- Cutting board with a groove: Juicy meats and tomatoes can make a mess fast.
- Sharp chef’s knife: Thin onion slices and clean kabob cuts are much easier with a real edge.
- Sheet pans: Handy for carrying raw food to the grill and resting cooked food afterward.
- Basting brush: Good for sauces, butter, and oil.
- Serving platters and shallow bowls: Backyard food looks better when it’s not crammed into one small dish.
Smart Shopping and Ingredient Tips
Start with the proteins. Chicken thighs are the least fussy cut in the group, so I’d buy those first if you want the safest bet for a crowd. For burgers, choose ground beef with enough fat — 80/20 is the sweet spot — because lean beef gets dry and crumbly on a hot griddle. Pork shoulder should have visible marbling; that fat is not the enemy on a long cook, it’s the thing that keeps the meat tender.
For fish, look for salmon fillets that are evenly thick so they cook at the same speed from end to end. Shrimp should smell clean, not fishy, and the shells should look glossy if you’re buying them shell-on. If you’re using halloumi, grab a block that feels firm in the package and doesn’t weep too much liquid.
Produce matters more than people like to admit. Tomatoes need to taste like tomatoes, especially in the peach salsa and flatbread pizzas. Peaches and nectarines should give a little when you press them near the stem. Corn should look plump under the husk, and the silk should not be dry and brittle. Peppers with glossy skin and heavy onions with tight layers will hold up better on the grill.
One more thing. Buy extra buns, extra herbs, and one more lime or lemon than you think you need. Backyard dinners disappear in uneven ways, and the small things run out first.
How to Serve These Recipes
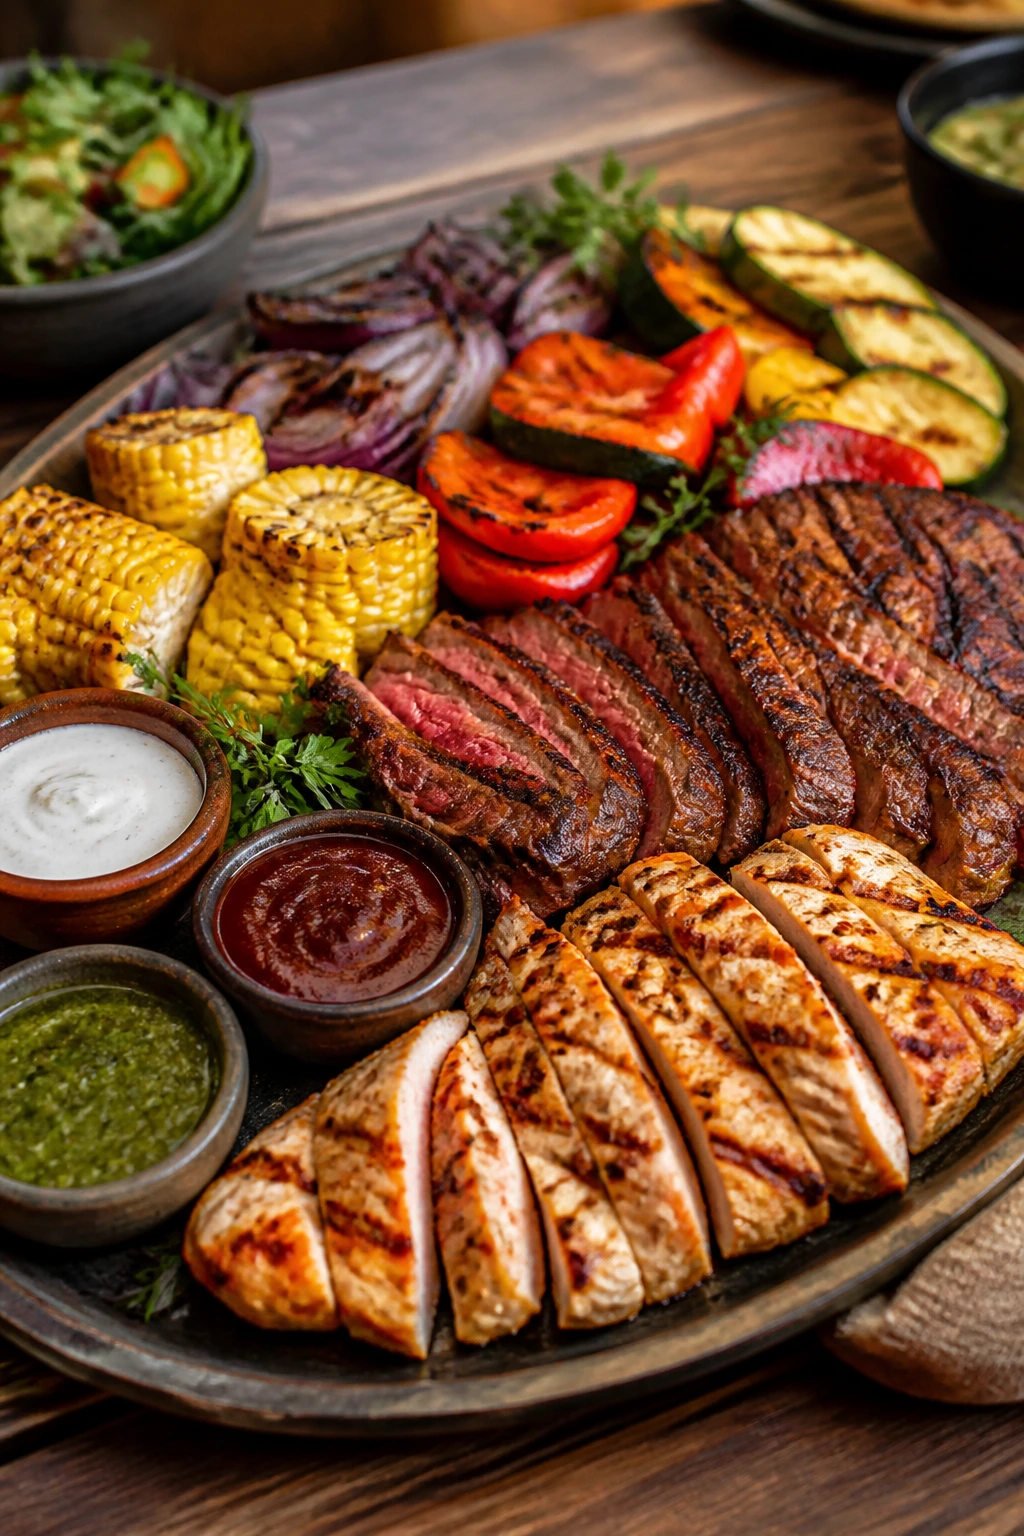
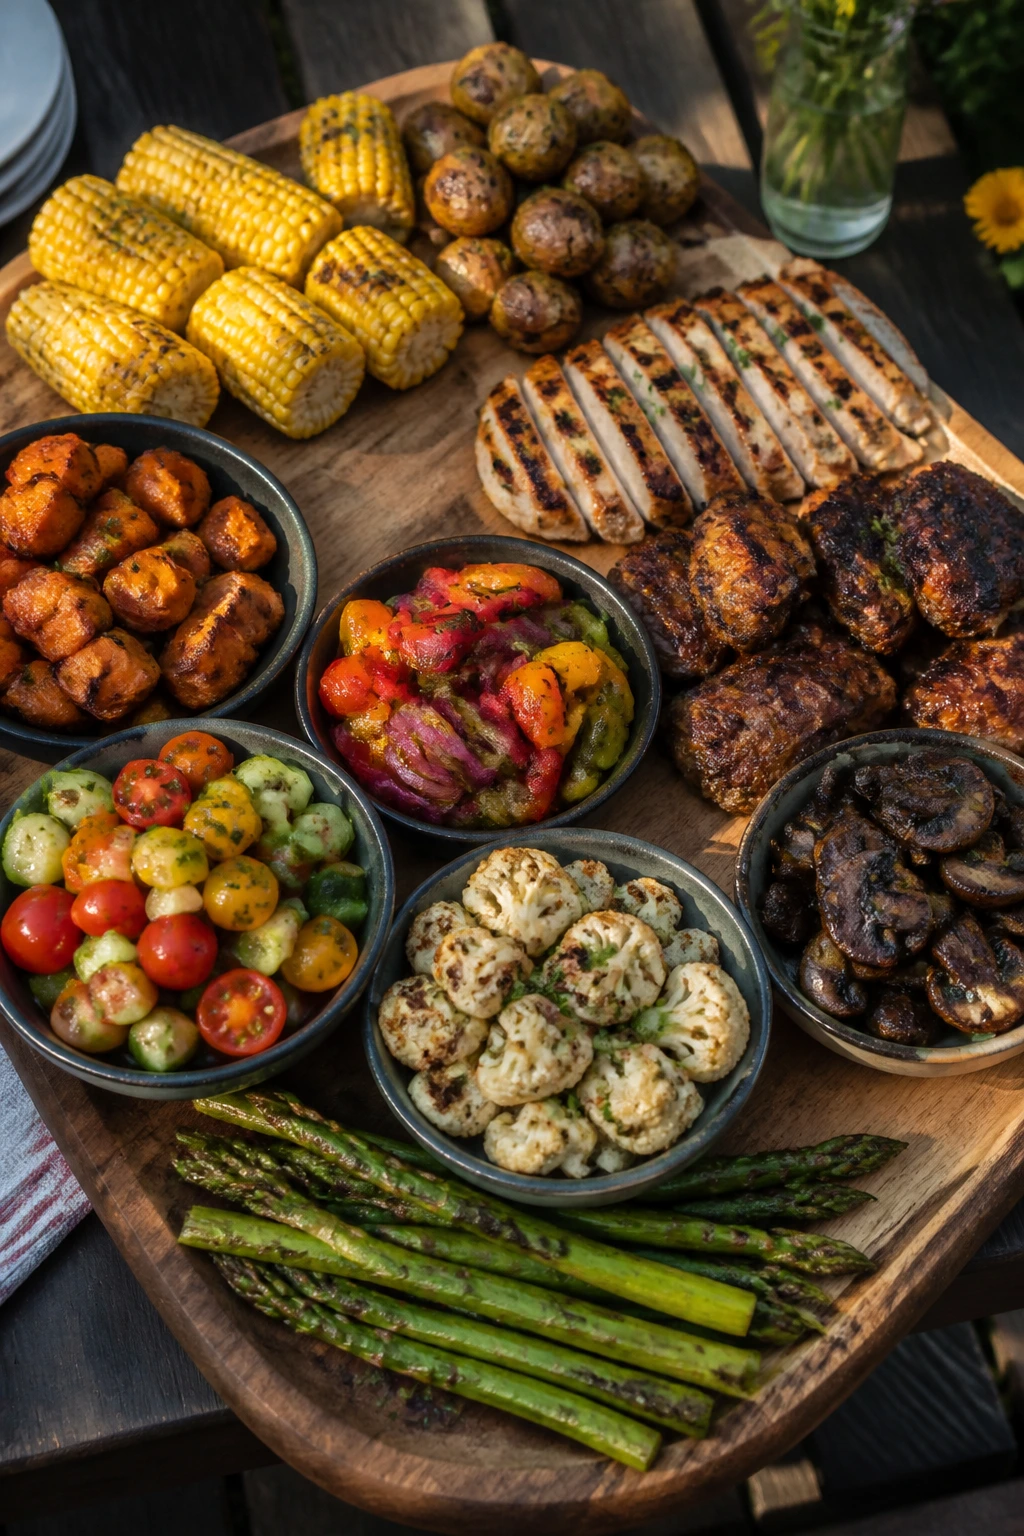
Presentation: Put the food on wide platters instead of deep bowls. Chicken thighs and kabobs look more inviting when they’re spread out, with salsas and sauces in small dishes on the side so the colors stay bright.
Accompaniments: Serve these dinners with grilled corn, potato salad, simple slaw, watermelon wedges, baked beans, or a big green salad with a sharp vinaigrette. If the main is rich — ribs, pulled pork, burgers — lean on something crisp or acidic next to it.
Portions: Plan on about 6 to 8 ounces of cooked meat per adult for heartier mains, a little less for burgers and sandwiches, and 4 to 5 shrimp skewers or 1 to 2 kabobs per person depending on the rest of the spread. If you’ve got side dishes stacked high, you can back that down a bit.
Beverage Pairing: I like iced tea with lemon, sparkling water with cucumber or citrus, a cold lager with burgers and ribs, and lemonade with chicken, shrimp, or flatbread. Keep the drinks simple; the food already has enough going on.
Additional Tips and Flavor Boosters
Flavor Enhancement: A finishing squeeze of lime, lemon, or vinegar wakes up grilled food more than another heavy sauce ever will. I’m especially fond of a final sprinkle of flaky salt on tomatoes, flatbreads, and salmon.
Customization: Hot honey on chicken, chopped pickles on burgers, and a spoonful of pesto on halloumi skewers all change the tone without forcing you to rewrite the recipe. Small additions matter here. They make the food feel personal.
Serving Suggestions: Fresh herbs should go on after the food leaves the grill, not before. Basil, dill, parsley, mint, and cilantro all taste brighter when they’re not scorched. Same with soft cheese. Keep it as a finish.
Make-It-Yours: If you cook for people who like less spice, leave the jalapeños and red pepper flakes on the side. If you’ve got spice fans, put hot sauce, chili crisp, or sliced fresh chiles at the table. That way one batch serves everybody without turning the main dish into a compromise.
Make-Ahead, Storage, and Reheating Guidance
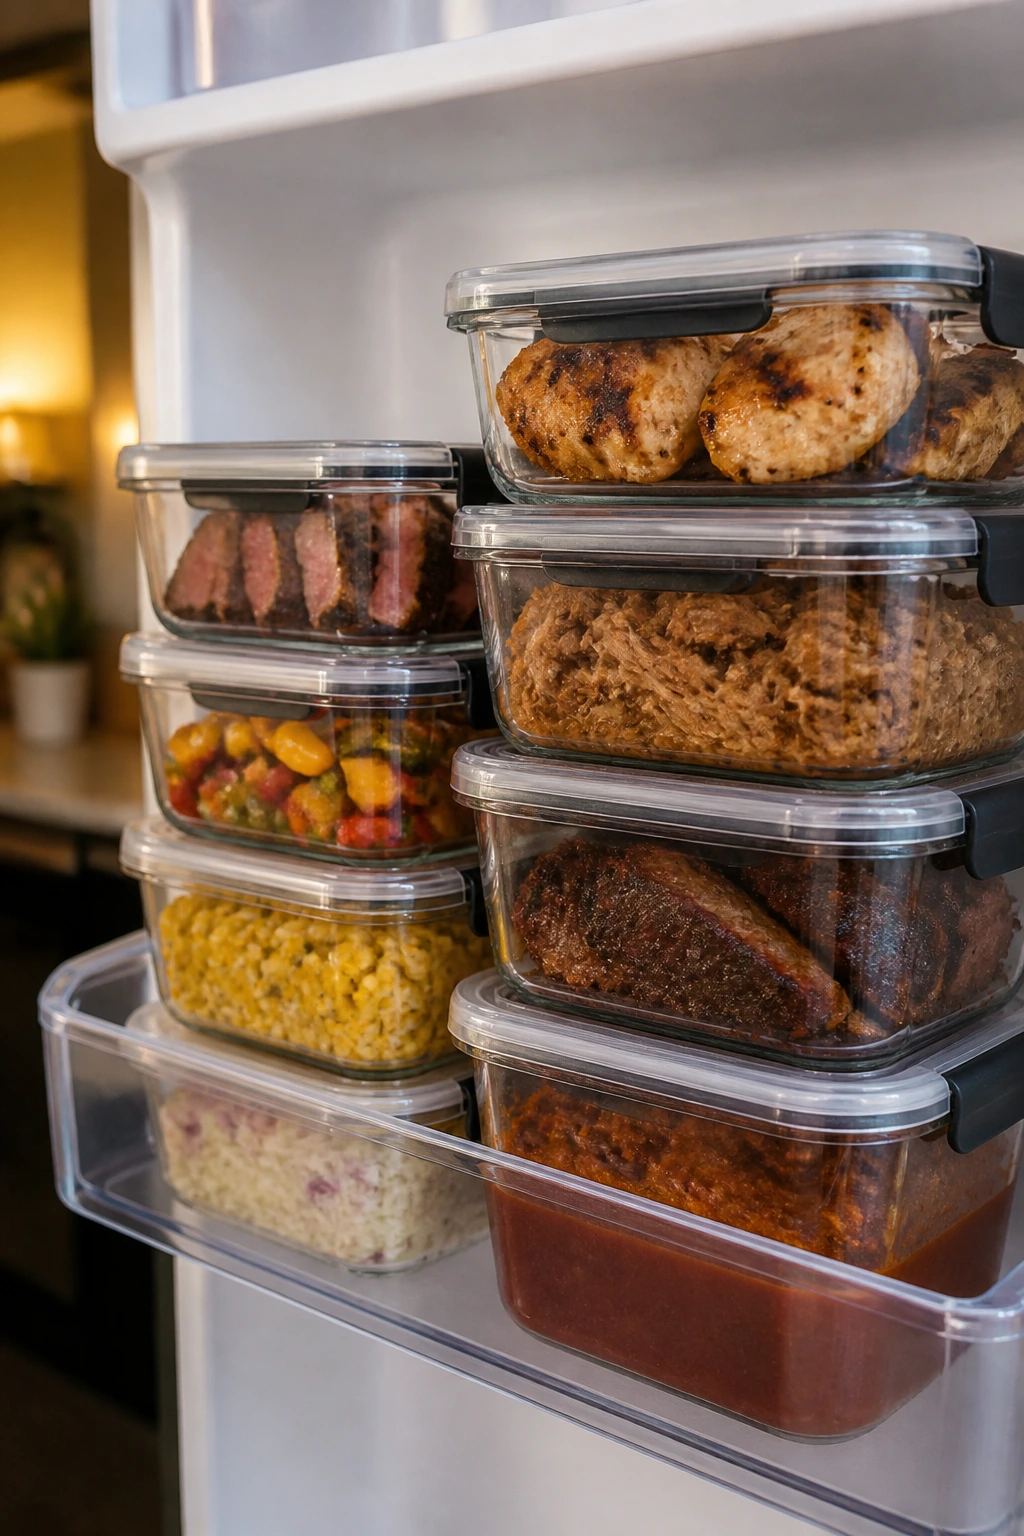
A few of these recipes are best the minute they leave the grill. Burgers, shrimp, and flatbread pizzas fall into that category. They’re still edible later, sure, but they lose the crisp edges and soft cheese pull that make them feel special. Chicken thighs, ribs, pulled pork, and pork tenderloin keep better, especially if you store the sauce separately.
Most cooked meats hold well in the refrigerator for 3 to 4 days in airtight containers. Pulled pork and ribs can be frozen for up to 2 months if wrapped tightly and packed with a little sauce to protect the texture. Grilled chicken thighs also freeze well. Salmon and shrimp are more fragile; I’d eat them within 2 days if possible.
Reheat pulled pork, ribs, chicken, and pork tenderloin in a 300°F oven covered with foil and a spoonful of broth, water, or sauce. That gentle heat keeps the meat from drying out. For burgers, reheat the patty in a skillet over medium-low heat and toast the bun separately. Shrimp and salmon need even more care — low heat, short time, and no heavy microwave blast unless you enjoy rubber.
Make-ahead work helps a lot here. Sauces can be mixed a day ahead. Slaw can be shredded and dressed shortly before serving. Chicken and pork can be rubbed or marinated in the morning. Flatbread pizzas should be assembled only right before grilling, though you can prep the toppings earlier and keep them chilled. That’s the part most people overlook.
Variations and Adaptations to Try
Gluten-Free Picnic Plate: Use corn tortillas for the fajitas, skip the hoagie rolls, and serve the ribs or pulled pork over baked potatoes or rice. Most of the recipes are already close to gluten-free if you check the barbecue sauce and soy sauce labels.
Dairy-Free Grill Night: Skip the cheese on burgers and flatbreads, leave out the yogurt sauce on salmon, and finish with chimichurri, salsa, or a simple herb oil instead. You lose some richness, but the grill flavor becomes more obvious.
Mild Table, Happy Kids: Pull back the cayenne, jalapeño, and red pepper flakes, then let adults add heat at the table. Honey-lime chicken, sausage hoagies, smash burgers, and flatbreads all work well with a gentler hand.
Extra-Smoky Swap: Add smoked paprika to chicken, pork, shrimp, and even the burger mix if you want a deeper fire-kissed flavor without a smoker. A few wood chunks on a charcoal grill or a cedar plank on the salmon can also tilt the whole table toward smoke.
Vegetarian Centerpiece: Stack the halloumi skewers higher, add grilled portobello caps to the flatbread pizzas, and serve a big bean salad or grilled corn salad alongside. You can make the meatless part of the meal feel intentional instead of side-lined.
Common Mistakes to Avoid
Running one heat zone for everything: Burgers, shrimp, ribs, and pork shoulder do not want the same fire. If your grill has only one intensity level, you’ll burn the quick-cooking items while waiting for the slow ones to finish. Set up direct and indirect heat if you can.
Saucing too early: Barbecue sauce burns fast because of its sugar content. Brush it on near the end, not at the beginning, unless you enjoy sticky black edges. The same goes for honey-heavy glazes.
Crowding the grill grate: Food needs space for heat to move around it. If you pile on too many kabobs, shrimp skewers, or flatbreads at once, the temperature drops and you lose char. Cook in batches. It’s less dramatic, but the result is better.
Skipping the rest time: Chicken, pork tenderloin, steak, and ribs all need a few minutes off the heat before slicing. Cut too early and the juices run out onto the board instead of staying in the meat. That’s not a small thing. It changes the whole texture.
Under-seasoning the sides: A bland slaw or plain salad can drag the whole plate down. Give the vegetables acid, salt, and enough herbs to stand up beside the meat. Backyard dinners taste better when the side dishes carry their own weight.
Frequently Asked Questions

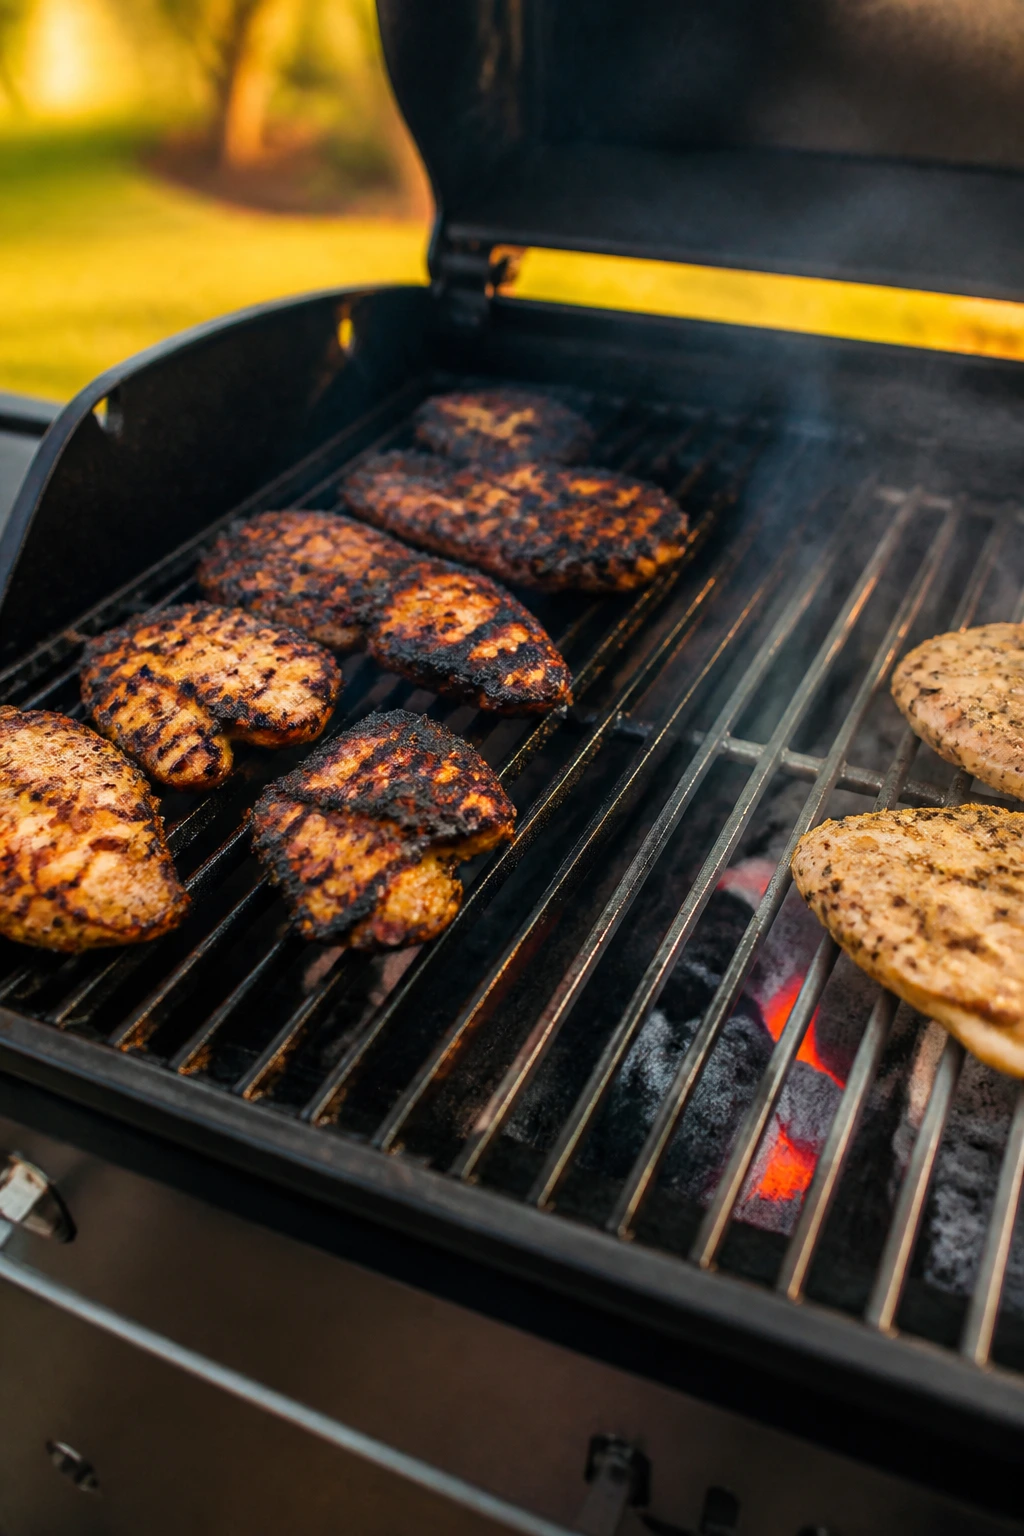
Can I make all of these on a gas grill instead of charcoal?
Yes. Gas grills handle almost every recipe here, and they’re especially useful for chicken thighs, burgers, shrimp, and flatbreads because you can control the heat more easily. If you want extra smoke, use a smoker box or a cedar plank where the recipe allows it.
Which recipes work best if I need to feed a big crowd?
Pulled pork, ribs, sausage and peppers, and chicken thighs scale up most easily because they can sit warm for a little while without falling apart. Smash burgers are doable too, but they need more active cooking at the grill. I’d save those for a smaller group unless you’ve got help.
What can I prep the day before?
You can marinate the chicken, season the pork, mix the burger sauce, make the slaw base, and whisk together the mustard sauce for the tenderloin ahead of time. Cut the vegetables for kabobs and fajitas too. Just keep watery toppings like tomato slices and basil separate until the end.
How do I keep food warm while everyone is wandering around the yard?
Use a low oven, about 200°F, for ribs, pulled pork, sausage, or chicken. Cover the food loosely with foil so it doesn’t dry out. Flatbreads, burgers, shrimp, and salmon are better served quickly and refreshed in small batches.
What if I don’t have skewers?
You can cook kabob ingredients in a grill basket or a cast-iron skillet on the grill. For the shrimp, a basket is actually easier if the pieces are small. Foil packets handle the fajita filling without skewers at all.
How do I know the meat is done without cutting into it?
Use an instant-read thermometer. Poultry should reach 165°F, pork tenderloin should hit 145°F and rest, and pulled pork should climb to roughly 195°F to 203°F so it shreds easily. That one tool takes a lot of guesswork out of backyard cooking.
Can I swap chicken breasts for thighs in the chicken recipes?
You can, but you’ll need to watch them more closely. Breasts dry out faster, especially over direct heat. If you use them, keep the grill at medium instead of blazing hot and pull them as soon as they reach 165°F.
What should I do if the grill has hot spots?
Move quick-cooking food to the cooler side and rotate the items more often than you think you need to. Hot spots are a headache with burgers, flatbread, and shrimp, but they’re manageable if you keep one safe zone and one hotter zone. A little unevenness is normal; total chaos is avoidable.
One More Plate to Pass Around
The best backyard dinners don’t feel precious. They feel generous. Smoke on the edges, sauce on the fingers, people reaching across the table for one more piece of chicken or the last slice of flatbread — that’s the whole point.
If you build your menu around a few strong grilled mains, one cold-crisp side, and a couple of bright sauces, the meal takes care of itself. The grill does the heavy lifting. You get to enjoy the evening.