
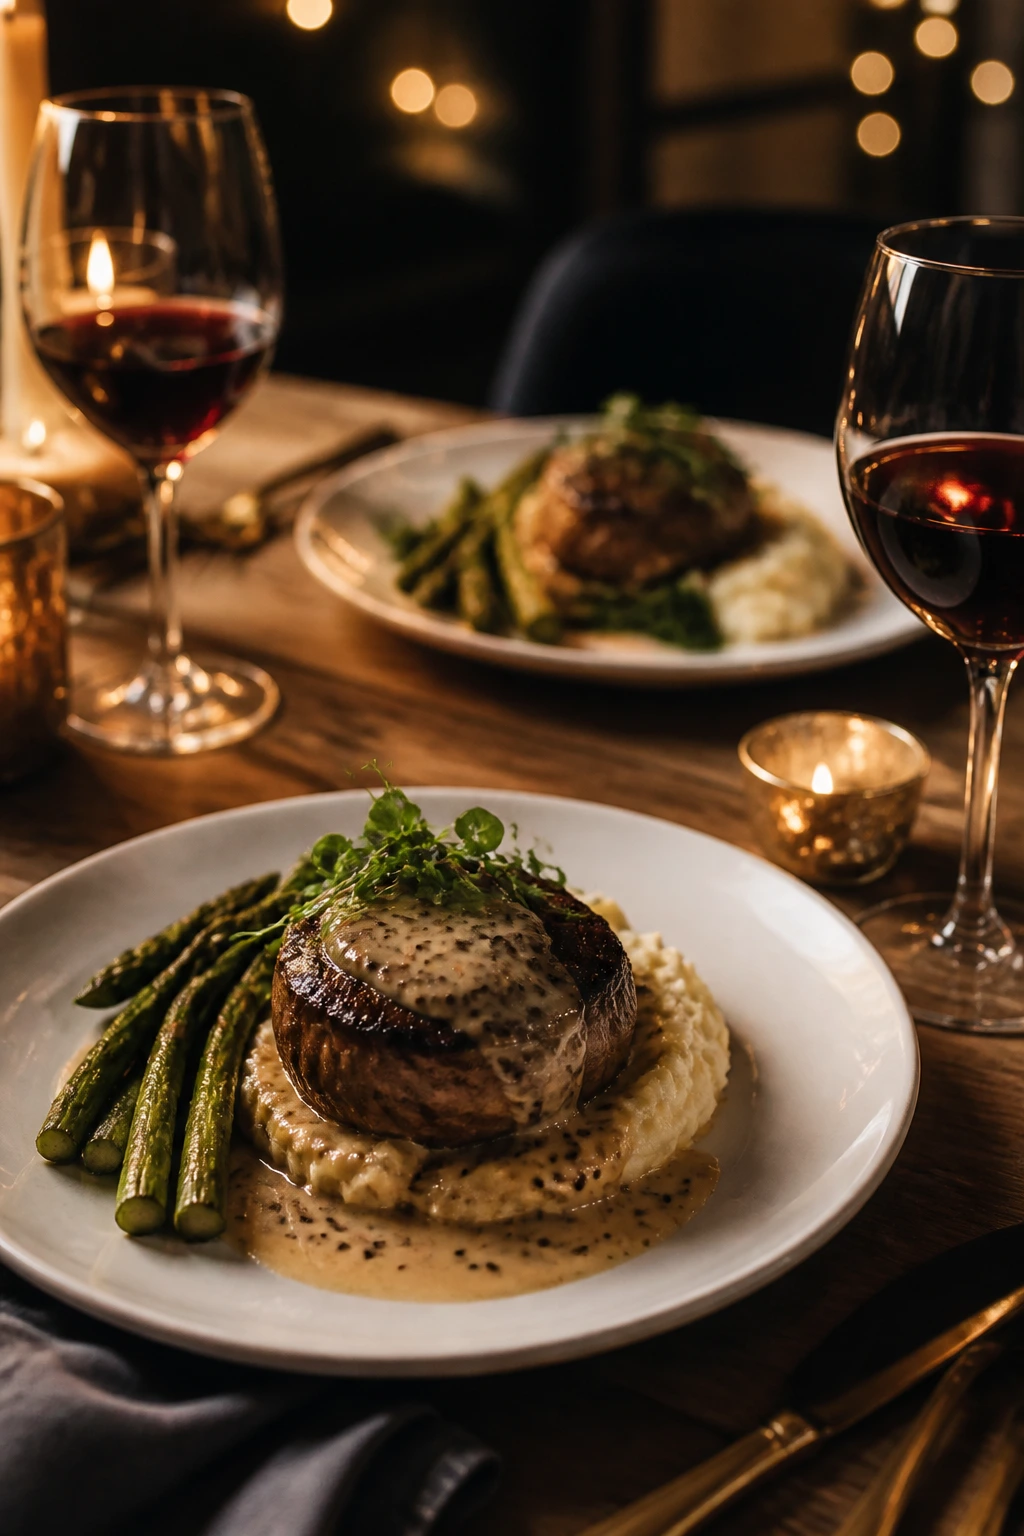
A good New Year’s Eve dinner for two should feel a little dressed up, but not fussy enough to drain the evening before the clock gets anywhere near midnight. That balance is the whole point of these New Year’s Eve dinner ideas for two: one good main, a sauce that tastes like you tried harder than you did, and a plate that still leaves room for a glass of something cold.
The best small-batch holiday dinners have a certain rhythm to them. A steak sears quickly and rests while the butter melts. Pasta finishes in the pan with a bit of sauce and a handful of herbs. Salmon, shrimp, pork, chicken, and even a cozy vegetarian bake can all feel celebratory if you give them one bright finishing touch and keep the sides tidy.
I like dinners like this because they don’t ask for a parade of side dishes or a sink full of leftovers. They ask for attention, not exhaustion. And when you’re cooking for two, that matters more than people admit.
Why You’ll Love This Collection
-
Small-Batch, Big-Flavor: Every recipe is built for two people, so the sauce stays glossy, the protein stays tender, and nothing gets stretched thin.
-
Actually Manageable on a Busy Evening: Most of these dinners land in the 30- to 45-minute range, which leaves room for dressing the table and opening something fizzy.
-
A Little Fancy Without the Drama: You get filet mignon, lobster tails, risotto, and shrimp scampi, but nothing here requires restaurant gear or a culinary degree.
-
Built for Different Moods: Some nights call for steak. Some call for pasta. Some call for a pan of creamy chicken and a quiet corner of the couch afterward.
-
Less Waste, Better Ingredients: Smaller portions make it easier to buy better produce, a nicer cut of meat, or fresh herbs without tossing half of them later.
-
Easy to Mix and Match: A crisp salad, roasted asparagus, mashed potatoes, or crusty bread can carry almost any dish in this collection without making dinner feel overplanned.
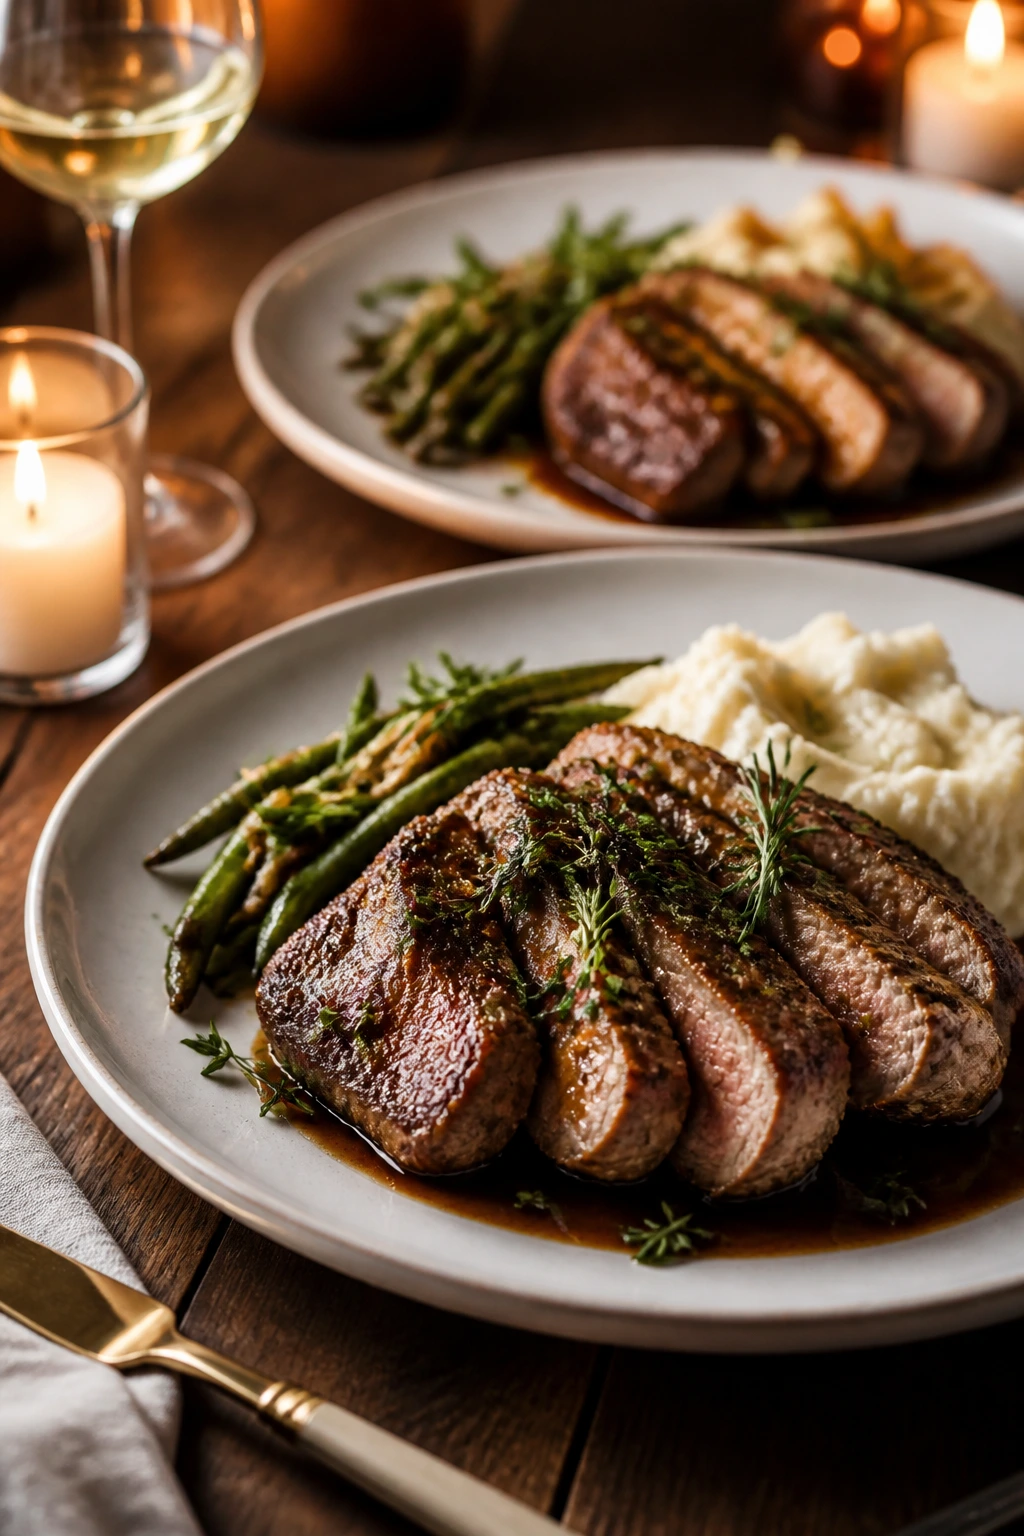
1. Filet Mignon with Garlic Herb Butter
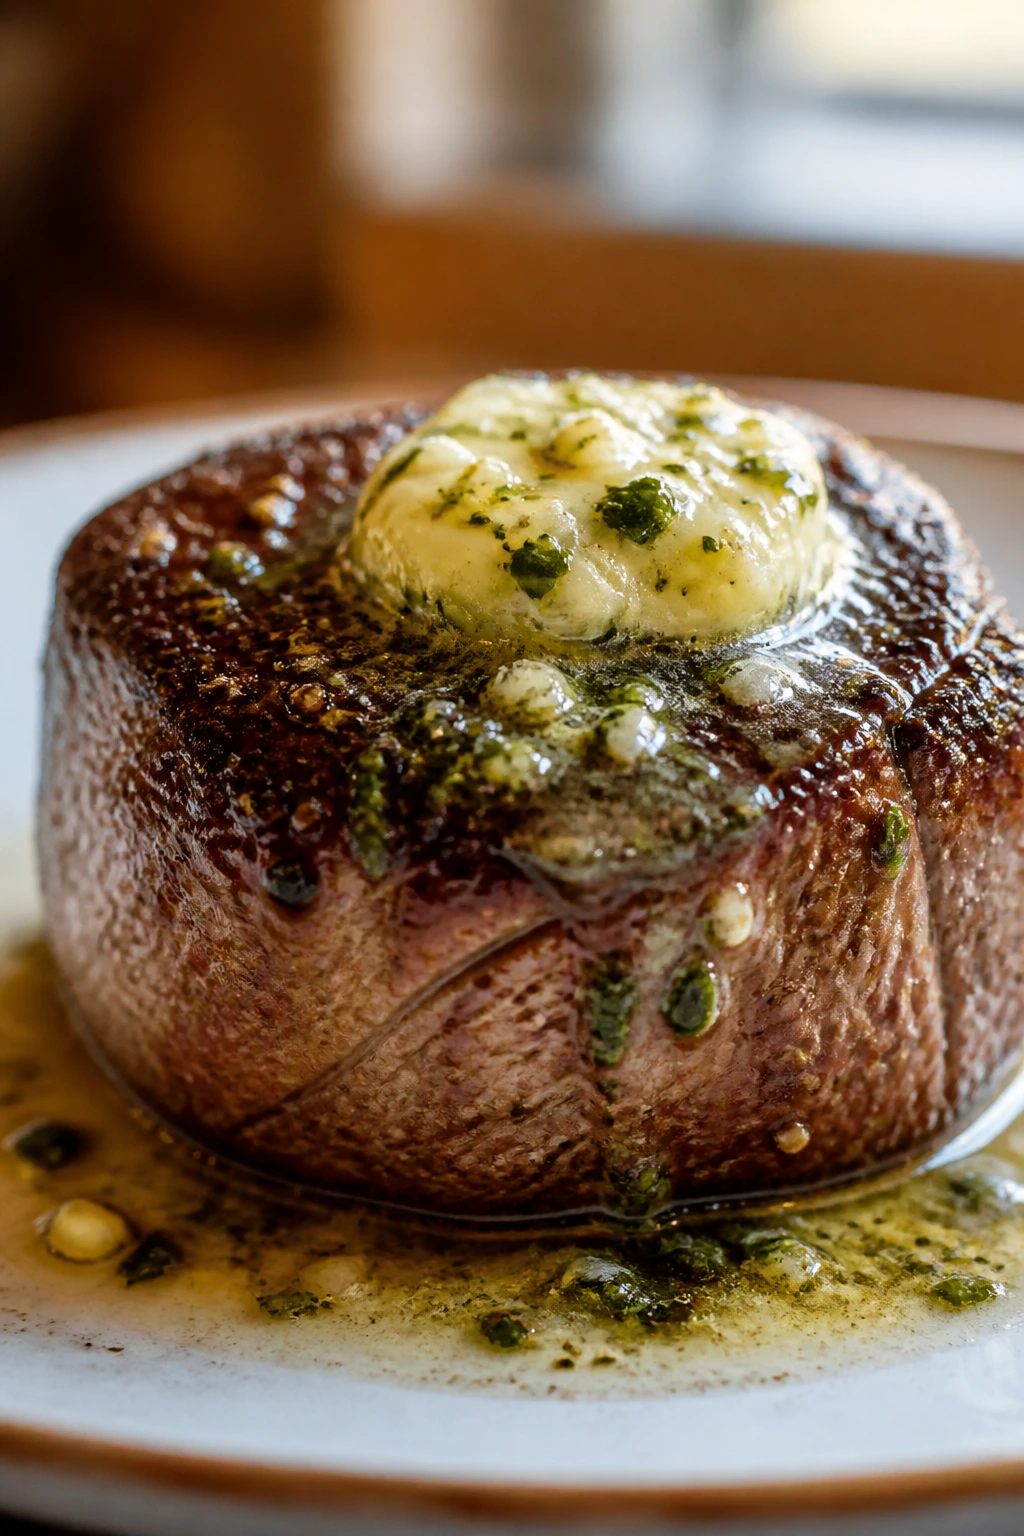
Filet mignon is the quiet overachiever of a special-occasion dinner. It sears fast, stays buttery-tender, and gives you that restaurant feeling without turning the kitchen into a war zone. A quick garlic herb butter melts over the top and slides into every slice.
This version is the one I reach for when I want dinner to feel polished but I don’t want to babysit a sauce for half the night. The steak gets a hard sear in a hot skillet, then a short finish in the oven so the center stays rosy. That little oven step matters; it keeps the outside from overcooking while the middle reaches the right temperature.
Why It Works: Filet mignon is naturally lean, so the trick is heat control, not complication. A 1½-inch-thick steak can take a good sear and still stay tender inside, especially if you let it rest before slicing. The herb butter adds moisture and a clean, savory finish, and the garlic perfumes the whole plate without making the meat heavy. If you want a real date-night dish with very little mess, this is hard to beat.
Key Ingredients:
- 2 filet mignons, 6 to 8 ounces each and about 1½ inches thick — thickness gives you room for a proper sear
- 1½ teaspoons kosher salt — seasons the meat all the way through
- 1 teaspoon freshly ground black pepper — gives the crust a little bite
- 1 tablespoon neutral oil — helps the sear start fast
- 3 tablespoons unsalted butter — the base for the finishing butter
- 2 cloves garlic, lightly smashed — keeps the flavor gentle instead of sharp
- 2 sprigs fresh thyme or rosemary — adds a woodsy note
- 1 tablespoon chopped parsley — for a fresh finish
- Flaky salt, for serving — optional, but it makes the crust pop
Quick Steps:
- Dry and Season: Pat the steaks dry with paper towels, then season all sides with the kosher salt and black pepper. Let them sit at room temperature for 20 to 30 minutes so they cook more evenly.
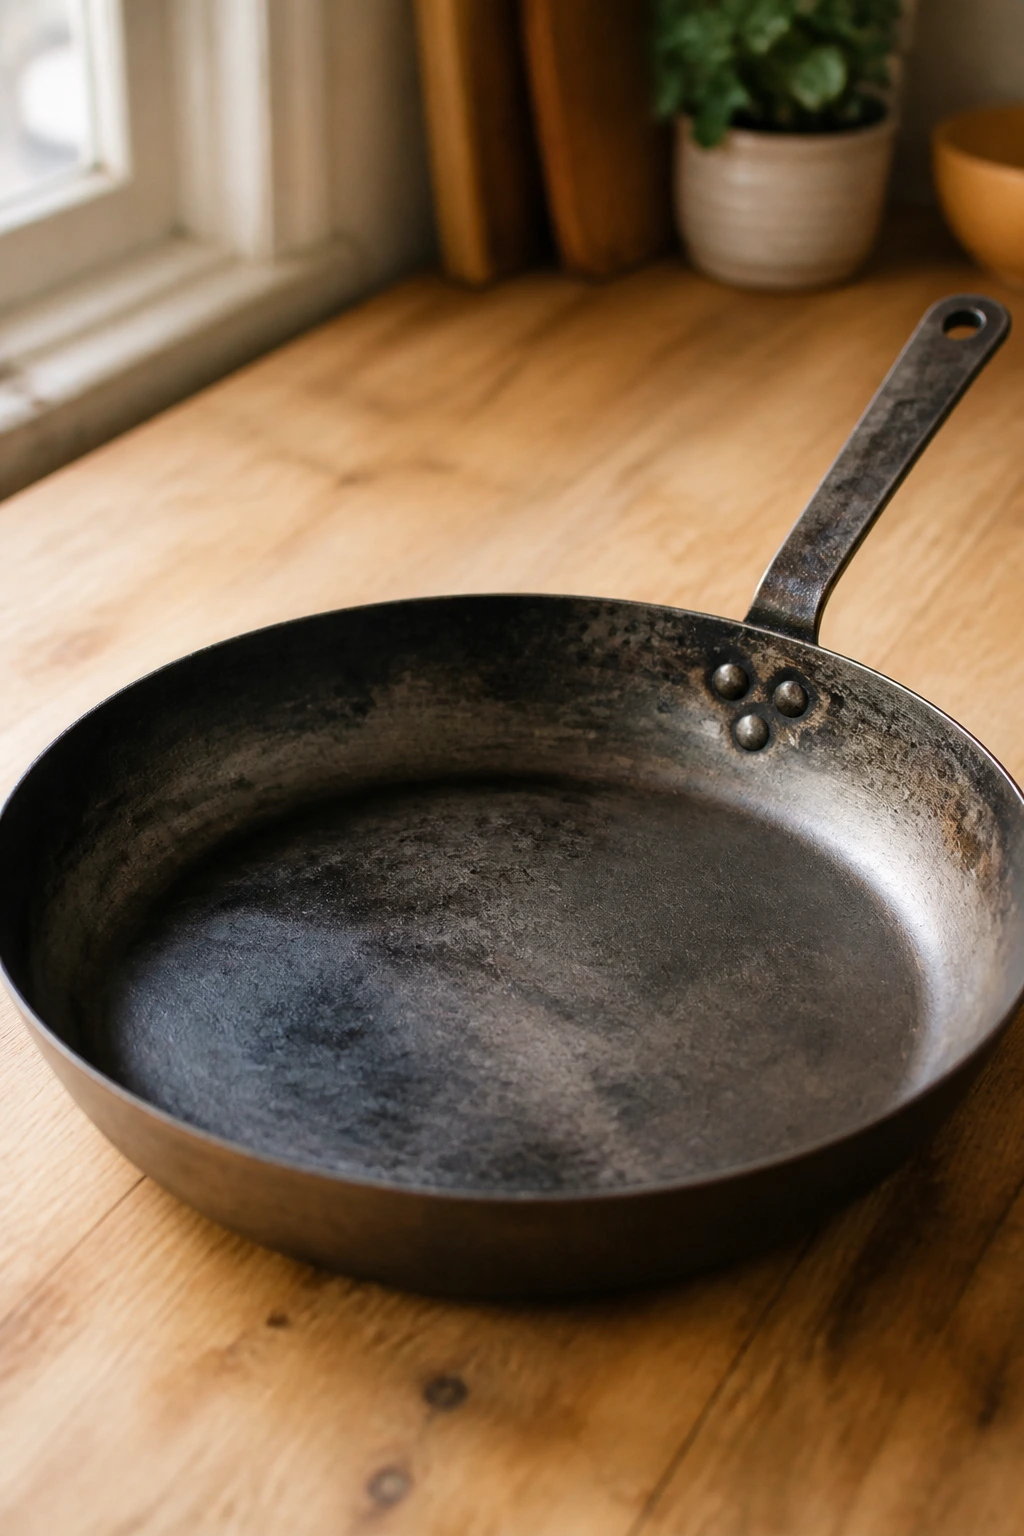
- Preheat and Heat the Pan: Set the oven to 400°F (205°C). Heat a cast-iron or heavy oven-safe skillet over medium-high heat until it’s very hot, then add the oil.
- Sear the Steaks: Lay the steaks in the pan and do not move them for 2½ to 3 minutes, until a deep brown crust forms. Flip and sear the second side for another 2 to 3 minutes.
- Add the Butter and Herbs: Reduce the heat to medium-low, add the butter, garlic, and thyme or rosemary, then tilt the pan and spoon the melted butter over the steaks for 30 to 45 seconds.
- Finish in the Oven: Transfer the skillet to the oven and cook for 3 to 6 minutes, depending on thickness, until the internal temperature reaches 125°F for medium-rare or 130°F for medium. Use a thermometer; guessing with filet mignon is a bad habit.
- Rest and Serve: Move the steaks to a plate, spoon the buttery pan drippings over the top, and rest for 5 to 8 minutes before serving. Finish with parsley and a little flaky salt.
Tips and Variations:
- Make-Ahead: Season the steaks up to 2 hours ahead and keep them uncovered in the fridge; they’ll sear better after the surface dries.
- Swap: A strip steak or top sirloin works if filet feels too rich.
- Serve With: Roasted asparagus and mashed potatoes keep the plate classic and tidy.
2. Lemon Butter Shrimp Scampi
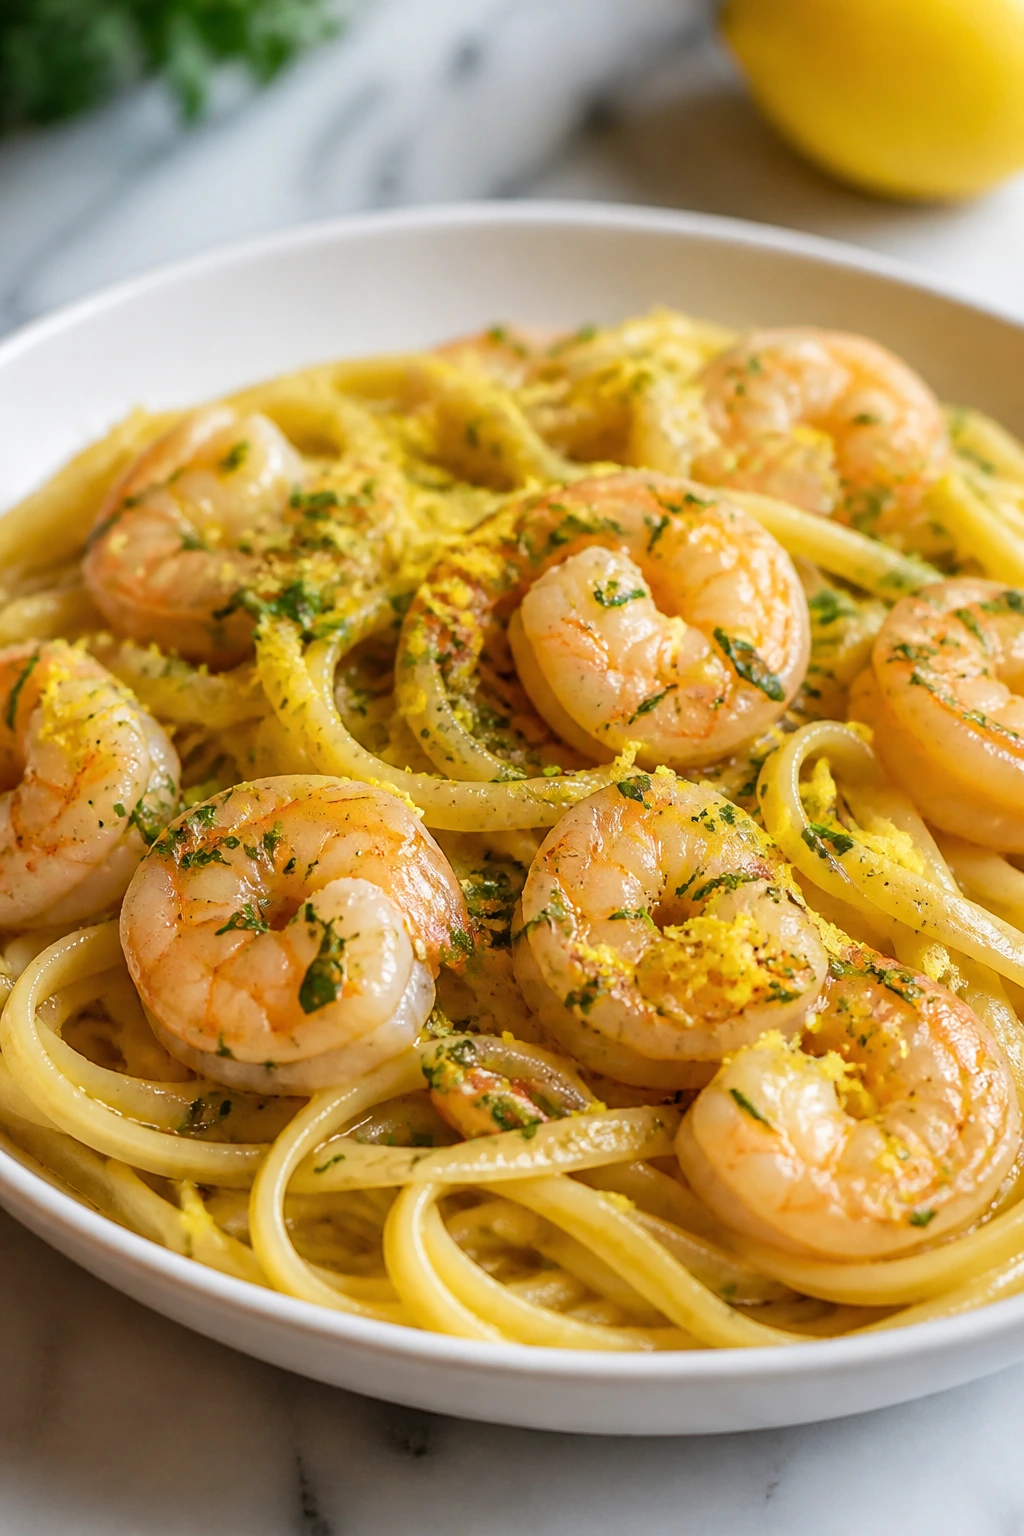
Shrimp scampi is the kind of dinner that makes a small kitchen feel efficient instead of cramped. It tastes bright, buttery, and a little briny, with garlic and lemon doing most of the talking. Over pasta, it feels like a proper meal; without pasta, it can lean lighter and still feel complete.
I like this for New Year’s Eve because it moves fast. Too fast, honestly, if you’re distracted by glasses clinking and someone asking whether the candles are crooked. The good news is that shrimp scampi forgives a lot as long as you don’t overcook the shrimp and you keep the sauce lively with lemon.
Why It Works: Shrimp cook in minutes, which keeps the evening relaxed and the texture snappy. The butter and olive oil combo gives you flavor without making the sauce greasy, and a splash of white wine or broth lifts the pan fond so the sauce tastes rounded instead of flat. Tossing the shrimp with pasta right at the end lets the starch help the sauce cling to every strand. It’s one of those dinners that feels elegant because the components are simple and precise.
Key Ingredients:
- 8 ounces linguine or spaghetti — enough for two generous plates
- 1 pound large shrimp, peeled and deveined — 16/20 or 21/25 size is a sweet spot
- 1 teaspoon kosher salt — for seasoning the shrimp and pasta water
- 1/4 teaspoon black pepper — keeps the shrimp sharp and clean
- 3 tablespoons unsalted butter — builds the sauce
- 2 tablespoons olive oil — keeps the butter from browning too fast
- 4 cloves garlic, minced — the backbone of scampi
- 1/2 cup dry white wine or low-sodium chicken broth — for deglazing
- Juice and zest of 1 lemon — brightens the sauce
- 1/4 teaspoon red pepper flakes — optional heat
- 2 tablespoons chopped parsley — fresh finish
- 1/4 cup grated parmesan — optional, but nice if you want a fuller sauce
Quick Steps:
- Boil the Pasta: Bring a large pot of salted water to a boil and cook the linguine until just shy of al dente, about 1 minute less than the package says. Reserve 1/2 cup of pasta water, then drain.
- Prep the Shrimp: Pat the shrimp dry and season with the salt and pepper. Dry shrimp sear better and don’t leak water into the sauce.
- Build the Garlic Base: Warm the butter and olive oil in a large skillet over medium heat. Add the garlic and red pepper flakes and cook for about 30 seconds, just until fragrant. Do not let the garlic brown.
- Cook the Shrimp: Add the shrimp in a single layer and cook for 1 to 2 minutes per side, until they turn pink and curl into a loose C shape.
- Deglaze and Finish the Sauce: Pour in the wine or broth and lemon juice, scraping up the browned bits. Let it bubble for 1 to 2 minutes, then add the lemon zest and a splash of pasta water if the pan looks tight.
- Toss and Serve: Add the pasta and parsley, tossing until everything glistens. Finish with parmesan if you want it, then serve immediately.
Tips and Variations:
- Make-Ahead: Peel and devein the shrimp earlier in the day, then keep them cold and covered.
- Swap: Use angel hair for a lighter feel, or serve the shrimp over zucchini noodles if you want less pasta.
- Watch For: Shrimp go from perfect to rubbery fast, so pull them as soon as they lose translucence.
3. Creamy Tuscan Chicken
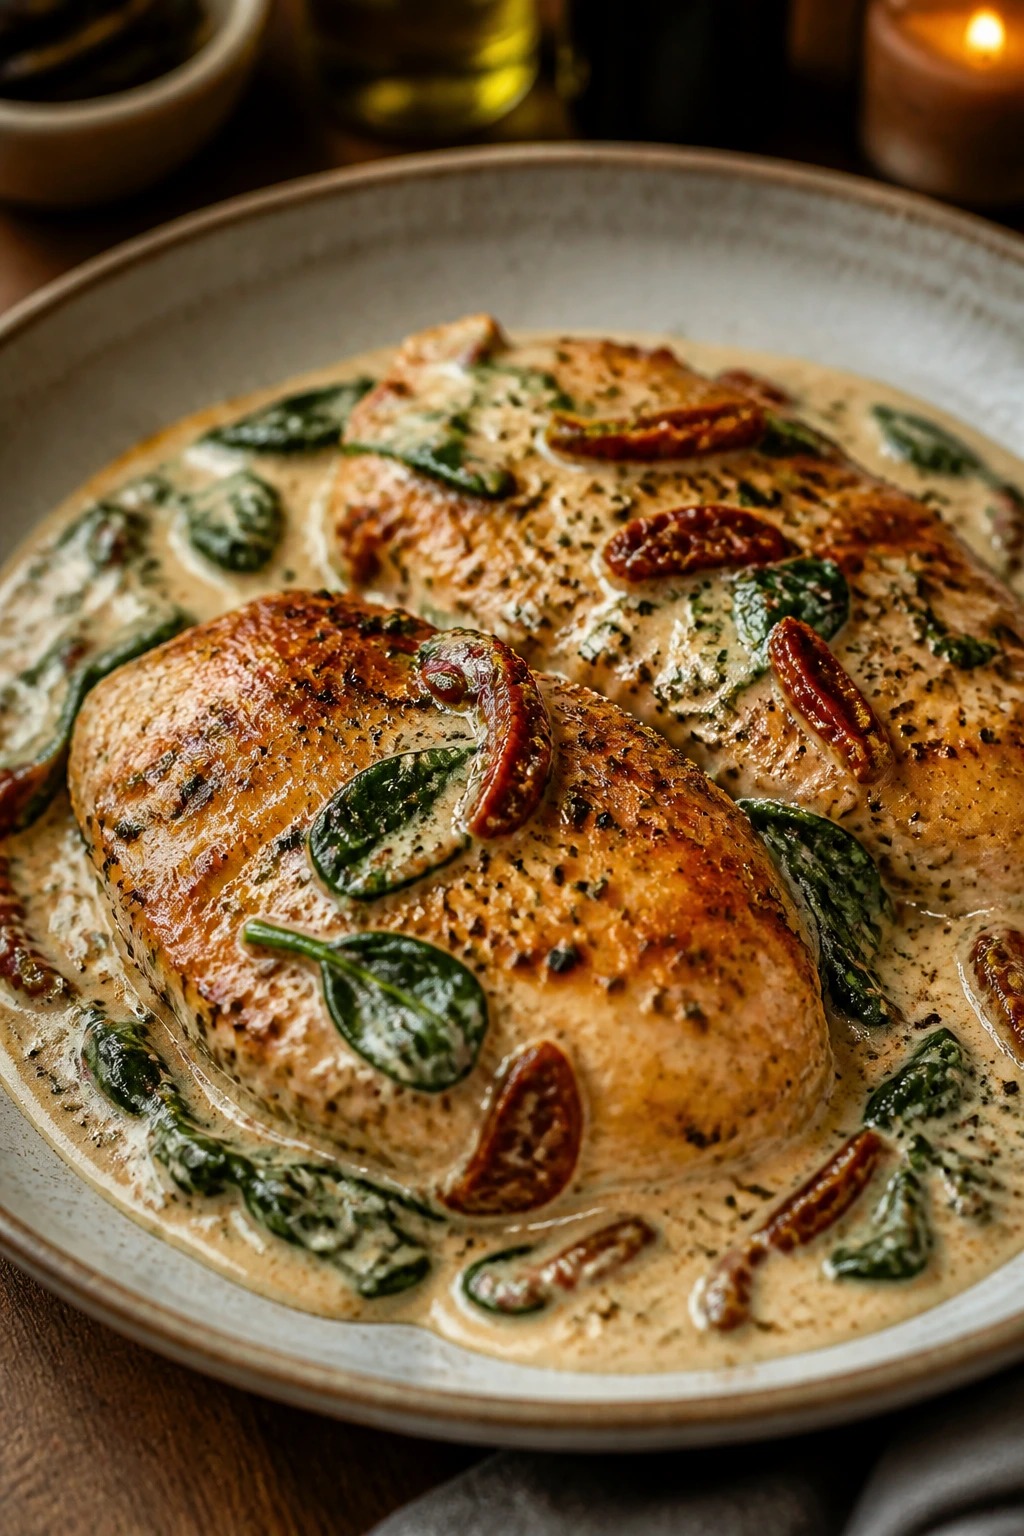
Creamy Tuscan chicken is rich, savory, and just a little dramatic in the best way. The sun-dried tomatoes bring a sweet-tangy punch, the spinach softens into the sauce, and the chicken stays juicy if you don’t rush the sear. It’s the sort of dinner that looks like you planned the whole evening around it.
For two people, this dish lands in that sweet spot between comforting and special. You get enough sauce to spoon over potatoes, rice, or bread, but not so much that you’re left with a quart of leftovers nobody asked for. I also love that it uses pantry-friendly ingredients that still read as a celebration.
Why It Works: The first sear gives the chicken color and flavor, while the sauce turns silky from cream and parmesan without needing a flour-heavy roux. Sun-dried tomatoes carry concentrated sweetness, which is exactly what keeps the sauce from feeling one-note. Spinach wilted at the end adds color and a tiny bitter edge that balances all the richness. The whole dish feels full and luxurious without being fussy.
Key Ingredients:
- 2 boneless, skinless chicken breasts, about 1½ pounds total — pounded to even thickness
- 1 teaspoon kosher salt — seasons the chicken
- 1/2 teaspoon black pepper — for the crust
- 1 teaspoon Italian seasoning — easy herb backbone
- 2 tablespoons all-purpose flour — helps the chicken brown
- 1 tablespoon olive oil — for searing
- 1 tablespoon unsalted butter — adds flavor to the pan
- 3 cloves garlic, minced — brings the sauce to life
- 1/3 cup chopped sun-dried tomatoes — the signature tang
- 1/2 cup low-sodium chicken broth — loosens the pan fond
- 3/4 cup heavy cream — gives the sauce body
- 1/3 cup grated parmesan — melts into the sauce
- 3 packed cups baby spinach — wilts down quickly
- 1 teaspoon lemon juice — optional, but sharpens the sauce
Quick Steps:
- Prep the Chicken: Pound the chicken breasts to an even 1/2-inch thickness, then season with salt, pepper, and Italian seasoning. Dust lightly with flour on both sides.
- Sear Until Golden: Heat the oil and butter in a large skillet over medium-high heat. Cook the chicken for 4 to 5 minutes per side, until deeply golden and cooked through to 165°F. Transfer to a plate.
- Cook the Garlic and Tomatoes: Lower the heat to medium and add the garlic and sun-dried tomatoes. Stir for about 30 seconds, just until fragrant.
- Build the Sauce: Pour in the broth and scrape the pan bottom well. Stir in the cream and parmesan, then simmer for 2 to 3 minutes until the sauce thickens enough to coat a spoon.
- Add the Spinach: Toss in the spinach and cook until wilted, about 1 minute. Stir in the lemon juice if using.
- Return the Chicken: Nestle the chicken back into the skillet and spoon sauce over the top. Heat for 1 minute, then serve hot.
Tips and Variations:
- Make-Ahead: Pound and season the chicken earlier in the day, then refrigerate on a plate covered loosely.
- Swap: Chicken thighs work too; just cook them a few minutes longer.
- Serve With: Mashed potatoes or buttered rice make the sauce count for something.
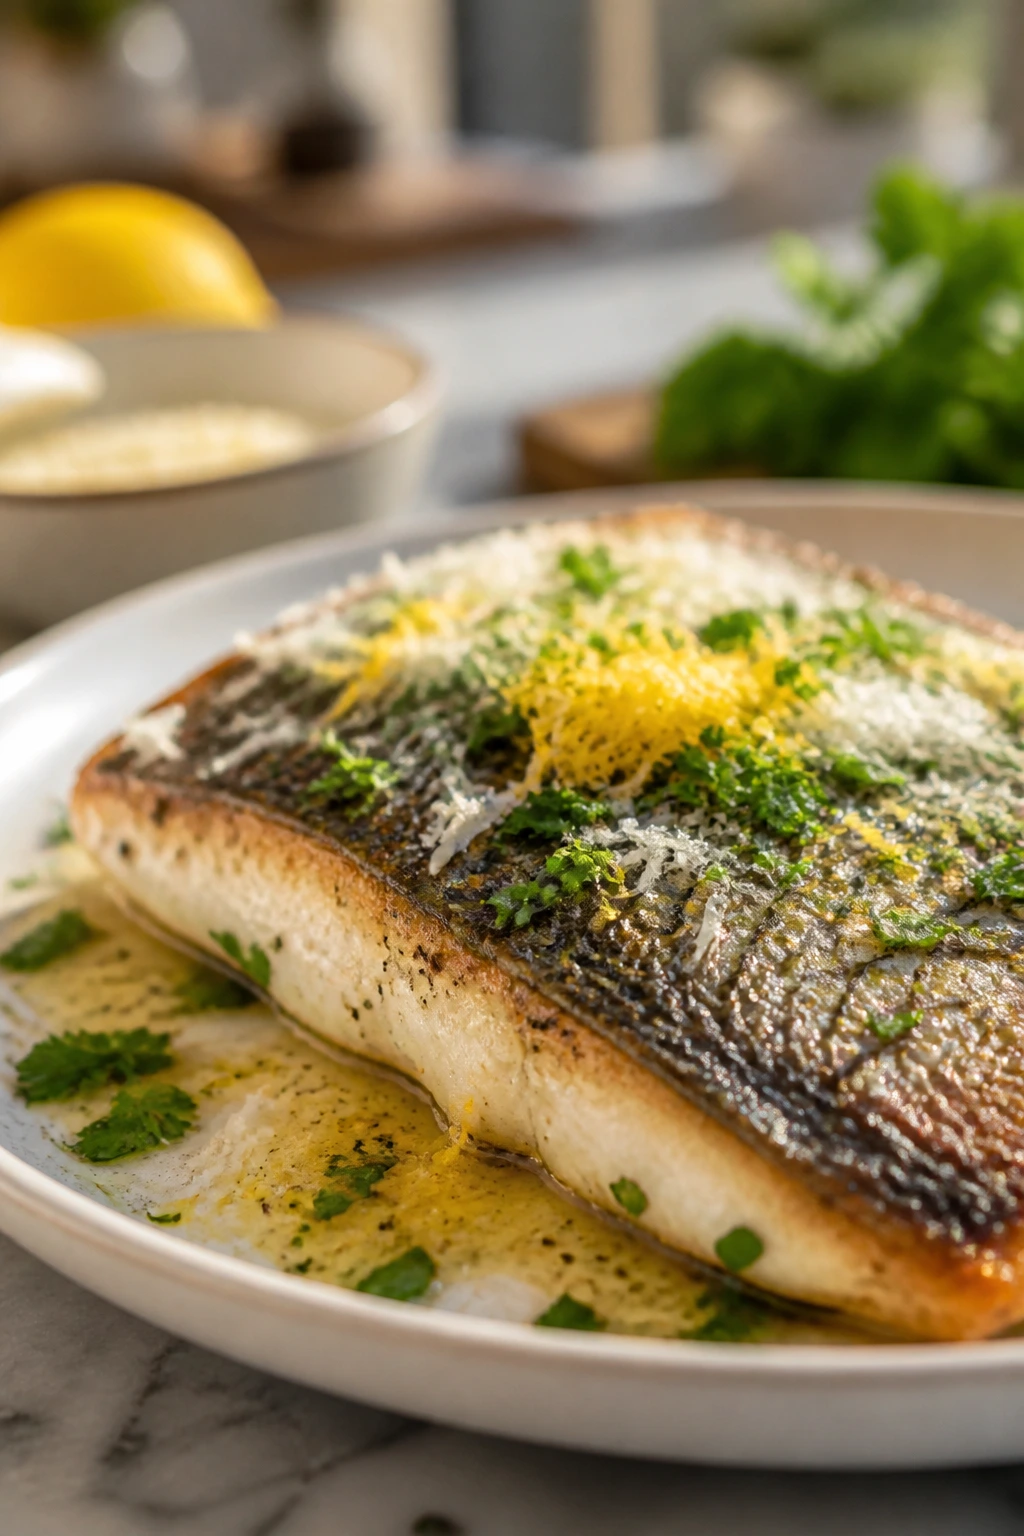
4. Pan-Seared Salmon with Dill Yogurt Sauce

Salmon is a smart New Year’s Eve choice when you want dinner to feel clean and a little bright. The fish gets crisp on the outside, silky in the middle, and the dill yogurt sauce brings a cool, lemony finish that keeps the richness in check. It tastes polished without needing much effort, which is a combination I’ll always defend.
This is also one of the easiest dishes in the group to get right at home. Salmon loves a hot pan and a short cook time. The real trick is drying the fish well and leaving it alone long enough for the skin, if you use it, to crisp properly.
Why It Works: A center-cut fillet cooks more evenly than a skinny tail piece, which means fewer dry edges and a nicer final texture. The yogurt sauce gives you creaminess without heaviness, and dill brings the sharp green note that salmon loves. A touch of lemon juice or zest cuts through the oiliness of the fish and makes the whole plate taste brighter. This is a dinner that feels fresh enough for a late evening but rich enough to feel like a treat.
Key Ingredients:
- 2 salmon fillets, 6 to 8 ounces each and ideally center-cut — even thickness matters
- 1 teaspoon kosher salt — for the fish
- 1/2 teaspoon black pepper — for the fish
- 1 tablespoon olive oil — helps the skin crisp
- 1/2 cup plain Greek yogurt — the base of the sauce
- 1 tablespoon chopped fresh dill — the flavor that ties it together
- 1 small garlic clove, finely grated — optional, but useful
- 1 teaspoon lemon zest — adds fragrance
- 1 tablespoon lemon juice — brightens the sauce
- 1 tablespoon chopped chives or parsley — for freshness
- Lemon wedges, for serving — optional
Quick Steps:
- Mix the Sauce: Stir together the yogurt, dill, garlic, lemon zest, lemon juice, and chives in a small bowl. Chill it while you cook the fish.
- Dry and Season the Salmon: Pat the fillets dry on both sides, then season with salt and pepper. Dry skin is the difference between crisp and leathery.
- Heat the Skillet: Warm the olive oil in a nonstick or stainless-steel skillet over medium-high heat until it shimmers.
- Sear Skin-Side Down: Place the salmon skin-side down and press lightly for 10 seconds so it doesn’t curl. Cook for 4 to 5 minutes, until the skin is crisp and the fish is cooked about three-quarters of the way up the side.
- Flip Briefly: Turn the fillets and cook for 30 to 60 seconds more, just until the centers reach 125°F to 130°F for medium or 145°F if you want them fully done.
- Serve: Spoon the dill yogurt sauce on the plate or over the top, then finish with lemon wedges.
Tips and Variations:
- Swap: Use sour cream instead of yogurt if you want a tangier, thicker sauce.
- Make-Ahead: The sauce can sit in the fridge for a few hours and gets better once the dill settles in.
- Serve With: Roasted potatoes and asparagus make the plate feel complete.
5. Mushroom Risotto with Parmesan and Thyme
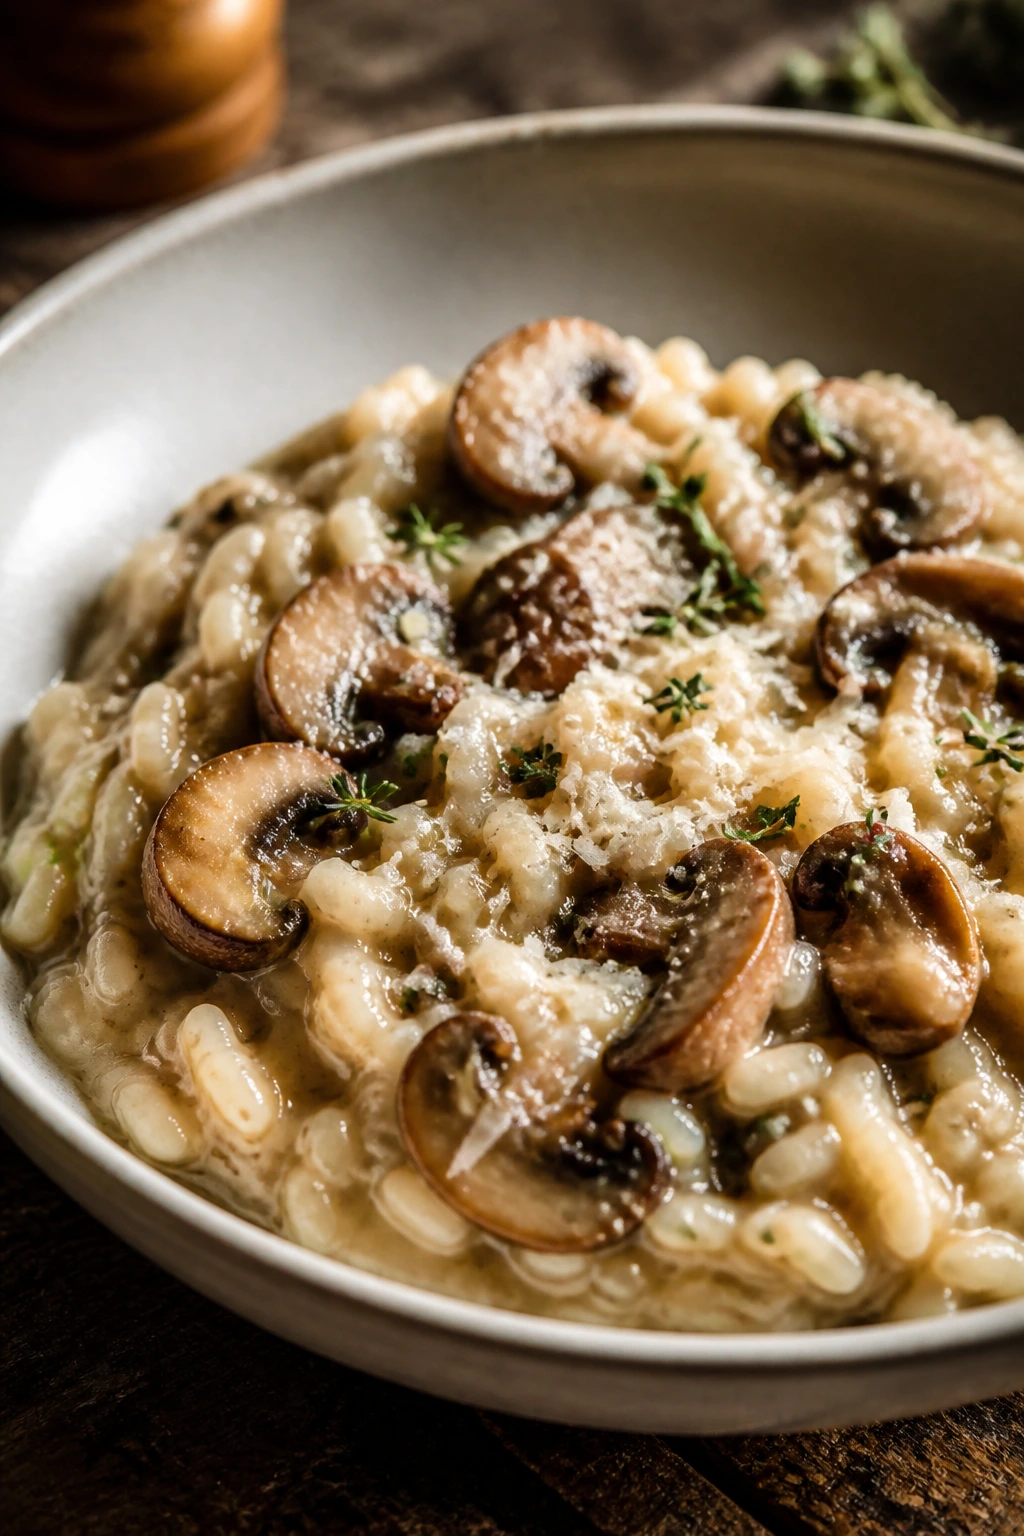
Risotto is for people who enjoy a little rhythm in the kitchen. Stir, ladle, stir again. The reward is a bowl of rice that’s soft, creamy, and edged with the earthy flavor of mushrooms and thyme. It’s cozy, but not dull.
For New Year’s Eve dinner ideas for two, risotto is a sleeper hit because it feels lavish without needing an expensive protein on top. The starch itself does the heavy lifting. By the time the parmesan melts in, the whole pan tastes like a very good decision.
Why It Works: Arborio rice releases starch as it cooks, which gives risotto its signature creamy texture without adding a ton of cream. Warm stock matters because cold liquid slows the cooking and makes the rice cook unevenly. Browning the mushrooms first builds a savory base, and a final knob of butter keeps the finished dish glossy. If you’ve only ever had risotto that felt stodgy, this version shows how light and silky it can be when the heat stays controlled.
Key Ingredients:
- 1 cup arborio rice — the right rice makes the texture
- 8 ounces cremini mushrooms, sliced — earthy and sturdy
- 1 small shallot, finely chopped — sweet aromatic base
- 2 tablespoons unsalted butter — divided
- 1 tablespoon olive oil — for browning
- 1/2 cup dry white wine — adds acidity
- 4 cups low-sodium chicken or vegetable stock, kept warm — essential for risotto
- 1 teaspoon fresh thyme leaves — subtle herbal lift
- 1/2 cup grated parmesan — for richness
- 1/2 teaspoon kosher salt — adjust to taste
- 1/4 teaspoon black pepper — optional
- 1 tablespoon chopped parsley — for finishing
Quick Steps:
- Warm the Stock: Set the stock in a saucepan over low heat so it stays hot but does not boil.
- Brown the Mushrooms: Heat 1 tablespoon butter and the olive oil in a wide skillet over medium-high heat. Add the mushrooms and cook for 5 to 7 minutes until browned and their liquid cooks off. Remove half for topping if you want a prettier finish.
- Soften the Shallot and Toast the Rice: Lower the heat to medium, add the shallot, and cook for 1 minute. Stir in the rice and thyme and toast for 1 to 2 minutes until the grains look shiny at the edges.
- Add Wine and Begin Stirring: Pour in the white wine and cook until mostly absorbed. Then add the warm stock one ladle at a time, stirring often and waiting until each addition is almost absorbed before adding the next.
- Finish the Risotto: Continue for 18 to 22 minutes until the rice is tender but still has a small bite in the center. Stir in the remaining butter, parmesan, salt, and pepper.
- Serve Right Away: Spoon into warm bowls and top with the reserved mushrooms and parsley. Risotto waits for nobody.
Tips and Variations:
- Make-Ahead: Slice the mushrooms and measure the rice earlier, but cook the risotto at the last minute.
- Swap: Use shiitake or a mushroom mix if you want more depth.
- Watch For: If the risotto gets too thick, loosen it with a splash of hot stock before serving.
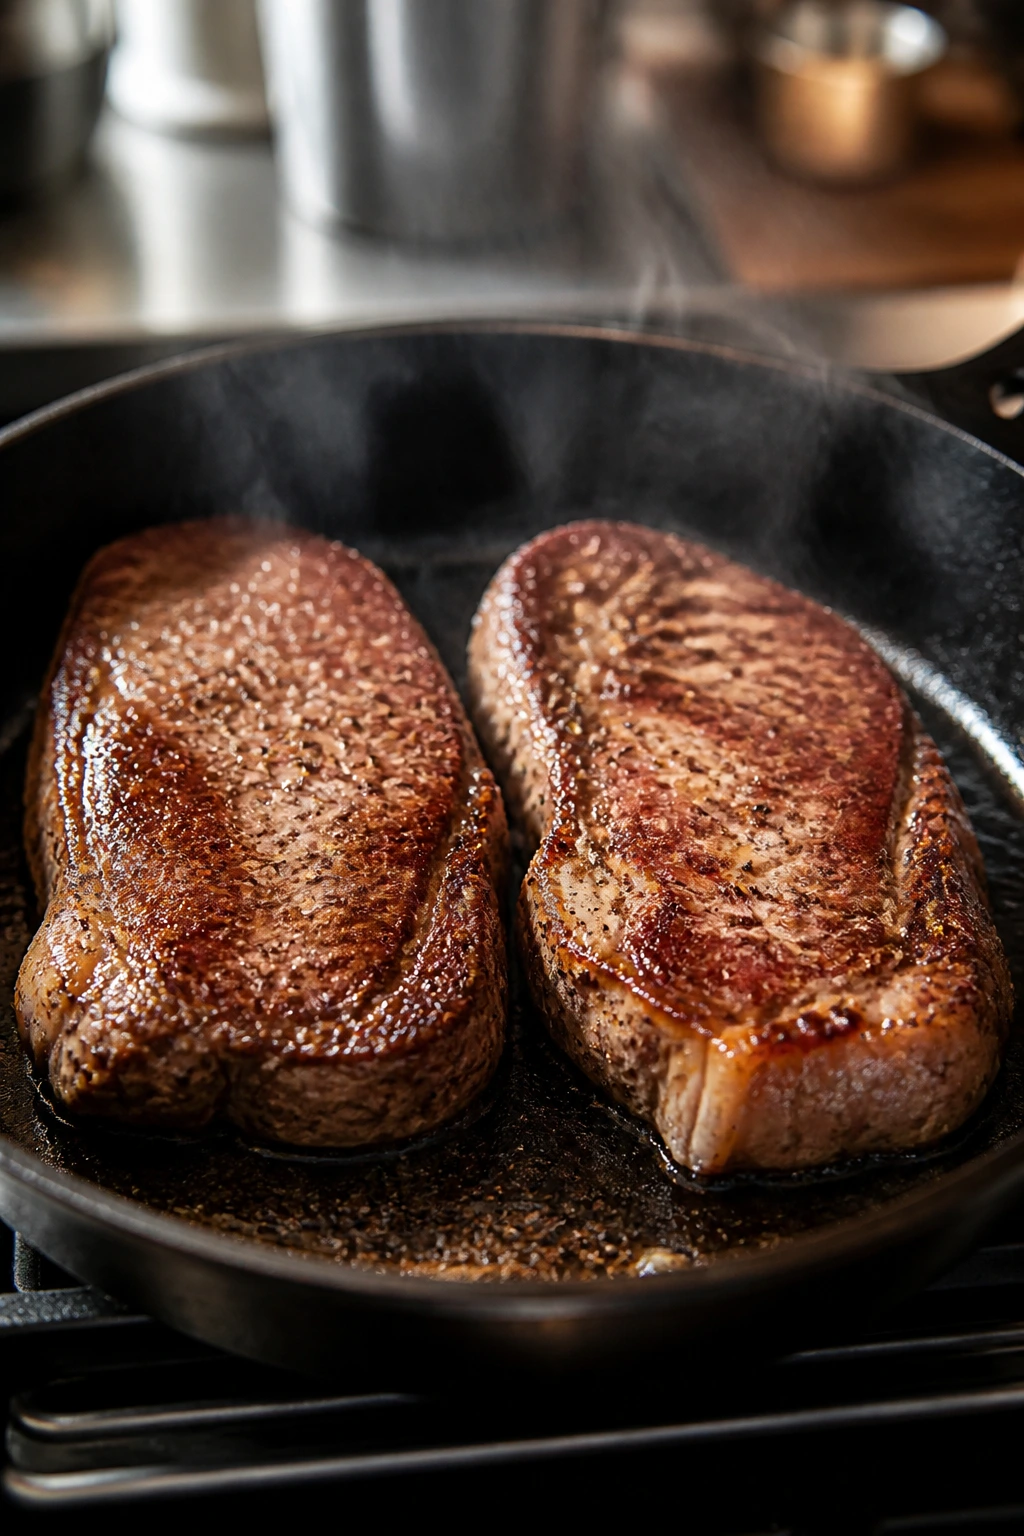
6. Steak Frites for Two
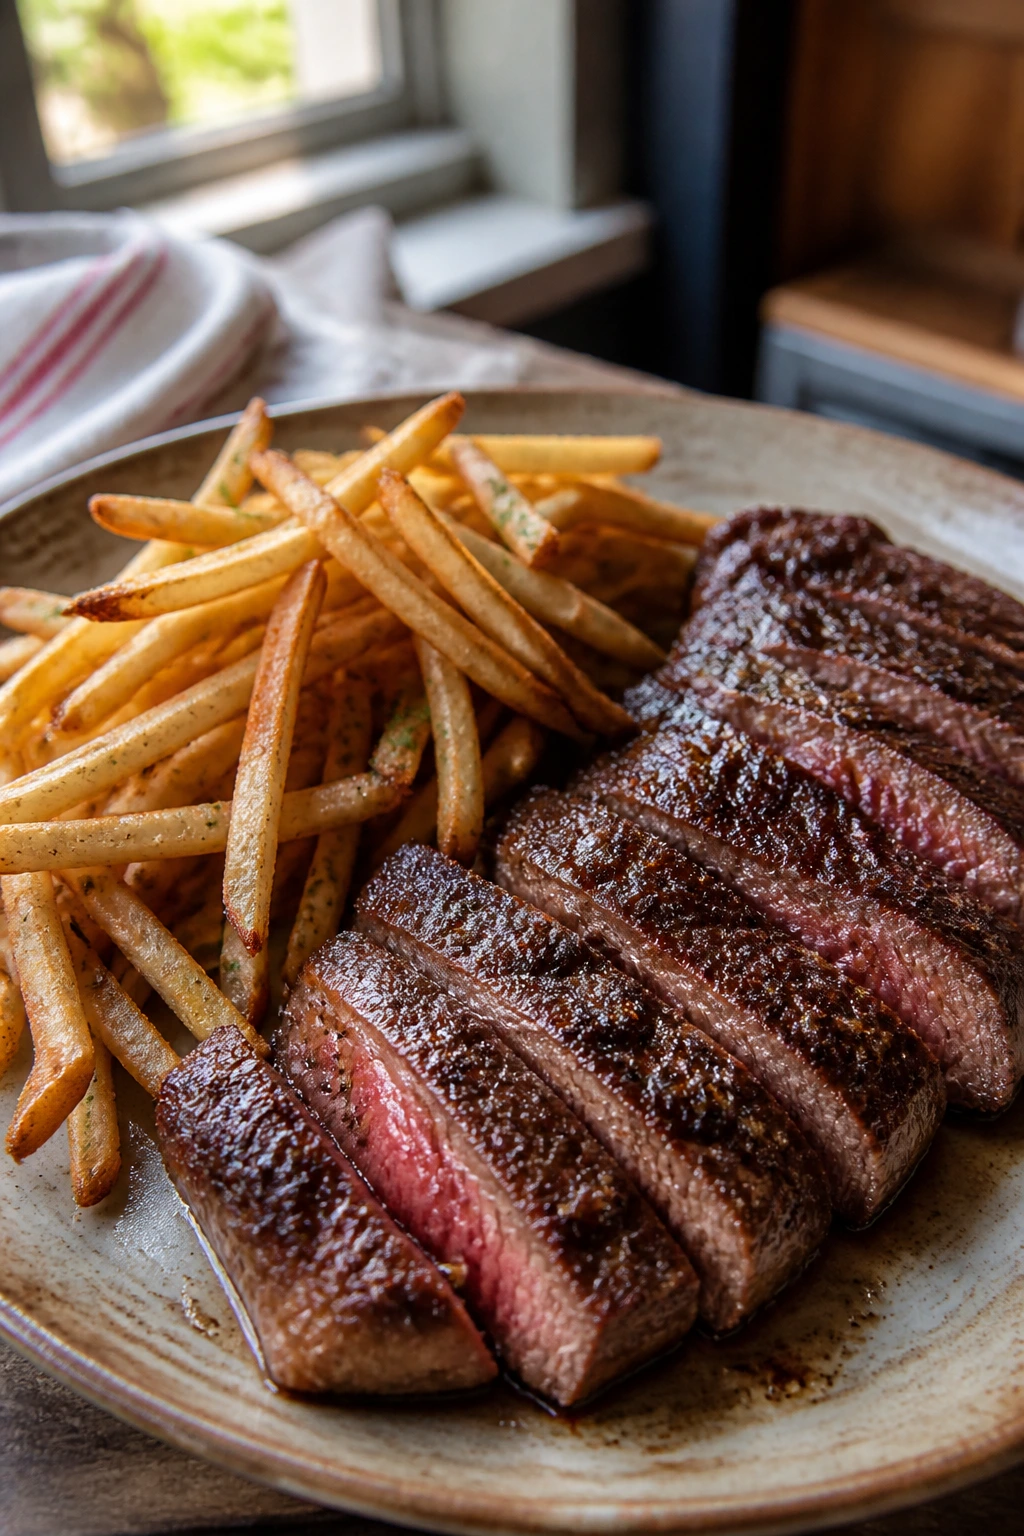
Steak frites is the classic answer when you want dinner to feel like a proper event and not just another Tuesday in nicer clothing. You get a seared steak, crisp potatoes, and that deep satisfaction that comes from plating two things that belong together. It’s straightforward, but not plain.
I like steak frites for New Year’s Eve because it feels generous without being hard to pull off. The fries can roast while the steaks rest. The whole meal is built on simple timing, which is exactly what you want when the evening already has enough moving parts.
Why It Works: A hot oven turns potatoes crisp on the outside and fluffy inside, while a properly dried steak develops the kind of crust that tastes expensive. Using one skillet for the steak concentrates the drippings, so even a quick pan sauce or herb butter tastes richer. The trick is to keep the fries and steak on separate clocks; if you try to force them into the same one, somebody ends up overdone. Done right, this is diner-speed cooking with holiday clothes on.
Key Ingredients:
- 2 strip steaks, 8 ounces each and about 1 to 1¼ inches thick — a good sear-to-center ratio
- 1½ pounds Yukon Gold or russet potatoes — for the fries
- 2 tablespoons neutral oil — for the potatoes
- 1 teaspoon kosher salt — divided
- 1/2 teaspoon black pepper — for the steak
- 2 tablespoons unsalted butter — for finishing
- 1 clove garlic, minced — optional, for the butter
- 1 tablespoon chopped parsley — for the butter or garnish
- 1/3 cup mayonnaise — if you want a quick aioli
- 1 teaspoon lemon juice — for the aioli
- 1 small garlic clove, grated — for the aioli
Quick Steps:
- Prep the Potatoes: Cut the potatoes into thin fries, about 1/4 to 1/2 inch thick. Toss with oil and 1/2 teaspoon salt.
- Roast the Fries: Spread the potatoes on a hot sheet pan and roast at 425°F (220°C) for 25 to 35 minutes, flipping once, until golden and crisp at the edges.
- Season the Steaks: Pat the steaks dry and season them with the remaining salt and the pepper. Let them sit while the oven runs.
- Sear the Steak: Heat a skillet over medium-high until hot, then sear the steaks in a thin film of oil for 2½ to 4 minutes per side, depending on thickness and desired doneness.
- Finish and Rest: Add the butter and garlic during the last minute, spooning it over the steaks. Pull them at 125°F for medium-rare or 130°F for medium, then rest for 5 to 8 minutes.
- Serve Together: Plate the fries with the steak and a spoonful of aioli or herb butter.
Tips and Variations:
- Shortcut: Buy good frozen fries if you want to save time; roast them on a preheated pan for better crispness.
- Swap: A ribeye works if you prefer more fat and a deeper beef flavor.
- Serve With: A green salad keeps the plate from feeling too heavy.
7. Chicken Parmesan for Two

Chicken Parmesan has a certain old-school charm that never really misses. Crispy chicken, marinara, bubbling cheese, and a little basil on top — it’s familiar in the best way. For two people, it feels indulgent without requiring a giant casserole dish.
The key is keeping the breading crisp under the sauce. That sounds obvious, but a lot of home versions drown the chicken and lose the crunch. A quick skillet fry and a short oven finish solve that problem.
Why It Works: Pounding the chicken to an even thickness helps it cook quickly and stay juicy, while panko gives the crust a cleaner, louder crunch than plain breadcrumbs. A quick sear sets the crust before the sauce and cheese go on top, so the oven only has to melt and finish the chicken instead of drying it out. A little parmesan in the breading gives the crust extra savoriness, which keeps the final plate from tasting like just sauce and cheese. It’s the kind of dish that feels familiar, but still earns a little applause at the table.
Key Ingredients:
- 2 boneless, skinless chicken breasts, about 1½ pounds total — pounded to 1/2-inch thickness
- 1/2 teaspoon kosher salt — for the chicken
- 1/2 teaspoon black pepper — for the chicken
- 1/3 cup all-purpose flour — for dredging
- 1 large egg — for the breading station
- 1 tablespoon water — thins the egg slightly
- 3/4 cup panko breadcrumbs — for the crisp coating
- 1/4 cup grated parmesan — mixed into the crumbs
- 2 tablespoons olive oil — for pan-frying
- 1 cup marinara sauce — use a good one here
- 1 cup shredded mozzarella — for melting
- 1 tablespoon chopped basil or parsley — for garnish
Quick Steps:
- Set Up the Breading Station: Put the flour in one shallow bowl, whisk the egg with the water in a second bowl, and mix the panko with parmesan in a third.
- Prep the Chicken: Season the chicken with salt and pepper, then dredge each piece in flour, dip in egg, and coat with the breadcrumb mixture, pressing gently so it sticks.
- Pan-Fry: Heat the oil in a skillet over medium heat. Cook the chicken for 3 to 4 minutes per side until golden brown.
- Add Sauce and Cheese: Spoon marinara over each piece, then top with mozzarella.
- Bake: Transfer the skillet or move the chicken to a baking dish and bake at 400°F (205°C) for 8 to 10 minutes, until the cheese is melted and the chicken reaches 165°F.
- Serve: Finish with basil and serve over spaghetti or with a green salad.
Tips and Variations:
- Make-Ahead: Bread the chicken ahead and refrigerate it for up to 4 hours before frying.
- Swap: Use provolone with the mozzarella if you want a sharper melt.
- Watch For: Too much sauce makes the crust soggy, so spoon lightly.
8. Lobster Tails with Brown Butter
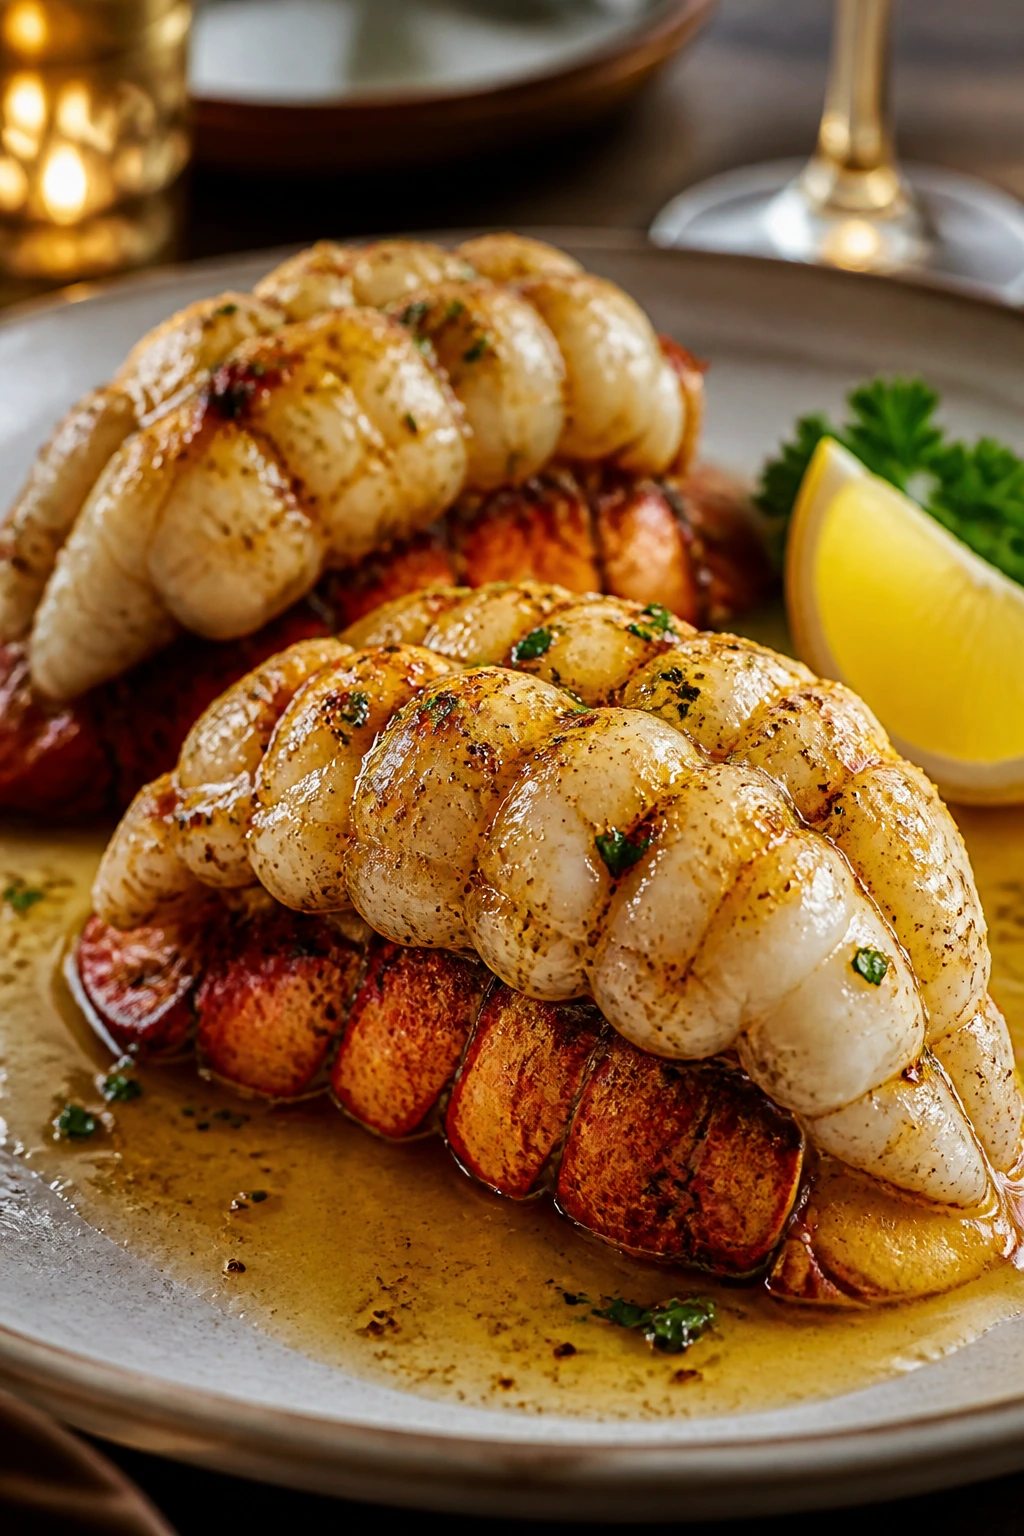
Lobster tails bring instant occasion energy. They’re rich, sweet, and a little theatrical when they come out of the oven with browned butter and lemon. If there’s a night to make the meal feel a touch extravagant, this is it.
I’m not shy about saying this: lobster tails are easier than people think, but they do demand precision. Overcook them and they turn rubbery in a hurry. Under-cook them and nobody’s happy. The brown butter and lemon keep the flavor vivid enough to justify the effort.
Why It Works: Splitting the shells lets the meat cook evenly and sit on top of the shell, which makes for a prettier presentation and better heat exposure. Brown butter adds a nutty note that lobster loves, and lemon keeps the richness from feeling sticky. A short broil or bake is all you need because lobster meat dries out once it crosses the line. For a celebratory dinner, that quick cook is part of the charm.
Key Ingredients:
- 2 lobster tails, 4 to 6 ounces each — enough for two
- 4 tablespoons unsalted butter — for the sauce
- 2 cloves garlic, minced — flavor base
- 1 teaspoon lemon zest — brightens the butter
- 1 tablespoon lemon juice — cuts the richness
- 1/2 teaspoon paprika — adds color and mild warmth
- 1 tablespoon chopped parsley — for finishing
- 1/4 teaspoon kosher salt — for the butter
- 1 tablespoon breadcrumbs — optional, for a light crunchy topping
- 1 teaspoon olive oil — helps the shells brown a little
Quick Steps:
- Prep the Lobster: Use kitchen shears to cut the top of each shell lengthwise, then gently loosen the meat and lift it partly on top of the shell.
- Make the Butter: Melt the butter in a small saucepan over medium heat and cook until it smells nutty and turns golden brown, about 3 to 4 minutes. Stir in the garlic, lemon zest, lemon juice, paprika, and salt.
- Arrange for Broiling: Set the lobster tails on a sheet pan and brush generously with the brown butter. If using breadcrumbs, sprinkle a little on top.
- Broil: Broil 6 inches from the heat for 7 to 10 minutes, depending on size, until the meat is opaque and reaches about 140°F to 145°F.
- Baste Again: Brush with the remaining butter as soon as they come out.
- Serve: Sprinkle with parsley and lemon wedges, then get them to the table fast.
Tips and Variations:
- Swap: A squeeze of orange can stand in for part of the lemon if you want a sweeter edge.
- Make-Ahead: The butter can be browned earlier in the day and rewarmed gently before serving.
- Serve With: Asparagus or a small bowl of risotto keeps the meal balanced.
9. Pork Chops with Apples and Dijon Pan Sauce
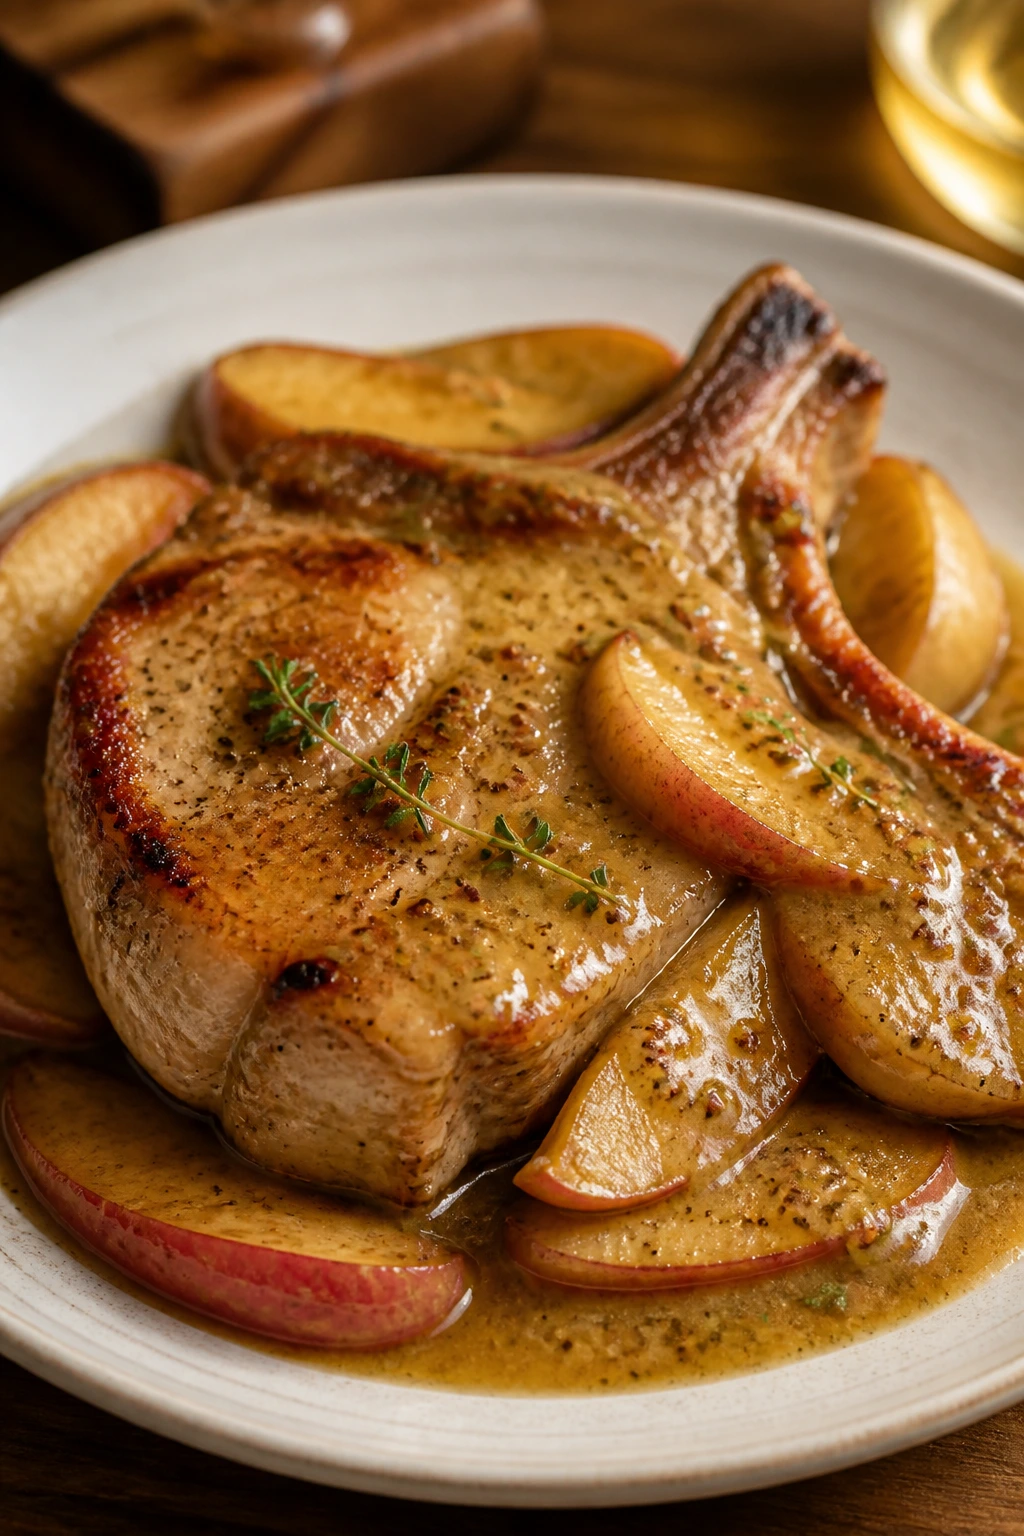
Pork chops and apples are a pairing that still earns its keep. The meat is savory and a little rich, the apples soften into something sweet and tart, and the Dijon ties the whole pan together with a clean bite. It feels seasonal without leaning on clichés.
For two, this dish is especially useful because it cooks in one skillet and looks more involved than it is. Bone-in chops hold up better than thin boneless ones, and the pan sauce builds from the browned bits left behind. That’s where the good stuff is.
Why It Works: A thick bone-in chop gives you time to develop a crust before the meat overcooks. Apples soften enough to become jammy but still keep their shape, and Dijon adds sharpness that keeps the sauce from turning syrupy. A splash of cider or broth pulls the fond off the pan so the sauce tastes like it belongs to the pork, not beside it. If you like dinners that feel smart rather than complicated, this one lands in the right place.
Key Ingredients:
- 2 bone-in pork chops, 1 to 1¼ inches thick — better texture and more forgiveness
- 1 teaspoon kosher salt — for the chops
- 1/2 teaspoon black pepper — for the chops
- 1 tablespoon olive oil — for searing
- 1 tablespoon unsalted butter — for finishing and sauce
- 1 medium apple, thinly sliced — Honeycrisp or Granny Smith both work
- 1 small shallot, thinly sliced — sweet aromatic base
- 1 tablespoon Dijon mustard — sharpens the sauce
- 1/2 cup apple cider or low-sodium broth — for deglazing
- 1 teaspoon fresh thyme leaves — herbal note
- 1 teaspoon apple cider vinegar — optional, for extra brightness
Quick Steps:
- Season the Pork: Pat the chops dry and season both sides with salt and pepper. Let them sit while the skillet heats.
- Sear the Chops: Warm the oil in a skillet over medium-high heat. Cook the chops for 3 to 5 minutes per side until browned and the internal temperature reaches 145°F.
- Cook the Apples: Remove the chops and add the butter, apples, and shallot. Cook for 3 to 4 minutes until the apples start to soften and the shallot turns translucent.
- Build the Pan Sauce: Stir in the Dijon, cider or broth, thyme, and vinegar if using. Scrape up the browned bits and simmer for 2 to 3 minutes until slightly thickened.
- Return the Pork: Nestle the chops back into the skillet and spoon the sauce over them for 1 minute.
- Serve: Plate the chops with the apples and pan sauce spooned over the top.
Tips and Variations:
- Swap: Pears work if apples are too sharp for your taste.
- Make-Ahead: Slice the apples and shallot earlier, but cook the chops fresh.
- Serve With: Potatoes mashed with a little butter make the sauce feel complete.
10. Tagliatelle Bolognese for Two
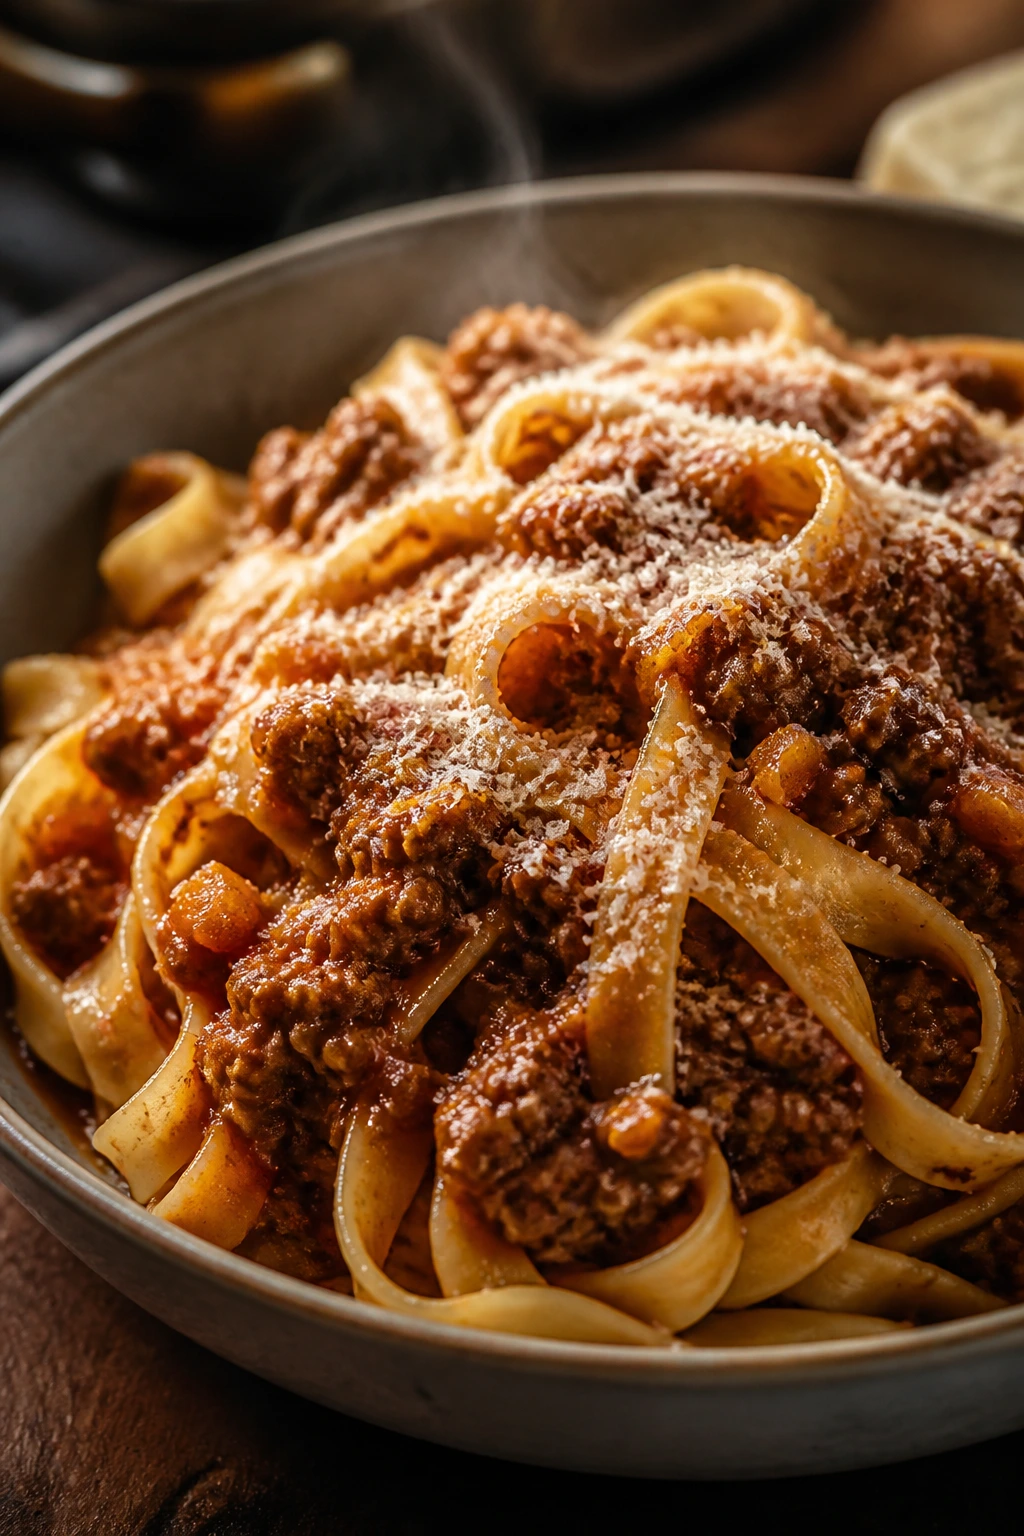
Bolognese is not fast, and that’s part of why it feels so good on a holiday evening. The sauce gets deep and mellow as it simmers, with beef, pork, tomatoes, wine, and milk all doing their own quiet work. It’s the kind of dinner that makes the room smell like someone knows what they’re doing.
This version is sized for two generous plates, not a pot meant to feed a football team. That matters because smaller batches cook more evenly and reduce the temptation to drown the pasta in sauce. I always think pasta tastes better when the sauce has been given enough time to become one thing instead of several.
Why It Works: A mix of ground beef and pork gives the sauce both body and sweetness, while the carrot, celery, and onion base keeps it balanced. Tomato paste adds concentrated depth, wine lifts the meat flavor, and milk softens the edges so the sauce tastes rounded instead of sharp. Long simmering lets everything settle together. It’s not difficult, but it does reward patience in a way few other dinners do.
Key Ingredients:
- 8 ounces tagliatelle or pappardelle — broad noodles hold the sauce well
- 1 tablespoon olive oil — for the base
- 1/2 pound ground beef — for richness
- 1/2 pound ground pork — for sweetness and texture
- 1 small onion, finely chopped — base flavor
- 1 small carrot, finely chopped — traditional soffritto
- 1 celery stalk, finely chopped — rounds out the base
- 2 cloves garlic, minced — optional but useful
- 2 tablespoons tomato paste — concentrated tomato flavor
- 1/2 cup dry red wine — deglazes the pan
- 1/2 cup whole milk — softens the sauce
- 1 cup crushed tomatoes or passata — the tomato body
- 1/2 teaspoon kosher salt — adjust as needed
- 1 bay leaf — optional, but lovely
- 1/4 teaspoon black pepper — for balance
- 1/4 cup grated parmesan — to finish
Quick Steps:
- Build the Base: Warm the oil in a saucepan over medium heat. Cook the onion, carrot, and celery for 5 to 7 minutes until softened but not browned.
- Brown the Meat: Add the beef and pork, breaking them up with a spoon. Cook until no pink remains and the meat starts to brown in spots.
- Add Tomato Paste and Garlic: Stir in the tomato paste and garlic and cook for 1 minute, until the paste darkens slightly.
- Deglaze and Simmer: Pour in the wine and cook until mostly evaporated. Stir in the milk, crushed tomatoes, salt, pepper, and bay leaf, then reduce to low and simmer for 30 to 40 minutes.
- Cook the Pasta: Boil the tagliatelle in salted water until al dente, then reserve a splash of pasta water and drain.
- Toss and Serve: Remove the bay leaf, toss the pasta with the sauce, and loosen with a little pasta water if needed. Finish with parmesan.
Tips and Variations:
- Swap: All-beef works if that’s what you have, though the sauce loses some sweetness.
- Make-Ahead: Bolognese tastes even better the next day and freezes well.
- Serve With: A simple green salad and crusty bread keep the meal grounded.
11. Gnocchi with Sausage, Spinach, and Cream
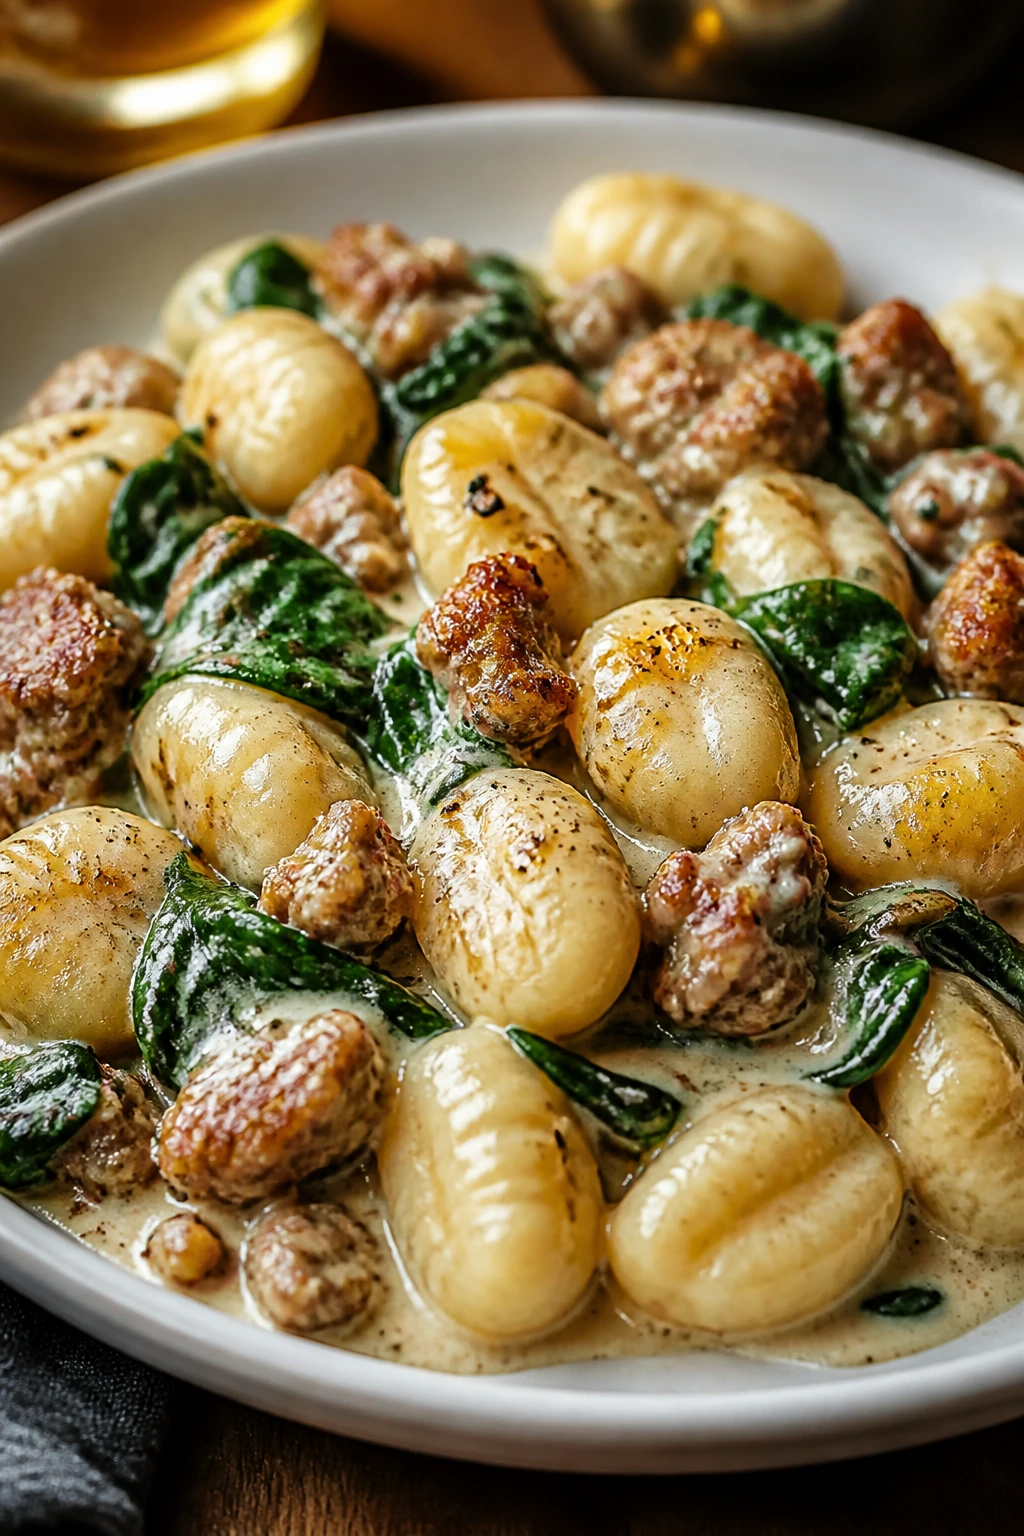
Gnocchi is the kind of thing that tastes richer than the effort it takes, which is always a good trick to keep in your pocket. Potato dumplings, browned sausage, garlic, and cream make a skillet full of soft, savory comfort. It’s not elegant in a delicate way. It’s elegant in a cozy, sticky-fingers, second-helping way.
This is a strong pick if you want something warm and rich without the formality of a roast. The sausage seasons the whole pan, the gnocchi soaks up the sauce, and the spinach gives you enough green to pretend balance is part of the plan. I’m not complaining.
Why It Works: Shelf-stable or refrigerated gnocchi both work well because the dumplings only need a short simmer to become tender. The sausage fat flavors the sauce, while cream and parmesan turn the pan juices into something velvety. Spinach wilts in almost no time, so it keeps the dish looking fresh and cuts through the richness just enough. It’s the sort of meal that reads as indulgent from the first bite.
Key Ingredients:
- 1 pound potato gnocchi — fresh or shelf-stable
- 8 ounces Italian sausage, casings removed — mild or hot
- 1 tablespoon olive oil — if the sausage is lean
- 2 cloves garlic, minced — for aroma
- 1 small shallot or 1/2 small onion, finely chopped — sweet base
- 3/4 cup heavy cream — creates the sauce
- 1/4 cup chicken broth — loosens the sauce
- 2 cups baby spinach — wilts into the pan
- 1/3 cup grated parmesan — for salty depth
- 1/4 teaspoon red pepper flakes — optional heat
- 1 tablespoon chopped basil or parsley — to finish
Quick Steps:
- Brown the Sausage: Heat the olive oil in a large skillet over medium heat, then cook the sausage until browned and cooked through, breaking it into crumbles.
- Add the Aromatics: Stir in the shallot and garlic and cook for 1 minute until fragrant.
- Make the Sauce: Pour in the cream and broth and bring the mixture to a gentle simmer. Add the parmesan and stir until the sauce thickens slightly.
- Cook the Gnocchi: Drop the gnocchi into the skillet and simmer for 2 to 3 minutes, or until they are tender and the sauce clings to them.
- Wilt the Spinach: Fold in the spinach and red pepper flakes if using, cooking just until the leaves collapse.
- Finish and Serve: Stir in basil or parsley and serve immediately.
Tips and Variations:
- Swap: Turkey sausage works if you want something a little lighter.
- Make-Ahead: The sauce can be made ahead, but add the gnocchi at the end so they don’t turn soft.
- Serve With: Garlic bread is not subtle here. That’s fine.
12. Thai Red Curry Shrimp with Jasmine Rice

Thai red curry shrimp has a bright, fragrant heat that wakes up a dinner table fast. Coconut milk softens the curry paste, lime cuts through the richness, and shrimp cook right in the sauce, which keeps the process tidy. It’s bold without being heavy.
For two, this is one of the easiest ways to make a meal feel lively near the end of the evening. The rice steadies the plate, the curry does the talking, and you get something that tastes layered even though the ingredient list is short. I like recipes that do a lot with one can of coconut milk and a spoonful of curry paste.
Why It Works: Red curry paste is concentrated, so a small amount carries garlic, chiles, lemongrass, and spice all at once. Coconut milk smooths the heat and turns the sauce spoonable, while fish sauce and lime keep it from tasting flat or sweet. Shrimp only need a few minutes in the hot curry, which keeps them tender. That fast finish matters, because overcooked shrimp turn rubbery before you can blink.
Key Ingredients:
- 1 cup jasmine rice — fluffy and fragrant
- 1 tablespoon neutral oil — for the curry base
- 1 tablespoon Thai red curry paste — adjust to heat preference
- 1 can coconut milk, 13.5 ounces — the sauce base
- 1/2 cup low-sodium chicken broth or water — loosens the curry
- 1 red bell pepper, sliced — color and crunch
- 1 cup snow peas — quick-cooking green vegetable
- 1 pound shrimp, peeled and deveined — the main protein
- 1 tablespoon fish sauce — savory depth
- 1 teaspoon brown sugar — balances the heat
- Juice of 1 lime — for finishing
- 2 tablespoons chopped basil or cilantro — fresh finish
Quick Steps:
- Cook the Rice: Rinse the jasmine rice and cook it according to the package directions.
- Bloom the Curry Paste: Heat the oil in a skillet or wide saucepan over medium heat. Add the curry paste and stir for 30 seconds until fragrant.
- Build the Sauce: Pour in the coconut milk and broth, whisking to dissolve the paste. Add the bell pepper, snow peas, fish sauce, and brown sugar.
- Simmer Briefly: Cook for 4 to 5 minutes until the vegetables start to soften.
- Add the Shrimp: Stir in the shrimp and cook for 2 to 3 minutes, until pink and opaque.
- Finish: Turn off the heat, squeeze in the lime juice, and scatter basil or cilantro over the top. Serve over the rice.
Tips and Variations:
- Swap: Chicken or firm tofu works if shrimp isn’t your thing.
- Make-Ahead: The curry base can be made earlier; add shrimp right before serving.
- Watch For: Keep the curry at a gentle simmer so the coconut milk stays smooth.
13. Shepherd’s Pie for Two
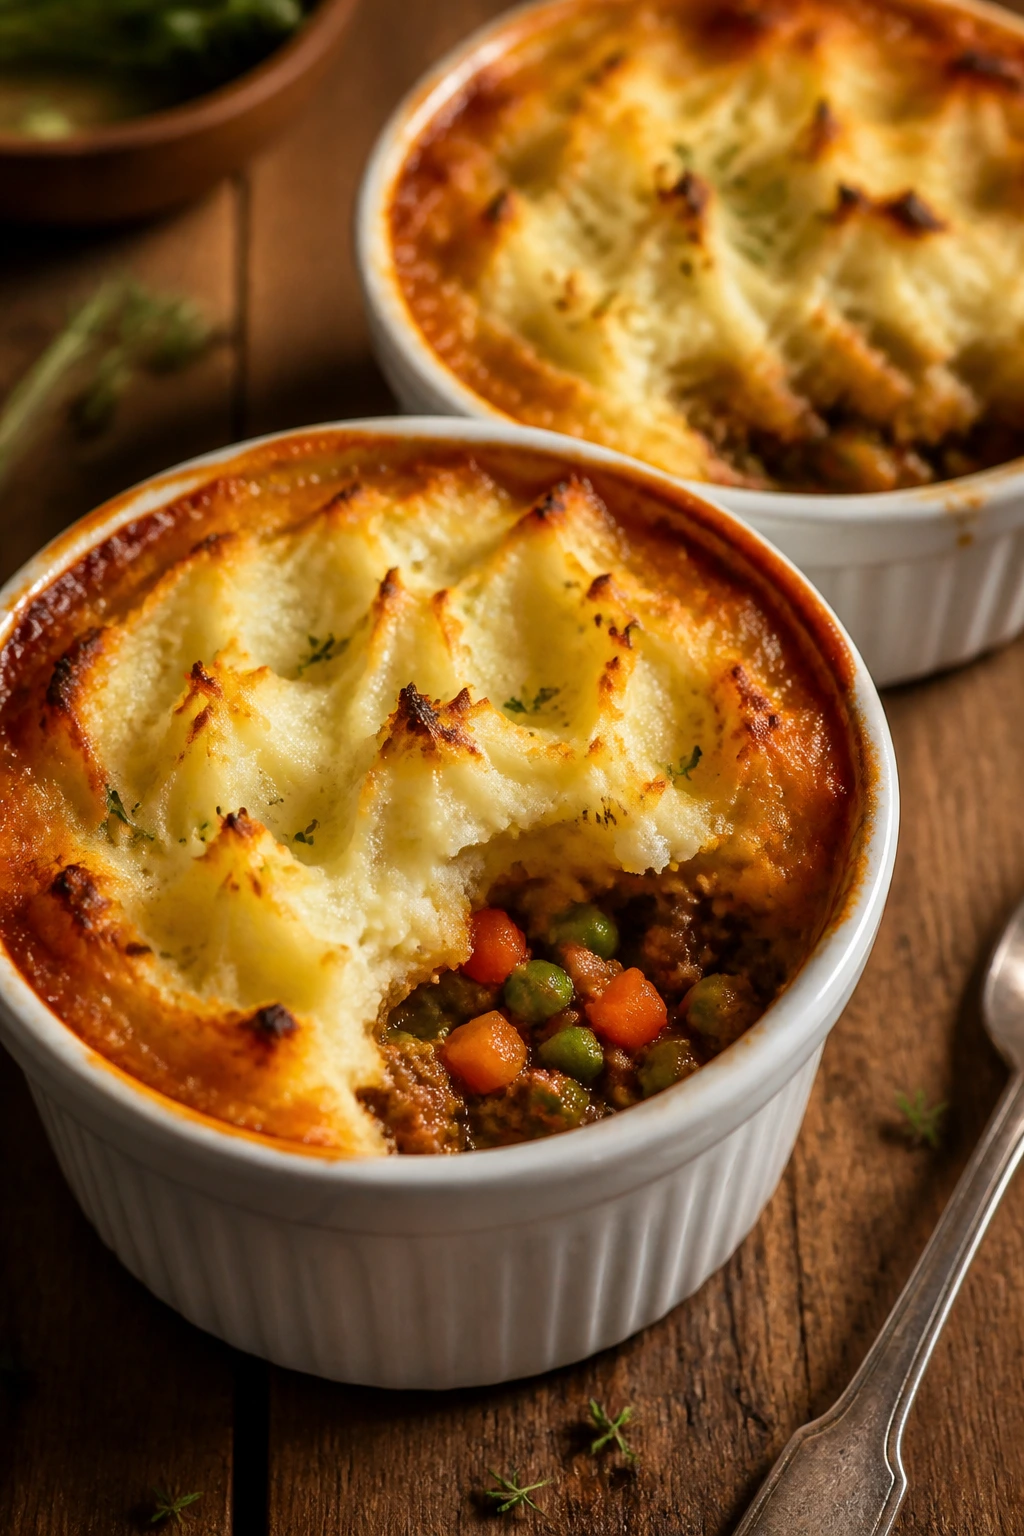
Shepherd’s pie is pure comfort with a browned top. A savory meat filling hides under mashed potatoes, and the whole thing comes out of the oven bubbling at the edges. It’s cozy enough for a quiet night, but still feels like a proper dinner.
I like making it in two ramekins or one small baking dish, because the portions stay neat and the potato topping gets more surface area to brown. That browned top matters. It gives you a little crunch before you hit the soft filling underneath, and that contrast is what keeps this dish from feeling sleepy.
Why It Works: The filling gets depth from tomato paste, Worcestershire, and a short simmer with carrots and peas, while the mash acts like a soft, buttery lid. Keeping the potato layer thick enough to hold shape but not so thick that it turns gluey is the whole game. A little milk and butter make the topping plush, and a hot oven gives you those little browned ridges everybody goes after first. It’s old-fashioned, yes, but there’s a reason it stuck around.
Key Ingredients:
- 1 pound Yukon Gold potatoes, peeled and cubed — for the topping
- 1/4 cup milk — for the mash
- 2 tablespoons unsalted butter — for the mash
- 1/2 teaspoon kosher salt — for the potatoes
- 1/2 pound ground lamb or ground beef — the filling
- 1 small onion, finely chopped — flavor base
- 1 small carrot, diced finely — classic sweetness
- 1/2 cup frozen peas — stirred in at the end
- 1 tablespoon tomato paste — deepens the filling
- 1 teaspoon Worcestershire sauce — savory note
- 1/2 cup beef broth — helps the filling stay moist
- 1 tablespoon chopped parsley — for the finish
Quick Steps:
- Boil the Potatoes: Put the potatoes in salted water and boil until fork-tender, about 12 to 15 minutes. Drain well.
- Make the Filling: Cook the onion and carrot in a skillet over medium heat for 4 to 5 minutes, then add the ground meat and brown it well.
- Season the Meat: Stir in the tomato paste, Worcestershire sauce, broth, peas, salt, and parsley. Simmer for 3 to 4 minutes until thickened.
- Mash the Potatoes: Mash the potatoes with the butter and milk until smooth but not sticky.
- Assemble: Spread the meat filling in a small baking dish or two ramekins, then top with the mashed potatoes. Rough up the surface with a fork for better browning.
- Bake: Bake at 400°F (205°C) for 20 to 25 minutes until bubbling, then broil briefly for a golden top. Rest 5 minutes before serving.
Tips and Variations:
- Swap: Ground turkey works, though you may want a little more butter in the filling.
- Make-Ahead: Assemble earlier in the day and bake when ready.
- Serve With: A bitter green salad balances the mash nicely.
14. Butternut Squash Ravioli with Sage Brown Butter
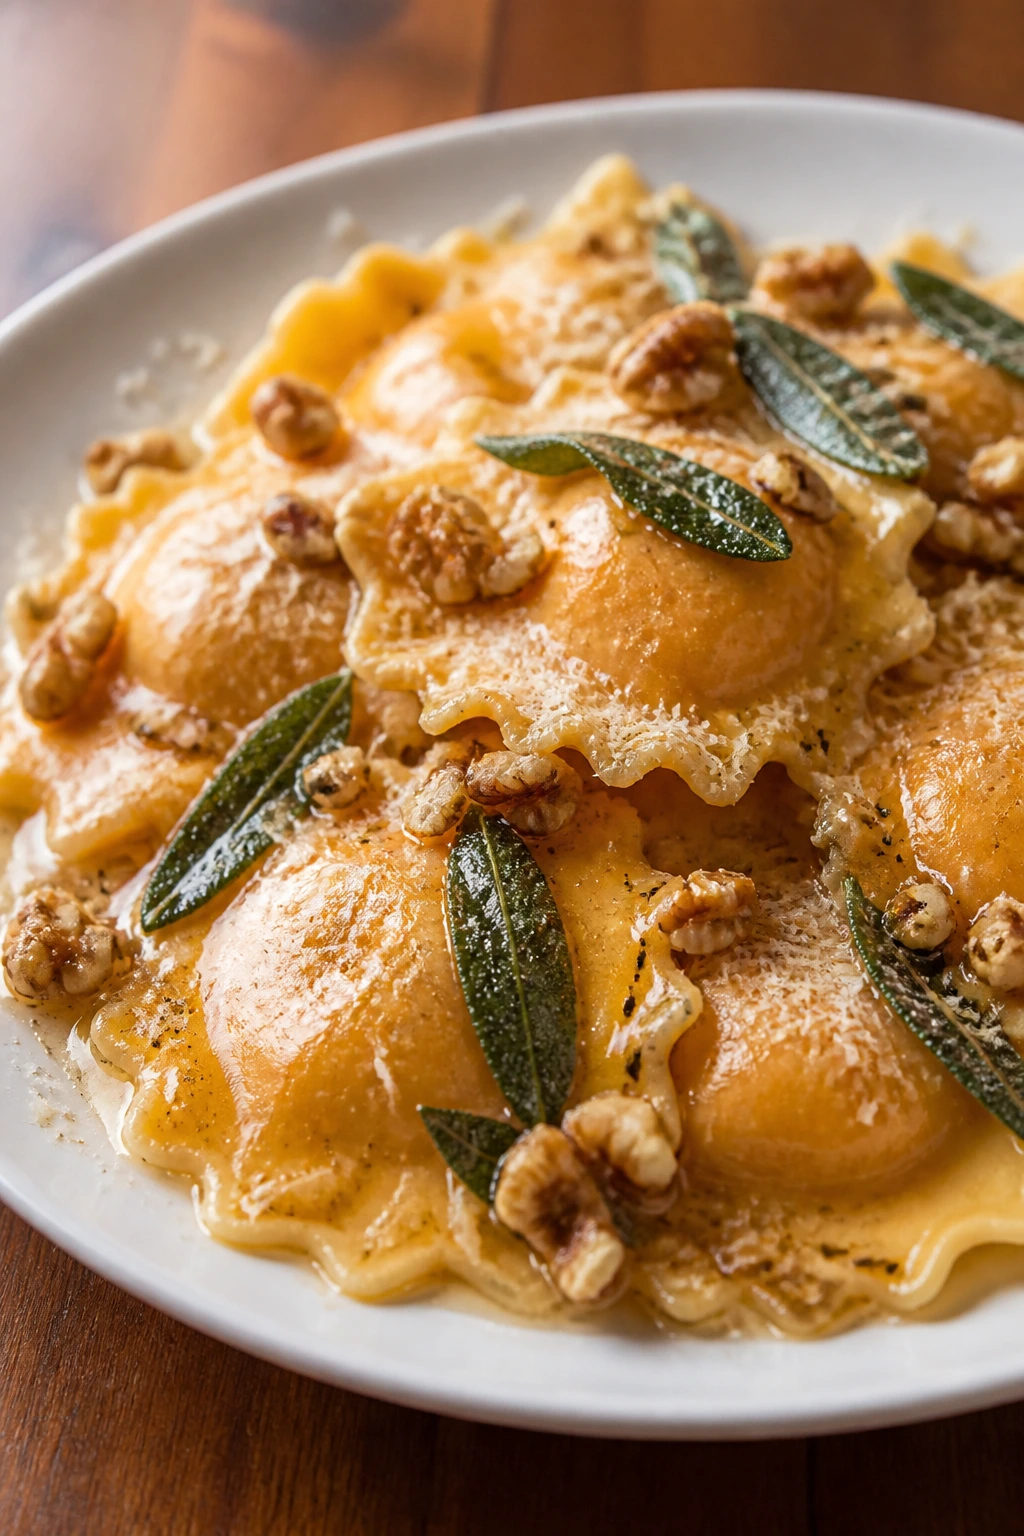
Butternut squash ravioli is a little cheat code for a festive dinner. The filling tastes sweet and nutty, the pasta cooks in minutes, and brown butter with sage gives the whole plate a warm, toasted edge. It’s the sort of meal that feels like winter without leaning too hard on heaviness.
This is one of my favorite last-minute choices because the ravioli does most of the work. You only need to build a sauce that respects the filling instead of smothering it. Brown butter is perfect for that. It’s fast, fragrant, and a little fancier than plain melted butter in a way people notice immediately.
Why It Works: Refrigerated ravioli cooks quickly and holds a soft, delicate texture that pairs well with a simple sauce. Sage turns crisp in the butter and infuses it with a woodsy note that makes the squash taste deeper. A few walnuts add crunch, and parmesan gives the plate a salty finish so the sweetness doesn’t run away with the whole dish. It’s easy, but not lazy — there’s a difference.
Key Ingredients:
- 9 to 10 ounces refrigerated butternut squash ravioli — fresh pasta cooks best here
- 4 tablespoons unsalted butter — for the sauce
- 6 to 8 fresh sage leaves — the signature flavor
- 1/4 cup chopped toasted walnuts — optional crunch
- 1/4 teaspoon kosher salt — for the sauce
- 1/4 teaspoon black pepper — for balance
- 1/4 cup grated parmesan — for serving
- 1 teaspoon lemon zest — optional, but bright
- 1 tablespoon pasta water — as needed to loosen the sauce
Quick Steps:
- Boil the Ravioli: Cook the ravioli in salted water according to the package directions until they float and are tender, usually 3 to 5 minutes. Reserve a splash of pasta water, then drain gently.
- Brown the Butter: Melt the butter in a skillet over medium heat. Add the sage and cook for 2 to 3 minutes until the butter smells nutty and the sage turns crisp.
- Add Texture: Stir in the walnuts, salt, and pepper. If the butter looks too thick, add a spoonful of pasta water.
- Toss the Ravioli: Add the drained ravioli to the skillet and turn gently so the pasta gets coated without breaking.
- Finish: Sprinkle with parmesan and lemon zest if using.
- Serve Warm: Plate immediately while the butter is glossy and the ravioli are still soft.
Tips and Variations:
- Swap: Pecorino Romano adds a sharper finish than parmesan.
- Make-Ahead: Toast the walnuts earlier so everything else moves quickly.
- Serve With: A simple arugula salad keeps the meal from feeling too sweet.
What Makes a Small-Batch Holiday Dinner Feel Special
Two-person dinner changes the whole tempo of cooking, and that’s a gift. You can sear steak one minute and rest it the next. You can keep shrimp in a single layer instead of crowding a pan with half a pound too many. You can use warm stock, fresh herbs, and a last-minute sauce because the scale stays human.
That’s why these recipes work so well for a celebratory evening. None of them asks you to juggle five casseroles or make a giant roast that sits under foil while everything else suffers. A small dinner rewards attention. A quick herb butter, a bright squeeze of lemon, a properly browned crust — those tiny details matter more when there are only two plates on the table.
The nicest part is how forgiving the evening becomes. If one course takes longer, the meal still feels calm. If you choose pasta instead of steak, or salmon instead of chicken, the structure stays the same: one main thing, one clean side, one sauce or finishing touch. That’s enough.
Essential Equipment for These Recipes
- 12-inch skillet: Large enough for steak, chicken, pork chops, shrimp, or curry without crowding.
- Cast-iron or oven-safe sauté pan: Useful for searing and finishing steak, chicken, or pork in the oven.
- Medium saucepan: Good for sauces, brown butter, and small-batch pasta water.
- Large pot: Needed for pasta, gnocchi, and boiling potatoes.
- Rimmed sheet pan: Best for fries, lobster tails, chicken Parmesan, or roasting vegetables.
- Wooden spoon or heat-safe spatula: Lets you scrape browned bits without scratching the pan.
- Tongs: Essential for flipping steak, chicken, shrimp, and salmon without tearing the surface.
- Instant-read thermometer: The easiest way to avoid overcooking steak, chicken, pork, fish, or lobster.
- Chef’s knife and cutting board: For chopping herbs, vegetables, apples, shallots, and garlic.
- Microplane or fine grater: Great for parmesan, lemon zest, and garlic when you want a fine texture.
- Whisk: Helps smooth sauces, curry, pan drippings, and mustard mixtures.
- Measuring cups and spoons: Small-batch cooking still needs precision.
- Fine-mesh strainer or colander: Handy for pasta, gnocchi, and rinsing rice.
- Small bowls for prep: A few of these make breading chicken or organizing ingredients much less chaotic.
- Aluminum foil: Useful for resting meat, tenting dishes, and keeping things warm briefly.
Smart Shopping and Ingredient Tips
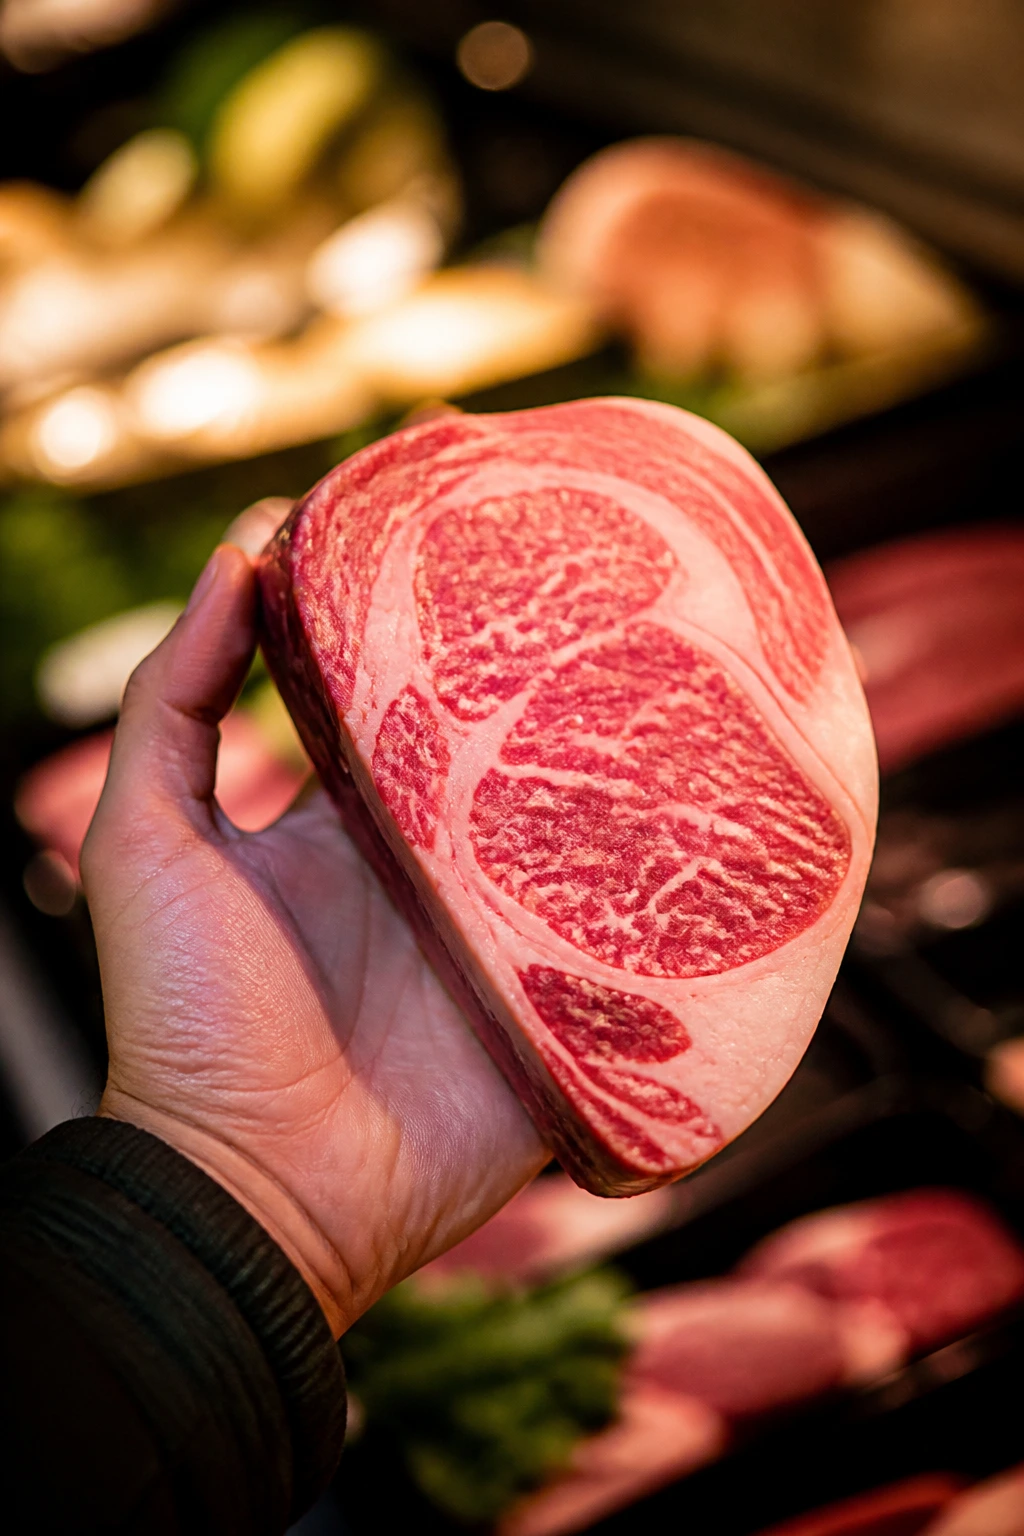
A dinner for two gives you permission to buy better ingredients instead of more ingredients, and that’s usually the smarter move. For steak, look for cut pieces that are 1 to 1½ inches thick with a dry surface and visible marbling; thin steaks cook too fast and don’t give you much crust. For salmon, center-cut fillets cook more evenly than the skinny tail end, and skin-on pieces crisp better in a hot pan. Shrimp should be firm, not mushy, and if you’re buying frozen, thaw them in the fridge or under cold running water, then dry them well before cooking.
Chicken breasts are often uneven, so a quick pound to even thickness saves you from a dry edge and a raw center. Pork chops should be bone-in and at least 1 inch thick if you want a proper sear without overcooking. Lobster tails are easiest to work with when they’re small to medium, around 4 to 6 ounces each. Anything much bigger can feel unwieldy for a two-person dinner.
For pasta dishes and risotto, a good parmesan matters more than people admit. Buy a wedge and grate it yourself if you can. Pre-grated cheese often has anti-caking agents that make sauces grainy. For mushrooms, cremini usually taste deeper than plain white mushrooms. For herbs, fresh parsley, dill, basil, thyme, and sage all earn their place here; dried herbs can work in a pinch, but fresh ones make these dinners feel lively instead of sleepy.
Canned tomatoes, curry paste, and broth also deserve a quick look. Pick low-sodium broth so you can control the seasoning yourself. Red curry paste varies a lot by brand, so taste a little before using a full tablespoon if you know you like heat on the gentler side. If you’re buying ravioli, check the filling ingredients and choose a brand with a short ingredient list — the squash flavor comes through better when the pasta isn’t overloaded with fillers.
How to Serve These Recipes
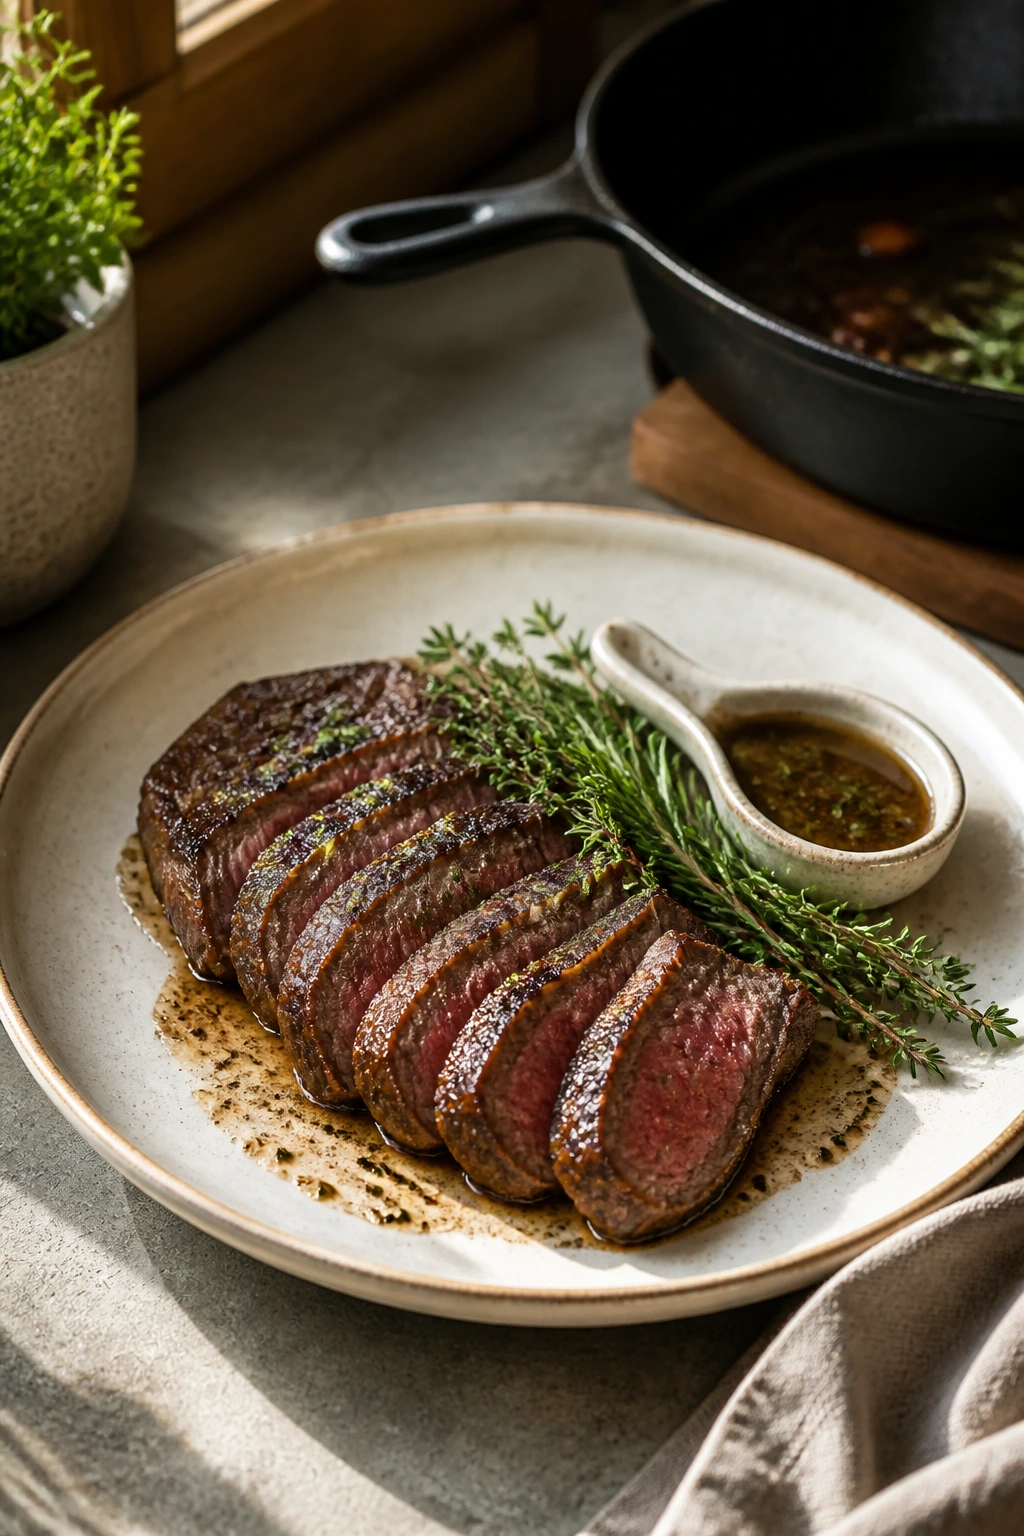
Presentation: Keep the plates warm if you can. Steak looks better sliced across the grain and fanned out slightly, salmon benefits from a spoonful of sauce spooned beside rather than over the skin, and pasta always looks better twirled into a nest with herbs on top. A few well-placed garnishes beat a cluttered plate every time.
Accompaniments: Roasted asparagus, a crisp green salad, garlicky broccolini, mashed potatoes, crusty bread, buttered rice, or simple fries work across the whole collection. If you want the meal to feel fuller without getting heavy, choose one green thing and one starch. That’s enough. You don’t need a second side just because it’s a holiday.
Portions: Most of these recipes serve two generous portions, though risotto, pasta, and shepherd’s pie can lean generous enough for a small leftover lunch. If you want to scale up, double the ingredients rather than guessing; the timing usually stays close, but the searing and simmering may need a larger pan. For a lighter dinner, cut the starch in half and keep the protein portion the same.
Beverage Pairing: Sparkling wine works with nearly everything here, which is why people keep pouring it on festive nights. Dry white wine fits shrimp, salmon, lobster, and curry; pinot noir or a light red goes nicely with pork, chicken Parmesan, and bolognese; a dry cider is excellent with pork chops and apple sauce. If you want a nonalcoholic option, a sparkling water with lemon or a tart pomegranate spritz keeps the same celebratory feel.
Additional Tips and Flavor Boosters
Flavor Enhancement: A final hit of acid wakes up almost every dish in this collection. Lemon juice over fish, a splash of wine in chicken sauce, a teaspoon of vinegar in pork pan drippings, or a little extra parmesan in pasta can turn a good plate into a memorable one. Salt matters too, but acid is the part people forget.
Customization: If you like heat, add red pepper flakes to shrimp scampi, gnocchi, curry, or even the mushroom risotto. If you like richer food, finish steak, chicken, or pork with compound butter instead of plain butter. If you want a lighter plate, use Greek yogurt for sauces, broth instead of cream where it makes sense, and extra herbs to keep the flavor from going flat.
Serving Suggestions: Fresh herbs are not decorative fluff here. Parsley, dill, chives, basil, and sage all do real work. So does a little lemon zest, especially on rich dishes like lobster, salmon, and ravioli. Finish with flaky salt on steak or roast potatoes, and the whole meal suddenly tastes more awake.
Make-It-Yours: For gluten-free diners, swap in GF pasta, use cornstarch or rice flour for light breading, and lean on rice, potatoes, or polenta instead of breadcrumbs. For dairy-free meals, use olive oil, coconut milk, or a nut-based sauce where it fits, and skip the cheese on the dishes that can live without it. For a vegetarian route, the risotto, ravioli, and curry all adapt cleanly, and mushroom sauces can step into the role of a centerpiece without feeling like a compromise.
Make-Ahead, Storage, and Reheating Guidance
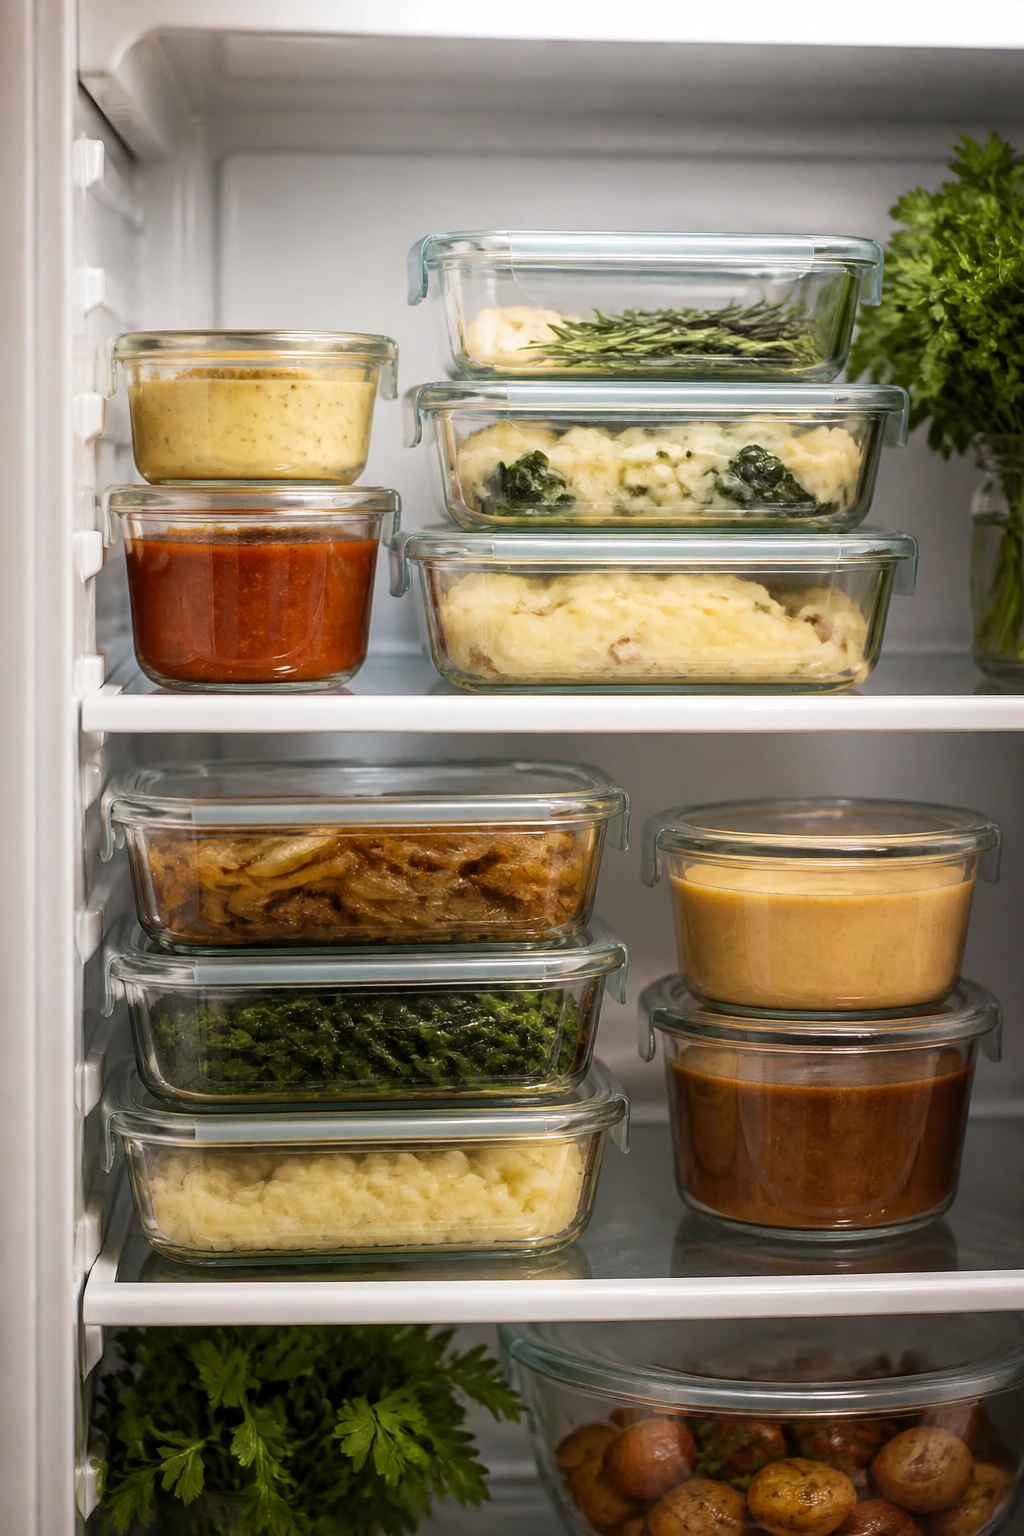
A few of these dinners are best made right before serving, especially steak, salmon, shrimp, and lobster. Those proteins are at their peak when the sear is fresh and the texture is still tight. Once they sit too long, they lose the thing that made them special in the first place.
Pasta sauces, bolognese, shepherd’s pie filling, creamy chicken sauce, and curry all hold well in the fridge for 3 to 4 days in airtight containers. Bolognese and shepherd’s pie also freeze well for up to 2 to 3 months. Risotto can be refrigerated for 2 to 3 days, but the texture softens; if you reheat it, stir in a splash of broth and a small pat of butter to bring it back. Chicken Parmesan keeps for about 3 days refrigerated, though the crust will lose some crispness.
Seafood needs a shorter leash. Cooked shrimp, salmon, and lobster are best eaten within 1 to 2 days. Reheat them gently in a low oven, about 275°F to 300°F, covered loosely with foil, or skip the oven and serve leftovers cold in a salad or grain bowl. High heat turns seafood chalky fast.
For rewarming steak, pork chops, or chicken, use a skillet over low heat with a spoonful of broth or pan sauce. Cover the pan for a minute or two so the steam helps the center warm without hardening the outside. Pasta dishes can be revived in a skillet with a splash of water or broth over low heat, while shepherd’s pie and chicken Parmesan reheat best in a 350°F oven until the center is hot and the top has come back to life.
If you’re planning ahead for a celebratory evening, make the sauce, chop the vegetables, and prep the sides earlier in the day. Keep breaded chicken uncovered in the fridge for a few hours so the coating dries slightly and crisps better. Brown butter can be made ahead and warmed gently. Mashed potatoes can be held in a covered bowl set over simmering water for a short time, though I’d still make them close to serving if you can.
Variations and Adaptations to Try
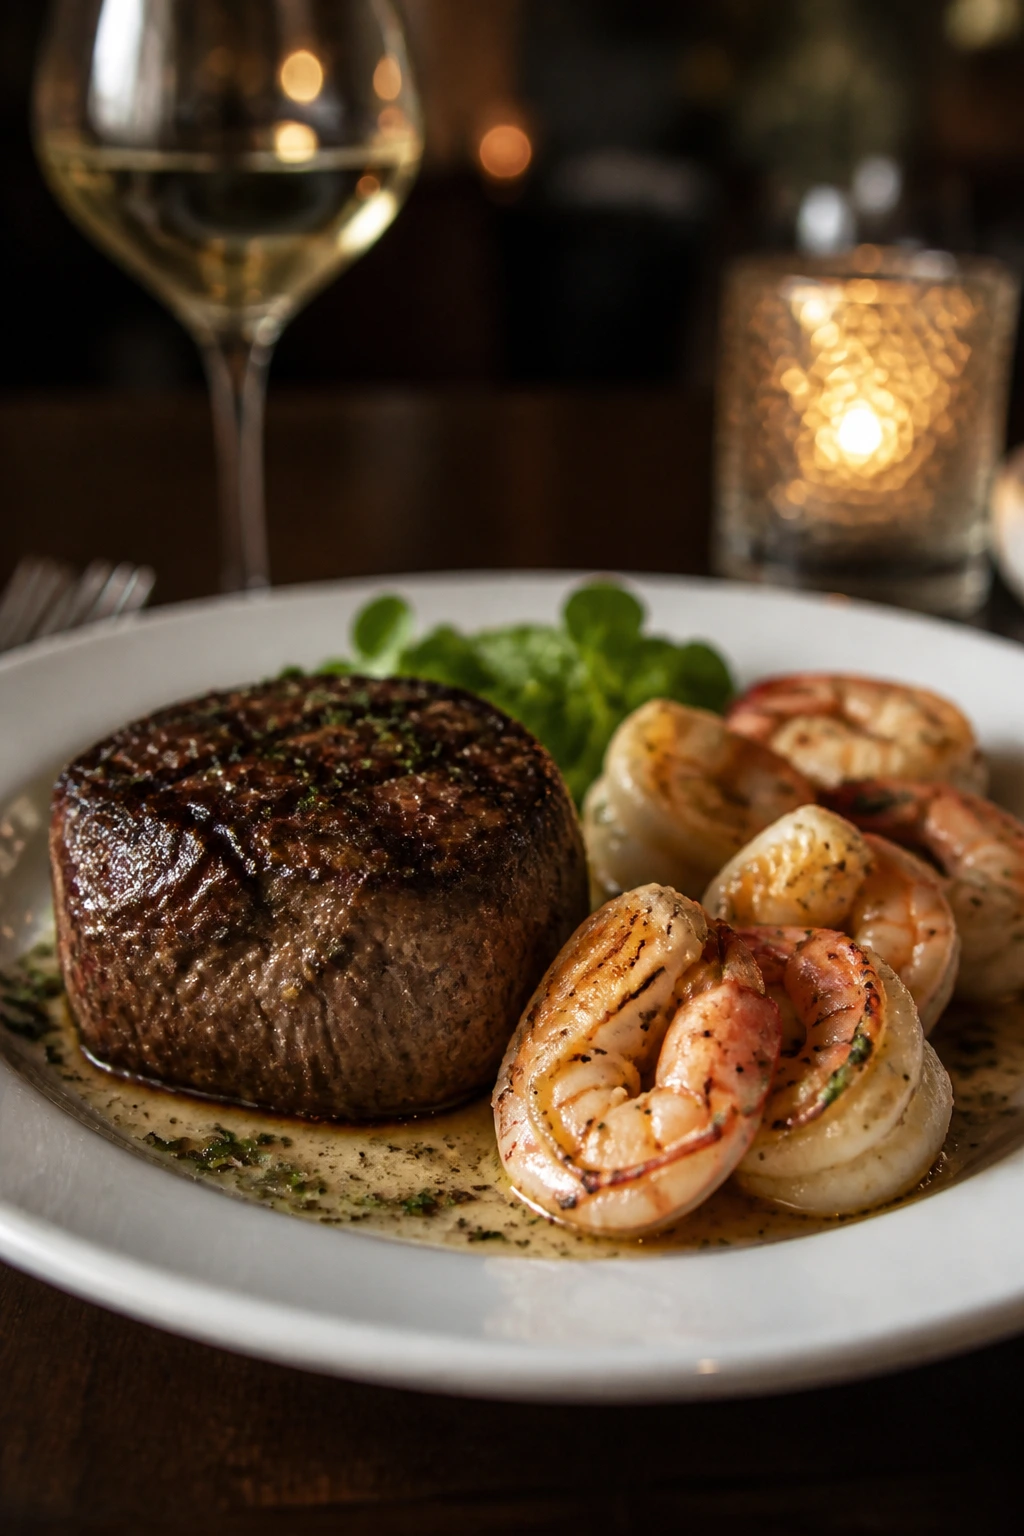
Surf-and-Turf Switch: Pair filet mignon with shrimp scampi instead of a heavy side, or serve lobster tails alongside steak for a classic indulgent plate. Keep the seasoning simple so the proteins don’t fight each other. This works well when you want the meal to feel like a small banquet.
Cozy Vegetarian Night: Lean into mushroom risotto, butternut squash ravioli, or a double-vegetable plate of roasted asparagus and a crisp salad. Use vegetable stock instead of chicken stock, and don’t be shy with parmesan or browned butter if dairy is on the table. These dishes carry enough flavor to stand on their own.
Gluten-Free Table: Swap gluten-free pasta into the scampi, bolognese, or curry meal; use potato starch or cornstarch for a light dredge on chicken; and skip breadcrumbs on the lobster tails or chicken Parmesan. Potatoes, rice, and polenta make easy, natural sides. The key is not trying to force a bad substitute where the original structure matters.
Lighter Plate: Choose salmon, shrimp, pork chops, or curry, and trim back the butter and cream slightly without stripping out the flavor. Greek yogurt sauces, extra lemon, and more herbs keep the dishes bright. This route works well if you want a festive dinner that won’t sit too heavy later in the evening.
Spice-It-Up Version: Add red pepper flakes to the scampi, extra curry paste to the Thai curry, or a hotter sausage in the gnocchi. A pinch of cayenne in the chicken Parmesan breading also works better than people expect. Heat is easiest to control when you add it little by little.
Simple Red-Wine Night: Choose bolognese, steak frites, or pork chops, then build the meal around one bottle of red and a salad with peppery greens. A little wine in the pan sauce or pasta sauce makes the whole evening feel tied together. It’s an easy way to make the menu feel intentional without piling on work.
Common Mistakes to Avoid
Crowding the Pan: Two portions may seem tiny, so people cram them into a small skillet and expect a good sear. The result is steam, not browning. Use a pan large enough for space around each piece, or cook in batches.
Skipping the Thermometer: Steak, chicken, pork, fish, and lobster all behave differently, and guessing is how holiday dinner gets ruined. Chicken should hit 165°F, pork 145°F, lobster around 140°F to 145°F, and steak can come off a little earlier and rest up. A thermometer takes away the drama.
Overcooking Seafood: Shrimp and salmon do not need long on the heat. Shrimp are done when they turn opaque and curl into a loose C, not a tight O, and salmon should still look moist in the center when it leaves the pan. If you wait for seafood to look “totally cooked” in the pan, you’ve probably gone too far.
Underseasoning Small-Batch Dishes: Two-person dinners can taste flat if you don’t season every layer. Salt the meat, salt the pasta water, salt the potatoes, and finish with herbs or citrus. Small meals need clear flavor because there’s less volume to hide behind.
Rushing Rest Time: Steak, chicken, and pork need a few minutes off the heat so the juices settle. Slice too soon and the juices run all over the board instead of staying in the meat. It’s a tiny pause, but it matters.
Forgetting Texture Contrast: A plate of soft-on-soft can feel dull, even if the flavors are good. Add a crisp element somewhere: seared meat, toasted walnuts, roasted potatoes, crusty bread, or a fresh green salad. The crunch makes the whole dinner feel more alive.
Frequently Asked Questions

Which dinner idea is easiest if I don’t want to spend all night cooking?
Shrimp scampi, pan-seared salmon, and butternut squash ravioli are the fastest options here. They each rely on short cooking times and simple finishing steps, so you can get dinner on the table without losing the evening to prep work.
What if I only have one skillet?
Pick a recipe that cooks in stages in the same pan, like creamy Tuscan chicken, pork chops with apples, or gnocchi with sausage. If you’re making something with a separate starch, cook that first and hold it warm while the main dish finishes.
Can I make any of these ahead of time?
Yes, but not the main protein itself if it’s seafood or steak. Bolognese, shepherd’s pie filling, curry base, mashed potatoes, and the salad components all prep well earlier in the day. Keep the final sear, boil, or broil for the last minute.
What’s the best choice if one person wants meat and the other wants seafood?
Filet mignon with shrimp scampi side-by-side, or salmon with a small steak, gives you a clean surf-and-turf feel without overcomplicating the menu. Keep the seasonings simple and shared so the plate feels unified.
How do I scale these recipes for four people instead of two?
Double the ingredients, but do not assume the pan size can stay the same. Use a larger skillet or cook in batches so the food browns instead of steaming, especially with chicken, steak, and shrimp.
What should I do if the sauce gets too thick?
Add a spoonful of pasta water, broth, or stock and stir over low heat. A sauce often tightens up as it sits, and a small splash brings it back without watering down the flavor.
Can I use frozen seafood or vegetables?
Absolutely, and in some cases frozen is the smarter buy. Frozen shrimp are often frozen at peak freshness, and frozen peas or spinach work well in curry, shepherd’s pie, and gnocchi dishes. Just thaw seafood fully and dry it well before cooking.
Which recipes reheat the best the next day?
Bolognese, shepherd’s pie, curry, and chicken Parmesan hold up best. Risotto can be revived, but it turns softer, and seafood-based dishes are better eaten soon after cooking. If leftovers matter to you, choose a sauce-heavy dish rather than a delicate seared protein.
A Table Worth Dressing Up For
There’s a nice kind of freedom in cooking for two. You can chase a good crust, a bright sauce, or a plate with enough contrast to keep every bite interesting. You do not need a massive spread to make the night feel special.
Pick the dinner that matches the mood you actually want at the table. Steak if you want drama. Pasta if you want comfort. Shrimp or salmon if you want something lively and clean. The small scale makes room for better ingredients, quieter timing, and a meal that feels intentional from the first bite to the last.