
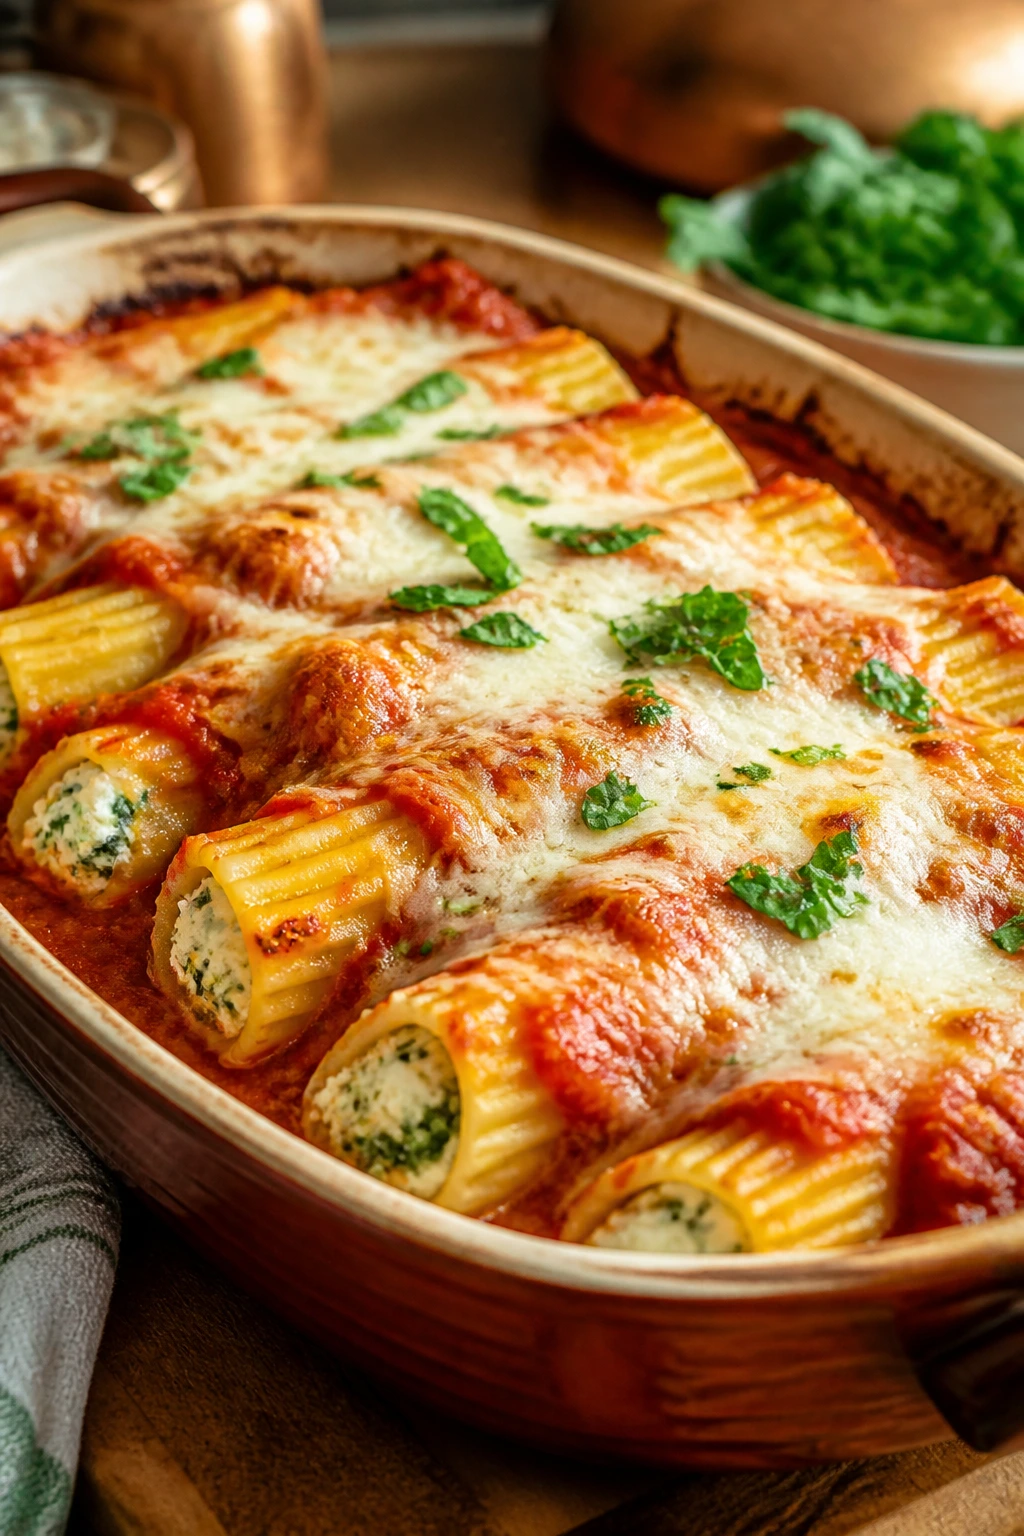
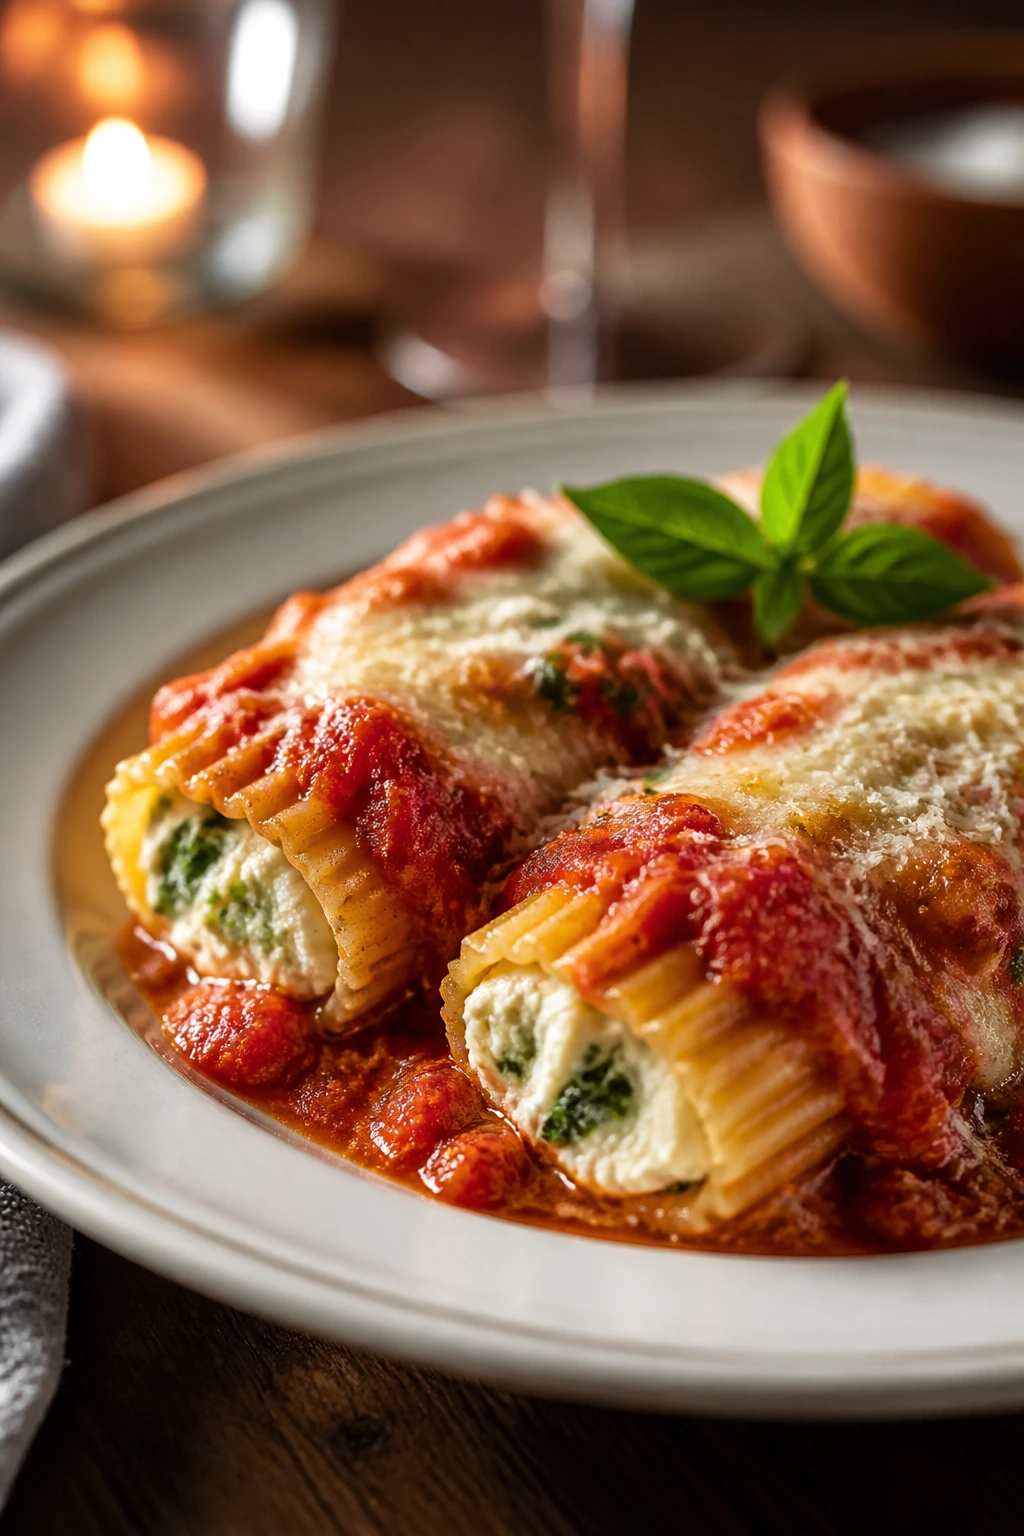
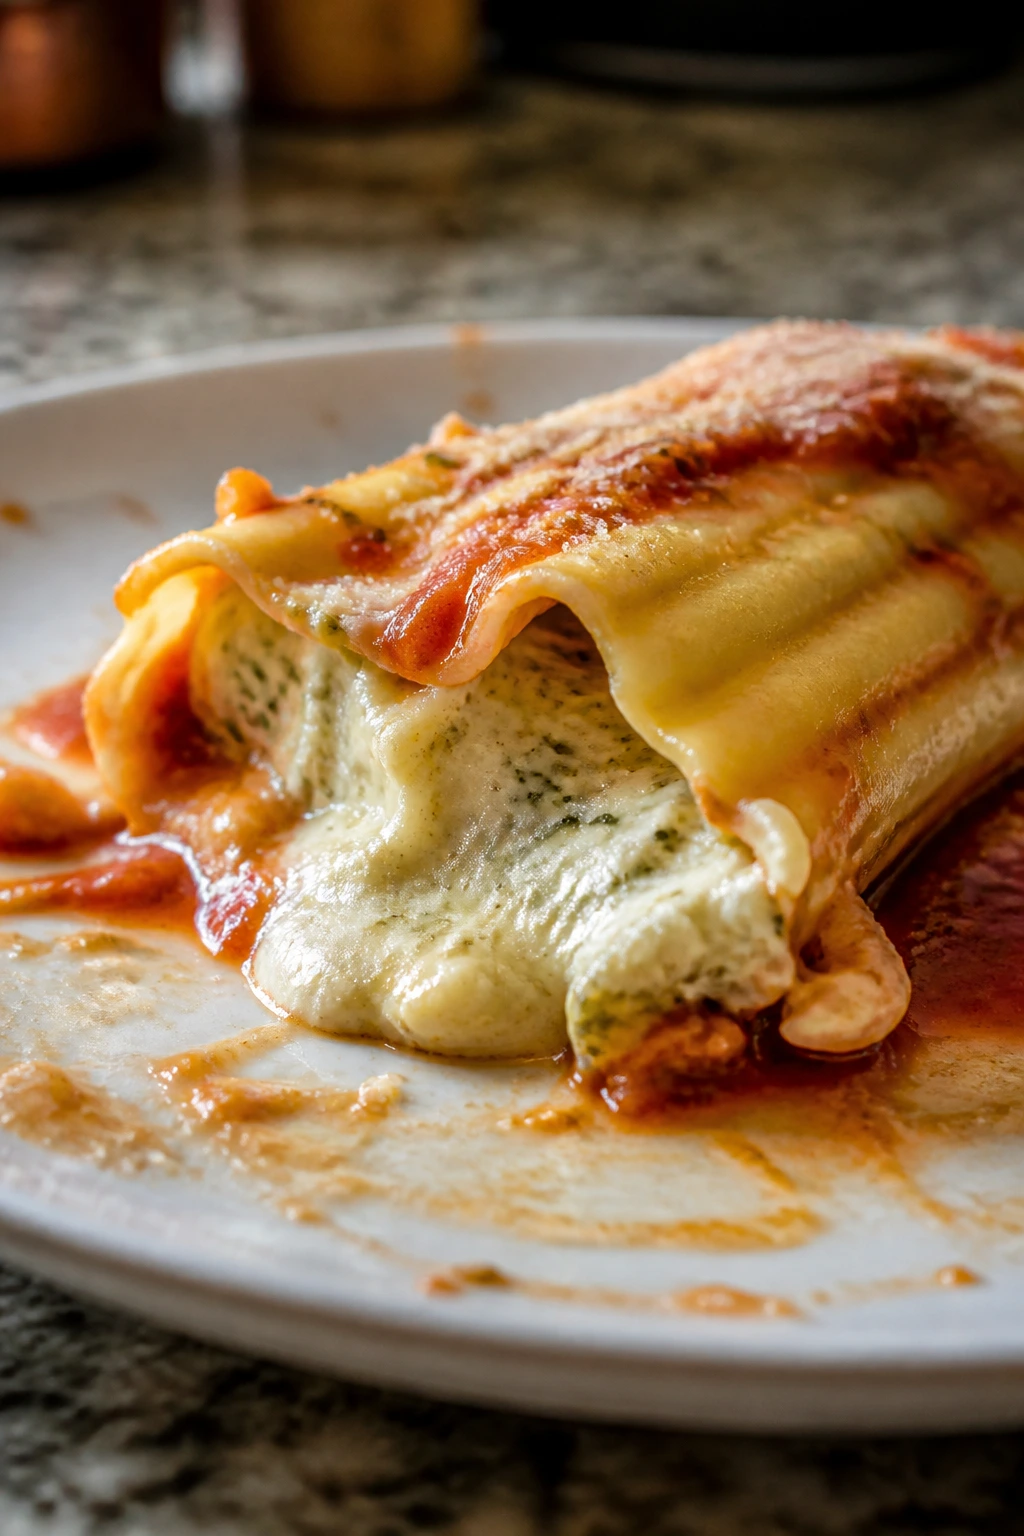
When a pan of manicotti comes out of the oven, the whole kitchen shifts. The sauce is bubbling at the edges, the cheese has settled into soft ridges, and one forkful gives you that mix of tender pasta, creamy filling, and hot tomato that feels like a small victory. Manicotti dinners have the kind of Sunday-supper gravity that’s hard to fake. They look generous. They eat like someone cared.
The nice part? They don’t ask for much drama. A good manicotti pan is mostly about steady hands, decent sauce, and a filling that isn’t too wet. That’s it. If you’ve ever worried that stuffed pasta sounds fussy, you’re probably imagining the wrong version. The right one is calm work: boil the shells until they’re just flexible, keep the filling thick, and give the baked dish enough sauce to stay plush in the oven.
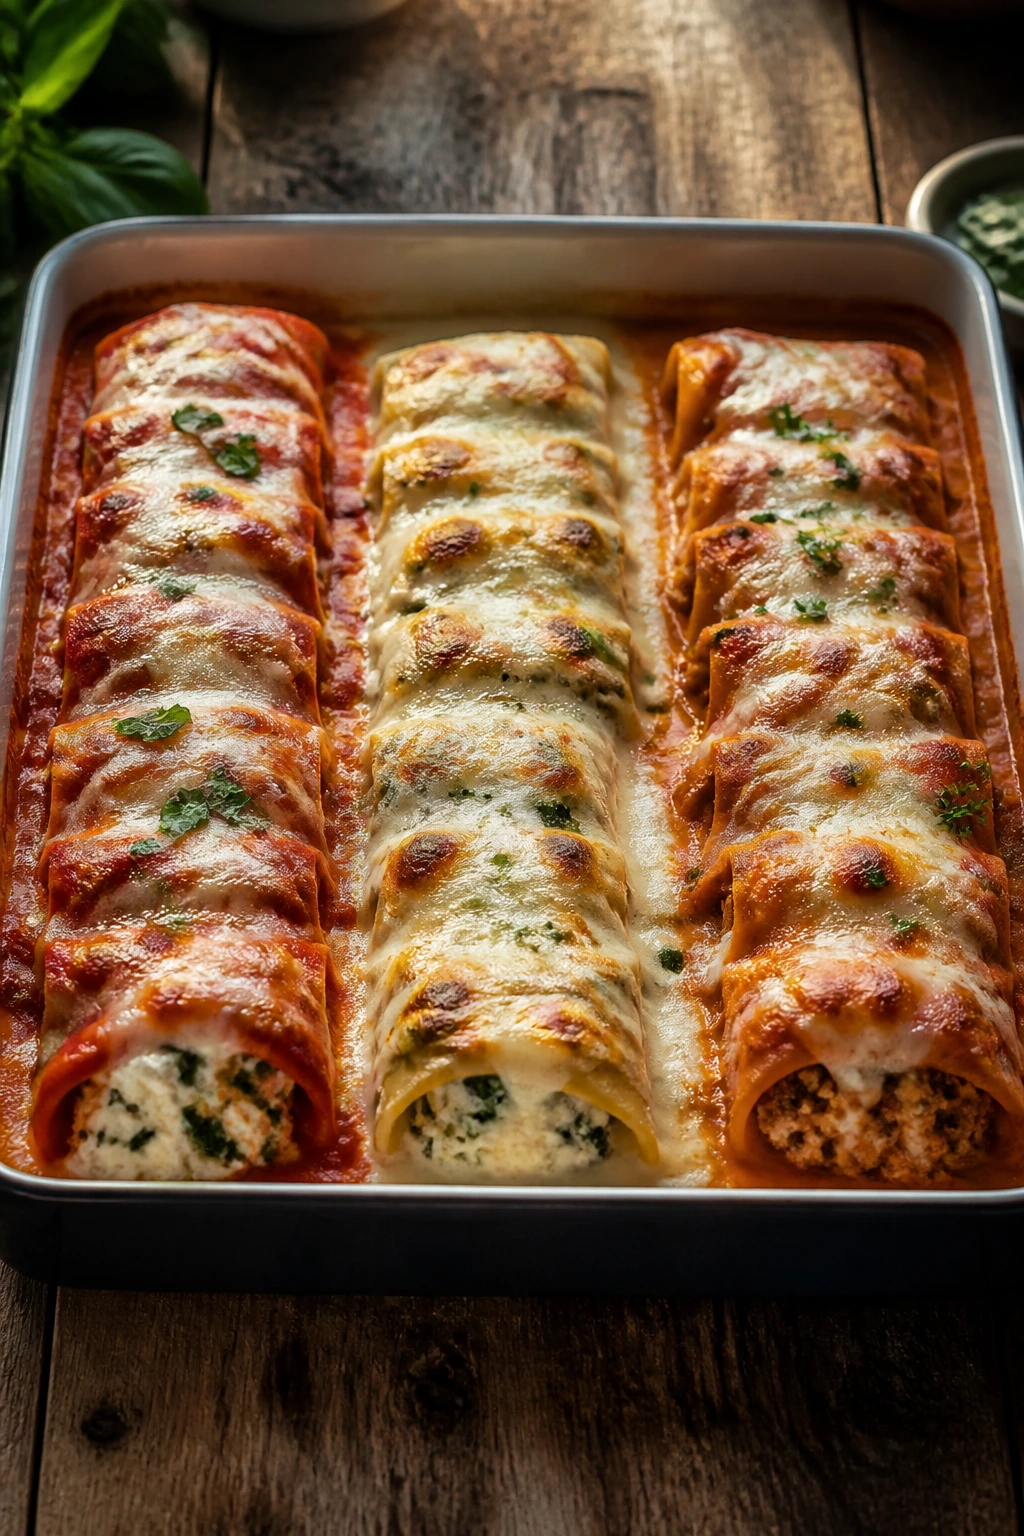
And because the format is so forgiving, it opens the door to all kinds of Sunday-table moods. Some pans lean classic and red-sauced. Some go rich and white. Some bring sausage, chicken, seafood, roasted vegetables, or a sharp hit of lemon to cut through the richness. The shape stays the same, but the personality changes completely. That’s the fun of it.
Why These Manicotti Dinners Earn a Place at the Table
- One format, lots of flavor: The same stuffed-pasta shell can carry ricotta, sausage, pesto, seafood, or roasted vegetables without feeling like you’re repeating yourself.
- Sunday supper without a long roster of tasks: Most of the work happens in a bowl and a baking dish, not in a dozen separate pans.
- Make-ahead friendly by design: A filled manicotti pan holds well in the fridge, which gives you breathing room before guests arrive or the house fills up with hungry people.
- Leftovers stay useful: Reheat a few shells with extra sauce and they still taste like dinner, not a sad lunch container.
- Easy to scale up: A 9×13-inch dish feeds a family, a couple of guests, or a smaller crowd that just happens to love pasta.
- Comfort with some range: You can stay in tomato-sauce territory or switch to white sauce, pesto, or a light lemon cream and still keep the same cozy baked-pasta feel.
1. Classic Ricotta Manicotti with Slow-Simmered Marinara
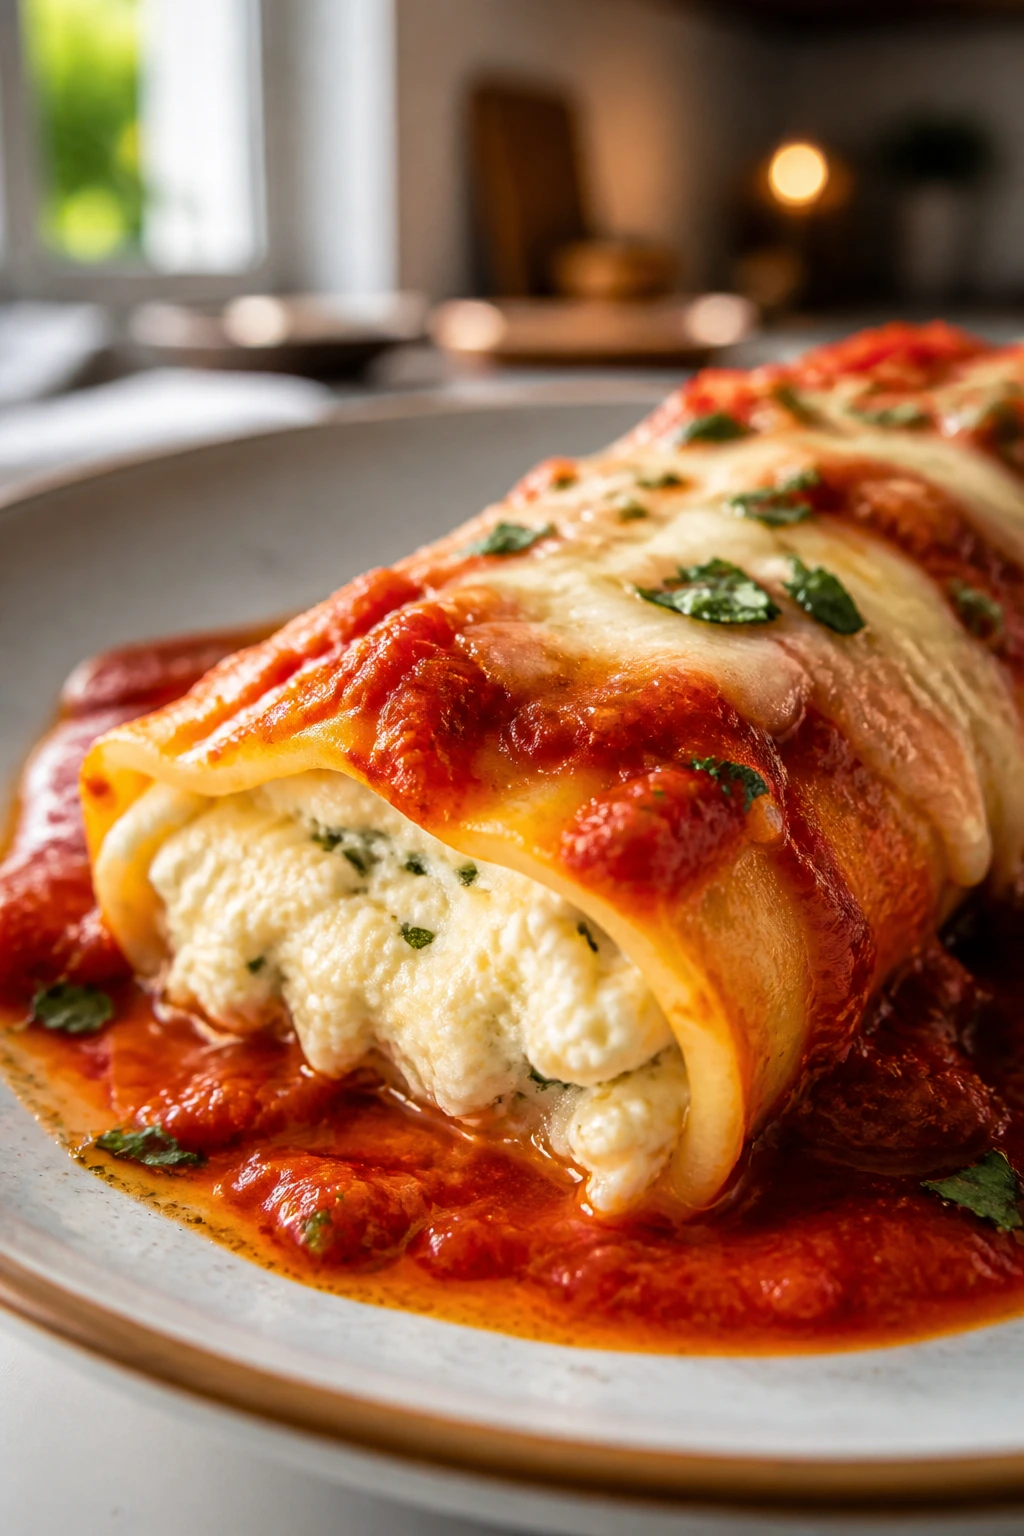
Classic ricotta manicotti is the version I keep coming back to when I want the dish to taste like itself. No extra tricks. No detours. Just tender pasta shells, a thick ricotta filling, and enough marinara to soak the edges of the noodles while the tops take on a little color in the oven.
The first bite should be creamy, tangy, and a little salty from the Parmesan. The second bite is where the basil and garlic show up. It’s plain in the best sense of the word: direct, warm, and exactly what a Sunday supper should feel like.
Why It Works:
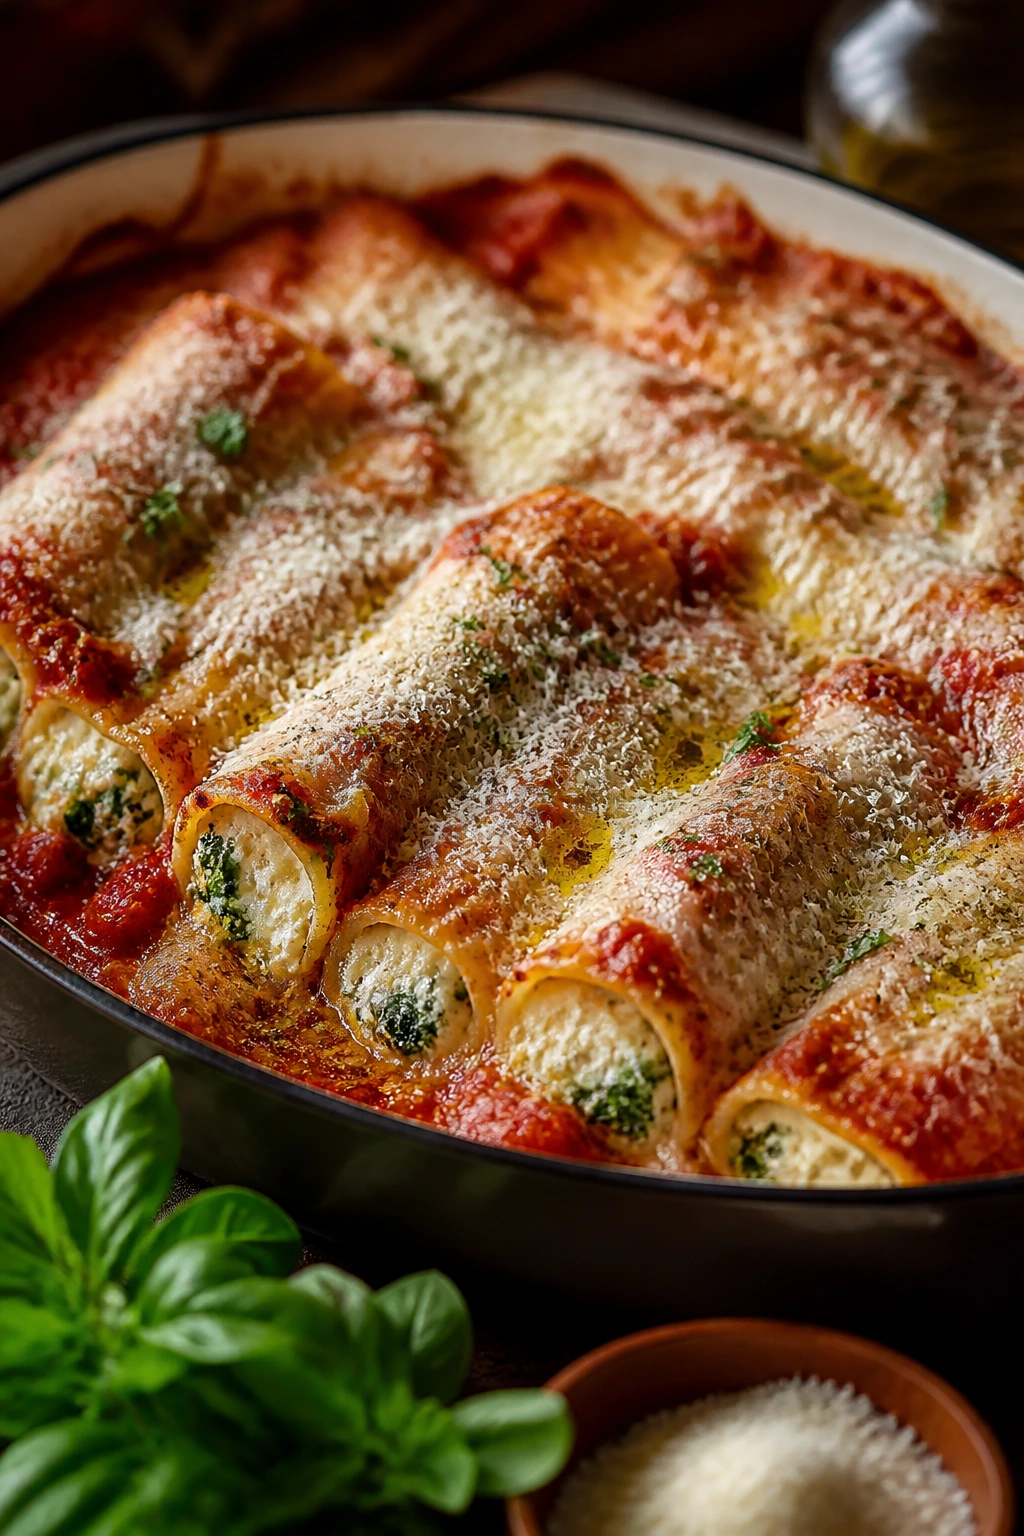
This version works because the filling stays clean and dairy-forward, while the sauce keeps the pasta from drying out. Ricotta is mild, so it takes well to basil, parsley, and garlic without fighting them. Baking covered for most of the time lets the shells finish cooking gently, then uncovering the pan at the end gives the cheese a little bronze on top. That final bit of color matters more than people think. It smells like dinner is ready before you even open the oven door.
Key Ingredients:
- 12 manicotti shells — boil them only until flexible; they finish in the oven.
- 2 cups whole-milk ricotta — choose thick ricotta, not watery.
- 1 cup shredded low-moisture mozzarella — melts smoothly into the filling.
- 1/2 cup grated Parmesan — gives the filling a salty edge.
- 1 large egg — helps the filling hold together.
- 2 cloves garlic, minced — use fresh garlic for a cleaner taste.
- 2 tablespoons chopped fresh basil — brings that familiar red-sauce aroma.
- 1 tablespoon chopped fresh parsley — keeps the filling bright.
- 1 teaspoon kosher salt — enough to season the filling without overdoing it.
- 1/2 teaspoon black pepper — gives a little bite.
- 3 cups marinara sauce, divided — use a sauce you’d happily eat on its own.
- 1 tablespoon olive oil — keeps the cooked shells from sticking.
Quick Steps:
- Preheat the oven to 375°F (190°C). Bring a large pot of salted water to a boil and cook the manicotti shells for 6 to 7 minutes, until just flexible but not fully tender. Drain and rinse briefly with cool water so they stop cooking.
- Spread the shells out on a lightly oiled sheet pan or baking sheet. Drizzle with a little olive oil if they’re sticking together, and set them aside while you make the filling.
- In a large bowl, stir together the ricotta, mozzarella, Parmesan, egg, garlic, basil, parsley, salt, and pepper until thick and well blended.
- Spread 1 cup of marinara across the bottom of a 9×13-inch baking dish.
- Fill each shell with the ricotta mixture using a spoon or piping bag, then arrange the shells seam-side up in the dish.
- Spoon the remaining marinara over the shells, then scatter a little extra mozzarella or Parmesan on top if you like.
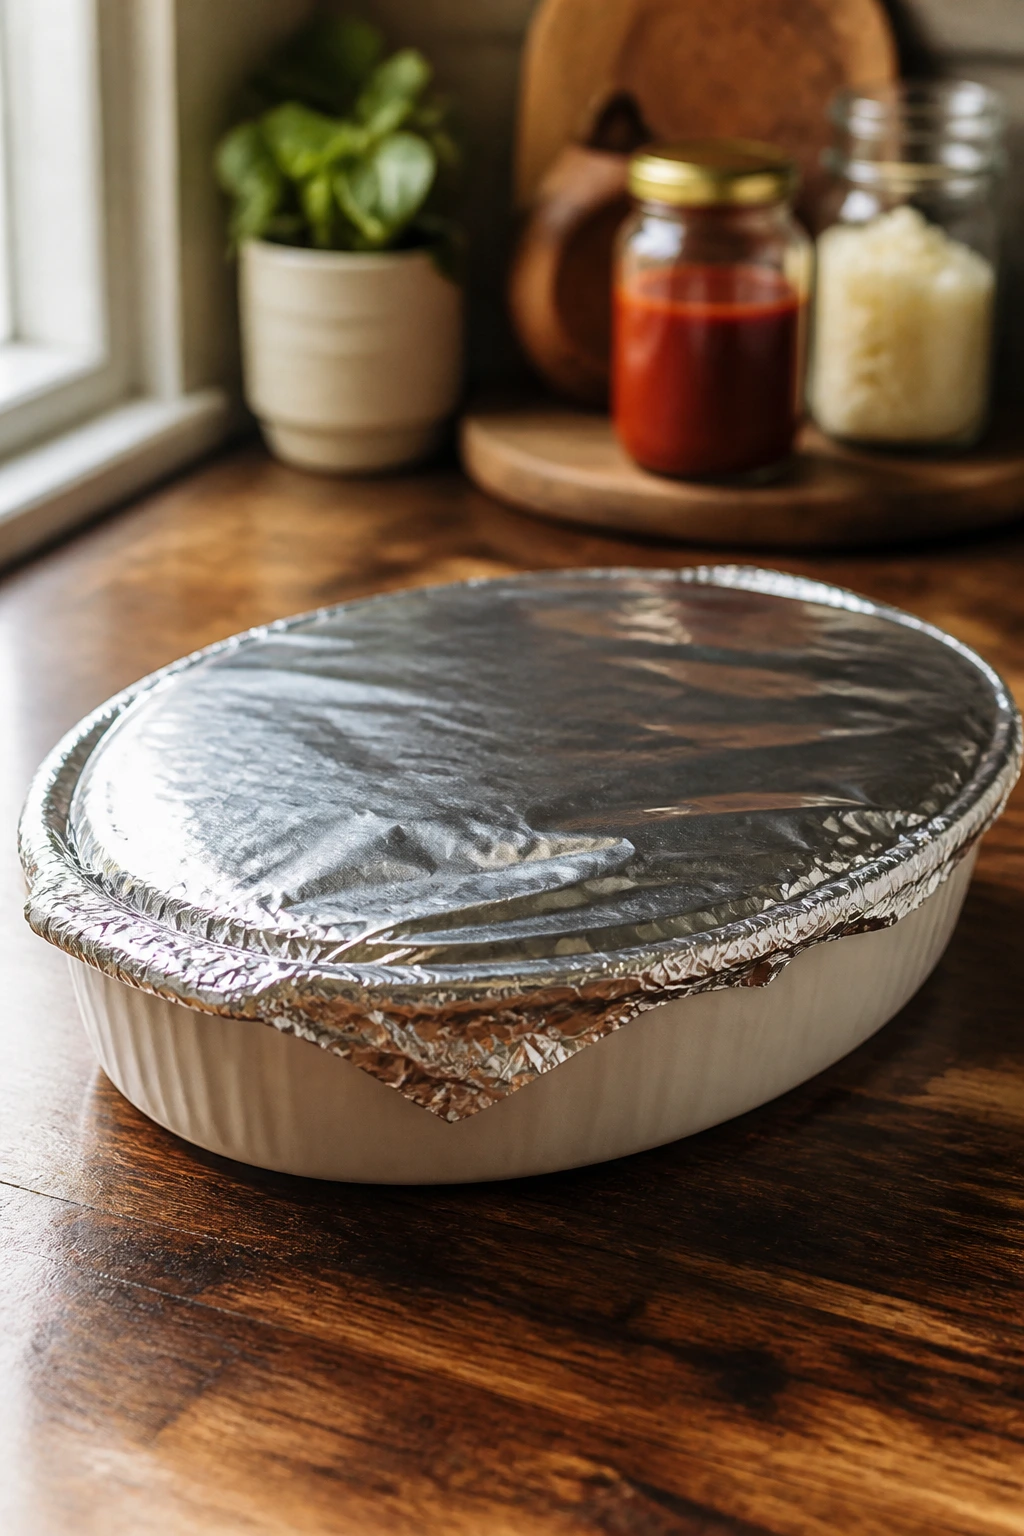
- Cover the dish tightly with foil and bake for 25 minutes. Remove the foil and bake 10 to 12 minutes more, until the sauce is bubbling at the edges and the top has a few browned spots.
- Let the manicotti rest for 10 minutes before serving so the filling settles and doesn’t spill out onto the plate.
Tips and Variations:
- Add 1 cup finely chopped spinach if you want more green in the filling, but squeeze it dry first.
- If your marinara tastes sharp, stir in 1 teaspoon of butter before baking. It softens the sauce without making it sweet.
- A spoonful of pesto over each plated shell makes the classic version feel a little more alive.
2. Sausage and Spinach Manicotti
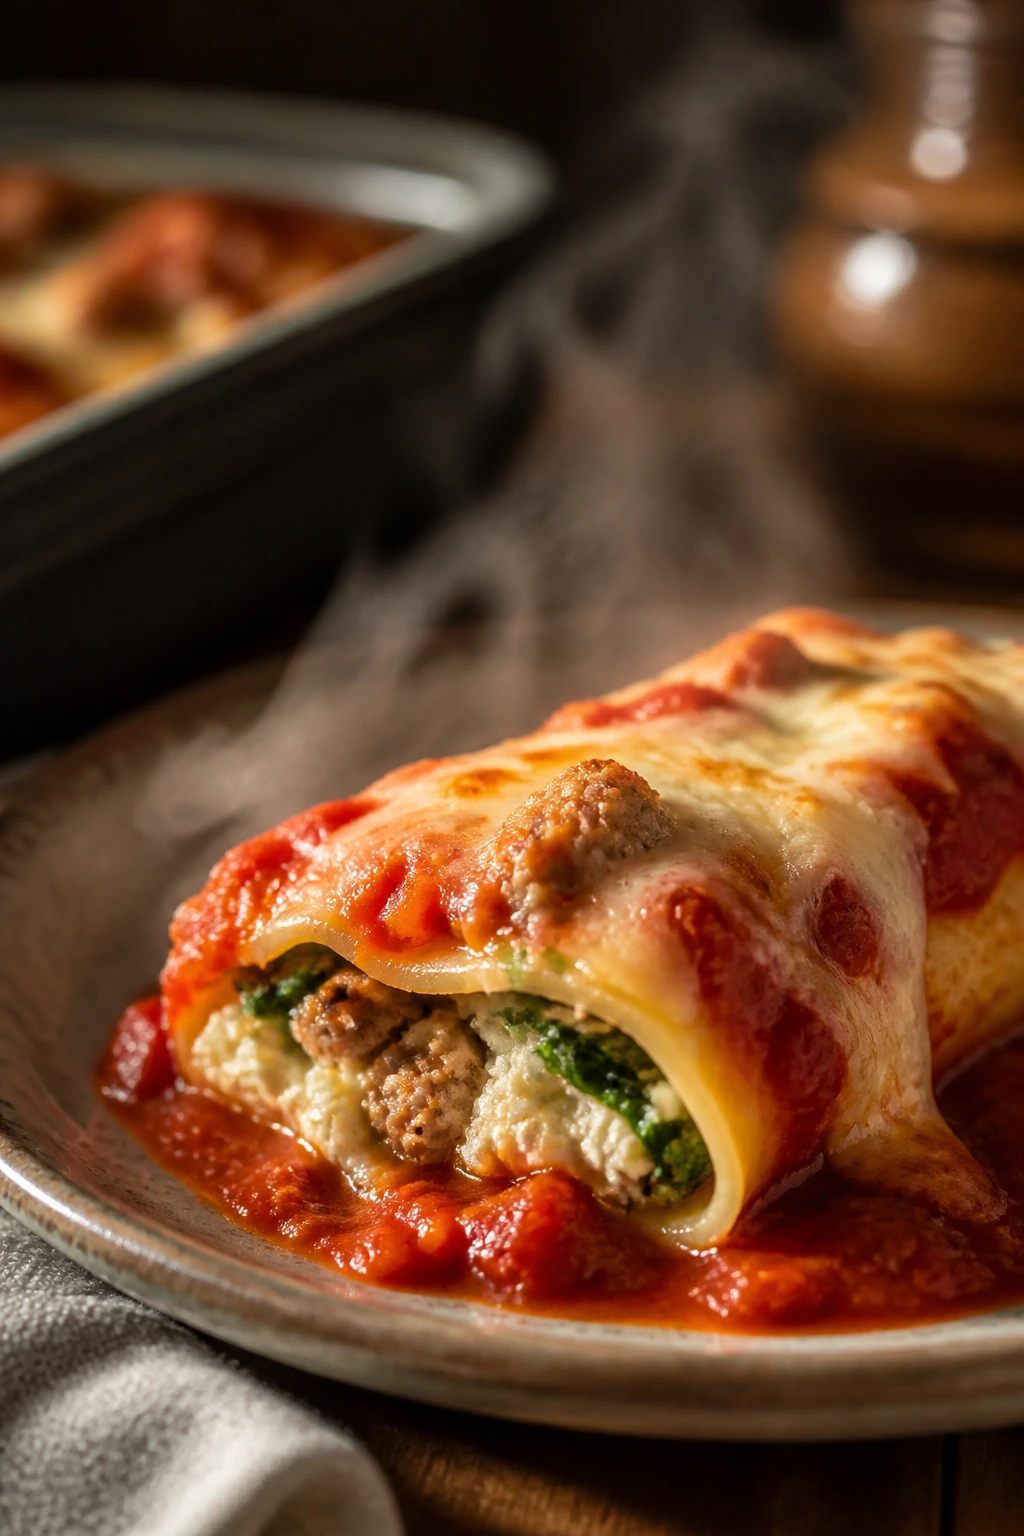
This is the pan that smells like a good Italian restaurant before it even reaches the table. The sausage brings fat and seasoning, the spinach keeps the filling from feeling heavy, and the ricotta smooths the whole thing into something rich but not sloppy.
The flavor lands somewhere between rustic and indulgent. You get little pockets of fennel, garlic, and pepper from the sausage, then a milder, creamy finish from the cheese. It’s the kind of manicotti dinner that can carry a whole Sunday meal without needing much else.
Why It Works:
Italian sausage gives the filling a head start, which matters because manicotti shells don’t offer much room for bold seasoning once they’re baked. Spinach adds color and a little bitterness that cuts through the richness, and ricotta keeps everything soft enough to spoon or pipe. I like this version with red sauce because the tomato brings the sausage into focus instead of burying it. Bake it covered first, and the shells stay tender instead of chewy.
Key Ingredients:
- 12 manicotti shells — cook them until just pliable.
- 1 pound sweet or hot Italian sausage, casings removed — choose the heat level you actually want.
- 10 ounces frozen chopped spinach, thawed and squeezed dry — water is the enemy here.
- 2 cups whole-milk ricotta — the base of the filling.
- 1 cup shredded mozzarella — melts into the meat and greens.
- 1/2 cup grated Parmesan — sharpens the filling.
- 1 large egg — helps bind the stuffing.
- 1 small onion, finely chopped — gives the sausage more depth.
- 2 cloves garlic, minced — keep it small so it doesn’t burn.
- 3 cups marinara sauce — enough for the bottom and top.
- 1/2 teaspoon red pepper flakes — optional, but useful if the sausage is mild.
- Salt and black pepper, to taste — season lightly after tasting the sausage.
Quick Steps:
- Preheat the oven to 375°F (190°C). Boil the manicotti shells for 6 to 7 minutes, then drain and cool them briefly so they’re easier to handle.
- Set a large skillet over medium heat. Cook the sausage and onion for 7 to 8 minutes, breaking the meat into small crumbles, until the sausage is browned and the onion is soft. Stir in the garlic for the last 30 seconds.
- Transfer the sausage mixture to a bowl and let it cool for a few minutes. Stir in the spinach, ricotta, mozzarella, Parmesan, egg, and red pepper flakes.
- Spread 1 cup marinara in the bottom of a 9×13-inch baking dish.
- Fill the shells with the sausage mixture and arrange them in a single layer in the dish.
- Spoon the rest of the marinara over the shells, then sprinkle a little extra mozzarella on top if you want a cheesier crust.
- Cover with foil and bake for 30 minutes. Remove the foil and bake 10 minutes more, until the sauce is bubbling and the top has color.
- Rest for 10 minutes before serving so the filling doesn’t run.
Tips and Variations:
- Sweet sausage gives a rounder flavor; hot sausage gives the dish more edge.
- Squeeze the spinach with your hands, then squeeze it again in a clean towel. That extra minute saves the whole pan.
- A little fennel seed in the filling makes the sausage taste more pronounced without adding heat.
3. Chicken Alfredo Manicotti
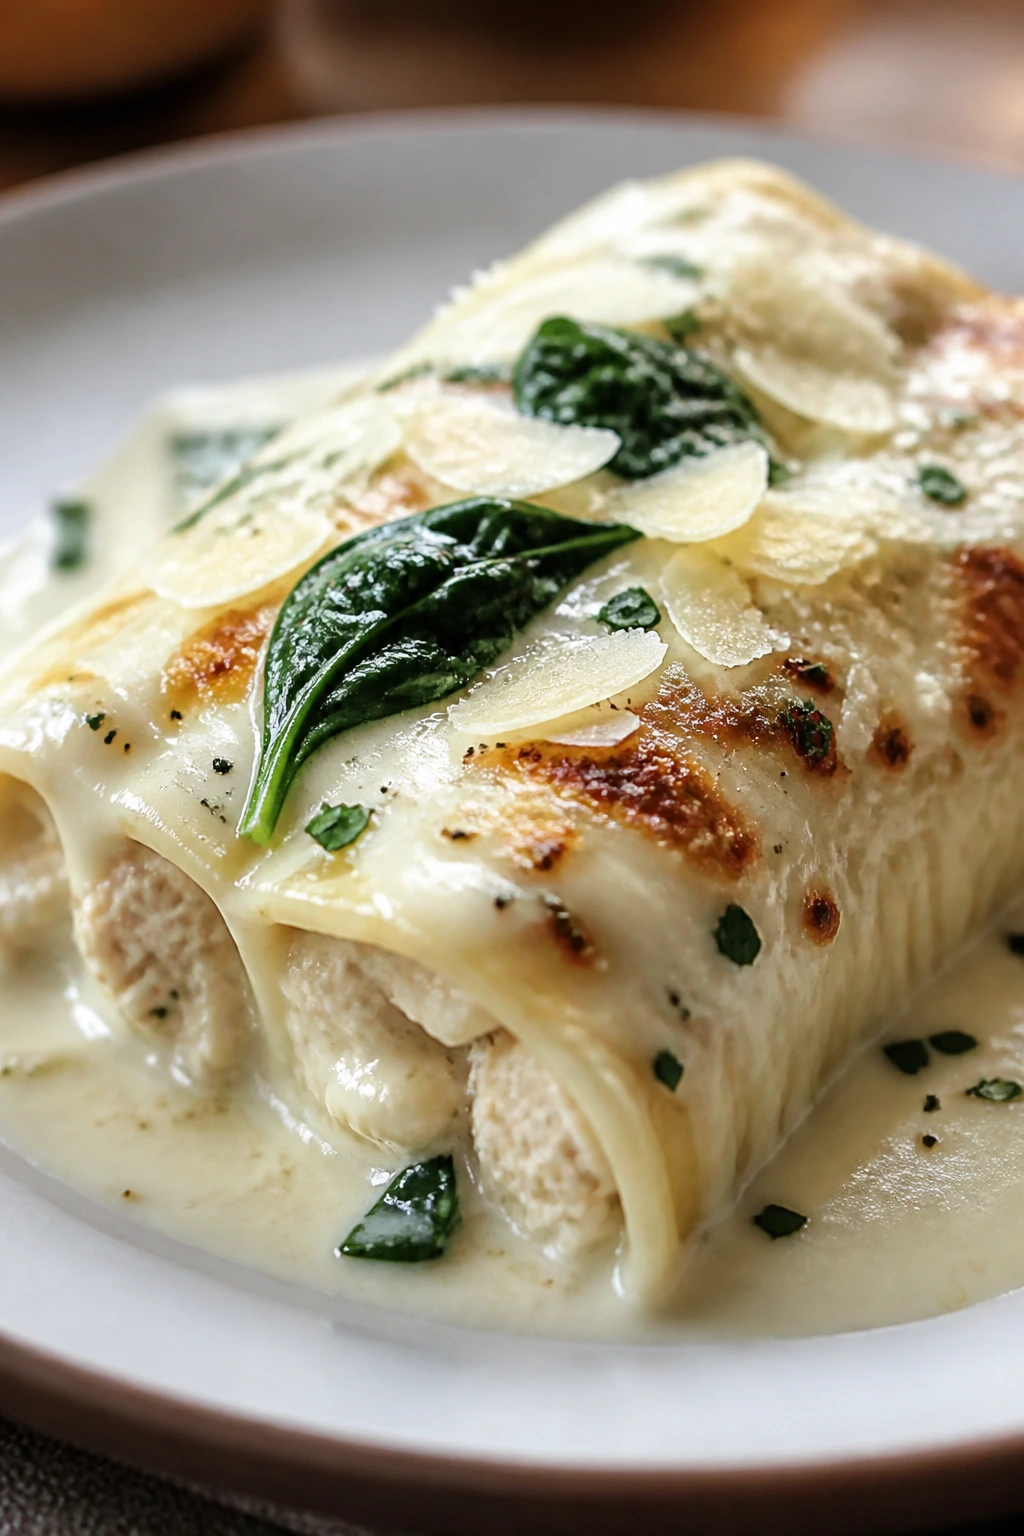
Want the richest white-sauce version on the table? This is it. Chicken Alfredo manicotti feels lush in a way red-sauce pans never quite do, with shredded chicken tucked into a cheesy filling and a creamy sauce that clings to every ridge of pasta.
The taste is familiar but not dull. Garlic, Parmesan, and a little lemon zest keep the sauce from turning flat, and the spinach gives the filling a fresh lift. This is the pan I’d make when I want something cozy that still feels a touch polished.
Why It Works:
Chicken gives the filling more structure than ricotta alone, which means the shells slice better after baking. Alfredo sauce also behaves differently from marinara; it needs a lower oven temperature so the dairy stays smooth instead of splitting or scorching. That’s why this version bakes at 350°F. A little lemon zest is the quiet trick here. It doesn’t make the dish taste lemony. It just keeps the cream sauce awake.
Key Ingredients:
- 12 manicotti shells — boiled until flexible.
- 2 cups cooked shredded chicken — rotisserie chicken works well.
- 2 cups whole-milk ricotta — keeps the filling soft.
- 1 cup shredded mozzarella — adds stretch.
- 3/4 cup grated Parmesan — brings salt and nutty flavor.
- 2 cups prepared Alfredo sauce — homemade or store-bought.
- 1 cup baby spinach, chopped — optional, but it cuts the richness nicely.
- 1 clove garlic, minced — a little goes a long way.
- 1 teaspoon lemon zest — brightens the cream.
- 1/2 teaspoon kosher salt — season after tasting the chicken.
- 1/2 teaspoon black pepper — enough for a gentle bite.
- Pinch of nutmeg — optional, but good in cream sauces.
Quick Steps:
- Preheat the oven to 350°F (175°C). Cook the manicotti shells for 6 minutes, just until they bend without cracking. Drain and set them on a lightly oiled tray.
- In a bowl, mix the chicken, ricotta, mozzarella, Parmesan, spinach, garlic, lemon zest, salt, pepper, and nutmeg until evenly combined.
- Spread 1 cup of Alfredo sauce in the bottom of a baking dish.
- Fill the shells with the chicken mixture and place them in the dish in a single layer.
- Spoon the remaining Alfredo sauce over the shells, making sure the pasta edges are covered.
- Sprinkle a little extra Parmesan on top, then cover tightly with foil.
- Bake for 25 to 30 minutes, until the center is hot and the sauce is gently bubbling around the sides. Uncover and bake 8 to 10 minutes more if you want a little color on top.
- Let the pan rest for 10 minutes before serving.
Tips and Variations:
- Chop the chicken finely if you want a smoother filling; leave it in larger shreds if you like more texture.
- A handful of frozen peas can go into the filling straight from the freezer. They thaw in the oven and add a little sweetness.
- If your Alfredo sauce is thick, loosen it with 2 to 3 tablespoons of milk so it spreads easily.
4. Beef and Three-Cheese Manicotti
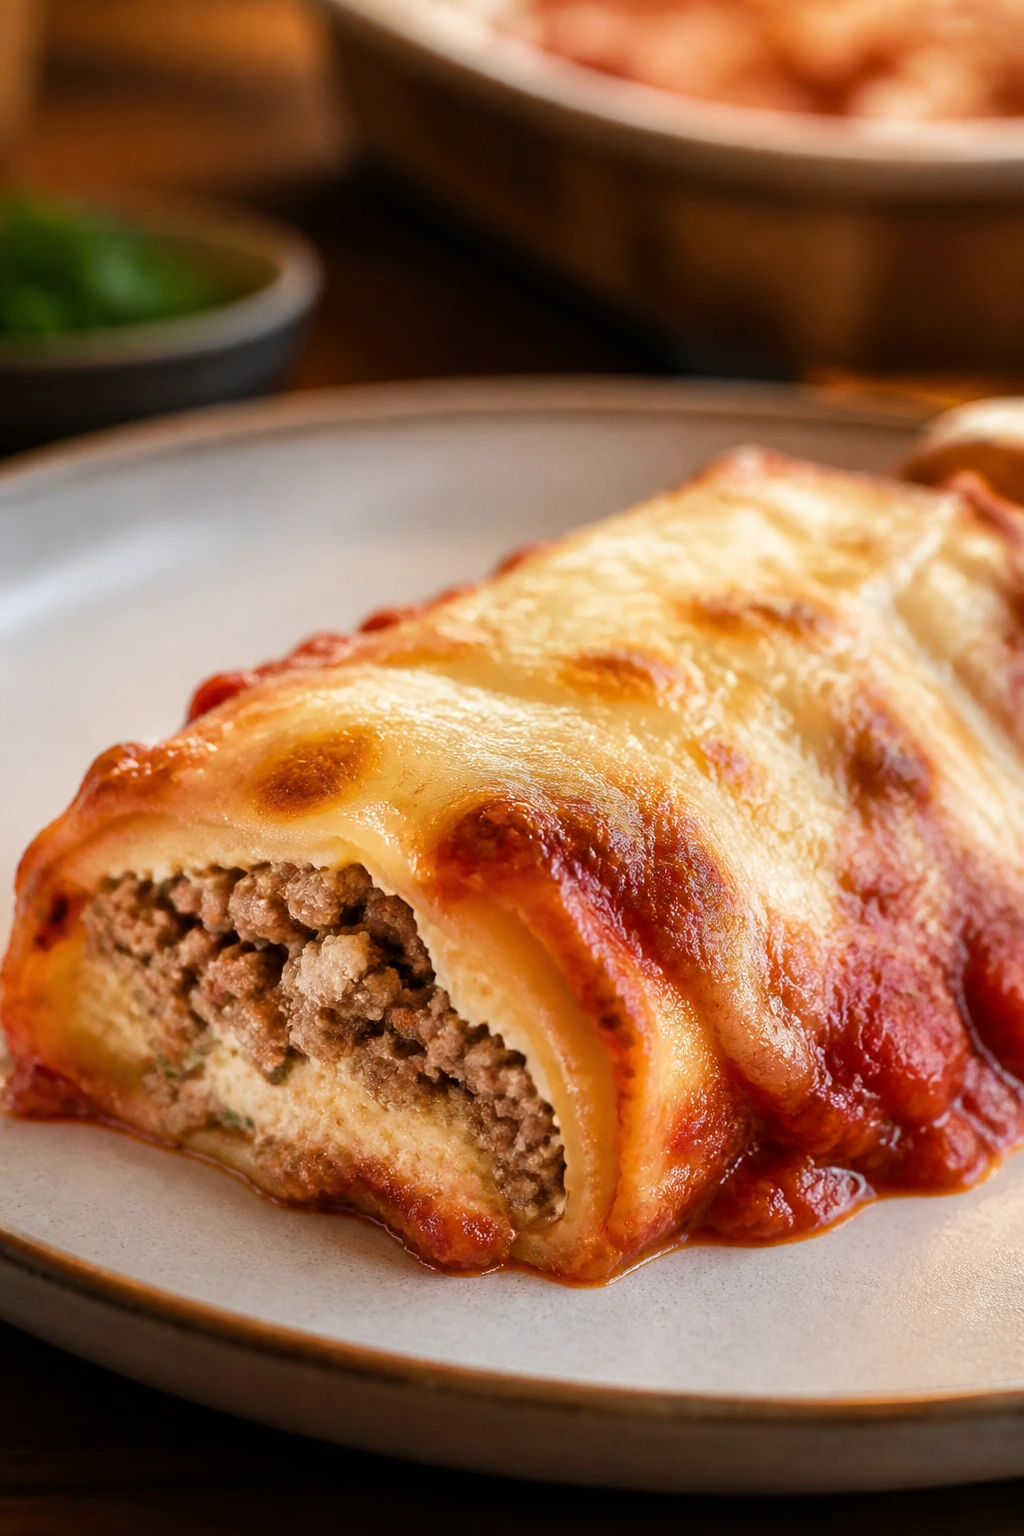
Ground beef isn’t the only way to make manicotti hearty, but it’s one of the fastest ways to get there. This version leans rich and savory, with browned beef folded into a three-cheese filling and enough tomato sauce to keep the pasta tender from the first bite to the last.
The result tastes a little like a cross between baked pasta and a stuffed meatball dinner. It’s sturdy. It’s familiar. And it absolutely disappears when there’s garlic bread nearby.
Why It Works:
Beef brings protein and texture, but it needs support from cheese so the filling doesn’t feel dry after baking. Provolone melts into the ricotta and gives the whole pan a deeper, almost smoky edge. Tomato paste in the beef mixture matters too. It gives the meat a concentrated, cooked tomato taste that plain sauce can’t supply on its own. Bake it covered first so the shells soften before the top starts to brown.
Key Ingredients:
- 12 manicotti shells — cooked just until flexible.
- 1 pound lean ground beef — 85/15 or 90/10 both work.
- 1 small onion, finely chopped — cooks down into the beef.
- 2 cloves garlic, minced — stir in near the end.
- 2 cups whole-milk ricotta — the creamy base.
- 1 cup shredded provolone — gives the filling extra body.
- 1/2 cup grated Parmesan — sharp and salty.
- 1 large egg — helps hold the filling together.
- 1 tablespoon tomato paste — concentrates the meat flavor.
- 3 cups tomato sauce — enough for the base and top.
- 1 teaspoon Italian seasoning — keeps the flavor familiar.
- 1/4 teaspoon red pepper flakes — optional.
- Salt and black pepper, to taste — season after the beef is browned.
Quick Steps:
- Preheat the oven to 375°F (190°C). Boil the shells for 6 to 7 minutes, then drain and cool them briefly.
- Set a skillet over medium-high heat and cook the beef and onion for 7 to 8 minutes, until the beef is browned and the onion is soft. Add the garlic and tomato paste and cook for 1 minute more.
- Scrape the beef mixture into a bowl and let it cool for a few minutes.
- Stir in the ricotta, provolone, Parmesan, egg, Italian seasoning, red pepper flakes, salt, and pepper.
- Spread 1 cup tomato sauce across the bottom of a baking dish.
- Fill the shells with the beef and cheese mixture and arrange them in the dish.
- Spoon the remaining sauce over the top and add a small handful of mozzarella if you want a deeper cheese crust.
- Cover with foil and bake for 30 minutes, then uncover and bake 10 minutes more until the sauce bubbles and the top has browned spots.
- Rest for 10 minutes before serving.
Tips and Variations:
- Drain off excess fat from the beef. Too much grease makes the filling slide around.
- A tablespoon of grated onion mixed into the filling gives the beef a sweeter edge.
- If you want a softer, more lasagna-like texture, add 1/4 cup extra sauce to the filling.
5. Spinach and Mushroom Manicotti with Cream Sauce
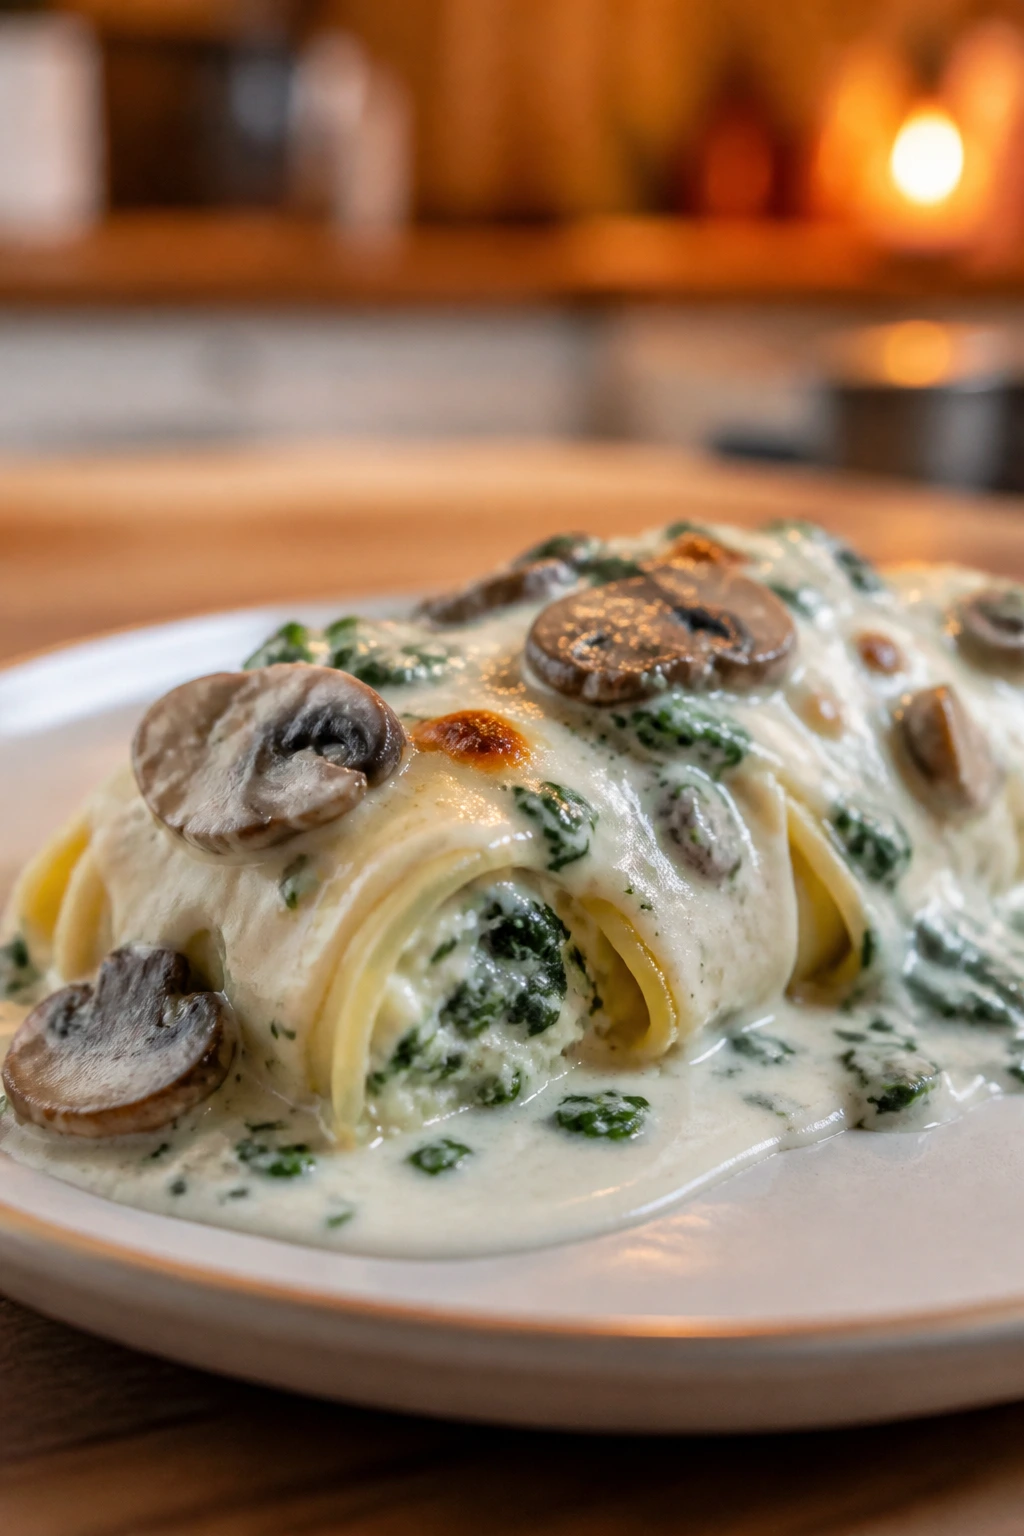
Picture a pan that smells like browned mushrooms, garlic, and butter before it ever leaves the oven. That’s this one. Spinach and mushroom manicotti is earthy, creamy, and a little more grown-up than the red-sauce versions, which is probably why it tends to vanish faster than expected.
The mushrooms need to be cooked down properly. Not half-cooked. Not damp. Brown and meaty. Once they’re there, the whole filling takes on a deeper flavor that plays beautifully against the mild ricotta and the sweet milkiness of the cream sauce.
Why It Works:
Mushrooms hold a lot of water, and that’s the whole game here. If you cook them until the skillet is dry and the edges start to brown, they turn savory instead of soggy. Spinach brings color and a little grassiness, while a simple béchamel gives the dish a smooth base that doesn’t compete with the filling. White sauce is the right move here because it lets the mushroom flavor stay front and center. A red sauce would pull the dish in the wrong direction.
Key Ingredients:
- 12 manicotti shells — cooked until barely flexible.
- 12 ounces cremini mushrooms, sliced — they have more flavor than white button mushrooms.
- 10 ounces fresh spinach — chopped after wilting.
- 2 cups whole-milk ricotta — for the filling.
- 1 cup shredded mozzarella — melts into the mushrooms and greens.
- 1/2 cup grated Parmesan — sharpens the sauce and filling.
- 1 large egg — keeps the filling stable.
- 2 tablespoons butter — for the mushrooms and sauce.
- 2 tablespoons flour — thickens the cream sauce.
- 2 cups whole milk — the base of the béchamel.
- 2 cloves garlic, minced — add after the mushrooms have browned.
- 1/4 teaspoon nutmeg — tiny amount, but useful in cream sauces.
- Salt and black pepper, to taste — season the mushrooms well.
Quick Steps:
- Preheat the oven to 350°F (175°C). Boil the manicotti shells for 6 minutes, then drain and set aside.
- Melt 1 tablespoon butter in a skillet over medium-high heat. Add the mushrooms with a pinch of salt and cook for 8 to 10 minutes, stirring now and then, until they give up their liquid and start to brown.
- Stir in the garlic and spinach and cook until the spinach is wilted and any remaining liquid has evaporated. Cool the mixture slightly, then chop it if needed.
- In a separate saucepan, melt the remaining butter. Whisk in the flour for 1 minute, then slowly whisk in the milk. Cook for 3 to 4 minutes, whisking, until the sauce thickens enough to coat the back of a spoon. Stir in 1/4 cup Parmesan, nutmeg, salt, and pepper.
- Mix the mushroom-spinach mixture with the ricotta, mozzarella, egg, and another pinch of black pepper.
- Spread a little cream sauce in the bottom of a baking dish. Fill the shells and arrange them on top.
- Spoon the remaining cream sauce over the shells and dust with a little extra Parmesan.
- Cover with foil and bake for 25 minutes. Remove the foil and bake 8 to 10 minutes more, until the sauce bubbles at the corners and the top looks lightly set.
- Rest for 10 minutes before serving.
Tips and Variations:
- Let the mushrooms sit in a hot pan before stirring them too often; that’s how you get browning instead of steam.
- A few chopped thyme leaves are lovely here if you want a woodsy note.
- If you’re short on time, use prepared white sauce, but warm it first so it spreads cleanly.
6. Pesto Ricotta and Mozzarella Manicotti
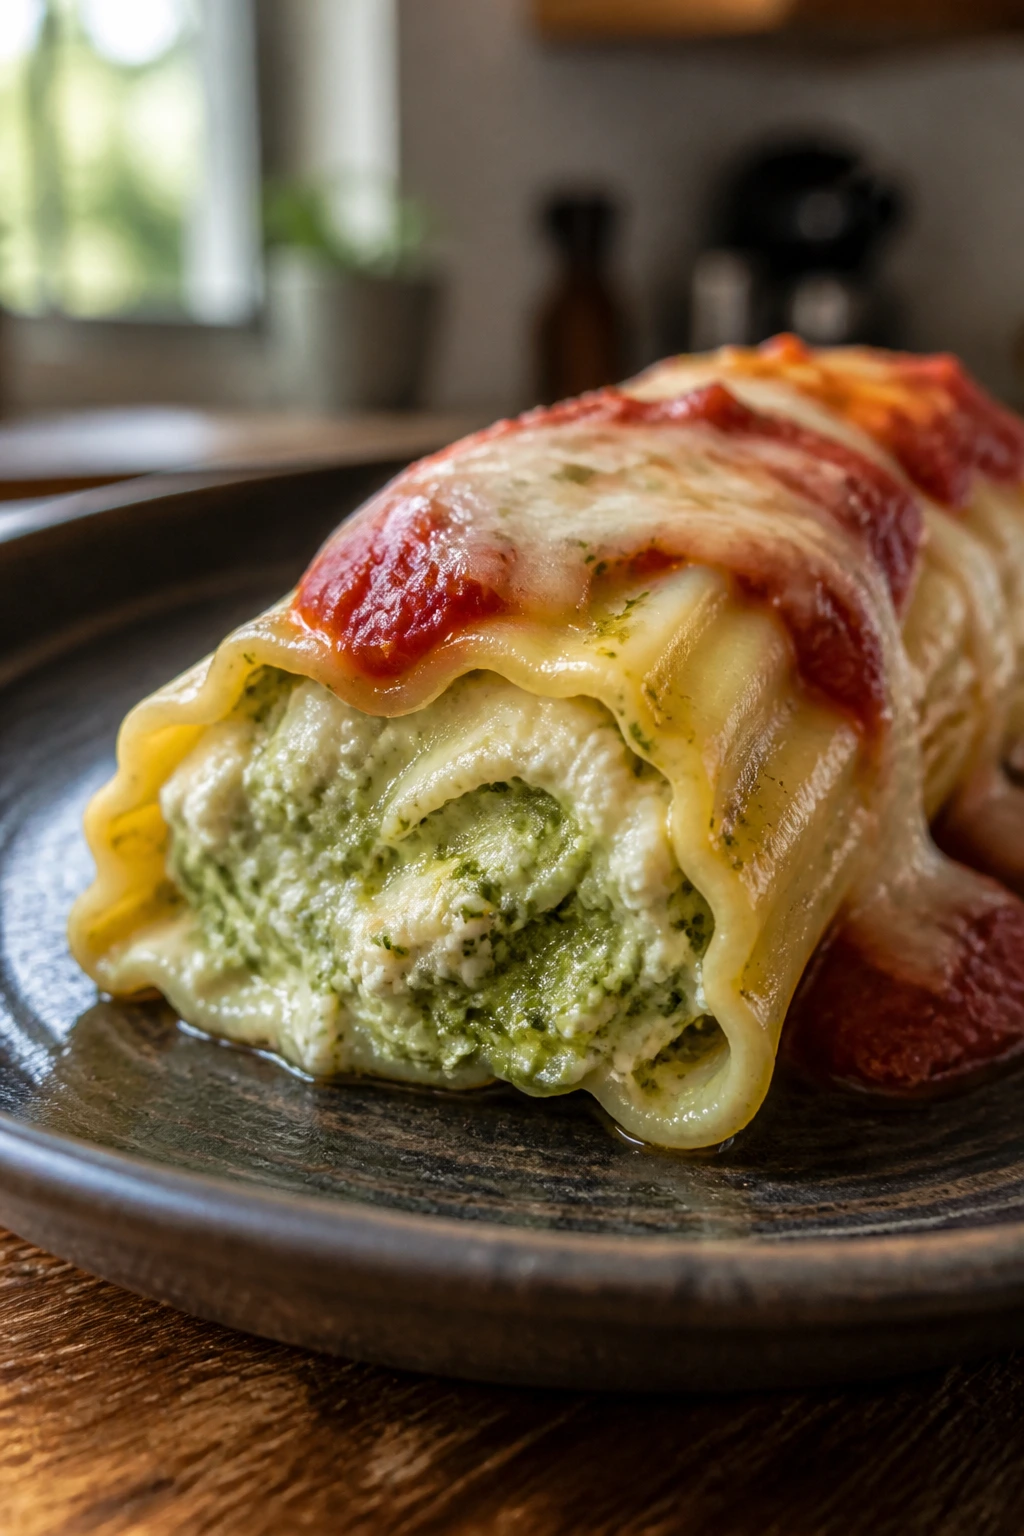
Pesto changes the whole mood of manicotti. Instead of deep red sauce and heavy savoriness, you get basil, garlic, pine nuts, and olive oil cutting through the cheese like a bright green ribbon. It tastes lighter, but not thin. There’s still plenty of comfort in the pan.
This one is especially good when you want a pasta dinner that feels fresh without turning into a salad. The filling stays creamy, the pesto keeps it lively, and a small amount of marinara underneath gives the shells something warm and familiar to sit on.
Why It Works:
Pesto does the heavy lifting on flavor, so the filling doesn’t need a long list of herbs or spices. Ricotta calms the pesto’s intensity, mozzarella gives stretch, and Parmesan adds enough salt to make each bite taste complete. A thin layer of marinara under the shells keeps the pasta from sticking and gives the dish just enough acidity. That balance matters. Too much red sauce would bury the pesto. Too little and the pasta can taste flat.
Key Ingredients:
- 12 manicotti shells — cooked just until flexible.
- 2 cups whole-milk ricotta — the creamy base.
- 1/2 cup basil pesto — homemade or good store-bought.
- 1 cup shredded mozzarella — for melt and stretch.
- 1/2 cup grated Parmesan — to season the filling.
- 1 large egg — helps the filling hold shape.
- 2 cups marinara sauce — use a light hand.
- 1 cup cherry tomatoes, halved — optional, for extra brightness.
- 2 cloves garlic, minced — if your pesto is mild.
- Salt and black pepper, to taste — be careful if the pesto is already salty.
- 1 tablespoon olive oil — keeps the shells from clumping.
Quick Steps:
- Preheat the oven to 375°F (190°C). Cook the shells for 6 to 7 minutes, then drain and cool them on a lightly oiled tray.
- In a bowl, mix the ricotta, pesto, mozzarella, Parmesan, egg, garlic, and a little black pepper until thick and evenly green.
- Spread 1 cup marinara across the bottom of a baking dish.
- Fill each shell with the pesto mixture and arrange them over the sauce.
- Spoon the rest of the marinara around and lightly over the shells. Scatter cherry tomatoes over the top if you’re using them.
- Cover tightly with foil and bake for 25 minutes.
- Uncover and bake 10 minutes more, until the sauce is bubbling and the edges of the shells look glossy.
- Rest for 10 minutes, then finish with a small drizzle of olive oil or a pinch of Parmesan if you like.
Tips and Variations:
- If your pesto is very thick, loosen it with 1 to 2 tablespoons of milk so it mixes into the ricotta more easily.
- Toasted pine nuts make a nice finish, but use them sparingly.
- A little lemon zest in the filling keeps the pesto from tasting heavy.
7. Butternut Squash and Sage Manicotti
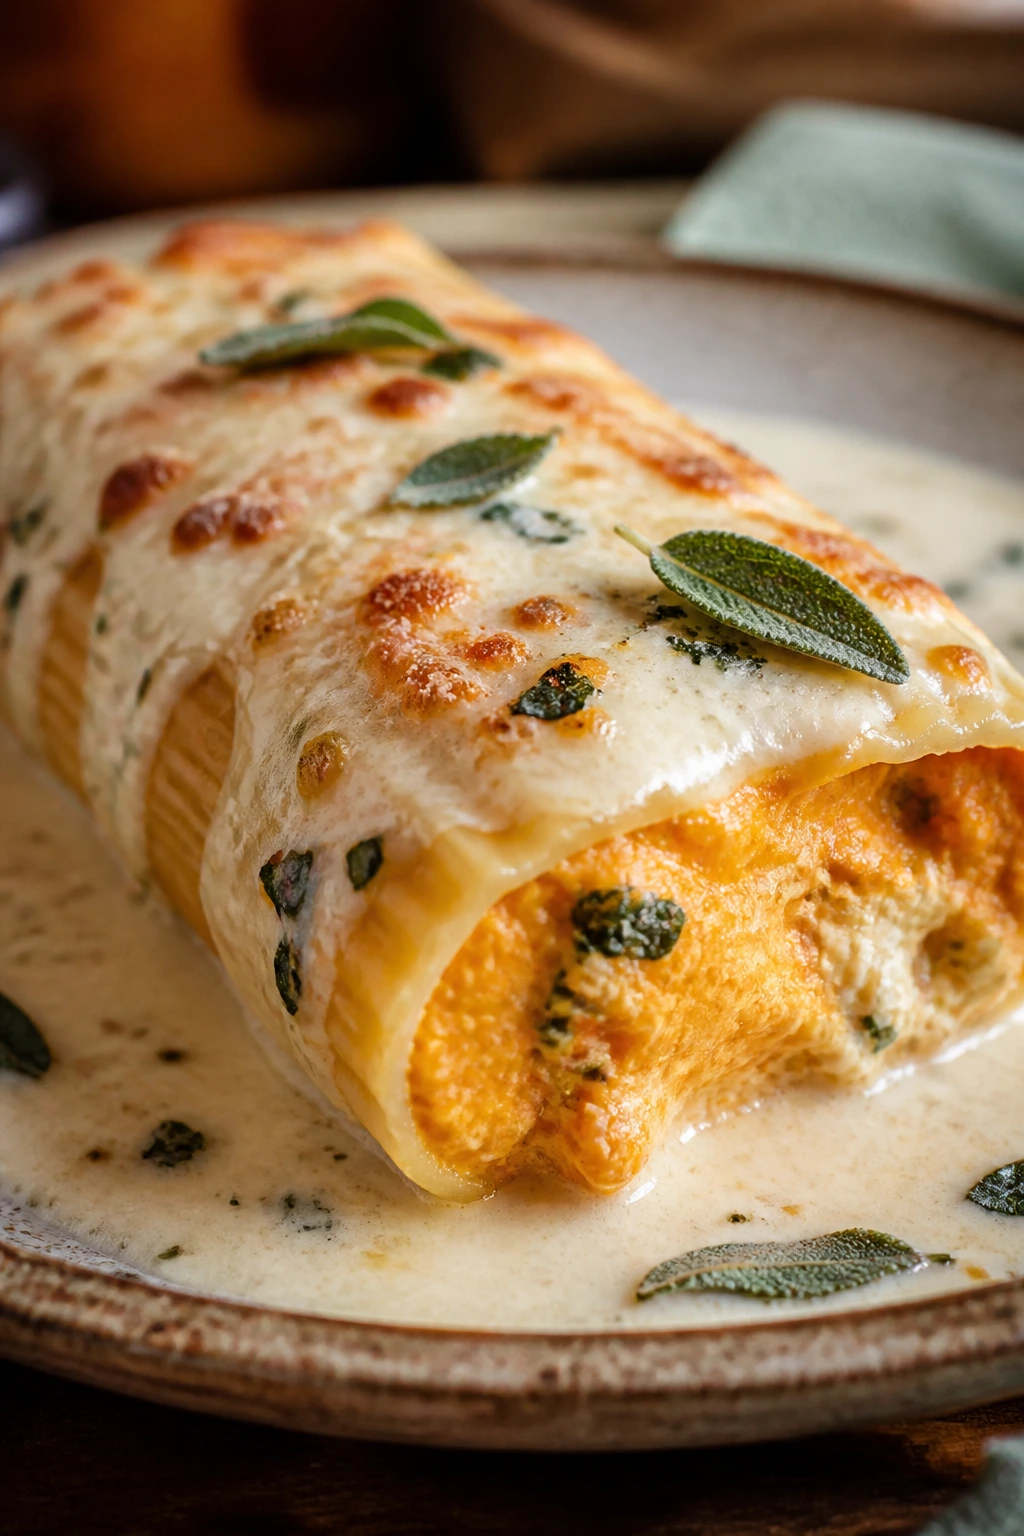
Butternut squash has a way of turning pasta into something softer and silkier. The flavor is sweet without being sugary, and sage keeps it from drifting into dessert territory. This is the pan you bring out when you want a rich meatless dinner that still feels substantial.
The texture matters here. Roasted squash should be dry enough to mash into the ricotta without turning loose, and the sage should taste like a real herb, not a sprinkle of perfume. When both are handled well, the filling gets this almost velvety feel that sits beautifully in baked pasta.
Why It Works:
Squash adds body and sweetness, which gives the filling a different shape from the usual cheese-only versions. Ricotta keeps the mixture soft, Parmesan brings salt, and sage supplies the earthy edge that stops the dish from feeling one-note. A cream sauce or light béchamel helps the shells bake evenly and keeps the edges from drying out. Because squash can mellow quickly in the oven, the seasoning needs to be clear and measured. Nutmeg does a quiet amount of work here too.
Key Ingredients:
- 12 manicotti shells — boiled until just flexible.
- 3 cups butternut squash, peeled and cubed — about 1 small squash.
- 2 tablespoons olive oil — for roasting.
- 2 cups whole-milk ricotta — gives the filling structure.
- 1 cup shredded fontina or mozzarella — fontina is a little deeper.
- 1/2 cup grated Parmesan — seasons the filling.
- 1 large egg — binds everything together.
- 1 tablespoon chopped fresh sage — the herb that makes the dish.
- 1/4 teaspoon nutmeg — just enough to warm the flavor.
- 2 cups cream sauce or béchamel — for the bottom and top.
- Salt and black pepper, to taste — squash needs both.
- 1 tablespoon butter — optional, for extra richness.
Quick Steps:
- Preheat the oven to 400°F (205°C). Toss the squash cubes with olive oil, salt, and pepper, then roast for 25 to 30 minutes until tender and lightly browned at the edges.
- Let the squash cool for a few minutes, then mash it until mostly smooth with a few soft chunks left for texture.
- Reduce the oven to 350°F (175°C). Cook the manicotti shells for 6 minutes, then drain and set aside.
- In a bowl, mix the squash, ricotta, fontina, Parmesan, egg, sage, nutmeg, salt, and pepper until thick and even.
- Spread 1 cup of cream sauce in the bottom of a baking dish.
- Fill the shells with the squash mixture and line them up in the dish.
- Spoon the remaining cream sauce over the shells. Dot with a little butter if you want a more golden finish.
- Cover with foil and bake for 25 minutes. Uncover and bake 8 to 10 minutes more until the sauce is bubbling and the top looks set.
- Rest for 10 minutes before serving.
Tips and Variations:
- Roast the squash until it has some browning. Pale squash tastes flat.
- A little crumbled amaretti cookie sounds unusual, but some cooks swear by it in squash fillings. If that feels too far out, skip it.
- If your squash is very watery, let it sit in a strainer for a few minutes before mixing it with the cheese.
8. Shrimp, Crab, and Lemon Manicotti
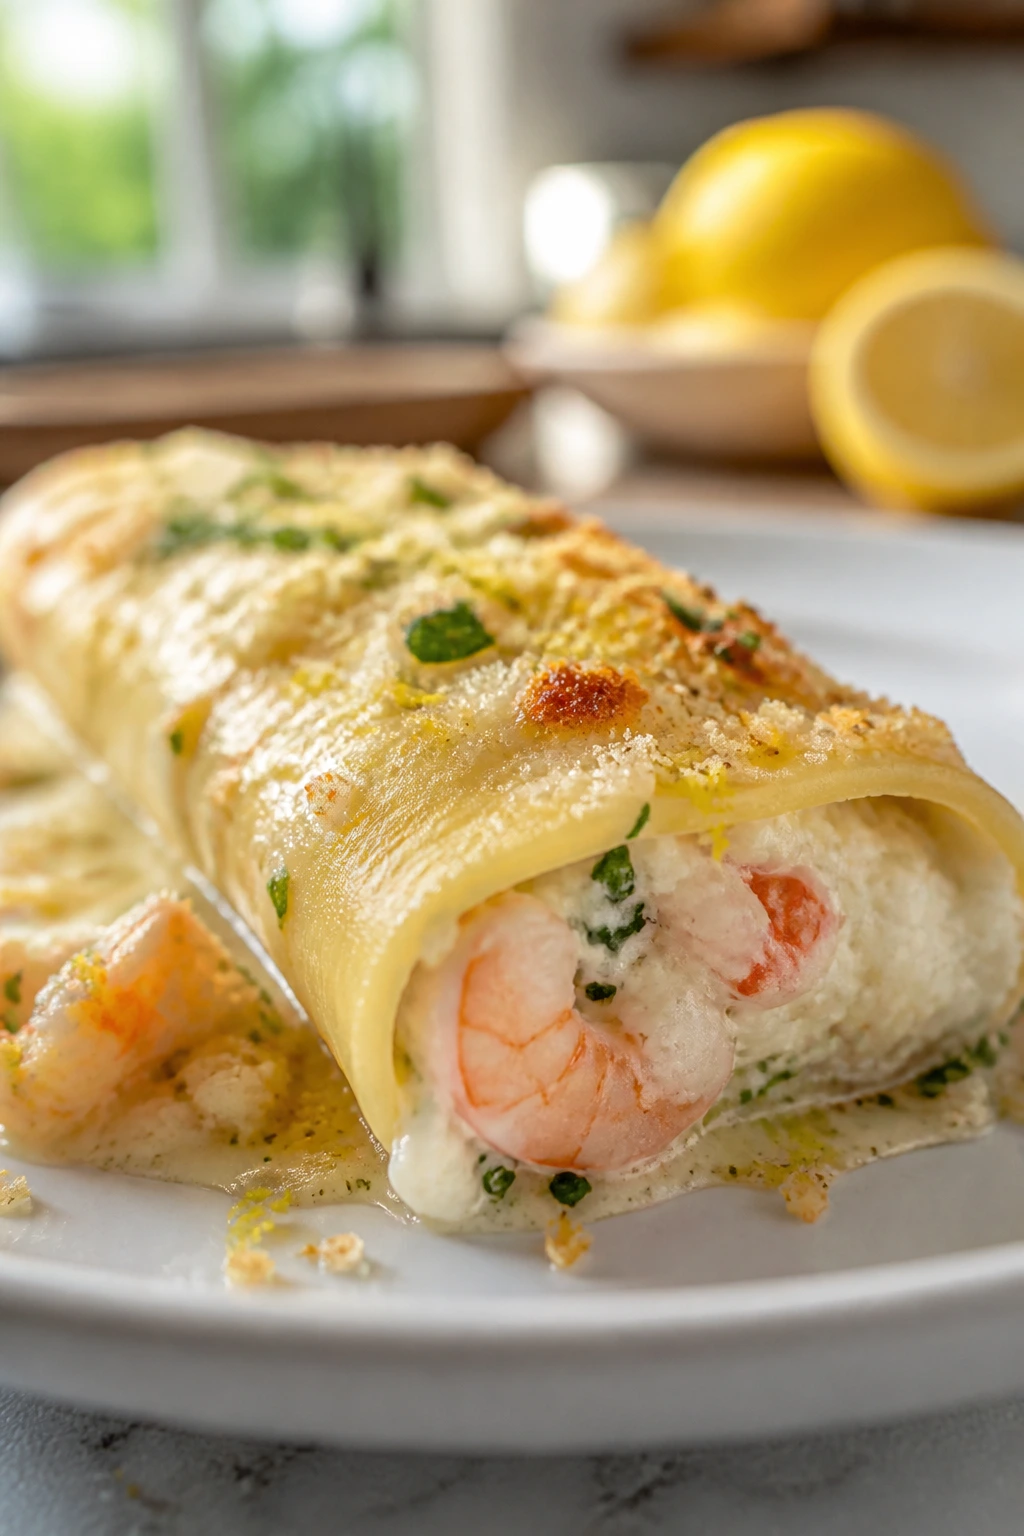
Seafood manicotti sounds fancy only until you make it once. Then it just sounds smart. Shrimp and crab bring sweetness and a little brine, lemon keeps the filling from becoming heavy, and the cream sauce gives the whole pan a plush finish.
This is one of the few manicotti dinners that benefits from restraint. You don’t want to bury the seafood under too much cheese or sauce. The point is to let the crab taste like crab and the shrimp stay tender instead of rubbery.
Why It Works:
Seafood needs shorter baking time than beef or sausage, so this version stays at 350°F and gets pulled as soon as the center is hot. Ricotta gives the filling enough body to stay in the shells, while lemon zest and chives keep the flavor clean. Crab is delicate, so it should be folded in gently, not mashed into paste. A creamy white sauce pairs better than tomato here because the tomato would fight the sweetness of the seafood.
Key Ingredients:
- 12 manicotti shells — cooked until flexible.
- 8 ounces cooked shrimp, chopped — cut into small pieces.
- 8 ounces lump crabmeat, picked over — remove shell bits carefully.
- 1 1/2 cups whole-milk ricotta — keeps the filling light.
- 1 cup shredded mozzarella — for melt.
- 1/2 cup grated Parmesan — for salt and body.
- 1 large egg — binds the filling.
- 1 teaspoon lemon zest — brightens the seafood.
- 1 tablespoon lemon juice — use it sparingly.
- 2 tablespoons chopped chives or dill — both work.
- 2 cups Alfredo sauce — a creamy base for the pan.
- 1 small shallot, finely minced — optional, but nice.
- Salt and black pepper, to taste — season gently.
Quick Steps:
- Preheat the oven to 350°F (175°C). Boil the manicotti shells for about 6 minutes, then drain and cool them briefly.
- If you’re using the shallot, sauté it in a small skillet with a little butter for 2 to 3 minutes until soft, then cool it.
- In a bowl, combine the shrimp, crab, ricotta, mozzarella, Parmesan, egg, lemon zest, lemon juice, chives, shallot, salt, and pepper. Fold gently so the crab stays in visible pieces.
- Spread 1 cup of Alfredo sauce in the bottom of a baking dish.
- Fill the shells with the seafood mixture and arrange them in the dish.
- Spoon the remaining Alfredo sauce over the shells, making sure the pasta edges are covered.
- Cover tightly with foil and bake for 25 minutes, just until the filling is hot and the sauce is bubbling softly at the edges.
- Uncover for the last 5 minutes if you want a little bit of color, then rest for 10 minutes before serving.
Tips and Variations:
- Use cooked shrimp here, not raw. Raw shrimp can overcook before the pasta is done.
- A sprinkle of paprika on top gives the pan a warmer color without changing the flavor much.
- If crab is expensive or hard to find, all shrimp still works. Just chop it a little finer.
9. Buffalo Chicken Manicotti
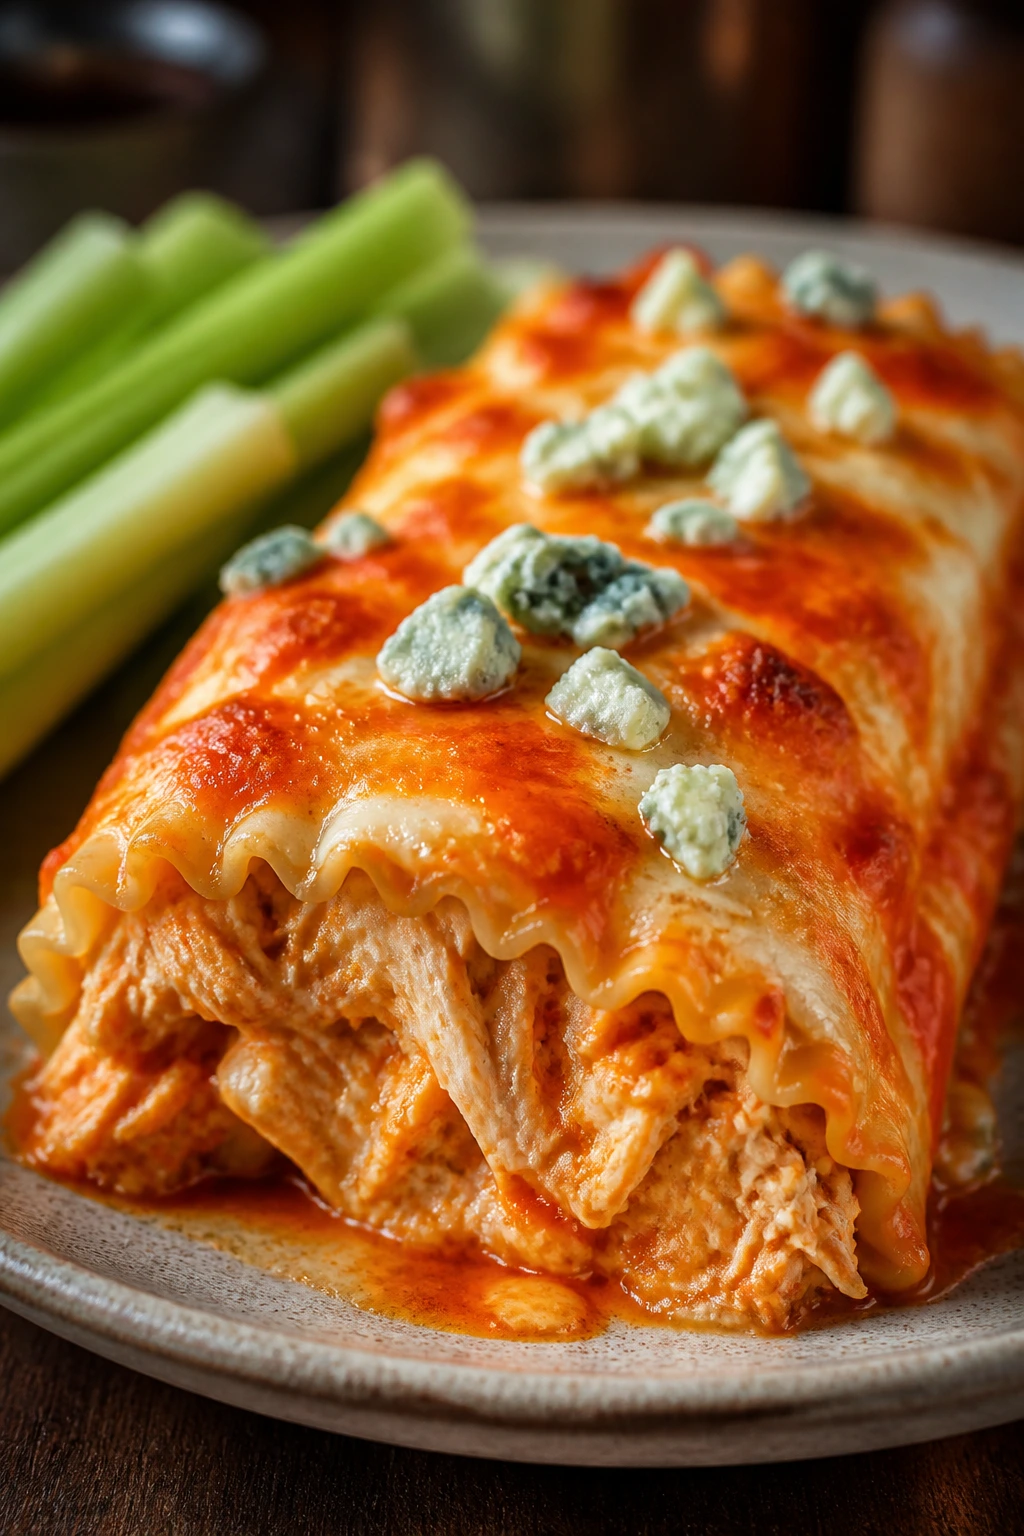
If your family likes heat, this one tends to vanish fast. Buffalo chicken manicotti takes the same creamy baked-pasta idea and gives it a sharp, tangy edge that cuts through the richness. It’s the least traditional pan in the bunch, and honestly, that’s part of why it works.
The sauce is bright, the filling is savory, and the blue cheese, if you use it, makes the whole thing taste like a cross between game-day food and a proper baked dinner. Celery on the side keeps the plate from feeling heavy. Nice little reset.
Why It Works:
Buffalo sauce can be loud, so the filling needs dairy to soften it. Ricotta and cream cheese do that job well, turning sharp heat into a creamy, spoonable stuffing. Chicken gives the shells enough substance to feel like a full meal, while Alfredo sauce on the outside keeps the bake from drying out. The celery doesn’t sound important until you eat the dish. Then it is. It adds crunch and keeps the richness in check.
Key Ingredients:
- 12 manicotti shells — boiled until just flexible.
- 2 cups cooked shredded chicken — rotisserie chicken works neatly.
- 3/4 cup buffalo sauce — use your preferred heat level.
- 4 ounces cream cheese, softened — keeps the filling smooth.
- 1 1/2 cups whole-milk ricotta — balances the heat.
- 1 cup shredded mozzarella — for melt.
- 1/2 cup blue cheese crumbles — optional, but sharp and useful.
- 1 cup Alfredo sauce — spreads under and over the shells.
- 2 celery stalks, finely chopped — brings crunch into the filling.
- 2 tablespoons chopped chives — for freshness.
- Salt and black pepper, to taste — go lightly because the buffalo sauce is already seasoned.
Quick Steps:
- Preheat the oven to 350°F (175°C). Cook the manicotti shells for 6 minutes, then drain and cool.
- In a mixing bowl, stir together the shredded chicken, buffalo sauce, cream cheese, ricotta, mozzarella, blue cheese, celery, chives, salt, and pepper until the filling is thick and uniform.
- Spread 1/2 cup of Alfredo sauce in the bottom of a baking dish.
- Fill the shells with the chicken mixture and arrange them in the dish.
- Spoon the remaining Alfredo sauce over the shells, then sprinkle a little extra mozzarella on top if you want more melt.
- Cover tightly with foil and bake for 25 minutes.
- Remove the foil and bake 8 minutes more, until the sauce bubbles at the edges and the top looks set.
- Rest for 10 minutes, then finish with extra chives or a little more buffalo sauce if you want more heat.
Tips and Variations:
- Skip the blue cheese if your table doesn’t like it; the dish still works with extra mozzarella.
- A drizzle of ranch over the plated shells is not subtle, but it is good.
- Keep the buffalo sauce at the lower end if you’re serving this to mixed ages. Heat climbs after baking.
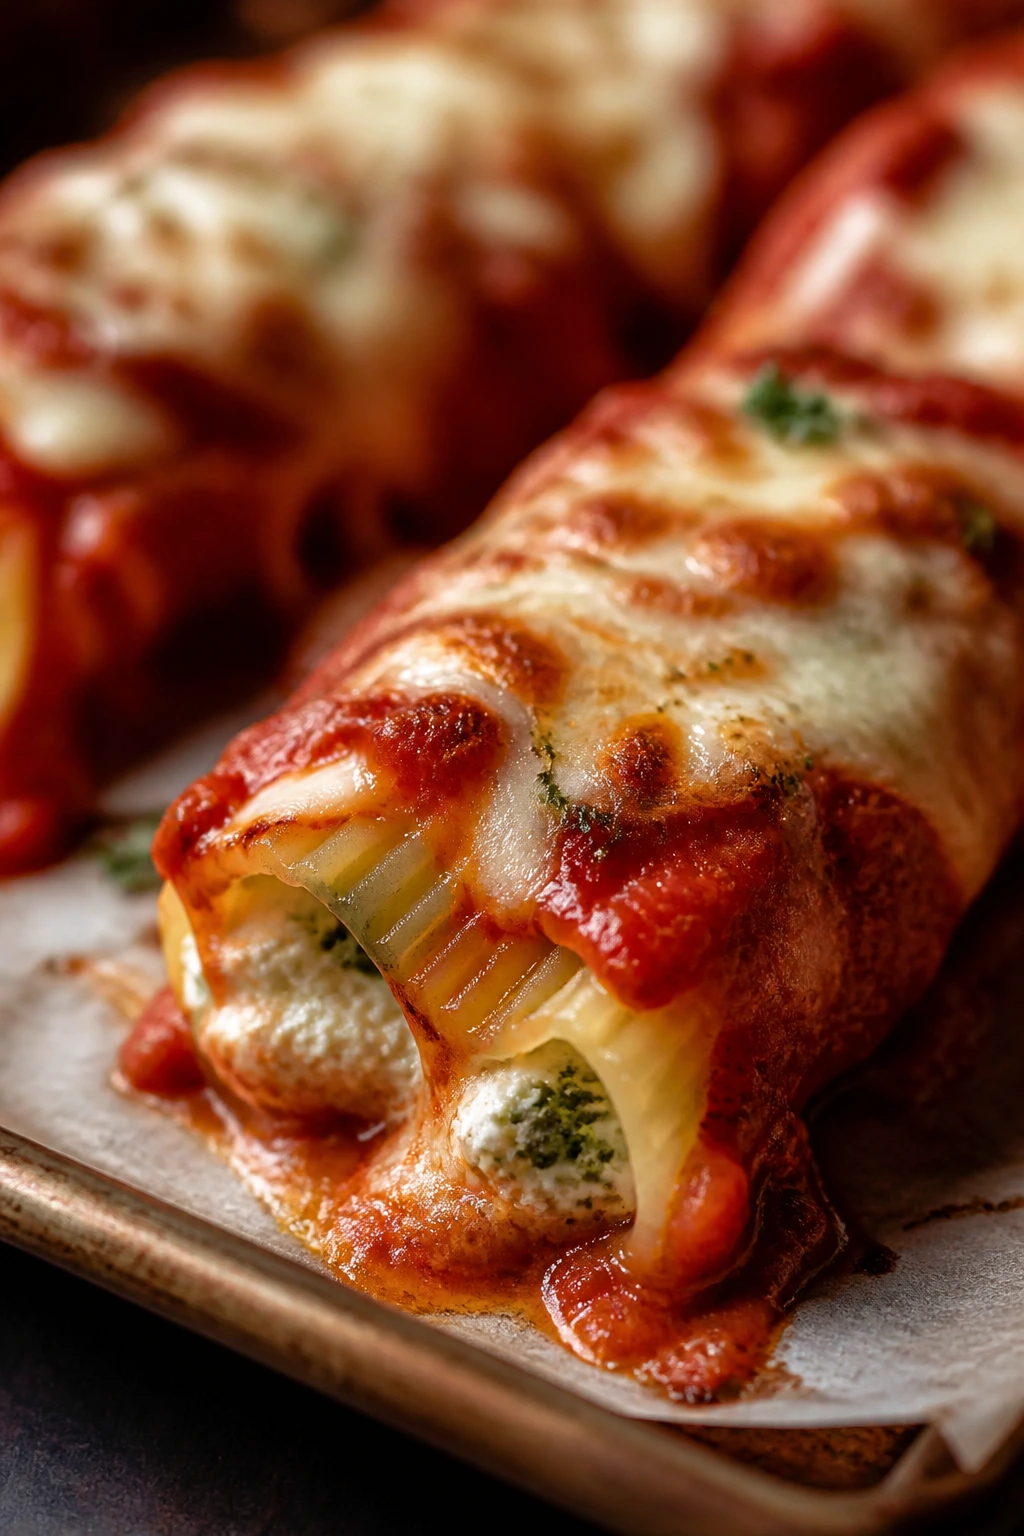
10. Lasagna-Style Manicotti with Meat Sauce
Need a red-sauce pan that eats like a full Sunday meal? This is the one. Lasagna-style manicotti gives you the rich comfort of a meat ragù, plenty of cheese, and the tidy stuffed-pasta shape that slices so nicely on a serving plate.
It feels more layered than classic manicotti because the sauce itself is part of the story. The meat simmers into the tomatoes, the ricotta filling cools the richness, and the whole pan comes out tasting like it took more effort than it actually did. I’m not mad about that.
Why It Works:
The meat sauce does more than sit under the pasta. It seasons the shells from below and above, which means each bite carries a little bit of everything. Using both beef and pork gives the sauce more depth than beef alone, and tomato paste pushes the ragù toward a fuller, slower-cooked flavor. Since the sauce is richer, the filling can stay simple: ricotta, Parmesan, mozzarella, and parsley. That keeps the dish from becoming too heavy.
Key Ingredients:
- 12 manicotti shells — cooked until barely tender.
- 1 pound ground beef — for the ragù.
- 1/2 pound ground pork or Italian sausage — adds richness.
- 1 small onion, finely chopped — softens into the sauce.
- 3 cloves garlic, minced — stir in after the meat browns.
- 2 tablespoons tomato paste — builds deeper tomato flavor.
- 1/2 cup dry red wine or broth — deglazes the pan.
- 1 28-ounce can crushed tomatoes — the body of the sauce.
- 1 teaspoon dried basil — a little goes a long way.
- 1 teaspoon dried oregano — keeps the sauce savory.
- 2 cups whole-milk ricotta — the filling base.
- 1 large egg — binds the cheese.
- 1 cup shredded mozzarella — melts on top and inside.
- 1/2 cup grated Parmesan — seasons the filling.
- 1/4 cup chopped parsley — freshens the cheese.
- Salt and black pepper, to taste — taste the sauce before assembling.
Quick Steps:
- Preheat the oven to 375°F (190°C). Boil the manicotti shells for 6 to 7 minutes, then drain and cool them.
- In a skillet over medium-high heat, cook the beef, pork, and onion for 8 minutes, breaking up the meat as it browns. Add the garlic and tomato paste and cook for 1 minute.
- Pour in the wine or broth and stir, scraping up the browned bits from the pan. Add the crushed tomatoes, basil, oregano, salt, and pepper. Simmer for 15 to 20 minutes until the sauce thickens slightly.
- In a bowl, combine the ricotta, egg, mozzarella, Parmesan, parsley, and a pinch of black pepper.
- Spread 1 cup of the meat sauce in the bottom of a baking dish.
- Fill the shells with the ricotta mixture and arrange them in the dish. Spoon the remaining meat sauce over and around the shells.
- Cover with foil and bake for 30 minutes. Uncover and bake 10 minutes more, until the sauce is bubbling and the top looks glossy.
- Rest for 10 minutes before serving.
Tips and Variations:
- If the sauce tastes flat, stir in a tiny pinch of sugar or an extra spoon of tomato paste. Not a lot.
- A splash of milk in the ricotta makes the filling looser and easier to pipe.
- Fresh basil at the table makes this pan taste brighter than dried herbs alone.
11. Roasted Vegetable and Ricotta Manicotti
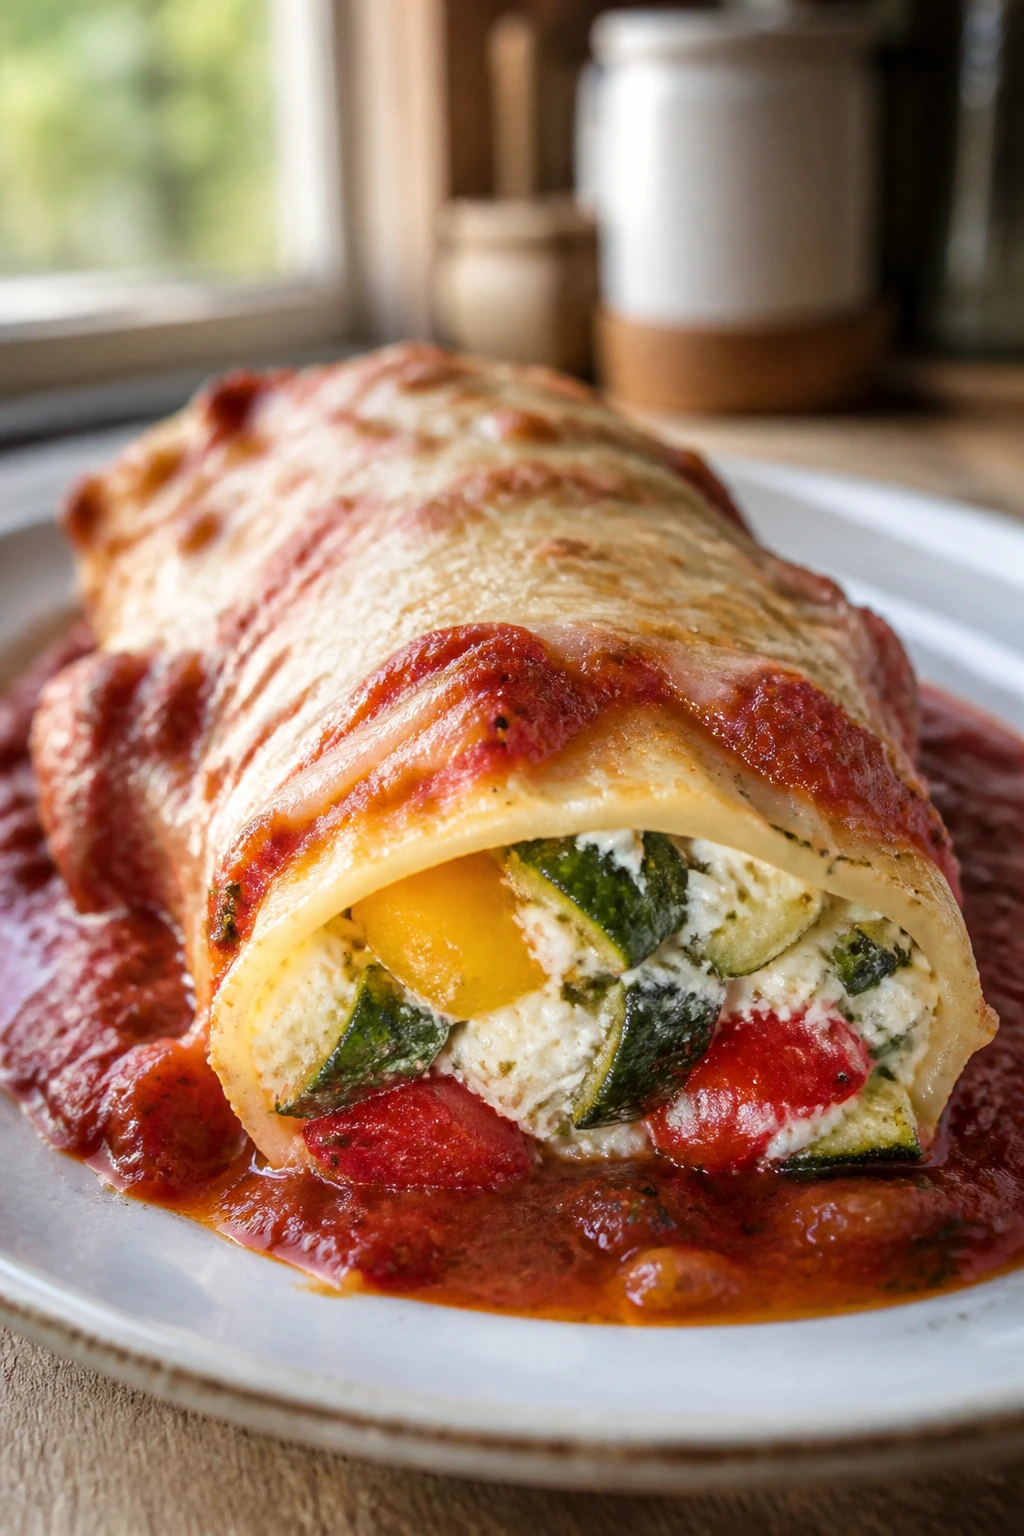
Roasted vegetables do a very specific kind of work in manicotti. They bring sweetness, a little smoke, and enough texture to keep the filling from becoming one-note. This pan tastes generous in a different way: not meaty, not sharp, just full of vegetables that have actually been browned before they were folded into the cheese.
That browning step is the whole thing. Raw vegetables in a filling often turn soggy or bland. Roasted ones taste concentrated, and once they’re mixed with ricotta and Parmesan, the whole dish lands somewhere between cozy and bright.
Why It Works:
Vegetables need heat before they go into stuffed pasta. Roasting pulls moisture out and concentrates flavor, which keeps the filling from watering down the sauce. Ricotta smooths the rough edges, mozzarella gives the bake its stretch, and marinara underneath keeps everything grounded. This is the kind of manicotti dinner that tastes more complex than it looks because the vegetables bring their own caramelized sweetness.
Key Ingredients:
- 12 manicotti shells — cooked until pliable.
- 1 zucchini, diced — a mild base vegetable.
- 1 red bell pepper, diced — brings sweetness.
- 1 yellow bell pepper, diced — adds another layer of sweetness.
- 1 small eggplant, diced — soaks up flavor after roasting.
- 1 small red onion, sliced — turns soft and sweet in the oven.
- 3 tablespoons olive oil — for roasting.
- 2 cups whole-milk ricotta — makes the filling creamy.
- 1 cup shredded mozzarella — for melt.
- 1/2 cup grated Parmesan — keeps the filling savory.
- 1 large egg — helps hold the filling together.
- 2 cloves garlic, minced — mix into the cooled vegetables.
- 2 cups marinara sauce — for the baking dish.
- 1 tablespoon chopped basil — fresh finish.
- Salt and black pepper, to taste — season the vegetables well.
Quick Steps:
- Preheat the oven to 425°F (220°C). Toss the zucchini, bell peppers, eggplant, and onion with olive oil, salt, and pepper on a sheet pan.
- Roast for 20 to 25 minutes, stirring once halfway through, until the vegetables are browned at the edges and soft.
- Let the vegetables cool for a few minutes, then chop them smaller if needed.
- Reduce the oven to 375°F (190°C). Cook the manicotti shells for 6 minutes, then drain and cool them.
- In a bowl, mix the roasted vegetables with ricotta, mozzarella, Parmesan, egg, garlic, and basil.
- Spread 1 cup marinara in the bottom of a baking dish.
- Fill the shells and arrange them over the sauce. Spoon the remaining marinara over the top.
- Cover with foil and bake for 25 minutes. Uncover and bake 10 minutes more, until the sauce is bubbling and the cheese has started to color.
- Rest for 10 minutes before serving.
Tips and Variations:
- Roast the vegetables in a single layer. Crowding makes them steam.
- A few chopped olives can make the filling taste sharper and more savory.
- If you want more richness, add 2 tablespoons of mascarpone to the filling.
12. Artichoke, Lemon, and Parmesan Manicotti
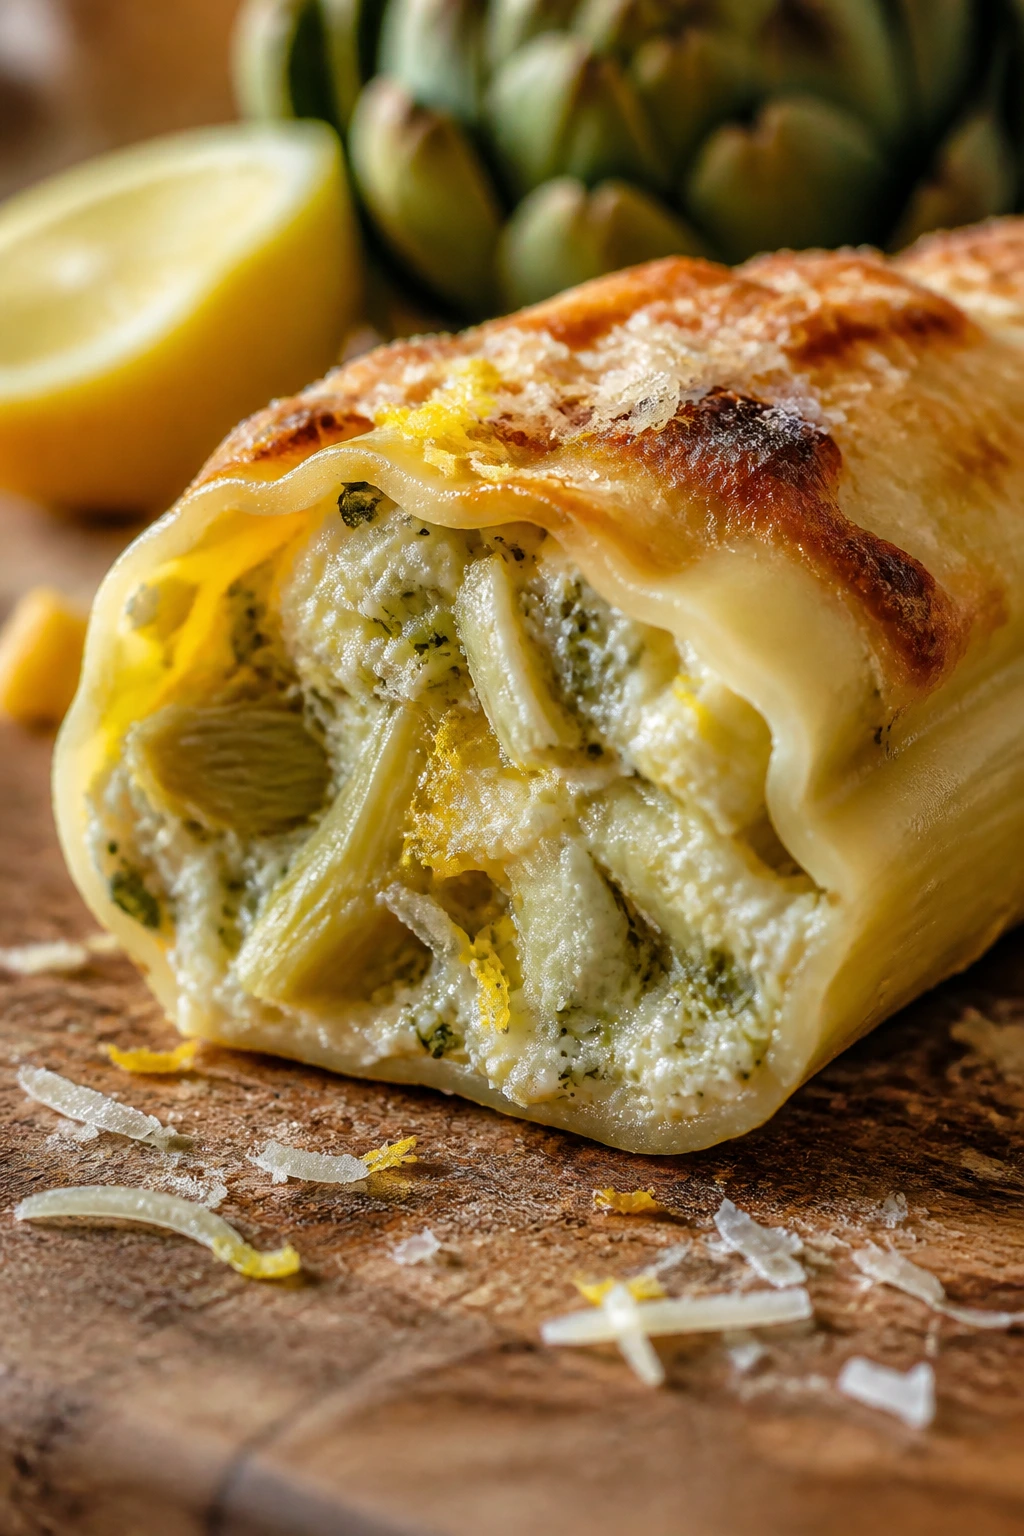
Artichokes change the tone of manicotti in a useful way. They add a little tang, a little brine, and a firm bite that keeps the filling from feeling soft all the way through. With lemon and Parmesan, the whole pan tastes cleaner and sharper than the usual cheese-heavy bake.
This is a good dish for people who like creamy pasta but don’t want the plate to feel heavy by the third bite. The artichokes keep it moving. The lemon makes the filling smell fresh as soon as the pan comes out of the oven.
Why It Works:
Artichoke hearts bring both acidity and texture, which matters in a dish built around ricotta. Lemon zest and juice keep the filling bright, and Parmesan adds enough salt to make the artichokes taste more distinct. Alfredo or a mild cream sauce works because it gives the pasta a smooth base without stealing the show. This is one of those manicotti dinners that tastes more balanced than rich, and that’s a nice change when the table already has bread, salad, or a heavier main nearby.
Key Ingredients:
- 12 manicotti shells — boiled until just flexible.
- 1 14-ounce can artichoke hearts, drained and chopped — pat them dry first.
- 2 cups whole-milk ricotta — the filling base.
- 1 cup grated Parmesan — bold, salty, and necessary.
- 1 cup shredded mozzarella — helps the filling melt into place.
- 1 large egg — binds the stuffing.
- 2 tablespoons lemon juice — brightens the artichokes.
- 1 teaspoon lemon zest — keeps the flavor fresh.
- 2 cloves garlic, minced — don’t overdo it.
- 2 tablespoons chopped parsley — gives the filling a green finish.
- 2 cups Alfredo sauce or mild cream sauce — for the bottom and top.
- Salt and black pepper, to taste — season after tasting the artichokes.
Quick Steps:
- Preheat the oven to 350°F (175°C). Cook the manicotti shells for 6 minutes, then drain and cool them.
- Pat the artichoke hearts dry with paper towels and chop them into small pieces.
- In a bowl, combine the artichokes, ricotta, Parmesan, mozzarella, egg, lemon juice, lemon zest, garlic, parsley, salt, and pepper.
- Spread 1 cup of Alfredo sauce in the bottom of a baking dish.
- Fill the shells with the artichoke mixture and arrange them in the dish.
- Spoon the remaining sauce over the shells, making sure the pasta edges are covered.
- Cover tightly with foil and bake for 25 minutes. Uncover and bake 8 minutes more, until the sauce is bubbling and the filling is hot through.
- Rest for 10 minutes, then finish with a little extra parsley or lemon zest if you want the top to smell fresher.
Tips and Variations:
- If the artichokes taste a little salty, skip extra salt until the filling is mixed.
- A few chopped spinach leaves can go in if you want more green in the filling.
- This one likes a crisp salad on the side because the lemon makes it feel lighter than the other pans.
Why Baked Manicotti Feels Right for Sunday Supper
Baked manicotti works because it turns a few simple moves into a meal that feels larger than the effort behind it. You boil the shells. You make a thick filling. You tuck everything into sauce and let the oven do the patient work. That rhythm is part of the charm. There’s no frantic timing, no complicated plating, no racing a pan across the stove while another pan threatens to burn.
The shell shape helps more than people expect. Stuffed tubes hold their filling in a way that feels tidy and generous, and they give sauce somewhere to cling. If you build the dish with enough moisture underneath and on top, the pasta stays tender instead of drying out around the edges. That’s the small trick that separates a merely edible pan from one that people keep reaching toward.
I also like how flexible the format is. A classic tomato version, a white-sauce version, a seafood version, even a roasted vegetable version — they all fit the same dinner shape. That means you can stay inside one method while changing the flavor enough to match the crowd, the pantry, or the mood at the table. Which is useful. More useful than people admit, actually.
Essential Equipment for a Pan of Stuffed Pasta
- Large pot: You need enough water for the manicotti shells to move freely while boiling.
- Slotted spoon or spider strainer: Makes it easier to lift the shells out without tearing them.
- Colander: Essential for draining and briefly cooling the pasta.
- 9×13-inch baking dish: The standard size for most of these manicotti dinners.
- Large mixing bowls: One for the filling and, if needed, one for the sauce components.
- Rubber spatula or wooden spoon: Good for folding thick fillings without crushing them.
- Piping bag or zip-top bag: Helpful for filling shells cleanly; snip one corner if using a bag.
- Skillet: Needed for sausage, beef, mushrooms, vegetables, or any filling that starts on the stove.
- Sheet pan: Useful for cooling shells or roasting vegetables and squash.
- Aluminum foil: Keeps the dish from drying out during the first stage of baking.
- Box grater: Better Parmesan, better melt, better flavor.
- Measuring cups and spoons: Especially useful for the cheese-heavy fillings, where amounts matter.
- Instant-read thermometer: Optional, but useful for chicken or seafood pans if you want exact heat on the center.
Smart Shopping for Shells, Cheese, and Sauce
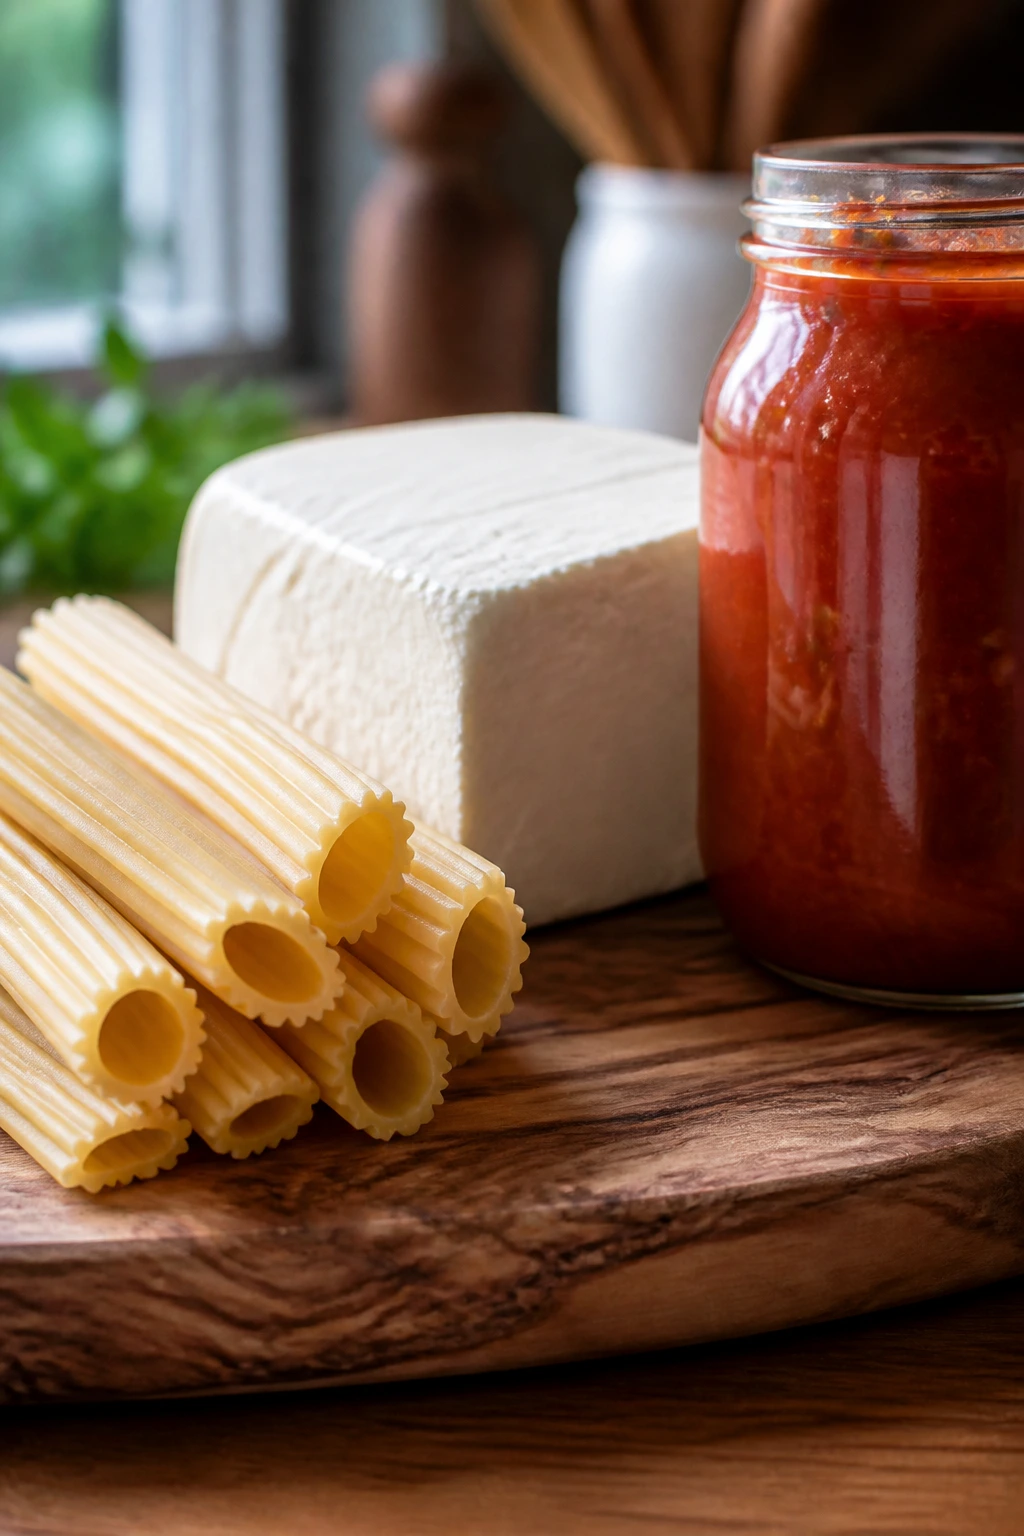
Manicotti shells are one of those pantry items that look interchangeable until you actually cook with them. Buy shells that are intact, not cracked through the box, because broken shells become a chore fast. If you can only find the ridged kind, that’s fine. They hold sauce well. Just boil them until they bend without snapping, since overcooked shells tear the moment you try to fill them.
Ricotta is worth paying attention to. Whole-milk ricotta gives you a creamier filling and fewer grainy surprises after baking. If the ricotta looks wet in the tub, drain it in a fine-mesh strainer or a cheesecloth-lined sieve for 20 to 30 minutes before using it. That little step saves the texture of the whole pan, especially with spinach, artichokes, or squash fillings.
For the cheese, block mozzarella usually melts better than the pre-shredded stuff because it doesn’t carry the same anti-caking powder. Parmesan should smell sharp and nutty, not stale. And when a recipe uses sauce — marinara, Alfredo, cream sauce, or ranch-buffalo mixture — choose something you’d eat with a spoon. Manicotti is not the place for a weak sauce. The pasta wants enough flavor to carry the filling, not hide it.
Vegetables and seafood need their own checks. Spinach should be squeezed until it feels almost dry. Mushrooms should be cooked until the pan is no longer wet. Artichokes need to be patted dry. Seafood should be firm, cool, and already cooked if the recipe calls for it, because the oven is not the place to “maybe finish” shrimp. Those details are annoying for about five minutes and then they save the entire dish.
How to Serve These Manicotti Dinners
Presentation: Spoon a little extra sauce onto each plate before adding the shells, then finish with grated Parmesan, chopped herbs, or a thin drizzle of olive oil. Warm plates help a baked pasta hold its heat longer, and a clean edge of sauce around the pasta makes the dish look cared for instead of dumped out of a dish.
Accompaniments: A crisp green salad with a sharp vinaigrette is the easiest match for the richer pans, especially the sausage, beef, and Alfredo versions. Garlic bread is the obvious side, and yes, it belongs there. Roasted broccoli, broccolini, asparagus, or a fennel salad also work well because they add crunch next to all that cheese.
Portions: Plan on 2 shells for a lighter eater and 3 shells for a very hungry adult. A standard 12-shell pan usually serves 4 to 6 people, depending on the filling and what else is on the table. If you’re stretching the meal, add salad, bread, and roasted vegetables rather than cutting the shells smaller.
Beverage Pairing: Red-sauce pans go nicely with Chianti, Sangiovese, or another dry red that can handle tomato acidity. White-sauce and seafood versions do well with Pinot Grigio or a dry sparkling wine. If you’re skipping alcohol, a glass of sparkling water with lemon or a lightly bitter Italian soda keeps the meal feeling bright.
Small Upgrades That Change the Whole Pan
Flavor Enhancement: A finishing shower of grated Parmesan and a drizzle of good olive oil right before serving makes almost every version taste more alive. For red-sauce pans, a pinch of crushed red pepper or a little chopped basil wakes up the whole dish. For white-sauce pans, lemon zest or a tiny grating of nutmeg does more than another handful of cheese ever will.
Customization: If you want a looser filling, add a spoonful of milk or cream. If you want more structure, add another egg white or a bit more Parmesan. You can also swap mozzarella for fontina, provolone, or smoked mozzarella depending on how deep you want the flavor to go.
Serving Suggestions: Toasted breadcrumbs on top give you a crunchy finish that people notice immediately. So do fresh herbs. Chives for the seafood pan. Basil for the tomato pans. Sage for the squash version. Don’t overdo garnishes. One clear finish is better than a confetti storm.
Make-It-Yours: For a gluten-free version, use gluten-free manicotti shells if you can find them, or roll the filling into gluten-free lasagna sheets. For a dairy-light pan, use part-skim ricotta and a smaller amount of cheese on top, but keep the sauce generous so the texture doesn’t dry out. For a meatless option that still feels substantial, build the filling around mushrooms, squash, or roasted vegetables rather than simply leaving the shells half empty.
Make-Ahead, Storage, and Reheating Guidance
Most of these manicotti dinners can be assembled ahead and held in the fridge, which is one reason they work so well for Sunday supper. A baked pasta pan usually holds for 3 to 4 days refrigerated if it’s covered tightly. Unbaked, assembled manicotti can sit in the fridge for up to 24 hours before baking. Seafood versions are the exception; I’d keep those to the same day or, at most, overnight, because delicate fillings lose their best texture if they sit too long.
Freezing works too. An assembled unbaked pan can be frozen for up to 2 months if it’s wrapped well in foil and plastic wrap, or sealed in a freezer-safe container if the dish fits. Baked leftovers can also be frozen for about the same time, though the texture of the pasta will be a little softer after reheating. For best results, freeze individual portions with a spoonful of extra sauce over the top. That extra sauce keeps the shells from drying out in the freezer.
Reheat covered in a 350°F (175°C) oven until hot through, usually 20 to 30 minutes for refrigerated portions and closer to 45 minutes for frozen ones. If the top starts to dry before the center is hot, add a splash of water or sauce around the edges and recover with foil. For single servings, the microwave works fine if you cover the plate and stop halfway to stir the sauce a little. White-sauce versions need gentler heat; red-sauce pans are a bit more forgiving.
Variations and Adaptations to Try
Gluten-Free Shell Night: Use gluten-free manicotti shells if you find a brand you trust, but boil them carefully because they can split faster than wheat pasta. If you can’t get shells, roll the filling into gluten-free lasagna noodles and bake the same way. Keep the sauce generous and the bake covered for most of the time.
Dairy-Light Comfort Pan: Use part-skim ricotta, cut the mozzarella by a third, and lean on herbs, garlic, and good tomato sauce for more flavor. The filling will be a little less plush, so don’t skimp on sauce. A little extra Parmesan goes farther than you’d expect.
Meatless But Hearty: Skip the sausage or beef and build the filling around roasted mushrooms, spinach, artichokes, or squash. The trick is to roast or sauté the vegetables until they lose moisture, or the pan will turn watery. A handful of toasted breadcrumbs on top gives the dish more body.
Mild Family Version: Keep buffalo sauce, red pepper flakes, and hot sausage out of the picture, then let people add heat at the table. Sweet sausage, classic ricotta, and plain marinara usually land well with mixed ages. A little basil or parsley goes a long way when the spice level is low.
Coastal Lemon Version: Use the shrimp-and-crab filling, or even the artichoke version, and switch the sauce to a mild cream sauce with extra lemon zest. This style feels lighter and sharper. It’s a good change when you want pasta dinner without the full weight of tomato and cheese.
Common Mistakes to Avoid
Watery filling: This is the one that causes the most trouble. Wet ricotta, under-squeezed spinach, or mushrooms that never cooked down will make the filling leak and the shells slide around. Drain, squeeze, and cool everything before it goes into the bowl.
Boiling the shells too long: Soft shells seem easier, but they tear when you try to stuff them and turn mushy after baking. Cook them until they’re flexible, not fully tender, then stop the cooking with cool water and a little oil.
Under-saucing the dish: A dry manicotti pan is usually a sign that there wasn’t enough sauce under or over the shells. You want the pasta nestled into sauce, not sitting bare in the dish. Keep at least a thin layer on the bottom and enough on top to coat the shells.
Overstuffing the pasta: It’s tempting to load each shell until it looks generous, but too much filling makes the seams split open in the oven. Fill the shells snugly, not tightly. A little extra filling in the bowl is better than a pan full of broken pasta.
Skipping the covered bake: Uncovered manicotti at the beginning often browns before the center gets hot. Foil keeps the steam inside, which helps the shells finish cooking without drying out. Pull the foil only at the end if you want color.
Serving it the second it leaves the oven: This dish needs a short rest. Ten minutes is enough for the filling to settle and the sauce to stop running all over the plate. Skip the rest and you’ll watch the first shell collapse into the dish.
Frequently Asked Questions
Can I use no-boil manicotti shells?
You can, but they work best when the recipe has plenty of sauce and a fairly moist filling. I still like to check the package instructions, because some no-boil shells need more liquid than standard ones. If the pan looks dry before baking, add more sauce rather than hoping the pasta will take care of itself.
How do I fill manicotti without tearing the shells?
A piping bag or a zip-top bag with the corner snipped off makes the job much easier than a spoon. The filling should be thick enough to hold shape, not run like dip. If the pasta cracks, don’t panic; place the seam or break toward the middle of the dish and keep going.
Can I assemble manicotti the day before?
Yes, and that’s one of the reasons the dish is such a good Sunday-supper move. Cover the assembled pan tightly and refrigerate it for up to 24 hours, then bake it straight from the fridge with a few extra minutes in the oven. Let the pan sit on the counter while the oven preheats so it doesn’t go in ice-cold.
Which versions freeze best?
The classic ricotta, sausage and spinach, beef ragù, and roasted vegetable pans freeze well because they use sturdier fillings. Seafood and buffalo chicken are better eaten sooner, since their texture changes more after freezing and reheating. Always wrap the pan tightly so freezer burn doesn’t dry out the pasta edges.
What if my ricotta filling looks loose?
Stir in a little more Parmesan, or let the filling sit for 10 minutes so the cheese absorbs some moisture. If it still seems soft, drain the ricotta before you mix it next time. The filling should hold a mound on a spoon.
Can I swap cottage cheese for ricotta?
Yes, though the texture is a little grainier and the flavor is sharper. Blend it briefly if you want something closer to ricotta, and drain it well first. I prefer ricotta for manicotti, but cottage cheese can do the job in a pinch.
How do I keep the top from drying out?
Make sure the shells have sauce on both the bottom and the top, then keep the pan covered for most of the bake. If the cheese starts browning before the center is hot, re-cover the dish with foil. A spoonful of sauce added after reheating helps a lot too.
What sides work best with manicotti dinner?
A crisp salad, roasted broccoli, or garlicky green beans are the easiest matches. Bread belongs there if you like it, but a vegetable side keeps the plate from feeling too heavy. For the richer pans, a sharp salad dressing helps the whole meal feel balanced.
A Sunday Table Worth Repeating
Manicotti has a way of making a normal dinner feel a little more deliberate. The pan comes to the table bubbling and soft-edged, the filling stays creamy, and the sauce does what sauce is supposed to do: hold everything together without showing off. That’s why these manicotti dinners work for Sunday suppers. They’re generous without being fussy.
Keep one tomato version in rotation, one white-sauce version, and one that leans on vegetables or seafood, and you’ve got a family of dinners that can stretch across a lot of moods. Some nights want sausage. Some want lemon. Some want a pan of ricotta and basil with nothing more than salad and bread beside it. The format takes all of it.
Make one this week, and save the leftovers if you have any. They tend to disappear faster than they should.
| Recipe | Prep Time | Cook Time | Total Time | Servings | Standout Detail |
|---|---|---|---|---|---|
| Classic Ricotta Manicotti with Slow-Simmered Marinara | 20 min | 35 min | 55 min | 6 servings | clean, classic Sunday-supper flavor |
| Sausage and Spinach Manicotti | 25 min | 40 min | 1 hr 5 min | 6 servings | savory sausage and well-seasoned greens |
| Chicken Alfredo Manicotti | 20 min | 35 min | 55 min | 6 servings | the creamiest white-sauce pan |
| Beef and Three-Cheese Manicotti | 25 min | 40 min | 1 hr 5 min | 6 servings | hearty beef with a rich cheese finish |
| Spinach and Mushroom Manicotti with Cream Sauce | 30 min | 40 min | 1 hr 10 min | 6 servings | earthy mushrooms with silky béchamel |
| Pesto Ricotta and Mozzarella Manicotti | 20 min | 35 min | 55 min | 6 servings | bright basil flavor in every bite |
| Butternut Squash and Sage Manicotti | 35 min | 45 min | 1 hr 20 min | 6 servings | sweet squash with a sage edge |
| Shrimp, Crab, and Lemon Manicotti | 25 min | 30 min | 55 min | 4 to 6 servings | the lightest, most delicate filling |
| Buffalo Chicken Manicotti | 20 min | 33 min | 53 min | 6 servings | spicy, creamy, and fast to disappear |
| Lasagna-Style Manicotti with Meat Sauce | 30 min | 40 min | 1 hr 10 min | 6 servings | ragù flavor with stuffed-pasta shape |
| Roasted Vegetable and Ricotta Manicotti | 30 min | 35 min | 1 hr 5 min | 6 servings | roasted vegetables with real depth |
| Artichoke, Lemon, and Parmesan Manicotti | 20 min | 33 min | 53 min | 6 servings | bright, briny, and a little sharper than the rest |