
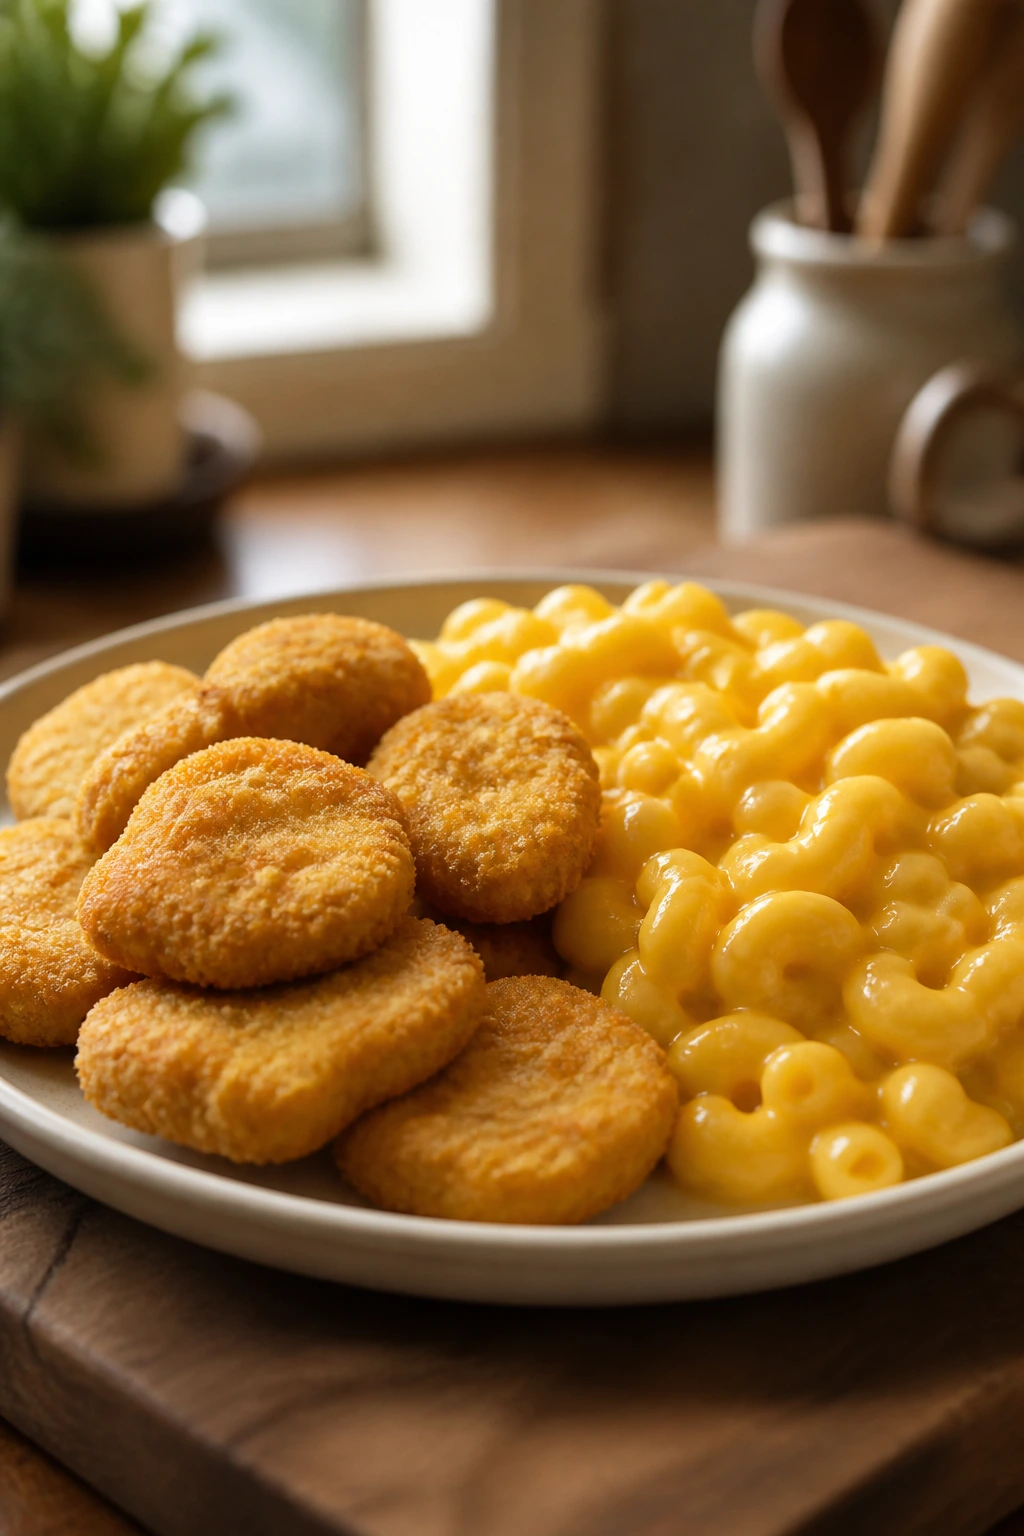
Chicken dinners picky kids will eat usually win for one reason: they look familiar before they even touch the plate. A crisp tender, a cheesy bake, a slider on a soft bun — those are foods kids can read at a glance. No guessing. No mystery.
Most picky eaters are not asking for a culinary adventure at six o’clock on a weeknight. They want soft or crunchy in predictable places, sauce they recognize, and nothing that smells like a dare. That’s why chicken shows up so often at family tables: it can be breaded, shredded, baked, folded into tortillas, tucked into pasta, or glazed with something sweet enough to feel friendly.
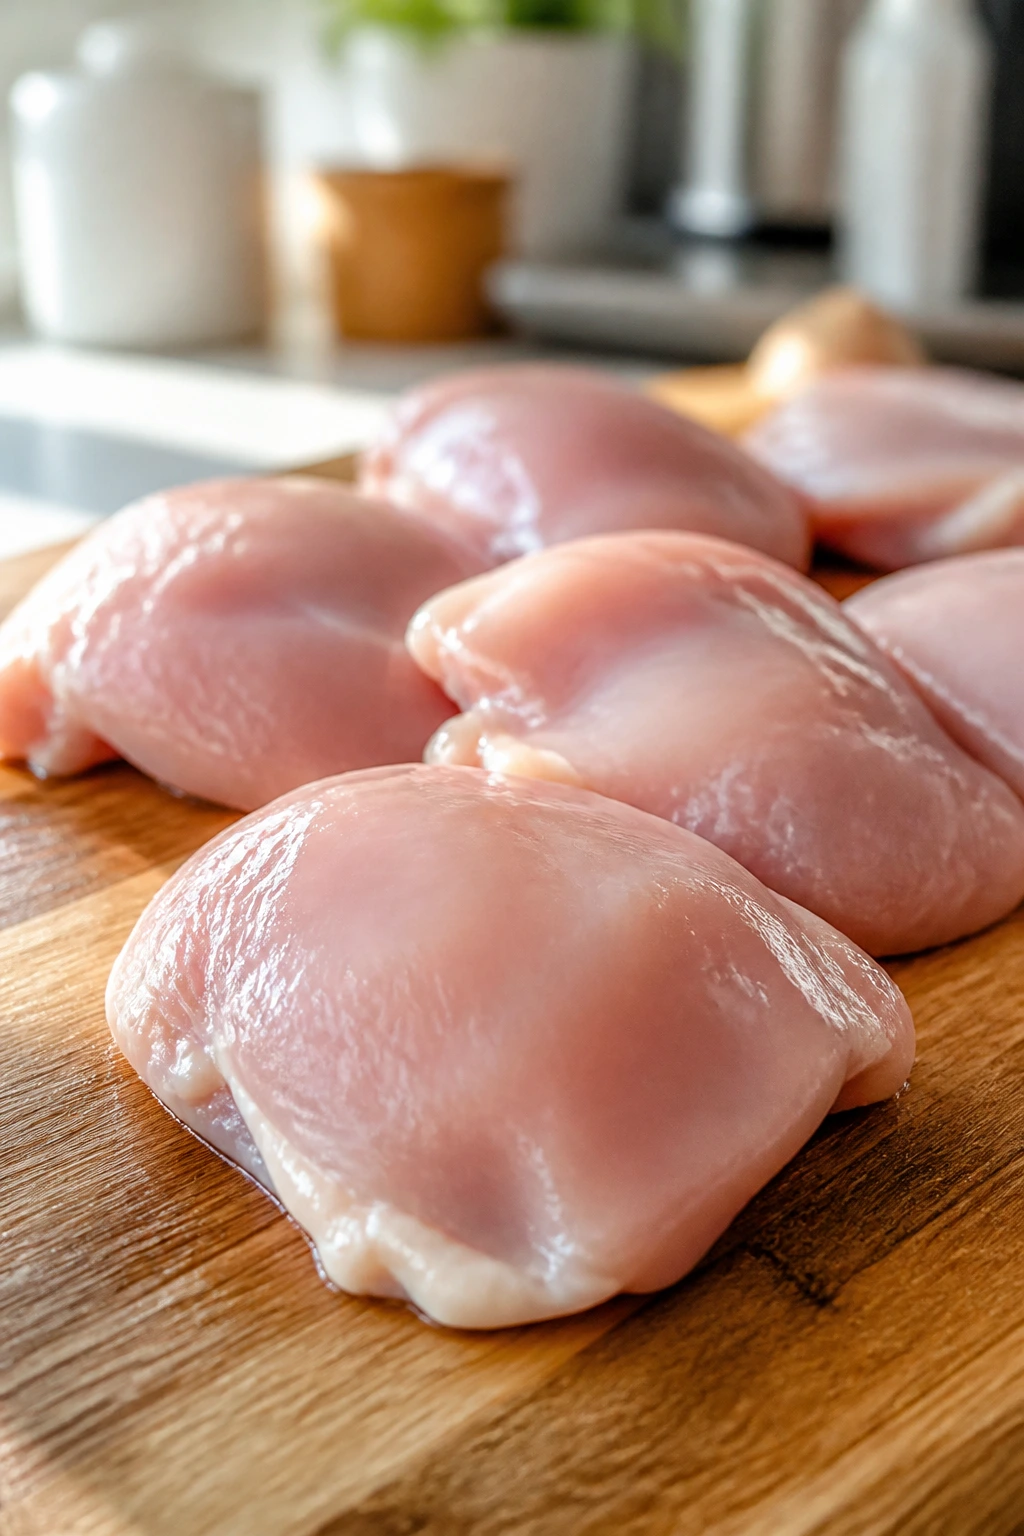
The smartest chicken dinners for kids don’t hide behind tricks. They keep the flavors mild, the textures clear, and the portions easy to hold with little hands. And yes, the chicken should still reach 165°F in the thickest piece — no guessing, no crossing fingers, no hoping the middle looks “probably done.”
These 22 ideas lean hard on that logic. Some are fast skillet meals, some bake in one dish, and a few use the slow cooker when the evening has already gone sideways. The common thread is simple: these are dinners that usually come back with empty trays and a little pride.
Why These Chicken Dinners Work for Picky Kids
-
Familiar shapes help: Tenders, sliders, quesadillas, meatballs, and casseroles feel recognizable before the first bite, which lowers the resistance level fast.
-
Mild flavor beats loud flavor: Garlic powder, cheddar, butter, barbecue sauce, honey, and ranch carry enough taste to keep adults happy without scaring off cautious kids.
-
Texture matters more than people think: Crispy edges, soft noodles, gooey cheese, and tender shredded chicken are easier wins than anything watery or mushy.
-
Dipping makes dinner feel safer: Ketchup, ranch, honey mustard, salsa, and gravy let kids control each bite instead of committing to a sauced-up plate.
-
Leftovers still have a job: Several of these recipes reheat well, and a few taste even better after the sauce settles overnight.
-
Cleanup stays sane: Sheet pans, skillets, casseroles, and slow cookers keep the sink from turning into a second dinner.
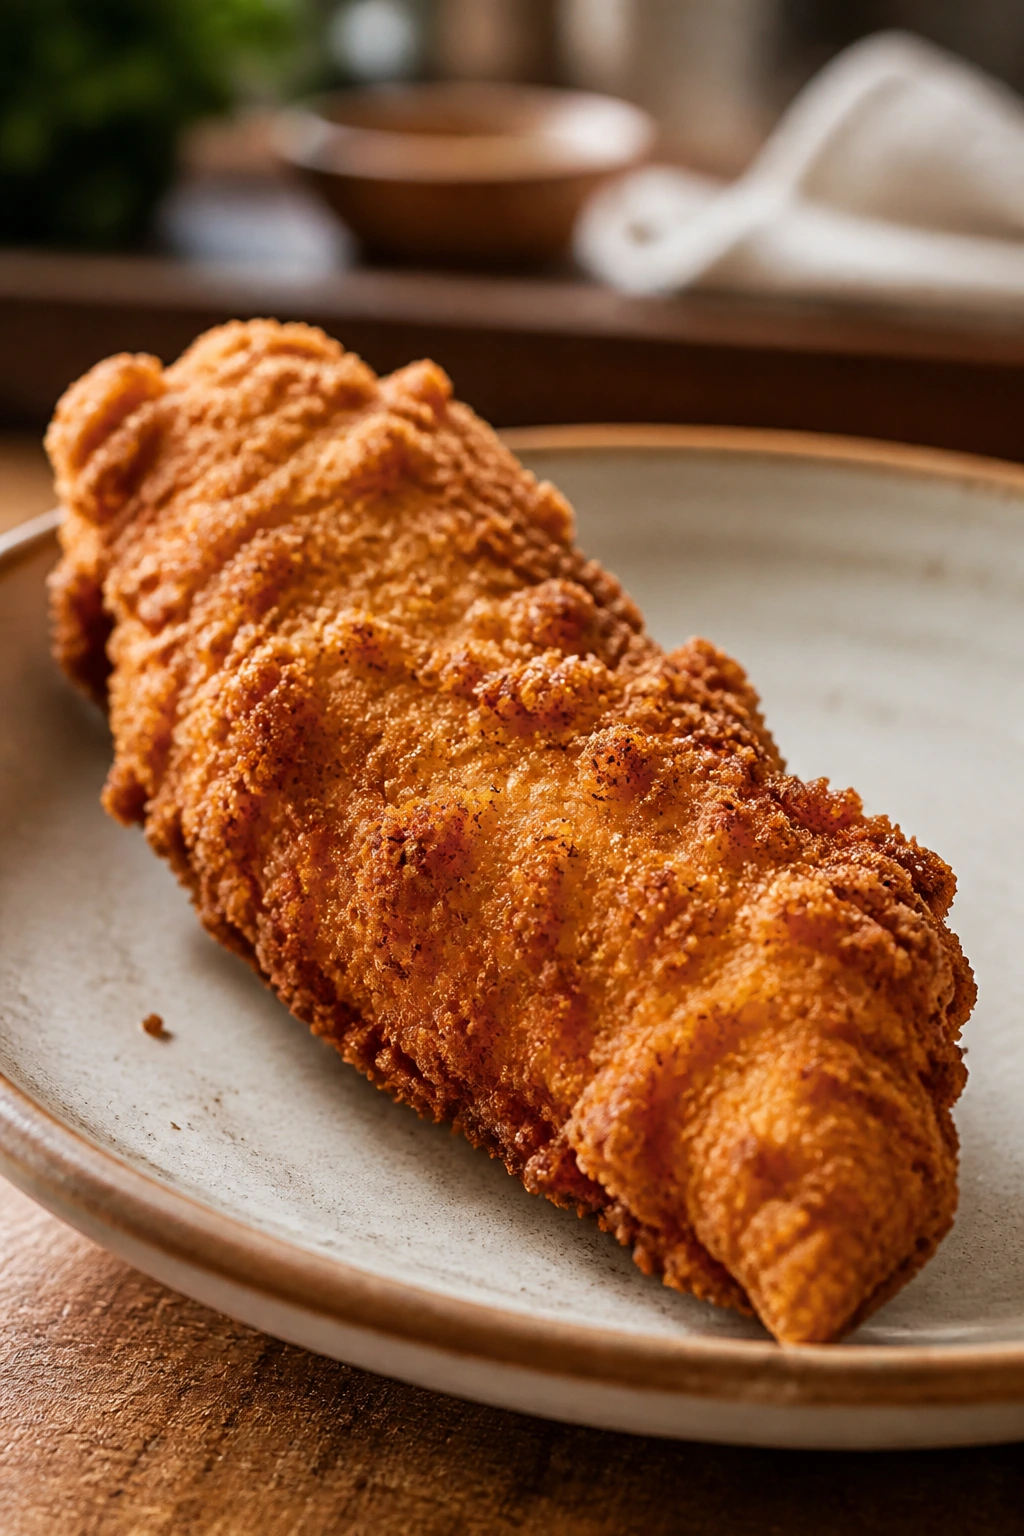
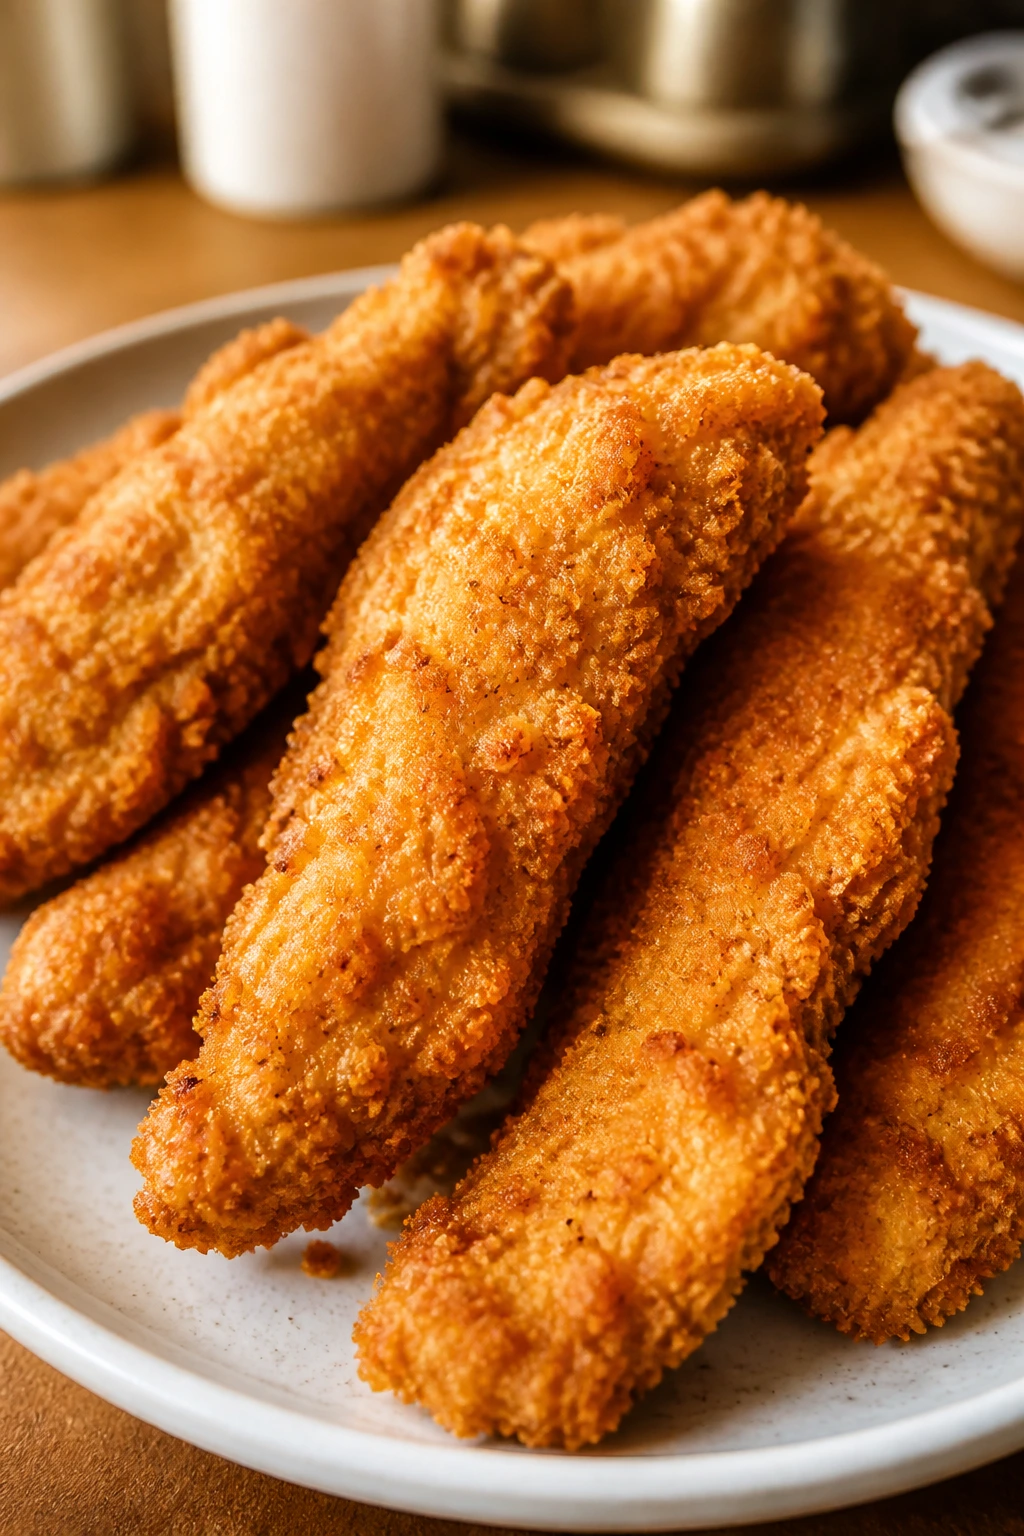
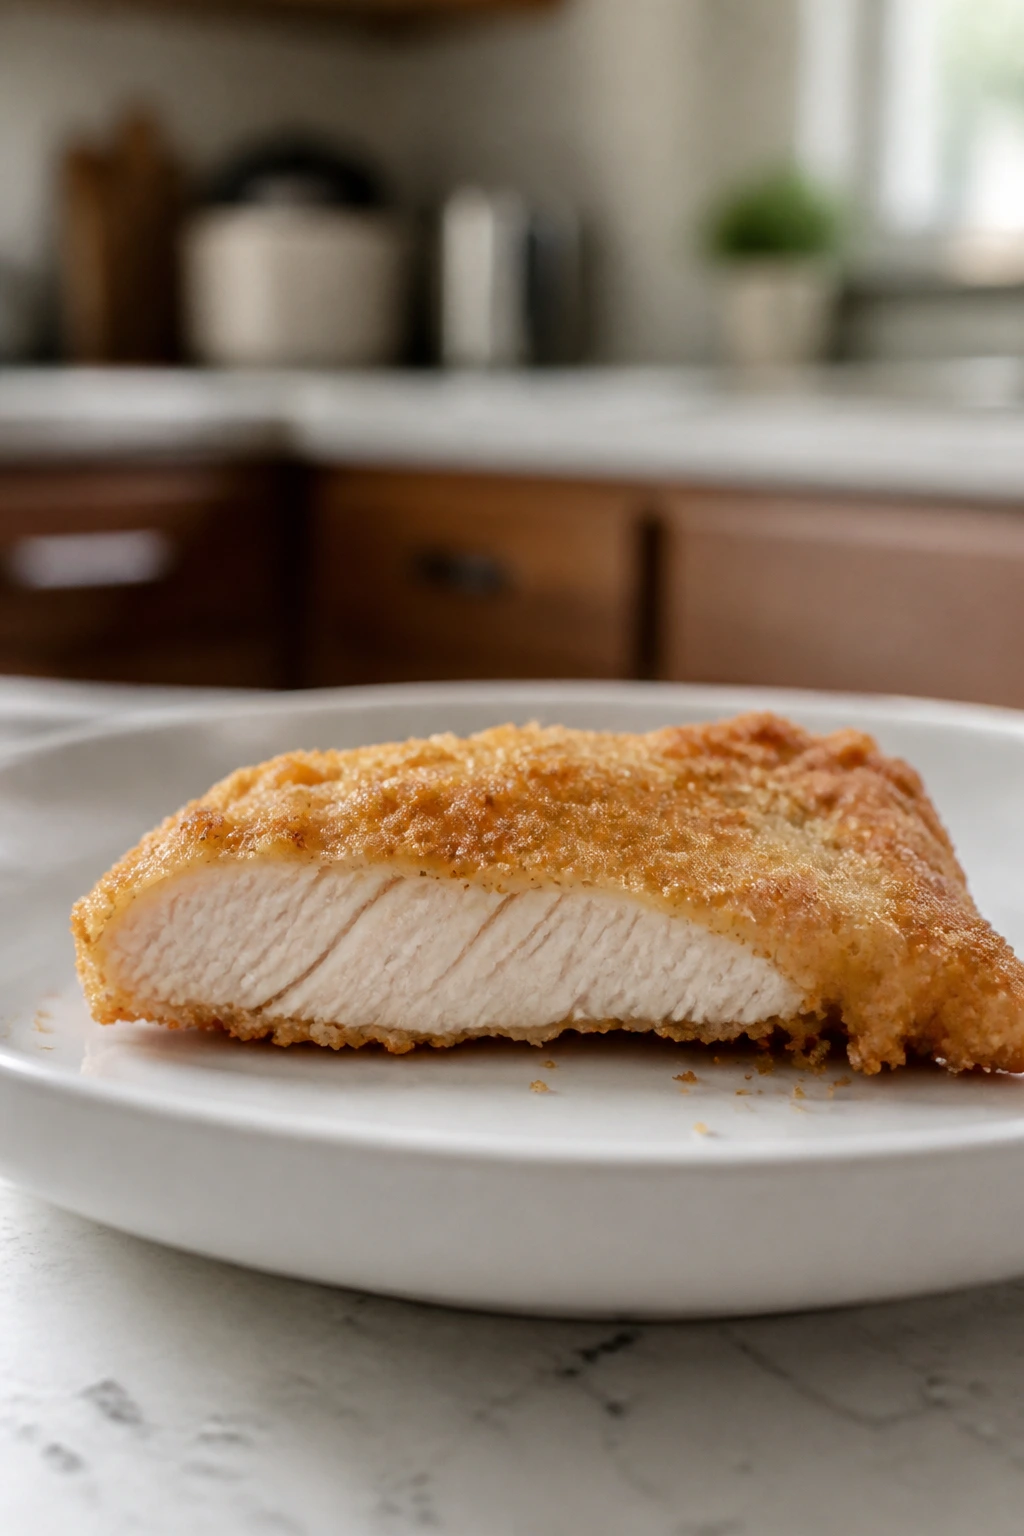
1. Crispy Oven Chicken Tenders with Parmesan
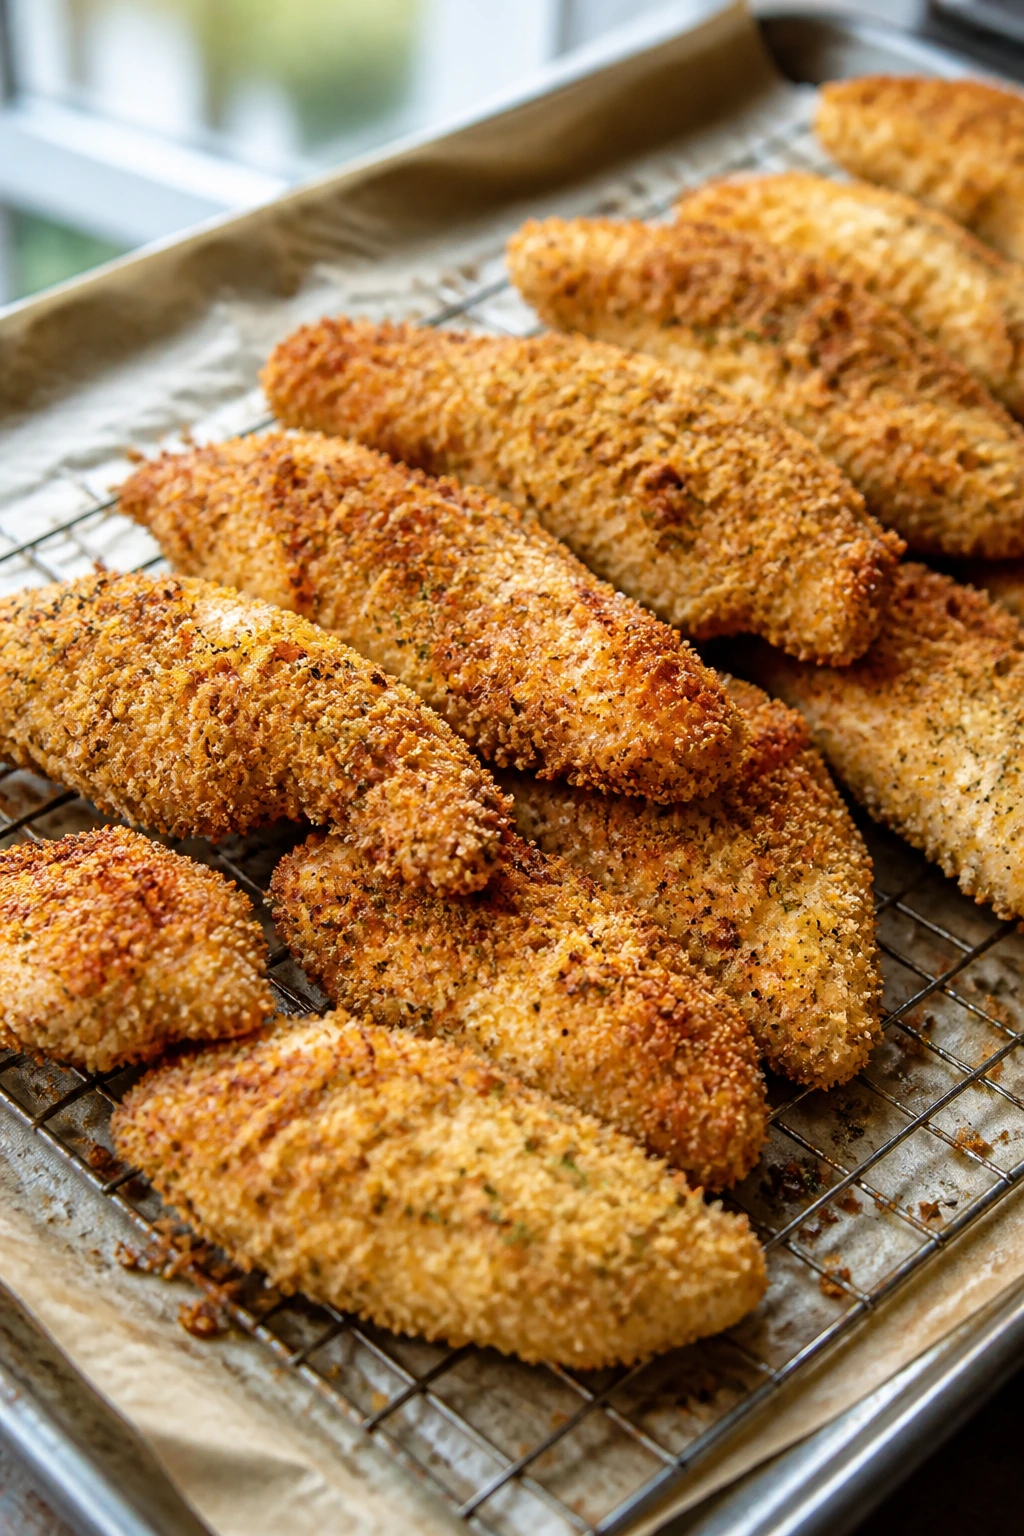
A plate of chicken tenders has a funny kind of power. It looks plain, then the first bite hits with a crunchy, salty crust and juicy chicken underneath, and suddenly the “no thanks” kid becomes suspiciously quiet.
Why It Works
This version leans on a panko-Parmesan coating, which bakes up crisp without the oil smell or the mess of frying. The tenders cook fast, stay juicy, and feel familiar enough that even cautious eaters usually give them a chance. A hot oven — 425°F — does most of the heavy lifting, and a wire rack helps the bottoms stay crisp instead of soggy.
Key Ingredients
- 1½ pounds chicken tenders: Use thin, even pieces so they cook at the same speed.
- 1 cup panko breadcrumbs: The lighter crumbs give you the crunch kids notice first.
- ½ cup finely grated Parmesan: Choose the fine stuff so it sticks well.
- ½ cup all-purpose flour: Helps the egg grab onto the chicken.
- 2 large eggs: Beat until smooth for an even coating.
- 1 teaspoon garlic powder: Keeps the flavor mild and familiar.
- 1 teaspoon kosher salt: Enough to season the coating without making it harsh.
- ½ teaspoon black pepper: Optional for younger palates, but nice for older kids.
- Cooking spray or olive oil spray: Helps the crust brown in the oven.
Quick Steps
- Preheat and set up: Heat the oven to 425°F and place a wire rack on a sheet pan. Line it with foil if you want easier cleanup.
- Build the breading station: Put flour in one bowl, beaten eggs in a second, and panko mixed with Parmesan, garlic powder, salt, and pepper in a third.
- Coat the chicken: Dredge each tender in flour, dip in egg, then press into the crumb mixture until fully covered.
- Arrange and spray: Lay the tenders on the rack with space between them, then mist the tops lightly with oil spray.
- Bake until crisp: Bake for 15 to 18 minutes, flipping once halfway through, until the crust is golden and the chicken reaches 165°F.
- Rest for a minute: Let them sit briefly so the coating settles instead of sliding off.
Tips and Variations
- Dipping Sauce: Serve with ketchup, honey mustard, or ranch on the side.
- Air Fryer Swap: Cook at 400°F for about 10 to 12 minutes if you want a faster, extra-crisp version.
- Kid Fix: Cut bigger tenders into strips before breading if your child likes smaller bites.
2. Honey Butter Chicken Bites
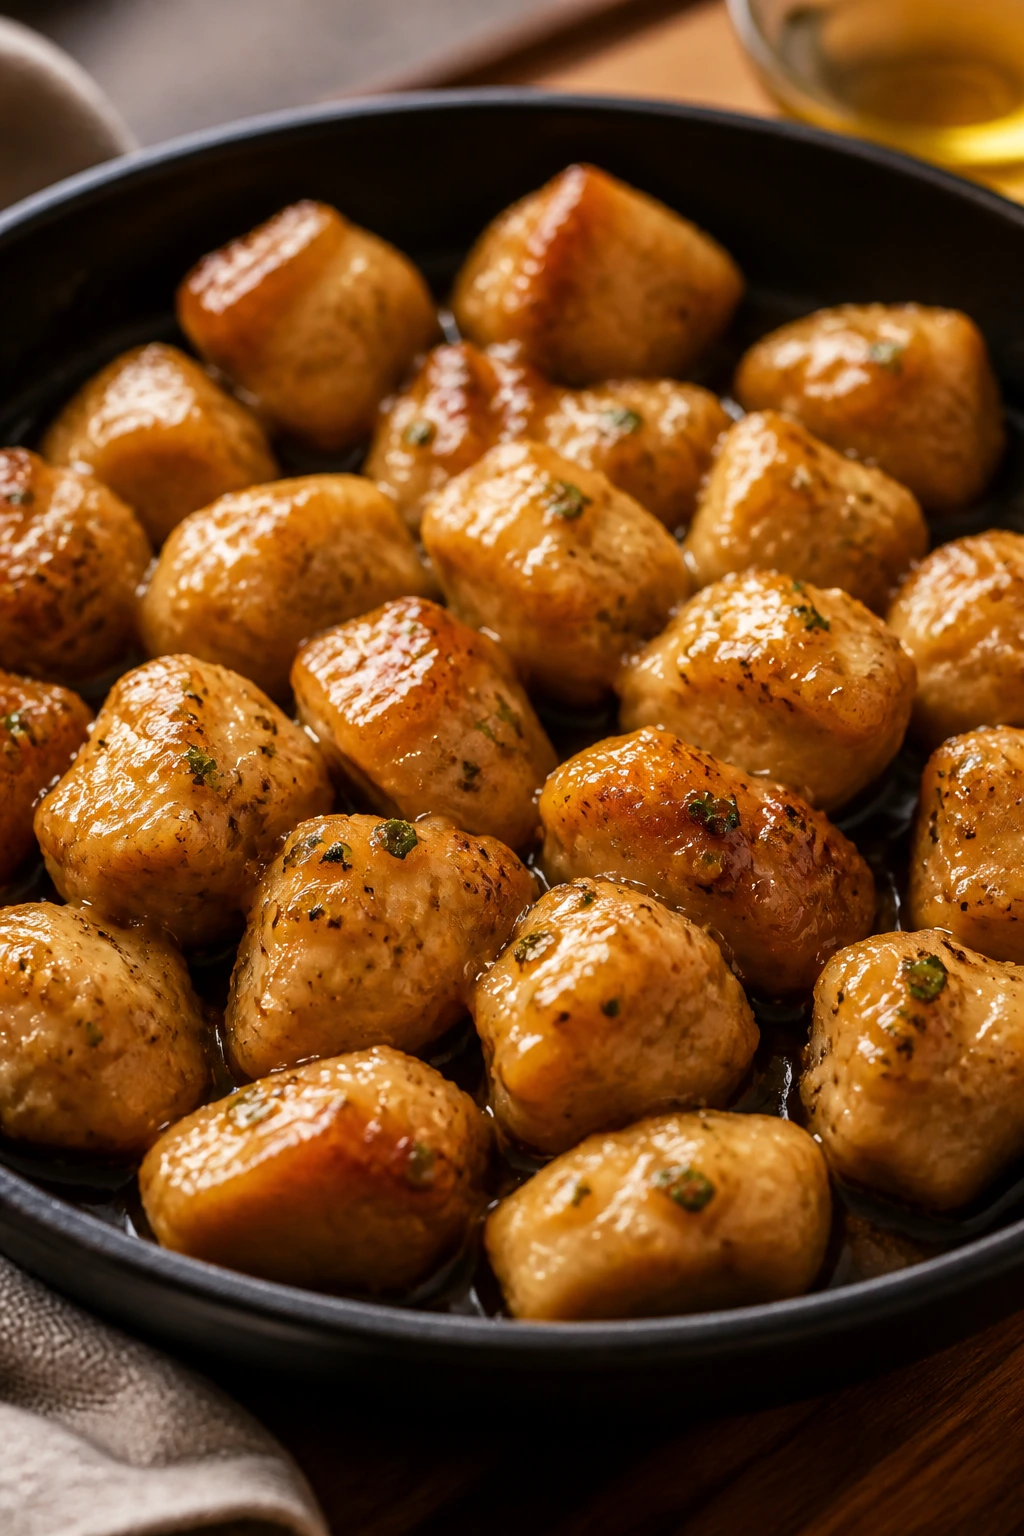
This is the kind of skillet dinner that smells like dinner is already going your way. Sweet, glossy, and a little buttery, these chicken bites stay soft inside and lightly sticky on the outside.
Why It Works
Cutting chicken into bite-size pieces speeds up the cooking and makes the whole thing easier to eat, which matters more than people admit. A light dusting of cornstarch helps the outside brown, while the honey-butter sauce clings in a thin layer instead of flooding the pan. Kids who dodge “saucy” food often do better when the coating is sweet, not spicy, and easy to recognize.
Key Ingredients
- 1½ pounds boneless, skinless chicken breasts or thighs: Thighs stay juicier; breasts are a little leaner.
- 2 tablespoons cornstarch: Gives the bites a light crust.
- 1 teaspoon garlic powder: Keeps the flavor mellow.
- 1 teaspoon kosher salt: Seasons the chicken before it hits the pan.
- 2 tablespoons butter: Used for both browning and the sauce.
- 2 tablespoons honey: Brings the sweet, kid-friendly finish.
- 1 tablespoon low-sodium soy sauce: Adds depth without making it taste like takeout.
- 1 teaspoon apple cider vinegar: Keeps the sauce from tasting flat.
- 1 tablespoon oil: Helps the chicken sear cleanly.
Quick Steps
- Coat the chicken: Toss the chicken pieces with cornstarch, garlic powder, and salt until lightly dusted.
- Brown the bites: Heat oil in a large skillet over medium-high heat and cook the chicken for 3 to 4 minutes per side until golden.
- Check doneness: Keep cooking until the centers reach 165°F and the juices run clear.
- Make the sauce: Lower the heat, add butter, honey, soy sauce, and vinegar, and stir until it bubbles and thickens slightly.
- Toss and glaze: Return the chicken to the skillet and turn it through the sauce until every piece looks shiny.
- Serve right away: The glaze is best when warm and loose, not clumpy.
Tips and Variations
- Serve Over Rice: Plain white rice catches the sauce and makes the dish feel complete.
- Add Garlic Rice: Stir a little butter and garlic powder into the rice for a stronger flavor bridge.
- Sauce Note: If your child likes things less sweet, cut the honey to 1 tablespoon and add an extra splash of soy sauce.
3. Cheesy Chicken and Rice Casserole
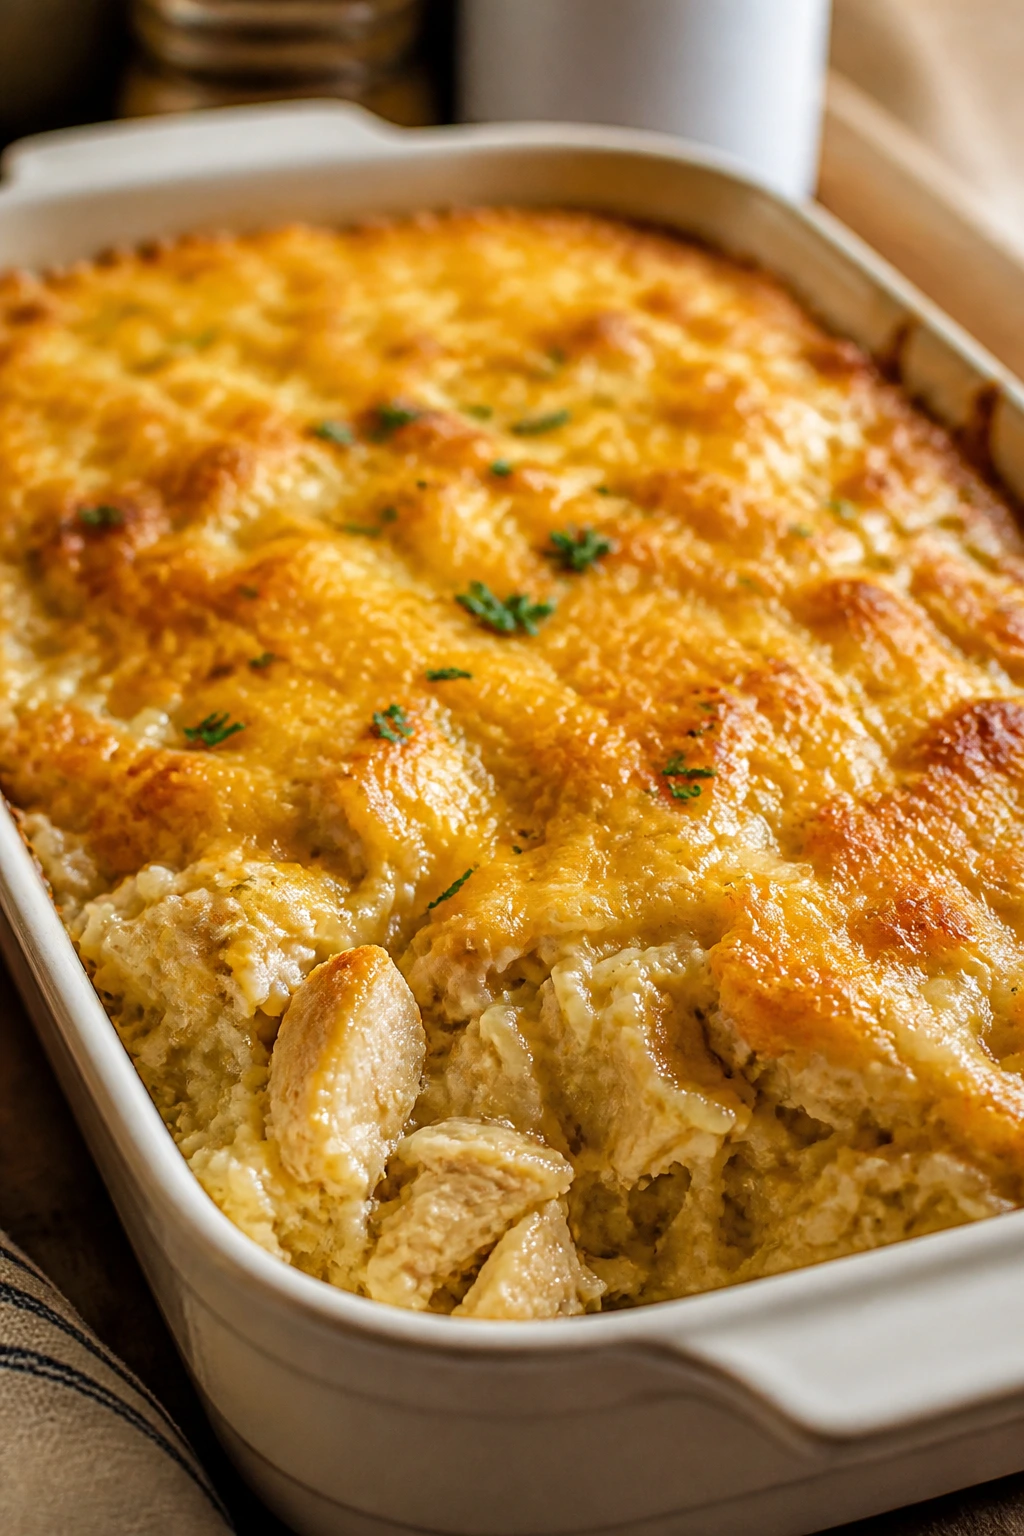
There’s a reason this kind of casserole keeps showing up at family tables. It’s soft, creamy, and bland in the best sense of the word — in other words, easy to love.
Why It Works
Rice casserole is one of the easiest ways to turn a small amount of chicken into a full dinner that feels abundant. The rice soaks up broth and creaminess while the cheese melts into the top layer, which gives you both soft and slightly browned textures in the same pan. Picky kids often like that the flavors stay predictable from the first forkful to the last.
Key Ingredients
- 1¼ cups uncooked long-grain white rice: It cooks evenly and stays fluffy.
- 2 cups cooked, shredded chicken: Rotisserie chicken works well here.
- 1 can (10½ ounces) cream of chicken soup: Keeps the casserole creamy and kid-friendly.
- 2 cups chicken broth: Helps the rice cook all the way through.
- 1 cup sour cream: Adds richness without making the dish heavy.
- 1½ cups shredded cheddar: Mild cheddar melts smoothly.
- 1 teaspoon onion powder: Gives flavor without chopped bits.
- 1 cup frozen peas, optional: A soft add-in if your kids accept green things.
Quick Steps
- Preheat the oven: Set it to 375°F and grease a 9×13-inch baking dish.
- Mix the base: Stir the rice, chicken, soup, broth, sour cream, onion powder, and half the cheese together in the dish.
- Cover and bake: Cover tightly with foil and bake for 35 minutes.
- Add the top layer: Remove the foil, stir once, then scatter the rest of the cheese on top.
- Finish baking: Bake uncovered for 10 more minutes, until the rice is tender and the cheese is melted and lightly golden.
- Rest before serving: Let it sit for 5 to 10 minutes so it firms up enough to scoop cleanly.
Tips and Variations
- Texture Fix: If the rice looks dry before the end, splash in ¼ cup broth and keep baking.
- Veggie Swap: Finely chopped steamed broccoli can replace the peas if that’s the vegetable your household tolerates.
- Extra Comfort: A few buttered cracker crumbs on top add a crisp finish.
4. Mild Chicken Quesadillas
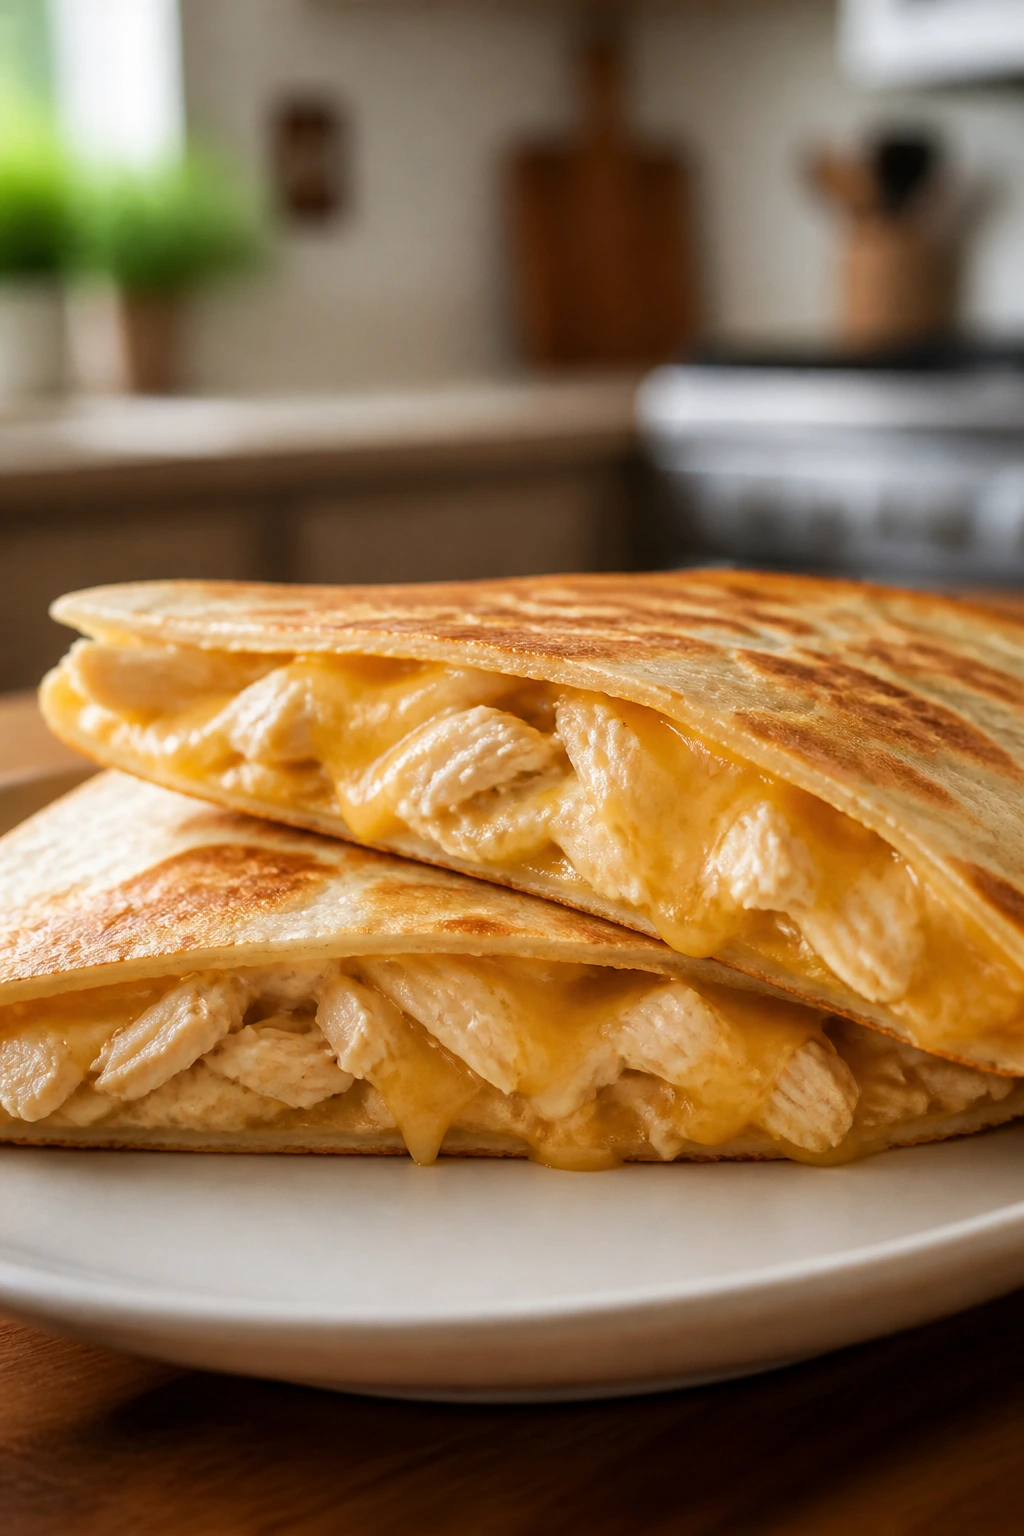
Quesadillas are the kind of dinner that disappear without much discussion. They’re warm, cheesy, and easy to hold, which already puts them ahead of anything that needs a fork and a pep talk.
Why It Works
The tortilla gives kids a familiar hand-held shape, while the melted cheese acts as glue for the chicken. Keeping the filling mild matters here; too much salsa or spice and the whole thing turns into a negotiation. A hot skillet creates crisp spots on the tortilla, and those browned edges are usually the part kids remember.
Key Ingredients
- 4 large flour tortillas: Soft tortillas fold and crisp nicely.
- 2 cups cooked shredded chicken: Chop it small for easier bites.
- 2 cups shredded Monterey Jack or mild cheddar: Both melt smoothly.
- 2 tablespoons cream cheese: Helps the filling stay creamy.
- ⅓ cup mild salsa: Use only if your kids like a little moisture in the filling.
- 1 teaspoon mild taco seasoning: Optional, but useful for a gentle flavor lift.
- 1 tablespoon butter: For the skillet.
- Sour cream, for serving: Keeps the plate friendly for cautious eaters.
Quick Steps
- Mix the filling: Stir the chicken, cream cheese, salsa, and taco seasoning together in a bowl.
- Heat the skillet: Melt butter in a large skillet over medium heat.
- Build the quesadilla: Lay one tortilla in the pan, sprinkle cheese over half, add the chicken mixture, then more cheese on top.
- Fold and cook: Fold the tortilla over and cook for 2 to 3 minutes per side until the outside is golden and the cheese melts.
- Slice and serve: Rest for 1 minute, then cut into wedges with a pizza cutter or sharp knife.
Tips and Variations
- Low-Mess Option: Skip the salsa if your child prefers a drier filling.
- Make-Ahead Move: Assemble and refrigerate for a few hours, then cook straight from the fridge.
- Dip Idea: Serve with plain Greek yogurt or sour cream if salsa feels too bold.
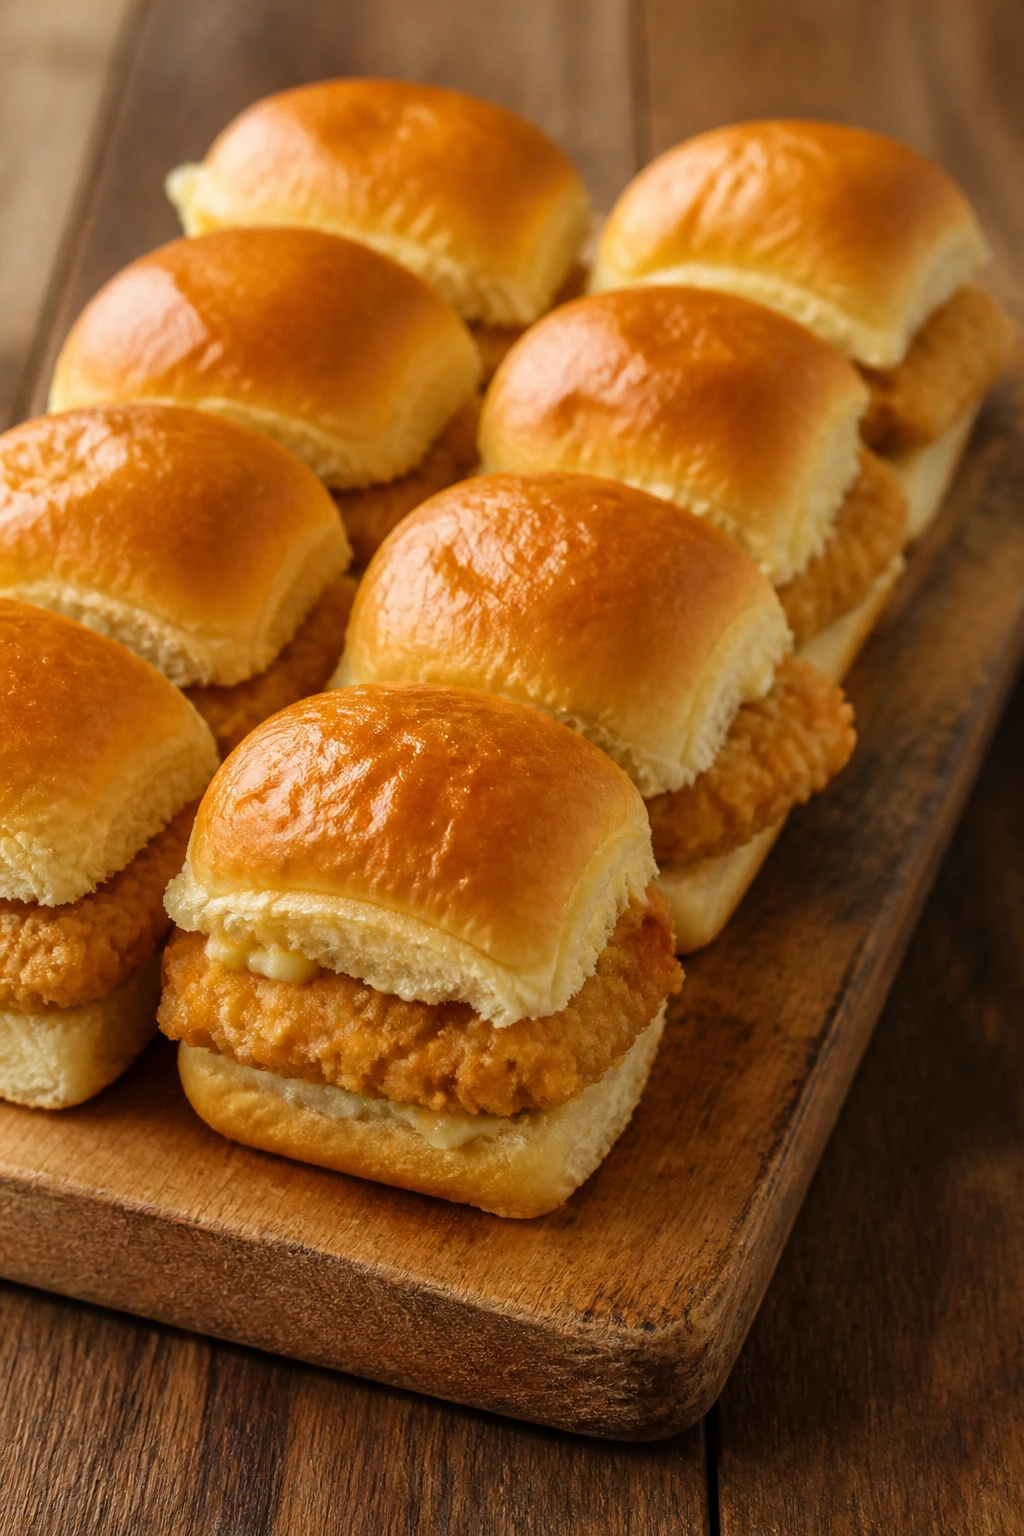
5. BBQ Chicken Sliders
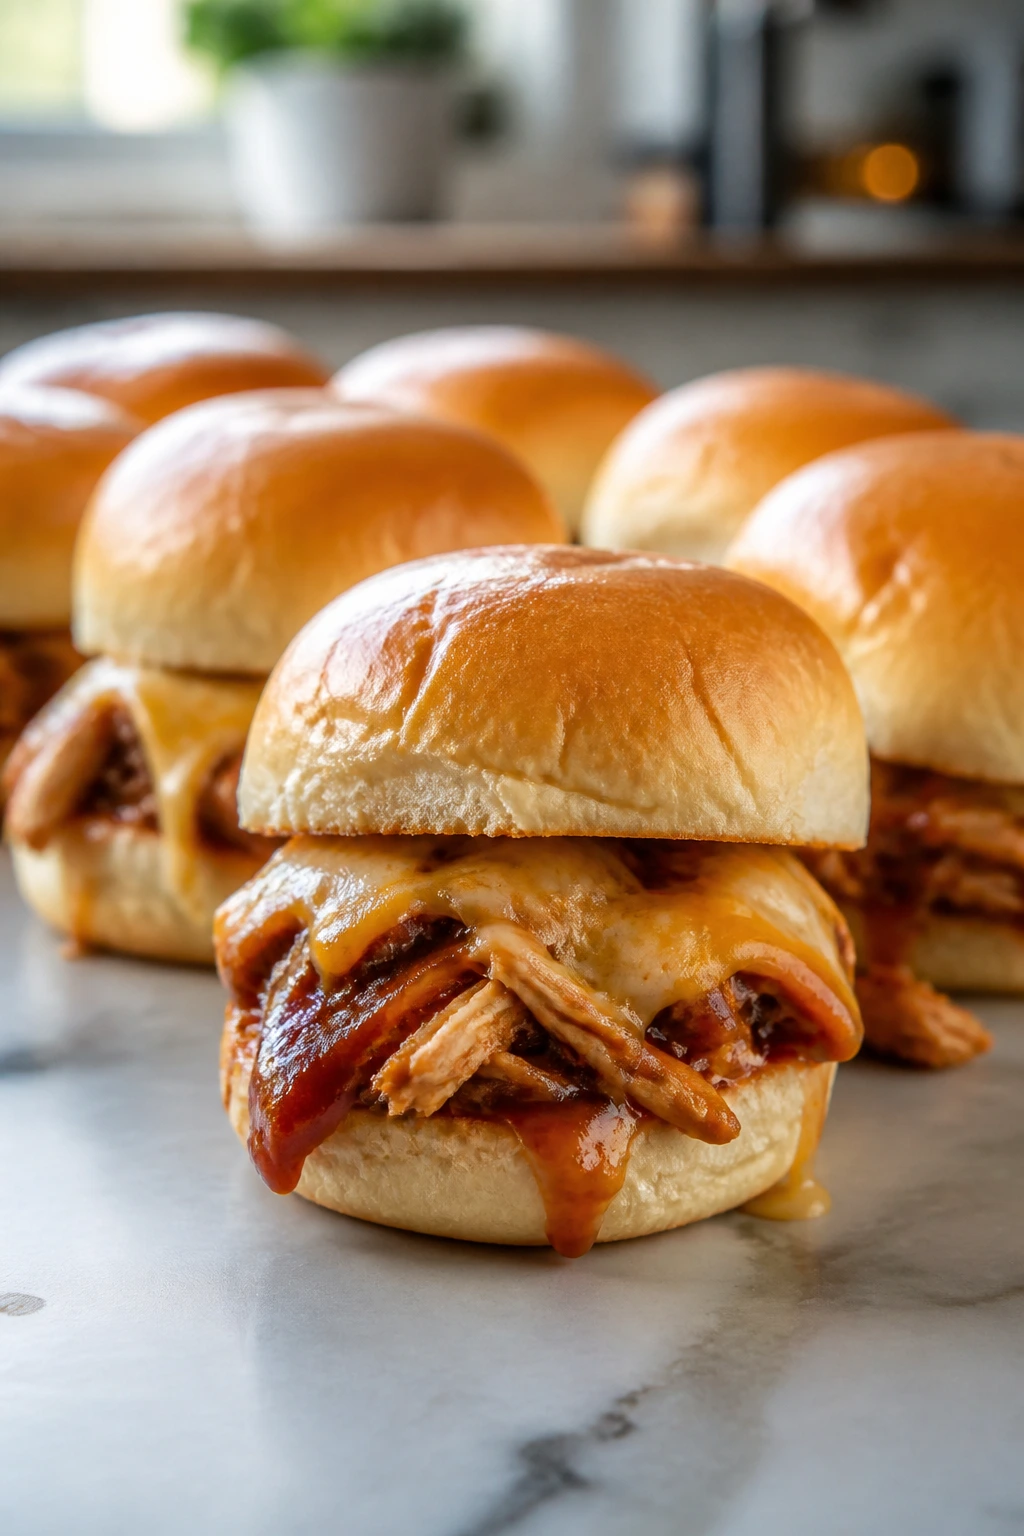
These are messy in the exact way kids like. Soft rolls, sweet barbecue sauce, and melted cheese turn shredded chicken into something that feels like a treat without requiring a knife.
Why It Works
Slider buns do a lot of the work here. They’re soft, sweet, and easy to split, and the chicken stays tender because it’s shredded instead of sliced. Barbecue sauce brings a gentle sweetness, which usually reads as friendly even to very cautious eaters. The whole tray bakes together, so the cheese melts into the bread a little and gives the tops that glossy, pulled-apart look.
Key Ingredients
- 3 cups cooked shredded chicken: Rotisserie chicken keeps this fast.
- 1 cup barbecue sauce: Choose a sweet, mild sauce rather than a smoky-hot one.
- 1 tablespoon butter: Helps coat the buns and add flavor.
- 8 slider buns: Hawaiian rolls work especially well.
- 6 slices cheddar cheese: Mild cheddar melts cleanly.
- ¼ cup finely diced onion, optional: Leave it out if your kids object to onion bits.
- 1 tablespoon brown sugar: Optional for a sweeter sauce.
- 1 teaspoon Worcestershire sauce: Adds depth without changing the flavor too much.
Quick Steps
- Preheat the oven: Heat to 375°F and lightly grease a baking dish.
- Warm the filling: Stir the chicken, barbecue sauce, brown sugar, and Worcestershire sauce together in a skillet over low heat.
- Split the buns: Cut the slider buns in half and set the bottoms in the dish.
- Layer and top: Spoon on the chicken, add cheese, then place the bun tops over everything.
- Brush and bake: Brush the tops with melted butter and bake for 12 to 15 minutes until the cheese melts and the tops turn golden.
- Serve warm: Pull them apart while the cheese is still stretchy.
Tips and Variations
- Crunch Option: Add a few pickles on the side instead of inside the slider if your kids like them.
- Kid-Safe Version: Use a very mild barbecue sauce and skip the onion.
- Party Trick: Slice each slider in half before serving so little hands have an easier time.
6. Creamy Chicken Noodle Skillet
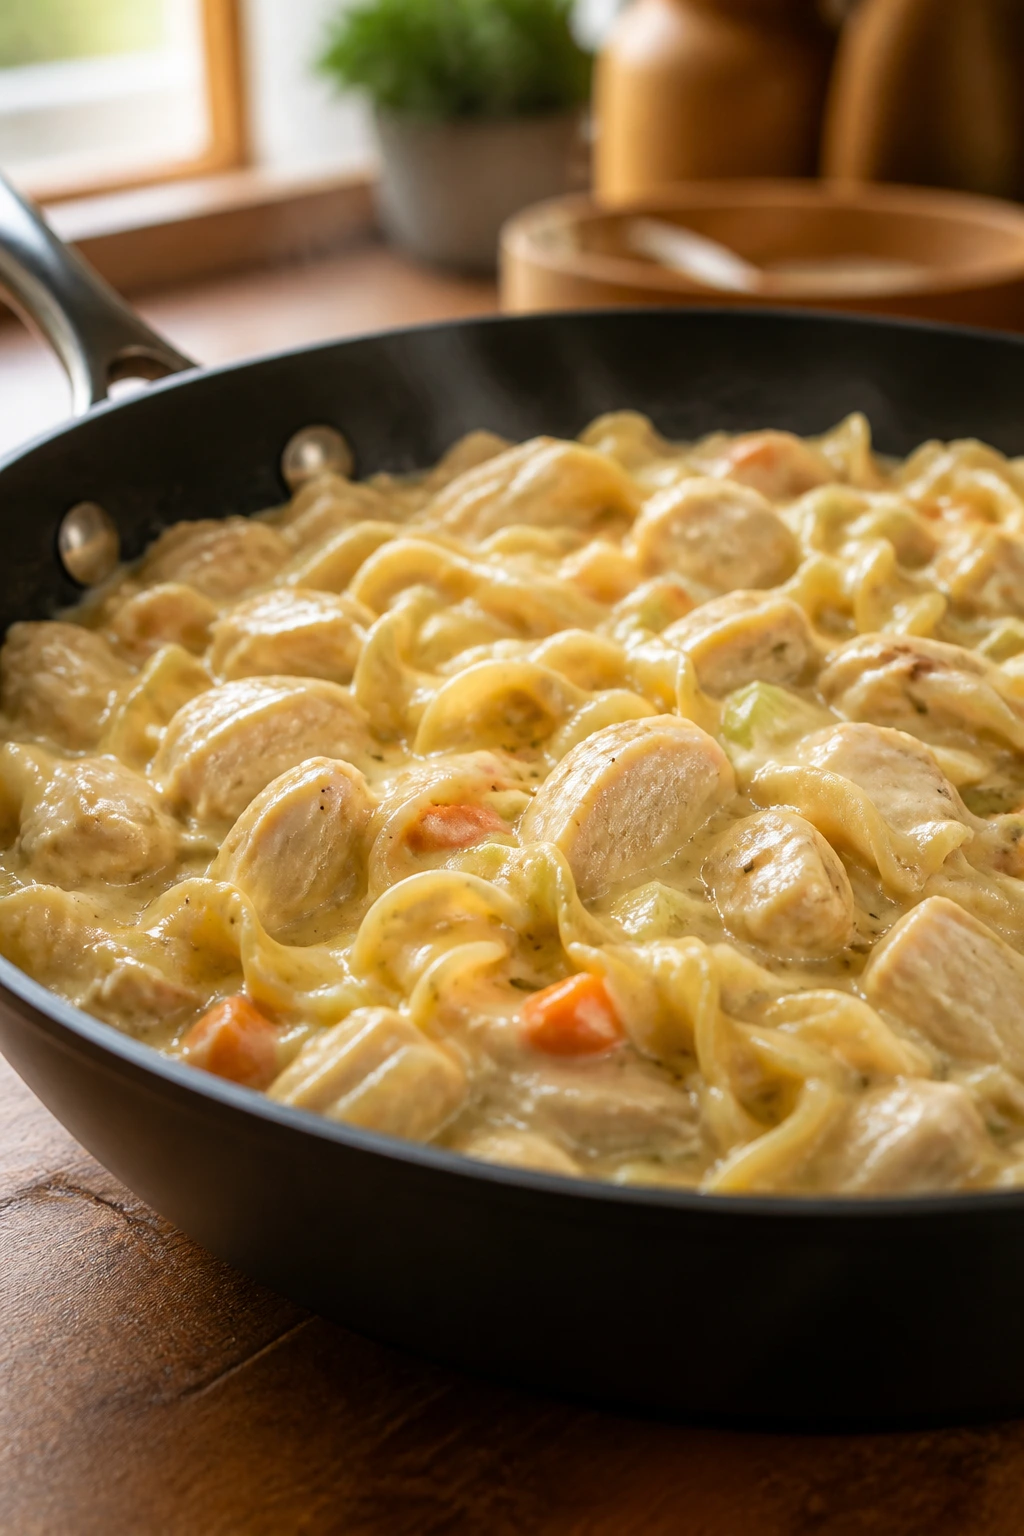
This one tastes like the friendly side of chicken soup, only thicker, richer, and much more likely to hold a child’s attention. The noodles soak up the sauce, and the whole skillet smells like butter and dinner.
Why It Works
Egg noodles cook fast and stay soft, which is exactly why they work so well here. A creamy broth keeps everything comforting without turning the dish into a heavy casserole, and the carrots stay small enough to blend in rather than dominate. The texture is gentle from the first spoonful, which helps when a child is suspicious of anything with too many parts.
Key Ingredients
- 8 ounces egg noodles: The wide noodles catch the sauce nicely.
- 2 cups diced cooked chicken: Small pieces are easier for kids to manage.
- 1 tablespoon butter: For the vegetables and base flavor.
- 1 carrot, finely diced: Adds sweetness and color.
- 1 celery stalk, finely diced: Keep the pieces tiny if your kids notice crunch.
- 3 cups chicken broth: The noodles cook right in it.
- 1 cup milk: Makes the sauce creamy.
- 2 ounces cream cheese: Helps thicken the skillet.
- 1 teaspoon dried thyme: Use a light hand so it stays subtle.
Quick Steps
- Soften the vegetables: Melt butter in a large skillet over medium heat and cook the carrot and celery for 3 to 4 minutes.
- Add the broth and noodles: Pour in broth, milk, and noodles, then bring to a gentle simmer.
- Cook until tender: Stir often and cook for 8 to 10 minutes until the noodles are soft and the liquid thickens.
- Stir in the chicken: Add the chicken, cream cheese, and thyme, then keep stirring until the cream cheese melts.
- Finish and serve: Taste for salt, then ladle into bowls while it’s hot and silky.
Tips and Variations
- Extra Creamy: Stir in a handful of shredded cheddar if your family likes a richer sauce.
- Veggie Hideout: Finely grated zucchini disappears well in the broth.
- Leftover Move: Add a splash of broth when reheating, because noodles keep drinking up liquid.
7. Chicken Broccoli Pasta Bake
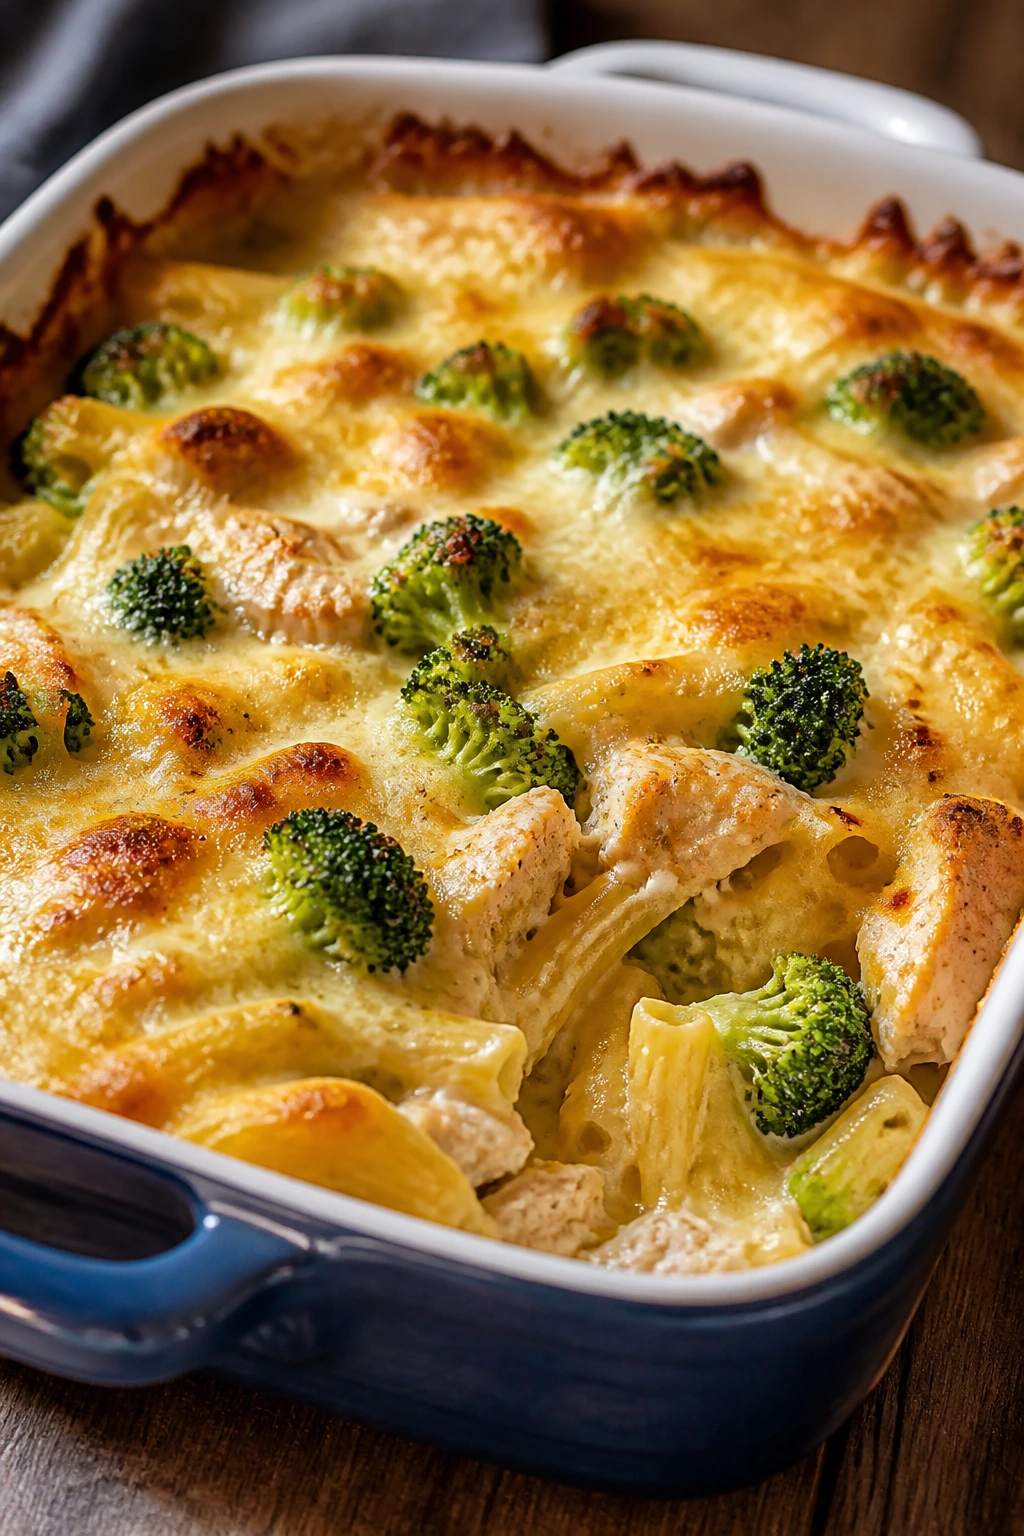
Some casseroles are all comfort and no backbone. This one actually has both: soft pasta, tender chicken, and broccoli tucked into a cheesy sauce that bakes up with browned edges.
Why It Works
Broccoli works better when it’s cut small and mixed into something kids already want. Pasta bake is useful for exactly that reason — the cheese sauce coats the vegetables, the pasta gives each bite a familiar shape, and the baked top adds a little contrast. It’s a good bridge dish for families that want vegetables on the table without making the vegetables the point.
Key Ingredients
- 12 ounces penne or rotini: Short pasta holds the sauce well.
- 2 cups cooked, diced chicken: Small pieces distribute evenly.
- 3 cups small broccoli florets: Chop them bite-size so they soften quickly.
- 2 tablespoons butter: For the sauce.
- 2 tablespoons flour: Thickens the sauce base.
- 2 cups milk: Use whole milk if you want a richer bake.
- 2 cups shredded cheddar: Mild and melt-friendly.
- 1 cup shredded mozzarella: Helps with the stretch.
- 1 teaspoon garlic powder: Keeps the flavor simple.
Quick Steps
- Cook the pasta: Boil until just shy of tender, then drain.
- Par-cook the broccoli: Steam or blanch for 2 minutes so it turns bright green and softens slightly.
- Make the sauce: Melt butter, whisk in flour for 1 minute, then slowly add milk until smooth and thick.
- Combine everything: Stir in the chicken, pasta, broccoli, garlic powder, and most of the cheese.
- Bake until bubbly: Pour into a greased casserole dish, top with the remaining cheese, and bake at 400°F for 20 minutes until hot and lightly browned.
Tips and Variations
- Cheese Choice: A block of cheddar grated by hand melts better than pre-shredded.
- Kid Swap: Use cauliflower florets instead of broccoli if that’s the vegetable you can get away with.
- Make It Crispier: Add a thin layer of buttered breadcrumbs on top before baking.
8. Biscuit-Topped Chicken Pot Pie
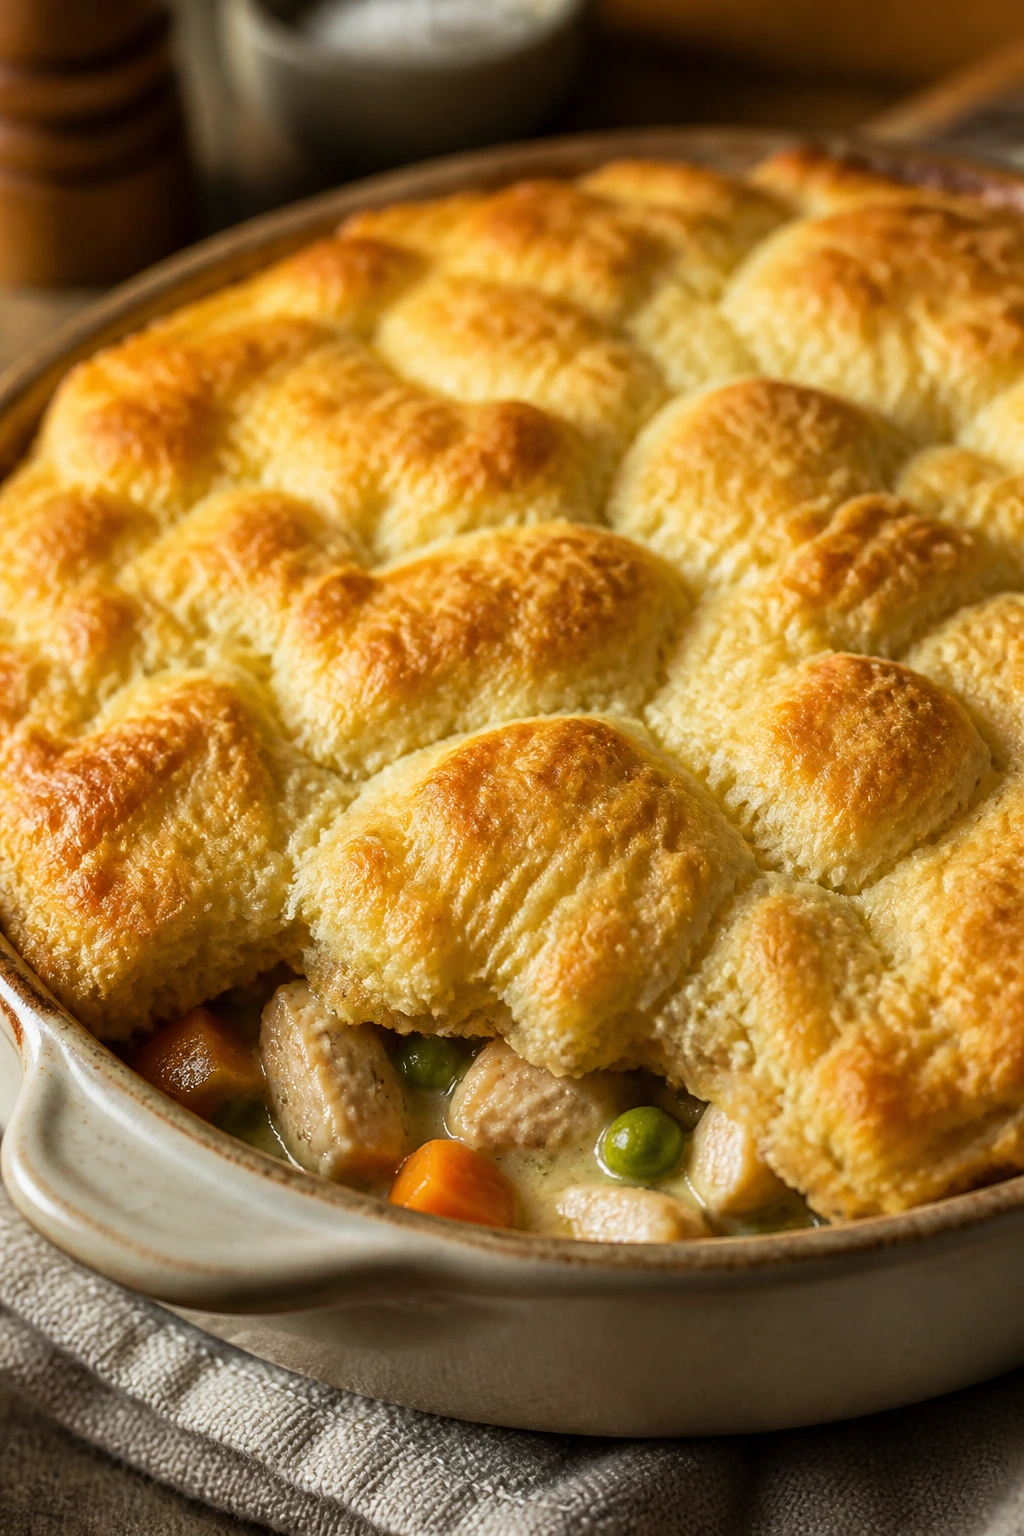
Chicken pot pie feels old-fashioned in the best possible way. Warm filling underneath, soft biscuits on top, and a smell that makes the kitchen feel calmer than it was five minutes earlier.
Why It Works
Pot pie succeeds because it keeps the vegetables small, the sauce creamy, and the topping easy to pull apart. Biscuit dough is less fussy than pie crust and usually more appealing to kids who would rather eat bread than pastry. The filling can simmer on the stovetop first, which gives you control over thickness before it goes into the oven.
Key Ingredients
- 2 cups cooked shredded chicken: Rotisserie chicken saves time.
- 2 cups frozen mixed vegetables: Peas, carrots, and corn are the usual win.
- 3 tablespoons butter: For the sauce base.
- 3 tablespoons flour: Thickens the filling.
- 2 cups chicken broth: Gives the filling body.
- ½ cup milk: Adds creaminess.
- 1 teaspoon poultry seasoning: Use lightly.
- 1 can refrigerated biscuits: A fast topping that browns well.
- Salt and pepper, to taste: Keep them moderate.
Quick Steps
- Preheat the oven: Set it to 400°F.
- Make the filling: Melt butter, whisk in flour, then slowly add broth and milk until the sauce thickens.
- Add chicken and vegetables: Stir in the chicken, vegetables, and seasoning and cook until hot.
- Top with biscuits: Transfer to a baking dish and arrange biscuit dough over the filling.
- Bake until golden: Bake for 20 to 25 minutes until the biscuits are browned and the filling bubbles at the edges.
Tips and Variations
- Shortcut: Use leftover turkey the same way after a holiday meal.
- Texture Tip: Cut the biscuits smaller if your kids want more topping in every bite.
- Serving Note: Let it sit for 10 minutes so the filling stops sloshing around.
9. Teriyaki Chicken Rice Bowls

Sweet, sticky, and tame enough for cautious eaters, these bowls do a lot without looking complicated. The sauce is glossy, the rice is plain on purpose, and the chicken gets all the attention.
Why It Works
Teriyaki has a built-in advantage with kids because it tastes sweet before it tastes anything else. The sauce clings to sliced chicken, the rice balances the sweetness, and the bowl format lets each person build their own bite. If a child wants chicken and rice only, that works. If they want a cucumber slice on the side, that works too.
Key Ingredients
- 1½ pounds boneless, skinless chicken thighs: Sliced thin for fast cooking.
- ¼ cup low-sodium soy sauce: The savory backbone.
- 3 tablespoons honey: Keeps the glaze child-friendly.
- 1 tablespoon rice vinegar: Adds brightness.
- 2 cloves garlic, minced: Use small amounts so it stays mellow.
- 1 teaspoon grated fresh ginger: Optional, but nice.
- 1 tablespoon cornstarch: Thickens the sauce.
- 2 tablespoons water: Mix with cornstarch before adding.
- 4 cups cooked white rice: A soft base that soaks up sauce.
- 2 cups steamed peas or cucumber slices: Pick one side and keep it simple.
Quick Steps
- Mix the sauce: Stir soy sauce, honey, vinegar, garlic, ginger, cornstarch, and water together.
- Cook the chicken: Heat a skillet over medium-high and cook the sliced chicken for 5 to 7 minutes until browned and cooked through.
- Add the glaze: Pour in the sauce and simmer for 2 to 3 minutes until it turns glossy and coats the chicken.
- Build the bowls: Spoon rice into bowls and top with the chicken.
- Finish lightly: Add peas, cucumbers, or sesame seeds if your kids are open to them.
Tips and Variations
- Milder Taste: Use a little less ginger if your family prefers a gentler sauce.
- Rice Upgrade: Jasmine rice gives the bowl a softer aroma.
- Packable Dinner: Keep the sauce separate if you want to build lunch boxes from leftovers.
10. Chicken Meatball Spaghetti
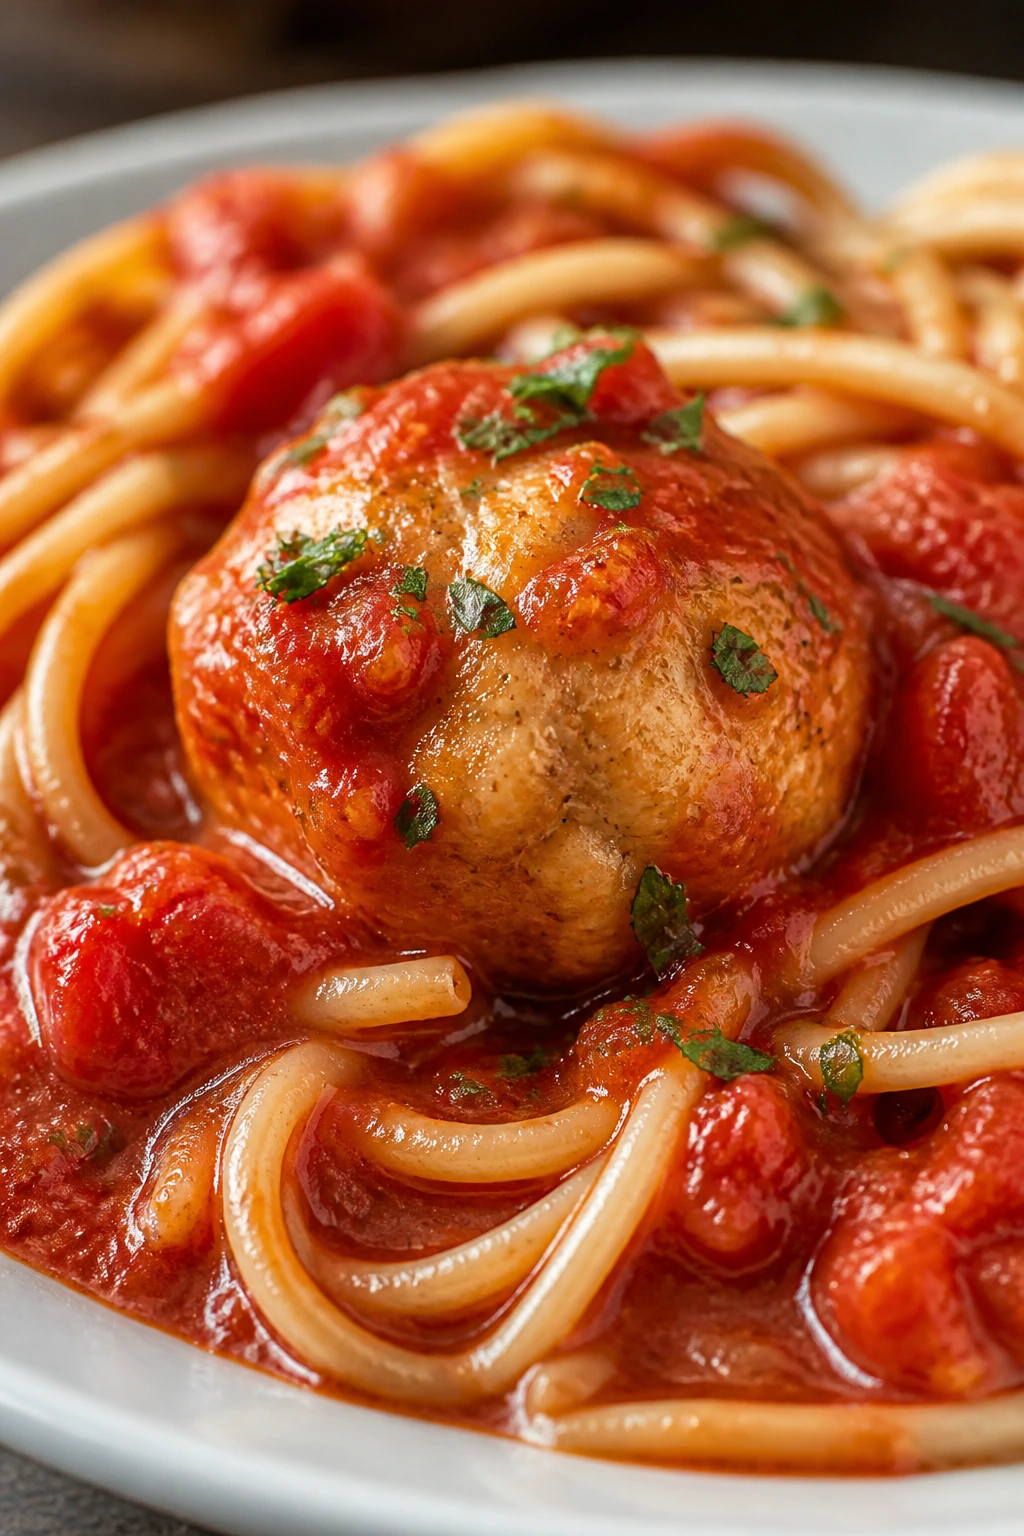
There’s something reassuring about meatballs. They’re round, neat, and not trying too hard. That alone gets them a long way with picky eaters.
Why It Works
Ground chicken takes on flavor well, and meatballs let you build a dinner that feels closer to pasta night than “health food.” Baking the meatballs first keeps them tender and cuts down on splatter, then a short simmer in marinara finishes the job. Spaghetti is a safe pairing because kids already know what to expect when they see it on the plate.
Key Ingredients
- 1 pound ground chicken: Keep it cold until mixing.
- ½ cup plain breadcrumbs: Helps the meatballs hold together.
- 1 large egg: Binds the mixture.
- ¼ cup finely grated Parmesan: Adds mild savory flavor.
- 2 cloves garlic, minced: Use less if your kids are garlic-shy.
- 1 teaspoon Italian seasoning: Keeps the flavor familiar.
- 24 ounces marinara sauce: Choose a smooth one without big chunks.
- 12 ounces spaghetti: A classic match.
- 2 tablespoons olive oil: For the baking sheet or pan.
Quick Steps
- Preheat the oven: Set it to 400°F.
- Mix the meatballs: Combine chicken, breadcrumbs, egg, Parmesan, garlic, and seasoning until just blended.
- Shape and bake: Roll into 1½-inch balls and bake for 12 to 15 minutes until cooked through.
- Warm the sauce: Simmer marinara in a saucepan, then add the meatballs for 5 minutes.
- Serve with spaghetti: Toss the pasta with a little sauce and place the meatballs on top.
Tips and Variations
- Sauce Control: Keep the pasta lightly sauced if your kids like things less messy.
- Cheese Finish: A shower of mozzarella can melt right over the top.
- Freezer Tip: Baked meatballs freeze well, which makes this an easy second dinner later.
11. Chicken Fried Rice
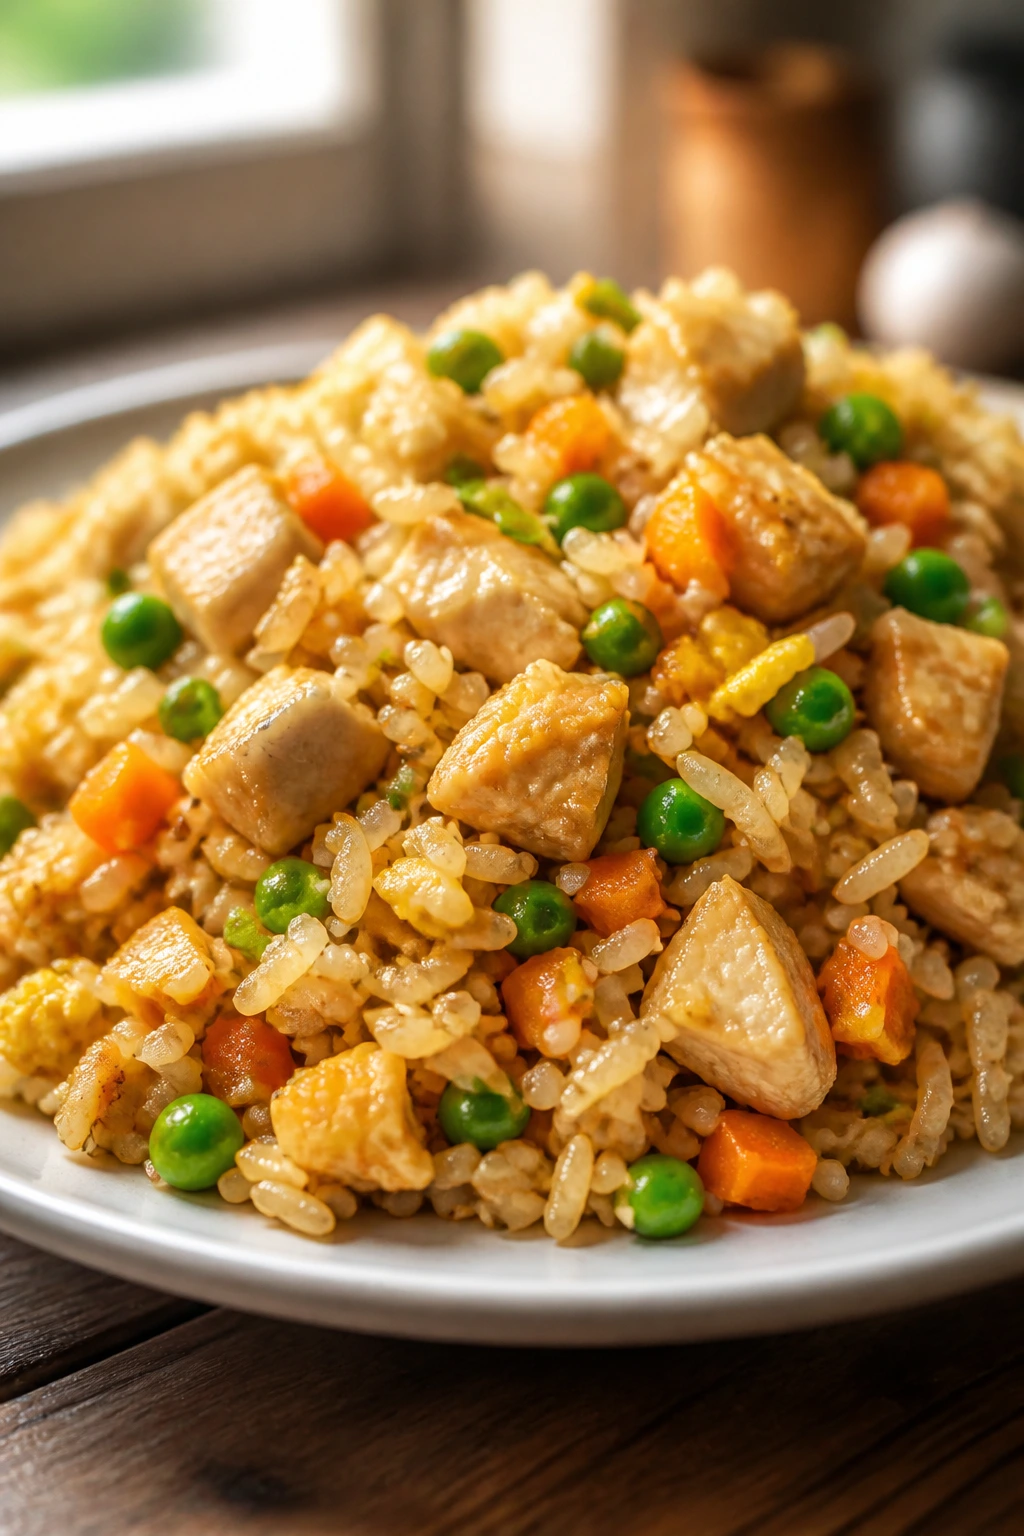
Fried rice solves a lot of dinner problems at once. It uses leftover rice, hides little bits of vegetables, and comes out tasting like someone paid attention.
Why It Works
Cold rice is the key here because it fries instead of turning gummy. Small chicken pieces, eggs, peas, and carrots fit into a single skillet without making the texture confusing. Kids often accept fried rice because it looks like individual bites, not a mixed-up pile, and the soy sauce stays mild if you measure it carefully.
Key Ingredients
- 3 cups cooked, chilled white rice: Day-old rice works best.
- 2 cups diced cooked chicken: Small cubes mix through the rice easily.
- 2 large eggs: Scramble them into the rice.
- 1 cup frozen peas and carrots: A classic kid-friendly mix.
- 2 tablespoons low-sodium soy sauce: Start small.
- 1 tablespoon butter: Adds flavor and helps the rice brown.
- 1 tablespoon sesame oil: Use sparingly for aroma.
- 2 green onions, sliced, optional: Skip if your kids notice them.
- 1 teaspoon garlic powder: An easy seasoning shortcut.
Quick Steps
- Scramble the eggs: Cook them in a hot skillet, then set aside.
- Warm the chicken and vegetables: Stir-fry both in butter over medium-high heat.
- Add the rice: Break up clumps and fry for 3 to 4 minutes.
- Season the pan: Drizzle in soy sauce and sesame oil, then add the eggs back in.
- Finish quickly: Stir until everything is hot and lightly browned at the edges.
Tips and Variations
- Rice Rule: Freshly cooked rice can work if you spread it out to cool and dry first.
- Kid Add-In: Tiny diced ham or corn can replace the peas and carrots if needed.
- Sauce Watch: Add soy sauce in small splashes so the rice doesn’t turn dark and salty.
12. Chicken Alfredo Tortellini Bake
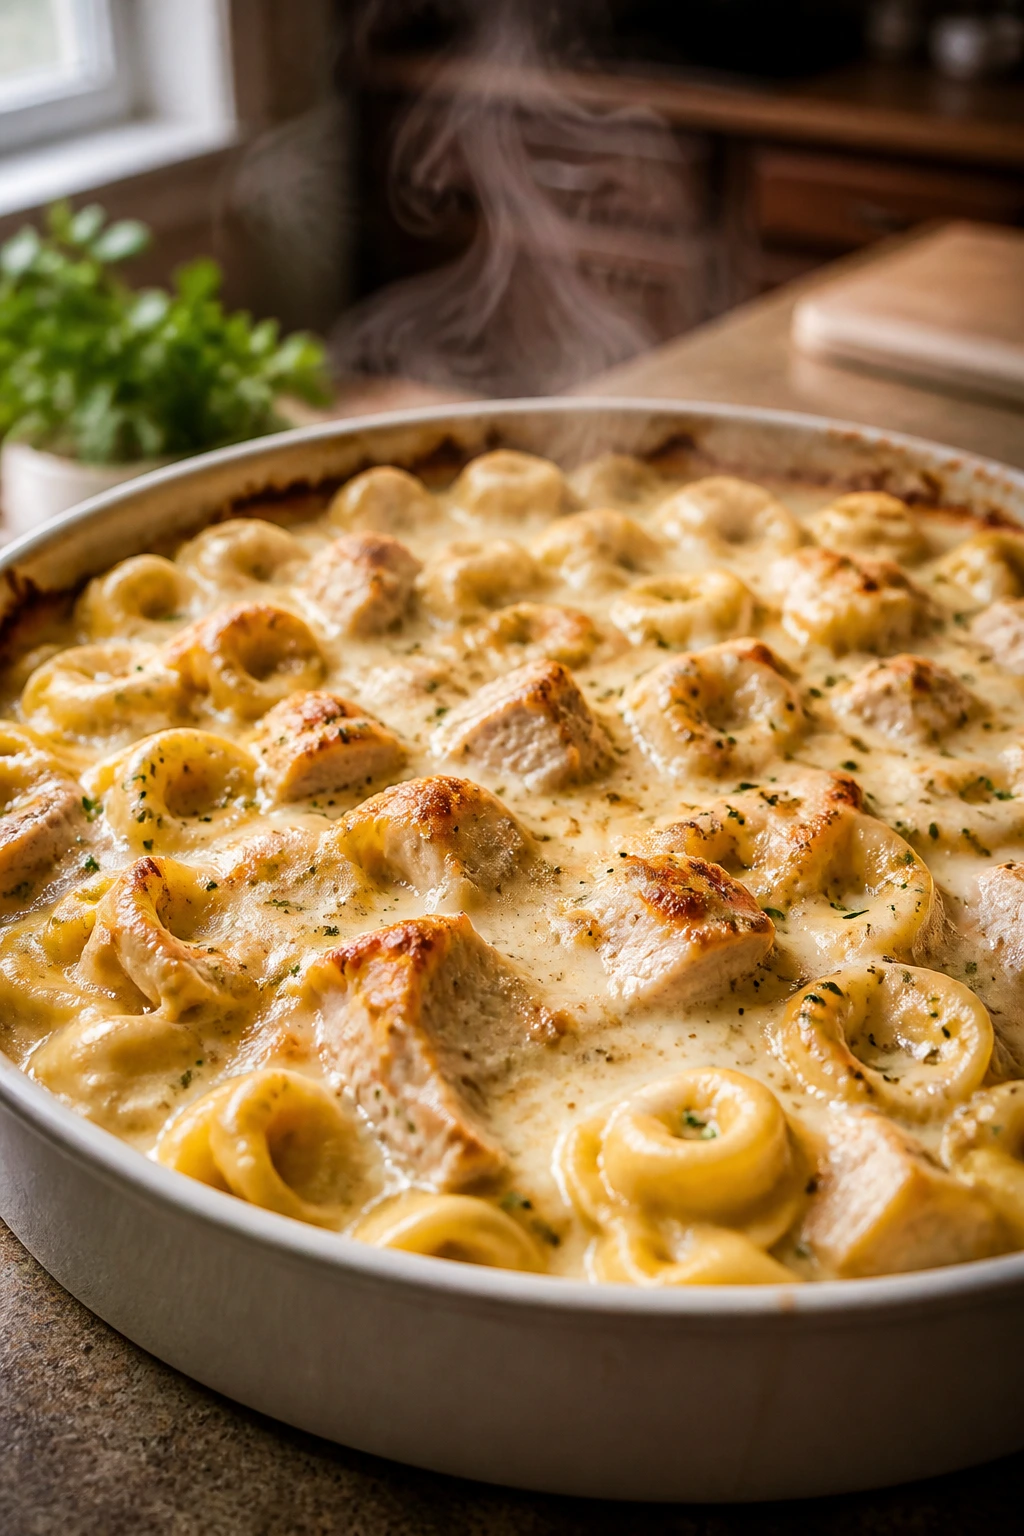
Creamy pasta bakes have a kind of gravitational pull on kids. The sauce is soft, the cheese is mild, and tortellini has the kind of shape children usually trust.
Why It Works
Cheese tortellini gives you built-in richness before the sauce even starts. Add chicken and Alfredo, bake it until bubbly, and you get a dish that feels indulgent without being weirdly complicated. The tortellini stays tender, the chicken stays in small, manageable pieces, and the baked top adds just enough contrast to keep the first bite interesting.
Key Ingredients
- 1 pound cheese tortellini: Fresh or refrigerated works best.
- 2 cups cooked chicken, chopped: Keep the pieces small.
- 2 cups Alfredo sauce: Jarred or homemade both work here.
- 1 cup shredded mozzarella: For the top.
- ½ cup grated Parmesan: Brings sharpness without making it bold.
- 1 teaspoon garlic powder: Keeps the flavor in the familiar zone.
- 1 cup chopped spinach, optional: Fold it in only if your kids tolerate greens.
- 1 tablespoon butter: For greasing the dish.
Quick Steps
- Preheat the oven: Set it to 375°F and butter a baking dish.
- Combine the filling: Toss tortellini, chicken, Alfredo sauce, garlic powder, and spinach if using.
- Top with cheese: Spread mozzarella and Parmesan over the surface.
- Bake until bubbly: Bake for 20 to 25 minutes until the edges bubble and the top turns lightly golden.
- Rest briefly: Let it sit for 5 minutes so the sauce thickens a little before serving.
Tips and Variations
- Short on Time: Use a rotisserie chicken and refrigerated tortellini to keep this fast.
- Extra Creamy: Add 2 tablespoons of cream cheese to the sauce mixture.
- Veggie Sneak: Finely chopped broccoli florets can work if your kids don’t mind green specks.
13. Slow Cooker Ranch Chicken Sandwiches
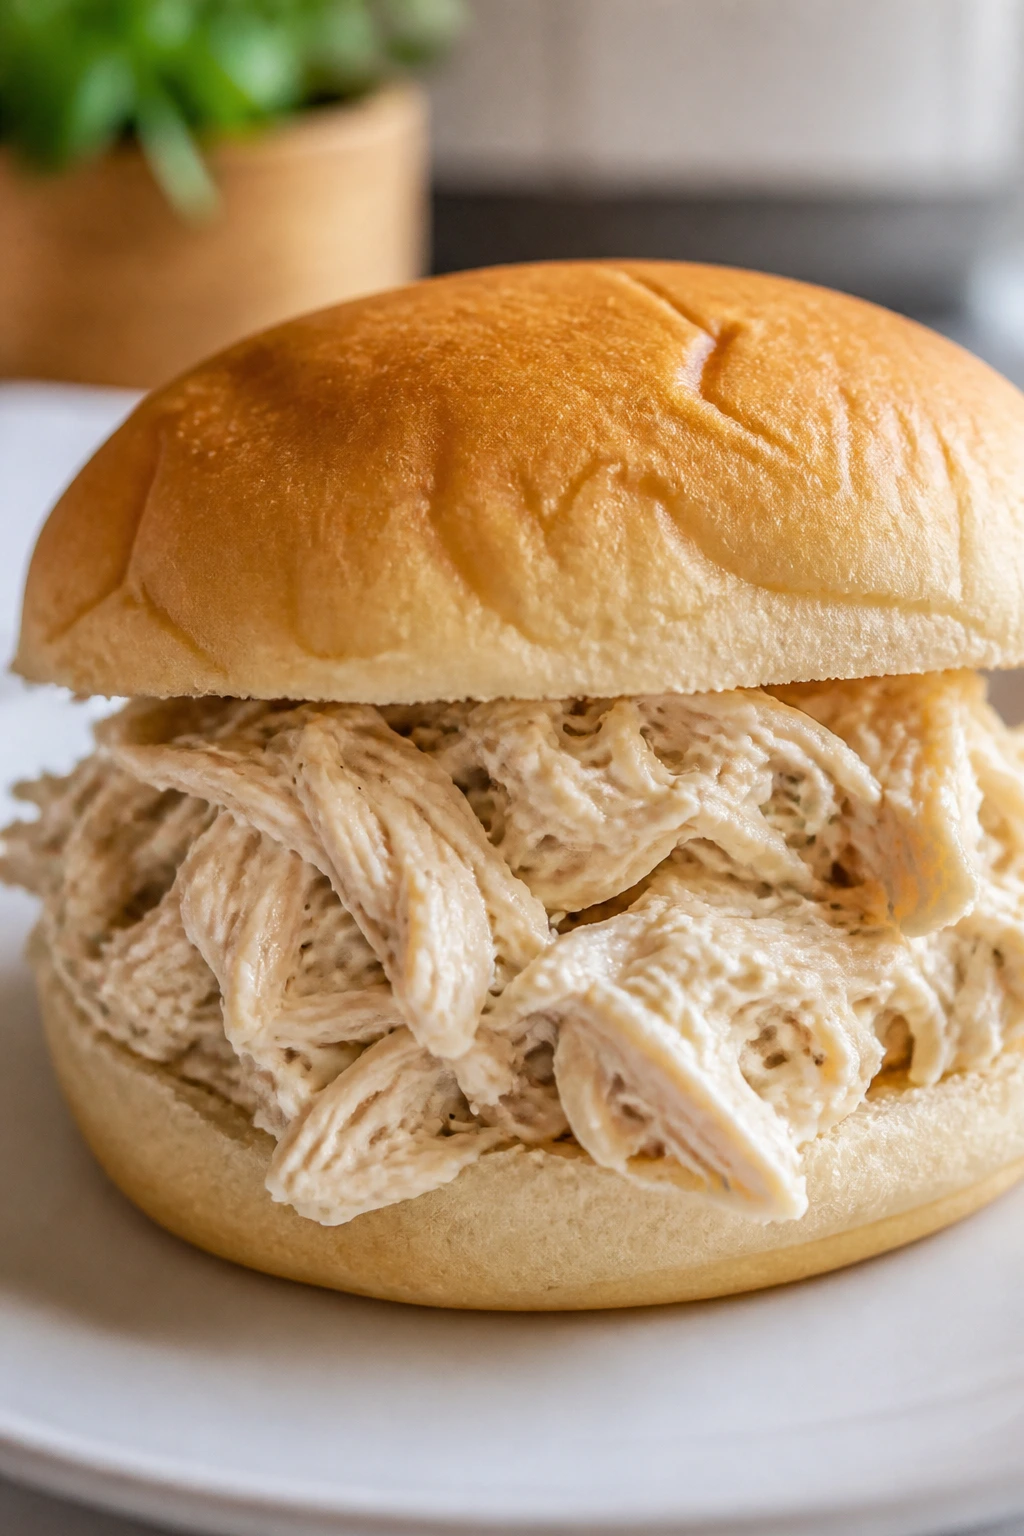
When dinner needs to happen while you do three other things, this is a good place to stand. The chicken comes out shreddable, the sauce stays mild, and the buns do the rest.
Why It Works
Slow cookers are good at turning plain chicken into something tender enough for sandwiches without much intervention. Ranch seasoning gives the filling a familiar savory note, cream cheese smooths out the texture, and the barbecue-like mess is minimal compared with a saucy skillet meal. It’s also one of those dinners that holds well on warm, which helps if the family doesn’t all sit down at once.
Key Ingredients
- 2 pounds boneless, skinless chicken breasts: Trimmed of excess fat.
- 1 packet ranch seasoning or 2 tablespoons homemade mix: Go light if your kids are sensitive to salt.
- 1 cup chicken broth: Keeps the chicken moist.
- 4 ounces cream cheese: Softens the filling.
- 1 tablespoon butter: Optional, for richness.
- 8 sandwich buns: Soft buns hold the filling best.
- 1 cup shredded cheddar: Melts into the chicken if you want extra comfort.
- Pickles, optional: Serve on the side rather than inside the sandwich if needed.
Quick Steps
- Load the slow cooker: Place chicken, ranch seasoning, and broth in the insert.
- Cook low and slow: Cover and cook on low for 4 to 5 hours, or high for 2 to 3 hours, until the chicken shreds easily.
- Shred and soften: Pull the chicken apart with two forks, then stir in the cream cheese until smooth.
- Warm the buns: Toast them lightly so they don’t collapse under the filling.
- Assemble and serve: Pile the chicken onto buns and add cheddar if you like.
Tips and Variations
- Texture Note: If the filling looks loose, leave the lid off for 10 minutes to thicken.
- Slider Option: Use dinner rolls for a smaller, kid-sized version.
- Flavor Boost: A spoonful of barbecue sauce can make the filling sweeter without turning it into a different meal.
14. Chicken Enchilada Skillet
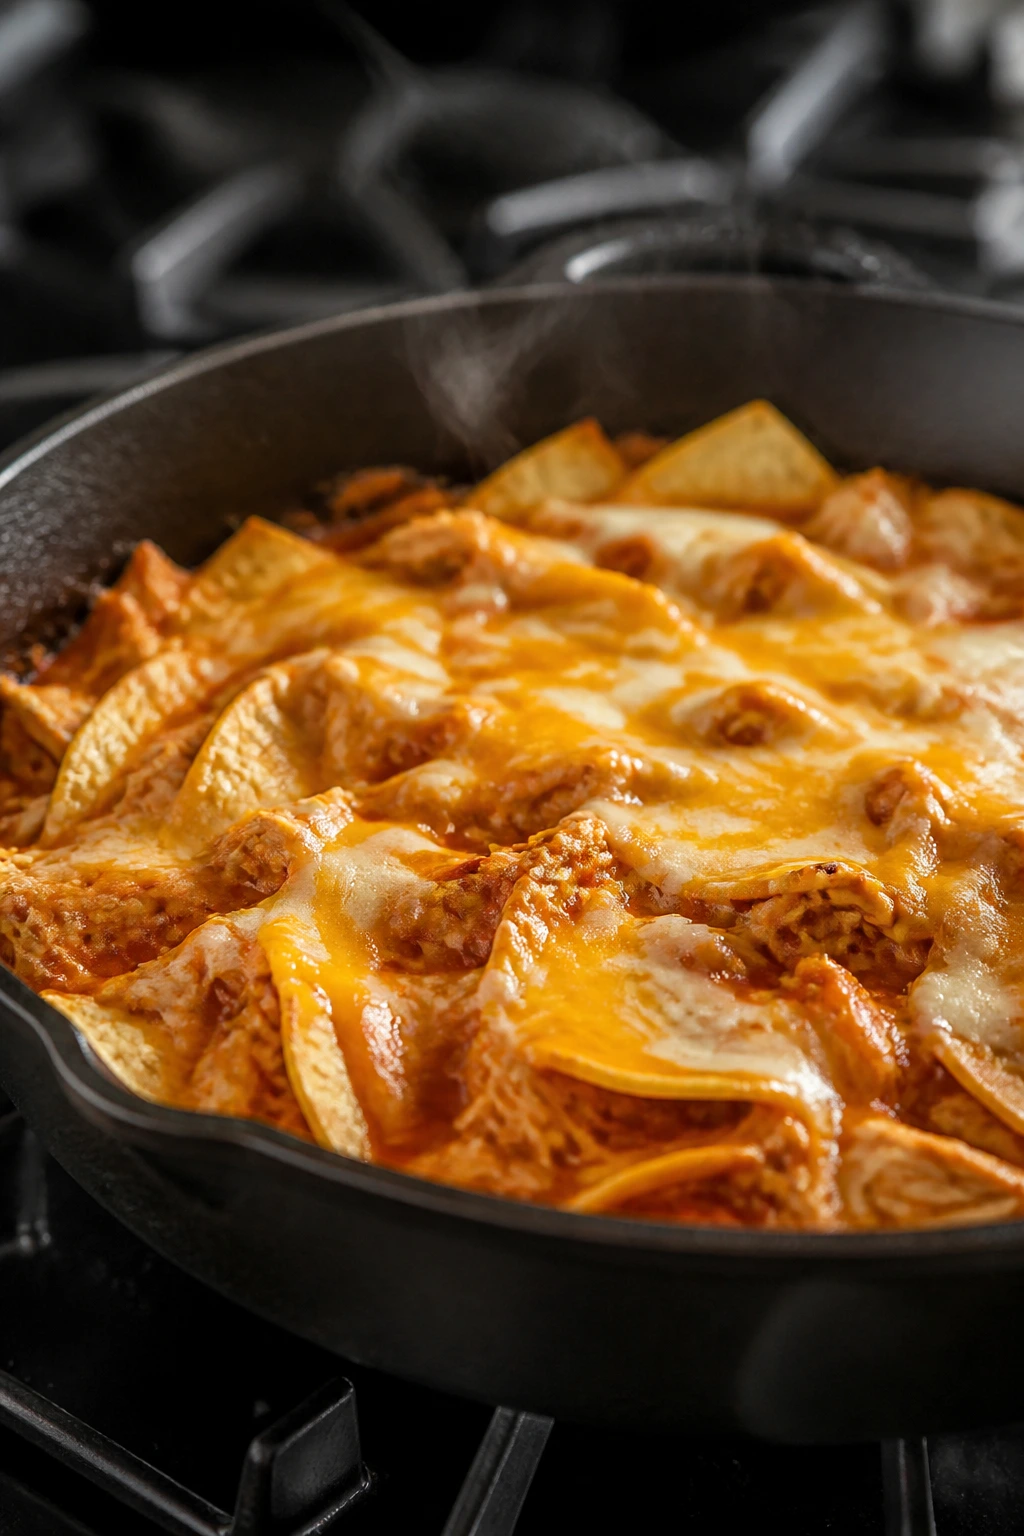
This is the Tex-Mex dinner that usually wins because it never asks kids to wrestle with a full casserole. Everything stays in one skillet, the cheese melts in place, and the flavor stays soft enough for cautious eaters.
Why It Works
A skillet enchilada dinner keeps the layers simple: chicken, tortillas, sauce, cheese. That makes it much easier for kids to understand than a saucy pan full of mixed pieces. Mild enchilada sauce gives the whole thing a tomato-forward flavor without pushing the heat too far, and the tortillas soften into the sauce instead of staying dry.
Key Ingredients
- 2 cups cooked shredded chicken: Bite-size shreds work better than long strands.
- 1 can (10 ounces) mild red enchilada sauce: Choose a mild version.
- 8 small flour or corn tortillas: Cut into strips or wedges.
- 2 cups shredded cheddar: Mild and melty.
- 1 cup shredded Monterey Jack: Smooth melt, easy flavor.
- ½ cup corn, optional: Adds sweetness.
- 1 cup black beans, optional: Leave out if the texture is a problem.
- 1 tablespoon oil: For the skillet.
Quick Steps
- Heat the skillet: Warm oil over medium heat.
- Build the layers: Add a thin layer of sauce, then tortillas, chicken, beans or corn if using, and cheese.
- Repeat once: Add another layer in the same order, ending with cheese.
- Cover and cook: Cover and cook on low for 10 to 12 minutes until the cheese melts and the tortillas soften.
- Finish uncovered: If you want a browned top, uncover for 2 minutes.
Tips and Variations
- Less Mess: Cut the tortillas into strips before adding them so the skillet is easier to serve.
- Kid Version: Serve sour cream on the side and skip any jalapeños.
- Leftover Move: Reheat in a covered skillet with a splash of water to keep it soft.
15. Lemon Parmesan Chicken Orzo
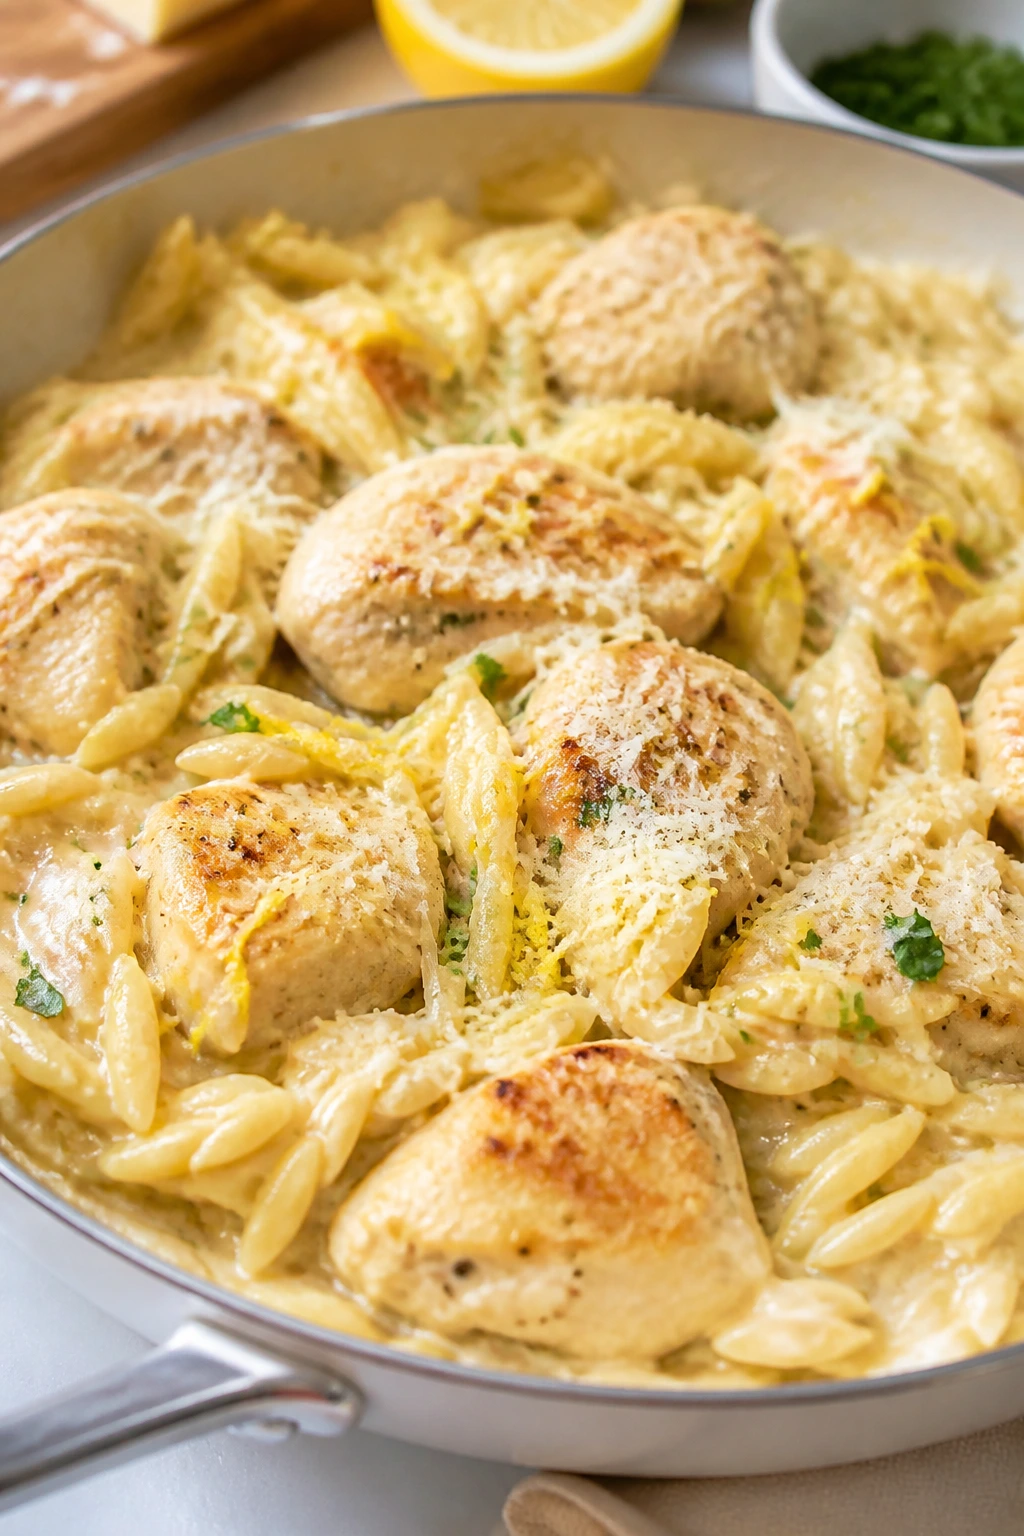
This one tastes bright without turning sharp. The lemon is there for lift, not drama, and the orzo gives you a soft, spoonable dinner that usually plays well with kids who like pasta more than “sides.”
Why It Works
Orzo cooks quickly and behaves a little like rice and a little like pasta, which makes it a useful bridge for picky eaters. Parmesan adds saltiness, the lemon keeps the whole dish from tasting heavy, and the chicken can be cut into neat little pieces. It’s a good example of a meal that feels grown-up without becoming a battle.
Key Ingredients
- 1 pound boneless chicken breasts: Cut into bite-size pieces.
- 8 ounces orzo: Small pasta, fast cooking.
- 2 cups chicken broth: Helps the orzo cook directly in the pan.
- 1 cup milk: Adds creaminess.
- 1 lemon, zested and juiced: Use a light hand if your family likes mild flavors.
- ½ cup grated Parmesan: Finishes the sauce.
- 2 tablespoons butter: For the pan.
- 1 teaspoon garlic powder: Keeps the flavor rounded.
- 1 cup baby spinach, optional: Stir in at the end if needed.
Quick Steps
- Brown the chicken: Cook the chicken in butter over medium-high heat until lightly golden and cooked through.
- Toast the orzo: Stir the dry orzo into the pan for 1 minute so it picks up flavor.
- Add liquid: Pour in broth and milk, then simmer gently for 8 to 10 minutes, stirring often.
- Finish the sauce: Stir in lemon juice, zest, Parmesan, and spinach if using.
- Serve warm: The orzo should be creamy and loose, not dry.
Tips and Variations
- Milder Finish: Start with half the lemon and add more only if the kids accept it.
- Protein Swap: Rotisserie chicken works if you want to skip the browning step.
- Add-on: A little extra butter at the end makes the sauce taste rounder.
16. Chicken and Stuffing Casserole
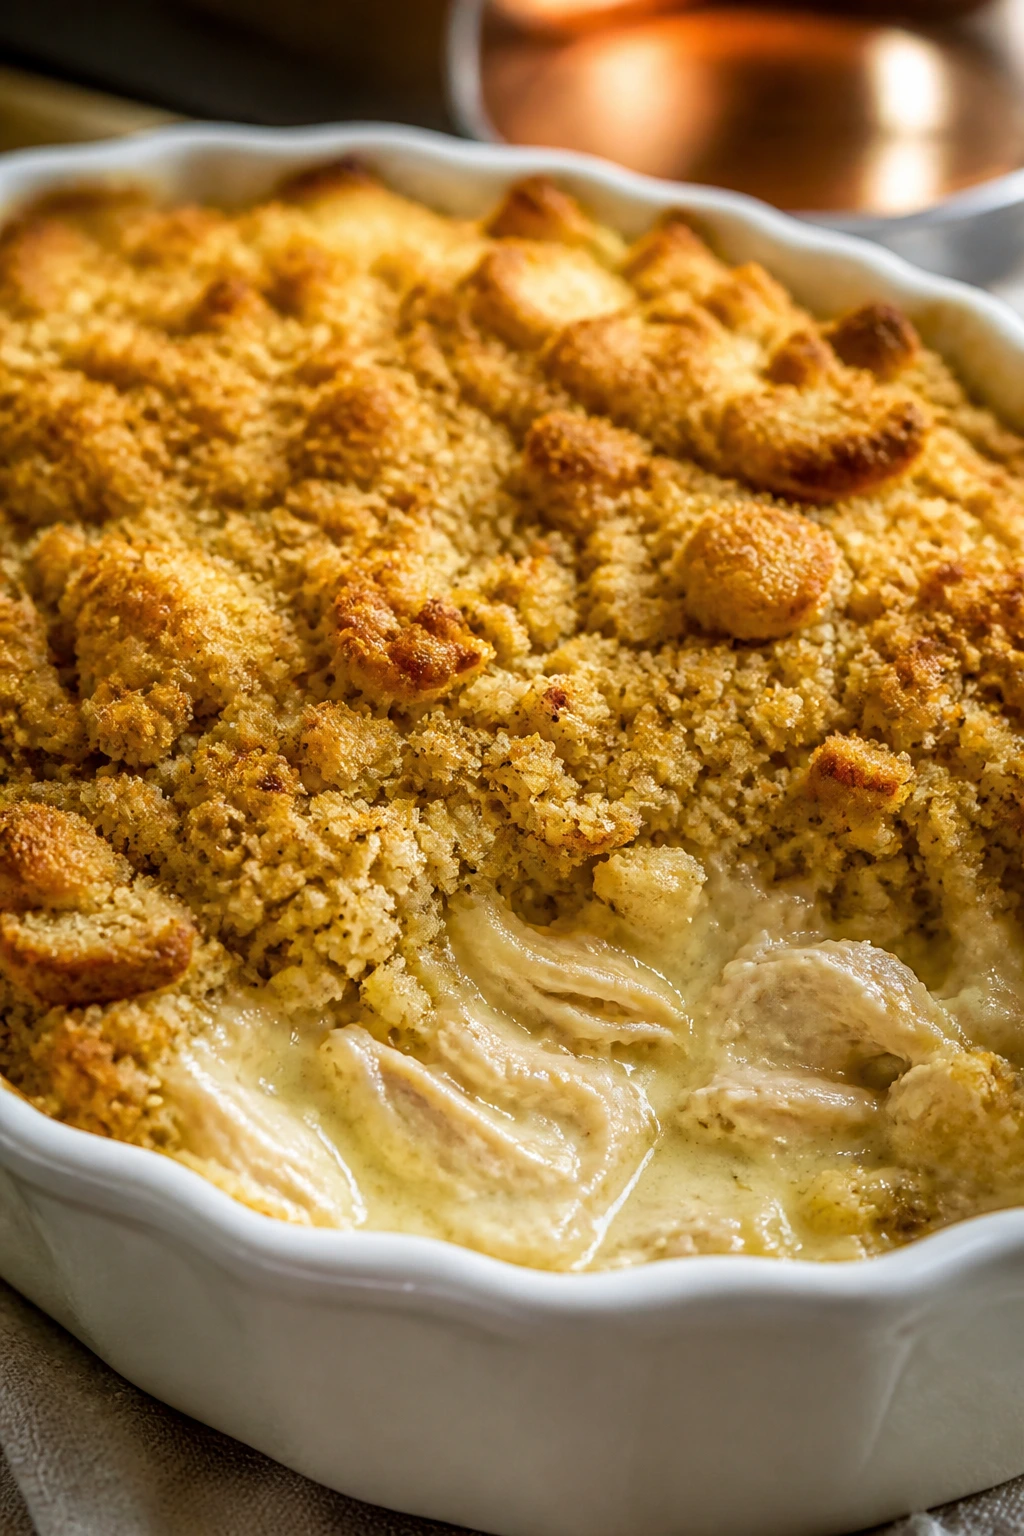
If you grew up around stuffing mix, this dish probably feels like a shortcut to a very familiar kind of comfort. It’s soft, savory, and a little nostalgic, which helps on nights when everyone is tired.
Why It Works
Stuffing mix brings built-in seasoning and a soft crumb that kids usually accept without much argument. The creamy chicken layer underneath stays moist, while the top turns into something between bread and crust. It’s a casserole built around textures kids know, not ingredients they want to debate.
Key Ingredients
- 2 cups cooked chicken: Shredded or chopped.
- 6 ounces stuffing mix: Any plain or herb version works.
- 1 can (10½ ounces) cream of chicken soup: Forms the creamy base.
- 1 cup chicken broth: Loosens the filling.
- ½ cup milk: Adds creaminess.
- 2 tablespoons butter: For the stuffing or the dish.
- ½ cup diced celery: Optional, but classic.
- ½ cup diced onion: Optional if your kids tolerate small pieces.
- 1 cup frozen peas, optional: A soft vegetable add-in.
Quick Steps
- Preheat the oven: Set it to 375°F and grease a casserole dish.
- Mix the chicken layer: Stir chicken, soup, broth, milk, celery, onion, and peas if using.
- Prepare the stuffing: Make the stuffing mix according to package directions, using a little butter if you want more flavor.
- Layer the casserole: Spread the chicken mixture in the dish, then spoon stuffing over the top.
- Bake until hot: Bake for 30 to 35 minutes until the center bubbles and the top looks golden.
Tips and Variations
- Quick Shortcut: Use leftover roast chicken to make the dish even faster.
- Texture Tip: Keep the stuffing layer loose if your family likes a lighter top.
- Make It Friendlier: Skip the celery and onion if visible bits are a problem.
17. Sheet-Pan Chicken and Potatoes
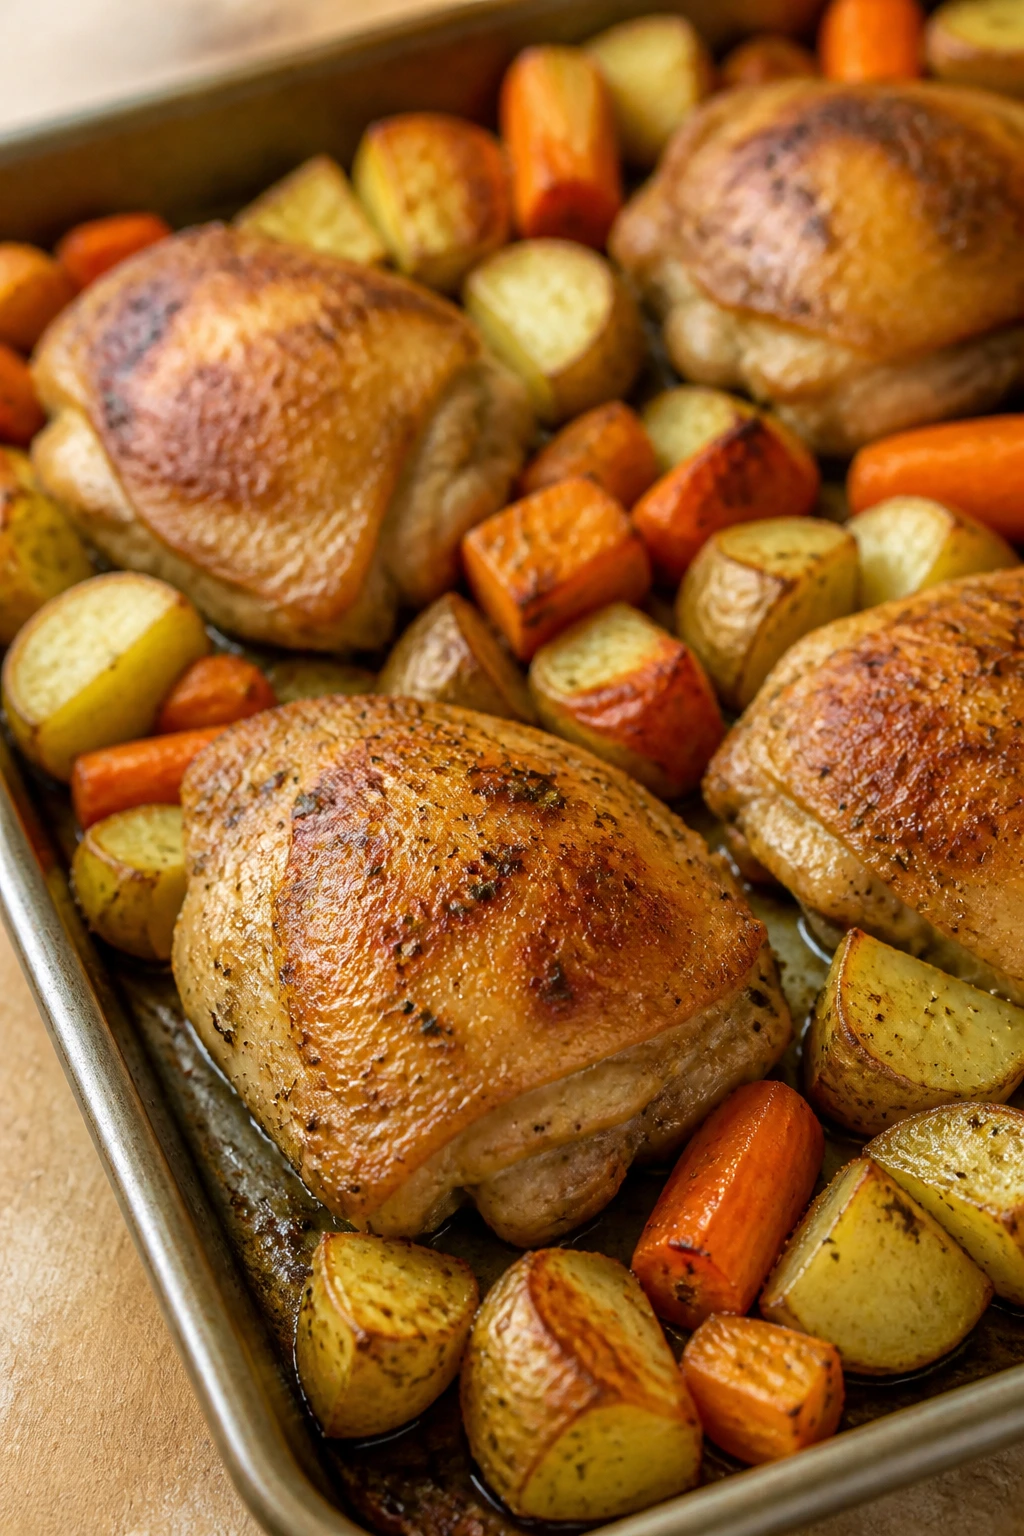
This is the dinner that makes the oven do the hard part. The potatoes get crisp at the edges, the chicken stays juicy, and the carrots turn sweet enough to sneak past a skeptical kid.
Why It Works
Sheet-pan meals work because the ingredients can roast at the same temperature without much fuss. Chicken thighs are especially forgiving here; they stay moist even when the potatoes need a little more time. The seasoning stays simple — garlic powder, paprika, salt, pepper — which is exactly the right move when the goal is “will eat” rather than “will rave.”
Key Ingredients
- 1½ pounds chicken thighs or boneless breasts: Thighs are more forgiving.
- 1 pound baby potatoes: Halve them so they roast faster.
- 3 carrots: Cut into thick coins or sticks.
- 3 tablespoons olive oil: Helps everything brown.
- 2 teaspoons garlic powder: A gentle base seasoning.
- 1 teaspoon paprika: Adds color without heat.
- 1 teaspoon kosher salt: Keeps the flavors clear.
- ½ teaspoon black pepper: Optional.
- Fresh parsley, optional: For a final sprinkle.
Quick Steps
- Preheat the oven: Heat to 425°F and line a sheet pan with parchment.
- Season the vegetables: Toss potatoes and carrots with half the oil, salt, pepper, garlic powder, and paprika.
- Add the chicken: Rub the chicken with the remaining oil and seasoning, then place it on the pan.
- Roast until done: Bake for 30 to 35 minutes, stirring the vegetables once, until the chicken reaches 165°F and the potatoes are browned.
- Rest and serve: Let everything sit for 5 minutes before plating.
Tips and Variations
- Extra Crisp: Give the potatoes space; overcrowding turns them soft.
- Swap Vegetables: Use green beans or zucchini in the last 15 minutes if needed.
- Dipping Help: Ketchup or ranch on the side makes the plate look friendlier.
18. Chicken Caesar Pita Pockets
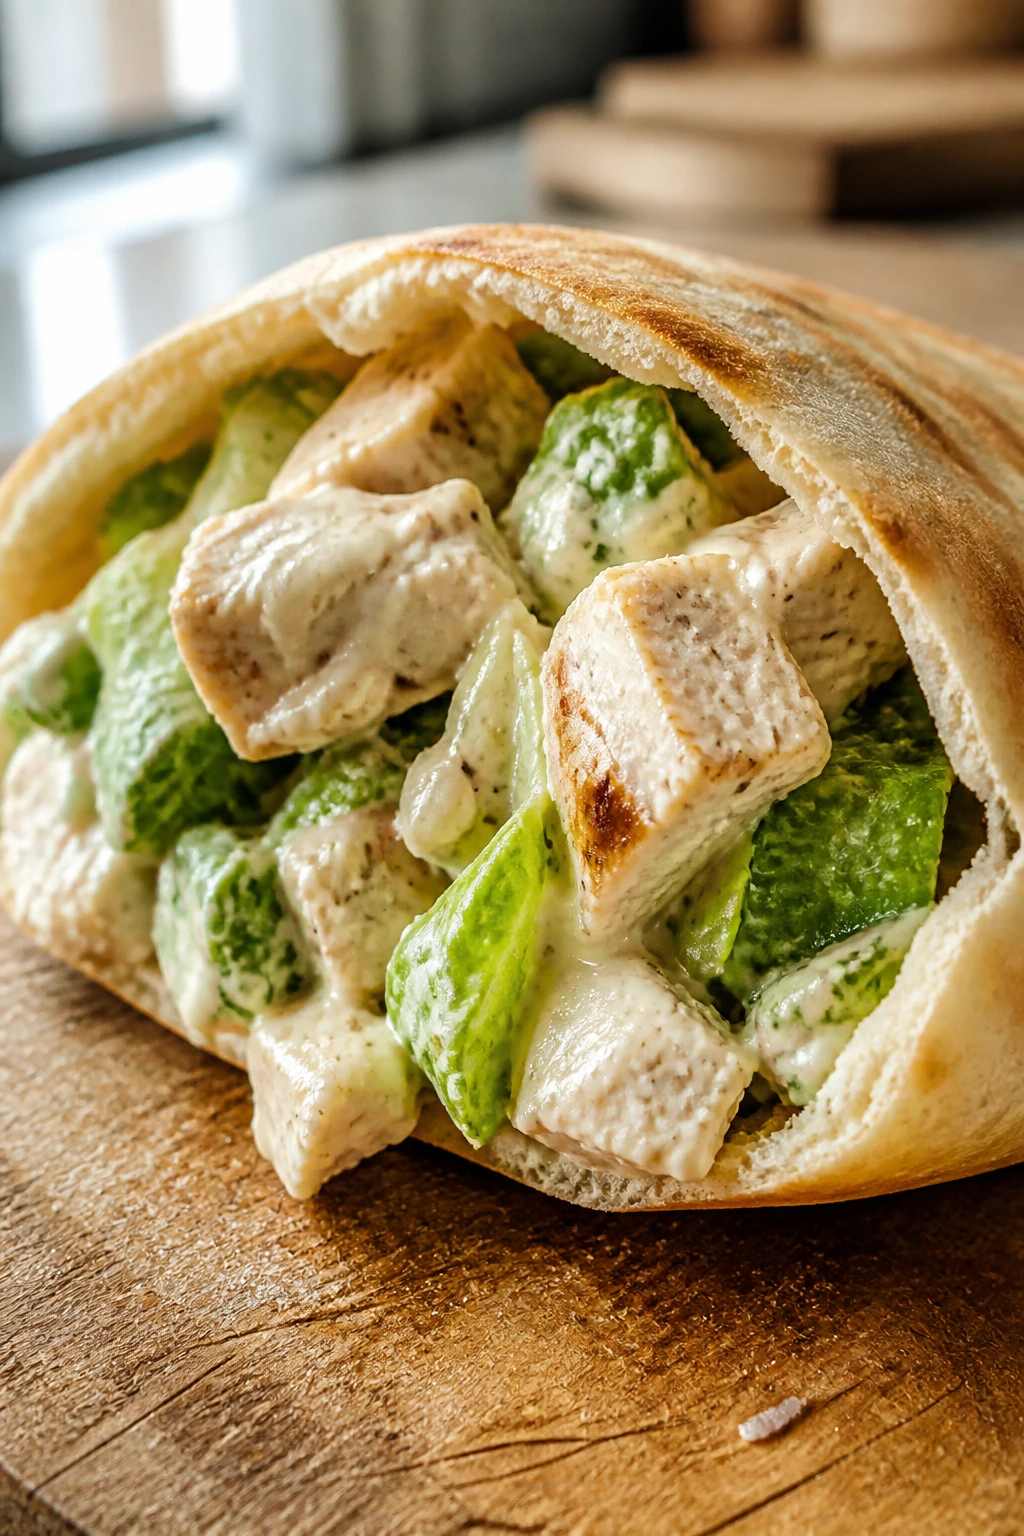
Some dinners work because they feel like lunch upgraded. These pita pockets are cool, crunchy, creamy, and easy to handle — all useful things when appetite is shaky.
Why It Works
Caesar flavor is familiar enough for many kids because it reads as creamy salad dressing rather than something sharp or spicy. Stuffing the chicken into pita pockets keeps the filling contained, which cuts down on mess and makes the meal easier to hold. If you use pre-cooked chicken, this turns into one of the fastest dinners in the group.
Key Ingredients
- 3 cups cooked chopped chicken: Rotisserie chicken is perfect here.
- 4 pita pockets: Warm them so they open without tearing.
- 2 cups chopped romaine: Keep the pieces small.
- ½ cup Caesar dressing: Use a mild, creamy version.
- ¼ cup grated Parmesan: Adds the salty finish.
- ½ cup cucumber slices, optional: For crunch.
- Salt and pepper, to taste: Go light.
- Lemon wedges, optional: For anyone who wants more brightness.
Quick Steps
- Warm the pitas: Toast or microwave them briefly so they’re soft and flexible.
- Toss the filling: Mix chicken, romaine, Caesar dressing, Parmesan, and cucumber if using.
- Fill the pockets: Spoon the mixture into each pita without overstuffing.
- Serve immediately: Keep extra dressing on the side if some family members want more.
- Add a crunch side: Chips or fruit work well beside the pockets.
Tips and Variations
- No-Tear Tip: Cut the pita halfway open instead of forcing it all the way apart.
- Kid Twist: Use flatbreads if pita pockets split too easily.
- Make Ahead: Mix the chicken and dressing separately from the lettuce until serving time.
19. Cheddar Chicken Meatloaf Muffins
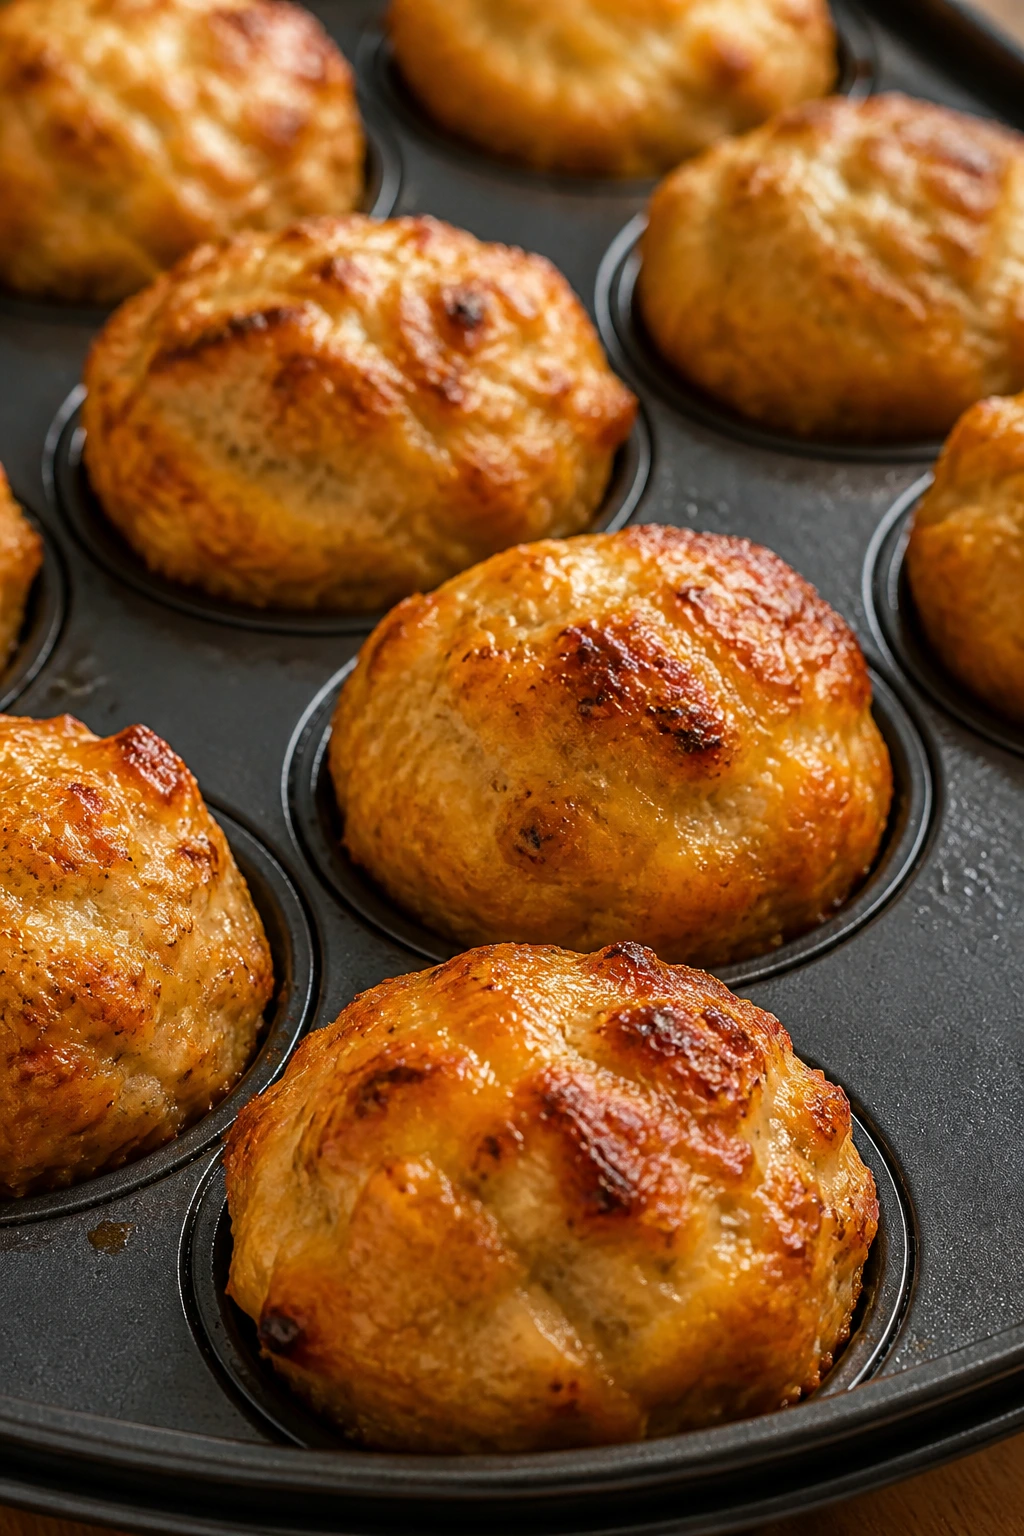
Mini meatloaves sound a little odd until you serve them. Then they start to make sense fast: smaller shape, faster bake, easier serving, less argument.
Why It Works
Ground chicken can dry out, so baking it in muffin cups helps it cook quickly and stay tender. The cheddar melts into the mixture and gives each little muffin a familiar flavor that feels more like a savory snack than a chore. Kids also tend to like foods that come in individual portions. That part matters more than it should.
Key Ingredients
- 1½ pounds ground chicken: Keep it cold before mixing.
- ½ cup plain breadcrumbs: Helps the muffins hold together.
- 1 large egg: Binds the mixture.
- ⅓ cup shredded cheddar: Fold it in so the cheese stays inside.
- 2 tablespoons ketchup: Adds moisture and a touch of sweetness.
- 1 teaspoon onion powder: Gives flavor without visible onion.
- 1 teaspoon garlic powder: Keeps the seasoning mild.
- ½ teaspoon kosher salt: Enough for the whole batch.
- ¼ cup ketchup + 1 tablespoon brown sugar: For a simple glaze.
Quick Steps
- Preheat the oven: Set it to 375°F and grease a 12-cup muffin tin.
- Mix the meatloaf base: Combine chicken, breadcrumbs, egg, cheddar, ketchup, and seasonings until just blended.
- Portion the mixture: Pack it into the muffin cups evenly.
- Glaze the tops: Spoon the ketchup-brown sugar glaze over each one.
- Bake until set: Bake for 20 to 22 minutes until the centers reach 165°F.
- Rest briefly: Let them sit for 5 minutes so they lift out cleanly.
Tips and Variations
- Sauce Swap: Barbecue sauce can replace the ketchup glaze if your family likes it sweeter.
- Freezer Friendly: These freeze well after baking and cooling.
- Serving Idea: Pair with mashed potatoes so the dinner feels complete.
20. Orange Chicken Stir-Fry
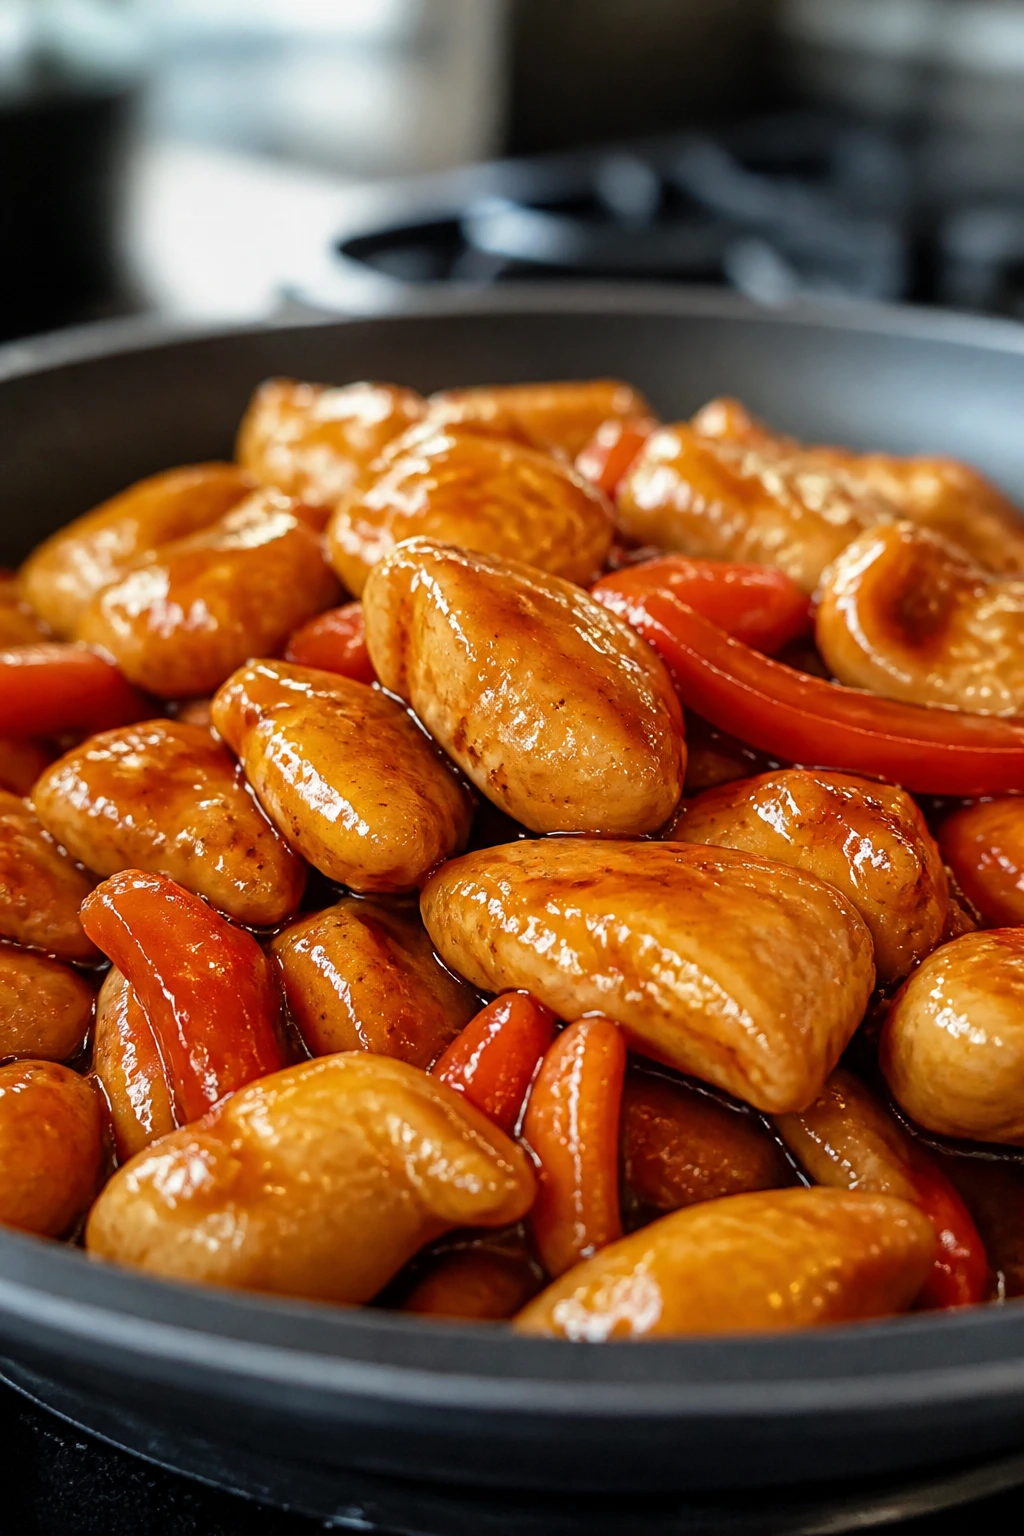
Sweet orange sauce has a way of landing better than a lot of other “special” flavors. It tastes bright, glossy, and a little familiar — like takeout, but gentler.
Why It Works
Orange chicken works for picky eaters because the sauce is sweet first and citrusy second. Quick-cooking chicken pieces stay tender, and the sauce thickens just enough to coat the meat without drowning it. Serve it with rice, and the whole thing feels predictable enough for cautious diners to try without much resistance.
Key Ingredients
- 1½ pounds boneless chicken breasts: Cut into bite-size pieces.
- ½ cup orange juice: Fresh or bottled works.
- 3 tablespoons low-sodium soy sauce: Keeps the sauce savory.
- 2 tablespoons honey: Adds sweetness.
- 1 tablespoon cornstarch: Thickens the sauce.
- 2 cloves garlic, minced: Small amount, big payoff.
- 1 teaspoon grated ginger: Optional.
- 1 red bell pepper, sliced thin: Adds color and mild crunch.
- 2 cups broccoli florets: Optional but useful.
- 4 cups cooked rice: For serving.
Quick Steps
- Cook the chicken: Brown the chicken in a skillet over medium-high heat until nearly done.
- Add the vegetables: Stir in peppers and broccoli and cook for 3 to 4 minutes.
- Mix the sauce: Whisk orange juice, soy sauce, honey, cornstarch, garlic, and ginger together.
- Glaze the pan: Pour in the sauce and simmer for 2 to 3 minutes until thick and shiny.
- Serve over rice: Spoon the stir-fry onto rice while the sauce is hot.
Tips and Variations
- Sweeter Version: Add another teaspoon of honey if your child likes a sweeter finish.
- Veggie Control: Use only peppers if broccoli gets rejected.
- Texture Note: Keep the chicken pieces similar in size so nothing overcooks.
21. Classic Chicken and Dumplings
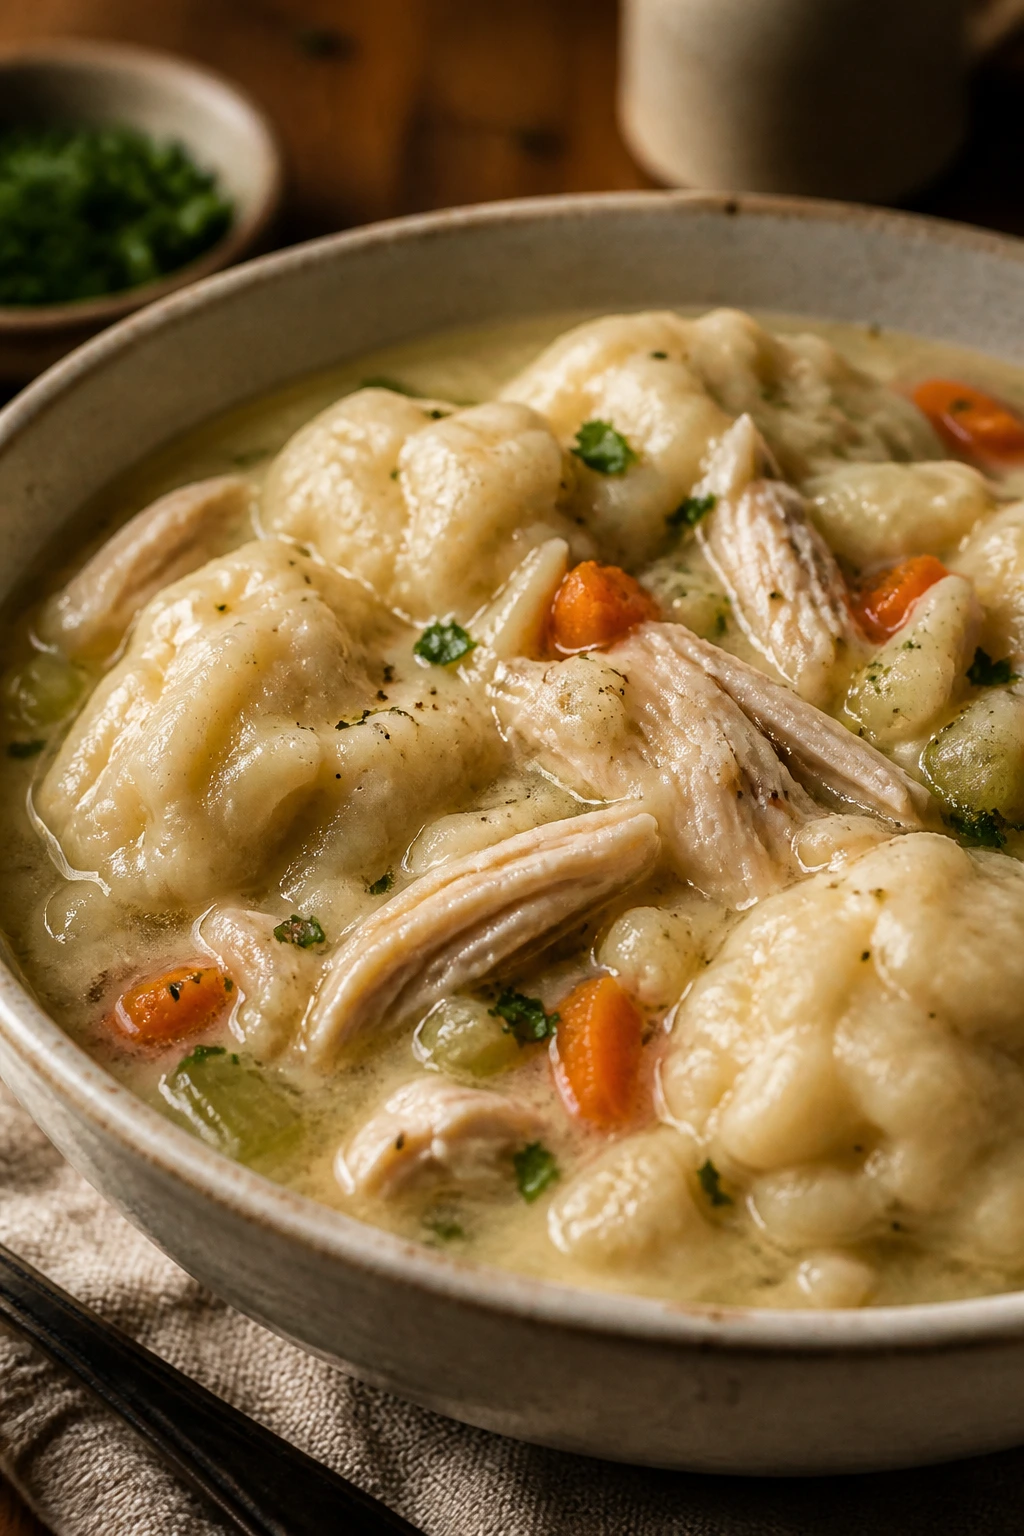
This is the kind of meal that feels like a blanket. Soft dumplings, savory broth, and tender chicken make the whole pot taste like it meant to happen.
Why It Works
Chicken and dumplings have old-school comfort baked into every spoonful, but the reason kids usually accept it is simpler than nostalgia. The broth is mild, the chicken stays tender, and the dumplings are soft enough to feel like bread in soup form. Because everything simmers together, the flavors stay unified instead of competing for attention.
Key Ingredients
- 1½ pounds chicken thighs: They stay moist in the broth.
- 6 cups chicken broth: Forms the base of the stew.
- 2 carrots, sliced thin: Keep them small for easier eating.
- 2 celery stalks, sliced thin: Optional, but traditional.
- 1 onion, diced: Cook until soft so it disappears into the broth.
- 3 tablespoons butter: For the base.
- 3 tablespoons flour: Thickens the broth slightly.
- 1 cup milk: Makes the stew creamier.
- 2 cups all-purpose flour: For the dumplings.
- 1 tablespoon baking powder: Helps the dumplings puff.
- 1 teaspoon salt: For the dumpling dough.
- 3 tablespoons butter + ¾ cup milk: For the dumpling mix.
Quick Steps
- Start the stew: Cook onion, carrot, and celery in butter until softened.
- Build the broth: Stir in flour, then slowly add broth and milk until lightly thickened.
- Simmer the chicken: Add the chicken and cook gently until tender and fully cooked.
- Make the dumpling dough: Mix flour, baking powder, salt, butter, and milk until a soft dough forms.
- Drop and steam: Spoon dumplings onto the simmering stew, cover tightly, and cook for 15 minutes without lifting the lid.
- Serve carefully: Check that the dumplings are cooked through and fluffy before ladling.
Tips and Variations
- Lid Rule: Do not lift the lid while the dumplings steam or they can turn dense.
- Thicker Stew: Simmer uncovered for a few minutes before adding dumplings if the broth feels thin.
- Kid-Friendly Finish: A little extra butter stirred in at the end makes the broth taste rounder.
22. One-Pan Chicken Mac and Cheese
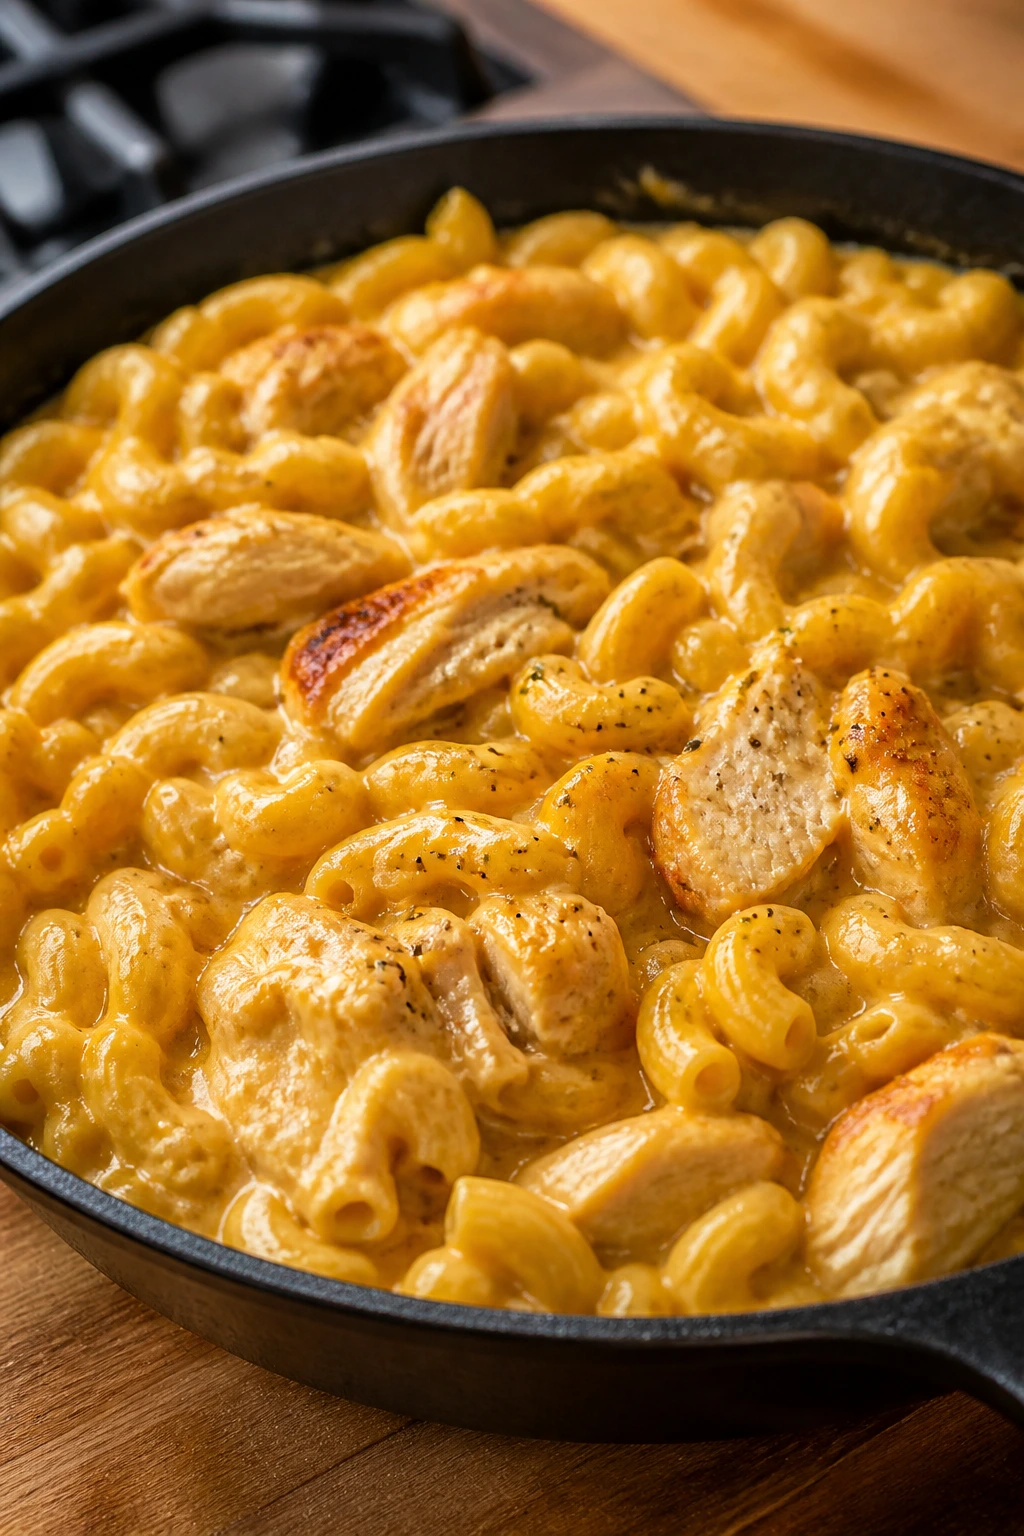
Mac and cheese with chicken is one of those dinners that gets eaten before anyone starts talking about vegetables. It’s familiar, creamy, and hard to argue with when the cheese stretches.
Why It Works
Mac and cheese is already a safe food for a lot of picky kids, so adding chicken doesn’t feel threatening when the texture stays soft and the sauce stays smooth. Cooking the pasta in broth lets it absorb flavor, and the cheese sauce comes together right in the pan instead of requiring a separate pot. It’s a tidy, practical dinner, which is a nice bonus when the evening is running late.
Key Ingredients
- 2 cups diced cooked chicken: Small pieces disappear into the pasta nicely.
- 8 ounces elbow macaroni: The classic shape for this dish.
- 3 cups chicken broth: Cooks the pasta in the pan.
- 1½ cups milk: For the cheese sauce.
- 2 cups shredded cheddar: Mild and melty.
- 2 tablespoons butter: Builds the sauce.
- 1 tablespoon flour: Helps thicken the liquid.
- 1 cup frozen peas, optional: A soft green add-in if accepted.
- Salt and pepper, to taste: Keep them light.
Quick Steps
- Cook the pasta: Simmer macaroni in broth until tender and most of the liquid is absorbed.
- Start the sauce: Stir in butter and flour, then add milk slowly.
- Melt the cheese: Add cheddar and stir until smooth and creamy.
- Add the chicken: Fold in diced chicken and peas if using.
- Serve hot: The sauce should coat the pasta but still look loose and glossy.
Tips and Variations
- Extra Creamy: Add a few spoonfuls of cream cheese if your family likes a thicker sauce.
- Crunch Option: A small sprinkle of buttered breadcrumbs on top gives texture without changing the flavor much.
- Leftover Fix: Add milk when reheating so the pasta doesn’t dry out.
Why the Familiar Route Usually Wins
These dinners lean on things kids already understand: chicken nuggets’ cousin, cheesy pasta, soft buns, mild sauce, and small pieces that don’t ask too much. That sounds simple, because it is. Simple is useful at dinner.
The trick is not to hide every vegetable or flatten every flavor into one note. It’s to build a plate that feels friendly on sight, then make the first bite taste better than expected. That’s where cheese, butter, rice, noodles, tortillas, and bread earn their keep.
Essential Equipment for Chicken Dinners Kids Will Eat
- Large sheet pan: Needed for tenders, roasted chicken, and anything that benefits from dry heat.
- 12-inch skillet: The workhorse for bites, fried rice, sauces, and quick skillet meals.
- 9×13-inch baking dish or casserole dish: Best for rice casseroles, pasta bakes, and pot pie-style dinners.
- Slow cooker: Useful for shredded chicken sandwiches and other low-effort meals.
- Large pot: Needed for pasta, soup, dumplings, and any dish with broth.
- Mixing bowls: A few bowls keep breading, sauce, and filling from turning into a mess.
- Measuring cups and spoons: Helpful for sauce balance, especially in sweet or creamy dishes.
- Instant-read thermometer: The easiest way to know chicken is done at 165°F without overcooking it.
- Box grater: Freshly grated cheese melts better than pre-shredded cheese.
- Wooden spoon or spatula: Good for stirring without scraping nonstick pans to death.
Smart Shopping and Ingredient Tips
Chicken choice matters more than people think. Boneless thighs stay juicy in skillet meals, casseroles, and slow-cooker recipes, while boneless breasts work well when the cooking time is short and controlled. If you’re making tenders, meatballs, or sliders, buying chicken that’s already cut or shredded can save the part of dinner prep that feels most annoying.
Cheese is another place where a small decision changes the result. A block of cheddar or Monterey Jack shredded by hand usually melts smoother than a bag of pre-shredded cheese, which often carries anti-caking powder. For casseroles and pasta bakes, that extra minute of grating pays off in texture.
Sauces should match the family’s threshold, not yours. Mild barbecue sauce, low-sodium soy sauce, and gentle enchilada sauce keep the flavor friendly without tasting bland. If a dish relies on broth, low-sodium broth gives you room to season the rest of the pan instead of locking yourself into a salty end result.
And if you’re shopping for pasta or grains, small shapes win. Egg noodles, orzo, rotini, penne, elbow macaroni, and rice are easier for kids than long, slippery strands when the meal needs to feel familiar. Save the fancy shapes for another night. Or don’t. But for picky eaters, plain shapes usually do more work.
How to Serve These Recipes
Presentation: Keep the serving style simple and neat. Chicken tenders look friendlier when stacked beside a small dip cup, casseroles scoop cleanly into wide shallow bowls, and sliders feel easier to eat when they’re cut in half.
Accompaniments: Build the plate around soft, safe sides: apple slices, steamed peas, carrot sticks, buttered corn, cucumber coins, garlic bread, plain rice, or mashed potatoes. If a vegetable has to fight for attention, it’s probably the wrong one for this dinner.
Portions: Most of these recipes serve 4 to 6 people, and the kid portion is usually smaller than the adult portion unless you have a child who treats dinner like a second lunch. For big appetites, add bread, rice, or pasta rather than making the chicken itself the only source of volume.
Beverage Pairing: Milk, water with lemon, or a mild fruit spritzer all fit the theme. For adults, iced tea or a light sparkling water keeps the meal feeling fresh without clashing with cheese, barbecue, or tomato sauces.
Additional Tips and Flavor Boosters

Flavor Enhancement: A small finishing move can help without making the dinner louder. A teaspoon of butter stirred into hot rice, a sprinkle of Parmesan over pasta, or a squeeze of lemon over chicken orzo can make the whole dish taste more finished.
Customization: Let each child pick a lane. One kid gets plain tenders and ketchup, another gets sauce on the side, and the vegetable can stay separate if that’s what keeps the peace. Sometimes the smartest move is not mixing everything together.
Serving Suggestions: Offer at least one dip, one soft side, and one fruit. That trio covers a lot of ground, and it gives hesitant kids a few safe things to choose from before they even touch the main dish.
Make-It-Yours: For dairy-free cooking, swap butter for olive oil and skip the cheese-heavy versions. For gluten-free meals, use GF breadcrumbs, GF pasta, corn tortillas, or rice. For lower-sodium dinners, lean on garlic powder, onion powder, herbs, and a squeeze of lemon instead of extra salt.
Make-Ahead, Storage, and Reheating Guidance
Most cooked chicken dinners keep well for 3 to 4 days in the refrigerator when sealed in shallow containers. Casseroles, shredded chicken, pasta bakes, and meatballs usually freeze well for up to 2 to 3 months, though the texture of cream-based sauces can soften a bit after thawing. Baked tenders and crispy items are the least forgiving; they’re still edible later, but they lose their best texture.
For reheating, the method matters. Casseroles and pot pies do best in a 325°F oven, covered loosely with foil, until hot in the center. Skillet dinners and saucy chicken usually reheat well over low heat on the stove with a splash of broth, milk, or water to loosen the sauce. Pasta dishes need a spoonful of liquid and a gentle stir so they don’t turn dry or gummy.
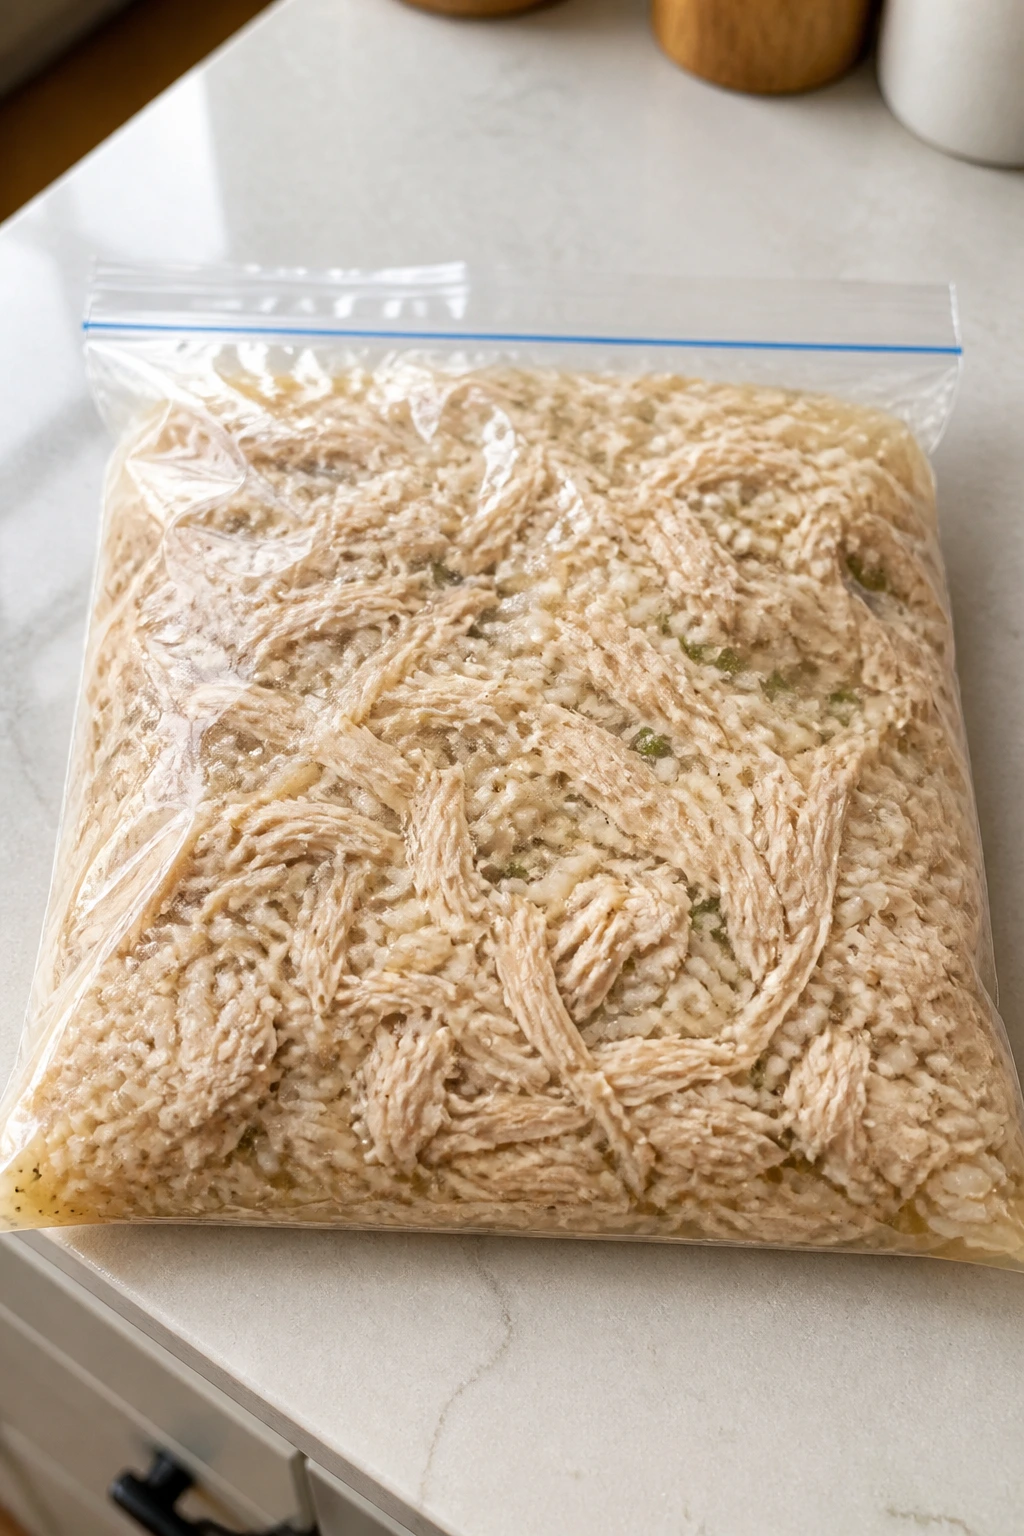
If you’re freezing, cool the food first, then portion it into flat containers or freezer bags. Flat bags thaw faster and save space. For best results, freeze sauces and chicken separately from crispy toppings, then add the topping fresh when you reheat.
Some of these meals are better the next day. Chicken and rice casserole, meatballs in marinara, and slow-cooker shredded chicken often settle into a more cohesive flavor overnight. Crispy tenders and sheet-pan chicken are best fresh, which is no surprise. Crunch is a short-lived thing.
Variations and Adaptations to Try
Gluten-Free Crunch Box: Use gluten-free breadcrumbs or crushed gluten-free cereal for tenders and meatballs, swap in GF pasta for baked dishes, and choose corn tortillas or rice for bowls and skillet meals. The flavor stays the same; the texture changes only a little.
Dairy-Light Swaps: Use olive oil instead of butter where you can, choose broth-based skillet meals, and skip extra cheese on the table if your household needs it. A little non-dairy cheese can work in casseroles, but it usually behaves better when mixed with a real melt-friendly cheese rather than standing alone.
Lower-Sodium Family Night: Buy low-sodium broth, low-sodium soy sauce, and mild sauces with simpler ingredient lists. Then build flavor with garlic powder, onion powder, paprika, lemon, or a little vinegar rather than more salt.
Veggie-Sneak Version: Finely grate zucchini into pasta bakes, stir cauliflower rice into fried rice, or mince carrots until they almost disappear into casseroles. Small pieces get noticed less than big ones, and soft vegetables usually do better than crunchy ones.
Mild Tex-Mex Shift: Use shredded chicken, mild salsa, cheddar, tortillas, and a little cumin to turn sliders, quesadillas, or skillet bakes into a dinner that tastes a little different without turning hot. This is the lane for families that want variety, not fireworks.
Common Mistakes to Avoid
Overcooking the chicken: Dry chicken is the fastest way to lose a picky eater’s trust. Use an instant-read thermometer and pull chicken at 165°F, especially in thin tenders, bite-size pieces, and breast meat.
Making every dish too saucy: Too much sauce turns crisp food limp and makes the plate feel messy. Add sauce gradually, then stop when it coats the food instead of flooding it.
Using vegetables in big chunks: Large carrot coins, chunky onions, and thick broccoli stems tend to get picked around. Cut vegetables small, soften them well, and tuck them into creamy or cheesy dishes when possible.
Thinking “kid food” means bland food: Bland is not the goal. Mild is the goal. Garlic powder, Parmesan, butter, paprika, ranch, and honey all add flavor without pushing kids out of the meal.
Skipping the rest time: Chicken tenders, casseroles, and skillet meals all settle as they sit for a few minutes. If you cut or scoop too early, the sauce runs, the crust slides, and the texture loses its shape.
Choosing the wrong cut for the job: Lean chicken breast can work beautifully in fast recipes, but it can dry out in slow cooks and long bakes. Thighs are the safer choice when the oven or crockpot is doing the heavy lifting.
Frequently Asked Questions

What chicken cut is best for picky kids?
Boneless, skinless chicken breasts are the most familiar, but thighs are often juicier and more forgiving. If the goal is tenderness and a soft bite, thighs usually win. If the goal is a very lean, mild piece, breasts still work well in quick-cooking dishes.
Can I use rotisserie chicken in these recipes?
Yes, and it saves a surprising amount of time. It works especially well in casseroles, quesadillas, sliders, pasta bakes, and sandwiches. Use it anytime the recipe calls for cooked shredded chicken.
How do I keep chicken from turning dry?
Do not overcook it, and use the right cut for the method. Fast pan recipes do fine with breasts, but long bakes, slow cooker meals, and casseroles usually stay juicier with thighs or a little added sauce.
What if my child hates visible vegetables?
Start with recipes where vegetables can be cut tiny or folded into a creamy base, like fried rice, casseroles, and skillet pasta. Broccoli florets, peas, carrots, and onions do better when they’re soft and small. Or serve vegetables on the side and keep the main dish simple.
Which recipe is the fastest on a busy night?
Chicken Caesar pita pockets, chicken quesadillas, orange chicken stir-fry, and honey butter chicken bites are all quick. If you already have cooked chicken, the pita pockets can be on the table in about 10 minutes.
Can I freeze chicken casseroles and pasta bakes?
Yes, most of them freeze well for 2 to 3 months. Creamy sauces can soften a little after thawing, so reheat gently and add a splash of milk or broth if needed. Crispy toppings are better added fresh.
How do I make these dinners less salty?
Use low-sodium broth, low-sodium soy sauce, and lighter hands with cheese and seasoning packets. Then build flavor with garlic powder, onion powder, paprika, lemon zest, or a little vinegar so the dish still tastes finished.
What if my kid only eats plain chicken?
Start there and build around it. Serve plain tenders, plain shredded chicken, or plain baked chicken with dipping sauces on the side. Once the chicken is accepted, the rice, pasta, or tortilla can carry more of the flavor later.
Are these good for meal prep?
Several are. Chicken and rice casserole, meatballs, shredded slow-cooker chicken, fried rice, and pasta bakes hold up well for a few days. Crisp items are better fresh, so save tenders and sheet-pan chicken for the night you want the best texture.
A Table That Gets More Clean Plates
These dinners work because they stay close to the food kids already trust, then nudge things forward with a little more flavor, a little more texture, and a lot less drama. That’s the whole trick, honestly. Familiar first, then gently better.
A few of these will become weekly regulars. Others will sit in the back pocket for the nights when everyone is tired, hungry, and not in the mood to negotiate with a fork.