
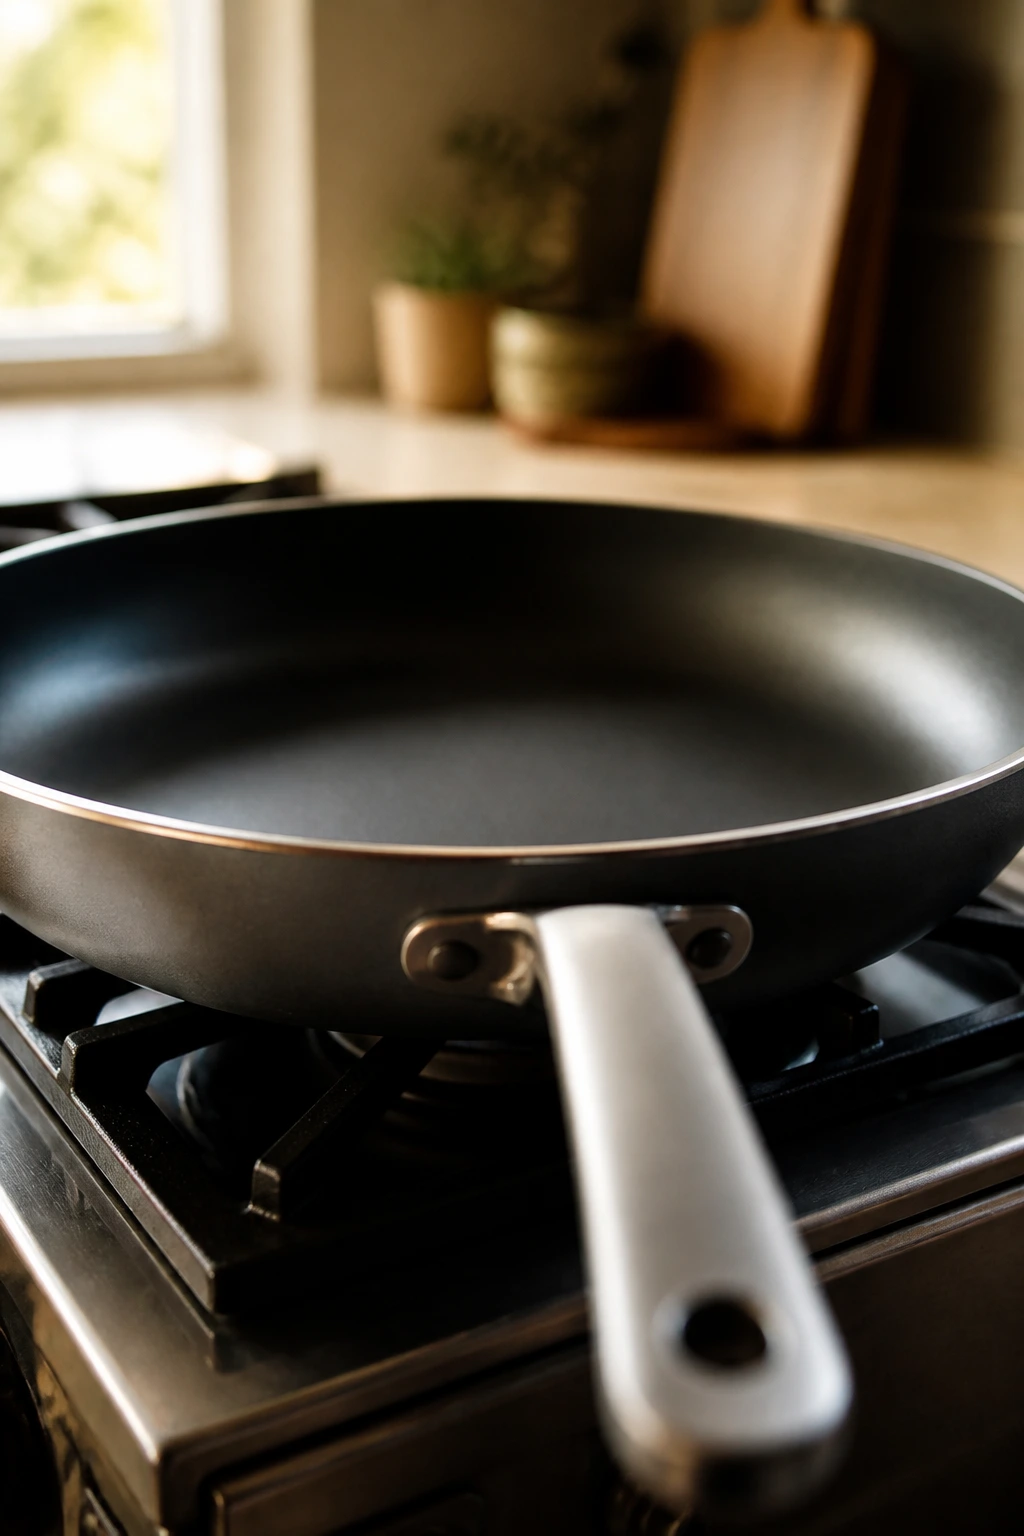
Easy dinners for first-time cooks should feel steady, not intimidating. A hot pan, a short ingredient list, and a recipe that tells you exactly when the food is done — that’s the sweet spot. You do not need a giant knife kit or a stack of special gadgets. You need dinners that behave.
The trick is that beginner cooking usually goes sideways for one reason: too many decisions at once. A pasta dish that asks you to boil, sauté, simmer, drain, and finish all in one breath can feel chaotic if you’ve never done it before. A good starter dinner does the opposite. It narrows the job down to a few familiar moves and gives you clear cues: the onions turn soft, the sauce thickens, the chicken hits 165°F, the cheese melts, the rice stops looking wet.
That is why this collection leans on skillet meals, sheet pan dinners, one-pot comfort food, and a few low-stress baked dishes. They teach useful habits without making you wrestle dinner into submission. Good food, in other words, without the circus.
Why These Easy Dinners Work for First-Time Cooks
- Simple timing: Most of these recipes ask you to do one thing at a time, so you can watch the pan instead of juggling three burners.
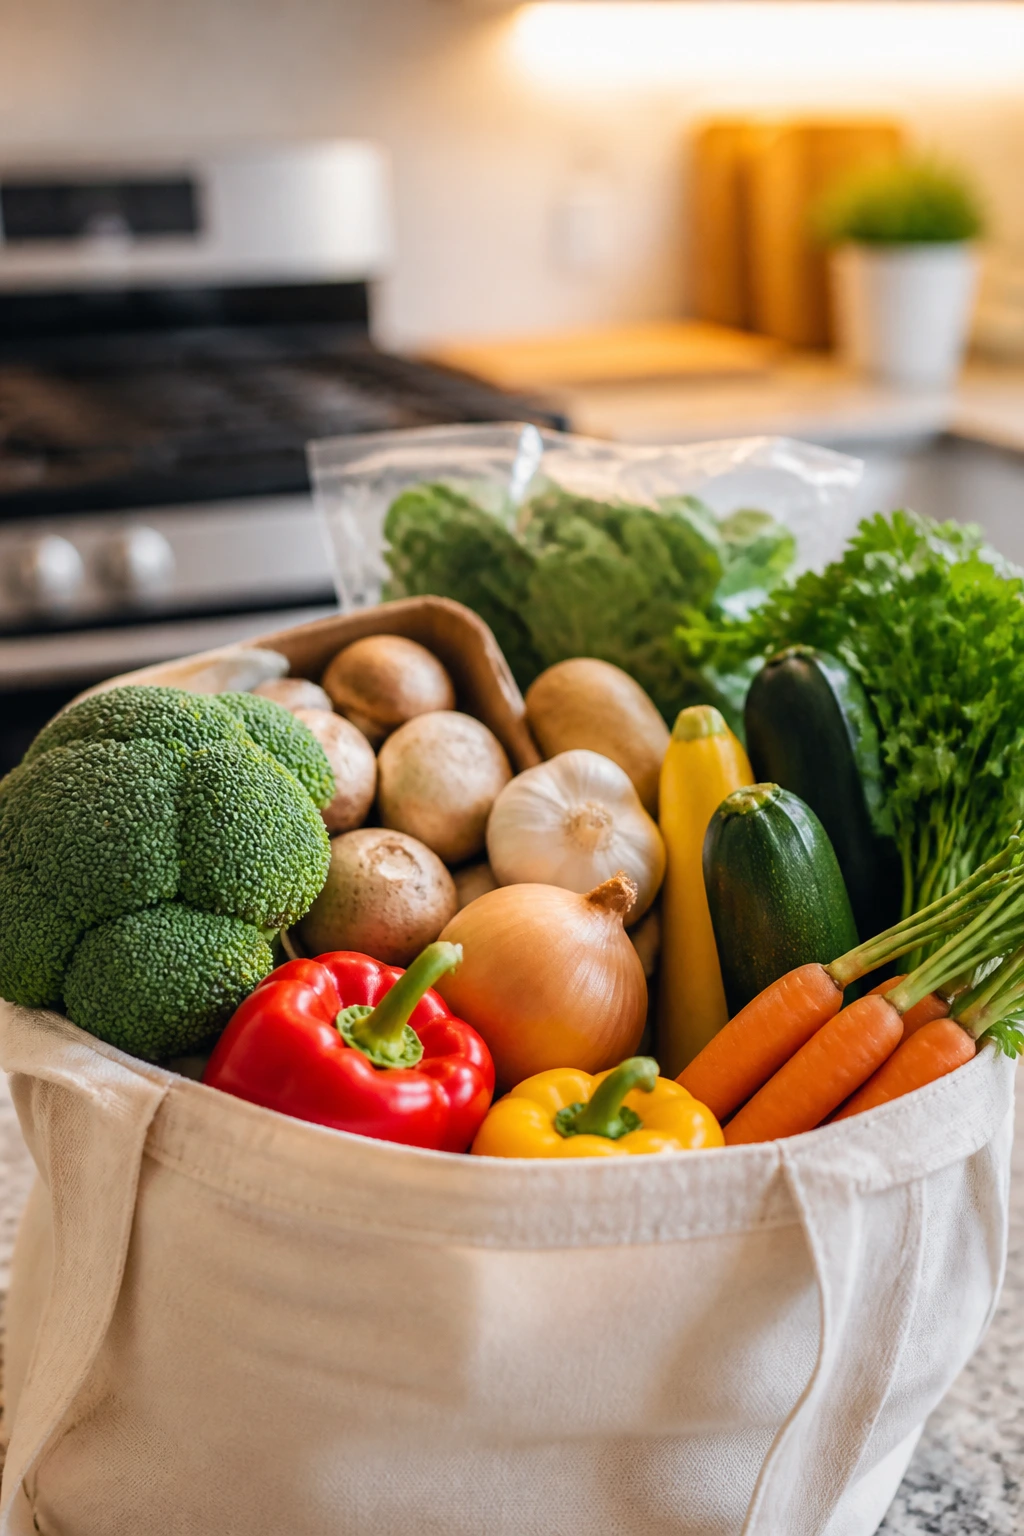
- Familiar ingredients: Ground meat, pasta, tortillas, rice, frozen vegetables, and jarred sauce show up often because they make dinner less brittle.
- Forgiving methods: Sheet pan meals, soups, and saucy pastas give you a little margin if your heat runs a touch high or your chop is uneven.
- Fast cleanup: Fewer pots means fewer dishes, and fewer dishes means you’re more likely to cook again tomorrow.
- Real kitchen skills: You’ll practice browning, simmering, roasting, and saucing — the workhorse techniques that show up in home cooking all the time.
- Built-in comfort: These meals are the kind that taste familiar on purpose. That matters when you’re learning and you want dinner to feel like a win.
1. Spaghetti with Easy Meat Sauce
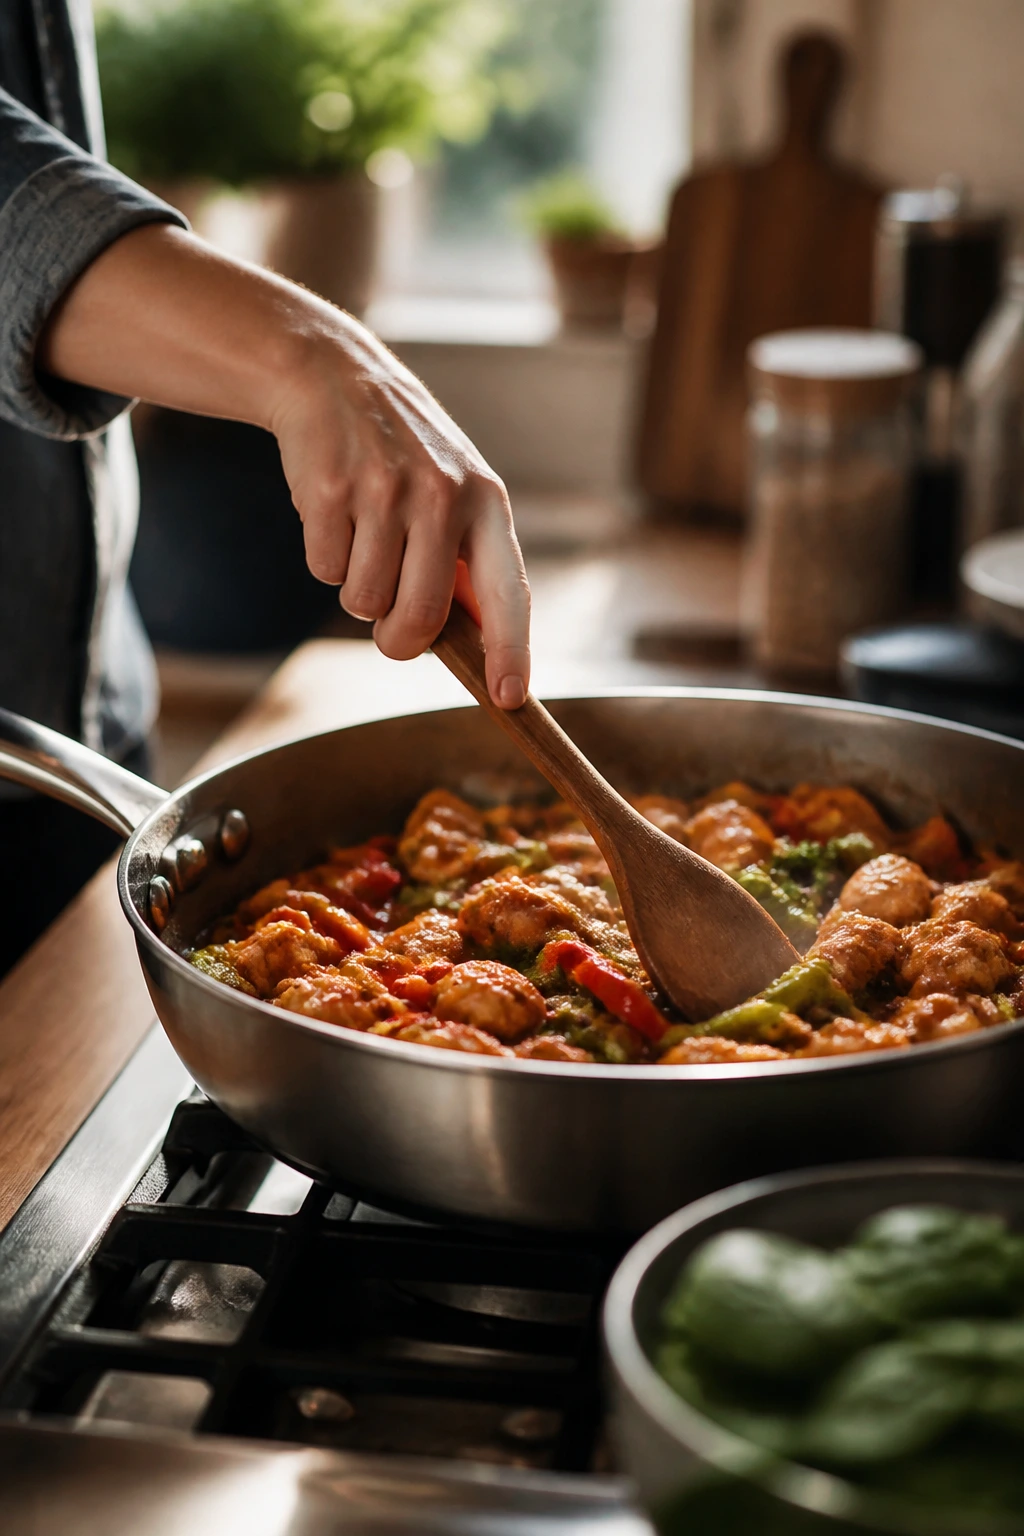
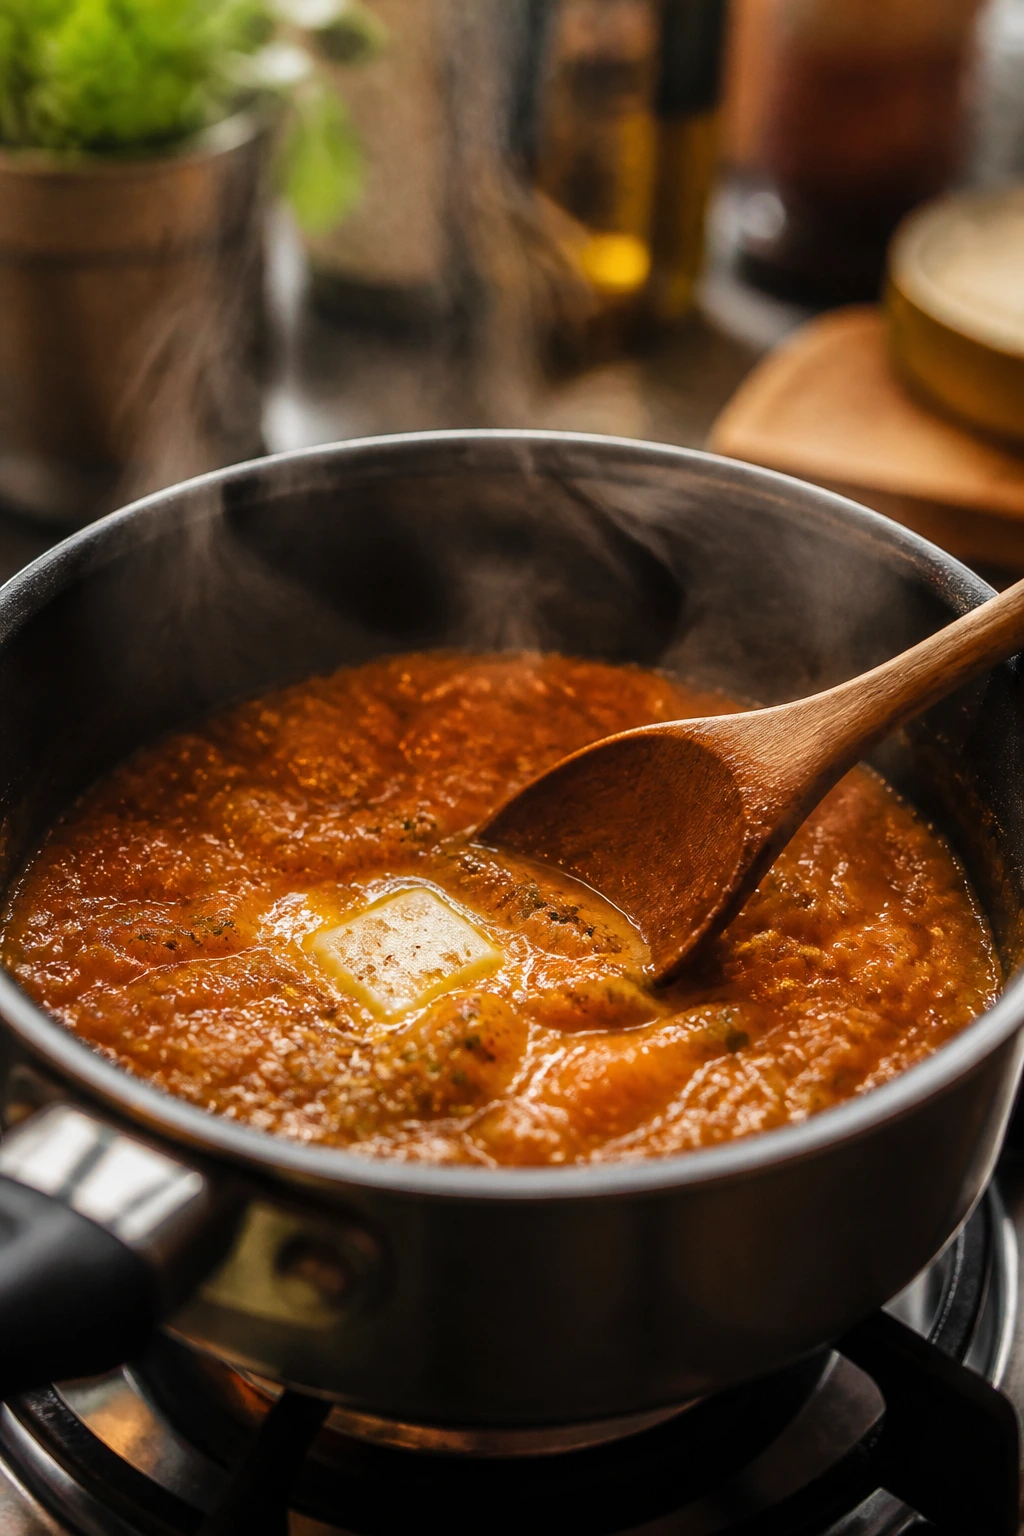
A skillet of meat sauce is one of the kindest places to start. The garlic softens in the oil, the tomato sauce takes on a deeper, richer smell, and the pasta gives you something concrete to finish while the sauce simmers. It looks like a real dinner without asking for a real chef.
Why It Works
This is the classic beginner move because the sauce does most of the heavy lifting. Browning the beef builds flavor fast, and a jar of marinara gives you a strong base without forcing you to make sauce from scratch. A little reserved pasta water helps the sauce cling to the spaghetti instead of sliding off in a thin red puddle. Good texture, easy timing, no drama.
Key Ingredients
- 12 oz spaghetti — regular spaghetti works fine, though thin spaghetti cooks a minute faster.
- 1 tbsp kosher salt — for the pasta water; it should taste pleasantly salty.
- 1 tbsp olive oil — helps the beef brown and keeps the onion from sticking.
- 1 lb ground beef — 85/15 gives flavor without a greasy pan.
- 1 small yellow onion, finely diced — melts into the sauce and keeps the meat from tasting flat.
- 3 cloves garlic, minced — add near the end so it stays sweet.
- 2 tbsp tomato paste — a little spoonful of depth.
- 1 jar (24 oz) marinara sauce — choose a plain one with ingredients you can pronounce.
- 1 tsp dried oregano — gives the sauce a familiar Italian-style note.
- 1/2 tsp black pepper — enough to sharpen the sauce without making it hot.
- 1/2 cup reserved pasta water — helps the sauce coat the noodles.
- 1/2 cup grated Parmesan — salty finish, stirred in at the end.
- 2 tbsp chopped parsley — optional, but the green color helps the plate.
Quick Steps
- Boil the Pasta: Bring a large pot of water to a boil, salt it well, and cook the spaghetti until al dente, usually 8 to 10 minutes. Reserve 1/2 cup of the pasta water before draining.
- Brown the Beef: Warm the olive oil in a large skillet over medium heat. Add the onion and beef, breaking the meat into small crumbles, and cook for 6 to 8 minutes until the beef is no longer pink and the onion is soft.
- Build the Flavor: Stir in the garlic and tomato paste and cook for 1 minute, until the paste darkens slightly and smells sweet, not sharp.
- Simmer the Sauce: Pour in the marinara, oregano, and pepper. Lower the heat and simmer for 8 to 10 minutes, stirring now and then, until the sauce looks thicker and glossy.
- Finish the Pasta: Add the drained spaghetti and a splash of the reserved pasta water. Toss until the sauce clings to the noodles. Stir in the Parmesan.
- Serve: Top with parsley and extra cheese if you want it. The sauce should look thick enough to sit on the pasta instead of pooling under it.
Tips and Variations
- Make it milder: Skip the pepper flakes and use a sweet marinara if you want a softer flavor.
- Stretch the batch: Stir in a cup of spinach during the last minute of simmering; it wilts fast and disappears into the sauce.
- Use what you have: Ground turkey works here too, though it likes an extra pinch of salt.
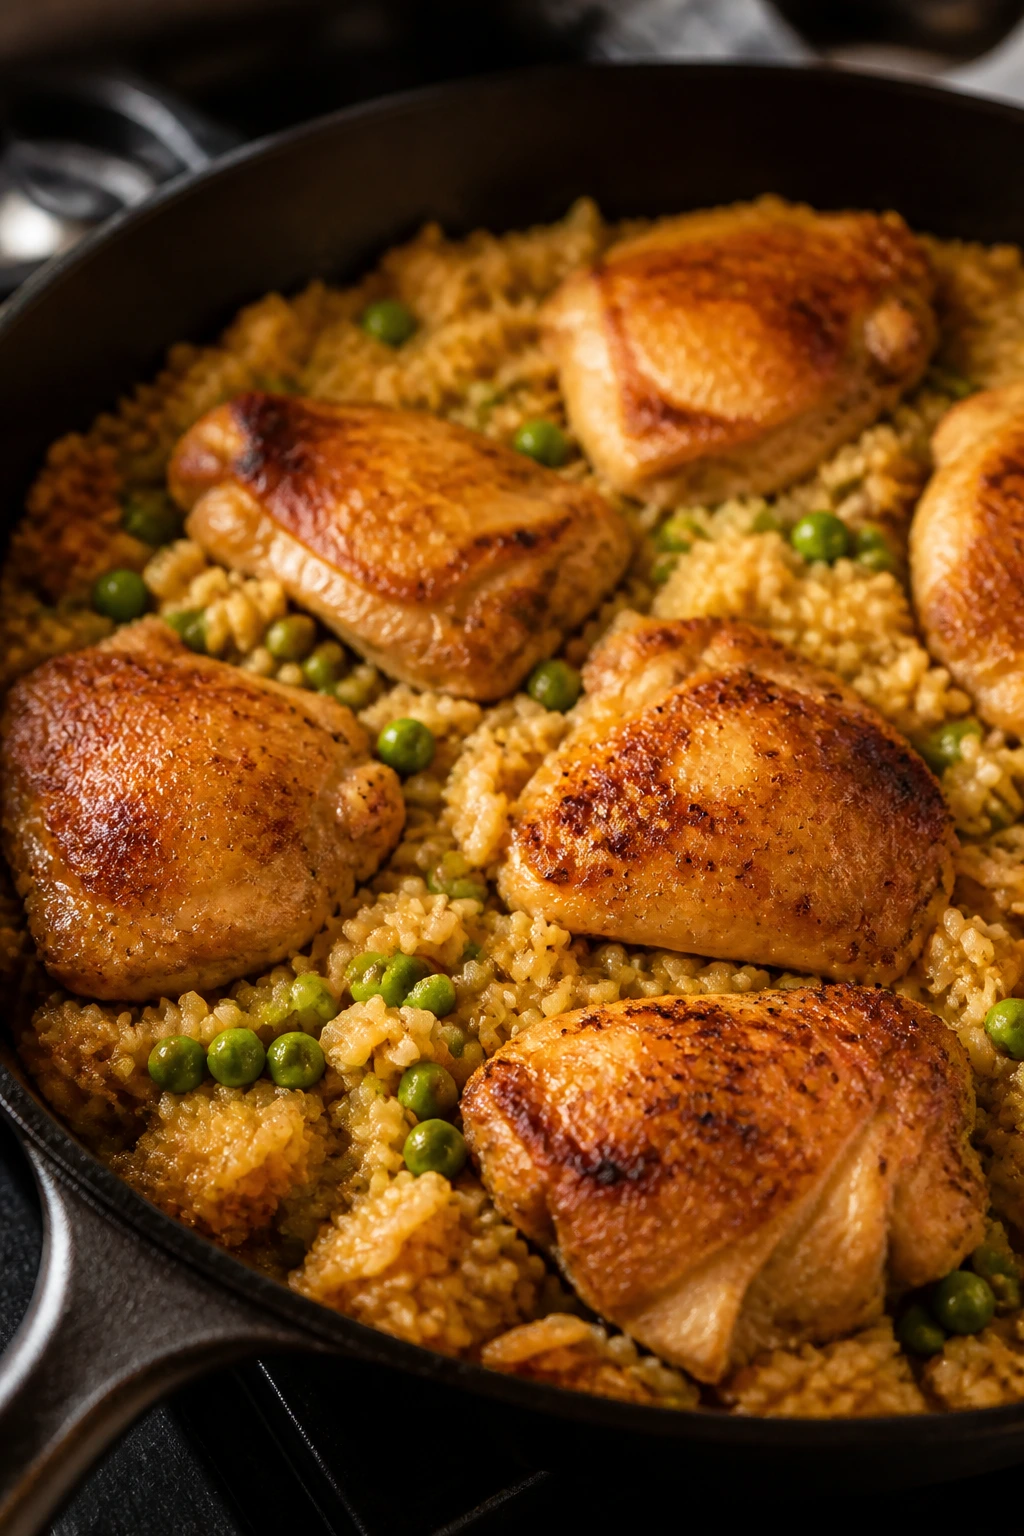
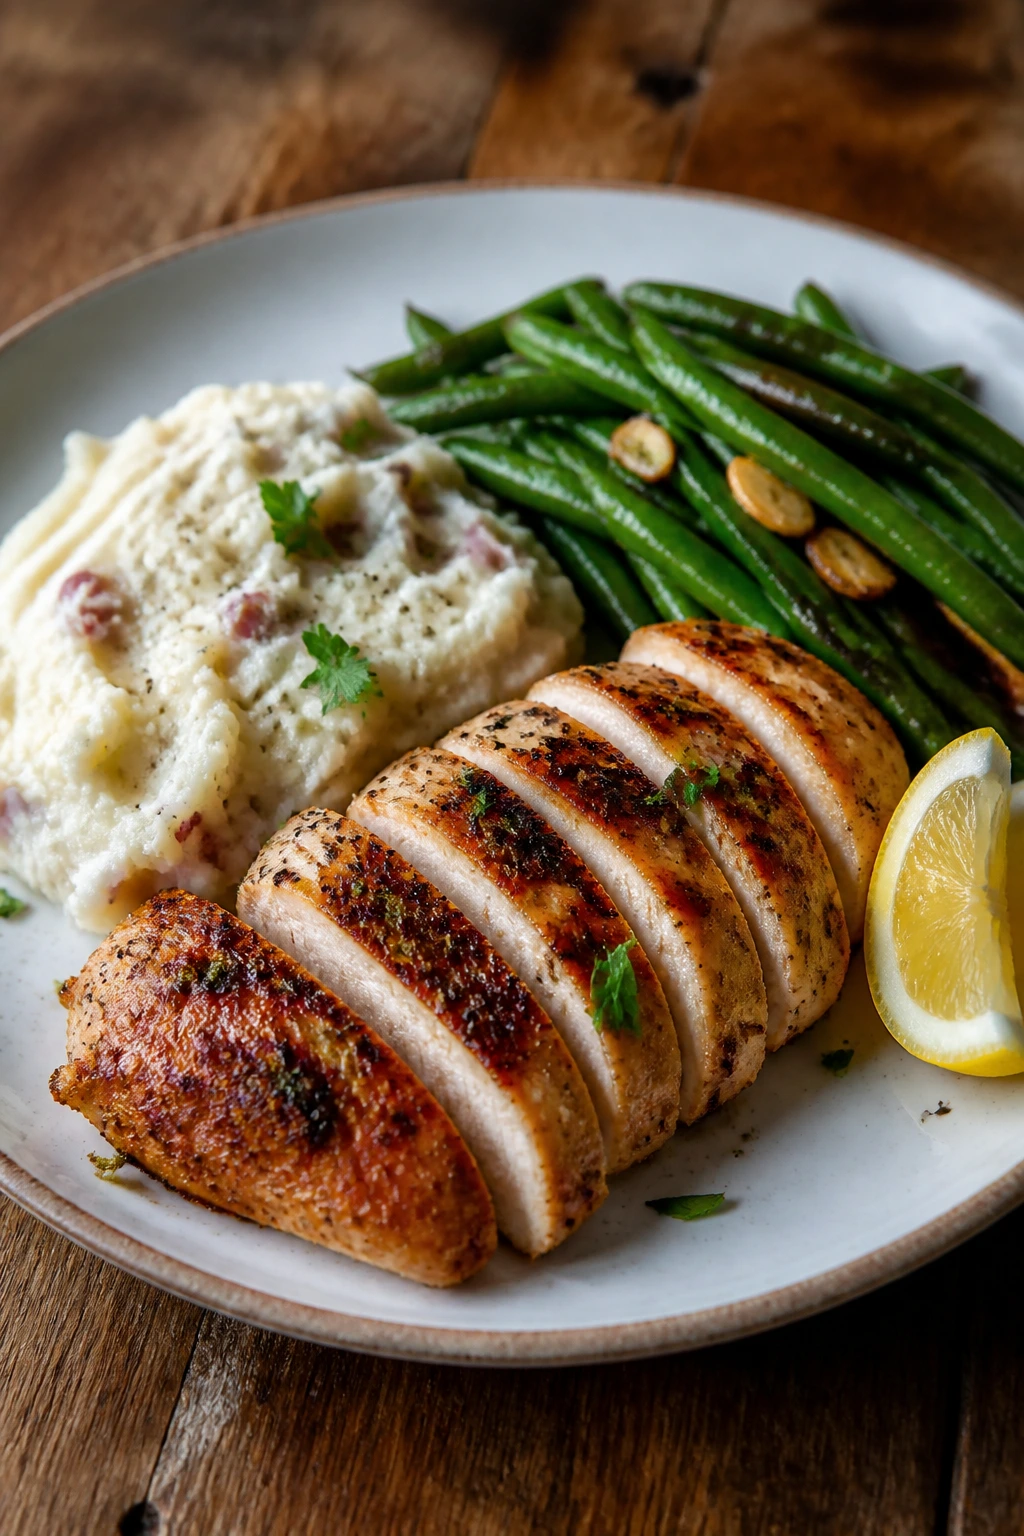
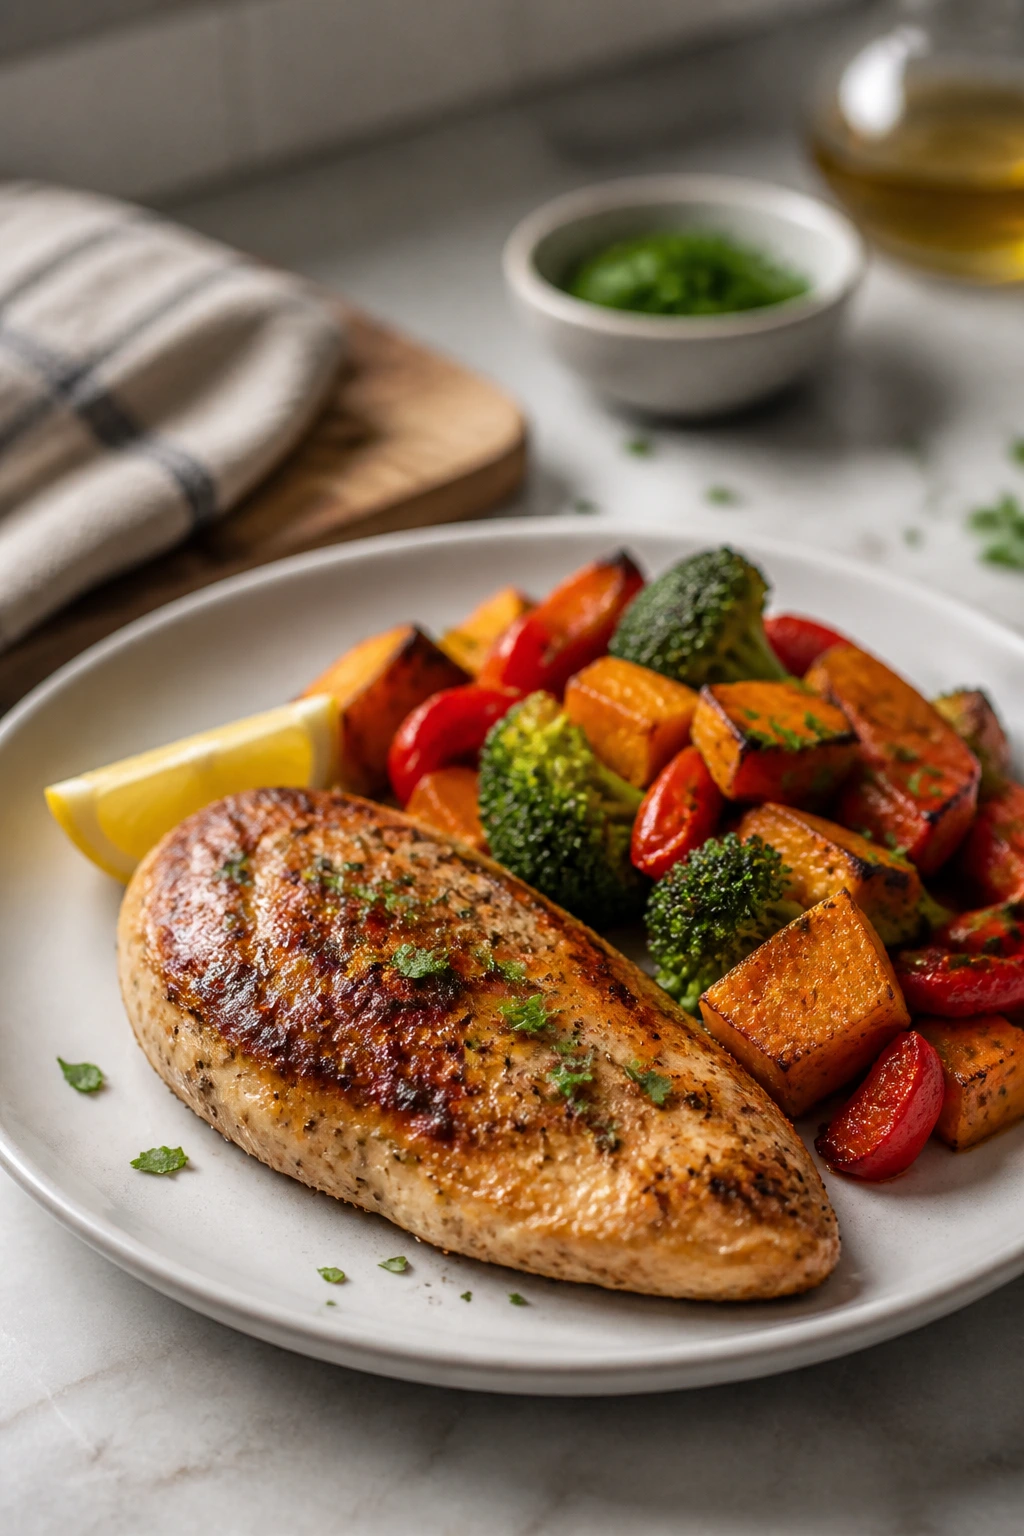
2. Sheet Pan Chicken Thighs with Potatoes and Carrots
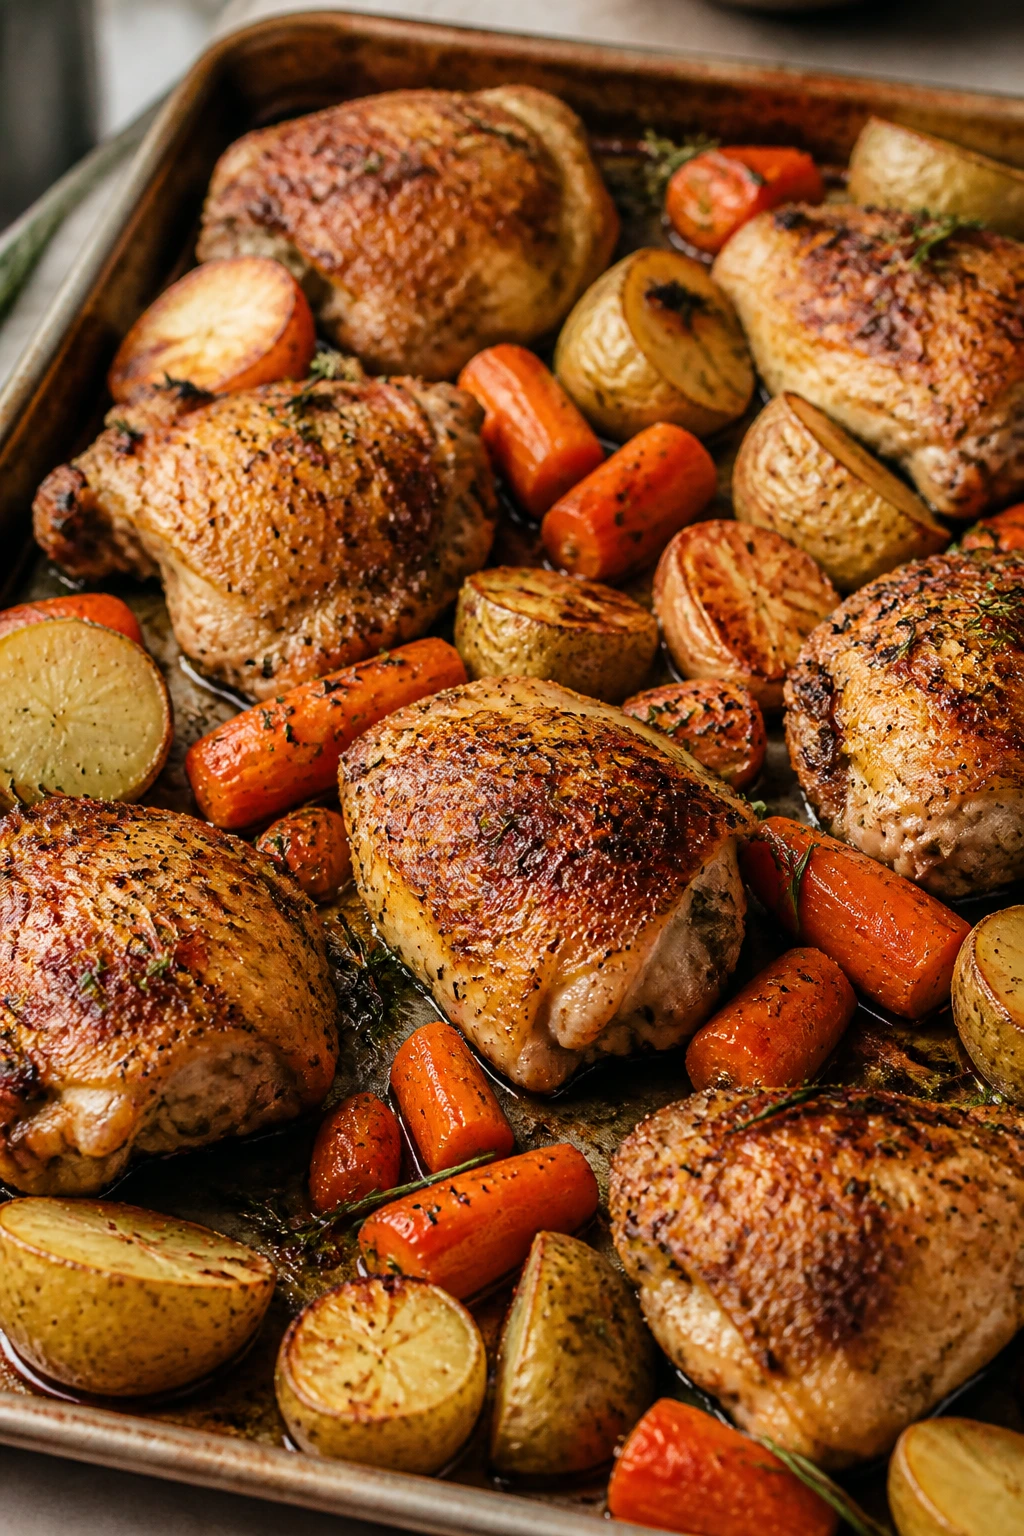
Sheet pan chicken is the recipe that calms a nervous kitchen. The potatoes roast into browned corners, the carrots go sweet, and the chicken gives off enough juices to season the vegetables below it. Everything lands on one tray. That alone makes it worth keeping in your back pocket.
Why It Works
Chicken thighs are friendly to beginners because they stay juicy even if you leave them in the oven a minute too long. The vegetables cook in the same heat, which means dinner runs on one clock instead of three. Roasting at a fairly high temperature gives the potatoes color before the carrots turn limp. That contrast — crisp edges, tender centers — is what makes sheet pan dinners feel like more than a shortcut.
Key Ingredients
- 1 1/2 lb boneless, skinless chicken thighs, trimmed — thighs are more forgiving than breasts.
- 1 lb baby potatoes, halved — small potatoes cook evenly and brown well.
- 3 medium carrots, peeled and cut into 1-inch pieces — similar size matters here.
- 2 tbsp olive oil — enough to coat the pan without making it greasy.
- 1 tsp kosher salt — helps the chicken and vegetables season from the start.
- 1/2 tsp black pepper — a mild kick.
- 1 tsp garlic powder — easier than mincing fresh garlic on a busy night.
- 1 tsp paprika — gives color and a gentle smoky note.
- 1 tsp dried thyme — keeps the dish in the roast-dinner lane.
- 1 lemon, cut into wedges — the squeeze at the end wakes everything up.
Quick Steps
- Heat the Oven: Set the oven to 425°F (220°C) and line a large sheet pan with parchment or foil for easier cleanup.
- Season the Vegetables: Toss the potatoes and carrots with 1 tablespoon of olive oil, half the salt, half the pepper, half the garlic powder, and half the paprika.
- Add the Chicken: Pat the chicken thighs dry, then rub them with the remaining oil, salt, pepper, garlic powder, paprika, and thyme.
- Arrange on the Pan: Spread the vegetables out in a single layer and place the chicken among them. Leave space between the pieces so they roast instead of steam.
- Roast: Bake for 35 to 40 minutes, until the chicken reaches 165°F in the thickest part and the potatoes are tender with browned edges.
- Rest and Finish: Let the tray rest for 5 minutes, then squeeze lemon over the top. The lemon should smell bright the second it hits the hot pan.
Tips and Variations
- Don’t crowd the pan: If the vegetables are piled on top of one another, they’ll go soft before they brown.
- Swap the vegetables: Parsnips, sweet potatoes, or broccoli can stand in for carrots if you cut them to a similar size.
- Add a sauce later: A spoonful of yogurt mixed with lemon and garlic makes a quick drizzle if you want more tang.
3. Ground Beef Tacos with Simple Fixings

Taco night is one of the easiest ways to learn how a hot pan behaves. The beef browns fast, the seasoning smells like dinner almost immediately, and everyone at the table gets to build their own plate. That part matters more than people admit. Choice makes beginners feel capable.
Why It Works
Ground beef is one of the least demanding proteins in the kitchen. It cooks quickly, tells you when it’s browned by changing color, and forgives a little inattention if the heat stays medium. Taco seasoning gives you a built-in spice mix, so you don’t have to guess at ratios of cumin, chili powder, and paprika. Add the toppings at the end and you get a meal that feels personal without making extra work.
Key Ingredients
- 1 tbsp olive oil — helpful if you use lean beef.
- 1 lb ground beef — 85/15 is a nice middle ground.
- 1 small onion, finely diced — optional, but it adds sweetness.
- 2 tbsp taco seasoning — store-bought or homemade; both work.
- 1/2 cup water — helps the seasoning coat the meat.
- 8 taco shells or small flour tortillas — choose hard shells for crunch or tortillas for flexibility.
- 1 cup shredded lettuce — cool contrast.
- 1 cup diced tomatoes — fresh and juicy.
- 1 cup shredded cheddar — melts a little on contact.
- 1/2 cup salsa — the simplest finishing sauce.
- 1/4 cup sour cream — optional, for richness.
- 1 avocado, sliced — optional, but very welcome.
Quick Steps
- Cook the Beef: Warm the oil in a skillet over medium heat. Add the onion, if using, and cook for 2 minutes. Add the beef and break it up with a spoon.
- Brown and Drain: Cook for 6 to 8 minutes, until the beef has no pink left and the edges start to brown. Drain off extra fat if needed.
- Season: Stir in the taco seasoning and water. Simmer for 3 to 4 minutes, until the mixture looks thick and clings to the meat.
- Warm the Shells: Heat the taco shells or tortillas according to the package directions so they bend and fill easily.
- Assemble: Fill each shell with beef, lettuce, tomatoes, cheese, salsa, and sour cream or avocado if you like.
- Serve Right Away: Taco shells soften if they sit too long, so bring them to the table while the filling is still hot.
Tips and Variations
- Prep toppings first: Chop the lettuce and tomatoes before you turn on the stove. Once the meat is done, dinner is ready fast.
- Go softer if you’re nervous: Flour tortillas are easier to fill than hard shells and less likely to crack.
- Make it bean-heavy: Add 1 cup of rinsed black beans to stretch the filling and make it more filling.
4. Baked Ziti with Mozzarella
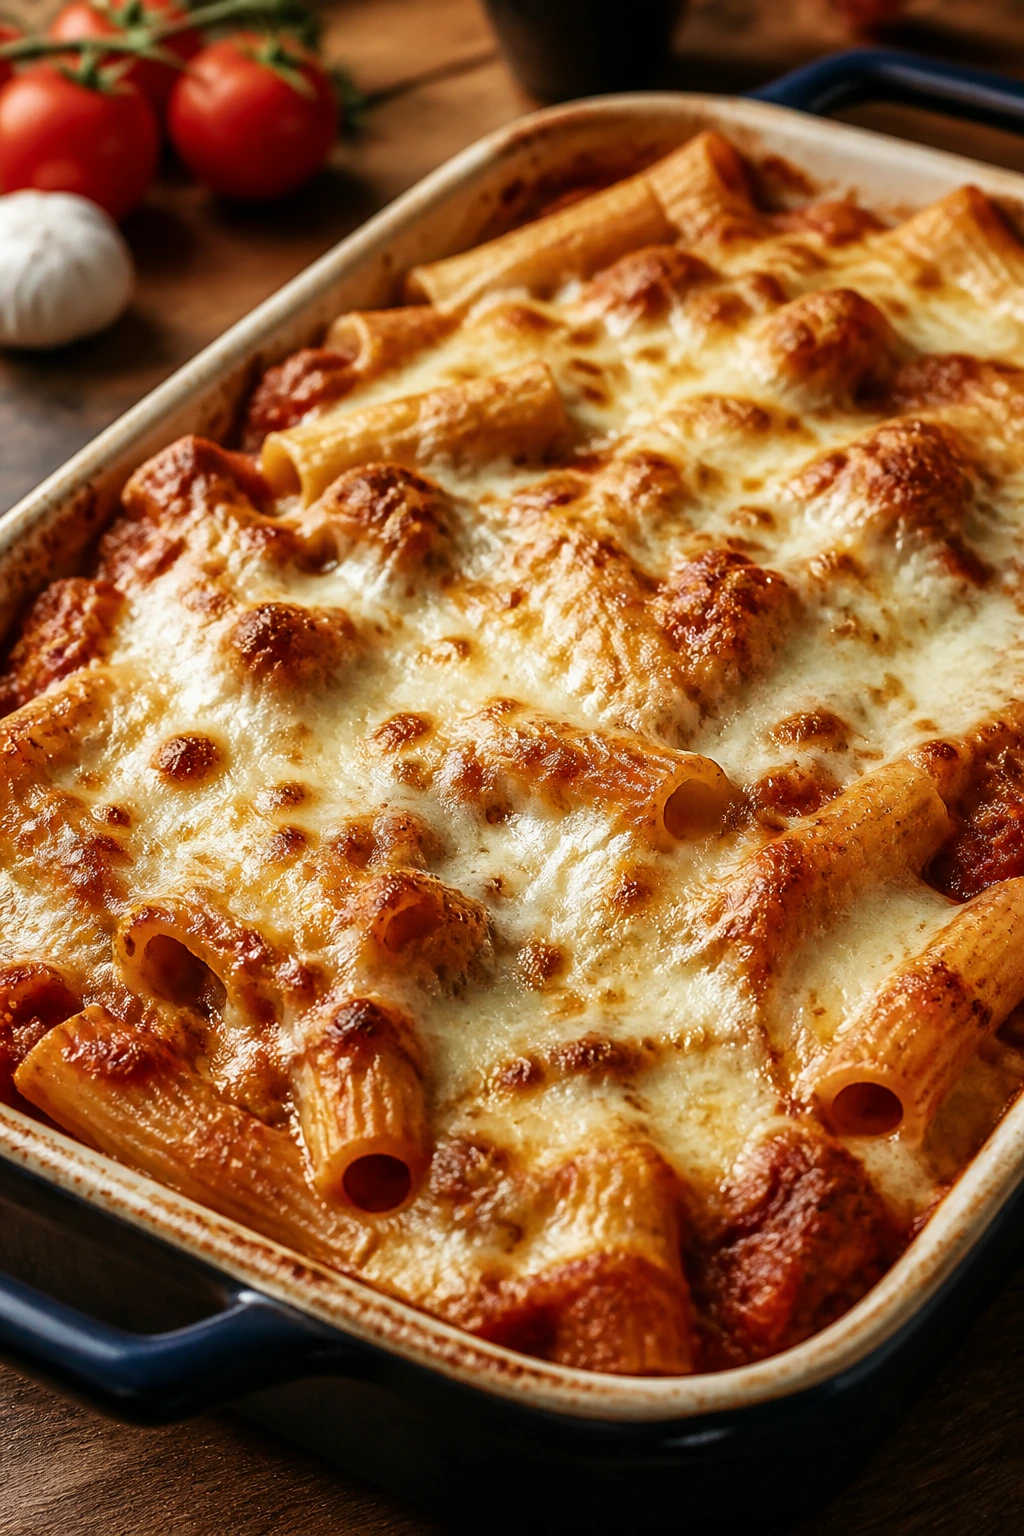
Baked ziti is comfort food with training wheels. The ricotta makes the middle creamy, the marinara keeps the pasta from drying out, and the mozzarella on top turns into a browned lid that looks more complicated than it is. If you’ve never baked pasta before, this is a very kind place to begin.
Why It Works
The real trick here is keeping the pasta a little underdone before it goes into the oven. That way it finishes in the sauce instead of going mushy. Mixing ricotta with egg and Parmesan gives you a soft, rich layer that holds together when served. This is the sort of dinner that improves if it sits for 10 minutes, which is helpful because beginners often need that pause.
Key Ingredients
- 12 oz ziti or penne — either shape catches sauce well.
- 1 lb ground beef or mild Italian sausage — beef is easier; sausage brings more seasoning.
- 1 tbsp olive oil — for the pan.
- 1 small onion, diced — builds a sweeter base.
- 2 cloves garlic, minced — keep it short so it doesn’t burn.
- 1 jar (24 oz) marinara sauce — the backbone of the dish.
- 1 tsp dried basil — simple herb flavor.
- 1/2 tsp salt — adjust if your sauce is already salty.
- 1/4 tsp black pepper — enough for balance.
- 1 cup ricotta — for the creamy layer.
- 1 large egg — helps the ricotta hold shape.
- 1/2 cup grated Parmesan — adds salt and depth.
- 2 cups shredded mozzarella, divided — half inside, half on top.
- 2 tbsp chopped parsley — optional garnish.
Quick Steps
- Heat the Oven: Set the oven to 375°F (190°C) and grease a 9×13-inch baking dish.
- Cook the Pasta: Boil the ziti in salted water until it is 2 minutes shy of al dente. Drain well.
- Make the Sauce: Brown the beef with the onion in a skillet over medium heat. Add the garlic, then pour in the marinara, basil, salt, and pepper. Simmer for 5 minutes.
- Mix the Cheese Layer: Stir together the ricotta, egg, Parmesan, and 1 cup of mozzarella.
- Assemble: Toss the pasta with the sauce, then spread half into the baking dish. Dollop on the ricotta mixture, add the rest of the pasta, and finish with the remaining mozzarella.
- Bake and Rest: Cover with foil and bake for 20 minutes. Uncover and bake 10 minutes more, until the cheese is bubbling and lightly browned. Rest for 10 minutes before serving.
Tips and Variations
- Undercook the pasta a bit: It keeps its shape after baking.
- Use a deeper dish if you double it: A crowded pan steams instead of browns.
- Add spinach or chopped mushrooms: Stir them into the sauce for a little more vegetable heft.
5. Baked Lemon Butter Salmon with Green Beans
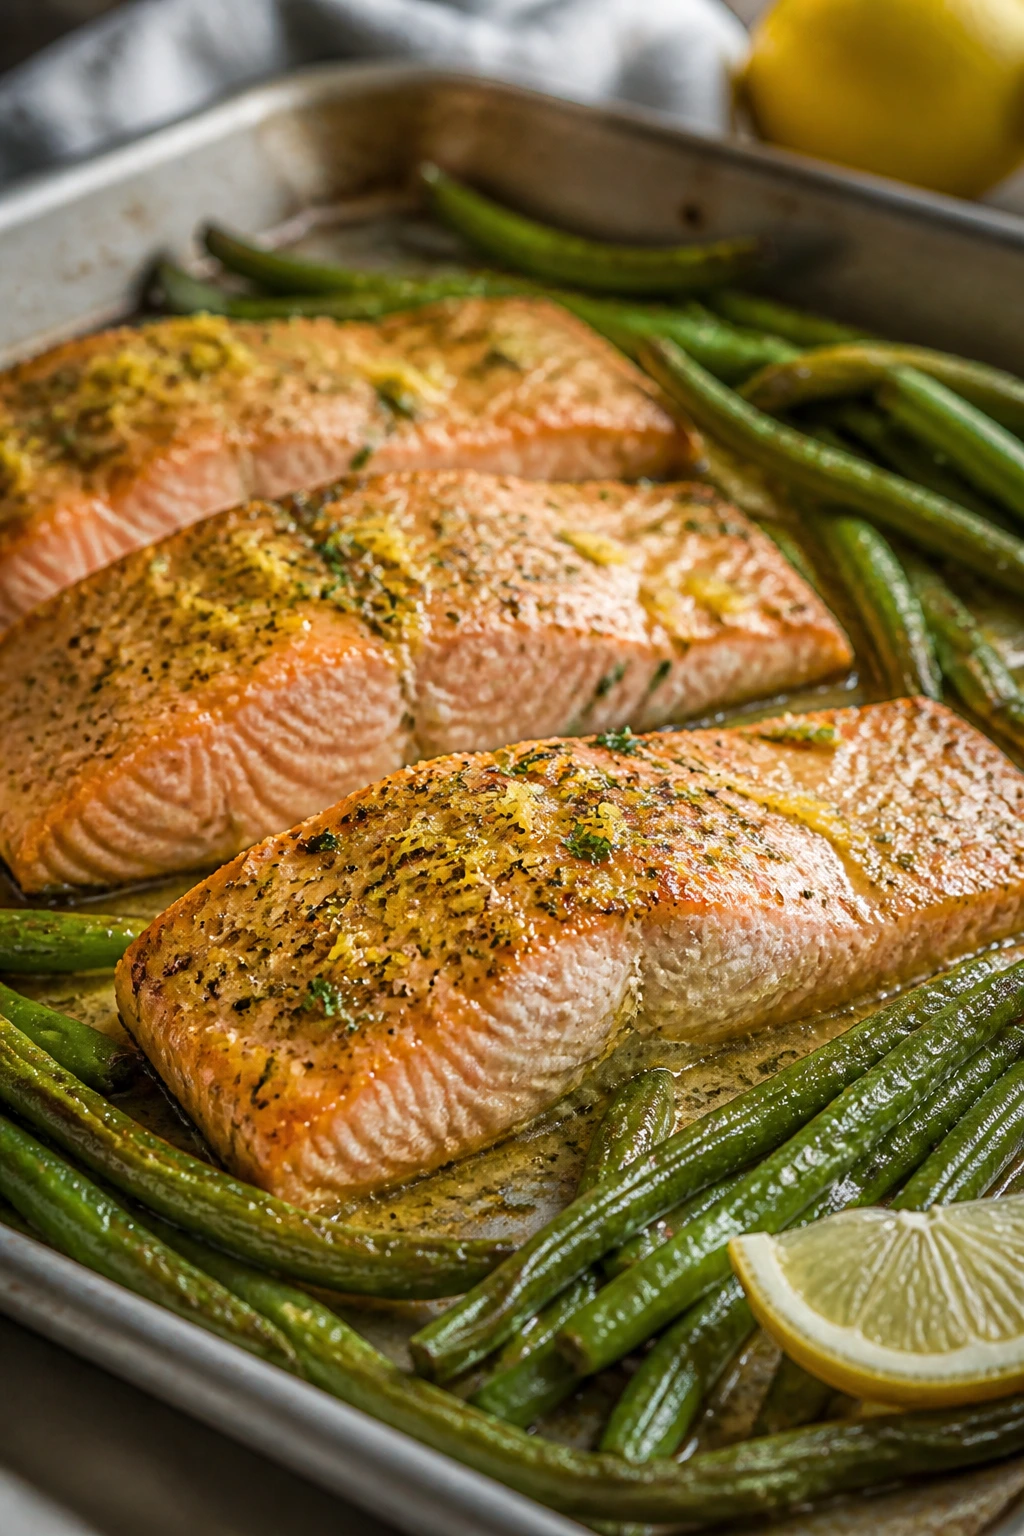
Baked salmon is the gentle version of fish cookery. No flipping. No smoke-filled skillet. The green beans roast beside it, the butter melts into a glossy sauce, and the lemon makes the whole tray smell bright before it even reaches the table. Clean, fast, and merciful.
Why It Works
Fish can scare new cooks because overcooking is so easy in a pan. The oven takes away some of that pressure, and salmon is rich enough to stay moist even after a few extra minutes. Green beans cook at the same rate if they’re spread out in a single layer, so you get a whole meal from one sheet pan. A little lemon zest in the butter makes the dish taste fresher without needing a long ingredient list.
Key Ingredients
- 4 salmon fillets, 5 to 6 oz each — center-cut fillets cook more evenly.
- 12 oz green beans, trimmed — fresh works best here.
- 2 tbsp olive oil, divided — one spoon for the beans, one for the salmon if needed.
- 1/2 tsp kosher salt — season both the fish and the vegetables.
- 1/2 tsp black pepper — keep it light.
- 1/2 tsp garlic powder — a little flavor without chopping more garlic.
- 2 tbsp butter, melted — the sauce base.
- 2 tbsp fresh lemon juice — brightens the fish.
- 1 tsp lemon zest — adds aroma.
- 2 cloves garlic, minced — stir into the butter.
- 1 tbsp chopped dill or parsley — optional, but worth it.
- Lemon slices — for serving.
Quick Steps
- Heat the Oven: Set the oven to 400°F (200°C) and line a baking sheet with parchment.
- Season the Beans: Toss the green beans with 1 tablespoon of olive oil, half the salt, and a little pepper. Spread them on one side of the pan.
- Prepare the Salmon: Pat the fillets dry, brush with the remaining oil if needed, and season with the rest of the salt, pepper, and garlic powder.
- Mix the Butter Sauce: Stir together the melted butter, lemon juice, lemon zest, and minced garlic.
- Bake: Place the salmon on the pan beside the green beans and brush the butter mixture over the fish. Bake for 12 to 15 minutes, until the salmon flakes with a fork and the beans are crisp-tender.
- Finish: Sprinkle with herbs and serve with lemon slices. The top of the fish should look opaque but still moist.
Tips and Variations
- Use parchment: It keeps the fish from sticking and makes cleanup easy.
- Watch the last 2 minutes: Salmon goes from tender to dry faster than chicken.
- Swap the herbs: Dill gives a more classic fish-house feel; parsley keeps the flavor cleaner.
6. Chicken Quesadillas
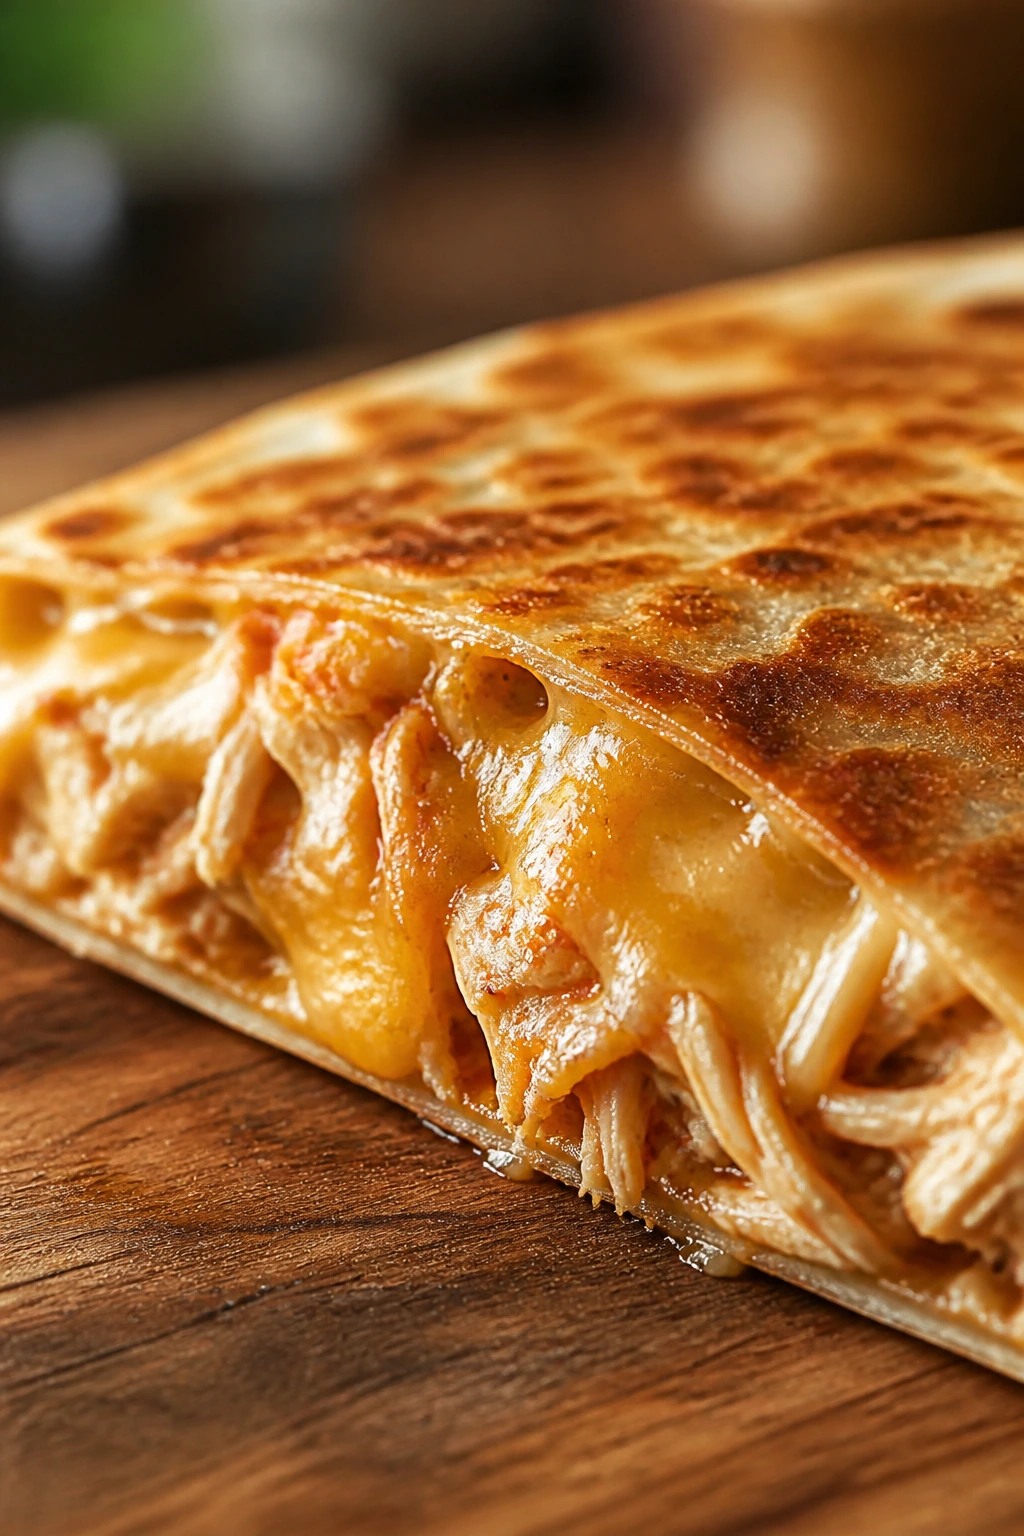
Chicken quesadillas are what happens when dinner needs to be fast and friendly. The tortilla crisps up, the cheese turns molten, and the filling stays flexible enough for almost any leftover chicken you have. Slice them into wedges and they look like you planned ahead. Nice trick.
Why It Works
The beauty of a quesadilla is that it teaches heat control without making you babysit a pot. You only need medium heat, a little butter or oil, and a pan you trust. Cook too hot and the tortilla burns before the cheese melts; keep it moderate and the whole thing comes together in minutes. That lesson alone is worth making them.
Key Ingredients
- 2 cups cooked shredded chicken — rotisserie chicken is the easiest route.
- 1 1/2 cups shredded Monterey Jack or cheddar — cheese that melts without fuss.
- 1/2 cup salsa — adds moisture and flavor.
- 1/4 cup chopped green onions — a quick fresh bite.
- 1/4 tsp ground cumin — gives the filling a warm base note.
- 4 large flour tortillas — flexible and easy to fold.
- 1 tbsp butter or oil — for crisping the tortillas.
- Sour cream or guacamole — optional for serving.
Quick Steps
- Mix the Filling: Stir the chicken, salsa, green onions, and cumin together in a bowl.
- Heat the Pan: Warm a large skillet over medium heat and add the butter or oil.
- Build the Quesadilla: Place one tortilla in the skillet, then sprinkle cheese over half of it. Add a layer of chicken filling and a little more cheese on top.
- Fold and Cook: Fold the tortilla over and cook for 2 to 3 minutes per side, pressing lightly with a spatula, until the outside is golden and the cheese has melted.
- Repeat: Cook the remaining quesadillas the same way.
- Slice and Serve: Let them sit for 1 minute before cutting. If you slice too early, the cheese runs out.
Tips and Variations
- Do not overfill them: A quesadilla that looks packed usually leaks.
- Try beans: Black beans can replace half the chicken for a cheaper, meat-light version.
- Make them ahead carefully: Cook the chicken filling in advance, then crisp the tortillas fresh.
7. Ground Beef and Broccoli Stir-Fry
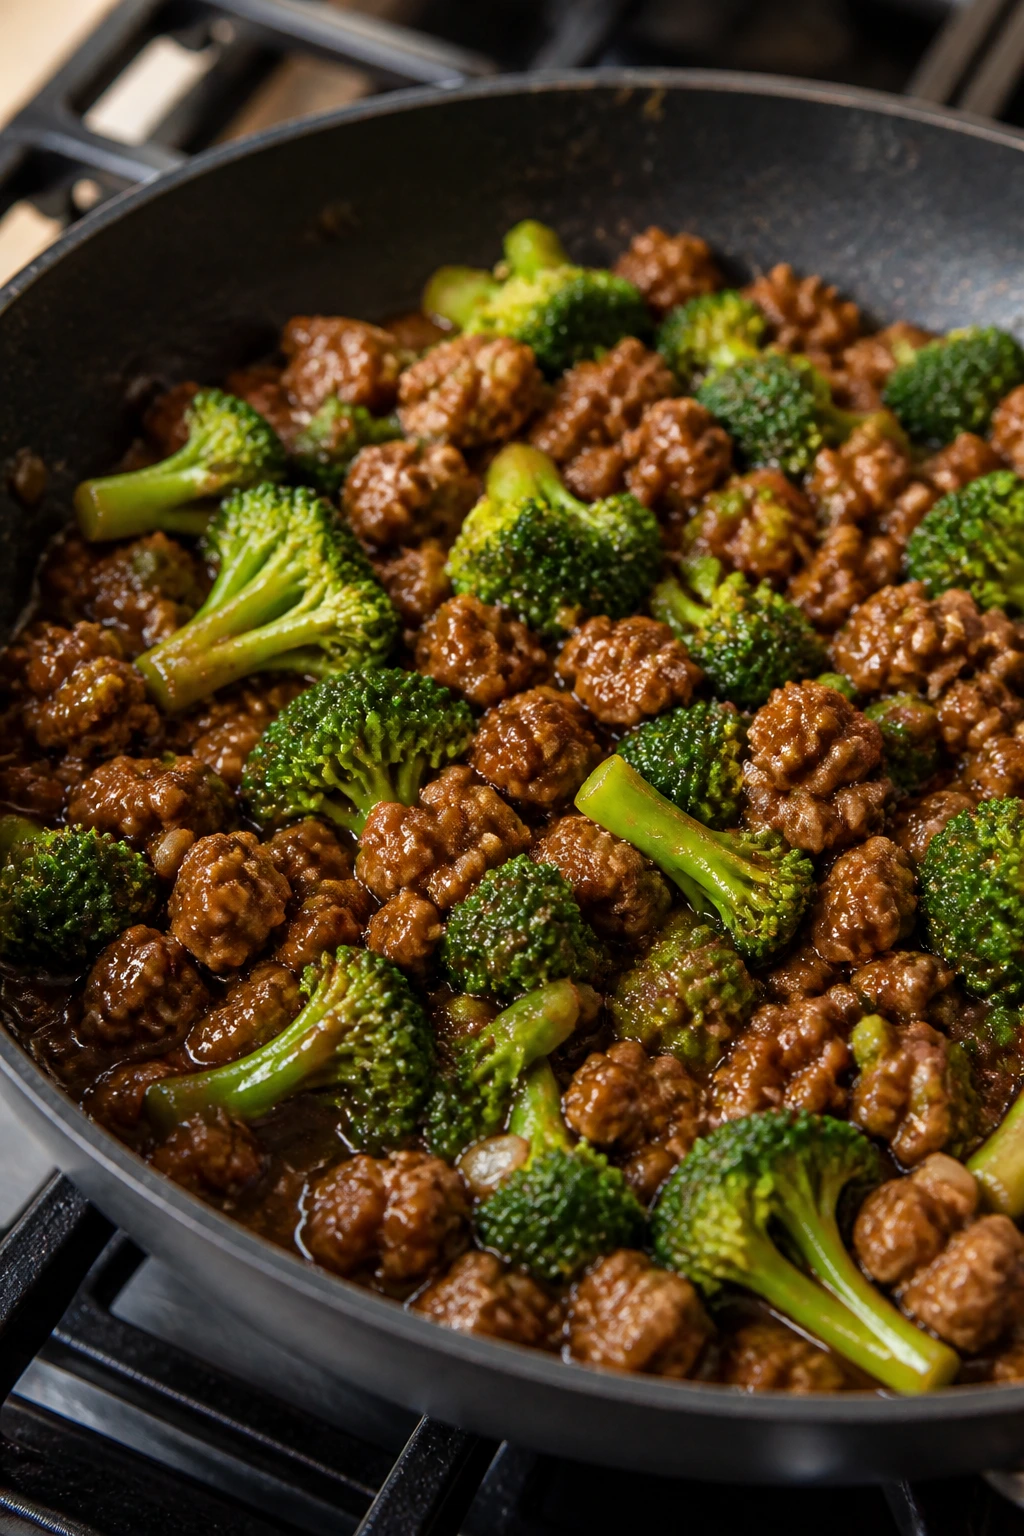
A stir-fry sounds fussy until you make one with ground beef. Then it turns into a fast skillet dinner with glossy sauce and broccoli that still has some bite. You do not need perfect knife work here. You need a hot pan and a little attention.
Why It Works
Ground beef shortens the learning curve because it cooks evenly and does not require slicing against the grain. Broccoli softens fast if you give it a small splash of water and a cover for a minute or two, which means you can keep it bright instead of dull and mushy. The sauce thickens with cornstarch and coats the beef in a way that feels takeout-adjacent without any special gear.
Key Ingredients
- 1 lb ground beef — regular or lean both work.
- 4 cups broccoli florets — cut small so they cook on time.
- 1 tbsp neutral oil — canola, avocado, or vegetable oil.
- 2 cloves garlic, minced — classic stir-fry base.
- 1 tsp grated fresh ginger or 1/2 tsp ground ginger — adds warmth.
- 1/4 cup low-sodium soy sauce — the salty backbone.
- 2 tbsp water — helps the sauce spread.
- 1 tbsp brown sugar or honey — softens the soy sauce.
- 1 tbsp cornstarch — thickens the sauce.
- 1 tsp sesame oil — finish, not cooking oil.
- 2 cups cooked rice, warmed — for serving.
- 2 green onions, sliced — fresh finish.
Quick Steps
- Mix the Sauce: Whisk the soy sauce, water, brown sugar, and cornstarch together in a small bowl until smooth.
- Brown the Beef: Heat the oil in a large skillet over medium-high heat. Add the beef and cook for 6 to 7 minutes, breaking it up as it browns.
- Add the Broccoli: Stir in the broccoli and 2 tablespoons of water. Cover for 2 minutes so the florets steam a bit, then uncover.
- Flavor the Pan: Add the garlic and ginger and cook for 30 seconds, just until fragrant.
- Thicken: Pour in the sauce and stir for 1 to 2 minutes, until it turns glossy and coats the beef and broccoli.
- Finish and Serve: Drizzle with sesame oil, top with green onions, and spoon over warm rice.
Tips and Variations
- Cut the broccoli small: Big florets lag behind and make the pan uneven.
- Use leftovers wisely: This reheats well the next day with a splash of water.
- Swap the rice: Noodles work too if that’s what you have.
8. Turkey Sloppy Joes
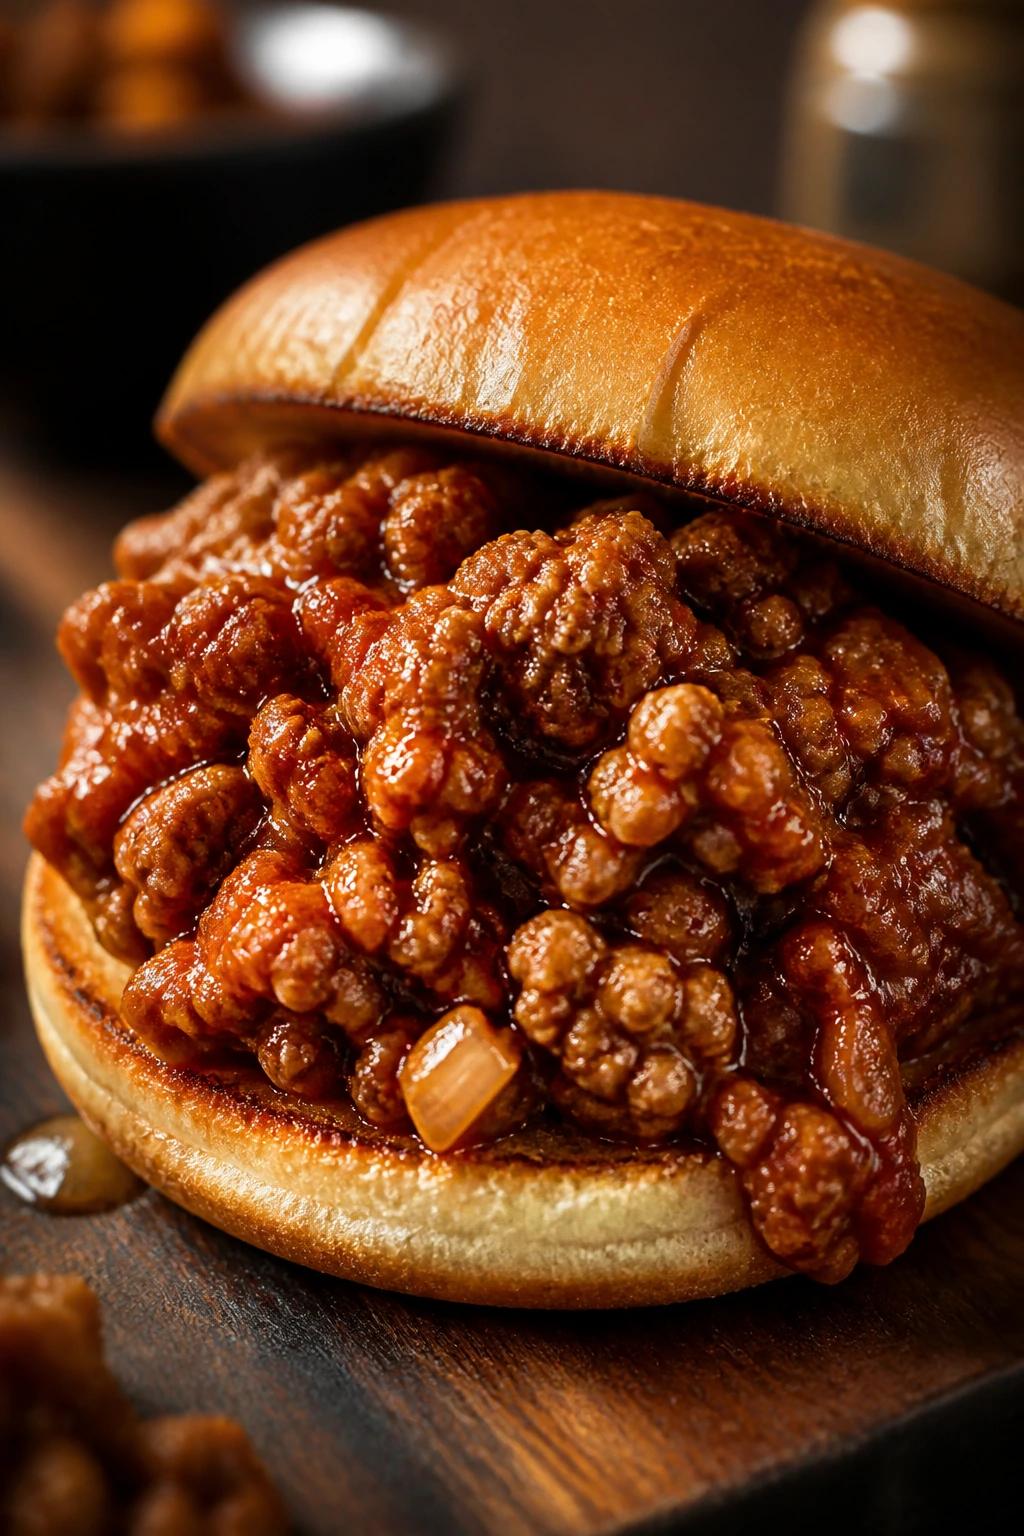
Sloppy joes are messy in the best possible way. The sauce turns sweet, tangy, and thick, the turkey stays light, and the toasted bun catches the extra sauce so nothing feels wasted. This is comfort food with almost no edge.
Why It Works
Ground turkey is mild, which means the sauce has room to shine. Tomato paste, ketchup, mustard, and Worcestershire sauce build a familiar sloppy joe flavor with very little effort. Simmering the mixture for a few minutes is what turns it from saucy meat into an actual sandwich filling. Skip that simmer and you’ll end up with drippy filling. Nobody wants that.
Key Ingredients
- 1 tbsp olive oil — helps the onion soften.
- 1 small onion, diced — the sweetness matters.
- 1 lb ground turkey — a lighter base than beef.
- 2 cloves garlic, minced — added after the turkey browns.
- 1/2 cup ketchup — gives color and sweetness.
- 2 tbsp tomato paste — thickens the sauce.
- 1 tbsp Worcestershire sauce — adds savory depth.
- 1 tbsp yellow mustard — keeps the sauce from tasting flat.
- 1 tbsp brown sugar — balances the tang.
- 1/2 cup water — helps the sauce simmer properly.
- 1/2 tsp salt — season the meat.
- 1/4 tsp black pepper — just enough bite.
- 4 hamburger buns — toasted if you like structure.
- Pickles for serving — optional, but excellent.
Quick Steps
- Cook the Onion: Warm the oil in a skillet over medium heat. Add the onion and cook for 2 to 3 minutes, until softened.
- Brown the Turkey: Add the turkey, salt, and pepper. Cook for 6 to 7 minutes, breaking it up until no pink remains.
- Add the Garlic: Stir in the garlic and cook for 30 seconds.
- Build the Sauce: Add ketchup, tomato paste, Worcestershire sauce, mustard, brown sugar, and water. Stir well.
- Simmer: Lower the heat and cook for 8 to 10 minutes, stirring now and then, until the mixture is thick enough to mound on a spoon.
- Serve: Spoon onto toasted buns and add pickles if you like the sharp crunch.
Tips and Variations
- Toast the buns: A soft bun gets soggy fast.
- Make it sweeter or sharper: More brown sugar gives a classic school-cafeteria feel; extra mustard pushes it tangier.
- Serve with something crunchy: Chips, slaw, or sliced cucumbers help cut the richness.
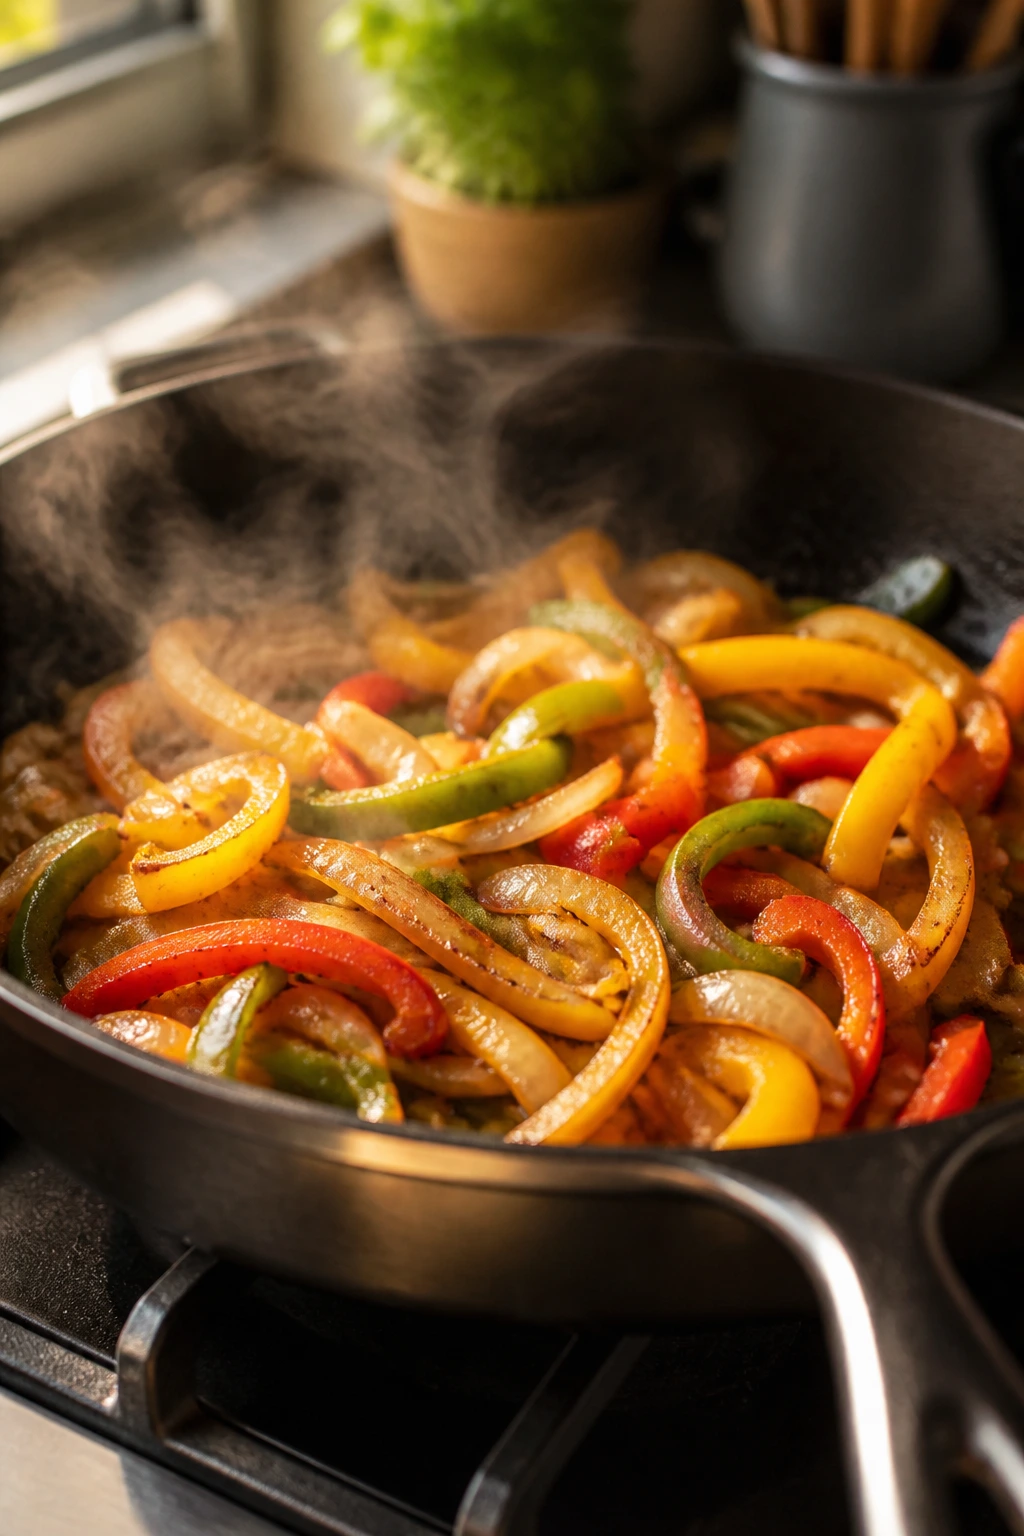
9. Sausage, Peppers, and Onions Skillet
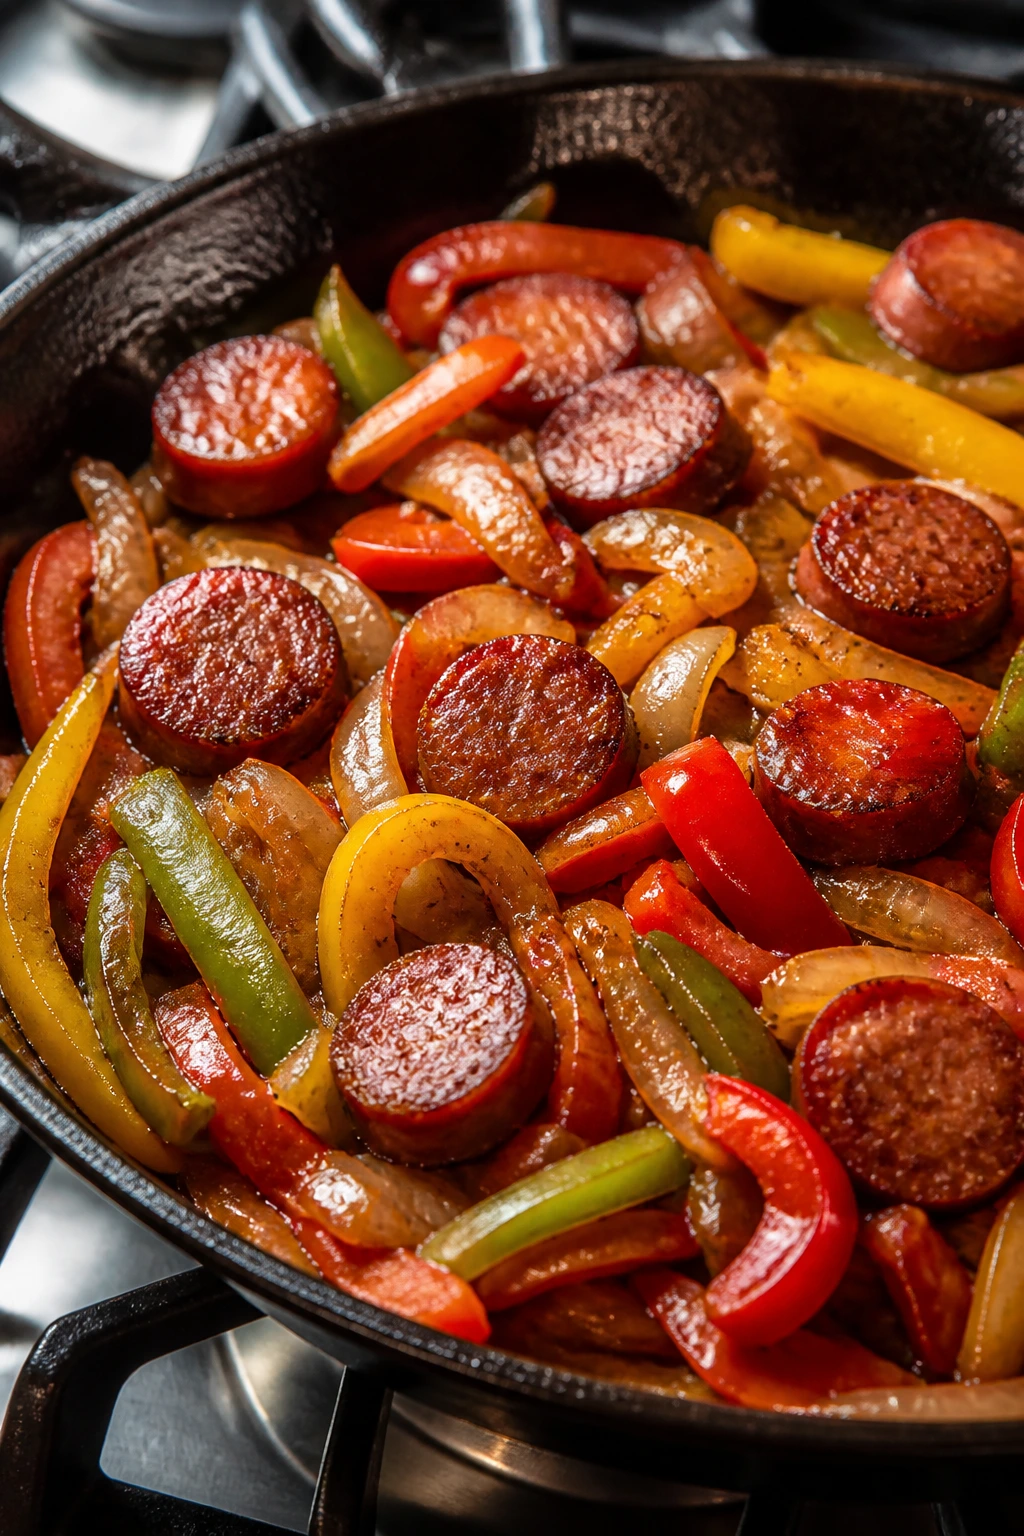
Sausage, peppers, and onions is the kind of skillet dinner that smells done before it looks done. The onions go soft and sweet, the peppers keep a little snap, and the sausage gives the whole pan a smoky base. You can serve it on rolls, over pasta, or straight from the skillet if the night is that kind of night.
Why It Works
Smoked sausage is already cooked, which lowers the risk and shortens the clock. The vegetables need only enough heat to soften and pick up color, so you learn how to build a pan sauce without overcomplicating anything. A splash of marinara pulls everything together and gives the dish a little gloss. That small move makes the meal feel finished.
Key Ingredients
- 14 oz smoked sausage, sliced into 1/2-inch rounds — easy and reliable.
- 2 bell peppers, sliced — use different colors for a brighter pan.
- 1 large onion, sliced — sweetens as it cooks.
- 2 tbsp olive oil — enough to keep the vegetables from sticking.
- 1 tsp Italian seasoning — the herb mix keeps the flavor familiar.
- 1/2 tsp kosher salt — season as you go.
- 1/4 tsp black pepper — enough to sharpen the vegetables.
- 1/2 cup marinara sauce — a light coat, not a heavy bath.
- 4 hoagie rolls or 3 cups cooked pasta — choose one way to serve it.
Quick Steps
- Brown the Sausage: Heat the olive oil in a large skillet over medium-high heat. Add the sausage and cook for 4 to 5 minutes, until the cut sides get color.
- Add the Vegetables: Stir in the onions and peppers. Cook for 8 to 10 minutes, stirring now and then, until they soften and start to brown at the edges.
- Season: Sprinkle in the Italian seasoning, salt, and pepper.
- Add the Sauce: Pour in the marinara and cook for 2 to 3 minutes, just until everything looks coated and glossy.
- Serve: Spoon onto rolls or over pasta. If you use rolls, toast them first.
Tips and Variations
- Slice the peppers the same width: Even pieces cook at the same pace.
- Add mushrooms if you like them: They soak up the sauce and make the pan feel fuller.
- Keep the sauce light: Too much marinara turns this into something soupy.
10. Chili Mac

Chili mac is what happens when chili and pasta stop competing and decide to work together. The sauce gets rich, the noodles soak up spice, and the cheddar melts into the pot instead of sitting on top like a garnish. It is hearty in the way weeknight food should be: warm, filling, and not precious.
Why It Works
This is a one-pot dinner that teaches you how to layer flavor without a long ingredient list. Brown the beef and onion first, and the pot already tastes deeper. Add the pasta directly to the chili base and it absorbs seasoning as it cooks, which means every bite has more going on than plain macaroni. The cheese at the end smooths out the chili and keeps the pot from feeling too sharp.
Key Ingredients
- 1 lb ground beef — the main protein.
- 1 small onion, diced — gives the chili a sweet base.
- 2 cloves garlic, minced — add after the beef browns.
- 2 tbsp chili powder — the main seasoning.
- 1 tsp ground cumin — classic chili flavor.
- 1/2 tsp paprika — adds warmth.
- 1 1/2 tsp salt — season the whole pot.
- 1/2 tsp black pepper — a little bite.
- 1 can (15 oz) kidney beans, drained and rinsed — makes the pot heartier.
- 1 can (14.5 oz) diced tomatoes — the liquid base.
- 2 cups beef broth — enough to cook the pasta.
- 2 cups elbow macaroni — the shape that does the best job here.
- 1 cup shredded cheddar — melted in at the end.
- 2 tbsp chopped cilantro — optional, for freshness.
Quick Steps
- Brown the Beef: Heat a large pot over medium heat. Add the beef and onion and cook for 6 to 8 minutes, until the beef is browned and the onion is soft.
- Season the Pot: Stir in the garlic, chili powder, cumin, paprika, salt, and pepper. Cook for 30 seconds.
- Add the Liquid: Pour in the tomatoes, broth, and beans. Bring the pot to a simmer.
- Cook the Pasta: Stir in the macaroni and simmer for 10 to 12 minutes, stirring often, until the pasta is tender and the liquid thickens.
- Finish with Cheese: Turn off the heat and stir in the cheddar until melted.
- Serve: Top with cilantro if you’re using it. The chili mac should be thick enough to scoop, not soupy.
Tips and Variations
- Stir often near the end: Pasta likes to stick to the bottom of a thick pot.
- Use mild chili powder if you’re unsure: You can always add heat later.
- Top with scallions or sour cream: Small finishes make the bowl feel more complete.
11. Veggie Fried Rice
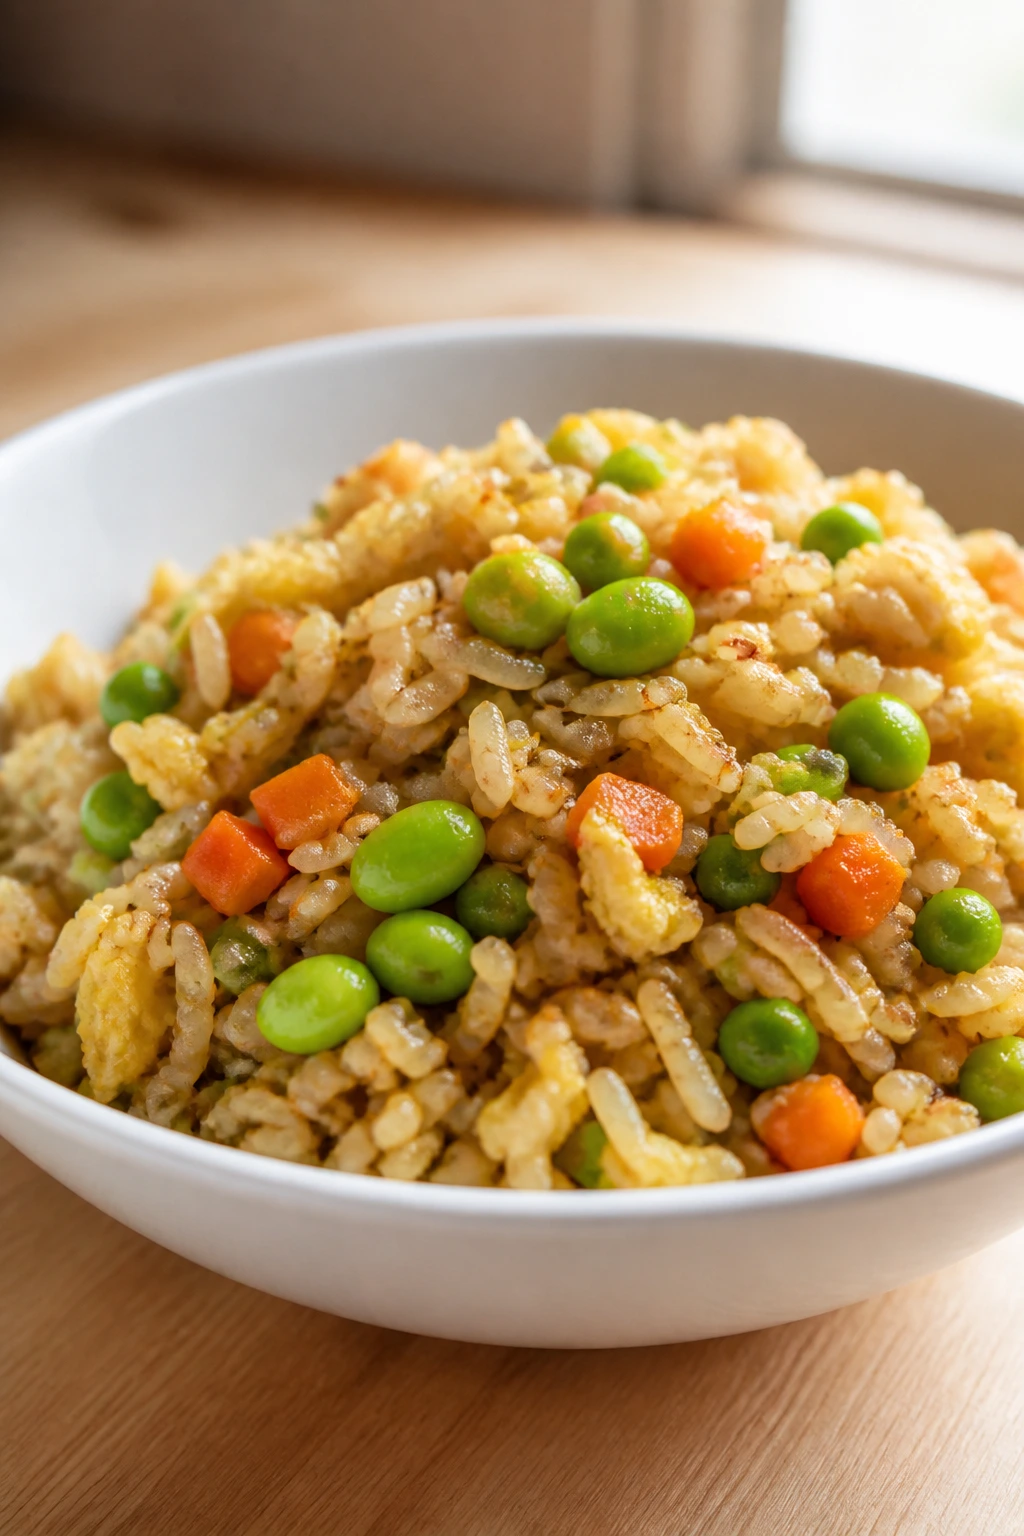
Fried rice is one of the best confidence builders in a kitchen. Leftover rice turns into something savory and hot, the eggs cook in minutes, and frozen vegetables fill in the rest without complaint. If the rice clumps a little, that is fixable. If it picks up some brown bits, even better.
Why It Works
Day-old rice is drier, so it fries instead of steaming. That one detail changes the whole dish. A hot skillet, a quick scramble of eggs, and a short blast of soy sauce are enough to make dinner feel finished without much prep. This is the kind of meal that teaches you how to move quickly without panicking.
Key Ingredients
- 3 cups cooked white rice, chilled — leftover rice works best.
- 2 tbsp neutral oil — for the pan.
- 2 eggs, beaten — gives the rice substance.
- 1 1/2 cups frozen peas and carrots — no chopping needed.
- 1 cup frozen edamame, thawed — adds a little more body.
- 2 green onions, sliced — fresh finish.
- 2 cloves garlic, minced — keep it fast and fragrant.
- 3 tbsp soy sauce — start here and adjust if needed.
- 1 tsp sesame oil — a finishing flavor, not a cooking oil.
- 1/2 tsp black pepper — enough to lift the rice.
Quick Steps
- Scramble the Eggs: Heat 1 tablespoon of oil in a large skillet or wok over medium-high heat. Add the eggs and scramble until just set, then move them to a plate.
- Cook the Vegetables: Add the remaining oil, peas and carrots, and edamame. Cook for 2 to 3 minutes, until hot.
- Add the Garlic: Stir in the garlic for 30 seconds.
- Fry the Rice: Add the chilled rice and break up clumps with a spatula. Cook for 3 to 4 minutes, until the rice is hot and some grains start to crisp.
- Season: Stir in the soy sauce, black pepper, and sesame oil.
- Finish: Return the eggs to the pan and add the green onions. Toss once or twice and serve right away.
Tips and Variations
- Use a wide pan: More surface area means better frying.
- Do not skip the chilled rice: Fresh rice tends to turn sticky.
- Add leftover chicken or shrimp: A cup or two turns this into a bigger dinner without changing the method.
12. BBQ Chicken Sliders
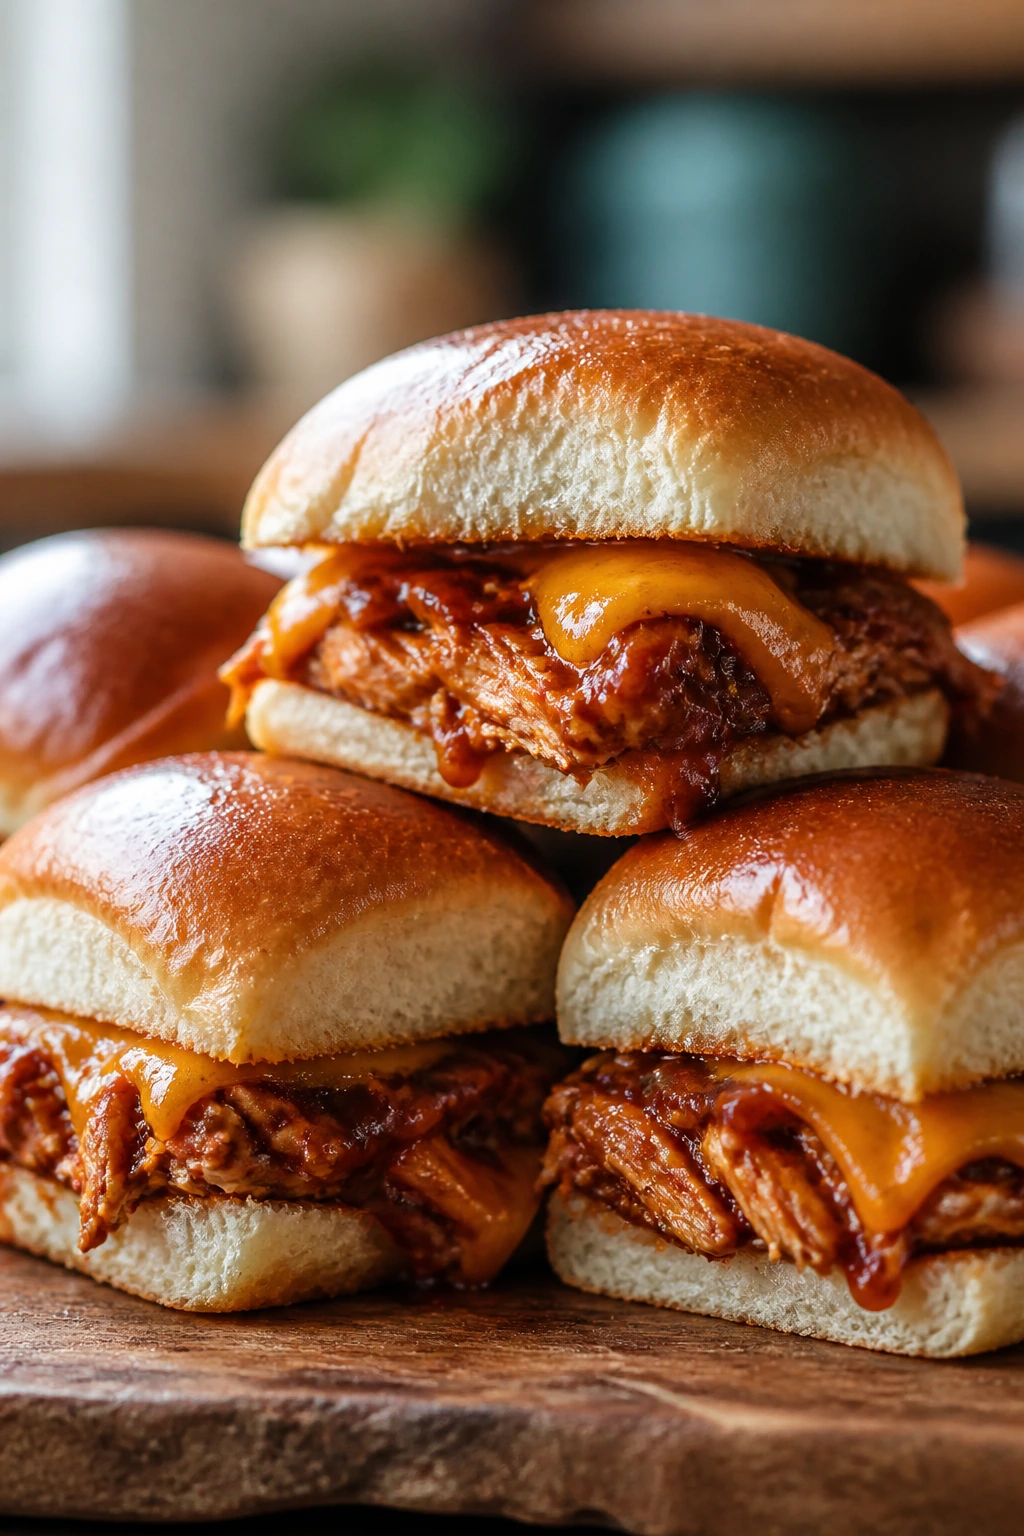
These sliders are the kind of dinner people eat standing up near the counter. The chicken gets coated in barbecue sauce, the buns soak up a little steam in the oven, and the cheese melts into the bread’s soft edges. They’re fast, soft, and easy to hand to someone who is hungry right now.
Why It Works
This recipe leans on cooked chicken, which is why it feels so manageable. All the work happens in the mixing bowl and the oven. The barbecue sauce keeps the chicken moist, and the brief bake softens the buns without turning them to mush. You can make a tray of these and serve them with a salad or chips. Done.
Key Ingredients
- 2 cups cooked shredded chicken — rotisserie chicken is ideal.
- 1 cup barbecue sauce — choose one you already like.
- 1/2 tsp smoked paprika — deepens the sauce.
- 12 slider buns or Hawaiian rolls — sweet rolls work especially well.
- 1 cup shredded cheddar — melts into the filling.
- 2 tbsp melted butter — brushed on top for color.
- 1 tbsp sesame seeds or poppy seeds — optional garnish.
- 1/2 cup coleslaw or pickle chips — for serving.
Quick Steps
- Heat the Oven: Set the oven to 350°F (175°C) and grease a baking dish or line it with parchment.
- Mix the Chicken: Stir the shredded chicken, barbecue sauce, and smoked paprika together until coated.
- Build the Sliders: Slice the buns horizontally if needed. Place the bottom halves in the dish, add the chicken, then sprinkle the cheese over the top.
- Top and Brush: Add the top buns, then brush the melted butter over them. Sprinkle with seeds if using.
- Bake: Cover loosely with foil and bake for 10 minutes, then uncover and bake 5 more minutes, until the cheese melts and the tops are lightly golden.
- Serve: Add coleslaw or pickles if you want crunch.
Tips and Variations
- Use a sharp knife for clean cuts: Slider buns tear if you saw through them carelessly.
- Add a thin layer of mustard or mayo: It gives the sandwich a little more moisture.
- Keep the filling modest: Too much sauce makes the buns collapse.
13. Garlic Shrimp Pasta
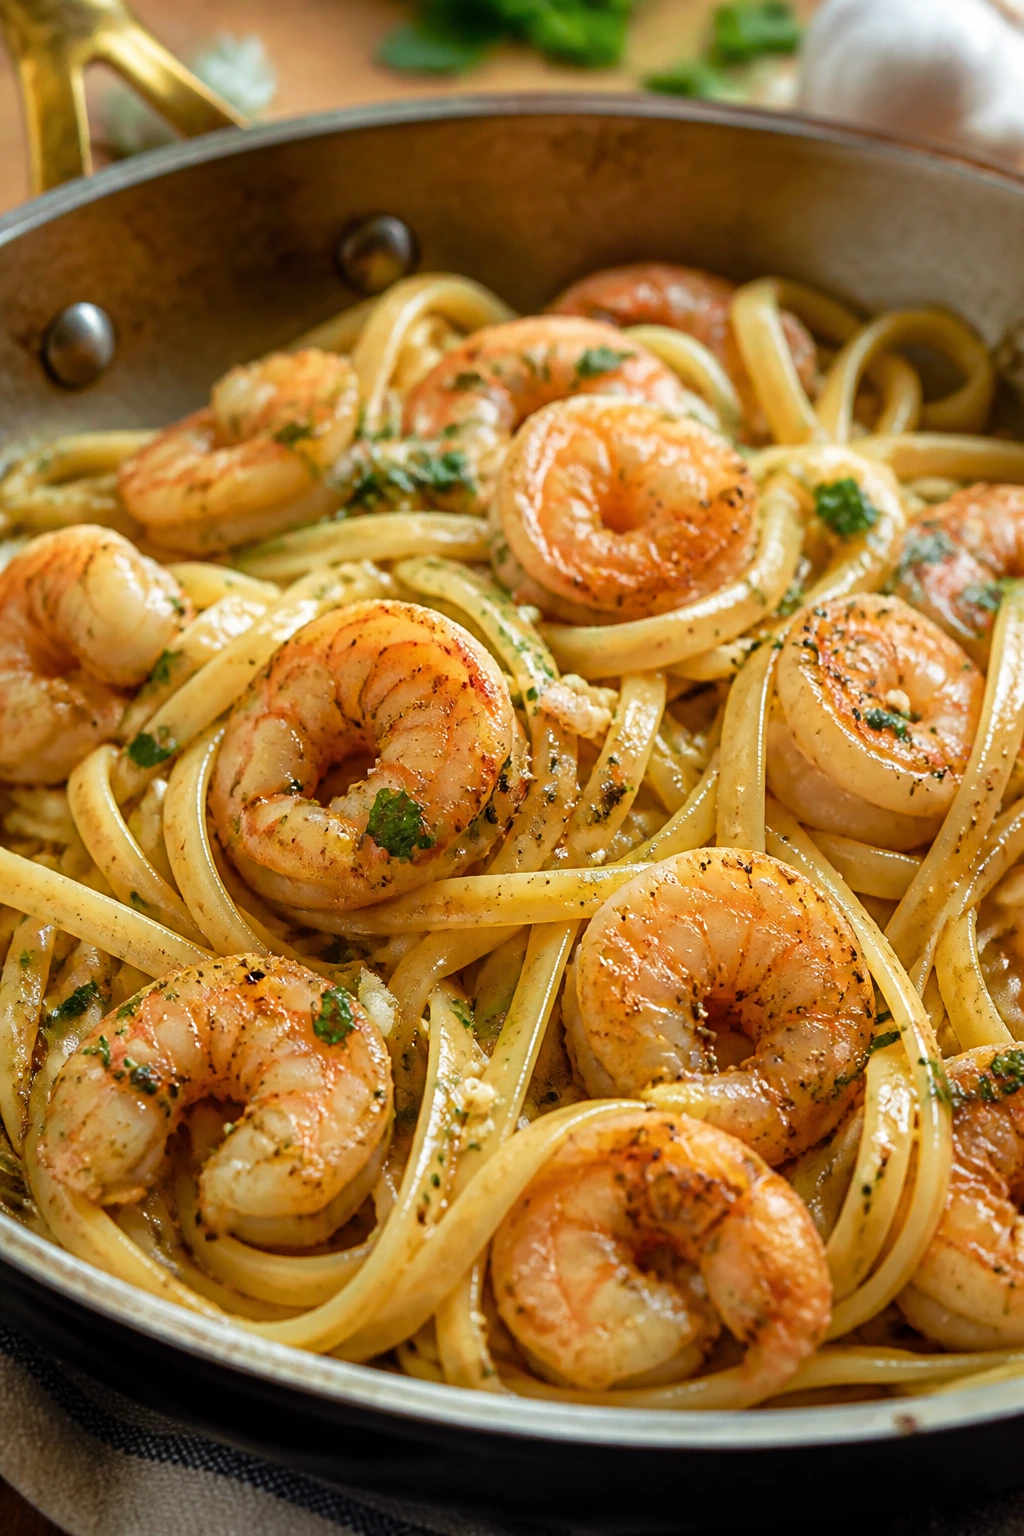
Garlic shrimp pasta looks like a dish that should be harder than it is. Shrimp cook in a blink, garlic perfumes the butter, and the pasta water turns everything into a silky sauce if you save enough of it. The only real rule is this: do not walk away.
Why It Works
Shrimp are fast, which is great for new cooks, but that speed cuts both ways. Once they curl into a loose C shape and turn pink, they’re done. Pasta water brings starch into the sauce, so the butter and lemon don’t just sit at the bottom of the bowl. That small trick is what makes the sauce cling.
Key Ingredients
- 12 oz linguine or spaghetti — a long pasta that twirls well.
- 1 lb raw shrimp, peeled and deveined — medium shrimp cook evenly.
- 2 tbsp olive oil — for the shrimp.
- 2 tbsp butter — gives the sauce richness.
- 4 cloves garlic, minced — the main flavor.
- 1/2 tsp red pepper flakes — optional heat.
- 1/2 cup reserved pasta water — helps build the sauce.
- 2 tbsp lemon juice — brightens the whole bowl.
- 1/4 cup chopped parsley — a fresh finish.
- 1/2 tsp salt — season the shrimp and pasta.
- 1/4 tsp black pepper — enough to sharpen the flavor.
- 1/4 cup grated Parmesan — optional, for a little body.
Quick Steps
- Cook the Pasta: Boil the pasta in salted water until al dente. Reserve 1/2 cup of the water before draining.
- Cook the Shrimp: Heat the oil and butter in a large skillet over medium heat. Add the shrimp, salt, and pepper. Cook for 1 to 2 minutes per side until pink and opaque.
- Add the Garlic: Stir in the garlic and red pepper flakes and cook for 30 seconds, just until fragrant.
- Build the Sauce: Add the lemon juice and 1/4 cup of pasta water. Stir, scraping up any bits from the pan.
- Toss: Add the pasta and enough remaining pasta water to make the sauce coat the noodles. Toss in the parsley and Parmesan if using.
- Serve: The sauce should look glossy, not watery. Add more pasta water a spoonful at a time if needed.
Tips and Variations
- Dry the shrimp before cooking: Wet shrimp steam, and steamed shrimp don’t brown.
- Do not overcook them: Shrimp get rubbery fast.
- Add spinach at the end: A handful wilts in seconds and makes the bowl feel fuller.
14. Tuna Noodle Casserole
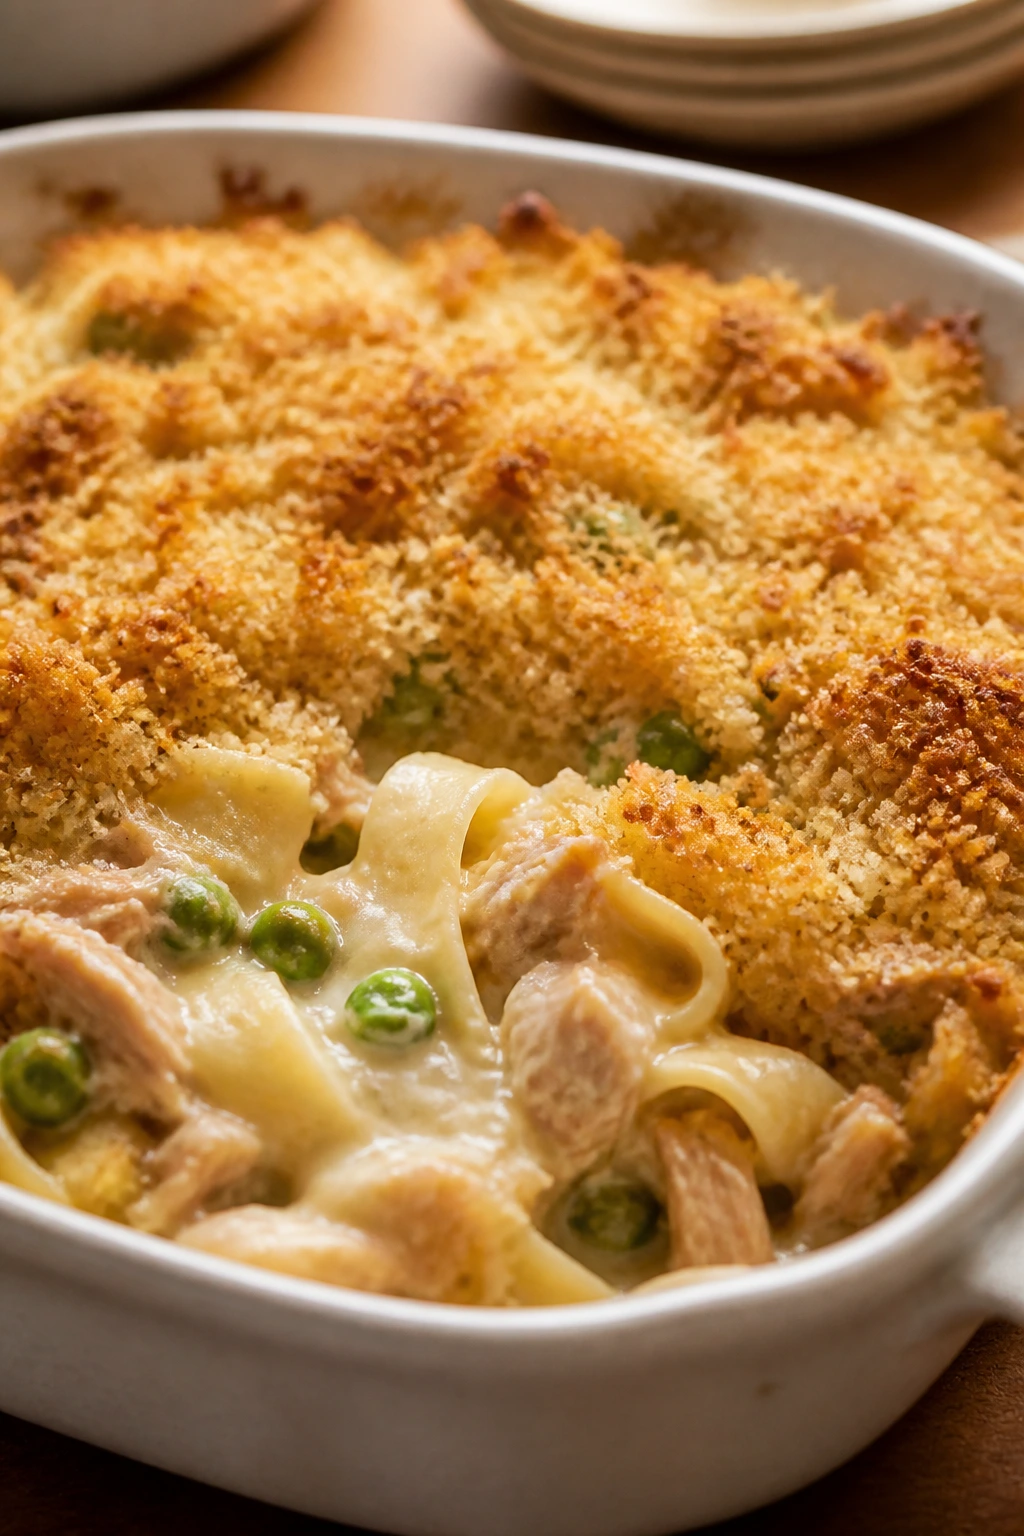
Tuna noodle casserole is old-school pantry cooking, and that is exactly why it still works. The noodles, peas, and creamy sauce bake into one soft, cozy pan, while the buttery breadcrumb top gives you something crisp to break through. It is not fussy. It is dependable.
Why It Works
This is the sort of dinner that saves you when the fridge looks plain and the energy level is low. Canned tuna brings protein, frozen peas add color and sweetness, and cream-of-mushroom soup turns into a sauce with almost no effort. Baking the casserole creates a hotter, thicker finish than stovetop mixing alone. You get the comfort without a long list of moving parts.
Key Ingredients
- 12 oz egg noodles — the classic shape for this casserole.
- 2 cans tuna (5 oz each), drained — water-packed tuna is fine.
- 1 can (10.5 oz) cream of mushroom soup — the shortcut that makes the sauce.
- 1 cup milk — loosens the soup into a pourable sauce.
- 1 cup frozen peas — no chopping needed.
- 1 1/2 cups shredded cheddar, divided — some inside, some on top.
- 1/2 cup breadcrumbs — for the crust.
- 2 tbsp butter, melted — helps the crumbs brown.
- 1/2 tsp salt — season the casserole.
- 1/4 tsp black pepper — keeps the flavor from flattening.
- 1 tsp onion powder — adds savoriness without more chopping.
Quick Steps
- Heat the Oven: Set the oven to 375°F (190°C) and grease a 9×13-inch baking dish.
- Cook the Noodles: Boil the egg noodles until barely tender, then drain.
- Mix the Filling: In a large bowl, stir together the soup, milk, tuna, peas, 1 cup of the cheddar, salt, pepper, and onion powder.
- Combine: Fold in the noodles and spoon everything into the baking dish.
- Top: Mix the breadcrumbs with the melted butter and sprinkle over the casserole. Add the remaining cheddar.
- Bake: Cook for 20 to 25 minutes, until the top is golden and the edges bubble.
Tips and Variations
- Do not overcook the noodles: They keep cooking in the oven.
- Use panko if you like more crunch: It gives the top a cleaner bite.
- Add a squeeze of lemon: Tuna likes a little brightness.
15. Pesto Tortellini with Peas

Pesto tortellini has one job: look like you meant to make dinner feel easy. Refrigerated tortellini cook fast, pesto brings all the flavor in one spoonful, and peas give the bowl a little green pop without extra chopping. This is the kind of dinner that rescues a busy night without tasting lazy.
Why It Works
Refrigerated tortellini are a smart starter move because the cooking window is short and obvious. Once they float and turn tender, they’re done. Pesto carries basil, garlic, oil, and cheese in one sauce, so the dish has body without a long simmer. A little pasta water or cream makes the pesto coat the tortellini instead of sticking in thick clumps.
Key Ingredients
- 20 oz refrigerated cheese tortellini — cooks quickly and holds sauce well.
- 1 cup frozen peas — added near the end.
- 1 cup basil pesto — store-bought is fine.
- 1/4 cup heavy cream or reserved pasta water — smooths the sauce.
- 1/2 cup grated Parmesan — salty finish.
- 1 cup cherry tomatoes, halved — optional, for brightness.
- 1 tbsp olive oil — only if your pan needs a little help.
- Salt and black pepper — season to taste.
Quick Steps
- Boil the Tortellini: Cook the tortellini according to the package directions. Add the peas during the last minute.
- Drain: Save a splash of pasta water before draining.
- Warm the Sauce: Return the tortellini and peas to the pot over low heat. Stir in the pesto and cream or a few spoonfuls of pasta water.
- Finish: Add the Parmesan and black pepper. Toss until the sauce looks silky and coats the pasta.
- Add Tomatoes: If using cherry tomatoes, fold them in at the end so they stay fresh.
- Serve: Taste for salt. Pesto can vary a lot, so this is where you adjust.
Tips and Variations
- Use more pasta water before more cream: It lightens the sauce without making it heavy.
- Try spinach tortellini: The flavor still works.
- Add rotisserie chicken: A cup or two makes this stretch farther for a bigger table.
16. One-Pan Chicken and Rice
One-pan chicken and rice teaches a useful lesson: rice can cook under chicken and come out flavored by everything above it. The grains soak up broth, the chicken turns tender, and the peas wake the whole dish up at the end. It feels like a little magic trick, but the method is plain old home cooking.
Why It Works
This is one of the best dinners for a new cook because it introduces you to layering. You sear the chicken first for color, then simmer it over rice so the juices season the pan. The rice cooks in broth, not plain water, which means it tastes like something. If you keep the heat low once the lid goes on, the whole thing behaves.
Key Ingredients
- 1 lb boneless, skinless chicken thighs or breasts — thighs are more forgiving.
- 1 cup long-grain white rice, rinsed — rinsing keeps the grains separate.
- 1 small onion, diced — the base flavor.
- 2 cloves garlic, minced — add after the onion softens.
- 2 cups chicken broth — the cooking liquid.
- 1 tbsp butter or oil — for searing.
- 1 tsp salt — season the pan.
- 1/2 tsp black pepper — simple seasoning.
- 1 tsp paprika — adds color and warmth.
- 1 tsp dried parsley or thyme — keeps the flavor familiar.
- 1 cup frozen peas — stir in near the end.
Quick Steps
- Sear the Chicken: Heat the butter or oil in a deep skillet with a lid over medium-high heat. Season the chicken with salt, pepper, and paprika, then brown it for 3 to 4 minutes per side. It does not need to be cooked through yet.
- Cook the Onion: Remove the chicken to a plate. Add the onion to the pan and cook for 2 to 3 minutes, then add the garlic for 30 seconds.
- Add the Rice: Stir in the rinsed rice and toast it for 1 minute.
- Simmer: Pour in the broth and herbs, then nestle the chicken back on top. Bring to a simmer, cover, and lower the heat. Cook for 18 to 20 minutes.
- Add the Peas: Stir the peas into the rice, cover again, and cook for 3 more minutes.
- Rest: Turn off the heat and let the pan sit for 5 minutes before serving. The rice should look tender, not wet.
Tips and Variations
- Use a tight lid: Steam is part of the cooking method.
- Keep the heat low once covered: High heat can scorch the rice.
- Finish with lemon: A squeeze over the top keeps the dish from tasting heavy.
17. Chicken Noodle Soup
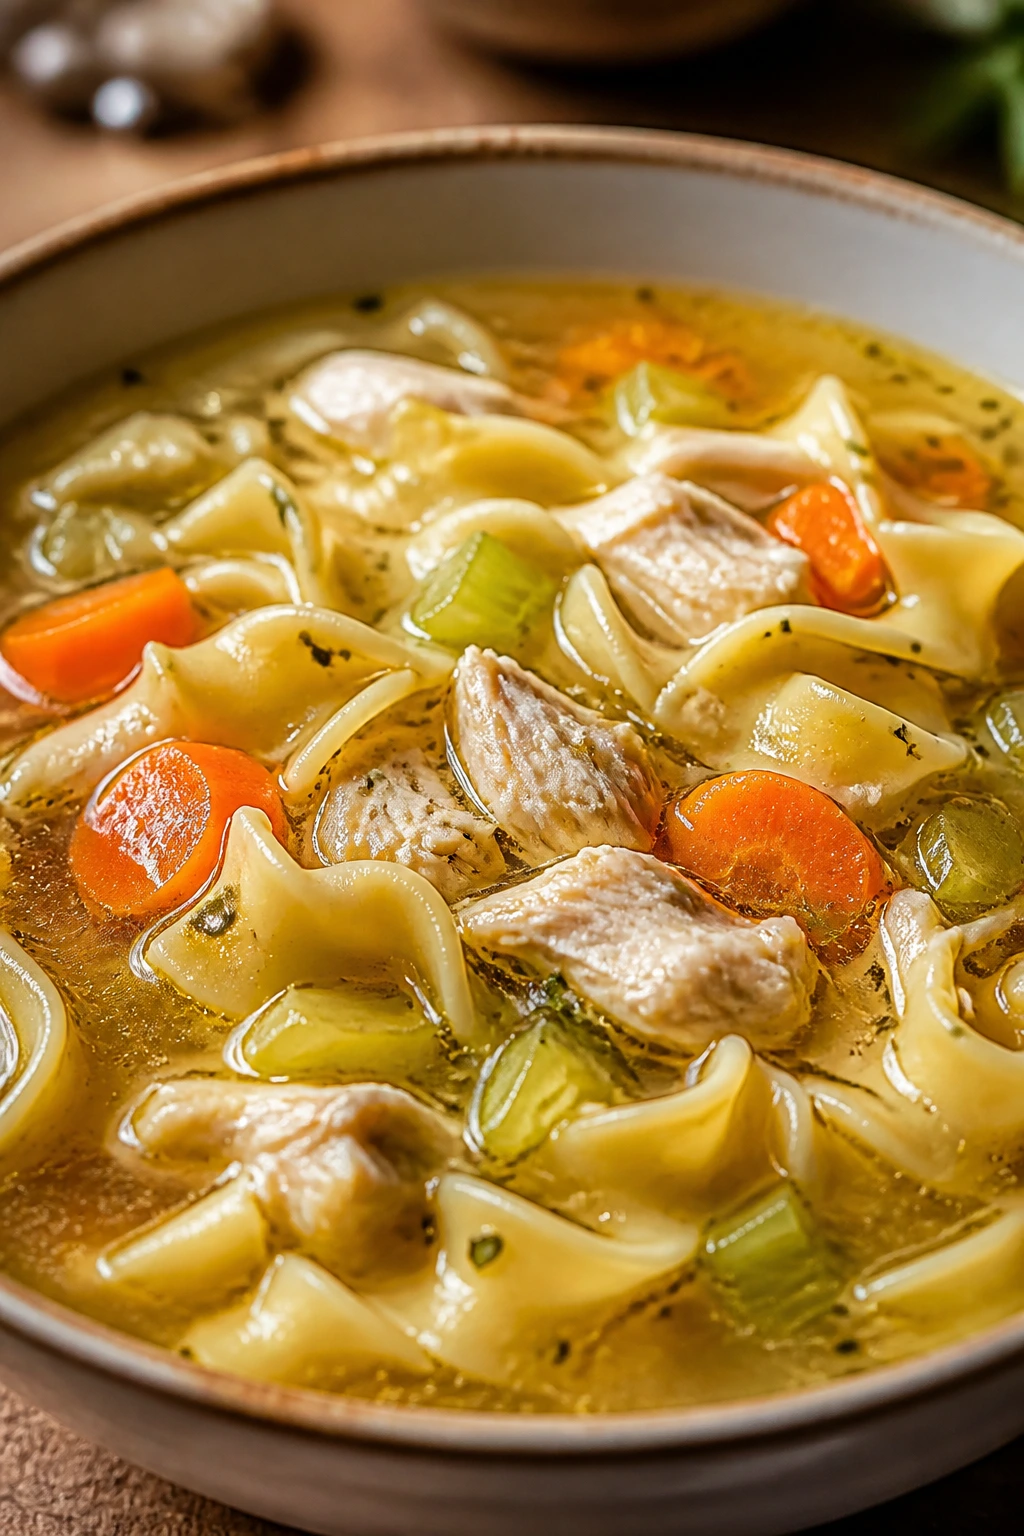
Chicken noodle soup is the steady hand in this collection. The broth simmers with carrots, celery, and thyme; the chicken shreds easily; and the noodles turn it into a real meal instead of a starter. If you can keep a pot at a gentle bubble, you can make this soup.
Why It Works
This recipe teaches the most useful soup habit: build the broth first, then add the noodles later so they do not go soft and swollen. Boneless chicken cooks directly in the pot, which means the broth gains flavor from the meat as it simmers. The vegetables soften without needing precision knife work, and the whole pot smells like home by the time the chicken comes out.
Key Ingredients
- 1 lb boneless chicken breasts or thighs — thighs give richer broth; breasts shred cleanly.
- 1 tbsp olive oil — for the vegetables.
- 1 medium onion, diced — soup foundation.
- 2 carrots, sliced — classic sweetness.
- 2 celery stalks, sliced — the old-school soup backbone.
- 2 cloves garlic, minced — add near the end of the sauté.
- 8 cups chicken broth — the liquid base.
- 1 bay leaf — adds quiet depth.
- 1 tsp dried thyme — the main herb.
- 8 oz egg noodles — the pasta.
- 1 tsp salt — adjust after simmering.
- 1/2 tsp black pepper — enough for warmth.
- 2 tbsp chopped parsley — optional at the end.
Quick Steps
- Start the Vegetables: Heat the olive oil in a large pot over medium heat. Add the onion, carrots, and celery and cook for 5 minutes, until the onion softens.
- Add the Garlic: Cook for 30 seconds.
- Build the Broth: Pour in the chicken broth, then add the chicken, bay leaf, thyme, salt, and pepper. Bring to a gentle simmer.
- Cook the Chicken: Simmer for 15 to 20 minutes, until the chicken is cooked through and easy to shred.
- Shred and Add Noodles: Remove the chicken, shred it with two forks, and return it to the pot. Add the noodles and cook according to the package directions.
- Finish: Pull out the bay leaf, stir in parsley, and taste for salt before serving.
Tips and Variations
- Add noodles near the end: They soak up broth quickly.
- Use rotisserie chicken if needed: Stir it in with the noodles and skip the chicken-simmer step.
- Thin the soup with more broth later: Soup thickens as it sits in the fridge.
18. Sheet Pan Sausage and Veggies
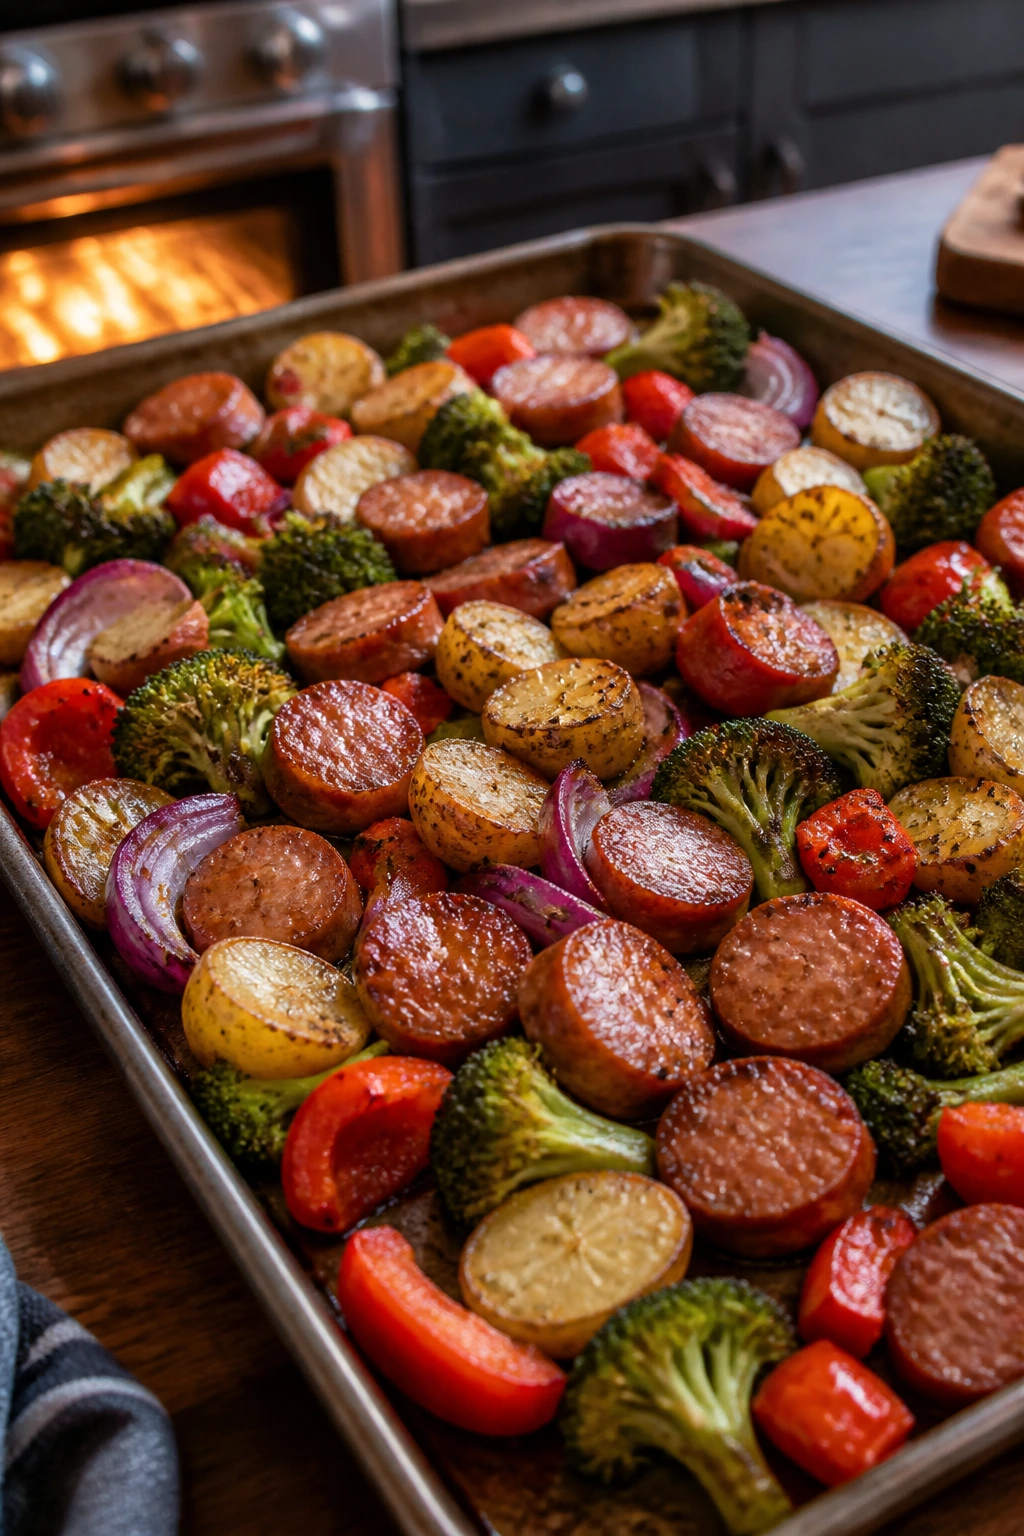
Sheet pan sausage and vegetables is the cleanest way to get dinner onto a tray and into the oven. The potatoes roast first so they have time to brown, then the sausage and vegetables take over, soaking up paprika and garlic as they go. The finished pan smells like dinner should smell: warm, salty, and ready.
Why It Works
Smoked sausage is already cooked, so you get color and flavor without worrying about doneness in the meat itself. That gives beginners breathing room. The vegetables are cut into pieces that roast at roughly the same speed, and the two-stage bake keeps the potatoes from ending up raw while the rest of the tray goes soft. One pan. One clock. Nice and steady.
Key Ingredients
- 14 oz smoked sausage, sliced — pre-cooked sausage keeps the method simple.
- 1 lb baby potatoes, halved — they need the head start.
- 2 cups broccoli florets — cut into medium pieces.
- 1 red bell pepper, chopped — sweet and colorful.
- 1 red onion, cut into wedges — softens and browns.
- 2 tbsp olive oil — coats the vegetables.
- 1 tsp garlic powder — easy seasoning.
- 1 tsp smoked paprika — gives a deeper color and flavor.
- 1/2 tsp kosher salt — enough to season the tray.
- 1/4 tsp black pepper — a little bite.
- 1 tbsp Dijon mustard — optional, for a sharper finish.
Quick Steps
- Heat the Oven: Set the oven to 425°F (220°C) and line a sheet pan.
- Roast the Potatoes First: Toss the potatoes with 1 tablespoon of olive oil, half the garlic powder, half the paprika, half the salt, and half the pepper. Roast for 15 minutes.
- Add the Rest: Toss the sausage, broccoli, bell pepper, and onion with the remaining oil and seasoning. Add them to the pan and spread everything out.
- Finish Roasting: Bake for 15 to 20 minutes more, until the potatoes are tender and the sausage has browned at the edges.
- Optional Finish: Stir the Dijon mustard with a teaspoon of water and drizzle it over the tray if you want a little tang.
- Serve: Eat it straight from the pan or spoon it over rice. The vegetables should be browned, not limp.
Tips and Variations
- Cut the potatoes small and even: That head start matters.
- Use two pans if needed: Crowding is the fastest way to lose browning.
- Add a squeeze of lemon at the end: It lifts the sausage and cuts the oil.
Why One-Pan, One-Skillet, and One-Pot Cooking Builds Confidence
A beginner kitchen gets noisy fast. Too many burners. Too many bowls. Too many chances to forget what’s happening where. One-pan and one-pot dinners shrink that noise down to something your brain can hold without stress.
Less juggling, more watching
The big win is that the food starts moving in the same place. You brown, stir, simmer, roast, or bake in a single vessel, so you spend more time looking at the food and less time bouncing between tasks. That makes it easier to notice the important cues: onions turning soft, sauce thickening, pasta moving from hard to tender, chicken reaching 165°F.
Built-in cleanup relief
Dirty dishes matter. Seriously. If a first dinner leaves three pans, two bowls, a strainer, and a cutting board in the sink, the next meal starts to feel like punishment. A sheet pan dinner or a skillet pasta leaves a smaller mess, which makes cooking again feel possible instead of heroic.
Repetition helps the skill stick
There’s another quiet benefit. These methods repeat the same useful moves: heat the pan, add fat, cook the aromatics, build the sauce, check the texture, and stop on time. That repetition is how beginner cooks get better without a classroom. The method starts to feel familiar, and familiar is where confidence lives.
Essential Equipment for These Recipes
- Large skillet or sauté pan — good for tacos, sloppy joes, stir-fries, and sausage skillets.
- Deep pot with a lid — needed for soup, chili mac, and one-pan rice.
- Large sheet pan — the backbone of chicken, salmon, and sausage tray dinners.
- 9×13-inch baking dish — best for ziti, tuna casserole, and sliders.
- Medium saucepan — handy for boiling pasta or warming sauce.
- Colander — drains pasta and noodles cleanly.
- Wooden spoon or silicone spatula — useful for breaking up meat and stirring thick sauces.
- Tongs — helpful for flipping chicken, shrimp, or sausage.
- Chef’s knife and cutting board — no need for perfection, but even cuts cook more evenly.
- Measuring cups and spoons — beginner recipes depend on consistency.
- Instant-read thermometer — especially useful for chicken and salmon.
- Airtight storage containers — leftovers keep better when they cool in shallow containers.
- Fish spatula — optional, but handy for salmon if you make it often.
Smart Shopping for Easy Dinners for First-Time Cooks
Buy proteins that forgive small mistakes
Ground beef, ground turkey, chicken thighs, smoked sausage, rotisserie chicken, and shrimp all show up here for a reason. They’re quick to cook, easy to portion, and less temperamental than big roasts or bone-in cuts. If you want the least stress, choose chicken thighs over breasts, and choose smoked sausage over raw sausage links. Both are more forgiving.
Let pantry staples do the heavy lifting
Jarred marinara, canned tuna, taco seasoning, pesto, broth, canned tomatoes, beans, and pasta are the quiet heroes of beginner cooking. Pick versions with short ingredient lists and moderate sodium if you can. Low-sodium broth and tomatoes give you more control over the final taste, which matters because beginner cooks often inherit too much salt without meaning to.
Frozen vegetables are not a compromise
Frozen peas, peas and carrots, broccoli, and edamame save time and waste. They’re picked and frozen at peak freshness, and in recipes like fried rice, soup, and one-pot chicken and rice, they work beautifully. Use fresh when the dish depends on browning, like green beans on a sheet pan or broccoli in a stir-fry. Use frozen when the vegetable is there to add color, texture, or volume.
Cheese choice matters more than people think
Pre-shredded cheese is convenient, but block cheese melts smoother because it does not carry the same anti-caking powder. If the recipe depends on a gooey top — ziti, quesadillas, sliders, casserole — grate your own if you can. If convenience keeps you cooking, though, the bagged stuff still works. A kitchen is not a purity contest.
How to Serve These Dinners Without Extra Fuss
Presentation: Keep it simple and clean. Pasta looks best in shallow bowls with a little extra Parmesan and parsley on top. Sheet pan dinners look better when you pile the food slightly off-center on a platter instead of serving them flat on the tray. Tacos, sliders, and quesadillas feel friendlier when you cut them into neat pieces and arrange them in a line rather than scattering them.
Accompaniments: A bagged salad, sliced cucumbers, garlic bread, steamed broccoli, buttered corn, or a bowl of fruit can fill in the edges without making more work. Chili mac, ziti, and soup already lean heavy, so a crisp side helps. Salmon, sheet pan chicken, and sausage dinners like a starch or bread on the side if you want the meal to stretch.
Portions: Most of these recipes serve 4 to 6 people, and that’s a useful baseline for a beginner. If you’re cooking for one or two, plan for leftovers and choose meals that reheat well, like chili mac, soup, and baked ziti. If you’re cooking for a bigger group, add bread, salad, or an extra vegetable instead of doubling every pan in the kitchen.
Beverage Pairing: Sparkling water with lemon, iced tea, or a light beer works across almost all of these dinners. For richer dishes like ziti, sloppy joes, or tuna casserole, a cold cola or simple lemonade does the job too. Keep the drink easy. The meal already has enough going on.
Additional Tips and Flavor Boosters
Flavor Enhancement: A small finish changes more than you’d think. A spoonful of butter stirred into red sauce, a squeeze of lemon over salmon or chicken, and a handful of fresh herbs at the end can make a beginner dinner taste more awake. You do not need fancy garnishes. You need one bright note.
Customization: Keep the base recipe steady and change the middle. Add black beans to tacos, spinach to ziti, mushrooms to sausage and peppers, or extra peas to fried rice. If you want a little heat, use red pepper flakes only at the table so the whole pan stays friendly.
Serving Suggestions: Toasted buns, garlic bread, or a little crunch on top go a long way. Breadcrumbs on casserole, sesame seeds on sliders, Parmesan on pasta, and green onions on stir-fries are small touches that make dinner feel finished.
Make-It-Yours: For gluten-free meals, use corn tortillas, gluten-free pasta, or rice bowls. For dairy-free versions, lean on olive oil, lemon, broth, and tomato-based sauces. For lower-sodium cooking, choose unsalted broth, no-salt-added tomatoes, and season in small increments so you stay in control.
Make-Ahead, Storage, and Reheating Guidance
Most of these beginner dinners keep well for 3 to 4 days in the refrigerator if you cool them in shallow containers within 2 hours of cooking. Soups, chili mac, baked ziti, and sloppy joe filling are especially good leftover meals because the flavor settles and the sauce thickens a little overnight. Keep pasta dishes separate from extra Parmesan or herbs so the finish stays fresh.
Freezing works for several of them, but not all. Chili mac, meat sauce, sloppy joe filling, chicken soup, baked ziti, and tuna casserole can all be frozen for up to 2 months in airtight containers. Let them cool first, then freeze in meal-sized portions so you can thaw only what you need. Fried rice, quesadillas, and salmon do not freeze as well. They’re better eaten fresh or within a couple of days.
Reheat pasta sauces and casseroles with a splash of water or broth in a covered dish at a low oven temperature or in the microwave at medium power. That little extra moisture keeps the noodles from turning stiff. Soups can be warmed on the stove over medium-low heat until steaming, and rice dishes should be heated with a spoonful of water and a loose cover so the grains soften again. Fish is best reheated gently — short microwave bursts or a low oven — because high heat dries it out fast.
For make-ahead planning, cook the sauce or filling a day early if you want the evening to feel easier. Boil fresh pasta or rice the day you serve it, though. Those two are at their best when they’re not sitting around waiting.
Easy Swaps and Adaptations to Try
The Pantry Rescue: Use what’s already on the shelf and in the freezer. Jarred sauce, canned beans, frozen vegetables, canned tuna, and rotisserie chicken can turn half the recipes here into dinner with almost no shopping. This version is especially good for nights when the fridge looks bare and you do not feel like inventing a plan.
The Gluten-Free Shelf: Swap in corn tortillas for tacos, gluten-free pasta for ziti and spaghetti, and rice for pasta in the stir-fry or chicken dinner. Use certified gluten-free breadcrumbs if you make the casserole. The method stays the same; only the starch changes.
The Mild Family Plate: Pull back on chili powder, red pepper flakes, and heavy garlic if you’re feeding people who like plain flavors. Keep salsa, hot sauce, or pepper flakes on the table so the spice can be added after serving. That keeps the main dish friendly without making it boring.
The Vegetable-Heavy Tray: Add spinach to pasta, extra broccoli to fried rice, more carrots to soup, or mushrooms and zucchini to sausage skillets. The easiest way to make a dinner feel healthier is usually to add vegetables rather than remove everything fun. That’s a better deal for taste, too.
The Lean Protein Switch: Ground turkey can stand in for ground beef in tacos, sloppy joes, chili mac, and some skillet dinners. Chicken thighs can replace chicken breasts when you want more forgiveness. Shrimp can replace chicken in pasta if you want a faster dish. Keep the seasonings the same and adjust the cook time.
Common Mistakes That Make Easy Dinners Harder Than They Need to Be
Starting before reading the whole recipe: The symptom is obvious — you realize halfway through that the oven wasn’t preheated or the rice needed rinsing. The fix is boring but effective: read the whole recipe once, then gather everything before the heat goes on.
Crowding the pan: When the food sits in a pile, it steams instead of browns. That’s why sheet pan dinners and skillet meals can taste flat if the pan is overloaded. Use a bigger pan, split the batch, or accept that browning needs open space.
Turning the heat up too far: Beginners often think high heat makes dinner faster. Sometimes it does. It also burns garlic, scorches sauces, and dries out chicken. Medium and medium-high are your friends more often than you think.
Skipping the taste check: A dish can look done and still taste dull, undersalted, or too sharp. Taste at the end and adjust with salt, lemon, herbs, or a little fat. One spoonful can save a whole pan.
Overcooking the pasta or rice: Mushy starch is hard to fix. Pull pasta when it still has a little bite and let it finish in sauce. For rice, keep the lid on and resist stirring too much while it cooks.
Using the wrong leftover method: Some meals need moisture when reheated, some need crisp heat, and some are better rebuilt from scratch. If a quesadilla or slider gets soggy, reheat it in a skillet or oven instead of the microwave. If soup thickens, loosen it with broth before warming.
Questions New Cooks Ask Most Often

Which dinner should I make first if I’ve barely cooked at all?
Start with tacos, spaghetti with meat sauce, or chicken quesadillas. They teach basic stove skills, finish fast, and don’t punish small mistakes the way a delicate fish dish might.
Do I need fancy cookware for these recipes?
No. A large skillet, one sheet pan, one pot, and a baking dish will cover nearly everything here. If you can cook in a pan that holds heat evenly, you’re in good shape.
Can I use frozen vegetables in these dinners?
Yes, and in some recipes they’re the better choice. Frozen peas, peas and carrots, and edamame work especially well in fried rice, soup, and chili mac. For sheet pan dinners, fresh vegetables usually brown better.
How do I know chicken is cooked through?
The safest sign is an instant-read thermometer showing 165°F (74°C) in the thickest part. If you do not have one, cut into the center and look for opaque meat with clear juices, though the thermometer is more dependable.
What if my sauce is too thin?
Simmer it a little longer with the lid off, or stir in a spoonful of tomato paste, Parmesan, or a cornstarch slurry depending on the dish. Thin sauce is common at first and usually easy to fix.
Can I make these meals ahead of time?
Yes, especially the saucy ones. Meat sauce, chili mac, sloppy joe filling, soup, and baked ziti all hold well. Just keep delicate items like salmon, quesadillas, and fried rice closer to serving time.
What if I only have one skillet?
That’s fine for most of this collection. Cook the filling, move it to a plate, and use the same skillet for the next step. One good pan is enough for a surprising amount of dinner.
How do I keep pasta dishes from drying out when reheating?
Add a spoonful of water, broth, or sauce before reheating, then cover the dish loosely. Gentle heat works better than a blast of high heat, which tightens the noodles and dries the cheese.
A Good First Stretch at the Stove
The smartest beginner dinners are not the fanciest ones. They’re the ones that give you a clean win, teach a useful skill, and leave you with enough energy to cook again later in the week. That is the real payoff here. Not perfection. Momentum.
Pick one skillet, one sheet pan, or one pot, and let that be enough for tonight. The rest can wait on the page until you’re ready for it, which is how a good kitchen habit starts anyway.
Recipe Collection Quick Reference Table
| Recipe | Prep Time | Cook Time | Total Time | Servings | Standout Detail |
|---|---|---|---|---|---|
| Spaghetti with Easy Meat Sauce | 10 min | 25 min | 35 min | 4 | classic starter pasta with a rich jar-sauce boost |
| Sheet Pan Chicken Thighs with Potatoes and Carrots | 15 min | 35 min | 50 min | 4 | one pan, browned edges, very forgiving chicken |
| Ground Beef Tacos with Simple Fixings | 15 min | 10 min | 25 min | 4 | fastest build-your-own dinner in the set |
| Baked Ziti with Mozzarella | 20 min | 35 min | 55 min | 6 | creamy ricotta layer with a browned cheese top |
| Baked Lemon Butter Salmon with Green Beans | 10 min | 15 min | 25 min | 4 | the easiest fish dinner here |
| Chicken Quesadillas | 10 min | 10 min | 20 min | 4 | crisp tortillas with molten cheese and salsa |
| Ground Beef and Broccoli Stir-Fry | 15 min | 15 min | 30 min | 4 | glossy sauce, fast broccoli, served over rice |
| Turkey Sloppy Joes | 10 min | 20 min | 30 min | 4 | sweet-tangy filling that holds well on buns |
| Sausage, Peppers, and Onions Skillet | 10 min | 20 min | 30 min | 4 | smoky sausage with soft peppers and onions |
| Chili Mac | 15 min | 25 min | 40 min | 6 | one-pot comfort with pasta and beans |
| Veggie Fried Rice | 10 min | 15 min | 25 min | 4 | leftover rice turns into dinner fast |
| BBQ Chicken Sliders | 10 min | 15 min | 25 min | 6 | soft rolls, saucy chicken, easy party-style meal |
| Garlic Shrimp Pasta | 15 min | 15 min | 30 min | 4 | bright lemon-garlic sauce in a few minutes |
| Tuna Noodle Casserole | 15 min | 25 min | 40 min | 6 | pantry dinner with a crisp breadcrumb top |
| Pesto Tortellini with Peas | 10 min | 10 min | 20 min | 4 | refrigerated tortellini makes dinner nearly immediate |
| One-Pan Chicken and Rice | 15 min | 35 min | 50 min | 4 | rice cooks under the chicken for extra flavor |
| Chicken Noodle Soup | 15 min | 35 min | 50 min | 6 | gentle, classic soup with simple ingredients |
| Sheet Pan Sausage and Veggies | 15 min | 35 min | 50 min | 4 | roasted potatoes, sausage, and vegetables in one tray |