
Quesadilla dinners are what I reach for when the evening has already gone sideways and I still want something hot, crisp, and worth putting on a plate. A tortilla, a handful of cheese, and a good skillet can rescue a tired fridge faster than most takeout menus can load.
The charm is not subtle. It’s the sound of the tortilla going crackly at the edge, the smell of toasted flour and melting cheese, the way a filling that looked ordinary five minutes ago suddenly feels like dinner with a pulse. Quesadillas can be rustic, messy, sharp-edged, cheesy, and a little chaotic — which is exactly why they work so well on low-energy nights.
What makes them so useful is how they absorb leftovers and pantry odds and ends without acting like leftovers. Cooked chicken, taco beef, pulled pork, beans, mushrooms, potatoes — all of it behaves better once it’s tucked between two tortillas with enough cheese to hold the whole thing together. That cheese is doing more than tasting good. It’s the glue, the insurance policy, the thing that keeps the filling from sliding out onto the counter.
Why These Quesadilla Dinners Belong in Your Back Pocket
-
Fast without tasting thin: Most of these dinners land on the table in about 20 to 30 minutes, but they still feel like a real meal, not a snack stretched too far.
-
Built for leftovers: Rotisserie chicken, roast pork, extra steak, and even yesterday’s potatoes all get a second life here without much fuss.
-
One skillet, very little cleanup: A good quesadilla dinner does not ask for a sink full of pans. One skillet and a spatula will carry most of the load.
-
Easy to steer with what you have: If you’ve got cheddar instead of Monterey Jack, or black beans instead of beef, the structure stays the same.
-
Crowd-pleasing in a way that’s almost unfair: Crispy tortillas and melted cheese tend to win people over before they’ve even decided what’s inside.
-
Flexible enough for picky eaters: You can keep some quesadillas plain, add hot sauce to others, and let everyone build a plate that makes sense to them.
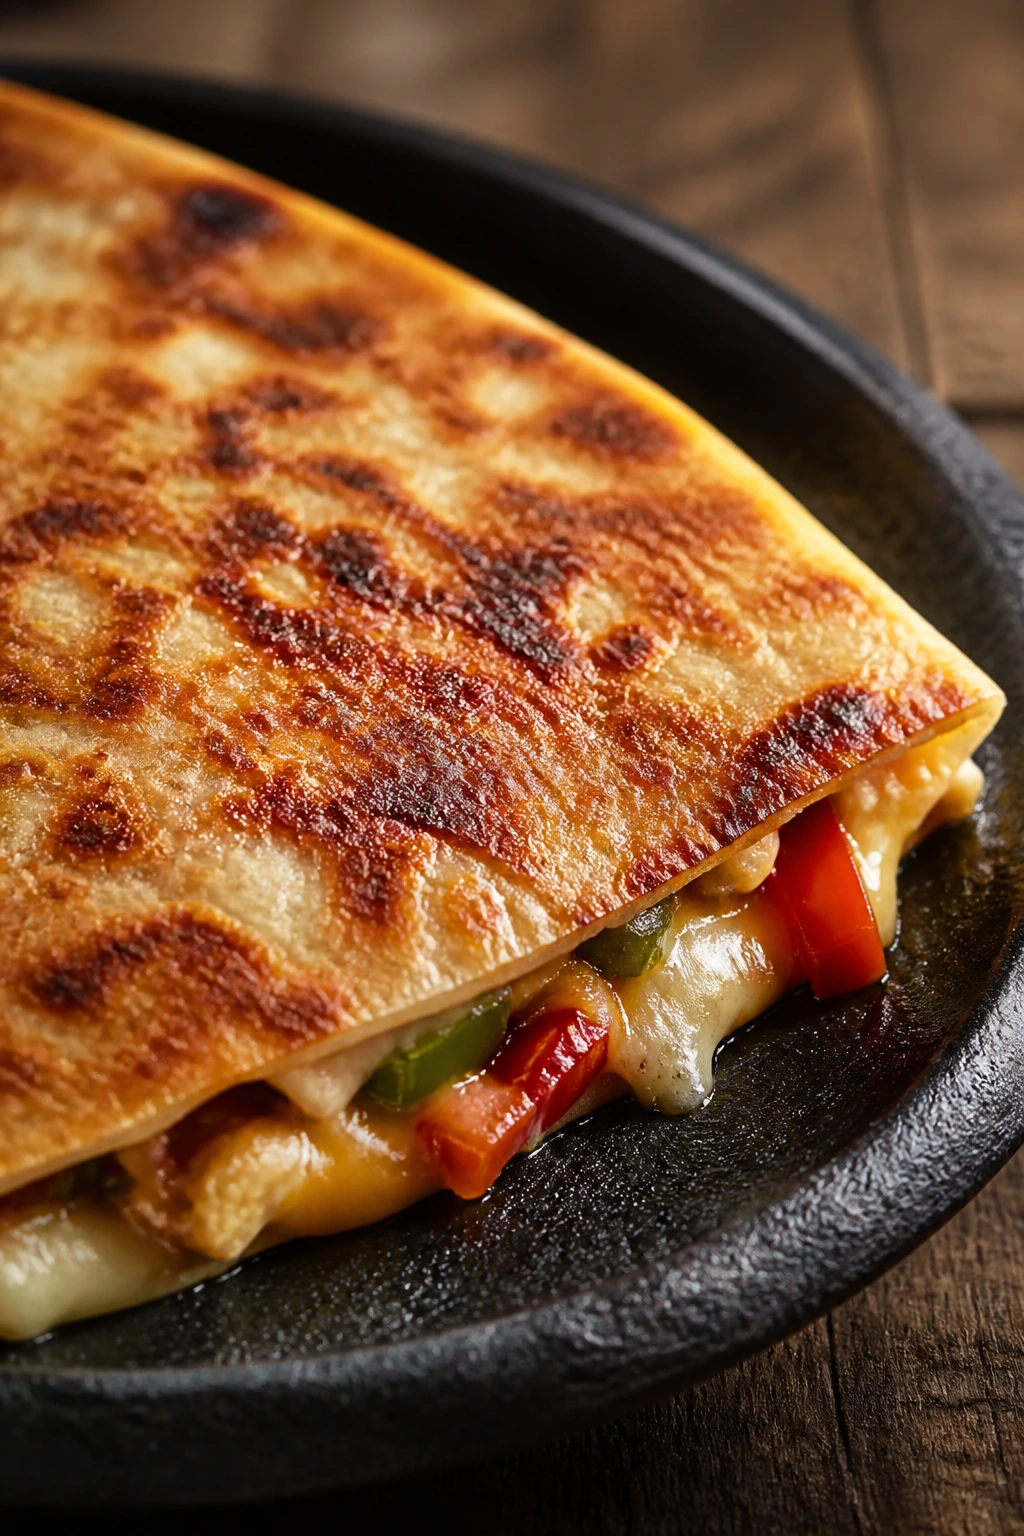
1. Chicken Fajita Quesadillas
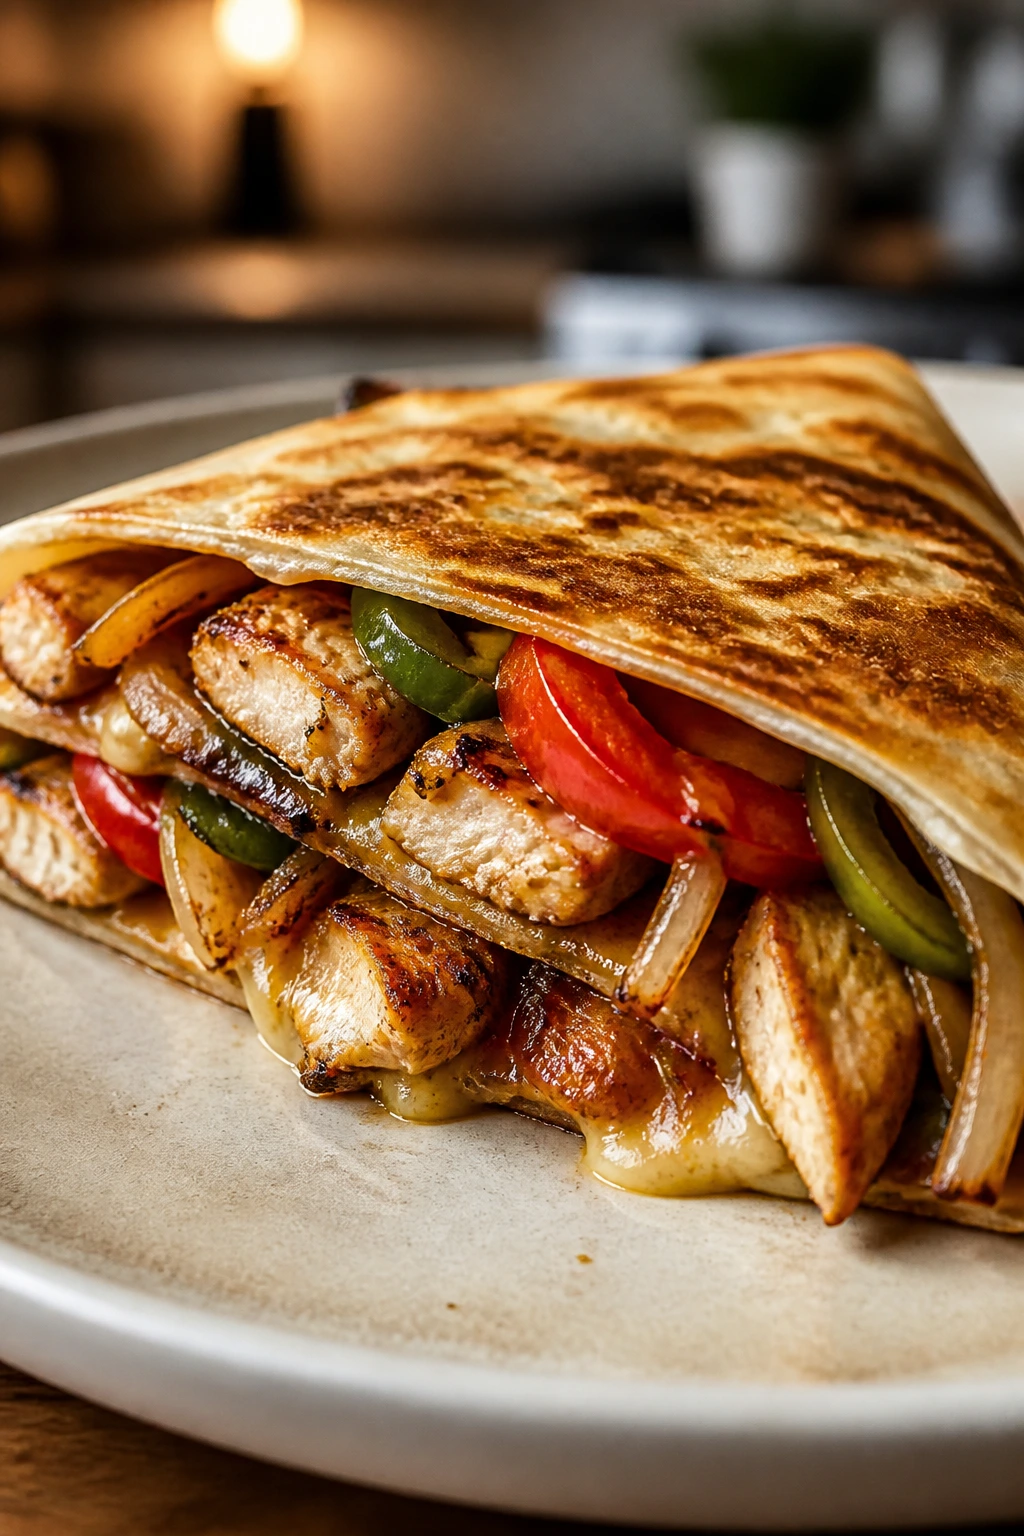
Chicken fajita quesadillas are what happens when a half-used package of tortillas meets the kind of dinner that smells better than it has any right to. The peppers soften, the onions sweeten, and the chicken gets dusted with fajita seasoning so every bite tastes a little smoky, a little bright, and a little more alive than the fridge suggested it would.
I like this version because it behaves like a rescue meal, not a compromise. You can use leftover chicken, rotisserie chicken, or plain cooked chicken from earlier in the week, and once it hits the skillet with the peppers, it stops feeling recycled. That’s the magic here. The filling is colorful enough to look deliberate, but the whole thing still comes together with almost rude ease.
Why It Works
The filling stays structured because the peppers and onions are cooked until they lose most of their moisture before they ever go inside the tortilla. That matters. Wet vegetables make the tortilla steam instead of toast, and that’s how you end up with a floppy quesadilla that tears when you cut it.
Monterey Jack is the right cheese here because it melts smoothly and doesn’t fight the fajita seasoning. A little lime at the end keeps the filling from tasting heavy, and the skillet gives you that toasted, almost nutty flavor on the outside. Fast, colorful, and forgiving.
Key Ingredients
- 8 medium flour tortillas (8-inch) — the size matters because it folds neatly without becoming hard to handle.
- 2 cups shredded cooked chicken — rotisserie chicken works, but any cooked chicken will do.
- 1 red bell pepper, thinly sliced — adds sweetness and color.
- 1 yellow bell pepper, thinly sliced — keeps the filling bright and balanced.
- 1 medium yellow onion, thinly sliced — softens into the kind of savory base that makes the whole thing taste complete.
- 2 cups shredded Monterey Jack cheese — melts cleanly and holds the filling together.
- 1 tablespoon fajita seasoning — use a salt-forward blend so the chicken doesn’t taste flat.
- 1 tablespoon olive oil — helps the vegetables soften and toast.
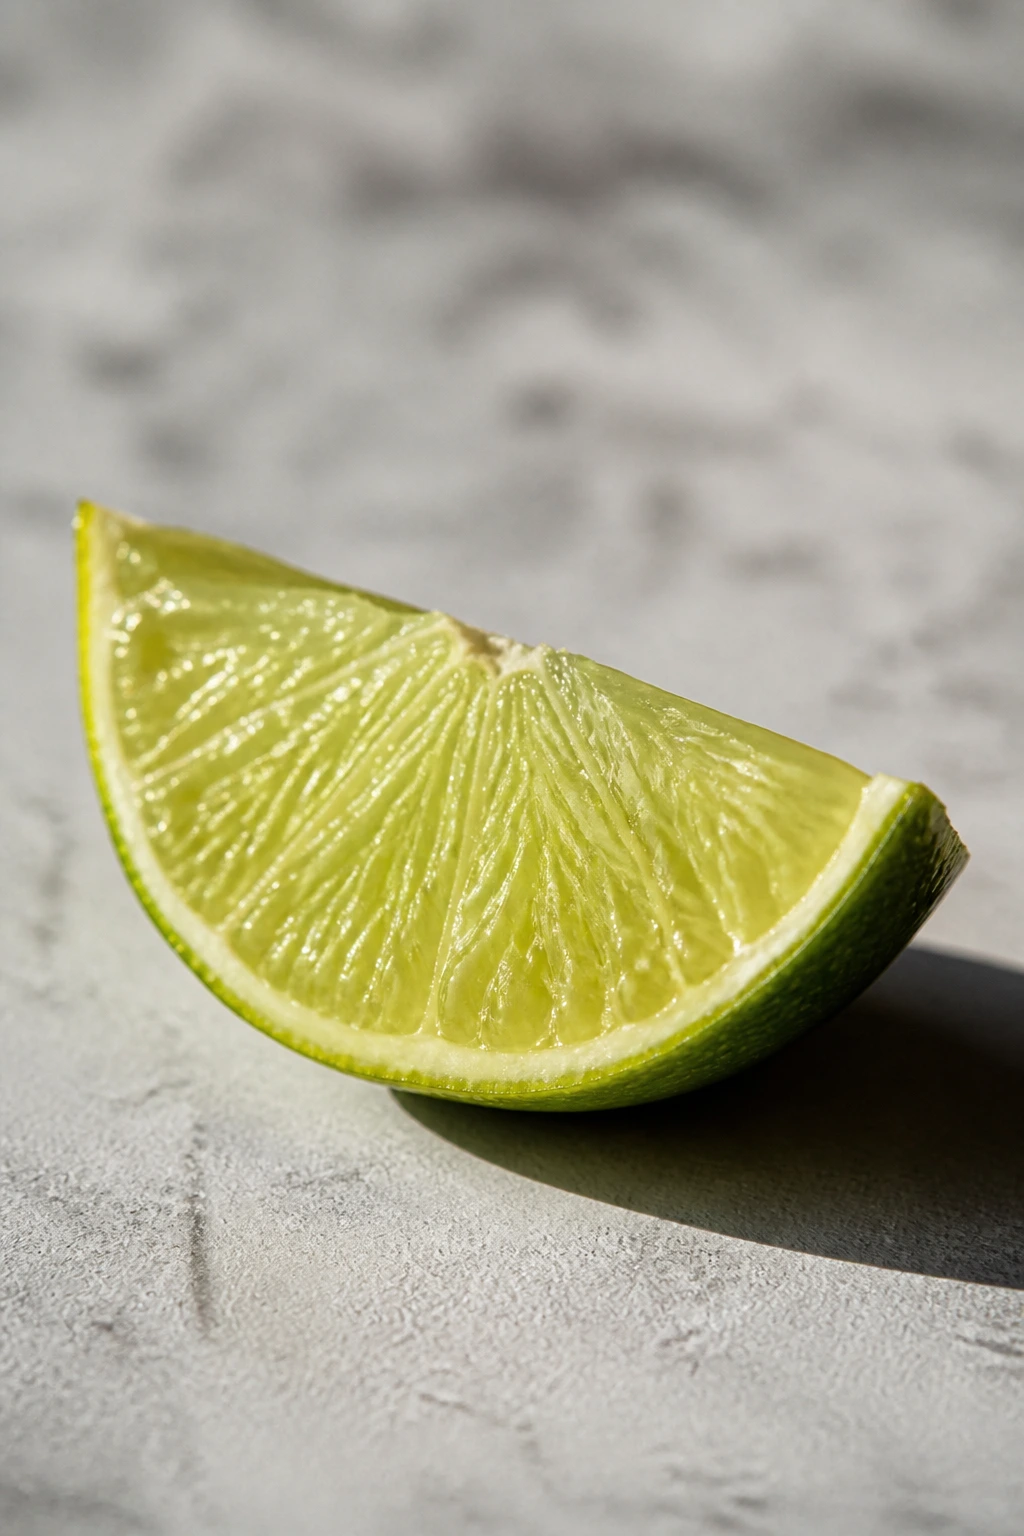
- 1 lime, cut into wedges — the final squeeze wakes everything up.
- 2 tablespoons chopped cilantro, optional — for a fresh finish if you like it.
Quick Steps
-
Cook the vegetables first: Heat 1 tablespoon olive oil in a large skillet over medium-high heat. Add the sliced peppers and onion with a pinch of salt, then cook for 5 to 6 minutes, stirring often, until the onions are soft and the edges of the peppers begin to blister.
-
Season the filling: Stir in the fajita seasoning and the shredded chicken. Cook for 1 to 2 minutes, just until the chicken is hot and everything smells fragrant. If the pan looks dry, add 1 tablespoon water to keep the seasoning from scorching.
-
Warm the tortillas: Lower the heat to medium and wipe out the skillet if needed. Set one tortilla in the pan and let it warm for 10 to 15 seconds so it folds without cracking.
-
Build the quesadilla: Sprinkle about 1/2 cup cheese over half the tortilla, add a generous scoop of the chicken mixture, then top with another small handful of cheese. Fold the tortilla over gently. Don’t overfill it — the cheese should still be able to seal the edges.
-
Toast both sides: Cook for 2 to 3 minutes per side, pressing lightly with a spatula, until the tortilla is deep golden brown and the cheese melts out at the seam in a few tiny bubbles.
-
Rest, slice, and serve: Let the quesadilla sit for 1 minute before cutting. Slice into wedges, squeeze over lime, and finish with cilantro if you want a sharper, fresher edge.
Tips and Variations
- If your chicken is plain, add a pinch of cumin and garlic powder when you warm it with the vegetables.
- Thinly sliced jalapeños fit in well here, but keep them on one half so the heat stays optional.
- If you want a creamier version, add 2 tablespoons of sour cream or softened cream cheese to the filling after it comes off the heat.
2. Taco Beef Quesadillas
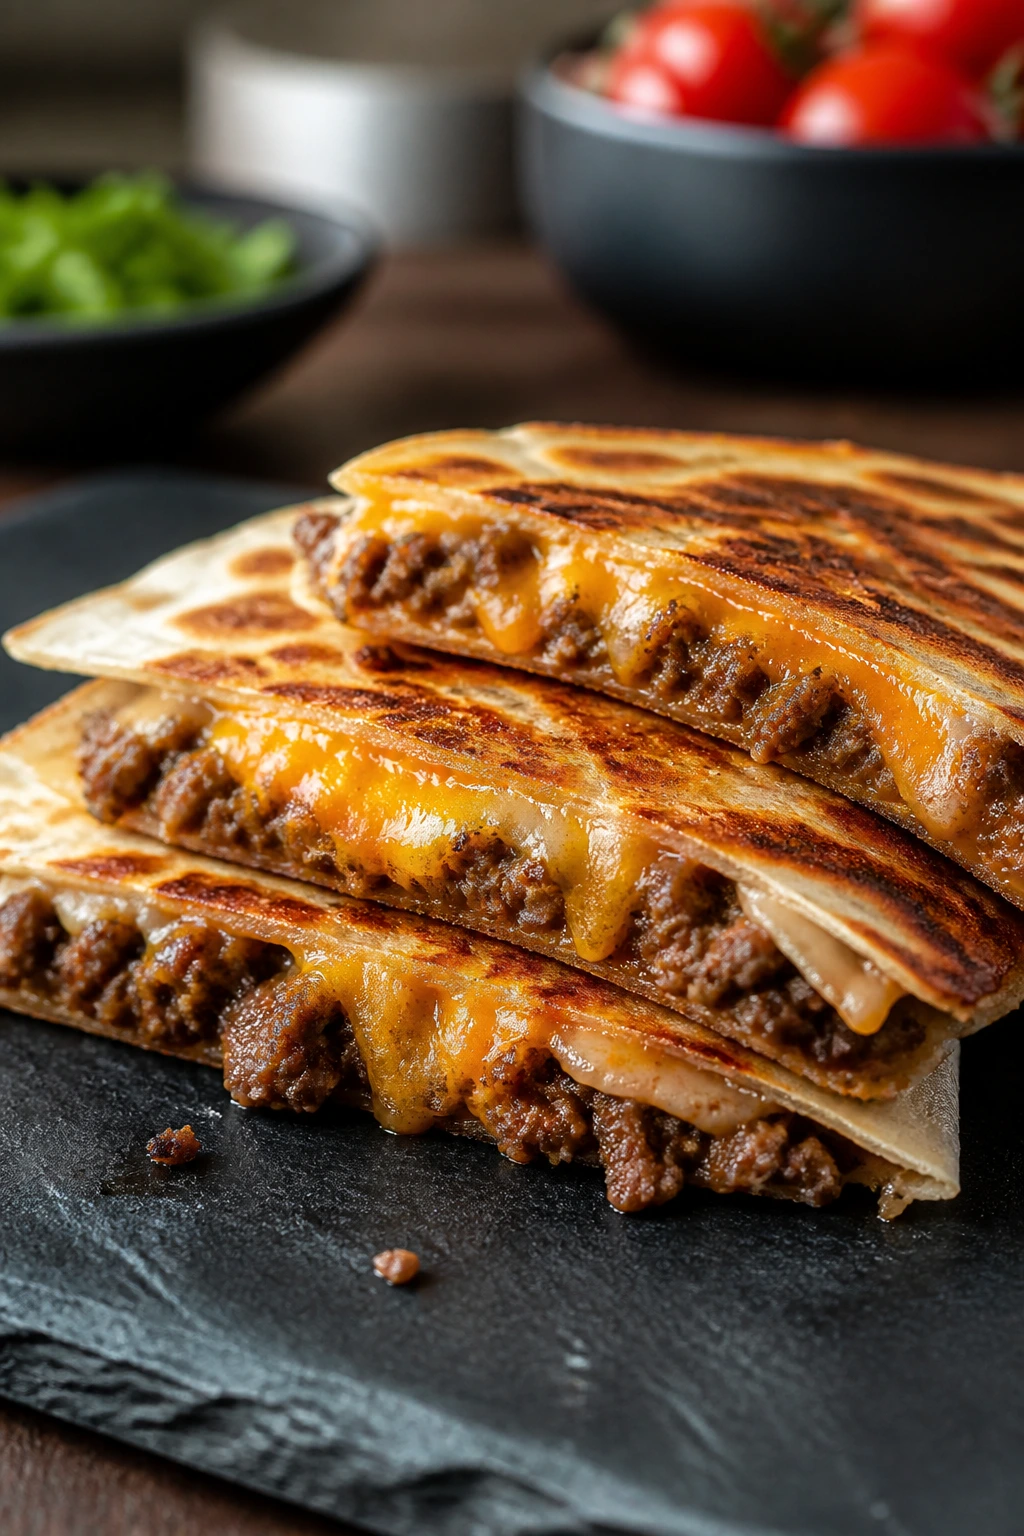
Can ground beef and a tortilla pull off taco night without turning into a mess? Absolutely — if the filling is cooked dry enough and the cheese is doing its job. Taco beef quesadillas are the kind of dinner that feels like a fast version of everyone’s favorite weeknight comfort food, but with less fiddly assembly and fewer broken shells on the plate.
What I like most is the texture. The beef stays savory and crumbly, the cheddar adds a sharp bite, and the tortilla gives you a clean crisp edge that a taco shell can’t match. If you’ve got one pound of ground beef, you can stretch it across four quesadillas and make dinner look a lot more generous than the ingredient list would suggest.
Why It Works:
Ground beef has enough fat to carry taco seasoning, but it needs to be cooked until the pan goes dry enough that the filling won’t steam the tortilla from the inside. Salsa adds flavor, but not so much that it floods the quesadilla, and the blend of cheddar and Monterey Jack gives you both sharpness and melt. The result is sturdy, smoky, and easy to slice. That matters more than people admit.
Key Ingredients:
- 1 pound lean ground beef — 85/15 is a good middle ground; leaner works too if you add a splash of oil.
- 1 small onion, finely diced — softens into the beef and keeps the filling from tasting one-note.
- 2 teaspoons chili powder — gives the filling its taco backbone.
- 1 teaspoon ground cumin — for that warm, earthy flavor.
- 1/2 teaspoon garlic powder — keeps the seasoning broad and savory.
- 1/2 cup thick salsa — use a chunky style, not a watery one.
- 2 cups shredded sharp cheddar cheese — gives the quesadilla bite.
- 1 cup shredded Monterey Jack cheese — helps the filling melt instead of clumping.
- 8 medium flour tortillas — they hold up better than thin tortillas here.
- 1 tablespoon oil — only if your beef is very lean.
- Optional: 1/4 cup sliced pickled jalapeños or black olives — choose one, not both, unless you want the filling crowded.
Quick Steps:
-
Heat a large skillet over medium-high heat. Add the beef and onion, then cook for 6 to 7 minutes, breaking the meat apart with a spoon until no pink remains and the onion turns soft and glossy.
-
Drain off excess fat if needed. Stir in chili powder, cumin, garlic powder, and a pinch of salt, then cook for 30 seconds so the spices bloom in the hot pan.
-
Add the salsa and cook for 1 to 2 minutes more, just until the mixture looks thick and not saucy. If it looks wet, keep cooking. Wet beef is the enemy of a crisp tortilla.
-
Set a tortilla in the skillet over medium heat. Add cheddar, then a scoop of beef, then Monterey Jack, and fold the tortilla over.
-
Cook each side for 2 to 3 minutes until the outside is golden with darker brown spots and the cheese starts to leak at the seam in tiny strings.
-
Rest for 1 minute, cut into wedges, and serve with sour cream or extra salsa on the side.
Tips and Variations:
- If you want a little extra texture, stir in 2 tablespoons of finely chopped bell pepper with the onion.
- Keep the salsa thick. Thin salsa turns the filling sloppy fast.
- A spoonful of refried beans spread under the cheese makes the quesadilla richer and more stable.
3. Buffalo Chicken Ranch Quesadillas
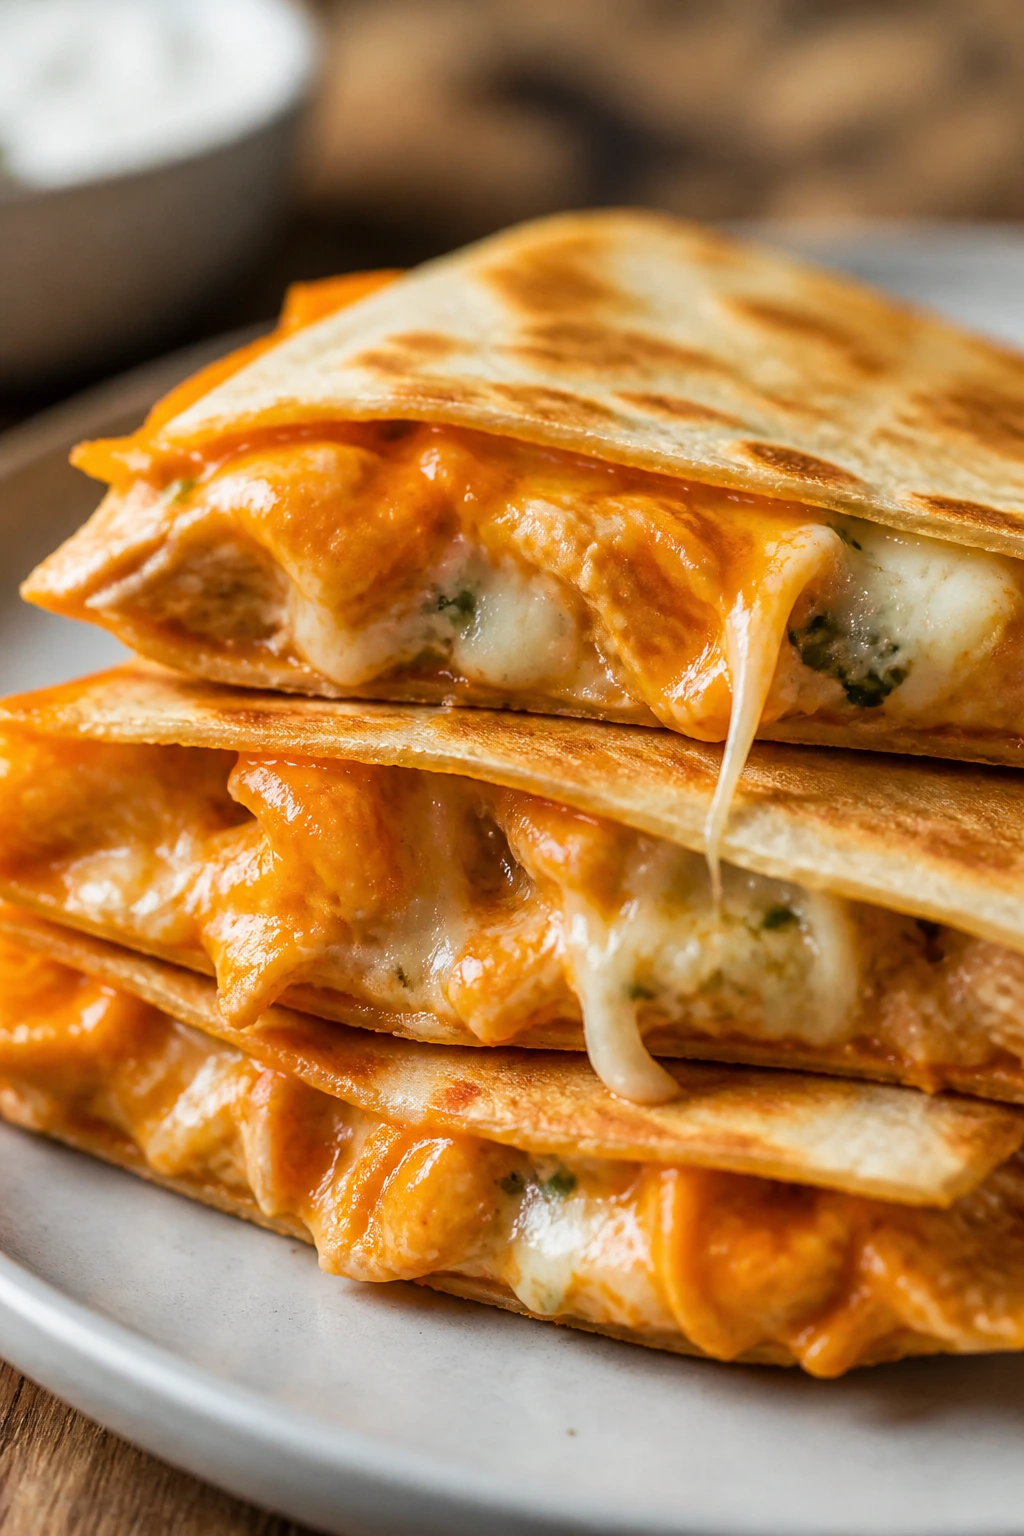
The first bite is tangy and hot, with buffalo sauce on the tongue and a cool ranch note hiding underneath. Buffalo chicken quesadillas are loud in the best way: orange filling, melted cheese, crisp tortilla, and enough bite to make a tired evening feel less sleepy.
This is the one I make when plain chicken has become a chore. Buffalo sauce changes the mood in about five seconds, and ranch softens the sharp edges without turning the filling into something dull. Add a little celery or scallion for crunch, and you get a quesadilla that tastes like a chicken wing decided to behave itself.
Why It Works
Buffalo sauce brings acidity, heat, and salt, which is a lot for a tortilla to manage unless the filling is cushioned by plenty of cheese. Mozzarella melts into long strands and cheddar adds a stronger flavor, while ranch gives the filling a creamy base so it doesn’t taste thin. The trick is to keep the chicken warm and the sauce measured. Too much buffalo sauce and the tortilla softens. Too little, and the whole thing tastes timid.
Key Ingredients
- 2 cups shredded cooked chicken — warm chicken absorbs the sauce better than cold chicken.
- 1/3 cup buffalo sauce — enough to coat, not drown.
- 2 tablespoons ranch dressing — helps round out the heat.
- 2 cups shredded mozzarella cheese — for a stretchy melt.
- 1 cup shredded cheddar cheese — adds flavor that mozzarella can’t carry on its own.
- 1/2 cup thinly sliced celery or 2 scallions, sliced — optional, but the crunch is worth it.
- 8 medium flour tortillas — the usual 8-inch size works well.
- 1 tablespoon butter or oil — butter gives a richer crust; oil browns a little faster.
- 1/2 cup blue cheese crumbles, optional — for people who want the full wing-shop feeling.
Quick Steps
-
In a bowl, toss the shredded chicken with buffalo sauce and ranch until every piece is coated. The mixture should look glossy and lightly wet, not soupy.
-
Stir in the celery or scallions if using. Add the blue cheese crumbles only if you want a sharper, saltier finish.
-
Heat a skillet over medium heat and lightly butter one side of a tortilla. Place it butter-side down in the pan.
-
Sprinkle half the tortilla with mozzarella and cheddar, spoon on the chicken mixture, then add a little more cheese on top. Fold it over and press gently.
-
Cook for 2 to 3 minutes per side until the tortilla is crisp and the cheese is fully melted. Keep the heat at medium; buffalo sauce darkens fast.
-
Let the quesadilla rest for 1 minute, then cut into triangles and serve with extra ranch or blue cheese dressing.
Tips and Variations
- If the buffalo sauce tastes sharp, add 1 tablespoon of softened cream cheese to the chicken mixture.
- Thinly sliced pickles sound odd here, but they work if you like tang with heat.
- A few drops of hot sauce on the plate is better than overloading the filling.
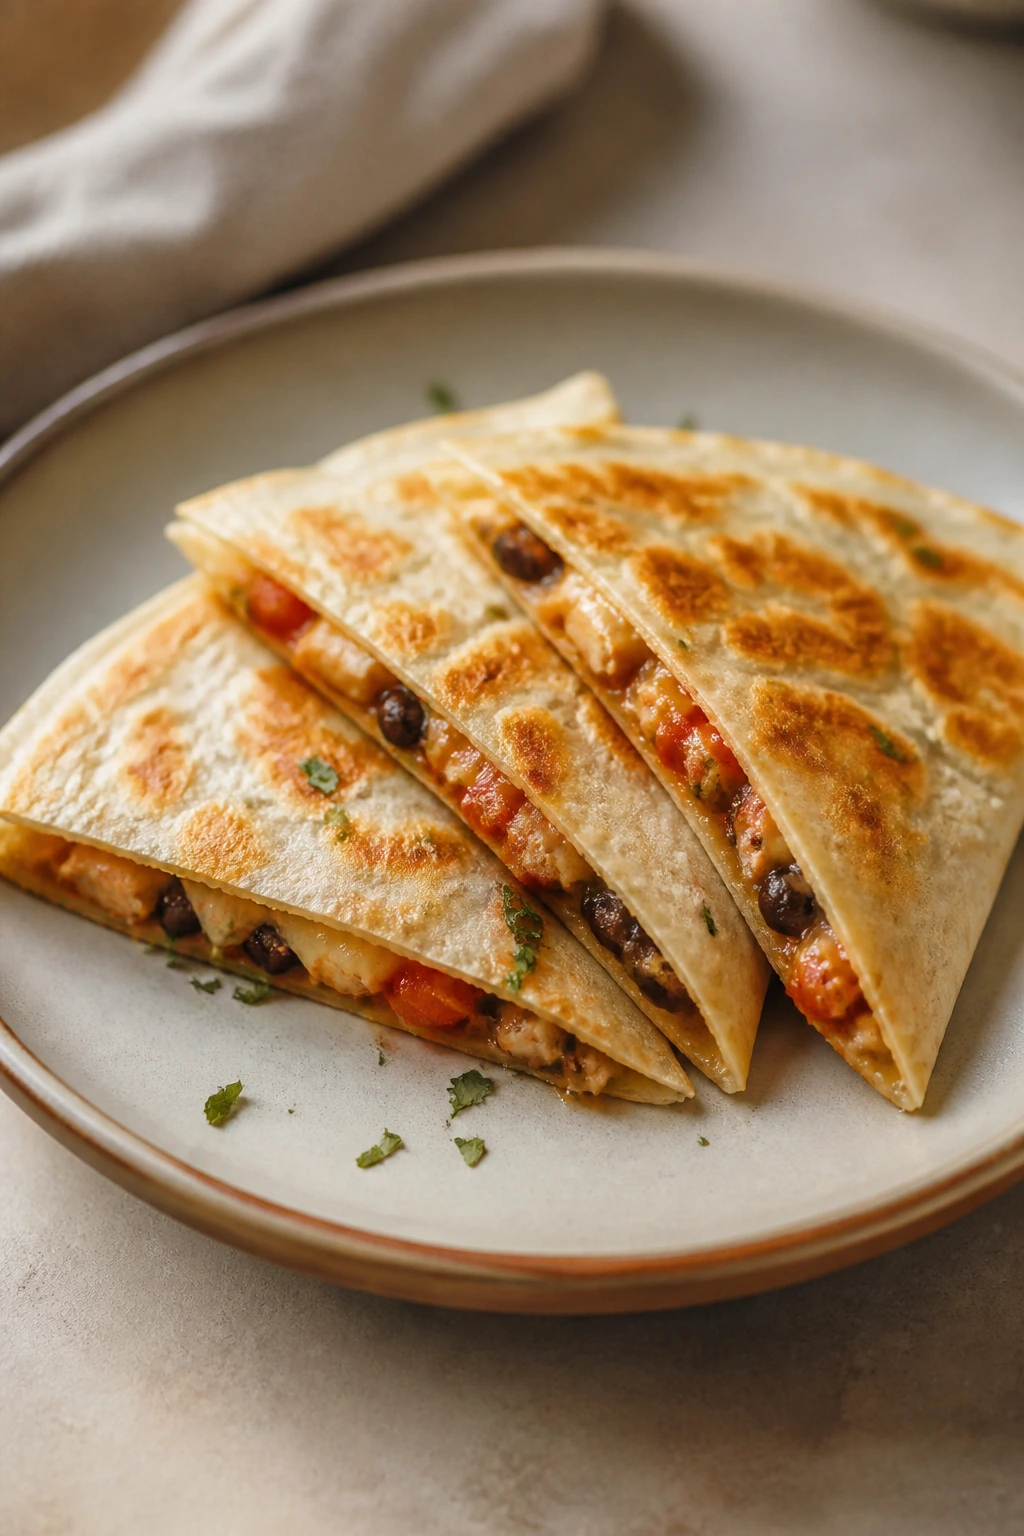
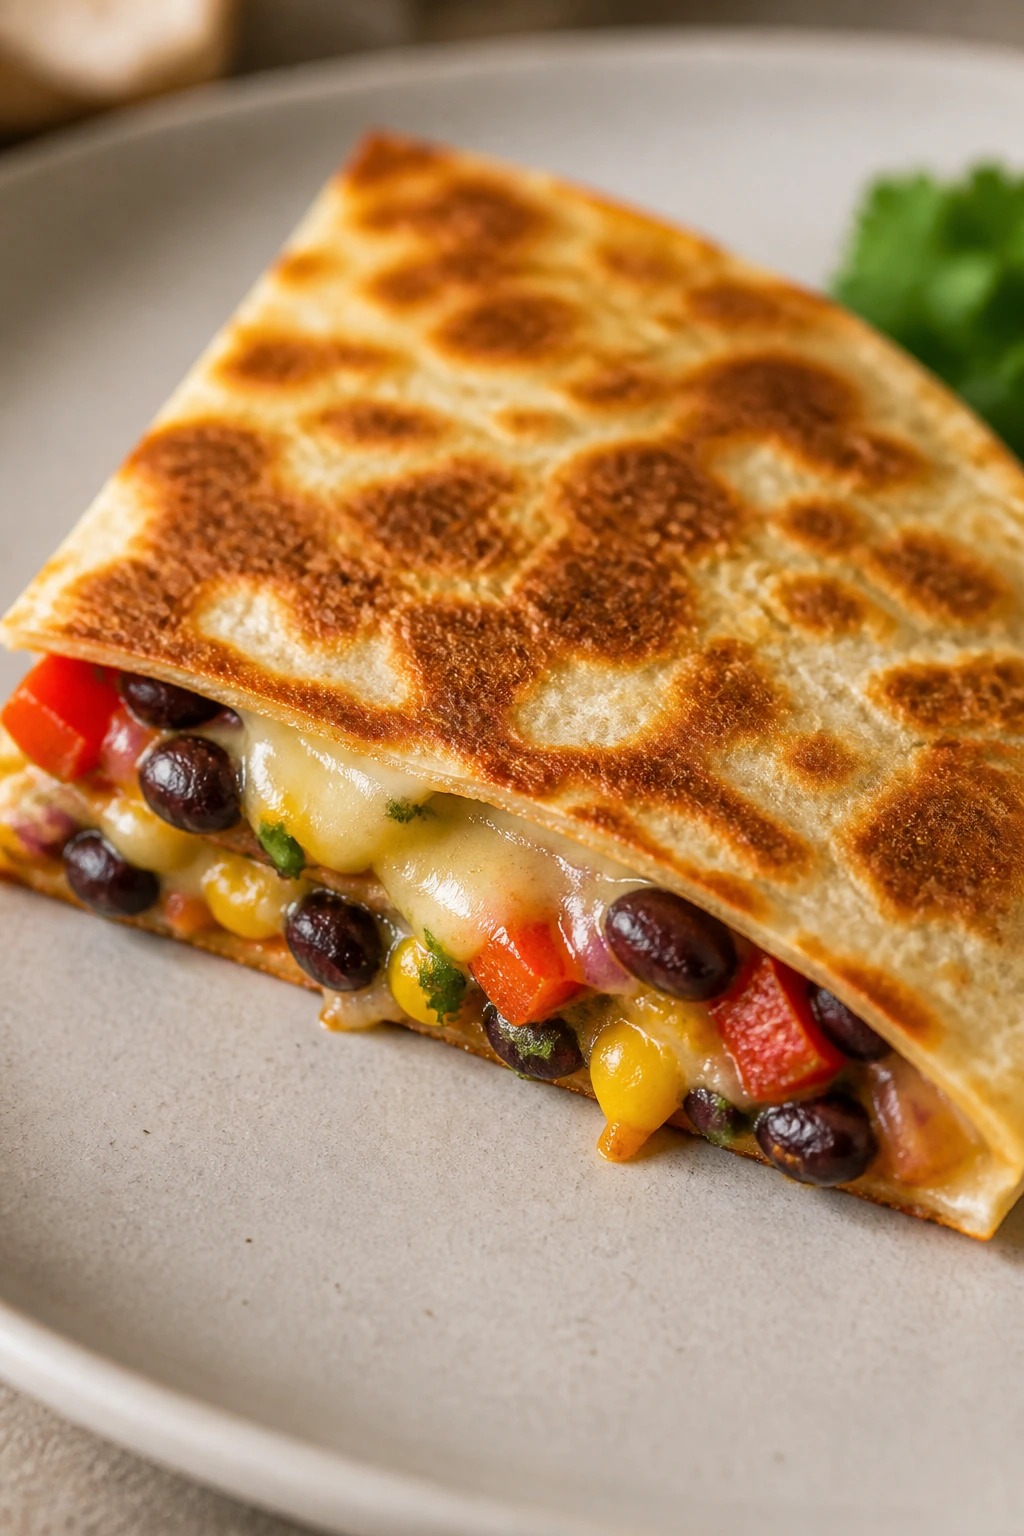
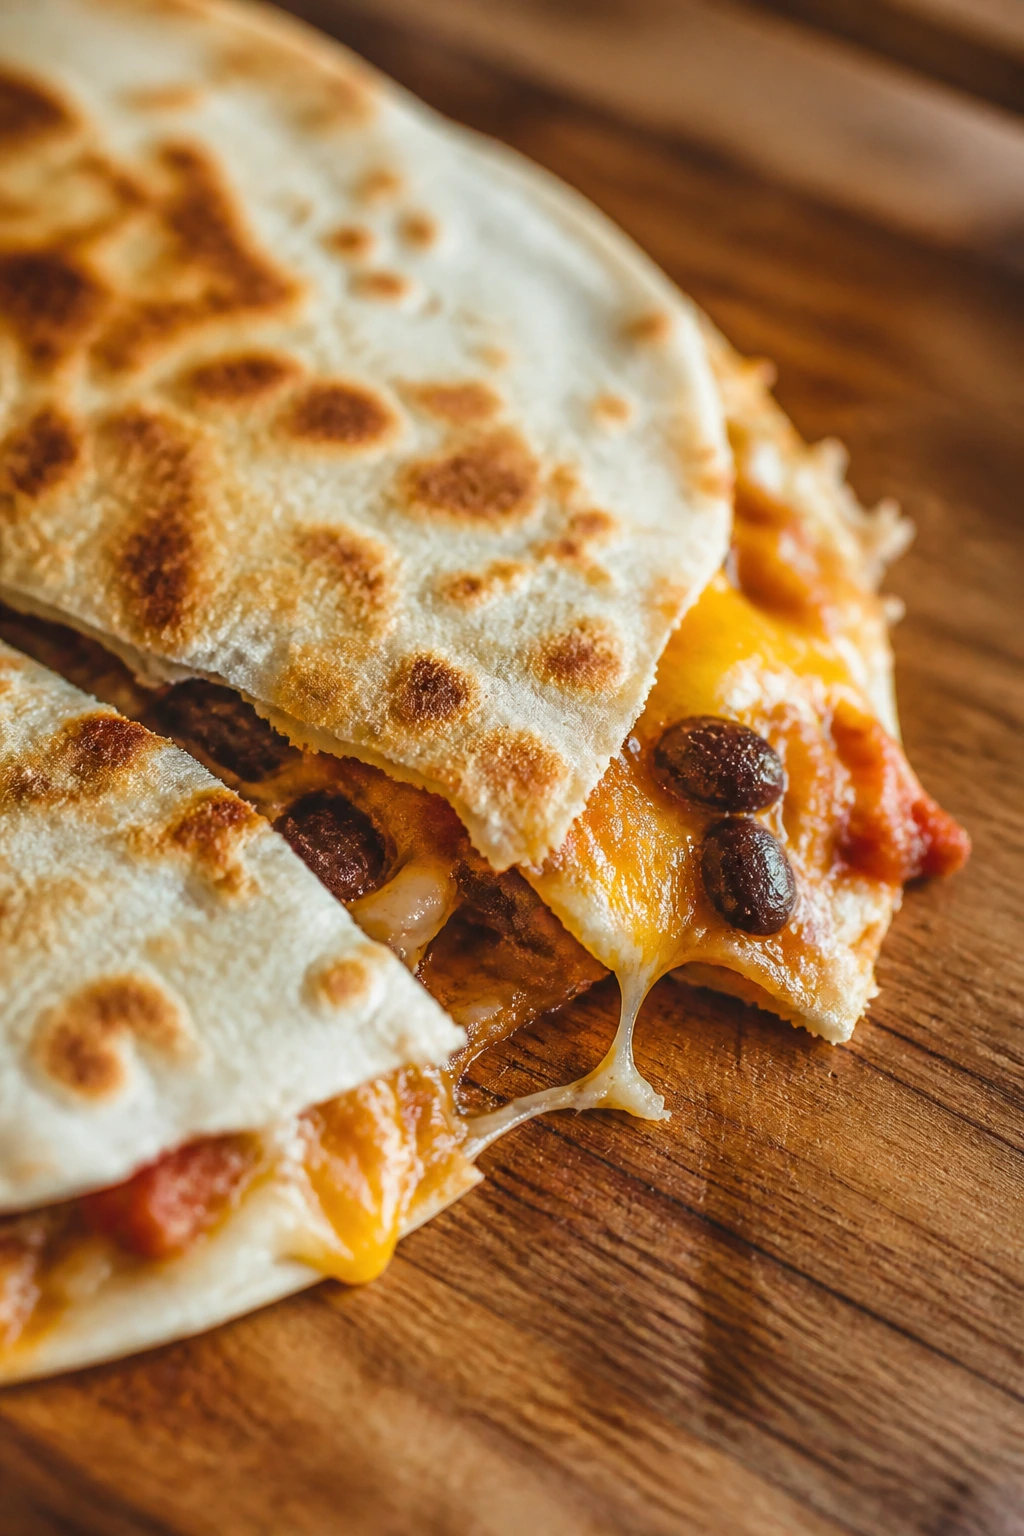
4. Black Bean, Corn, and Pepper Jack Quesadillas
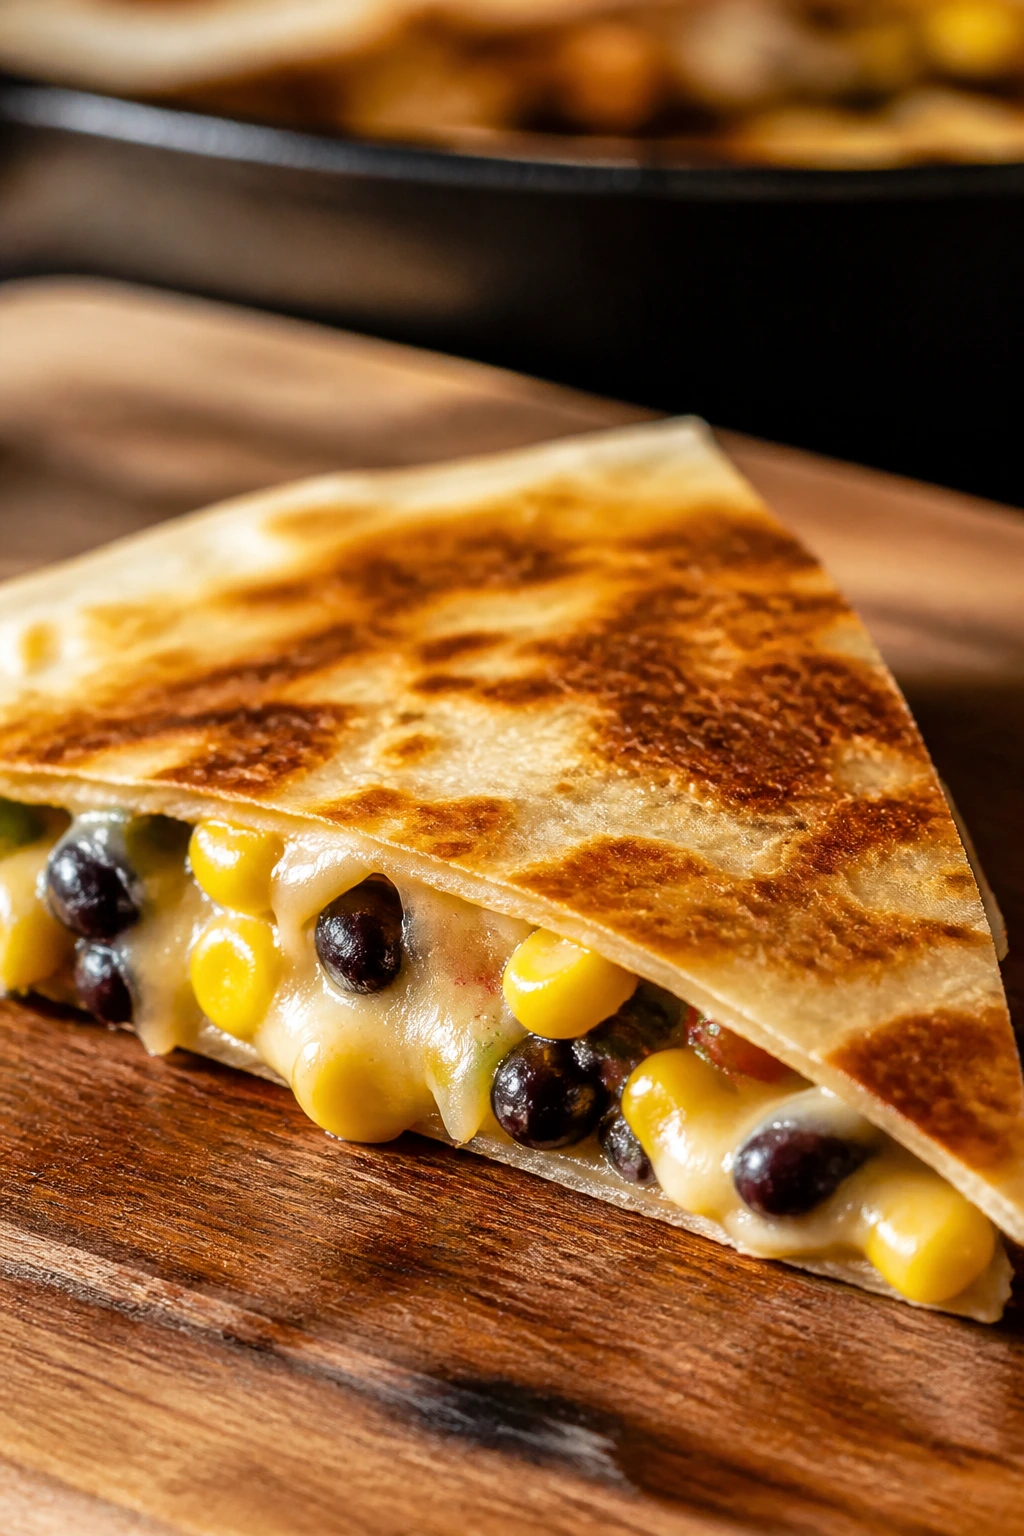
A meatless quesadilla does not need to feel like a compromise, and black beans are the reason. They’re creamy, cheap, filling, and happy to sit next to corn and pepper jack without making a scene. The result is one of those dinners that looks modest at first glance, then quietly outperforms a lot of heavier food.
This one is especially good when the fridge is in that awkward state where there isn’t enough of anything to build a full meal, but there are plenty of odds and ends. Beans in the pantry. A half onion. Frozen corn. One lonely bell pepper. That’s enough.
Why It Works
Black beans bring body, but only if you smash some of them lightly in the pan. If you leave them whole, the filling can slide around. Mash a portion, and suddenly the mixture behaves like a thick, cheesy spread that holds together inside the tortilla.
Pepper jack gives you enough heat to keep the filling from tasting flat, and corn adds little sweet pops that break up the creaminess. The pepper and onion are there for color and freshness, but they also cook down enough to keep the filling dry. That dry, almost paste-like center is what makes the tortilla crisp instead of sad.
Key Ingredients
- 1 (15-ounce) can black beans, drained and rinsed — rinse well so the filling doesn’t taste metallic.
- 1 cup corn kernels — frozen, canned, or fresh all work.
- 1 small red bell pepper, diced — gives sweetness and a little crunch.
- 1/2 small onion, finely diced — cooks fast and disappears into the filling.
- 1 teaspoon ground cumin — the flavor anchor.
- 1/2 teaspoon smoked paprika — adds a subtle smoky note.
- 2 cups shredded pepper jack cheese — brings melt and a little heat.
- 8 medium flour tortillas — sturdy enough for a soft filling.
- 1 tablespoon oil — for sautéing the vegetables.
- 1 lime, cut into wedges — the finishing acid.
- Salt, to taste — beans need more seasoning than people expect.
Quick Steps
-
Heat the oil in a skillet over medium heat. Add the onion and bell pepper, and cook for about 4 minutes until softened and lightly glossy.
-
Stir in the corn, cumin, smoked paprika, and black beans. Cook for 2 to 3 minutes, then mash about one-third of the beans with the back of a spoon. You want thick and chunky, not loose and soupy.
-
Taste and season with salt. Remove the pan from the heat so the mixture stops cooking while you assemble the quesadillas.
-
Set a tortilla in a clean skillet over medium heat. Add cheese, then a scoop of the bean mixture, then a little more cheese. Fold it over gently.
-
Cook for 2 to 3 minutes per side, pressing lightly, until the tortilla is golden and the cheese has melted through the middle.
-
Let it rest for a minute before cutting. Squeeze lime over the wedges and serve while the edges are still crisp.
Tips and Variations
- If you want more texture, add 1/4 cup chopped roasted poblano or jalapeño.
- A spoonful of salsa on the side is better than stirring it into the filling.
- This filling can be made ahead and kept in the fridge for 3 days.
5. BBQ Pulled Pork Quesadillas
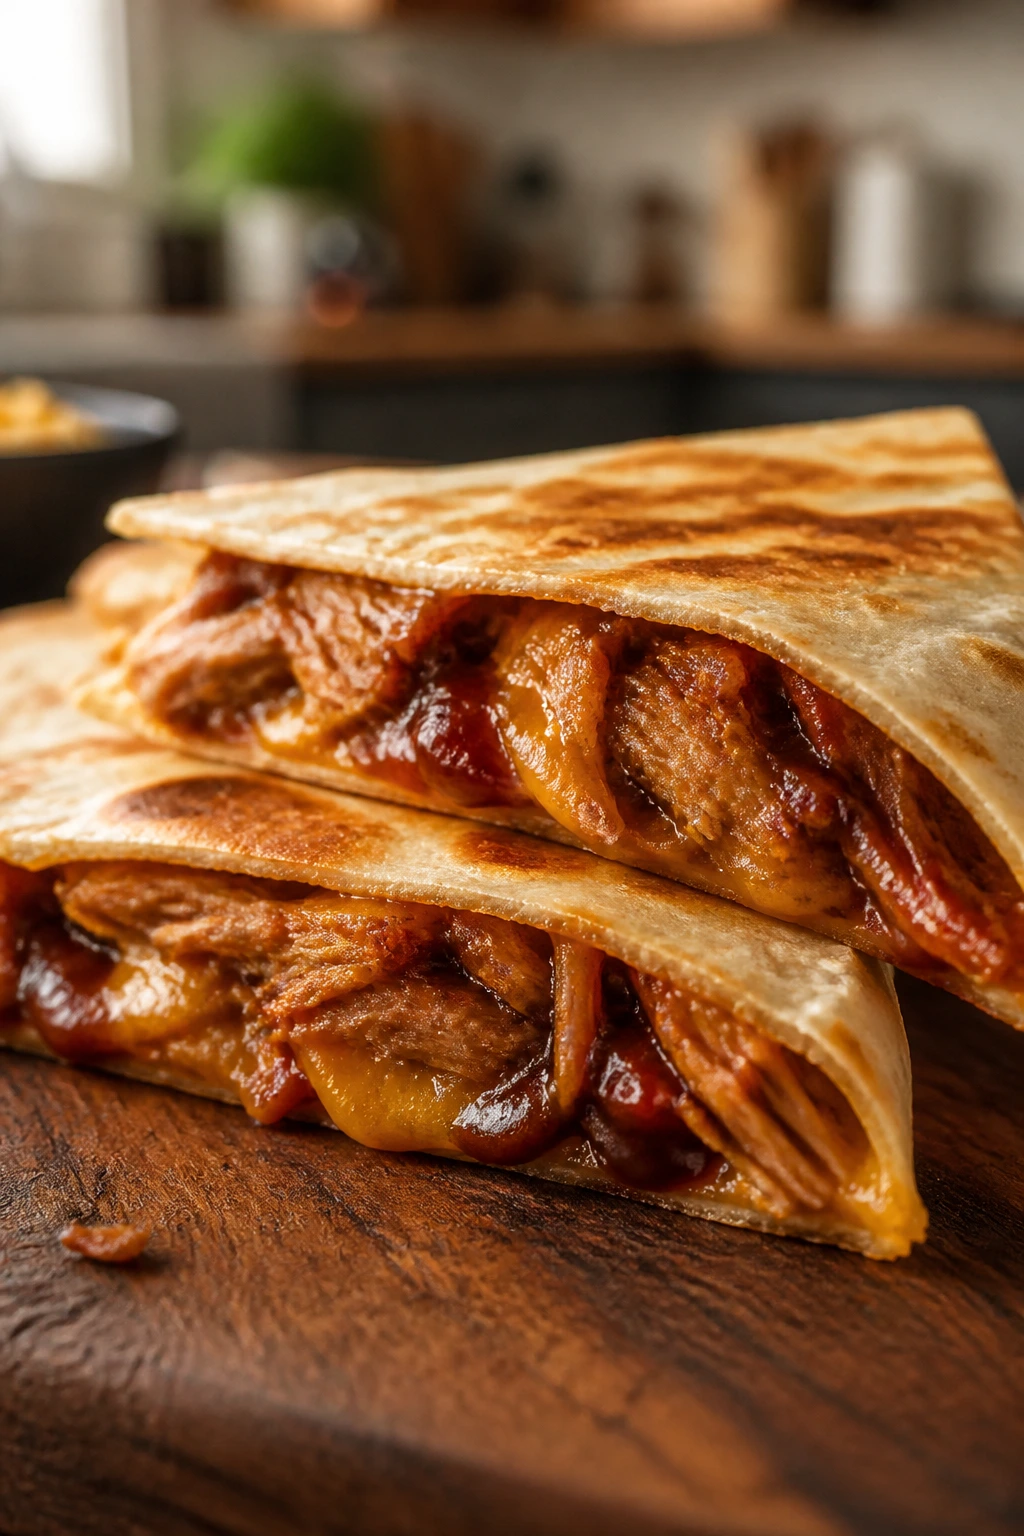
If you’ve got half a container of pulled pork staring back at you from the fridge, this is the night it gets a second life. BBQ pulled pork quesadillas are smoky, sweet, and a little sticky in the best way, with cheddar to keep the whole thing grounded and a few sharp bites from onion or pickles to keep things from feeling heavy.
This is one of those dinners that looks like you planned ahead when you absolutely did not. The pork does the hard work for you. All you really need to do is warm it up, keep the sauce under control, and make sure the tortilla browns before the filling escapes.
Why It Works:
Pulled pork is already tender, so it doesn’t need much more than heat and sauce. That means the quesadilla comes together fast, and the filling stays juicy without becoming wet. Sharp cheddar is the right cheese here because it can stand up to the sweetness of BBQ sauce, and a few sliced pickles or red onions add the kind of bite that keeps each wedge from tasting all the same. The whole thing tastes like backyard barbecue without requiring a smoker.
Key Ingredients:
- 2 cups shredded pulled pork — leftovers are ideal, but store-bought pulled pork works too.
- 1/2 cup BBQ sauce — use a thick sauce, not a thin glaze.
- 2 cups shredded sharp cheddar cheese — the salty edge balances the sweetness.
- 1 cup thinly sliced red onion — optional, but it keeps the filling sharp.
- 1/2 cup chopped dill pickles or sliced pickled jalapeños — pick one for crunch and tang.
- 8 medium flour tortillas — the standard size fits the filling well.
- 1 tablespoon butter or oil — butter gives better flavor; oil is a touch simpler.
- 1 teaspoon smoked paprika, optional — good if your pork is a little plain.
- Salt, only if needed — BBQ sauce and pork can already be salty.
Quick Steps:
-
Warm the pulled pork in a skillet over medium heat with the BBQ sauce. Cook for 2 to 3 minutes until the pork is hot and the sauce looks thick enough to cling to the meat.
-
If the mixture seems loose, keep it on the heat another minute. The filling should mound on a spoon, not run off it.
-
Set a tortilla in a second skillet or wipe out the first one and lower the heat to medium. Add a layer of cheddar to one half.
-
Spoon on the pork, then top with onion and pickles or jalapeños if you’re using them. Add a little more cheese, then fold the tortilla over.
-
Cook each side for 2 to 3 minutes until the tortilla is crisp and the cheese seals the seam.
-
Rest briefly, then slice and serve with extra BBQ sauce or a small pile of coleslaw.
Tips and Variations:
- If the pork feels dry, add 1 to 2 tablespoons of water before the BBQ sauce so it loosens evenly.
- Coleslaw on the side is better than stuffing it inside unless you like a soft quesadilla.
- This also works with shredded chicken, which is handy when the pork is gone and the tortillas are still there.
6. Spinach Artichoke Chicken Quesadillas
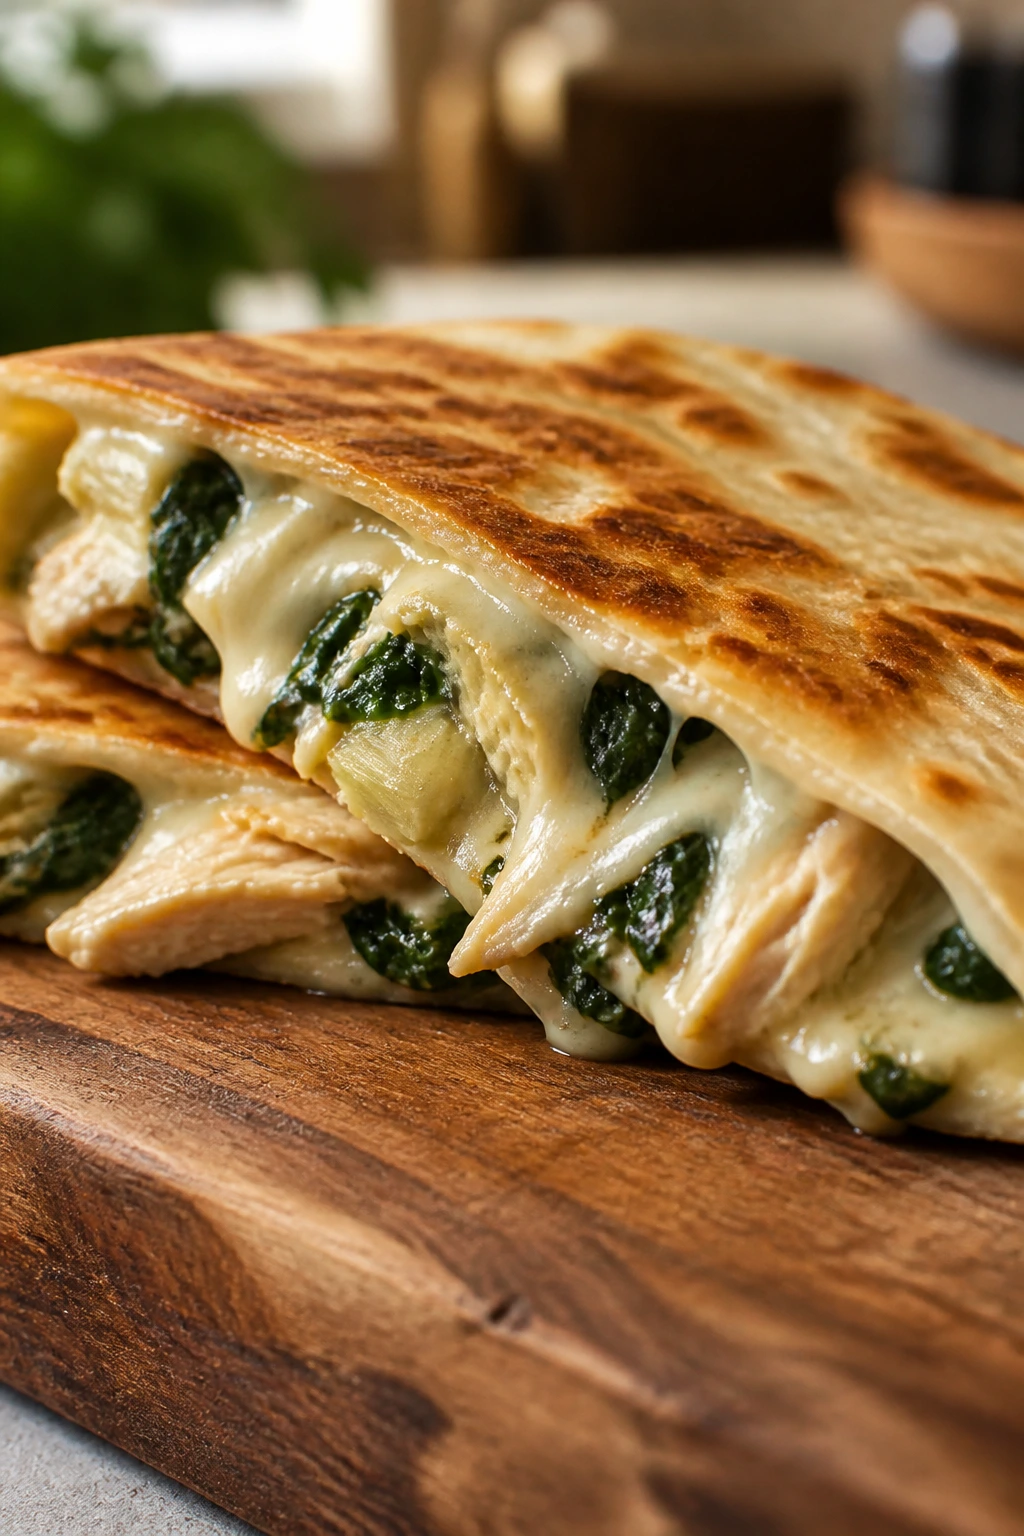
Creamy. Salty. Green around the edges. Spinach artichoke chicken quesadillas taste like the dip everybody hovers around at a party, but they cook fast enough for a Wednesday night with no patience left. The filling is rich, but not in a heavy, brick-like way. It has that warm, soft center that makes the tortilla feel almost fancy.
I’m partial to this version because it gives leftover chicken a much better outfit. Cream cheese, yogurt or sour cream, chopped artichokes, and squeezed-dry spinach turn plain cooked meat into something that feels deliberate. A little Parmesan gives the filling some grit, which is what keeps it from tasting like pasta sauce in a tortilla.
Why It Works
Spinach and artichokes bring flavor, but they also bring moisture, and that’s where the technique matters. Frozen spinach has to be squeezed nearly dry, and canned or jarred artichokes need to be drained and chopped small. The cream cheese binds everything into a thick filling that stays put when the quesadilla hits the pan.
Mozzarella melts into the filling, while Parmesan adds salt and a sharper edge. Because the mixture is already creamy, the quesadilla doesn’t need much oil. Medium heat is enough. Push the heat too high and the tortilla browns before the center warms through.
Key Ingredients
- 2 cups chopped cooked chicken — rotisserie chicken saves time and has good flavor.
- 4 ounces cream cheese, softened — the binder that makes the filling hold.
- 1/2 cup plain Greek yogurt or sour cream — adds tang and keeps the filling spoonable.
- 1 cup chopped artichoke hearts, well drained — chop them small so they don’t poke through the tortilla.
- 1 cup frozen chopped spinach, thawed and squeezed dry — dry spinach is not optional here.
- 1 cup shredded mozzarella cheese — for melt.
- 1/2 cup grated Parmesan cheese — for salt and depth.
- 1 clove garlic, minced — just enough to lift the filling.
- 8 medium flour tortillas — wide enough to hold the filling neatly.
- 1 tablespoon oil — for browning the tortilla.
- Black pepper, to taste — this filling likes a little bite.
Quick Steps
-
In a bowl, mix the cream cheese, yogurt or sour cream, garlic, spinach, artichokes, and Parmesan until thick and evenly combined. Fold in the chicken and mozzarella.
-
Taste the filling and add black pepper. It should be creamy but not runny. If it slides off a spoon, it needs more cheese or a little less yogurt.
-
Heat a skillet over medium-low heat and add a thin film of oil. A lower flame is better here because the filling needs time to warm through.
-
Place one tortilla in the skillet and spread the filling over half of it. Fold it over gently and press with a spatula.
-
Cook for 2 to 3 minutes per side until the tortilla is golden and the cheese in the center turns soft and molten.
-
Let the quesadilla sit for 1 minute before cutting so the filling settles instead of spilling out.
Tips and Variations
- A pinch of red pepper flakes gives the creamy filling more shape.
- If you’re using fresh spinach, cook it first and squeeze it dry; don’t drop raw leaves into the mix.
- This filling also works inside toasted pita pockets if you run out of tortillas.
7. Steak, Peppers, and Onions Quesadillas
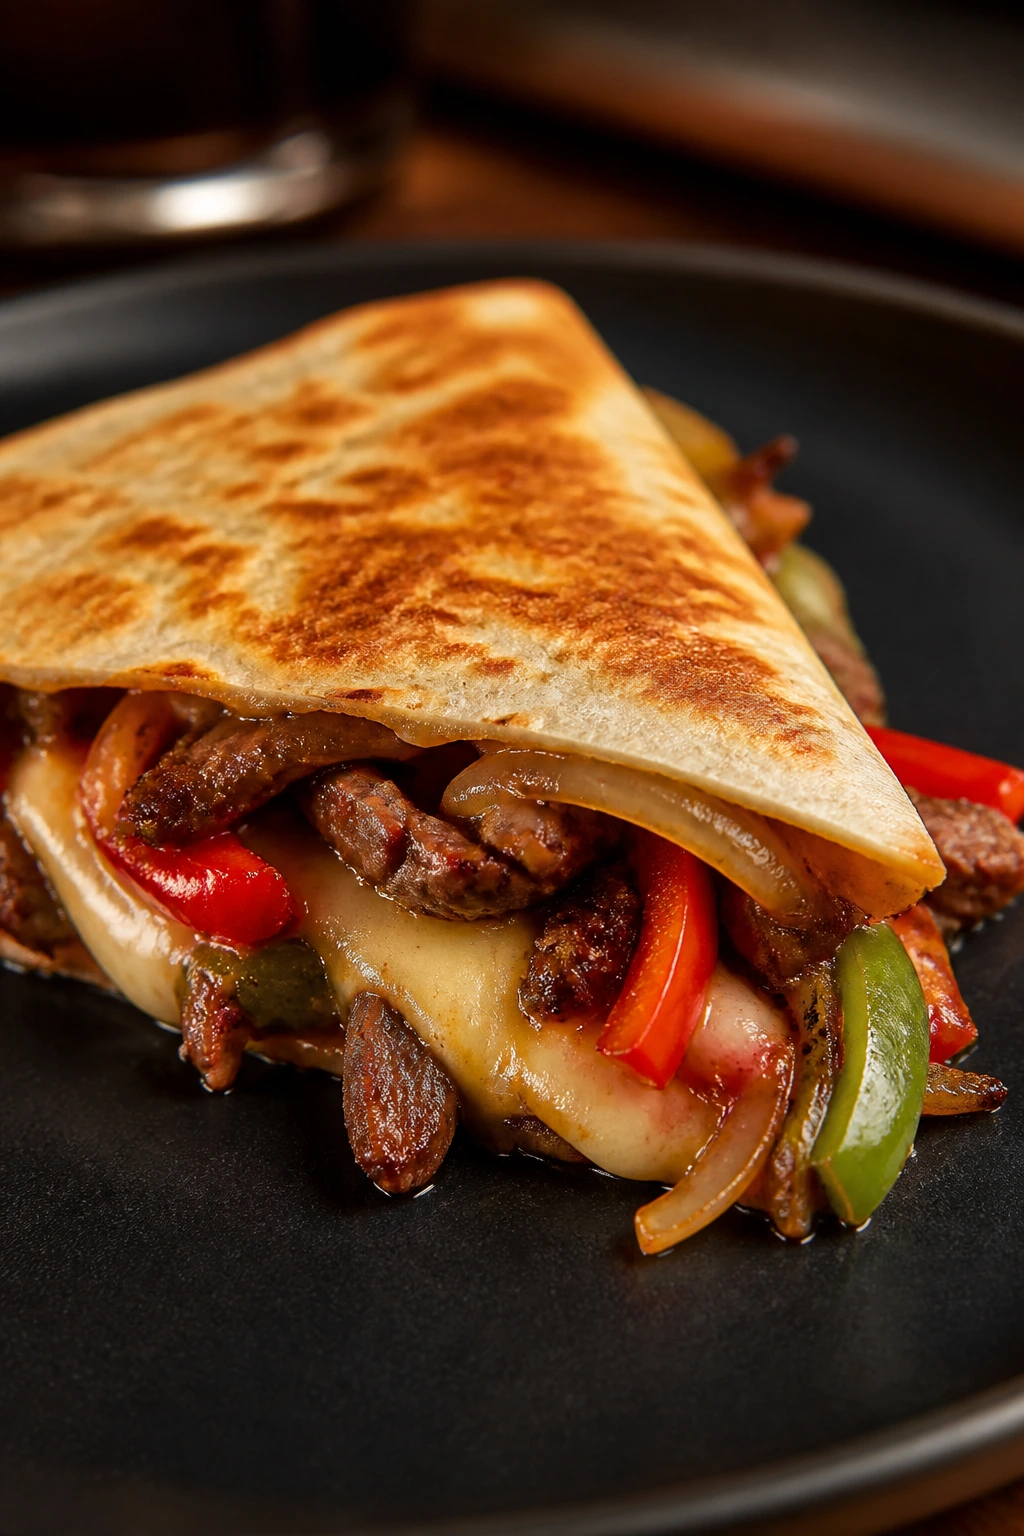
Twelve ounces of steak can stretch across four quesadillas if you slice it thin and don’t waste space. That’s the trick here. Steak, peppers, and onions give you the feeling of something more substantial than a sandwich, but the work stays light if you treat the meat like a quick-cooking topping instead of a giant centerpiece.
The flavor is familiar in a good way. Char on the steak, sweetness from the onions, a little green bite from the peppers, and melty provolone or Monterey Jack to tie the whole thing together. It tastes like a steakhouse appetizer that grew up and decided to become dinner.
Why It Works
Thin steak cooks fast, which is what makes this quesadilla feel practical instead of fussy. If you slice it against the grain and sear it only until browned, it stays tender inside the tortilla. The peppers and onions give the filling bulk, so you don’t need a huge amount of steak to make the quesadilla feel full.
Provolone is a strong choice because it melts well and has enough flavor to stand next to beef without vanishing. Worcestershire sauce adds a little savory depth, and the skillet does the rest. You get browned edges, a hot center, and a filling that tastes like it took longer than it did.
Key Ingredients
- 12 ounces flank steak or sirloin, thinly sliced — slice it across the grain for tenderness.
- 1 bell pepper, thinly sliced — red, yellow, or green all work.
- 1 medium onion, thinly sliced — softens into the filling without dominating it.
- 2 cups shredded provolone or Monterey Jack cheese — both melt cleanly.
- 1 teaspoon Worcestershire sauce — adds beefy depth.
- 1 teaspoon garlic powder — simple and effective.
- 1/2 teaspoon kosher salt — steak needs seasoning before it hits the pan.
- 1/2 teaspoon black pepper — for the crust on the meat.
- 8 medium flour tortillas — sturdy enough for the heavier filling.
- 1 tablespoon oil — for searing the steak and vegetables.
Quick Steps
-
Heat the oil in a skillet over medium-high heat. Season the steak with salt, pepper, and garlic powder, then sear it for 1 to 2 minutes until browned but still slightly pink in the center.
-
Add the sliced pepper and onion to the skillet. Cook for 3 to 4 minutes until softened and a few browned bits appear on the pan.
-
Stir in the Worcestershire sauce and return the steak to the pan. Toss everything together just long enough to coat. Do not keep cooking until the steak is dry; it should stay juicy.
-
Lower the heat to medium. Place a tortilla in the skillet, sprinkle on cheese, then add a scoop of the steak mixture and a little more cheese.
-
Fold the tortilla over and cook for 2 to 3 minutes per side until crisp and sealed.
-
Rest for 1 minute, then cut and serve while the cheese is still soft.
Tips and Variations
- If you’ve got leftover steak, slice it thin and add it only at the very end so it doesn’t toughen.
- A spoonful of sautéed mushrooms fits in here without changing the feel of the dish.
- Serve with hot sauce or a little sour cream, not both, unless you want to bulldoze the steak flavor.
8. Mushroom, Swiss, and Caramelized Onion Quesadillas
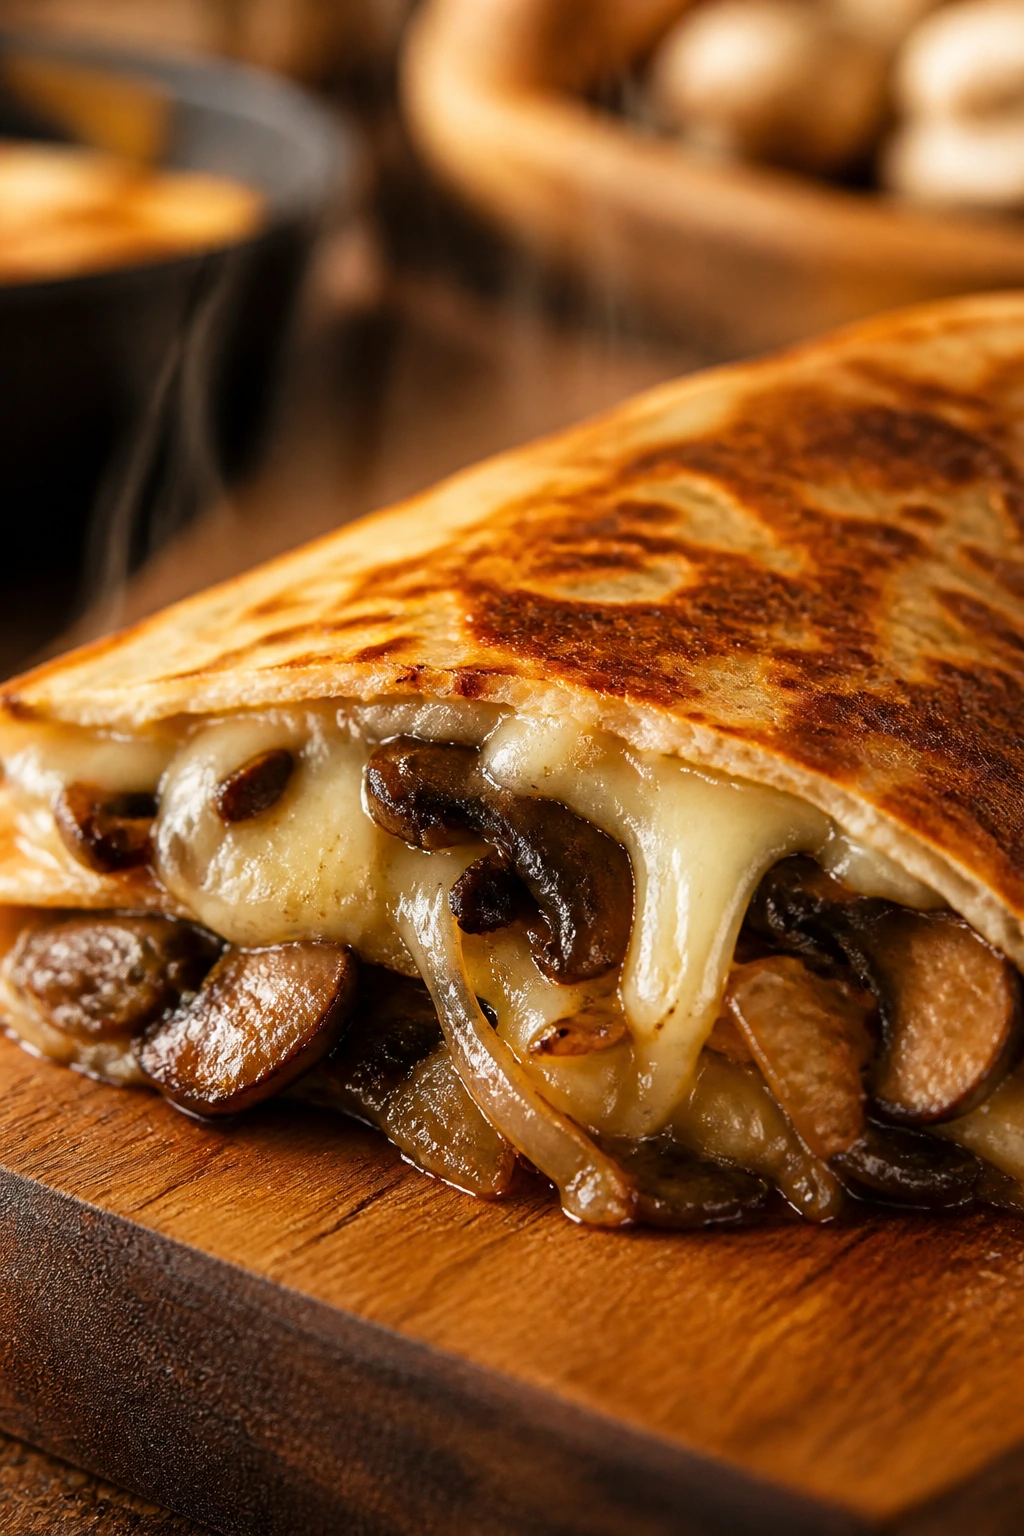
I trust mushroom quesadillas when I want something that feels a little slower than the effort it took to cook it. This one is earthy, buttery, and a touch sweet from the onions. Swiss cheese gives it a nutty, clean finish, and the whole thing tastes more composed than the time investment suggests.
This is the richest vegetarian option in the group, and it earns that position the old-fashioned way: by cooking the vegetables until they stop being watery and start being deeply savory. Mushrooms do not like to be rushed. Neither do onions, if you want them golden instead of merely soft.
Why It Works
Mushrooms release a lot of moisture before they brown, which means they need a hot skillet and a little patience. Once that moisture cooks off, their flavor gets deeper and more concentrated. The onions do the same slow trick, even if you’re only taking them to a soft golden stage rather than a full long caramelization.
Swiss cheese is the right partner because it melts smoothly and has enough character to stand up to the vegetables. A small spoonful of Dijon mustard sharpens everything without making the filling taste like a sandwich. That tiny bit of bite matters. Otherwise the quesadilla can drift too soft and sweet.
Key Ingredients
- 12 ounces mushrooms, sliced — cremini or white mushrooms both work.
- 1 large yellow onion, thinly sliced — the sweet base of the filling.
- 2 tablespoons butter — for flavor and browning.
- 1 tablespoon olive oil — helps the butter keep moving without scorching.
- 1 teaspoon kosher salt — draws moisture out of the mushrooms and onions.
- 1 teaspoon fresh thyme leaves or 1/2 teaspoon dried thyme — gives the filling a savory, woodsy note.
- 1 teaspoon Dijon mustard — enough to sharpen the flavor without taking over.
- 2 cups shredded Swiss cheese — the main melt.
- 1/2 cup shredded Gruyère, optional — adds more depth if you want it.
- 8 medium flour tortillas — sturdy, flexible, and easy to crisp.
- Black pepper, to taste — these quesadillas like it.
Quick Steps
-
Melt the butter with the olive oil in a skillet over medium heat. Add the onion and salt, then cook for 8 to 10 minutes, stirring often, until the onion turns soft and golden.
-
Add the mushrooms and thyme. Cook for another 6 to 8 minutes until the mushrooms release their liquid, the pan dries out again, and the edges start to brown.
-
Stir in the Dijon mustard and black pepper. The filling should look glossy and smell deeply savory.
-
Place one tortilla in a clean skillet over medium heat. Add Swiss cheese to half the tortilla, spoon on the mushroom mixture, then add a little Gruyère if using.
-
Fold and cook for 2 to 3 minutes per side until the tortilla is crisp and the cheese is fully melted.
-
Rest for 1 minute before cutting, because the filling will be hot and loose the second it leaves the pan.
Tips and Variations
- If you’re short on time, cook the onions until soft and golden rather than deeply caramelized; the quesadilla will still taste good.
- A handful of baby spinach can go in at the end of the mushroom step, but cook off the moisture first.
- Serve this one with a peppery salad or tomato soup if you want to make it feel like a full sit-down meal.
9. Pesto Turkey and Mozzarella Quesadillas

Pesto turns plain turkey into dinner with almost no extra work. That’s the whole appeal here. A little basil, a little garlic, mozzarella for stretch, and a handful of sun-dried tomatoes to keep the filling from feeling too soft. It’s green, savory, and fast enough to make when you’re too tired to think in full sentences.
This is the kind of quesadilla I make when the fridge offers up deli turkey or leftover roast turkey and I don’t want to turn it into another sandwich. The pesto does the heavy lifting. The cheese is there to hold the line, and the spinach brings a fresh edge that keeps the filling from leaning too rich.
Why It Works
Pesto is both sauce and seasoning, so it solves two problems at once. It coats the turkey in fat and flavor, and because it’s thick, it doesn’t flood the tortilla the way a loose sauce might. Mozzarella gives you the melt, while Parmesan adds a salty finish that keeps the pesto from tasting flat.
Sun-dried tomatoes are worth keeping in this one because they cut through the richness with a little chew and sweet acidity. A handful of spinach helps the filling feel lighter, but it also keeps the interior from turning monotone. The thing to remember is simple: pesto is strong, so a little goes a long way.
Key Ingredients
- 2 cups chopped or shredded cooked turkey — deli turkey or leftover roast turkey both work.
- 1/4 cup basil pesto — enough to coat without overwhelming.
- 2 cups shredded mozzarella cheese — for stretch and melt.
- 1/2 cup chopped sun-dried tomatoes, drained if packed in oil — adds tang and chew.
- 1 cup baby spinach — gives freshness and color.
- 1/4 cup grated Parmesan cheese — sharpens the flavor.
- 8 medium flour tortillas — a reliable shell for the filling.
- 1 tablespoon oil — for crisping the tortillas.
- Black pepper, to taste — useful because pesto can still taste soft without it.
Quick Steps
-
Toss the turkey with the pesto in a bowl until evenly coated. The meat should look lightly green and glossy, not drenched.
-
Stir in the sun-dried tomatoes and baby spinach. The heat from the skillet will wilt the spinach, so don’t cook it ahead of time.
-
Heat a skillet over medium heat and add a little oil. Set one tortilla in the pan and sprinkle half with mozzarella.
-
Add a scoop of the turkey mixture and a light shower of Parmesan, then fold the tortilla over.
-
Cook for 2 to 3 minutes per side until the tortilla is crisp and the mozzarella melts into a soft, stretchy center.
-
Let it rest briefly, slice, and serve with a spoonful of marinara or a simple green salad.
Tips and Variations
- Keep the pesto light; too much makes the filling greasy and blunt.
- Roasted red peppers can replace the sun-dried tomatoes if that’s what you have.
- If the turkey is dry, add 1 tablespoon of plain yogurt or cream cheese to the pesto before mixing.
10. Sausage, Potato, and Cheddar Quesadillas
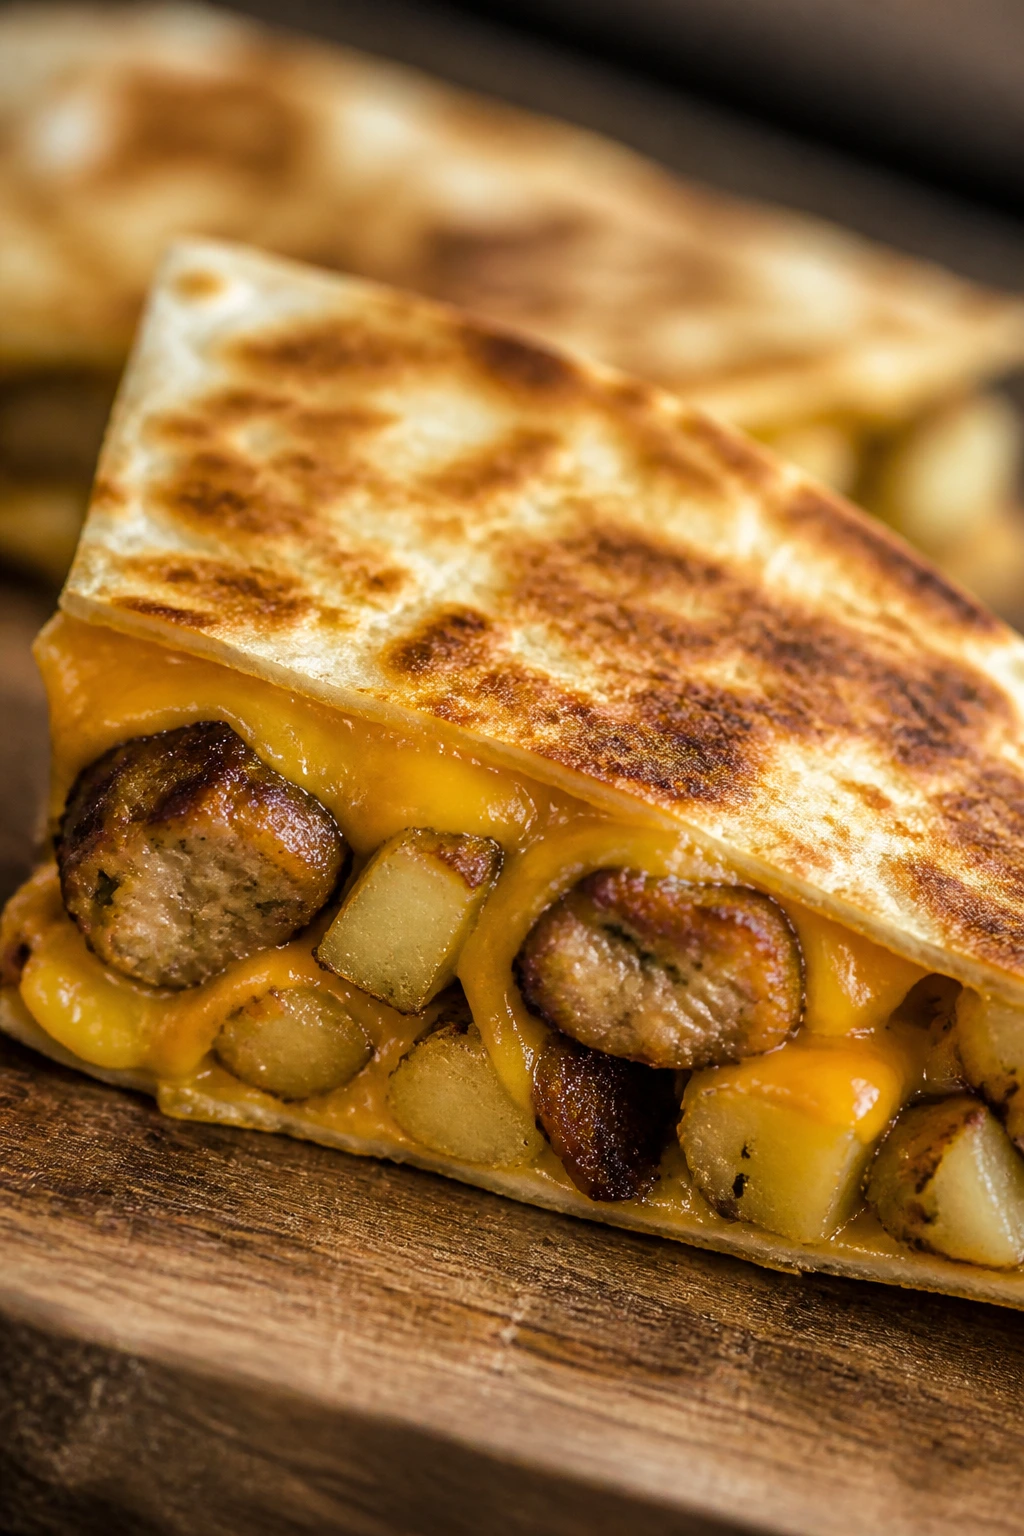
What if dinner needed to taste like a diner plate but cook like a sandwich? Potato and sausage quesadillas are the answer. They’re hearty, salty, and deeply practical, especially if you’ve got leftover roasted potatoes or a bag of frozen hash browns that needs a job.
This one is the most filling of the bunch, which is why I like it when everyone is hungry and nobody wants to cook twice. Sausage brings the savory punch, potatoes soak up the seasoning, and cheddar melts into the gaps like it knows exactly what role it’s supposed to play. It’s a little rustic. Good. It should be.
Why It Works
Sausage and potatoes already want to be together, so the quesadilla is doing less invention and more assembly. The important part is getting the potatoes crisp enough that they don’t turn mushy inside the tortilla. If they’ve been sitting in the fridge, a quick trip through the skillet wakes them up and dries their edges a little.
Cheddar gives this version a familiar sharpness, while a bit of mustard or smoked paprika keeps the filling from tasting heavy. Since the sausage is already cooked, you’re really just heating and browning, which is exactly the kind of job a weeknight dinner should ask for.
Key Ingredients
- 8 ounces fully cooked smoked sausage or kielbasa, diced — choose one with good seasoning.
- 1 1/2 cups diced cooked potatoes or thawed hash browns — leftover roasted potatoes work especially well.
- 1 small onion, finely diced, or 2 scallions, sliced — optional, but useful for freshness.
- 2 cups shredded cheddar cheese — the main melt and main flavor.
- 1 teaspoon smoked paprika — adds depth without much effort.
- 1 teaspoon Dijon mustard, optional — gives the filling a little sharpness.
- 8 medium flour tortillas — large enough for a hearty filling.
- 1 tablespoon oil or butter — butter tastes better; oil browns a little more evenly.
- Black pepper, to taste — sausage can handle it.
Quick Steps
-
Heat the oil or butter in a skillet over medium heat. Add the sausage and potatoes, then cook for 5 to 6 minutes until the potatoes start to crisp and the sausage edges darken.
-
Stir in the onion and smoked paprika. If you’re using Dijon mustard, add it now and cook for 1 more minute. The filling should smell savory and a little smoky.
-
Remove the mixture from the pan and lower the heat to medium. Wipe the skillet if there’s too much grease.
-
Set a tortilla in the skillet and add cheddar to half of it, then spoon on the sausage-potato mixture and add a little more cheese on top.
-
Fold the tortilla over and cook for 2 to 3 minutes per side until the outside is crisp and the cheese is melted through.
-
Rest for 1 minute before slicing. Serve with sour cream, hot sauce, or nothing at all if you’re happy with a full plate and a fork.
Tips and Variations
- Leftover roasted potatoes beat freshly boiled potatoes because they have better texture.
- If the sausage is salty, skip extra salt and lean on black pepper instead.
- A spoonful of sauerkraut on the side is a sharp, good match if you like contrast.
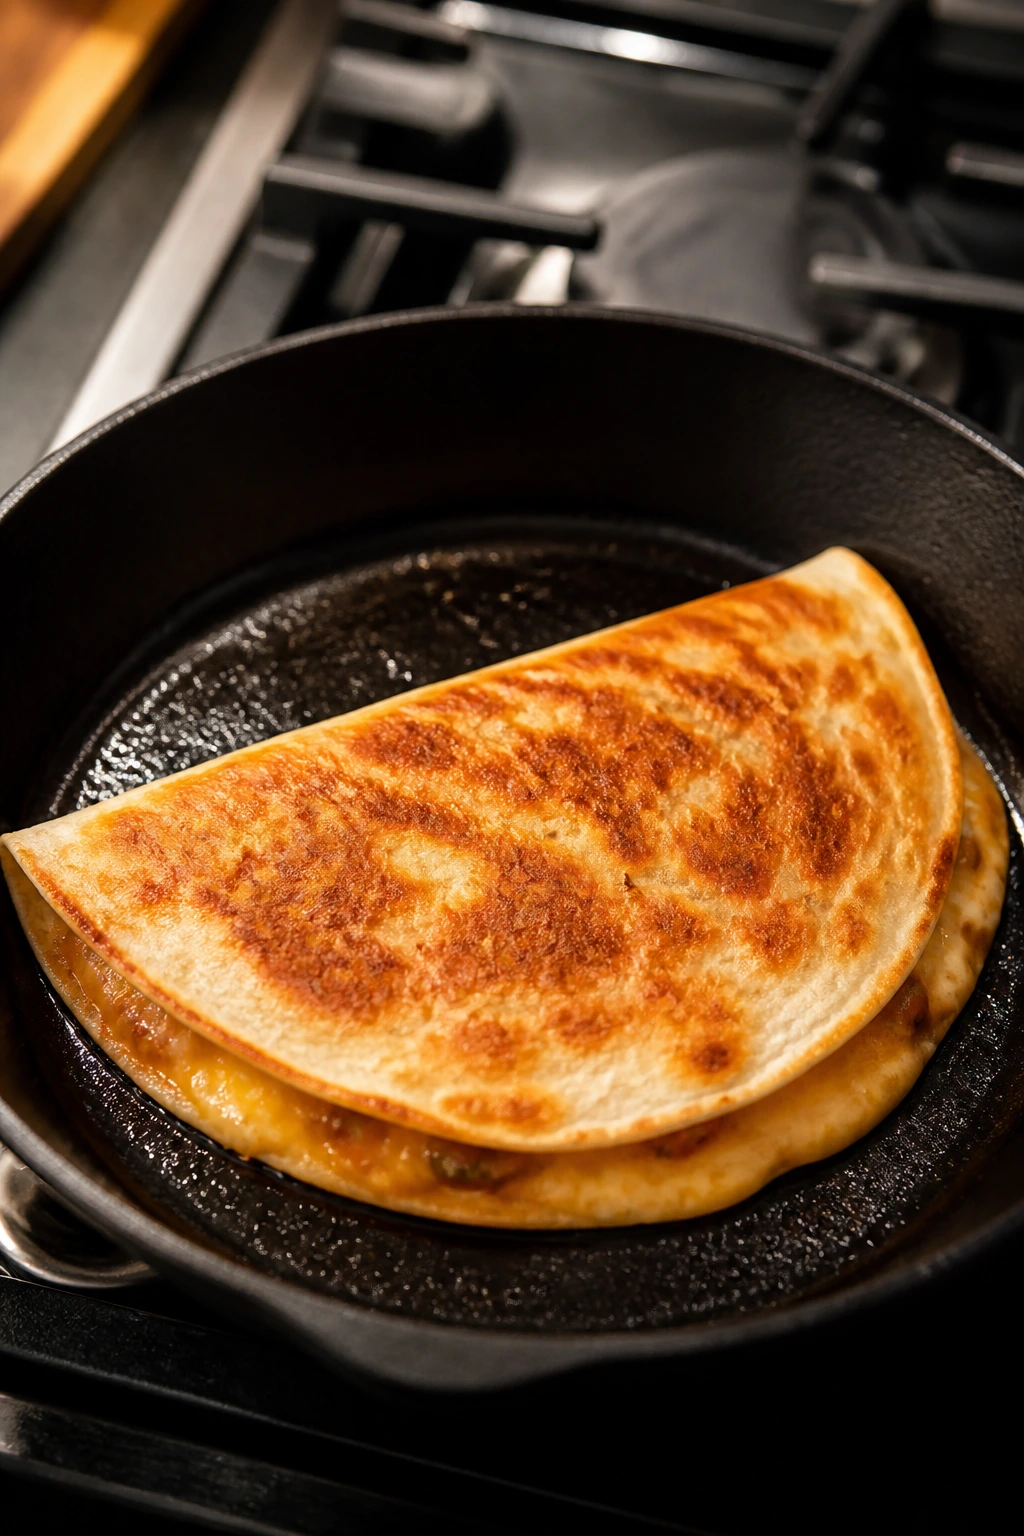
Why the Skillet Beats the Oven for Crispy Quesadillas
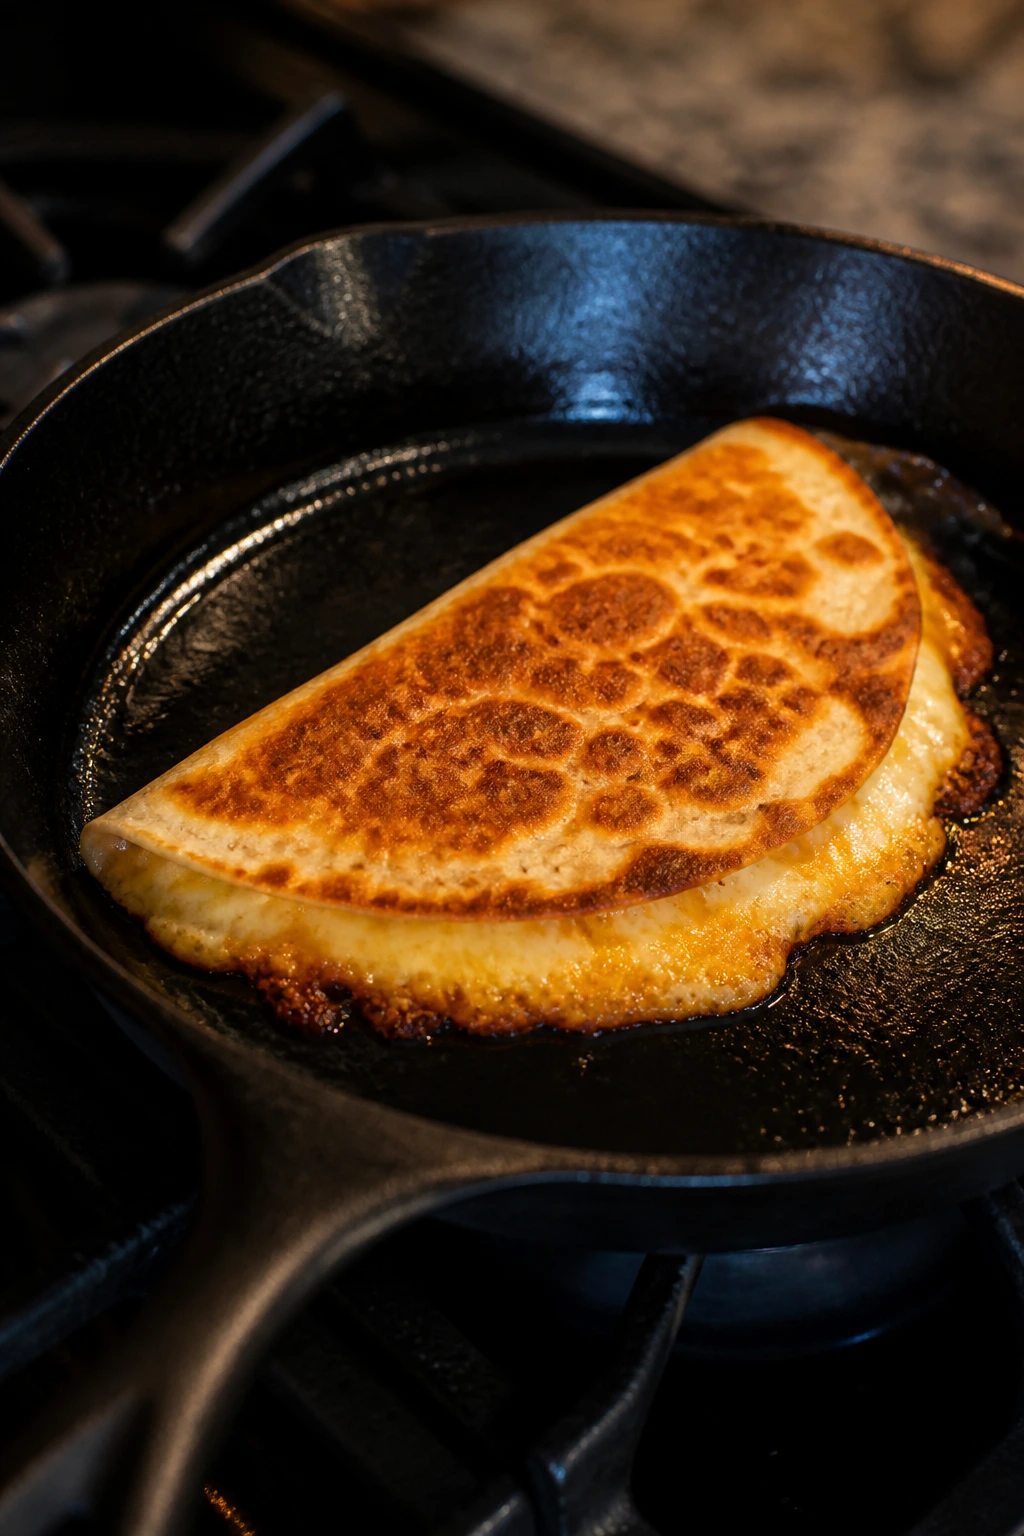
A skillet gives you control in a way the oven never quite does. You can see the tortilla browning, hear the cheese start to sizzle, and adjust heat the second something starts to go too fast. That matters more than people think, especially when you’re working with different fillings in the same night — chicken, beans, pork, mushrooms, all of them behave a little differently.
The oven can make quesadillas for a crowd, and it has its place, but it often leaves you with a texture that is more evenly warm than actually crisp. A skillet gives you contrast. Golden outside, soft center, melted seams. That contrast is the whole point. Without it, you’re basically making a warm folded wrap and hoping the cheese forgives you.
The tortilla browns before the filling overheats
Medium heat is the sweet spot. High heat makes the tortilla look done while the cheese stays stubborn in the middle, and low heat leaves you with a pale, chewy shell that never really wakes up. A dry pan or a thin film of butter or oil is enough. You do not need to flood the pan.
Cheese does more than taste good
The cheese acts like a glue between the tortilla and the filling, which is why a layer on both sides of the filling works better than dumping everything in the middle. It melts, seals, and keeps the quesadilla from sliding apart when you cut it. That little detail is the difference between a neat wedge and a plate full of scraps.
Leftovers stop behaving like leftovers
A skillet is friendly to pre-cooked filling. It warms chicken evenly, tightens up taco beef, dries off bean mixtures, and crisps potatoes without turning them rubbery. That means the quesadilla becomes a second cooking stage, not a reheating afterthought.
Essential Equipment for These Recipes
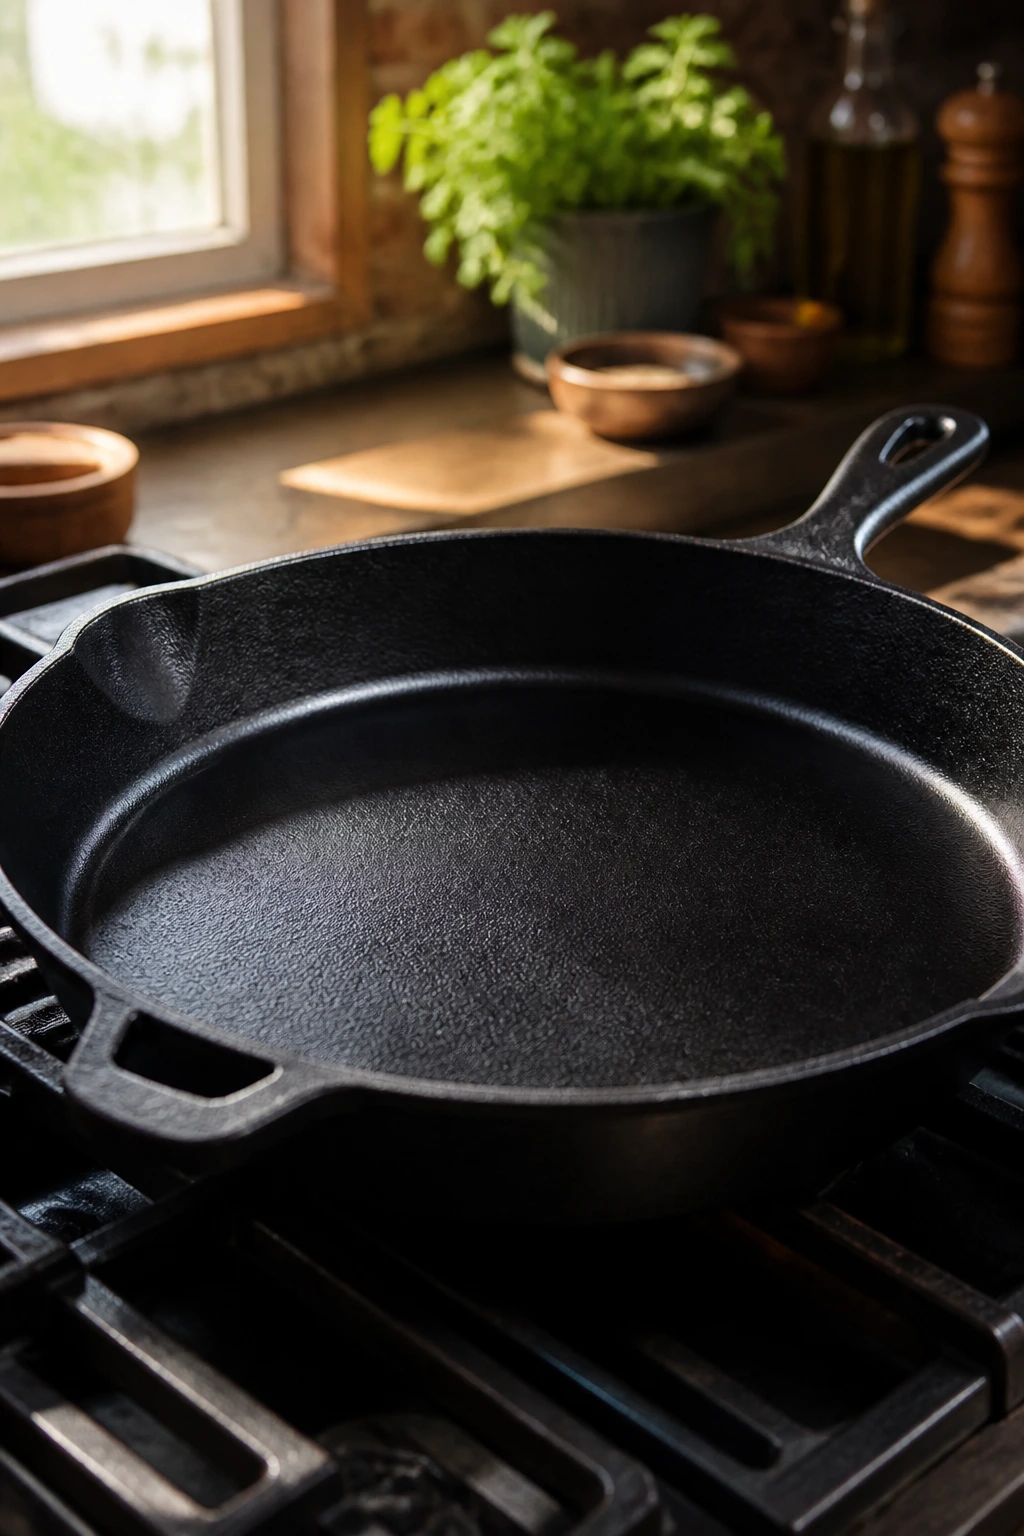
- Large skillet or cast-iron pan: The main tool for crisping the tortillas and heating the filling.
- Spatula: A wide one helps flip without tearing the tortilla.
- Sharp knife: Thin slices of onion, pepper, and steak are easier to cook evenly.
- Cutting board: Use one board for vegetables and one for meat if you want less cross-contamination.
- Mixing bowl: Handy for saucing chicken, turkey, or beans before assembly.
- Box grater or food processor shredder: Freshly shredded cheese melts better than most bagged blends.
- Measuring cups and spoons: Helpful for keeping the filling dry enough and the cheese balanced.
- Tongs: Useful for moving hot tortillas and turning peppers or onions.
- Paper towels: Great for squeezing spinach dry or blotting wet fillings.
- Airtight storage containers: Keep leftover filling separate from cooked quesadillas so the texture holds up.
Smart Shopping and Ingredient Tips
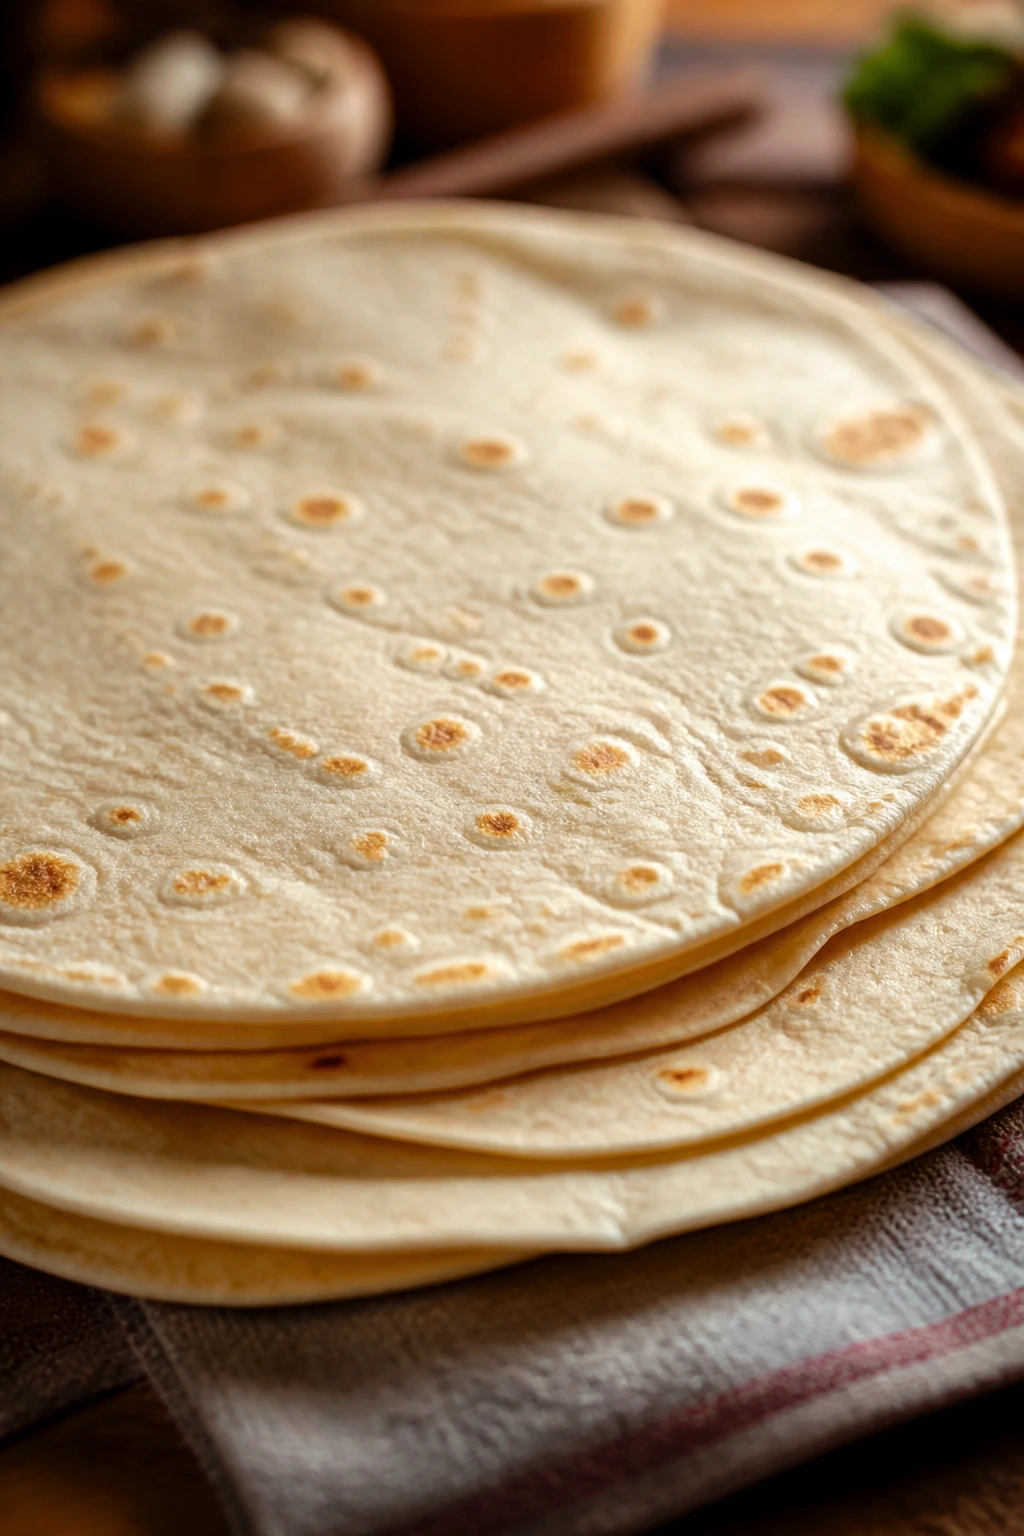
Good quesadilla dinners start with ingredients that don’t fight the skillet. Tortillas matter more than people think. Choose flour tortillas that feel soft and bend easily in the package, because brittle ones crack the second they warm up. Eight-inch tortillas are the easiest to handle, but ten-inch tortillas are useful when the filling is chunky or the dinner needs to feel larger.
Cheese should be chosen for melt first, flavor second, and then both together if you can manage it. Monterey Jack, cheddar, mozzarella, provolone, pepper jack, Swiss, and a little Parmesan all behave well in different combinations. Shred from a block if you can. Pre-shredded cheese works in a pinch, but it carries anti-caking starches that can make the melt a little less smooth.
For fillings, the dry side is your friend. Cooked chicken, pork, steak, sausage, beans, roasted vegetables, or sautéed mushrooms all work because they can be warmed without collapsing into liquid. If you’re using frozen vegetables or canned beans, drain them hard. Water is the enemy here. A filling that looks a touch too dry in the bowl usually cooks better than one that looks glossy and loose.
A final shopping note: buy one thing with flavor, not four things that all sort of taste the same. If you’re using mild chicken, pick a strong cheese. If the filling is sweet, add something sharp. If the meat is rich, use lime, pickles, mustard, or salsa to keep it awake. That small balance keeps quesadilla dinners from blurring together.
How to Serve These Recipes
Presentation:
Slice each quesadilla into 3 wedges and stand them slightly overlapping on a warm plate so the browned edges show. A little garnish goes a long way — chopped cilantro, scallions, lime wedges, or a spoon of salsa on the side keeps the plate from looking flat.
Accompaniments:
Black beans, Mexican rice, a simple cabbage slaw, avocado slices, or a chopped tomato salad work across almost all of these dinners. If the quesadilla is rich — like sausage, steak, or spinach artichoke — serve something sharp or fresh beside it. If it’s lighter, like black bean or pesto turkey, a small pile of chips and salsa fits easily.
Portions:
One quesadilla per adult is a solid serving when there’s a side dish on the plate. Two smaller quesadillas may be better for hungrier eaters, especially with the sausage or beef versions. For kids, one quesadilla cut into smaller triangles usually goes farther than you expect, mostly because crisp edges make everything more appealing.
Beverage Pairing:
Sparkling water with lime keeps things clean, especially with spicy fillings. A cold lager, iced tea, or an unsweetened hibiscus drink works well too. For richer quesadillas like mushroom or spinach artichoke, a tart beverage helps more than a sweet one.
Additional Tips and Flavor Boosters
Flavor Enhancement:
A small squeeze of lime at the end does more than people think. It sharpens cheese, lifts beans, and makes rich fillings like pulled pork or sausage taste less heavy. A teaspoon of pickled jalapeño brine stirred into a filling can do the same job if you want acid without changing the whole flavor profile.
Customization:
If you want more heft, add a thin layer of refried beans, mashed avocado, or cooked rice under the cheese. If you want more crunch, tuck in sliced pickles, shredded cabbage, or thin bell pepper strips after the main filling is cooked. The point is not to stuff the tortilla harder. It’s to make each bite feel built, not random.
Serving Suggestions:
Top finished wedges with cilantro, scallions, crema, hot sauce, or a spoonful of salsa verde. A dusting of cotija or Parmesan over the top right after cutting adds salty texture without another pan. That last-minute finish is cheap, easy, and makes the plate look more finished than it really is.
Make-It-Yours:
For gluten-free quesadilla dinners, use certified gluten-free tortillas and keep the filling a little drier than usual because many GF wraps are more delicate. For dairy-free versions, use a meltable dairy-free shred and add avocado or seasoned beans so the filling still feels complete. For a lighter version, lean toward chicken, turkey, beans, or mushrooms and keep the cheese to a thinner layer rather than removing it entirely.
Make-Ahead, Storage, and Reheating Guidance

The fillings are the part worth making ahead. Most of them keep well in the refrigerator for 3 to 4 days in airtight containers, and several — especially taco beef, pulled pork, bean filling, and sautéed vegetables — taste even better after they sit overnight and the seasoning settles in. Keep the filling separate from the tortillas until you’re ready to cook.
Cooked quesadillas are best the day they’re made, but they can be refrigerated for up to 2 days if wrapped tightly once fully cooled. Reheat them in a dry skillet over medium-low heat for 2 to 3 minutes per side, or in an oven at 375°F for about 8 to 10 minutes. An air fryer works well too; 350°F for 4 to 6 minutes usually brings the crispness back without drying the center.
Freezing works better for fillings than for assembled quesadillas. Most cooked fillings freeze well for up to 2 months in airtight containers or freezer bags laid flat. If you absolutely want to freeze assembled quesadillas, let them cool first, wrap each one tightly, and reheat from frozen in a 375°F oven until the center is hot and the tortilla has crisped again. The texture won’t be as clean as fresh, but it’s still useful for a future dinner emergency.
Never leave cooked quesadillas at room temperature for more than 2 hours. That’s boring advice, but it keeps dinner safe. If the filling is dairy-heavy or meat-heavy, cool it quickly before storing so the tortilla doesn’t trap steam and soften into a soggy blanket.
Variations and Adaptations to Try
The Pantry-Swaps Version
Use beans, canned corn, jarred salsa, and whatever cheese is in the fridge. This works especially well for black bean or taco-style fillings, where the pantry ingredients already fit the flavor profile. Keep the mixture thick and drain the canned items well, or the quesadilla loses its crisp edge.
The Air Fryer Finish
Assemble the quesadilla and brush the outside lightly with oil, then cook it in the air fryer until the tortilla is golden and the cheese has melted. This approach gives a sturdy crisp finish, though you’ll still want to keep the filling modest. It’s useful when you want to make two or three quesadillas at once without standing at the stove.
The Dairy-Light Swap
Use a smaller amount of cheese and build flavor with salsa verde, pesto, mustard, lime, or seasoned beans instead. The quesadilla will still hold together, but it won’t feel as rich. This variation works best with chicken, turkey, or vegetables, where the filling can carry more of the flavor load.
The Gluten-Free Stack
Choose small corn tortillas and make two smaller quesadillas per serving rather than forcing one big fold. Corn tortillas crisp beautifully, but they’re less flexible, so a double-layer method often works better. Heat them gently so they don’t crack before the cheese begins to melt.
The Extra-Spicy Route
Add pickled jalapeños, chipotle peppers, hot sauce, or a pinch of cayenne to the filling. Use this with chicken, beef, or bean fillings where a little heat can ride on top of the base flavor instead of fighting it. A cool dip on the side, like sour cream or ranch, helps keep the balance.
The Vegetarian Stretch
Combine beans, sautéed mushrooms, roasted peppers, and a little cheese for a filling that feels hearty without meat. This is the version I reach for when the pantry is doing most of the talking. It’s cheap, filling, and not boring — which is rarer than it should be.
Common Mistakes to Avoid
Overstuffing the tortilla:
This is the fastest way to get a torn seam and a skillet full of escaping filling. The symptom is obvious: the tortilla splits before the cheese melts. The fix is simple — keep the filling in a thin, even layer and let cheese do some of the volume work.
Using wet filling straight from the bowl:
If the filling looks glossy and loose, the tortilla will steam instead of toast. You’ll notice a pale, soft bottom and a center that slides when you cut it. Cook the filling longer, drain it better, or let it cool for a minute so excess moisture evaporates.
Cooking over heat that’s too high:
Burnt tortilla, cold center. It happens fast. Medium heat gives the cheese time to melt before the outside gets too dark, and that small adjustment changes everything.
Skipping the cheese near the edges:
Cheese in the center only leaves the tortilla unsealed at the seam. Put a little cheese near the fold so it melts and acts like glue. That tiny habit keeps the quesadilla from falling apart the moment a knife touches it.
Cutting it too soon:
Hot filling rushes out if you slice the quesadilla the second it leaves the pan. Let it rest for a minute. Seriously. The cheese firms up just enough to hold the wedge together.
Forgetting to season the filling:
A good tortilla can’t save bland chicken or unseasoned beans. Taste the filling before it goes in the pan. Salt, cumin, lime, mustard, pesto, or BBQ sauce should make a noticeable difference, not a polite one.
Frequently Asked Questions

What cheese melts best in quesadillas?
Monterey Jack is one of the easiest because it melts smoothly and doesn’t get oily fast. Cheddar adds stronger flavor, mozzarella gives stretch, and provolone or Swiss work well in richer fillings. A blend is often better than a single cheese.
Can I make quesadillas in the oven instead of a skillet?
Yes, but the texture changes. The oven works for making several at once, especially on a sheet pan, though the tortilla usually comes out a little less crisp than a skillet version. If you use the oven, brush the outside lightly with oil and flip once for better browning.
How do I keep quesadillas from getting soggy?
Dry the filling first. Cook off excess liquid from meat, vegetables, and beans, and avoid pouring salsa or sauce straight into the tortilla unless it’s very thick. Let hot fillings cool for a minute before assembly so they don’t dump steam into the tortilla.
Can I use corn tortillas?
You can, but use them differently. Corn tortillas are more delicate, so two smaller tortillas stacked with cheese in the middle usually work better than one big fold. Warm them first so they don’t crack.
What’s the best way to reheat leftover quesadillas?
A dry skillet is the best bet for bringing back the crispness. Medium-low heat for a few minutes per side usually does the job. An oven or air fryer also works well if you’re reheating several at once.
Can I freeze the fillings?
Yes, and that’s the smart move. Most cooked fillings freeze well for up to 2 months in airtight containers or freezer bags. Thaw in the fridge overnight and reheat in a skillet before assembling the quesadillas.
How much filling should I use per quesadilla?
Enough to cover one half of an 8-inch tortilla in a thin layer, not enough to create a mound. If the tortilla looks domed before you fold it, there’s too much in there. A modest filling cooks cleaner and tastes better.
What if my tortilla cracks when I fold it?
It usually means the tortilla is too cold or too dry. Warm it in the skillet for 10 to 15 seconds first, or cover it briefly with a damp towel in the microwave to soften it. A cracked tortilla can still work, but it’s easier to prevent than to patch.
A Better Kind of Easy
A good quesadilla dinner doesn’t try to impress you with effort. It wins by being useful, hot, and smart about leftovers. That’s the part I like most. It knows exactly what job it has, and it does it without a lot of drama.
Keep tortillas around, keep a couple of cheeses that melt well, and treat the filling like a place to use what’s already in the house. Chicken, beef, beans, pork, mushrooms, potatoes — all of them can turn into dinner if the skillet is hot and the filling is dry enough to behave. The structure stays the same. The flavor can wander.
And that’s the real charm here: a pan, a tortilla, a little cheese, and a filling that gets a second chance. The rest is just timing.