
Two plates. One pressure cooker. No sink full of pans.
Instant Pot dinners for two people make sense when you want a real meal without accidentally cooking for a crowd. The pot does its best work in small batches: rice that stays fluffy, beans that go tender without babysitting, and tougher cuts of meat that come out fork-soft instead of chewy. It is not magic. It is steady steam, a tight seal, and recipes that know how to use both.
Cooking for two has its own annoyances. Too much food goes limp before you get to the second serving. Too little food feels stingy. The sweet spot is a dinner that tastes full and layered, but still fits neatly into a 6-quart pot and lands on two plates without drama.
These recipes lean into that sweet spot. Some are fast and bright, some are rich and cozy, and a few ask for a little browning first because pressure cooking loves flavor that starts in the pot before the lid goes on. That is the part people miss: the Instant Pot is not just a timer with a seal. Used well, it builds dinner with a little more control than a stovetop simmer and a lot less hovering.
1. Lemon Garlic Chicken and Rice
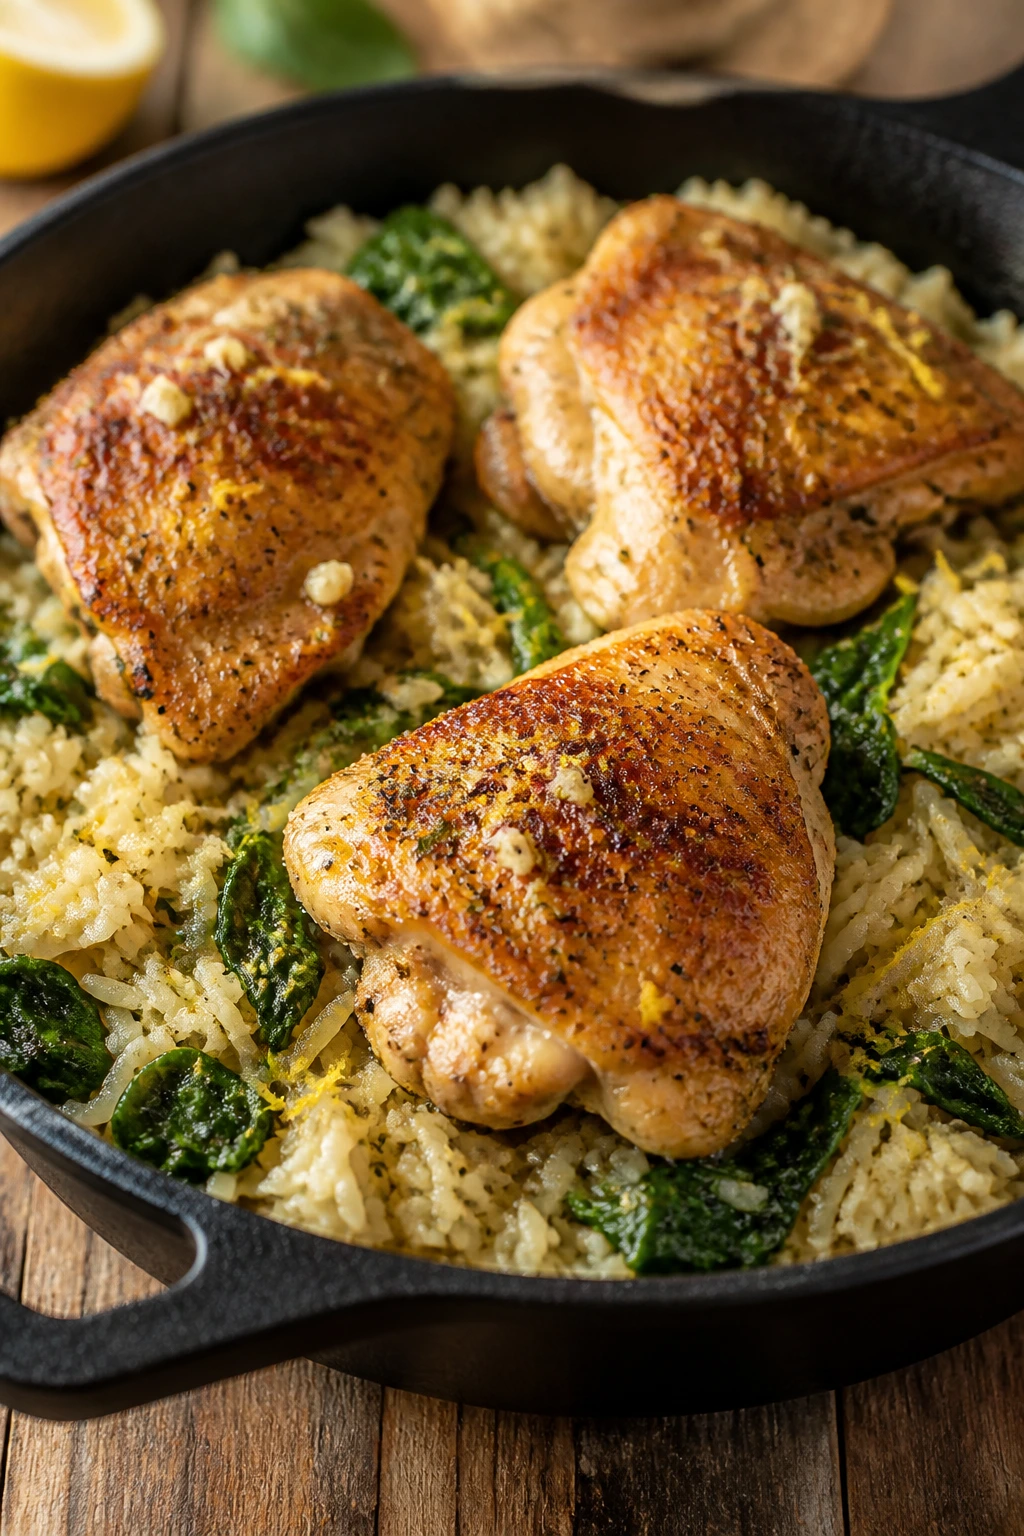
This is the dinner I make when I want something clean-tasting and filling without a side quest. The rice drinks up chicken broth, lemon, and garlic, while the chicken thighs stay juicy enough to forgive a slightly long natural release. It smells bright the second the lid comes off. That matters more than people admit.
Why It Works
Chicken thighs and long-grain rice are a smart pair in the pressure cooker because they finish at about the same pace. The rice absorbs flavor from the browned bits on the bottom, and the lemon gets added at the end so it stays fresh instead of turning flat and dull. If you use thighs, the meat stays tender even if the pot sits for a couple of minutes after cooking. That little bit of forgiveness is worth a lot on a weeknight.
Key Ingredients
- 1 pound boneless, skinless chicken thighs
- 1 tablespoon olive oil
- 1 small yellow onion, finely diced
- 3 garlic cloves, minced
- 1 cup long-grain white rice, rinsed until the water runs mostly clear
- 1 1/4 cups low-sodium chicken broth
- Zest and juice of 1 lemon
- 1 teaspoon dried oregano
- 1/2 teaspoon kosher salt
- 1/4 teaspoon black pepper
- 1 cup baby spinach
- 2 tablespoons grated Parmesan
- 1 tablespoon chopped parsley
Quick Steps
-
Sear the Chicken: Set the Instant Pot to Sauté and heat the olive oil. Brown the chicken thighs for about 2 minutes per side, until the surface looks golden, then transfer them to a plate.
-
Build the Base: Add the onion and cook for 3 minutes, stirring often. Add the garlic for 30 seconds, just until fragrant, and scrape up the brown bits from the bottom of the pot.
-
Add the Rice and Liquid: Stir in the rice, broth, lemon zest, oregano, salt, and pepper. Make sure nothing is stuck to the bottom. Those browned bits are flavor, but burnt bits are trouble.
-
Pressure Cook: Nestle the chicken back on top. Seal the lid and cook on High Pressure for 8 minutes. Let the pressure release naturally for 10 minutes, then quick release what is left.
-
Finish the Dish: Check that the chicken has reached 165°F, then fluff the rice. Stir in the spinach, lemon juice, and Parmesan until the leaves wilt and the rice turns creamy. Top with parsley.
-
Serve Hot: Spoon into two bowls and let it sit for 2 minutes before eating. The rice firms up a little and the flavor settles.
Tips and Variations
- Use thighs, not breasts, if you can. Breasts work, but thighs handle pressure cooking better and stay moist.
- Swap in peas or chopped asparagus. Add them after pressure cooking so they stay bright and don’t collapse.
- Want more richness? Stir in 1 tablespoon of butter with the Parmesan.
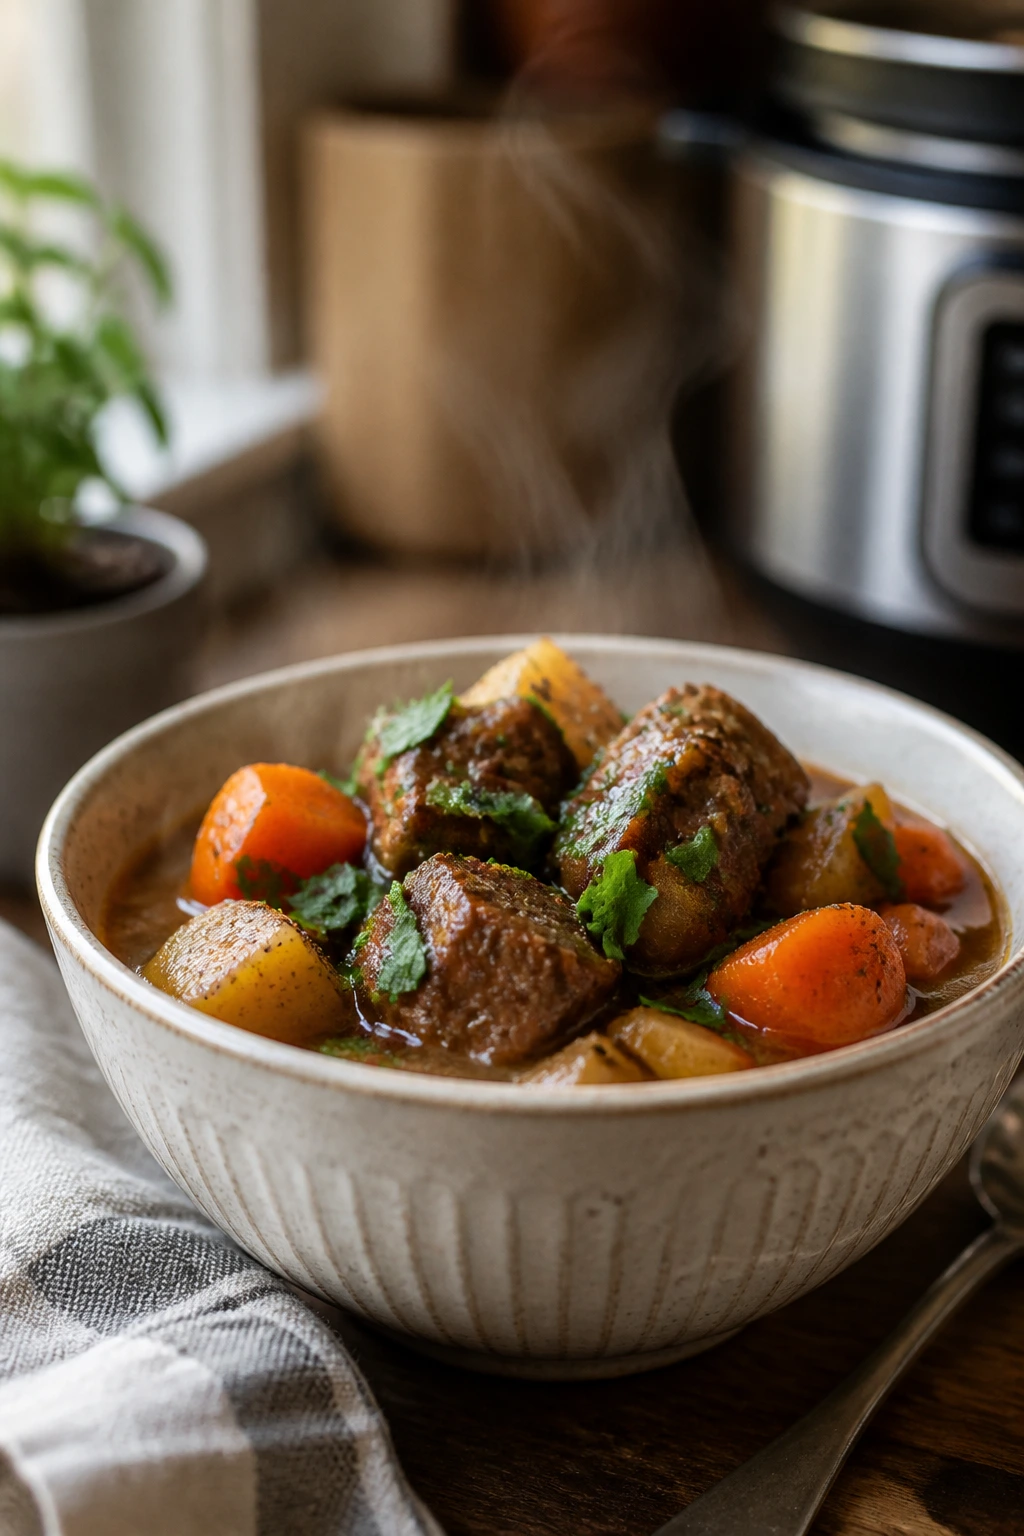
2. Beef Stroganoff for Two

Beef stroganoff has a deep, old-school comfort to it, but it can turn heavy fast if the sauce is muddy or the beef cooks too long. This version keeps the mushrooms front and center and uses the pressure cooker to make the beef tender without babysitting a skillet for half an hour. The sauce ends up silky, not stodgy. Good stroganoff should glide.
Why It Works
Chuck roast or stew meat benefits from pressure because the connective tissue softens without needing hours on the stove. Mushrooms bring their own savory juice, and Dijon plus Worcestershire sharpen the sauce so it does not taste like a beige lump of cream. The noodles go in after the beef is tender, which keeps them from overcooking into paste. That is the part that saves this dish.
Key Ingredients
- 1 pound beef chuck roast, trimmed and cut into 1-inch cubes
- 1 tablespoon neutral oil
- 1 small onion, thinly sliced
- 8 ounces cremini mushrooms, sliced
- 2 garlic cloves, minced
- 1 tablespoon tomato paste
- 1 tablespoon Worcestershire sauce
- 2 teaspoons Dijon mustard
- 2 cups beef broth
- 1/2 teaspoon kosher salt
- 1/4 teaspoon black pepper
- 8 ounces egg noodles
- 1/2 cup sour cream
- 2 tablespoons chopped parsley
Quick Steps
-
Brown the Beef: Use Sauté to heat the oil. Brown the beef in a single layer for 3 to 4 minutes, working in batches if needed. You want color on the outside, not cooked-through meat.
-
Cook the Mushrooms and Onion: Add the onion and mushrooms and cook for 4 minutes, stirring until the mushrooms give off their moisture and start to look glossy. Add the garlic for 30 seconds.
-
Make the Sauce Base: Stir in the tomato paste, Worcestershire, Dijon, broth, salt, and pepper. Scrape the bottom of the pot well so the pressure cooker can seal properly.
-
Pressure Cook the Beef: Seal and cook on High Pressure for 20 minutes. Let the pressure release naturally for 10 minutes, then open the lid.
-
Cook the Noodles: Stir in the egg noodles and 1 cup hot water. Switch back to Sauté and simmer, stirring often, for 6 to 8 minutes until the noodles are tender and the sauce thickens enough to coat a spoon.
-
Finish with Cream: Turn off the heat. Stir in the sour cream until smooth, then top with parsley and serve right away.
Tips and Variations
- Do not add sour cream before pressure cooking. It can split and turn grainy.
- If you like a looser sauce, add a splash of broth at the end.
- Serve with buttered peas if you want a green side without making a second pan.
3. Pork Carnitas Tacos

Pork carnitas are one of those dishes that make a small dinner feel bigger than it is. The meat gets seasoned, steamed tender, then blasted under the broiler so the edges go crisp and brown. That contrast is the whole point. Soft inside, crunchy around the edges, warm tortillas underneath. Done.
Why It Works
Pork shoulder has enough fat and connective tissue to survive pressure cooking and come out silky. Orange juice, lime, and garlic cut through the richness, while a short broiler finish gives you the brittle edges that make carnitas worth bothering with. You can shred the meat straight from the pot, but the extra 4 or 5 minutes under heat changes the texture in a way that feels much more like restaurant tacos. Worth it.
Key Ingredients
- 1 1/2 pounds pork shoulder, cut into 3 large chunks
- 1 tablespoon neutral oil
- 1 teaspoon kosher salt
- 1 teaspoon ground cumin
- 1 teaspoon chili powder
- 1/2 teaspoon dried oregano
- 1/4 teaspoon black pepper
- 1 small onion, quartered
- 4 garlic cloves, smashed
- 1/2 cup orange juice
- 1/2 cup chicken broth
- 1 tablespoon lime juice
- 6 small corn tortillas
- Chopped cilantro, diced onion, salsa, and avocado for serving
Quick Steps
-
Season and Sear the Pork: Rub the pork with salt, cumin, chili powder, oregano, and pepper. Set the pot to Sauté and brown the pork pieces for 2 to 3 minutes per side.
-
Add the Aromatics: Drop in the onion and garlic. Pour in the orange juice, broth, and lime juice, then scrape the bottom well.
-
Pressure Cook: Seal and cook on High Pressure for 35 minutes. Let the pressure release naturally for 10 minutes before opening.
-
Shred the Meat: Transfer the pork to a bowl and shred it with two forks. Spoon a little cooking liquid over the meat so it stays juicy.
-
Crisp It Up: Spread the shredded pork on a sheet pan and broil for 4 to 6 minutes, tossing once, until the edges are dark and crisp.
-
Assemble the Tacos: Warm the tortillas and pile on the carnitas, cilantro, onion, salsa, and avocado.
Tips and Variations
- Save some cooking liquid. A spoonful over the tacos keeps the meat from drying out.
- Use flour tortillas if corn tortillas crack on you.
- Try pineapple juice in place of half the orange juice for a sweeter, sharper finish.
4. Turkey Chili with Beans
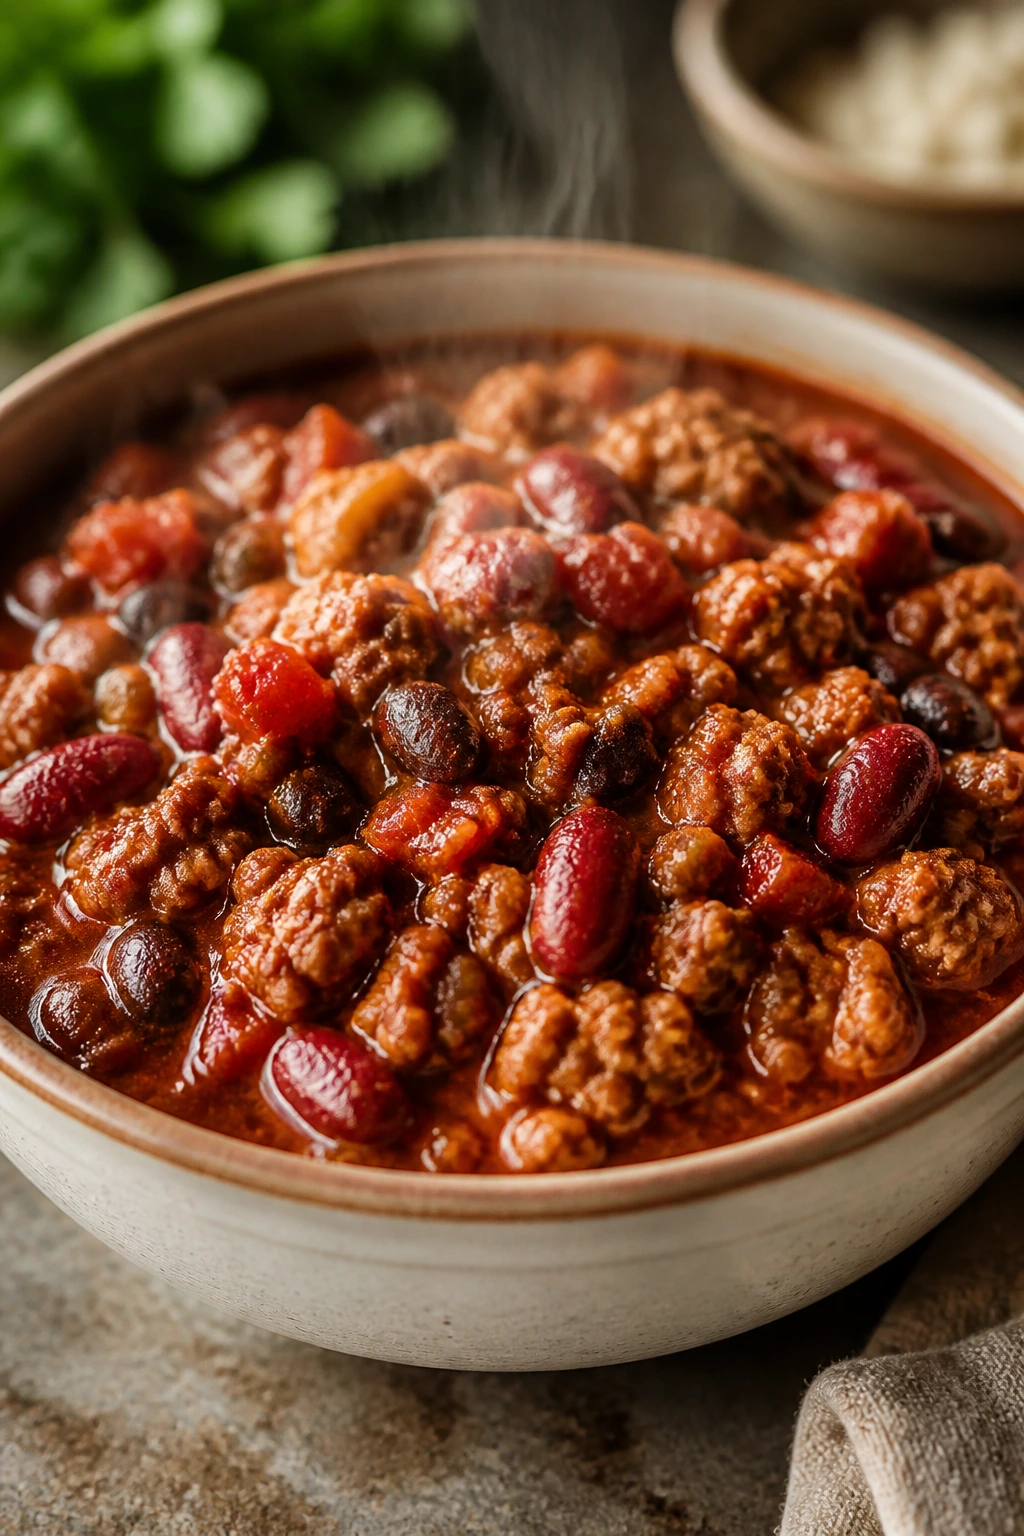
Turkey chili is one of those dinners that quietly solves a lot of problems. It is cheap, filling, and easy to portion for two without leaving you with a giant pot that tastes better by Tuesday than it does on night one. The Instant Pot keeps the beans tender and the turkey rich enough to taste like more than diet food. That line matters. It really does.
Why It Works
Ground turkey needs seasoning and moisture, and pressure cooking gives it both. The chili powder blooms in the hot oil, the tomato paste brings thickness, and the beans drink in the spiced broth while the pressure cooker does the work. A short natural release lets the flavors settle instead of blasting apart the sauce the second you open the lid. Chili gets better when it is not rushed at the finish.
Key Ingredients
- 1 pound ground turkey
- 1 tablespoon olive oil
- 1 small onion, diced
- 1 bell pepper, diced
- 2 garlic cloves, minced
- 2 tablespoons chili powder
- 1 teaspoon ground cumin
- 1 teaspoon smoked paprika
- 1/2 teaspoon kosher salt
- 2 tablespoons tomato paste
- 1 can diced tomatoes, 14.5 ounces
- 1 cup low-sodium chicken broth
- 1 can kidney beans, drained and rinsed
- 1 can black beans, drained and rinsed
- Sour cream, shredded cheddar, and chopped scallions for topping
Quick Steps
-
Brown the Turkey: Heat the oil on Sauté and cook the turkey, onion, and bell pepper for 5 minutes, breaking the meat into small crumbles.
-
Wake Up the Spices: Add the garlic, chili powder, cumin, paprika, salt, and tomato paste. Stir for 1 minute until the spice mixture smells smoky and a little sweet.
-
Add the Liquids and Beans: Pour in the diced tomatoes and broth, then stir in the beans. Scrape the bottom carefully.
-
Pressure Cook: Seal and cook on High Pressure for 10 minutes. Let it naturally release for 10 minutes, then quick release the rest.
-
Adjust the Texture: Stir the chili well. If you want it thicker, simmer on Sauté for 3 to 5 minutes with the lid off.
-
Top and Serve: Spoon into bowls and finish with sour cream, cheddar, and scallions.
Tips and Variations
- Use 93% lean turkey if you want a richer pot; leaner turkey can taste dry.
- Add a chopped jalapeño with the onion if you like heat.
- Freeze extra chili in one-cup portions for an easy lunch later.
5. Creamy Tuscan Chicken and Potatoes
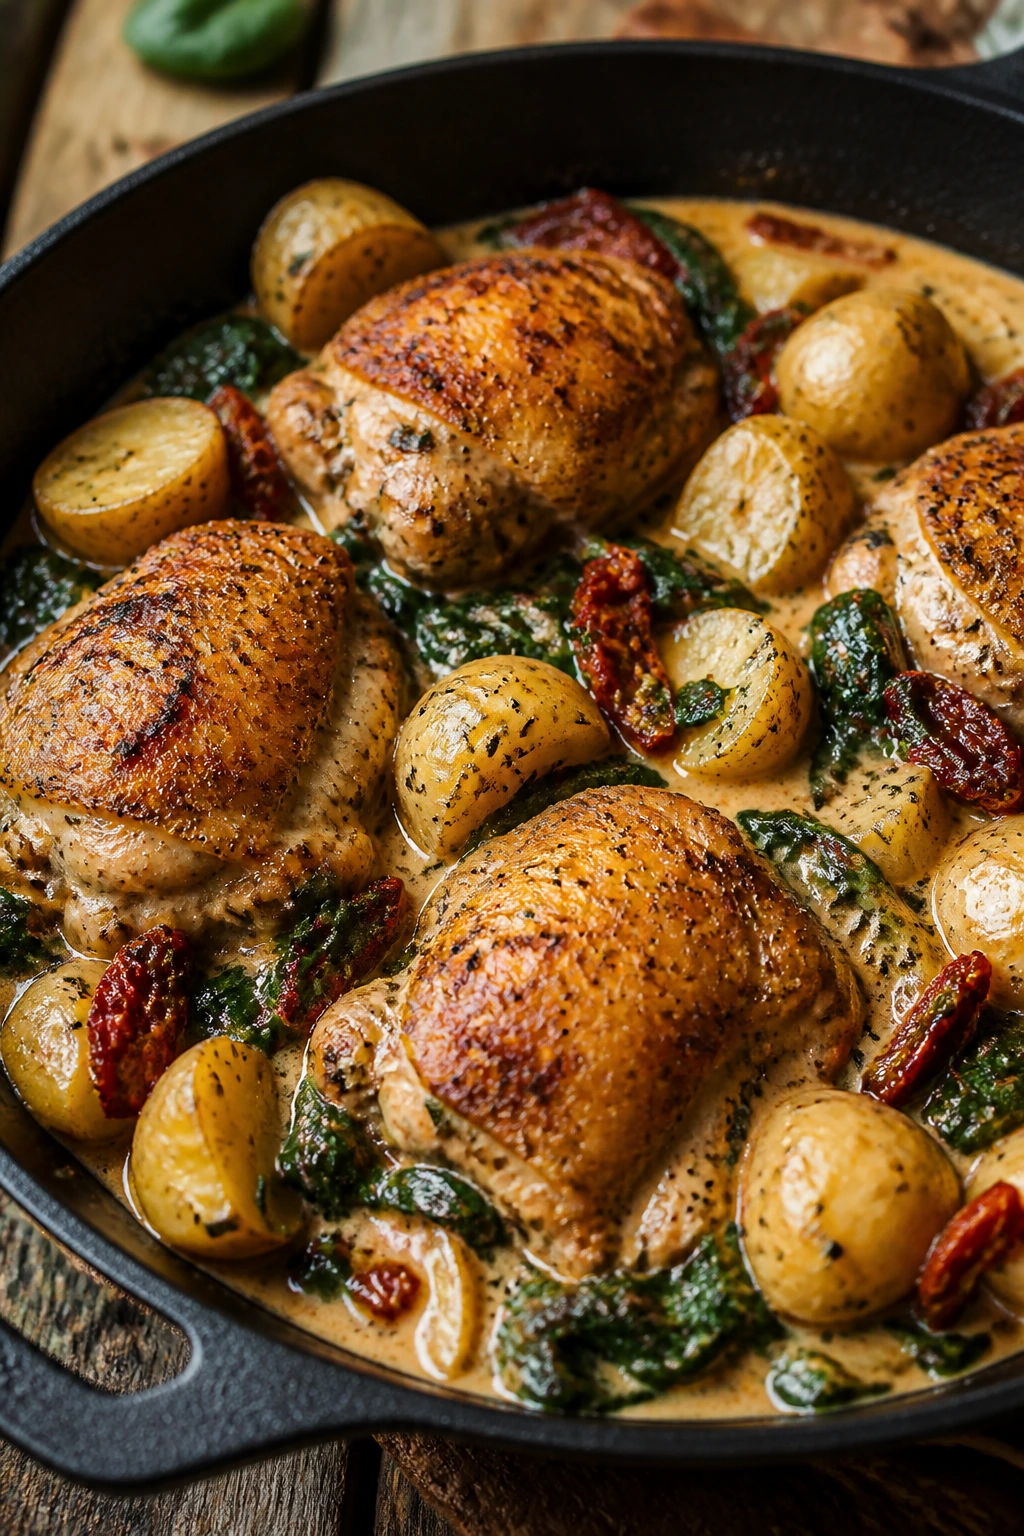
This is the kind of dinner that looks fancier than it is. Chicken thighs, baby potatoes, sun-dried tomatoes, and spinach go from tidy ingredients to a sauce that tastes like it came from a much slower stove. The cream is not the star; it is the softening note that pulls the whole thing together.
Why It Works
Potatoes give the sauce body, and chicken thighs keep their texture in the pressure cooker better than breasts do. Sun-dried tomatoes bring sweet, concentrated tomato flavor without watering the pot down, and spinach wilts at the very end so it stays green instead of turning swampy. The result feels rich but not heavy, which is exactly where this dish should land.
Key Ingredients
- 1 pound boneless, skinless chicken thighs
- 12 ounces baby potatoes, halved
- 1 tablespoon olive oil
- 3 garlic cloves, minced
- 1 cup low-sodium chicken broth
- 1 teaspoon Italian seasoning
- 1/2 teaspoon kosher salt
- 1/4 teaspoon black pepper
- 1/3 cup chopped sun-dried tomatoes
- 1/2 cup heavy cream
- 2 cups baby spinach
- 2 tablespoons grated Parmesan
Quick Steps
-
Sear the Chicken: Brown the chicken thighs in olive oil on Sauté for 2 minutes per side. Move them to a plate.
-
Start the Sauce Base: Add the garlic and cook for 30 seconds. Pour in the broth and scrape the bottom clean.
-
Add Potatoes and Seasoning: Stir in the potatoes, Italian seasoning, salt, pepper, and sun-dried tomatoes. Set the chicken on top.
-
Pressure Cook: Seal and cook on High Pressure for 8 minutes. Let the pressure release naturally for 5 minutes, then quick release the rest.
-
Make It Creamy: Remove the chicken, stir in the cream, spinach, and Parmesan, and simmer for 2 minutes on Sauté until the spinach wilts and the sauce turns silky.
-
Serve: Slice the chicken, spoon the potatoes and sauce over the top, and eat while it is still hot and glossy.
Tips and Variations
- Use half-and-half instead of cream if you want a lighter sauce, but don’t expect quite the same body.
- Baby gold potatoes hold their shape best.
- Add mushrooms with the potatoes if you want more earthiness.
6. Butter Chicken with Basmati Rice
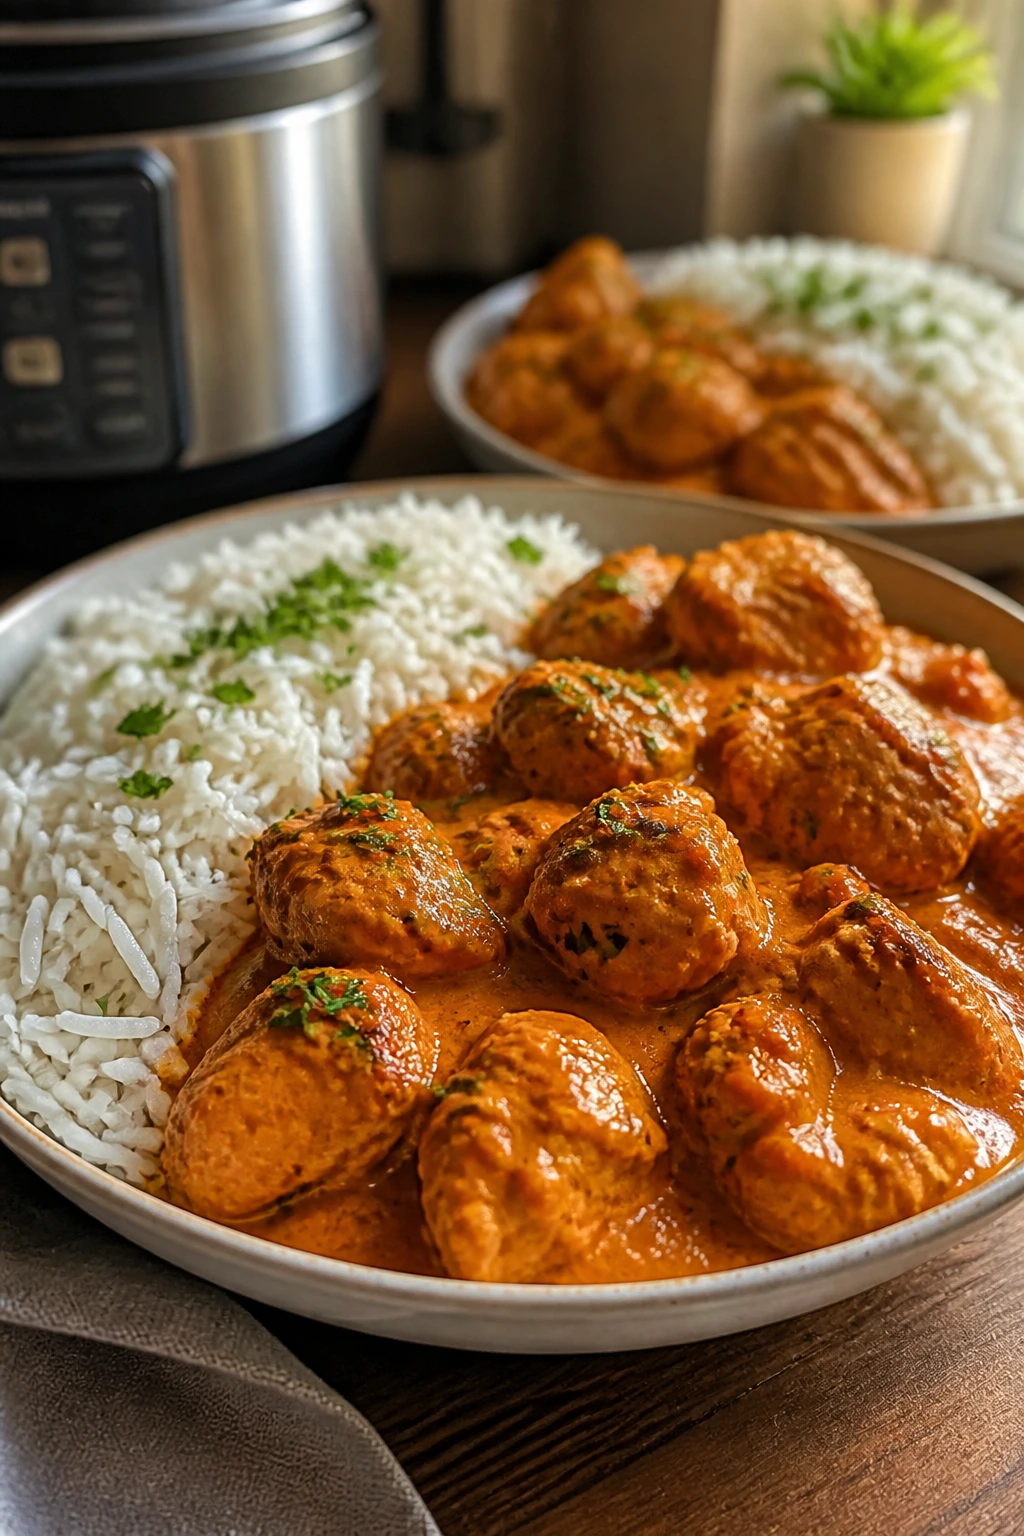
Butter chicken is one of the friendliest pressure cooker dinners for two because the sauce does a lot of the heavy lifting. It is fragrant, tomato-rich, and a little soft around the edges in the best way. You get a restaurant-style curry without three separate pans and a sink full of orange splatters. Nice trade.
Why It Works
Chicken thighs stay tender under pressure, while tomato paste, garam masala, cumin, and paprika build the warm spice base that butter chicken needs. The pressure cooker softens the onion and garlic into the sauce so the final texture tastes blended, not chopped up. Cream goes in at the end to keep the sauce smooth. If you add it too early, it gets lost.
Key Ingredients
- 1 pound boneless, skinless chicken thighs, cut into bite-size pieces
- 1 tablespoon butter
- 1 small onion, finely diced
- 3 garlic cloves, minced
- 1 tablespoon grated fresh ginger
- 2 tablespoons tomato paste
- 1 cup tomato sauce
- 1 teaspoon garam masala
- 1 teaspoon ground cumin
- 1 teaspoon paprika
- 1/2 teaspoon kosher salt
- 1/2 cup water or chicken broth
- 1/2 cup heavy cream
- 1 tablespoon lemon juice
- Chopped cilantro for serving
Quick Steps
-
Sauté the Aromatics: Melt the butter on Sauté and cook the onion for 3 minutes. Add the garlic and ginger for 30 seconds.
-
Toast the Spices: Stir in the tomato paste, garam masala, cumin, paprika, and salt. Cook for 1 minute so the spices bloom and the paste darkens slightly.
-
Add the Chicken and Sauce: Stir in the chicken, tomato sauce, and water or broth. Scrape the pot clean.
-
Pressure Cook: Seal and cook on High Pressure for 8 minutes. Let it naturally release for 5 minutes, then quick release.
-
Finish the Curry: Stir in the cream and lemon juice. Simmer for 2 minutes if you want the sauce a little thicker.
-
Serve: Spoon over cooked basmati rice and finish with cilantro.
Tips and Variations
- Naan is a fine substitute for rice if you want to keep the dinner lighter.
- Add a pinch of cayenne if you like more heat.
- Leftovers thicken overnight, so add a splash of water when reheating.
7. Chicken Tortilla Soup
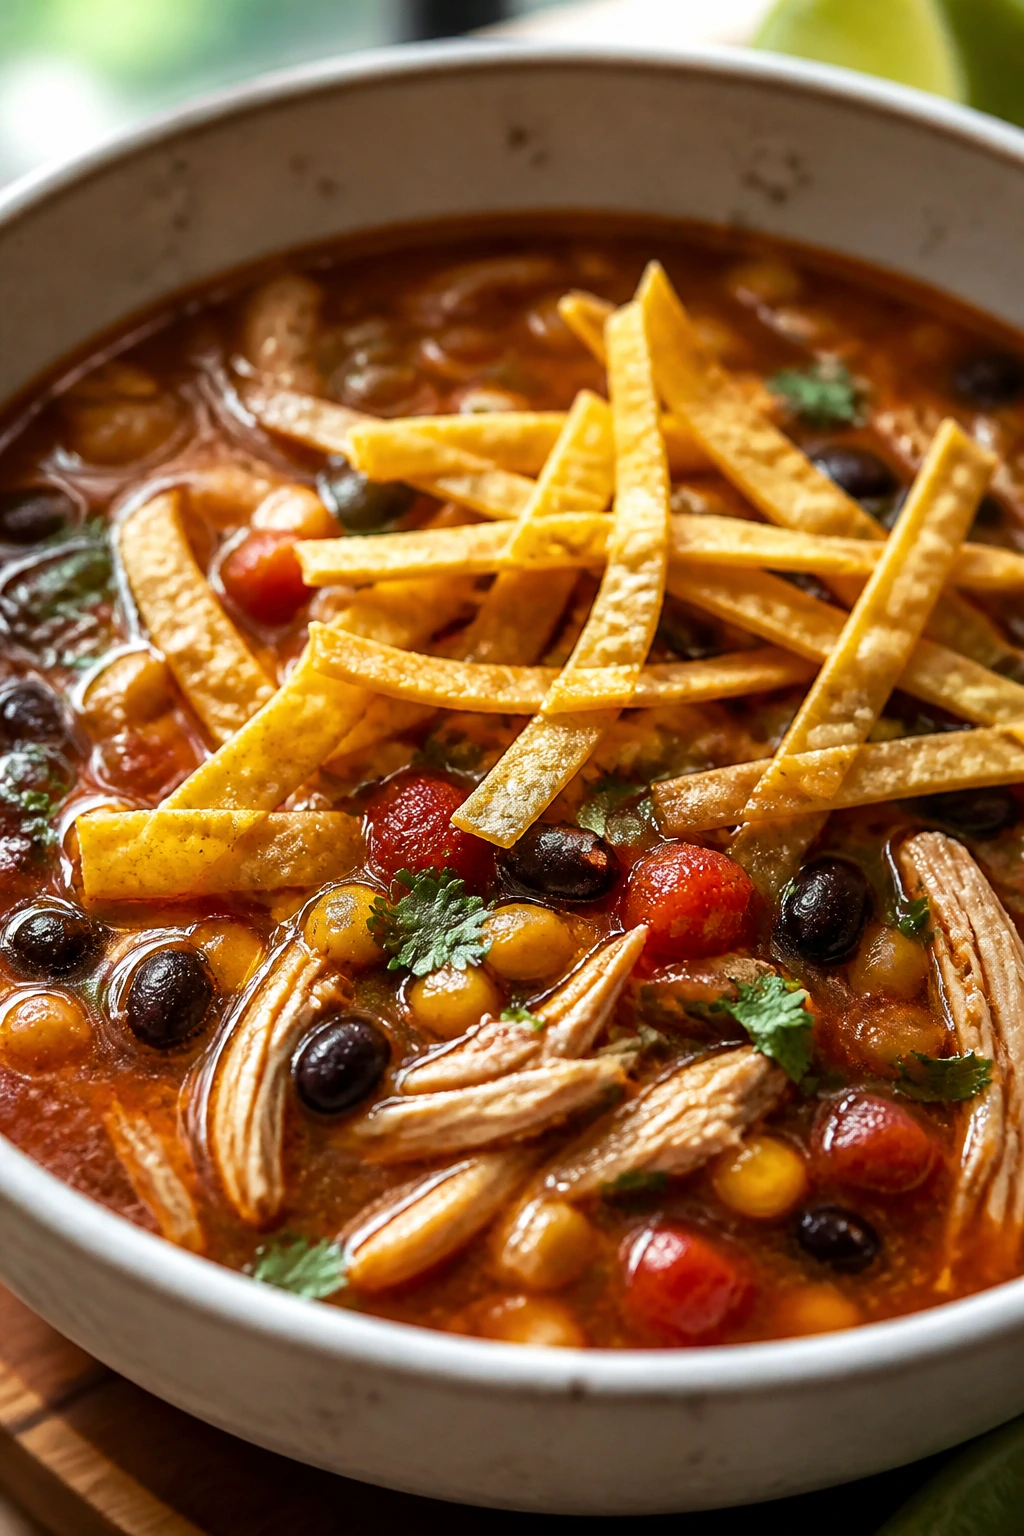
Chicken tortilla soup is one of the easiest Instant Pot wins for two people. It tastes lively, it freezes well, and it does not care if you toss in a few things from the pantry. The broth gets rich from the chicken and tomatoes, then the toppings do the rest of the work. Crisp tortilla strips on top are not optional in my house.
Why It Works
Pressure cooking pulls flavor from the chicken, tomatoes, beans, and spices in one shot, which is exactly why this soup feels bigger than the ingredient list suggests. The quick release keeps the chicken from drying out, and the shredded tortilla topping adds the crunch that makes the bowl feel finished. If you like soup that eats like dinner instead of an appetizer, this is the one.
Key Ingredients
- 1 pound boneless chicken breasts or thighs
- 1 tablespoon olive oil
- 1 small onion, diced
- 1 bell pepper, diced
- 2 garlic cloves, minced
- 1 can diced tomatoes, 14.5 ounces
- 1 can black beans, drained and rinsed
- 1 cup frozen corn
- 3 cups low-sodium chicken broth
- 1 teaspoon ground cumin
- 1 teaspoon chili powder
- 1/2 teaspoon kosher salt
- Tortilla strips, avocado, shredded cheese, cilantro, and lime wedges for serving
Quick Steps
-
Sauté the Vegetables: Cook the onion and bell pepper in olive oil for 4 minutes on Sauté. Add the garlic for 30 seconds.
-
Add the Soup Base: Stir in the tomatoes, black beans, corn, broth, cumin, chili powder, and salt.
-
Pressure Cook the Chicken: Nestle in the chicken, seal the lid, and cook on High Pressure for 10 minutes.
-
Release and Shred: Quick release the pressure. Remove the chicken and shred it with two forks.
-
Finish the Soup: Stir the chicken back in. Taste and add more salt or lime if needed.
-
Serve with Crunch: Ladle into bowls and top with tortilla strips, avocado, cheese, cilantro, and a squeeze of lime.
Tips and Variations
- Use thighs if you want a slightly richer broth.
- A spoonful of salsa stirred in at the end gives the soup more depth.
- Keep tortilla strips separate until serving so they stay crisp.
8. Sausage, White Bean, and Kale Soup
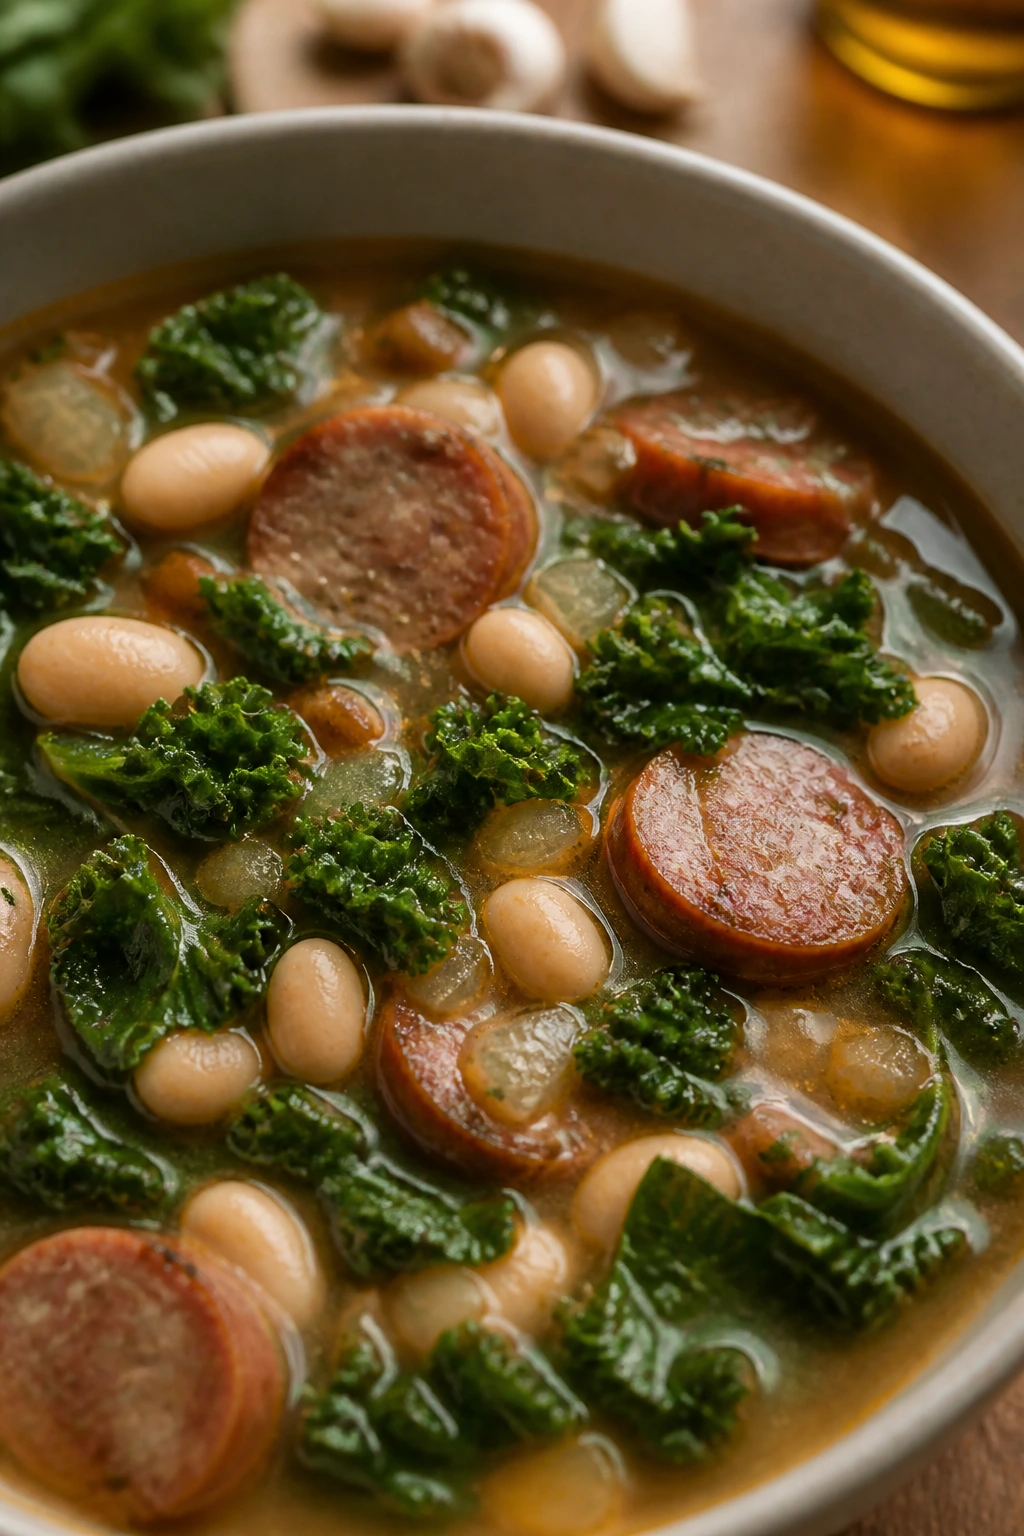
There is something almost rude about how little effort this soup asks for compared with how much it gives back. Sausage, beans, kale, and broth become a bowl that tastes like a long simmer even when dinner came together fast. It is sturdy, savory, and the kind of thing you want when the day has been loud.
Why It Works
The sausage seasons the broth early, and the beans turn creamy enough under pressure to thicken the soup without flour. Kale waits until the end so it stays green and a little chewy instead of turning limp. A splash of lemon sharpens the whole pot right before serving. That last hit of acid keeps the soup from tasting sleepy.
Key Ingredients
- 8 ounces andouille or Italian sausage, sliced
- 1 tablespoon olive oil, if needed
- 1 small onion, diced
- 2 carrots, diced
- 2 celery stalks, diced
- 2 garlic cloves, minced
- 2 cans cannellini beans, drained and rinsed
- 3 cups low-sodium chicken broth
- 1 teaspoon dried thyme
- 1 bay leaf
- 1/2 teaspoon black pepper
- 2 cups chopped kale, ribs removed
- 1 tablespoon lemon juice
Quick Steps
-
Brown the Sausage: Use Sauté to cook the sausage for 3 to 4 minutes, until the edges start to brown. If the sausage is lean, add the olive oil first.
-
Cook the Vegetables: Add the onion, carrots, and celery and cook for 4 minutes. Stir in the garlic for 30 seconds.
-
Build the Soup: Add the beans, broth, thyme, bay leaf, and pepper. Scrape the bottom clean.
-
Pressure Cook: Seal and cook on High Pressure for 5 minutes. Let the pressure release naturally for 5 minutes, then quick release.
-
Add the Kale: Stir in the kale and lemon juice. Let the residual heat wilt the greens for 2 minutes.
-
Serve: Remove the bay leaf and ladle into bowls. A little Parmesan on top is a good idea.
Tips and Variations
- Swiss chard can replace kale if you want a softer green.
- Smoked sausage gives a stronger flavor than mild Italian sausage.
- If the soup feels too thick, add a splash of broth before serving.
9. Mushroom Risotto with Parmesan
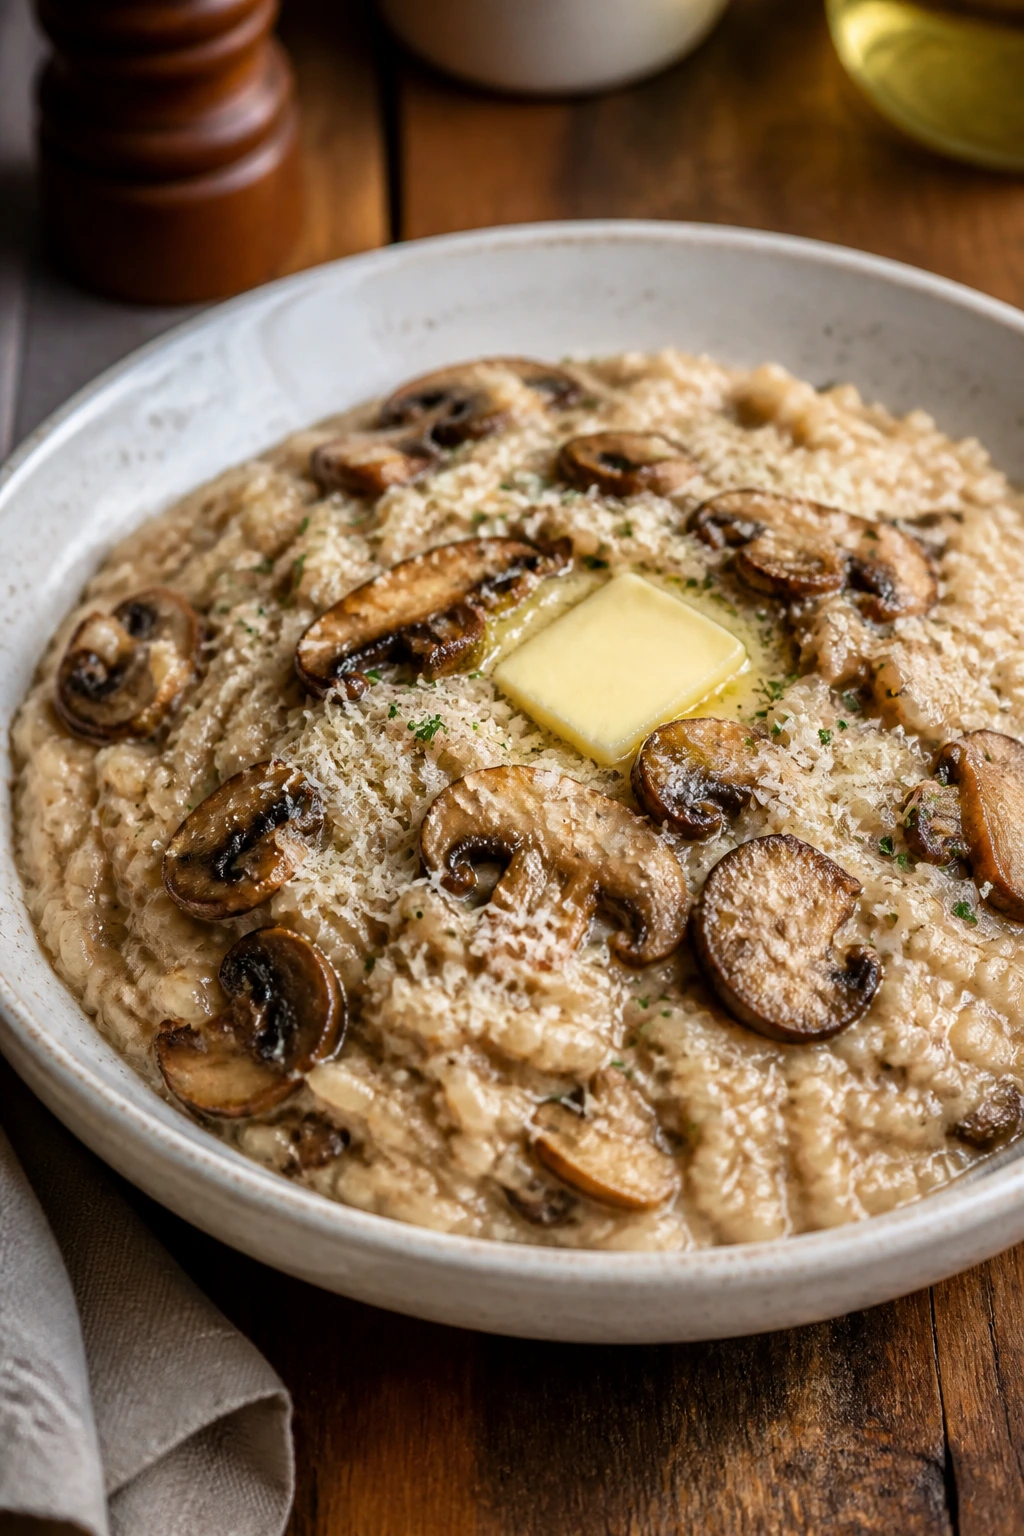
Risotto is usually the dish people think requires constant stirring and a sort of kitchen loyalty test. The pressure cooker changes that. You still get the creamy, starchy finish, but the pot does most of the work while you stand nearby like a person who has things under control. Which, for once, you do.
Why It Works
Arborio rice is built for this kind of treatment because it gives up starch quickly under pressure. Mushrooms bring a deep savory note, and a final stir of butter and Parmesan makes the texture lush without turning it gluey. The trick is not to overdo the broth or leave it uncovered too long after cooking. Risotto wants to stay loose and moving.
Key Ingredients
- 1 tablespoon butter
- 1 tablespoon olive oil
- 8 ounces cremini mushrooms, sliced
- 1 small shallot or onion, finely diced
- 2 garlic cloves, minced
- 1 cup arborio rice
- 1/4 cup dry white wine, optional
- 2 1/2 cups vegetable broth
- 1/2 teaspoon kosher salt
- 1/4 teaspoon black pepper
- 1/2 cup grated Parmesan
- 1 tablespoon butter
- Chopped parsley for serving
Quick Steps
-
Brown the Mushrooms: Use Sauté to heat the butter and oil. Cook the mushrooms for 5 minutes until they give off moisture and start to brown around the edges.
-
Add the Aromatics: Stir in the shallot and cook for 2 minutes, then add the garlic for 30 seconds.
-
Toast the Rice: Add the arborio rice and stir for 1 minute so the grains look glossy. Pour in the wine, if using, and let it bubble until mostly absorbed.
-
Pressure Cook: Add the broth, salt, and pepper. Seal and cook on High Pressure for 6 minutes, then let the pressure release naturally for 5 minutes before opening.
-
Finish the Risotto: Stir in the Parmesan and final tablespoon of butter until creamy and smooth. If it looks stiff, add a splash more broth.
-
Serve Right Away: Spoon into warm bowls and top with parsley. Risotto waits for no one.
Tips and Variations
- Use broth you actually like drinking. Cheap broth makes bland risotto.
- Add peas at the end for color and a little sweetness.
- A squeeze of lemon wakes the whole dish up nicely.
10. Lentil Bolognese over Pasta
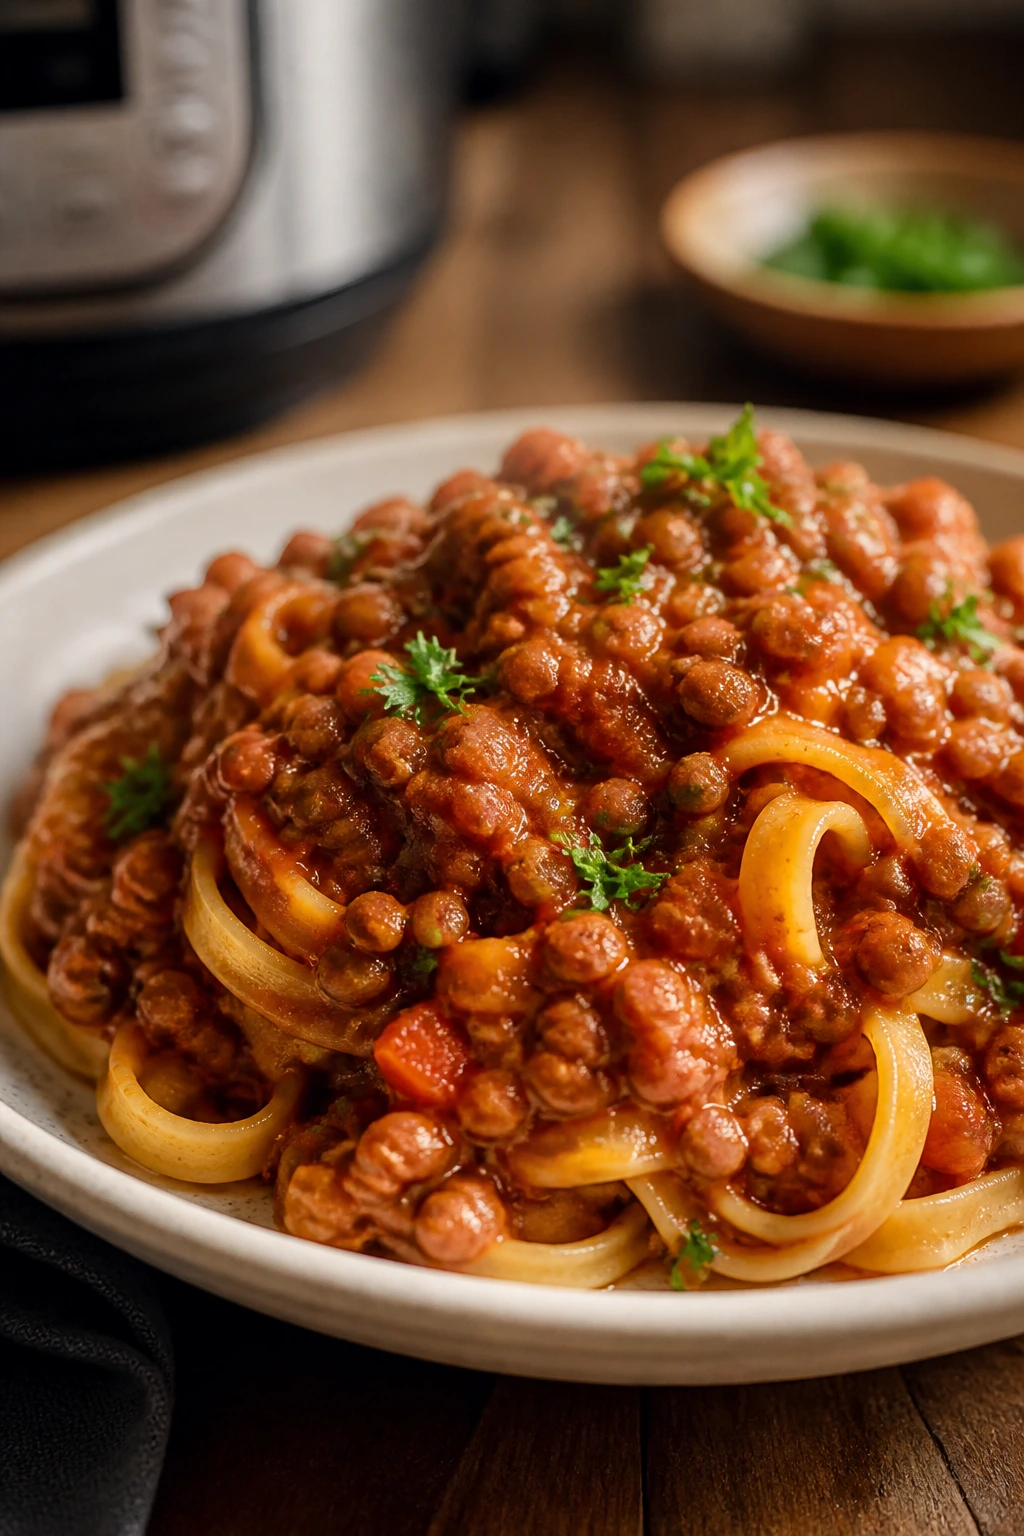
This is the meatless dinner I trust when I want something sturdy enough to satisfy two people who are hungry, not virtuous. Lentils bring a chewy, earthy backbone, and the tomato base gets thick in a way that clings to pasta instead of sliding off it. It is the kind of sauce that makes you forget you were trying to save money or skip meat.
Why It Works
Brown or green lentils hold their shape under pressure, which matters here because you want body, not mush. Onion, carrot, and celery build the classic sauce base, while tomato paste and crushed tomatoes give you the deep red color and slow-cooked feel. A little simmer at the end tightens the sauce so it behaves like bolognese instead of soup. That difference is the whole game.
Key Ingredients
- 1 tablespoon olive oil
- 1 small onion, finely diced
- 1 carrot, finely diced
- 1 celery stalk, finely diced
- 3 garlic cloves, minced
- 1 cup brown or green lentils, rinsed
- 1 tablespoon tomato paste
- 1 can crushed tomatoes, 14.5 ounces
- 1 cup vegetable broth
- 1 teaspoon Italian seasoning
- 1/2 teaspoon kosher salt
- 1/4 teaspoon black pepper
- 1 bay leaf
- 6 ounces pasta, cooked separately
- Grated Parmesan or nutritional yeast for serving
Quick Steps
-
Cook the Vegetables: Use Sauté to cook the onion, carrot, and celery in olive oil for 5 minutes. Add the garlic and cook for 30 seconds.
-
Add the Flavor Base: Stir in the tomato paste, lentils, crushed tomatoes, broth, Italian seasoning, salt, pepper, and bay leaf.
-
Pressure Cook: Seal and cook on High Pressure for 12 minutes. Let it naturally release for 10 minutes, then open the lid.
-
Thicken the Sauce: Remove the bay leaf and simmer on Sauté for 3 to 5 minutes until the sauce looks thick and spoonable.
-
Cook the Pasta: Boil the pasta in a separate pot until al dente. Drain it well.
-
Serve: Spoon the lentil bolognese over the pasta and finish with Parmesan.
Tips and Variations
- Add chopped mushrooms if you want an even meatier texture.
- Use chickpea pasta if you want more protein.
- The sauce freezes well, which makes this a smart batch-cook dinner.
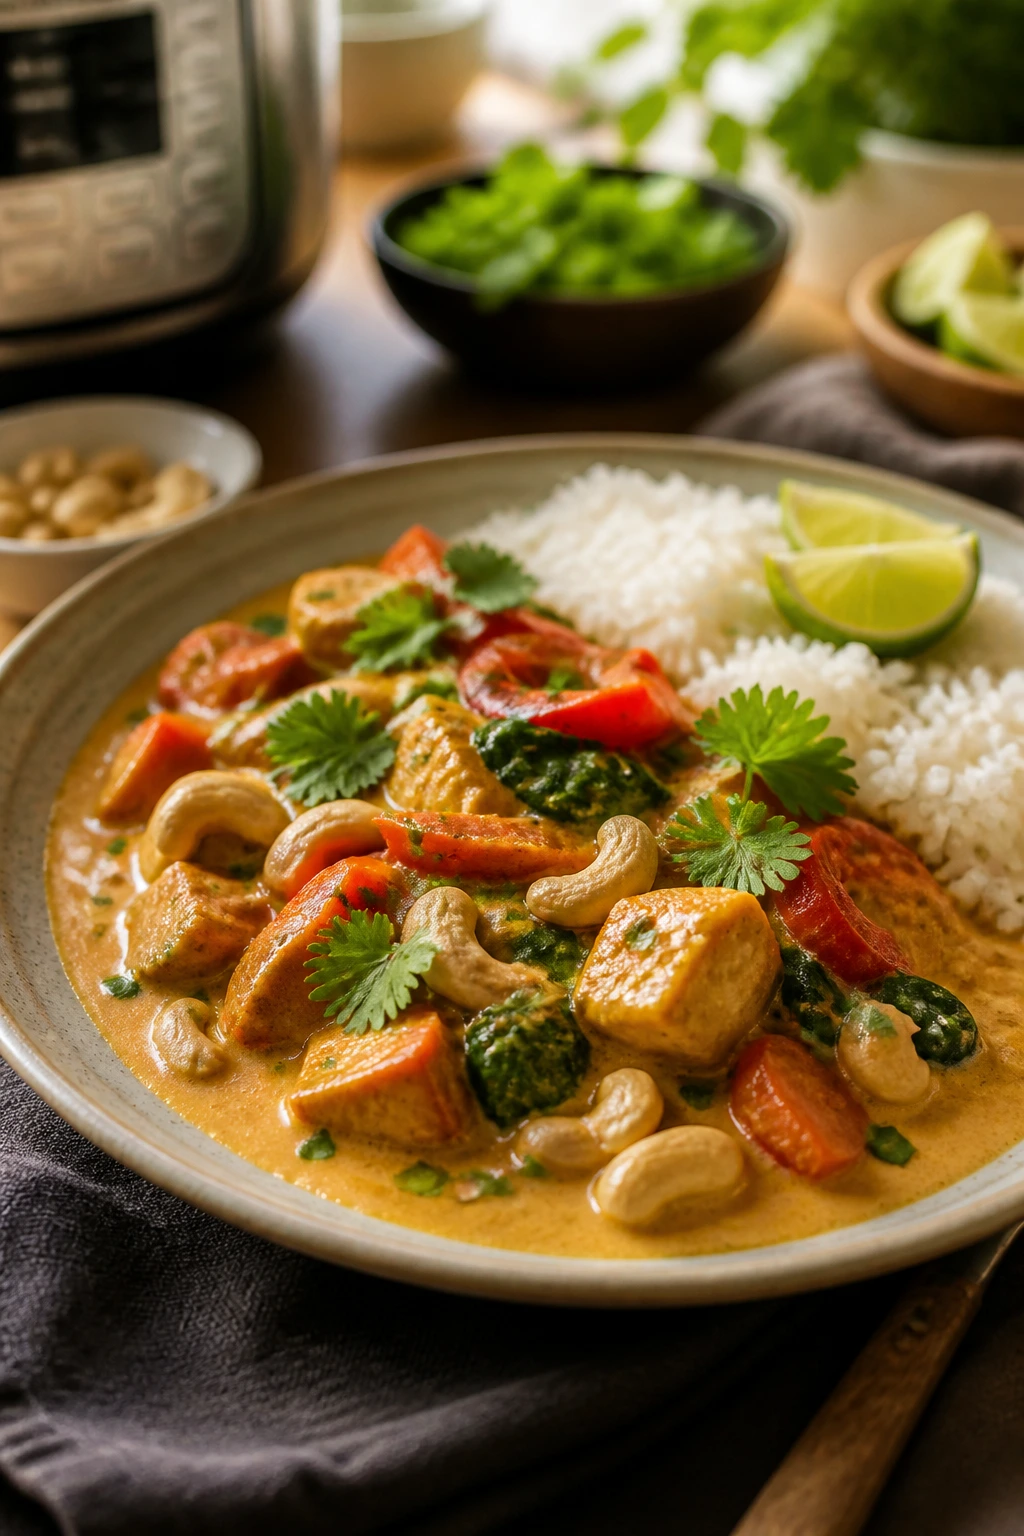
11. Shrimp Coconut Curry
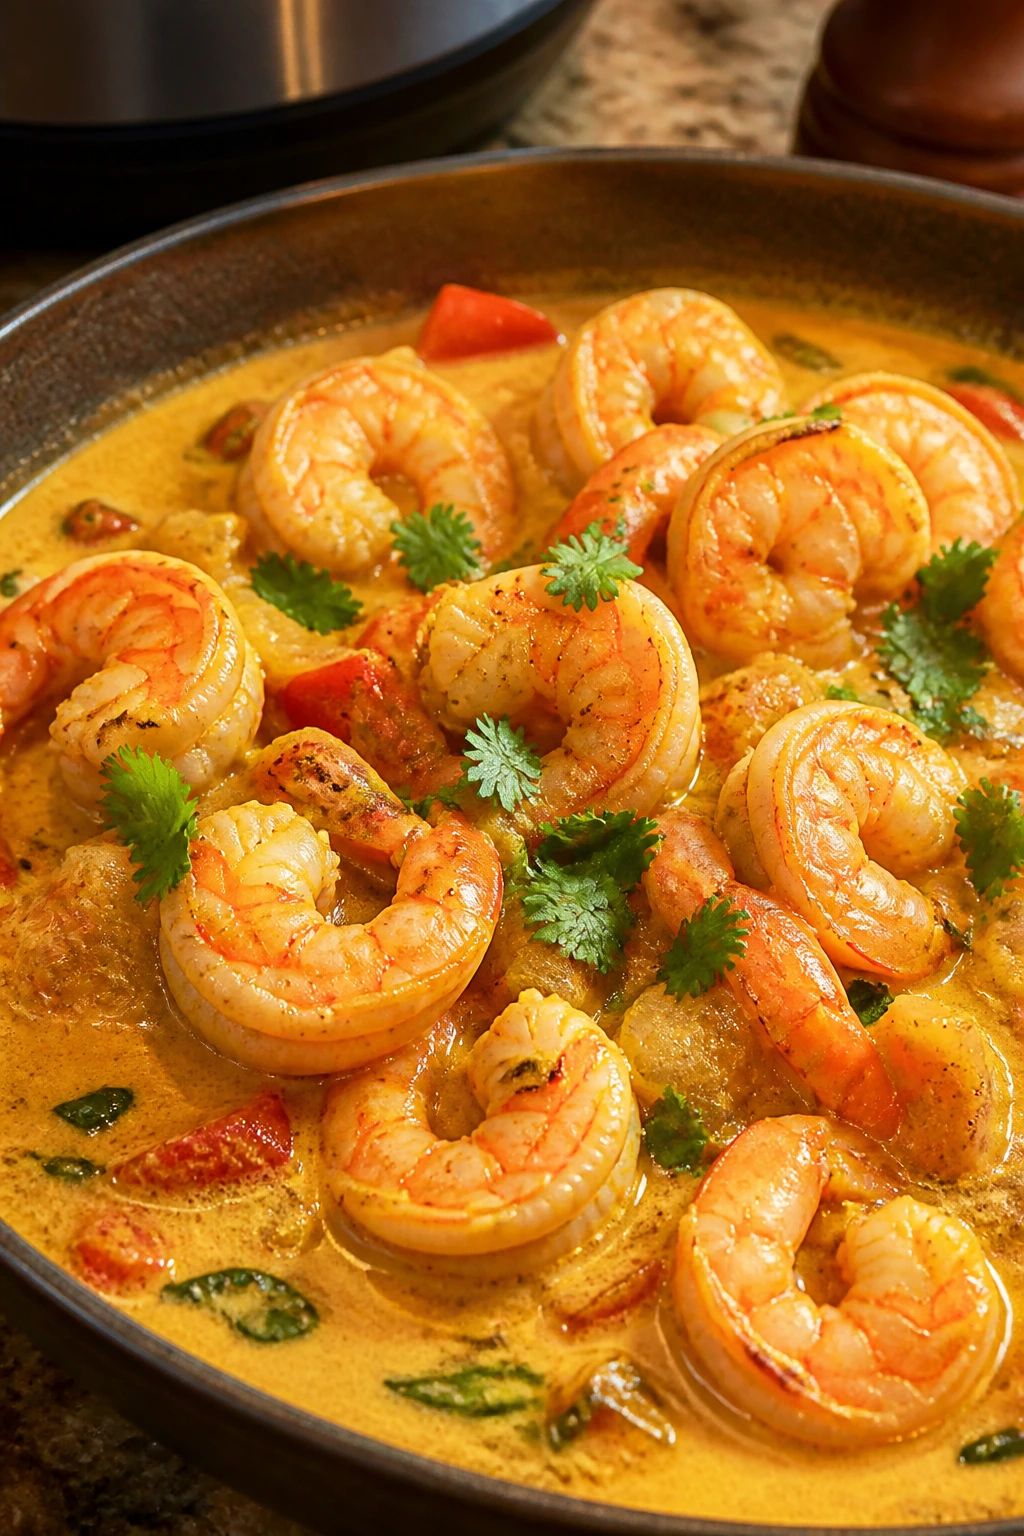
Shrimp curry can go wrong fast if you treat the shrimp like a meat that needs long cooking. It does not. The Instant Pot is best here for building the sauce and then gently finishing the shrimp at the end, which keeps them snappy instead of rubbery. Coconut milk, curry paste, ginger, and lime make a very good case for dinner with little fuss.
Why It Works
The pressure cooker softens onion, garlic, and ginger into the base of the curry, while coconut milk rounds off the heat from the curry paste. Shrimp are added after pressure so they only need a couple of minutes to turn pink and opaque. That is the trick. Cook the sauce with pressure, not the shrimp.
Key Ingredients
- 1 tablespoon neutral oil
- 1 small onion, sliced
- 2 garlic cloves, minced
- 1 tablespoon grated fresh ginger
- 1 tablespoon red curry paste
- 1 can full-fat coconut milk, 13.5 ounces
- 1/2 cup low-sodium broth
- 1 tablespoon fish sauce or soy sauce
- 1 teaspoon brown sugar
- 8 ounces shrimp, peeled and deveined
- 2 cups baby spinach
- Juice of 1 lime
- Chopped cilantro for serving
- Cooked rice for serving
Quick Steps
-
Start the Curry Base: Sauté the onion in oil for 3 minutes. Add the garlic, ginger, and curry paste and cook for 30 seconds.
-
Add Liquid and Pressure Cook: Pour in the coconut milk, broth, fish sauce or soy sauce, and brown sugar. Seal and cook on High Pressure for 1 minute, then quick release.
-
Add the Shrimp: Switch back to Sauté and stir in the shrimp. Cook for 2 to 3 minutes, just until they turn pink and curl.
-
Wilt the Greens: Stir in the spinach and let it collapse for 1 minute.
-
Brighten the Sauce: Add the lime juice and taste for salt.
-
Serve: Spoon over rice and top with cilantro.
Tips and Variations
- Do not pressure cook the shrimp. They will overcook.
- Bell peppers can be stirred in after pressure if you want more vegetable crunch.
- A spoonful of peanut butter gives the sauce a richer, deeper finish.
12. Broccoli Mac and Cheese
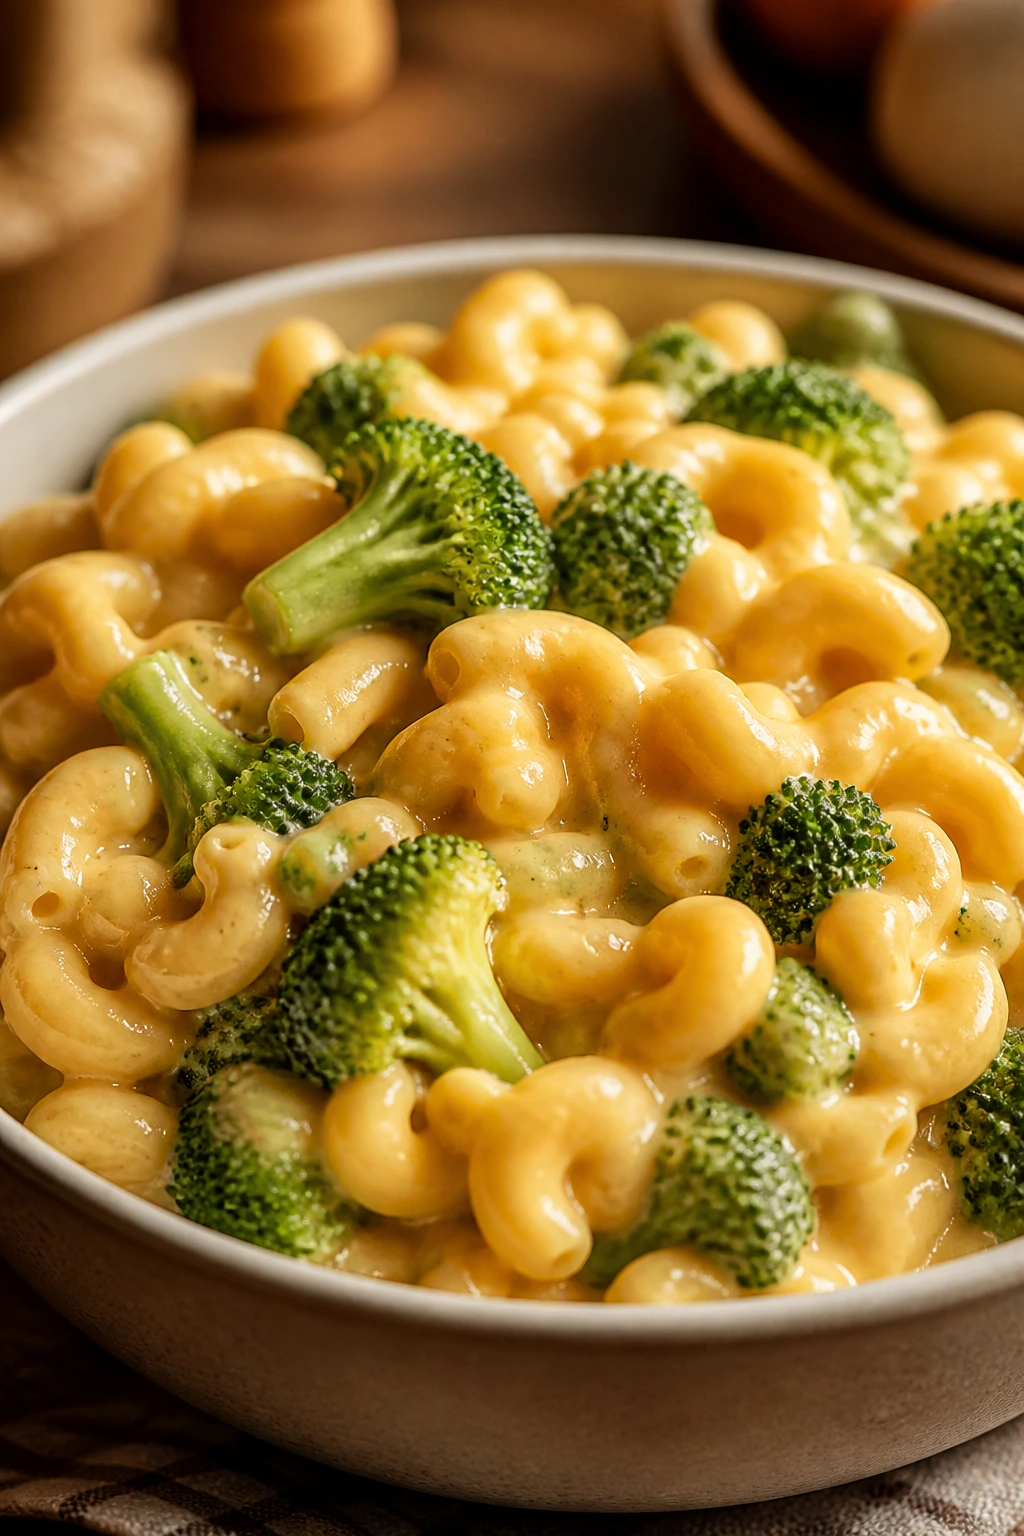
Mac and cheese in the Instant Pot can be brilliant or gloopy. The difference is usually liquid balance and cheese timing. Done right, you get creamy noodles, tender broccoli, and a sauce that coats rather than puddles. It is the sort of dinner that looks like kid food and behaves like comfort food.
Why It Works
The pasta cooks directly in the liquid, which means the starch stays in the pot and helps thicken the sauce. Broccoli goes in near the end so it keeps some bite. Cheese gets stirred in after pressure, never before, because high heat can make it stringy or grainy. People ruin mac and cheese by rushing the cheese. That part is annoyingly simple.
Key Ingredients
- 8 ounces elbow macaroni
- 1 3/4 cups water or low-sodium broth
- 1 1/2 cups whole milk
- 1/2 teaspoon kosher salt
- 1 tablespoon butter
- 2 cups small broccoli florets
- 2 cups shredded sharp cheddar
- 1/2 cup shredded Monterey Jack
- 1/2 teaspoon mustard powder
- 1/4 teaspoon black pepper
Quick Steps
-
Cook the Pasta: Add the macaroni, water or broth, milk, salt, butter, and mustard powder to the pot. Stir well.
-
Pressure Cook: Seal and cook on High Pressure for 4 minutes. Quick release the pressure immediately when the timer ends.
-
Add the Broccoli: Stir in the broccoli florets. Cover the pot for 2 minutes so the residual heat softens them without turning them to mush.
-
Stir in the Cheese: Add the cheddar, Monterey Jack, and black pepper. Stir until melted and creamy.
-
Check the Texture: If the sauce seems too thick, add 2 to 3 tablespoons of milk. If it is too loose, let it sit uncovered for 2 minutes.
-
Serve Hot: Spoon into bowls while the sauce is still silky.
Tips and Variations
- Smoked cheddar adds depth if you want the dish less plain.
- Frozen broccoli works fine and usually holds shape better.
- Breadcrumb topping is optional, but I like it if I have 5 extra minutes to toast it.
13. Red Beans and Rice with Andouille

This is one of those small-batch dinners that tastes like it fed more people than it did. The rice cooks right in the pot with the beans and sausage, so the whole thing turns into a thick, savory bowl that needs little more than hot sauce and maybe a green onion. It is hearty without being fussy. That combination is hard to beat.
Why It Works
Canned beans keep the cooking time short, but they still soak up the Cajun seasoning and sausage drippings in a way that feels slow-cooked. Rice turns the whole pot into a dinner instead of a side dish. The key is enough liquid for the rice to cook, plus enough salt and spice to keep the beans from tasting flat. A bay leaf helps more than people expect.
Key Ingredients
- 8 ounces andouille sausage, sliced
- 1 tablespoon olive oil
- 1 small onion, diced
- 1 bell pepper, diced
- 2 celery stalks, diced
- 3 garlic cloves, minced
- 2 cans red beans or kidney beans, drained and rinsed
- 1 cup long-grain white rice, rinsed
- 1 1/2 cups low-sodium chicken broth
- 1 cup water
- 1 tablespoon tomato paste
- 1 teaspoon Cajun seasoning
- 1 bay leaf
- Chopped scallions and hot sauce for serving
Quick Steps
-
Brown the Sausage: Sauté the sausage for 3 minutes until the edges start to brown. Add the olive oil only if the sausage is lean.
-
Cook the Vegetables: Add the onion, bell pepper, and celery. Cook for 4 minutes, then stir in the garlic for 30 seconds.
-
Build the Pot: Add the beans, rice, broth, water, tomato paste, Cajun seasoning, and bay leaf. Stir carefully and scrape the bottom well.
-
Pressure Cook: Seal and cook on High Pressure for 4 minutes. Let the pressure release naturally for 10 minutes before quick releasing the rest.
-
Fluff and Adjust: Remove the bay leaf, fluff the rice, and check the seasoning. Add a splash of broth if it feels too tight.
-
Serve: Top with scallions and hot sauce.
Tips and Variations
- Smoked paprika can stand in for some Cajun seasoning if you want less heat.
- Turkey sausage works well if you want a lighter pot.
- Do not stir too aggressively after cooking, or the rice breaks down.
14. Ginger Sesame Meatballs
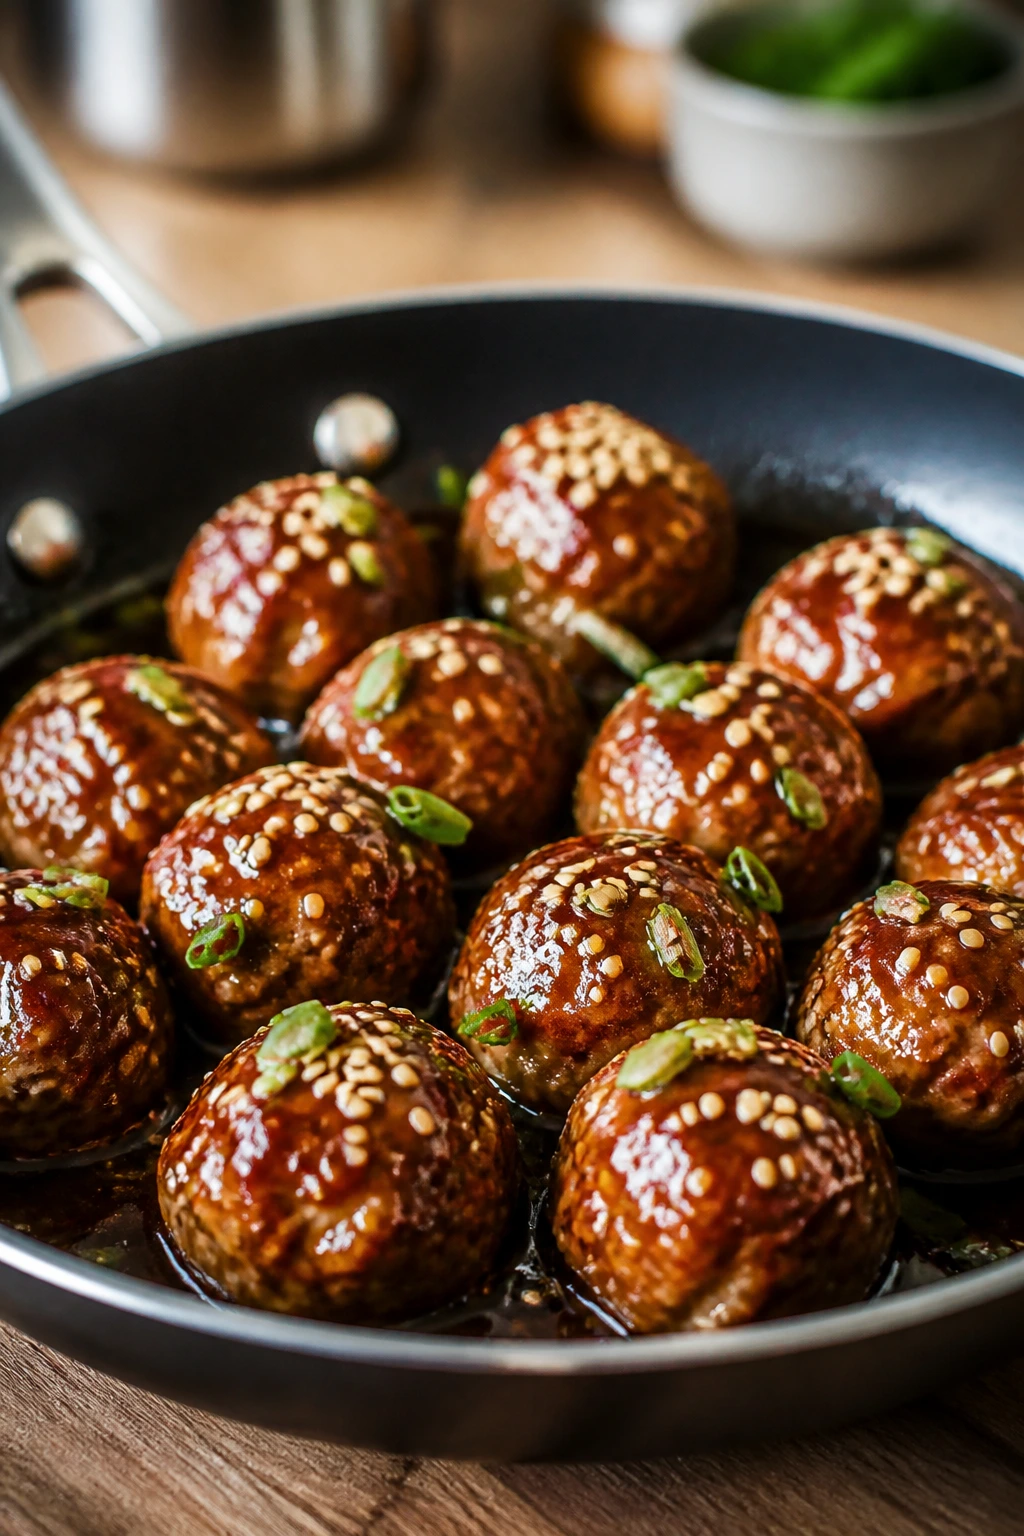
These meatballs taste like takeout comfort, but they fit neatly into an Instant Pot dinner for two. The sauce is sticky in the right way, with soy, ginger, and a little honey to gloss the meatballs instead of drowning them. I like this one because it feels a little playful. Not childish. Just playful.
Why It Works
Ground turkey or pork meatballs hold together well under pressure when they are mixed with an egg and panko. The sauce cooks around them, so they absorb flavor instead of drying out on the stove. Broccoli or snap peas can be added after pressure for a quick finish, which keeps the vegetables bright and the meal looking alive in the bowl. Texture matters here more than people think.
Key Ingredients
- 1 pound ground turkey or ground pork
- 1 large egg
- 1/4 cup panko breadcrumbs
- 2 teaspoons minced fresh ginger
- 2 garlic cloves, minced
- 1 tablespoon soy sauce
- 1 teaspoon sesame oil
- 1/2 teaspoon kosher salt
- 1/2 cup low-sodium chicken broth
- 3 tablespoons soy sauce
- 2 tablespoons honey
- 1 tablespoon rice vinegar
- 1 teaspoon cornstarch mixed with 1 tablespoon water
- 2 cups small broccoli florets
- Sesame seeds and sliced green onions for serving
Quick Steps
-
Mix the Meatballs: Combine the turkey or pork, egg, panko, ginger, garlic, soy sauce, sesame oil, and salt. Form into 12 small meatballs.
-
Make the Sauce: Whisk the broth, soy sauce, honey, and rice vinegar in the pot. Nestle the meatballs into the liquid.
-
Pressure Cook: Seal and cook on High Pressure for 5 minutes. Let the pressure release naturally for 3 minutes, then quick release.
-
Thicken the Sauce: Stir in the cornstarch slurry on Sauté and cook for 1 minute until glossy.
-
Add the Broccoli: Stir in the broccoli and cook for 2 to 3 minutes, just until bright green and crisp-tender.
-
Serve: Spoon over rice and finish with sesame seeds and green onions.
Tips and Variations
- If the mixture feels loose, chill the meatballs for 10 minutes before cooking.
- A little chili crisp on top gives the dish more bite.
- Frozen meatballs can work, but use fully cooked ones and shorten the pressure time.
15. Stuffed Pepper Soup
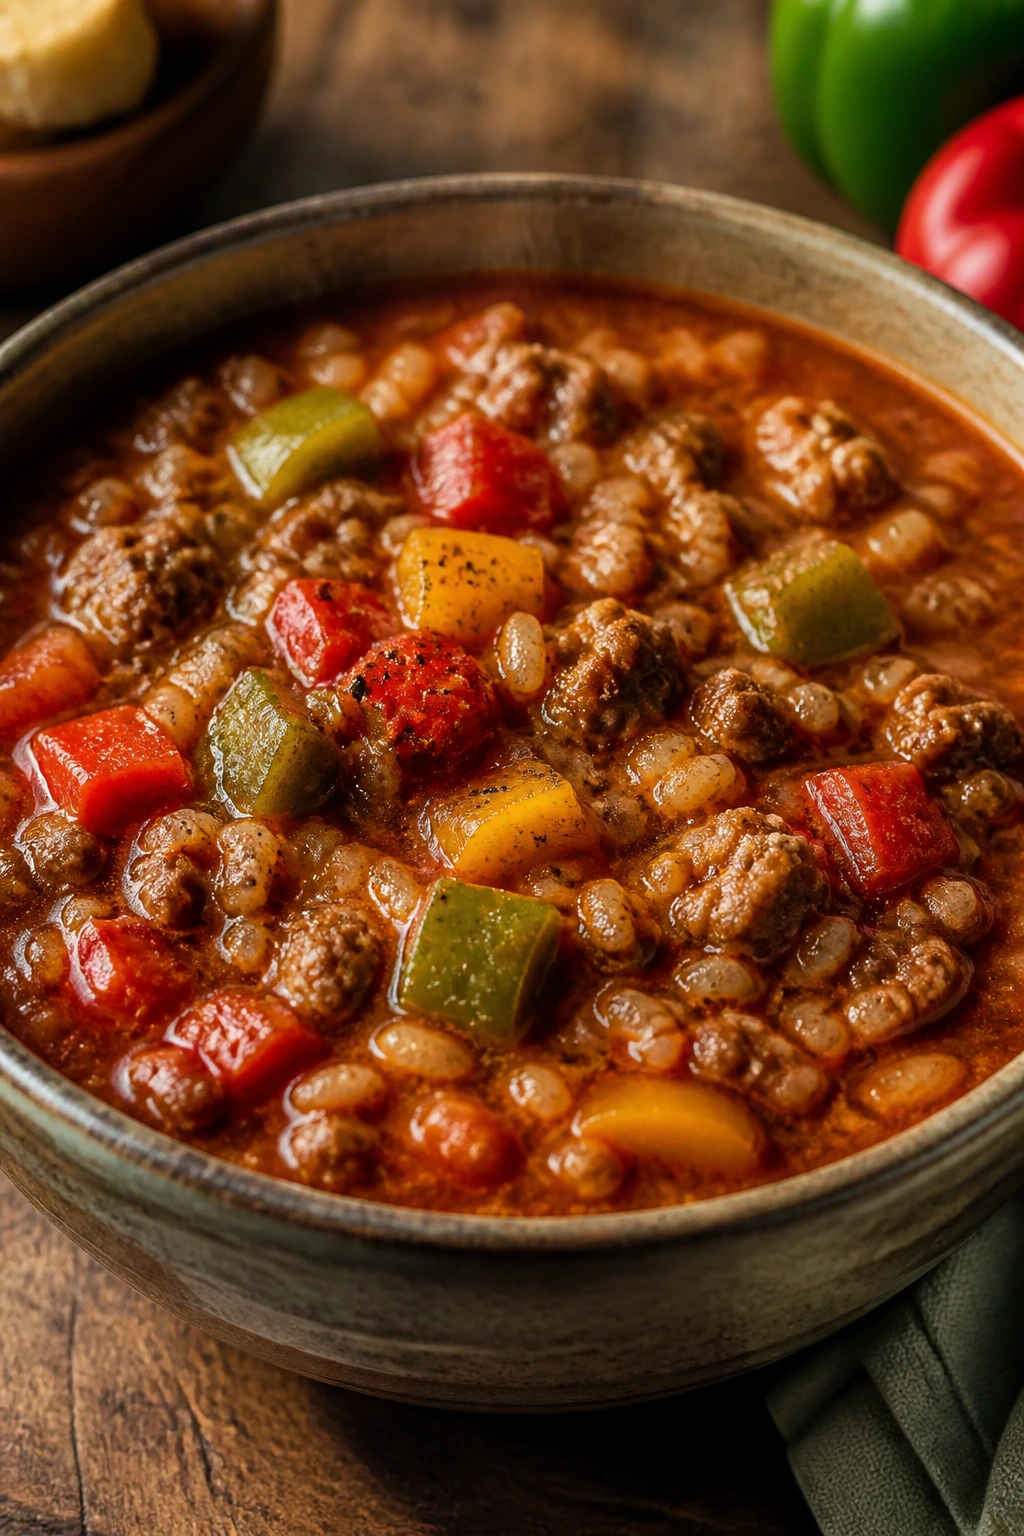
Stuffed peppers are nice. Stuffed pepper soup is easier and, honestly, more satisfying on a busy night. You get the same sweet pepper, tomato, and beef combination without having to fuss over hollowing out vegetables or worrying about whether the rice inside cooked through. It is a straight shot to comfort.
Why It Works
The pressure cooker softens the peppers just enough while keeping some shape, so the soup tastes like stuffed peppers instead of tomato rice porridge. Ground beef gives the broth weight, and the rice thickens the pot as it cooks. Tomatoes and peppers have a natural sweetness that comes out more when they are sealed with seasoning and heat. That is the whole charm.
Key Ingredients
- 1 tablespoon olive oil
- 1 pound ground beef or ground turkey
- 1 small onion, diced
- 2 bell peppers, diced
- 2 garlic cloves, minced
- 1 tablespoon tomato paste
- 1 can diced tomatoes, 14.5 ounces
- 1 can crushed tomatoes, 14.5 ounces
- 1 cup low-sodium beef broth
- 1/2 cup uncooked white rice, rinsed
- 1 teaspoon Italian seasoning
- 1 teaspoon kosher salt
- 1/4 teaspoon black pepper
- Chopped parsley or shredded cheese for serving
Quick Steps
-
Brown the Meat: Use Sauté to cook the beef or turkey with the onion for 5 minutes, breaking the meat into small pieces.
-
Add the Peppers and Garlic: Stir in the bell peppers and garlic. Cook for 2 minutes so the peppers start to soften.
-
Build the Soup: Add the tomato paste, diced tomatoes, crushed tomatoes, broth, rice, Italian seasoning, salt, and pepper. Stir well.
-
Pressure Cook: Seal and cook on High Pressure for 4 minutes. Let it naturally release for 10 minutes before opening.
-
Check the Rice: Stir the soup and let it sit for 2 minutes. If the rice needs a touch more softness, cover and rest another couple of minutes.
-
Serve: Finish with parsley or a handful of shredded cheese.
Tips and Variations
- Parboiled rice can replace white rice if you want a firmer texture.
- A splash of Worcestershire deepens the beef flavor.
- This soup freezes well, but the rice softens a bit after thawing.
16. Pot Roast with Baby Potatoes
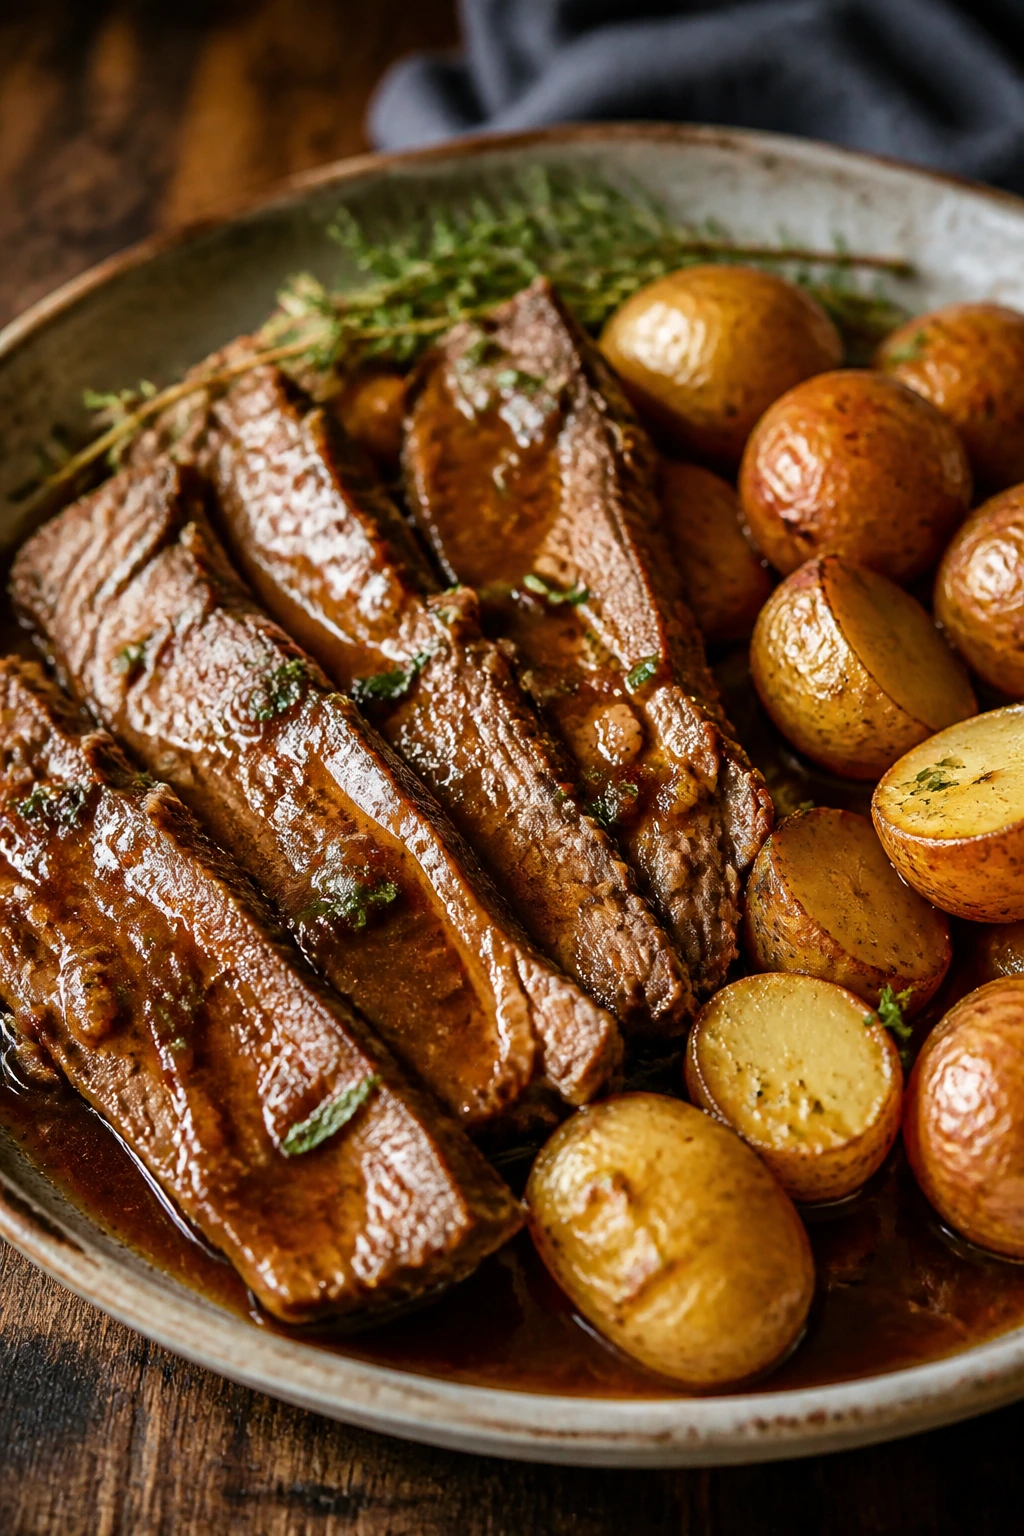
Pot roast for two sounds almost too much like a Sunday thing, but the Instant Pot trims the wait down without flattening the flavor. You still get the beefy gravy, the soft carrots, and potatoes that soak up every bit of it. It is a big meal in a small package. And yes, it feels like a small victory.
Why It Works
Chuck roast is built for pressure cooking because its connective tissue needs time and moisture to soften. The pot roast also benefits from a good sear first, since browned meat and browned tomato paste give the gravy its darker, deeper flavor. Baby potatoes keep their shape better than big chopped ones, and the final cornstarch slurry turns the liquid into actual gravy instead of broth with ambition. That distinction matters.
Key Ingredients
- 1 1/2 pounds chuck roast
- 1 teaspoon kosher salt
- 1/2 teaspoon black pepper
- 1 tablespoon neutral oil
- 1 small onion, sliced
- 2 carrots, cut into large chunks
- 1 pound baby potatoes, halved if large
- 2 garlic cloves, minced
- 1 1/2 cups beef broth
- 1 tablespoon tomato paste
- 1 tablespoon Worcestershire sauce
- 1 teaspoon dried thyme
- 1 bay leaf
- 1 tablespoon cornstarch mixed with 2 tablespoons water
Quick Steps
-
Season and Sear the Beef: Pat the roast dry, season with salt and pepper, and brown it in oil on all sides for 3 to 4 minutes per side.
-
Add the Vegetables: Put the onion, carrots, potatoes, and garlic in the pot around the beef.
-
Make the Braising Liquid: Stir the broth, tomato paste, Worcestershire, thyme, and bay leaf together, then pour it into the pot.
-
Pressure Cook: Seal and cook on High Pressure for 45 minutes. Let the pressure release naturally for 15 minutes before quick releasing the rest.
-
Make the Gravy: Remove the beef and vegetables. Stir in the cornstarch slurry on Sauté and cook for 2 minutes until the liquid thickens.
-
Serve: Slice or shred the beef and spoon the gravy over the top.
Tips and Variations
- A roast with good marbling will taste better than a very lean one.
- Add mushrooms if you want a more earthy gravy.
- Let the roast rest for 5 minutes before slicing so the juices stay put.
17. Chicken Enchilada Pasta
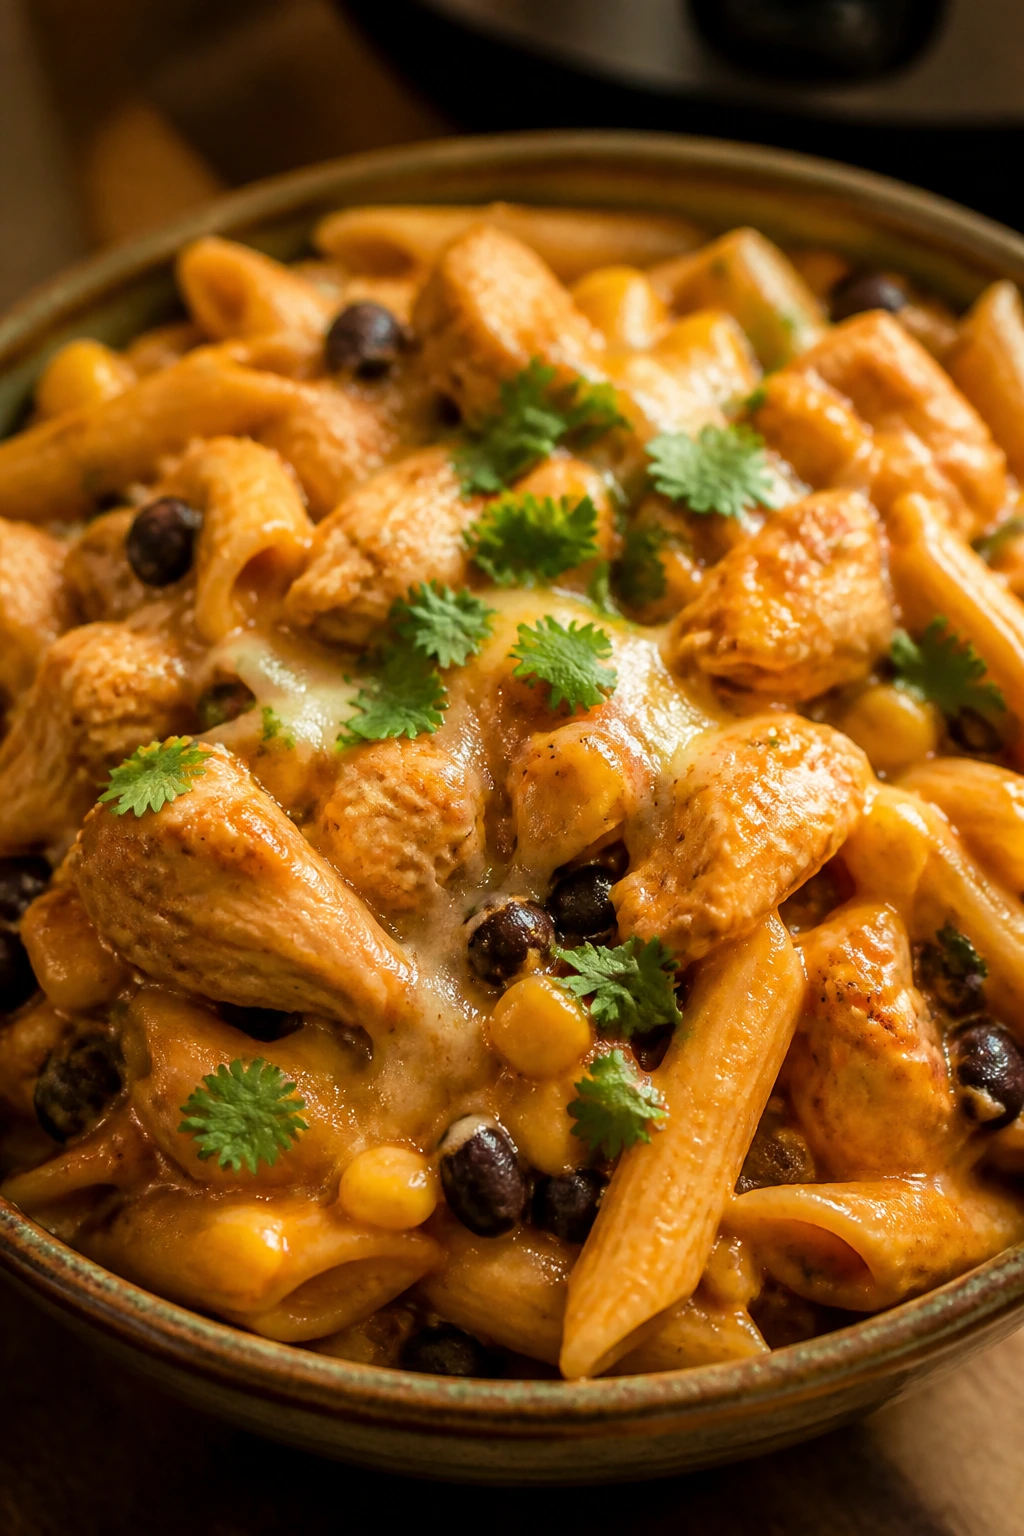
This one sits in the small, useful category of dinners that make people stop asking questions and start eating. It has the chili-spiced flavor of enchiladas, the comfort of pasta, and enough cheese to feel like a real treat without becoming a casserole brick. I like that it is messy in a good way. Dinner should occasionally be a little red and a little noisy.
Why It Works
Pasta, sauce, and chicken all cook together under pressure, which lets the noodles absorb enchilada flavor instead of just getting coated with it after the fact. Corn and beans add texture without much extra work, and cheese stirred in at the end melts into the sauce instead of sitting on top like a blanket that never fully settles. This is one of those dishes where the pot and the timing matter more than the ingredient list.
Key Ingredients
- 1 pound boneless chicken thighs or breast chunks
- 1 tablespoon neutral oil
- 1 small onion, diced
- 2 garlic cloves, minced
- 1 1/2 cups red enchilada sauce
- 1 cup low-sodium chicken broth
- 8 ounces rotini or penne
- 1 cup frozen corn
- 1 cup black beans, drained and rinsed
- 1 teaspoon ground cumin
- 1/2 teaspoon kosher salt
- 1 cup shredded Monterey Jack or cheddar
- Chopped cilantro and lime wedges for serving
Quick Steps
-
Sauté the Onion and Chicken: Brown the chicken and onion in oil for 4 minutes. Add the garlic for 30 seconds.
-
Add the Sauce and Pasta: Pour in the enchilada sauce and broth. Stir in the pasta, corn, beans, cumin, and salt.
-
Pressure Cook: Seal and cook on High Pressure for 5 minutes. Quick release as soon as the timer ends.
-
Check the Pasta: Stir well. If the pasta looks a little firm, cover and rest for 2 minutes before stirring again.
-
Melt the Cheese: Add the shredded cheese and stir until melted and creamy.
-
Serve: Top with cilantro and a squeeze of lime.
Tips and Variations
- A spoonful of sour cream stirred in at the end softens the spice.
- Use green enchilada sauce if you want a tangier, brighter pot.
- Do not overcook the pasta. It keeps softening as it sits.
18. French Onion Soup with Gruyère Toast
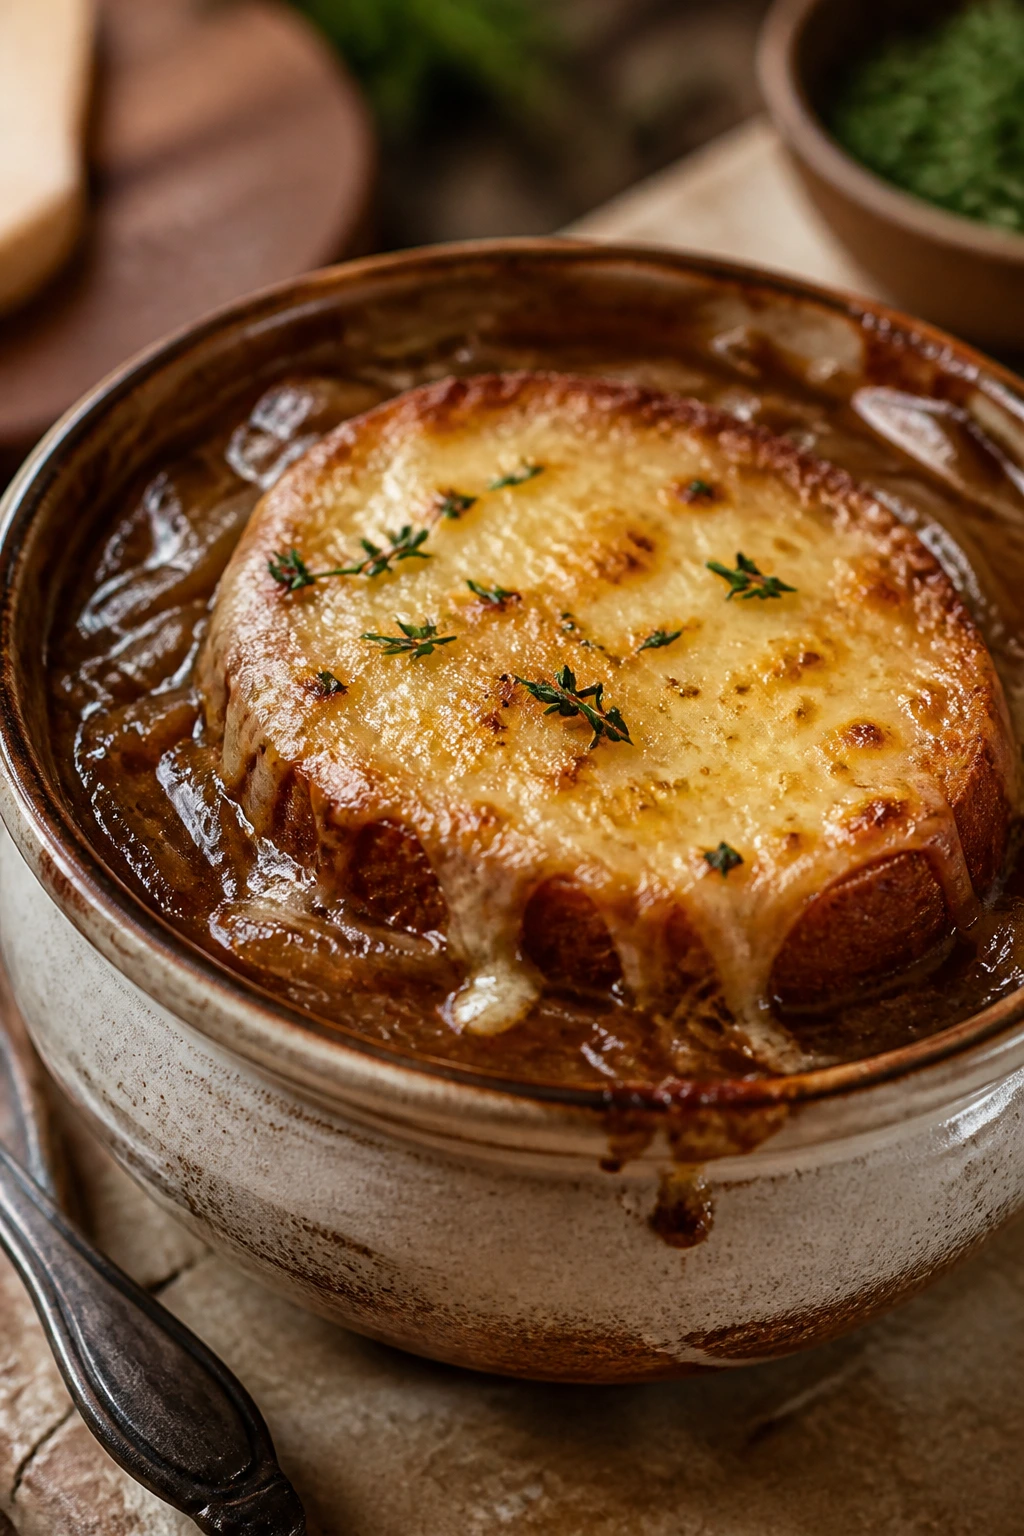
French onion soup is not flashy. It is patient, caramelized, and a little old-fashioned in the best possible way. The Instant Pot helps with the slow part, then the broiler gives you the cheese cap that everyone wants anyway. If you like dinner that feels like a cold-weather coat, this is it.
Why It Works
Onions need time to turn sweet and dark, and the Sauté mode does that without requiring a separate pan. Pressure cooking after the onions soften deepens the broth quickly, so the soup tastes like it has been simmering all day. The baguette and Gruyère finish matter because French onion soup is really about three textures: soft onion, savory broth, and a molten lid. Skip the lid part and you have merely onion broth. Nobody wants that.
Key Ingredients
- 3 medium yellow onions, thinly sliced
- 2 tablespoons butter
- 1 tablespoon olive oil
- 1/2 teaspoon kosher salt
- 2 garlic cloves, minced
- 1/4 cup dry sherry or white wine
- 3 cups beef broth
- 1 cup water
- 1 bay leaf
- 1 teaspoon fresh thyme leaves or 1/2 teaspoon dried thyme
- 1/4 teaspoon black pepper
- 4 slices baguette
- 1 cup shredded Gruyère or Swiss cheese
Quick Steps
-
Caramelize the Onions: Use Sauté to melt the butter with the oil. Add the onions and salt and cook for 20 to 25 minutes, stirring often, until the onions turn deep golden brown.
-
Add Garlic and Wine: Stir in the garlic for 30 seconds, then pour in the sherry or wine and scrape the bottom.
-
Pressure Cook the Soup: Add the broth, water, bay leaf, thyme, and black pepper. Seal and cook on High Pressure for 5 minutes, then quick release.
-
Toast the Bread: While the soup cooks, toast the baguette slices until dry and lightly crisp.
-
Finish Under the Broiler: Ladle the soup into oven-safe bowls, top with toast and Gruyère, and broil for 2 to 4 minutes until the cheese bubbles and browns in spots.
-
Serve Carefully: Let the bowls sit for 1 minute. The cheese is hot enough to punish impatience.
Tips and Variations
- Use oven-safe bowls only if you plan to broil the cheese on top.
- A pinch of sugar can help if your onions are slow to brown.
- A little mustard on the toast is not traditional, but it works.
Why the Instant Pot Wins on Busy Nights
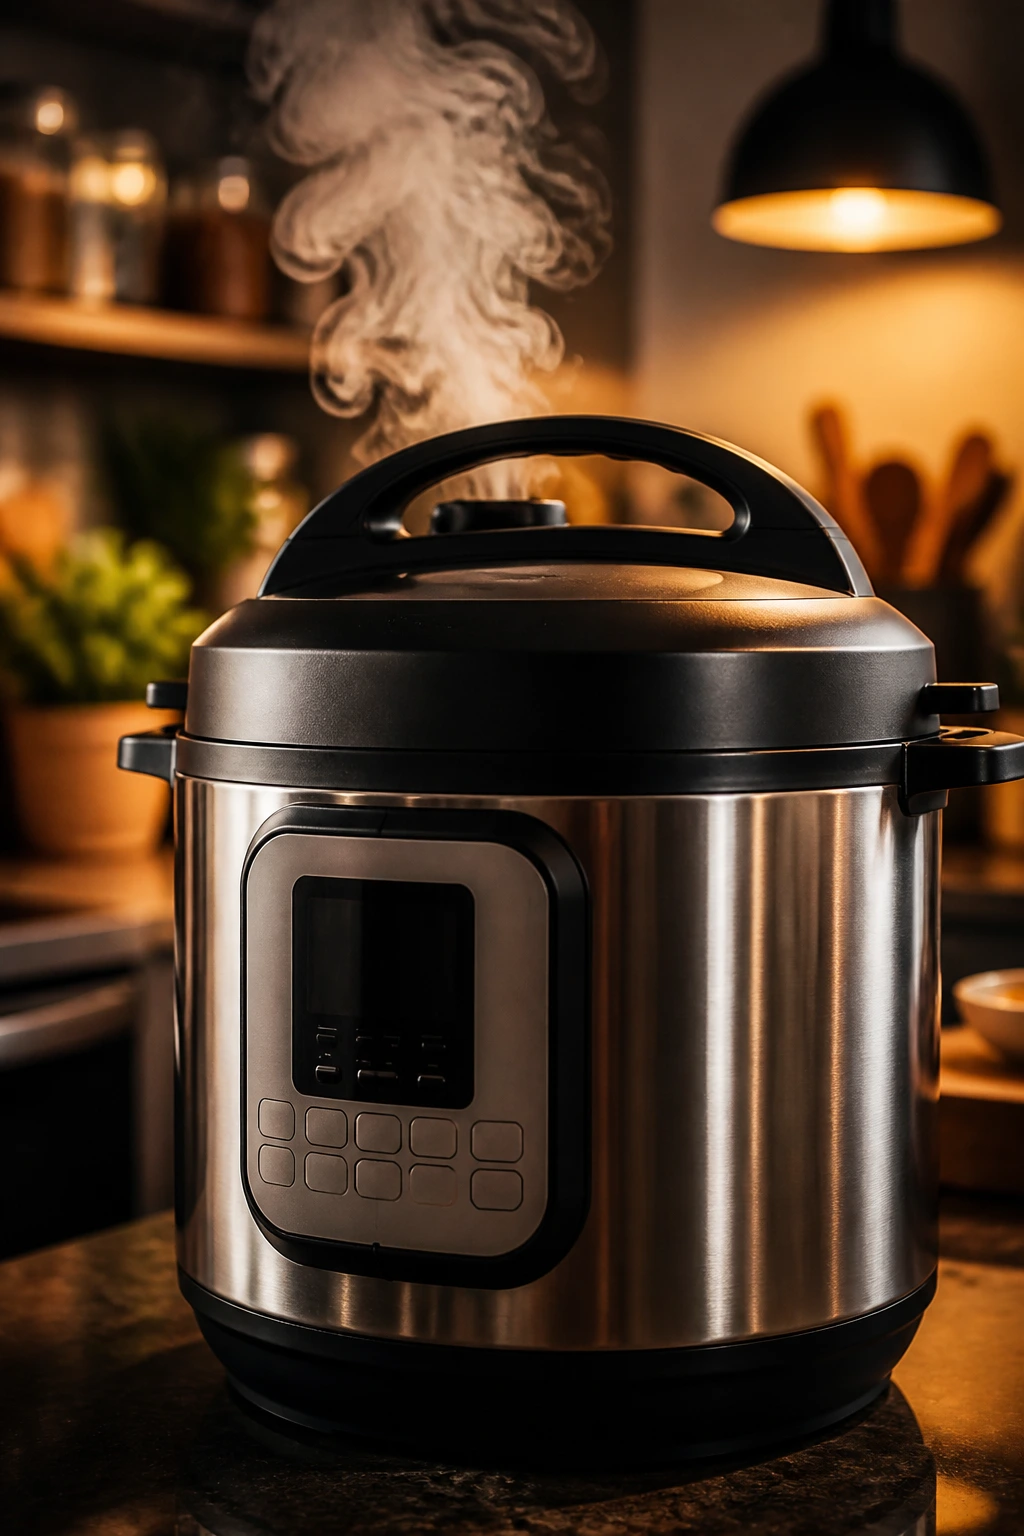
The Instant Pot earns its keep when dinner needs to feel bigger than the effort behind it. That is the real reason it works so well for two people. It lets you braise short ribs, soften beans, cook rice, and turn cheap cuts tender without forcing you to watch a pot for forty minutes. And the sauté button matters more than people think. It means you can build flavor in the same vessel instead of treating pressure cooking like a shortcut that skips the good part.
Small batches behave nicely in the pressure cooker if you give them enough liquid and do not crowd the pot with too many ingredients at once. A 6-quart model handles two servings comfortably, and a 3-quart model can be lovely for very small recipes, though it leaves less room for splattering or frothing sauces. The big win is consistency. Once you learn how long chicken thighs, rice, beans, or chuck roast need, you stop guessing and start cooking with a little less tension in your shoulders.
There is also the cleanup angle, which nobody should be too polite to mention. One inner pot, one lid, one cutting board if you behave. That is a good trade.
Essential Equipment for These Recipes
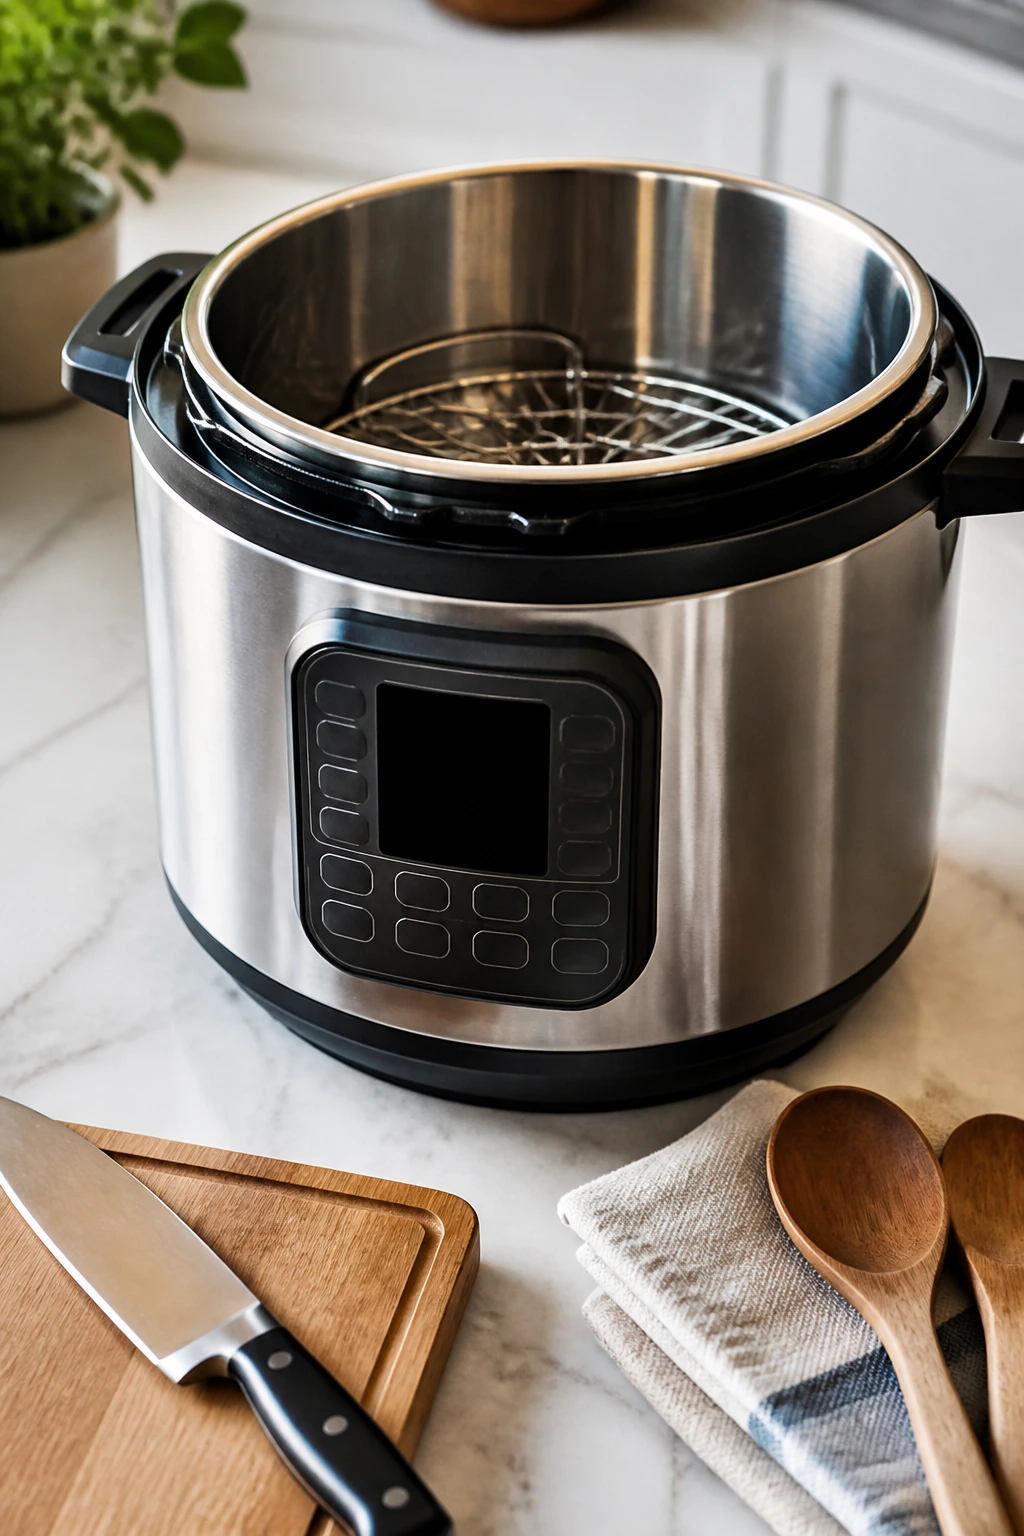
- 6-quart Instant Pot or electric pressure cooker — the most flexible size for two-serving dinners.
- Trivet or steamer rack — useful for recipes that need lifting or pot-in-pot cooking.
- Wooden spoon or silicone spatula — safest for scraping the bottom without scratching the pot.
- Chef’s knife and cutting board — several recipes rely on even onion, pepper, and carrot cuts.
- Measuring cups and spoons — pressure recipes are less forgiving when liquid is guessed.
- Tongs — ideal for searing chicken, turning meat, and lifting hot pieces out of the pot.
- Fine-mesh strainer — handy for rinsing rice and beans.
- Two forks — for shredding chicken or pork without fighting it.
- Oven-safe bowls — needed if you want to broil cheese on French onion soup or any similar finish.
Smart Shopping and Ingredient Tips
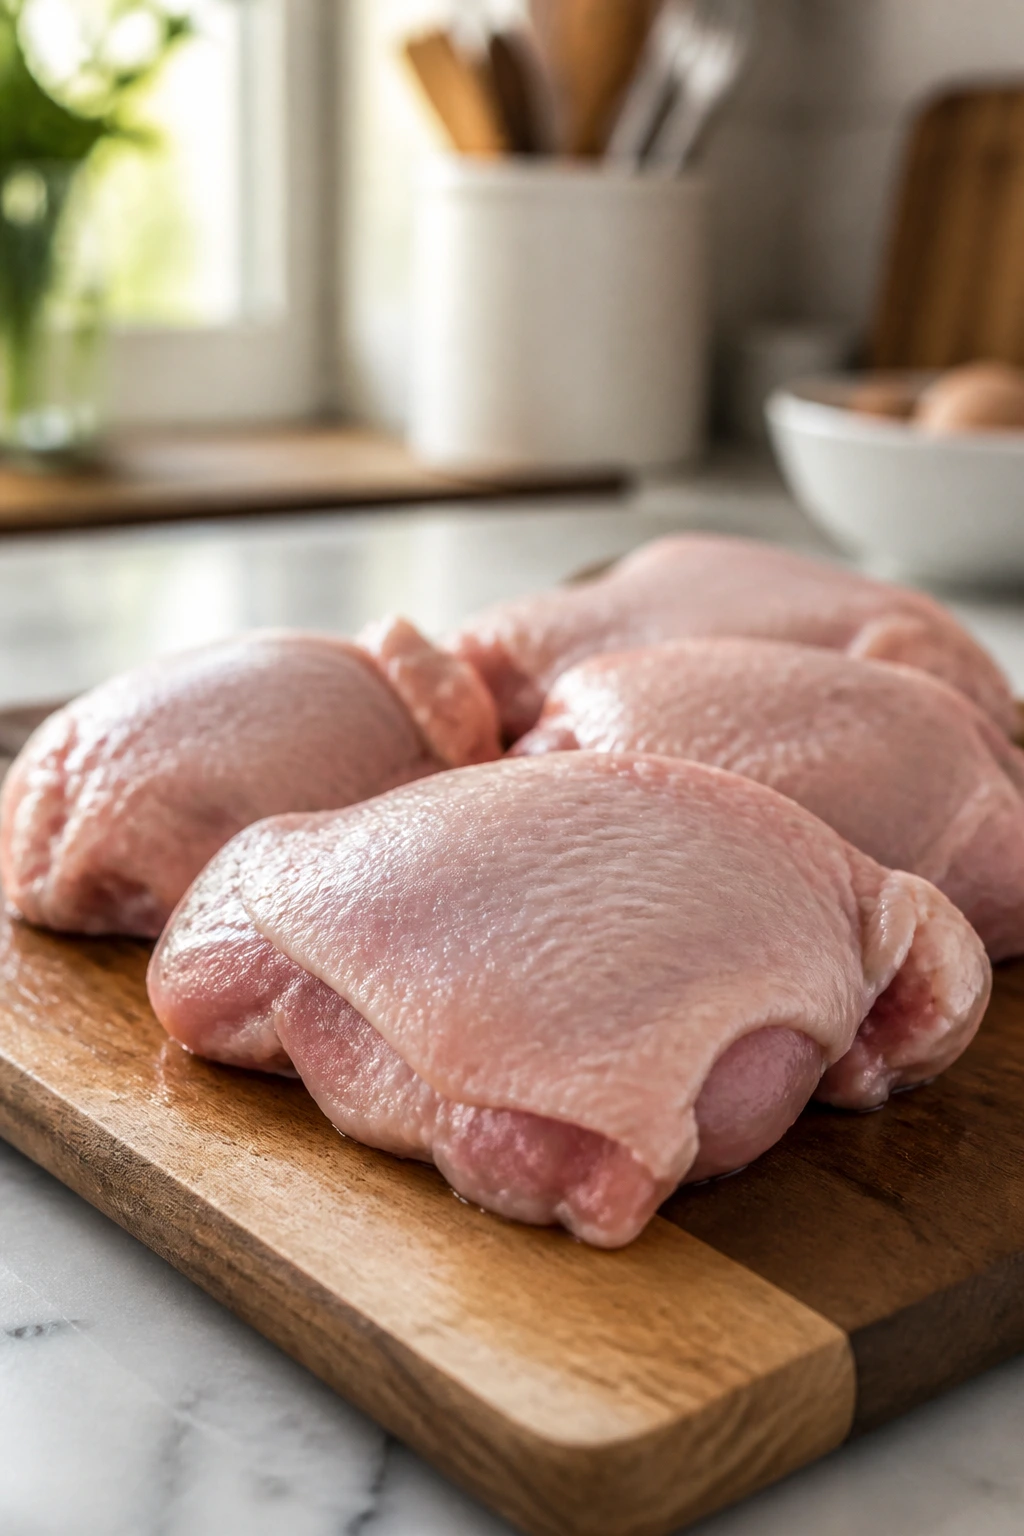
For small-batch Instant Pot cooking, the ingredient choices matter more than they do in giant casseroles. Chicken thighs are usually the safer buy than chicken breasts because they stay moist under pressure, and chuck roast or pork shoulder gives you better texture than lean cuts that turn dry or stringy. For ground meat, 90% lean is a decent balance. Go much leaner and you often need extra fat or you end up with a dry, dusty pot.
Rice, beans, and broth deserve more attention than people give them. Long-grain white rice behaves predictably in pressure recipes, while arborio rice is the right choice for risotto because it gives off starch fast. Canned beans are fine for quick dinners, but low-sodium versions give you more control over seasoning. Broth should taste decent on its own. If it tastes thin in a cup, it will taste thin in dinner.
Vegetables need to be cut with the cooking time in mind. For a two-person recipe, that usually means smaller pieces, not more pieces. Carrots should be cut into coins or short batons, not giant hunks. Broccoli florets should be small enough to soften in the residual heat. And when a recipe uses cream, cheese, or sour cream, buy enough to finish the dish properly. That final handful of Parmesan or splash of cream often decides whether the dinner tastes rounded or flat.
Make-Ahead, Storage, and Reheating Guidance
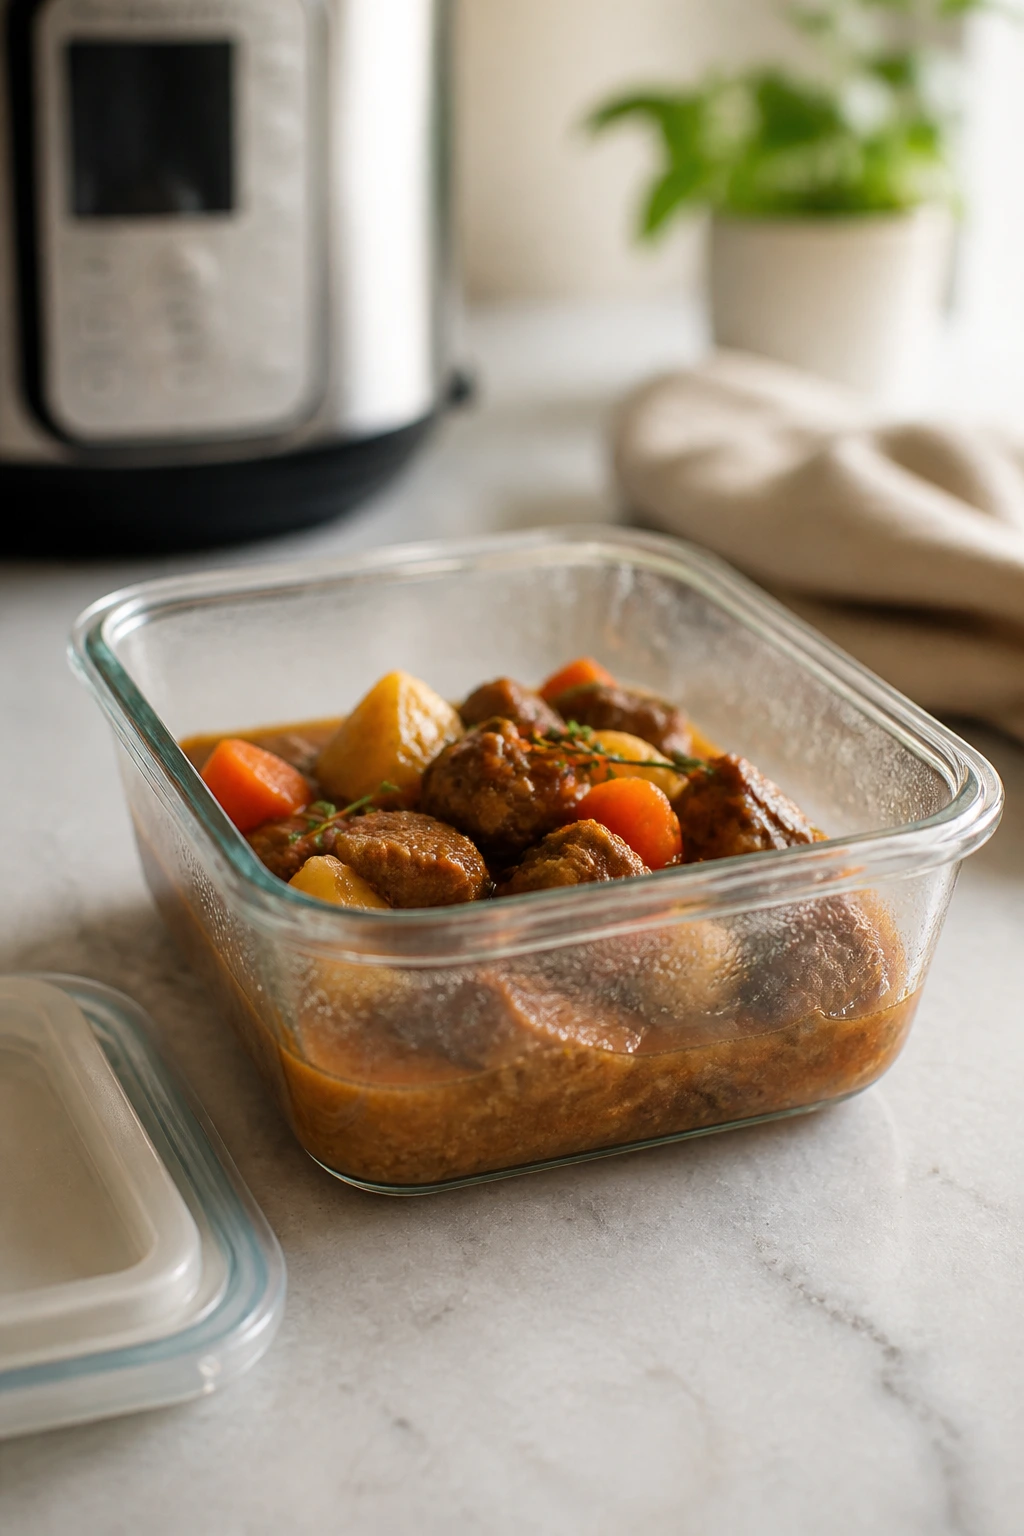
Most of these Instant Pot dinners for two people keep well for 3 to 4 days refrigerated in airtight containers. Soups, chili, curry, and braises usually reheat the best because they have enough liquid to forgive a second round of heat. Pasta dishes and rice dishes need a little more care. Add a splash of broth, water, or milk before reheating so they do not turn tight and dry.
Freezing works well for the meatier recipes, especially chili, soup, carnitas, lentil bolognese, and pot roast. They keep for up to 2 to 3 months frozen if packed flat in freezer-safe containers. Creamy dishes can freeze, but the sauce may separate a little when thawed. That is not a disaster. Stir it well while reheating and, if needed, add a spoonful of cream or broth to smooth things out.
For reheating, the stovetop is best for soups and saucy dishes because you can control the texture. Low heat, a covered pan, and a splash of liquid usually do the job. Microwaves work too, especially for one serving, but stop and stir halfway through so the hot spots do not overcook the edges. Rice and pasta are happiest when reheated gently. High heat makes them clump and go dull.
A few dishes improve overnight. Chili, pot roast, and French onion soup are all better after the flavors have had a night to settle. Pasta and shrimp dishes are not as forgiving. Eat those sooner rather than later.
Variations and Adaptations to Try
Gluten-Free Swaps
Use rice, potatoes, corn tortillas, and gluten-free pasta where they fit naturally. Most of the soup and stew recipes already live close to gluten-free territory; just check the broth, soy sauce, and sausage labels. The pressure cooker does not care what you swap, but the texture of gluten-free pasta is softer, so shorten the cook time by a minute or two.
Dairy-Free Fixes
Leave out cream, sour cream, and cheese in the recipes that use them, then replace the body with coconut milk, a little extra broth, or a spoonful of cashew cream. Butter chicken and shrimp curry adapt especially well to coconut milk. Mac and cheese is trickier, obviously, because dairy is the point, but even there you can make a respectable cashew-based sauce.
Lower-Sodium Cooking
Choose low-sodium broth, rinse canned beans well, and cut back on sausage, cheese, and soy sauce where possible. Then make the food taste alive with acid: lemon juice, lime juice, vinegar, or a little tomato paste. Salt is easy to add at the end. It is harder to take it back out.
Vegetarian Nights
Mushroom risotto, lentil bolognese, broccoli mac and cheese, and a bean-heavy chili all cover the meatless lane nicely. If you want extra protein, add white beans to soup or serve curry with chickpeas. The Instant Pot is good at vegetarian cooking when you remember that flavor needs enough fat and seasoning to stand up on its own.
Extra-Heat Versions
Stir in diced jalapeños, red pepper flakes, cayenne, or hot sauce at the sauté stage so the heat gets cooked into the dish. For a slower burn, finish with chili oil or crisped pepper flakes at the table. That keeps everyone happy. Or at least keeps the arguments interesting.
Common Mistakes to Avoid
The biggest mistake is treating every Instant Pot dinner like it needs the same timing. It does not. Chicken thighs, rice, beans, and stews all forgive slightly different behavior, while shrimp and pasta demand much tighter control. If you pressurize something delicate for the same length of time you use for chuck roast, you will get mush. Not dinner. Mush.
Skipping the deglaze step is another classic problem. The bottom of the pot holds browned bits, and if you do not scrape them up with broth or sauce, the cooker can throw a burn warning. That warning is usually not random. It is the pot telling you that a little onion, tomato paste, or meat stuck and scorched.
People also add dairy too early. Cream, sour cream, and shredded cheese can split or clump under pressure. Stir them in after cooking, or at most on a low simmer. The same goes for fresh greens and soft vegetables. They are not meant to pressure cook into oblivion. Add them at the end and let the residual heat do the work.
Too little liquid is its own problem. A pressure cooker needs enough to build steam, and recipes for two can tempt you to cut the liquid too far. Resist that urge. You can always simmer a sauce down later, but you cannot pressure cook a pot that never sealed properly in the first place.
Frequently Asked Questions

Can I make these recipes in a 3-quart Instant Pot?
Yes, most of them can be scaled down a little and still work fine in a 3-quart model. You just need to leave room for steam and avoid filling the pot too high, especially with beans, pasta, and foamy sauces.
Do I have to use natural release every time?
No, but it helps with chicken, rice, beans, and stews because the food finishes gently. Quick release is better for shrimp, pasta, and vegetables that turn soft fast. The release method matters as much as the pressure time.
Can I use frozen chicken or pork?
You can, but add extra time and do not expect a browned crust. Frozen meat is best for plain braises, soups, and shredded meat recipes. For anything that depends on searing, thaw it first.
What if I only have chicken breasts?
Chicken breasts work in several of these recipes, but they need a shorter cook time and a little more care. If you use them instead of thighs, cut them into larger chunks or reduce the pressure time by a couple of minutes so they do not dry out.
Can I double these recipes for leftovers?
Many of them can be doubled, but only if the pot is not crowded past the safe fill line. Soups, chili, and braises scale better than pasta or risotto. When in doubt, double the seasoning less aggressively than the liquid and adjust at the end.
Why did my pasta turn soft?
It probably sat in the hot liquid too long after pressure cooking. Pasta keeps absorbing liquid even after the lid comes off, so it needs quick attention. If you know your model runs hot, shave a minute off the pressure time.
Can I use the slow cooker setting instead?
Sometimes, but not always. The pressure function is what gives these recipes their speed and compact flavor. The slow cooker mode is fine for pot roast or soup, but it will not help much with rice, pasta, or risotto.
Small-Batch Comfort
The best Instant Pot dinners for two people are the ones that know exactly what the machine does well. They lean into pressure for tenderness, into sauté for flavor, and into sensible portion sizes so dinner does not turn into three days of leftovers nobody asked for. That is why these recipes work: they respect the pot, and they respect the cook.
I like small-batch pressure cooking because it feels practical without feeling stripped down. You can make something rich, saucy, or deeply savory and still have a clean kitchen by the time the plates are empty. That is not a small thing. It changes how often you actually cook.
Once you get used to the pattern, the whole thing gets easier to trust. A little browning. Enough liquid. A sensible release. Dinner follows from there.