
Keto dinners for beginners fail for one simple reason: they ask too much of a tired cook. Too many special ingredients. Too many steps. Too much faith that you want to buy monk fruit sweetener before you’ve even figured out what’s for dinner.
The dinners that actually stick are calmer than that. Skillet chicken. Ground beef tucked into a casserole. Salmon with a quick cream sauce. Roasted vegetables that share a pan with the protein and pick up all the good browned bits underneath. Those are the kinds of meals that make low-carb eating feel less like a project and more like a habit.
And that’s the real trick. A beginner keto dinner should taste like dinner, not like a compromise. It should smell like garlic and butter, look like something you’d happily make again, and leave you with enough energy to wash one pan instead of three. That’s the lane these recipes live in.
Why These Keto Dinners Feel So Manageable
-
No specialty-store scavenger hunt: Every recipe leans on groceries you can find in a regular supermarket, from chicken thighs and ground beef to cauliflower rice and frozen vegetables.
-
Forgiving cooking methods: Skillets, sheet pans, and casseroles give you room to make a small mistake without ruining supper, which matters more than fancy technique when you’re new.
-
Built-in flavor: Garlic, mustard, Parmesan, taco seasoning, lemon, and browned meat carry a lot of the flavor load, so you do not have to rely on complicated sauces.
-
Weeknight speed: Most of these dinners land in the 25- to 40-minute range, and several of them are fast enough to make when you’re already hungry and slightly impatient.
-
Easy to scale: If you need two servings or six, these dishes stretch cleanly without changing the method much, which makes them useful for meal prep too.
-
Real keto comfort: There’s enough cheese, cream, roast chicken skin, and sizzled sausage here to keep the food satisfying. No sad salad energy.
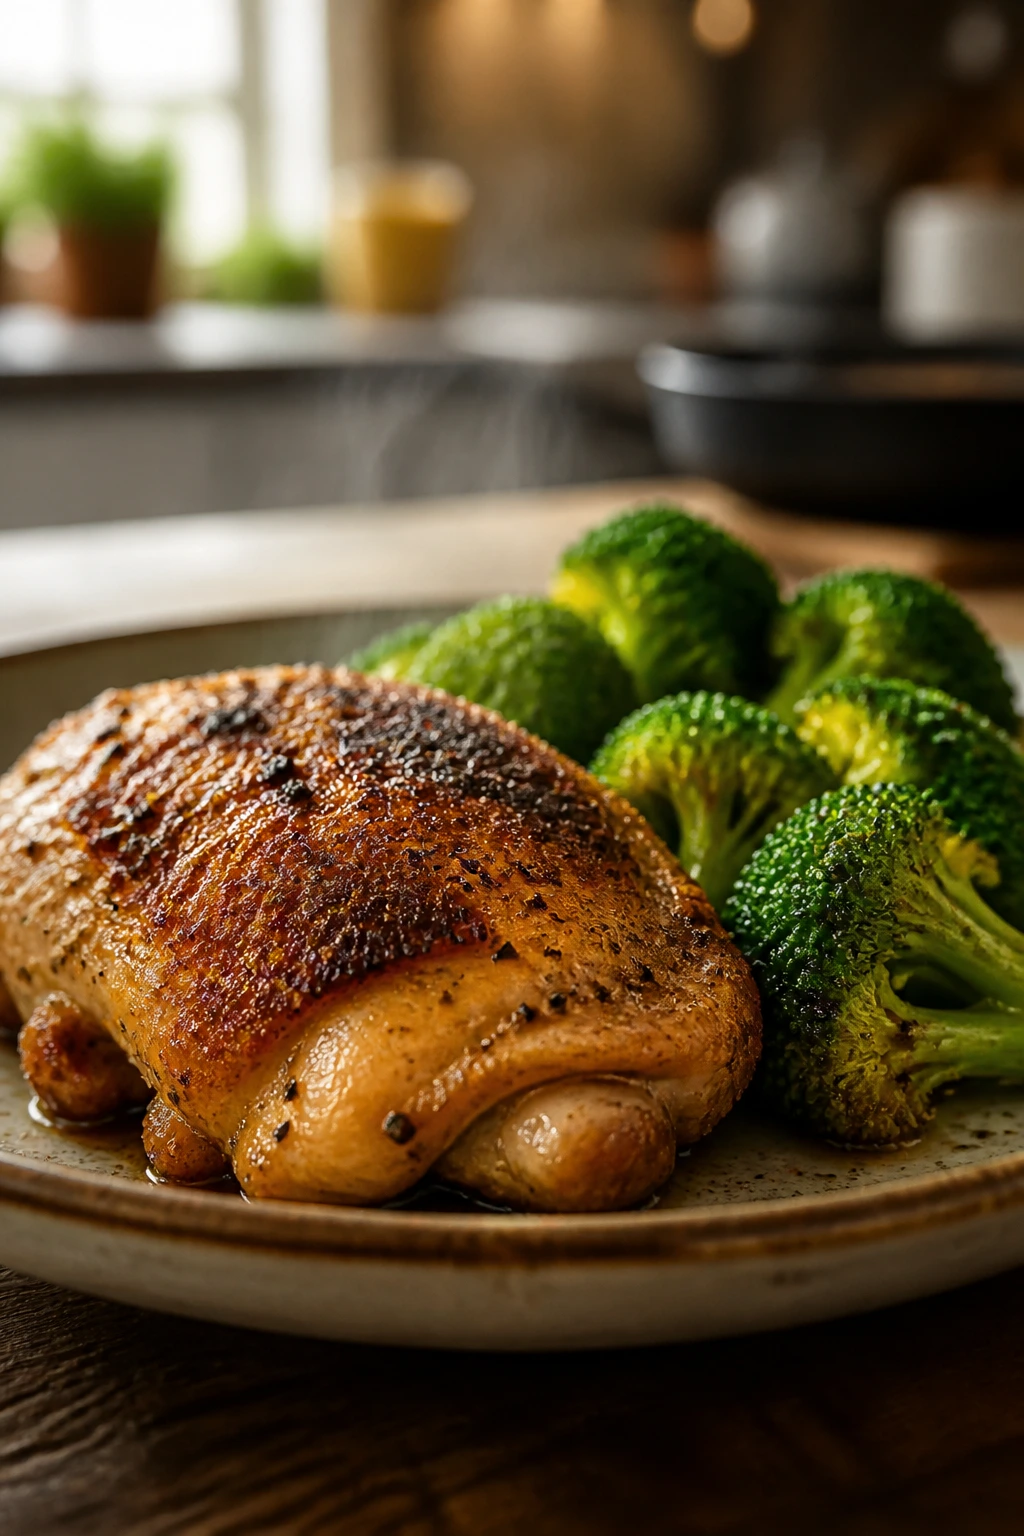
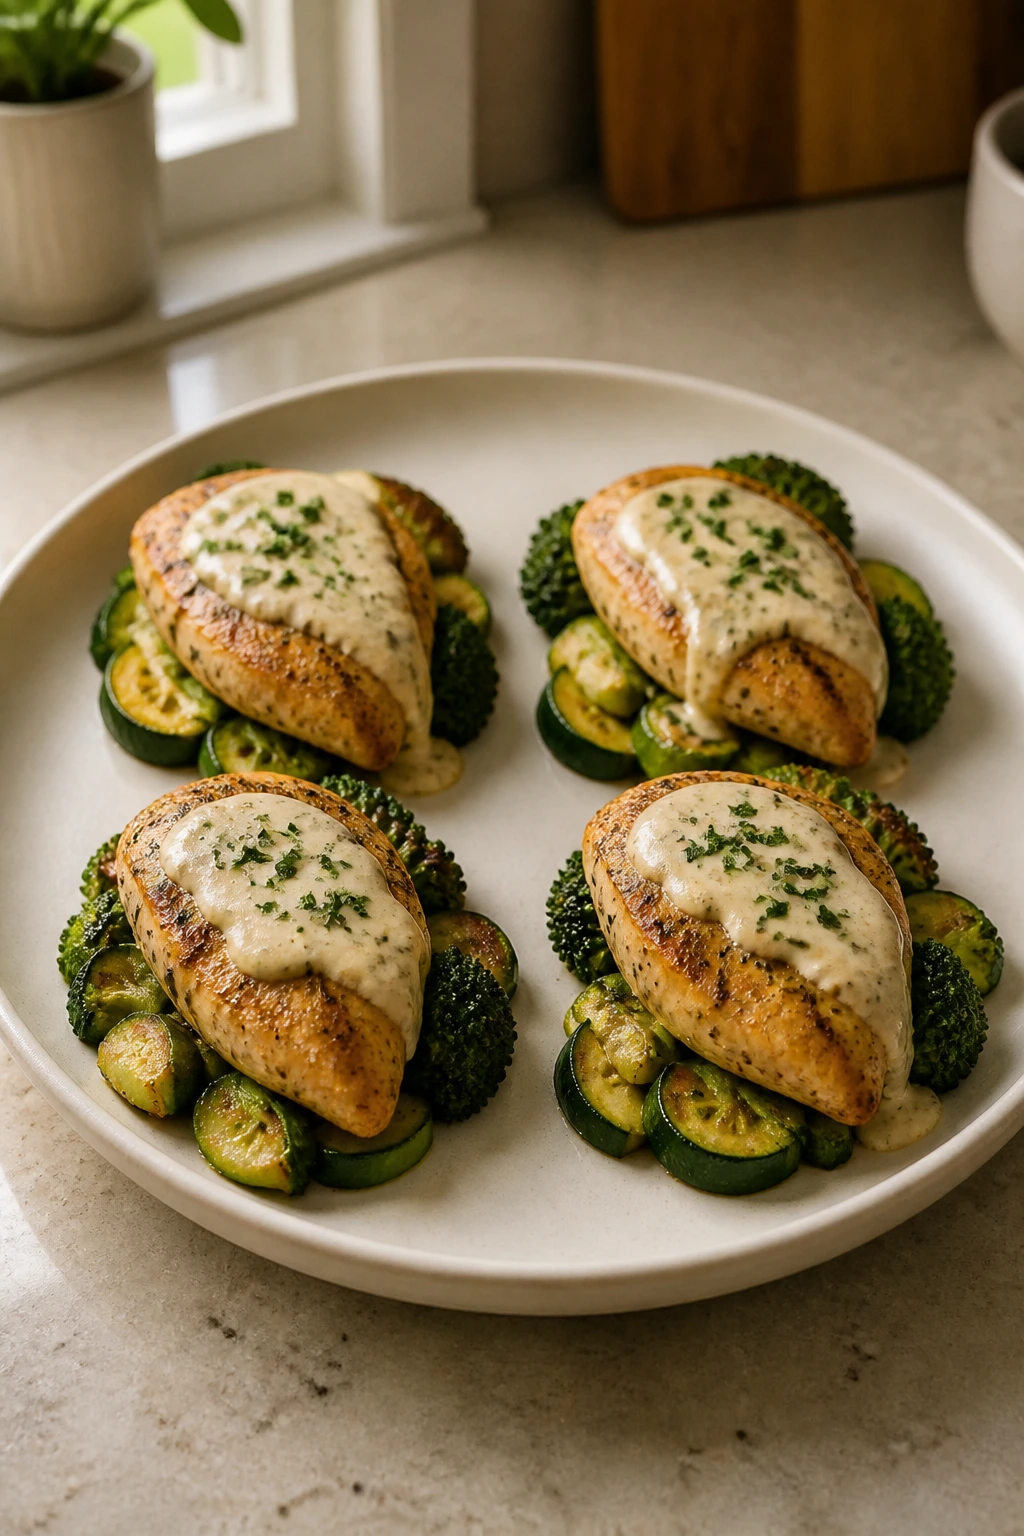
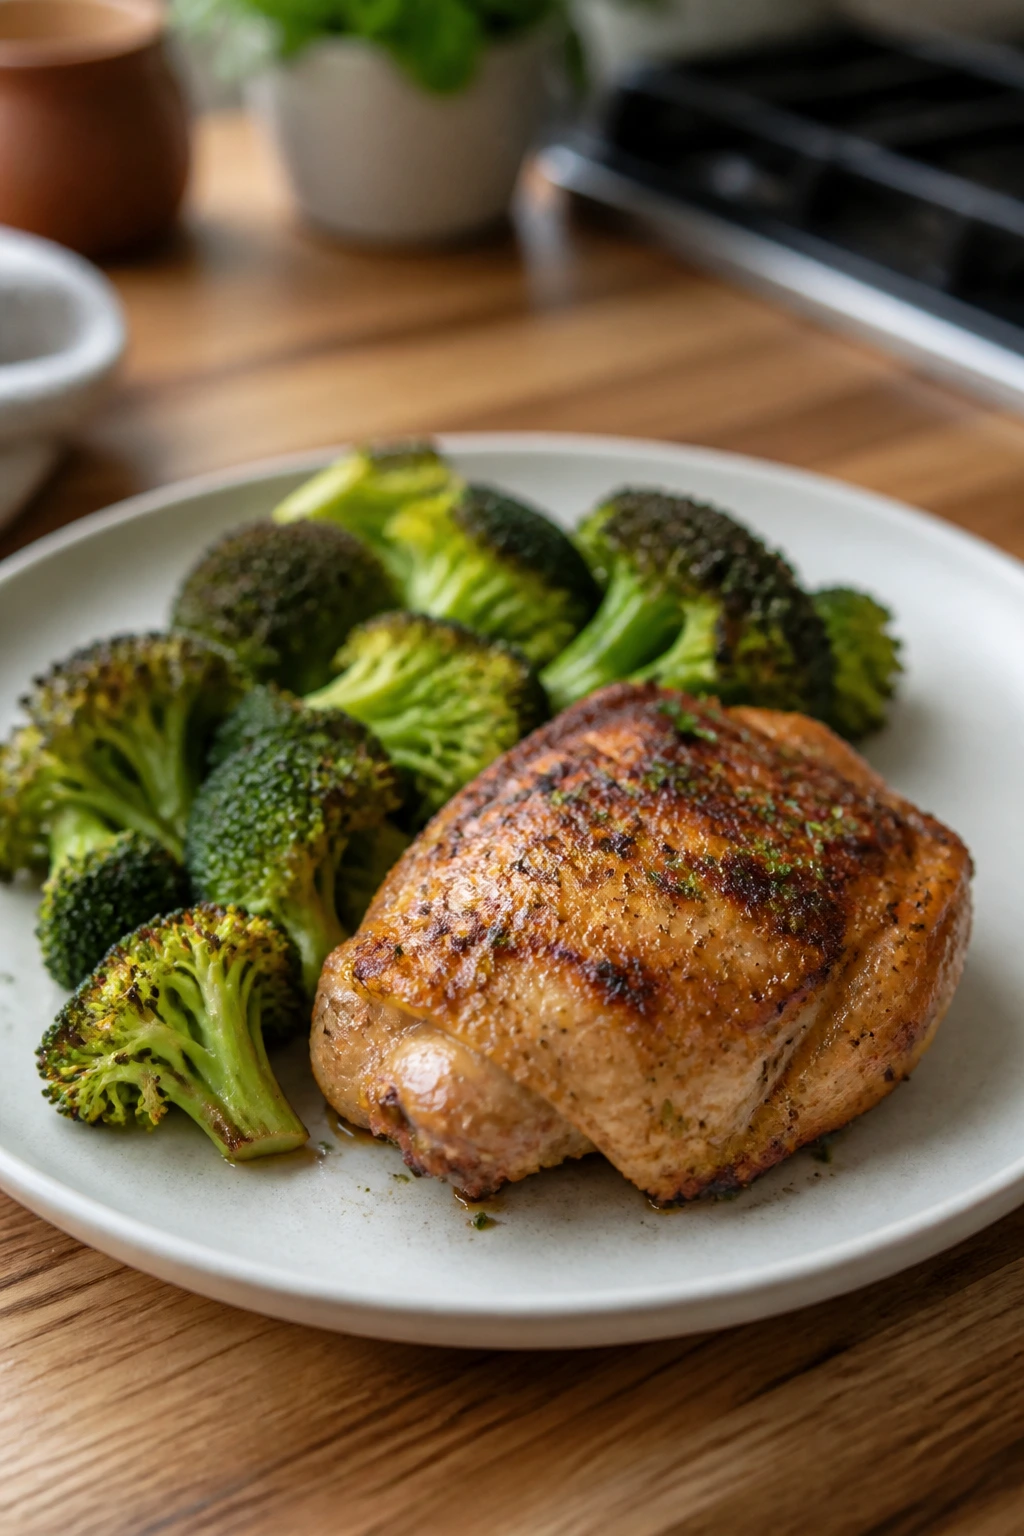
1. Garlic Butter Chicken Thighs with Broccoli

The pan comes out of the oven smelling like garlic, pepper, and browned chicken skin, which is a pretty excellent way to announce dinner. Broccoli roasts right in the same skillet and picks up the drippings, so every bite tastes a little more deliberate than the effort suggests. I like this one for beginners because chicken thighs are forgiving, and broccoli can handle a little heat without turning to mush.
Why It Works
Chicken thighs are the dependable workhorse of keto cooking. They stay juicy at a higher internal temperature, which means you do not have to baby them the way you would with chicken breasts. Roasting the broccoli in the same pan keeps the whole dinner in one place, and the garlic butter gets spooned over everything at the end, where it can soak into the florets and the chicken skin alike. If you want a dinner that teaches you how to brown, roast, and finish with a simple sauce, this is a very good place to start.
Key Ingredients
- 6 bone-in, skin-on chicken thighs, patted dry
- 2 tablespoons olive oil
- 1 1/2 teaspoons kosher salt
- 1 teaspoon black pepper
- 1 teaspoon paprika
- 4 cups broccoli florets, cut into even pieces
- 4 tablespoons unsalted butter
- 4 cloves garlic, minced
- 1 tablespoon lemon juice
- 1 tablespoon chopped fresh parsley
Quick Steps
-
Preheat the oven to 425°F and place a rack in the center. Pat the chicken thighs very dry with paper towels so the skin can crisp instead of steaming.
-
Rub the thighs with olive oil, salt, pepper, and paprika. Make sure the seasoning reaches under any loose skin, not just on top.
-
Heat a large oven-safe skillet over medium-high heat. Place the chicken skin-side down and cook for 5 to 6 minutes, until the skin is deep golden and releases easily from the pan.
-
Flip the chicken and cook for 2 minutes on the second side. The goal here is color, not doneness; the oven will finish the job.
-
Scatter the broccoli around the chicken and toss it lightly with a little extra oil and a pinch of salt. Transfer the skillet to the oven and roast for 18 to 20 minutes, until the chicken reaches 175°F and the broccoli edges are browned.
-
Melt the butter in a small pan or the microwave, stir in the garlic and lemon juice, and spoon it over the chicken and broccoli. Rest for 5 minutes, then finish with parsley.
Tips and Variations
- Broccoli timing: If your florets are very small, add them after 10 minutes in the oven so they do not overbrown.
- Flavor shift: A pinch of crushed red pepper in the butter gives the dish a sharper edge.
- Easy swap: Asparagus works in place of broccoli; use thicker spears and trim the woody ends first.
2. Cheesy Taco Skillet with Cauliflower Rice
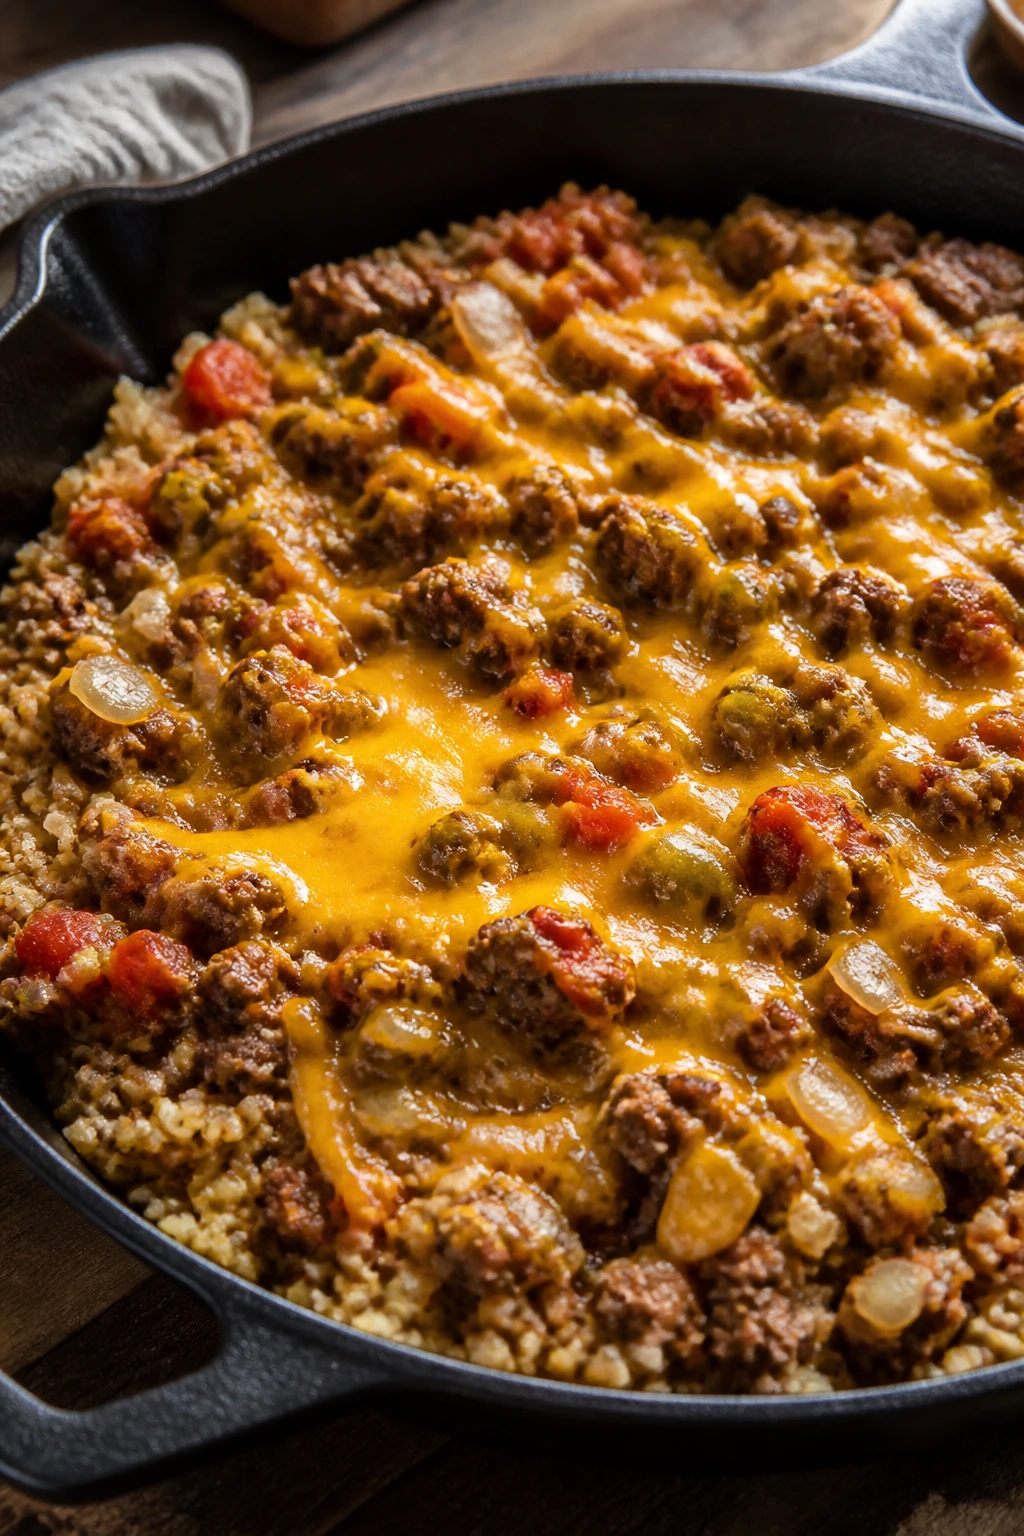
This is the kind of skillet that looks messy in a good way. Browned beef, soft onions, melted cheddar, and bits of tomato and chile make the whole thing feel like taco night without the tortillas. If you like dinners that can be spooned straight from the pan, this one lands in the sweet spot.
Why It Works
Ground beef cooks fast, which makes it a friendly protein for beginners. Cauliflower rice takes on the taco seasoning and tomato juices, then softens just enough to feel like part of the filling rather than a separate vegetable. The sour cream goes in at the end so the skillet stays creamy instead of splitting or boiling itself into a grainy mess. This is the sort of recipe that teaches the basic keto move: brown, season, soften, melt. That’s the whole dance.
Key Ingredients
- 1 pound ground beef, preferably 80/20 or 85/15
- 1 tablespoon avocado oil, only if the beef is very lean
- 1 small yellow onion, diced
- 2 cloves garlic, minced
- 2 tablespoons taco seasoning
- 1 can diced tomatoes with green chiles, 10 ounces
- 3 cups cauliflower rice, fresh or frozen
- 1/2 cup beef broth
- 1 cup shredded cheddar cheese
- 1/4 cup sour cream
- 2 tablespoons sliced green onions
Quick Steps
-
Set a large skillet over medium-high heat. If your beef is lean, add the avocado oil first, then the onion and cook for 2 minutes until it starts to soften.
-
Add the ground beef and cook for 6 to 8 minutes, breaking it up with a spatula until no pink remains and the edges begin to brown.
-
Stir in the garlic and taco seasoning and cook for 30 seconds, just until the garlic smells sweet and the spices wake up.
-
Pour in the diced tomatoes with green chiles, cauliflower rice, and beef broth. Reduce the heat to medium and cook for 5 to 7 minutes, stirring once or twice, until the cauliflower rice is tender and most of the liquid is gone.
-
Sprinkle the cheddar over the top, cover the skillet for 1 to 2 minutes, and wait until the cheese melts into a glossy layer.
-
Turn off the heat, add the sour cream in small spoonfuls, and finish with green onions.
Tips and Variations
- Watery skillet fix: If the pan looks soupy, leave it uncovered for another 2 minutes so the extra moisture can cook off.
- Topping idea: Chopped avocado gives the skillet a cool, creamy contrast.
- Heat level: Use mild taco seasoning if you’re cooking for kids, then add hot sauce at the table.
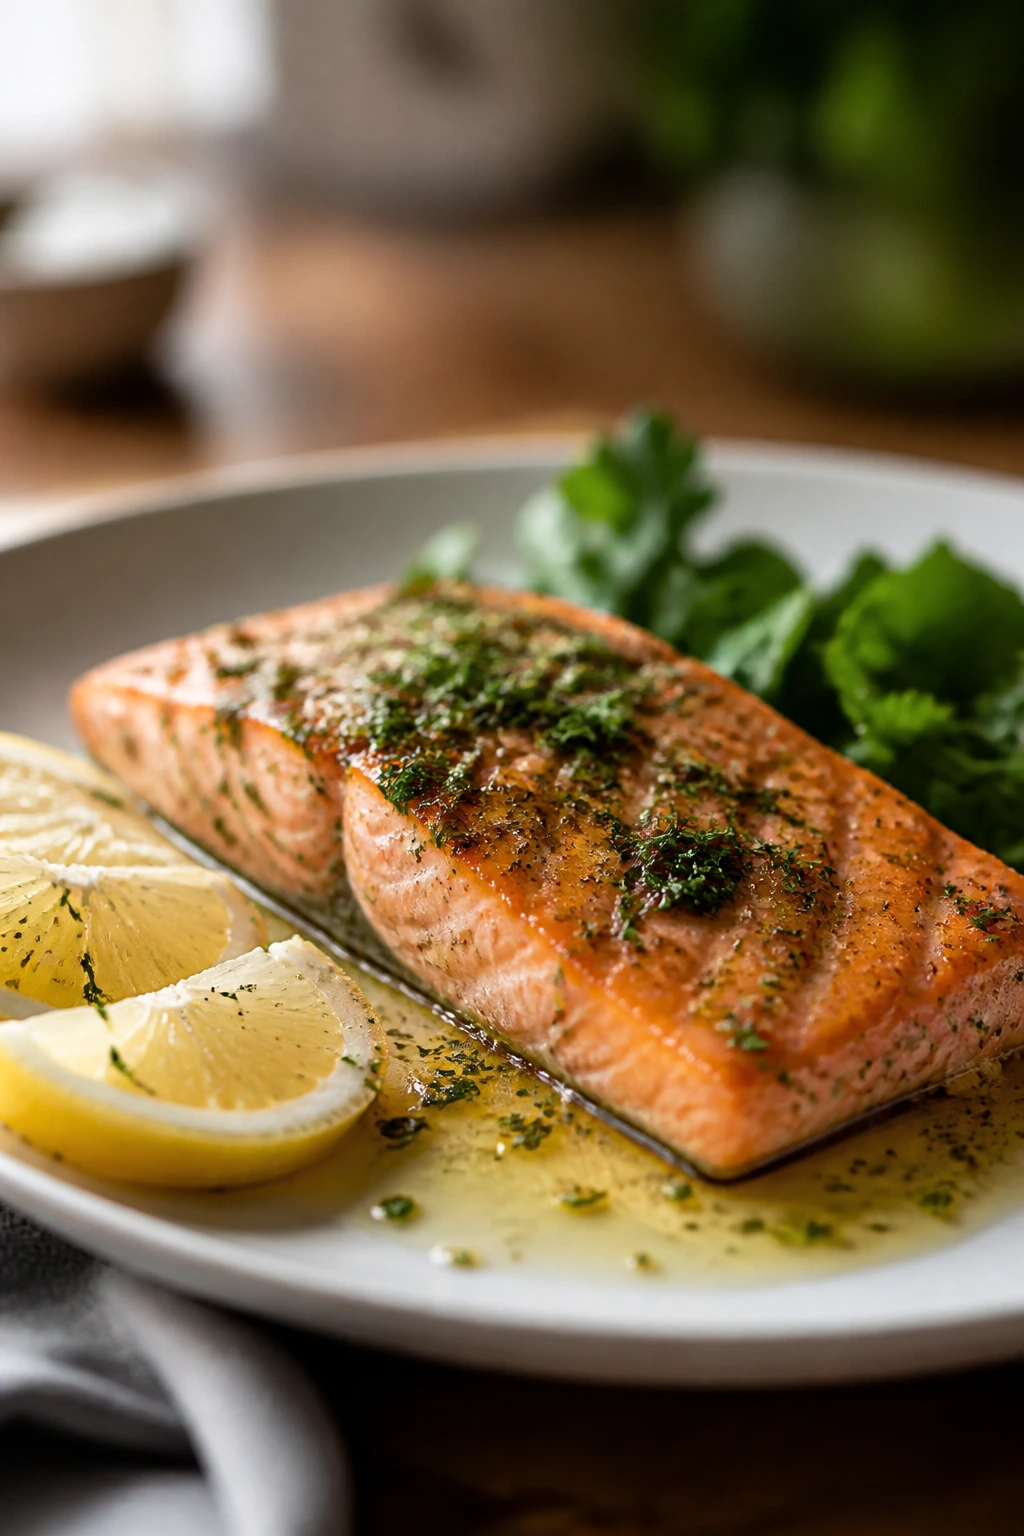
3. Creamy Tuscan Salmon
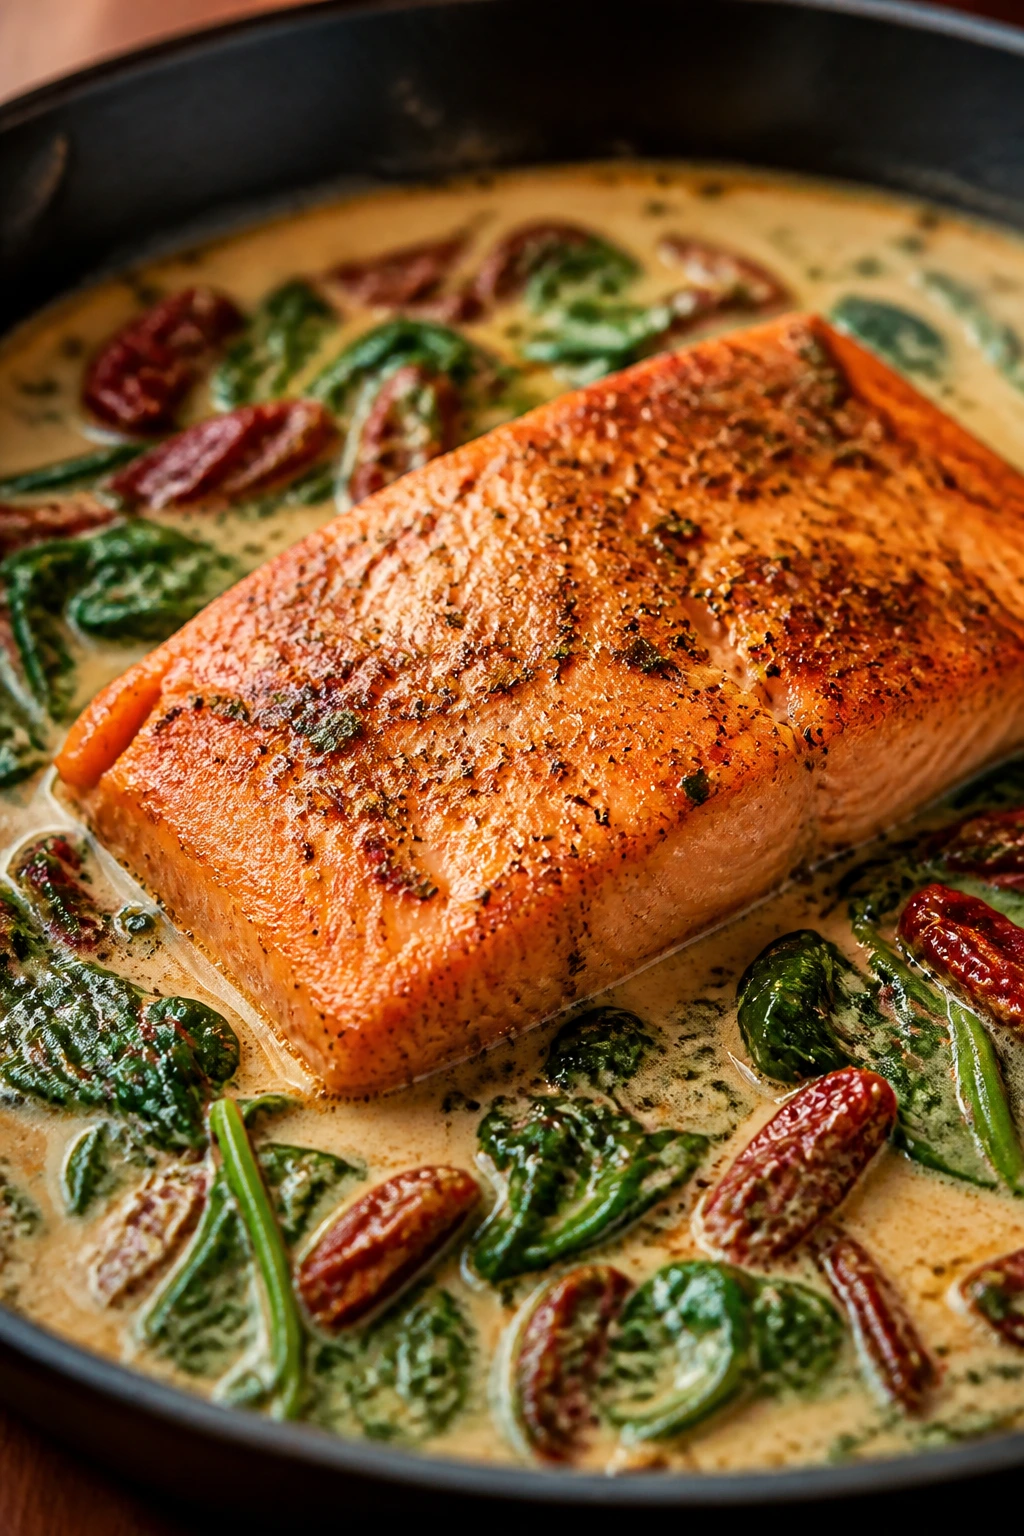
Salmon gets treated like a special-occasion fish too often. In a skillet with cream, garlic, spinach, and sun-dried tomatoes, it turns into a sturdy weeknight dinner that feels far fancier than the cooking really is. The sauce is rich, but the lemony edge from the tomatoes keeps it from feeling heavy.
Why It Works
Salmon cooks quickly and tells you when to stop if you pay attention. Its natural fat plays nicely with cream sauce, and the spinach wilts in almost no time, which keeps the whole pan moving fast. Searing the fish first gives you a good crust, then the sauce builds in the same skillet so all the browned bits become part of the flavor. I prefer this kind of dish for new keto cooks because it shows how a short ingredient list can still taste layered and complete.
Key Ingredients
- 4 salmon fillets, about 6 ounces each
- 1 teaspoon kosher salt
- 1/2 teaspoon black pepper
- 1 tablespoon olive oil
- 2 tablespoons butter
- 3 cloves garlic, minced
- 1/3 cup sun-dried tomatoes, drained and sliced
- 1 cup heavy cream
- 1/2 cup chicken broth
- 3 cups baby spinach
- 1/4 cup grated Parmesan cheese
- 1 teaspoon Italian seasoning
Quick Steps
-
Pat the salmon dry and season both sides with salt and pepper. Dry fish sears better, and that crust matters here.
-
Heat the olive oil in a large skillet over medium-high heat. Place the salmon in the pan and cook for 4 minutes on the first side without moving it.
-
Flip the fillets and cook for 2 to 3 minutes more, until the center is just opaque and the fish flakes when nudged with a fork. Transfer the salmon to a plate.
-
Lower the heat to medium and melt the butter in the same skillet. Add the garlic and sun-dried tomatoes and cook for 1 minute, stirring until the garlic is fragrant.
-
Pour in the heavy cream and chicken broth. Simmer for 2 to 3 minutes, stirring often, until the sauce looks slightly thickened and coats the spoon.
-
Stir in the spinach, Parmesan, and Italian seasoning until the spinach wilts. Return the salmon to the pan and spoon the sauce over the top for a minute before serving.
Tips and Variations
- Sauce warning: Keep the heat at a gentle simmer; a hard boil can make the cream separate.
- Fish swap: Trout or cod works too, though the cooking time drops a little.
- Serve it with: Cauliflower mash soaks up the sauce better than plain cauliflower rice.
4. Cheeseburger Casserole
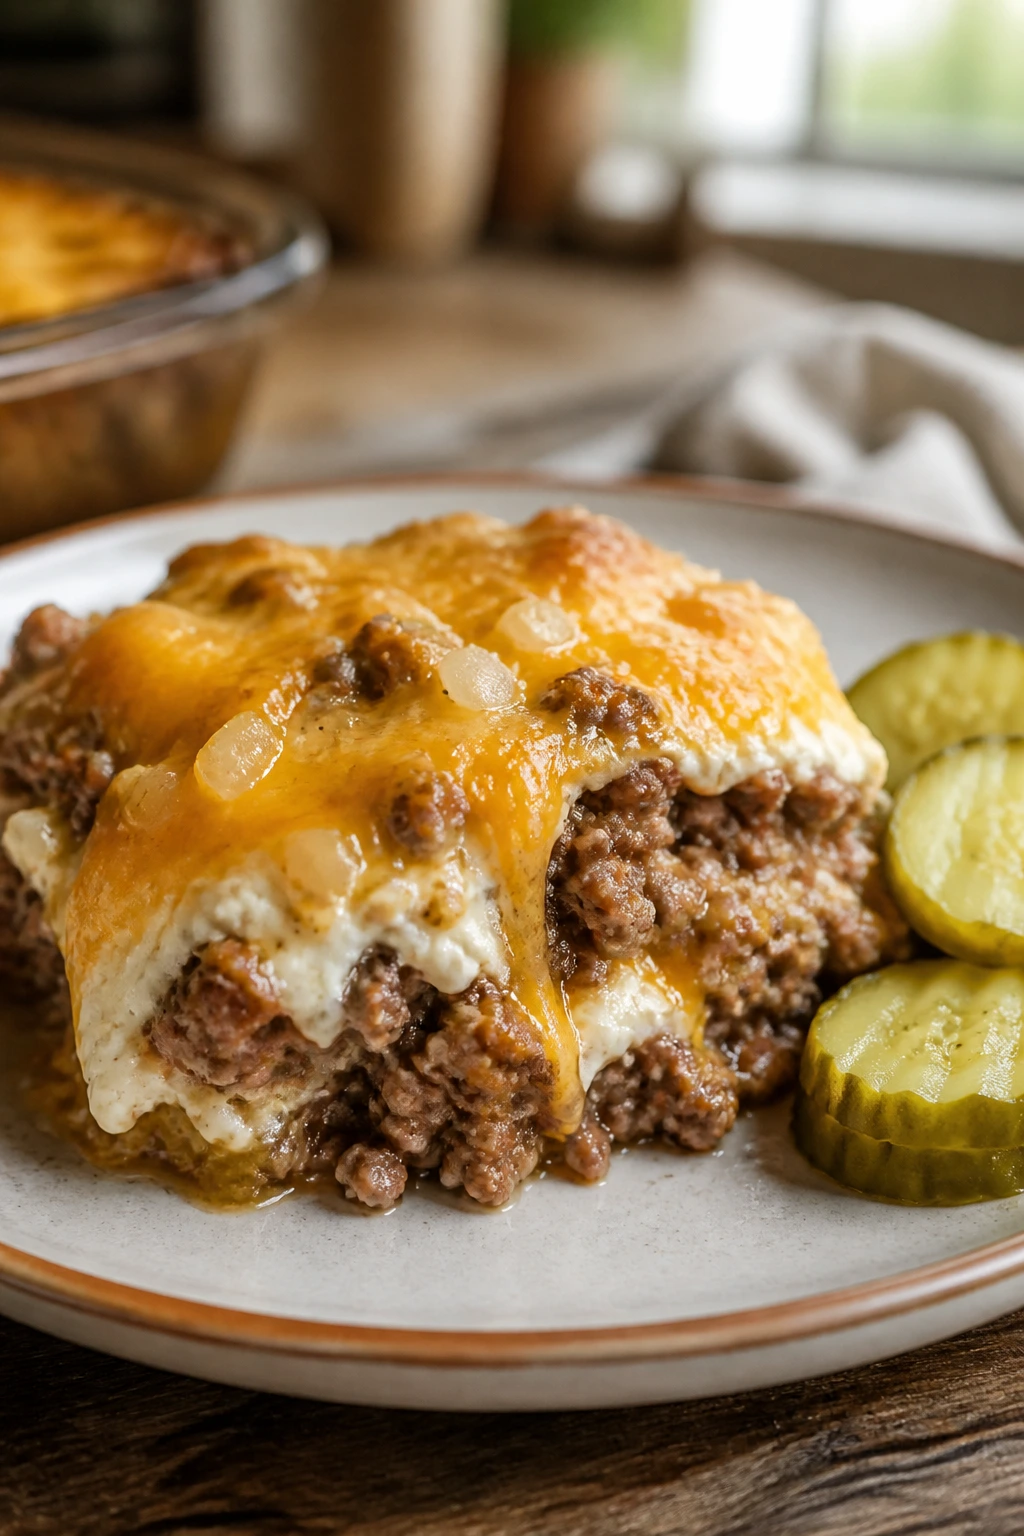
This one tastes like the middle of a cheeseburger without the bun getting in the way. Beef, onion, pickles, cream cheese, and melted cheddar bake into a pan that smells like a diner kitchen in the best sense. If you want one dish that feels familiar to almost everyone at the table, this is it.
Why It Works
Casseroles are quietly useful for keto because they let you build flavor in layers. The beef gets browned first, which gives you a base that tastes deeper than a quick sauté. Cauliflower rice stands in for the bulk you might otherwise get from pasta or potatoes, and cream cheese gives the filling enough body to hold together once it bakes. This is the sort of dinner that proves low-carb food does not need to act like a substitute. It can just be its own thing.
Key Ingredients
- 1 pound ground beef
- 1 small onion, diced
- 2 cloves garlic, minced
- 3 cups cauliflower rice, fresh or frozen
- 4 ounces cream cheese, cut into cubes
- 1 tablespoon tomato paste
- 1 tablespoon yellow mustard
- 1 teaspoon kosher salt
- 1/2 teaspoon black pepper
- 1 cup shredded cheddar cheese, divided
- 1/2 cup chopped dill pickles
Quick Steps
-
Preheat the oven to 375°F and lightly grease a 9-inch baking dish.
-
Brown the beef and onion in a skillet over medium heat for 7 to 8 minutes, until the meat is no longer pink and the onion is soft.
-
Add the garlic and tomato paste and cook for 30 seconds, stirring until the paste darkens a shade and smells sweet.
-
Stir in the cauliflower rice, mustard, salt, and pepper. Cook for 4 to 5 minutes, just until the cauliflower starts to soften and most of the moisture is gone.
-
Add the cream cheese and half of the cheddar. Stir until the cheese melts into the beef mixture and the pan looks thick and cohesive.
-
Spread the mixture in the prepared baking dish, top with the remaining cheddar, and bake for 10 to 12 minutes until the cheese is bubbling. Finish with chopped pickles.
Tips and Variations
- If the casserole looks wet: Let the beef mixture sit off the heat for 3 minutes before baking; it thickens as it rests.
- Burger-style finish: Add a handful of shredded lettuce on top right before serving.
- Shortcut: Frozen cauliflower rice saves time and works fine if you cook off the extra water.
5. Sheet-Pan Sausage, Peppers, and Zucchini
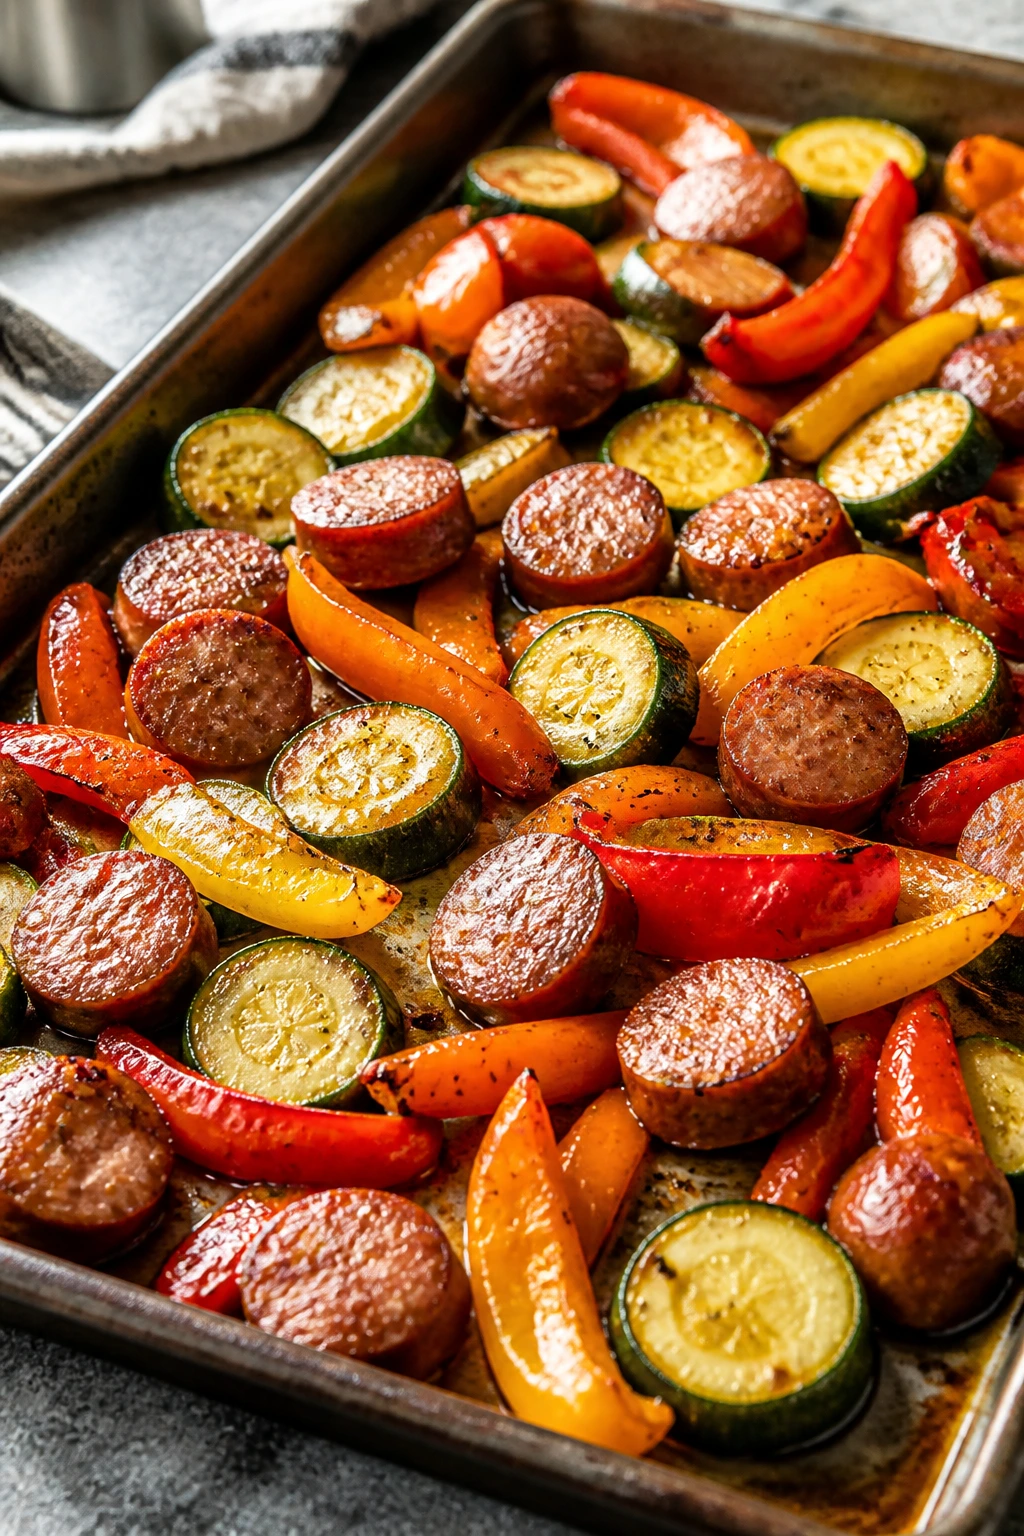
There’s a reason this dinner shows up in so many kitchens: it’s simple, colorful, and impossible to overthink. The sausage browns at the edges, the peppers soften and sweeten, and the zucchini turns tender without falling apart if you cut it thick enough. It feels like a meal that knows exactly what it is.
Why It Works
Smoked sausage already comes cooked, which removes the part of dinner that makes many beginners nervous. That lets the vegetables take center stage without forcing you to watch the pan like a hawk. The key is cutting everything into pieces that roast at roughly the same speed, then giving the tray enough space to brown instead of steaming. A crowded sheet pan is the enemy here. Give the food room and it pays you back.
Key Ingredients
- 1 1/2 pounds smoked sausage or kielbasa, sliced into 1/2-inch rounds
- 2 bell peppers, sliced into strips
- 2 medium zucchini, cut into thick half-moons
- 1 red onion, sliced
- 2 tablespoons olive oil
- 1 teaspoon Italian seasoning
- 1/2 teaspoon garlic powder
- 1/2 teaspoon kosher salt
- 1/4 teaspoon black pepper
- Pinch of red pepper flakes, optional
Quick Steps
-
Preheat the oven to 425°F and line a large sheet pan with parchment for easier cleanup.
-
Add the sausage, peppers, zucchini, and onion to the pan. Drizzle with olive oil, then sprinkle with Italian seasoning, garlic powder, salt, pepper, and red pepper flakes if you want a little heat.
-
Toss everything directly on the pan until lightly coated, then spread the mixture into a single layer with some space between the pieces.
-
Roast for 12 minutes, then pull the pan out and stir so the vegetables on the edges move toward the center.
-
Return the pan to the oven and roast for another 10 to 12 minutes, until the sausage has browned spots and the zucchini is tender but not collapsing.
-
Let it rest for 2 minutes before serving so the juices settle a little.
Tips and Variations
- Pan space matters: If you double the recipe, use two sheet pans rather than crowding one.
- Extra flavor: A squeeze of lemon at the end sharpens the sausage nicely.
- Vegetable swap: Mushrooms work here too; add them in roughly the same size as the zucchini.
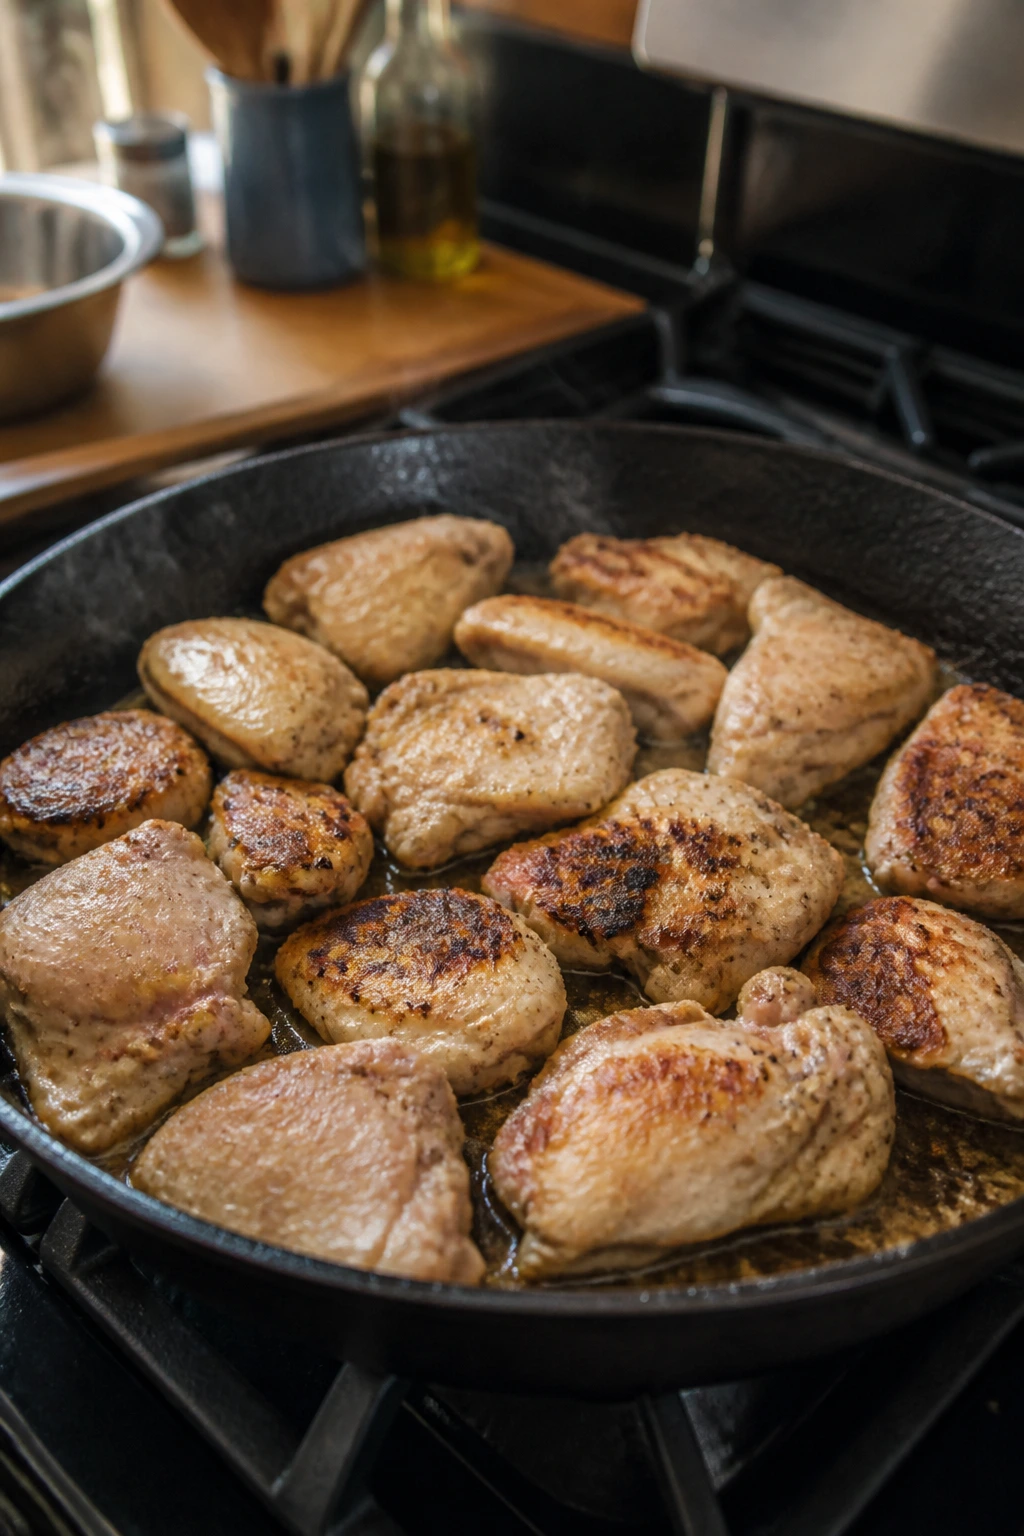
6. Pork Chops with Mushroom Cream Sauce
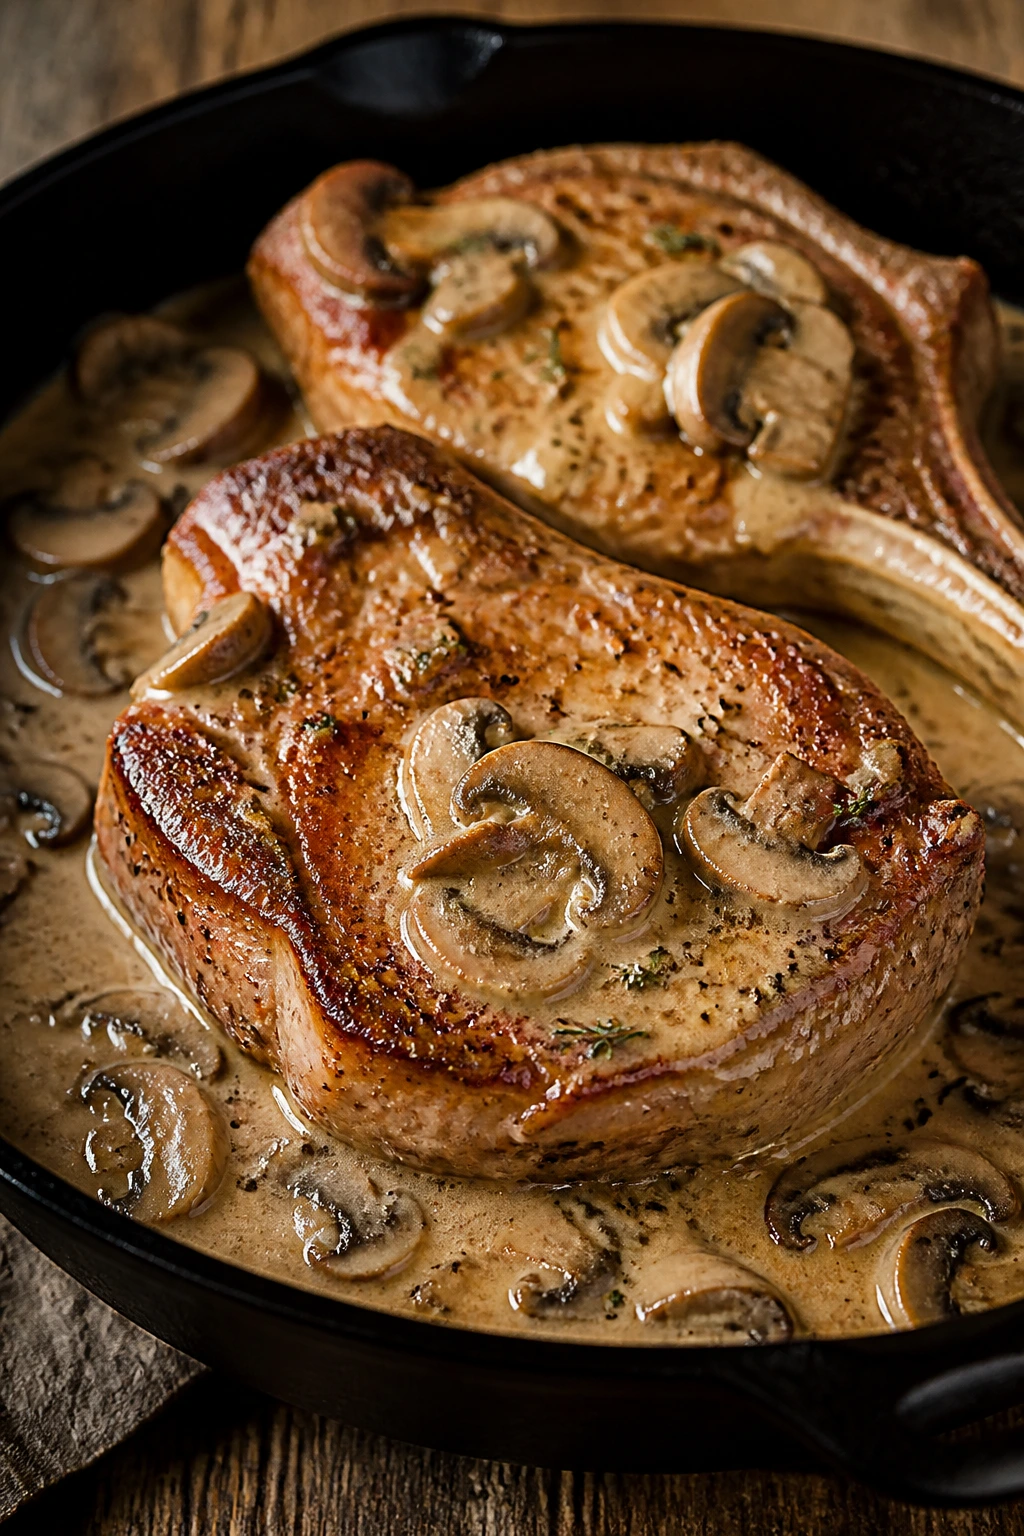
This is the sort of dinner that feels a little old-school in the best way. Pork chops get a deep golden crust, mushrooms soften in the pan drippings, and the cream sauce ties everything together without asking much from you. If you’ve ever wanted a sauce that makes pan cooking feel worth the effort, this one is a strong candidate.
Why It Works
Pork chops are easier than people make them sound, especially when you use bone-in chops that are about an inch thick. They sear well, stay juicier, and give you enough time to build a sauce in the same skillet. Mushrooms are useful here because they absorb flavor first, then give some of it back into the cream. The Dijon adds sharpness so the sauce doesn’t taste flat. That little bit of tang matters more than it sounds.
Key Ingredients
- 4 bone-in pork chops, about 1 inch thick
- 1 teaspoon kosher salt
- 1/2 teaspoon black pepper
- 1 tablespoon olive oil
- 2 tablespoons butter, divided
- 8 ounces cremini mushrooms, sliced
- 2 cloves garlic, minced
- 1/2 cup chicken broth
- 3/4 cup heavy cream
- 1 teaspoon Dijon mustard
- 1 teaspoon fresh thyme leaves or 1/2 teaspoon dried thyme
Quick Steps
-
Pat the pork chops dry and season both sides with salt and pepper. Let them sit on the counter for 10 minutes while you prep the mushrooms.
-
Heat the olive oil and 1 tablespoon of butter in a large skillet over medium-high heat. Sear the pork chops for 4 to 5 minutes per side, until a deep brown crust forms. Transfer them to a plate.
-
Add the remaining butter and the mushrooms to the skillet. Cook for 5 minutes, stirring occasionally, until the mushrooms release their liquid and then begin to brown.
-
Stir in the garlic and cook for 30 seconds. Pour in the chicken broth and scrape up the browned bits from the bottom of the pan.
-
Add the heavy cream, Dijon, and thyme. Simmer gently for 2 to 3 minutes, until the sauce thickens enough to coat the back of a spoon.
-
Return the pork chops to the skillet and spoon sauce over them for 2 to 3 minutes, until the internal temperature reaches 145°F. Rest the chops for 5 minutes before serving.
Tips and Variations
- Don’t rush the sear: If the chops stick, give them another 30 seconds; they usually release once the crust sets.
- Sauce adjustment: A splash more broth loosens a sauce that gets too thick.
- Herb swap: Rosemary works if you want a sharper, woodier flavor than thyme.
7. Chicken Alfredo Zucchini Noodles
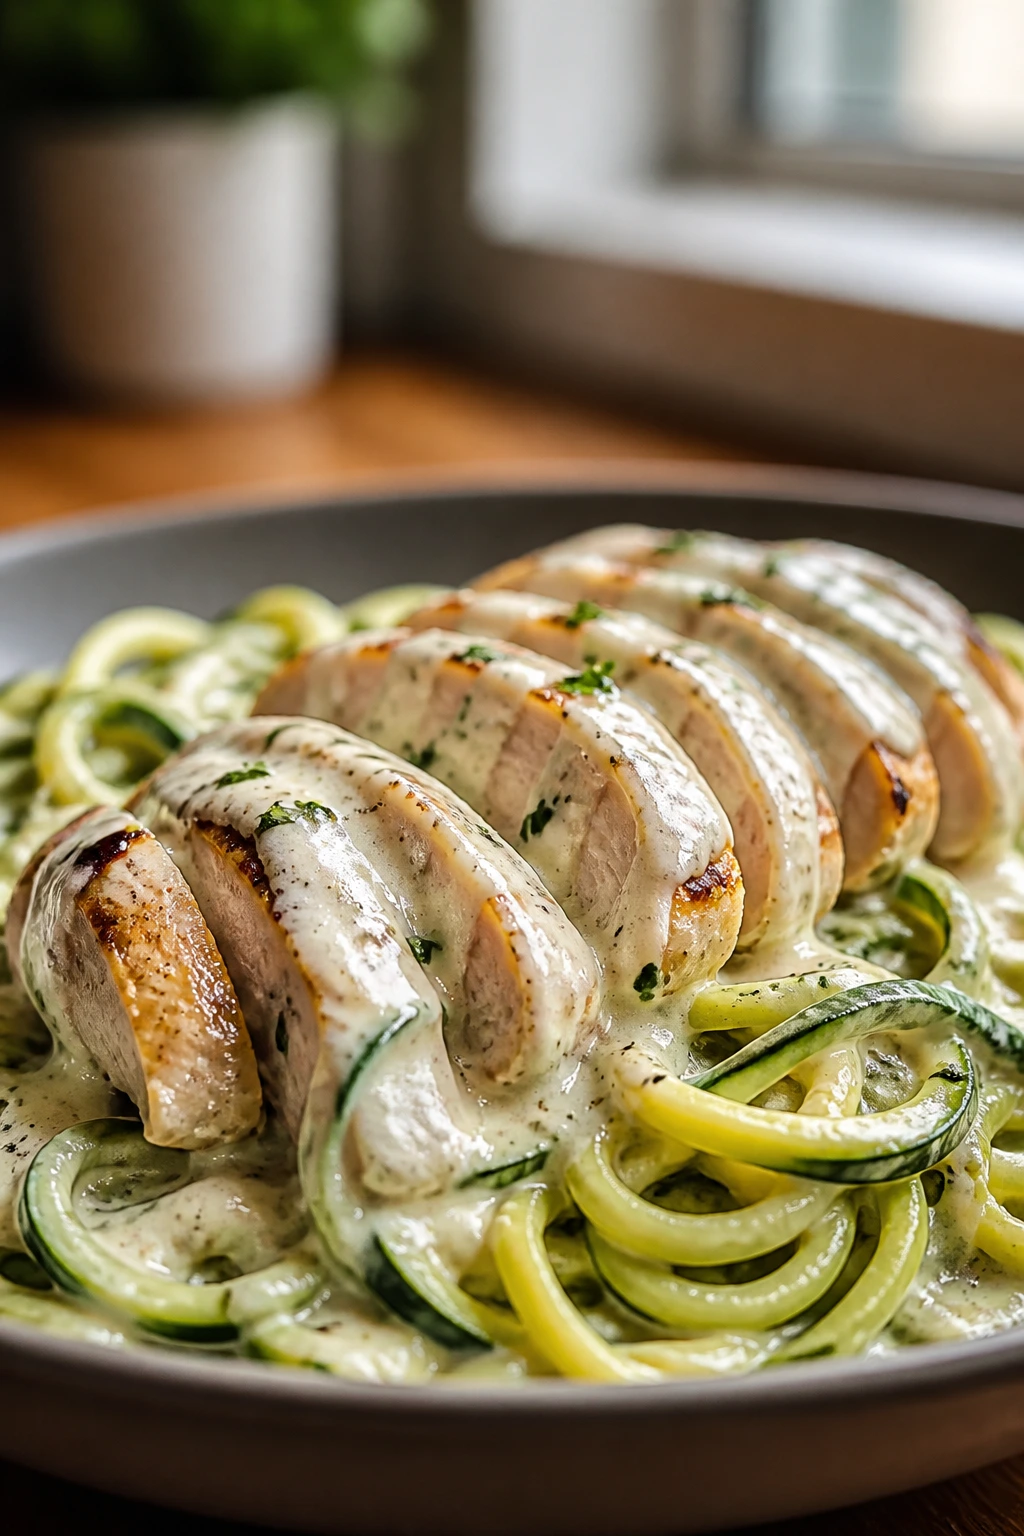
Zucchini noodles can go watery fast, which is exactly why this version keeps the sauce separate until the last minute. The chicken gets a light sear, the Alfredo sauce turns glossy in the same pan, and the zoodles only warm through so they stay bright and a little crisp. I like this dinner because it scratches the pasta itch without pretending to be pasta.
Why It Works
Alfredo sauce is built from simple fat and dairy, which makes it friendly for keto as long as you handle it gently. The trick is to cook the chicken first, then use that skillet to build a sauce with butter, garlic, cream, and Parmesan. Zucchini noodles need a very short cook time—more of a warm-through than a sauté—because they release water quickly and can turn limp if you treat them like real pasta. Respect the zucchini and it behaves.
Key Ingredients
- 1 1/2 pounds chicken breast or boneless chicken thighs, sliced
- 1 teaspoon kosher salt
- 1/2 teaspoon black pepper
- 2 tablespoons olive oil
- 2 tablespoons butter
- 3 cloves garlic, minced
- 1 cup heavy cream
- 1/2 cup grated Parmesan cheese
- 2 medium zucchini, spiralized into noodles
- Pinch of nutmeg, optional
- 1 tablespoon chopped parsley
Quick Steps
-
Season the sliced chicken with salt and pepper. Heat the olive oil in a large skillet over medium-high heat.
-
Cook the chicken for 4 to 5 minutes, stirring or flipping once, until it is browned on the outside and cooked through. Move it to a plate.
-
Lower the heat to medium and melt the butter in the same skillet. Add the garlic and cook for 30 seconds until fragrant, not browned.
-
Pour in the heavy cream and bring it to a gentle simmer for 2 minutes. Stir in the Parmesan and nutmeg, if using, until the sauce is smooth and slightly thick.
-
Add the zucchini noodles and toss for 1 to 2 minutes, just until they soften a little and take on the sauce. The noodles should still have some bite.
-
Return the chicken to the skillet, toss everything together, and finish with parsley.
Tips and Variations
- Watery zoodle fix: If your zucchini gives off a lot of liquid, drain the noodles in a colander for 5 minutes before cooking.
- Flavor twist: A handful of sautéed mushrooms fits well here.
- Cheese note: Grate the Parmesan fresh if you can; pre-shredded cheese tends to make the sauce grainy.
8. Bunless Burger Bowls with Special Sauce
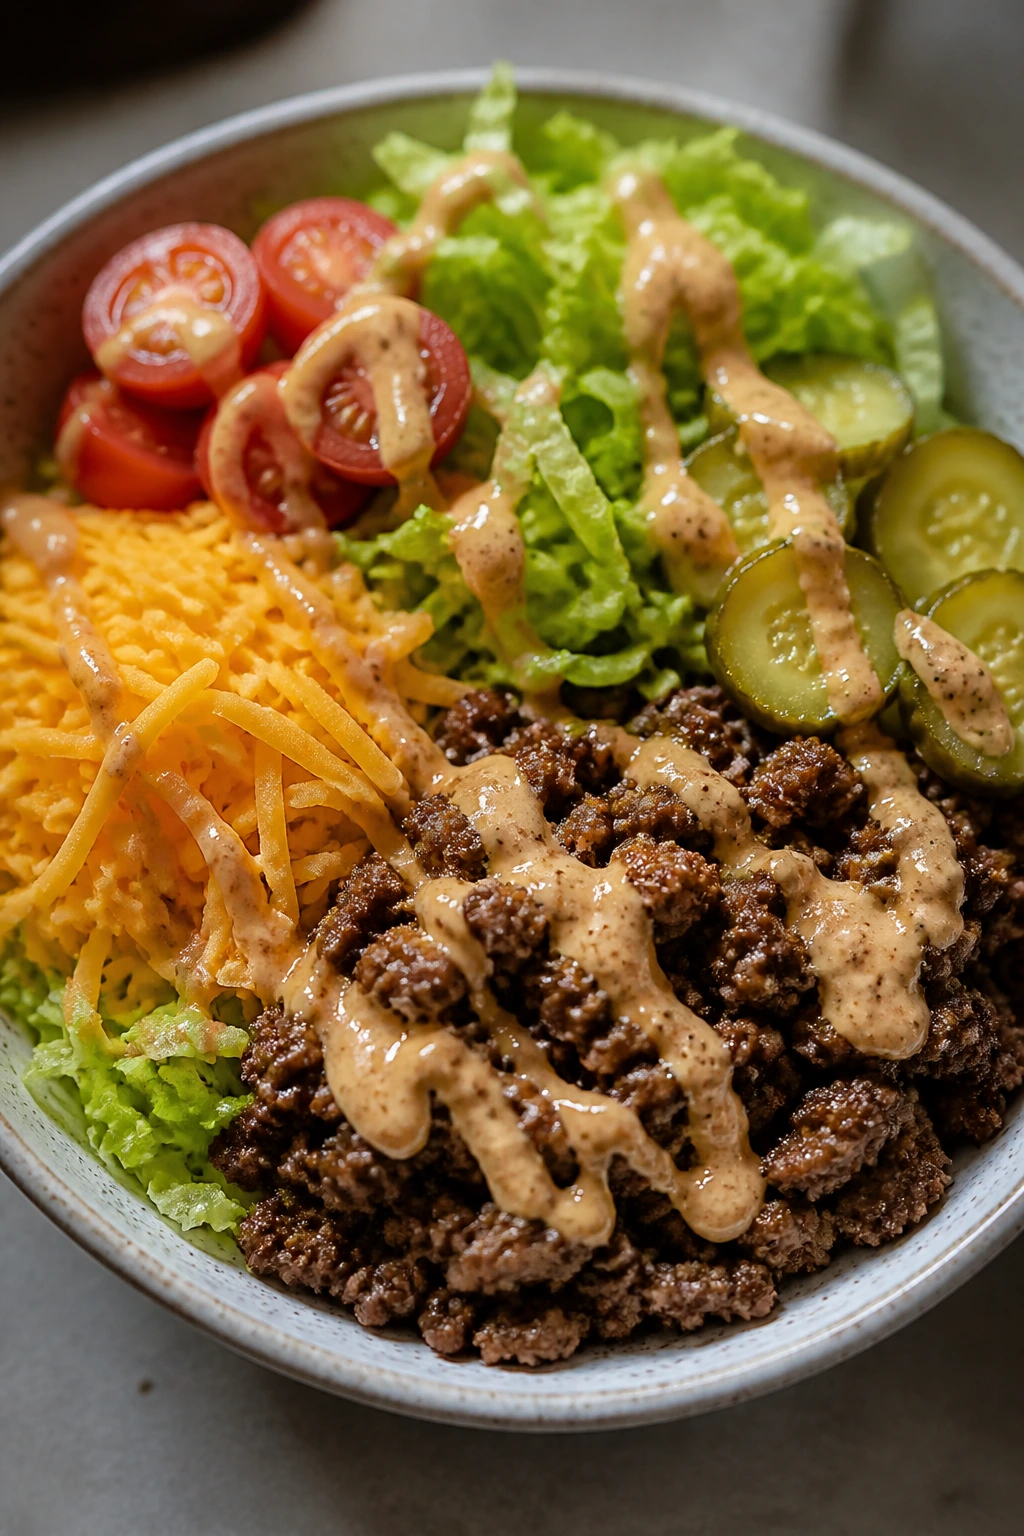
A burger without the bun sounds like a compromise until you put it in a bowl with cold crunch, hot beef, sharp pickles, and a sauce that tastes suspiciously close to the diner version. The contrast does most of the work here. Warm meat, cool lettuce, creamy sauce, salty cheese. That’s the whole trick.
Why It Works
Burger bowls are useful because they recycle a flavor profile almost everyone already likes. The cooking itself is barely more complicated than making burgers on a skillet, and the toppings let each person build their own bowl without waiting for a finished stack to hold together. The special sauce gives you that burger-shop taste with mayo, mustard, ketchup, and pickle juice, which is much easier than trying to make a more elaborate dressing. Sometimes the simplest version is the one that actually gets eaten.
Key Ingredients
- 1 pound ground beef
- 1 teaspoon kosher salt
- 1/2 teaspoon black pepper
- 4 cups shredded romaine lettuce
- 1 cup cherry tomatoes, halved
- 1/2 cup chopped dill pickles
- 1/2 cup shredded cheddar cheese
- 1 avocado, sliced
- 1/4 cup mayonnaise
- 1 tablespoon sugar-free ketchup
- 1 teaspoon yellow mustard
- 1 teaspoon pickle juice
- 1/4 teaspoon paprika
Quick Steps
-
Brown the ground beef in a skillet over medium-high heat with the salt and pepper, breaking it into small crumbles, until no pink remains and some pieces are browned at the edges.
-
While the beef cooks, whisk together the mayonnaise, sugar-free ketchup, mustard, pickle juice, and paprika in a small bowl until smooth.
-
Divide the romaine among four bowls.
-
Spoon the warm beef over the lettuce, then add the tomatoes, pickles, cheddar, and avocado.
-
Drizzle with the special sauce right before serving so the lettuce stays crisp.
-
Taste and add a little more pickle juice or mustard if you like a sharper sauce.
Tips and Variations
- Meal prep move: Store the beef and sauce separately, then assemble the bowls at the last minute.
- Extra crunch: Chopped celery or cucumber fits nicely if you want more texture.
- Fried egg option: A fried egg on top makes the bowl feel more like dinner and less like a salad.
9. Parmesan Crusted Baked Cod
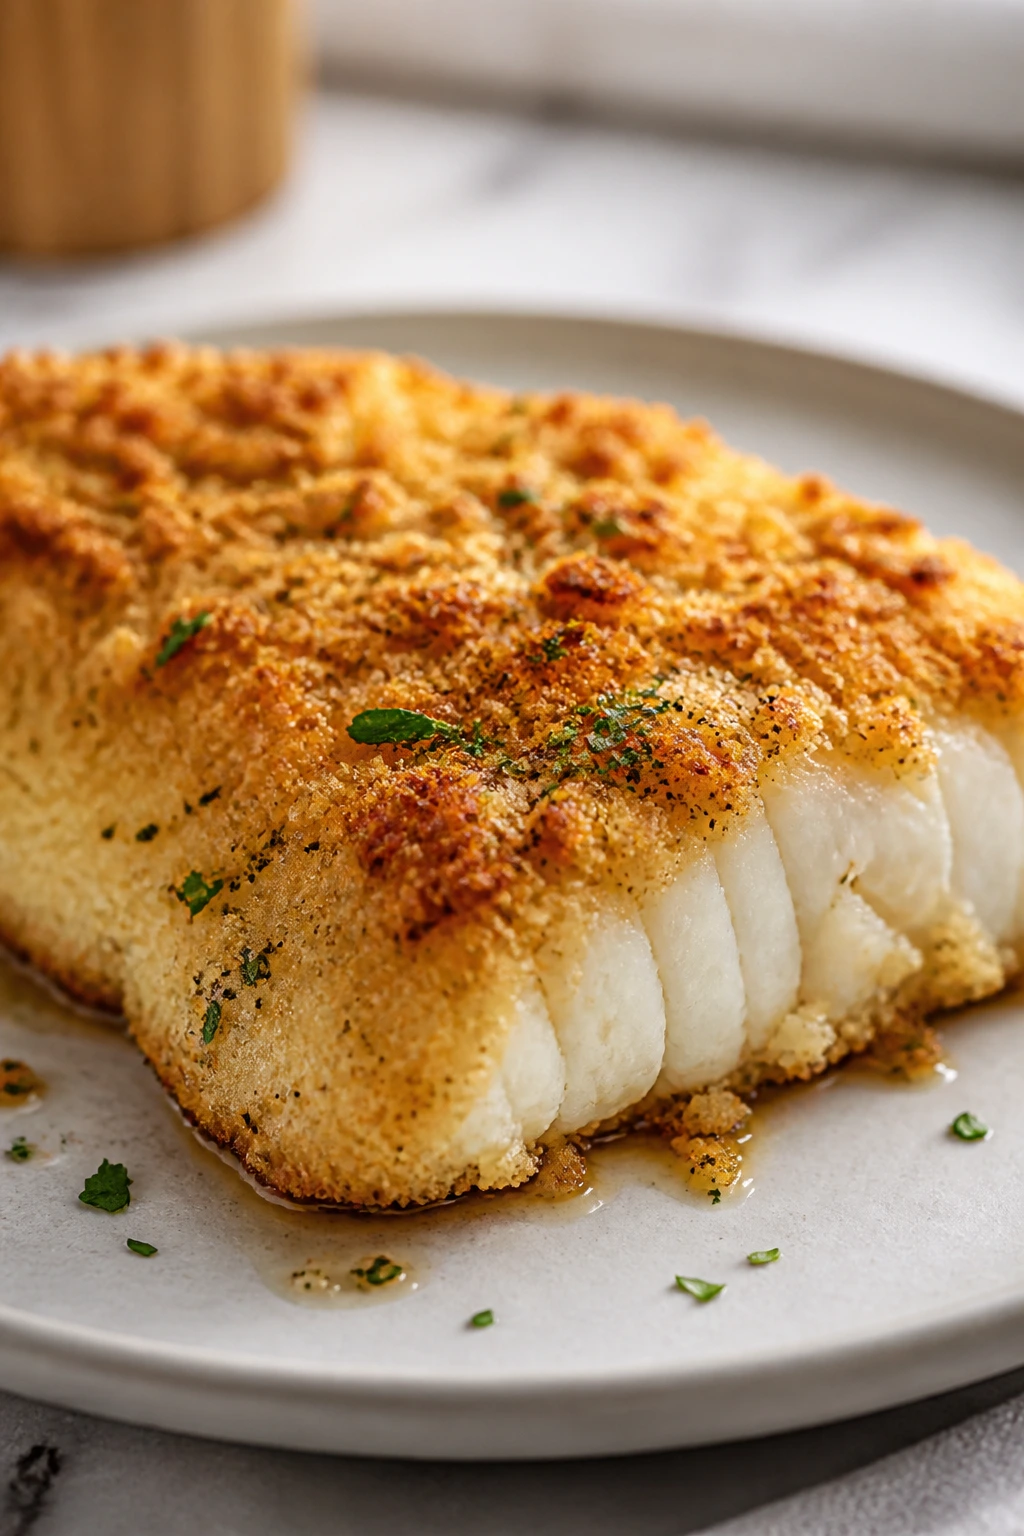
Cod is gentle, mild, and easy to work with, which makes it a smart fish for beginners who are nervous about seafood. The Parmesan-almond crust gives the fillets a crisp, salty top without turning the dish heavy. It bakes fast, smells clean, and leaves you with less drama than a pan full of seared fish.
Why It Works
Cod is lean, so the biggest risk is overcooking it. Baking at a hot temperature with a crust on top helps protect the fish from drying out while still giving you a browned surface. Almond flour keeps the coating light and keto-friendly, while mayonnaise gives the crust something to cling to and helps it color in the oven. The fish itself stays mild enough for people who think they do not like fish. That matters.
Key Ingredients
- 4 cod fillets, about 6 ounces each, patted dry
- 1 teaspoon kosher salt
- 1/2 teaspoon black pepper
- 1 tablespoon olive oil
- 1/2 cup grated Parmesan cheese
- 1/3 cup almond flour
- 2 tablespoons mayonnaise
- 1 teaspoon garlic powder
- 1 tablespoon chopped parsley
- Lemon wedges, for serving
Quick Steps
-
Preheat the oven to 425°F and line a baking sheet with parchment paper.
-
Pat the cod dry and place the fillets on the sheet. Drizzle with olive oil and season with salt and pepper.
-
In a small bowl, stir together the Parmesan, almond flour, mayonnaise, garlic powder, and parsley until the mixture looks crumbly but holds together when pressed.
-
Spoon the crust mixture over the top of each fillet and press it down gently so it sticks.
-
Bake for 10 to 12 minutes, until the fish flakes easily and the crust is golden around the edges. If you want more color, broil for 30 to 60 seconds at the end, watching closely.
-
Serve with lemon wedges and let the fish rest for 2 minutes before lifting it from the tray.
Tips and Variations
- Dry fish wins: If the cod is wet, the crust slides off. Paper towels help more than fancy technique.
- Different fish: Haddock or tilapia can work, but the bake time may shorten by a minute or two.
- Bright finish: A squeeze of lemon cuts through the Parmesan nicely.
10. Ground Beef Stuffed Bell Peppers
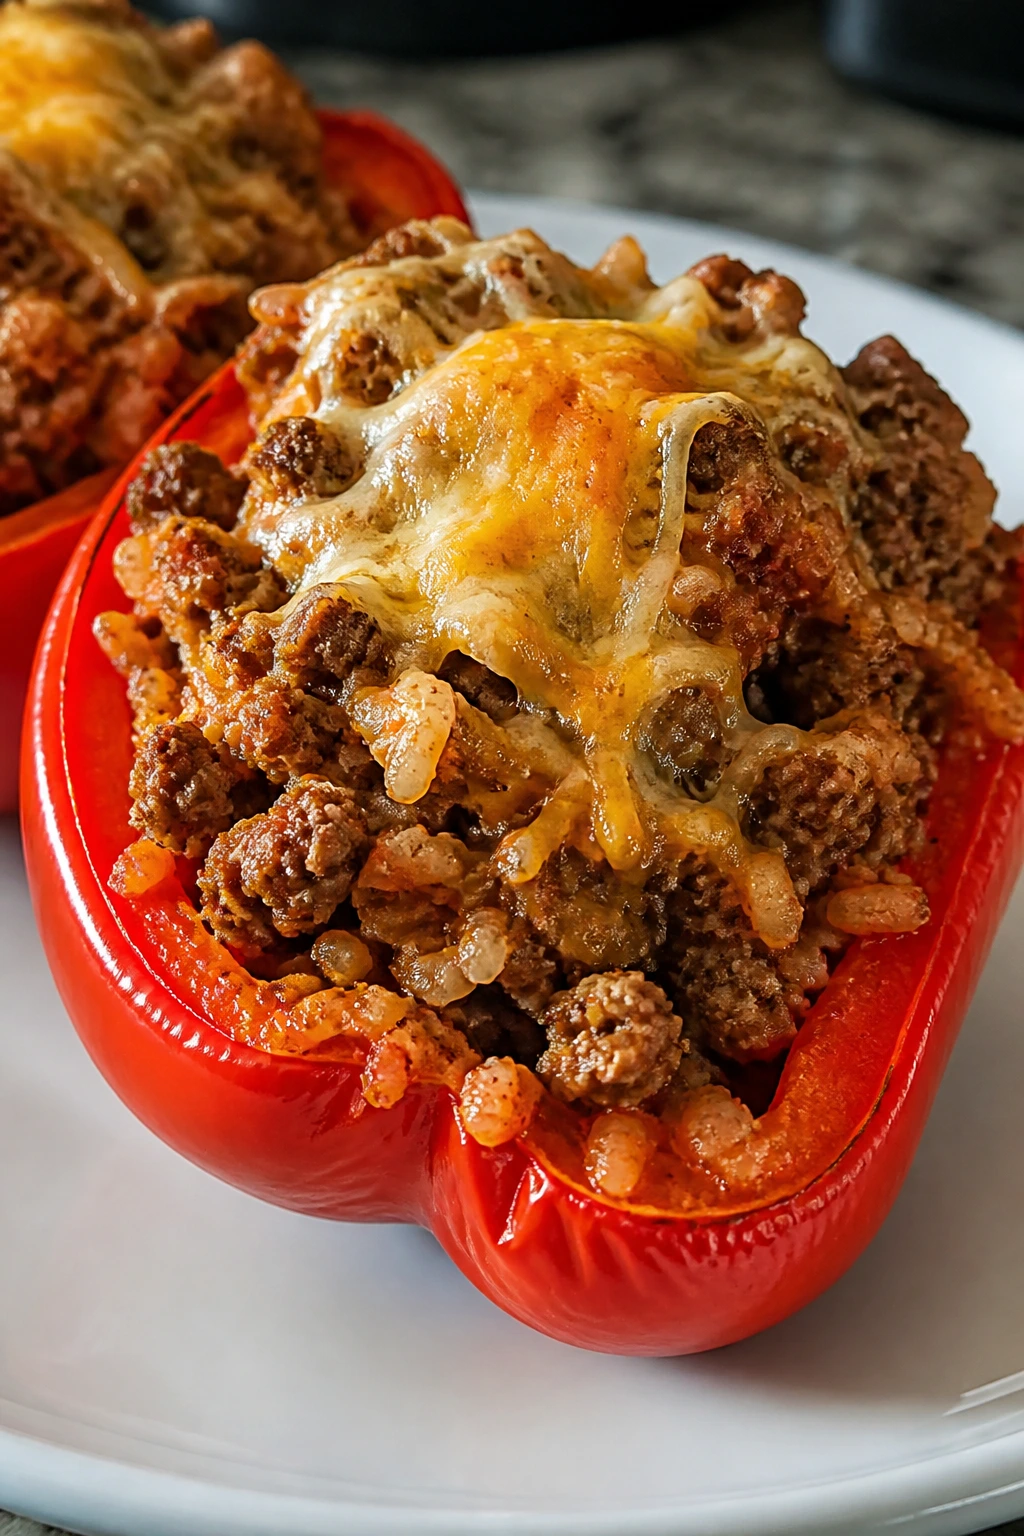
Stuffed peppers have a reputation for being fussy, which is unfair. Once the peppers are halved and the filling is cooked, the oven does most of the work. They’re neat, self-contained, and very good at looking like you put in more effort than you did.
Why It Works
Bell peppers are sturdy little edible bowls. They hold the filling, keep their shape, and get sweet as they roast. Ground beef and cauliflower rice make a filling that feels hearty without drifting out of keto territory, and the tomato gives the mix enough moisture that it does not dry out in the oven. The cheese on top is not decoration. It seals the deal.
Key Ingredients
- 4 large bell peppers, halved lengthwise and seeded
- 1 pound ground beef
- 1 small onion, diced
- 2 cloves garlic, minced
- 1 cup cauliflower rice
- 1 can diced tomatoes, 14.5 ounces, drained
- 1 tablespoon Italian seasoning
- 1 teaspoon kosher salt
- 1/2 teaspoon black pepper
- 1 cup shredded mozzarella or cheddar cheese
Quick Steps
-
Preheat the oven to 375°F. Place the pepper halves cut-side up in a baking dish and bake for 10 minutes to soften them slightly.
-
While the peppers pre-bake, cook the ground beef and onion in a skillet over medium heat for 6 to 8 minutes until the beef is browned and the onion is soft.
-
Stir in the garlic, cauliflower rice, drained tomatoes, Italian seasoning, salt, and pepper. Cook for 4 to 5 minutes, until the cauliflower rice has lost its raw texture and most of the moisture is gone.
-
Spoon the filling into the pepper halves, mounding it slightly.
-
Top with the cheese and return the dish to the oven for 15 minutes, until the peppers are tender and the cheese is melted and browned in spots.
-
Rest for 5 minutes before serving so the filling settles.
Tips and Variations
- Pepper stability: Choose peppers with flat bottoms so they sit upright in the pan.
- Shorter bake: If you like firmer peppers, skip the pre-bake and add 5 extra minutes at the end.
- Flavor boost: A spoonful of pesto stirred into the beef gives the filling a basil-heavy finish.
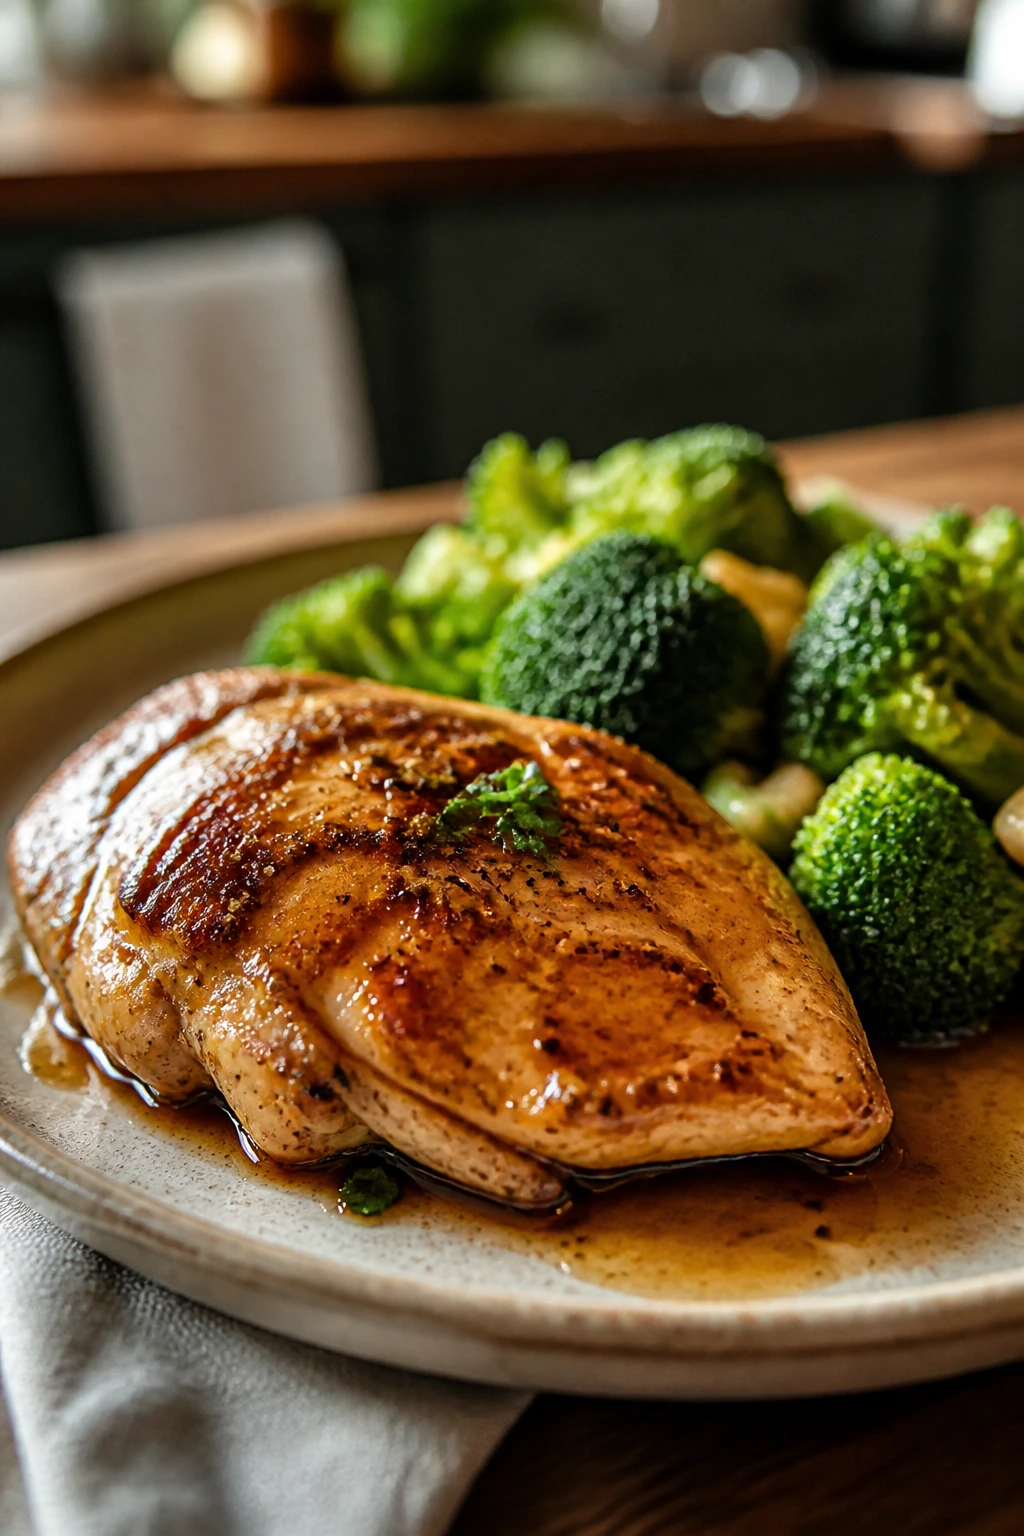
11. Lemon Herb Chicken and Green Beans
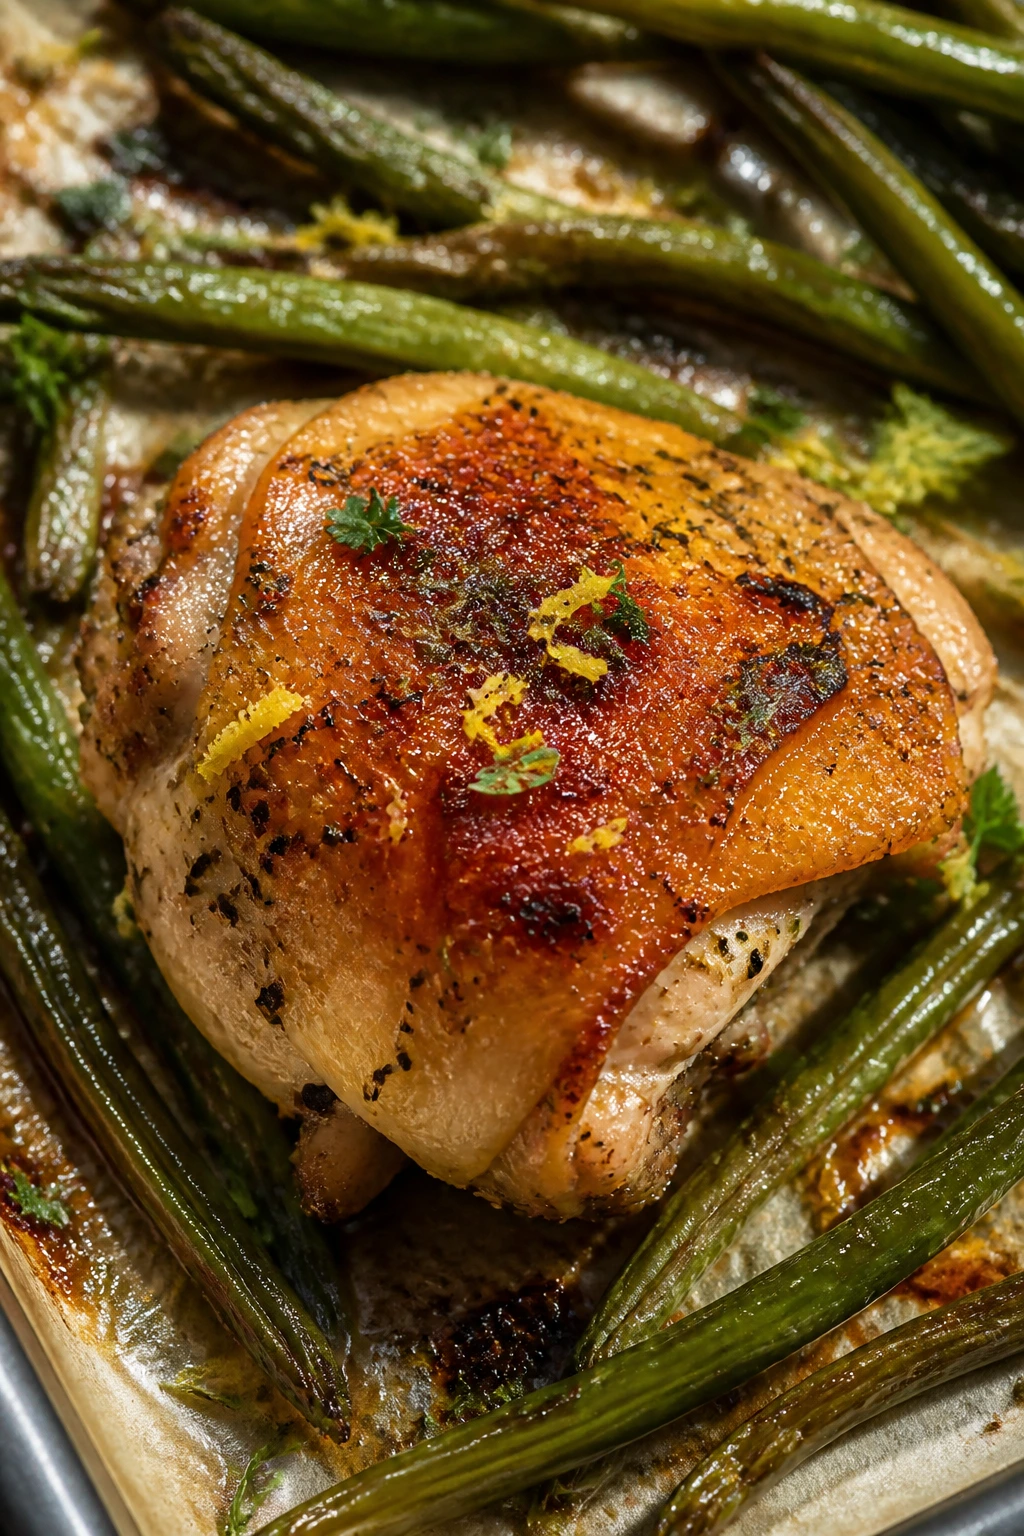
This is the dinner you make when you want something fresh, not heavy. The lemon keeps the chicken bright, the green beans roast until blistered at the edges, and the whole tray smells clean in a way that makes the kitchen feel less crowded. It’s a very good antidote to rich sauce fatigue.
Why It Works
Sheet-pan dinners work because the oven handles the uneven parts for you. Green beans and chicken thighs can roast at the same temperature without one collapsing before the other is done, especially if the beans are tossed with oil and spread into a single layer. Lemon zest adds more aroma than juice alone, and that matters because keto food can lean rich fast. Here, the acid keeps the plate lively.
Key Ingredients
- 6 bone-in, skin-on chicken thighs or 4 boneless chicken breasts
- 1 pound green beans, trimmed
- 2 tablespoons olive oil
- 1 lemon, zested and juiced
- 2 cloves garlic, minced
- 1 teaspoon dried oregano
- 1 teaspoon kosher salt
- 1/2 teaspoon black pepper
- 2 tablespoons butter, optional
- 1 tablespoon chopped parsley
Quick Steps
-
Preheat the oven to 425°F and line a sheet pan with parchment.
-
Pat the chicken dry and season it with salt, pepper, oregano, half the garlic, and the lemon zest.
-
Toss the green beans with olive oil, the remaining garlic, and a small pinch of salt. Spread them on one side of the pan.
-
Place the chicken on the other side, skin-side up if you’re using thighs. Roast for 25 to 30 minutes, until the chicken reaches 165°F for breasts or 175°F for thighs and the green beans are browned in spots.
-
If you want a little sauce, melt the butter with the lemon juice and spoon it over the chicken right after it comes out of the oven.
-
Finish with parsley and serve immediately.
Tips and Variations
- Thighs are easier: They stay juicier if you get distracted for a minute.
- Green bean shortcut: Haricots verts work too and roast a little faster.
- Herb swap: Dill gives the whole tray a fresher, sharper edge than oregano.
12. Turkey Meatballs with Cauliflower Mash and Garlic Spinach
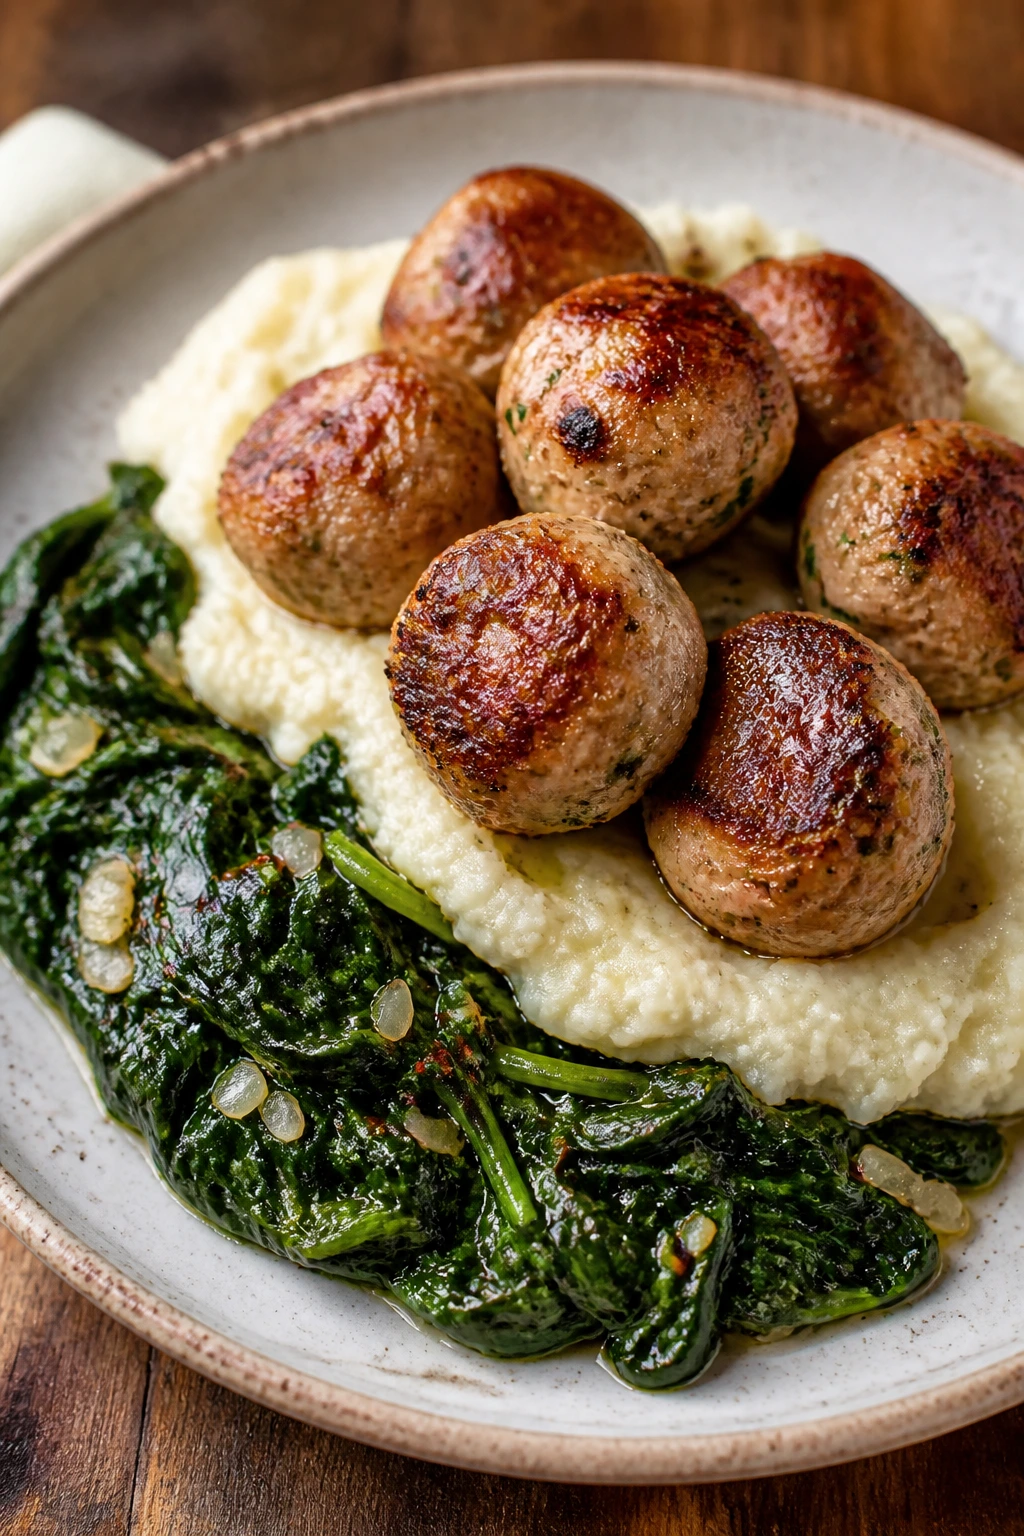
Meatballs and mash feel like comfort food that got dressed properly. The turkey stays tender, the cauliflower mash tastes creamy instead of watery if you drain it well, and the spinach adds a fast green side that keeps the plate from feeling beige. This is a good one when you want a full dinner that still feels light on the stomach.
Why It Works
Ground turkey benefits from a little fat and a gentle hand. Parmesan, egg, and almond flour hold the meatballs together without making them dense, and baking them is easier than babysitting a skillet full of delicate rounds. Cauliflower mash gives you the comfort-food shape of mashed potatoes with a fraction of the carbs, but it needs one real trick: cook off the water before mashing. Skip that part and the mash gets loose. Do it properly and it turns plush.
Key Ingredients
For the Meatballs:
- 1 pound ground turkey
- 1 large egg
- 1/2 cup grated Parmesan cheese
- 1/3 cup almond flour
- 2 cloves garlic, minced
- 1 teaspoon Italian seasoning
- 1 teaspoon kosher salt
- 1/2 teaspoon black pepper
For the Cauliflower Mash:
- 1 large head cauliflower, cut into florets, about 4 cups
- 2 tablespoons butter
- 2 tablespoons cream cheese
- 1/2 teaspoon kosher salt
- 1/4 teaspoon black pepper
For the Garlic Spinach:
- 1 tablespoon olive oil
- 1 clove garlic, minced
- 5 ounces baby spinach
- Pinch of salt
Quick Steps
-
Preheat the oven to 400°F and line a baking sheet with parchment paper.
-
In a bowl, mix the ground turkey, egg, Parmesan, almond flour, garlic, Italian seasoning, salt, and pepper until just combined. Do not overmix or the meatballs turn tight.
-
Roll the mixture into 16 meatballs and place them on the baking sheet. Bake for 15 to 18 minutes, until the centers reach 165°F and the tops are lightly browned.
-
While the meatballs bake, steam or boil the cauliflower florets until fork-tender, about 10 minutes. Drain them very well and let the cauliflower sit for a minute so steam can escape.
-
Mash the cauliflower with the butter, cream cheese, salt, and pepper until smooth or slightly rustic, depending on how you like your mash.
-
Heat the olive oil in a skillet over medium heat, add the garlic for 20 seconds, then toss in the spinach and a pinch of salt. Cook just until wilted.
-
Serve the meatballs over the cauliflower mash with the spinach alongside.
Tips and Variations
- Drain the cauliflower well: A clean kitchen towel helps squeeze out extra water.
- Flavor shift: Add a spoonful of pesto to the mash for a brighter finish.
- Protein swap: Ground chicken works if you prefer a milder meatball.
Why Keto Dinners for Beginners Work Best as Simple Patterns
Most beginner keto dinners go wrong because they try to be clever. They pile on special ingredients, unusual flours, and sauces that need five minutes of whisking every other minute. That’s a lot to ask from a weeknight cook who mostly wants something hot, savory, and not carb-heavy.
Simple patterns work better. Brown a protein. Roast or sauté a vegetable. Add a sauce that comes together in the same pan. Once you notice that formula, the whole style of cooking stops feeling mysterious. Chicken thighs, salmon, sausage, ground beef, and pork chops are all useful because they can carry flavor without much drama. They also forgive small timing mistakes, which is worth more than a dozen fancy tips.
There’s another reason this approach holds up: you can repeat it without getting bored. Swap broccoli for green beans, cod for salmon, mustard for taco seasoning, or cauliflower rice for zucchini noodles, and the method still makes sense. That kind of repetition is what turns a list of recipes into actual dinner habits.
Essential Equipment for These Recipes
- Large oven-safe skillet: Useful for chicken thighs, salmon sauce, pork chops, and taco skillet dinners; cast iron is especially handy.
- Rimmed sheet pans: Give sausage, peppers, chicken, green beans, and cod enough room to brown instead of steam.
- 9-inch or 9×13-inch baking dish: Good for casseroles, stuffed peppers, and anything you want to hold together in the oven.
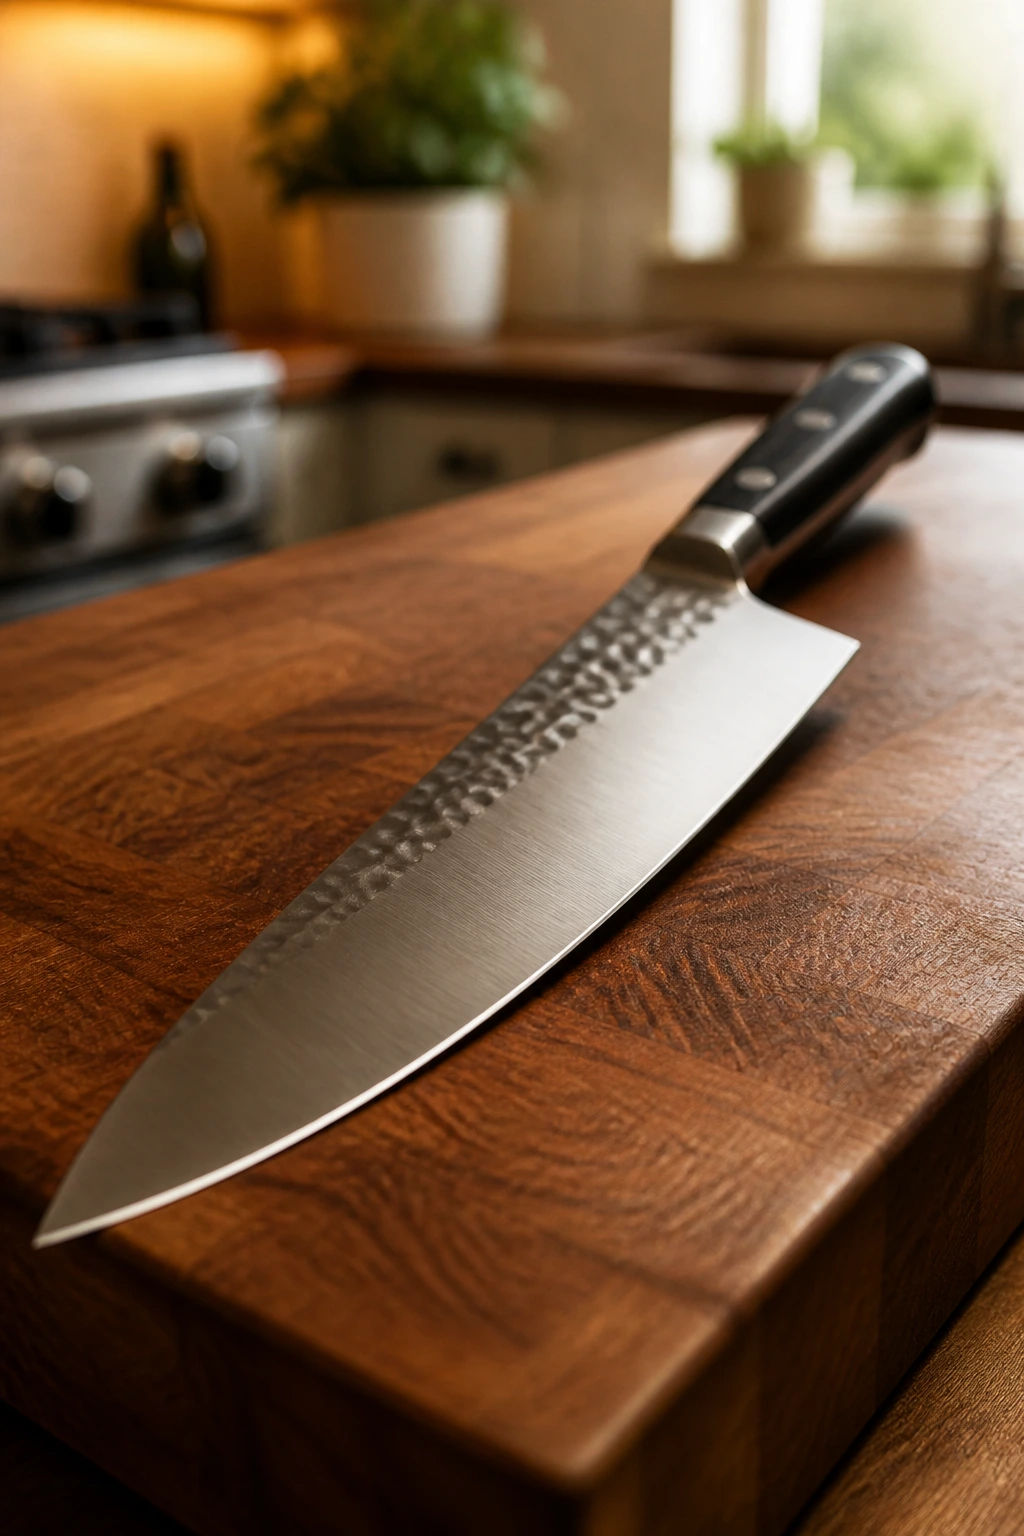
- Chef’s knife: A sharp knife makes pepper strips, zucchini, onions, and broccoli much easier and safer.
- Cutting board: One sturdy board for vegetables and one for raw meat keeps cleanup and food safety simpler.
- Tongs: Helpful for flipping chicken, sausage, and fish without tearing the surface.
- Wooden spoon or spatula: Needed for breaking up beef and scraping browned bits from the pan.
- Measuring cups and spoons: Sauces and seasoning blends behave better when you measure them instead of guessing.
- Instant-read thermometer: The best tool in the whole set for chicken, pork, and fish; it removes the guesswork.
- Box grater: Freshly grated Parmesan and cheddar melt better than the pre-shredded stuff.
- Mixing bowls: One medium and one large bowl cover most of the prep work.
- Colander or fine-mesh strainer: Useful for cauliflower rice, zoodles, and anything that needs moisture removed before cooking.
- Silicone spatula: Scrapes cream sauces and casserole fillings cleanly without scratching pans.
- Airtight storage containers: Make leftovers and meal prep much easier, especially for skillet dinners and meatballs.
Smart Shopping and Ingredient Tips
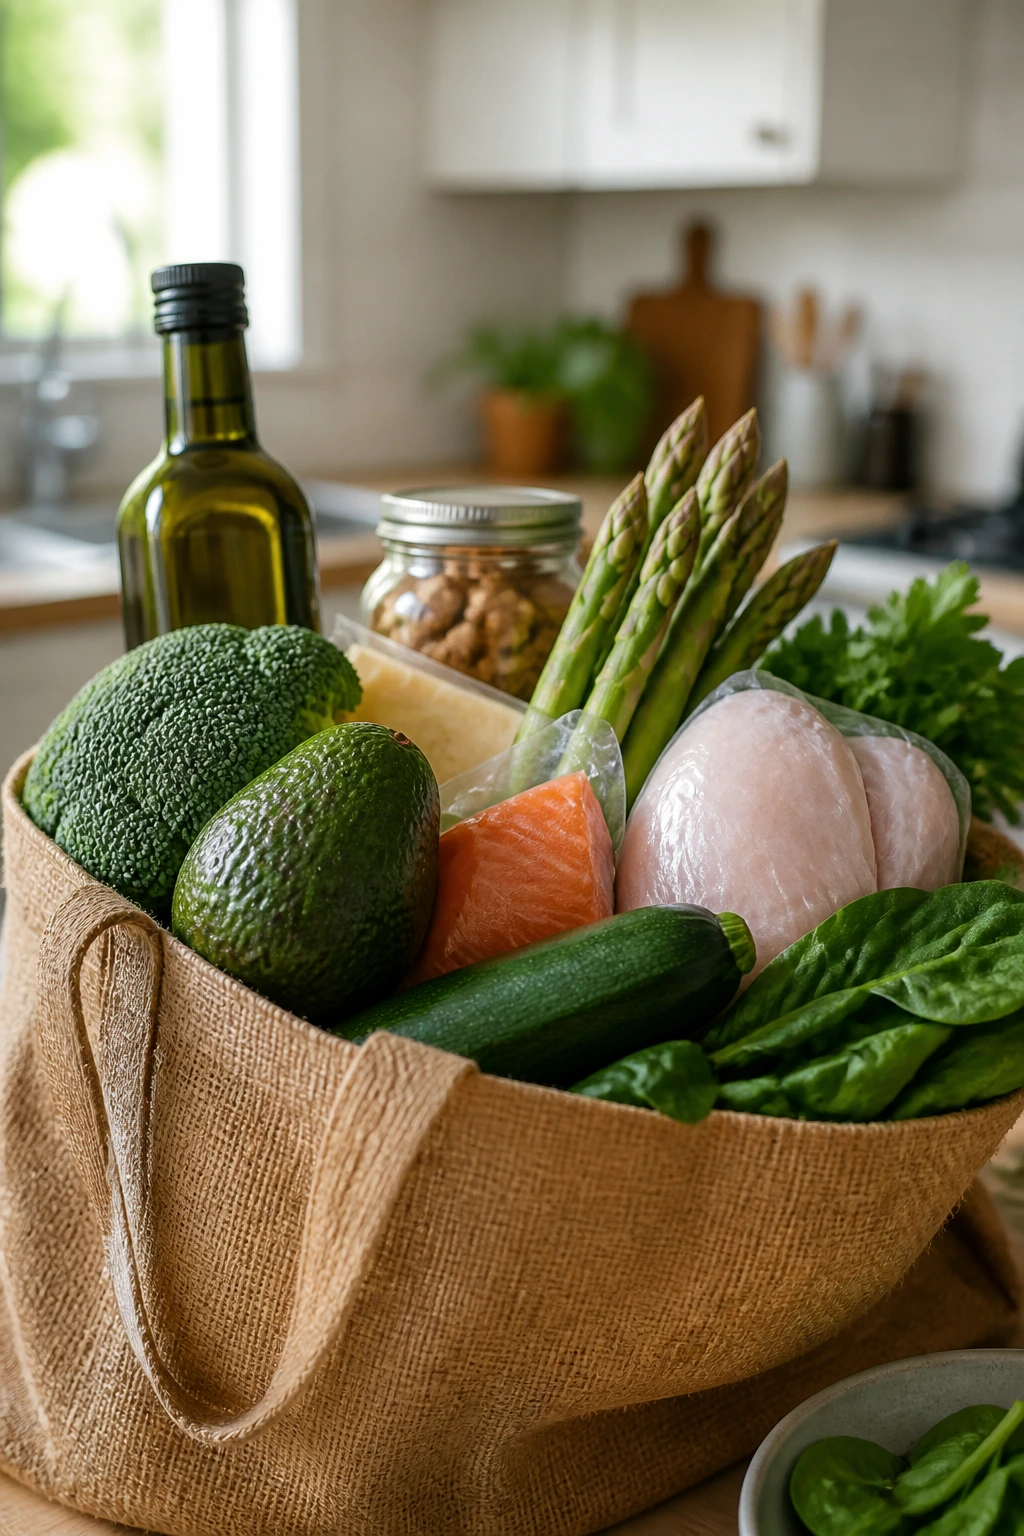
The easiest keto dinners start with ingredients that behave well under heat. That means choosing the right cut of meat, the right fat level, and vegetables that can take some browning. For beef, I prefer 80/20 or 85/15 ground meat because it stays juicy and carries seasoning better than very lean beef. For chicken, thighs are the friendlier choice. Breasts can work, but they go from juicy to dry much faster, so they ask more of you at the stove.
Fish deserves a quick look in the fish counter or freezer aisle before you buy. Fresh cod, salmon, or trout should smell clean, not fishy, and the flesh should spring back when pressed. Frozen fish is fine too, and often easier to use because it comes portioned. Thaw it slowly in the fridge, then pat it dry with paper towels before cooking. That dry surface helps the crust or sear work the way you want it to.
Vegetables matter more than people think in keto cooking. Frozen cauliflower rice is often the easiest choice, and there’s nothing wrong with it. What matters is cooking off the moisture before it hits the plate. The same goes for zucchini noodles, mushrooms, and stuffed pepper filling. If the pan looks wet, the food tastes less crisp and more tired. Give those vegetables a few minutes of heat until the steam calms down.
Cheese and dairy are worth buying with a little care. Block cheddar, Parmesan, and mozzarella melt more smoothly than the pre-shredded kind because they don’t carry the same anti-caking starches. Heavy cream, cream cheese, and sour cream are your sauce builders; they turn a pile of meat and vegetables into a dinner that feels complete. Seasoning blends should be checked for hidden sugar if you use taco mix, sausage, or bottled sauces. The label is worth ten seconds of attention.
How to Serve These Keto Dinners on Busy Nights
Presentation: Saucy dishes like Tuscan salmon or pork chops look better in shallow bowls where the sauce can pool a little. Sheet-pan meals can go straight onto warm plates with the browned edges facing up, which keeps the color visible. A little chopped parsley, green onion, or lemon zest goes farther than people expect.
Accompaniments: I like simple sides that do not fight the main dish: a quick cucumber salad, extra roasted green beans, steamed asparagus, or a second spoonful of cauliflower mash. For a heartier plate, add a side of sautéed spinach or a small romaine salad with oil and vinegar. Keto dinners often do not need a lot of extra food; they need one crisp element, one saucy element, and a clean finish.
Portions: A typical serving lands around 4 to 6 ounces of cooked protein plus 1 to 2 cups of vegetables. If you’re feeding bigger appetites, increase the protein first, then the vegetables. That’s easier than adding complicated sides that pull attention away from the main dish.
Beverage Pairing: Sparkling water with lime works with almost everything here. If you want something more structured, dry white wine suits salmon and chicken, while a dry red matches beef, sausage, and pork. Unsweetened iced tea or a simple club soda with lemon keeps the meal feeling light.
Additional Tips and Flavor Boosters
Flavor Enhancement: Acid is your friend. A squeeze of lemon, a splash of vinegar, or a spoonful of mustard can wake up a creamy keto dinner that tastes a little flat. I reach for that move constantly, especially with salmon, pork chops, and anything using cream.
Customization: Add mushrooms to the taco skillet, olives and feta to the salmon, jalapeños to burger bowls, or spinach to the cheeseburger casserole. Those small add-ins change the mood of the meal without changing the method. That’s the sweet spot for beginners.
Serving Suggestions: Crunch makes low-carb dinners feel less soft and samey. Chopped fresh herbs, toasted sesame seeds, crispy bacon bits, or a few crushed pork rinds on top of casseroles all help. Use them sparingly. You want a finish, not a pile.
Make-It-Yours: If you need a dairy-free version, swap heavy cream for full-fat coconut cream in the saucy dishes and use olive oil instead of butter where it makes sense. For nut-free cooking, replace almond flour with crushed pork rinds or extra Parmesan in the cod crust and meatballs. For a higher-veg plate, double the green beans, broccoli, or zucchini and scale the protein a little lower.
Make-Ahead, Storage, and Reheating Guidance
Most of these dinners keep well for 3 to 4 days in the refrigerator in airtight containers. Fish is the exception; salmon and cod are best eaten within 2 days because their texture changes faster than beef or chicken. Casseroles, meatballs, stuffed peppers, and cheeseburger-style dishes freeze well for up to 2 months, especially if you cool them first and wrap them tightly.
Cool hot food within 2 hours and refrigerate it promptly. That rule matters more than fancy packaging. For skillet dinners with sauce, let the food cool a little before sealing the lid so steam doesn’t collect and make everything soggy. If you’re freezing meatballs or casseroles, portion them first. Smaller containers thaw and reheat more evenly, and you won’t end up with one giant block of dinner.
Reheating works best by cooking style. Skillet meals and casseroles come back nicely in a covered skillet or baking dish at 350°F to 375°F until hot, usually 10 to 15 minutes depending on the portion size. Add a tablespoon or two of broth, water, or cream if the sauce looks tight. For chicken, sausage, and beef dishes, a low skillet reheat over medium-low heat keeps the meat from drying out. Fish is touchier; reheat it gently in a 300°F oven or eat it cold over salad if you prefer.
Zucchini noodles and cauliflower rice are the least forgiving leftovers. If you know a dish will be eaten later, keep the vegetable base a little underdone the first time. That gives you room to warm it again without ending up with a soggy mess. And yes, some of these meals taste better the next day. The cheeseburger casserole and meatballs are good examples. The flavors settle in a way that feels almost generous.
Variations and Adaptations to Try
Dairy-Free Weeknights
Use olive oil instead of butter and coconut cream instead of heavy cream in the cream-based dishes. The flavor changes, but not in a bad way if you keep the seasoning sharp with garlic, lemon, or mustard. This works especially well in the salmon and pork chop recipes.
Spice-Forward Taco Night
Add chipotle powder, jalapeños, or a spoonful of salsa verde to the taco skillet and burger bowls. The recipes already have enough structure to handle more heat, and the extra spice gives you a good break from cream-heavy dinners. A little lime at the end helps too.
Mediterranean Pantry Dinner
Swap Italian seasoning for oregano, add olives and feta, and lean on lemon and garlic instead of heavier sauces. This fits the salmon, chicken thighs, and sheet-pan sausage especially well. It’s a clean change that makes the whole table taste brighter.
Freezer-First Prep
Double the meatballs, cheeseburger casserole, or stuffed pepper filling and freeze half before the final bake. That gives you a second dinner without another round of chopping and browning. It also keeps you from getting tired of the same meal three nights in a row.
Vegetable-Heavier Plates
If you want more vegetables and a little less meat, stretch the dinner with an extra tray of broccoli, green beans, or zucchini. The skillet and sheet-pan recipes already give you a method, so adding more produce doesn’t upset the balance much. I like this approach when I want dinner to feel a little lighter but still satisfying.
Common Mistakes to Avoid
Crowding the pan: If chicken, sausage, or vegetables are piled on top of one another, they steam instead of brown. The symptom is pale food with soft edges. Use a larger pan or split the batch across two trays.
Treating cauliflower like rice from a box: Cauliflower rice and zoodles both carry a lot of water. If you throw them into the pan without cooking off that moisture, the dish turns soupy. Give them a few extra minutes uncovered, or drain them first.
Cooking lean meat like it’s forgiving: Chicken breasts and very lean ground beef can dry out fast. The fix is simple: lower the heat a little, use a thermometer, and pull them as soon as they hit the right temperature.
Under-seasoning because the food is keto: Low-carb dinner does not mean low flavor. A little more salt, garlic, mustard, lemon, or Parmesan often makes the difference between “fine” and “I’d make that again.” Taste the food before you serve it.
Dumping cheese in too early: Cheese can separate or turn greasy if it cooks too long at high heat. Add it near the end, cover the pan for a minute, and let residual heat finish the melt.
Skipping the thermometer: This is the easiest way to overcook chicken, pork, or fish. Guessing works until it doesn’t. A basic instant-read thermometer saves more dinners than any trick I know.
Frequently Asked Questions

Which recipe is the easiest for a first-time keto cook?
The taco skillet and bunless burger bowls are the most forgiving because they use ground beef, simple seasoning, and very little timing pressure. If you want something that teaches roasting, the sheet-pan sausage and vegetables is the next easiest step.
Can I use chicken breasts instead of thighs?
Yes, but watch the clock more carefully. Breasts cook faster and dry out sooner, so pull them as soon as they reach 165°F. Thighs are easier for beginners because they give you a bigger margin of error.
Is frozen cauliflower rice okay?
Absolutely. Frozen cauliflower rice is often the easiest option, and it’s perfect for the taco skillet and cheeseburger casserole. Cook off the moisture first so the final dish doesn’t get watery.
How do I make these dinners dairy-free?
Use olive oil instead of butter and swap heavy cream for full-fat coconut cream in the saucy recipes. Parmesan and cheddar are harder to replace one-for-one, so I’d lean on herbs, lemon, garlic, and a little more salt to keep the flavor strong.
What should I do if my sauce turns thin?
Keep simmering it uncovered for another minute or two, stirring often. If it still needs help, add a little more Parmesan or cream cheese, depending on the recipe. A thin sauce usually means it just needs more time, not more panic.
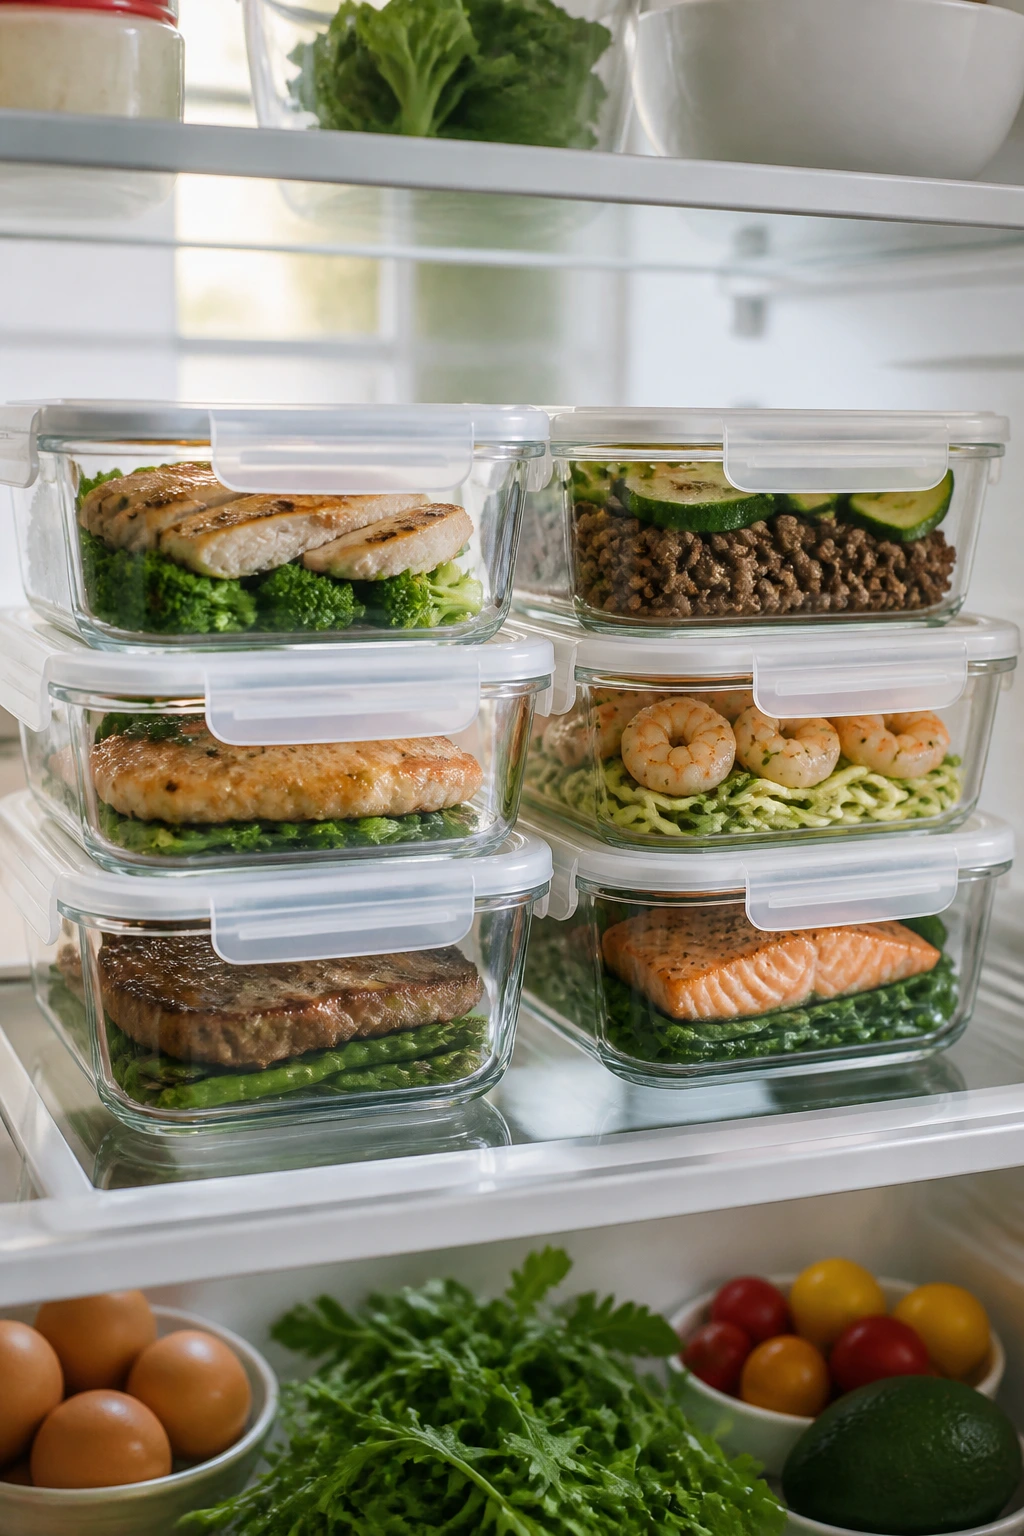
Can I meal prep these recipes for the week?
Yes, especially the beef casseroles, meatballs, stuffed peppers, and sausage skillet. Store the sauces separately when you can, and keep the fish recipes for the front of the line because they lose texture faster. Reheat gently so the meat stays juicy.
How do I know when chicken, pork, or fish is done?
Use an instant-read thermometer if you have one: chicken should hit 165°F, pork chops 145°F with a short rest, and salmon or cod should flake easily and look opaque in the center. If the thermometer is unavailable, cut into the thickest part and check that the juices run clear and the center is no longer translucent.
Can I swap in different vegetables?
Usually, yes. Broccoli, green beans, zucchini, bell peppers, spinach, asparagus, and mushrooms all fit well in this kind of cooking. Just pay attention to their water content and cook time so everything finishes together instead of one vegetable turning to mush while another is still raw.
Keeping Keto Dinner Simple
The best part of beginner keto cooking is that it gets easier faster than people expect. Once you know how to brown meat, roast vegetables, and finish with a quick sauce, dinner stops feeling fragile. It becomes a short list of moves you can repeat with different ingredients and different moods.
That’s what these 12 recipes are really for. Not rules. Not a rigid meal plan. Just a set of steady dinners you can pull off on a normal night without turning the kitchen into a mess of specialty products and half-used jars.