
A bowl of spaghetti tastes even better when the table already smells like garlic, basil, and toasted bread. That’s why Italian appetizers for pasta night earn their place: they wake up the palate before the first forkful of sauce, and they make the whole meal feel like more than a plate of noodles hurried out of the kitchen.
The best spread is not the one with the most dishes. It’s the one with contrast. You want salt from prosciutto, acid from tomatoes or pickles, cream from ricotta or burrata, and something crisp enough to survive a few minutes beside a steaming pot of pasta without turning limp and sad.
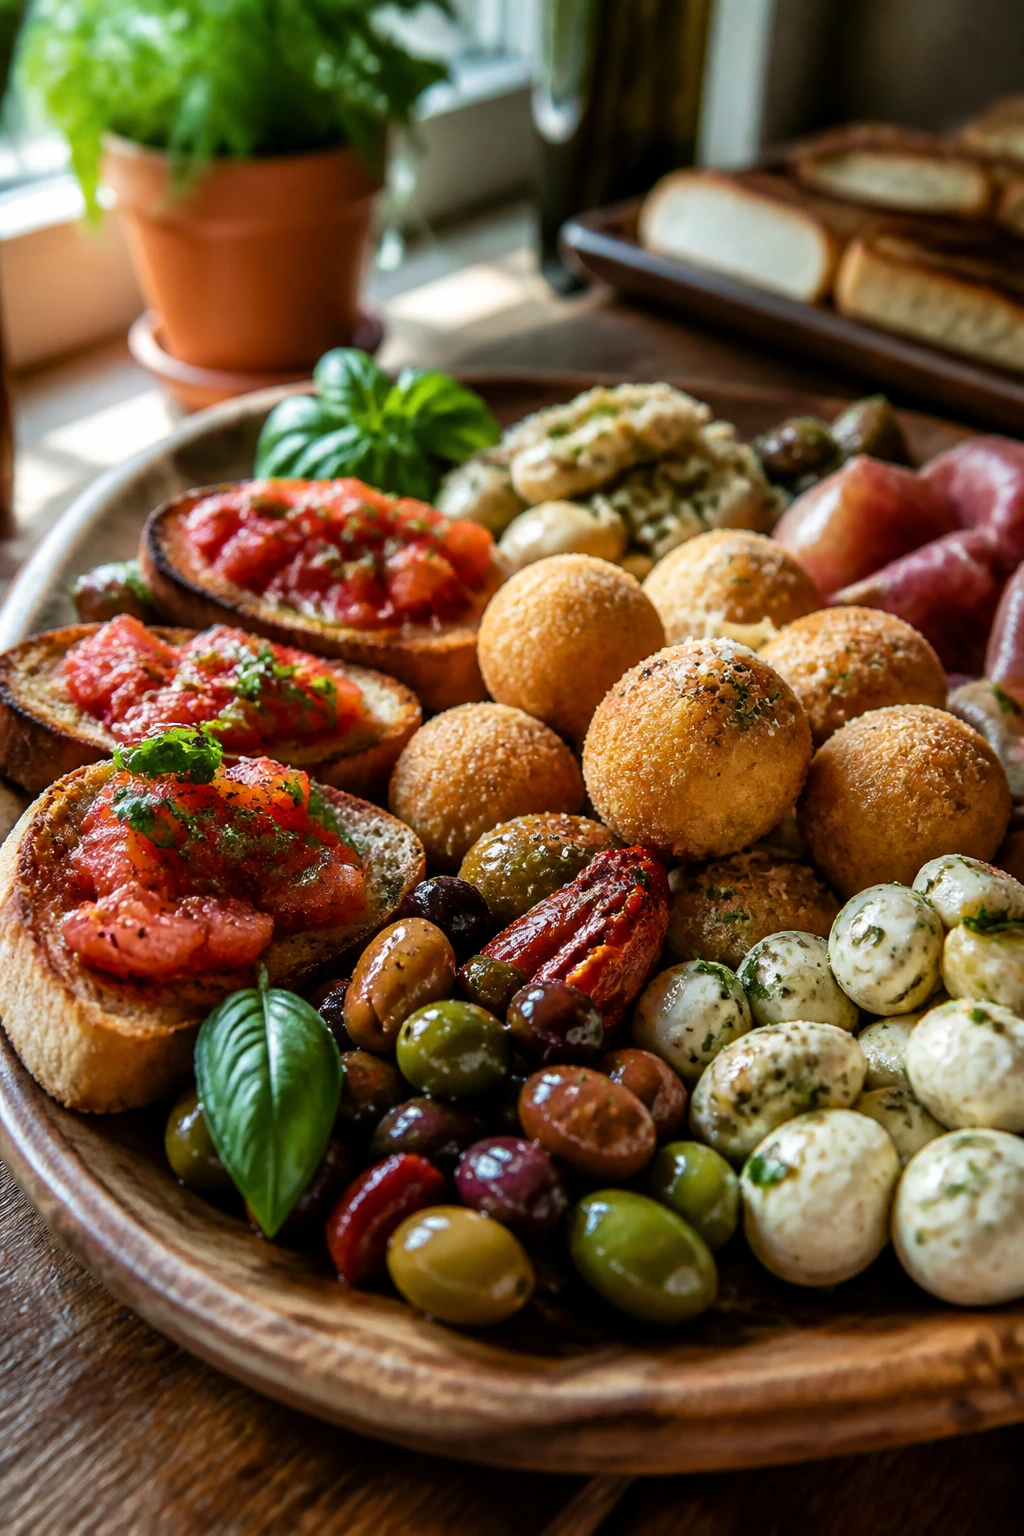
I like appetizers that can be passed around with one hand while the other keeps an eye on the sauce. No one wants a fussy pre-dinner production number. What works here is a mix of cold bites, hot bites, bread, olives, cheese, and a few sturdy vegetables that can sit on the table without getting in the way of dinner.
Why This Spread Works on Pasta Night
-
Acid resets the palate: Tomatoes, lemon, capers, and vinegar keep a rich pasta sauce from feeling heavy after the second bite.
-
Crunch matters more than people think: Toasted bread, fried zucchini, polenta fries, and crisp crostini give the table a texture the pasta itself cannot provide.
-
You can mix hot and cold without chaos: A chilled caprese skewer next to hot arancini feels balanced, and neither one needs to be piping hot at the exact same second.
-
Most of these recipes rely on pantry basics: Olive oil, garlic, breadcrumbs, canned tomatoes, and dried oregano show up again and again, which keeps the shopping list sane.
-
They scale cleanly for a group: A tray of bruschetta or a bowl of marinated olives can be doubled with almost no extra work, while meatballs and arancini turn leftover staples into something worth setting out.
-
They do not compete with the pasta: The appetizers should sharpen appetite, not steal the show. That’s the sweet spot.
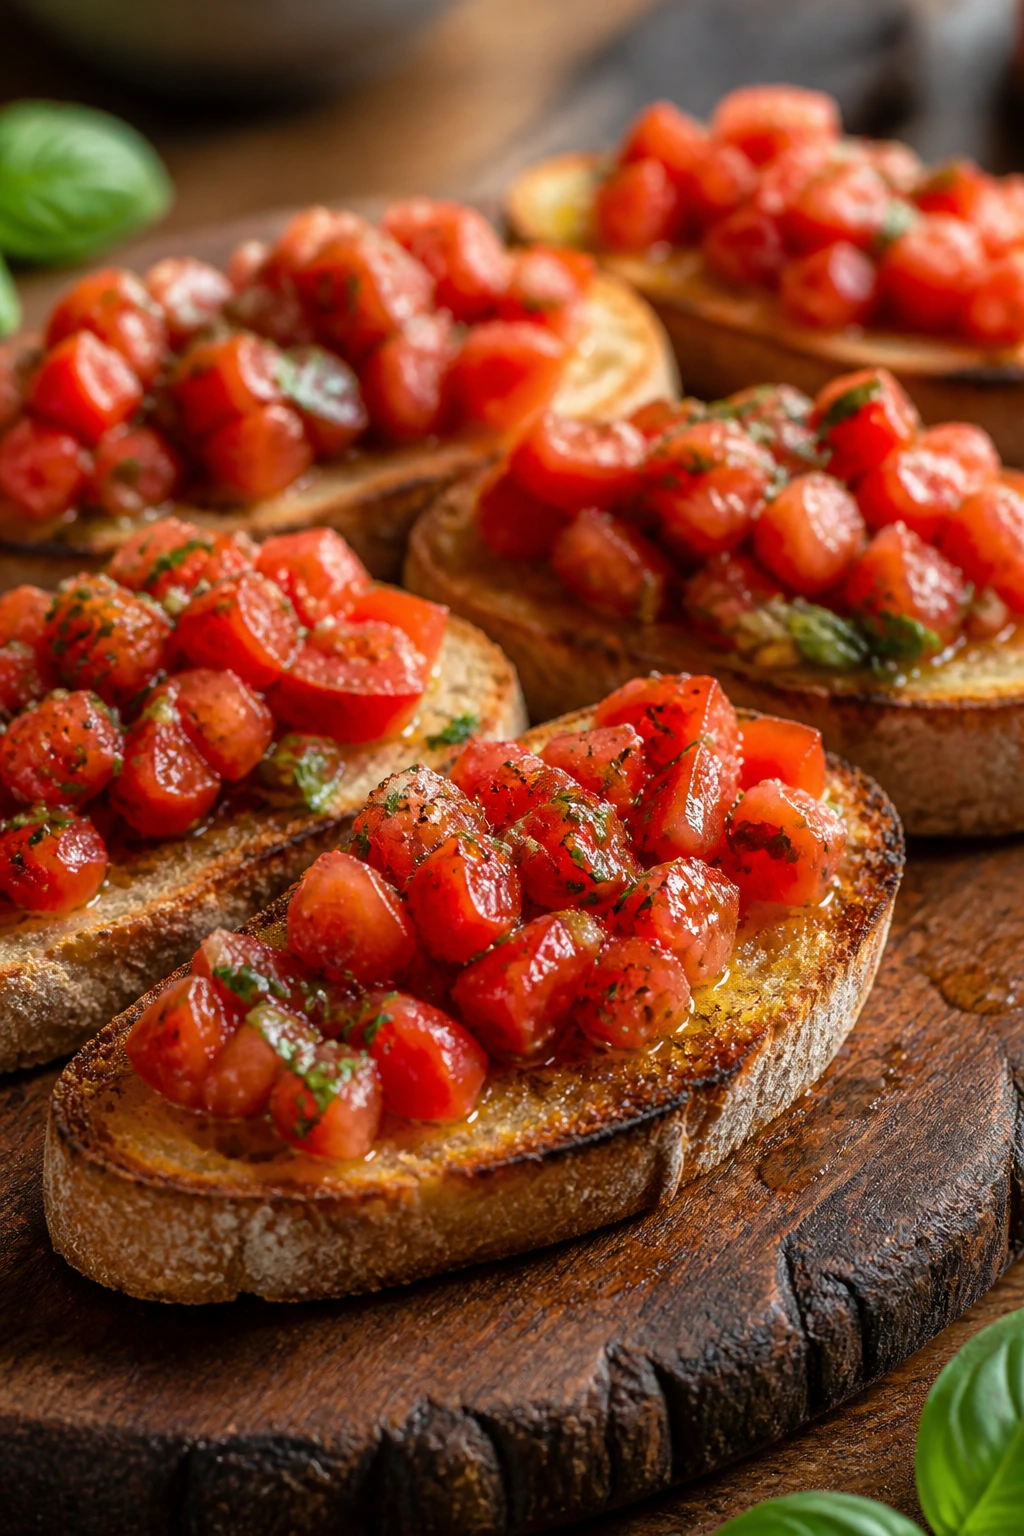
1. Classic Bruschetta al Pomodoro
The first bite should crack a little. Toasted bread, warm olive oil, and tomatoes that still taste like tomatoes are the whole point here. Bruschetta looks simple, and that’s the trick: when the bread is crisp and the topping is well salted, it tastes brighter than a lot of more complicated starters.
Why It Works:
Bruschetta works because the bread gets rubbed with garlic after toasting, so the flavor sits on the surface instead of turning bitter in the oven. Salting the tomatoes for a few minutes pulls out their excess liquid, which keeps the toast from collapsing into a soggy mess. A little basil and olive oil are enough; this is one of those dishes where heavy seasoning only muddies the clean tomato taste. Serve it near a saucy pasta like rigatoni alla vodka or spaghetti pomodoro, and the first course and the main course will speak the same language.
Key Ingredients:
- 1 rustic baguette or Italian loaf, sliced into 1/2-inch rounds
- Use bread with some structure so it stays crisp under the topping.
- 3 cups ripe tomatoes, seeded and diced
- The sweeter and more fragrant, the better.
- 1 garlic clove, finely grated
- Use it in the tomato mix and save another clove for rubbing the toast.
- 1/4 cup fresh basil, thinly sliced
- Tear it by hand if the knife makes it bruise.
- 3 tablespoons extra-virgin olive oil
- This is not the place for bland oil.
- 1 teaspoon balsamic vinegar, optional
- A tiny splash deepens the tomatoes if they taste flat.
- 1/2 teaspoon kosher salt
- 1/4 teaspoon black pepper
- 1/4 cup finely shaved Parmesan, optional
- I like it, but I do not always use it.
Quick Steps:
- Toast the bread: Heat the oven to 400°F (200°C). Arrange the bread slices on a sheet pan, brush lightly with olive oil, and bake for 8 to 10 minutes until the edges are golden and the centers feel crisp.
- Season the tomatoes: Stir together the diced tomatoes, grated garlic, basil, olive oil, vinegar, salt, and pepper. Let them sit for 10 minutes so the juices pool at the bottom of the bowl.
- Rub the toast: While the bread is still warm, rub each slice with a cut garlic clove. The surface should smell sharp and sweet, not burnt.
- Top and serve: Spoon the tomatoes onto the bread right before serving. Add Parmesan if you want a salty finish.
- Keep the bowl separate: If you expect guests to linger, leave extra tomato mixture in its own bowl so the toast stays crisp.
Equipment for This Recipe:
- Rimmed sheet pan
- Sharp chef’s knife
- Mixing bowl
- Cutting board
- Spoon for topping
How to Serve This Dish:
Pile the bruschetta on a wooden board or a big white platter so the red tomatoes and green basil show up properly. It sits well beside a tomato-based pasta, a green salad, or a bowl of olives, and it makes sense in small portions: two pieces per person before dinner, three if the pasta is arriving late. A dry white wine or a cold sparkling water with lemon keeps it lively.
Pro Tips for This Recipe:
- Salt the tomatoes early. If you skip that step, the topping tastes flatter and the bread goes soggy faster.
- Toast the bread a shade darker than you think you need. It softens a little once the tomatoes hit it.
- If the tomatoes are pale, add a pinch of sugar or a few drops of balsamic, not both.
- Rub the garlic on the bread while it is warm. Cold toast does not pick up the same fragrance.
Variations on This Dish:
- Cherry Tomato Burst: Use halved cherry tomatoes, a pinch of chili flakes, and extra basil for a sweeter, brighter topping.
- Burrata Bruschetta: Add a spoonful of burrata under the tomatoes for a creamier version that leans richer.
- Roasted Garlic Bruschetta: Replace the raw garlic with soft roasted garlic mashed into the olive oil for a gentler, sweeter finish.
Common Mistakes to Avoid with This Dish:
- Overloading the toast: Too much topping turns every bite into a slide. Keep it light enough to eat in one or two bites.
- Using watery tomatoes straight from the cutting board: Let them drain first, or the bread will suffer.
- Skipping the garlic rub: That tiny step is the difference between good toast and bruschetta.
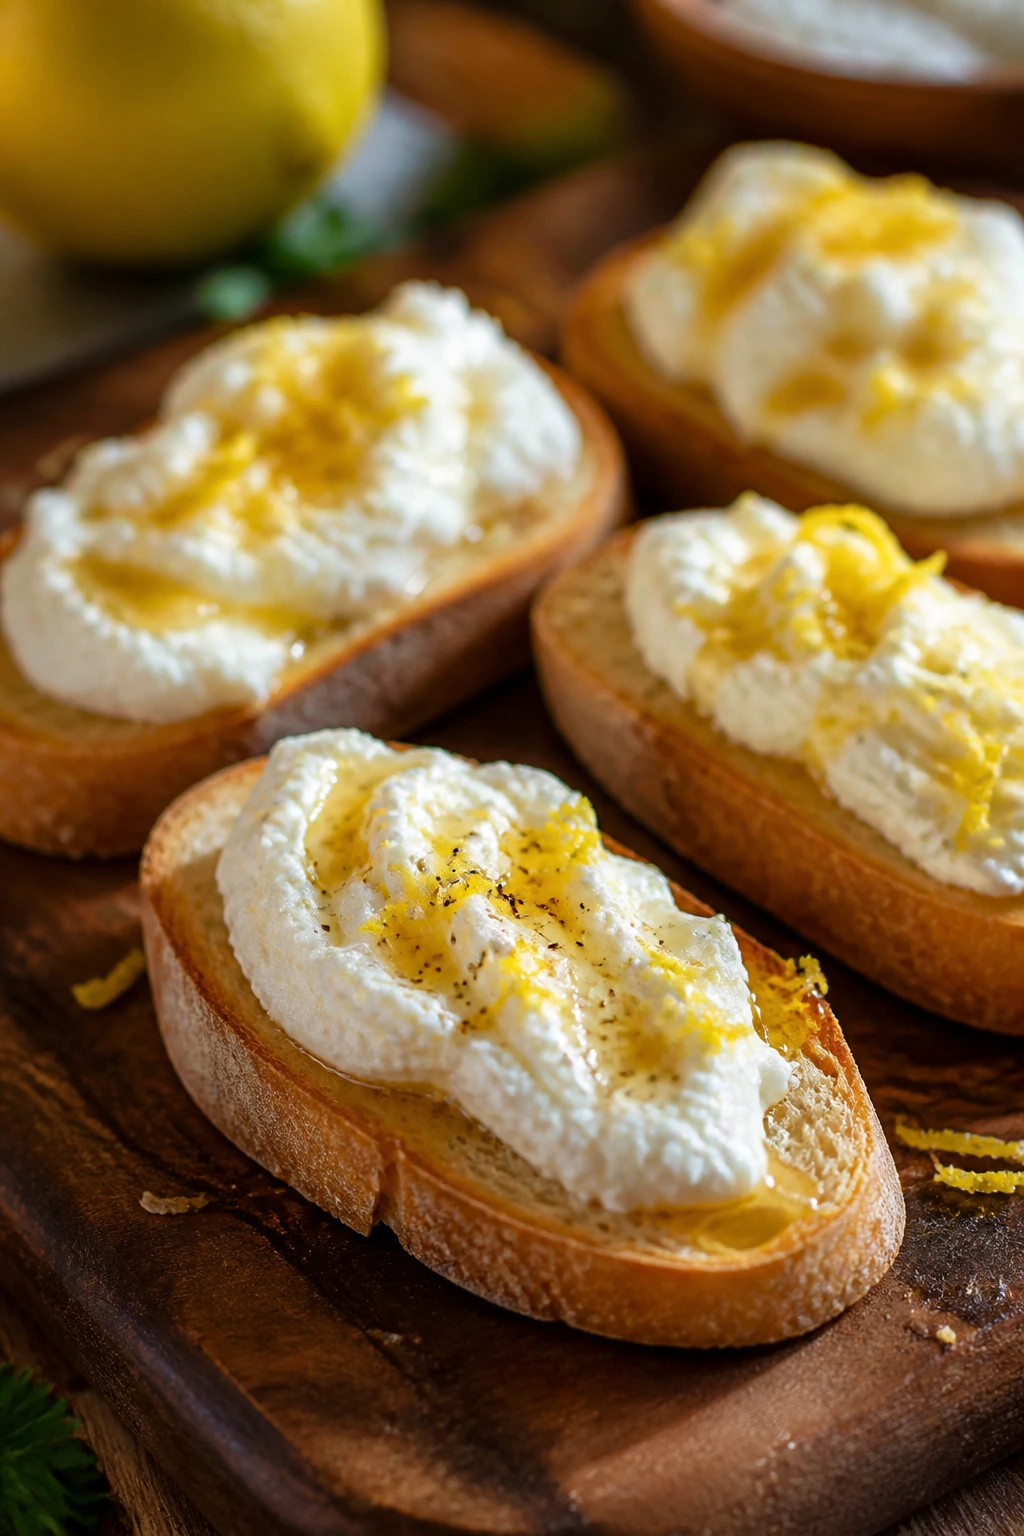
2. Whipped Ricotta Crostini with Lemon and Honey
This one tastes like a clean white shirt and a sharp jacket buttoned the right way. Whipped ricotta is mild, silky, and a little luxurious without being fussy, which makes it a smart counterweight to a heavy pasta sauce.
Why It Works:
Ricotta has enough body to hold a swoop on a toast round, but it needs salt, lemon, and olive oil to wake up. Whipping it with a spoon or mixer changes the texture from grainy to plush in a minute or two. Lemon zest keeps it from feeling flat, and a small drizzle of honey gives the whole thing a sweet edge that works especially well before a spicy arrabbiata or a rich baked ziti. The contrast is the point: smooth cheese, crisp bread, bright citrus.
Key Ingredients:
- 1 1/2 cups whole-milk ricotta
- Whole-milk ricotta gives you a softer, fuller spread.
- 1 tablespoon extra-virgin olive oil
- It smooths the cheese and adds flavor.
- 1 teaspoon lemon zest
- Zest only the yellow peel; the white part turns bitter.
- 1 tablespoon lemon juice
- Just enough to brighten, not so much that it thins the ricotta.
- 1/2 teaspoon kosher salt
- 1/4 teaspoon black pepper
- 1 tablespoon honey
- Warm it slightly if it is thick.
- 1 baguette, sliced and toasted
- 1 tablespoon chopped thyme leaves, optional
- Pinch of red pepper flakes, optional
Quick Steps:
- Whip the ricotta: Stir or beat the ricotta, olive oil, lemon zest, lemon juice, salt, and pepper until the mixture looks smooth and slightly fluffy.
- Toast the bread: Bake the baguette slices at 400°F (200°C) for 8 minutes, or until the edges are pale gold and the centers feel crisp.
- Spread generously: Spoon the ricotta onto each toast round and make a small well in the middle with the back of the spoon.
- Finish the top: Drizzle with honey, then add thyme or red pepper flakes if you want a little lift.
- Serve right away: Ricotta is at its best the moment the toast still has some warmth.
Equipment for This Recipe:
- Mixing bowl
- Hand mixer or sturdy spoon
- Sheet pan
- Microplane or fine grater
- Knife
How to Serve This Dish:
Set these on a plate with a little honey dripped across the board, not in a neat line. They work before a tomato cream pasta, a spinach pasta, or a simple bowl of cacio e pepe, because the ricotta is mild enough to let the sauce lead. Plan on two crostini per person if you have a few other appetizers on the table.
Pro Tips for This Recipe:
- If the ricotta seems wet, drain it in a fine-mesh strainer for 20 minutes before whipping.
- A tiny pinch of salt matters here; without it, the cheese tastes sleepy.
- Toast the bread fully. Soft bread under ricotta turns gummy fast.
- Keep the honey drizzle small. You want contrast, not dessert.
Variations on This Dish:
- Lemon-Pepper Ricotta: Skip the honey and finish with cracked black pepper and more lemon zest for a sharper profile.
- Hot Honey Ricotta: Use hot honey instead of plain honey if the pasta has a little heat.
- Herb Garden Crostini: Fold in chopped basil, parsley, and chives for a greener, more savory spread.
Common Mistakes to Avoid with This Dish:
- Using watery ricotta: It spreads poorly and tastes thin. Drain it first.
- Overdoing the lemon juice: Too much acid makes the cheese loose and sharp in the wrong way.
- Assembling too early: The toast softens, and the crostini loses the part that makes it worth eating.
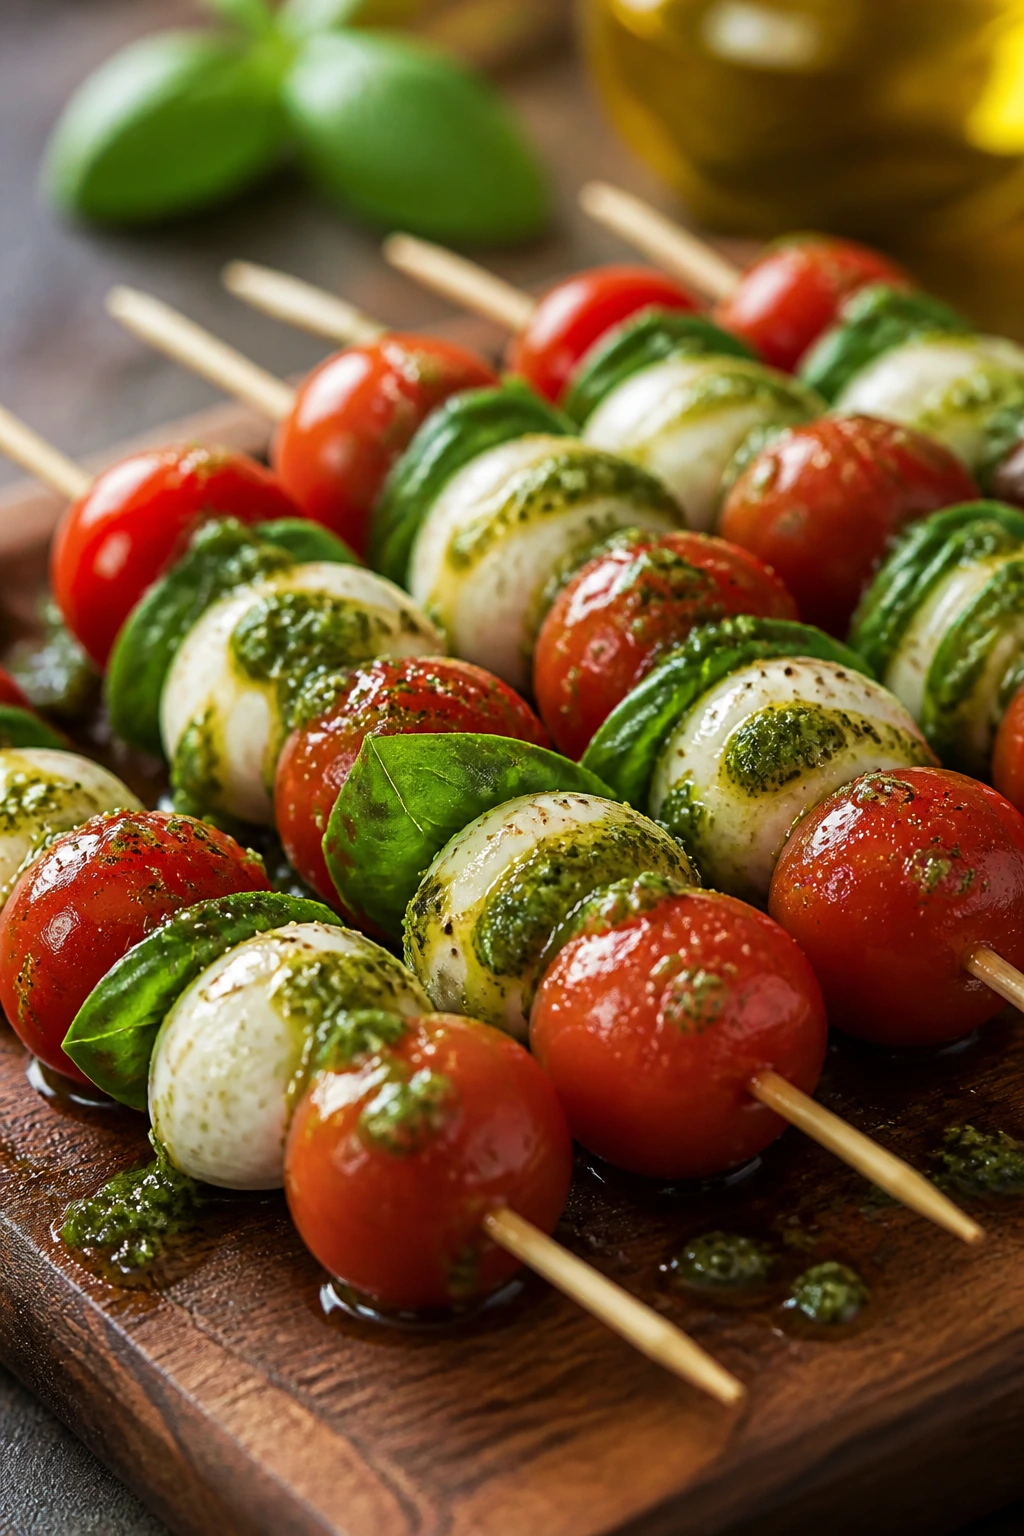
3. Caprese Skewers with Basil Pesto
A good caprese bite should taste like tomato juice on warm fingers. These skewers do the same job with less mess, and they look tidy on a tray when the pasta pot is still bubbling.
Why It Works:
Caprese skewer ingredients are already friendly to each other: tomato, mozzarella, basil. Threading them onto a pick keeps the ratio steady in every bite, and a little pesto ties the flavors together without turning the whole thing into a sauce bomb. The basil does the heavy lifting here, so use leaves that are glossy and not bruised. These work best with a long-simmered pasta, like meat sauce or mushroom ragù, because the fresh bite cuts through the depth.
Key Ingredients:
- 24 cherry tomatoes
- Choose tomatoes that feel firm but give slightly under pressure.
- 12 ounces fresh mozzarella balls, drained
- Mini bocconcini or ciliegine both work.
- 24 small basil leaves
- Pick the smaller, tender leaves if you can.
- 1/4 cup basil pesto
- Store-bought is fine if it tastes bright.
- 1 tablespoon olive oil
- 1 teaspoon balsamic glaze, optional
- 1/2 teaspoon kosher salt
- 1/4 teaspoon black pepper
- 12 short skewers or toothpicks
Quick Steps:
- Dry the mozzarella: Pat the cheese balls dry so the pesto clings instead of sliding off.
- Thread the skewers: Start with tomato, then basil leaf, then mozzarella. Repeat if the skewers are long enough.
- Season lightly: Arrange the skewers on a platter and sprinkle with salt and pepper.
- Finish with pesto: Thin the pesto with olive oil if needed, then drizzle over the skewers or serve it in a small bowl for dipping.
- Add glaze if you want it: A tiny drizzle of balsamic glaze makes them sweeter and a little more dramatic.
Equipment for This Recipe:
- Small skewers or toothpicks
- Serving platter
- Paper towels
- Small bowl for pesto
- Spoon
How to Serve This Dish:
These belong on the cold side of the table, next to olives or melon, where they can sit without losing texture. They pair especially well with tomato sauces and baked pasta because they keep the meal from feeling one-note. Three skewers per person is a fair starting point if dinner is still coming.
Pro Tips for This Recipe:
- Dry the mozzarella. Wet cheese ruins the pesto coating.
- Tear basil only if the leaves are large; tiny leaves stay prettier whole.
- Keep the balsamic glaze optional. Too much turns the flavor sticky.
- If the tomatoes are bland, salt them an hour ahead and chill.
Variations on This Dish:
- Pesto Swirl Caprese: Toss the tomatoes and mozzarella in pesto before skewering for a stronger herb note.
- Strawberry Caprese: Use halved strawberries in place of some tomatoes when you want a sweeter first bite.
- Grilled Caprese Skewers: Briefly char the tomatoes in a grill pan for a smokier edge.
Common Mistakes to Avoid with This Dish:
- Using giant tomatoes: The skewers become awkward and the ratios go off.
- Skipping the paper towel step: Wet mozzarella makes the whole thing slide around.
- Serving with wilted basil: Fresh basil is the point; once it browns, the skewers look tired.
4. Prosciutto-Wrapped Melon with Mint
This is the cold, salty, sweet bite that disappears before people admit they were hungry. The trick is choosing melon that smells fragrant and using prosciutto thin enough to cling without tearing.
Why It Works:
Prosciutto brings salt, fat, and that almost buttery cured-meat flavor; melon gives water, sweetness, and a cool finish. Together they make a clean palate reset before a heavy pasta bake or a rich cream sauce. Mint is optional, but I like it because it lifts the melon and keeps the whole bite from feeling too rich for a starter. A few drops of lemon or balsamic are enough; anything more starts arguing with the prosciutto.
Key Ingredients:
- 1 small cantaloupe or honeydew melon
- Choose fruit with a strong aroma at the stem end.
- 8 ounces thinly sliced prosciutto
- Thin slices wrap more cleanly.
- 1 tablespoon olive oil
- 1 teaspoon fresh lemon juice
- 8 to 10 mint leaves
- Fresh black pepper, to taste
- 1 teaspoon aged balsamic, optional
Quick Steps:
- Cut the melon: Remove the seeds and slice the melon into wedges or bite-size crescents.
- Wrap each piece: Drape a strip of prosciutto around each melon piece, pressing lightly so it sticks.
- Season the plate: Arrange the wrapped melon on a platter, then drizzle with olive oil and lemon juice.
- Add mint and pepper: Tear the mint leaves over the top and finish with a few turns of black pepper.
- Serve chilled: The melon should be cold and juicy, not icy.
Equipment for This Recipe:
- Sharp knife
- Spoon for scooping seeds
- Serving platter
- Small brush or spoon for oil
- Cutting board
How to Serve This Dish:
Set this beside a bowl of olives or a plate of marinated vegetables so the salty-sweet bite has company. It works especially well before pasta with tomato sauce or pesto, where the fresh melon keeps the meal from becoming dense too fast. Two wrapped pieces per person is plenty if there are other appetizers.
Pro Tips for This Recipe:
- Chill the melon before slicing so the wrapping stays neat.
- If the prosciutto tears, overlap two thin pieces instead of forcing one strip to do the job.
- A whisper of balsamic is enough. Too much makes the melon taste muddy.
- Mint should be fresh and soft; woody mint distracts from the fruit.
Variations on This Dish:
- Fig and Prosciutto: Swap melon for ripe figs when you want a deeper, jammy sweetness.
- Melon Caprese Style: Add a tiny mozzarella pearl with the melon for a richer bite.
- Citrus Prosciutto Cups: Serve the prosciutto in little folds around orange segments for a brighter version.
Common Mistakes to Avoid with This Dish:
- Using underripe melon: Bland fruit makes the whole bite fall flat.
- Wrapping thick prosciutto around tiny melon cubes: The ratio gets heavy and awkward.
- Adding too much dressing: Prosciutto already brings salt and fat.
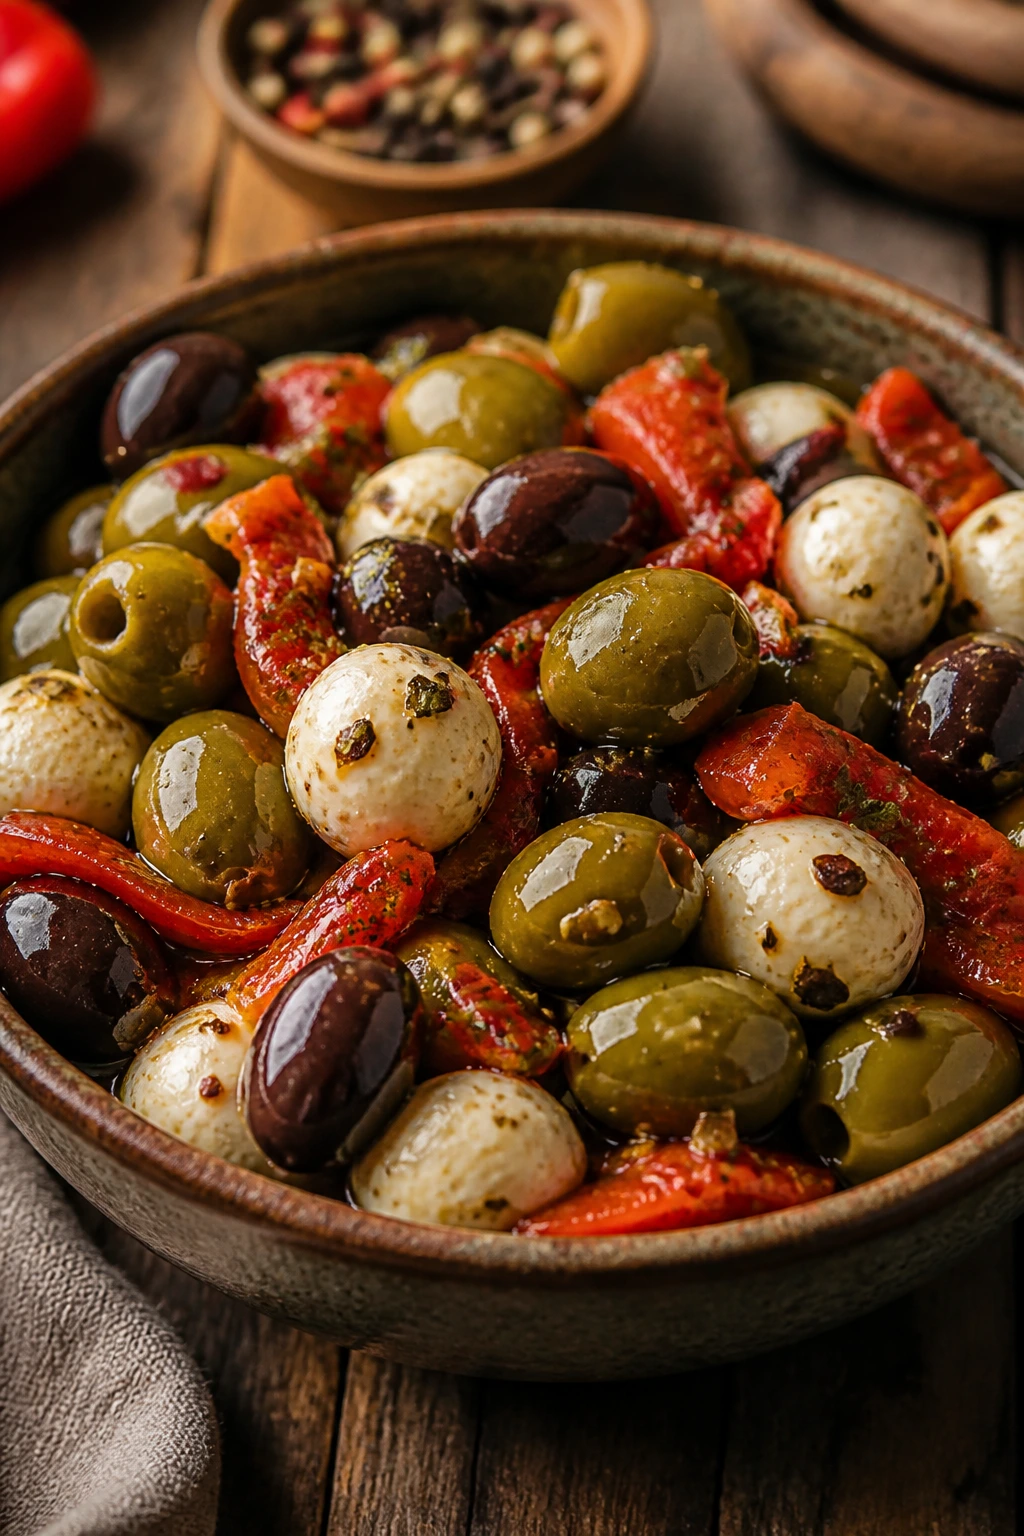
5. Marinated Olives with Mozzarella and Roasted Peppers
A bowl like this is the quiet workhorse of the table. It gives people something to pick at while the pasta finishes, and it tastes even better after it sits for a few minutes and the garlic and herbs get into the oil.
Why It Works:
Olives bring bitterness and salt, mozzarella brings softness, and roasted peppers add sweetness. The oil carries the oregano and garlic into every corner of the bowl, which is why this tastes better after a short rest than it does right away. It also buys you breathing room in the kitchen. Put this out before the sauce is done, and nobody will hover in the doorway asking how much longer.
Key Ingredients:
- 2 cups mixed olives, drained
- Use a mix of green and black for better flavor.
- 8 ounces mozzarella pearls
- Drain them well.
- 1/2 cup roasted red peppers, sliced
- Jarred peppers are fine here.
- 2 tablespoons extra-virgin olive oil
- 1 garlic clove, smashed
- 1 teaspoon dried oregano
- 1/2 teaspoon red pepper flakes
- 1 teaspoon lemon zest
- 2 tablespoons chopped parsley
- Black pepper, to taste
Quick Steps:
- Combine the base: Put the olives, mozzarella pearls, and roasted peppers in a bowl.
- Mix the marinade: Stir together the olive oil, garlic, oregano, red pepper flakes, lemon zest, parsley, and black pepper.
- Toss gently: Pour the marinade over the bowl and stir just enough to coat everything.
- Rest briefly: Let it sit for 15 to 20 minutes so the flavors settle in.
- Serve at room temperature: Cold oil goes dull; room temp oil tastes brighter.
Equipment for This Recipe:
- Mixing bowl
- Spoon
- Measuring spoons
- Knife
- Small jar, optional, for shaking the marinade
How to Serve This Dish:
Serve this in a shallow bowl with a spoon, not in a tall one where the good bits sink out of reach. It pairs cleanly with nearly any pasta, but it is especially helpful before baked rigatoni, lasagna, or anything with sausage. A few olives and one mozzarella pearl per person is enough to start.
Pro Tips for This Recipe:
- Drain the mozzarella well or the marinade gets cloudy.
- Smash, don’t mince, the garlic if you want a softer bite.
- Add chopped basil at the very end if you want a fresher finish.
- Let the bowl sit at room temperature for 10 minutes before serving.
Variations on This Dish:
- Herby Ligurian Bowl: Add chopped rosemary and thyme for a piney, more savory profile.
- Pepperoncini Olive Mix: Swap the roasted peppers for sliced pepperoncini if you want more snap and heat.
- Mini Antipasto Bowl: Add cubes of salami or soppressata for a meatier version.
Common Mistakes to Avoid with This Dish:
- Serving straight from the fridge: The oil turns stiff and the flavors hide.
- Using too much garlic: One clove is enough; raw garlic can take over.
- Forgetting to drain the mozzarella: Wet cheese waters down the marinade.
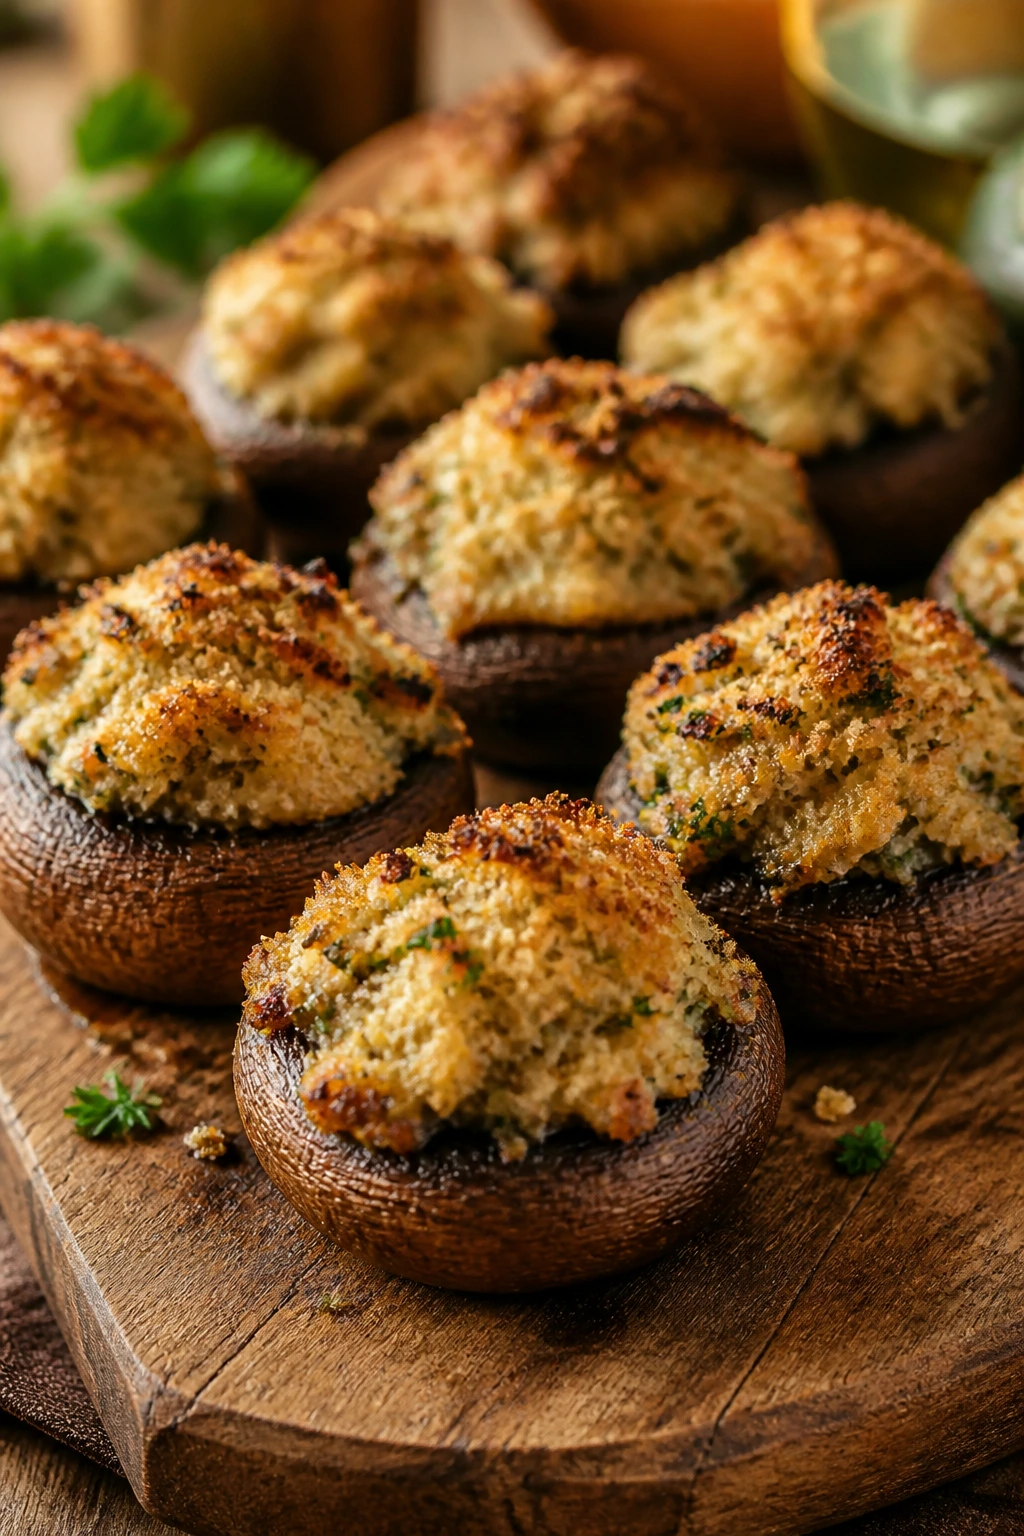
6. Garlic Parmesan Stuffed Mushrooms
These are the kind of starters people keep reaching for after they say they are “saving room.” The mushroom caps soften, the filling gets bronzed at the top, and the Parmesan turns the whole tray savory in a way that smells expensive for very little actual effort.
Why It Works:
Mushrooms have enough moisture to stay juicy in the oven, but they also make a nice little cup for a breadcrumb filling. The stems get chopped and cooked back into the stuffing, which gives you a deeper mushroom flavor instead of a random pile of crumbs. Garlic, Parmesan, and parsley keep the filling lively, and a touch of cream cheese or mascarpone makes it hold together. They belong next to a pasta with tomato sauce or sausage because the browned mushroom flavor sits happily under stronger sauces.
Key Ingredients:
- 24 medium cremini mushrooms
- Look for caps that are firm and dry.
- 2 tablespoons butter
- 2 garlic cloves, minced
- 1/2 cup panko breadcrumbs
- 1/3 cup grated Parmesan
- 2 tablespoons chopped parsley
- 2 ounces cream cheese or mascarpone, softened
- 1 tablespoon olive oil
- Salt and black pepper
Quick Steps:
- Prep the mushrooms: Remove the stems, wipe the caps clean, and chop the stems finely.
- Cook the filling: Sauté the chopped stems in butter and garlic for 3 to 4 minutes until they smell nutty and the moisture cooks off.
- Mix it up: Stir the stem mixture with breadcrumbs, Parmesan, parsley, cream cheese, salt, and pepper.
- Stuff the caps: Fill each mushroom cap generously and set them on an oiled sheet pan.
- Bake: Roast at 400°F (200°C) for 16 to 18 minutes until the tops are golden and the mushrooms have softened.
Equipment for This Recipe:
- Sheet pan
- Skillet
- Spoon for stuffing
- Mixing bowl
- Paper towels
How to Serve This Dish:
Serve them hot, right off the tray, because that crisp top and soft center are the whole appeal. They go especially well with baked ziti, lasagna, or a mushroom pasta, and four to six mushrooms per person is a sensible starter if you have other appetizers around. A small platter lined with parsley looks better than a pile in a bowl.
Pro Tips for This Recipe:
- Don’t soak the mushrooms. Wipe them clean instead.
- Chop the stems finely so the filling holds together.
- If the stuffing seems dry, add a teaspoon of olive oil.
- Use a hot oven; low heat makes them rubbery before the tops brown.
Variations on This Dish:
- Sausage-Stuffed Mushrooms: Fold in cooked Italian sausage for a heartier bite.
- Spinach and Ricotta Mushrooms: Add chopped spinach and ricotta for a softer, creamier filling.
- Lemon-Parmesan Mushrooms: Add lemon zest for a brighter finish that works with seafood pasta.
Common Mistakes to Avoid with This Dish:
- Overfilling the caps so the topping burns before the mushrooms cook: Pack them in, but do not mound them too high.
- Using watery cheese: The filling loosens and slides off.
- Underbaking: The caps should be tender, not squeaky.
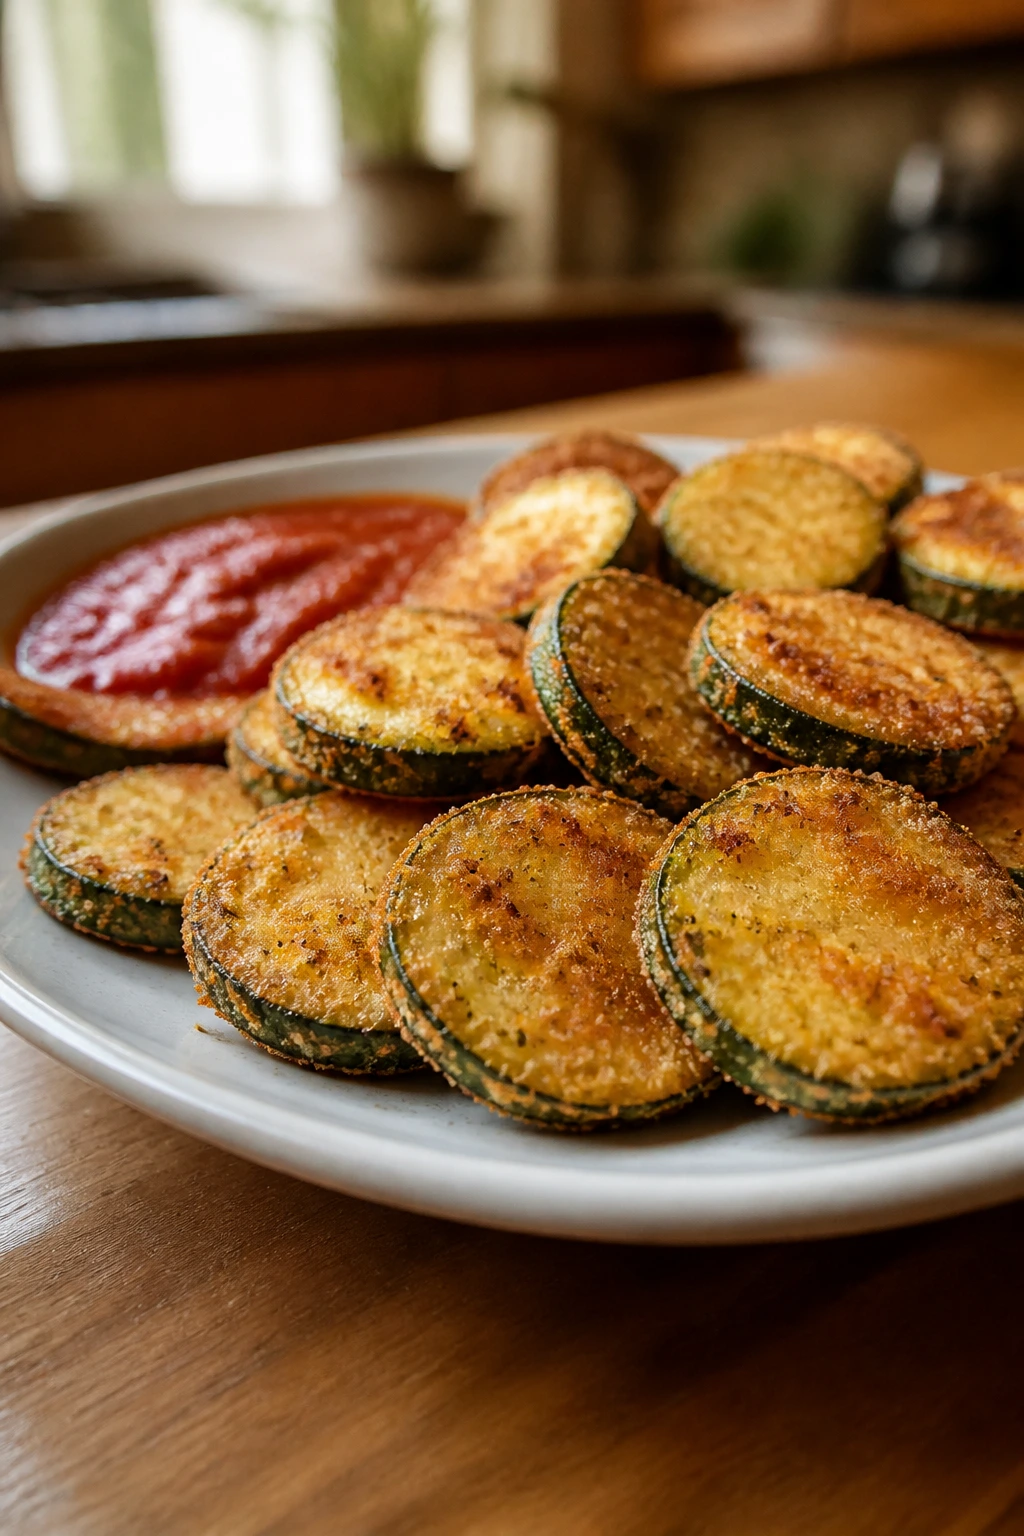
7. Fried Zucchini Coins with Marinara
There’s something deeply satisfying about zucchini when it gets a crisp shell and a soft middle. On pasta night, these fried coins give you the fry-shop texture people crave, but the tomato sauce keeps them from feeling heavy.
Why It Works:
Zucchini has a mild flavor and a high water content, which is a problem if you roast it and expect crunch. Frying fixes that fast, especially when the slices are salted first and lightly coated in flour, egg, and breadcrumbs. Parmesan in the crumb adds a salty edge that carries the zucchini without making it bland. Marinara on the side turns it into a true appetizer instead of a lonely vegetable side.
Key Ingredients:
- 2 medium zucchini, sliced into 1/4-inch coins
- Keep the slices even so they cook at the same pace.
- 1 teaspoon kosher salt
- 1 cup all-purpose flour
- 2 large eggs, beaten
- 1 cup breadcrumbs or panko
- 1/2 cup grated Parmesan
- 1 teaspoon dried oregano
- 1/2 teaspoon garlic powder
- Neutral oil for frying
- 1 cup warm marinara, for serving
Quick Steps:
- Salt the zucchini: Toss the coins with salt and let them sit for 10 minutes, then blot them dry.
- Set up the breading: Put flour in one bowl, eggs in another, and breadcrumbs mixed with Parmesan, oregano, and garlic powder in a third.
- Bread the slices: Dredge each coin in flour, then egg, then crumb mixture. Press lightly so the coating sticks.
- Fry in batches: Heat 1/2 inch of oil to 350°F (175°C) and fry the coins for 2 to 3 minutes per side until deeply golden.
- Drain and serve: Move them to a rack or paper towels and serve hot with marinara.
Equipment for This Recipe:
- Deep skillet or Dutch oven
- Tongs
- Three shallow bowls
- Wire rack
- Paper towels
How to Serve This Dish:
Pile the coins on a platter with the marinara in a small bowl in the center. They work well before a tomato pasta or a meat sauce because they echo the main dish without repeating it exactly. Plan on 5 to 6 coins per person if you have other starters.
Pro Tips for This Recipe:
- Blot the zucchini after salting or the coating slides off.
- Keep the oil hot enough; cool oil means greasy zucchini.
- Fry in small batches so the temperature stays steady.
- A little extra Parmesan in the crumb makes a big difference.
Variations on This Dish:
- Baked Zucchini Coins: Bake at 425°F (220°C) on a greased rack for a lighter version, though the crust will be thinner.
- Spicy Zucchini Coins: Add red pepper flakes to the crumb mix.
- Herb Crumb Zucchini: Swap oregano for chopped parsley and basil for a fresher flavor.
Common Mistakes to Avoid with This Dish:
- Skipping the salting step: The zucchini leaks into the breading and softens.
- Crowding the pan: The oil cools and the coins get limp.
- Serving too late: Fried zucchini wants to be eaten while the crust is still crisp.
8. Arancini with Mozzarella Center
Arancini are the appetizer that makes people stop talking for a second. You cut into the crust and hit soft rice, melted cheese, and a crisp shell that crackles if the oil was hot enough.
Why It Works:
Arancini are built from cold, seasoned risotto, so they turn leftover rice into something worth the fryer. The starch in the risotto helps the balls hold together, while the mozzarella gives you that molten center people always hope for. Breadcrumbs on the outside turn properly crisp when the oil is hot and the rice is chilled. They are a little more work than the rest of this collection, but the payoff is huge next to a plate of pasta with red sauce or meat ragù.
Key Ingredients:
- 3 cups cold cooked risotto
- It should be fully chilled and firm.
- 1 large egg
- 1/2 cup grated Parmesan
- 1/2 cup mozzarella, cut into small cubes
- 1 cup all-purpose flour
- 2 large eggs, beaten
- 2 cups breadcrumbs
- Salt and black pepper
- Neutral oil for frying
- Warm marinara, for serving
Quick Steps:
- Chill the risotto: Make sure the rice is cold enough to shape without sticking to your hands.
- Mix the base: Stir the egg, Parmesan, salt, and pepper into the risotto.
- Shape and fill: Scoop a handful of rice, press a mozzarella cube into the center, and form a tight ball.
- Bread carefully: Roll each ball in flour, egg, and breadcrumbs.
- Fry until crisp: Fry at 350°F (175°C) for 3 to 4 minutes until deep golden, then drain and serve with marinara.
Equipment for This Recipe:
- Sheet tray
- Three shallow bowls
- Slotted spoon
- Dutch oven or heavy pot
- Thermometer, if you have one
How to Serve This Dish:
Serve arancini on a platter with sauce underneath or beside them, never over the top. They pair best with a lighter pasta course, since they are already rich and filling, and two small arancini per person is usually enough before dinner. A wedge of lemon on the side is not traditional everywhere, but it sharpens the bite.
Pro Tips for This Recipe:
- Cold risotto shapes better than warm risotto.
- Seal the cheese in tightly or it leaks out in the fryer.
- Do not fry at a low temperature. The crust soaks oil and turns heavy.
- Make them the same size so they cook evenly.
Variations on This Dish:
- Saffron Arancini: Use saffron risotto if you want a deeper color and classic Sicilian aroma.
- Spinach Arancini: Fold in finely chopped spinach for a greener center.
- Baked Arancini: Brush with oil and bake at 425°F (220°C) for 20 minutes, though the shell will be less crackly.
Common Mistakes to Avoid with This Dish:
- Using loose risotto: If it’s too wet, the balls fall apart.
- Skipping the chill time: Warm rice sticks to everything and shapes badly.
- Frying too many at once: The oil temperature drops and the crust dulls.
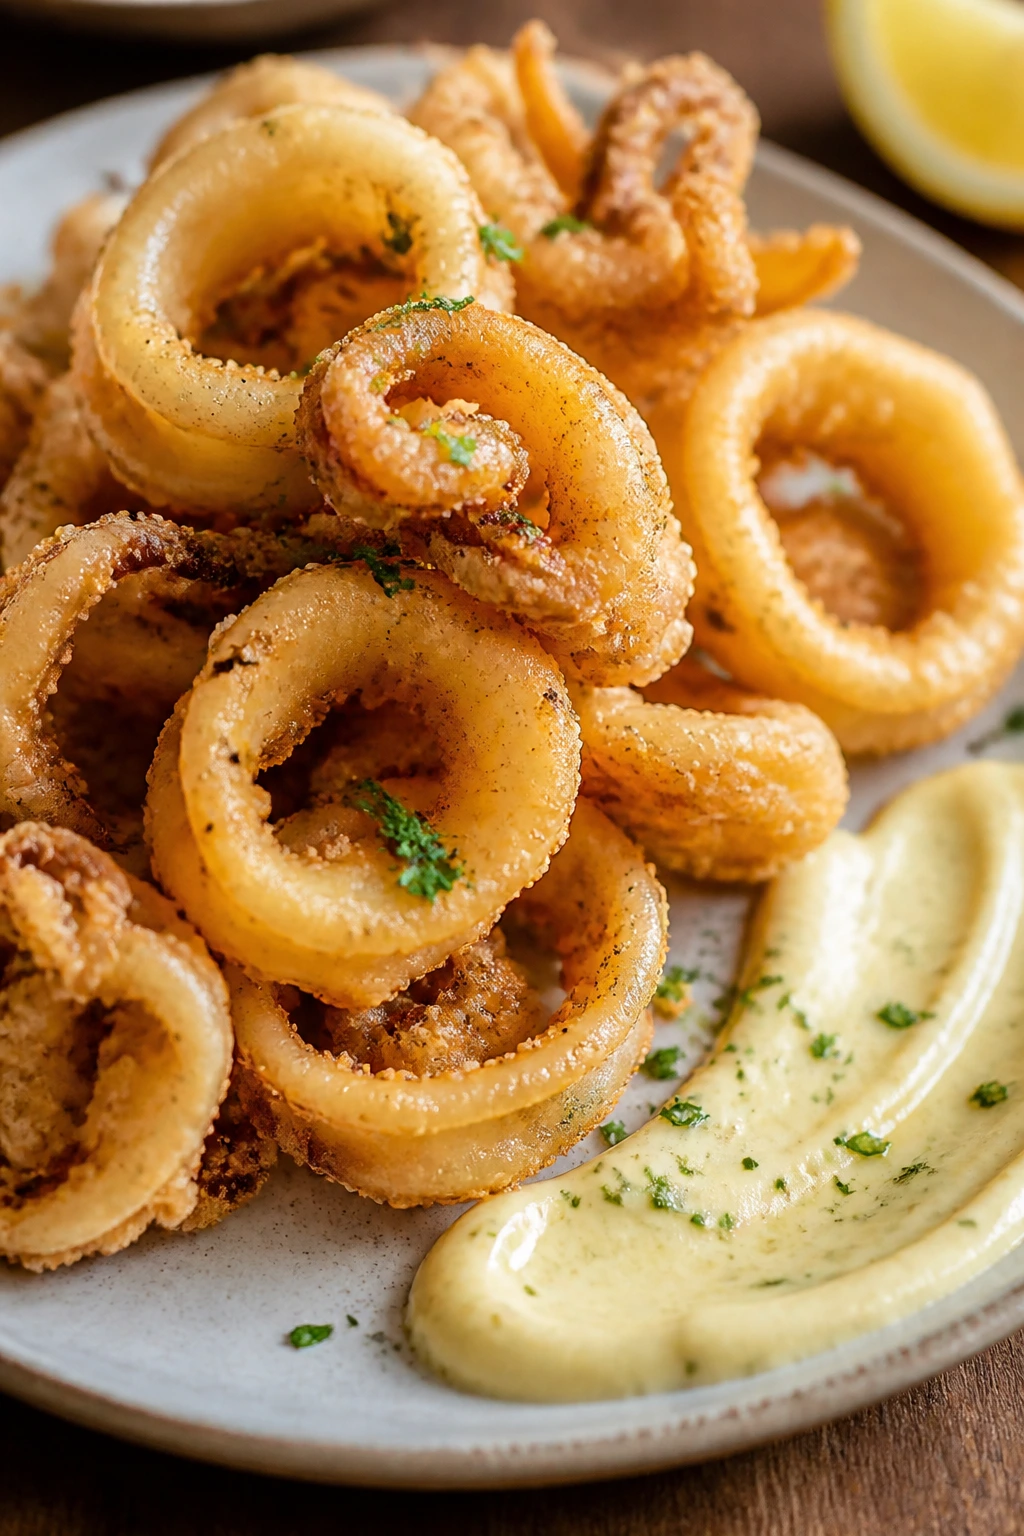
9. Calamari Fritti with Lemon Garlic Aioli
Calamari should be crisp, not chewy. When the batter is light and the oil is hot, the rings turn tender in minutes and the smell alone can pull people into the kitchen before you call them.
Why It Works:
Squid cooks fast. That’s the whole secret and the whole trap. If you fry it briefly at the right temperature, it stays tender and sweet; if you linger, it goes rubbery. A mix of flour and semolina gives a lighter crust with a little grit, and the lemon garlic dip adds enough brightness to make the fried coating feel sharp instead of greasy. This is a strong match for pasta night because it gives you a seafood note before a tomato or olive-oil pasta.
Key Ingredients:
- 1 1/2 pounds cleaned squid, cut into rings with tentacles separated
- Pat it dry before breading.
- 1 cup all-purpose flour
- 1/2 cup semolina or rice flour
- 1 teaspoon kosher salt
- 1/2 teaspoon black pepper
- 1/2 teaspoon paprika, optional
- Neutral oil for frying
- Lemon wedges, for serving
For the Lemon Garlic Aioli:
- 1/2 cup mayonnaise
- 1 tablespoon lemon juice
- 1 small garlic clove, grated
- Pinch of salt
Quick Steps:
- Mix the dip: Stir the mayonnaise, lemon juice, garlic, and salt together and chill it.
- Dry the squid: Pat the rings and tentacles with paper towels so the coating sticks.
- Coat lightly: Toss the squid with flour, semolina, salt, pepper, and paprika. Shake off the excess.
- Fry fast: Heat oil to 375°F (190°C) and fry in small batches for 1 to 2 minutes until pale golden and crisp.
- Drain and salt: Move the calamari to a rack, salt immediately, and serve with lemon wedges and aioli.
Equipment for This Recipe:
- Heavy pot or deep skillet
- Spider or slotted spoon
- Paper towels
- Mixing bowl
- Thermometer
How to Serve This Dish:
Serve calamari the second it comes out of the oil, because waiting kills the texture. It works beside a pasta with red sauce, seafood pasta, or even a simple lemon pasta, and a small pile for each person is enough; this is not a dish you want to weigh down the table. Put the aioli in a shallow bowl so people can dip quickly.
Pro Tips for This Recipe:
- Dry squid is the difference between crisp and gummy.
- Keep the batches small so the oil stays hot.
- Salt right after frying, while the surface is still tacky.
- If you want a lighter crust, use more semolina and less flour.
Variations on This Dish:
- Spicy Calamari: Add cayenne or red pepper flakes to the flour mixture.
- Cornmeal Crust Calamari: Replace part of the semolina with fine cornmeal for more crunch.
- Lemon Herb Calamari: Toss the hot rings with chopped parsley and lemon zest before serving.
Common Mistakes to Avoid with This Dish:
- Overcooking the squid: Even 30 extra seconds can make it rubbery.
- Letting the coating get wet before frying: The crust won’t crisp evenly.
- Using lukewarm oil: The calamari drinks oil and the whole batch gets heavy.
10. Burrata with Roasted Cherry Tomatoes
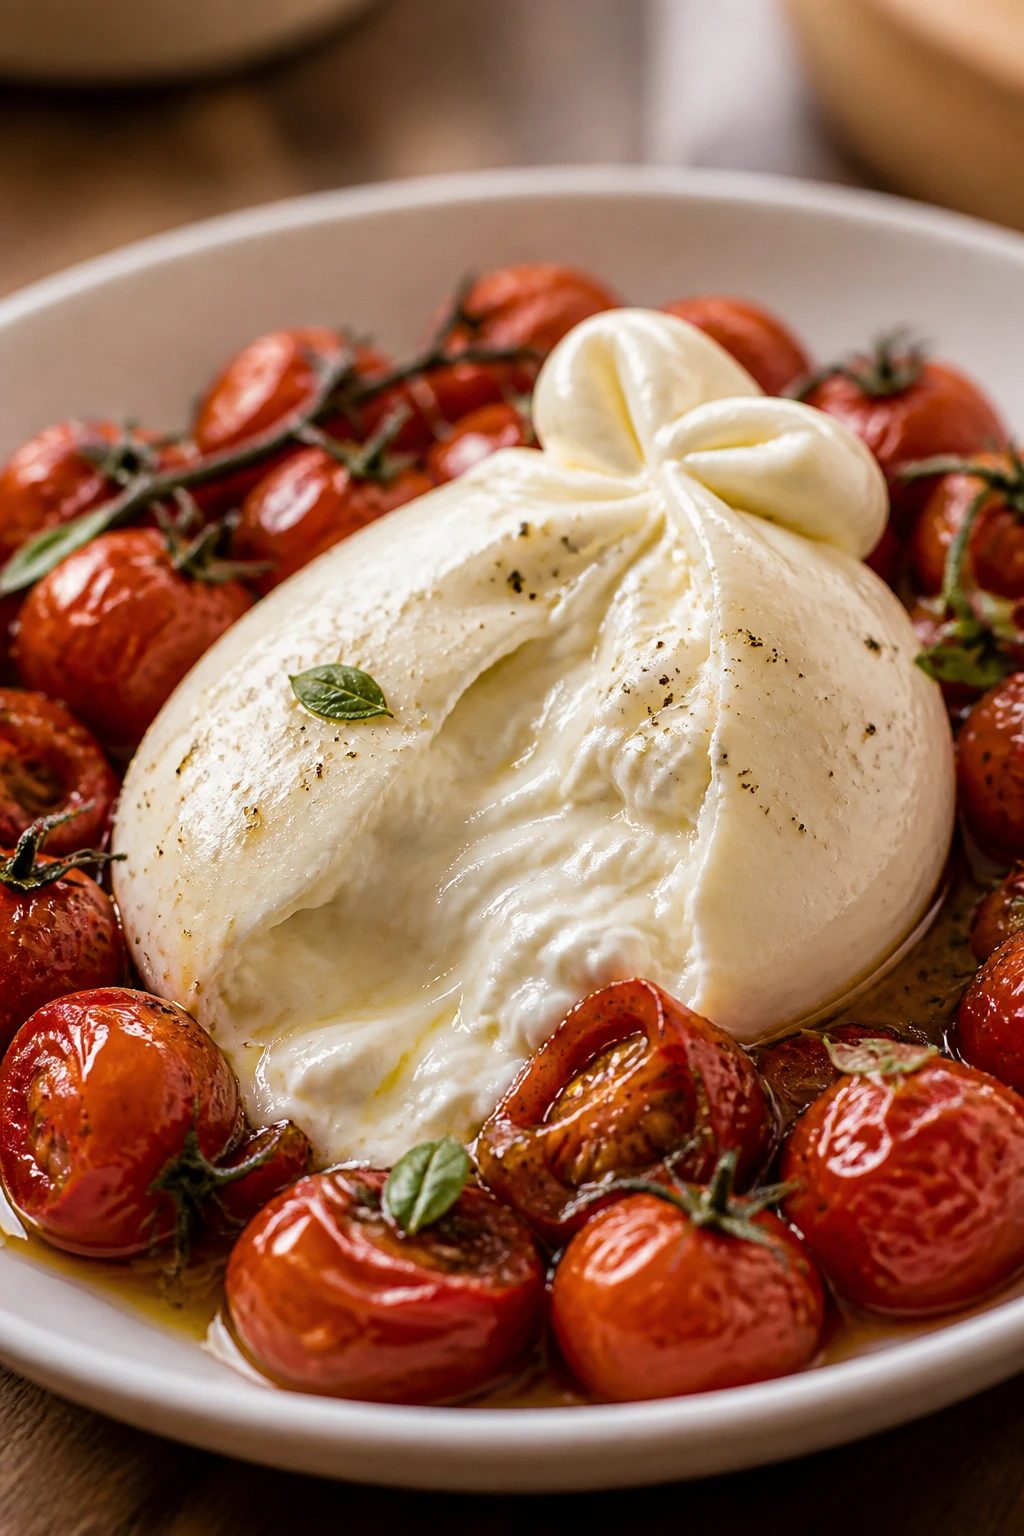
Burrata is one of those ingredients that looks almost too soft to be useful until you cut into it and the cream spills out. Roasted tomatoes make that cream taste fuller, sweeter, and a little more dramatic on the plate.
Why It Works:
Burrata needs a warm contrast. Roasted cherry tomatoes give you concentrated sweetness and just enough acidity to keep the cheese from feeling one-dimensional. A little garlic and oregano in the roasting pan perfumes the whole thing, and crostini on the side give people something sturdy to scoop with. It is a clean, rich starter that plays especially well before pesto pasta or a simple olive-oil noodle dish.
Key Ingredients:
- 2 balls burrata, about 8 ounces each
- Keep them chilled until just before serving.
- 3 cups cherry tomatoes
- 2 tablespoons olive oil
- 1 garlic clove, smashed
- 1 teaspoon dried oregano
- 1/2 teaspoon kosher salt
- 1/4 teaspoon black pepper
- 1/4 cup basil leaves
- Crostini, for serving
Quick Steps:
- Roast the tomatoes: Toss the tomatoes with olive oil, garlic, oregano, salt, and pepper. Roast at 425°F (220°C) for 15 to 18 minutes until they blister and split.
- Set the burrata down first: Place the burrata on a shallow platter or bowl.
- Spoon the tomatoes over and around it: Pour the hot tomatoes and some of the pan juices onto the cheese.
- Add basil: Tear the basil over the top while the tomatoes are still warm.
- Serve with crostini: Let people break into the burrata and scoop it up.
Equipment for This Recipe:
- Sheet pan
- Serving platter
- Spoon
- Knife
- Small bowl for crostini, optional
How to Serve This Dish:
This wants to be the centerpiece of the cold starters, even though the tomatoes are warm. Put it on a platter large enough for the cheese to spread a little once cut, and surround it with crostini or grilled bread. One ball of burrata can comfortably serve four as a starter, maybe more if there are several other appetizers on the table.
Pro Tips for This Recipe:
- Warm tomatoes against cold burrata is the contrast you want.
- Use a shallow dish so the juices pool around the cheese instead of running away.
- A pinch of flaky salt at the end sharpens everything.
- Don’t drown the burrata under tomatoes. Leave some cheese visible.
Variations on This Dish:
- Balsamic Burrata: Add a few drops of balsamic glaze at the end for a sweeter edge.
- Pepper Burrata: Roast sliced red peppers with the tomatoes for a smokier plate.
- Herbed Burrata: Finish with chopped parsley and mint when you want a fresher, brighter flavor.
Common Mistakes to Avoid with This Dish:
- Serving burrata straight from the fridge: The center tastes muted and the texture feels stiff.
- Using underseasoned tomatoes: The cheese cannot carry the whole dish by itself.
- Over-roasting until the tomatoes dry out: You want juicy blistered skins, not shriveled skins.
11. Italian Antipasto Skewers
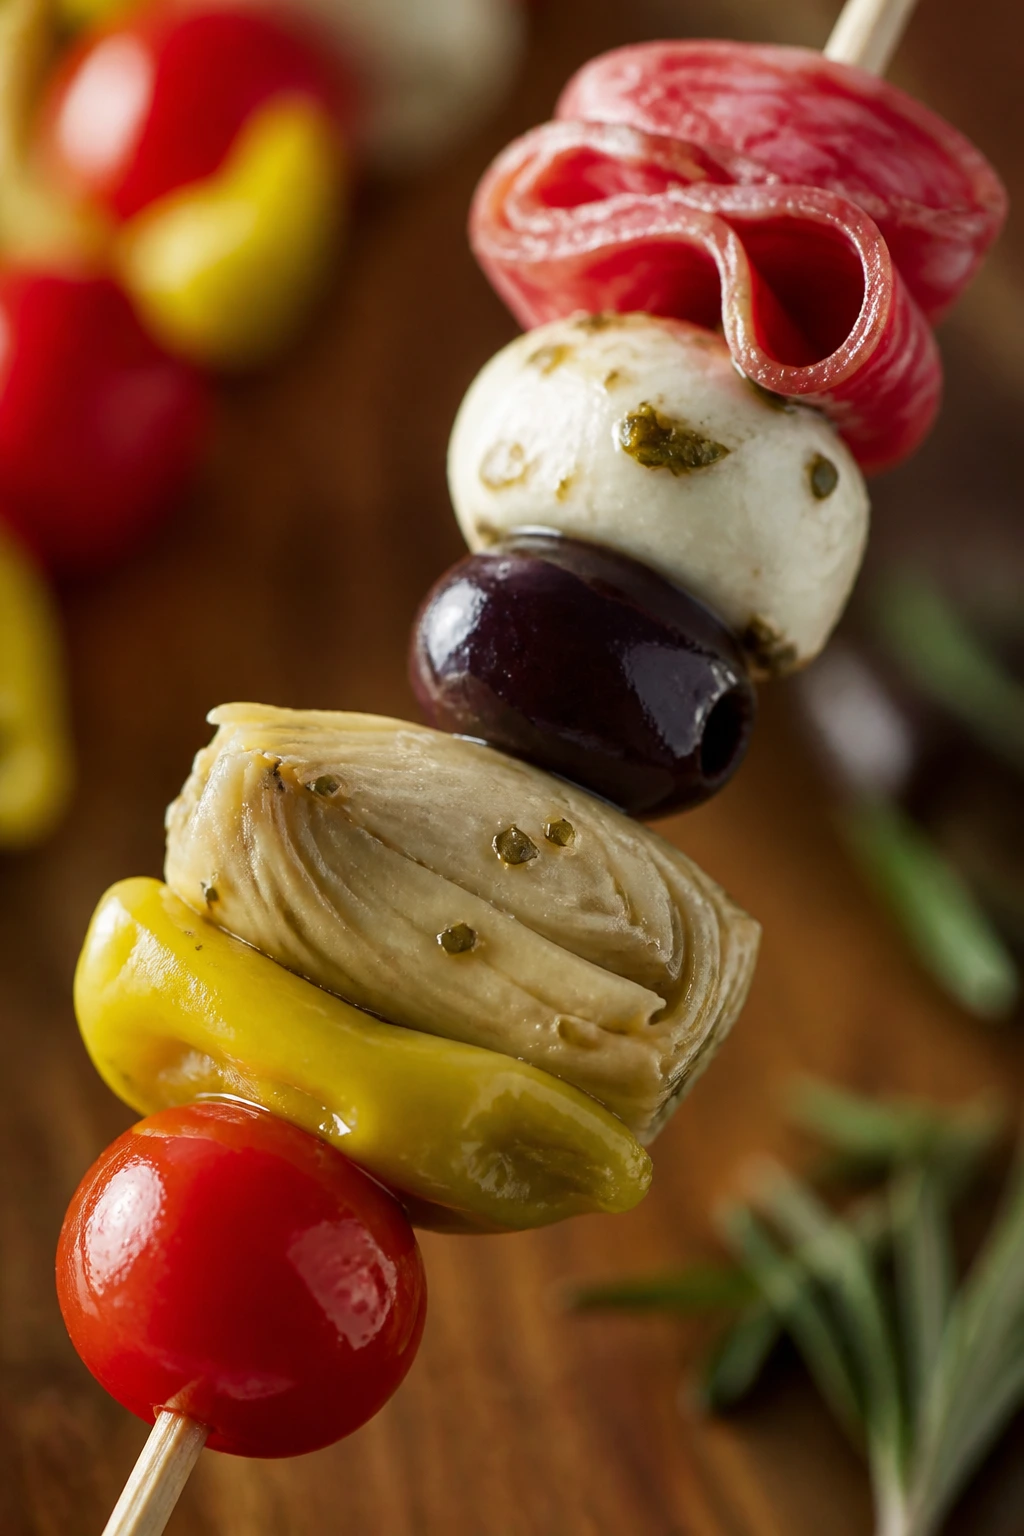
These are the tray passers’ appetizer. Everything is already bite-size, nothing needs a knife, and the flavor hits in layers—salty, briny, meaty, sharp, and cool all in one bite.
Why It Works:
Antipasto skewers compress the familiar flavors of an Italian cold plate into something easy to hand around. Salami brings fat and spice, mozzarella softens the salt, olives and pepperoncini cut through the richness, and artichoke hearts add a little tangy softness. They are an efficient answer to a crowded pasta-night table because they don’t require extra plates or much cleanup. If you want a starter that lets the cook breathe for a minute, this is a strong one.
Key Ingredients:
- 12 slices salami, folded
- 12 mini mozzarella balls
- 12 pitted olives
- 12 marinated artichoke heart pieces
- 12 pepperoncini rings or small pieces
- 12 cherry tomatoes
- 2 tablespoons olive oil or Italian dressing
- 1 tablespoon chopped parsley
- Black pepper, to taste
- 12 short skewers
Quick Steps:
- Drain everything well: Moisture ruins the grip and makes the skewers slide.
- Thread the ingredients: Build each skewer with a little mix of salami, cheese, olive, artichoke, pepperoncini, and tomato.
- Dress lightly: Drizzle with olive oil or a small amount of Italian dressing.
- Finish with parsley and pepper: Scatter both over the tray.
- Chill briefly if needed: Ten minutes in the fridge firms them up, but do not leave them so long that the tomatoes lose flavor.
Equipment for This Recipe:
- Short skewers
- Cutting board
- Paper towels
- Serving platter
- Small bowl for dressing
How to Serve This Dish:
Lay them flat on a long platter so people can grab one without knocking the next one over. They pair with almost any pasta, but especially with baked pasta or tomato sauces, because the salty, briny notes keep the meal from feeling too soft. Two skewers per person is a comfortable starter if dinner is close.
Pro Tips for This Recipe:
- Dry the artichokes and mozzarella before threading.
- Fold the salami instead of stacking a flat slice; it looks better and stays put.
- Use cherry tomatoes that are firm, not watery.
- Dress lightly. These are meant to taste like the ingredients, not the marinade.
Variations on This Dish:
- Vegetarian Antipasto Skewers: Replace salami with more artichokes, roasted peppers, and marinated mushrooms.
- Spicy Skewers: Add pepperoncini and soppressata for more heat.
- Cheese-Forward Skewers: Use provolone cubes instead of mozzarella for a firmer, saltier bite.
Common Mistakes to Avoid with This Dish:
- Packing the skewer too tightly: The flavors get muddy and the pieces tear.
- Using wet ingredients: They slide around and dilute the dressing.
- Making them huge: Antipasto skewers should be one-bite or two-bite, not a meal on a stick.
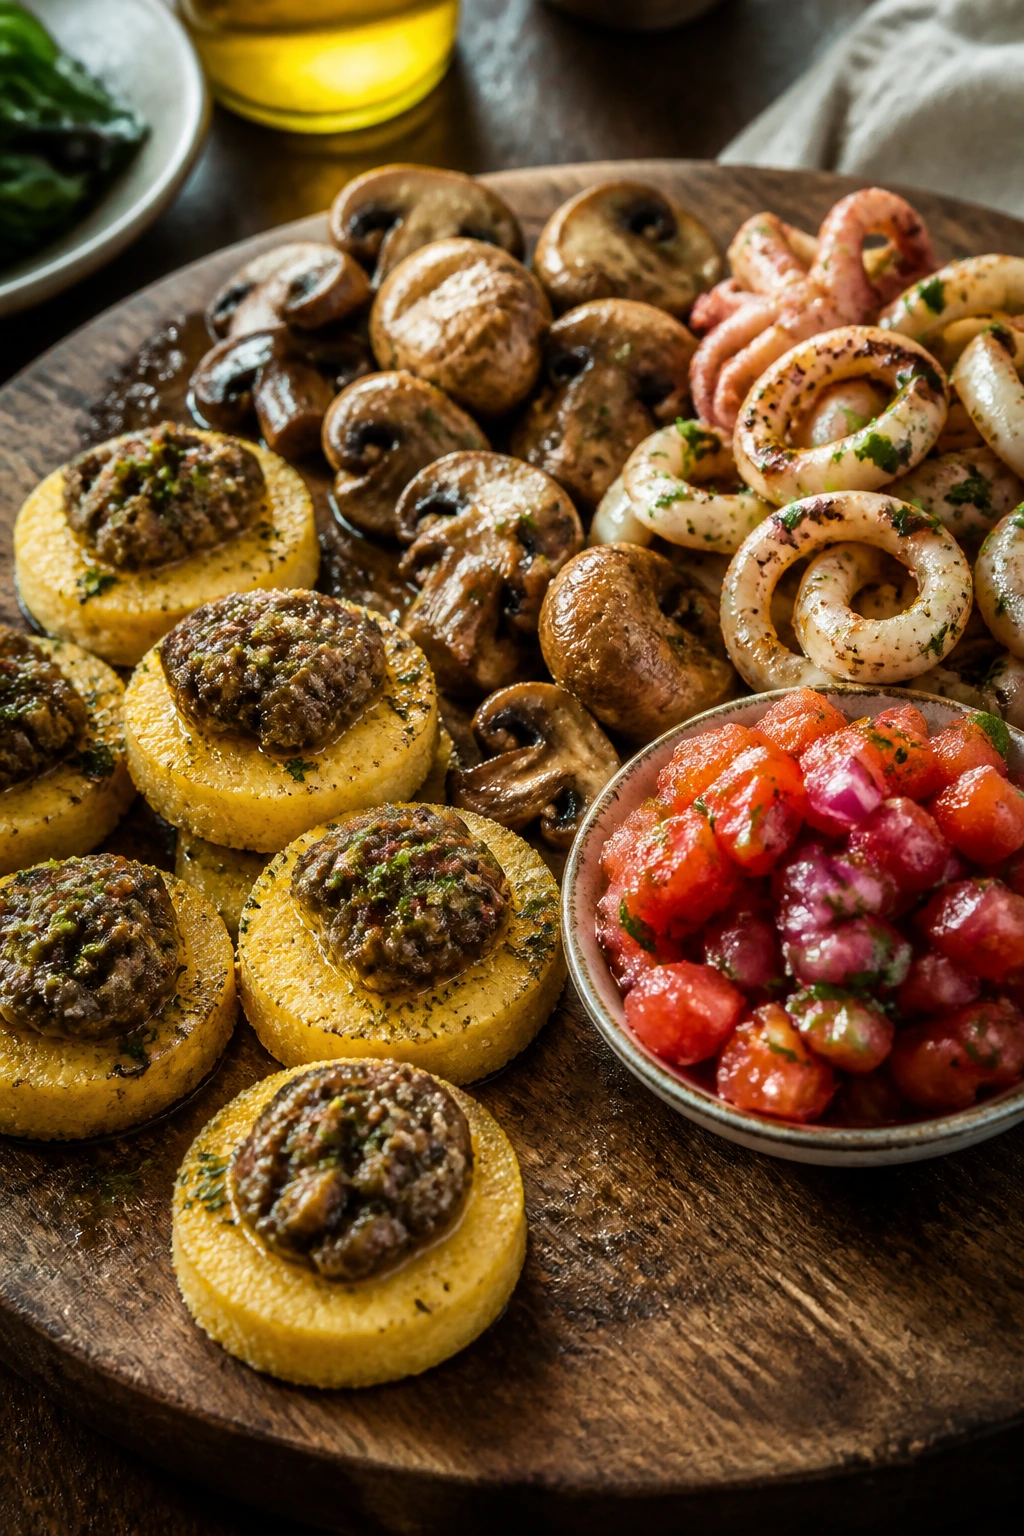
12. Polenta Fries with Marinara
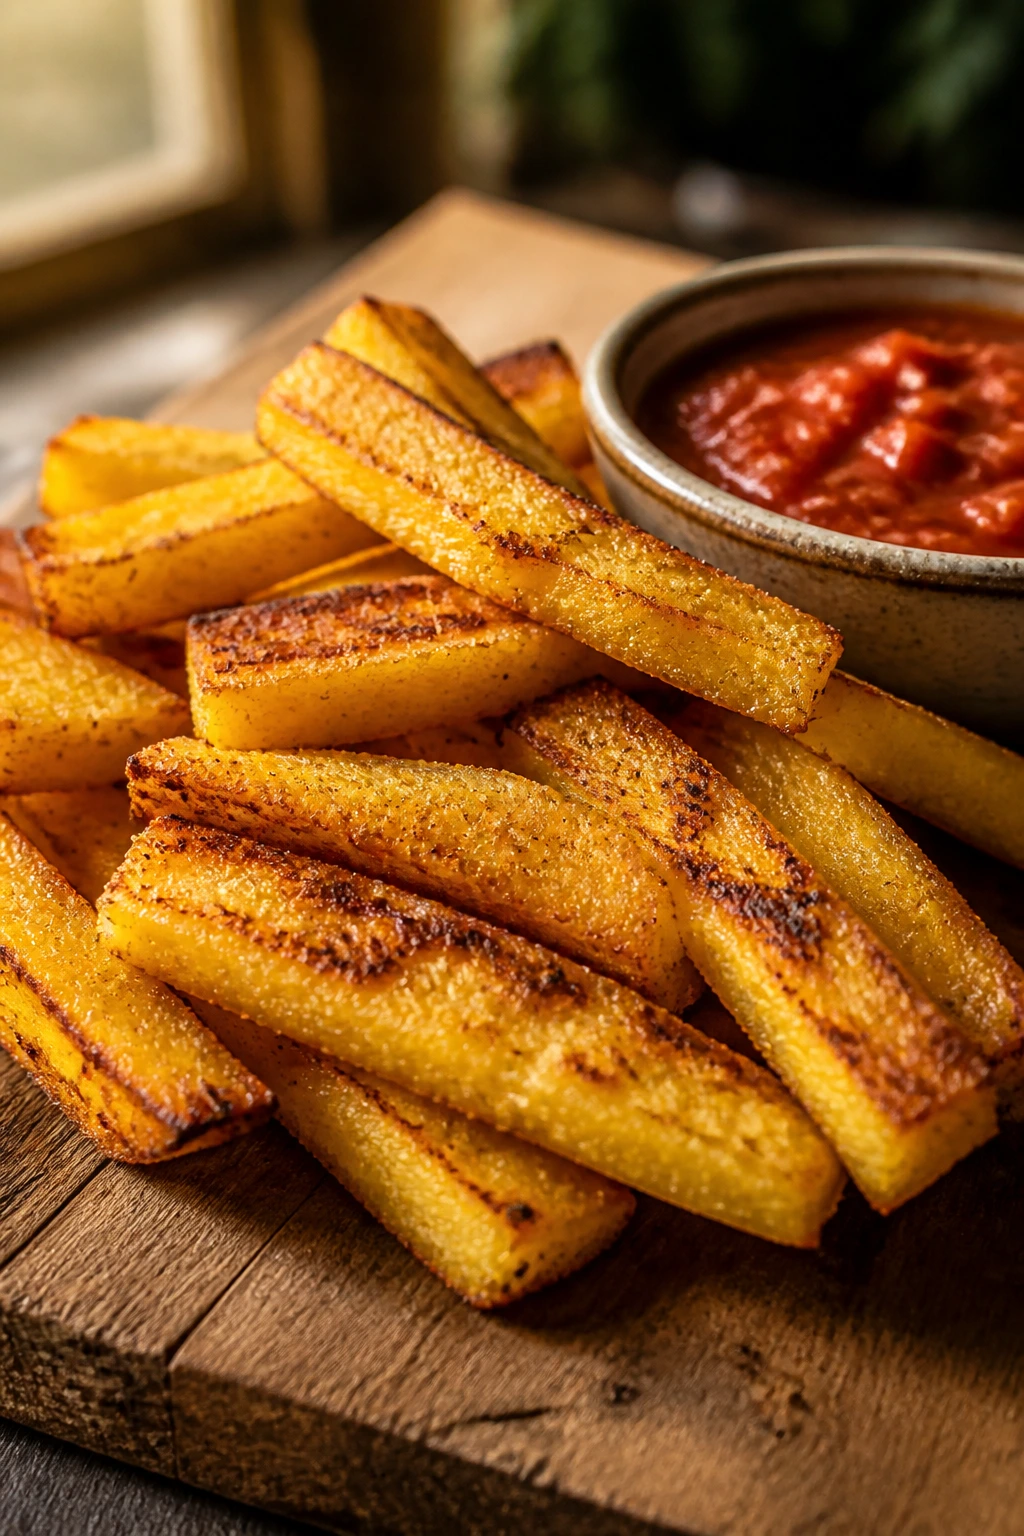
Polenta fries are what happen when you want something golden and dippable without committing to actual potato fries. They crisp at the edges, stay soft in the middle, and give the table a little cornmeal character that works well before pasta.
Why It Works:
Polenta sets into a firm slab once chilled, which means you can cut it into fries and roast or fry it without losing shape. The outside gets crisp, the inside stays creamy, and Parmesan adds enough savoriness that the fries don’t feel like a blank starch. Marinara is the natural dip because it keeps the whole thing tied to the rest of dinner. I like this as a starter before sausage pasta or baked ziti because it feels hearty without being heavy.
Key Ingredients:
- 1 tube precooked polenta, 18 ounces
- Or use chilled homemade polenta if that’s what you have.
- 2 tablespoons olive oil
- 1/4 cup grated Parmesan
- 1 teaspoon kosher salt
- 1/2 teaspoon black pepper
- 1 teaspoon chopped rosemary or thyme
- 1 cup warm marinara
- Flaky salt, optional
Quick Steps:
- Slice the polenta: Cut the tube into fry-shaped sticks about 1/2 inch thick.
- Oil the surface: Brush the fries with olive oil so they brown instead of drying out.
- Season well: Sprinkle with Parmesan, salt, pepper, and rosemary.
- Bake until crisp: Roast at 425°F (220°C) for 22 to 25 minutes, turning once halfway through, until the edges are deep gold.
- Serve with marinara: Put the sauce in a warm bowl and keep the fries on a rack or platter.
Equipment for This Recipe:
- Sheet pan
- Sharp knife
- Pastry brush, optional
- Small bowl for marinara
- Spatula
How to Serve This Dish:
Serve these as the crunchy, starchy appetizer on the table, especially if the pasta is sauced lightly. They hold up nicely with meatballs, tomato sauces, or a bowl of olives, and three to four fries per person is a reasonable starter portion. They are easiest to eat when the sauce is nearby but not poured over them.
Pro Tips for This Recipe:
- Chill homemade polenta until firm before slicing.
- Turn them once so both sides crisp.
- Use a rack if you want them to stay crisp for longer.
- A little flaky salt at the end makes the corn flavor pop.
Variations on This Dish:
- Cheesy Polenta Fries: Add more Parmesan and a little mozzarella on top near the end of baking.
- Spicy Polenta Fries: Add crushed red pepper to the seasoning mix.
- Herb-Roasted Fries: Use rosemary, thyme, and sage together for a more savory edge.
Common Mistakes to Avoid with This Dish:
- Skipping the oil brush: Dry polenta browns poorly.
- Overcrowding the sheet pan: The fries steam instead of crisp.
- Serving them cold: They lose the soft middle that makes them good.
13. Mini Meatballs in Marinara
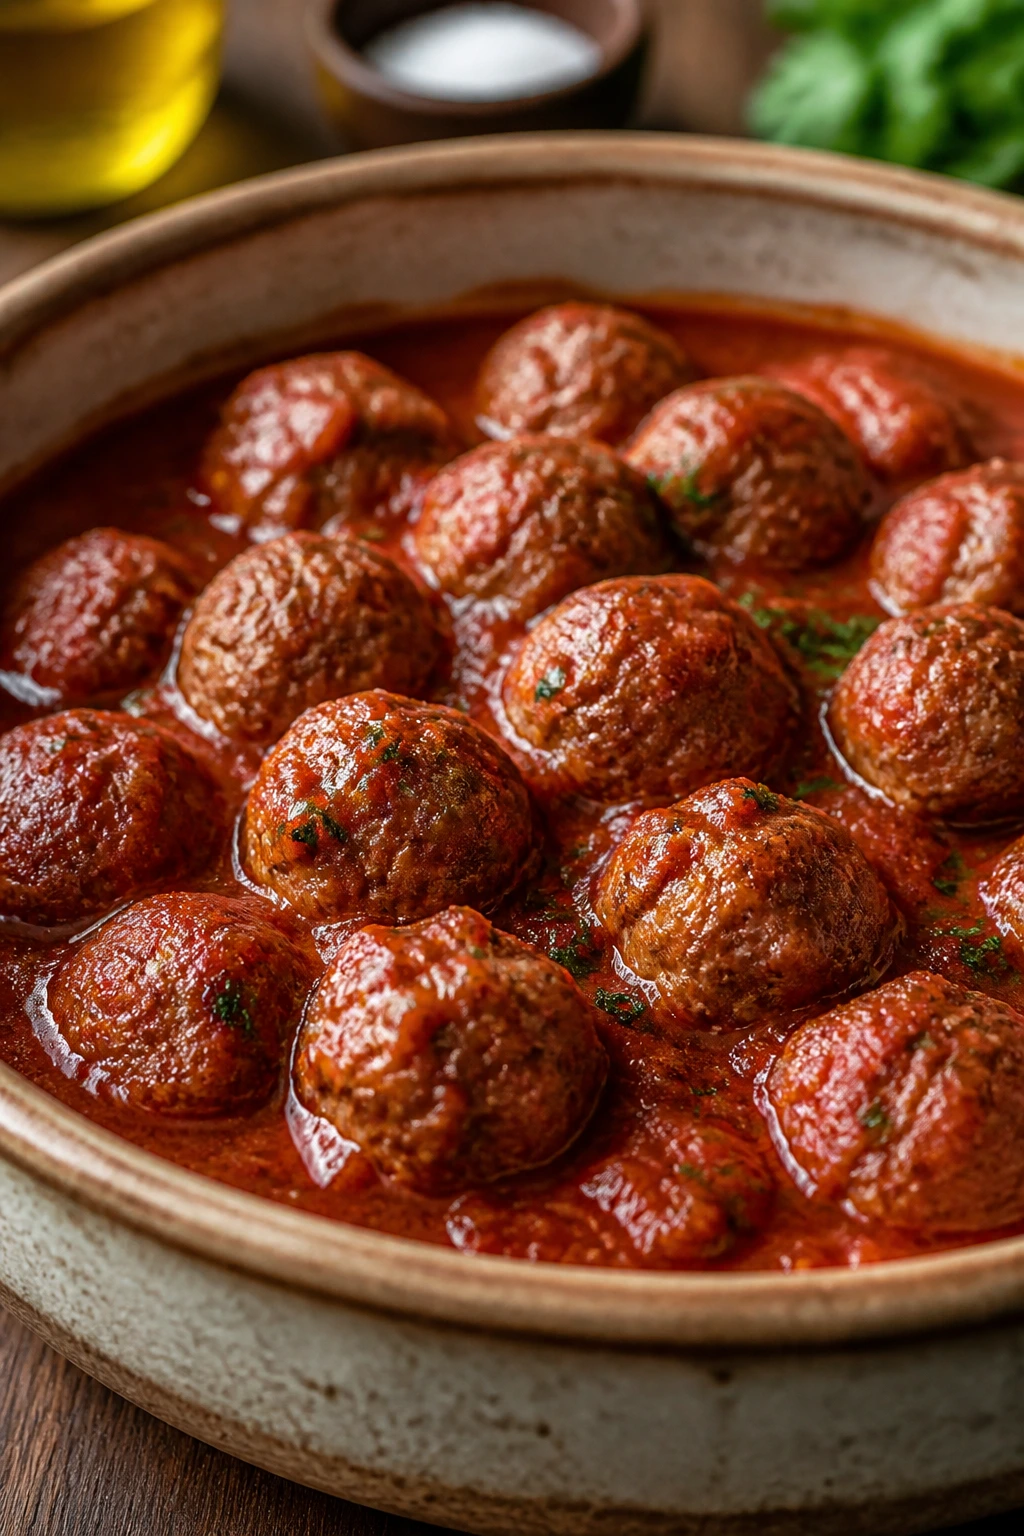
Mini meatballs are the appetizer people pretend they do not need until they eat three. They are savory, tender, and just small enough to feel like a starter rather than a full meal, which is exactly why they work so well before pasta.
Why It Works:
A mix of beef and pork gives the meatballs flavor and tenderness without making them greasy. Breadcrumbs and milk keep the texture soft, while Parmesan and parsley bring the Italian profile that you expect. Baking the meatballs first keeps the kitchen cleaner than frying them, and a brief simmer in marinara coats them without breaking them apart. Serve them with a spicy pasta or baked pasta, and the table starts to feel properly abundant.
Key Ingredients:
- 1 pound ground beef
- 1/2 pound ground pork
- 1/2 cup breadcrumbs
- 1/4 cup milk
- 1 large egg
- 1/3 cup grated Parmesan
- 2 garlic cloves, minced
- 2 tablespoons chopped parsley
- 1 teaspoon kosher salt
- 1/2 teaspoon black pepper
- 2 cups marinara
- 1 tablespoon olive oil
Quick Steps:
- Soak the breadcrumbs: Mix breadcrumbs and milk in a bowl for 2 minutes.
- Mix the meatball base: Add beef, pork, egg, Parmesan, garlic, parsley, salt, and pepper. Stir gently until just combined.
- Form small balls: Shape into 1-inch meatballs and place on an oiled sheet pan.
- Bake: Roast at 425°F (220°C) for 10 to 12 minutes until browned and cooked through.
- Simmer in sauce: Warm the marinara, add the meatballs, and simmer for 5 to 10 minutes so they soak up the sauce.
Equipment for This Recipe:
- Sheet pan
- Mixing bowl
- Spoon or small scoop
- Skillet or saucepan
- Tongs
How to Serve This Dish:
Pile the meatballs into a shallow bowl with a spoonful of marinara underneath and a little Parmesan on top. They fit neatly beside red-sauce pasta, lasagna, or even a cheesy baked rigatoni, and two or three meatballs per person is enough if dinner is near. A basket of bread on the side makes sense here.
Pro Tips for This Recipe:
- Mix gently. Hard mixing makes dense meatballs.
- Keep them small so they bake quickly and stay appetizer-sized.
- Simmer only a short time in the sauce or they lose shape.
- If the mix feels sticky, wet your hands before rolling.
Variations on This Dish:
- Turkey Meatballs: Use ground turkey and add a little extra Parmesan for flavor.
- Spicy Meatballs: Mix in red pepper flakes or chopped Calabrian chili.
- Cheese-Stuffed Meatballs: Hide a tiny cube of mozzarella in the center of each one.
Common Mistakes to Avoid with This Dish:
- Overmixing the meat: The balls turn tight and springy.
- Making them too large: They stop feeling like appetizers.
- Adding them to boiling sauce: The rough bubbling can break the crust.
14. Spinach and Ricotta Puff Pastry Puffs

These puffs are flaky, creamy, and a little messy in the best way. They bring that buttery bakery smell to the table without requiring you to make puff pastry from scratch, which is a trade I will happily take.
Why It Works:
Puff pastry gives you instant layers and crisp edges, while the spinach-ricotta filling keeps the center soft and savory. The key is removing excess moisture from the spinach so the pastry can actually puff instead of steaming into a damp pocket. Parmesan and nutmeg make the filling taste round and warm, not flat. These are especially nice before a light pasta like lemon linguine or a tomato-basil pasta, because they feel rich without dominating the meal.
Key Ingredients:
- 1 sheet puff pastry, thawed
- 1 cup ricotta
- 1 cup chopped cooked spinach, squeezed dry
- 1 egg
- 1/3 cup grated Parmesan
- Pinch of nutmeg
- 1/2 teaspoon kosher salt
- 1/4 teaspoon black pepper
- 1 egg beaten with 1 teaspoon water, for egg wash
Quick Steps:
- Heat the oven: Set it to 400°F (200°C) and line a sheet pan with parchment.
- Mix the filling: Stir the ricotta, spinach, egg, Parmesan, nutmeg, salt, and pepper until combined.
- Cut the pastry: Slice the puff pastry into 9 squares.
- Fill and seal: Spoon a little filling onto each square, fold into triangles or leave as squares, and seal the edges with a fork.
- Brush and bake: Brush with egg wash and bake for 18 to 20 minutes until puffed and golden.
Equipment for This Recipe:
- Sheet pan
- Parchment paper
- Mixing bowl
- Fork
- Pastry brush
How to Serve This Dish:
These are best warm, when the pastry is still crisp and the filling has a gentle, creamy center. They pair nicely with a simple pasta and a green salad, and one or two puffs per person is enough because they are richer than they look. Put them on a parchment-lined tray so the bottoms stay crisp.
Pro Tips for This Recipe:
- Squeeze the spinach dry in a towel. Any extra water hurts the pastry.
- Keep the pastry cold until the oven is ready.
- Don’t overfill the squares or they burst.
- A little grated Parmesan on top before baking gives extra color.
Variations on This Dish:
- Ricotta and Herb Puffs: Swap the spinach for chopped basil, parsley, and chives.
- Mushroom Puff Pockets: Use finely chopped sautéed mushrooms instead of spinach.
- Spicy Puffs: Add red pepper flakes and a little pecorino for a sharper bite.
Common Mistakes to Avoid with This Dish:
- Using wet filling: The pastry turns limp.
- Letting the pastry warm up too much before baking: It won’t puff as well.
- Cutting them open too early: The steam needs a minute to settle.
15. Rosemary Focaccia Squares
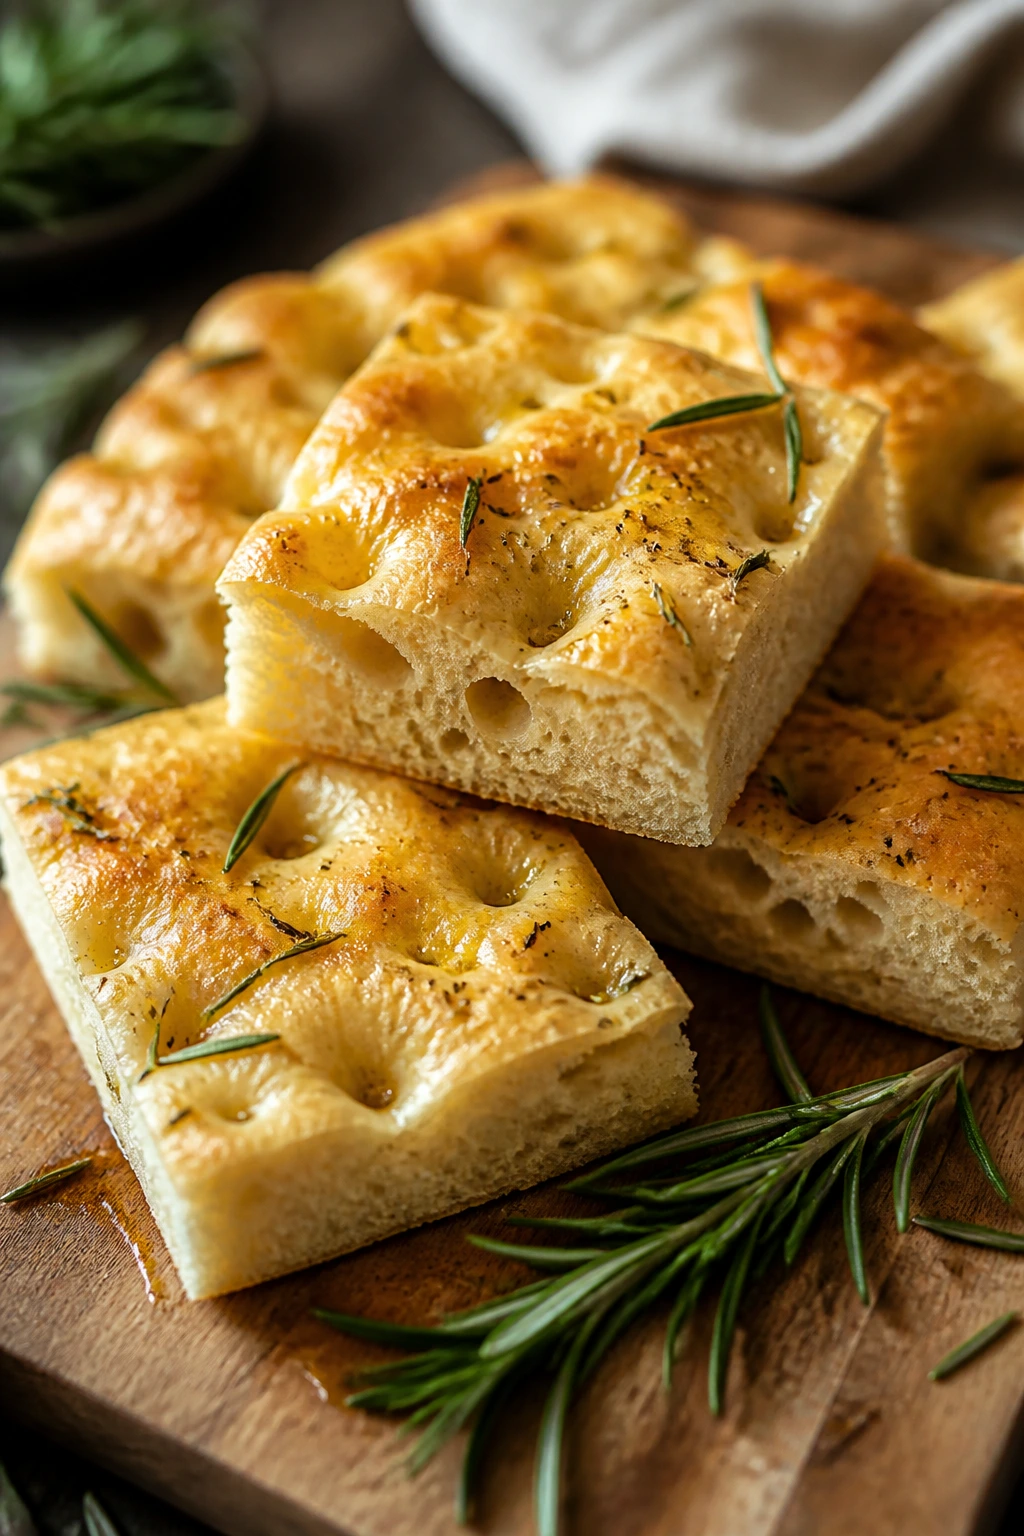
A pan of focaccia makes the room smell like olive oil and warm bread in the best possible way. It is less a side dish than a signal that dinner is about to feel like a gathering.
Why It Works:
Focaccia gives the table a soft, airy bread with a crisp, oiled top, which is exactly what pasta night needs when sauce is involved. The dimples catch olive oil and salt, so every square has those little pockets of flavor that make people keep reaching for “one more piece.” Rosemary brings a piney note that works with tomato sauces, seafood pastas, and even creamy sauces. This is the dish that lets you mop the bowl later without apology.
Key Ingredients:
- 4 cups bread flour
- 2 1/4 teaspoons instant yeast
- 2 teaspoons kosher salt
- 1 3/4 cups warm water
- 1/4 cup extra-virgin olive oil, plus more for the pan
- 2 tablespoons fresh rosemary leaves
- Flaky salt, for finishing
Quick Steps:
- Mix the dough: Stir flour, yeast, salt, water, and olive oil until no dry flour remains.
- Rest the dough: Let it rise in a covered bowl for about 1 hour, until puffy.
- Move it to the pan: Oil a sheet pan generously, spread the dough into it, and let it relax for 20 minutes.
- Dimple and top: Press your fingers deep into the dough, drizzle with more oil, and scatter rosemary and flaky salt over the top.
- Bake: Roast at 450°F (230°C) for 20 to 24 minutes until deeply golden at the edges.
Equipment for This Recipe:
- Large mixing bowl
- Sheet pan
- Bench scraper or spatula
- Measuring cups
- Clean kitchen towel
How to Serve This Dish:
Cut the focaccia into squares and serve it warm on a board with a small dish of olive oil for dipping. It works with nearly every pasta, but especially with saucy tomato dishes and seafood pasta where you want bread with some structure. A small square per person is enough to start, though people often come back for more.
Pro Tips for This Recipe:
- Use enough oil in the pan to make the bottom crisp.
- Let the dough relax before stretching or it springs back.
- Dimple the dough deep enough to hold the oil.
- Slice after it cools for a few minutes so the crumb settles.
Variations on This Dish:
- Olive Focaccia: Press chopped olives into the dough before baking.
- Garlic Focaccia: Add sliced garlic to the top during the last 10 minutes of baking.
- Tomato Focaccia: Nestle halved cherry tomatoes into the dimples for a brighter, juicier loaf.
Common Mistakes to Avoid with This Dish:
- Under-oiling the pan: The bottom sticks and loses its crispness.
- Rushing the rise: The bread gets dense.
- Cutting immediately out of the oven: The texture needs a brief rest to settle.
16. Sicilian Panelle with Lemon
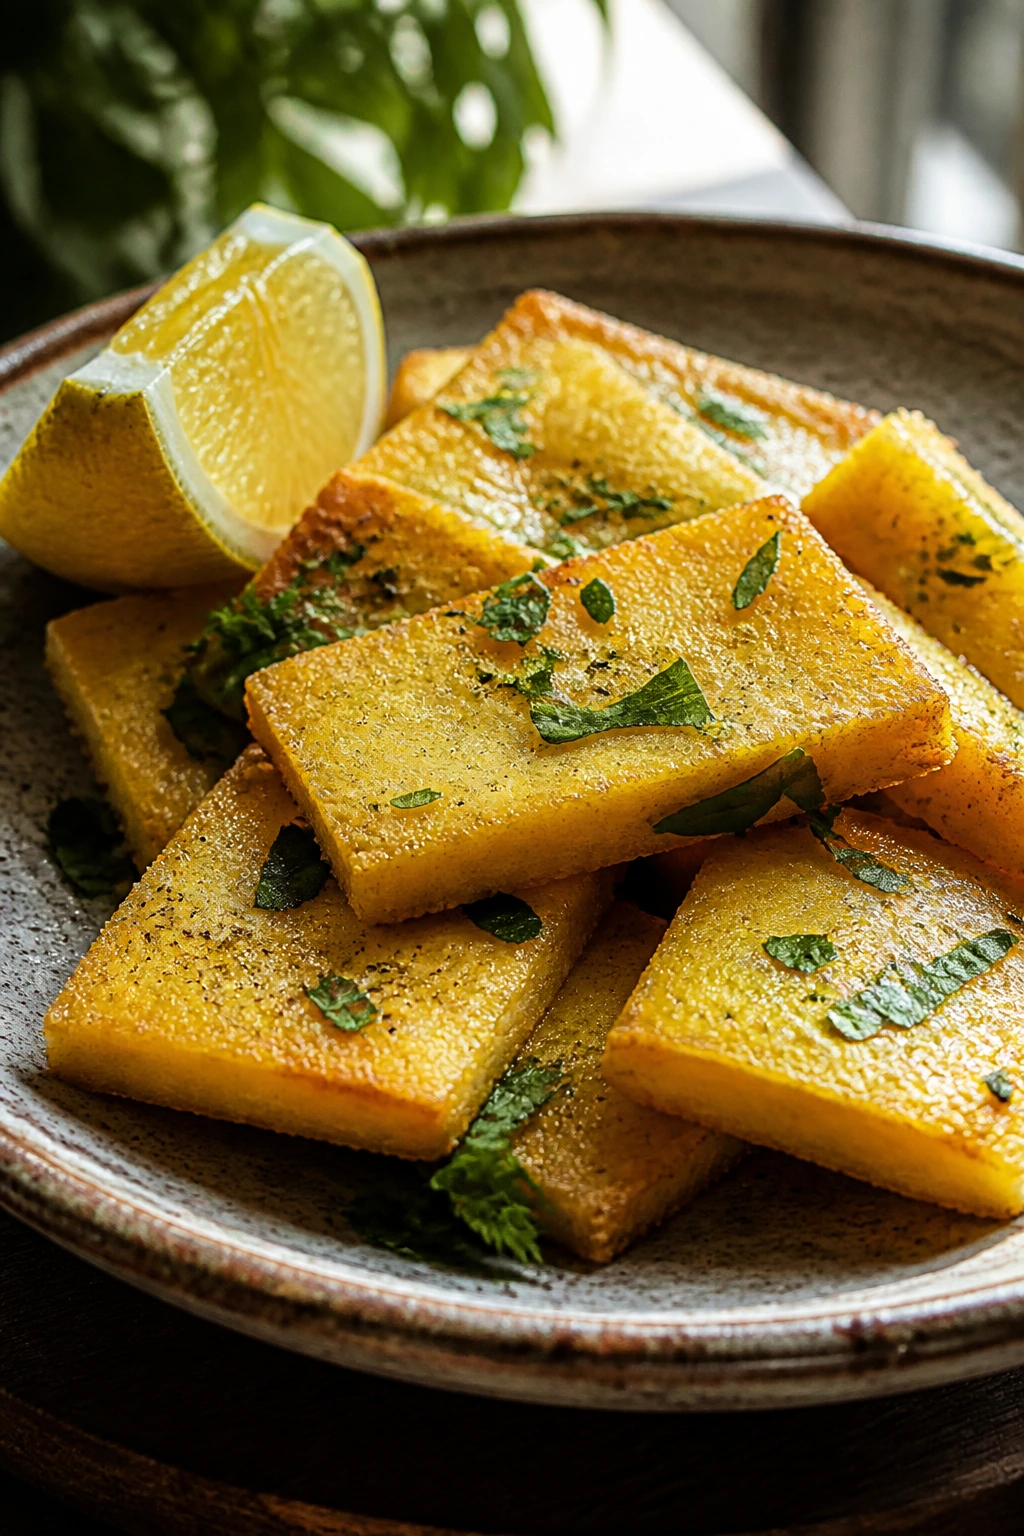
Panelle are one of those street-food snacks that prove how far chickpea flour can go when it gets the right treatment. Crisp edges, a soft center, and a squeeze of lemon are enough to make them disappear off the tray.
Why It Works:
Chickpea flour cooks into a thick, savory paste before it is chilled and cut, which gives the panelle their structure. Once fried, the outside turns crisp while the inside stays tender and a little creamy. Parsley brings a green, fresh note, and lemon keeps the fried flavor from sticking to the palate. This is a good appetizer before pasta because it gives you something hearty and savory without using cheese or meat.
Key Ingredients:
- 1 cup chickpea flour
- 3 cups water
- 1 teaspoon kosher salt
- 1/2 teaspoon black pepper
- 2 tablespoons chopped parsley
- 1 tablespoon olive oil
- Neutral oil for frying
- Lemon wedges, for serving
Quick Steps:
- Whisk the base: Stir the chickpea flour, water, salt, and pepper until smooth.
- Cook the paste: Pour into a saucepan and cook over medium heat, stirring often, for 8 to 10 minutes until very thick and glossy.
- Finish with herbs: Stir in parsley and olive oil.
- Chill and cut: Spread the mixture in a lined pan, chill until firm, then cut into squares or strips.
- Fry until crisp: Fry at 375°F (190°C) for 2 to 3 minutes until golden at the edges. Serve with lemon.
Equipment for This Recipe:
- Saucepan
- Whisk
- Square baking dish or pan
- Knife
- Slotted spoon
How to Serve This Dish:
Serve panelle hot and plain with lemon wedges, or tuck them into a small plate with olives and tomatoes. They work well before a tomato pasta or a seafood pasta because the chickpea flavor has enough depth to stand up without feeling heavy. Three or four pieces per person is plenty.
Pro Tips for This Recipe:
- Stir the mixture often so it doesn’t stick or clump.
- Chill it fully before cutting; soft panelle are hard to handle.
- Fry in a reasonably shallow layer so the edges get crisp.
- A squeeze of lemon right before eating wakes them up.
Variations on This Dish:
- Rosemary Panelle: Add chopped rosemary to the chickpea batter for a woodsy note.
- Pepper Panelle: Stir in a pinch of chili flakes for heat.
- Herb and Garlic Panelle: Add grated garlic and more parsley if you want a louder savory profile.
Common Mistakes to Avoid with This Dish:
- Undercooking the chickpea paste: It tastes raw and gritty.
- Frying before it firms up: The pieces break apart.
- Serving without lemon: The flavor stays flat and a little dusty.
17. Stuffed Cherry Peppers with Tuna and Breadcrumbs

These have a sharp little bite that cuts through pasta in a way softer starters can’t. The peppers bring tang, the tuna brings body, and the breadcrumbs keep the filling from feeling slippery.
Why It Works:
Cherry peppers are bright and a little sweet, which makes them a strong shell for a tuna filling with capers, parsley, and lemon. The oil-packed tuna gives richness, while breadcrumbs absorb enough moisture to keep the stuffing cohesive. You can serve these cold or bake them briefly, depending on whether you want a brighter or softer finish. They pair especially well with a garlicky pasta or anything tomato-heavy, because the vinegar in the peppers resets the palate between bites.
Key Ingredients:
- 12 pickled or jarred cherry peppers, drained
- 2 cans tuna in oil, drained
- 1/4 cup fine breadcrumbs
- 2 tablespoons capers, chopped
- 1 tablespoon lemon juice
- 2 tablespoons chopped parsley
- 2 tablespoons olive oil
- Black pepper, to taste
- Pinch of chili flakes, optional
Quick Steps:
- Prep the peppers: Cut open each pepper and remove seeds if needed.
- Mix the filling: Stir the tuna, breadcrumbs, capers, lemon juice, parsley, olive oil, pepper, and chili flakes together.
- Stuff the peppers: Spoon the mixture into each pepper without overpacking it.
- Serve cold or warm: Eat them as is, or bake at 375°F (190°C) for 8 to 10 minutes to soften the peppers slightly.
- Finish with a drizzle: A little olive oil over the top makes them look and taste better.
Equipment for This Recipe:
- Small bowl
- Spoon
- Knife
- Baking dish, if warming
- Paper towels
How to Serve This Dish:
Arrange them on a small platter with the cut sides up so people can see the filling. They are great before a pasta with meat sauce or tomato sauce because the vinegar and capers keep the meal from feeling too soft. One pepper per person is enough unless you have a lot of pepper fans at the table.
Pro Tips for This Recipe:
- Drain the tuna well or the filling gets oily.
- Chop the capers finely so every bite tastes balanced.
- If the filling seems loose, add another spoonful of breadcrumbs.
- Serve them at room temperature for the best flavor.
Variations on This Dish:
- Anchovy Tuna Peppers: Add a minced anchovy for a saltier, deeper flavor.
- Herbed Peppers: Mix in basil and oregano for a greener profile.
- Mediterranean Peppers: Add chopped olives and roasted red peppers to the filling.
Common Mistakes to Avoid with This Dish:
- Using wet tuna: The filling slides out.
- Overstuffing the peppers: They split and become messy.
- Serving too cold: The flavors mute and the oil firms up.
18. Caponata Crostini
Caponata brings a sweet-sour, glossy finish to the table that a lot of vegetable appetizers never quite manage. It tastes deeper than the ingredient list looks, and it gets even better after a short rest.
Why It Works:
Eggplant turns silky when it cooks properly, and caponata layers that texture with celery, olives, capers, and vinegar. The raisins are optional, but I like them because they round out the acid and make the sauce feel more complete. Spoon it onto crostini and you get a starter that is bold enough for a pasta night but still vegetable-forward. If you’re serving a creamy or cheesy pasta, this is the kind of thing that keeps the menu from leaning too rich.
Key Ingredients:
- 1 medium eggplant, diced into 1/2-inch cubes
- 2 tablespoons olive oil
- 1 small onion, diced
- 1 celery stalk, diced
- 1 cup crushed tomatoes
- 2 tablespoons capers, drained
- 1/3 cup chopped green olives
- 1 tablespoon red wine vinegar
- 1 teaspoon sugar
- 2 tablespoons raisins, optional
- 2 tablespoons chopped basil
- Crostini, for serving
- Salt and pepper
Quick Steps:
- Cook the eggplant: Roast or sauté the eggplant in olive oil until browned and soft.
- Build the base: Cook the onion and celery in a pan until they soften and the onion turns translucent.
- Add the flavor layers: Stir in tomatoes, capers, olives, vinegar, sugar, raisins, salt, and pepper.
- Simmer gently: Cook for 10 to 12 minutes until glossy and cohesive.
- Finish and serve: Stir in basil and spoon onto crostini.
Equipment for This Recipe:
- Skillet or sauté pan
- Knife
- Cutting board
- Spoon
- Baking sheet for crostini, if needed
How to Serve This Dish:
Serve caponata warm or at room temperature on toasted bread. It pairs well with almost any pasta, but especially with simple olive-oil pasta or a baked pasta where you want one sharp, bright starter on the side. Two crostini per person is a reasonable amount if there are other appetizers.
Pro Tips for This Recipe:
- Brown the eggplant well so it tastes rich, not watery.
- Let the caponata sit for 15 minutes before serving if you have time.
- Add the basil at the end so it stays fresh.
- If it tastes too sharp, add a pinch more sugar, not more oil.
Variations on This Dish:
- Pine Nut Caponata: Add toasted pine nuts for a little crunch.
- Pepper Caponata: Add roasted red peppers for more sweetness.
- Spicy Caponata: Add a pinch of chili flakes if the pasta itself is mild.
Common Mistakes to Avoid with This Dish:
- Underbrowning the eggplant: The flavor stays thin.
- Using too much vinegar too soon: It can take over.
- Serving on soft bread: The crostini need backbone or they collapse.
How These Italian Appetizers Set Up Pasta Night
The nicest thing about a pasta-night appetizer spread is that it buys the kitchen a little rhythm. One bowl can sit cold on the counter, one tray can come out of the oven, and one skillet can stay on the stove while the sauce finishes. That is the real magic here. The meal feels abundant without becoming complicated.
Essential Equipment for These Recipes
- Sheet pans: You’ll use them for bruschetta, mushrooms, polenta fries, focaccia, and anything else that needs oven heat.
- Mixing bowls in at least three sizes: Small for dressings, medium for fillings, large for breading and tossing.
- Sharp chef’s knife: Clean cuts matter for tomatoes, melon, peppers, and all the small skewers.
- Cutting board with a damp towel underneath: Keeps it from slipping while you dice or slice.
- Wire rack: Helpful for fried foods and toasted bread so steam does not soften the crust.
- Skillet or sauté pan: Needed for caponata, mushrooms, and the quick-cooked fillings.
- Heavy pot or Dutch oven: Best for frying calamari, zucchini, arancini, or panelle.
- Slotted spoon or spider: Makes frying safer and keeps the crust intact.
- Thermometer: Not glamorous, but it helps with frying oil more than guessing ever will.
- Microplane: Good for lemon zest, garlic, and Parmesan that disappears into sauces or fillings.
Smart Shopping and Ingredient Tips

Good Italian appetizers start with a few ingredients that deserve a little care. Buy tomatoes that smell like tomatoes; if the carton smells like water, the bruschetta will taste like water with salt on it. For burrata and ricotta, choose whole-milk versions whenever possible. They hold flavor better and tend to have a fuller texture, which matters a lot once you spread them on bread.
Olive oil is worth paying attention to, because it shows up everywhere in this collection. You do not need the most expensive bottle in the shop, but you do want one that tastes fruity and a little peppery rather than flat. The same goes for prosciutto and salami: thin slices are easier to wrap, fold, and thread, and they taste less chewy on a cold platter.
For fried recipes, look for breadcrumbs that are dry and light, not damp and clumpy. Panko gives more lift, while finer breadcrumbs cling better to mushrooms or stuffed peppers. If you can find chickpea flour that smells nutty and clean, the panelle will taste better. And when you buy mozzarella pearls, drain them well before they ever meet a platter; excess moisture is what turns pretty bites into slippery ones.
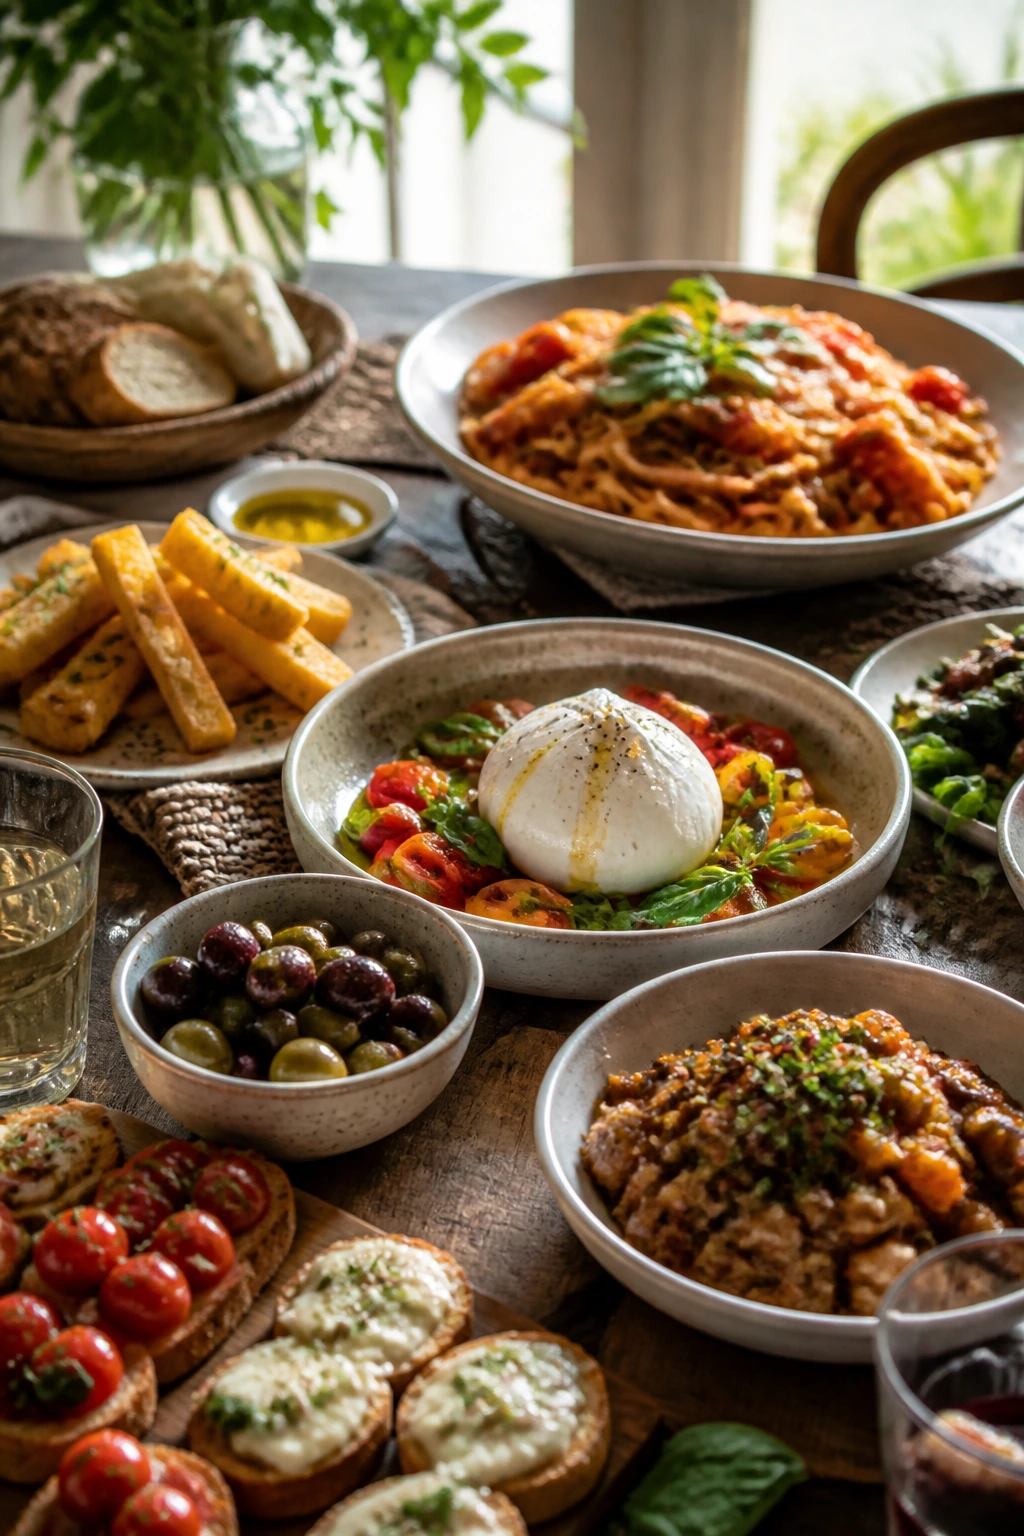
How to Serve These Recipes
Presentation:
Use a mix of platters, shallow bowls, and wooden boards so the table feels layered instead of crowded. Cold items belong on broad platters where color shows up, while hot things look better on sheet pans or shallow dishes that keep them from steaming under their own heat. A little height helps too—stack crostini, lean skewers against each other, and scatter basil leaves or parsley around the edges so the food looks like it was placed with care.
Accompaniments:
For tomato-based pasta, put out salty or creamy starters: bruschetta, burrata, olives, stuffed mushrooms, or caponata. For cream sauces, lean on brighter bites like prosciutto-wrapped melon, caprese skewers, and marinated peppers so the meal does not feel too heavy. Bread always makes sense, but keep it simple—focaccia, crostini, or polenta fries are enough. A small green salad with lemon and olive oil can sit quietly in the background without fighting the appetizers.
Portions:
If pasta is the main event, count on 2 to 3 small bites per person from a few different dishes rather than full servings of everything. Cold starters can be a little more generous because they hold well, while fried items should be scaled carefully so they stay crisp and do not turn into leftovers by accident. For a larger gathering, pick 4 to 6 appetizers from the collection and make them in abundance instead of trying to serve all 18 at once.
Beverage Pairing:
A dry white like Pinot Grigio or Vermentino works across the board, especially with olives, seafood, and burrata. For red sauce pasta and meatballs, a light Sangiovese or Barbera keeps pace without flattening the starters. Sparkling water with lemon is the quiet hero if you want the food to stay in charge.
Additional Tips and Flavor Boosters
Flavor Enhancement:
A final drizzle of good olive oil right before serving does more than you think. It wakes up caponata, burrata, ricotta, and even a bowl of olives. For tomato-heavy bites, a pinch of flaky salt or a few shavings of Parmesan at the end makes the flavor snap into focus.
Customization:
Mix hot and cold appetizers on purpose. That one decision keeps the table from feeling one-note. If the pasta is rich, choose more acid and brine. If the pasta is simple and olive-oil based, bring in cheese and cured meat. You do not need to match every starter to every sauce. Two or three strong contrasts are enough.
Serving Suggestions:
Fresh basil, parsley, lemon zest, and thinly shaved Parmesan can be sprinkled across almost all of these dishes without causing trouble. Keep a small bowl of chili flakes nearby for the people who want heat. I also like warm crostini with a little olive oil brushed on after toasting; they taste cleaner and never feel stale.
Make-It-Yours:
For a vegetarian spread, lean hard into bruschetta, ricotta, caponata, panelle, mushrooms, and polenta fries. For a dairy-free version, skip the cheese-forward bites and build around olives, melon, caponata, skewers, and herbed vegetables. For a lower-sodium table, rinse the olives, go lighter on the prosciutto, and use herbs and lemon to carry the flavor instead of salt.
Make-Ahead, Storage, and Reheating Guidance
Several of these appetizers can be prepared ahead, but not all of them survive storage the same way. Marinated olives, caponata, stuffed cherry peppers, and even the tuna-filled peppers improve after a night in the fridge and keep well for 3 to 4 days. Bruschetta topping can also be made ahead and chilled for 1 day; just drain any extra liquid before spooning it over toast.
Fried items are another story. Zucchini coins, calamari, arancini, panelle, and polenta fries are at their best the day they are cooked. If you need to save them, refrigerate them in a single layer if possible, then reheat on a rack in a 400°F (200°C) oven or air fryer until the exterior crisps again. That usually takes 6 to 10 minutes for smaller pieces and closer to 12 minutes for thicker ones. Skip the microwave unless you want soft breading and tired oil.
Breads and crostini need the most caution. Toast them the day you serve them, or keep the slices plain and crisp them right before topping. Focaccia keeps at room temperature for a day wrapped in a towel and stored in a bag, then can be warmed briefly in a 350°F (175°C) oven. Mini meatballs hold well in the fridge for 3 to 4 days and freeze for up to 2 months; reheat them gently in marinara so they stay tender. Burrata, ricotta crostini, and melon should be assembled at the last minute. The parts can wait. The finished bites should not.
Variations and Adaptations to Try
-
Gluten-Free Antipasto Spread: Swap crostini for polenta rounds, serve panelle as written, and make sure breadcrumbs and flour are certified gluten-free. The menu still feels full without leaning on bread.
-
Vegetarian-Only Table: Center the spread on bruschetta, ricotta crostini, caponata, mushrooms, fritters, polenta fries, and stuffed puff pastry. You will not miss the meat if the seasoning is strong and the textures are varied.
-
Seafood-Forward Starter Set: Build around calamari, caprese skewers, burrata, marinated olives, and melon. It reads lighter and works well before seafood pasta or lemony noodles.
-
Spicy Southern Italian Version: Add Calabrian chili paste, red pepper flakes, or hot honey to ricotta, tomatoes, meatballs, and caponata. A little heat gives the whole table more snap.
-
Kid-Friendly Tray: Keep the melon, mozzarella skewers, focaccia, polenta fries, and mini meatballs, then pull back on garlic, capers, and pepperoncini. Kids tend to go after the simple, salty pieces first.
-
Make-Ahead Party Plan: Choose five items that hold well—marinated olives, caponata, stuffed peppers, meatballs, and polenta fries—then add one fresh bread item and one chilled cheese item right before serving. That mix keeps the work manageable.
Common Mistakes to Avoid

-
Making every appetizer rich and cheesy: Pasta night can get heavy fast. Use briny, acidic, and vegetable-forward items to keep the table moving.
-
Serving cold food straight from the fridge: Olive oil firms up, cheese tightens, and herbs lose scent. Give marinated items a little room temperature time before serving.
-
Letting fried items sit on paper towels too long: They steam from underneath and lose the crust. A wire rack is the better landing spot.
-
Overdoing the garlic: It is tempting, because garlic smells like dinner. But raw garlic in too many appetizers can flatten the whole spread. Use it where it counts and let tomatoes, herbs, and oil do the rest.
-
Skipping seasoning on the tomato and cheese dishes: Bruschetta, ricotta crostini, caprese, and burrata all need salt to taste alive. Without it, they read as pretty but bland.
-
Trying to serve all 18 recipes at once: That turns a smart spread into a kitchen pileup. Pick a few hot items, a few cold ones, and one bread component. That is enough.
Frequently Asked Questions
How many of these appetizers should I make for a pasta night?
For a smaller dinner, 3 to 4 appetizer choices is enough. For a bigger crowd, 5 or 6 works well if you keep the portions modest. Pasta should still feel like the main event.
Can I make most of these ahead of time?
Yes, but choose the right recipes. Marinated olives, caponata, stuffed peppers, and meatballs are friendly to advance prep, while bruschetta, crostini, burrata, and fried foods are best assembled or finished right before serving.
What if I want a no-fry menu?
You can still make a strong spread. Bruschetta, whipped ricotta crostini, caprese skewers, prosciutto-wrapped melon, marinated olives, burrata, antipasto skewers, and caponata all work without a fryer.
How do I keep crostini from getting soggy?
Toast the bread well, let it cool slightly before topping, and keep wet toppings drained. If the topping sits for a while, spoon it on at the last minute instead of building the bites early.
Which appetizers pair best with cream sauces?
Choose brighter, saltier starters like melon and prosciutto, olives, caprese skewers, caponata, and lemony ricotta crostini. They cut through richness better than another cheesy bite would.
Can I make this spread gluten-free?
Yes. Use polenta fries, panelle, stuffed peppers, marinated olives, melon, burrata, and caprese skewers. Swap crostini for gluten-free bread or toasted polenta slices, and use gluten-free breadcrumbs where needed.
What should I do if fried appetizers turn greasy?
The oil was probably too cool, or the pan was overcrowded. Let the oil return to temperature between batches, fry in smaller groups, and drain on a rack instead of a flat stack of paper towels.
Is it okay to mix very salty items with very mild ones?
That’s actually the point. Prosciutto, olives, and tuna are stronger by nature, while ricotta, burrata, and melon soften the edges. A good pasta-night spread needs both sides of that contrast.
A Table Worth Setting Twice
The nicest pasta nights are not the ones with the most complicated sauce. They are the ones that feel balanced from the first bite. A little salt, a little cream, a little crunch, a little acid—those are the pieces that make a simple dinner feel generous.
If you keep only one idea from this collection, make it this: choose appetizers that help the pasta taste better. Not louder. Better. That small shift changes the whole table, and once you start setting out a proper antipasto spread, plain boiled noodles stop feeling like dinner and start feeling like the middle of the story.