
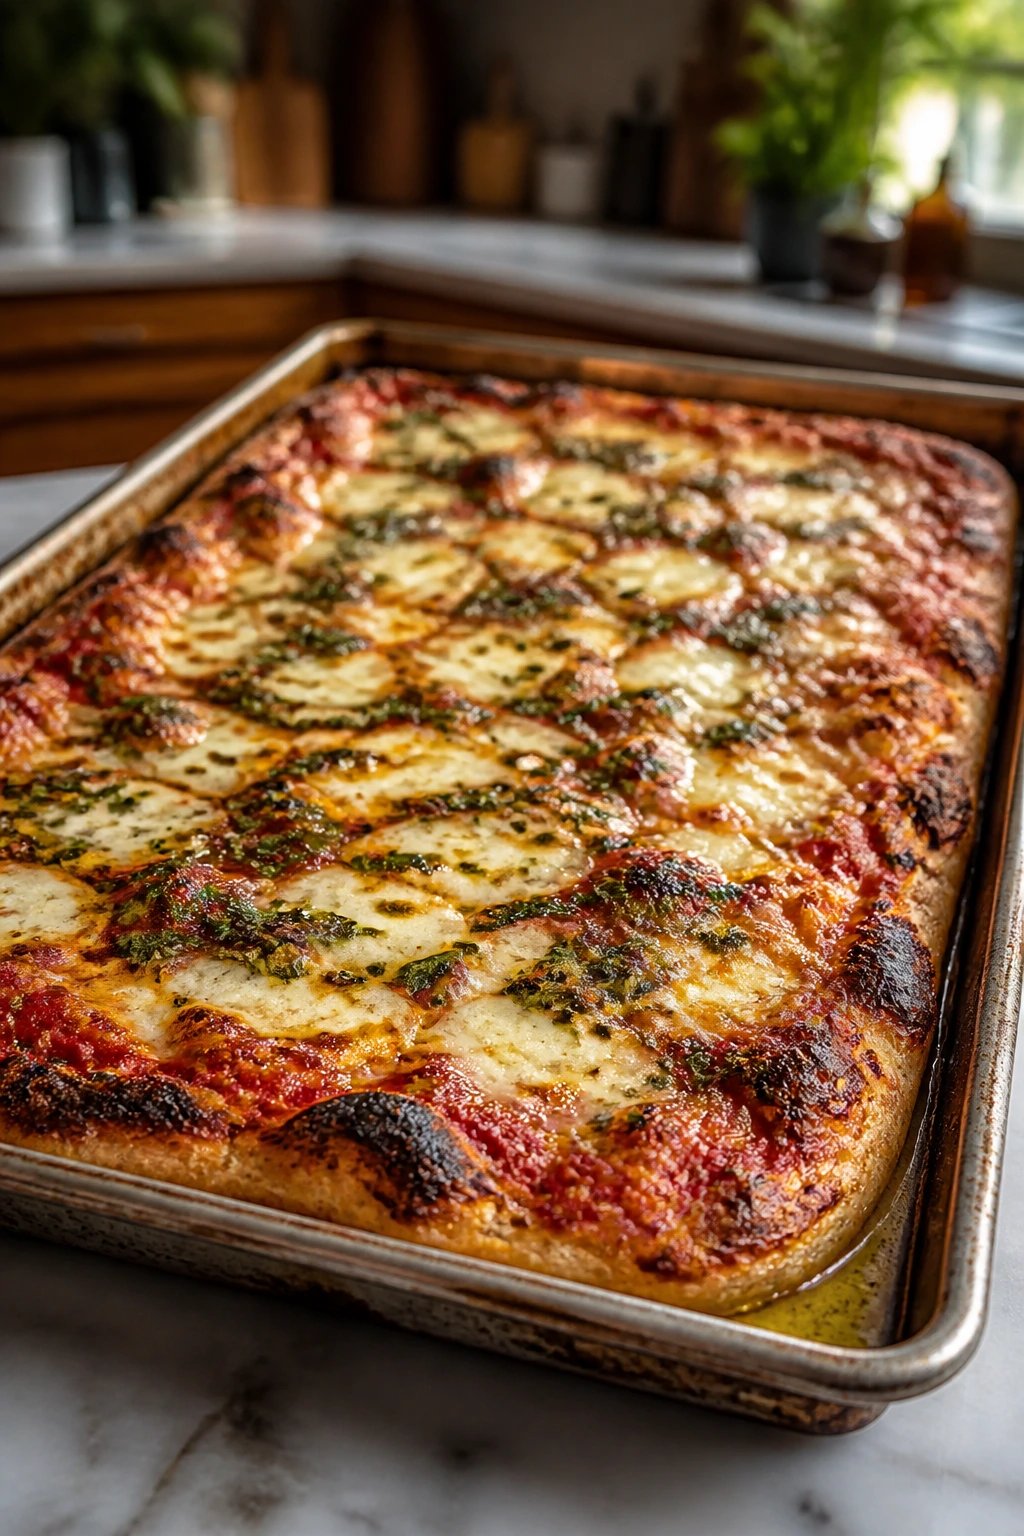
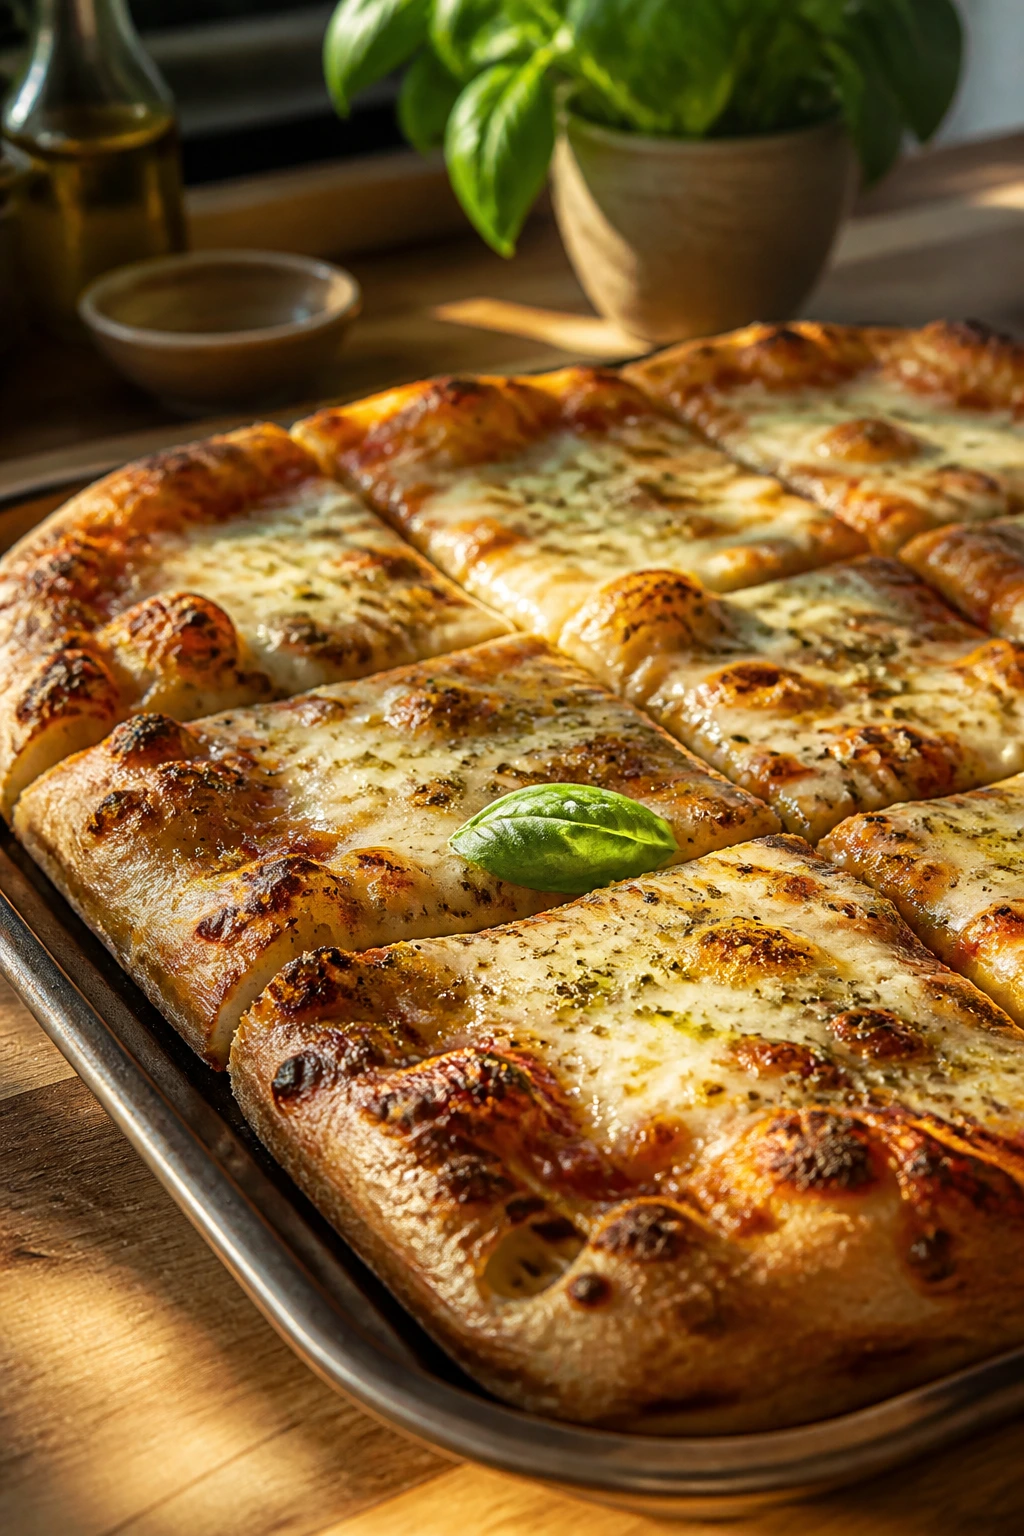
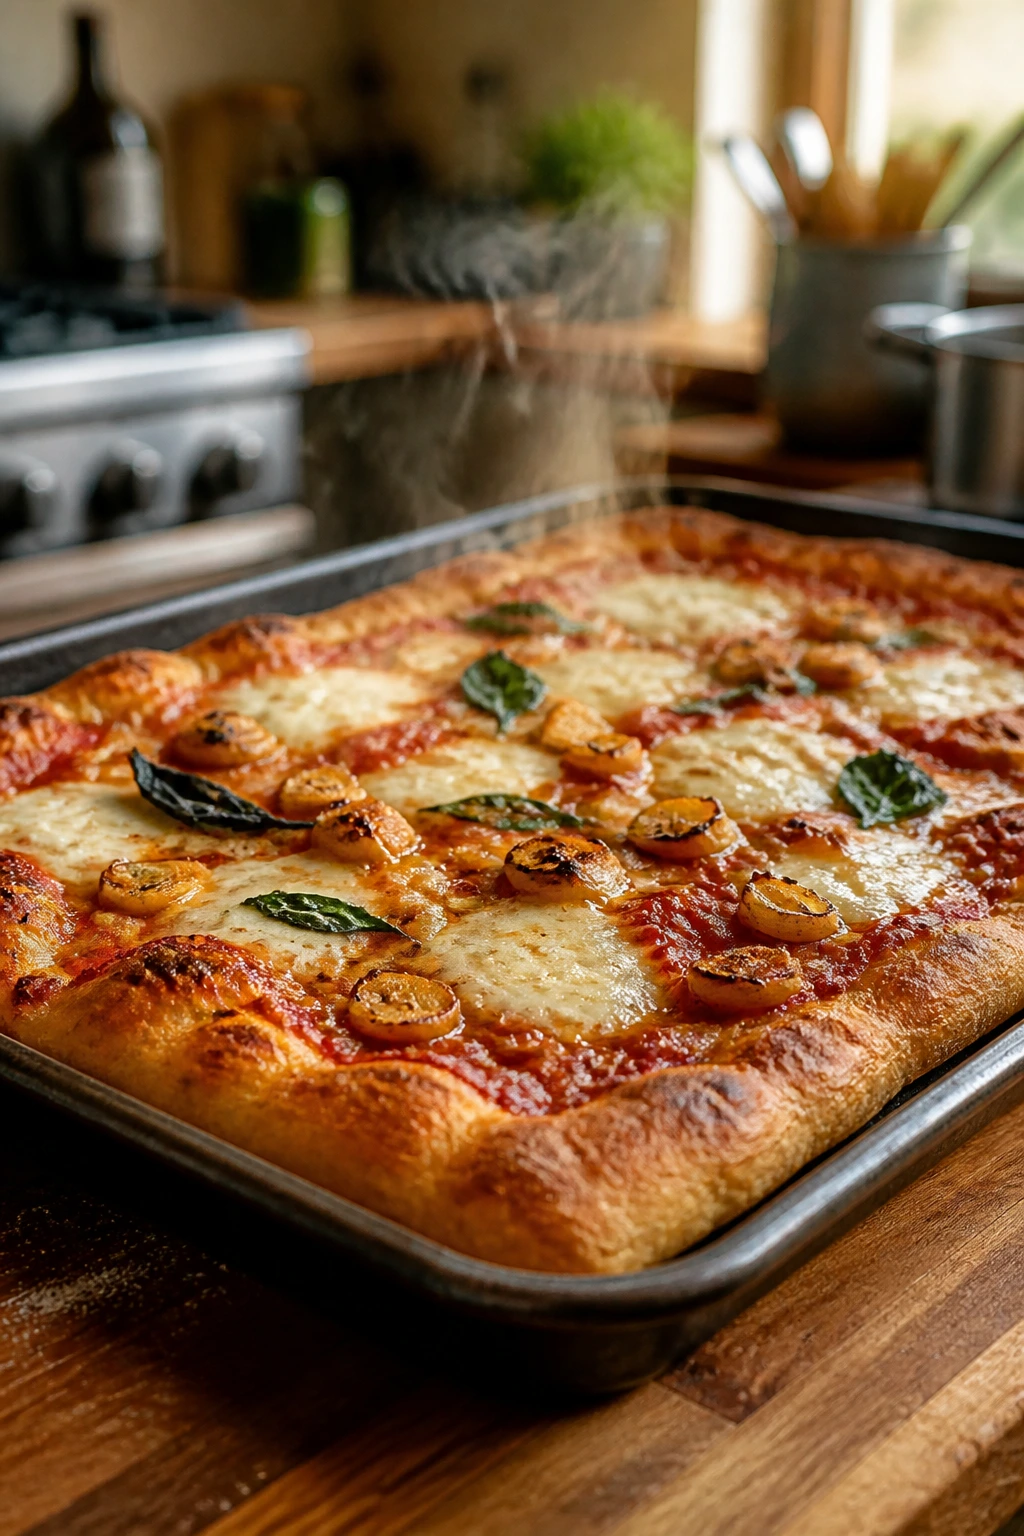
A good family pizza night needs one thing more than anything else: a crust that smells like warm olive oil the second it comes out of the oven. Not fancy toppings. Not a pile of cheese so thick it slides around on the board. Just that soft, browned, slightly blistered base that makes everybody stand in the kitchen and ask if the first slice can be cut “just a little faster.”
That’s the charm of a herbed family pizza night like Nonna used to make. The sauce tastes cooked, not canned. The garlic stays sweet instead of sharp. Basil shows up at the end, where it belongs, and the whole thing lands on the table in a pan that looks like it has already been passed around twice before anyone even sits down. It’s humble food, but not lazy food. There’s a difference.
Most pizza trouble starts with overthinking and ends with a soggy middle. Too much sauce. Too much cheese. An oven that never got hot enough. A dough that was pushed and dragged before it had time to relax. The fix is simple, and it’s the kind of simple that only works when you respect the details: a soft dough, a thick tomato sauce, low-moisture mozzarella, and enough heat to turn the edges bronze before the top dries out.
Why This Pizza Belongs at a Family Table
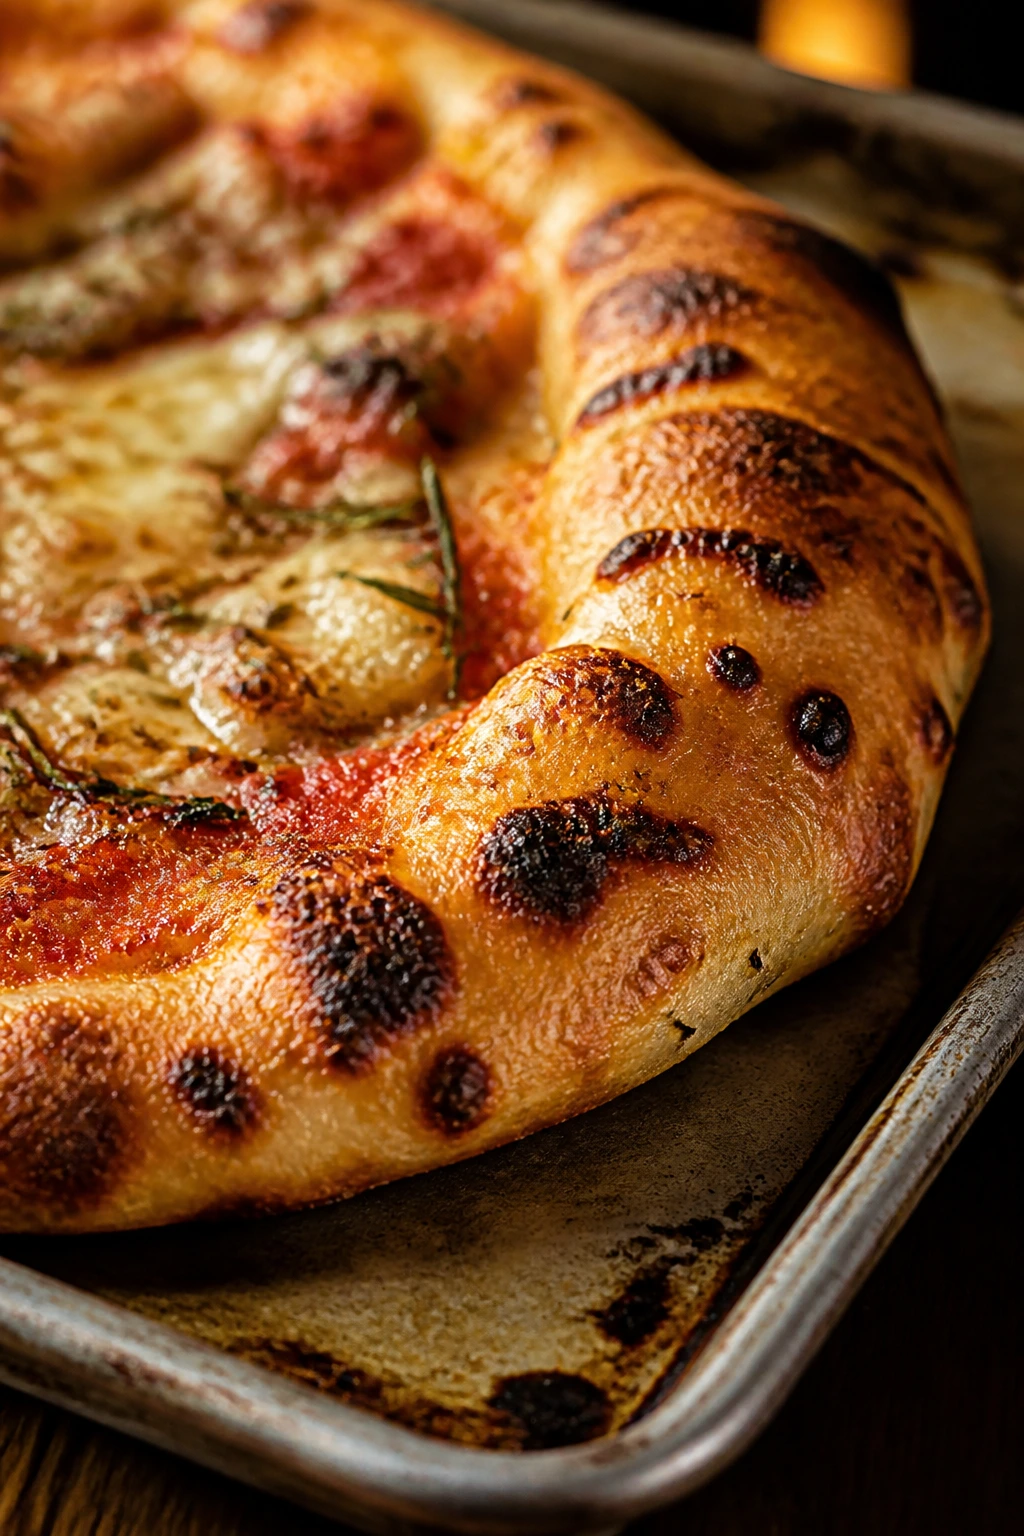
Soft, chewy crust with crisp corners: The dough bakes into a pan pizza base that bends before it breaks, but the edges still toast in a way that gives the whole slice real structure.
The sauce tastes cooked, not raw: A short simmer takes the tinny edge off crushed tomatoes, and the garlic becomes mellow enough to taste like part of the sauce instead of a separate bite.
Built for sharing, not ceremony: One half-sheet pan cuts into easy rectangles, which means people can grab a piece without balancing a big floppy triangle over the plate.
Herbs do the heavy lifting: Oregano in the sauce, basil on top, a little parsley at the end — that layered herb flavor is what makes this feel like a family recipe instead of a generic pizza night.
Leftovers stay useful: A slice reheated in a skillet keeps its bottom intact, which is more than I can say for most takeout pizza after an overnight fridge stay.
Nothing here depends on expensive ingredients: Good canned tomatoes, low-moisture mozzarella, olive oil, and flour are enough. The magic comes from how they’re handled, not from a shopping list that reads like a specialty catalog.
What One Half-Sheet Pan Makes and How Long It Takes
Yield: Serves 6 to 8
Prep Time: 30 minutes
Cook Time: 20 minutes
Total Time: About 2 hours 15 minutes, including rising time
Chill/Rest Time: 1 hour 15 minutes to 1 hour 30 minutes for the dough to rise
Difficulty: Beginner — the dough is straightforward, the sauce is a simple simmer, and the sheet pan does most of the shaping work for you.
If you want to move fast, make the sauce while the dough rises. That’s the easiest place to save time without cutting corners. The sauce needs to cool a bit anyway before it hits the dough, and the oven wants a long preheat if you want that bottom crust to brown instead of just dry out.
This is also a good recipe to scale mentally. One pan feeds a table of six if you’re serving salad and maybe a bowl of olives. If it’s the main event and the crowd is hungry, cut the pan into 12 or 16 pieces and count on second helpings disappearing first.
The Shopping List for Dough, Sauce, and Finish
For the Dough:
- 4 cups (500 g) bread flour or unbleached all-purpose flour, plus more for dusting
- 2 1/4 teaspoons instant yeast, or active dry yeast if that’s what you keep on hand
- 1 1/2 teaspoons fine sea salt
- 1 teaspoon sugar
- 1 1/2 cups warm water, about 105°F to 110°F / 40°C to 43°C
- 2 tablespoons extra-virgin olive oil, plus more for the bowl and pan
For the Herb Tomato Sauce:
- 1 tablespoon extra-virgin olive oil
- 3 garlic cloves, minced
- 1 tablespoon tomato paste
- 1 can (28 oz / 794 g) crushed tomatoes, plain and unsweetened
- 1 teaspoon dried oregano
- 1 teaspoon dried basil
- 1/2 teaspoon fine sea salt
- 1/4 teaspoon freshly ground black pepper
- 1 pinch sugar, only if the tomatoes taste sharp
For the Topping and Finish:
- 16 oz (450 g) low-moisture mozzarella, shredded
- 1/2 cup (50 g) grated Parmesan or Pecorino Romano
- 2 tablespoons chopped fresh basil
- 1 tablespoon chopped fresh parsley
- 1/2 teaspoon dried oregano
- 1 to 2 tablespoons extra-virgin olive oil, for drizzling
- Crushed red pepper flakes, to taste
Why Each Ingredient Matters More Than It First Appears
The Dough
What to use: 4 cups of bread flour gives the crust more chew, but unbleached all-purpose flour still works well if that’s what sits in your pantry. The yeast, salt, sugar, water, and olive oil are the backbone of the whole pan.
Preparation: Measure the flour lightly, don’t pack it down, and keep the water warm rather than hot. Hot water can kill yeast; cold water makes the dough sluggish and annoyingly slow to rise.
Substitutions: If you only have all-purpose flour, use it. If you want a slightly softer base, all-purpose gives you that. If you need to use active dry yeast instead of instant, let it sit in the warm water with the sugar for 5 to 10 minutes before adding flour.
Tips: The dough should feel soft and a little tacky, not wet and sticky like batter. A good pizza dough wants to breathe, not drown in flour. I keep a tiny bowl of olive oil nearby for my hands instead of piling on dry flour, because too much flour on the outside turns the crust dusty and dull.
The Sauce
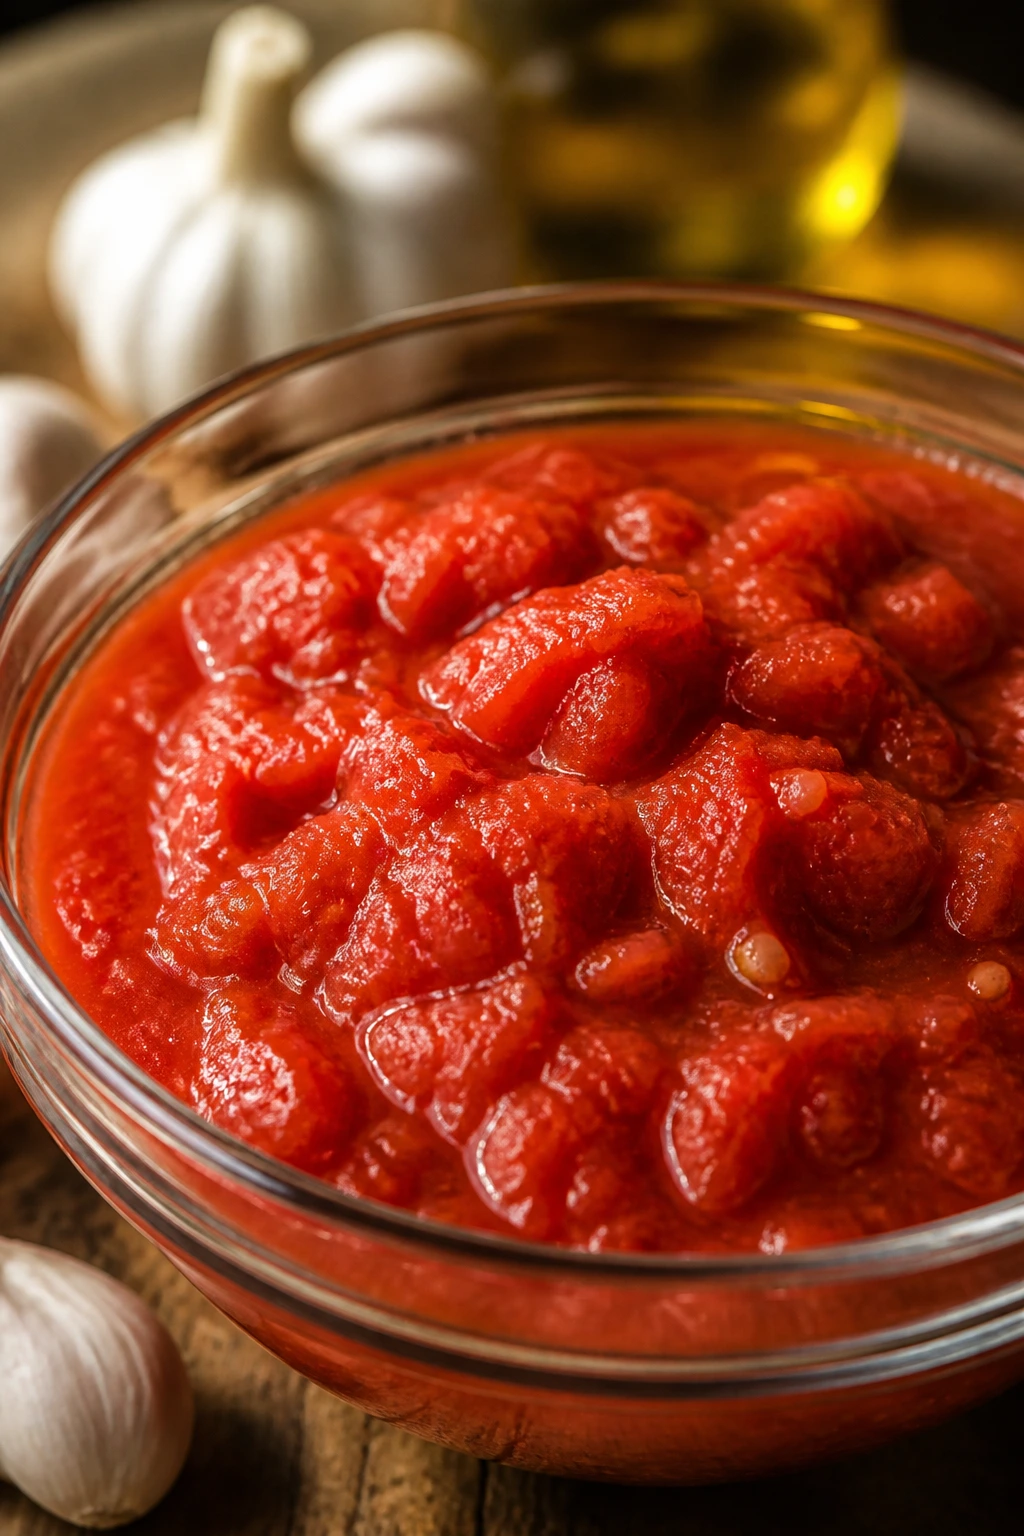
What to use: One can of crushed tomatoes, garlic, tomato paste, oregano, basil, salt, pepper, and a touch of sugar if the tomatoes need rounding out. Tomato paste matters more than people think; it gives the sauce body so it sits on the dough instead of soaking into it.
Preparation: Cook the garlic in olive oil just until it smells sweet, then add the tomato paste for a minute before the tomatoes go in. That tiny step keeps the sauce from tasting raw or watery.
Substitutions: Whole peeled tomatoes, crushed by hand, can stand in for crushed tomatoes if that’s what you have. Fresh basil can replace dried basil in a pinch, but save the fresh leaves for the end because they lose brightness fast in the oven.
Tips: Taste the sauce while it’s warm, not when it’s stone cold. Warm sauce tastes saltier and more complete, so it’s easier to judge whether it needs another pinch of salt or a whisper of sugar.
The Cheese and Finish
What to use: Low-moisture mozzarella is the right cheese here. It melts into long, stretchy strands without dumping a puddle of whey onto the middle of the pie. Parmesan or Pecorino adds salt and a sharp finish. Fresh basil and parsley go on at the end.
Preparation: Shred the mozzarella from a block if you can. Pre-shredded cheese is fine in a busy kitchen, but the anti-caking coating can make the melt slightly grainy. Fresh herbs should be chopped right before baking or garnish time so they stay fragrant.
Substitutions: Provolone can replace part of the mozzarella for a stronger flavor. Ricotta can be dotted on top if you want creamier pockets. If you need a dairy-free version, use a good melting plant-based mozzarella and expect a little less browning.
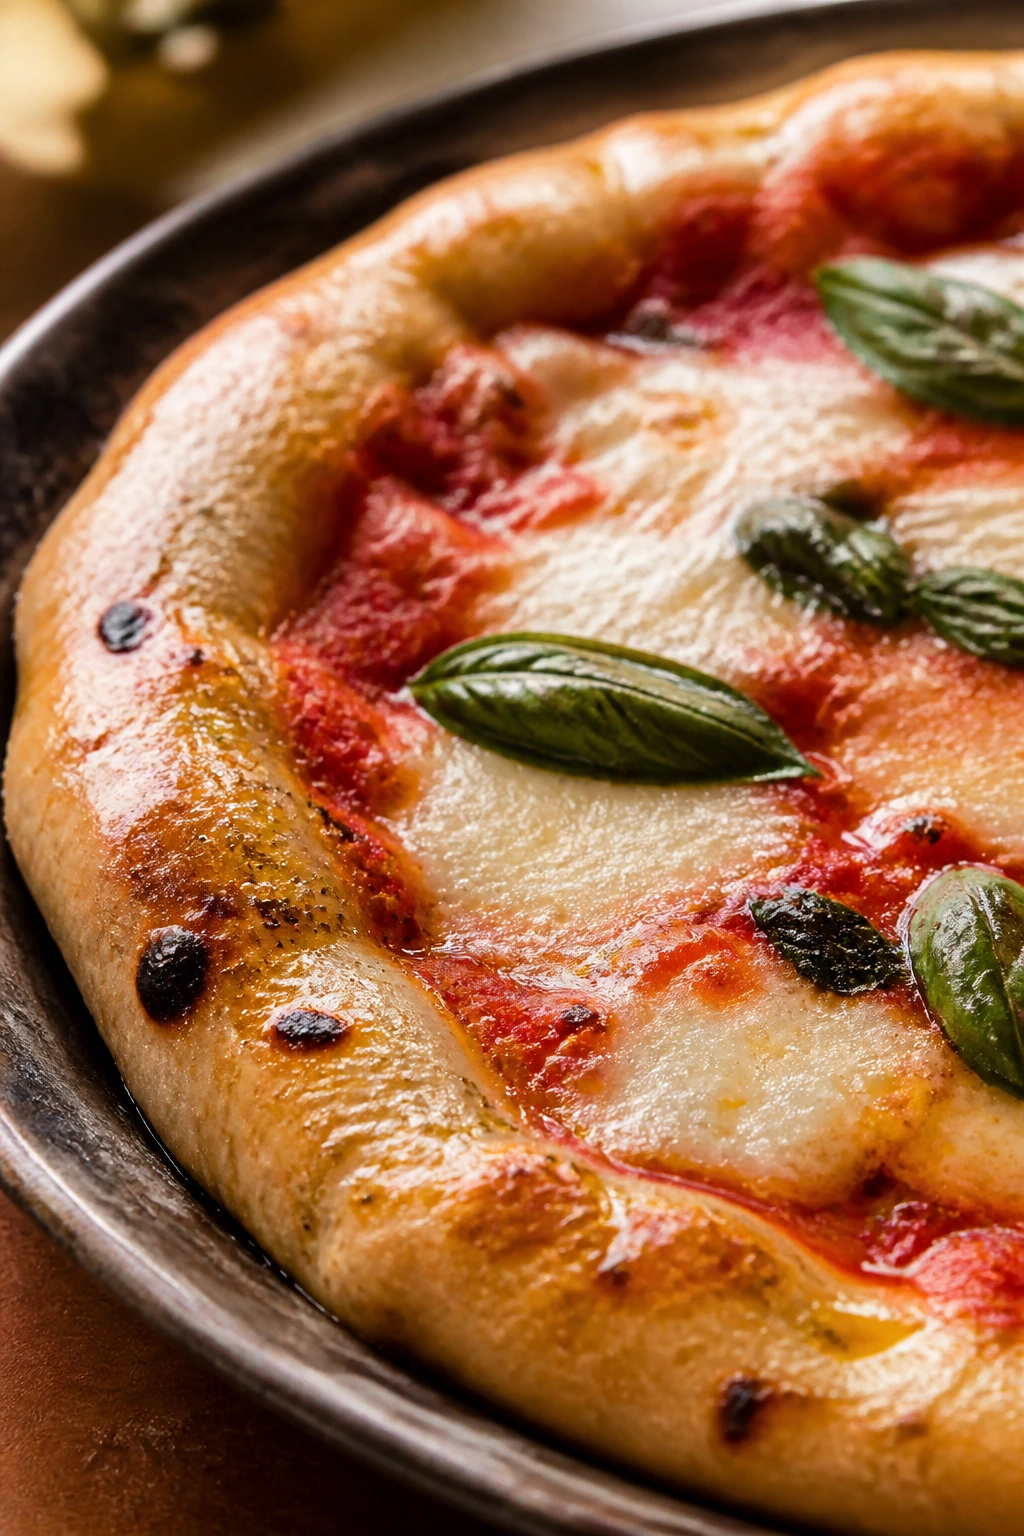
Tips: Don’t bury the basil under the cheese before baking. Put the fresh basil on after the pizza comes out, where its scent can stay sharp instead of turning dull and dark in the heat.
How to Mix, Knead, and Let the Dough Rise
Dough Phase
-
Make the dough base: In a large mixing bowl, whisk together the bread flour, yeast, salt, and sugar. Pour in the warm water and the 2 tablespoons of olive oil, then stir with a wooden spoon or dough whisk until a shaggy dough forms and no dry flour remains in the bottom of the bowl.
-
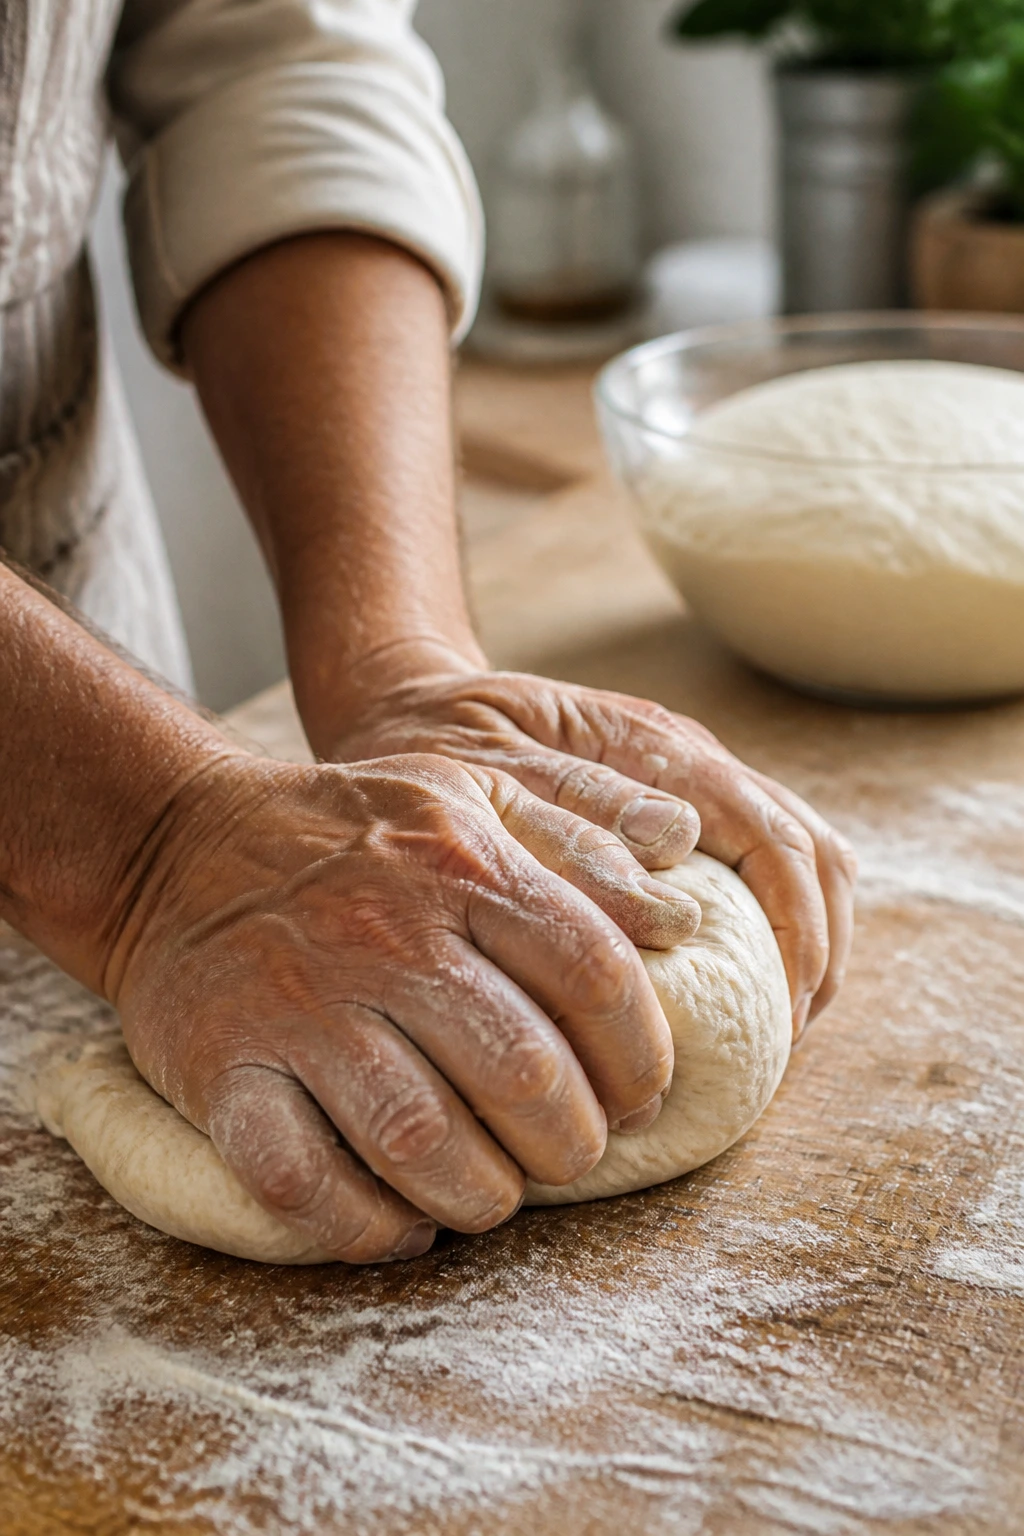
Knead until smooth: Turn the dough onto a lightly oiled counter and knead for 6 to 8 minutes, or knead in the bowl if it’s easier for you, until the dough feels smooth, elastic, and only slightly tacky. If the dough sticks so badly that it clings to your fingers, it needs a dusting of flour; if it feels stiff, drizzle on a teaspoon of water and keep kneading.
-
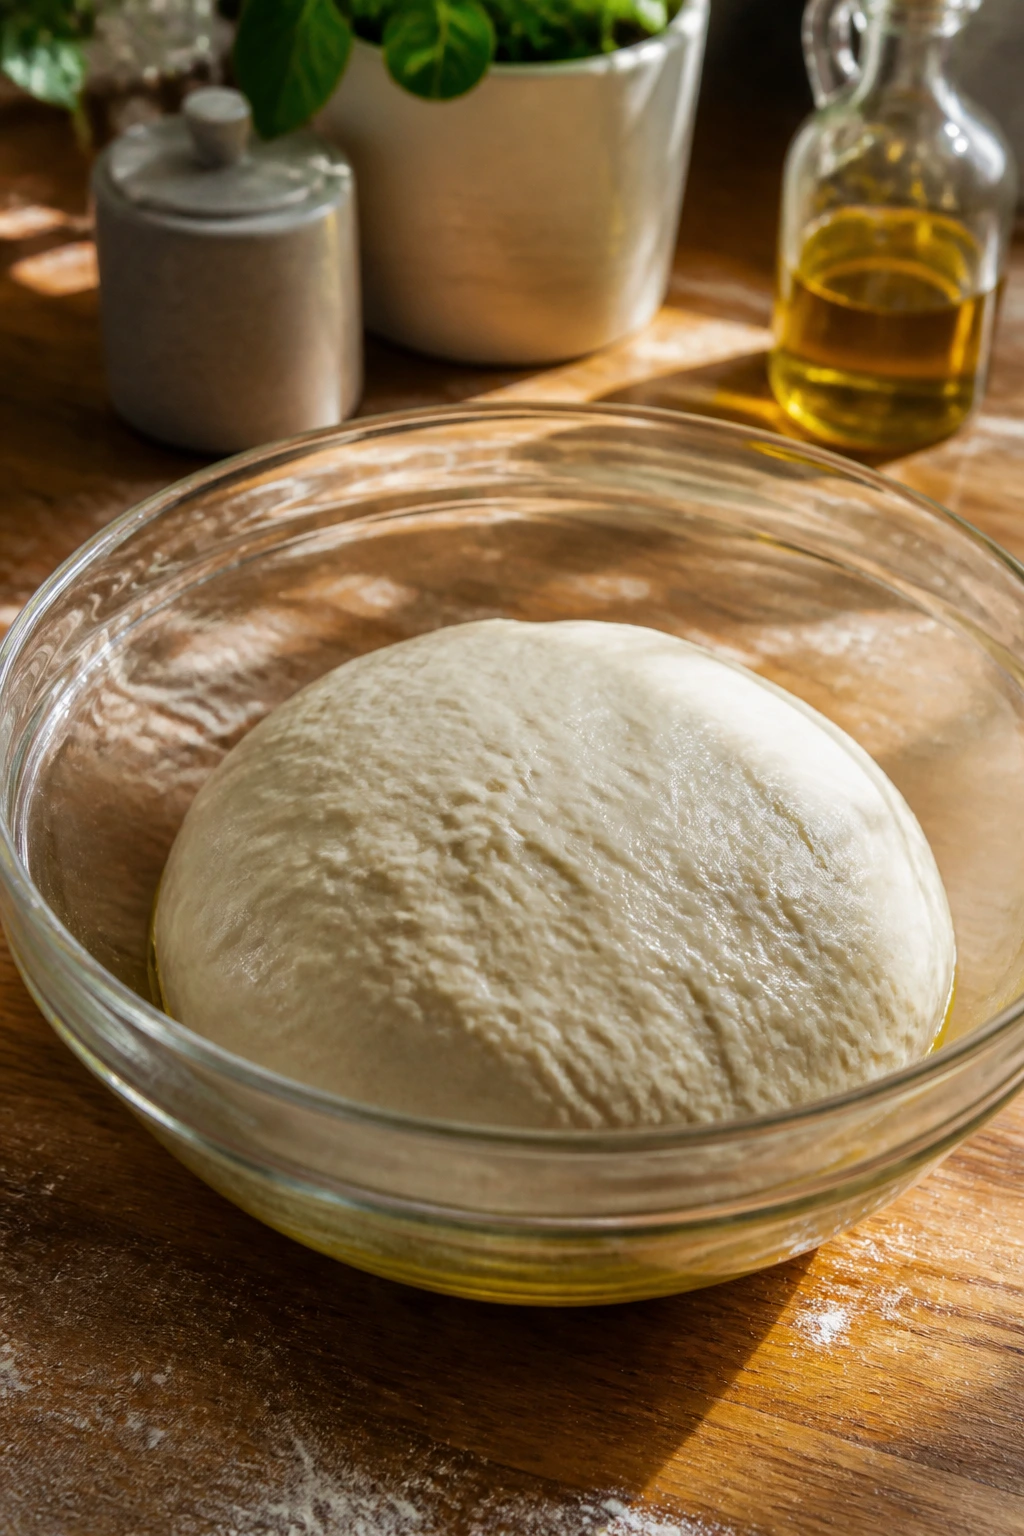
Let it rise: Place the dough in a lightly oiled bowl, turn it once to coat all sides, cover it with a clean towel or plastic wrap, and let it rise in a warm spot for 1 hour to 1 hour 15 minutes, until doubled in size and puffy at the surface. A finger pressed into the dough should leave a dent that fills back slowly.
That slow rise matters. It gives the dough flavor, but it also relaxes the gluten so you can stretch it without fighting it later. If your kitchen is cool, set the bowl near a preheating oven, not on top of it. You want warmth, not heat. Heat makes the outside of the dough dry before the inside has a chance to rise.
Building the Sauce, Stretching the Dough, and Topping the Pan
Sauce Phase
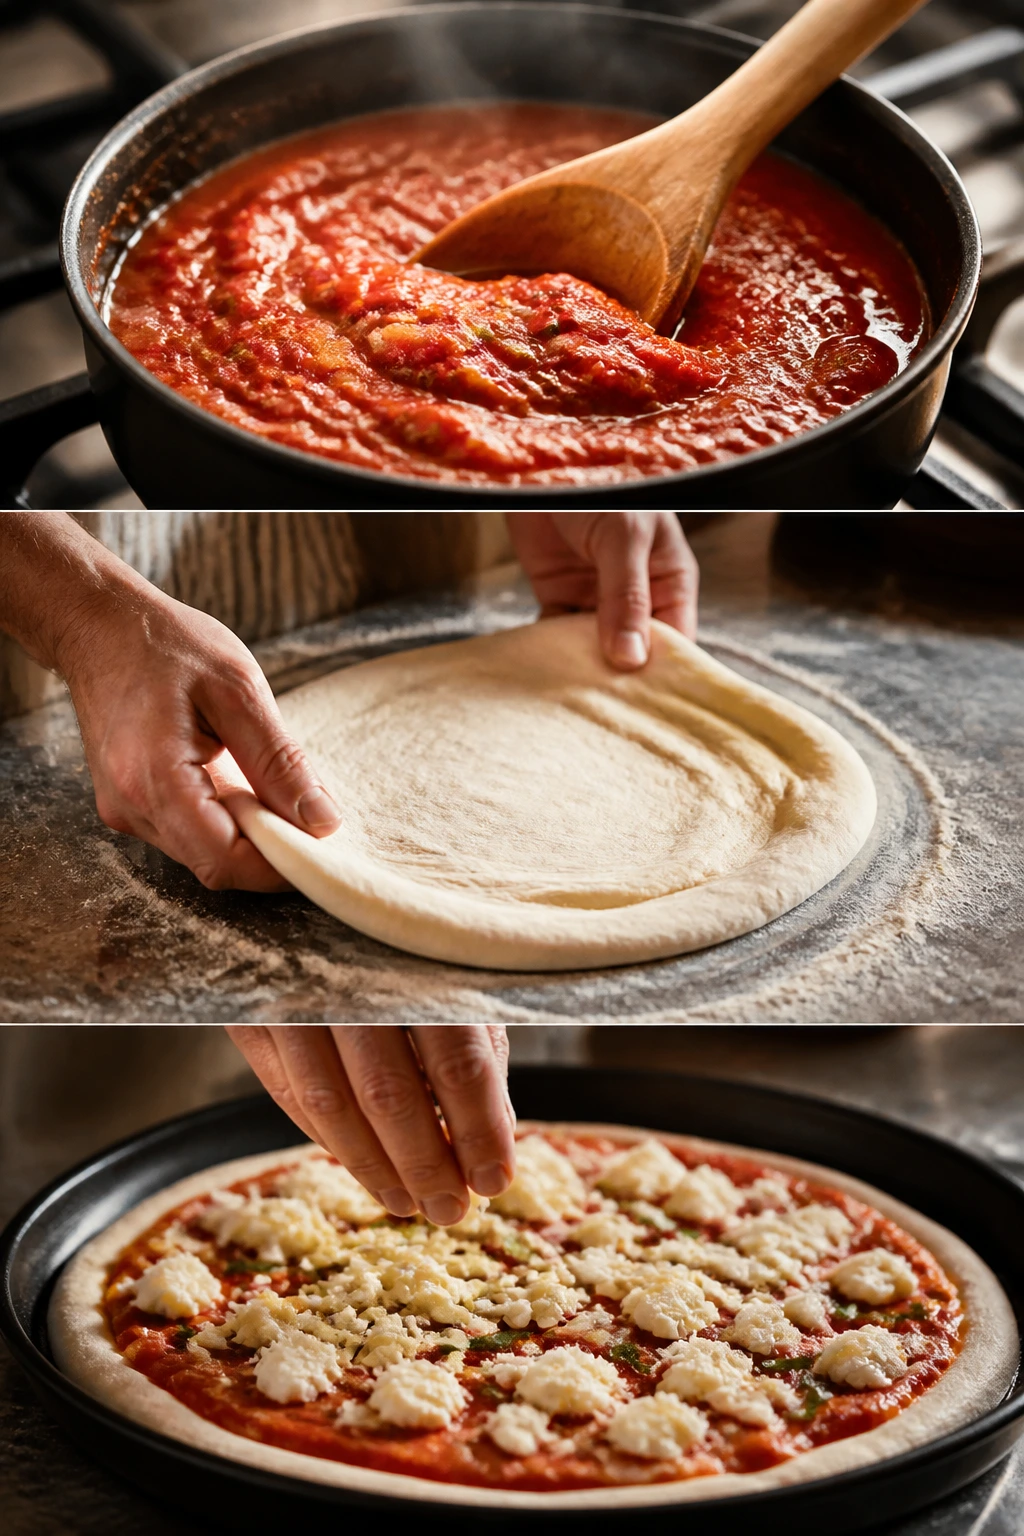
- Cook the sauce: While the dough rises, warm 1 tablespoon olive oil in a small saucepan over medium heat. Add the minced garlic and cook for about 30 seconds, just until fragrant and pale gold at the edges. Stir in the tomato paste and cook for 1 minute, then add the crushed tomatoes, oregano, basil, salt, pepper, and sugar if using. Simmer for 15 to 20 minutes, stirring now and then, until the sauce is thick enough to leave a trail when you drag a spoon across the bottom of the pan.
Assembly Phase
-
Preheat and prep the pan: Set a rack in the lower third of the oven and preheat to 500°F / 260°C. If your oven only reaches 475°F / 245°C, that still works — just plan on a few extra minutes of bake time. Brush a 13 x 18-inch rimmed half-sheet pan generously with olive oil, making sure the corners are covered.
-
Stretch the dough into the pan: Turn the risen dough onto a lightly oiled surface and press it into a rough rectangle with your fingertips. Transfer it to the prepared sheet pan and gently nudge it toward the edges. If it keeps springing back, cover it for 10 minutes, then continue. Do not force the dough if it resists; resting is faster than fighting. Once it reaches the edges, press a few dimples into the surface with oiled fingers.
Baking It Hot Enough to Give the Crust Real Personality
Bake and Finish
-
Add sauce and cheese: Spread about 1 1/2 cups of the cooled sauce over the dough, leaving a 1/2-inch border for the crust. Scatter the mozzarella evenly over the top, then add the Parmesan, dried oregano, and red pepper flakes if you like a little heat. Drizzle the top with 1 tablespoon olive oil. Use a light hand with sauce; too much will make the center soft instead of supple.
-
Bake until the edges brown: Bake for 15 to 18 minutes, rotating the pan once halfway through, until the cheese is bubbling, the edges are deep golden, and the bottom sounds hollow when you lift a corner with a spatula. If you want a few browned spots on top, broil for 1 to 2 minutes at the end, watching it closely the whole time. Rest the pizza for 5 minutes, then scatter the fresh basil and parsley over the top and cut into rectangles.
That last rest is not optional. Cut too soon and the cheese will slip, the sauce will run, and the crust won’t have time to set. Five minutes is enough to settle the whole pan without killing the heat.
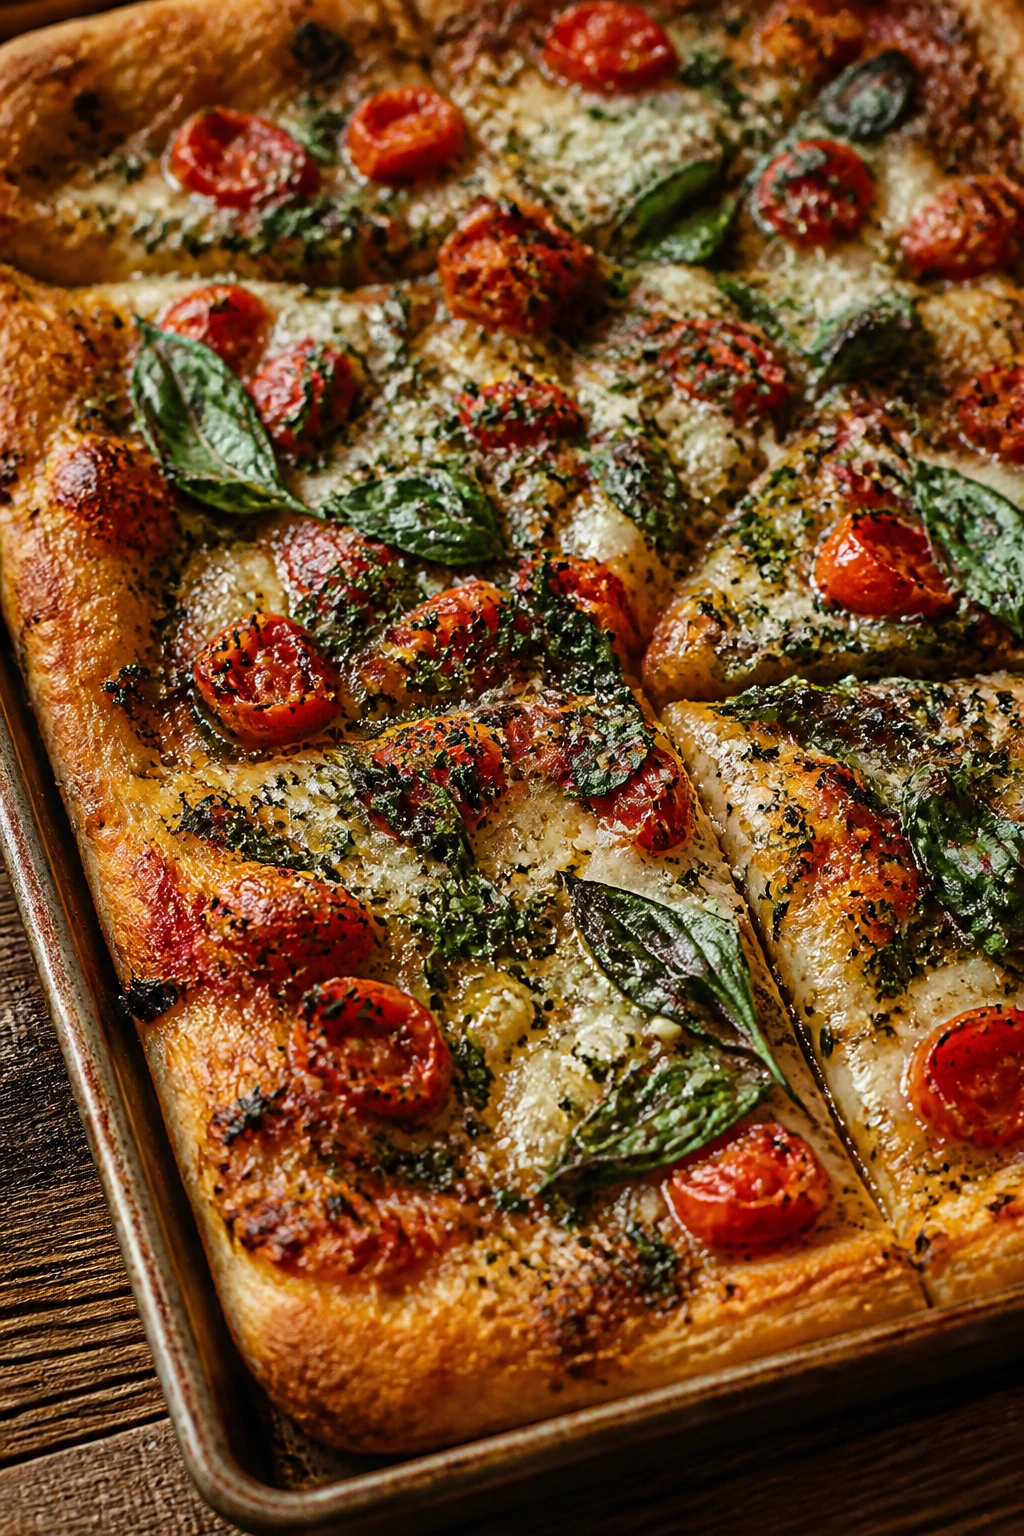
How to Serve It at the Table
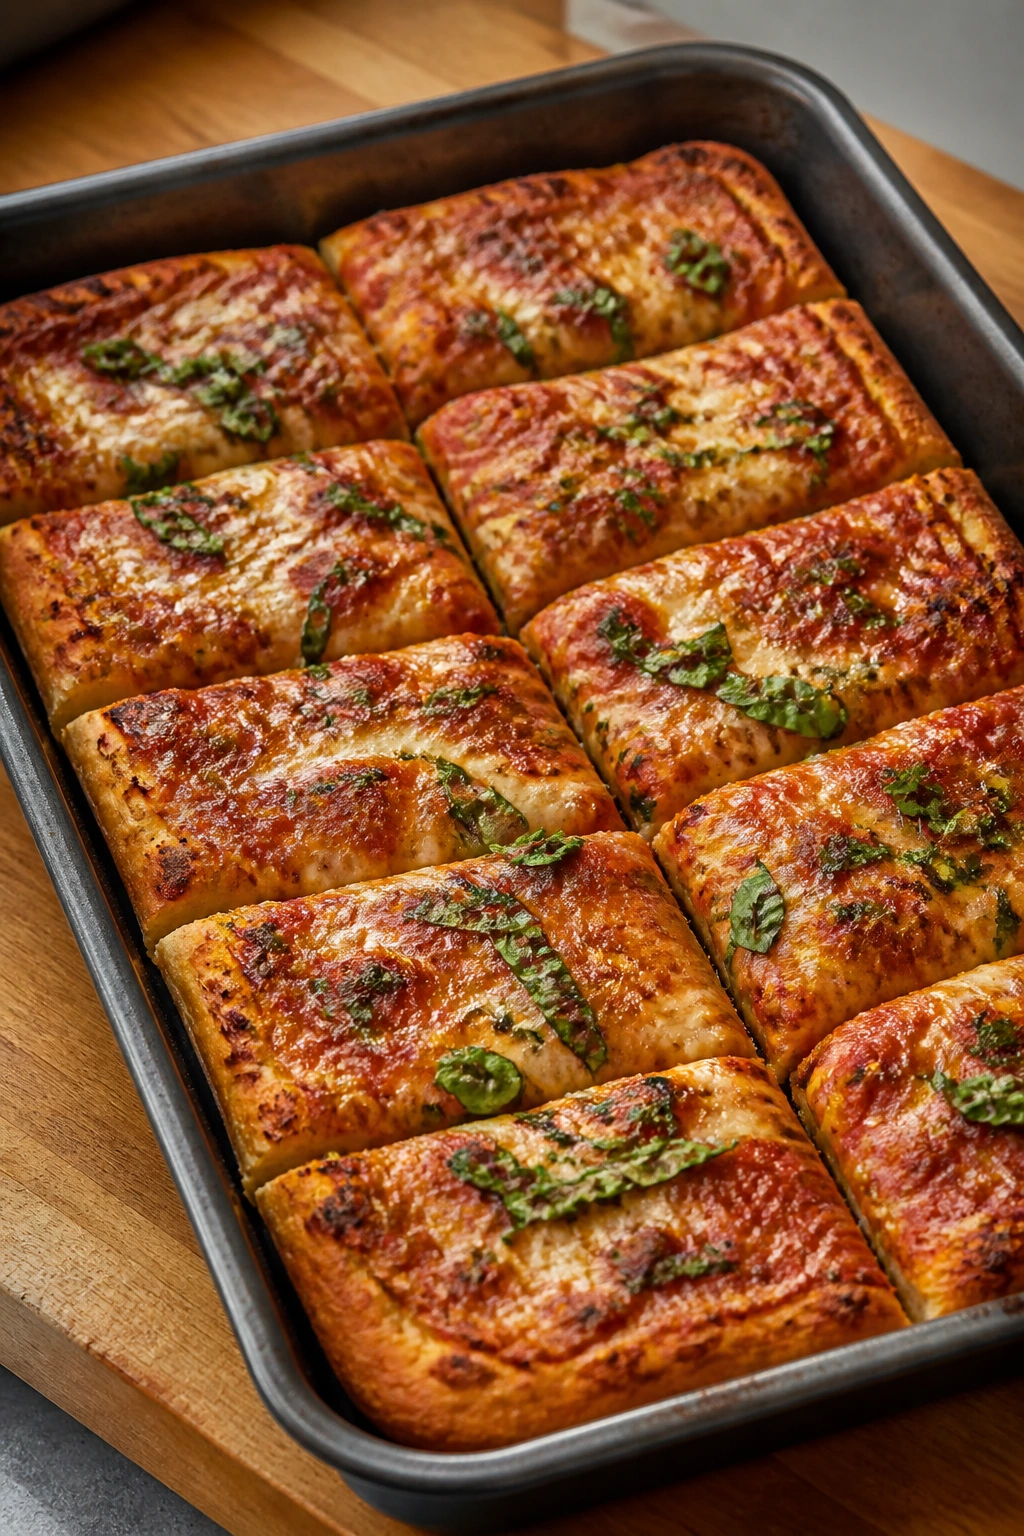
Presentation: I like to leave the pizza in the pan and cut it into long rectangles right there on the counter. It feels generous, and the browned edges look better when they’re not lost on a platter. A little extra basil on top right before serving gives the whole thing a fresh green finish.
Accompaniments: Keep the sides sharp and simple. A romaine salad with lemon juice, olive oil, salt, and shaved fennel cuts through the cheese better than a creamy dressing ever will. Marinated olives, pepperoncini, or roasted broccoli rabe fit the mood if you want the table to feel a little more like an Italian-American supper than a plain pizza dinner.
Portions: One half-sheet pan serves 6 to 8 as a main meal. For a crowd, cut 12 rectangles and let people take two. If kids are eating, smaller squares work better because the crust stays tidy in small hands.
Beverage Pairing: A chilled Barbera or Lambrusco is a strong match because the acidity keeps up with the tomatoes and cheese. For a nonalcoholic option, sparkling water with lemon or orange peel keeps the meal bright instead of heavy.
Small Moves That Make It Taste More Like Nonna’s
Flavor Enhancement: Brush the edge of the crust with a teaspoon or two of olive oil mixed with a little minced garlic during the last 3 minutes of baking. It perfumes the rim without burning the garlic, and the first bite tastes warmer than the rest.
Time-Saver: Make the sauce while the dough rises, then cool it in a shallow bowl instead of the pan. Wide surface area helps it cool faster, which means you can assemble sooner without steaming the dough underneath.
Dough Handling: Oil your fingertips instead of dusting the dough with extra flour when you stretch it. Flour can dry the surface and leave pale, chalky patches on the baked crust. A little oil makes the dough easier to press and gives you a softer finish.
Cost-Saver: Buy mozzarella in block form when you can. It usually costs less per ounce than pre-shredded cheese, and the melt is cleaner. If the block is too much for one pizza night, shred the extra and freeze it in a thin bag so it breaks apart easily later.
Serving Suggestions: Keep a bowl of torn basil leaves and crushed red pepper near the pan. People can finish their own slices, which makes the pizza feel a little more alive at the table. It also solves the age-old problem of the person who wants more heat and the person who doesn’t.
Common Pizza Night Mistakes and the Fix for Each One
-
Sauce that’s too wet: The middle turns soft, and the slice droops when you lift it. Simmer the sauce until it’s thick enough to mound slightly on a spoon, then use less than you think you need. A thin coat is better than a slippery one.
-
Stretching the dough before it’s ready: It keeps springing back, tears at the edges, and never reaches the corners of the pan. Cover it and give it 10 minutes to relax. That short rest is not wasted time; it’s the difference between fighting the dough and guiding it.
-
Too much cheese piled in the center: The top looks exciting, but the center bakes greasy and heavy while the edges brown too fast. Spread the mozzarella evenly from edge to edge and stop at 16 ounces for a 13 x 18-inch pan. More cheese is not always more pizza.
-
Oven not hot enough: The crust stays pale, and the cheese starts to dry before the bottom gets color. Preheat the oven for a full 30 to 45 minutes and bake on the lower third rack. If your oven runs cool, add 2 to 3 minutes, not extra sauce.
-
Cutting the pizza immediately: The cheese slides, the sauce runs, and the whole pan looks messier than it needs to. Wait the full 5 minutes after baking. That pause lets the crumb settle and makes cleaner cuts.
-
Using watery fresh mozzarella without draining it: The cheese releases liquid, and the center gets damp. If you want to use fresh mozzarella, slice it thin and let it drain on paper towels for at least 20 minutes first. On a sheet pan, dry cheese is your friend.
Variations That Keep the Same Heart
Sausage, Peppers, and Onion Tray Pizza: Brown 8 ounces of Italian sausage first, then add thinly sliced bell peppers and onions that have been cooked until soft. Spread them over the sauce before the cheese so they don’t dump water into the pizza while it bakes. This is the version I’d make when dinner needs to feel louder and more filling.
White Herb Pizza with Ricotta: Skip the tomato sauce and spread 1 cup of ricotta mixed with 1 tablespoon olive oil, 1 grated garlic clove, lemon zest, salt, and parsley over the dough. Add mozzarella and a little Parmesan, then finish with basil after baking. The result is creamier and quieter, with a soft garlic note that feels almost buttery.
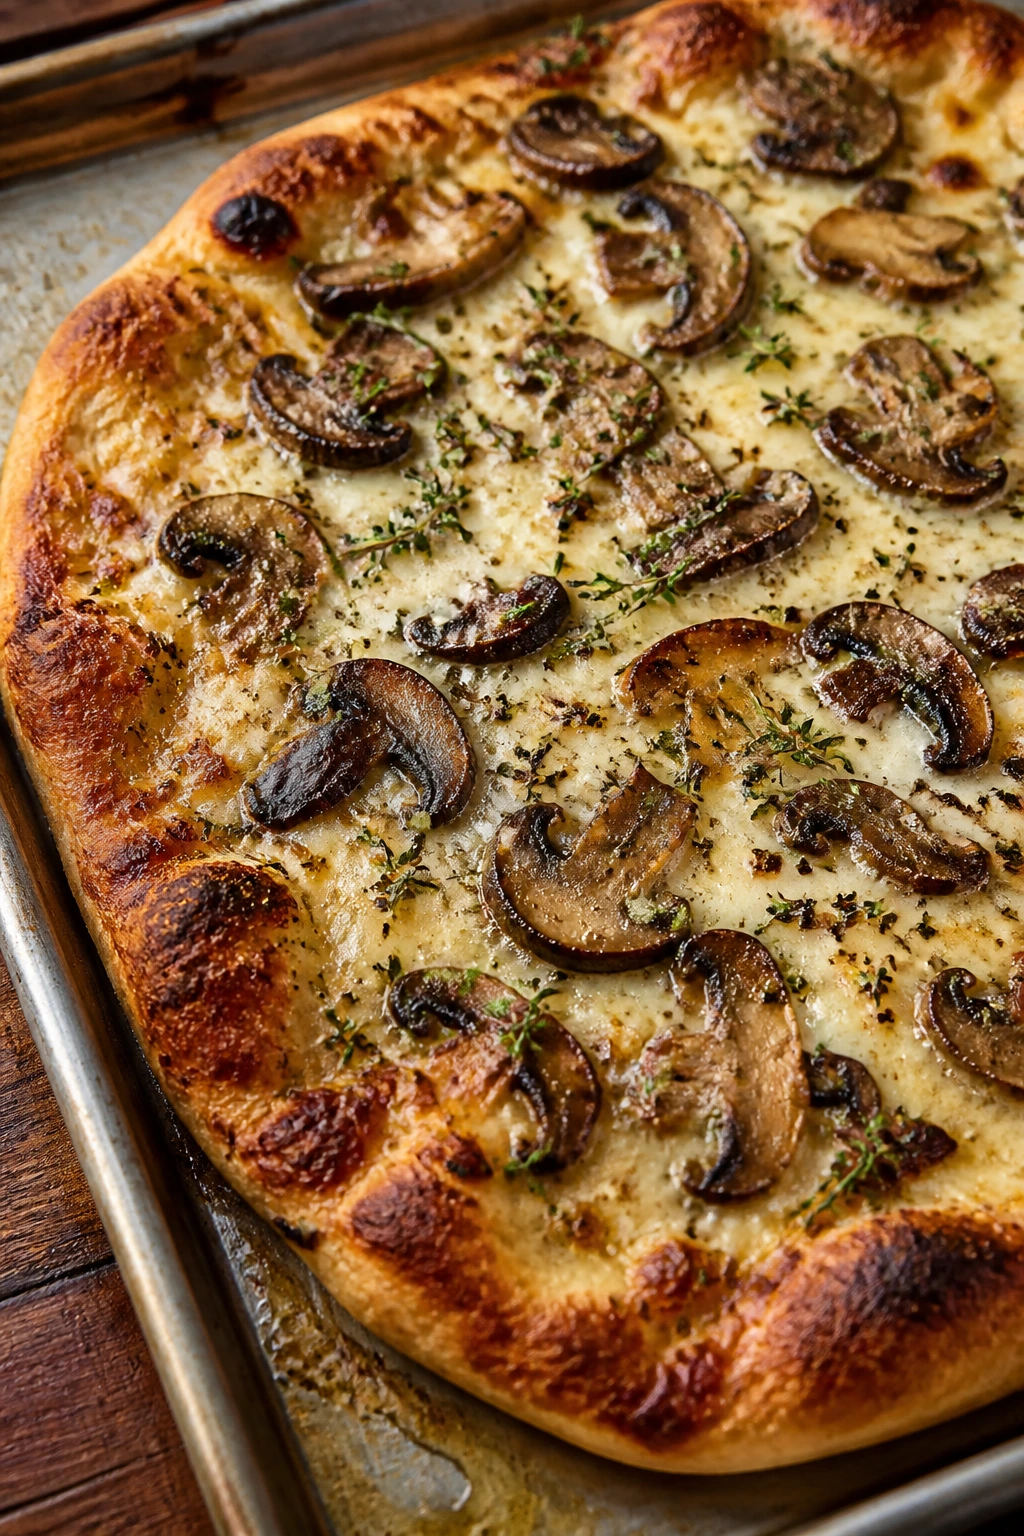
Mushroom and Thyme Pan Pizza: Sauté 8 ounces of sliced mushrooms over medium-high heat until they give up their moisture and start to brown. Stir in a pinch of thyme and layer them over the sauce with the cheese. If mushrooms go in raw, they leak. Cook them first or live with a wet middle.
Dairy-Lighter Olive Oil Pizza: Use half the mozzarella and lean on olive oil, herbs, and Parmesan for flavor. Add roasted zucchini or thinly sliced cherry tomatoes if you want a little more color. This version tastes lighter on the tongue, but it still scratches the same pizza-night itch.
Gluten-Free Sheet-Pan Version: Use a high-quality gluten-free flour blend with xanthan gum and expect a softer dough that needs careful handling. Press it into an oiled pan and give it a short rest before topping so it can settle. The crust won’t have the same chew as wheat dough, but the olive oil and browned cheese still carry the flavor.
The Tools That Make Pizza Night Easier
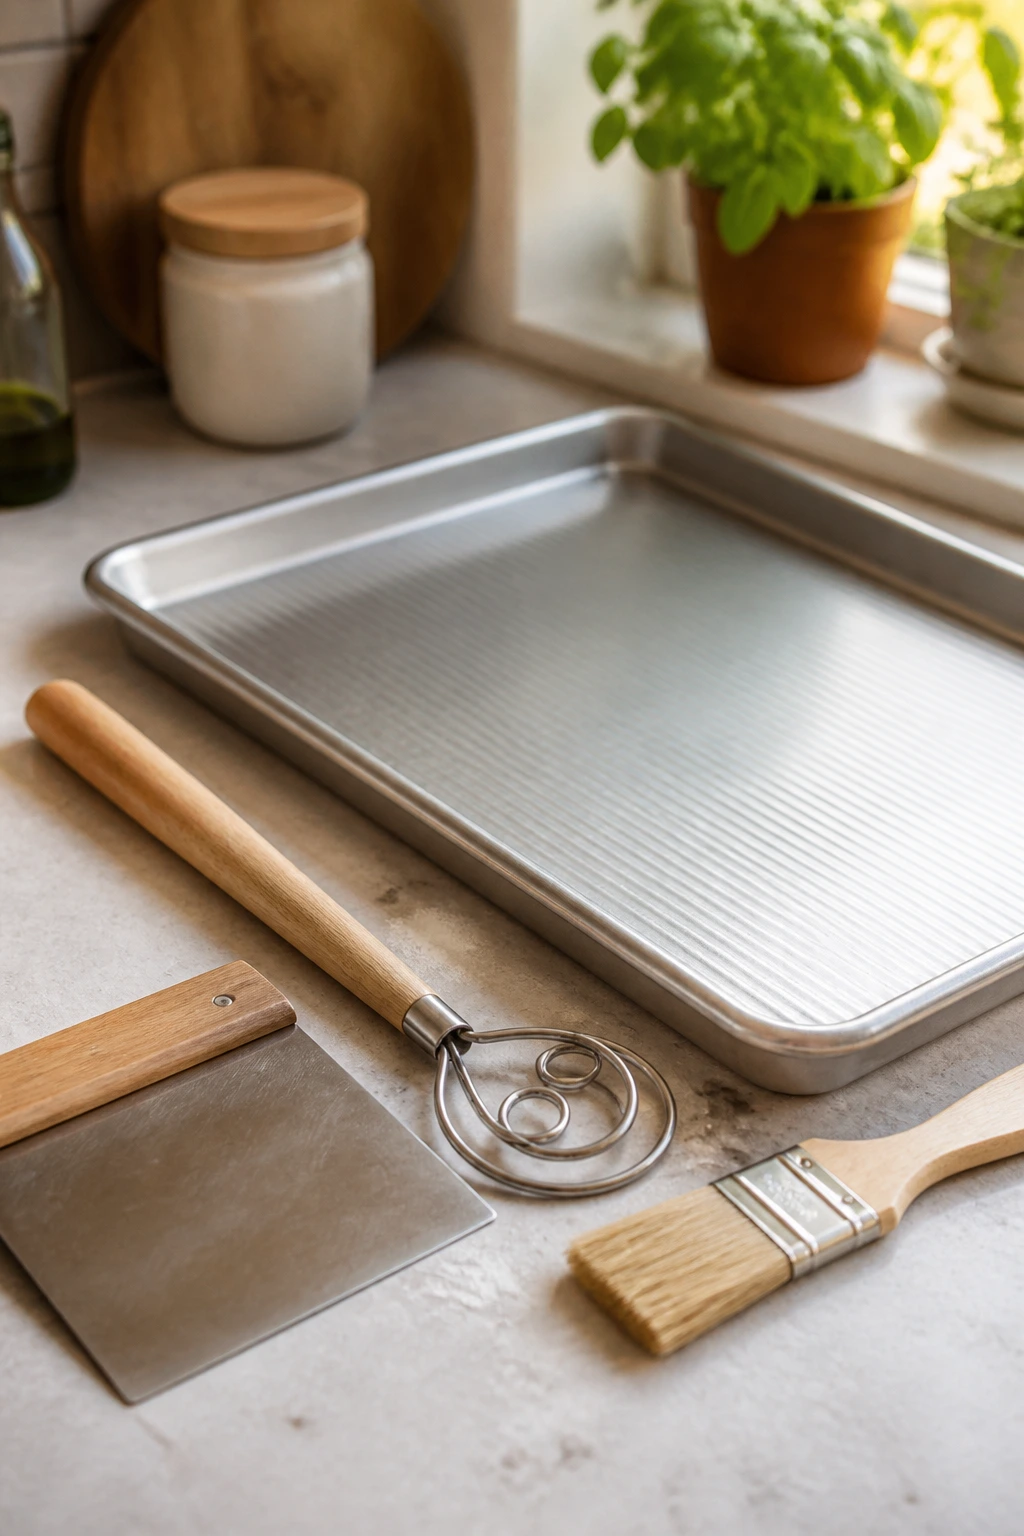
- 13 x 18-inch rimmed half-sheet pan: This is the workhorse. A dark metal pan browns the bottom a little faster, so watch the last few minutes closely.
- Large mixing bowl: You need room for the dough to rise without climbing over the sides.
- Wooden spoon or dough whisk: Either one handles the shaggy stage better than a fork.
- Clean kitchen towel or plastic wrap: The dough needs a cover so the surface doesn’t dry out during the rise.
- Small saucepan: For the sauce. A wide skillet can work too, but a saucepan keeps tomato splatter under control.
- Box grater or food processor: Useful for shredding mozzarella quickly if you bought it in a block.
- Bench scraper or flexible spatula: Handy for moving dough without tearing it.
- Pizza cutter or sharp chef’s knife: A sharp blade gives cleaner rectangles than sawing with a dull knife.
- Pastry brush, optional: Nice for brushing the pan and the crust edge with olive oil, though a spoon works in a pinch.
Storage, Reheating, and Make-Ahead Notes
Room temperature: Baked pizza should not sit out longer than 2 hours. After that, the cheese and sauce have had enough time in the danger zone that it’s smarter to refrigerate what’s left.
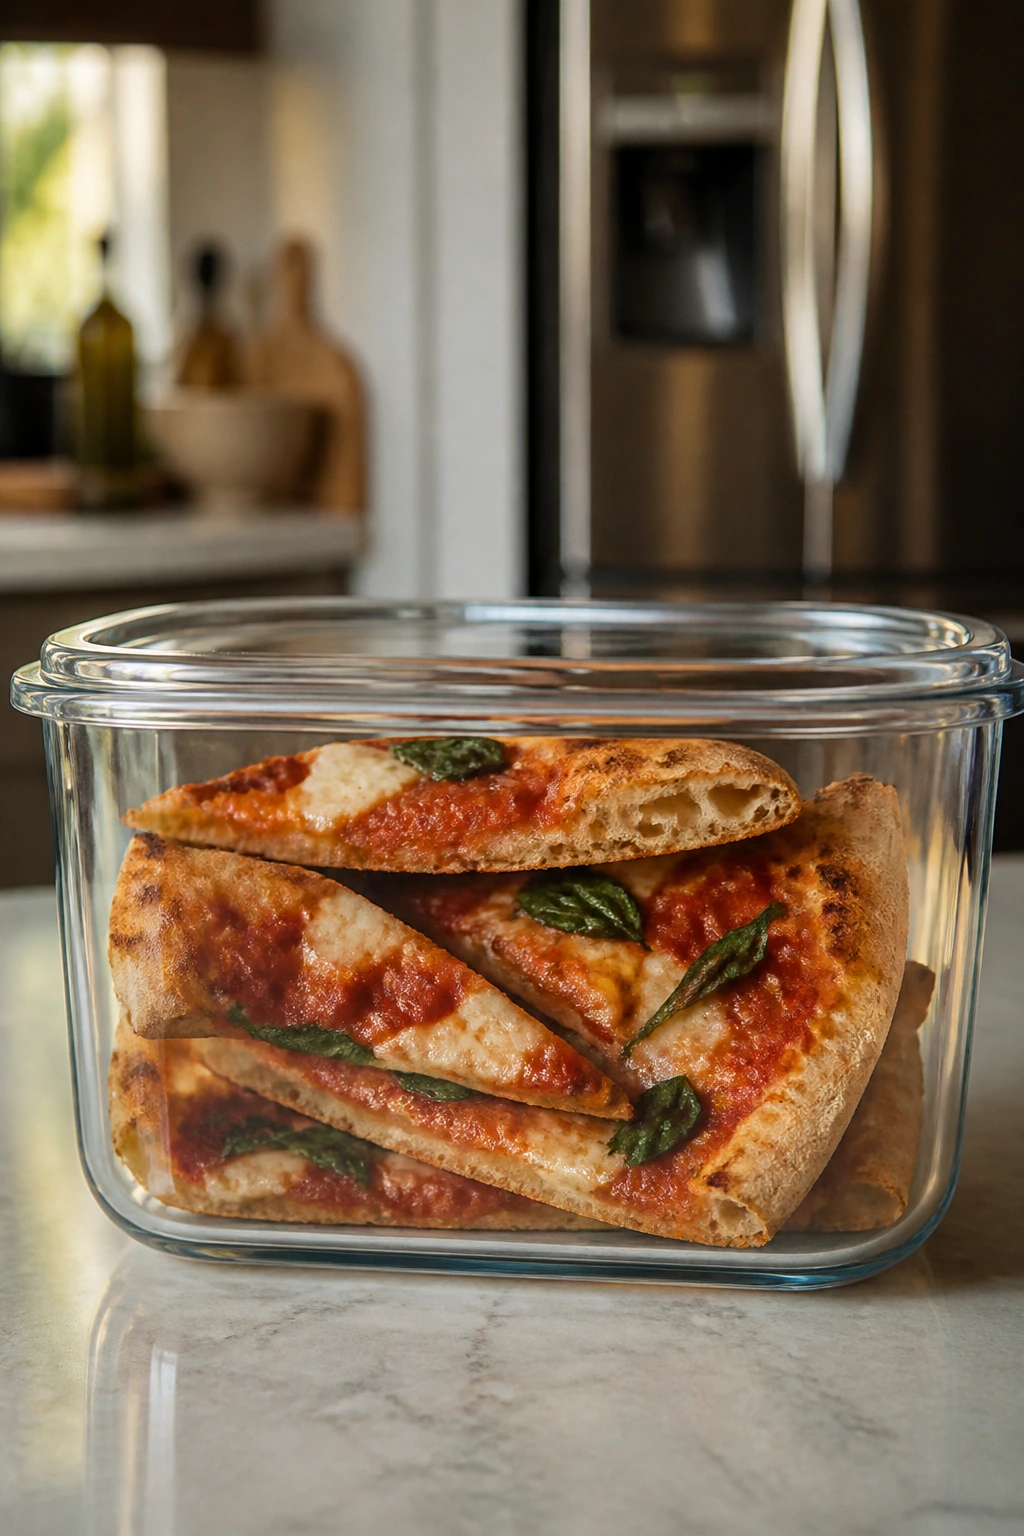
Refrigerator: Store cooled slices in an airtight container or wrap them tightly in foil for 3 to 4 days. If the slices are stacked, slip a piece of parchment between them so the cheese doesn’t glue itself to the next slice.
Freezer: Freeze individual slices wrapped in foil and then tucked into a freezer bag for up to 2 months. That extra layer of foil helps keep the crust from picking up freezer smell. Thaw in the refrigerator overnight before reheating, or reheat from frozen with a few extra minutes in the oven.
Best reheating method: For the crispiest bottom, heat slices in a dry skillet over medium-low heat for 3 to 4 minutes, then cover for 1 minute so the cheese warms through. In the oven, 400°F / 205°C for 8 to 10 minutes on a baking sheet works well. Skip the microwave if you care about the crust; it turns the bottom rubbery and the cheese oddly greasy.
Make-ahead plan: The sauce can be made 3 days ahead and kept in the fridge. The dough can rise, then rest covered in the fridge for up to 24 hours after the first rise; bring it back to room temperature for 30 to 45 minutes before stretching. I would not assemble the whole pizza far ahead unless you enjoy fighting a damp crust.
Questions People Ask Before the Oven Goes On

Can I use store-bought pizza dough?
Yes, and it’s a perfectly sensible shortcut. Use about 1 pound of dough for this half-sheet pan, let it come to room temperature first, and handle it gently so it doesn’t tear when you stretch it.
Do I need a pizza stone or steel for this recipe?
No. This is a sheet-pan pizza on purpose, and the pan gives you enough browning if the oven is hot and the rack is low. A stone or steel helps if you’re making round pizzas, but for this style, a well-oiled pan is enough.
Can I use fresh mozzarella instead of low-moisture mozzarella?
You can, but drain it well and use it sparingly. Fresh mozzarella holds more water, and on a pan pizza that extra moisture often shows up as a wet center. If you want that milky flavor, mix a little fresh mozzarella with low-moisture cheese instead of replacing it outright.
Why does my dough keep shrinking when I stretch it?
The gluten is tight and needs a break. Let the dough rest for 10 minutes, covered, then come back to it. This is one of those places where patience saves effort.
How do I keep the middle from getting soggy?
Use thick sauce, not wet sauce, and don’t overdo the topping layer. Also, bake on the lower rack so the bottom gets heat early, and let the pizza rest for 5 minutes before slicing. That resting time helps the steam escape instead of soaking back into the crust.
Can I make the dough the day before?
Yes. After the first rise, punch it down, cover it, and refrigerate it for up to 24 hours. Cold dough needs 30 to 45 minutes at room temperature before it will stretch without snapping back.
What if my oven only reaches 475°F / 245°C?
Bake it a little longer, usually 17 to 20 minutes, and watch the bottom color rather than the clock alone. If the cheese is done before the crust browns enough, move the pan one rack lower for the last 2 minutes or give it a brief broil at the end.
A Last Word Before the First Slice
The best thing about this herbed family pizza night is that it doesn’t ask for a fancy plan. It asks for a hot oven, a soft dough, and a little respect for garlic, tomatoes, and basil. That’s enough to make a pan of pizza that feels generous in the way family food ought to feel.
And once you’ve made it a few times, the whole rhythm gets easier: sauce while the dough rises, pan while the oven heats, basil at the end, slice, pass, repeat. The pan will come back emptier than you expect, which is usually how you know you got it right.
Herbed Family Pizza Night Like Nonna Used to Make — Recipe Card
Recipe Name: Herbed Family Pizza Night Like Nonna Used to Make
Description: A soft, olive-oil-rich sheet-pan pizza with garlicky tomato sauce, mozzarella, Parmesan, and fresh herbs. It bakes into a crisp-edged, shareable pan pie that tastes like the kind of dinner people linger over.
Prep Time: 30 minutes
Cook Time: 20 minutes
Total Time: About 2 hours 15 minutes, including rising time
Course: Dinner, Main Course
Cuisine: Italian-American
Servings: 6 to 8 servings
Calories: About 490 kcal per serving
Ingredients
For the Dough:
- 4 cups (500 g) bread flour or unbleached all-purpose flour, plus more for dusting
- 2 1/4 teaspoons instant yeast, or active dry yeast if preferred
- 1 1/2 teaspoons fine sea salt
- 1 teaspoon sugar
- 1 1/2 cups warm water, about 105°F to 110°F / 40°C to 43°C
- 2 tablespoons extra-virgin olive oil, plus more for the bowl and pan
For the Herb Tomato Sauce:
- 1 tablespoon extra-virgin olive oil
- 3 garlic cloves, minced
- 1 tablespoon tomato paste
- 1 can (28 oz / 794 g) crushed tomatoes
- 1 teaspoon dried oregano
- 1 teaspoon dried basil
- 1/2 teaspoon fine sea salt
- 1/4 teaspoon freshly ground black pepper
- 1 pinch sugar, if needed
For the Topping and Finish:
- 16 oz (450 g) low-moisture mozzarella, shredded
- 1/2 cup (50 g) grated Parmesan or Pecorino Romano
- 2 tablespoons chopped fresh basil
- 1 tablespoon chopped fresh parsley
- 1/2 teaspoon dried oregano
- 1 to 2 tablespoons extra-virgin olive oil, for drizzling
- Crushed red pepper flakes, to taste
Instructions
-
Make the dough: Mix the flour, yeast, salt, and sugar. Add the warm water and olive oil, then stir until a shaggy dough forms. Knead 6 to 8 minutes until smooth and elastic.
-
Let it rise: Place the dough in an oiled bowl, cover, and let it rise 1 hour to 1 hour 15 minutes, until doubled.
-
Cook the sauce: Warm olive oil in a saucepan over medium heat. Cook the garlic for 30 seconds, then add tomato paste, crushed tomatoes, oregano, basil, salt, pepper, and sugar. Simmer 15 to 20 minutes until thick.
-
Preheat and prep the pan: Heat the oven to 500°F / 260°C with a rack in the lower third. Oil a 13 x 18-inch rimmed half-sheet pan generously.
-
Stretch the dough: Press the dough into a rough rectangle, transfer to the pan, and stretch it to the edges. If it springs back, rest it 10 minutes and finish stretching.
-
Top the pizza: Spread about 1 1/2 cups sauce over the dough. Add the mozzarella, Parmesan, dried oregano, red pepper flakes, and olive oil.
-
Bake: Bake 15 to 18 minutes, rotating once, until the cheese bubbles and the crust is golden at the edges. Broil 1 to 2 minutes if you want more browning.
-
Finish and serve: Rest 5 minutes, then top with fresh basil and parsley. Cut into rectangles and serve warm.
Notes: Sauce can be made 3 days ahead. If your oven runs cool, add 2 to 3 minutes to the bake time. Fresh basil goes on after baking, not before.