
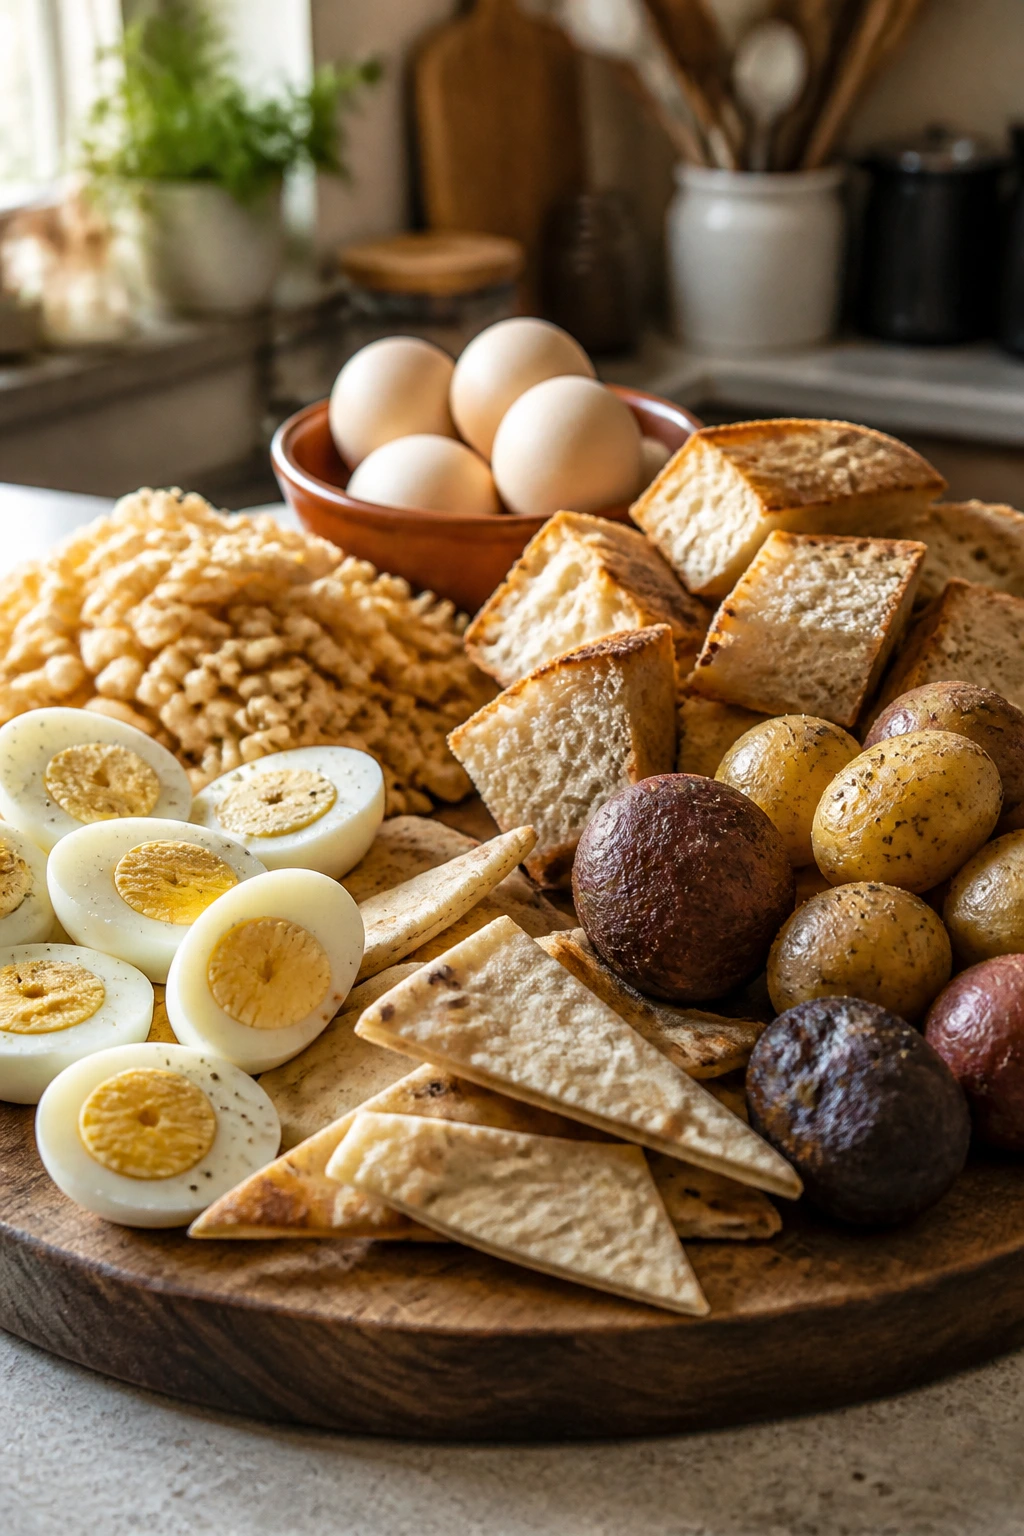
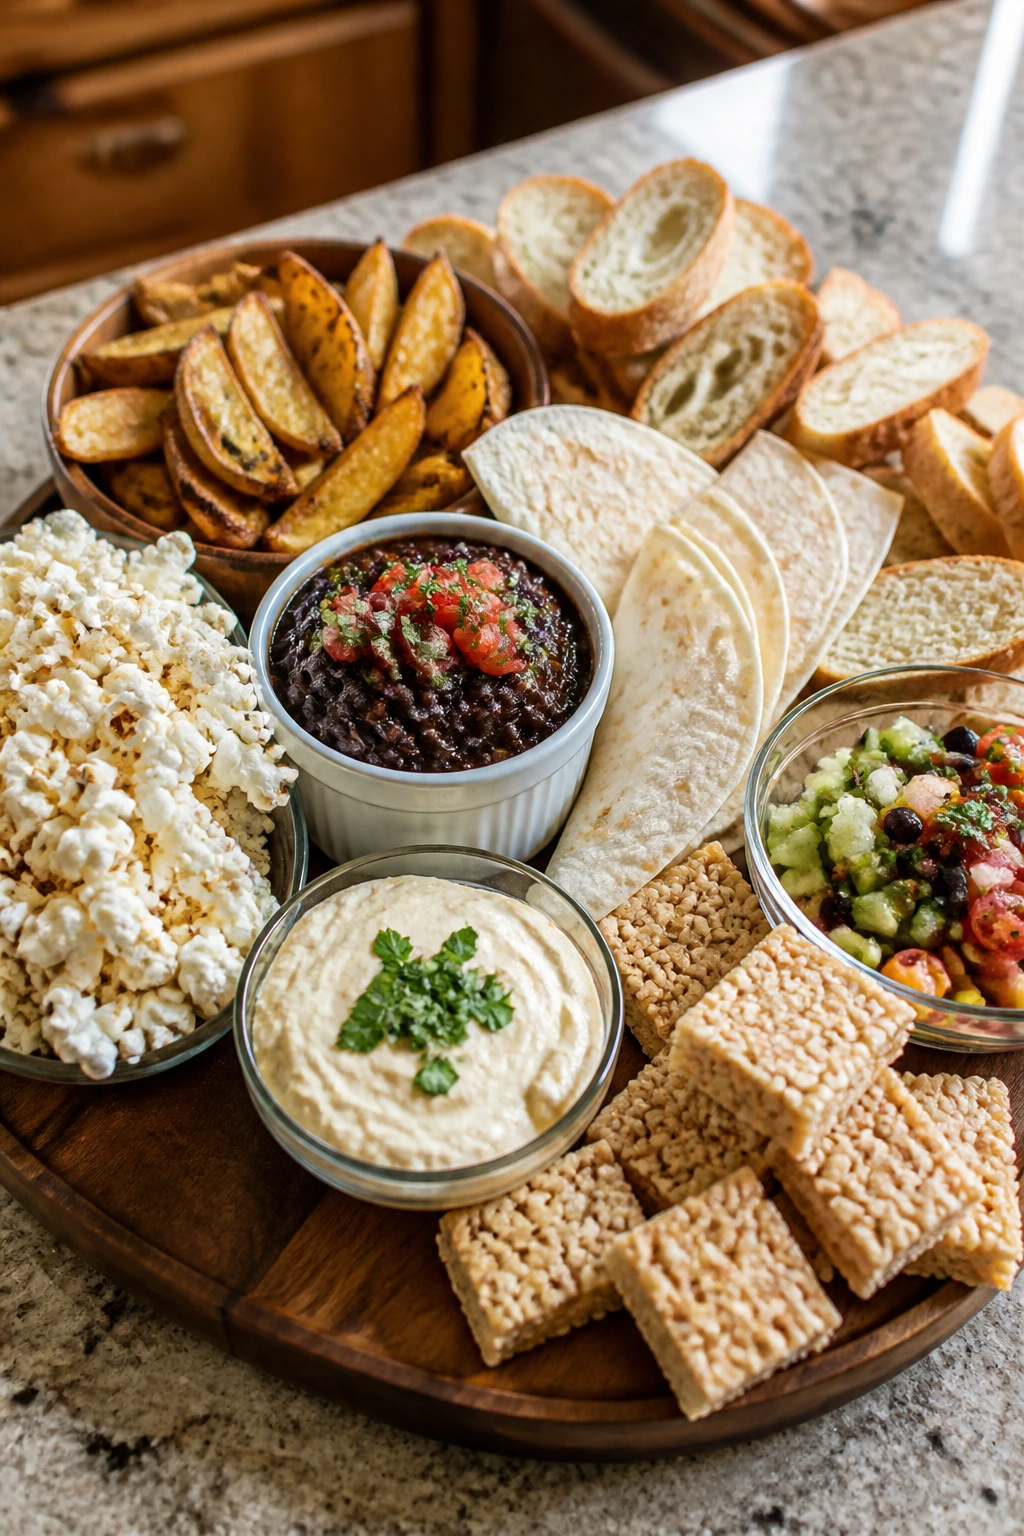
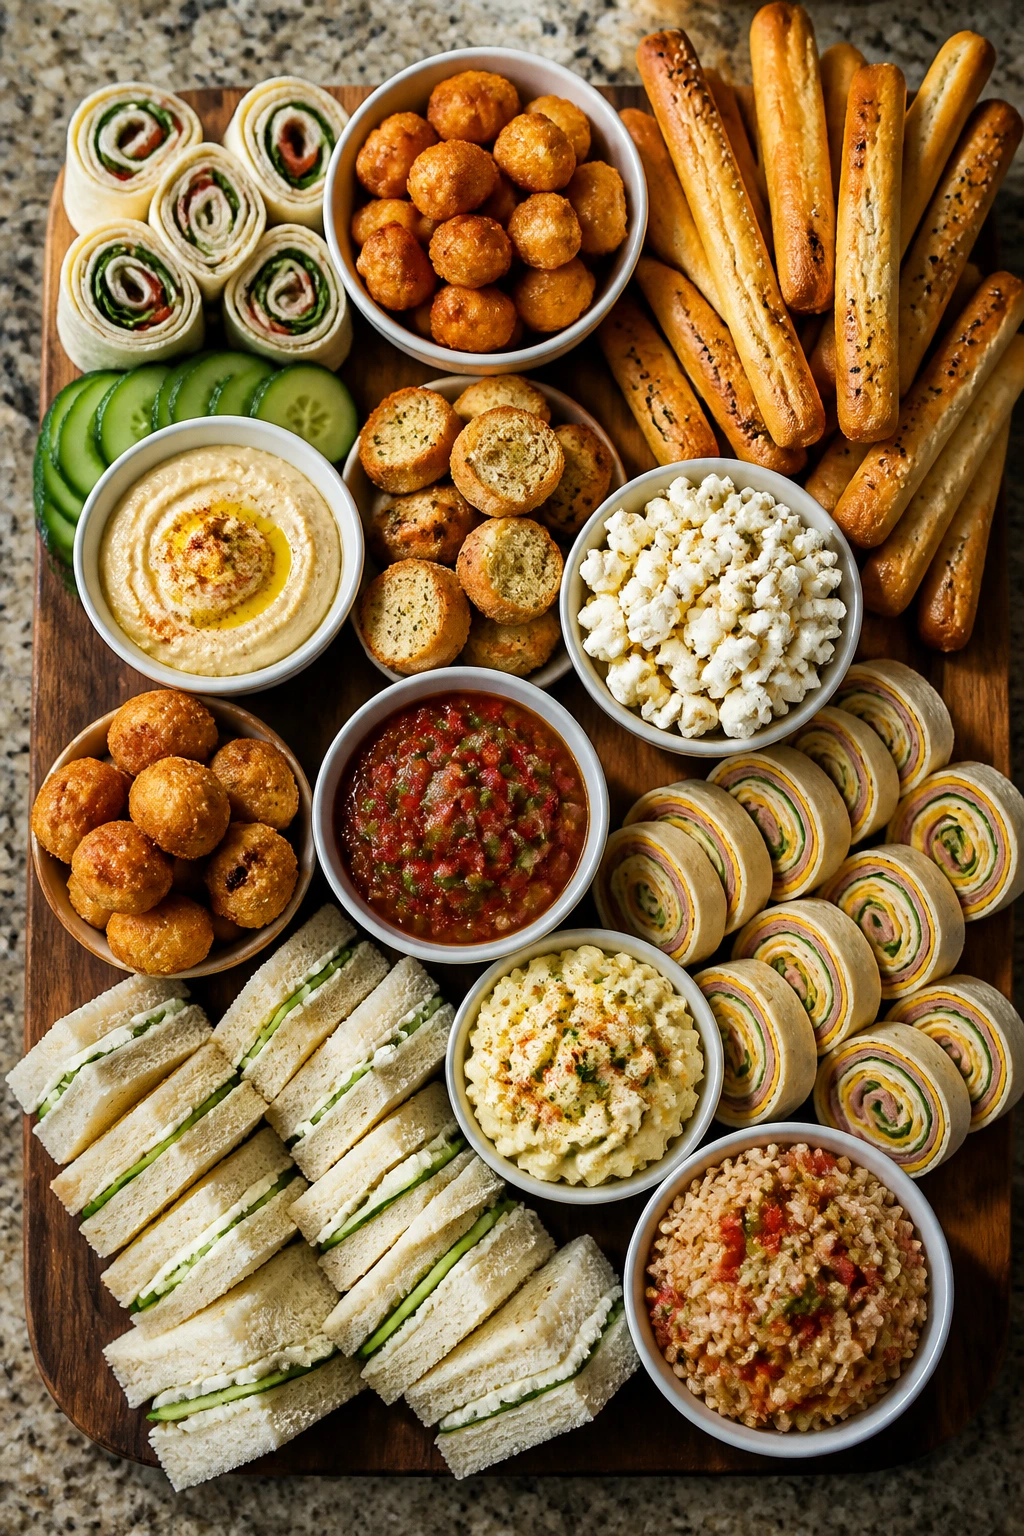
A tight grocery budget can still put out a spread that looks generous when you know which foods pull their weight. Party foods on a budget are usually the dishes people underestimate: eggs, beans, tortillas, potatoes, popcorn, bread, rice cereal, and a few smart pantry extras that turn into trays, dips, and finger foods fast. No one remembers how much a deviled egg cost. They remember that the tray emptied first.
The trick is not chasing fancy ingredients. It’s choosing foods that stretch, hold well on a buffet, and taste good at room temperature after somebody’s third trip past the table. A bowl of warm bean dip can feed more people than a tiny platter of deli bites. A pan of quesadilla wedges can disappear in minutes. And if you’ve ever watched a tray of popcorn snack mix get picked over while the expensive stuff sits there untouched, you already know where this is going.
What follows is a collection built for real-life hosting: cheap enough to make without wincing at the receipt, sturdy enough to survive a party table, and flexible enough to scale up when more people show up with vague promises of “just one drink.”
Why This Collection Earns a Spot on the Table
-
Stretchy ingredients: Eggs, beans, tortillas, bread, potatoes, and rice cereal show up more than once here because they feed a crowd without eating your whole budget.
-
Low drama on party day: Most of these recipes can be made ahead, baked in one pan, or assembled in a few blunt, practical moves while the rest of the house is still a mess.
-
Buffet-friendly texture: These foods hold their shape better than delicate canapés, so they still look decent after they’ve sat out for a while.
-
Easy to scale: If you need 12 more pieces of something, you usually can add one can, one loaf, one extra dozen eggs, or one extra bag of tortillas and keep moving.
-
Flexible with store brands: A store-brand tortilla, cheese, or cereal works just fine here. In a few cases, it works better because the texture is a little sturdier.
-
A mix of hot, cold, salty, and sweet: That matters more than people think. A party spread gets boring fast if every dish leans the same way.
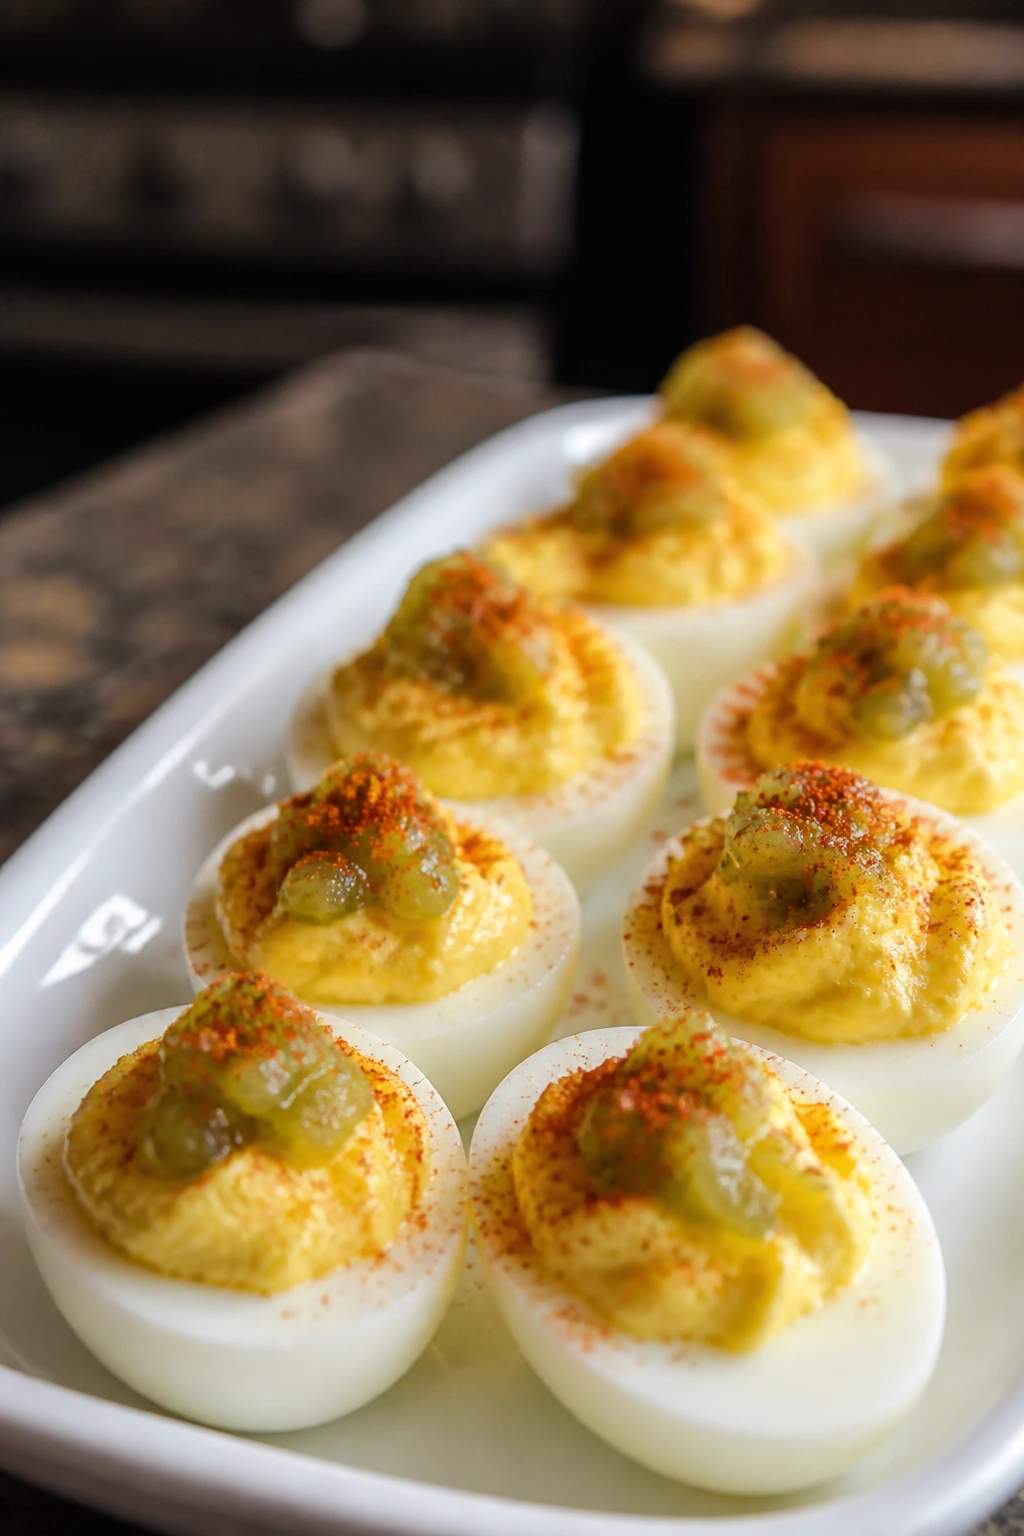
1. Deviled Eggs with Mustard, Sweet Relish, and Paprika
Deviled eggs are one of those old-school party foods that never really stopped being smart. They’re cheap, they look tidy on a platter, and they disappear in a way that makes you feel like you got the proportions right. The filling should be creamy and a little tangy, with enough mustard to wake it up and a tiny hit of relish so the yolks don’t taste flat.
Why It Works:
Eggs are still one of the cheapest crowd foods around, and they give you built-in portions without any slicing or plating drama. A dozen eggs makes 24 halves, which is enough to anchor a tray. The filling sets up nicely in the fridge, so the flavor gets better after 30 minutes of chilling. That little bit of vinegar matters; it keeps the yolks from tasting heavy.
Key Ingredients:
- 6 large eggs
- 3 tablespoons mayonnaise
- 1 teaspoon yellow mustard
- 1 teaspoon sweet relish, drained
- 1 teaspoon white vinegar
- 1/8 teaspoon fine salt
- 1/8 teaspoon black pepper
- 1/4 teaspoon paprika, for topping
Quick Steps:
- Place the eggs in a saucepan and cover with cold water by 1 inch. Bring to a boil over medium-high heat.
- Once the water boils, cover the pan, turn off the heat, and let the eggs sit for 10 to 11 minutes.
- Move the eggs to an ice bath for 5 minutes, then peel and slice them in half lengthwise.
- Pop the yolks into a bowl and mash them with mayo, mustard, relish, vinegar, salt, and pepper until smooth.
- Spoon or pipe the filling back into the whites, then dust the tops with paprika. Chill for 20 minutes if you’ve got the time.
Equipment for This Recipe:
- Medium saucepan
- Slotted spoon
- Mixing bowl
- Fork or small whisk
- Piping bag or zip-top bag, optional but tidy
How to Serve This Dish:
Set the halves on a flat platter lined with lettuce leaves or paper doilies if you want the old-fashioned look. They’re good beside pickles, olives, and crackers, and they work as the first thing people grab while other food is still warm.
Pro Tips for This Recipe:
- Use eggs that are not rock-fresh; they peel more cleanly after boiling.
- Drain the relish before mixing it in, or the filling turns loose.
- Add the paprika right before serving so it stays bright.
- If the filling feels stiff, add 1 teaspoon of mayo at a time instead of dumping in a big spoonful.
Variations on This Dish:
- Dill-Pickle Version: Swap the sweet relish for chopped dill pickles and add a pinch of dill.
- Smoky Version: Use smoked paprika and a tiny splash of hot sauce in the filling.
- No-Mayo Version: Replace half the mayo with plain Greek yogurt for a sharper, lighter filling.
Common Mistakes to Avoid with This Dish:
- Overcooking the eggs: The yolks turn gray-green at the edges and smell sulfurous. Pull them at 10 to 11 minutes, then ice-bath them fast.
- Filling that’s too wet: Too much relish or vinegar makes the center slide around. Drain the relish and add liquid slowly.
- Skipping the chill: Warm filling tastes flatter and is harder to pipe cleanly. Even 20 minutes in the fridge helps.
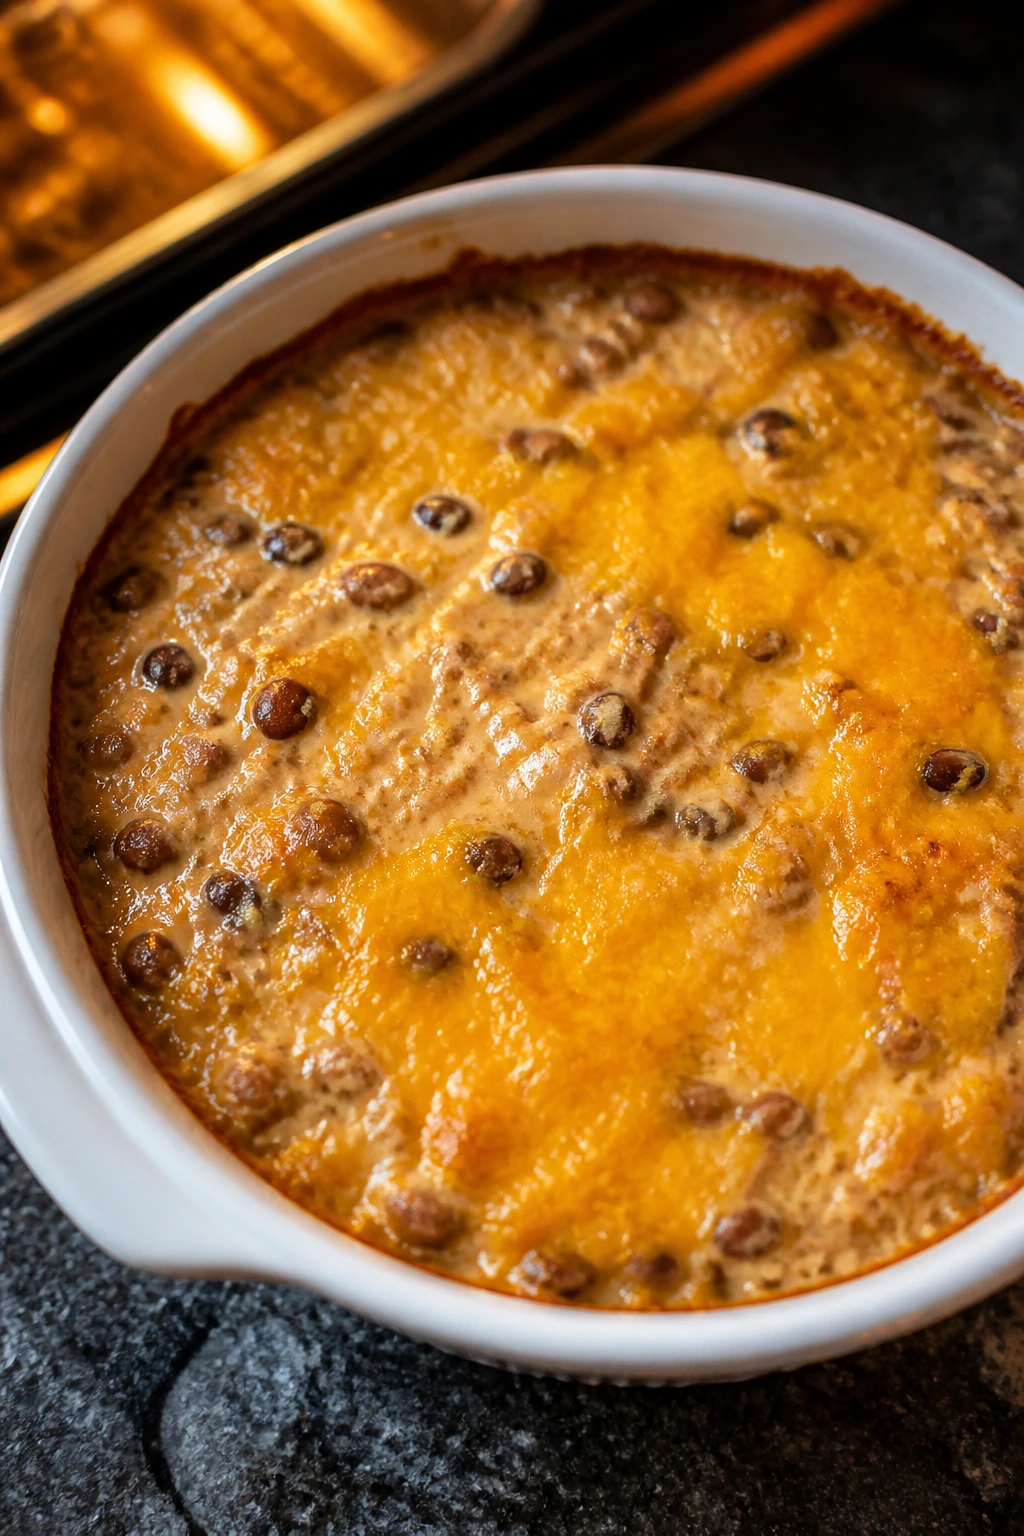
2. Warm Bean and Cheese Dip
Bean dip is the quiet workhorse of a budget party table. It looks humble going into the oven, then comes out bubbling at the edges with a top layer that smells like toasted cumin and melted cheddar. Serve it with tortilla chips, and people start treating a $6 bowl like it was the main event.
Why It Works:
Beans are cheap, filling, and naturally creamy when blended or mashed. A can of refried beans gives the dip body, while salsa brings salt, acid, and moisture without buying a pile of extra vegetables. Cream cheese and shredded cheddar keep it rich enough to feel like party food instead of a side dish. It also holds heat well, which matters when people drift in late.
Key Ingredients:
- 1 can (16 ounces) refried beans
- 1 cup salsa, drained slightly if very loose
- 4 ounces cream cheese, softened
- 1 cup shredded cheddar cheese
- 1/2 teaspoon chili powder
- 1/2 teaspoon ground cumin
- 1/4 teaspoon garlic powder
- Tortilla chips, for serving
Quick Steps:
- Preheat the oven to 375°F (190°C).
- Stir the refried beans, salsa, cream cheese, chili powder, cumin, and garlic powder together in a bowl until mostly smooth.
- Spread the mixture into an 8-inch baking dish and top with the cheddar.
- Bake for 18 to 22 minutes, until the edges bubble and the cheese melts across the top.
- Let it sit for 5 minutes before serving so it thickens a little.
Equipment for This Recipe:
- Mixing bowl
- Rubber spatula
- 8-inch baking dish
- Measuring cups and spoons
- Oven mitts
How to Serve This Dish:
Serve it straight from the baking dish with sturdy tortilla chips, pita chips, or even thick-cut celery sticks if you want a little crunch variety. A spoonful of salsa on top makes the whole pan look more finished.
Pro Tips for This Recipe:
- Drain watery salsa a bit so the dip doesn’t turn soupy.
- Shred your own cheddar if you can; it melts smoother than the bagged kind.
- Warm the cream cheese first so you don’t end up with cold lumps.
- If the top browns too fast, cover it loosely with foil for the last few minutes.
Variations on This Dish:
- Black Bean Swap: Replace half the refried beans with mashed black beans for a chunkier texture.
- Green Chile Version: Stir in a small can of chopped green chiles for a cleaner, brighter heat.
- Extra-Cheesy Top: Add a handful of Monterey Jack with the cheddar for a softer melt.
Common Mistakes to Avoid with This Dish:
- Using salsa that’s too thin: It dilutes the dip and makes it slide around the dish. Drain off excess liquid first.
- Baking it until dry: The edges should bubble, not turn crusty. Pull it while the center is still soft.
- Serving it straight from the oven: People burn their mouths, then stop eating. Let it rest a few minutes.
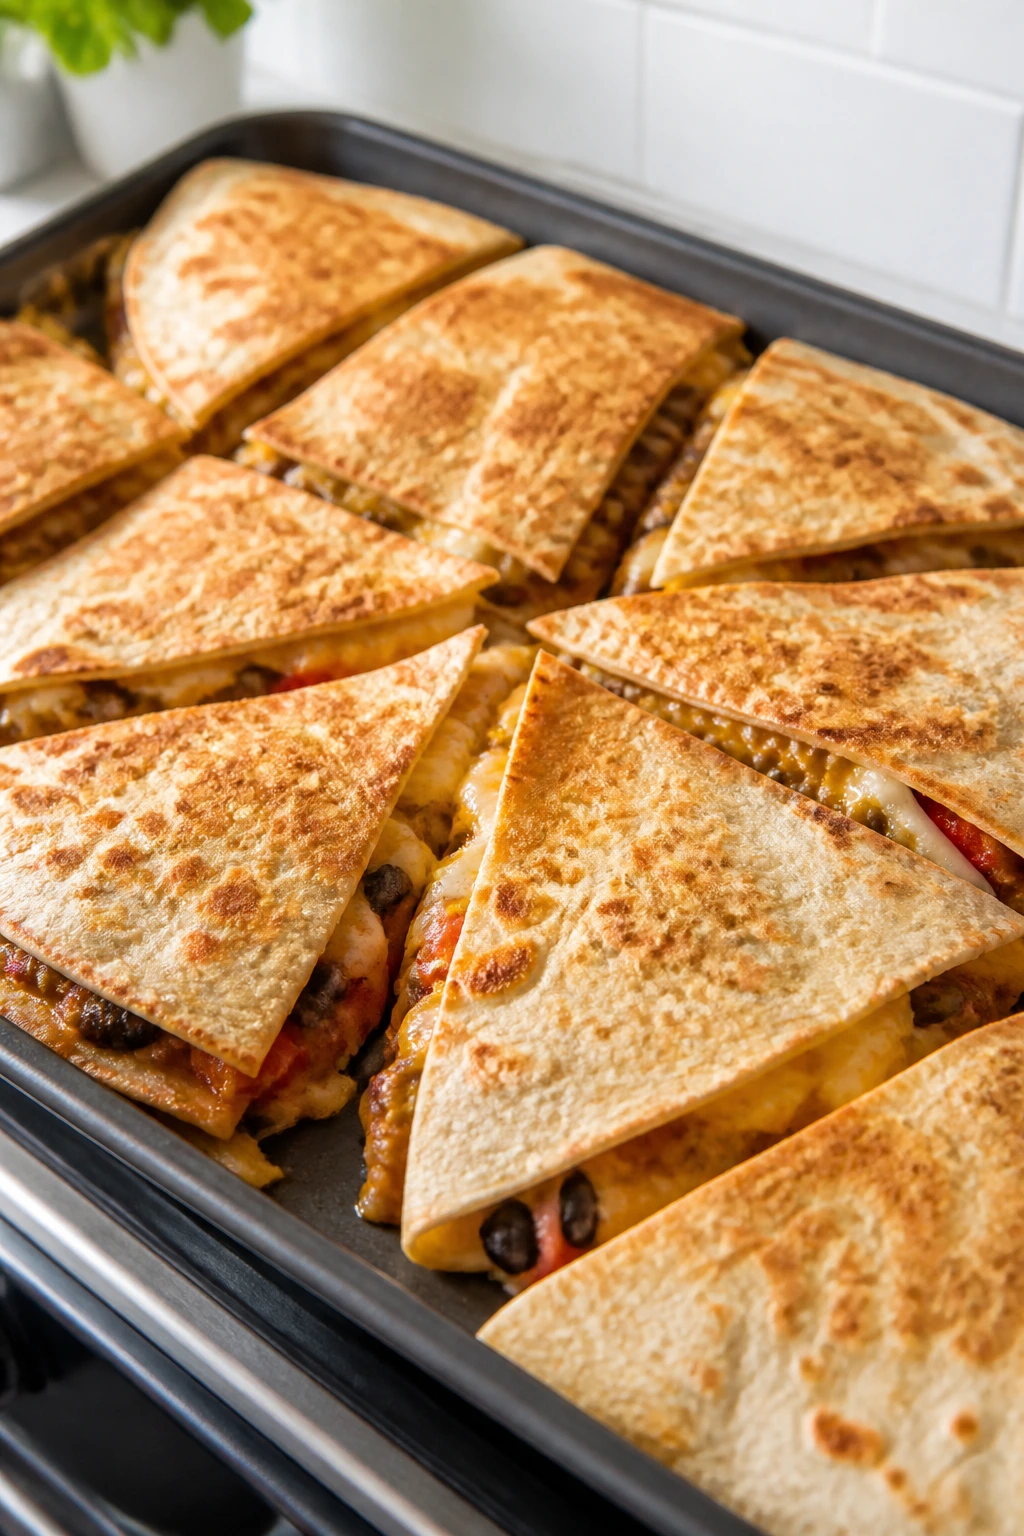
3. Sheet-Pan Quesadilla Wedges
A sheet-pan quesadilla gives you the same cheesy pull as a skillet version, just in a shape that feeds a crowd without standing over the stove. The edges crisp up, the center stays melty, and the whole thing cuts into wedges that feel party-ready instead of lunchbox plain. If you’ve got tortillas and a little cheese, you’re already halfway there.
Why It Works:
This is one of the cheapest hot foods you can make that still feels substantial. Tortillas act like both crust and serving vessel, so you’re not buying pie dough or breading. Beans bulk out the filling, cheese ties everything together, and corn adds tiny sweet pops that keep the flavor from getting one-note. Bake it in one go, slice it once, and it’s done.
Key Ingredients:
- 4 large flour tortillas
- 2 cups shredded Mexican blend cheese
- 1 cup canned black beans, drained and rinsed
- 3/4 cup frozen corn, thawed
- 1/4 cup diced onion, optional
- 1 tablespoon oil or melted butter
- 1/2 teaspoon chili powder
- Salsa or sour cream, for serving
Quick Steps:
- Preheat the oven to 425°F (220°C).
- Lay one tortilla on a greased sheet pan, leaving a little overhang if needed.
- Scatter half the cheese, all the beans, corn, onion, and chili powder over the tortilla, then add the rest of the cheese.
- Top with the second tortilla and brush the outside lightly with oil or butter.
- Bake for 10 to 12 minutes, flip carefully, then bake 2 to 3 minutes more until both sides are golden.
- Rest for 2 minutes, then cut into wedges with a sharp knife or pizza wheel.
Equipment for This Recipe:
- Large rimmed sheet pan
- Sharp knife or pizza cutter
- Pastry brush or spoon
- Spatula
- Cutting board
How to Serve This Dish:
Pile the wedges on a plate with salsa and sour cream in separate bowls. They’re good hot, but they also hold up at room temperature for a while, which makes them useful when other food is moving slower than planned.
Pro Tips for This Recipe:
- Don’t overfill it; a thin layer crisps better and cuts more cleanly.
- Press the top tortilla down lightly before baking so the edges seal.
- Let it rest before slicing or the filling will gush out.
- Use a pizza cutter if you want clean wedges without dragging the cheese around.
Variations on This Dish:
- Chicken Add-In: Use 1 cup shredded cooked chicken if you’ve got leftovers.
- Bean-Only Version: Skip the corn and onion and use extra beans for a cheaper filling.
- Spicy Version: Add sliced pickled jalapeños under the top tortilla.
Common Mistakes to Avoid with This Dish:
- Too much filling: It bursts at the edges and won’t seal. Keep it thin.
- Skipping the flip: One-sided browning tastes fine, but both sides need heat for that crisp bite.
- Cutting too soon: Wait a minute or two so the cheese firms up enough to slice neatly.
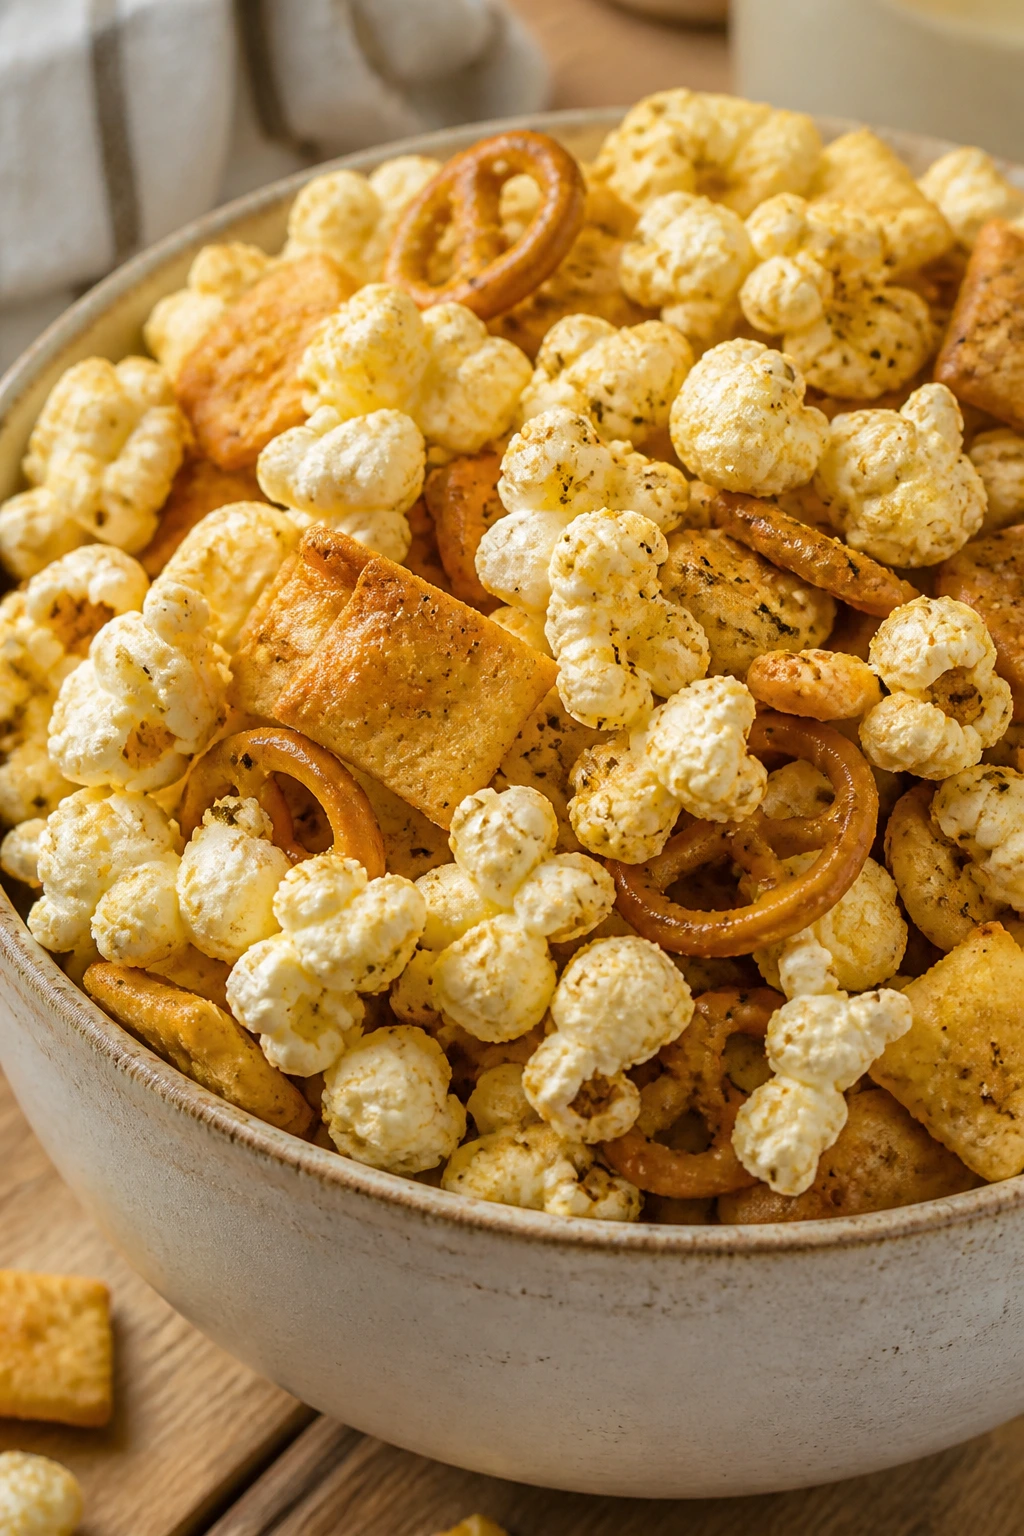
4. Ranch Popcorn Snack Mix
This is the kind of snack mix that vanishes from a bowl before anyone admits they’ve gone back for seconds. Popcorn is cheap, pretzels are cheap, crackers are cheap, and ranch seasoning plus butter makes the whole thing taste like more effort than it took. It’s salty, crunchy, and the sort of thing people keep grabbing during conversations.
Why It Works:
Popcorn is one of the lowest-cost volume foods you can make. It fills a big bowl for very little money, and the dry seasonings cling to the butter instead of falling to the bottom. A short bake in a low oven helps the coating set, which keeps the mix from tasting greasy. It’s also easy to portion into cups if you want less mess.
Key Ingredients:
- 12 cups plain popped popcorn
- 2 cups small pretzels
- 2 cups buttery round crackers
- 1/4 cup unsalted butter, melted
- 1 1/2 tablespoons ranch seasoning mix
- 1/2 teaspoon garlic powder
- 1/4 cup finely grated Parmesan
Quick Steps:
- Preheat the oven to 250°F (120°C).
- Spread the popcorn, pretzels, and crackers in a large roasting pan or two sheet pans.
- Stir the melted butter, ranch seasoning, and garlic powder together, then drizzle it over the snack mix.
- Toss gently with a spatula until the pieces look lightly coated.
- Sprinkle with Parmesan and bake for 15 minutes, stirring once halfway through.
- Cool completely before serving so it crisp up.
Equipment for This Recipe:
- Large roasting pan or sheet pans
- Large mixing bowl
- Spatula
- Measuring spoons
- Airtight container for leftovers
How to Serve This Dish:
Spoon it into paper cups, small bowls, or one big serving bowl with a scoop. It works well alongside dips because people can snack while they wait for hot foods to finish.
Pro Tips for This Recipe:
- Use plain popcorn, not butter-flavored microwave popcorn, or the seasoning turns muddy.
- Grate the Parmesan very fine so it sticks instead of falling through the mix.
- Stir gently; too much rough handling crushes the crackers.
- Let it cool all the way before storing or it will steam itself soft.
Variations on This Dish:
- Cheddar Ranch Mix: Add 2 tablespoons powdered cheddar for a sharper flavor.
- Spicy Version: Stir in 1/4 teaspoon cayenne or a pinch of chili powder.
- Sweet-Salty Twist: Toss in 1 cup pretzel sticks and 1/2 cup roasted peanuts.
Common Mistakes to Avoid with This Dish:
- Using salted butter plus salty crackers plus too much seasoning: It turns harsh fast. Taste the ranch mix first.
- Crowding the pan: The mix steams instead of toasting. Use two pans if needed.
- Packing it away while warm: That traps moisture and kills the crunch.
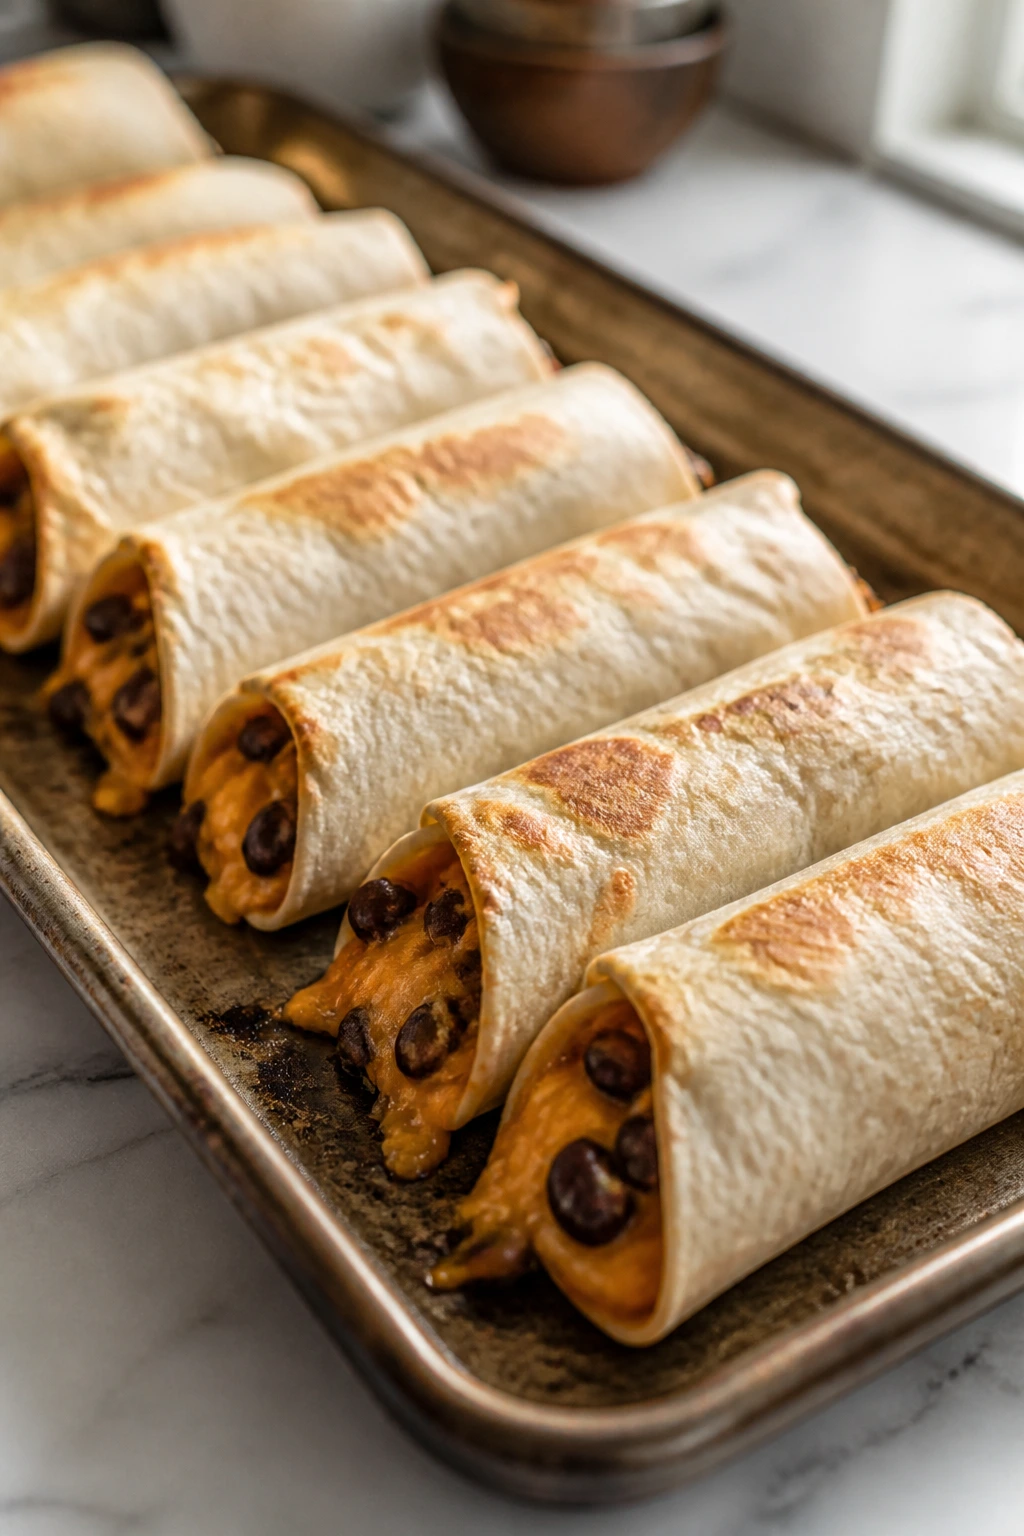
5. Mini Bean and Cheese Burritos
Mini burritos are a budget party move that makes sense the second you set them down. They’re handheld, filling, and cheap to build from tortillas, beans, rice, and cheese. If you want something people can eat while standing around the kitchen, this is it.
Why It Works:
Beans and rice together stretch farther than either one alone, and cheese gives the filling enough richness to taste like an actual treat. Smaller burritos also mean more servings from the same ingredients, which is exactly what you want when the grocery list is tight. A quick bake in the oven seals the seam and gives the tortillas a little color.
Key Ingredients:
- 8 small flour tortillas
- 1 can (16 ounces) refried beans
- 1 cup cooked white rice
- 1 cup shredded cheddar cheese
- 1/2 cup salsa, drained
- 1/2 teaspoon cumin
- 1 tablespoon oil, for brushing
- Sour cream or salsa, for serving
Quick Steps:
- Preheat the oven to 400°F (205°C).
- Stir the refried beans, rice, salsa, and cumin together in a bowl.
- Spoon about 1/4 cup filling onto each tortilla, add a spoonful of cheese, then roll tightly and tuck the ends in.
- Place the burritos seam-side down on a sheet pan and brush the tops lightly with oil.
- Bake for 10 to 12 minutes until the tortillas are lightly golden and the seams stay closed.
- Cut in half or serve whole.
Equipment for This Recipe:
- Baking sheet
- Mixing bowl
- Spoon
- Pastry brush
- Sharp knife, if halving
How to Serve This Dish:
Cut them on a bias for a cleaner look and stack them on a platter with salsa and sour cream. They’re filling enough to count as the “substantial” food on a snack table, which helps when the rest of the spread is lighter.
Pro Tips for This Recipe:
- Cool the rice a little first so the tortillas don’t tear from steam.
- Don’t overfill them, or the seam opens in the oven.
- Warm tortillas for 10 seconds in the microwave if they feel stiff.
- Bake seam-side down only; that little detail matters.
Variations on This Dish:
- Breakfast Burrito Bite: Add scrambled eggs instead of rice.
- Bean-and-Corn Version: Swap half the rice for corn kernels.
- Cheddar-Jack Upgrade: Use a mix of cheddar and Monterey Jack for a softer melt.
Common Mistakes to Avoid with This Dish:
- Wet filling: Too much salsa makes the tortilla soggy. Drain it a bit first.
- Rolling loosely: Loose burritos leak in the oven. Roll tightly and tuck the ends.
- Skipping the seam-side-down bake: They may unroll while heating.
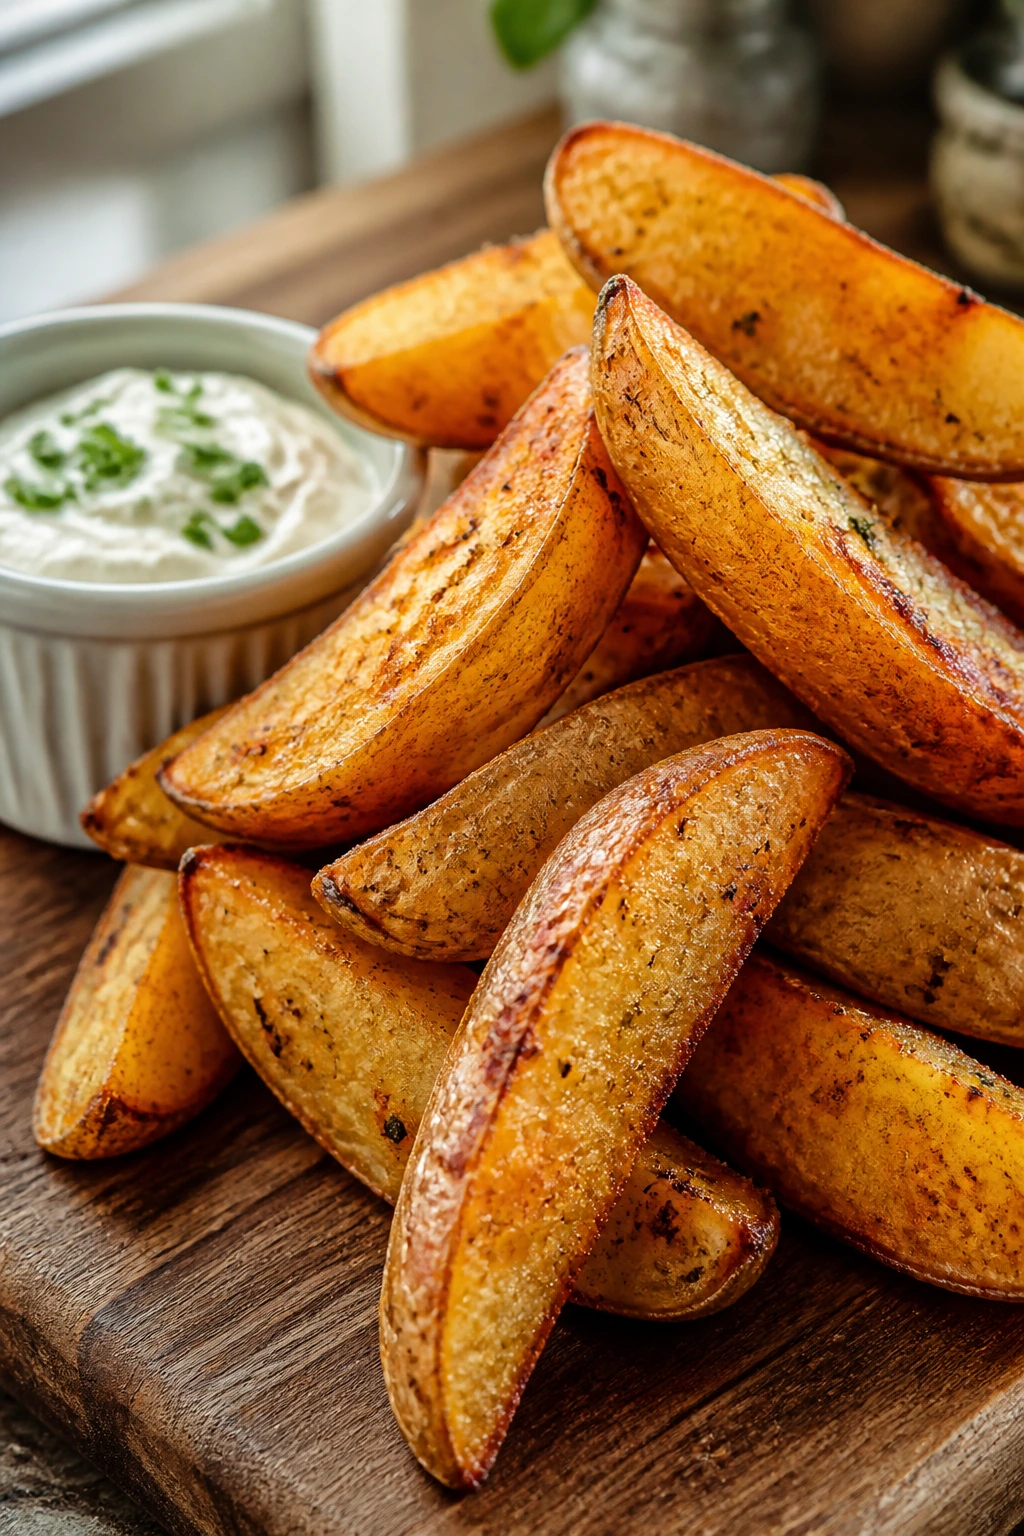
6. Crispy Potato Wedges with Sour Cream Dip
Potatoes are a budget host’s best friend, and wedges are the least fussy way to turn them into party food. They come out crisp on the outside, fluffy in the middle, and cheap enough that you can make a mountain of them without blinking at the price tag. Put out a bowl of dip and they start acting like bar food.
Why It Works:
Russet potatoes are high in starch, which is exactly what you want for a crisp edge and soft center. A hot oven pulls the surface dry, and a quick toss with oil, salt, and paprika gives them color without needing breading or deep frying. The sour cream dip adds tang and keeps the plate from feeling heavy.
Key Ingredients:
- 2 pounds russet potatoes
- 2 tablespoons oil
- 1 teaspoon salt
- 1/2 teaspoon paprika
- 1/2 teaspoon garlic powder
- 1/2 cup sour cream
- 1 tablespoon milk
- 1 teaspoon chopped chives or dill, optional
Quick Steps:
- Preheat the oven to 425°F (220°C) and line a sheet pan with parchment.
- Scrub the potatoes, cut them into wedges, and pat them dry.
- Toss the wedges with oil, salt, paprika, and garlic powder.
- Spread them in a single layer and bake for 30 to 35 minutes, flipping once, until the edges are browned and the centers feel tender when pierced.
- Mix the sour cream, milk, and herbs for the dip, then serve warm.
Equipment for This Recipe:
- Cutting board
- Sharp knife
- Sheet pan
- Large bowl
- Small bowl for dip
How to Serve This Dish:
Serve the wedges in a wide bowl or lined basket with the dip in the center. They’re good alongside sandwiches, dips, or anything saucy that needs a starch to back it up.
Pro Tips for This Recipe:
- Dry the potatoes well or they steam instead of crisp.
- Leave the skin on; it gives texture and saves time.
- Don’t crowd the pan. Space matters.
- Flip once only. Too much turning knocks off the crust.
Variations on This Dish:
- Spicy Wedges: Add 1/4 teaspoon cayenne to the seasoning.
- Herbed Version: Use dried rosemary and thyme instead of paprika.
- Cheesy Finish: Sprinkle with Parmesan in the last 5 minutes of baking.
Common Mistakes to Avoid with This Dish:
- Crowding the pan: The wedges soften and go pale. Use two pans if needed.
- Cutting uneven wedges: The small ones burn before the big ones cook.
- Serving without salt: Potatoes need enough seasoning after baking or they taste flat.
7. Pigs in a Blanket with Honey-Mustard Dip
Few things disappear faster than pigs in a blanket. They look playful, they’re easy to eat in one or two bites, and the dough-to-hot-dog ratio gives you a salty, buttery little package that people rarely leave alone. They’re also one of the few party foods that make store-brand hot dogs feel like a smart choice.
Why It Works:
The crescent dough bakes fast, which keeps the prep short and the batch moving. Cocktail wieners are cheap enough to stretch across a tray, and they need almost no seasoning because the dough and dip do the lifting. A honey-mustard dip gives you sweet and tangy balance without buying a separate sauce with a long ingredient list.
Key Ingredients:
- 2 cans refrigerated crescent roll dough
- 24 cocktail wieners
- 1 egg, beaten for brushing, optional
- 1/4 cup yellow mustard
- 2 tablespoons mayonnaise
- 1 tablespoon honey
- 1/4 teaspoon paprika
Quick Steps:
- Preheat the oven to 375°F (190°C).
- Unroll the dough and separate it into triangles, then cut each triangle into 3 strips.
- Wrap each strip around a cocktail wiener and place seam-side down on a lined baking sheet.
- Brush lightly with beaten egg if using.
- Bake for 12 to 15 minutes until the dough is puffed and golden.
- Stir the mustard, mayo, honey, and paprika together for dipping.
Equipment for This Recipe:
- Baking sheet
- Parchment paper
- Small bowl for dip
- Pastry brush, optional
- Knife or pizza cutter
How to Serve This Dish:
Serve them warm on a platter with the dip in a bowl right in the middle. They’re one of those foods that feel festive even when they’re sitting on a plain tray with a paper napkin under them.
Pro Tips for This Recipe:
- Dry the wieners with a paper towel so the dough sticks better.
- Cut the crescent dough into strips rather than using the full triangles; it wraps more evenly.
- Bake until the bottoms are actually golden, not just the tops.
- If the dough browns too fast, move the pan down a rack.
Variations on This Dish:
- Cheese-Stuffed Version: Tuck a thin strip of cheddar under the dough.
- Everything Bagel Finish: Sprinkle the tops with seasoning before baking.
- Spicy Dip: Add a spoonful of hot sauce to the honey-mustard bowl.
Common Mistakes to Avoid with This Dish:
- Using dough pieces that are too thick: The centers stay doughy. Cut the strips narrower than you think.
- Overbaking: The wieners split and the dough dries out. Watch the bottoms.
- Serving cold: The texture gets rubbery once they cool down too much.
8. French Bread Pizza Bites
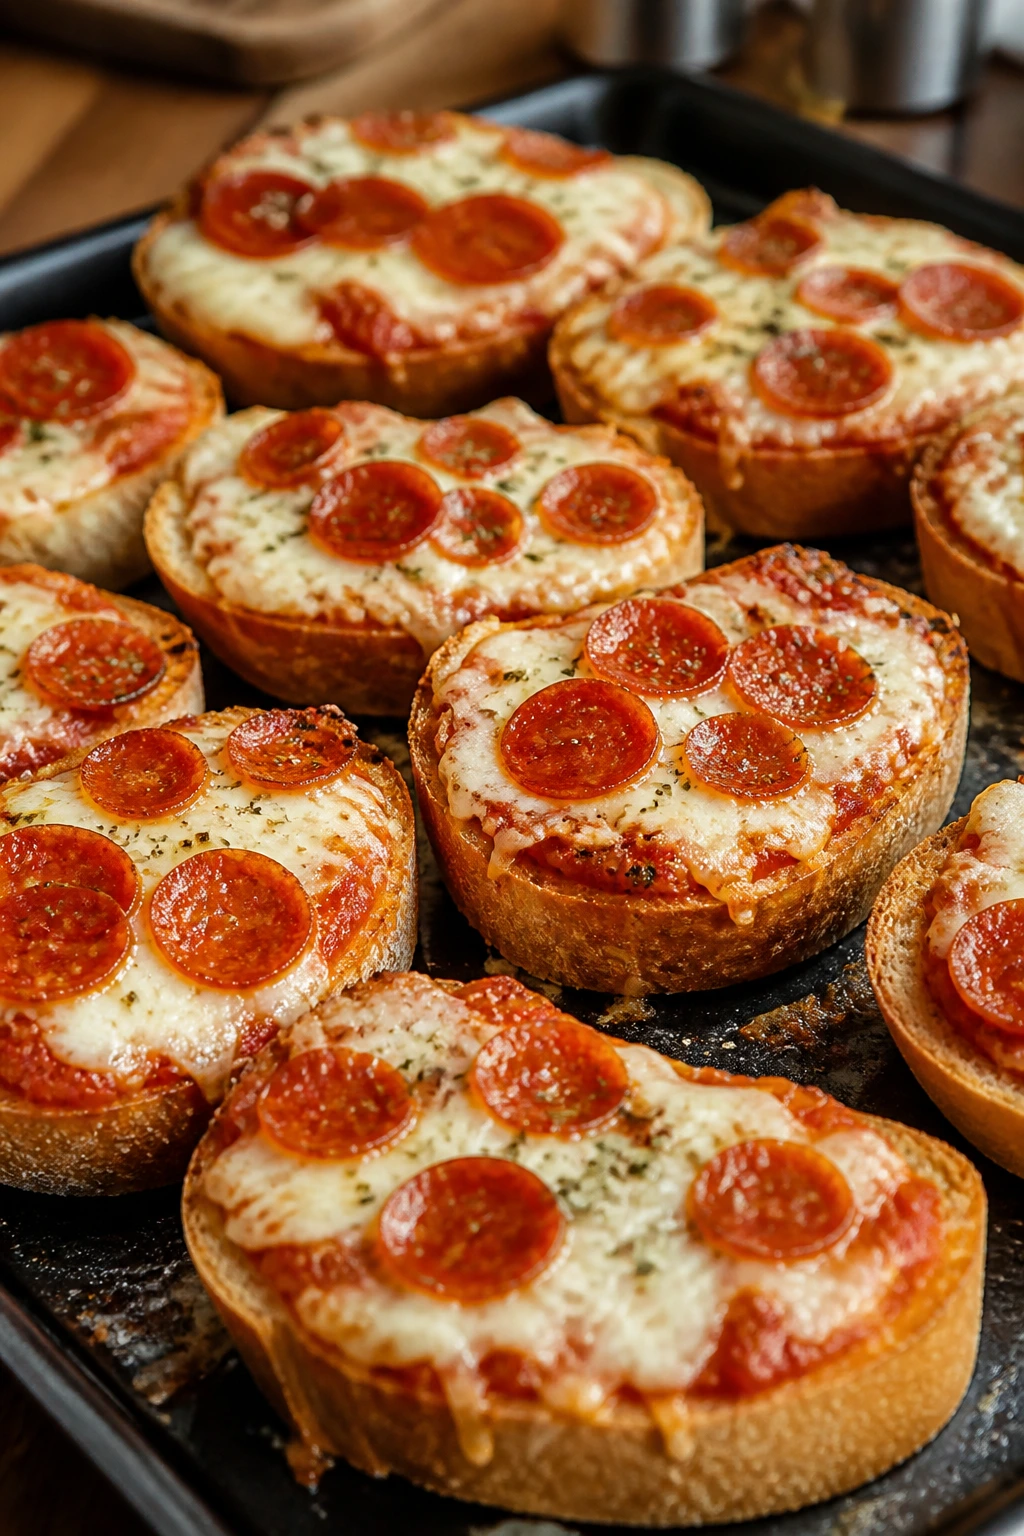
French bread pizza bites are what happen when you want pizza energy without paying for delivery or making individual pies. The bread turns crisp at the edges, the sauce stays familiar, and the cheese melts into those little browned spots that tell you the tray is probably going to empty. Cheap, cheerful, and easy to scale.
Why It Works:
A single loaf of French bread gives you a wide, sturdy base that’s already portioned once you slice it. Pizza sauce stretches farther than regular pasta sauce because you use it sparingly, and a modest amount of shredded cheese goes a long way over cut bread. If you’ve got leftover pepperoni or chopped vegetables, they fit right in.
Key Ingredients:
- 1 loaf French bread
- 1 cup pizza sauce
- 2 cups shredded mozzarella
- 1/2 cup mini pepperoni or diced cooked vegetables
- 1 teaspoon Italian seasoning
- 1 tablespoon olive oil
- 2 tablespoons grated Parmesan
Quick Steps:
- Preheat the oven to 425°F (220°C).
- Slice the bread lengthwise, then cut each half into bite-size sections if you want smaller bites.
- Brush the cut sides with olive oil and lay them on a sheet pan.
- Spread with pizza sauce, top with mozzarella, pepperoni or vegetables, Italian seasoning, and Parmesan.
- Bake for 10 to 12 minutes until the cheese is melted and the bread edges are crisp.
- Cut into smaller squares if needed.
Equipment for This Recipe:
- Serrated bread knife
- Sheet pan
- Spoon
- Pastry brush
- Pizza cutter, optional
How to Serve This Dish:
Pile the bites onto a board with extra warm sauce for dipping. They work well as the savory anchor next to crunchy snacks and lighter cold foods.
Pro Tips for This Recipe:
- Don’t overload the sauce or the bread gets soggy.
- Toasting the bread lightly before topping gives you a sturdier base.
- Use a good mozzarella that melts in long strands.
- If you’re adding vegetables, cook out the extra moisture first.
Variations on This Dish:
- White Pizza Bites: Swap the red sauce for garlic cream spread.
- Sausage Version: Add a little cooked crumbled sausage instead of pepperoni.
- Veggie Tray Version: Use chopped peppers, mushrooms, and onions.
Common Mistakes to Avoid with This Dish:
- Too much sauce: The bread turns limp fast. Spread a thin layer only.
- Using too-large toppings: Big chunks slide off the bread. Chop them small.
- Skipping the Parmesan: That final dusting adds salt and a little browning.
9. BBQ Meatball Skewers
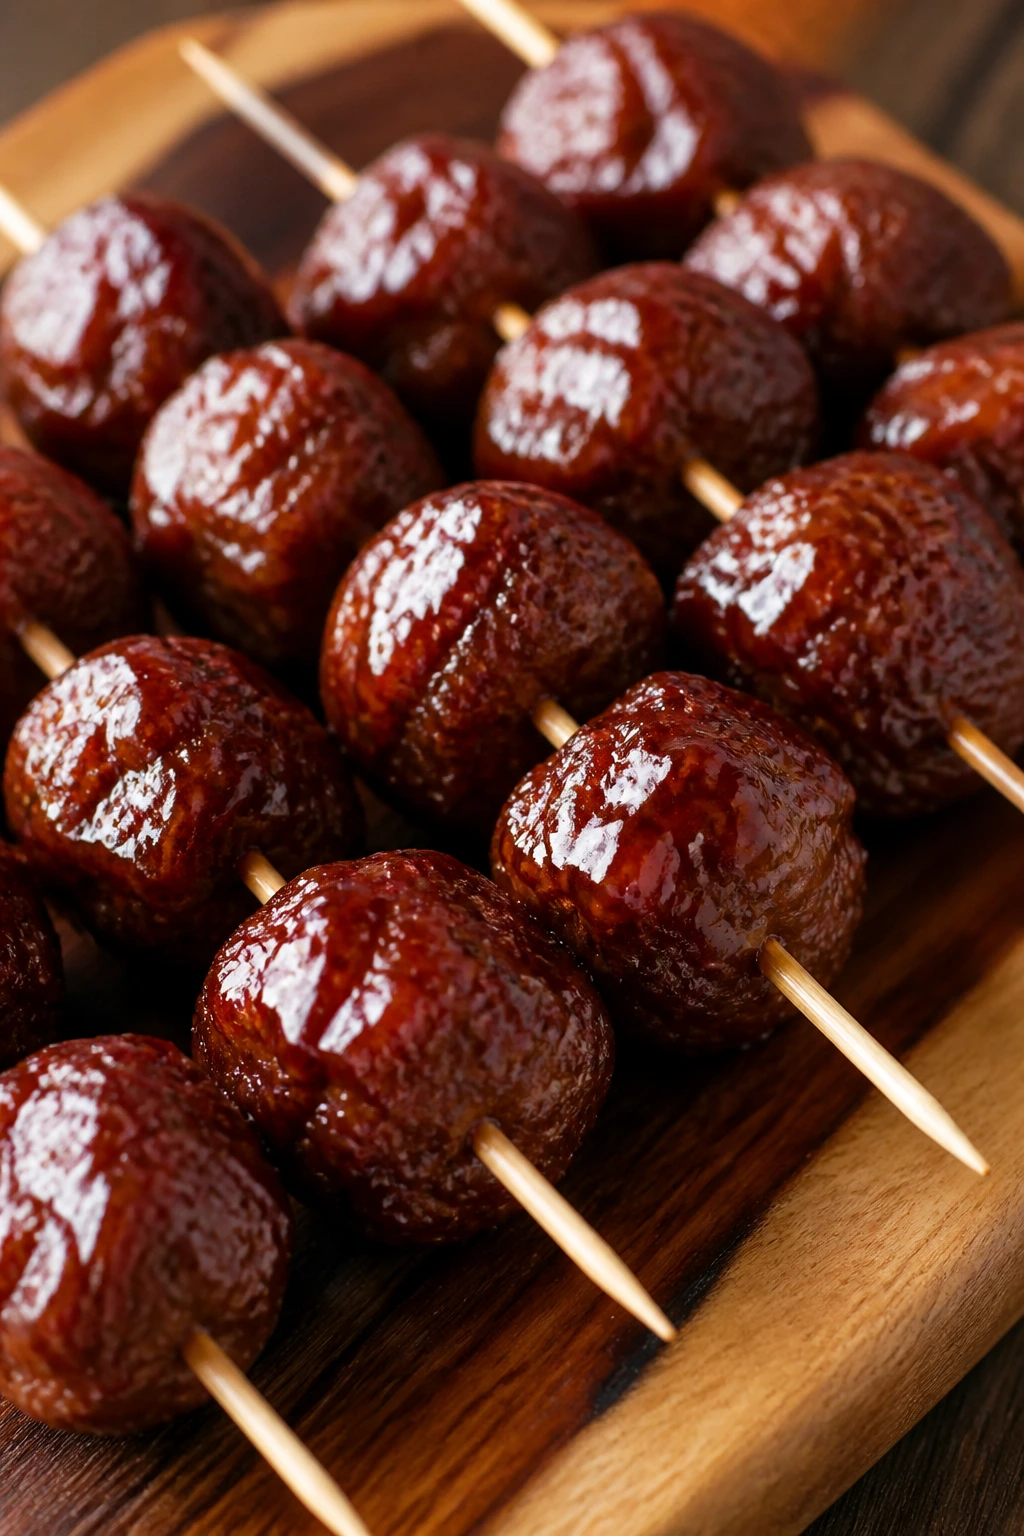
Meatballs on toothpicks feel fancier than they are, which is part of the appeal. A small batch of ground beef, breadcrumbs, and sauce can turn into a tray of bite-size snacks that taste like you spent more than you did. The sweet BBQ glaze gives them that sticky, glossy finish people notice first.
Why It Works:
Ground beef stretches well when you mix in breadcrumbs and egg, and the meatballs stay tender if you don’t overwork them. Baking instead of frying keeps the process easier and avoids splatter. A quick BBQ and grape jelly glaze gives you a saucy coating that clings without needing a long simmer.
Key Ingredients:
- 1 pound ground beef
- 1/2 cup plain breadcrumbs
- 1 large egg
- 1 teaspoon garlic powder
- 1/2 teaspoon salt
- 1/4 teaspoon black pepper
- 1 cup barbecue sauce
- 1/2 cup grape jelly
- Toothpicks or small skewers
Quick Steps:
- Preheat the oven to 400°F (205°C).
- Mix the beef, breadcrumbs, egg, garlic powder, salt, and pepper just until combined.
- Form into 1-inch meatballs and set them on a lined sheet pan.
- Bake for 12 to 15 minutes, until cooked through and browned on the edges.
- Warm the barbecue sauce and grape jelly together in a saucepan or microwave, then toss the meatballs in the glaze.
- Insert toothpicks and serve warm.
Equipment for This Recipe:
- Mixing bowl
- Sheet pan
- Small saucepan or microwave-safe bowl
- Toothpicks
- Spoon or small scoop
How to Serve This Dish:
Serve them in a shallow bowl with the skewers facing up or on a platter with extra sauce on the side. They hold up well beside potato wedges, rolls, or a cold crunchy salad.
Pro Tips for This Recipe:
- Use a small cookie scoop so the meatballs stay even.
- Don’t pack the meat mixture tight; loose handling keeps them tender.
- Warm the glaze before tossing so it coats faster.
- If the sauce seems too sweet, add a teaspoon of vinegar.
Variations on This Dish:
- Turkey Meatballs: Swap in ground turkey and watch the baking time closely.
- Spicy BBQ: Stir hot sauce into the glaze.
- Asian-Style Version: Use hoisin and a little soy sauce instead of barbecue sauce.
Common Mistakes to Avoid with This Dish:
- Overmixing the meat: The meatballs turn dense and bouncy. Mix just until it comes together.
- Using too much glaze too early: The sugar can burn. Toss after baking, not before.
- Making them too large: Bigger meatballs take longer and are harder to serve on toothpicks.
10. Cream Cheese Salsa Pinwheels
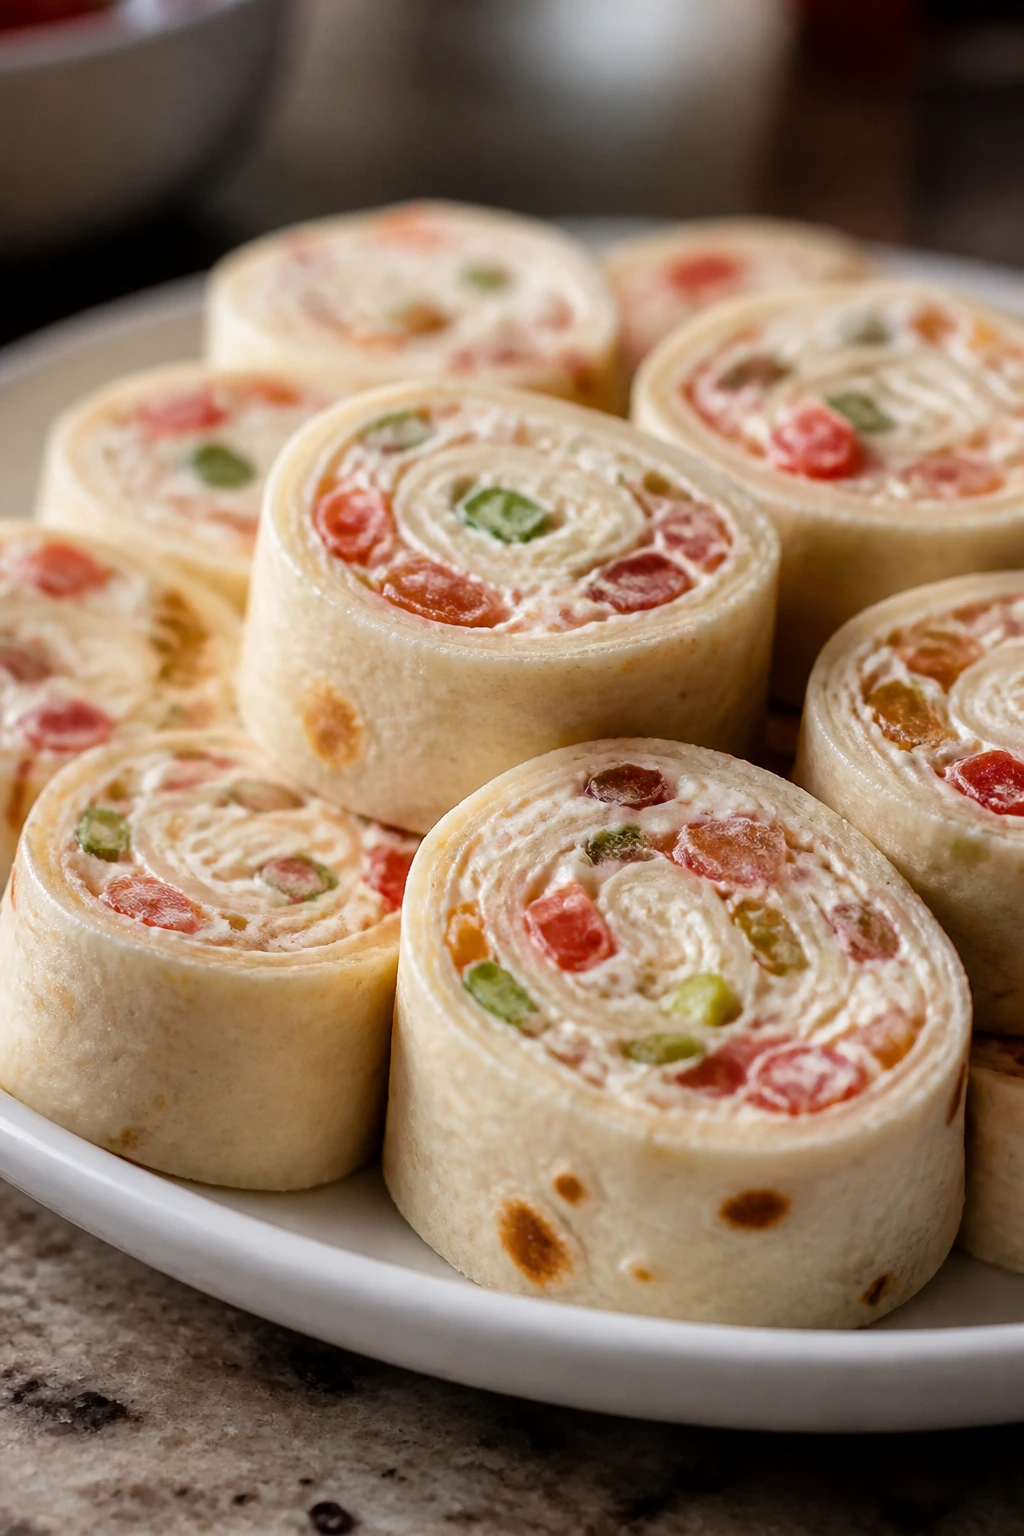
Pinwheels are one of those low-cost party foods that look like you planned ahead, even when you made them in ten minutes before people arrived. Tortillas, cream cheese, salsa, and shredded cheese roll up into neat spirals that slice cleanly and travel well from fridge to platter. No oven needed.
Why It Works:
The cream cheese acts like glue, so the filling stays inside the tortilla when you slice it. Salsa adds flavor, but if you drain it a bit, the roll won’t collapse into mush. These are a smart make-ahead choice because chilling firms the roll and makes the pinwheels easier to cut.
Key Ingredients:
- 8 ounces cream cheese, softened
- 1/2 cup salsa, drained
- 1 cup shredded cheddar or Mexican blend cheese
- 4 large flour tortillas
- 2 tablespoons sliced green onions, optional
- 1/4 teaspoon garlic powder
Quick Steps:
- Stir the cream cheese, salsa, cheese, green onions, and garlic powder until smooth.
- Spread the filling in a thin layer over each tortilla, leaving a 1/2-inch border.
- Roll each tortilla tightly and wrap in plastic.
- Chill for at least 30 minutes, or until firm.
- Slice into 1-inch pinwheels with a sharp knife and arrange on a plate.
Equipment for This Recipe:
- Mixing bowl
- Rubber spatula
- Plastic wrap
- Sharp knife
- Cutting board
How to Serve This Dish:
Arrange them in tight circles on a platter so the spiral filling shows. They’re useful for balancing heavier hot foods because they’re cold, creamy, and easy to eat in two bites.
Pro Tips for This Recipe:
- Drain the salsa well or the tortillas get soggy.
- Chill before slicing, or the spirals flatten.
- Wipe the knife between cuts for cleaner edges.
- Use the largest flour tortillas you can find; they roll better.
Variations on This Dish:
- Taco Pinwheels: Add a little taco seasoning and corn.
- Veggie Pinwheels: Stir in finely chopped bell pepper and spinach.
- Spicy Version: Add diced jalapeños or a few splashes of hot sauce.
Common Mistakes to Avoid with This Dish:
- Spreading the filling too thick: It oozes out when rolled. Use a thin layer.
- Skipping the chill: Warm rolls smear into messy slices.
- Using watery salsa: It breaks the filling and softens the tortilla.
11. Velveeta-Style Queso Dip with Tomatoes and Green Chiles
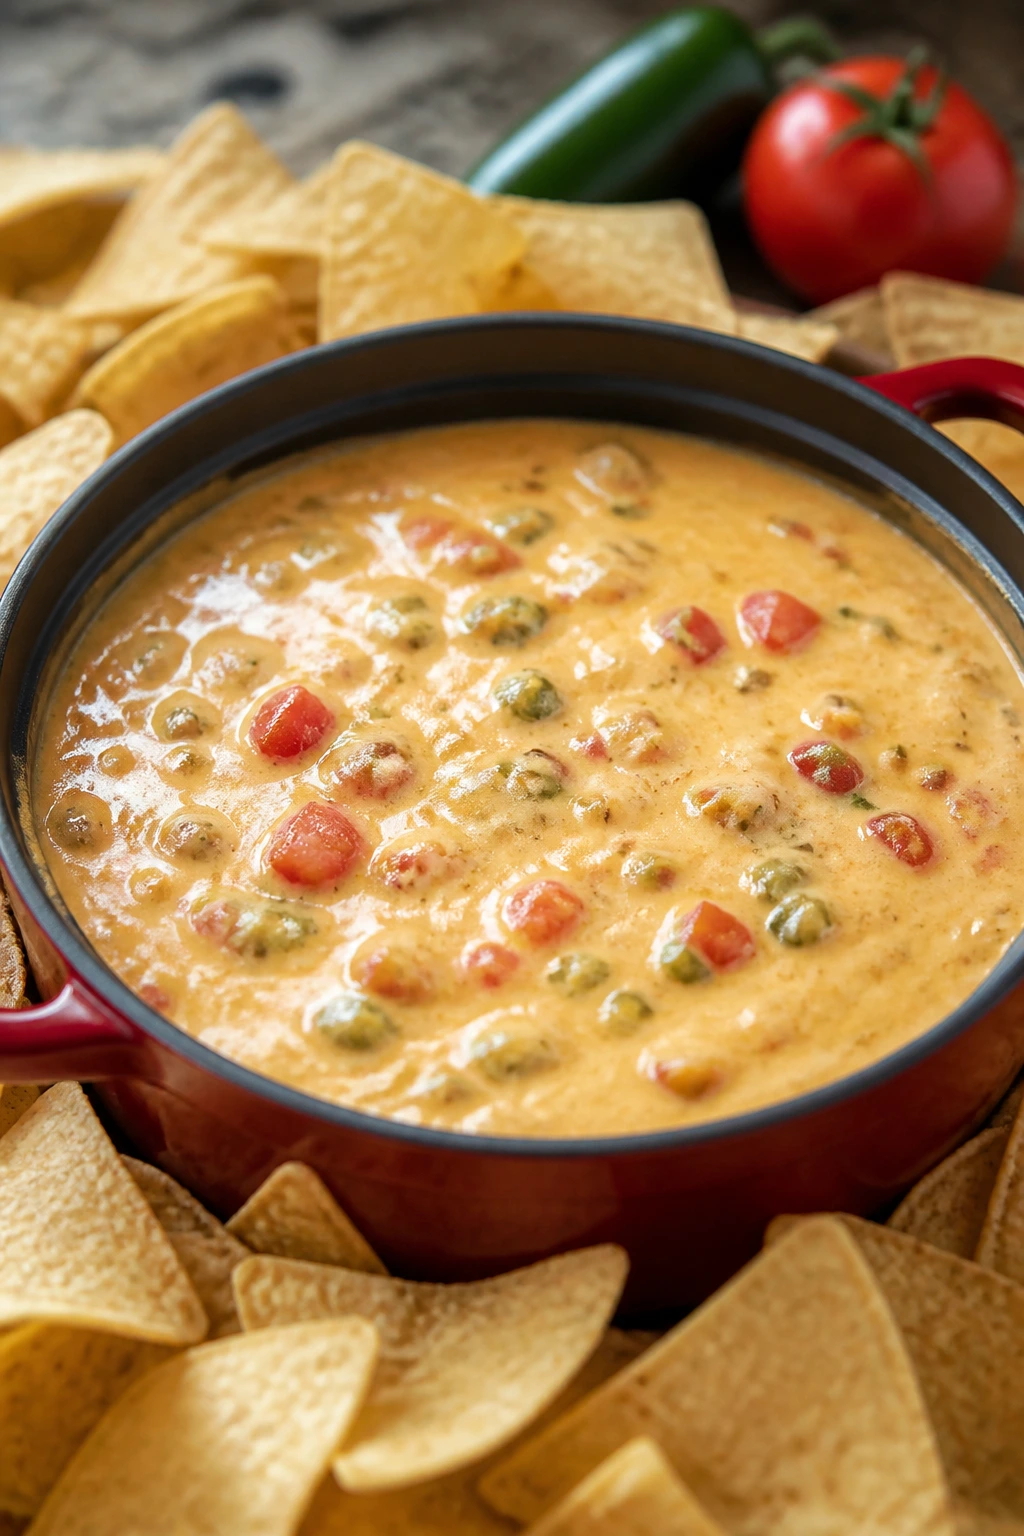
Queso is expensive only if you let it be. A block of processed cheese, a can of tomatoes and green chiles, and a splash of milk turn into the kind of dip people hover over without thinking. It’s rich, salty, and built for tortilla chips, pretzels, or anything else that can scoop.
Why It Works:
Processed cheese melts smoothly and stays smooth, which is why it’s still the cheapest reliable party dip in the room. Tomatoes and green chiles add brightness and keep the cheese from tasting one-dimensional. A little cumin gives the whole thing a warm, savory edge that tastes like it took more than five minutes.
Key Ingredients:
- 16 ounces processed cheese, cubed
- 1 cup milk
- 1 can (10 ounces) diced tomatoes with green chiles, drained slightly
- 1/2 teaspoon ground cumin
- 1/4 teaspoon garlic powder
- 1/4 teaspoon salt, if needed
- Tortilla chips or pretzels
Quick Steps:
- Combine the cheese and milk in a saucepan over low heat.
- Stir often until the cheese melts into a smooth sauce.
- Add the tomatoes, green chiles, cumin, and garlic powder.
- Keep stirring until everything is hot and glossy, about 5 to 7 minutes.
- Serve warm, and keep it on very low heat if it’ll sit out.
Equipment for This Recipe:
- Medium saucepan or small slow cooker
- Wooden spoon or spatula
- Measuring cups and spoons
- Serving bowl
- Ladle, optional
How to Serve This Dish:
Serve it in a warm bowl with chips around the edge and maybe a handful of sliced scallions on top. It’s also good poured over mini baked potatoes if you want to stretch the party spread further.
Pro Tips for This Recipe:
- Keep the heat low or the cheese can separate.
- Add milk slowly if you want a thinner dip.
- Drain some liquid from the tomatoes so the queso stays smooth.
- A tiny splash of hot sauce wakes it up without changing the cost much.
Variations on This Dish:
- Sausage Queso: Stir in 1/2 pound cooked breakfast sausage.
- Bean Queso: Add 1/2 cup mashed black beans for a thicker dip.
- Milder Version: Use plain diced tomatoes if you want less heat.
Common Mistakes to Avoid with This Dish:
- High heat: It scorches the bottom and makes the dip grainy.
- Too much liquid from the can: The queso gets thin and loses body.
- Walking away while it melts: Cheese needs occasional stirring or it sticks.
12. Cucumber Sandwiches with Dill Spread
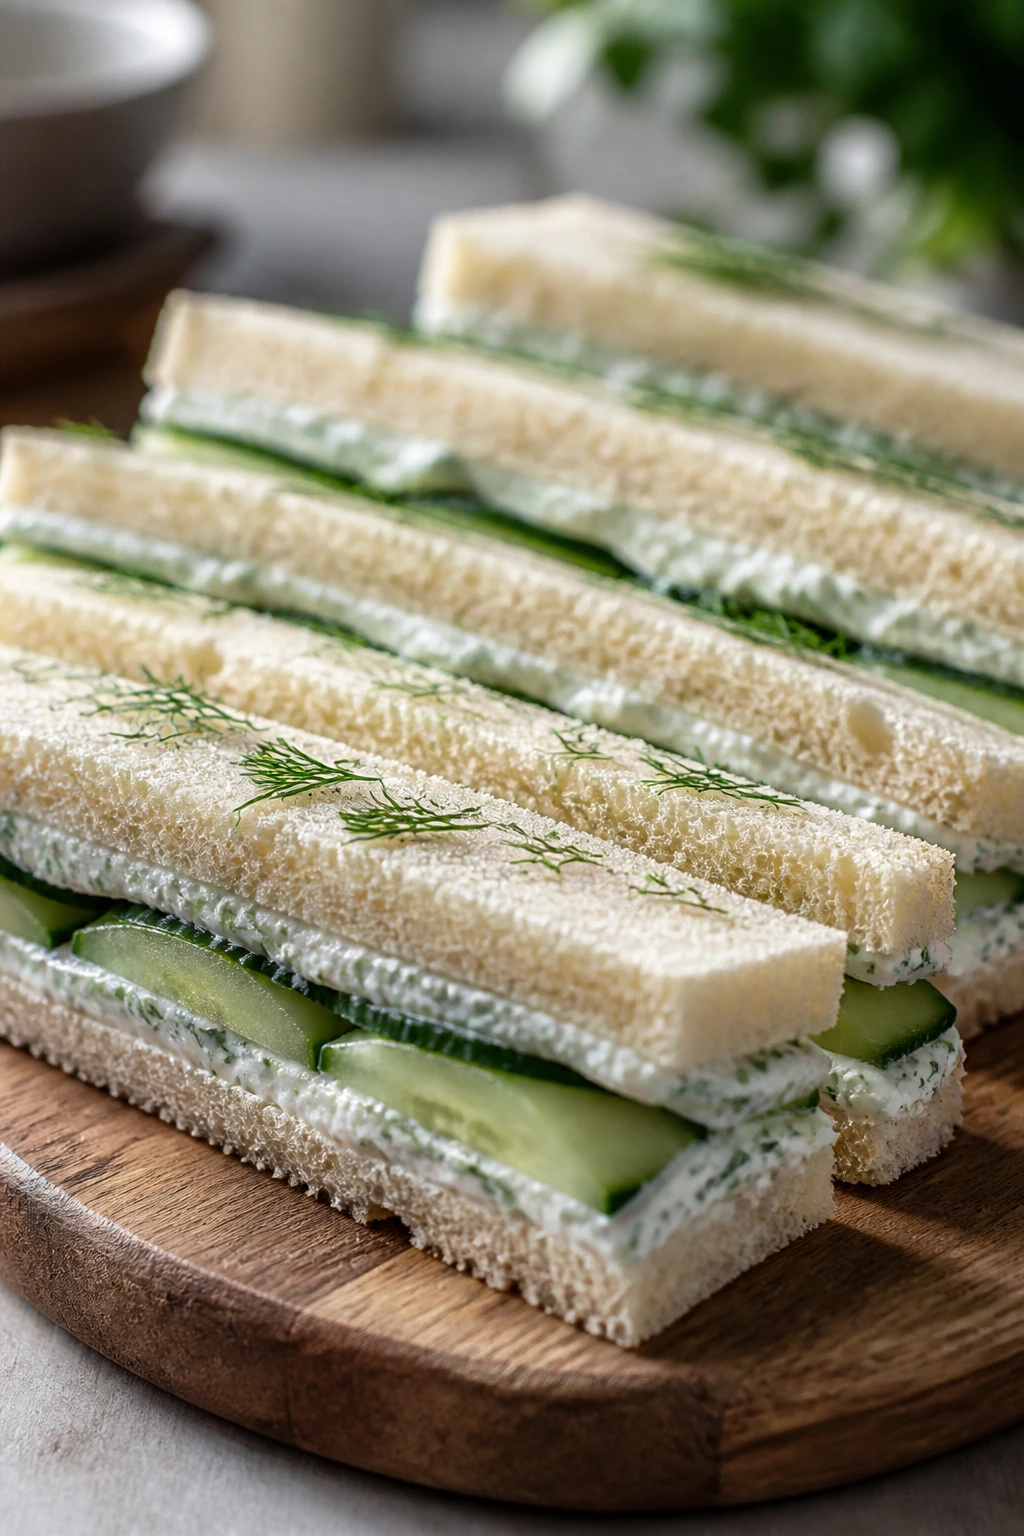
These are the lightest item on the table, and that’s their job. Cucumber sandwiches bring crunch, coolness, and a little freshness between all the salty hot foods. They also look more polished than they cost, which is handy when the grocery budget is thin but the table still needs some balance.
Why It Works:
Cucumbers are cheap, especially when they’re bought whole and sliced thin yourself. Cream cheese gives the spread enough body to hold the bread together, while dill and lemon keep the filling from tasting heavy. Cut them small, and they become tidy little bites that feel a lot more expensive than they are.
Key Ingredients:
- 1 large cucumber, thinly sliced
- 8 ounces cream cheese, softened
- 2 tablespoons mayonnaise
- 1 teaspoon dried dill or 1 tablespoon fresh dill
- 1 teaspoon lemon juice
- 1/4 teaspoon salt
- 8 slices sandwich bread, crusts removed if desired
- Black pepper, to taste
Quick Steps:
- Stir the cream cheese, mayo, dill, lemon juice, salt, and pepper until smooth.
- Pat the cucumber slices dry with paper towels.
- Spread the dill mixture on the bread, layer with cucumbers, and top with another slice of bread.
- Press gently, then cut into fingers or triangles.
- Chill 15 minutes before serving if you want cleaner cuts.
Equipment for This Recipe:
- Mixing bowl
- Butter knife or spatula
- Sharp serrated knife
- Cutting board
- Paper towels
How to Serve This Dish:
Cut them small and serve on a cold platter, ideally with the crusts trimmed for a cleaner tea-sandwich look. They’re a good palate reset next to fried or cheesy foods.
Pro Tips for This Recipe:
- Dry the cucumber slices well or the bread softens fast.
- Use soft sandwich bread, not crusty bread.
- Slice just before serving if you want the sharpest edges.
- A pinch of extra salt on the cucumbers helps the flavor.
Variations on This Dish:
- Herb Swap: Use chives or parsley instead of dill.
- Creamy Avocado Version: Mix in a little mashed avocado for a greener spread.
- Savory Version: Add a few drops of Worcestershire sauce to the filling.
Common Mistakes to Avoid with This Dish:
- Wet cucumber slices: They turn the bread soggy. Pat them dry.
- Overstuffing the sandwich: The filling squeezes out when cut.
- Leaving them uncovered too long: The bread dries on the edges.
13. Baked Ravioli Bites with Marinara

Frozen ravioli is one of those freezer aisle buys that deserves more respect. Breaded and baked, it turns into a crunchy, dippable snack that eats like a bar appetizer without bar prices. The cheese inside gives it heft, and the crisp shell makes it feel like more than pasta in another form.
Why It Works:
Frozen ravioli already comes portioned, which saves both time and money. A simple flour-egg-breadcrumb coating gives it a fried-style crunch without oil splatter. Bake them hot enough and they brown quickly, so the outside stays crisp while the filling warms through.
Key Ingredients:
- 1 package frozen cheese ravioli, about 20 ounces
- 1/2 cup all-purpose flour
- 2 large eggs, beaten
- 1 1/2 cups breadcrumbs
- 1/2 teaspoon Italian seasoning
- 1/4 cup grated Parmesan
- 1 cup marinara sauce, warmed
Quick Steps:
- Preheat the oven to 425°F (220°C) and line a sheet pan with parchment.
- Set up three bowls: flour in one, beaten eggs in another, breadcrumbs mixed with Italian seasoning and Parmesan in the third.
- Coat each frozen ravioli in flour, then egg, then breadcrumbs.
- Place on the sheet pan and spray or brush lightly with oil.
- Bake for 15 to 18 minutes, flipping once, until golden and crisp.
- Serve hot with marinara.
Equipment for This Recipe:
- Three shallow bowls
- Sheet pan
- Parchment paper
- Tongs or a fork
- Small saucepan for marinara, optional
How to Serve This Dish:
Serve in a bowl with marinara in the middle, or line them up with little sauce cups for dipping. They’re one of the best “I need something snacky and hot” answers on a budget.
Pro Tips for This Recipe:
- Keep the ravioli frozen until coating time.
- Press the breadcrumbs on lightly so they stick.
- Don’t pile them on the pan or they steam.
- Warm the marinara before serving so the temperature matches.
Variations on This Dish:
- Spinach Ravioli: Use spinach and cheese ravioli for a greener filling.
- Spicy Breadcrumbs: Add a pinch of red pepper flakes to the coating.
- Air Fryer Version: Cook in batches if you want extra crisp edges.
Common Mistakes to Avoid with This Dish:
- Thawing the ravioli first: They get soft and harder to coat.
- Skipping oil on the coating: The breadcrumbs stay pale.
- Overcrowding: The crust won’t crisp evenly.
14. Peanut Butter Pretzel Bites

Sweet, salty, crunchy, and about as cheap as a party candy can get. Peanut butter pretzel bites use pantry ingredients and make a tray of little nibbles that disappear fast because they hit all the snack cravings at once. You can keep them plain or drizzle a little chocolate over the top if you want them to look dressed up.
Why It Works:
Peanut butter is dense and cheap, and powdered sugar stiffens it into a filling you can shape. Pretzels provide the salt and the crunch, so you do not need a long ingredient list to make the flavor feel complete. If you chill the bites, they set up enough to handle without falling apart.
Key Ingredients:
- 1 cup creamy peanut butter
- 2 cups powdered sugar
- 1 1/2 cups mini pretzels
- 1 cup semi-sweet chocolate chips, optional
- 1 teaspoon coconut oil or butter, optional for melting chocolate
Quick Steps:
- Stir the peanut butter and powdered sugar together until a thick dough forms.
- Roll into small balls, about 1 teaspoon each.
- Sandwich each ball between two mini pretzels and press gently.
- Chill for 20 minutes.
- If using chocolate, melt the chips with coconut oil and drizzle lightly over the tops.
- Chill again until set.
Equipment for This Recipe:
- Mixing bowl
- Spoon
- Small baking sheet
- Parchment paper
- Microwave-safe bowl, if using chocolate
How to Serve This Dish:
Serve them in a small bowl or lined candy cups so they don’t roll around the platter. They work best as a sweet finish after salty snacks, not as the first food people reach for.
Pro Tips for This Recipe:
- Use creamy peanut butter, not the dry natural kind, unless you want to adjust the sugar.
- Make the balls small; big ones break the pretzels.
- Chill before moving them.
- A pinch of salt on top deepens the peanut flavor.
Variations on This Dish:
- Chocolate-Covered Version: Dip half the bite in melted chocolate.
- Crunchy Version: Roll the peanut butter centers in crushed pretzels.
- Sunflower Butter Swap: Use sunflower butter for a peanut-free tray.
Common Mistakes to Avoid with This Dish:
- Too much filling: The pretzels crack.
- Using runny peanut butter: The centers won’t hold shape.
- Skipping the chill: They smear and bend when handled.
15. Rice Krispie Treat Bars
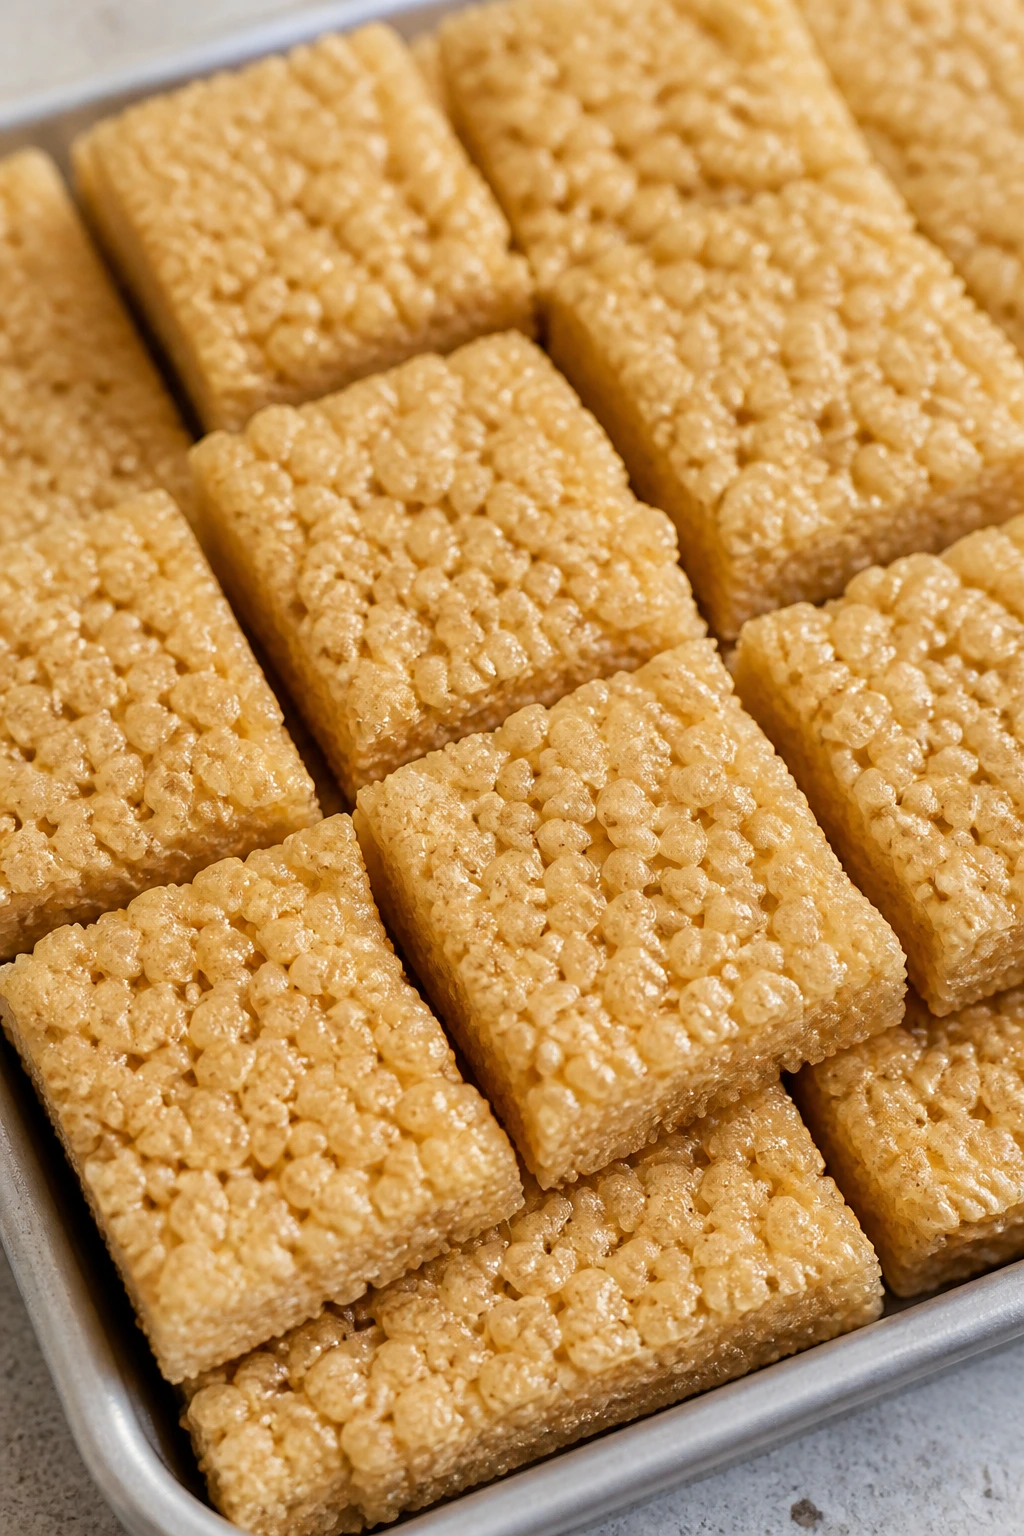
Rice Krispie treats are the definition of cheap party comfort. Three ingredients, one pan, no oven, and a tray full of bars that feel nostalgic enough to pull people back to the snack table. They’re plain in the best way: sweet, chewy, and gone before you can ask whether anyone wants a corner piece.
Why It Works:
Marshmallows and cereal stretch a little butter into a lot of dessert. The texture is all about the ratio; too many marshmallows and the bars get sticky, too few and they crumble. Pressing them into a pan while they’re still warm creates those dense, even squares people can grab with one hand.
Key Ingredients:
- 3 tablespoons unsalted butter
- 1 package marshmallows, 10 ounces
- 6 cups crisp rice cereal
- 1/4 teaspoon fine salt
- 1/2 teaspoon vanilla extract, optional
Quick Steps:
- Melt the butter in a large pot over low heat.
- Add the marshmallows and stir until mostly melted and smooth.
- Stir in the salt and vanilla, then fold in the cereal until coated.
- Press into a greased 9×13-inch pan with a buttered spatula or wax paper.
- Cool for 30 minutes, then cut into squares.
Equipment for This Recipe:
- Large pot
- Wooden spoon or spatula
- 9×13-inch pan
- Buttered spatula or wax paper
- Sharp knife
How to Serve This Dish:
Cut them into small squares for a party tray, not giant lunchbox slabs. They sit nicely next to brownies, fruit, or anything chocolate, and they’re easy to stack on a napkin.
Pro Tips for This Recipe:
- Keep the heat low so the marshmallows stay soft.
- Butter your hands or spatula before pressing the mixture.
- Don’t pack them too hard or they get brick-like.
- A pinch of salt keeps the sweetness from turning one-note.
Variations on This Dish:
- Chocolate Drizzle: Add a thin drizzle of melted chocolate after cutting.
- Peanut Butter Version: Stir in 1/4 cup peanut butter with the marshmallows.
- Sprinkle Top: Press colorful sprinkles into the top before cooling.
Common Mistakes to Avoid with This Dish:
- High heat: The marshmallows harden and the bars get stiff.
- Overpacking the pan: The treats become dense instead of chewy.
- Using stale cereal: The texture goes flat and dusty.
16. Fudgy Brownie Bites
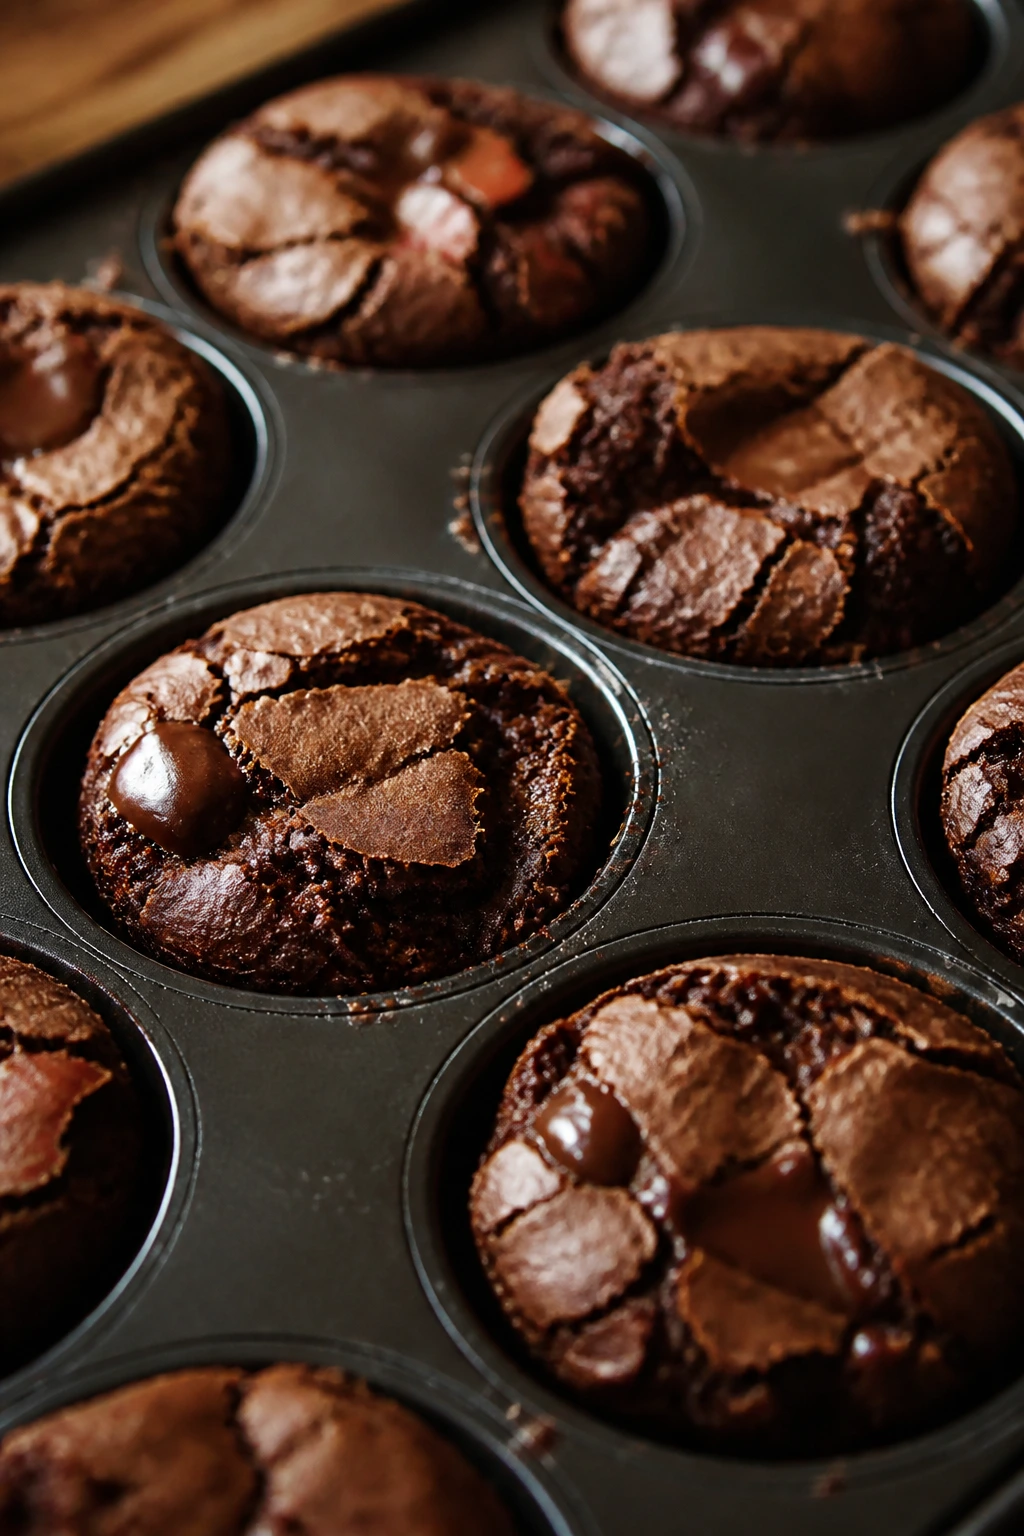
Brownie bites give you the chocolate fix without the cost of a layered dessert or a bakery run. A single batch baked in a mini muffin tin makes neat little portions that look intentional on a tray. The edges get a bit crackly, the centers stay soft, and that contrast is half the charm.
Why It Works:
Cocoa powder, sugar, eggs, and butter are all pantry-friendly, and you don’t need fancy chocolate bars to get a deep chocolate flavor. Baking in mini muffin cups shortens the cooking time and gives you built-in portions for a crowd. A small pinch of salt keeps them from tasting like plain sweet batter.
Key Ingredients:
- 1/2 cup unsalted butter, melted
- 1 cup granulated sugar
- 2 large eggs
- 1 teaspoon vanilla extract
- 1/2 cup unsweetened cocoa powder
- 1/2 cup all-purpose flour
- 1/4 teaspoon salt
- 1/2 cup chocolate chips, optional
Quick Steps:
- Preheat the oven to 350°F (175°C) and grease a mini muffin tin.
- Whisk the butter and sugar together, then beat in the eggs and vanilla.
- Stir in the cocoa powder, flour, and salt until just combined.
- Fold in chocolate chips if using.
- Spoon into the muffin tin and bake for 12 to 14 minutes, until the tops are set but the centers still look slightly soft.
- Cool before removing.
Equipment for This Recipe:
- Mixing bowl
- Whisk
- Mini muffin tin
- Spoon or small scoop
- Cooling rack
How to Serve This Dish:
Serve them plain, dusted with powdered sugar, or stacked on a dessert plate. They’re easy to place near coffee, milk, or hot cocoa if you’re serving a mixed-age crowd.
Pro Tips for This Recipe:
- Don’t overbake them; fudgy beats dry every time.
- Line the tin with mini paper cups if you want easier cleanup.
- Let them cool before removing or the centers may tear.
- A few chocolate chips on top make them look finished with almost no effort.
Variations on This Dish:
- Walnut Version: Fold in 1/3 cup chopped walnuts.
- Peppermint Version: Add 1/4 teaspoon peppermint extract.
- Espresso Version: Stir in 1 teaspoon instant espresso powder.
Common Mistakes to Avoid with This Dish:
- Baking until the tops look fully dry: They’ll be overdone. Pull them when the center still looks a little soft.
- Overmixing the batter: That makes them cakier and less rich.
- Removing too soon from the pan: Let them set first.
17. Fruit Skewers with Honey Yogurt Dip
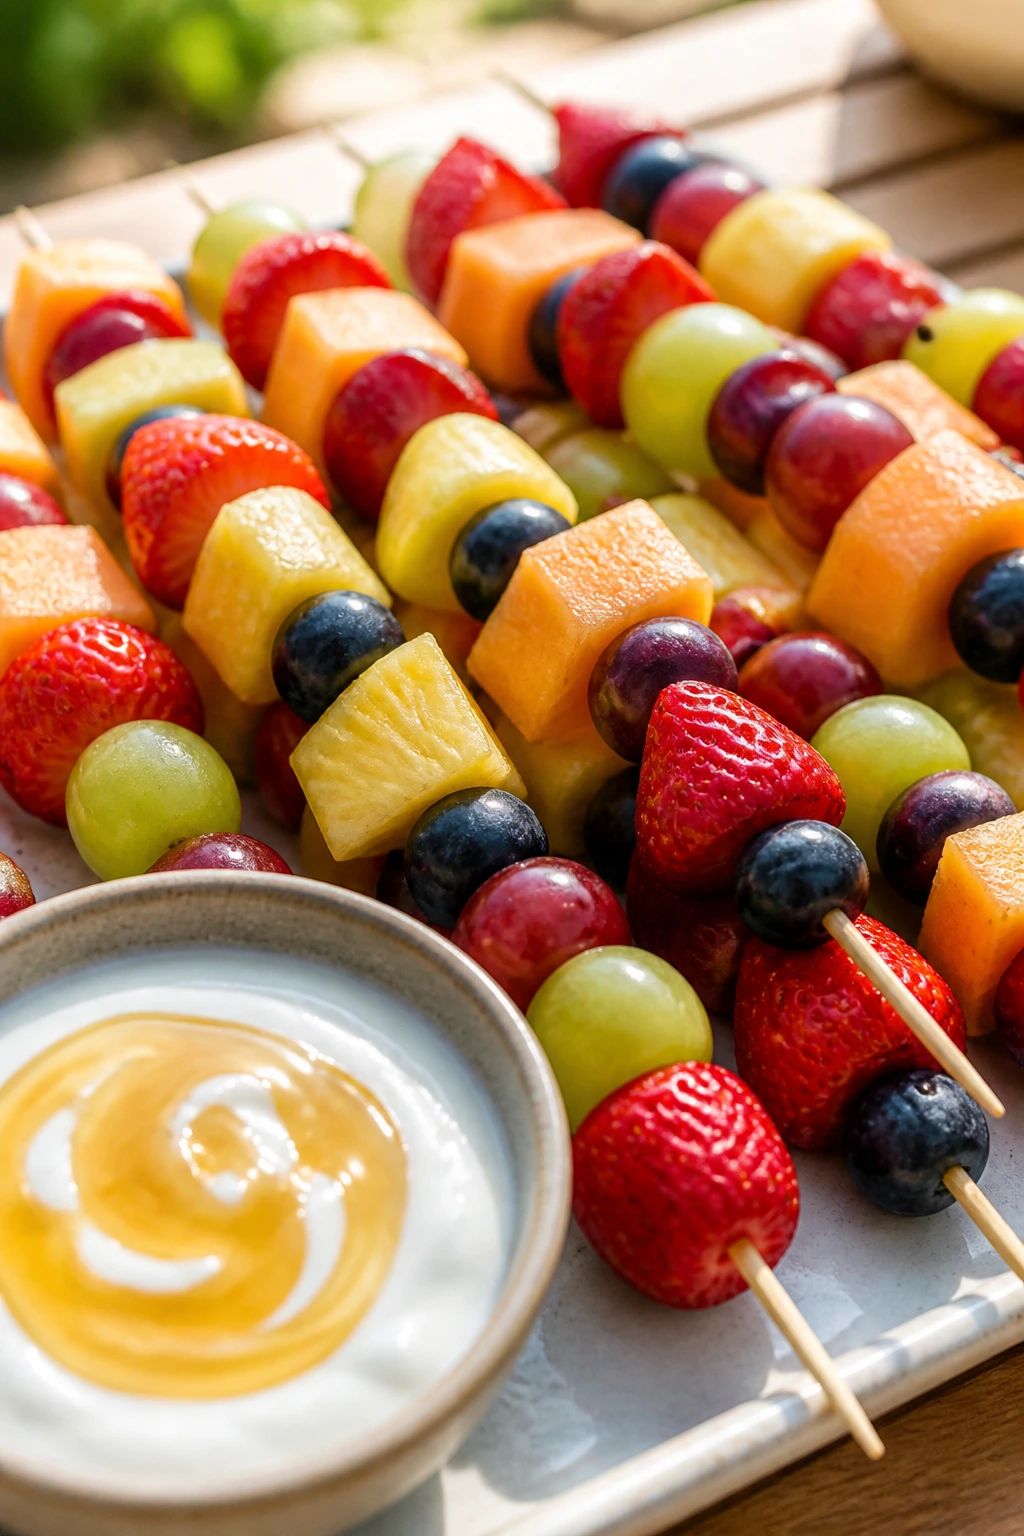
Fruit skewers give you color and freshness without asking for much cash. They are especially useful when the rest of the spread leans salty, cheesy, or fried. The yogurt dip adds a little sweetness and makes the fruit feel like a party food instead of something you’d pack in a lunchbox.
Why It Works:
Fruit is one of the easiest ways to make a table look full without spending much. Using a few fruits in rotation—apples, bananas, grapes, strawberries—keeps the tray bright and keeps shopping simple. A quick dip made from yogurt and honey gives you a creamy contrast that makes the fruit feel more complete.
Key Ingredients:
- 2 apples, cored and cut into chunks
- 2 bananas, sliced thick
- 2 cups red or green grapes
- 1 pint strawberries, hulled
- 1 cup plain or vanilla yogurt
- 2 tablespoons honey
- 1/2 teaspoon vanilla extract
- 1 tablespoon lemon juice
Quick Steps:
- Stir the yogurt, honey, vanilla, and lemon juice together for the dip.
- Thread the fruit onto skewers, alternating colors and shapes.
- Keep the banana pieces near the middle or end so they stay intact.
- Arrange on a platter and chill until serving.
- Serve the dip in a bowl at the center.
Equipment for This Recipe:
- Skewers or short wooden picks
- Cutting board
- Sharp knife
- Mixing bowl
- Small serving bowl
How to Serve This Dish:
Lay the skewers in rows and put the dip in the middle like a small anchor. They work best on a buffet where you want one lighter, brighter option among the richer foods.
Pro Tips for This Recipe:
- Toss apple and banana pieces in a little lemon juice if they’ll sit for a while.
- Keep the bananas thick or they break off the skewer.
- Use firm strawberries rather than very soft ones.
- Make the skewers the same size so the tray looks even.
Variations on This Dish:
- Melon Version: Swap in cantaloupe or honeydew cubes.
- Chocolate Dip: Add a spoonful of cocoa to the yogurt for a dessert-like dip.
- Cinnamon Version: Stir cinnamon into the yogurt for a warmer flavor.
Common Mistakes to Avoid with This Dish:
- Using overripe fruit: It bruises and slides off. Choose fruit with some firmness.
- Making the banana pieces too thin: They break apart fast.
- Skipping the lemon juice on apples: They brown quickly on a party tray.
18. Garlic Butter Breadsticks from Pizza Dough
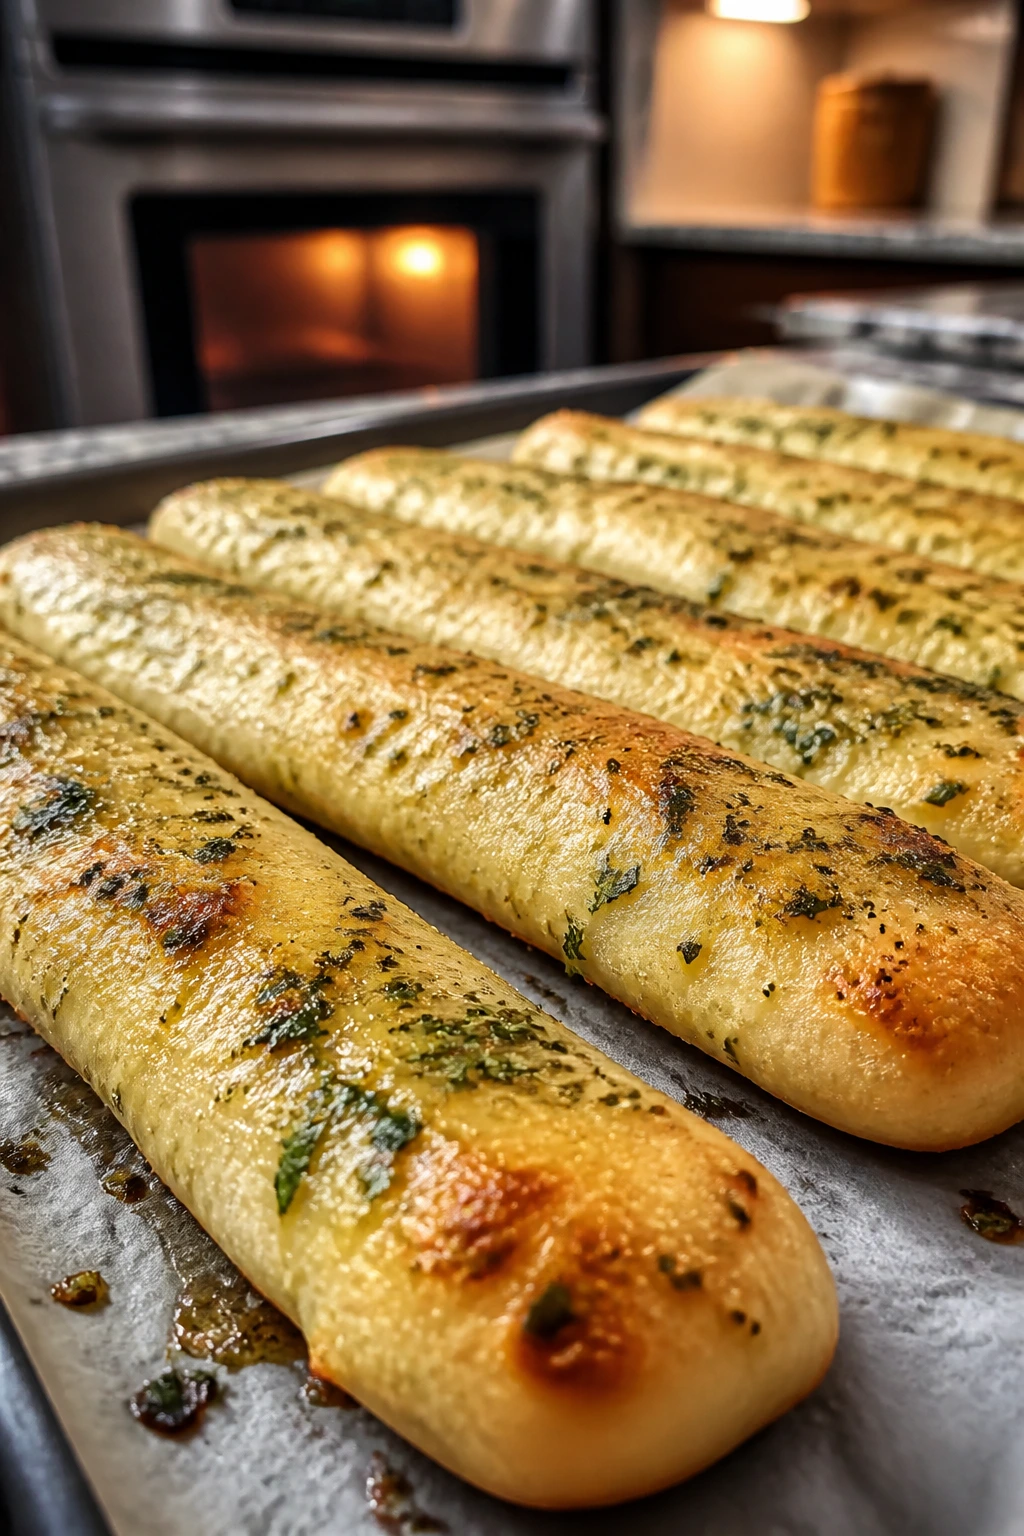
Breadsticks made from pizza dough are one of the cheapest warm fillers you can put beside dips, soups, or pasta-style party foods. They’re soft inside, browned at the edges, and brushed with garlic butter right when they come out of the oven so the scent hits first. And yes, people always take more than they meant to.
Why It Works:
Pizza dough is cheap, forgiving, and easy to shape. Once you cut it into strips, the dough bakes fast and stretches into a tray full of portions with almost no waste. Garlic butter gives you a finish that feels like restaurant food, even though the base ingredients are plain and low-cost.
Key Ingredients:
- 1 pound pizza dough
- 3 tablespoons unsalted butter, melted
- 1 teaspoon garlic powder
- 1/2 teaspoon dried parsley
- 1/4 teaspoon salt
- 2 tablespoons grated Parmesan, optional
- Marinara or ranch, for dipping
Quick Steps:
- Preheat the oven to 425°F (220°C).
- Roll the dough into a rectangle and cut into 12 strips.
- Twist or leave straight, then place on a lined sheet pan with space between them.
- Bake for 12 to 15 minutes until puffed and golden at the edges.
- Stir the melted butter, garlic powder, parsley, and salt together, then brush over the hot breadsticks.
- Sprinkle with Parmesan if using and serve warm.
Equipment for This Recipe:
- Rolling pin, optional
- Pizza cutter or sharp knife
- Sheet pan
- Pastry brush
- Small bowl for garlic butter
How to Serve This Dish:
Serve them in a basket with a bowl of marinara or ranch. They’re the sort of thing that rounds out a budget menu because they make the table feel fuller without much extra cost.
Pro Tips for This Recipe:
- Let the dough relax for 10 minutes if it keeps springing back.
- Brush with butter while hot so the garlic flavor sticks.
- Don’t bake them pale; the color gives you flavor.
- A little Parmesan goes a long way, so use it sparingly.
Variations on This Dish:
- Cheesy Version: Top with mozzarella for the last 2 minutes of baking.
- Herb Version: Swap parsley for Italian seasoning.
- Cinnamon Stick Version: Use butter, sugar, and cinnamon for a sweet tray.
Common Mistakes to Avoid with This Dish:
- Crowding the pan: They steam and stay soft instead of browning.
- Adding garlic butter before baking: The garlic can burn. Brush it on after.
- Cutting the strips unevenly: The thin ones dry out before the thick ones bake.
Why These Budget Party Foods Work So Well Together
The reason this spread works is not that every recipe is fancy. It’s that each one solves a different party problem without asking for a different specialty ingredient list. You’ve got hot foods, cold foods, crunchy foods, creamy foods, sweet foods, and a few things that can sit out for a while without getting sad.
That matters more than people realize. A tray that mixes textures and temperatures makes a small grocery budget feel larger because the table feels complete. Beans, eggs, potatoes, tortillas, bread, popcorn, and rice cereal show up again and again because they’re cheap, familiar, and easy to reshape into something people will actually eat. Fancy food can be forgettable. A well-set tray of simple foods usually isn’t.
Essential Equipment for These Recipes

- Sheet pans: You’ll use them for quesadillas, breadsticks, potato wedges, ravioli bites, and meatballs.
- Mixing bowls: Medium and large bowls make it easier to keep dips, fillings, and batters separate.
- Sharp knife: Clean cuts matter for pinwheels, sandwiches, wedges, and fruit skewers.
- Cutting board: A stable board saves time and keeps the prep less chaotic.
- Saucepan: Needed for queso, deviled eggs, and warming glazes.
- 9×13-inch baking dish: Bean dip, brownie bites, and some baked party foods fit well here.
- Mini muffin tin: Useful for brownie bites and any bite-size baked snack.
- Parchment paper: It keeps cheese and sugar from welding themselves to the pan.
- Slotted spoon or tongs: Handy when you’re moving fried-style or baked snacks around without tearing them.
- Airtight storage containers: Leftovers last longer and stay cleaner to reheat.
Smart Shopping and Ingredient Tips
The cheapest party menu starts with a shopping list that leans hard on store brands and pantry staples. Eggs, beans, tortillas, popcorn kernels, rice cereal, pasta sauce, and potatoes usually cost less per serving than any deli tray or pre-made appetizer box. Buy the basic version unless a recipe needs a very specific texture, like processed cheese for smooth queso or crescent dough for pigs in a blanket.
Frozen ingredients can help a lot here. Frozen corn, frozen ravioli, and frozen meatballs are often less expensive than fresh versions and take the guesswork out of prep. Just watch the moisture. If a frozen ingredient throws off water as it thaws, drain or pat it dry before it goes into the recipe.
Cheese is where people waste money without meaning to. Block cheese usually melts better, while pre-shredded cheese is faster and still works in dips, quesadillas, and bread toppings. If your budget is tight, buy one or two cheeses and use them in several recipes instead of buying six half-used bags that all do the same thing.
One last thing: don’t buy ingredients for visual drama if they don’t change the food. A tray doesn’t need three different herbs, two kinds of olives, and a garnish nobody eats. It needs enough salt, enough heat, and enough texture so people keep reaching for another piece.
How to Serve These Recipes
Presentation: Use one large board or tray for cold items like pinwheels, deviled eggs, cucumber sandwiches, and fruit skewers, then keep the hot foods in shallow bowls or lined baskets. Height helps; a few stacked wedges or breadsticks look more generous than flat rows.
Accompaniments: A good budget party spread usually needs chips, crackers, salsa, sour cream, marinara, mustard, and one cooling dip. If you’ve got room for a starch, potato wedges, breadsticks, or French bread pizza bites can sit beside the dips and make the whole menu feel fuller.
Portions: Plan 2 to 4 pieces per person for the smallest bites, like deviled eggs, pinwheels, and pretzel bites, then 1 to 2 pieces per person for heavier items like burritos, pizza bites, or meatball skewers. If you expect a hungry crowd, lean hard on the cheapest stretchers: popcorn mix, breadsticks, potatoes, and beans.
Beverage Pairing: Lemon-lime soda, iced tea, beer, and sparkling water cover most of this menu without fighting the flavors. For sweet bites, coffee or cold milk works better than you’d think. For salty dips and spicy foods, something fizzy usually feels right.
Additional Tips and Flavor Boosters
Flavor Enhancement: A little acid changes almost everything. A squeeze of lemon over cucumber sandwiches, a splash of vinegar in deviled eggs, or a spoon of salsa in bean dip keeps cheap ingredients tasting lively instead of heavy.
Customization: If you’re feeding mixed ages, keep the heat on the side. Put hot sauce, sliced jalapeños, and extra mustard in small bowls so one tray can serve a crowd with different tolerances. That’s cheaper than making separate dishes.
Serving Suggestions: Use garnishes that do real work. Paprika on deviled eggs, parsley on breadsticks, scallions on queso, and a dusting of Parmesan on popcorn all add a little flavor and help the food look finished. None of that has to be expensive.
Make-It-Yours: For gluten-free guests, the bean dip, deviled eggs, queso, fruit skewers, and potato wedges already do most of the work. For dairy-free needs, lean on the popcorn mix, fruit, potato wedges, and bean-based foods, then keep a simple salsa or mustard dip nearby.
Make-Ahead, Storage, and Reheating Guidance
A few of these recipes are better made ahead, and that’s one of the reasons they belong on a tight-budget menu. Deviled eggs, pinwheels, dip fillings, meatball mix, and brownie bites all hold well when made a few hours early or even the day before. Keep cold foods covered in the fridge and avoid slicing things like pinwheels or sandwiches until close to serving if you want cleaner edges.
Most refrigerated leftovers will keep for 3 to 4 days in airtight containers. Queso, bean dip, meatballs, and breadsticks reheat well in the oven or microwave, though breaded items like ravioli bites and potato wedges are better in a hot oven or air fryer so they regain some crispness. Set the oven around 375°F (190°C) and heat until the center is hot and the edges start to crisp again.
Freezer space helps with a few of these, too. Meatballs, breadsticks, brownie bites, rice krispie treats, and even some burritos freeze well for up to 2 months if wrapped tightly. Thaw overnight in the fridge, then reheat gently. Anything with fresh cucumber, fruit, or a cream-cheese-heavy filling is best eaten fresh or chilled, not frozen.
Room temperature is where party food gets tricky. Anything dairy-based or egg-based should not sit out for long stretches. If the room is warm, rotate cold trays back into the fridge and keep hot dishes warm on low heat, then bring them back out in smaller batches. That’s a little annoying, yes. It also keeps the food tasting like food instead of leftovers someone forgot on the counter.
Variations and Adaptations to Try
Pantry-Purge Party: Build the spread from whatever dry goods are already in the cupboard—crackers, pasta, rice cereal, tortillas, canned beans, and peanut butter. This version is less about perfect matching and more about using what you’ve already bought before it drifts to the back of the shelf.
Heat-It-Up Tray: Add jalapeños, hot sauce, cayenne, chili powder, or pepper jack to the savory foods. The nice part is you can keep the base recipe cheap and then make one corner of the tray sharper for the people who want more bite.
Kid-First Version: Cut everything smaller, keep the spice low, and lean into familiar flavors like cheese, bread, fruit, and mild dips. Mini burritos, breadsticks, rice krispie treats, and fruit skewers tend to disappear fast when the crowd is younger.
Dairy-Light Swap: Focus on recipes that don’t rely on cheese for structure. Deviled eggs, fruit skewers, popcorn mix, potato wedges, and peanut butter pretzel bites can all fit a lower-dairy table with a few small adjustments.
Gluten-Free Friendly Spread: Potato wedges, deviled eggs, queso, bean dip with corn chips, and fruit skewers already do the heavy lifting here. For anything breaded or wrapped, use gluten-free tortillas, bread crumbs, or chips where they make sense rather than trying to force one exact replacement across the whole menu.
Sweet Table Finish: If the party needs dessert more than another savory tray, lean on brownie bites, rice krispie treats, fruit skewers, and peanut butter pretzel bites together. That gives you crunchy, chewy, soft, and fresh without making a separate expensive dessert spread.
Common Mistakes to Avoid
The first mistake is overbuying novelty ingredients. A single jar of something weird can eat a budget fast, and half the time it doesn’t even show up in the finished food. If an ingredient doesn’t improve texture or flavor in a way you can taste, skip it.
Another common miss is making every dish creamy or rich. Cheese, mayo, and sour cream are cheap ways to build body, but a whole table of them gets heavy fast. That’s why the fruit skewers, cucumber sandwiches, and popcorn matter; they give the palate a break.
People also underestimate how much salt and acid these foods need. Beans, potatoes, rice cereal treats, and bread-based snacks can taste flat if they’re not seasoned enough. A pinch of salt, a splash of lemon, a spoon of mustard, or a little salsa changes a budget dish more than a pricey garnish ever will.
Skipping make-ahead work is another one. Pinwheels need chilling, deviled eggs need cooling, bread dough needs shaping, and dips need time to settle. If you try to do all of it at the last second, the food still gets done, but you’ll be rushed, and rushed food is where the budget gets wasted.
The last mistake is using the wrong container for the job. Crispy foods need a vented container or a paper-lined tray, not a sealed box that traps steam. Cold foods need lids. Hot foods need a warm dish. Small thing. Big difference.
Frequently Asked Questions
How do I build a full party spread when the grocery budget is tiny?
Start with 2 or 3 cheap anchors like bean dip, potato wedges, and deviled eggs, then add one sweet item and one cold item for balance. That mix gives you enough food volume without forcing you to buy a lot of specialty ingredients.
Which recipes from this list can I make the day before?
Deviled eggs, pinwheels, brownie bites, rice krispie treats, meatballs, and the fillings for bean dip or queso all hold well ahead of time. Keep the freshest-cut items, like fruit skewers and cucumber sandwiches, closer to serving time.
What if I need the food to stay warm for a while?
Use low oven heat, around 200°F to 250°F, for items like meatballs, breadsticks, quesadillas, and potato wedges. Keep hot foods covered loosely so they don’t dry out, and refresh them in smaller batches if the party runs long.
Can I make these recipes with mostly store-brand ingredients?
Yes, and in several cases store-brand ingredients are the smarter buy. Tortillas, beans, popcorn, bread, pasta sauce, cereal, and eggs are all good places to save without losing much quality.
How many snacks should I plan per guest?
For small bites like deviled eggs, pinwheels, pretzel bites, or fruit skewers, plan 2 to 4 pieces per person. For bigger items like burritos, pizza bites, or meatballs, 1 to 2 pieces per person is usually enough once there are several dishes on the table.
What if my dip gets too thick?
Thin it slowly with milk, salsa, or a spoonful of water depending on the recipe. Add a little at a time and stir well; too much liquid at once makes the dip loose fast.
Can I make a few of these gluten-free without changing the whole spread?
Absolutely. Deviled eggs, queso, bean dip with corn chips, potato wedges, fruit skewers, and many dips already fit that direction. For the bread or tortilla recipes, use gluten-free versions only where the texture still makes sense.
What’s the best way to keep crispy foods crisp?
Bake them close to serving time and move them to a paper-lined tray instead of a sealed container. If they need reheating, use a hot oven or air fryer, not the microwave.
A Good Party Spread Without a Big Grocery Bill

A budget party table works when every dish earns its spot. These recipes do that by stretching simple ingredients into trays, bowls, and bite-size snacks that people actually finish. Eggs, beans, tortillas, potatoes, bread, popcorn, and fruit aren’t glamorous, but they are reliable. Reliable matters when you’re trying to host without overspending.
The best part is that this kind of menu doesn’t feel stripped down. It feels smart. There’s enough variety for a crowd, enough texture to keep people interested, and enough flexibility to swap in what you already have in the pantry. Put a few of these together, and you get a spread that looks full, tastes good, and leaves your grocery receipt in a much friendlier place.