
Cheap doesn’t have to taste thin. A jar of quick pickled vegetables can rescue a tired sandwich, a plain bowl of rice, or last night’s leftovers for less than the price of a drive-thru side, and that still feels a little unfair in the best way. The vinegar does most of the heavy lifting; the vegetables are just the excuse to get that sharp, cold snap onto the plate.
If you’ve ever opened a jar of pickles and found soft cucumbers floating in a weak brine, you know exactly how disappointing that can be. The fix is not fancy gear or expensive produce. It’s thin slicing, enough salt, the right vinegar strength, and a fridge-cold resting period that lets the flavors settle into the vegetables instead of bouncing off the surface.
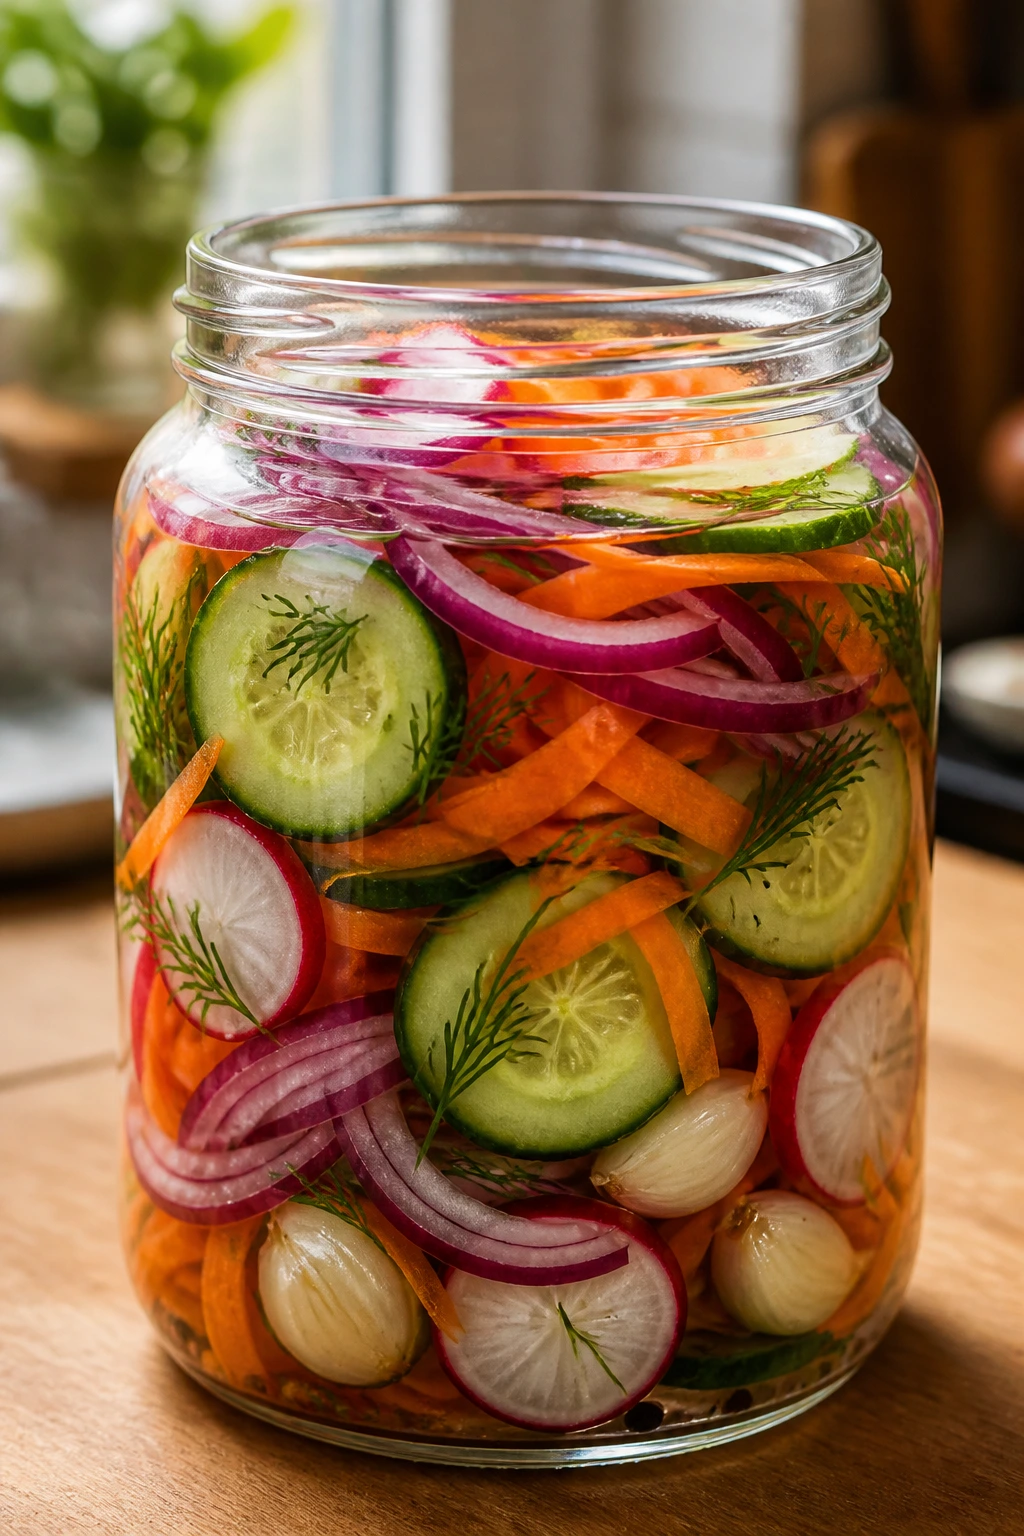
This quick pickled vegetables under $10 batch is built for the regular grocery aisle, not the specialty pickle shelf. Cucumbers, onion, carrots, and radishes do the work here, and they do it cheaply. When the jar is right, the onion blushes pink, the carrots lose their raw edge, and the cucumbers stay crisp instead of collapsing into sour mush. That’s the whole point.
Why This Budget Pickle Jar Earns Fridge Space
Low-cost, high-payoff: A small pile of common produce turns into several days of acidic punch, and the brine stretches the value farther than a fresh salad ever could.
Fast enough for real life: You can eat these after an hour, which means they’re useful on the same day you make them instead of sitting around and waiting for “later.”
Built for leftovers: The mix here plays nicely with fried eggs, roasted chicken, rice bowls, beans, burgers, and cold sandwiches that need a sharp edge.
No special equipment: A saucepan, a knife, and a couple of jars are enough. No canner. No preserving drama. Just hot brine, cold storage, and a little patience.
Better than a random condiment hunt: One jar gives you something crisp, salty, vinegary, and ready to grab with a fork. That beats opening three half-used bottles of sauces and hoping they somehow become a meal.
Yield: Makes about 2 pint jars, or roughly 6 to 8 condiment servings
Prep Time: 20 minutes
Cook Time: 5 minutes
Total Time: 25 minutes, plus at least 1 hour chilling
Chill/Rest Time: 1 to 4 hours for the first serving; overnight for the cleanest flavor
Difficulty: Beginner — the work is slicing, packing, and pouring a hot brine
Best Served: Cold, after the vegetables have had time to soak up the brine
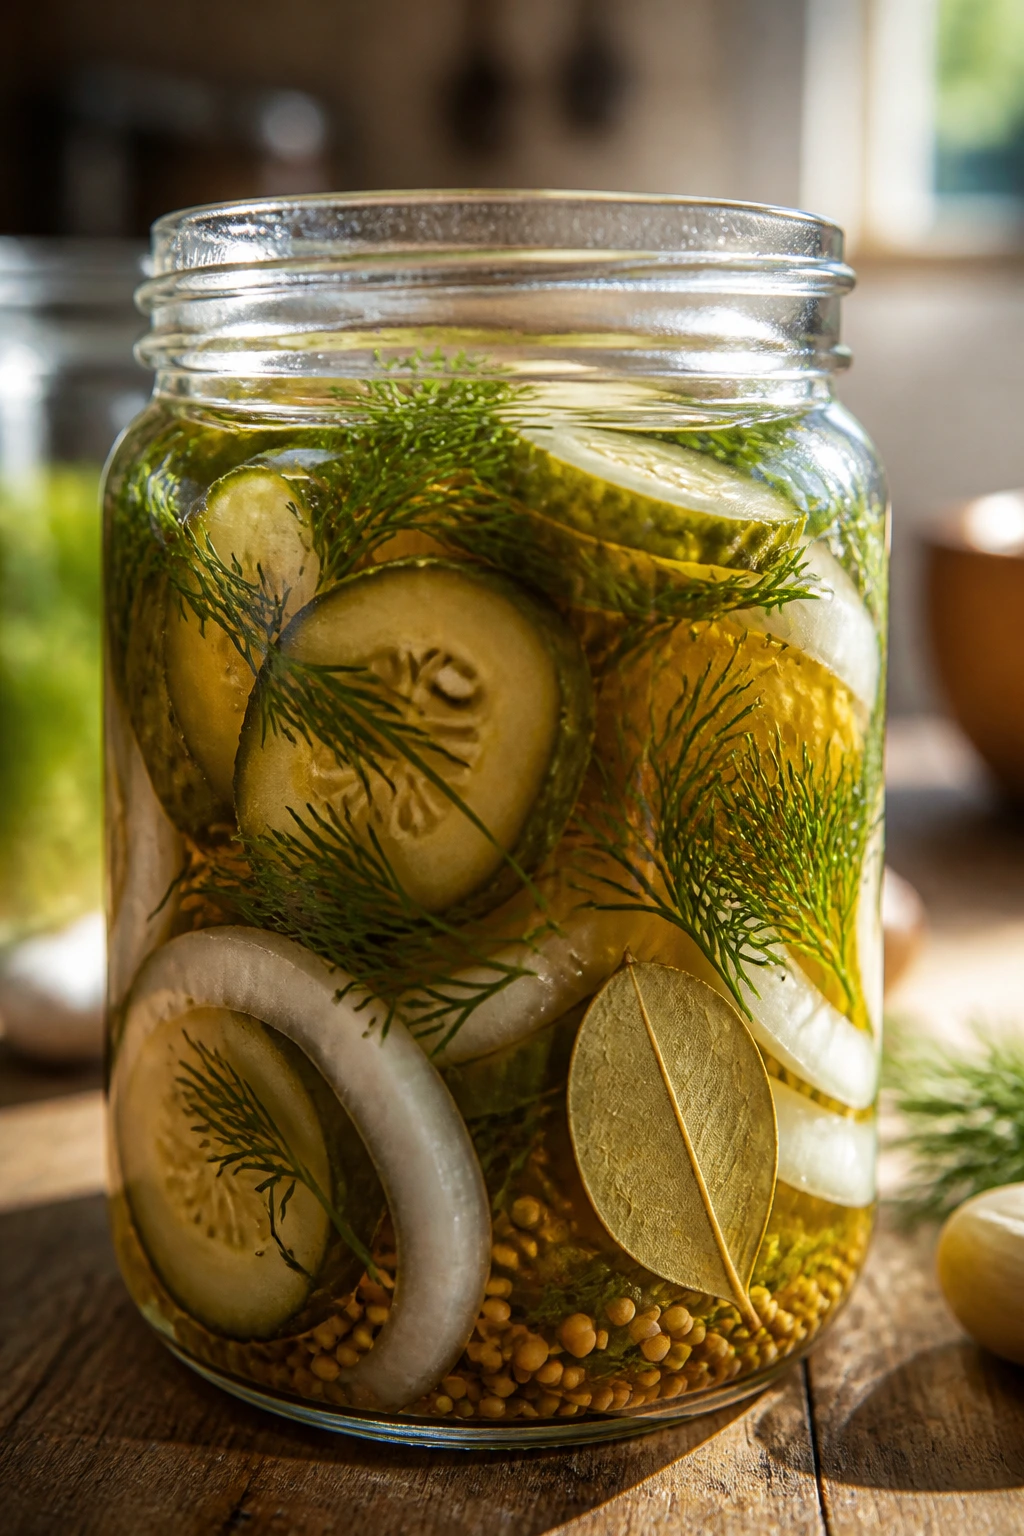
For the Vegetables
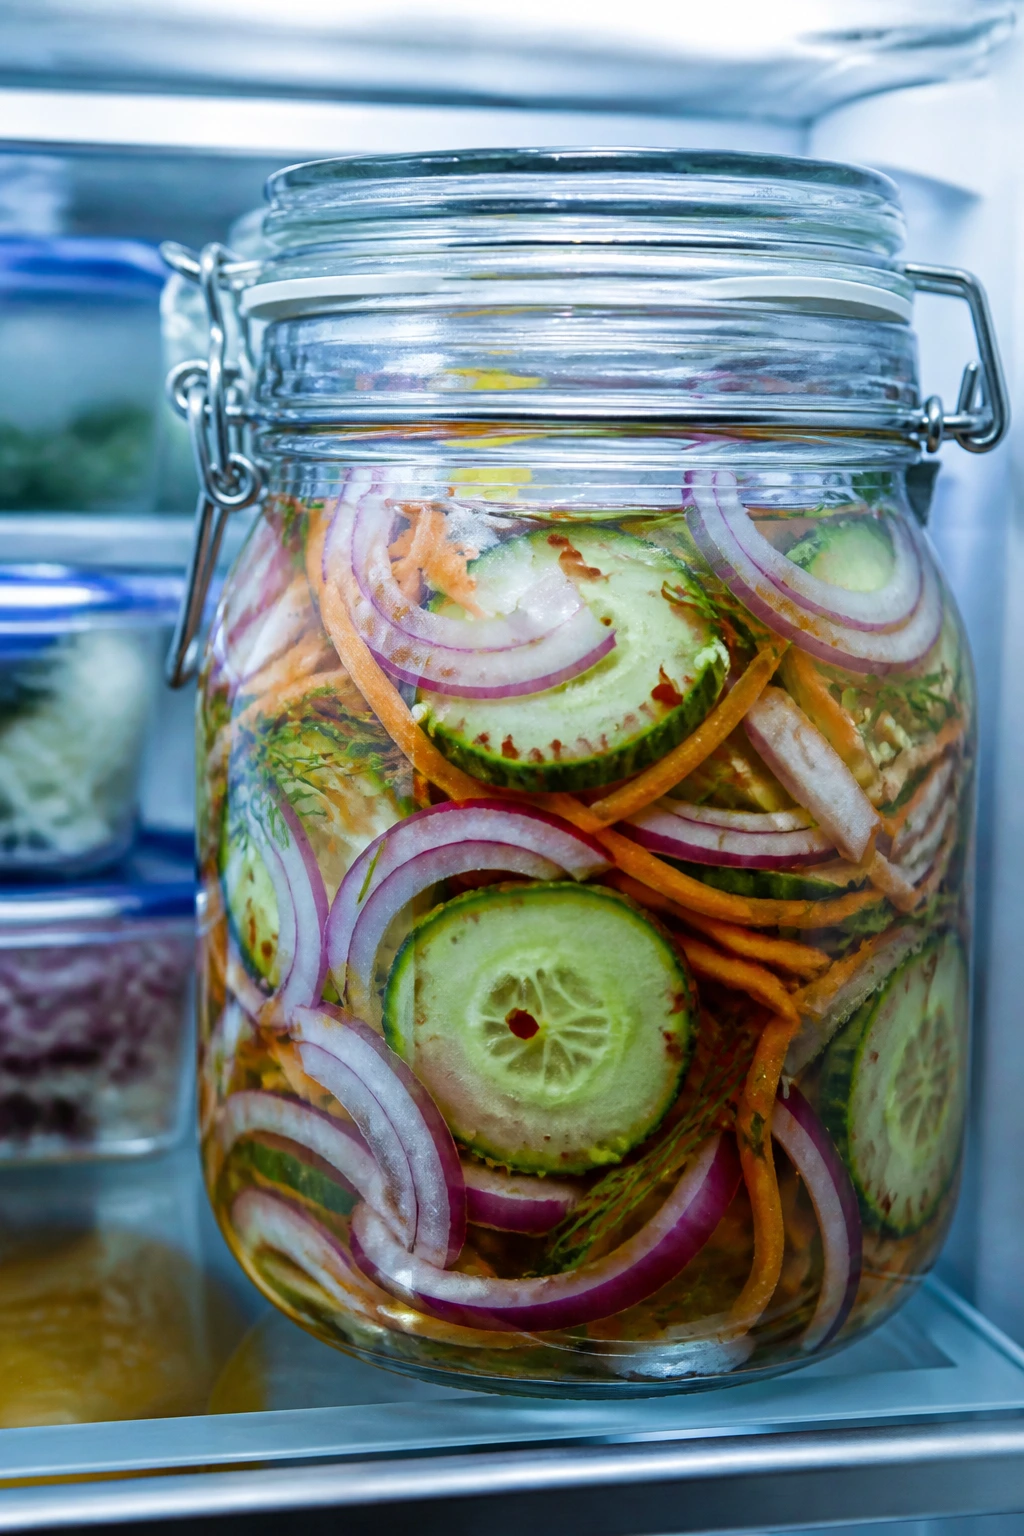
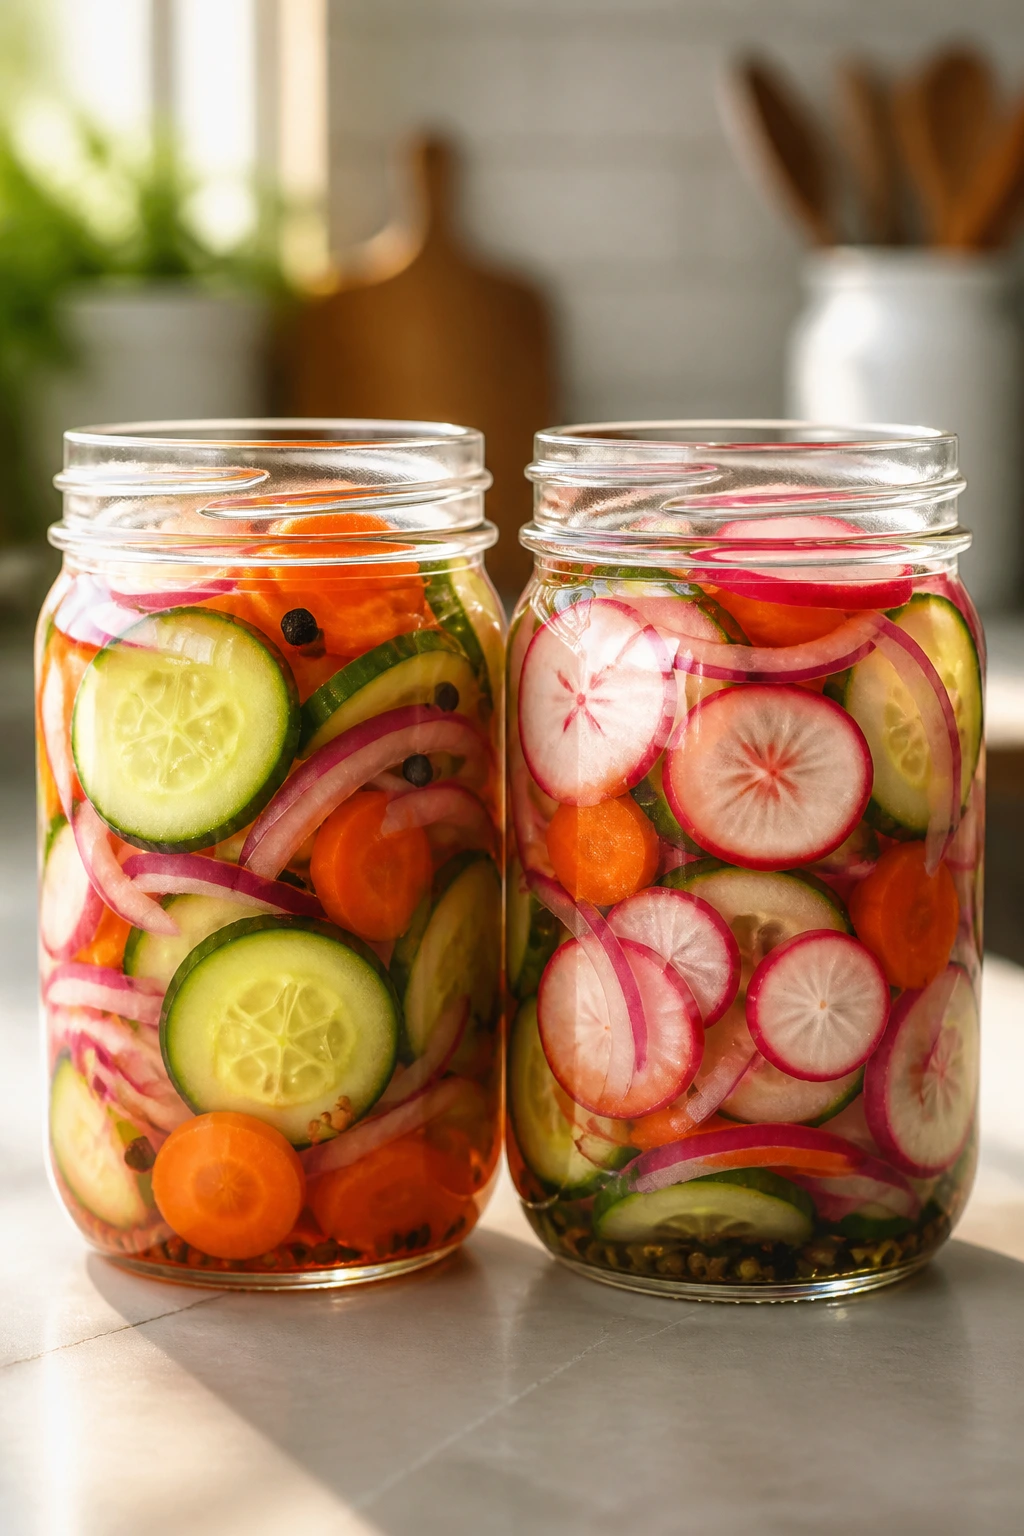
- 2 medium cucumbers, about 12 ounces total, scrubbed and sliced into 1/8-inch coins or half-moons
- 1 small red onion, halved and thinly sliced
- 2 medium carrots, peeled into thin ribbons or 1/8-inch coins
- 1 cup radishes, trimmed and thinly sliced
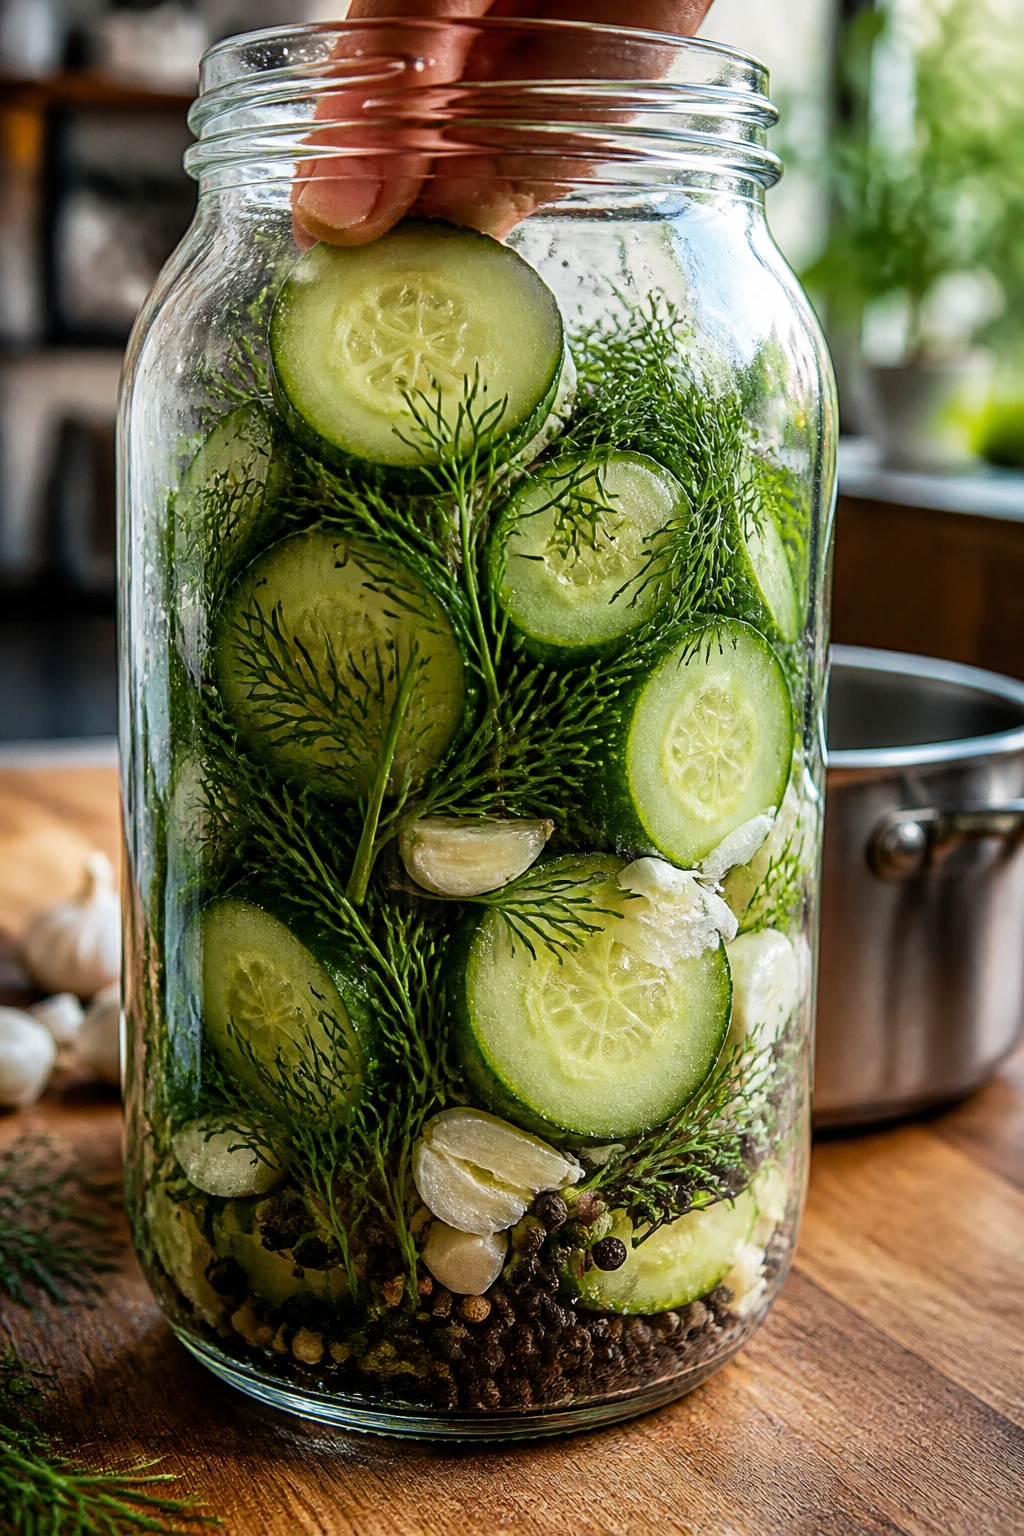
- 2 garlic cloves, lightly smashed
- 4 sprigs fresh dill
For the Quick Brine
- 1 1/2 cups white vinegar, 5% acidity
- 1 1/2 cups water
- 3 tablespoons granulated sugar
- 1 1/2 tablespoons kosher salt
- 1 teaspoon black peppercorns
- 1/2 teaspoon red pepper flakes, optional
What Goes Into a $10 Batch
The Vegetables That Pull Their Weight
What to use: 2 medium cucumbers, 1 small red onion, 2 medium carrots, and 1 cup radishes give the jar enough body without pushing the grocery bill into annoying territory.
Preparation: Slice everything thin enough that the brine can reach it quickly. Cucumbers do well at 1/8-inch; carrots can be ribbons, coins, or matchsticks; onion wants thin arcs so it softens instead of staying sharp and bulky.
Substitutions: Cauliflower florets, fennel, green beans, and thin bell pepper strips all work if one of the main vegetables is cheaper or already hanging around in the crisper drawer. The texture changes, but the method does not.
Tips: Firm vegetables matter more here than expensive ones. A wrinkled cucumber or a floppy carrot will taste tired in the jar, and no amount of vinegar can hide that.
The Brine That Does the Preserving
What to use: 1 1/2 cups white vinegar, 1 1/2 cups water, 3 tablespoons sugar, and 1 1/2 tablespoons kosher salt make a brine that tastes sharp without going harsh.
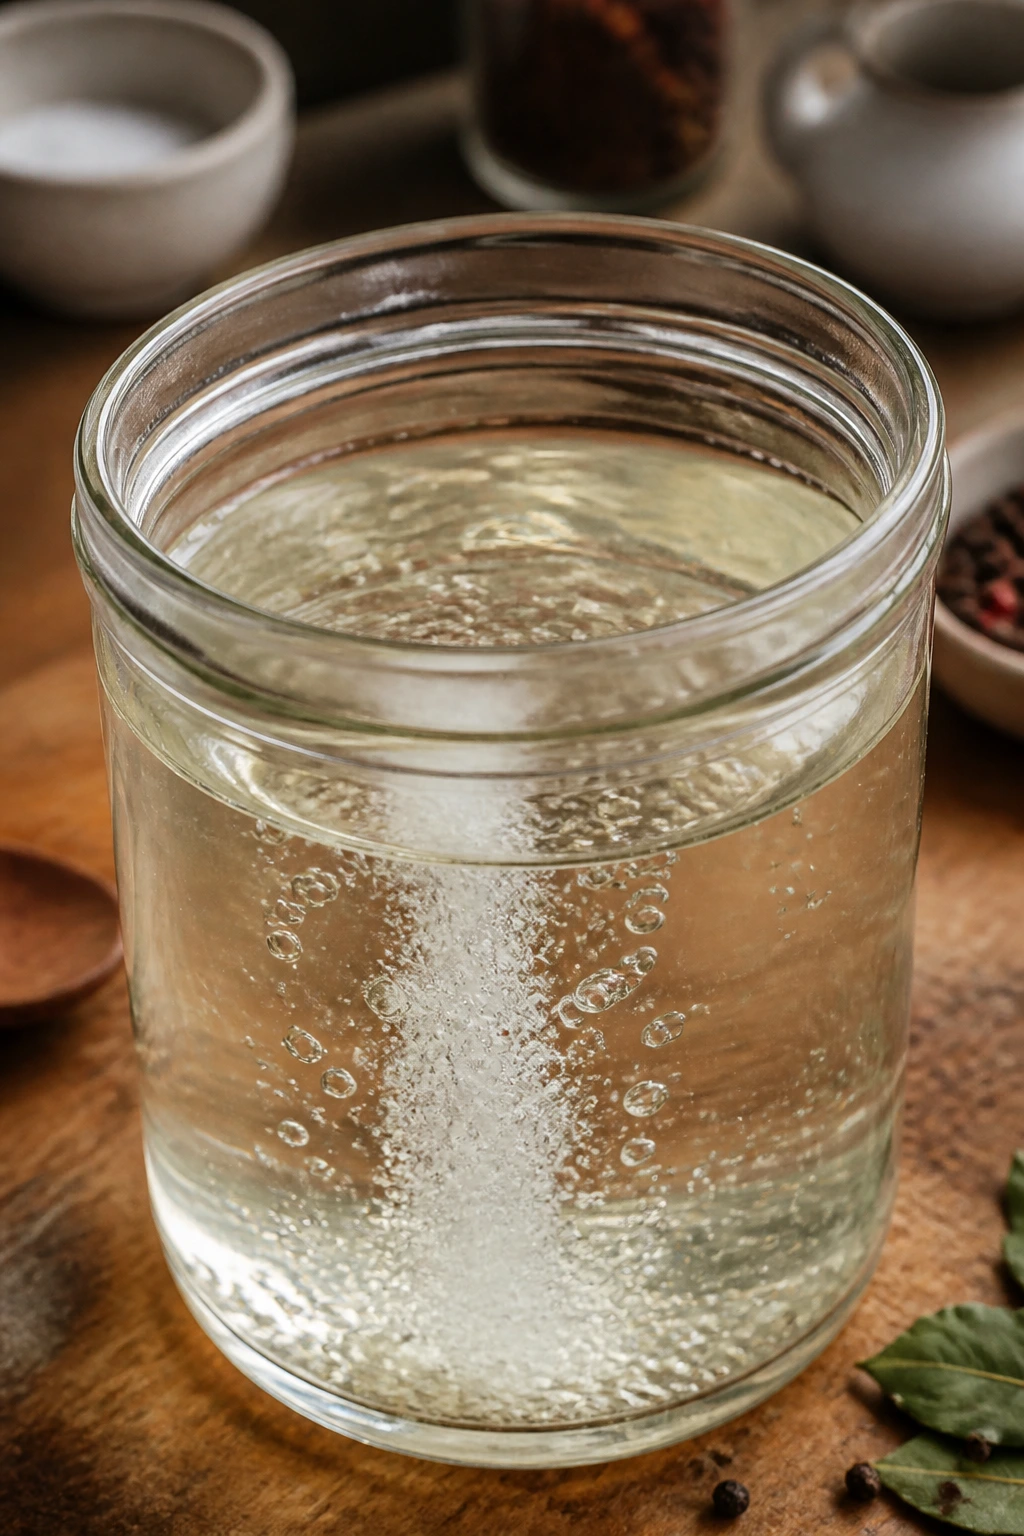
Preparation: Heat the mixture until the sugar and salt dissolve and the liquid starts to steam, then pull it off the heat. You want hot brine, not a violent boil.
Substitutions: Apple cider vinegar gives a softer, fruitier edge and a warmer color. Rice vinegar makes a gentler pickle that leans lighter in taste, while a honey swap for sugar will round the edges a little more.
Tips: Use vinegar labeled 5% acidity. That standard strength gives the vegetables enough acid to taste properly pickled without turning the jar into sour water.
The Flavor Add-Ins That Make It Taste Intentional
What to use: 2 smashed garlic cloves, 4 sprigs of fresh dill, 1 teaspoon black peppercorns, and 1/2 teaspoon red pepper flakes if you want heat.
Preparation: Smash the garlic with the flat side of a knife instead of mincing it. That gives the brine more aroma without turning it cloudy or bitter.
Substitutions: A bay leaf, a teaspoon of mustard seed, coriander seed, or a few jalapeño slices can shift the jar toward deli-style, taco-style, or a sharper pantry-pickle profile.
Tips: Fresh dill gives the cleanest herbal note, but dried dill works in a pinch. If you use dried, keep the amount modest; too much can make the brine look muddy and taste dusty.
Why the Vinegar Brine Has to Stay Balanced
Sharp pickles are not made by dumping vinegar over vegetables and hoping. That approach gives you something that tastes sour on the first bite and flat by the third. The balance between vinegar, water, salt, and sugar matters because each part does a different job.
The vinegar brings the acid. The water keeps that acid from bullying the vegetables. Salt seasons the vegetables all the way through and helps them taste like pickles instead of cold salad. Sugar does not make the jar sweet unless you overdo it; it rounds off the hard edges so the onion tastes bright instead of biting back.
A 1:1 vinegar-to-water ratio is where I start for refrigerator pickles that need to taste good within a day or two. Go much weaker and the vegetables taste like they were splashed with vinaigrette. Go much stronger and the jar can feel aggressive, especially if there’s raw onion in it. The sweet spot is a brine that tastes a little too sharp when warm, then settles into something balanced once it chills.
What the salt is doing
Salt is easy to underplay because it doesn’t scream the way vinegar does. But if the salt level is too low, the vegetables stay bland in the middle, and the whole jar tastes one-note. If it’s too high, the brine goes metallic and the onion starts to taste harsh instead of clean.
Why the heat matters
The brine only needs enough heat to dissolve the sugar and salt. A hard boil can be rough on delicate vegetables, especially cucumbers. Hot brine also helps the aromatics wake up fast, which is why the garlic and dill taste present after a few hours instead of hiding in the back of the jar.
What happens overnight
The first hour gives you a bright, crunchy pickle with the vinegar sitting mostly on the outside. After a night in the fridge, the brine has moved farther into the carrot and onion, and the cucumber tastes less raw. That shift is the real reason refrigerator pickles feel useful: they get better while you’re doing something else.
The Tools That Keep the Process Easy
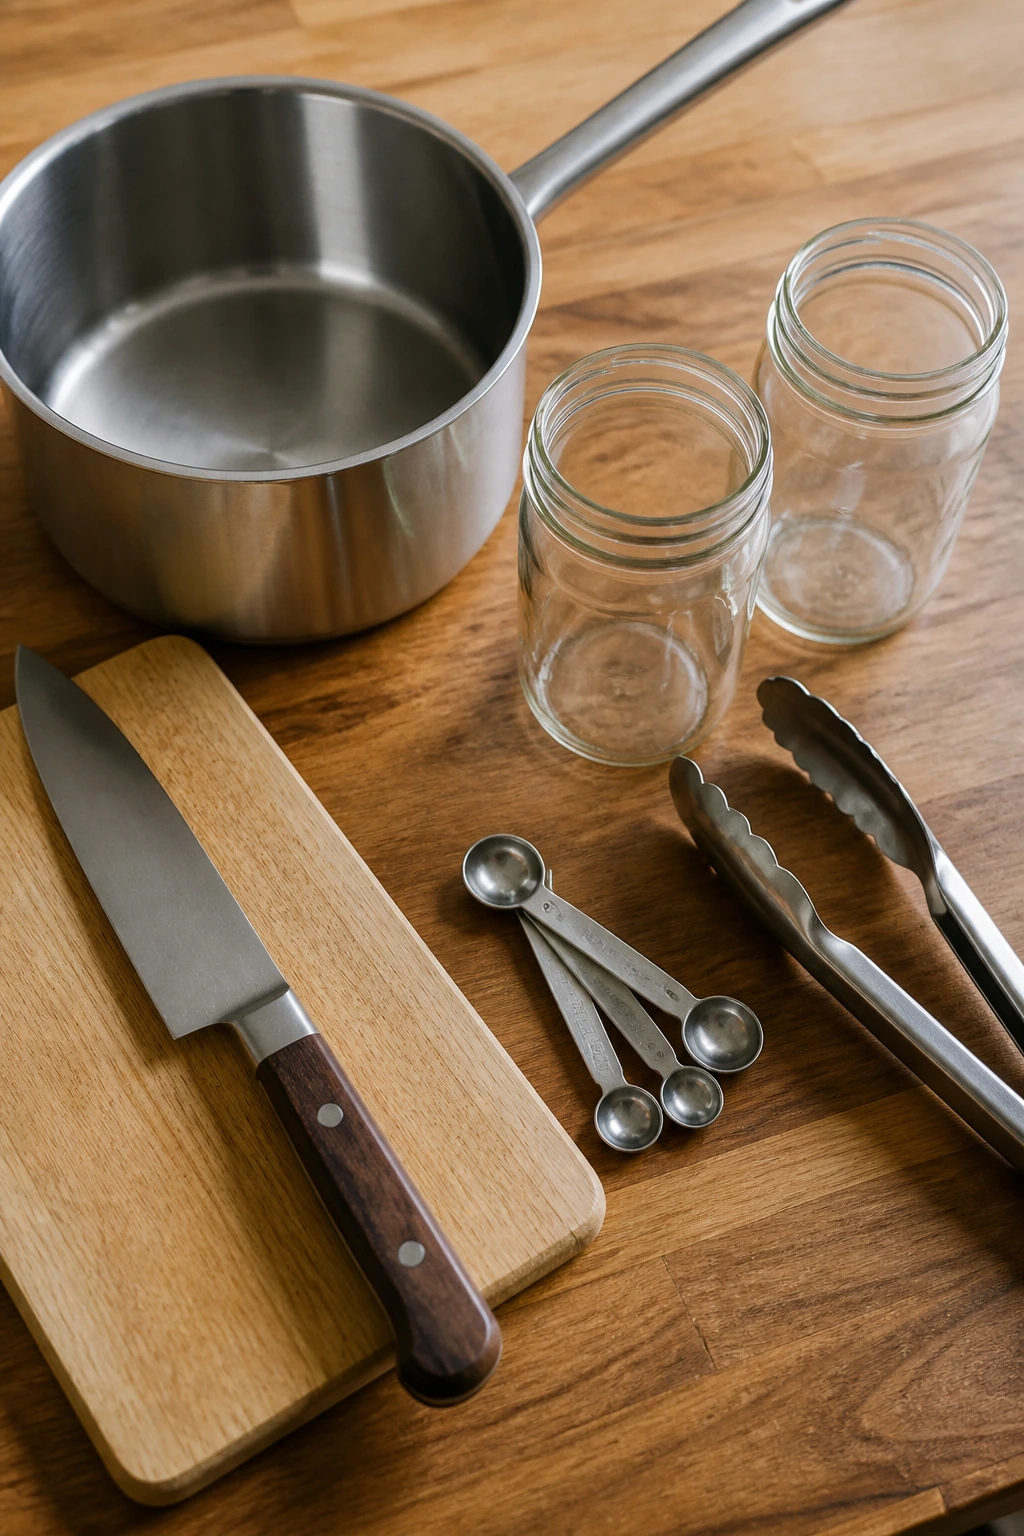
You do not need a canning setup for this. In fact, bringing out a water-bath canner for a refrigerator pickle is a little like wearing snow boots to answer the mail.
- Medium saucepan: Big enough to hold the brine without splashing when you whisk it.
- Cutting board and chef’s knife: Thin, even slicing keeps the vegetables crisp and helps them pickle at the same pace.
- Two pint jars or one quart jar with tight lids: Clean glass jars make packing and storage easy, and the clear sides let you check whether the vegetables are fully submerged.
- Measuring cups and spoons: The vinegar, water, sugar, and salt need to stay in proportion if you want the jar to taste right.
- Tongs or a long spoon: Handy for packing vegetables and nudging the slices under the brine.
- Small funnel, optional: Useful if you hate spilling hot liquid down the side of a jar.
- Clean weight or folded cabbage leaf, optional: Only needed if you want to pin stubborn floating vegetables under the brine.
Wash the jars well in hot soapy water and let them dry before filling. No sterilizing ritual is needed here because these are refrigerator pickles, not shelf-stable canned pickles. Clean is enough. Dry is better.
Step-by-Step: Building the Jar
Prep the Vegetables
-
Wash the cucumbers, onion, carrots, radishes, and dill under cool water, then dry them well with a clean towel. Extra water on the vegetables can dilute the brine and soften the final texture.
-
Slice the cucumbers into 1/8-inch coins or half-moons, slice the onion thinly, and cut the carrots and radishes as evenly as you can. Aim for similar thickness across the jar so one vegetable doesn’t stay raw while another turns floppy.
Pack the Jars
-
Divide the smashed garlic, dill sprigs, black peppercorns, and red pepper flakes between the jars. Put the aromatics at the bottom and middle of the jar so the brine can move past them.
-
Pack the vegetables into the jars fairly tightly. Press them in enough that the slices fit without big empty gaps, but do not crush them into a compressed block. A little room helps the brine move around.
Make the Brine
-
Combine the vinegar, water, sugar, and salt in a medium saucepan over medium heat. Stir until the sugar and salt dissolve and the liquid looks clear, about 3 to 5 minutes. Do not let it boil hard; a gentle steam is enough.
-
Pull the pan off the heat and let the brine sit for a minute or two. Very hot liquid can knock delicate cucumber slices around and make them soften faster than you want.
Fill and Chill
-
Pour the hot brine over the vegetables until they are fully covered, leaving about 1/2 inch of headspace at the top of each jar. Tap the jar lightly on the counter to release bubbles, then use a spoon to nudge any floating slices under the liquid.
-
Let the jars cool on the counter for 20 to 30 minutes, then seal and refrigerate them. Do not leave the jars out longer than 2 hours after cooling; the fridge is part of the preservation plan here.
-
Taste after 1 hour if you want a bright, raw, crunchy pickle. For the best balance, wait 4 to 24 hours. The carrots and onions will taste deeper, and the cucumbers will settle into a cleaner vinegar snap.
How to Serve These Pickles on Real Food
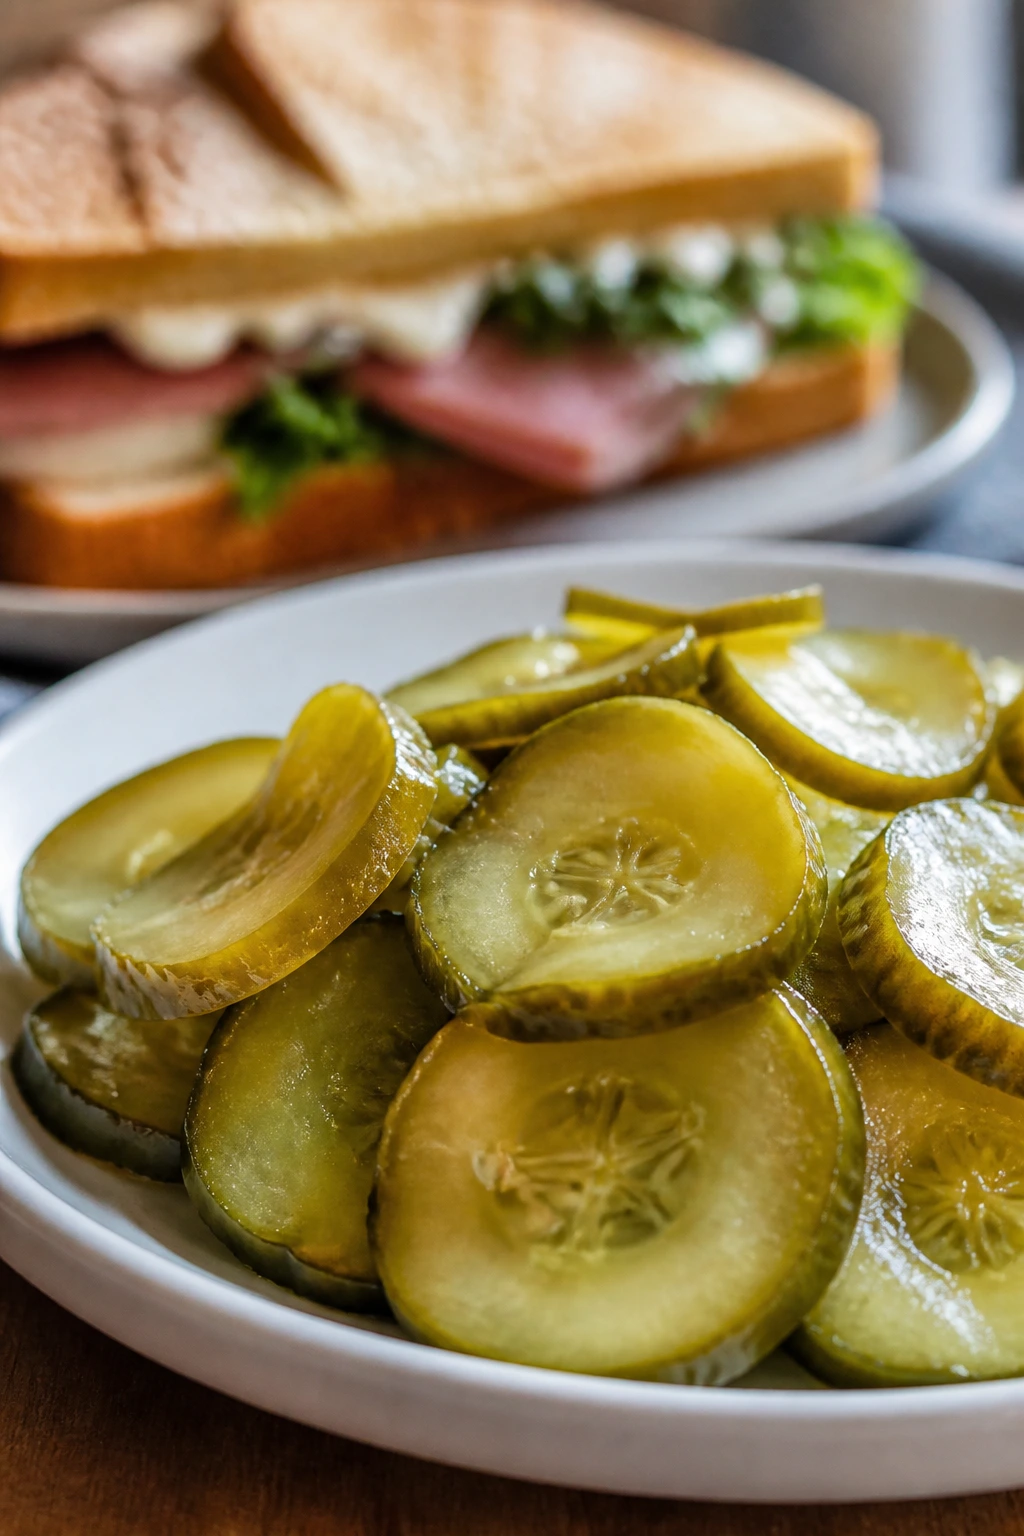
Presentation: Drain the slices briefly before piling them onto a plate so the brine does not drown whatever they’re sitting next to. I like the onions and radishes on top because their color does a lot of work with very little effort.
Accompaniments: These belong beside burgers, grilled cheese, tuna salad, rice bowls, bean tacos, roasted chicken, and fried eggs. They also cut through anything fatty or creamy, which is why they disappear fast next to mayo-heavy sandwiches.
Portions: As a garnish, 2 to 4 slices can wake up a sandwich. As a side, 1/4 cup per person is plenty. If you’re feeding a crowd, double the batch and use a wider jar so the vegetables pack without getting squashed.
Beverage Pairing: Sparkling water with lime, iced tea with lemon, or a cold lager all suit the vinegar and garlic without fighting it. If you’re serving the pickles with a rich sandwich, a plain soda water is a cleaner match than a sweet drink.
The nice thing about this jar is that it does not need to be hidden. Spoon the vegetables right into a bowl with grains, scatter them over beans, or tuck them into a wrap where the brine can run into the bread a little. That little leak is not a flaw. It’s part of the point.
Practical Ways to Stretch Flavor Further
Flavor Enhancement: If you already have coriander seed or mustard seed in the pantry, add 1 teaspoon to the brine. Coriander brings a faint citrus note that works well with carrots, while mustard seed gives the jar a more deli-style edge.
Cost-Saver: Buy whatever vegetable looks best on sale and let the rest of the jar fill itself out with onion and carrots. A single cucumber can carry a jar if the onion slices are thin and the carrots are cut properly. The brine cares less about a perfect produce lineup than it does about size and freshness.
Texture Trick: Salt the cucumber slices with about 1 teaspoon kosher salt for 10 minutes, then blot them dry before packing. That extra step pulls out some surface water and helps the cucumbers stay crisper longer in the fridge.
Make-It-Yours: Cut the sugar to 2 tablespoons if you want a sharper pickle, or bump it to 4 tablespoons if you like the edge softened. Honey works too, though it changes the flavor a little and gives the brine a warmer finish.
A little lemon peel in the jar can brighten the top note, but do not go heavy with citrus zest. One thin strip is enough. More than that and the pickle starts tasting like it’s trying too hard.
Common Mistakes That Wreck the Crunch

-
Cutting the vegetables too thick: Thick cucumber rounds and chunky carrots take forever to taste pickled, and the centers stay blunt while the outside gets sour. Keep the slices thin and even so the brine can move through them quickly.
-
Using tired produce: Soft cucumbers, rubbery carrots, and limp radishes turn mushy after a day in brine. Buy firm vegetables and chill them before slicing if they’ve been sitting on the counter.
-
Boiling the brine hard: A furious boil can make the garlic harsh and soften delicate vegetables faster than you want. Simmer only long enough to dissolve the sugar and salt, then pull the pan off the heat.
-
Skipping the salt balance: If the brine tastes flat before it hits the jar, it will taste flat after. Salt is part of the recipe, not a garnish. Use the measured amount and taste the warm brine before pouring it.
-
Packing the jar too loosely or too tightly: Loose packing leaves air pockets and floating slices. Overpacking crushes the vegetables and blocks the brine from moving around them. Aim for snug, not jammed.
-
Treating refrigerator pickles like pantry pickles: These are not shelf-stable. They need the fridge, they need clean utensils, and they need to stay cold. If you want a jar to sit on the shelf, that is a different method entirely.
If the brine gets cloudy, that is not always a problem. Vinegar brines can go slightly hazy from spices or garlic. What matters is smell and texture. If it smells off, turns slimy, or shows mold, toss it.
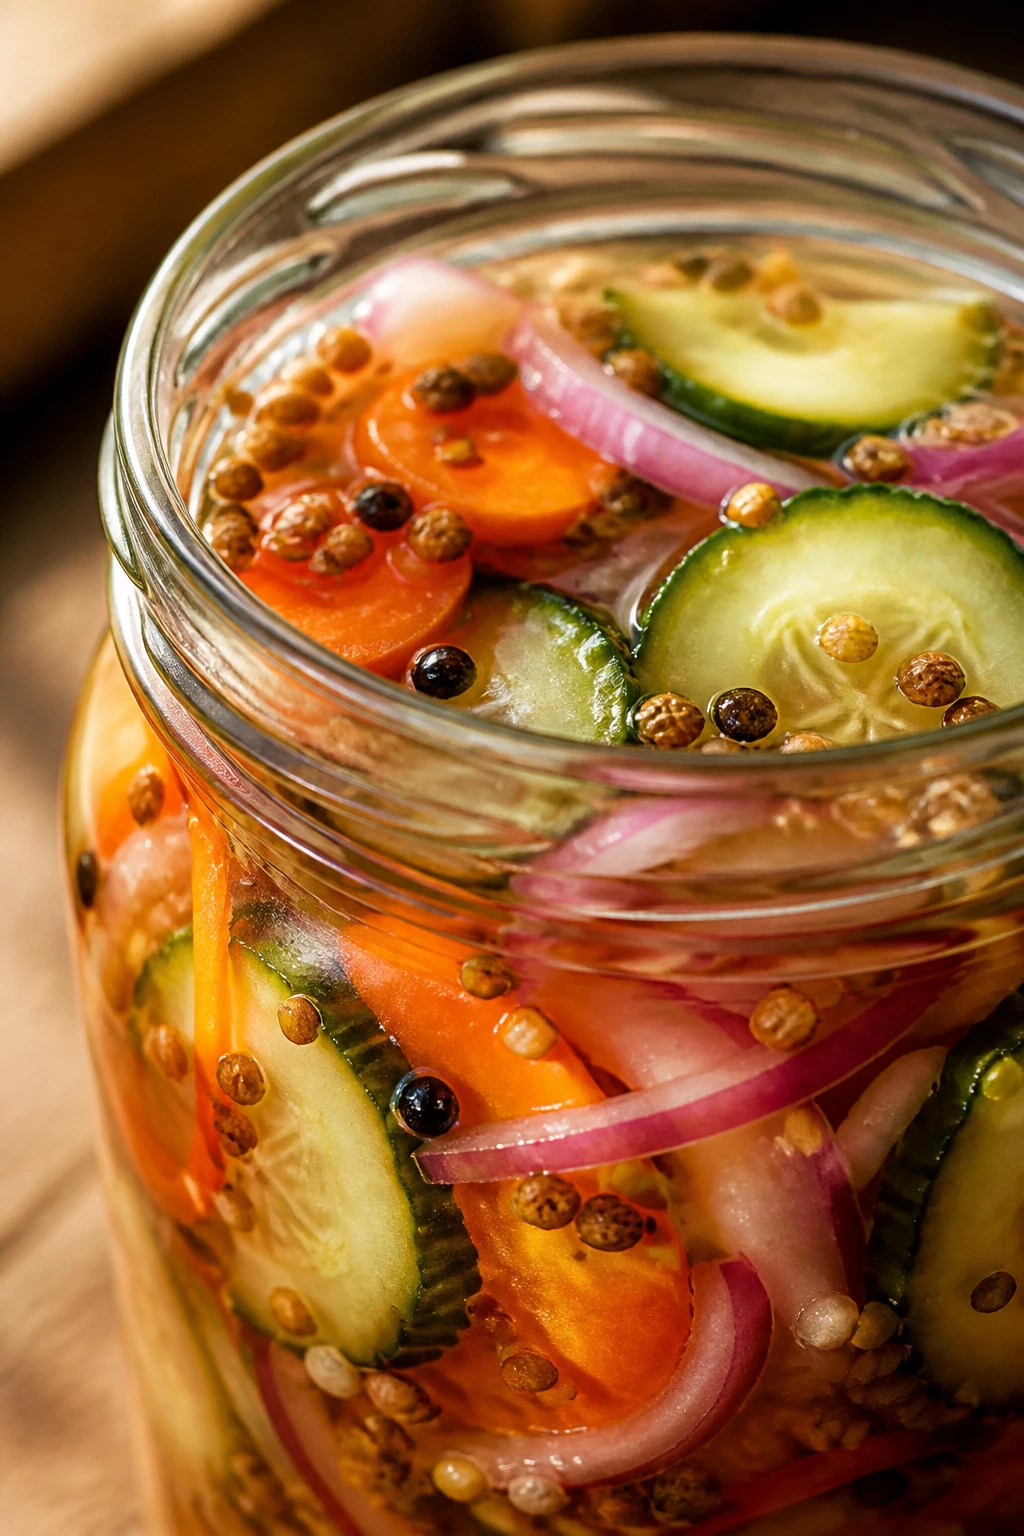
Variations and Swaps Worth Trying
Deli-Style Dill Stack: Add 1 teaspoon mustard seed and 1 bay leaf to the jar, then lean a little heavier on the dill. The result tastes closer to a sandwich shop pickle and works best with burgers, roast beef, or turkey.
Sweet Onion Coins: Skip the radishes and double the red onion if you want a jar that leans sharp and a little sweet. Raise the sugar to 4 tablespoons for this version, which takes the sting off the onion and makes it better for pulled pork or grilled sausages.
Taco-Heat Mix: Add 1 sliced jalapeño and use the full 1/2 teaspoon red pepper flakes. This version is good when you want something bright enough to cut through cheese, avocado, and beans without disappearing.
Apple Cider Brightness: Swap the white vinegar for apple cider vinegar and keep the rest of the brine the same. The pickle tastes softer and a touch fruitier, which is a nice fit for carrots and radishes.
No-Sugar Sharp Jar: Leave the sugar out and keep the vinegar-to-water ratio the same. The jar turns brisk and very direct, which some people love with rich food like fried eggs, mayo-heavy sandwiches, or roast chicken.
Each variation should still respect the same basic rule: keep the slices thin and the brine strong enough to hold its shape. Change the flavor if you want. Do not change the physics.
Storage, Make-Ahead, and Fridge Life
How long the jar stays useful
These quick pickled vegetables should go into the fridge after the jars cool on the counter. Once chilled, they keep well for about 2 to 3 weeks. Cucumbers are the first to lose snap, usually after the second week, while carrots and radishes can keep their texture a bit longer.
Make-ahead timing
The brine can be made a day ahead and kept in the fridge, then rewarmed only until it loosens enough to pour. You can also slice the vegetables in advance and store them dry in a container for about 24 hours before pickling. The full jar is often better after overnight chilling, so making it ahead for lunch or a cookout is a smart move.
What not to do
Do not freeze quick pickles. The texture goes soft and watery, and that ruins the whole reason for making them. Do not leave the jar sitting out on the counter after it has chilled; use a clean fork or spoon and return it to the fridge after serving.
A few storage habits that help
Use a clean utensil every time you reach into the jar. If you stick a used fork into the brine after it has touched bread, meat, or anything else, the jar will not last as long. If the vegetables are no longer submerged, top them off with a small splash of equal parts vinegar and water heated together and cooled first.
The brine can be reused once for a second batch of similar vegetables if it is still clean, smells fresh, and has not been contaminated by stray crumbs or sauce. I would not push it beyond that. Fresh brine tastes sharper, and this recipe is cheap enough that making a new batch usually makes more sense.
Questions People Ask Before They Make a Jar
Can I use apple cider vinegar instead of white vinegar?
Yes. Apple cider vinegar gives a softer, fruitier pickle and a warmer color, which works especially well with carrots and onions. Keep the acidity at 5%, and the jar will stay in the same basic safety lane.
How soon can I eat quick pickled vegetables?
You can taste them after 1 hour, and they’ll already be useful by then. After 4 to 24 hours in the fridge, the flavor settles and the vegetables taste more fully pickled instead of just vinegary on the outside.
Why are my pickles soft?
Usually the vegetables were old, cut too thick, or hit with brine that was too hot for too long. A soft cucumber gives up fast, so start with firm produce and slice it thin. If you want more crunch, salt the cucumbers briefly and blot them dry before packing.
Do I need to sterilize the jars?
Not for refrigerator pickles. Clean jars washed in hot soapy water are enough because the fridge is doing the preservation work. Dry them well so the extra water does not dilute the brine.
Can I make this without sugar?
Yes, though the jar will taste sharper and a little less round. If you like a cleaner vinegar bite, leave the sugar out. If you want the flavor to feel softer, keep the sugar or replace part of it with honey.
Can I double the recipe?
Absolutely. Keep the same ratios for vinegar, water, sugar, and salt, and use a wider pot so the brine heats evenly. Doubling works well when you’ve got more vegetables than one jar can handle, especially if you’re prepping for sandwiches or a cookout.
Are these safe on the pantry shelf?
No. These are refrigerator pickles, not shelf-stable canned pickles. They need to stay cold the whole time, and they should be treated like a fresh condiment, not a pantry preserve.
What vegetables work best if I want the jar to last the longest?
Carrots, radishes, and thin onion slices hold up better than cucumbers. If you know the jar may sit for two weeks, lean heavier on those and use cucumber as the supporting player rather than the whole show.
A Jar Worth Keeping
A jar like this earns its place because it solves a plain, practical problem: too many soft meals, not enough sharpness, and no desire to spend a lot fixing it. A few inexpensive vegetables and a straightforward brine turn into something that can wake up lunch all week without asking for much in return.
Keep the slices thin, keep the vinegar honest, and keep the jar cold. That’s the whole game, and it works because it doesn’t try to be more complicated than it needs to be. The next time the fridge feels empty but dinner needs one bright note, this is the jar you’ll reach for first.
Budget Quick Pickled Vegetables — Recipe Card
- Recipe Name: Budget Quick Pickled Vegetables
- Description: Crisp cucumbers, red onion, carrots, and radishes in a bright vinegar brine with dill and garlic. This refrigerator pickle comes together fast and stays useful for sandwiches, bowls, and sides.
- Prep Time: 20 minutes
- Cook Time: 5 minutes
- Total Time: 25 minutes, plus at least 1 hour chilling
- Course: Condiment / Side
- Cuisine: American
- Servings: 6 to 8
- Calories: about 20 kcal per serving
Ingredients
For the Vegetables:
- 2 medium cucumbers, about 12 ounces total, scrubbed and sliced into 1/8-inch coins or half-moons
- 1 small red onion, halved and thinly sliced
- 2 medium carrots, peeled into thin ribbons or 1/8-inch coins
- 1 cup radishes, trimmed and thinly sliced
- 2 garlic cloves, lightly smashed
- 4 sprigs fresh dill
For the Quick Brine:
- 1 1/2 cups white vinegar, 5% acidity
- 1 1/2 cups water
- 3 tablespoons granulated sugar
- 1 1/2 tablespoons kosher salt
- 1 teaspoon black peppercorns
- 1/2 teaspoon red pepper flakes, optional
Instructions
-
Wash and dry the vegetables and jars, then slice the cucumbers, onion, carrots, and radishes thinly.
-
Divide the garlic, dill, peppercorns, and red pepper flakes between the jars, then pack in the vegetables snugly.
-
Combine the vinegar, water, sugar, and salt in a medium saucepan over medium heat and stir until dissolved.
-
Pour the hot brine over the vegetables until fully covered, leaving about 1/2 inch of headspace.
-
Tap the jars lightly to release bubbles, cool for 20 to 30 minutes, then seal and refrigerate.
-
Chill for at least 1 hour before tasting; the flavor is best after 4 to 24 hours.
Notes: Keep refrigerated only. The pickles stay crispest in the first 2 weeks, though carrots and radishes can hold a little longer. Add mustard seed or jalapeño if you want a different flavor path.