
Picky eaters and movie night can be a fragile truce. Put out one saucy casserole or anything with too many green flecks, and somebody suddenly isn’t hungry. The remote sits untouched, the popcorn bowl gets nudged aside, and you spend the first half hour negotiating bites like a hostage situation.
The answer is usually not a fancier dinner. It’s food with familiar shapes, mild seasoning, crisp edges, and enough cheese to keep everyone interested without making the tray feel heavy. You want things that can survive the walk from kitchen to couch, hold up under a dip, and still taste good when the opening credits are already rolling.
That is the standard here: hand-held, dippable, and friendly to cautious eaters. There’s a little crunch, a little melt, a little sweetness, and a lot of low-drama comfort. The recipes below are the ones I keep coming back to when I want the room fed fast and the complaints kept to a minimum.
Why These Movie Night Recipes Work So Well

-
Familiar flavors: Every recipe leans on cheese, bread, chicken, beef, potatoes, or fruit, which keeps the first bite from feeling like a gamble.
-
One-hand eating: These snacks and mini meals are built for couch food, so nobody needs a fork, a knife, or a lap full of sauce.
-
Dip-friendly by design: Ketchup, ranch, marinara, honey mustard, and yogurt dips give picky eaters control over how much extra flavor they take on.
-
Crunch with a soft center: That crisp-outside, tender-inside contrast is what keeps these foods interesting without making them feel “fancy.”
-
Easy to mix and match: You can serve two or three savory recipes together and still have the table feel calm, because the flavors stay in the same family.
-
Leftovers that still behave: Most of these reheat well in the oven or air fryer, which matters when movie night stretches into the next day.
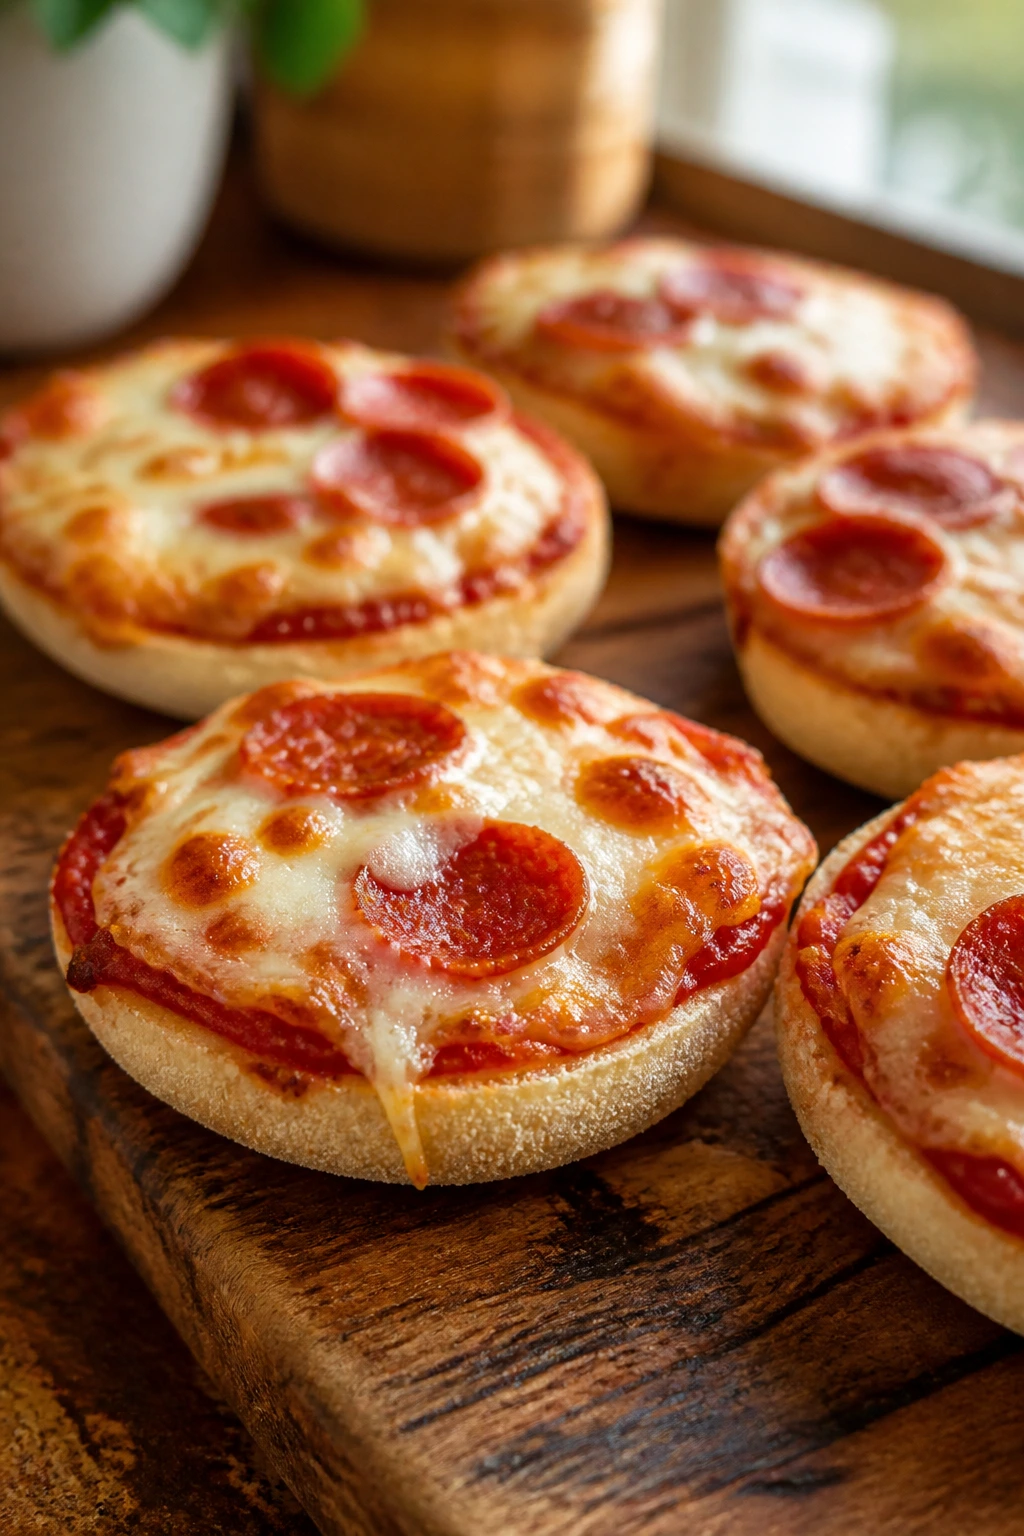
1. Mini English Muffin Cheese Pizzas
English muffin pizzas are the kind of movie-night food that disappears before anyone finishes the trailers. The edges get crisp, the cheese bubbles into little browned spots, and the whole thing tastes like pizza without the fuss of cutting slices while people are walking past the couch.
Why It Works:
English muffins give you a sturdy base with enough nooks to catch sauce and melted cheese. They toast quickly, which keeps the bottoms from turning soggy under the toppings. The flavor stays familiar: tomato, mozzarella, and a little pepperoni if you want it. That’s exactly why picky eaters tend to accept them without a fight.
Key Ingredients:
- 4 English muffins, split in half — the rough surface holds sauce better than smooth bread.
- 1 cup pizza sauce — use a thick sauce so the muffins don’t get damp.
- 2 cups shredded low-moisture mozzarella — this melts cleanly and gives the best stretch.
- 1/2 cup mini pepperoni — small pieces spread out well and keep each bite balanced.
- 2 tablespoons grated Parmesan — a little salty edge on top.
- 1/2 teaspoon dried oregano — adds the pizza smell people expect.
- 1 tablespoon olive oil or softened butter — helps the cut sides toast.
- Pinch of garlic powder — optional, but nice if you want the bread to taste more finished.
Quick Steps:
- Preheat and Toast: Heat the oven to 425°F (220°C). Set the English muffin halves cut-side up on a sheet pan and brush lightly with olive oil or butter.
- Give Them a Head Start: Toast the muffins for 3 minutes, just until the edges feel dry and a little crisp.
- Add the Sauce: Spread about 2 tablespoons of pizza sauce on each half. Keep the layer thin and even.
- Pile on the Cheese: Add mozzarella, pepperoni, Parmesan, oregano, and a tiny pinch of garlic powder.
- Bake Until Bubbly: Bake for 8 to 10 minutes, until the cheese melts and the edges of the muffin are golden.
- Rest Briefly: Let them sit for 2 minutes before serving so the cheese settles.
Equipment for This Recipe:
- Rimmed baking sheet — catches melted cheese.
- Pastry brush — handy for buttering the muffin halves.
- Spoon — for spreading sauce without tearing the bread.
- Oven mitts — the tray gets hot fast.
How to Serve This Dish:
Pile the pizzas on a parchment-lined tray and let everyone grab their own. A little bowl of warm marinara on the side makes sense if your crowd likes extra dipping. Two halves per kid is a good starting point, and adults usually end up reaching for a third.
Pro Tips for This Recipe:
- Toast the muffins first. That small step keeps the sauce from soaking in and going gummy.
- Use thick pizza sauce, not watery marinara.
- If you want a better melt, shred the mozzarella yourself. Pre-shredded works, but the texture is looser.
- Don’t overload the toppings. One heavy mound slides off when people pick up the muffin.
Variations on This Dish:
- Plain Cheese Squares: Skip the pepperoni and use a little extra mozzarella for the most cautious eaters.
- Supreme-for-Adults Batch: Add chopped olives, mushrooms, or peppers to half the tray and leave the rest plain.
- Garlic Bread Version: Swap pizza sauce for garlic butter and finish with mozzarella and parsley.
Common Mistakes to Avoid with This Dish:
- Skipping the toast: Raw muffin halves soak up sauce too fast and turn soft in the center.
- Using too much sauce: A thick layer slides off and makes the bread taste wet.
- Baking on a cold pan: A preheated tray helps the bottoms crisp instead of steaming.
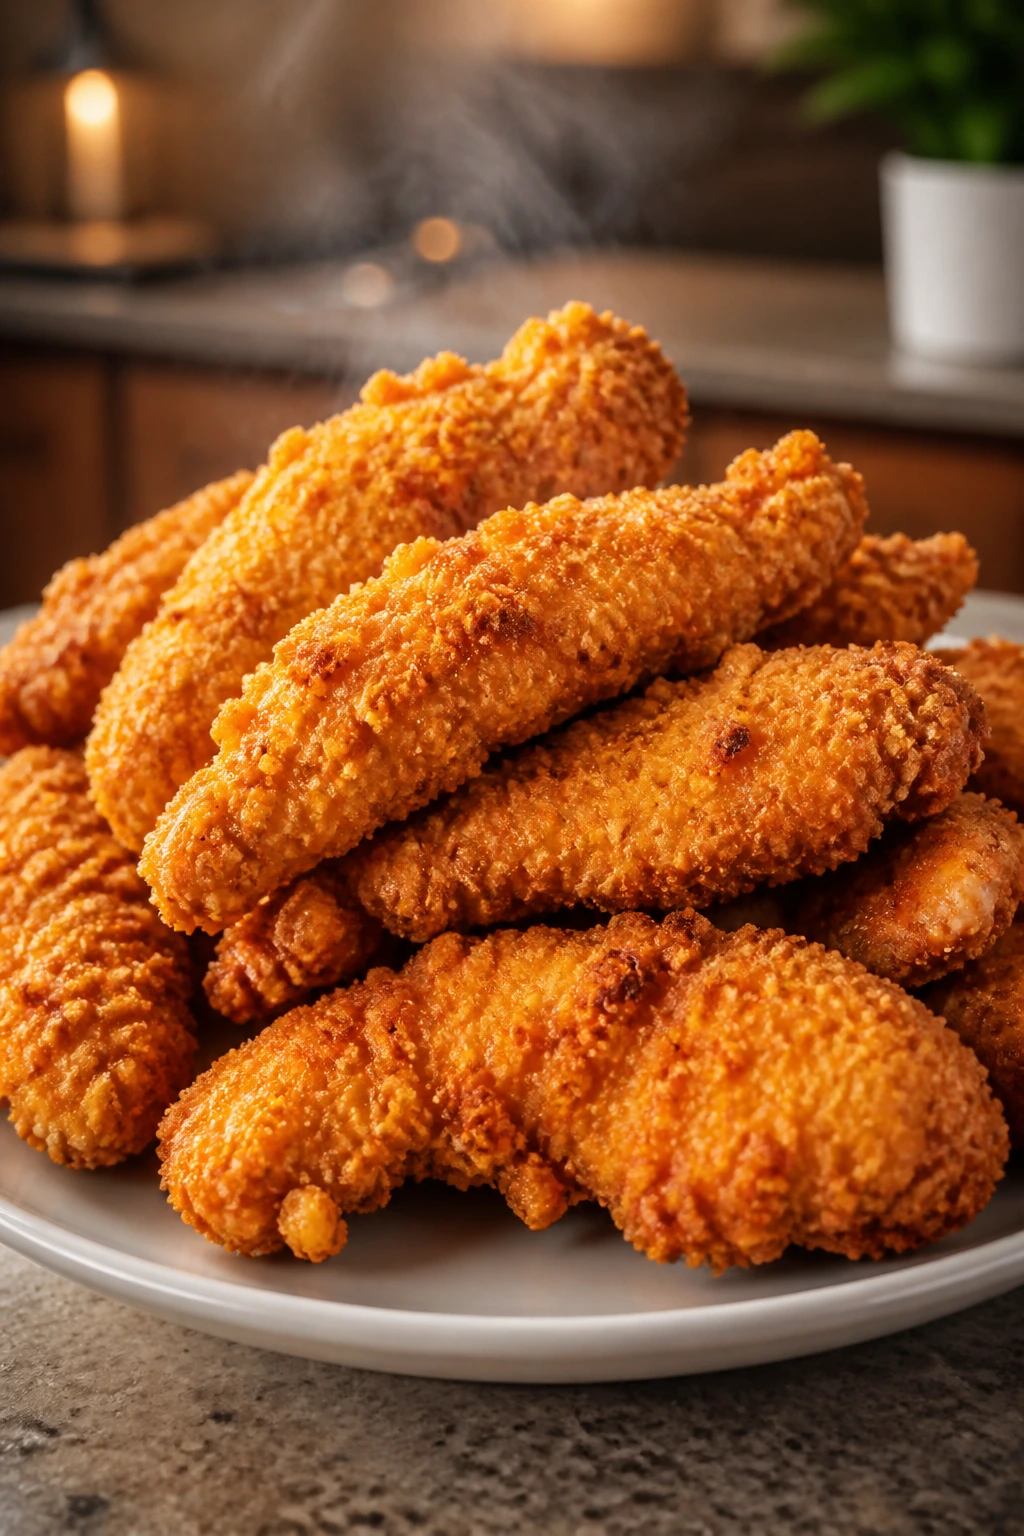
2. Crispy Oven Chicken Tenders
Chicken tenders earn their place on this list because they solve a problem no “special” dinner can solve: they give you crunch, salt, and a dipping handle. They also work for the adults in the room, which is a useful thing when movie-night food starts disappearing faster than the previews.
Why It Works:
The breading does the heavy lifting here. Flour dries the surface, egg gives the crumbs something to cling to, and panko brings that crisp finish kids notice right away. Baking at high heat keeps the coating crunchy without a skillet full of oil. If you’ve got a thermometer, the sweet spot is 165°F in the thickest piece.
Key Ingredients:
- 1 1/2 pounds chicken tenders — or chicken breasts cut into strips.
- 1/2 cup all-purpose flour — the first dry layer matters.
- 1 teaspoon salt — enough to season the meat, not just the crust.
- 1/2 teaspoon black pepper — mild, but enough to keep the flavor from flattening.
- 1 teaspoon paprika — gives the crust a little color.
- 2 large eggs — the breading glue.
- 1 tablespoon milk — loosens the egg wash slightly.
- 2 cups panko breadcrumbs — for the crisp coating.
- 1/2 cup grated Parmesan — adds savory depth.
- Oil spray — helps the crumbs brown in the oven.
Quick Steps:
- Heat the Oven: Set the oven to 425°F (220°C) and line a sheet pan with parchment or place a wire rack on top.
- Set Up the Breading Line: Mix flour, salt, pepper, and paprika in one bowl. Whisk eggs and milk in another. Put panko and Parmesan in a third.
- Coat the Chicken: Dredge each tender in flour, then egg, then crumbs, pressing lightly so the coating sticks.
- Arrange and Spray: Put the tenders on the pan with a little space between them. Spray the tops lightly with oil.
- Bake Until Crisp: Bake for 15 to 18 minutes, flipping once halfway through, until the crust is deep golden and the chicken reaches 165°F.
- Rest and Serve: Let them sit for 3 minutes so the crust stays on instead of sliding off.
Equipment for This Recipe:
- Rimmed baking sheet or wire rack
- Three shallow bowls for breading
- Tongs for cleaner hands
- Instant-read thermometer
How to Serve This Dish:
Serve with ketchup, honey mustard, or ranch in small bowls so picky eaters can choose their own path. A tray of tenders, a few potato wedges, and some carrot sticks makes a solid movie-night plate. One to two tenders per younger child is usually enough; adults tend to eat three or four without blinking.
Pro Tips for This Recipe:
- Pat the chicken dry before breading. Wet chicken makes the coating slide.
- Use one hand for wet and one hand for dry to keep the whole process less messy.
- A wire rack under the chicken keeps the bottoms from getting soggy.
- If the crumbs look pale at the end, give the tray 1 to 2 extra minutes under the broiler, but watch it closely.
Variations on This Dish:
- Parmesan-Lover’s Batch: Increase the Parmesan to 3/4 cup for a more savory crust.
- Cornflake Crunch Version: Replace 1 cup of the panko with crushed cornflakes for a louder crunch.
- Mild Buffalo Finish: Toss the baked tenders in a tiny bit of melted butter and mild buffalo sauce for older kids.
Common Mistakes to Avoid with This Dish:
- Crowding the pan: The chicken steams instead of crisping.
- Skipping the spray: Dry crumbs stay powdery and pale.
- Overbaking: The tenders go from juicy to stringy fast, so use a thermometer.
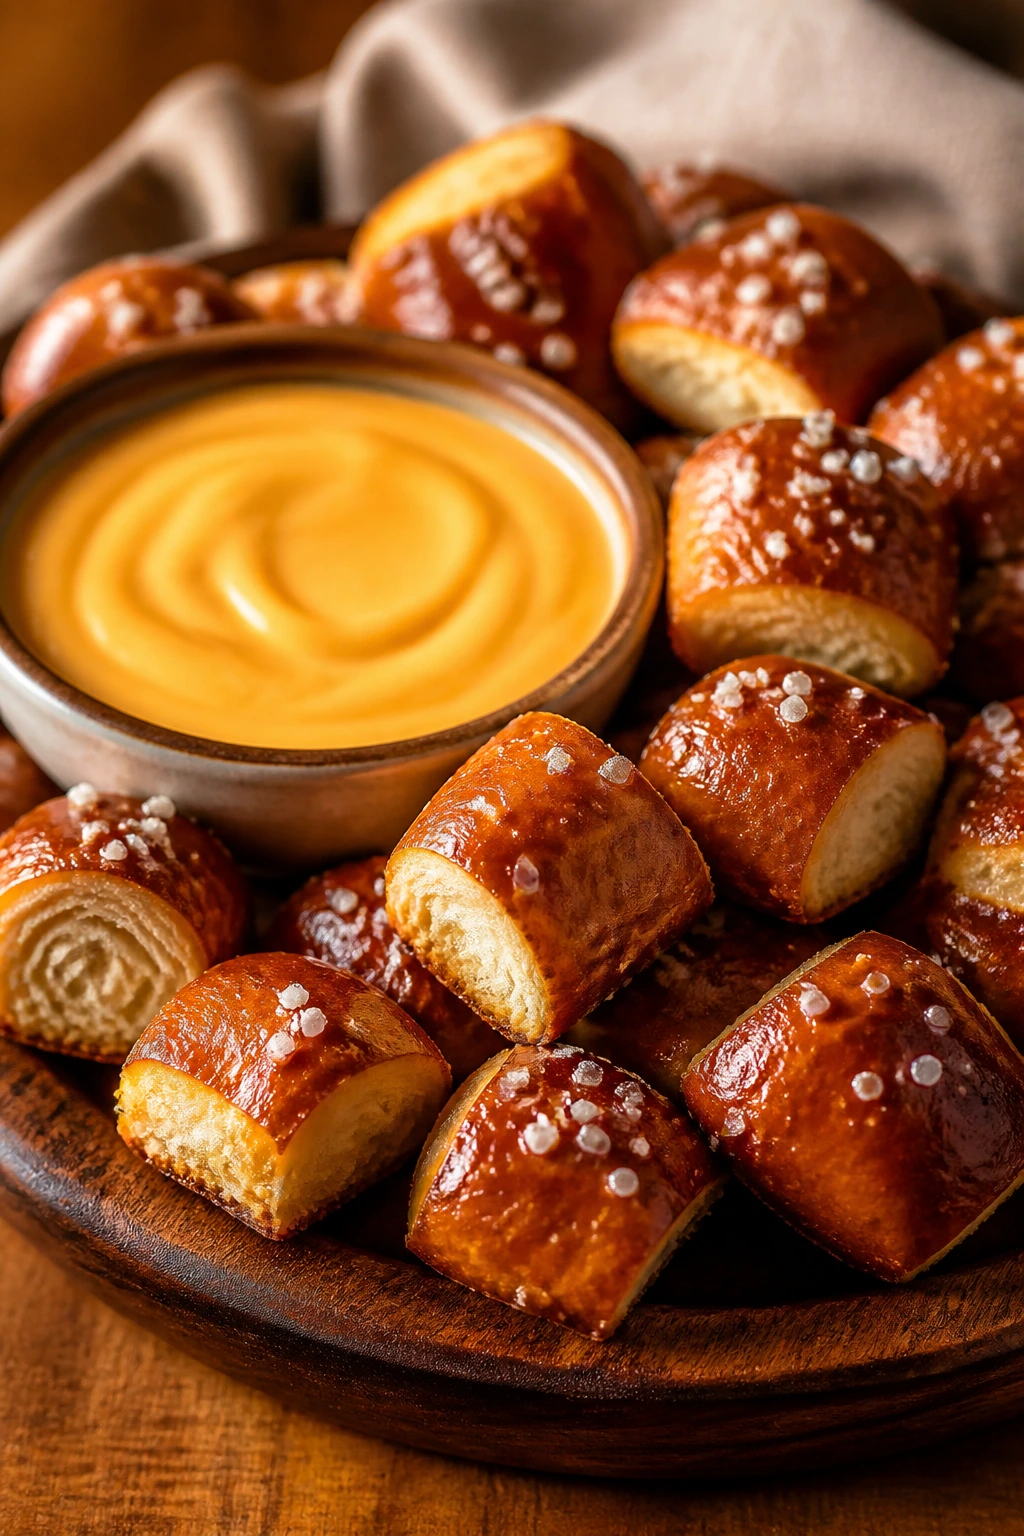
3. Soft Pretzel Bites with Warm Cheese Dip
Pretzel bites feel like fair food that learned to behave indoors. They’re chewy, salty, and easy to grab by the handful, which is exactly the sort of thing a couch crowd likes when everyone is watching the same scene and not trying to pass a plate around.
Why It Works:
The baking soda bath gives the dough that pretzel flavor and dark brown finish without requiring special equipment. Cutting the dough into bite-size pieces means the crust gets more surface area, so every piece has that chewy shell people go back for. The cheese dip keeps the bites from feeling plain, but it stays mild enough for cautious eaters.
Key Ingredients:
- 1 pound pizza dough — store-bought is fine and saves time.
- 8 cups water — for the baking soda bath.
- 1/2 cup baking soda — gives the pretzel crust its signature finish.
- 1 large egg mixed with 1 tablespoon water — for the wash.
- 2 tablespoons coarse salt — for topping.
- 2 tablespoons butter — for the cheese dip.
- 2 tablespoons flour — thickens the dip.
- 1 cup milk — base for the sauce.
- 1 1/2 cups shredded cheddar — for the dip.
- 2 tablespoons cream cheese — makes the sauce smoother.
Quick Steps:
- Preheat the Oven: Heat to 425°F (220°C) and line two sheet pans with parchment.
- Cut the Dough: Roll the dough into a rope, then cut it into 1-inch pieces.
- Make the Bath: Bring the water and baking soda to a gentle simmer in a large pot.
- Dip and Drain: Drop the dough pieces into the bath for 20 seconds, then lift them out with a slotted spoon and place them on the pan.
- Brush and Salt: Brush each piece with egg wash and sprinkle with coarse salt.
- Bake: Bake for 12 to 14 minutes, until deeply golden.
- Make the Dip: Melt the butter, whisk in the flour, then whisk in the milk until smooth. Stir in cheddar and cream cheese until melted and glossy.
Equipment for This Recipe:
- Large pot
- Slotted spoon
- Two sheet pans
- Small saucepan
How to Serve This Dish:
Put the pretzel bites in a wide bowl and keep the cheese dip warm in a small saucepan or heatproof bowl. They’re best eaten right away, while the crust still has some chew. I’d serve these with sliced apples or baby carrots if you want the tray to feel less snack-only.
Pro Tips for This Recipe:
- Don’t skip the baking soda bath. That’s where the pretzel flavor starts.
- Keep the dough pieces roughly the same size so they bake evenly.
- Shred the cheddar finely for the dip; it melts smoother.
- If the dip thickens too much, whisk in a tablespoon of milk at a time.
Variations on This Dish:
- Cinnamon Sugar Batch: Leave off the salt, brush with butter, and toss with cinnamon sugar after baking.
- Jalapeño Cheese Dip: Stir a spoonful of minced pickled jalapeño into the dip for the adults.
- Garlic Pretzel Bites: Add garlic powder to the egg wash and finish with Parmesan.
Common Mistakes to Avoid with This Dish:
- Leaving the dough in the soda bath too long: The bites can taste metallic.
- Using too much salt: The topping can get harsh fast.
- Baking them too close together: They bake into each other and lose the rounded shape.
4. Ham and Cheese Slider Tray
Ham and cheese sliders are the kind of tray that makes a room go quiet in the best way. The rolls stay soft, the cheese melts into the ham, and the butter on top browns into a salty crust that smells like you’ve actually put effort into dinner.
Why It Works:
Sweet rolls plus salty ham plus melty cheese is a combination almost nobody argues with. The whole tray bakes together, so you get warm filling and lightly crisp tops at the same time. A butter glaze with a little onion powder gives the sliders a finished taste without pushing them into “too savory” territory.
Key Ingredients:
- 12 Hawaiian rolls — one connected pack makes assembly easy.
- 12 ounces sliced ham — thin slices layer better than thick ones.
- 6 slices mild cheddar or American cheese — melts cleanly and stays kid-friendly.
- 4 tablespoons butter, melted — for the glaze.
- 1 tablespoon Dijon mustard — optional, but keeps the flavor from being flat.
- 1 teaspoon onion powder — gives the buttery tops more depth.
- 1 teaspoon poppy seeds — optional for texture.
- 1 tablespoon chopped parsley — optional for color.
Quick Steps:
- Preheat and Prep: Heat the oven to 350°F (175°C). Slice the rolls in half horizontally without separating them.
- Build the Sliders: Lay the bottom half in a baking dish, add ham in an even layer, then the cheese, then the tops.
- Mix the Glaze: Stir the butter, Dijon, onion powder, poppy seeds, and parsley together.
- Brush the Tops: Pour or brush the glaze evenly over the rolls, making sure the edges get some too.
- Bake Covered: Cover with foil and bake for 15 minutes.
- Brown the Tops: Uncover and bake 5 more minutes until the tops are glossy and lightly browned.
- Slice and Serve: Cut apart while warm.
Equipment for This Recipe:
- 9×13-inch baking dish
- Serrated knife
- Pastry brush
- Foil
How to Serve This Dish:
A tray of sliders looks best cut into neat squares and piled on a platter with pickles on the side. They work as a full meal if you add wedges or fruit, or as part of a bigger snack spread. Two sliders per person is the sweet spot for most kids; adults usually reach for three.
Pro Tips for This Recipe:
- Keep the rolls connected while cutting so the bottom stays in one piece.
- Use thin ham slices; thick deli meat makes the sliders slide apart.
- Covering the tray with foil first keeps the cheese from drying out before the tops brown.
- If you want cleaner cuts, let the tray sit for 3 minutes before slicing.
Variations on This Dish:
- Turkey-Cheddar Swap: Replace ham with sliced turkey for a milder flavor.
- Pizza-Style Sliders: Use pepperoni, mozzarella, and a spoonful of pizza sauce instead of ham.
- Deli-Classic Version: Add a few thin pickle slices inside for a sharper bite.
Common Mistakes to Avoid with This Dish:
- Overloading the filling: Too much meat makes the sliders hard to hold.
- Skipping the foil cover: The tops brown too fast before the cheese melts.
- Using watery cheese slices: Some processed slices separate; choose a brand that melts smoothly.
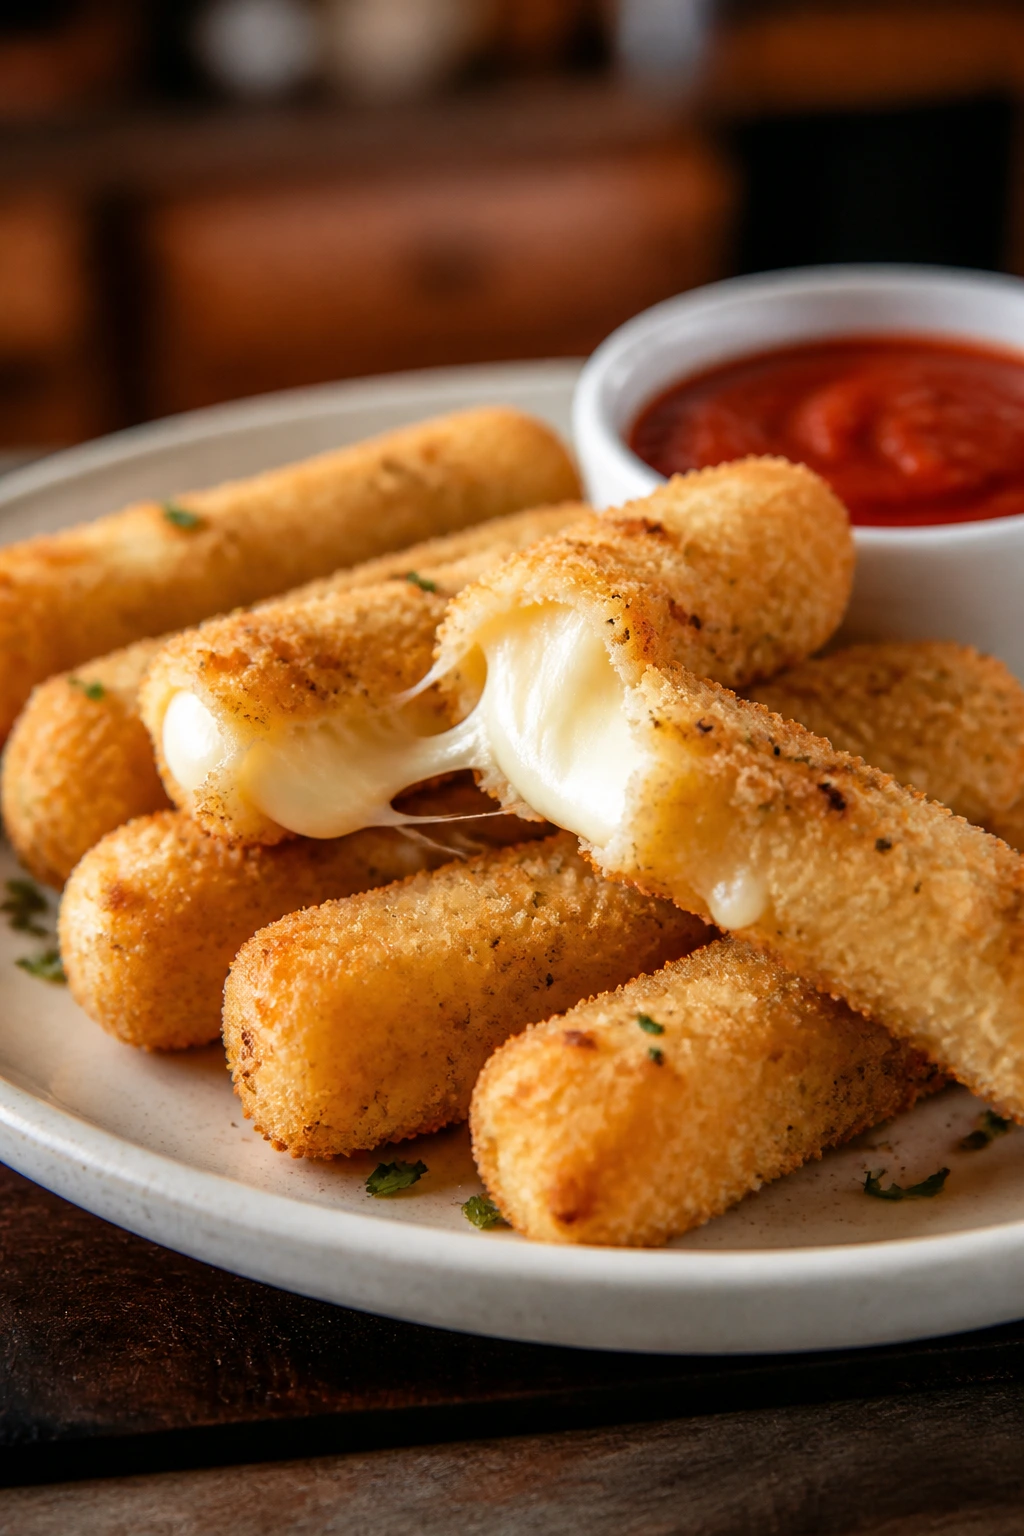
5. Baked Mozzarella Sticks
Baked mozzarella sticks bring the cheese pull without the frying drama. That matters on movie night, because nobody wants a pot of hot oil bubbling while people are looking for blankets and arguing over the remote.
Why It Works:
String cheese is the trick here. It already has the right shape and a low-moisture texture that survives breading and baking better than soft cheese. Freezing the sticks before they go into the oven keeps the centers from spilling out before the crust firms up. A double breading gives you a shell that stays intact.
Key Ingredients:
- 12 string cheese sticks — cut in half for smaller bites.
- 1/2 cup all-purpose flour — the first dry layer.
- 2 large eggs — for the egg wash.
- 2 tablespoons milk — loosens the egg enough to coat evenly.
- 1 1/2 cups Italian breadcrumbs — the main crust.
- 1/2 cup panko breadcrumbs — adds extra crunch.
- 1 teaspoon Italian seasoning — keeps the flavor from tasting flat.
- 1/2 teaspoon garlic powder — mild but useful.
- 1/2 teaspoon salt — just enough seasoning.
- Oil spray — helps the crust turn golden.
Quick Steps:
- Freeze the Cheese: Cut the string cheese in half and freeze the pieces for 20 minutes.
- Set Up the Breading: Put flour in one bowl, beaten eggs and milk in another, and breadcrumbs mixed with seasoning in a third.
- Bread Twice: Coat each piece in flour, egg, crumbs, then repeat egg and crumbs once more.
- Freeze Again: Place the breaded sticks on a tray and freeze for 15 minutes so the coating firms up.
- Bake Hot: Heat the oven to 425°F (220°C), place the sticks on a parchment-lined sheet, spray lightly with oil, and bake for 7 to 9 minutes.
- Serve Fast: Pull them out as soon as the crust is golden and the cheese is just starting to soften.
Equipment for This Recipe:
- Sheet pan
- Parchment paper
- Three shallow bowls
- Freezer space, even if only a small shelf
How to Serve This Dish:
Serve these with warm marinara in a small bowl and a pile of napkins nearby. They’re best eaten straight from the tray, before the cheese has time to harden again. I’d pair them with something fresh, like cucumber slices or fruit, because the sticks themselves lean rich.
Pro Tips for This Recipe:
- Freeze between breading layers. That is what keeps the cheese inside.
- Press the crumbs on gently but firmly so the coating doesn’t flake off.
- Don’t bake them too long. If the cheese leaks, they’re overdone.
- A light oil spray helps the crust color without greasing the pan.
Variations on This Dish:
- Parmesan Crust: Mix in 1/4 cup Parmesan for a sharper crust.
- Spicy Marinara Side: Stir a pinch of red pepper flakes into the dipping sauce for the adults.
- Gluten-Free Version: Use gluten-free flour and breadcrumbs, then freeze a little longer before baking.
Common Mistakes to Avoid with This Dish:
- Skipping the freezer step: The cheese melts out too fast.
- Using fresh mozzarella: It’s too wet and breaks the coating.
- Overcrowding the tray: The sticks need space so they crisp instead of steaming.
6. Mac and Cheese Muffins
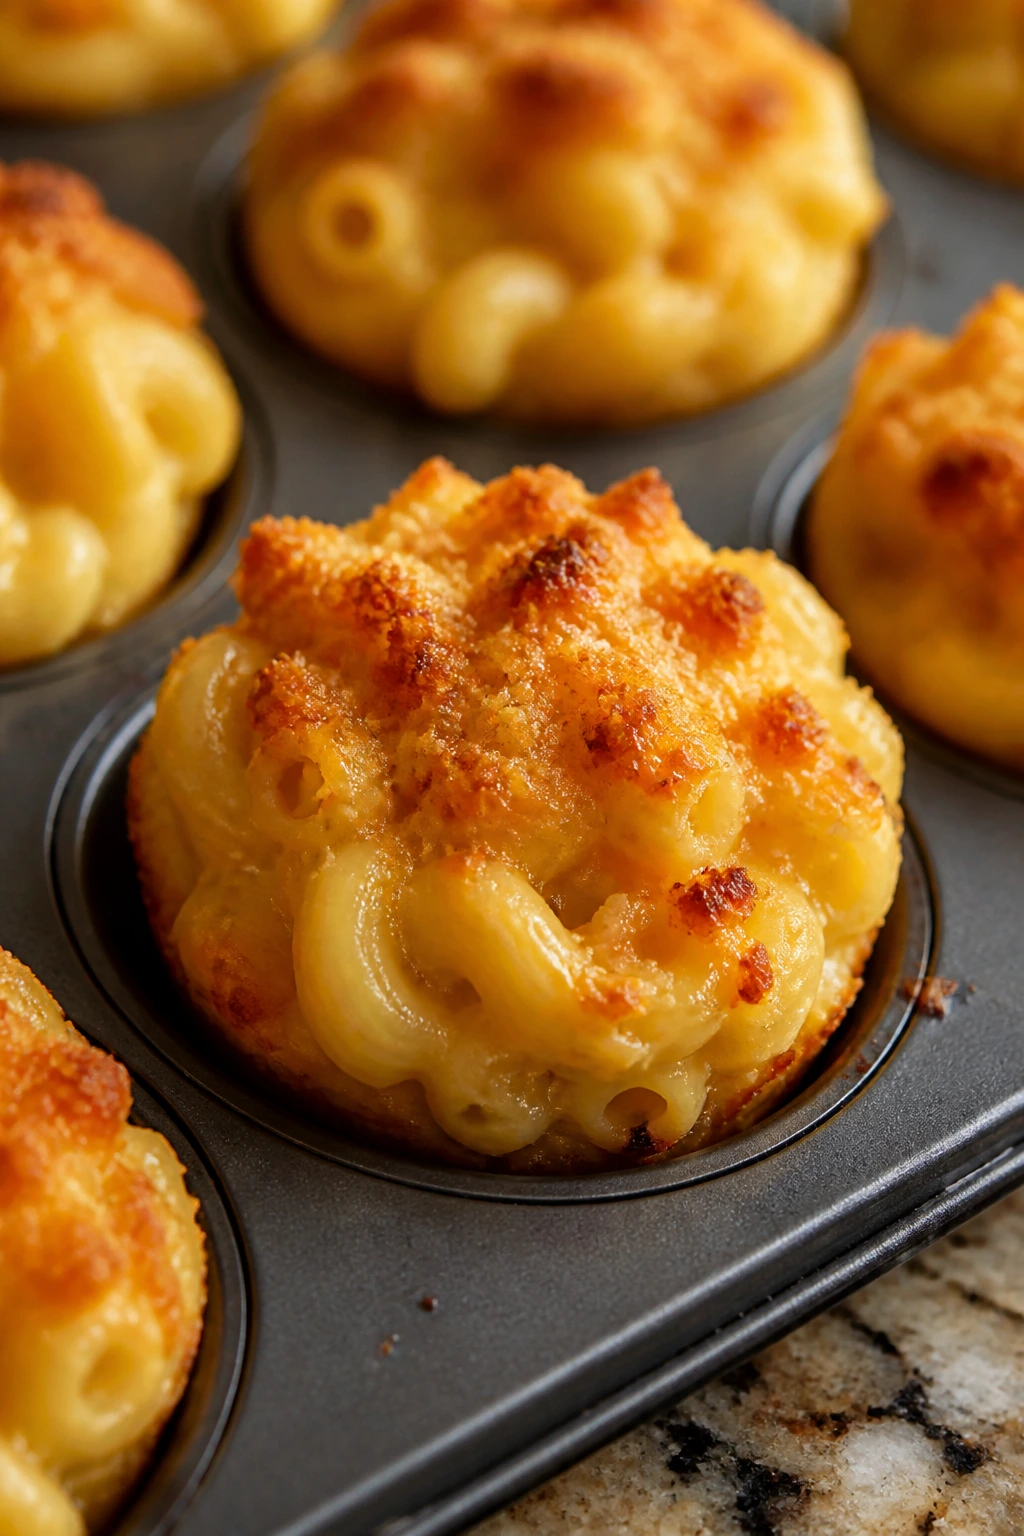
Mac and cheese muffins are what happens when a comfort food learns to fit neatly in a hand. They’re soft in the middle, lightly crisp on top, and less messy than trying to balance a scoop of saucy pasta in the dark.
Why It Works:
Cooking the pasta until just shy of done keeps it from turning mushy in the oven. A simple cheese sauce binds the noodles, and the egg helps the mixture hold its shape in the muffin tin. Breadcrumbs on top give each little portion a bit of crunch, which is the part most kids notice first.
Key Ingredients:
- 8 ounces elbow macaroni — small pasta fits the muffin cups well.
- 2 tablespoons butter — for the sauce.
- 2 tablespoons flour — thickens the sauce.
- 1 1/2 cups milk — keeps the mixture creamy.
- 2 cups shredded cheddar — the main flavor.
- 1 large egg — helps the muffins set.
- 1/2 teaspoon salt — seasons the pasta mixture.
- 1/4 teaspoon black pepper — optional but useful.
- 1/2 cup breadcrumbs — for the top.
Quick Steps:
- Cook the Pasta: Boil the macaroni until just shy of al dente, about 1 minute less than the package says. Drain.
- Make the Sauce: Melt the butter in a saucepan, whisk in flour, then slowly add milk until smooth and thick.
- Add Cheese: Stir in cheddar until melted, then mix in the egg, salt, and pepper off the heat.
- Combine: Fold the pasta into the cheese sauce until coated.
- Fill the Tin: Spoon the mixture into a greased mini muffin tin, pressing lightly so each cup is packed.
- Top and Bake: Sprinkle breadcrumbs over the tops and bake at 375°F (190°C) for 18 to 20 minutes, until set and lightly browned.
- Cool Briefly: Let them rest for 5 minutes before lifting them out.
Equipment for This Recipe:
- Mini muffin tin
- Saucepan
- Whisk
- Large mixing bowl
How to Serve This Dish:
Serve these warm with a little bowl of ketchup or extra cheese sauce if your crowd wants more richness. They hold their shape best after a short rest, so don’t rush them straight from the oven to a serving plate. Three or four muffins is a normal snack portion; six can stand in for dinner with fruit.
Pro Tips for This Recipe:
- Use sharp cheddar if you want the flavor to survive the pasta.
- A mini muffin tin gives better crispy edges than a standard tin.
- Don’t overcook the pasta before baking, or the texture gets soft.
- Grease the tin well, especially around the edges, so the muffins release cleanly.
Variations on This Dish:
- Mild Three-Cheese Batch: Swap part of the cheddar for mozzarella and Monterey Jack.
- Bacon Bit Version: Add cooked bacon crumbles for older kids and adults.
- Broccoli Hidden Inside: Stir in finely chopped, steamed broccoli if your crowd tolerates it.
Common Mistakes to Avoid with This Dish:
- Using too much sauce: The muffins won’t hold together.
- Skipping the rest time: They fall apart if you try to lift them too soon.
- Packing the cups too loosely: The mac should be snug so the muffins keep their shape.
7. Pepperoni Pizza Rolls

Pizza rolls have the familiar flavor of pizza but the better shape. They’re easier to grab, easier to dip, and less likely to dump sauce onto a shirt sleeve when somebody shifts on the sofa.
Why It Works:
Rolling the dough around a thin layer of sauce, cheese, and pepperoni gives you little spirals of flavor in every bite. Pizza dough bakes into a soft crust with browned edges, and because the filling is inside, it stays warmer longer than a flat slice. A quick brush of oil on top keeps the exterior from drying out.
Key Ingredients:
- 1 pound pizza dough — store-bought keeps this simple.
- 1/2 cup thick pizza sauce — use less than you think.
- 1 1/2 cups shredded mozzarella — the main melt.
- 1 cup pepperoni slices — chopped or left whole.
- 2 tablespoons grated Parmesan — for the top.
- 1 tablespoon olive oil — helps the crust brown.
- 1 teaspoon Italian seasoning — for a little extra flavor.
Quick Steps:
- Preheat the Oven: Heat to 425°F (220°C) and line a sheet pan with parchment.
- Roll the Dough: Stretch the dough into a rough 12-by-16-inch rectangle on a lightly floured counter.
- Add the Filling: Spread the sauce in a thin layer, leaving a 1-inch border. Sprinkle on mozzarella, pepperoni, Parmesan, and Italian seasoning.
- Roll Tight: Starting from the long side, roll the dough into a log and pinch the seam closed.
- Slice: Cut the log into 12 rolls and place them cut-side up on the pan.
- Bake: Brush with olive oil and bake for 15 to 18 minutes, until golden and cooked through.
- Cool a Bit: Let them rest for 3 minutes so the cheese settles.
Equipment for This Recipe:
- Rolling pin
- Parchment-lined sheet pan
- Sharp knife or bench scraper
- Pastry brush
How to Serve This Dish:
Serve the rolls with warm marinara in a small bowl for dipping. They work well as a snack plate on their own, or alongside wedges and fruit for a more complete spread. Four rolls is usually enough for a kid who’s also eating other snacks.
Pro Tips for This Recipe:
- Keep the sauce thin or the roll will leak.
- Pinch the seam well before slicing so the rolls stay closed.
- Chilling the rolled log for 10 minutes makes slicing cleaner.
- If the tops brown too fast, lay a loose piece of foil over the pan.
Variations on This Dish:
- Cheese-Only Rolls: Leave out the pepperoni and add more mozzarella.
- Supreme Half-Log: Add chopped mushrooms or peppers to one end of the dough and keep the rest plain.
- Garlic Butter Finish: Brush the baked rolls with garlic butter instead of olive oil.
Common Mistakes to Avoid with This Dish:
- Overfilling the dough: The filling squirts out when you slice it.
- Using watery sauce: It soaks the dough and makes the rolls heavy.
- Cutting while warm: The spirals squish and lose their shape.
8. Cheesy Quesadilla Wedges
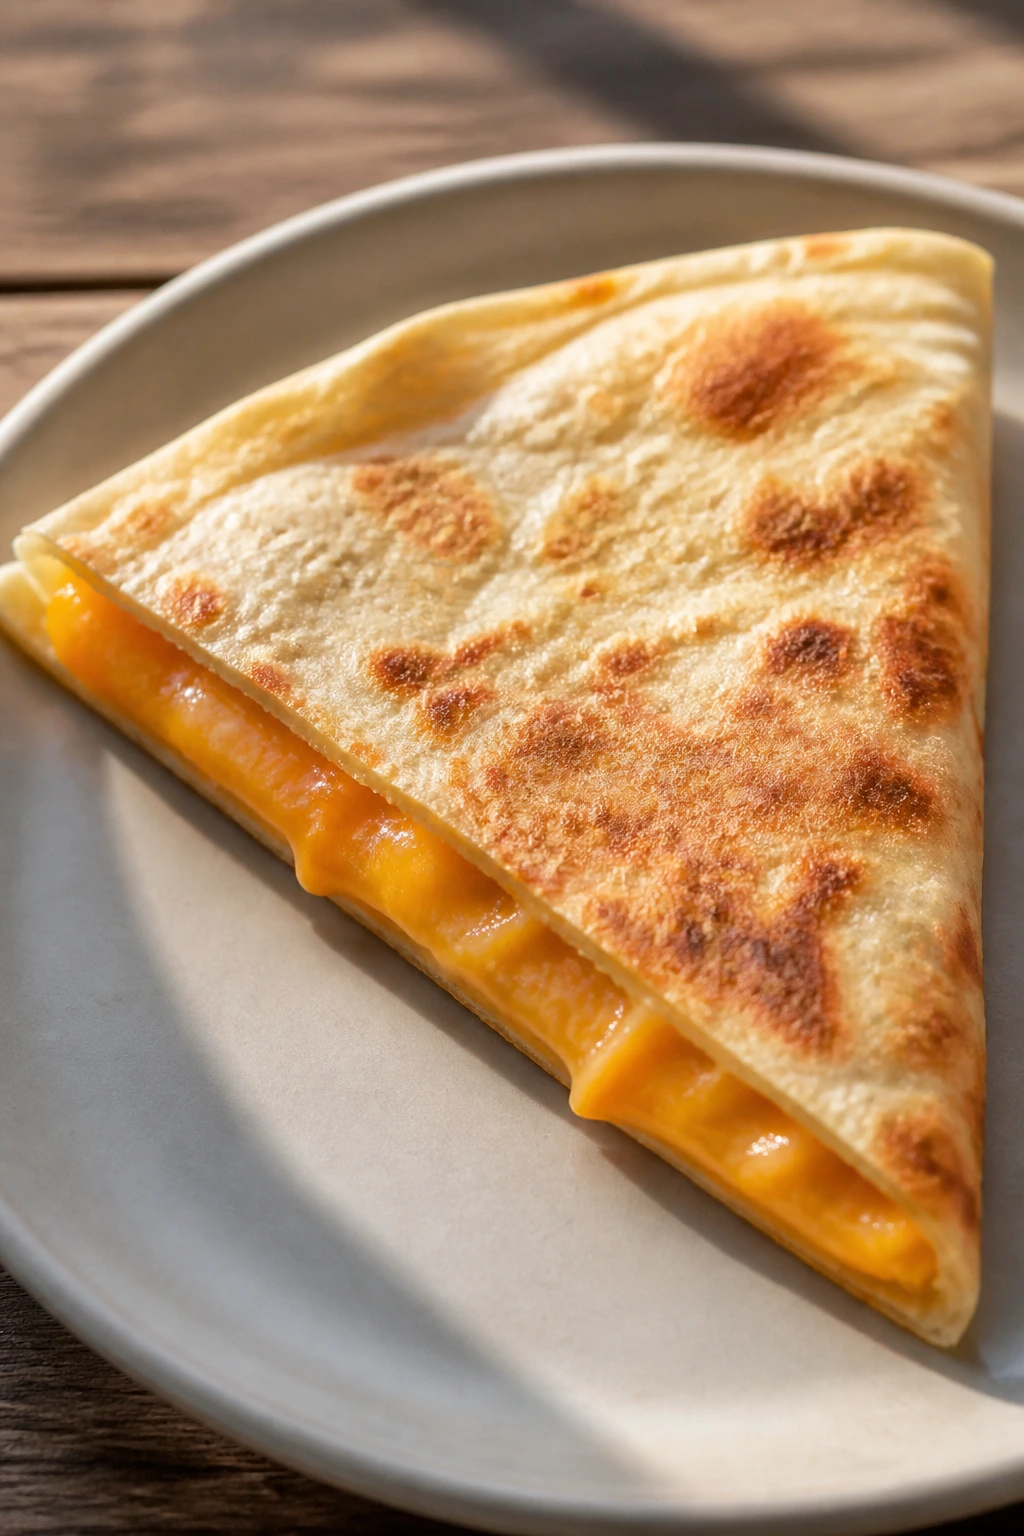
A quesadilla cut into wedges is about as low-stress as dinner gets. It’s fast, soft, and familiar, and if somebody wants nothing but cheese inside, you can make that happen without changing the whole tray.
Why It Works:
A tortilla gives you a thin shell that crisps in a skillet in just a couple of minutes. Cheese melts fast and holds the filling together, so the wedges stay neat when you cut them. Keeping the seasoning mild means the flavor stays in the safe zone for picky eaters, but you can still sneak in chicken for anyone who wants it.
Key Ingredients:
- 6 large flour tortillas — soft and easy to fold.
- 3 cups shredded cheddar-Jack cheese — melts well and tastes familiar.
- 1 cup cooked shredded chicken — optional, for a heartier filling.
- 2 tablespoons butter — for the skillet.
- 1/2 teaspoon garlic powder — mild flavor boost.
- 1/4 teaspoon salt — optional, depending on the cheese.
- Salsa or sour cream for serving — optional, but useful.
Quick Steps:
- Heat the Pan: Warm a large skillet over medium heat.
- Build the Quesadilla: Place one tortilla in the pan, sprinkle on cheese, add chicken if using, and top with another tortilla.
- Cook the First Side: Cook for 2 to 3 minutes until the bottom is golden and the cheese starts to melt.
- Flip Carefully: Slide the quesadilla onto a plate, then invert it back into the skillet to cook the second side.
- Finish Cooking: Cook another 2 to 3 minutes until both sides are crisp and the cheese is fully melted.
- Cut into Wedges: Rest for 1 minute, then slice into 6 triangles.
Equipment for This Recipe:
- Large skillet
- Spatula
- Cutting board
- Sharp knife or pizza cutter
How to Serve This Dish:
Serve the wedges stacked on a plate with little bowls of sour cream and salsa. They’re filling enough to work as the main event, especially if you add fruit or corn on the side. Two wedges are a good snack portion; four can cover a hungry kid’s dinner.
Pro Tips for This Recipe:
- Use medium heat, not high. High heat burns the tortilla before the cheese melts.
- Don’t overfill the quesadilla or the wedges will slide apart.
- Let it rest for a minute before cutting so the cheese sets slightly.
- A pizza cutter gives cleaner slices than a knife.
Variations on This Dish:
- Plain Cheese Version: Skip the chicken and keep the filling all cheese.
- Chicken Ranch Wedges: Add 1 tablespoon ranch seasoning to the chicken.
- Breakfast Quesadilla: Swap the chicken for scrambled eggs and mild cheddar.
Common Mistakes to Avoid with This Dish:
- Cooking too hot: The outside turns too dark before the center melts.
- Using wet fillings: Anything watery makes the tortilla limp.
- Cutting immediately: The cheese rushes out instead of staying put.
9. Mini Corn Dog Muffins

Mini corn dog muffins taste like a fair snack shrunk down to movie-night size. They bring the sweet cornbread flavor kids know, plus little bites of hot dog tucked inside, which is about as straightforward as snack food gets.
Why It Works:
Cornbread batter bakes quickly in a mini muffin tin, so you get a tender crumb around a savory center. The hot dog pieces stay juicy, and the muffin shape makes them easy to pick up without drips. Using a boxed mix keeps the flavor familiar and the prep short.
Key Ingredients:
- 1 box corn muffin mix, about 8.5 ounces — the base.
- Ingredients listed on the box — usually 1 egg, 1/3 cup milk, and 1/4 cup oil.
- 4 hot dogs, cut into 24 pieces — the filling.
- 1 cup shredded cheddar — optional, but good for extra richness.
- 1 tablespoon melted butter — for brushing the tops.
Quick Steps:
- Preheat the Oven: Set it to 400°F (205°C). Grease a mini muffin tin well.
- Mix the Batter: Prepare the cornbread batter according to the box.
- Fill the Cups: Spoon batter into each mini muffin cup about two-thirds full.
- Add the Hot Dogs: Press one hot dog piece into the center of each cup. Add a pinch of cheddar on top if using.
- Bake: Bake for 12 to 14 minutes, until puffed and golden.
- Brush and Cool: Brush the tops with melted butter and let them cool for 5 minutes.
Equipment for This Recipe:
- Mini muffin tin
- Mixing bowl
- Spoon or small cookie scoop
- Pastry brush
How to Serve This Dish:
Serve these warm with ketchup and mustard on the side. They’re easy to stack on a tray or tuck into a napkin, which makes them ideal for couch eating. Four to six muffins works as a kid-sized snack; a dozen can stand in as a light meal.
Pro Tips for This Recipe:
- Grease the tin well or the edges will stick.
- Cut the hot dogs into small, even pieces so each muffin gets the same amount.
- Don’t overfill the cups; the batter puffs quite a bit.
- A little melted butter on top helps the muffins taste less boxed.
Variations on This Dish:
- Cheddar-Stuffed Batch: Drop a tiny cube of cheese into the center with the hot dog.
- Jalapeño-Free “Dawg House” Version: Mix a spoonful of shredded cheese into the batter for more richness.
- Turkey Dog Swap: Use turkey hot dogs if that’s what your family buys.
Common Mistakes to Avoid with This Dish:
- Using too much batter: The muffins spill over and bake into each other.
- Underbaking: The centers stay gummy.
- Skipping the grease: Mini muffins can cling stubbornly to the pan.
10. Garlic Bread Pizza Toast
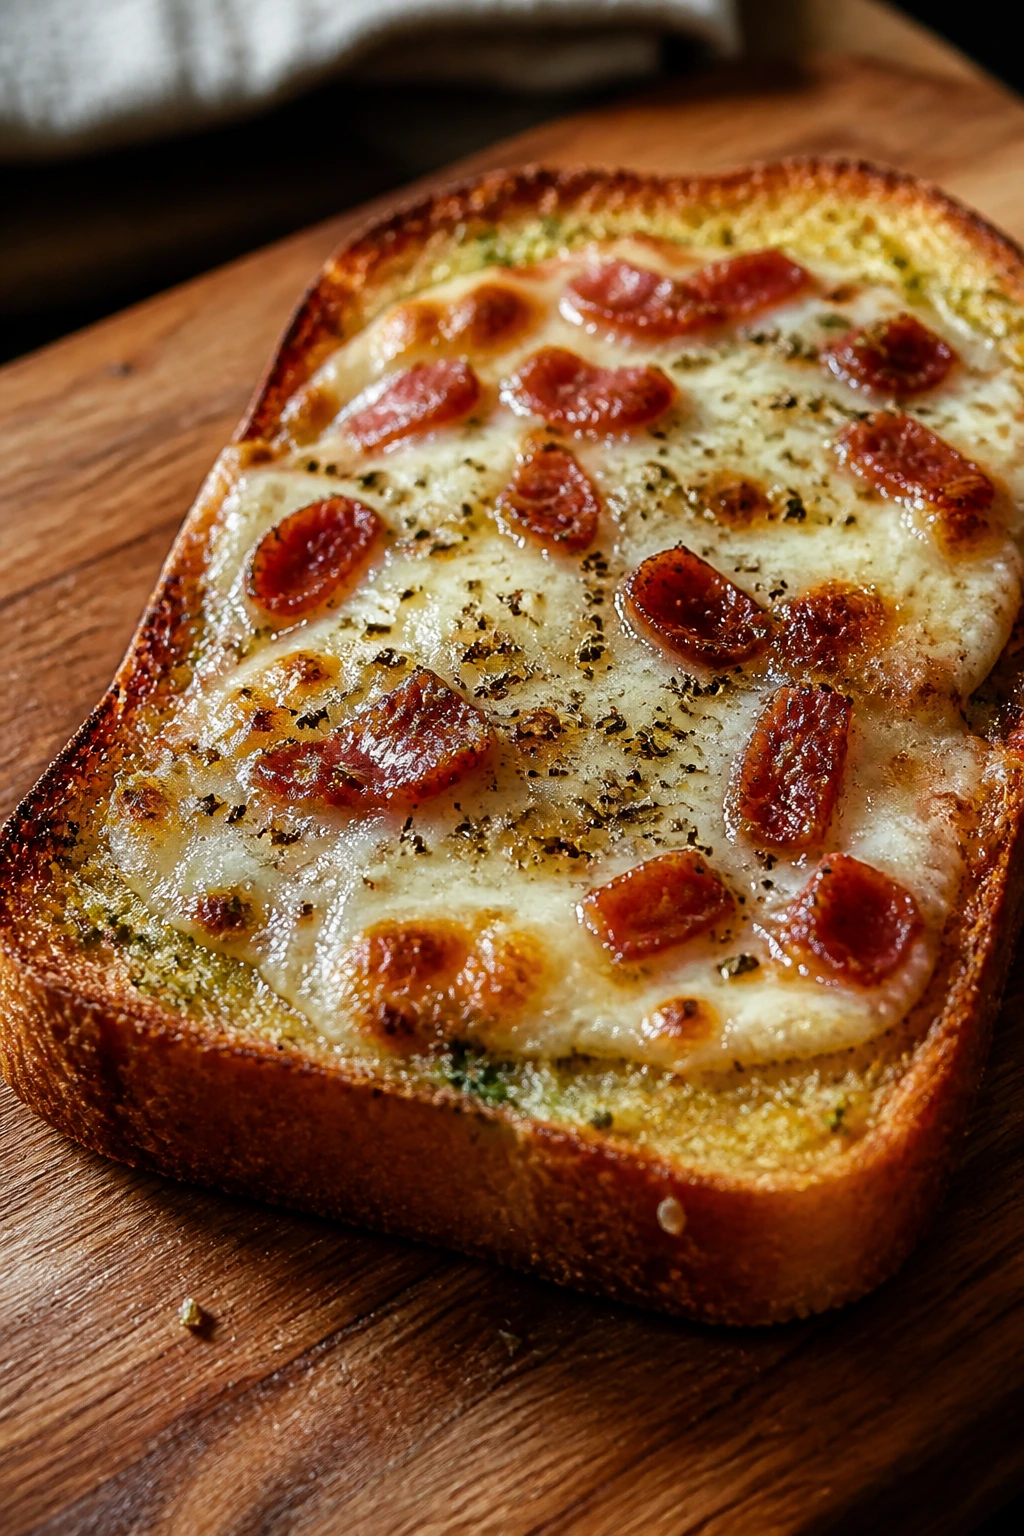
Garlic bread pizza toast lands right in the sweet spot between snack and dinner. It’s crunchy on the edges, soft under the cheese, and easy to make in a batch when the room is already full of people waiting for the movie to start.
Why It Works:
The bread gets a quick toast before the toppings go on, which keeps the bottom from going soft. Garlic butter adds the smell people expect from garlic bread, while pizza sauce and mozzarella push it back toward familiar pizza territory. You can make some pieces plain and some with pepperoni, which keeps everyone calm.
Key Ingredients:
- 1 baguette or Italian loaf — sliced lengthwise.
- 4 tablespoons butter, softened — for the garlic layer.
- 2 cloves garlic, finely minced — gives the bread its smell and flavor.
- 1 cup pizza sauce — spread thin.
- 2 cups shredded mozzarella — enough to melt generously.
- 1/2 cup pepperoni slices, chopped — optional.
- 1 teaspoon Italian seasoning — for the top.
Quick Steps:
- Preheat the Oven: Heat to 425°F (220°C).
- Make Garlic Butter: Mix the butter and garlic together.
- Toast the Bread: Spread garlic butter on the cut sides and bake the bread for 5 minutes.
- Add the Toppings: Spread pizza sauce over the toasted bread, then add mozzarella, pepperoni, and Italian seasoning.
- Bake Again: Return to the oven for 8 to 10 minutes, until the cheese bubbles.
- Broil Briefly: Broil for 30 to 60 seconds if you want the top a little more browned.
- Cut and Serve: Slice into strips while hot.
Equipment for This Recipe:
- Baking sheet
- Small bowl for garlic butter
- Sharp serrated knife
- Spatula
How to Serve This Dish:
Cut the toast into long strips so it feels easy to grab. A small bowl of extra sauce on the side works well, though plenty of kids will eat it plain. Pair it with a simple salad if you want the tray to feel more like dinner than snack food.
Pro Tips for This Recipe:
- Toast the bread first so the sauce doesn’t soak in.
- Use low-moisture mozzarella, not fresh mozzarella.
- Keep the sauce layer light; too much turns the bread heavy.
- If you’re making a few plain pieces, mark them with a little extra Parmesan so nobody loses track.
Variations on This Dish:
- Cheesy Garlic Strip Version: Skip the sauce and pile on extra mozzarella.
- Pepperoni Edge Batch: Put pepperoni only on one half of the tray and keep the other half plain.
- Herby White Toast: Use garlic butter, mozzarella, and a sprinkle of parsley instead of pizza sauce.
Common Mistakes to Avoid with This Dish:
- Using soft sandwich bread: It can’t hold the toppings as well as a baguette or Italian loaf.
- Adding too much sauce: The toast loses its crunch.
- Skipping the first bake: The bottom turns soggy in the oven.
11. Crispy Potato Wedges with Ketchup Dip
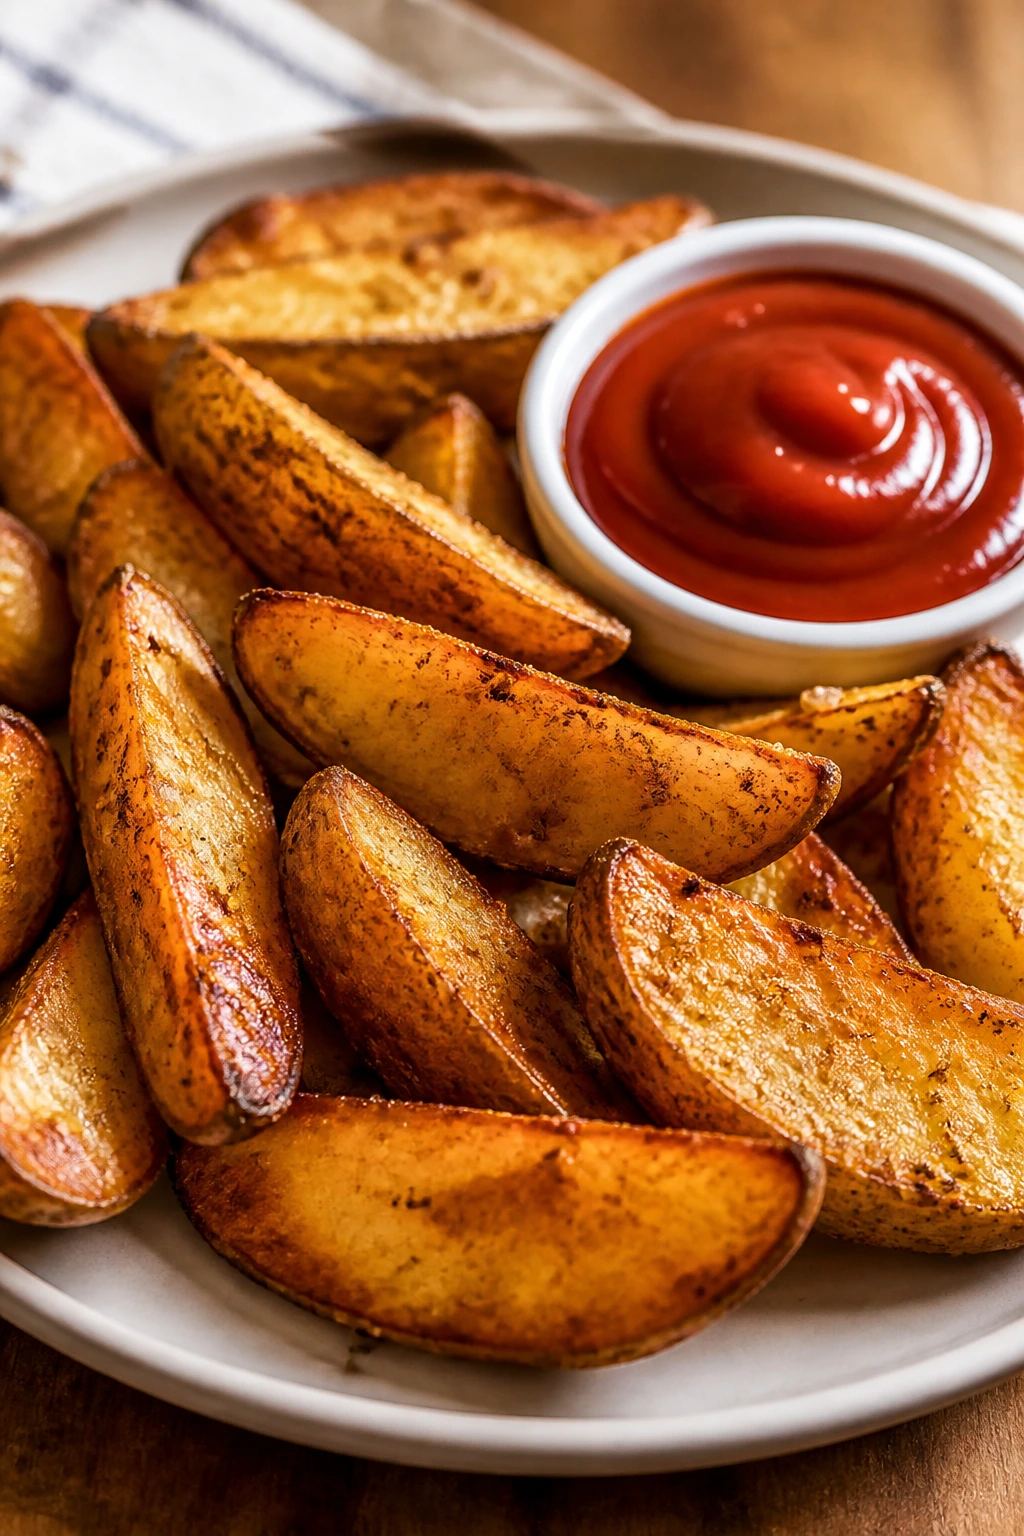
Potato wedges are the bowl on the coffee table that somehow empties first. They’re salty, crisp at the edges, and mild enough that even careful eaters usually reach for one more, especially when they’ve got a dip to go with them.
Why It Works:
Russet potatoes give you that fluffy middle and crisp exterior people want from oven wedges. A little cornstarch helps dry the surface so the skin gets a more crackly finish. The ketchup dip is familiar and sweet enough to keep the whole thing friendly.
Key Ingredients:
- 3 pounds russet potatoes — best for crisp wedges.
- 3 tablespoons oil — coats the potatoes evenly.
- 1 tablespoon cornstarch — helps the crust crisp.
- 1 teaspoon salt — seasons the wedges.
- 1 teaspoon paprika — adds color and a little warmth.
- 1/2 teaspoon garlic powder — for a simple savory note.
- 1/4 teaspoon black pepper — optional.
- 1/2 cup ketchup — for the dip.
- 1 tablespoon mayonnaise — rounds out the dip.
- 1 teaspoon pickle juice — gives the dip a little tang.
Quick Steps:
- Preheat and Prep: Heat the oven to 425°F (220°C). Line a sheet pan with parchment.
- Cut the Potatoes: Scrub the potatoes and cut each one into 6 to 8 wedges.
- Dry and Season: Pat the wedges dry, then toss with oil, cornstarch, salt, paprika, garlic powder, and pepper.
- Spread Them Out: Arrange the wedges in a single layer with space between them.
- Bake: Roast for 20 minutes, flip, then roast another 15 to 20 minutes until the edges are deep golden.
- Mix the Dip: Stir together ketchup, mayonnaise, and pickle juice while the wedges bake.
- Serve Hot: Salt lightly if needed and serve right away.
Equipment for This Recipe:
- Sheet pan
- Sharp knife
- Large bowl
- Mixing spoon
How to Serve This Dish:
Pile the wedges into a wide bowl or basket so they stay crisp longer than they would on a flat plate. They work well next to sliders or chicken tenders, but they’re also good on their own with dip. Plan on about 1 potato per child or 2 per adult if they’re part of a bigger spread.
Pro Tips for This Recipe:
- Soak the cut wedges in cold water for 20 minutes if you have time; it pulls off extra starch.
- Dry them well before oiling.
- Turn them once, not repeatedly, or you’ll lose the crisp edges.
- A hot pan helps the first side start browning faster.
Variations on This Dish:
- Seasoned Salt Batch: Swap the paprika for seasoned salt if your family likes a more classic diner flavor.
- Cheesy Finish: Sprinkle the wedges with Parmesan right after baking.
- Sweet Potato Version: Use sweet potatoes and reduce the roast time by a few minutes.
Common Mistakes to Avoid with This Dish:
- Crowding the pan: The wedges steam and go soft.
- Leaving them wet: Damp potatoes don’t crisp well.
- Flipping too soon: Give the first side time to set and brown.
12. Popcorn Chicken with Honey Mustard
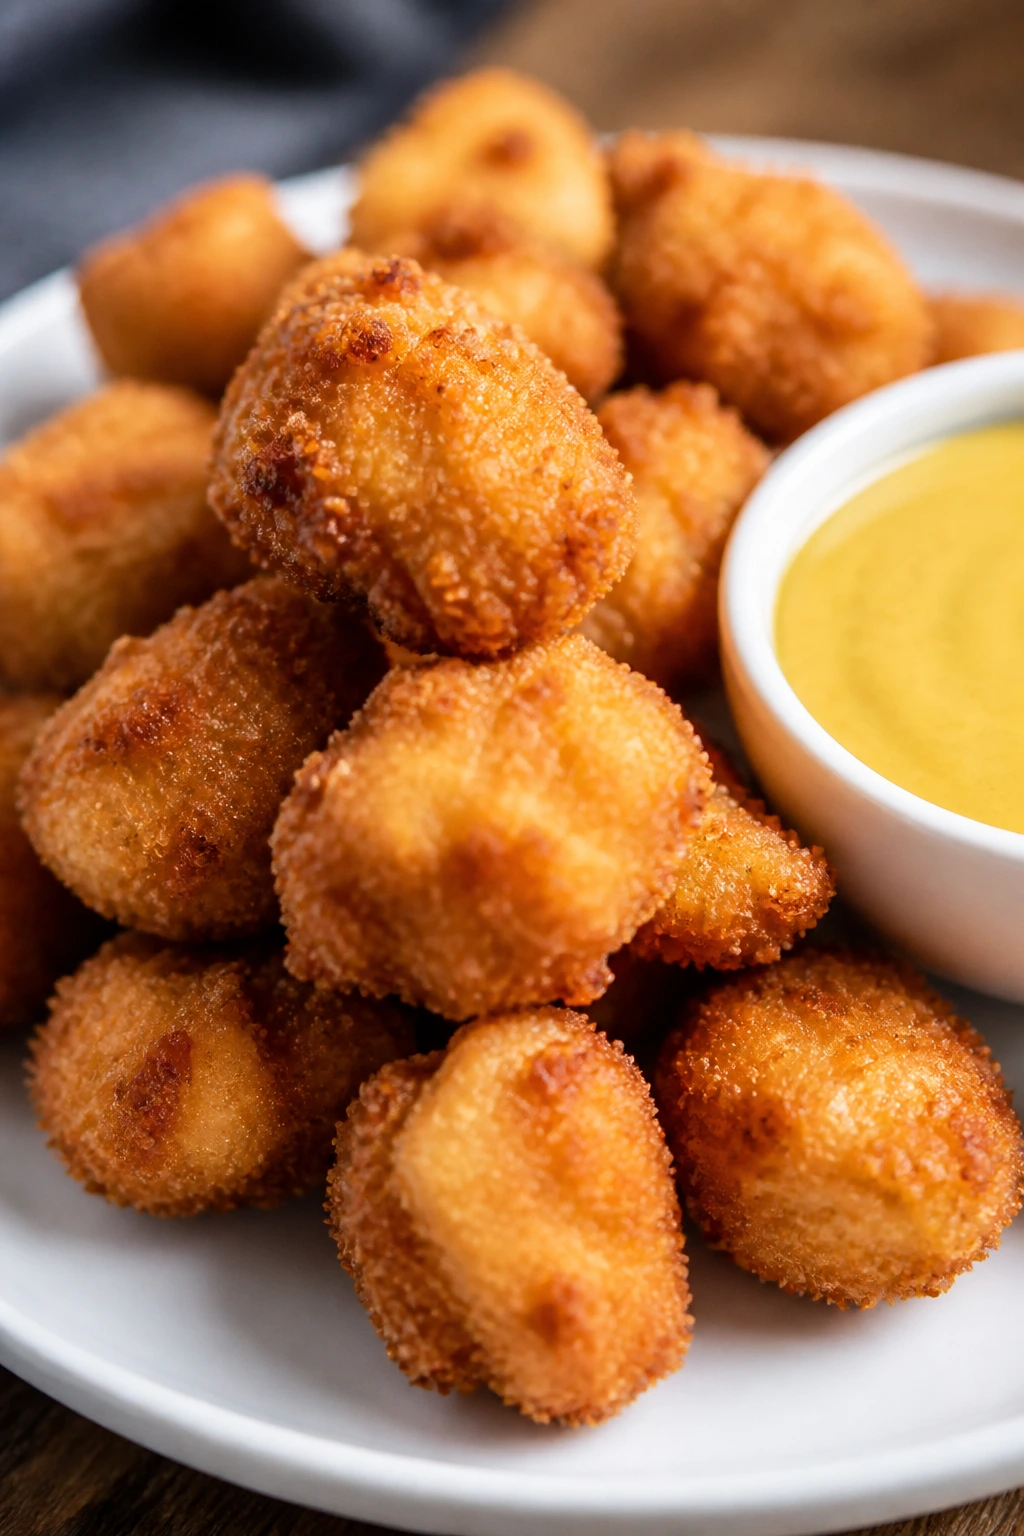
Popcorn chicken is the one chicken recipe that never asks anyone to use a fork. It’s bite-size, crisp, and easy to dunk, which makes it one of the simplest ways to feed a mixed-age movie crowd without a lot of noise from the kitchen.
Why It Works:
Small pieces cook fast and evenly, so the coating gets crisp before the chicken dries out. A breadcrumb crust gives you crunch, and the honey mustard adds a sweet-salty dip that feels familiar. Because the pieces are bite-size, kids are less likely to pick at the plate and more likely to actually eat dinner.
Key Ingredients:
- 1 1/2 pounds boneless chicken breasts — cut into 1-inch pieces.
- 1/2 cup flour — the first coat.
- 2 large eggs — for the egg wash.
- 1 1/2 cups panko breadcrumbs — the crisp layer.
- 1 teaspoon salt — seasons the chicken.
- 1 teaspoon paprika — adds a little color.
- 1/2 teaspoon garlic powder — mild depth.
- Oil spray — for browning.
- 1/3 cup mayonnaise — base for the dip.
- 3 tablespoons yellow mustard — keeps the dip kid-friendly.
- 2 tablespoons honey — rounds out the sauce.
Quick Steps:
- Preheat the Oven or Air Fryer: Heat the oven to 400°F (205°C), or set the air fryer to 390°F (200°C).
- Set Up the Breading: Put flour in one bowl, eggs in another, and panko mixed with salt, paprika, and garlic powder in a third.
- Bread the Chicken: Dip each piece in flour, egg, then panko, pressing lightly.
- Arrange in a Single Layer: Place the pieces on a greased rack or air fryer basket and spray with oil.
- Cook Until Crisp: Bake for 12 to 15 minutes, or air fry for 10 to 12 minutes, until golden and 165°F inside.
- Mix the Dip: Stir the mayonnaise, mustard, and honey together.
- Serve Immediately: The coating is best right away.
Equipment for This Recipe:
- Sheet pan or air fryer basket
- Three shallow bowls
- Tongs
- Instant-read thermometer
How to Serve This Dish:
Set the popcorn chicken in a bowl with toothpicks or small forks if you want a neater tray. Honey mustard on the side keeps the pieces from feeling too plain, and fries or wedges make a complete movie-night dinner. Six to eight pieces is a normal snack portion; more like 10 to 12 if it’s the main meal.
Pro Tips for This Recipe:
- Cut the chicken into even pieces so nothing overcooks.
- Spray the breading lightly with oil for a better color.
- Don’t pile the pieces up while they cook.
- Use parchment only in the oven, not in an air fryer basket unless the basket is meant for it.
Variations on This Dish:
- Parmesan Crust: Mix 1/4 cup Parmesan into the crumbs.
- Mild BBQ Dip: Swap the honey mustard for a sweet barbecue sauce.
- Cornflake Crunch: Use half panko and half crushed cornflakes for a louder crunch.
Common Mistakes to Avoid with This Dish:
- Breading wet chicken: The coating falls off.
- Overcrowding the basket: The chicken steams instead of crisping.
- Skipping the thermometer: Bite-size pieces cook fast, and a few extra minutes matter.
13. Beef Cheeseburger Sliders

Burger sliders give you the cheeseburger experience without the awkward full-size bite. They’re compact, cheesy, and easy to serve in a batch, which is why they work so well when the room is full and nobody wants to sit at the table for long.
Why It Works:
A sheet-pan beef layer keeps the meat juicy and makes assembly easier than forming a dozen tiny patties. American cheese melts in a smooth, even layer, and the slider buns stay soft under the heat. The final brush of butter on top gives the rolls a little shine and a toasted finish.
Key Ingredients:
- 1 1/2 pounds ground beef — 80/20 gives the best flavor.
- 1 teaspoon salt — seasons the meat.
- 1/2 teaspoon black pepper — enough to keep it from tasting flat.
- 1 teaspoon garlic powder — simple savory flavor.
- 1 tablespoon Worcestershire sauce — optional, but useful.
- 12 slider buns — split but kept connected if possible.
- 6 slices American cheese — melts well and stays mild.
- 2 tablespoons butter, melted — for the tops.
- 1 tablespoon sesame seeds — optional.
- Pickle chips and ketchup — for serving.
Quick Steps:
- Preheat the Oven: Heat to 400°F (205°C).
- Season the Beef: Mix the ground beef with salt, pepper, garlic powder, and Worcestershire sauce.
- Form the Base: Press the beef into a parchment-lined 9×13-inch pan in an even layer.
- Bake: Bake for 12 to 15 minutes, until the beef reaches 160°F and the juices have mostly settled.
- Add the Cheese: Lay cheese slices over the hot beef so they melt.
- Assemble: Place the beef and cheese onto the buns, add pickles if using, and top with the bun lids.
- Butter and Finish: Brush the tops with melted butter, sprinkle sesame seeds, and bake for 5 minutes more.
Equipment for This Recipe:
- 9×13-inch baking pan
- Mixing bowl
- Pastry brush
- Sharp knife for slicing
How to Serve This Dish:
Cut the sliders apart after a short rest and serve them with ketchup, pickles, or a little mustard on the side. They’re filling enough to stand alone, though wedges or fruit keep the tray from feeling too heavy. One slider is enough for smaller kids; two is a reasonable adult portion if there are other snacks.
Pro Tips for This Recipe:
- Press the beef evenly so the sliders slice cleanly.
- Drain extra fat if the pan looks greasy after baking.
- Let the cheese melt on the beef before moving it to the buns.
- A few pickle chips add brightness without scaring off picky eaters.
Variations on This Dish:
- Bacon Cheeseburger Batch: Add cooked, chopped bacon over the cheese.
- Turkey Slider Swap: Use ground turkey and add an extra spoonful of ketchup or mustard for moisture.
- Onion-Free Version: Skip Worcestershire if your crowd is sensitive to bold flavor.
Common Mistakes to Avoid with This Dish:
- Using lean beef only: The sliders dry out too fast.
- Overbaking: The meat turns crumbly and the buns get tough.
- Loading on condiments before baking: The sliders become slippery and messy.
14. Baked Ravioli Bites
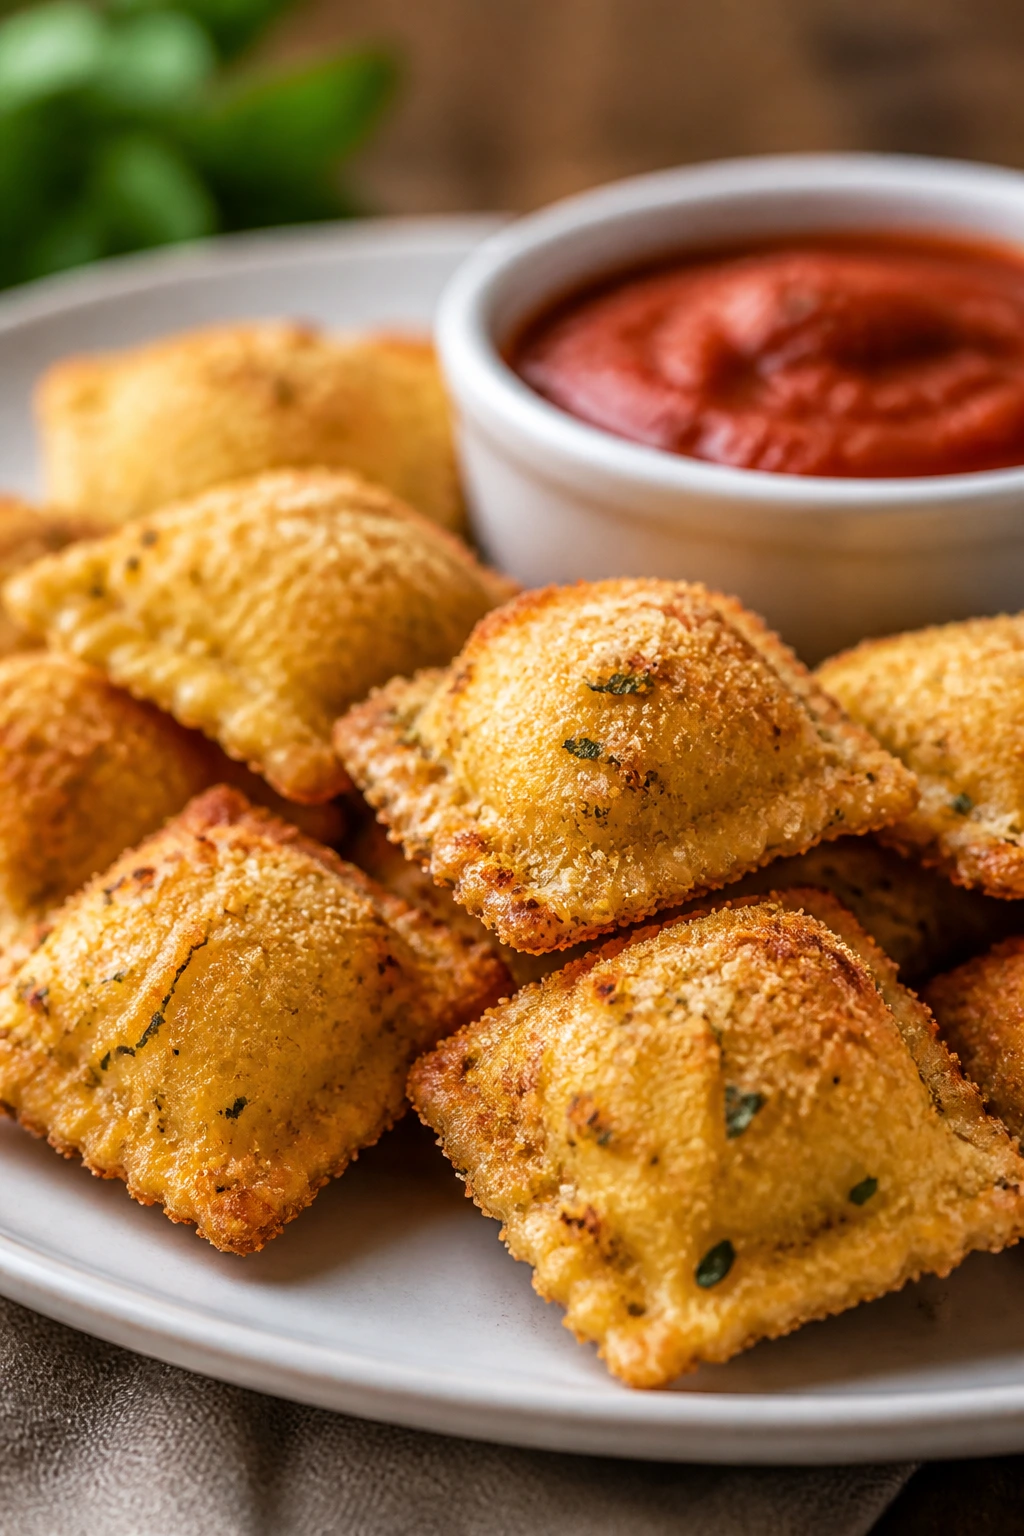
Baked ravioli bites are little pasta pockets with a crisp shell. They give you a cheesy center, a crunchy outside, and a dip handle, which is more than enough to keep them moving off the tray during a movie.
Why It Works:
Ravioli already has the pasta-and-cheese combo built in, so you’re mostly adding texture. A breadcrumb coating turns them into finger food, and baking keeps the outside crisp without making the filling leak everywhere. Marinara on the side lets cautious eaters stay in control of the sauce.
Key Ingredients:
- 1 package cheese ravioli, about 20 ounces — refrigerated or thawed frozen.
- 2 large eggs — for the dip.
- 2 tablespoons milk — loosens the egg wash.
- 1 1/2 cups Italian breadcrumbs — the main coating.
- 1/2 cup grated Parmesan — adds savory flavor.
- 1 teaspoon Italian seasoning — keeps the coating from tasting plain.
- 1 cup marinara sauce — for dipping.
- Oil spray — for the tray.
Quick Steps:
- Boil Briefly: Cook the ravioli in salted water for 2 to 3 minutes, just until they float and soften.
- Drain Well: Lay them on a towel or tray and let the steam escape.
- Bread Them: Dip each ravioli into egg and milk, then into the breadcrumb-Parmesan mixture.
- Arrange on the Tray: Place them on a greased or parchment-lined sheet pan and spray lightly with oil.
- Bake: Bake at 425°F (220°C) for 15 to 18 minutes, flipping once if you want more even browning.
- Serve with Sauce: Warm the marinara and serve it on the side.
Equipment for This Recipe:
- Large pot
- Slotted spoon
- Sheet pan
- Shallow bowls for breading
How to Serve This Dish:
These are best served as a warm finger food with marinara in a small bowl. A simple green salad or sliced cucumbers can cut the richness if you’re making them part of dinner. Plan on 6 to 8 ravioli bites per person for a snack, more if they’re standing in for the main course.
Pro Tips for This Recipe:
- Don’t overcook the ravioli before breading.
- Dry them well so the crumbs stick.
- Use parchment if you want easier cleanup, but still spray lightly for color.
- The bites are best right out of the oven, when the crust still has some bite.
Variations on This Dish:
- Cheese and Spinach Batch: Use spinach ravioli if your kids tolerate greens hiding inside pasta.
- Air-Fryer Version: Cook at 390°F for a few minutes less, shaking once.
- Garlic-Parmesan Style: Add extra garlic powder and Parmesan to the crumb mix.
Common Mistakes to Avoid with This Dish:
- Skipping the drain time: Wet ravioli won’t bread well.
- Using too much breadcrumb coating: It can separate from the pasta.
- Serving them late: The crust softens quickly after they sit.
15. Fruit Skewers with Vanilla Yogurt Dip
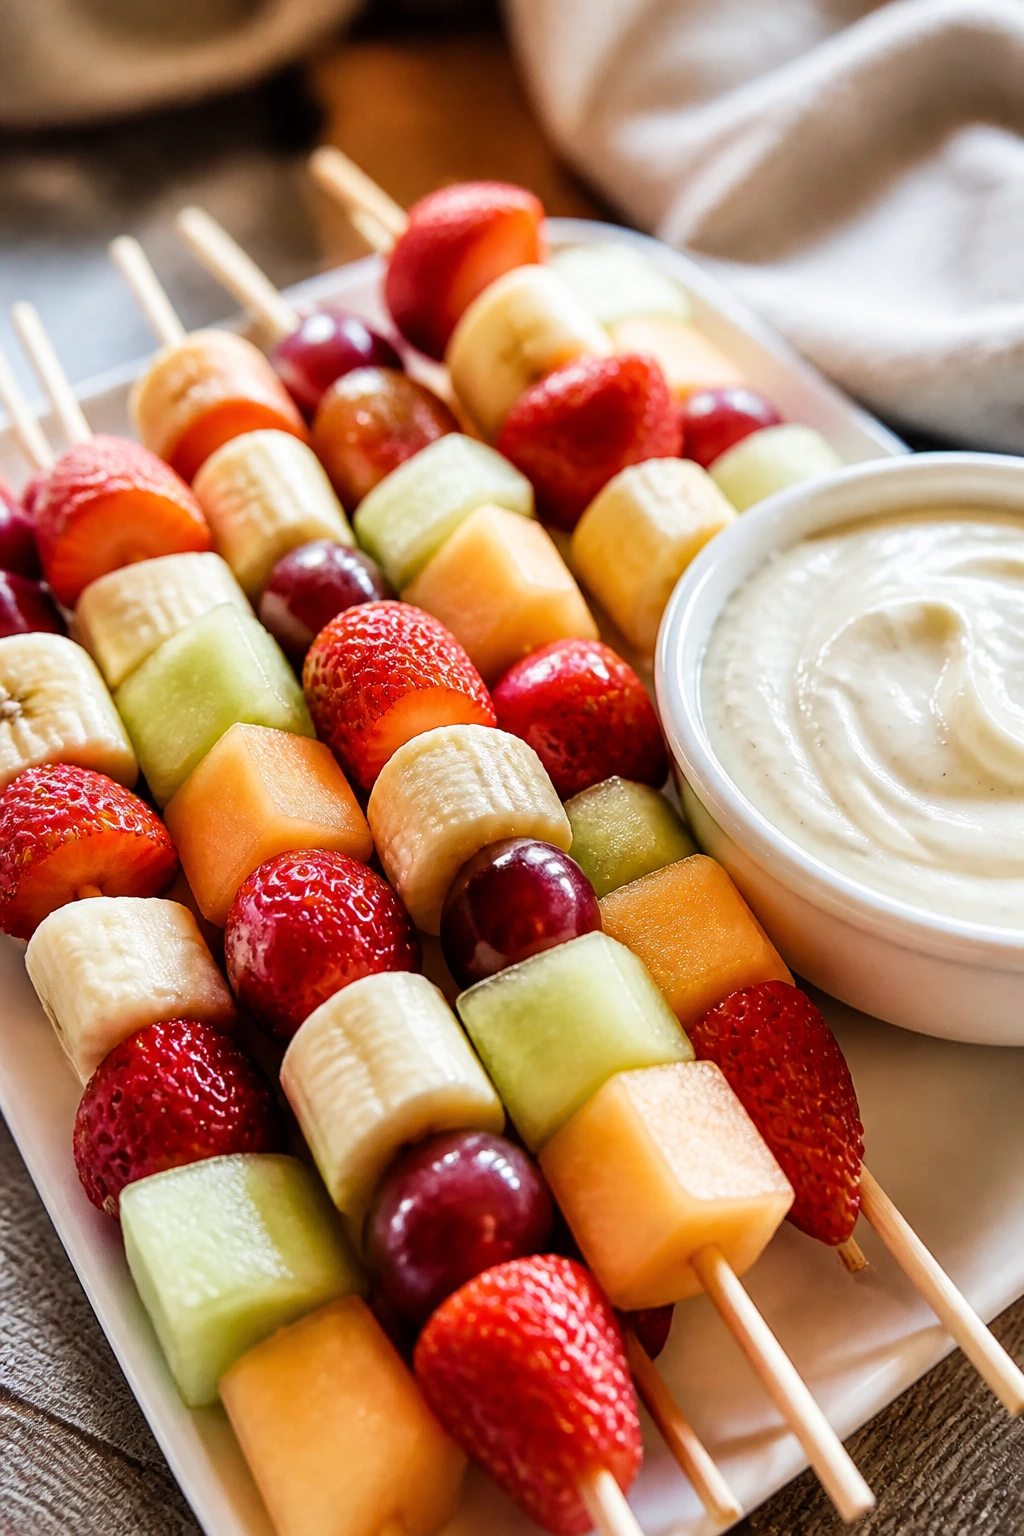
Fruit skewers look cheerful on a tray, and they give the table a break from all the cheese. They’re fresh, cold, and simple, which is useful when the rest of the spread leans salty and baked.
Why It Works:
The fruit is naturally sweet, so it tastes like dessert even before the yogurt dip shows up. Skewers make the pieces easy to grab, and they keep the snack from becoming a fruit salad that nobody feels like spooning. A little lemon juice on the banana keeps the tray from going brown too fast.
Key Ingredients:
- 2 cups strawberries, hulled — bright and sturdy.
- 2 bananas — sliced into thick rounds.
- 2 cups seedless grapes — easy to thread.
- 2 cups melon cubes — use cantaloupe or honeydew.
- 2 cups vanilla yogurt — the dip base.
- 2 tablespoons honey — for the dip.
- 1 teaspoon vanilla extract — deepens the yogurt flavor.
- 1 tablespoon lemon juice — helps the bananas stay pale.
Quick Steps:
- Prep the Fruit: Wash and dry the berries and grapes. Cut the melon into bite-size cubes and slice the bananas.
- Protect the Bananas: Toss the banana slices with lemon juice.
- Thread the Skewers: Alternate fruit pieces onto short skewers or sturdy toothpicks.
- Make the Dip: Stir yogurt, honey, and vanilla together until smooth.
- Chill Briefly: Keep the tray cold until serving.
- Serve Fresh: Put the dip in the center of the platter.
Equipment for This Recipe:
- Short skewers or toothpicks
- Cutting board
- Small mixing bowl
- Serving platter
How to Serve This Dish:
Set the skewers around the yogurt dip like a little wreath. They work as a reset between salty snacks, or as the one item on the tray that doesn’t need reheating. Three skewers per child is a good starting point; adults usually take four or five if the fruit is cold.
Pro Tips for This Recipe:
- Choose fruit that is firm enough to stay on the skewer.
- Dry the fruit after washing so the dip doesn’t slide off.
- If you want cleaner handling, use shorter skewers and leave the pointed ends off the edge of the tray.
- Make the dip ahead and keep it chilled.
Variations on This Dish:
- Berry-Only Tray: Use strawberries, blueberries, and raspberries if your crowd likes fruit with less crunch.
- Chocolate Dip Swap: Stir a little cocoa powder into the yogurt for a dessert-style dip.
- Rainbow Party Version: Add pineapple and kiwi for more color if your eaters are open to it.
Common Mistakes to Avoid with This Dish:
- Using overripe bananas: They split and slide off.
- Cutting the fruit too small: The pieces won’t stay on the skewer.
- Leaving the tray warm too long: The fruit gets soft and loses its snap.
16. Chocolate Drizzle Popcorn
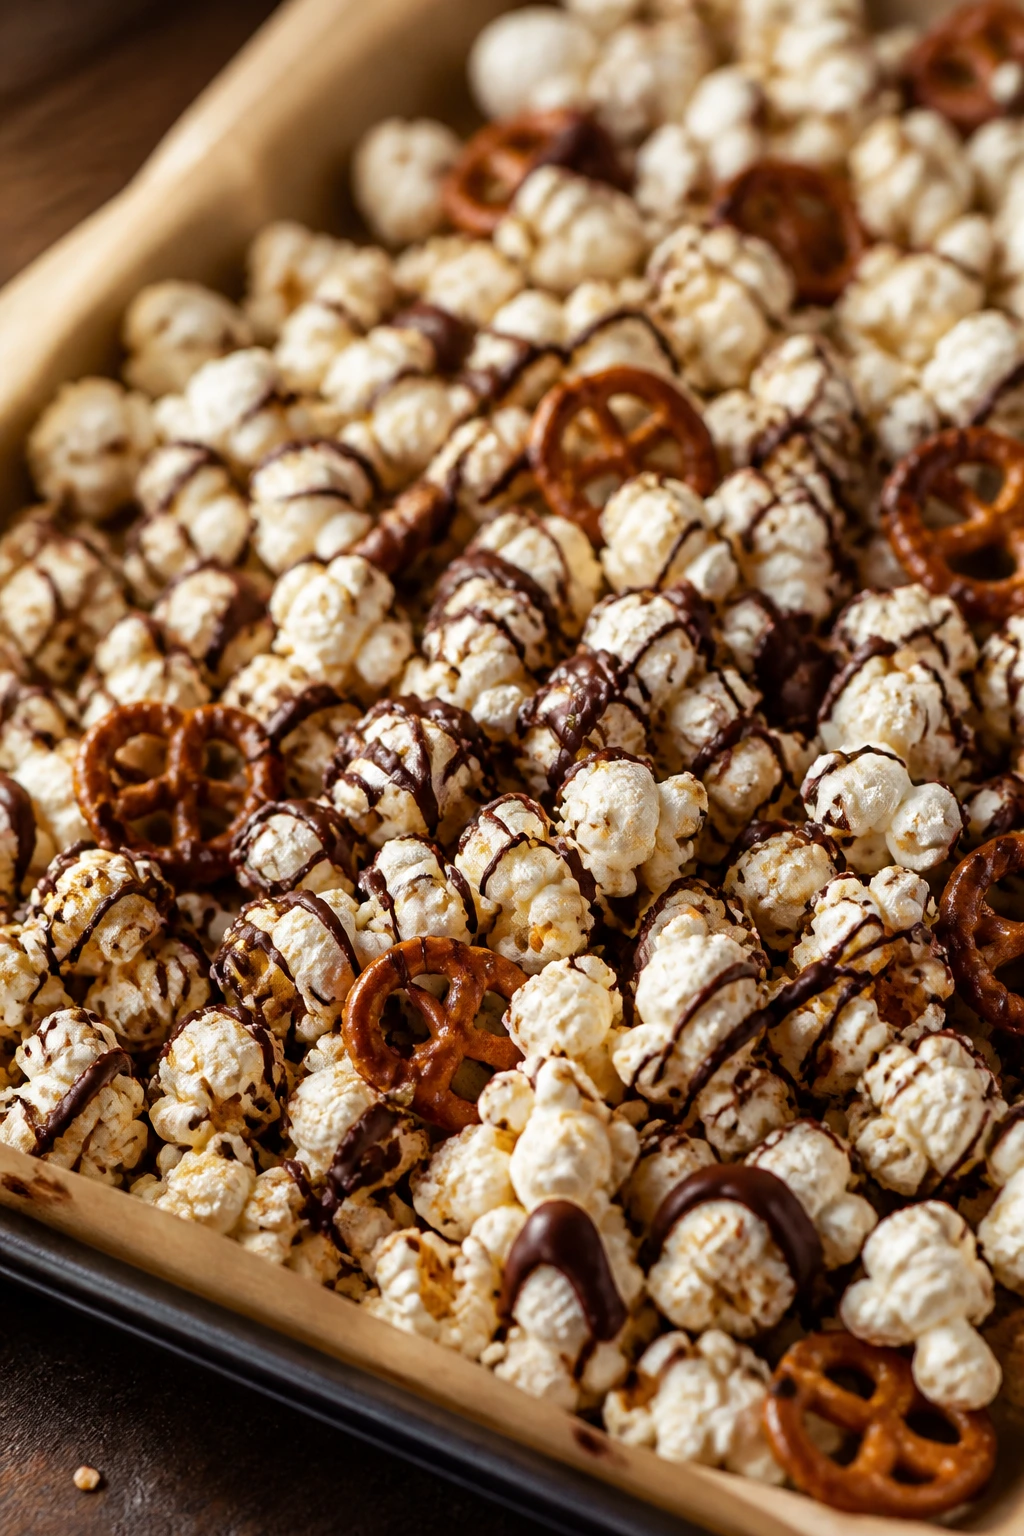
Chocolate drizzle popcorn is the recipe I make when I want a sweet snack that still feels like movie food. It has the crunch of popcorn, the salt of pretzels, and just enough chocolate to make the bowl feel special without turning into a full dessert.
Why It Works:
Popcorn gives you a light base that carries flavor well. The chocolate sets into thin ribbons instead of thick chunks, so the mix stays snappy rather than sticky. A little salt keeps the sweetness from getting cloying, and the pretzels add a second kind of crunch.
Key Ingredients:
- 10 cups popped popcorn — use plain, not butter-heavy.
- 1 cup mini pretzels — adds salty crunch.
- 1/2 cup mini marshmallows — optional, for soft bits.
- 1/2 cup semi-sweet chocolate chips — for the drizzle.
- 1 teaspoon coconut oil or butter — helps the chocolate melt smoothly.
- 1/4 teaspoon salt — balances the sweetness.
Quick Steps:
- Prep the Surface: Line a baking sheet with parchment paper.
- Mix the Base: Combine the popcorn, pretzels, and marshmallows in a large bowl.
- Melt the Chocolate: Microwave the chocolate chips with the coconut oil in 20-second bursts, stirring until smooth.
- Drizzle: Pour the chocolate over the popcorn mix in thin lines, then sprinkle with salt.
- Toss Lightly: Use a spatula to coat the mix without crushing the popcorn.
- Set: Spread it on the parchment and let it sit for 20 minutes until the chocolate firms up.
- Break and Serve: Break into clusters and pile into a bowl.
Equipment for This Recipe:
- Large mixing bowl
- Microwave-safe bowl
- Parchment-lined sheet pan
- Spatula
How to Serve This Dish:
Pour it into a big bowl or individual paper cups so everyone can grab a handful. It works best as a sweet finish after the savory recipes, especially if the movie night leans snack-heavy. A small bowl goes a long way because the chocolate and pretzels keep each bite interesting.
Pro Tips for This Recipe:
- Use plain popcorn so the chocolate flavor stays clear.
- Drizzle, don’t dump, or the mix clumps together.
- Let the chocolate set fully before storing.
- If you want neater clusters, chill the tray for 10 minutes.
Variations on This Dish:
- White Chocolate Version: Swap in white chocolate chips for a sweeter finish.
- Candy-Studded Mix: Add a handful of mini candy-coated chocolates after the chocolate sets.
- Caramel Corn Hybrid: Drizzle with a little caramel sauce instead of chocolate for a different mood.
Common Mistakes to Avoid with This Dish:
- Using buttered popcorn: The chocolate won’t stick as well.
- Overmixing after the drizzle: The popcorn breaks.
- Storing before it sets: The mix turns sticky.
17. Mild Chicken Taco Pinwheels
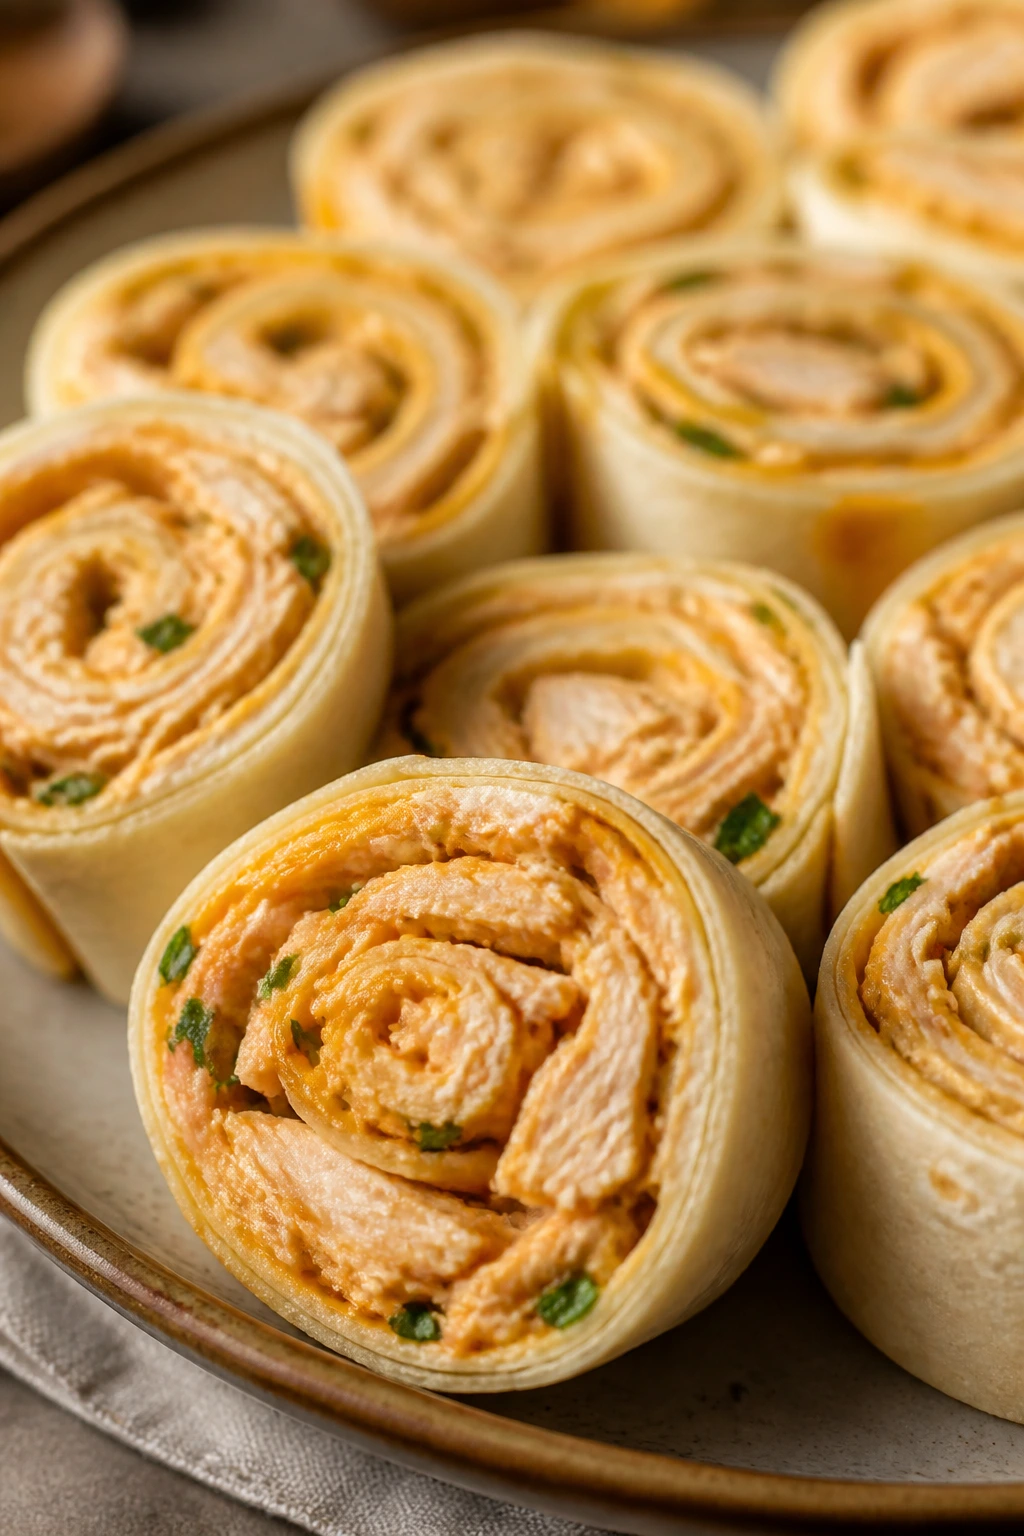
Chicken taco pinwheels are tidy, cold, and easy to slice, which makes them useful when the room wants finger food but not something hot and drippy. They taste like a mild taco wrap, minus the mess of filling a shell at the couch.
Why It Works:
Cream cheese holds the filling together, so the pinwheels slice cleanly and don’t fall apart on the platter. Shredded chicken brings substance, cheddar adds familiar flavor, and mild taco seasoning keeps the spice level low. The tortillas soften slightly as they chill, which helps them roll without cracking.
Key Ingredients:
- 8 ounces cream cheese, softened — the binder.
- 1 cup shredded cooked chicken — rotisserie chicken works well.
- 1 cup shredded cheddar — for the cheesy core.
- 1 tablespoon mild taco seasoning — enough flavor without heat.
- 2 tablespoons salsa — keep it thick, not watery.
- 4 large flour tortillas — the wrap.
- 1 tablespoon chopped green onion — optional, if your crowd accepts it.
Quick Steps:
- Mix the Filling: Stir the cream cheese, chicken, cheddar, taco seasoning, salsa, and green onion together.
- Spread on Tortillas: Divide the mixture evenly across the tortillas, spreading it in a thin layer to the edges.
- Roll Tight: Roll each tortilla firmly into a log.
- Chill: Wrap or cover and chill for 20 to 30 minutes so the filling firms up.
- Slice: Cut each log into 1-inch pinwheels.
- Serve Cold or Slightly Chilled: Arrange on a platter with salsa or ranch if desired.
Equipment for This Recipe:
- Mixing bowl
- Spatula
- Sharp knife
- Plastic wrap or a covered tray
How to Serve This Dish:
Stack the pinwheels in a ring on a platter so the cut sides show. They’re good alongside fruit, chips, or potato wedges, and they’re one of the few items here that don’t need reheating. Plan on 4 to 6 pieces per person if they’re part of a bigger snack lineup.
Pro Tips for This Recipe:
- Soften the cream cheese all the way or the filling will stay lumpy.
- Keep the salsa thick so the tortillas don’t get soggy.
- Chill before slicing, or the rolls squish flat.
- Use a sharp knife and wipe it between cuts for cleaner pinwheels.
Variations on This Dish:
- Turkey Taco Roll-Ups: Replace chicken with shredded turkey.
- No-Heat Taco Pinwheels: Skip the salsa and use a spoonful of sour cream instead.
- Bean and Cheese Version: Swap the chicken for mashed black beans if you want a meatless tray.
Common Mistakes to Avoid with This Dish:
- Using wet filling: The tortillas go limp.
- Rolling loosely: The pinwheels unwind when sliced.
- Skipping the chill: The cuts look ragged and messy.
18. Fudgy Brownie Bites
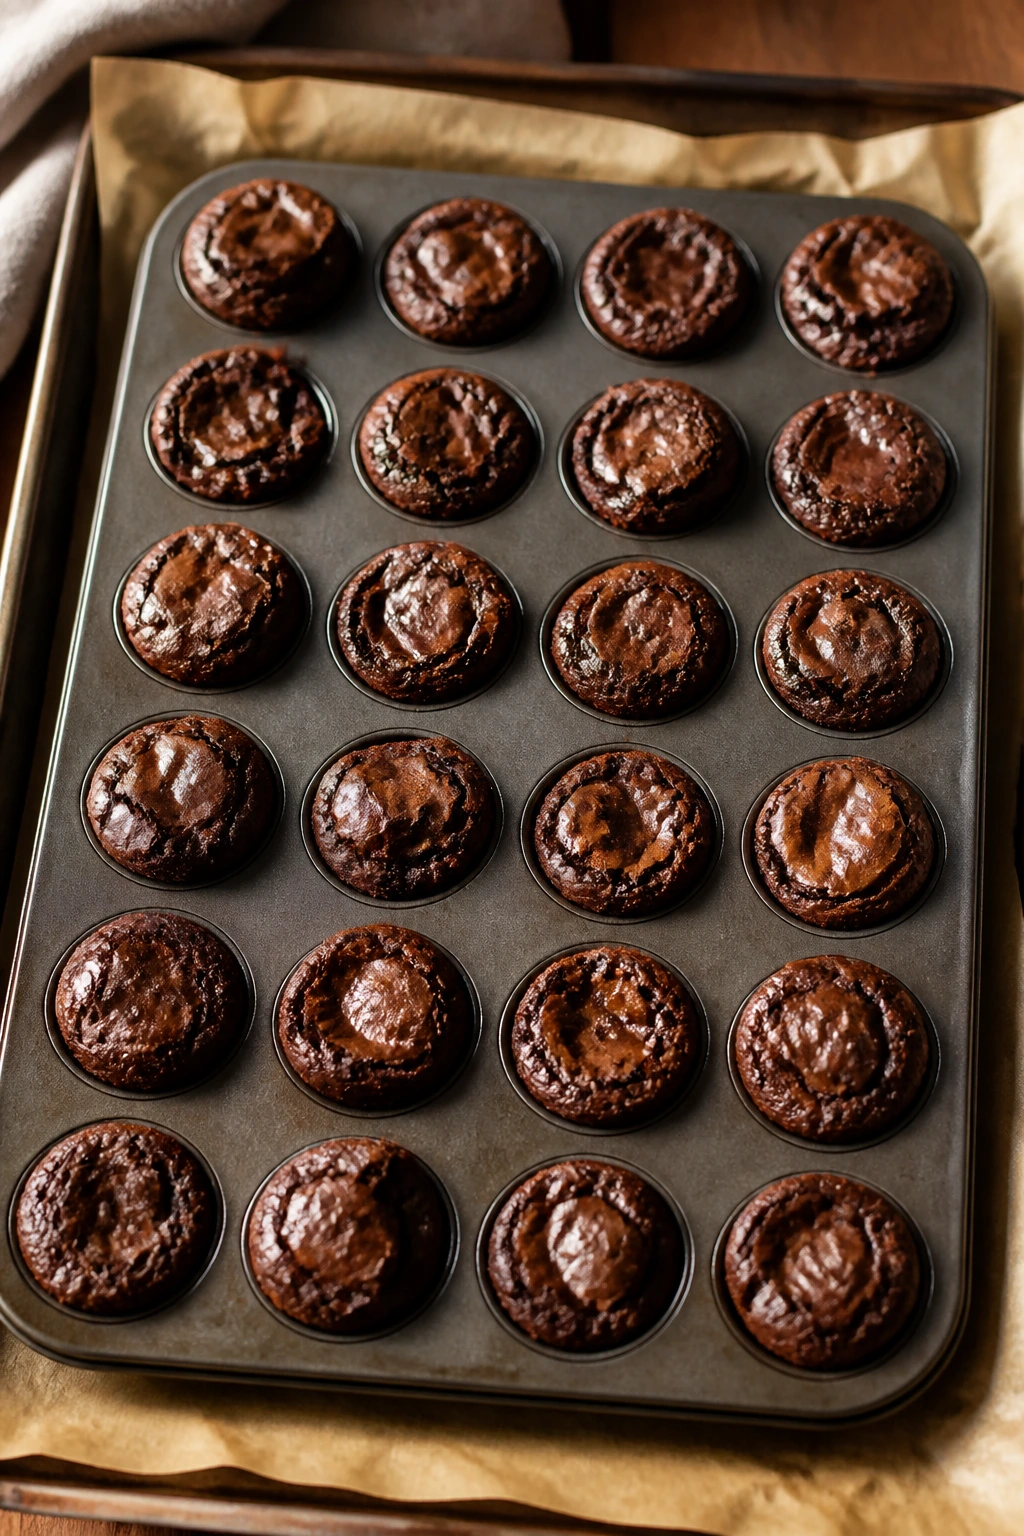
Brownie bites finish the night with a dark chocolate edge and a soft center. They’re rich enough to feel like dessert, but the mini-muffin shape keeps them from becoming a full plate of fork-and-knife trouble.
Why It Works:
Brownies bake best when the batter stays simple and the pan is small enough to encourage chewy edges. A mini muffin tin gives you the crusty corners people fight over, and the middle stays soft and fudgy. Chocolate chips folded in at the end make the bites feel extra dense and melty.
Key Ingredients:
- 1/2 cup butter — melted for an easy batter.
- 1 cup granulated sugar — gives the brownie its crackly top.
- 2 large eggs — for structure.
- 1 teaspoon vanilla extract — rounds out the chocolate flavor.
- 1/3 cup cocoa powder — the main chocolate base.
- 1/2 cup all-purpose flour — enough to hold the bites together.
- 1/4 teaspoon salt — sharpens the chocolate.
- 1/2 cup chocolate chips — for pockets of melt.
- Powdered sugar for dusting — optional.
Quick Steps:
- Preheat the Oven: Heat to 350°F (175°C) and grease a mini muffin tin well.
- Mix the Batter: Whisk the melted butter and sugar, then add the eggs and vanilla.
- Add the Dry Ingredients: Stir in the cocoa powder, flour, and salt until just combined.
- Fold in Chocolate Chips: Mix them in gently.
- Fill the Tin: Spoon the batter into each cup, about three-quarters full.
- Bake: Bake for 12 to 14 minutes, until the tops look set but the centers still feel soft.
- Cool Before Removing: Let the bites rest for 10 minutes, then lift them out and dust with powdered sugar if you like.
Equipment for This Recipe:
- Mini muffin tin
- Mixing bowl
- Whisk
- Small spoon or cookie scoop
How to Serve This Dish:
Serve these on a plate with napkins, or tuck one into a small paper cup for easy grabbing. They’re rich enough to stand alone, though a scoop of vanilla ice cream turns them into a more deliberate dessert. Two brownie bites is plenty for most kids; adults usually take three.
Pro Tips for This Recipe:
- Don’t overbake them. The centers should stay soft.
- Grease the tin thoroughly, especially the corners.
- Let them cool before removing so they keep their shape.
- A few chocolate chips on top make them look finished without much effort.
Variations on This Dish:
- Walnut Batch: Add chopped walnuts if your crowd likes a little crunch.
- Double-Chocolate Version: Replace part of the cocoa with extra chocolate chips.
- Swirl Finish: Drop a tiny spoonful of peanut butter on top before baking and swirl it lightly.
Common Mistakes to Avoid with This Dish:
- Overmixing the batter: The bites get cakier and less fudgy.
- Baking until dry: They should still look soft in the center.
- Pulling them from the pan too soon: They break apart if they haven’t set.
Why the Couch-Friendly Approach Works
Movie-night food has one job before the lights go down: keep the table calm. That means familiar ingredients, small portions, and food that can travel from tray to hand without collapsing onto the blanket. Crisp edges matter. So does a dip bowl. And so does the mercy of being able to make three recipes without putting yourself through a full dinner-service production.
I also like that this style of food leaves room for uneven appetites. A child who wants only pizza toast and fruit can do that. A teenager who wants sliders, wedges, and brownie bites can build a bigger plate. You aren’t forcing one giant dinner onto everybody; you’re laying out a spread that lets people pick what they’ll actually eat.
Essential Equipment for These Recipes
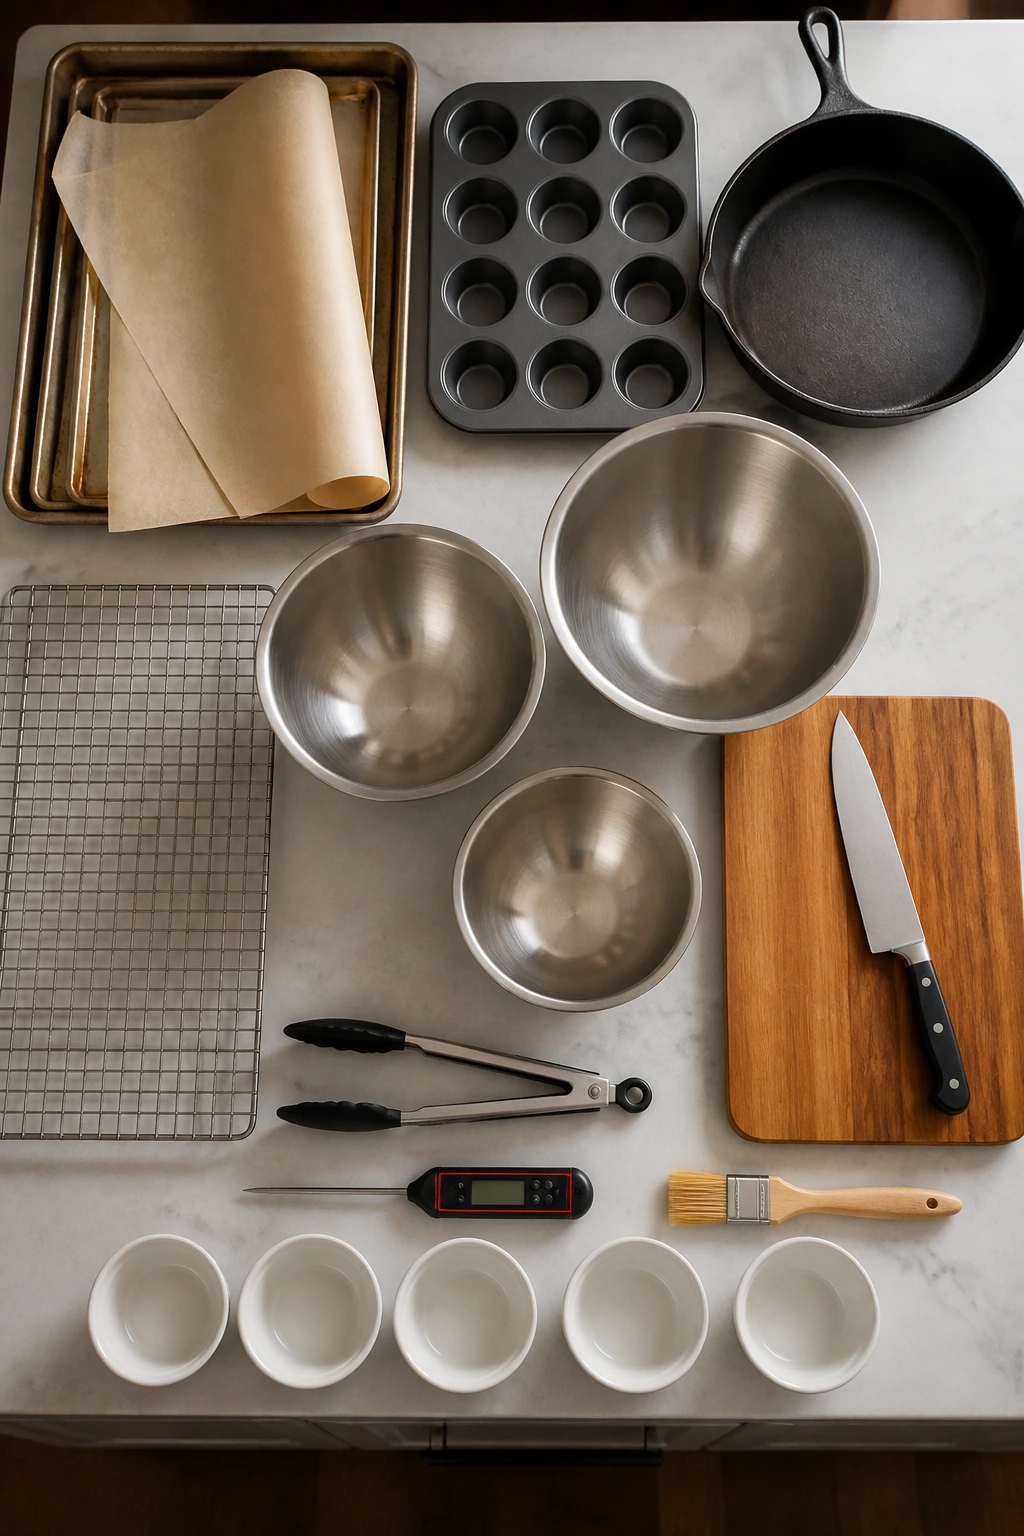
- Rimmed baking sheets: You’ll use them for pizzas, tenders, potato wedges, and anything with melted cheese that likes to run.
- Parchment paper: Keeps sticky cheese and sugar from welding themselves to the pan.
- Mini muffin tin: Useful for mac and cheese muffins, corn dog muffins, and brownie bites.
- Large skillet: Needed for quesadillas and any quick pan-browned recipe.
- Mixing bowls in at least three sizes: Breaded foods are easier when you can separate wet and dry ingredients.
- Wire rack: Helps chicken and potato snacks crisp underneath instead of steaming.
- Sharp knife and cutting board: For sliders, pinwheels, fruit, and dough.
- Tongs: Cleaner than fingers for breaded items and hot trays.
- Instant-read thermometer: Especially useful for chicken and burger sliders.
- Pastry brush: Handy for garlic butter, slider glaze, and pretzel tops.
- Small dipping bowls: Keep sauces contained so the couch doesn’t pay the price.
Smart Shopping and Ingredient Tips
The smartest grocery move here is to buy for texture, not just flavor. Low-moisture mozzarella melts more cleanly than fresh mozzarella on pizza toast, English muffin pizzas, and pizza rolls. String cheese is worth buying for mozzarella sticks because it holds its shape better than a block of cheese cut into sticks. For sliders, Hawaiian rolls are softer and a little sweeter than standard buns, which helps them stand up to salty ham or beef without tasting dry.
Chicken tenders and popcorn chicken both benefit from meat that isn’t too thick. If you’re cutting chicken breasts yourself, aim for strips or cubes that are close in size so they cook evenly. Ground beef for sliders is better at 80/20 than extra-lean; the little bit of fat keeps the meat from turning dry. For potato wedges, russets are the move because their starch gives you that fluffy middle and crisper edge.
Sauce choice matters more than people think. Thick pizza sauce is better than loose marinara on anything bread-based. Ketchup, honey mustard, and ranch all do their job here because they’re familiar and forgiving. When you buy store-bought marinara, look for one that isn’t too watery and doesn’t taste sharply acidic straight from the jar, because kids notice that faster than adults do.
For pantry items, panko is the one breadcrumb I’d buy with confidence. It gives chicken tenders, mozzarella sticks, and ravioli bites a lighter crunch than standard breadcrumbs. If you’re making several of these recipes in one night, buy extra eggs, one more bag of shredded cheese than you think you need, and an extra pack of tortillas or rolls. Movie-night menus have a habit of vanishing faster than the shopping list suggests.
How to Serve These Recipes
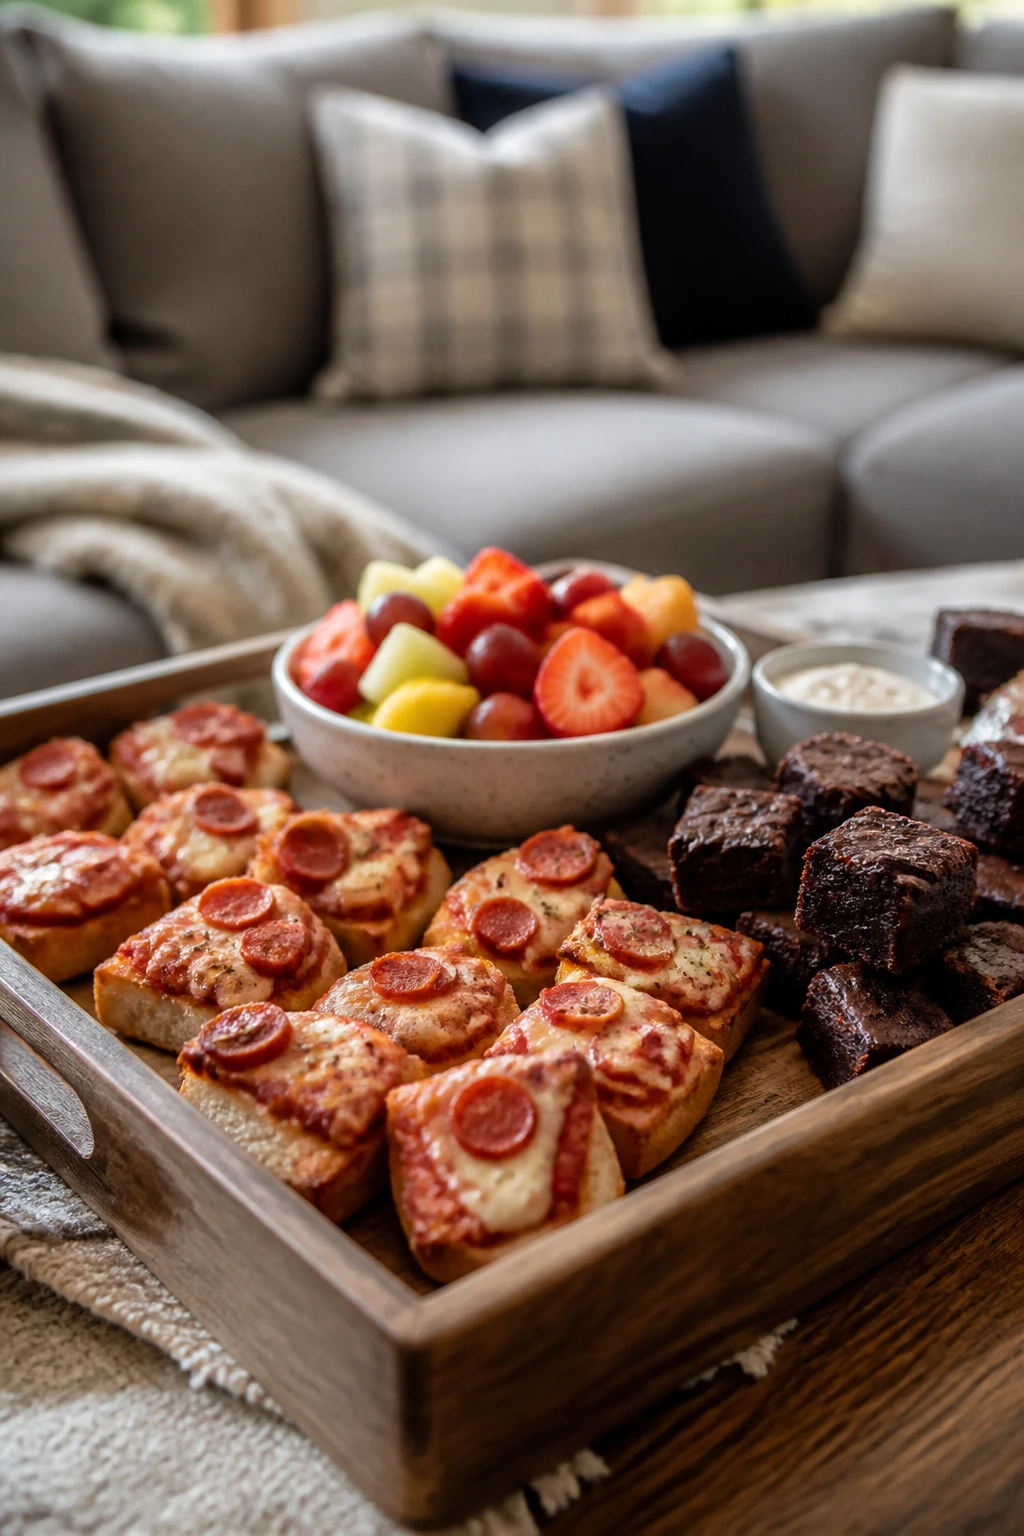
Presentation:
Serve the food in separate clusters instead of one giant pile. A tray of savory snacks on one side, fruit in the middle, and brownies or popcorn in a smaller bowl makes the whole spread easier to read at a glance. Parchment-lined sheet pans, baskets with paper liners, and small bowls for dips keep the table from looking chaotic.
Accompaniments:
If you want a balanced spread, pair one cheesy item, one crisp item, one protein-heavy item, and one fresh item. That could mean pizza toast, chicken tenders, potato wedges, and fruit skewers. For dips, keep marinara, ketchup, ranch, and honey mustard on hand; those four cover most of the recipes without creating a sauce zoo.
Portions:
For younger kids, count on 2 to 3 small items plus a fruit or sweet bite. For older kids and adults, 4 to 6 savory bites or one slider plus a snack plus dessert usually feels right. If the recipes are part of a bigger buffet, make the portions smaller than you think and let people go back for seconds.
Beverage Pairing:
Sparkling water with lemon is the easiest neutral option. For a sweeter pairing, cold milk works especially well with brownies, popcorn mix, and pizza snacks. If you want something a little more grown-up on the same table, iced tea or a light ginger ale keeps the saltiness of sliders, wedges, and pretzel bites in check.
Additional Tips and Flavor Boosters

Flavor Enhancement:
A small amount of garlic butter can sharpen a lot of these recipes. Brush it on slider tops, pizza toast, or pretzel bites right after baking, and the whole tray smells more finished. For chicken and potato recipes, a pinch of smoked paprika is enough to add depth without making the food taste spicy.
Customization:
Keep a few mix-ins in separate bowls so each person can nudge a recipe in their own direction. Pepperoni, pickles, extra cheese, chopped parsley, and mild salsa all work as low-risk add-ons. That way the picky eater keeps the base recipe plain while the bolder eater builds a more dressed-up plate.
Serving Suggestions:
Paper boats, small napkins, and toothpicks sound minor, but they make a couch meal far easier. If you’re serving several crispy items, line them with parchment and leave a little space between pieces so they don’t steam each other. A bowl for empty wrappers or toothpicks also keeps the coffee table from becoming a mess halfway through the movie.
Make-It-Yours:
For dairy-free plates, use plant-based cheese on the pizza-style recipes and skip the cheese dip in favor of ketchup or marinara. For gluten-free eaters, choose GF breading, corn tortillas, and a certified gluten-free pizza crust or roll. For lower-sodium plates, lean on fruit skewers, plain potato wedges, and chicken tenders with a lighter salt hand.
Make-Ahead, Storage, and Reheating Guidance
A few of these recipes can be built ahead without losing their shape. Slider trays, pizza rolls, pinwheels, and mac and cheese muffins can all be assembled earlier in the day and kept covered in the fridge until bake time. That’s useful when the movie starts right after dinner and you don’t want to be measuring flour while everyone is asking whether the film has started yet.
Breaded items are best handled in two stages. Chicken tenders, popcorn chicken, mozzarella sticks, and ravioli bites can be breaded, then frozen on a tray until firm and moved into a freezer bag for up to 2 months. Bake them from chilled or thawed according to the recipe, and keep the heat high enough that the crust crisps before the filling overcooks. Once they’re cooked, they’ll hold in the fridge for 3 to 4 days in a sealed container.
Reheating matters more than people think. Chicken tenders, wedges, mozzarella sticks, and ravioli bites should go back into a 375°F oven or air fryer for a few minutes rather than the microwave, which softens the coating. Sliders reheat well covered in foil at 325°F for about 10 to 12 minutes. Pretzel bites are best warmed briefly and then eaten right away. Pizza toast can be revived in the oven until the cheese softens and the bread crisps again.
Fruit skewers are the one exception. They’re best the same day, especially if bananas are involved. The yogurt dip will keep for 2 to 3 days in the fridge, but the fruit itself should be assembled close to serving time. Brownie bites keep well at room temperature for 2 days in an airtight container, or up to 5 days in the fridge, though I think they taste better after a short rest than cold from the fridge.
Variations and Adaptations to Try
Gluten-Free Snack Lineup:
Use gluten-free breadcrumbs for the chicken, mozzarella sticks, and ravioli bites, and swap in corn tortillas for the quesadilla wedges. For the pizza-style recipes, buy a GF crust or flatbread that can handle sauce without collapsing. The rest of the tray barely changes, which makes the swap less annoying than it sounds.
Dairy-Light Couch Night:
Use dairy-free cheese shreds on pizza toast, English muffin pizzas, and quesadillas, then skip the cheese dip on the pretzel bites. The texture won’t be identical, but it still works if you keep the toppings modest and the bread crisp. Fruit skewers and potato wedges become especially useful in this version because they don’t need cheese to feel finished.
Vegetarian Mix-and-Match Tray:
Leave out the chicken, ham, and beef recipes and lean harder on pizza toast, pretzel bites, mac and cheese muffins, ravioli bites, wedges, fruit, and brownie bites. If you want more protein, add extra cheese or use bean filling in the pinwheels. A vegetarian tray can still feel hearty if you keep the portions a little larger.
Lower-Sodium Movie Night:
Choose reduced-sodium cheese where possible, skip extra salt on the wedges, and keep sauces on the side instead of baked into everything. Plain fruit skewers, unsalted popcorn, and chicken tenders with a light seasoning mix give you good options without turning the spread bland. A pinch of herbs can do more work than another handful of salt.
Air-Fryer Favorites:
Chicken tenders, popcorn chicken, mozzarella sticks, ravioli bites, and even some potato wedges do well in the air fryer as long as you keep them in a single layer. The basket gets them crisp fast, which is useful when the oven is already full. Watch the timing closely; air fryers move fast and don’t forgive much.
Build-Your-Own Dip Bar:
Put ketchup, ranch, honey mustard, marinara, and cheese sauce in separate bowls and let people choose. That small change makes the table feel more flexible without changing the recipes themselves. Picky eaters get control, and adults can mix sauces without dragging the whole meal into argument territory.
Common Mistakes to Avoid
The first mistake is loading the tray like you’re feeding a banquet. Too much food in one pan blocks airflow, which is how you end up with soft chicken, pale wedges, and pizza toast that sweats under the cheese. Leave space between pieces, even if it means using a second pan.
Another one is using wet ingredients without thinking about structure. Watery pizza sauce, salsa, or too much dip inside a pinwheel can turn otherwise sturdy food limp. Thick sauces do the job better here, and it’s worth blotting canned or jarred ingredients if they seem loose.
People also rush the crisp foods. If you pull tenders, wedges, or mozzarella sticks too soon, they’ll taste soft or leak cheese before the coating has time to settle. A two- or three-minute rest on the tray is not wasted time. It’s the difference between crunchy and disappointing.
Then there’s the couch problem. Food that’s too hot, too saucy, or too fragile becomes a mess the moment it leaves the kitchen. Give the tray a few minutes to cool, use shallow bowls for dips, and cut things into the right size before they ever reach the living room.
Finally, don’t assume every recipe should be served the same way. Fruit belongs cold. Brownies can sit out. Breaded foods want the oven or air fryer, not the microwave. Matching the reheating method to the food saves more texture than any fancy trick.
Frequently Asked Questions

Which recipe is the easiest one on the list?
The quickest wins are fruit skewers, potato wedges, and garlic bread pizza toast. They need the fewest steps and the least babysitting. If you want something hot and filling with almost no fuss, ham and cheese sliders are another strong choice.
Can I make more than one of these recipes ahead of time?
Yes. Sliders, pinwheels, mac and cheese muffins, and pizza rolls are all good candidates for early assembly. Breaded items can also be frozen before baking, which is handy if movie night needs to happen fast.
How do I keep crispy foods from going soggy on the table?
Put them on a wire rack or a parchment-lined tray and don’t stack them right away. If they sit under a lid or in a deep bowl, steam softens the crust fast. Serve breaded foods last if the meal will sit for a while.
What if my kids won’t touch marinara or mustard?
Use plain ketchup, ranch, or even no dip at all. Several of these recipes already carry enough flavor on their own, especially the sliders, pizza toast, and mac and cheese muffins. A small “plain” section on the tray helps more than forcing one sauce on everybody.
Can I air fry most of these instead of baking them?
Several recipes work well in the air fryer, especially chicken tenders, popcorn chicken, mozzarella sticks, ravioli bites, and wedges. Keep the pieces in a single layer and check them early. The air fryer runs hotter than a regular oven, so the timing is usually shorter.
Which recipes freeze the best?
Chicken tenders, popcorn chicken, mozzarella sticks, ravioli bites, and even some sliders freeze well once cooked or breaded. Fruit skewers do not belong in the freezer, and brownie bites are better stored at room temperature or in the fridge. Freeze what needs crisping; skip what needs freshness.
How many recipes should I make for one movie night?
For a small family, two savory recipes plus one sweet recipe is usually enough. If you’re feeding a bigger crowd, add one starch-heavy item like wedges or sliders and one fresh item like fruit skewers. More than that can start to feel like a buffet you have to manage.
What if I only have a half hour?
Make mini English muffin pizzas, quesadilla wedges, fruit skewers, or chocolate drizzle popcorn. Those four move fast and don’t need a lot of cooling time. If you want protein too, popcorn chicken in an air fryer can fit into a short window.
Movie Night, Handled
The best family movie night food doesn’t try to impress anyone. It stays familiar, travels well, and gives picky eaters enough control to relax instead of negotiate every bite. That’s the real win here: not just feeding people, but keeping the whole evening from turning into a dinner debate.
Pick two or three of these recipes, add one sweet thing, and keep the sauces in small bowls where they belong. The tray will disappear, the kitchen will stay manageable, and the remote will probably stay in someone’s hand for once.