
A good grill night starts with smoke, not drama. You want food that can take heat, pick up a little char, and still taste bright when it hits the plate — a squeeze of lime here, a cold yogurt sauce there, a pile of herbs at the end, maybe a peach so warm it gives under the knife but still keeps its shape. That balance is the whole trick behind the best summer recipes for the grill, and it’s why the same old burgers get left in the dust when the grate is hot and the evening air feels thin.
What makes grilled summer food worth chasing is contrast. Smoky shrimp against cool avocado salsa. Salmon with dill yogurt. Romaine that looks almost too fragile until the cut side turns bronze and crisp. Fruit belongs here too, and not just as dessert; peaches, apricots, watermelon, and nectarines all do something useful over flame. They lose a little water, their sugars tighten up, and they taste cleaner, sharper, and less sugary than they do raw. That’s the part people miss when they think grilling is only for meat.
These 18 recipes lean on that contrast hard. Some are fast enough for a weeknight, some want a slightly longer marinade, and a few are there because a cookout feels incomplete without a cold salad or a grilled dessert that smells like honey and wood smoke. Keep the heat honest, don’t crowd the grates, and finish with acid or herbs whenever the food starts to feel heavy. The rest falls into place.
Why These Grill Recipes Earn a Spot on the Weekend Menu
Bright finishes matter: Nearly every recipe here ends with citrus, herbs, yogurt, vinegar, or a quick salsa, which keeps the smoke from flattening the flavor.
The grill does more than sear meat: It softens peaches, char-grills lettuce, and pulls sweetness out of corn, eggplant, and watermelon in ways a stovetop can’t fake.
Most of these dishes travel well: Shrimp skewers, chicken kebabs, steak tacos, and veggie platters all hold up on a table for a little while without going limp.
You can mix and match the whole spread: A lean protein, a grilled vegetable, a cold salad, and one sweet finish make a full summer meal without a lot of side dishes.
The cleanup stays manageable: Skewers, sheet pans, one mixing bowl for a sauce, and a hot grill are usually enough. No pile of pots waiting afterward.
There’s room for both gas and charcoal cooks: These recipes work on either setup, and the differences mostly come down to how much smoke you want, not whether the food will work.
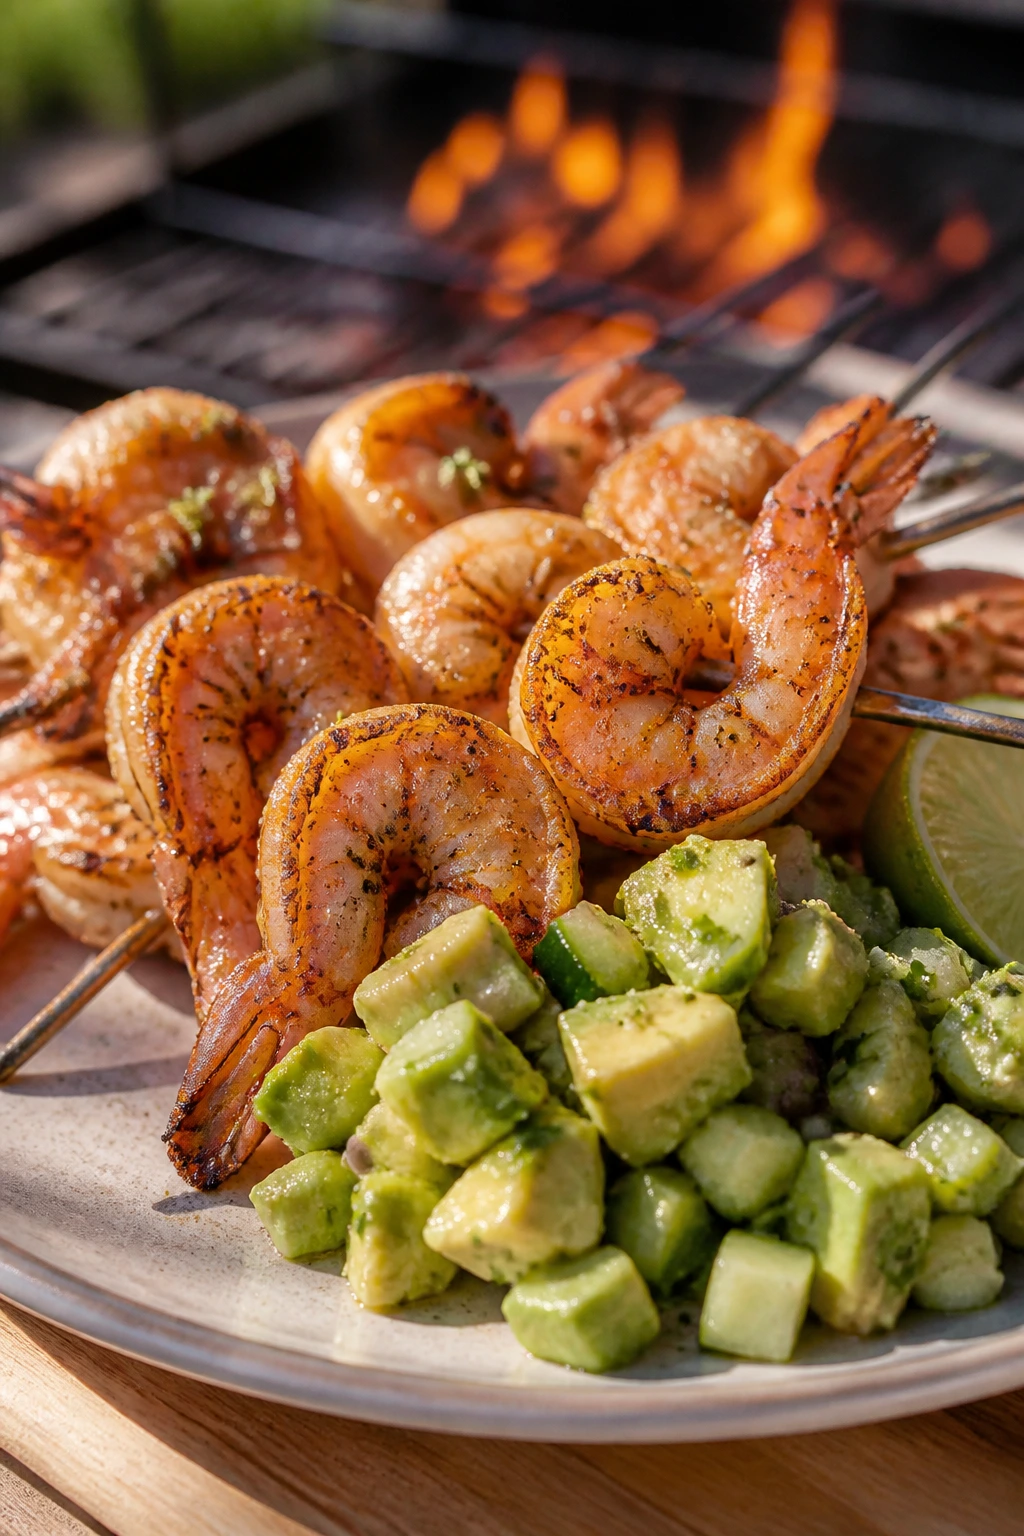
1. Citrus Shrimp Skewers with Avocado-Cucumber Salsa
Shrimp and hot grill grates get along fast. That’s the appeal here: a quick marinade, a sharp sear, and a cold salsa with enough cucumber and lime to make the plate feel almost chilled, even when the shrimp still have a little heat on them. I like this one when the evening is too warm for anything heavy and the menu needs to feel lifted, not loaded down.
Why It Works: Shrimp take on flavor quickly, so the lime zest, garlic, and smoked paprika do their job in 15 minutes instead of needing an overnight wait. The avocado-cucumber salsa adds fat and crunch without drowning the shrimp, and the cold ingredients make the char taste cleaner. Keep the cook time short; shrimp that go past opaque and springy start to turn rubbery fast.
Key Ingredients:
- 1 1/2 pounds large shrimp, peeled and deveined
- 2 tablespoons olive oil
- Zest and juice of 2 limes
- 2 garlic cloves, grated
- 1 teaspoon kosher salt
- 1/2 teaspoon black pepper
- 1 teaspoon smoked paprika
- 2 avocados, diced
- 1 cup cucumber, diced
- 1/4 cup cilantro, chopped
- 1 jalapeño, seeded and minced
- 1 tablespoon red onion, finely diced
Quick Steps:
- Soak 8 to 10 wooden skewers in water for 20 minutes, or use metal skewers.
- Toss the shrimp with olive oil, lime zest and juice, garlic, salt, pepper, and smoked paprika. Let stand for 15 minutes.
- Mix the avocado, cucumber, cilantro, jalapeño, red onion, and a spoonful of lime juice in a bowl.
- Thread shrimp onto skewers without packing them tight.
- Grill over medium-high heat for 2 to 3 minutes per side, until opaque and lightly charred.
- Serve the shrimp over the salsa, with extra lime wedges.
Equipment for This Recipe:
- Grill or grill pan
- Skewers
- Mixing bowl
- Tongs
- Small knife and cutting board
How to Serve This Dish: Pile the salsa onto a shallow platter first, then lay the shrimp skewers over the top so the juices run into the avocado. A handful of torn cilantro makes the whole thing look fresher. Serve with grilled tortillas or a cold rice salad if you want a fuller meal.
Pro Tips for This Recipe:
- Pat the shrimp dry before marinating; wet shrimp steam instead of sear.
- Use two skewers per row of shrimp if they keep spinning on you.
- Add the avocado at the end, not earlier, or it turns muddy and soft.
- Pull the shrimp the second they curl into a loose C shape.
Variations on This Dish:
- Mango-Swap Salsa: Trade the cucumber for diced mango and add mint instead of cilantro.
- Chili-Lime Heat: Stir a pinch of chili flakes into the marinade and finish with hot sauce.
- No-Skewer Version: Grill the shrimp in a perforated grill basket if you’d rather skip threading.
Common Mistakes to Avoid with This Dish:
- Over-marinating the shrimp: More than 30 minutes in lime juice starts to change the texture. Keep it short.
- Crowding the skewers: If the shrimp touch too much, you lose char where it matters.
- Cooking until they feel firm: By then they’re already overdone. Look for opaque flesh and lightly curled tails.
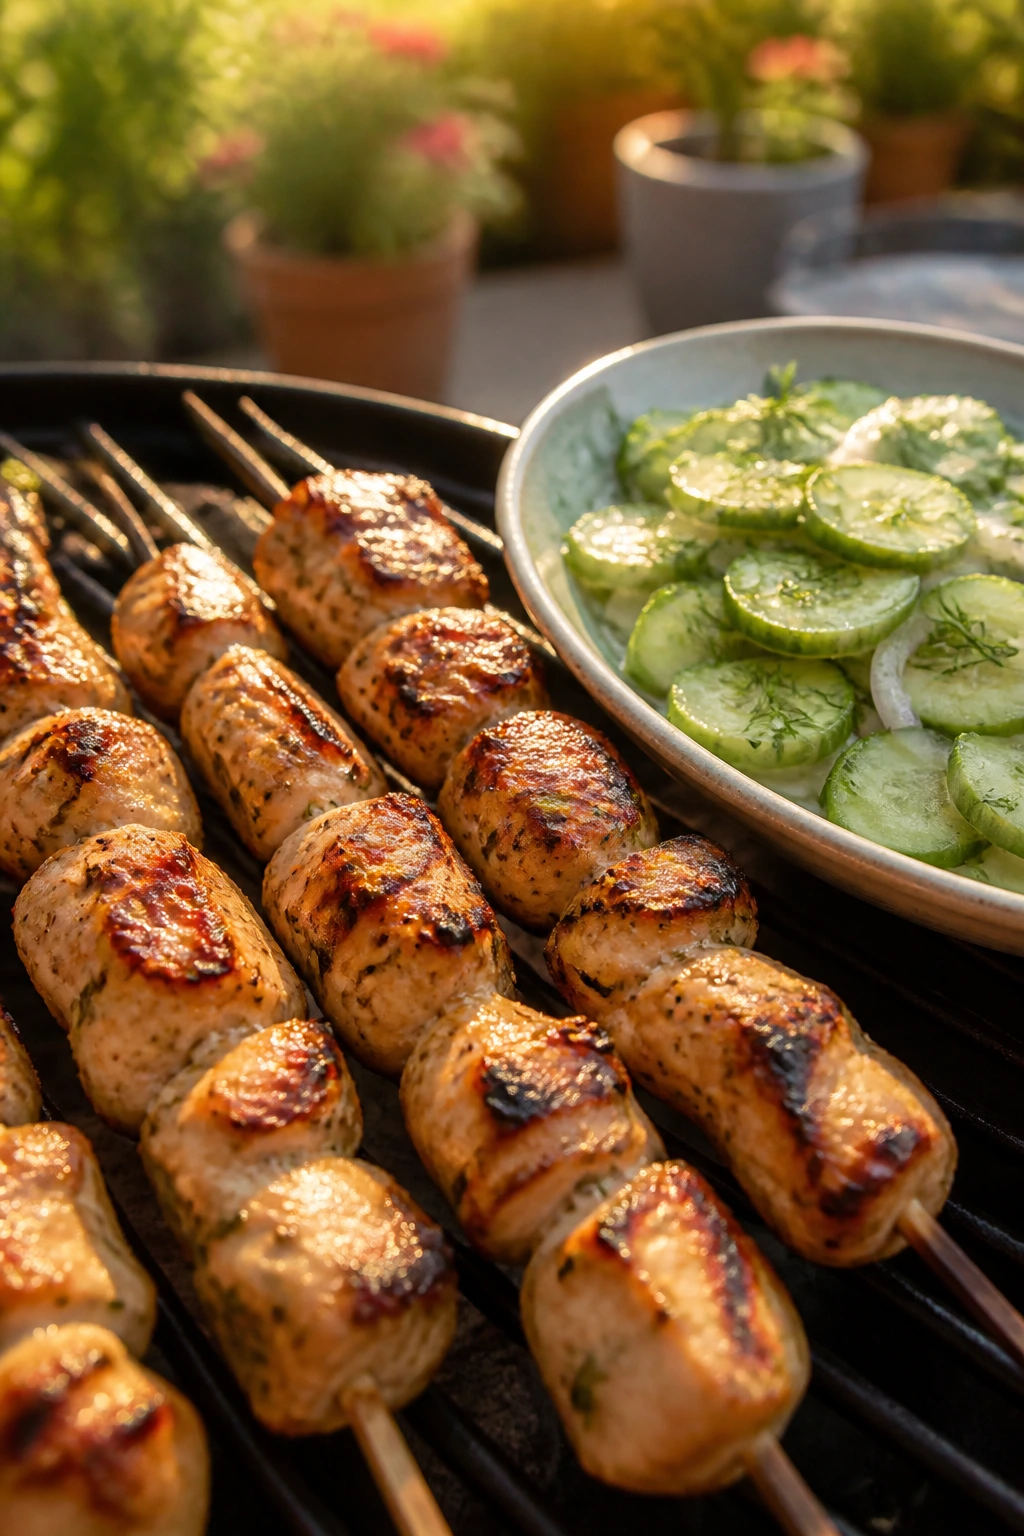
2. Chicken Souvlaki with Cucumber-Dill Salad
Chicken souvlaki has a nice way of sounding like extra work and cooking like a weekday. Once the thighs are cut into chunks and the lemon-garlic marinade is mixed, the rest is mostly skewers and a quick turn over fire. The cucumber-dill salad stays cold and sharp, which is exactly what you want next to smoke and oregano.
Why It Works: Chicken thighs stay juicy on a grill better than breasts, especially when the pieces are small and the heat is fairly direct. A lemony marinade seasons the meat all the way through, and the salad adds crunch so the plate doesn’t lean soft. This is one of those recipes where the side dish matters as much as the main event.
Key Ingredients:
- 2 pounds boneless, skinless chicken thighs, cut into 1 1/2-inch pieces
- 1/4 cup olive oil
- Juice of 2 lemons
- 4 garlic cloves, minced
- 2 teaspoons dried oregano
- 1 teaspoon kosher salt
- 1/2 teaspoon black pepper
- 2 cups cucumber, sliced
- 1 cup cherry tomatoes, halved
- 1/4 cup fresh dill, chopped
- 1/3 cup Greek yogurt
- 1 small red onion, thinly sliced
Quick Steps:
- Whisk olive oil, lemon juice, garlic, oregano, salt, and pepper in a bowl.
- Add the chicken and marinate for 30 minutes to 4 hours in the fridge.
- Toss cucumber, tomatoes, dill, yogurt, and red onion in a separate bowl.
- Thread the chicken onto soaked skewers.
- Grill over medium-high heat for 10 to 12 minutes total, turning every few minutes, until the chicken reaches 165°F.
- Rest for 5 minutes and serve with the salad.
Equipment for This Recipe:
- Grill
- Skewers
- Large bowl
- Instant-read thermometer
- Tongs
How to Serve This Dish: I like this with warm pita, a spoon of tzatziki, and maybe a few olives if the table wants a salty edge. The chicken should come off the grill with browned corners and a little sheen from the oil. Build each plate so the salad sits beside the skewers, not under them, or it loses its crunch too fast.
Pro Tips for This Recipe:
- Cut the chicken pieces the same size so they cook evenly.
- Don’t pack the skewers tightly; air between pieces helps the edges char.
- If the grill runs hot, move the skewers to a cooler spot after the first sear.
- Rest the chicken before serving so the juices stay in the meat.
Variations on This Dish:
- Breast Meat Version: Use chicken breast, but keep the cubes a touch larger and pull them at 160°F.
- Lamb Souvlaki: Swap in boneless lamb shoulder for a deeper, richer flavor.
- Dairy-Free Plate: Skip the yogurt in the salad and finish with a little olive oil and extra lemon.
Common Mistakes to Avoid with This Dish:
- Uneven cutting: Tiny pieces dry out before the big ones are done.
- Skipping the rest: Slice too early and the juices run across the board instead of staying in the meat.
- Overcooking for color: Dark edges are fine; dry chicken is not.
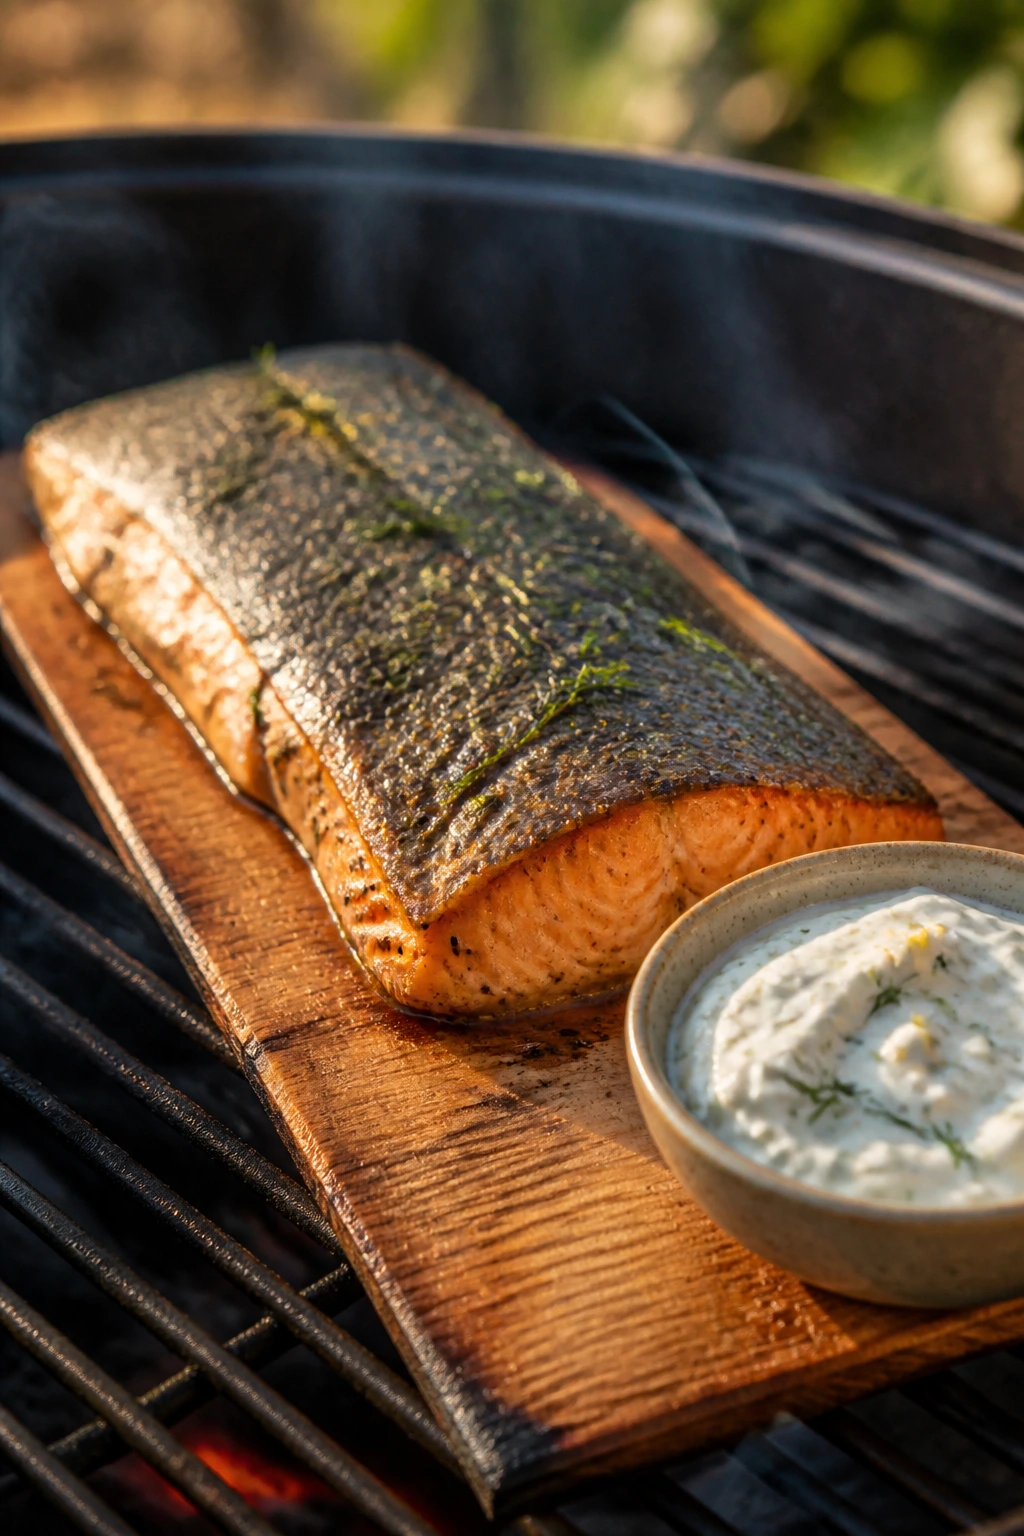
3. Cedar-Plank Salmon with Lemon Herb Yogurt
Cedar and salmon make sense together in a very old, very practical way. The plank keeps the fish from sticking, the smoke from the wood wraps around the fillet, and the yogurt sauce cools everything back down. You get something that feels polished without asking you to babysit a pan.
Why It Works: Salmon takes well to indirect heat, especially when it’s on a soaked cedar plank that softens the blast from the flame. The yogurt sauce brings dill, lemon, and a little garlic into the picture, which cuts the richness and keeps each bite from feeling heavy. Skin-on fillets behave best here because they hold together on the plank and stay moist.
Key Ingredients:
- 4 salmon fillets, 6 ounces each, skin on
- 1 tablespoon olive oil
- 1 teaspoon kosher salt
- 1/2 teaspoon black pepper
- 1 cedar plank, soaked in water for at least 1 hour
- 1 cup Greek yogurt
- 2 tablespoons lemon juice
- 1 teaspoon lemon zest
- 2 tablespoons chopped dill
- 1 tablespoon chopped chives
- 1 garlic clove, finely grated
Quick Steps:
- Soak the cedar plank in water for at least 1 hour.
- Mix the yogurt, lemon juice, lemon zest, dill, chives, and garlic.
- Rub the salmon with olive oil, salt, and pepper.
- Place the plank on a medium-hot grill until it starts to smoke lightly.
- Set the salmon on the plank, close the lid, and cook for 12 to 15 minutes, until the fish flakes and reaches 125 to 130°F in the thickest part.
- Spoon the yogurt sauce over the salmon or serve it on the side.
Equipment for This Recipe:
- Grill with lid
- Cedar plank
- Instant-read thermometer
- Small bowl
- Fish spatula
How to Serve This Dish: A mound of cucumber salad or grilled asparagus keeps the plate light. The salmon should look glossy and just set in the center, not dry and flaky all the way through. I prefer serving the sauce cold so it sits like a bright stripe against the warm fish.
Pro Tips for This Recipe:
- Use fillets of similar thickness so they finish together.
- Let the plank warm on the grill before adding the fish.
- Watch the plank, not just the salmon; if the wood starts to flare badly, move it to cooler heat.
- Make the yogurt sauce first so the flavors have a few minutes to settle.
Variations on This Dish:
- Dill-Cucumber Sauce: Fold in grated cucumber for a thicker, more tzatziki-like finish.
- Maple-Dijon Salmon: Swap the herb sauce for a thin maple-Dijon glaze brushed on near the end.
- Trout Plank: Use trout fillets if you want a slightly lighter, smaller fish.
Common Mistakes to Avoid with This Dish:
- Using a dry plank: Unsoaked wood burns fast and can turn the fish bitter.
- Overcooking the center: Salmon carries over after it leaves the grill, so pull it before it looks fully done.
- Saucing too early: Cold yogurt on top of raw fish is awkward; wait until the salmon is plated.
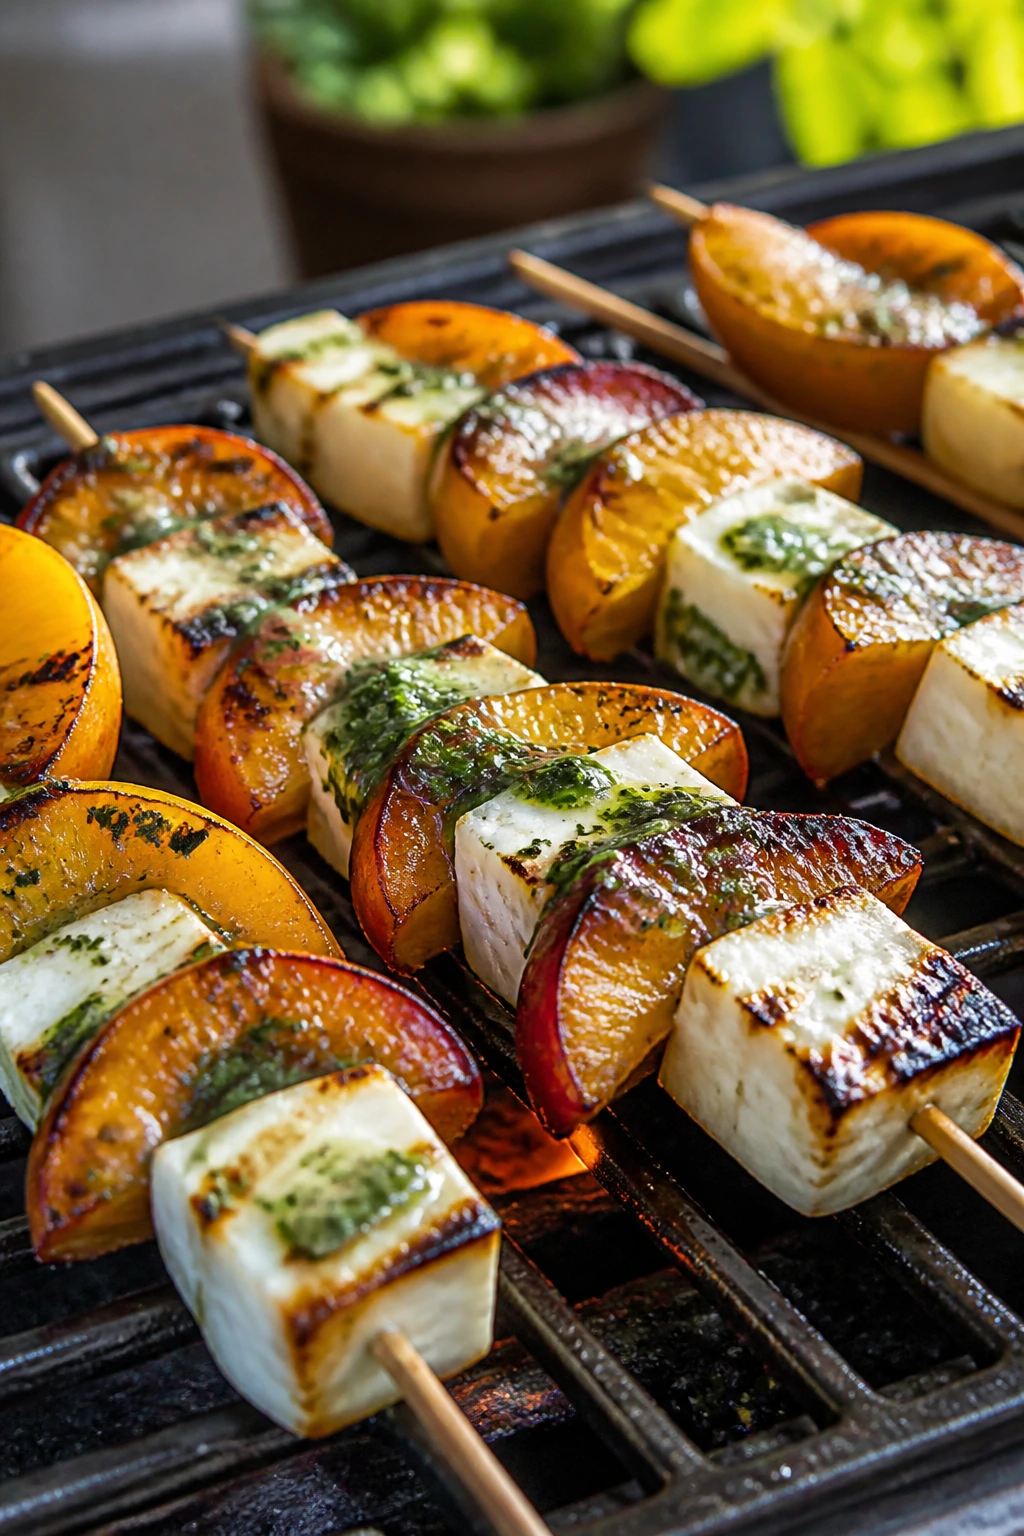
4. Halloumi and Peach Skewers with Basil Honey
Halloumi is one of those ingredients that rewards a hot grill without needing much help. Add peaches and basil honey, and the whole thing turns into sweet-salty-silky bites that feel made for late daylight. I like this one because it behaves like an appetizer and a side dish at once.
Why It Works: Halloumi keeps its shape over heat instead of disappearing into a puddle, which makes it ideal for skewers. Peaches soften at the edges and get sweeter after a minute or two on the grates. A drizzle of honey with torn basil gives the plate a fresh finish that smells like a herb garden after rain.
Key Ingredients:
- 12 ounces halloumi, cut into 1-inch cubes
- 3 ripe but firm peaches, pitted and cut into wedges
- 2 tablespoons olive oil
- 2 tablespoons honey
- 1 tablespoon lemon or lime juice
- 1/4 cup basil leaves, torn
- Flaky salt, for finishing
- Black pepper, to taste
Quick Steps:
- Whisk the honey, lemon juice, and torn basil in a small bowl.
- Brush the halloumi and peach wedges with olive oil.
- Thread halloumi and peaches onto skewers, leaving a little space between pieces.
- Grill over medium-high heat for 1 to 2 minutes per side, until the cheese has grill marks and the peaches soften.
- Transfer to a platter and spoon the basil honey over the top.
- Finish with flaky salt and a few cracks of pepper.
Equipment for This Recipe:
- Grill or grill pan
- Skewers
- Pastry brush
- Small bowl
- Tongs
How to Serve This Dish: Serve these warm, right off the skewers, with arugula or baby greens underneath if you want a little bitterness to balance the honey. They also work beside grilled chicken or salmon when you need a side that isn’t just another starch. The plate should taste salty first, then sweet.
Pro Tips for This Recipe:
- Keep the peaches firm; soft peaches collapse before they char.
- Pat the halloumi dry so it browns instead of steaming.
- Use metal skewers if you have them, since halloumi can be a little slippery.
- Pull the skewers as soon as you see clear grill marks.
Variations on This Dish:
- Nectarine Swap: Use nectarines for a firmer bite and a sharper edge.
- Mint-Honey Finish: Add mint with the basil if you want the topping colder and brighter.
- No-Skewer Plate: Grill the halloumi and peaches loose, then scatter them over greens.
Common Mistakes to Avoid with This Dish:
- Cooking halloumi too long: It gets rubbery, not better.
- Using overripe peaches: They fall apart before the grill marks can set.
- Skipping the acid: Honey alone turns the dish sleepy; the lemon or lime wakes it up.
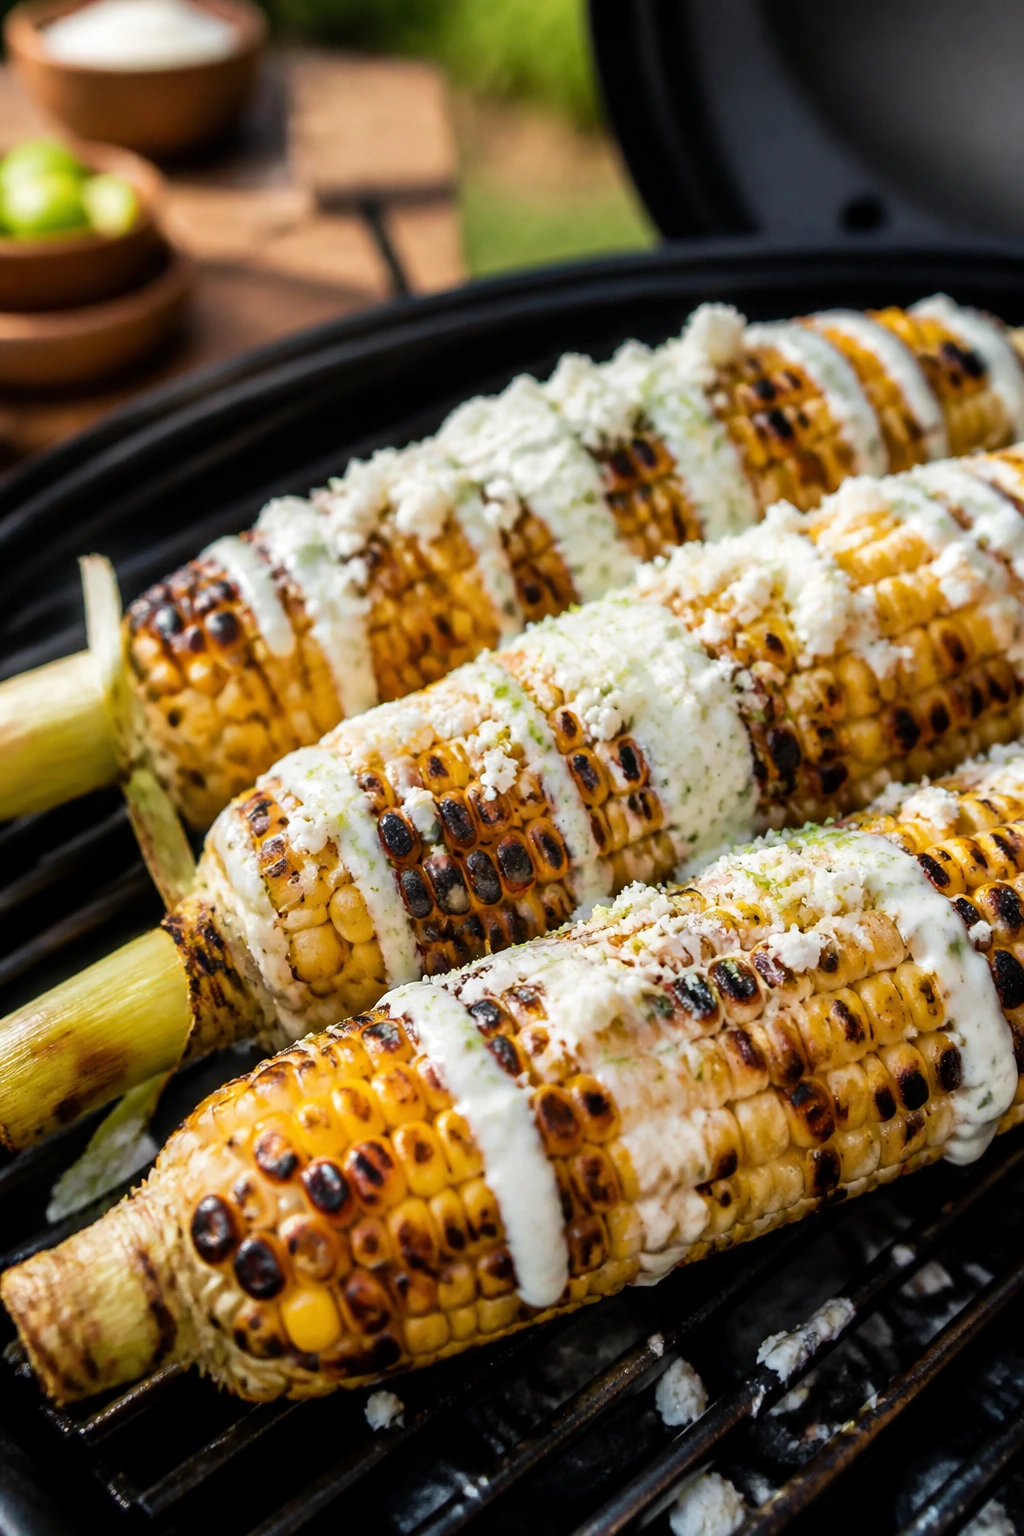
5. Charred Corn with Lime Crema and Cotija
Corn on the grill is one of those easy wins that still feels like a small event. The kernels pick up smoke, the edges blister, and the crema slips into the gaps with lime and chili powder. It’s the kind of side dish that keeps disappearing before the mains arrive.
Why It Works: High heat adds color and a roasted edge to corn without turning it leathery. Lime crema and cotija bring salt and tang, which makes the corn taste sweeter instead of richer. Leave a little char on the ears; that darker flavor is the whole point.
Key Ingredients:
- 6 ears corn, husked
- 2 tablespoons olive oil
- 1/2 cup sour cream or Greek yogurt
- 1 tablespoon lime juice
- 1 teaspoon lime zest
- 1 small garlic clove, grated
- 1/2 teaspoon chili powder
- 1/2 cup cotija cheese, crumbled
- 2 tablespoons chopped cilantro
- Kosher salt, to taste
Quick Steps:
- Brush the corn with olive oil and season lightly with salt.
- Grill over medium-high heat for 10 to 12 minutes, turning every 2 to 3 minutes, until the kernels are spotty brown and tender.
- Stir the sour cream, lime juice, lime zest, garlic, and chili powder into a crema.
- Brush the corn with crema or spoon it over the ears.
- Finish with cotija and cilantro.
- Serve with extra lime on the side.
Equipment for This Recipe:
- Grill
- Tongs
- Small bowl
- Pastry brush or spoon
- Sharp knife, if you cut kernels off the cob
How to Serve This Dish: Serve the ears whole for a cookout, or slice the kernels off and pile them into a shallow bowl for easier sharing. A few extra cotija crumbles on top look better than a heavy coat. This pairs with steak, chicken, or grilled mushrooms without arguing with any of them.
Pro Tips for This Recipe:
- Rotate the corn every few minutes so you get an even char.
- Don’t drown it in crema before grilling; the sauce belongs after the heat.
- If your corn is very fresh and sweet, go easier on the salt.
- Cut the kernels off the cob only after the ears have cooled for a minute.
Variations on This Dish:
- Feta and Dill: Swap cotija for feta and add chopped dill to the crema.
- Spicy Street Corn: Mix a little chipotle in adobo into the sauce.
- Dairy-Free Version: Use vegan mayo and a spoon of tahini in place of sour cream.
Common Mistakes to Avoid with This Dish:
- Leaving the corn too close to the flame: It should char in spots, not blacken all over.
- Salting after the crema is on: Some salt is good on the corn before it hits the grill.
- Using watery crema: Thicker sauce clings better and keeps the kernels from sliding around.
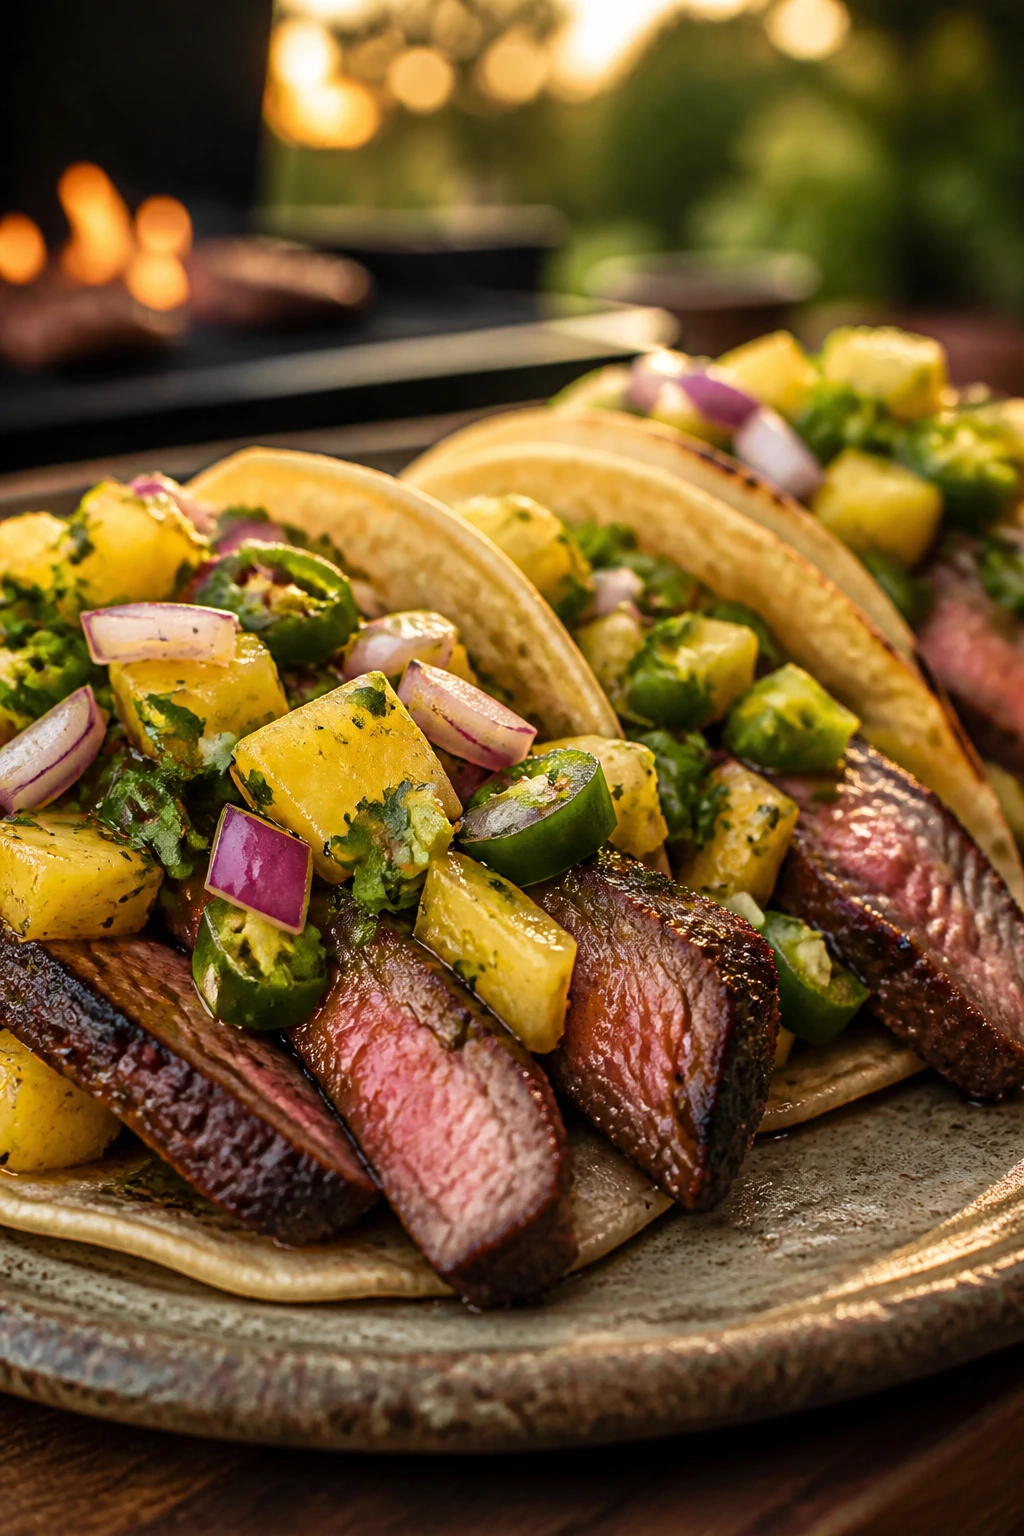
6. Flank Steak Tacos with Pineapple-Jalapeño Salsa
Flank steak loves a grill because it comes off fast, picks up a hard crust, and slices into something almost tender enough to forget it was such a lean cut. Pineapple and jalapeño keep the tacos from feeling heavy, which is the whole game when the weather is warm and the table needs lifting, not more weight.
Why It Works: Flank steak is built for high heat and short cooking, as long as you slice it across the grain. Pineapple brings acid and sweetness, jalapeño brings bite, and the salsa keeps each taco bright enough to eat more than one without getting tired of the flavor. Warm tortillas matter here more than people admit.
Key Ingredients:
- 1 3/4 pounds flank steak
- 2 tablespoons olive oil
- 1 teaspoon kosher salt
- 1 teaspoon ground cumin
- 1 teaspoon smoked paprika
- 1/2 teaspoon black pepper
- 2 cups pineapple, diced small
- 1 jalapeño, minced
- 1/4 cup red onion, finely diced
- 1/4 cup cilantro, chopped
- 1 tablespoon lime juice
- 8 small tortillas
Quick Steps:
- Rub the steak with olive oil, salt, cumin, paprika, and black pepper.
- Mix the pineapple, jalapeño, red onion, cilantro, and lime juice in a bowl.
- Preheat the grill to medium-high and oil the grates.
- Grill the steak for 4 to 5 minutes per side, until it reaches 130 to 135°F for medium-rare.
- Rest the steak for 10 minutes, then slice thinly against the grain.
- Warm the tortillas on the grill for 20 to 30 seconds per side and fill them with steak and salsa.
Equipment for This Recipe:
- Grill
- Instant-read thermometer
- Sharp carving knife
- Cutting board
- Small bowl for salsa
How to Serve This Dish: Stack the tacos on a platter lined with foil so they stay warm. Add avocado slices or shredded cabbage if you want more texture, but don’t bury the steak. These tacos do best with a cold drink and a stack of napkins.
Pro Tips for This Recipe:
- Bring the steak closer to room temperature before grilling.
- Slice against the grain; if you cut with it, the meat chews like rope.
- Let the salsa sit for 10 minutes so the lime can wake up the pineapple.
- Oil the grates, not the steak, if flare-ups have been a problem.
Variations on This Dish:
- Skirt Steak Swap: Use skirt steak and shave a few minutes off the grill time.
- Chicken Taco Version: The same salsa works over grilled chicken thighs.
- Lettuce Cup Dinner: Swap tortillas for romaine leaves when you want a lighter plate.
Common Mistakes to Avoid with This Dish:
- Skipping the rest: Steak juices need that pause or they end up on the board.
- Overcooking flank steak: Medium-rare to medium is the sweet spot; farther than that and it tightens.
- Cutting thick slices: Thin slices are the difference between easy tacos and a jaw workout.
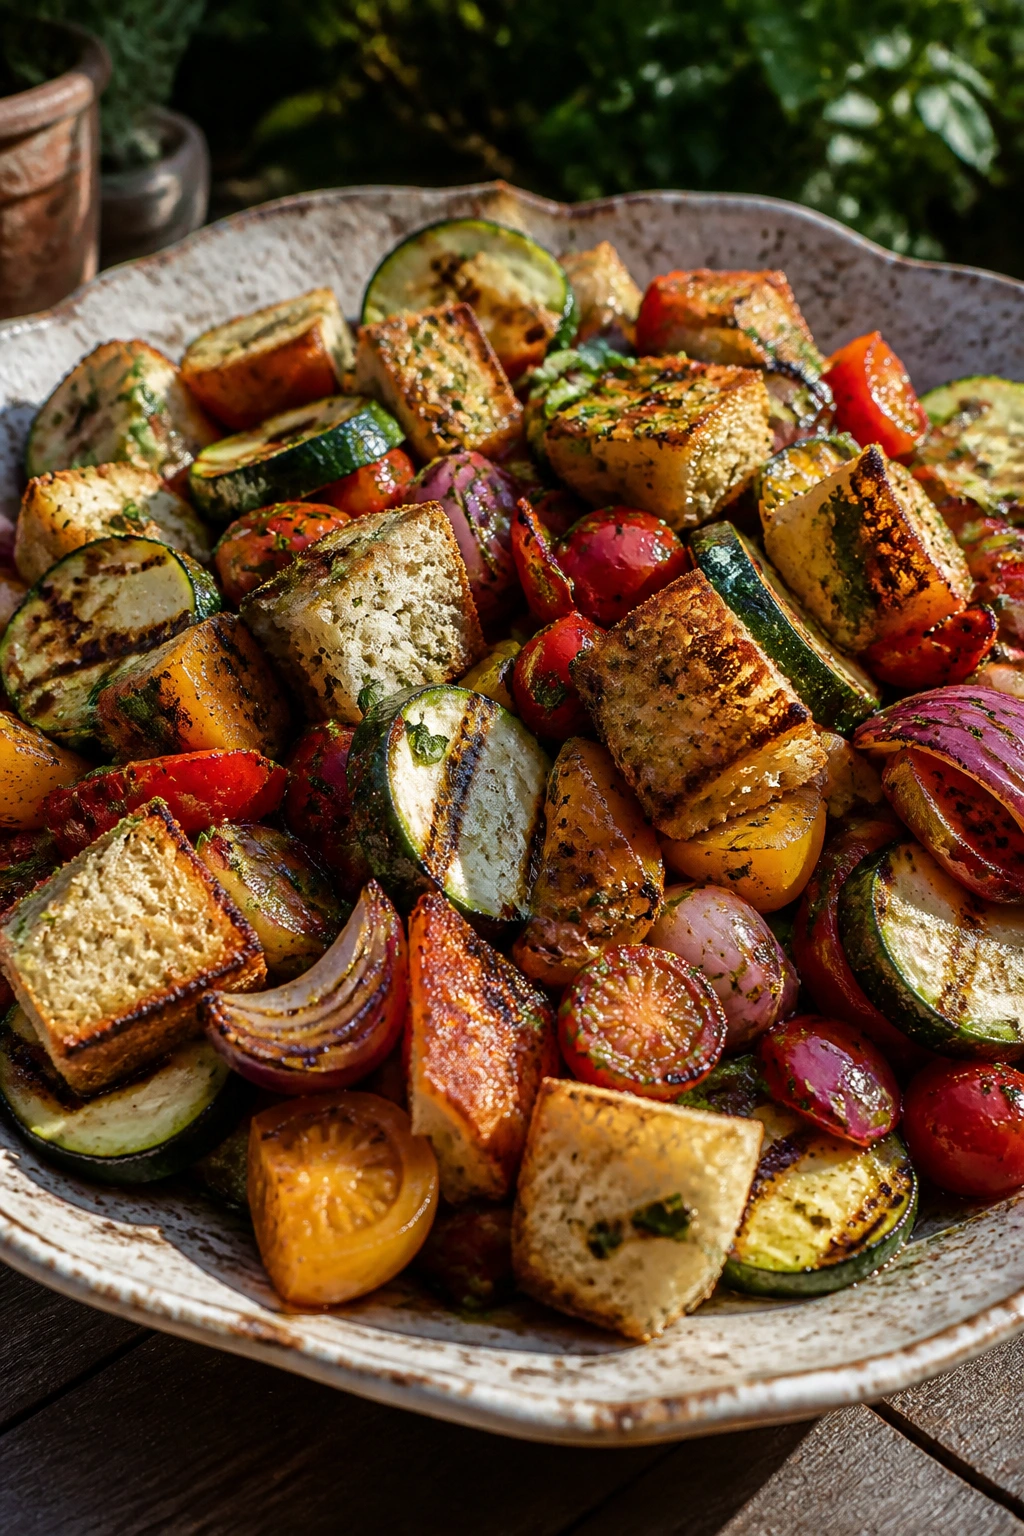
7. Grilled Veggie Panzanella with Sourdough Croutons
Panzanella is already a salad built around bread, which is lucky, because grilled bread is one of the best uses for stale sourdough. Add charred zucchini, peppers, onions, and tomatoes, and you get a bowl that tastes like a cookout and still eats like lunch. The trick is keeping the bread crisp long enough to matter.
Why It Works: Grilling the vegetables concentrates their flavor and gives the salad a smoky backbone, while the bread soaks up dressing without turning instantly soggy if you toss it at the last minute. The vinegar in the dressing sharpens the sweetness from the tomatoes and peppers. It’s a better use of summer produce than a lot of fussy salads that forget to season their bread.
Key Ingredients:
- 6 cups sourdough bread, cut into 1-inch cubes
- 2 zucchini, sliced lengthwise
- 2 bell peppers, quartered
- 1 red onion, sliced into thick rounds
- 2 cups cherry tomatoes, halved
- 1/4 cup olive oil
- 2 tablespoons red wine vinegar
- 1 teaspoon Dijon mustard
- 1 garlic clove, grated
- 1/2 cup basil leaves, torn
- Kosher salt and black pepper
Quick Steps:
- Toss the bread cubes with a little olive oil and grill them in a basket or on foil until toasted.
- Brush the zucchini, peppers, and onion with olive oil and grill until charred and tender.
- Whisk the vinegar, Dijon, garlic, salt, pepper, and remaining olive oil for the dressing.
- Chop the grilled vegetables into bite-size pieces.
- Toss the bread, vegetables, tomatoes, basil, and dressing together just before serving.
- Taste and add more salt if the tomatoes need it.
Equipment for This Recipe:
- Grill
- Grill basket or sheet of foil
- Large bowl
- Tongs
- Sharp knife
How to Serve This Dish: Serve it in a wide bowl so the grilled bread stays visible and doesn’t sink to the bottom. A little extra basil on top makes it look intentional instead of like leftover vegetables in a hurry. It can sit next to grilled chicken, salmon, or nothing at all.
Pro Tips for This Recipe:
- Use sturdy bread with a tight crumb; soft sandwich bread falls apart.
- Dress the salad at the last possible minute.
- Let the grilled vegetables cool just enough to handle before chopping.
- Salt the tomatoes once they’re mixed in or they taste strangely flat.
Variations on This Dish:
- Mozzarella Addition: Add torn fresh mozzarella if you want it richer.
- Chickpea Boost: Toss in drained chickpeas for more substance.
- Herby Finish: Swap basil for mint and parsley when basil isn’t your thing.
Common Mistakes to Avoid with This Dish:
- Tossing too early: Bread that sits in dressing for 20 minutes turns heavy.
- Using limp vegetables: Firm zucchini and peppers hold up better on the grill.
- Underseasoning the vinaigrette: Panzanella needs a bracing dressing to work.
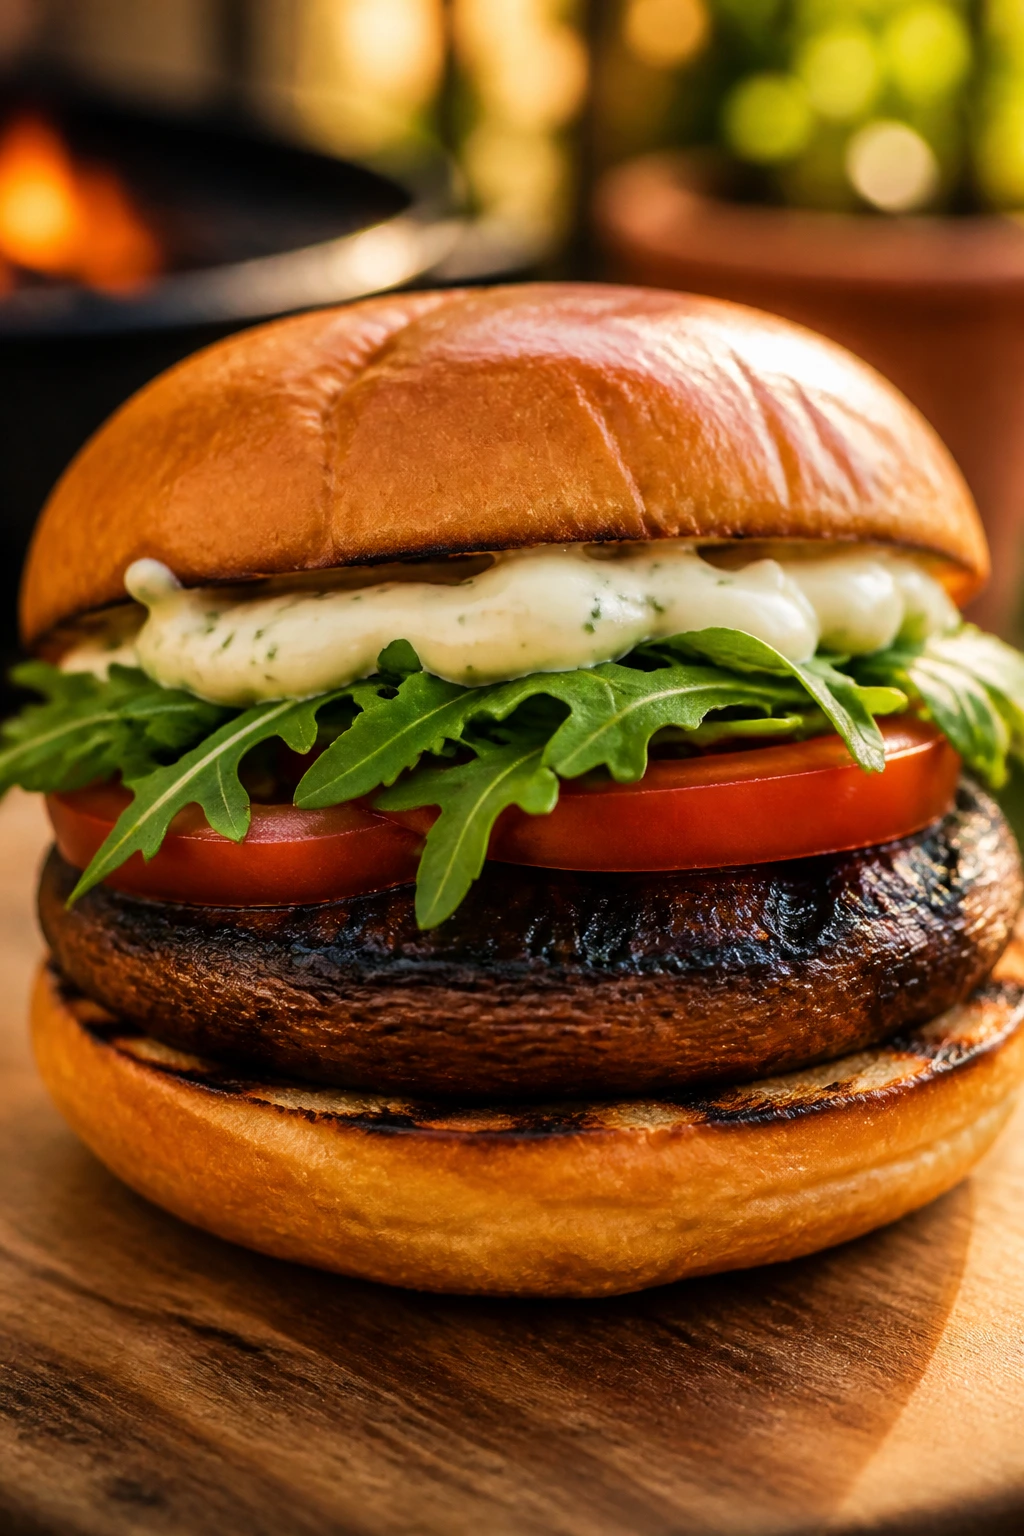
8. Portobello Mushroom Burgers with Garlic Aioli
Portobellos are the burger stand-in people reach for when they want something meaty without actually serving meat. On the grill, they soak up oil and smoke, and when you pair them with garlic aioli and a toasted bun, the whole sandwich gets that savory, juicy, slightly messy thing people keep coming back for. They need heat, not fuss.
Why It Works: Portobello caps have enough structure to grill like a steak and enough surface area to catch marinades. A quick balsamic-garlic soak seasons the mushrooms without making them soggy, and the aioli supplies the fat that a burger bun wants. Toasting the bun matters. A soft bun under a juicy mushroom is a slippery problem.
Key Ingredients:
- 4 large portobello mushroom caps, stems removed
- 3 tablespoons olive oil
- 2 tablespoons balsamic vinegar
- 2 garlic cloves, minced
- 1/2 teaspoon kosher salt
- 1/2 teaspoon black pepper
- 1/2 cup mayonnaise
- 1 garlic clove, grated
- 1 tablespoon lemon juice
- 4 burger buns, split
- 1 cup arugula or lettuce
- 1 tomato, sliced
Quick Steps:
- Whisk the olive oil, balsamic, garlic, salt, and pepper.
- Brush the mushroom caps with the marinade and let them sit for 15 minutes.
- Mix the mayonnaise, grated garlic, and lemon juice for the aioli.
- Grill the mushrooms over medium-high heat for 4 to 5 minutes per side, until tender and marked.
- Toast the buns on the grill for about 30 seconds.
- Spread aioli on the buns and build with arugula, tomato, and mushrooms.
Equipment for This Recipe:
- Grill
- Pastry brush
- Small bowl
- Tongs
- Burger buns
How to Serve This Dish: Serve these open-faced if the caps are large and juicy; it keeps the sandwich from toppling apart. A pile of thin fries or a sharp slaw sits nicely beside them. The mushroom should taste smoky and concentrated, not watery.
Pro Tips for This Recipe:
- Scrape the gills if you want a cleaner mushroom flavor, though I usually leave them.
- Don’t soak the mushrooms in marinade for too long.
- Oil the grill grates well, because mushrooms love to stick.
- Toast the buns every time. Skipping that step is a mistake.
Variations on This Dish:
- Goat Cheese Version: Add a thin slice of goat cheese right after grilling.
- Vegan Burger: Use vegan mayo for the aioli and keep the rest the same.
- Balsamic Onion Upgrade: Top with grilled onions if you want more sweetness.
Common Mistakes to Avoid with This Dish:
- Wet mushrooms: If they’re washed too aggressively, they steam instead of grill.
- Skipping the bread toast: The bun softens fast once the aioli and mushroom juices hit it.
- Cooking until collapsed: Portobellos should stay thick enough to bite, not shrink into mush.
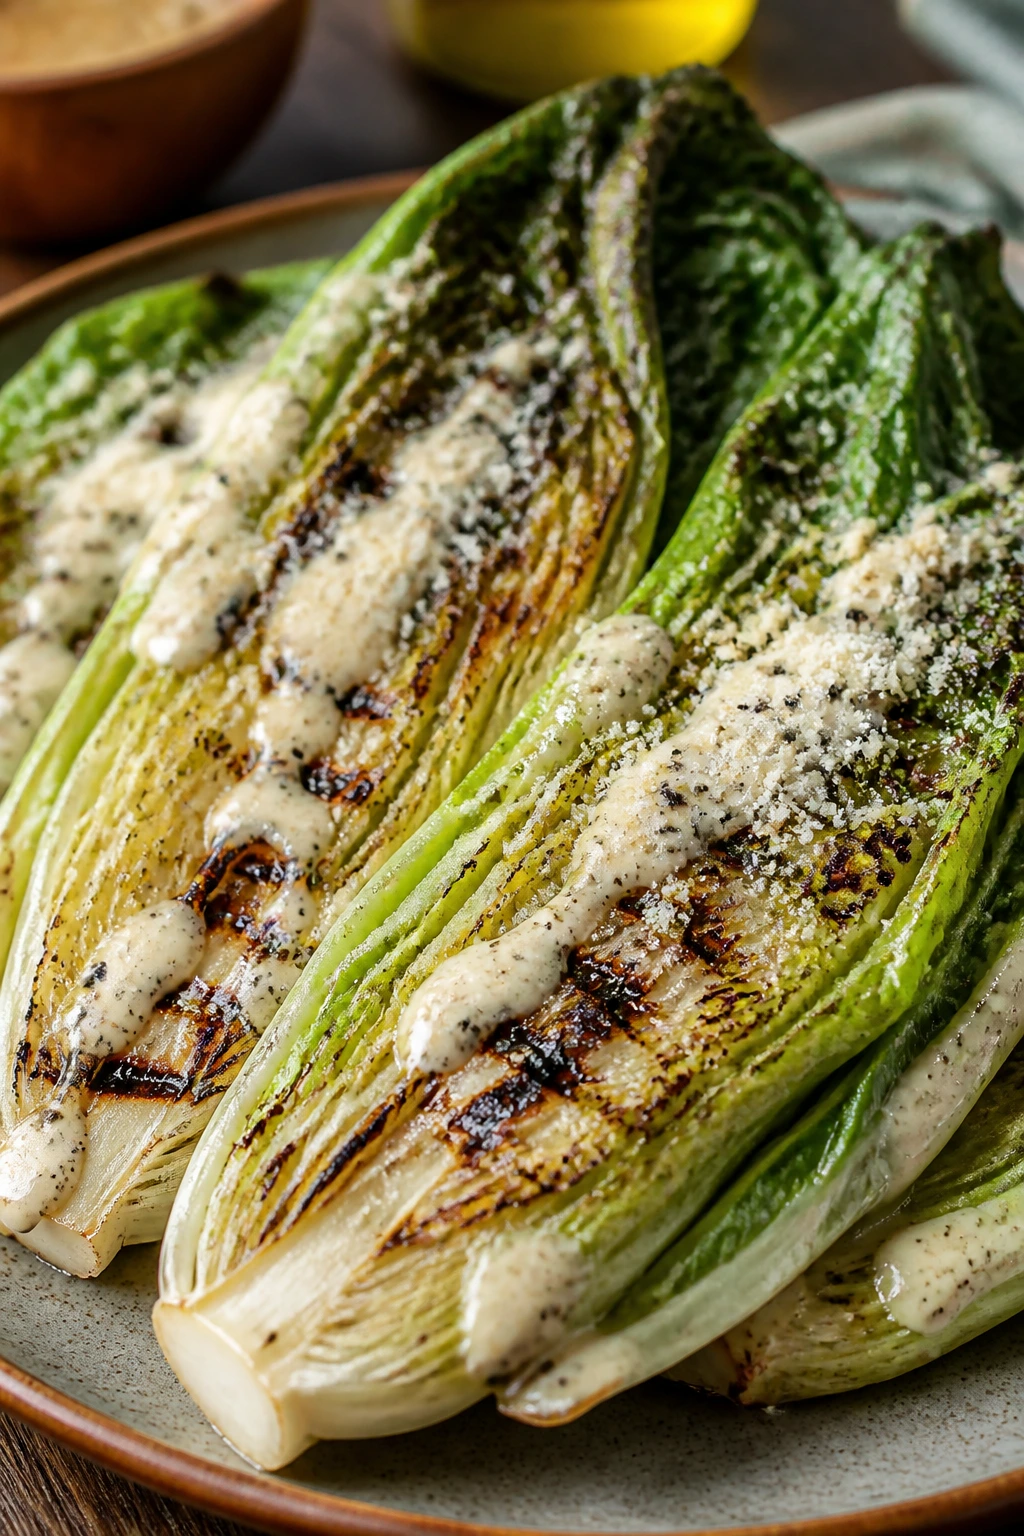
9. Grilled Romaine Caesar with Anchovy-Parmesan Dressing
Grilled romaine sounds odd until you taste the first bite: crisp stems, smoky edges, and a cold, punchy dressing that hits with salt, lemon, and garlic. It’s a Caesar that actually feels suited to summer, because the lettuce gets warm in the middle and stays snappy at the ribs. I make it when I want a salad that behaves like a side dish with attitude.
Why It Works: Romaine’s structure lets it take heat for a minute or two without collapsing. The char on the cut side gives the salad a roasted note, while the dressing clings to the leaves better than a watery vinaigrette would. Anchovy paste sounds forceful, but it mostly brings depth, not fishiness, when you use a small amount.
Key Ingredients:
- 2 romaine hearts, halved lengthwise
- 2 tablespoons olive oil
- 1/2 teaspoon kosher salt
- 1/4 cup mayonnaise
- 1 tablespoon anchovy paste
- 1 tablespoon lemon juice
- 1 teaspoon Dijon mustard
- 1 garlic clove, grated
- 1/4 cup finely grated Parmesan
- 1 cup croutons
- Black pepper, to taste
Quick Steps:
- Brush the romaine with olive oil and sprinkle the cut sides with salt.
- Whisk the mayonnaise, anchovy paste, lemon juice, Dijon, garlic, Parmesan, and black pepper.
- Grill the romaine cut-side down over high heat for 1 to 2 minutes, just until lightly charred.
- Turn and give the outer side 30 seconds if you want more color.
- Drizzle with dressing, top with croutons, and finish with more Parmesan.
- Serve while the lettuce is still a little warm.
Equipment for This Recipe:
- Grill
- Tongs
- Whisk
- Small bowl
- Serving platter
How to Serve This Dish: Put the romaine on a long platter and spoon the dressing in a loose zigzag, not a flood. Croutons should stay crisp on top, so add them at the last second. It’s good beside grilled chicken or as the first cold-green bite before steak hits the table.
Pro Tips for This Recipe:
- Dry the romaine well after washing.
- Keep the grill very hot for this one; the lettuce needs a fast kiss of heat.
- Use a wedge of lemon at the table for people who want extra brightness.
- Make the dressing a few hours ahead if you want the garlic to settle down.
Variations on This Dish:
- Yogurt Caesar: Swap half the mayonnaise for Greek yogurt.
- No-Anchovy Dressing: Add a little extra Parmesan and a dash of Worcestershire instead.
- Shrimp Caesar: Top with grilled shrimp and make it a full meal.
Common Mistakes to Avoid with This Dish:
- Leaving the lettuce on too long: Two minutes is enough; after that it turns limp.
- Using cold dressing from the fridge: Let it sit 10 minutes so it spreads more easily.
- Too much sauce: A Caesar should coat the leaves, not drown them.
10. Turkey Burgers with Tzatziki and Tomato Relish
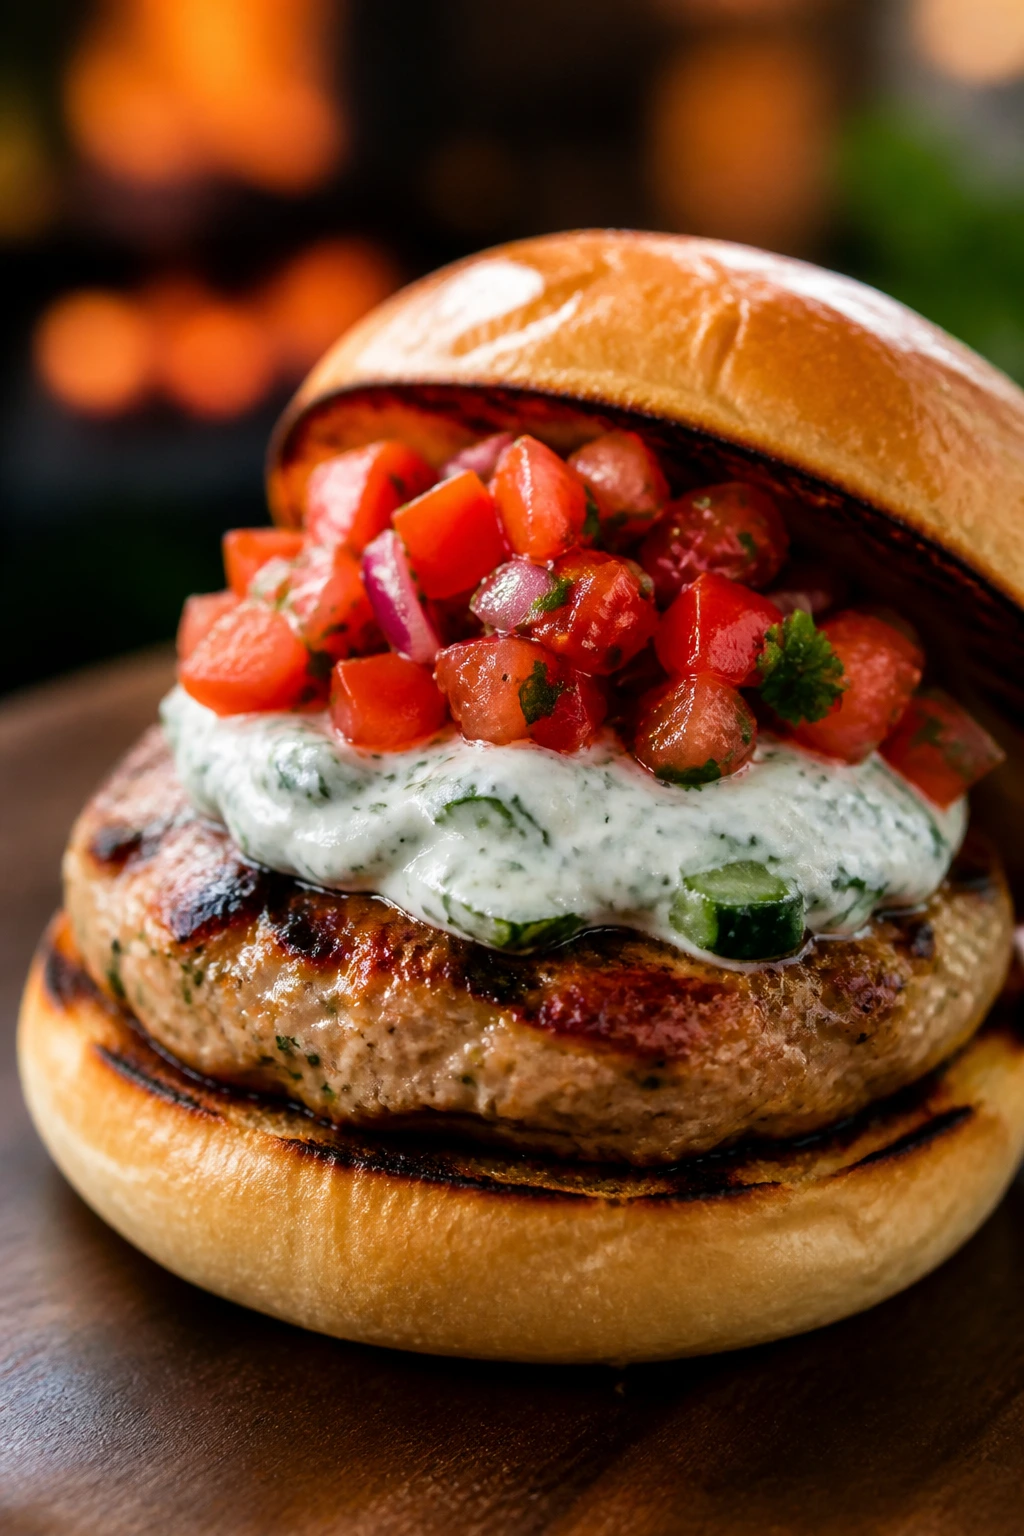
Turkey burgers get blamed for being dry, which is usually what happens when nobody adds enough moisture or stops cooking at the right moment. Tzatziki and tomato relish fix that problem in a practical way: one cool and garlicky, the other juicy and sharp. The burger itself stays fairly lean, but the plate doesn’t taste lean at all.
Why It Works: Ground turkey needs help from grated onion or zucchini and a little olive oil so it doesn’t tighten on the grill. Tzatziki brings yogurt, cucumber, and dill, which give each bite some coolness. The tomato relish adds acid and freshness, which is what keeps a turkey burger from feeling flat and one-note.
Key Ingredients:
- 1 1/2 pounds ground turkey
- 1/2 cup grated onion
- 2 tablespoons grated zucchini, squeezed dry
- 1 tablespoon olive oil
- 1 teaspoon kosher salt
- 1/2 teaspoon black pepper
- 1 teaspoon dried oregano
- 1 cup Greek yogurt
- 1/2 cup grated cucumber, squeezed dry
- 1 tablespoon chopped dill
- 1 tablespoon lemon juice
- 2 tomatoes, diced
- 1/4 cup red onion, diced
- 4 burger buns
Quick Steps:
- Gently mix the turkey, grated onion, zucchini, olive oil, salt, pepper, and oregano.
- Form 4 patties, making a slight dent in the center of each one.
- Stir the yogurt, cucumber, dill, and lemon juice for the tzatziki.
- Mix the tomatoes and red onion for the relish.
- Grill the patties over medium-high heat for 5 to 6 minutes per side, until they reach 165°F.
- Rest for 3 minutes, then stack on buns with tzatziki and relish.
Equipment for This Recipe:
- Grill
- Mixing bowl
- Instant-read thermometer
- Spatula
- Small bowl
How to Serve This Dish: Serve with sliced cucumbers or a simple grilled corn salad. These burgers do best when the sauce is generous but not sloppy; spoon the tzatziki on the bun first, then the burger, then the relish. That way the tomato juices stay where they belong.
Pro Tips for This Recipe:
- Mix the turkey lightly; overworking it makes the patties dense.
- Keep the patties cold until they hit the grill.
- Don’t press them with a spatula while they cook.
- Use a thermometer. Guessing with turkey is how dry burgers happen.
Variations on This Dish:
- Lamb Burger Spin: Mix half lamb and half turkey for a richer patty.
- Lettuce-Wrap Version: Skip the bun and wrap in romaine leaves.
- Feta Finish: Crumble a little feta into the relish if you want more salt.
Common Mistakes to Avoid with This Dish:
- Dry mix-ins: If the onion and zucchini aren’t squeezed and balanced, the burger can get either mushy or dry.
- Flipping too early: Wait until the first side releases cleanly.
- Underseasoning the meat: Turkey needs more salt than people think.
11. Miso-Glazed Eggplant with Sesame Scallions
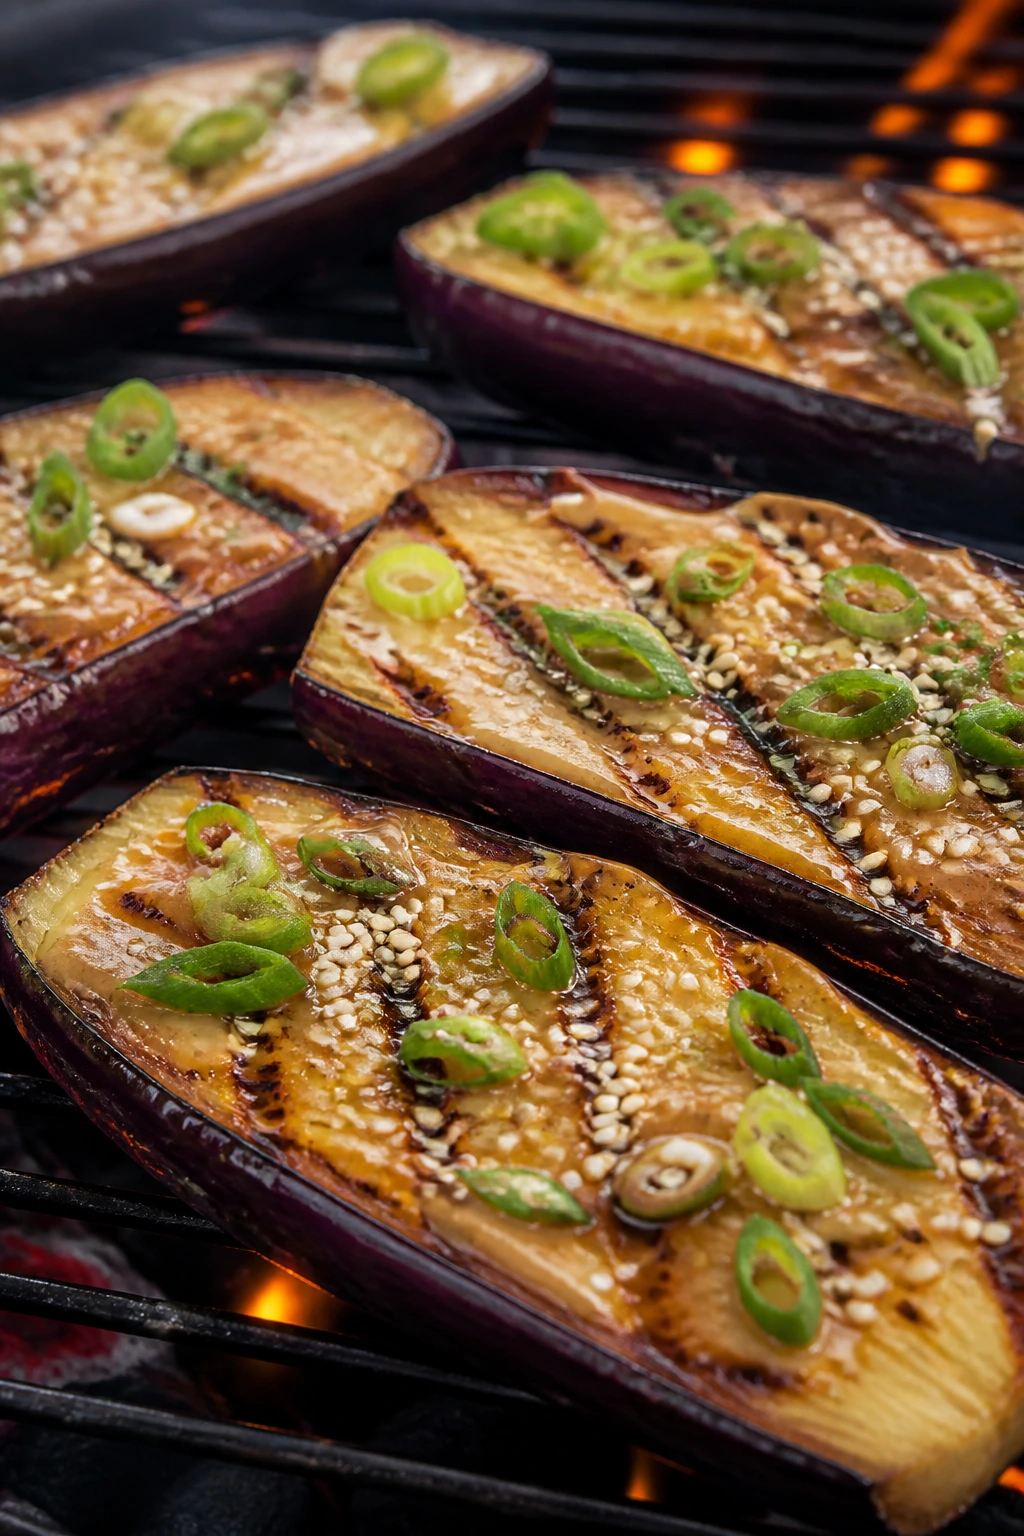
Eggplant can be a little lazy on the grill if you let it, which is why a miso glaze helps. The salt and sweetness punch through the soft flesh, while the scallions and sesame give the finished slices some snap. I like this one because it plays like a side but eats like a main when the table is mostly vegetarian.
Why It Works: Eggplant is a sponge, for better and worse. A thin glaze of white miso, honey, and soy gets into the flesh without soaking it down, and the grill dries the surface enough to create those browned edges people always hope for. Scallions and sesame keep the dish from feeling too soft.
Key Ingredients:
- 2 medium eggplants, halved lengthwise
- 3 tablespoons olive oil
- 2 tablespoons white miso
- 1 tablespoon honey
- 1 tablespoon soy sauce or tamari
- 1 tablespoon rice vinegar
- 2 teaspoons sesame oil
- 3 scallions, thinly sliced
- 1 teaspoon toasted sesame seeds
Quick Steps:
- Score the eggplant flesh in a crosshatch pattern and brush with olive oil.
- Whisk the miso, honey, soy sauce, rice vinegar, and sesame oil.
- Grill the eggplant cut-side down over medium heat for 5 to 7 minutes, then flip.
- Brush with the glaze and grill 4 to 5 minutes more, until the flesh is tender and the top is browned.
- Transfer to a platter and top with scallions and sesame seeds.
- Serve hot or warm.
Equipment for This Recipe:
- Grill
- Pastry brush
- Small bowl
- Tongs
- Sharp knife
How to Serve This Dish: Slice the eggplant into thick strips and serve over rice, quinoa, or a plate of cucumbers if you want it even lighter. A little lime wedge on the side does surprising work here. The glaze should taste glossy and savory, not sticky-sweet.
Pro Tips for This Recipe:
- Choose eggplants that feel heavy for their size.
- If the flesh looks seedy, salt it for 15 minutes before grilling.
- Brush the glaze on at the end so it doesn’t burn.
- Let the cut side sit on the grill long enough to soften before you flip.
Variations on This Dish:
- Gochujang Version: Swap half the miso glaze for gochujang if you want heat.
- Tahini Finish: Drizzle with tahini and lemon instead of sesame oil.
- Tofu Pairing: Grill thick tofu slabs alongside the eggplant and serve them together.
Common Mistakes to Avoid with This Dish:
- Glazing too soon: Miso and honey can scorch fast.
- Cutting thin slices: Thin eggplant dries out before it turns silky.
- Undercooking the middle: The flesh should be soft enough to spoon, not bouncy.
12. Grilled Naan Pizzas with Burrata and Heirloom Tomatoes
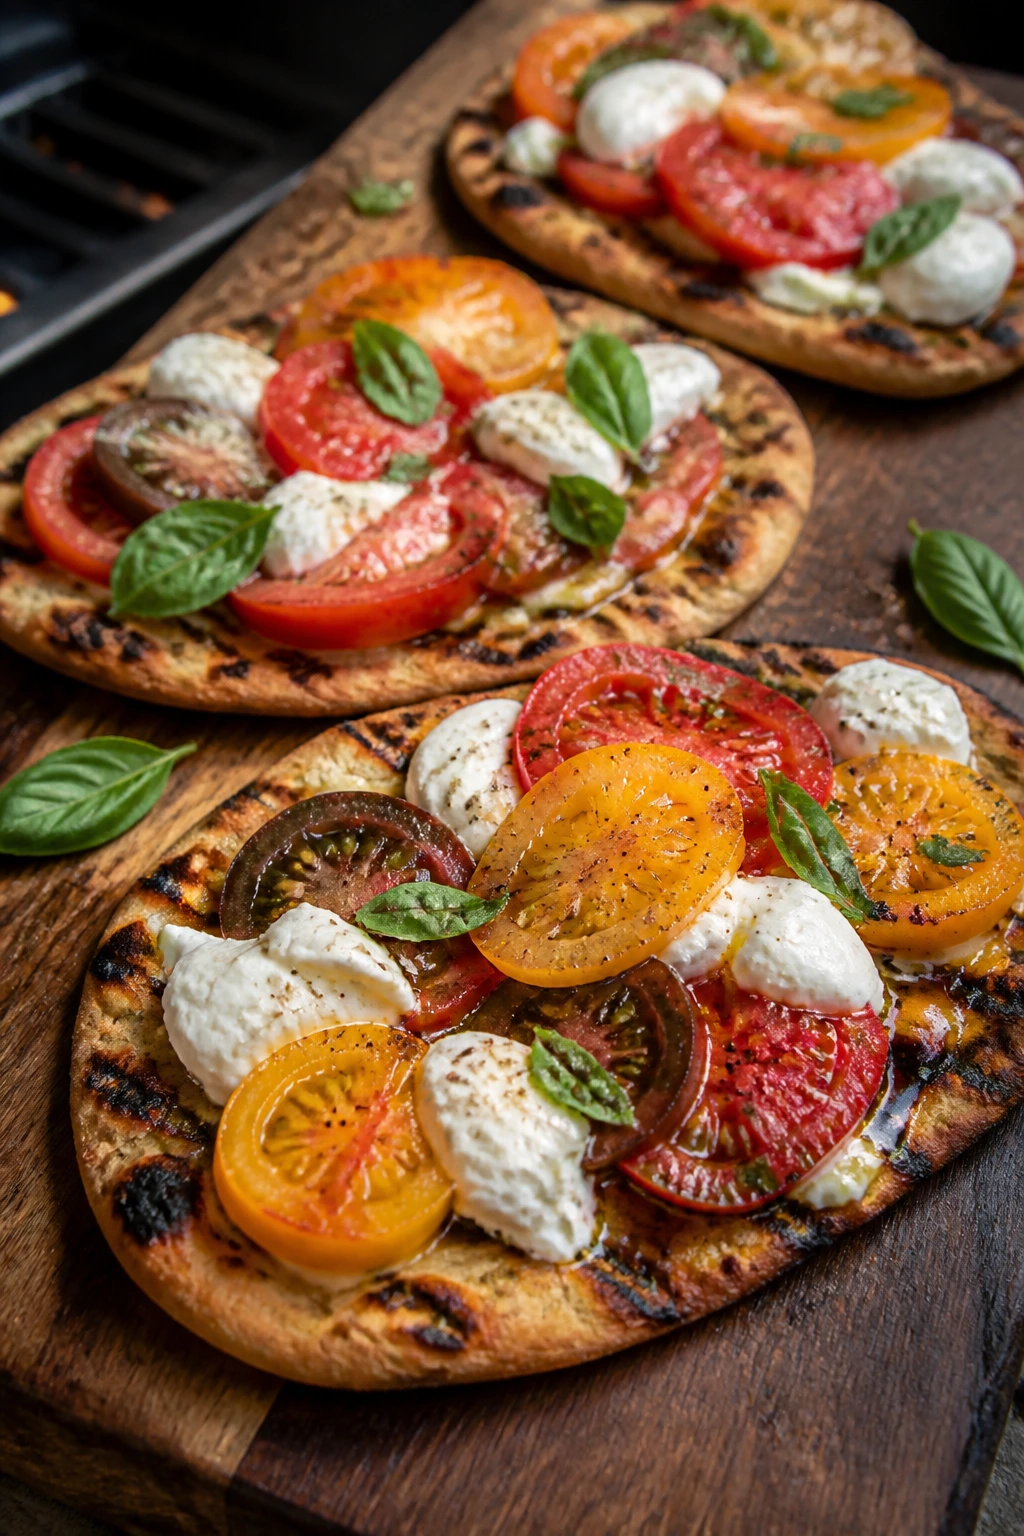
There’s something deeply satisfying about turning the grill into a pizza oven without a single brick in sight. Naan gives you a fast base, heirloom tomatoes bring their own sweetness, and burrata lands on top in cold, creamy clouds. This is the recipe I reach for when I want dinner to feel a little casual and a little showy at the same time.
Why It Works: Naan cooks fast enough that it can be charred and topped in one pass. The tomatoes don’t need much help — just salt, oil, and a bit of basil — because their job is to stay juicy against the smoky bread. Burrata goes on after grilling so it stays cool and spoonable.
Key Ingredients:
- 4 pieces naan
- 2 tablespoons olive oil
- 1 garlic clove, grated
- 2 cups heirloom tomatoes, sliced or halved
- 8 ounces burrata
- 1/4 cup basil leaves
- 1 tablespoon balsamic glaze
- Salt and black pepper
Quick Steps:
- Brush the naan with olive oil and a little grated garlic.
- Grill for 1 to 2 minutes per side, until lightly charred and warmed through.
- Toss the tomatoes with salt, pepper, and a drizzle of olive oil.
- Tear the burrata over the warm naan.
- Top with tomatoes, basil, and balsamic glaze.
- Slice and serve right away.
Equipment for This Recipe:
- Grill
- Tongs
- Small bowl
- Knife
- Serving board
How to Serve This Dish: Slice into wide strips and serve on a board, not a plate, so the burrata doesn’t run everywhere. A little extra black pepper over the top helps the cheese and tomatoes taste sharper. If you’re feeding a crowd, cut each naan into 4 pieces and let people grab and go.
Pro Tips for This Recipe:
- Use naan that’s sturdy enough to hold toppings.
- Salt the tomatoes a few minutes before serving so their juices get tastier, not just wetter.
- Add the burrata after grilling, never before.
- If you want more smoke, grill the tomatoes on a small tray first.
Variations on This Dish:
- Pesto Swap: Spread pesto on the naan before the tomatoes.
- Peach and Burrata Version: Use peach slices instead of tomatoes for a sweeter edge.
- Gluten-Free Flatbread: Use a gluten-free flatbread with enough structure to grill.
Common Mistakes to Avoid with This Dish:
- Loading the bread too much: A heavy top makes the naan droop.
- Skipping the oil: Dry naan can toughen fast on the grill.
- Serving too late: Burrata is best when it’s still cool against the warm bread.
13. Pork Tenderloin with Nectarine Salsa
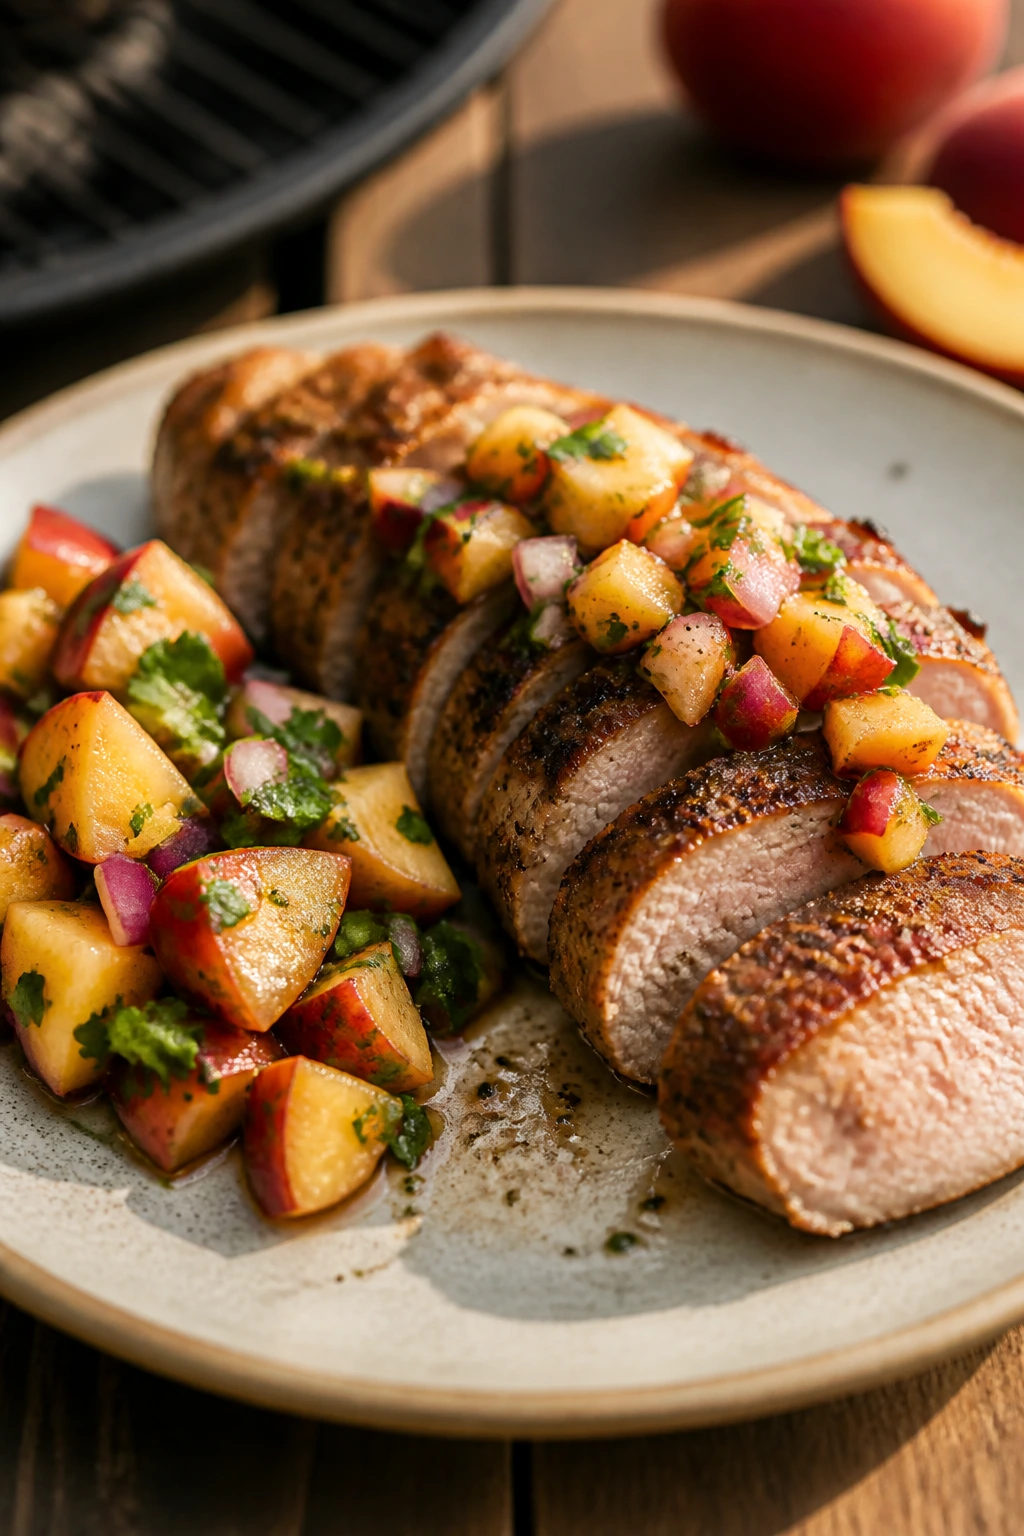
Pork tenderloin is one of the cleanest, leanest cuts to put on a grill, which means it benefits from a sauce or salsa with real life in it. Nectarines, red onion, jalapeño, and mint bring the sweet-tart crunch that keeps the meat from feeling too tidy. Slice it thin and it looks more complicated than it is.
Why It Works: Pork tenderloin cooks fast and stays tender if you pull it at the right temperature. Nectarine salsa works because the fruit is firm enough to dice and juicy enough to taste fresh after a brief toss with lime and herbs. The sweetness softens the lean pork, but the onion and jalapeño keep the whole thing awake.
Key Ingredients:
- 2 pounds pork tenderloin
- 2 tablespoons olive oil
- 1 teaspoon kosher salt
- 1 teaspoon black pepper
- 1 teaspoon ground cumin
- 1/2 teaspoon smoked paprika
- 3 nectarines, diced
- 1/4 cup red onion, finely diced
- 1 jalapeño, minced
- 2 tablespoons mint or cilantro, chopped
- 1 tablespoon lime juice
- 1 teaspoon honey
Quick Steps:
- Trim the silverskin from the pork tenderloin.
- Rub the pork with olive oil, salt, pepper, cumin, and smoked paprika.
- Mix the nectarines, red onion, jalapeño, mint, lime juice, and honey.
- Grill the pork over medium-high heat for 12 to 15 minutes total, turning every few minutes, until it reaches 145°F.
- Rest the pork for 10 minutes.
- Slice thinly and top with salsa.
Equipment for This Recipe:
- Grill
- Instant-read thermometer
- Sharp knife
- Cutting board
- Small bowl
How to Serve This Dish: I like this with grilled asparagus or a cold cucumber salad so the plate stays light. The pork should be rosy in the center, not gray, and the salsa should spill a little over the slices. If you want a starch, try new potatoes tossed with herbs.
Pro Tips for This Recipe:
- Remove the silverskin before grilling; it tightens and curls.
- Resting matters a lot with this cut.
- Slice on a bias for wider, more tender pieces.
- Make the salsa early enough for the flavors to mingle, but not so early the nectarines go soft.
Variations on This Dish:
- Peach Salsa: Swap nectarines for peaches when that’s what looks best.
- Chili-Lime Pork: Add a pinch of chipotle powder to the rub.
- Mustard Glaze: Brush the tenderloin with Dijon and honey near the end.
Common Mistakes to Avoid with This Dish:
- Overcooking a lean cut: Pork tenderloin dries out quickly past 145°F.
- Not trimming the silverskin: It’s chewy and distracts from everything else.
- Cutting immediately: The juices need time to settle after grilling.
14. Grilled Tofu Lettuce Cups with Sesame-Ginger Slaw
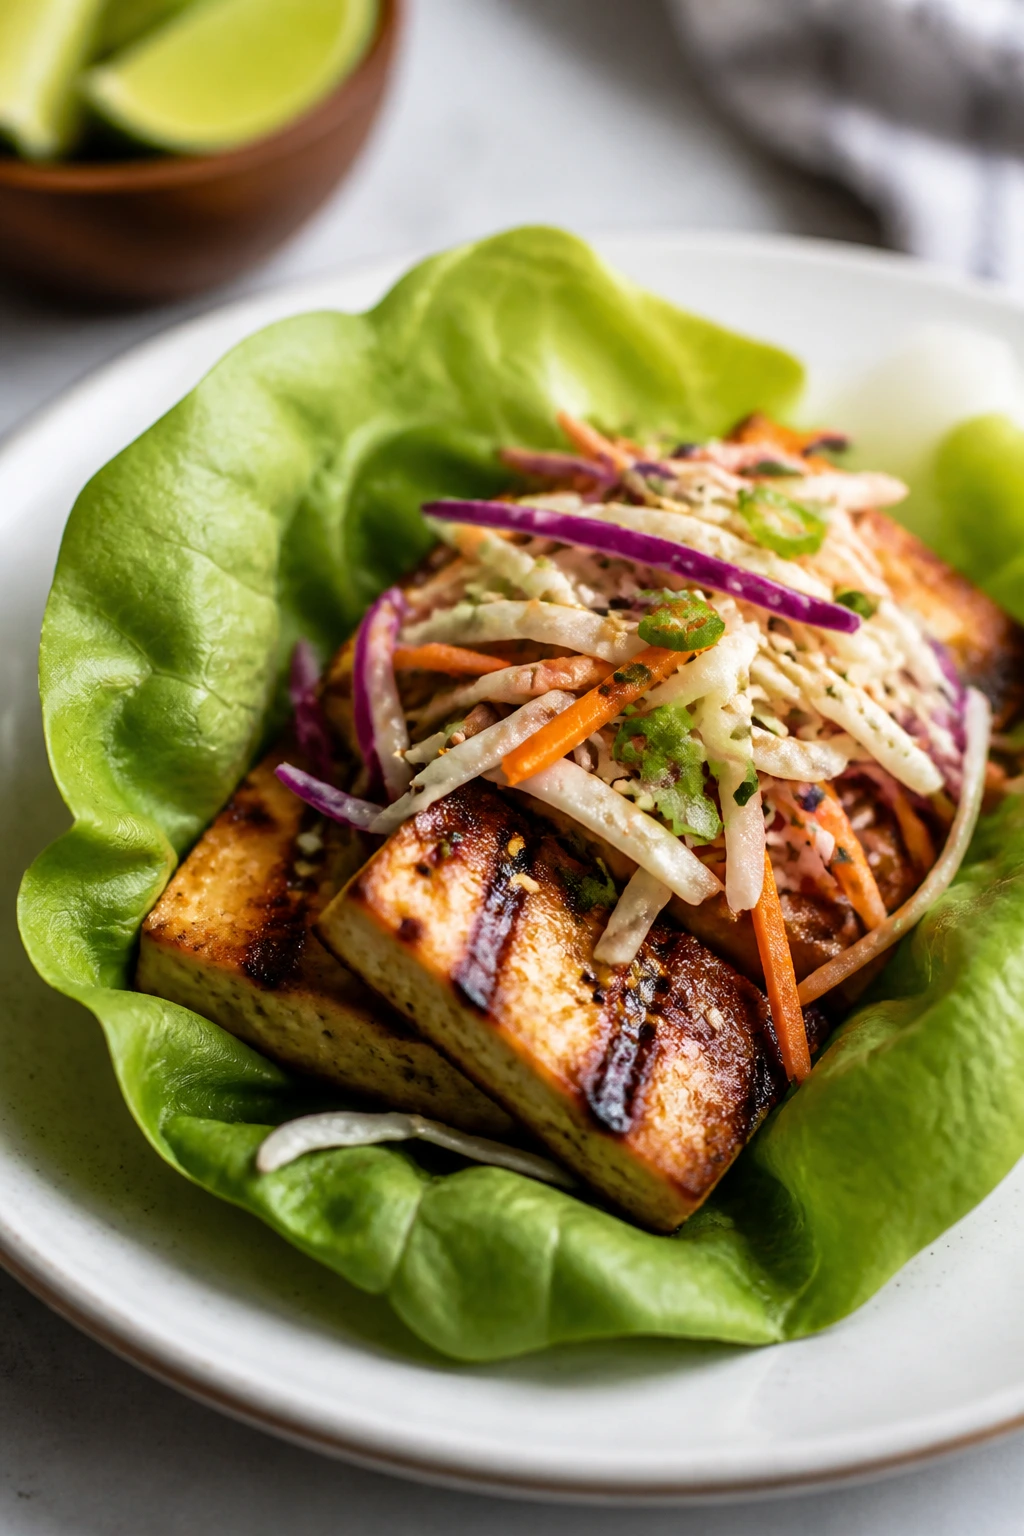
Tofu on the grill can be boring if you treat it like a sad substitute. Give it a proper press, a salty-sweet marinade, and a crunchy slaw, and it becomes one of the most refreshing things on the table. The lettuce cups keep the bites cool and tidy, which is useful when the whole point is lightness.
Why It Works: Extra-firm tofu holds up to direct heat when enough moisture has been pressed out. A sesame-ginger marinade gives it enough flavor to stand on its own, and the slaw brings crunch, acid, and freshness. Lettuce cups make the whole thing feel crisp even when the tofu is still warm.
Key Ingredients:
- 2 blocks extra-firm tofu, pressed and cut into slabs
- 3 tablespoons soy sauce or tamari
- 1 tablespoon sesame oil
- 1 tablespoon rice vinegar
- 1 tablespoon maple syrup
- 1 teaspoon grated ginger
- 1 garlic clove, grated
- 2 cups shredded cabbage
- 1 cup shredded carrot
- 1/2 cup cucumber, thinly sliced
- 2 scallions, sliced
- 1 tablespoon chopped cilantro
- 1 head butter lettuce or romaine hearts, leaves separated
Quick Steps:
- Press the tofu for 20 to 30 minutes, then slice it into slabs.
- Whisk the soy sauce, sesame oil, rice vinegar, maple syrup, ginger, and garlic.
- Marinate the tofu for 15 to 30 minutes.
- Toss the cabbage, carrot, cucumber, scallions, and cilantro for the slaw.
- Grill the tofu over medium-high heat for 3 to 4 minutes per side, until marked and heated through.
- Fill lettuce leaves with slaw and grilled tofu.
Equipment for This Recipe:
- Grill
- Tofu press or paper towels and a plate
- Mixing bowls
- Tongs
- Knife and cutting board
How to Serve This Dish: Let people assemble their own cups so the lettuce stays crisp. A drizzle of extra marinade or a quick peanut sauce works if you want a little more richness. Keep the tofu in wide slabs, not crumbles; it eats better that way.
Pro Tips for This Recipe:
- Press the tofu longer than you think you need to.
- Use romaine if your lettuce cups keep tearing.
- Oil the grill grates lightly so the tofu releases cleanly.
- Don’t over-marinate or the tofu can get spongy instead of flavorful.
Variations on This Dish:
- Peanut Sauce Version: Add a peanut drizzle if you want more richness.
- Tempeh Swap: Use tempeh for a firmer, nuttier bite.
- Spicy Sriracha Finish: Stir sriracha into the marinade or sauce.
Common Mistakes to Avoid with This Dish:
- Skipping the press: Wet tofu won’t brown well.
- Flipping too soon: Let a crust form or the tofu tears.
- Using limp lettuce: The cups should snap a little when you bend them.
15. Asparagus and Ricotta Flatbread with Lemon
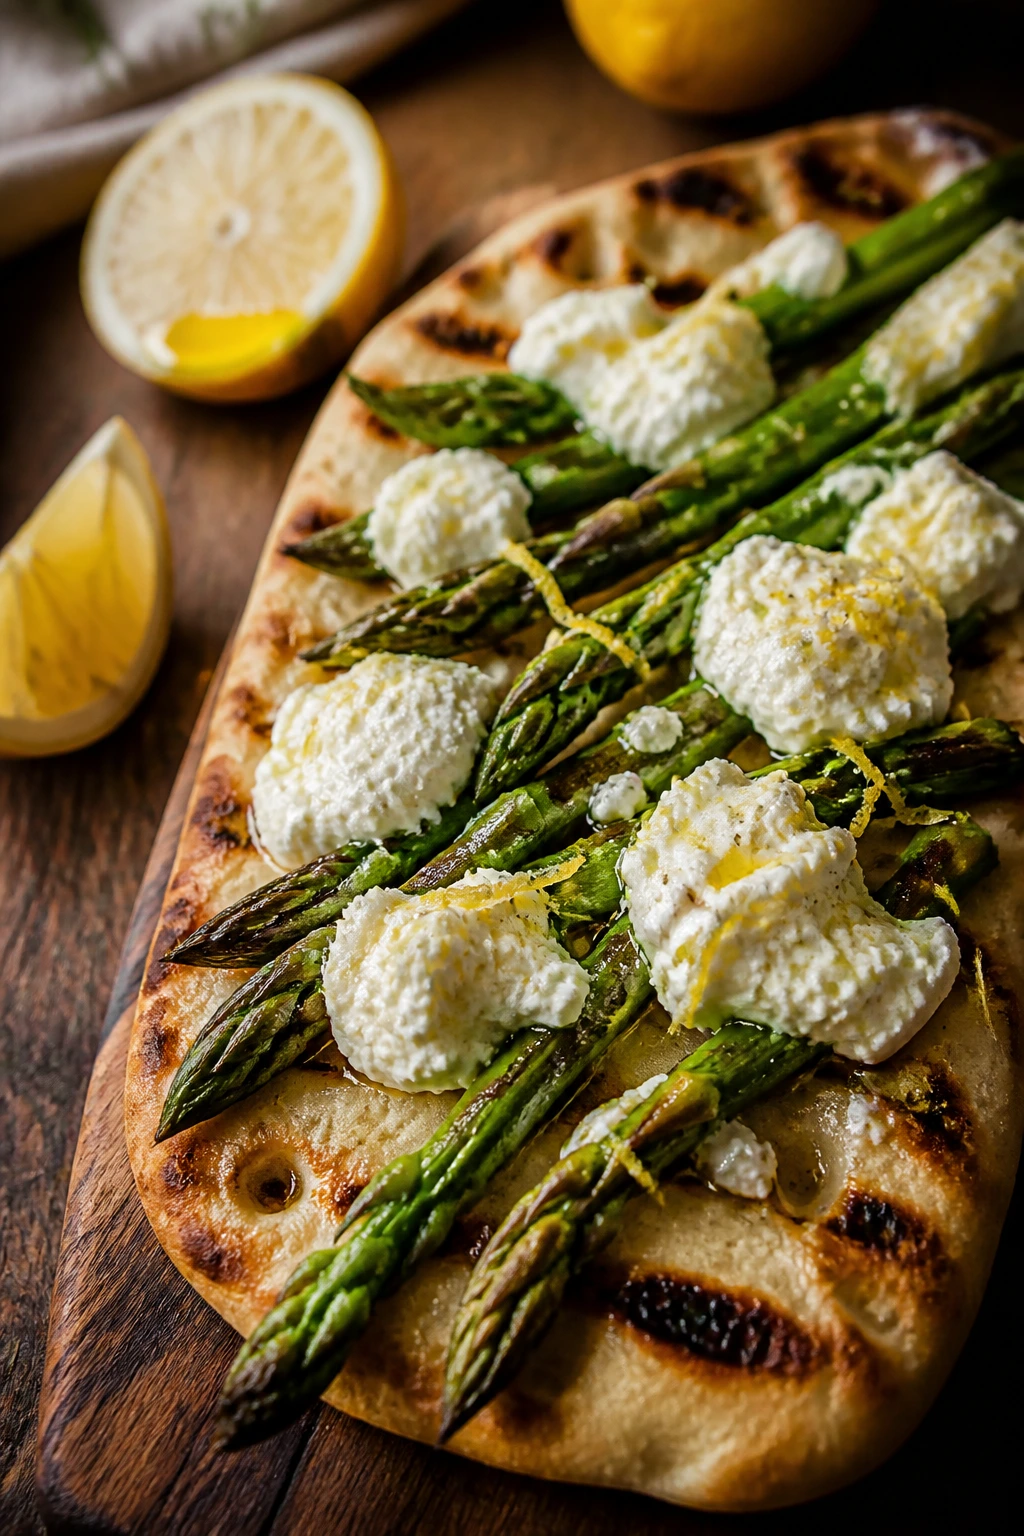
Asparagus on the grill turns sweet and a little nutty, which is why it belongs on flatbread instead of hiding in the back of a side dish bowl. Ricotta gives the base some creaminess, lemon keeps it bright, and the whole thing lands somewhere between snack and dinner. It’s a good use for a short ingredient list and a hot grate.
Why It Works: Flatbread is quick enough to grill without much risk, and ricotta acts like a soft landing pad for the asparagus. Lemon zest and a few flakes of salt wake everything up, while the char from the asparagus cuts through the cheese so the bite doesn’t feel rich in a heavy way.
Key Ingredients:
- 2 store-bought flatbreads or naan
- 1 bunch asparagus, trimmed
- 1 cup ricotta
- 1 tablespoon olive oil
- 1 teaspoon lemon zest
- 1 tablespoon lemon juice
- 1 garlic clove, grated
- 1/4 cup grated Parmesan
- 2 tablespoons basil or mint, torn
- Red pepper flakes, to taste
Quick Steps:
- Toss the asparagus with olive oil and a pinch of salt.
- Grill the flatbreads for 1 minute per side until lightly charred.
- Grill the asparagus for 3 to 5 minutes, turning once, until tender-crisp.
- Mix the ricotta with lemon zest, lemon juice, garlic, and a pinch of salt.
- Spread the ricotta on the grilled bread and top with asparagus, Parmesan, herbs, and red pepper flakes.
- Slice and serve warm.
Equipment for This Recipe:
- Grill
- Tongs
- Bowl
- Knife
- Serving board
How to Serve This Dish: Cut the flatbread into narrow strips if it’s starting a meal, or into larger wedges if it’s dinner. A side salad with bitter greens plays nicely against the ricotta. I like a final drizzle of olive oil on top because flatbread can look dry even when it isn’t.
Pro Tips for This Recipe:
- Trim asparagus stalks where they naturally bend.
- Use ricotta that’s thick, not watery.
- Grill the flatbread first so it doesn’t go soft under the toppings.
- Add the herbs at the end so they stay bright.
Variations on This Dish:
- Pea and Mint Flatbread: Add smashed peas under the ricotta.
- Smoked Salmon Version: Lay a little smoked salmon on top after grilling.
- Dairy-Free Spread: Use whipped white beans and lemon instead of ricotta.
Common Mistakes to Avoid with This Dish:
- Asparagus too thick or too thin: Medium stalks grill more evenly.
- Wet ricotta: Thin cheese turns the bread soggy.
- Overloading the toppings: A light hand keeps the flatbread crisp.
16. Grilled Apricots with Vanilla Yogurt and Pistachios
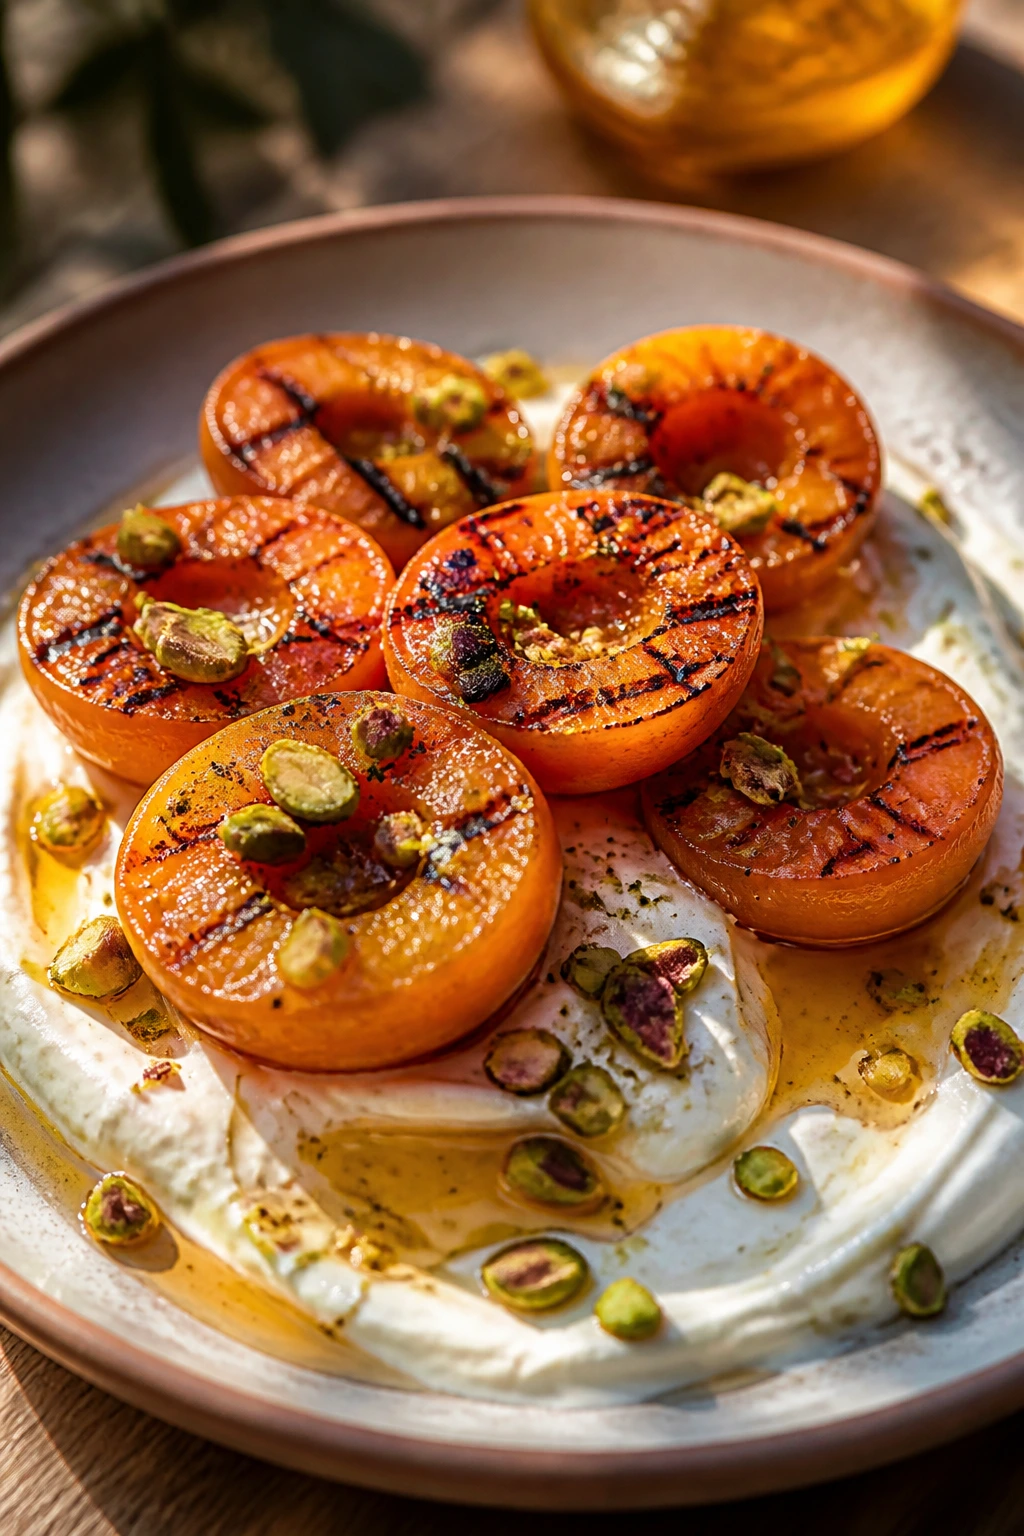
Apricots behave beautifully on a grill because they are small, quick, and just sweet enough to caramelize without losing their shape. Add vanilla yogurt and pistachios, and the whole dessert tastes cool and warm at once. It’s the sort of thing that ends a cookout with a little less heaviness and a lot more brightness.
Why It Works: The grill intensifies the apricots’ sugars, which makes them taste deeper without needing much added sweetness. Yogurt brings tang and softness, while pistachios add a crunch that keeps the dessert from melting into a puddle. A little lemon zest or mint is enough to pull the whole bowl into focus.
Key Ingredients:
- 12 apricots, halved and pitted
- 1 tablespoon olive oil or melted butter
- 1 cup plain Greek yogurt
- 1 teaspoon vanilla extract
- 1 tablespoon honey, plus more for drizzling
- 1 teaspoon lemon zest
- 1/4 cup pistachios, chopped
- Fresh mint leaves, for serving
Quick Steps:
- Brush the apricots with olive oil or butter.
- Whisk the yogurt with vanilla, honey, and lemon zest.
- Grill the apricots cut-side down for 1 to 2 minutes, until marked and slightly softened.
- Spoon the yogurt onto plates or bowls.
- Top with the apricots, pistachios, a drizzle of honey, and mint.
- Serve warm or at room temperature.
Equipment for This Recipe:
- Grill
- Tongs
- Small bowl
- Spoon
- Serving bowls
How to Serve This Dish: Serve in shallow bowls so the yogurt pools around the fruit instead of disappearing under it. A little extra mint on top keeps the dessert smelling fresh. If the apricots are especially sweet, you can skip the honey drizzle and let the fruit do the talking.
Pro Tips for This Recipe:
- Pick apricots that are firm but give a little when pressed.
- Grill cut-side down only long enough to mark and soften.
- Chill the yogurt if the weather is hot; the contrast matters.
- Chop the pistachios by hand so they stay chunky.
Variations on This Dish:
- Peach or Plum Swap: Use the same method with peaches or plums.
- Coconut Yogurt Version: Works well for a dairy-free dessert.
- Mascarpone Finish: Replace yogurt with lightly sweetened mascarpone for a richer bowl.
Common Mistakes to Avoid with This Dish:
- Using overripe fruit: It turns mushy before the grill can do its work.
- Grilling too long: Apricots need a quick char, not a full roast.
- Putting nuts on too early: They stay crisper if they go on right before serving.
17. Watermelon-Feta Salad with Mint and Charred Lime
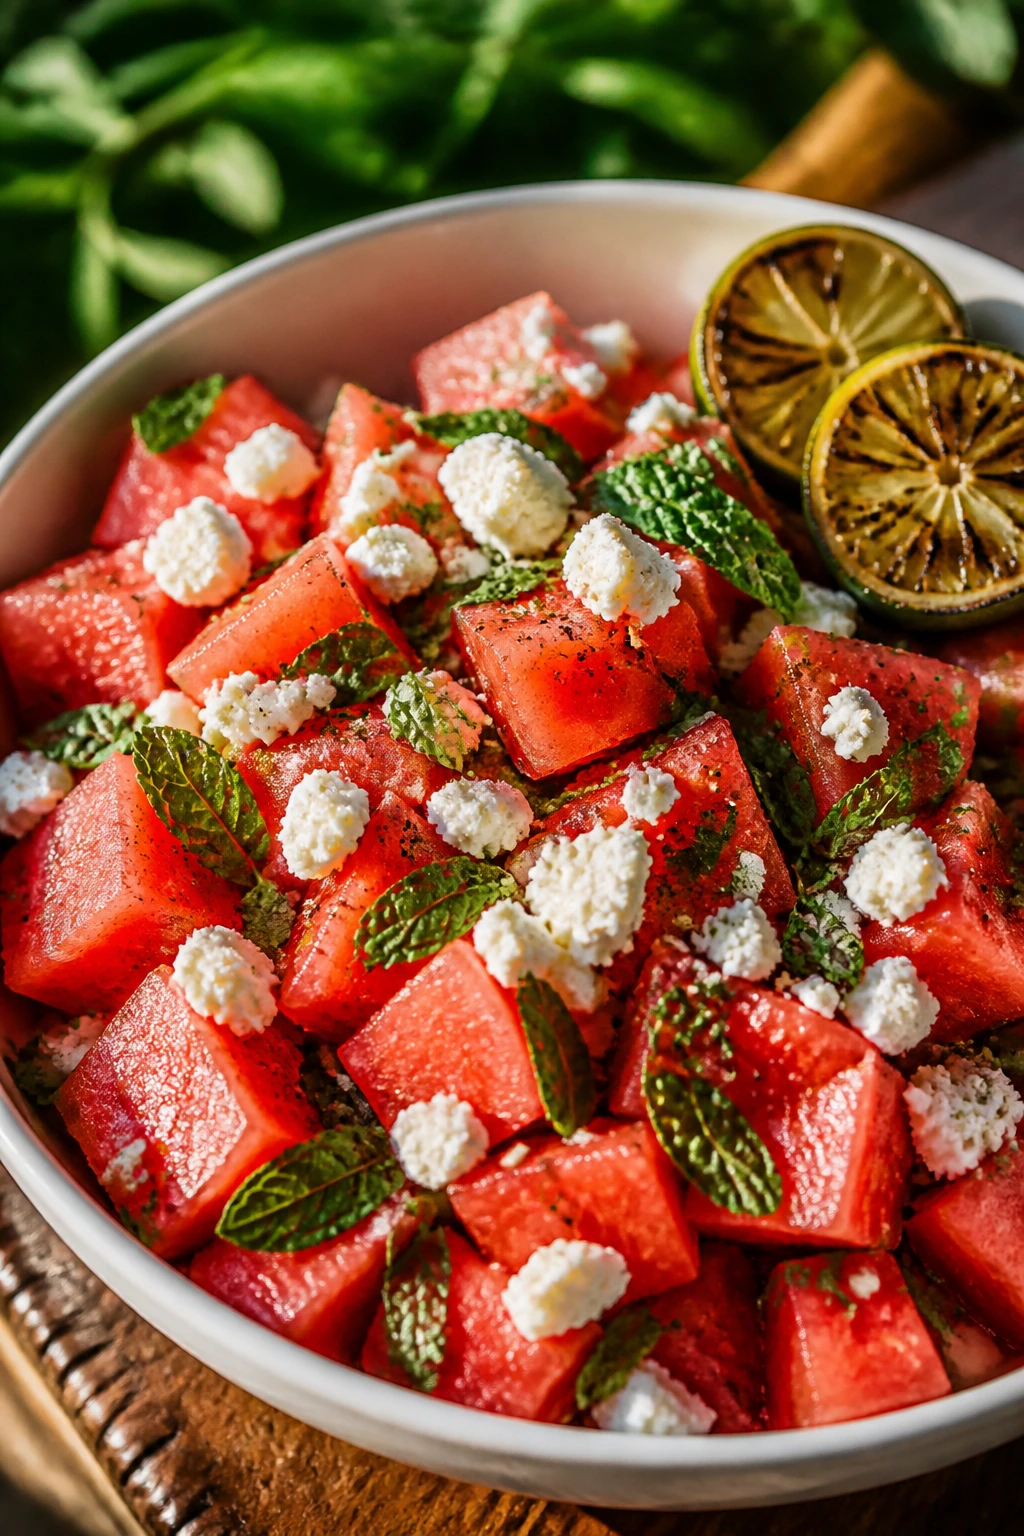
Watermelon salad can feel tired if it’s only sweetness and cheese. The grill changes that. A quick char on the watermelon deepens the flavor just enough, and a squeezed charred lime turns the whole bowl sharper and less sugary. Mint keeps it cool, feta keeps it salty, and the result tastes like the best part of a hot day.
Why It Works: Brief heat tightens watermelon’s surface and brings out a softer, almost floral flavor under the usual sweetness. Feta gives you salt and crumbly texture, while cucumber and mint keep the salad crisp and fresh. The charred lime is a small move that makes a big difference; it tastes rounder than raw lime and much less sharp.
Key Ingredients:
- 8 cups watermelon, cut into wedges or thick cubes
- 1 tablespoon olive oil
- 1 cucumber, sliced
- 6 ounces feta, crumbled
- 1/4 cup mint leaves
- 2 limes, halved
- Black pepper, to taste
- Pinch of flaky salt, optional
Quick Steps:
- Brush the watermelon lightly with olive oil.
- Grill the wedges or thick cubes for 30 to 60 seconds per side, just until marked.
- Grill the lime halves cut-side down for 1 to 2 minutes.
- Arrange the watermelon and cucumber on a platter.
- Add feta and mint, then squeeze the charred lime over the top.
- Finish with black pepper and a small pinch of flaky salt.
Equipment for This Recipe:
- Grill
- Tongs
- Serving platter
- Knife
- Small bowl, if you want to catch juice
How to Serve This Dish: Serve cold or only slightly warm. I like to scatter the feta instead of burying it so the red, green, and white colors stay visible. This salad can sit beside grilled chicken, shrimp, or halloumi, but it also stands on its own as a starter.
Pro Tips for This Recipe:
- Choose watermelon with a firm flesh, not one that feels loose or grainy.
- Dry the melon after grilling so the salad doesn’t water itself down.
- Use block feta if you want cleaner crumbles.
- Add mint at the last second so it stays fragrant.
Variations on This Dish:
- Basil Instead of Mint: A sweeter herb profile, especially good with peaches mixed in.
- Chili-Lime Heat: Add chili flakes or thinly sliced jalapeño.
- Goat Cheese Version: Softer and creamier than feta, though less salty.
Common Mistakes to Avoid with This Dish:
- Overgrilling the watermelon: It only needs enough heat to mark the surface.
- Dressing too early: Watermelon leaks fast; toss or season right before serving.
- Skipping the salt: Just a little salt makes the sweetness taste deeper.
18. Lemon-Garlic Chicken and Zucchini Kebabs
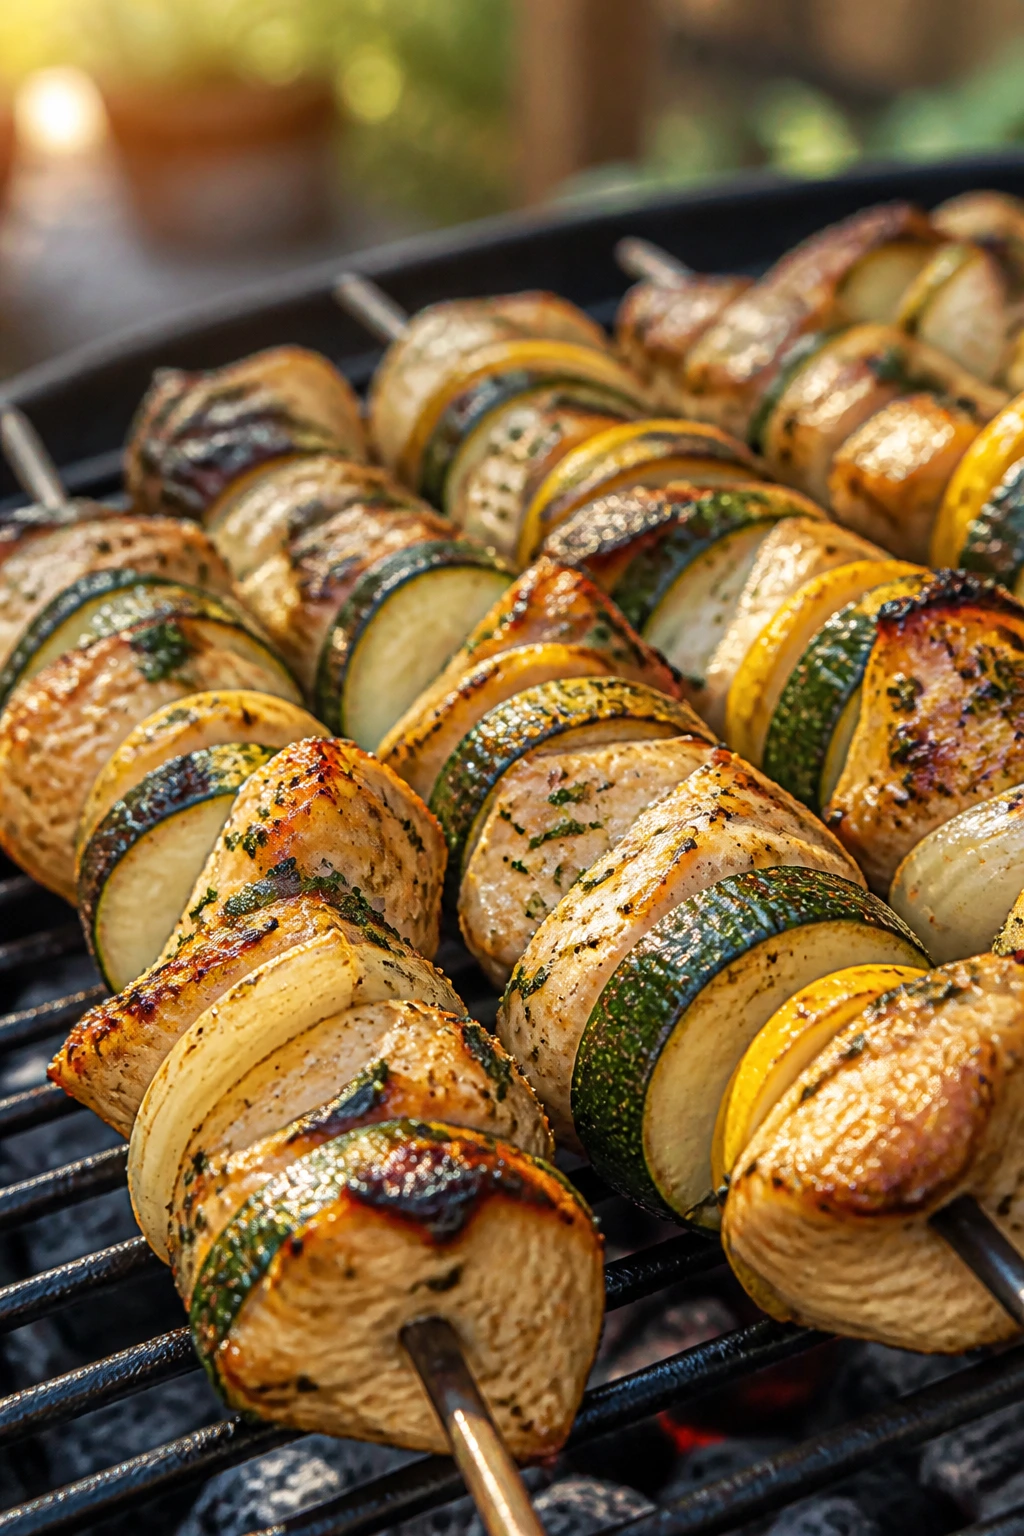
If I had to pick one recipe here that behaves like the weekend workhorse, this is it. Chicken, zucchini, onion, lemon, garlic, and a hot grill are a simple combination, but they give you enough contrast — juicy meat, tender vegetables, char on the edges — to make dinner feel complete. It’s the kind of kebab that disappears fast because nothing on the stick feels extra.
Why It Works: The lemon-garlic marinade brightens the chicken without turning it mushy if you keep the marinating time sane. Zucchini grills best in thick pieces, not paper-thin slices, and red onion adds sweetness once it softens over the flame. Chicken thighs stay juicier, but breasts work if you pull them at the right moment.
Key Ingredients:
- 1 1/2 pounds boneless chicken thighs or breasts, cut into 1 1/2-inch pieces
- 2 zucchini, cut into thick half-moons
- 1 red onion, cut into chunks
- 3 tablespoons olive oil
- Juice of 2 lemons
- 3 garlic cloves, minced
- 2 teaspoons dried oregano
- 1 teaspoon kosher salt
- 1/2 teaspoon black pepper
- 1 teaspoon lemon zest
Quick Steps:
- Whisk the olive oil, lemon juice, garlic, oregano, salt, pepper, and lemon zest.
- Toss the chicken in the marinade and let it sit for 20 to 30 minutes.
- Thread the chicken, zucchini, and onion onto skewers.
- Grill over medium-high heat for 10 to 12 minutes, turning every few minutes, until the chicken reaches 165°F.
- Rest for 5 minutes.
- Serve with extra lemon wedges or a spoon of yogurt sauce.
Equipment for This Recipe:
- Grill
- Skewers
- Mixing bowl
- Tongs
- Instant-read thermometer
How to Serve This Dish: These kebabs sit nicely with rice, couscous, or a chopped salad with cucumbers and herbs. If you want the plate to feel especially fresh, add a spoonful of yogurt mixed with mint and garlic. The finished skewers should look bronzed at the edges and juicy in the middle.
Pro Tips for This Recipe:
- Cut the chicken and zucchini to similar thickness so they finish together.
- If using wooden skewers, soak them first or the tips burn.
- Turn the kebabs only when one side has enough color to release cleanly.
- Rest the skewers before serving so the juices stay where they belong.
Variations on This Dish:
- Feta Finish: Sprinkle feta over the hot skewers right before serving.
- Spiced Version: Add a pinch of paprika or cumin to the marinade.
- Vegetable-Heavy Skewers: Double the zucchini and onion if you want a lighter plate.
Common Mistakes to Avoid with This Dish:
- Uneven chunks: Big chicken pieces and tiny zucchini slices finish at different speeds.
- Too much marinade time: Lemon is helpful, but it can start to affect texture if you leave it too long.
- Serving immediately from the grill: A short rest improves both juiciness and flavor.
Why the Grill Makes Bright Food Taste Sharper
The grill is not just a heat source; it’s a flavor sorter. It pushes water out of vegetables, fruit, and meat just enough to concentrate what’s left, and that concentration is why a peach tastes more peach-like after 90 seconds over flame. The smoke does one job, the char does another, and the bright ingredients you add at the end — herbs, acid, yogurt, vinegar — keep the whole plate from turning dull.
That’s why these summer recipes for the grill lean on contrast instead of heaviness. A creamy sauce can cool a hot protein. A cucumber salad can wake up charred corn. Even watermelon, which people usually treat as a cold picnic fruit, changes in a useful way when it kisses the grate. Once you notice that pattern, it’s hard to go back to plain grilled meat with nothing sharp on the side.
Essential Equipment for These Recipes
- Gas or charcoal grill: Either one works; charcoal gives a deeper smoke note, gas gives cleaner control.
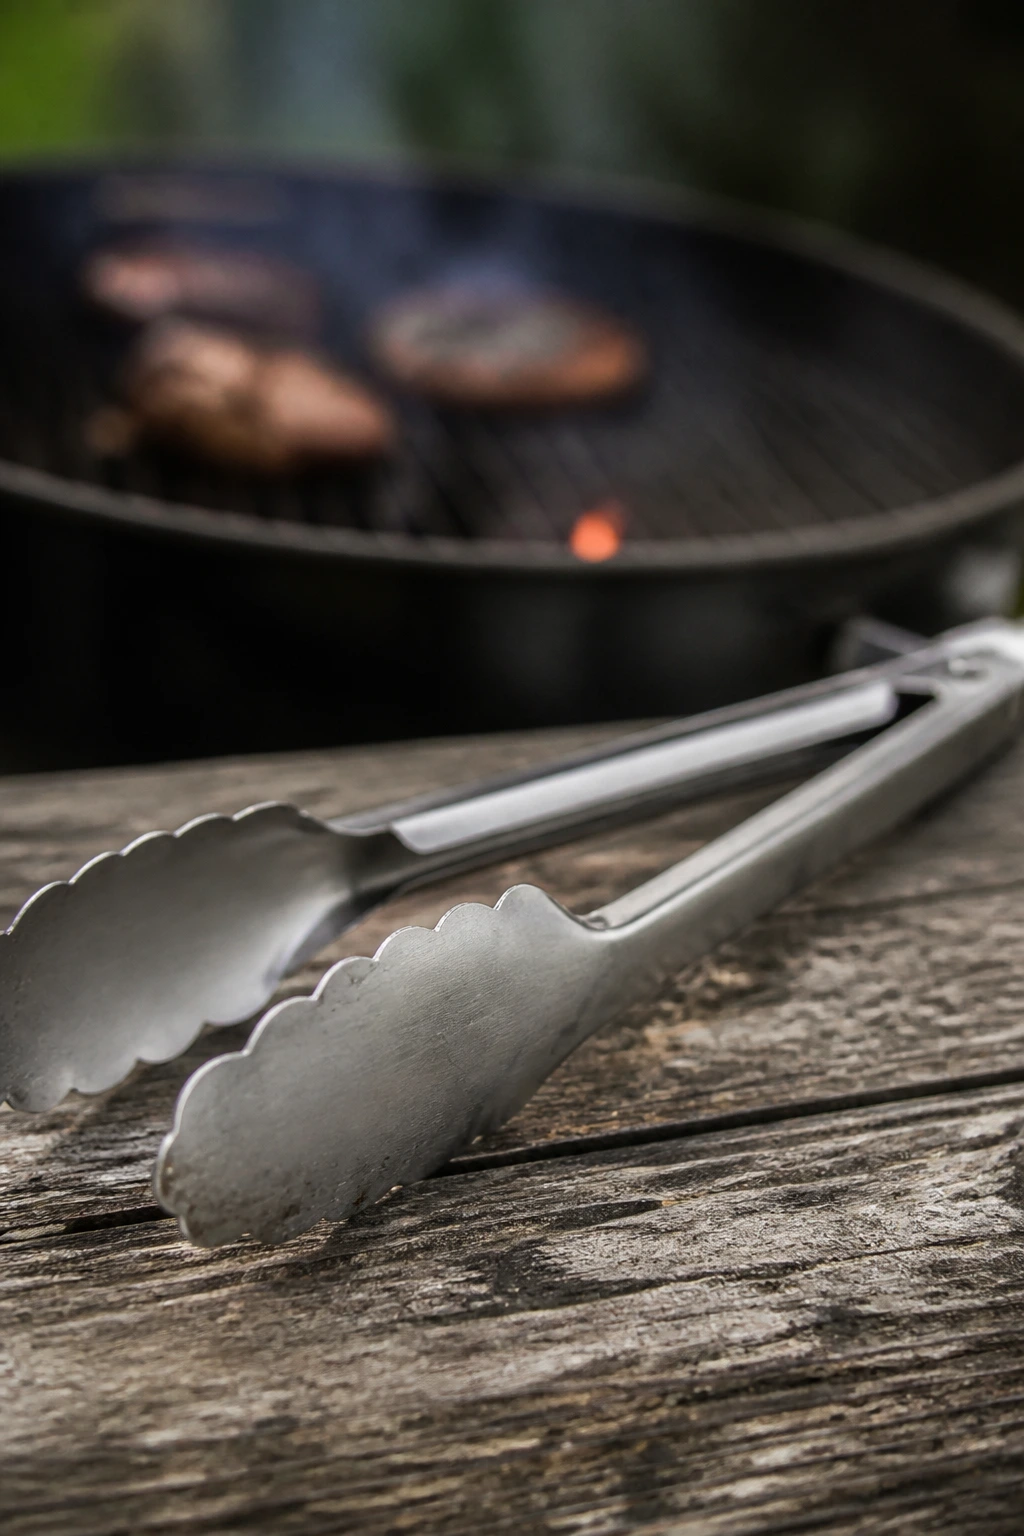
- Long-handled tongs: You’ll use these constantly for skewers, vegetables, and delicate lettuce.
- Instant-read thermometer: The easiest way to keep chicken, pork, and salmon from wandering into overdone territory.
- Skewers: Metal is easiest; wooden skewers need soaking first.
- Mixing bowls: You’ll want at least two or three for marinades, sauces, and salsas.
- Pastry brush: Handy for oiling peaches, bread, halloumi, and eggplant.
- Fish spatula: Optional, but it helps when salmon or romaine wants to stick.
- Grill basket or foil tray: Useful for bread cubes, small vegetables, or anything that might slip through the grates.
- Sharp knife and sturdy cutting board: Especially important for steak, pork, melons, and bread.
- Serving platters and shallow bowls: These recipes look best spread out, not piled in deep bowls.
Smart Shopping and Ingredient Tips
The recipes here live or die on a few smart choices at the market. Shrimp should smell clean, not salty-fishy, and the bigger ones are easier to skewer without overcooking. For salmon, buy fillets of similar thickness so the thinner tail end doesn’t dry out while the thick part finishes. Chicken thighs forgive a lot more grill heat than breasts, so I reach for them when I know the fire will be lively.
Fruit matters more than people think. Peaches, nectarines, apricots, and watermelon should all be ripe enough to taste sweet, but still firm enough to hold shape when they hit heat. If you can press a peach and leave a deep dent, it’s too soft for skewers or grilling. Corn should have bright green husks if you’re buying it whole, and the kernels should feel plump through the husk.
A few pantry choices help too. White miso should be smooth and pale for the eggplant glaze. Use block feta and cotija when you can; the crumbly pre-packaged stuff is fine in a pinch, but the texture is drier. For tofu, buy extra-firm and press it well. And with halloumi, check the package for a block that feels dense and a little springy, not brittle.
How to Serve These Recipes
Presentation: Spread food out on wide platters and shallow bowls so the char, herbs, and fresh toppings stay visible. A little mess is welcome here — salsa dripping off steak, yogurt trailing under salmon, burrata melting into tomatoes — but keep the pieces distinct enough to see what’s what.
Accompaniments: The easiest pairings are cold cucumber salads, grilled bread, warm tortillas, couscous, herb rice, and simple greens. Shrimp and chicken like citrusy sides. Steak tacos want chopped onions, avocado, or slaw. The vegetarian dishes stand up well beside grains or flatbread, especially if you want the meal to feel complete without adding another grilled protein.
Portions: Most of these recipes serve 4, though the skewers and salads can stretch a little farther if you add bread or rice. For a bigger crowd, double the sauces first, then the protein. That keeps the balance right and saves you from serving a plate that’s all meat and no freshness.
Beverage Pairing: I like iced tea with lemon, sparkling water with cucumber, or a crisp lager for the savory recipes. For the fruit-forward dishes, a dry rosé or a gin-and-tonic with lots of ice keeps pace without crowding the flavors.
Additional Tips and Flavor Boosters
Flavor Enhancement: A finishing squeeze of lime or lemon, added after the food leaves the grill, does more than a final sprinkle of salt in most of these recipes. If the plate feels flat, acid is usually the fix.
Customization: You can move the flavor profile around without changing the method. Swap dill for mint, feta for cotija, peaches for nectarines, or tofu for halloumi, and the recipes still hold together.
Serving Suggestions: Keep a bowl of fresh herbs on the table — basil, dill, cilantro, mint — and let people add their own. It makes the food smell better, and it lets each plate lean either greener or sweeter.
Make-It-Yours: If you eat dairy-free, lean on yogurt alternatives, tahini, avocado, and herb vinaigrettes. If you want less heat, skip the jalapeño in the salsas and use black pepper and citrus instead. If you want more smoke, add chipotle, paprika, or a little char on the vegetables before you turn them into a salad.
Make-Ahead, Storage, and Reheating Guidance
A few parts of this collection hold well, and a few really do not. Cooked chicken, turkey burgers, flank steak, pork tenderloin, shrimp, and salmon all keep in the refrigerator for 3 to 4 days in airtight containers. Reheat them gently in a 300°F oven or in a covered skillet over low heat so they don’t dry out. Shrimp and salmon are best warmed only until the chill is gone; pushing them too far ruins the texture.
Grilled vegetables, eggplant, corn, and panzanella-style components usually keep for 2 to 3 days, though the bread in the panzanella should stay separate until serving. Fruit dishes are the least forgiving. Grilled peaches, apricots, and watermelon taste best the day they’re made, and they’ll still be fine chilled for a day, but they lose their edge if they sit much longer. Burrata and ricotta flatbread can be assembled ahead in parts, but the final assembly should happen right before eating.
Sauces and dressings are the easiest make-ahead piece. Tzatziki, lemon herb yogurt, Caesar dressing, basil honey, and miso glaze all keep for about 3 days in the fridge. The eggplant glaze can be made a day ahead and brushed on at the end. For grilling day, do the cutting and mixing early, then keep the sauces cold and the proteins seasoned until the grill is ready.
Variations and Adaptations to Try
Gluten-Free Grill Night: Swap naan, burger buns, and tortillas for corn tortillas, lettuce cups, grilled potatoes, or rice bowls. Check sauces that use soy sauce and use tamari instead.
Dairy-Free Char: Use tahini, avocado crema, coconut yogurt, or herb vinaigrettes in place of ricotta, burrata, sour cream, and Greek yogurt. The food stays bright; it just shifts in texture.
Spice-Forward Tables: Add chipotle, harissa, jalapeño, chili flakes, or a pinch of cayenne to marinades and salsas. The trick is to keep the heat from burying the grilled flavor, so use it like a side note, not the whole sentence.
Vegetarian and Vegan Swaps: The tofu, eggplant, mushroom, halloumi, corn, grilled fruit, and flatbread recipes already give you a strong base. Add grains or beans if you want the meal to feel larger.
Lower-Sodium Cooking: Use more herbs, citrus, garlic, and vinegar so you can ease back on the salt. Miso, feta, cotija, and anchovy dressing all bring their own salt, so taste before adding more.
Regional Twists: Push the flavors toward Mediterranean with oregano, dill, lemon, and yogurt; toward Latin flavors with lime, jalapeño, corn, and cotija; or toward a Southeast Asian profile with ginger, sesame, and tamari.
Common Mistakes to Avoid
The first mistake is starting with a grill that isn’t hot enough. Food sticks more, gets pale instead of charred, and never develops the edge that makes these recipes taste like they came off flame. Give the grates time to heat fully, then oil them right before the food goes on.
The second mistake is treating every ingredient like it wants the same amount of heat. Shrimp and romaine take minutes. Pork tenderloin and chicken need a thermometer. Fruit and halloumi need just enough time to mark and soften, not enough time to collapse. Separate the delicate stuff from the sturdy stuff, or cook them in stages.
Another one: putting sauces on too early. Honey glazes burn. Yogurt slides off if the surface is too hot. Burrata melts into a puddle if you let it sit on the grill. Save the cool and creamy finishes for after the food comes off.
Crowding the grates causes trouble too. When there’s no space between pieces, steam builds and the char turns soft. Give shrimp skewers, mushroom caps, asparagus, and corn room to breathe. You’ll get better color and cleaner flavor.
Finally, don’t skip resting meat. Steak, pork, and chicken all need a few minutes after grilling so the juices settle. Slice too early and you lose the best part onto the board. It’s a tiny wait. It pays off.
Frequently Asked Questions
Can I make most of these recipes on a gas grill instead of charcoal?
Yes. Gas gives you cleaner control and faster temperature changes, which actually helps with delicate foods like shrimp, romaine, and fruit. Charcoal adds more smoke, so if you use it, keep a cooler zone ready for anything that needs a gentler finish.
How do I keep vegetables from sticking to the grill?
Heat the grill fully, oil the grates, and brush the vegetables with a thin coat of oil before they go on. Let them sit long enough to sear on one side before turning; if you fuss with them too soon, they tear.
Can I prep the sauces and salsas ahead of time?
Yes, and I usually do. Yogurt sauces, Caesar dressing, basil honey, nectarines salsa, and tzatziki all benefit from a little resting time in the fridge, though avocados and watermelon are better cut closer to serving.
What if I don’t have skewers?
You can grill shrimp, mushrooms, or chicken pieces directly on the grates if they’re large enough, or use a grill basket. For halloumi and fruit, a clean grill basket or foil tray works well and saves you from chasing slippery pieces.
How do I know chicken, turkey, or pork is done without drying it out?
Use an instant-read thermometer. Chicken and turkey should hit 165°F; pork tenderloin is best at 145°F with a short rest. The thermometer removes guesswork, and guesswork is where dry meat starts.
Can I make these recipes a few hours before dinner?
Some, yes. Grill the proteins and vegetables ahead, then rewarm them gently and add the cold sauces or salsas right before serving. Salads with bread or lettuce should wait until the last minute or they get soggy.
What’s the best way to grill fruit without turning it into mush?
Use fruit that’s ripe but firm, and keep the cooking time short — usually 1 to 2 minutes per side or less. You want mark lines and a little softening, not a full collapse.
Do I need a thermometer for every recipe?
Not for every one, but it helps more than people expect. Use it for chicken, turkey, pork, salmon, and thicker steak cuts. Once you’ve made these recipes a few times, you’ll know some of the visual cues, but the thermometer keeps the margins honest.
A Cooler Kind of Cookout
The nicest thing about grilling in warm weather is that the food doesn’t have to fight the season. It can lean into it. Smoke, char, cold herbs, citrus, fruit, yogurt, and a few well-placed salty bits do most of the heavy lifting, and the result feels lighter without turning bland or timid.
Pick one skewer, one salad, one sauce, and one grilled fruit or vegetable dish, and you’ve already got a menu that feels more thought-out than a tray of burgers ever could. The grill is at its best when it’s doing a little less and the finishing touches are doing a little more. That’s the move worth keeping.