
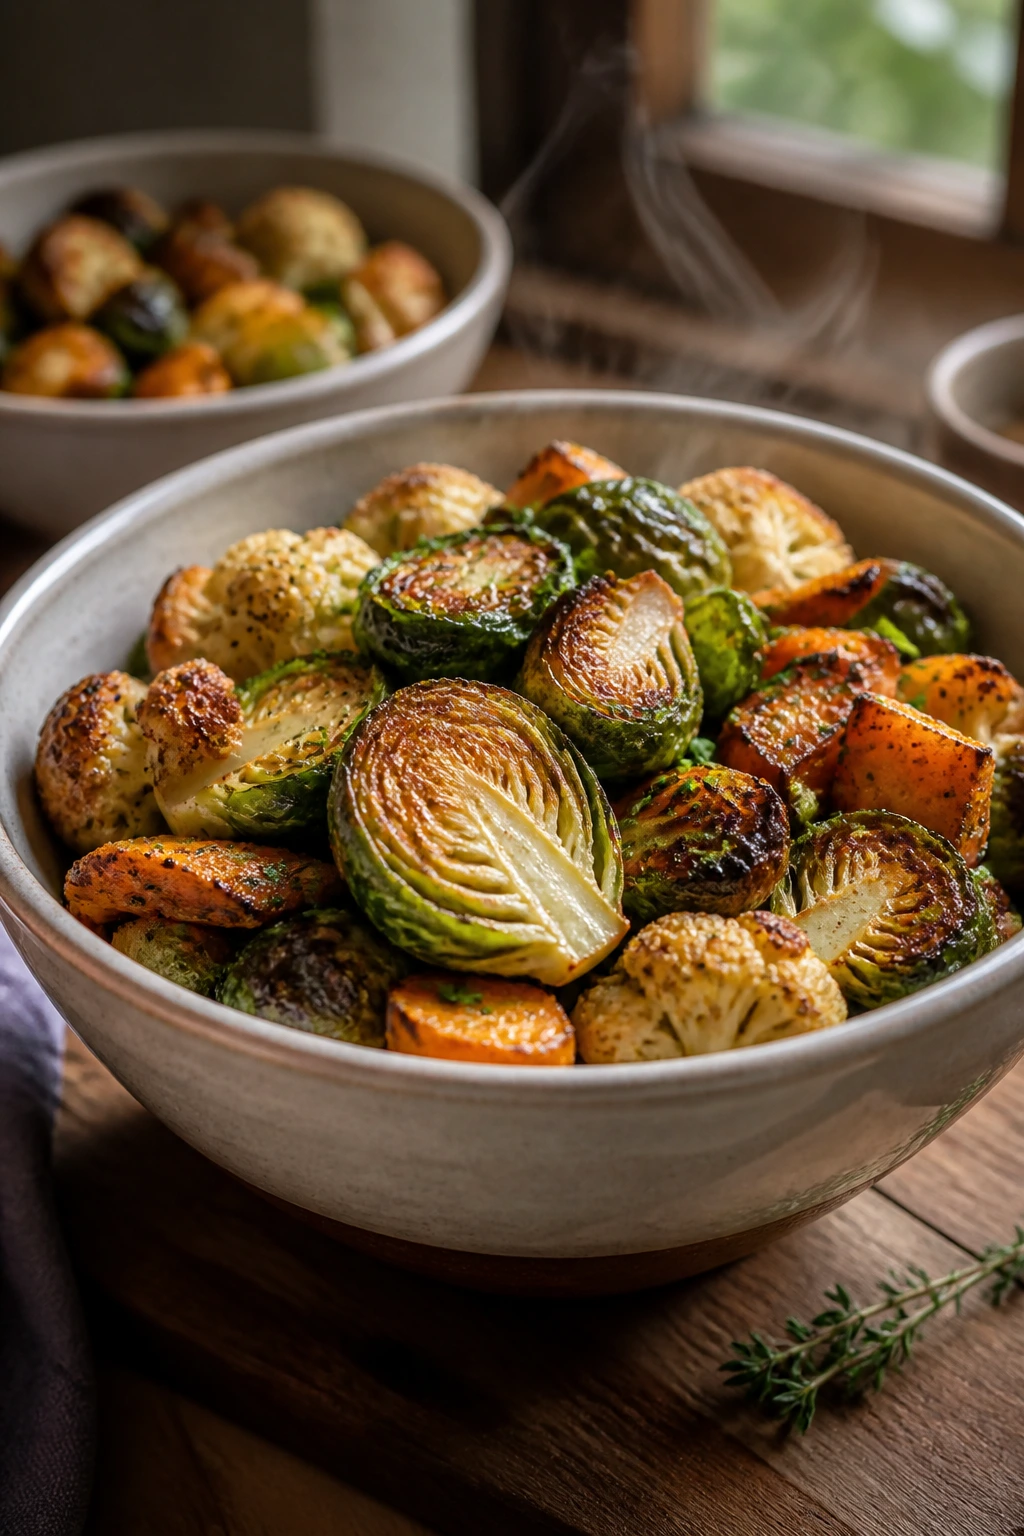
A good air fryer does something vegetables desperately need: it dries the surface fast enough to brown before the inside gives up its moisture. That’s why airfried veggie recipes can turn a skeptical table around so quickly. A tray of Brussels sprouts with dark, lacy edges disappears faster than anyone expects. Same with cauliflower, zucchini, mushrooms, sweet potatoes—especially when they come out hot, salted, and a little blistered.
The trick isn’t pretending vegetables taste like steak. It’s giving them the kind of heat they respond to: high, direct, and dry. That’s where the air fryer earns its keep. You get crisp edges, concentrated seasoning, and a texture that feels more like a snack than a side dish. And once you learn how much oil, how much salt, and how much space each vegetable needs, the whole thing stops being guesswork.
Some of these are crunchy finger-foods. Some are sturdy sides. A few are the sort of thing I’d put next to burgers, grilled chicken, roast fish, or nothing at all because they’re already doing enough on their own. The common thread is simple: these are vegetables with backbone.
Why These Air-Fried Veggies Win Over Skeptics
- Crisp Without Deep Frying: The air fryer gives you browned edges and a dry, crackly surface with about 1 to 2 tablespoons of oil instead of a bath of fat.
- Seasoning Sticks Better: Garlic powder, paprika, Parmesan, lemon zest, and spice blends cling to the hot surface instead of sliding off into a pan.
- Fast Enough for Weeknights: Most of these recipes cook in 8 to 18 minutes, which means you can get a tray on the table before a pot of rice finishes.
- Easy to Scale: You can cook a single zucchini or two full pounds of Brussels sprouts, as long as you leave space for air to move.
- Vegetables That Feel Meaty: Mushrooms, cauliflower steaks, cabbage wedges, and onion rings all bring a chew or heft that meat eaters usually appreciate.
- Less Mess Than Frying: No oil splatter, no huge pot, and no lingering fried smell hanging around the kitchen.
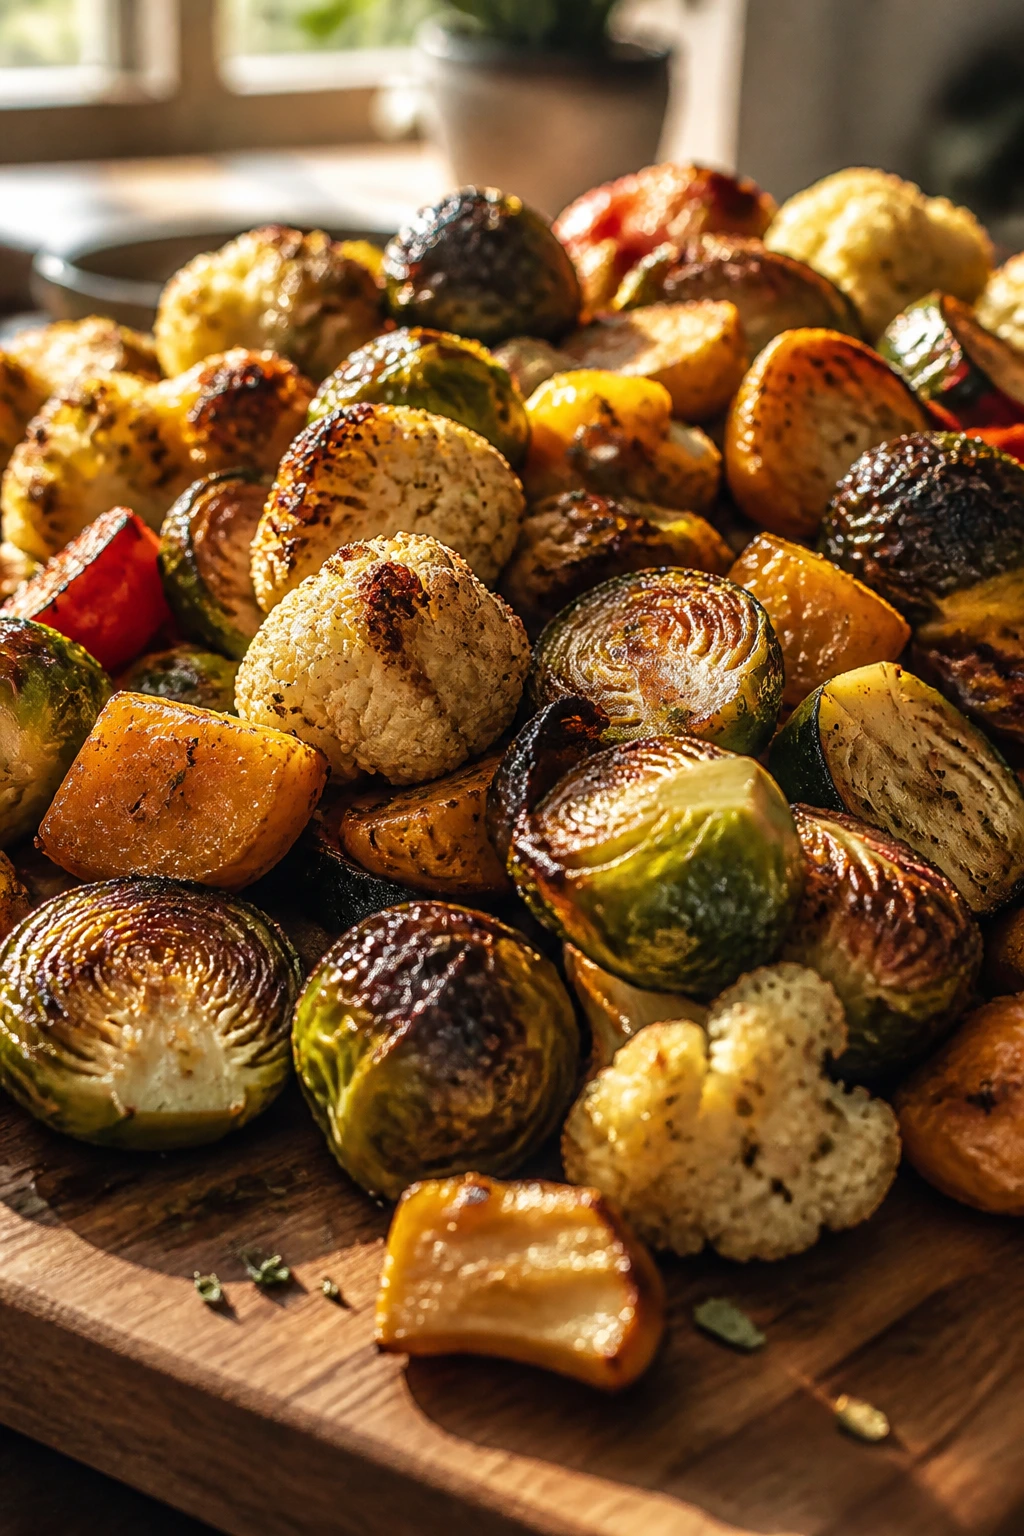
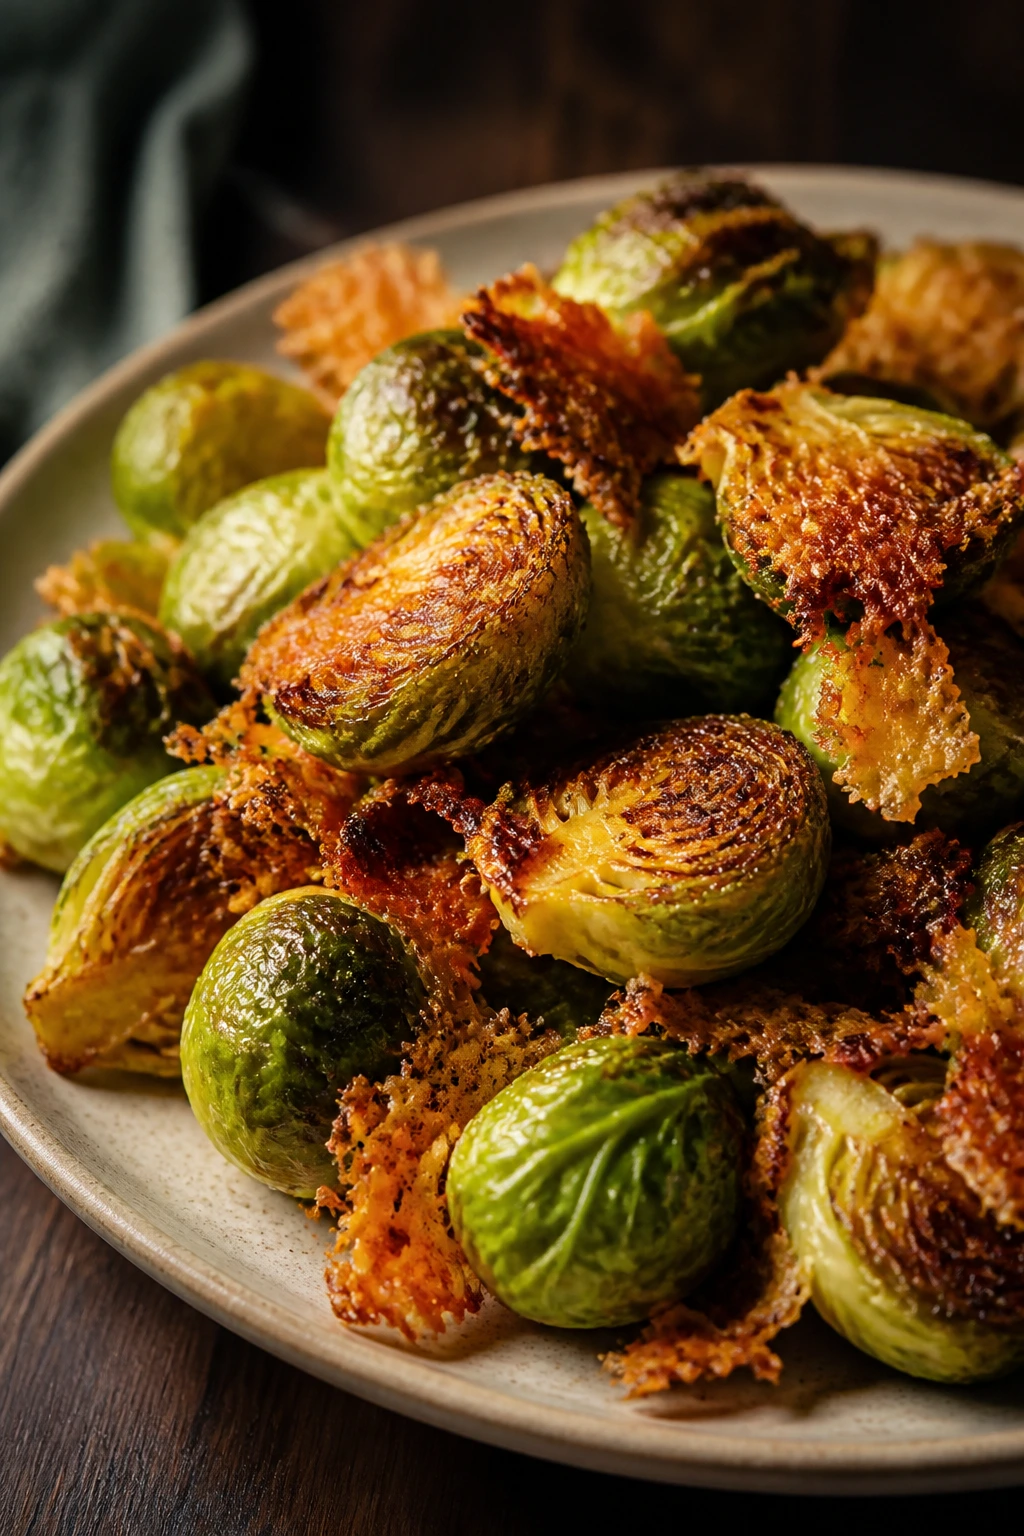
1. Crispy Parmesan Brussels Sprouts
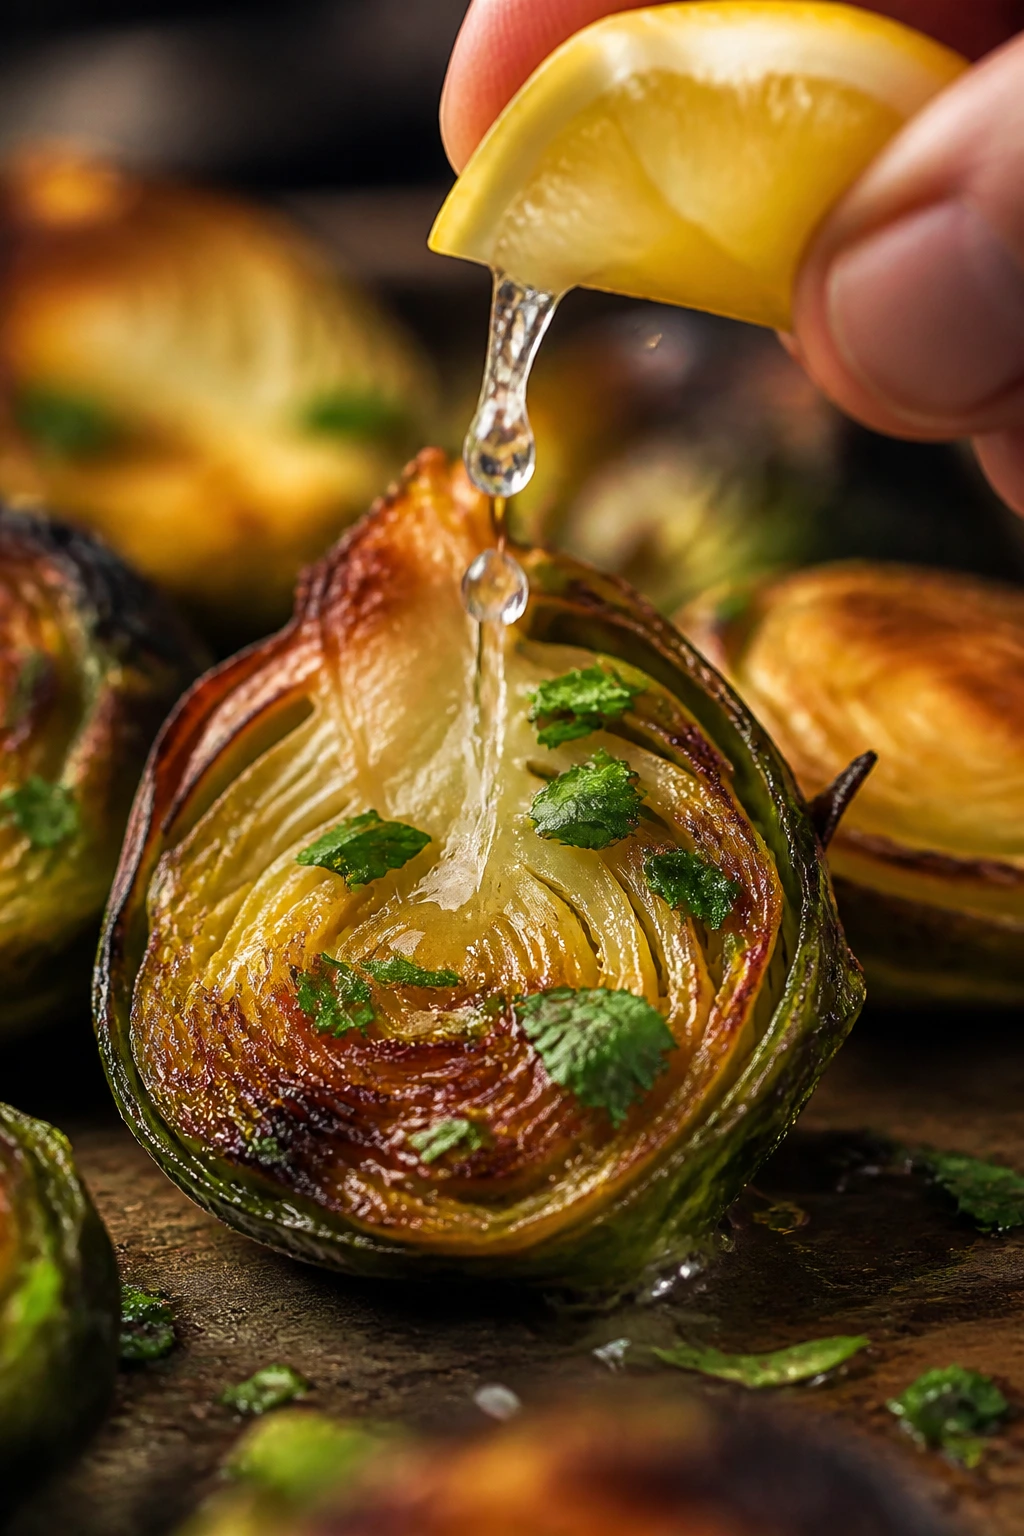
A well-made Brussels sprout should be nutty, browned, and a little aggressive around the edges. These get there fast in the air fryer. When the cut sides hit the basket, they caramelize in spots and the Parmesan adds a salty crust that tastes far richer than the ingredient list suggests.
Why It Works:
Brussels sprouts love dry heat, and the air fryer gives them exactly that. Splitting them in half exposes the cut surface, which browns in 10 to 12 minutes at 375°F. A little Parmesan at the end clings to the hot leaves and turns the outer layer crisp instead of soggy.
Key Ingredients:
- 1½ pounds Brussels sprouts, trimmed and halved
- 2 tablespoons olive oil
- ½ teaspoon kosher salt
- ½ teaspoon black pepper
- ½ teaspoon garlic powder
- ⅓ cup finely grated Parmesan
- 1 teaspoon lemon juice
- Pinch of red pepper flakes, optional
Quick Steps:
- Preheat the air fryer to 375°F for 3 minutes.
- Toss the Brussels sprouts with olive oil, salt, pepper, and garlic powder until each cut side looks lightly coated.
- Arrange them in a single layer, cut side down, and air fry for 10 minutes.
- Shake the basket, then cook 2 more minutes until the outer leaves are browned and crisp.
- Transfer to a bowl, toss with Parmesan, lemon juice, and red pepper flakes, and serve right away.
Equipment for This Recipe:
- Air fryer basket
- Large mixing bowl
- Tongs or a spatula
How to Serve This Dish:
Pile them on a warm platter and finish with a little extra Parmesan. They sit well next to steak, roast chicken, or a bowl of creamy polenta.
Pro Tips for This Recipe:
- Cut the sprouts through the stem so they stay intact.
- If your sprouts are tiny, shave 1 to 2 minutes off the cook time.
- Parmesan burns if it goes in too early; add it after cooking.
Variations on This Dish:
- Balsamic Glaze Finish: Drizzle with 1 tablespoon balsamic glaze after cooking for a sweet-sharp edge.
- Spicy Bacon-Style Version: Add ½ teaspoon smoked paprika and ¼ teaspoon cayenne for a deeper, savory bite.
Common Mistakes to Avoid with This Dish:
- Crowding the basket: The sprouts steam instead of crisp. Cook in batches if needed.
- Adding Parmesan too soon: It turns bitter. Toss it on after the sprouts come out.
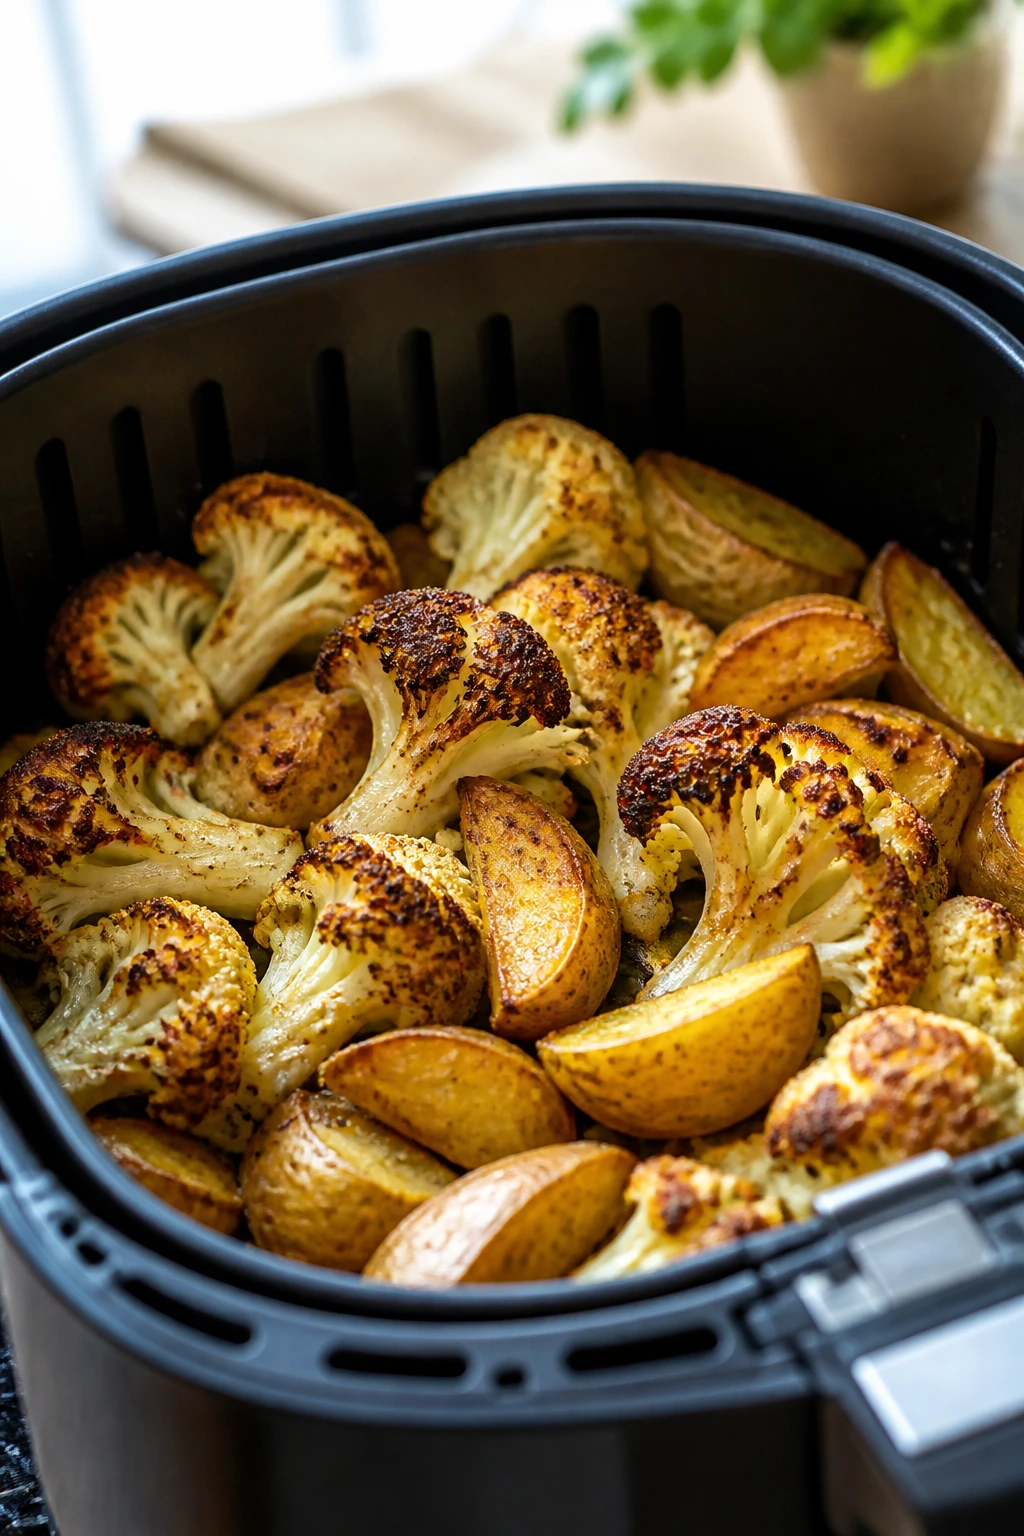
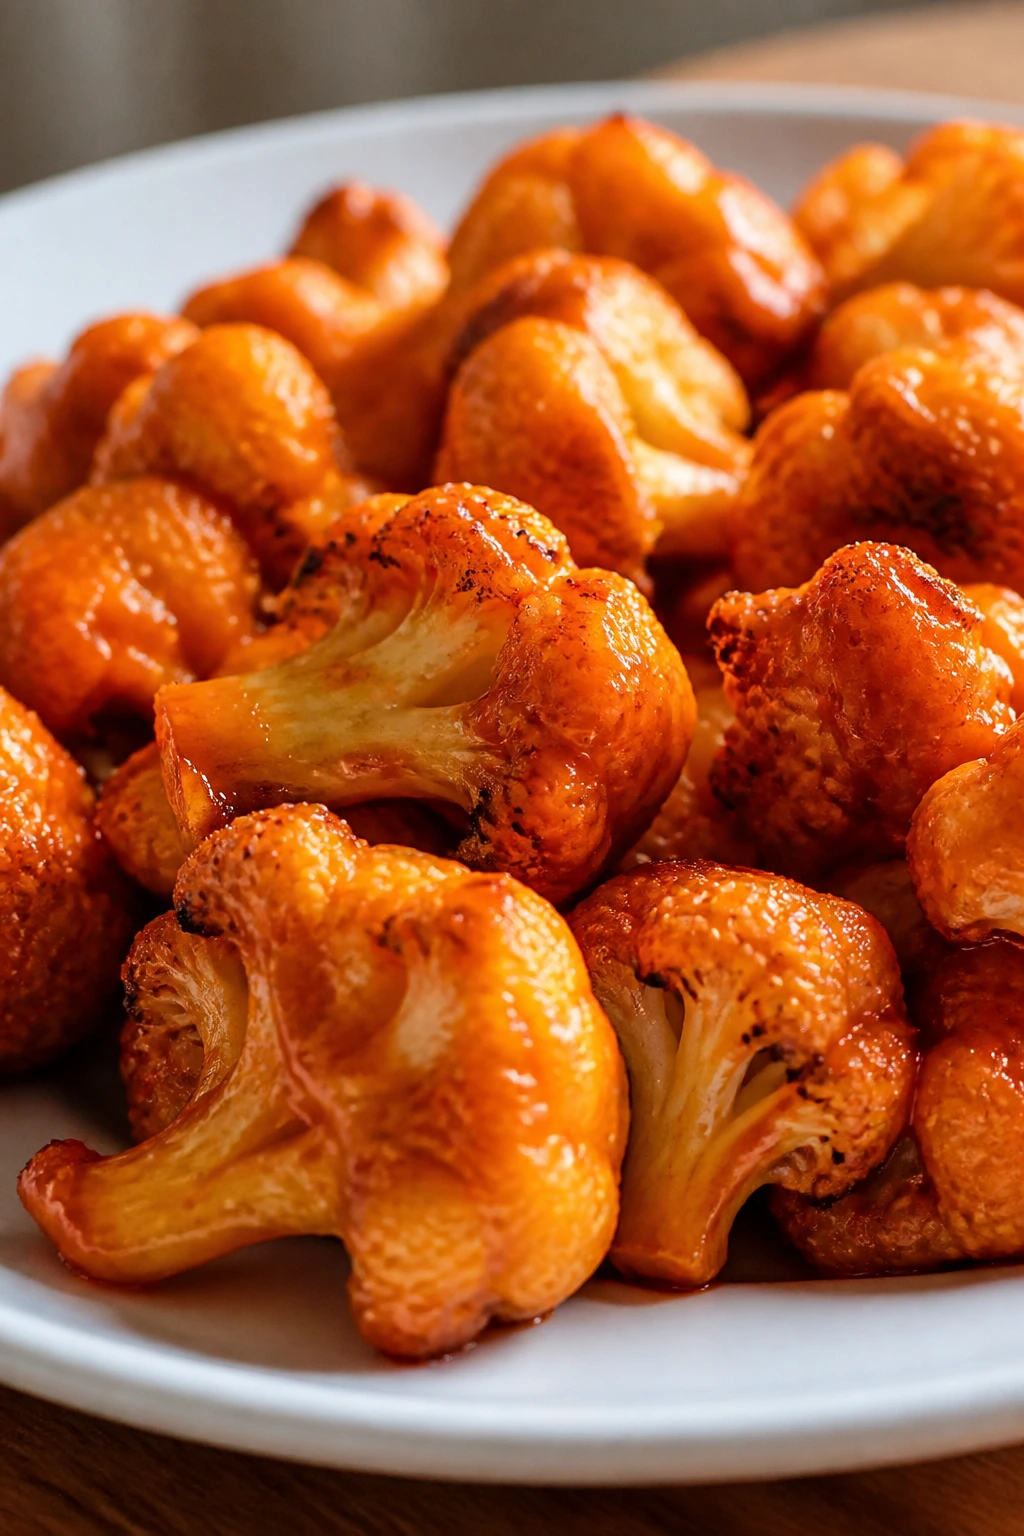
2. Buffalo Cauliflower Bites
These are the dish that makes cauliflower behave like bar food. The florets turn tender inside, bronzed outside, and the Buffalo sauce clings in a sticky, fiery coat that smells like a game-day platter. They’re messy in the best way.
Why It Works:
Cauliflower has enough structure to hold sauce without collapsing. A thin flour batter helps the florets keep moisture in while the air fryer builds the crust. Tossing them with Buffalo sauce after the first cook gives you heat and shine without sogginess.
Key Ingredients:
- 1 large head cauliflower, cut into bite-size florets
- ¾ cup all-purpose flour
- ¾ cup water
- 1 teaspoon garlic powder
- ½ teaspoon salt
- 1 tablespoon olive oil
- ⅓ cup Buffalo sauce
- 1 tablespoon melted butter
- Ranch or blue cheese, for serving
Quick Steps:
- Preheat the air fryer to 390°F.
- Whisk the flour, water, garlic powder, and salt into a smooth batter.
- Dip the cauliflower florets in the batter and let excess drip off.
- Air fry for 10 minutes, flip, then cook 5 minutes more until lightly crisp.
- Toss with Buffalo sauce mixed with melted butter, return to the fryer for 2 minutes, and serve hot.
Equipment for This Recipe:
- Air fryer basket
- Medium mixing bowl
- Whisk
- Tongs
How to Serve This Dish:
Serve with celery sticks and ranch or blue cheese. These work as a snack, a side, or the thing everyone keeps stealing from the plate.
Pro Tips for This Recipe:
- Make the batter thin enough to coat, not paste.
- Let the florets rest 2 minutes after battering so the coating grips.
- Use a Buffalo sauce with decent vinegar bite; bland sauce disappears here.
Variations on This Dish:
- Garlic Parmesan Style: Skip the hot sauce and toss with melted butter, garlic powder, and Parmesan.
- Honey Heat Version: Add 1 tablespoon honey to the Buffalo sauce for a sweeter finish.
Common Mistakes to Avoid with This Dish:
- Too much batter: You’ll get gummy clumps instead of a light shell.
- Saucing before the first cook: The coating won’t set and the florets will slump.
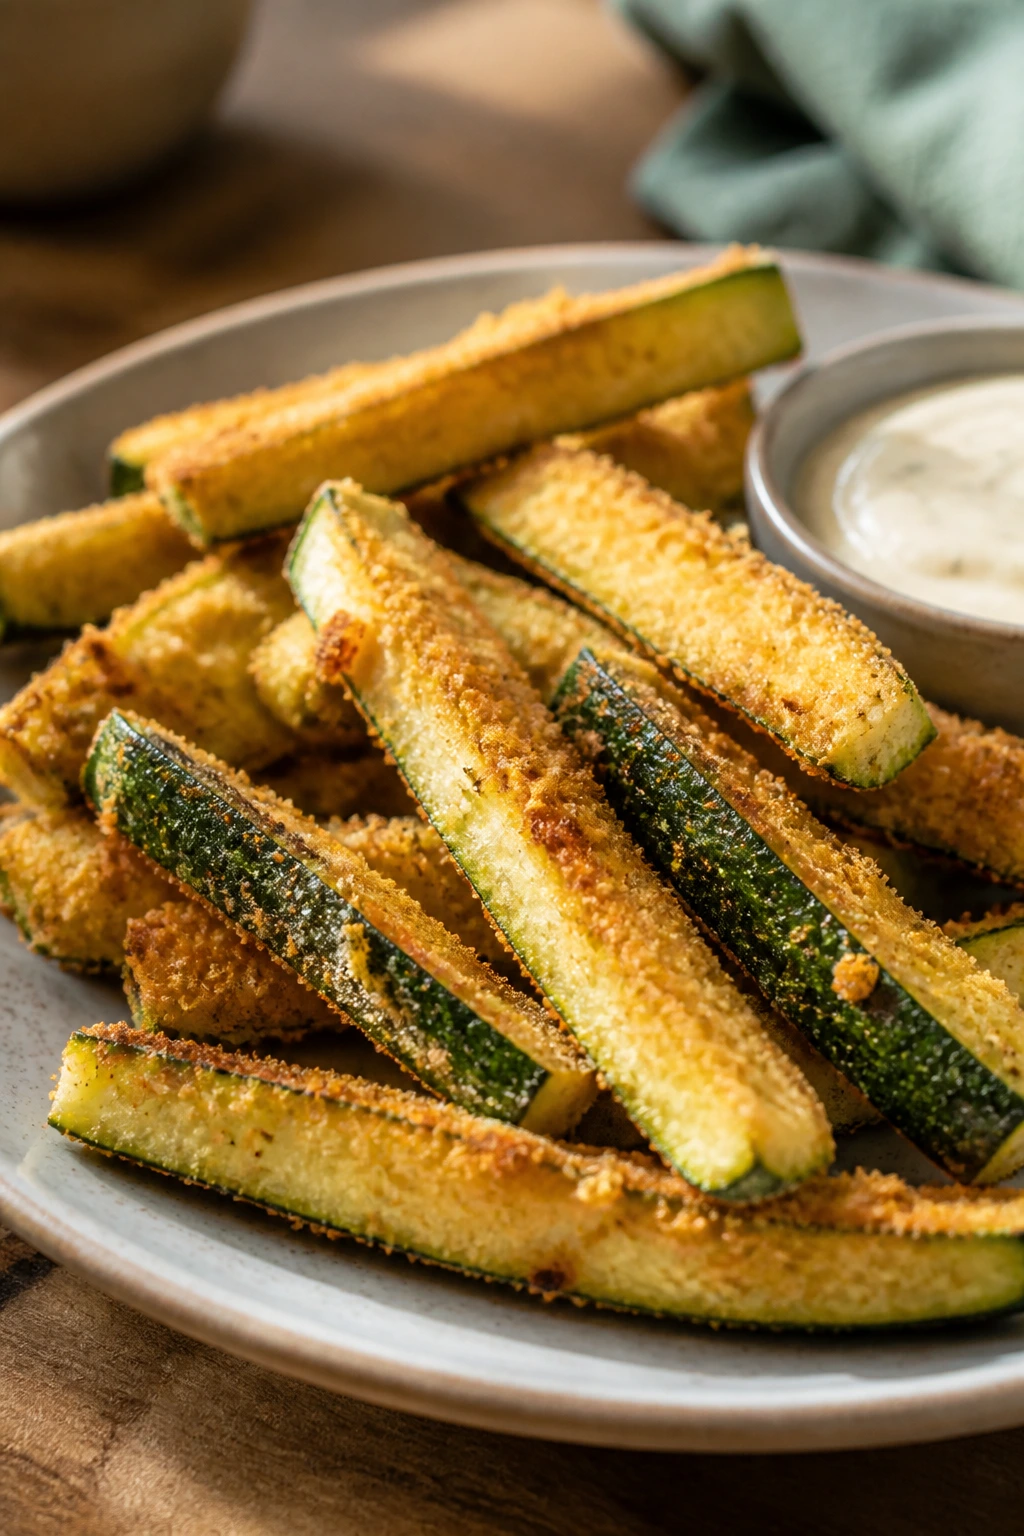
3. Zucchini Fries with Parmesan Crust
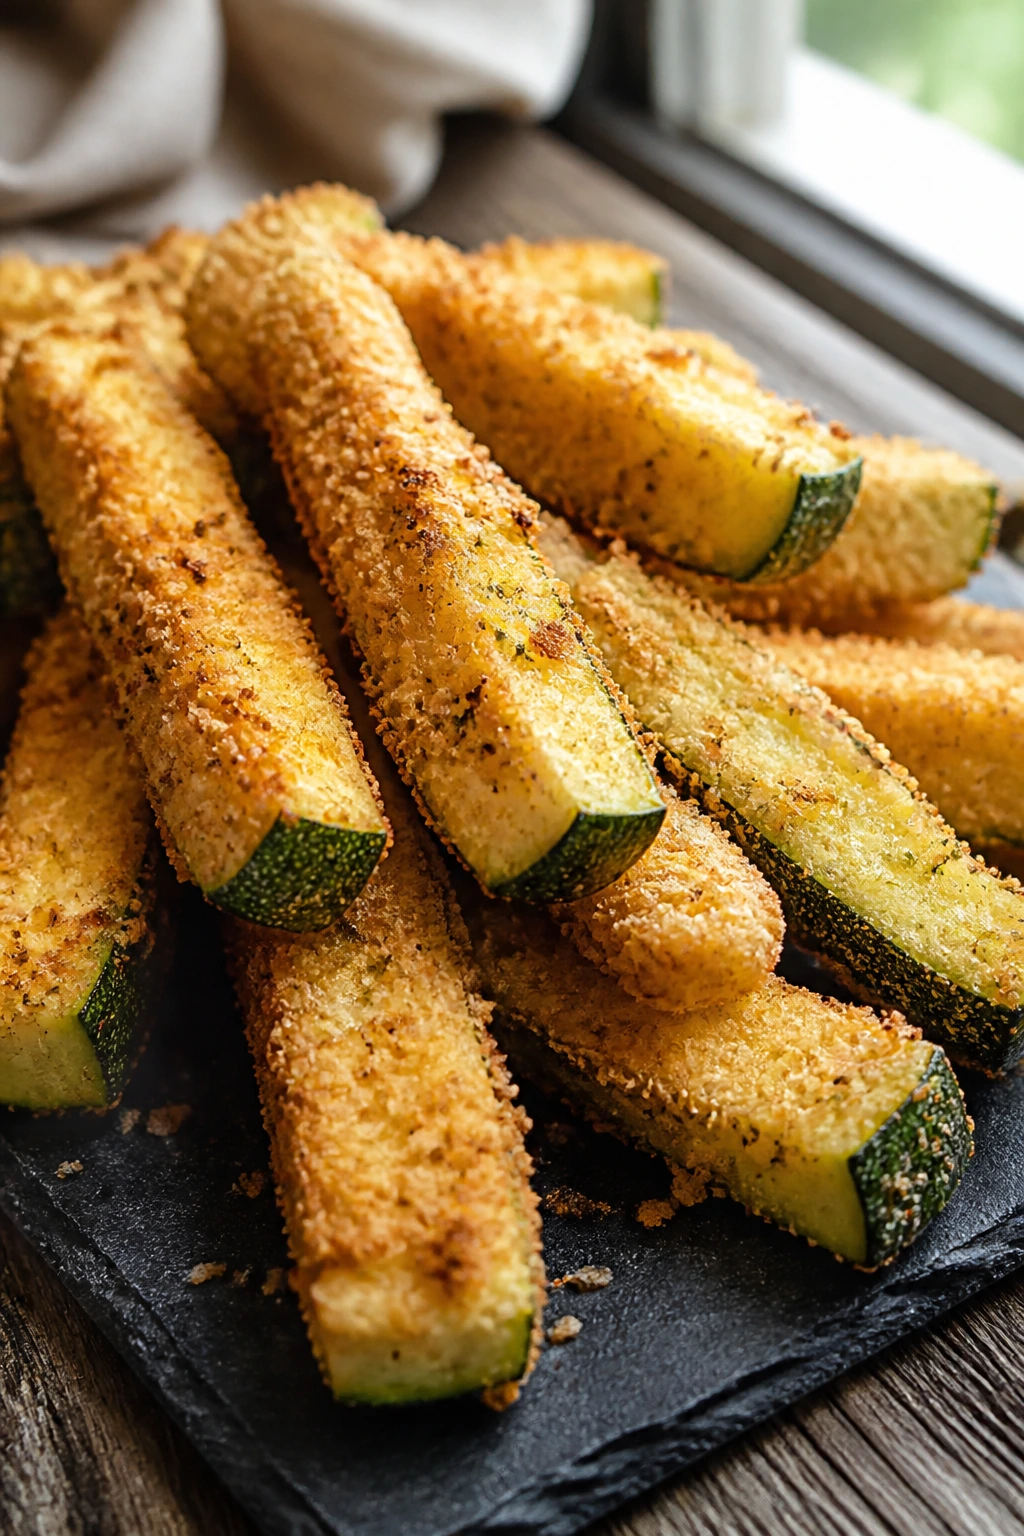
Zucchini can be watery and disappointing, or it can be the thing people keep reaching for before the burgers are ready. The difference is moisture control and a crust that actually stays put. These fries come out tender in the middle, crunchy outside, and salty enough to eat plain.
Why It Works:
Cutting zucchini into thick batons prevents them from collapsing into mush. Salting them briefly pulls surface water out, and the panko-Parmesan coating gives the air fryer something dry to crisp. A quick spray of oil helps the crumbs brown instead of drying pale.
Key Ingredients:
- 2 medium zucchini, cut into fry-shaped sticks
- 1 teaspoon kosher salt
- ½ cup all-purpose flour
- 2 large eggs, beaten
- 1 cup panko breadcrumbs
- ½ cup grated Parmesan
- 1 teaspoon Italian seasoning
- Olive oil spray
- Marinara, for dipping
Quick Steps:
- Toss the zucchini with salt and let sit 10 minutes.
- Pat the sticks dry with paper towels.
- Set out three bowls: flour, eggs, and panko mixed with Parmesan and Italian seasoning.
- Dredge each stick, then lay it in the air fryer basket in a single layer.
- Spray lightly with oil and cook at 400°F for 8 to 10 minutes, flipping once, until golden and crisp.
Equipment for This Recipe:
- Air fryer basket
- Three shallow bowls
- Paper towels
- Tongs
How to Serve This Dish:
Serve them fast while the crust is still crisp. I like them with marinara, but ranch or garlic aioli works too.
Pro Tips for This Recipe:
- Don’t cut the fries thin; thin zucchini gets floppy.
- Dry them well after salting or the coating slides off.
- Leave space between pieces so the crust browns.
Variations on This Dish:
- Spicy Breadcrumb Version: Add ½ teaspoon cayenne to the panko mix.
- Gluten-Free Crust: Use gluten-free flour and breadcrumbs; the texture stays sturdy.
Common Mistakes to Avoid with This Dish:
- Skipping the salting step: The fries leak water and go soft.
- Overcrowding the basket: You lose crispness at the contact points.
4. Garlic Butter Mushrooms
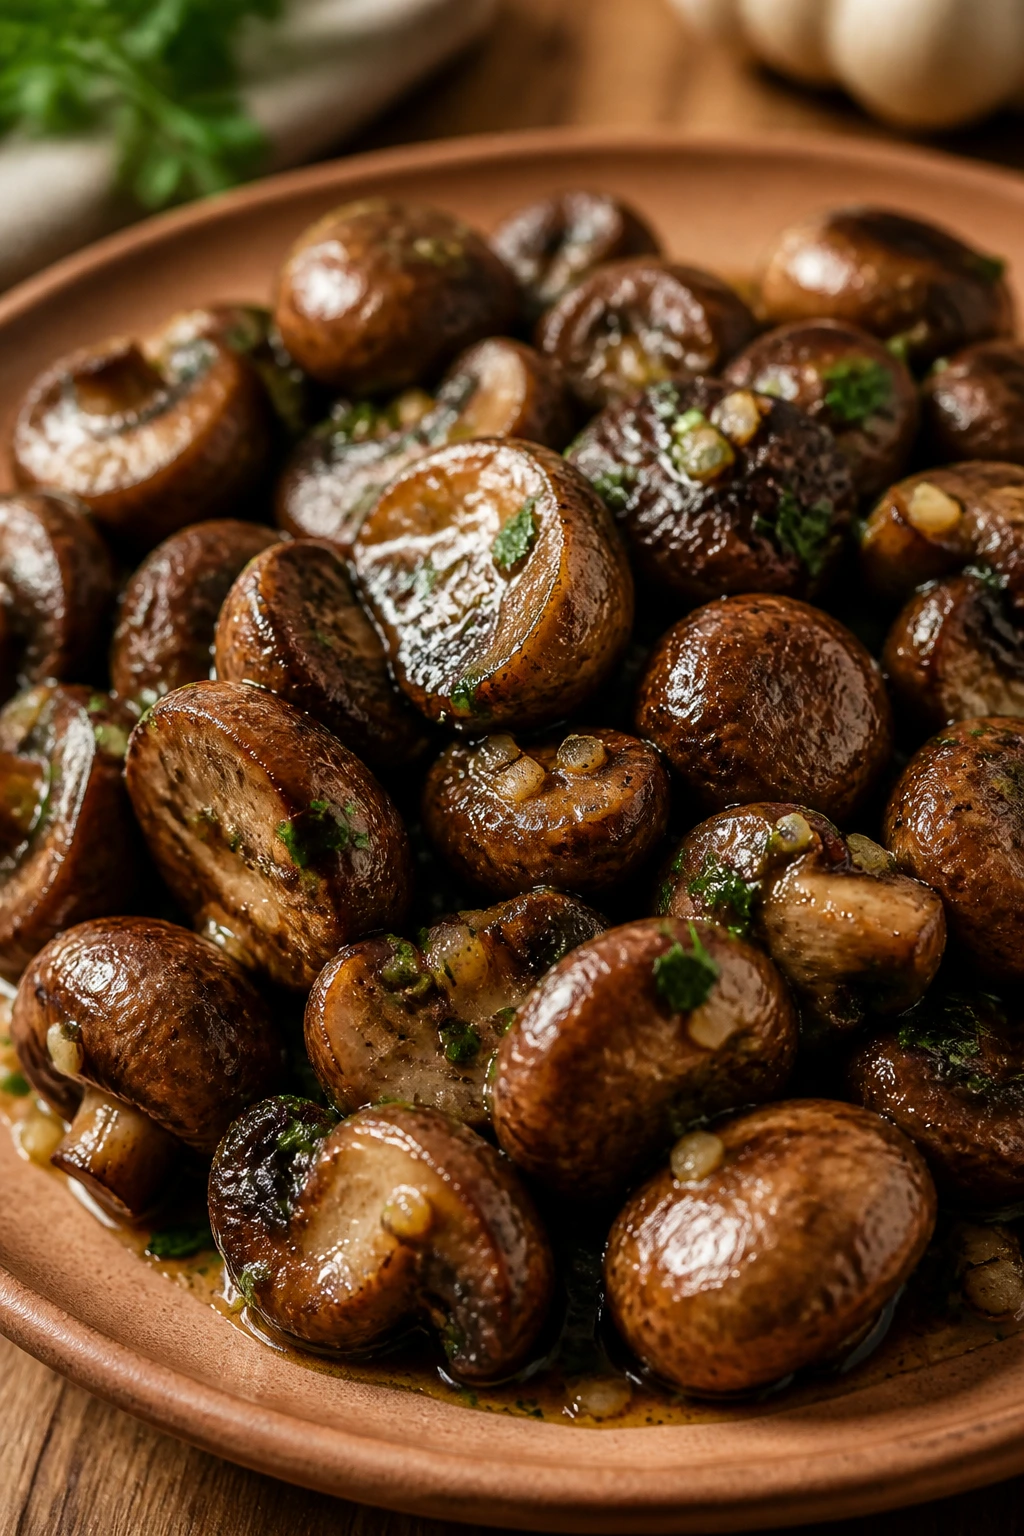
Mushrooms are one of those vegetables that seem to know what they’re doing when you give them high heat. They shrink, turn glossy, and pick up a browned, almost steakhouse-style edge. A little garlic butter at the end makes them smell like the side dish you’d order twice.
Why It Works:
Mushrooms have high water content, and the air fryer drives it off quickly. That concentrates their flavor and gives the edges a meaty chew. Garlic butter added after cooking clings to the hot surface instead of burning.
Key Ingredients:
- 1 pound cremini mushrooms, cleaned and halved if large
- 1 tablespoon olive oil
- ½ teaspoon salt
- ¼ teaspoon black pepper
- 2 tablespoons unsalted butter, melted
- 2 cloves garlic, finely grated
- 1 tablespoon chopped parsley
- 1 teaspoon lemon juice
Quick Steps:
- Preheat the air fryer to 380°F.
- Toss the mushrooms with olive oil, salt, and pepper.
- Air fry for 8 minutes, shaking once halfway through.
- Mix melted butter with garlic, parsley, and lemon juice.
- Toss the hot mushrooms with the garlic butter and serve immediately.
Equipment for This Recipe:
- Air fryer basket
- Mixing bowl
- Small bowl for butter
- Spoon or spatula
How to Serve This Dish:
These belong next to grilled meat, pasta, or toast. Spoon them over steak if you like, but they’re just as good piled into a bowl with crusty bread nearby.
Pro Tips for This Recipe:
- Use cremini or baby bellas for a deeper flavor.
- Don’t rinse mushrooms under water; wipe them clean so they don’t steam.
- Add the butter after cooking, not before, or the garlic can scorch.
Variations on This Dish:
- Soy-Butter Umami Version: Replace half the salt with 1 teaspoon soy sauce in the butter.
- Herb-Led Version: Swap parsley for thyme and a pinch of rosemary.
Common Mistakes to Avoid with This Dish:
- Using too much oil: Mushrooms turn slick instead of browned.
- Cooking raw garlic in the basket: It burns in seconds.
5. Smoky Sweet Potato Wedges
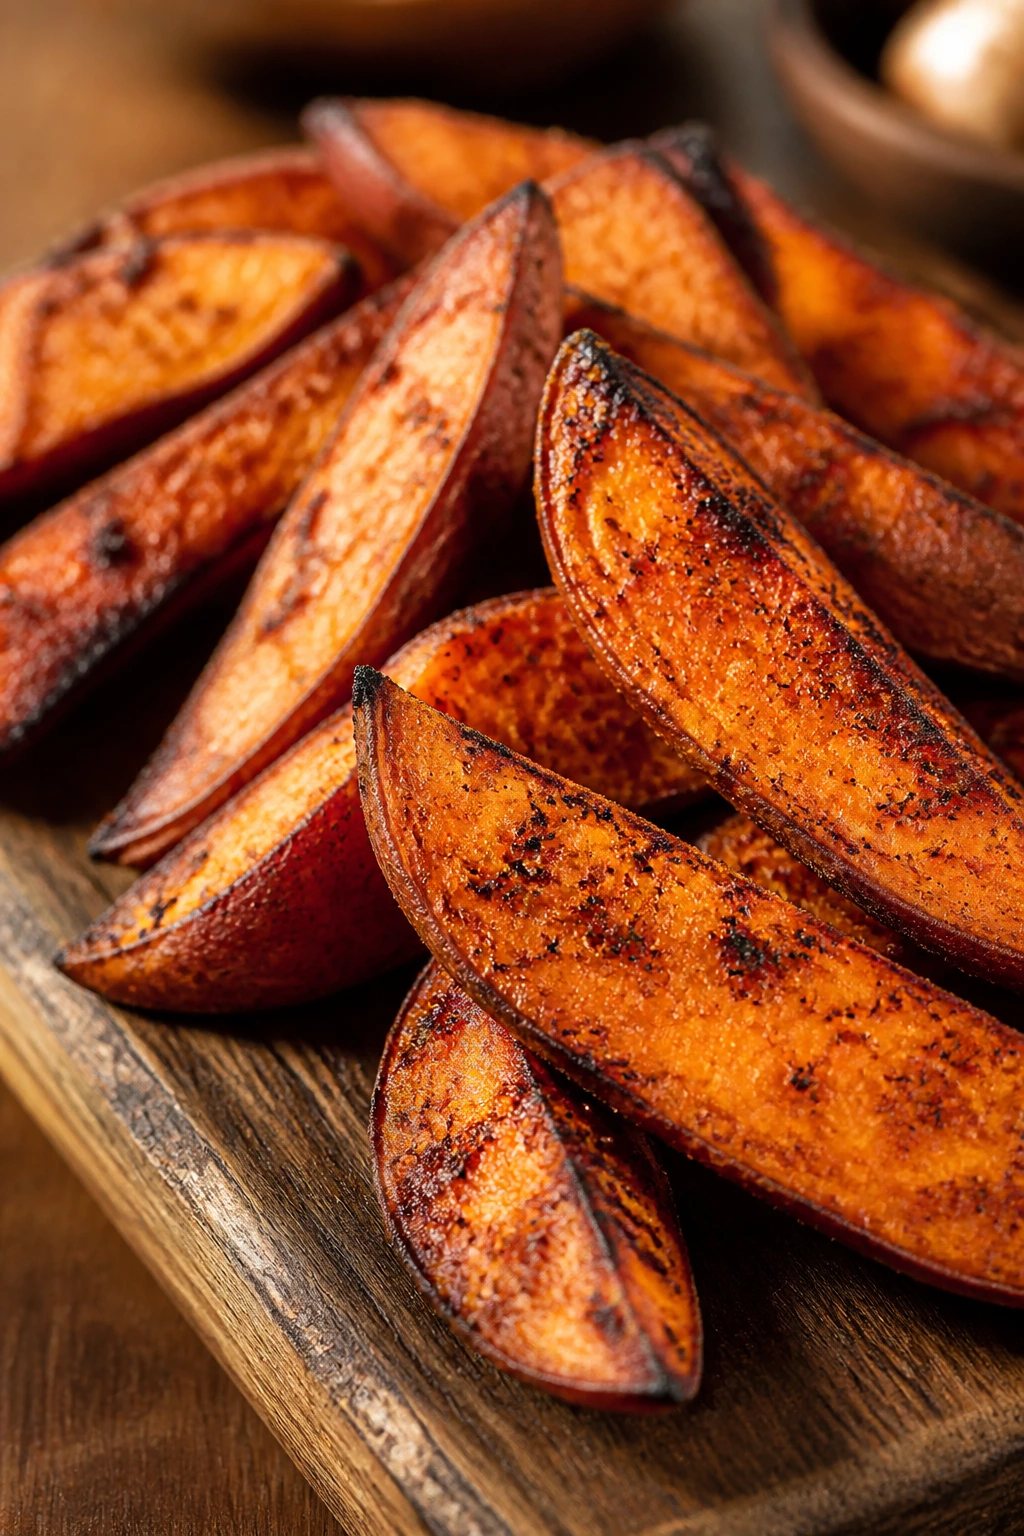
Sweet potatoes get sweet fast, but they need enough heat to develop a browned edge that balances the sugar. These wedges come out with caramelized tips, a fluffy center, and a smoky paprika crust that makes them feel less like a side and more like something you crave.
Why It Works:
Cut wedges hold together better than thin fries in the air fryer. The starch on the cut surface browns, while smoked paprika and garlic powder keep the flavor savory. A little cornstarch helps the edges crisp without turning dry.
Key Ingredients:
- 2 large sweet potatoes, cut into wedges
- 1½ tablespoons olive oil
- 1 tablespoon cornstarch
- 1 teaspoon smoked paprika
- ½ teaspoon garlic powder
- ¾ teaspoon salt
- ¼ teaspoon black pepper
- 1 tablespoon chopped cilantro, optional
Quick Steps:
- Preheat the air fryer to 400°F.
- Toss the wedges with oil, cornstarch, paprika, garlic powder, salt, and pepper.
- Arrange in one layer and air fry for 12 minutes.
- Flip the wedges and cook 6 to 8 minutes more until browned at the corners.
- Finish with cilantro if you want a fresh note.
Equipment for This Recipe:
- Air fryer basket
- Cutting board and knife
- Large bowl
- Tongs
How to Serve This Dish:
Serve them with burgers, grilled sausages, or a fried egg on top. A bowl of chipotle mayo on the side makes sense here.
Pro Tips for This Recipe:
- Cut wedges the same size so they finish evenly.
- Don’t skip the cornstarch; it helps the crust dry out.
- If the wedges are very thick, add 2 extra minutes.
Variations on This Dish:
- Cajun Style: Use Cajun seasoning instead of paprika and garlic.
- Maple-Chili Finish: Toss with 1 teaspoon maple syrup and chili flakes after cooking.
Common Mistakes to Avoid with This Dish:
- Cutting uneven wedges: Thin pieces burn before thick ones soften.
- Using too much syrup or sugar early: It darkens before the potato cooks through.
6. Lemon Pepper Broccoli Florets
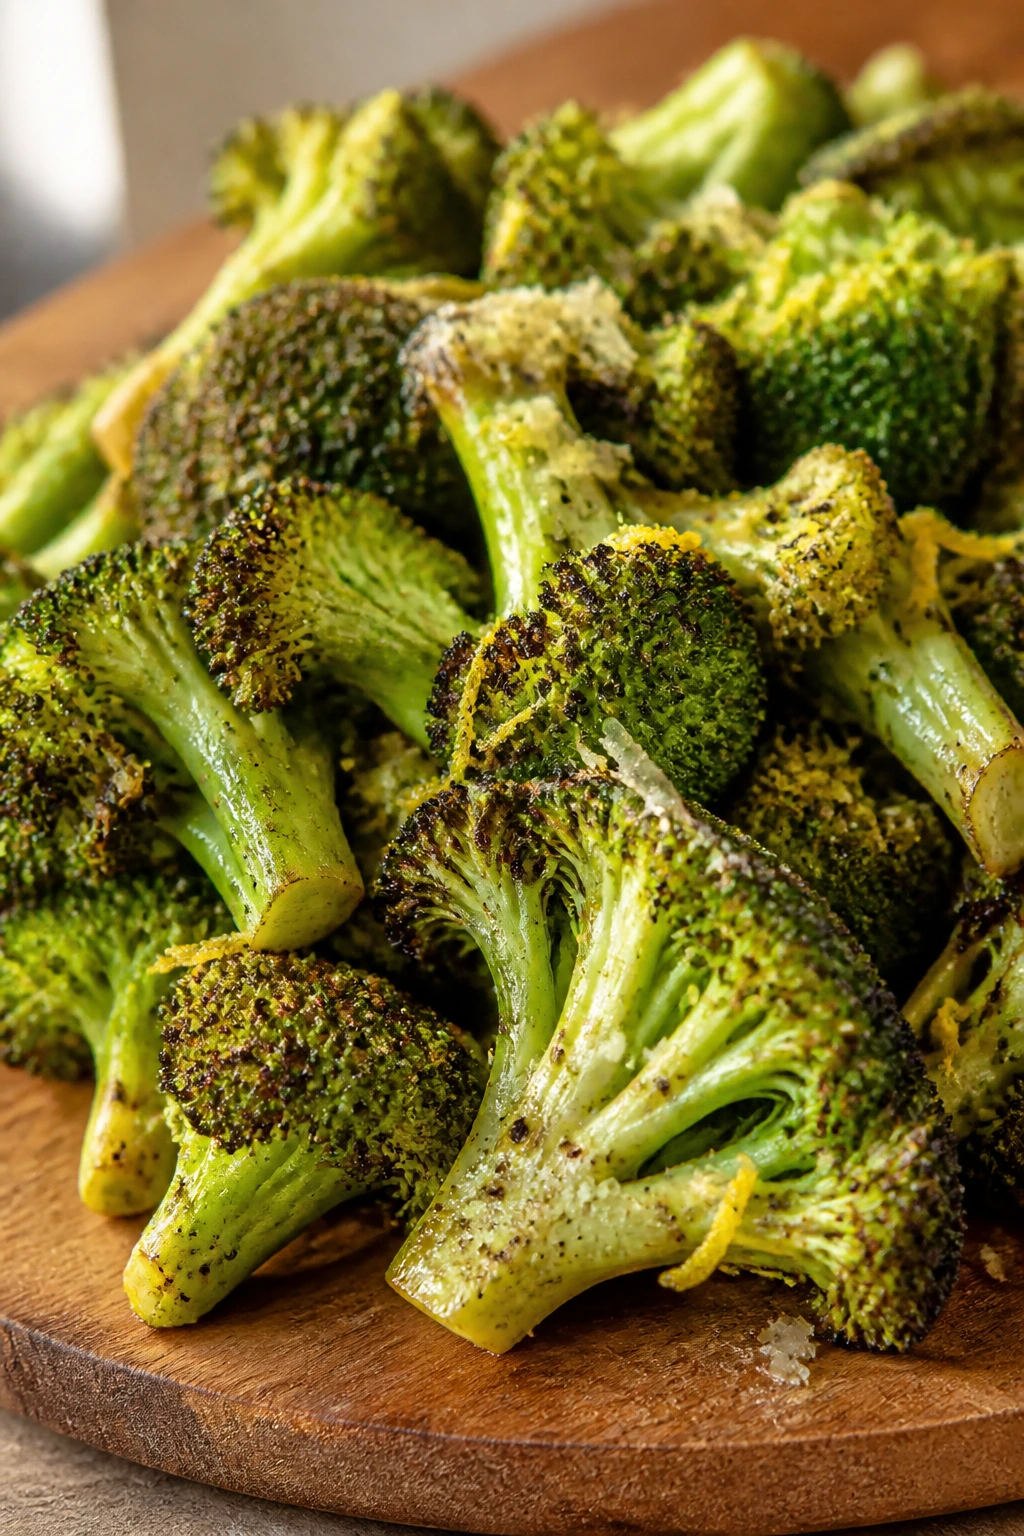
Broccoli is one of the easiest vegetables to rescue from blandness. Give it air fryer heat and the tops turn crisp, the stems stay tender, and lemon pepper sneaks in with a sharp, peppery edge that wakes everything up.
Why It Works:
Broccoli loves direct heat because the tiny florets brown quickly. Tossing it with just enough oil lets the tips char lightly while the stems soften. Lemon zest and cracked pepper keep the flavor bright instead of heavy.
Key Ingredients:
- 1 large head broccoli, cut into florets
- 1½ tablespoons olive oil
- ½ teaspoon salt
- 1 teaspoon lemon pepper seasoning
- 1 teaspoon lemon zest
- 1 tablespoon grated Parmesan, optional
- Lemon wedges, for serving
Quick Steps:
- Preheat the air fryer to 390°F.
- Toss the broccoli with oil, salt, and lemon pepper.
- Air fry for 8 minutes, shake, then cook 2 to 3 minutes more.
- Add lemon zest and Parmesan while hot.
- Serve with lemon wedges on the side.
Equipment for This Recipe:
- Air fryer basket
- Large bowl
- Zester or microplane
- Tongs
How to Serve This Dish:
This is the broccoli I’d put beside salmon, chicken thighs, or a bowl of rice. It also works under a fried egg with a little hot sauce.
Pro Tips for This Recipe:
- Cut the florets small enough to catch heat, but not so small they burn.
- Keep the stems if they’re tender; peel the tough outer layer first.
- Lemon zest goes on after cooking so it stays fragrant.
Variations on This Dish:
- Garlic-Lemon Version: Add ½ teaspoon garlic powder to the seasoning.
- Chili Crisp Finish: Drizzle with 1 teaspoon chili crisp after air frying.
Common Mistakes to Avoid with This Dish:
- Wet broccoli: Dry it well or the edges won’t brown.
- Too much cheese: Heavy Parmesan can mute the lemon and pepper.
7. Eggplant Fries with Herby Panko
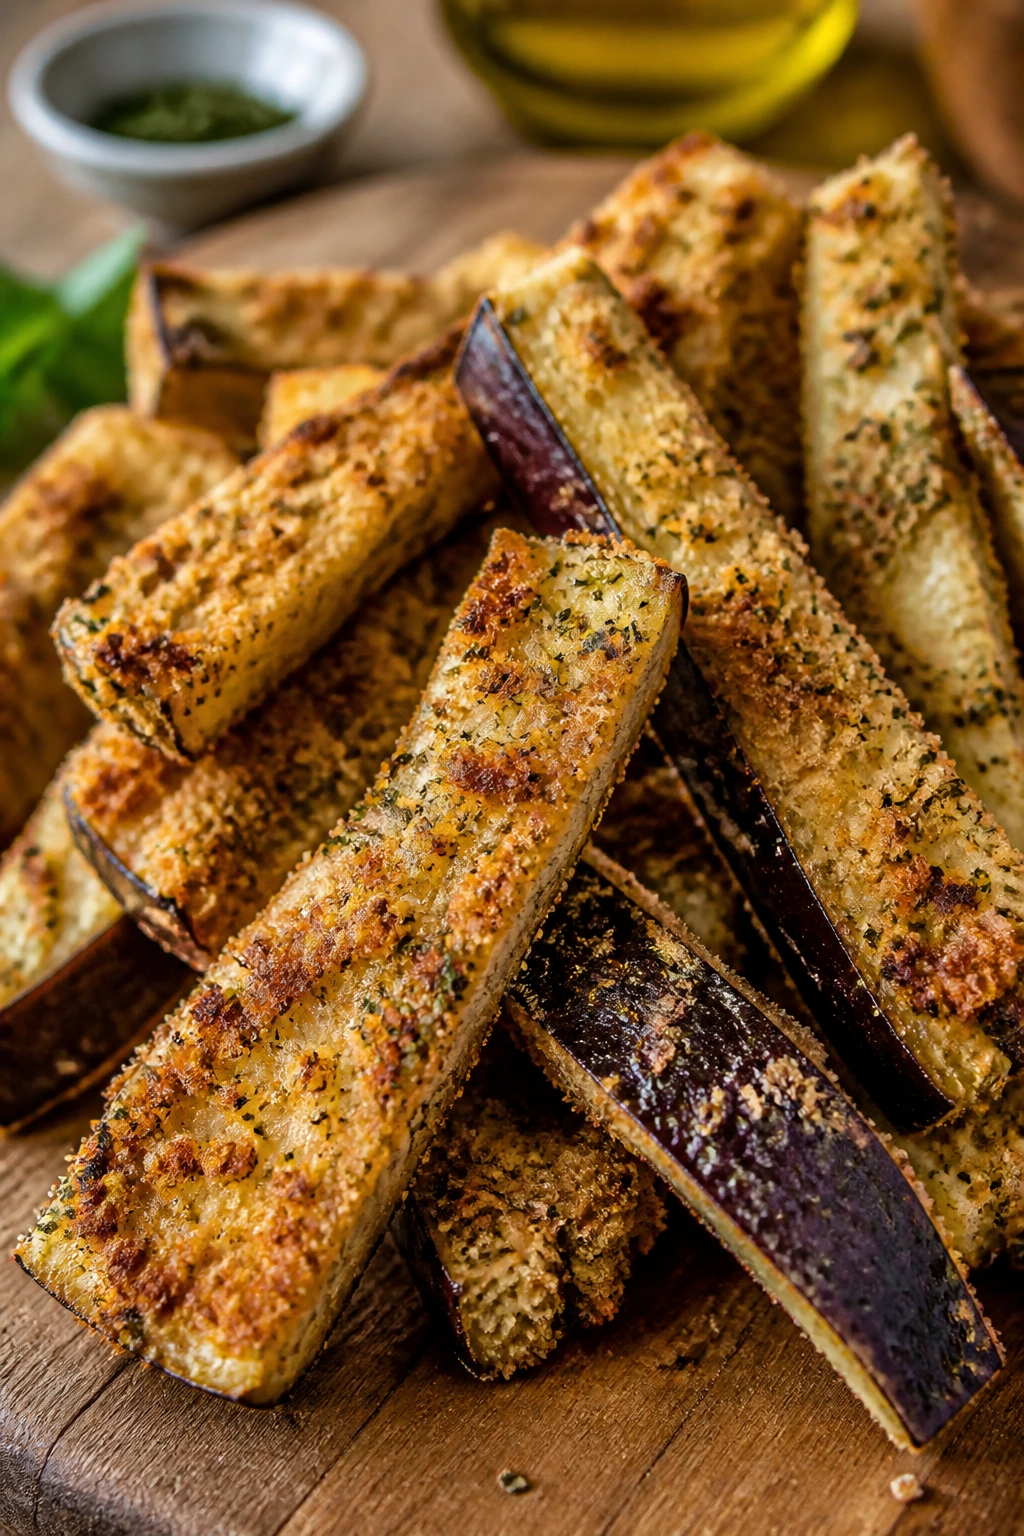
Eggplant can go limp fast, which is why this cut matters. In fry form, the flesh turns creamy and the coating stays crisp enough to hold a dip. The result is closer to a snack than a side, and that’s exactly why people keep eating them.
Why It Works:
Eggplant needs salt and time to lose excess moisture. The panko-herb coating creates the dry surface the air fryer needs, and a good blast of heat keeps the fries from collapsing. Thin slices won’t work here; thick sticks are the move.
Key Ingredients:
- 1 medium eggplant, peeled partially and cut into sticks
- 1 teaspoon salt
- ½ cup flour
- 2 eggs, beaten
- 1 cup panko
- ½ cup grated Parmesan
- 1 teaspoon dried oregano
- ½ teaspoon garlic powder
- Olive oil spray
- Tzatziki, for serving
Quick Steps:
- Salt the eggplant sticks and let them sit 20 minutes.
- Pat them dry.
- Set up flour, eggs, and panko mixed with Parmesan, oregano, and garlic powder.
- Coat each stick, spray lightly with oil, and air fry at 390°F for 10 to 12 minutes.
- Flip halfway through and cook until the crust is golden and the centers are soft.
Equipment for This Recipe:
- Air fryer basket
- Paper towels
- Three shallow bowls
- Tongs
How to Serve This Dish:
Serve with tzatziki or marinara. They’re best hot, when the crust still has some snap.
Pro Tips for This Recipe:
- Use eggplant that feels heavy for its size.
- Peel strips of skin if you want a softer bite, but leave some on for structure.
- Don’t skip the salting; it keeps the fries from turning watery.
Variations on This Dish:
- Mediterranean Version: Add thyme and a little lemon zest to the crumb.
- Spicy Version: Mix cayenne into the flour and serve with spicy mayo.
Common Mistakes to Avoid with This Dish:
- Skipping the rest after salting: The fries stay damp inside.
- Using rounds instead of sticks: Rounds tend to flop and steam.
8. Asparagus with Crispy Panko Topping
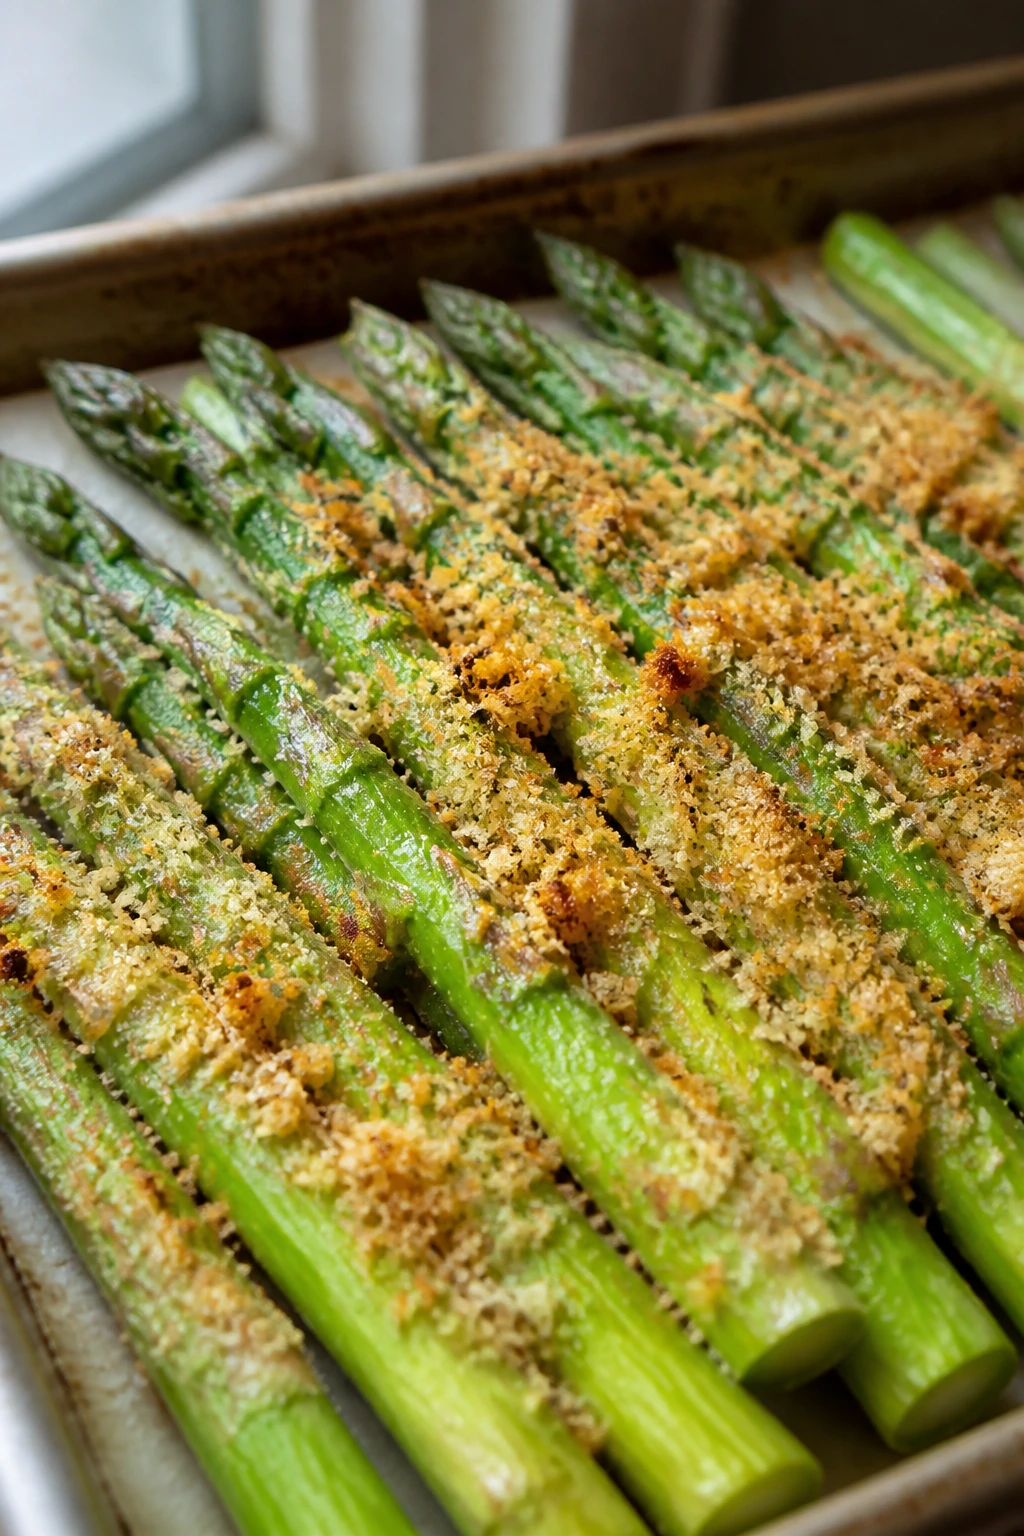
Asparagus is best when it still has a little bite, and the air fryer treats it kindly. The spears stay snappy, while the panko topping gives you the crunch that plain roasted asparagus never quite manages. It tastes more finished, less like an afterthought.
Why It Works:
Asparagus cooks fast, so the air fryer gets it done before the stalks turn stringy. A light coating of oil keeps the spears from drying out, and panko browns on top in minutes. Lemon at the end keeps the flavor from feeling flat.
Key Ingredients:
- 1 pound asparagus, woody ends trimmed
- 1 tablespoon olive oil
- ½ teaspoon salt
- ¼ teaspoon black pepper
- ⅓ cup panko breadcrumbs
- 1 tablespoon grated Parmesan
- 1 teaspoon lemon zest
- 1 teaspoon lemon juice
Quick Steps:
- Preheat the air fryer to 380°F.
- Toss asparagus with oil, salt, and pepper.
- Mix panko, Parmesan, and lemon zest, then scatter it over the spears.
- Air fry for 7 to 9 minutes until the tips are browned and the stalks are tender-crisp.
- Finish with lemon juice and serve.
Equipment for This Recipe:
- Air fryer basket
- Knife
- Mixing bowl
- Small spoon
How to Serve This Dish:
Lay the spears in a neat row and spoon any stray crumb over the top. They’re good with fish, chicken, or a spoonful of soft scrambled eggs.
Pro Tips for This Recipe:
- Choose medium-thick asparagus; very thin spears cook too fast.
- Trim the ends where they naturally snap.
- Add the lemon juice after cooking or the crumbs soften.
Variations on This Dish:
- Almond Crumb Version: Swap panko for finely chopped almonds.
- Garlic-Parmesan Version: Add ½ teaspoon garlic powder to the crumb mix.
Common Mistakes to Avoid with This Dish:
- Overcooking: Asparagus goes limp fast; check at 7 minutes.
- Using wet lemon juice too early: It dampens the crumb.
9. Crispy Green Beans with Almond Crunch
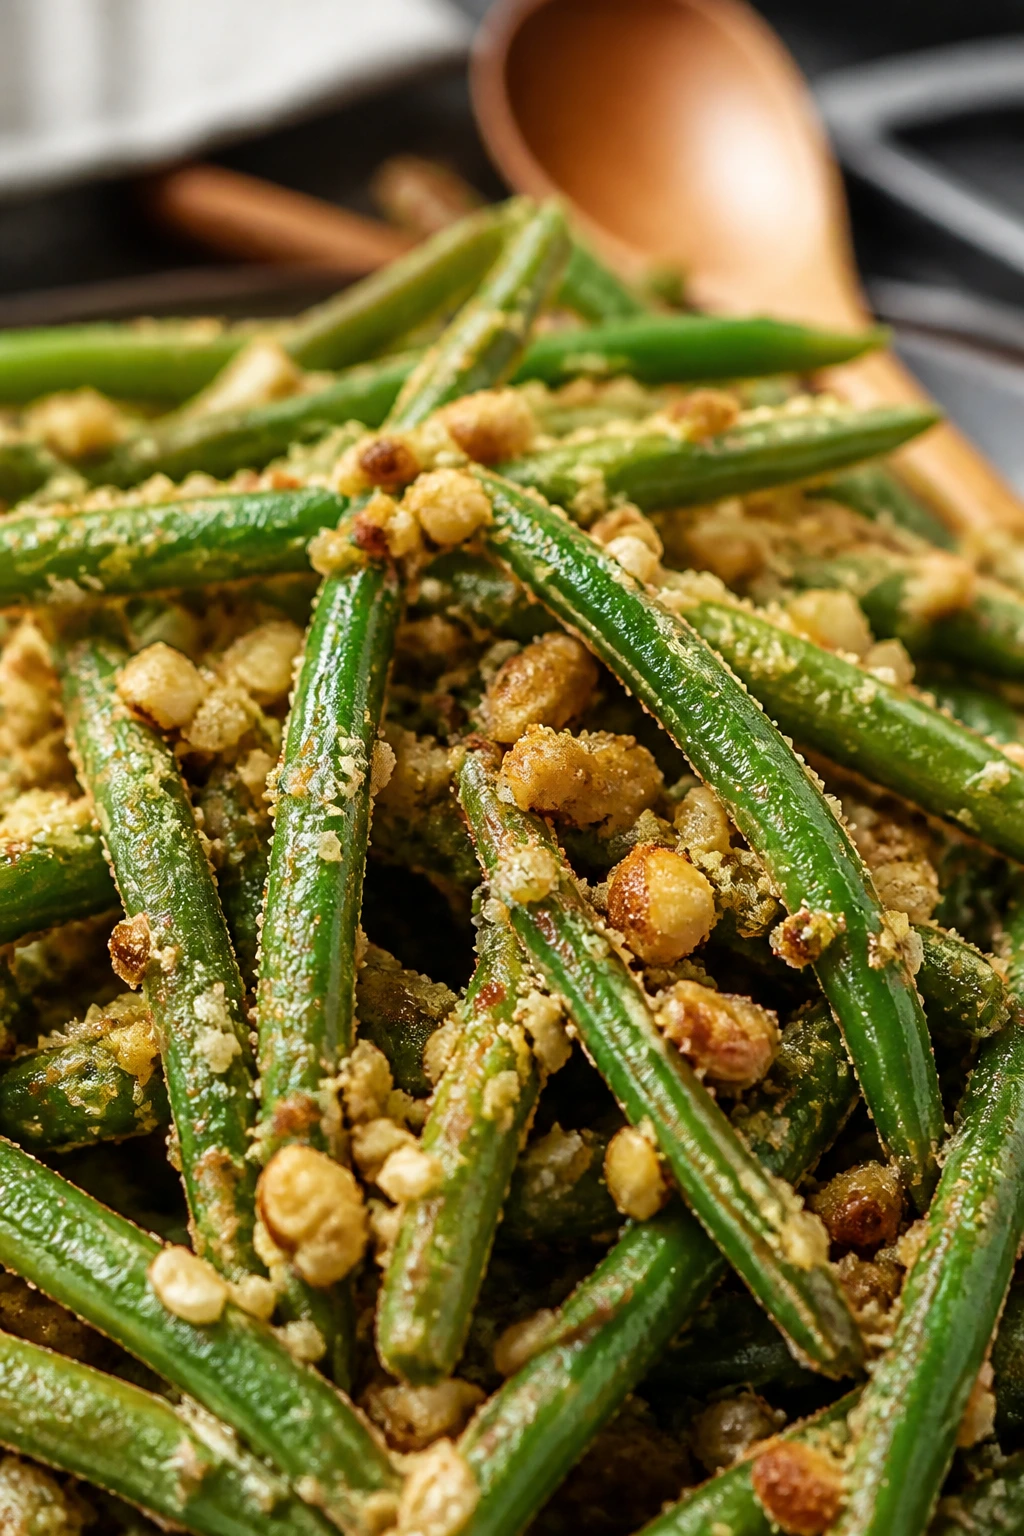
Fresh green beans in the air fryer feel almost snacky. The skins blister slightly, the centers stay crisp, and the almond coating adds a toasted note that makes the beans taste richer than they have any right to.
Why It Works:
Green beans are sturdy enough to handle high heat but thin enough to cook fast. A light egg wash or oil coating helps the almond crumbs stick, and the air fryer toasts the nuts before the beans overcook. Salt after cooking keeps the surface crisp.
Key Ingredients:
- 1 pound green beans, trimmed
- 1 tablespoon olive oil
- 1 egg, beaten
- ½ cup finely chopped almonds
- ¼ cup panko
- ½ teaspoon salt
- ¼ teaspoon black pepper
- 1 teaspoon sesame seeds, optional
Quick Steps:
- Preheat the air fryer to 390°F.
- Toss the beans with oil, then dip lightly in egg.
- Roll in almonds, panko, salt, and pepper.
- Air fry for 8 to 10 minutes, shaking once.
- Serve while the almond coating is still crisp.
Equipment for This Recipe:
- Air fryer basket
- Mixing bowls
- Tongs
- Knife and board
How to Serve This Dish:
These belong next to roast chicken, grilled pork, or rice bowls. They also make a sharp little appetizer with lemon aioli.
Pro Tips for This Recipe:
- Dry the beans well so the coating doesn’t slip off.
- Chop the almonds fine; big chunks fall away.
- Check early if your beans are thin and pencil-like.
Variations on This Dish:
- Pecan Crunch Version: Use chopped pecans for a sweeter finish.
- Spiced Version: Add a pinch of cayenne and smoked paprika.
Common Mistakes to Avoid with This Dish:
- Too much coating: The beans can turn heavy and spotty.
- Using frozen beans: They release too much water and won’t crisp.
10. Stuffed Mini Peppers with Herbed Cream Cheese
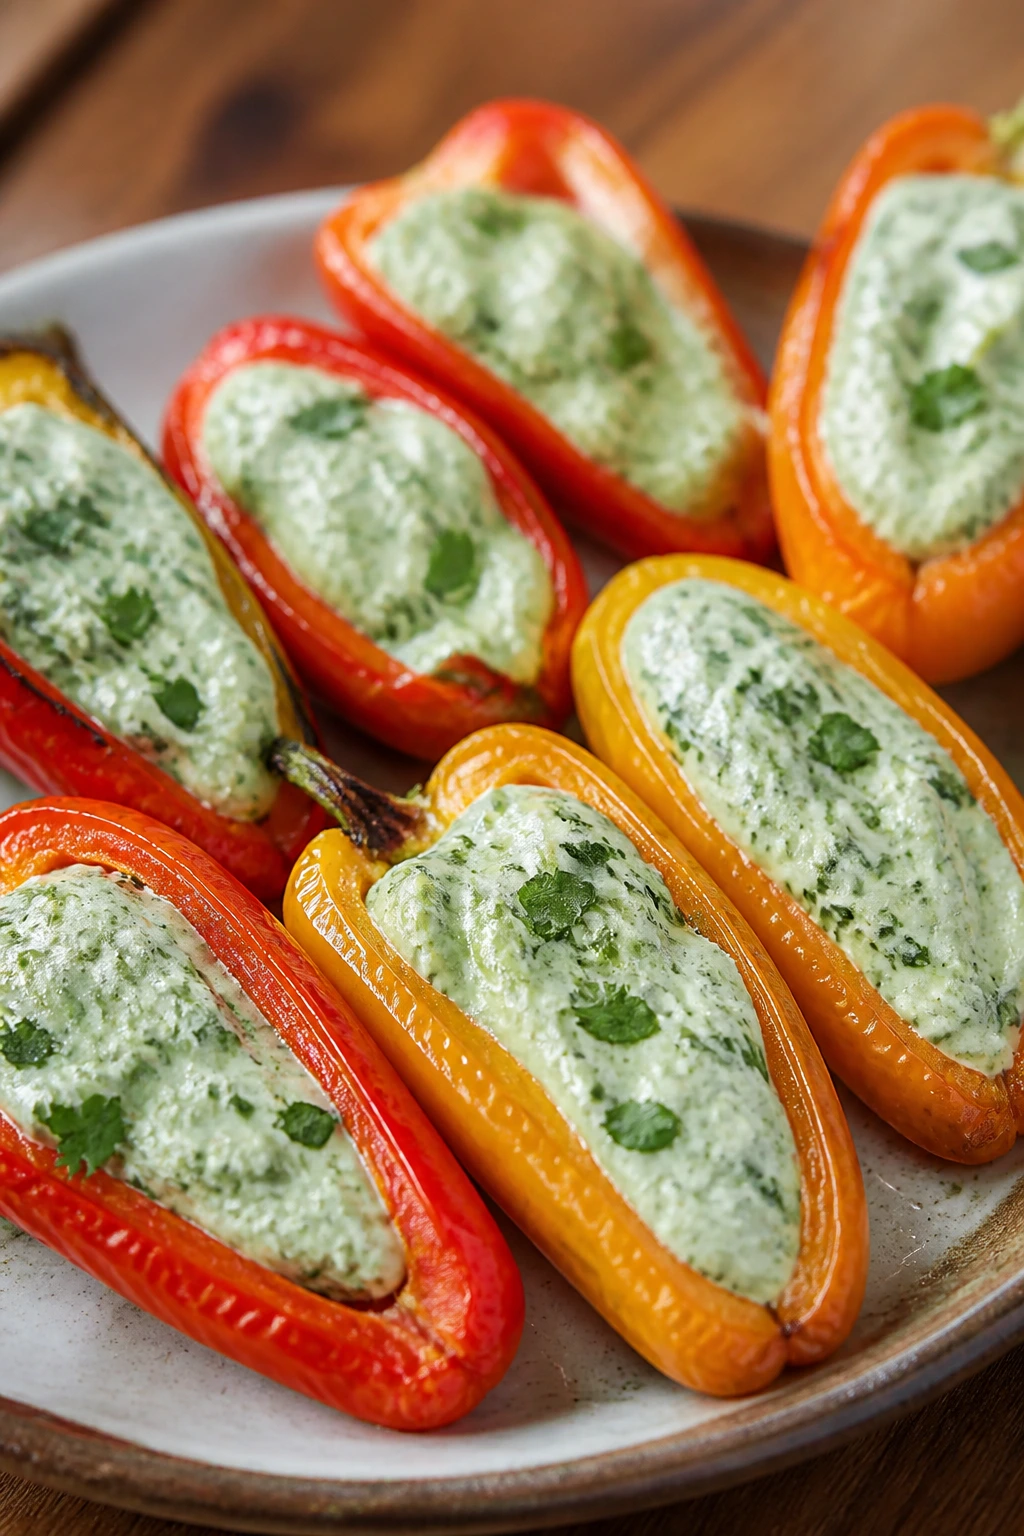
Mini peppers are one of the easiest vegetables to turn into finger food. Their skins soften and blister, while the filling stays cool, creamy, and salty. The sweet pepper shell makes each bite feel almost like a tiny appetizer board.
Why It Works:
Air frying softens the peppers without making them collapse. The filling, kept simple, stays stable under heat instead of running out. A little shredded cheese on top gives you those brown spots that make people reach for seconds.
Key Ingredients:
- 12 mini sweet peppers, halved and seeded
- 4 ounces cream cheese, softened
- ½ cup shredded cheddar
- 2 tablespoons chopped chives
- 1 tablespoon chopped parsley
- ¼ teaspoon garlic powder
- ¼ teaspoon salt
- 2 tablespoons grated Parmesan, for topping
Quick Steps:
- Preheat the air fryer to 360°F.
- Mix cream cheese, cheddar, chives, parsley, garlic powder, and salt.
- Fill each pepper half with the cheese mixture.
- Top with Parmesan and air fry for 6 to 8 minutes until the peppers soften and the tops brown.
- Let cool 2 minutes before serving.
Equipment for This Recipe:
- Air fryer basket
- Small mixing bowl
- Spoon
- Parchment liner, optional
How to Serve This Dish:
Serve them on a small platter with napkins nearby. They work as a party snack, but they’re also fine beside grilled meat or a crisp salad.
Pro Tips for This Recipe:
- Use room-temperature cream cheese so the filling mixes smoothly.
- Don’t overfill the peppers or the tops slide off.
- A parchment liner helps with cleanup, but keep it perforated.
Variations on This Dish:
- Jalapeño Popper Style: Add chopped pickled jalapeños to the filling.
- Dairy-Light Version: Swap half the cream cheese for mashed ricotta.
Common Mistakes to Avoid with This Dish:
- Overcooking the peppers: They turn too soft and lose their shape.
- Using cold filling: It won’t spread neatly and tends to clump.
11. Carrot Fries with Cumin and Yogurt Dip
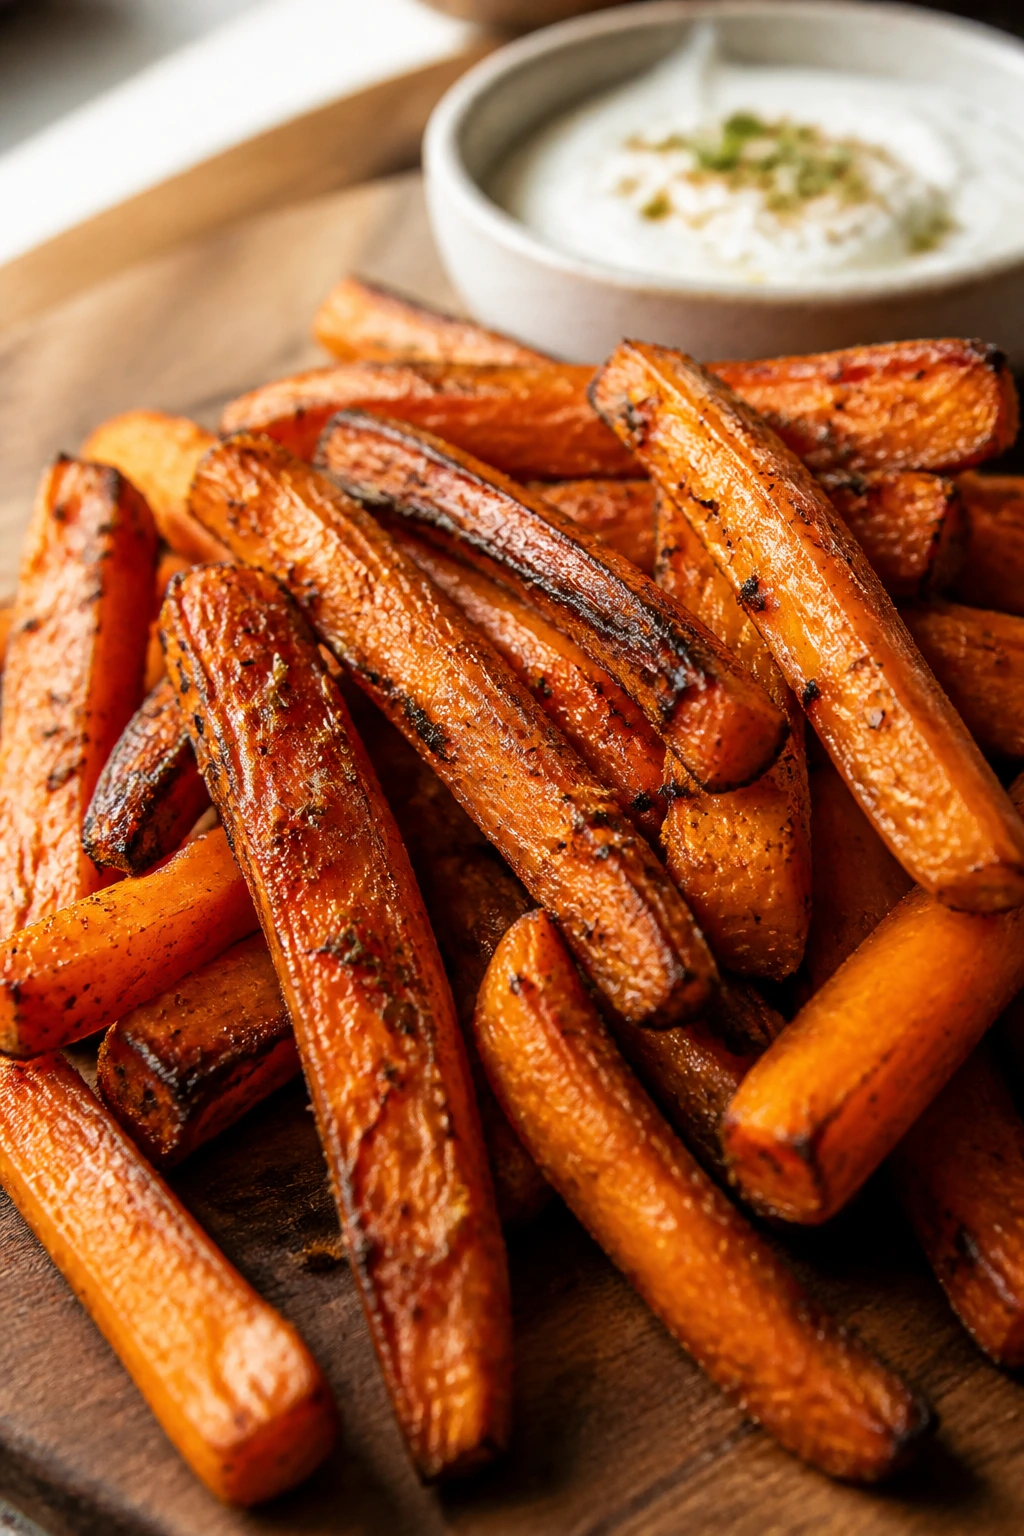
Carrots are sweet, but they’re much better when that sweetness is nudged in a savory direction. In fry form, they get caramelized edges, a tender bite, and enough spice to stand up to a dip. I like these more than I probably should.
Why It Works:
Carrots need a bit of fat and a hot basket to brown before they soften too much. Cumin and paprika deepen the flavor, while a yogurt dip cools the edges just enough. Cutting them into thick batons keeps them from drying out.
Key Ingredients:
- 1½ pounds carrots, peeled and cut into fries
- 1½ tablespoons olive oil
- 1 teaspoon ground cumin
- ½ teaspoon smoked paprika
- ½ teaspoon salt
- ¼ teaspoon black pepper
- ½ cup plain Greek yogurt
- 1 teaspoon lemon juice
Quick Steps:
- Preheat the air fryer to 400°F.
- Toss carrots with oil, cumin, paprika, salt, and pepper.
- Air fry for 12 minutes, shake, then cook 4 to 6 minutes more.
- Mix yogurt with lemon juice for dipping.
- Serve the fries hot with the dip on the side.
Equipment for This Recipe:
- Air fryer basket
- Peeler
- Mixing bowl
- Small bowl for dip
How to Serve This Dish:
Serve them like fries, not like a side salad. A sprinkle of flaky salt right before they hit the table helps.
Pro Tips for This Recipe:
- Cut the fries thick enough to hold onto heat.
- If the carrots are large, split them lengthwise first.
- Add a pinch of cayenne if you want more bite.
Variations on This Dish:
- Harissa Version: Toss with 1 teaspoon harissa paste and a touch more oil.
- Honey-Cumin Version: Add ½ teaspoon honey after cooking for a glazed finish.
Common Mistakes to Avoid with This Dish:
- Cutting them too thin: Thin carrot sticks dry out before they brown.
- Skipping the dip: The yogurt gives needed contrast and keeps the dish from tasting one-note.
12. Corn Ribs with Chili-Lime Butter
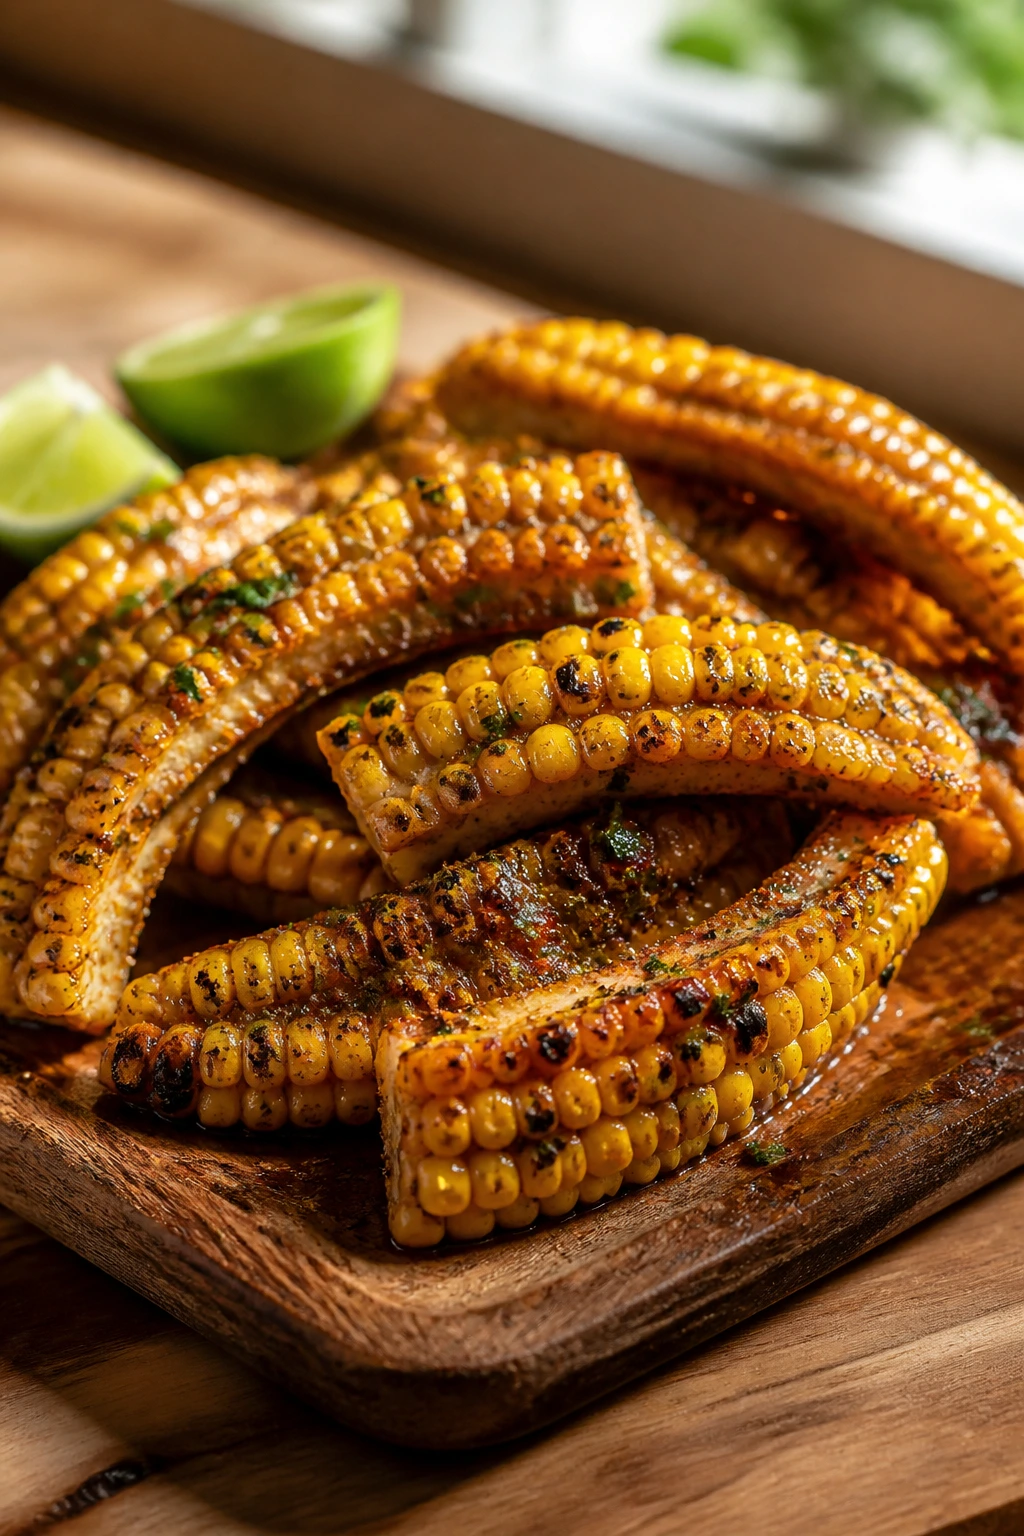
Corn ribs are the kind of recipe that makes people look twice when you put the tray down. The kernels curl and blister, the pieces bend into rib-like arcs, and every bite gives you sweet corn, smoke, salt, and a little char. Messy. Fun. Worth it.
Why It Works:
Corn has enough sugar to brown quickly in the air fryer. Cutting the cobs into quarters exposes the kernels to the heat on both sides, which is what creates the rib effect. Chili-lime butter finishes the job with a sticky, savory sheen.
Key Ingredients:
- 3 ears corn, husked
- 1½ tablespoons olive oil
- ½ teaspoon salt
- ½ teaspoon chili powder
- 2 tablespoons melted butter
- 1 teaspoon lime zest
- 1 tablespoon lime juice
- 1 tablespoon chopped cilantro, optional
Quick Steps:
- Preheat the air fryer to 400°F.
- Carefully cut each ear of corn lengthwise into 4 ribs.
- Toss with olive oil, salt, and chili powder.
- Air fry for 10 to 12 minutes, turning once, until the edges are browned.
- Brush with chili-lime butter and serve.
Equipment for This Recipe:
- Sharp chef’s knife
- Cutting board
- Air fryer basket
- Pastry brush
How to Serve This Dish:
Serve them with extra lime wedges and a plate of napkins. They’re at home next to grilled meat, but they also vanish fast on their own.
Pro Tips for This Recipe:
- Stand the cob upright in a towel-lined bowl before cutting.
- If the corn is very fresh, the ribs curl better.
- Brush on butter after cooking so the spices stay bright.
Variations on This Dish:
- Mexican Street Corn Version: Add cotija, mayo, and chili powder after cooking.
- Garlic Herb Version: Swap chili powder for garlic powder and parsley.
Common Mistakes to Avoid with This Dish:
- Forcing dull knives through the cob: Use a sharp chef’s knife and steady pressure.
- Overseasoning before cooking: Too much butter too early can block browning.
13. Crispy Artichoke Hearts with Lemon Mayo
Artichoke hearts are already halfway to good snack food. The air fryer turns the edges crisp and a little jagged, while the inside stays tender and faintly sweet. With lemon mayo, they land somewhere between appetizer and side dish.
Why It Works:
Canned or jarred artichoke hearts are convenient, but they need to be dried well so they crisp instead of steaming. A thin breadcrumb coating helps them brown, and lemon mayo brings acidity that keeps the flavor lively.
Key Ingredients:
- 1 can (14 ounces) artichoke hearts, drained and patted dry
- 1 tablespoon olive oil
- ½ cup panko breadcrumbs
- ¼ cup grated Parmesan
- ½ teaspoon garlic powder
- ¼ teaspoon salt
- ¼ teaspoon black pepper
- ¼ cup mayonnaise
- 1 teaspoon lemon juice
Quick Steps:
- Preheat the air fryer to 390°F.
- Toss artichoke hearts with oil.
- Mix panko, Parmesan, garlic powder, salt, and pepper, then coat the artichokes.
- Air fry for 8 to 10 minutes until the crumbs are golden.
- Stir mayo with lemon juice and serve alongside.
Equipment for This Recipe:
- Air fryer basket
- Mixing bowl
- Small bowl for sauce
- Tongs
How to Serve This Dish:
Serve them as a starter with lemon mayo or aioli. They’re also good scattered over a salad that needs something salty and crunchy.
Pro Tips for This Recipe:
- Dry the artichokes well or the coating slips.
- Use quartered hearts if the whole ones are too large.
- A quick spritz of oil helps the crumbs brown.
Variations on This Dish:
- Spicy Aioli Version: Add sriracha to the mayo.
- Herb Crumb Version: Mix in thyme and parsley for a fresher finish.
Common Mistakes to Avoid with This Dish:
- Using wet artichokes straight from the jar: They won’t crisp.
- Trying to cook them too long: The outer crumb burns before the hearts improve.
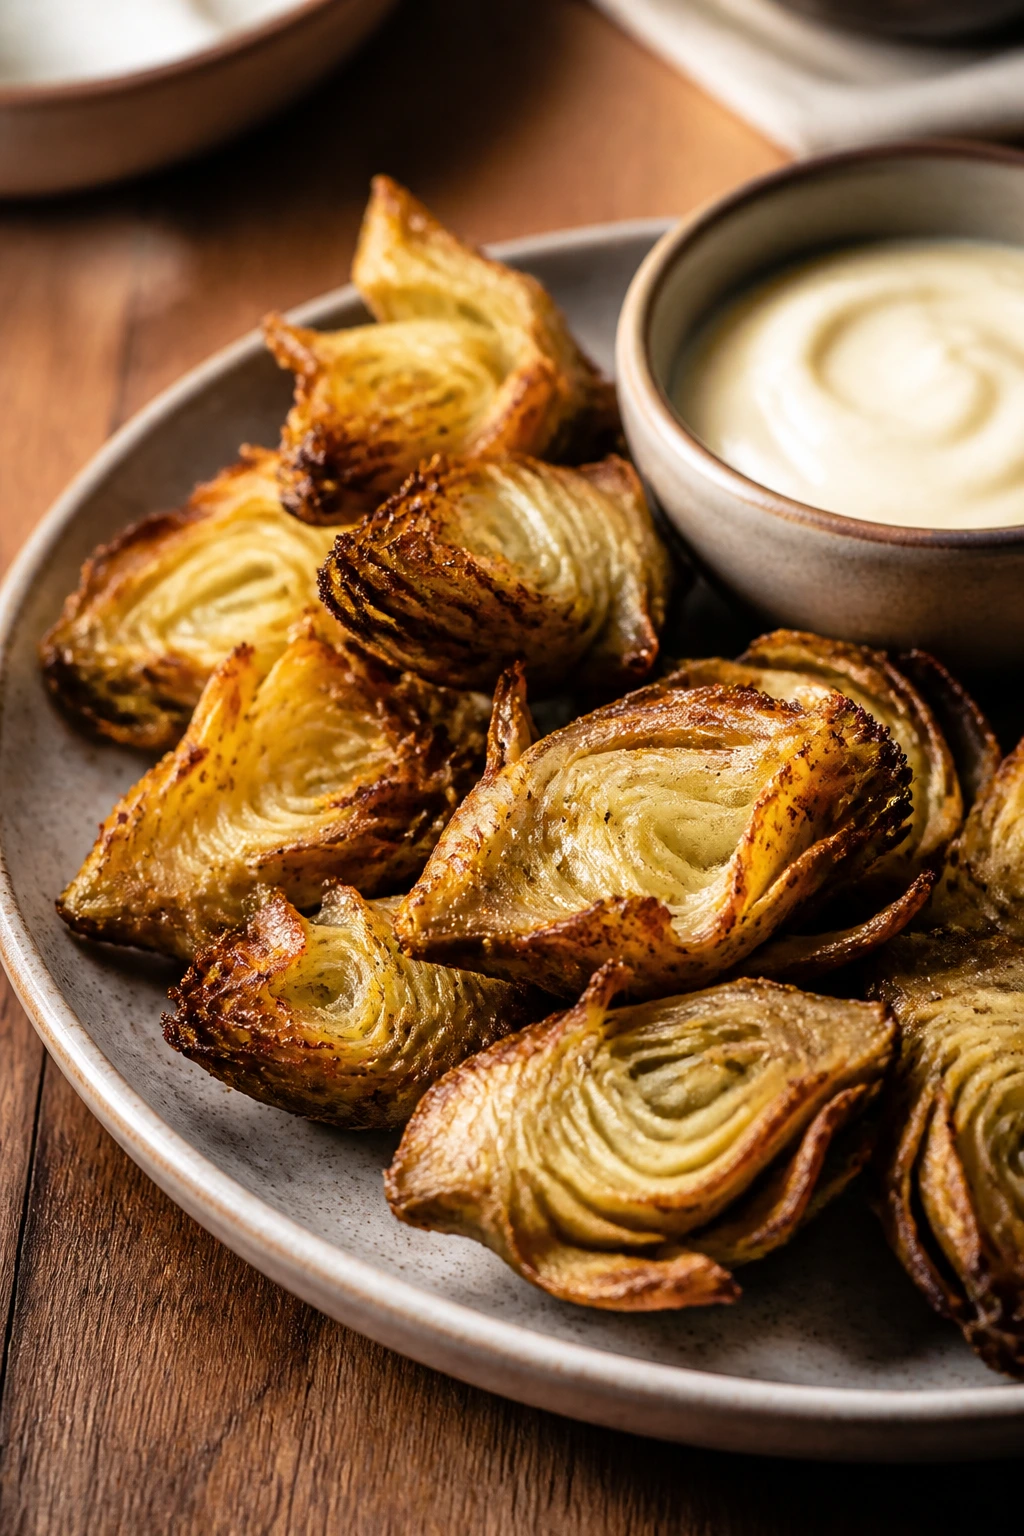
14. Crispy Smashed Baby Potatoes
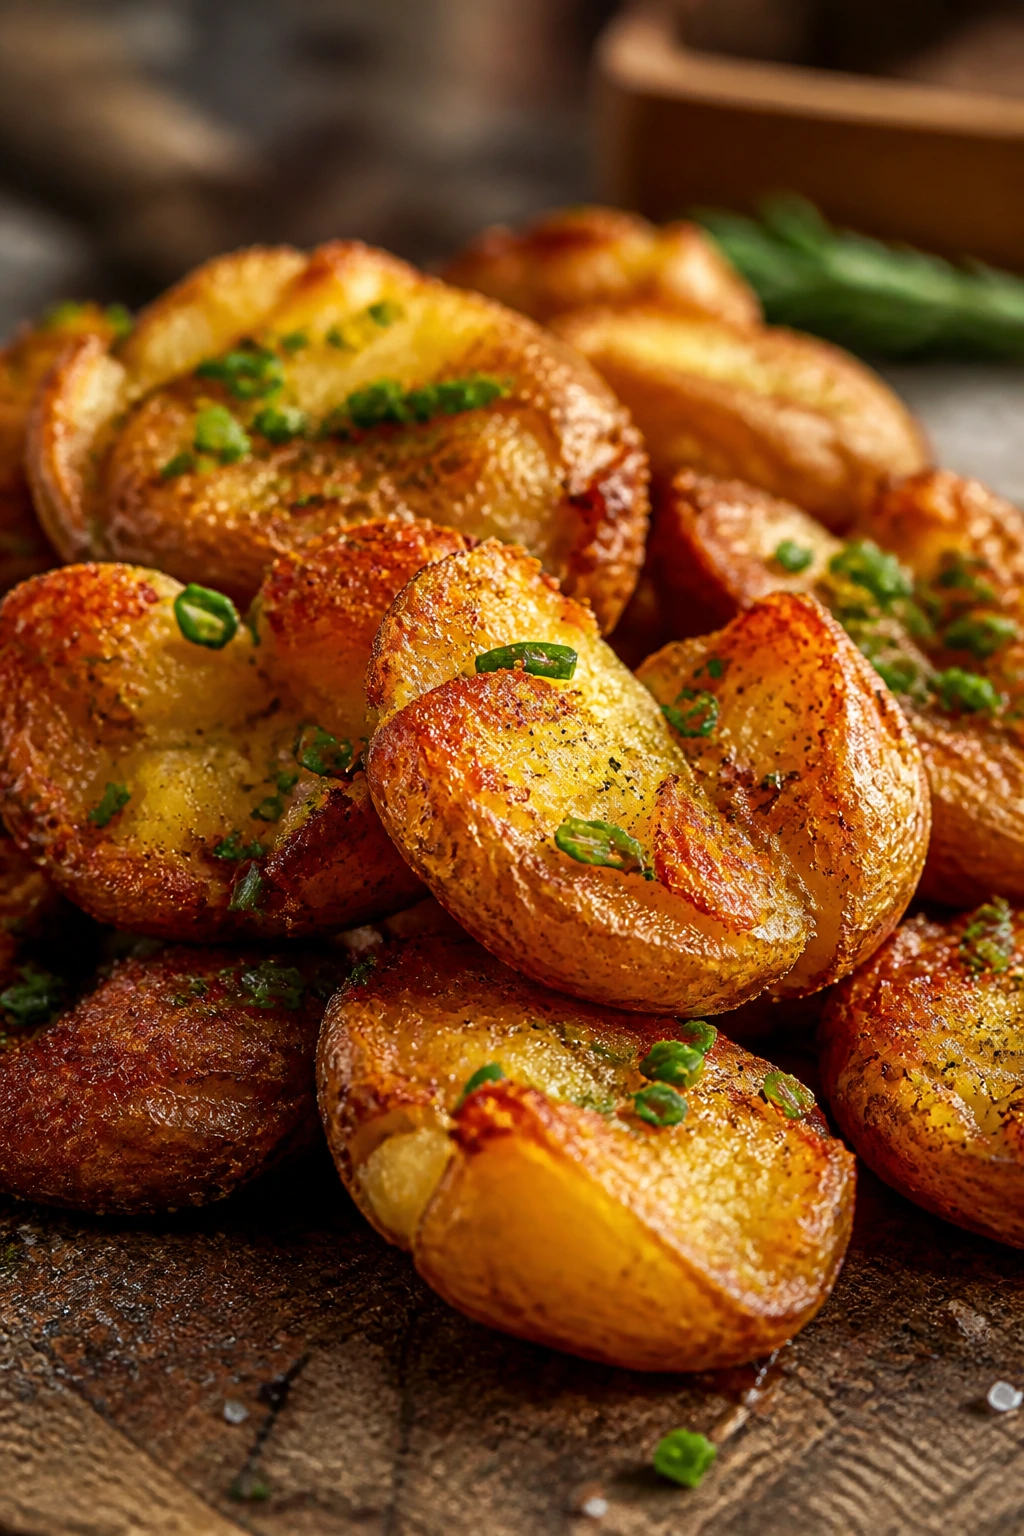
Potatoes don’t need much help, which is part of their charm. Smash them, season them, and the air fryer turns the rough edges into tiny crisp shells while the middle stays soft and almost creamy. It’s the kind of side dish people pretend not to care about until the bowl is empty.
Why It Works:
Parboiling softens the potatoes so they can be smashed without falling apart. Once flattened, their surface area expands, which means more room for browning in the air fryer. The result is crunchy edges and a fluffy center in one bite.
Key Ingredients:
- 1½ pounds baby potatoes
- 1 tablespoon salt, for boiling
- 2 tablespoons olive oil
- ½ teaspoon garlic powder
- ½ teaspoon salt
- ¼ teaspoon black pepper
- 2 tablespoons chopped chives
- Sour cream, for serving
Quick Steps:
- Boil the potatoes in salted water for 12 to 15 minutes until fork-tender.
- Drain and let them steam-dry for 5 minutes.
- Smash each potato gently with the bottom of a glass.
- Toss with olive oil, garlic powder, salt, and pepper.
- Air fry at 400°F for 12 to 14 minutes until the edges are deep golden.
- Finish with chives and serve with sour cream.
Equipment for This Recipe:
- Pot for boiling
- Air fryer basket
- Potato masher or glass
- Tongs
How to Serve This Dish:
Serve them as a side for roast chicken, burgers, or grilled fish. A bowl of sour cream or ranch on the side disappears fast.
Pro Tips for This Recipe:
- Dry the potatoes after boiling or they won’t crisp well.
- Don’t smash them too hard; you want rough, craggy edges, not rubble.
- Small potatoes crisp better than oversized ones.
Variations on This Dish:
- Cheddar-Loaded Version: Add cheddar in the last 2 minutes.
- Rosemary Salt Version: Swap chives for chopped rosemary and flaky salt.
Common Mistakes to Avoid with This Dish:
- Skipping the boil: Raw potatoes won’t smash neatly.
- Crowding the basket: The bottoms stay soft if they sit on top of each other.
15. Cauliflower Steaks with Chimichurri
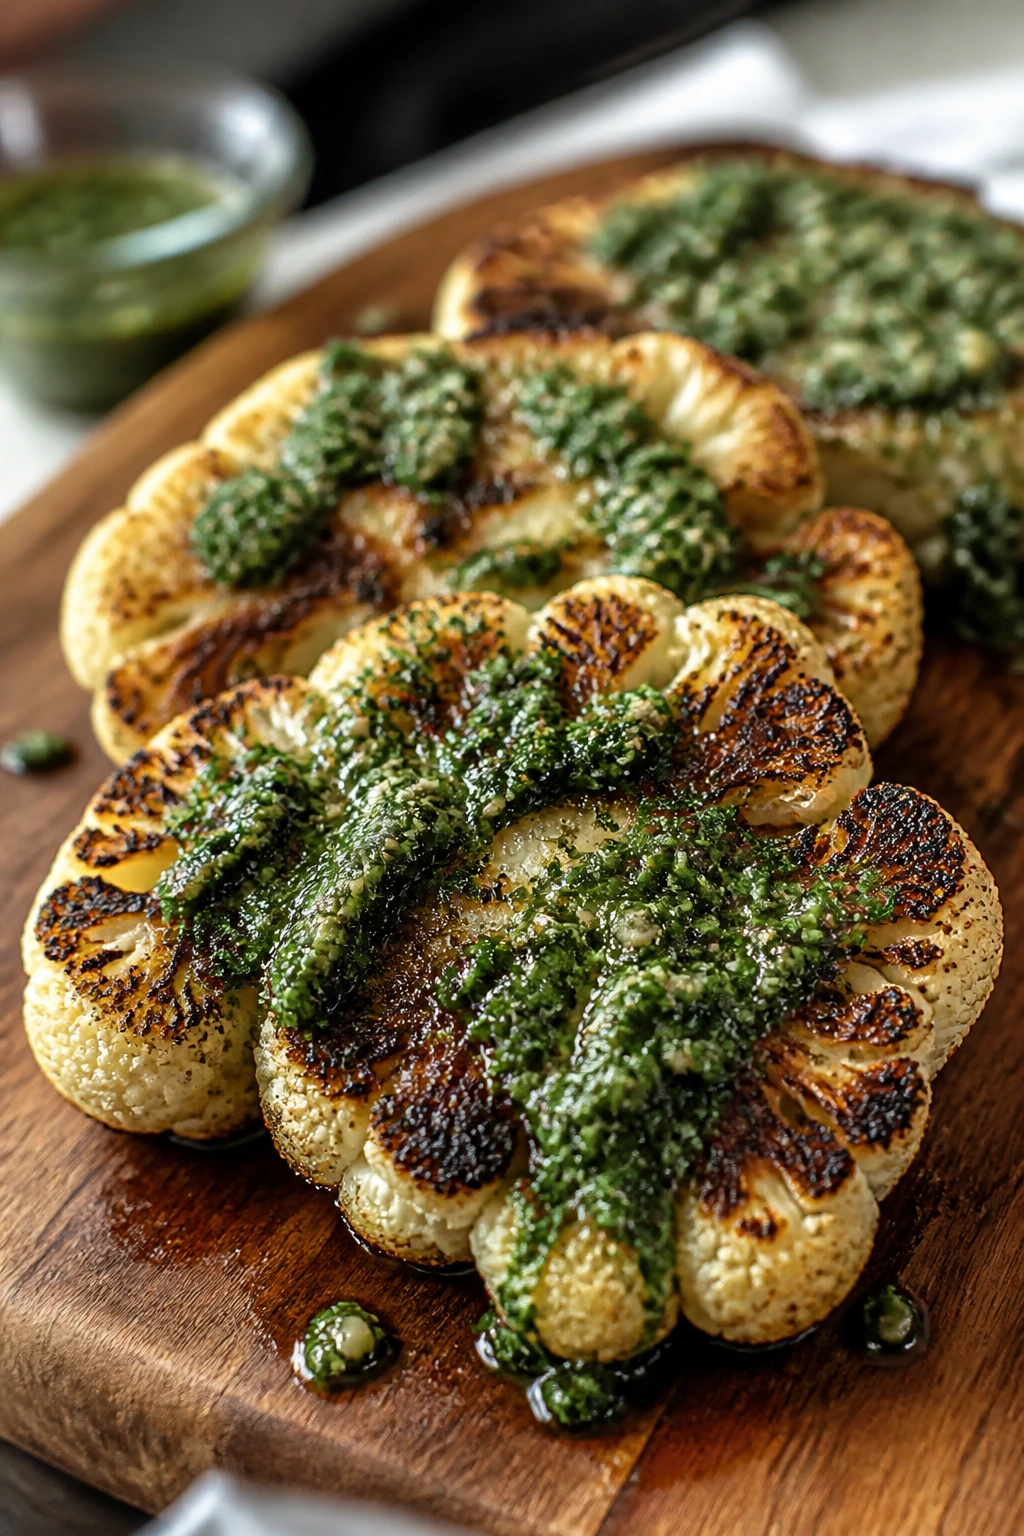
Cauliflower steaks sound fancier than they are, which is fine by me. The thick slices char on the outside, stay tender in the middle, and take on seasoning like they’ve been waiting for it. Chimichurri gives them the sharp, herby lift they need.
Why It Works:
Thick cauliflower slices hold up under strong heat better than loose florets. The air fryer browns the cut surface and edges quickly, and a spoonful of chimichurri adds acidity, parsley, garlic, and oil in one clean finish. It feels hearty without being heavy.
Key Ingredients:
- 1 large head cauliflower
- 2 tablespoons olive oil
- 1 teaspoon salt
- ½ teaspoon black pepper
- 1 teaspoon smoked paprika
- ½ cup chopped parsley
- 2 tablespoons chopped cilantro
- 1 small garlic clove, minced
- 2 tablespoons olive oil for chimichurri
- 1 tablespoon red wine vinegar
Quick Steps:
- Slice the cauliflower into ¾-inch steaks.
- Brush both sides with olive oil and season with salt, pepper, and paprika.
- Air fry at 390°F for 10 minutes, carefully flip, then cook 6 to 8 minutes more.
- Mix parsley, cilantro, garlic, olive oil, and vinegar for the chimichurri.
- Spoon the sauce over the cauliflower and serve.
Equipment for This Recipe:
- Sharp knife
- Air fryer basket
- Small bowl
- Pastry brush
How to Serve This Dish:
Plate one steak per person with chimichurri spooned over the top. It works as a main for a light meal or as a side with grilled meat.
Pro Tips for This Recipe:
- Keep the core intact so the steaks don’t break apart.
- Save the loose florets and air fry them separately.
- Chimichurri tastes brighter if it sits 10 minutes before serving.
Variations on This Dish:
- Tahini Version: Swap chimichurri for tahini thinned with lemon juice.
- Indian-Spice Version: Use cumin, coriander, and turmeric instead of paprika.
Common Mistakes to Avoid with This Dish:
- Cutting steaks too thin: They fall apart before browning.
- Leaving out acidity: The dish needs a sharp finish to keep it from tasting flat.
16. Crispy Cabbage Wedges with Miso Butter
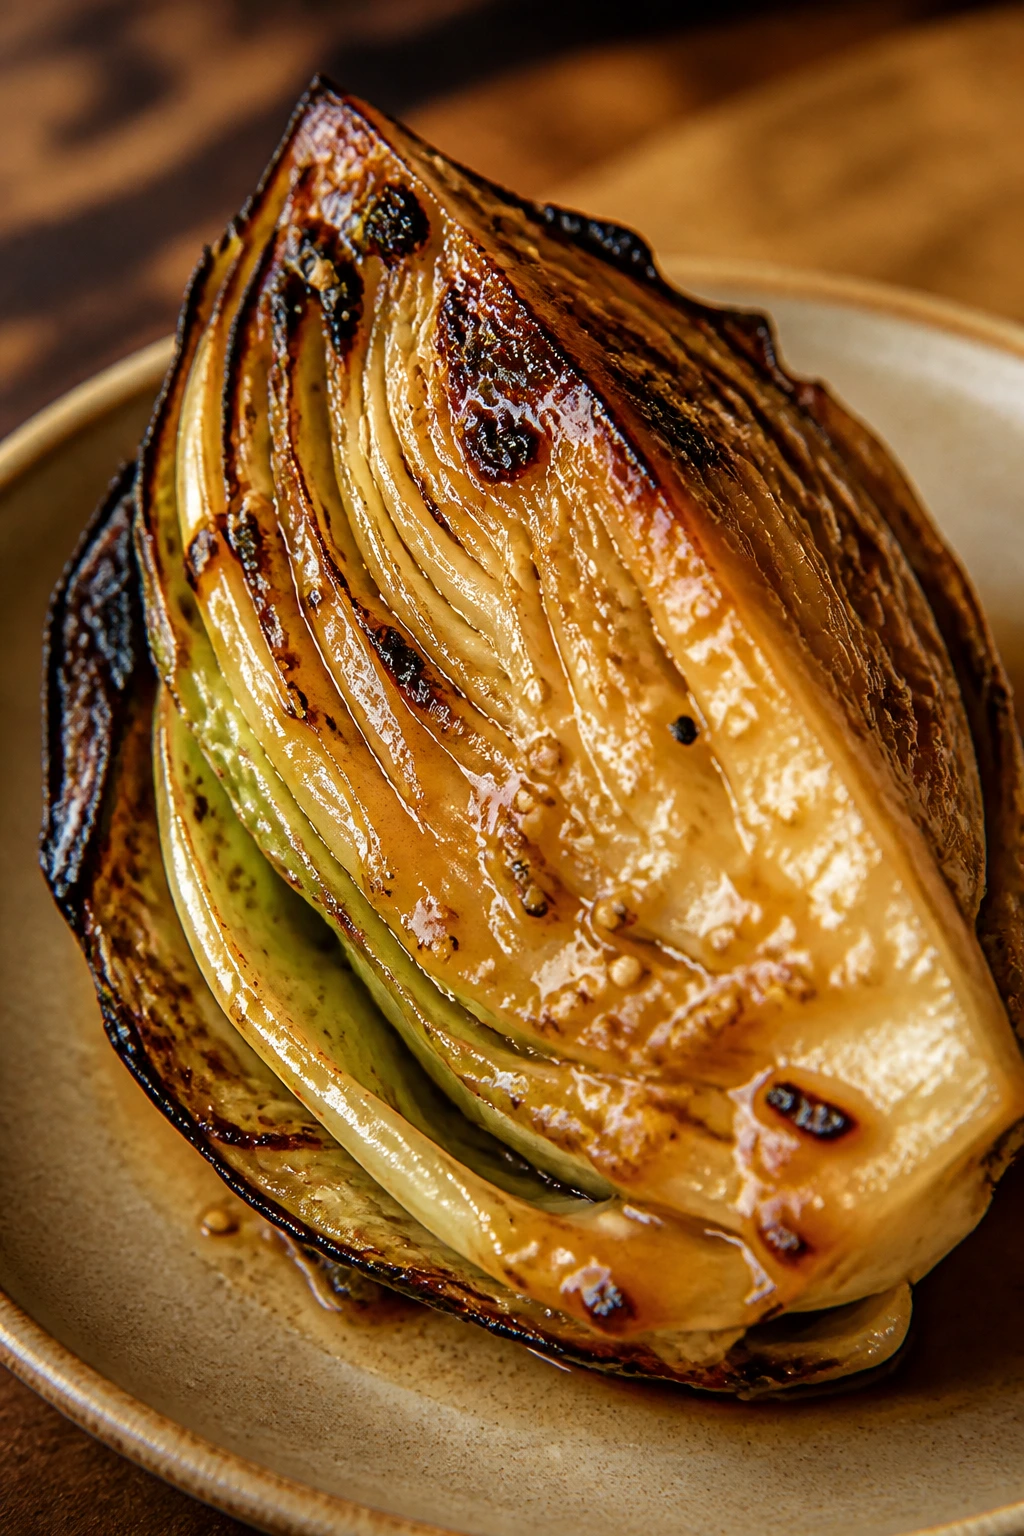
Cabbage is underrated in the exact way that annoys people who like good food. Cut into wedges, it turns soft in the center and browned at the edges, with a sweetness that shows up only after heat does its work. Miso butter makes it taste deep, savory, and oddly luxurious.
Why It Works:
Cabbage holds together during air frying, which makes it ideal for wedge treatment. The cut edges brown while the inner leaves steam just enough to soften. Miso adds salt and fermented depth, and butter helps it cling to the leaves.
Key Ingredients:
- 1 small green cabbage, cut into 4 wedges
- 1½ tablespoons olive oil
- ½ teaspoon salt
- ¼ teaspoon black pepper
- 1 tablespoon white miso
- 2 tablespoons melted butter
- 1 teaspoon rice vinegar
- Sesame seeds, for finishing
Quick Steps:
- Preheat the air fryer to 380°F.
- Brush the wedges with olive oil and season with salt and pepper.
- Air fry for 10 minutes, flip carefully, then cook 8 minutes more.
- Stir miso, butter, and rice vinegar together.
- Brush the hot cabbage with miso butter and finish with sesame seeds.
Equipment for This Recipe:
- Sharp knife
- Air fryer basket
- Small bowl
- Pastry brush
How to Serve This Dish:
Serve with rice, roast pork, or grilled tofu. A squeeze of lime or a dash of chili flakes wakes it up nicely.
Pro Tips for This Recipe:
- Leave part of the core attached so the wedges stay intact.
- If the outer leaves are loose, tuck them in before cooking.
- Brush on the miso butter after air frying, not before.
Variations on This Dish:
- Garlic-Sesame Version: Add grated garlic and toasted sesame oil to the butter.
- Spicy Gochujang Version: Stir a little gochujang into the glaze.
Common Mistakes to Avoid with This Dish:
- Cutting the wedges too small: They can burn before the center softens.
- Glazing too early: Miso can darken and taste harsh.
17. Portobello Mushroom Steaks
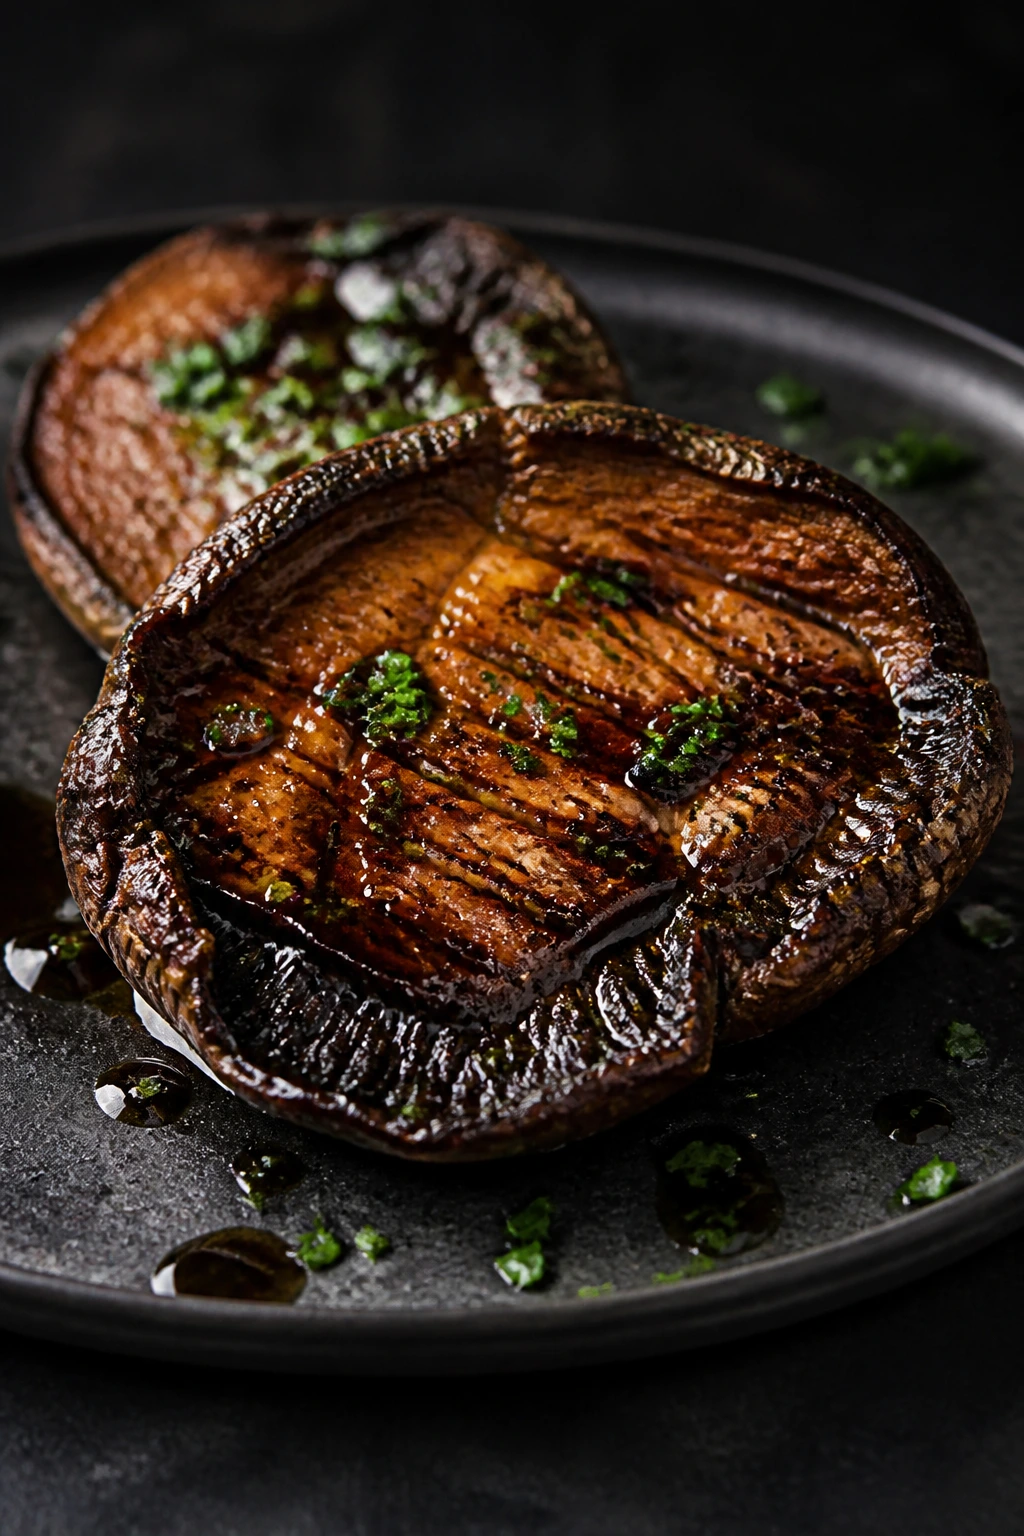
Portobellos are the vegetable equivalent of a heavyweight. They’re dense, juicy, and take seasoning well, which makes them one of the easiest meatless mains to sell to a skeptical crowd. When they come out of the air fryer with browned edges and balsamic gloss, no one calls them a side dish.
Why It Works:
The mushroom cap traps moisture while the hot air browns the surface. A short marinade seasons the cap all the way through, and the air fryer gets the underside tender without turning it soggy. Slice it right, and it eats like a steak with fewer rules.
Key Ingredients:
- 4 large portobello caps, stems removed and gills scraped
- 2 tablespoons olive oil
- 1 tablespoon balsamic vinegar
- 1 teaspoon soy sauce
- 1 teaspoon garlic powder
- ½ teaspoon black pepper
- ½ teaspoon salt
- 1 tablespoon chopped thyme or parsley
Quick Steps:
- Wipe the caps clean and scrape out the gills.
- Mix olive oil, balsamic vinegar, soy sauce, garlic powder, salt, and pepper.
- Brush the mixture over both sides of the mushrooms.
- Air fry at 390°F for 8 minutes, then flip and cook 4 to 6 minutes more.
- Rest for 2 minutes and finish with herbs.
Equipment for This Recipe:
- Air fryer basket
- Pastry brush
- Small bowl
- Tongs
How to Serve This Dish:
Serve with mashed potatoes, polenta, or a salad of bitter greens. A fried egg on top turns it into a real meal.
Pro Tips for This Recipe:
- Remove the gills so the cap doesn’t turn muddy in flavor.
- Don’t skip the resting time; the juices settle back in.
- If the caps are small, reduce the second cook time.
Variations on This Dish:
- Steakhouse Style: Add Worcestershire and a little smoked paprika.
- Garlic-Herb Style: Add fresh rosemary and more black pepper.
Common Mistakes to Avoid with This Dish:
- Leaving the gills in: They can make the mushroom taste earthy in a blunt way.
- Overcooking: The cap shrinks fast and loses its meaty chew.
18. Air-Fried Okra with Cornmeal Crust
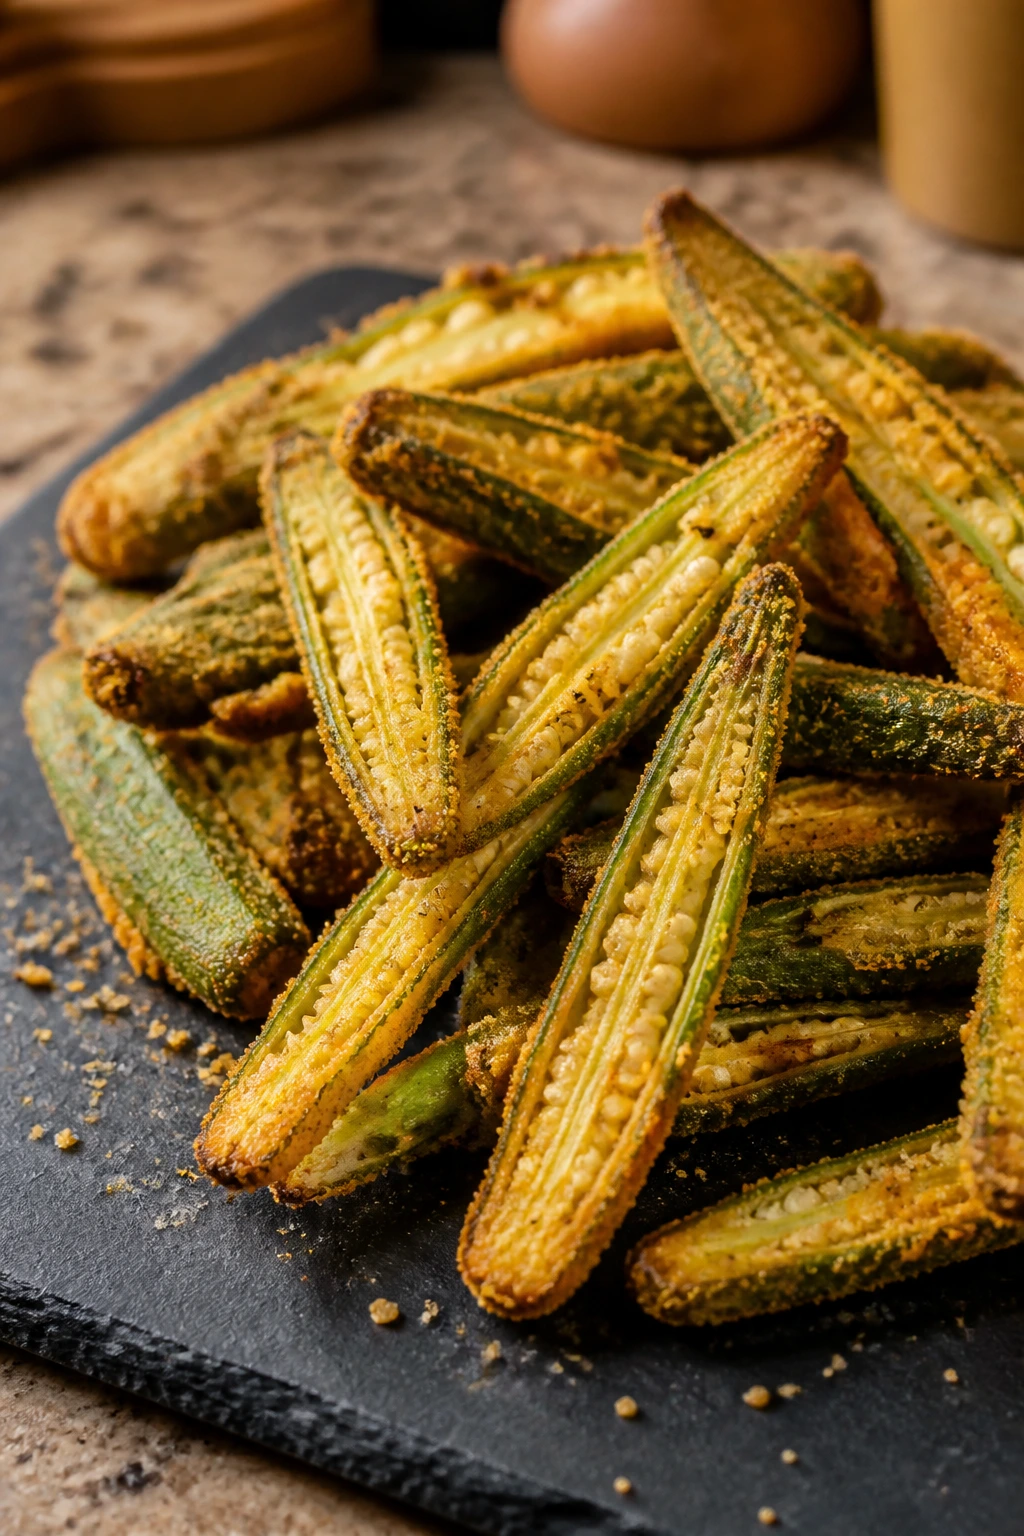
Okra gets unfairly judged by people who have only had it boiled into a slimy mess. In the air fryer, sliced okra turns crisp around the edges, the coating stays gritty in a good way, and the inside keeps its tender bite. Cornmeal is what makes this one sing.
Why It Works:
Okra pods are naturally suited to dry, hot cooking. Slicing them and coating them lightly in cornmeal reduces the slippery texture people worry about. A brief high-heat cook gives you crunch before the pods lose shape.
Key Ingredients:
- 1 pound fresh okra, trimmed and sliced in half lengthwise
- 1 tablespoon olive oil
- ½ cup cornmeal
- ¼ cup all-purpose flour
- ½ teaspoon salt
- ½ teaspoon smoked paprika
- ¼ teaspoon black pepper
- Hot sauce or lemon wedges, for serving
Quick Steps:
- Preheat the air fryer to 400°F.
- Toss okra with olive oil.
- Mix cornmeal, flour, salt, paprika, and pepper, then coat the okra lightly.
- Air fry for 9 to 11 minutes, shaking once, until the coating is crisp.
- Serve with hot sauce or lemon.
Equipment for This Recipe:
- Air fryer basket
- Mixing bowl
- Knife and board
- Tongs
How to Serve This Dish:
Serve as a snack, a side, or a crunchy starter with a little hot sauce. It pairs especially well with barbecue food.
Pro Tips for This Recipe:
- Use fresh okra, not limp pods.
- Dry the pods well before coating.
- A light coating works better than a thick breading.
Variations on This Dish:
- Cajun Okra: Add Cajun seasoning and a pinch of cayenne.
- Garlic Cornmeal Version: Add garlic powder and a little Parmesan.
Common Mistakes to Avoid with This Dish:
- Overhandling the okra: Rough treatment can trigger more slime.
- Using frozen okra: It won’t crisp the same way.
19. Crispy Onion Rings with Paprika Panko
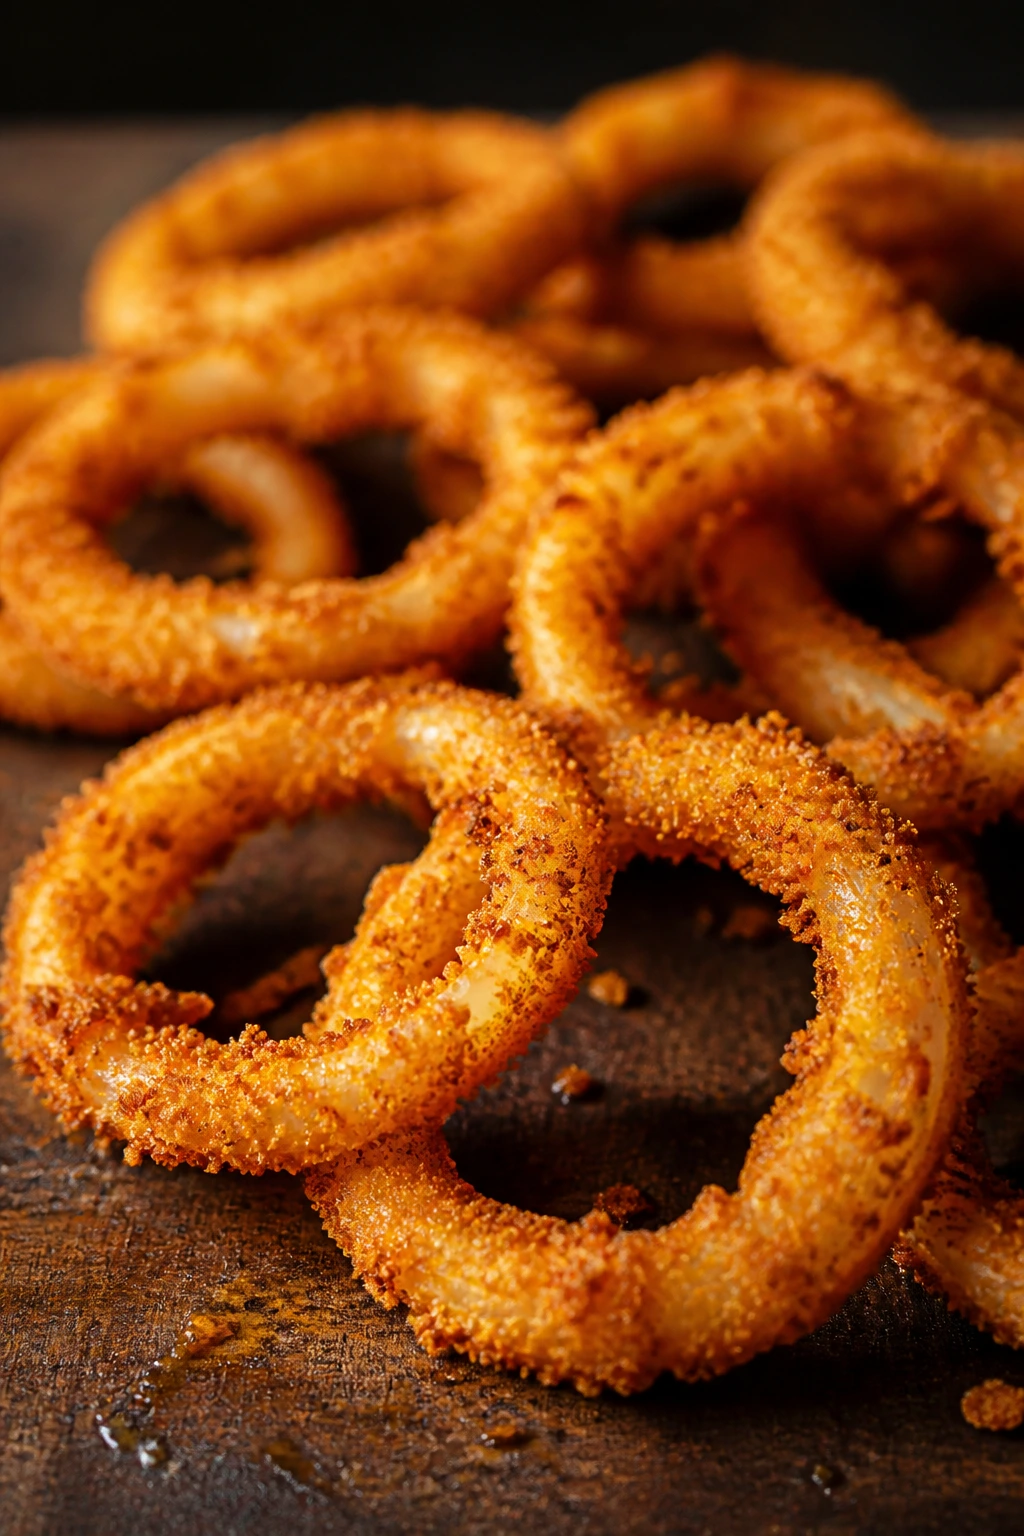
Onion rings are the easiest way to remind people that vegetables can be a little indulgent. The onion softens and sweetens, the coating turns gold and crunchy, and the whole thing feels like something from a diner—only lighter, and a lot less greasy.
Why It Works:
Onions sweat as they cook, so the coating needs to be dry and sturdy. Panko gives a rough surface that browns quickly, and a little paprika adds color and a mild smoky note. Separate rings are easier to crisp than thick onion slabs.
Key Ingredients:
- 2 large yellow onions, sliced into rings
- ½ cup flour
- 2 eggs, beaten
- 1½ cups panko breadcrumbs
- 1 teaspoon paprika
- 1 teaspoon salt
- ½ teaspoon black pepper
- Olive oil spray
- Dip of choice, for serving
Quick Steps:
- Separate the onion rings.
- Dredge in flour, dip in egg, then coat in panko mixed with paprika, salt, and pepper.
- Preheat the air fryer to 400°F.
- Lay rings in a single layer, spray lightly with oil, and air fry for 8 to 10 minutes.
- Flip once if needed and serve while hot.
Equipment for This Recipe:
- Air fryer basket
- Three shallow bowls
- Tongs
- Cutting board
How to Serve This Dish:
Serve with burger night, or just with a dipping sauce and a cold drink. They’re best as soon as they leave the basket.
Pro Tips for This Recipe:
- Keep the rings separated as much as possible.
- Use yellow onions for the best sweetness.
- A light spray of oil gives the panko that fried look.
Variations on This Dish:
- Spicy Ring Version: Add cayenne to the panko.
- Gluten-Free Version: Use rice flour and gluten-free breadcrumbs.
Common Mistakes to Avoid with This Dish:
- Overlapping rings in the basket: The coating stays pale where they touch.
- Skipping the oil spray: The crust can look dusty instead of crisp.
20. Delicata Squash Rings with Maple Mustard
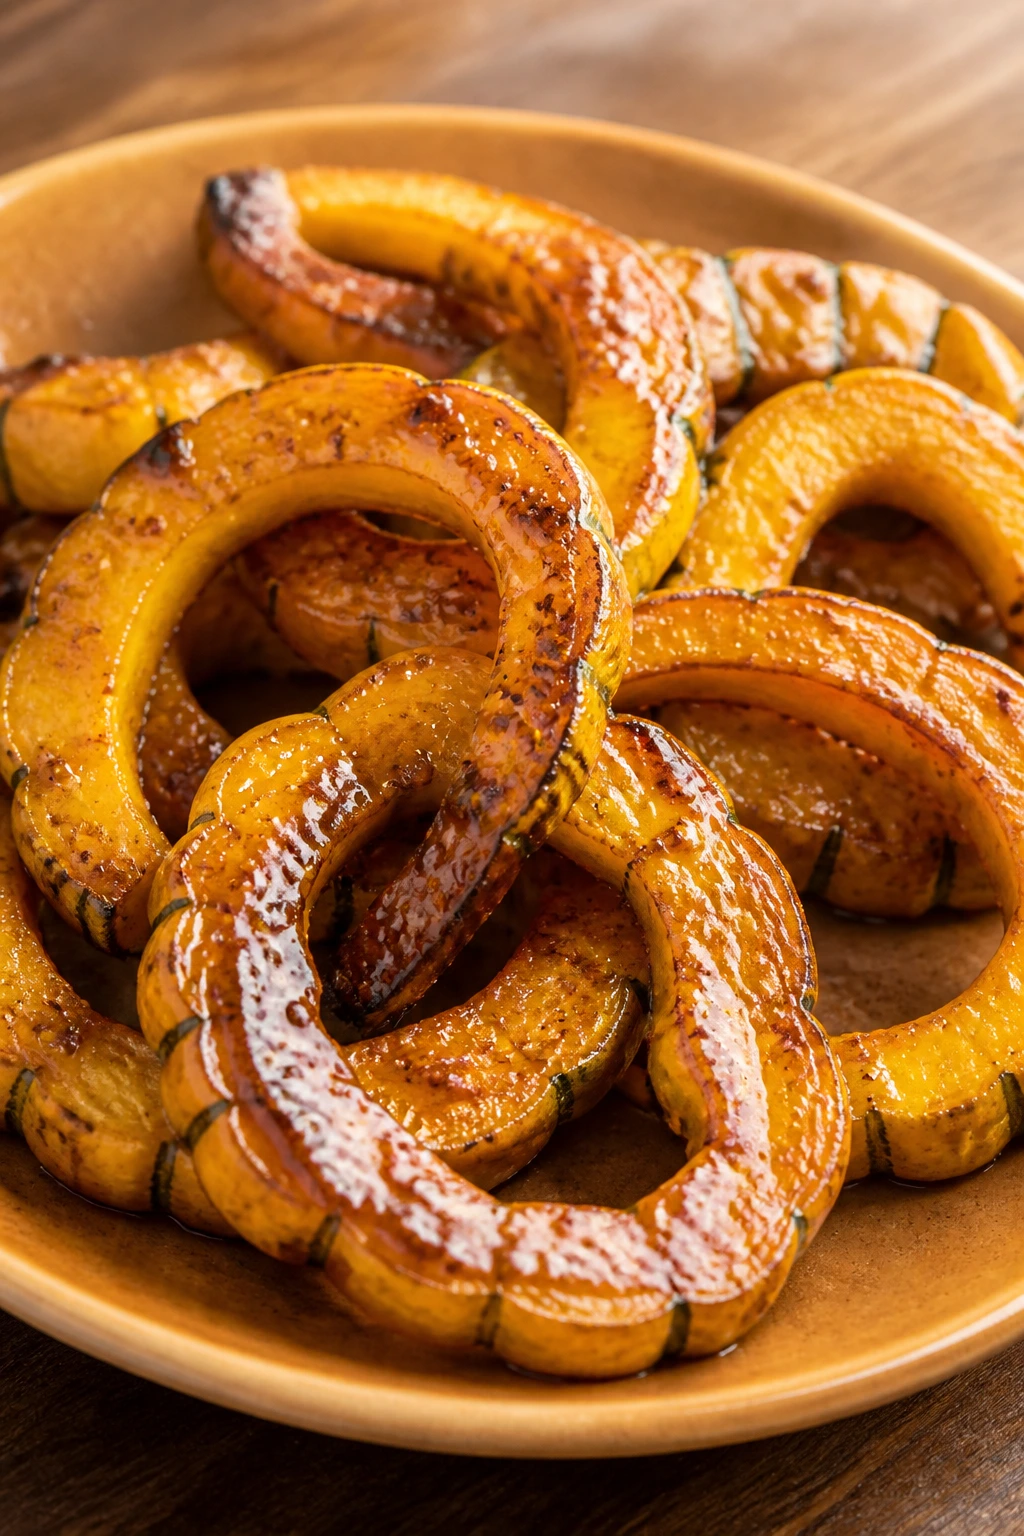
Delicata squash is the easygoing cousin of winter squash. The skin is edible, the flesh softens fast, and the rings come out with browned edges and a sweet, nutty center. Maple mustard pushes it into that sweet-savory lane people tend to remember.
Why It Works:
The ring shape means more surface area hits the basket, which helps the squash brown instead of steam. Delicata’s thin skin saves you a peeling step, and the maple-mustard glaze is sticky enough to cling without flooding the basket. It tastes polished without being fussy.
Key Ingredients:
- 2 delicata squash, seeded and sliced into ½-inch rings
- 1½ tablespoons olive oil
- ½ teaspoon salt
- ¼ teaspoon black pepper
- 1 tablespoon Dijon mustard
- 1 tablespoon maple syrup
- 1 teaspoon apple cider vinegar
- Chopped parsley, for finishing
Quick Steps:
- Preheat the air fryer to 390°F.
- Toss the squash rings with oil, salt, and pepper.
- Air fry for 10 minutes, flip, then cook 4 to 6 minutes more.
- Mix Dijon, maple syrup, and vinegar, then brush over the hot squash.
- Finish with parsley and serve.
Equipment for This Recipe:
- Air fryer basket
- Spoon or brush
- Sharp knife
- Mixing bowl
How to Serve This Dish:
Serve beside roast chicken, pork tenderloin, or a grain bowl. The rings look especially good stacked loosely on a platter with parsley over the top.
Pro Tips for This Recipe:
- Slice even rings so the thinner ends don’t overcook.
- Don’t drown the squash in glaze; a light brush is enough.
- If your squash is large, cut the rings into half-moons for easier handling.
Variations on This Dish:
- Brown Butter Version: Swap the maple-mustard glaze for brown butter and sage.
- Chili-Mustard Version: Add a pinch of chili flakes to the glaze.
Common Mistakes to Avoid with This Dish:
- Using squash that’s too thick in the middle: It takes too long to soften.
- Adding the glaze too early: The sugars can darken before the squash finishes.
Why the Air Fryer Works So Well for Vegetables
The air fryer is built for one thing vegetables need most: fast, dry heat. That matters more than people think. A damp oven tray can roast broccoli, sure, but it usually takes longer and gives you a broader, softer browning. The air fryer concentrates airflow around the food, so the outside dries first, which is exactly what makes sprouts crisp, cauliflower brown, and mushrooms shrink into something meatier.
Size matters here. Small florets cook quickly. Thick wedges need space and a little oil. Dense vegetables like sweet potato and potato usually do better when they’re cut into shapes with more edges—wedges, fries, smashed rounds, or rings—because edges are where the browning happens. That’s the part I care about most. It’s the part people reach for.
The other benefit is control. You can stop halfway through, shake the basket, and see instantly whether the vegetables are browning evenly. No peeking through oven glass and guessing. If a batch looks pale, add 2 more minutes. If it’s already dark at the tips, pull it out. That kind of direct feedback is why air fried vegetables taste more alive than the steamed or boiled versions people grew up pretending to like.
Essential Equipment for These Recipes

- Air fryer basket or drawer model: A 4-quart or larger basket makes it easier to keep vegetables in a single layer.
- Large mixing bowl: You need room to toss the vegetables without breaking them.
- Tongs: Better than a spoon when you’re turning hot sprouts, wedges, and rings.
- Sharp chef’s knife: Several recipes depend on even cuts, especially squash, potatoes, and cabbage.
- Cutting board with a damp towel underneath: Keeps slippery vegetables from sliding while you cut.
- Measuring spoons and cups: Helpful for seasoning mixes and batters.
- Paper towels: Dry vegetables crisp better than wet ones.
- Small bowls: Good for dips, glazes, and crumb mixtures.
- Pastry brush: Useful for butter, miso glaze, or mustard finishes.
- Oil spray bottle, optional: Handy for light, even coverage without soaking the coating.
Smart Shopping and Ingredient Tips
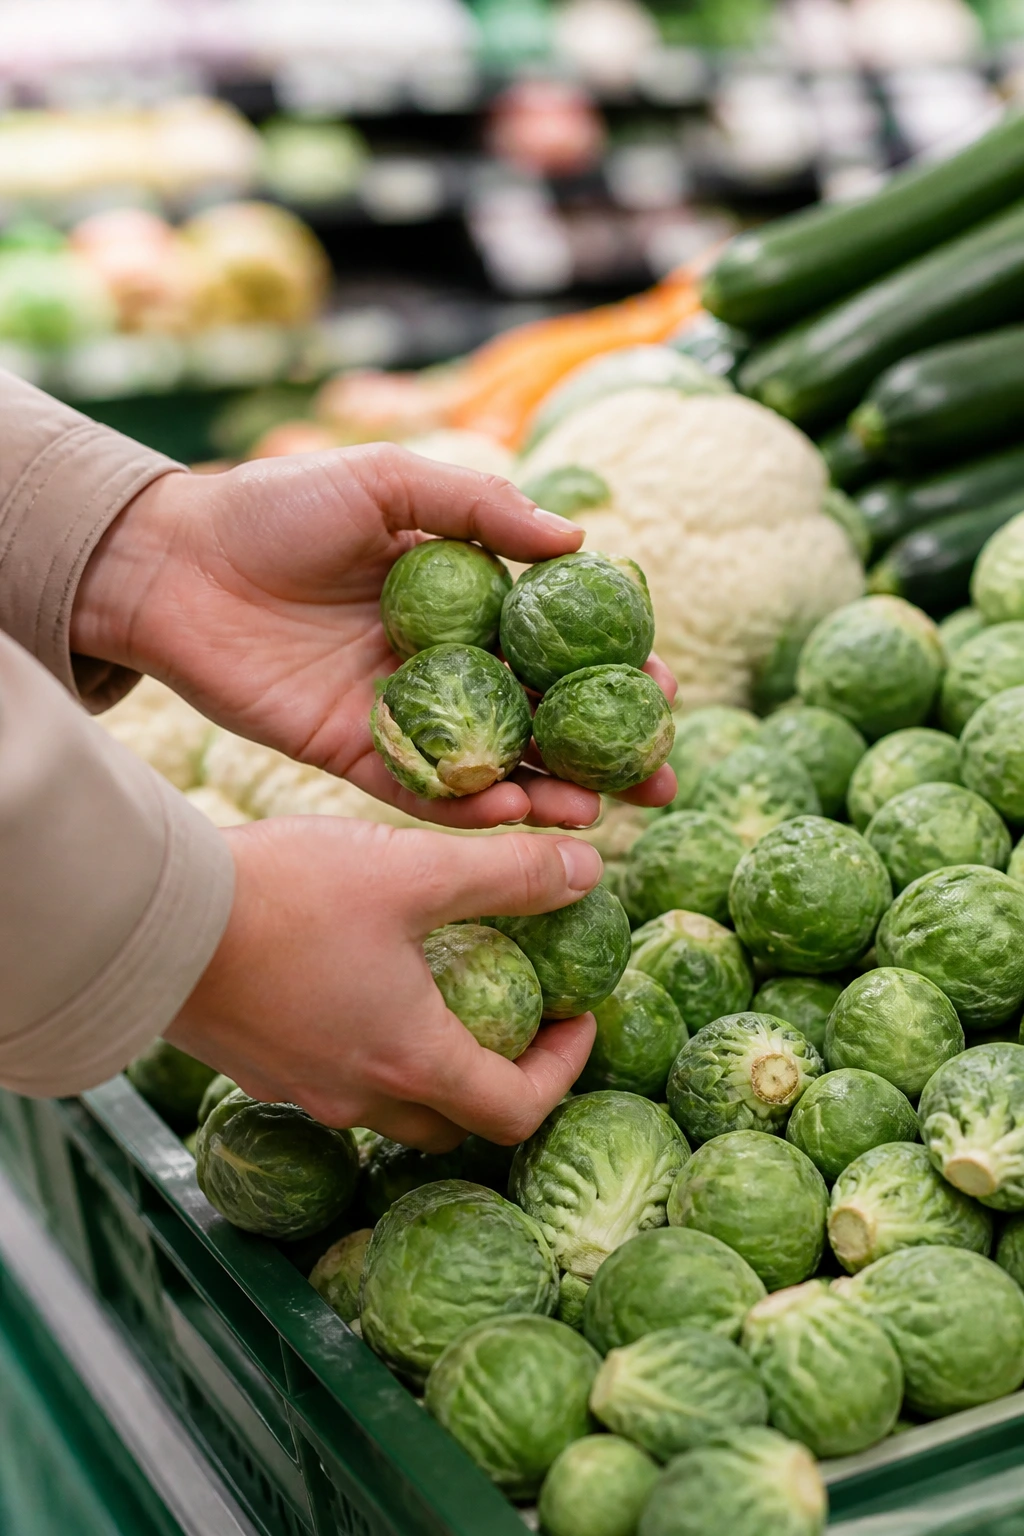
The vegetables themselves matter more than the seasoning most of the time. Buy Brussels sprouts that feel tight and heavy, not loose or yellowing. Look for cauliflower with a compact head and firm stem. Zucchini should be medium-sized; giant ones get seedy and watery, which is a bad trade in the air fryer.
If you’re buying mushrooms, choose ones that feel dry and closed, not slimy or bruised. For potatoes, smaller baby potatoes usually crisp better than big russets in these recipes because they have less internal water and more manageable surfaces after smashing. With squash, delicata is the easy win because you can eat the skin and skip peeling.
Breadcrumbs matter too. Panko gives you the rough, airy crust that regular fine crumbs don’t always deliver. Parmesan should be finely grated if you want it to melt into the coating; the chunky stuff tends to sit there and brown unevenly. Oil should be light and neutral unless the recipe asks for olive oil specifically. Too much oil makes the basket slick and can turn a crisp coating patchy.
One last thing: dry your vegetables before seasoning. Water is the enemy of browning. Always.
How to Serve These Recipes
Presentation:
Pile crisp vegetables into warm bowls or shallow platters instead of flat plates. That keeps steam from collecting underneath and lets browned edges stay visible. Finish with a final pinch of salt, a squeeze of lemon, or a scatter of herbs right before serving.
Accompaniments:
These recipes sit well beside grilled chicken, burgers, fish, rice bowls, pasta, and grain salads. Buffalo cauliflower wants ranch. Brussels sprouts like lemon. Sweet potatoes and corn ribs love something creamy or tangy on the side. Onion rings and zucchini fries practically ask for a dip.
Portions:
For a side dish, plan on 4 to 6 ounces of vegetables per person once trimmed and cooked. For a snack or appetizer, that can jump to 6 to 8 ounces because people snack harder on crunchy food than they admit. If you’re feeding a mixed crowd, make two recipes with different textures—say sprouts and fries—so the platter feels fuller.
Beverage Pairing:
Crisp sparkling water with lime works across the board. If you want something stronger, a pale lager with onion rings or Buffalo cauliflower makes sense, while a dry white wine stands up well to broccoli, asparagus, and artichokes.
Additional Tips and Flavor Boosters
Flavor Enhancement:
A finishing acid changes everything. Lemon juice, lime zest, rice vinegar, or a tiny splash of balsamic can wake up a tray that tastes a little flat after browning. Use it after cooking, not before, unless the recipe says otherwise.
Customization:
If your table likes heat, add cayenne, crushed red pepper, or chili crisp at the end instead of loading the coating. If the crowd leans milder, lean on garlic powder, smoked paprika, parsley, and Parmesan. The same vegetable can take either direction without much fuss.
Serving Suggestions:
Serve crunchy vegetables with a dip that has either creaminess or sharpness: ranch, yogurt sauce, mustard mayo, tahini, chimichurri, tzatziki, or lemon aioli. A dry vegetable without a finishing sauce can taste a little stern.
Make-It-Yours:
For dairy-free versions, skip Parmesan and finish with toasted breadcrumbs, nutritional yeast, or herb oil. For gluten-free cooking, use rice flour, almond flour, or gluten-free panko. For lower-oil cooking, spray lightly instead of tossing heavily—just don’t expect the same crust density.
Make-Ahead, Storage, and Reheating Guidance
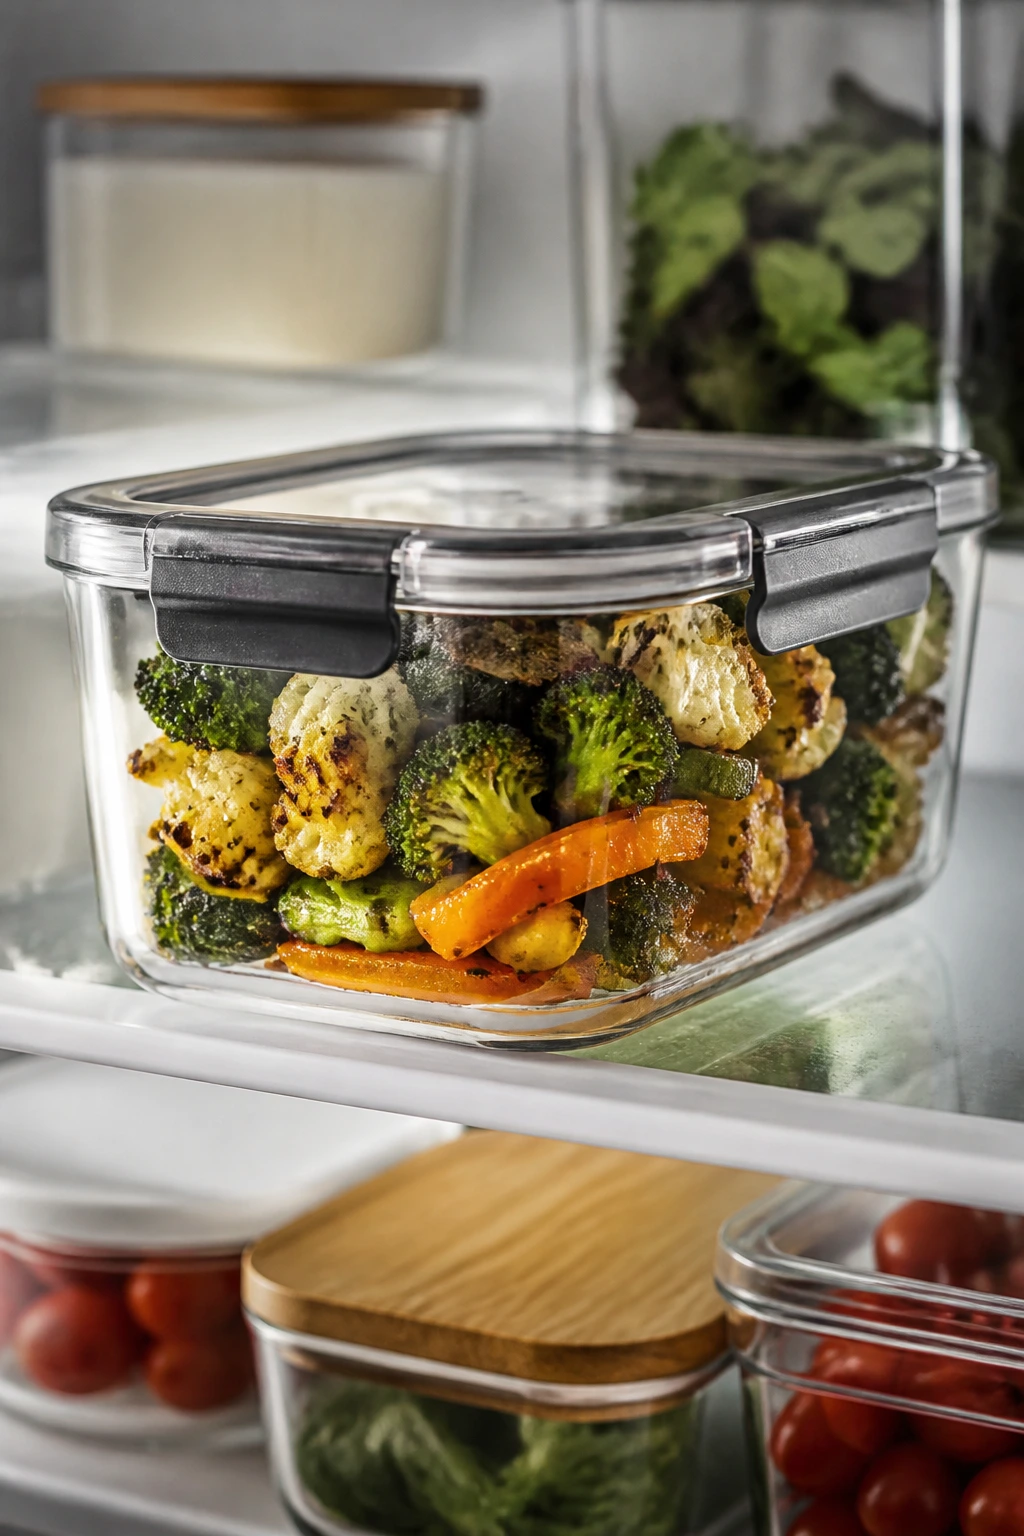
Most of these recipes taste best right out of the basket, which is the price of good crispness. Still, leftovers can work. Store cooked vegetables in an airtight container in the fridge for 3 to 4 days. Buffalo cauliflower and stuffed peppers hold the shortest because sauces and fillings soften the outside faster.
The freezer is better for a few of these than others. Sweet potato wedges, cauliflower florets, and Brussels sprouts freeze for up to 2 months if you cool them fully first and pack them flat. Mushrooms, zucchini fries, and asparagus tend to go soft after freezing, so I wouldn’t bother unless you plan to chop them into something like a grain bowl later.
Reheating is where the air fryer earns a second paycheck. Set it to 350°F and warm most vegetables for 3 to 6 minutes, shaking once. Thicker items like smashed potatoes or corn ribs may need 6 to 8 minutes. If the coating looks dry, add a tiny spray of oil before reheating. The oven works too, but it usually takes longer and softens the edges more than I like. Microwaving is a last resort. It’ll warm the food, sure, but it also erases the very texture you came here for.
Variations and Adaptations to Try
Gluten-Free Crunch:
Use gluten-free panko, rice flour, or almond flour in place of wheat flour and breadcrumbs. This works especially well for zucchini fries, onion rings, and artichoke hearts. The key is keeping the coating light, because dense gluten-free crumbs can go heavy fast.
Dairy-Free Finishes:
Skip Parmesan and butter, then finish with olive oil, lemon, herbs, or nutritional yeast. Brussels sprouts, broccoli, and cauliflower all take that swap without losing their personality.
Low-Oil Batch:
Use an oil spray instead of tossing vegetables in a full coating of oil. This helps on mushrooms, asparagus, and green beans, though you may lose a little browning on denser vegetables like sweet potato and potato.
Spicy Table Version:
Add cayenne, chili flakes, or chipotle powder to the seasoning mix, then offer yogurt or ranch on the side. Buffalo cauliflower already lives here, but Brussels sprouts, cabbage, and corn ribs can all take heat well.
Kid-Friendly Sweet Spot:
Keep the seasoning simple—salt, garlic powder, and a little Parmesan. Carrot fries, sweet potato wedges, and corn ribs usually land well with younger eaters because the natural sweetness stays obvious.
Meal-Prep Friendly Mix:
Choose the sturdier vegetables for make-ahead cooking: Brussels sprouts, potatoes, cauliflower, cabbage, and sweet potatoes. They reheat better than zucchini or asparagus and keep their shape in lunch containers.
Common Mistakes to Avoid
Crowding the basket:
This is the fastest way to ruin crispness. If the vegetables are stacked, they steam. Cook in batches when the basket looks packed, even if that feels annoying in the moment.
Skipping the dry step:
Wet vegetables stay pale and patchy. Pat everything dry after washing, and with items like zucchini or eggplant, salt and rest them first so surface moisture has somewhere to go.
Using too much coating:
Thick batter or heavy crumb layers can taste muddy. A thin, even coat is better. The air fryer wants exposed edges, not armor.
Ignoring size differences:
If your pieces vary a lot, the small ones burn while the big ones stay raw. Cut everything to a similar thickness and shape. That’s especially true for sweet potatoes, carrots, potatoes, and squash.
Adding sticky glazes too early:
Maple, honey, miso, mustard, and sugary sauces can darken before the vegetable is done. Brush them on after the main cook, or at the very end for a quick return to the basket.
Forgetting to taste at the end:
Air fryer cooking can mute salt a little because the surface dries out. Taste before serving and add flaky salt, lemon, or herbs where needed. A finished vegetable should taste alive, not merely cooked.
Frequently Asked Questions
Can I stack vegetables in the air fryer if I shake them halfway?
A little overlap is fine for very sturdy items like potatoes or Brussels sprouts, but heavy stacking blocks airflow. If the vegetables sit in two layers, the bottom layer usually steams and the top layer browns unevenly.
Do I need to preheat the air fryer every time?
For the crispiest result, yes. A 2- to 3-minute preheat gives the basket a head start, which matters on recipes that rely on quick browning like zucchini fries, asparagus, and onion rings.
What vegetables work least well in the air fryer?
Very wet, delicate vegetables can struggle. Tomatoes, cucumbers, and leafy greens without enough oil tend to collapse or burn in odd spots. If you want greens, kale chips are the exception, not the rule.
Can I use frozen vegetables?
Sometimes. Frozen Brussels sprouts, cauliflower, and green beans can work if you cook them straight from frozen and accept a softer result. For anything breaded, fresh vegetables are usually better because frozen ones release too much water.
How do I keep zucchini and eggplant from turning soggy?
Salt them first, let them sit, and blot them dry. Thick cuts help too. Thin slices lose the fight in the basket almost every time.
What oil should I use?
Use olive oil for flavor when the recipe leans Mediterranean or herby. Use avocado or another neutral oil when you want the seasoning to lead. The important part is using only enough to lightly coat the surface.
Can I reheat these in the microwave if I’m in a hurry?
You can, but the texture will soften fast. If you care about crispness at all, use the air fryer for 3 to 6 minutes at 350°F instead.
Why do my vegetables brown on one side but not the other?
Usually the basket is too crowded, or the pieces weren’t turned at the halfway point. Also, make sure the vegetables are coated evenly with oil so the dry spots don’t stay pale.
How do I scale these recipes for a crowd?
Double the ingredients, but don’t force them into one batch. Plan on cooking in rounds so each piece gets space. If you’re serving a big group, pick 2 or 3 recipes with different textures—something crunchy, something creamy, and one with a little heat.
The Vegetable Tray People Actually Empty
The nicest thing about these airfried veggie recipes is that they stop behaving like a compromise. Brussels sprouts get crisp enough to chase with your fingers. Cauliflower turns into a Buffalo snack. Potatoes, mushrooms, onions, and squash all show off in their own way, which is more than most vegetable platters can say.
I’d make a tray like this for people who claim they “don’t really do vegetables.” That crowd usually just doesn’t want wet broccoli and underseasoned steam-table food. Give them browned edges, salt, a sharp finish, and one good dip, and the conversation changes fast. Then the leftovers disappear, which is the best compliment a vegetable can get.