
Cheap party food ideas on a tight grocery budget live or die on one thing: stretch. A bowl of beans, a tray of eggs, a sack of potatoes, and a couple of dough packages can feed a room in a way that a fancy deli spread never will. The trick is not pretending cheap food is elegant. The trick is choosing foods that already know how to be party food — things people can grab with one hand, eat while standing, and come back for when the conversation drifts toward the kitchen.
There’s also a rhythm to a good budget spread that people notice even if they can’t name it. You want creamy next to crisp, salty next to bright, hot food near cold food, and at least one dish that can sit out for a while without turning into a disaster. Beans, eggs, tortillas, bread, popcorn, potatoes, cream cheese, and a little shredded cheese do a lot of heavy lifting here. Honestly, they do more than their price tags suggest.
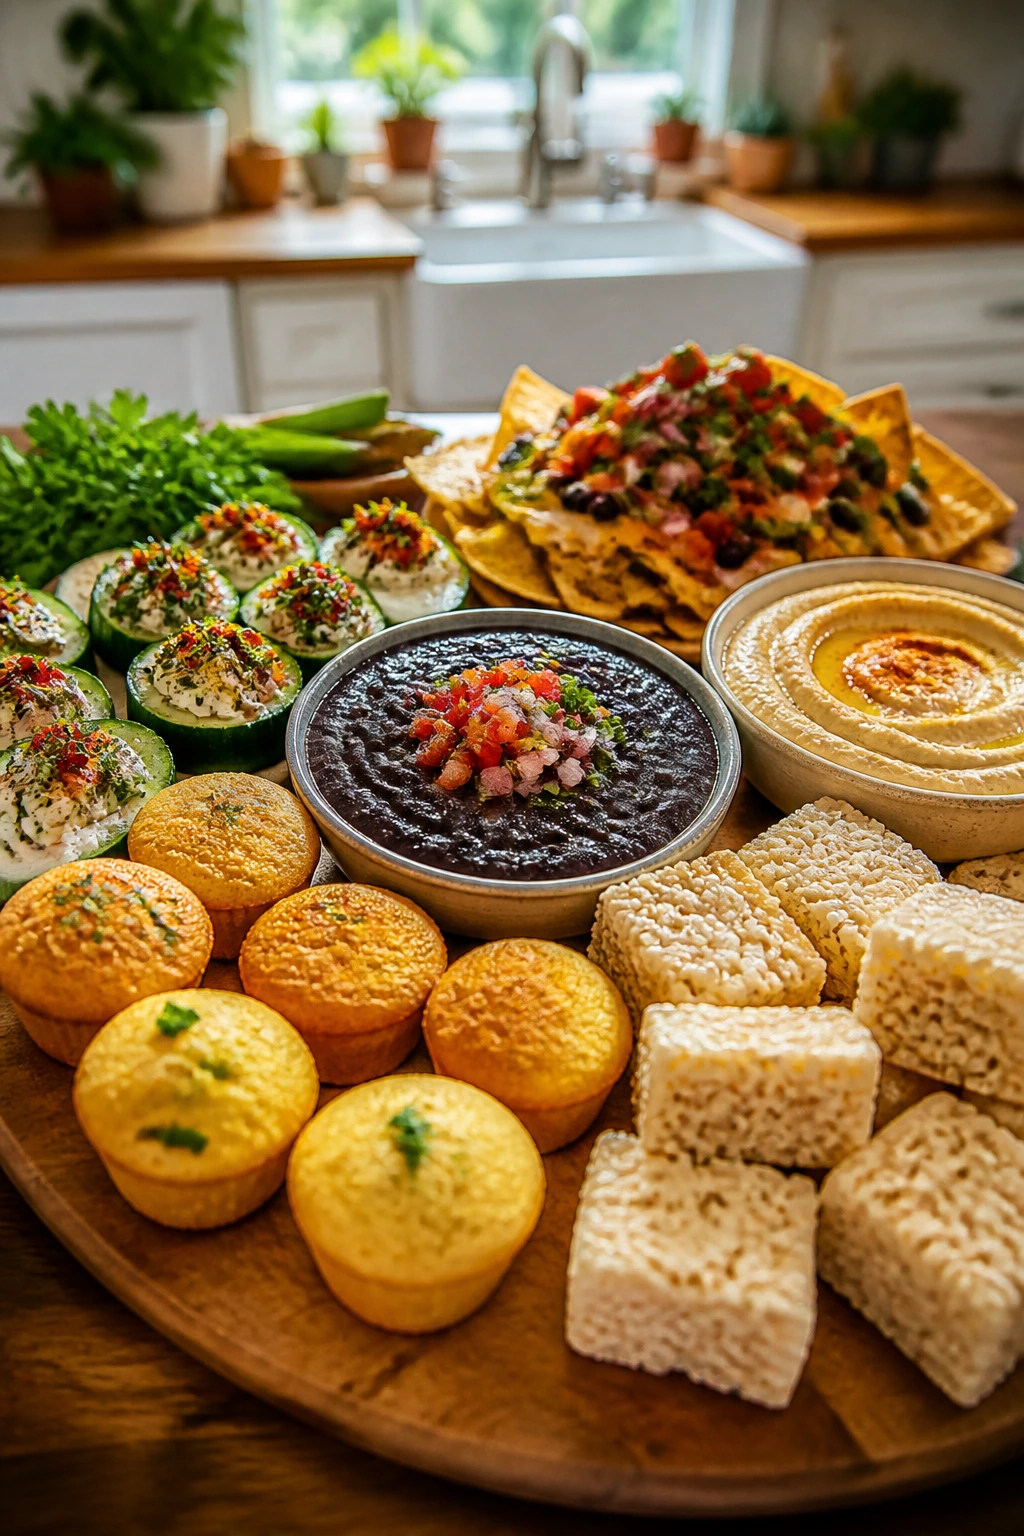
The best cheap party tables don’t look cheap because they aren’t built from one giant pile of the same thing. They feel intentional because each tray earns its place. A hot dip beside a cold sandwich bite. A crunchy snack mix next to a tray of sloppy sliders. A sweet square at the end so nobody leaves hungry. That’s the game, and the first section gets into why this kind of spread works so well when the grocery bill has to stay under control.
Why This Collection Works When the Grocery Budget Is Tight

Pantry staples do the heavy lifting: Beans, eggs, potatoes, bread, tortillas, popcorn, and rice cereal cost less per serving than almost any party snack in the store, and they scale up without much fuss.
Small amounts of meat go farther here: A pound of ground beef, sausage, or frozen meatballs can anchor a tray when you pair it with buns, tortillas, or bread instead of serving it as the whole show.
Hot and cold dishes balance the table: A bean dip, deviled eggs, and cucumber bites cover different temperatures and textures, which keeps people circling instead of feeling like they’re chewing through one note.
Most of these dishes can be made ahead: That matters more than people admit. If the dip is chilled, the bars are cut, and the sliders are prepped, your oven isn’t chained to one pan while guests are already at the door.
They use everyday grocery-store ingredients: No specialty aisle detours. No obscure sauces. These recipes lean on store-brand basics that still taste good once you season them properly.
They work for both snacking and grazing: That’s the sweet spot. A party food idea should be easy to hold, easy to refill, and sturdy enough to survive more than one trip across the room.
1. Creamy Black Bean Dip With Cumin and Lime
A black bean dip like this has the right kind of thrift to it: humble ingredients, big payoff, and a texture that lands somewhere between creamy and rustic. It smells like warm cumin and garlic the second it hits the skillet, and the lime at the end keeps it from tasting heavy. I like it with a little texture left in the beans — smooth enough to scoop, not so pureed that it feels like baby food for grownups.
Why It Works:
Two cans of beans can feed a small crowd when you season them properly, and this version gets the job done without expensive add-ins. The onion and garlic build a real base, while salsa and cumin give the dip body and a little heat. It’s cheap because it’s mostly pantry food, but it tastes like somebody paid attention. Serve it warm, and it stays friendly for a long time on the table.
Key Ingredients:
- 2 cans (15 ounces each) black beans, drained and rinsed — these make the dip thick and filling.
- 1 tablespoon olive oil — just enough to soften the onion without frying it hard.
- 1 small yellow onion, finely diced — the sweet edge matters here.
- 2 cloves garlic, minced — keep it fine so it melts into the dip.
- 1 teaspoon ground cumin — the backbone of the flavor.
- 1 teaspoon chili powder — adds warmth without turning the dip spicy.
- 1/2 cup salsa — use a chunky jarred salsa to save time and add moisture.
- 2 tablespoons lime juice — the sharp finish keeps the beans awake.
- 1/2 teaspoon salt, plus more to taste — beans need it.
- 2 to 4 tablespoons water — loosen the dip if it gets too thick.
- Chopped cilantro or sliced green onions for topping — optional, but they make the bowl look finished.
Quick Steps:
- Heat the olive oil in a medium skillet over medium heat.
- Add the onion and cook for 4 to 5 minutes, stirring now and then, until it turns soft and translucent.
- Stir in the garlic, cumin, and chili powder, then cook for 30 seconds until the spices smell toasty.
- Add the black beans, salsa, salt, and 2 tablespoons water. Simmer for 5 minutes, stirring occasionally.
- Mash the beans with a potato masher for a chunkier dip, or blend half the mixture with an immersion blender if you want it smoother.
- Stir in the lime juice, taste for salt, and add another splash of water if the dip feels too stiff.
- Spoon into a bowl, top with cilantro or green onions, and serve warm with tortilla chips.
Equipment for This Recipe:
- Medium skillet — big enough to cook the onions without crowding.
- Potato masher or immersion blender — choose your texture.
- Wooden spoon — useful for stirring the spices into the beans.
- Serving bowl — a shallow bowl makes scooping easier.
How to Serve This Dish:
Serve it with sturdy tortilla chips, not the thin ones that snap under pressure. It also works beside toasted pita wedges, raw bell pepper strips, or little bowls of rice if you want the dip to feel more substantial. A shallow bowl with a spoon on the side keeps the table from becoming a chip-crumble disaster.
Pro Tips for This Recipe:
- If the dip tastes flat, add another pinch of salt before more lime. Beans need salt before they need more acid.
- For a little smoke, stir in 1/4 teaspoon smoked paprika with the cumin.
- If you’re making this ahead, stop before the final lime juice and add it right before serving so the flavor stays bright.
- A spoonful of sour cream on top makes the bowl look fuller and mellows the spice.
Variations on This Dish:
- Cheesy Bean Skillet: Stir in 1/2 cup shredded cheddar at the end and let it melt before serving.
- Corny Southwest Dip: Add 1/2 cup thawed frozen corn for sweetness and more texture.
- Spicy Chipotle Bowl: Swap the chili powder for 1 minced chipotle in adobo if you want a deeper, smoky heat.
Common Mistakes to Avoid with This Dish:
- Skipping the onion step: Raw onion makes the dip taste rough. Cook it until soft first.
- Serving it too thick: If it mounds like paste, stir in a tablespoon of water at a time until it scoops easily.
- Forgetting the lime at the end: Lime in the pot is fine, but lime at the end is what makes the whole bowl taste fresh.
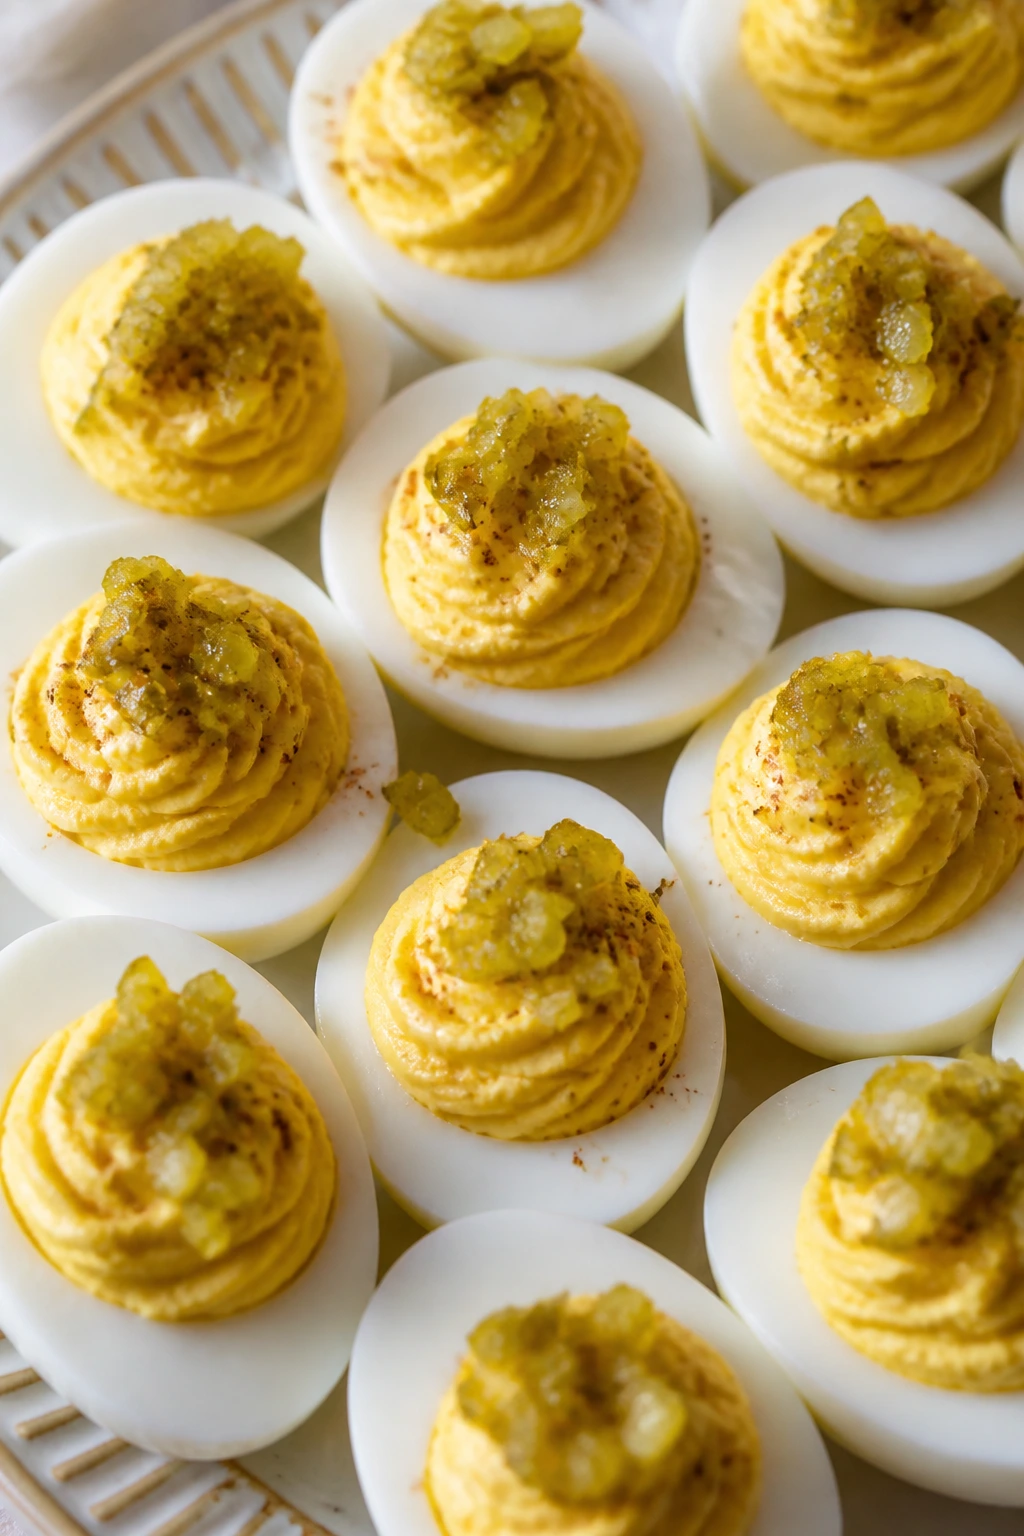
2. Classic Deviled Eggs With Pickle Relish
Deviled eggs are one of those party foods that feel expensive even when they aren’t, which is exactly why they keep showing up on budget tables. The filling should be creamy, a little tangy, and not so sweet that it tastes like sandwich spread. I like a fine chop on the relish so the filling stays smooth; chunky relish turns every bite into a surprise in the wrong way.
Why It Works:
Eggs are still one of the cheapest party proteins you can buy, and they turn into a polished appetizer with very little effort. The yolk filling can be mixed in one bowl, piped or spooned, and finished with paprika in under half an hour if the eggs are already cooked. They also travel well, which matters when the party is happening somewhere other than your own kitchen.
Key Ingredients:
- 12 large eggs — the foundation of the whole tray.
- 1/4 cup mayonnaise — gives the filling its creamy body.
- 1 teaspoon yellow mustard — sharpens the yolks.
- 1 tablespoon sweet pickle relish — adds brightness and a little crunch.
- 1/2 teaspoon apple cider vinegar — helps the filling taste less heavy.
- 1/4 teaspoon salt — enough to wake up the eggs.
- 1/8 teaspoon black pepper — a light background note.
- Paprika for dusting — it finishes the eggs and gives them that classic look.
Quick Steps:
- Place the eggs in a saucepan and cover them with cold water by about 1 inch.
- Bring the water to a gentle boil over medium-high heat, then turn off the heat, cover the pan, and let the eggs sit for 10 to 11 minutes.
- Move the eggs to an ice bath for 5 minutes, then peel them once they’re cool enough to handle.
- Slice the eggs in half lengthwise and pop the yolks into a bowl.
- Mash the yolks with mayonnaise, mustard, relish, vinegar, salt, and pepper until smooth.
- Spoon or pipe the filling back into the egg whites.
- Dust with paprika and chill for 15 minutes before serving, if you have the patience.
Equipment for This Recipe:
- Medium saucepan — wide enough to hold the eggs in one layer.
- Mixing bowl — for the yolk filling.
- Fork or small whisk — to smooth out the yolks.
- Piping bag or spoon — spooning works fine if you’re not chasing perfect shapes.
How to Serve This Dish:
Arrange the eggs on a plate lined with lettuce leaves or a few paper-thin cucumber rounds if you want them to look a little dressed up. They’re best eaten cold, and they work well beside salty chips, crackers, or a platter of sliced vegetables. Two halves per guest is a safe starting point if the rest of the spread is full.
Pro Tips for This Recipe:
- Older eggs peel more easily than ultra-fresh ones. That’s not a myth; it saves you from shredded whites.
- If the filling looks dry, add mayonnaise a teaspoon at a time instead of dumping in a spoonful.
- A tiny pinch of sugar can soften the mustard bite if your relish is especially sharp.
- Chill the filled eggs before serving so the yolk mixture firms up and slices cleanly if you need to move them.
Variations on This Dish:
- Dill Pickle Version: Swap the sweet relish for finely chopped dill pickles and add a pinch of dill.
- Smoky Paprika Eggs: Stir 1/4 teaspoon smoked paprika into the yolk mixture and dust the top with more.
- Sriracha Eggs: Add a small squeeze of Sriracha to the filling for heat that doesn’t bulldoze the egg flavor.
Common Mistakes to Avoid with This Dish:
- Overcooking the eggs: Gray, sulfur-smelling yolks are a giveaway. Pull them at the right time and cool them fast.
- Using too much relish liquid: Drain the relish if it’s very wet, or the filling gets sloppy.
- Skipping the salt check: Eggs need a real seasoning hit. Taste the filling before you refill the whites.
3. Pigs in a Blanket With Yellow Mustard Dip
There’s a reason pigs in a blanket keep showing up at parties. They’re tiny, warm, salty, and gone fast. Cheap doesn’t have to mean bare-bones, and this is one of those cases where canned dough and cocktail sausages do exactly what they’re supposed to do. The outside bakes up golden and crisp while the sausage stays juicy enough to snap.
Why It Works:
You only need two main ingredients to get a tray full of finger food, and both are easy to buy in store-brand versions. Crescent dough wraps tightly around the sausages and puffs into buttery layers in the oven. They’re also one of the few budget appetizers that feel finished even without extra garnish. A little mustard on the side is enough.
Key Ingredients:
- 2 cans refrigerated crescent roll dough — the standard tube kind works best.
- 24 cocktail sausages or mini hot dogs — pat them dry so the dough sticks.
- 1 large egg, beaten with 1 teaspoon water — for brushing the tops, optional but useful.
- 2 tablespoons yellow mustard — for the dip or serving.
- 2 tablespoons mayonnaise — if you want a smoother mustard dip.
- 1 teaspoon honey — optional, if you like a sweeter dip.
Quick Steps:
- Heat the oven to 375°F and line a baking sheet with parchment paper.
- Separate the crescent dough into triangles and cut each triangle into 2 or 3 smaller strips.
- Roll each cocktail sausage in a piece of dough, starting at the wide end and wrapping toward the tip.
- Place the wrapped sausages seam-side down on the baking sheet.
- Brush the tops lightly with egg wash if you want extra color.
- Bake for 12 to 15 minutes, until the dough is deep golden and puffed.
- Mix the mustard, mayonnaise, and honey for dipping and serve warm.
Equipment for This Recipe:
- Rimmed baking sheet — keeps the sausages from sliding around.
- Parchment paper — makes cleanup easy.
- Sharp knife or kitchen scissors — for trimming the dough.
- Small bowl — for the dip.
How to Serve This Dish:
Pile them on a warm platter and keep the dip in a small bowl right in the middle. They’re best with other salty snacks, like potato wedges or popcorn mix, so the table doesn’t feel too soft. Figure on 3 to 4 pieces per person if they’re part of a bigger spread.
Pro Tips for This Recipe:
- Pat the sausages dry before wrapping. Wet surfaces make the dough slip.
- Don’t over-stretch the dough strips or they’ll tear in the oven.
- If you want a darker top, use egg wash; if not, plain dough still bakes fine.
- Bake them seam-side down so the dough doesn’t unwind while it puffs.
Variations on This Dish:
- Cheese-Stuffed Blanket Bites: Add a tiny strip of cheddar under each sausage before rolling.
- Everything Seasoned Version: Sprinkle everything bagel seasoning over the tops before baking.
- Spicy Dipper: Serve with mustard mixed with a little hot sauce instead of plain yellow mustard.
Common Mistakes to Avoid with This Dish:
- Using dough that’s too warm: It gets sticky and hard to wrap. Chill it for a few minutes if needed.
- Overcrowding the pan: Leave a little room between each piece so the dough can puff.
- Serving them cold: They lose their charm fast. Warm is the whole point.
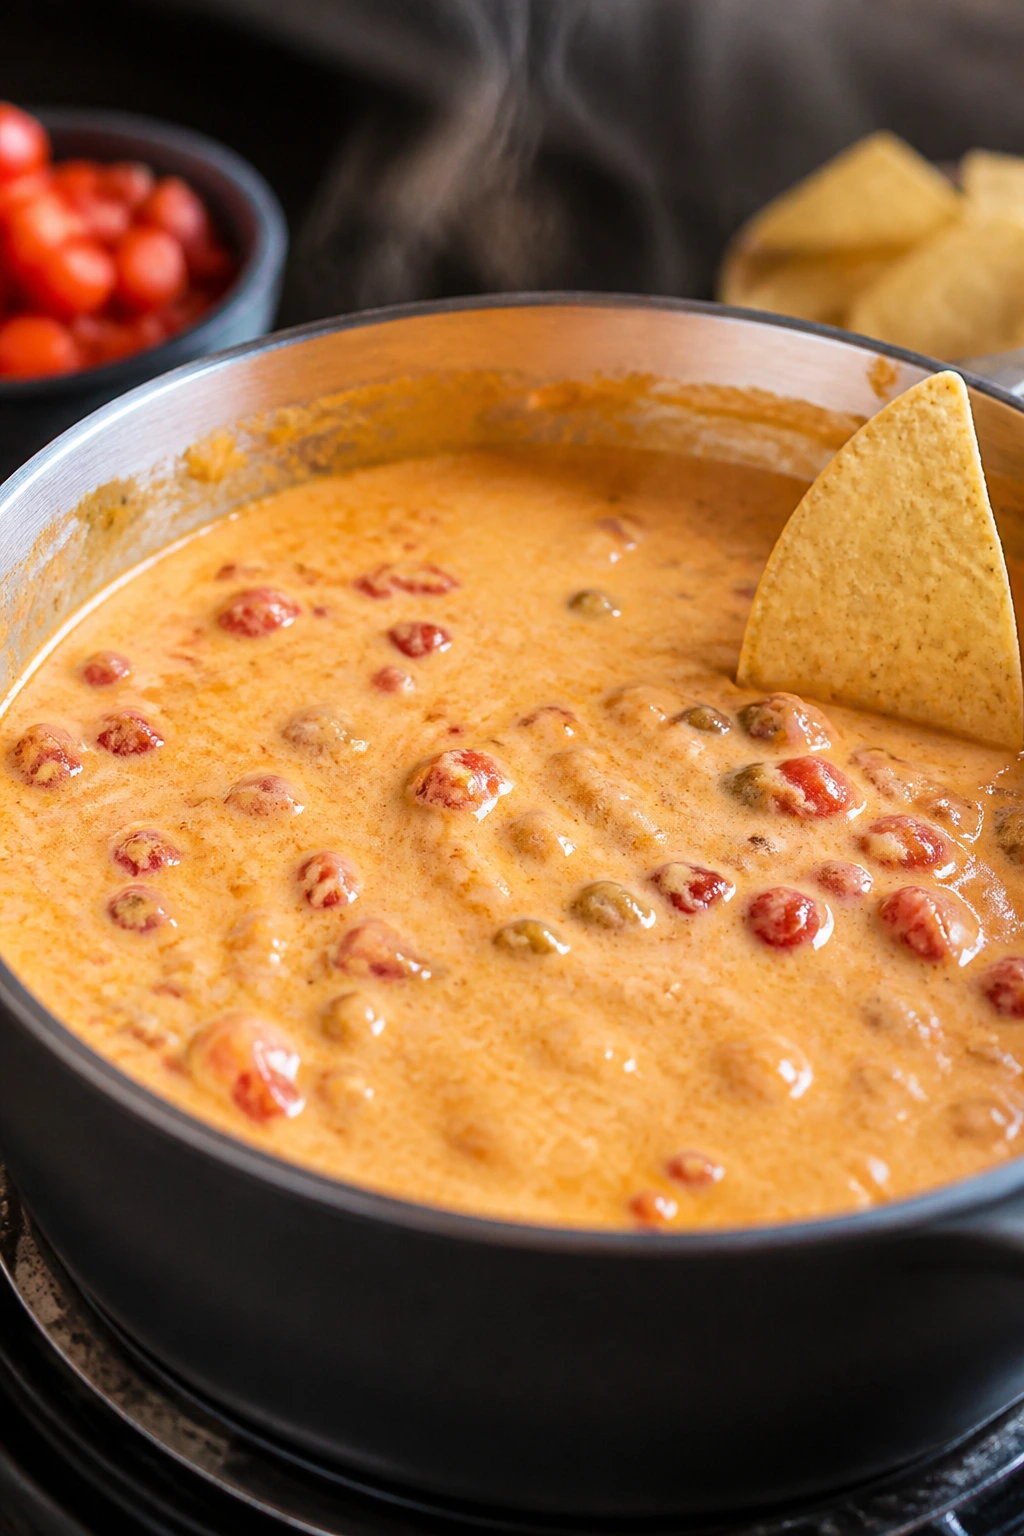
4. Stovetop Rotel Queso That Stays Scoopable
Rotel queso is one of those party foods that does not care about manners. It wants a chip, a spoon, and a steady stream of people leaning over the counter. The cheap version is often the best version because it uses cheese that melts smoothly instead of pretending it needs to be fancy. Make it too complicated and you end up with greasy clumps. Keep it loose and warm, and it disappears.
Why It Works:
Canned tomatoes with chiles, processed cheese or a carefully chosen cheddar blend, and evaporated milk make a sauce that stays dippable for a long stretch. That matters at a party, because queso that seizes up in five minutes is a private annoyance nobody needs. If you want to bulk it up, a little sausage or ground beef goes a long way without blowing the budget.
Key Ingredients:
- 1 pound processed cheese, cut into cubes, or 16 ounces sharp cheddar, shredded with 1 teaspoon cornstarch tossed through it — the processed cheese melts easiest.
- 1 can (10 ounces) diced tomatoes with green chiles, drained lightly — the classic Rotel-style base.
- 1 can (12 ounces) evaporated milk — keeps the sauce creamy.
- 1/2 teaspoon ground cumin — adds warmth.
- 1/4 teaspoon garlic powder — rounds out the flavor.
- 1/4 teaspoon salt, plus more to taste — go easy if your cheese is salty.
- 1/2 pound cooked breakfast sausage or ground beef, optional — for a heartier dip.
- 2 tablespoons chopped jalapeños or a splash of hot sauce, optional — if you want more heat.
Quick Steps:
- Set a saucepan over low heat and pour in the evaporated milk.
- Add the cheese cubes or shredded cheese a handful at a time, stirring constantly until melted.
- Stir in the drained tomatoes with green chiles, cumin, garlic powder, and salt.
- If you’re using sausage or beef, fold it in once the sauce is smooth.
- Keep the queso on very low heat or in a small slow cooker so it stays scoopable.
- If it gets too thick, stir in a splash of warm milk until it loosens.
Equipment for This Recipe:
- Medium saucepan — heavy enough to keep the bottom from scorching.
- Wooden spoon or silicone spatula — constant stirring matters here.
- Small slow cooker — optional, but handy for parties.
- Chip bowl or tortilla basket — because the chips need a place to live.
How to Serve This Dish:
Serve it with sturdy tortilla chips, not delicate restaurant-style ones. It’s also good with pretzel bites, toasted bread cubes, or spooned over nachos if you want to turn one cheap dish into another. A warm bowl and a ladle keep it from turning into a sticky mess on the counter.
Pro Tips for This Recipe:
- Keep the heat low. High heat is how queso turns grainy and greasy.
- If using shredded cheddar, toss it with cornstarch first so it melts cleaner.
- A splash of milk right before serving can save queso that thickens too much.
- Stir every few minutes if it sits on the stove. The bottom likes to catch.
Variations on This Dish:
- Sausage Queso: Brown 8 ounces of sausage first and stir it in for a meatier dip.
- Bean Queso: Add 1/2 cup mashed refried beans to stretch the batch and give it more body.
- Chipotle Queso: Stir in 1 minced chipotle pepper from a can of adobo for smoky heat.
Common Mistakes to Avoid with This Dish:
- Cranking the burner up: Cheese burns faster than people think.
- Adding all the cheese at once: It melts unevenly and can clump.
- Letting it cool uncovered: A skin forms on top. Cover it loosely when it’s off heat for a few minutes.
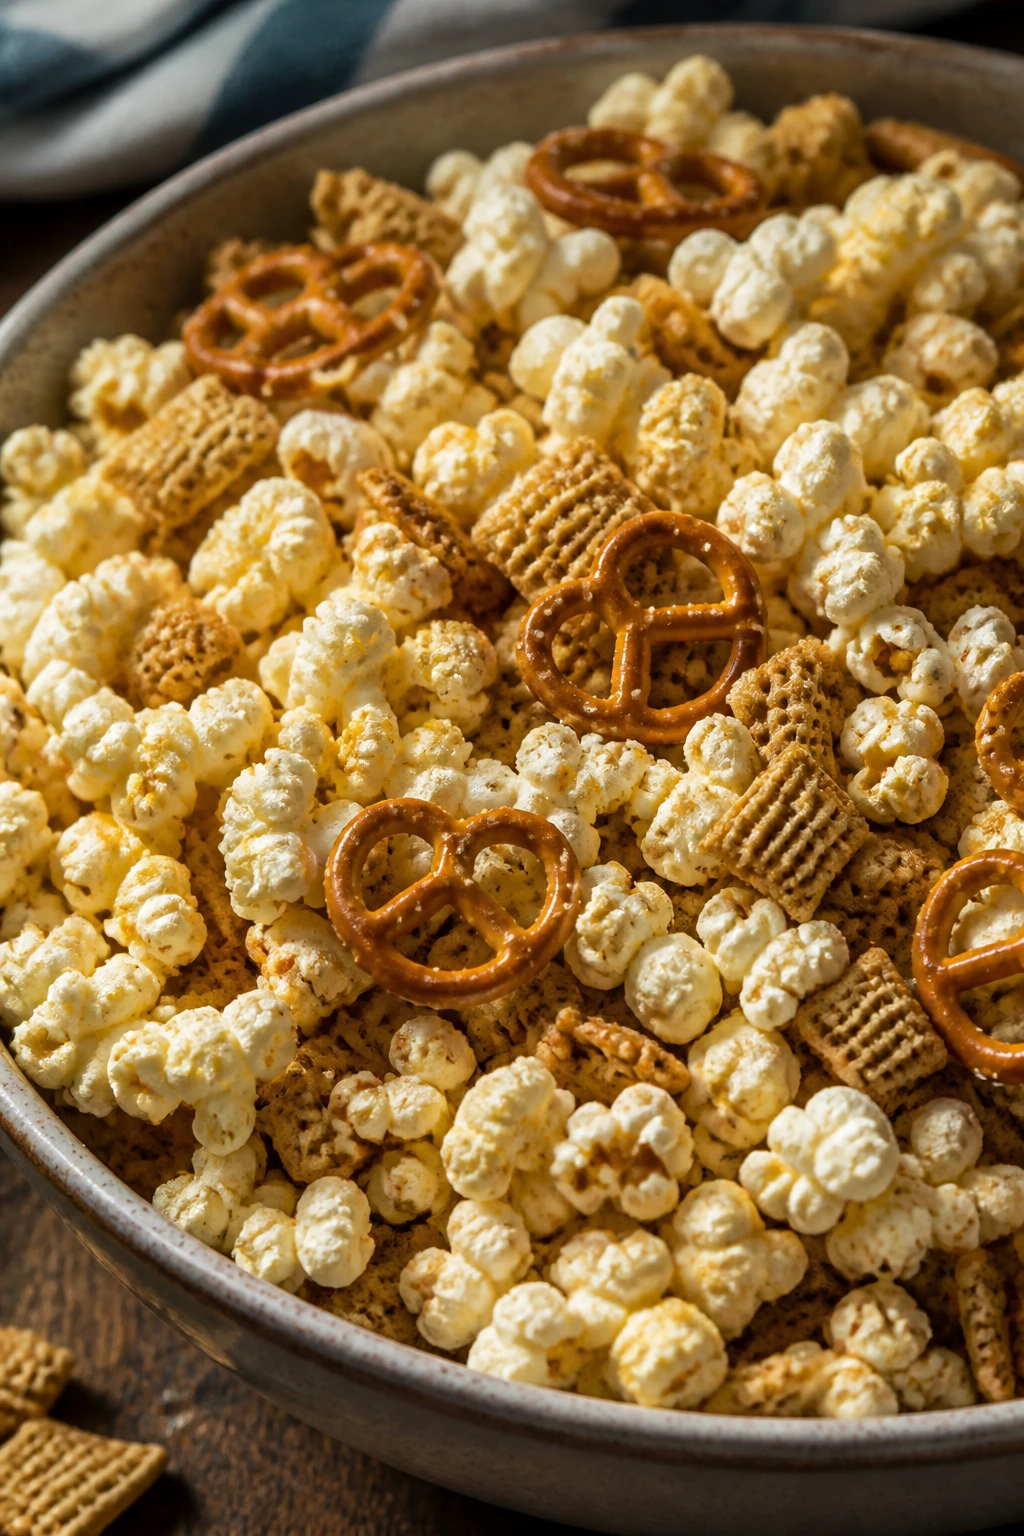
5. Salted Popcorn Party Mix With Pretzels and Cereal
Popcorn mix is the snack that does the most for the least. It fills a bowl, stays crisp, and costs less than almost any bagged party snack once you buy the kernels. The salty-sweet thing works especially well for mixed crowds because it gives people something to grab between heavier bites. And yes, this is one of those recipes where the cheap cereal aisle is quietly useful.
Why It Works:
Popcorn stretches like a champion. Once you add pretzels and a second crunchy piece like cereal or crackers, you get a snack mix that looks full and eats even fuller. A quick bake dries the butter onto the mix so it doesn’t feel greasy, and the seasoning sticks instead of sliding to the bottom of the bowl.
Key Ingredients:
- 1/2 cup popcorn kernels, popped, or about 12 cups popped popcorn — a big base for little money.
- 2 cups mini pretzels — for salt and shape.
- 2 cups plain corn cereal or toasted oat cereal — cheap, crunchy filler.
- 1/4 cup unsalted butter, melted — enough to coat without soaking everything.
- 1 tablespoon vegetable oil — helps the seasoning spread.
- 1 teaspoon seasoned salt — the main flavor.
- 1 teaspoon garlic powder — adds savory depth.
- 1/2 teaspoon smoked paprika — optional, but worth it.
- 1/4 teaspoon sugar — tiny amount, just to round out the salt.
Quick Steps:
- Heat the oven to 250°F and line a large baking sheet with parchment.
- Place the popcorn, pretzels, and cereal in a large bowl.
- Stir together the melted butter, oil, seasoned salt, garlic powder, paprika, and sugar.
- Drizzle the seasoning mixture over the snack mix and toss until evenly coated.
- Spread the mix on the baking sheet and bake for 20 minutes, stirring once halfway through.
- Let it cool completely before serving so it crisps up.
Equipment for This Recipe:
- Large mixing bowl — you need room to toss.
- Rimmed baking sheet — keeps the mix from sliding off.
- Measuring cup or small bowl — for the seasoning.
- Parchment paper — makes cleanup less annoying.
How to Serve This Dish:
Serve it in paper cones, small bowls, or one big communal bowl with a scoop. It’s especially useful beside dips and sliders because it gives people something to snack on while the warm food finishes or cools. A batch makes enough for 8 to 10 snackers if nobody is hovering over it like it’s the last thing on earth.
Pro Tips for This Recipe:
- Let the popcorn cool before seasoning if it was freshly popped and still steaming.
- Don’t skip the stir halfway through baking. The edges dry faster than the middle.
- If you want a sweet-salty version, add 2 tablespoons of finely crushed pretzels and a pinch more sugar.
- Store it only after it’s fully cool, or the crisp texture disappears.
Variations on This Dish:
- Ranch Snack Mix: Swap the garlic powder and paprika for 1 tablespoon ranch seasoning.
- Cheddar Crunch Mix: Add 1/4 cup powdered cheese snack dust if you have it.
- Cinnamon Sugar Party Mix: Replace the savory seasonings with cinnamon and sugar for a dessert version.
Common Mistakes to Avoid with This Dish:
- Using too much butter: It turns the mix soggy instead of glossy.
- Baking at a high temperature: The outside burns before the center dries.
- Packing it into a container warm: Condensation ruins the crunch.
6. Taco Pinwheels Wrapped in Flour Tortillas
Pinwheels are the kind of party food that looks more fiddly than it is. They slice into neat spirals, which makes any tray look more deliberate than the effort really was. The trick is keeping the filling thick enough to stay inside the tortilla. If it’s too loose, the whole thing squishes when you cut it. If it’s balanced, you get a cold bite with creaminess, a little spice, and a clean edge.
Why It Works:
This is a cheap crowd-pleaser because tortillas, cream cheese, and a small amount of shredded cheese stretch into a lot of bites. The cream cheese holds everything together, the salsa brings tang, and taco seasoning gives the filling a familiar party flavor without requiring a separate sauce. Chill time does most of the work.
Key Ingredients:
- 4 large flour tortillas — the 10-inch size is easiest to roll.
- 8 ounces cream cheese, softened — the glue.
- 1 cup shredded cheddar — gives the pinwheels substance.
- 1/2 cup salsa, drained if watery — for flavor and color.
- 1 tablespoon taco seasoning — start with this amount and taste.
- 1/2 cup canned black beans, rinsed and patted dry — cheap bulk and extra bite.
- 1/4 cup finely diced bell pepper — optional but nice for crunch.
- 2 tablespoons sliced green onions — fresh finish.
Quick Steps:
- Stir the cream cheese, cheddar, salsa, taco seasoning, beans, bell pepper, and green onions in a bowl until thick and spreadable.
- Lay the tortillas flat on the counter and divide the filling evenly between them.
- Spread the mixture in a thin layer, leaving a 1/2-inch border on one edge.
- Roll each tortilla tightly into a log.
- Wrap the rolls in plastic and chill for at least 30 minutes.
- Slice into 1/2-inch rounds with a sharp knife and arrange on a platter.
- Serve cold or just slightly cool.
Equipment for This Recipe:
- Mixing bowl — for the filling.
- Rubber spatula — helps spread the cream cheese.
- Sharp knife — a serrated knife helps with clean slices.
- Plastic wrap — for chilling the rolls.
How to Serve This Dish:
Pinwheels do well on a platter lined with parchment or lettuce leaves so they don’t slide around. They’re a good cold item to set beside hot trays like sliders or sausage balls. Plan on 3 to 4 pinwheels per person if they’re part of a larger spread.
Pro Tips for This Recipe:
- Drain watery salsa before mixing or the tortillas soften and split.
- Roll the tortillas tightly, but not so hard that the filling squeezes out the ends.
- Chill before slicing. Warm tortillas tear.
- If the filling feels loose, add a bit more shredded cheese to firm it up.
Variations on This Dish:
- Southwest Crunch Pinwheels: Add crushed tortilla chips right before rolling for a little texture.
- Bean-and-Corn Version: Swap the bell pepper for 1/4 cup drained corn.
- Buffalo Pinwheels: Replace the salsa with 2 tablespoons hot sauce mixed into the cream cheese.
Common Mistakes to Avoid with This Dish:
- Using overfilled tortillas: They burst when sliced.
- Skipping the chill time: You’ll get messy spirals instead of neat rounds.
- Cutting with a dull knife: It smears the filling and flattens the edges.
7. Sloppy Joe Sliders on Soft Dinner Rolls
Sloppy Joe sliders are the sort of party food that gets eaten from the edges first and then disappears with very little ceremony. They’re messy in the right way. A thick, saucy beef filling tucked into soft rolls gives you a full bite without requiring forks, which is half the reason they feel so useful on a budget table. Keep the filling thick, and the buns stay intact.
Why It Works:
A pound of ground beef turns into a panful of sandwich filling once you add onion, ketchup, and a little sugar and vinegar for balance. The rolls stretch the meat across a dozen-plus sliders, which means you’re feeding a crowd without buying a giant amount of protein. Toasting the bottoms first keeps them from turning soggy under the sauce.
Key Ingredients:
- 1 pound ground beef — or ground turkey if you want a lighter version.
- 1 small onion, finely diced — gives the filling sweetness.
- 1 clove garlic, minced — optional, but it helps.
- 3/4 cup ketchup — the main sauce base.
- 1 tablespoon yellow mustard — sharpens the sweetness.
- 1 tablespoon brown sugar — just enough to round the tomato edge.
- 1 tablespoon Worcestershire sauce — depth in one pour.
- 1 tablespoon apple cider vinegar — keeps the filling from tasting flat.
- 12 slider buns or small dinner rolls — split them carefully.
- 2 tablespoons butter, melted — for the tops, optional.
Quick Steps:
- Brown the ground beef and onion in a skillet over medium heat for 6 to 8 minutes, breaking the meat into small crumbles.
- Drain off excess fat if needed.
- Stir in the garlic, ketchup, mustard, brown sugar, Worcestershire sauce, and vinegar.
- Simmer for 5 to 7 minutes until the filling is thick enough to mound on a spoon.
- Split the rolls and toast the cut sides lightly in the oven or skillet.
- Spoon the filling onto the bottom halves, add the tops, and brush with melted butter if using.
- Serve warm.
Equipment for This Recipe:
- Large skillet — enough room to brown the meat without steaming it.
- Wooden spoon — for breaking up the beef.
- Baking sheet — if you want to toast the buns.
- Sharp knife — for slicing the rolls cleanly.
How to Serve This Dish:
Stack the sliders on a tray and keep a stack of napkins close by. They’re substantial enough to act like a main bite, so they work well with lighter sides like cucumber bites or popcorn mix. Two sliders per person is a solid estimate if the rest of the table is full.
Pro Tips for This Recipe:
- Cook the filling down until it’s thick. Loose sauce is what ruins the buns.
- Toast the rolls lightly so they can handle the moisture.
- If you’re making a double batch, use a wide skillet so the beef browns instead of turning gray.
- A slice of pickles inside each slider adds a sharp bite that cuts the sweetness.
Variations on This Dish:
- Tex-Mex Joe Sliders: Add 1 teaspoon chili powder and a handful of shredded cheddar.
- BBQ Joe Sliders: Swap the ketchup for barbecue sauce and reduce the brown sugar.
- Turkey Joe Sliders: Use ground turkey and add a splash more Worcestershire so the filling doesn’t taste thin.
Common Mistakes to Avoid with This Dish:
- Leaving the filling watery: Simmer it longer.
- Using buns that are too soft and fresh: They collapse faster than sturdier rolls.
- Skipping the salt check: Tomato-heavy fillings need a final taste before serving.
8. Crispy Oven Potato Wedges With Garlic Dip
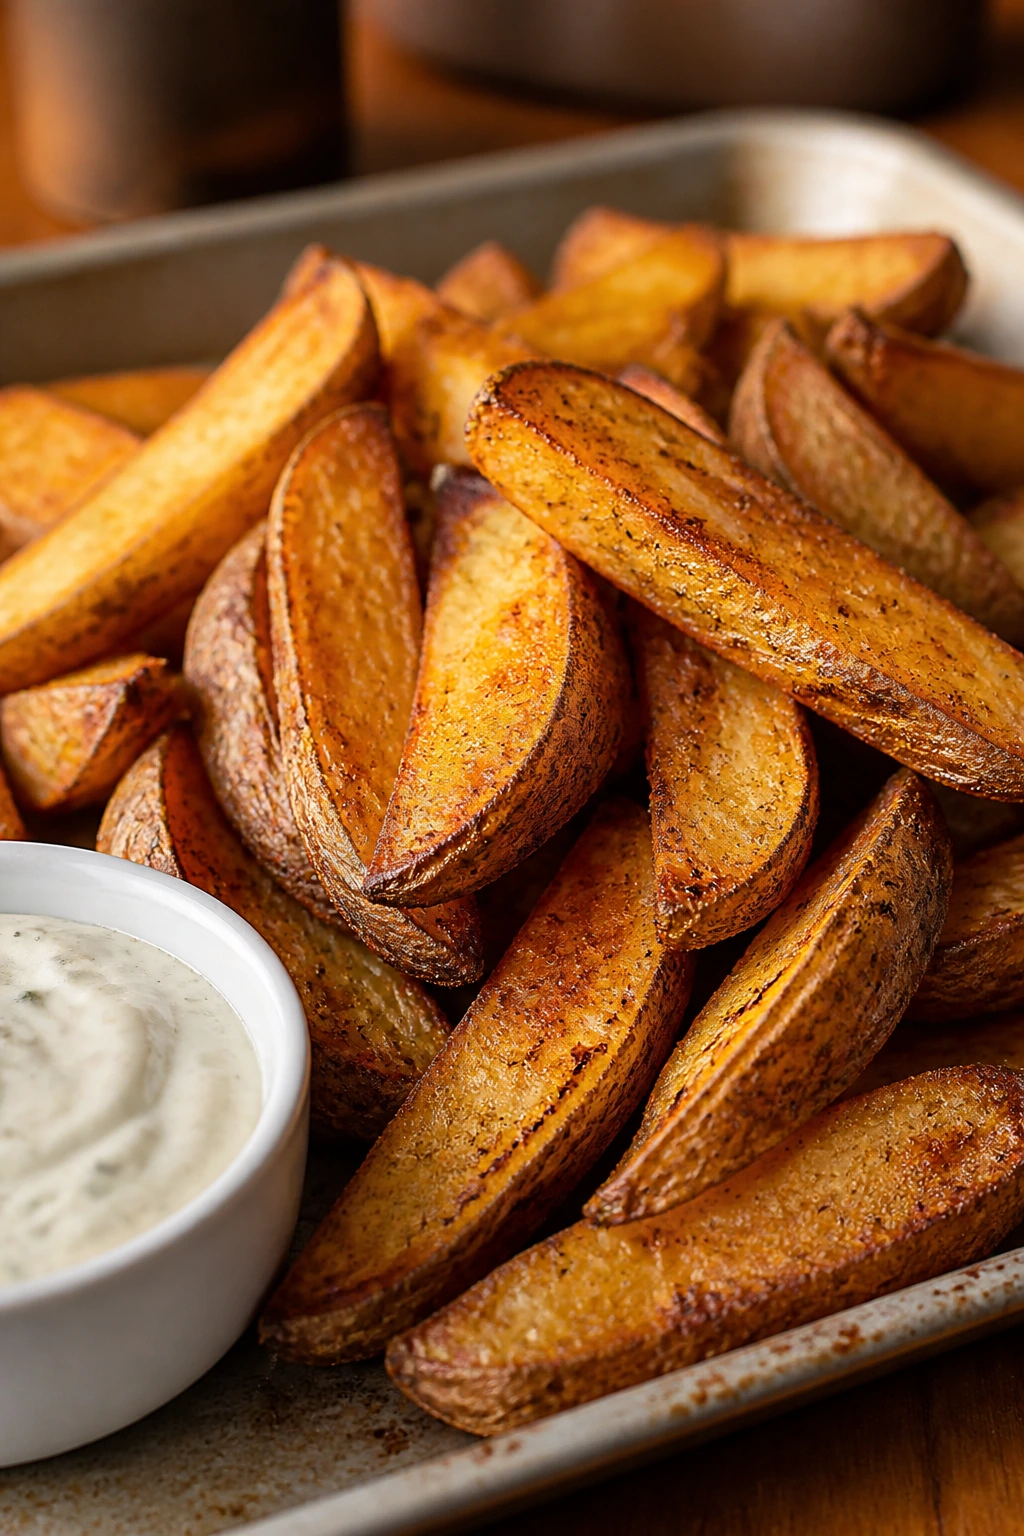
Potatoes are one of the few budget ingredients that can look generous with almost no help. Cut them into wedges, coat them in oil and seasoning, and roast them until the edges turn brown and crisp. The smell alone will bring people into the kitchen. They’re cheaper than fries from a box and taste better because they actually get caramelized on the pan.
Why It Works:
Russet potatoes are sturdy, inexpensive, and forgiving in the oven. A hot bake draws moisture off the surface, which is what gives you the crunchy edges and fluffy centers people expect from party potatoes. The dip matters too; sour cream or yogurt with garlic powder gives the wedges a cold, creamy partner so the platter doesn’t feel dry.
Key Ingredients:
- 2 1/2 pounds russet potatoes, scrubbed — the starch helps them crisp.
- 2 tablespoons vegetable oil — coats the wedges without weighing them down.
- 1 teaspoon salt — more if your potatoes are large.
- 1 teaspoon garlic powder — steady flavor.
- 1 teaspoon paprika — color and a little sweetness.
- 1/2 teaspoon black pepper — background heat.
- 1 cup sour cream or plain Greek yogurt — for the dip.
- 1 small garlic clove, finely grated — if making the dip.
- 1 teaspoon lemon juice — brightens the dip.
Quick Steps:
- Heat the oven to 425°F and line a large baking sheet with parchment.
- Cut the potatoes into even wedges, about 8 per potato.
- Toss the wedges with oil, salt, garlic powder, paprika, and pepper until coated.
- Spread them cut-side down on the baking sheet with a little space between each piece.
- Roast for 20 minutes, flip, then roast 15 to 20 minutes more until deep golden and crisp at the edges.
- Stir together the sour cream or yogurt, garlic, lemon juice, and a pinch of salt.
- Serve the wedges hot with the dip on the side.
Equipment for This Recipe:
- Large baking sheet — crowding kills the crisp.
- Sharp knife — for even wedges.
- Mixing bowl — for tossing the potatoes.
- Small bowl — for the dip.
How to Serve This Dish:
Serve the wedges in a basket or on a large platter lined with parchment, with the dip in a bowl right in the middle. They go well beside sliders, sausages, or any sandwich-style party food. A pound of potatoes usually feeds 3 to 4 snackers if they’re being treated like a side.
Pro Tips for This Recipe:
- Dry the potatoes after scrubbing. Water on the surface slows browning.
- Put the wedges cut-side down for the first roast. That’s where the best crust forms.
- If your potatoes are large, cut them evenly or some pieces will scorch while others stay soft.
- A little extra salt right after baking makes the wedges taste louder.
Variations on This Dish:
- Herbed Wedges: Toss the potatoes with dried rosemary and thyme instead of paprika.
- Spicy Wedges: Add 1/2 teaspoon cayenne to the seasoning mix.
- Cheesy Finish: Sprinkle grated Parmesan over the wedges in the last 5 minutes of baking.
Common Mistakes to Avoid with This Dish:
- Overcrowding the pan: The wedges steam and go soft.
- Cutting uneven pieces: Small wedges burn before the big ones are done.
- Serving them late: Potato wedges are at their best the minute they come out of the oven.
9. Mini Cornbread Muffins With Honey Butter
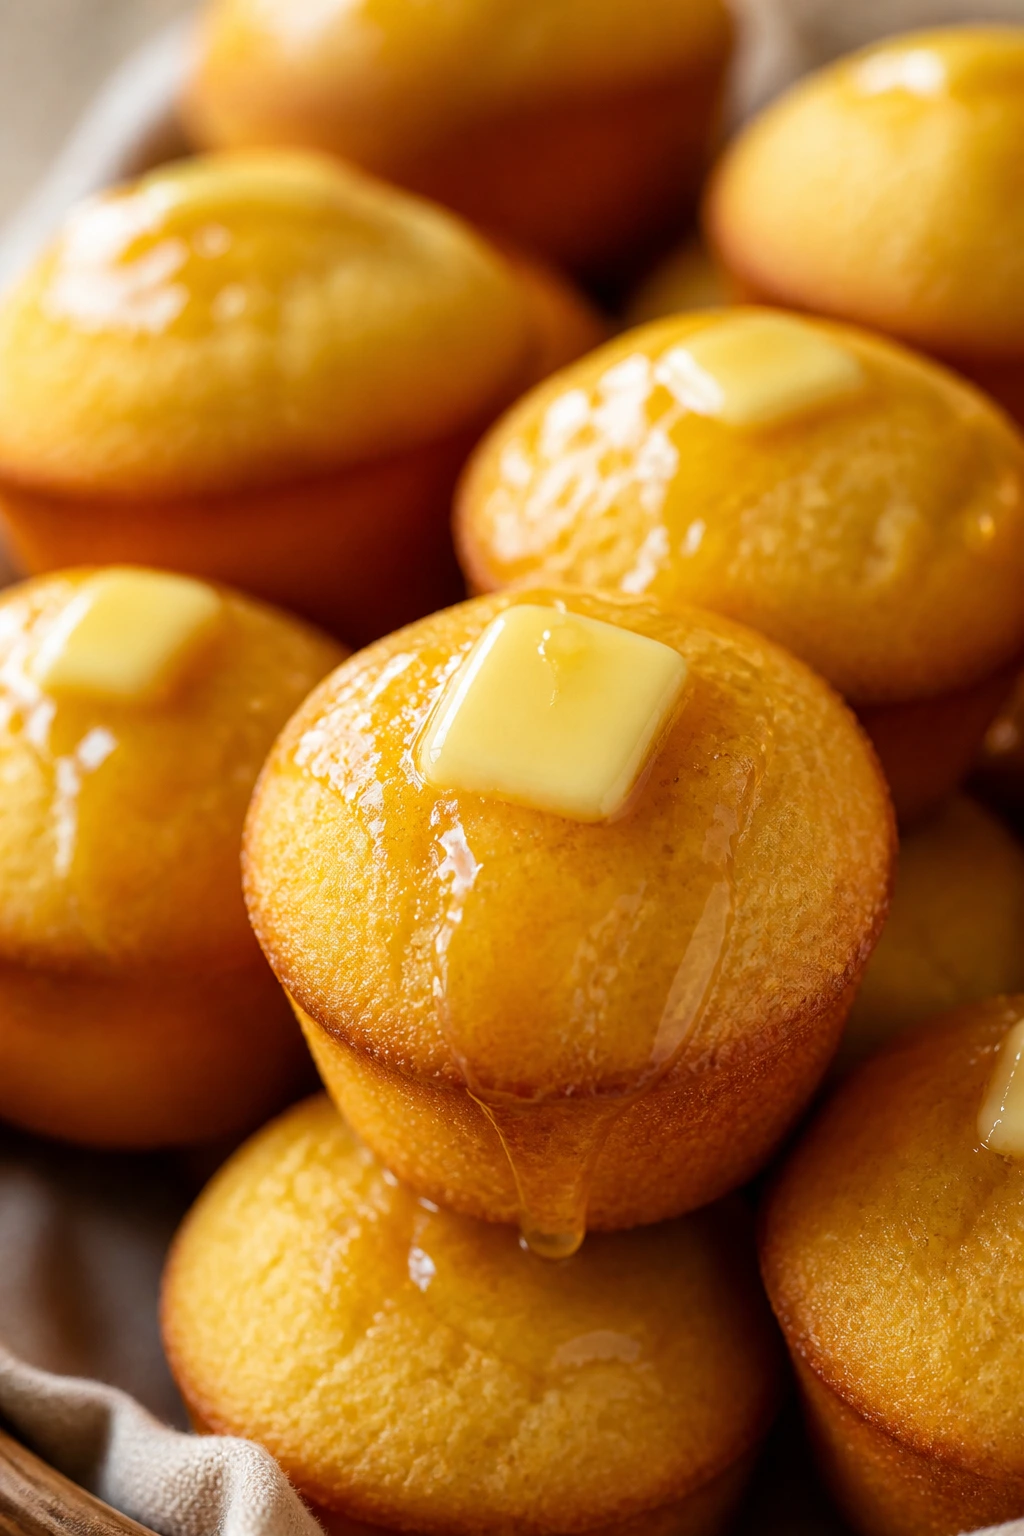
Cornbread muffins are cheap, cheerful, and useful in more than one way. They can sit next to chili, dips, or a tray of sliders, and they also work as a little sweet-savory bite on their own. The honey butter is what makes them feel party-ready instead of like a side dish in a paper towel basket. Warm muffins and cold honey butter are a simple thing, but they work.
Why It Works:
A box of cornbread mix turns into a whole tray of finger food with almost no shopping list. The muffins bake fast, hold their shape, and give you a break from all the cheese-heavy snacks that tend to dominate budget spreads. Honey butter makes the tops glossy and gives the muffins a soft finish once they cool a little.
Key Ingredients:
- 1 box cornbread mix, about 8 to 9 ounces — the fast route.
- 1 large egg — helps the muffins rise and hold together.
- 2/3 cup milk — check the box directions, but this is a common amount.
- 3 tablespoons melted butter — for extra richness.
- 1/2 cup unsalted butter, softened — for the honey butter.
- 3 tablespoons honey — enough to sweeten the butter without making it runny.
- Pinch of salt — sharpens the butter.
Quick Steps:
- Heat the oven to 375°F and grease a mini muffin pan.
- Whisk together the cornbread mix, egg, milk, and melted butter just until combined.
- Spoon the batter into the muffin cups, filling each about 3/4 full.
- Bake for 10 to 12 minutes, until the tops are golden and a toothpick comes out clean.
- Beat the softened butter, honey, and salt together until fluffy.
- Serve the muffins warm with a small bowl of honey butter.
Equipment for This Recipe:
- Mini muffin pan — makes neat bite-size pieces.
- Mixing bowl — for the batter.
- Small bowl and spoon — for the honey butter.
- Toothpick — for checking doneness.
How to Serve This Dish:
Pile the muffins in a basket lined with a clean towel so they stay warm for a while. They’re good alongside chili, bean dip, or sausage balls, and they also work as a soft counterpoint to salty snacks. Plan on 2 muffins per guest if they’re one part of a bigger spread.
Pro Tips for This Recipe:
- Don’t overmix the batter. A few small lumps are fine.
- Pull them as soon as the tops spring back when tapped. Cornbread dries fast.
- Honey butter spreads better if the butter is soft, not melted.
- A pinch of flaky salt on top of the butter makes them taste less like dessert.
Variations on This Dish:
- Jalapeño Cornbread Muffins: Stir in 2 tablespoons diced jalapeños.
- Cheddar Cornbread Muffins: Add 1/2 cup shredded cheddar to the batter.
- Maple Butter Version: Swap the honey for maple syrup in the topping.
Common Mistakes to Avoid with This Dish:
- Overbaking: Dry cornbread is nobody’s friend.
- Using cold butter for the topping: It tears the muffin apart instead of spreading.
- Skipping the grease in the pan: Mini muffins like to cling.
10. Savory Sausage Balls With Sharp Cheddar

Sausage balls have a reputation for showing up at every holiday spread, but honestly, they belong at budget parties too. Three ingredients can carry a tray if you season them well and don’t overbake them into dry little pebbles. The outside gets browned and a little crisp, while the inside stays rich and cheesy. They’re the kind of bite people keep grabbing until the tray is bare.
Why It Works:
Breakfast sausage gives you seasoning, fat, and protein in one package. Baking mix binds the mixture so the balls hold shape without needing a fussy dough step. Sharp cheddar matters because mild cheese disappears under the sausage; sharp cheese punches through and makes each bite taste finished.
Key Ingredients:
- 1 pound breakfast sausage — regular or hot, depending on the crowd.
- 2 cups baking mix — the classic shortcut.
- 2 cups shredded sharp cheddar — shred it yourself if you can.
- 2 to 4 tablespoons milk — just enough to bring the dough together.
- 1/4 teaspoon black pepper — optional, but helpful.
- 1/2 teaspoon dried parsley — optional for color.
Quick Steps:
- Heat the oven to 375°F and line a baking sheet with parchment.
- In a large bowl, mix the sausage, baking mix, cheddar, pepper, and parsley.
- Add milk a tablespoon at a time until the mixture holds together when squeezed.
- Roll into 1-inch balls and place them on the baking sheet.
- Bake for 20 to 25 minutes, until browned on the outside and cooked through.
- Let them rest for 5 minutes before serving.
Equipment for This Recipe:
- Large mixing bowl — roomy enough for hands-on mixing.
- Baking sheet — for even browning.
- Parchment paper — easier cleanup.
- Small cookie scoop — optional, but it keeps the balls even.
How to Serve This Dish:
Serve them warm with mustard, ranch, or a simple marinara if you want a dipping option. They’re rich enough to stand on their own, but a little acidity on the side keeps the tray from feeling heavy. Four to five sausage balls per person works well if there are several other snacks on the table.
Pro Tips for This Recipe:
- Mix with your hands. A spoon will fight you.
- Shred the cheese yourself if possible. Pre-shredded works, but block cheese melts better.
- If the mixture feels crumbly, a splash more milk will bring it back.
- Don’t overbake. You want browned edges, not dry centers.
Variations on This Dish:
- Jalapeño Sausage Balls: Fold in 2 tablespoons minced pickled jalapeños.
- Herb Cheddar Balls: Add dried thyme or rosemary for a more savory edge.
- Mini Bacon Version: If bacon is on sale, add 1/4 cup cooked, crumbled bacon to the mix.
Common Mistakes to Avoid with This Dish:
- Using sausage that’s too lean: The balls can turn dry.
- Adding too much milk: The mixture spreads instead of holding shape.
- Pulling them too early: The centers need time to cook through.
11. Pizza Crescent Roll Bites

Pizza bites are basically a budget party trick, and I mean that in the nicest way. Crescent dough wraps around a simple pizza filling, bakes fast, and gives you something that tastes like a hot slice in finger-food form. The key is keeping the filling modest. Too much sauce and they leak. Too much cheese and the centers turn molten lava. Balanced, they’re perfect for a tray that disappears fast.
Why It Works:
Pizza flavors are familiar, cheap, and easy to scale. Crescent dough puffs into soft layers around tomato sauce and mozzarella, which gives you a warm bite without having to make actual pizza. They’re also flexible; pepperoni, olives, or a few chopped vegetables can stretch the filling without adding much cost.
Key Ingredients:
- 2 cans refrigerated crescent roll dough — the base.
- 1 cup pizza sauce, thickened if watery — too much sauce leaks.
- 1 1/2 cups shredded mozzarella — the cheese pull matters here.
- 1/2 cup mini pepperoni or chopped pepperoni — optional but popular.
- 1/4 cup finely chopped bell pepper or mushroom — optional, if you want vegetable bits.
- 1 teaspoon Italian seasoning — for the top.
- 2 tablespoons grated Parmesan — optional for extra salt.
Quick Steps:
- Heat the oven to 375°F and line a baking sheet with parchment.
- Separate the crescent dough into triangles and spoon a small amount of pizza sauce onto each one.
- Add mozzarella, pepperoni, and any vegetables you’re using.
- Roll the dough up around the filling and pinch the seams shut.
- Place the bites seam-side down on the baking sheet.
- Sprinkle with Italian seasoning and Parmesan.
- Bake for 12 to 15 minutes, until golden and cooked through.
Equipment for This Recipe:
- Baking sheet — roomy enough for the bites to expand.
- Parchment paper — keeps the cheese from welding to the pan.
- Small spoon — for portioning the sauce.
- Sharp knife — if you’re chopping toppings.
How to Serve This Dish:
Set them out with extra pizza sauce or warm marinara for dipping. They’re good beside popcorn mix or potato wedges, but they also hold their own as a hot snack. Figure on 2 to 3 bites per person if you’re serving a lot of other food.
Pro Tips for This Recipe:
- Use thick sauce. Thin sauce leaks.
- Don’t overfill the triangles; the dough needs space to seal.
- Let them cool for a few minutes before moving them or the cheese spills out.
- If you want browner tops, brush with a little melted butter before baking.
Variations on This Dish:
- Supreme Bites: Add tiny pieces of olive and onion with the pepperoni.
- Cheese-Only Bites: Use just mozzarella and Parmesan for a lighter version.
- Buffalo Pizza Bites: Swap the sauce for a mix of pizza sauce and hot sauce.
Common Mistakes to Avoid with This Dish:
- Using too much sauce: It blows out the seams.
- Forgetting to pinch the edges: The filling escapes.
- Baking at too low a temperature: The dough stays pale and soft instead of puffing.
12. Egg Salad Tea Sandwiches With Dill
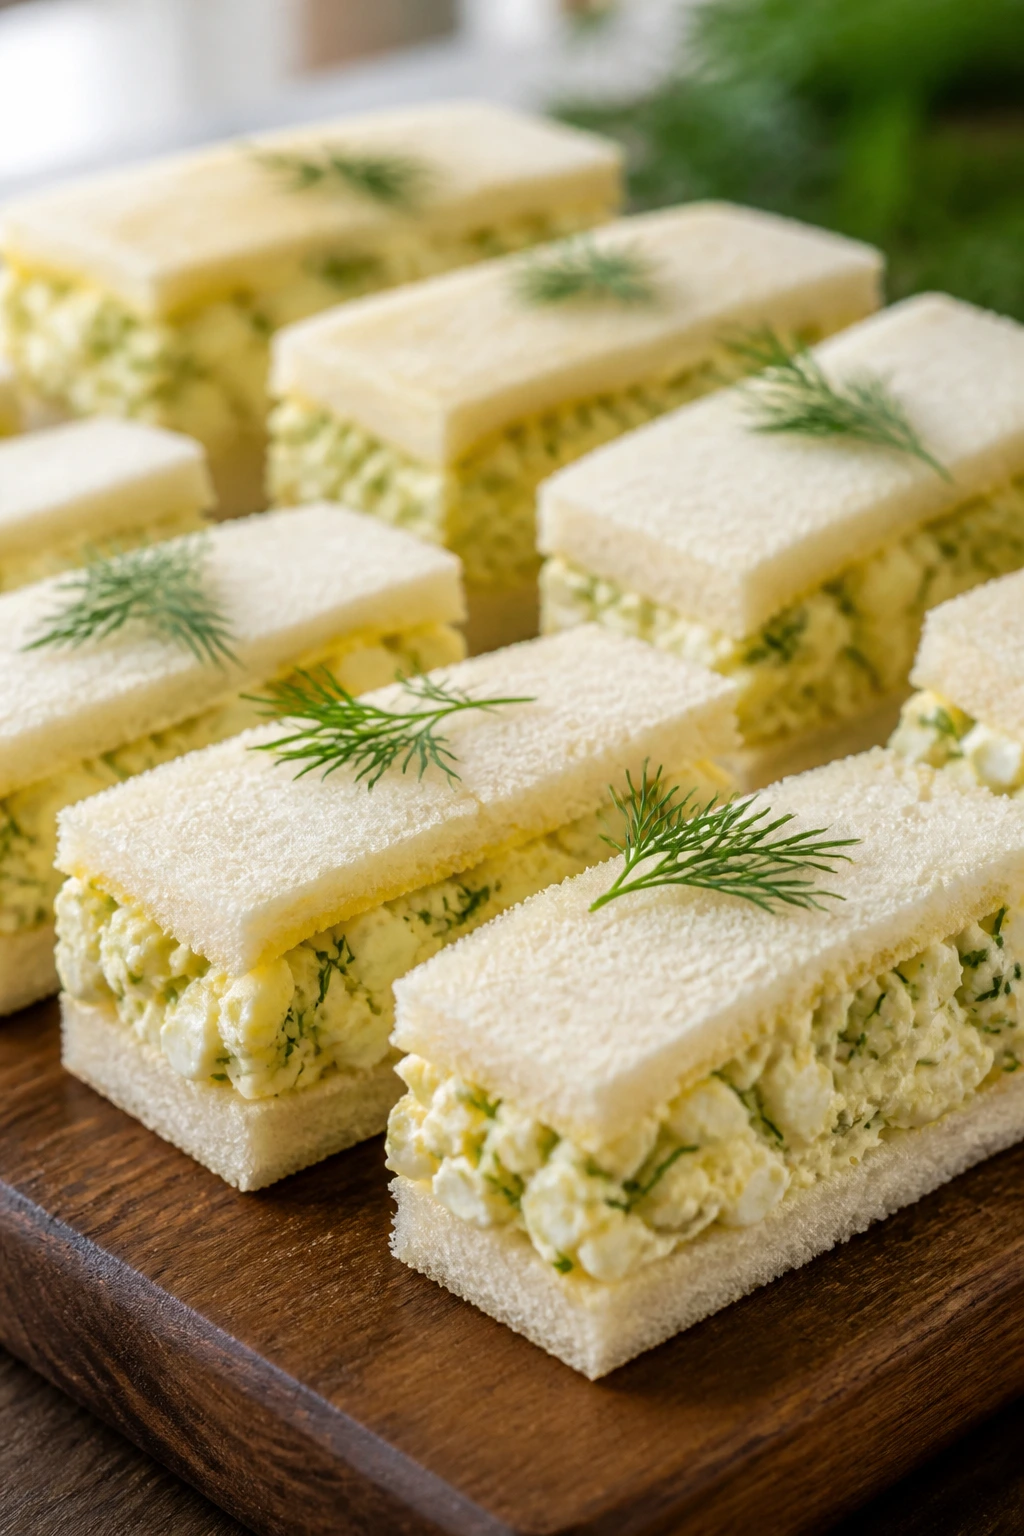
Egg salad is one of those quiet budget foods that can be dressed up just enough to feel party-ready. On soft bread, with the crusts trimmed and the filling seasoned properly, it turns into a neat little sandwich bite that people actually want to eat standing up. Dill helps. So does cutting the filling a touch sharper than you would for lunch.
Why It Works:
Eggs stretch beautifully here, and the other ingredients are cheap and easy to keep on hand. The trick is making the filling smooth enough to spread but not so loose that it seeps into the bread. Thin slices make the whole tray feel more elegant, but the ingredients themselves stay humble, which is the point.
Key Ingredients:
- 8 large eggs — cooked and peeled.
- 1/4 cup mayonnaise — enough to bind without drowning the eggs.
- 1 teaspoon yellow mustard — adds sharpness.
- 1 tablespoon finely chopped dill pickles or relish — for tang.
- 1 teaspoon chopped fresh dill or 1/2 teaspoon dried dill — a clean herby note.
- 1/4 teaspoon salt — more to taste.
- 1/8 teaspoon black pepper — keeps it from tasting flat.
- 8 slices soft sandwich bread — white or wheat both work.
- Butter, optional — a thin smear helps prevent sogginess.
Quick Steps:
- Chop the peeled eggs into small pieces or mash them lightly with a fork.
- Stir in the mayonnaise, mustard, pickles, dill, salt, and pepper.
- Taste and adjust the seasoning; egg salad needs a firmer salt level than people expect.
- Spread a thin layer of butter on the bread if you want extra moisture protection.
- Spoon the egg salad onto 4 slices of bread and top with the remaining slices.
- Trim the crusts and cut each sandwich into 4 small squares or triangles.
- Chill briefly before serving if you want clean edges.
Equipment for This Recipe:
- Mixing bowl — for the egg salad.
- Fork or potato masher — to control texture.
- Sharp knife — for trimming and cutting.
- Cutting board — useful for neat squares.
How to Serve This Dish:
Stack the sandwiches on a chilled platter and cover them lightly with a damp paper towel if they’re waiting a bit. They pair nicely with chips, fruit skewers, or deviled eggs for a cold party tray that doesn’t cost much. Three to four small pieces per person is a fair starting point.
Pro Tips for This Recipe:
- Chop the eggs fine if you want the filling to stay smooth.
- Dry the pickles or relish a little before mixing so the bread doesn’t get soggy.
- Use soft bread, but not ultra-fragile slices that tear when you cut them.
- A little extra mustard helps the filling taste less heavy.
Variations on This Dish:
- Curry Egg Salad: Add 1/4 teaspoon curry powder for a warm, savory edge.
- Dill-and-Onion Version: Fold in a tablespoon of very finely minced green onion.
- Open-Face Version: Serve the egg salad on crackers instead of bread for a crisp bite.
Common Mistakes to Avoid with This Dish:
- Making the filling too wet: It leaks into the bread.
- Cutting the sandwiches with a dull knife: The filling smears out.
- Skipping the seasoning taste: Egg salad needs more salt than people usually guess.
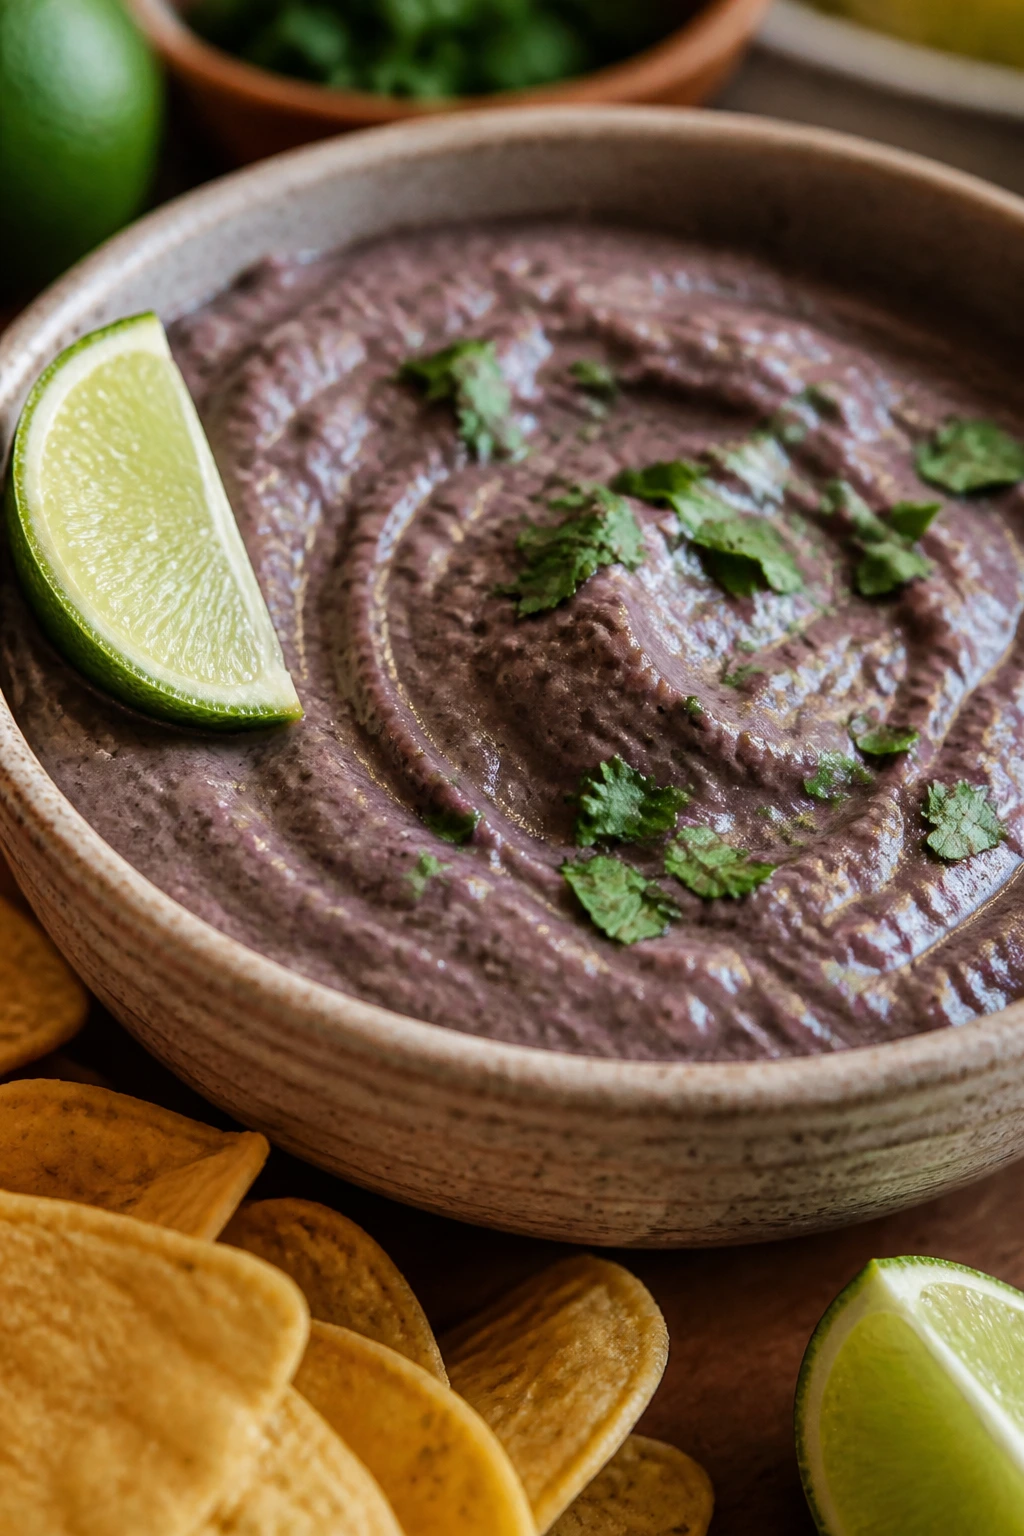
13. Homemade Hummus With Pita Chips
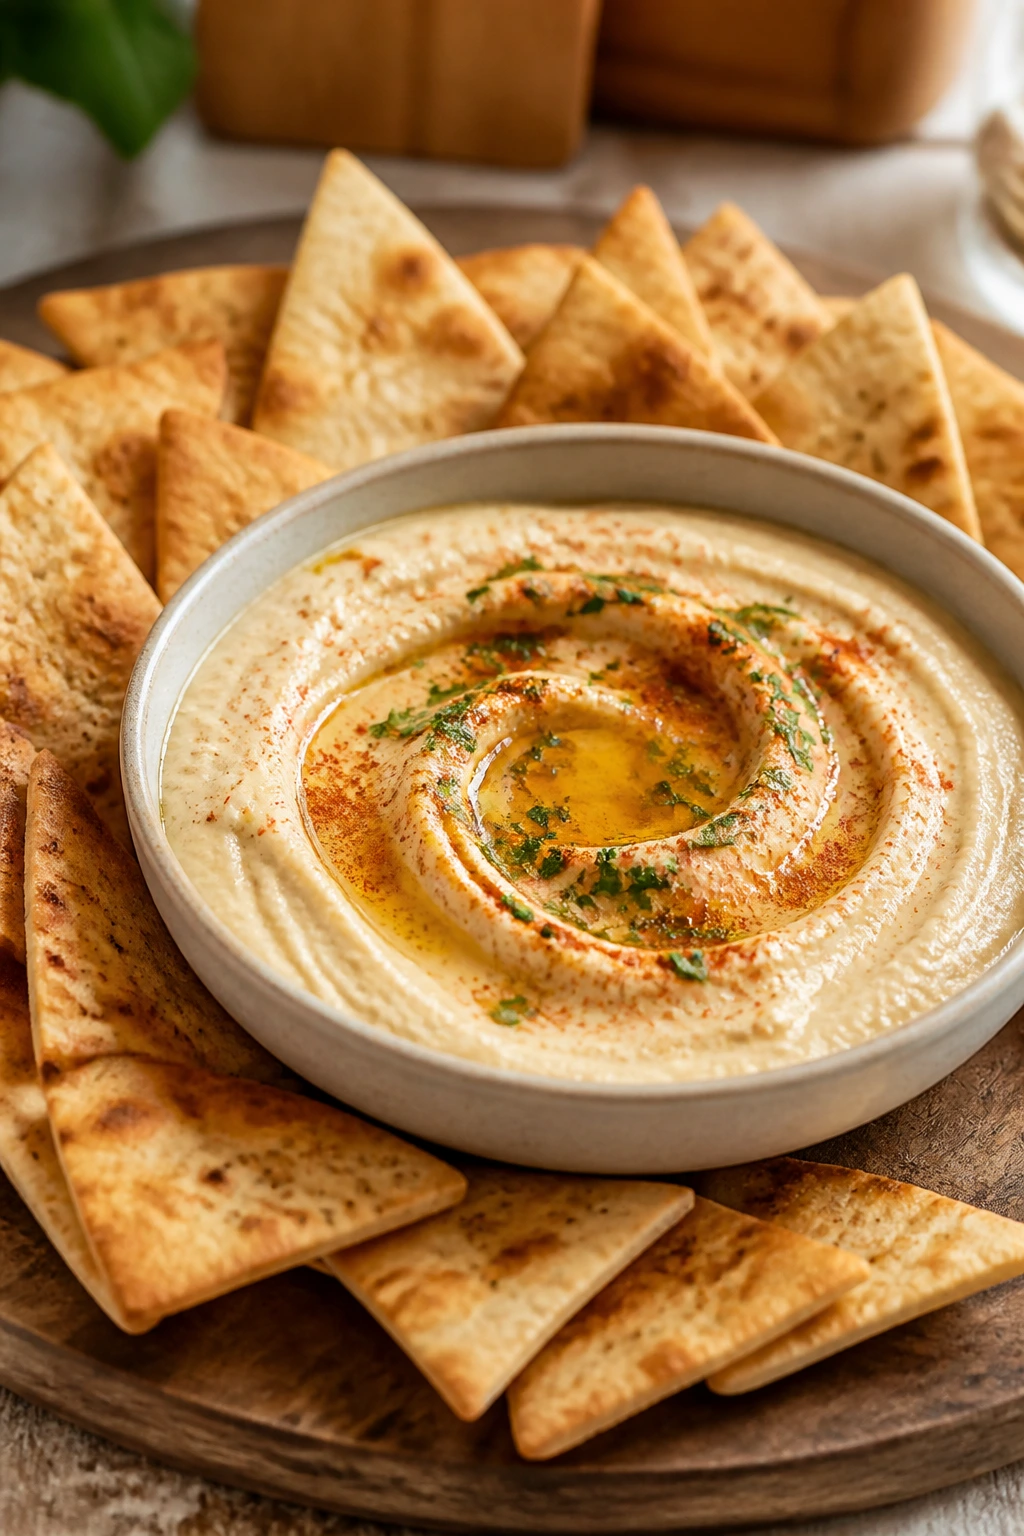
Hummus is cheap in the smartest possible way: canned chickpeas, garlic, lemon, and a little oil become a bowl that feels much fancier than the shopping list. The texture is the whole game here. If it’s grainy, it feels unfinished. If it’s smooth and drizzly, it suddenly becomes the kind of dip people stand over.
Why It Works:
Chickpeas are inexpensive, filling, and easy to blend into something that eats like a party snack instead of a health-food afterthought. A touch of tahini gives hummus its familiar nutty flavor, but you can keep the amount modest and still get a good result. Pita chips are cheap to make from leftover pita and much better than buying a tiny tub of something sad.
Key Ingredients:
- 2 cans (15 ounces each) chickpeas, drained and rinsed — the base.
- 2 tablespoons tahini — for that classic sesame flavor.
- 2 tablespoons olive oil, plus more for serving — richness and smoothness.
- 2 tablespoons lemon juice — brightness.
- 1 small garlic clove — go easy; raw garlic can bully the bowl.
- 1/2 teaspoon salt — or to taste.
- 1/2 teaspoon ground cumin — optional, but I like it.
- 2 to 4 tablespoons cold water — for blending.
- 4 pita rounds, cut into wedges — for the chips.
- 1 tablespoon oil and pinch of salt for the pita chips — simple and enough.
Quick Steps:
- Heat the oven to 400°F and spread the pita wedges on a baking sheet.
- Toss the wedges with oil and a pinch of salt, then bake for 8 to 10 minutes until crisp and lightly golden.
- Blend the chickpeas, tahini, olive oil, lemon juice, garlic, salt, cumin, and 2 tablespoons water until smooth.
- Add more water, a tablespoon at a time, until the hummus is creamy and spoonable.
- Taste and adjust the salt or lemon.
- Spoon into a bowl, drizzle with olive oil, and serve with the pita chips.
Equipment for This Recipe:
- Food processor or strong blender — smoother is better.
- Baking sheet — for the pita chips.
- Spatula — to scrape down the sides.
- Serving bowl — a shallow bowl makes dipping easier.
How to Serve This Dish:
Serve the hummus in a wide bowl with a little olive oil in the center and maybe a dusting of cumin or paprika. It works with pita chips, cucumber rounds, carrot sticks, or even as a spread for pinwheels. If you have it, a spoonful of chopped parsley on top makes the platter look alive.
Pro Tips for This Recipe:
- Blend longer than you think. The extra minute is where the smooth texture shows up.
- Cold water helps the hummus whip up lighter.
- If the garlic tastes harsh, let the hummus sit for 15 minutes before serving.
- Save a few whole chickpeas for garnish if you want the bowl to look fuller.
Variations on This Dish:
- Roasted Garlic Hummus: Blend in a few soft roasted garlic cloves instead of raw garlic.
- Smoky Paprika Hummus: Add smoked paprika and a little extra cumin.
- Lemony Herb Hummus: Mix chopped parsley or dill into the top right before serving.
Common Mistakes to Avoid with This Dish:
- Using too little liquid: The hummus stays pasty.
- Skipping the salt check: Chickpeas need it.
- Overtoasting the pita: It goes from crisp to hard quickly.
14. Sheet-Pan Loaded Nachos
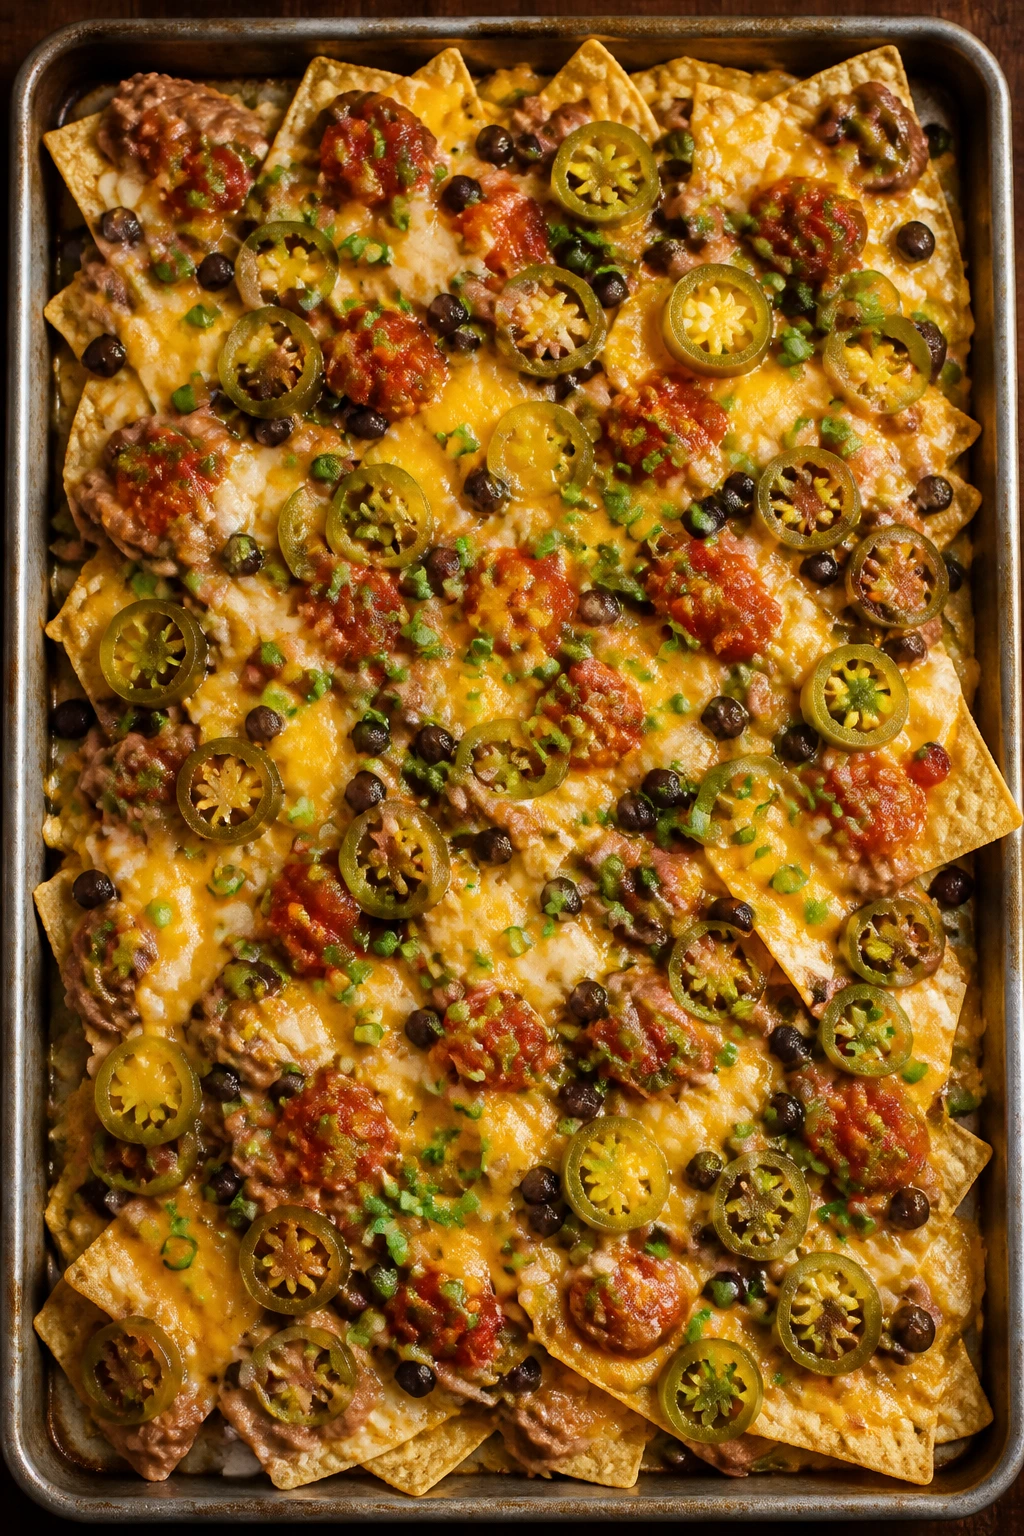
Loaded nachos are one of the easiest ways to make a small amount of ingredients look abundant. Chips, beans, cheese, and a few toppings spread across a tray create a party snack that feels full and fast. The important part is layering. Dumping everything in one pile is how you end up with bare chips on top and a swamp at the bottom.
Why It Works:
A sheet pan gives you surface area, which is what nachos need. When the chips are spread out, the cheese melts across more of them and the beans stay distributed instead of sinking in one corner. Refried beans are especially useful on a budget because they behave like glue and make every chip feel more substantial.
Key Ingredients:
- 1 large bag tortilla chips — choose a sturdy chip.
- 1 can refried beans, warmed slightly — for the base layer.
- 2 cups shredded cheddar or Mexican blend cheese — enough to melt across the pan.
- 1 can black beans, rinsed and patted dry — for bulk.
- 1/2 cup salsa — spooned on after baking or lightly before.
- 1/4 cup sliced jalapeños — optional.
- 2 chopped green onions — fresh finish.
- 1/4 cup sour cream — for serving.
- 1/4 cup chopped cilantro — optional.
Quick Steps:
- Heat the oven to 400°F and line a rimmed sheet pan with parchment if you want easier cleanup.
- Spread half the chips across the pan in a single layer.
- Dot the chips with warmed refried beans, then scatter on the black beans and half the cheese.
- Add the rest of the chips, then top with the remaining cheese and jalapeños.
- Bake for 8 to 10 minutes, until the cheese is melted and bubbling.
- Spoon salsa, sour cream, green onions, and cilantro over the top.
- Serve immediately.
Equipment for This Recipe:
- Rimmed sheet pan — a flat tray is not enough.
- Parchment paper — optional, but it helps.
- Spoon — for the beans and toppings.
- Oven mitts — hot pan, hot cheese, hot everything.
How to Serve This Dish:
Nachos should land on the table the second they come out of the oven. If they sit around, the chips soften and the whole thing loses its edge. They’re best as a shared snack before the main food arrives, or as a sloppy, satisfying side to sliders or dip.
Pro Tips for This Recipe:
- Use a sturdy chip so the toppings don’t snap it in half.
- Warm the refried beans first so they spread easily.
- Add wet toppings like salsa after baking unless you want soggy chips.
- Keep the layer thin. One deep pile is just a melted mess.
Variations on This Dish:
- Chickenless Nachos: Skip meat and double the beans for a vegetarian tray.
- Breakfast Nachos: Add scrambled eggs and a little salsa verde.
- Extra-Cheesy Version: Mix a handful of processed cheese cubes into the shredded cheese for better melt.
Common Mistakes to Avoid with This Dish:
- Piling the chips too high: The bottom chips get buried and soggy.
- Using too many wet toppings before baking: They leak into the tray.
- Walking away once it’s out of the oven: Nachos wait for nobody.
15. BBQ Meatballs With a Sticky Pantry Sauce
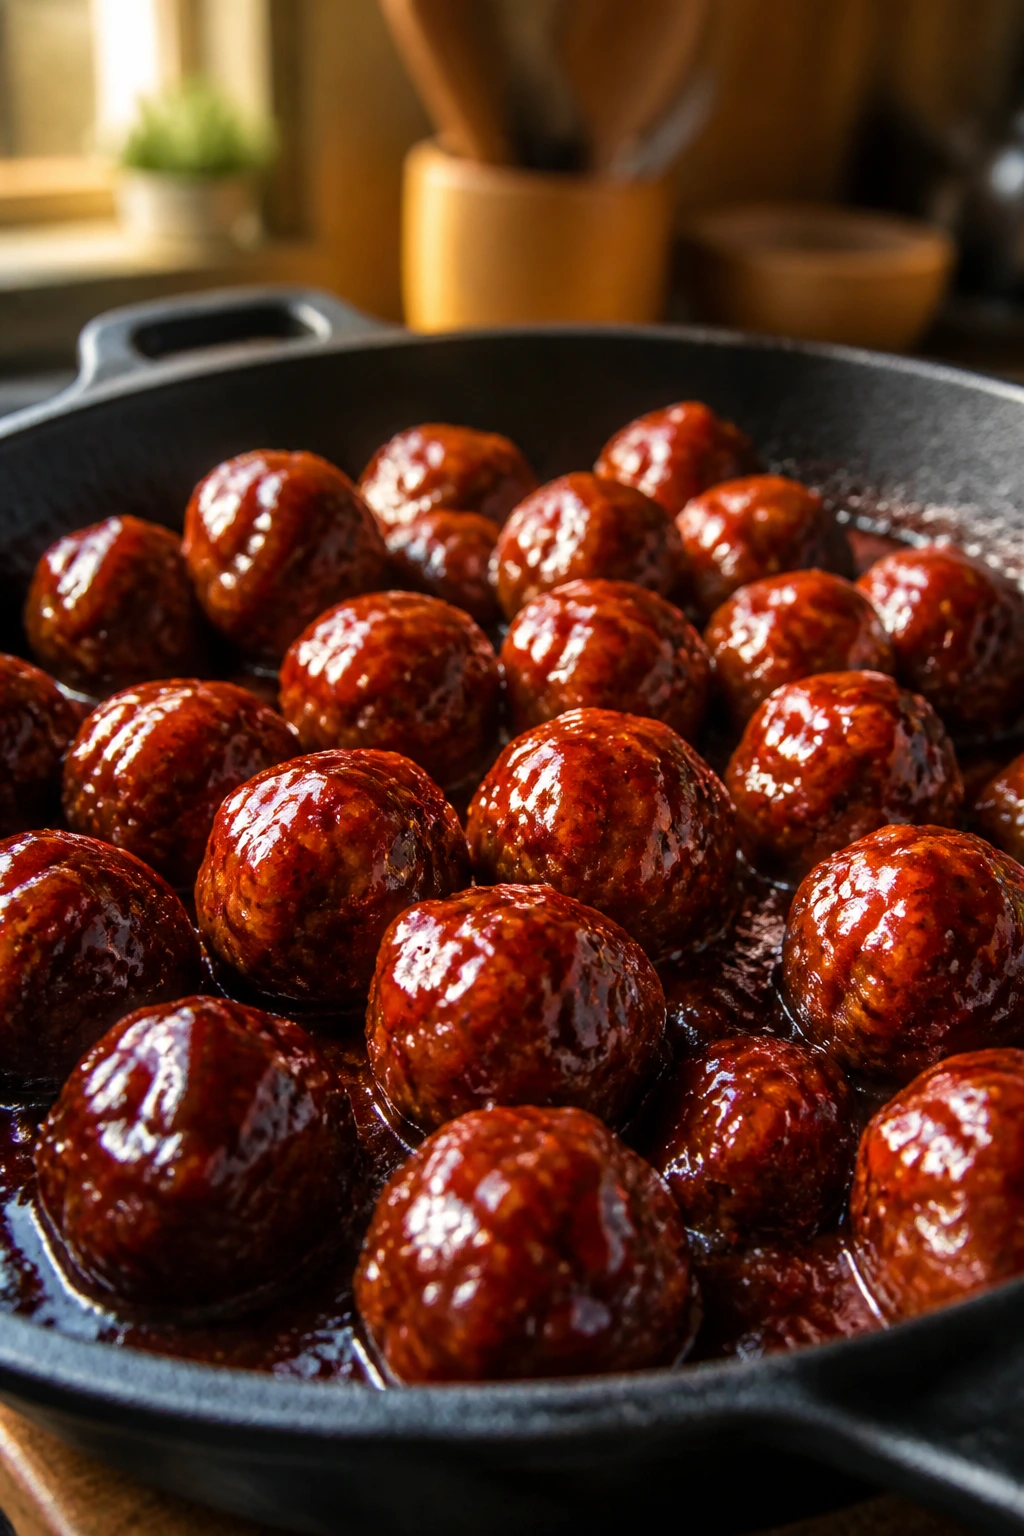
BBQ meatballs are one of those party trays that feels like it took more effort than it did, which is probably why people love them. The sauce clings, the meatballs stay juicy, and you can keep them warm in a slow cooker if the party runs long. The sweet-savory glaze is doing most of the work here, and that’s fine by me.
Why It Works:
Frozen meatballs are a budget shortcut that saves time and delivers consistent results. If you make them from scratch, they still need only a little seasoning and some binder. The sauce is where the personality comes from, and a mix of barbecue sauce with a pantry sweetener like grape jelly or ketchup makes a glossy coating that sticks instead of running off the meatballs.
Key Ingredients:
- 2 pounds frozen meatballs, thawed enough to separate — the easiest route.
- 1 cup barbecue sauce — choose one with enough body.
- 1/2 cup grape jelly or apricot preserves — for sweetness and shine.
- 1 tablespoon Worcestershire sauce — deepens the sauce.
- 1 teaspoon hot sauce, optional — for a little edge.
- 2 tablespoons chopped parsley or green onion — optional garnish.
Quick Steps:
- Put the barbecue sauce, jelly, Worcestershire sauce, and hot sauce in a saucepan over low heat.
- Stir until the jelly melts into the sauce and everything looks smooth.
- Add the meatballs and toss to coat.
- Simmer for 10 to 15 minutes, stirring now and then, until the meatballs are hot through and glazed.
- Transfer to a serving bowl or slow cooker set on warm.
- Sprinkle with parsley or green onion if you want a little color.
Equipment for This Recipe:
- Medium saucepan or skillet — for the sauce.
- Slow cooker — optional for holding.
- Wooden spoon — for coating the meatballs.
- Serving bowl with tongs or toothpicks — easier for guests.
How to Serve This Dish:
Serve them with toothpicks in a bowl or keep them warm in a small slow cooker beside the serving spoon. They sit nicely next to potato wedges or cornbread muffins, since the sauce begs for something starchy. Four to five meatballs per person is a decent estimate when the spread is large.
Pro Tips for This Recipe:
- If the sauce feels too sweet, add a little more Worcestershire or a splash of vinegar.
- Keep the heat low or the sauce can catch and scorch.
- Thawing the meatballs slightly helps them heat evenly and hold their shape.
- Stir gently so the coating stays on the meatballs, not on the bottom of the pan.
Variations on This Dish:
- Spicy BBQ Meatballs: Add 1 to 2 teaspoons hot sauce or red pepper flakes.
- Tangy Mustard Glaze: Replace half the barbecue sauce with yellow mustard.
- Swedish-Style Budget Meatballs: Use cream-based gravy instead of BBQ sauce if you want a milder tray.
Common Mistakes to Avoid with This Dish:
- Using sauce that’s too thin: It won’t cling to the meatballs.
- Boiling the sauce hard: Sugar burns fast.
- Forgetting to stir while holding: The bottom layer sticks and dries out.
16. Garlic Bread Dippers With Marinara
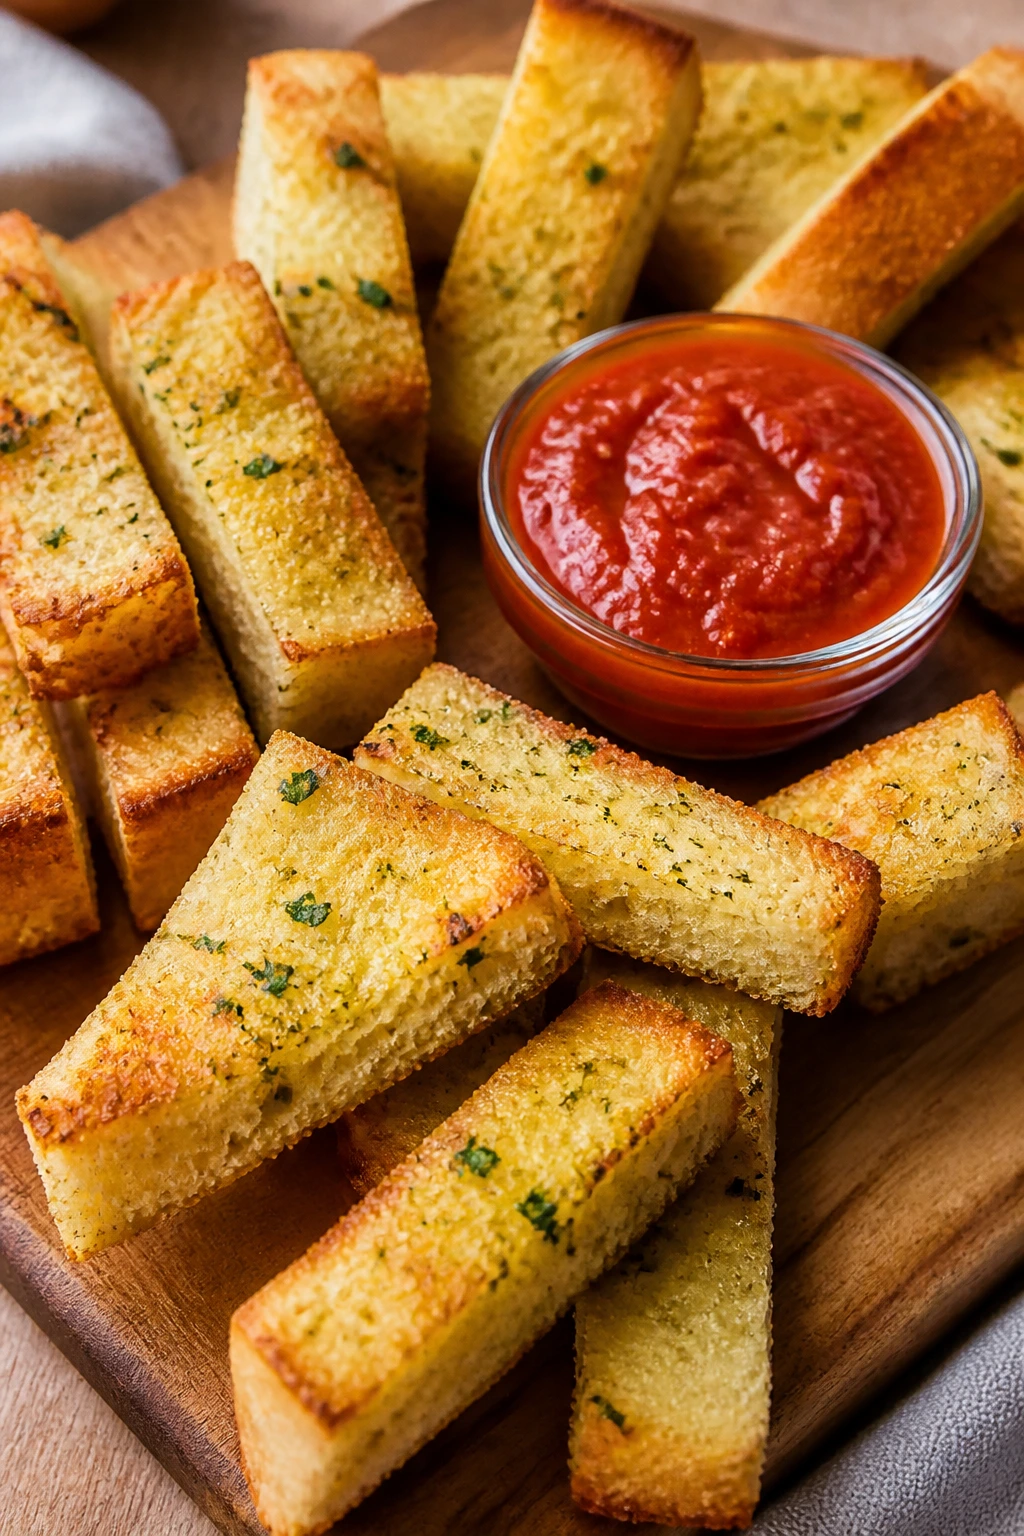
A loaf of bread can go a long way at a party if you treat it like an appetizer and not just a side. Garlic bread dippers are cheap, fast, and surprisingly satisfying because they give people something to hold while they hover near the sauce bowl. Crisp edges, soft centers, and a warm tomato dip — that’s enough.
Why It Works:
Bread is one of the cheapest party foods around, and garlic butter turns it into something people actually fight over. Cutting it into strips or cubes gives you a dippable format that works with marinara, queso, or even bean dip. If you want a tray that feels fuller than the grocery bill, bread is a very good place to start.
Key Ingredients:
- 1 large loaf French bread or Italian bread — slightly stale bread works fine.
- 1/2 cup unsalted butter, softened — the garlic butter base.
- 2 cloves garlic, finely grated or minced — strong but not harsh.
- 1 teaspoon dried parsley — for color and a little herb flavor.
- 1/2 teaspoon garlic powder — extra savory depth.
- 1/4 teaspoon salt — enough to wake up the bread.
- 1 1/2 cups marinara sauce, warmed — for dipping.
- 1/2 cup shredded mozzarella, optional — if you want a cheesy top.
Quick Steps:
- Heat the oven to 400°F.
- Mix the softened butter, garlic, parsley, garlic powder, and salt in a small bowl.
- Cut the loaf into thick strips or cubes, depending on how you want to serve it.
- Spread the garlic butter over the cut sides.
- Place the pieces on a baking sheet and sprinkle with mozzarella if using.
- Bake for 8 to 10 minutes until the edges are golden and the bread smells toasty.
- Serve warm with marinara for dipping.
Equipment for This Recipe:
- Bread knife — for clean cuts.
- Baking sheet — for the dippers.
- Small bowl — for the garlic butter.
- Spoon or butter knife — for spreading.
How to Serve This Dish:
Serve the dippers stacked in a basket with the marinara in a bowl nearby. They work well alongside pizza bites, meatballs, or a bean dip so the table has more than one bread-based option. A couple of strips per person is fine if you’ve got a lot of other food.
Pro Tips for This Recipe:
- Slightly stale bread toasts better than ultra-soft fresh bread.
- Grate the garlic finely so you don’t get sharp raw bits.
- If the bread is very thick, toast it a minute longer so the center isn’t doughy.
- Warm the marinara separately so the whole tray feels intentional.
Variations on This Dish:
- Cheesy Garlic Toast: Add more mozzarella and a little Parmesan.
- Herb Bread Dippers: Mix in Italian seasoning or oregano.
- Spicy Dip Version: Stir red pepper flakes into the marinara.
Common Mistakes to Avoid with This Dish:
- Using too much butter: The bread gets greasy instead of crisp.
- Cutting the pieces too small: They dry out too fast.
- Serving cold marinara: It drags the whole tray down.
17. Cucumber Cream Cheese Bites
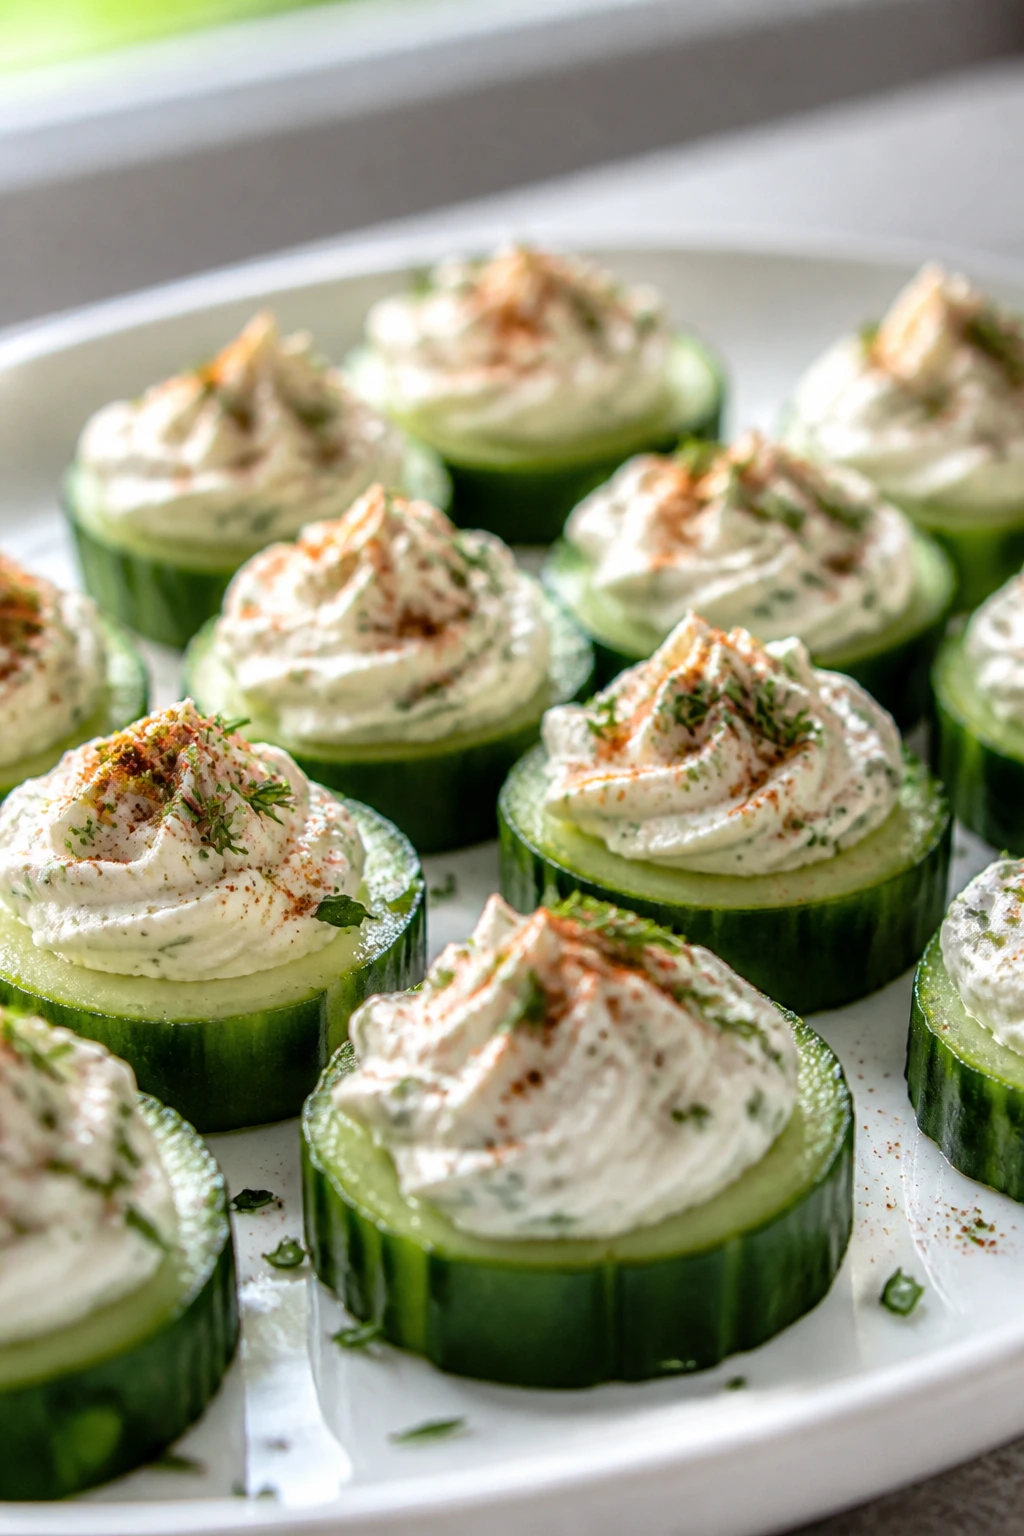
Cucumber bites are the cool, clean note on a table that’s otherwise full of baked and fried things. They’re cheap enough when cucumbers are in season or on sale, and they give the tray some breathing room. The crunch matters. So does drying the cucumber slices well, because nobody wants a watery bite sliding across the plate.
Why It Works:
Cream cheese gives you a smooth, salty spread that can carry herbs, pepper, or ranch seasoning without requiring much else. Cucumbers add freshness and a bit of snap, which makes them useful next to richer bites like sausage balls or sliders. They also hold up better than fragile crackers once they’re topped, as long as you dry them properly.
Key Ingredients:
- 2 large cucumbers — English or regular, peeled if the skin is thick.
- 8 ounces cream cheese, softened — the topping.
- 1 tablespoon ranch seasoning or 1 teaspoon dried dill — your flavor base.
- 1/4 teaspoon salt — tiny amount, because the seasoning mix may already be salty.
- 1/8 teaspoon black pepper — enough to keep it from tasting flat.
- Paprika or chopped herbs for garnish — optional.
- Crackers or toasted bread rounds, optional — if you want a sturdier base.
Quick Steps:
- Slice the cucumbers into 1/4-inch rounds.
- Lay them on paper towels and blot the tops dry.
- Stir the cream cheese, ranch seasoning or dill, salt, and pepper until smooth.
- Spoon or pipe a small dollop onto each cucumber slice.
- Dust with paprika or herbs if you want a finished look.
- Serve immediately or chill for 10 minutes.
Equipment for This Recipe:
- Sharp knife — for even cucumber slices.
- Paper towels — drying is not optional.
- Small bowl — for the cream cheese mix.
- Spoon or piping bag — either works.
How to Serve This Dish:
Arrange them in circles on a chilled platter so they don’t tumble around. They’re a helpful contrast to hot food and heavy snacks, and they work best when the rest of the table is a little rich. Plan on 4 to 6 bites per person if you’re using them as one item in a larger spread.
Pro Tips for This Recipe:
- Dry the cucumber slices well or the topping slides off.
- If the cream cheese is stiff, let it sit at room temperature until spreadable.
- Make these close to serving time. They’re not a long-haul appetizer.
- A pinch of lemon zest wakes them up if the flavor feels too flat.
Variations on This Dish:
- Everything Bagel Bites: Sprinkle everything seasoning on top of the cream cheese.
- Herbed Garden Bites: Use dill, chives, and parsley together.
- Cracker Stack Version: Swap the cucumber for crackers if you need a sturdier base for a longer party.
Common Mistakes to Avoid with This Dish:
- Leaving cucumber slices wet: The topping slips.
- Overloading the cream cheese: The bites become awkward and messy.
- Making them too early: They lose crunch and start to weep.
18. No-Bake Peanut Butter Chocolate Bars
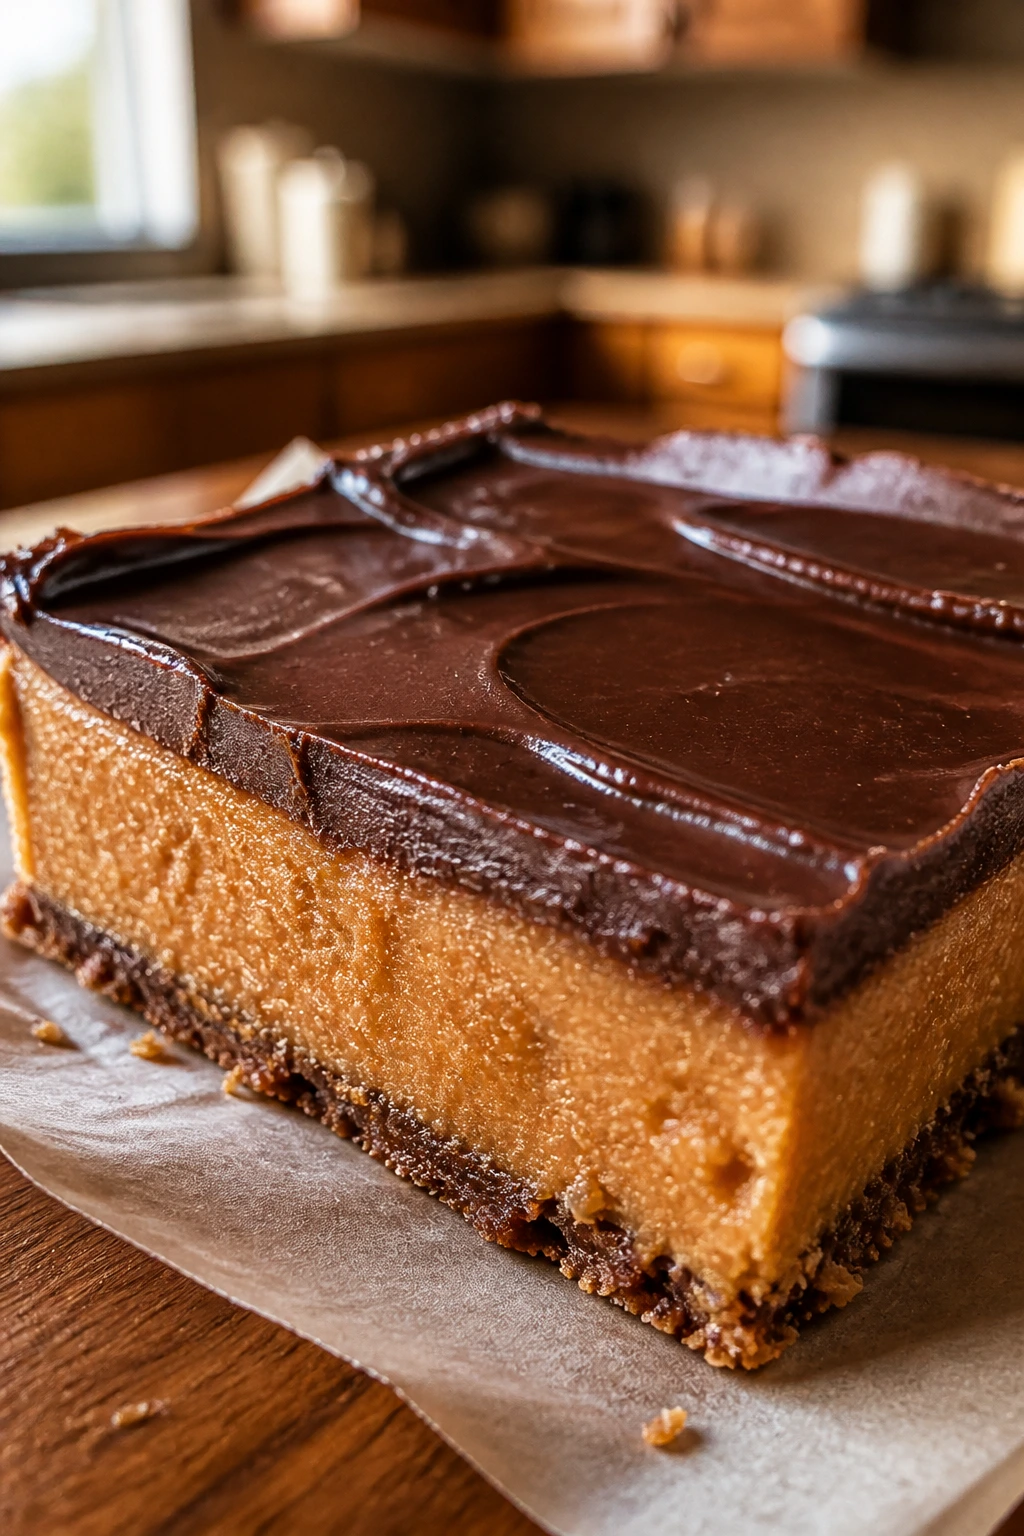
Not every party food needs to be savory, and these bars prove it without asking for an oven. The peanut butter layer is salty and dense, the chocolate top sets into a clean snap, and the whole thing feels like a dessert that knows its job. The ingredients are pantry-level, which is exactly where cheap party food should be looking.
Why It Works:
Graham crumbs or crushed cereal, peanut butter, butter, powdered sugar, and chocolate chips make a dessert with almost no baking time. That matters when oven space is already claimed by dips and sliders. The bars cut cleanly after chilling, which makes them easy to set on a tray with very little fuss.
Key Ingredients:
- 2 cups graham cracker crumbs — or finely crushed digestive biscuits.
- 1 cup creamy peanut butter — the binding layer.
- 1/2 cup unsalted butter, melted — helps the base set.
- 1 cup powdered sugar — sweetens and thickens the bottom layer.
- 1 1/2 cups semi-sweet chocolate chips — the top.
- 1 tablespoon butter or coconut oil — helps the chocolate spread smoothly.
- Pinch of salt — makes the peanut butter taste fuller.
Quick Steps:
- Line an 8-inch square pan with parchment paper.
- Stir together the graham crumbs, peanut butter, melted butter, powdered sugar, and salt until thick.
- Press the mixture into the pan in an even layer.
- Melt the chocolate chips with the extra butter or coconut oil in short microwave bursts or over low heat.
- Spread the chocolate over the peanut butter layer.
- Chill for at least 1 hour until firm.
- Slice into small bars with a sharp knife.
Equipment for This Recipe:
- Square baking pan — 8-inch or 9-inch works.
- Parchment paper — for easy lifting.
- Mixing bowl — for the base.
- Small saucepan or microwave-safe bowl — for the chocolate.
How to Serve This Dish:
Cut them into small squares and serve them on a separate plate from the salty snacks so the flavors don’t blur together. They’re sturdy enough to travel and hold their shape at room temperature for a while. One small square per guest is often enough if the table already has lots of food.
Pro Tips for This Recipe:
- Press the base firmly so it doesn’t crumble when sliced.
- Chill fully before cutting or the chocolate smears.
- A sprinkle of flaky salt on top makes the bars taste less sweet and more balanced.
- Use a warm knife wiped clean between cuts for tidy edges.
Variations on This Dish:
- Crunchy Peanut Bars: Stir 1/2 cup chopped peanuts into the base.
- Marbled Chocolate Top: Swirl a little melted white chocolate over the dark top.
- Oat Version: Replace half the graham crumbs with quick oats for a heartier bite.
Common Mistakes to Avoid with This Dish:
- Using too much butter in the base: The bars won’t hold.
- Cutting before they’re chilled: Everything sticks to the knife.
- Overheating the chocolate: It seizes and gets dull.
19. Fruit Skewers With Yogurt Dip
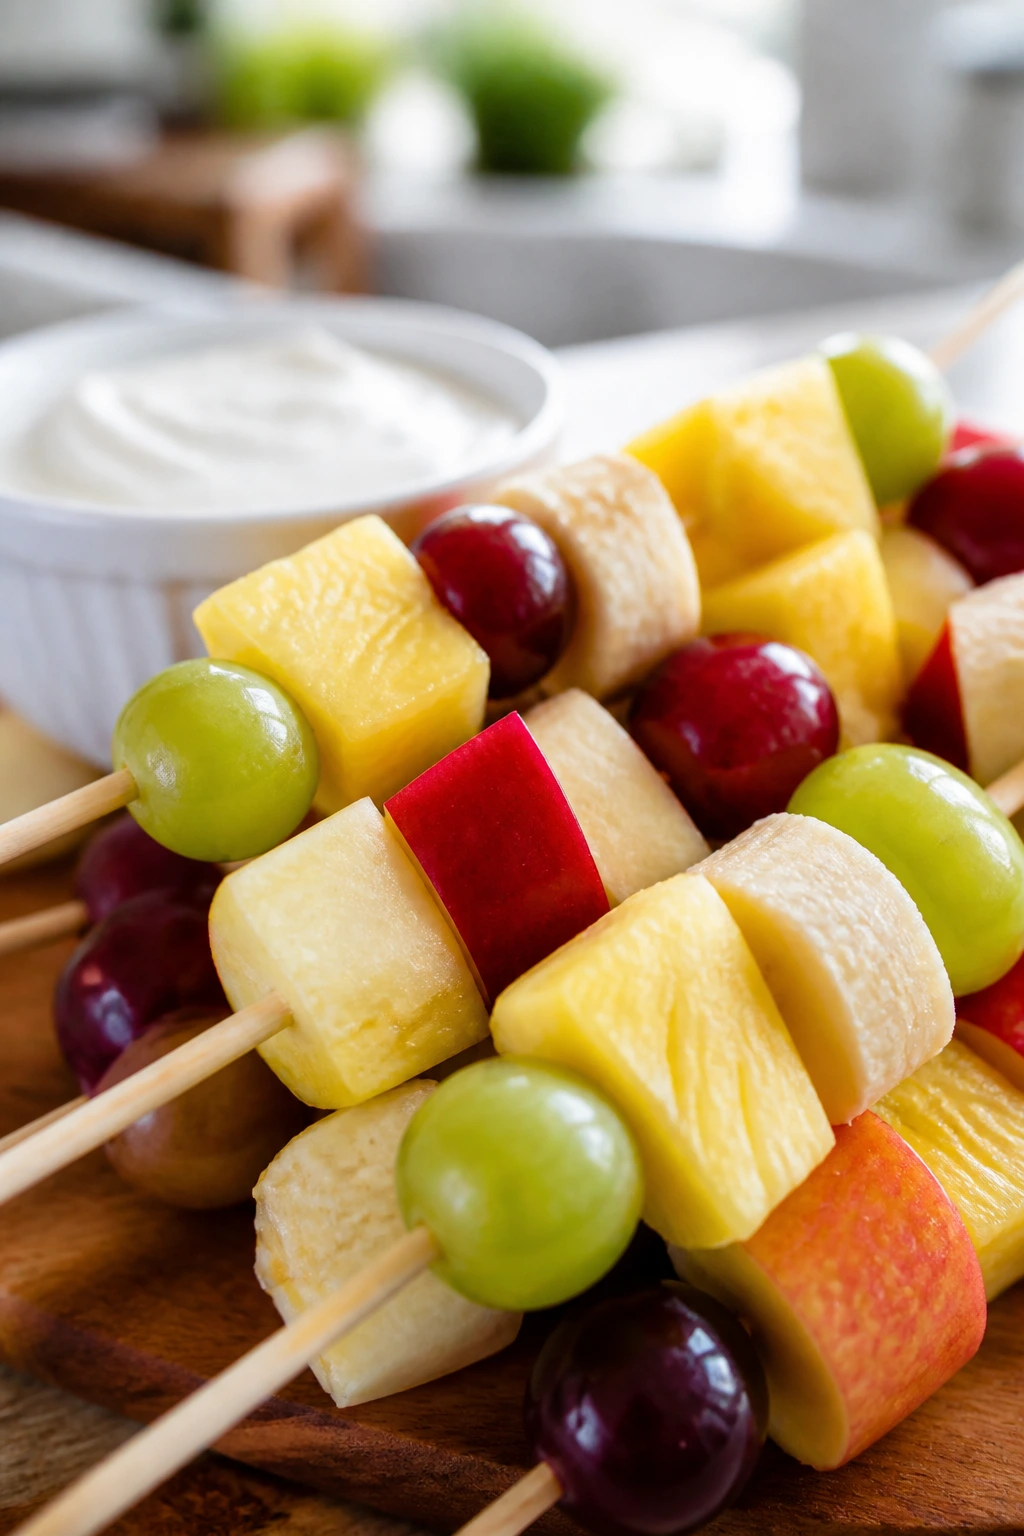
Fruit skewers are the one fresh-looking item that can rescue a budget table from looking all beige. They’re cheap if you lean on whatever fruit is on sale, and they’re easy enough for a second-rate plate to feel bright again. The yogurt dip adds a creamy pause between the salty snacks, which makes the whole spread feel more balanced.
Why It Works:
Fruit is naturally party-friendly because it needs very little work. Cut it into pieces, put it on skewers, and it suddenly becomes portable. The yogurt dip is where you can add a little sweetness and vanilla so it tastes like more than plain dairy. If apples are in the mix, a little lemon juice keeps them from browning too quickly.
Key Ingredients:
- 2 bananas, cut into thick rounds — use them close to serving time.
- 2 apples, cored and cut into chunks — toss with lemon juice.
- 2 cups grapes — seedless works best.
- 1 cup pineapple chunks or orange segments — for juicy contrast.
- 1 cup plain yogurt or vanilla yogurt — for dipping.
- 2 tablespoons honey — if using plain yogurt.
- 1/4 teaspoon cinnamon — optional but nice.
- 1 tablespoon lemon juice — for the apples.
Quick Steps:
- Prep the fruit into bite-size pieces.
- Toss the apple pieces with lemon juice to slow browning.
- Thread the fruit onto skewers in whatever pattern looks good to you.
- Stir the yogurt, honey, and cinnamon together.
- Chill the skewers and dip until serving time.
- Serve the dip in a small bowl beside the fruit.
Equipment for This Recipe:
- Cutting board and knife — for the fruit.
- Skewers or short cocktail picks — whichever size fits your platter.
- Small bowl — for the dip.
- Serving tray — a flat tray keeps the skewers from rolling.
How to Serve This Dish:
Fruit skewers are useful at the end of the table, where people can grab something cold after all the hot food. They also help the spread feel less one-note. Two to three skewers per person is usually enough if there are other desserts or snacks nearby.
Pro Tips for This Recipe:
- Keep bananas for last-minute assembly; they brown fastest.
- Use fruit that’s firm enough to hold on the skewer.
- Dry washed grapes before threading them or the skewers get slippery.
- If the yogurt dip seems thin, chill it for 15 minutes before serving.
Variations on This Dish:
- Berry Skewers: Use strawberries and blueberries when they’re affordable.
- Citrus-Forward Version: Add clementine segments and a little orange zest to the dip.
- Chocolate Drizzle Upgrade: Drizzle the finished skewers with melted chocolate right before serving.
Common Mistakes to Avoid with This Dish:
- Using overripe fruit: It falls apart on the skewer.
- Making the skewers too early: Bananas and apples lose their appeal.
- Skipping the lemon on apples: They brown and look tired.
20. Rice Krispie Treat Squares With a Salty Finish
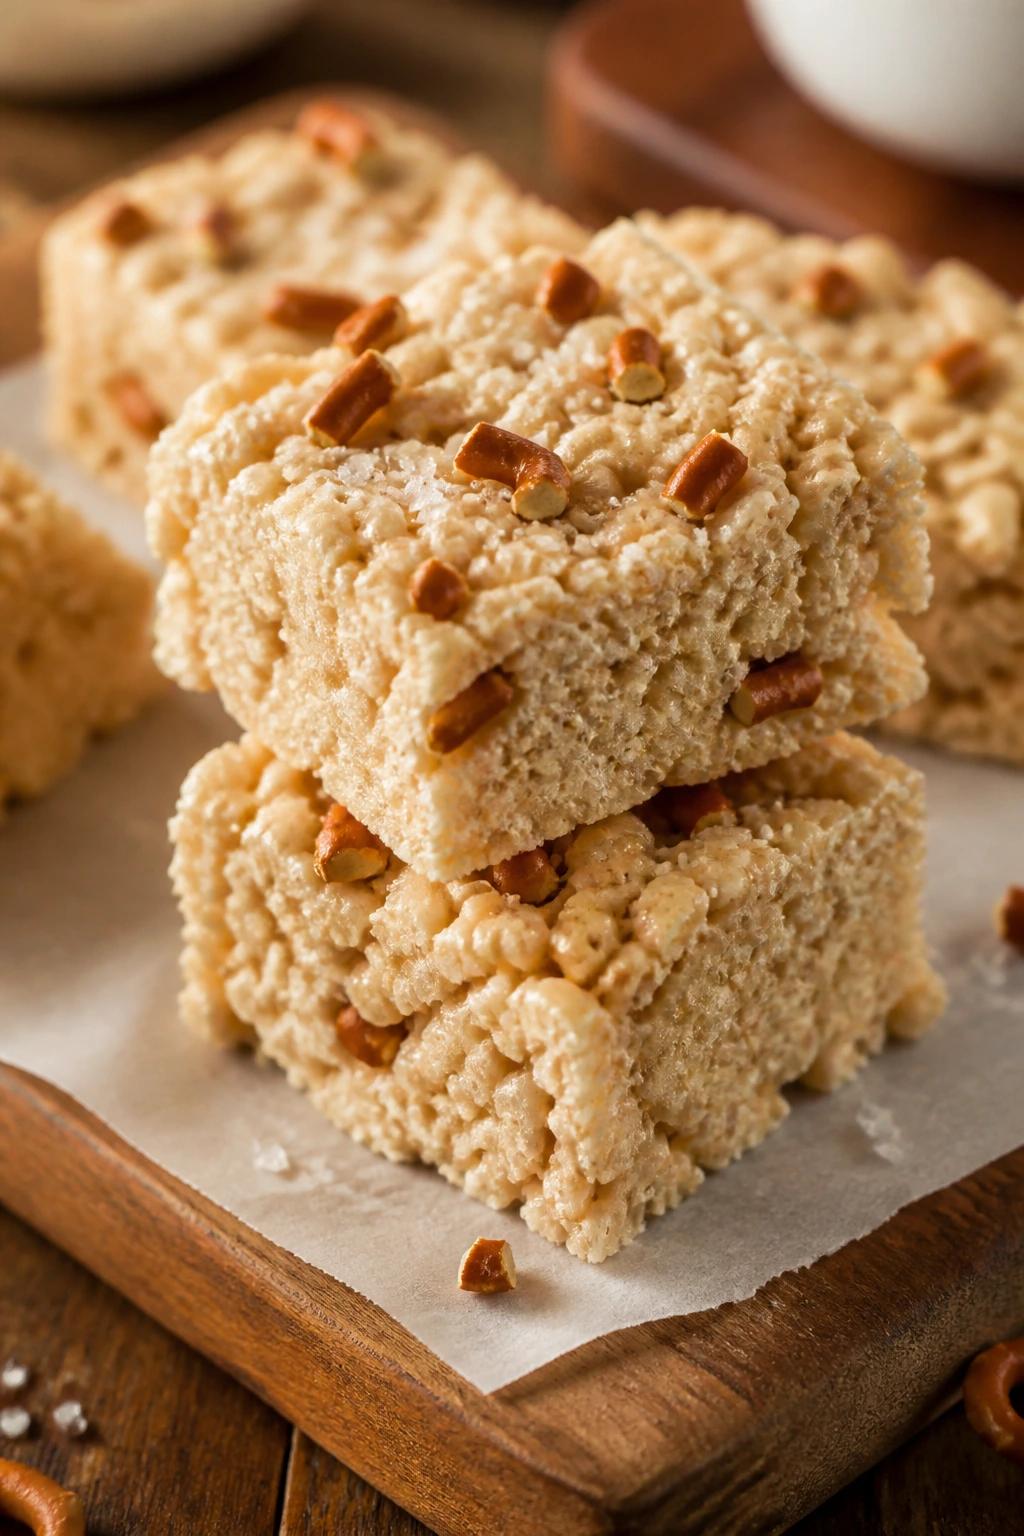
Rice Krispie treats are the cheapest sweet crowd-pleaser in the room if you make them yourself, and they’re still a good party move because they cut cleanly and don’t need frosting or plates. I like a little salt on top. It keeps the marshmallow from turning cloying and makes the squares taste more grown-up without becoming fussy. A handful of pretzel bits folded in gives you that salty finish from the inside instead of only on top.
Why It Works:
Marshmallows, butter, and cereal are cheap, fast, and reliable. The mixture sets in one pan, which means no ovens, no long cooling times, and no guesswork. Because the texture is soft and chewy, you can cut the squares small and still satisfy people who want dessert without committing to cake.
Key Ingredients:
- 3 tablespoons unsalted butter — the base.
- 1 package (10 ounces) mini marshmallows — the binder and sweetness.
- 6 cups crispy rice cereal — the structure.
- 1 cup broken pretzels, optional — for the salty twist.
- 1/2 teaspoon fine salt — just enough to sharpen the sweetness.
- 1 teaspoon vanilla extract — optional, but it helps.
- Extra flaky salt for topping — optional.
Quick Steps:
- Grease a 9-inch square pan or line it with parchment.
- Melt the butter in a large pot over low heat.
- Add the marshmallows and stir until they’re smooth and fully melted.
- Remove from the heat and stir in the vanilla, salt, cereal, and pretzels if using.
- Press the mixture into the pan lightly with a buttered spatula or wax paper.
- Sprinkle with flaky salt if you want it.
- Cool until set, then cut into squares.
Equipment for This Recipe:
- Large pot — big enough for the cereal.
- Square pan — for setting the bars.
- Spatula or wax paper — for pressing without sticking.
- Sharp knife — for clean squares.
How to Serve This Dish:
Put the squares on a separate dessert plate or tuck them near the fruit skewers so the sweet items are in one corner of the table. They’re easy to wrap and carry, which makes them a good travel dessert. Cut them smaller than you think; people will still take two.
Pro Tips for This Recipe:
- Keep the heat low when melting marshmallows so they stay soft.
- Press the mixture gently. Crushing it hard makes the bars dense.
- Add the pretzels after the marshmallow is off heat so they stay crisp.
- Use a buttered spatula or wax paper to avoid sticky hands.
Variations on This Dish:
- Chocolate Swirl Treats: Drizzle melted chocolate over the top once cooled.
- Peanut Butter Version: Stir 1/4 cup peanut butter into the melted marshmallows.
- Birthday Sprinkle Bars: Add a small handful of sprinkles before pressing into the pan.
Common Mistakes to Avoid with This Dish:
- Overcooking the marshmallows: They turn hard after cooling.
- Packing the cereal too tightly: The bars get brick-like.
- Cutting too soon: They smear instead of slicing cleanly.
Why Cheap Party Food Wins on a Tight Grocery Budget
Cheap party food works best when the ingredients do more than one job. Beans stretch cheese. Bread carries sauce. Potatoes act like filler and side dish at the same time. That’s the real trick behind a budget-friendly party spread: each item earns its place by feeding more people than the ingredient list suggests.
Cold foods also buy you time. Deviled eggs, cucumber bites, fruit skewers, pinwheels, and egg salad sandwiches let you build out the table before anybody is ringing the doorbell. Hot foods then fill in the middle of the table so the spread feels active rather than static. I like that contrast. It keeps the room moving.
A good budget table also knows how to stop. You do not need six hot dishes. You need two or three that stay warm, two that can sit cold, one crunchy thing, and one sweet finish. That mix looks full without sending your grocery bill into a spiral.
Essential Equipment for These Recipes
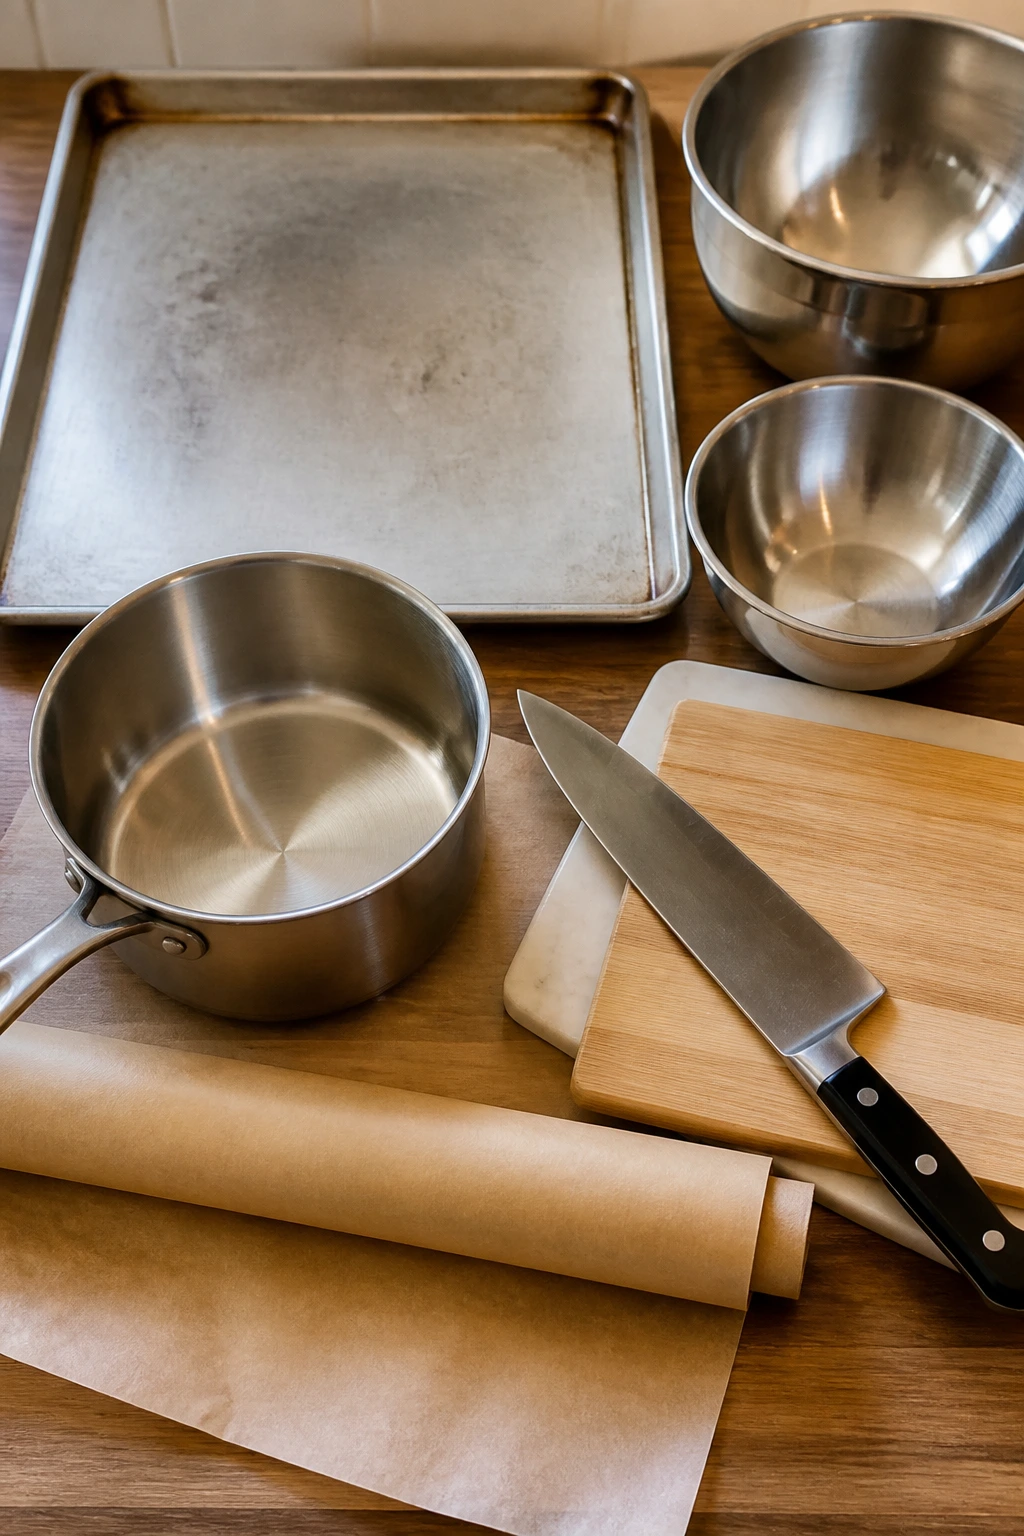
- Rimmed baking sheets — useful for pigs in a blanket, wedges, pizza bites, nachos, and bread dippers.
- Medium and large mixing bowls — you’ll need at least one of each for dips, fillings, and batters.
- Sharp chef’s knife — clean cuts matter for pinwheels, sandwiches, and fruit.
- Cutting boards — one for produce and one for bread or cooked foods if you want to keep things cleaner.
- Saucepan or skillet — bean dip, queso, sloppy joe filling, and BBQ meatballs all depend on one.
- Potato masher or fork — handy for deviled eggs and bean dip.
- Parchment paper — it saves time and keeps sticky foods from welding to the pan.
- Small bowls for dips — one for mustard, one for marinara, one for yogurt. The table looks more deliberate when the sauces aren’t all in coffee mugs.
- Slow cooker — optional, but useful for holding queso or meatballs warm.
- Serving platters and toothpicks — small things, but they change the whole feel of a party tray.
Smart Shopping and Ingredient Tips for Budget Party Food
The cheapest party spread usually starts in the aisle where people hurry past. Canned beans, eggs, oats, pasta, potatoes, popcorn kernels, and tortillas are all good value because they stretch without much effort. Buy the store brand if it looks normal and the ingredient list is short. You’re not trying to impress a food critic. You’re trying to keep 12 people fed without a second grocery run.
Cheese is where a lot of budgets wobble. Block cheese tends to melt better than pre-shredded because it doesn’t carry as much anti-caking powder, but pre-shredded can save time when the clock is the enemy. For queso and nachos, I often use a mix: a little processed cheese or evaporated milk for smooth melt, then cheddar for flavor. That combination behaves better than a mountain of raw cheddar alone.
Eggs, potatoes, and bread are your quiet heroes. A dozen eggs can become deviled eggs and egg salad. Potatoes roast into wedges or turn into a tray of snacky bites. Bread can become garlic dippers, sliders, or tea sandwiches. If your budget is tight, build around those foods first and then add one brighter item so the table doesn’t look brown from edge to edge.
Fresh herbs are nice, but they are not required. Dill, parsley, and green onions can be bought in small amounts or swapped for dried versions in dips and fillings. Same idea with vegetables: bell peppers, cucumbers, and onions can be used in tiny amounts and still do their job. The important part is using enough salt and acid to make the cheap ingredients taste awake.
How to Serve These Cheap Party Food Ideas

Presentation:
A party spread looks better when it has height and spacing. Put dips in shallow bowls, stack sliders on a tray, and line up pinwheels or deviled eggs in neat rows. Leave little gaps between dishes so the table feels intentional, not crowded by accident.
Accompaniments:
The best sidekicks here are tortilla chips, pita chips, crackers, napkins, toothpicks, and a few simple crunchy vegetables. If you want one starch to do a lot of work, make potato wedges or cornbread muffins and let them sit beside the dips. They’ll catch spills and stretch the meal.
Portions:
For a mixed appetizer table, plan on 4 to 6 bites per person for lighter snacks and 6 to 8 if the party food is acting as dinner. Hot foods like sliders, sausage balls, and meatballs usually disappear faster than fruit or cucumber bites, so make a little more of those. It’s easier to refill a cold tray than to explain why the good tray ran out first.
Beverage Pairing:
Sparkling water with lime, iced tea, lemonade, and light beer all fit here without fighting the food. If the spread leans spicy — queso, nachos, taco pinwheels — a cold citrus drink keeps the table from feeling too heavy. For a sweet finish, plain coffee or milk works just fine with the bars and Rice Krispie treats.
Additional Tips and Flavor Boosters
Flavor Enhancement:
A small bowl of something sharp changes a cheap table fast. Pickled jalapeños, sliced green onions, chopped dill pickles, or a squeeze bottle of hot sauce can wake up beans, queso, sliders, and deviled eggs without costing much. Acid is cheap flavor. Use it.
Customization:
Keep one tray mild and one tray spiced. If half your guests hate heat and the other half reach for hot sauce by reflex, that small decision saves the whole spread. A mild bean dip beside a spicy queso is smarter than trying to make every dish do the same job.
Serving Suggestions:
Garnish with what you already used inside the food. Paprika on deviled eggs, cilantro on bean dip, parsley on meatballs, scallions on nachos — those tiny finishing touches tell people the table was planned. A tray lined with parchment or lettuce leaves also looks cleaner than food dumped straight onto bare plastic.
Make-It-Yours:
For a gluten-free table, lean on deviled eggs, bean dip, queso, potato wedges, cucumber bites, and fruit skewers. For a vegetarian spread, the hummus, nachos, bean dip, cornbread, and Rice Krispie treats already do a lot of work. For a dairy-free table, the fruit skewers, black bean dip, popcorn mix, potato wedges, and garlic bread dippers can carry most of the load with a few swaps.
Make-Ahead, Storage, and Reheating Guidance
A budget party gets easier when half the work is done the day before. Deviled eggs, pinwheels, egg salad filling, hummus, bean dip, queso, sloppy joe filling, meatballs, and Rice Krispie treats all benefit from being made ahead in some form. The trick is knowing what holds and what doesn’t. Cucumber bites, fruit skewers, and nachos need last-minute assembly if you want them crisp and bright.
Most of the savory leftovers keep 3 to 4 days in the refrigerator if they were cooled and stored properly. Bean dip, queso, sloppy joe filling, meatballs, and hummus reheat well on the stovetop or in the microwave with a splash of water or milk if they thicken. Use low heat and stir often; that’s what stops cheese sauces and meat sauces from splitting or drying at the edges. Potato wedges and bread dippers are best reheated in a 375°F oven for 8 to 10 minutes or in an air fryer for a few minutes, because the microwave turns them soft.
Freezer-friendly items include sloppy joe filling, BBQ meatballs, sausage balls, and some cookie or bar-style sweets. Those can usually stay frozen up to 2 months in airtight containers or zip bags. Let them thaw in the fridge overnight before reheating. Deviled eggs, cucumber bites, and fruit skewers do not freeze well. Don’t force it. They get watery and strange.
Room temperature matters, too. Creamy items and meat dishes should not sit out for hours on end. If you’re hosting, set out a smaller platter and refill it from the fridge or warmer as needed. It keeps the food nicer, and it keeps the table from turning into a biology experiment.
Budget-Friendly Variations and Adaptations to Try
Vegetarian Party Tray:
Build the table around black bean dip, hummus, loaded nachos without meat, cucumber bites, cornbread muffins, and Rice Krispie treats. You can still get plenty of heft from beans, cheese, and potatoes, which is usually where budget vegetarian food does its best work.
Gluten-Free Swap Table:
Lean on deviled eggs, potato wedges, queso, black bean dip, cucumber bites, fruit skewers, and meatballs. Corn chips and plain popcorn are easy stand-ins for wheat-based snacks, and the whole table still feels full enough to feed a crowd.
Spice-Forward Version:
Add jalapeños to the pinwheels, hot sauce to the queso, cayenne to the potato wedges, and chipotle to the black bean dip. Keep one or two milder foods in the lineup so the heat doesn’t flatten the whole spread.
Kid-Friendly Spread:
Make the sausage balls mild, skip the pickled relish in the eggs if kids dislike tang, and keep the pizza bites simple with cheese only. Fruit skewers and Rice Krispie treats usually disappear without much help, which is its own kind of proof.
Make-Ahead Potluck Version:
Choose bean dip, deviled eggs, pinwheels, hummus, meatballs, and bars. They hold up well in containers, travel neatly, and don’t depend on a perfect oven setup once you get to the party.
Pantry-First Version:
If the budget is razor-thin, build the entire table from canned beans, eggs, bread, popcorn, potatoes, tortillas, peanut butter, and rice cereal. It won’t look sparse if you season each thing well and vary the textures.
Common Mistakes to Avoid

Making every dish creamy or soft:
A table full of dips and mashy fillings feels heavy fast. Keep at least two crunchy things on the spread — popcorn mix, wedges, pita chips, or raw vegetables.
Under-salting cheap ingredients:
Beans, potatoes, eggs, and bread all need more seasoning than people expect. Taste before you serve. A dish can be cheap and still taste flat if you stop seasoning too early.
Ignoring texture once food sits out:
Nachos soften, cucumber bites weep, and bread gets soggy. Time your assembly so the food reaches the table close to when people start eating.
Trying to make everything from scratch:
That’s how a budget turns into a project. Use shortcuts where they help — crescent dough, canned beans, frozen meatballs, boxed cornbread mix — and spend your energy on seasoning and timing instead.
Not planning enough dip:
People always use more dip than you think they will. If queso, bean dip, or hummus is on the menu, make extra chips or pita wedges and give yourself a little buffer on the dip itself.
Serving only one hot tray:
If the tray runs out or cools too fast, the table feels thin. Two hot items and two cold items is a better rhythm. It keeps the room fed while one thing cools and another is refilled.
Frequently Asked Questions About Cheap Party Food on a Tight Grocery Budget
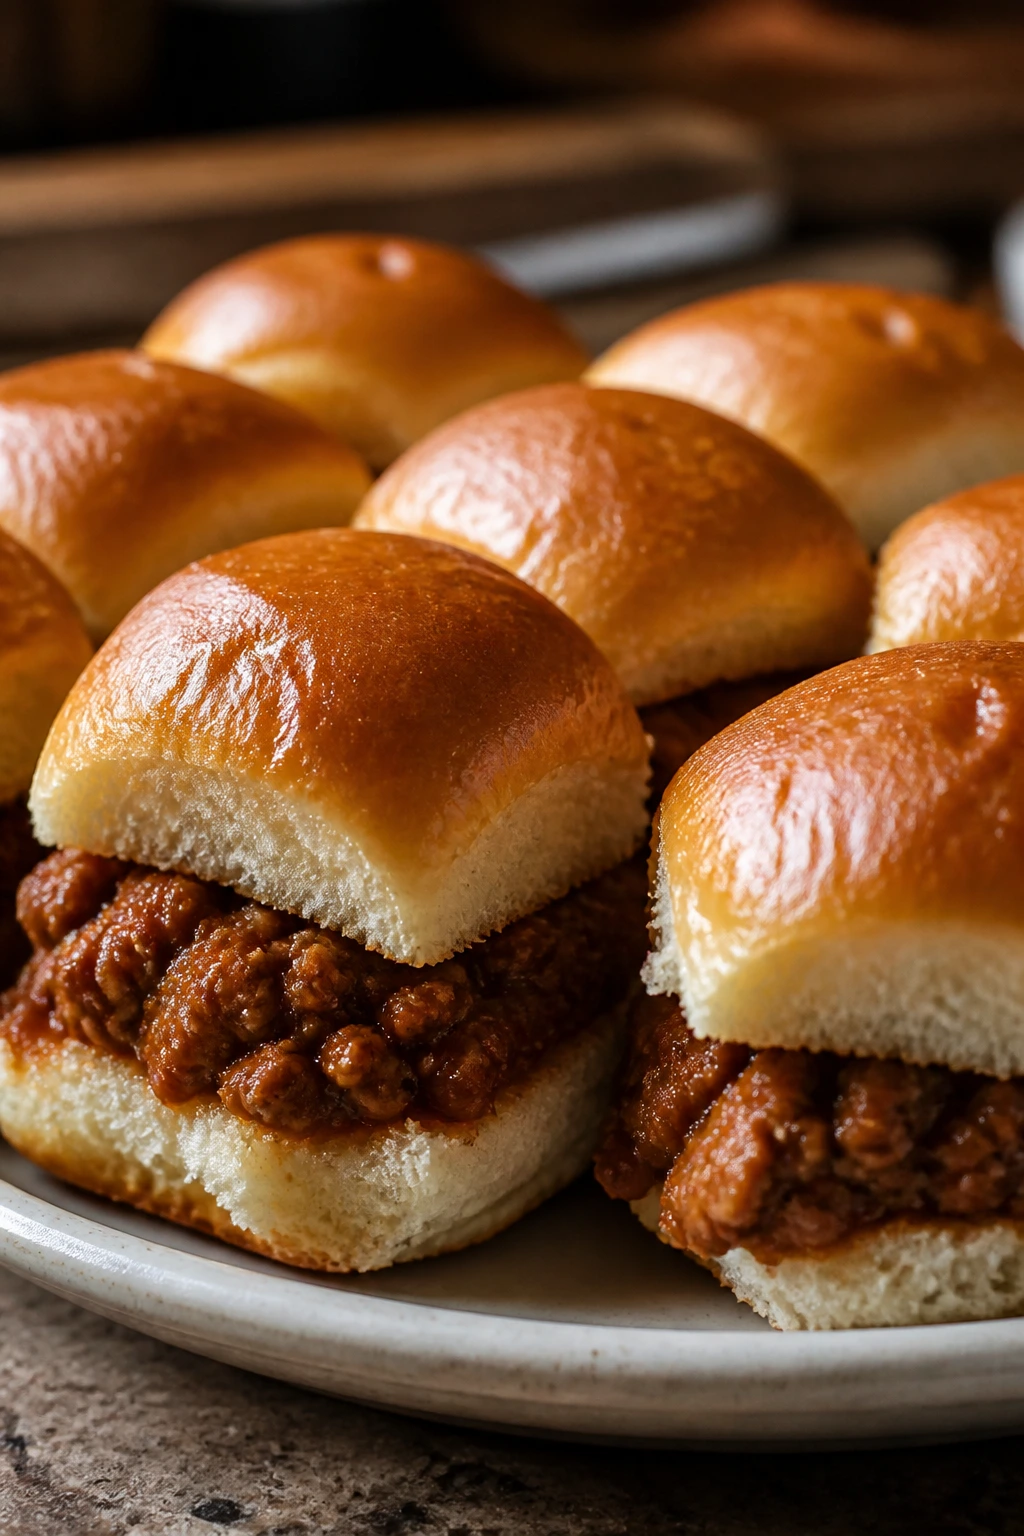
How much party food should I plan per person?
For a mixed appetizer spread, 4 to 6 bites per person is a safe baseline if you’re also serving dessert or a main dish later. If these snacks are the meal, plan more like 8 to 10 bites per person and lean hard on the filling items like sliders, sausage balls, and wedges.
What’s the cheapest type of party food to make in bulk?
Dips made from beans, eggs, or potatoes are usually the least expensive per serving because they use inexpensive staples and stretch with chips or bread. Popcorn mix and Rice Krispie treats also scale well, especially when oven space is limited.
What can I make the day before the party?
Deviled eggs, pinwheels, hummus, bean dip, sloppy joe filling, meatballs, egg salad filling, and dessert bars all work well ahead of time. Keep anything crunchy or watery — like cucumber bites and nachos — for the last minute.
How do I keep hot food warm without drying it out?
Use a low oven, around 200°F, or a small slow cooker on warm. Cover the food loosely so steam doesn’t condense and make the toppings soggy, and stir sauces like queso or meatballs every so often.
What if I only have one oven and a tiny kitchen?
Choose more no-bake and stovetop items: deviled eggs, pinwheels, hummus, cucumber bites, fruit skewers, bean dip, and bars. Then bake just one or two trays of hot food, like sausage balls or potato wedges, so your oven isn’t overbooked.
Can I make this kind of spread without meat?
Absolutely. Bean dip, hummus, queso, nachos without meat, potato wedges, cornbread muffins, popcorn mix, fruit skewers, and Rice Krispie treats already give you a full table. Eggs can add more protein if you want a little extra substance.
What should I buy first if my grocery budget is really tight?
Buy eggs, tortillas, potatoes, bread, beans, popcorn, and one cheese you can use in more than one recipe. Those ingredients cover both snacks and filling options, which means less waste and fewer last-minute compromises.
How do I stop bread-based snacks from getting soggy?
Toast the bread lightly, cool fillings before assembling, and keep wet toppings separate until serving when possible. Sloppy Joe sliders, garlic dippers, and tea sandwiches all hold better when the bread gets a little barrier first.
Can I scale these recipes up for a bigger crowd?
Yes, and many of them scale better than expensive appetizers do. Dips, meatballs, popcorn mix, potatoes, and bars double cleanly; pinwheels and deviled eggs need a little more hands-on time, but the ingredient math is still straightforward.
A Table That Feels Generous, Not Spendy
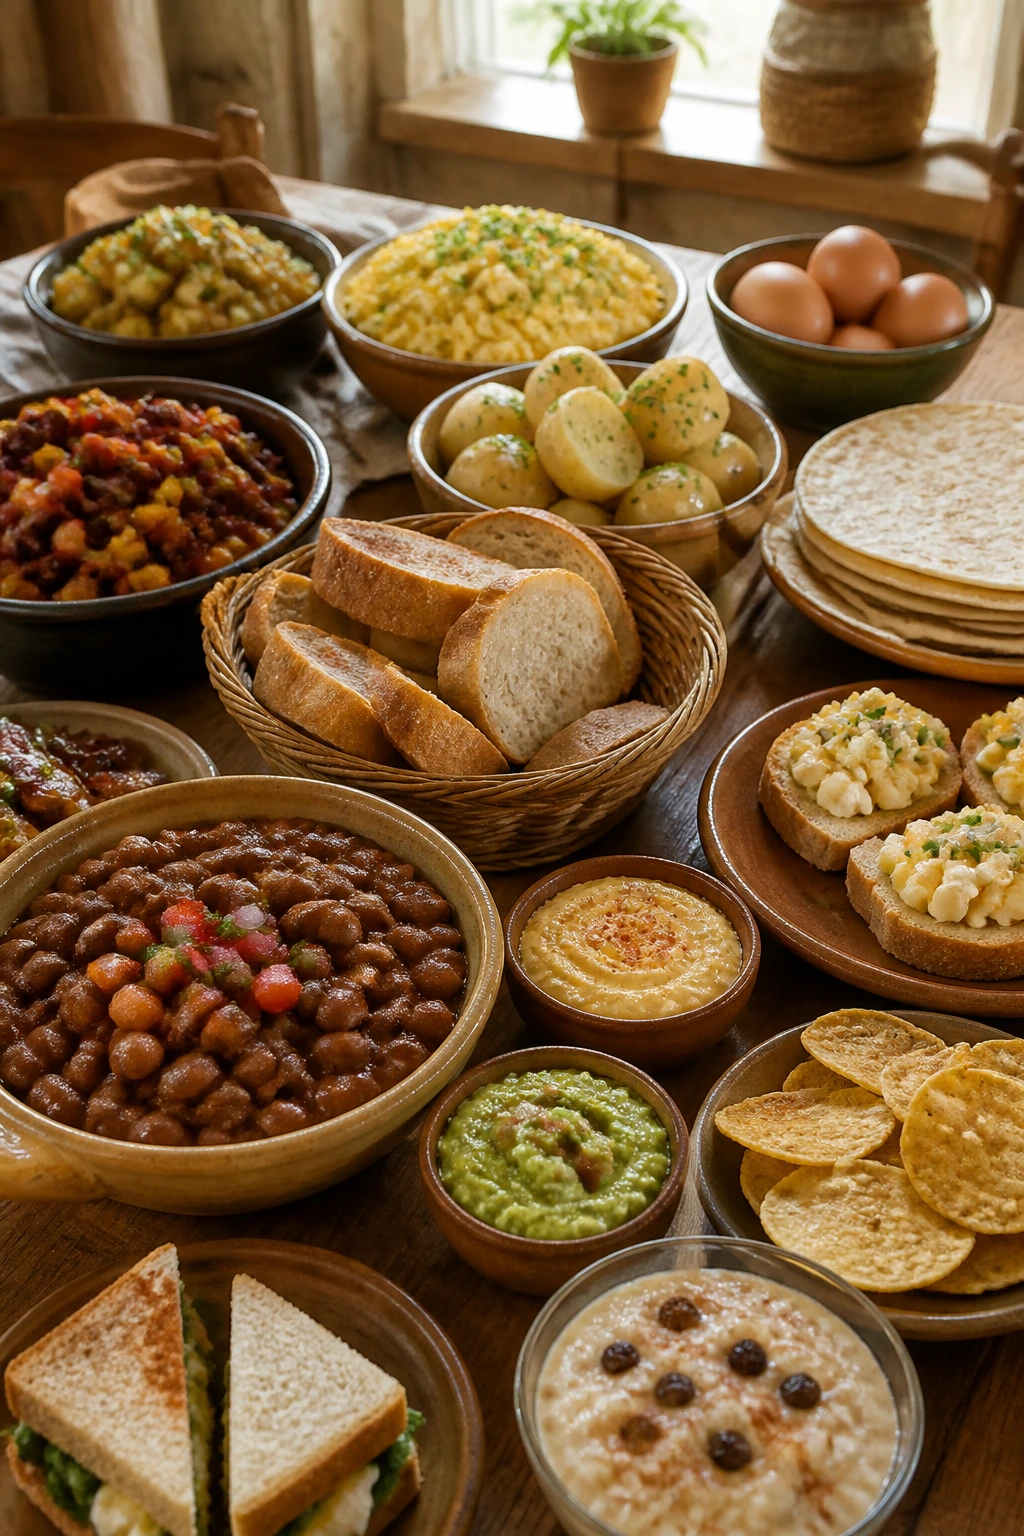
A party spread does not need to be expensive to feel full, lively, or generous. When you build around beans, eggs, bread, potatoes, tortillas, and a few smart shortcuts, the table looks like someone planned it — and that matters more than people think. Cheap party food is only disappointing when it’s lazy. Give the ingredients salt, acid, and a little timing, and they hold their own.
The nicest thing about a budget menu like this is how flexible it stays. You can lean hot, lean cold, lean savory, or lean sweet without changing the whole shopping list. That means less waste, less panic, and fewer dishes that look impressive for ten minutes and then fall apart. Start with two dips, one crunchy snack, one sandwich-style bite, and one dessert. That’s a party table with backbone.