
Open the pantry and the fridge lights don’t have to mean surrender. A can of chickpeas, a box of spaghetti, a jar of salsa, half a bag of rice—those are dinner ingredients, not backup plans, if you know how to lean on heat, salt, and a little acid.
That is the whole trick with 15-minute meals from pantry staples: stop asking shelf-stable food to act delicate. Give beans a hot skillet, finish pasta with oil and lemon, turn tomato paste into sauce instead of treating it like an afterthought. The food starts tasting intentional fast.
I care about this category because it saves more than time. It saves the whole evening from becoming a grocery errand in sweatpants. The recipes below are built the way real weeknight food should be built: one quick stove move, one dependable starch, one protein or bean, and something briny or bright at the end.
Why You’ll Love This Collection
- No special shopping run: Every meal leans on things that keep well—pasta, rice, beans, canned tomatoes, tuna, tortillas, eggs, and shelf-stable noodles.
- Fast by design: These dishes are built around boiling water, a hot skillet, or a microwave pouch, which means the clock stays honest.
- Cheap without feeling stripped down: A single can of fish, beans, or tomatoes carries more weight when it’s paired with a smart starch and a punchy finish.
- Texture actually matters here: Crisp toast, chewy noodles, creamy beans, and saucy tomatoes keep these meals from tasting like “pantry food” in the sad sense.
- Easy to scale up or down: Most of these recipes turn into two servings, four servings, or lunch leftovers with almost no extra work.
- Less waste, more dinner: That half-used jar of salsa or spoonful of tomato paste finally has a job.
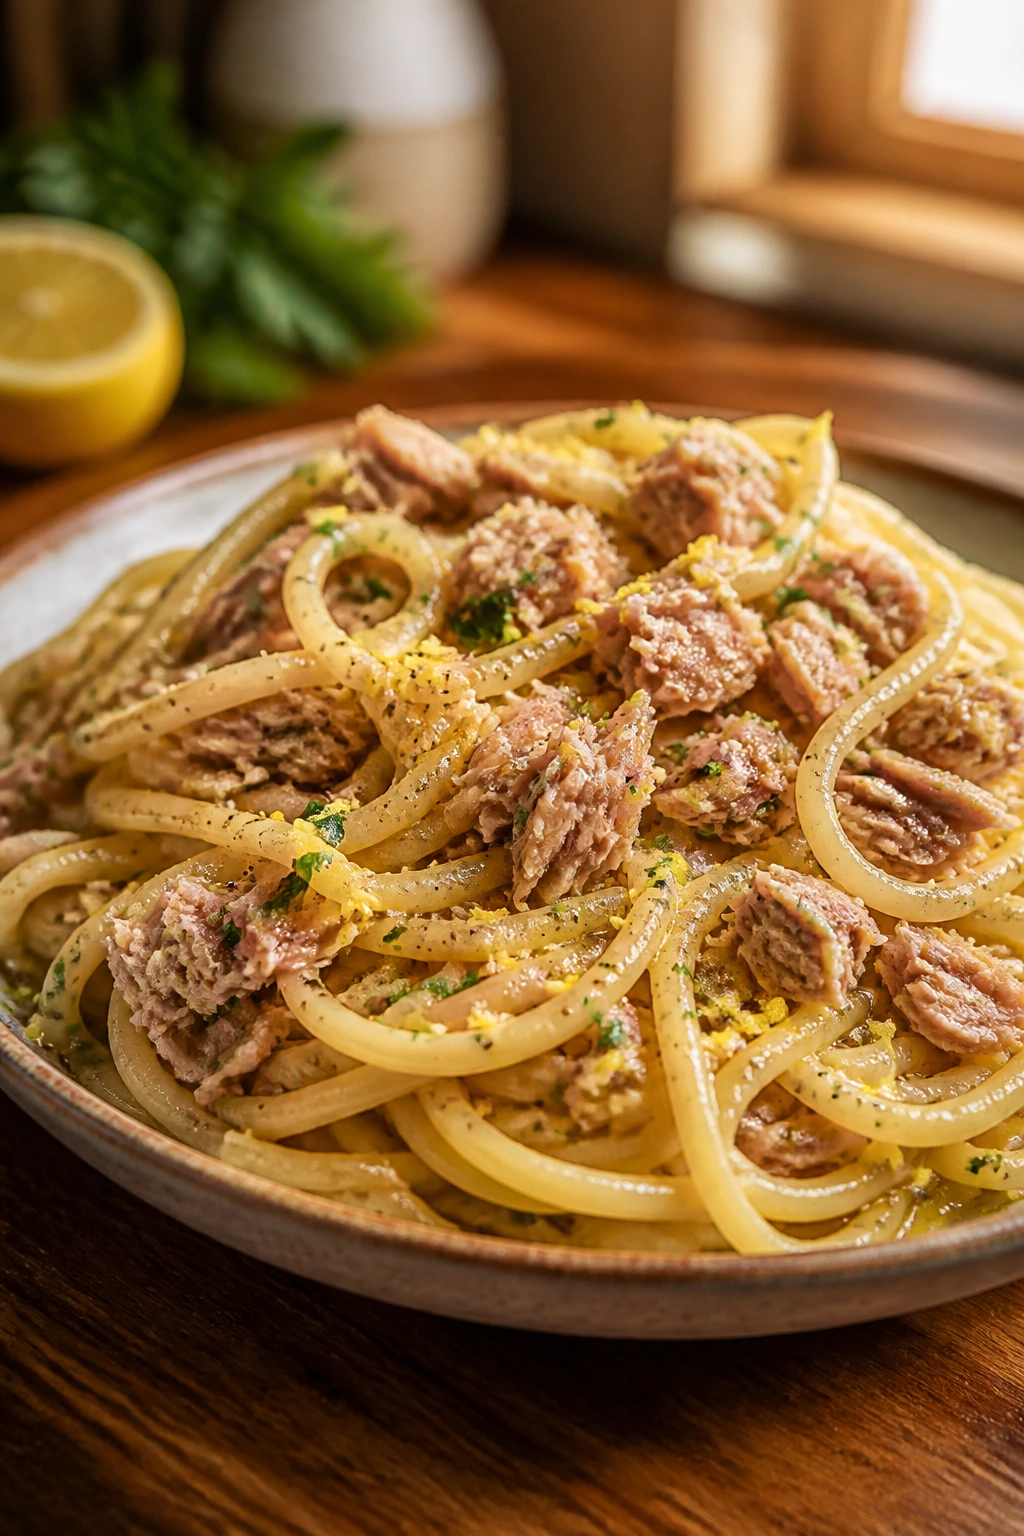
1. Garlic Butter Tuna Pasta
A good tuna pasta should taste briny, glossy, and a little luxurious, not like you dumped a can over noodles and hoped for the best. The butter, garlic, and lemon pull the tuna into something round and savory, and the pasta water gives the sauce that clingy finish people usually mistake for “restaurant” magic.
Why It Works:
Canned tuna in oil brings instant depth, and the garlic-butter base needs only about 30 seconds to bloom before it goes bitter. Lemon wakes up the whole thing at the end, which matters more than people think. Without acid, this kind of pasta can taste flat and oddly heavy.
Key Ingredients:
- 8 ounces spaghetti or linguine
- 2 tablespoons olive oil
- 2 tablespoons unsalted butter
- 3 garlic cloves, minced
- 1 (5-ounce) can tuna in oil, lightly drained
- 1 teaspoon red pepper flakes
- 1 teaspoon lemon zest plus 1 tablespoon lemon juice
- 2 tablespoons chopped parsley
- ¼ cup reserved pasta water
Quick Steps:
- Bring a pot of salted water to a boil and cook the pasta until al dente, about 8 to 10 minutes.
- Reserve ¼ cup pasta water, then drain the noodles.
- Warm the olive oil and butter in a skillet over medium heat, then add garlic and cook for 30 seconds until fragrant.
- Stir in tuna and red pepper flakes, breaking the fish into flakes as it warms.
- Add pasta, lemon zest, lemon juice, and pasta water. Toss until the sauce looks glossy and coats the noodles, then finish with parsley.
Equipment for This Recipe:
- Medium saucepan
- Large skillet
- Tongs or a pasta fork
How to Serve This Dish:
Pile it into a shallow bowl so the sauce pools a little around the edges. A shower of black pepper and a few extra parsley leaves make it look intentional. I like it with a side of sliced tomatoes or toast rubbed with garlic.
Pro Tips for This Recipe:
- Use tuna packed in oil if you can; it tastes richer and needs less help.
- Pull the pasta off the heat before adding lemon juice so the sauce stays smooth.
- Save a splash of extra pasta water in case the noodles seize while you toss.
Variations on This Dish:
- Capers and Dill: Add 1 tablespoon capers and 1 tablespoon chopped dill for a sharper, more old-school pantry feel.
- Creamy Pantry Pasta: Stir in 2 tablespoons cream cheese with the pasta water for a softer, richer sauce.
Common Mistakes to Avoid with This Dish:
- Don’t overcook the garlic. It turns harsh in seconds, and you’ll taste it all the way through the bowl.
- Don’t skip the pasta water. Dry noodles with tuna on top feel separated instead of saucy.
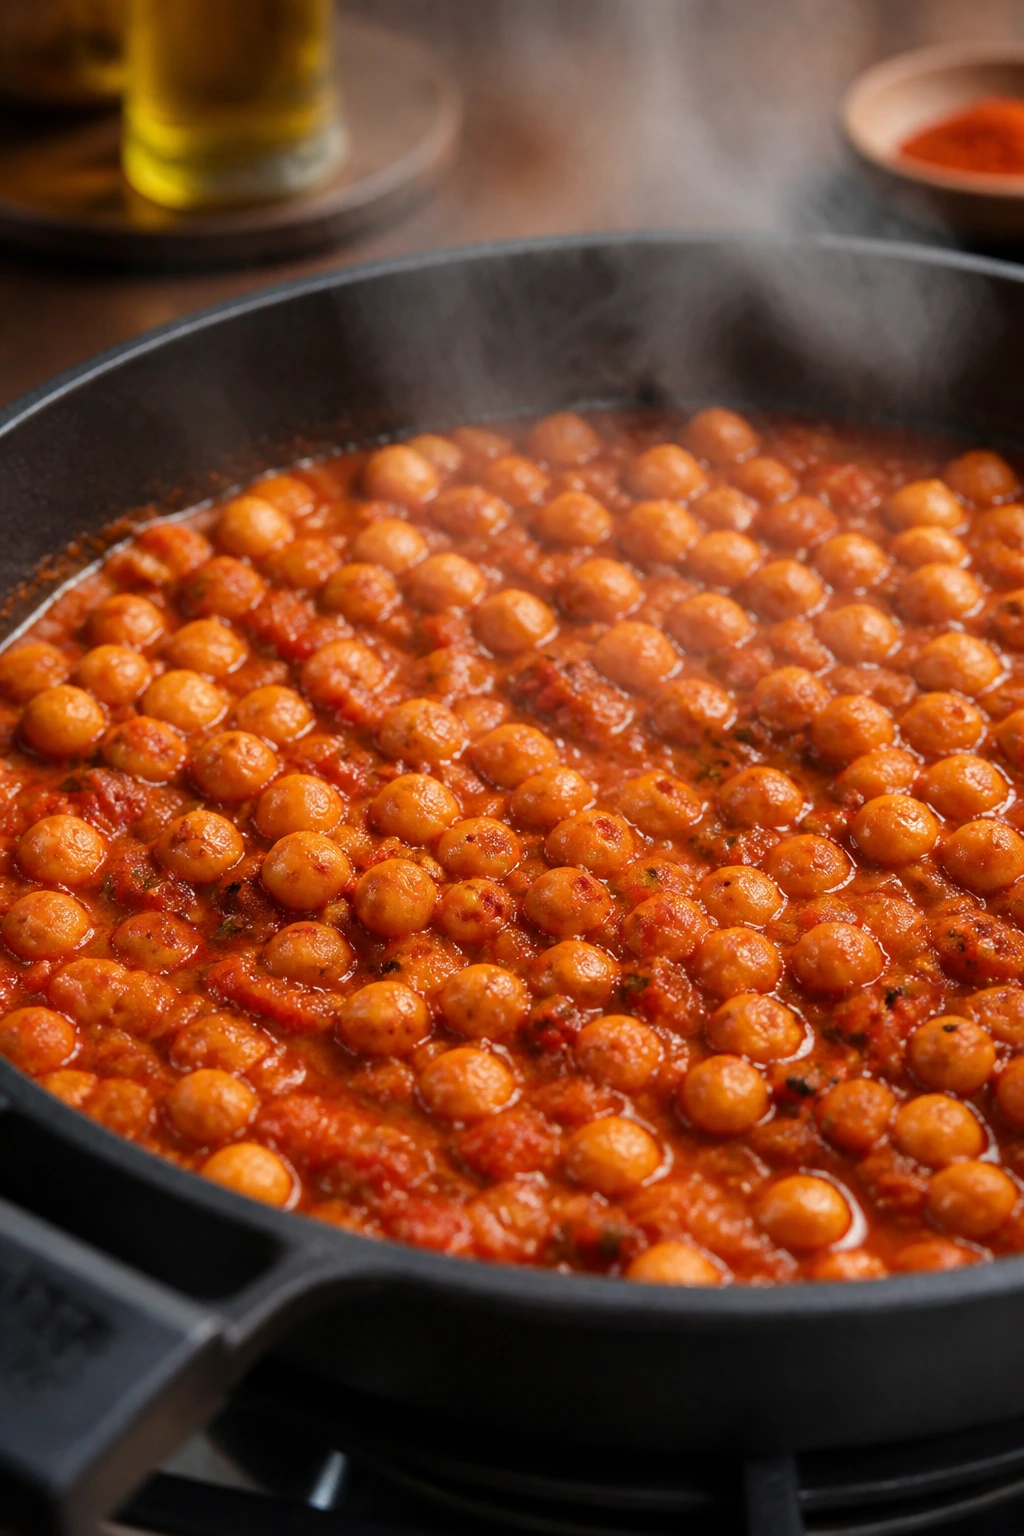
2. Smoky Chickpea Tomato Skillet
This is the kind of skillet meal that smells like dinner before the pan even looks full. Canned chickpeas take on tomato paste, smoked paprika, and garlic in a way that feels hearty without needing a long simmer.
Why It Works:
Tomato paste gives the skillet a deep, cooked flavor in minutes, and chickpeas hold their shape while soaking up the spices. Smoked paprika does the heavy lifting here; one teaspoon gives the whole pan a campfire edge without making it hot. A quick splash of water loosens the sauce just enough to cling to bread or rice.
Key Ingredients:
- 1 tablespoon olive oil
- 1 small onion, finely chopped
- 2 garlic cloves, minced
- 1 tablespoon tomato paste
- 1 teaspoon smoked paprika
- 1 (15-ounce) can chickpeas, rinsed and drained
- 1 (14.5-ounce) can diced tomatoes
- ½ teaspoon salt
- 2 tablespoons chopped parsley or cilantro
Quick Steps:
- Heat the olive oil in a skillet over medium-high heat and cook the onion for 2 minutes until softened.
- Add garlic, tomato paste, and smoked paprika. Cook for 30 seconds until the paste darkens.
- Stir in chickpeas, diced tomatoes, and salt.
- Simmer briskly for 5 to 6 minutes, stirring once or twice, until the sauce thickens and turns shiny.
- Finish with herbs and serve hot.
Equipment for This Recipe:
- 10- or 12-inch skillet
- Wooden spoon
- Can opener
How to Serve This Dish:
Spoon it over toast, couscous, or rice, depending on what’s closest. I also like it with a soft egg on top if there’s one sitting in the fridge. The sauce should be thick enough to sit on the bread without sliding off in a flood.
Pro Tips for This Recipe:
- Rinse the chickpeas well so the sauce doesn’t taste tinny.
- Let the tomato paste darken slightly before adding the tomatoes; that quick step changes the whole pan.
- If the tomatoes taste sharp, add ½ teaspoon sugar or a pinch more salt.
Variations on This Dish:
- Olive and Feta Version: Stir in ¼ cup chopped olives and a sprinkle of feta at the end.
- Chili-Hot Version: Add ¼ teaspoon cayenne or a spoonful of harissa with the paprika.
Common Mistakes to Avoid with This Dish:
- Don’t keep the heat too low. A gentle simmer won’t reduce the sauce enough, and it’ll taste watery.
- Don’t forget salt. Chickpeas need more than you think to stop tasting dusty.
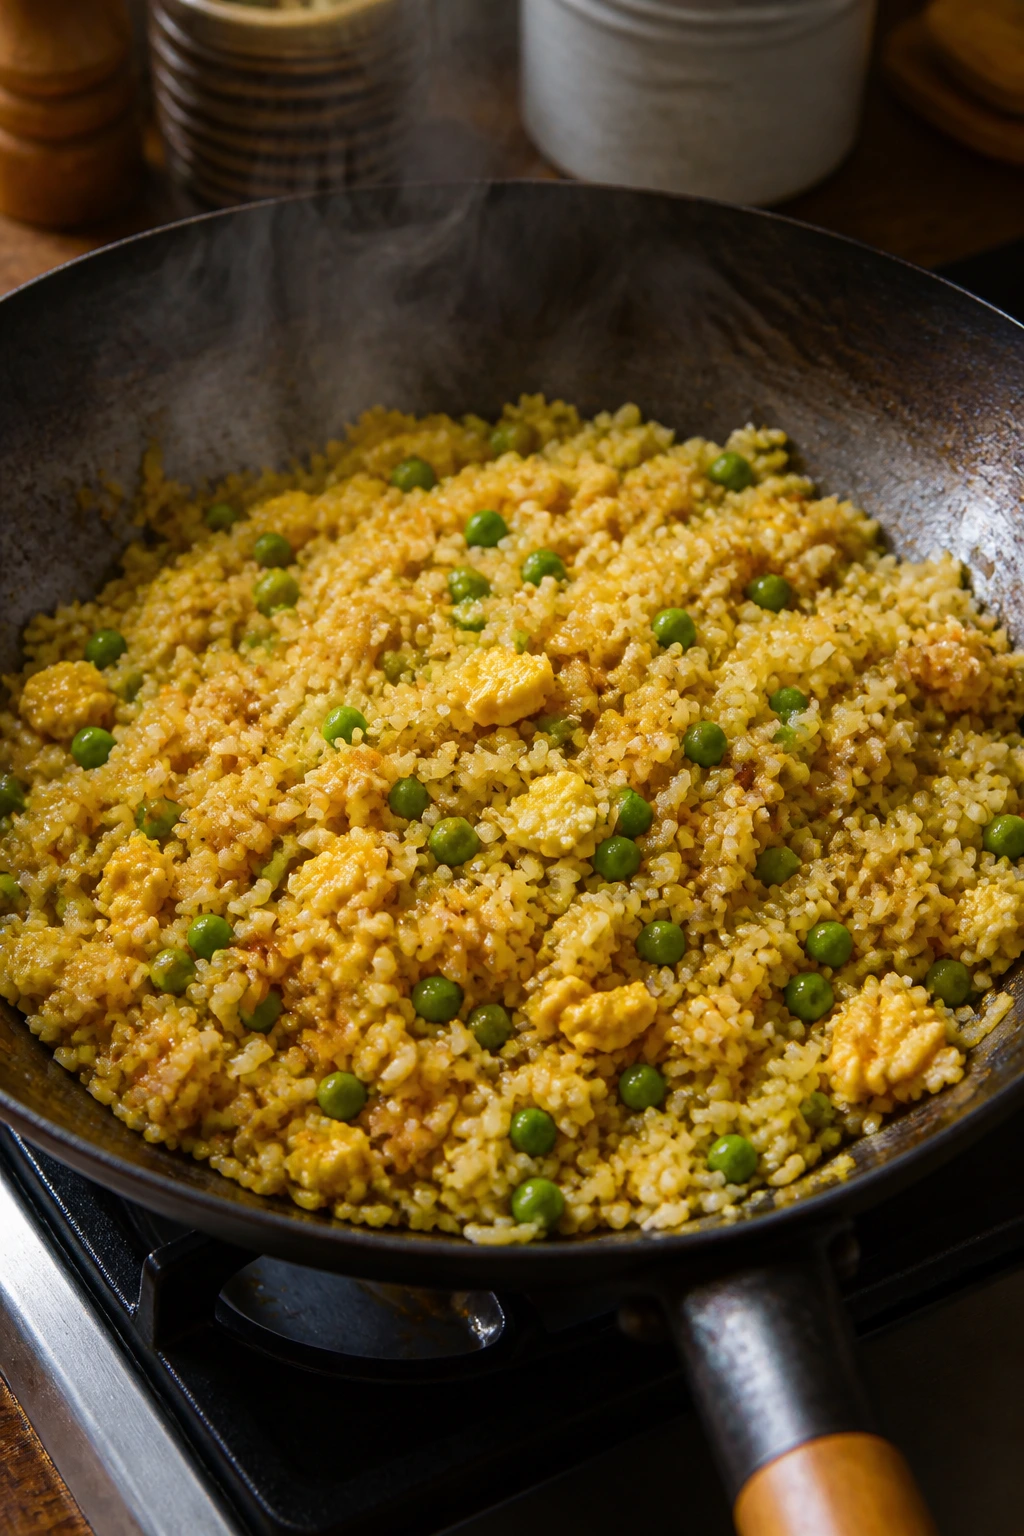
3. Egg Fried Rice with Frozen Peas
Cold rice, hot pan, eggs, and soy sauce. That’s the backbone, and it works because the grains can dry out a little in the skillet instead of turning mushy. Frozen peas are the easy green that makes the bowl look finished in two minutes.
Why It Works:
Day-old rice or microwavable rice pouches fry faster because the grains are already set. Egg adds protein and a little richness, while sesame oil gives the rice a toasted smell that reads as “takeout” even when the whole thing took less time than a phone call. The peas can go straight from freezer to pan.
Key Ingredients:
- 3 cups cooked cold rice or 2 microwave rice pouches
- 2 tablespoons neutral oil
- 2 large eggs, beaten
- 1 cup frozen peas
- 2 tablespoons soy sauce
- 1 teaspoon sesame oil
- 2 scallions, sliced
- 1 teaspoon rice vinegar or lime juice
Quick Steps:
- Heat the neutral oil in a large skillet or wok over medium-high heat.
- Add the beaten eggs and scramble for 30 to 45 seconds, until just set.
- Stir in the peas and cook for 1 minute until they turn bright green.
- Add the rice, breaking up any clumps with a spatula, and fry for 3 to 4 minutes until hot and slightly crisp at the edges.
- Stir in soy sauce, sesame oil, scallions, and rice vinegar, then cook for 30 seconds more.
Equipment for This Recipe:
- Large skillet or wok
- Spatula
- Small bowl for beating eggs
How to Serve This Dish:
Serve it in a wide bowl so you can see the peas and egg scattered through the rice. A few extra scallion slices on top help. If you want more substance, add a fried egg or a handful of peanuts.
Pro Tips for This Recipe:
- Use a wide pan; crowded rice steams instead of fries.
- Add soy sauce around the edge of the pan, not straight onto the rice, so it spreads more evenly.
- If the rice is sticky, splash in 1 tablespoon water and keep moving it.
Variations on This Dish:
- Sesame-Chili Rice: Stir in chili crisp at the end for heat and crunch.
- Ham and Pea Version: Add ½ cup chopped ham with the peas if you keep it in the fridge.
Common Mistakes to Avoid with This Dish:
- Don’t use steaming-hot fresh rice. It clumps and turns pasty.
- Don’t drown it in soy sauce. The rice should be savory, not brown and wet.
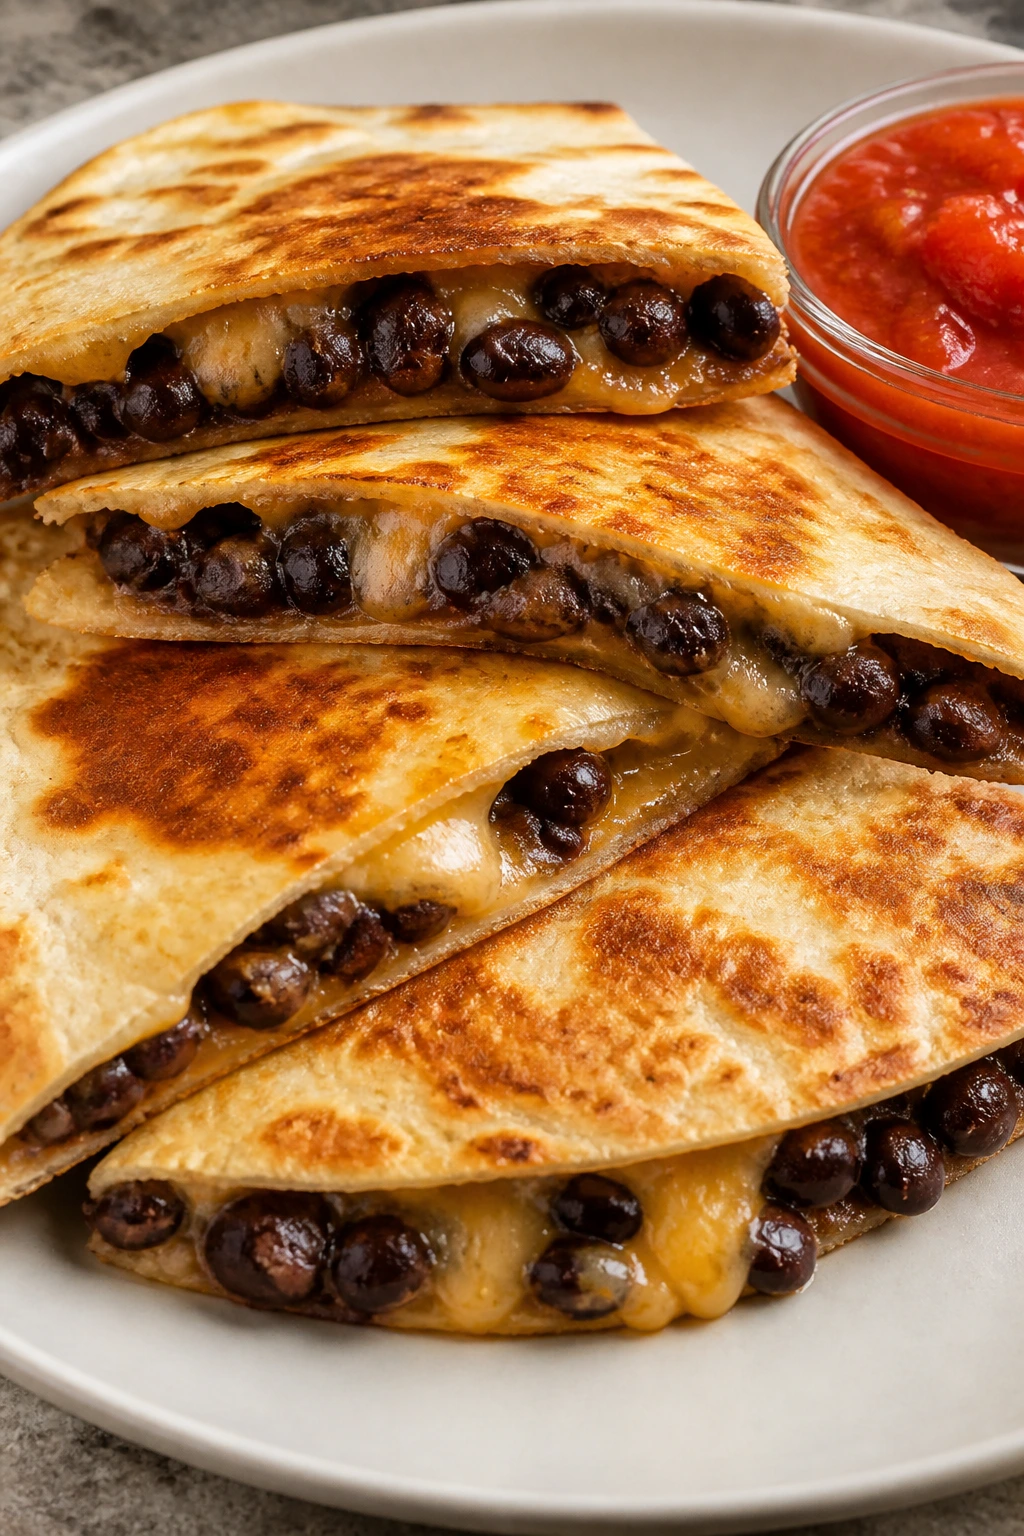
4. Black Bean Quesadillas with Salsa
These are all about contrast: crisp tortilla, melty cheese, soft beans, and a hit of salsa on the side. A quesadilla feels almost too simple until you make one with enough seasoning and enough heat in the pan to get those brown, lacy spots.
Why It Works:
Black beans mash easily, which helps them stay put inside the tortilla instead of rolling around like loose pebbles. The cheese binds everything together, and a pinch of cumin gives the filling a warm note that makes the beans taste fuller. You can eat these plain or drag them through salsa; both work.
Key Ingredients:
- 4 flour tortillas
- 1 (15-ounce) can black beans, rinsed and drained
- 1 cup shredded cheddar or Monterey Jack
- ½ cup salsa
- ½ teaspoon cumin
- 1 tablespoon butter or oil
Quick Steps:
- Mash half the black beans with cumin and 2 tablespoons salsa in a bowl.
- Heat a skillet over medium heat and melt a little butter or oil.
- Lay down one tortilla, spread on bean mixture, scatter cheese, and top with a second tortilla.
- Cook for 2 to 3 minutes per side until browned and the cheese melts.
- Slice into wedges and serve with the remaining salsa.
Equipment for This Recipe:
- Skillet
- Spatula
- Mixing bowl
How to Serve This Dish:
Cut the quesadillas into triangles and stack them slightly off-center on a plate. A spoonful of salsa on the side keeps the tortilla from going soggy. Sour cream or plain yogurt works if you want a cooler finish.
Pro Tips for This Recipe:
- Mash some beans; whole beans alone fall out when you slice the quesadilla.
- Keep the heat at medium, not high, or the tortilla will scorch before the cheese softens.
- Let the quesadilla rest for 1 minute before cutting so the filling settles.
Variations on This Dish:
- Corn and Bean Quesadilla: Add ¼ cup canned corn for sweetness and extra texture.
- Spicy Chipotle Version: Stir 1 teaspoon chipotle in adobo into the bean mash.
Common Mistakes to Avoid with This Dish:
- Don’t overfill the tortilla. It seems generous until the cheese starts leaking out.
- Don’t cut immediately. The filling runs everywhere if you slice too soon.
5. White Bean Rosemary Toast
This is pantry food with a long coat on. White beans get mashed with garlic, rosemary, and olive oil until they turn creamy enough to spread, then the toast catches the salt and lemon like it was made for it.
Why It Works:
White beans are soft enough to mash in minutes, and their mild flavor takes on garlic fast. Rosemary can be strong, so a little goes a long way; once it hits hot oil, the smell turns piney and savory. Lemon at the end keeps the toast from tasting dull.
Key Ingredients:
- 1 (15-ounce) can cannellini or great northern beans, rinsed and drained
- 2 tablespoons olive oil
- 1 garlic clove, grated or minced
- 1 teaspoon chopped fresh rosemary or ¼ teaspoon dried
- 4 slices sturdy bread, toasted
- 1 tablespoon lemon juice
- Salt and black pepper to taste
Quick Steps:
- Warm the olive oil in a small skillet over medium heat.
- Add garlic and rosemary and cook for 20 to 30 seconds until fragrant.
- Stir in the beans and 2 tablespoons water, then mash roughly with a fork for 1 to 2 minutes.
- Add lemon juice, salt, and pepper, and cook until the beans look creamy and hot.
- Spoon onto toast and finish with more olive oil if you like.
Equipment for This Recipe:
- Small skillet
- Fork or potato masher
- Toaster
How to Serve This Dish:
Serve two toasts per person with a peppery salad if you want to turn it into lunch. The beans should sit in a thick layer, not a puddle. A few chili flakes on top make it taste sharper.
Pro Tips for This Recipe:
- Keep some beans whole; the mix feels better when it’s not fully smooth.
- Use sturdy bread or the topping will soak straight through.
- A little lemon zest on top makes the whole toast smell brighter.
Variations on This Dish:
- Parmesan Bean Toast: Add 2 tablespoons grated parmesan to the warm bean mash.
- Harissa White Beans: Stir in 1 teaspoon harissa for heat and depth.
Common Mistakes to Avoid with This Dish:
- Don’t let the garlic brown. It should smell sweet, not bitter.
- Don’t skip the water in the pan. Dry beans mash into paste instead of cream.
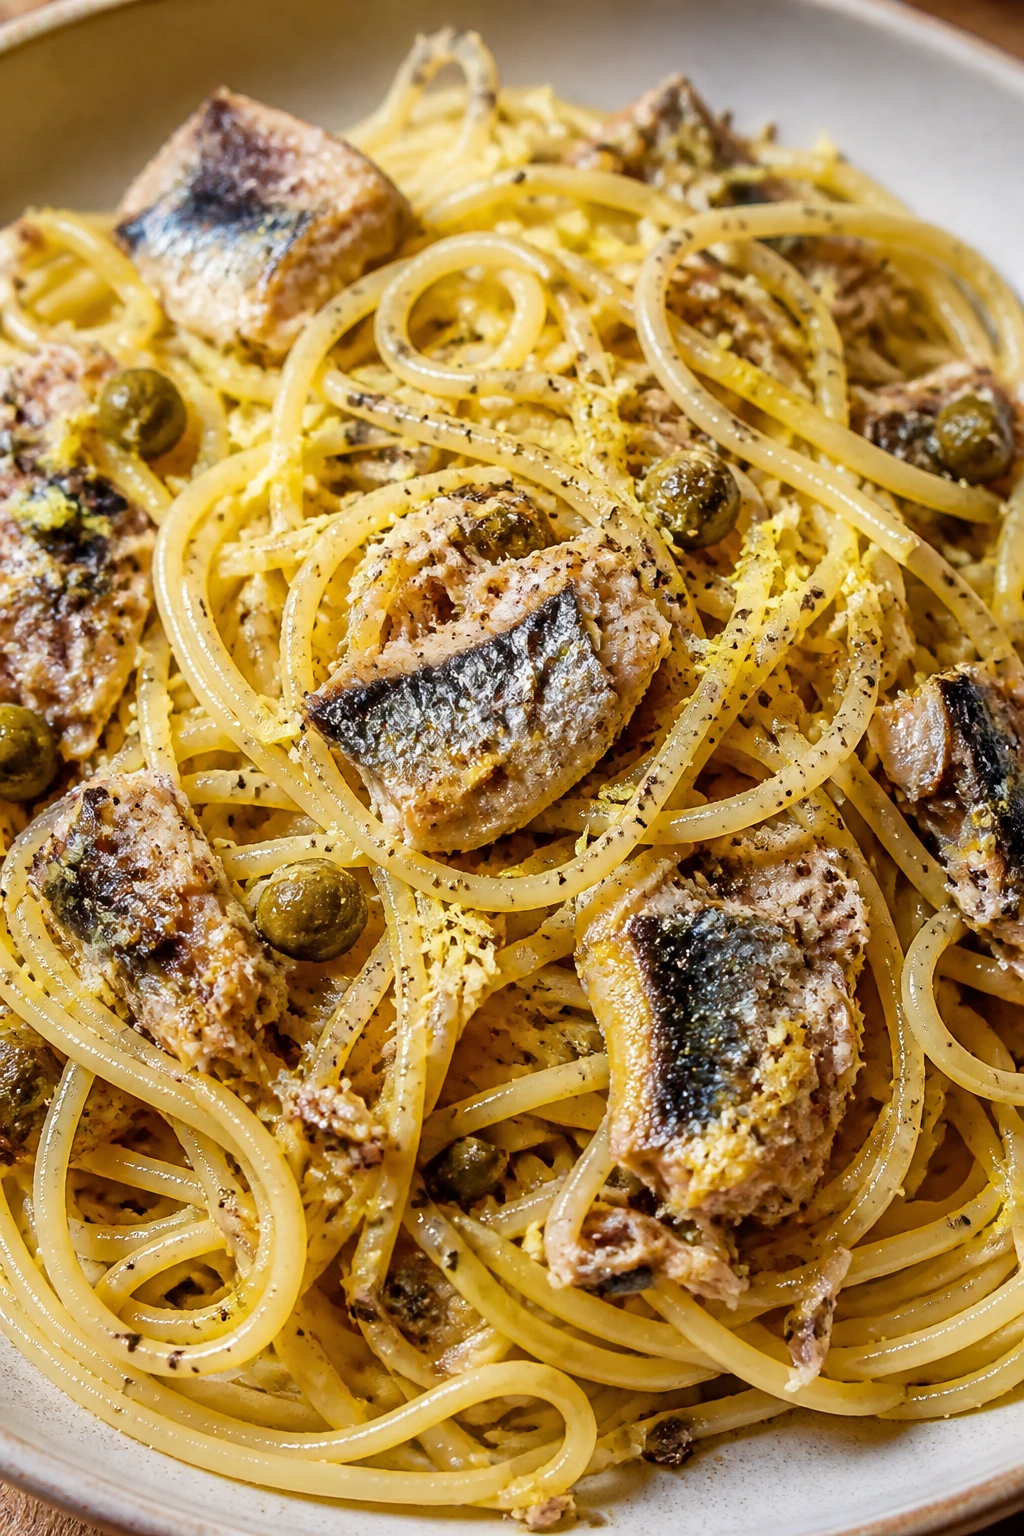
6. Sardine Lemon Pepper Pasta
If tuna pasta is familiar, sardine pasta is its sharper, saltier cousin. The sardines melt into the oil, the lemon cuts through the richness, and the pasta ends up tasting like you paid attention, which is half the battle on a Tuesday night.
Why It Works:
Sardines bring built-in fat and seasoning, so they need only a brief warm-up. Lemon zest and black pepper keep them from tasting too dense, and capers, if you use them, add little bursts of brine. This is one of those meals that gets better the moment you stop treating the fish like a problem to hide.
Key Ingredients:
- 8 ounces spaghetti
- 2 tablespoons olive oil
- 1 (4.4-ounce) can sardines in olive oil, drained slightly
- 2 garlic cloves, sliced thin
- 1 teaspoon lemon zest plus 1 tablespoon lemon juice
- 1 teaspoon capers, drained
- ½ teaspoon black pepper
- 2 tablespoons chopped parsley
Quick Steps:
- Cook the spaghetti in salted water until al dente and reserve ¼ cup pasta water.
- Heat olive oil in a skillet over medium heat and cook garlic for 30 seconds.
- Add sardines, capers, and black pepper, then break the fish into large flakes.
- Toss in pasta, lemon zest, lemon juice, and pasta water until the noodles look glossy.
- Finish with parsley and serve right away.
Equipment for This Recipe:
- Pot for pasta
- Large skillet
- Tongs
How to Serve This Dish:
I like this in a wide bowl with extra black pepper over the top. A simple green salad or a few cucumber slices are enough beside it. If you want a sharper edge, add another squeeze of lemon at the table.
Pro Tips for This Recipe:
- Don’t mash the sardines into dust; large flakes give the pasta better texture.
- Add lemon after the pasta is off the heat so the sauce doesn’t break.
- Oil-packed sardines are the best fit here because they stay richer and less dry.
Variations on This Dish:
- Tomato Sardine Pasta: Stir in 2 tablespoons tomato paste with the garlic.
- Chili Breadcrumb Version: Toast ¼ cup breadcrumbs in oil and sprinkle them on top.
Common Mistakes to Avoid with This Dish:
- Don’t cook the sardines too long. They turn dry and fishy fast.
- Don’t skip capers or lemon if you have them; the dish needs that lift.
7. Pantry Shakshuka with Eggs in Tomato Sauce
Shakshuka is one of those meals that looks like more work than it is. Eggs poach in a spiced tomato sauce until the whites are set and the yolks stay soft, and the whole pan ends up feeling warm, saucy, and strangely generous.
Why It Works:
Canned tomatoes become the base in minutes, and the spices bloom in oil before the eggs go in. That matters because eggs want a sauce that’s already seasoned, not something you fix after the fact. The bread on the side is not optional in my book; you need it for the last streaks of sauce.
Key Ingredients:
- 1 tablespoon olive oil
- 1 small onion, chopped
- 2 garlic cloves, minced
- 1 teaspoon cumin
- 1 teaspoon paprika
- 1 (28-ounce) can crushed tomatoes
- 4 large eggs
- Salt and black pepper to taste
- 2 tablespoons chopped parsley
- Bread for serving
Quick Steps:
- Heat olive oil in a skillet over medium heat and cook onion for 2 minutes until softened.
- Add garlic, cumin, and paprika, and cook for 30 seconds.
- Pour in crushed tomatoes and simmer for 5 minutes until slightly thickened.
- Make 4 small wells, crack in the eggs, cover, and cook 4 to 5 minutes until the whites set but yolks stay soft.
- Season, scatter parsley, and serve with bread.
Equipment for This Recipe:
- Large skillet with lid
- Wooden spoon
- Spoon for making wells
How to Serve This Dish:
Bring the pan to the table if you can. The eggs look best nestled in the sauce, and the yolks should still wobble a little when the lid comes off. Toasted bread or pita is the natural side, and a spoonful of yogurt cools the spice if needed.
Pro Tips for This Recipe:
- Simmer the tomato sauce before adding eggs; watery sauce makes runny whites.
- Crack each egg into a small cup first so you can place it neatly.
- If the sauce is too sharp, add ¼ teaspoon sugar rather than more salt.
Variations on This Dish:
- Feta Shakshuka: Crumble ¼ cup feta over the eggs in the last minute.
- Bean-Heavy Version: Stir in 1 cup drained chickpeas for a more filling pan.
Common Mistakes to Avoid with This Dish:
- Don’t crank the heat after the eggs go in. High heat turns the whites rubbery.
- Don’t skip the lid. Steam is what sets the tops without drying out the sauce.
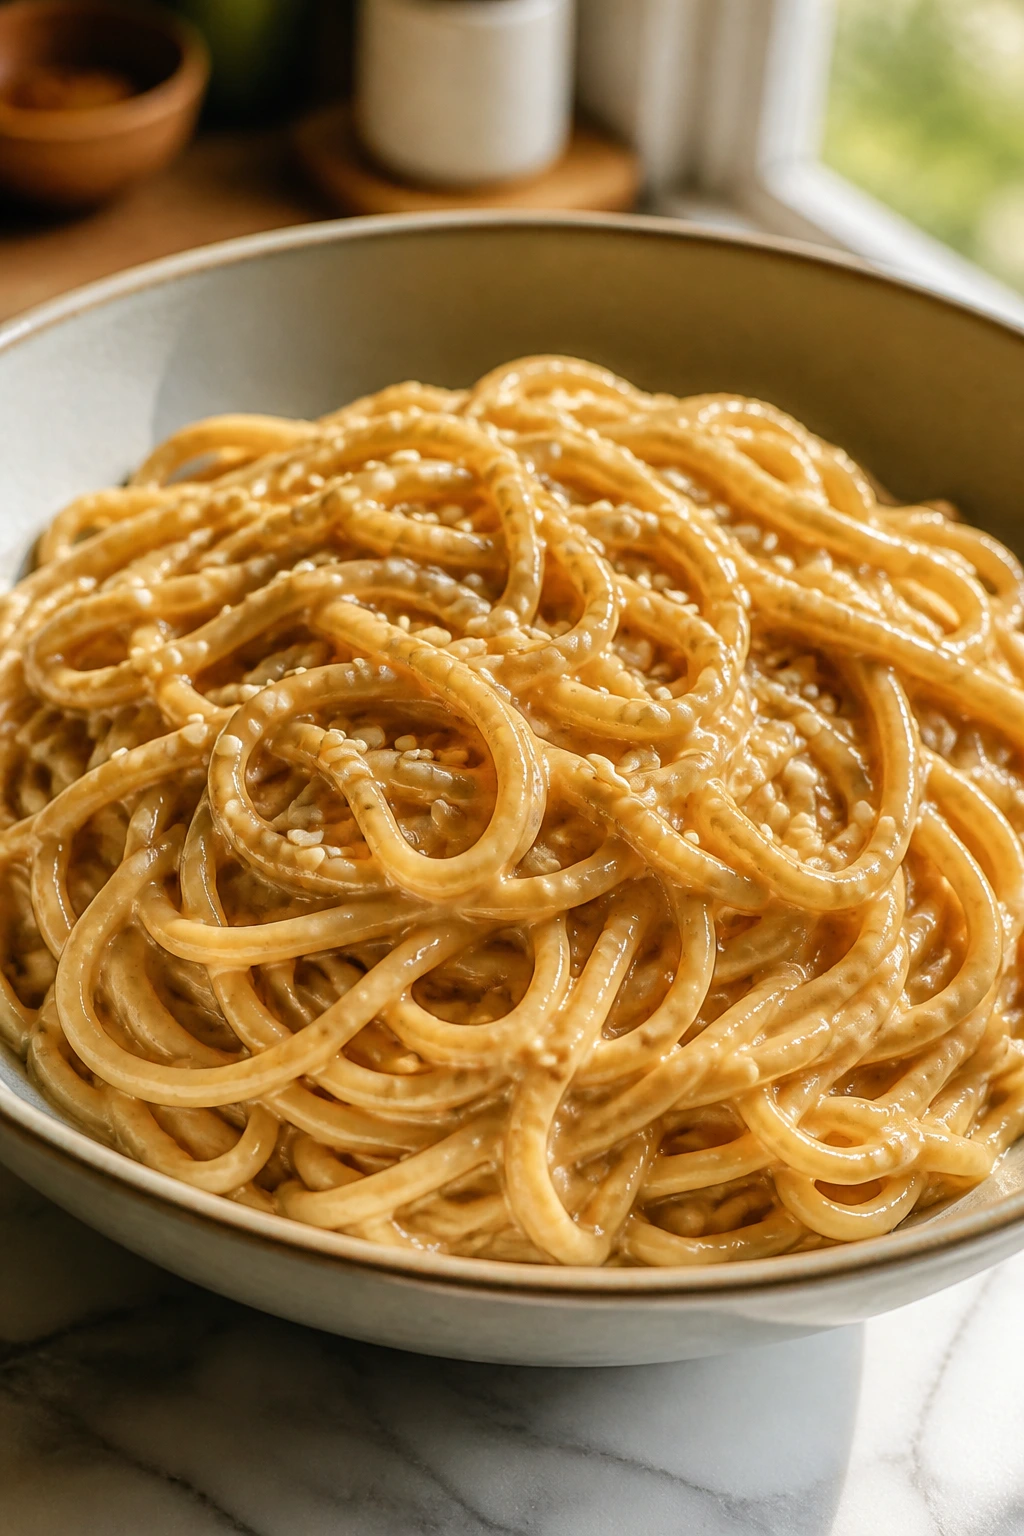
8. Peanut Sesame Noodles
These noodles are slippery, salty, and nutty in the best way. Peanut butter turns into a sauce faster than most people expect, and with a little soy sauce and vinegar, it behaves like something far more complicated than a pantry rescue.
Why It Works:
Peanut butter is thick, so it needs warm water or hot noodle water to loosen into a sauce. Soy sauce handles salt, vinegar brings the bite, and sesame oil gives you the toasted finish that makes the bowl smell complete. The whole dish is built for speed because the sauce can be whisked while the noodles cook.
Key Ingredients:
- 8 ounces spaghetti, ramen, or rice noodles
- 3 tablespoons peanut butter
- 2 tablespoons soy sauce
- 1 tablespoon rice vinegar
- 1 teaspoon sesame oil
- 1 teaspoon honey or sugar
- 1 garlic clove, grated
- 2 tablespoons chopped scallions
- 3 to 4 tablespoons hot water
Quick Steps:
- Cook the noodles until tender and reserve ¼ cup hot noodle water.
- Whisk peanut butter, soy sauce, vinegar, sesame oil, honey, garlic, and 3 tablespoons hot water in a bowl.
- Toss the drained noodles with the sauce until coated.
- Add more hot water a teaspoon at a time if the sauce looks too thick.
- Top with scallions and serve warm or at room temperature.
Equipment for This Recipe:
- Pot
- Mixing bowl
- Whisk or fork
How to Serve This Dish:
Serve it in bowls with chopsticks or a fork—either works. A handful of sesame seeds or crushed peanuts adds crunch if you have them. I like it with cucumber slices on the side because the coolness cuts through the peanut sauce.
Pro Tips for This Recipe:
- Use hot water, not cold, or the peanut butter stays stiff.
- Taste the sauce before tossing the noodles; peanut butter brands vary a lot in salt.
- If you want a thinner, silkier sauce, use a bit more noodle water than you think.
Variations on This Dish:
- Chili Peanut Noodles: Add 1 teaspoon chili crisp or sriracha.
- Lime-Peanut Version: Swap the vinegar for lime juice and add zest if you have it.
Common Mistakes to Avoid with This Dish:
- Don’t pour the sauce on dry noodles and hope for the best. They need a little looseness.
- Don’t overcook the noodles; a firm bite keeps the sauce from turning gluey.
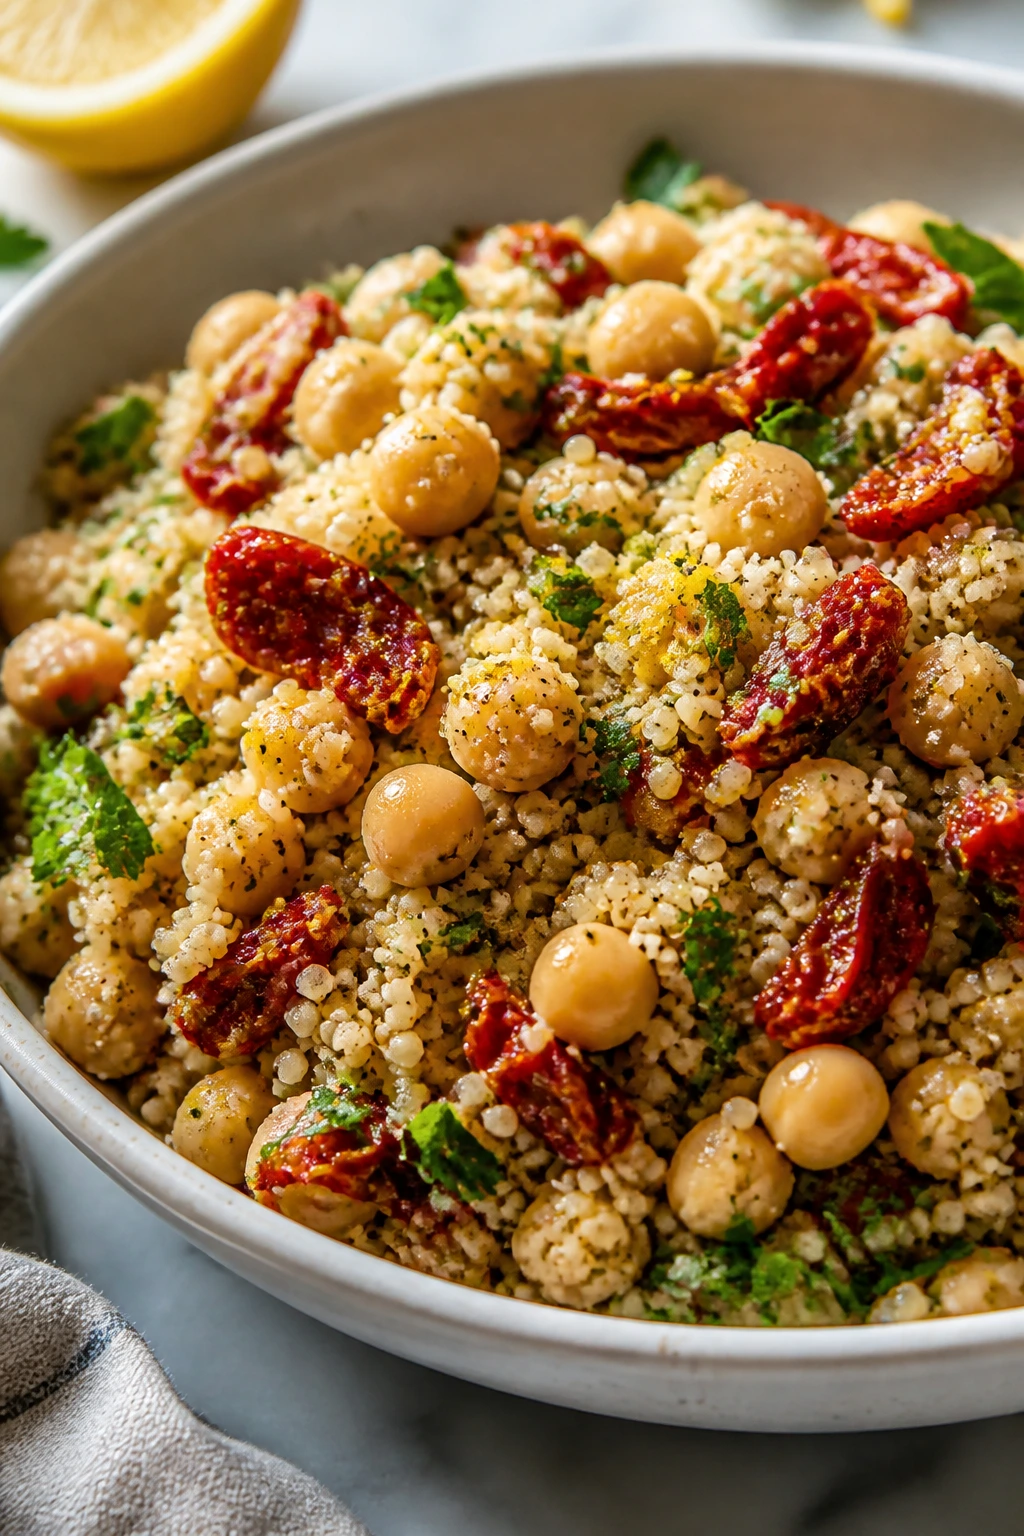
9. Chickpea Couscous with Sun-Dried Tomatoes
Couscous earns its keep in exactly fifteen minutes, and it’s a little underused in pantry cooking. It fluffs up with boiling water, then takes on olive oil, chickpeas, and sun-dried tomatoes like it was built for this kind of job.
Why It Works:
Couscous cooks by absorption, so you only need a kettle and a bowl. Chickpeas add heft, sun-dried tomatoes bring concentrated sweetness, and lemon keeps the bowl from feeling dry or dusty. This is one of the rare meals where the pantry grain is the main event instead of the side note.
Key Ingredients:
- 1 cup couscous
- 1 cup boiling water or broth
- 1 (15-ounce) can chickpeas, rinsed and drained
- ¼ cup chopped sun-dried tomatoes
- 2 tablespoons olive oil
- 1 tablespoon lemon juice
- 2 tablespoons chopped parsley
- Salt and pepper to taste
Quick Steps:
- Put couscous in a bowl and pour over the boiling water or broth.
- Cover and let stand for 5 minutes, then fluff with a fork.
- Stir in chickpeas, sun-dried tomatoes, olive oil, lemon juice, parsley, salt, and pepper.
- Taste and adjust the seasoning; the bowl should be bright and lightly oily.
- Serve warm or at room temperature.
Equipment for This Recipe:
- Heatproof bowl
- Fork
- Kettle or small saucepan
How to Serve This Dish:
This works as a main bowl or a side next to anything roasted. I like it with a spoonable yogurt on top if I want more creaminess. It also travels well, which is handy if dinner ends up becoming lunch.
Pro Tips for This Recipe:
- Use broth if you have it; couscous tastes fuller without much extra work.
- Chop the sun-dried tomatoes finely so they spread through the bowl.
- Let the couscous sit covered the full 5 minutes or the grains stay dry in the middle.
Variations on This Dish:
- Mediterranean Olive Bowl: Add ¼ cup chopped olives and a little feta.
- Spiced Harissa Couscous: Stir in 1 teaspoon harissa for a warmer, redder flavor.
Common Mistakes to Avoid with This Dish:
- Don’t overdo the liquid. Couscous gets soggy fast.
- Don’t skip the fork-fluffing step; otherwise the grains clump into little cement balls.
10. Tomato Bean Soup with Parmesan Toast
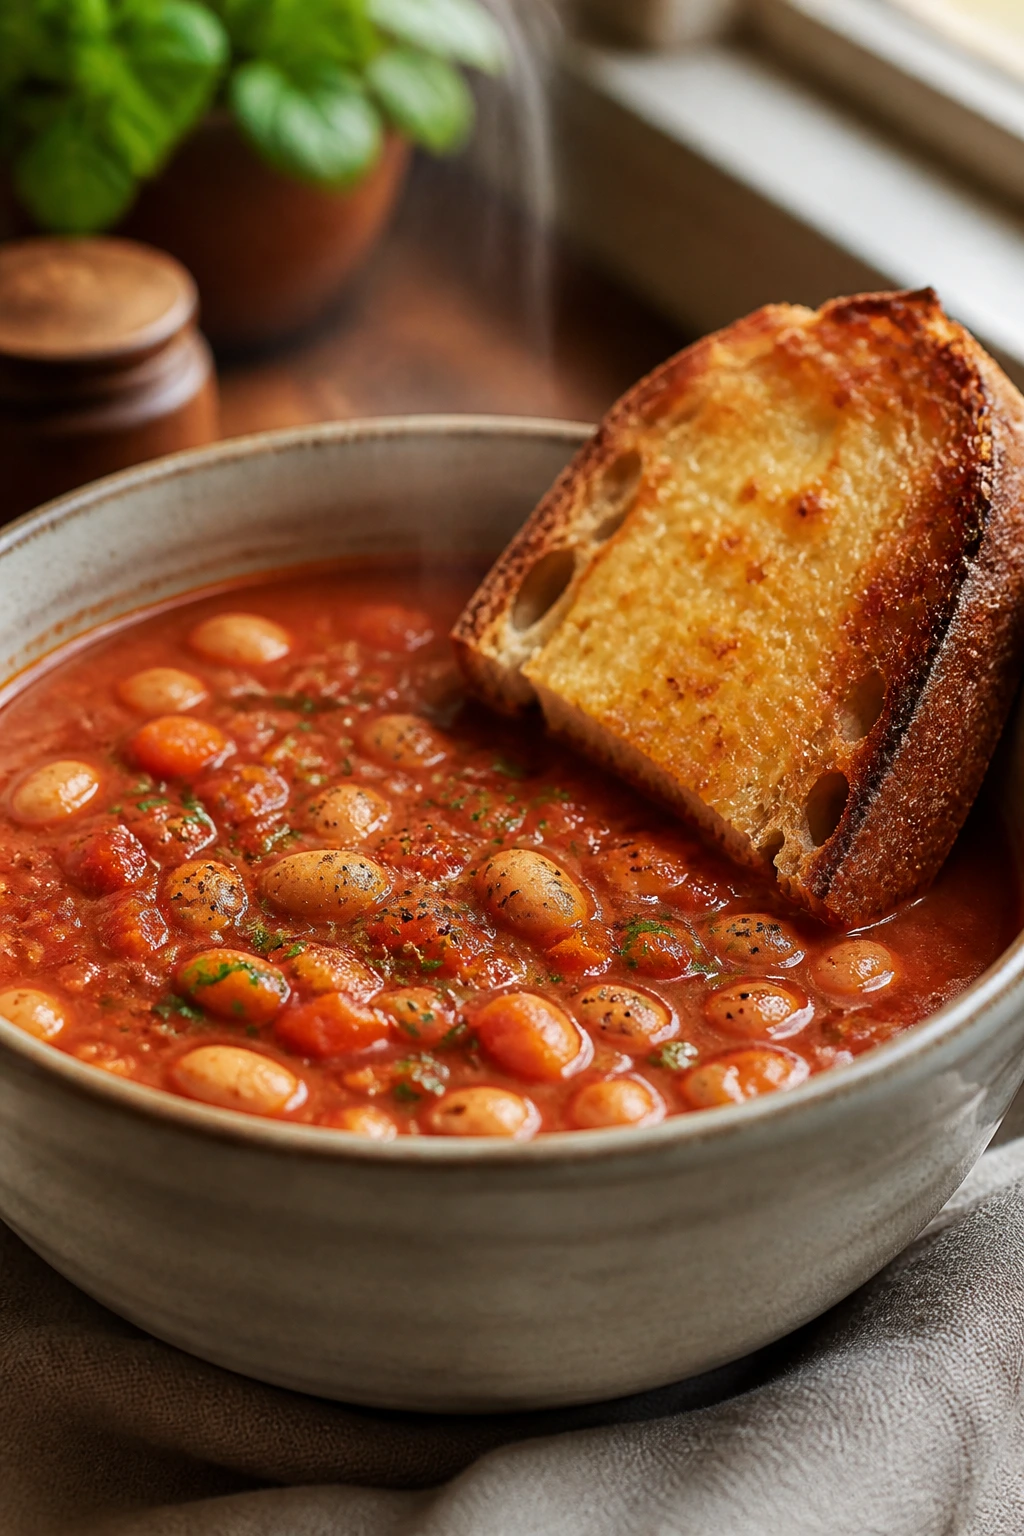
This soup is what I reach for when the pantry looks a little bleak but still has enough in it to matter. Canned tomatoes and beans give you body, and the parmesan toast turns the whole thing from “thin soup” into a meal with edges.
Why It Works:
Beans thicken the broth without needing cream, and the tomatoes bring enough acidity to keep the soup lively. A short simmer pulls the flavors together fast, especially if you start with onion and garlic. The toast adds crunch, which is the piece too many soup recipes forget.
Key Ingredients:
- 1 tablespoon olive oil
- 1 small onion, chopped
- 2 garlic cloves, minced
- 1 (28-ounce) can crushed tomatoes
- 1 (15-ounce) can cannellini beans, rinsed and drained
- 2 cups vegetable or chicken broth
- 1 teaspoon dried basil or oregano
- 4 slices bread
- ¼ cup grated parmesan
Quick Steps:
- Warm olive oil in a saucepan over medium heat and cook onion for 2 minutes.
- Add garlic, tomatoes, beans, broth, and basil or oregano.
- Simmer for 7 to 8 minutes until the beans are soft and the soup looks slightly thicker.
- Toast the bread, sprinkle with parmesan, and broil or toast until the cheese melts.
- Ladle the soup into bowls and serve with the parmesan toast.
Equipment for This Recipe:
- Saucepan
- Blender or immersion blender if you want it smoother
- Toaster or broiler
How to Serve This Dish:
Serve the soup in deep bowls so the toast can lean over the rim without sinking. A drizzle of olive oil on top gives it a glossy finish. If you like a smoother soup, blend half of it and leave the rest chunky.
Pro Tips for This Recipe:
- Rinse the beans so the broth doesn’t taste muddy.
- If the soup tastes too sharp, simmer it 2 minutes longer before reaching for sugar.
- Use sturdy bread for the toast; flimsy slices go limp under parmesan.
Variations on This Dish:
- Creamy Red Soup: Blend the whole pot and stir in a splash of milk or cream.
- Spicy Bean Soup: Add red pepper flakes with the garlic.
Common Mistakes to Avoid with This Dish:
- Don’t boil it hard once the beans go in. That can make them break apart into grainy bits.
- Don’t under-salt the broth. Tomatoes need more seasoning than they first admit.
11. Tuna Melt Pitas

A tuna melt is already a pantry classic, but putting the filling in pita pockets gives you faster assembly and less mess. The warm cheese, cold-ish tuna salad, and toasted bread edges hit the same notes as the diner version without asking for a broiler routine.
Why It Works:
Tuna mixed with mayo and mustard stays moist enough to heat through without drying out. Pita pockets hold the filling better than sliced bread, and a hot skillet melts the cheese before the outside turns brittle. If you like pickles, this is the place for them.
Key Ingredients:
- 1 (5-ounce) can tuna, drained
- 2 tablespoons mayonnaise
- 1 teaspoon Dijon mustard
- 2 tablespoons chopped pickles or relish
- ¼ teaspoon black pepper
- 2 pita breads, split
- 4 slices cheddar or American cheese
Quick Steps:
- Mix tuna, mayonnaise, mustard, pickles, and black pepper in a bowl.
- Stuff each pita with half the tuna mixture and 2 slices of cheese.
- Heat a skillet over medium heat and toast the pitas for 2 to 3 minutes per side.
- Press lightly with a spatula until the cheese melts and the pita turns golden.
- Cut and serve warm.
Equipment for This Recipe:
- Skillet
- Mixing bowl
- Spatula
How to Serve This Dish:
Serve the pita halves cut on the diagonal so you can see the filling. A few potato chips or carrot sticks on the side make sense here. If you want a sharper plate, add sliced tomato or red onion.
Pro Tips for This Recipe:
- Drain the tuna well or the pita gets soggy.
- Use sliced cheese, not shredded, for the fastest melt.
- Keep the heat medium so the pita browns before the filling dries out.
Variations on This Dish:
- Open-Faced Melt: Skip the pocket and toast the filling on top of bread under the broiler.
- Spicy Pickle Version: Add 1 teaspoon hot sauce to the tuna mix.
Common Mistakes to Avoid with This Dish:
- Don’t overstuff the pita. The cheese needs room to melt instead of spilling out.
- Don’t use high heat. Burnt pita with cold cheese is a bad trade.
12. Coconut Lentil Curry
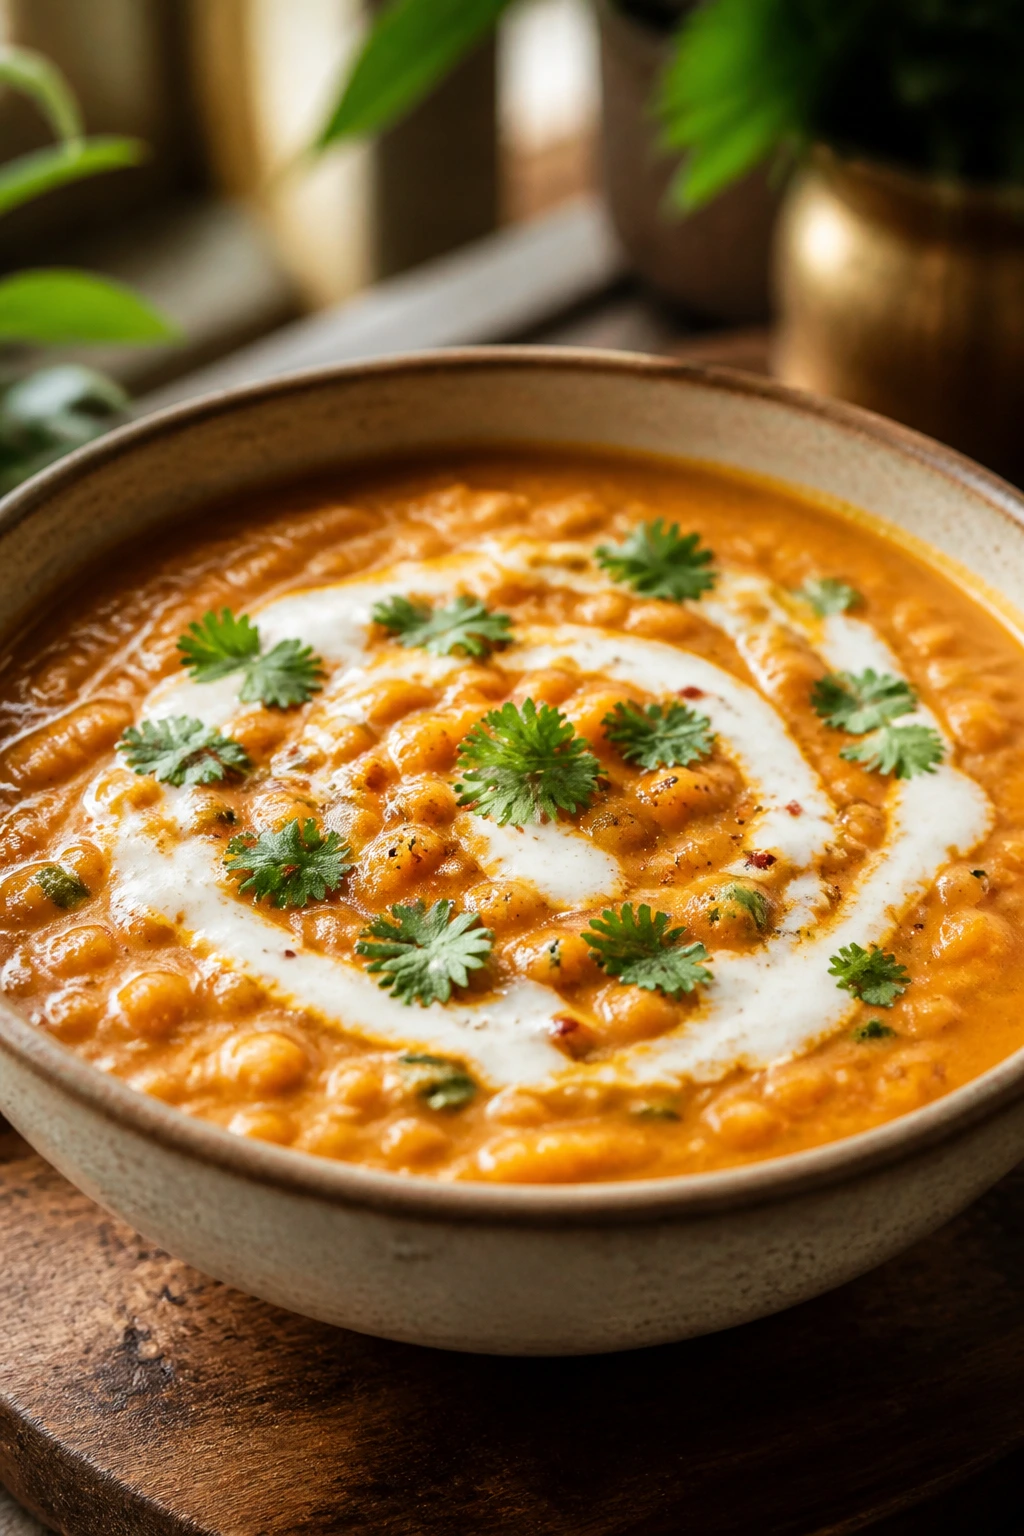
Red lentils are one of the best pantry buys because they disappear into a creamy curry in minutes. Coconut milk makes the sauce feel rounded and rich, while curry powder gives you most of the flavor work without dragging out the clock.
Why It Works:
Red lentils cook fast and break down just enough to thicken the sauce. Coconut milk softens the spice and gives body, especially when paired with canned tomatoes. A good curry here should be spoonable, not soupy.
Key Ingredients:
- 1 tablespoon oil
- 1 small onion, chopped
- 2 garlic cloves, minced
- 1 tablespoon curry powder
- 1 cup red lentils, rinsed
- 1 (13.5-ounce) can coconut milk
- 1 (14.5-ounce) can diced tomatoes
- 1 cup water
- Salt to taste
Quick Steps:
- Warm oil in a saucepan over medium heat and cook onion for 2 minutes.
- Add garlic and curry powder and cook for 30 seconds.
- Stir in lentils, coconut milk, tomatoes, water, and salt.
- Simmer for 10 to 12 minutes, stirring once or twice, until the lentils are soft and the curry thickens.
- Taste and serve with rice or flatbread.
Equipment for This Recipe:
- Saucepan
- Wooden spoon
- Measuring cup
How to Serve This Dish:
Serve it over microwave rice or with warm naan if you have it. A squeeze of lime makes the whole bowl smell brighter. It also looks good with a spoonful of yogurt on top, though that’s optional.
Pro Tips for This Recipe:
- Rinse lentils until the water runs less cloudy.
- Stir the pot a couple of times so the coconut milk doesn’t catch on the bottom.
- If the curry gets too thick, add a splash of water and keep it moving.
Variations on This Dish:
- Spinach Curry: Stir in frozen spinach in the last 2 minutes.
- Peanut Curry: Add 1 tablespoon peanut butter for a nutty, thicker sauce.
Common Mistakes to Avoid with This Dish:
- Don’t use green or brown lentils here if you want a 15-minute finish; they take longer.
- Don’t walk away from the pot. Red lentils can grab the bottom fast.
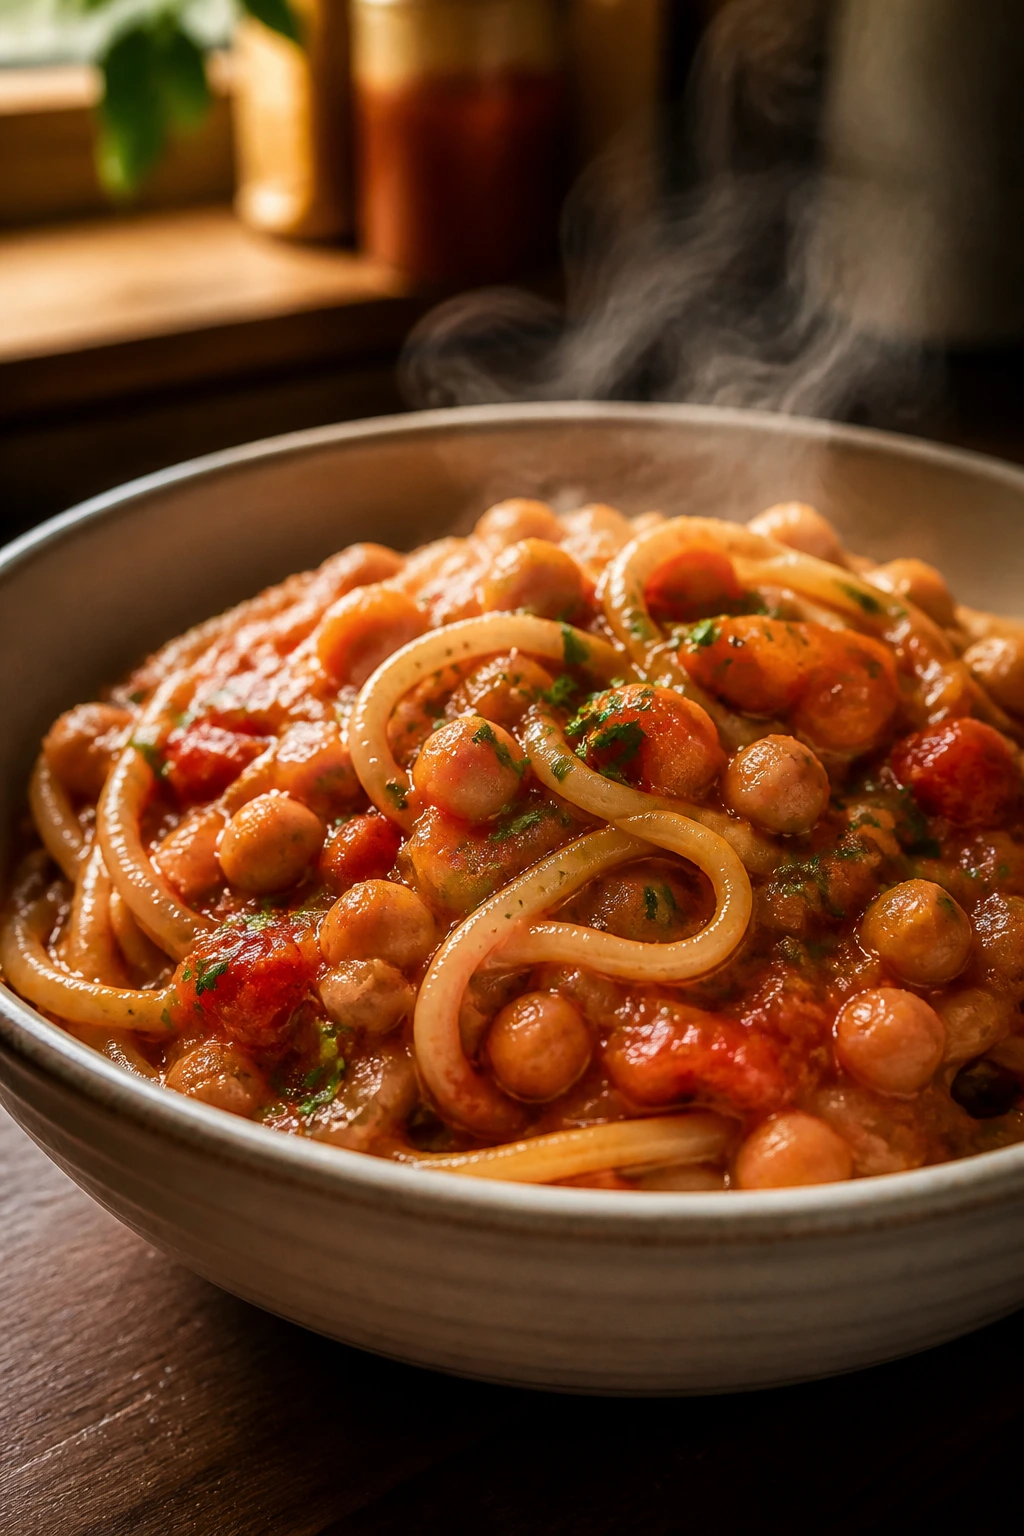
13. Pasta e Ceci
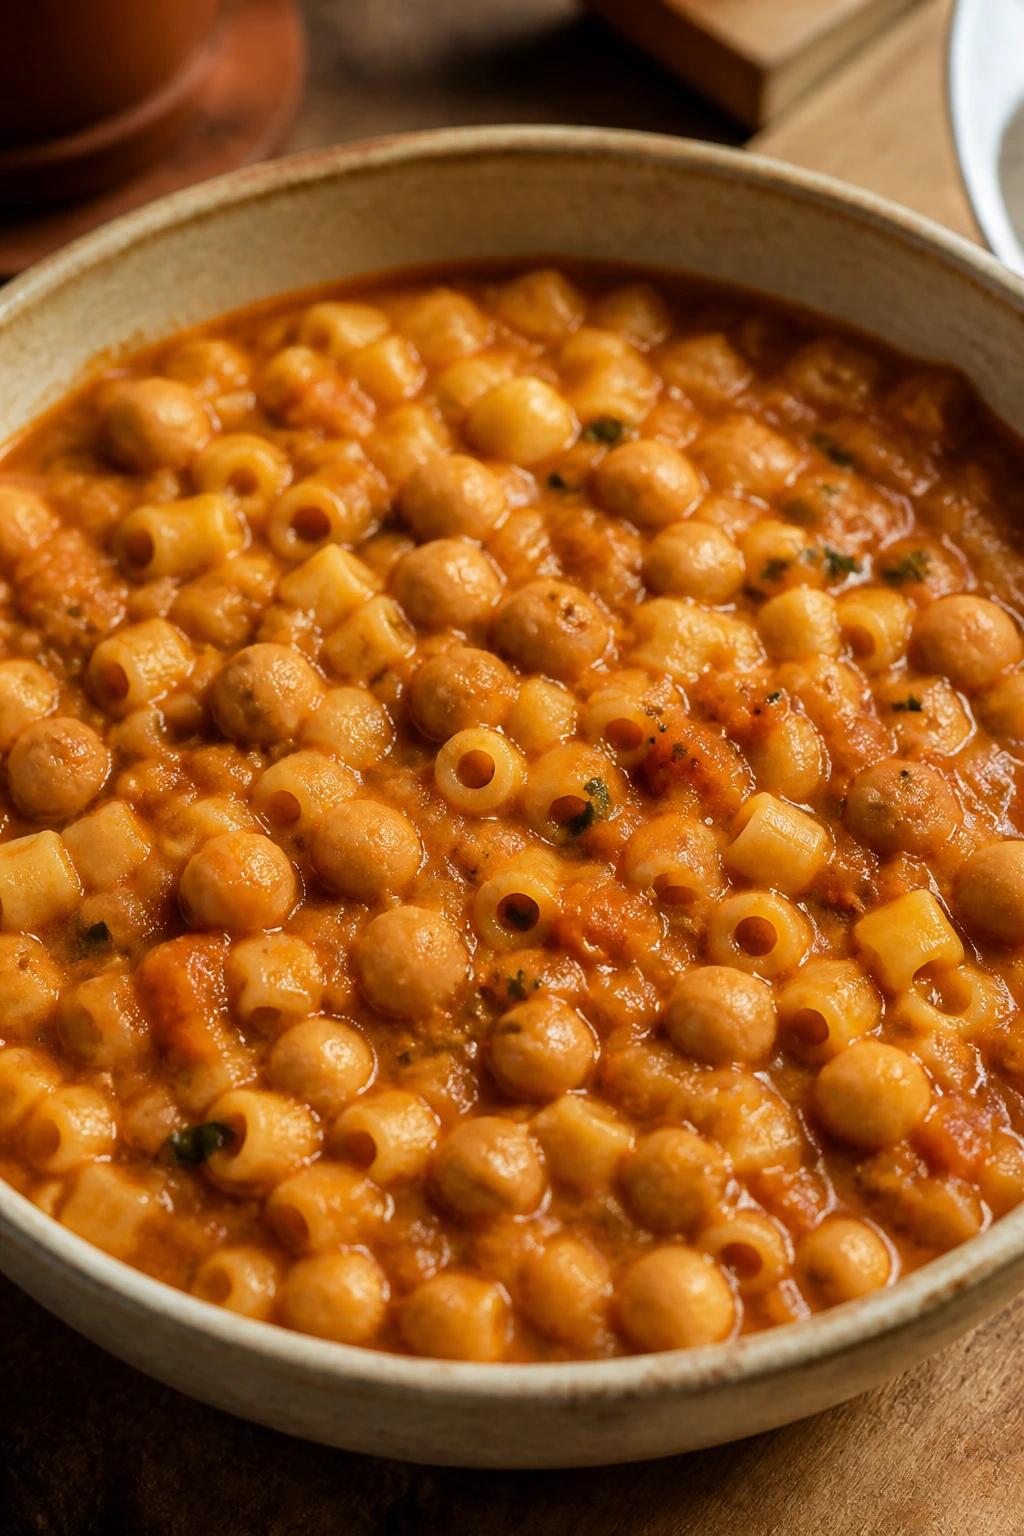
This is a pantry meal that tastes older than the pantry itself. Pasta and chickpeas cook together with tomato and garlic until the starch turns everything creamy, and the result lands somewhere between soup and stew, which is exactly why it works.
Why It Works:
Small pasta releases starch into the pot, and that starch thickens the broth without any flour or cream. Chickpeas add body and bite, while tomato paste gives the whole thing a deep red color in minutes. A little rosemary or oregano makes it feel cooked, not assembled.
Key Ingredients:
- 2 tablespoons olive oil
- 2 garlic cloves, minced
- 1 tablespoon tomato paste
- 1 teaspoon chopped rosemary or ½ teaspoon dried oregano
- 1 (15-ounce) can chickpeas, rinsed and drained
- 1 cup small pasta, like ditalini
- 3 cups broth or water
- Salt and black pepper to taste
Quick Steps:
- Heat olive oil in a saucepan over medium heat and cook garlic for 20 seconds.
- Stir in tomato paste and rosemary, then cook for 30 seconds.
- Add chickpeas, pasta, and broth or water.
- Simmer for 8 to 10 minutes, stirring often, until the pasta is tender and the liquid is creamy.
- Season and serve immediately.
Equipment for This Recipe:
- Medium saucepan
- Wooden spoon
- Ladle
How to Serve This Dish:
Serve it in bowls with a little extra olive oil and black pepper on top. If you have parmesan, grate a small amount over each bowl. The texture should sit between soup and pasta sauce; that middle ground is the whole point.
Pro Tips for This Recipe:
- Stir often so the pasta doesn’t glue itself to the pan.
- Keep extra broth nearby; the pot thickens as it sits.
- Use a small pasta shape so the chickpeas and noodles stay balanced in each spoonful.
Variations on This Dish:
- Tomato-Free Version: Skip the tomato paste and finish with lemon and parsley.
- Spicy Ceci: Add chili flakes with the garlic.
Common Mistakes to Avoid with This Dish:
- Don’t let it dry out completely. Pasta e ceci should be loose and spoonable.
- Don’t forget to stir; the starch can catch fast at the bottom.
14. Corn and Black Bean Taco Skillet
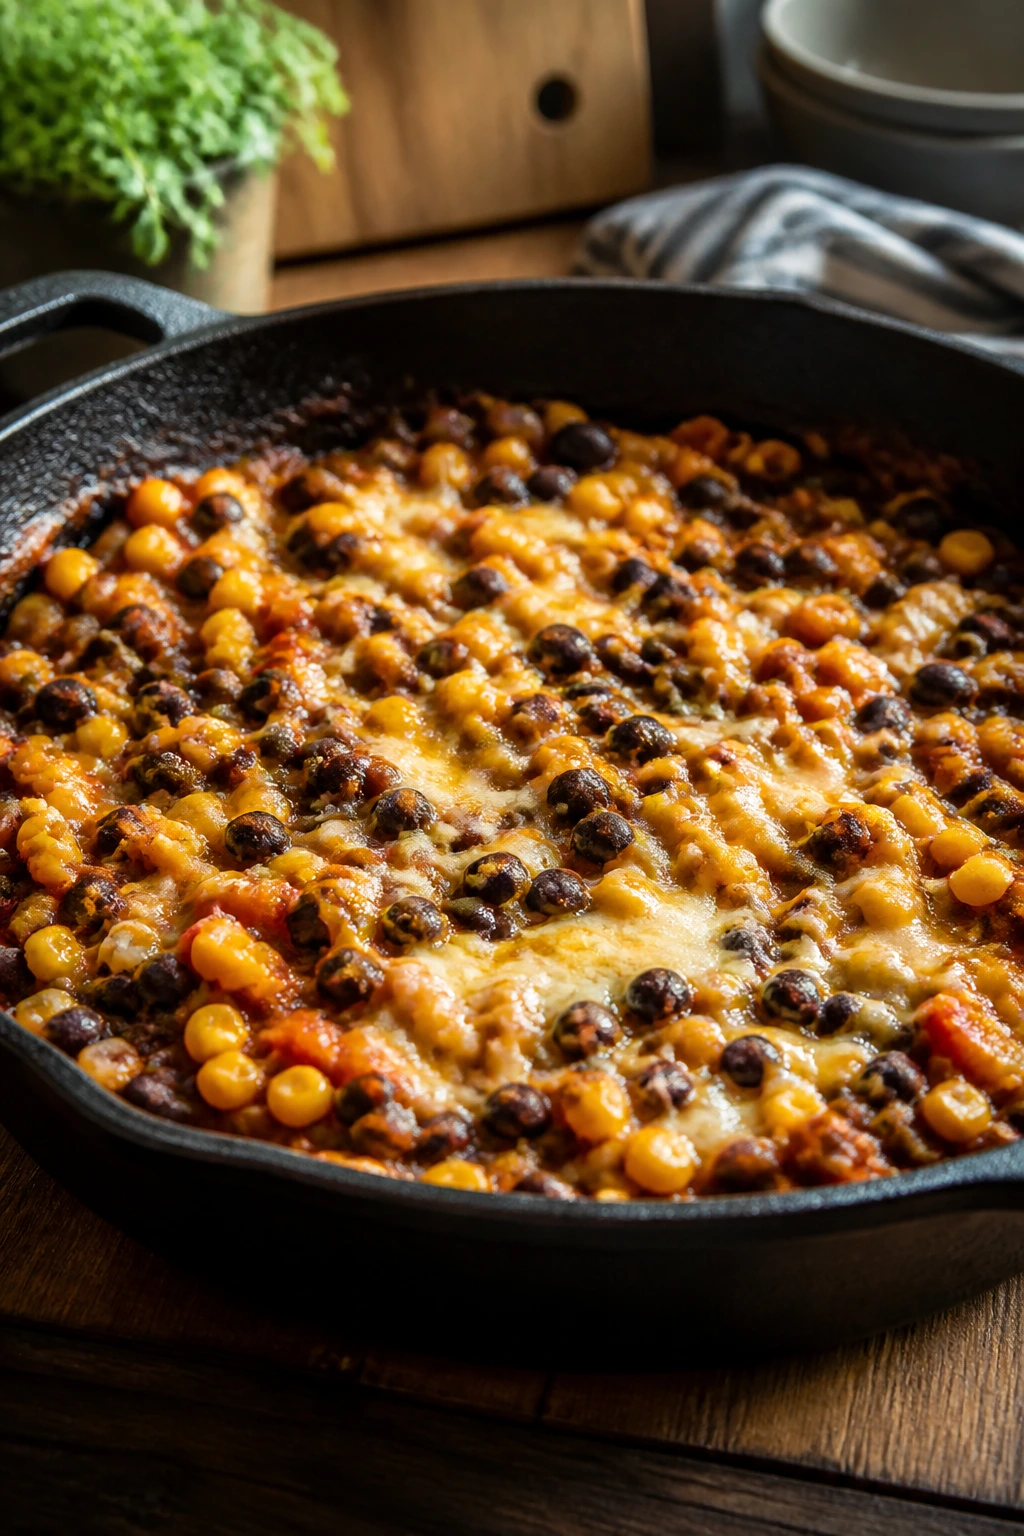
This skillet tastes like tacos without the folding step, which is a relief on a busy night. Corn adds sweetness, black beans add heft, and salsa ties everything together so you can scoop it with chips or spoon it into tortillas.
Why It Works:
Salsa does the job of tomatoes, spice, and acid all at once, which is why this meal moves quickly. Black beans are soft enough to absorb the seasoning, and canned corn brings a little pop when the kernels warm through. It’s one of the easiest ways to turn pantry odds and ends into dinner that looks finished.
Key Ingredients:
- 1 tablespoon oil
- 1 (15-ounce) can black beans, rinsed and drained
- 1 cup canned or thawed corn
- 1 cup salsa
- 1 teaspoon cumin
- 4 small tortillas or tortilla chips
- ½ cup shredded cheese
- 2 tablespoons chopped cilantro, optional
Quick Steps:
- Heat oil in a skillet over medium-high heat.
- Add black beans, corn, salsa, and cumin, then cook for 4 to 5 minutes until bubbling and hot.
- Sprinkle cheese over the top and cover for 1 minute to melt.
- Serve with tortillas or chips.
- Finish with cilantro if you have it.
Equipment for This Recipe:
- Skillet
- Lid or plate
- Wooden spoon
How to Serve This Dish:
Serve it in the skillet or spoon it into bowls with chips on the side. If you want a softer meal, tuck it into tortillas and fold it like soft tacos. A little sour cream or plain yogurt cools the salsa nicely.
Pro Tips for This Recipe:
- Choose salsa with enough body; watery salsa makes a thin skillet.
- Heat the beans and corn fully so the cheese melts properly.
- If the salsa is mild, add a pinch of chili powder.
Variations on This Dish:
- Breakfast Taco Skillet: Top with fried eggs and hot sauce.
- Rice Bowl Version: Spoon it over microwave rice instead of using tortillas.
Common Mistakes to Avoid with This Dish:
- Don’t overcook the corn until it wrinkles. It should stay a little sweet and plump.
- Don’t use too much cheese. A light melt is enough; a heavy lid turns the skillet greasy.
15. Miso Butter Udon
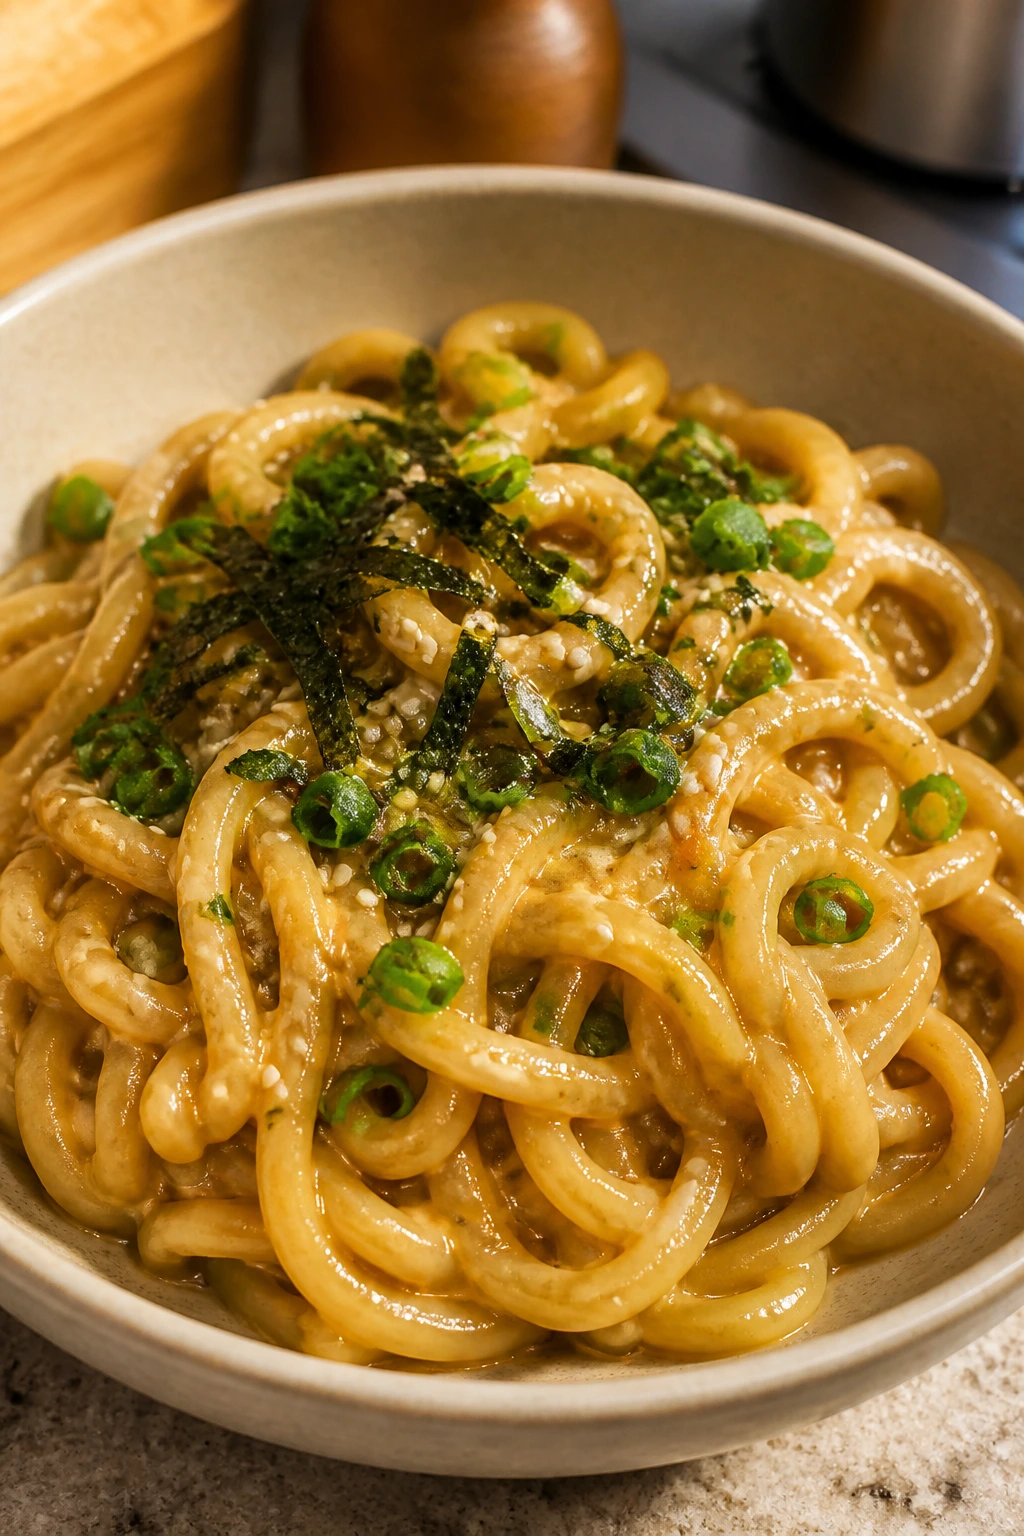
Miso and butter is one of those pairings that sounds strange until you taste it. The butter smooths out the miso’s salty edge, the udon noodles hold onto the sauce, and the whole bowl ends up rich without feeling heavy.
Why It Works:
Miso is intensely savory, so a small amount brings a lot of flavor fast. Butter softens it and helps it coat noodles evenly, while sesame oil adds a toasted finish that makes the bowl smell deeper. This is one of the fastest ways to make shelf-stable noodles taste deliberate.
Key Ingredients:
- 7 ounces udon noodles, fresh or shelf-stable
- 1 tablespoon unsalted butter
- 1 tablespoon white miso paste
- 1 tablespoon soy sauce
- 1 teaspoon sesame oil
- 1 garlic clove, minced or ¼ teaspoon garlic powder
- 2 scallions, sliced
Quick Steps:
- Cook the udon according to the package and reserve 2 tablespoons noodle water.
- Melt butter in a skillet over medium-low heat.
- Stir in miso, soy sauce, sesame oil, and garlic with the noodle water until smooth.
- Toss in the udon and stir until the noodles are glossy and hot.
- Top with scallions and serve.
Equipment for This Recipe:
- Pot
- Skillet or wide pan
- Spatula or tongs
How to Serve This Dish:
Serve it in a deep bowl with scallions scattered over the top. A fried egg sits nicely here if you want more protein. If you have toasted sesame seeds, they add a small crunch that the bowl appreciates.
Pro Tips for This Recipe:
- Keep the heat low once the miso goes in; high heat makes it taste harsh.
- Miso paste dissolves more smoothly with a spoonful of noodle water.
- Fresh udon is softer and more slippery, but shelf-stable works fine.
Variations on This Dish:
- Spicy Miso Udon: Add chili crisp or red pepper flakes.
- Peanut-Miso Version: Stir in 1 teaspoon peanut butter for a thicker sauce.
Common Mistakes to Avoid with This Dish:
- Don’t fry the miso over high heat. It loses its round flavor fast.
- Don’t forget the noodle water; without it, the sauce clumps instead of coating.
16. Savory Baked Beans on Toast with Fried Egg
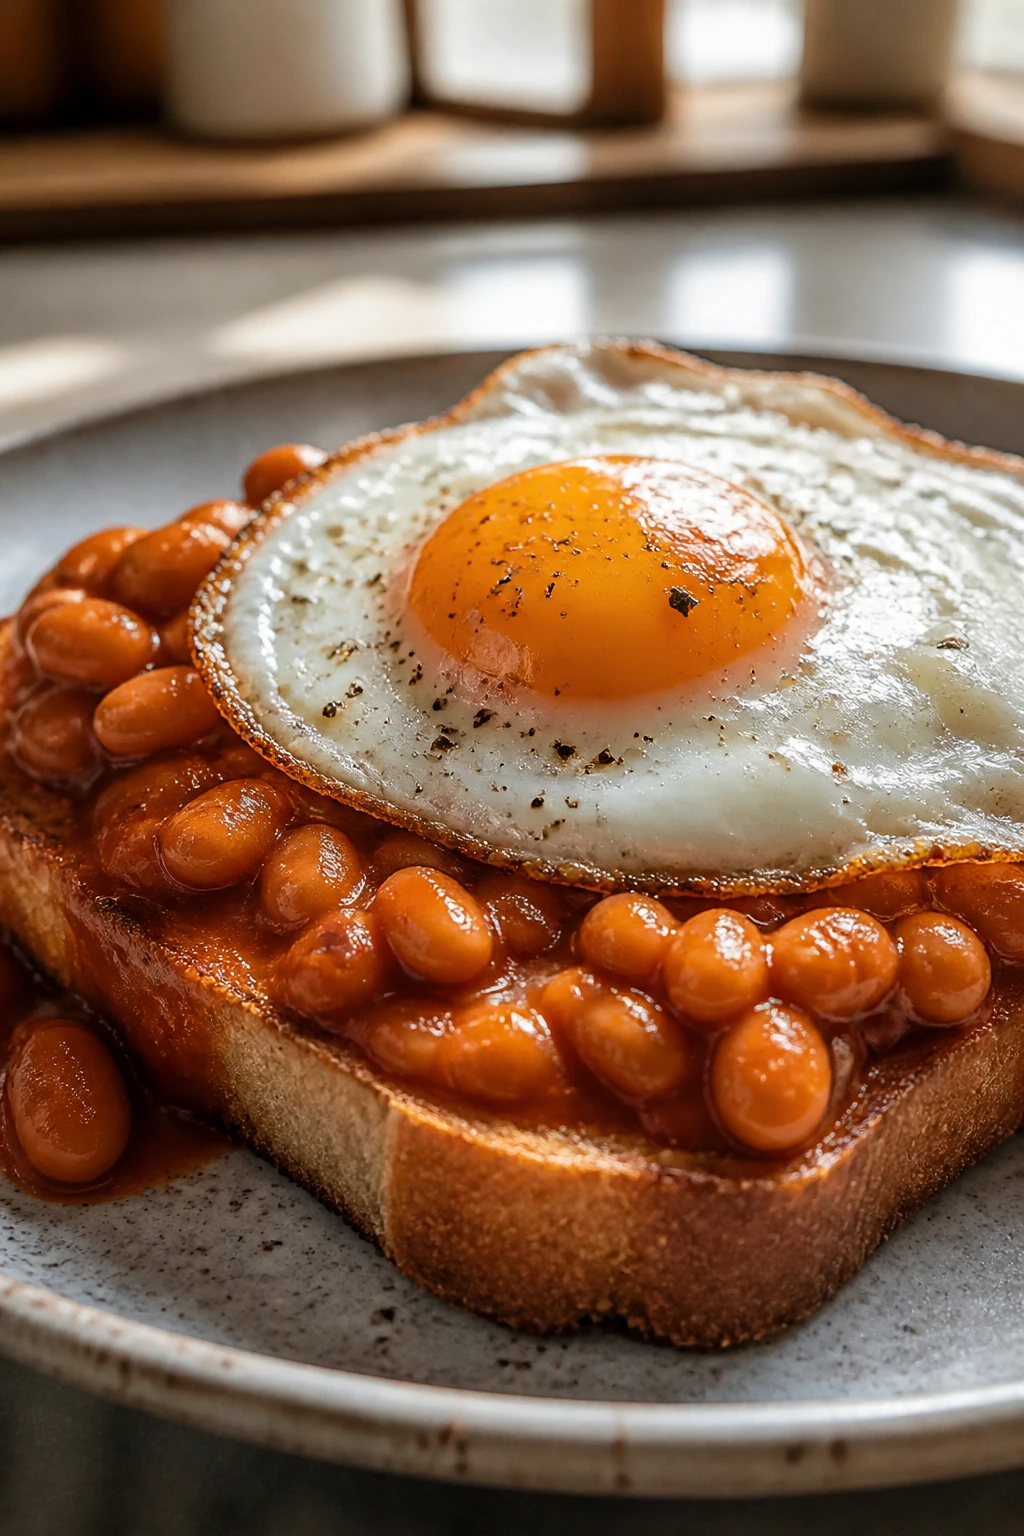
This is diner food wearing pantry clothes. Sweet baked beans get sharpened with mustard and pepper, then a fried egg lands on top and turns the toast into something that feels much bigger than the ingredient list.
Why It Works:
Baked beans already come seasoned and saucy, so they only need a little help to taste less canned. A fried egg adds richness and a runny yolk that mixes with the beans and soaks into the toast. If you want a breakfast-for-dinner plate that doesn’t require much thinking, this is it.
Key Ingredients:
- 1 tablespoon butter
- 1 (15-ounce) can baked beans
- 1 teaspoon Dijon mustard
- 1 teaspoon Worcestershire sauce
- Black pepper to taste
- 2 large eggs
- 2 slices thick bread, toasted
Quick Steps:
- Warm the butter in a small skillet over medium heat and add the baked beans, mustard, Worcestershire, and pepper.
- Simmer for 3 to 4 minutes until the beans are hot and a little thicker.
- Fry the eggs in a separate pan to your preferred doneness.
- Spoon the beans over the toast.
- Set an egg on each slice and serve immediately.
Equipment for This Recipe:
- Small skillet
- Frying pan
- Spatula
How to Serve This Dish:
Serve it open-faced so the yolk can run where it wants. A few sliced scallions or a shake of hot sauce are enough garnish here. I’d keep the plate simple; the beans and egg already do the work.
Pro Tips for This Recipe:
- Add mustard, not sugar, if the beans taste too sweet.
- Toast the bread well so it holds the bean sauce.
- Keep the eggs soft if you want the yolk to act like extra sauce.
Variations on This Dish:
- Cheesy Beans on Toast: Melt cheddar over the beans before adding the egg.
- Spicy Beans: Add a few dashes of hot sauce or chili flakes.
Common Mistakes to Avoid with This Dish:
- Don’t let the beans boil hard. They can spit and thicken unevenly.
- Don’t use flimsy bread; it collapses under the egg and beans.
17. Peanut Butter Ramen with Egg
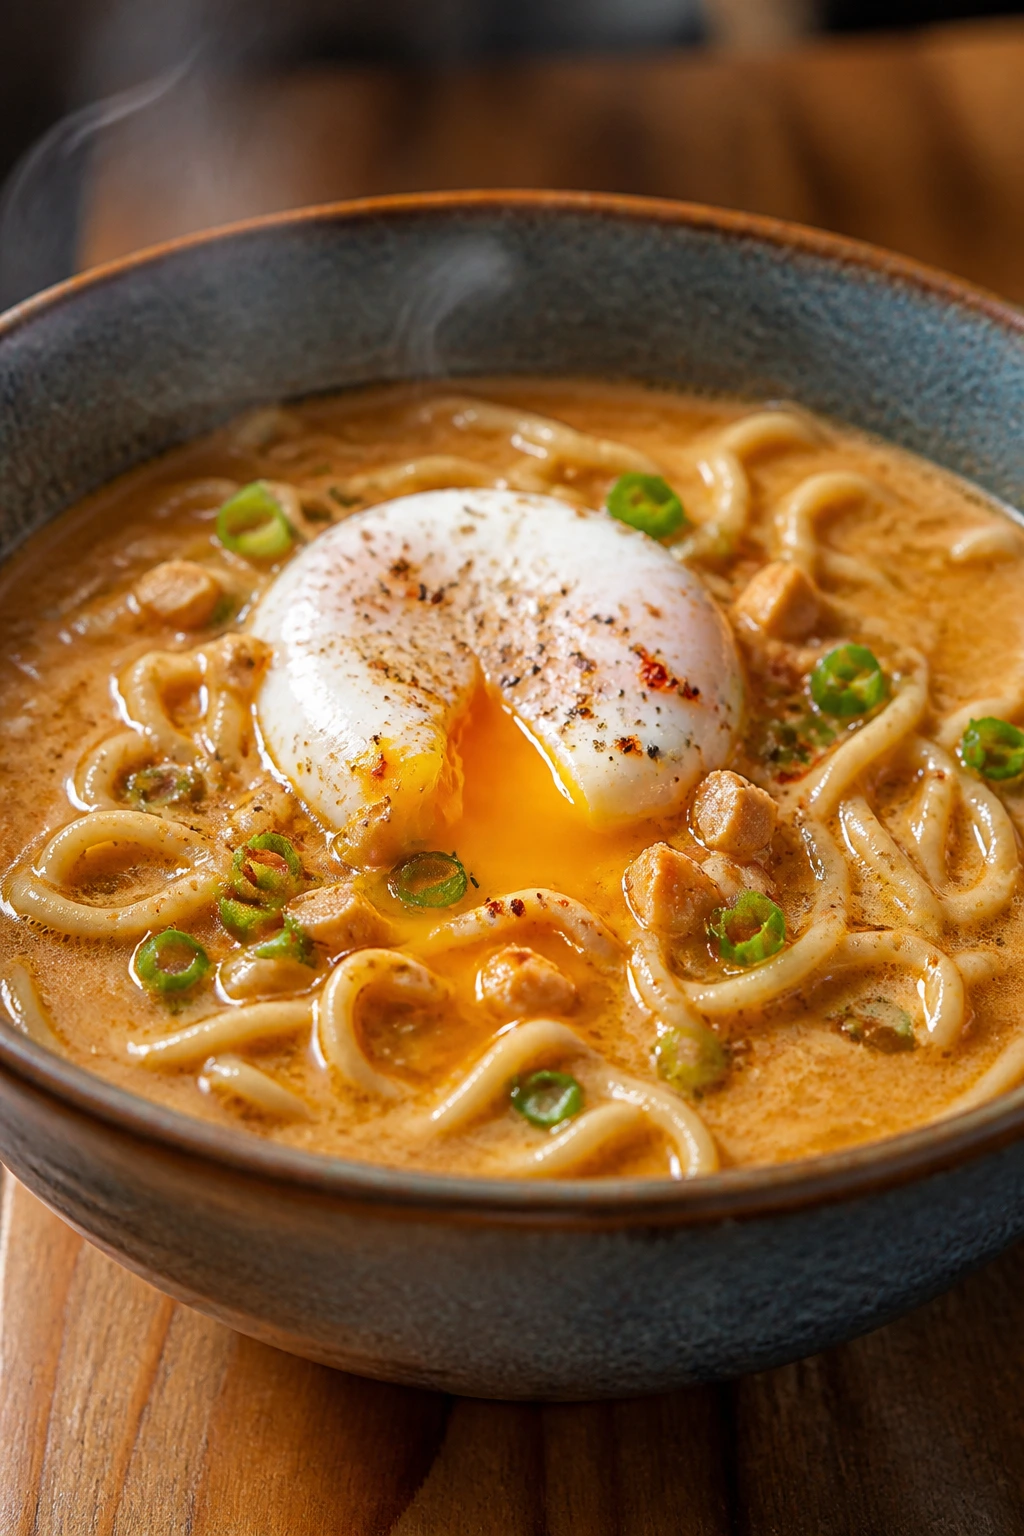
Instant ramen deserves a better life than the seasoning packet alone. Peanut butter turns the broth into a creamy, nutty sauce, the egg makes the bowl feel like dinner, and the noodles stay slurpy instead of sad.
Why It Works:
The seasoning packet gives you salt, but peanut butter gives you body. A little soy sauce and vinegar turn the broth into something balanced, and an egg cooked in the same pot keeps the whole meal in the 15-minute lane. It’s fast, but not lazy-fast.
Key Ingredients:
- 1 pack instant ramen noodles, seasoning packet included
- 1 tablespoon peanut butter
- 1 tablespoon soy sauce
- 1 teaspoon rice vinegar or lime juice
- 1 large egg
- 1 teaspoon sesame oil
- 1 scallion, sliced
- Chili flakes to taste
Quick Steps:
- Bring 2 cups water to a simmer in a small pot and add the ramen noodles.
- After 2 minutes, stir in the seasoning packet, peanut butter, soy sauce, vinegar, and sesame oil.
- Crack in the egg and simmer gently for 1 to 2 minutes for a soft-poached texture.
- Stir once so the peanut butter melts into the broth and the noodles separate.
- Top with scallions and chili flakes.
Equipment for This Recipe:
- Small pot
- Spoon
- Chopsticks or fork
How to Serve This Dish:
Serve it hot in a bowl with all the broth. The yolk should break into the soup when you stir, and that’s part of the appeal. If you want more crunch, add peanuts or sesame seeds.
Pro Tips for This Recipe:
- Use only part of the seasoning packet if your peanut butter is salted.
- Keep the broth at a simmer, not a boil, so the egg stays tender.
- If the soup gets too thick, add a splash of hot water.
Variations on This Dish:
- Miso Peanut Ramen: Add 1 teaspoon miso for deeper savory flavor.
- Veggie Ramen: Stir in frozen peas or spinach in the last minute.
Common Mistakes to Avoid with This Dish:
- Don’t let the noodles overcook while the sauce comes together.
- Don’t add too much vinegar; the broth should be bright, not sharp.
18. Spanish Chickpea and Spinach Stew
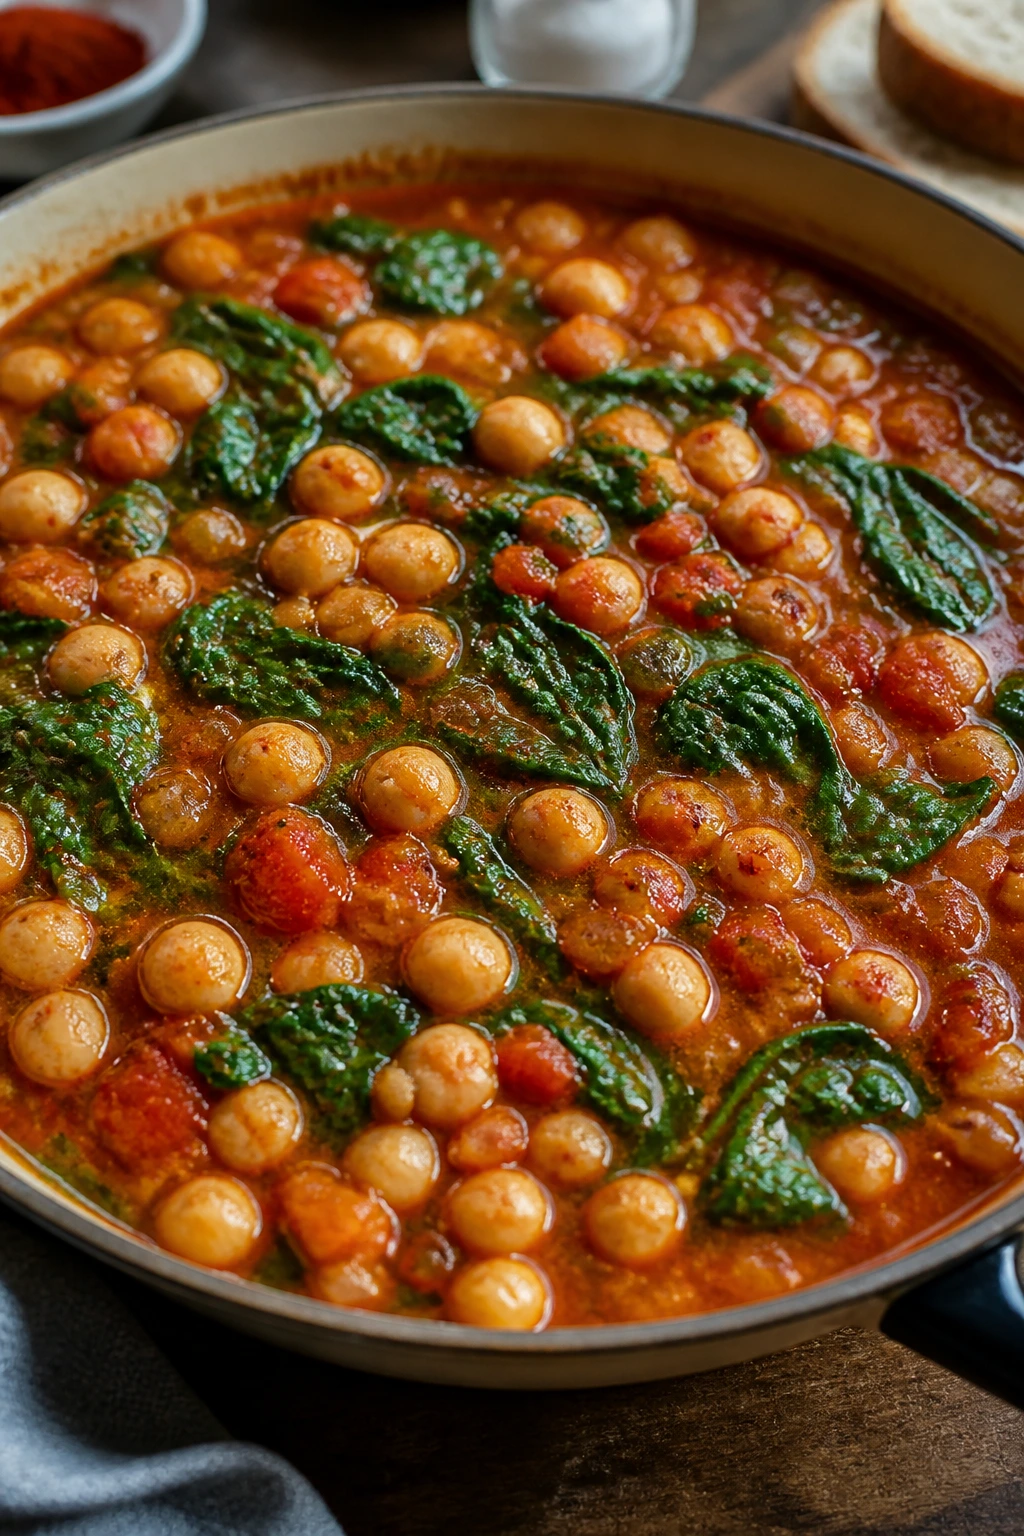
Smoked paprika, garlic, and chickpeas do a lot of heavy lifting in a short time. Add spinach at the end and the stew suddenly looks and tastes like something that took longer than it did, which is half the charm of this kind of pantry cooking.
Why It Works:
Spanish-style chickpea dishes lean on pantry staples that already bring character: paprika, olive oil, canned tomatoes, and beans. Spinach wilts in the residual heat, so it takes almost no time at all. The finished stew should be brothy but not thin, with enough oil to gloss the surface.
Key Ingredients:
- 2 tablespoons olive oil
- 2 garlic cloves, minced
- 1 teaspoon smoked paprika
- 1 (15-ounce) can chickpeas, rinsed and drained
- 1 (14.5-ounce) can diced tomatoes
- 2 cups baby spinach or 1 cup frozen spinach, thawed
- Salt and black pepper to taste
- Bread for serving
Quick Steps:
- Heat olive oil in a skillet or saucepan over medium heat.
- Add garlic and paprika and cook for 20 to 30 seconds.
- Stir in chickpeas and tomatoes and simmer for 6 to 7 minutes.
- Add spinach and cook just until wilted or heated through.
- Season and serve with bread.
Equipment for This Recipe:
- Skillet or saucepan
- Wooden spoon
- Lid, optional
How to Serve This Dish:
Serve it in shallow bowls with crusty bread tucked on the side. A drizzle of olive oil on top gives it a nice finish. If you want a little tang, a splash of sherry vinegar works well.
Pro Tips for This Recipe:
- Use smoked paprika, not regular, or the stew loses its backbone.
- Frozen spinach needs to be squeezed a bit so the stew doesn’t turn watery.
- Let the tomatoes reduce slightly before adding spinach.
Variations on This Dish:
- Potato-Free Heft: Add a little more chickpea and serve over toast.
- Egg-Topped Version: Crack in eggs and cover for 3 to 4 minutes.
Common Mistakes to Avoid with This Dish:
- Don’t scorch the paprika; it becomes bitter in a hot dry pan.
- Don’t add spinach too early or it disappears into gray threads.
19. Creamy Polenta with Tomato Beans
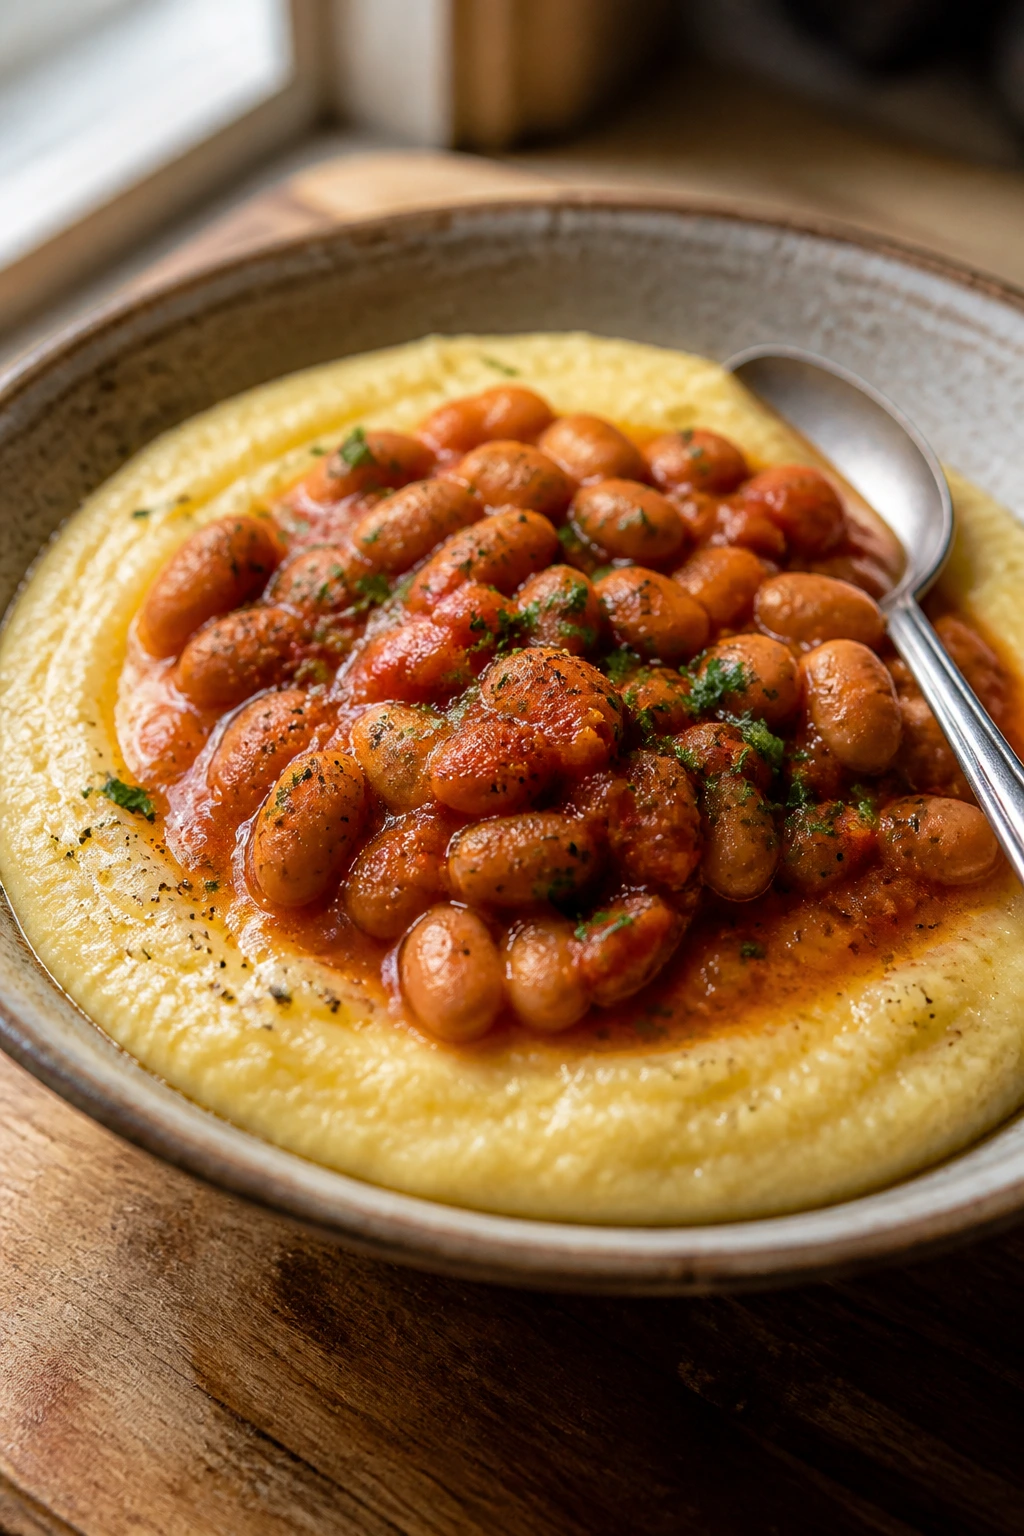
Polenta is one of the best fast starches when you want something soft and spoonable. Top it with saucy beans and tomatoes, and you get a bowl that feels warm and substantial without needing a lot of ingredients.
Why It Works:
Quick-cooking polenta thickens in minutes, especially if you whisk steadily. Tomato beans bring acidity and protein, and parmesan adds a salty finish that keeps the bowl from tasting bland. The texture contrast matters here: creamy base, chunky topping, little bursts of tomato.
Key Ingredients:
- 1 cup quick-cooking polenta
- 4 cups water or broth
- 1 tablespoon butter
- ¼ cup grated parmesan
- 1 tablespoon olive oil
- 1 (15-ounce) can white beans, rinsed and drained
- 1 cup canned crushed tomatoes
- 1 teaspoon Italian seasoning
Quick Steps:
- Bring water or broth to a boil, then whisk in the polenta slowly.
- Reduce heat and cook for 5 minutes, whisking often, until thick and smooth.
- Stir in butter and parmesan.
- Warm olive oil in a small pan, then add beans, tomatoes, and Italian seasoning; cook 4 to 5 minutes.
- Spoon the tomato beans over the polenta and serve hot.
Equipment for This Recipe:
- Saucepan
- Whisk
- Small skillet
How to Serve This Dish:
Spoon the beans into the center of the polenta and let the edges stay soft. A little black pepper on top helps. If you want more freshness, add chopped parsley or basil.
Pro Tips for This Recipe:
- Add the polenta slowly while whisking to avoid lumps.
- Keep the beans saucy; dry topping makes the bowl feel heavy.
- Serve immediately because polenta thickens as it sits.
Variations on This Dish:
- Garlicky Polenta: Stir minced garlic into the butter before adding parmesan.
- Spicy Tomato Beans: Add chili flakes with the Italian seasoning.
Common Mistakes to Avoid with This Dish:
- Don’t stop whisking too early. Lumps set fast in polenta.
- Don’t let the topping get too dry; it should spoon easily over the base.
20. Salsa Rice Bowls with Refried Beans
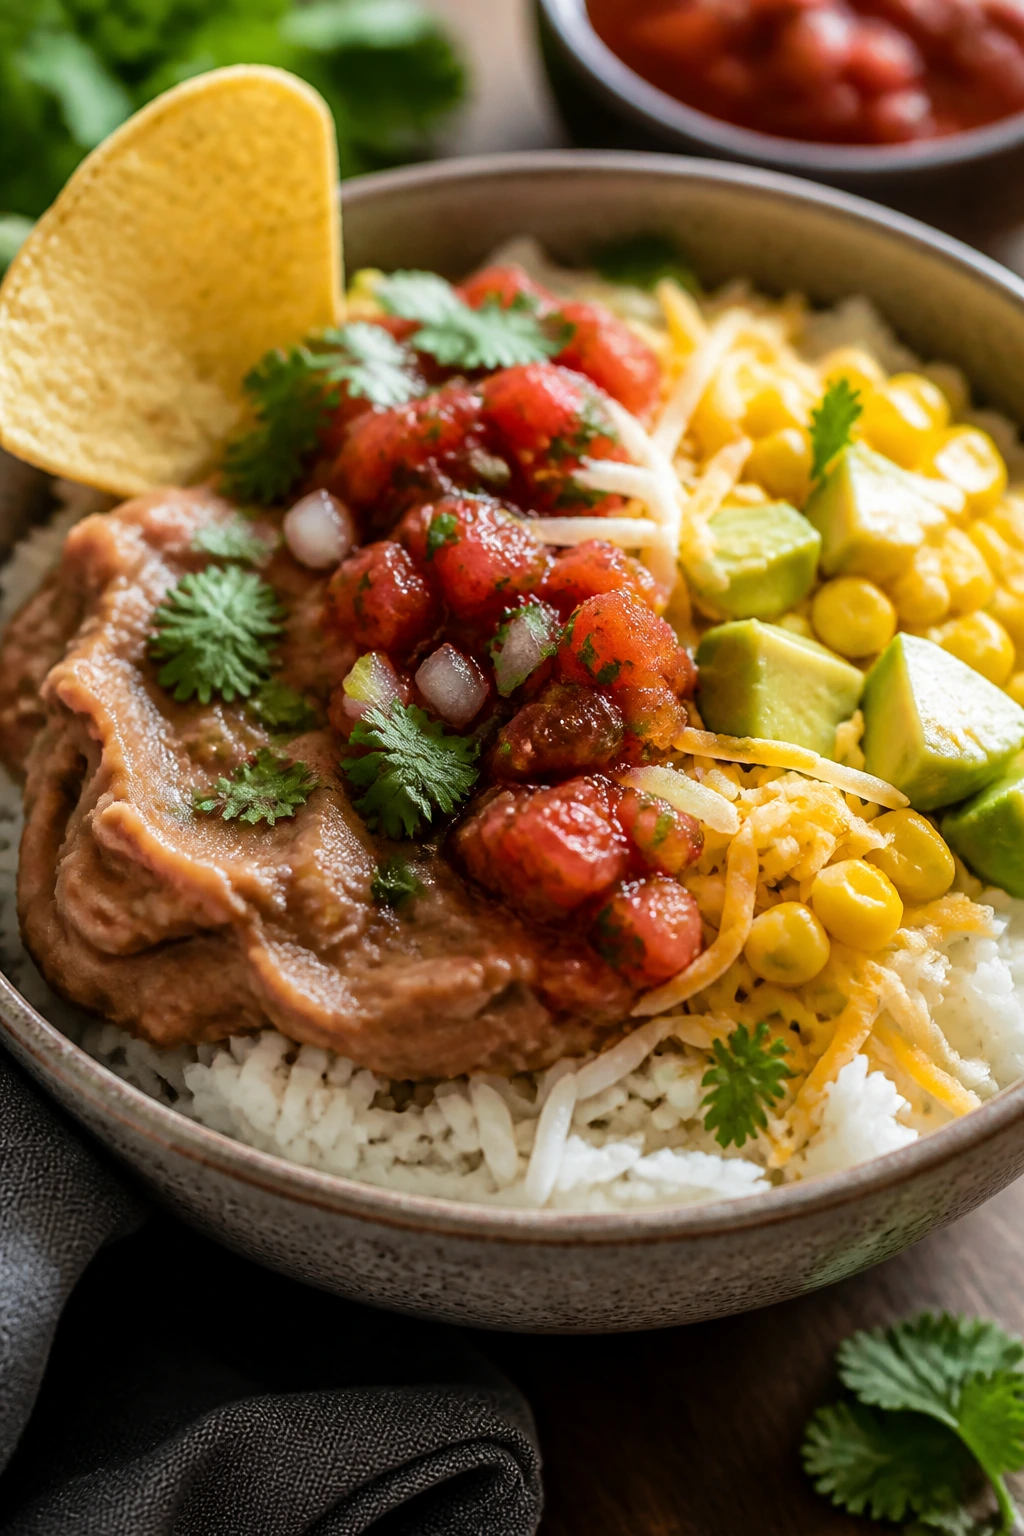
This is the kind of meal that feels assembled in a good way. Rice, refried beans, salsa, and a handful of cheese turn into a bowl that’s soft, saucy, and easy to scale up if somebody shows up hungry.
Why It Works:
Microwave rice or leftover rice keeps this under 15 minutes, and refried beans spread better than whole beans when time is tight. Salsa brings acid and spice in one move, which saves you from juggling a lot of condiments. A few crunchy chips on top give the bowl a needed edge.
Key Ingredients:
- 2 cups cooked rice or 2 microwave rice pouches
- 1 tablespoon oil
- 1 (16-ounce) can refried beans
- ¾ cup salsa
- ½ cup shredded cheese
- ¼ cup canned corn, drained
- Tortilla chips for topping
Quick Steps:
- Warm the rice according to package directions if needed.
- Heat oil in a saucepan over medium heat and stir in the refried beans with 2 tablespoons water until smooth.
- Warm the salsa and corn in a second pan or in the microwave for 1 minute.
- Divide the rice into bowls and top with beans, salsa, corn, and cheese.
- Finish with tortilla chips.
Equipment for This Recipe:
- Saucepan
- Microwave-safe bowl, if using pouch rice
- Serving bowls
How to Serve This Dish:
Layer it like a grain bowl so each bite gets rice, beans, and salsa. A dollop of sour cream or yogurt works if you want it creamier. Lime wedges also help, though they’re optional.
Pro Tips for This Recipe:
- Thin the beans with a little water so they spread easily.
- Heat the rice fully before adding the toppings; lukewarm rice kills the bowl.
- Use chunky salsa if you want more texture.
Variations on This Dish:
- Taco Bowl: Add cumin and chili powder to the beans.
- Breakfast Bowl: Top with a fried egg and hot sauce.
Common Mistakes to Avoid with This Dish:
- Don’t leave the beans stiff in the can shape. They need thinning.
- Don’t bury the bowl under too much cheese; it should complement, not blanket.
21. Savory Oatmeal with Soy Egg and Sesame
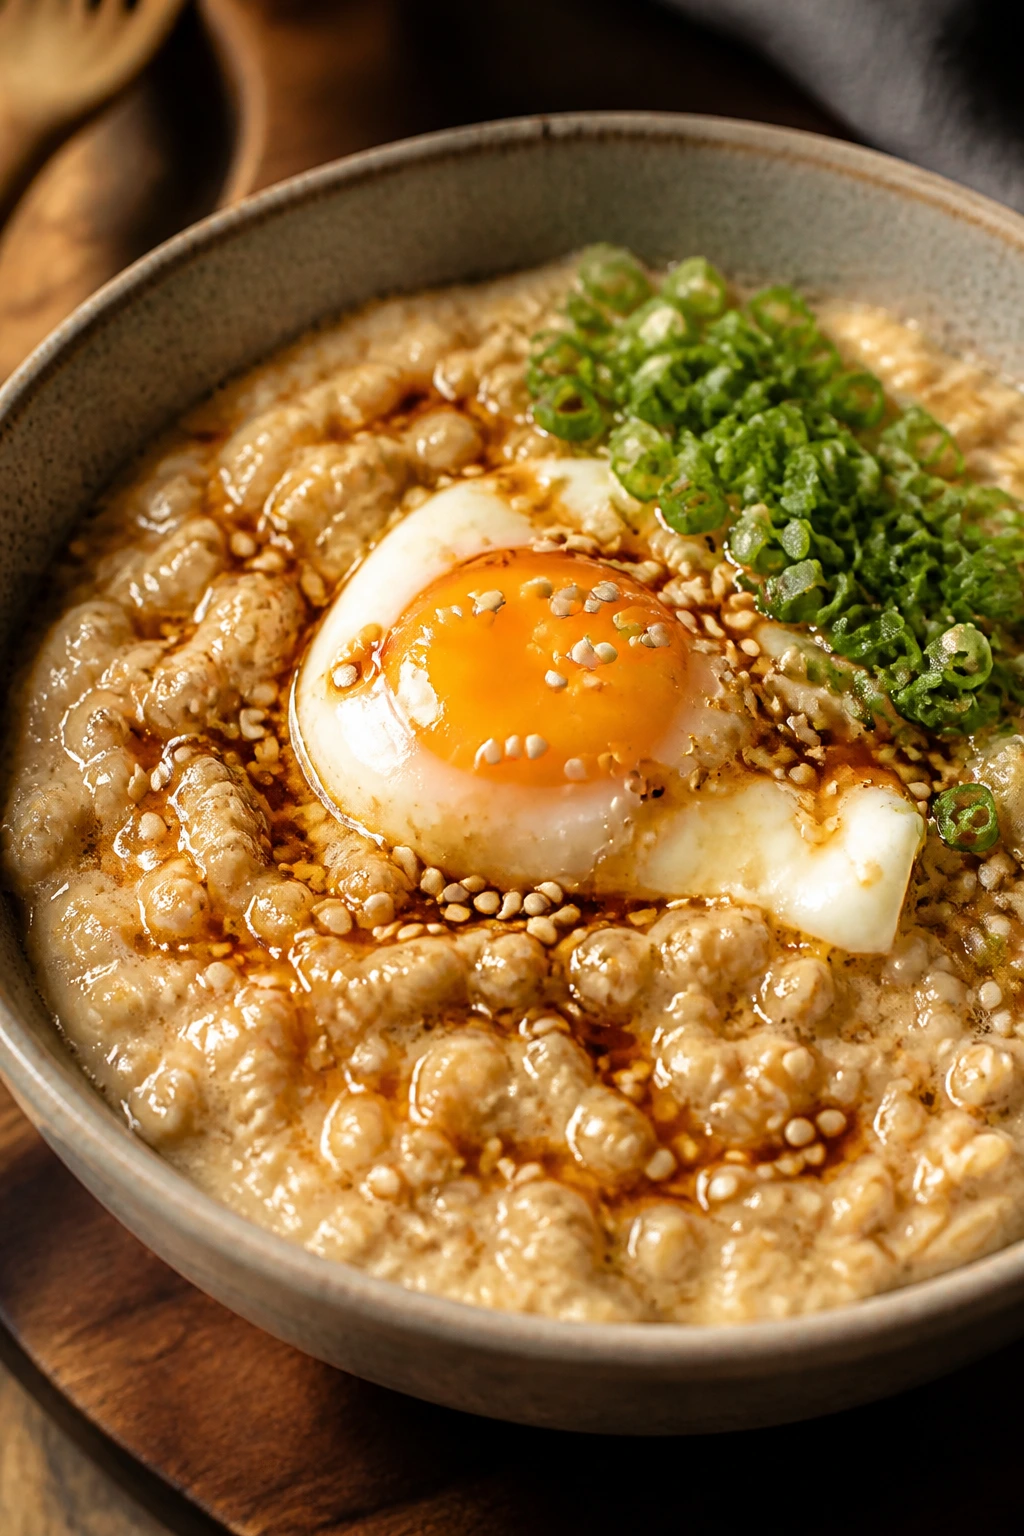
Sweet oatmeal gets all the attention, but savory oats are better when the pantry is low and you want something warm with more backbone. Soy sauce, sesame oil, and a softly cooked egg turn the bowl into a fast breakfast-or-dinner situation.
Why It Works:
Rolled oats cook in minutes and hold onto salty, umami-heavy flavors well. The egg gives you richness, and sesame oil adds the kind of aroma that makes the bowl smell much more finished than it is. If you’ve only ever had oats with fruit, this version can feel like a small reset.
Key Ingredients:
- 1 cup rolled oats
- 2 cups water or broth
- 1 tablespoon soy sauce
- 1 teaspoon sesame oil
- 1 large egg
- 1 scallion, sliced
- Chili flakes or black pepper to taste
Quick Steps:
- Bring water or broth to a simmer in a small saucepan.
- Stir in oats and cook for 3 to 5 minutes until thick.
- Stir in soy sauce and sesame oil.
- Fry, poach, or soft-boil the egg while the oats cook.
- Spoon the oats into a bowl, top with the egg and scallions, and finish with chili flakes.
Equipment for This Recipe:
- Small saucepan
- Frying pan or second pot for the egg
- Spoon
How to Serve This Dish:
Serve it in a deep bowl so the egg yolk can run through the oats. A spoonful of chili crisp makes the bowl more exciting if you have it. The texture should be loose enough to eat with a spoon, not stiff like paste.
Pro Tips for This Recipe:
- Use broth if you want more savory depth with no extra work.
- Keep the oats slightly looser than breakfast oatmeal; they tighten as they cool.
- A jammy egg is ideal here because the yolk acts like sauce.
Variations on This Dish:
- Miso Oats: Stir in 1 teaspoon miso with the soy sauce.
- Cheddar Oats: Add 2 tablespoons shredded cheddar at the end for a sharper bowl.
Common Mistakes to Avoid with This Dish:
- Don’t overcook the oats until they seize. Savory oats should stay creamy.
- Don’t skip salt just because soy sauce is in the pot; oats still need seasoning.
22. Mushroom and White Bean Toasts
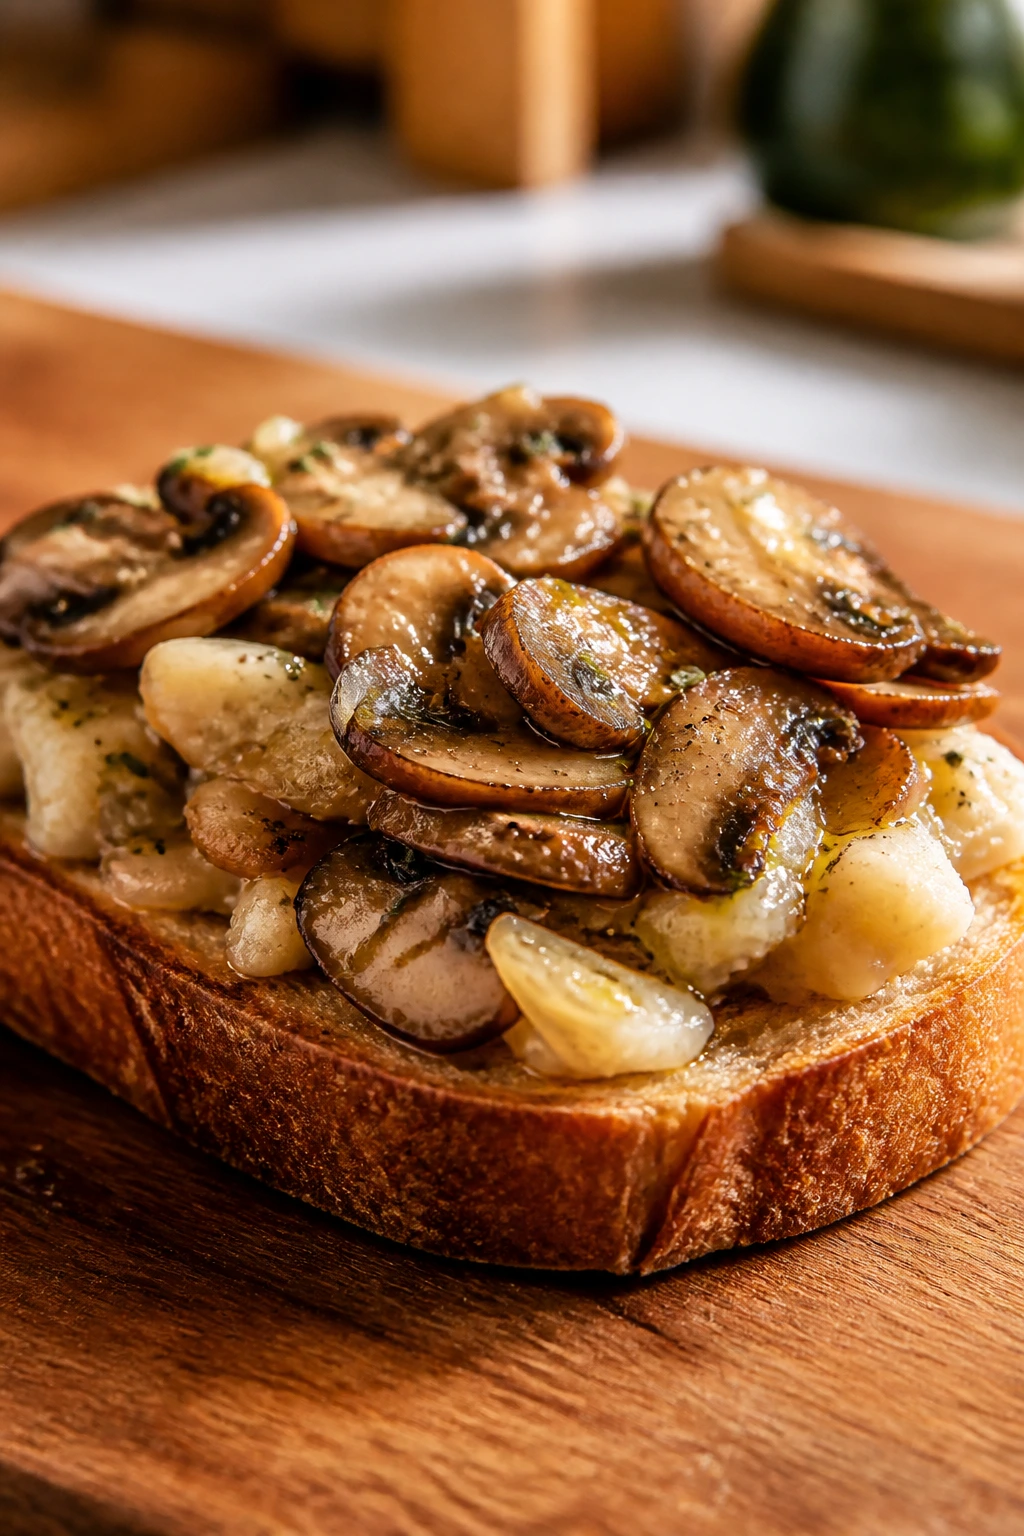
This one has the shape of a café lunch and the speed of a pantry fix. Canned mushrooms or jarred mushrooms get sautéed with garlic, then tossed with white beans until the whole thing turns savory and spoonable on toast.
Why It Works:
Mushrooms bring that earthy, meaty flavor that beans alone can miss. White beans give the topping body, and a little vinegar at the end keeps it from tasting muddy. Toast is the right base because it holds up to the moisture without going soggy in a minute.
Key Ingredients:
- 2 tablespoons olive oil
- 1 garlic clove, minced
- 1 (10-ounce) can mushrooms, drained
- 1 (15-ounce) can white beans, rinsed and drained
- 1 teaspoon dried thyme
- 1 teaspoon red wine vinegar or lemon juice
- 4 slices sturdy bread, toasted
- Salt and black pepper to taste
Quick Steps:
- Heat olive oil in a skillet over medium heat and cook garlic for 20 seconds.
- Add mushrooms and thyme and cook for 2 minutes until the mushrooms are hot and a little browned.
- Stir in white beans and 2 tablespoons water, then mash lightly with a fork.
- Add vinegar, salt, and pepper, and cook for 1 minute until the mixture looks glossy.
- Spoon over toast and serve hot.
Equipment for This Recipe:
- Skillet
- Fork
- Toaster
How to Serve This Dish:
Serve the topping thickly spread over toasted bread, then cut the slices in half for easier eating. A little olive oil drizzled over the top gives it a finished look. If you have parsley, it brightens the plate fast.
Pro Tips for This Recipe:
- Drain the mushrooms well so the pan browns instead of steaming.
- Mash only part of the beans; you want some texture left.
- Add vinegar at the end so the flavor stays clean and bright.
Variations on This Dish:
- Creamy Mushroom Toast: Stir in 1 tablespoon cream cheese or yogurt off the heat.
- Garlic-Herb Version: Add dried parsley and a pinch of oregano with the thyme.
Common Mistakes to Avoid with This Dish:
- Don’t use soft sandwich bread if you can avoid it; it goes soggy under the topping.
- Don’t skip the acid. Mushrooms and beans need that last sharp note to wake up.
Why 15-Minute Pantry Meals Work So Well
The best pantry meals are not trying to imitate a slow-cooked dinner. They’re doing something else: using ingredients that already have some structure, some salt, or some fat so the clock doesn’t beat you. Canned beans, tuna, sardines, tomatoes, miso, peanut butter, tortillas, couscous, and instant noodles all bring their own momentum. That’s why the recipes above can move fast without tasting thin.
A lot of quick cooking fails because people ask one ingredient to do too much. Dry beans need hours. A raw sauce needs more simmer time than you’ve got. A box of pasta without enough salt or fat tastes like boiled paper. Pantry meals work when each part carries a job: starch for bulk, protein for heft, acid for brightness, and something hot enough to make the flavors wake up.
Heat management matters more than fancy technique here. A skillet that’s hot enough to brown garlic for 20 seconds and then immediately catch tomato paste, or a pot that can bring noodles to al dente before the sauce separates, is doing real work. So is restraint. You do not need eight spices. You need the right three in the right order.
Essential Equipment for These Recipes
- 10- to 12-inch skillet: Big enough for pasta tosses, bean skillets, fried rice, and quesadillas without crowding.
- Medium saucepan: Useful for soups, curry, polenta, and anything that needs a controlled simmer.
- Large pot: Needed for pasta, noodles, rice, or boiling water for couscous.
- Wooden spoon or spatula: Better than a whisk in most of these recipes; it helps you mash beans and scrape the pan clean.
- Tongs: Handy for pasta and noodles when you want to toss instead of stir.
- Can opener: Obvious, yes. Still the one tool people forget.
- Fine grater or microplane: Great for garlic, lemon zest, and parmesan.
- Measuring cups and spoons: Pantry cooking still needs actual measurements if you want repeatable results.
- Toaster or broiler: For toast-based meals, this matters more than it sounds.
- Lid or sheet pan: A lid helps melt cheese, set eggs, or steam a skillet shut in a hurry.
Smart Shopping and Ingredient Tips
Start with the pantry items that earn the most mileage. A few cans of chickpeas, black beans, white beans, tuna, crushed tomatoes, and coconut milk can cover a surprising amount of dinner ground. If you buy only one thing in bulk, make it pasta or rice, because those two stretch easily and pair with almost everything above.
Low-sodium beans and tomatoes are worth seeking out if you cook this way often. They give you room to season the dish yourself instead of fighting a salty can. Rinsing beans under running water for 20 to 30 seconds takes off the tinny liquid and lets the sauce taste cleaner. For canned fish, oil-packed tuna and sardines bring a fuller flavor than water-packed versions, which matters when the recipe has only a few moving parts.
Shelf-stable starches are the secret weapons here. Couscous, instant polenta, ramen, udon, microwave rice, and small pasta shapes all behave well under a tight clock. If you keep tortillas and sturdy bread on hand too, half the list becomes possible without any planning. Frozen peas, spinach, and corn are fair game as well—they’re pantry-adjacent in the way that counts, because they go from freezer to skillet in minutes.
How to Serve These Recipes
Presentation: Keep the food in shallow bowls or on wide plates so the sauces don’t disappear. Toast-based meals look best with the topping heaped slightly off-center, and pasta wants a loose twirl rather than a flat pile.
Accompaniments: Crisp things help these meals most. Think toast for soups, tortilla chips for bean skillets, cucumber slices for peanut noodles, or a quick green salad if you have the energy. Bread is not a side note here; in several of these dishes, it’s the mop.
Portions: Most of these recipes serve 2 as a full dinner or 3 to 4 as lighter portions. If you want to stretch them, add extra beans, another egg, or a second starch rather than just more sauce. That keeps the texture balanced.
Beverage Pairing: Sparkling water with lemon fits almost all of them because it cuts the salt and fat. If you want something warmer, unsweetened iced tea or a light beer works well with the bean and tomato dishes.
Additional Tips and Flavor Boosters

Flavor Enhancement: Keep a few finishing ingredients around—lemon, vinegar, chili flakes, olive oil, and parmesan. A teaspoon of one of those at the end can do more than another half teaspoon of dried spice at the start.
Customization: Beans, rice, pasta, toast, and noodles all accept add-ins easily. A fried egg, frozen spinach, corn, or a spoonful of salsa can change the feel of a dish without changing the cook time much.
Serving Suggestions: Think about crunch. Toasted breadcrumbs, chips, sesame seeds, or chopped nuts give these meals the edge that soft pantry food often lacks. Even a few cracks of black pepper help more than people expect.
Make-It-Yours: For dairy-free versions, use olive oil instead of butter and skip the cheese or replace it with nutritional yeast. For higher protein, add an egg, extra beans, or canned fish. For lower heat, keep the chili flakes off the table and finish with lemon instead.
Make-Ahead, Storage, and Reheating Guidance
Most of these meals are best the day they’re made, especially the noodle bowls, quesadillas, and toast dishes. Pasta, fried rice, bean skillets, soups, curries, and stews hold better. In the fridge, the cooked dishes usually keep for 3 to 4 days in airtight containers. Soups and bean stews can be frozen for up to 2 months; pasta dishes are better eaten sooner because the noodles keep drinking liquid.
Reheat rice and fried rice in a skillet with 1 to 2 tablespoons water over medium heat, stirring until hot. Soups, curries, and tomato-based skillets do well on the stove over medium-low heat; add a splash of broth or water if they thicken too much overnight. Polenta needs a little extra liquid and a whisk to loosen up again. Noodle dishes can be revived in a skillet with hot water, but peanut sauces sometimes need an extra teaspoon of soy sauce or lime to taste awake again.
Toast-based meals do not store well once assembled. Keep the topping and bread separate, then toast fresh bread when you’re ready to eat. Quesadilla filling can be made ahead and held for 3 days, but the tortillas should be cooked right before serving so they stay crisp. Beans and tomato mixtures often taste even better after a night in the fridge, which is one of the few nice things about a delayed dinner.
Variations and Adaptations to Try

Gluten-Free Pantry Swaps: Use rice, polenta, corn tortillas, rice noodles, or gluten-free pasta in place of bread, couscous, and wheat noodles. The biggest thing to watch is texture; gluten-free pasta can go soft fast, so pull it early and toss quickly.
Dairy-Free Fixes: Leave out butter, cheese, and parmesan, then lean on olive oil, sesame oil, or a spoonful of tahini for body. The meals stay satisfying because the beans, noodles, and eggs already carry plenty of richness.
Low-Sodium Pantry Planning: Buy no-salt-added tomatoes and beans when you can, rinse canned beans well, and finish with lemon or vinegar instead of more salt. That keeps the flavors sharp without making the food taste flat.
Kid-Friendly Mild Mode: Skip the chili flakes, use cheddar or mozzarella, and keep sauces a little sweeter with corn, baked beans, or a touch of honey. Kids usually respond better to crispy toast, melted cheese, and familiar shapes than to fiery spice.
Protein-Heavy Upgrades: Add a fried egg, extra chickpeas, canned tuna, or shredded rotisserie chicken if you happen to have it. The pantry base stays the same; you’re just giving it more staying power.
Smoky-and-Spiced Version: Smoked paprika, cumin, chipotle, or curry powder can turn the same pantry shelf into a different dinner direction. Use one bold spice at a time so the meal doesn’t taste muddy.
Common Mistakes to Avoid
The biggest mistake is under-seasoning the pantry. Beans, rice, pasta, and oats all need more salt than people expect because they start out plain. If the dish tastes like it needs “something,” that something is usually salt, acid, or both.
Another common miss: cooking garlic too hard. Garlic goes from fragrant to bitter in about the time it takes to turn your head, especially in a dry skillet. Keep the heat at medium or lower, and add the next ingredient the second it smells sweet.
Don’t drown the meal in liquid just because it feels safe. Couscous turns soggy, polenta loses its shape, and noodle sauces slide off instead of coating. Start with less water or broth than you think you need; you can always loosen the dish at the end.
Crowding is a quiet problem too. A skillet packed with rice, beans, or noodles steams instead of browns, which takes away the texture that makes these meals worth making. Use the biggest pan you own when in doubt.
Finally, people often forget a finishing note. That might be lemon on tuna pasta, vinegar on mushroom toast, scallions on noodles, or pepper on beans. Without it, the dish can taste cooked but not alive.
Frequently Asked Questions
Can I use dried beans instead of canned beans?
Yes, but not if you need dinner in 15 minutes. Canned beans are the point here because they’re already cooked; dried beans need soaking or pressure cooking and belong in a different plan.
What pantry staples should I keep on hand for these meals?
Pasta, rice, couscous, canned beans, canned tomatoes, tuna, sardines, tortillas, broth or bouillon, peanut butter, instant noodles, and olive oil cover most of the recipes above. Add garlic, onions, lemon, and a few spices, and the list gets a lot more useful.
Do microwave rice pouches count as pantry staples?
They do if they live in your cupboard. They’re one of the easiest ways to keep a rice-based meal inside the 15-minute window without relying on leftovers.
How do I make these meals vegetarian or vegan?
Skip the tuna, sardines, egg, butter, and cheese, then lean harder on beans, chickpeas, lentils, olive oil, and miso. The chickpea tomato skillet, couscous bowl, lentil curry, and white bean toast already sit close to vegetarian by design.
Which recipes freeze well?
Tomato soup, chickpea stew, lentil curry, and bean-heavy skillet dishes freeze best for up to 2 months. Pasta, toast, quesadillas, and noodle dishes are usually better fresh because the texture slips after freezing.
What if I don’t have broth?
Water works fine in almost all of these recipes. Just season a little more aggressively and, if needed, add a bouillon cube or a spoonful of miso to replace some of the missing depth.
How do I keep pasta dishes from drying out when I reheat them?
Reheat them in a skillet with a splash of water over medium-low heat and stir until the noodles loosen. Pasta that started with a little reserved cooking water usually comes back better than pasta that was tossed dry.
Can I make these meals with only one pan?
Several of them already are one-pan meals, but even the two-pan recipes can be simplified. Fried eggs, toast, rice, and noodles can all be moved around to fit what you’ve got; the real rule is keeping the starch and the sauce close together.
Dinner From the Cupboard
A pantry meal works best when it doesn’t apologize for being practical. Beans, tuna, tomatoes, noodles, rice, and toast can carry more flavor than people give them credit for, especially when you use heat, salt, and a finishing hit of acid the right way.
The nice part is that none of these recipes asks you to stock a showroom kitchen. Keep a few shelf-stable staples, a decent skillet, and one or two bright things like lemon or vinegar, and dinner stops being a question mark.
Keep a can of beans, a box of pasta, and one jar of something briny on the shelf, and you’re never far from a 15-minute meal that tastes like you meant to make it.