
At 4:15 p.m., the kitchen turns into a negotiation table. Someone is hungry right now, someone else wants a snack that feels like dinner, and you’re trying to make one hot thing that doesn’t require a grocery run, a second sink full of dishes, or a 90-minute wait. That’s the sweet spot for these weeknight dinner ideas for after-school snacks: crisp-edged, dip-friendly, easy to split, and sturdy enough to survive the walk from counter to backpack pile.
I’ve always liked dinners that don’t act precious. A quesadilla can be cut into triangles and eaten with one hand. A slider can be wrapped in foil and tucked into a lunchbox the next day. A baked ravioli bite, if you do it right, gives you the crunchy shell of a fried snack without making the stove smell like a county fair. That kind of food earns its keep fast.
And yes, there should be vegetables in the mix. Not hidden forever. Not punished. Just folded into meals that taste like something kids will actually reach for after school, before they’ve settled into homework mode or the second round of cartoons. The recipes below lean into that practical middle ground: fast enough for a weeknight, snacky enough for after-school hunger, and flexible enough that you can scale up, cut down, or patch together from what’s already in the fridge.
Why This Collection Works on Busy Afternoons

- Snackable shapes: Triangles, sliders, cups, roll-ups, and bites are easier for kids to eat than a big plated dinner when they’re half in motion.
- Fast cook times: Most of these hit the table in 15 to 35 minutes, which matters when hunger arrives before your coat is off.
- Built-in leftovers: Several recipes reheat well in a toaster oven or skillet, so tomorrow’s snack is already waiting.
- Picky-eater flexibility: Toppings, dips, and fillings stay separate in many of these, which keeps the peace at the table.
- Actual dinner fuel: Each recipe brings protein, starch, or both, so you’re not serving a parade of crackers and calling it supper.
- Low-fuss cleanup: Sheet pans, skillets, muffin tins, and one-pot meals keep the sink from becoming part of the recipe.
1. Crispy Bean-and-Cheese Quesadillas
A hot skillet and a stack of tortillas can calm a hungry house faster than almost anything else. These quesadillas get shatter-crisp at the edges, stay creamy in the middle, and cut into wedges that feel like snack food even when you plate them as dinner.
Why It Works: Refried beans keep the filling thick, so the tortilla doesn’t go soggy, and cheddar melts quickly without needing a long cook. You can make two at a time in about 8 minutes.
Key Ingredients:
- 4 flour tortillas, 8-inch
- 1 cup refried black beans
- 1 1/2 cups shredded cheddar
- 1/2 cup salsa
- 1 tablespoon butter
- 1/4 teaspoon salt
Quick Steps:
- Spread 1/4 cup beans on half of each tortilla.
- Sprinkle with cheese and a spoonful of salsa.
- Fold closed and brush the outside lightly with butter.
- Cook in a skillet over medium heat for 2 to 3 minutes per side, until golden and crisp.
- Rest 1 minute, then slice into wedges.
Equipment for This Recipe:
- 10- or 12-inch skillet
- Spatula
- Knife or pizza cutter
How to Serve This Dish: Stack the wedges on a plate with carrot sticks, apple slices, and a little sour cream for dipping. Two wedges often work as a snack; four make a full meal.
Pro Tips for This Recipe:
- Use medium heat, not high. High heat burns the tortilla before the cheese melts.
- A thin layer of beans is enough; too much filling slides out.
- Salt goes on the beans, not the skillet.
Variations on This Dish:
- Chicken-Bean Version: Add 1/2 cup shredded rotisserie chicken to the filling.
- Pepper Jack Kick: Swap in pepper jack cheese and add diced jalapeños for older kids.
Common Mistakes to Avoid with This Dish:
- Overstuffing the tortilla: If the filling bulges, the quesadilla tears when flipped. Use less than you think.
- Skipping the rest: Cutting too soon lets the cheese run out. Give it one minute to settle.
2. Mini Pita Pizzas with Hidden Veggies
Pita bread makes a sturdy little pizza base that bakes fast and stays crisp at the edges. These are the kind of after-school snacks that disappear in a blink because they taste like pizza but take a fraction of the effort.
Why It Works: The pita holds sauce without getting heavy, and a thin layer of grated zucchini melts into the cheese instead of announcing itself. Ten minutes in a hot oven gets everything bubbling.
Key Ingredients:
- 4 pita rounds
- 1/2 cup pizza sauce
- 1 1/2 cups shredded mozzarella
- 1 small zucchini, finely grated and squeezed dry
- 1/4 cup sliced mushrooms
- 1/2 teaspoon dried oregano
Quick Steps:
- Heat the oven to 425°F and line a sheet pan.
- Set the pitas on the pan and spread each with 2 tablespoons sauce.
- Scatter zucchini, mushrooms, mozzarella, and oregano over the top.
- Bake 8 to 10 minutes, until the cheese melts and the edges brown.
- Cool 2 minutes before slicing into quarters.
Equipment for This Recipe:
- Rimmed sheet pan
- Box grater
- Parchment paper
How to Serve This Dish: Cut them into quarters and pile them next to cucumber coins or grapes. They’re excellent with ranch, marinara, or nothing at all.
Pro Tips for This Recipe:
- Squeeze the zucchini in a towel until it feels dry, or the crust softens.
- Don’t pile on sauce. A thin layer keeps the pita crisp.
- Bake directly on the pan, not in a dish, for better browning.
Variations on This Dish:
- Pepperoni School-Night Version: Add 12 pepperoni slices to each pita.
- White Pizza Spin: Use ricotta, mozzarella, and a little garlic instead of red sauce.
Common Mistakes to Avoid with This Dish:
- Wet vegetables: Unpatted mushrooms steam the top instead of roasting it. Slice thin and use a small amount.
- Cutting before cooling: The cheese will slide. Give it 2 minutes.
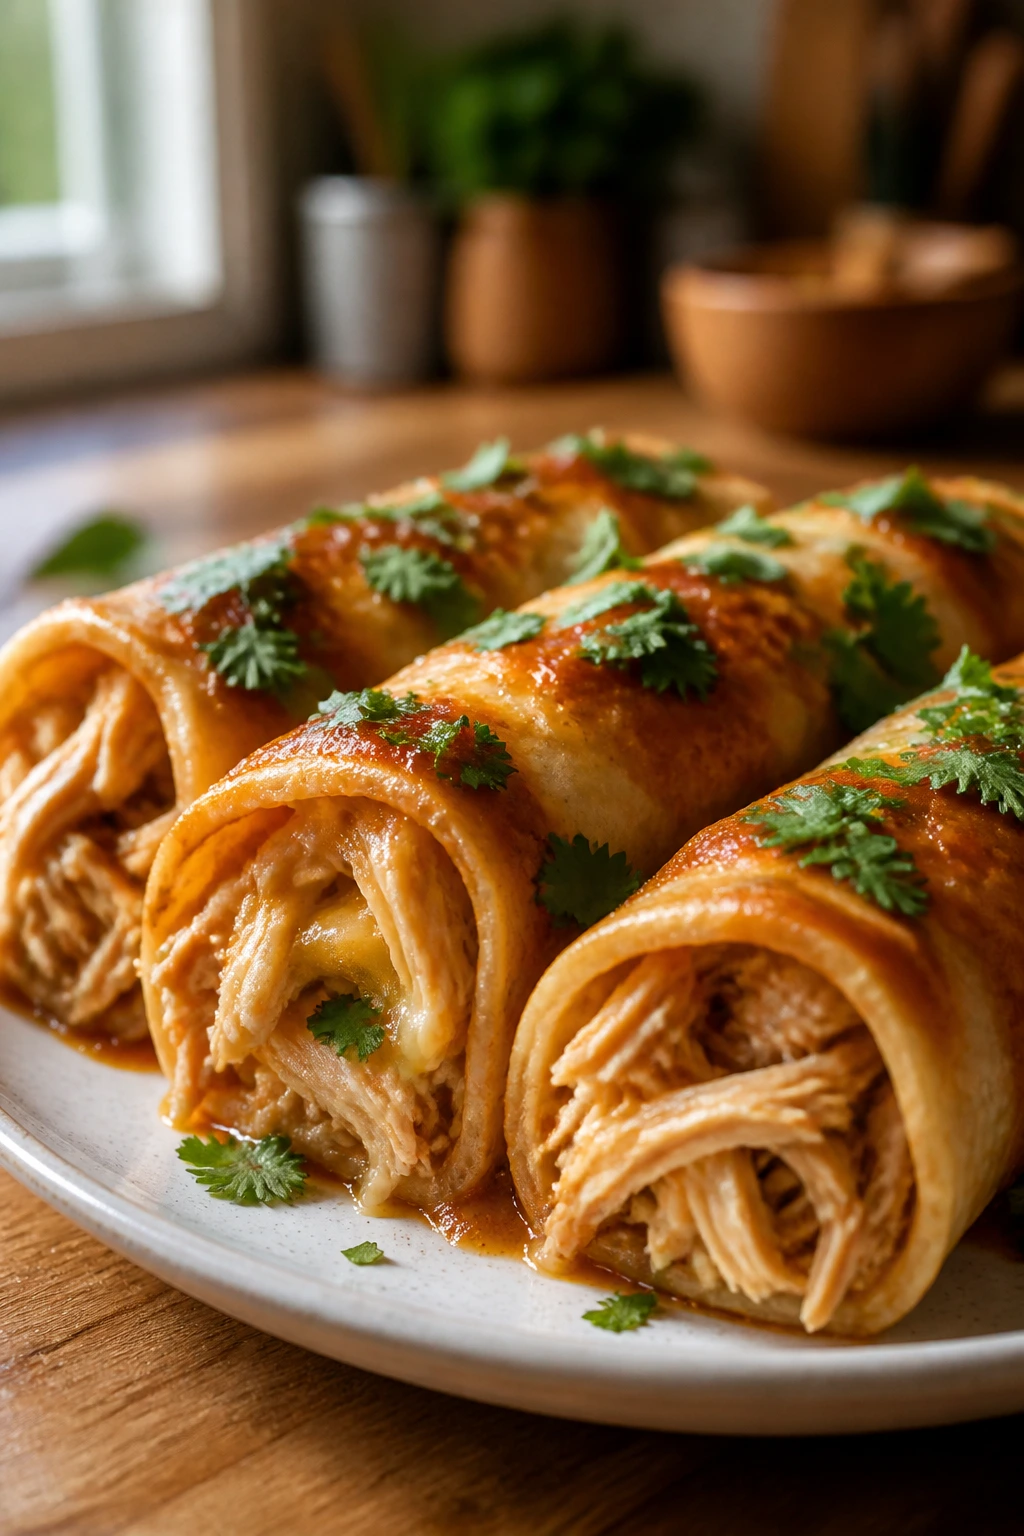
3. Chicken Taquitos with Salsa for Dipping
Rolled tortillas baked until the seams get golden have a very specific appeal to hungry kids. They crunch when you bite them, but the center stays soft and cheesy, which is why these disappear faster than a bowl of chips.
Why It Works: Rotisserie chicken keeps the filling quick, and a little cream cheese helps the taquitos stay moist after baking. They crisp best at 425°F on a lightly oiled tray.
Key Ingredients:
- 2 cups shredded cooked chicken
- 4 ounces cream cheese, softened
- 1/2 cup shredded Monterey Jack
- 1/3 cup salsa
- 8 small flour tortillas
- 1 tablespoon oil
Quick Steps:
- Mix chicken, cream cheese, cheese, and salsa.
- Warm tortillas for 15 seconds so they bend without cracking.
- Spoon filling onto each tortilla and roll tightly.
- Brush with oil and bake at 425°F for 12 to 15 minutes.
- Serve hot with more salsa.
Equipment for This Recipe:
- Sheet pan
- Mixing bowl
- Pastry brush
How to Serve This Dish: Serve three taquitos per child with lime wedges and cucumber slices. For dinner, add a simple rice bowl on the side.
Pro Tips for This Recipe:
- Roll them tightly and place seam-side down.
- A warm tortilla cracks less than a cold one.
- Don’t overload the filling, or the centers stay soft.
Variations on This Dish:
- Bean Boost: Add 1/2 cup mashed pinto beans for extra bulk.
- Cheesy Green Taquitos: Mix in chopped spinach and use pepper jack.
Common Mistakes to Avoid with This Dish:
- Using cold tortillas: They split when rolled. Warm them first.
- Skipping the oil: Bare tortillas bake pale and brittle instead of crisp.
4. Sloppy Joe Slider Buns
A good sloppy joe is messy in the right way: saucy, a little sweet, and best served on soft buns that can soak up the filling. Turning that filling into sliders makes the whole meal feel casual enough for after-school snacking.
Why It Works: Ground beef simmers with ketchup, tomato sauce, and Worcestershire until thick enough to stay put. You can make the filling ahead and rewarm it in 5 minutes.
Key Ingredients:
- 1 pound ground beef
- 1 small onion, diced
- 3/4 cup ketchup
- 1/2 cup tomato sauce
- 1 tablespoon Worcestershire sauce
- 6 slider buns
Quick Steps:
- Brown beef and onion in a skillet over medium-high heat.
- Drain excess fat, then stir in ketchup, tomato sauce, and Worcestershire.
- Simmer 8 minutes, until the sauce looks glossy and thick.
- Spoon onto buns and close.
- Serve warm, with pickles if you like them.
Equipment for This Recipe:
- Large skillet
- Wooden spoon
- Slotted spoon
How to Serve This Dish: Pair two sliders with baked chips and apple wedges. For a bigger dinner, add corn on the cob or a green salad.
Pro Tips for This Recipe:
- Cook the filling until it clings to the spoon, not a minute sooner.
- Toast the buns lightly if you want them to stand up better.
- A pinch of brown sugar is nice, but don’t make it dessert-sweet.
Variations on This Dish:
- Turkey Sloppy Joes: Use ground turkey and add 1 tablespoon olive oil to the pan.
- Baked Cheese Sliders: Top the assembled buns with provolone and warm under the broiler.
Common Mistakes to Avoid with This Dish:
- Thin sauce: Runny filling leaks straight through the bun. Simmer longer.
- Overcrowding the pan: If the beef steams, you lose the browned flavor that makes these work.
5. Baked Mac and Cheese Muffins
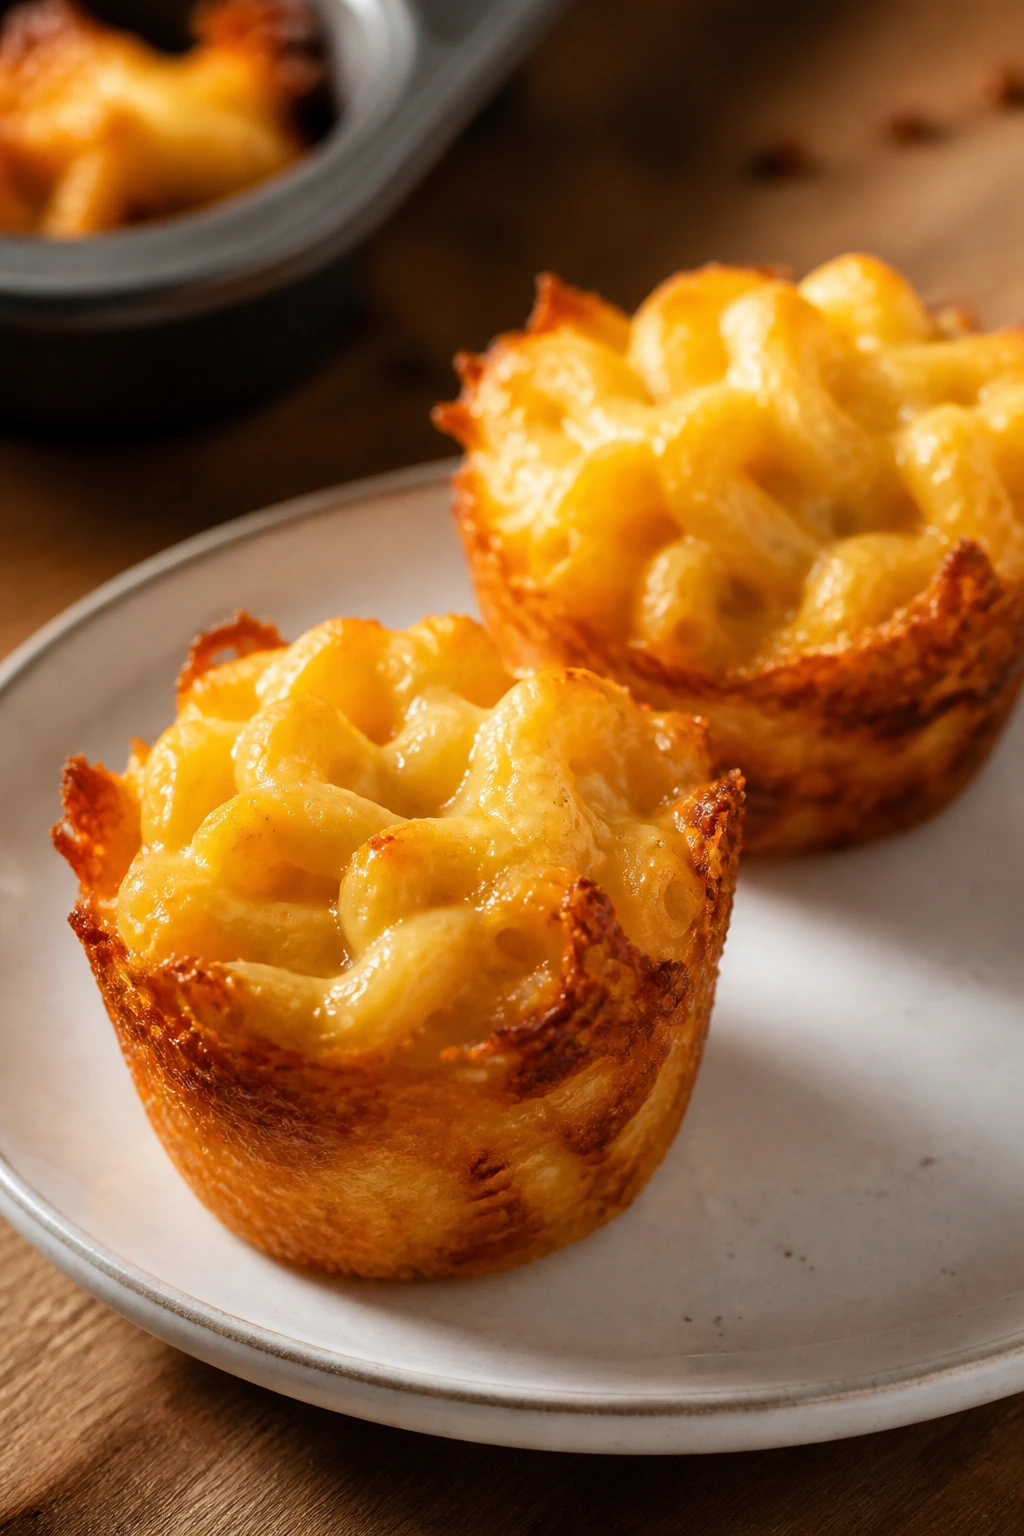
Mac and cheese in muffin form sounds a little silly until you try it and realize how well it solves the “I want pasta but also I want to hold it” problem. The edges bake into a crisp shell, while the center stays creamy.
Why It Works: Eggs help the macaroni set in the muffin tin, so each cup holds its shape. They’re easy to bake ahead and rewarm without turning gluey.
Key Ingredients:
- 3 cups cooked elbow macaroni
- 2 cups shredded cheddar
- 2 eggs
- 1/2 cup milk
- 1/3 cup breadcrumbs
- 2 tablespoons melted butter
Quick Steps:
- Heat the oven to 375°F and grease a muffin tin.
- Stir macaroni, cheese, eggs, milk, and half the breadcrumbs together.
- Spoon into the cups and sprinkle with remaining crumbs.
- Drizzle with butter and bake 18 to 20 minutes.
- Cool 5 minutes before lifting out.
Equipment for This Recipe:
- 12-cup muffin tin
- Mixing bowl
- Spoon or scoop
How to Serve This Dish: Two muffins make a snacky dinner with peas and sliced tomatoes. Serve them warm, when the cheese still pulls a little.
Pro Tips for This Recipe:
- Let the pasta cool before mixing, or the eggs scramble.
- Grease the tin well; the cheese likes to stick.
- Pack the cups firmly for cleaner edges.
Variations on This Dish:
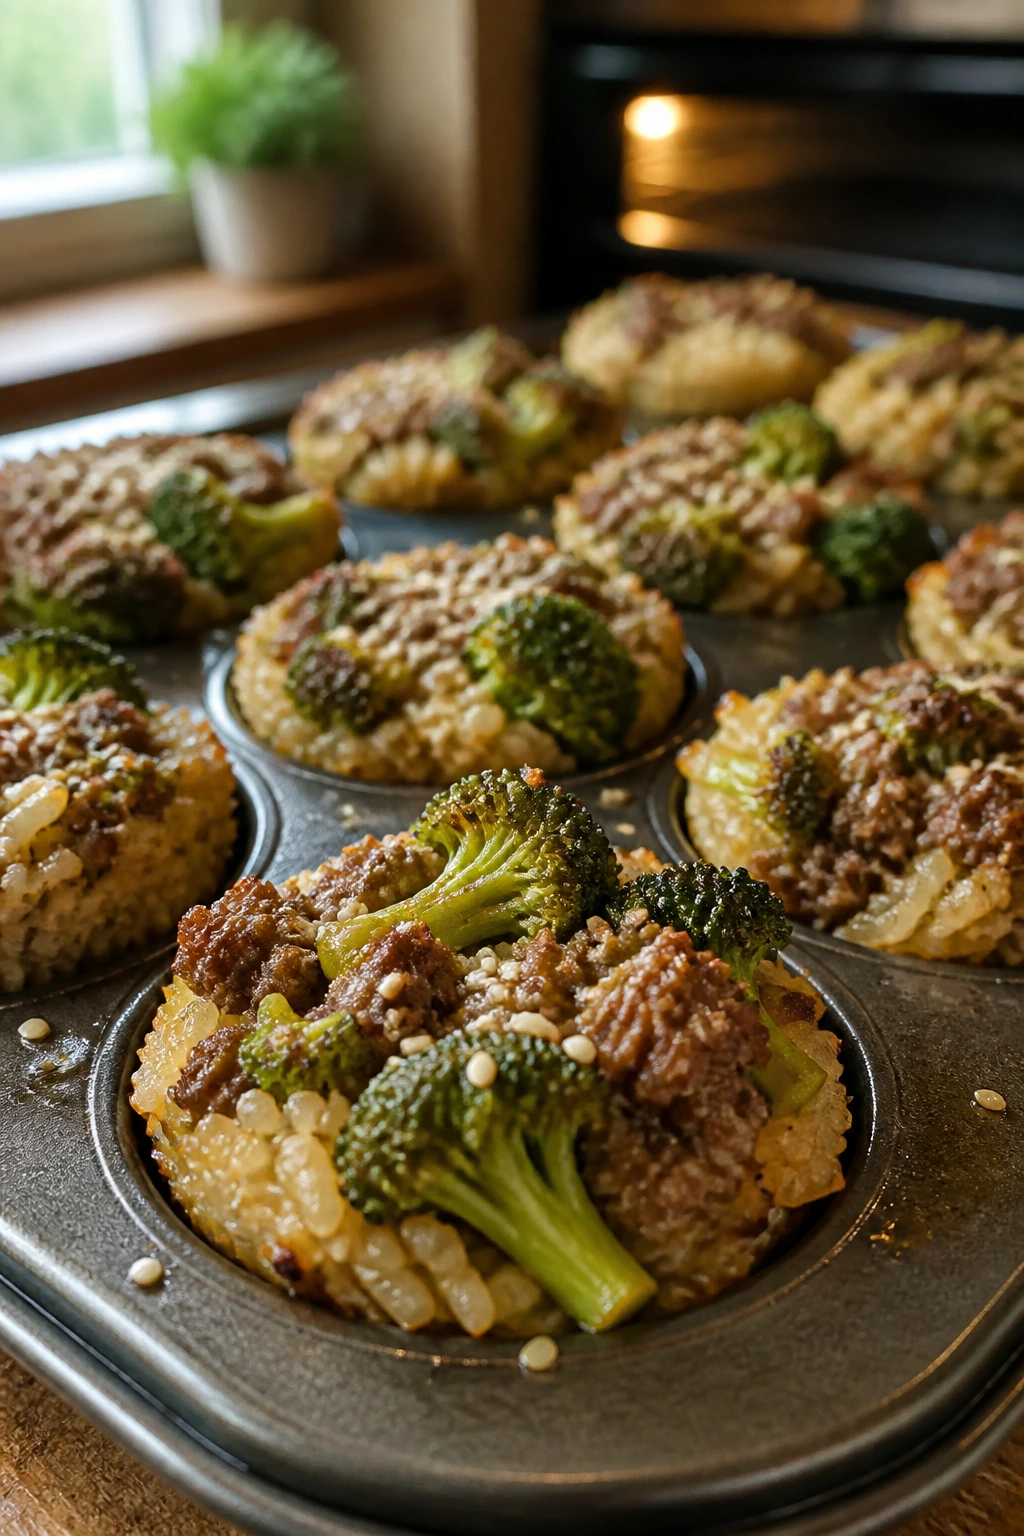
- Broccoli Cheddar Cups: Fold in 1/2 cup chopped steamed broccoli.
- Bacon Version: Add 1/3 cup crisp chopped bacon to the mix.
Common Mistakes to Avoid with This Dish:
- Too much milk: The cups slump and won’t hold. Measure carefully.
- Removing them too early: Wait 5 minutes so they set enough to lift cleanly.
6. Turkey and Hummus Pinwheel Wraps
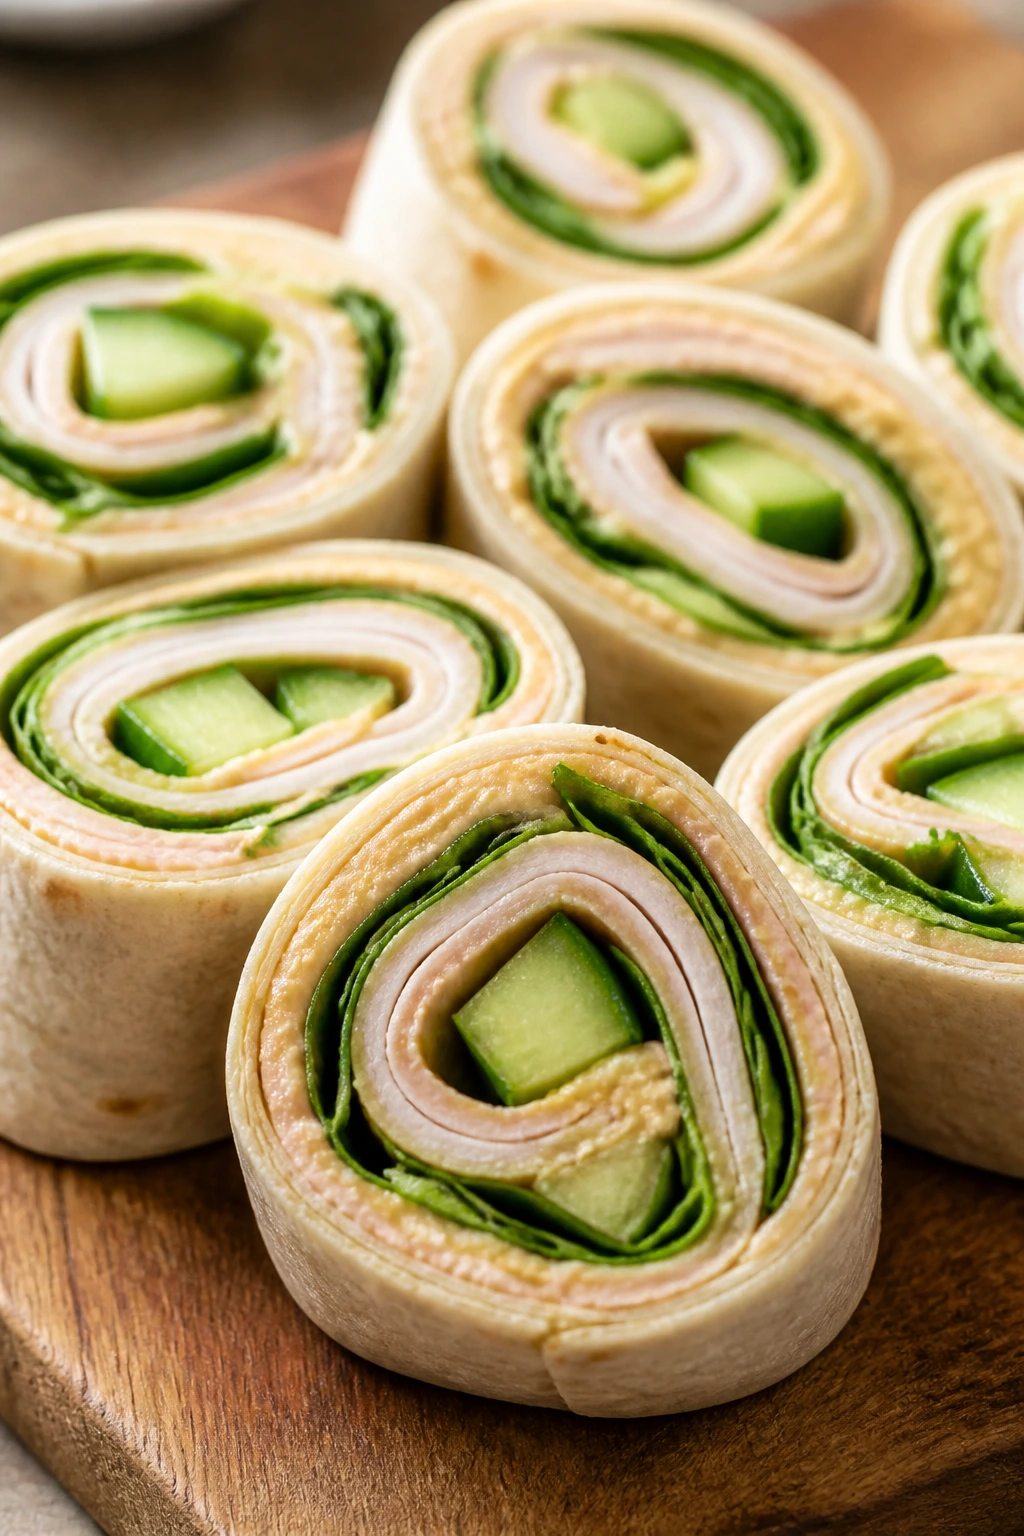
These are the lunchbox trick that accidentally works as dinner. Soft tortillas, creamy hummus, sliced turkey, and a little crunch from cucumber make pinwheels that feel like snack food but still carry protein.
Why It Works: Hummus acts like glue, which keeps the wrap tight and gives every slice a tidy spiral. They take 10 minutes and don’t require any cooking.
Key Ingredients:
- 4 large tortillas
- 1/2 cup hummus
- 8 ounces sliced turkey
- 1 cucumber, thinly sliced
- 2 cups baby spinach
- 1/4 teaspoon black pepper
Quick Steps:
- Spread hummus over each tortilla.
- Layer turkey, cucumber, spinach, and pepper.
- Roll tightly, pressing as you go.
- Chill 10 minutes for cleaner slices.
- Cut into 1-inch pinwheels.
Equipment for This Recipe:
- Cutting board
- Sharp knife
- Small spatula or butter knife
How to Serve This Dish: Serve with grapes, carrot sticks, and a handful of pretzels. They also work on a snack board with cheese cubes.
Pro Tips for This Recipe:
- Pat the cucumber dry so the wraps don’t loosen.
- Use large tortillas; small ones unroll more easily.
- Chill before slicing for the neatest swirls.
Variations on This Dish:
- Chicken Caesar Pinwheels: Swap turkey for chicken and hummus for Caesar spread.
- Veggie-Only Roll-Ups: Use extra hummus, shredded carrots, and roasted red peppers.
Common Mistakes to Avoid with This Dish:
- Overfilling the wrap: The spiral falls apart. Use a thin, even layer.
- Cutting immediately: The filling squishes out. A short chill fixes that.
7. Pesto Grilled Cheese with Tomato Slices
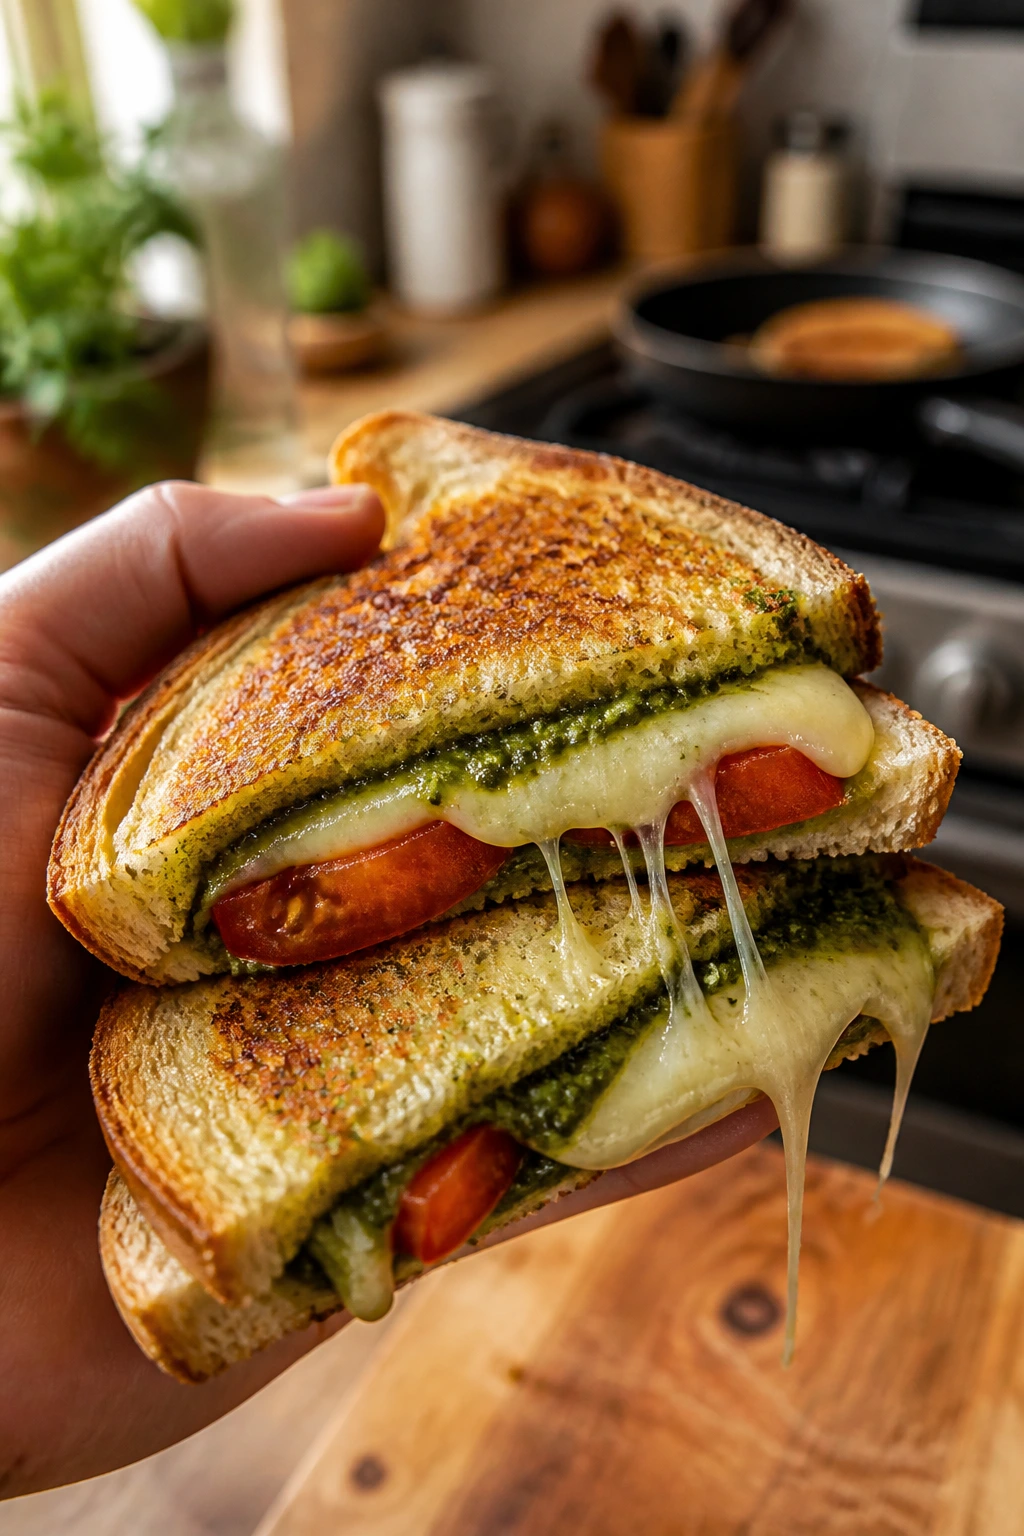
A grilled cheese with pesto feels a little more grown-up without losing the buttery edges that make it comforting. Add tomato slices and you’ve got a sandwich that reads as dinner but eats like a favorite snack.
Why It Works: Pesto brings garlic and herb flavor in one swipe, and mozzarella melts into long, stretchy strands. Medium heat gives the bread time to brown before the center goes too soft.
Key Ingredients:
- 8 slices sandwich bread
- 4 tablespoons basil pesto
- 8 slices mozzarella
- 1 medium tomato, thinly sliced
- 2 tablespoons butter
- Pinch of salt
Quick Steps:
- Spread pesto on four slices of bread.
- Layer cheese and tomato, then salt lightly.
- Top with bread and butter the outsides.
- Cook in a skillet over medium heat for 3 to 4 minutes per side.
- Rest 1 minute before cutting.
Equipment for This Recipe:
- Skillet
- Spatula
- Bread knife
How to Serve This Dish: Cut into strips for easy dipping in tomato soup or serve with a pile of celery sticks. One sandwich is enough for a snack; two make dinner.
Pro Tips for This Recipe:
- Dry the tomato slices on a towel first.
- Butter the bread edge to edge for even browning.
- Cover the pan for 30 seconds if the cheese needs help melting.
Variations on This Dish:
- Cheddar Pesto Melt: Swap mozzarella for cheddar if you want a sharper bite.
- Turkey Pesto Melt: Add a few slices of turkey for more protein.
Common Mistakes to Avoid with This Dish:
- Heat too high: The bread burns before the cheese melts.
- Wet tomatoes: They make the middle slippery and weaken the sandwich.
8. Oven-Baked Chicken Nuggets

There’s a reason chicken nuggets are a kid magnet: they’re compact, crisp, and easy to dip. Baking them at home gives you the same shape and crunch without the fryer smell or the drive-through box.
Why It Works: A breadcrumb-and-parmesan coating gets golden in the oven, and a quick egg dip keeps the crust attached. Chicken should reach 165°F in the thickest nugget.
Key Ingredients:
- 1 1/2 pounds chicken breast, cut into nuggets
- 1 cup breadcrumbs
- 1/2 cup grated parmesan
- 2 eggs
- 1/2 cup flour
- 1 teaspoon salt
Quick Steps:
- Heat oven to 425°F and line a sheet pan.
- Set up flour, beaten eggs, and breadcrumb-parmesan mix.
- Coat each nugget and place on the pan.
- Bake 16 to 18 minutes, flipping once.
- Serve hot with ketchup or ranch.
Equipment for This Recipe:
- Rimmed sheet pan
- Three shallow bowls
- Tongs
How to Serve This Dish: Serve with roasted broccoli, sliced strawberries, and a dip trio. If you want a fuller dinner, add oven fries.
Pro Tips for This Recipe:
- Cut the chicken into same-size pieces so they cook evenly.
- Press the crumbs on firmly.
- A light spray of oil helps the crust brown better.
Variations on This Dish:
- Cornflake Crunch: Use crushed cornflakes for a louder crunch.
- Spicy Nugget Version: Add paprika and a pinch of cayenne to the coating.
Common Mistakes to Avoid with This Dish:
- Uneven pieces: Small nuggets dry out before large ones finish.
- Crowding the pan: Steam keeps the coating pale and soft.
9. Taco Toast with Black Beans
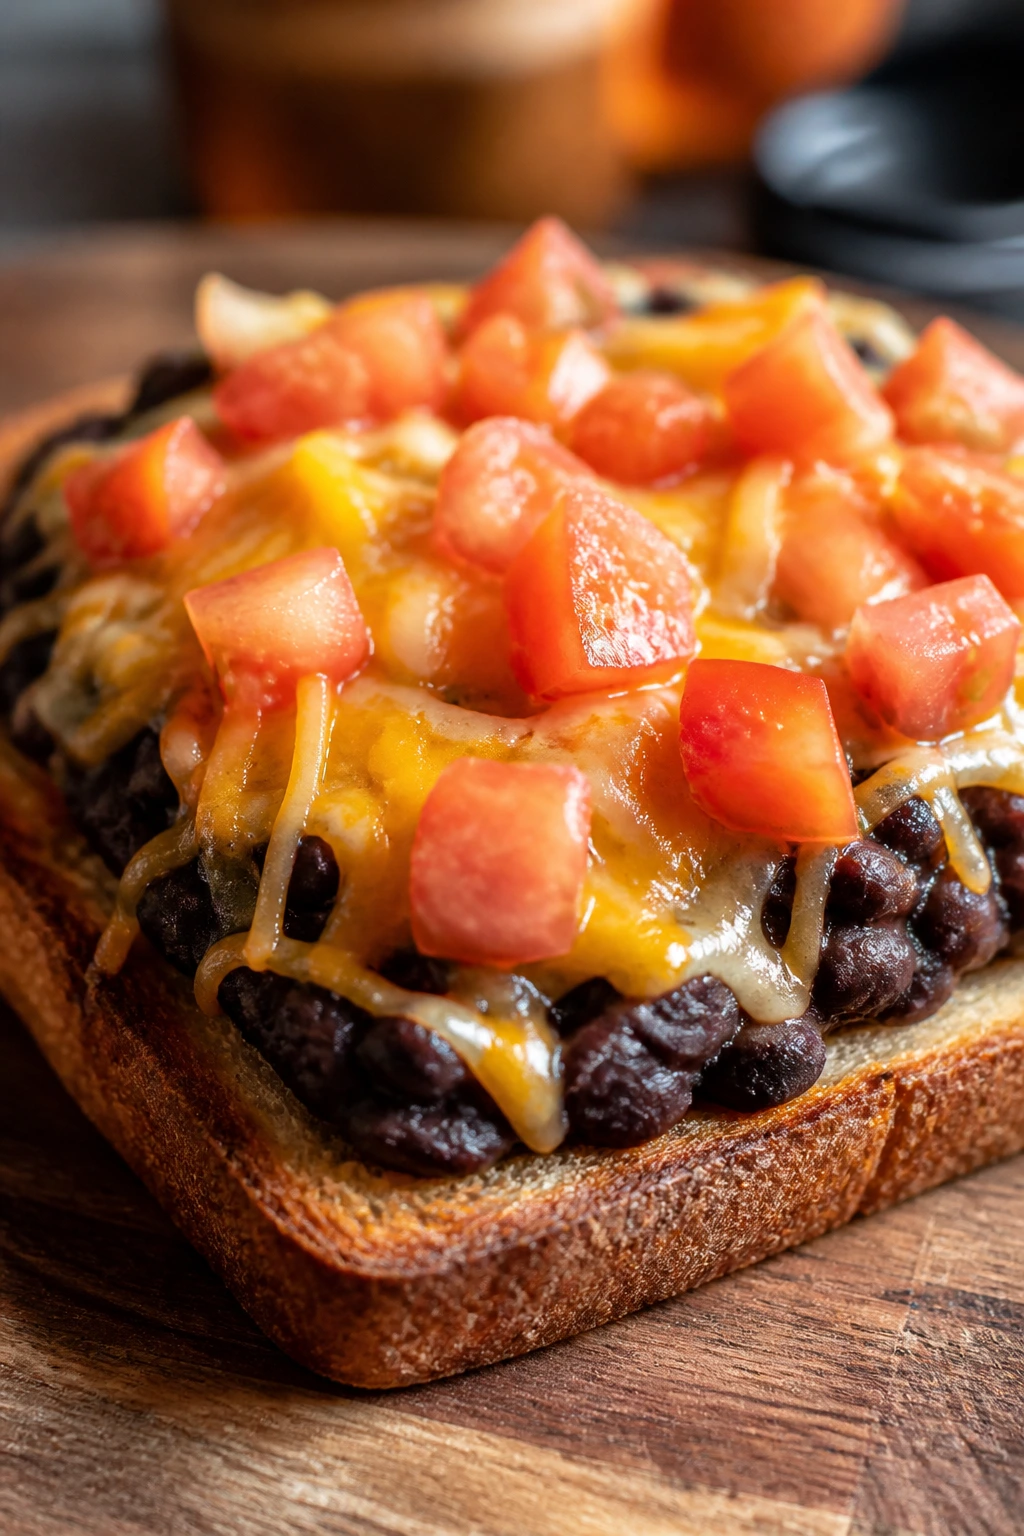
This is what happens when taco night and toast night meet in the middle. The base gets crisp, the beans bring heft, and the cheese ties it all together in a way that feels fast but not flimsy.
Why It Works: Toast holds up better than a tortilla for saucy toppings, and mashed black beans make the slice feel substantial. Broiling for a minute melts the cheese without drying the bread.
Key Ingredients:
- 4 slices sturdy bread
- 1 cup black beans, drained
- 1/2 teaspoon cumin
- 1 cup shredded cheddar
- 1/2 cup diced tomato
- 1 avocado, sliced
Quick Steps:
- Toast the bread lightly.
- Mash beans with cumin and spread on each slice.
- Top with cheese and tomato.
- Broil 1 to 2 minutes, until the cheese melts.
- Finish with avocado slices.
Equipment for This Recipe:
- Sheet pan
- Fork
- Broiler-safe tray
How to Serve This Dish: Cut each slice in half and serve with corn chips or orange wedges. A drizzle of hot sauce works for older kids who like a little heat.
Pro Tips for This Recipe:
- Use thick bread so it doesn’t collapse under the toppings.
- Mash the beans just enough to spread.
- Watch the broiler closely; it changes fast.
Variations on This Dish:
- Chicken Taco Toast: Add shredded chicken under the cheese.
- Corn-and-Bean Version: Mix in 1/3 cup corn for extra sweetness.
Common Mistakes to Avoid with This Dish:
- Skipping the pre-toast: Soft bread turns soggy. Give it a head start.
- Too much avocado early: Add it after broiling so it stays fresh.
10. Mini Meatball Subs
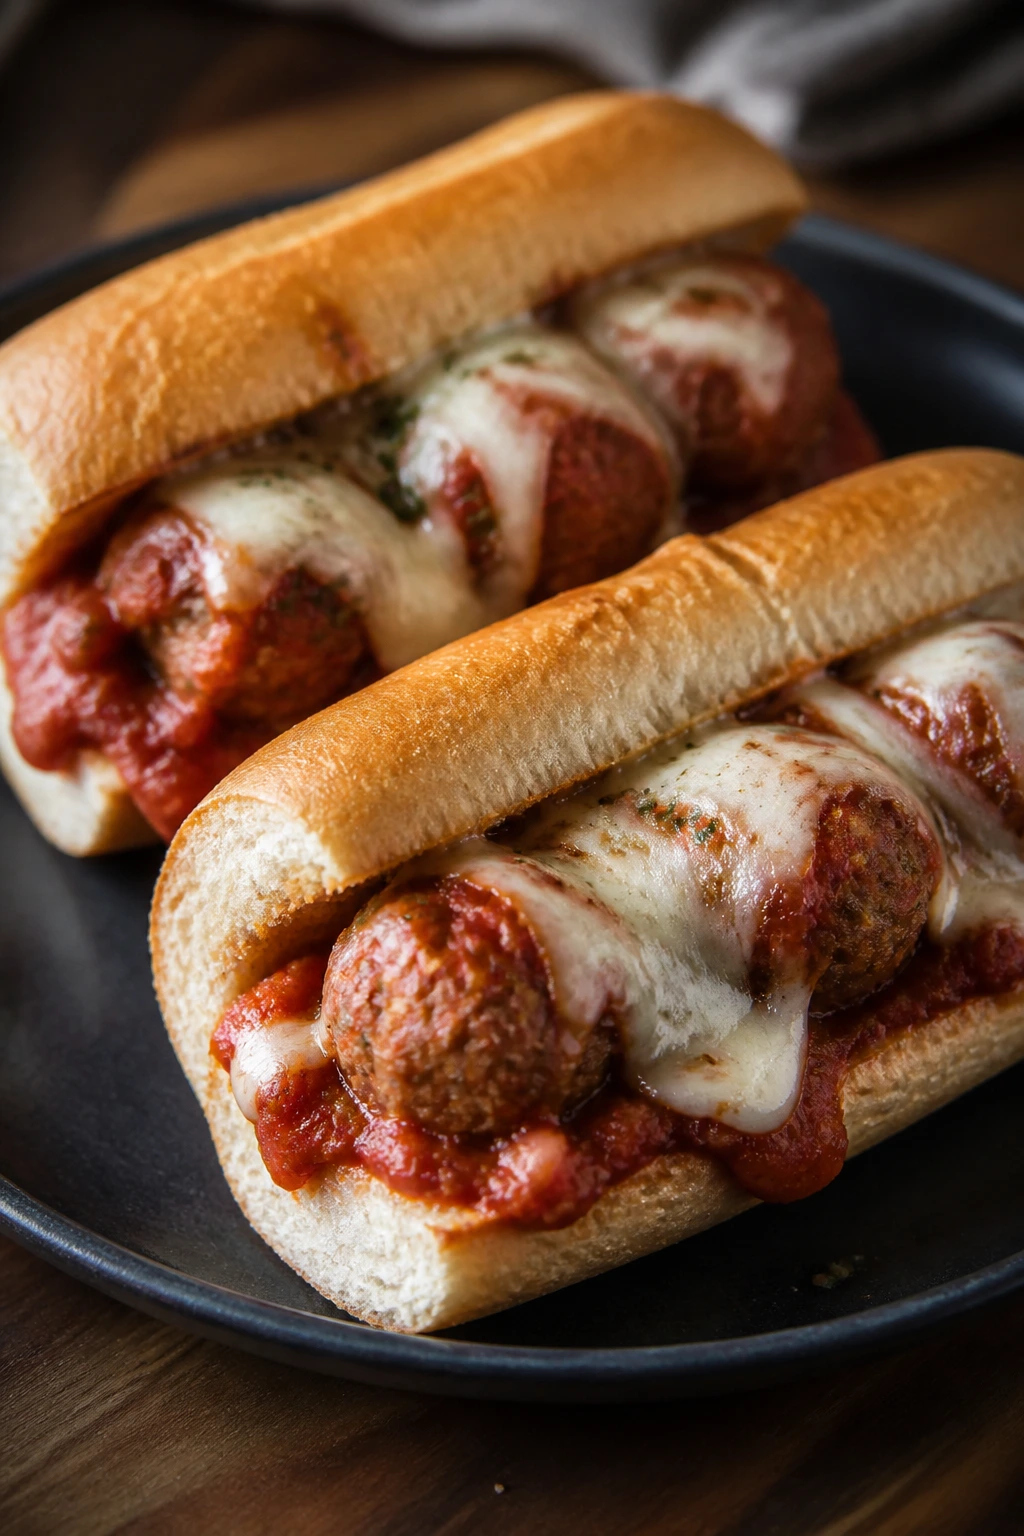
A small sub has a nice practical charm. It’s still saucy and cheesy, but the portion fits a child’s hands and doesn’t spill all over the table before the first bite.
Why It Works: Meatballs simmered in marinara stay juicy, and the rolls only need a quick toast before assembly. This one is ready in about 20 minutes if the meatballs are pre-cooked.
Key Ingredients:
- 12 small cooked meatballs
- 1 1/2 cups marinara sauce
- 6 small hoagie rolls
- 1 cup shredded mozzarella
- 1 tablespoon olive oil
- 1 tablespoon grated parmesan
Quick Steps:
- Warm meatballs in marinara over medium heat.
- Split the rolls and brush with olive oil.
- Toast the rolls lightly under the broiler.
- Fill with meatballs and sauce, then top with mozzarella.
- Broil until the cheese melts, about 1 minute.
Equipment for This Recipe:
- Small saucepan
- Baking sheet
- Spoon
How to Serve This Dish: Serve two mini subs with cucumber spears and a little extra sauce for dipping. They’re messy in the way kids like, so keep napkins nearby.
Pro Tips for This Recipe:
- Don’t drown the rolls in sauce.
- Broil just long enough to melt, not burn.
- Use small rolls so the ratio of bread to filling stays balanced.
Variations on This Dish:
- Turkey Meatball Subs: Use turkey meatballs for a lighter version.
- Provolone Melt: Swap mozzarella for provolone if you want a sharper cheese pull.
Common Mistakes to Avoid with This Dish:
- Too much sauce in the roll: It softens the bread fast.
- Skipping the broil: Cold cheese on a hot sub feels unfinished.
11. Veggie Fried Rice with Scrambled Egg
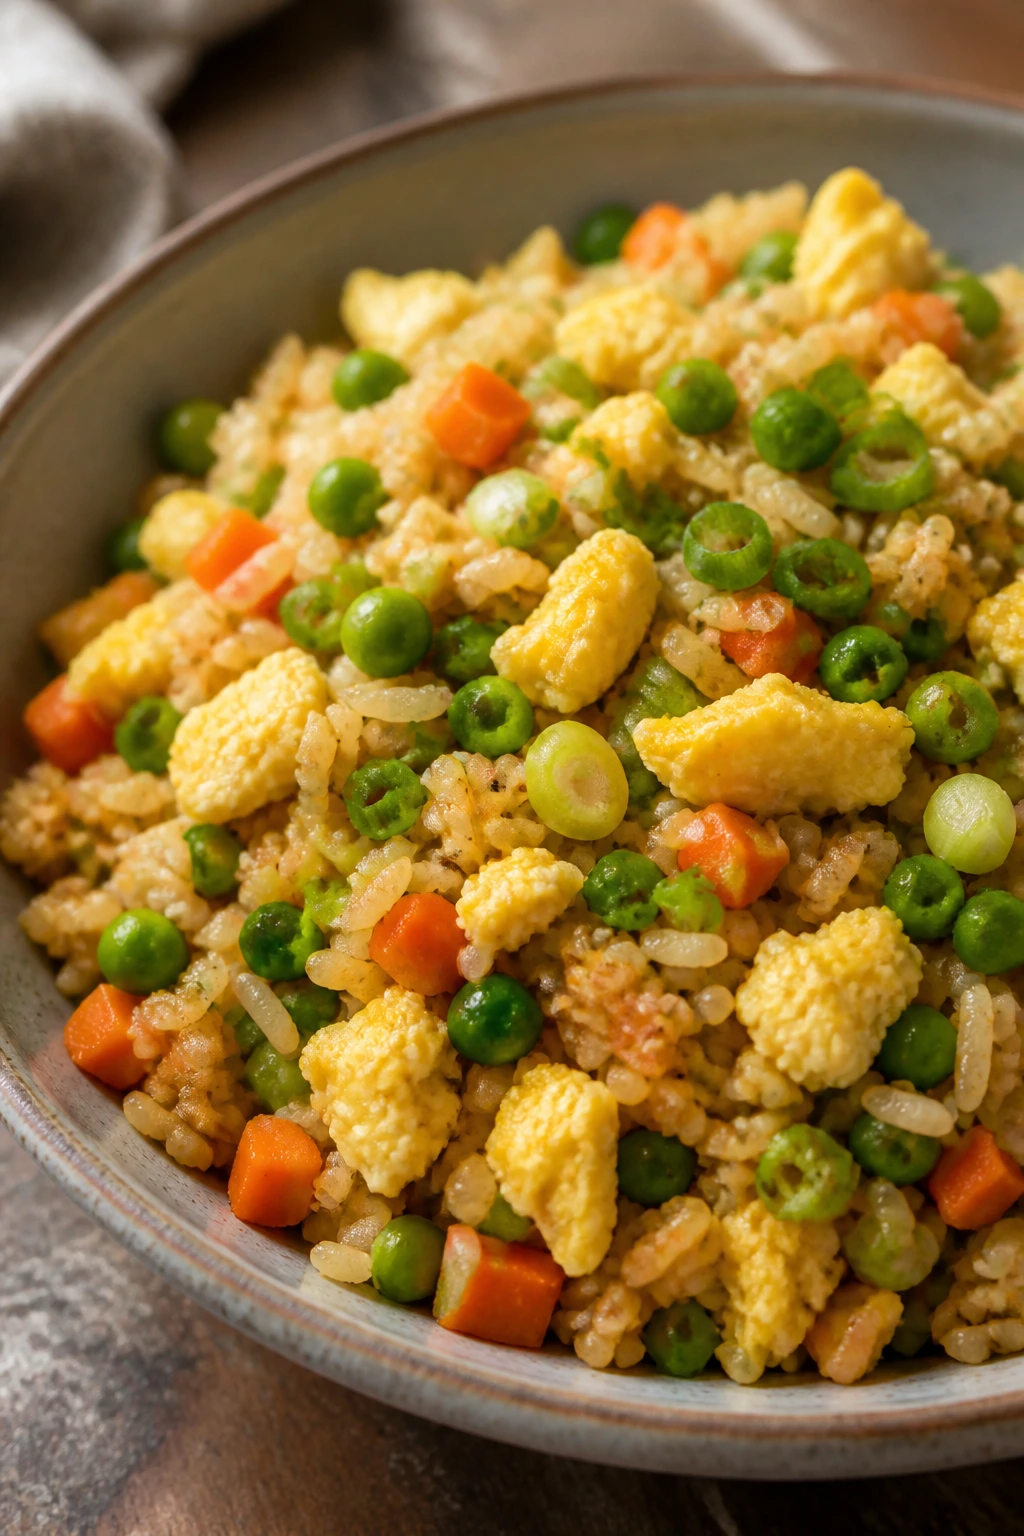
Fried rice is one of those dinners that looks humble and eats like a rescue mission for leftover rice. The grains separate, the vegetables stay bright, and the egg gives the whole bowl just enough richness to feel like dinner.
Why It Works: Cold rice fries better than warm rice because the grains are drier. A hot pan and a quick stir keep the texture loose instead of sticky.
Key Ingredients:
- 3 cups cold cooked rice
- 2 eggs
- 1 cup frozen peas and carrots
- 2 tablespoons soy sauce
- 1 tablespoon sesame oil
- 2 green onions, sliced
Quick Steps:
- Scramble the eggs in a hot skillet and set aside.
- Add sesame oil, peas, carrots, and rice.
- Stir-fry over medium-high heat for 3 to 4 minutes.
- Add soy sauce and the eggs back in.
- Finish with green onions.
Equipment for This Recipe:
- Large skillet or wok
- Spatula
- Small bowl
How to Serve This Dish: Scoop into bowls with sliced cucumbers or orange segments. A fried egg on top turns it into a more filling dinner.
Pro Tips for This Recipe:
- Break up rice clumps before it hits the pan.
- Use medium-high heat so the rice fries, not steams.
- Keep the soy sauce measured; too much makes it heavy.
Variations on This Dish:
- Chicken Fried Rice: Add 1 cup diced cooked chicken.
- Pineapple Fried Rice: Fold in 1/2 cup diced pineapple for sweetness.
Common Mistakes to Avoid with This Dish:
- Fresh hot rice: It clumps and turns mushy.
- Weak heat: A crowded, cool pan makes pale rice instead of fried rice.
12. English Muffin Pizza Melts
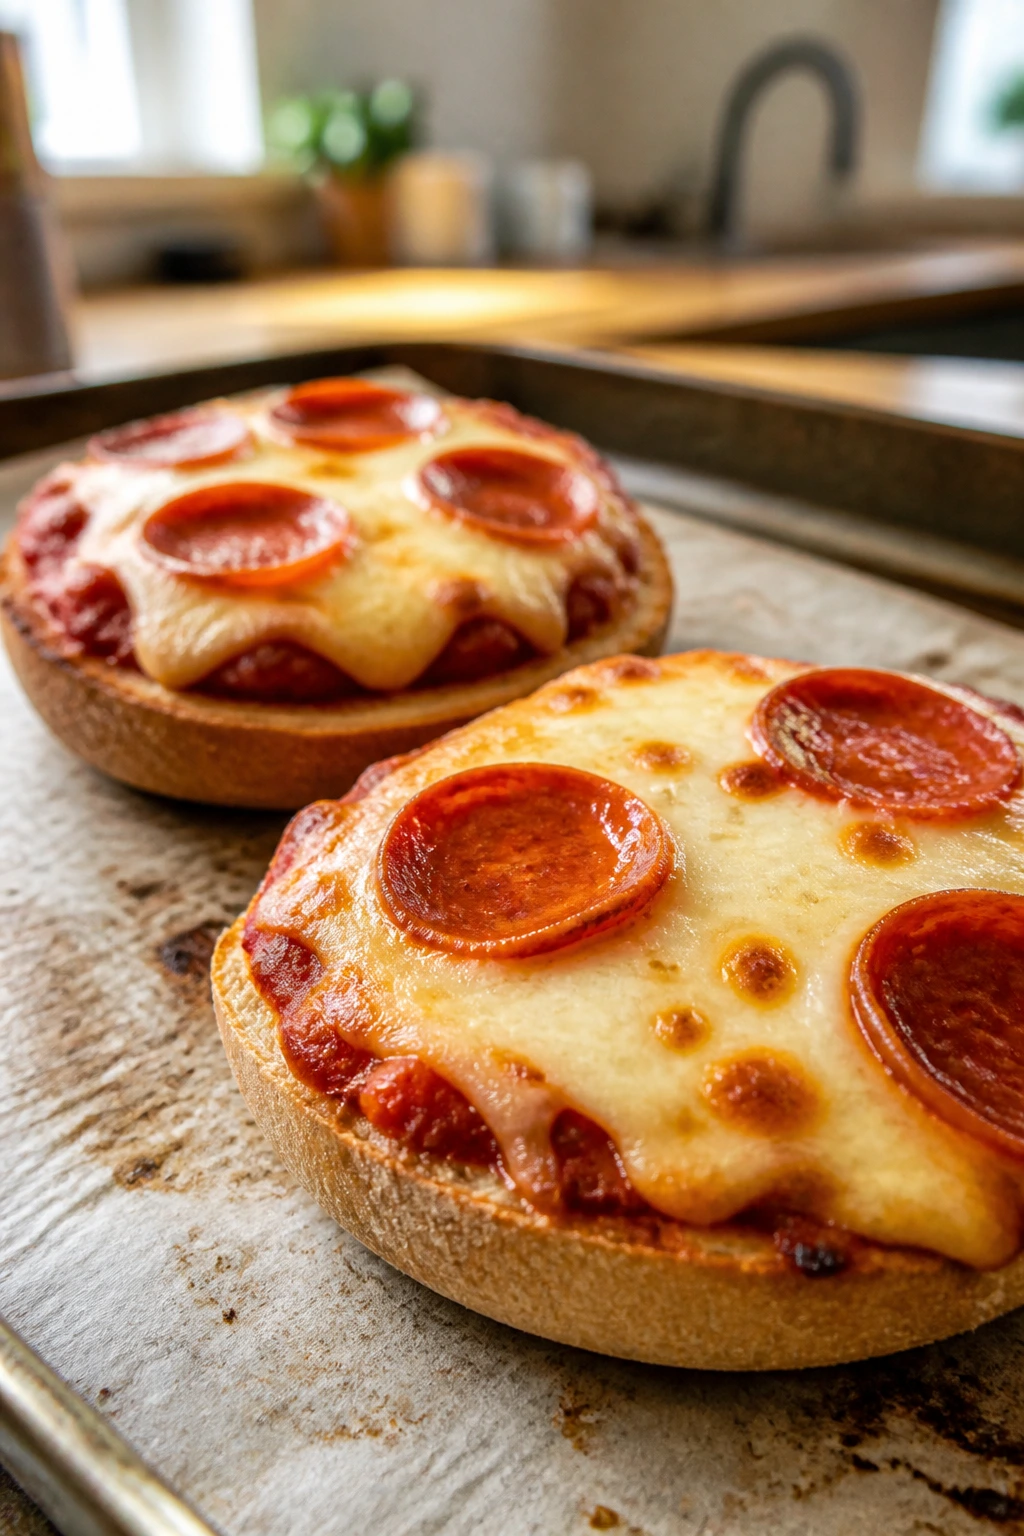
English muffins are built for this sort of thing. Their craggy surface catches sauce, their edges brown well, and each half behaves like a tiny personal pizza that can be eaten before a homework folder is even opened.
Why It Works: The split surface gives you lots of nooks for sauce and cheese, and the muffin toasts fast under high heat. You can make a full tray in under 15 minutes.
Key Ingredients:
- 6 English muffins, split
- 3/4 cup pizza sauce
- 2 cups shredded mozzarella
- 24 pepperoni slices
- 1/2 teaspoon dried oregano
Quick Steps:
- Heat oven to 425°F.
- Place muffins cut-side up on a sheet pan.
- Top with sauce, cheese, pepperoni, and oregano.
- Bake 8 to 10 minutes, until melty and browned.
- Rest briefly before serving.
Equipment for This Recipe:
- Sheet pan
- Spoon
- Oven mitts
How to Serve This Dish: Cut each half into smaller pieces for snack plates with olives or carrot sticks. They’re also easy to pack for a next-day lunch.
Pro Tips for This Recipe:
- Toast the muffins lightly before topping if you want extra crunch.
- Use a thin layer of sauce.
- Keep toppings small so they don’t slide off.
Variations on This Dish:
- Veggie Muffin Pizza: Add diced peppers and mushrooms.
- Breakfast Pizza Muffins: Top with scrambled egg and a little bacon.
Common Mistakes to Avoid with This Dish:
- Too much sauce: The muffin turns wet under the cheese.
- Baking too long: The cheese can go from melted to hard in a minute.
13. Loaded Baked Potato Boats
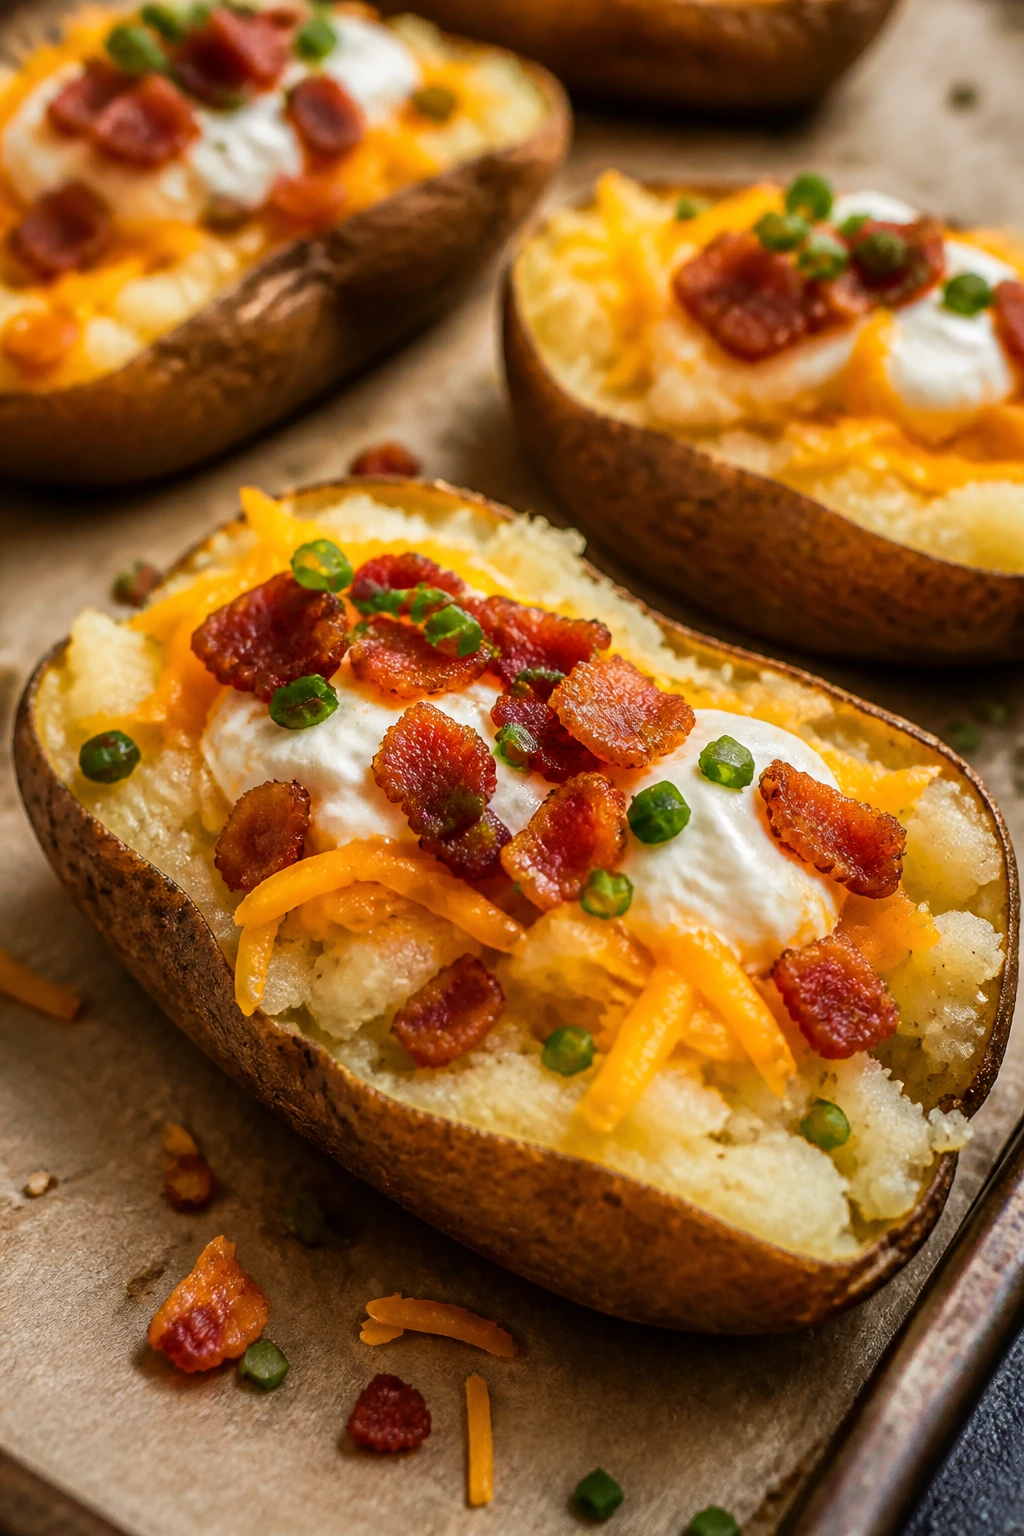
A baked potato becomes much more interesting once you split it open and load it with cheese, sour cream, and something salty on top. The skin gets crisp, the center gets fluffy, and the whole thing can be eaten with a fork in one hand.
Why It Works: Russet potatoes have a dry, fluffy interior that mashes easily with toppings. Baking them directly on the rack gives the skin better texture.
Key Ingredients:
- 4 medium russet potatoes
- 1 cup shredded cheddar
- 1/2 cup sour cream
- 4 slices cooked bacon, crumbled
- 2 tablespoons chopped chives
- 1 tablespoon butter
Quick Steps:
- Bake potatoes at 400°F for 45 to 50 minutes.
- Split open and fluff the centers with a fork.
- Add butter, cheddar, and a pinch of salt.
- Return to the oven for 5 minutes to melt.
- Finish with sour cream, bacon, and chives.
Equipment for This Recipe:
- Baking sheet
- Fork
- Knife
How to Serve This Dish: Serve one potato half for a snack and two for dinner, with steamed broccoli or a salad on the side. A little extra sour cream on the table helps.
Pro Tips for This Recipe:
- Prick the potatoes before baking so they don’t burst.
- Salt the skins after baking for extra flavor.
- Don’t overload the fillings before the second bake.
Variations on This Dish:
- Broccoli Cheddar Boat: Add chopped steamed broccoli.
- Turkey Chili Potato: Spoon leftover chili over the potato before the cheese.
Common Mistakes to Avoid with This Dish:
- Undercooked potatoes: The center stays waxy. Bake until a knife slides in easily.
- Skipping the fluffing step: A dense center won’t absorb the butter and cheese.
14. Breakfast Burrito Wraps

Breakfast for dinner works because kids don’t care what time it is when eggs, potatoes, and cheese show up in a tortilla. These burritos are hearty enough for supper but still portable enough to slice into snack-sized halves.
Why It Works: Eggs cook fast, potatoes add bulk, and tortillas make the whole thing easy to hold. If you wrap them tightly and toast the seam, they stay together.
Key Ingredients:
- 6 eggs
- 1 cup diced cooked potatoes
- 1 cup shredded cheddar
- 4 large tortillas
- 1/2 cup cooked sausage or black beans
- 2 tablespoons butter
Quick Steps:
- Scramble the eggs in butter until just set.
- Warm the potatoes and sausage or beans.
- Fill each tortilla with eggs, potatoes, and cheese.
- Roll tightly and toast seam-side down in a skillet.
- Slice in half and serve warm.
Equipment for This Recipe:
- Skillet
- Mixing bowl
- Spatula
How to Serve This Dish: Serve with salsa, sliced fruit, and a little plain yogurt for dipping. Half a burrito works as a snack; a full one plus fruit is dinner.
Pro Tips for This Recipe:
- Keep eggs soft so they don’t dry out on the reheat.
- Warm tortillas before rolling.
- Don’t overfill; burritos that look impressive usually split.
Variations on This Dish:
- Veggie Burrito: Use black beans, spinach, and peppers instead of sausage.
- Hash Brown Version: Swap diced potatoes for shredded hash browns.
Common Mistakes to Avoid with This Dish:
- Cold fillings: They make the tortilla stiff and hard to roll.
- Loose wrapping: The seam opens when you toast it.
15. Baked Ravioli Cups
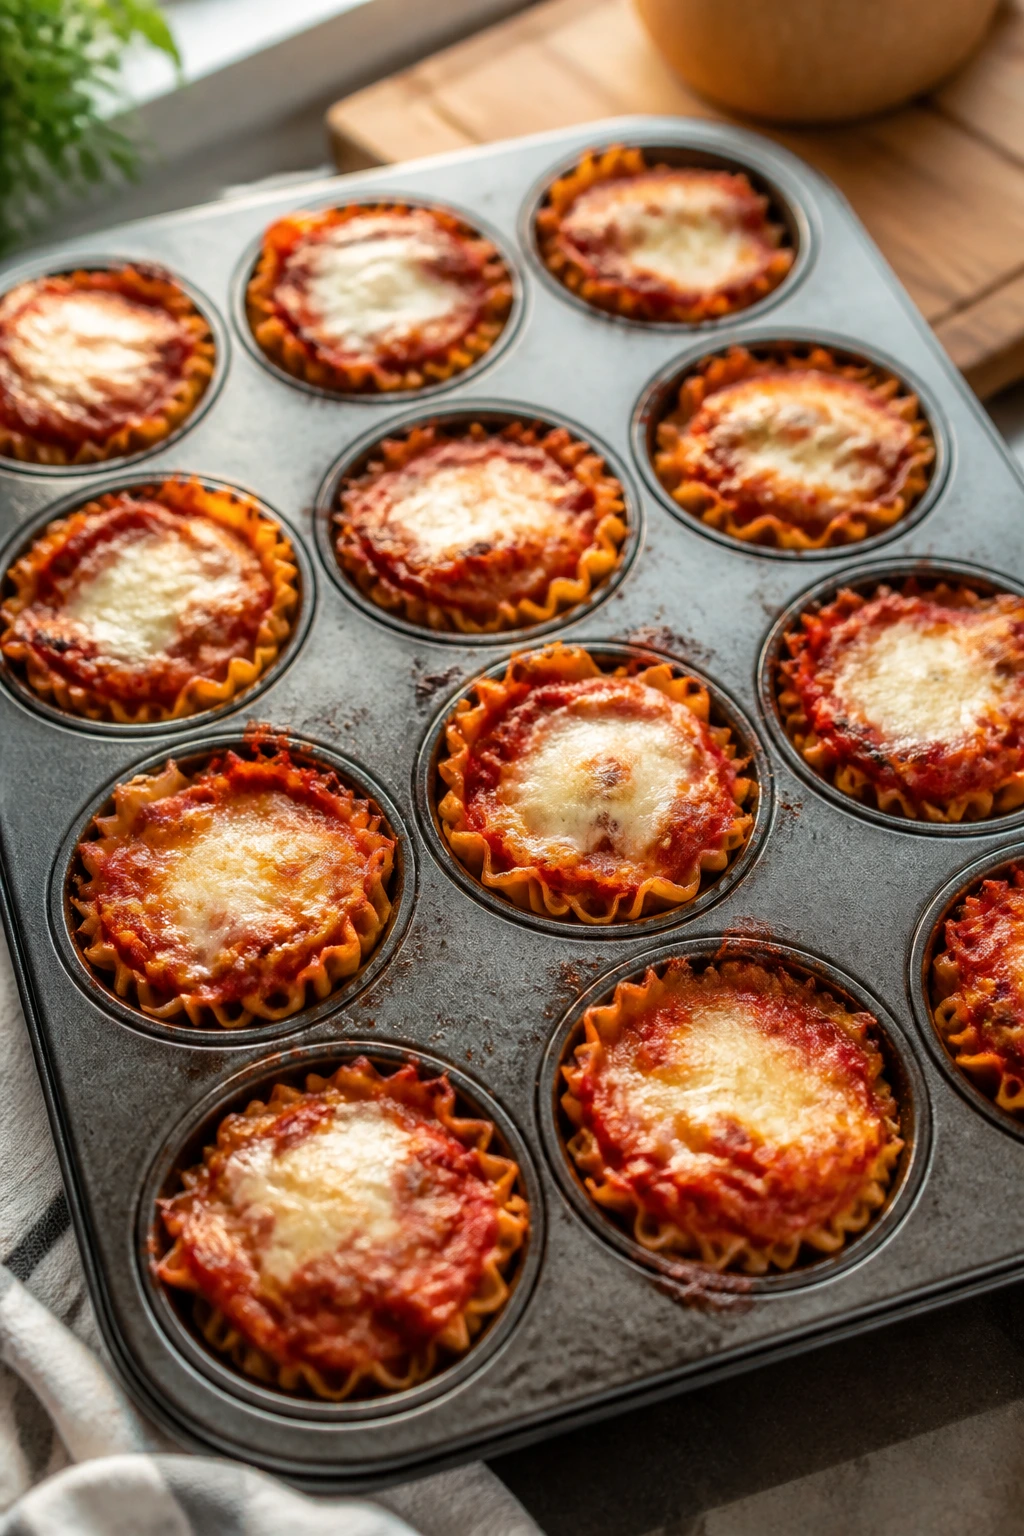
Ravioli doesn’t have to be boiled and plated like a formal pasta dinner. Tucked into a muffin tin, it turns into a compact, cheesy bite that tastes a little like lasagna without the layering project.
Why It Works: The pasta cups hold their shape, the sauce stays contained, and the cheese browns around the edges. Using refrigerated ravioli keeps the process fast.
Key Ingredients:
- 1 package refrigerated cheese ravioli
- 1 cup marinara sauce
- 1 1/2 cups shredded mozzarella
- 1/4 cup grated parmesan
- 1 tablespoon olive oil
- 1 teaspoon dried basil
Quick Steps:
- Heat oven to 375°F and grease a muffin tin.
- Press one ravioli into each cup with a little sauce.
- Top with mozzarella, parmesan, and basil.
- Bake 18 to 20 minutes until bubbly.
- Cool 5 minutes before lifting out.
Equipment for This Recipe:
- Muffin tin
- Spoon
- Oven mitts
How to Serve This Dish: Serve three cups per person with a green salad or sliced cucumbers. They’re especially good with extra warm marinara on the side.
Pro Tips for This Recipe:
- Grease the tin well; cheese likes to stick.
- Use small ravioli for tidier cups.
- Let them rest so they release cleanly.
Variations on This Dish:
- Spinach Ravioli Cups: Use spinach ravioli and add a pinch of garlic.
- Meat Sauce Version: Swap marinara for meat sauce if you want more heft.
Common Mistakes to Avoid with This Dish:
- Too much sauce: The cups lose structure.
- Uncooled removal: They tear apart if you lift too soon.
16. Chicken and Broccoli Alfredo Pasta
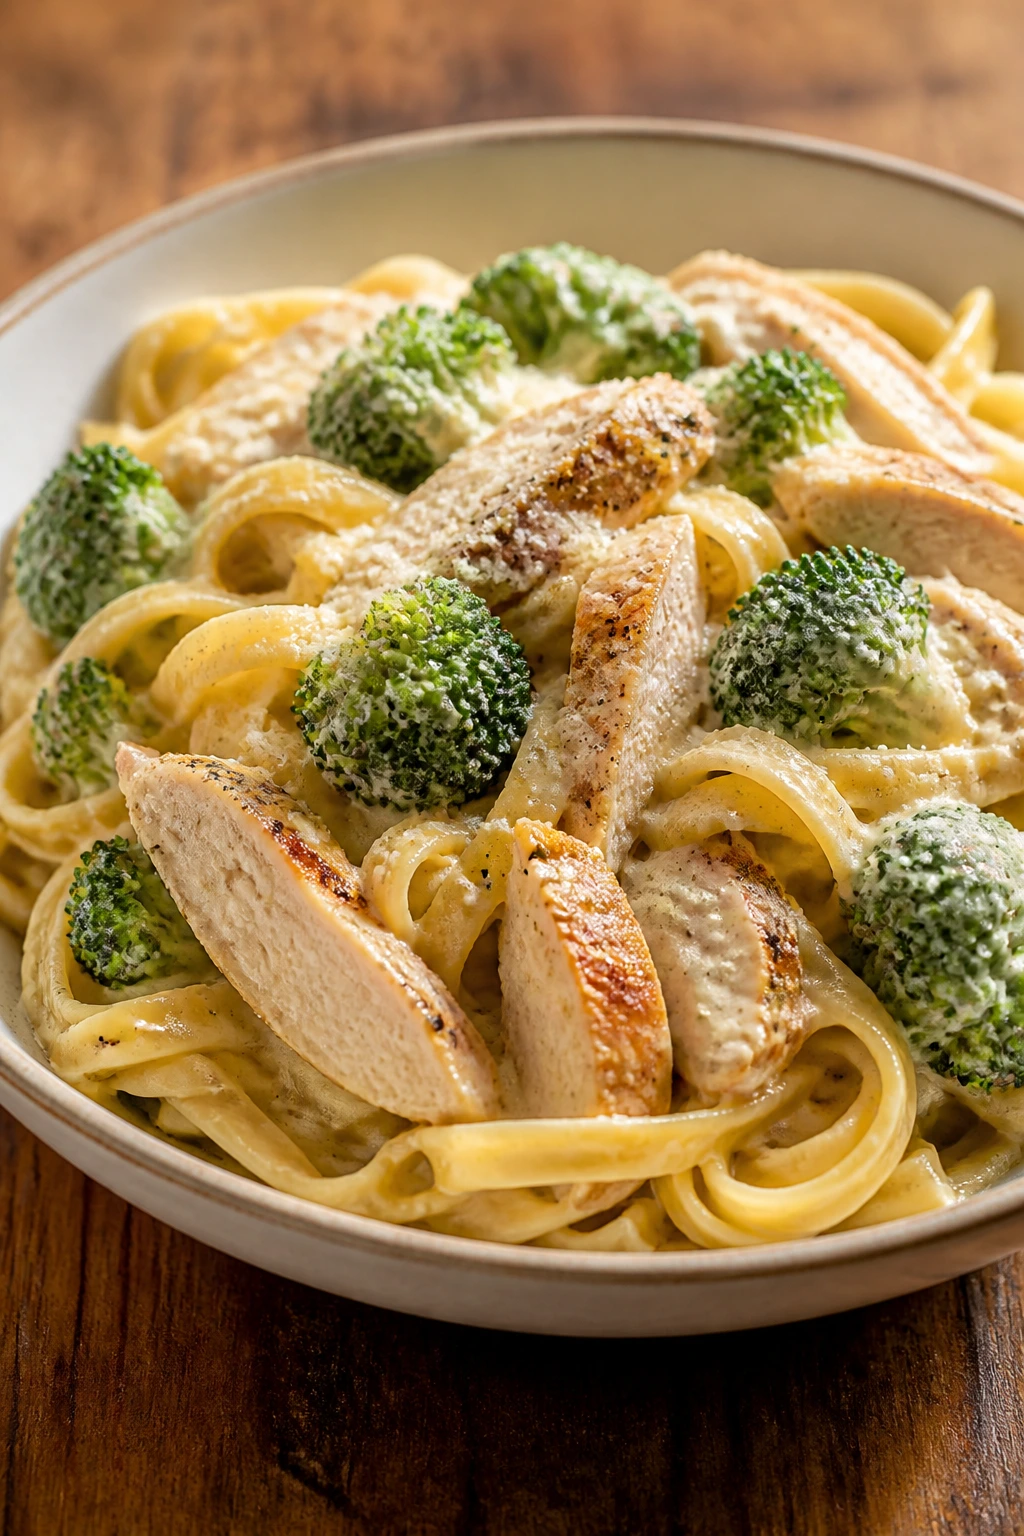
This is the kind of pasta that feels familiar the second it hits the bowl: creamy sauce, tender chicken, and broccoli that still has a little bite. It’s dinner, yes, but it also works in smaller bowls when the after-school crowd wants something warm and filling.
Why It Works: Broccoli blanches fast and keeps color, while cooked chicken makes the sauce feel complete without extra prep. The whole pan comes together in about 20 minutes if the pasta is already boiling.
Key Ingredients:
- 8 ounces fettuccine or penne
- 2 cups cooked chicken, chopped
- 2 cups broccoli florets
- 2 cups Alfredo sauce
- 1/2 cup grated parmesan
- 1 tablespoon butter
Quick Steps:
- Cook pasta until al dente.
- Blanch broccoli in the pasta water for 2 minutes, then drain.
- Warm butter, Alfredo sauce, chicken, and broccoli in a skillet.
- Toss in pasta and parmesan until coated.
- Serve hot with black pepper.
Equipment for This Recipe:
- Large pot
- Colander
- Skillet
How to Serve This Dish: Spoon into shallow bowls with garlic bread or crackers. For snack-style serving, use smaller bowls and top with extra parmesan.
Pro Tips for This Recipe:
- Don’t overcook the broccoli; it should still have some snap.
- Thin thick sauce with a splash of pasta water if needed.
- Use chopped chicken, not giant chunks, so every bite feels balanced.
Variations on This Dish:
- Lemon Alfredo: Add 1 teaspoon lemon zest for a brighter finish.
- Ham and Pea Alfredo: Swap chicken for chopped ham and peas.
Common Mistakes to Avoid with This Dish:
- Overcooked pasta: It breaks once tossed with sauce.
- Boiling the sauce hard: Creamy sauce can tighten and turn grainy.
17. Tuna Melt Toasties
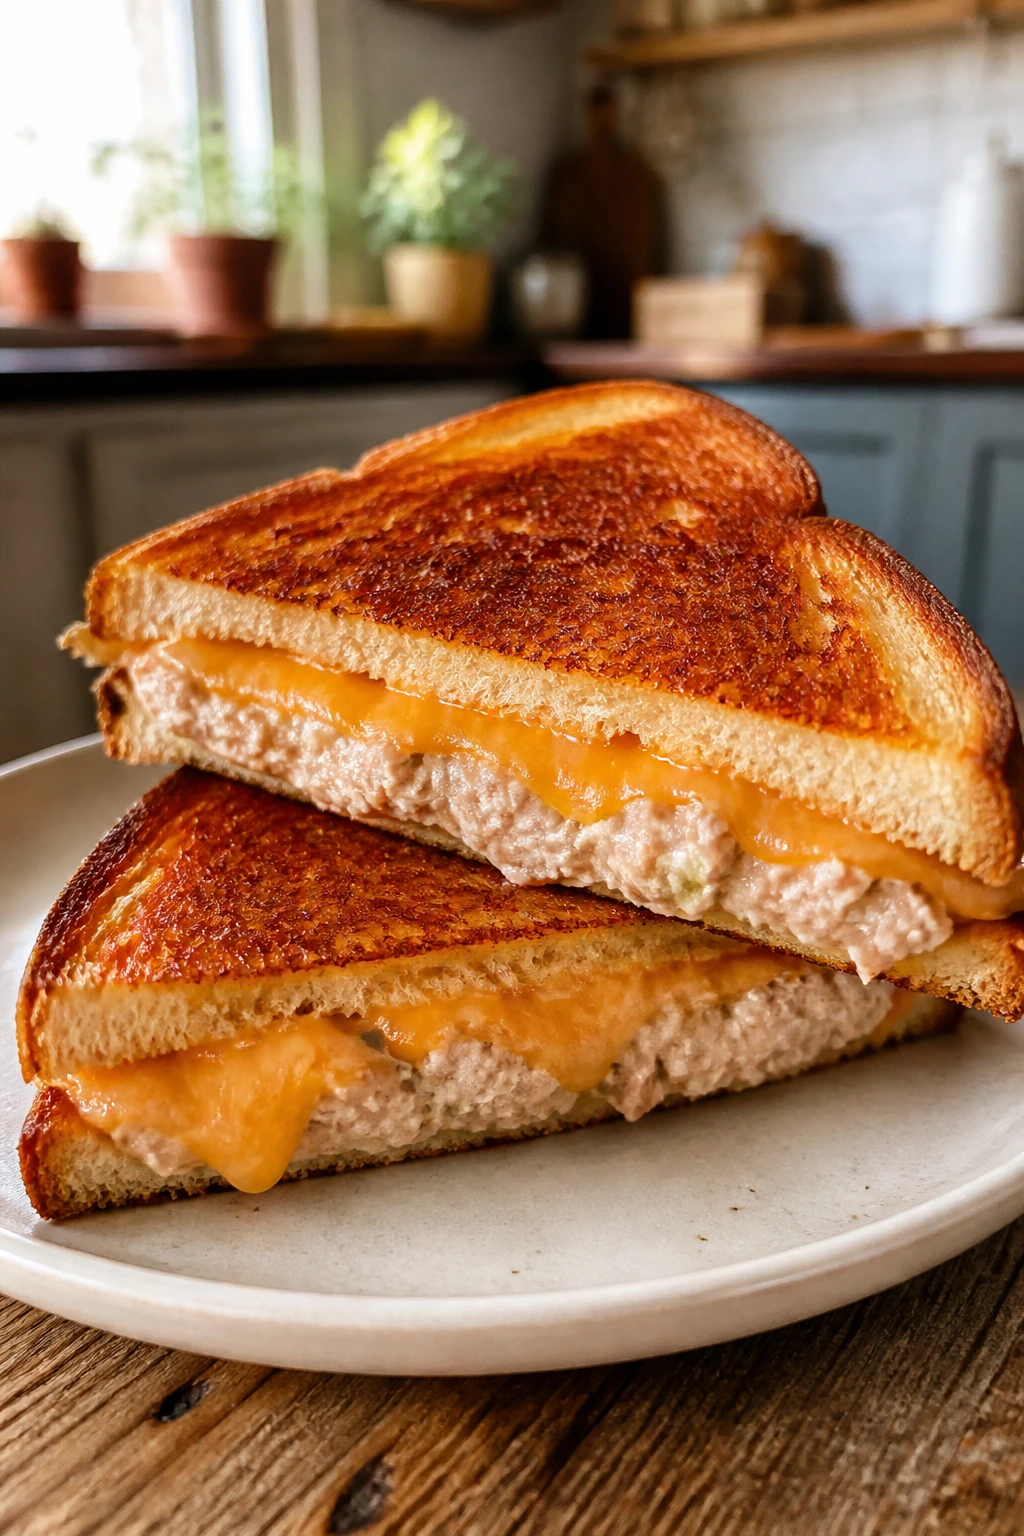
Tuna melts have a very specific old-school charm, but the toastie version feels neater and easier to eat. Crisp bread, warm tuna salad, and melted cheese are a strong combination when you need dinner to happen with minimal drama.
Why It Works: The tuna mixture is already cooked, so the heat job is all about melting cheese and browning bread. Celery gives crunch, and a little mustard keeps the filling from tasting flat.
Key Ingredients:
- 2 cans tuna, drained
- 1/4 cup mayonnaise
- 1 celery stalk, finely chopped
- 1 teaspoon mustard
- 8 slices bread
- 4 slices cheddar
Quick Steps:
- Mix tuna, mayo, celery, and mustard.
- Spread on four bread slices and top with cheese.
- Close the sandwiches.
- Toast in a skillet over medium heat for 3 to 4 minutes per side.
- Cut diagonally and serve hot.
Equipment for This Recipe:
- Skillet
- Mixing bowl
- Spatula
How to Serve This Dish: Pair with tomato soup, pickles, or sliced pears. Half a sandwich works as an after-school snack; a whole one is enough for dinner with fruit.
Pro Tips for This Recipe:
- Drain tuna well so the filling doesn’t get slippery.
- A thin layer of mayo is enough.
- Use bread that browns well, not super soft sandwich bread.
Variations on This Dish:
- Capers and Dill Version: Add a few chopped capers and dill.
- Hot Tuna Melt: Mix in a little hot sauce for older kids or adults.
Common Mistakes to Avoid with This Dish:
- Too much filling: The sandwich squishes apart when flipped.
- Heat too high: The bread browns before the cheese melts.
18. Mini Calzones with Ricotta and Mozzarella

Calzones make dinner feel like an event even when the filling is basic. The sealed edges keep the cheese inside, which means the first bite gives you a molten center instead of a puddle on the pan.
Why It Works: Pizza dough bakes into a sturdy shell, and ricotta keeps the filling creamy without running. Small calzones cook faster and are easier for kids to handle.
Key Ingredients:
- 1 pound pizza dough
- 1 cup ricotta
- 1 cup shredded mozzarella
- 1/2 cup chopped spinach
- 1/4 cup pepperoni, chopped
- 1 egg, beaten
Quick Steps:
- Heat oven to 425°F and line a sheet pan.
- Divide dough into 6 pieces and flatten each into a round.
- Mix ricotta, mozzarella, spinach, and pepperoni.
- Fill, fold, crimp, and brush with egg.
- Bake 14 to 16 minutes until golden.
Equipment for This Recipe:
- Sheet pan
- Rolling pin
- Fork
How to Serve This Dish: Serve with warm marinara for dipping and a crisp salad. One mini calzone makes a strong snack; two can handle dinner.
Pro Tips for This Recipe:
- Don’t overfill or the seams burst.
- Pinch the edges tightly.
- Cut a tiny steam vent in the top if needed.
Variations on This Dish:
- Margherita Calzone: Use mozzarella, basil, and tomato only.
- Ham and Swiss Version: Swap the fillings for chopped ham and Swiss cheese.
Common Mistakes to Avoid with This Dish:
- Dough too thin: It tears under the filling.
- Skipping the egg wash: The crust stays pale instead of golden.
19. Teriyaki Meatball Rice Bowls
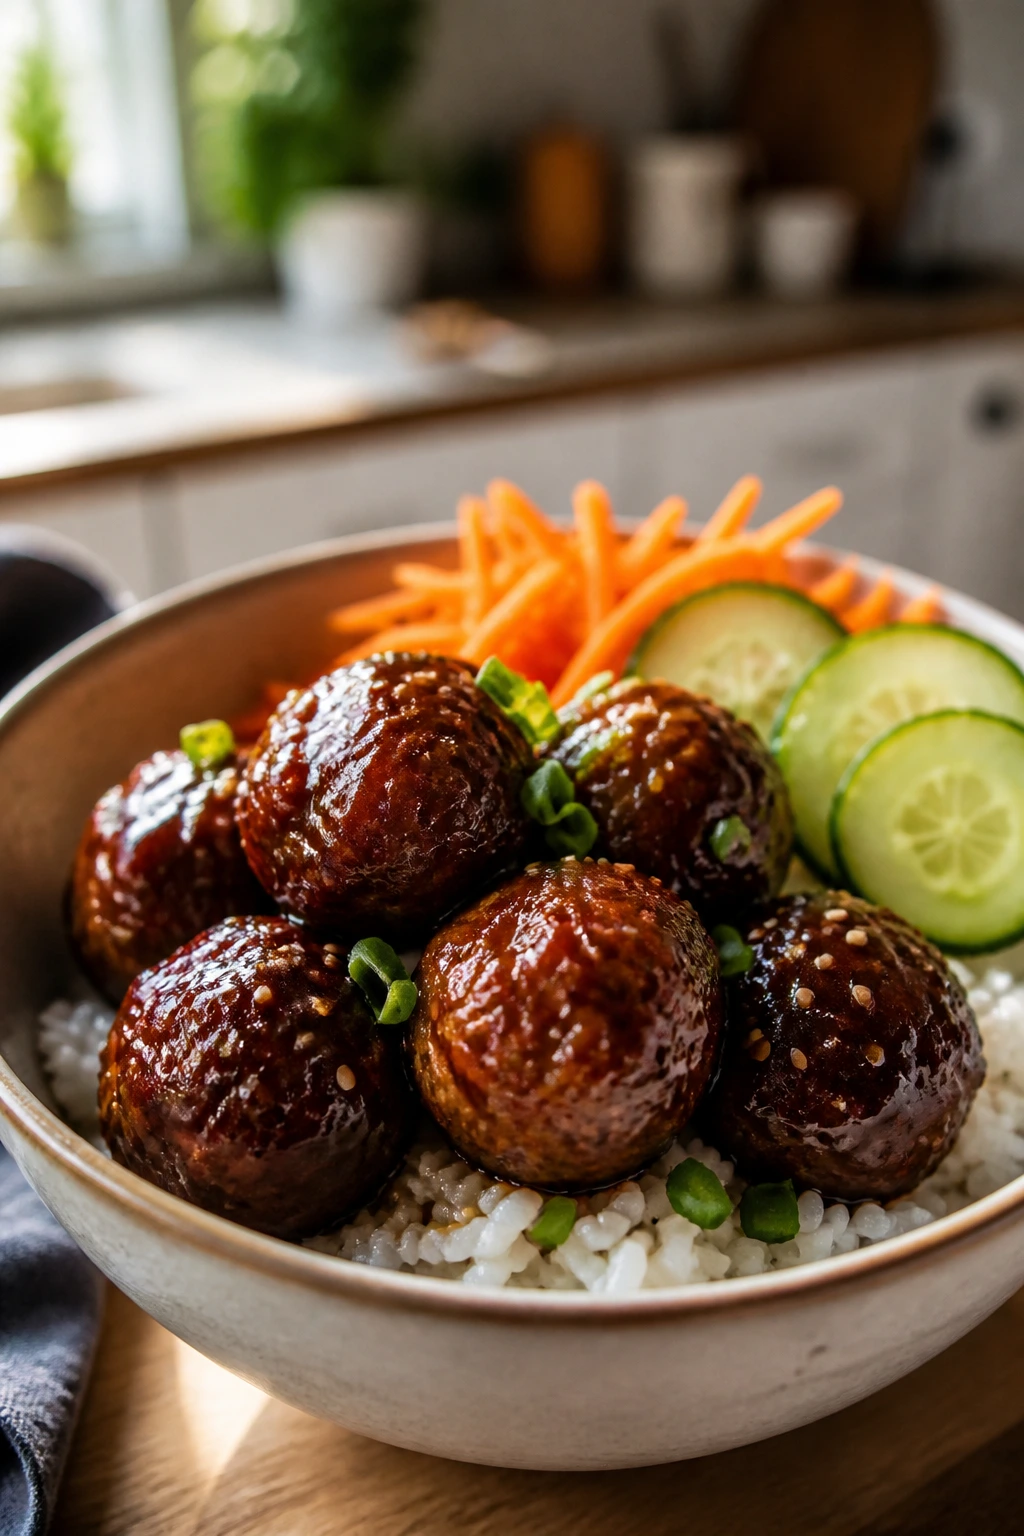
These bowls give you the sweet-salty pull of takeout without the wait. Meatballs glazed in teriyaki sit over rice with something fresh and crunchy on top, which keeps the bowl from feeling heavy.
Why It Works: Teriyaki thickens quickly and coats meatballs in minutes. Rice gives the bowl structure, and cucumbers or shredded carrots add a cold snap that kids usually like.
Key Ingredients:
- 16 cooked meatballs
- 1/2 cup teriyaki sauce
- 3 cups cooked rice
- 1 cucumber, sliced
- 1/2 cup shredded carrots
- 1 tablespoon sesame seeds
Quick Steps:
- Warm meatballs with teriyaki in a skillet.
- Heat the rice.
- Spoon rice into bowls and top with meatballs.
- Add cucumber, carrots, and sesame seeds.
- Serve right away.
Equipment for This Recipe:
- Skillet
- Saucepan
- Serving bowls
How to Serve This Dish: Build the bowls at the table so everyone can pick their toppings. For smaller eaters, serve it in a shallow bowl with chopsticks or a fork.
Pro Tips for This Recipe:
- Keep the sauce simmer gentle so it doesn’t burn.
- Add a splash of water if the teriyaki gets sticky.
- Use short-grain rice if you want it to clump a little for easier scooping.
Variations on This Dish:
- Chicken Meatball Bowls: Swap in chicken meatballs.
- Pineapple Teriyaki Bowl: Add a few pineapple chunks for sweetness.
Common Mistakes to Avoid with This Dish:
- Dry rice: Warm it with a spoonful of water.
- Sauce reduced too far: It turns pasty and loses shine.
20. Ham and Cheese Roll-Ups with Mustard Dip
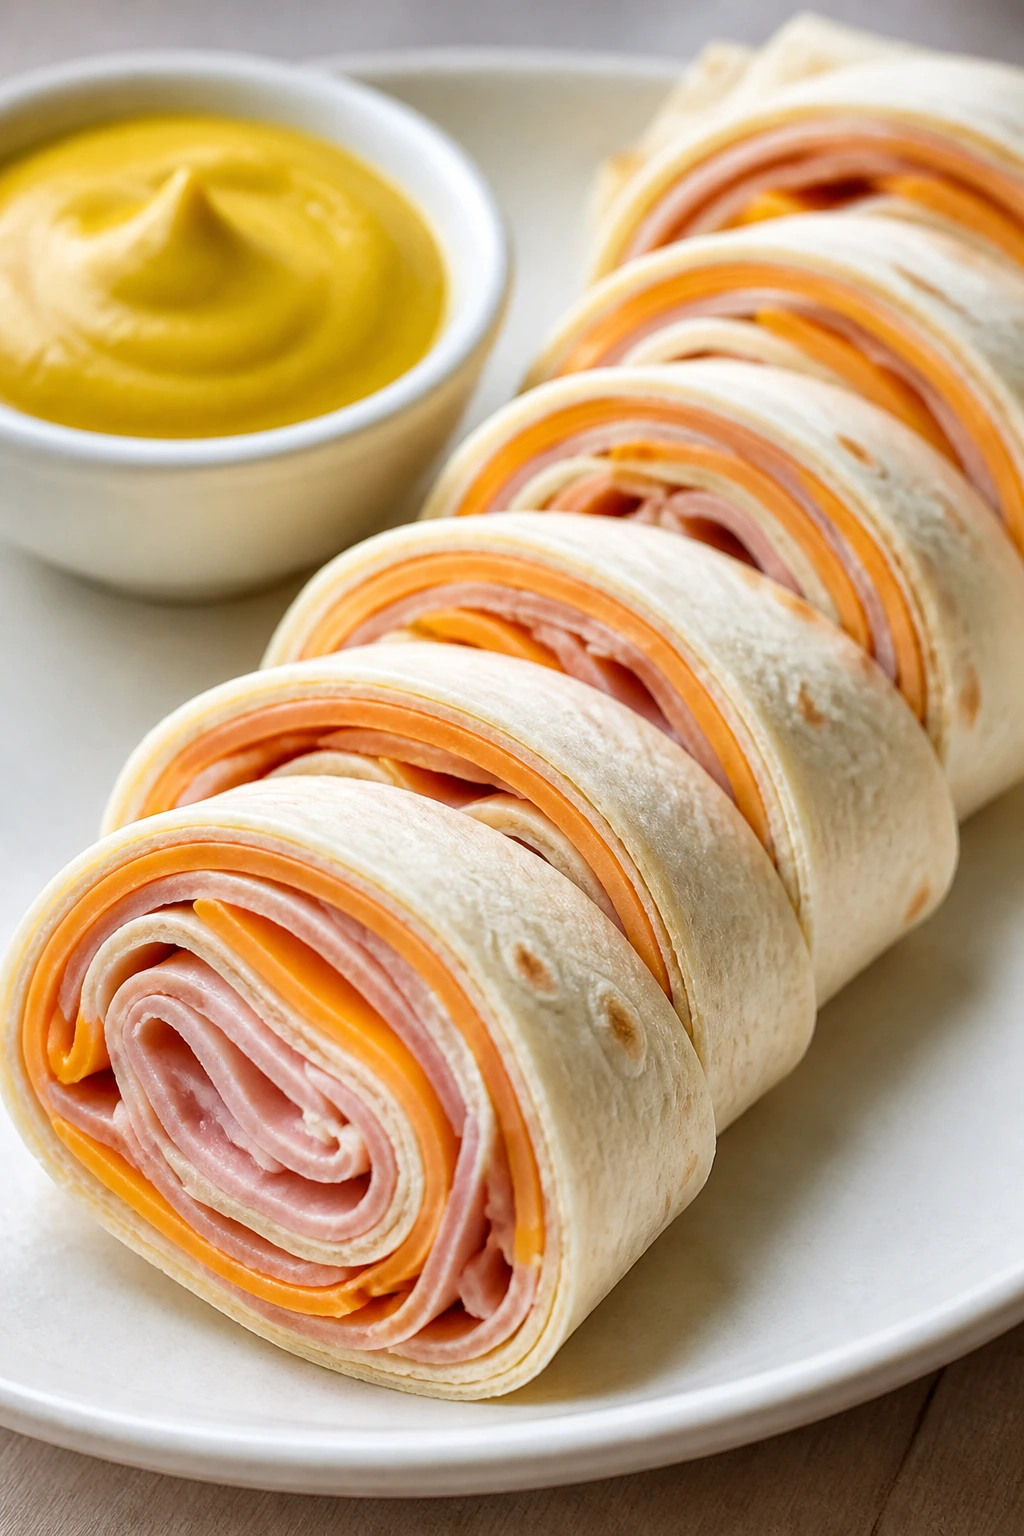
Roll-ups are the snack plate’s best friend. They’re fast, tidy, and easy to scale up when one kid says they’re not hungry and then circles back ten minutes later asking for more.
Why It Works: Tortillas or thin wraps seal around ham and cheese without needing heat, and a mustard dip adds flavor without much work. The slices hold their shape if you chill them briefly.
Key Ingredients:
- 4 large tortillas
- 8 slices ham
- 4 slices cheddar
- 4 tablespoons cream cheese
- 1 tablespoon mustard
- 1/4 teaspoon black pepper
Quick Steps:
- Spread cream cheese and mustard on each tortilla.
- Layer ham and cheese, then sprinkle with pepper.
- Roll tightly.
- Chill 10 minutes.
- Slice into 1-inch rounds.
Equipment for This Recipe:
- Knife
- Cutting board
- Small bowl
How to Serve This Dish: Serve with grapes, pretzels, and cut veggies. They’re good on a snack tray with apple slices and pickles.
Pro Tips for This Recipe:
- Pat the ham dry so the wraps don’t slip.
- Chill before slicing for clean rounds.
- Use a sharp knife and a gentle sawing motion.
Variations on This Dish:
- Turkey Roll-Ups: Swap ham for turkey and cheddar for Swiss.
- Dill Pickle Version: Add thin pickle strips for extra crunch.
Common Mistakes to Avoid with This Dish:
- Too much spread: The tortilla gets slippery.
- Skipping the chill: The slices smear instead of staying neat.
21. Shredded Chicken Nachos
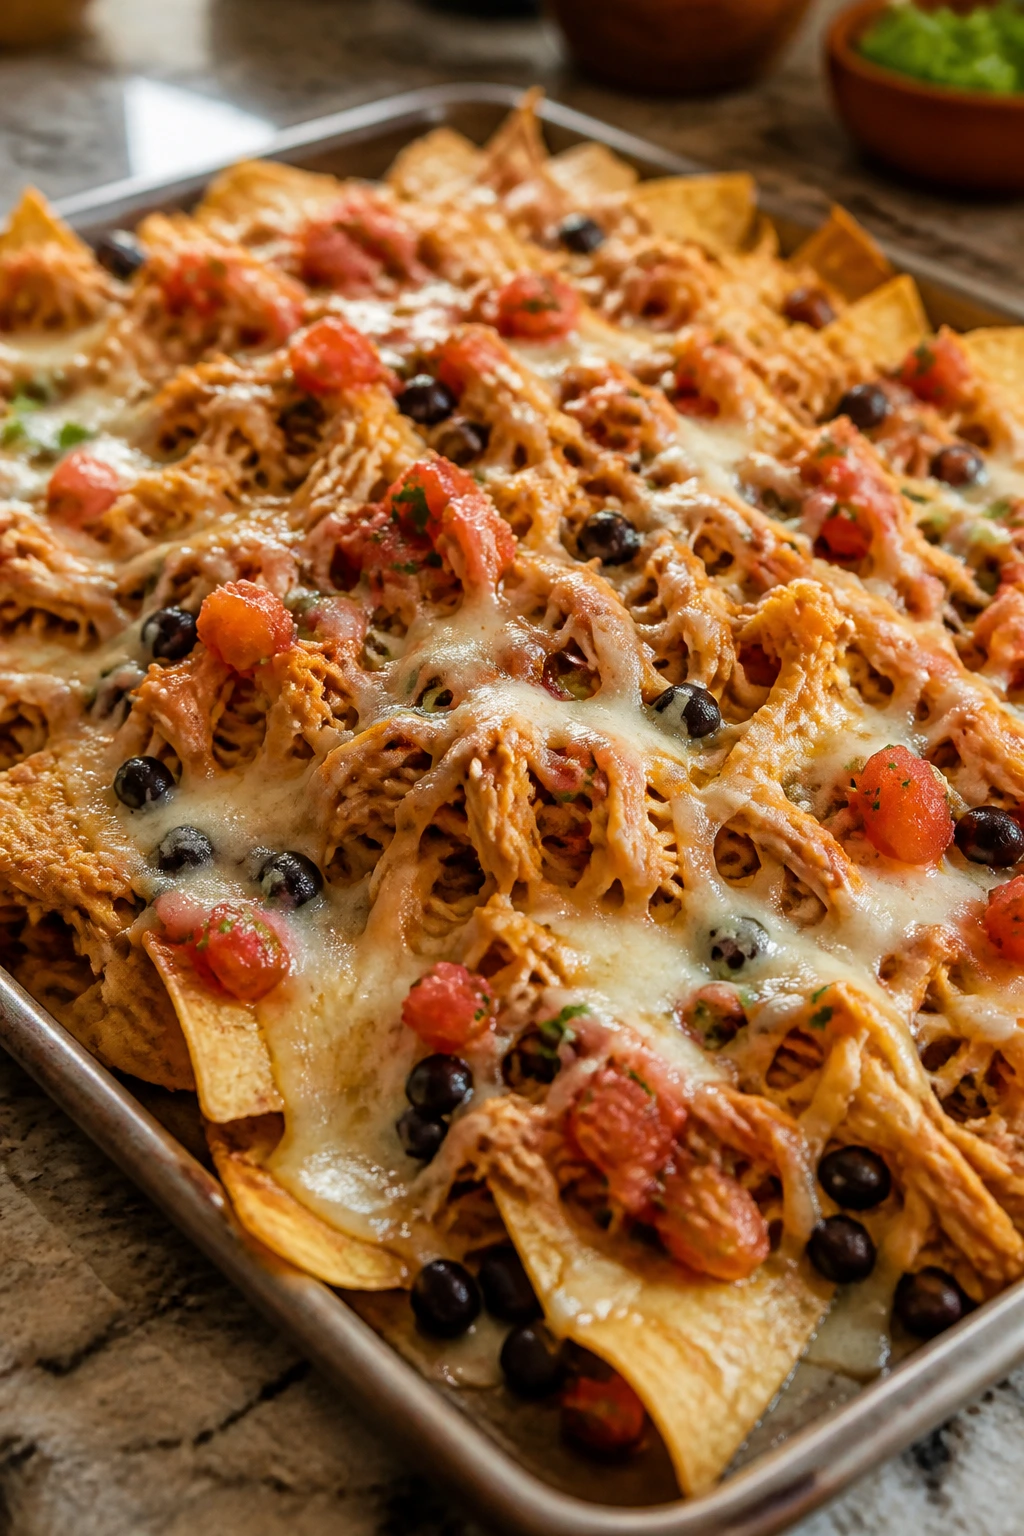
Nachos are one of the few dinners where nobody complains about the bowl getting passed around. The chips stay crunchy if you layer them right, and the melted cheese turns the whole tray into a hand-to-mouth situation in the best way.
Why It Works: Warm chicken, beans, and cheese go on top of the chips, not underneath them, so the base stays crisp. A short bake gets the cheese melted before the chips soften.
Key Ingredients:
- 6 cups tortilla chips
- 2 cups shredded cooked chicken
- 1 cup black beans
- 2 cups shredded Monterey Jack
- 1/2 cup salsa
- 1 avocado, diced
Quick Steps:
- Heat oven to 400°F.
- Spread chips on a sheet pan.
- Top with chicken, beans, cheese, and salsa.
- Bake 6 to 8 minutes, until the cheese melts.
- Finish with avocado.
Equipment for This Recipe:
- Rimmed sheet pan
- Spoon
- Oven mitts
How to Serve This Dish: Serve straight from the pan with extra salsa and sour cream. For a more balanced plate, add orange slices or a simple salad.
Pro Tips for This Recipe:
- Use sturdy chips so they don’t collapse.
- Keep toppings in a single layer.
- Add cold toppings after baking.
Variations on This Dish:
- Veggie Nachos: Use extra beans and roasted peppers instead of chicken.
- BBQ Chicken Nachos: Swap salsa for a little barbecue sauce.
Common Mistakes to Avoid with This Dish:
- Loading the chips too high: The bottom layer breaks.
- Baking too long: The chips dry out and the cheese gets oily.
22. Crispy Zucchini Fritters
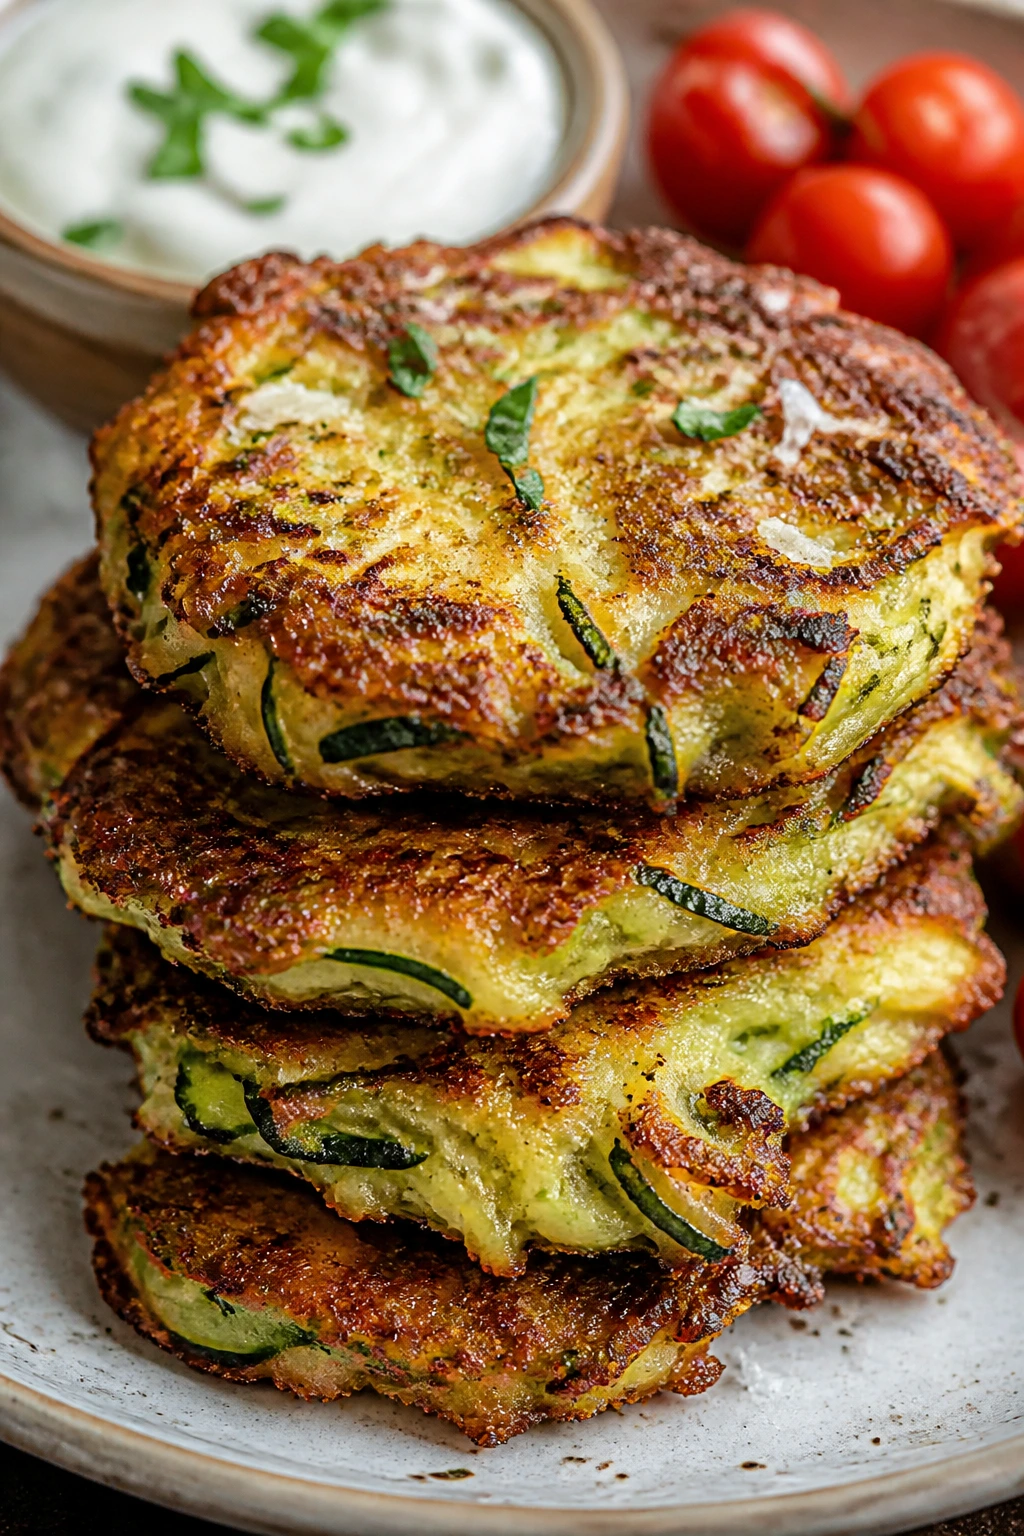
Zucchini fritters are what you make when you want a vegetable to behave like a snack. They fry into little golden cakes with crunchy edges and a soft center, and they’re excellent with a spoonful of yogurt on top.
Why It Works: Salting and squeezing the zucchini removes extra water, which is the difference between crisp fritters and soggy pancakes. Parmesan helps the edges brown.
Key Ingredients:
- 2 medium zucchini, grated
- 1 egg
- 1/4 cup flour
- 1/3 cup grated parmesan
- 1/2 teaspoon salt
- 2 tablespoons oil
Quick Steps:
- Salt the grated zucchini and squeeze it dry.
- Mix with egg, flour, parmesan, and pepper.
- Form small patties.
- Fry in oil over medium heat for 2 to 3 minutes per side.
- Drain on paper towels and serve warm.
Equipment for This Recipe:
- Box grater
- Skillet
- Paper towels
How to Serve This Dish: Serve with yogurt dip and cherry tomatoes. Three fritters make a snack; five make dinner with rice or bread.
Pro Tips for This Recipe:
- Squeeze harder than feels polite.
- Keep the patties small so they cook through.
- Don’t flip before the underside is deep gold.
Variations on This Dish:
- Corn Fritter Mix-in: Add 1/2 cup corn kernels.
- Herby Version: Add chopped dill or parsley to the batter.
Common Mistakes to Avoid with This Dish:
- Wet zucchini: The batter spreads and steams instead of frying.
- Overcrowding the pan: That traps moisture and softens the crust.
23. Mini Shepherd’s Pie Cups
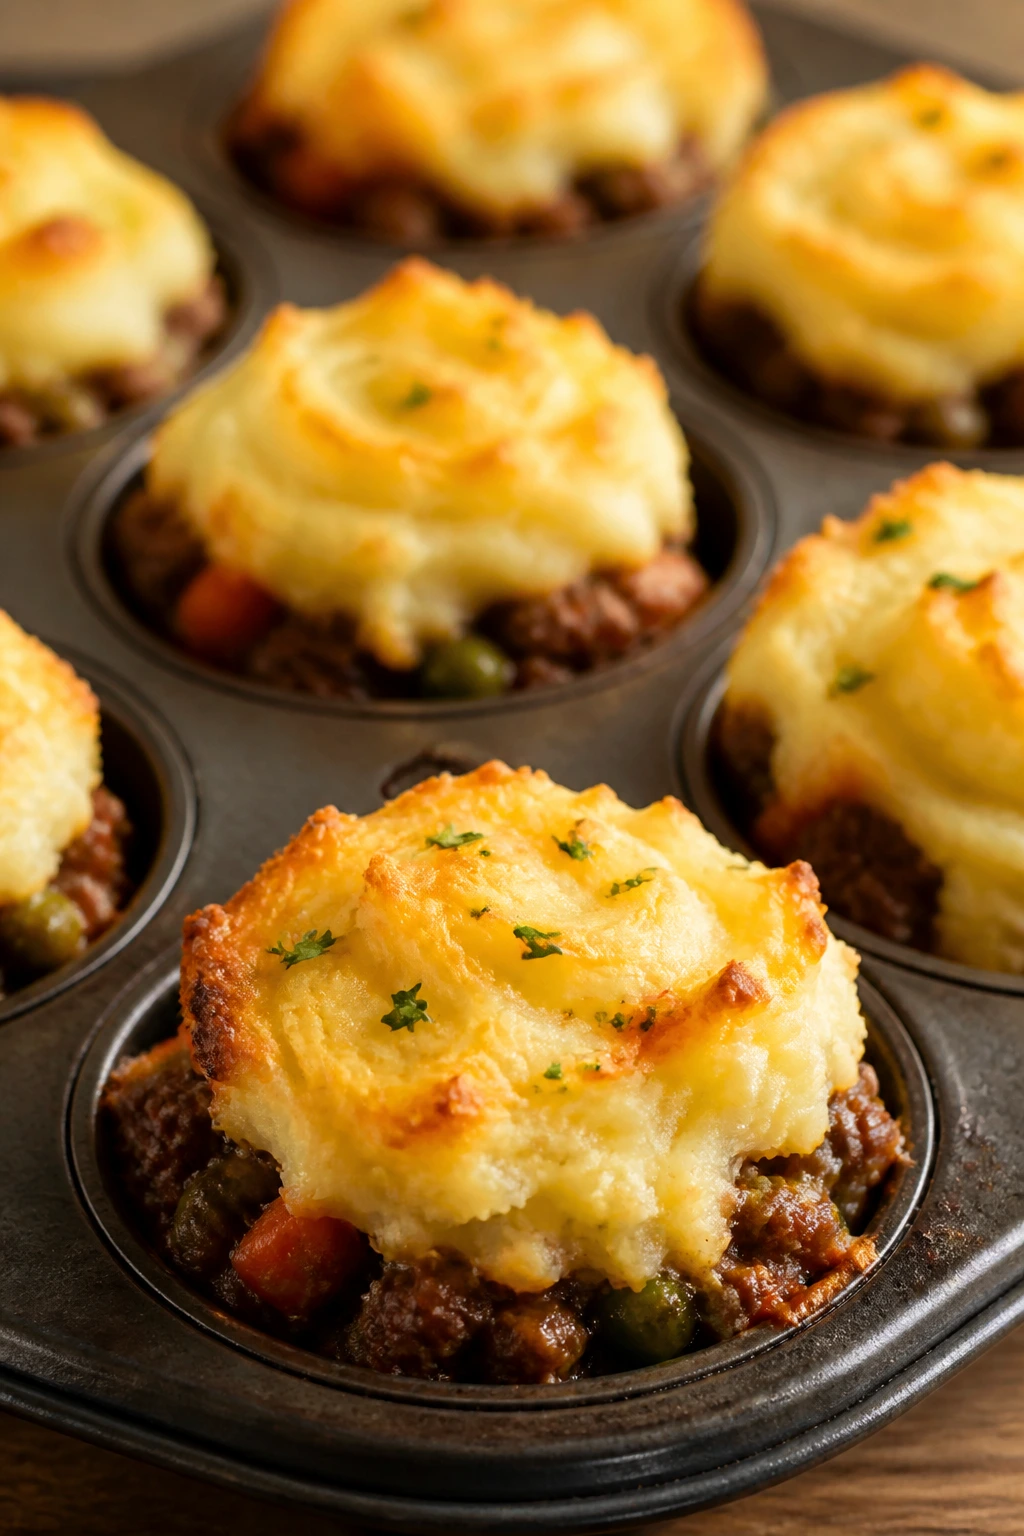
Shepherd’s pie gets friendlier when you bake it in muffin tins. The potato topping browns, the filling stays tucked inside, and every cup has the right ratio of meat to mash without a lot of knife work.
Why It Works: Small portions bake faster and cool faster, which matters when hungry kids are waiting. The potato layer seals in the filling and gives you a crisp top.
Key Ingredients:
- 1 pound ground beef or lamb
- 1 small onion, diced
- 1 cup frozen peas and carrots
- 2 cups mashed potatoes
- 1 tablespoon tomato paste
- 1 teaspoon salt
Quick Steps:
- Brown the meat and onion in a skillet.
- Stir in tomato paste, peas, carrots, and salt.
- Press the mixture into greased muffin cups.
- Top with mashed potatoes.
- Bake at 400°F for 15 minutes.
Equipment for This Recipe:
- Muffin tin
- Skillet
- Spoon
How to Serve This Dish: Serve with ketchup or gravy and a simple salad. Two cups are enough for a small dinner; one cup is perfect as a snack.
Pro Tips for This Recipe:
- Use thick mashed potatoes so the topping holds.
- Pack the filling in lightly, not hard.
- Let them rest before removing from the tin.
Variations on This Dish:
- Turkey Shepherd’s Pie: Use ground turkey and a little extra olive oil.
- Vegetarian Lentil Cups: Replace the meat with cooked lentils.
Common Mistakes to Avoid with This Dish:
- Runny mash: It slides off instead of browning.
- Skipping the rest: The cups fall apart when unmolded too soon.
24. Cheeseburger Pasta Skillet
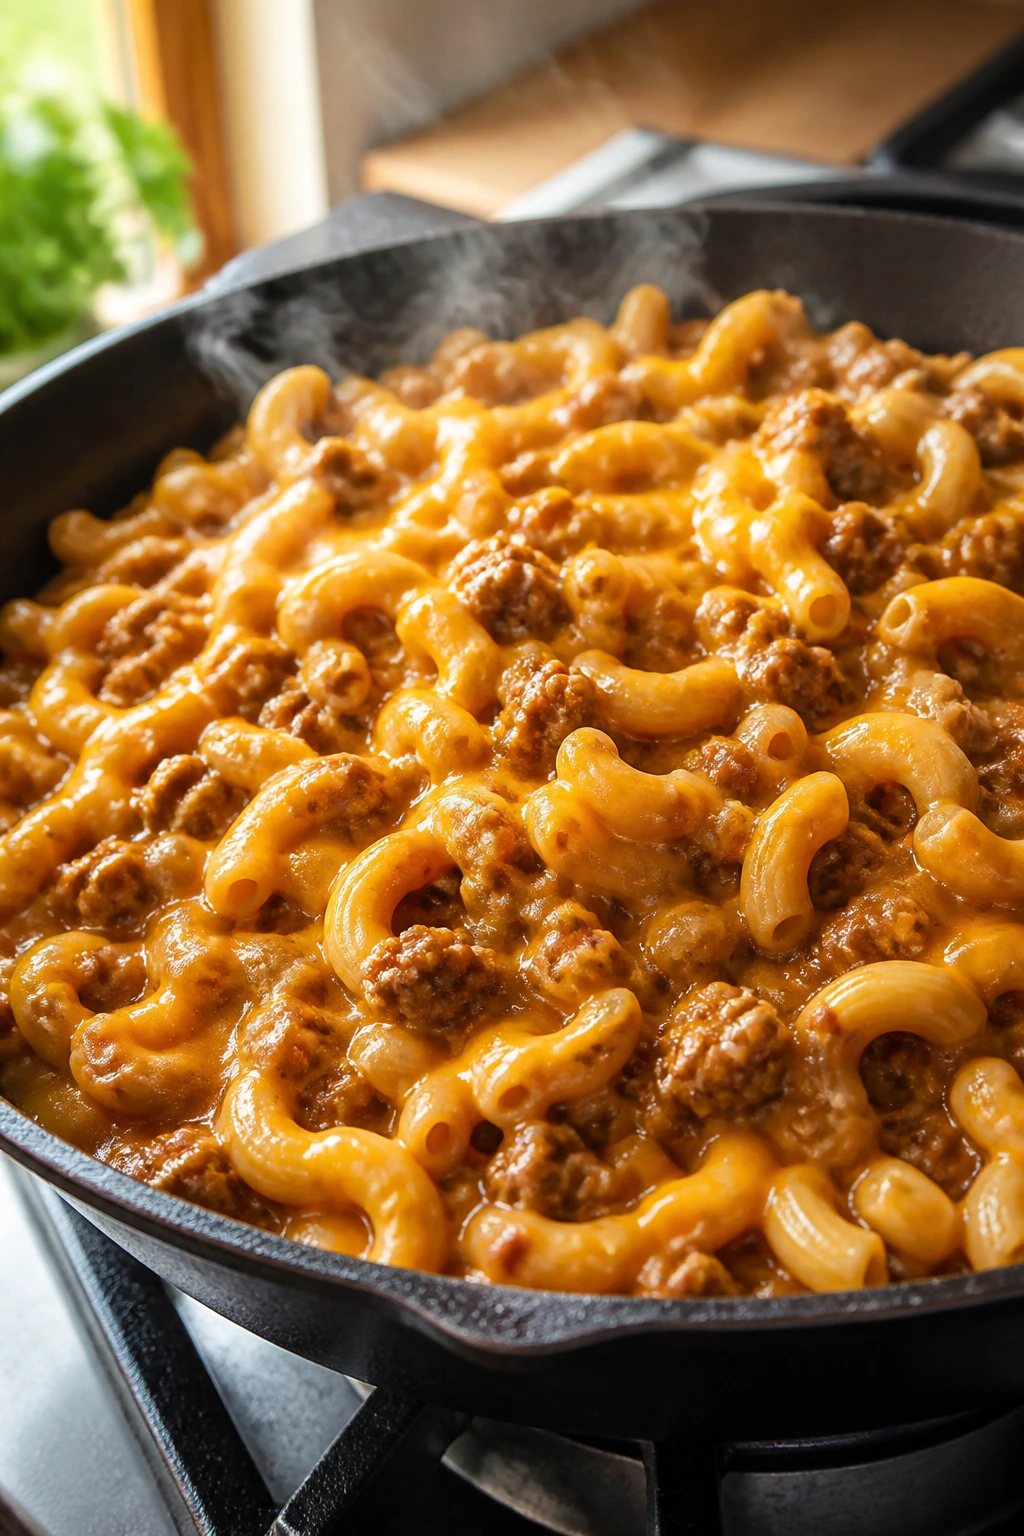
This is the sort of skillet dinner that smells like a fast-food memory, only less greasy and a lot easier to serve at the table. Beef, pasta, and cheddar come together in one pan, which is the sort of cleanup I will always applaud.
Why It Works: The sauce clings to the pasta, so every bite tastes like a cheeseburger without needing a bun. A little ketchup and mustard in the mix gives it the right diner-style flavor.
Key Ingredients:
- 1 pound ground beef
- 8 ounces small pasta
- 1 cup shredded cheddar
- 1/4 cup ketchup
- 1 tablespoon mustard
- 2 cups beef broth
Quick Steps:
- Brown the beef in a skillet.
- Stir in broth, pasta, ketchup, and mustard.
- Simmer covered until pasta is tender, about 12 minutes.
- Stir in cheddar until melted.
- Serve hot.
Equipment for This Recipe:
- Large skillet with lid
- Wooden spoon
- Measuring cup
How to Serve This Dish: Scoop into bowls and serve with pickle spears or sliced cucumbers. A sprinkle of chopped tomato on top makes it feel fresher.
Pro Tips for This Recipe:
- Keep the simmer low so the pasta cooks evenly.
- Add a splash more broth if the skillet dries out.
- Use small pasta shapes that hold sauce.
Variations on This Dish:
- Bacon Cheeseburger Pasta: Add chopped cooked bacon.
- Pickle Burger Version: Stir in a spoonful of pickle relish at the end.
Common Mistakes to Avoid with This Dish:
- Too-high heat: The liquid evaporates before the pasta cooks.
- Adding cheese too early: It can get stringy and separate.
25. Lemon Butter Gnocchi with Peas
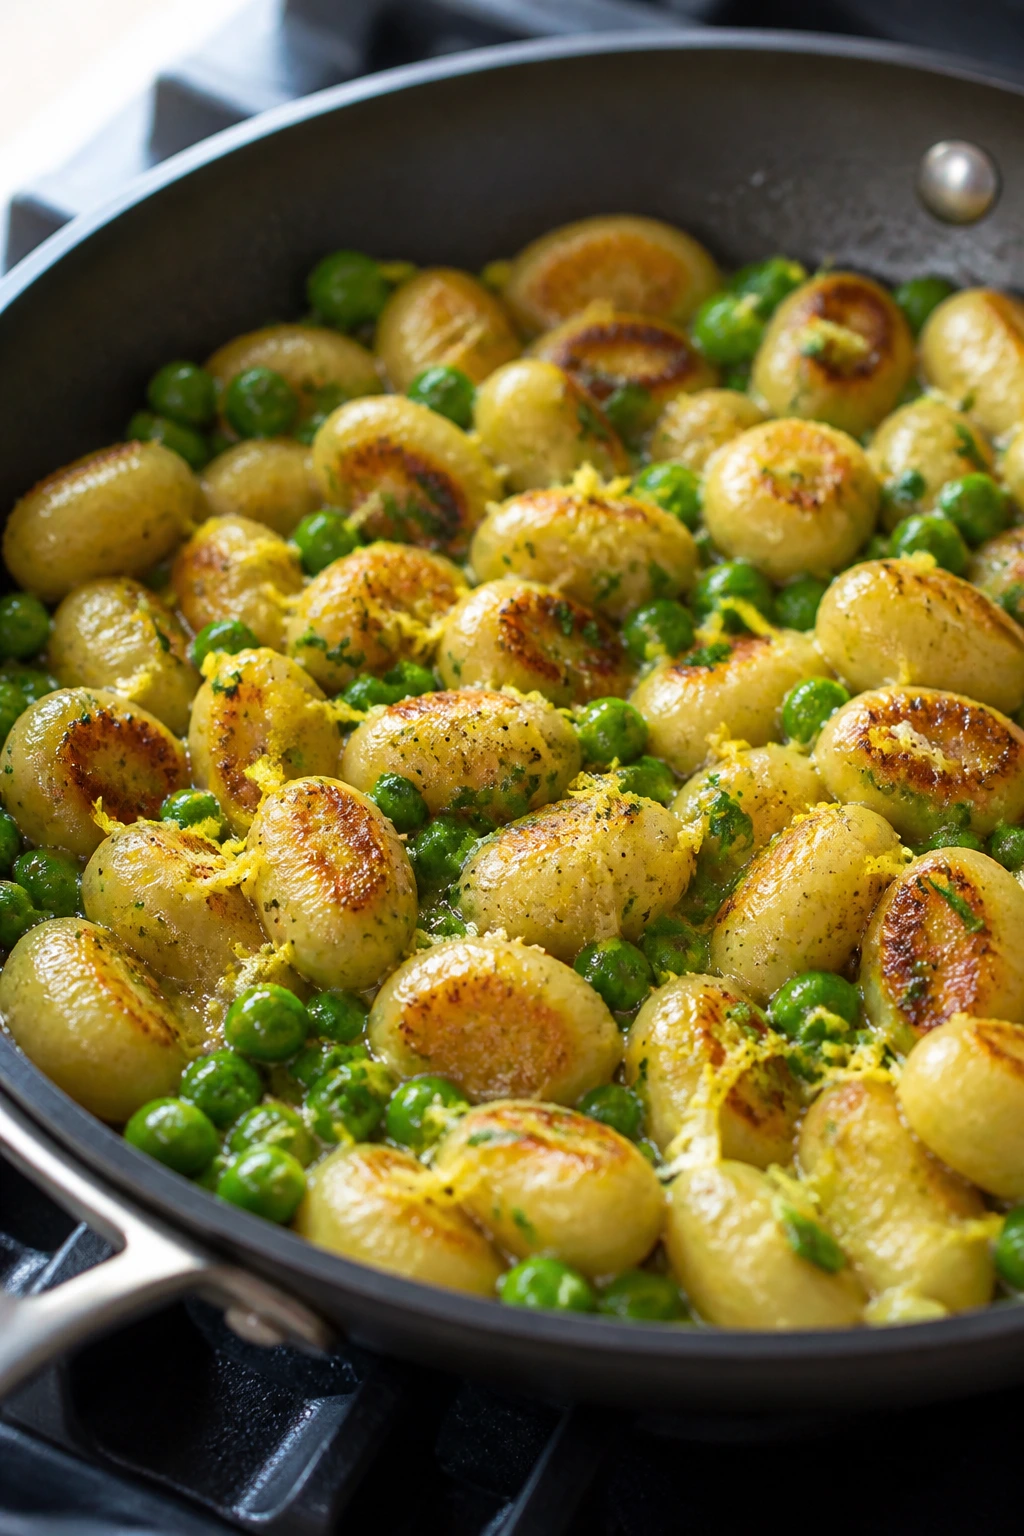
Gnocchi is one of the easiest ways to make a pan of dinner feel soft and comforting without actually spending much time. The dumplings get lightly browned, the peas add sweetness, and the lemon keeps the butter from feeling heavy.
Why It Works: Shelf-stable gnocchi cooks quickly and gets a little crisp in butter. The whole dish is done in one skillet in about 15 minutes.
Key Ingredients:
- 1 pound shelf-stable gnocchi
- 3 tablespoons butter
- 1 cup frozen peas
- 1 lemon, zested and juiced
- 1/4 cup grated parmesan
- 1/2 teaspoon salt
Quick Steps:
- Brown the gnocchi in butter over medium heat.
- Add peas and cook until hot.
- Stir in lemon juice, zest, salt, and parmesan.
- Toss until glossy.
- Serve immediately.
Equipment for This Recipe:
- Large skillet
- Citrus zester
- Wooden spoon
How to Serve This Dish: Serve in small bowls with shredded chicken or toasted bread if you want more protein. It’s also good with a green salad and a few cherry tomatoes.
Pro Tips for This Recipe:
- Let the gnocchi brown before stirring too much.
- Use fresh lemon, not bottled juice.
- A spoonful of pasta water can loosen the sauce if needed.
Variations on This Dish:
- Spinach Gnocchi: Stir in a handful of baby spinach at the end.
- Garlic Butter Version: Add 2 minced garlic cloves with the butter.
Common Mistakes to Avoid with This Dish:
- Constant stirring: The gnocchi won’t brown.
- Too much lemon: It turns sharp instead of bright.
26. Baked Falafel Pitas
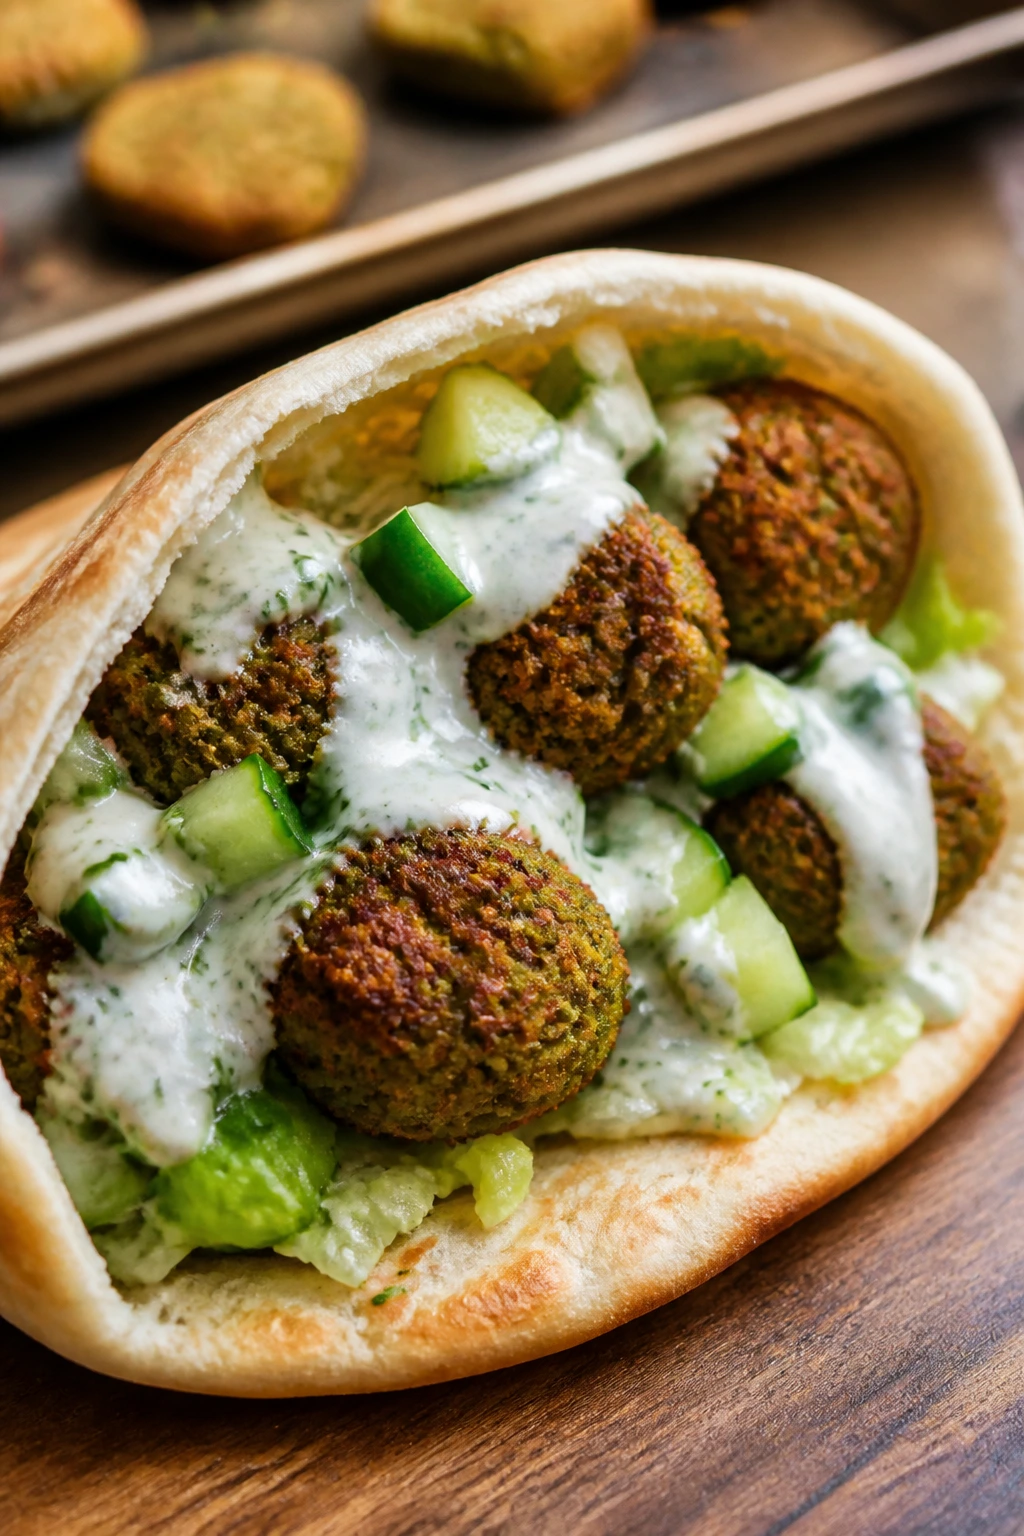
Falafel in pita pockets gives you crunch, creaminess, and enough herbs to keep the filling interesting. It’s also one of the better meatless dinner ideas when you want something the kids can hold without cutlery.
Why It Works: Baked falafel keeps the prep a little lighter and still gets a crisp shell. Tucked into pita with yogurt sauce, it becomes a compact meal that feels easy to carry.
Key Ingredients:
- 1 package falafel mix
- 1/2 cup plain yogurt
- 1 tablespoon lemon juice
- 4 pita rounds
- 1 cucumber, diced
- 1 cup shredded lettuce
Quick Steps:
- Prepare falafel mix and shape into small patties.
- Bake at 400°F until crisp, about 20 minutes.
- Stir yogurt and lemon juice together.
- Warm the pita rounds.
- Fill with falafel, cucumber, lettuce, and sauce.
Equipment for This Recipe:
- Baking sheet
- Mixing bowl
- Spoon
How to Serve This Dish: Serve with tomato wedges and extra yogurt sauce on the side. Half a pita works as a snack; a full pita becomes dinner fast.
Pro Tips for This Recipe:
- Keep falafel small so they cook through.
- Don’t stuff the pita too tightly.
- A little salt on the cucumber wakes up the whole pocket.
Variations on This Dish:
- Mediterranean Bowl: Skip the pita and serve over rice.
- Spicy Sauce Version: Add garlic and chili flakes to the yogurt.
Common Mistakes to Avoid with This Dish:
- Wet filling: It makes the pita split.
- Undercooked falafel: The center should feel firm, not pasty.
27. Mini Frittata Cups
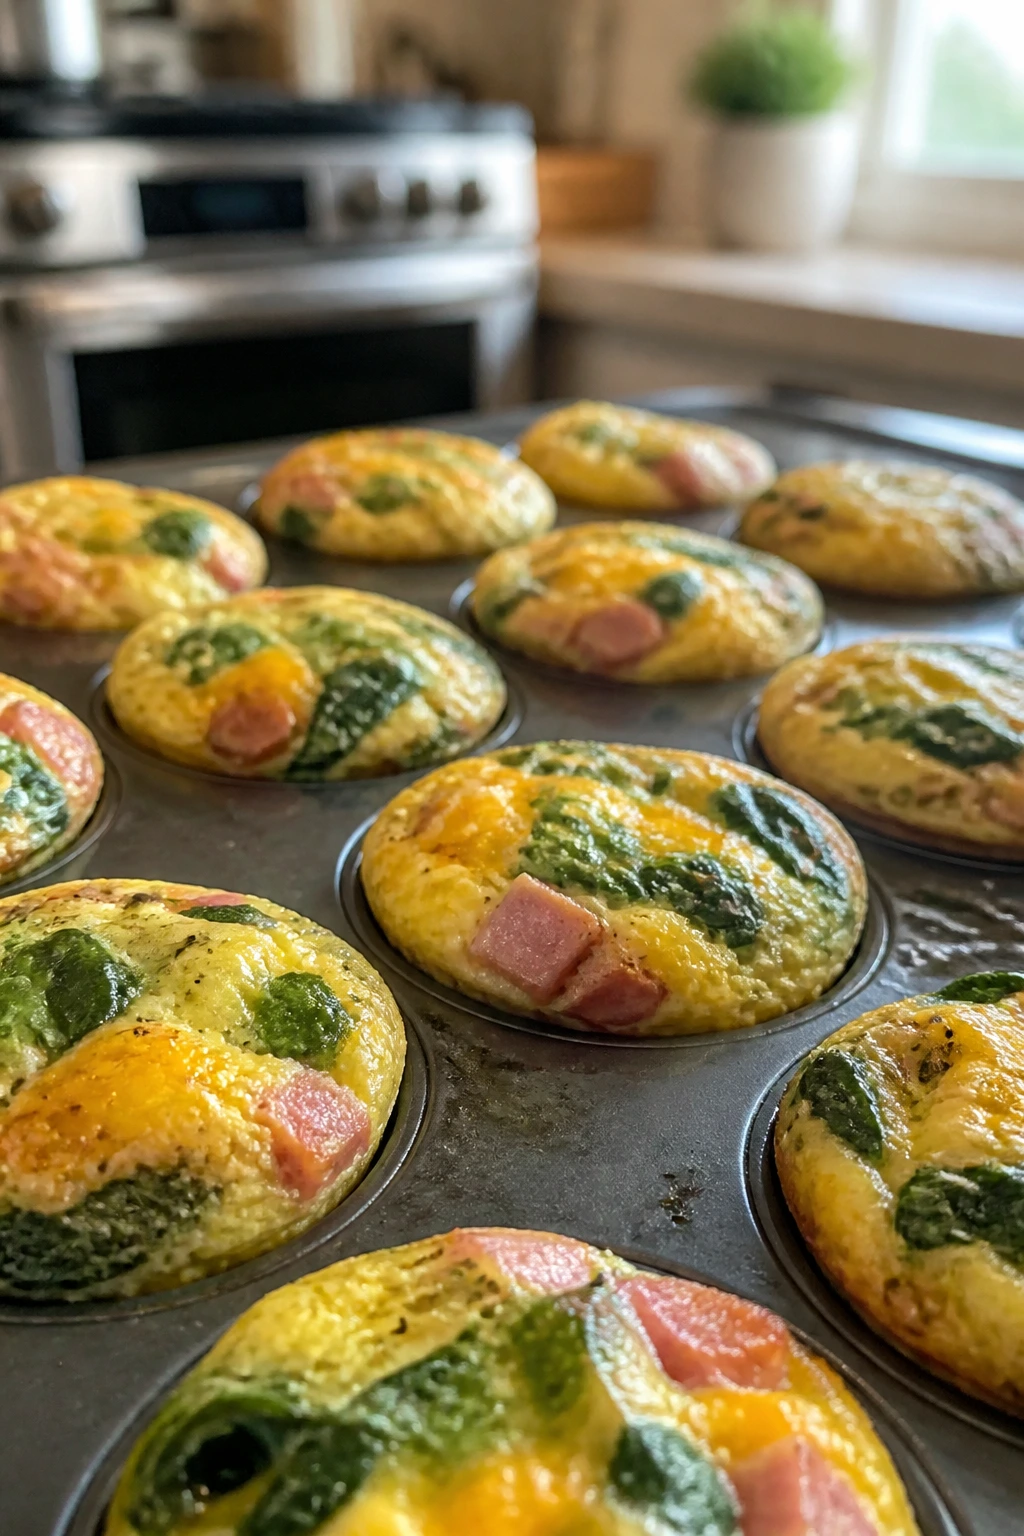
Egg cups are one of those recipes that look fussy and behave like common sense. They bake in a muffin tin, travel well, and can be eaten warm or at room temperature without losing their shape.
Why It Works: Eggs set neatly in small portions, and the fillings stay suspended instead of sinking. You can make a dozen in one pan and have dinner plus tomorrow’s snack.
Key Ingredients:
- 8 eggs
- 1/4 cup milk
- 1 cup chopped spinach
- 1/2 cup diced ham
- 1 cup shredded cheddar
- 1/2 teaspoon salt
Quick Steps:
- Heat oven to 350°F and grease a muffin tin.
- Whisk eggs, milk, and salt.
- Divide ham, spinach, and cheese among the cups.
- Pour egg mixture over top.
- Bake 18 to 22 minutes until set.
Equipment for This Recipe:
- Muffin tin
- Whisk
- Measuring cup
How to Serve This Dish: Pair with toast fingers and sliced fruit. Two cups make a snack; four with potatoes or salad make a real dinner.
Pro Tips for This Recipe:
- Fill the cups only about three-quarters full.
- Let them cool slightly so they release cleanly.
- Chop the fillings small so every bite tastes balanced.
Variations on This Dish:
- Veggie Frittata Cups: Use mushrooms, peppers, and onions.
- Cheddar and Bacon Cups: Swap ham for crisp bacon.
Common Mistakes to Avoid with This Dish:
- Overbaking: The eggs turn rubbery.
- Using watery vegetables: They make the cups soggy.
28. BBQ Chicken Flatbreads
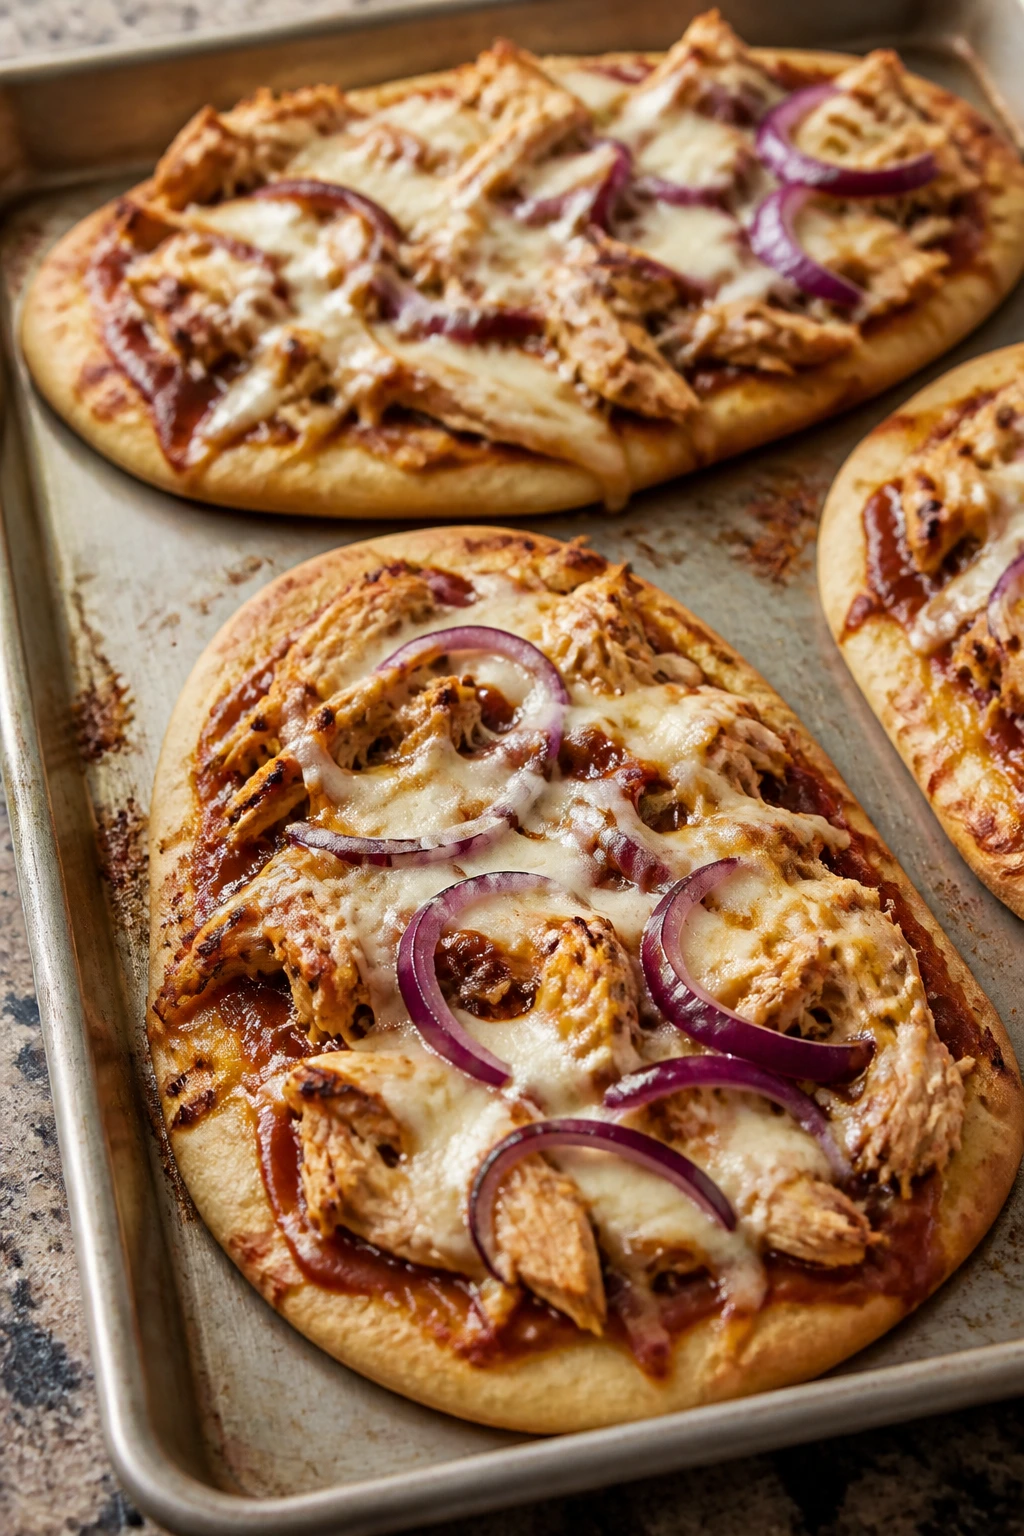
Flatbreads are a smart middle road between pizza and sandwich. They crisp up quickly, hold a generous amount of topping, and let barbecue sauce do most of the heavy lifting.
Why It Works: Pre-cooked chicken and store-bought flatbreads keep the timeline short, while the oven melts the cheese and caramelizes the onion. It’s a fast dinner that still feels like somebody planned it.
Key Ingredients:
- 2 flatbreads
- 2 cups cooked shredded chicken
- 1/2 cup barbecue sauce
- 1 1/2 cups shredded mozzarella
- 1/4 red onion, thinly sliced
- 1 tablespoon chopped cilantro
Quick Steps:
- Heat oven to 425°F.
- Mix chicken with barbecue sauce.
- Spread onto flatbreads and top with cheese and onion.
- Bake 8 to 10 minutes.
- Finish with cilantro.
Equipment for This Recipe:
- Sheet pan
- Mixing bowl
- Knife
How to Serve This Dish: Cut into strips and serve with corn kernels or a green salad. It works well as a family share plate with extra sauce on the side.
Pro Tips for This Recipe:
- Keep the sauce layer thin enough to avoid sogginess.
- Slice the onion very thin so it softens in the oven.
- Let the flatbread rest before cutting.
Variations on This Dish:
- Buffalo Chicken Flatbread: Swap barbecue sauce for buffalo sauce.
- Pineapple Flatbread: Add a few pineapple pieces for sweetness.
Common Mistakes to Avoid with This Dish:
- Too much sauce: The crust softens underneath.
- Burning the edge: Flatbreads brown quickly, so watch them closely.
29. Tomato Soup with Grilled Cheese Dippers
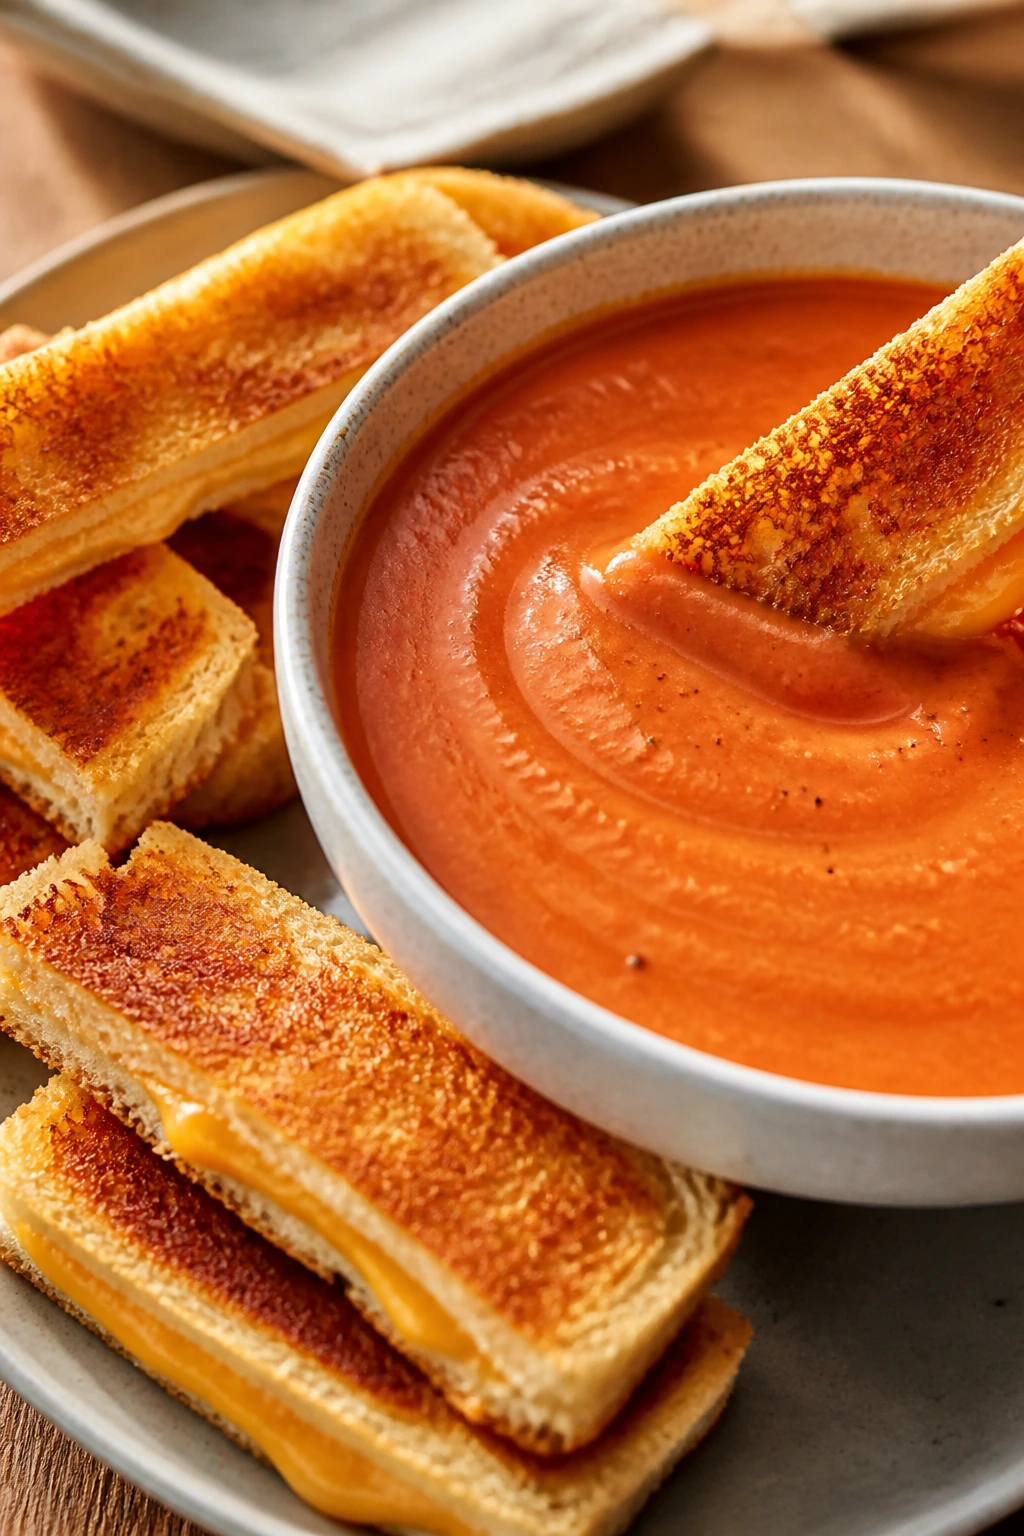
Some dinners need a spoon. Some need a sandwich. This one gives you both and turns the grilled cheese into dunkable sticks, which is a small change that makes a big difference for kids who want to play with their food a little.
Why It Works: The soup is smooth and quick, while the grilled cheese stays crisp enough to survive dipping. Cutting the sandwich into strips makes the meal feel more like a snack plate.
Key Ingredients:
- 2 cans crushed tomatoes
- 2 cups vegetable or chicken broth
- 1/4 cup cream
- 8 slices bread
- 4 slices cheddar
- 2 tablespoons butter
Quick Steps:
- Simmer tomatoes and broth for 15 minutes.
- Stir in cream and salt.
- Make grilled cheese sandwiches in butter.
- Cut into strips.
- Serve the strips alongside the soup.
Equipment for This Recipe:
- Pot
- Skillet
- Blender, optional
How to Serve This Dish: Pour the soup into mugs or small bowls and line up the grilled cheese fingers on the side. Add celery sticks or apple slices for crunch.
Pro Tips for This Recipe:
- Keep the soup at a gentle simmer, not a hard boil.
- Use bread that browns well and slices cleanly.
- A little parmesan on the grilled cheese adds bite.
Variations on This Dish:
- Roasted Garlic Soup: Stir in roasted garlic for deeper flavor.
- Turkey Melt Dippers: Add sliced turkey to the sandwich.
Common Mistakes to Avoid with This Dish:
- Soup too thin: Simmer longer to concentrate it.
- Bread too soft: It won’t hold up in the soup.
30. Sheet Pan Sausage and Peppers
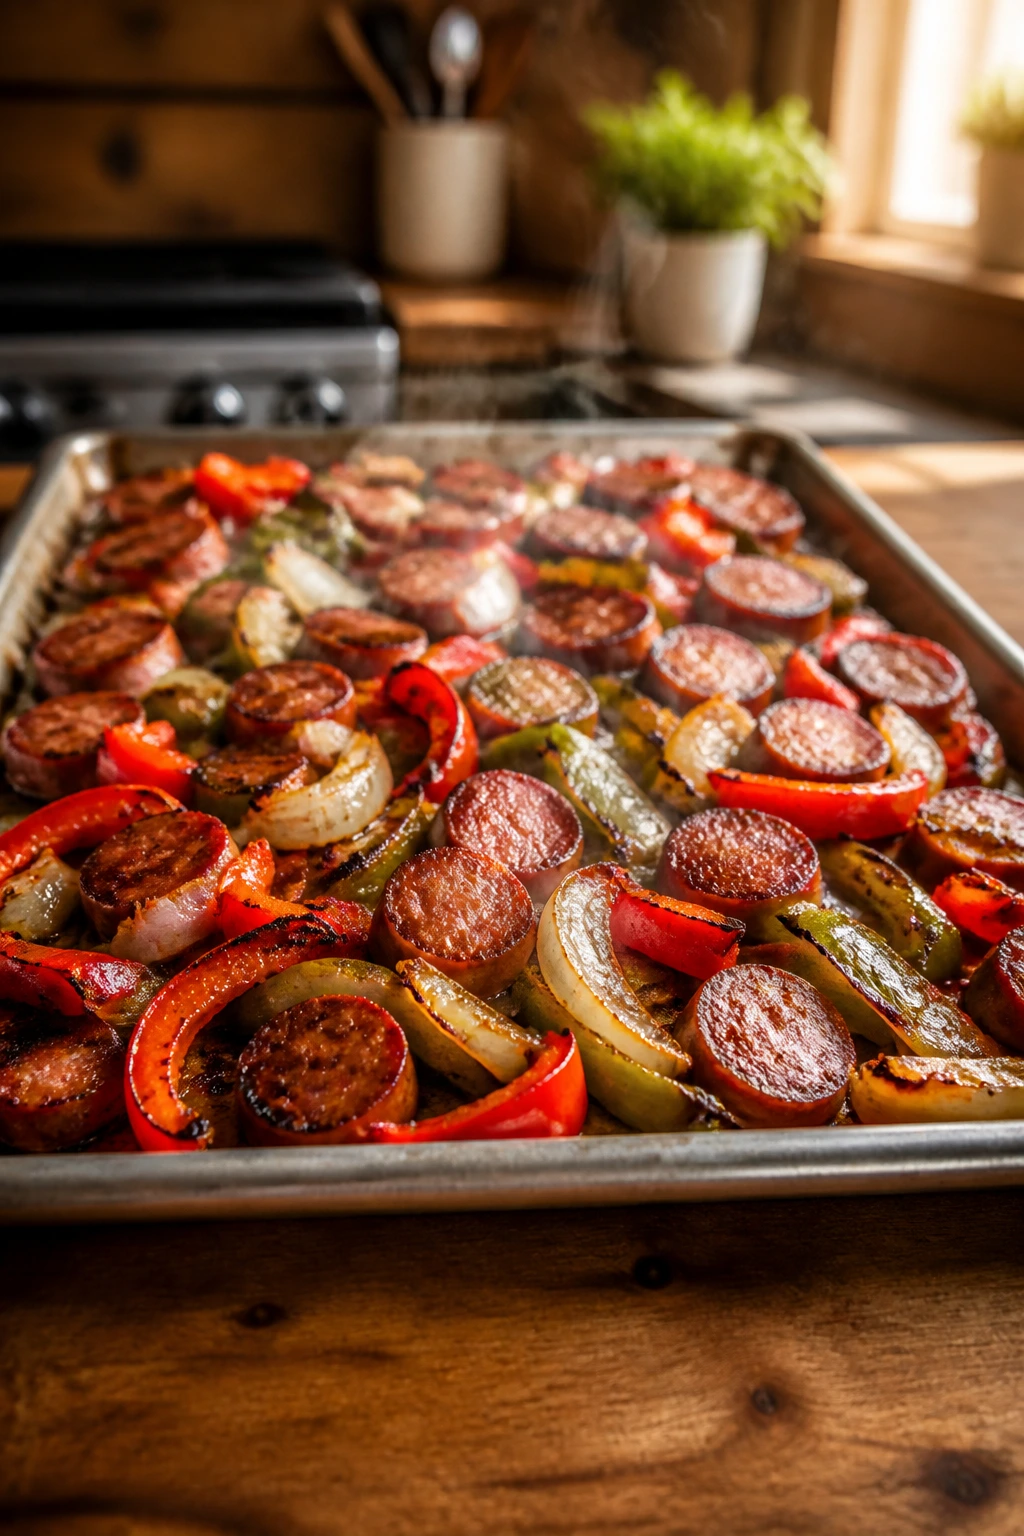
This is the kind of dinner that looks after itself once it’s in the oven. Sausage, peppers, and onions roast together until the edges brown and the whole pan smells sweet and savory at once.
Why It Works: High heat caramelizes the vegetables while the sausage renders enough fat to flavor the pan. It’s a full dinner with almost no babysitting.
Key Ingredients:
- 1 pound smoked sausage, sliced
- 3 bell peppers, sliced
- 1 large onion, sliced
- 2 tablespoons olive oil
- 1 teaspoon Italian seasoning
- 4 hoagie rolls, optional
Quick Steps:
- Heat oven to 425°F.
- Toss sausage, peppers, onion, oil, seasoning, and salt on a sheet pan.
- Roast 20 to 25 minutes, stirring once.
- Pile into rolls or bowls.
- Serve hot.
Equipment for This Recipe:
- Rimmed sheet pan
- Large bowl
- Spatula
How to Serve This Dish: Serve in rolls for bigger eaters or over rice for smaller snack-sized portions. A few pickles on the side give it a sharp edge.
Pro Tips for This Recipe:
- Slice the peppers evenly so they roast at the same rate.
- Don’t crowd the pan.
- Let the edges char a little; that’s the point.
Variations on This Dish:
- Chicken Sausage Version: Use chicken sausage for a lighter pan.
- Potato Add-In: Add small potato cubes and roast a little longer.
Common Mistakes to Avoid with This Dish:
- Too much oil: The vegetables braise instead of roast.
- Uneven slicing: Some pieces burn while others stay raw.
31. Coconut Chickpea Curry with Naan
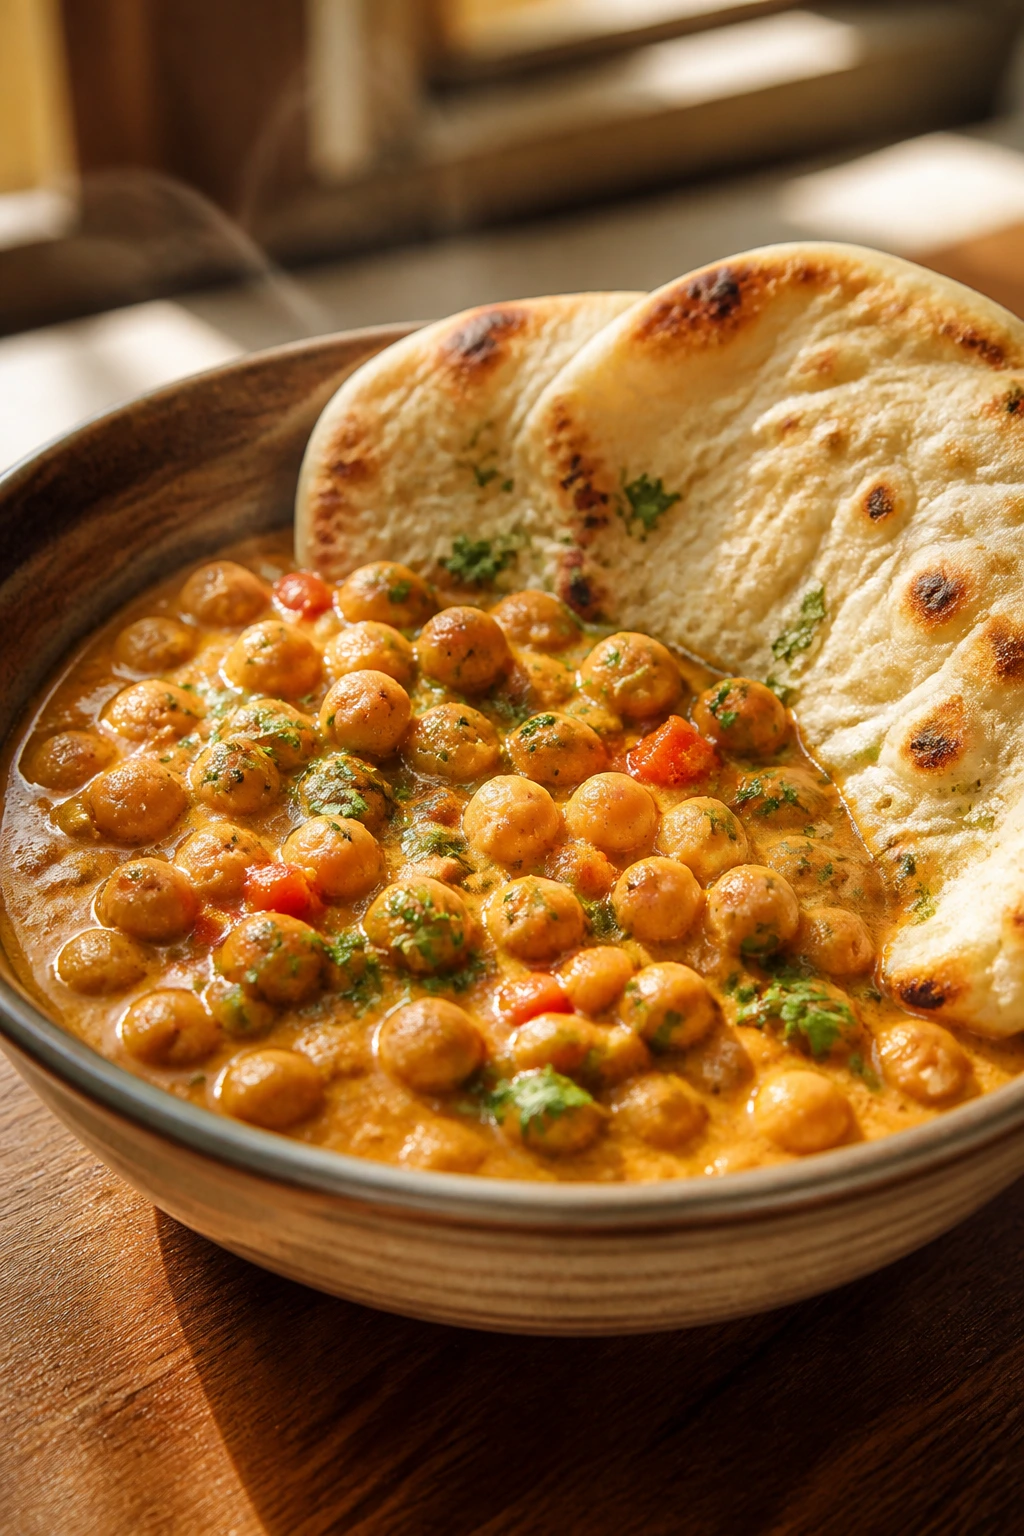
Curry sounds like a big project until you realize this one is basically a pot of pantry ingredients simmering into something fragrant and scoopable. The sauce is creamy, the chickpeas are soft, and naan turns it into dinner kids can tear apart with their hands.
Why It Works: Coconut milk smooths out the spice, and chickpeas bring protein without much prep. The curry thickens in about 15 minutes, which makes it a solid weeknight move.
Key Ingredients:
- 2 tablespoons oil
- 1 onion, diced
- 2 tablespoons curry paste
- 2 cans chickpeas, drained
- 1 can coconut milk
- 2 cups baby spinach
- 4 naan rounds
Quick Steps:
- Cook onion in oil until soft.
- Stir in curry paste for 30 seconds.
- Add chickpeas and coconut milk.
- Simmer 10 to 12 minutes, then stir in spinach.
- Serve with warmed naan.
Equipment for This Recipe:
- Large saucepan
- Wooden spoon
- Lid
How to Serve This Dish: Spoon it into bowls with torn naan for dipping. A little yogurt on top cools the heat if you made it spicy.
Pro Tips for This Recipe:
- Bloom the curry paste in oil first.
- Use full-fat coconut milk for a silkier sauce.
- Tear the naan so kids can scoop without a fork.
Variations on This Dish:
- Sweet Potato Curry: Add diced sweet potato and simmer longer.
- Mild Coconut Curry: Use less curry paste and more coconut milk.
Common Mistakes to Avoid with This Dish:
- Adding spinach too soon: It disappears and turns dull.
- Boiling hard: The coconut milk can separate.
32. Buffalo Cauliflower Wraps
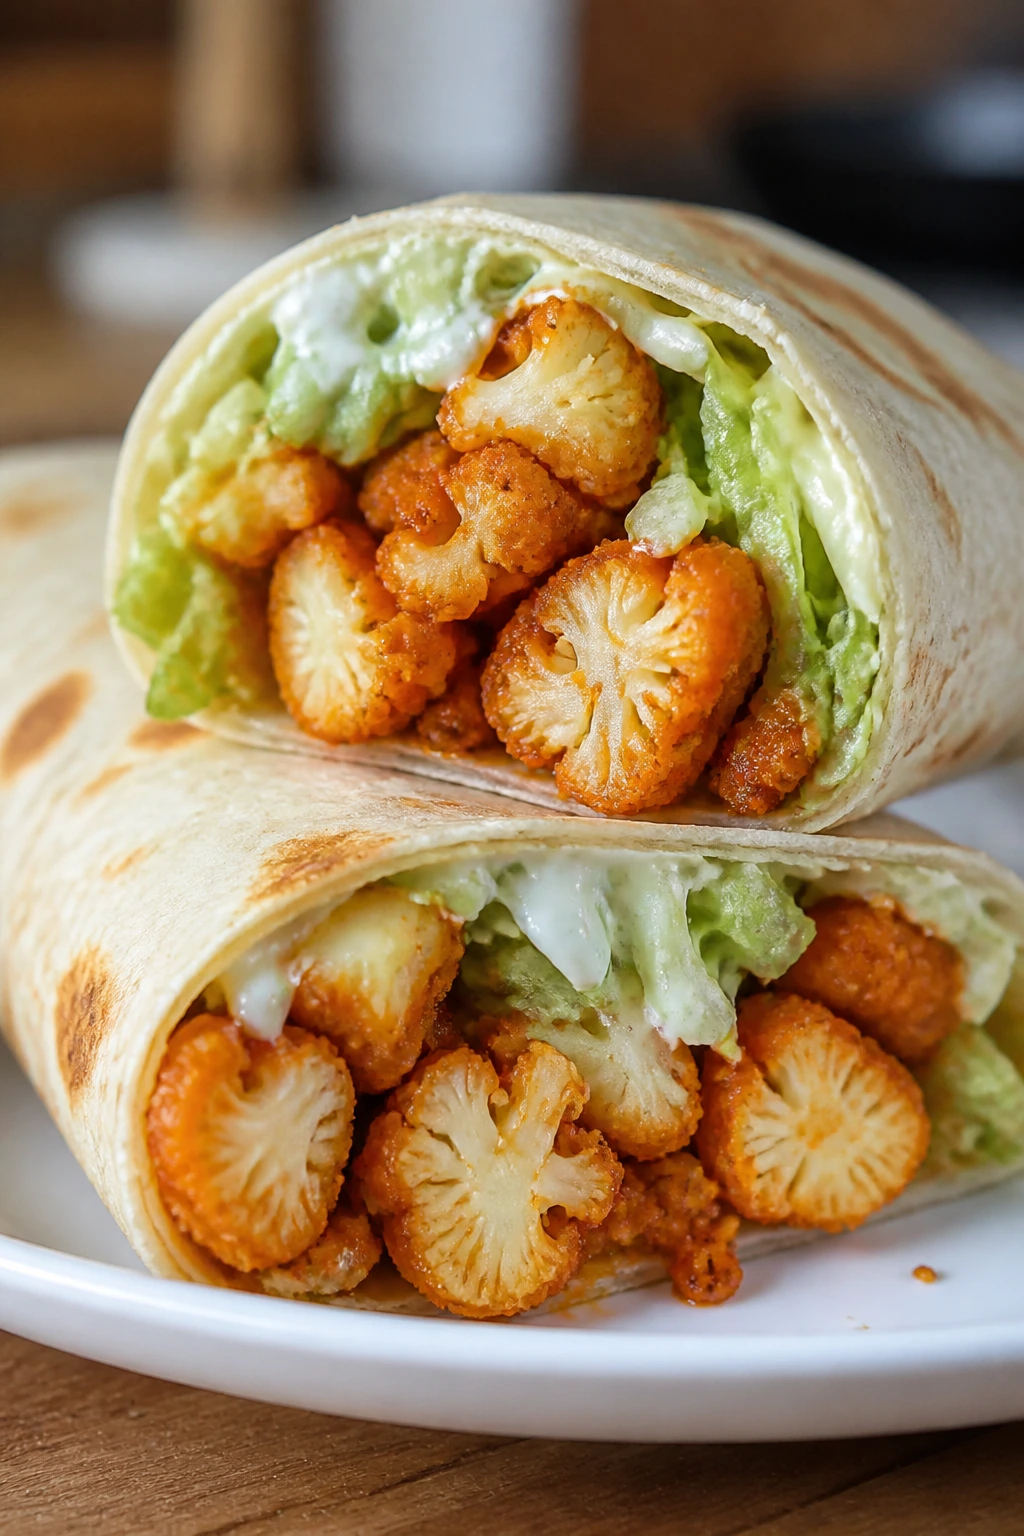
These wraps are for the kids who like a little heat, or for the adults who need a vegetable to stop pretending it isn’t dinner. Cauliflower gets roasted until the edges crisp, then tossed with buffalo sauce and tucked into a soft wrap.
Why It Works: Roasting dries the cauliflower enough for the sauce to cling instead of slide off. A cool ranch layer balances the heat and keeps the wrap from tasting one-note.
Key Ingredients:
- 1 head cauliflower, cut into florets
- 2 tablespoons oil
- 1/2 cup buffalo sauce
- 4 large tortillas
- 1/2 cup ranch dressing
- 1 cup shredded lettuce
Quick Steps:
- Roast cauliflower at 425°F with oil and salt for 20 minutes.
- Toss with buffalo sauce.
- Spread ranch on tortillas.
- Add cauliflower and lettuce, then roll.
- Slice and serve.
Equipment for This Recipe:
- Sheet pan
- Mixing bowl
- Tongs
How to Serve This Dish: Pair with celery sticks and apple slices to cool things down. For a more filling plate, serve with fries or a cup of soup.
Pro Tips for This Recipe:
- Roast until the edges brown, not just until tender.
- Warm the tortillas so they fold cleanly.
- Don’t drown the cauliflower in sauce.
Variations on This Dish:
- Buffalo Chicken Wraps: Swap the cauliflower for shredded chicken.
- Blue Cheese Version: Use blue cheese dressing instead of ranch.
Common Mistakes to Avoid with This Dish:
- Skipping the roast: Boiled cauliflower won’t hold sauce well.
- Overfilling the wrap: It breaks when you roll it.
33. Stuffed Pepper Boats
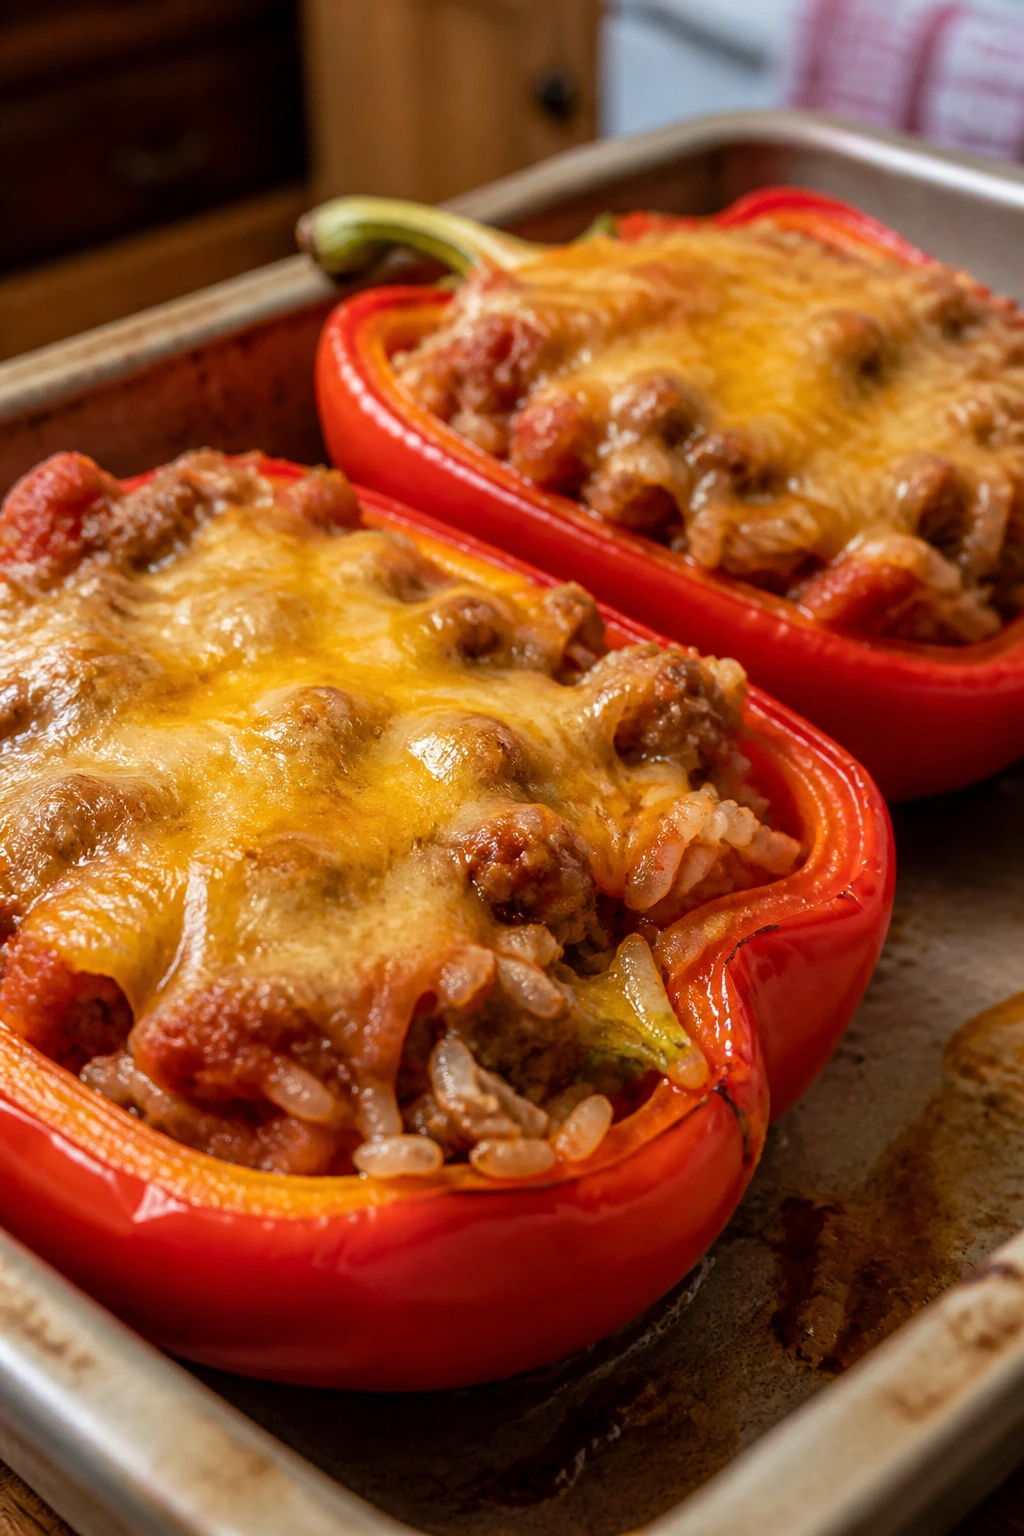
Stuffed peppers are one of those meals that can look a little formal until you cut them into boats and hand them over with a fork. The pepper softens, the filling gets savory, and the cheese on top turns into the part everyone notices first.
Why It Works: Halved peppers roast faster than whole ones, and the open shape makes serving easier for kids. Rice and meat give you enough substance that one half can pass as a snack or a small dinner.
Key Ingredients:
- 4 bell peppers, halved and seeded
- 1 pound ground turkey
- 1 cup cooked rice
- 1 cup tomato sauce
- 1 cup shredded cheddar
- 1 teaspoon Italian seasoning
Quick Steps:
- Brown the turkey in a skillet.
- Stir in rice, tomato sauce, seasoning, and salt.
- Fill pepper halves with the mixture.
- Top with cheese and bake at 400°F for 20 minutes.
- Bake until peppers are tender.
Equipment for This Recipe:
- Baking dish
- Skillet
- Spoon
How to Serve This Dish: Serve with bread for scooping up extra filling or a crisp salad. Smaller kids often like one half pepper cut into strips.
Pro Tips for This Recipe:
- Pre-bake the peppers for 10 minutes if you like them softer.
- Pack the filling loosely so it heats evenly.
- Use a baking dish snug enough to keep the peppers upright.
Variations on This Dish:
- Italian Pepper Boats: Use marinara and mozzarella.
- Mexican Pepper Boats: Swap in taco seasoning and salsa.
Common Mistakes to Avoid with This Dish:
- Undercooked peppers: They stay tough and watery.
- Too much filling: It spills into the pan and burns.
34. Sesame Noodles with Edamame
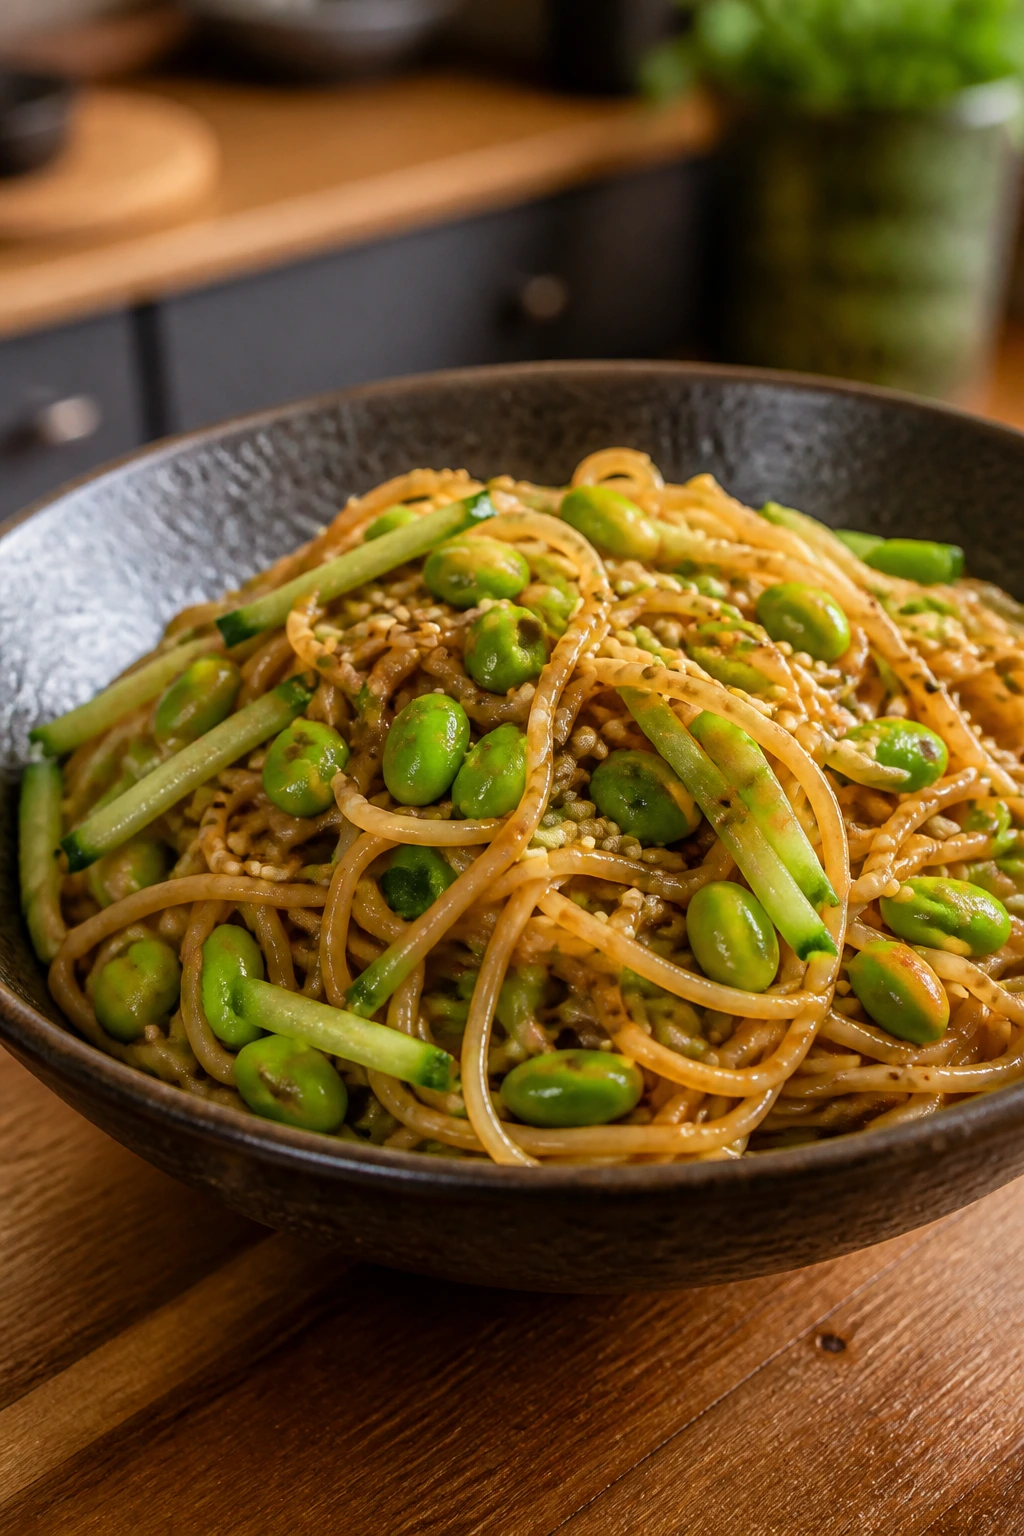
Cold or warm, these noodles have the kind of glossy, savory sauce that makes a bowl look more complicated than it is. Edamame brings a bright green pop, and sesame oil gives the whole thing a toasty finish.
Why It Works: The sauce is built from pantry items and clings best to noodles that are just drained, not rinsed too aggressively. It can be eaten warm for dinner or chilled for a snack later.
Key Ingredients:
- 8 ounces noodles
- 1 cup shelled edamame
- 2 tablespoons soy sauce
- 1 tablespoon sesame oil
- 1 tablespoon peanut butter
- 1 cucumber, julienned
Quick Steps:
- Cook noodles and edamame until tender.
- Whisk soy sauce, sesame oil, peanut butter, and a splash of warm water.
- Toss noodles with the sauce.
- Fold in cucumber and edamame.
- Serve warm or at room temperature.
Equipment for This Recipe:
- Pot
- Whisk
- Large bowl
How to Serve This Dish: Serve in small bowls with chopped peanuts on top. It works as a side dish, a snack bowl, or a light dinner with chicken.
Pro Tips for This Recipe:
- Add water to the sauce a teaspoon at a time until it loosens.
- Use noodles with some texture, like soba or linguine.
- Keep the cucumber cold for contrast.
Variations on This Dish:
- Chicken Noodle Bowl: Add shredded chicken.
- Chili-Sesame Version: Stir in chili crisp for heat.
Common Mistakes to Avoid with This Dish:
- Sauce too thick: It won’t coat evenly.
- Overcooked noodles: They turn pasty when tossed.
35. Crispy Salmon Cakes
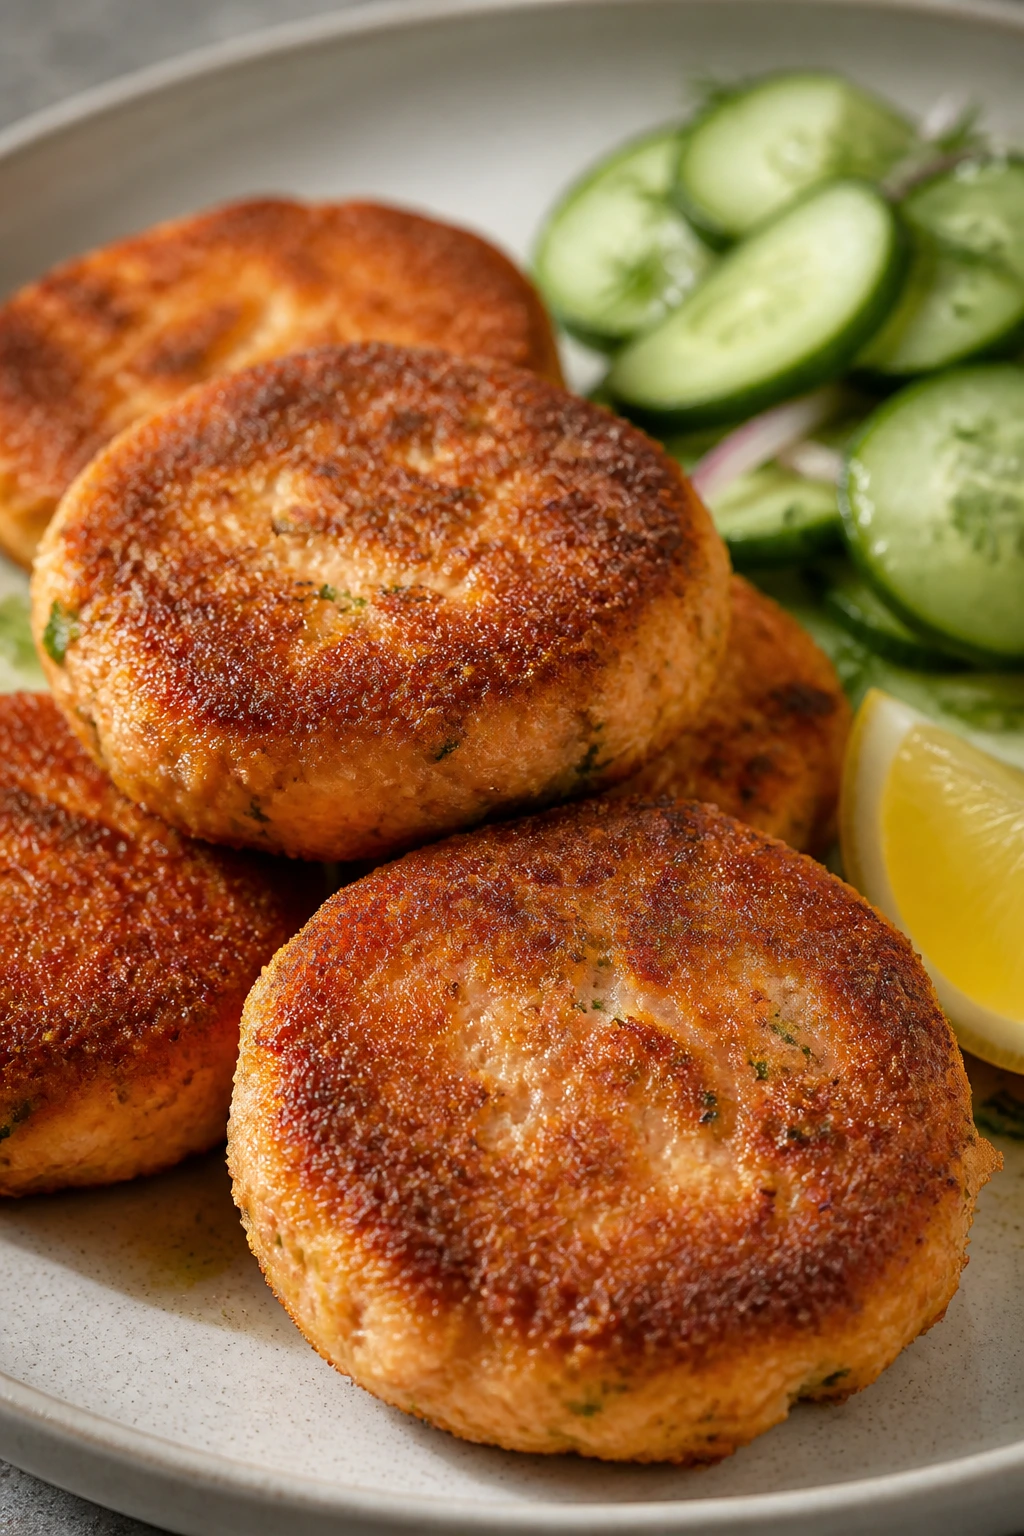
Salmon cakes are what you make when you want dinner to feel a little more grown-up without making it complicated. Crisp on the outside, tender inside, and good with a squeeze of lemon, they also happen to work well in smaller portions for after-school snacking.
Why It Works: Canned salmon is already cooked, so the pan job is just about browning and binding. Breadcrumbs and egg hold the cakes together while keeping them light.
Key Ingredients:
- 2 cans salmon, drained
- 1 egg
- 1/2 cup breadcrumbs
- 2 tablespoons mayonnaise
- 1 tablespoon lemon juice
- 2 tablespoons oil
Quick Steps:
- Mix salmon, egg, crumbs, mayo, lemon, and salt.
- Shape into 8 small cakes.
- Chill 10 minutes if the mix feels soft.
- Pan-fry in oil over medium heat for 3 minutes per side.
- Serve with lemon wedges.
Equipment for This Recipe:
- Skillet
- Mixing bowl
- Spatula
How to Serve This Dish: Serve with cucumber salad or mashed potatoes. For snack mode, make the cakes smaller and add a yogurt dip.
Pro Tips for This Recipe:
- Drain the salmon well.
- Don’t move the cakes too soon; let the crust set.
- A little Dijon in the mix adds depth.
Variations on This Dish:
- Dill Salmon Cakes: Add chopped dill.
- Corn Salmon Cakes: Fold in 1/3 cup corn for sweetness.
Common Mistakes to Avoid with This Dish:
- Too wet a mixture: The cakes fall apart.
- High heat: The outside burns before the center warms through.
36. Chicken Enchilada Roll-Ups
These have the punchy flavor of enchiladas without the whole baking dish commitment. Rolled tortillas keep the filling tidy, and the sauced tops pick up enough heat in the oven to taste fully finished.
Why It Works: Shredded chicken and cheese are easy to roll, and enchilada sauce keeps things moist without making them soggy if you use it lightly. A short bake melts everything together.
Key Ingredients:
- 2 cups shredded chicken
- 1 cup shredded cheese
- 1/2 cup enchilada sauce
- 4 large tortillas
- 2 tablespoons chopped cilantro
- 1/2 cup sour cream, for serving
Quick Steps:
- Mix chicken with half the sauce and half the cheese.
- Fill tortillas and roll.
- Place seam-side down in a baking dish.
- Spoon remaining sauce and cheese over the top.
- Bake at 400°F for 15 minutes.
Equipment for This Recipe:
- Baking dish
- Mixing bowl
- Spoon
How to Serve This Dish: Serve with sour cream, sliced avocado, and rice on the side. Cut the rolls into halves if you’re serving them as a snack plate.
Pro Tips for This Recipe:
- Warm the tortillas so they don’t crack.
- Use enough sauce to coat, not flood.
- Let the dish sit 5 minutes before serving.
Variations on This Dish:
- Bean Enchilada Roll-Ups: Add mashed beans to the filling.
- Green Chile Version: Swap red sauce for green enchilada sauce.
Common Mistakes to Avoid with This Dish:
- Overfilling: The tortillas split.
- Too much sauce underneath: The rolls slide around in the dish.
37. Mini Corn Dog Muffins

Corn dog muffins are a slightly absurd but extremely effective answer to the “what’s for dinner?” question. They taste like a fair-food shortcut, but they bake in one pan and fit neatly into small hands.
Why It Works: Cornbread batter rises around the hot dog pieces, giving you a sweet-savory bite in muffin form. They’re easy to portion and freeze.
Key Ingredients:
- 1 box cornbread mix
- 1 egg
- 3/4 cup milk
- 4 hot dogs, cut into 1/2-inch pieces
- 1 tablespoon melted butter
- 1/4 cup shredded cheddar, optional
Quick Steps:
- Heat oven to 375°F and grease a mini muffin tin.
- Mix cornbread batter with egg, milk, and butter.
- Spoon batter into cups and press in hot dog pieces.
- Bake 12 to 15 minutes.
- Cool slightly before removing.
Equipment for This Recipe:
- Mini muffin tin
- Mixing bowl
- Small spoon
How to Serve This Dish: Serve with mustard, ketchup, and apple slices. Five or six mini muffins make a snack; ten with veggies make dinner.
Pro Tips for This Recipe:
- Cut the hot dogs small so each bite has some in it.
- Don’t overfill the cups.
- Let them cool briefly so the cornbread sets.
Variations on This Dish:
- Cheddar Corn Dogs: Add shredded cheddar to the batter.
- Turkey Dog Version: Use turkey hot dogs.
Common Mistakes to Avoid with This Recipe:
- Batter too thin: The hot dogs sink.
- Removing too fast: They crumble before they set.
38. Pasta Salad Bowls with Salami and Mozzarella
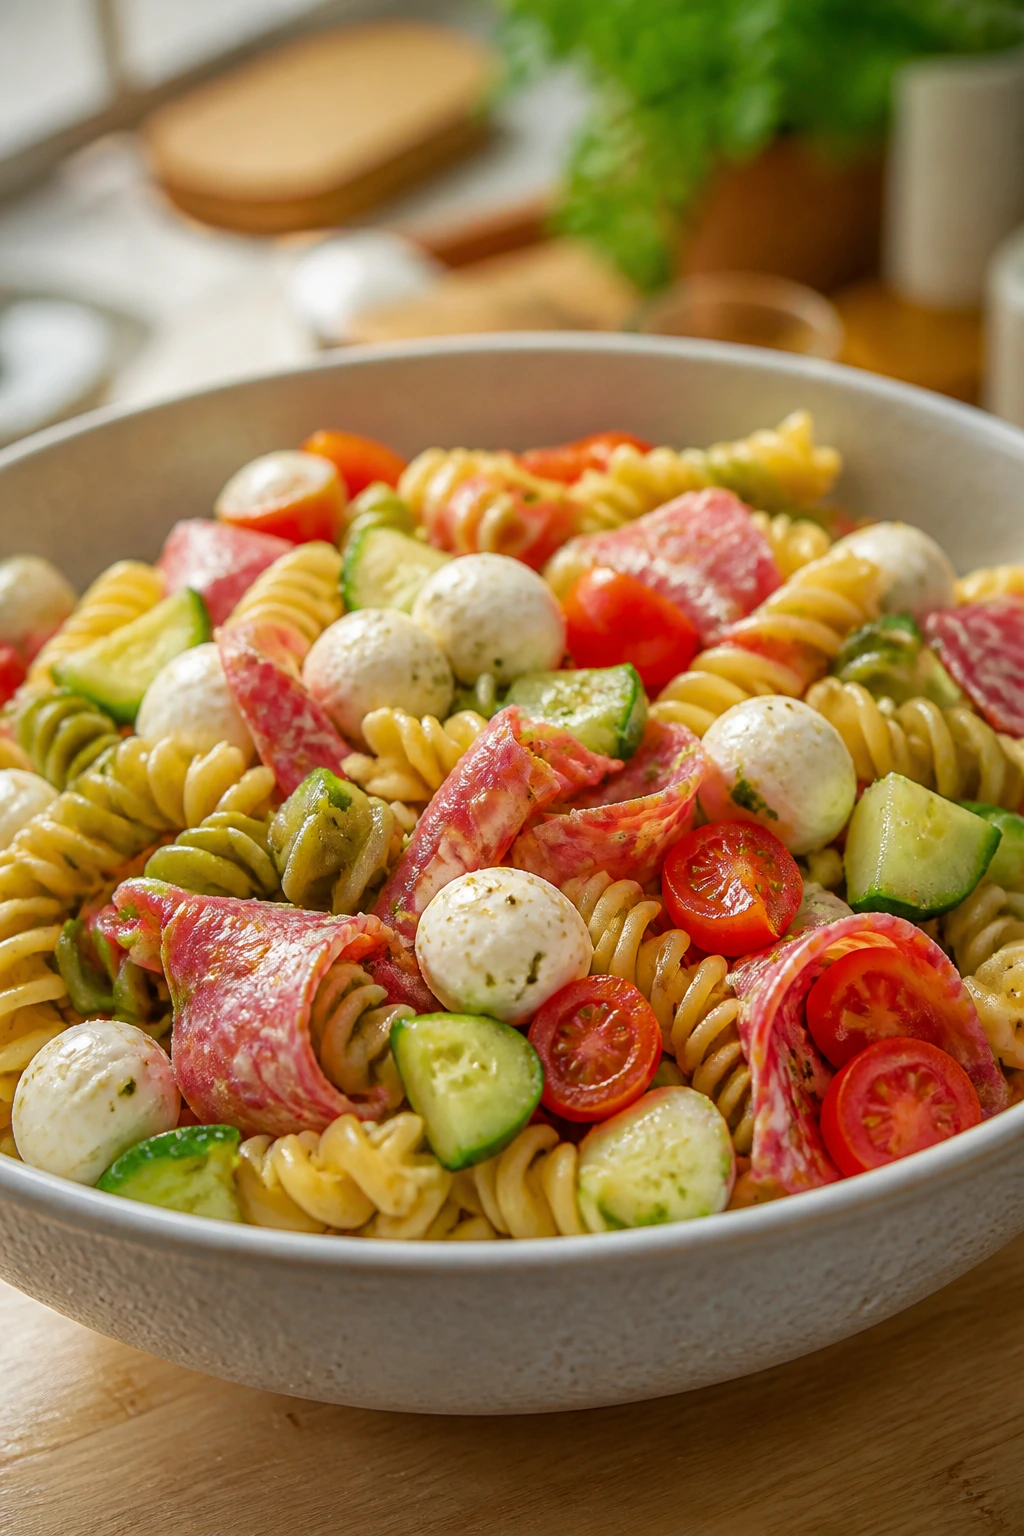
Pasta salad doesn’t have to be a side dish wearing a better outfit. When you add salami, mozzarella, and enough vegetables to make the bowl look bright, it becomes a cold dinner that’s easy to scoop after school.
Why It Works: The pasta holds dressing, the salami adds salt, and the mozzarella gives you soft bites that feel substantial. It’s good warm, cold, or somewhere in between.
Key Ingredients:
- 8 ounces rotini
- 4 ounces salami, chopped
- 1 cup mozzarella pearls
- 1 cup cherry tomatoes, halved
- 1/2 cup cucumber, diced
- 1/4 cup Italian dressing
Quick Steps:
- Cook and cool the pasta.
- Toss with salami, mozzarella, tomatoes, cucumber, and dressing.
- Season with salt and pepper.
- Chill 15 minutes if you want it colder.
- Serve in bowls.
Equipment for This Recipe:
- Pot
- Colander
- Large bowl
How to Serve This Dish: Serve with crackers and fruit on the side. It packs well in small containers for an after-school bite later.
Pro Tips for This Recipe:
- Dress the pasta while it’s still slightly warm.
- Cut the vegetables small for easier bites.
- Add more dressing just before serving if it looks dry.
Variations on This Dish:
- Chicken Pasta Salad: Use chopped chicken instead of salami.
- Greek Pasta Bowl: Swap in feta, olives, and cucumber.
Common Mistakes to Avoid with This Dish:
- Overdressing early: It can get greasy.
- Overcooked pasta: The salad turns mushy after chilling.
39. Turkey Taco Stuffed Sweet Potatoes
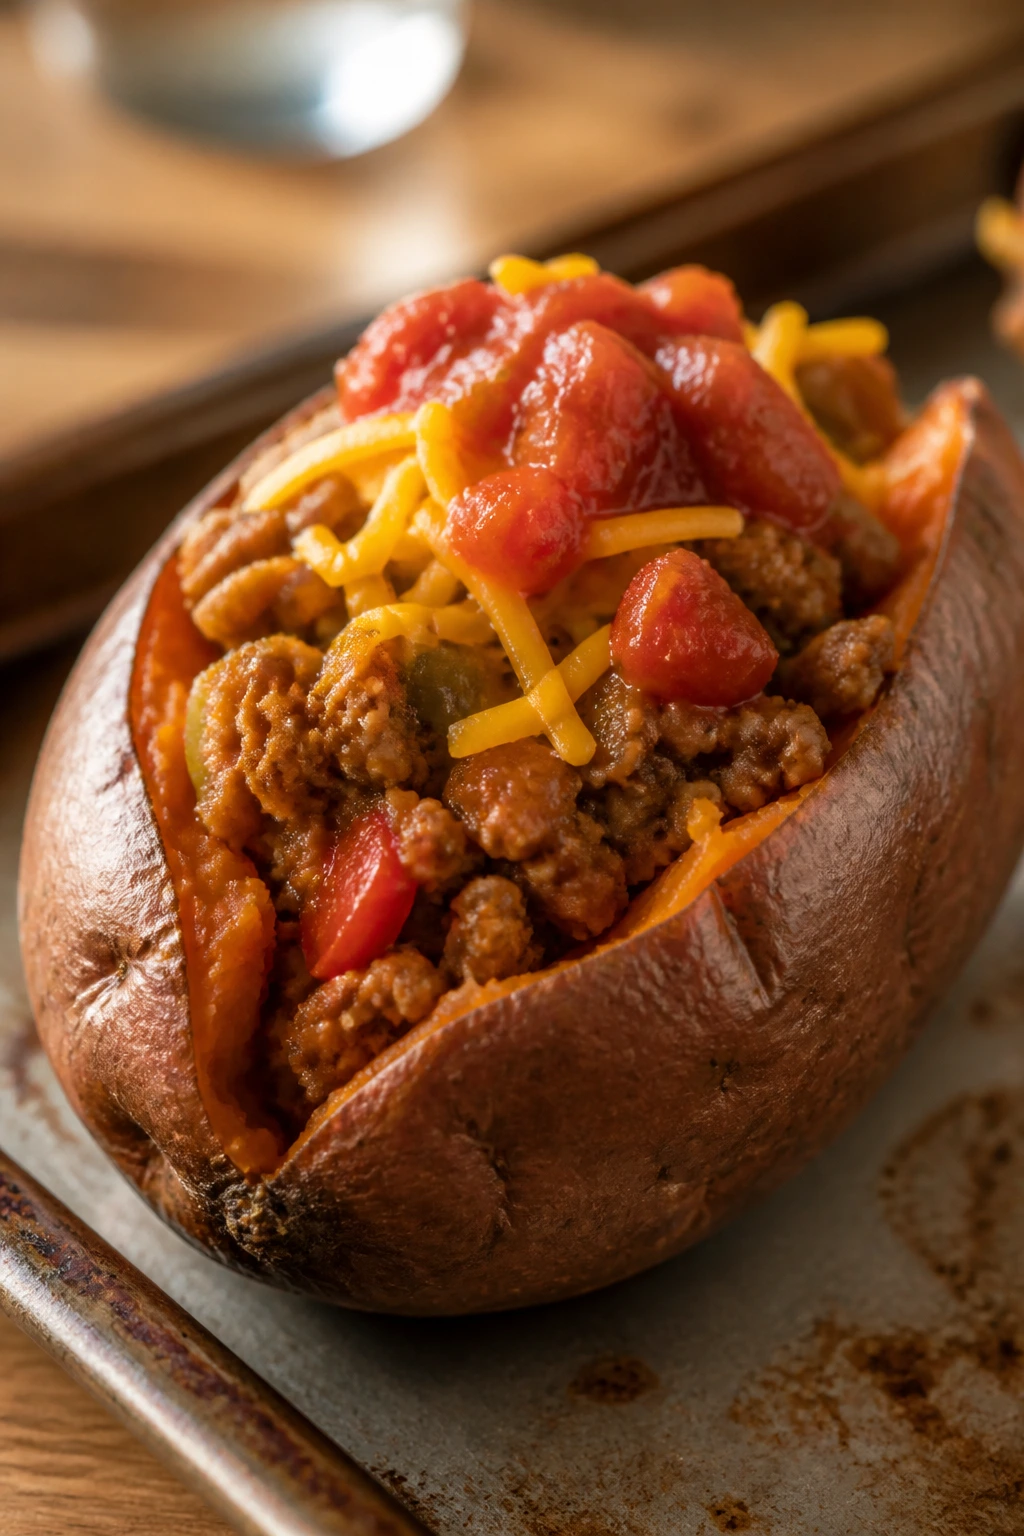
Sweet potatoes and taco filling are a strong pair because one brings sweetness and the other brings spice. Split the potato open, pile on the turkey, and you’ve got dinner that feels built, not assembled.
Why It Works: The potato gives you a soft, sturdy base, and taco meat keeps the filling savory. A spoonful of yogurt or sour cream balances the sweetness.
Key Ingredients:
- 4 medium sweet potatoes
- 1 pound ground turkey
- 2 tablespoons taco seasoning
- 1/2 cup salsa
- 1/2 cup shredded cheese
- 1/4 cup plain yogurt
Quick Steps:
- Bake sweet potatoes at 400°F until tender.
- Brown turkey with taco seasoning.
- Split the potatoes and fluff the centers.
- Fill with turkey, salsa, and cheese.
- Top with yogurt.
Equipment for This Recipe:
- Baking sheet
- Skillet
- Fork
How to Serve This Dish: Serve with crunchy lettuce or tortilla chips. For younger kids, mash the filling a little before serving so it stays contained.
Pro Tips for This Recipe:
- Bake the potatoes until they give easily when pressed.
- Use salsa with some body so the filling doesn’t run.
- Add cheese while the turkey is hot to help it melt.
Variations on This Dish:
- Black Bean Version: Mix beans into the turkey or use them instead.
- BBQ Sweet Potato: Swap taco seasoning for barbecue sauce.
Common Mistakes to Avoid with This Dish:
- Undercooked potatoes: The center stays hard.
- Too much salsa: It makes the filling slide out.
40. Spinach Ricotta Toasts
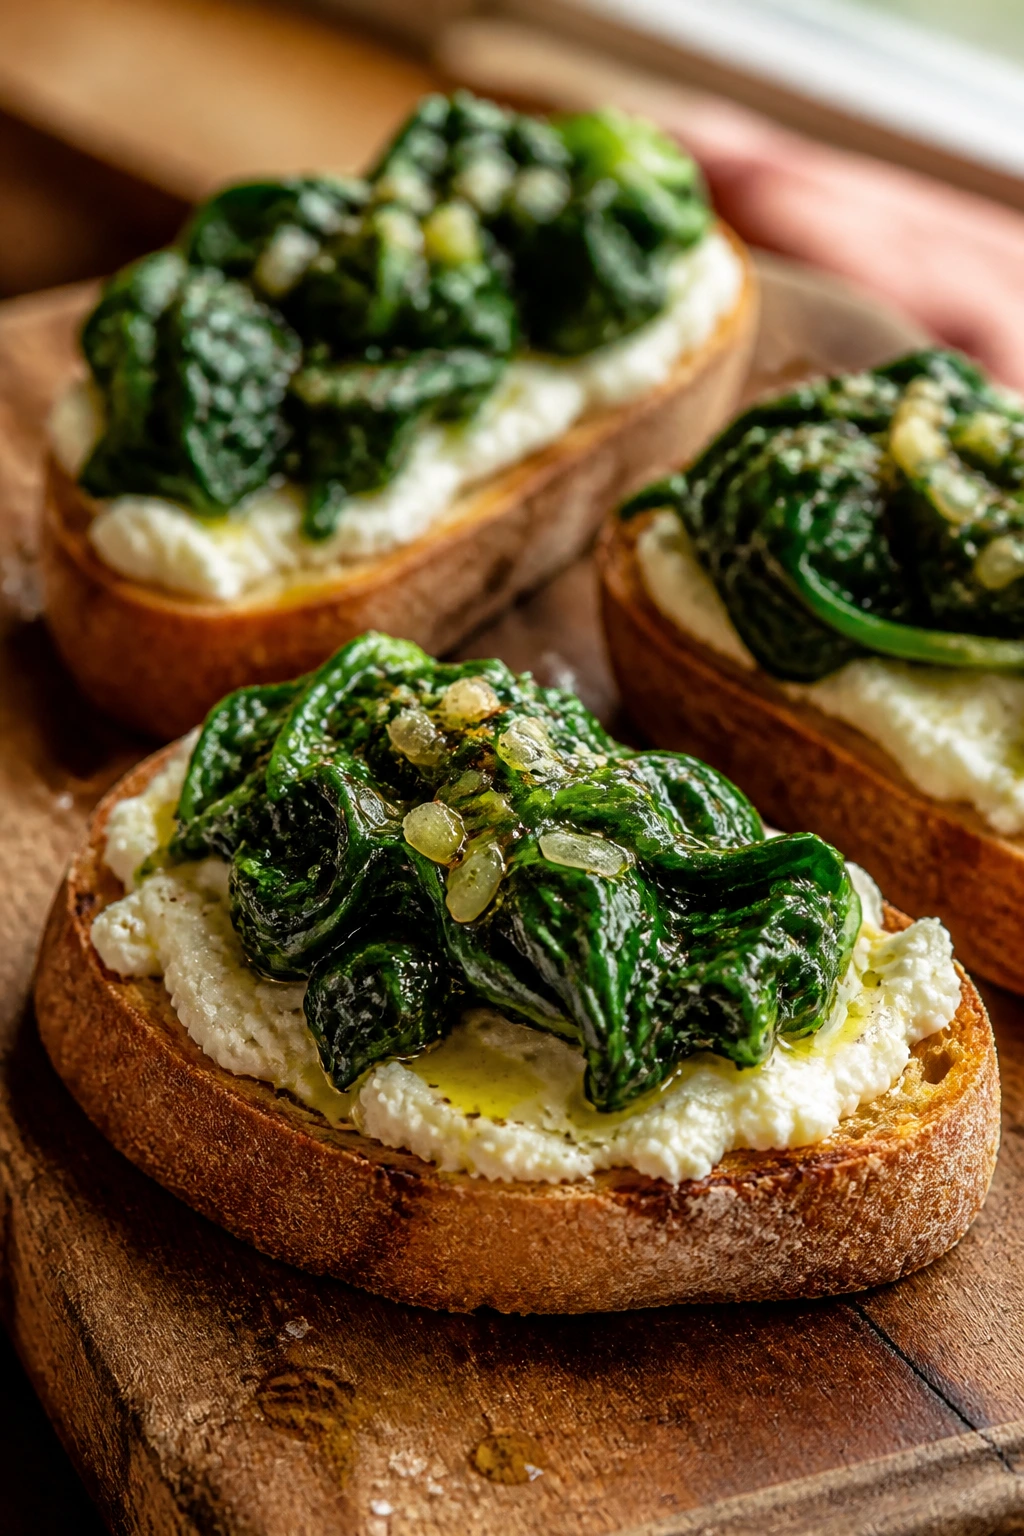
Ricotta toast has a way of looking elegant while staying ridiculously easy. Add garlicky spinach, and suddenly you’ve got a dinner that works on a slice of bread but still feels like somebody paid attention.
Why It Works: Ricotta gives the toast a creamy base, and sautéed spinach keeps the topping from getting watery. Toasted bread supports everything without getting floppy.
Key Ingredients:
- 4 thick slices bread
- 1 cup ricotta
- 2 cups baby spinach
- 1 garlic clove, minced
- 1 tablespoon olive oil
- Pinch of salt
Quick Steps:
- Toast the bread.
- Sauté garlic and spinach in olive oil until wilted.
- Spread ricotta on the toast.
- Top with spinach and a pinch of salt.
- Serve warm.
Equipment for This Recipe:
- Skillet
- Toaster or oven
- Spoon
How to Serve This Dish: Serve with sliced tomatoes or soup. Two toasts make a light dinner; one toast cut into fingers makes a snack.
Pro Tips for This Recipe:
- Use thick bread so it doesn’t bend.
- Drain off extra moisture from the spinach.
- A little lemon zest wakes up the ricotta.
Variations on This Dish:
- Tomato Ricotta Toast: Add sliced tomatoes on top.
- Egg-Topped Version: Add a fried egg for more staying power.
Common Mistakes to Avoid with This Recipe:
- Untoasted bread: It goes soft too fast.
- Wet spinach: It makes the toast slide apart.
41. Chicken Caesar Pitas
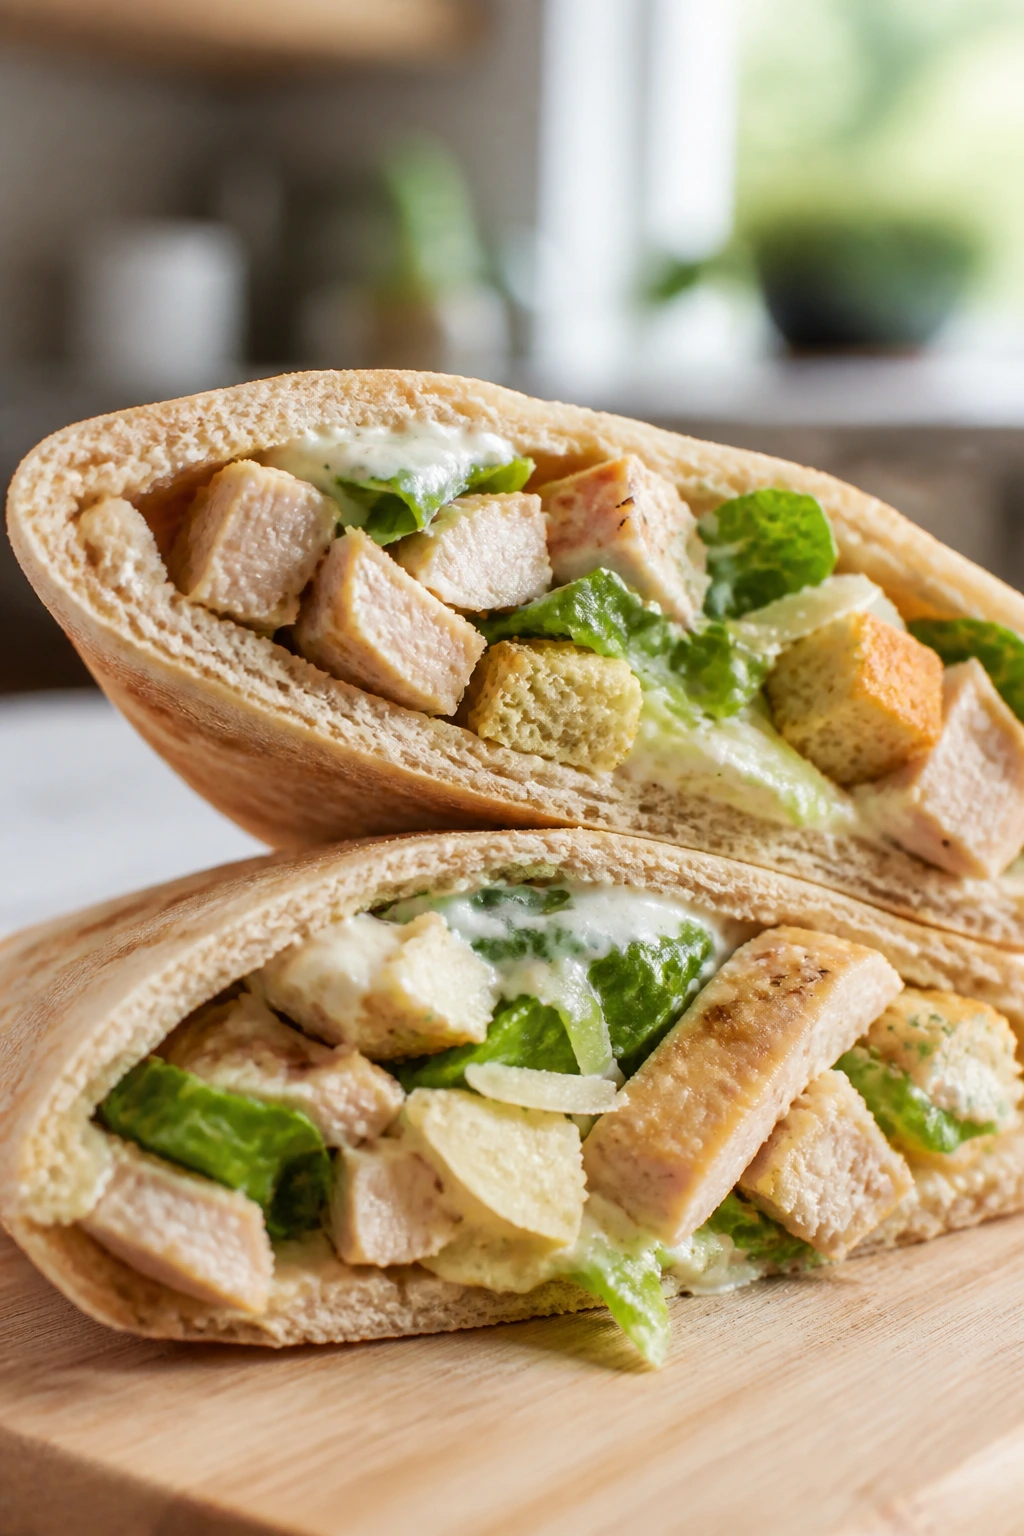
These are salad, sandwich, and snack all in one soft pocket. Chicken Caesar pitas stay neat in hand and feel satisfying enough for dinner without requiring a knife-and-fork situation.
Why It Works: Pita pockets hold the filling better than sliced bread, and Caesar dressing gives you flavor without much measuring. Using chopped chicken keeps every bite balanced.
Key Ingredients:
- 4 pita rounds
- 2 cups chopped cooked chicken
- 2 cups chopped romaine
- 1/3 cup Caesar dressing
- 1/4 cup grated parmesan
- 1/2 cup croutons, crushed
Quick Steps:
- Toss chicken, romaine, dressing, and parmesan together.
- Warm the pitas briefly.
- Spoon filling into each pita.
- Add crushed croutons for crunch.
- Serve right away.
Equipment for This Recipe:
- Mixing bowl
- Knife
- Spoon
How to Serve This Dish: Serve with grapes or celery sticks. If you want a fuller dinner, add a cup of soup or roasted potatoes.
Pro Tips for This Recipe:
- Don’t overdress the lettuce.
- Warm the pitas so they don’t split.
- Crumble the croutons right before serving so they stay crunchy.
Variations on This Dish:
- Turkey Caesar Pitas: Swap chicken for turkey.
- Buffalo Caesar Pitas: Mix a spoonful of buffalo sauce into the dressing.
Common Mistakes to Avoid with This Dish:
- Soggy filling: Dress the salad lightly.
- Overstuffing the pita: It tears when you bite into it.
42. Beef and Broccoli Rice Cups
Rice cups are handy because they portion themselves. Add beef and broccoli, and you get a small, savory meal that feels close to takeout but works in lunchbox-sized pieces.
Why It Works: The sauce coats the beef and broccoli before they go into the cups, which keeps the rice from drying out. Baking them briefly helps the flavors settle together.
Key Ingredients:
- 2 cups cooked rice
- 1 pound ground beef
- 2 cups broccoli florets, chopped small
- 1/4 cup soy sauce
- 1 tablespoon brown sugar
- 1 teaspoon garlic powder
Quick Steps:
- Brown the beef in a skillet.
- Stir in broccoli, soy sauce, brown sugar, and garlic powder.
- Mix with rice.
- Press into greased muffin cups.
- Bake at 375°F for 10 minutes.
Equipment for This Recipe:
- Muffin tin
- Skillet
- Spoon
How to Serve This Dish: Serve with sesame seeds and a side of mandarin oranges. Three or four cups make a solid dinner.
Pro Tips for This Recipe:
- Chop the broccoli small so it softens quickly.
- Press the rice mixture down gently.
- Let the cups rest before removing.
Variations on This Dish:
- Chicken and Broccoli Cups: Use chopped chicken instead of beef.
- Teriyaki Version: Swap the sauce for teriyaki.
Common Mistakes to Avoid with This Dish:
- Broccoli too large: It stays crunchy in the wrong way.
- Too much sauce: The cups get wet and collapse.
43. Baked Bean and Cheese Toasts
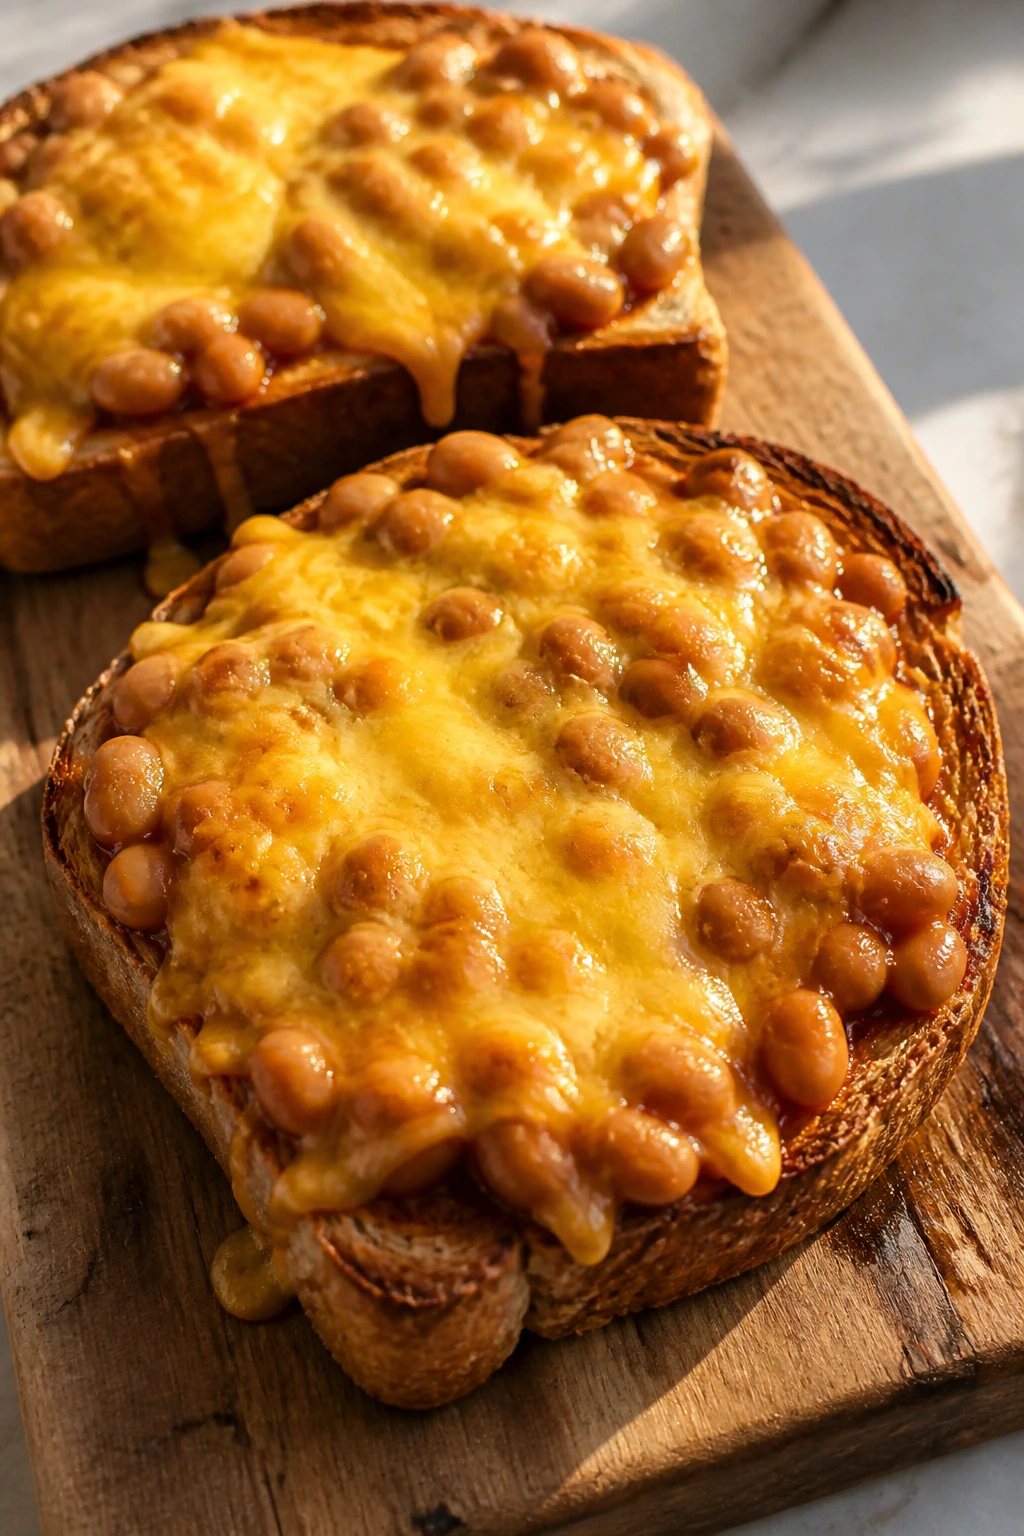
This is the kind of meal that looks almost too simple until you take the first bite. Toast, beans, and cheddar are cheap, fast, and far more satisfying than they sound on paper.
Why It Works: The beans bring protein and body, while the cheese seals the top and makes the toast feel finished. Broiling it briefly gives you a bubbly top in minutes.
Key Ingredients:
- 4 slices thick bread
- 1 cup baked beans
- 1 cup shredded cheddar
- 2 tablespoons chopped scallions
- 1 tablespoon butter
- 1/4 teaspoon black pepper
Quick Steps:
- Toast the bread lightly.
- Spread with butter and a layer of beans.
- Top with cheese and pepper.
- Broil 1 to 2 minutes until melted.
- Finish with scallions.
Equipment for This Recipe:
- Sheet pan
- Broiler-safe tray
- Spoon
How to Serve This Dish: Serve with sliced cucumbers or a fried egg. It makes a very respectable quick dinner with almost no cleanup.
Pro Tips for This Recipe:
- Use thick, sturdy bread.
- Keep a close eye on the broiler.
- Don’t use too much beans or the toast gets soft.
Variations on This Dish:
- Tomato Bean Toasts: Add sliced tomato under the cheese.
- Bacon Bean Toasts: Sprinkle with chopped cooked bacon.
Common Mistakes to Avoid with This Dish:
- Thin bread: It can’t handle the toppings.
- Broiling too long: The cheese turns hard instead of melted.
44. Mediterranean Couscous Bowls
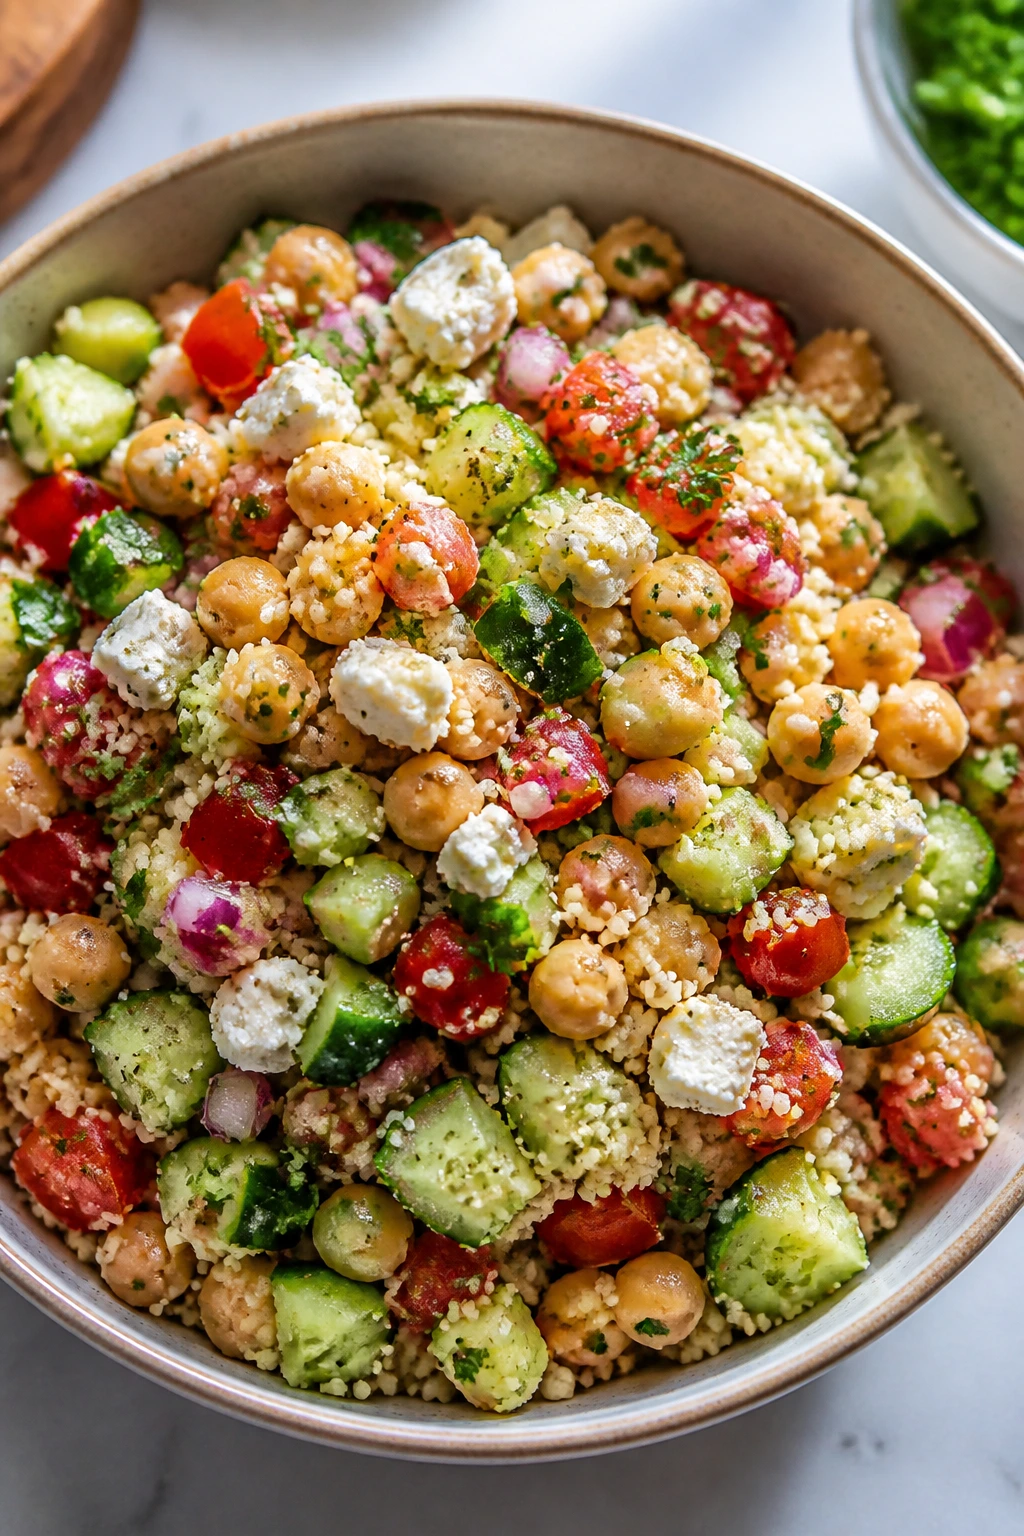
Couscous is fast enough to make when the afternoon has already gotten away from you. Toss it with chickpeas, cucumbers, and feta, and it becomes a bright bowl that can be eaten warm or at room temperature.
Why It Works: Couscous cooks in minutes and soaks up dressing easily. Chickpeas add protein, and the vegetables keep the bowl from feeling too soft.
Key Ingredients:
- 1 cup couscous
- 1 can chickpeas, drained
- 1 cucumber, diced
- 1 cup cherry tomatoes, halved
- 1/2 cup feta
- 2 tablespoons lemon juice
Quick Steps:
- Make couscous according to the package.
- Fluff with a fork and cool slightly.
- Toss with chickpeas, cucumber, tomatoes, feta, and lemon.
- Season with salt and pepper.
- Serve warm or chilled.
Equipment for This Recipe:
- Saucepan
- Fork
- Bowl
How to Serve This Dish: Serve with pita chips or grilled chicken on the side. It works well in shallow bowls where the toppings can stay visible.
Pro Tips for This Recipe:
- Fluff the couscous right after cooking.
- Salt the tomatoes lightly before tossing.
- Add a drizzle of olive oil if the bowl seems dry.
Variations on This Dish:
- Tuna Couscous Bowl: Swap chickpeas for tuna.
- Chicken Feta Bowl: Add chopped chicken and extra lemon.
Common Mistakes to Avoid with This Dish:
- Overcooked couscous: It turns gummy fast.
- Skipping the seasoning: The bowl tastes flat without salt and lemon.
45. Queso Burger Sliders
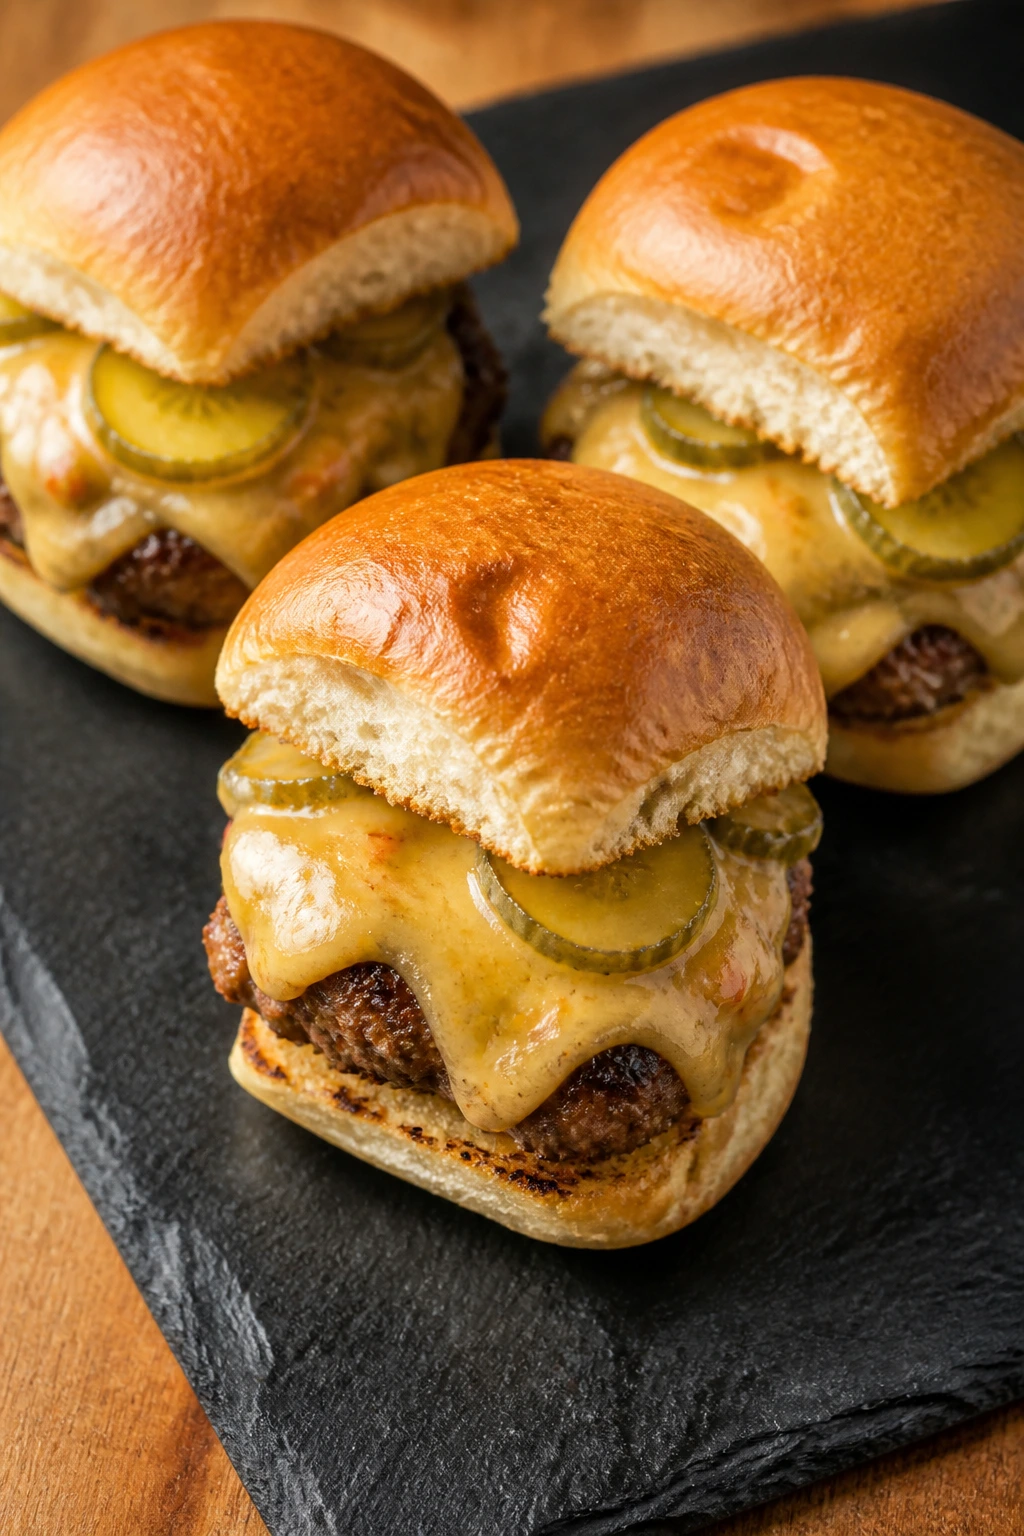
This is one of those dinners that behaves like a party food and still counts as a proper meal. Small burger patties, melted queso, and soft buns make sliders that are easy to hold and fast to finish.
Why It Works: Mini patties cook quickly and stay juicy, and queso brings the cheesy, saucy element without needing a long cheese melt. The buns warm through in minutes.
Key Ingredients:
- 1 pound ground beef
- 1 teaspoon salt
- 6 slider buns
- 1/2 cup queso
- 6 pickle slices
- 1 tablespoon butter
Quick Steps:
- Form beef into 6 small patties and season.
- Sear in a skillet 3 minutes per side.
- Warm the buns with butter.
- Spoon queso onto each patty.
- Add pickles and close the sliders.
Equipment for This Recipe:
- Skillet
- Spatula
- Knife
How to Serve This Dish: Serve with oven fries or carrot sticks. Two sliders are a snack; three with a side make dinner.
Pro Tips for This Recipe:
- Make the patties a little wider than the buns.
- Let them rest before assembling.
- Warm the queso so it pours easily.
Variations on This Dish:
- Turkey Sliders: Use ground turkey and add a little olive oil to the pan.
- Jalapeño Queso Version: Add sliced jalapeños for older eaters.
Common Mistakes to Avoid with This Dish:
- Pressing the patties hard: That squeezes out the juices.
- Cold buns: The sliders feel unfinished and dry.
46. Air-Fryer Ravioli Bites
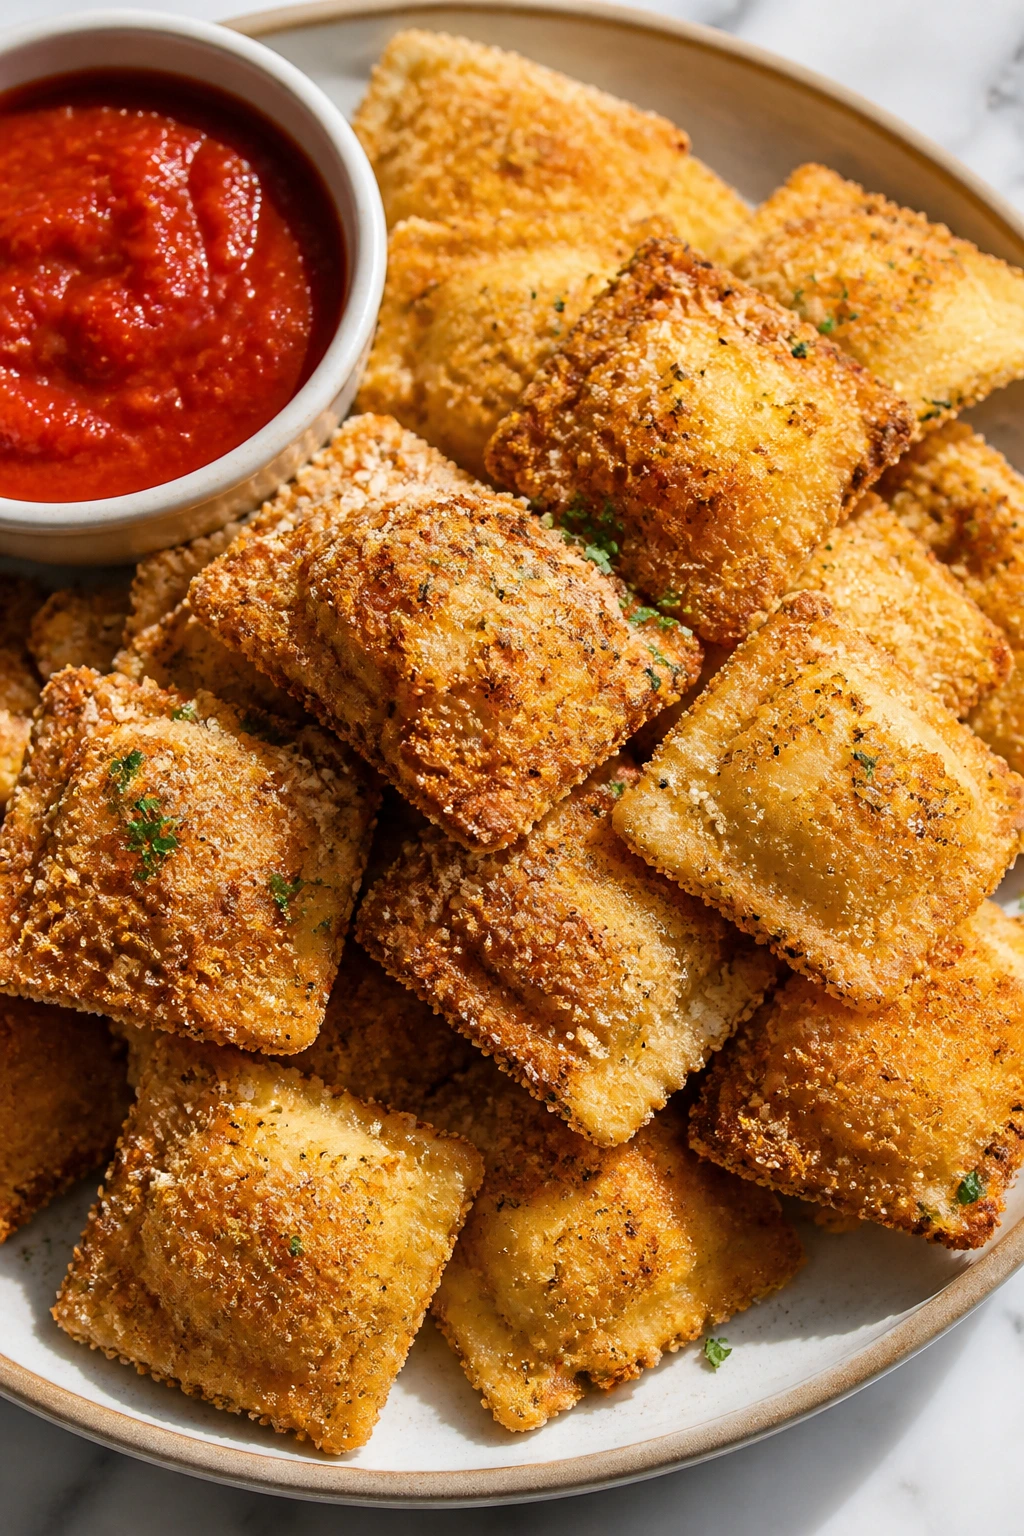
These little bites are what happen when ravioli gets a crunchy shell and decides to become a snack. They’re excellent for after-school grazing because they taste fried without needing a vat of oil.
Why It Works: The egg and breadcrumb coating crisps quickly in the air fryer, and the pasta filling stays soft inside. Marinara gives you a familiar dip on the side.
Key Ingredients:
- 1 package refrigerated ravioli
- 2 eggs
- 1 cup breadcrumbs
- 1/2 cup parmesan
- 1 tablespoon oil spray
- 1 cup marinara sauce
Quick Steps:
- Dip ravioli in beaten eggs.
- Coat in breadcrumbs mixed with parmesan.
- Spray lightly with oil.
- Air-fry at 375°F for 8 to 10 minutes.
- Serve with warm marinara.
Equipment for This Recipe:
- Air fryer
- Shallow bowls
- Tongs
How to Serve This Dish: Serve in a bowl with toothpicks and marinara for dipping. They’re a natural fit for snack plates with grapes or raw peppers.
Pro Tips for This Recipe:
- Don’t crowd the basket.
- Shake halfway through so the crust browns evenly.
- Use refrigerated ravioli, not frozen, for the best coating.
Variations on This Dish:
- Spicy Ravioli Bites: Add chili flakes to the breadcrumb mix.
- Pesto Dip Version: Serve with pesto instead of marinara.
Common Mistakes to Avoid with This Dish:
- Skipping the oil spray: The coating stays pale.
- Crowding the basket: The ravioli steams instead of crisping.
47. Lentil Sloppy Joes
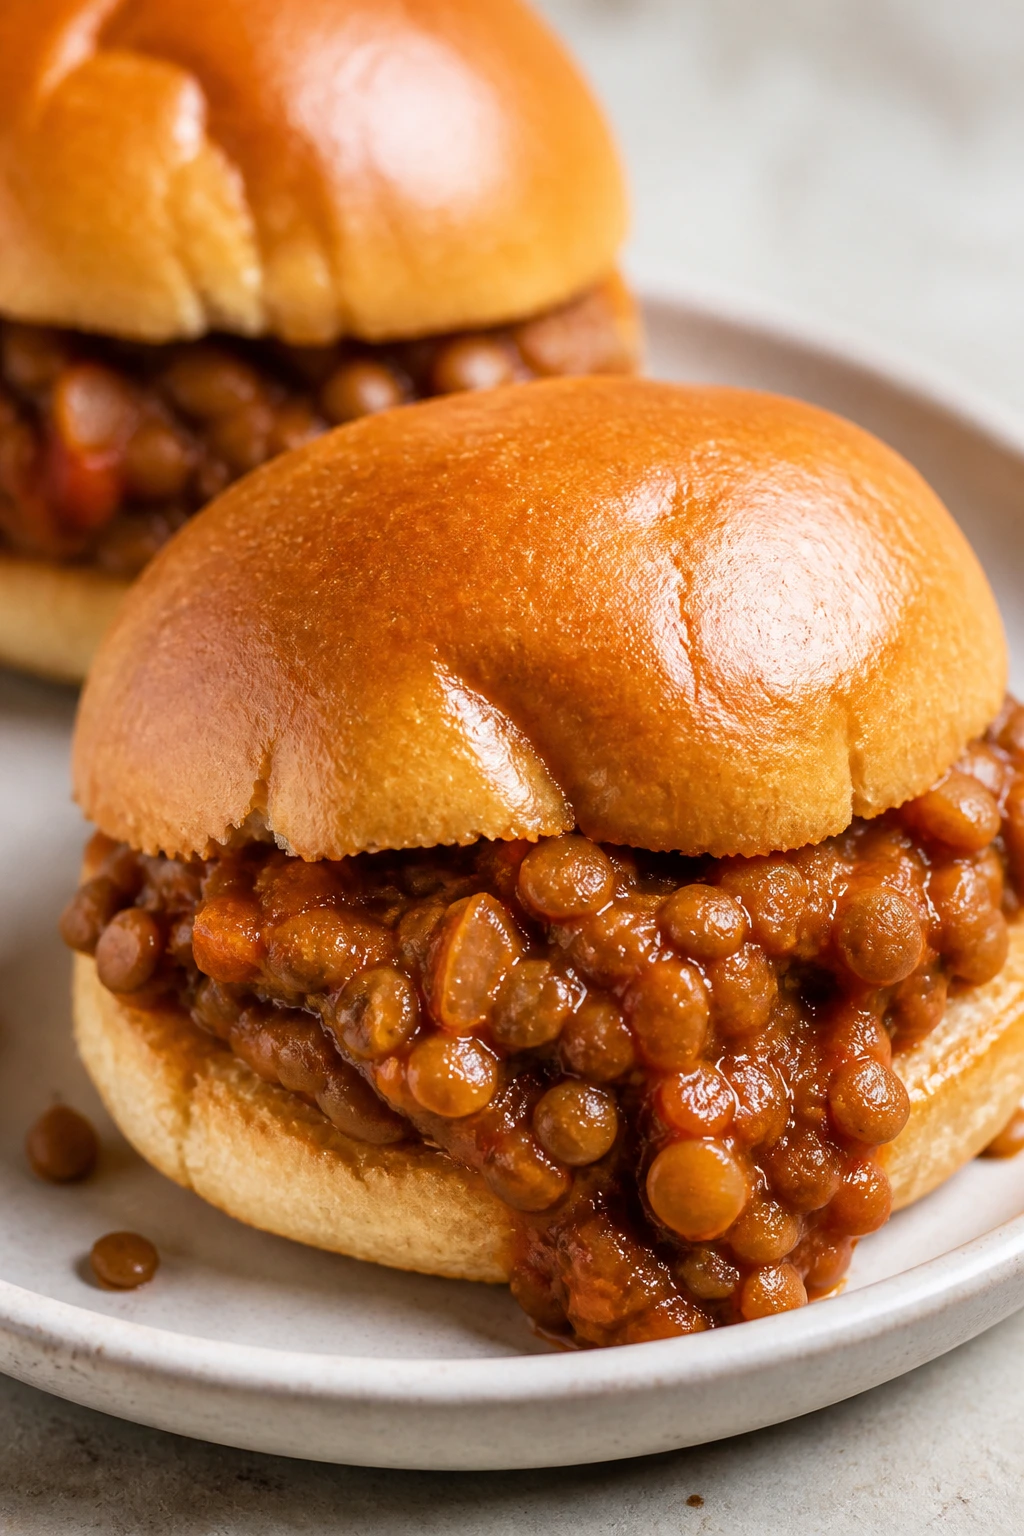
Lentils make a sloppy joe filling that’s earthy, thick, and surprisingly close to the original texture. The sauce clings to the beans well, so you get a sandwich that eats like the meat version but takes a different road to get there.
Why It Works: Lentils hold their shape after simmering, and tomato sauce plus ketchup gives the familiar sweet-savory profile. It’s a good pantry dinner when the fridge is looking thin.
Key Ingredients:
- 1 cup cooked lentils
- 1 small onion, diced
- 3/4 cup tomato sauce
- 1/4 cup ketchup
- 1 tablespoon Worcestershire sauce
- 6 slider buns
Quick Steps:
- Cook onion until soft.
- Stir in lentils, tomato sauce, ketchup, and Worcestershire.
- Simmer 8 to 10 minutes until thick.
- Spoon onto buns.
- Serve warm.
Equipment for This Recipe:
- Skillet
- Spoon
- Knife
How to Serve This Dish: Serve with pickle chips and a crunchy slaw. They’re filling enough for dinner but still small enough to count as a snacky bite.
Pro Tips for This Recipe:
- Simmer until the filling looks glossy and thick.
- Taste before salting; Worcestershire already brings salt.
- A little mustard sharpens the flavor.
Variations on This Dish:
- BBQ Lentil Joes: Replace ketchup with barbecue sauce.
- Mushroom Lentil Version: Add finely chopped mushrooms for more body.
Common Mistakes to Avoid with This Recipe:
- Thin filling: It spills out of the bun.
- Underseasoning: Lentils need salt and acid to taste alive.
48. Pork Carnitas Tostadas
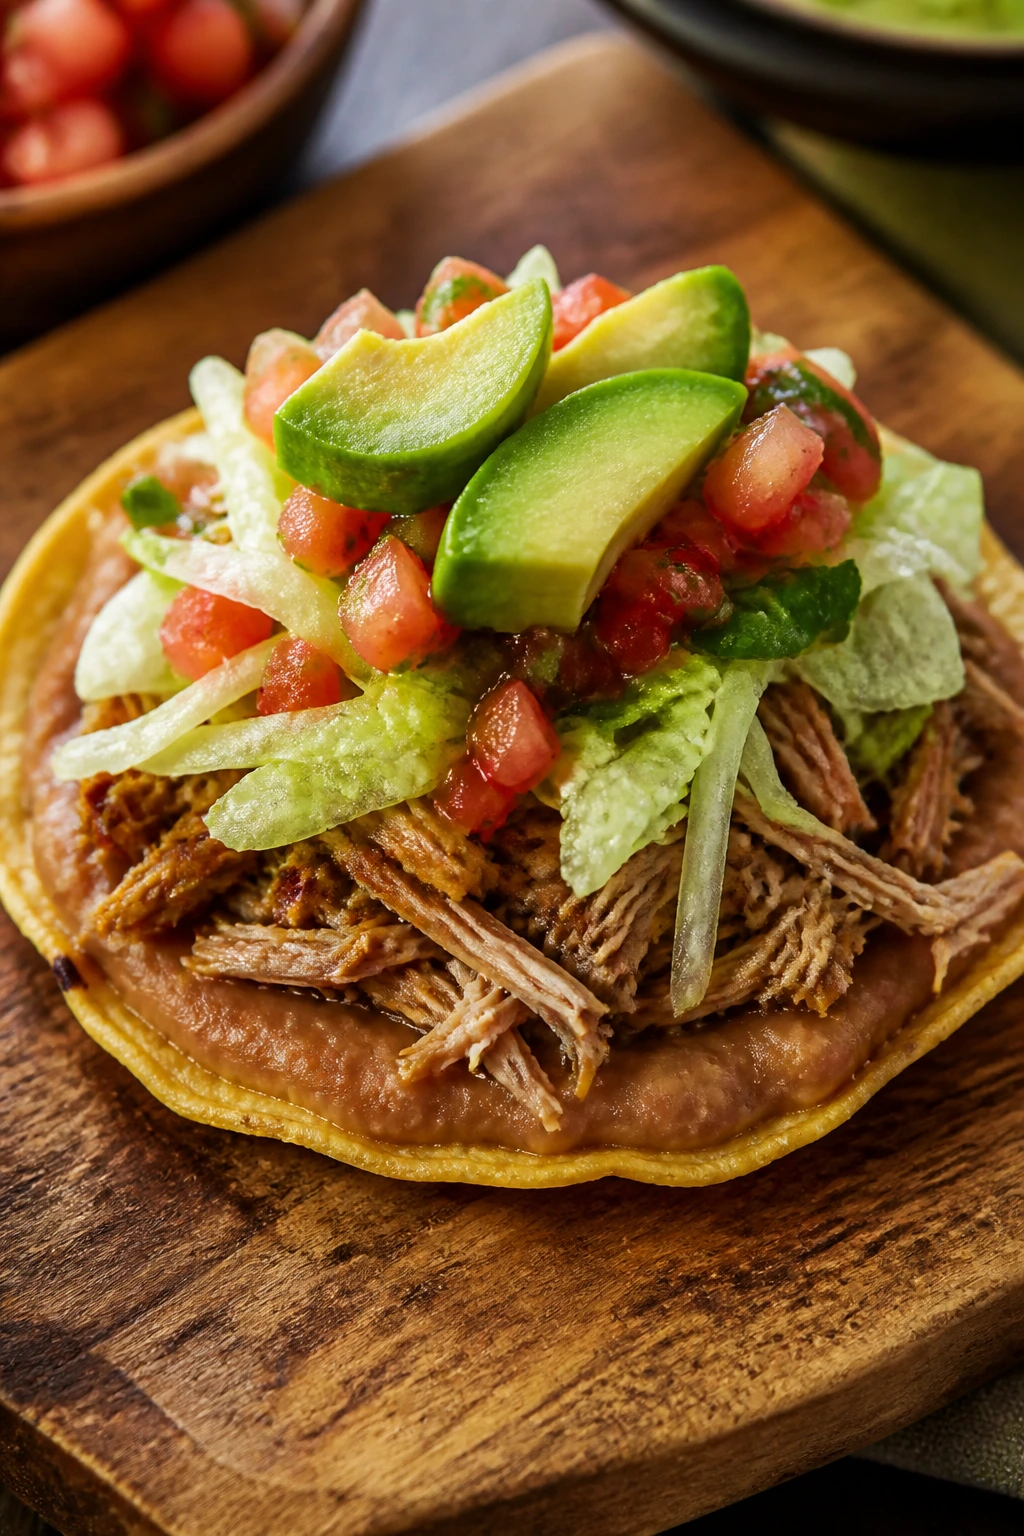
Crisp tostadas make a satisfying base for shredded pork, and that contrast between crunchy shell and juicy filling is why this one lands so well after a long day. It’s a little louder than some of the other recipes, and that’s part of the fun.
Why It Works: Carnitas-style pork brings rich flavor, and the tostada stays crisp under the toppings if you keep the sauce light. Avocado and salsa finish the plate without much extra work.
Key Ingredients:
- 2 cups shredded cooked pork
- 6 tostada shells
- 1/2 cup refried beans
- 1/2 cup salsa
- 1 avocado, sliced
- 1/2 cup shredded lettuce
Quick Steps:
- Warm the pork in a skillet.
- Spread tostadas with beans.
- Top with pork, lettuce, and salsa.
- Add avocado slices.
- Serve immediately.
Equipment for This Recipe:
- Skillet
- Spoon
- Knife
How to Serve This Dish: Serve one tostada per child for snack time or two for dinner. Put extra toppings in small bowls so everyone can build their own.
Pro Tips for This Recipe:
- Warm the pork so it doesn’t cool the tostadas too fast.
- Use beans as the glue between shell and filling.
- Add avocado at the end so it stays bright.
Variations on This Dish:
- Chicken Tostadas: Use shredded chicken instead of pork.
- Bean-Only Version: Skip the meat and double the beans.
Common Mistakes to Avoid with This Dish:
- Heavy wet toppings: They soften the shell fast.
- Waiting too long to serve: Tostadas lose their crunch on the counter.
49. Egg Fried Rice with Peas
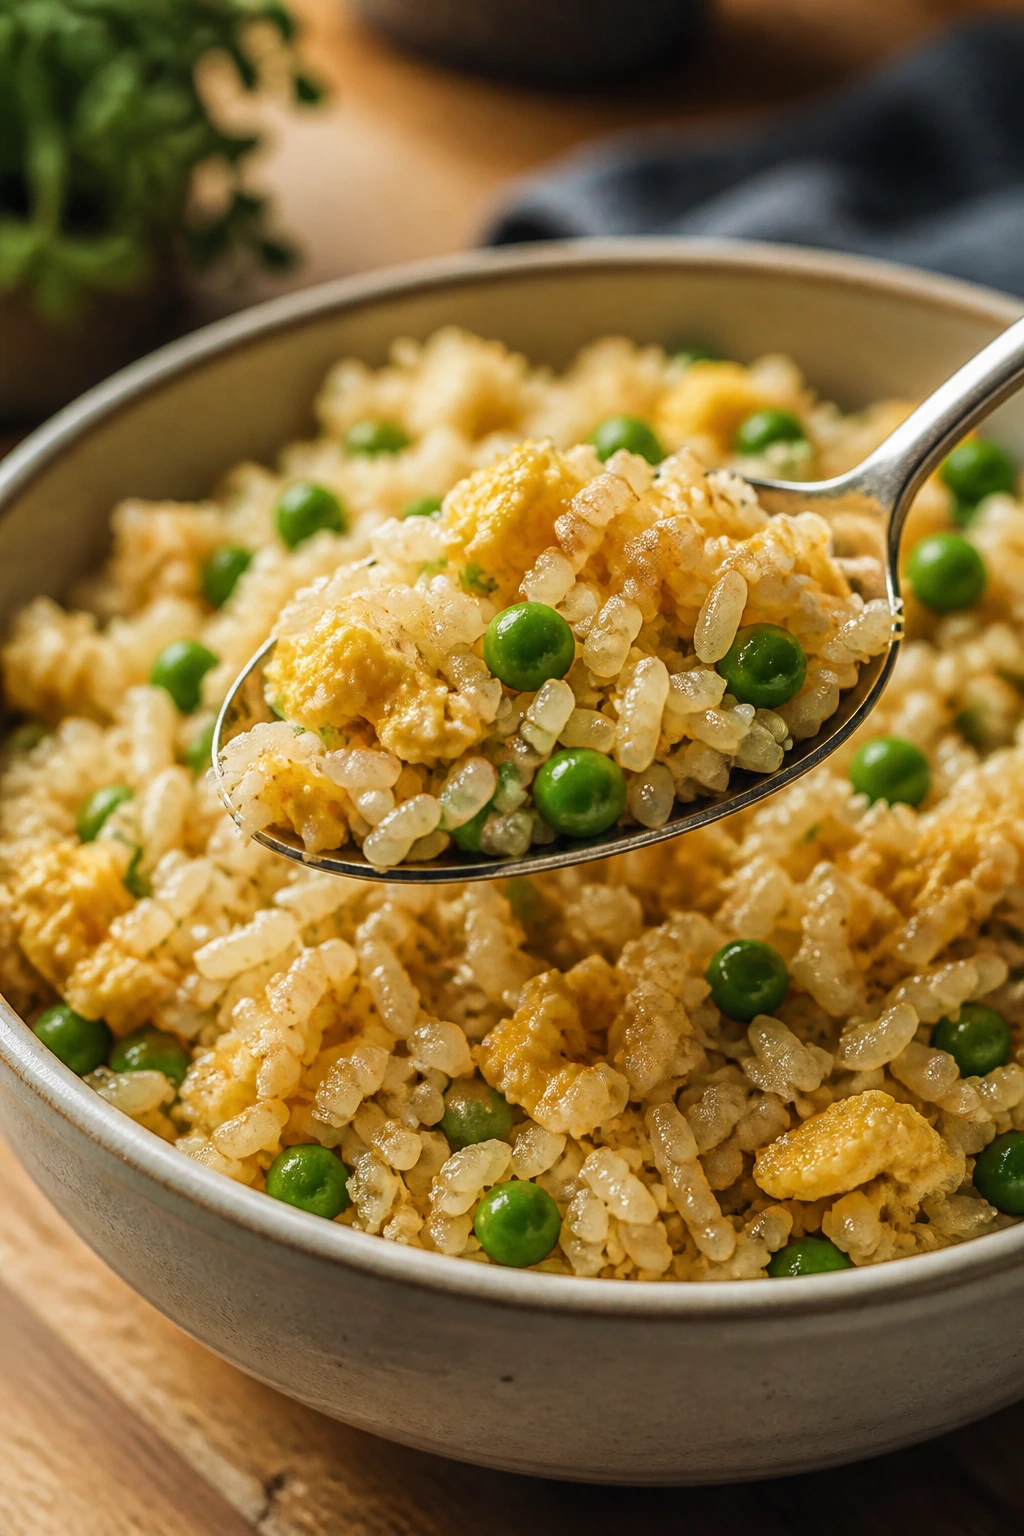
Egg fried rice is one of the fastest ways to turn cold rice into a hot meal that feels intentional. The peas add sweetness, the egg gives the rice some richness, and the whole pan comes together in a flash.
Why It Works: Day-old rice fries better because the grains separate. A hot skillet and quick stirring keep the texture light instead of sticky.
Key Ingredients:
- 3 cups cold cooked rice
- 3 eggs
- 1 cup frozen peas
- 2 tablespoons soy sauce
- 1 tablespoon sesame oil
- 2 green onions, sliced
Quick Steps:
- Scramble the eggs and set aside.
- Fry the peas and rice in sesame oil over medium-high heat.
- Stir in soy sauce.
- Add the eggs back in.
- Finish with green onions.
Equipment for This Recipe:
- Large skillet or wok
- Spatula
- Bowl
How to Serve This Dish: Serve with sliced cucumbers or leftover chicken. A fried egg on top makes it feel bigger without changing much.
Pro Tips for This Recipe:
- Break up rice clumps before cooking.
- Keep the pan hot and the rice moving.
- Use the soy sauce sparingly at first; you can add more.
Variations on This Dish:
- Ham Fried Rice: Add diced ham.
- Corn and Egg Version: Swap peas for corn if that’s what you have.
Common Mistakes to Avoid with This Recipe:
- Fresh rice: It clumps and turns mushy.
- Too much soy sauce: The rice gets dark and wet.
50. Honey Garlic Tofu Bites with Rice
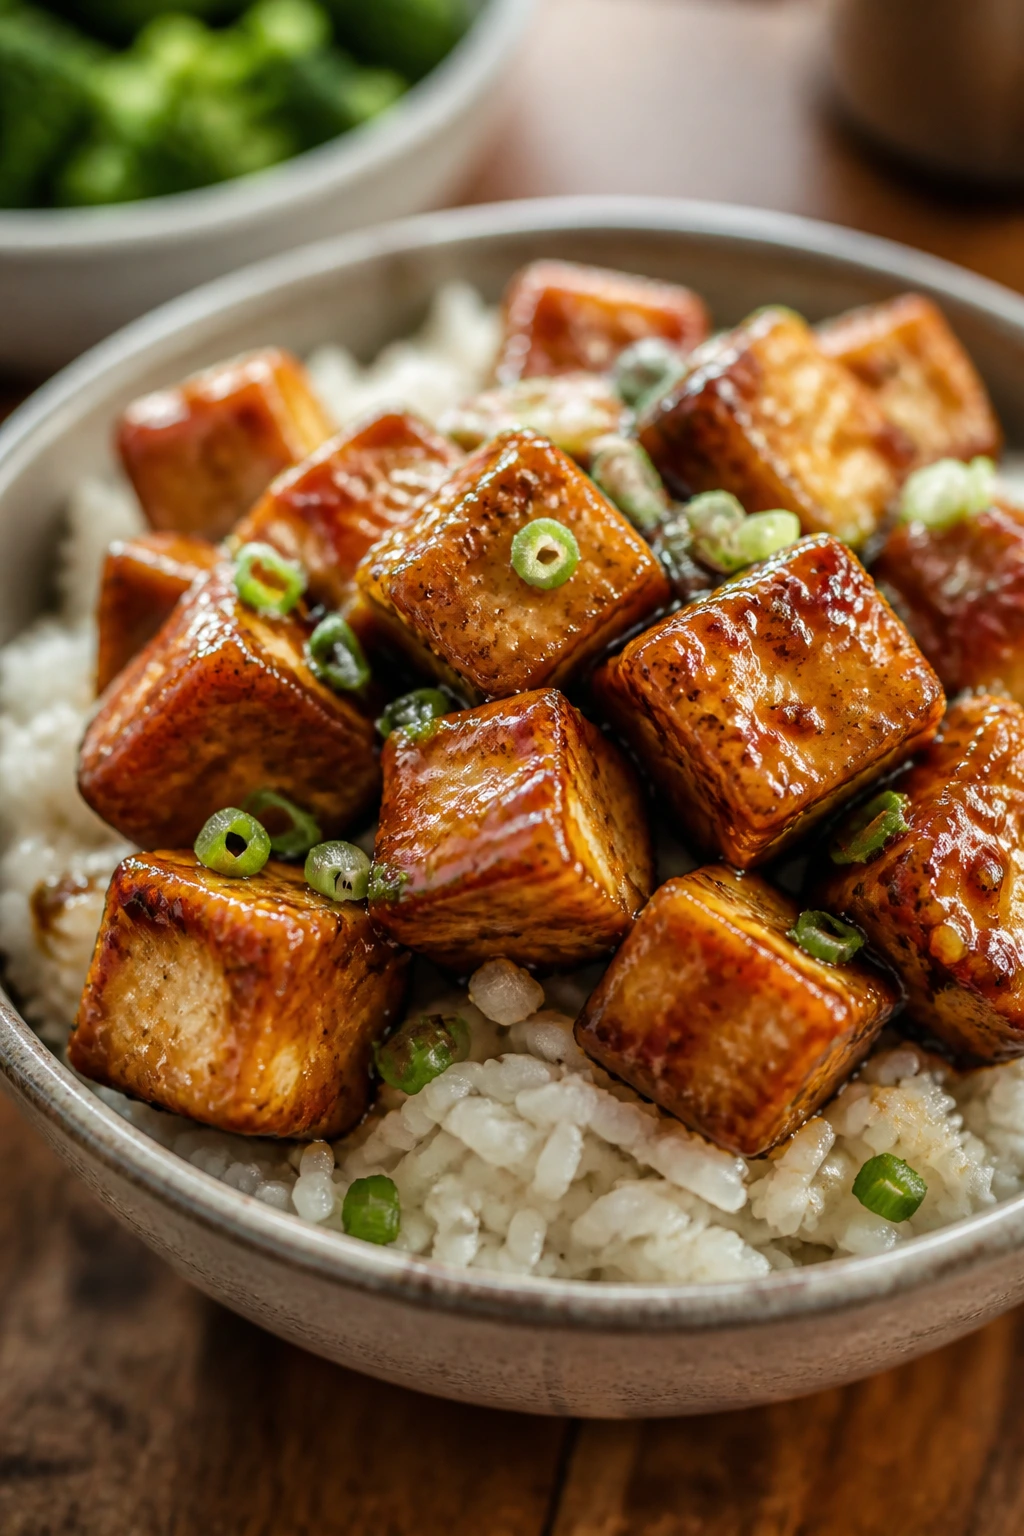
Tofu gets a bad rap from people who have only met it underseasoned. Coat it, crisp it, and glaze it with honey and garlic, and it turns into a sticky, snackable dinner that even skeptical eaters tend to finish.
Why It Works: Pressing the tofu removes moisture, which helps it brown instead of steam. The sauce is sweet, salty, and thick enough to cling to each bite.
Key Ingredients:
- 1 block extra-firm tofu, pressed and cubed
- 2 tablespoons cornstarch
- 2 tablespoons oil
- 2 tablespoons honey
- 2 tablespoons soy sauce
- 2 garlic cloves, minced
- 3 cups cooked rice
Quick Steps:
- Toss tofu with cornstarch.
- Pan-fry in oil until crisp on all sides.
- Stir honey, soy sauce, and garlic together.
- Pour sauce over tofu and toss until glazed.
- Serve over rice.
Equipment for This Recipe:
- Skillet
- Towel or tofu press
- Spoon
How to Serve This Dish: Serve with rice and steamed broccoli or snap peas. For snack plates, offer the tofu bites in a small bowl with toothpicks.
Pro Tips for This Recipe:
- Press tofu for at least 15 minutes.
- Don’t move the cubes too soon; let them brown first.
- Add a splash of water if the sauce thickens too quickly.
Variations on This Dish:
- Spicy Honey Garlic Tofu: Add chili flakes.
- Sesame Tofu Bowl: Finish with sesame seeds and scallions.
Common Mistakes to Avoid with This Dish:
- Skipping the press: Wet tofu won’t crisp.
- Adding sauce too early: The coating softens before it can brown.
Why the Snacky-Dinner Format Works So Well on Busy Afternoons
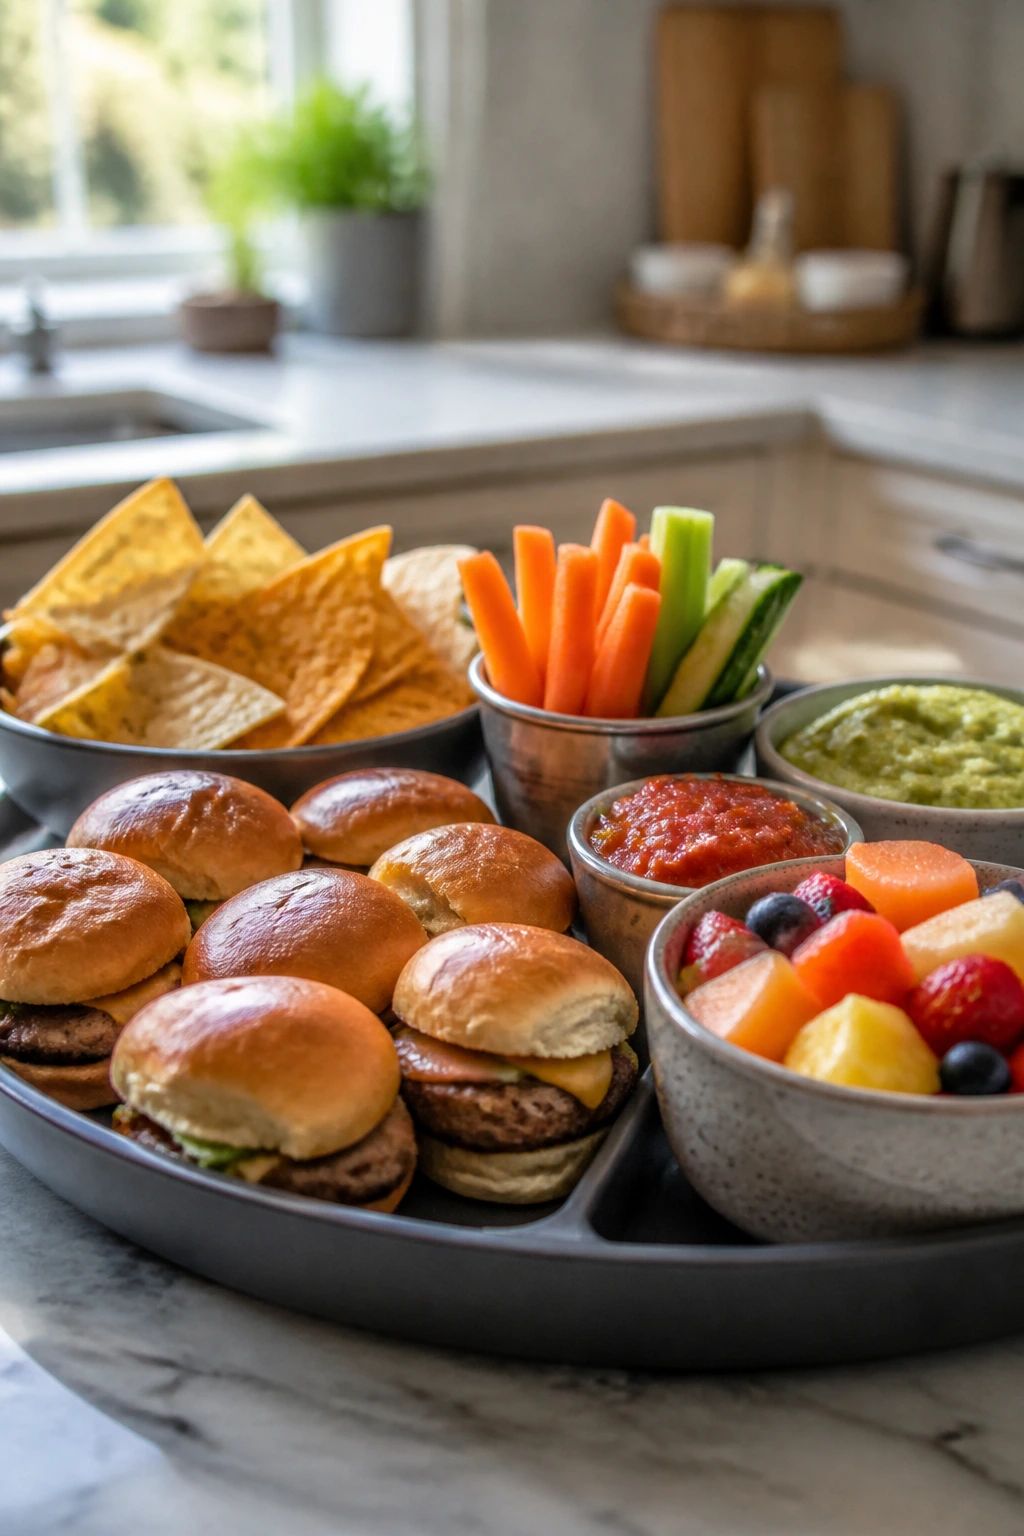
The best thing about this kind of cooking is that it meets people where they are. After-school hunger is rarely elegant. It is loud, immediate, and suspicious of anything that looks like a lecture on vegetables. Snacky dinners solve that by turning the meal into something that can be picked up, dipped, torn apart, or portioned into smaller bites without losing its dinner credentials.
There’s also a texture reason these work. Crisp tortillas, toasted bread, roasted vegetables, baked pasta cups, and hot little sliders all hold up better than a plate of food that sits there waiting for a fork. Once you notice that, you start cooking with shape in mind. A sandwich cut into fingers eats differently than a full sandwich. A potato split open and loaded with toppings feels more generous than a plain baked potato. Little details. Big payoff.
The other reason I keep coming back to this format is leftovers. A tray of taquitos, a bowl of fried rice, or a batch of mac and cheese muffins can be repurposed the next day with almost no effort. That matters. Dinner should feed the present, but it should also save tomorrow from becoming another scramble.
Essential Equipment for These Recipes
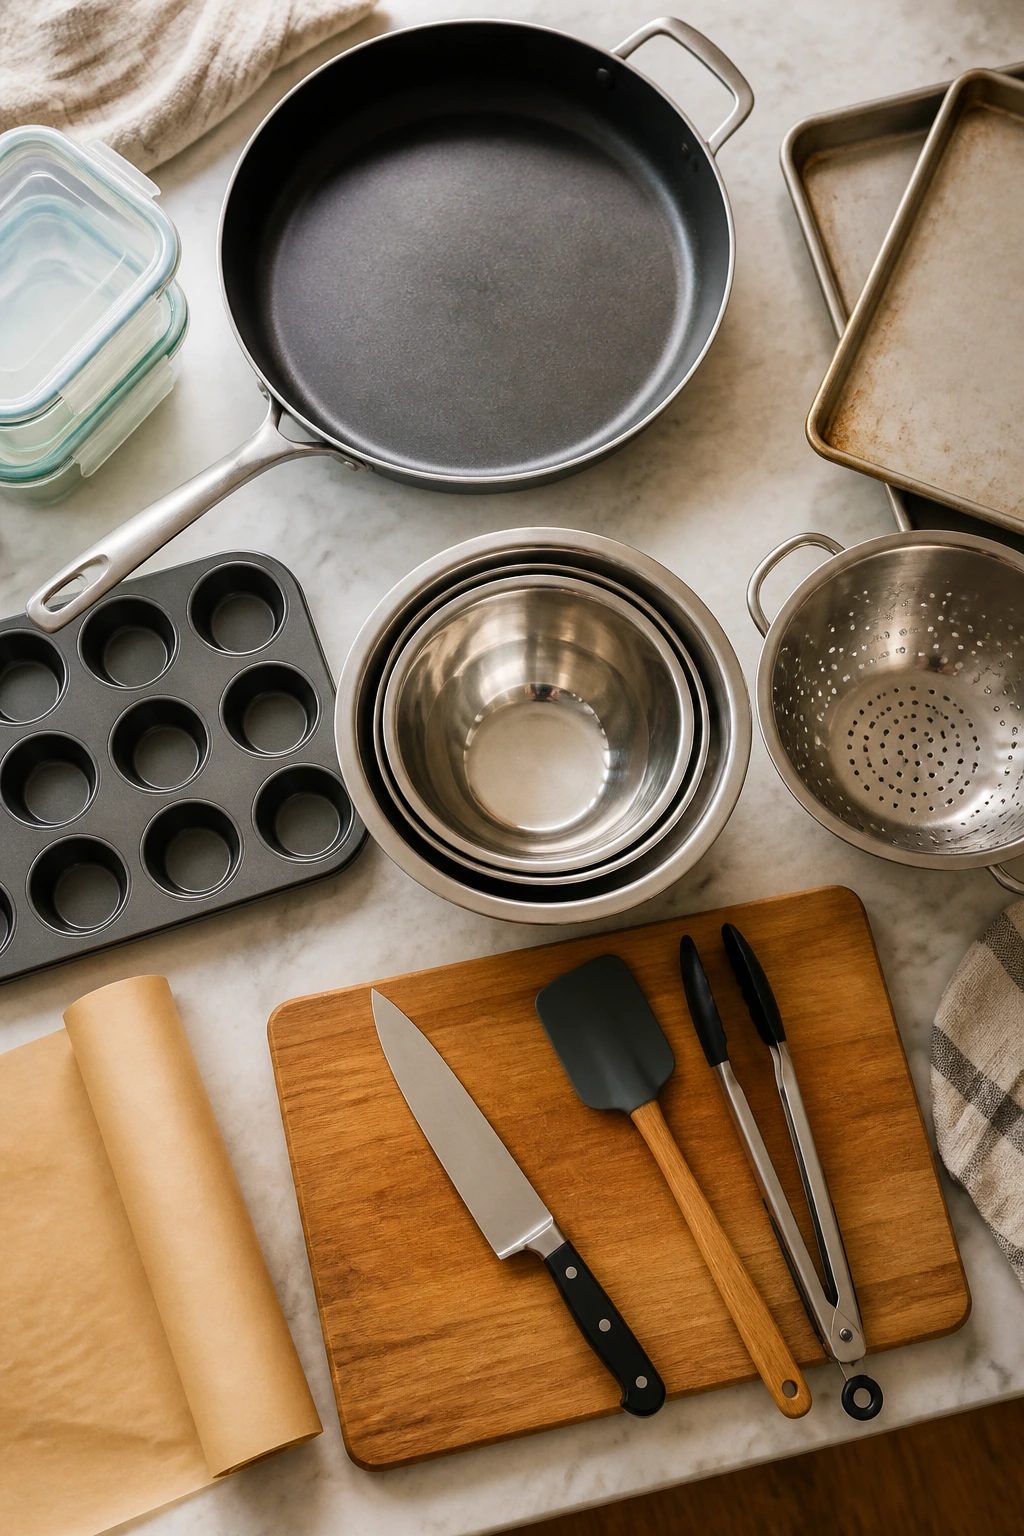
- Large skillet: You’ll use this for quesadillas, fried rice, sliders, chicken, and anything that needs quick browning.
- Rimmed sheet pans: These are the backbone of baked flatbreads, nuggets, taquitos, and sheet-pan dinners.
- Muffin tin: Handy for mac and cheese cups, ravioli cups, frittatas, shepherd’s pie cups, and corn dog muffins.
- Mixing bowls: At least two medium bowls make the assembly line less chaotic.
- Sharp knife and cutting board: Good slicing matters for pinwheels, peppers, cucumbers, and clean serving.
- Spatula and tongs: The right tool keeps coatings intact and sandwiches from falling apart.
- Colander: Needed for pasta, rice add-ins, and anything that needs draining fast.
- Parchment paper: Not fancy, just useful. It makes cleanup easier and helps sticky recipes release.
- Airtight containers: Useful for leftovers, make-ahead fillings, and next-day snack portions.
Smart Shopping and Ingredient Tips
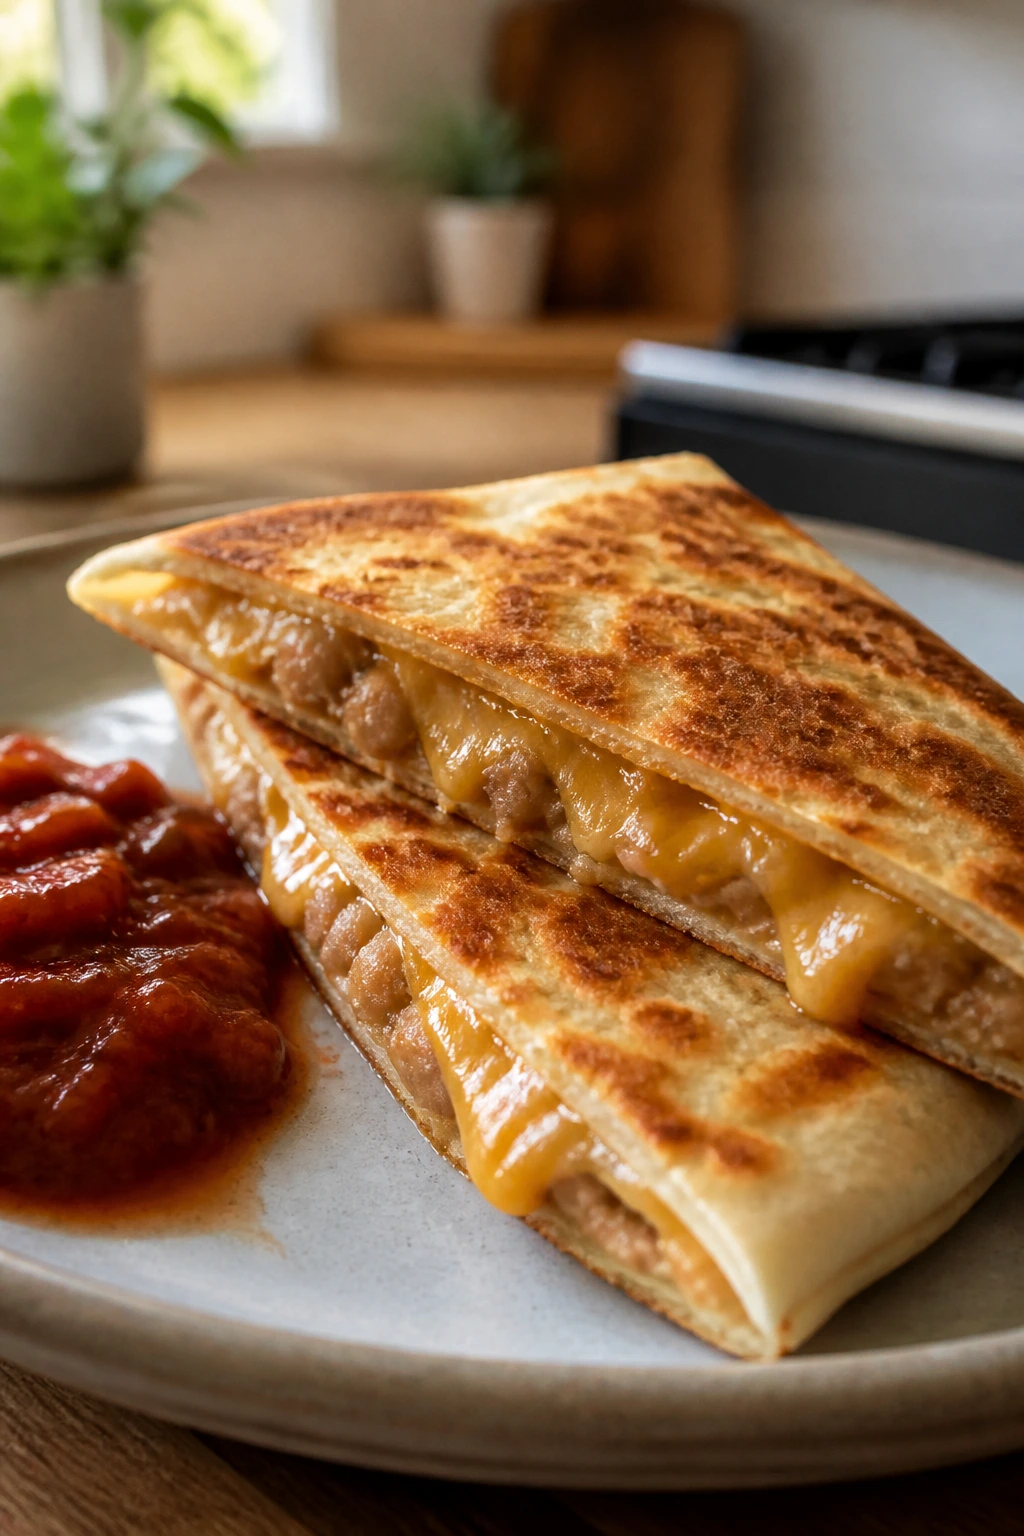
A lot of these recipes rely on a few repeat-buy ingredients, and that’s a good thing. Keep tortillas, shredded cheese, eggs, rice, canned beans, marinara, and a couple of bags of frozen vegetables around, and half the list becomes possible without thinking too hard.
For chicken, buy the form that matches the job. Shredded rotisserie chicken is best for taquitos, enchilada roll-ups, nachos, and pitas because the meat is already seasoned and easy to portion. Raw chicken breast is better for nuggets or skillet dishes where you want a fresh sear. Ground turkey and ground beef should be cooked until no pink remains; with ground meat, a thermometer reading of 160°F is the cleanest check.
Choose cheese based on melt, not just flavor. Mozzarella and Monterey Jack melt smoothly. Cheddar brings stronger flavor but can get oily if overheated. Parmesan is a supporting actor. It adds salt and browning, but it usually does not carry the whole dish.
For vegetables, buy the ones that can work in more than one recipe. Bell peppers, cucumbers, spinach, zucchini, broccoli, onions, and tomatoes show up again and again because they move between wraps, bowls, toasts, and skillet meals without much fuss. If a recipe asks for grated zucchini, squeeze it dry. If it asks for sliced tomatoes, seed them if they’re especially juicy. Small prep choices change the final texture more than people expect.
How to Serve These Recipes
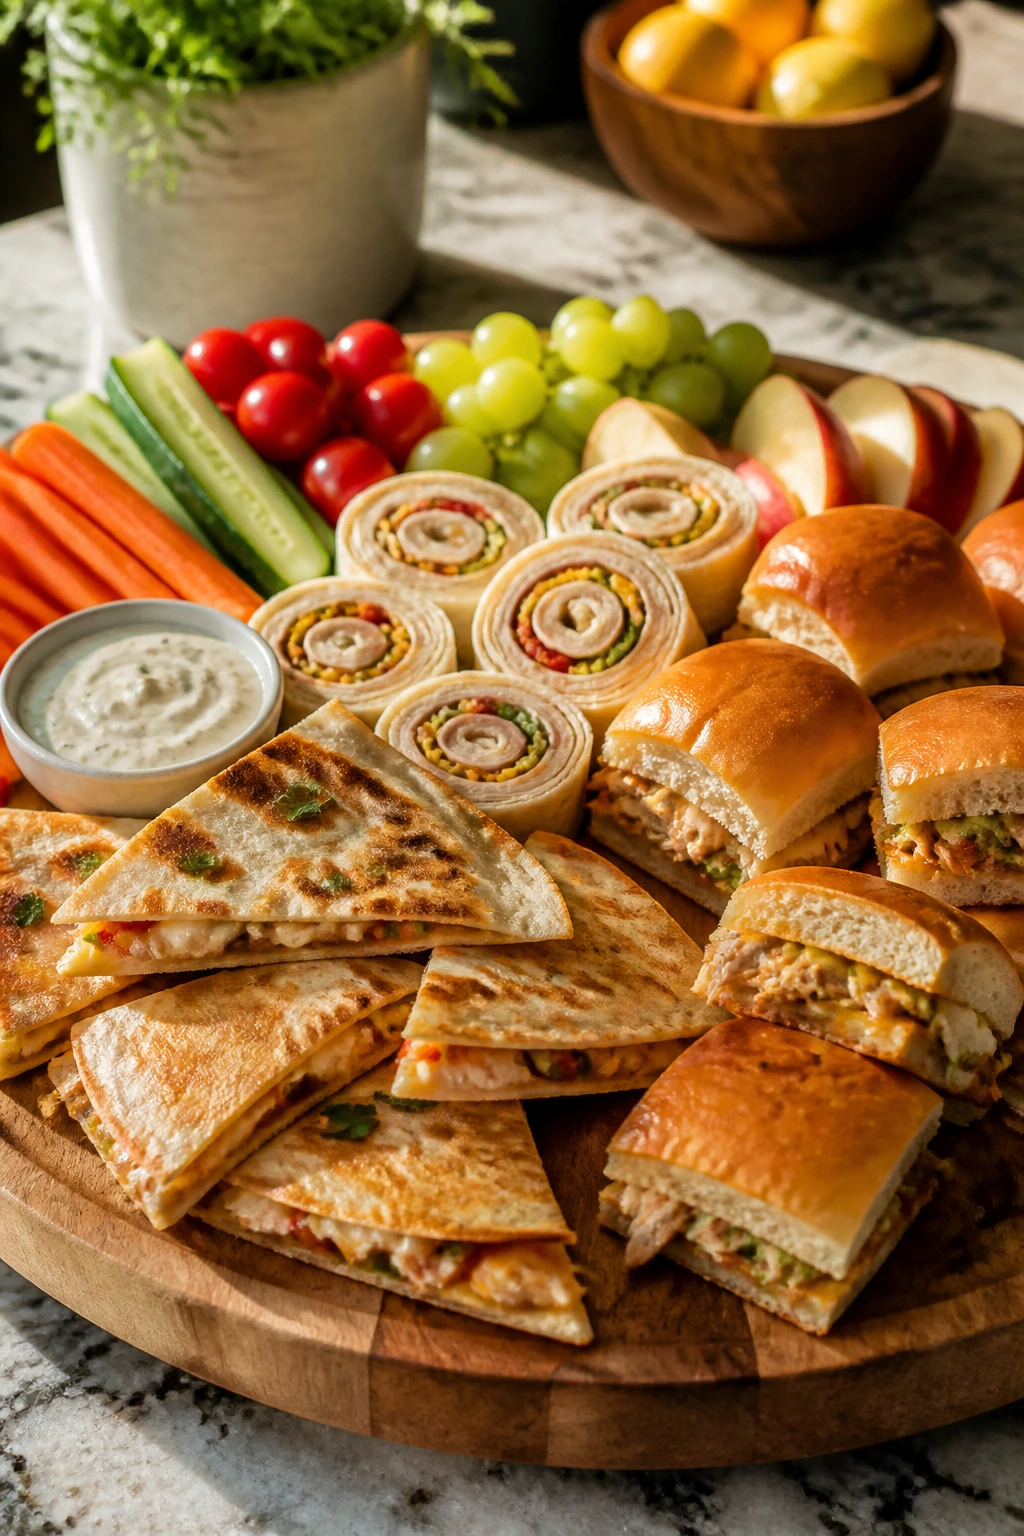
Presentation: Keep the food looking like snack food on purpose. Slice quesadillas into wedges, cut sliders in half, and arrange roll-ups or pinwheels in tight little rows. A wide platter makes the meal feel abundant even when the portions are modest.
Accompaniments: Fresh fruit, carrot sticks, cucumber rounds, roasted broccoli, and a small dip go with almost everything here. For the heartier recipes, add rice, soup, fries, or a salad so the meal lands as dinner rather than an oversized snack plate.
Portions: For younger kids, start with one or two snack-sized pieces and a fruit or vegetable side. For older kids and adults, figure on a sandwich, a bowl, or three to four smaller bites, then scale up if the plate empties fast. The recipes that reheat well can be made a little larger without regret.
Beverage Pairing: Sparkling water with lemon works with almost all of these. Milk fits the cheesy dishes. For adults eating alongside the kids, iced tea or a light lager can handle the salty, savory recipes without fighting them.
Additional Tips and Flavor Boosters
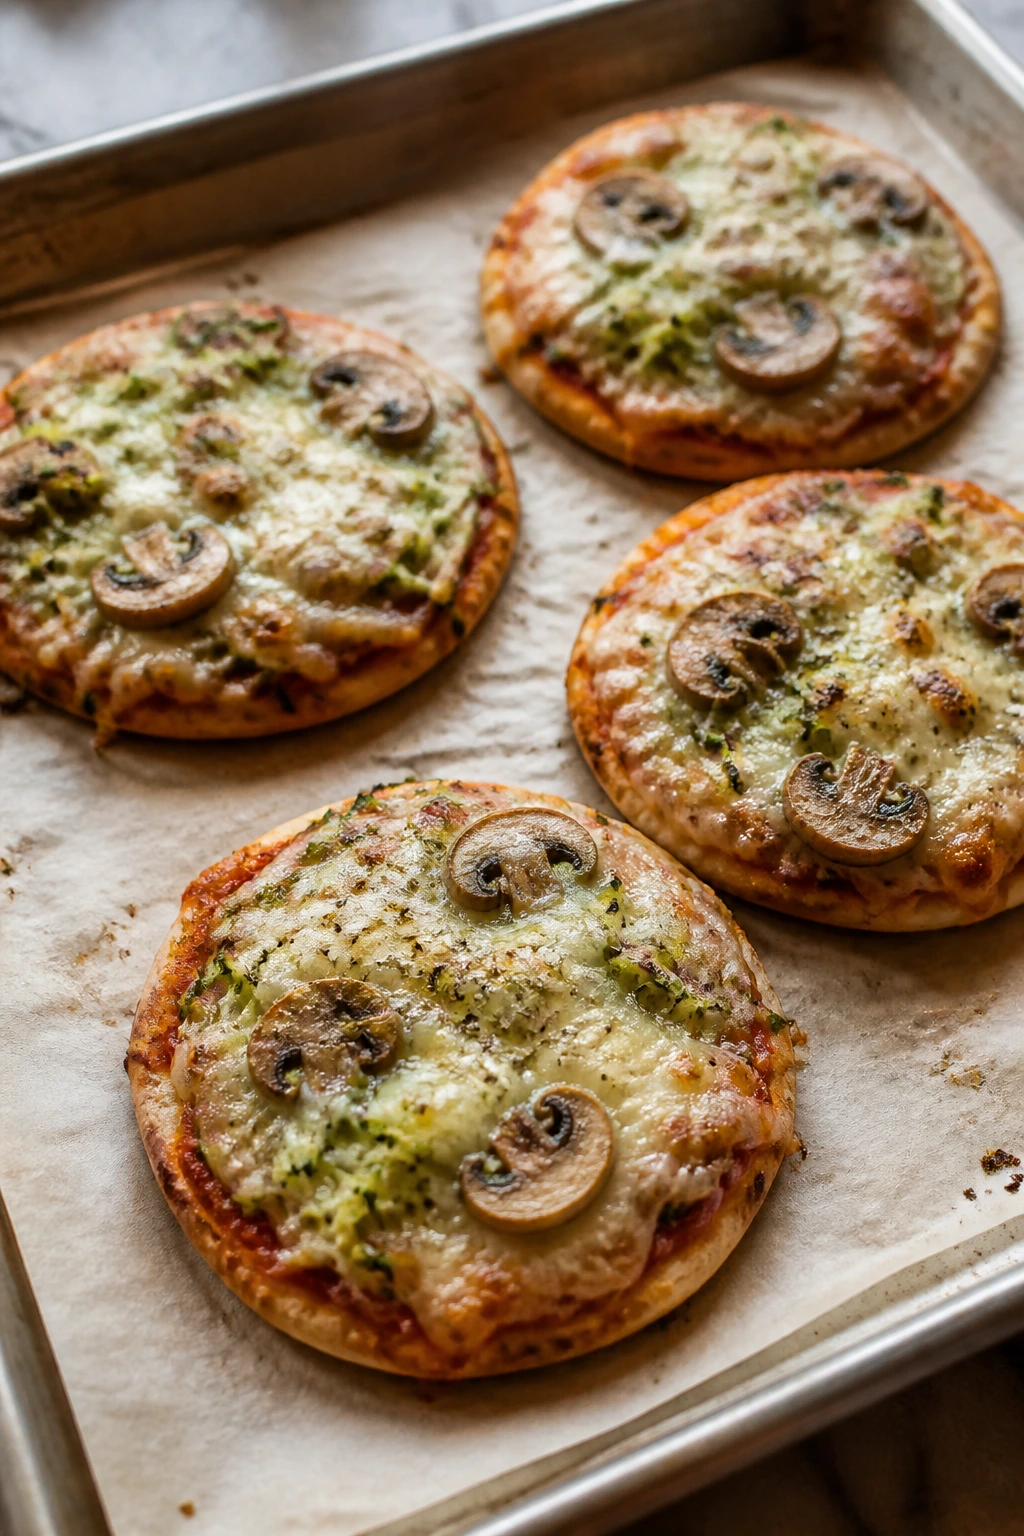
Flavor Enhancement: A small finishing hit changes a lot of these dishes. Lemon juice on gnocchi, scallions on fried rice, cilantro on flatbreads, or a spoonful of sour cream on taco toast can pull a meal together without turning it into a project.
Customization: Keep one plain, one spicy, and one veggie-forward option in rotation if you’ve got a mixed crowd. A cheese-heavy base, a hot sauce on the side, and a bowl of raw vegetables lets everyone build their own version without making separate dinners.
Serving Suggestions: Put dips where kids can see them. Salsa, ranch, marinara, yogurt sauce, queso, and hummus all make these foods easier to love because they change the pace of each bite. Tiny bowls help more than big ones here.
Make-It-Yours: If you’re feeding someone dairy-free, swap in dairy-free shreds on the pizzas and quesadillas and use hummus or avocado instead of cream-based spreads. For gluten-free eaters, use corn tortillas, rice bowls, potato boats, or gluten-free pasta where it makes sense. For extra-protein plates, add a hard-boiled egg, shredded chicken, or beans to the side without changing the whole recipe.
Make-Ahead, Storage, and Reheating Guidance
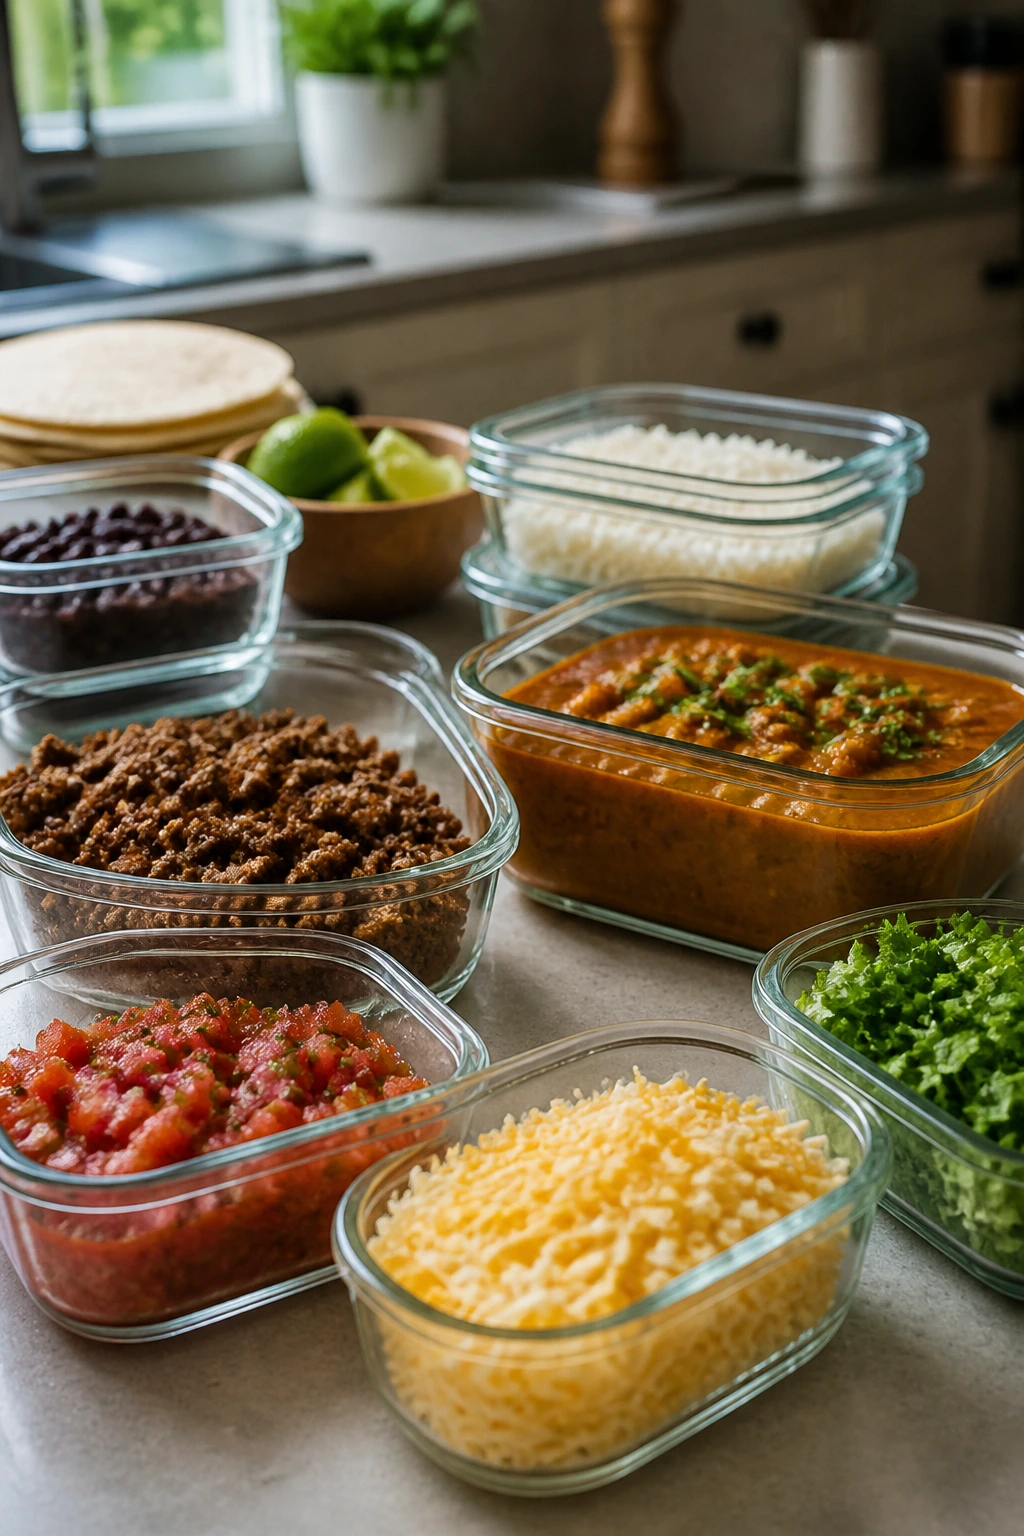
A few of these recipes are best the minute they come off the stove, but plenty hold up well if you plan ahead. Taco fillings, sloppy joe mixtures, curry, fried rice, meatballs, and cooked chicken can usually be made 3 to 4 days ahead and kept covered in the refrigerator. Most of the assembled recipes are fine for 2 to 3 days chilled, though crisp items like tostadas, nachos, and grilled cheese are better built fresh.
For freezing, think in components. Meatball mixtures, sloppy joe filling, curry, and cooked chicken fillings freeze well for up to 2 months in airtight containers. Mac and cheese muffins, frittata cups, taquitos, and mini calzones can also be frozen after cooling completely. Reheat them in a 350°F oven or toaster oven until hot in the center; that keeps the texture closer to the original than microwaving does. A microwave is fine for rice bowls, curry, and pasta, but use short bursts and stir halfway through so the edges don’t dry out.
Some recipes improve overnight. Sloppy joe filling, lentil joes, and pasta salad all get a little better after the flavors settle. Others lose their spark if they sit too long. Toasts, quesadillas, nachos, and anything meant to be crisp should be eaten fast. If you want to save leftovers from those, pull the moist toppings off and reheat the base separately.
Variations and Adaptations to Try
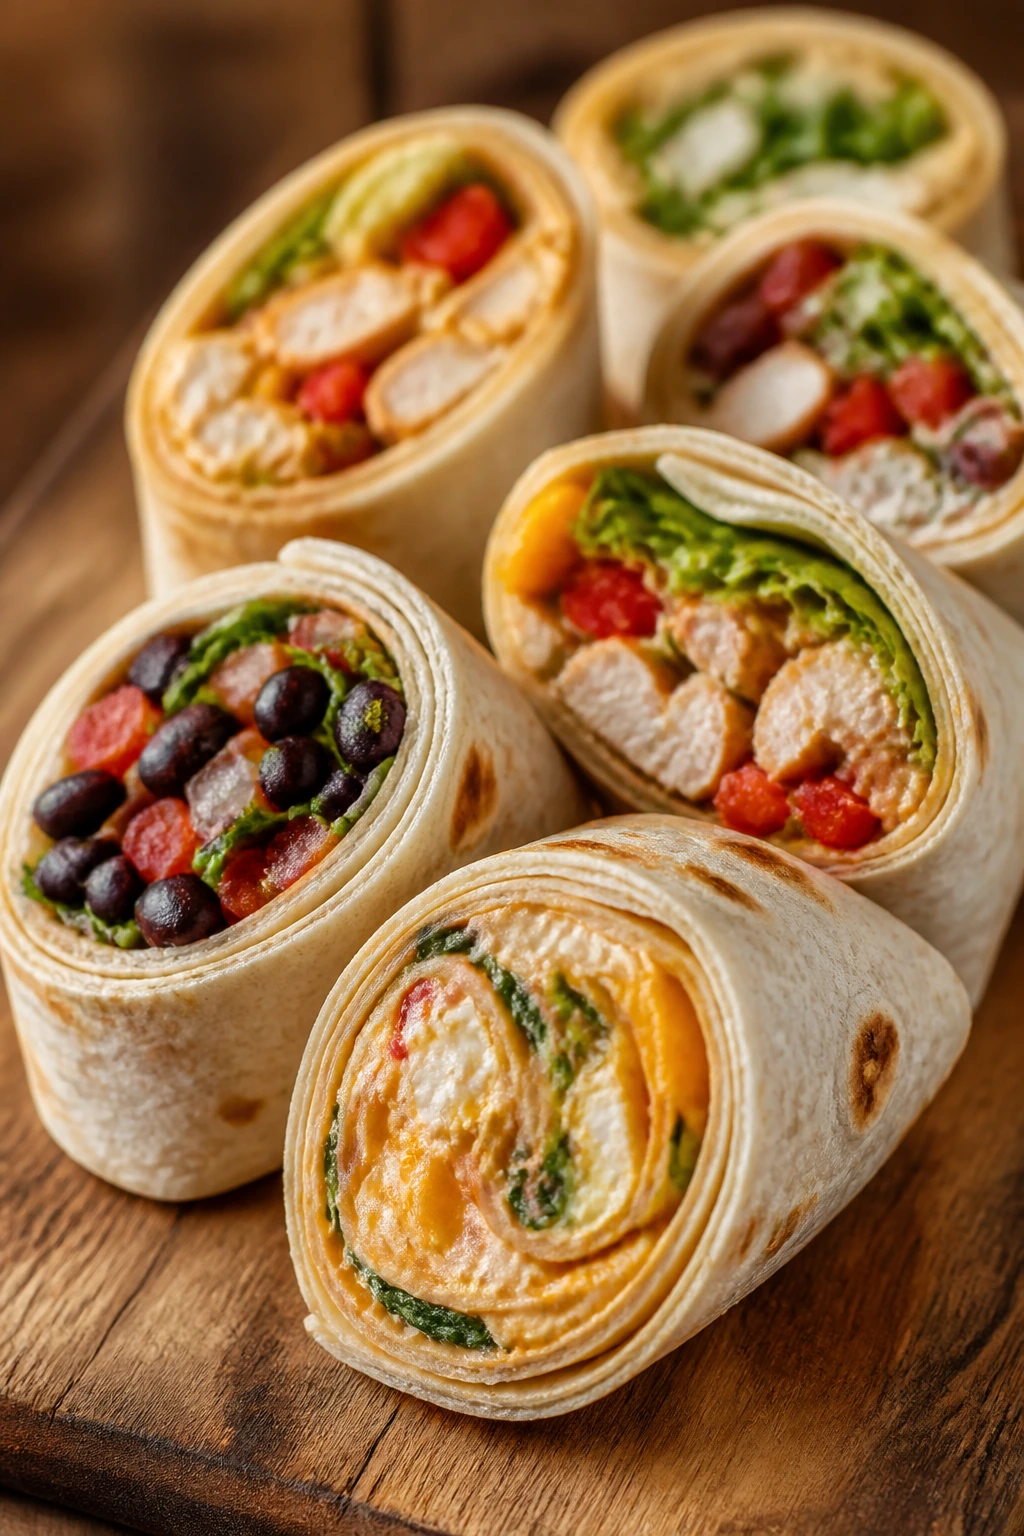
The Lighter Swap: Use chicken, turkey, tofu, or beans in place of beef or pork where the filling allows it. The method stays the same; the seasoning does the real work.
The Dairy-Free Path: Choose olive oil instead of butter, use dairy-free shredded cheese where you need melt, and lean on hummus, avocado, or salsa for creamy texture. Quesadillas, wraps, bowls, and tostadas adapt especially well.
The Gluten-Free Shortcut: Corn tortillas, rice, potatoes, polenta, sweet potatoes, and gluten-free pasta handle a lot of these recipes without much trouble. Just keep an eye on sauces and breads that may hide flour.
The Extra-Veggie Version: Fold grated zucchini into sauces, add spinach to eggs, or roast peppers and broccoli in bulk so you can drop them into three or four meals over the week. That approach works better than trying to force vegetables into every dish at the last minute.
The Mild-Kid Option: Pull back on chili flakes, hot sauce, and spicy salsa, then put the heat on the table in a separate bottle. That keeps the base food friendly and lets older eaters season their own plates.
Common Mistakes to Avoid
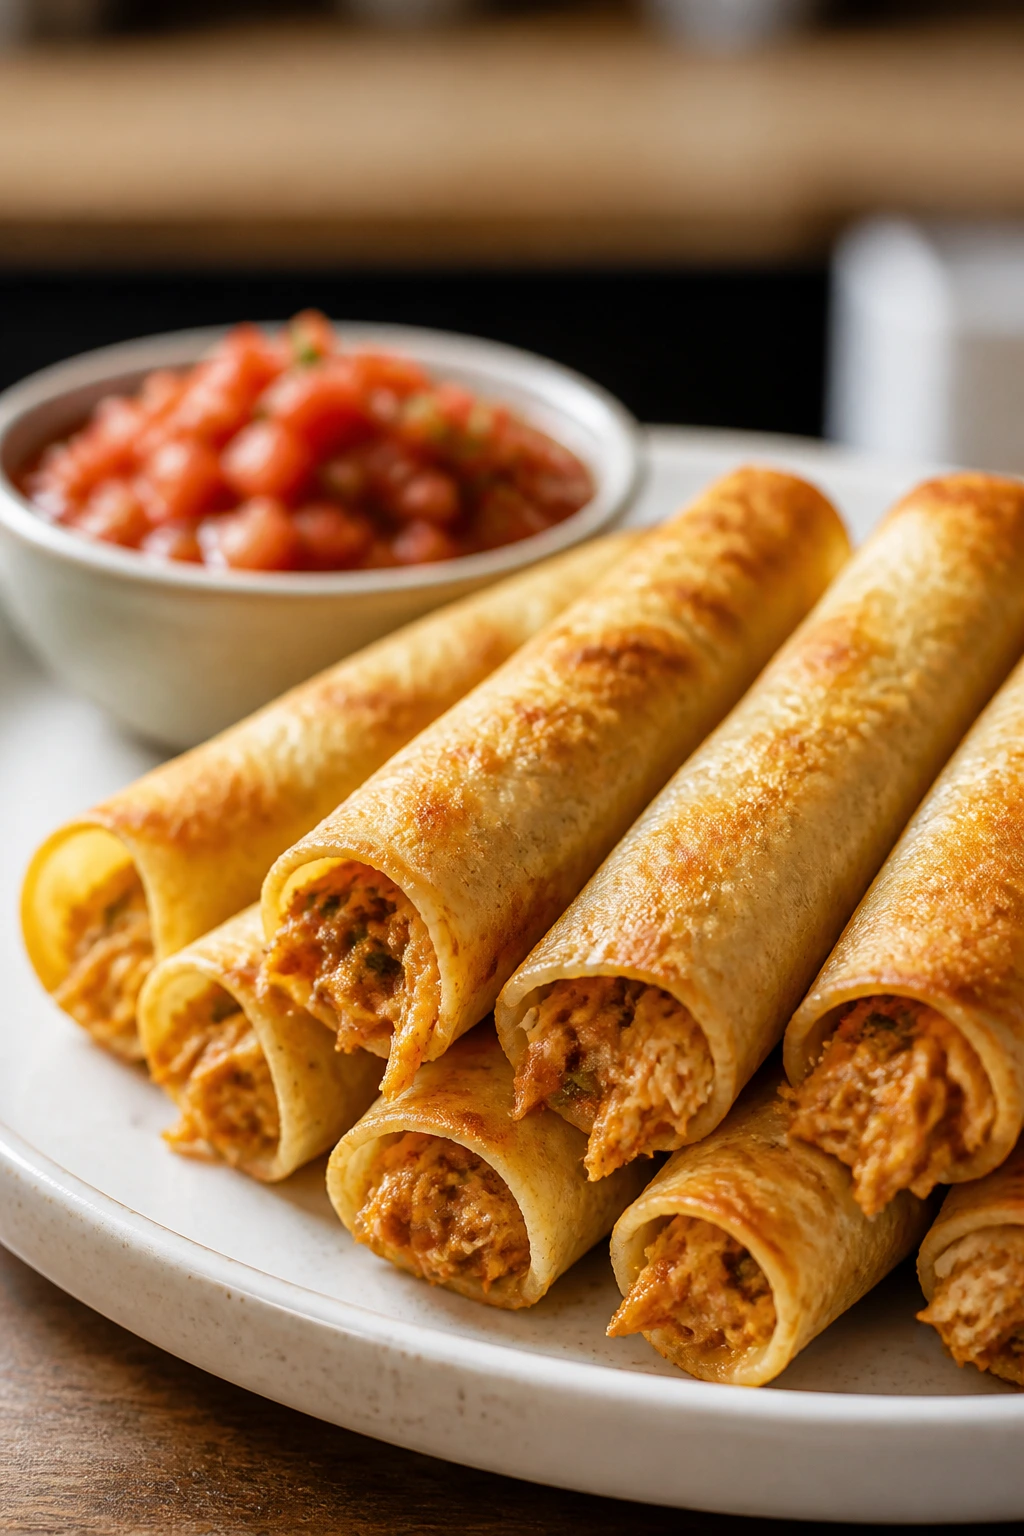
One mistake shows up over and over: making the filling too wet. Wet beans, watery tomatoes, juicy peppers, and sauce-heavy fillings turn crisp bread into a limp mess. Drain, pat dry, or simmer a little longer when needed.
Another one is overloading the vessel. Tortillas split, pita pockets tear, slider buns squish, and toast caves in when you try to stack too much on top. The goal is balance, not drama. If the filling looks tall enough to impress a camera, it is probably too much for actual eating.
Heat is another place people go wrong. Too high, and the bread burns before the cheese melts. Too low, and you get pale, chewy results. Medium heat is boring in the best way for quesadillas, grilled cheese, and most skillet sandwiches. High heat belongs to fried rice and quick searing, not to delicate melts.
And then there’s the “serve immediately” category. Some of these meals absolutely need it. Others benefit from a 2- to 5-minute rest so the cheese settles and the pieces hold together. Cutting too soon is a small mistake that ruins a clean slice.
Frequently Asked Questions
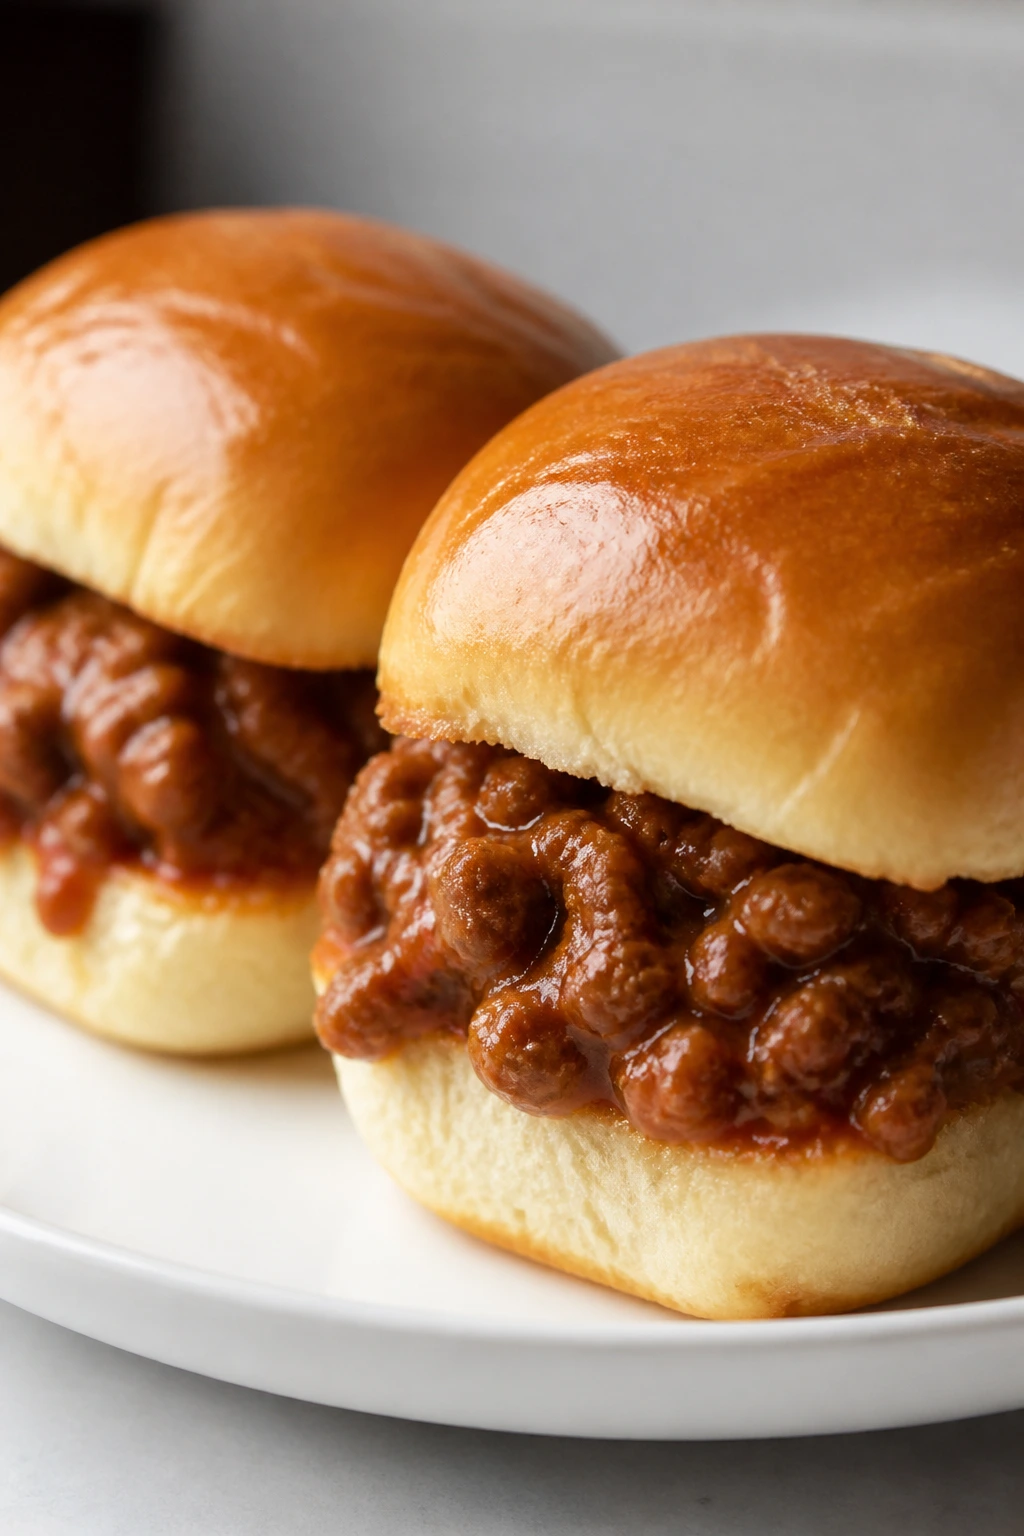
Can I make these recipes ahead of time?
Yes, but the best make-ahead strategy is usually components, not full assembly. Fillings, sauces, cooked rice, and shredded chicken keep well; crisp toppings and toasted breads should wait until the last minute.
What’s the best way to feed picky eaters with this collection?
Keep toppings separate whenever possible. Give kids the base they recognize — tortilla, bread, rice, pasta, or potato — and let them add cheese, sauce, or vegetables in small amounts.
How do I keep quesadillas and grilled cheese from getting soggy?
Use medium heat, keep the fillings dry, and don’t let the cooked sandwich sit under a lid. Rest it on a rack or cutting board instead of a covered plate.
Can I use frozen vegetables in these recipes?
Absolutely. Frozen peas, carrots, corn, broccoli, and spinach are practical here. Thaw and drain them when moisture would be a problem, or add them directly to hot skillets when extra water won’t hurt.
What if I don’t have an air fryer for the ravioli bites?
Bake them on a sheet pan at 425°F until crisp, flipping once halfway through. The crust won’t be quite as crunchy as the air-fryer version, but it still works.
Which recipes are best for lunch the next day?
Pasta salad, fried rice, sloppy joe filling, curry, meatballs, pinwheels, and frittata cups all reheat or serve cold without losing much. Toasts, nachos, and crisp sandwiches are better fresh.
How do I scale these up for a bigger family?
Double the fillings first, then the vessel. A second sheet pan, a second skillet, or a second muffin tin matters more than trying to cram everything onto one pan and hoping it behaves.
Are these okay for younger kids?
Most of them are, with a little slicing and cooling. Cut things into smaller pieces, keep sauces on the side, and avoid sharp toppings like raw onion unless you know your crowd likes them.
What if the filling keeps falling out of the wrap or sandwich?
You’re probably overfilling it or using a wet filling. Spread less, roll tighter, and chill briefly before slicing or toasting.
A Quiet Finish to the School-Night Rush
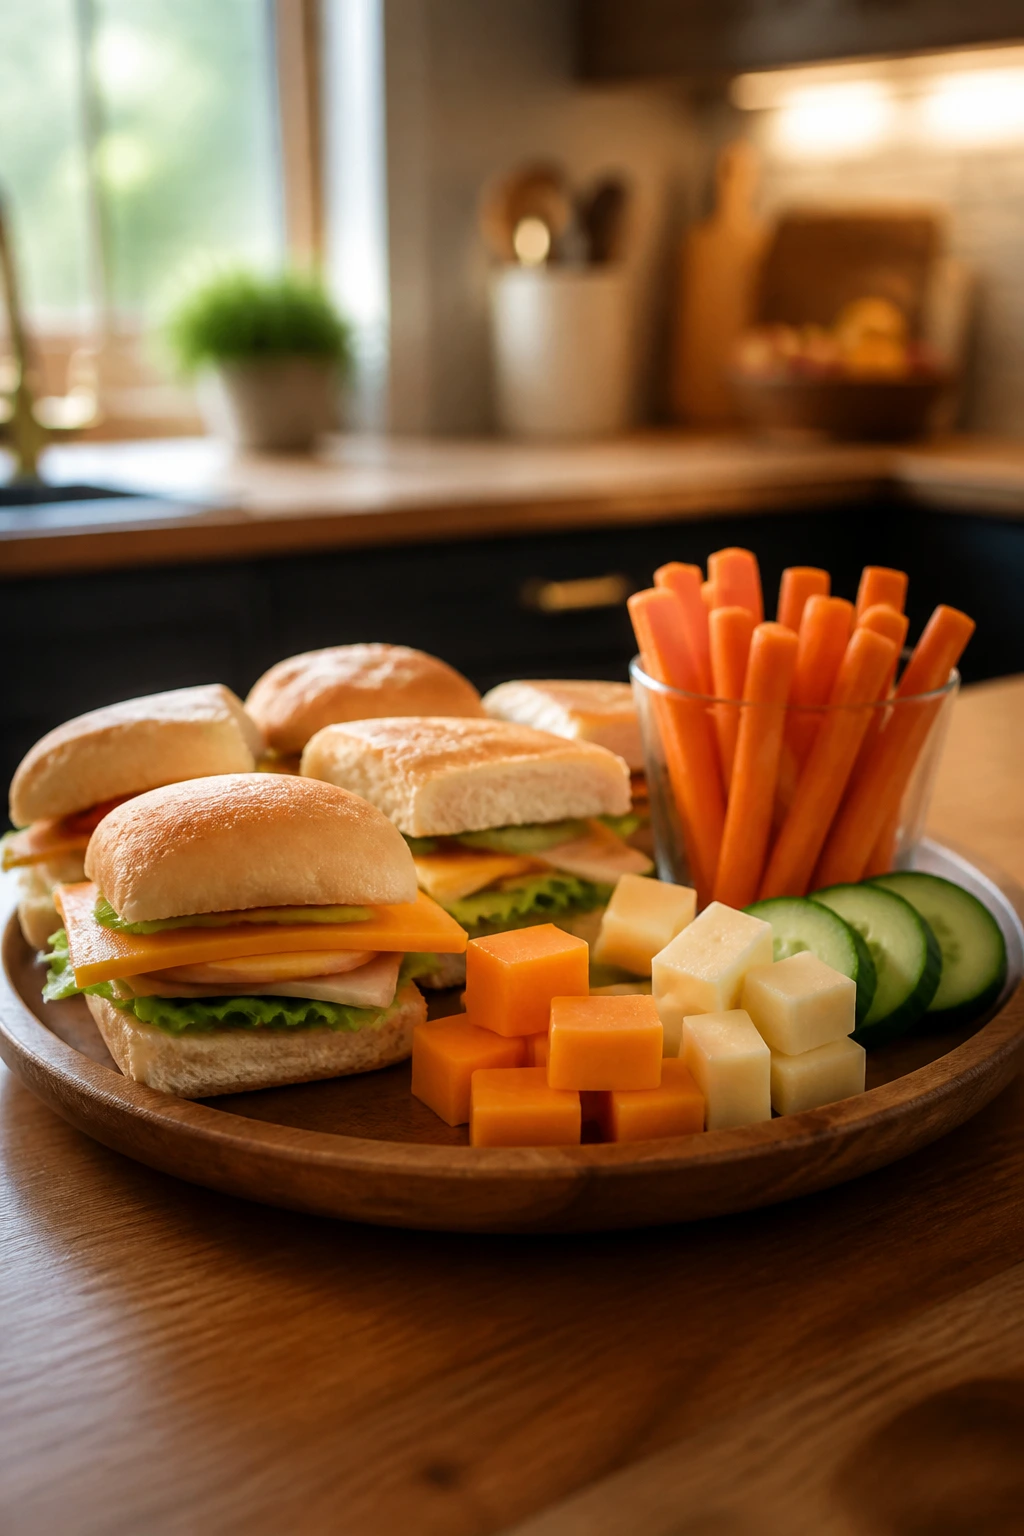
The best part of a collection like this is that it gives you options without making you think too hard. Some nights call for a skillet. Some call for a sheet pan. Some call for a few small things on a tray and a stack of napkins. That’s real life in a family kitchen, and it’s fine to lean into it.
If you keep a short list of these snacky dinners in rotation, the after-school hour stops feeling like a race you’re losing by default. You can still make something hot, still make it child-friendly, and still keep enough sanity to face the evening homework pile afterward.