
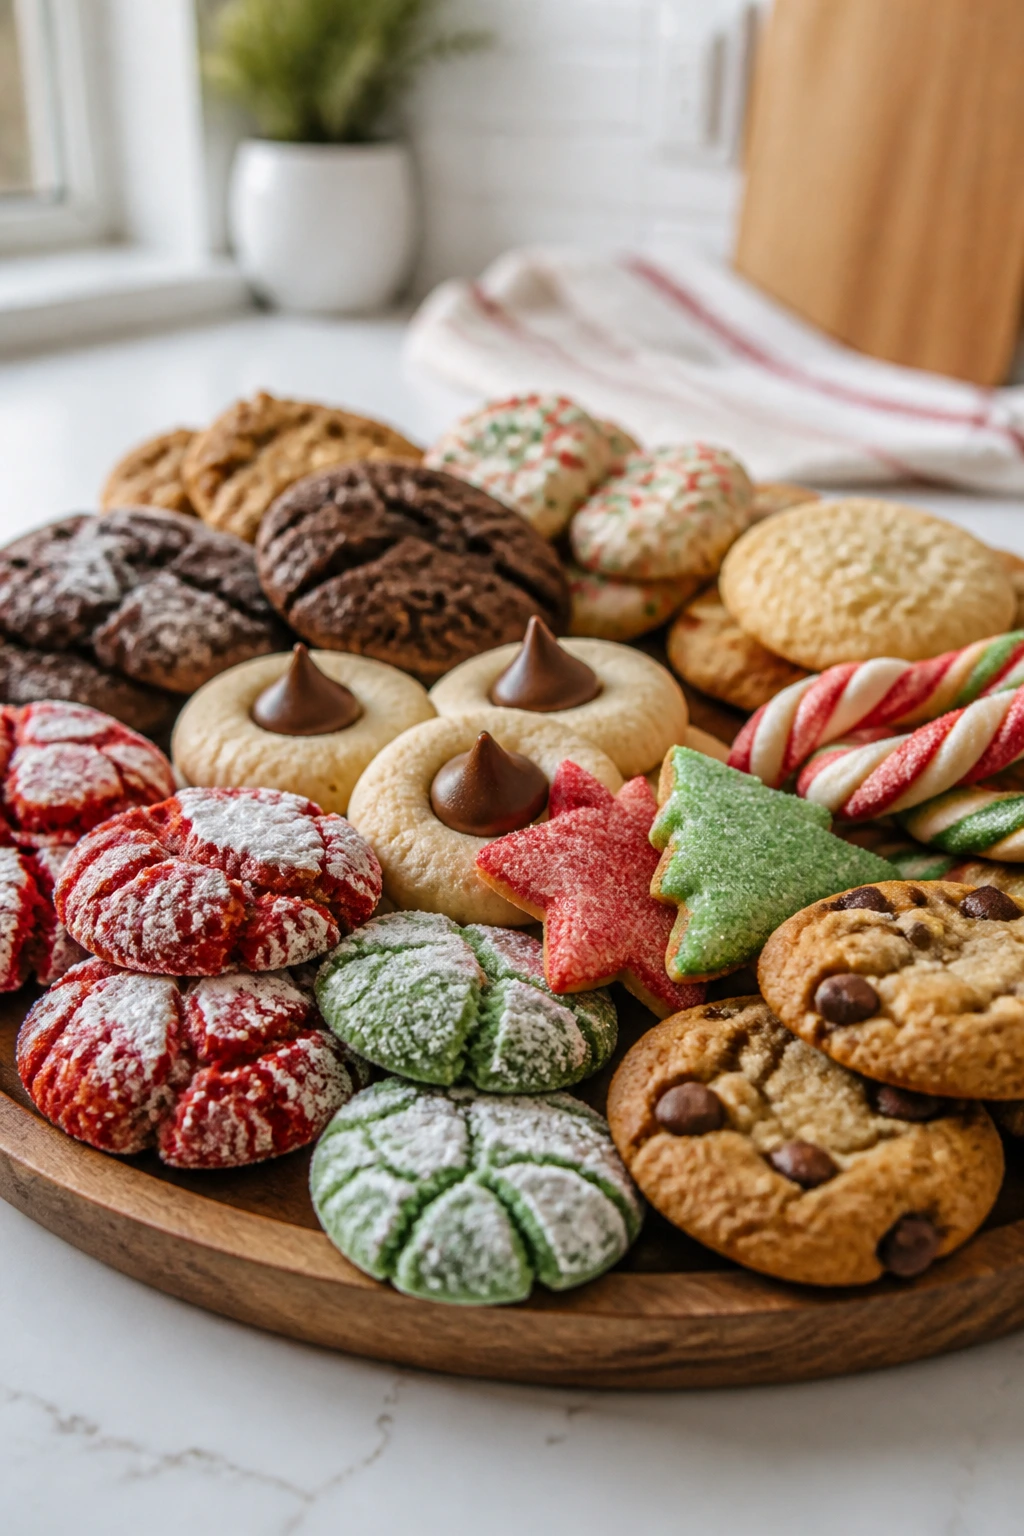
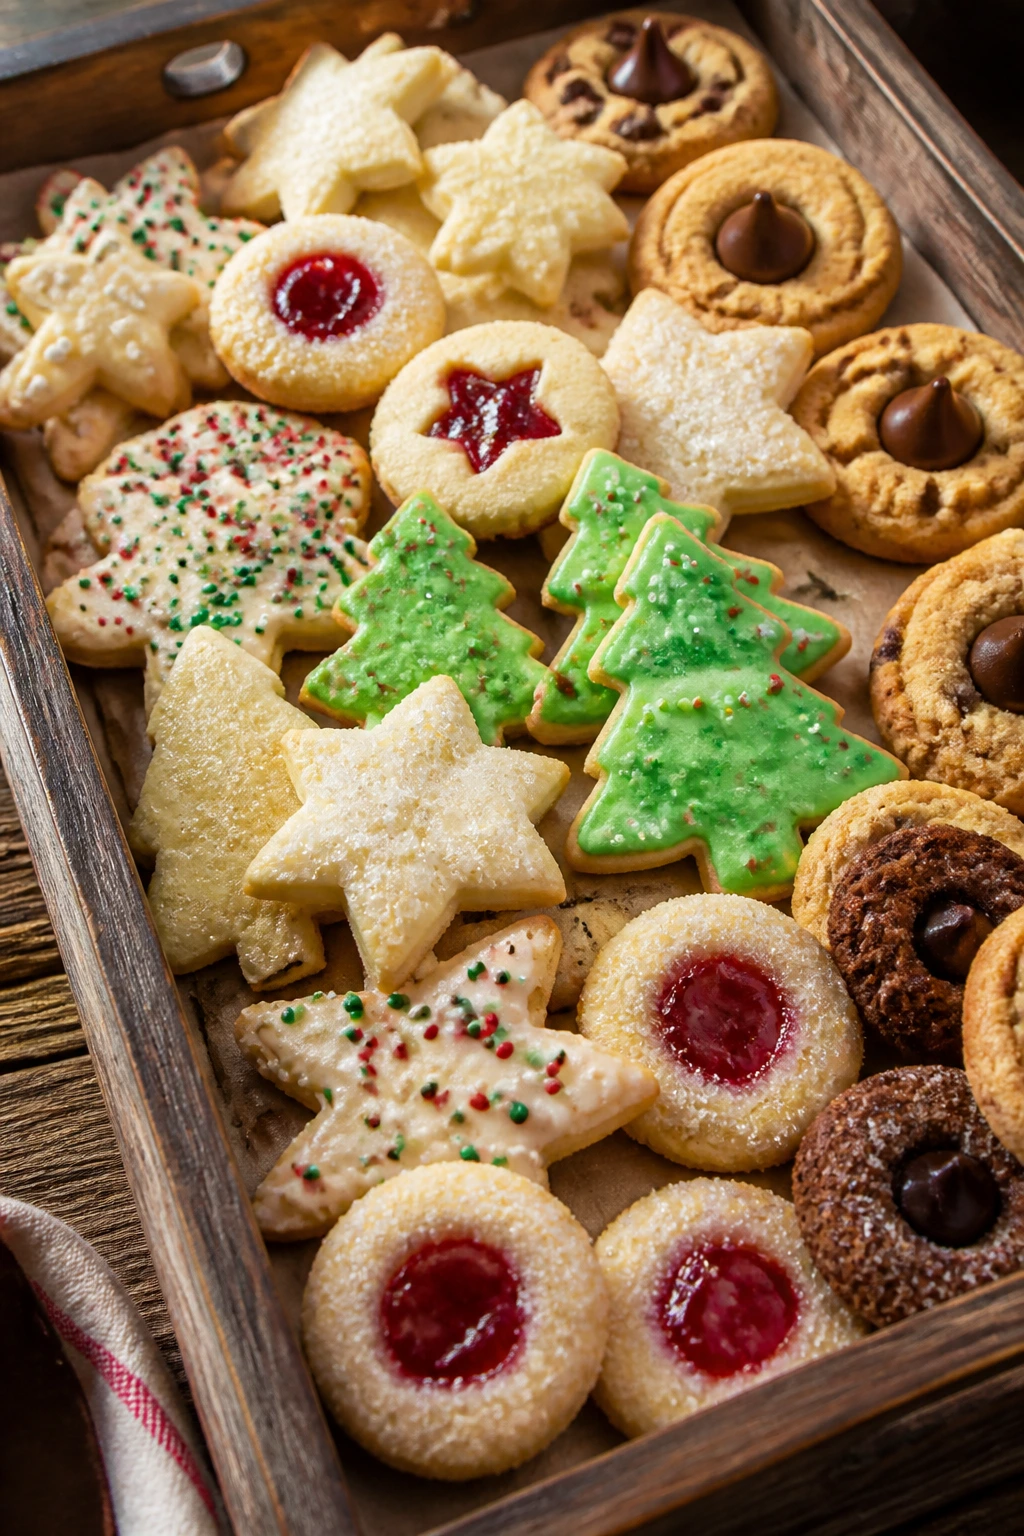
Holiday cookie baking gets messy in the best possible way. Flour on the floor, a bowl of sprinkles that somehow migrates across the room, one child insisting that every chocolate kiss must be pressed “just so.” That’s the scene these kid friendly cookie recipes for holiday baking were made for. They’re the cookies that can handle a little chaos and still come out looking cheerful on the tray.
What makes a cookie work for kids isn’t just sweetness. It’s dough that rolls without fighting back, decorations that don’t need a piping bag, and shapes sturdy enough to survive small hands. A good holiday cookie should also taste finished even if the frosting lines are crooked or the candies are placed with the confidence of a toddler. That’s the sweet spot here: reliable doughs, bold flavors, and finishes that reward help instead of requiring precision.
I’m leaning hard toward cookies that can be baked in batches, cooled on a rack, and shared without a lot of drama. Some are soft and chewy, some snap cleanly, some hide jam or chocolate in the middle, and a few turn decorating into the whole point. The list moves from classic cut-outs to slice-and-bake pinwheels, so you can match the recipe to the attention span in your kitchen. And once you’ve made a couple of these, the holiday baking rhythm starts to feel less like a project and more like a very sweet ritual.
Why These Cookies Earn a Spot on the Holiday Tray

-
Short, familiar ingredient lists: Most of these use pantry basics like butter, flour, sugar, eggs, cocoa, and vanilla, so you can start baking without a special shopping trip.
-
Built-in kid jobs: Rolling dough balls, pressing kisses, sprinkling sanding sugar, and placing pretzel antlers are all real tasks here, not fake “help” that still leaves you doing everything.
-
A mix of textures: Soft, chewy, crisp, jam-filled, and powdered-sugar-coated cookies all have a place on one tray, which keeps a tin from tasting one-note.
-
Make-ahead doughs: Several recipes chill well or freeze cleanly, so you can split the work over two days instead of trying to conquer the whole kitchen at once.
-
Decorating without perfection: These cookies look festive with simple finishes—powdered sugar, drizzled chocolate, colored sugar, or a single candy on top. No royal icing marathon required.
-
Kid-tested shapes and sizes: Small stars, thumbprints, sandwich cookies, and drop cookies are easier for little hands to handle than delicate lace cookies or flaky pastries.
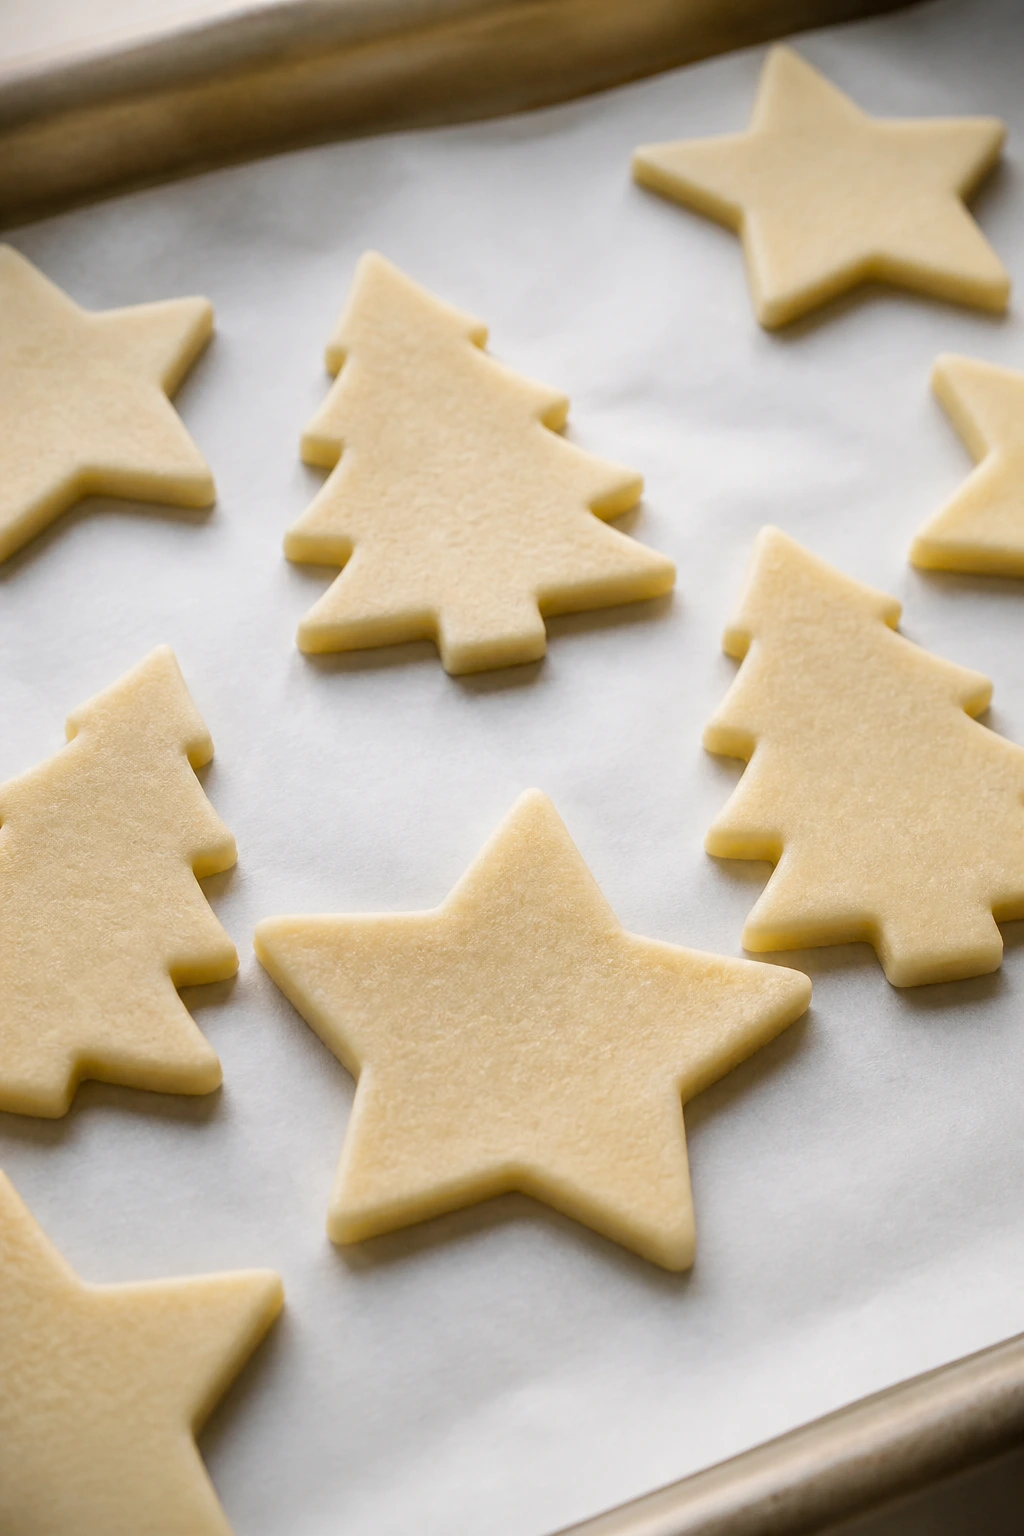
1. Classic Cut-Out Sugar Cookies That Keep Their Shape
A good cut-out cookie should roll thin without tearing, hold a star or tree shape after baking, and still taste like butter instead of cardboard. This dough does all three. It’s the kind of cookie that makes the whole kitchen smell warm and sweet before the first tray even comes out of the oven.
The real trick is balance. Too much flour and the dough cracks under the rolling pin. Too little chilling and the edges slump into soft blobs. This version lands in the middle, which is why it works so well for stars, bells, trees, and all the uneven shapes children love most.
Why It Works:
Cold dough gives you clean edges, and a modest amount of baking powder adds just enough lift to keep the cookies from tasting flat. Butter brings the flavor; vanilla keeps the sweetness from tasting hollow. Roll them to 1/4 inch thick, and they bake in about 8 to 10 minutes with pale tops and barely golden edges.
Key Ingredients:
- 3 cups all-purpose flour
- 1 teaspoon baking powder
- 1/2 teaspoon fine salt
- 1 cup unsalted butter, softened to cool room temperature
- 1 cup granulated sugar
- 1 large egg
- 2 teaspoons vanilla extract
- 1/2 teaspoon almond extract, optional but lovely
- 1 to 2 tablespoons milk, only if the dough feels dry
Quick Steps:
- Whisk the flour, baking powder, and salt in a medium bowl.
- Cream the butter and sugar on medium speed for 2 to 3 minutes, until pale and fluffy.
- Beat in the egg, vanilla, and almond extract.
- Add the dry ingredients and mix just until the dough comes together. If it looks crumbly, add 1 tablespoon milk.
- Divide the dough in half, flatten each piece into a disk, wrap, and chill for 1 hour.
- Roll to 1/4 inch thick, cut shapes, and place them 1 inch apart on parchment-lined sheets.
- Bake at 350°F for 8 to 10 minutes, until the edges are set and the centers still look pale.
- Cool for 5 minutes on the pan, then move to a rack before decorating.
Equipment for This Recipe:
- Stand mixer or hand mixer
- Rolling pin
- Cookie cutters
- Parchment-lined sheet pans
- Cooling rack
How to Serve This Dish:
Stack them in a tin with layers of parchment, or spread them on a white platter so the colored icing stands out. A few cookies dusted with sanding sugar and a few left plain make the tray look more relaxed, which I prefer anyway.
Pro Tips for This Recipe:
- Roll the dough between two sheets of parchment if it sticks to the pin.
- If the dough warms up while cutting, chill the scraps for 10 minutes before rerolling.
- Use a light touch with flour on the counter; too much flour makes the cookies dry.
- For clean shapes, dip the cutter in flour and shake off the excess.
Variations on This Dish:
- Lemon Ribbon Cut-Outs: Add 1 tablespoon lemon zest and swap the almond extract for lemon extract.
- Cocoa Half-Batch: Replace 1/2 cup flour with 1/2 cup cocoa powder for dark stars or trees.
- Gluten-Free Shapes: Use a good 1:1 gluten-free flour blend and chill the dough a little longer so it firms up.
Common Mistakes to Avoid with This Dish:
- Skipping the chill: The cookies spread and lose their sharp edges. Chill the dough for the full hour.
- Rolling too thick: Thick cookies puff awkwardly and bake unevenly. Keep the dough close to 1/4 inch.
- Browning them too much: Sugar cookies should be pale. Pull them when the edges are set, not when the tops turn gold.
2. Soft Gingerbread Men with a Gentle Molasses Bite
Gingerbread should smell like cinnamon, cloves, and warm molasses the second it hits the oven. These little men bake up soft enough for kids to bite through without snapping a tooth, but they still hold their arms, legs, and little cookie faces without sagging. That matters more than people admit.
I like this style because it’s sturdy without being dry. The molasses brings depth, but the spice mix stays friendly instead of sharp. And yes, you can decorate them with icing, raisin buttons, or tiny candy faces. The dough is doing enough work on its own.
Why It Works:
Molasses gives the cookies that deep brown color and a chewy center, while brown sugar keeps the flavor mellow. A short chill makes the dough easier to roll, and the spice level stays balanced enough that younger eaters don’t bounce off the flavor. Bake them for 8 to 9 minutes so they stay soft in the middle.
Key Ingredients:
- 3 1/4 cups all-purpose flour
- 1 teaspoon baking soda
- 2 teaspoons ground ginger
- 1 1/2 teaspoons ground cinnamon
- 1/4 teaspoon ground cloves
- 1/2 teaspoon fine salt
- 3/4 cup unsalted butter, softened
- 3/4 cup packed brown sugar
- 1 large egg
- 1/2 cup unsulphured molasses
Quick Steps:
- Whisk the flour, baking soda, ginger, cinnamon, cloves, and salt.
- Cream the butter and brown sugar for 2 to 3 minutes, until smooth and lighter in color.
- Beat in the egg and molasses; the mixture will look dark and glossy.
- Add the dry ingredients and mix until a soft dough forms.
- Divide the dough into two disks, wrap, and chill for 2 hours.
- Roll between parchment to 1/4 inch thick, cut gingerbread men, and transfer them to lined sheet pans.
- Bake at 350°F for 8 to 9 minutes, until the edges are set and the centers look slightly puffed.
- Cool completely before icing.
Equipment for This Recipe:
- Hand mixer or stand mixer
- Rolling pin
- Gingerbread man cutter
- Sheet pans
- Parchment paper
How to Serve This Dish:
They look best standing up in a jar or lined along a platter with white icing and candy buttons. I also like packing a few into a lunchbox-style tin; they travel better than softer frosted cookies.
Pro Tips for This Recipe:
- Use unsulphured molasses, not blackstrap, unless you want a stronger, sharper taste.
- If the dough cracks while rolling, let it sit for 5 minutes; cold dough straight from the fridge can be a little stubborn.
- Bake one test cookie first if your cutter is especially large; big shapes need an extra minute or two.
Variations on This Dish:
- Orange-Spice Gingerbread: Add 1 teaspoon orange zest for a brighter finish.
- Icing-Free Buttons: Press mini chocolate chips into the dough before baking instead of decorating later.
- Extra-Soft Gingerbread: Bake at 340°F for 1 extra minute and pull them while the centers still look a touch underdone.
Common Mistakes to Avoid with This Dish:
- Overloading the spice: Too much cloves or ginger can make the cookie harsh. Measure carefully.
- Rolling without chilling: Sticky dough tears and sticks. Chill it first.
- Overbaking: Gingerbread firms as it cools, so take it out while the centers still look soft.
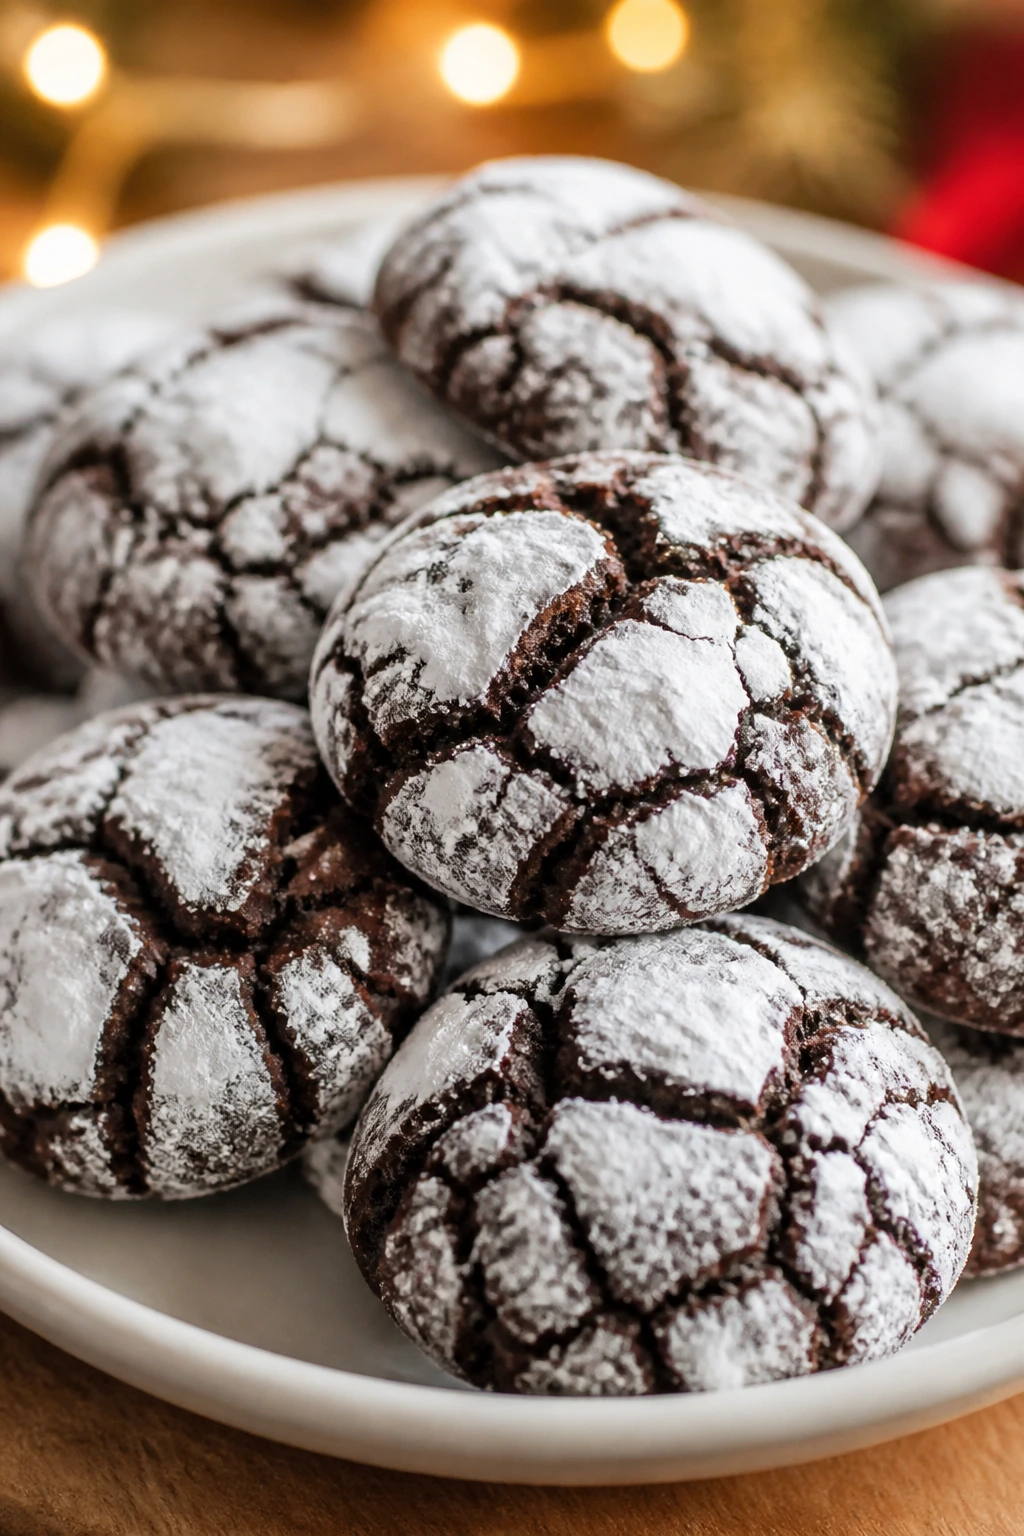
3. Peppermint Chocolate Crinkle Cookies with Snowy Tops
These are the cookies that look like they’ve been rolled through fresh snow and then sneaked a sip of hot cocoa. The crackled tops are half the appeal, and the peppermint stays in the background instead of taking over. Good peppermint cookies should taste cool, not like toothpaste. These do.
I like crinkles for kid baking because the shaping is nearly foolproof. Scoop, roll, coat in sugar, then roll again in powdered sugar and bake. That’s the whole game. The dramatic cracked top does the rest.
Why It Works:
Oil keeps the cookies tender and chewy, while cocoa powder gives the dough a dark base that shows off the white sugar coating. Rolling in granulated sugar first helps the powdered sugar stay bright and gives you those classic snowy cracks. The peppermint extract should stay light—just enough to notice, not enough to dominate.
Key Ingredients:
- 2 cups all-purpose flour
- 3/4 cup unsweetened cocoa powder
- 2 teaspoons baking powder
- 1/2 teaspoon fine salt
- 1 1/2 cups granulated sugar
- 1/2 cup neutral oil
- 4 large eggs
- 2 teaspoons vanilla extract
- 1/4 teaspoon peppermint extract
- 1 cup powdered sugar, for rolling
Quick Steps:
- Whisk the flour, cocoa, baking powder, and salt in one bowl.
- In another bowl, beat the granulated sugar, oil, eggs, vanilla, and peppermint extract until smooth.
- Stir the dry ingredients into the wet mixture until a thick dough forms.
- Cover and chill for 30 minutes, until the dough is easier to scoop.
- Scoop 1 1/2-inch balls, roll each in granulated sugar, then coat heavily in powdered sugar.
- Bake at 350°F for 10 to 11 minutes, until the tops crack and the centers still look soft.
- Cool on the pan for 5 minutes before moving to a rack.
Equipment for This Recipe:
- Mixing bowls
- Whisk
- Cookie scoop
- Parchment-lined sheet pans
- Cooling rack
How to Serve This Dish:
Pile them in a low bowl so the powdered sugar doesn’t smear against other cookies. They’re strong coffee cookies for adults and very-much-approved milk cookies for kids, which is a rare and useful thing.
Pro Tips for This Recipe:
- Don’t skip the first sugar coating; it keeps the powdered sugar bright after baking.
- If the dough feels sticky, chill it another 10 minutes before scooping.
- Use a light hand with peppermint extract. A little goes a long way.
Variations on This Dish:
- Double-Chocolate Crinkles: Fold in 1/2 cup mini chocolate chips for extra pockets of chocolate.
- Candy Cane Dusting: Add a pinch of fine crushed candy cane to the powdered sugar for a peppermint edge.
- Mocha Crinkles: Add 1 teaspoon instant espresso powder to deepen the cocoa flavor.
Common Mistakes to Avoid with This Dish:
- Undercoating in sugar: Bare spots turn dull in the oven. Coat them generously.
- Baking too long: Overbaked crinkles lose their fudgy center. Pull them when they still feel soft in the middle.
- Too much peppermint extract: The flavor can turn sharp fast. Measure with a careful hand.
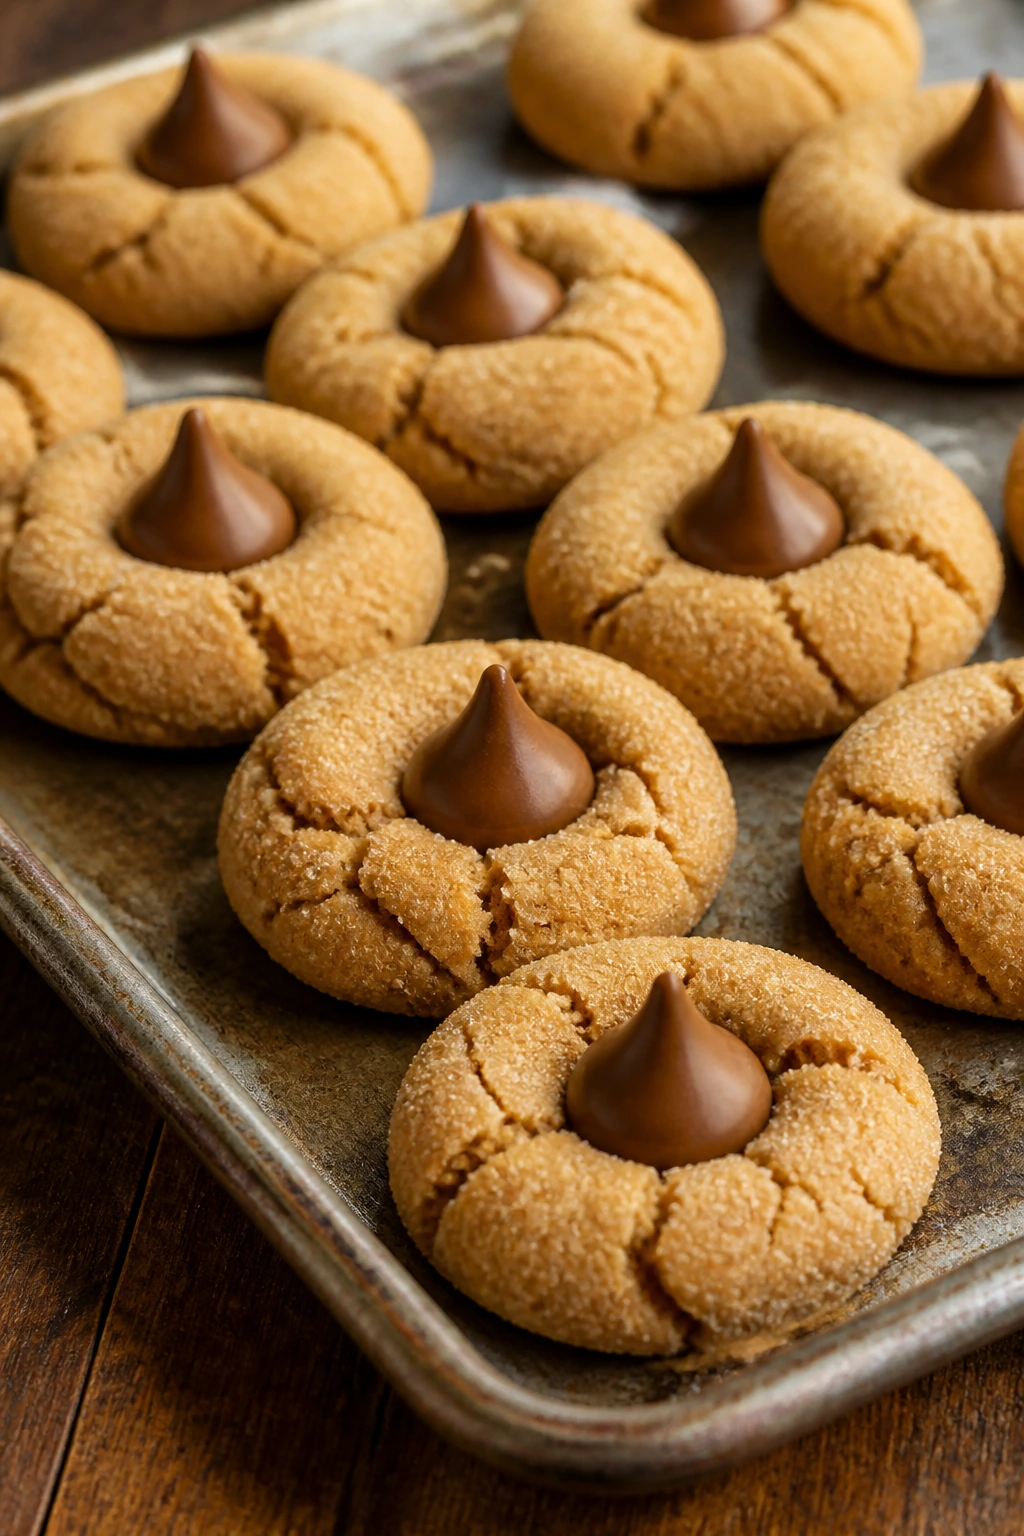
4. Peanut Butter Blossoms Kids Can Press Themselves
If you want one cookie where kids can do a real job without wrecking the batch, make these. The dough rolls easily, the sugar coating sparkles, and the chocolate kiss pressed into the middle makes every cookie look finished, even if the rows are a little crooked. I’ve never seen a tray of blossoms last long.
The flavor is all about that peanut butter-sugar balance. You get a soft center, a faint crunch from the outside, and the chocolate on top to pull everything together. No frosting. No piping. No complicated timing. Just a classic that behaves.
Why It Works:
Peanut butter gives the cookies structure and a dense, soft crumb, while the extra sugar helps them bake with a slightly crisp edge. Rolling the dough balls in granulated sugar keeps the outside dry enough to hold shape. The kiss goes on after baking so it softens just enough without melting into a puddle.
Key Ingredients:
- 1 1/4 cups all-purpose flour
- 1 teaspoon baking soda
- 1/2 teaspoon fine salt
- 1/2 cup unsalted butter, softened
- 3/4 cup creamy peanut butter
- 3/4 cup packed brown sugar
- 1/2 cup granulated sugar
- 1 large egg
- 1 teaspoon vanilla extract
- 36 chocolate kisses, unwrapped
- 1/4 cup granulated sugar, for rolling
Quick Steps:
- Whisk the flour, baking soda, and salt.
- Cream the butter, peanut butter, brown sugar, and granulated sugar for 2 minutes.
- Beat in the egg and vanilla.
- Mix in the dry ingredients just until combined.
- Scoop into 1-inch balls, roll in the extra sugar, and place 2 inches apart.
- Bake at 375°F for 8 to 10 minutes, until puffed and lightly golden underneath.
- Press one chocolate kiss into the center of each cookie as soon as they come out of the oven.
- Cool on the pan for 5 minutes so the chocolate settles.
Equipment for This Recipe:
- Hand mixer
- Mixing bowls
- Cookie scoop
- Sheet pans
- Cooling rack
How to Serve This Dish:
They belong on a tray with plain milk beside them, because the peanut butter and chocolate combo begs for it. I also like tucking them into mini paper cups when I’m building a cookie box; that keeps the chocolate tops from scuffing.
Pro Tips for This Recipe:
- Use creamy peanut butter, not natural runny peanut butter, or the dough can spread.
- Unwrap all the kisses before baking. It saves panic.
- If the kisses slump too much, let the cookies cool for a minute before pressing them in.
Variations on This Dish:
- Pretzel Blossom: Press a mini pretzel into the center instead of chocolate for a salty finish.
- Dark Chocolate Blossom: Swap the kisses for dark chocolate squares.
- Sunflower Seed Version: Use sunflower seed butter for a nut-free school-safe batch.
Common Mistakes to Avoid with This Dish:
- Using oily natural peanut butter: The cookies spread too much. Stick with regular creamy peanut butter.
- Pressing the kiss too early: It melts and loses shape. Wait until the cookies come out of the oven.
- Overbaking: They should still be soft when you pull them. They set as they cool.
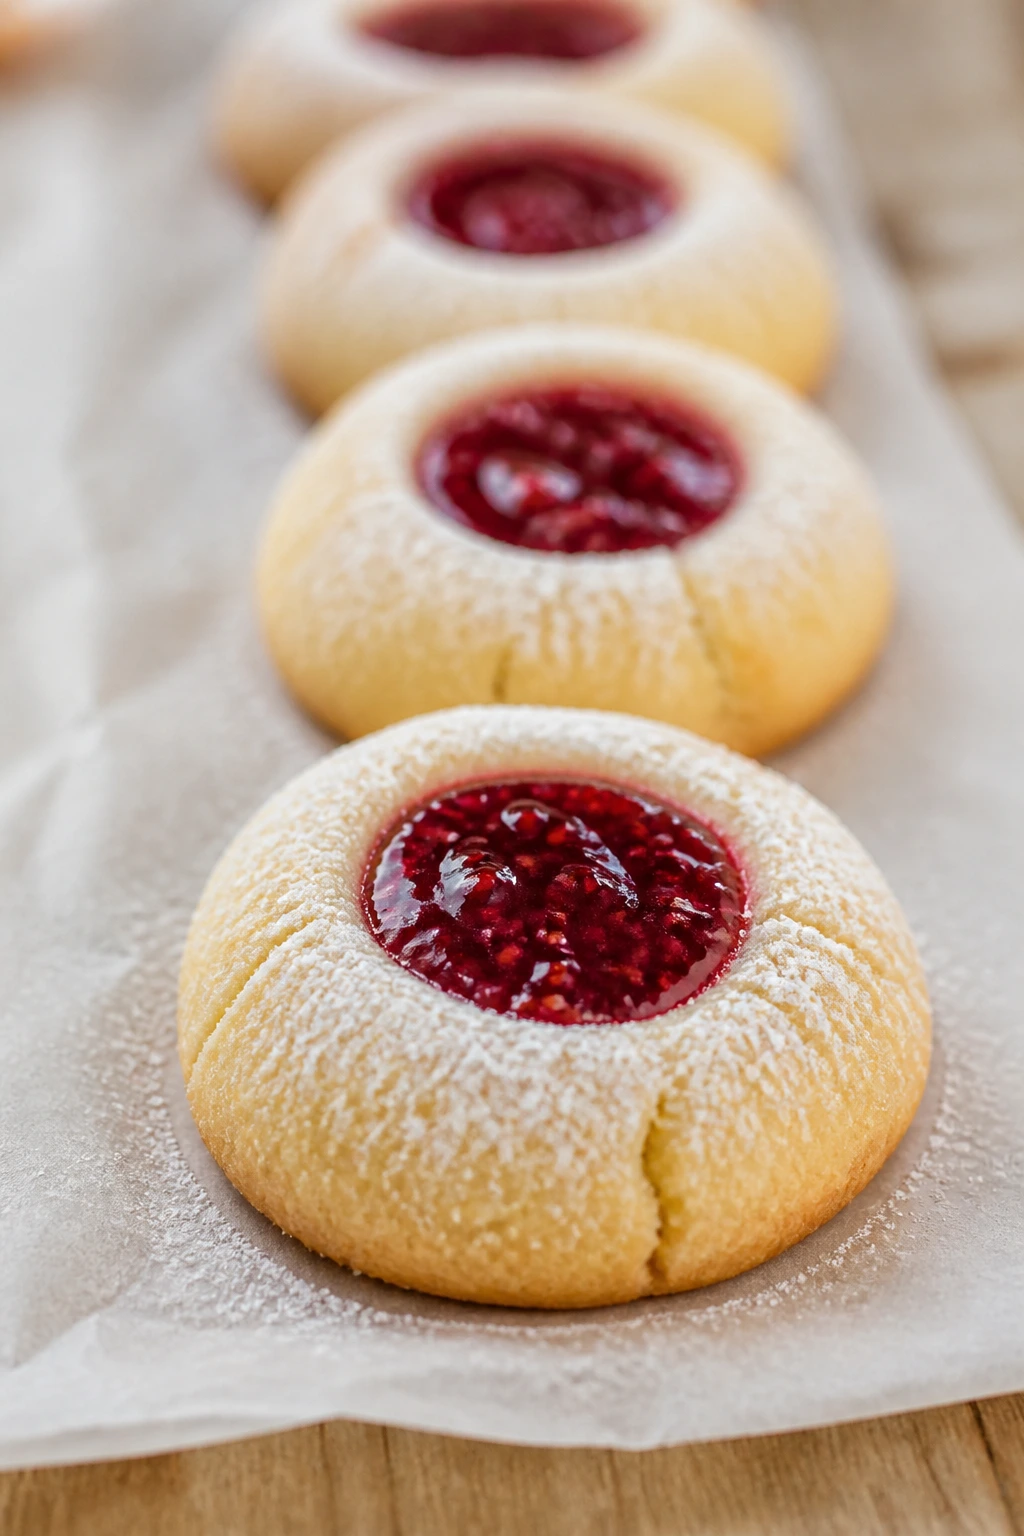
5. Raspberry Thumbprint Cookies with Jam Centers
Thumbprints are the neat little cousins of every louder holiday cookie. They’re small, tidy, and each one gets a glossy jam center that looks polished without any fuss. Kids love making the dents; adults like that they look more complicated than they are.
I prefer using thick raspberry jam here because it sets into a bright center instead of running across the pan. The cookie itself is tender, almost sandy, and the jam gives each bite a sharp sweet edge. A dusting of powdered sugar is optional, but it does make them look like they spent more time in the kitchen than they really did.
Why It Works:
Cornstarch keeps the cookie crumb tender, while the egg yolks add richness without making the dough cakey. The indent holds its shape better if you press it before baking and give the dough a short chill. Thicker jam stays put and bakes into a glossy center in about 12 minutes.
Key Ingredients:
- 2 cups all-purpose flour
- 1/4 cup cornstarch
- 1/4 teaspoon fine salt
- 1 cup unsalted butter, softened
- 2/3 cup granulated sugar
- 2 large egg yolks
- 1 teaspoon vanilla extract
- 1/2 cup seedless raspberry jam
- Powdered sugar, optional for finishing
Quick Steps:
- Whisk the flour, cornstarch, and salt.
- Cream the butter and sugar for 2 to 3 minutes, until pale.
- Beat in the egg yolks and vanilla.
- Mix in the dry ingredients until the dough just comes together.
- Chill for 20 to 30 minutes if the dough feels soft.
- Roll into 1-inch balls, place on lined sheets, and press a deep thumbprint into each one.
- Fill each indentation with about 1/2 teaspoon jam.
- Bake at 350°F for 11 to 13 minutes, until the edges look set and the bottoms are barely golden.
- Cool completely before dusting with powdered sugar, if using.
Equipment for This Recipe:
- Mixing bowls
- Hand mixer
- Sheet pans
- Small spoon or teaspoon measure
- Cooling rack
How to Serve This Dish:
These cookies are best arranged in tight circles or rows so the jam centers show off. They look especially good mixed with plain shortbread cookies, because the shiny red centers break up a pale tray.
Pro Tips for This Recipe:
- Use thick jam or preserves; thin jam can seep out and burn.
- If the indent puffs up in the oven, press it lightly again while the cookie is still warm.
- For sharper flavor, swap half the raspberry jam for apricot jam.
Variations on This Dish:
- Apricot Snow: Fill the centers with apricot preserves and dust with powdered sugar.
- Chocolate-Raspberry Thumbprints: Add 2 tablespoons cocoa to the dough for a darker base.
- Orange Jam Version: Use orange marmalade for a brighter, slightly bitter finish.
Common Mistakes to Avoid with This Dish:
- Making the indent too shallow: The jam slides off. Press deep enough to hold a full teaspoon.
- Using runny jam: It bleeds and burns. Choose a thick preserve.
- Filling with too much jam: The centers overflow. Stay close to 1/2 teaspoon per cookie.
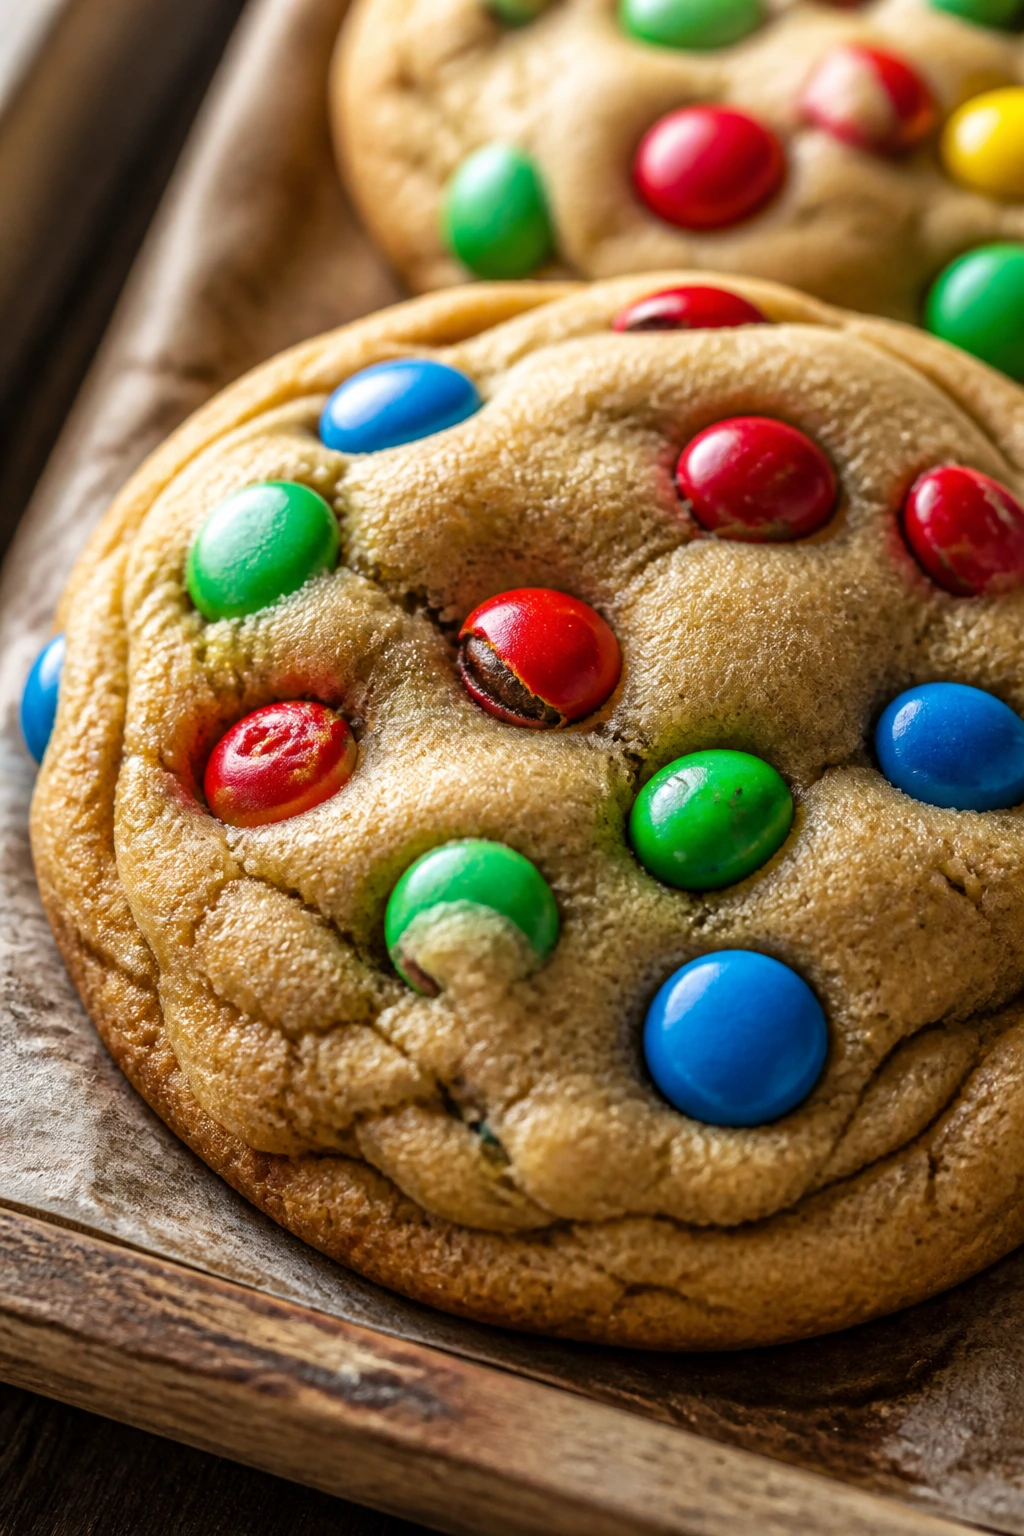
6. M&M Holiday Cookies for the Brightest Tray
These are the cookies that disappear first when a mixed tray hits the table. They’re thick, chewy, and studded with candy-coated chocolate pieces that hold their color in the oven. Kids can press the extra candies on top, which is honestly half the fun.
The base is a familiar brown-sugar cookie, so the texture stays soft in the middle and just a little crisp at the edges. Nothing tricky here. The recipe works because it doesn’t ask the dough to do too much; it just gives the candies a good home.
Why It Works:
Brown sugar keeps the centers chewy, while a bit of extra granulated sugar gives the edges a clean finish. The chocolate candies add color and crunch without melting into the dough. Chilling the scooped dough for 15 minutes helps the cookies stay thick instead of spreading into flat discs.
Key Ingredients:
- 2 1/2 cups all-purpose flour
- 1 teaspoon baking soda
- 1/2 teaspoon fine salt
- 1 cup unsalted butter, softened
- 3/4 cup packed brown sugar
- 1/2 cup granulated sugar
- 2 large eggs
- 2 teaspoons vanilla extract
- 1 cup semisweet chocolate chips
- 1 1/2 cups holiday M&M candies, plus a handful for the tops
Quick Steps:
- Whisk the flour, baking soda, and salt.
- Cream the butter and both sugars for 2 minutes.
- Beat in the eggs one at a time, then add the vanilla.
- Mix in the dry ingredients, then fold in the chocolate chips and M&Ms.
- Scoop 2-tablespoon portions onto lined sheets and chill the tray for 15 minutes if the dough feels warm.
- Bake at 350°F for 10 to 11 minutes, until the edges are set and the centers still look a little underbaked.
- Press extra M&Ms onto the tops as soon as the cookies come out.
- Cool on the sheet for 5 minutes before moving them.
Equipment for This Recipe:
- Mixer
- Mixing bowls
- Cookie scoop
- Sheet pans
- Cooling rack
How to Serve This Dish:
They’re easy to pile high in a bowl or mason jar because the candies make them look full even when the batch is half gone. Put them near the front of the tray; if you don’t, kids will find them anyway.
Pro Tips for This Recipe:
- Reserve a few M&Ms for the tops. The cookies look much better with visible candy.
- Pull them before the centers fully set; carryover heat finishes the job.
- If your kitchen is warm, chill the dough longer than 15 minutes.
Variations on This Dish:
- Double-Chip Version: Replace half the M&Ms with white chocolate chips for a richer cookie.
- Crunchy Pretzel Mix-In: Fold in 1/2 cup crushed mini pretzels for salty contrast.
- Nut-Free Classroom Batch: Use only chocolate chips and festive sprinkles if you want to skip candy-coated chocolate entirely.
Common Mistakes to Avoid with This Dish:
- Overbaking for color: These should stay soft. If they look fully done in the oven, they’ll be dry later.
- Adding too many candies: The dough can’t hold them all and the cookies spread oddly. Stick to the measured amount.
- Skipping the reserved topping candies: The tops look flat and one-sided without them.
7. Hot Cocoa Marshmallow Cookies in One Bite
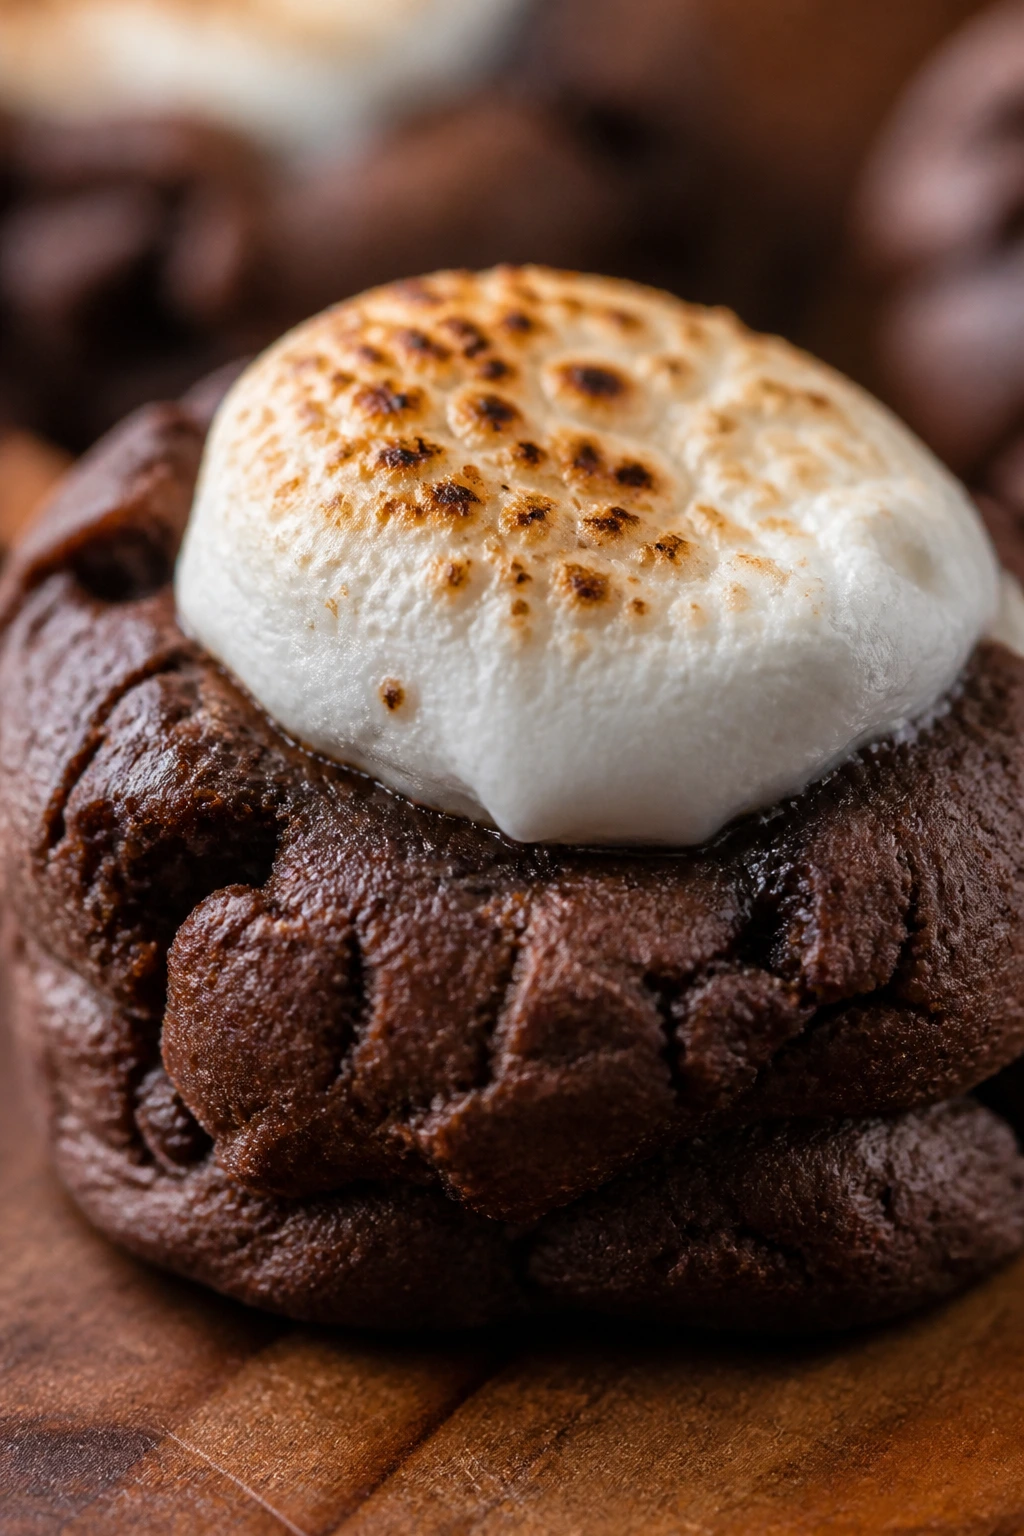
These taste like the mug you wanted after sledding, without the actual mug. Rich cocoa dough, a soft chocolate center, and a few marshmallows on top make them feel like a holiday treat with a campfire streak. They’re one of the few cookies that can make a room go quiet for a second.
The thing to watch is the marshmallow. If you bake it too early, it vanishes into the dough. If you wait too long, it won’t stick. The answer is a short first bake, then a quick marshmallow press, then back into the oven for just long enough to soften the tops.
Why It Works:
Cocoa powder builds a deep chocolate base, and a touch of brown sugar keeps the cookie chewy instead of dry. The dough benefits from a short chill because cocoa batters can spread if they’re too warm. Marshmallows added halfway through baking stay visible and glossy instead of disappearing.
Key Ingredients:
- 1 1/2 cups all-purpose flour
- 1/2 cup unsweetened cocoa powder
- 1/2 teaspoon baking soda
- 1/2 teaspoon fine salt
- 1/2 cup unsalted butter, softened
- 3/4 cup packed brown sugar
- 1/2 cup granulated sugar
- 1 large egg
- 1 teaspoon vanilla extract
- 1 cup semisweet chocolate chips
- 1 1/2 cups mini marshmallows
Quick Steps:
- Whisk the flour, cocoa, baking soda, and salt.
- Cream the butter and sugars for 2 minutes, then beat in the egg and vanilla.
- Mix in the dry ingredients, then fold in the chocolate chips.
- Chill the dough for 20 minutes.
- Scoop onto lined sheet pans and bake at 350°F for 5 minutes.
- Pull the pan out, press 3 or 4 mini marshmallows into the top of each cookie, and return the tray to the oven for 3 to 4 more minutes.
- Cool for 10 minutes before moving them.
Equipment for This Recipe:
- Mixer
- Bowls
- Cookie scoop
- Sheet pans
- Parchment paper
How to Serve This Dish:
Serve them warm if you want the marshmallows soft and glossy. A tiny pinch of flaky salt on top is my favorite move, because it keeps the chocolate from tasting flat.
Pro Tips for This Recipe:
- Use mini marshmallows; full-size ones are too bulky for the cookies.
- Don’t overbake after the marshmallow step or the tops turn tough.
- If you want more chocolate drama, press a few extra chips into the cookies before the first bake.
Variations on This Dish:
- Peppermint Cocoa Cookies: Add 1/4 teaspoon peppermint extract to the dough and top with crushed candy cane.
- S’mores Version: Add 1/3 cup crushed graham crackers to the dough.
- Dark Cocoa Batch: Use Dutch-process cocoa for a deeper color and darker flavor.
Common Mistakes to Avoid with This Dish:
- Baking the marshmallows too early: They melt away. Add them after the first 5 minutes.
- Using too much cocoa without enough sugar: The cookies turn dry and bitter. Keep the sugar amounts as written.
- Moving them too soon: The marshmallow tops are fragile while hot. Let them set on the pan.
8. Spritz Christmas Tree Cookies from a Cookie Press

Spritz cookies are the flashy little cousins of butter cookies. They come out of a press in neat little trees, stars, and wreaths, and they bake fast enough to keep impatient helpers interested. That’s a useful feature when the kitchen is full of tiny opinions.
The dough needs to be soft enough to press but not oily. Too warm and it smears. Too cold and the press jams. Once you find that middle point, spritz dough is oddly satisfying to work with, and kids love showering the shapes with colored sugar before they hit the oven.
Why It Works:
A high-butter dough gives the cookies a rich, delicate crumb, and the egg helps the shapes stay defined. The cookie press makes the sizing consistent, which means the whole tray bakes evenly. Seven to nine minutes is usually enough; you want the bottoms just barely turning gold.
Key Ingredients:
- 2 1/2 cups all-purpose flour
- 1/2 teaspoon fine salt
- 1 cup unsalted butter, softened
- 3/4 cup granulated sugar
- 1 large egg
- 2 teaspoons vanilla extract
- 1/2 teaspoon almond extract, optional
- Green sanding sugar or sprinkles, for decorating
Quick Steps:
- Whisk the flour and salt.
- Cream the butter and sugar for 2 to 3 minutes, until fluffy.
- Beat in the egg, vanilla, and almond extract.
- Mix in the flour mixture until the dough is smooth and pliable.
- Load the dough into a cookie press and press onto ungreased, cool sheet pans.
- Sprinkle with sanding sugar before baking.
- Bake at 375°F for 7 to 9 minutes, until the edges are just set and the bottoms are faintly golden.
- Let them cool on the pan for 2 minutes before moving.
Equipment for This Recipe:
- Cookie press
- Mixing bowls
- Mixer
- Unlined or parchment-lined sheet pans
- Cooling rack
How to Serve This Dish:
Lay them flat on a tray so the shapes stay visible. They’re pretty in a mixed cookie tin because they’re small and tidy, which balances the chunkier cookies around them.
Pro Tips for This Recipe:
- Use cool, ungreased pans; sticky dough needs grip to hold the design.
- If the dough won’t press cleanly, let it sit at room temperature for 5 minutes.
- Don’t overdo the sugar on top or the shapes get buried.
Variations on This Dish:
- Chocolate Spritz: Replace 1/4 cup flour with cocoa powder.
- Lemon Trees: Add 1 tablespoon lemon zest for a brighter flavor.
- Red and Green Pressed Cookies: Split the batch and tint one half with a tiny bit of gel color.
Common Mistakes to Avoid with This Dish:
- Oily dough: The cookies spread and blur. Start with softened, not melted, butter.
- Pressing onto hot pans: The shapes won’t stick. Use a cool sheet.
- Baking too long: Spritz cookies should stay pale. Pull them early.
9. Snickerdoodle Snowballs with Cinnamon Sugar Dust
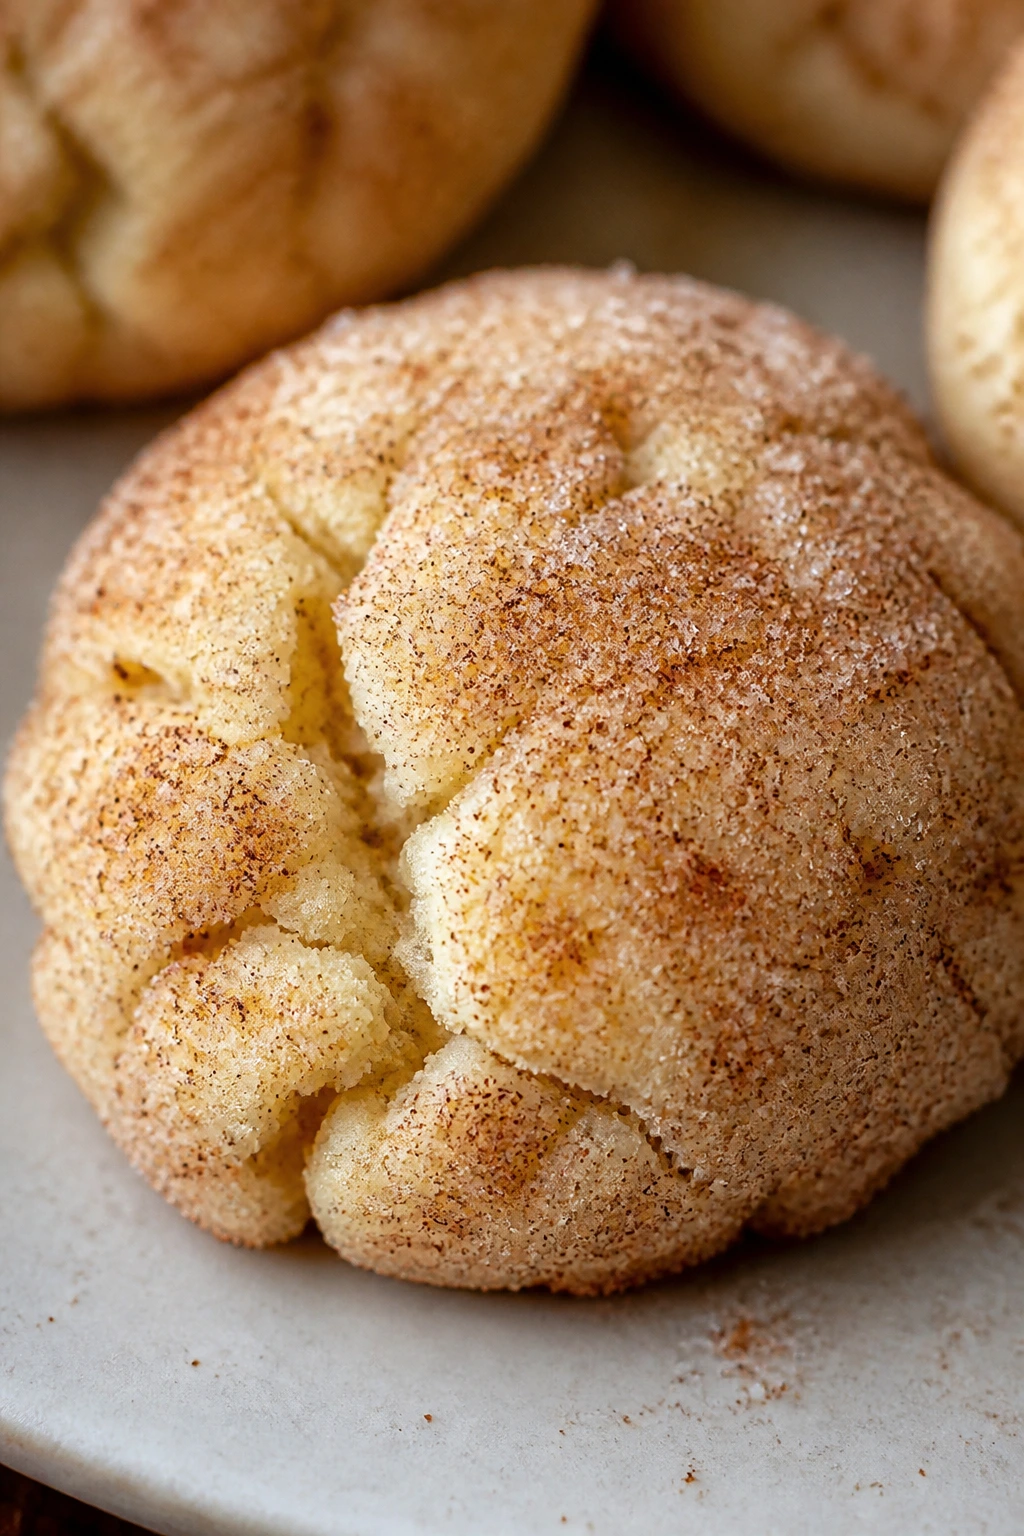
These are soft, round cookies with a crackly cinnamon coat and a center that stays tender instead of dry. They’re called snowballs here because the final sugar roll leaves them looking dusted and wintry, which is half the holiday charm. The cinnamon keeps them from tasting plain.
I like this dough because it behaves. It rolls into neat balls, the sugar coating grabs well, and the cookies puff into craggy little domes without turning hard. Cream of tartar gives the snickerdoodle its tang, which kids may not name but usually like.
Why It Works:
Cream of tartar gives snickerdoodles their classic tang and helps the cookies crack on top instead of baking flat. The sugar coating caramelizes lightly in the oven, which creates that soft sparkle on the outside. A short bake keeps the centers tender and gives you the cookie that disappears in two bites.
Key Ingredients:
- 2 1/4 cups all-purpose flour
- 2 teaspoons cream of tartar
- 1 teaspoon baking soda
- 1/2 teaspoon fine salt
- 2 teaspoons ground cinnamon
- 1 cup unsalted butter, softened
- 1/2 cup granulated sugar
- 1/2 cup packed brown sugar
- 1 large egg
- 2 teaspoons vanilla extract
- 1/4 cup granulated sugar mixed with 1 teaspoon cinnamon, for rolling
Quick Steps:
- Whisk the flour, cream of tartar, baking soda, salt, and cinnamon.
- Cream the butter, granulated sugar, and brown sugar for 2 minutes.
- Beat in the egg and vanilla.
- Mix in the dry ingredients until the dough comes together.
- Chill for 15 minutes if it feels soft.
- Roll into 1 1/2-inch balls, then coat each ball in cinnamon sugar.
- Bake at 350°F for 10 to 11 minutes, until the tops are crackled and set.
- Cool on the pan for 5 minutes before moving.
Equipment for This Recipe:
- Mixer
- Mixing bowls
- Cookie scoop
- Baking sheets
- Cooling rack
How to Serve This Dish:
They look nice stacked in a tin with parchment between layers, and they go especially well next to richer chocolate cookies. I also like serving them on a wooden board because the sugar sparkle stands out against the grain.
Pro Tips for This Recipe:
- Roll the balls evenly so they bake at the same speed.
- Don’t overmix once the flour goes in; that makes them tough.
- A little extra cinnamon in the sugar coating gives the outside a more bakery-like finish.
Variations on This Dish:
- Cardamom Snickerdoodles: Add 1/4 teaspoon ground cardamom to the coating.
- Orange Snickerdoodles: Stir 1 teaspoon orange zest into the dough.
- Mini Snowballs: Make 1-tablespoon dough balls and reduce bake time by 1 to 2 minutes.
Common Mistakes to Avoid with This Dish:
- Skipping the cream of tartar: The flavor changes and the cookies lose their snickerdoodle identity.
- Baking until brown: They should be set, not dark.
- Uneven sugar coating: Patchy rolling gives patchy color. Coat each ball thoroughly.
10. Chewy Chocolate Chip Holiday Cookies with Red-and-Green Bits
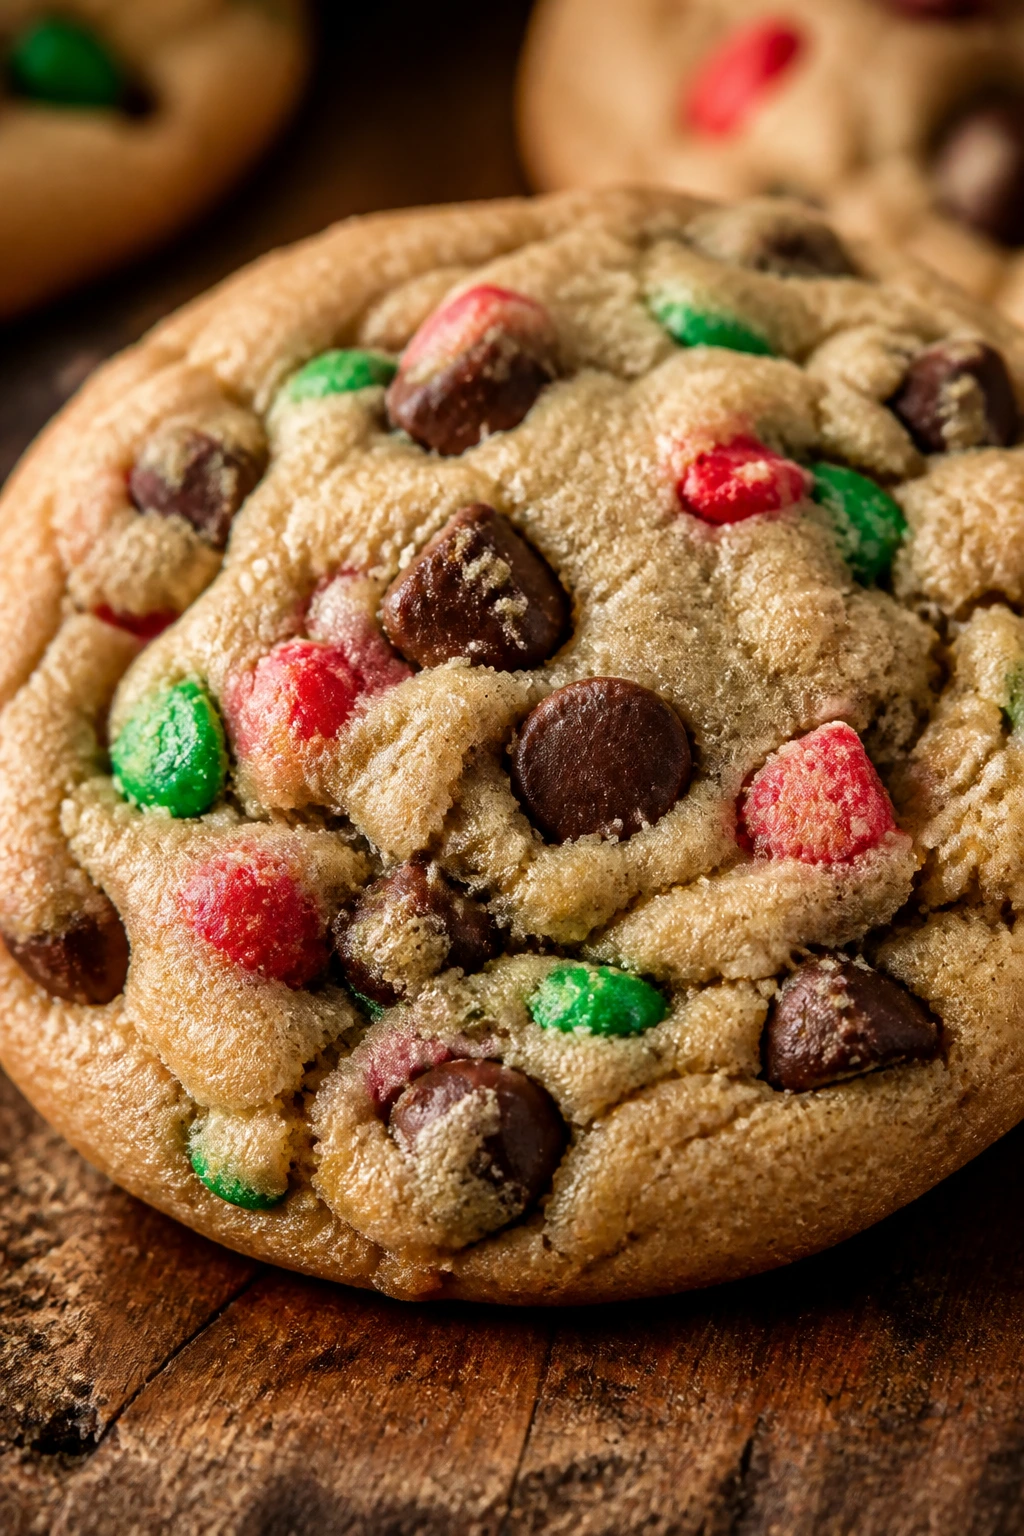
A good chocolate chip cookie doesn’t need a holiday costume to earn a place on the tray, but a handful of festive bits makes it fit right in. This version is chewy in the center, a little crisp at the edge, and sturdy enough for kids who immediately ask for a second one. That’s the kind of cookie I trust.
The melted butter gives these cookies that rich, dense chew that people chase in bakery versions. They also hold their shape nicely if the dough gets a short rest. Add a few red and green candies or sprinkles on top, and suddenly the tray looks seasonal without demanding any extra decorating time.
Why It Works:
Melted butter creates a chewy texture and a slightly deeper flavor than creamed butter alone. Brown sugar does most of the work here, keeping the centers soft. A brief rest lets the flour hydrate, which means the cookies bake thicker and less greasy.
Key Ingredients:
- 2 1/2 cups all-purpose flour
- 1 teaspoon baking soda
- 1 teaspoon fine salt
- 1 cup unsalted butter, melted and cooled slightly
- 1 cup packed brown sugar
- 1/2 cup granulated sugar
- 2 large eggs
- 2 teaspoons vanilla extract
- 2 cups semisweet chocolate chips
- 1/2 cup red and green candy-coated chocolate pieces or festive sprinkles
Quick Steps:
- Whisk the flour, baking soda, and salt.
- Stir the melted butter, brown sugar, and granulated sugar together until glossy.
- Beat in the eggs and vanilla.
- Add the dry ingredients and mix just until no flour streaks remain.
- Fold in the chocolate chips and festive candies.
- Rest the dough for 15 minutes, then scoop onto lined sheets.
- Bake at 350°F for 10 to 11 minutes, until the edges are set and the centers still look soft.
- Press a few extra chips or candies on top while warm.
Equipment for This Recipe:
- Mixing bowls
- Whisk and spatula
- Cookie scoop
- Sheet pans
- Cooling rack
How to Serve This Dish:
These are the cookies I put near the front of the platter because they’re the ones everybody recognizes first. A cold glass of milk or a mug of hot chocolate does the job nicely.
Pro Tips for This Recipe:
- Let the melted butter cool a bit before mixing or the dough gets greasy.
- Resting the dough makes a better cookie; 15 minutes is enough.
- Pull them while the centers still look glossy.
Variations on This Dish:
- Triple-Chip Holiday Batch: Use semisweet, milk, and white chocolate chips in equal parts.
- Cinnamon Chip Version: Add 1 teaspoon cinnamon for a warmer cookie.
- Sprinkle-Topped Cookies: Skip the candies and press coarse red and green sprinkles on top right after baking.
Common Mistakes to Avoid with This Dish:
- Using butter that’s too hot: The cookies spread fast. Let it cool a little first.
- Overmixing after the flour goes in: The cookies get tough. Stop as soon as the dough comes together.
- Baking until fully firm: These finish setting on the pan. Pull them a little early.
11. Candy Cane Kiss Cookies with a Peppermint Finish
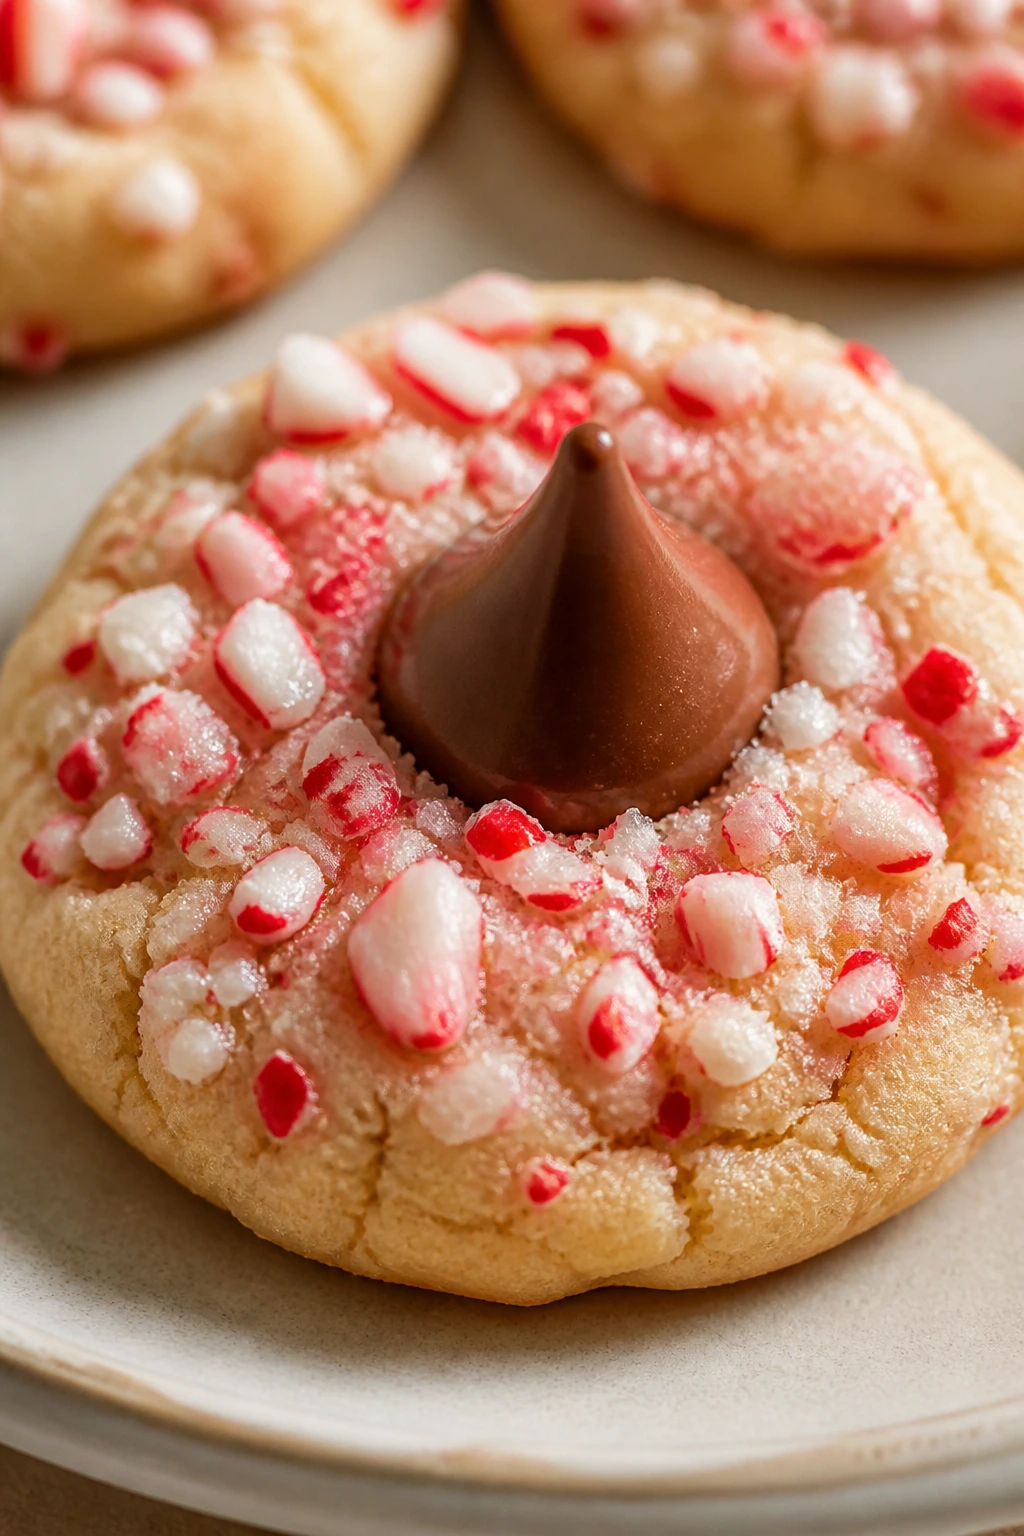
These are the candy cane cookies people remember because they look like they took more effort than they did. The dough is soft, the peppermint is bright but not overwhelming, and the chocolate kiss in the middle gives you that classic holiday finish. Kids love the part where they get to press the candy on top.
I like to crush the candy canes finely enough that they stick to the dough, but not so fine that they dissolve into dust. You want little red shards and a few white flakes showing against the sugar. The result is festive without becoming crunchy in a bad way.
Why It Works:
A simple sugar-cookie base gives the cookie enough body to support the candy on top. Peppermint extract carries the flavor without forcing the candy canes to do all the work. Pressing the kiss after baking keeps the chocolate glossy and helps it hold its shape.
Key Ingredients:
- 2 1/4 cups all-purpose flour
- 1 teaspoon baking soda
- 1/2 teaspoon fine salt
- 1 cup unsalted butter, softened
- 1 cup granulated sugar
- 1 large egg
- 1 1/2 teaspoons vanilla extract
- 1/4 teaspoon peppermint extract
- 1/2 cup finely crushed candy canes
- 30 chocolate kisses, unwrapped
- 1/4 cup granulated sugar, for rolling
Quick Steps:
- Whisk the flour, baking soda, and salt.
- Cream the butter and sugar for 2 minutes, then beat in the egg, vanilla, and peppermint extract.
- Add the dry ingredients and mix until soft dough forms.
- Fold in the crushed candy canes.
- Roll the dough into 1-inch balls, then roll each ball in granulated sugar.
- Bake at 350°F for 9 to 10 minutes, until the edges are just set.
- Press one kiss into the center of each warm cookie.
- Cool completely so the candy canes stay crisp.
Equipment for This Recipe:
- Mixer
- Mixing bowls
- Cookie scoop
- Sheet pans
- Cooling rack
How to Serve This Dish:
They look best on a white platter where the red candy pieces and chocolate tops stand out. I’d keep them separate from very soft cookies because the kisses can scuff if they’re packed too tightly.
Pro Tips for This Recipe:
- Crush the candy canes in a zip-top bag with a rolling pin so you get mix of shards and fine bits.
- Keep the peppermint extract light; the candy already carries a lot of flavor.
- Press the kisses in as soon as the cookies come out of the oven.
Variations on This Dish:
- Dark Chocolate Kiss Cookies: Use dark chocolate kisses for a less sweet finish.
- White Chocolate Peppermint: Swap the kiss for a white chocolate truffle style candy.
- Sugar Sparkle Version: Skip the crushed candy canes and roll the dough in red sanding sugar.
Common Mistakes to Avoid with This Dish:
- Using candy cane chunks that are too large: They can melt awkwardly. Crush them smaller.
- Leaving the kisses wrapped until after baking: You’ll lose time and the cookies will cool too much. Unwrap them first.
- Baking too long: The kiss should sit on a warm but soft cookie, not a hard one.
12. Linzer Sandwich Cookies with a Window of Jam
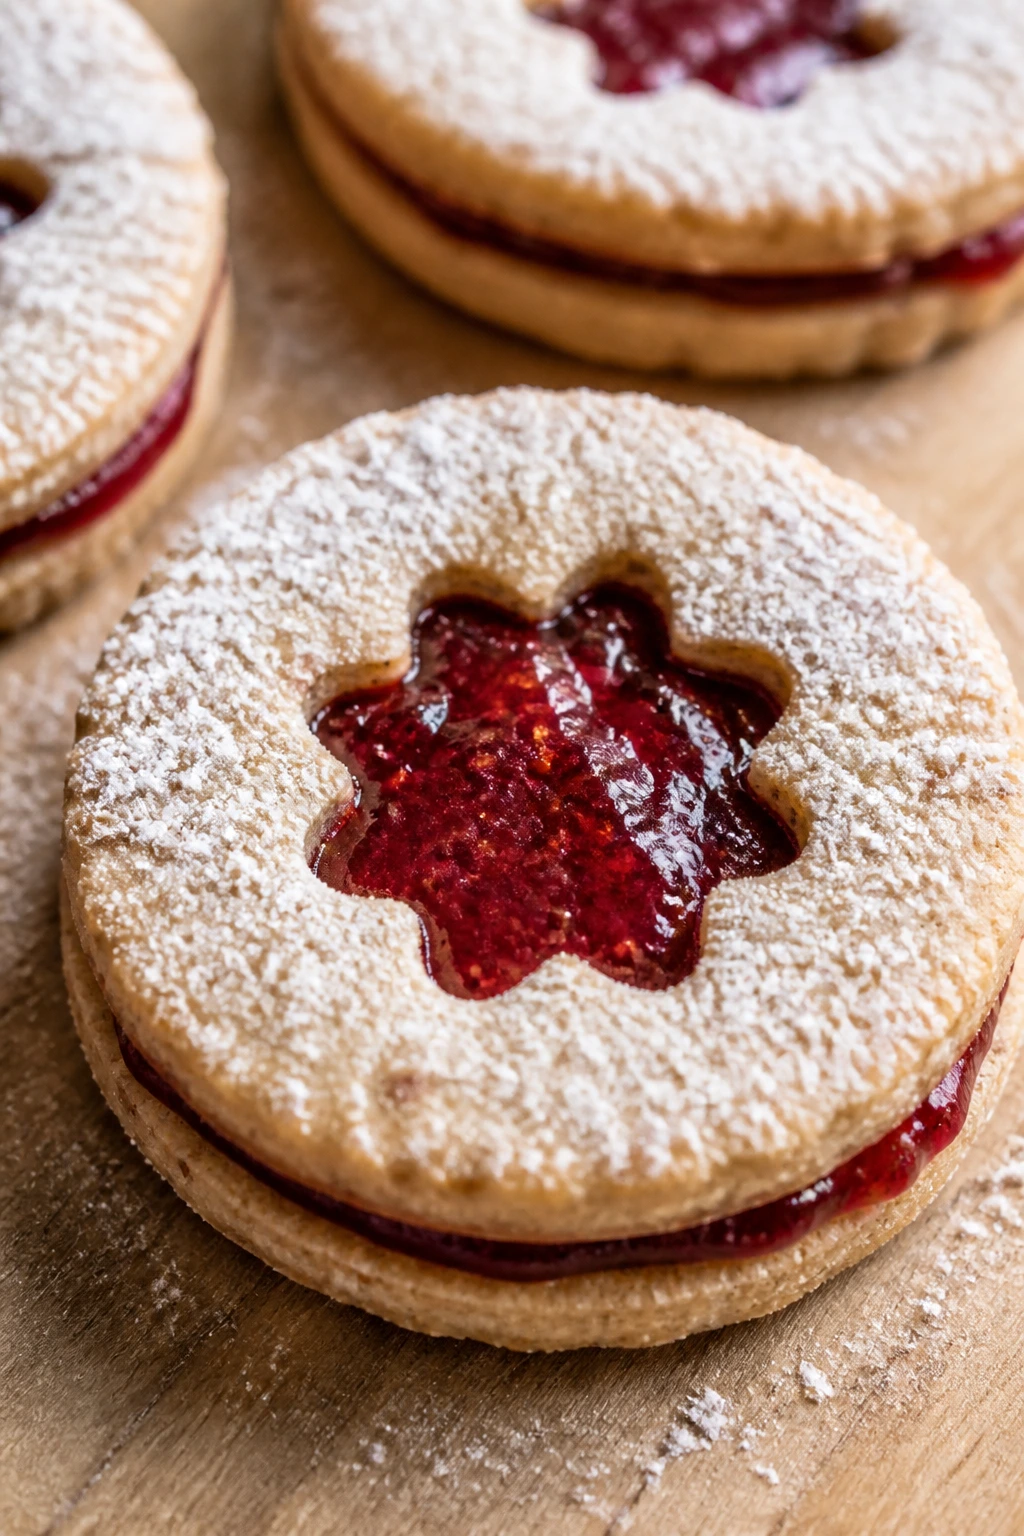
Linzers are the fancy-looking cookies that still behave like regular butter cookies once you break them open. The almond flour gives the dough a soft, almost sandy texture, and the jam peeking through the window makes every sandwich look like it belongs in a bakery case. Older kids usually love the window-cutting part.
I prefer raspberry or apricot here, because both give enough acidity to keep the cookie from feeling too sweet. The top cookie is dusted with powdered sugar, and that snowy finish gives the whole tray a very holiday look. They’re a little more involved than drop cookies, but not fussy in a bad way.
Why It Works:
Almond flour softens the crumb and gives the cookies a richer flavor than plain sugar cookies. The dough chills cleanly and rolls thin without tearing if you keep the flour light on the counter. Sandwiching the cookies after they cool keeps the jam glossy and stops the tops from sliding around.
Key Ingredients:
- 2 cups all-purpose flour
- 1 cup almond flour
- 1/4 teaspoon fine salt
- 1 cup unsalted butter, softened
- 3/4 cup powdered sugar
- 1 large egg
- 1 teaspoon vanilla extract
- 1 teaspoon lemon zest
- 1/2 cup raspberry or apricot jam
- Extra powdered sugar, for dusting
Quick Steps:
- Whisk the all-purpose flour, almond flour, and salt.
- Cream the butter and powdered sugar until light.
- Beat in the egg, vanilla, and lemon zest.
- Mix in the dry ingredients, divide the dough, and chill for 1 hour.
- Roll to 1/8 inch thick and cut an equal number of bottoms and tops, cutting a small window in the top pieces.
- Bake at 350°F for 10 to 12 minutes, until the edges are barely golden.
- Cool completely, then spread 1 teaspoon jam on each bottom cookie and dust the top cookies with powdered sugar before sandwiching.
Equipment for This Recipe:
- Mixer
- Rolling pin
- Round cutter and small window cutter
- Sheet pans
- Sifter or fine-mesh sieve
How to Serve This Dish:
These belong in a neat row on the tray because the cutouts and jam centers look better when you can see them all. They’re also the cookie I reach for when I want one item on the platter that looks a little more polished.
Pro Tips for This Recipe:
- Chill the dough well; thin cookies need structure.
- Dust the tops before sandwiching, or the sugar can disappear into the jam.
- Use a thick jam so the filling doesn’t squeeze out the sides.
Variations on This Dish:
- Strawberry Linzers: Swap in strawberry preserves for a softer fruit flavor.
- Chocolate Linzers: Add 2 tablespoons cocoa to the dough.
- Spiced Holiday Linzers: Add 1/4 teaspoon cinnamon to the flour mixture.
Common Mistakes to Avoid with This Dish:
- Rolling too thick: The sandwiches feel heavy. Stay near 1/8 inch.
- Filling while warm: The jam slips and the tops slide. Let everything cool first.
- Using jam that’s too loose: It runs out of the sides. Pick a thick preserve.
13. Brown Butter Toffee Cookies with Toasted Notes
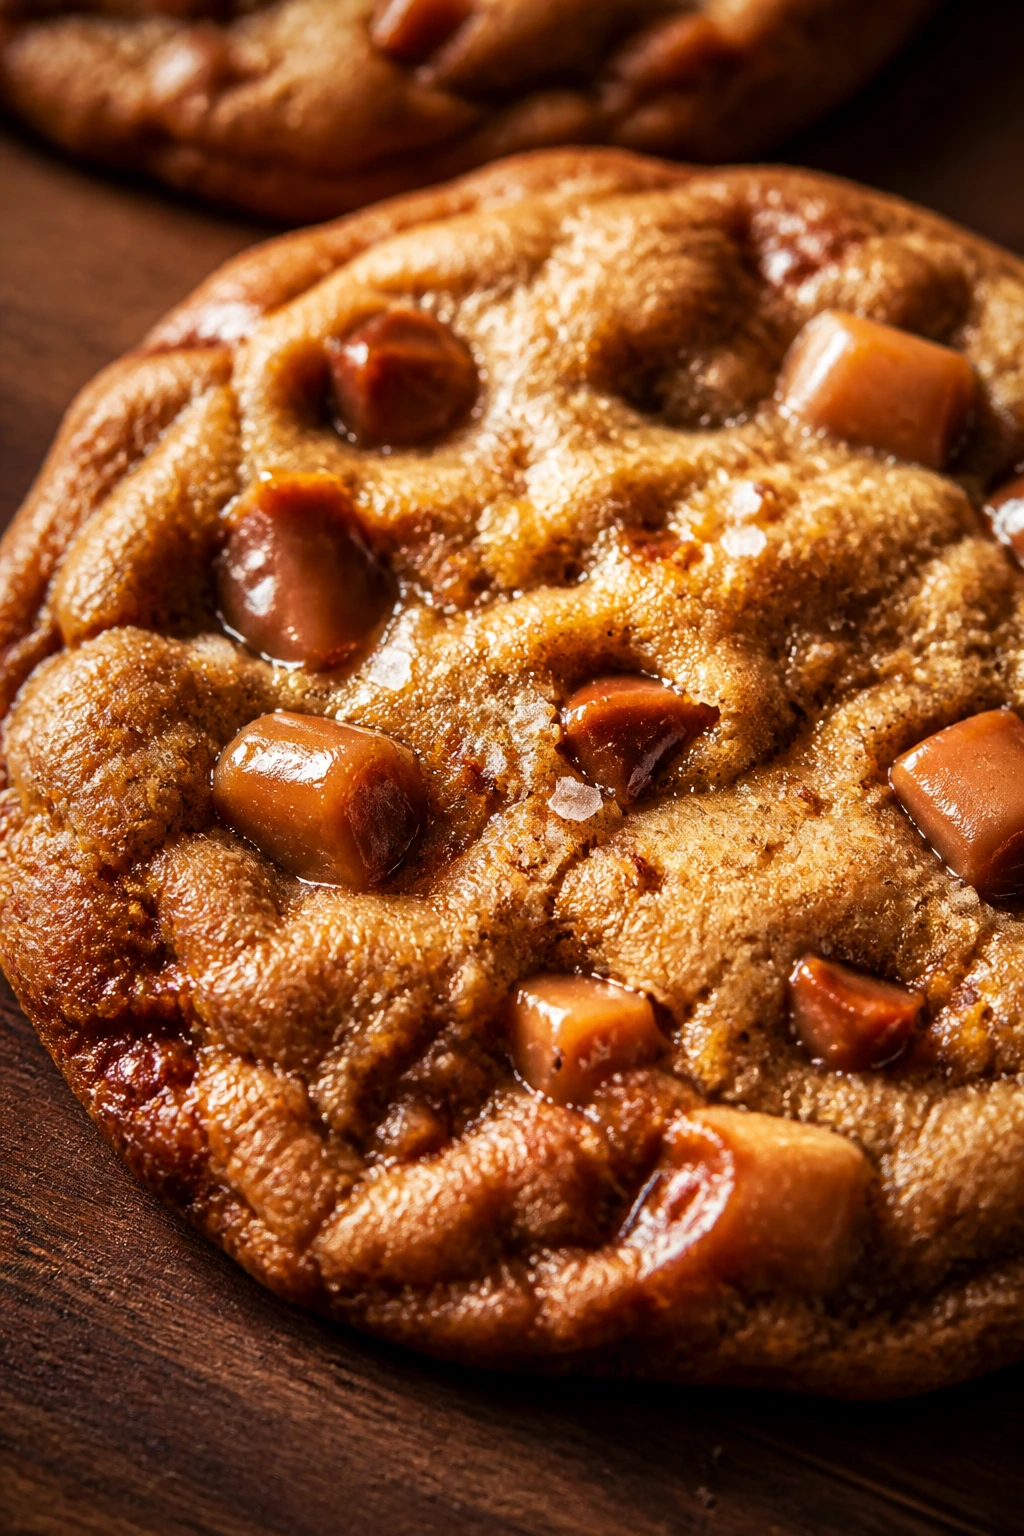
Brown butter changes the entire mood of a cookie. It smells nutty, tastes deep, and gives even a simple dough a more bakery-like edge. Add toffee bits, and you get little caramel crunches tucked inside a soft, chewy center. That’s a very good holiday cookie.
This is one of the recipes I’d make when I wanted something a little richer than plain chocolate chip but still easy enough for a tray bake. Kids like the sweet crunch of toffee; adults notice the browned butter right away. It’s a smart recipe because the flavor sounds fancy while the method stays plain.
Why It Works:
Browning the butter cooks out some water and adds nutty flavor from the browned milk solids. Toffee bits melt just enough to create caramelized pockets without disappearing. A short chill after mixing helps the dough hold thick, round edges instead of spreading flat.
Key Ingredients:
- 1 cup unsalted butter
- 1 cup packed brown sugar
- 1/2 cup granulated sugar
- 2 large eggs
- 2 teaspoons vanilla extract
- 2 1/2 cups all-purpose flour
- 1 teaspoon baking soda
- 1 teaspoon fine salt
- 1 1/2 cups toffee bits
- 1/2 cup semisweet chocolate chips, optional
Quick Steps:
- Cook the butter in a small saucepan over medium heat until it foams and turns golden brown with a nutty smell, about 5 to 7 minutes.
- Pour it into a bowl and let it cool for 10 minutes.
- Whisk in the brown sugar and granulated sugar, then beat in the eggs and vanilla.
- Stir in the flour, baking soda, and salt.
- Fold in the toffee bits and chocolate chips, if using.
- Chill the dough for 20 minutes.
- Scoop onto lined sheets and bake at 350°F for 10 to 12 minutes, until the edges are caramel-colored and the centers still look soft.
- Cool on the pan for 5 minutes.
Equipment for This Recipe:
- Saucepan
- Mixing bowls
- Whisk and spatula
- Cookie scoop
- Sheet pans
How to Serve This Dish:
These taste best with a small mug of coffee or cocoa beside them, because the browned butter flavor shows up more when the cookie isn’t buried under other sweets. They also look good in a plain tin, which lets the caramel color stand out.
Pro Tips for This Recipe:
- Brown the butter carefully; burned butter tastes bitter fast.
- Let it cool before mixing, or you’ll scramble the eggs.
- Chill the dough so the toffee doesn’t make the cookies flatten.
Variations on This Dish:
- Chocolate-Toffee Swirl: Add 1/4 cup cocoa to the dough for a darker cookie.
- Salted Toffee Cookies: Sprinkle flaky salt on top right after baking.
- White Chocolate Toffee: Swap the chocolate chips for white chocolate chips.
Common Mistakes to Avoid with This Dish:
- Undercooling the browned butter: Hot butter makes greasy dough. Let it settle.
- Overbaking the cookies: They should be chewy, not hard. Pull them while the centers still look soft.
- Adding too many mix-ins: The dough can’t hold everything. Stick to the measured amount.
14. Coconut Macaroons with Dark Chocolate Drizzle

Macaroons are one of the easiest cookies on the whole list, which makes them a relief during busy holiday baking. They’re chewy in the middle, toasted at the edges, and naturally gluten-free if you keep the flour out. The chocolate drizzle gives them just enough finish to feel festive.
The texture is the whole point here. You get crisp golden bits outside and a soft coconut center that stays chewy for days. Kids usually like helping scoop them, though the sticky mixture means wet fingers help a lot.
Why It Works:
Egg whites bind the coconut into tight mounds, while sugar helps the edges brown into that little toasted shell. A tiny bit of flour can help the shape if you want firmer cookies, but it’s optional. The cookies bake low and slow enough to dry slightly on the outside while staying soft in the middle.
Key Ingredients:
- 4 cups sweetened shredded coconut
- 3/4 cup granulated sugar
- 4 large egg whites
- 1 teaspoon vanilla extract
- 1/4 teaspoon fine salt
- 2 tablespoons all-purpose flour, optional for a firmer cookie
- 1/2 cup semisweet chocolate, melted, for drizzling
Quick Steps:
- Whisk the egg whites, sugar, vanilla, and salt until combined.
- Fold in the coconut and flour, if using, until the mixture is evenly moistened.
- Scoop compact mounds onto parchment-lined sheet pans.
- Bake at 325°F for 18 to 20 minutes, until the edges are golden and the tops are lightly toasted.
- Cool completely on the pan.
- Drizzle with melted chocolate and let it set.
Equipment for This Recipe:
- Mixing bowl
- Spoon or cookie scoop
- Sheet pans
- Parchment paper
- Small bowl for melting chocolate
How to Serve This Dish:
They look best in little clusters because the rough coconut texture makes a nice contrast against smoother cookies on the tray. I like these beside chocolate-heavy cookies, where the coconut brings a change in texture.
Pro Tips for This Recipe:
- Use sweetened shredded coconut for the best chewy result.
- Wet your fingers lightly when shaping sticky mounds.
- Don’t overbake; the centers should stay pale.
Variations on This Dish:
- Lemon Coconut Macaroons: Add 1 teaspoon lemon zest.
- Chocolate-Dipped Macaroons: Dip the bottoms instead of drizzling.
- Orange Coconut Batch: Add 1/2 teaspoon orange zest for a brighter flavor.
Common Mistakes to Avoid with This Dish:
- Overmixing the coconut mixture: It can get dense. Fold gently.
- Baking too hot: Coconut burns fast. Keep the oven at 325°F.
- Skipping the cooling step before chocolate: The drizzle melts and slides off.
15. Cranberry Orange Cookies with a Bright Citrus Edge
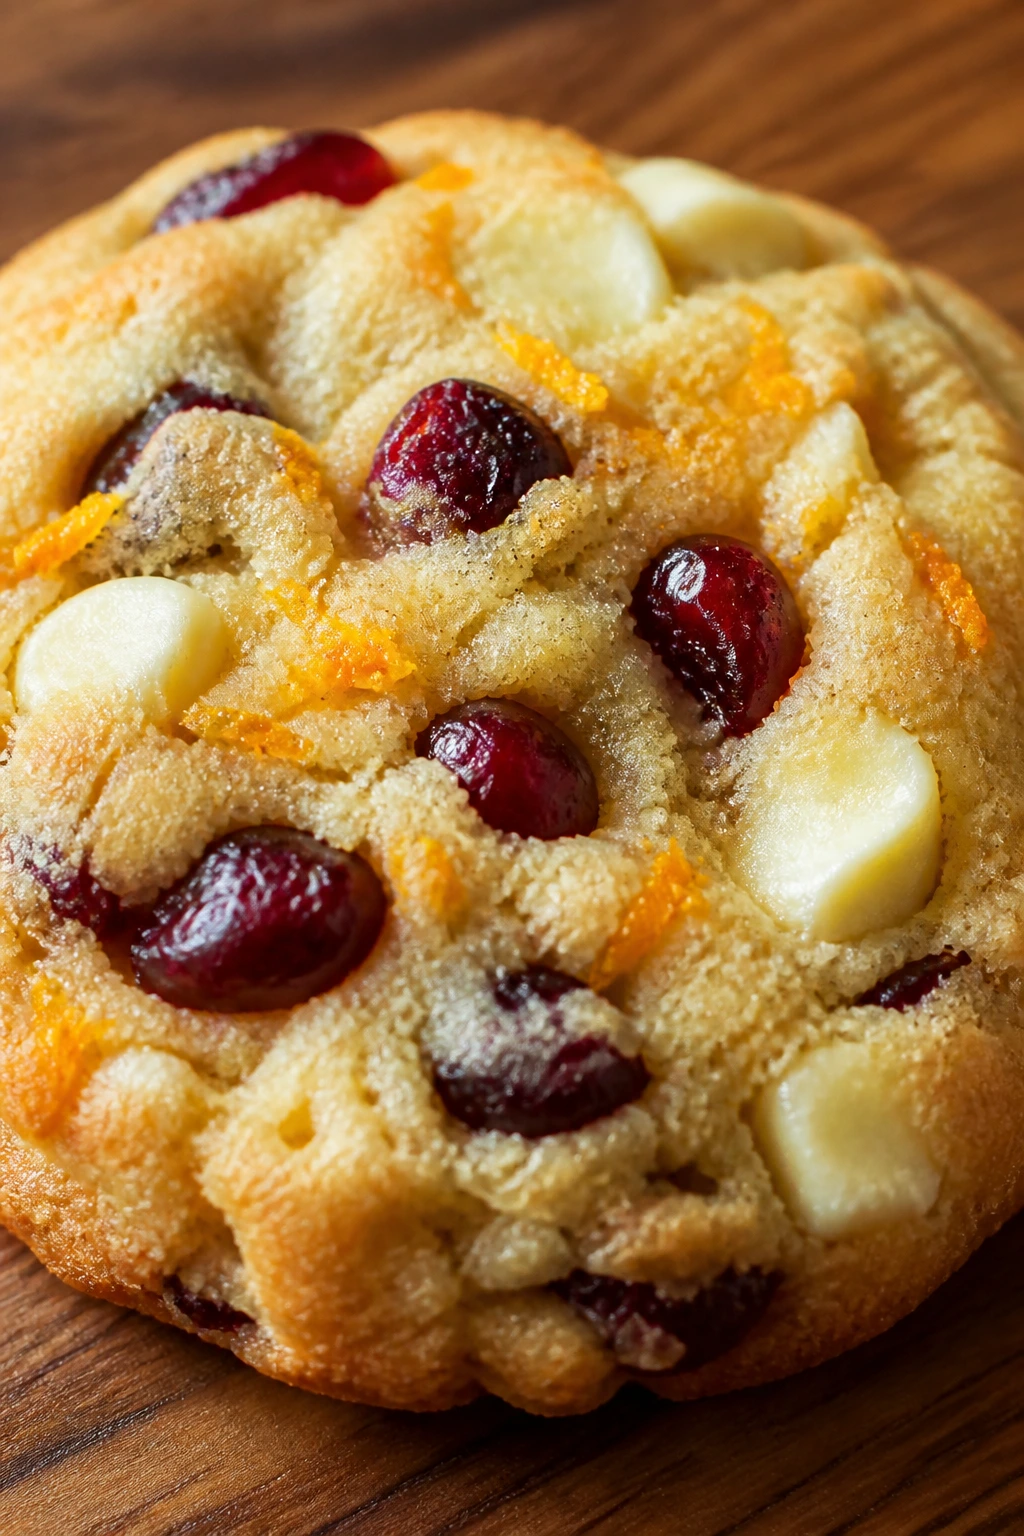
Cranberry and orange are one of those holiday pairings that earns its place by being useful, not just pretty. The citrus lifts the dough, the cranberries give little tart bites, and the white chocolate softens everything with sweetness. You get a cookie that tastes fresh instead of heavy.
I like this recipe for the middle of a cookie tray because it resets the palate. After peanut butter, chocolate, and spice, a cranberry-orange cookie feels bright. Kids usually like them more than they expect to because the white chocolate makes the fruit less sharp.
Why It Works:
Orange zest perfumes the dough without making it wet, and dried cranberries stay chewy instead of bleeding into the batter. White chocolate adds creamy sweetness that softens the tart fruit. A short chill keeps the cookie thick and prevents the cranberries from drifting out to the edges.
Key Ingredients:
- 2 1/2 cups all-purpose flour
- 1 teaspoon baking powder
- 1/2 teaspoon fine salt
- 1 cup unsalted butter, softened
- 1 cup granulated sugar
- 1 large egg
- 2 teaspoons orange zest
- 2 tablespoons orange juice
- 1 cup dried cranberries
- 1 cup white chocolate chips
Quick Steps:
- Whisk the flour, baking powder, and salt.
- Cream the butter and sugar for 2 minutes.
- Beat in the egg, orange zest, and orange juice.
- Mix in the dry ingredients, then fold in the cranberries and white chocolate chips.
- Chill the dough for 30 minutes.
- Scoop onto lined sheets and bake at 350°F for 10 to 11 minutes, until the edges are set.
- Cool on the pan for 5 minutes.
Equipment for This Recipe:
- Mixer
- Mixing bowls
- Cookie scoop
- Sheet pans
- Cooling rack
How to Serve This Dish:
These look lovely with a light dusting of powdered sugar or a few extra cranberries pressed on top. I’d place them near the center of the tray, where their color can break up the heavier chocolate cookies.
Pro Tips for This Recipe:
- Zest the orange before juicing it; that’s the easy order.
- If your cranberries are very dry, chop them roughly so they distribute better.
- Don’t skip the chill, or the fruit can crowd the dough and spread the cookie.
Variations on This Dish:
- Cranberry-Lemon Version: Swap orange zest for lemon zest.
- Pecan-Free Trail Mix Cookie: Add sunflower seeds instead of nuts if you want a crunchier bite.
- Holiday Drizzle: Finish with a thin white chocolate drizzle.
Common Mistakes to Avoid with This Dish:
- Using too much orange juice: The dough gets loose. Keep the liquid measured.
- Adding wet cranberries: They can bleed and turn the dough sticky. Use dried fruit.
- Overbaking: White chocolate cookies dry out fast. Pull them early.
16. Molasses Spice Cookies with Crackly Tops
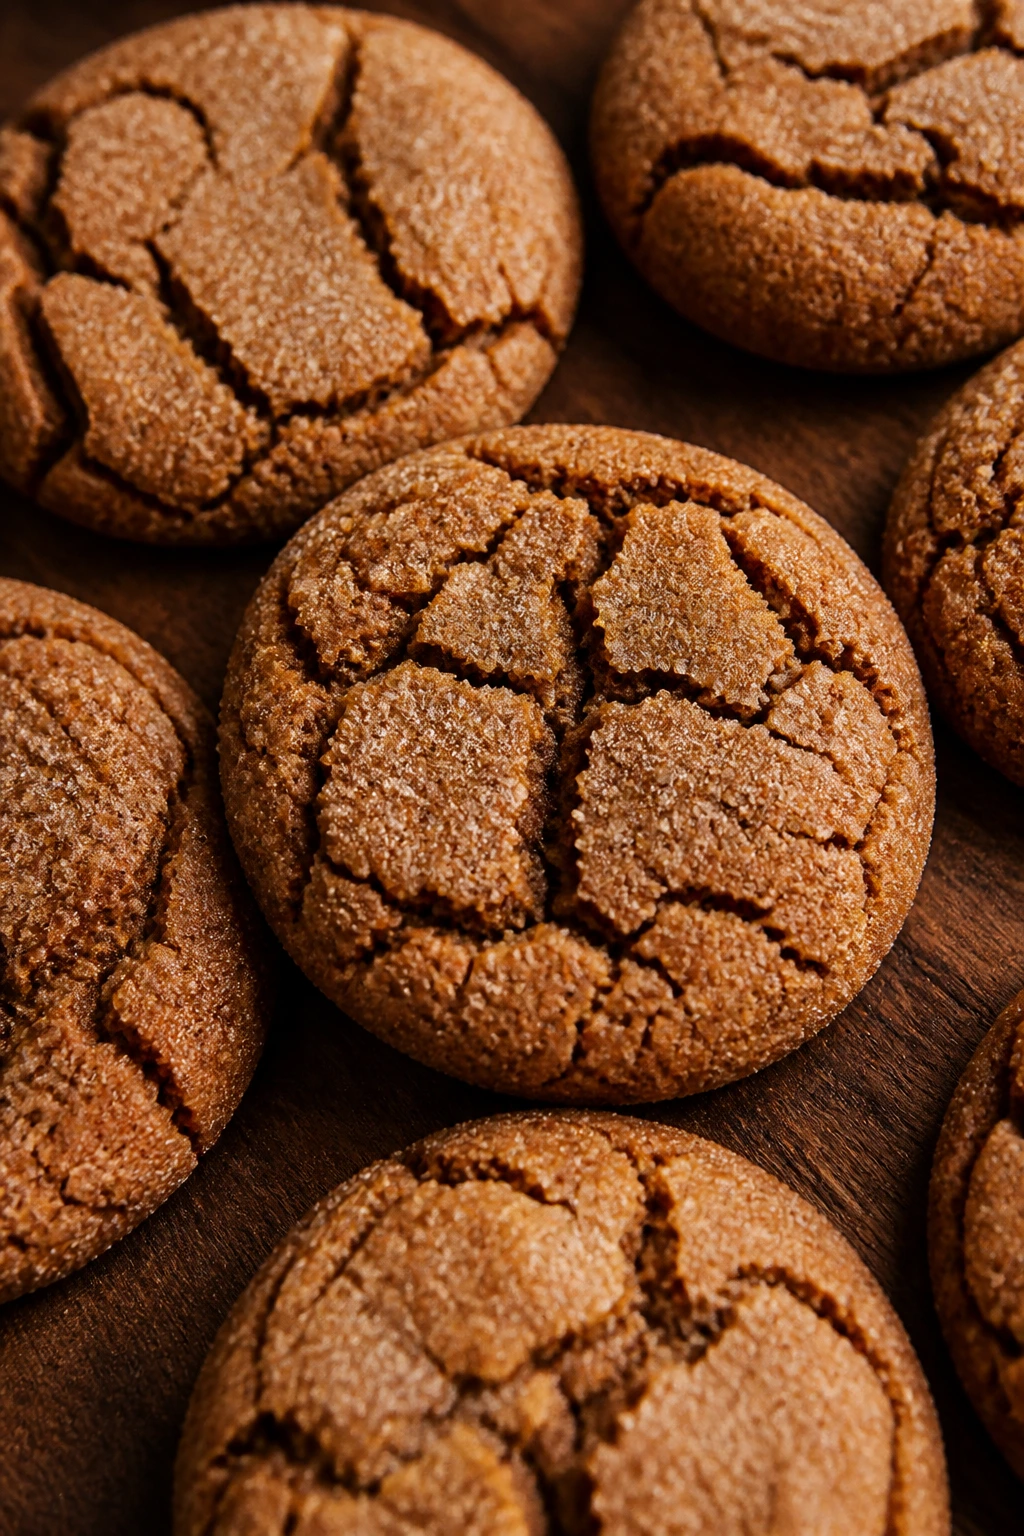
These are the deeper, darker cousins of gingerbread. They’re chewy, warmly spiced, and coated in sugar so they crack on top like little baked shells. If gingerbread is cheerful and decorative, molasses spice cookies are the ones that linger on the tray because the flavor keeps getting better as they cool.
I like them because they’re not too sweet. The molasses does the heavy lifting, and the spice list leans warm instead of sharp. Kids who like ginger snaps usually like these too, especially when the sugar coating gives them a little crunch at the edges.
Why It Works:
Molasses keeps the cookies moist and dark, while brown sugar adds chew. The sugar roll helps the tops crack during baking and gives the cookies a sparkly finish. A short chill makes the dough easier to roll and keeps the balls from spreading too quickly.
Key Ingredients:
- 2 1/2 cups all-purpose flour
- 1 teaspoon baking soda
- 1 1/2 teaspoons ground ginger
- 1 1/2 teaspoons ground cinnamon
- 1/4 teaspoon ground cloves
- 1/2 teaspoon fine salt
- 3/4 cup unsalted butter, softened
- 1 cup packed brown sugar
- 1 large egg
- 1/3 cup unsulphured molasses
- 1/4 cup granulated sugar, for rolling
Quick Steps:
- Whisk the flour, baking soda, ginger, cinnamon, cloves, and salt.
- Cream the butter and brown sugar for 2 minutes.
- Beat in the egg and molasses.
- Mix in the dry ingredients until a soft dough forms.
- Chill for 30 minutes.
- Roll into 1 1/2-inch balls, coat in granulated sugar, and place on lined sheets.
- Bake at 350°F for 10 to 11 minutes, until the tops are crackled and set.
- Cool on the pan for 5 minutes.
Equipment for This Recipe:
- Mixing bowls
- Hand mixer
- Cookie scoop
- Baking sheets
- Cooling rack
How to Serve This Dish:
They’re good on the same platter as chocolate cookies because their spice cuts the sweetness. I also like them with tea, which brings out the molasses without making the flavor feel heavy.
Pro Tips for This Recipe:
- Roll the balls evenly so the crackle pattern looks consistent.
- Use fresh spices; old ginger tastes flat.
- Don’t overbake or the chewy center disappears.
Variations on This Dish:
- Orange Molasses Cookies: Add 1 teaspoon orange zest.
- Extra-Cracked Top Version: Roll the dough in coarse sugar instead of fine granulated sugar.
- Mild Spice Batch: Cut the cloves in half for younger kids.
Common Mistakes to Avoid with This Dish:
- Using stale spices: The cookies taste dusty. Replace old jars.
- Skipping the sugar coat: You lose the crackly top.
- Baking until firm: They should stay soft in the middle.
17. Reindeer Peanut Butter Cookies with Pretzel Antlers
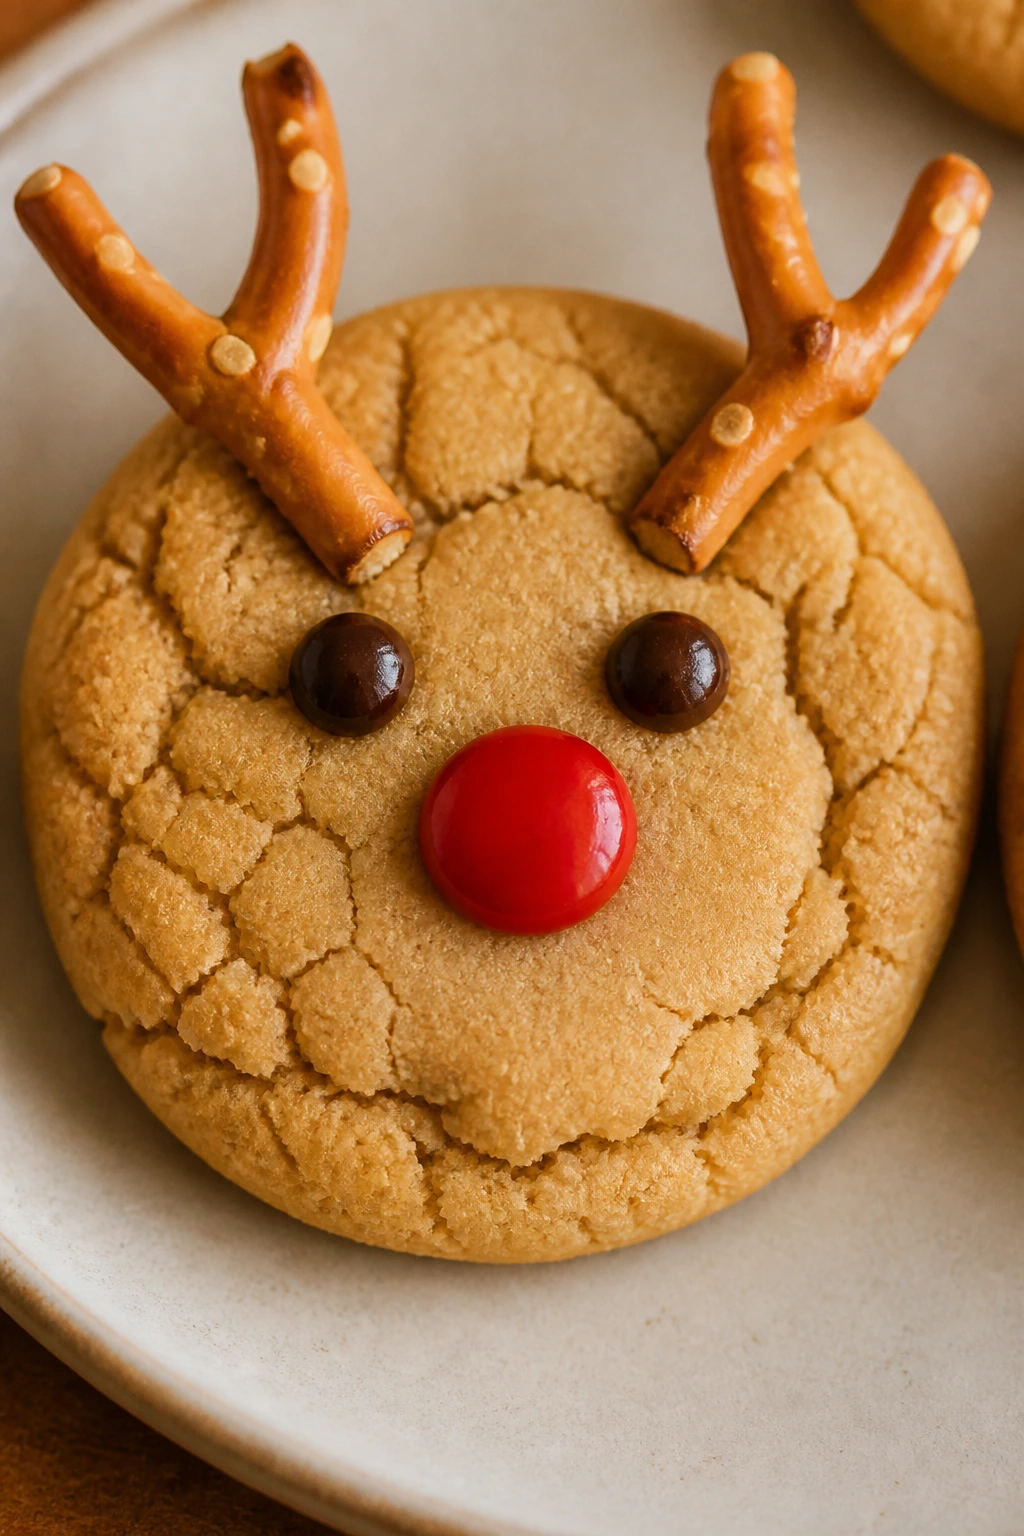
These are the cookies that turn decorating into the main event. The peanut butter base bakes into soft rounds, then pretzel twists become antlers, chocolate chips become eyes, and a red candy nose finishes the face. It’s goofy in the best way, which is exactly what kid baking should be.
The only trick is timing the decorations while the cookies are still warm enough to accept the antlers but not so hot that everything melts. Once you get that right, these become one of the easiest tray cookies to build with kids.
Why It Works:
Peanut butter gives the dough enough strength to hold the decorations without spreading too much. Brown sugar keeps the texture soft, and the salt in the dough balances the candy toppings. Pressing the pretzels in right after baking anchors them before the cookies set.
Key Ingredients:
- 1 3/4 cups all-purpose flour
- 1 teaspoon baking soda
- 1/2 teaspoon fine salt
- 1/2 cup unsalted butter, softened
- 1 cup creamy peanut butter
- 1 cup packed brown sugar
- 1 large egg
- 1 teaspoon vanilla extract
- 24 mini pretzel twists
- 24 red candy-coated chocolates
- 48 mini chocolate chips or candy eyes
Quick Steps:
- Whisk the flour, baking soda, and salt.
- Cream the butter, peanut butter, and brown sugar for 2 minutes.
- Beat in the egg and vanilla.
- Mix in the dry ingredients until a thick dough forms.
- Scoop into 1 1/2-inch balls and place on lined sheet pans.
- Bake at 350°F for 9 to 10 minutes, until the tops look set but still soft.
- Immediately press two pretzels into the top for antlers, one red candy for the nose, and two chocolate chips for eyes.
- Let the cookies cool on the pan until the decorations are fixed in place.
Equipment for This Recipe:
- Mixing bowls
- Mixer
- Cookie scoop
- Sheet pans
- Small bowl for decorations
How to Serve This Dish:
Arrange them face-up on a wide platter so the antlers don’t snag on other cookies. They’re the ones kids reach for first, so I’d make a full batch if you plan to share.
Pro Tips for This Recipe:
- Prep all the decorations before baking. The window to press them in is short.
- If the pretzels break easily, use pretzel sticks snapped into antler shapes.
- Let the cookies cool completely before stacking.
Variations on This Dish:
- Chocolate Reindeer: Add 2 tablespoons cocoa to the dough.
- Sunflower Seed Nose: Use a red candy-coated sunflower seed if you need a peanut-free version.
- Mini Reindeer Bites: Make 1-tablespoon cookies and reduce the bake time by 1 to 2 minutes.
Common Mistakes to Avoid with This Dish:
- Waiting too long to add decorations: The cookies set and the toppings won’t stick.
- Using too much peanut butter: The dough gets soft and spreads. Measure it carefully.
- Packing them before they cool: The antlers snap off. Let them set first.
18. White Chocolate Cranberry Cookies for the Cookie Tin
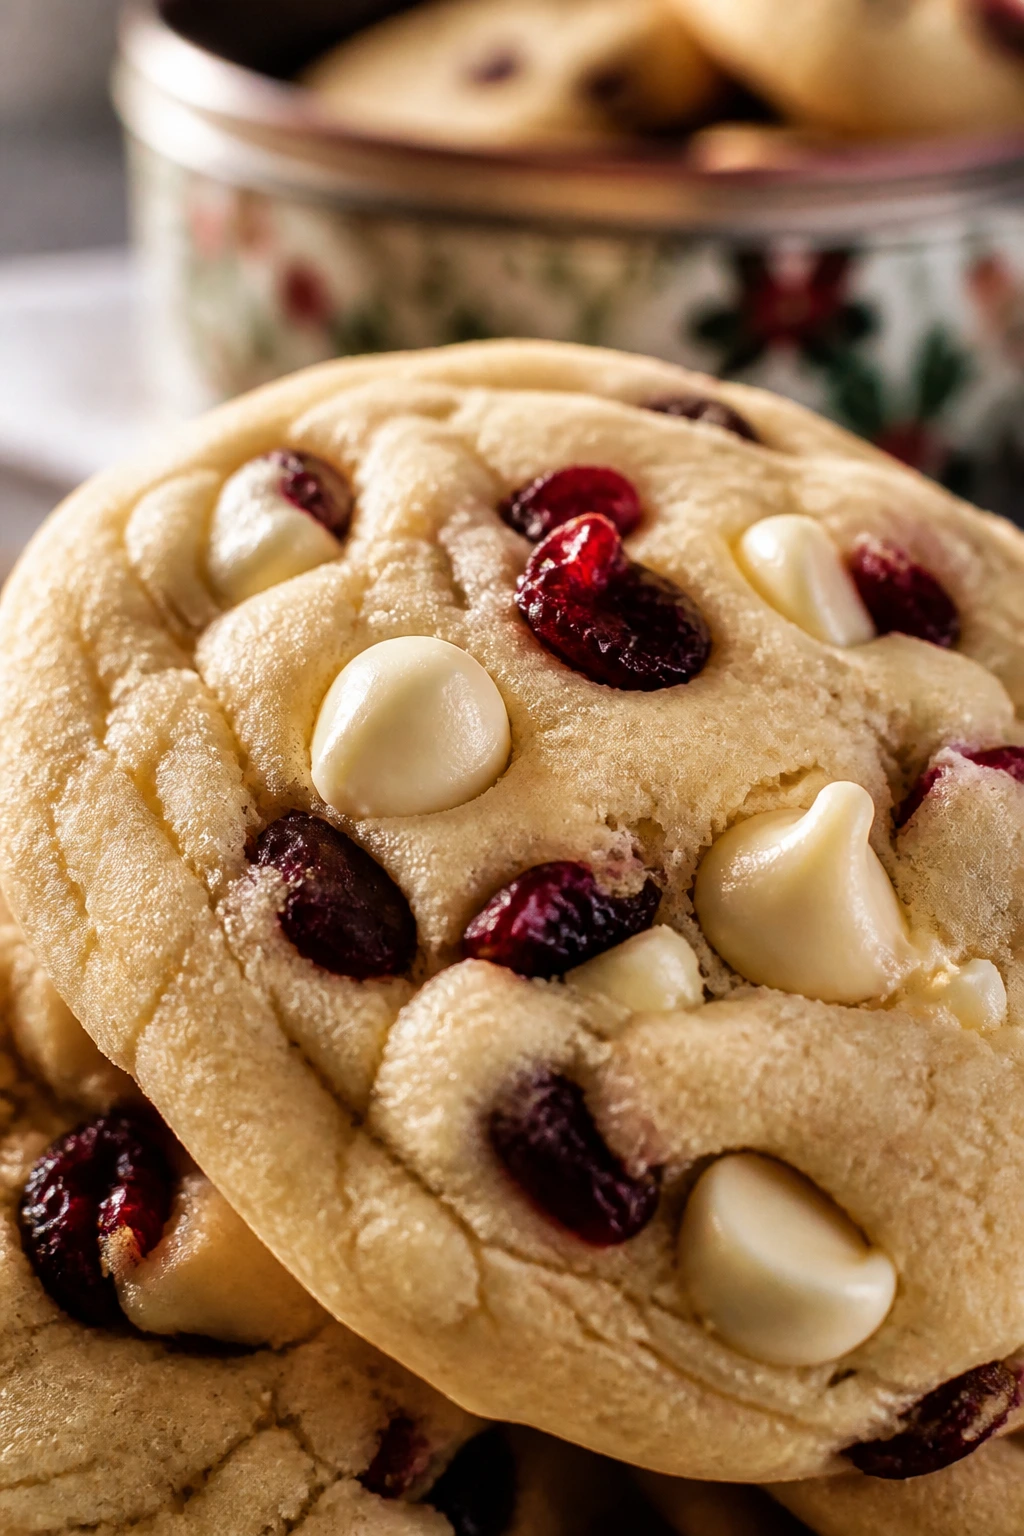
These are the softer, sweeter cousins of cranberry-orange cookies. The white chocolate melts into creamy pockets, the cranberries give tart little breaks, and the dough bakes into a pale, chewy cookie that belongs right on a winter tray. It’s an easy win for kids who like fruit bits in baked goods.
This version is especially good for gift tins because it keeps its shape and doesn’t need a finish on top. The flavor reads as rich and bright at the same time, which sounds fussy but really just means nobody gets bored after one bite. That matters when the tray has to travel.
Why It Works:
Brown sugar keeps the cookie chewy, while white chocolate brings a creamy sweetness that softens the tart cranberries. A touch of orange zest makes the whole batch smell brighter. Chilling the dough before baking helps the cookies stay thick and bake with soft centers.
Key Ingredients:
- 2 1/2 cups all-purpose flour
- 1 teaspoon baking soda
- 1/2 teaspoon fine salt
- 1 cup unsalted butter, softened
- 3/4 cup packed brown sugar
- 1/2 cup granulated sugar
- 2 large eggs
- 2 teaspoons vanilla extract
- 1 cup dried cranberries
- 1 1/2 cups white chocolate chips
- 1 teaspoon orange zest, optional
Quick Steps:
- Whisk the flour, baking soda, and salt.
- Cream the butter and sugars until light and fluffy.
- Beat in the eggs, vanilla, and orange zest.
- Mix in the dry ingredients, then fold in the cranberries and white chocolate chips.
- Chill the dough for 20 minutes.
- Scoop onto lined sheets and bake at 350°F for 10 to 12 minutes, until the edges are set and the centers still look soft.
- Cool on the pan for 5 minutes.
Equipment for This Recipe:
- Mixer
- Mixing bowls
- Cookie scoop
- Sheet pans
- Cooling rack
How to Serve This Dish:
These stack well in a cookie tin because the pale dough and red cranberries stay visible. They’re especially nice next to dark chocolate cookies, where the contrast feels intentional.
Pro Tips for This Recipe:
- Use dried cranberries, not fresh ones, or the dough gets wet.
- Press a few extra chips on top before baking if you want a better look.
- Chill the dough if your kitchen is warm.
Variations on This Dish:
- Orange-Only Batch: Leave out the white chocolate and add extra zest.
- Cranberry-Macadamia Version: Add chopped macadamias for crunch.
- Milk Chocolate Swap: Use milk chocolate chips for a sweeter cookie.
Common Mistakes to Avoid with This Dish:
- Overloading with add-ins: The dough can’t hold too many chips and fruit pieces. Stick to the measured amount.
- Using fresh cranberries: They release too much moisture. Use dried.
- Baking until brown: White chocolate cookies should stay pale.
19. Marshmallow-Filled Cocoa Cookies That Taste Like a Fireside Treat
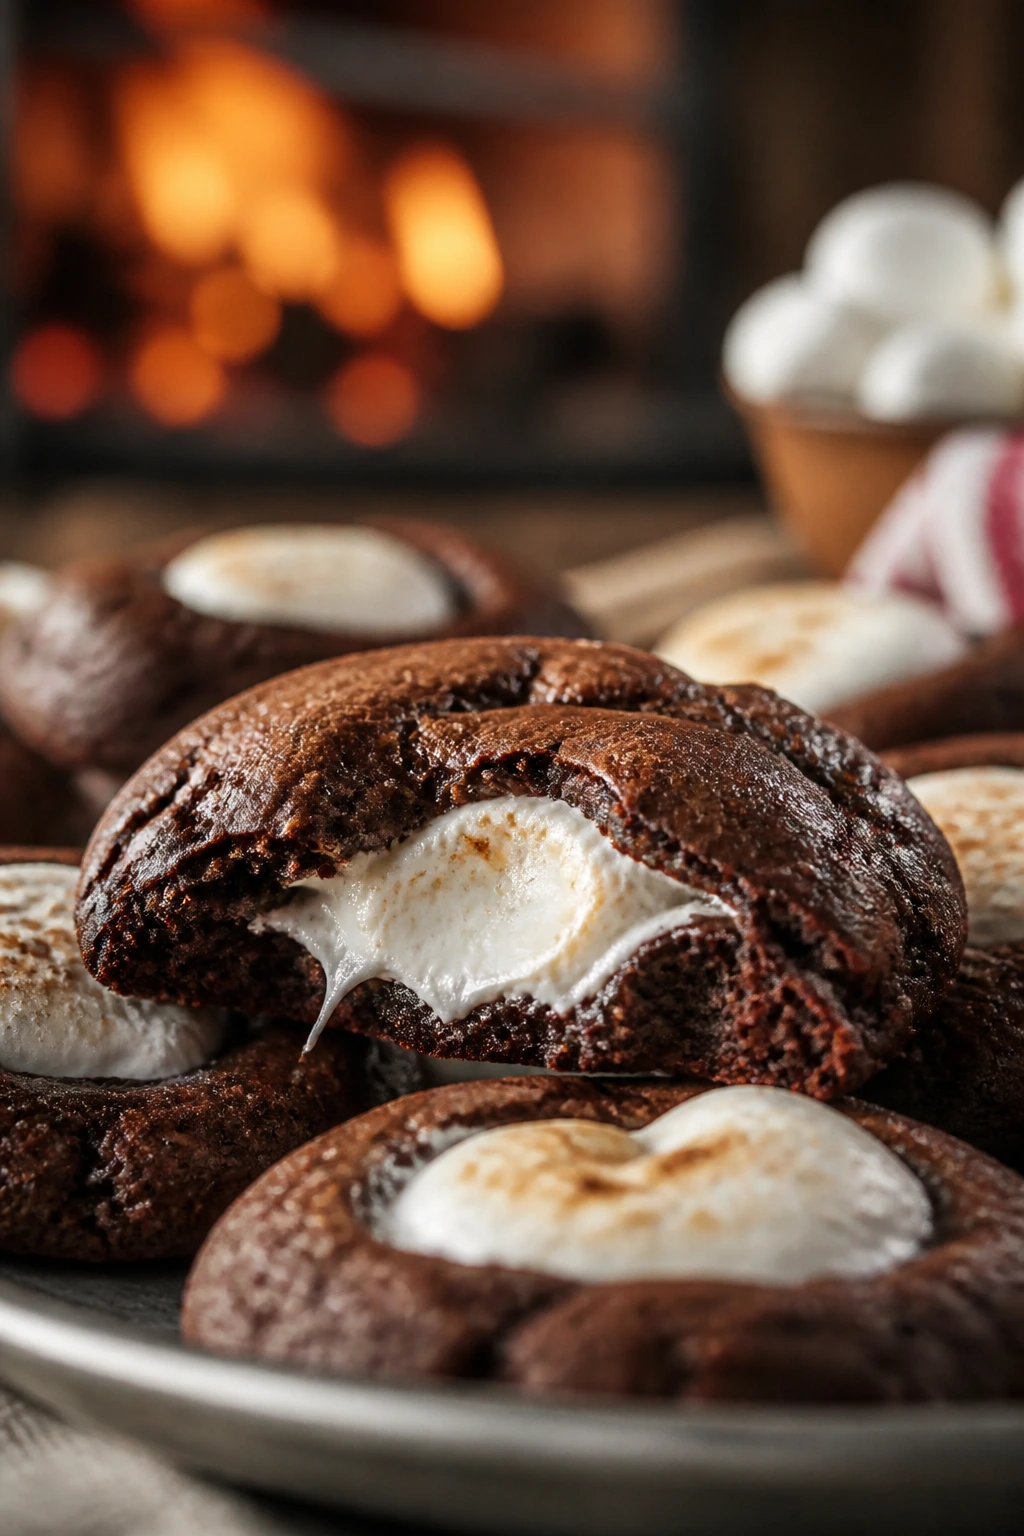
These are the cookies people ask about after one bite because the center gives way to a soft marshmallow pocket. The cocoa dough is rich and dark, and the marshmallow melts just enough to feel gooey without completely disappearing. It’s basically a hot cocoa mood in cookie form.
I like to make these when I want one cookie on the tray that feels a little dramatic. They’re not hard, but they do ask for neat sealing around the marshmallow. That small bit of care pays off when you break one open and the center stretches.
Why It Works:
Cocoa powder builds a brownie-like dough that supports a soft center without collapsing. The marshmallow melts inside the cookie instead of on the pan, which gives you that tucked-in surprise. A moderate bake keeps the outside set while the center stays soft and slightly gooey.
Key Ingredients:
- 1 3/4 cups all-purpose flour
- 1/2 cup unsweetened cocoa powder
- 1/2 teaspoon baking powder
- 1/2 teaspoon fine salt
- 1/2 cup unsalted butter, softened
- 3/4 cup packed brown sugar
- 1/2 cup granulated sugar
- 1 large egg
- 1 teaspoon vanilla extract
- 1 cup chocolate chips
- 24 mini marshmallows
Quick Steps:
- Whisk the flour, cocoa, baking powder, and salt.
- Cream the butter and sugars for 2 minutes, then beat in the egg and vanilla.
- Mix in the dry ingredients, then fold in the chocolate chips.
- Scoop 1 tablespoon of dough, flatten it, place a marshmallow in the center, and cover with another tablespoon of dough, sealing the edges tightly.
- Place the dough balls on lined sheet pans.
- Bake at 350°F for 8 to 9 minutes, until the tops are set but the centers still look soft.
- Cool on the pan for 10 minutes before moving.
Equipment for This Recipe:
- Mixing bowls
- Mixer
- Cookie scoop
- Sheet pans
- Parchment paper
How to Serve This Dish:
Serve them slightly warm so the marshmallow center stays soft. They’re especially good with hot chocolate because the flavor echoes what’s in the cookie already.
Pro Tips for This Recipe:
- Seal the dough tightly around the marshmallow or it can leak.
- Freeze the marshmallows for 10 minutes if your kitchen is warm; they’re easier to handle.
- Don’t overbake. The centers should stay soft.
Variations on This Dish:
- Peppermint Firewood Cookies: Add 1/4 teaspoon peppermint extract and top with crushed candy cane.
- Graham Cocoa Version: Add 1/3 cup crushed graham crackers to the dough.
- Dark Chocolate Core: Swap the marshmallow for a square of chocolate for a different surprise.
Common Mistakes to Avoid with This Dish:
- Using too little dough to seal the center: The marshmallow leaks out. Cover it fully.
- Baking too long: The gooey center disappears. Pull them early.
- Handling them too soon: The marshmallow is fragile when hot. Let them cool.
20. Slice-and-Bake Pinwheel Cookies with a Swirl Surprise
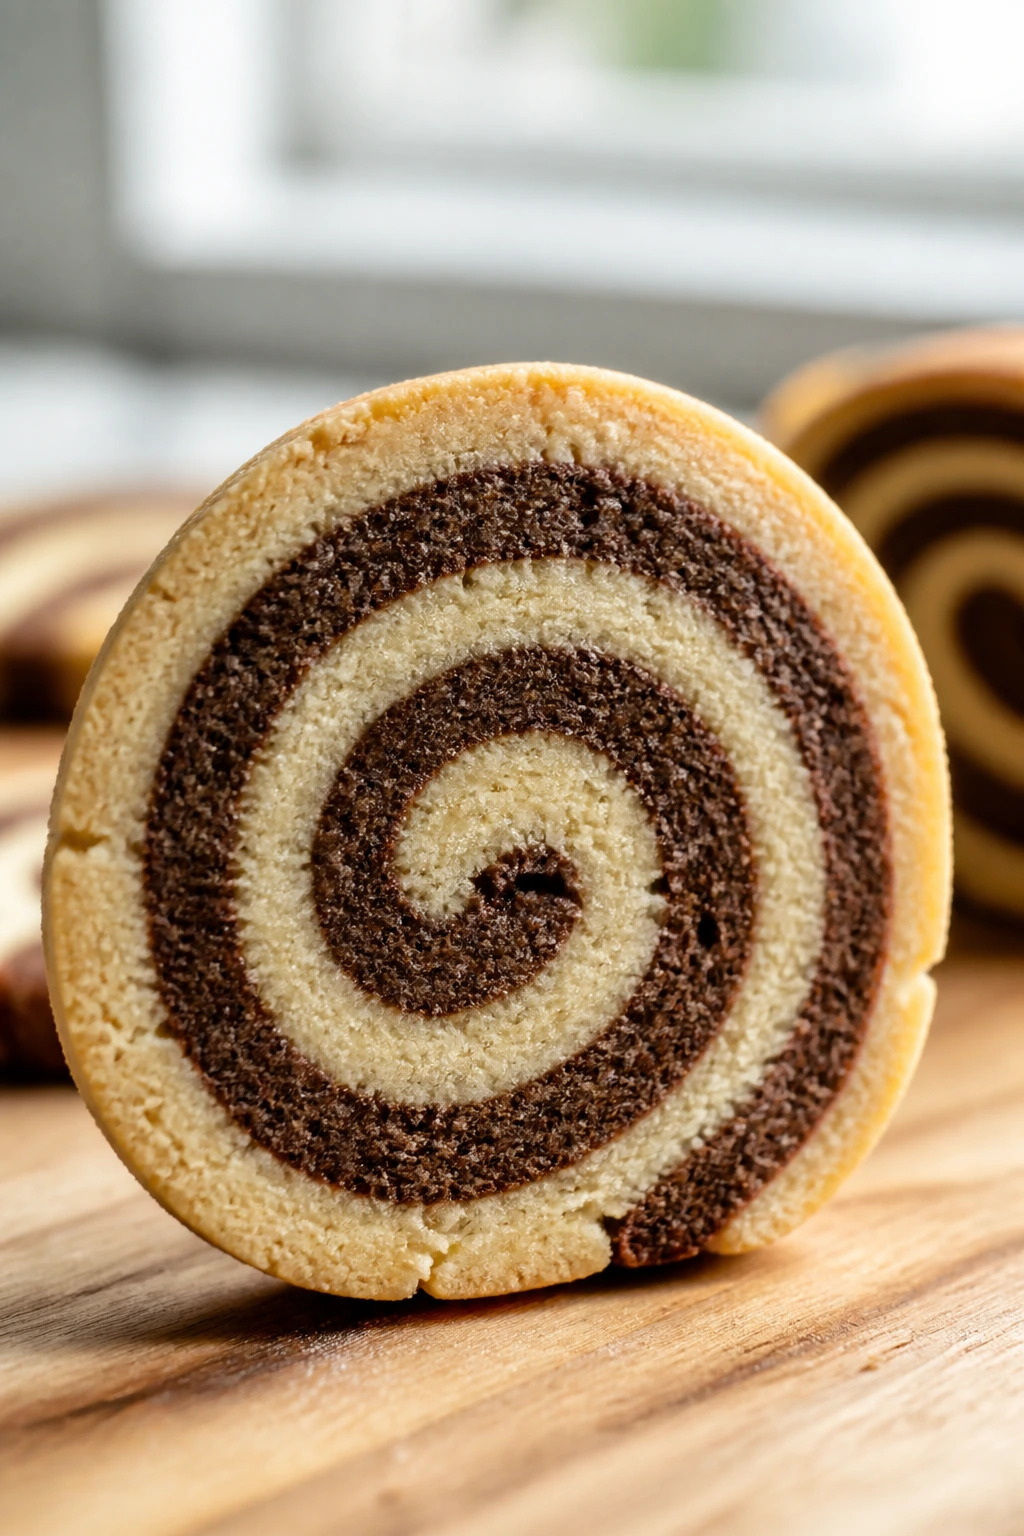
Pinwheel cookies are the cleanest way to get a little visual drama without spending all afternoon on decoration. The swirl looks polished, the slice is satisfying, and kids usually love being the ones to cut the log into rounds. They’re part cookie, part little magic trick.
This version uses one vanilla dough and one cocoa dough, which makes the contrast easy to see after slicing. Chill the log long enough and the spirals stay sharp; rush it, and you get a muddy ribbon instead of a proper swirl. The good news is that the method teaches itself pretty quickly.
Why It Works:
Dividing the dough and flavoring half with cocoa gives you a strong visual contrast. Chilling the logs before slicing keeps the pinwheel pattern crisp, and a modest amount of baking powder keeps the cookies from puffing too much. Because the slices are even, they bake in the same 10 to 12 minute window.
Key Ingredients:
- 2 1/2 cups all-purpose flour
- 1/2 teaspoon baking powder
- 1/2 teaspoon fine salt
- 1 cup unsalted butter, softened
- 1 cup granulated sugar
- 1 large egg
- 1 teaspoon vanilla extract
- 2 tablespoons cocoa powder
- 1 tablespoon milk, only for the cocoa half if needed
- Red or green sprinkles, optional for the edges
Quick Steps:
- Whisk the flour, baking powder, and salt.
- Cream the butter and sugar for 2 minutes, then beat in the egg and vanilla.
- Mix in the dry ingredients and divide the dough in half.
- Knead the cocoa powder into one half, adding 1 tablespoon milk only if the cocoa dough feels too dry.
- Roll each half between parchment into equal rectangles, stack one on top of the other, and roll into a tight log.
- Chill the log for 1 hour.
- Slice into 1/4-inch rounds and place on lined sheets.
- Bake at 350°F for 10 to 12 minutes, until the edges are set and the centers look pale.
Equipment for This Recipe:
- Mixer
- Mixing bowls
- Rolling pin
- Parchment paper
- Sharp knife or bench scraper
How to Serve This Dish:
These are the cookies I use when I want one tray to look engineered instead of thrown together. Put them near the top of the stack so the swirl can be seen; they disappear visually if they get buried under bigger cookies.
Pro Tips for This Recipe:
- Chill the log thoroughly or the swirl flattens while slicing.
- Use a sharp knife and wipe it between cuts for cleaner spirals.
- If the dough cracks when rolling, let it warm for 5 minutes before trying again.
Variations on This Dish:
- Peppermint Pinwheels: Add 1/4 teaspoon peppermint extract to the vanilla dough.
- Chocolate-Vanilla Sprinkle Edge: Roll the log in holiday sprinkles before chilling.
- Cinnamon Pinwheels: Add 1 teaspoon cinnamon to the vanilla dough for a warmer finish.
Common Mistakes to Avoid with This Dish:
- Rolling uneven rectangles: The swirl gets lopsided. Match the dough sizes closely.
- Skipping the chill: The pattern smears. Chill the log.
- Slicing with a dull knife: The rounds squish and lose shape. Use a sharp blade.
Why These Kid-Friendly Cookies Make Holiday Baking Easier

Holiday baking gets calmer when the recipes are built around real life instead of magazine-photo perfection. A tray full of these cookies gives you contrast without chaos: soft next to crisp, chocolate next to jam, peppermint next to spice. That mix matters. It keeps the table interesting without asking you to master seven different frostings.
There’s also a practical side that people sometimes ignore. When you choose doughs that chill well, scoop cleanly, or accept simple toppings, you make space for the part kids actually enjoy. That’s the point, really. Not perfect symmetry. Not identical icing swirls. Just cookies that taste good, look festive, and leave enough room for a small hand to help.
Essential Equipment for These Recipes
-
Stand mixer or hand mixer: Creams butter and sugar faster and more evenly than a spoon, especially for cut-outs and blossoms.
-
Mixing bowls in at least two sizes: One for dry ingredients, one for wet, and a backup when cocoa or candy needs its own space.
-
Sheet pans: Rimmed pans are easier to move in and out of the oven when the kitchen is crowded.
-
Parchment paper: Keeps sugar cookies, crinkles, and chocolate cookies from sticking and helps cleanup go faster.
-
Cookie scoop: Makes drop cookies bake evenly, which matters a lot when you’re doing several batches back-to-back.
-
Rolling pin: Essential for cut-outs, gingerbread, Linzers, and pinwheels.
-
Cookie cutters: Stars, trees, bells, gingerbread people, and small circles cover most of this list.
-
Cookie press: Needed only for spritz cookies, but worth it if you like neat shapes with little effort.
-
Cooling racks: Cookies finish setting without steaming underneath.
-
Offset spatula or thin knife: Useful for lifting cut-outs and sandwich cookies without tearing them.
Smart Shopping and Ingredient Tips
Holiday cookie baking gets easier when you choose ingredients that behave well instead of chasing the fanciest version of everything. Butter matters more than people think. Use unsalted butter when you can, because it gives you control over the salt level, and let it soften until it dents under light pressure without looking shiny or greasy. If the butter is slick, the dough will spread.
Cocoa powder is another place where the label matters. Natural cocoa works well in crinkles and cocoa cookies that use baking soda; Dutch-process cocoa gives a darker flavor and deeper color, but you should only swap it where the recipe can handle it. For jam-filled cookies, buy thick preserves, not a runny spread that pours like syrup.
Candy pieces need some thought too. Candy canes should be crushed with a mix of fine bits and small shards, not dust. Sprinkles are not all the same either: sanding sugar and jimmies usually hold up better on cookies than delicate nonpareils, which can bleed or melt into the dough. If you’re buying white chocolate, choose chips or baking bars that list cocoa butter, not just vegetable fat, so the flavor stays creamy instead of waxy.
A quick word on molasses: unsulphured molasses is the safer bet for gingerbread and spice cookies because blackstrap can taste bitter and a little metallic. And if you’re making peanut butter cookies, regular creamy peanut butter performs more predictably than natural peanut butter, which can throw off the texture and make the dough too loose.
How to Serve These Cookies
Presentation:
Mix heights and textures on the platter. Put powdered sugar cookies near dark chocolate cookies so the contrast pops, tuck jam-centered cookies into the middle, and leave a few decorated pieces on top where kids can see them first. A white tray, a wooden board, or a simple tin all work better than a busy dish with too much pattern.
Accompaniments:
Cold milk is the obvious partner, and for good reason. Hot cocoa works especially well with the cocoa, marshmallow, and peppermint cookies, while apple cider or black tea balances the spice cookies and molasses batches. If you’re sending cookies as a gift, pack in parchment-lined layers with a few plain crackers or a slice of bread in the tin to help softer cookies stay tender.
Portions:
For a child’s snack, 2 small cookies or 1 large cookie is usually enough. For a dessert plate, 3 to 4 cookies gives a good mix of flavors without turning the plate into a sugar pile. If you’re scaling a tray for a crowd, aim for a balance of 3 textures: one chewy, one crisp, and one filled or decorated.
Beverage Pairing:
Whole milk for peanut butter, chocolate, and M&M cookies. Peppermint tea or hot cocoa for the crinkle and marshmallow cookies. Chai or strong black tea for gingerbread, molasses, and cranberry-orange.
Additional Tips and Flavor Boosters

Flavor Enhancement:
A tiny pinch of flaky salt on chocolate, peanut butter, or toffee cookies makes the sweet parts taste sharper. It’s a small move, but it changes the whole bite. For citrus cookies, rub the orange or lemon zest into the sugar with your fingers before mixing; the sugar grabs the oils and the aroma gets louder.
Customization:
Swap raspberry jam for apricot, strawberry, or blackberry in the thumbprints and Linzers. Fold crushed candy canes into cocoa cookies, or use red and green candies in the chocolate chip batch. If the kids want to “decorate,” set out small bowls of sanding sugar, mini chips, and chopped candies so they can choose their own finishes.
Serving Suggestions:
Dust the Linzers, snickerdoodles, and sugar cookies right before serving so the tops stay bright. Press a few extra chocolate chips, M&Ms, or cranberries into the warm tops of the cookies so the tray looks fuller and more deliberate. A loose ribbon around a box of mixed cookies makes an ordinary tin feel gift-ready in about 10 seconds.
Make-It-Yours:
For gluten-free baking, the drop cookies and coconut macaroons are the easiest place to start with a good 1:1 flour blend or naturally flourless dough. For dairy-free batches, plant-based butter sticks and dairy-free chocolate work in most of the recipes here. For a lower-sugar approach, skip the extra candy topping on the M&M and peanut butter cookies and lean on fruit, spice, or cocoa instead.
Make-Ahead, Storage, and Reheating Guidance
Most of these doughs can be made ahead and chilled for 24 to 72 hours before baking. Cut-out sugar cookies, gingerbread, Linzer dough, pinwheel logs, and thumbprint dough all benefit from resting overnight because the flour fully hydrates and the dough handles better the next day. If you need longer storage, freeze shaped dough balls or wrapped dough disks for up to 2 months; log dough for pinwheels can stay frozen a bit longer if it’s wrapped well.
Baked cookies keep best in airtight containers once they’re fully cool. Soft cookies like chocolate chip, blossoms, molasses, and cocoa cookies usually stay good for 3 to 4 days at room temperature. Crisp cookies such as spritz, shortbread-style cookies, and some cut-outs can last 5 to 7 days if the container stays dry. Layer them with parchment paper so the tops don’t scratch each other.
For freezing, baked cookies hold for up to 2 months if packed tightly in a freezer-safe container or zip-top bag. Thaw them in the container so condensation forms on the outside instead of on the cookies themselves. If you want to warm a batch, use a 300°F oven for 3 to 5 minutes for crisp cookies or 5 to 7 minutes for softer ones. A microwave works only for very soft cookies; 5 to 8 seconds is enough, and anything longer can make them rubbery.
Decorated cookies need a little extra care. Kisses, icing, and jam centers are best when they’re fully set before stacking. If you’re packaging mixed cookies in tins, separate very crisp cookies from softer ones with parchment or wax paper, because moisture from the softer cookies can dull the crisp ones by the next day.
Variations and Adaptations to Try
Gluten-Free Cookie Tray:
The drop cookies in this collection work well with a good 1:1 gluten-free flour blend, especially chocolate chip, peanut butter blossoms, cranberry orange, and cocoa cookies. Chilled doughs still need a little rest so the flour can hydrate. Cut-out cookies can work too, but they usually need a gentler hand and a longer chill.
Dairy-Free Holiday Batch:
Use plant-based butter sticks in place of dairy butter for sugar cookies, gingerbread, molasses cookies, and most drop cookies. Choose dairy-free chocolate chips and kisses where needed. The texture may be a touch less rich, but the cookies will still bake cleanly if the butter substitute is meant for baking, not just spreading.
Nut-Free Decorating Plan:
Skip the peanut butter recipes and the almond-flour Linzers if you need a school-safe tray. Replace almond flavor with vanilla, and use jam, sprinkles, candy canes, or white chocolate on the rest. A nut-free cookie tray can still look varied if you mix jam centers, crinkles, cut-outs, and spritz cookies.
Lower-Sugar Cookie Box:
Choose fruit-filled, spice-forward, and cocoa cookies first, then go lighter on candy toppings and icing. Thumbprints, gingerbread men, molasses spice cookies, and coconut macaroons hold up well with less decoration. If you reduce sugar in a dough, do it by a small amount—usually 1/4 cup—not by gut feeling.
Mini Cookie Party Size:
Use a 1-tablespoon scoop for drop cookies and shorten the bake time by 1 to 2 minutes. Small cookies are easier for little hands, and they fill a tin fast. They also cool sooner, which is useful when children are hovering at the counter.
Extra-Spice Holiday Batch:
Add a pinch more cinnamon or ginger to the gingerbread, molasses, cranberry-orange, and snickerdoodle doughs if you want warmer flavor. Keep the spice nudge small so the cookies still read as kid-friendly. A tiny change goes further than people expect.
Common Mistakes to Avoid
-
Butter that’s too soft or melted: The dough spreads, the cookies lose shape, and the tray looks flatter than you planned. The fix is simple: butter should dent under pressure but not shine or puddle.
-
Skipping the chill on shape-sensitive doughs: Cut-outs, gingerbread, Linzers, and pinwheels need a cold rest or the edges blur in the oven. If the dough feels sticky, stop and refrigerate it instead of wrestling with it.
-
Baking for color instead of doneness: Several cookies here should come out pale, set at the edges, and soft in the center. If you wait for deep browning, you’ll end up with hard cookies after they cool.
-
Adding decorations at the wrong moment: Chocolate kisses pressed too early melt flat; pretzels pressed too late fall off; marshmallows added too soon disappear. Watch the clock and the texture, not just the recipe title.
-
Packing different textures together too soon: Crisp cookies absorb moisture from softer cookies if they share a container before they’re fully cooled. Let everything cool completely, then separate the types with parchment.
Frequently Asked Questions
Which cookies are easiest for younger kids to help with?
M&M cookies, peanut butter blossoms, snickerdoodle balls, and reindeer peanut butter cookies are the easiest because the shaping is simple and the decorating is forgiving. Little kids can roll dough, place candies, and press toppings without needing delicate technique.
Can I make the dough ahead of time?
Yes, and some of these improve after a rest. Sugar cookies, gingerbread, Linzers, pinwheels, and thumbprints all benefit from chilling overnight, while drop-cookie doughs can usually wait 1 to 3 days in the fridge.
How do I keep cut-out cookies from spreading?
Use cool butter, chill the dough, and avoid overmixing. Also, don’t crowd the pan; the cookies need space for a tiny bit of spread, even when the dough is well behaved.
Can I freeze these cookies?
Absolutely. Most doughs freeze well for up to 2 months, and baked cookies keep well for about the same time if they’re packed airtight. For the cleanest texture, freeze the dough rather than the fully decorated cookies whenever you can.
What if my cookies come out too hard?
They were probably baked a little too long or had too much flour. Next time, pull them when the centers still look slightly soft, and measure flour by spooning it into the cup instead of scooping hard from the bag.
Can I use salted butter instead of unsalted butter?
You can, but reduce the added salt a little so the flavor doesn’t tip too far. Salted butter varies by brand, which is why unsalted gives you more control.
Which cookies are best for gift tins?
Spritz cookies, cut-outs, thumbprints, molasses cookies, cranberry-orange cookies, and pinwheels all travel well if they’re fully cooled. Put the softest cookies on top of parchment layers and keep jam-filled cookies separate from crisp ones.
What’s the best way to decorate cookies without a lot of mess?
Use sanding sugar, crushed candy canes, chocolate kisses, pretzels, or a simple dusting of powdered sugar. Those finishes look festive fast, and they don’t require the kind of patience that frosting lines demand.
A Cookie Tray Worth Repeating
Holiday baking gets easier when the recipes stop fighting you. That’s the real appeal of this collection: the doughs chill well, the decorations stay simple, and the cookies give kids enough to do without handing them the keys to a piping bag and hoping for the best. You end up with trays that look lively, taste varied, and still feel manageable on a busy kitchen counter.
Mix a few shapes, keep the toppings simple, and don’t worry if the antlers tilt or the jam centers lean a little off-center. That looseness is part of the charm, and it’s usually the part people remember. The next time the oven is warm and the sprinkles are out, start with the cookie you know will disappear first.