
A dessert can be technically perfect and still feel forgettable. The ones people pause over are the ones with a little theater: a glossy berry crown, a clean slice through a mirror glaze, a sugar top that cracks under the back of a spoon. Pretty desserts do not need to be fussy, but they do need restraint, a steady hand, and at least one detail that looks deliberate.
The best part is that most of these sweets lean on simple building blocks: whipped cream, fruit, custard, sponge cake, meringue, chocolate. The trick is in the finish — how the berries are arranged, how the tart shell is browned, how the glaze settles, how the piping lands. A rough garnish can make a good dessert look tired; a few calm, precise moves can make a modest one look like it came from a pastry case.
So yes, these are the desserts that get photographed first and eaten second. They’re also the ones that reward patience: chill the panna cotta long enough, dry the pavlova properly, let the cheesecake set before you cut it, and you get clean edges instead of collapse. That’s where the pleasure is. And it starts with the desserts that know how to pose.
Why These Pretty Desserts Earn a Second Look
-
They build their own drama: A berry fan, a torch-brûléed top, or a mirror glaze gives you a finished look without extra decoration cluttering the plate.
-
They tolerate make-ahead work: Several of these recipes actually improve after a cold rest, which means less chaos when guests show up.
-
They cover different skill levels: Some are pure assembly, some need baking, and a few ask for a pastry bag or torch — enough variety to fit the mood you’re in.
-
They use real color, not gimmicks: Raspberries, citrus, pistachios, mango, passion fruit, and chocolate do the heavy lifting here.
-
They slice or spoon cleanly: The prettiest dessert in the room is usually the one that holds together when the knife hits it.
-
They reward a light hand: A little symmetry goes a long way. You do not need to pile on garnish until the dessert disappears.
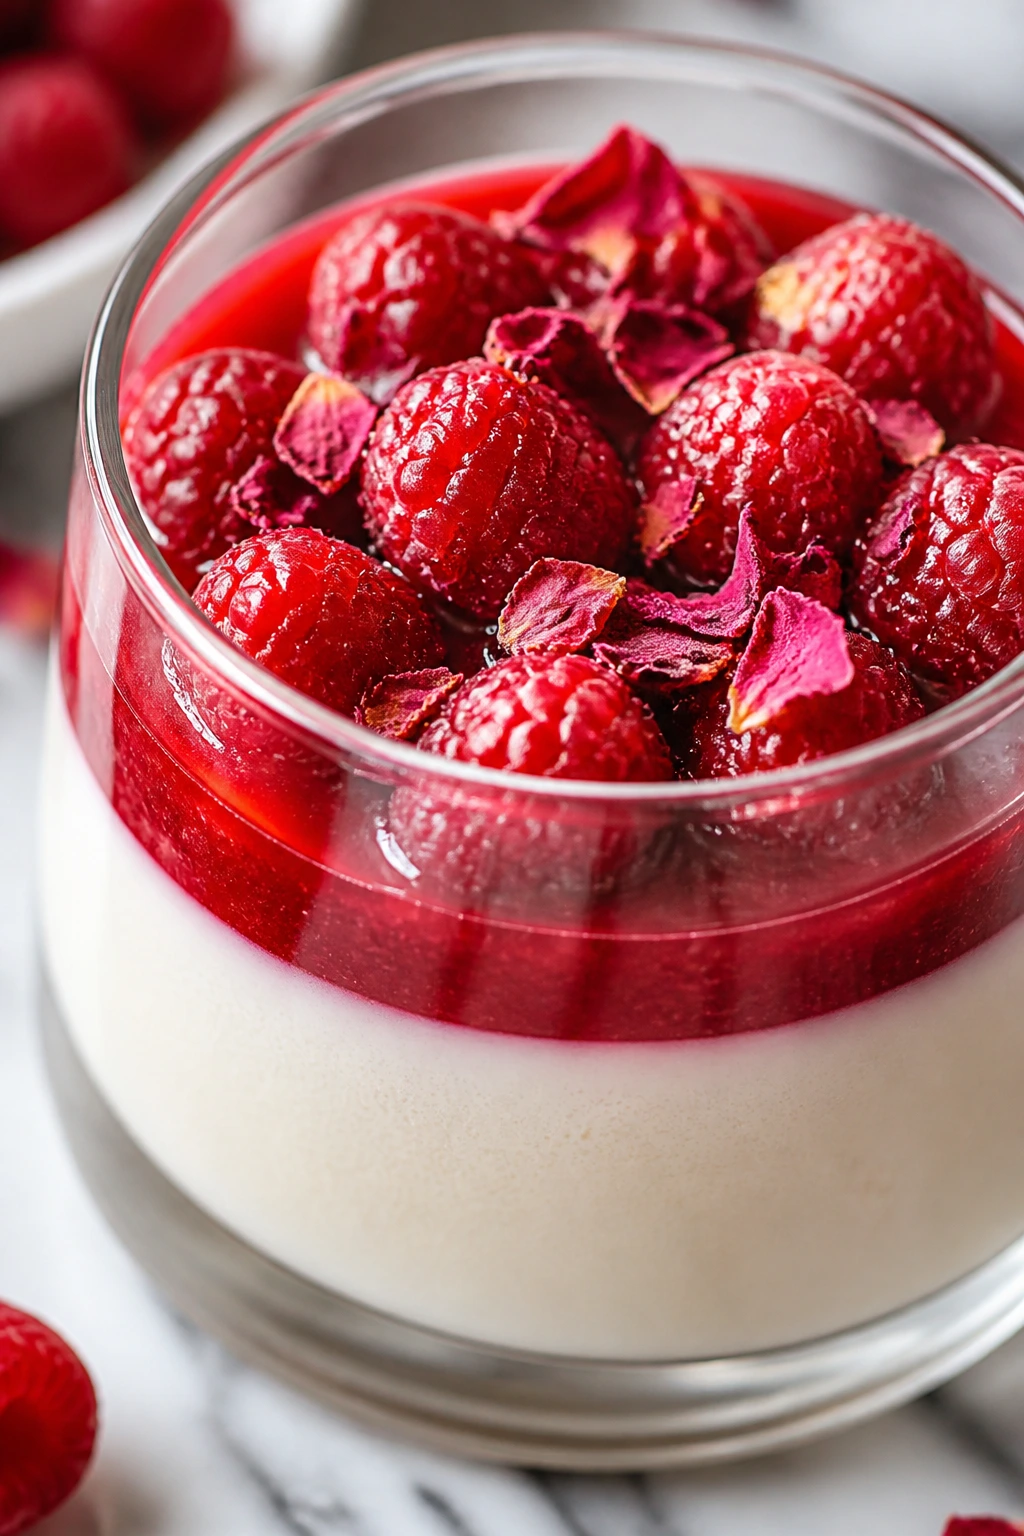
1. Raspberry Rose Panna Cotta
Intro: Silky panna cotta with raspberries on top has that quiet, polished look people remember. The texture should wobble softly, not slump, and the rosewater adds a floral note that stays in the background instead of taking over.
Why It Works: Gelatin gives the custard its clean set, which is why panna cotta looks so neat in glasses or ramekins. The raspberry topping cuts through the cream and keeps each spoonful bright, not heavy.
Key Ingredients:
- 2 cups heavy cream
- 1 cup whole milk
- 1/3 cup granulated sugar
- 2 teaspoons powdered gelatin
- 2 tablespoons cold water
- 1 teaspoon rosewater
- 1 cup fresh raspberries
- 1 teaspoon lemon juice
- Pinch of fine salt
Quick Steps:
- Bloom the gelatin in 2 tablespoons cold water for 5 minutes.
- Warm the cream, milk, sugar, and salt over medium heat until steaming, about 4 to 5 minutes.
- Whisk in the gelatin and rosewater, then strain into 4 glasses.
- Chill for at least 4 hours, top with raspberries mixed with lemon juice, and serve cold.
Equipment for This Recipe:
- Small saucepan
- Whisk
- Fine-mesh strainer
- 4 serving glasses or ramekins
- Measuring cups and spoons
How to Serve This Dish: Serve it in clear glasses so the pale custard shows. A few mint leaves and a spoonful of raspberries on top is enough; do not bury it under extra garnish.
Pro Tips for This Recipe:
- Bloom the gelatin fully or you’ll get little rubbery flecks.
- Rosewater should be faint, not perfumed.
- If the mixture starts to simmer, pull it off the heat before the dairy tastes cooked.
Variations on This Dish:
- Vanilla Berry Panna Cotta: Swap rosewater for 1 teaspoon vanilla extract.
- Citrus Brightened Version: Add 1 teaspoon orange zest to the warm cream.
- Dairy-Light Cup: Replace 1 cup of the cream with half-and-half for a softer set.
Common Mistakes to Avoid with This Dish:
- Skipping the chill time: The center will slosh instead of holding.
- Too much rosewater: The dessert can taste like soap fast; measure carefully.
- Adding fruit too early: Wet berries can slide and stain the surface.
2. Lemon Meringue Tart
Intro: A lemon meringue tart looks like sunshine with a lid on it. You get a crisp shell, sharp lemon curd, and tall swirls of meringue toasted to pale gold at the tips.
Why It Works: The tart shell gives the dessert structure, while the curd stays glossy and cuttingly bright. Meringue on top protects the filling from drying out, and that contrast is the whole point.
Key Ingredients:
- 1 9-inch tart shell, baked and cooled
- 4 large egg yolks
- 3/4 cup granulated sugar
- 1/3 cup fresh lemon juice
- 1 tablespoon lemon zest
- 4 tablespoons unsalted butter
- 3 large egg whites
- 1/4 teaspoon cream of tartar
- 1/4 cup superfine sugar
Quick Steps:
- Cook the yolks, sugar, lemon juice, and zest over low heat until thick, 6 to 8 minutes.
- Whisk in butter until smooth, then spread the curd into the tart shell.
- Beat egg whites with cream of tartar until foamy, then add superfine sugar and whip to stiff peaks.
- Pile the meringue on top, toast with a kitchen torch or under a hot broiler for 30 to 60 seconds, and chill 1 hour before slicing.
Equipment for This Recipe:
- 9-inch tart pan
- Medium saucepan
- Hand mixer or stand mixer
- Offset spatula
- Kitchen torch or broiler-safe tray
How to Serve This Dish: Slice with a hot dry knife for clean edges. A few thin curls of lemon zest on the plate look better than a mountain of garnish.
Pro Tips for This Recipe:
- Keep the curd on low heat; high heat scrambles yolks in a hurry.
- Spread meringue all the way to the crust edge to seal the curd.
- Torch only the peaks first, then touch the valleys if needed.
Variations on This Dish:
- Lime Meringue Tart: Use lime juice and zest for a sharper bite.
- Blood Orange Tart: Replace half the lemon juice with blood orange juice.
- Mini Tartlets: Bake in smaller shells and shorten the curd chill time.
Common Mistakes to Avoid with This Dish:
- Undercooked curd: It stays thin and leaks when sliced.
- Weeping meringue: Sugar that isn’t fully dissolved will bead on top.
- Cutting while warm: The filling needs the cold set or it runs.
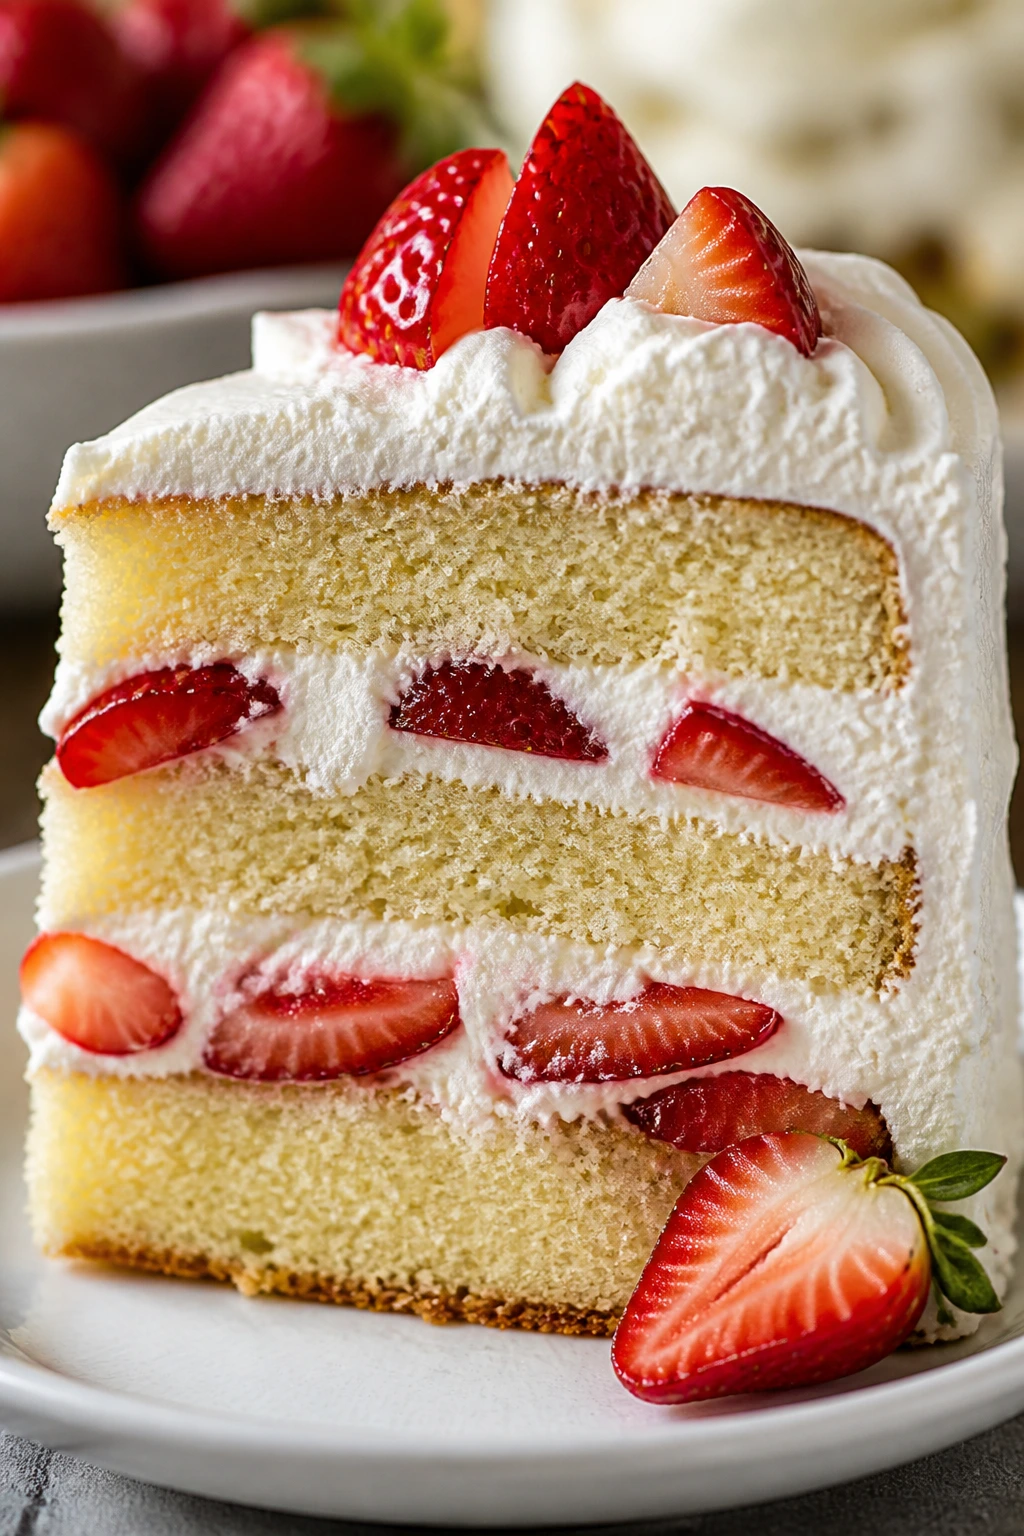
3. Strawberry Shortcake Layer Cake
Intro: This is the kind of cake that looks like it came from a good bakery window. Soft vanilla layers, whipped cream, and sliced strawberries stacked with a little mess around the edges — that mess is part of the charm.
Why It Works: Shortcake flavor does not need a dense frosting, so whipped cream keeps the cake light and the fruit readable. Fresh berries between the layers give you color right through the slice.
Key Ingredients:
- 2 1/2 cups all-purpose flour
- 2 1/2 teaspoons baking powder
- 1/2 teaspoon fine salt
- 1 cup unsalted butter, softened
- 1 1/2 cups granulated sugar
- 4 large eggs
- 1 tablespoon vanilla extract
- 1 cup whole milk
- 4 cups strawberries, sliced
- 2 cups heavy cream
- 1/3 cup powdered sugar
Quick Steps:
- Bake two 8-inch cake layers at 350°F for 25 to 30 minutes.
- Cool completely, then whip the cream and powdered sugar to soft peaks.
- Layer cake, whipped cream, and strawberries, pressing gently so the layers stay even.
- Frost the outside with more cream, finish with halved strawberries, and chill 30 minutes before slicing.
Equipment for This Recipe:
- Two 8-inch round cake pans
- Stand mixer or hand mixer
- Offset spatula
- Cooling rack
- Serrated knife
How to Serve This Dish: Serve chilled but not icy. A few strawberry halves on top and a light dusting of powdered sugar give the cake a finished look without hiding the fruit.
Pro Tips for This Recipe:
- Pat the strawberries dry or the cream will slip.
- Chill the bowl before whipping the cream.
- Level the cake layers so the stack doesn’t lean.
Variations on This Dish:
- Mixed Berry Shortcake: Use raspberries and blueberries with the strawberries.
- Lemon-Scented Cake: Add 1 tablespoon lemon zest to the batter.
- Angel-Food Shortcut: Stack the same filling on store-bought angel food cake.
Common Mistakes to Avoid with This Dish:
- Warm cake layers: The cream melts fast.
- Overwhipped cream: It turns grainy and hard to spread.
- Too much filling near the edge: The cake slides when you cut it.
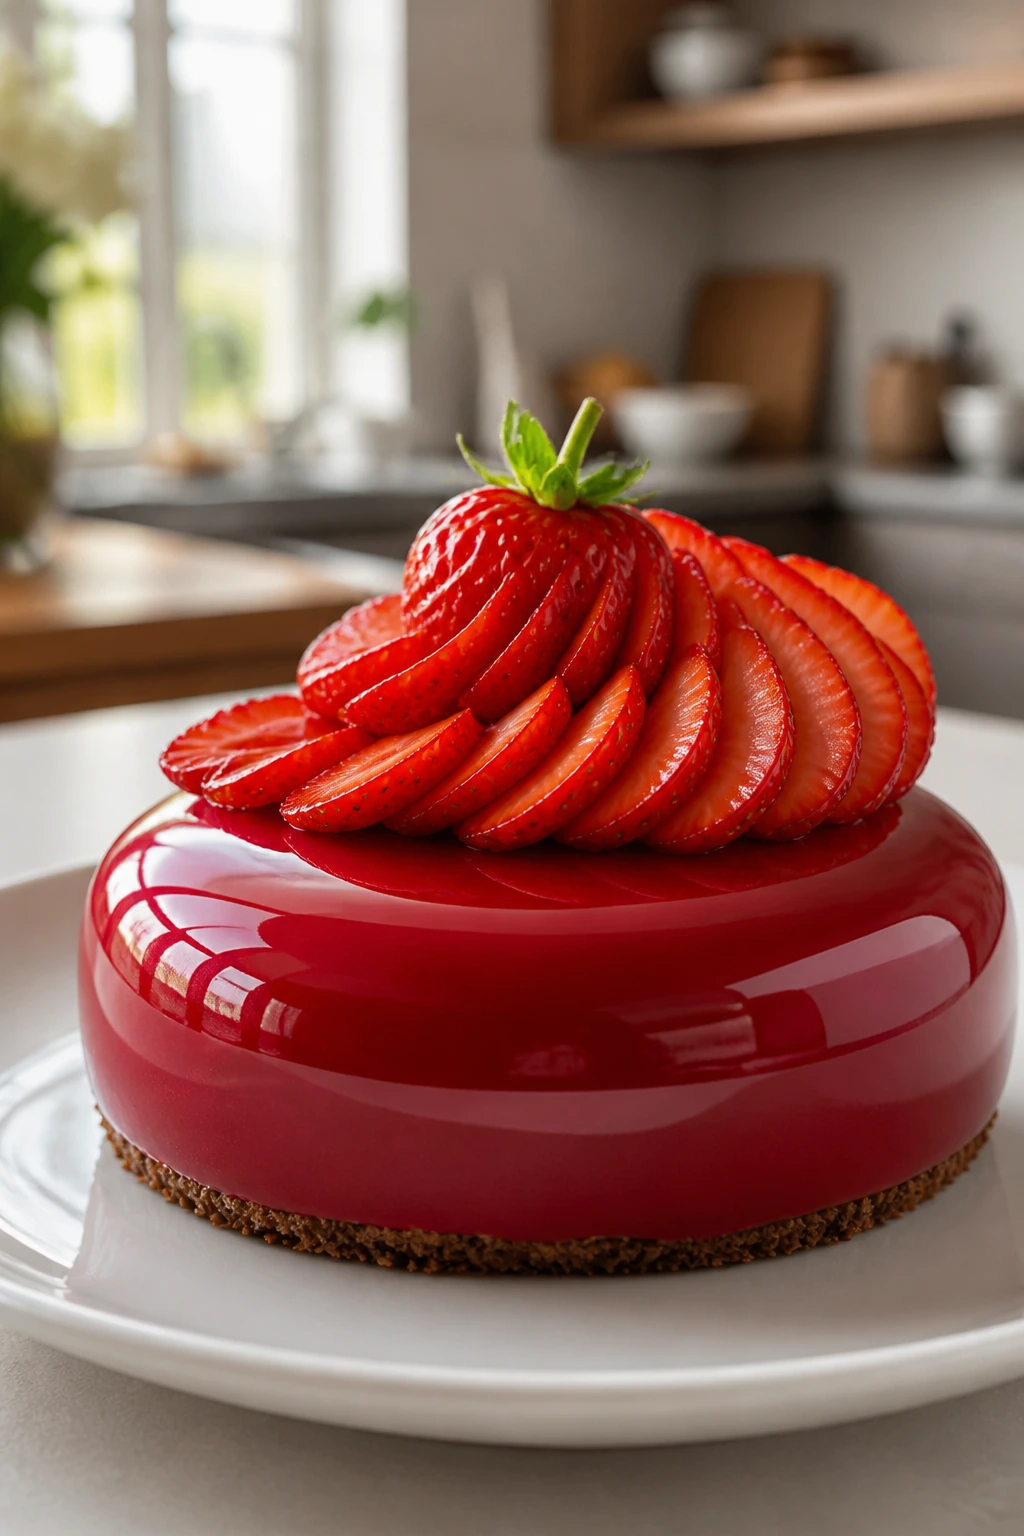
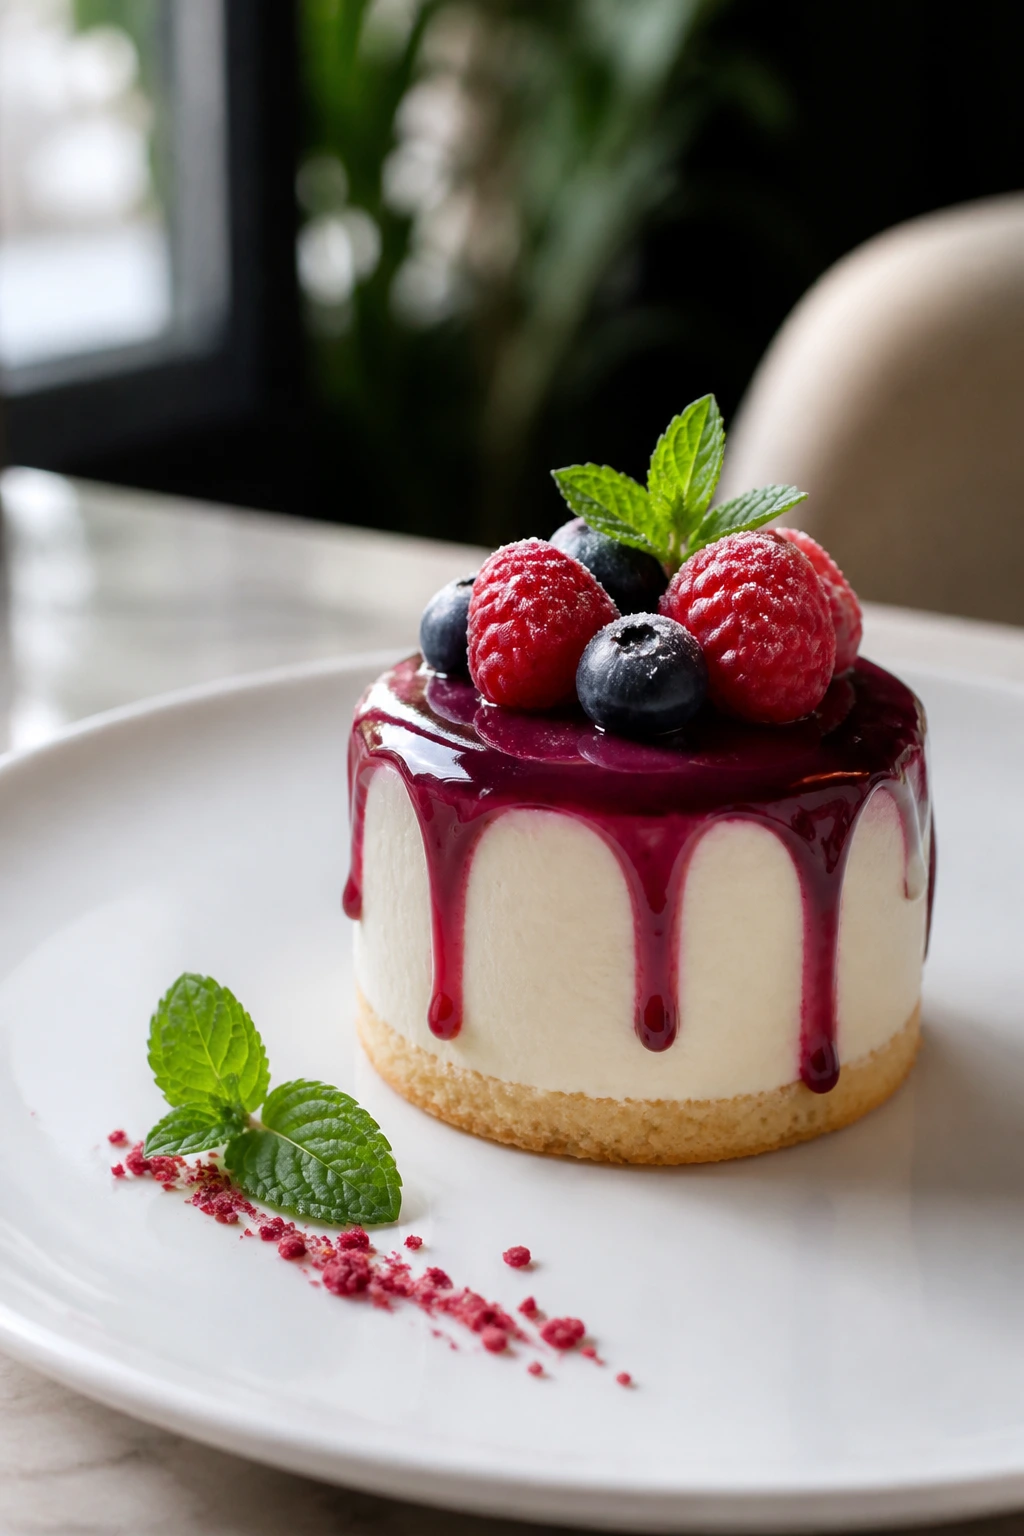
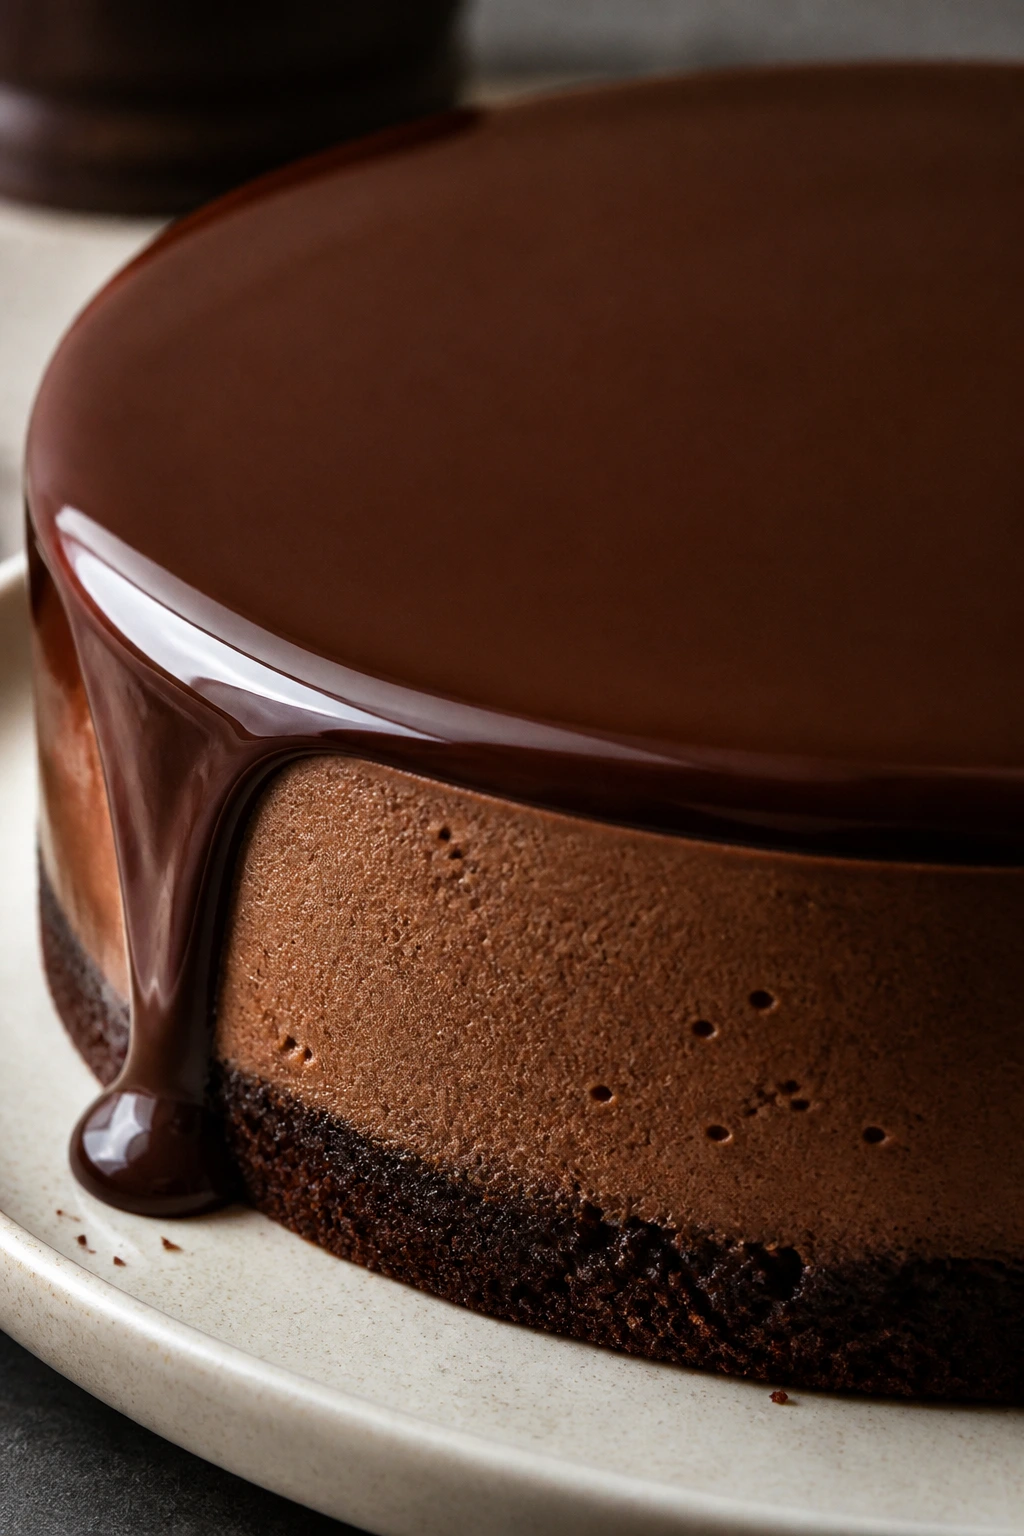
4. Mirror-Glaze Chocolate Mousse Cake
Intro: A chocolate mousse cake with mirror glaze looks almost too polished to touch. The glaze should shine like dark glass, and the mousse underneath should cut with a clean, soft edge.
Why It Works: The mousse layer gives you that airy, melt-on-the-tongue texture, while the glaze creates the visual snap. Even a simple cake base feels fancy when the top reflects light.
Key Ingredients:
- 1 chocolate sponge or brownie layer, 8 inches
- 8 ounces bittersweet chocolate, chopped
- 2 cups heavy cream, divided
- 2 teaspoons powdered gelatin
- 2 tablespoons cold water
- 1/2 cup granulated sugar
- 1/2 cup water
- 1/2 cup sweetened condensed milk
- 3 ounces white chocolate, optional for shine
Quick Steps:
- Place the cake layer in a springform pan and chill.
- Bloom the gelatin, then melt the chocolate and fold in whipped cream to make mousse.
- Pour over the base and chill at least 4 hours.
- Cook the sugar, water, condensed milk, and bloomed gelatin for the glaze, pour it over the cold cake at about 90°F, and let it set.
Equipment for This Recipe:
- 8-inch springform pan
- Candy thermometer
- Saucepan
- Offset spatula
- Hand mixer
How to Serve This Dish: Use a hot knife wiped clean between cuts. A few raspberries or a small chocolate shard on the plate is enough; the glaze already does the talking.
Pro Tips for This Recipe:
- The cake must be very cold before glazing.
- Keep the glaze warm but not hot, or it will run off.
- Tap the pan once after glazing to pop air bubbles.
Variations on This Dish:
- Dark Chocolate Espresso Cake: Add 1 teaspoon instant espresso to the mousse.
- Hazelnut Version: Swap the base for hazelnut sponge.
- Berry-Trimmed Finish: Add a ring of fresh berries after the glaze sets.
Common Mistakes to Avoid with This Dish:
- Glazing a soft cake: The glaze slides and pools.
- Using glaze that’s too hot: It melts the mousse surface.
- Skipping the chill: The cake will collapse when sliced.
5. Mini Fruit Tartlets
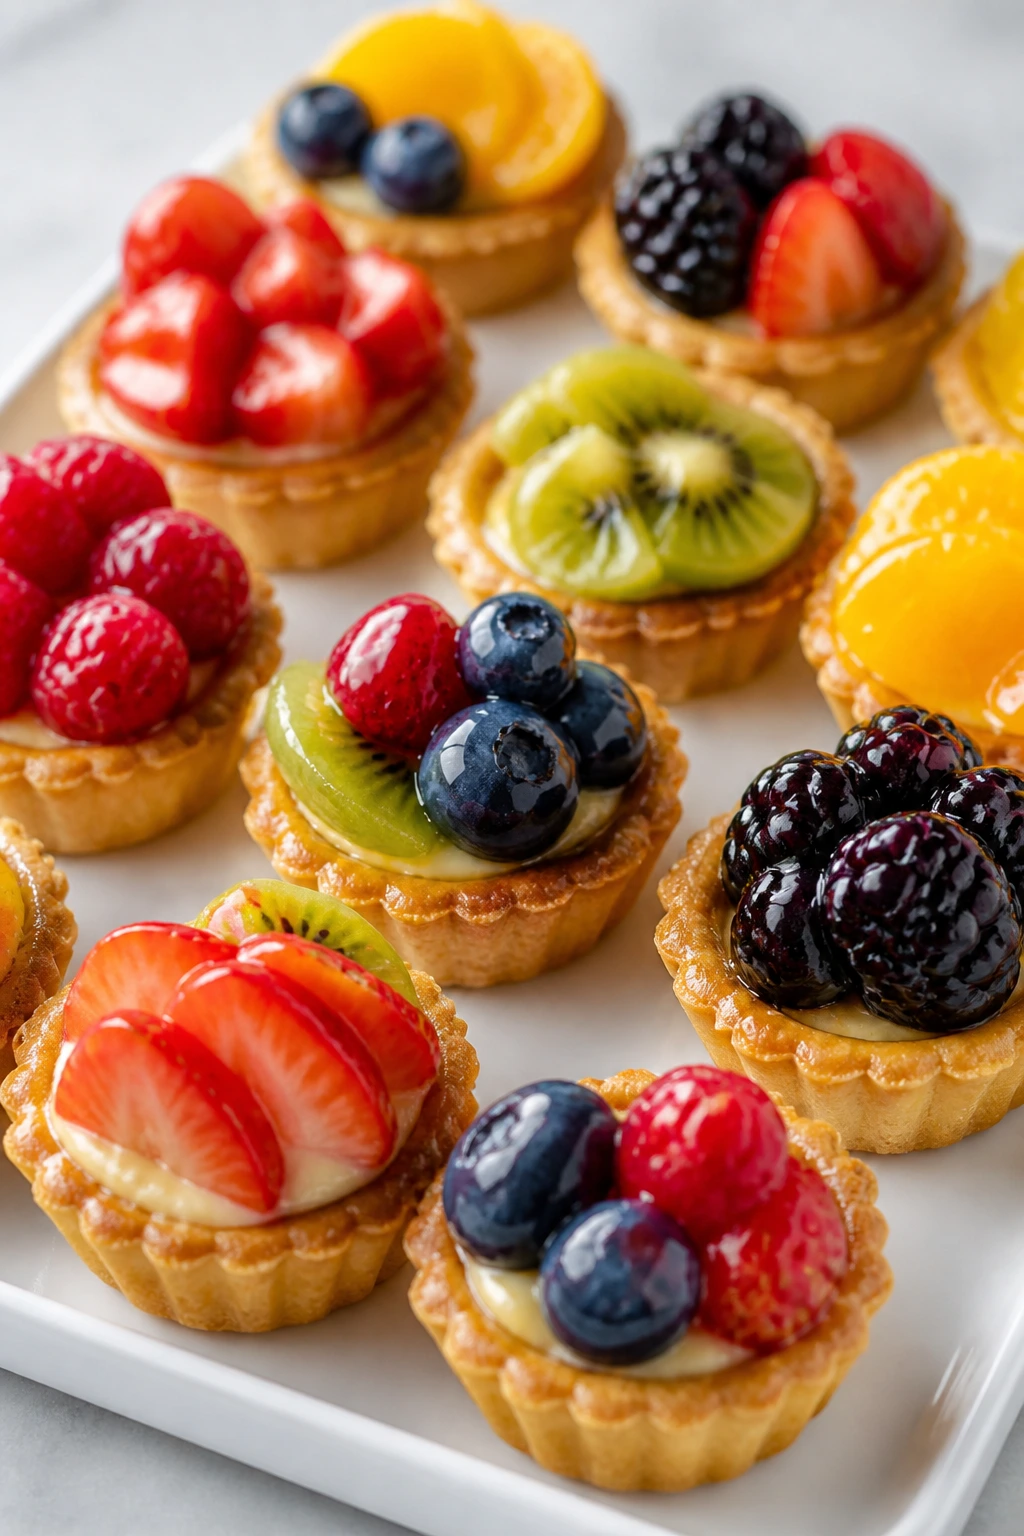
Intro: Mini tartlets are tiny, neat, and easy to overfill — so don’t. When they’re done right, the fruit sits like mosaic tiles over a smooth pastry cream, and each shell stays crisp.
Why It Works: The contrast is what makes them pretty: crumbly shell, creamy center, glossy fruit. They also let you use color on purpose, which matters more than piling on extra decoration.
Key Ingredients:
- 1 batch sweet tart dough, enough for 12 mini tart shells
- 2 cups whole milk
- 1/2 cup sugar
- 4 large egg yolks
- 3 tablespoons cornstarch
- 2 tablespoons unsalted butter
- 1 teaspoon vanilla extract
- 2 cups mixed berries and kiwi, sliced
- 2 tablespoons apricot jam, warmed
Quick Steps:
- Bake the tart shells at 375°F for 12 to 15 minutes and cool.
- Cook the milk, sugar, yolks, and cornstarch until thick, then whisk in butter and vanilla.
- Fill the shells with pastry cream and smooth the tops.
- Arrange fruit over each tartlet and brush lightly with warm apricot jam.
Equipment for This Recipe:
- Mini tart pans or muffin tin
- Whisk
- Saucepan
- Fine brush
- Pastry bag or spoon
How to Serve This Dish: Plate them on a white platter so the fruit colors pop. They’re best chilled for 30 minutes after assembly, but do not wait much longer if you want the shells crisp.
Pro Tips for This Recipe:
- Bake tart shells until pale gold, not blond.
- Let pastry cream cool with plastic wrap pressed on the surface.
- Use fruit that’s dry on the outside so the jam sheen sticks.
Variations on This Dish:
- Stone Fruit Tartlets: Use thin peach and plum slices in neat fans.
- Chocolate Shell Version: Brush the inside with melted chocolate before filling.
- Citrus Tartlets: Top with segmented orange and a little mint.
Common Mistakes to Avoid with This Dish:
- Soft shells: They turn soggy fast.
- Warm pastry cream: It melts the fruit arrangement.
- Too much jam glaze: The tartlets get sticky instead of glossy.
6. Classic Pavlova with Berries
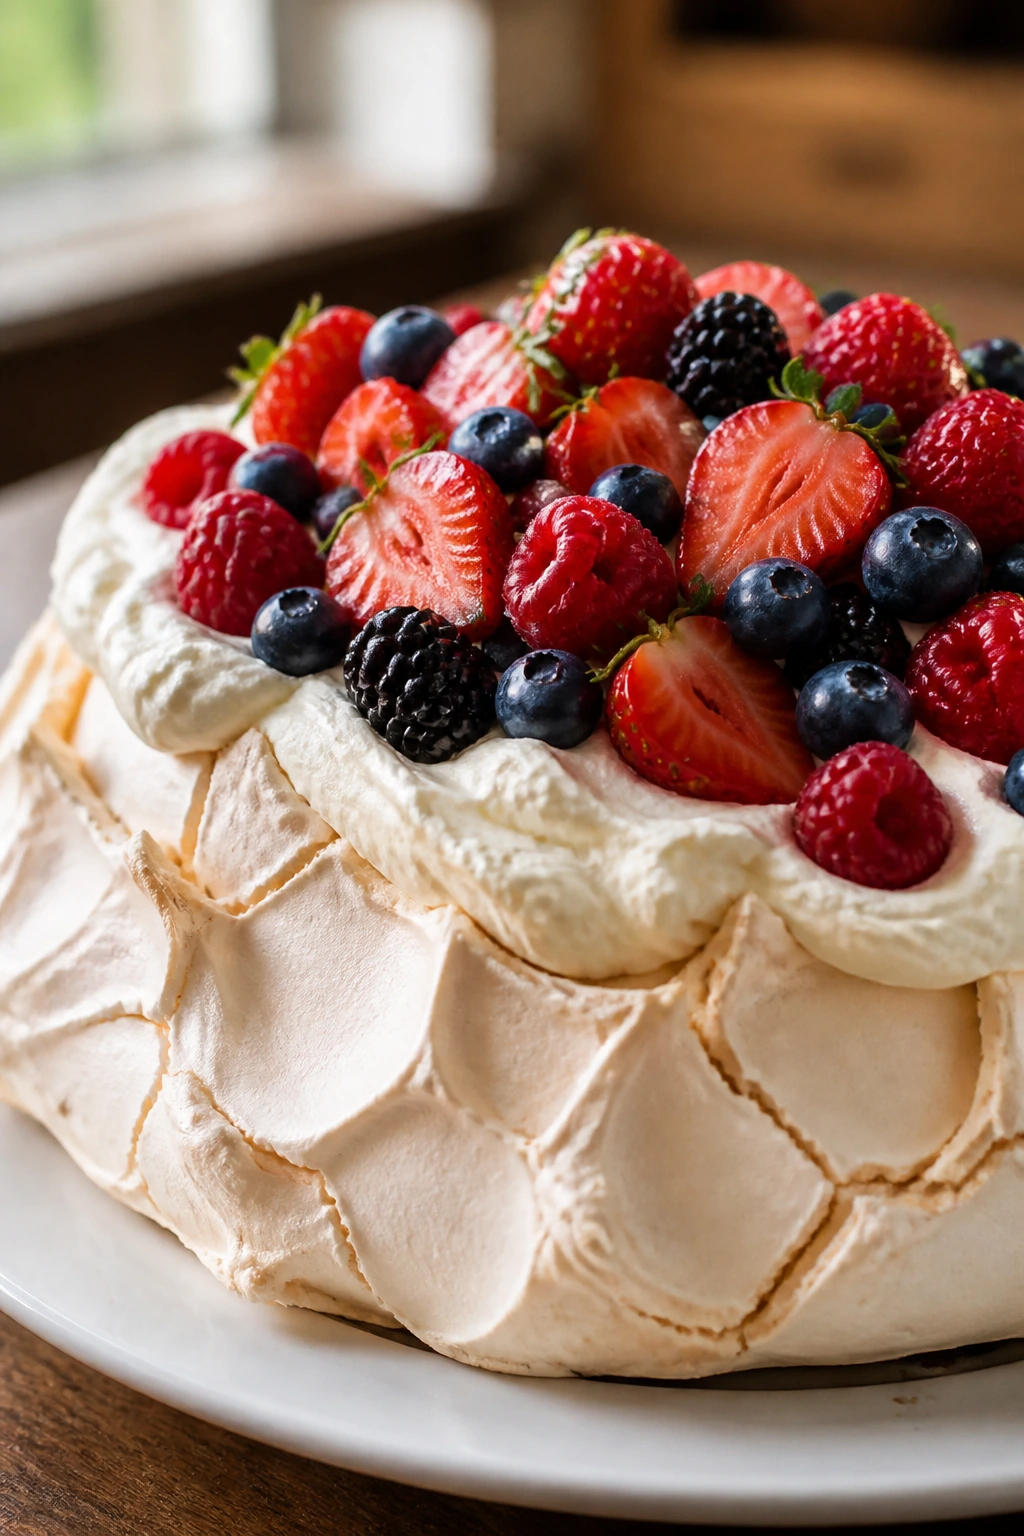
Intro: Pavlova looks like a cloud someone dressed for dinner. Crisp outside, marshmallow-soft inside, and topped with whipped cream and berries — it has one job, and it does it beautifully.
Why It Works: The meringue shell gives you height and crunch, while the cream and berries soften each bite. That balance is why pavlova feels light even when it looks elaborate.
Key Ingredients:
- 4 large egg whites
- 1 cup superfine sugar
- 1 teaspoon cornstarch
- 1 teaspoon white vinegar
- 1 teaspoon vanilla extract
- 1 1/2 cups heavy cream
- 2 tablespoons powdered sugar
- 2 cups mixed berries
Quick Steps:
- Whip egg whites to soft peaks, then add sugar slowly until glossy and stiff.
- Fold in cornstarch, vinegar, and vanilla, and shape the meringue on parchment.
- Bake at 250°F for 75 minutes, then cool in the oven with the door cracked.
- Top with whipped cream and berries just before serving.
Equipment for This Recipe:
- Stand mixer or hand mixer
- Sheet pan
- Parchment paper
- Rubber spatula
- Cooling rack
How to Serve This Dish: Put the cream on in a loose swoop, not a perfect dome. The berries should look scattered on purpose, with a few juices streaking the cream.
Pro Tips for This Recipe:
- Make sure the bowl has no grease.
- Add sugar slowly so the meringue stays fine and shiny.
- Assemble at the last minute; pavlova softens fast once it meets cream.
Variations on This Dish:
- Citrus Pavlova: Add orange zest to the cream.
- Chocolate Pavlova: Fold in 2 tablespoons cocoa powder with the cornstarch.
- Tropical Pavlova: Use kiwi, mango, and passion fruit.
Common Mistakes to Avoid with This Dish:
- Opening the oven too soon: The shell can crack badly.
- Using regular sugar too fast: It can leave grainy spots.
- Assembling early: The meringue turns sticky and collapses.
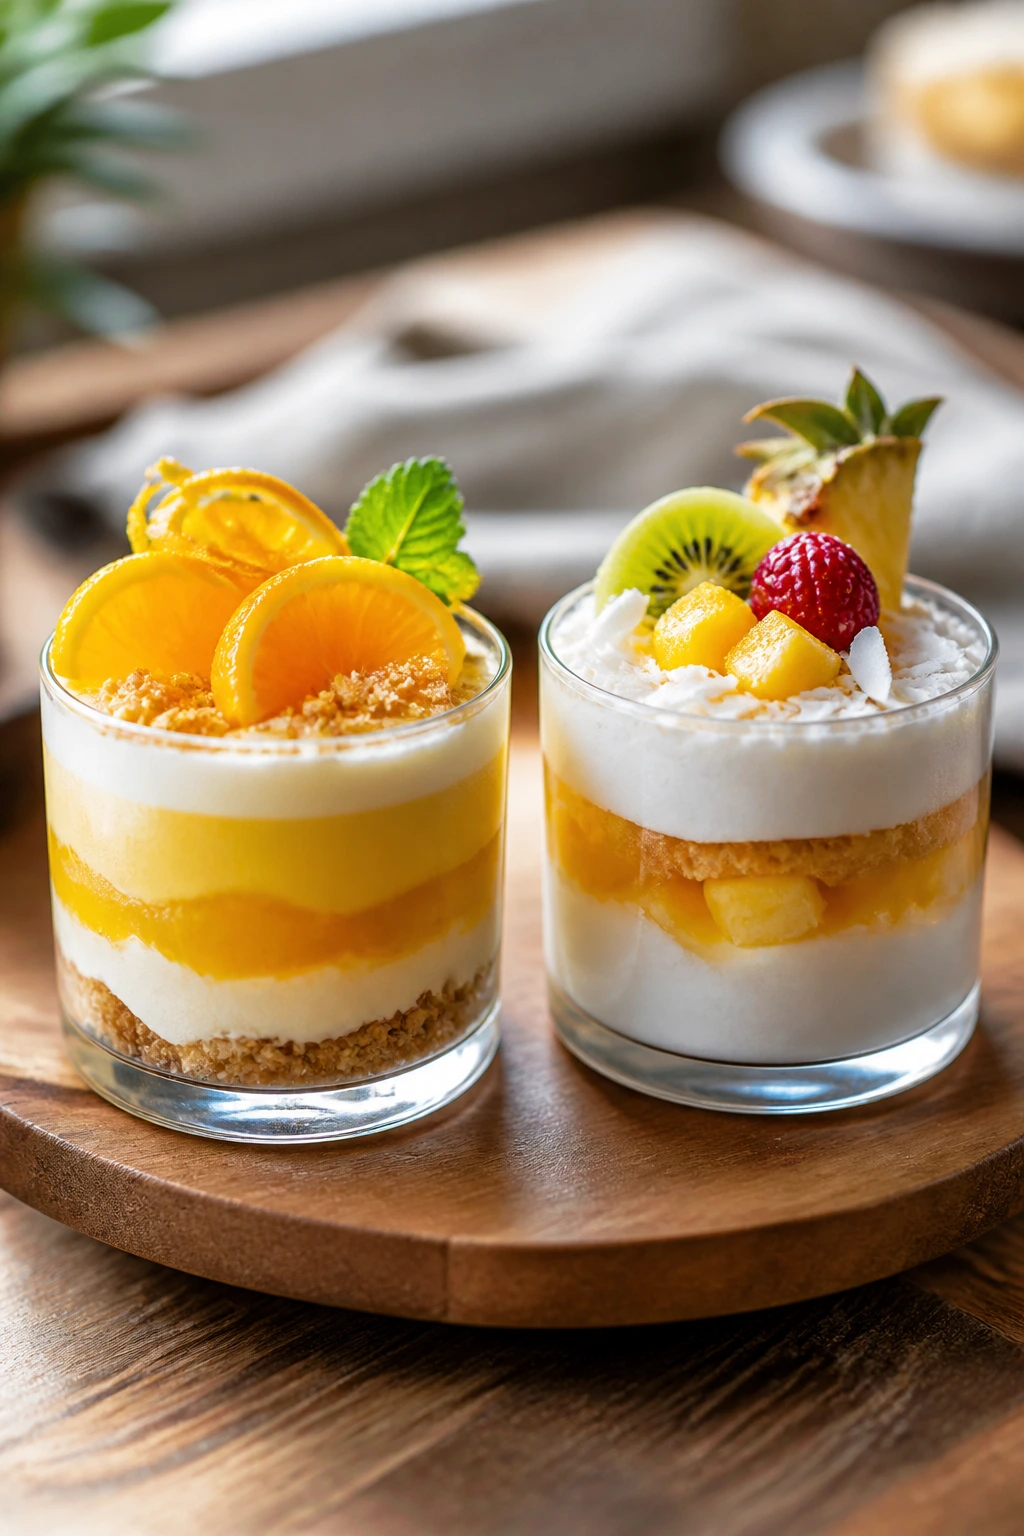
7. Tiramisu Trifle Cups
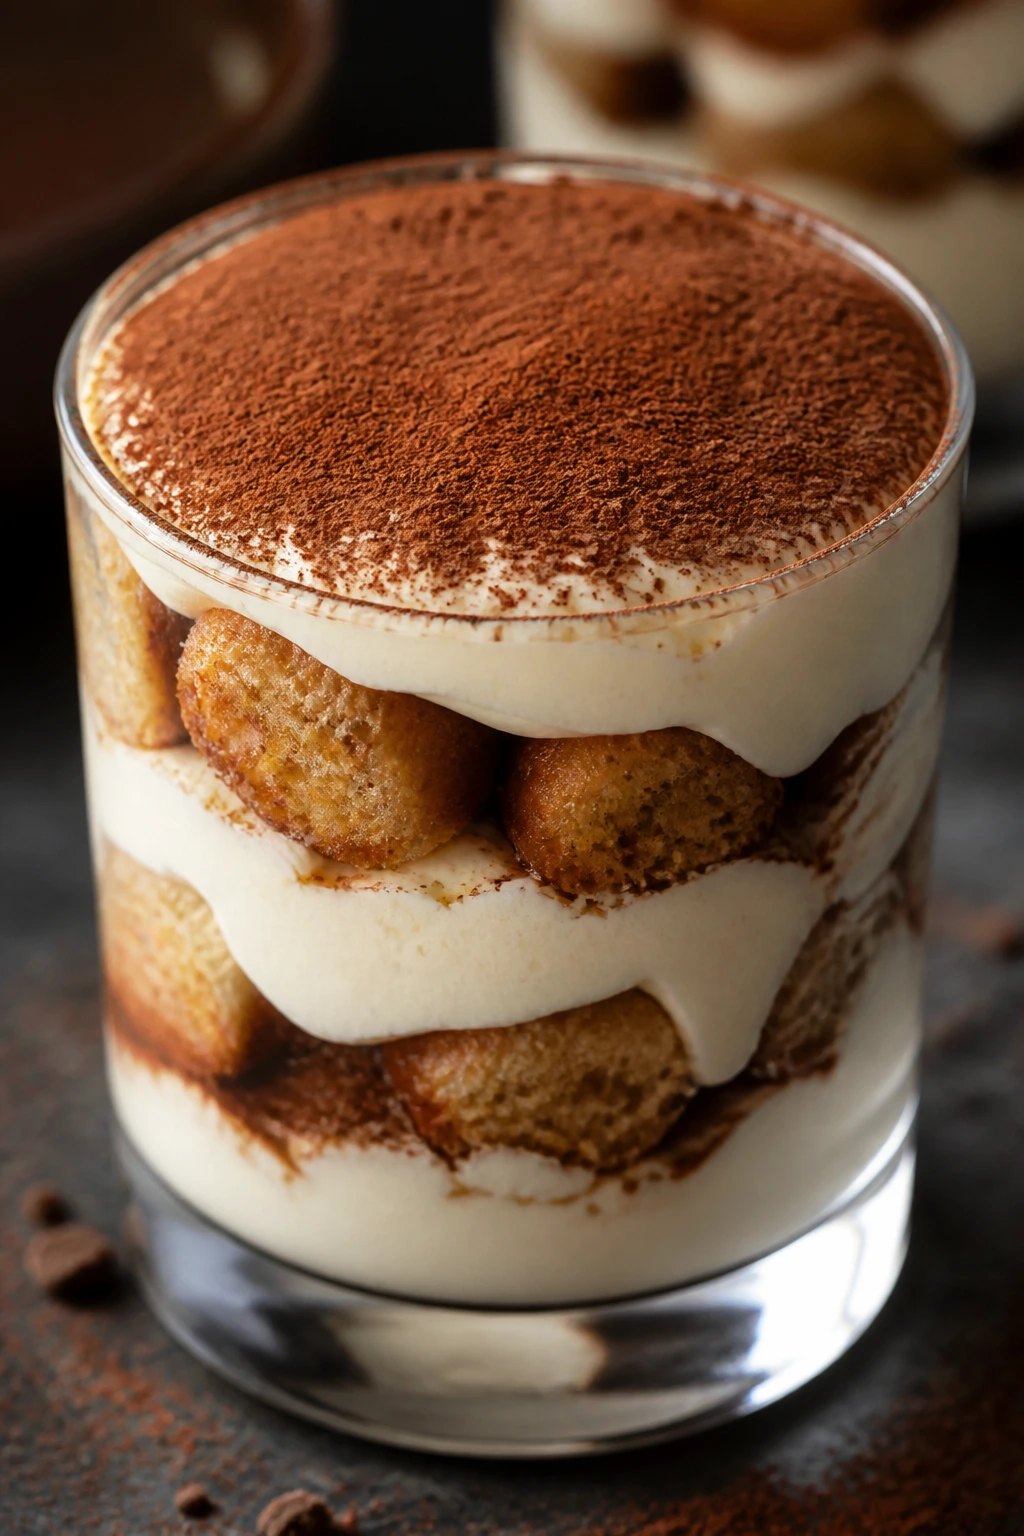
Intro: Tiramisu in glasses feels polished without trying too hard. You still get the coffee, cocoa, and mascarpone layers, but each portion stays tidy and easy to serve.
Why It Works: Trifle cups show off the layers, which is half the charm of tiramisu anyway. The espresso-soaked ladyfingers soften just enough, and the cream sits cleanly between them.
Key Ingredients:
- 1 cup strong espresso, cooled
- 2 tablespoons coffee liqueur, optional
- 24 ladyfingers, broken to fit
- 8 ounces mascarpone
- 1 cup heavy cream
- 1/3 cup powdered sugar
- 1 teaspoon vanilla extract
- 2 tablespoons unsweetened cocoa powder
Quick Steps:
- Mix espresso and liqueur, if using.
- Whip mascarpone, cream, sugar, and vanilla to thick peaks.
- Layer ladyfingers, coffee, and mascarpone cream in 6 glasses.
- Dust the top with cocoa powder and chill 2 hours.
Equipment for This Recipe:
- Mixing bowl
- Hand mixer
- Small glasses or dessert cups
- Sifter
- Spoon
How to Serve This Dish: Dust the cocoa right before serving so it stays dark instead of damp. A chocolate-covered espresso bean on top works if you want a neat finish.
Pro Tips for This Recipe:
- Dip ladyfingers quickly; oversoaking makes them mushy.
- Use cold mascarpone for a thicker cream.
- Chill before serving so the layers settle.
Variations on This Dish:
- Berry Tiramisu Cups: Swap coffee for berry syrup.
- Chocolate Tiramisu: Add melted chocolate to the cream.
- No-Liqueur Version: Use plain espresso and a splash of vanilla.
Common Mistakes to Avoid with This Dish:
- Soaking the ladyfingers too long: They fall apart.
- Loose mascarpone cream: It slides between layers.
- Dusting cocoa too early: The top gets patchy and wet.
8. Vanilla Bean Crème Brûlée
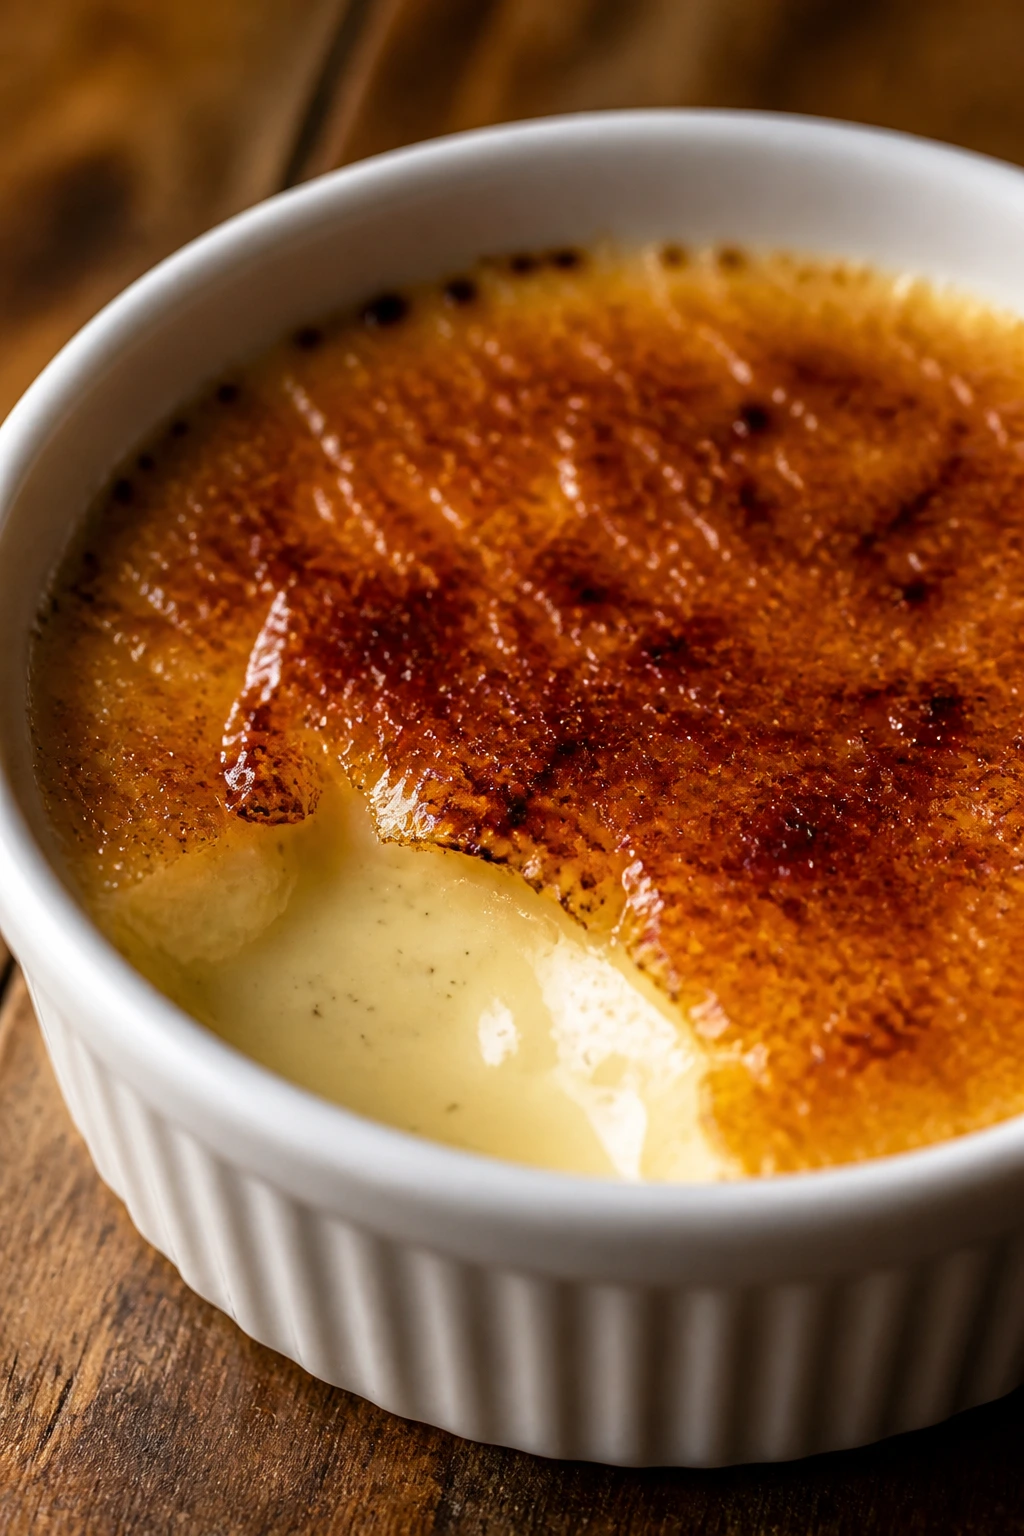
Intro: Crème brûlée is all about the crack. That thin burnt sugar shell over the smooth custard is one of the simplest, prettiest contrasts in dessert.
Why It Works: The custard stays understated, which lets the caramelized top become the visual cue. Vanilla bean specks look especially good because they telegraph what’s inside before the spoon breaks through.
Key Ingredients:
- 2 cups heavy cream
- 1 vanilla bean, split and scraped
- 5 large egg yolks
- 1/2 cup sugar
- 2 tablespoons sugar for topping
- Pinch of salt
Quick Steps:
- Heat cream and vanilla until just steaming, then steep 10 minutes.
- Whisk yolks, sugar, and salt, then slowly add the warm cream.
- Pour into ramekins and bake in a water bath at 300°F for 30 to 35 minutes.
- Chill 4 hours, sprinkle sugar on top, and brûlée until amber and glassy.
Equipment for This Recipe:
- Ramekins
- Deep baking pan
- Kitchen torch
- Whisk
- Fine sieve
How to Serve This Dish: Serve it chilled and brûlée the tops at the table if you can. A few raspberries beside the ramekin give you color without competing with the sugar crust.
Pro Tips for This Recipe:
- Pull the custards when the centers still wobble.
- Use a thin sugar layer for the best crack.
- Let the sugar cool 1 minute after torching.
Variations on This Dish:
- Orange Crème Brûlée: Steep the cream with orange zest.
- Espresso Version: Add 1 teaspoon instant espresso to the cream.
- Coconut Crème Brûlée: Replace 1/2 cup cream with coconut milk.
Common Mistakes to Avoid with This Dish:
- Overbaking: The custard turns grainy.
- Too much sugar on top: It burns before it melts.
- Torching a wet surface: The sugar clumps instead of cracking.
9. Chocolate Éclairs with Espresso Glaze
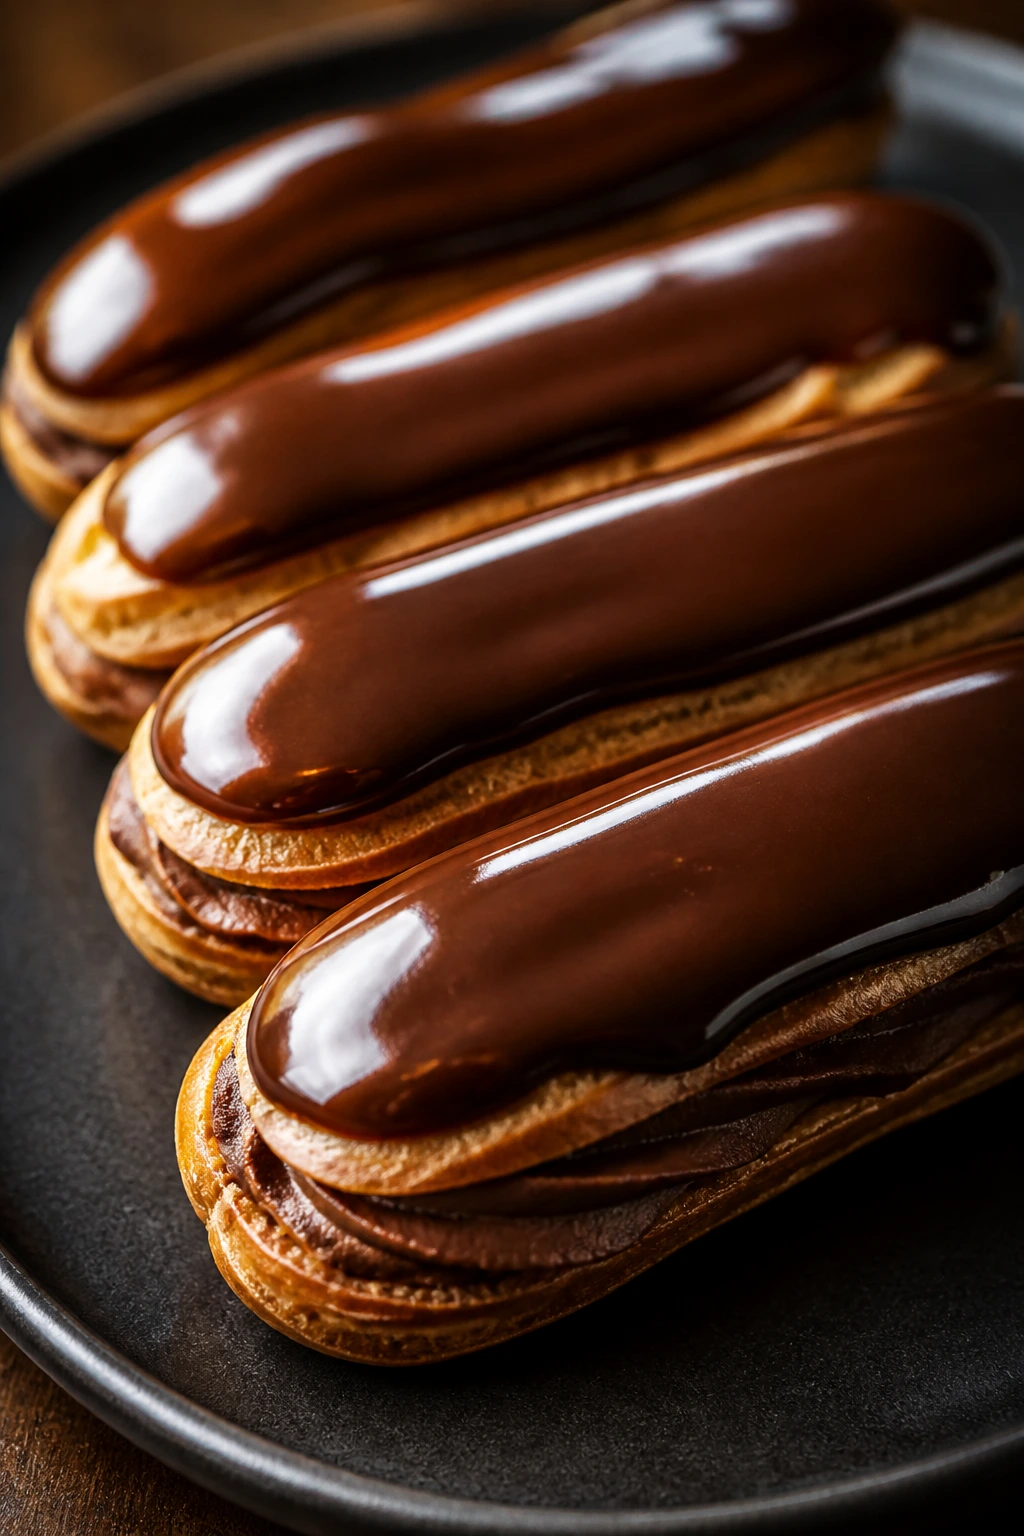
Intro: Éclairs look fussy, but their clean shape and glossy top make the effort obvious. Pâte à choux, cream filling, espresso glaze — it’s a neat little stack of textures.
Why It Works: The hollow pastry shell lets you pipe in cream without cutting the whole thing open. The glaze seals the top and gives the éclair its unmistakable shine.
Key Ingredients:
- 1 cup water
- 1/2 cup unsalted butter
- 1 cup all-purpose flour
- 4 large eggs
- 2 cups pastry cream or whipped vanilla cream
- 1 cup powdered sugar
- 2 tablespoons cocoa powder
- 1 to 2 tablespoons strong espresso
- Pinch of salt
Quick Steps:
- Cook water and butter, stir in flour, then beat in eggs to make choux pastry.
- Pipe 4-inch logs and bake at 400°F for 20 minutes, then lower to 350°F for 15 minutes.
- Cool, fill with cream, and dip tops in espresso glaze.
- Chill 20 minutes so the glaze sets.
Equipment for This Recipe:
- Piping bag with large round tip
- Baking sheet
- Parchment paper
- Wooden spoon
- Small offset spatula
How to Serve This Dish: Line the éclairs on a long platter with a dusting of cocoa under them. They’re best eaten the same day, when the shell still has a little snap.
Pro Tips for This Recipe:
- Dry the dough on the stove before adding eggs.
- Bake until deeply golden or the shells collapse.
- Cool fully before filling, or the cream melts inside.
Variations on This Dish:
- Vanilla Glaze Éclairs: Skip espresso and use milk in the glaze.
- Chocolate-Hazelnut Filling: Fold hazelnut spread into the cream.
- Mini Éclairs: Pipe shorter logs for a more delicate look.
Common Mistakes to Avoid with This Dish:
- Opening the oven during baking: The pastries sink.
- Filling warm shells: They go soft fast.
- Glaze too thick: It clumps instead of shining.
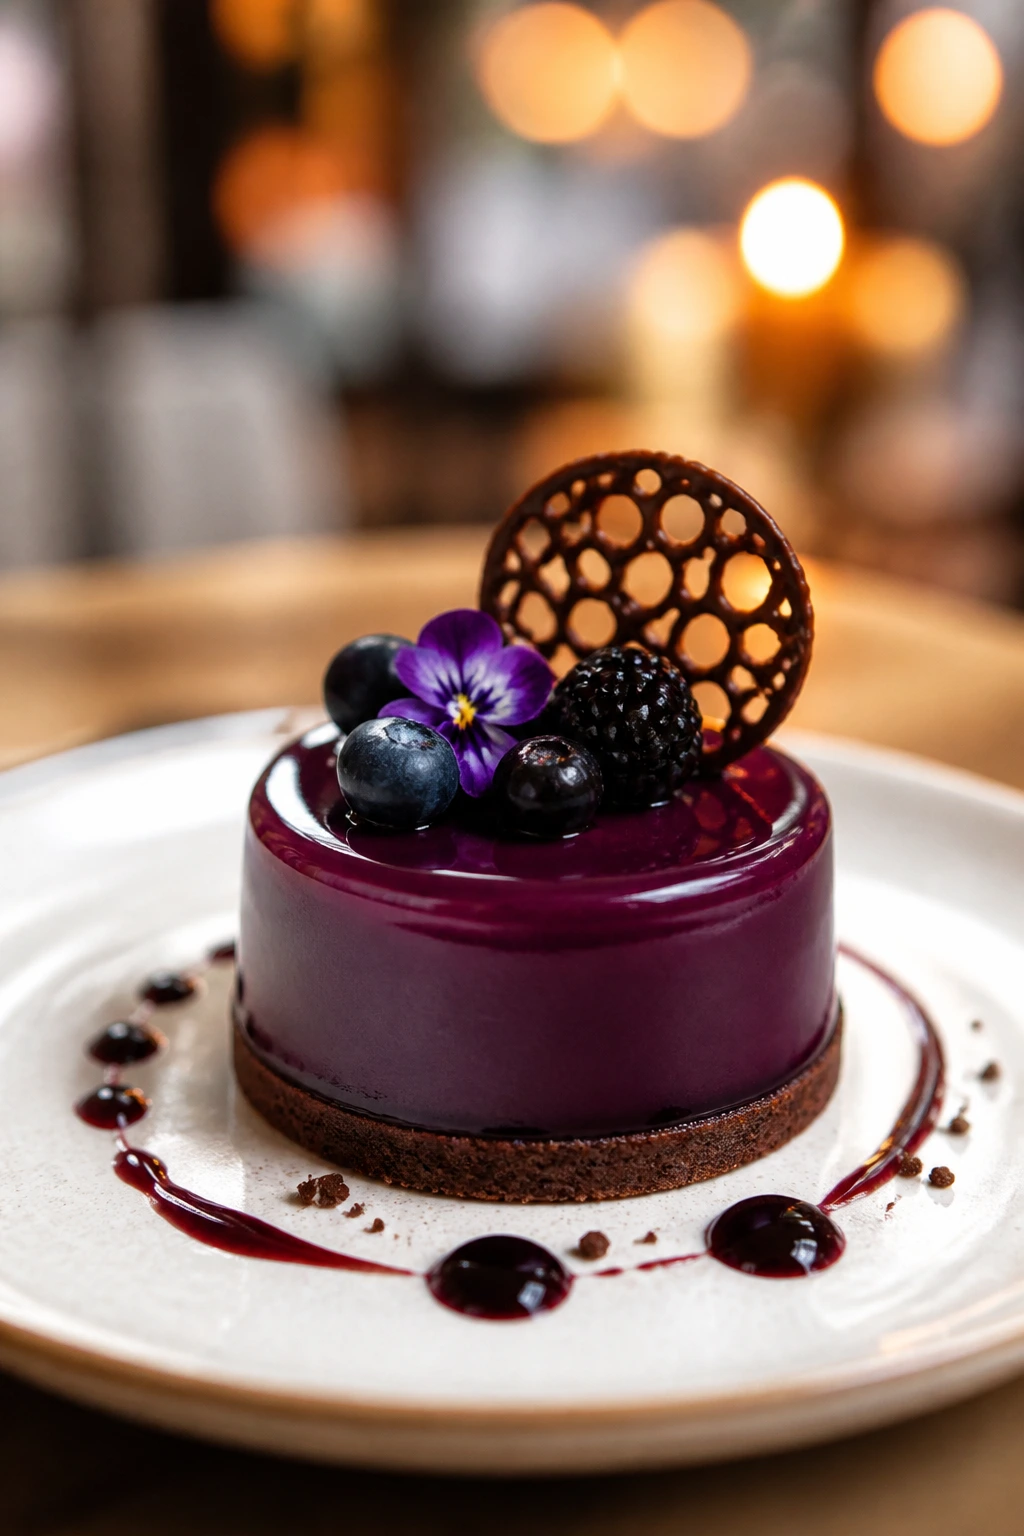
10. Blueberry Lavender Cheesecake Bars
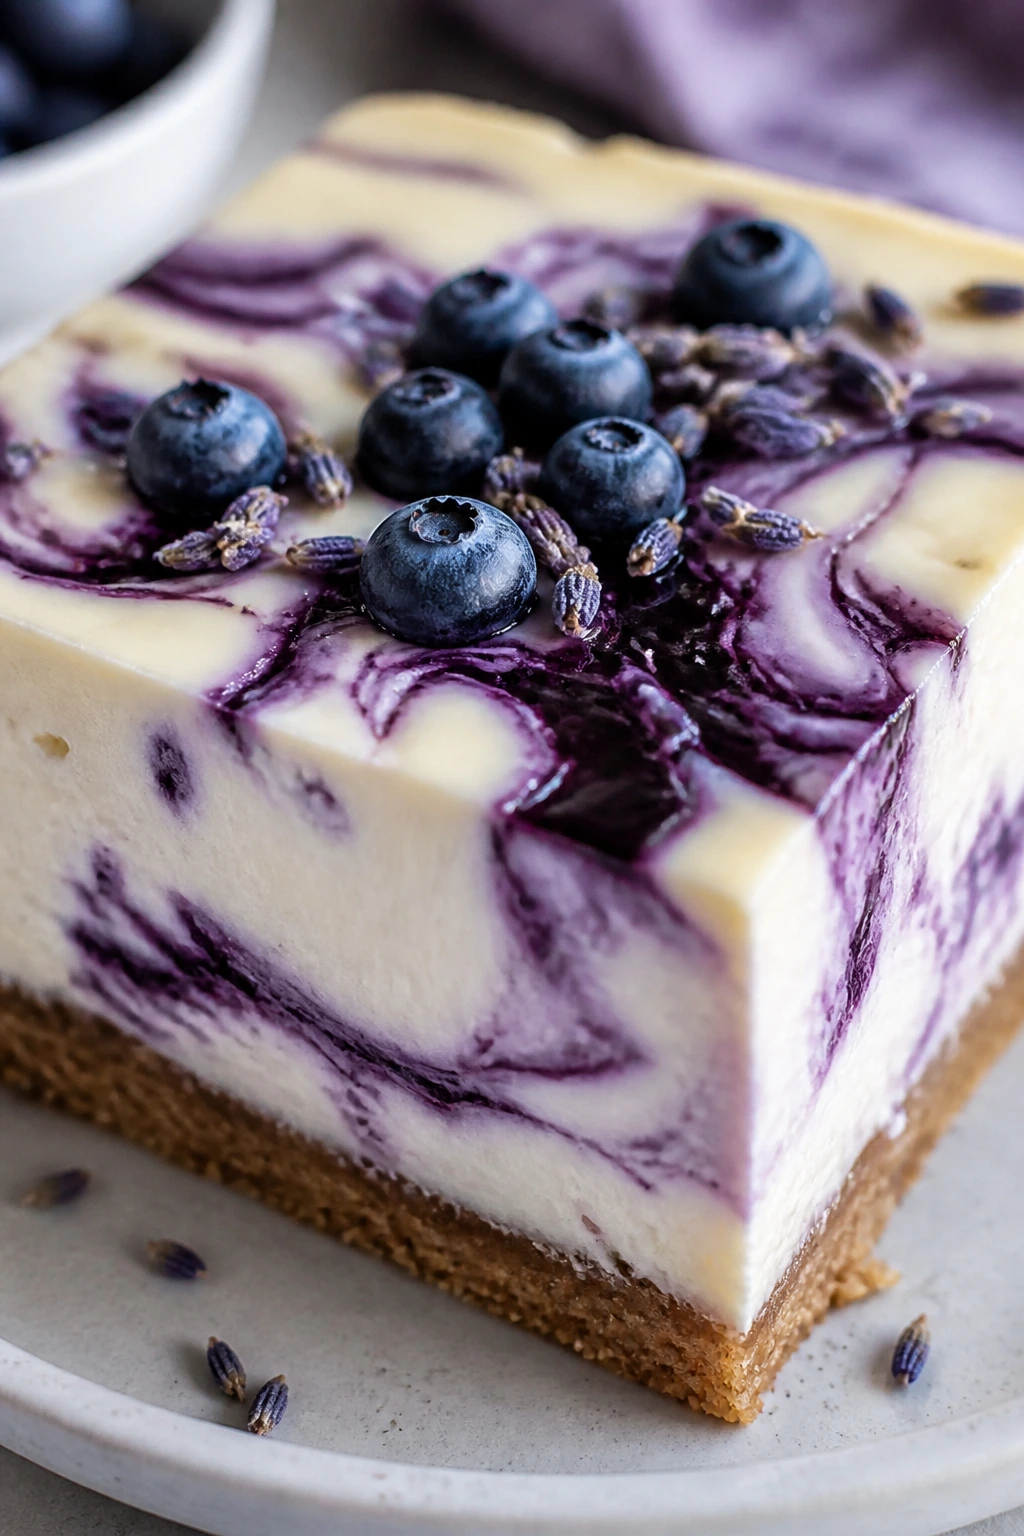
Intro: These bars look like a little watercolor painting cut into squares. The lavender should stay subtle, and the blueberry swirl does the visual work.
Why It Works: Cheesecake bars hold their shape better than a full round cheesecake, so they’re easier to serve neatly. The berry swirl gives you color on the surface without needing any piping.
Key Ingredients:
- 1 1/2 cups graham cracker crumbs
- 5 tablespoons melted butter
- 16 ounces cream cheese, softened
- 1/2 cup sugar
- 2 large eggs
- 1 teaspoon vanilla extract
- 1/2 teaspoon culinary lavender, ground
- 1 cup blueberries
- 1 tablespoon lemon juice
- 1 tablespoon cornstarch
Quick Steps:
- Bake the crumb crust at 350°F for 8 minutes.
- Cook blueberries, lemon juice, and cornstarch until thick, then cool slightly.
- Beat cream cheese, sugar, eggs, vanilla, and lavender until smooth.
- Swirl in the blueberry mixture, bake 30 minutes, and chill 4 hours before slicing.
Equipment for This Recipe:
- 8-inch square pan
- Hand mixer
- Saucepan
- Parchment paper
- Offset spatula
How to Serve This Dish: Cut with a warm knife and wipe between slices. A single blueberry and tiny lavender sprig on the plate is enough.
Pro Tips for This Recipe:
- Use culinary lavender only.
- Do not over-swirl or the pattern disappears.
- Chill before cutting or the bars will smear.
Variations on This Dish:
- Lemon-Blueberry Bars: Leave out lavender and add extra zest.
- Blackberry Version: Swap in blackberry puree for a darker look.
- Gluten-Free Base: Use almond flour crumbs instead of graham crumbs.
Common Mistakes to Avoid with This Dish:
- Too much lavender: It tastes like soap.
- Cutting warm bars: The swirl drags.
- Using watery puree: The filling loosens and won’t hold.
11. Raspberry Swirl Cheesecake
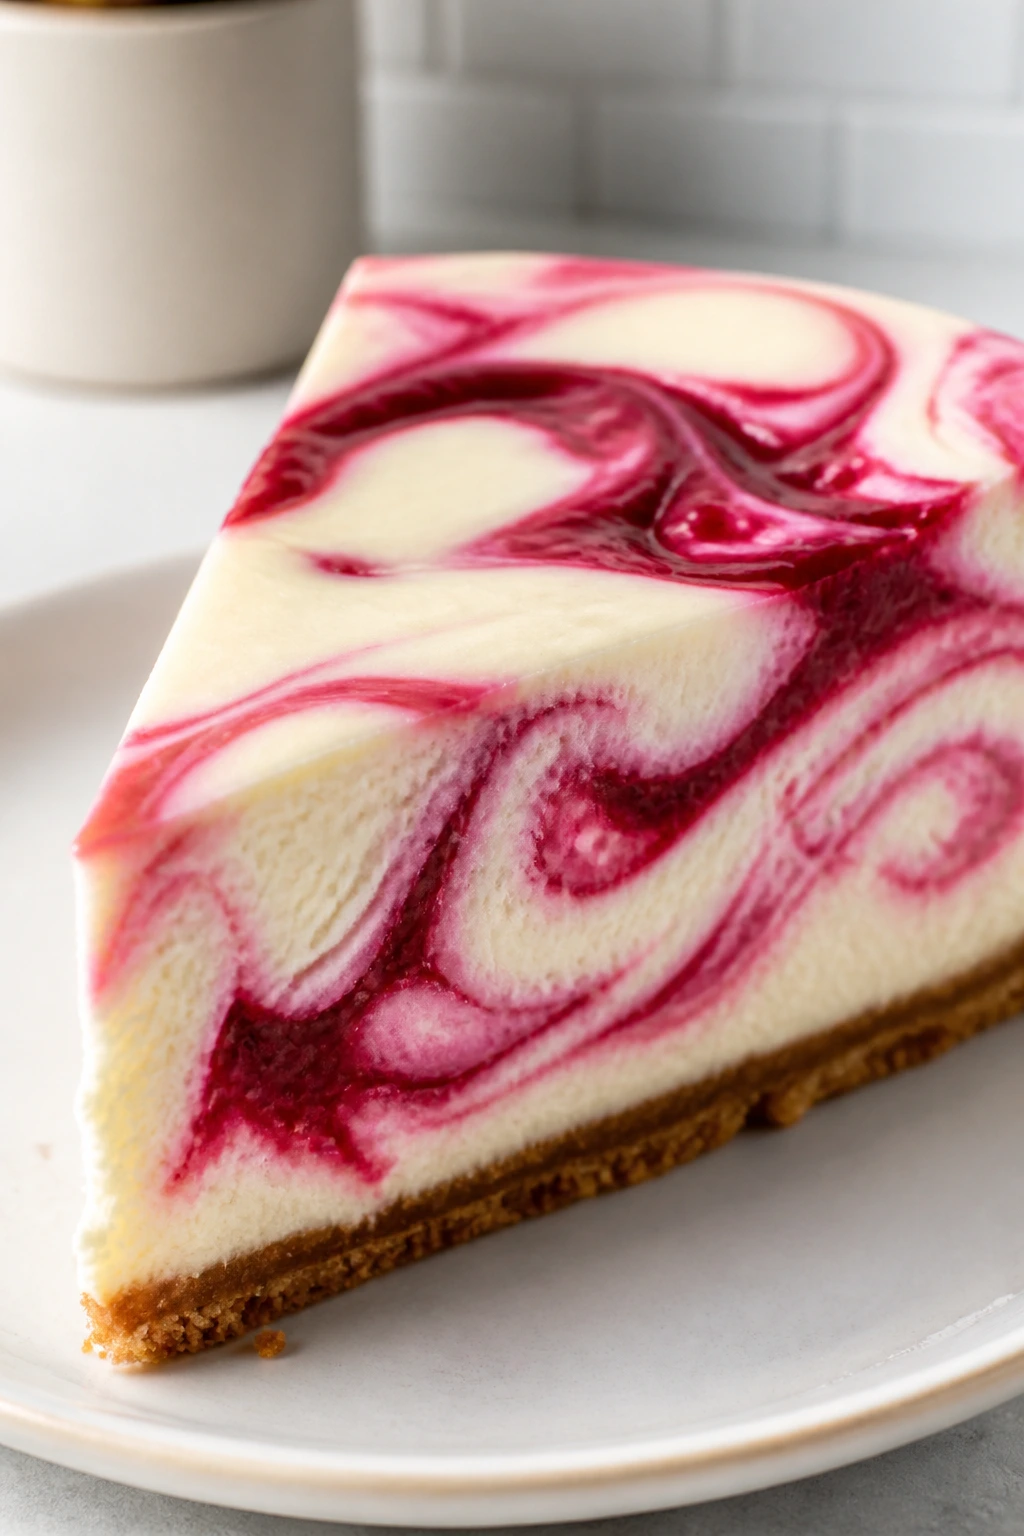
Intro: A raspberry swirl cheesecake is one of those desserts that looks richer than it is complicated. The surface should show ribbons of pink against the pale filling, not a muddy pink blur.
Why It Works: Cheesecake gives you a clean canvas, and raspberry puree adds color with just enough tartness to sharpen the cream cheese. A water bath helps the surface stay smooth, which matters if you want elegant slices.
Key Ingredients:
- 2 cups graham cracker crumbs
- 6 tablespoons melted butter
- 24 ounces cream cheese, softened
- 3/4 cup sugar
- 3 large eggs
- 1 teaspoon vanilla extract
- 1 cup raspberry puree, strained
- 1 tablespoon lemon juice
Quick Steps:
- Press the crust into a 9-inch springform pan and bake at 350°F for 10 minutes.
- Beat cream cheese, sugar, eggs, and vanilla until smooth.
- Pour into the crust, spoon raspberry puree on top, and swirl gently with a knife.
- Bake in a water bath at 325°F for 50 to 60 minutes, then chill overnight.
Equipment for This Recipe:
- 9-inch springform pan
- Hand mixer
- Aluminum foil
- Roasting pan
- Fine-mesh sieve
How to Serve This Dish: Serve with a few fresh raspberries and a thin line of sauce on the plate. Cheesecake needs clean edges more than busy decoration.
Pro Tips for This Recipe:
- Strain the puree so seeds do not clog the swirl.
- Do not overmix once the eggs are in.
- Cool slowly to reduce cracks.
Variations on This Dish:
- White Chocolate Swirl: Add melted white chocolate to the filling.
- Mixed Berry Version: Use a berry medley instead of all raspberry.
- Mini Cheesecakes: Bake in muffin tins for easier portioning.
Common Mistakes to Avoid with This Dish:
- Overbaking: The center becomes chalky.
- Aggressive swirling: You lose the ribbon effect.
- Slicing too soon: The filling needs a full overnight rest.
12. Coconut Mango Semifreddo
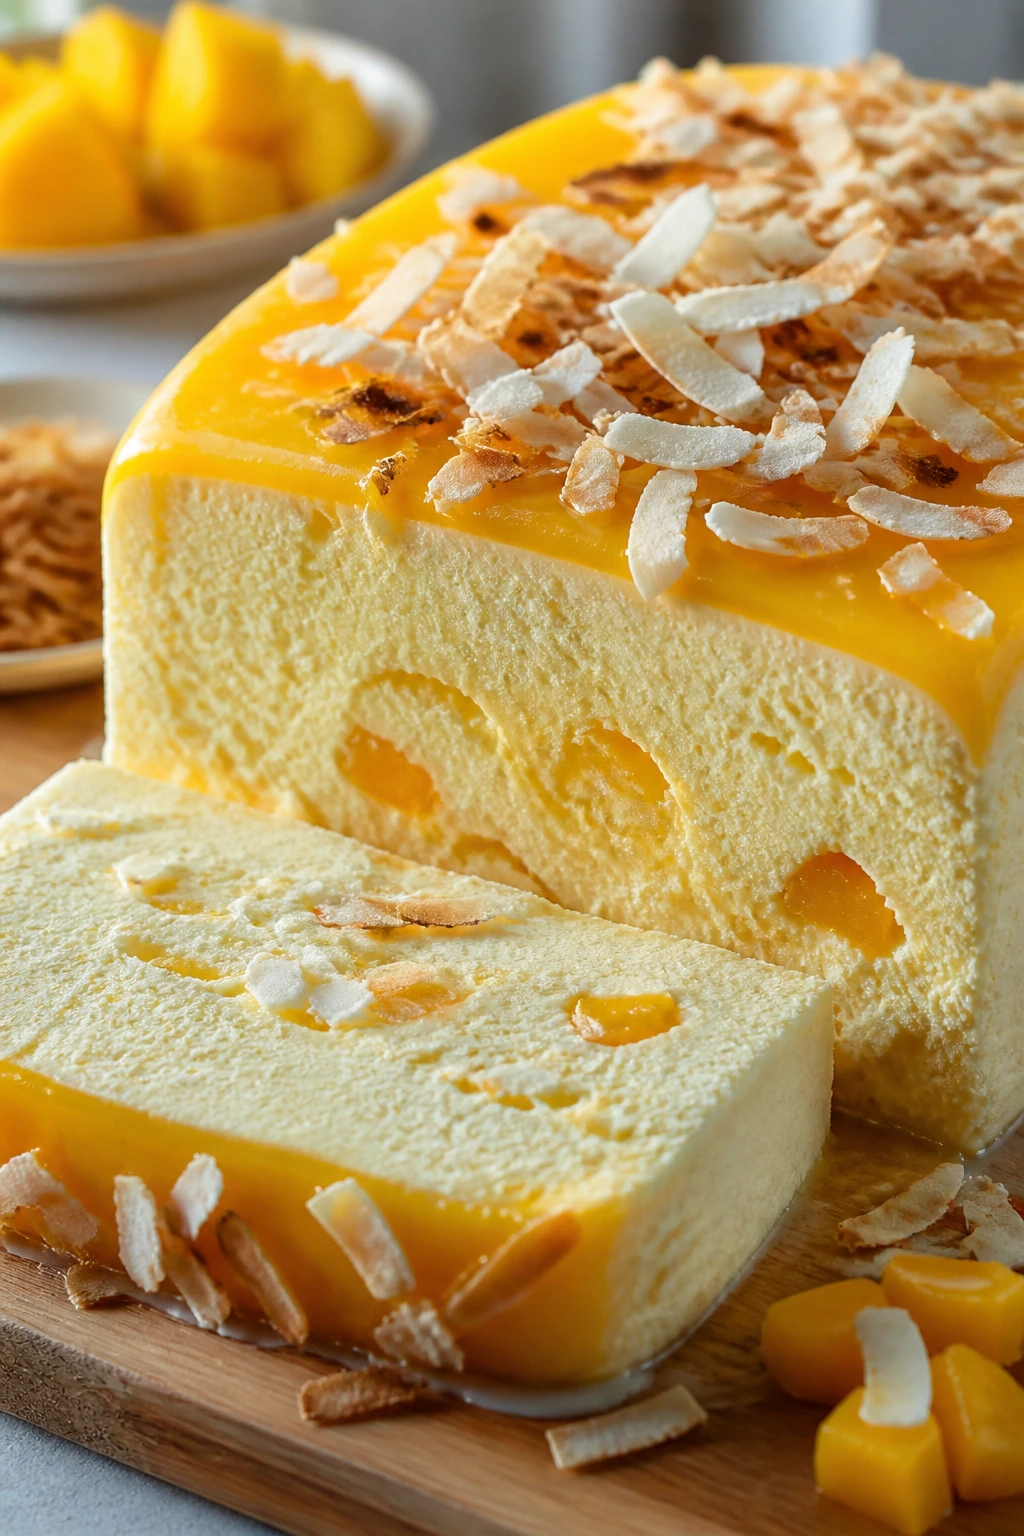
Intro: Semifreddo gives you the clean look of ice cream with less fuss. Coconut and mango make it feel bright and tropical, and the slices hold their shape better than a soft scoop.
Why It Works: Whipped cream and egg yolk foam trap air, so the dessert freezes into a silky block instead of a brick. Mango puree gives the top a vivid golden color that looks good with almost no garnish.
Key Ingredients:
- 1 1/2 cups heavy cream
- 4 large egg yolks
- 1/2 cup sugar
- 1 cup coconut milk
- 1 cup mango puree
- 1 teaspoon vanilla extract
- 1/2 cup toasted coconut flakes
Quick Steps:
- Whip the cream to soft peaks and keep it cold.
- Beat yolks and sugar until pale, then whisk in coconut milk, mango puree, and vanilla.
- Fold in the whipped cream and half the coconut flakes.
- Freeze in a loaf pan for at least 6 hours, then slice and top with remaining coconut.
Equipment for This Recipe:
- Loaf pan
- Mixer
- Rubber spatula
- Plastic wrap
- Sharp knife
How to Serve This Dish: Slice with a hot knife and plate immediately. A few cubes of fresh mango beside the slice make the colors pop without extra effort.
Pro Tips for This Recipe:
- Freeze the pan first if you can.
- Fold gently so the mixture stays airy.
- Let the loaf sit 5 minutes before slicing.
Variations on This Dish:
- Berry Coconut Semifreddo: Replace mango puree with raspberry puree.
- Pistachio Version: Add 1/2 cup chopped pistachios.
- Lime Twist: Add lime zest for sharper flavor.
Common Mistakes to Avoid with This Dish:
- Overfolding: The semifreddo loses its light texture.
- Warm puree: It can deflate the cream.
- Serving straight from the freezer: The slice cracks and crumbles.
13. Linzer Cookie Hearts
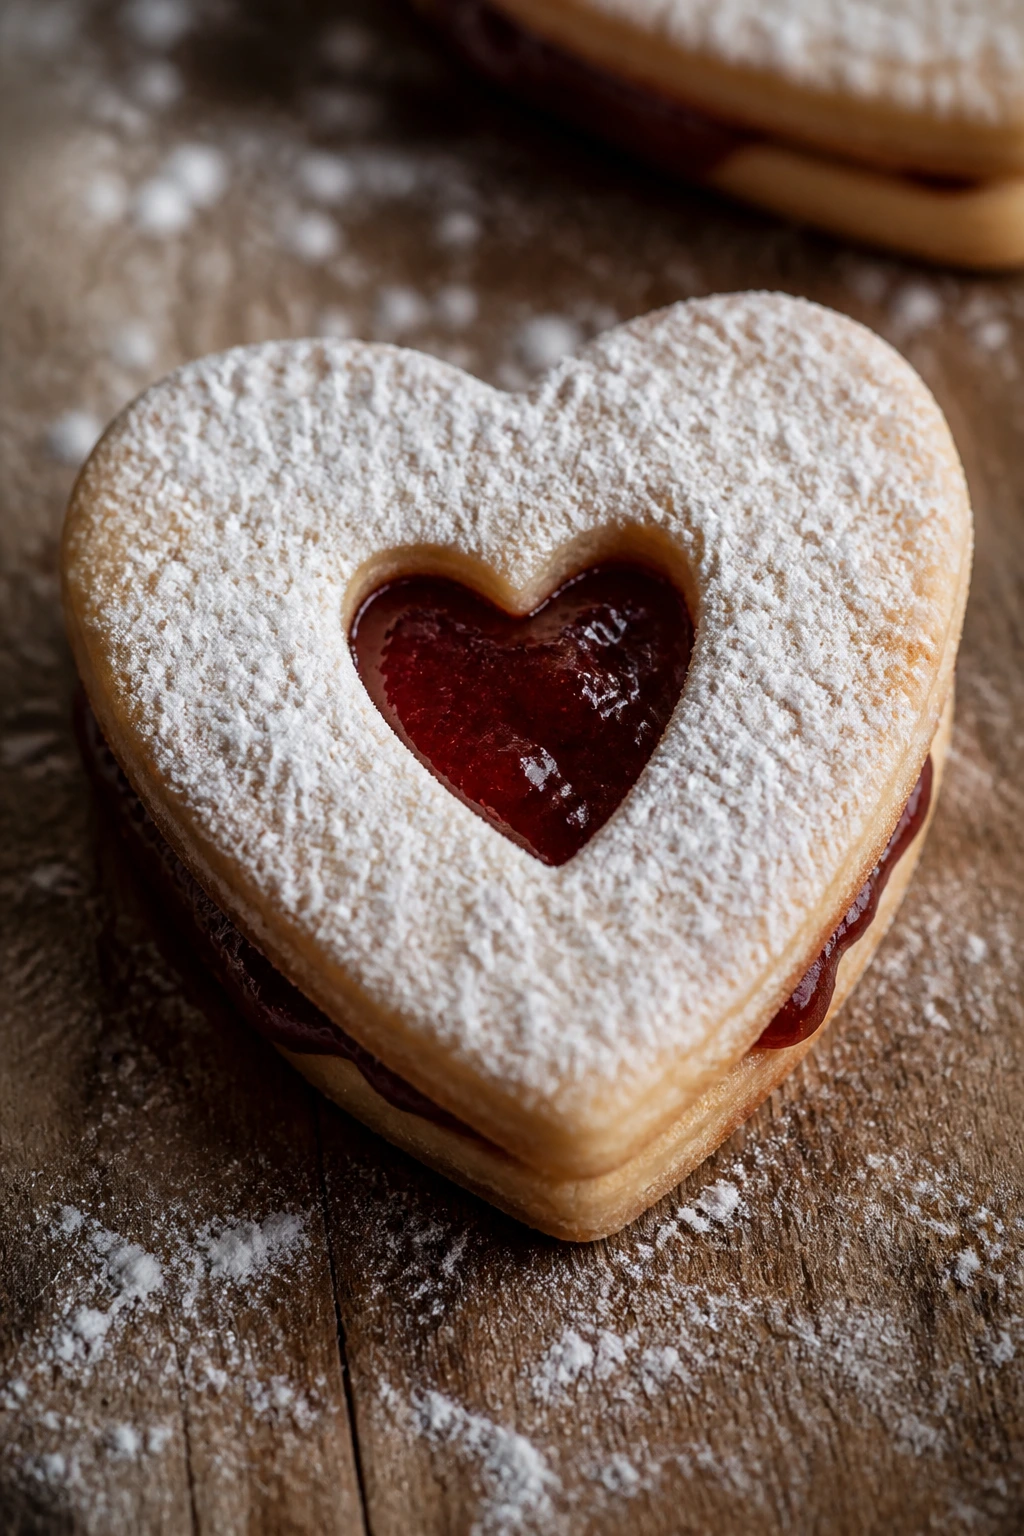
Intro: Linzer cookies are tiny, neat, and a little old-fashioned in the best way. The powdered sugar on top and the ruby jam showing through the center window make them look like jewelry.
Why It Works: The cutout lets the filling show through, which gives you contrast on a small scale. Almond flour in the dough adds a tender bite that keeps the cookie from feeling dry.
Key Ingredients:
- 2 cups all-purpose flour
- 1 cup almond flour
- 1/2 teaspoon cinnamon
- 1/2 teaspoon salt
- 1 cup unsalted butter, softened
- 3/4 cup sugar
- 1 large egg
- 1 teaspoon vanilla extract
- 3/4 cup raspberry jam
- Powdered sugar for dusting
Quick Steps:
- Make the dough, chill it 1 hour, then roll and cut heart shapes.
- Bake at 350°F for 10 to 12 minutes.
- Dust the cutout tops with powdered sugar.
- Spread jam on the bottom cookies and sandwich together.
Equipment for This Recipe:
- Rolling pin
- Cookie cutters
- Baking sheet
- Cooling rack
- Sifter
How to Serve This Dish: Stack them on a cake stand, but leave the powdered tops visible. They look especially nice beside tea or espresso.
Pro Tips for This Recipe:
- Chill the dough so the cutouts hold their shape.
- Warm jam spreads more evenly.
- Dust the tops before assembly, not after.
Variations on This Dish:
- Apricot Linzers: Use apricot jam for a sunnier color.
- Chocolate Linzers: Add 2 tablespoons cocoa powder to the dough.
- Hazelnut Version: Swap half the almond flour for hazelnut flour.
Common Mistakes to Avoid with This Dish:
- Rolling dough too thin: The cookies break.
- Too much jam: It leaks out the sides.
- Dusting after sandwiching: The sugar falls into the filling.
14. Cannoli Cups with Pistachios
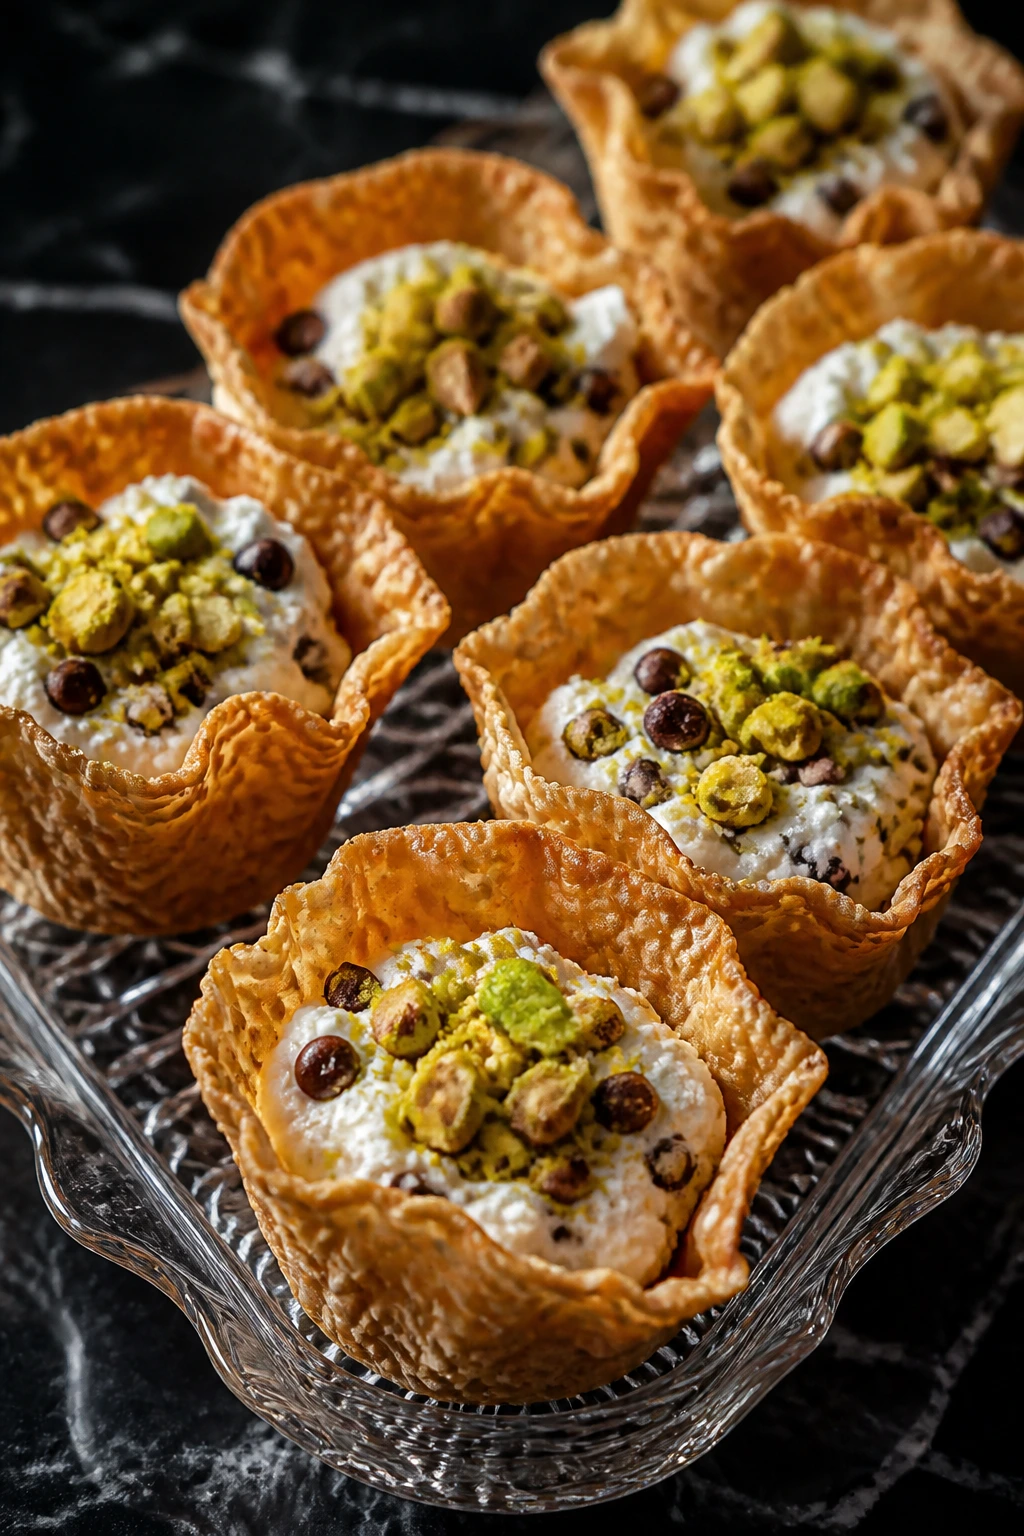
Intro: Cannoli cups give you the same creamy, crunchy thing as a classic cannoli without the shell stress. They look tidy on a platter, and the pistachios make the whole dessert feel dressed up.
Why It Works: Filling the shells right before serving keeps them crisp. Ricotta, chocolate, and citrus zest make a filling that tastes rich but not heavy.
Key Ingredients:
- 12 mini phyllo shells or baked tart shells
- 1 1/2 cups whole-milk ricotta, drained
- 1/2 cup powdered sugar
- 1/2 teaspoon vanilla extract
- 1/2 teaspoon orange zest
- 1/3 cup mini chocolate chips
- 1/4 cup chopped pistachios
- 2 tablespoons candied orange peel, optional
Quick Steps:
- Stir the ricotta, sugar, vanilla, and zest until smooth.
- Fold in chocolate chips.
- Spoon into the shells right before serving.
- Top with pistachios and orange peel.
Equipment for This Recipe:
- Mixing bowl
- Spoon or piping bag
- Fine sieve
- Small serving tray
- Paper towel
How to Serve This Dish: Serve them in a tight row so the toppings look intentional. A little extra pistachio dust on the tray looks elegant without adding clutter.
Pro Tips for This Recipe:
- Drain the ricotta or the filling turns loose.
- Pipe the filling for a cleaner finish.
- Fill the shells at the last minute.
Variations on This Dish:
- Chocolate Cannoli Cups: Add 1 tablespoon cocoa to the filling.
- Citrus Version: Use lemon zest instead of orange.
- Cherry Pistachio Cups: Fold in chopped dried cherries.
Common Mistakes to Avoid with This Dish:
- Wet ricotta: The filling puddles.
- Overstuffing shells: They crack or tip.
- Assembling too early: The shells soften.
15. Matcha Swiss Roll with Strawberries
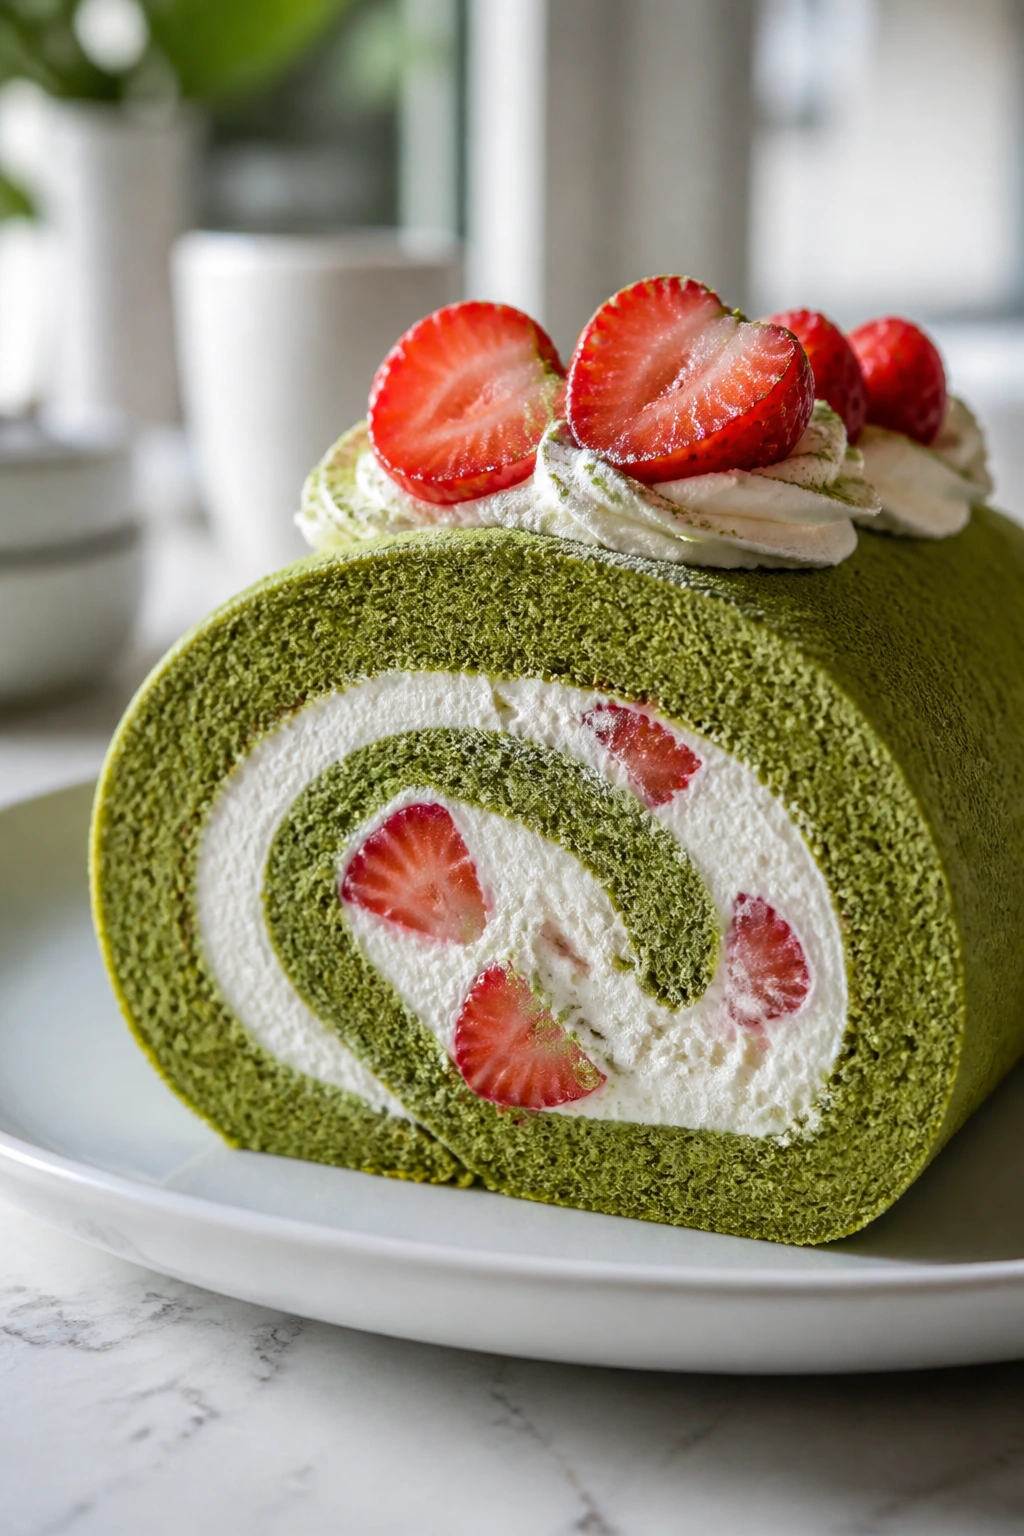
Intro: A Swiss roll always looks more impressive than the effort suggests. Matcha gives the sponge a soft green color, and the strawberry filling makes a clean, bright spiral when you slice it.
Why It Works: The sponge is thin and flexible, so it rolls without splitting if you handle it while warm. A whipped cream filling keeps the swirl visible, and strawberries add color right through the center.
Key Ingredients:
- 4 large eggs
- 2/3 cup sugar
- 3/4 cup cake flour
- 1 tablespoon matcha powder
- 1 teaspoon baking powder
- 1 cup heavy cream
- 2 tablespoons powdered sugar
- 1 cup strawberries, diced
Quick Steps:
- Bake the sponge in a jelly roll pan at 350°F for 10 to 12 minutes.
- Turn it onto a towel, peel the parchment, and roll it up while warm.
- Whip the cream and powdered sugar, then fold in strawberries.
- Fill, reroll, and chill 1 hour before slicing.
Equipment for This Recipe:
- Jelly roll pan
- Parchment paper
- Clean kitchen towel
- Hand mixer
- Serrated knife
How to Serve This Dish: Slice on a bias so the swirl shows wide. A light dusting of matcha on the plate makes the slices look deliberate.
Pro Tips for This Recipe:
- Roll the cake while warm to prevent cracks.
- Use culinary matcha with a fresh green color.
- Dice strawberries small so the roll closes cleanly.
Variations on This Dish:
- Black Sesame Roll: Swap the matcha for black sesame paste.
- Chocolate Roll: Leave out the matcha and add cocoa to the sponge.
- Raspberry Filling: Use raspberries if you want more tartness.
Common Mistakes to Avoid with This Dish:
- Overbaking the sponge: It cracks on the roll.
- Too much filling: The spiral bursts open.
- Rolling when cold: The cake loses flexibility.
16. Peach Galette with Almond Cream
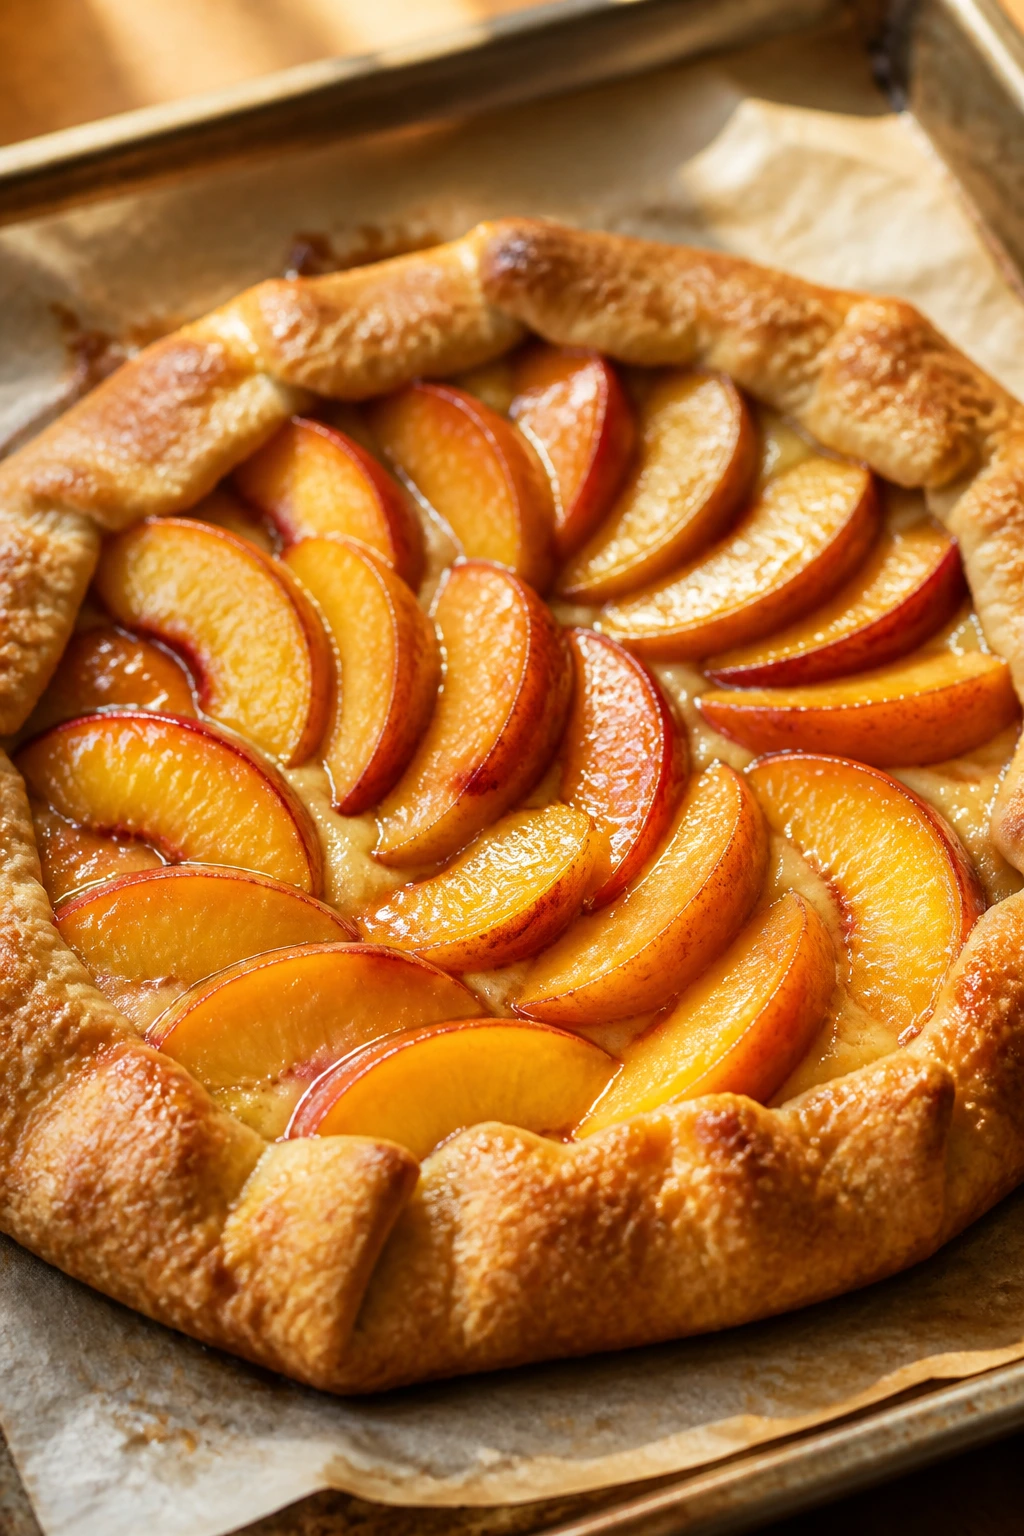
Intro: A galette is the easiest dessert here to make look rustic on purpose. The fruit fans out in the center, the edges fold like paper, and the almond cream keeps the bottom from going soggy.
Why It Works: The loose shape means you do not need a pie tin or perfect crimping. Thin peach slices bake into a glossy, overlapping pattern that looks much more polished than the effort level suggests.
Key Ingredients:
- 1 pie dough round, 12 inches
- 1/2 cup almond flour
- 3 tablespoons sugar
- 3 tablespoons softened butter
- 1 egg yolk
- 3 peaches, thinly sliced
- 1 tablespoon cornstarch
- 1 egg, beaten for egg wash
- 2 tablespoons sliced almonds
Quick Steps:
- Mix almond flour, sugar, butter, and yolk into a soft cream.
- Spread it in the center of the dough, leaving a 2-inch border.
- Toss peaches with cornstarch, arrange them on top, and fold the edges over.
- Brush with egg wash, sprinkle almonds, and bake at 400°F for 30 to 35 minutes.
Equipment for This Recipe:
- Baking sheet
- Parchment paper
- Rolling pin
- Pastry brush
- Sharp knife
How to Serve This Dish: Serve warm with a scoop of vanilla ice cream or cold crème fraîche. The galette looks nicest when the peach slices still show their shape.
Pro Tips for This Recipe:
- Keep the dough cold or it shrinks.
- Use peaches that are ripe but still firm.
- Let it cool 15 minutes before slicing.
Variations on This Dish:
- Plum Galette: Swap in plums for a deeper color.
- Apricot Almond Version: Add a little almond extract.
- Berry Galette: Use mixed berries, but add a bit more cornstarch.
Common Mistakes to Avoid with This Dish:
- Too much filling juice: The crust turns wet.
- Warm dough: The edges spread instead of folding.
- Skipping the almond cream: The bottom can go soggy fast.
17. Black Forest Cake Jars
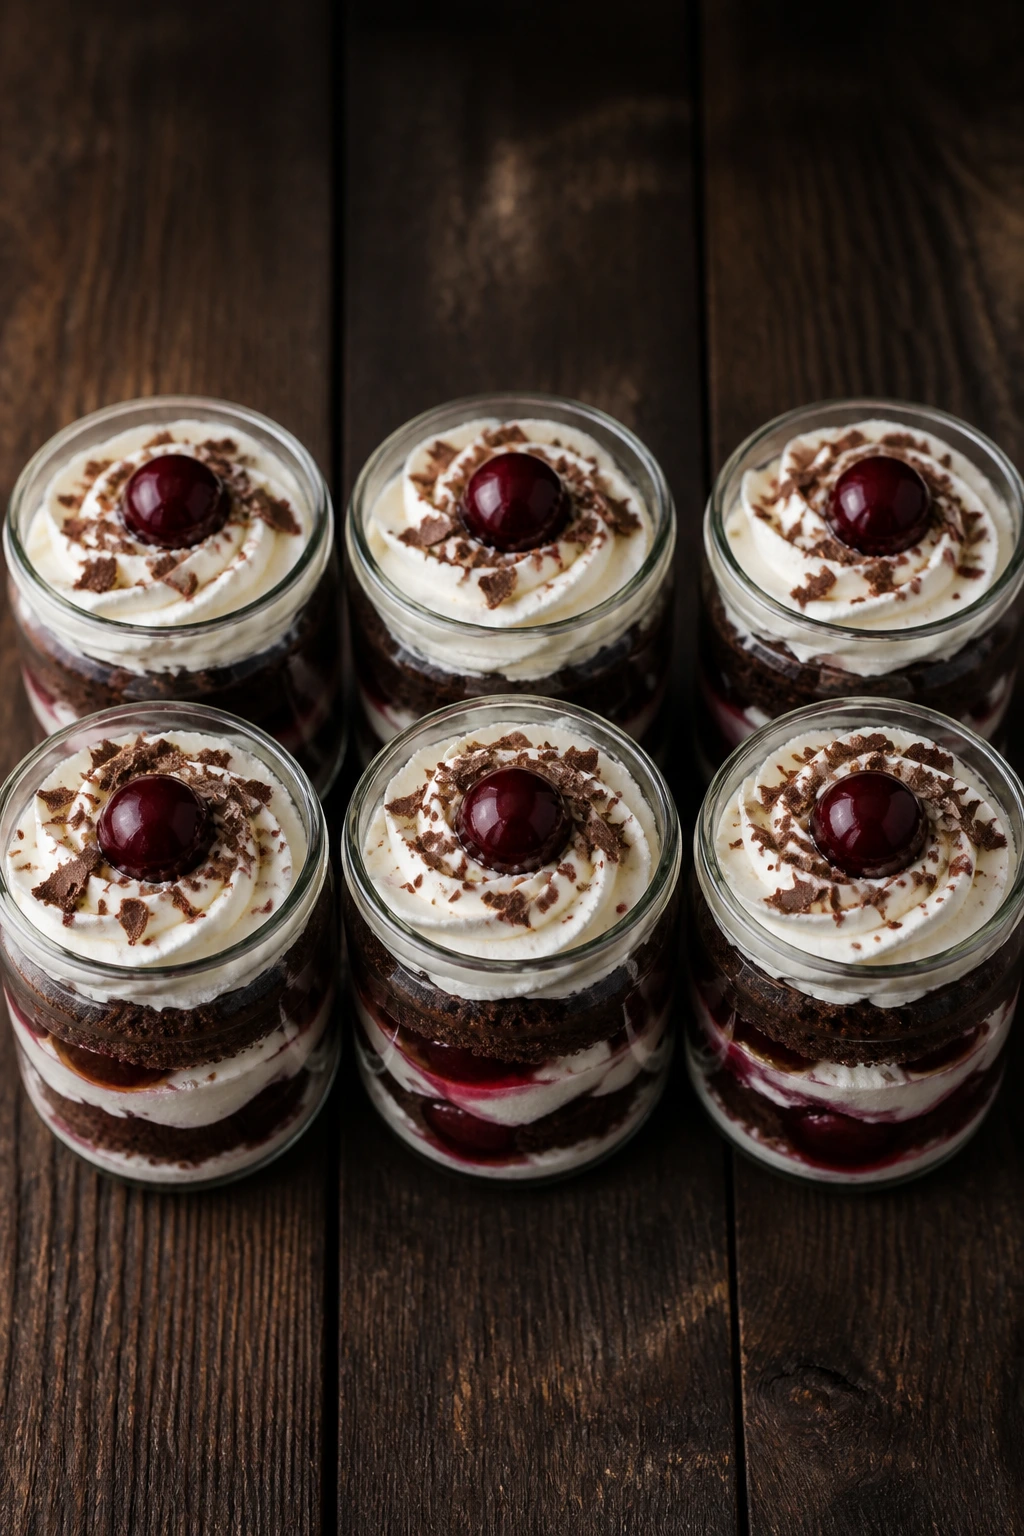
Intro: Black Forest in jars is a smart move. You get the chocolate cake, cherries, and cream in neat layers, and every spoonful lands with the same balance.
Why It Works: The glass shows the contrast between dark cake and pale cream, which is half the visual appeal. Cherry syrup soaks the cake just enough to keep it lush without making it heavy.
Key Ingredients:
- 2 cups chocolate cake, cubed
- 1 1/2 cups pitted cherries
- 2 tablespoons sugar
- 1 tablespoon lemon juice
- 1 cup heavy cream
- 2 tablespoons powdered sugar
- 1 teaspoon vanilla extract
- Chocolate shavings for topping
Quick Steps:
- Cook cherries, sugar, and lemon juice for 5 minutes until syrupy.
- Whip cream, powdered sugar, and vanilla to soft peaks.
- Layer cake, cherries, and cream in 6 jars.
- Finish with chocolate shavings and chill 1 hour.
Equipment for This Recipe:
- 6 small jars
- Saucepan
- Hand mixer
- Spoon
- Vegetable peeler or grater
How to Serve This Dish: Serve the jars straight from the fridge with small spoons. A dark napkin underneath makes the layers stand out visually.
Pro Tips for This Recipe:
- Cube the cake evenly so the layers stay straight.
- Cool the cherry mixture before assembling.
- Keep the chocolate shavings light; too much hides the layers.
Variations on This Dish:
- Espresso Black Forest: Add a little coffee syrup to the cake.
- White Forest Jars: Use white chocolate curls instead.
- Cherry Almond Version: Add almond extract to the cream.
Common Mistakes to Avoid with This Dish:
- Hot fruit filling: It melts the cream.
- Uneven cake cubes: The jars tilt.
- Overpacking the jar: You lose the clean layer look.
18. Salted Caramel Profiteroles
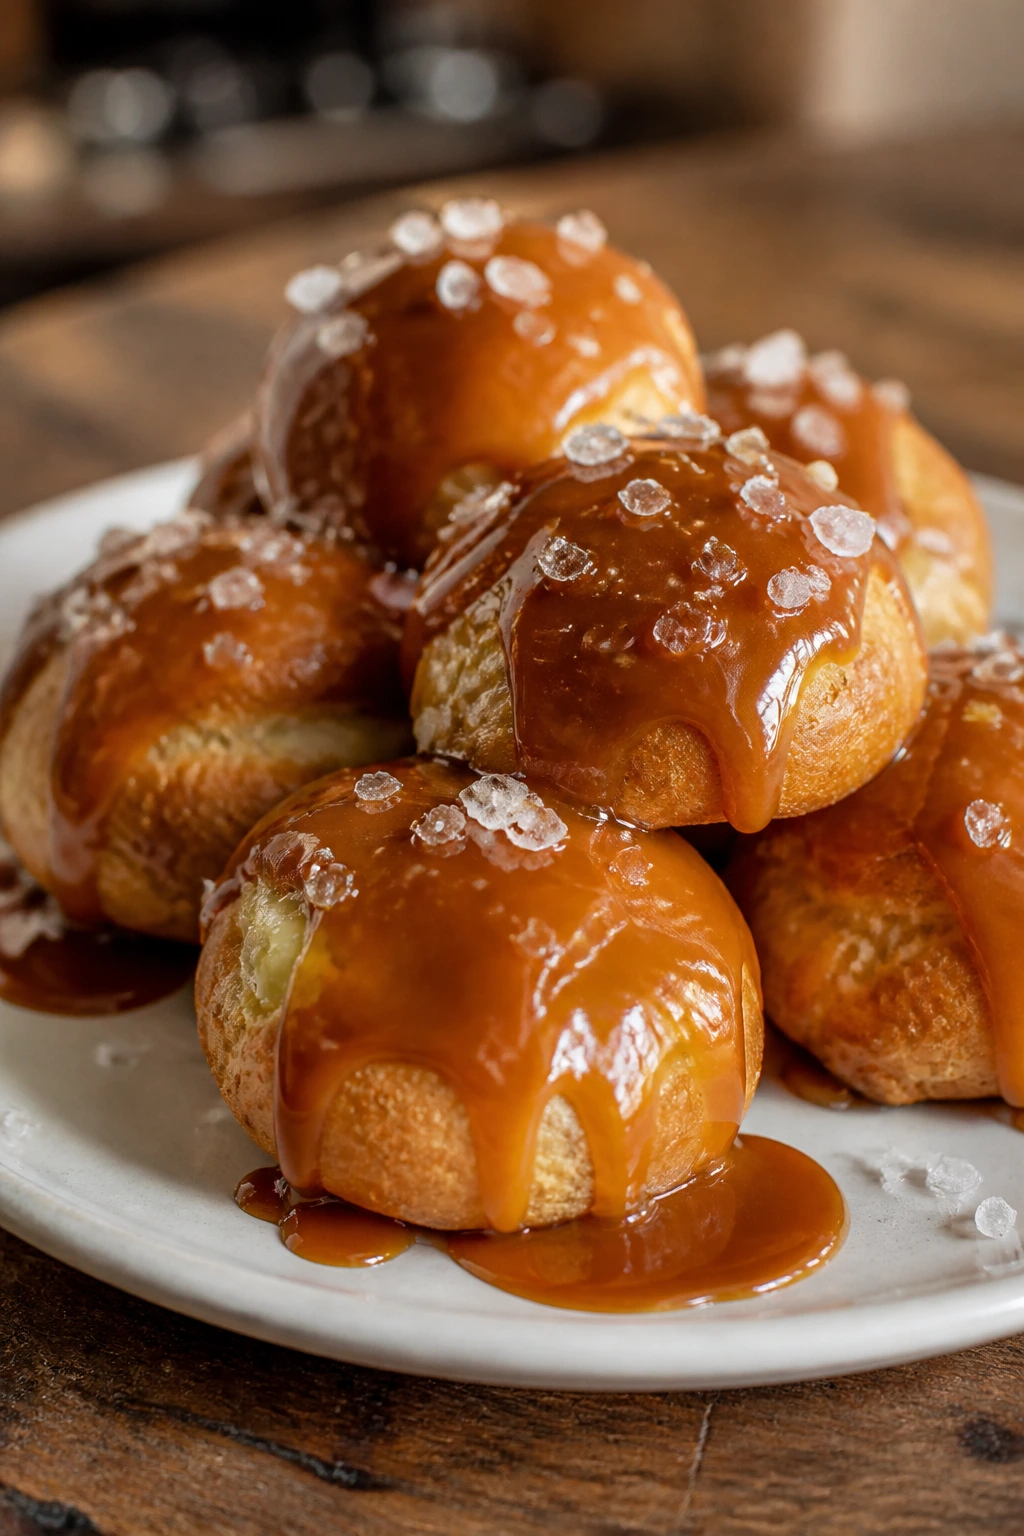
Intro: Profiteroles feel like the dessert equivalent of a little black dress. They are compact, crisp, and easy to make look elegant with a ribbon of caramel and a dusting of salt.
Why It Works: Choux pastry puffs into round shells that hold whipped or ice cream filling well. Salted caramel gives the top a glossy finish and keeps the sweetness from getting sticky.
Key Ingredients:
- 1 cup water
- 1/2 cup butter
- 1 cup flour
- 4 large eggs
- 2 cups vanilla ice cream or whipped cream
- 1 cup sugar
- 1/4 cup water
- 1/2 cup heavy cream
- Flaky salt
Quick Steps:
- Make choux pastry, pipe 12 mounds, and bake at 400°F for 20 minutes, then 350°F for 15 minutes.
- Cool completely and split or fill the shells.
- Cook sugar and water to amber, then whisk in cream for caramel.
- Drizzle the caramel over the profiteroles and finish with flaky salt.
Equipment for This Recipe:
- Piping bag
- Sheet pan
- Saucepan
- Whisk
- Ice cream scoop or spoon
How to Serve This Dish: Stack them on a platter and drizzle caramel at the last minute. A little extra caramel on the plate makes the serving look intentional.
Pro Tips for This Recipe:
- Bake until the shells are dry inside.
- Fill right before serving if using ice cream.
- Add salt in tiny pinches; caramel should still taste round.
Variations on This Dish:
- Chocolate Profiteroles: Replace caramel with ganache.
- Coffee Cream Version: Use espresso whipped cream inside.
- Hazelnut Crunch: Roll the tops in chopped toasted hazelnuts.
Common Mistakes to Avoid with This Dish:
- Soft shells: They collapse under filling.
- Caramel too dark: It turns bitter fast.
- Filling too early: The pastry loses its crunch.
19. Almond Financiers with Poached Pears
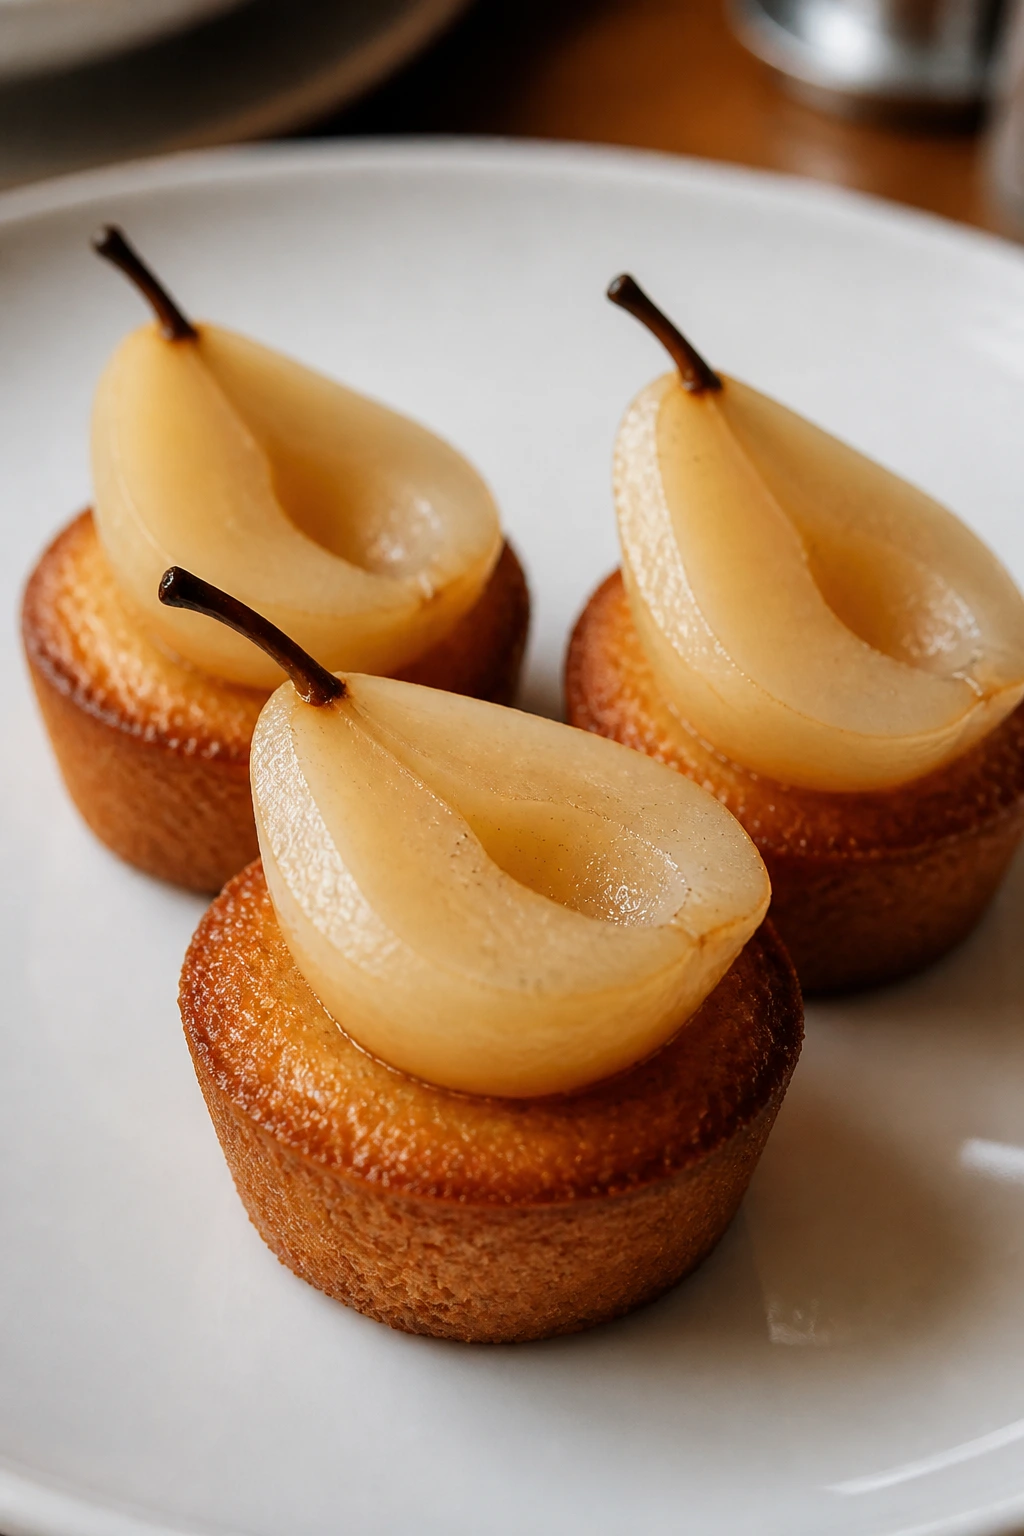
Intro: Financiers look modest until you realize how pretty they are with a pear leaned across the top. The almond cake is small, gold, and tidy — a dessert that behaves well on a plate.
Why It Works: Brown butter gives financiers their nutty edge, and poached pears bring a pale, elegant shape that sits nicely on top. The contrast is delicate without being fussy.
Key Ingredients:
- 1/2 cup unsalted butter
- 1/2 cup almond flour
- 1/2 cup powdered sugar
- 1/4 cup all-purpose flour
- 4 large egg whites
- 2 pears, peeled and halved
- 2 cups water
- 1/2 cup sugar
- 1 strip lemon peel
- 1 cinnamon stick
Quick Steps:
- Brown the butter and cool slightly.
- Mix almond flour, powdered sugar, flour, egg whites, and browned butter into a smooth batter.
- Bake in financier molds at 375°F for 12 to 15 minutes.
- Poach the pears in water, sugar, lemon peel, and cinnamon until tender, then slice and top the cakes.
Equipment for This Recipe:
- Financier mold or mini muffin tin
- Small saucepan
- Whisk
- Slotted spoon
- Cooling rack
How to Serve This Dish: Place one pear slice on each cake and spoon a little poaching syrup around the base. It gives the plate shine without making it messy.
Pro Tips for This Recipe:
- Brown the butter until nutty, not dark.
- Use ripe pears that still hold shape.
- Brush the cakes lightly with syrup for extra gloss.
Variations on This Dish:
- Hazelnut Financiers: Swap some almond flour for hazelnut flour.
- Apricot Topping: Use poached apricot halves instead of pears.
- Chocolate Financiers: Add 1 tablespoon cocoa powder.
Common Mistakes to Avoid with This Dish:
- Overbaking: The cakes dry out fast.
- Pears too soft: They lose their shape on top.
- Batter not rested: The texture can be coarse.
20. Key Lime Pie with Lime Whipped Cream
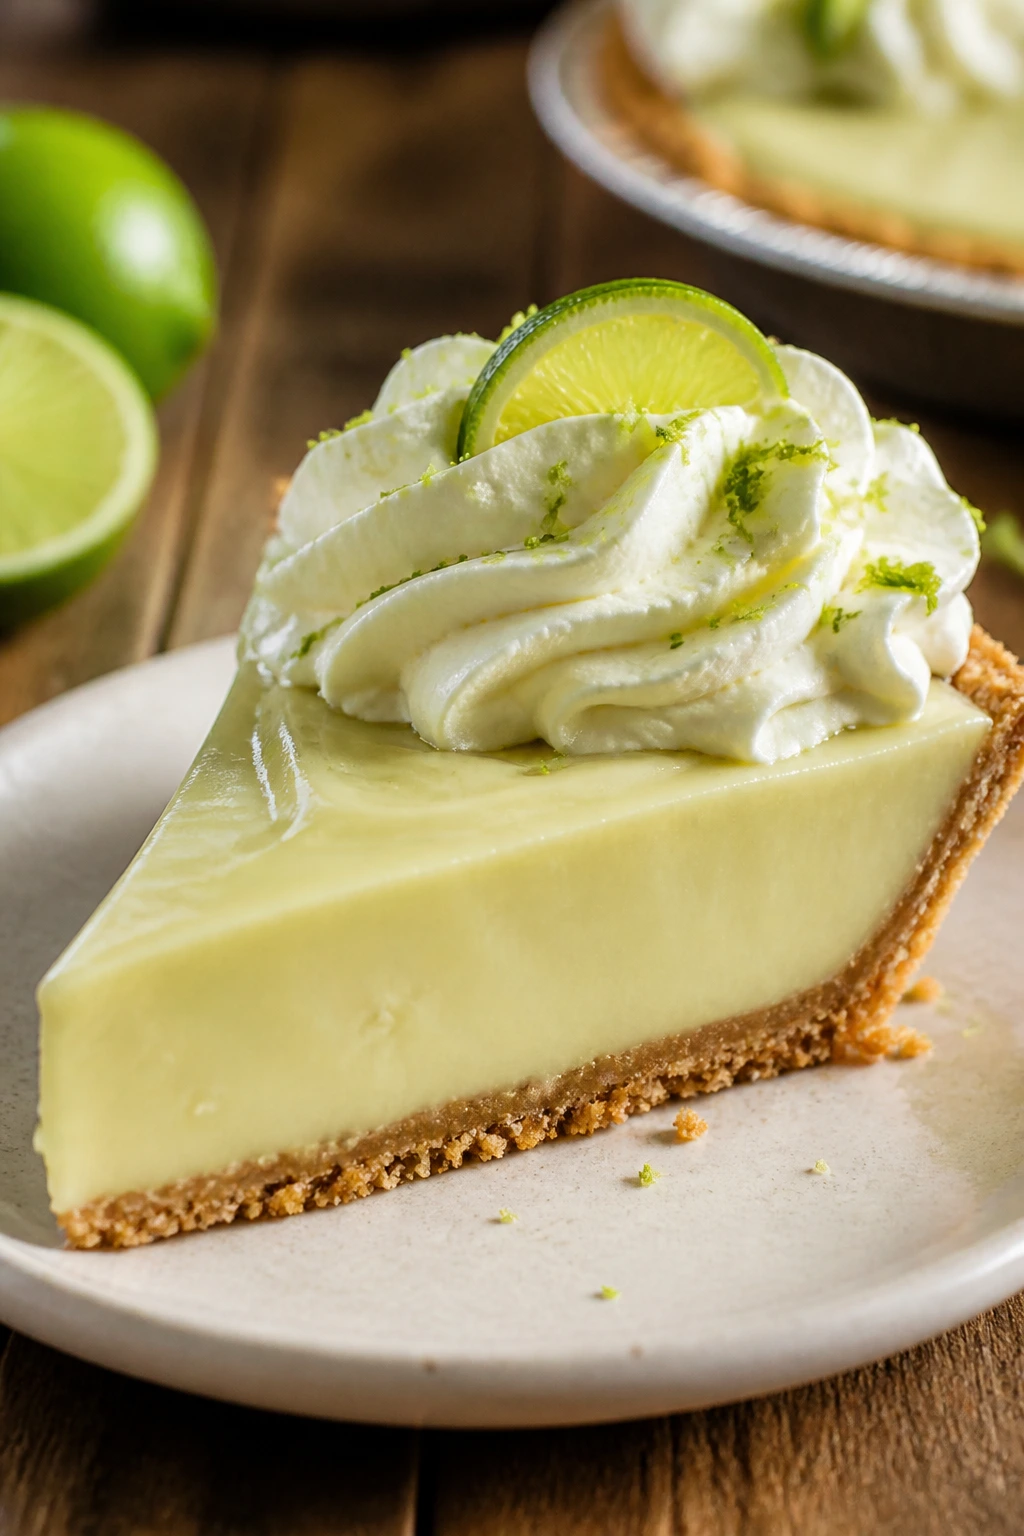
Intro: Key lime pie is all sharp edges and pale green charm. The filling should look smooth and almost glassy, with a whipped cream top that softens the whole thing.
Why It Works: The graham crust gives you crunch, while the tart lime filling cuts through the richness of the sweetened milk. Lime whipped cream ties the whole pie together without making it heavy.
Key Ingredients:
- 1 1/2 cups graham cracker crumbs
- 6 tablespoons melted butter
- 1/4 cup sugar
- 4 large egg yolks
- 1 can sweetened condensed milk
- 1/2 cup key lime juice
- 1 tablespoon lime zest
- 1 1/2 cups heavy cream
- 2 tablespoons powdered sugar
Quick Steps:
- Bake the crust at 350°F for 8 minutes.
- Whisk yolks, condensed milk, lime juice, and zest until smooth.
- Pour into the crust and bake 15 minutes, then chill 4 hours.
- Whip the cream with powdered sugar and spoon it over the pie.
Equipment for This Recipe:
- 9-inch pie plate
- Whisk
- Mixing bowls
- Zester
- Spatula
How to Serve This Dish: Pipe or spoon the whipped cream in loose swirls. A little extra zest on top gives the pie a clean, bright finish.
Pro Tips for This Recipe:
- Use fresh lime juice if you can.
- Chill the pie fully before slicing.
- Warm the knife for neat wedges.
Variations on This Dish:
- Meyer Lime Pie: Use Meyer limes for a softer flavor.
- Graham-Almond Crust: Add ground almonds to the crust.
- Berry Topped Version: Add a few raspberries on the cream.
Common Mistakes to Avoid with This Dish:
- Undercooked filling: It won’t set cleanly.
- Too much zest: The filling turns bitter.
- Warm slicing: The wedge slumps.
21. Chocolate Tart with Berry Crown
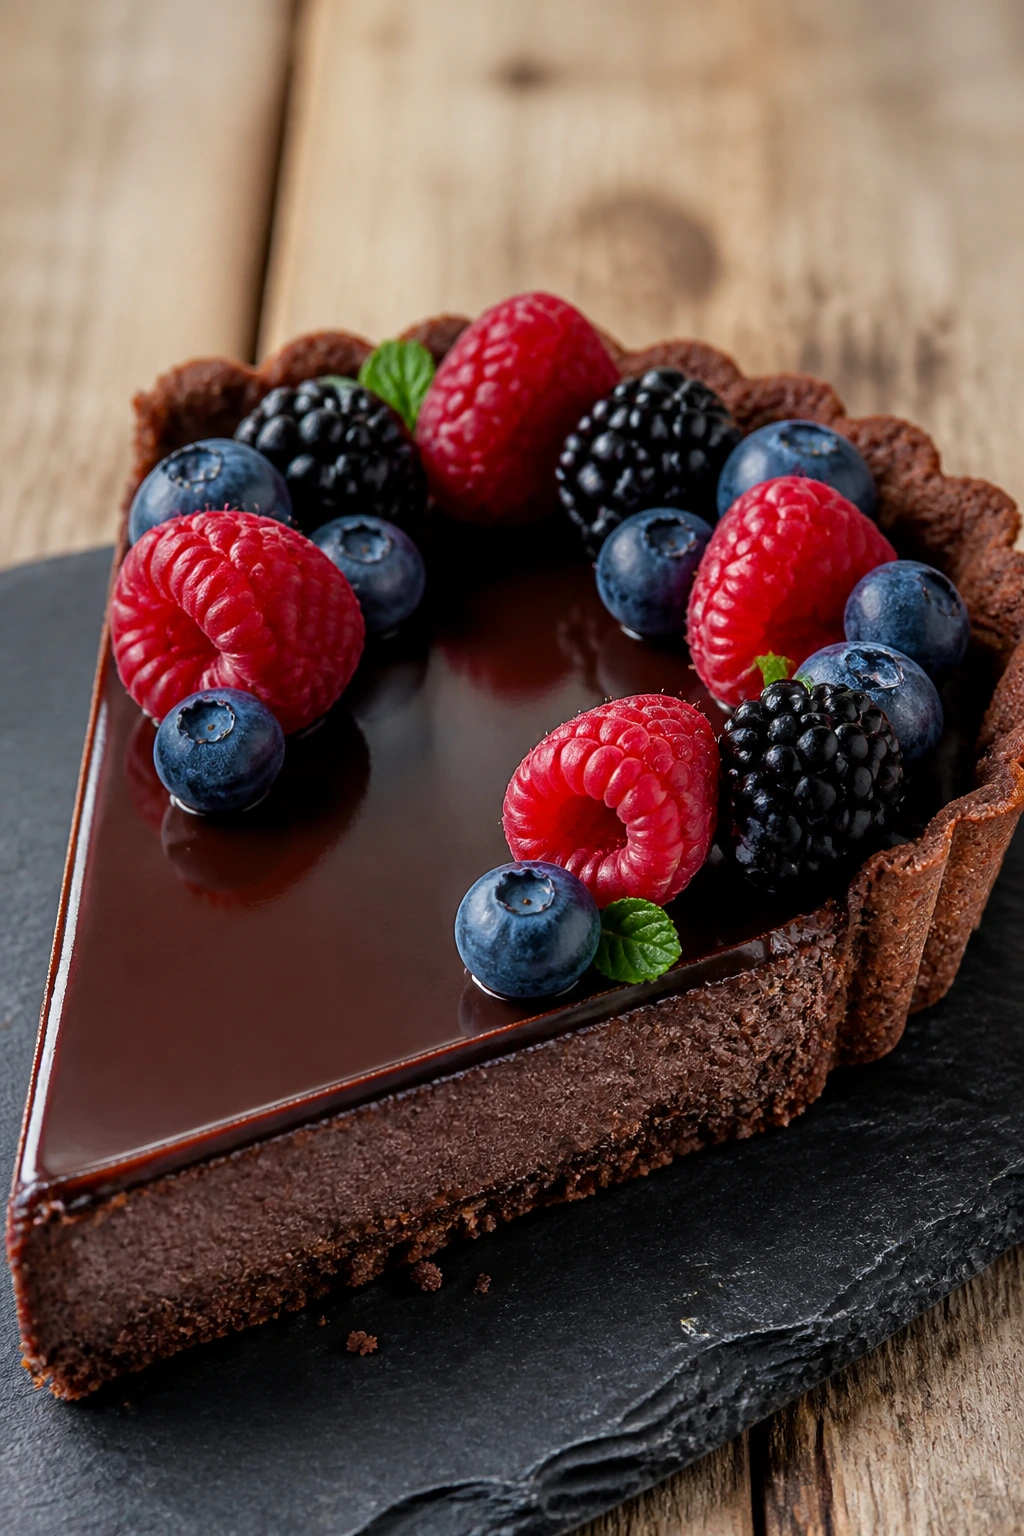
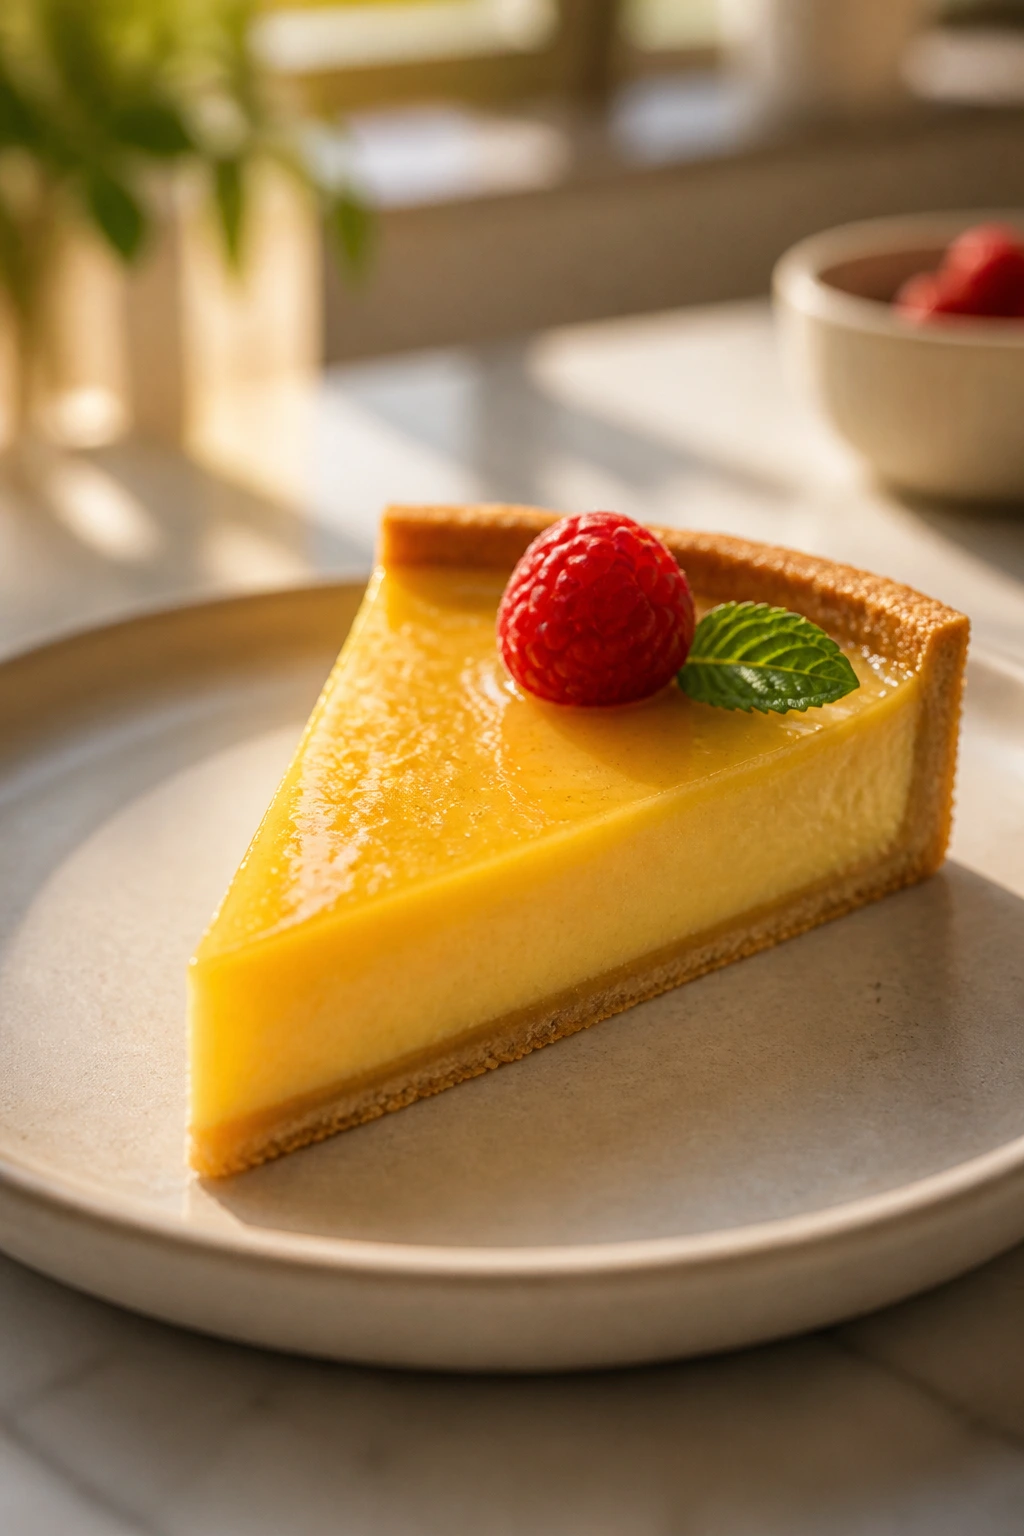
Intro: A chocolate tart topped with berries is pure contrast: dark, smooth filling underneath, bright fruit above. It’s a simple idea, but it looks expensive when the crust is crisp and the fruit is arranged with care.
Why It Works: Chocolate ganache sets into a neat sliceable layer, and berries keep the tart from feeling heavy. The tart shell frames everything, which is why this dessert always looks composed.
Key Ingredients:
- 1 9-inch tart shell, baked
- 8 ounces bittersweet chocolate
- 1 cup heavy cream
- 2 tablespoons butter
- 1 tablespoon honey
- 2 cups mixed berries
- 1 tablespoon apricot jam, warmed
- Pinch of flaky salt
Quick Steps:
- Heat the cream and honey, then pour over the chopped chocolate and butter.
- Stir until smooth and pour into the tart shell.
- Chill 2 hours until set.
- Arrange berries on top and brush lightly with warm jam.
Equipment for This Recipe:
- Tart pan
- Saucepan
- Whisk
- Offset spatula
- Small pastry brush
How to Serve This Dish: Cut thin slices because the chocolate is rich. A few berry juices on the plate make the presentation feel finished, not crowded.
Pro Tips for This Recipe:
- Use good chocolate; the filling is simple.
- Let the ganache cool slightly before pouring.
- Add salt sparingly so it lifts the chocolate.
Variations on This Dish:
- Orange Chocolate Tart: Add orange zest to the ganache.
- Hazelnut Crust: Replace part of the flour with ground hazelnuts.
- Raspberry-Only Version: Stick with one berry for a cleaner color story.
Common Mistakes to Avoid with This Dish:
- Hot ganache in a baked shell: It can soften the crust too fast.
- Too many berries: The tart starts to look crowded.
- Slicing before set: The filling oozes.
22. Pistachio Baklava Rolls
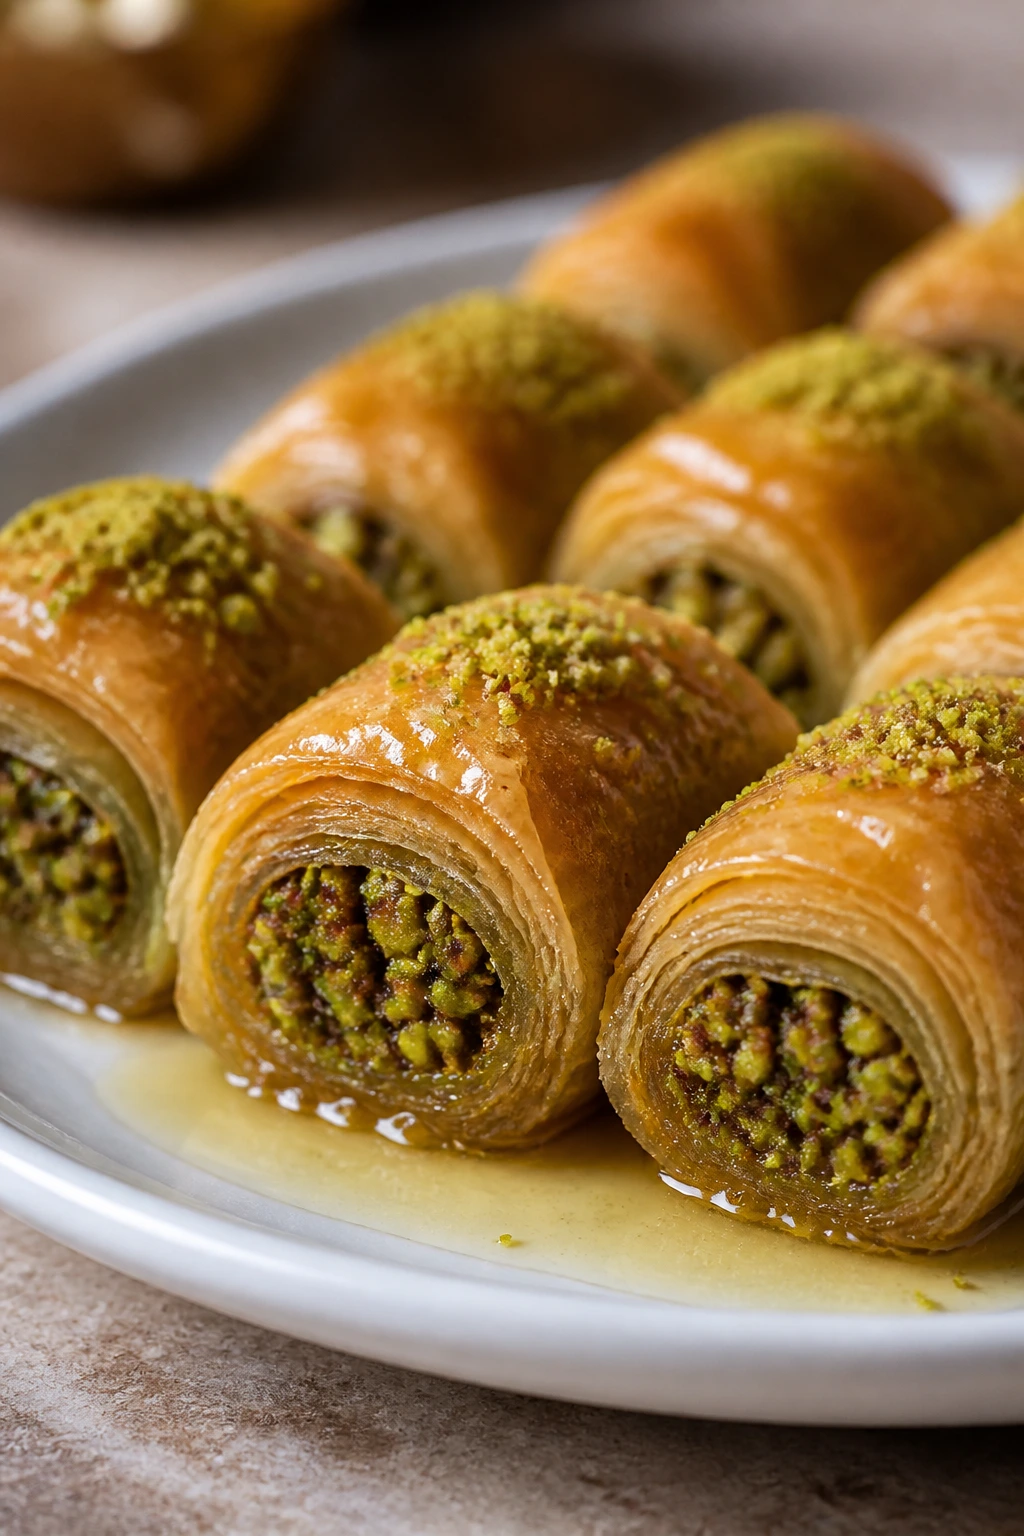
Intro: Baklava rolls have a neat, striped look that makes them stand out on a tray. The pistachios add color and texture, and the syrup gives the pastry that glossy finish.
Why It Works: Rolling the phyllo instead of stacking it creates tidy portions. Pistachios look especially good because their green color shows through once the syrup settles.
Key Ingredients:
- 10 sheets phyllo dough
- 1 1/2 cups shelled pistachios, finely chopped
- 1/2 cup sugar
- 1 teaspoon cinnamon
- 1/2 cup melted butter
- 3/4 cup honey
- 1/2 cup water
- 1 tablespoon lemon juice
Quick Steps:
- Mix pistachios, sugar, and cinnamon.
- Layer phyllo sheets, brushing with butter, sprinkle filling, and roll tightly.
- Cut into pieces and bake at 350°F for 35 to 40 minutes.
- Simmer honey, water, and lemon juice, then pour over hot baklava.
Equipment for This Recipe:
- Pastry brush
- Sharp knife
- Baking dish
- Small saucepan
- Clean kitchen towel
How to Serve This Dish: Let the syrup soak in before serving. A few crushed pistachios over the tray keep the look crisp and intentional.
Pro Tips for This Recipe:
- Keep phyllo covered so it doesn’t dry out.
- Cut before baking for the cleanest shape.
- Pour syrup over hot pastry and let it sit.
Variations on This Dish:
- Walnut Baklava Rolls: Use walnuts for a darker filling.
- Orange Syrup Version: Add orange peel to the syrup.
- Rosewater Baklava: Add a tiny splash of rosewater to the syrup.
Common Mistakes to Avoid with This Dish:
- Dry phyllo: It tears while rolling.
- Too little butter: The layers won’t crisp.
- Syrup too thick: It sits on top instead of soaking in.
23. Red Velvet Cupcakes with Cream Cheese Swirls

Intro: Red velvet cupcakes are classic for a reason: that deep red crumb and white swirls make a strong visual contrast. If you pipe the frosting cleanly, each cupcake looks finished without extra decoration.
Why It Works: The cocoa in the batter gives the cake a muted chocolate note, while the cream cheese frosting adds that tangy edge people expect. Cupcake form also makes the red color show up in every single serving.
Key Ingredients:
- 1 1/2 cups all-purpose flour
- 2 tablespoons cocoa powder
- 1/2 teaspoon baking soda
- 1/2 teaspoon salt
- 1 cup sugar
- 1/2 cup vegetable oil
- 2 large eggs
- 1 cup buttermilk
- 1 tablespoon red food coloring
- 8 ounces cream cheese, softened
- 1/2 cup butter, softened
- 2 cups powdered sugar
Quick Steps:
- Mix the dry ingredients, then whisk in oil, eggs, buttermilk, and coloring.
- Bake in lined muffin tins at 350°F for 18 to 20 minutes.
- Beat cream cheese, butter, and powdered sugar into a smooth frosting.
- Pipe swirls on cooled cupcakes.
Equipment for This Recipe:
- Muffin tin
- Cupcake liners
- Piping bag with star tip
- Mixer
- Cooling rack
How to Serve This Dish: Pipe tall swirls and stop cleanly so the tops look tidy. A few cake crumbs or red sugar sprinkles can work, but do not cover the frosting.
Pro Tips for This Recipe:
- Let the cupcakes cool fully before frosting.
- Use a piping tip for the cleanest look.
- Chill the frosting 10 minutes if it softens too much.
Variations on This Dish:
- Mini Cupcakes: Bake smaller portions for bite-size servings.
- Chocolate Cream Cheese Frosting: Add melted chocolate to the topping.
- Beet Tint Version: Use beet powder instead of dye.
Common Mistakes to Avoid with This Dish:
- Overfilling liners: The tops dome too much.
- Warm frosting on warm cakes: It slides off.
- Overmixing batter: The cupcakes turn tough.
24. Rose Cardamom Rice Pudding
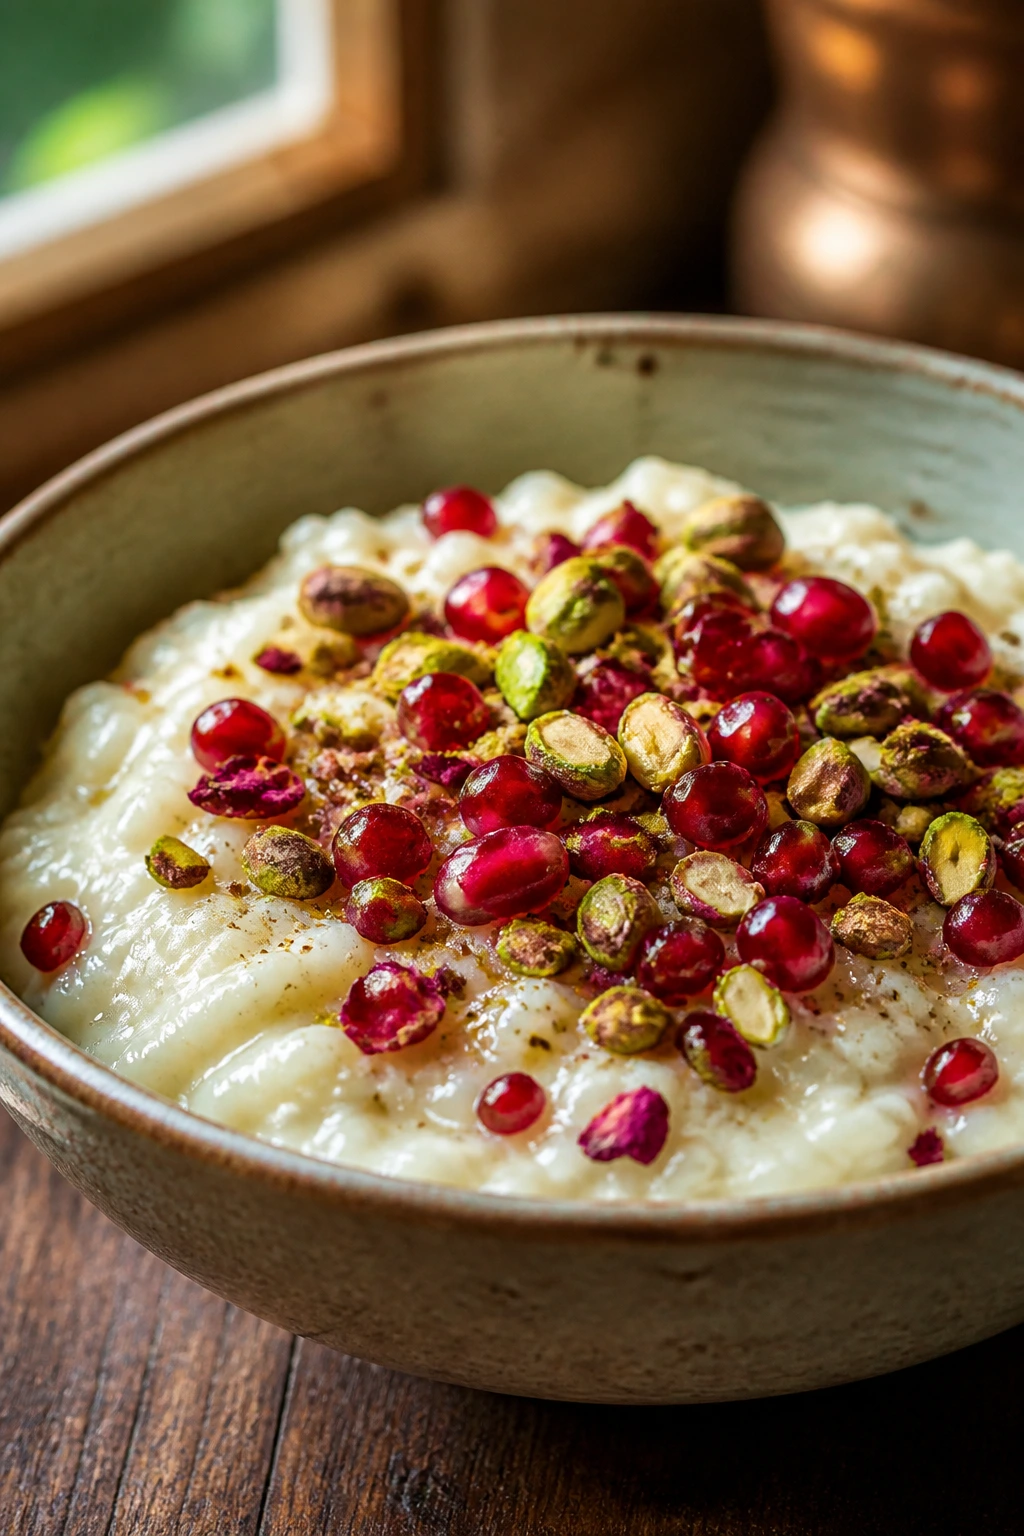
Intro: Rice pudding usually gets ignored until someone gives it a proper finish. Rose and cardamom turn it into something soft, fragrant, and surprisingly elegant, especially in shallow bowls.
Why It Works: The rice creates texture while the milk thickens into a creamy base. A few petals, pistachios, or pomegranate seeds on top make the whole thing look intentional instead of plain.
Key Ingredients:
- 1/2 cup arborio rice
- 4 cups whole milk
- 1/2 cup sugar
- 4 cardamom pods, crushed
- 1 teaspoon rosewater
- Pinch of salt
- 1/4 cup chopped pistachios
- 1/4 cup pomegranate seeds
Quick Steps:
- Simmer rice, milk, sugar, cardamom, and salt over low heat for 35 to 40 minutes.
- Stir often until the pudding is thick and the rice is tender.
- Remove cardamom pods, then stir in rosewater.
- Spoon into bowls and top with pistachios and pomegranate seeds.
Equipment for This Recipe:
- Heavy saucepan
- Wooden spoon
- Measuring cups
- Small bowls
- Ladle
How to Serve This Dish: Serve warm or chilled in shallow bowls. The red pomegranate against the pale pudding gives you all the visual contrast you need.
Pro Tips for This Recipe:
- Stir often so the bottom doesn’t scorch.
- Add rosewater at the end.
- Use cardamom lightly; it should whisper, not shout.
Variations on This Dish:
- Orange Cardamom Pudding: Add orange zest to the pot.
- Coconut Rice Pudding: Swap 1 cup of milk for coconut milk.
- Saffron Version: Steep a small pinch of saffron in the milk.
Common Mistakes to Avoid with This Dish:
- Too much heat: The milk can scorch.
- Overdoing rosewater: It overpowers the rice.
- Skipping garnish: The dessert looks flat without contrast.
25. Burnt Basque Cheesecake with Berry Compote
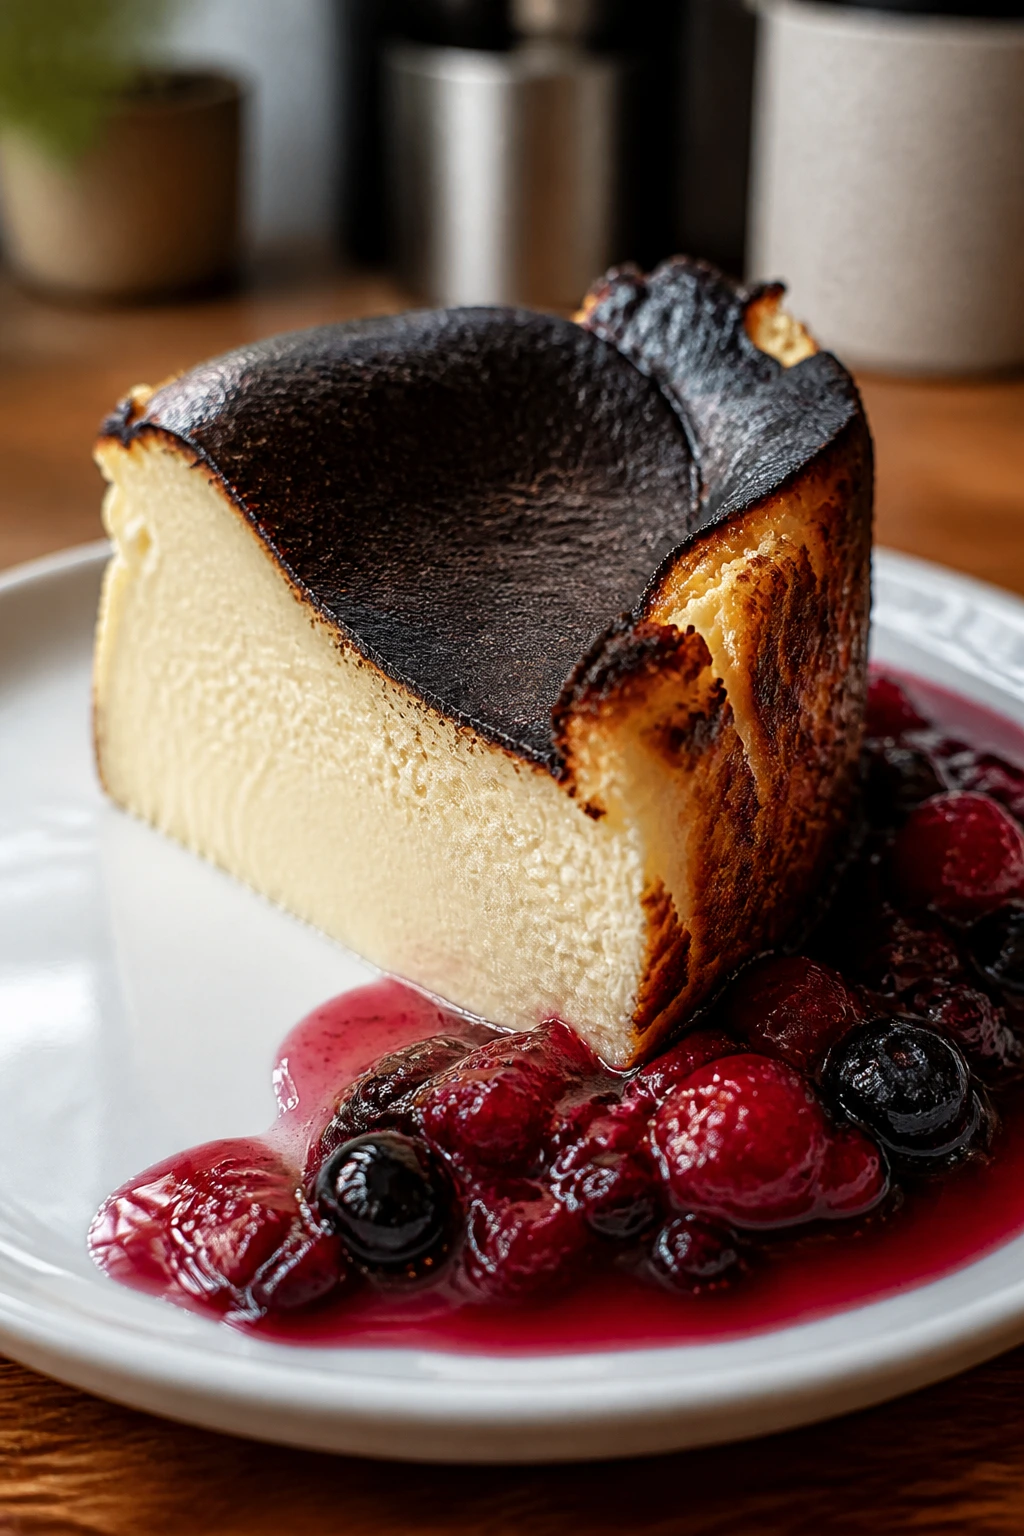
Intro: Burnt Basque cheesecake is the messy cousin that somehow looks fashionable. The dark top, cracked edges, and soft center create a dramatic look without any piping or glazing.
Why It Works: High heat creates the dark, almost caramelized top while the center stays custardy. That contrast is the whole story, and berry compote adds a bright line against the deep color.
Key Ingredients:
- 2 pounds cream cheese, softened
- 1 cup sugar
- 4 large eggs
- 1 1/2 cups heavy cream
- 1/4 cup flour
- 1 teaspoon vanilla extract
- 2 cups berries
- 2 tablespoons sugar
- 1 tablespoon lemon juice
Quick Steps:
- Line a 9-inch springform pan with parchment and heat the oven to 425°F.
- Beat the cheesecake ingredients until smooth and pour into the pan.
- Bake 45 to 50 minutes until deeply browned and still jiggly in the center.
- Cool, chill at least 4 hours, and top with warm berry compote.
Equipment for This Recipe:
- Springform pan
- Hand mixer
- Parchment paper
- Saucepan
- Cooling rack
How to Serve This Dish: Slice with a hot knife and let the compote slide down the side a little. That imperfect look is part of the appeal.
Pro Tips for This Recipe:
- Use parchment with high sides.
- Do not panic at the dark top; it’s supposed to look almost burnt.
- Chill before slicing or the center will smear.
Variations on This Dish:
- Chocolate Basque Cheesecake: Add melted chocolate to the batter.
- Citrus Version: Use orange zest and orange compote.
- Berry-Only Top: Keep the compote thick so it stays put.
Common Mistakes to Avoid with This Dish:
- Underbaking to a pudding state: It won’t hold a slice.
- Low oven temp: The top won’t darken enough.
- Serving warm: The texture is too loose.
26. Mango Sticky Rice with Coconut Cream
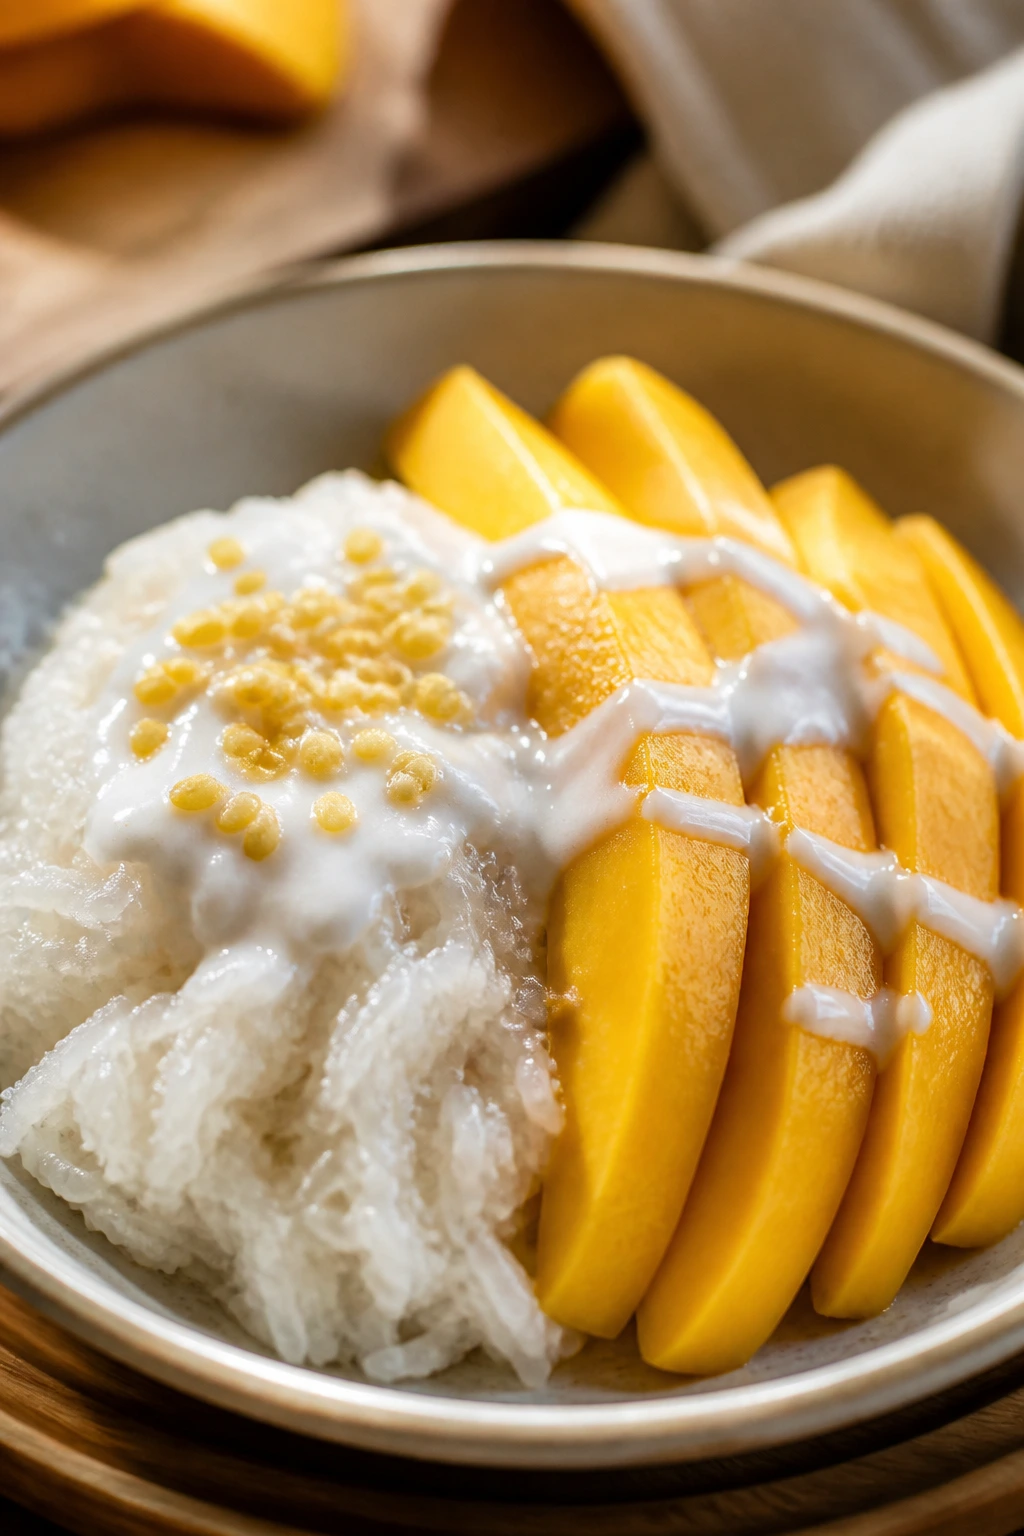
Intro: Mango sticky rice has a built-in color story: white rice, gold mango, and a glossy coconut finish. It looks calm on the plate, then hits with sweet, salty, tropical flavor.
Why It Works: Sticky rice holds together in a neat mound, and coconut cream gives the dessert shine. Mango slices laid in a fan create the cleanest presentation.
Key Ingredients:
- 1 1/2 cups glutinous rice
- 1 can coconut milk
- 1/3 cup sugar
- 1/2 teaspoon salt
- 2 ripe mangoes, sliced
- 1 tablespoon toasted sesame seeds
- 1 tablespoon toasted coconut flakes
Quick Steps:
- Soak and steam the rice until tender, about 25 to 30 minutes.
- Warm half the coconut milk with sugar and salt, then stir into the rice.
- Let it rest 15 minutes so the rice absorbs the cream.
- Plate with mango slices and drizzle with the remaining coconut milk.
Equipment for This Recipe:
- Steamer basket or bamboo steamer
- Saucepan
- Mixing bowl
- Rice paddle or spoon
- Sharp knife
How to Serve This Dish: Shape the rice with a cup or small mold for a tidy mound. Fan the mango slices beside it and drizzle the coconut milk lightly over the top.
Pro Tips for This Recipe:
- Use ripe but not mushy mangoes.
- Let the rice rest after mixing in coconut milk.
- Toast the sesame and coconut until fragrant, not dark.
Variations on This Dish:
- Pandan Rice: Add pandan leaf to the steaming water.
- Black Sticky Rice: Use black sticky rice for a deeper look.
- Pineapple Version: Swap mango for chilled pineapple chunks.
Common Mistakes to Avoid with This Dish:
- Regular rice: It won’t get the right sticky texture.
- Too much coconut sauce: The plate turns soupy.
- Undercooked mango: The fruit looks dull and tastes flat.
27. Apple Roses in Puff Pastry
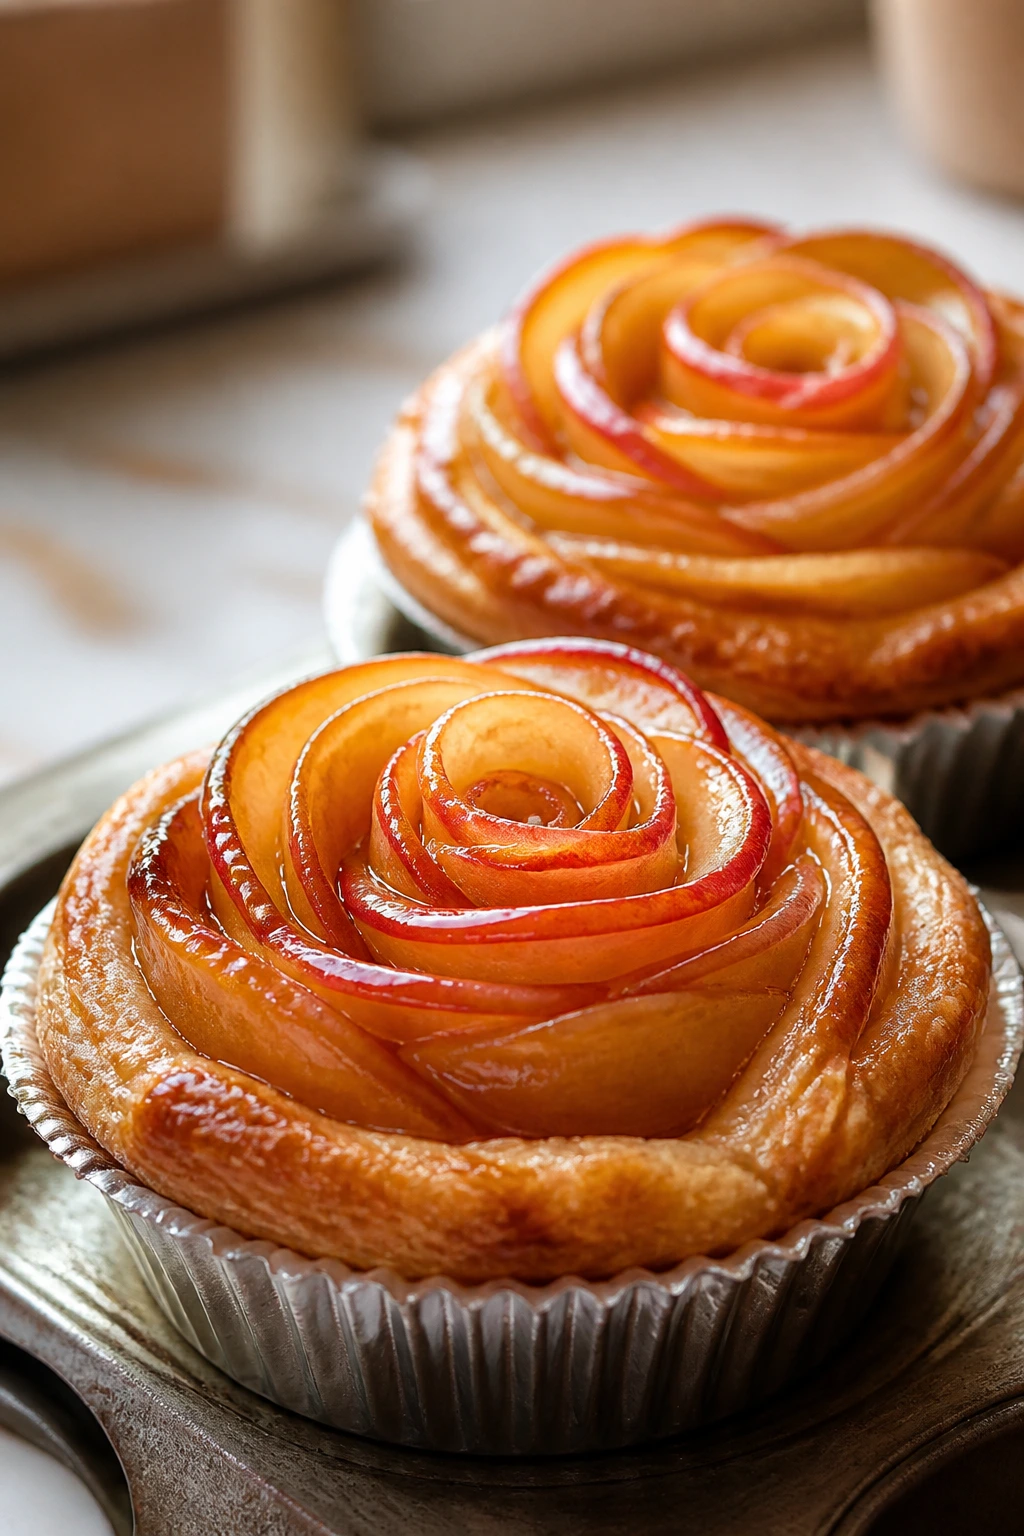
Intro: Apple roses are one of those desserts that look far trickier than they are. Thin apple slices curl into petals, and the puff pastry does the rest once the oven heat hits it.
Why It Works: The fruit shape does most of the visual work, while the pastry provides height and crisp edges. A little apricot jam adds gloss and keeps the apples from drying out.
Key Ingredients:
- 1 sheet puff pastry, thawed
- 2 red apples, thinly sliced
- 1/4 cup apricot jam
- 1 tablespoon lemon juice
- 1 tablespoon sugar
- 1/2 teaspoon cinnamon
- Flour for rolling
Quick Steps:
- Microwave apple slices with lemon juice and a splash of water for 2 minutes to soften.
- Cut puff pastry into strips and brush each with apricot jam.
- Layer apple slices along the top edge, fold the pastry over, and roll into roses.
- Bake in a muffin tin at 375°F for 35 to 40 minutes.
Equipment for This Recipe:
- Muffin tin
- Sharp knife
- Rolling pin
- Pastry brush
- Microwave-safe bowl
How to Serve This Dish: Dust with powdered sugar after cooling. They look best sitting upright, with the apple petals visible from the side.
Pro Tips for This Recipe:
- Slice apples very thin so they fold easily.
- Soften the apples enough to bend, but not so much they break.
- Use red-skinned apples for the color contrast.
Variations on This Dish:
- Pear Roses: Use pears if you want a softer flavor.
- Berry Jam Base: Spread raspberry jam under the apples.
- Savory-Sweet Twist: Add a pinch of cardamom.
Common Mistakes to Avoid with This Dish:
- Thick apple slices: They crack when rolled.
- Overfilling the pastry: The roses burst open.
- Too much jam: The pastry goes soggy.
28. White Chocolate Passion Fruit Mousse
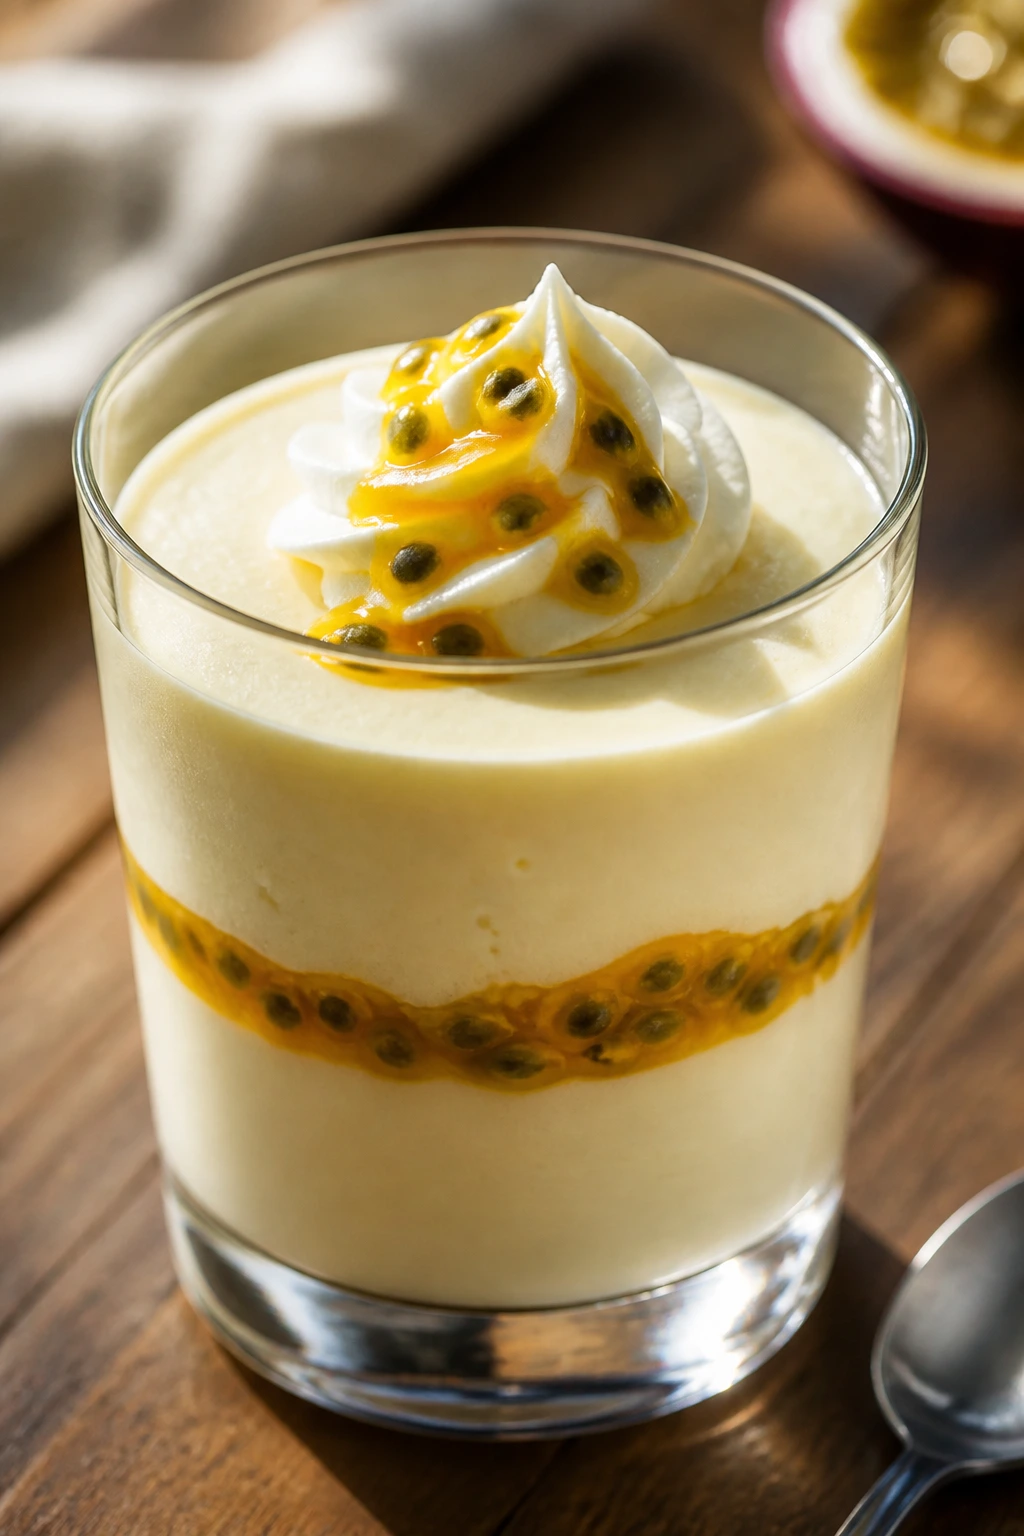
Intro: White chocolate mousse with passion fruit looks like a dessert dressed for a photo shoot. The pale mousse sets off the bright yellow fruit in a way that feels sharp and fresh, not sugary.
Why It Works: White chocolate gives the mousse a smooth base, and passion fruit brings acid that keeps it from tasting heavy. Served in glasses, the layers look deliberate even with minimal decoration.
Key Ingredients:
- 8 ounces white chocolate, chopped
- 1 1/2 cups heavy cream, divided
- 2 tablespoons powdered sugar
- 1 teaspoon vanilla extract
- 1/2 cup passion fruit pulp
- 1 teaspoon lemon juice
- 4 to 6 serving glasses
Quick Steps:
- Melt the white chocolate gently and let it cool slightly.
- Whip 1 cup cream with powdered sugar to soft peaks and fold it into the chocolate.
- Spoon a little passion fruit pulp into each glass, add the mousse, and chill 3 hours.
- Top with more pulp and a small swirl of whipped cream.
Equipment for This Recipe:
- Heatproof bowl
- Hand mixer
- Rubber spatula
- Serving glasses
- Small spoon
How to Serve This Dish: Keep the layers visible through the glass. A few passion fruit seeds on top add texture and make the surface look lively.
Pro Tips for This Recipe:
- Let the chocolate cool so it doesn’t melt the cream.
- Fold gently to keep the mousse airy.
- Chill long enough for a clean spoonful.
Variations on This Dish:
- Mango Passion Fruit Mousse: Add mango puree for a softer color.
- Berry Layer Version: Swap some pulp for raspberry sauce.
- Coconut Mousse: Use coconut cream for part of the dairy.
Common Mistakes to Avoid with This Dish:
- Hot chocolate: It deflates the whipped cream.
- Too much passion fruit at once: The mousse can thin out.
- Skipping the chill: The layers don’t hold together.
What Makes a Dessert Look Finished on the Plate
The prettiest desserts usually share the same quiet habits. They have one strong focal point, not six competing ones. They use contrast on purpose — pale cream against dark chocolate, bright fruit against white meringue, glossy glaze against a matte crust — and they leave a little breathing room on the plate.
Shape matters more than people think. A clean edge from a tart ring, a smooth swipe of mousse, or a neat spiral of cream gives the eye a place to land. Random garnish can be charming, but too much of it starts to look nervous. I’d rather see one perfect berry fan than a whole tray buried under mint and powdered sugar.
Temperature matters too. Cold desserts slice cleaner. Warm fruit desserts gleam better. Chilled mousses hold their shape, and torched sugar needs to be handled at the last second or it loses its snap. That’s the unglamorous part, and it’s also the part that makes the fancy look believable.
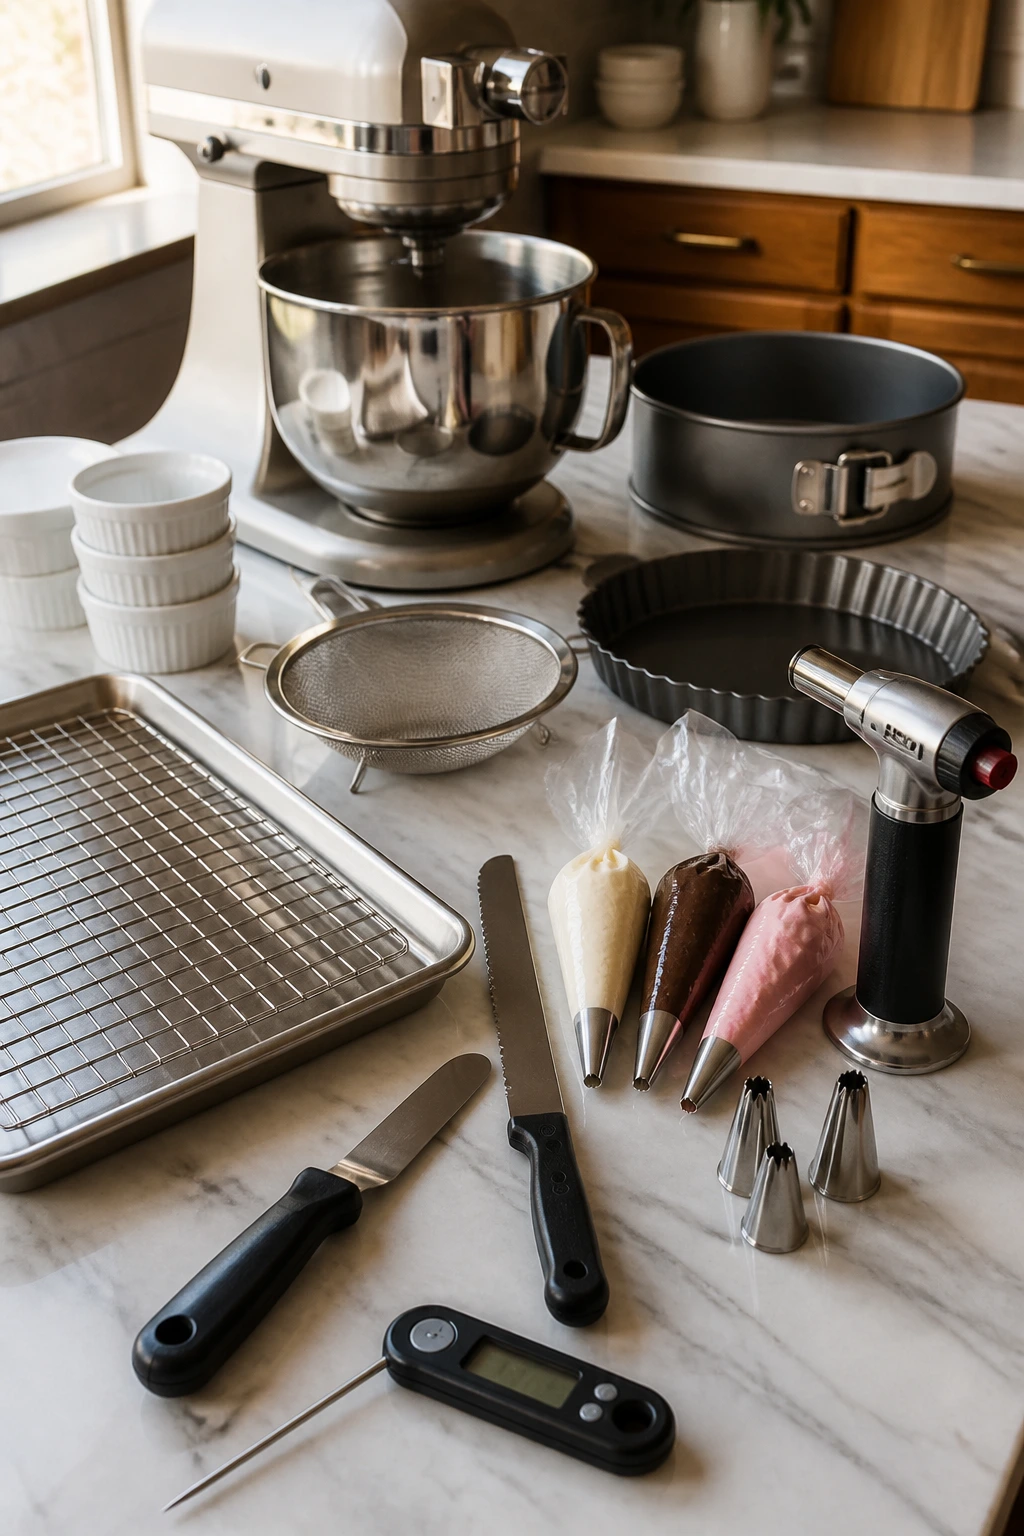
Essential Equipment for These Recipes
-
Stand mixer or hand mixer: Helpful for meringue, whipped cream, mousse, and cheesecake batters.
-
Offset spatula: The easiest way to smooth frosting, mousse, or ganache without dragging the surface.
-
Piping bags and a few tips: Useful for cream swirls, éclair filling, and tidy garnish work.
-
Fine-mesh strainer: Good for silky custards, curds, and fruit sauces with no seeds or lumps.
-
Kitchen torch: Needed for brûlée tops, toasted meringue, and quick color on finished desserts.
-
Springform pan: The best choice for cheesecakes and any cake that needs a clean release.
-
Tart pan or tart rings: Gives fruit tarts and ganache tarts a crisp, structured edge.
-
Ramekins and small glass cups: Ideal for custards, panna cotta, trifles, and mousse.
-
Jelly roll pan: Necessary for Swiss rolls and thin sheet cakes that need flexible structure.
-
Cooling rack: Helps cakes and shells cool evenly instead of steaming underneath.
-
Sharp serrated knife: Important for clean slices on cake, Swiss roll, and tart.
-
Candy thermometer: Optional, but useful for caramel, sugar syrups, and mirror glaze.
Smart Shopping and Ingredient Tips
Fruit does most of the visual work in this collection, so buy it like you mean it. Look for berries that are dry, glossy, and fully colored, not soft and leaking in the carton. Citrus should feel heavy for its size, which usually means more juice. If you need mangoes or peaches, choose fruit that yields slightly at the neck but still has some structure; mushy fruit looks messy once sliced.
Chocolate matters more than people admit. For ganache, mousse, and glaze, use chocolate you’d actually eat on its own. Cheap chocolate can set poorly and taste flat, which is a bad trade when the dessert is built around it. For white chocolate mousse, pick one with cocoa butter near the top of the ingredient list — the waxy stuff never tastes as clean.
Dairy is another place to be picky. Heavy cream should be at least 36 percent fat if you want stable whipped cream or mousse. Cream cheese needs to be fully softened before mixing, or you’ll chase lumps around the bowl. Ricotta for cannoli should be drained overnight, even if the package says it’s ready to go.
A few pantry items carry more weight than they look like they should. Good vanilla, fine salt, cornstarch, gelatin, and apricot jam all appear in these desserts because they control texture and shine. Fresh rosewater, matcha, pistachios, and cardamom should smell vivid when you open them. If they don’t, they’re probably too old to use in something this simple.
How to Serve These Recipes
Presentation: Use plain white platters, shallow bowls, or clear glasses so the color layers can do the talking. Leave empty space around the dessert. Crowding the plate makes even a pretty dessert feel busy.
Accompaniments: Keep side pieces small and quiet: a few berries, a mint leaf, a shard of chocolate, a thin cookie, or a spoonful of fruit compote. For richer desserts, a sharp coffee or a plain espresso helps cut through the sweetness. For fruit-forward desserts, unsweetened whipped cream, crème fraîche, or a light citrus sauce works better than extra frosting.
Portions: Most of these desserts serve 6 to 10 depending on the format, but a tart or cheesecake can stretch farther if the slices are narrow and clean. Rich items like chocolate tart, cheesecake, and profiteroles should be cut smaller than you think. Lighter desserts like pavlova and panna cotta can take a slightly larger portion.
Beverage Pairing: Espresso, black tea, sparkling water with citrus, or a glass of dessert wine all fit different parts of the collection. For chocolate-heavy desserts, coffee is the safest move. For fruit and cream desserts, tea or sparkling water keeps the palate fresh.
Additional Tips and Flavor Boosters

Flavor Enhancement: A tiny pinch of flaky salt on chocolate desserts wakes up the whole plate. On fruit desserts, a little lemon or lime zest can sharpen the flavor without making the dessert taste citrusy.
Customization: If you like less sweetness, lean on tart fruit, plain whipped cream, or a tangy component like mascarpone, crème fraîche, or yogurt. If you want more crunch, toasted almonds, pistachios, or a thin cookie on the side add texture without stealing attention.
Serving Suggestions: Brush fruit tarts with jam for shine, dust cakes with powdered sugar for a soft finish, and add herb leaves sparingly — mint, basil, and thyme all work when used like punctuation, not decoration overload. A warm spoon of sauce under a plated slice can also make a very simple dessert look finished.
Make-It-Yours: Gluten-free cooks can lean on meringues, pavlova, flourless mousse cakes, almond crusts, and cheesecake fillings. Dairy-free versions work well with coconut cream, coconut milk, and chilled fruit desserts; just keep an eye on sweetness because coconut brings its own roundness.
Make-Ahead, Storage, and Reheating Guidance
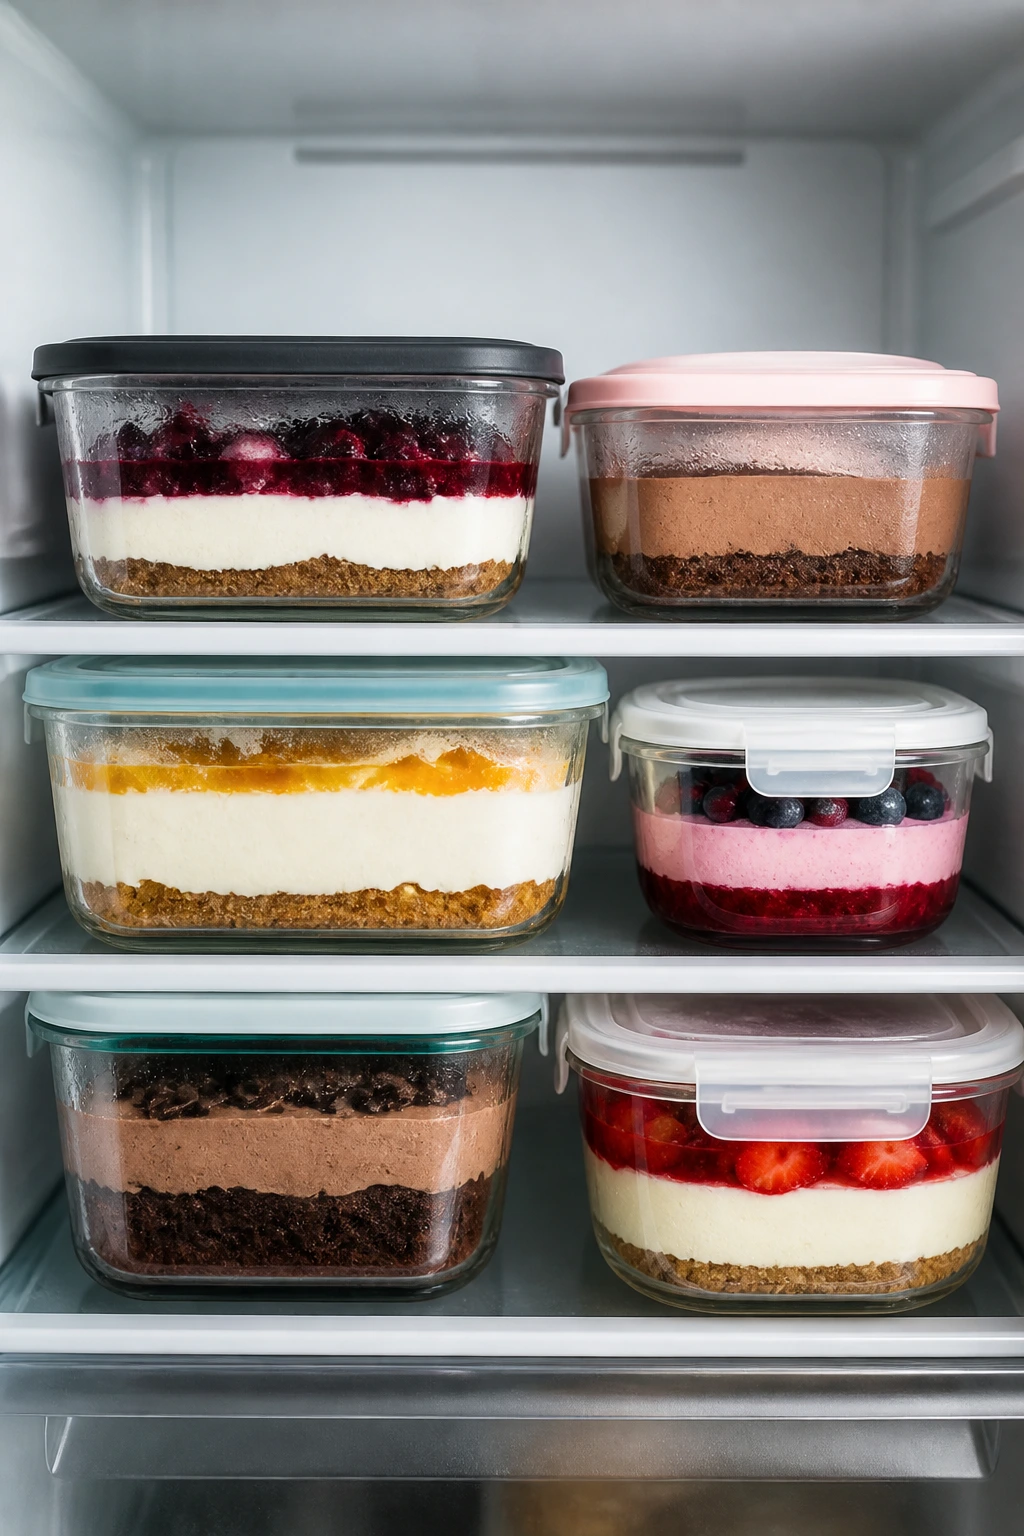
Most of these desserts are happiest in the fridge, not on the counter. Panna cotta, mousse, cheesecake, trifle cups, and tiramisu-style desserts keep well for 3 to 4 days refrigerated in covered containers. Cheesecake and mousse cake can often be frozen for up to 2 months if they’re wrapped tightly and thawed in the refrigerator overnight. Fruit toppings are best added after thawing, not before.
Cakes and bars can usually be made a day ahead, then frosted, glazed, or layered the next day. In fact, many of them cut cleaner after a rest. Swiss rolls, cheesecake bars, and layered cake jars all benefit from a cold set before serving. The one caveat: anything with fresh cream, soft fruit, or meringue should be assembled close to serving time if you want the best texture.
Puff pastry desserts, éclairs, profiteroles, and galettes are the most texture-sensitive. They taste best the day they’re baked, but unfilled choux shells and baked tart shells can be kept airtight at room temperature for a day or frozen for a month. To refresh puff pastry, warm it in a 300°F oven for 8 to 10 minutes. Do not microwave it unless you like soggy edges.
Pavlova and meringue desserts are the opposite. Store the baked shell airtight at room temperature, then add cream and fruit at the last minute. Once moisture hits the shell, the clock starts ticking fast. Rice pudding and custards can be served cold from the fridge or warmed gently over low heat if they seem too firm.
Variations and Adaptations to Try
Citrus First: Swap berries for lemons, limes, oranges, or grapefruit when you want brighter, sharper desserts. Citrus curds, zest, and segmented fruit bring the same visual punch as berries, but with a cleaner finish on the tongue.
Chocolate Heavy: If you want the richest path, lean into ganache, mousse, profiteroles, éclairs, and tart shells with cocoa or espresso in the crust. Dark chocolate gives a strong backdrop for fruit, and a little flaky salt keeps the sweetness from going dull.
Gluten-Free Swap: Pavlova, panna cotta, mousse cups, crème brûlée, rice pudding, and many cheesecakes already fit this lane or need only a simple crust swap. Almond flour crusts and nut-based cookies are the easiest stand-ins for wheat pastry.
Dairy-Free Route: Coconut milk, coconut cream, and fruit-forward desserts are the easiest wins. Semifreddo, sticky rice, mousse-style cups, and sorbets can all go dairy-free without losing their polished look, as long as the chill time is long enough.
Less-Sweet Finish: Cut the sugar slightly in whipped cream, pastry cream, and cheesecake fillings, then let tart fruit do more work. Passion fruit, raspberries, lime, and blackberries make this approach taste balanced instead of bland.
Small-Batch Serving: Mini tartlets, jars, cups, and small cheesecake bars give you the same elegant look with less slicing drama. They’re also easier to store, which matters if your fridge is already packed.
Common Mistakes to Avoid
Too much garnish: A dessert can look fussy in a bad way if every surface is covered. Pick one or two finishes and stop there. The eye needs a place to rest.
Ignoring chill time: Soft desserts need time to settle, and cutting them early is a fast way to get slumps, smears, and filling leaks. If a recipe says chill overnight, that’s not decorative language.
Using wet fruit: Fresh berries, peaches, and citrus segments need to be dry before they go on top. Water beads can slide under whipped cream, loosen glaze, and make tart shells soggy.
Overmixing delicate fillings: Cheesecake, mousse, and whipped cream can all lose structure if you beat them too hard. Once the ingredients come together, stop. The mixer is not a personality test.
Baking shells too pale: Tart crusts, choux pastry, and meringues need proper color or they won’t hold texture. Pale pastry often means soft pastry. Soft pastry goes limp fast.
Cutting with the wrong knife: A warm, thin blade gives cleaner slices on cheesecake, mousse cake, and layered tarts. Wipe between cuts. It’s annoying, but it beats dragging crumbs through the filling.
Frequently Asked Questions
Which of these desserts can I make the day before?
Panna cotta, cheesecake, tiramisu cups, rice pudding, mousse cups, and most tarts hold up well overnight. Assemble fruit toppings the next day if you want the freshest look.
Can I use frozen fruit instead of fresh?
Yes, but thaw it first and drain off the liquid. Frozen fruit works best in compotes, swirls, and fillings; it is less friendly as a fresh topping because it tends to bleed.
How do I keep fruit from sliding off a cake?
Dry the fruit, use a thin layer of frosting or cream as “glue,” and chill the cake before adding the top layer. Flat slices and halved berries stay put better than chunky pieces.
What if I don’t have a kitchen torch?
Use the broiler for meringue or brûlée toppings, but watch it closely and keep the dessert a few inches from the heat. The broiler moves fast — faster than most people expect.
Which desserts freeze best?
Cheesecake, mousse cakes, cake layers, financiers, and some bars freeze well. Meringues, puff pastry, and fresh whipped cream desserts do not like freezing once assembled.
How do I get clean slices from cheesecake or mousse cake?
Use a long knife dipped in hot water and wiped dry between each cut. Chill the dessert fully first; cold filling is the difference between neat wedges and a smeared mess.
Can I replace gelatin with agar-agar?
Sometimes, yes, but the set will be firmer and a little different in texture. Agar works better in some fruit-based desserts than in creamy panna cotta, so test a small batch if you’re changing the gelling agent.
What’s the easiest dessert here for beginners?
Panna cotta, trifle cups, rice pudding, and apple roses are among the simplest. They still look polished, which is the whole charm of this list.
How do I keep whipped cream from collapsing?
Use cold cream, a cold bowl, and stop at soft to medium peaks. If the cream will sit for a while, a spoonful of mascarpone or a little powdered sugar can help it hold.
Sweet Things Worth Dressing Up For
The nicest thing about these desserts is that most of them rely on a few good habits rather than wild technique. Cold ingredients. Clean edges. Fruit that’s dry before it’s dressed. Chocolate that actually tastes like chocolate. Not glamorous advice, but it’s the stuff that makes a dessert look composed instead of crowded.
Pick one recipe that fits your patience and your fridge space. Maybe it’s a tart, maybe it’s a jar dessert, maybe it’s a cheesecake that sits quietly in the cold until you’re ready to slice it. The beauty is in the restraint, and the first clean cut usually says more than any garnish ever could.